DocRob
-
Posts
7,127 -
Joined
-
Last visited
Content Type
Profiles
Forums
Events
Gallery
Everything posted by DocRob
-
Thank you PW, my perseverance is wearing and not because of hundreds of tiny PE parts, but because I suck at filling and sanding. I tried to get rid of the parting line of the hull with putty and after priming it looked not good enough to me. So out with the putty again, only to discover after priming, it was worse than before. Now I puttied and sanded a third time, and now I will leave it in it's suboptimal state. The whole model is primed and ready for painting, pics will follow. Cheers Rob
- 329 replies
-
- 4
-

-
- uss arizona
- eduard
- (and 1 more)
-
Thanks for reviewing this gem, Fran. I have this boxing in my stash and although I'm not a heli man, will build it soon. You're absolutely right about the fantastic complete package, which I got for the same price like the less equipped ICM kit. Carl already built the ICM kit here and, it went together fairly good, if I remember right. Cheers Rob
-

ProModeler 1/48 PBY-5A Catalina + Goodies, RFI
DocRob replied to CANicoll's topic in Let’s Get Wet Group Build.
Very fine progress with the big Cat Chris. I was a fan of the Cousteau films and I started to snorkle, after I saw some of his footage. I was well aware that his son died in a PBY and was very sad at the time. Cousteaus Cat was my first encounter with the plane and I immediately fell in love with it and part of my juvenile thinking was enjoying the spirit of freedom, this plane and the adventures of their owners emanated. Your work on the blisters will pay, as they are the focal point of every Catalina build. Cheers Rob -
I put my finger on the tube and made very gentle moves with the saw. Try to relax and feel the flow of the saw, it's so easy to jam it, due to the narrow slit in the mitre. Uh, sounds a bit raunchy, but I mean it . I use the finer toothed blade and not a lot of pressure. Sawing tubes is always delicate, when it comes to the middle part, the start and end is easier. Cheers Rob
-
Hi Phil, I generally avoid vinyl masks, wherever I can. Shrinking is an issue and Kabuki is easier to glue into tight cornered spots. It also helps, that they are less flexible. I never had issues with residues though with vinyl masks, maybe, because I never used lacquers on them. I like the products from Eduard, Maketar (you can choose between Kabuki and vinyl here) and 1ManArmy best. The latter produces a set for the Mossie, which includes the unbelievable fine cut stencils as well. They provide the basic markings and roundels, so you have to check if everything you need is there. They are generally sold by Hannants for example, but the Mossie set is out at the moment. I have some HGW transfers for my Mossie, a hit and miss product, but I will try them, when time comes. If they work, they look like tattooed on. Cheers Rob
-
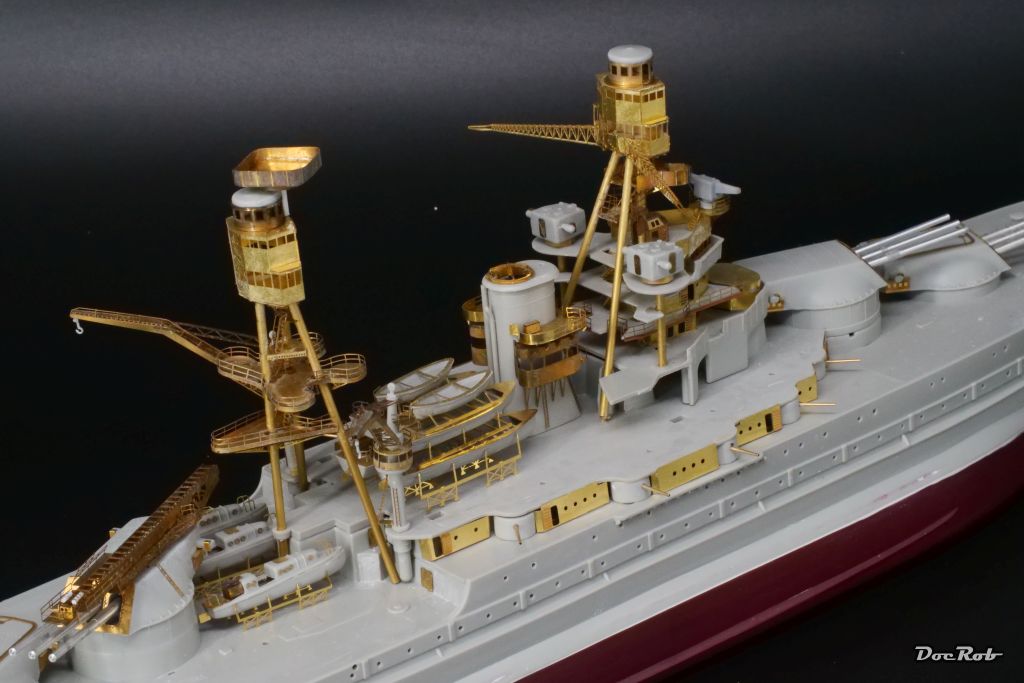
Thank you amigos, these 3D-printed parts add a lot of detail to the build. There will be more, searchlights, AA-guns, winches and fire extinguish guns along the Kingfishers and hopefully the bollards, which still need to be sent from Eduard, as some where missing in the kit. Thanks Kevin, I always reduce the resolution of my pics, normally only to not use so much resources and have fast opening pages, but in this case, it's also to hide the imperfections . Cheers Rob
- 329 replies
-
- 2
-

-
-
- uss arizona
- eduard
- (and 1 more)
-
Revell 1/32 Spitfire Mk IIa
DocRob replied to Peterpools's topic in LSM 1/35 and Larger Work In Progress
Like always, the extra work needed, performed by your skilled hands doesn't show in the results. That's what modelling is all about. Good that you changed the spinner, a part, falsely contoured can easily ruin the whole appearance. I'm a bit with Gary about Revell kits, but do own some and yes, all of them with a lot of AM. At last we are modelers and there is only a handful of near perfect kits out there and our hobby is not so much about to find these precious jewels, but to build, what we want to have built, no matter of the kit quality. Cheers Rob -
Fantastic result Kevin, your Schnellboot is a beauty, there are so many details, catching the eye. Cheers Rob
-
Great work on the stanchions. These slide fit brass tubes are a gift for modelling. The result looks very convincing. I have to look, if my mini mitre also provides a plastic length adjusting stop. At least mine worked without moving. Cheers Rob
-
Like it a lot, small story, well told. Cheers Rob
-
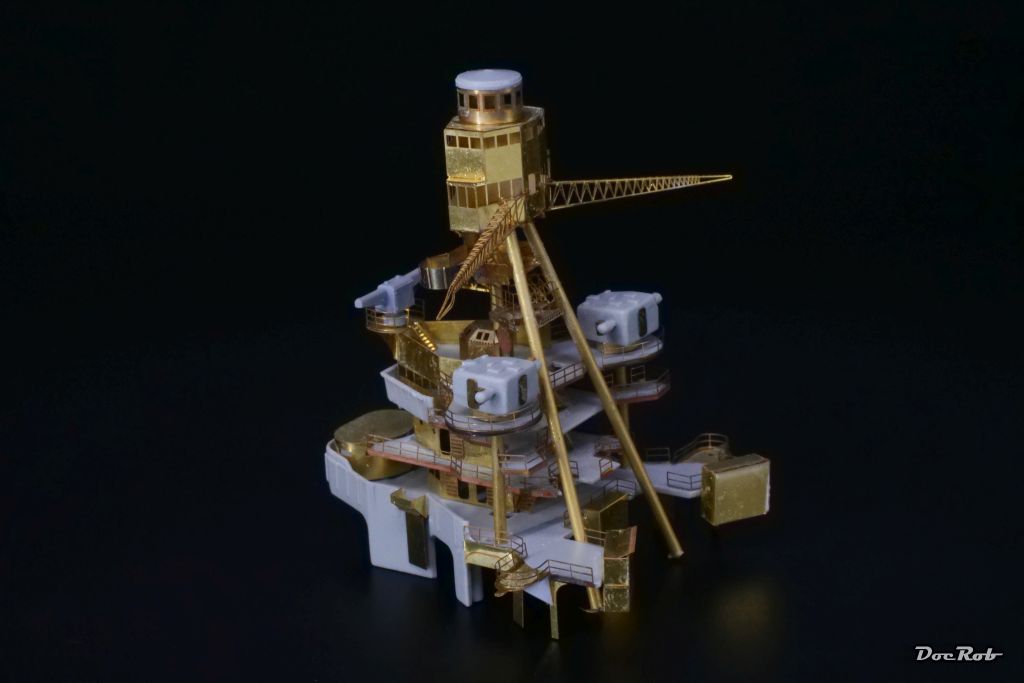
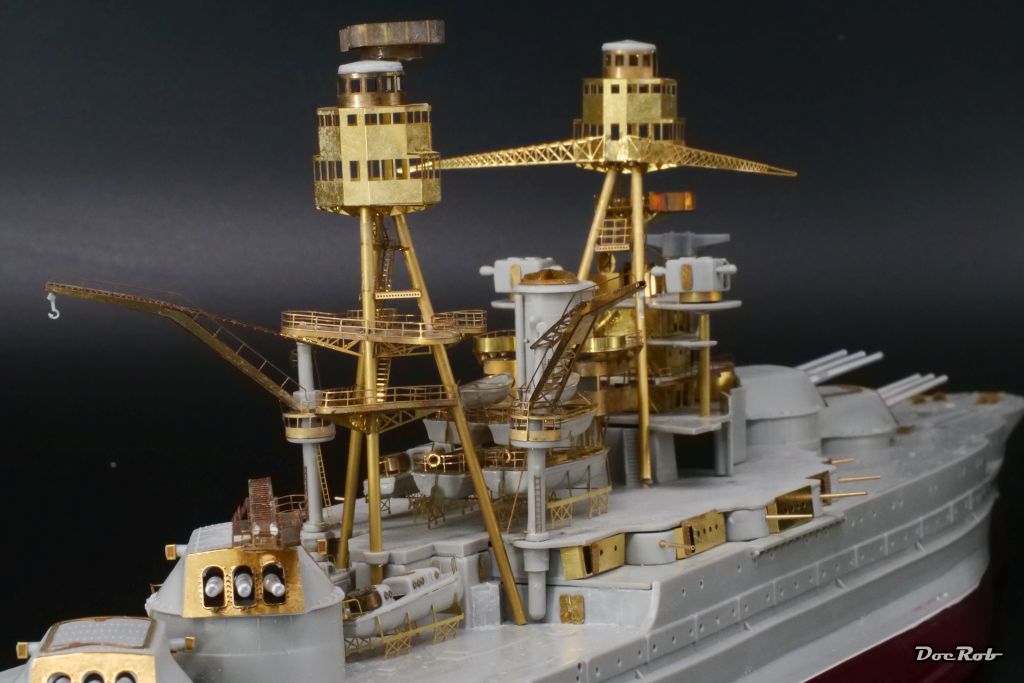
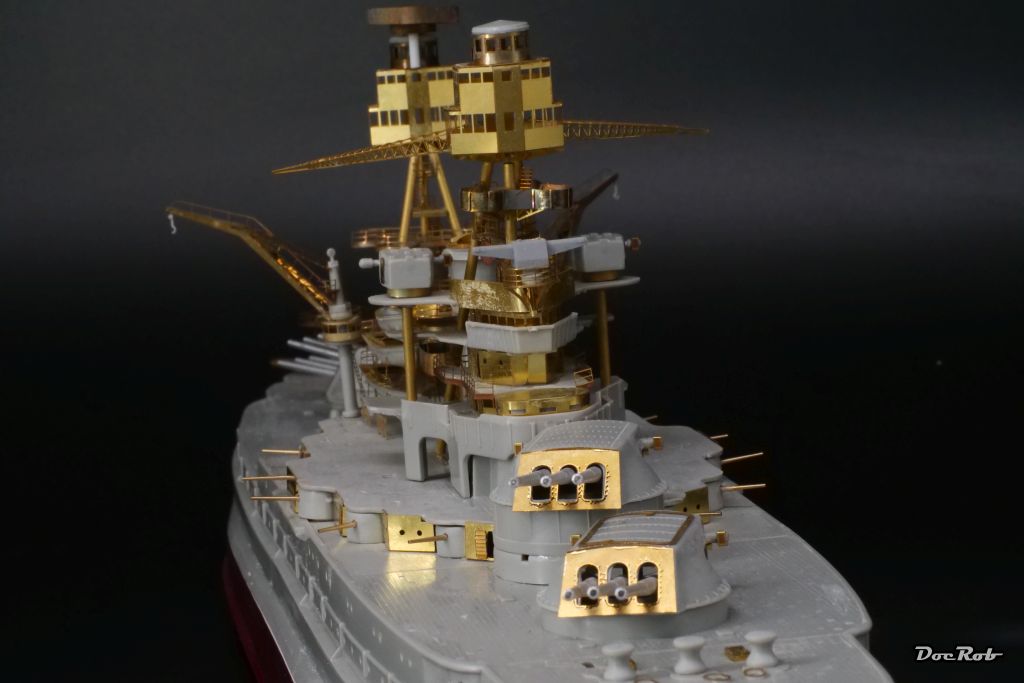
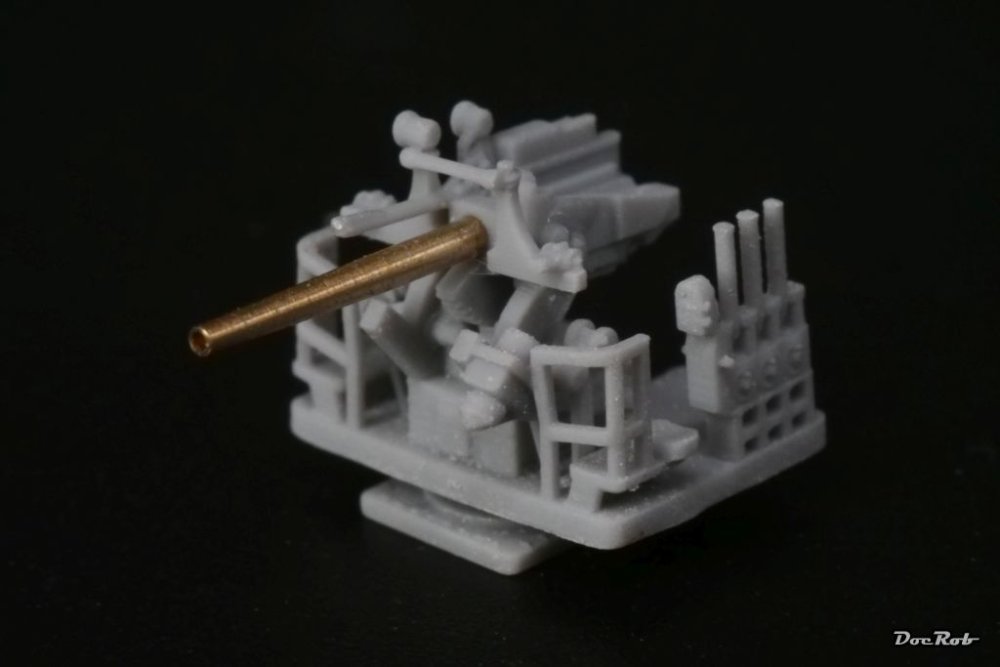
Today in the morning, I fired up my trusted old compressor with the intent to prime all that glaring PE along the few plastic remains with some Mr. Surfacer. Inspecting the manual showed me that there are several parts better to add now, than later, as I initially intended, like railings on the superstructure and some ladders here and there and parts, where I believed, they had to be glued to the deck, instead they are to glue to the superstructure. Railings are especially painful and the rounded shaped are the worst. I think the superstructures are finished now, except tiny antennas, AA-guns, searchlights and water pumps, which will be added after painting. Last for today, where eight of these guns sitting on top of the deck. They are 3D printed and have brass barrels and are superbly detailed. The manual suggests to cut away the railings and substitute them with PE, but I think they look good as they are and handle safer. Cheers Rob

- 329 replies
-
- 6
-
-
- uss arizona
- eduard
- (and 1 more)
-
Thanks for mentioning rigging Peter , I hadn't had a single thought about that until now. Patience indeed is a key for these kind of builds, as well as realizing that some days are not good for progress with this kind of work. Cheers Rob
- 329 replies
-
- 1
-
-
- uss arizona
- eduard
- (and 1 more)
-
Slowly approaching the finish line with all the PE-laden sub assemblies, thanks Gary. Cheers Rob
- 329 replies
-
- 1
-
-
- uss arizona
- eduard
- (and 1 more)
-
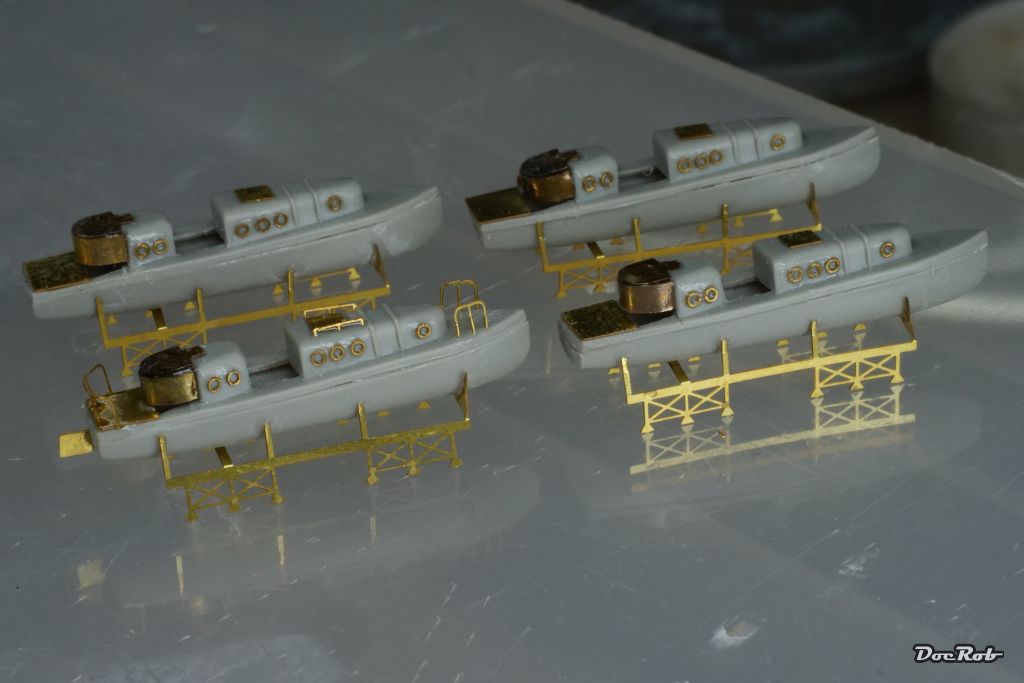
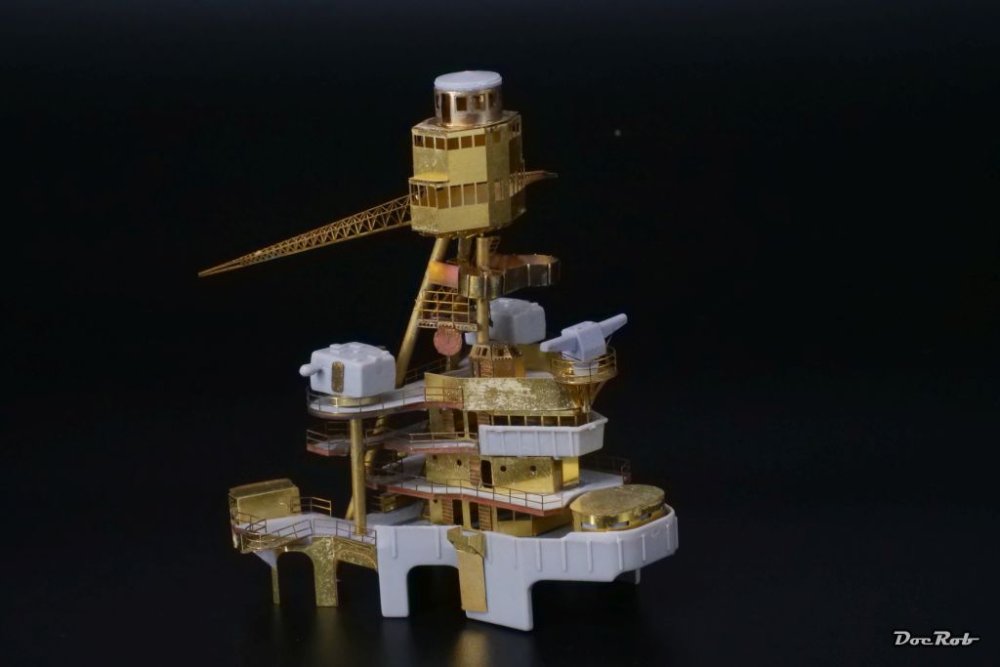
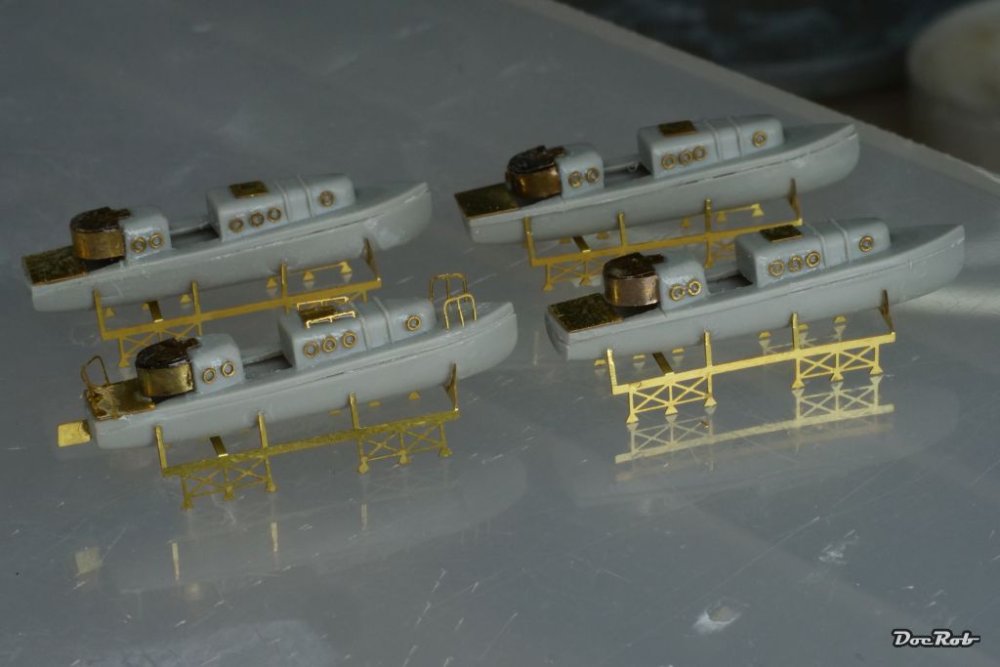
I started with the boats, hoping to find some relaxation, but was soon proved wrong. The flimsy racks didn't help and the last four of the twelve (I hope, I counted right) fought back wherever they could. fragile railings went on along with portholes and covers, which all went airborne on the first attempt and then stuck with the CA in unwanted places. I start to loose my patience with these ever more fiddly sub assemblies. The racks aren't looking too good, but they will have to do. For my own sanity, only to show how far I've come with the build, most of the assemblies where loosely grouped on the decks for some brass shots. Cheers Rob


- 329 replies
-
- 6
-
-

-
- uss arizona
- eduard
- (and 1 more)
-
Thank you Peter and I hear you. 'Prior to the completion', that sounds soon, but there are many things to do and my patience with this kit is starting to wear. Too much fighting, compared to the satisfaction it generates. I still have the urge to finish the Arizona, but it feels harder to resist other temptations. Cheers Rob
- 329 replies
-
- 1
-
-
- uss arizona
- eduard
- (and 1 more)
-
LSM Modelling News 2023 merged Fran and Artful69’s threads
DocRob replied to Fran's topic in Modelling Discussion
Not LS, but some of the phantastic Phantoms , made by Zoukei Moura in 48 scale where already built here. For the Wild Weasel-G-model, they added some extras to their portfolio, PE from Eduard, acrylic interior parts and sets of pilots. Search Results for "HE_221112_SWS OP" | VOLKS Official Hobby Paradise Online Store Cheers Rob -
Thank you Chris, if I ever finish it, there will be only distant shots, not to show the many imperfections, I fabricated. The good thing, living on a remote island is, nobody except me will ever see the thing with the real eye . One motivating thing with this build, I start to find the PE parts faster, because the five large PE-sheets start to empty up. Cheers Rob
- 329 replies
-
- 2
-
-
-
- uss arizona
- eduard
- (and 1 more)
-
ProModeler 1/48 PBY-5A Catalina + Goodies, RFI
DocRob replied to CANicoll's topic in Let’s Get Wet Group Build.
That's some great progress with the Cat, Chris. The pilots look perfectly well, drunken or not and the blisters are great with the figures in. This will be absolutely stunning when finished. Cheers Rob -
There are some mighty fine Schnellboot builds presented here, lately. Yours becomes better with every step Kevin, be it detailing or painting and weathering. I would consider some white for the weathering, replicating salt residues. I imagine these boats take a lot of spray, even in moderate conditions. Cheers Rob
-
Nice Gary, all the detail painting with wood , masts and linoleum enhances the contrast of the vessel and pleases the eye. I will not dig to deep into maritime subjects in the future, besides wooden ships, but there are some plastic kits, I want to build. I have the 1/35 Vosper in stash, with lots of AM and figures and there is the 1/200 Mikasa in 1902 trim tempting my buy button push finger, along with some PE, maybe Pontos and Ion figures. The Mikasa kit is a Hobby Boss releas, so has to be inspected properly before buying, having the unbelievable bad plastic of the USS Arizona in mind. Cheers Rob
-
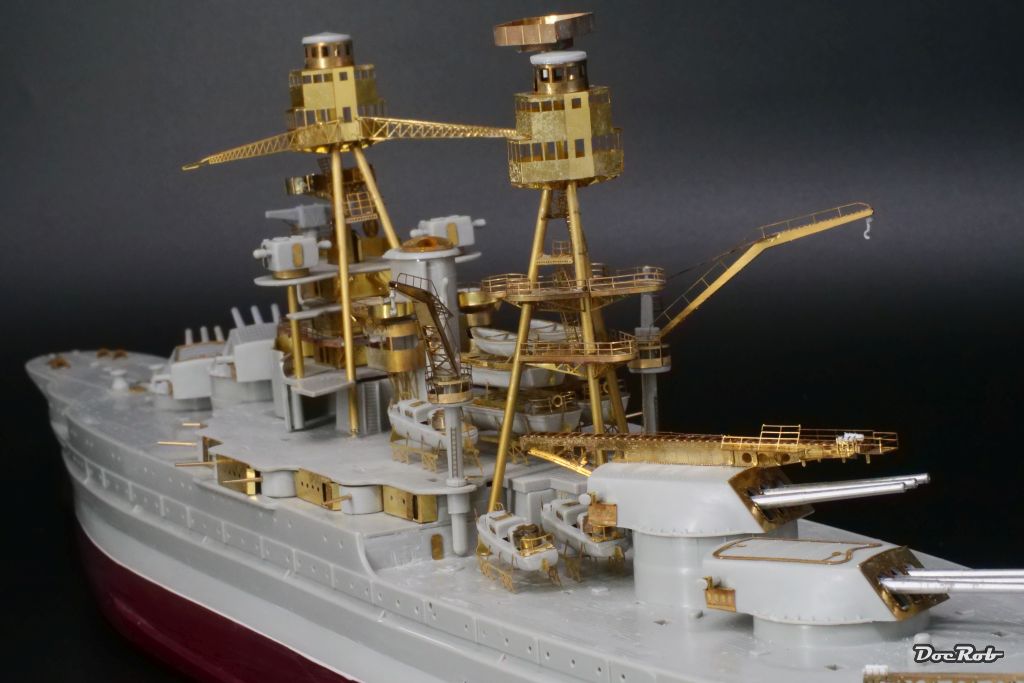
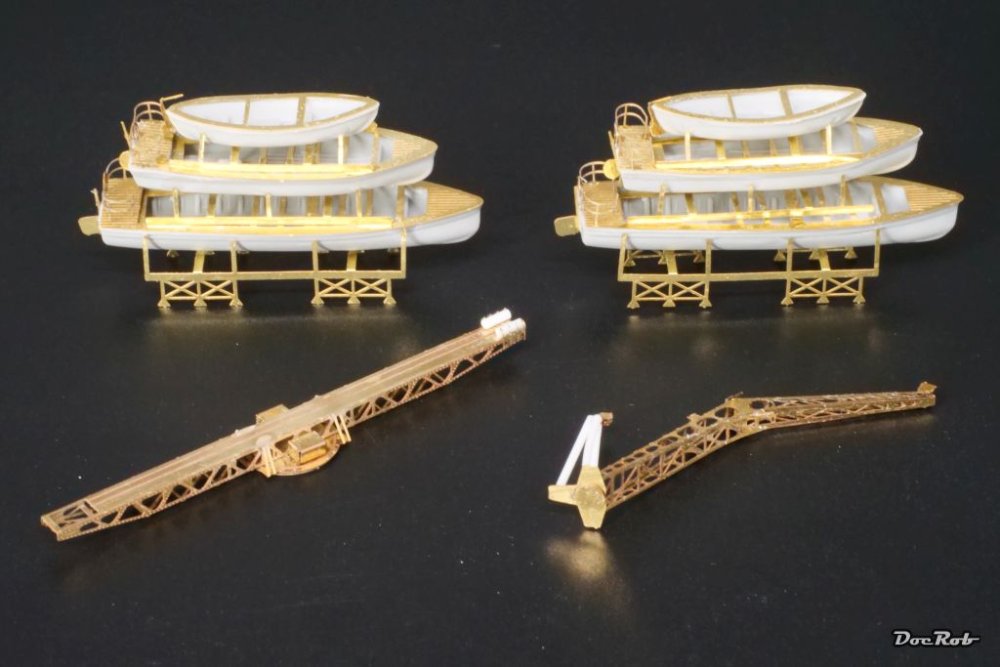
I continued with some more on deck subassemblies. The second catapult and the stern crane were easy to build up and I thought about having some relaxing fun with the boats and their cradles, but PE-madness stroke back. The plastic hulls needed a lot of cleanup but the extremely fragile racks where very difficult to glue into place unbent and more or less on level. They do look a bit rough and I hope to hide the crudeness behind primer and paint, as I have no intention to rework them. Cheers Rob
- 329 replies
-
- 6
-
-
-
- uss arizona
- eduard
- (and 1 more)
-
Muchas gracias Chris, like I mentioned above. I use a candle and hold the part above the tip of the flame. What soot there is can by wiped off. All other soft flames, lighter,... work as well. Only blowtorches, etc. are way too hot. The correct temperature can be seen, when the brass surface of the PE part turns into a blue hue. That happens very quick with small PE parts. Don't glow the parts, as they will become very fragile then. Cheers Rob
- 329 replies
-
- 2
-
-
- uss arizona
- eduard
- (and 1 more)
-
Thank you Mike, I had a look into the document and I do know about the phenomenon. If there is deformation of metals, there is stress and the stress results in a bit of hardening, but I never have heard of such a change like you described from soft and flexible to hard and rigid. Live and learn . Cheers Rob
- 329 replies
-
- 1
-
-
- uss arizona
- eduard
- (and 1 more)
-
There went definitely some nice work into the hull? /fuselage? Mike. Like you, I think, most of it will be invisible or you think about lighting and polishing the windows. Cheers Rob
-
What I like about these early S-boats is, they still carry some sporting yacht genes. You are close to the finish now, and I'm a bit jealous, not having participated the GB with my S-38, due to having lost the PE and other brass parts, still a miracle to me. Cheers Rob