HubertB
-
Posts
2,988 -
Joined
-
Last visited
Content Type
Profiles
Forums
Events
Gallery
Everything posted by HubertB
-

My airfix 1/24 spitfire!
HubertB replied to Irishman1's topic in LSM 1/35 and Larger Work In Progress
Bakelite is, with acetate and celluloid, one of the oldest forms of plastic. Unlike many modern plastics, bakelite is thermoset, i.e. once « cooked » it keeps its shape for ever. Polystyrene for instance is thermo-reversible: it is shaped by being molded at high temperature, but heating it again will melt it and the shape will disappear. So, bakelite it was . Bakelite is mostly black, by the addition of carbon powder (like the old telephone sets), but can be other colors, like white. On the Spitfire, it was a red-brown color. Hubert -
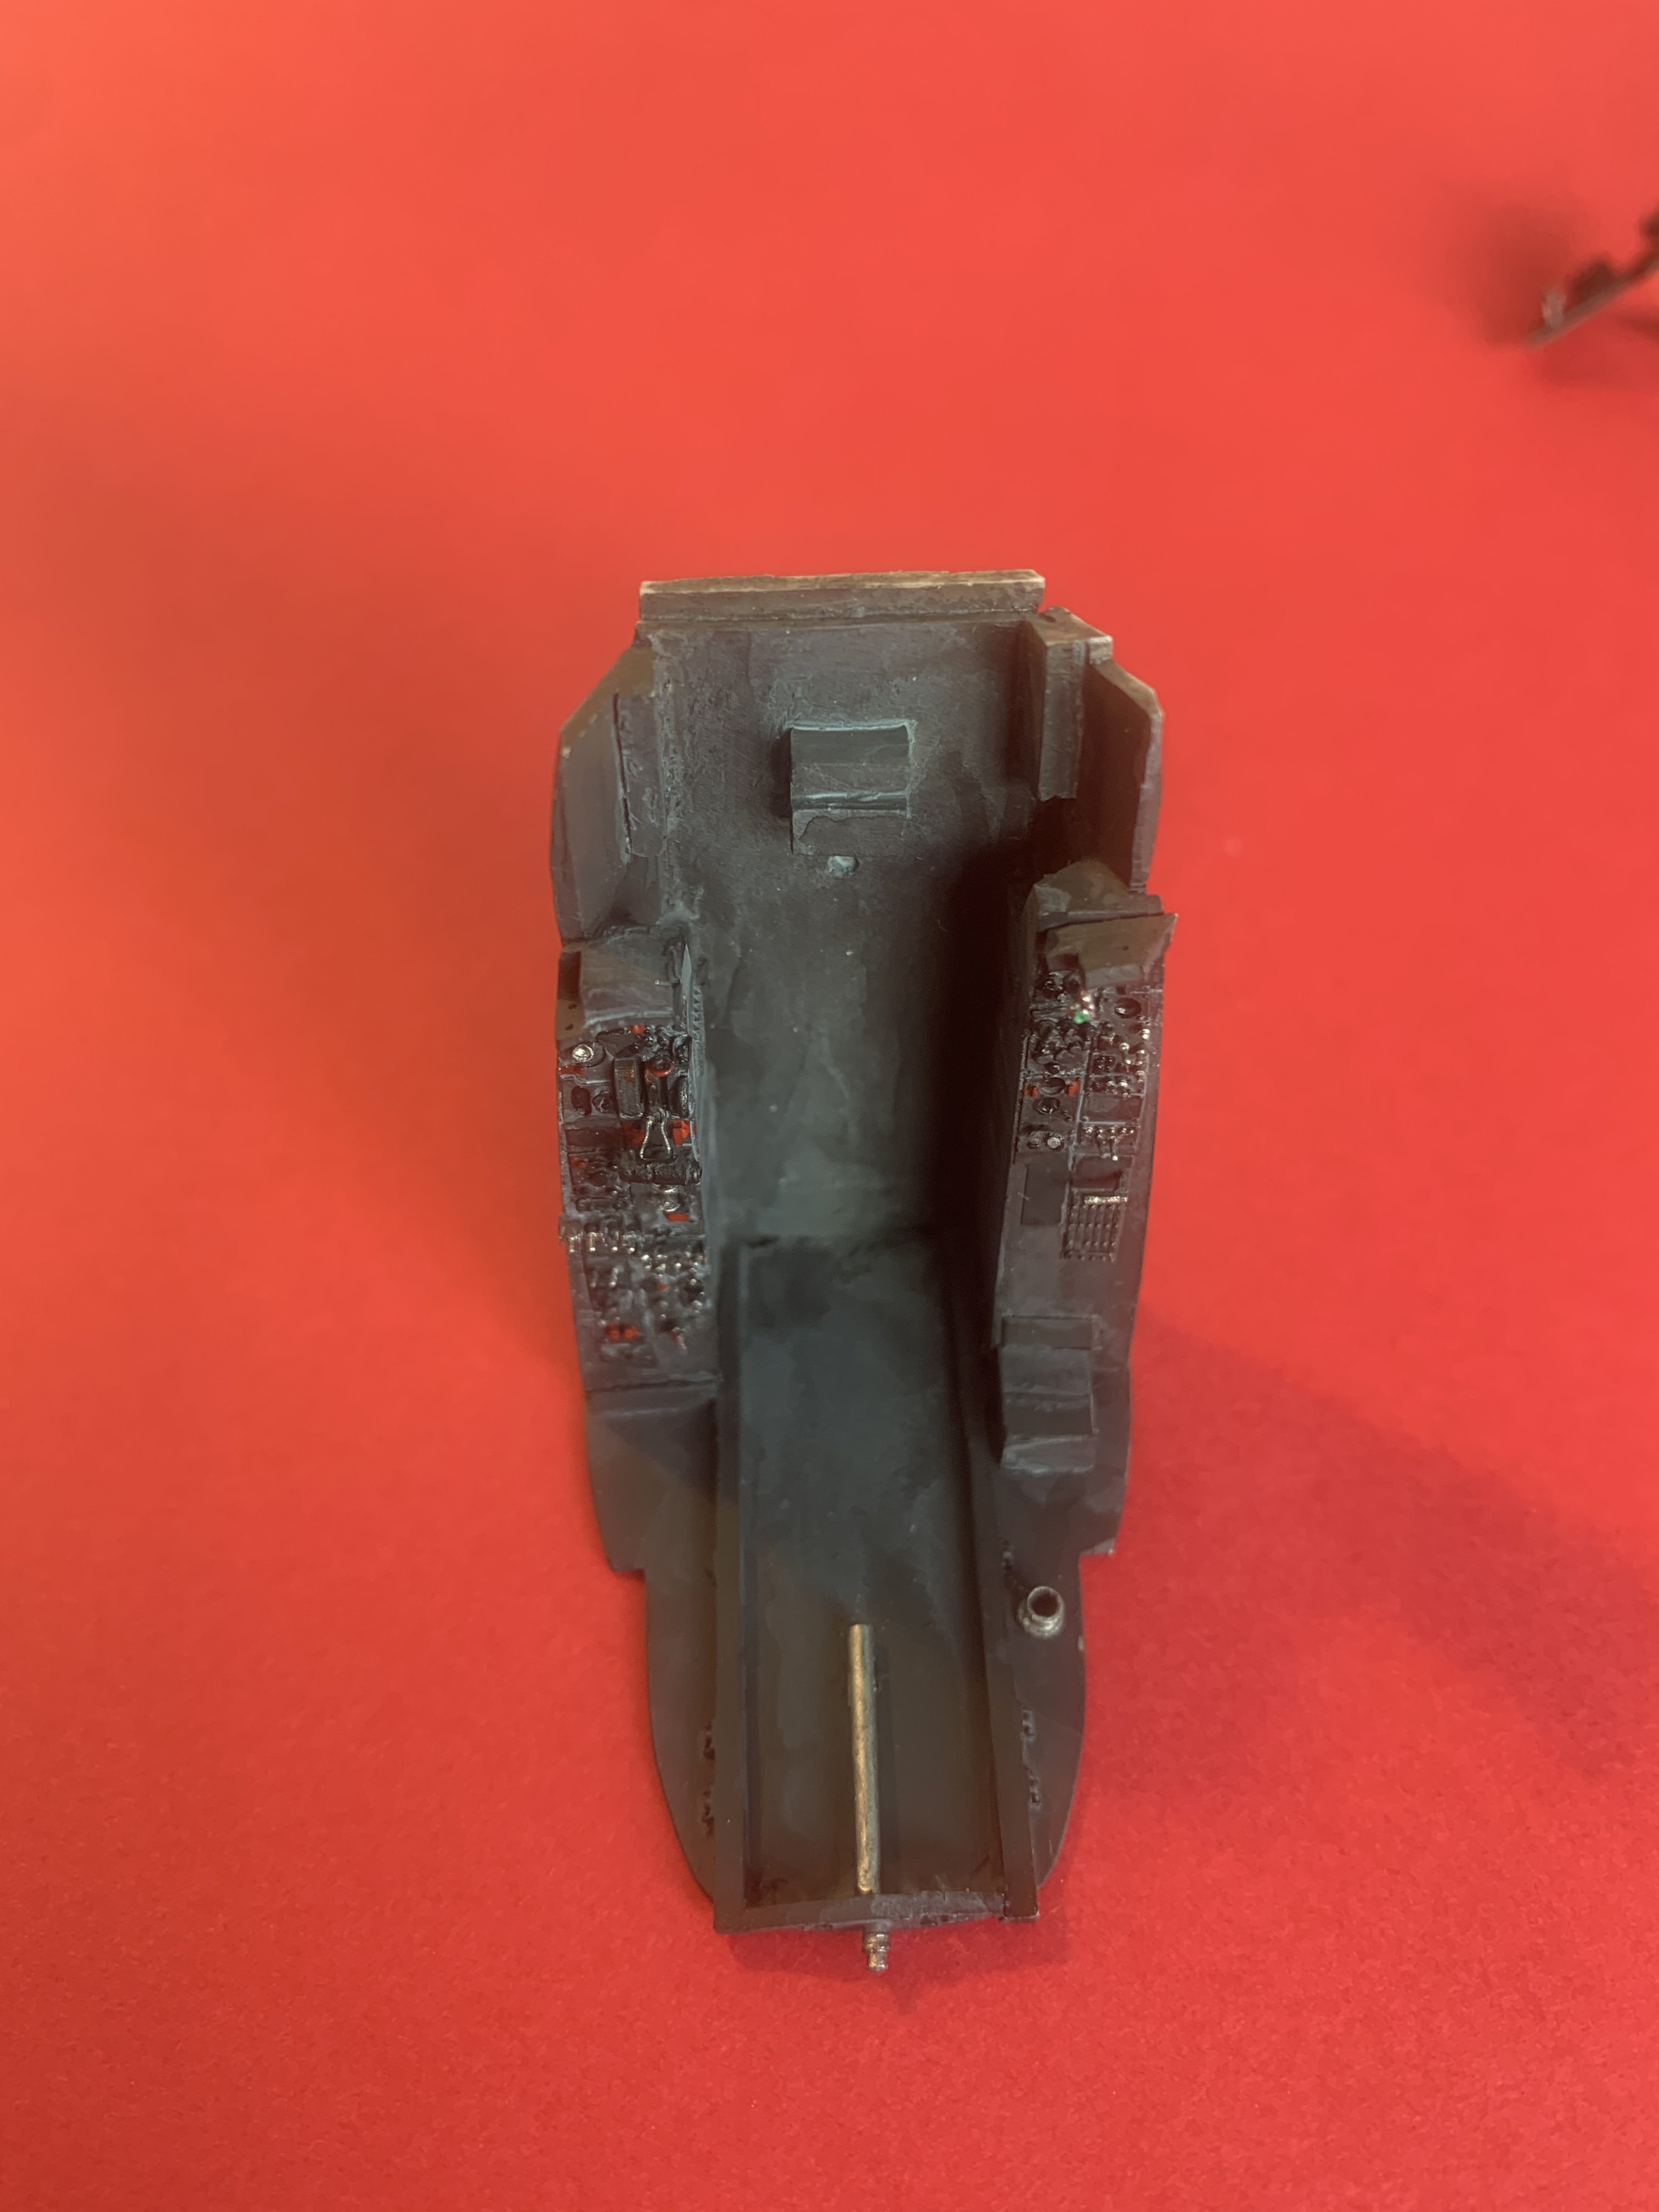
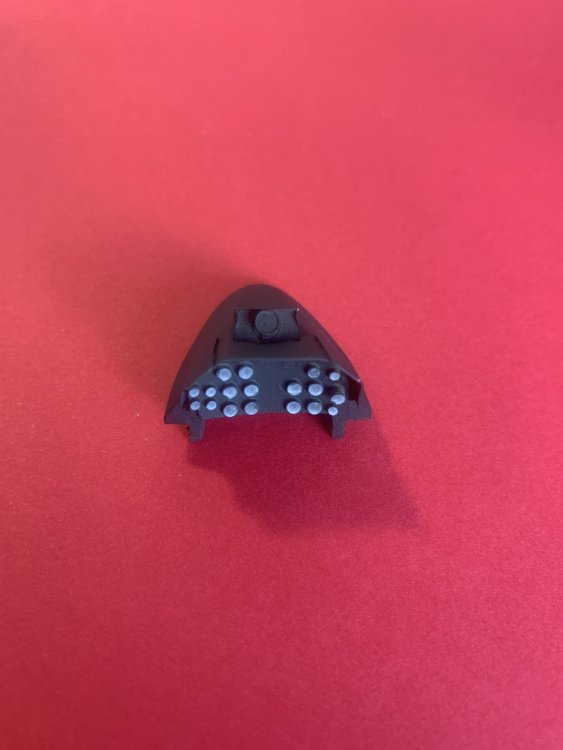
They used 3D-printing, but the details were a bit soft, or to be more precise, with insufficient relief. And, after my first cockpit suffered some cat munching, the second one I got was clearly showing the age of the molds. But to be fair, the issue is more that I am struggling to produce an interesting contrast, because the whole area is black on black. And I am watching it with high expectations, and a even higher magnification, where my work looks bland to my eyes. IRL, the switches are 0.2 mm in diameter, and the knobs 0.5 mm: this is really small, and Quinta just manage to make their details look crisp with just the trifle of overscale rendition that make them look good in the end. My handiwork is just not as crisp as the technology used by Quinta. Hubert
-
My airfix 1/24 spitfire!
HubertB replied to Irishman1's topic in LSM 1/35 and Larger Work In Progress
Maybe I’m wrong (and I am far from a Spitfire expert), but I thought the seat was bakelite (a thermoset plastic, like the one used on the old -fixed- telephones), not plywood. Hubert -
LSM Modelling News 2023 merged Fran and Artful69’s threads
HubertB replied to Fran's topic in Modelling Discussion
Well, it seems like HPH is not happy with the sales results of their Infinity IM kits, compared to the amount of work it implies for them, especially for a 4-people operation, and are thinking the Val might be their last one, not even bothering with releasing the Kate. That would be a shame, really. This said, I have bought plenty of HPH kits, but was not interested by the Helldiver nor the Vampire. Maybe they’d have sold more if they had chosen a subject with a Swastika. But the issue is also that they got a lot of flak for the quality of the Helldiver, and many people have started bashing Infinity without even seeing the Helldiver kit (which can be built in a great replica, as John and Ernie have demonstrated here). 1/32 aviation is already a niche per se. So a lot of 1/32 kits are a niche within a niche (and I am a buyer of niches within niches, therefore I am a resin-kits buyer). Choosing the right subject is a challenge in itself, and it’s easy to derail a business with a glitch in image or product choice. But we need to encourage the initiatives, and behaving like spoilt children is not always the best way to support the risk-taking of businesses. I am not necessarily a fan of the Val (or of any WWII fighter or bomber), but may buy one if it’s a way to encourage Infnity. Hubert -
Great start Peter. Knowing how unhappy I am with my Fisher Cutlass cockpit, which, viewed with maximum magnification, is not as I dreamed it would be, I am really jealous of the incredible results you get using Quinta sets. Hubert
-
It looks like a blown-up GWH TBD (which I sold some time ago, because it was 1/48). Wich is frankly good news, IMHO. Hubert PS: and it was first announced in 2005 … How time flies 😂
-
Looks really business-like 👍! Hubert
-
Wow ! The last one is incredibly realistic ! What scale is it ? 😁 Hubert
-
Oups ! My mistake for mixing up a Val and a Kate. Thank you for correcting me The major issue with resin is that it shrinks, and the shrinkage is not necessarily consistent between batches of the same resin. Plus the silicone molds degrade over use. That’s an issue you do not have, or not as acute, with polystyrene, although short-run molds are far less resistant than the large-runs steel ones … Hubert
-
Caudron C.561 French Racing Plane - Resin - 1/48 - S.B.S.
HubertB replied to DocRob's topic in LSM 1/48 Work in Progress
The « French blue » was an elusive color, but I agree that the blue used on racing Bugattis is too light for the Caudron. I think Williams Bros got it right on their 450 kit. I would want to check but the box is currently burried in the middle of the palet of boxes waiting for the next house move … Hubert PS: have you checked the Air Blue Caudron Simoun in the Musée de l’Air ? It might have the right blue (although the Musée de l’Air is not necessarily known for its historically accurate restorations) -
As long as SWMBO does not say WTF ? …. Hubert
-
I have no idea, honestly, but, were I to look for some, I’d go scouring Shapeways as a possible source … Sorry I can’t be more helpful. Hubert
-
LSM Modelling News 2023 merged Fran and Artful69’s threads
HubertB replied to Fran's topic in Modelling Discussion
Great shed 👍 ! And thanks for reminding me this existed (and that I have the Plastruct catalogue in the shelves). Now, knowing the Ford Trimotor corrugated skin had a 30 mm spacing between two « waves », I need to find which sheet would be closer for this need ! Hubert -
LSM Modelling News 2023 merged Fran and Artful69’s threads
HubertB replied to Fran's topic in Modelling Discussion
I am happy with what I see. AM producers will have a feast with this one ! Hubert -
LSM Modelling News 2023 merged Fran and Artful69’s threads
HubertB replied to Fran's topic in Modelling Discussion
I think the answer to this one is two-fold: 1) the corrugation of the TBD wing is actually a series of parallel « ridges ». Different from tje « wave » section of the skins you found on the Junkers or Ford Trimotor. Not very easy to reproduce if you are scratching it, but with CAD, and then CNC milling of spark-erosion electrodes, very doable ..’ 2) the process HPH use is fairly hand-made, scratching masters, and detailing the skin with PE panels, from which they produced molds in silicone for resin kits. This process is almost incompatible with the rendering of the corrugations of either the skins of the TBD or a « Tante Ju ». When I was thinking of scratching a TBD, I would have designed the wings using CAD, and 3D-printed it. My TBD is pre-ordered with AviationMegastore, and I cannot wait to receive it . Hubert -
LSM Modelling News 2023 merged Fran and Artful69’s threads
HubertB replied to Fran's topic in Modelling Discussion
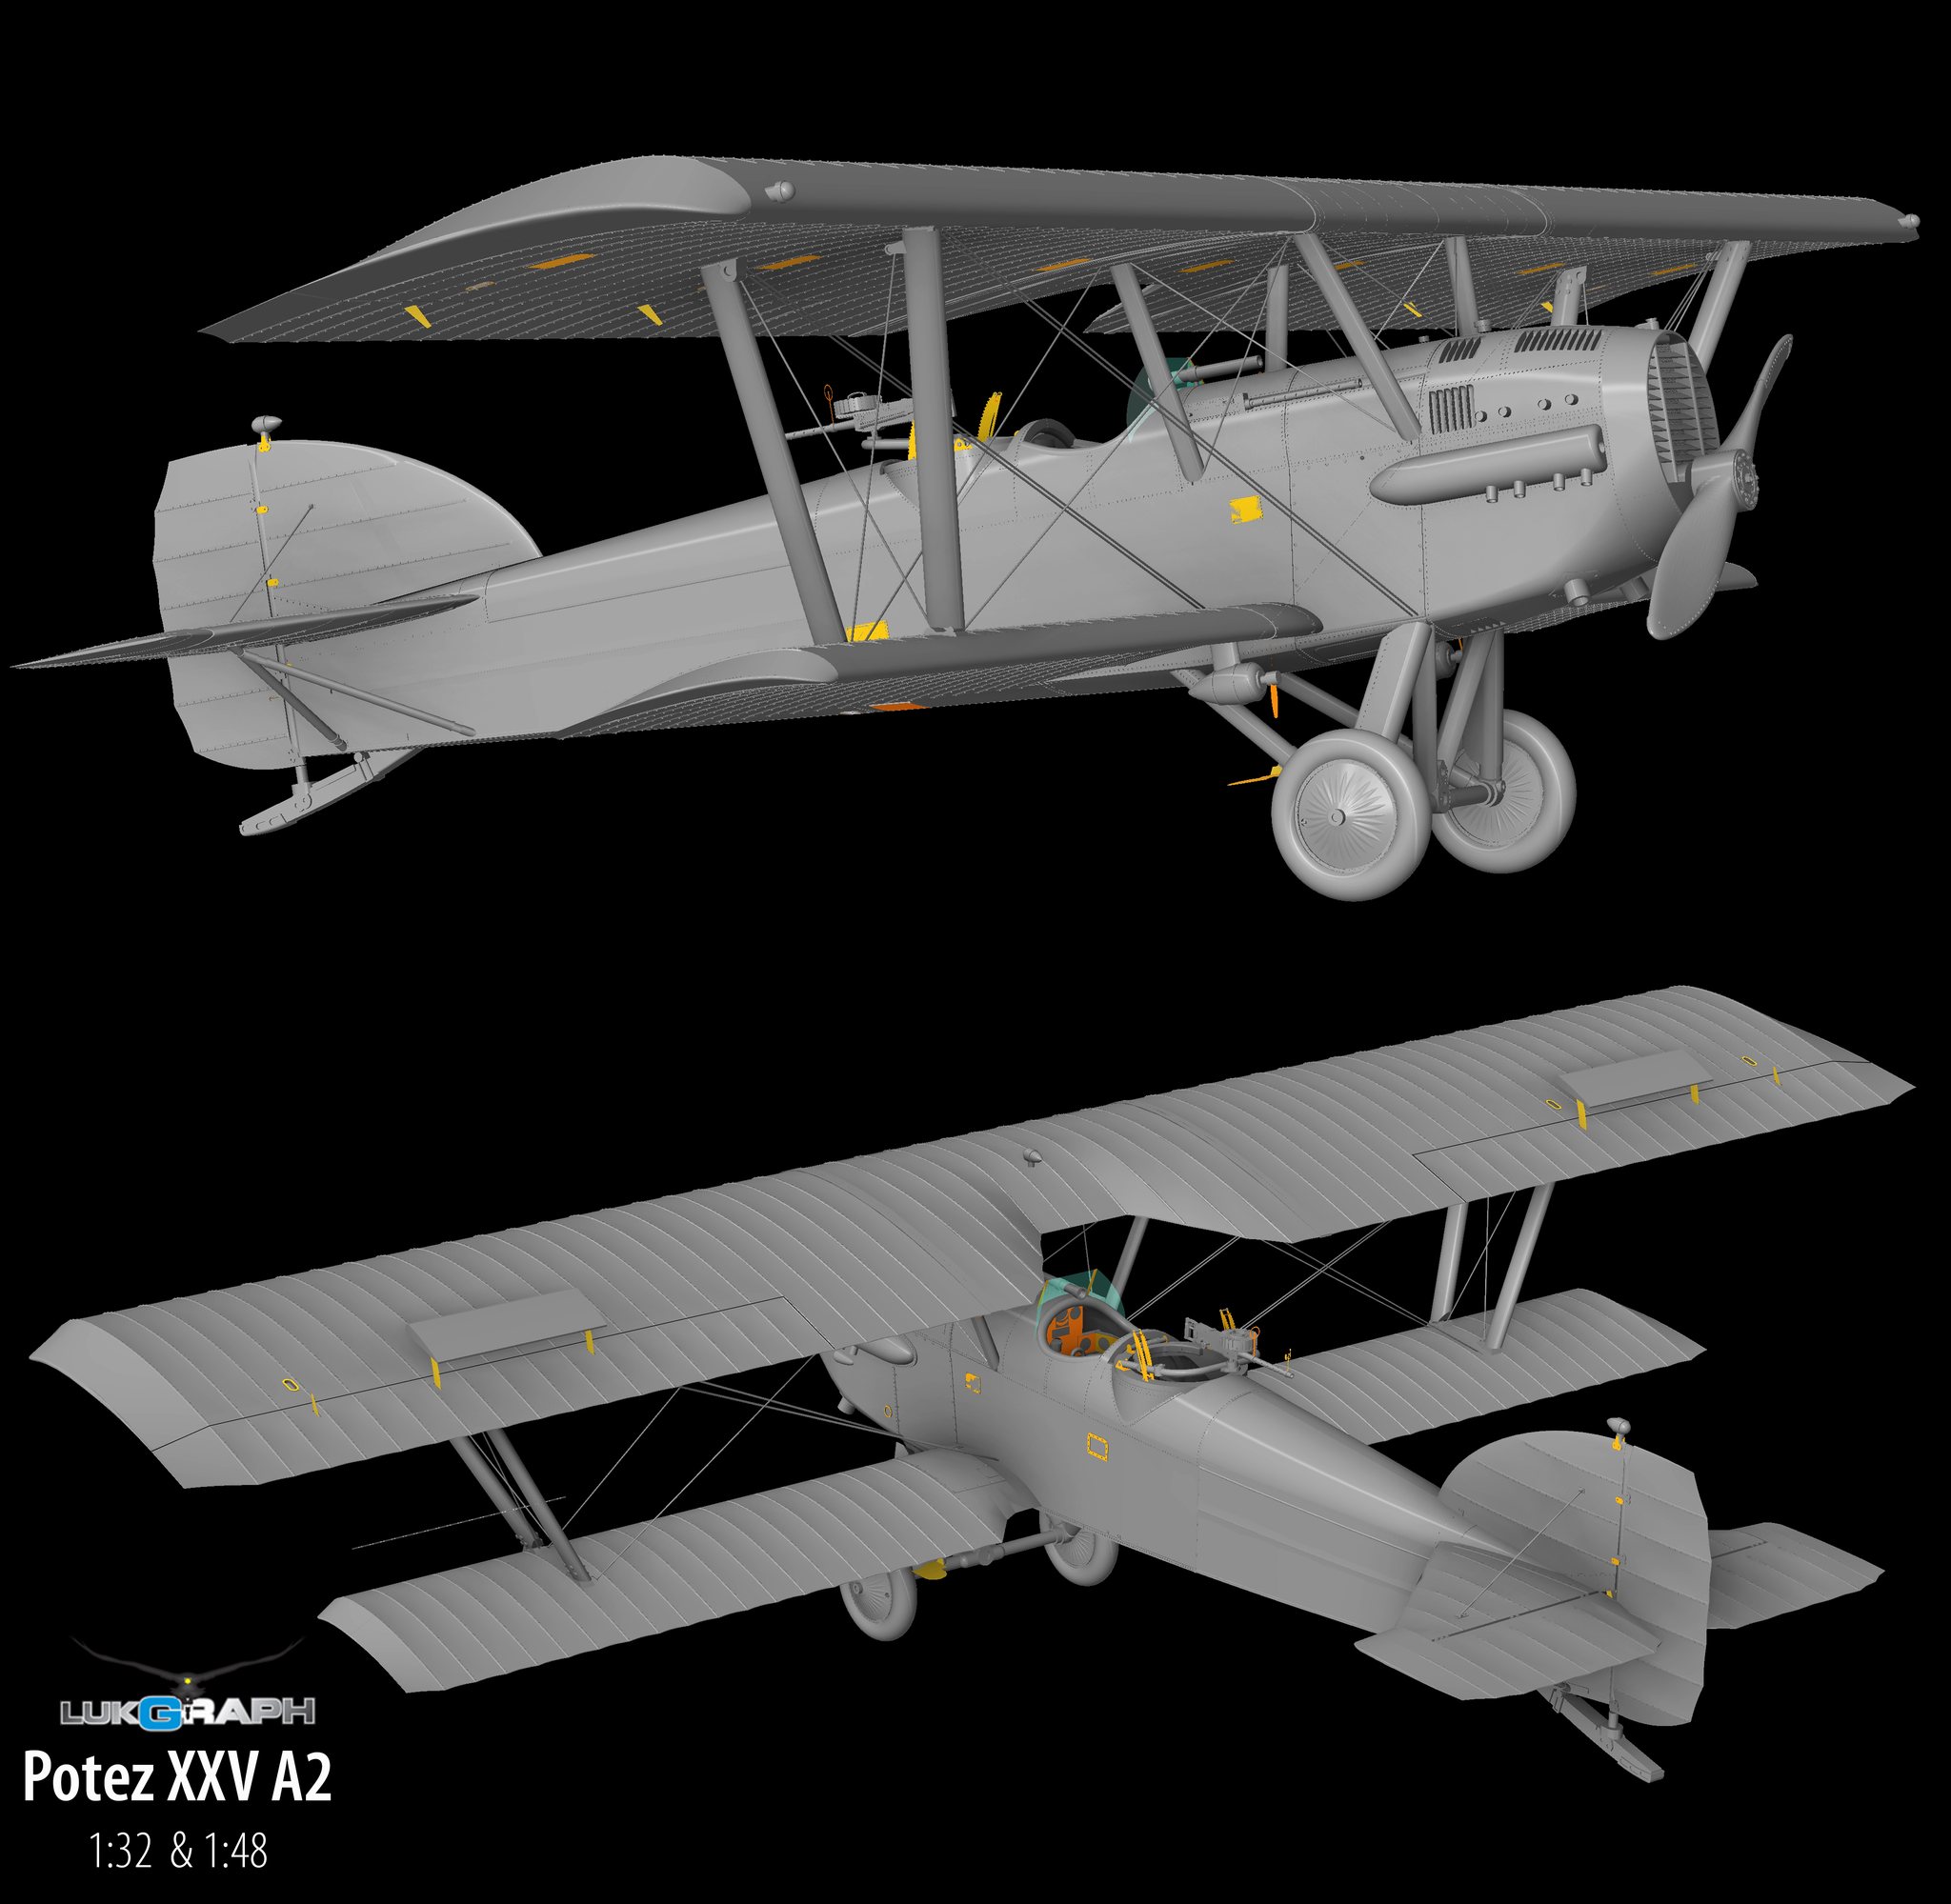
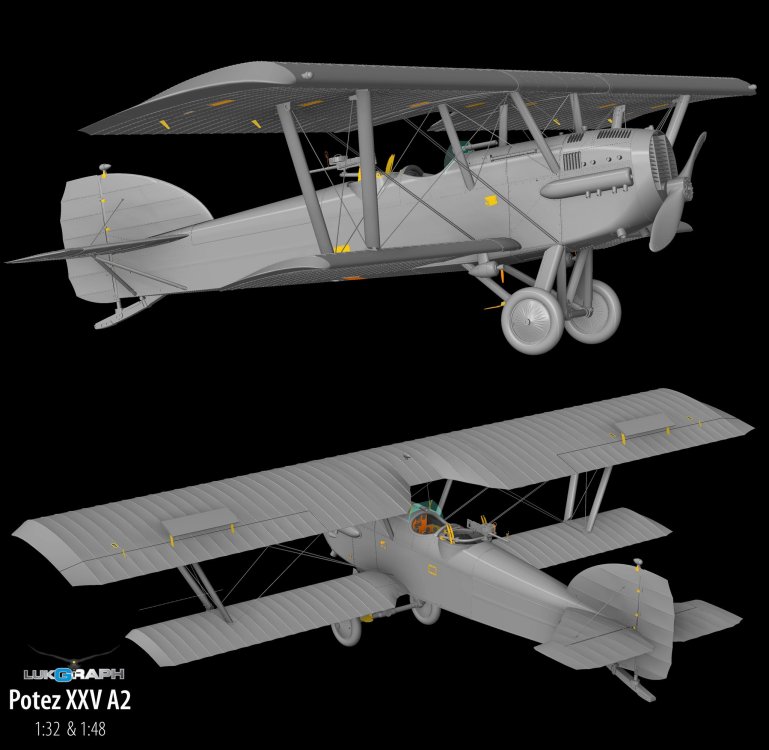
It looks like Lukgraph will release a 1/32 (and /48) Potez XXV …. Hubert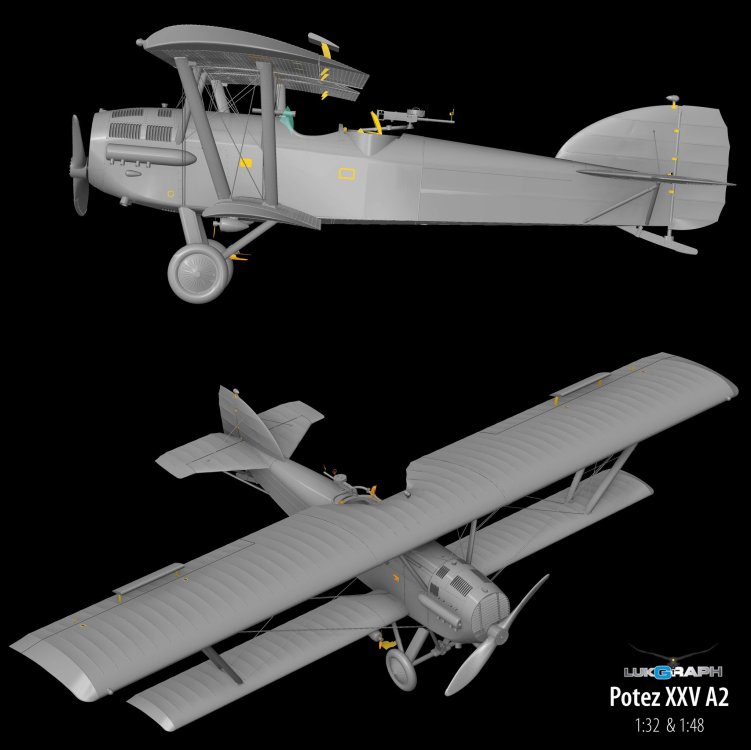
-
Caudron C.561 French Racing Plane - Resin - 1/48 - S.B.S.
HubertB replied to DocRob's topic in LSM 1/48 Work in Progress
I remember reading on French forums that the most likely interior color was light grey. The 460 replica is aluminium. HTH Hubert -
Very good-looking Lightning 👍 ! Hubert
-
When I met Patricia, 12 years ago, she was battling her cancers # 3 and 4, namely a liver and stomach cancer, and since then, we faced, 6 years ago, # 5, in the peritoneum area. She is now fully in remission (since July last year), and I bless every day our decision to move to Portugal back in 2017. So I understand fully well you situation, Peter. It’s important to keep a fighting spirit, and, besides the quality of the medical staff, the people close to you have probably as great a role to play. And I have been measuring every day for the last 12 years the importance of the « carpe diem » motto. Keep going my friend: you have no every reason to do so Hubert
-
Yes, that’s the intention. I’ll relegate the excellent Bitzkrieg’s engine to use on another kit. Now. I’ll have to resume the build of my PZL. And I’ll be hard-pressed to come even close to Marcin Matejko’s unbelievable build of the same subject (the 1934 Paris Air Show prototype) that I saw recently on LSP « Ready for inspection » Hubert
-
Caudron C.561 French Racing Plane - Resin - 1/48 - S.B.S.
HubertB replied to DocRob's topic in LSM 1/48 Work in Progress
YES ! Great project, Rob ! I found out recently that Renaissance had a 1/32 version of the C.561, and was resisting the itching to press the « order » button. (Btw, the thread for scratchbuilding the masters of the 1/32 kit was once published here on LSM). Now , the itch came back stronger than ever : damn you Rob 😡 ! In the meantime, I’ll be watching this one closely Hubert -
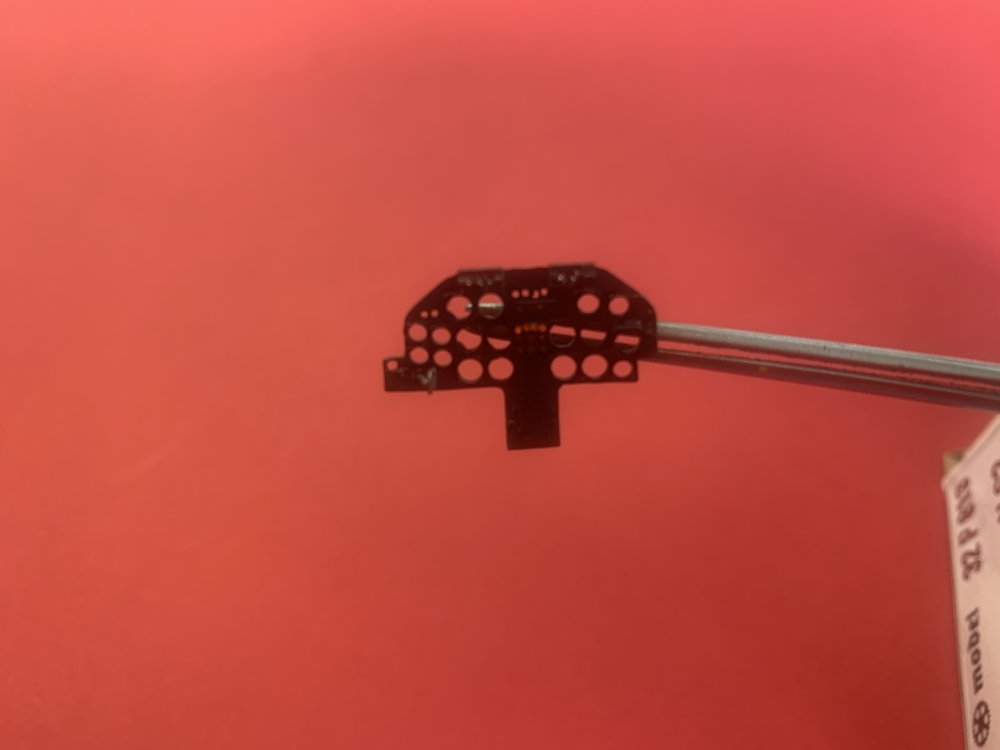
… And my pics are absolute crap on top 🤣 ! the blue background plays havoc with the « logic » of the phone camera. Let’s see if a new background will help ( some details have been enhanced between the previous pics and these ones, and I have started adding the warning lights on the IP)

-
Well, a few weeks have again elapsed. I need to prove this one has not found its way back to the SOD … N ly last update, I was adding bits and pieces to the cockpit. I did some surgery to remove the back bulkhead from the old cockpit that was chewed by my cat a few years ago, and graft it to the hew cockpit, in place of the new one, warped beyond reprieve. This is where I hit my nemesis, and went through a severe procrastination bout : black cockpits of the early jets. Iam really struggling to achieve some degree of interesting contrast in this black-on-black exercise. My first painting attempt was not satisfactory and was stripped, from its paint. This is where I am standing today, in tne middle of the process. The base color is MRP « tire black » with details highlighted here and there in real black, silver, red, etc. The oxygen hose needs re-gluing, the red dots reinforced, the IP fire alarm warning lights added, as the emergency cockpit and bom releases handles, etc. the control column and rudde pedals are still missing. So it’s not finished yet. Spending hours on this one with the maximum amplification Optivisor, I am not really satisfied with my work and results, but I have to remind myself that nobody will look at it with this degree of extreme magnification … And then the pics show that black on black is a real pain to photograph as well More to come …. one day or another …. Hubert
-
Following my first positive experience with FPW’s R-1820, I ordered their Bristol Mercury, which I just received. This one is specifically designed for the IBG’s PZL P-11c, with its metal sheet mounting. Having bought the Vector Mercury, the Kitsbitz’ one, having the kit’s engine, I can say FPW’S one is definitely the best of the lot, with the distinctive cowling supports integrally printed with the main engine. The engine is supplied with the carburetor, reduction gear crankcase, prop shaft and exhaust collector ring as separate items. Hubert
-
LSM Modelling News 2023 merged Fran and Artful69’s threads
HubertB replied to Fran's topic in Modelling Discussion
I think the answer to this one is « no, and therefore no » Hubert