GazzaS
-
Posts
6,396 -
Joined
-
Last visited
Content Type
Profiles
Forums
Events
Gallery
Everything posted by GazzaS
-
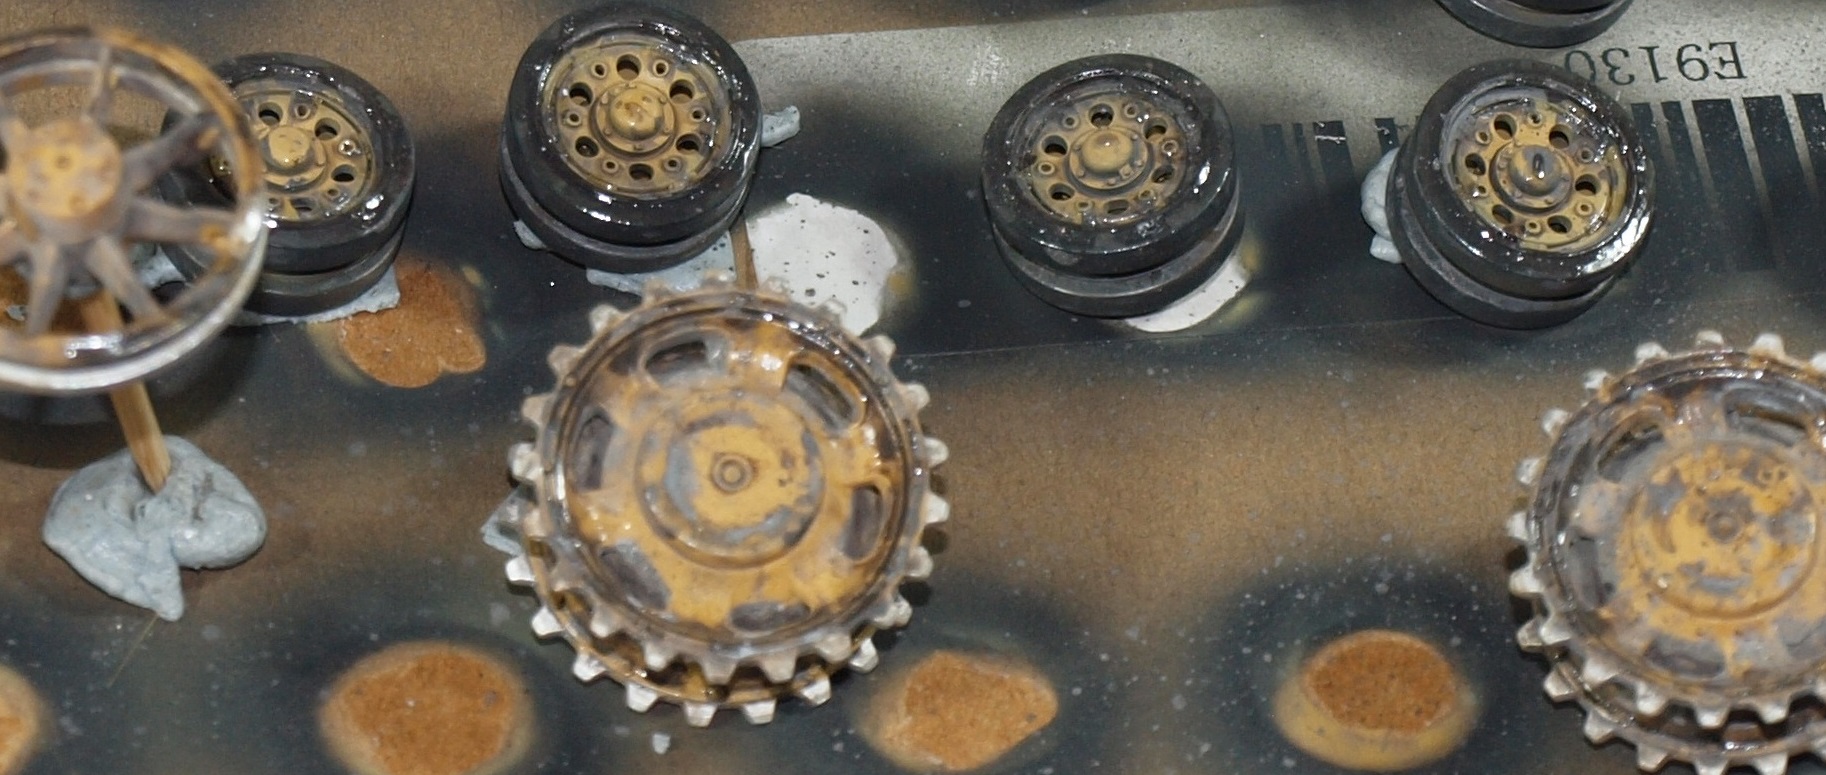
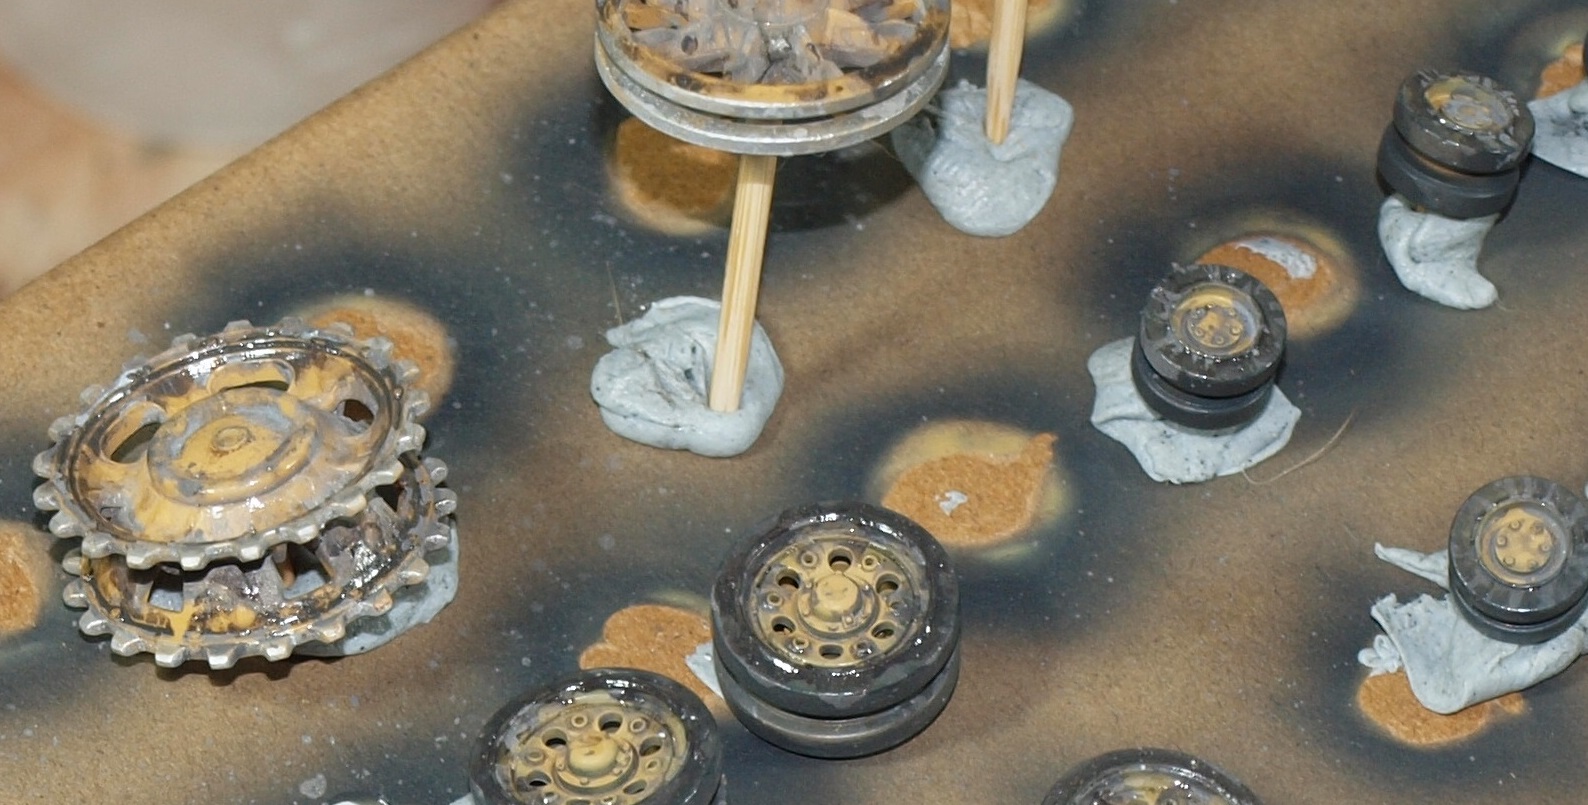
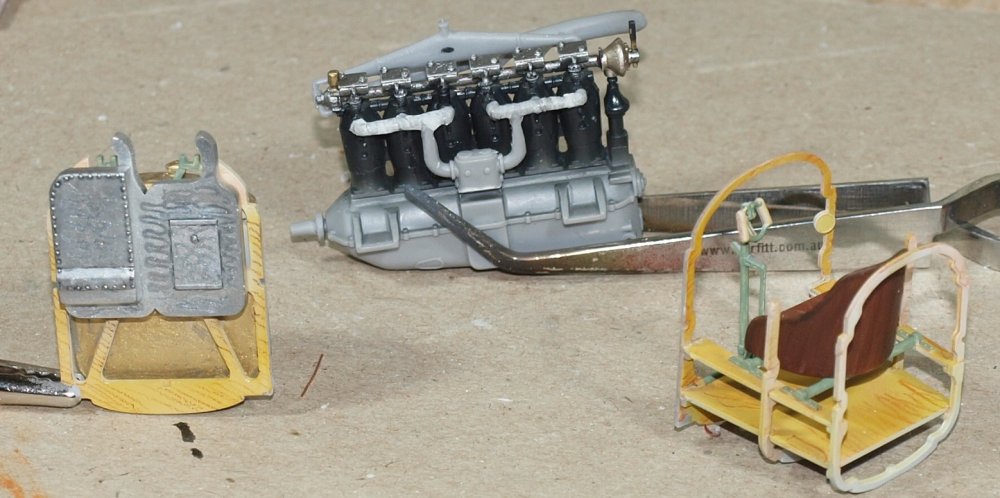
Thank you, Guys! I didn't get as much done this weekend as I'd liked. A few things to do, then my lovely granddaughter spent the night Saturday. So, between taking the dog to the chiropractor and cuddles... I only had a few hours today. Today's work was mostly on the engine. There were a few sink marks to fill... hard to miss as the black CA shows the way: The exhaust and the strange looking piece above it are only pinned on. Interestingly this engine has spark plugs molded on. And... the rocker cover and springs are AM... so much more detailed than the kit rocker. I also lagged the magneto pipes after thinning them substantially. I used cigarette paper as the lagging tape. I worked on other interior components as well. I tried to get that scalloped look on the ammo boxes. It didn't quite pan out. Next time I might foil the boxes first and then try something else. Because Molotow chrome pen over Alclad doesn't cut the mustard. There is another problem I have. That problem is the color orange. Idfleig (Inspektion der Fliegertruppen - "Inspectorate of Flying Troops") directed that that yellow stain was to be used on the Albatros fighters. Remember all of those Dark wood Albatros profiles in books in the 80's? Learning about the effects of orthochromatic film made a lot of models and pictures instantly 'wrong'. But it is really hard to get right. Believe it or not, I made four different attempts on my paint hack. And I'm still not sure... but I want to try. This effort is very light brown followed by other steps. The brown is so light that it is hard to distinguish from pink. Then the wood grain was marked in with colored pencils... then blended with varying success. Then sprayed with Tamiya clear yellow thinned 50/50. Finally, a brown filter gives the results shown. Tamiya yellow is very powerful. Any hint of yellow in your base paint just makes it worse. Anyway... the weekend is over. Have a great modelling week, my friends!


-
Sorry Phil... didn't see you down here! I've done a couple cellar builds down here, too. So, I'll try to remember to scan this far down. Those PE screens look great, and I bet all of the resin detail will look sweet painted up. Strappin' in!
-

Israeli Mirage III C with Atar9C
GazzaS replied to Kaireckstadt's topic in LSM 1/35 and Larger Work In Progress
Kai, the intake and nose cone areas look so much nicer now. You're really making this bird look great. Pre-scribing the details gave me an idea to share.... I'll try to make this short as it may help both of us on future models: Some friends at my club AMMS Brisbane told me how to handle the notorious dorsal spine panel line on the Bf 109. They told me the easiest thing to do was to sand each side of the joint at a slight angle to widen the line at the top before closing it up. Then... once the fuselage halves are glued together, your perfect line is still there. Here is a small , simplified illustration. It just occurred to me that this technique might help with nose cones, tail cones, and also the front cowlings of some radial engined models. I think it might have been very helpful with the cowling on that PCM 190 I just finished. Actually... it might be useful anywhere a panel line coincides with a seam. Hopefully we'll see some color, soon!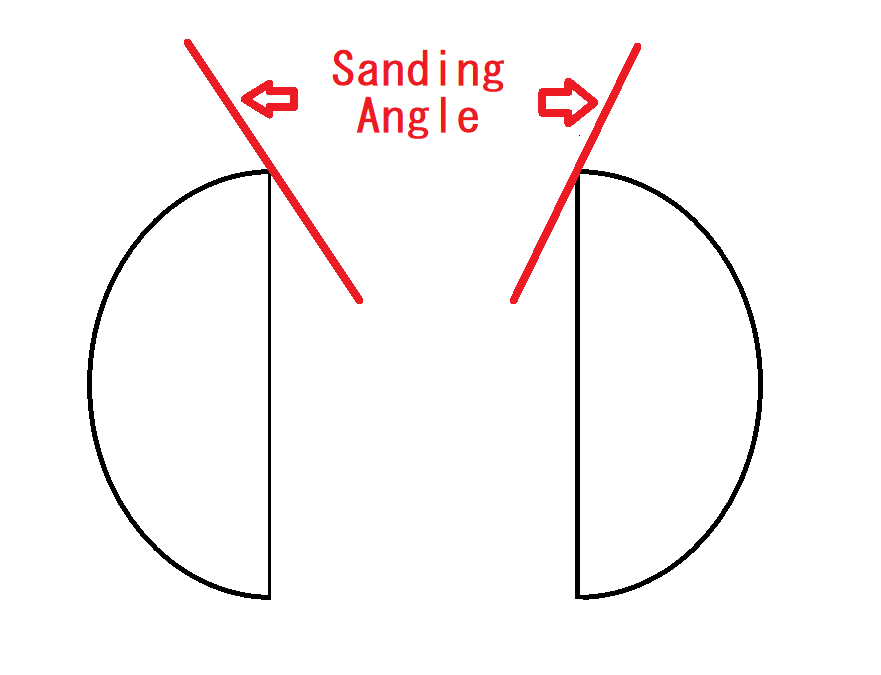
-
What is on your bench right now ? Share a picture :)
GazzaS replied to Martinnfb's topic in Modelling Discussion
That's quite a space to not-know-about. Good thing it wasn't occupied. -
1/32 Trumpeter P-40F Warhawk
GazzaS replied to Martinnfb's topic in LSM 1/35 and Larger Work In Progress
hahaha. I lack the funds for a trophy wife. -
1/32 Trumpeter P-40F Warhawk
GazzaS replied to Martinnfb's topic in LSM 1/35 and Larger Work In Progress
I prefer the short tail myself. -
Tank Ta-152 Willi Reschke
GazzaS replied to Kaireckstadt's topic in LSM 1/32 and Larger Aircraft Ready for Inspection
Thank you for the extra effort! Good to know!- 24 replies
-
- 2
-

-
- zoukei mura
- aires
- (and 2 more)
-
Looks good!
-
Thank you, Peter!
-
1/32 Trumpeter P-40F Warhawk
GazzaS replied to Martinnfb's topic in LSM 1/35 and Larger Work In Progress
Wow, Martin! Great work! -
Exceptional painting, John!
-
Tank Ta-152 Willi Reschke
GazzaS replied to Kaireckstadt's topic in LSM 1/32 and Larger Aircraft Ready for Inspection
Very nice job, Kai! Really love the paintwork on this one. Great Diorama! What is the symbol with the tiger and propeller?- 24 replies
-
- 3
-
-
- zoukei mura
- aires
- (and 2 more)
-
Nice!
-
Fw190A-8 3/JG1 crash Vreeland
GazzaS replied to JeroenPeters's topic in LSM 1/35 and Larger Work In Progress
Neat and tidy! -
Excellent detailing!
-
DB605 Engine 1/18 scale HPH
GazzaS replied to Trigger's topic in LSM 1/35 and Larger Work In Progress
Very nice work! -
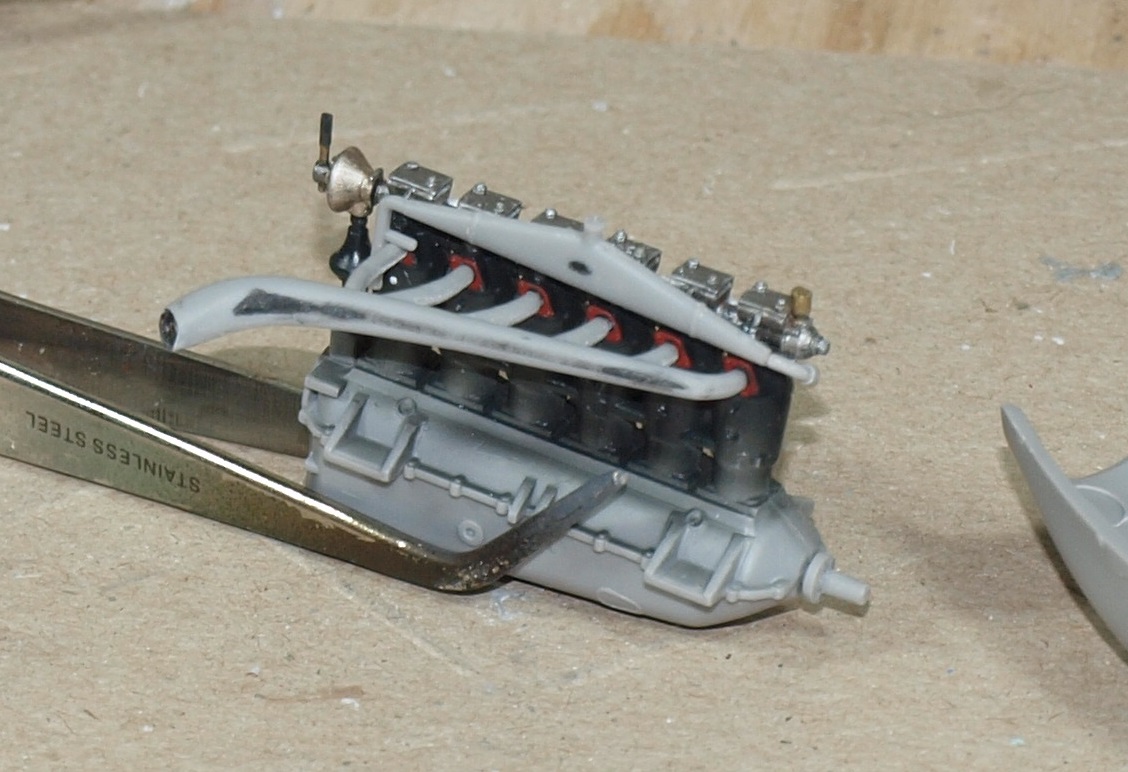
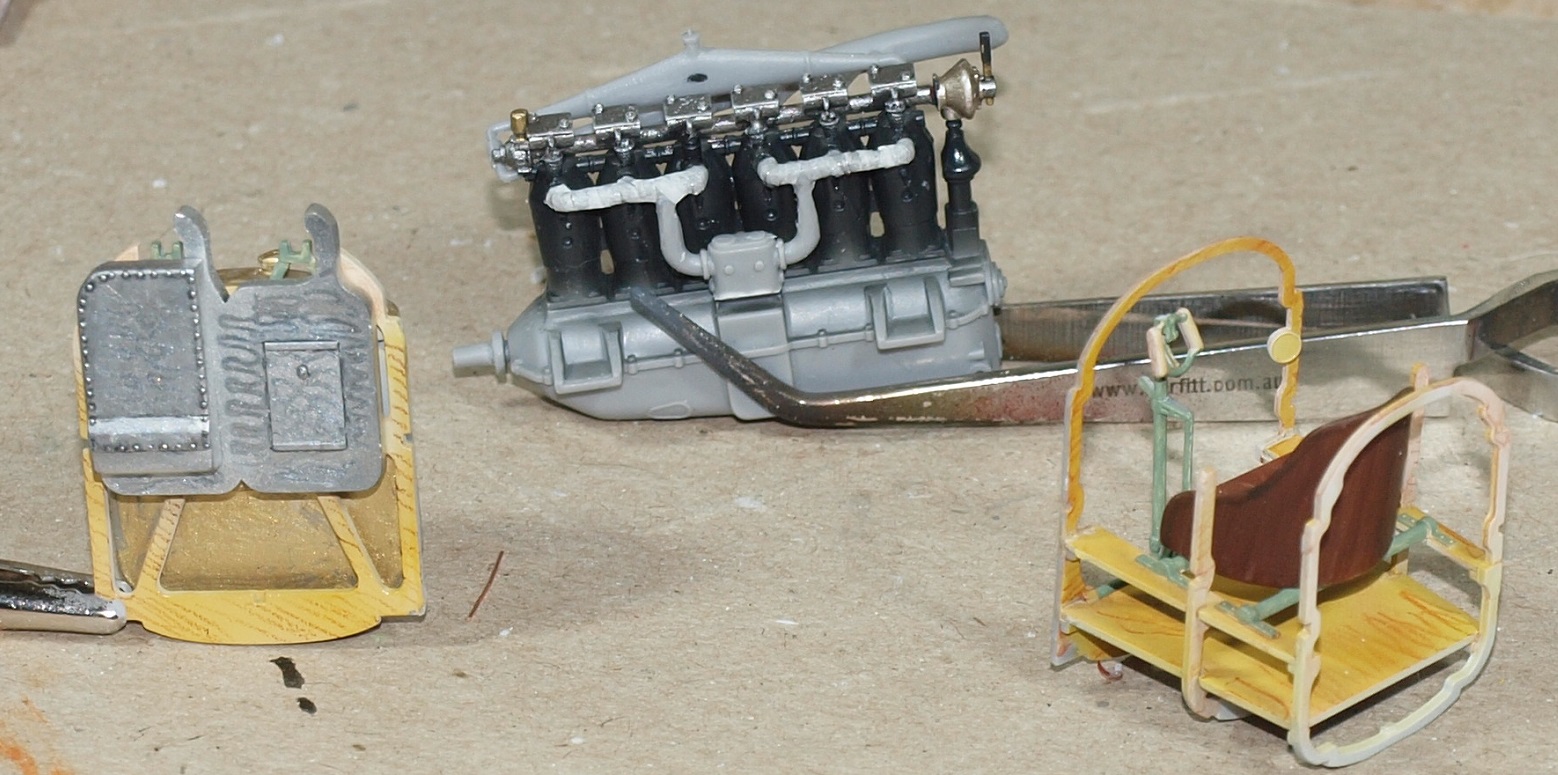
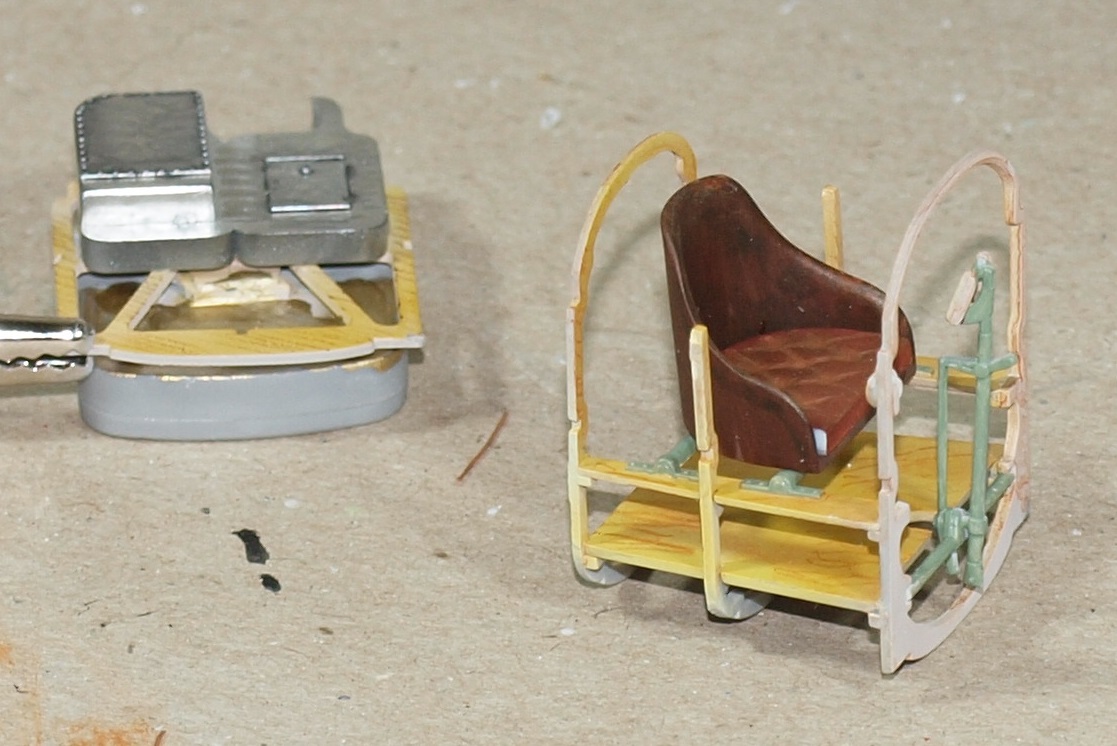
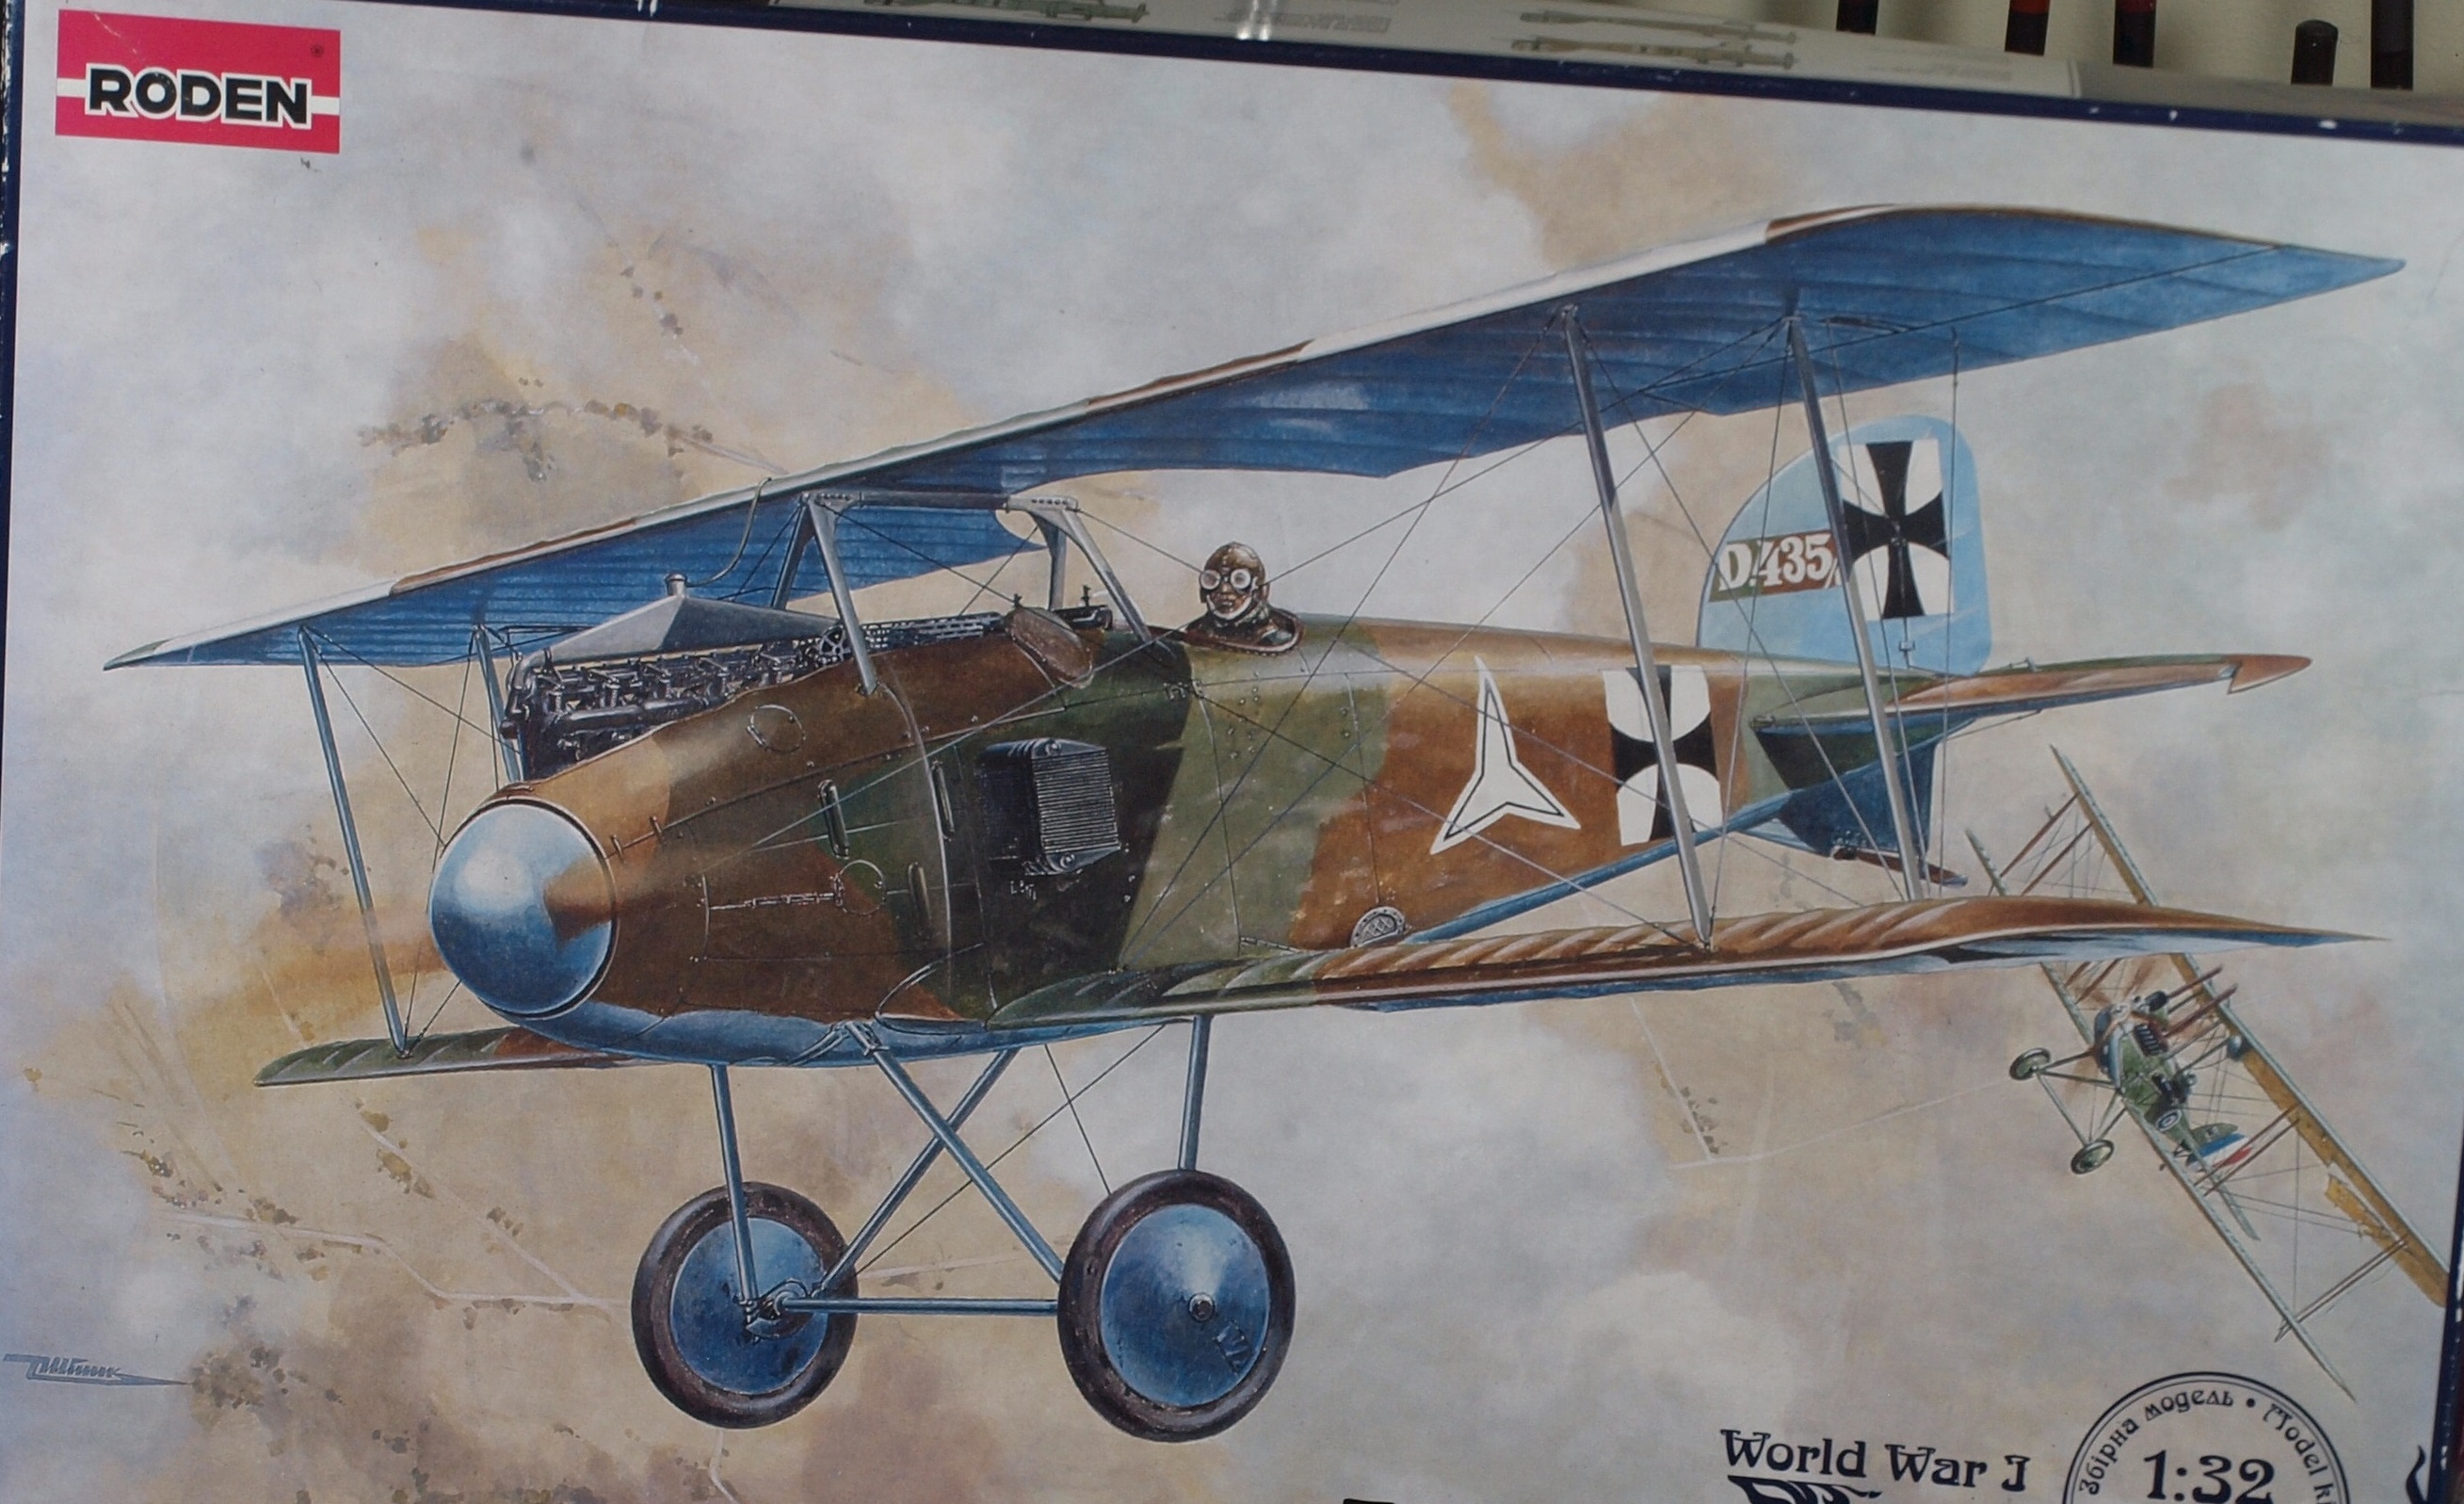
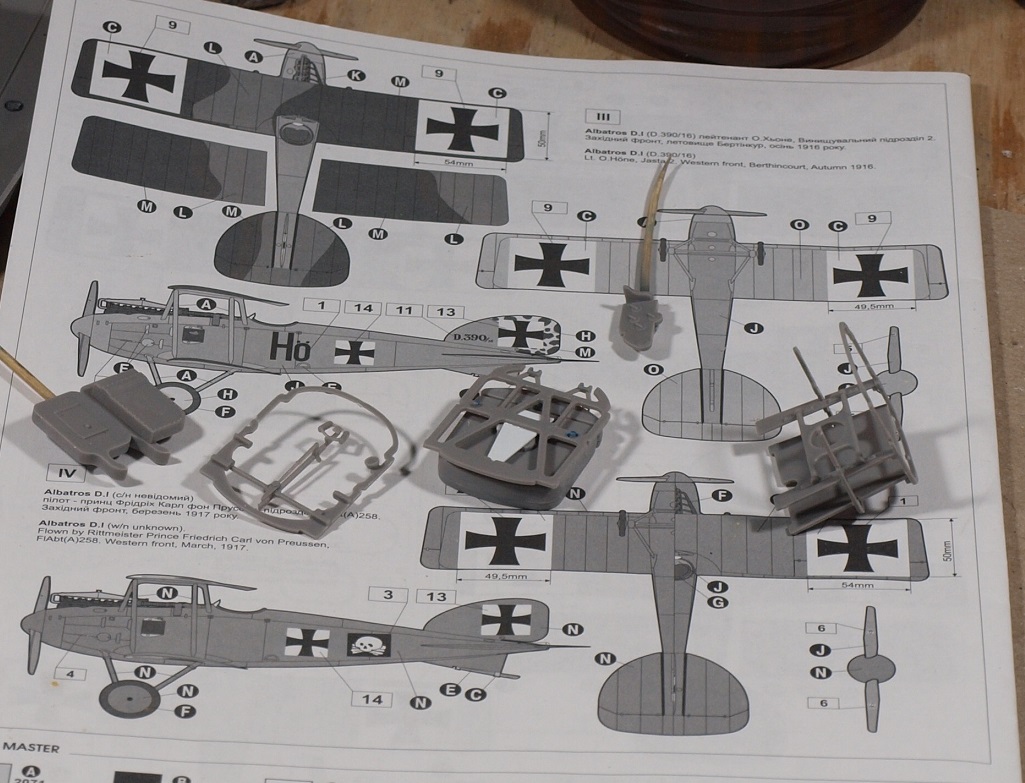
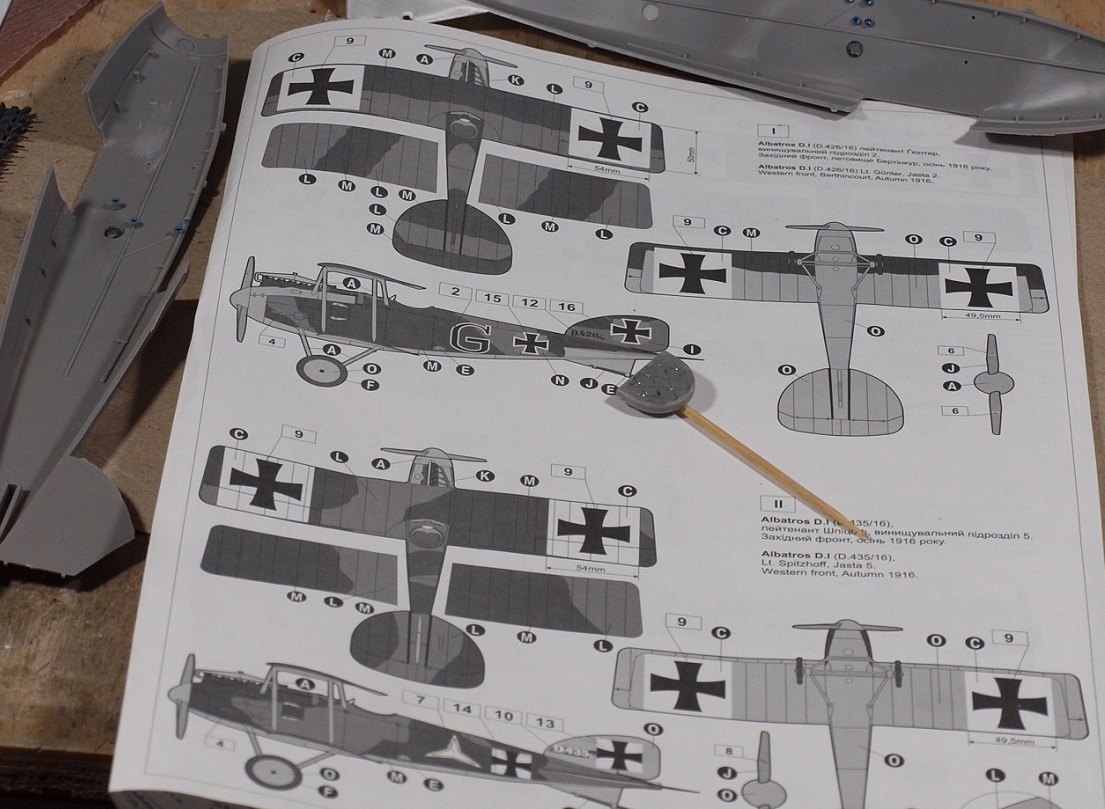
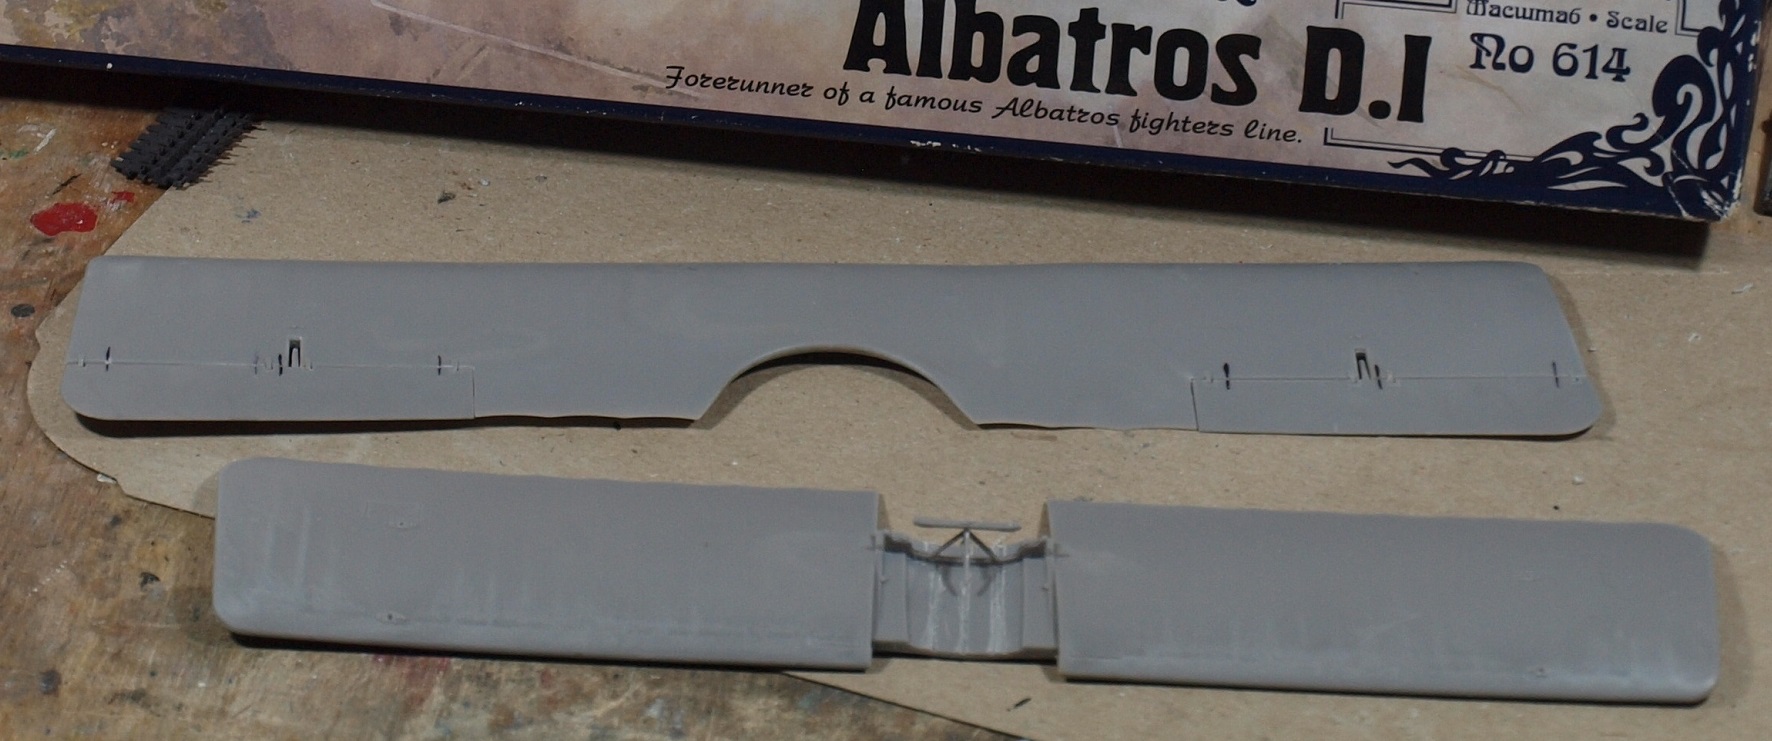
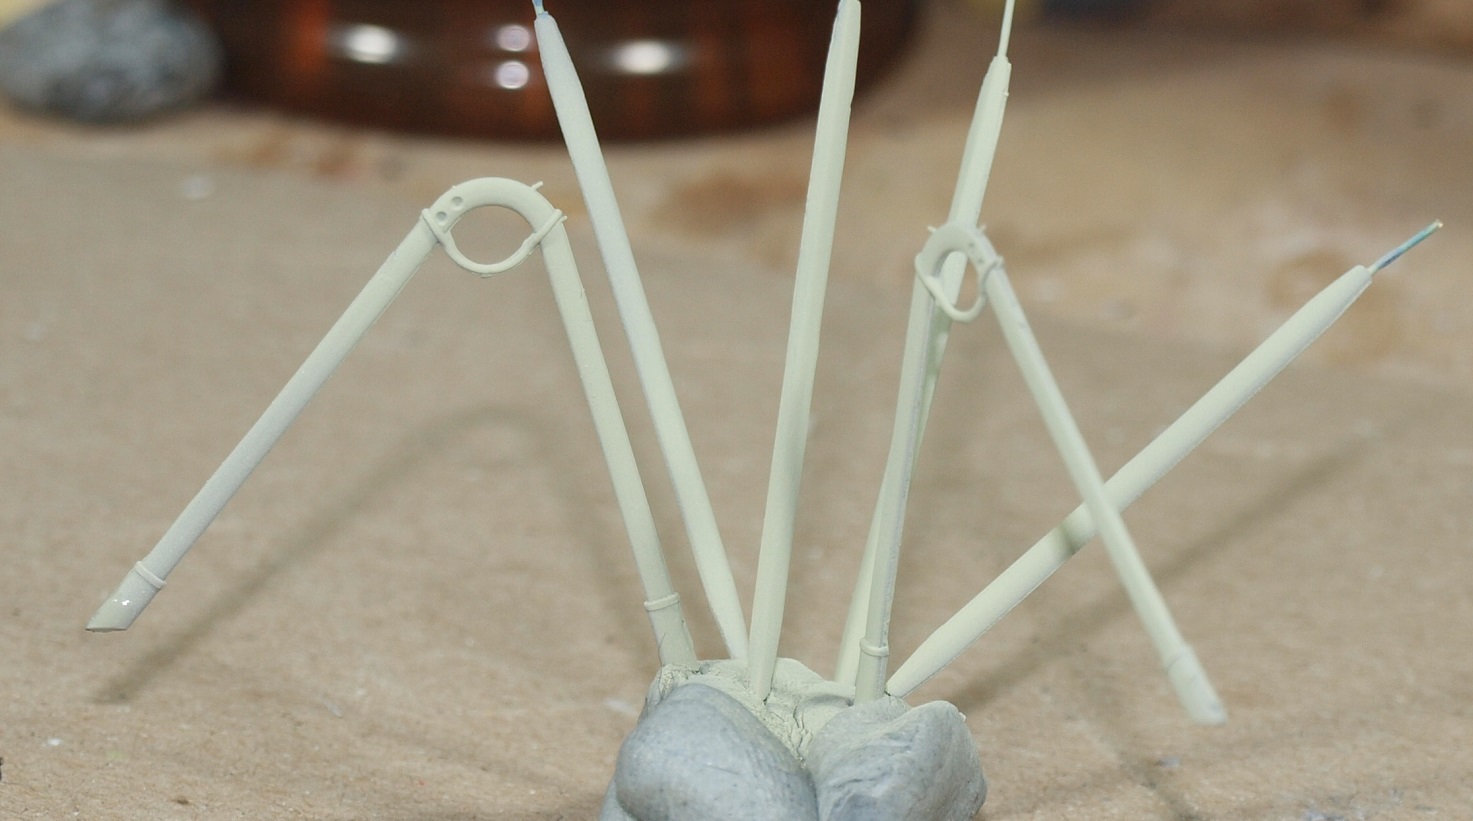
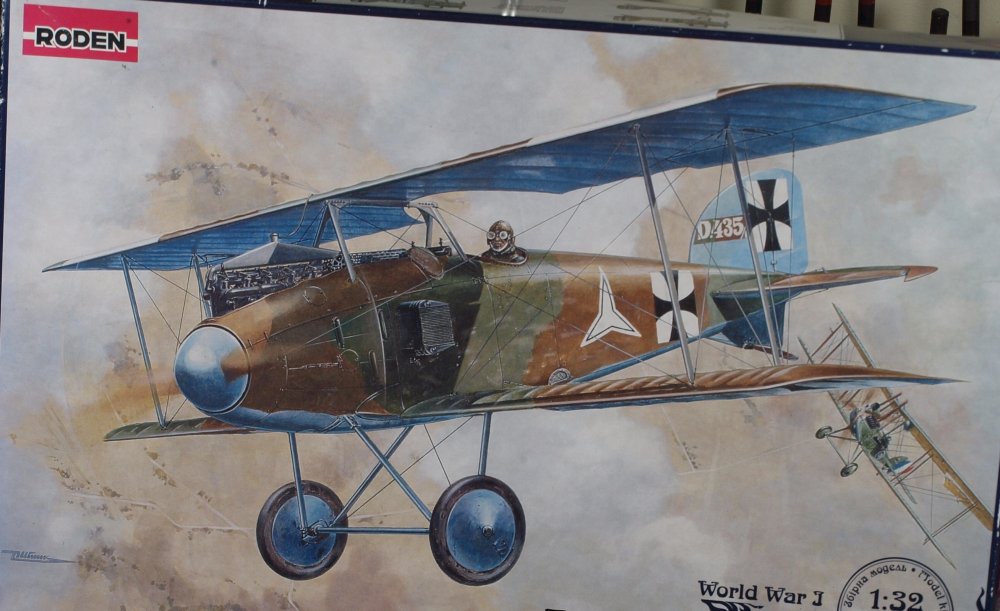
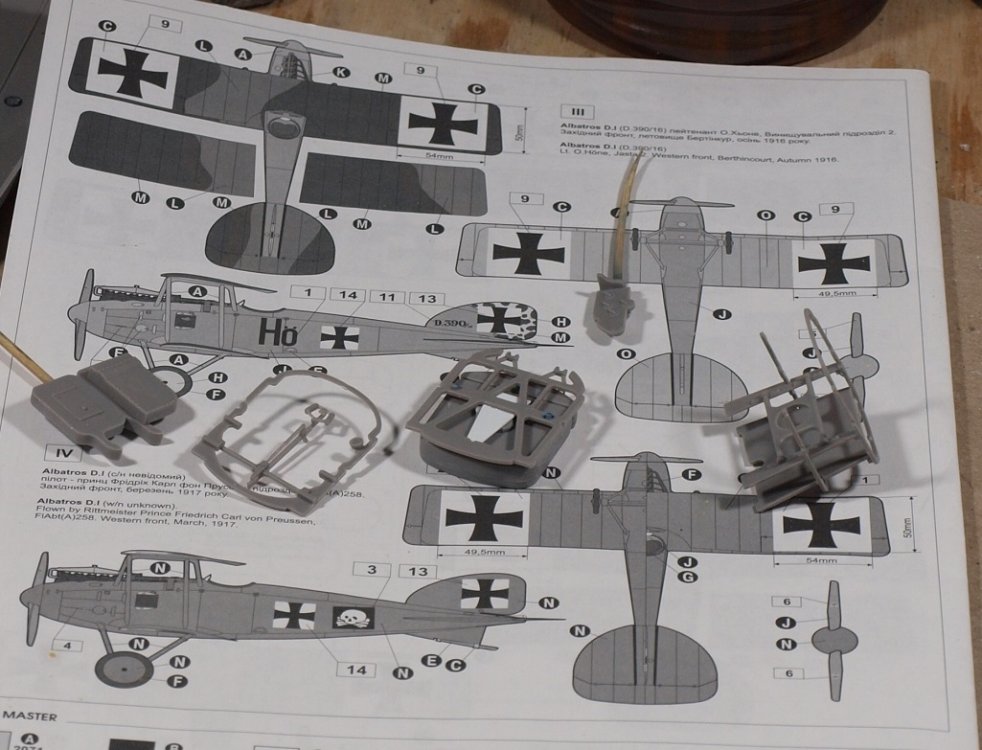
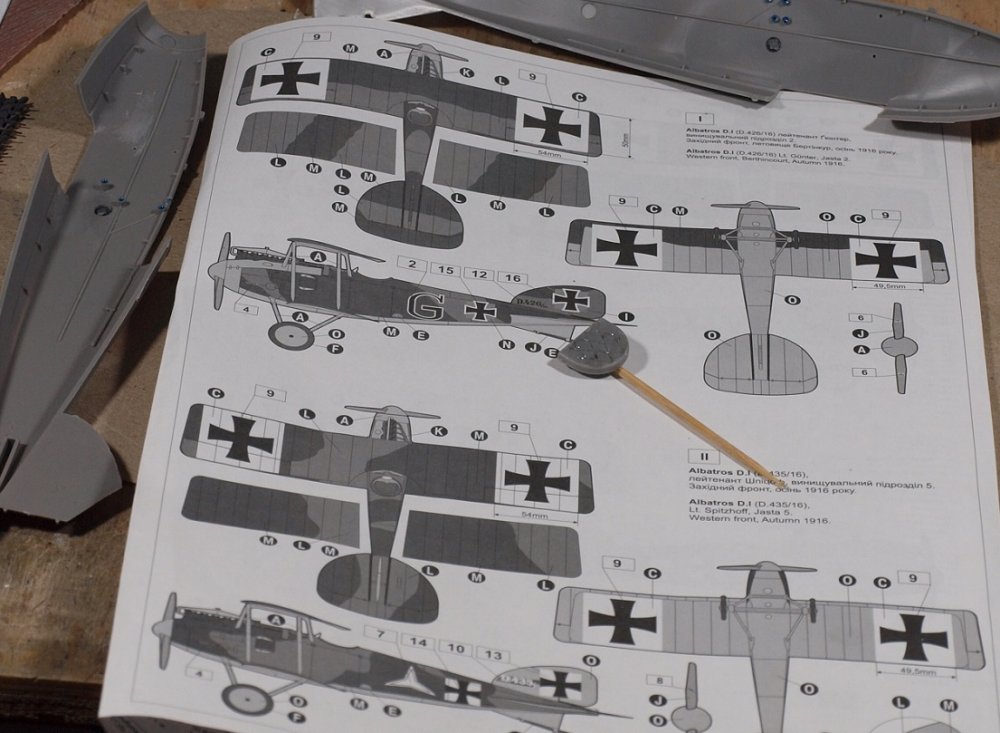
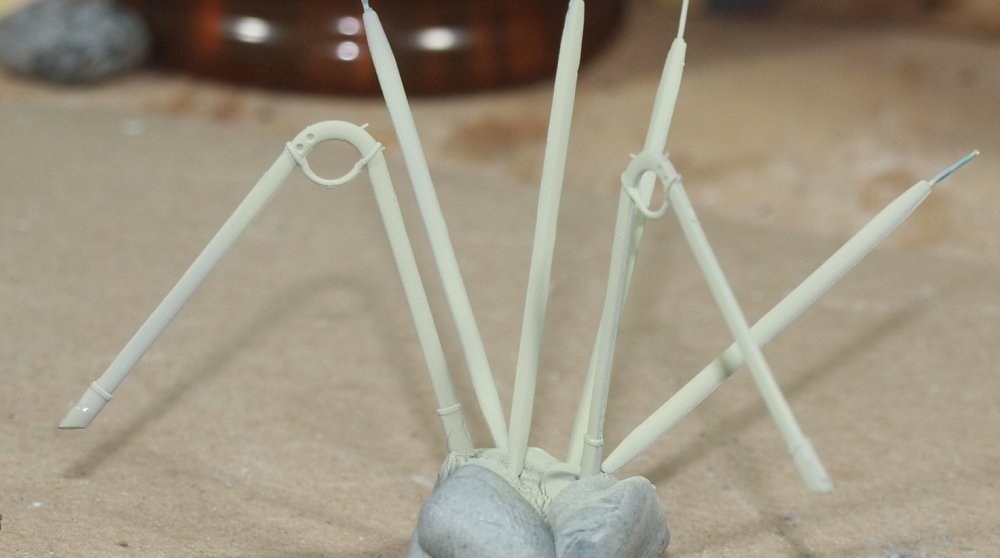
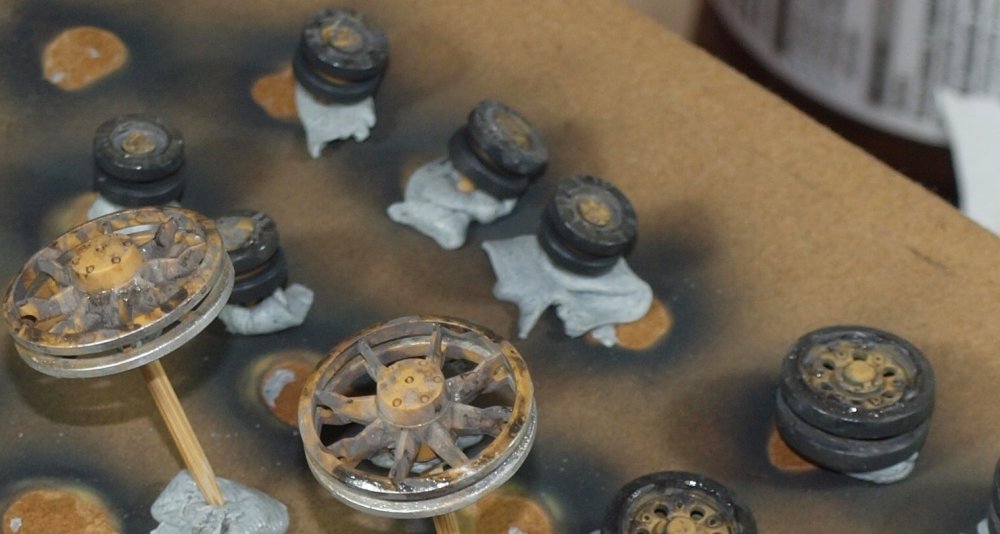
Thank you all for all of the kind, interested responses. We never did a proper initiation for this build. Here is the box art: For a "not so good kit" and for the fact that there weren't many D.I's operational, you get four schemes to build. You can see two here with some of the assembled internal components. Dunno how well you can see the cushion, but I modified it using scribing tools to put in the stress lines between the buttons. Unfortunately both wings were warped a bit causing some nasty anhedral. I made some grooves on the inside of the lower wing section and cold-bended the anhedral out. For the upper wing I used clamps and a hair dryer. I also attached both ailerons using three brass pins in each. Should be all right. It's been in myu stash for a while and I may have repacked everything wrong. Finally, the reinforced struts... all painted in a very faint feldgrau. I may change the color a bit. I know weathering will add some variations. But damn! It feels good to be working on an Albatros. After so much time with D.III and D.V's, the wide chord of the lower wing feels quite strange. But cool, nevertheless. Happy modelling!

-
Zoukei-Mura P51D Mustang SWS No 4.
GazzaS replied to Bomber_County's topic in LSM 1/35 and Larger Work In Progress
Those lg look sweet! -
Israeli Mirage III C with Atar9C
GazzaS replied to Kaireckstadt's topic in LSM 1/35 and Larger Work In Progress
Your patience is paying off, Kai! It will be worth it! -
I feel the need... for Shake and Bake... Tamiya StuG
GazzaS replied to GazzaS's topic in LSM 1/35 and Larger Work In Progress
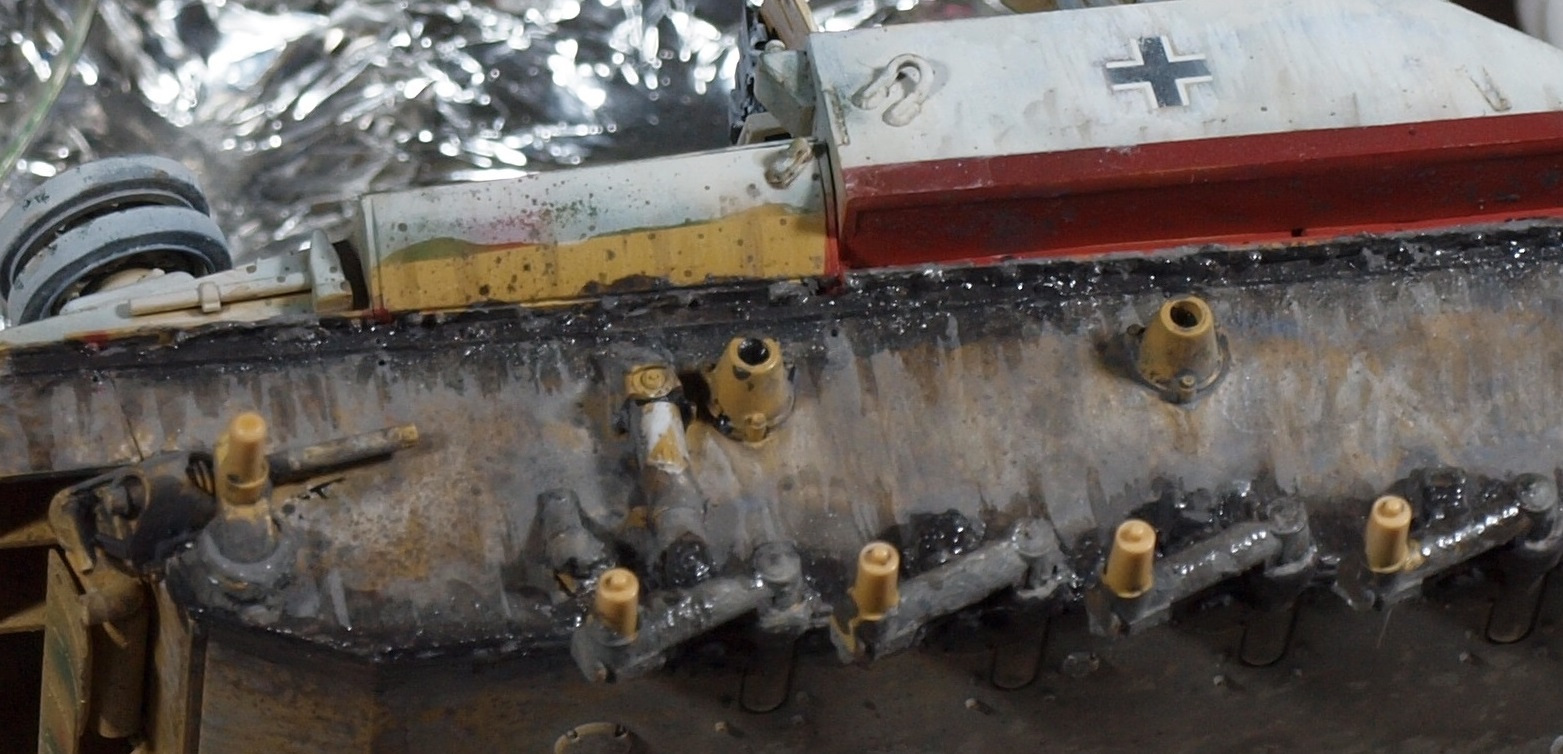
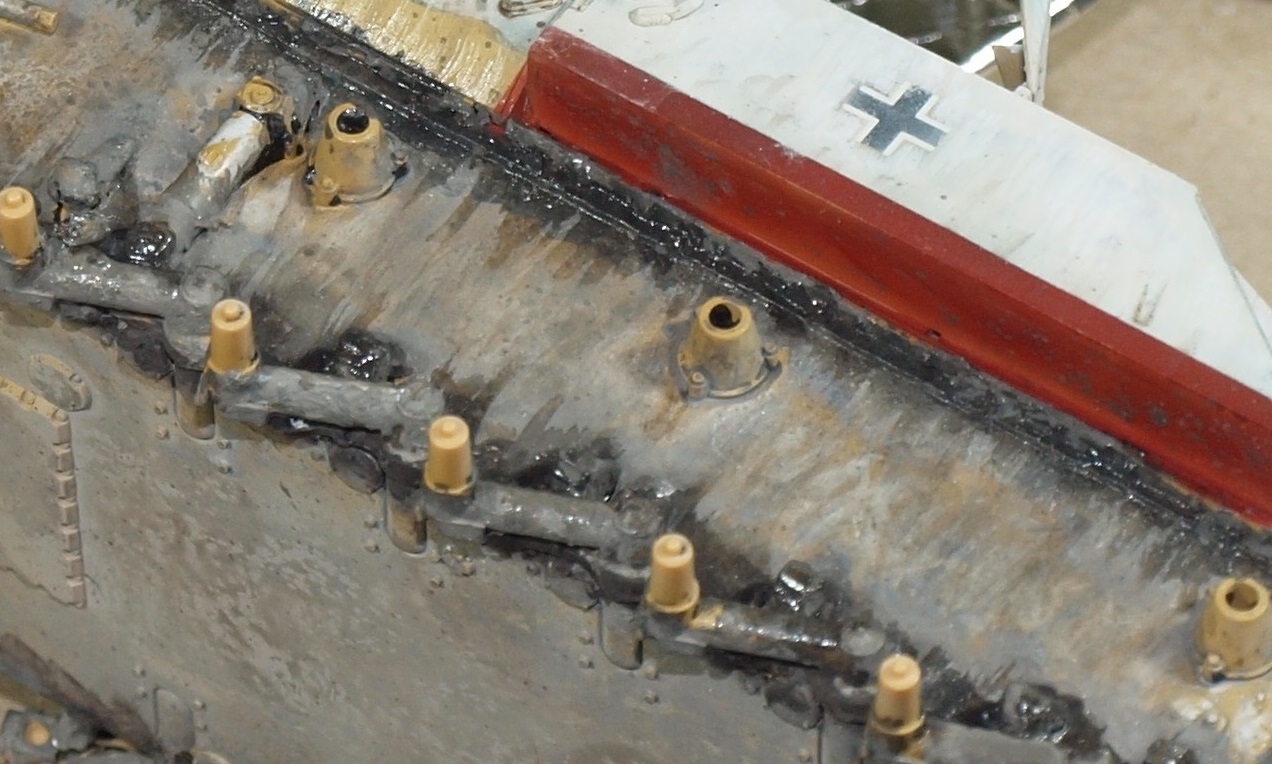
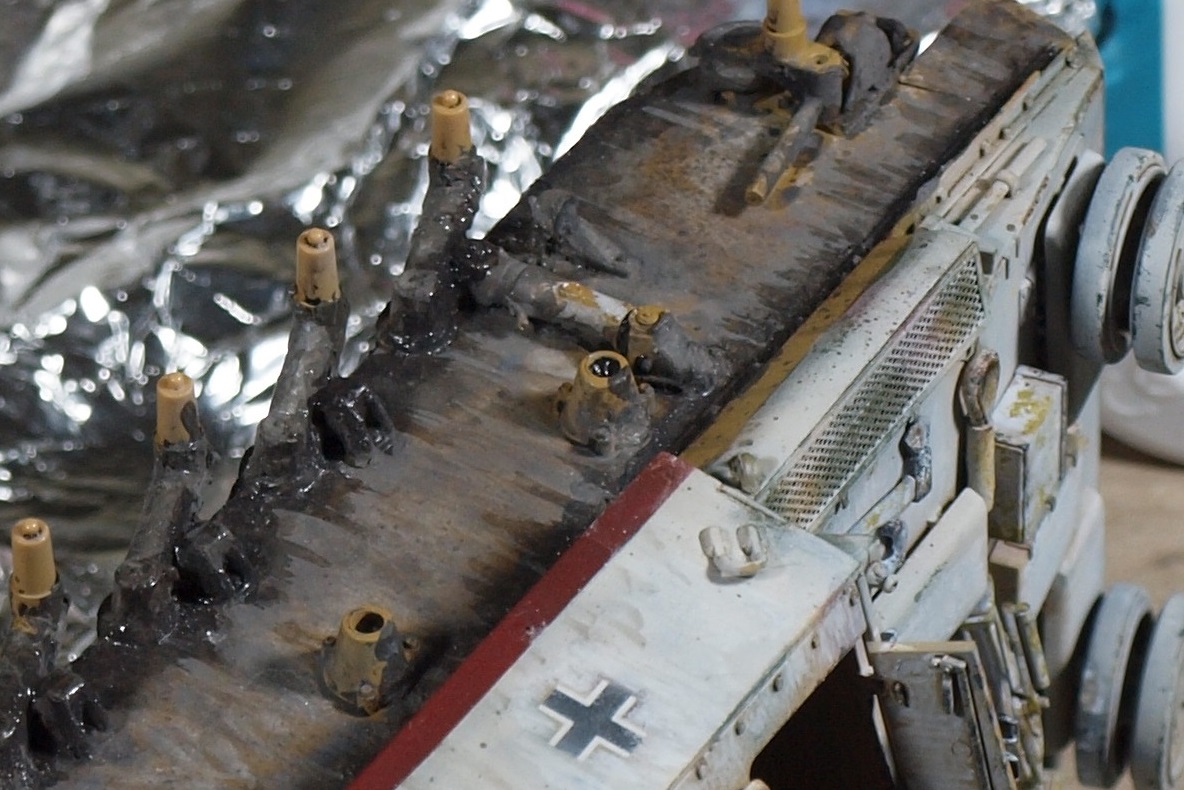
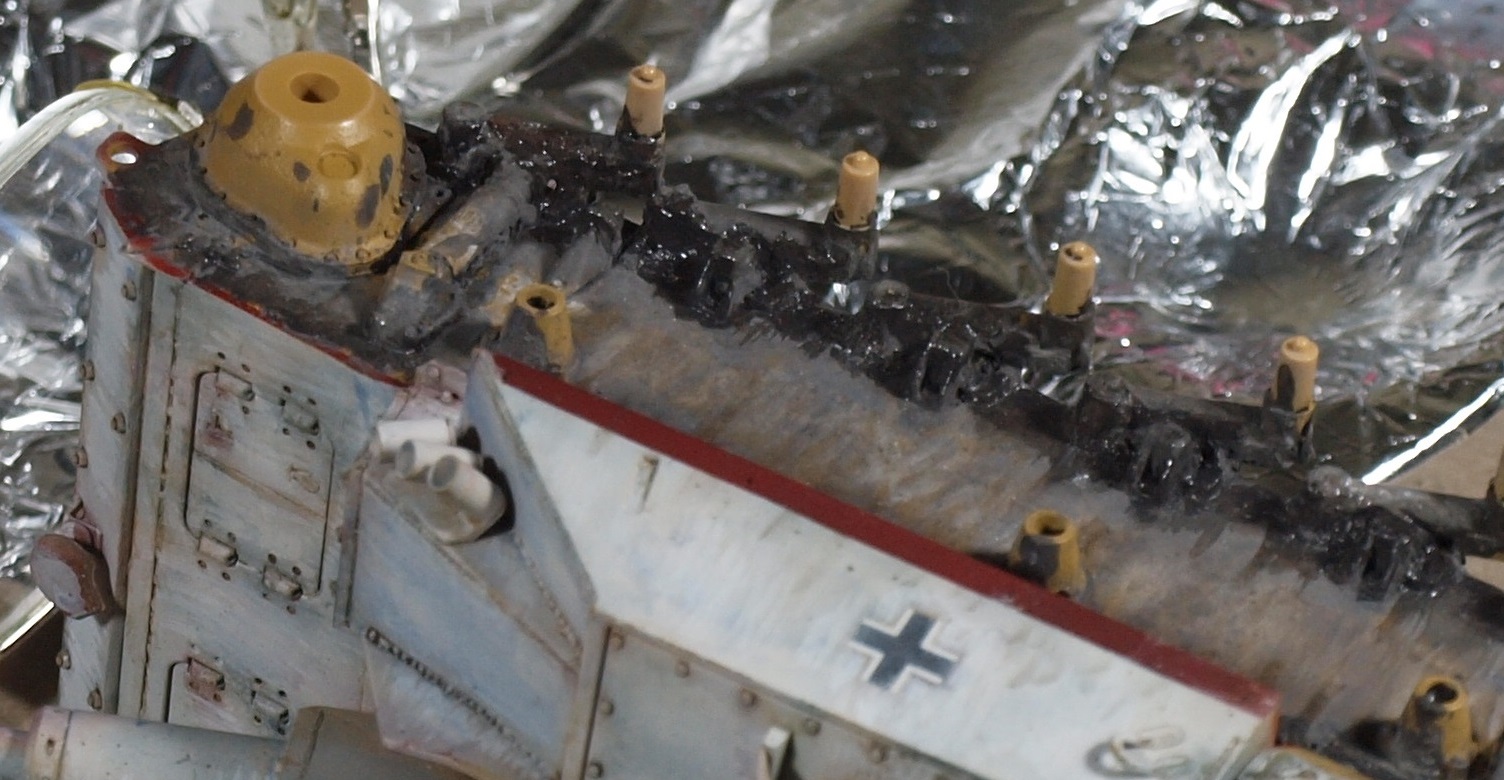
The wet effect. Not sure I like this. I had to make my own concoction of Future and gloss acrylic medium. Anyway... here is a barrage of photos. Lemme know what you think, please.


-
1/32 Trumpeter P-40F Warhawk
GazzaS replied to Martinnfb's topic in LSM 1/35 and Larger Work In Progress
Inspiration! -
Very nice!
-
I feel the need... for Shake and Bake... Tamiya StuG
GazzaS replied to GazzaS's topic in LSM 1/35 and Larger Work In Progress
Ugh... Even though I painted the commander's face as well, this guy is the better looking of the two. I thought his face looked pretty good with just my glasses on. Blown up, he looks so much worse. Practice, Grasshopper. I'll let him dry overnight, then start on the uniforms. One of the problems I find is that on one side of these Dragon Figs, you have one real eyeball to work with, and on the other side, a hole. Oh well.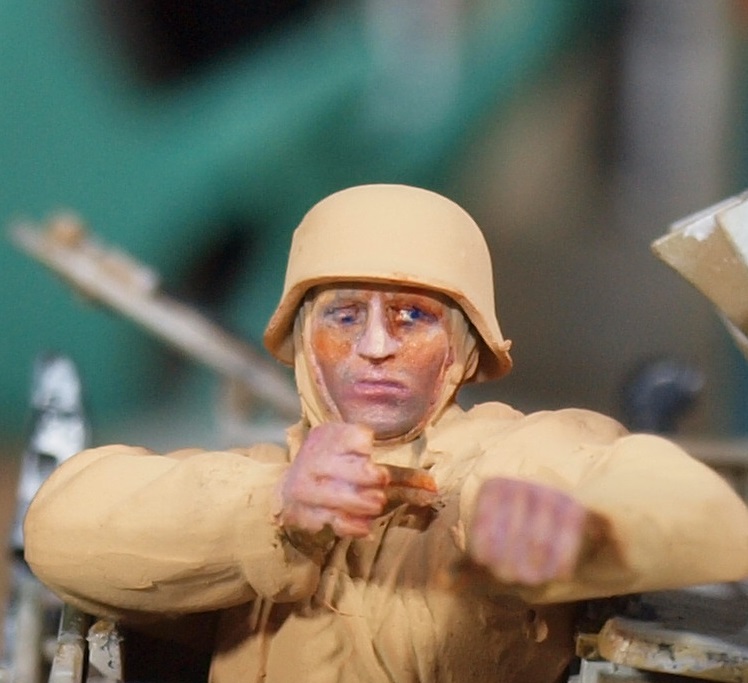
-
Wow! Great job, Rob! it is quite an impressive show of your modelling skills. It actually looks quite heavy and made of steel.
- 100 replies
-
- 5
-
-
- hasegawa
- ammoknight
- (and 1 more)
-
I feel the need... for Shake and Bake... Tamiya StuG
GazzaS replied to GazzaS's topic in LSM 1/35 and Larger Work In Progress
Thank you, Kai. No Eagle Cals. Except for the Swastika, all of the markings were done with masks I made. The tank diorama was a more of a slide-show with a back drop printed at home. Here is the rest of it in-order: