GazzaS
-
Posts
6,396 -
Joined
-
Last visited
Content Type
Profiles
Forums
Events
Gallery
Everything posted by GazzaS
-

Tamiya F4U-1D Warbird
GazzaS replied to denders's topic in LSM 1/32 and Larger Aircraft Ready for Inspection
Great looking Corsair, Dave. -
Tamiya F4U-1 Birdcage Corsair 1:32
GazzaS replied to shadowmare's topic in LSM 1/32 and Larger Aircraft Ready for Inspection
Very nice model! -
Tamiya F4U-1 birdcage "Bubbles" finished
GazzaS replied to JohnB's topic in LSM 1/32 and Larger Aircraft Ready for Inspection
Wow! very nice John. Pleased with your weathering. -
Kitty Hawk 1/35 SH-60B Seahawk
GazzaS replied to Peterpools's topic in LSM 1/35 and Larger Work In Progress
I'm glad the procedure went well, Peter. -
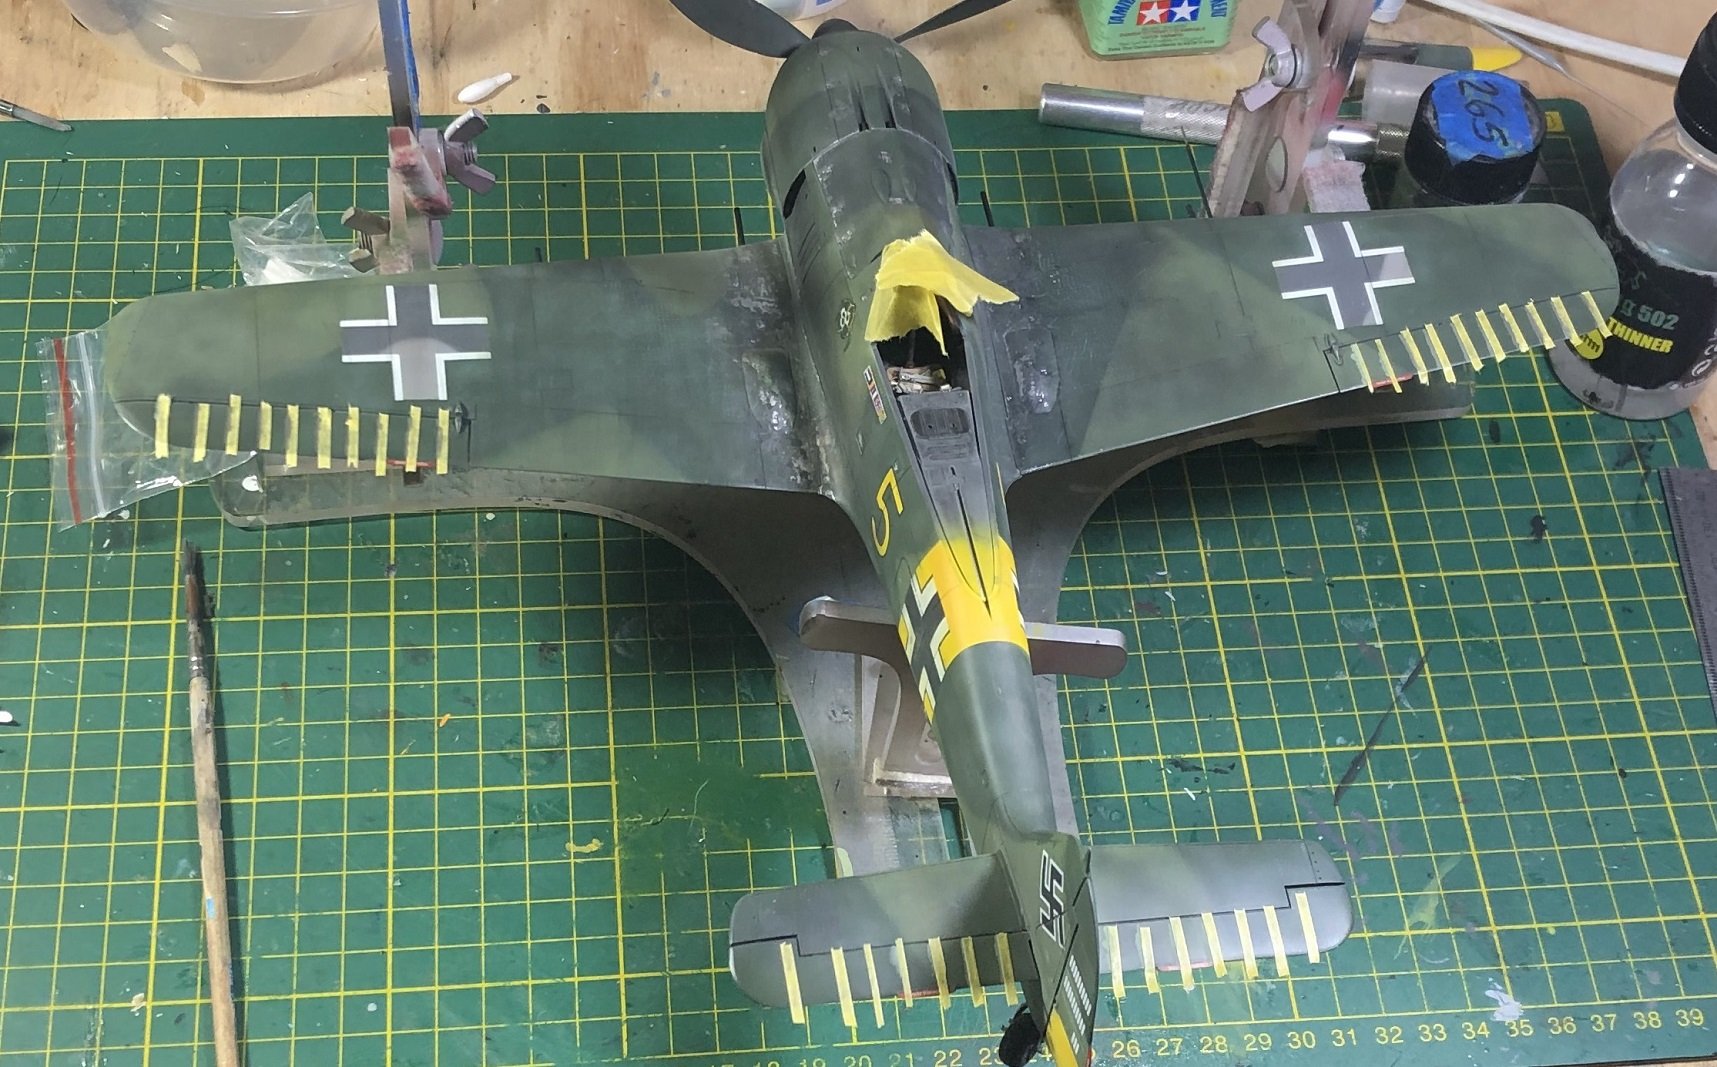
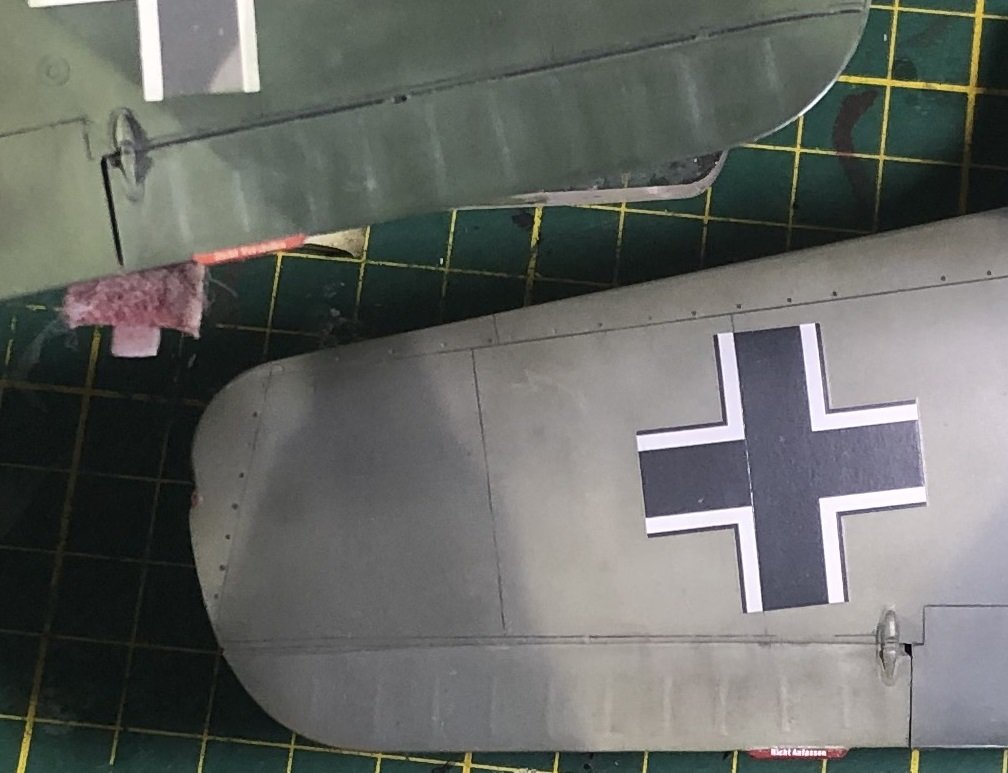
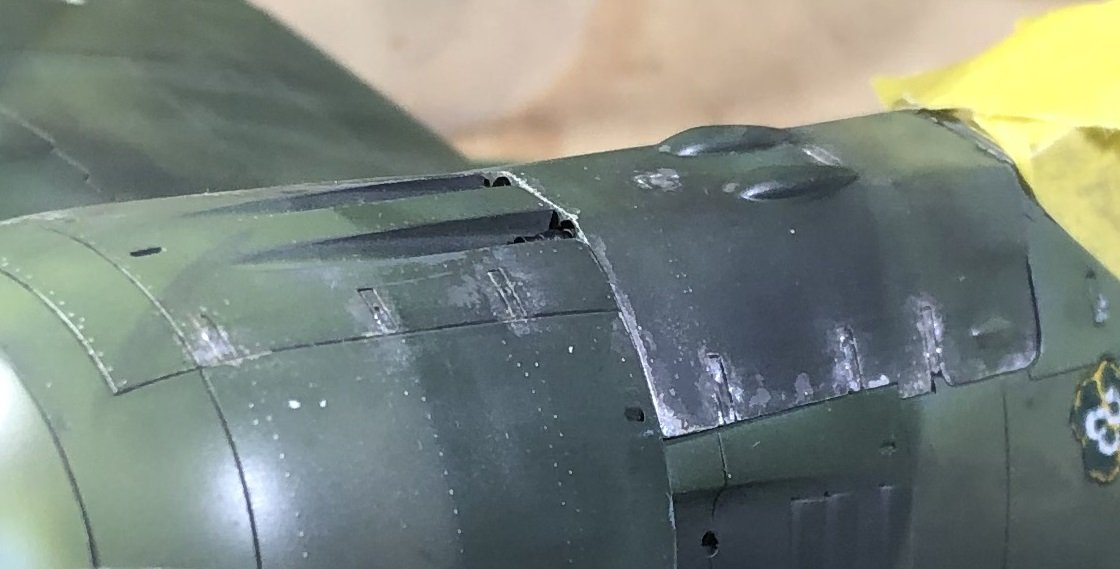
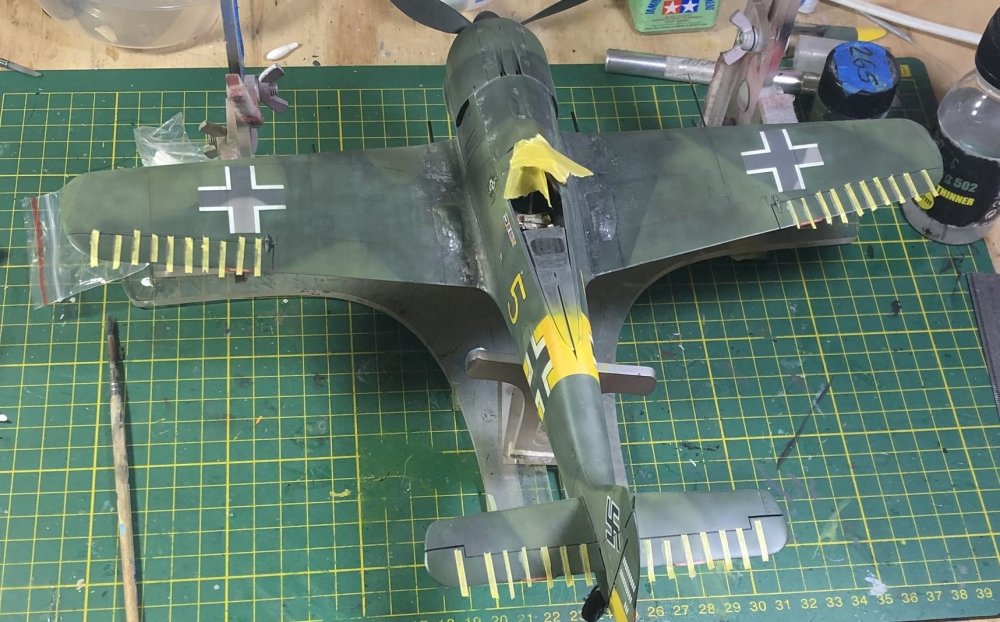
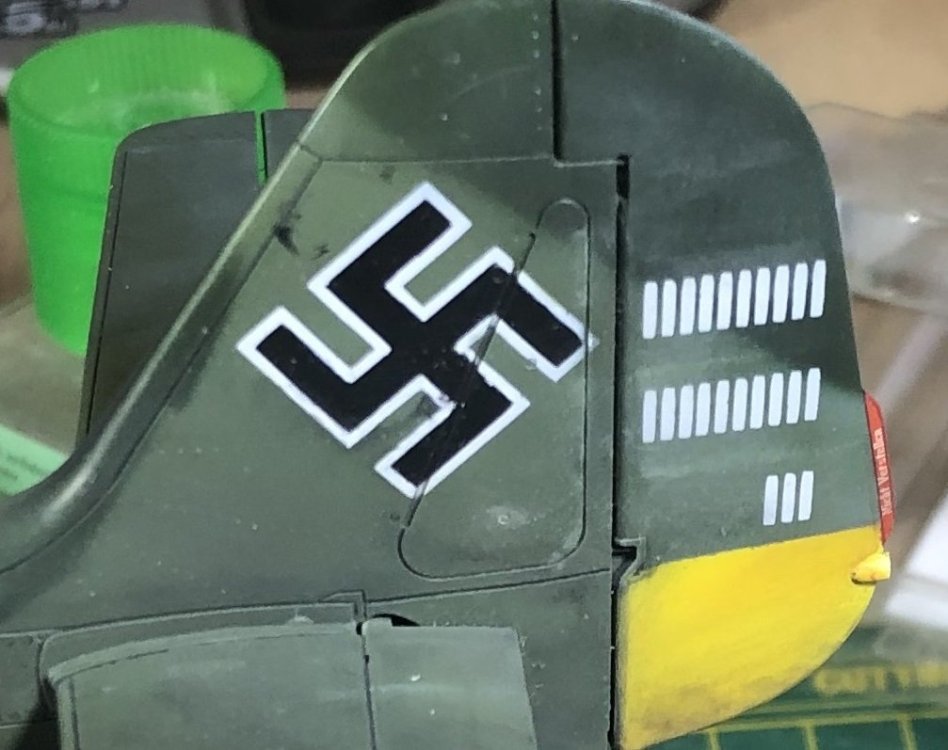
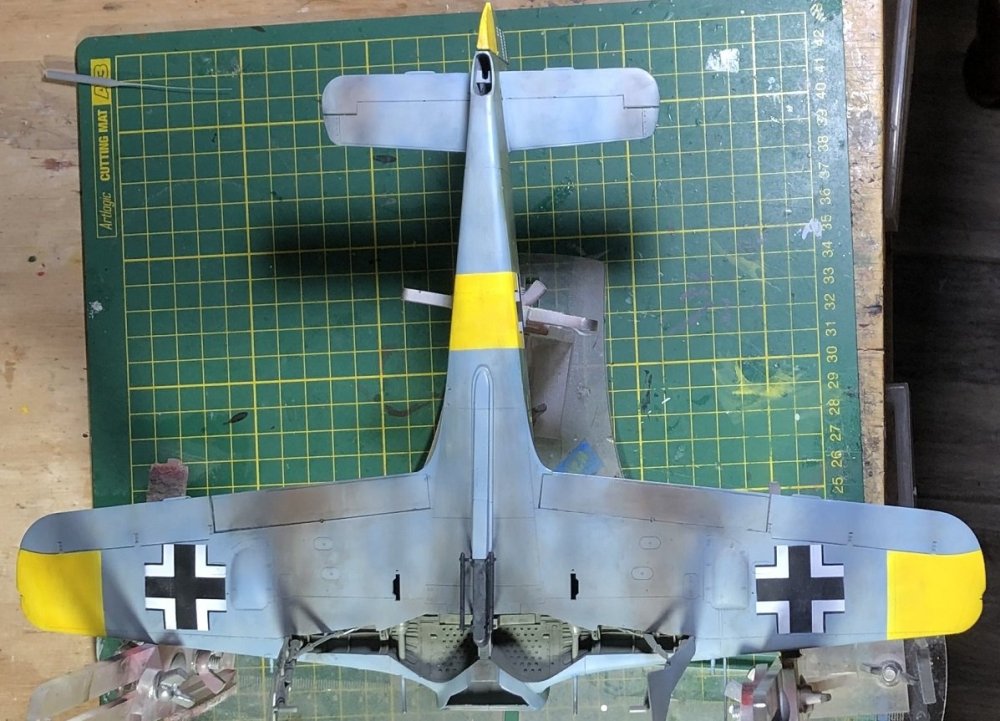
Thank you, Kevin! Today's update concerns the control surfaces. I had previously sanded off the too-heavy details provided in the original plastic. After all of the other steps, I laid down masking tape at measured intervals, and with oils, lay down straight-ish lines with shades that I hoped would fit in with the camoflage colors. Back when I built the PCM 190 a1-3, I had also removed all of the wing textures. Then I placed decals where the rib tapes belonged. I wasn't totally happy with the result, because after oil weathering and applying a matte coat, it looked rather dirty. The picture below illustrates the old PCM build compared to the current rib tapes on this build. But again, things will look different once the oils have dried and a matte coat has been applied. If they look too obtrusive, I can hit them with an airbrush filter in the original color to dumb them down a bit. Due to the victory marks on the rudder, I just decided to paint the lines by hand. But again, you will get an idea of my intent. Thanks for looking!


-
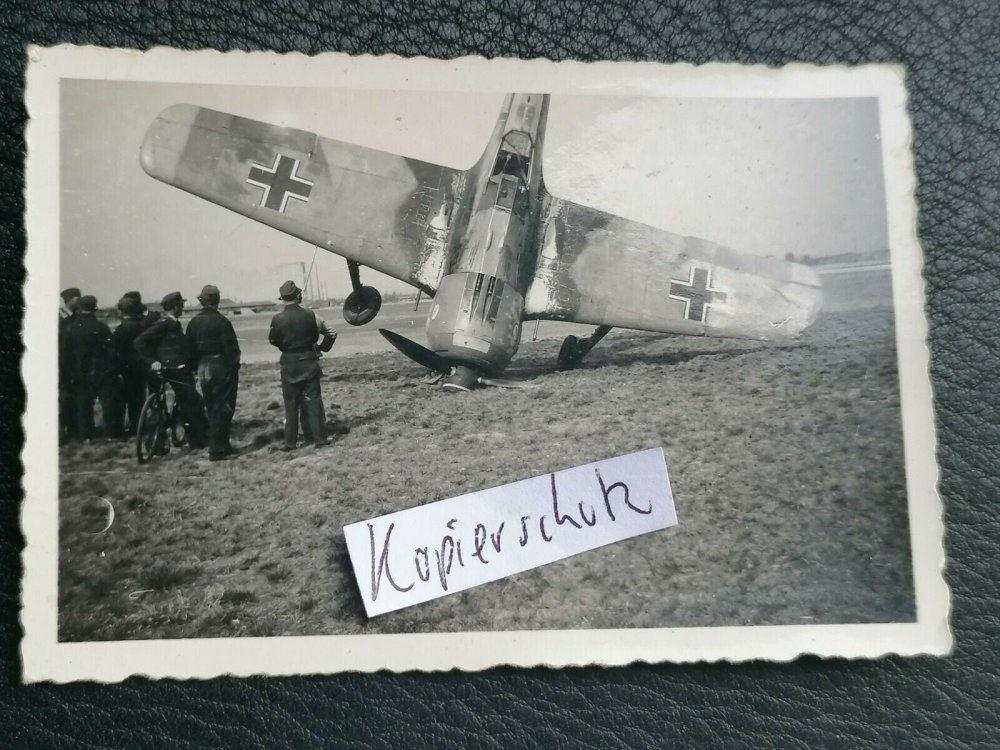
Just got this pic from Farcebook. Not sure if I will make changes to the underside, though. This is the first image I have that shows the weathering caused by the lower set of exhausts on the 190.
-
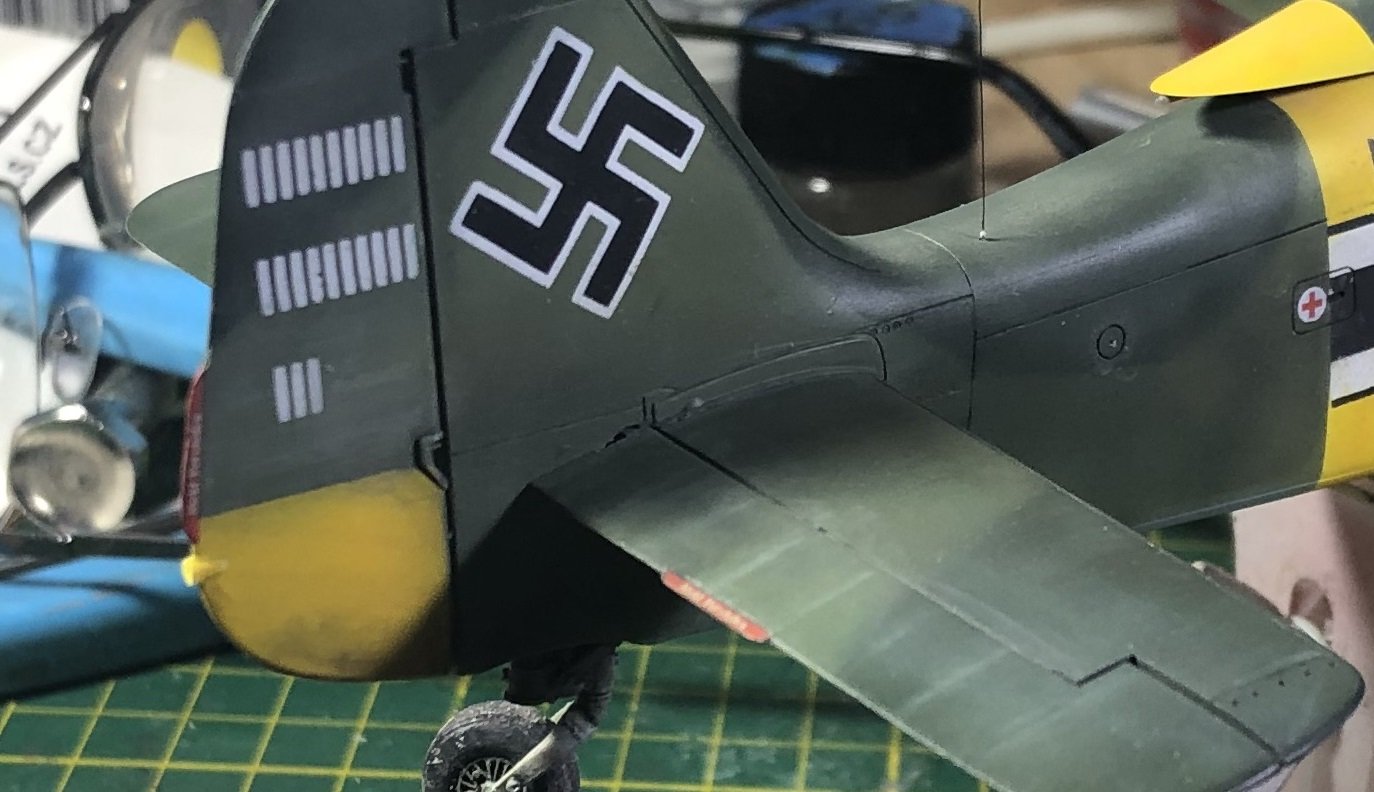
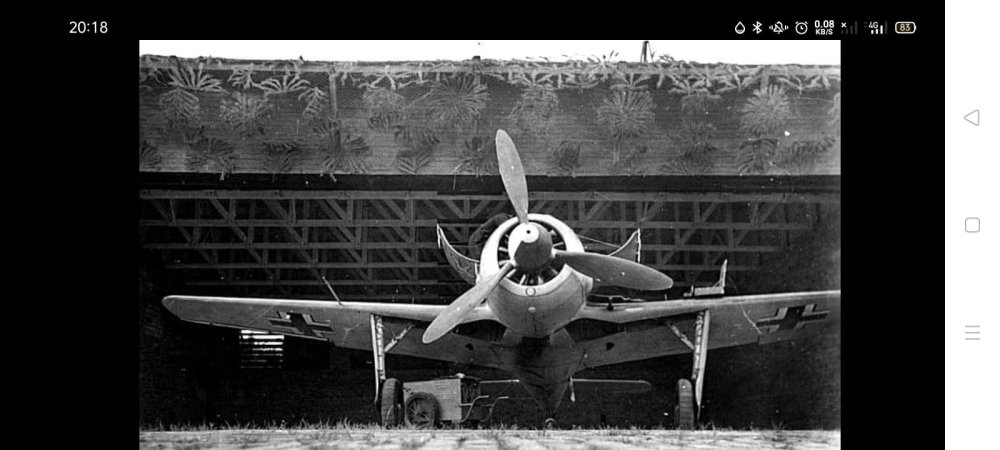
Thank you Rob. Please bear in mind that you were looking at macro photos in harsh light with no matte coat applied. This is the current state after matte coating and seen from normal viewing distance. The problem with using darker colors is finding colors themselves. I didn't have a darker gray. And using a green is really bad because all of the greens I have contrast too much to the color scheme itself. Thank you, Peter. You don't really get to see many photos of well-worn 190's. Check out this one: It's not only worn, but also has additional paint applied to the upper wings. I was saving this extreme example for an A4 if we ever get a new one. I read the memoirs of a ground attack (Schlacht Gruppen) pilot who flew in Russia. They were continually in action flying multiple sorties per day, every day. It sounded exhausting. Even more exhausting for the ground crews who had to stay up through the night making repairs and preparing the machines for the next day. I doubt repainting was a priority.

-
Thank you, Phil. I wanted to do more to that part... but it's so easy to do too much.
-
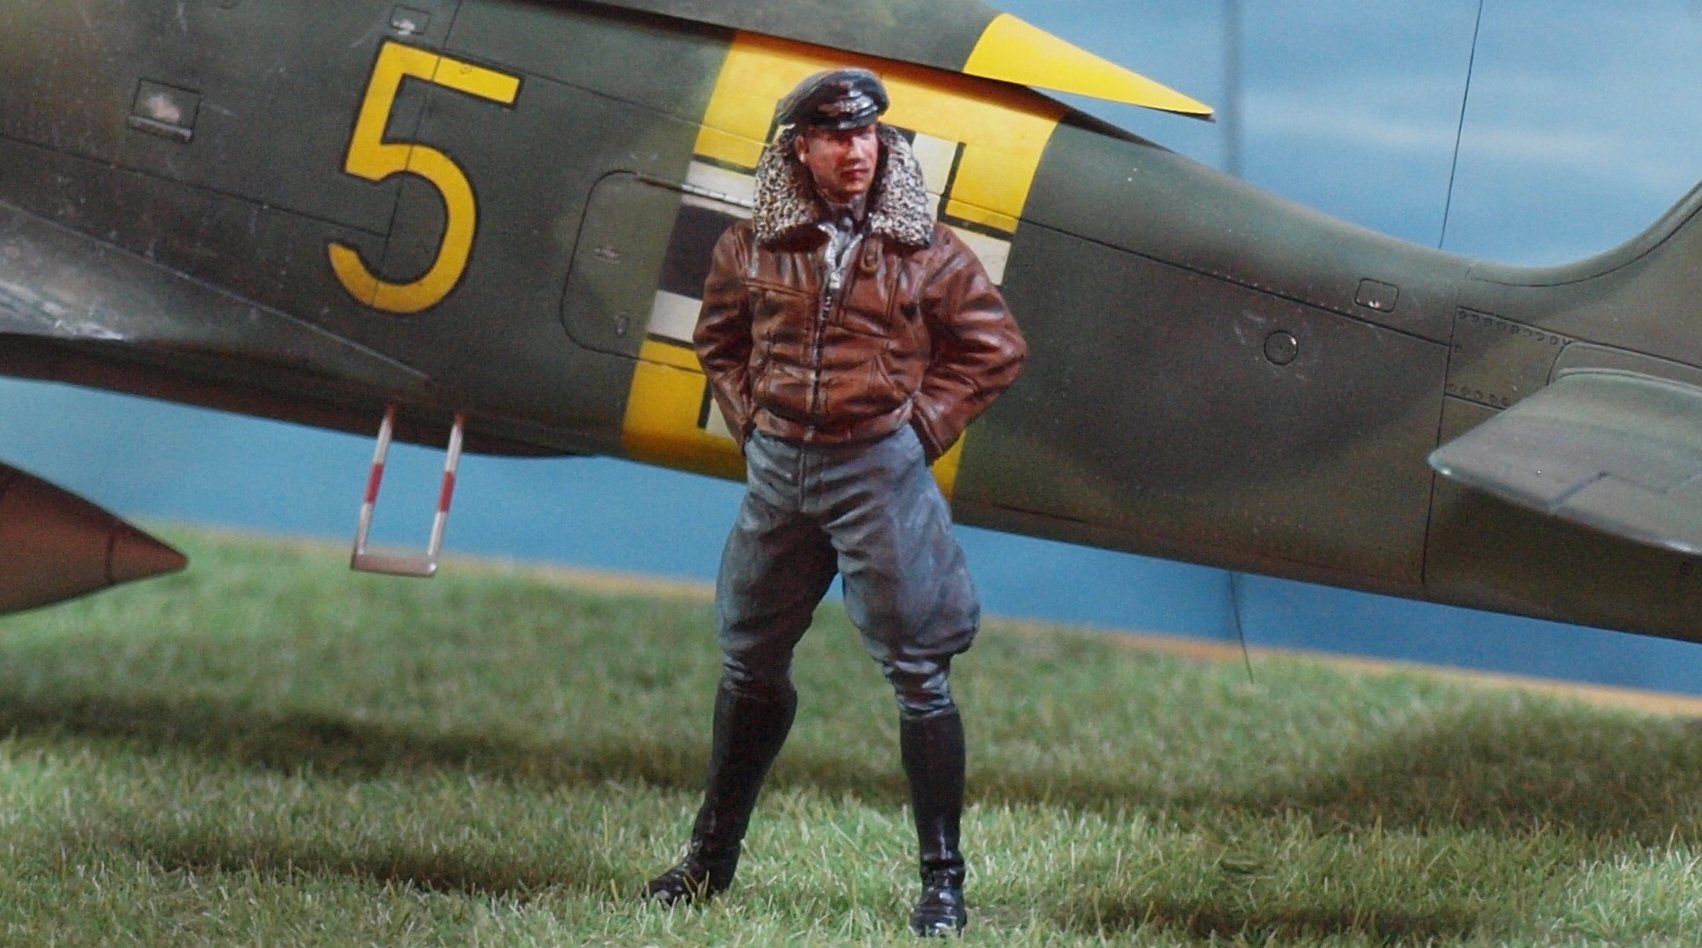
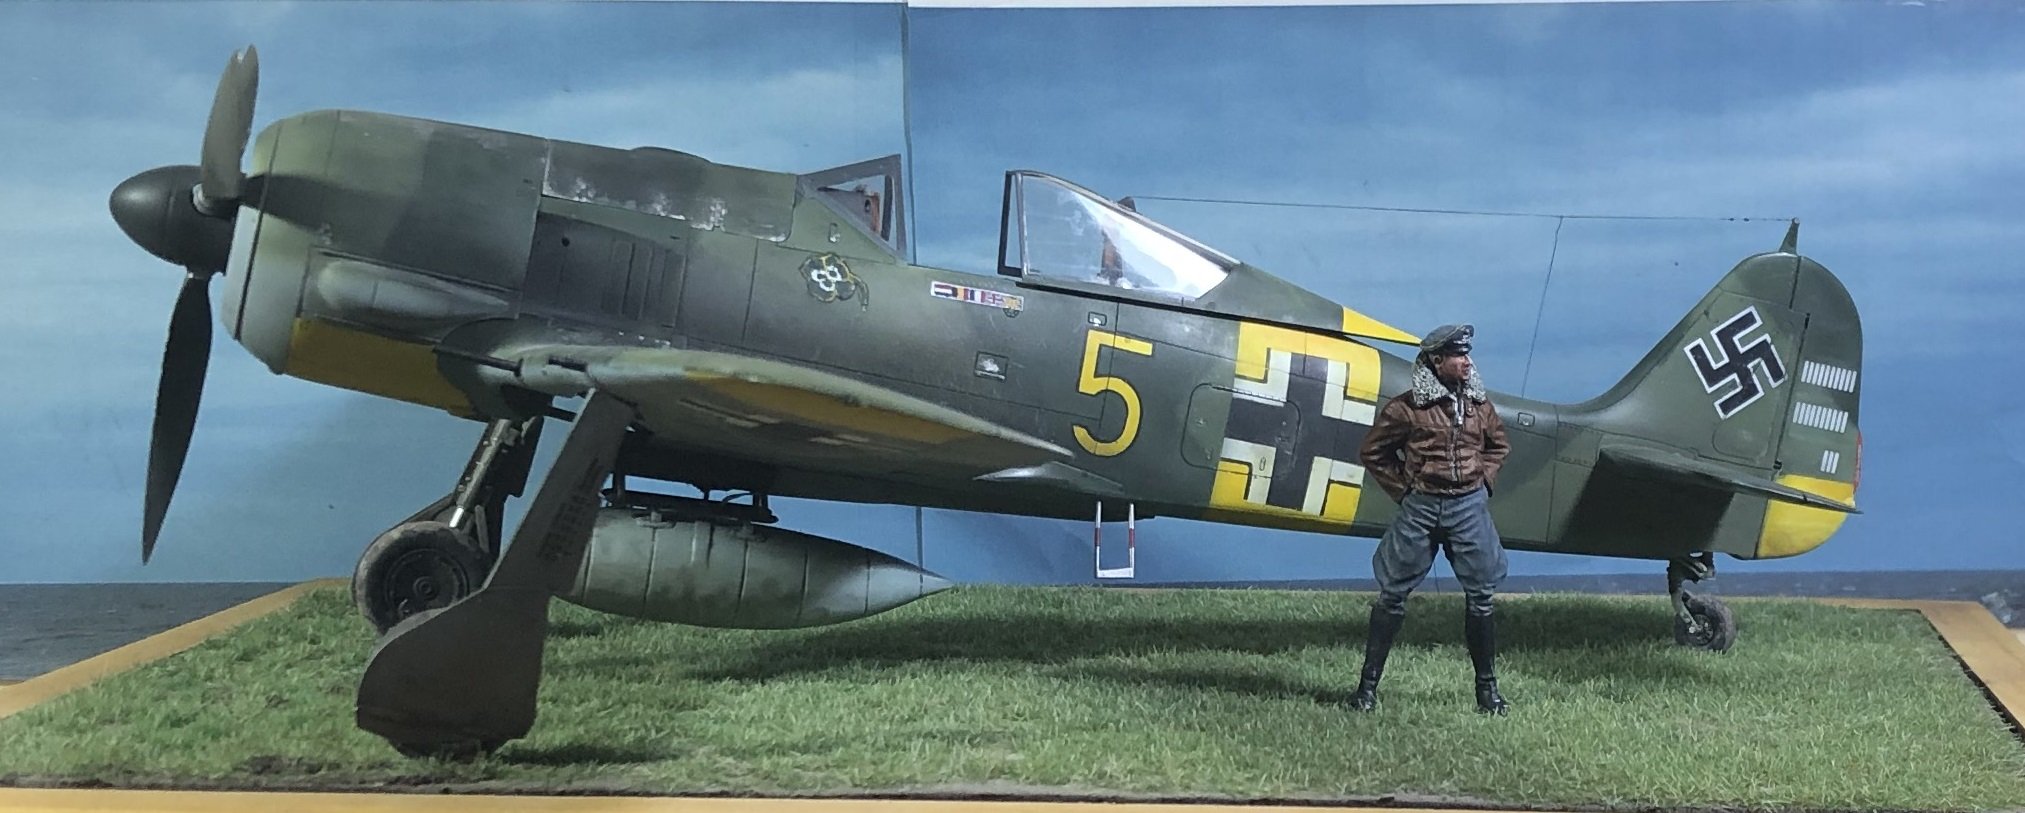
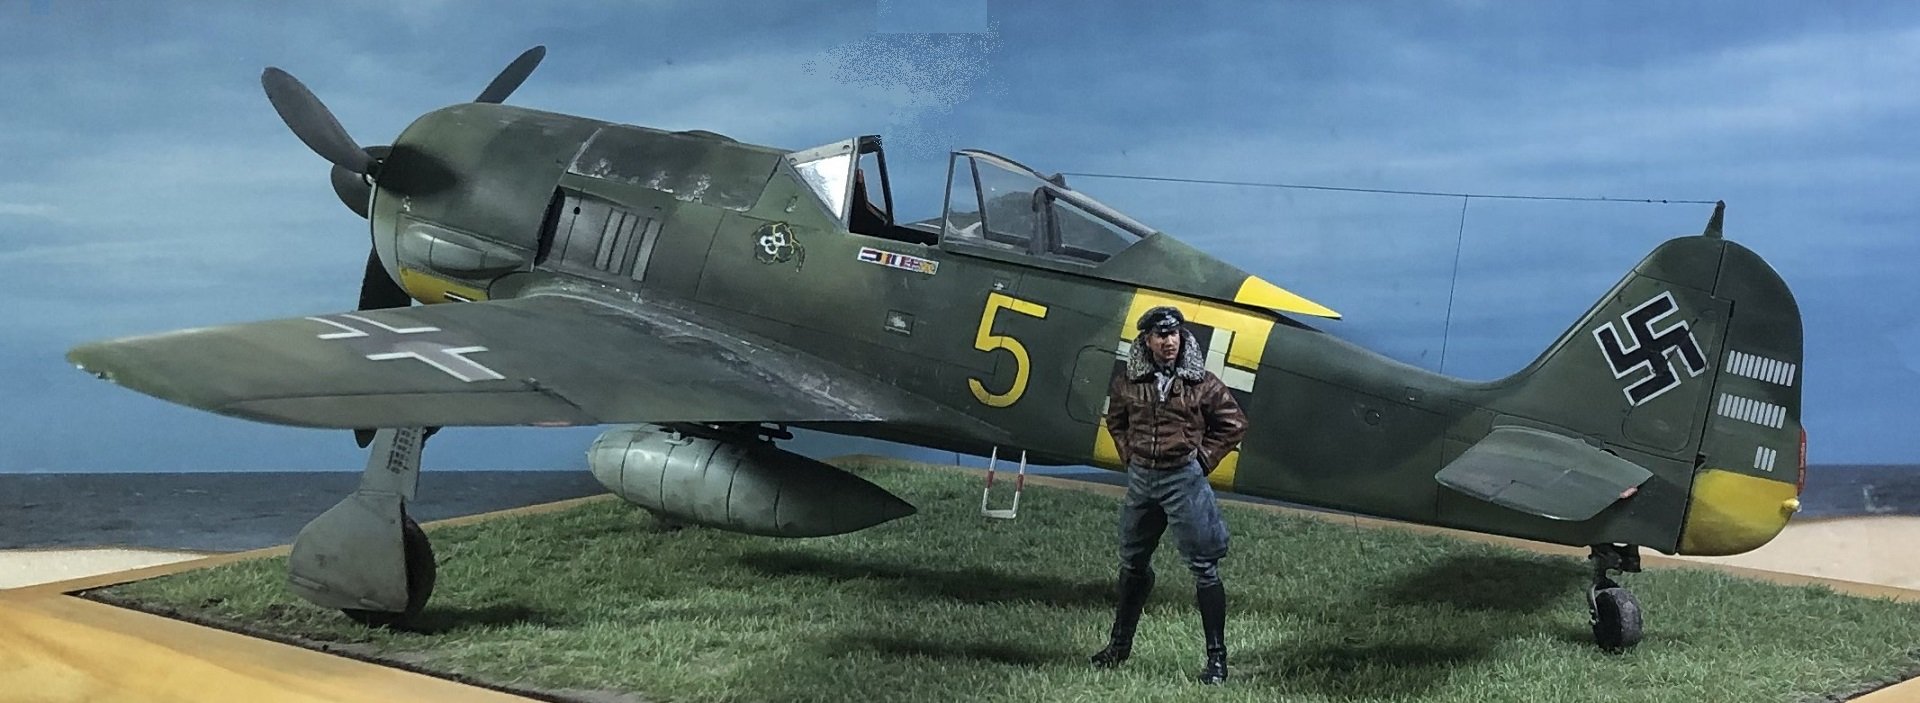
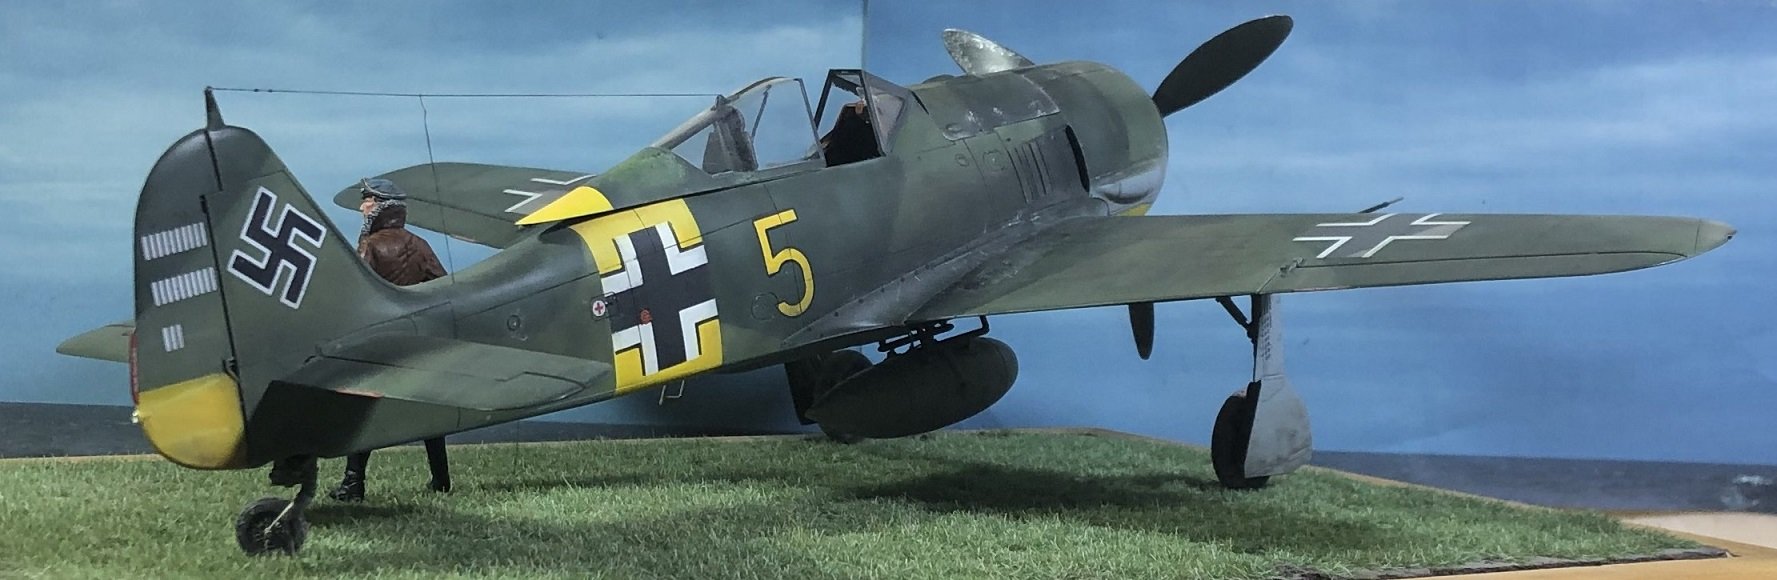
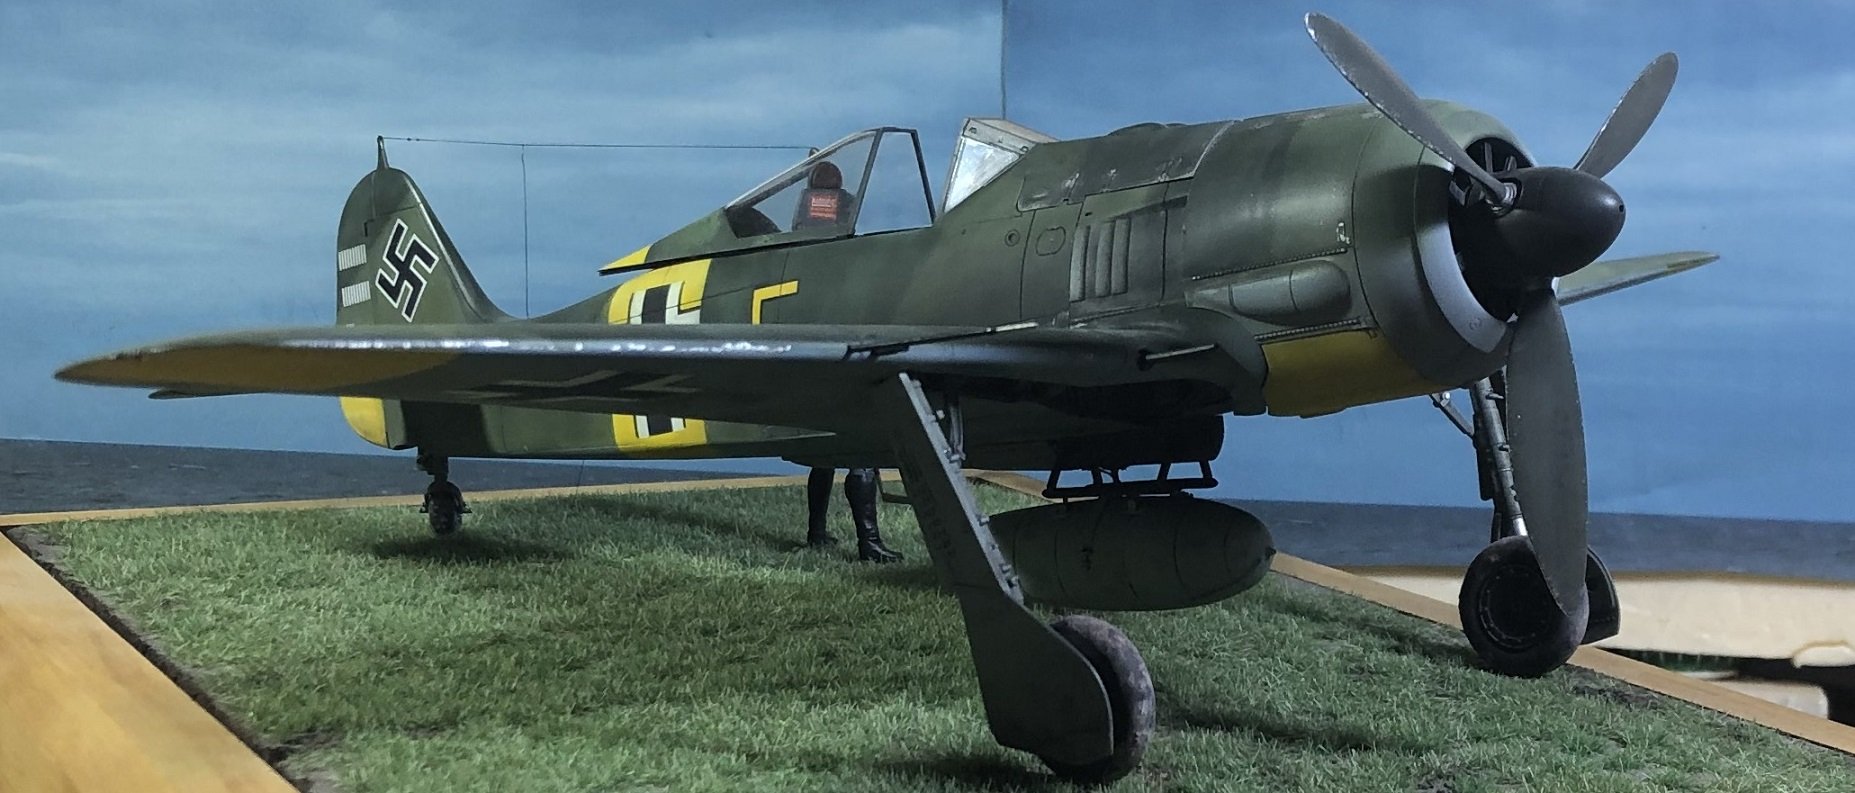
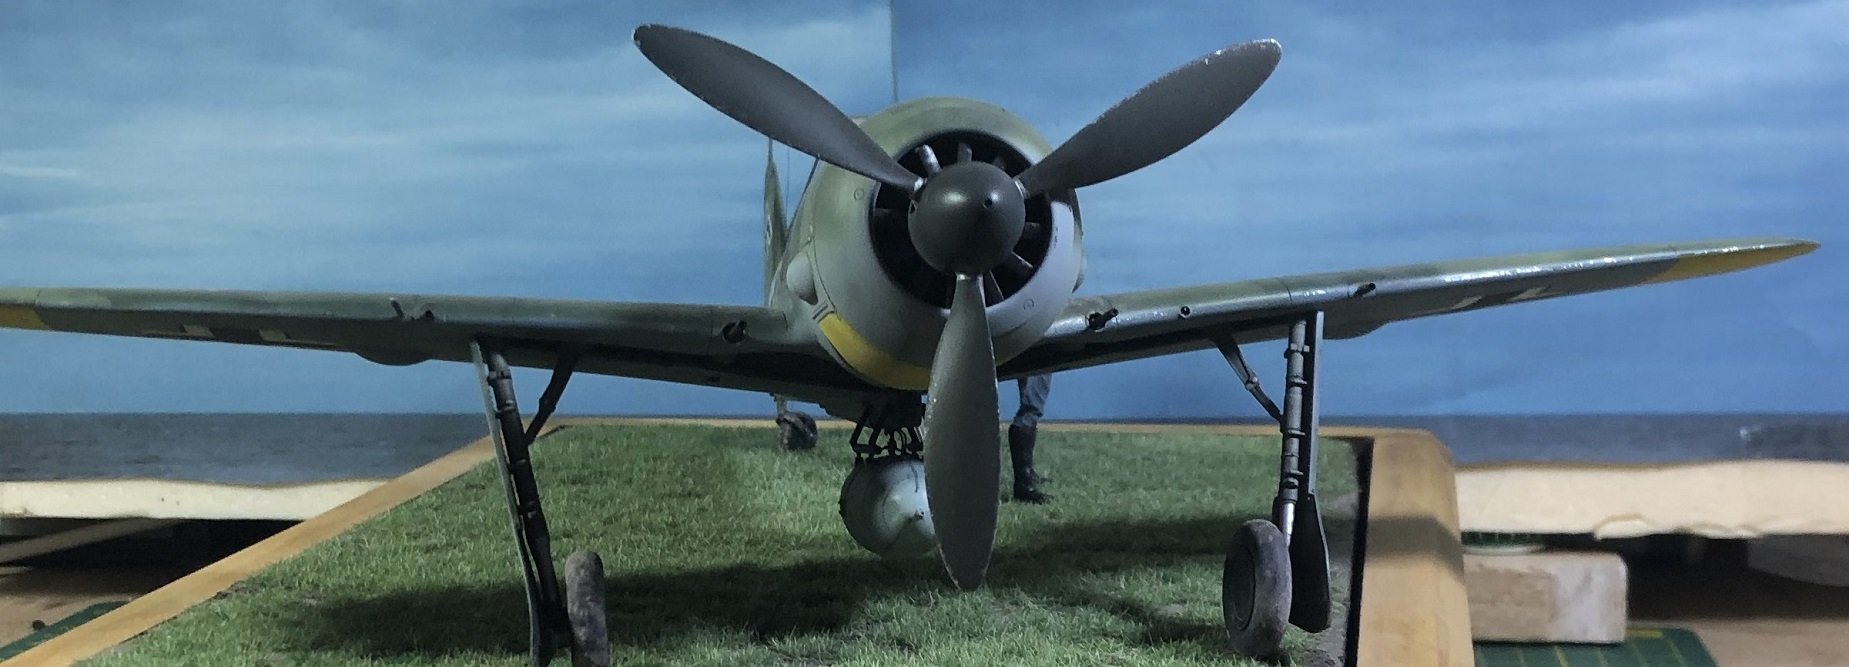
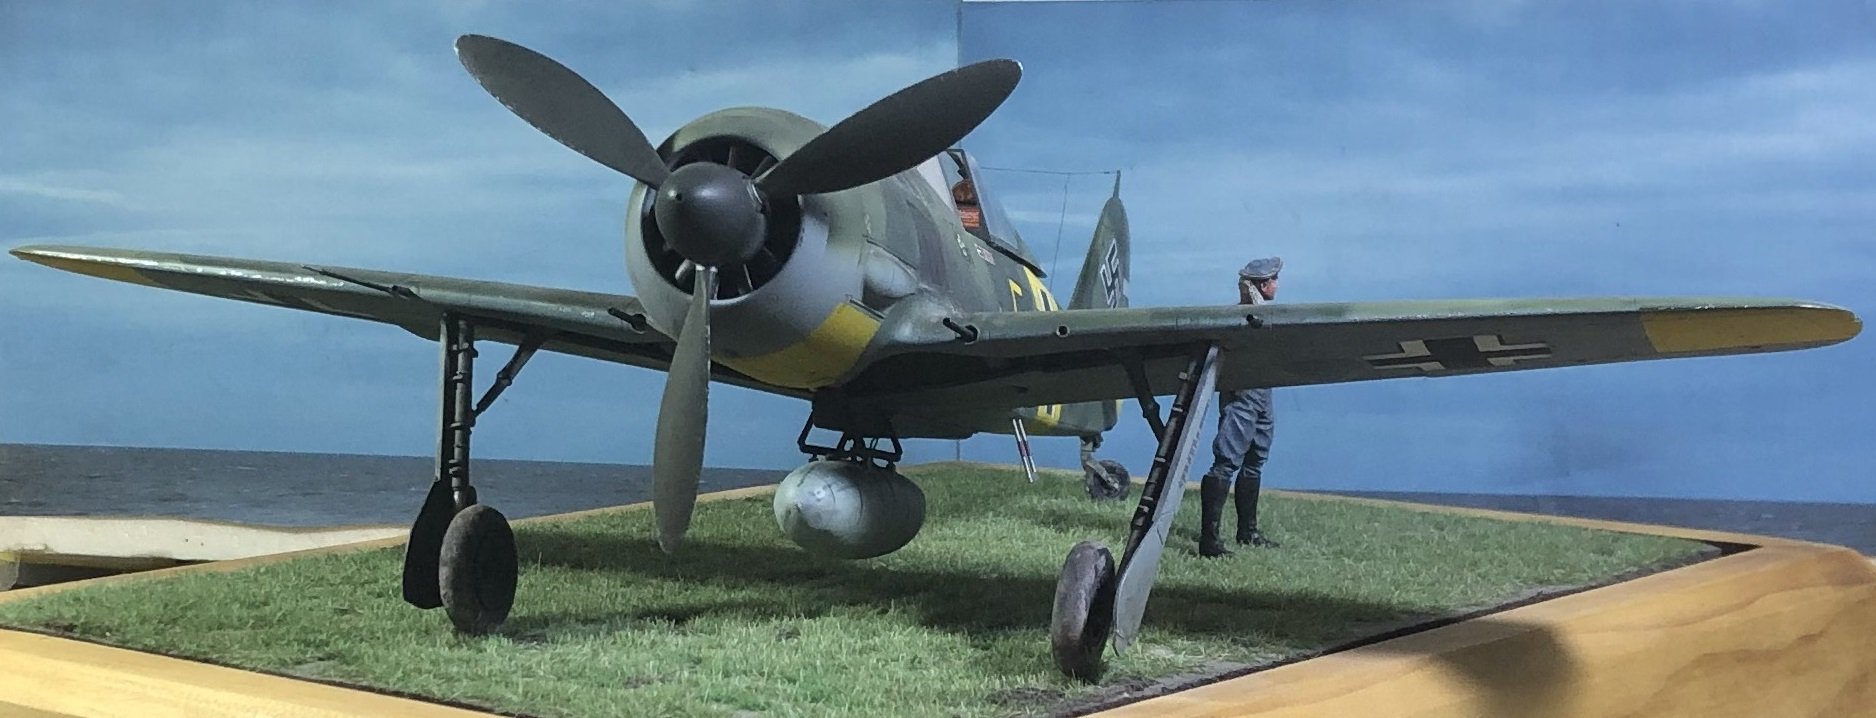
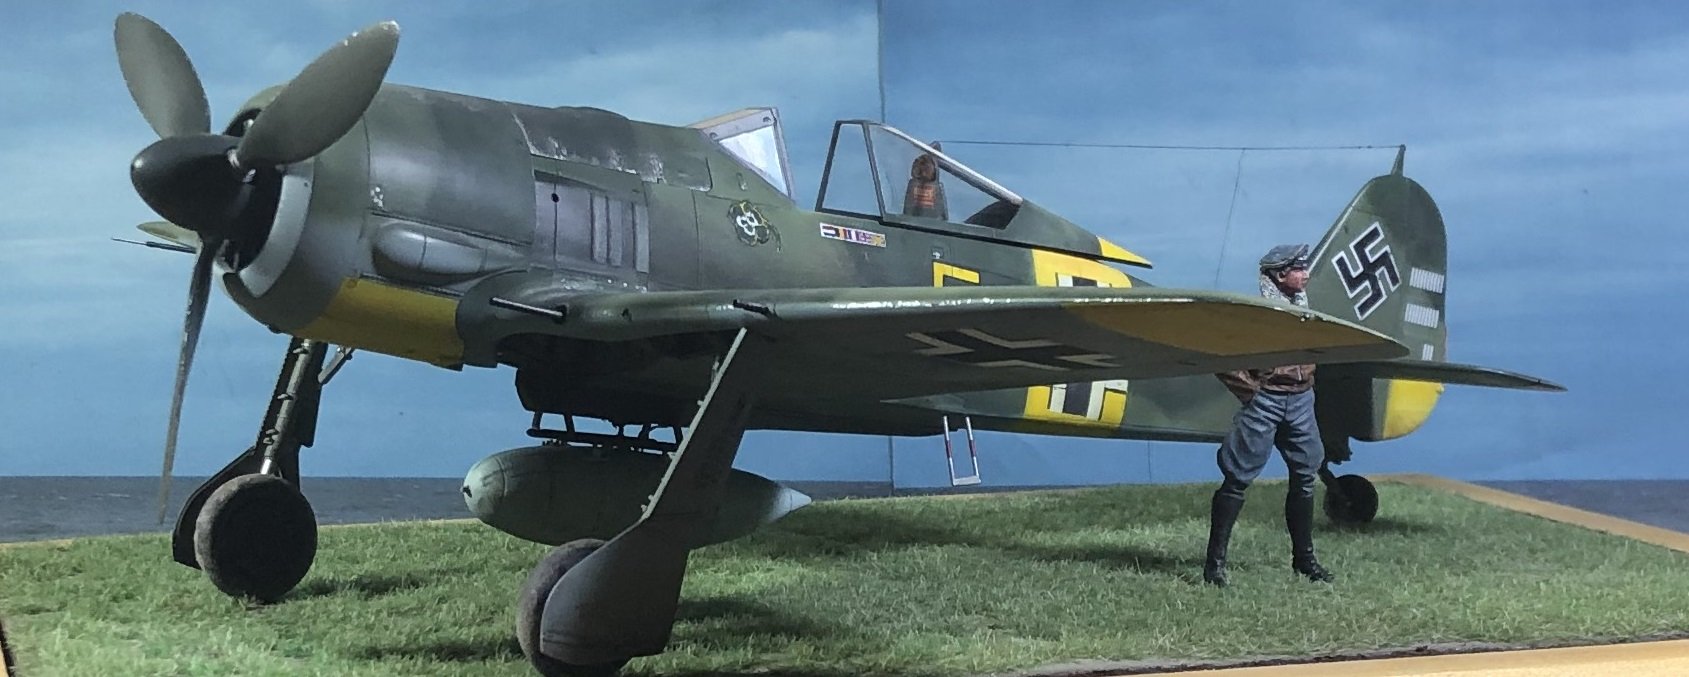
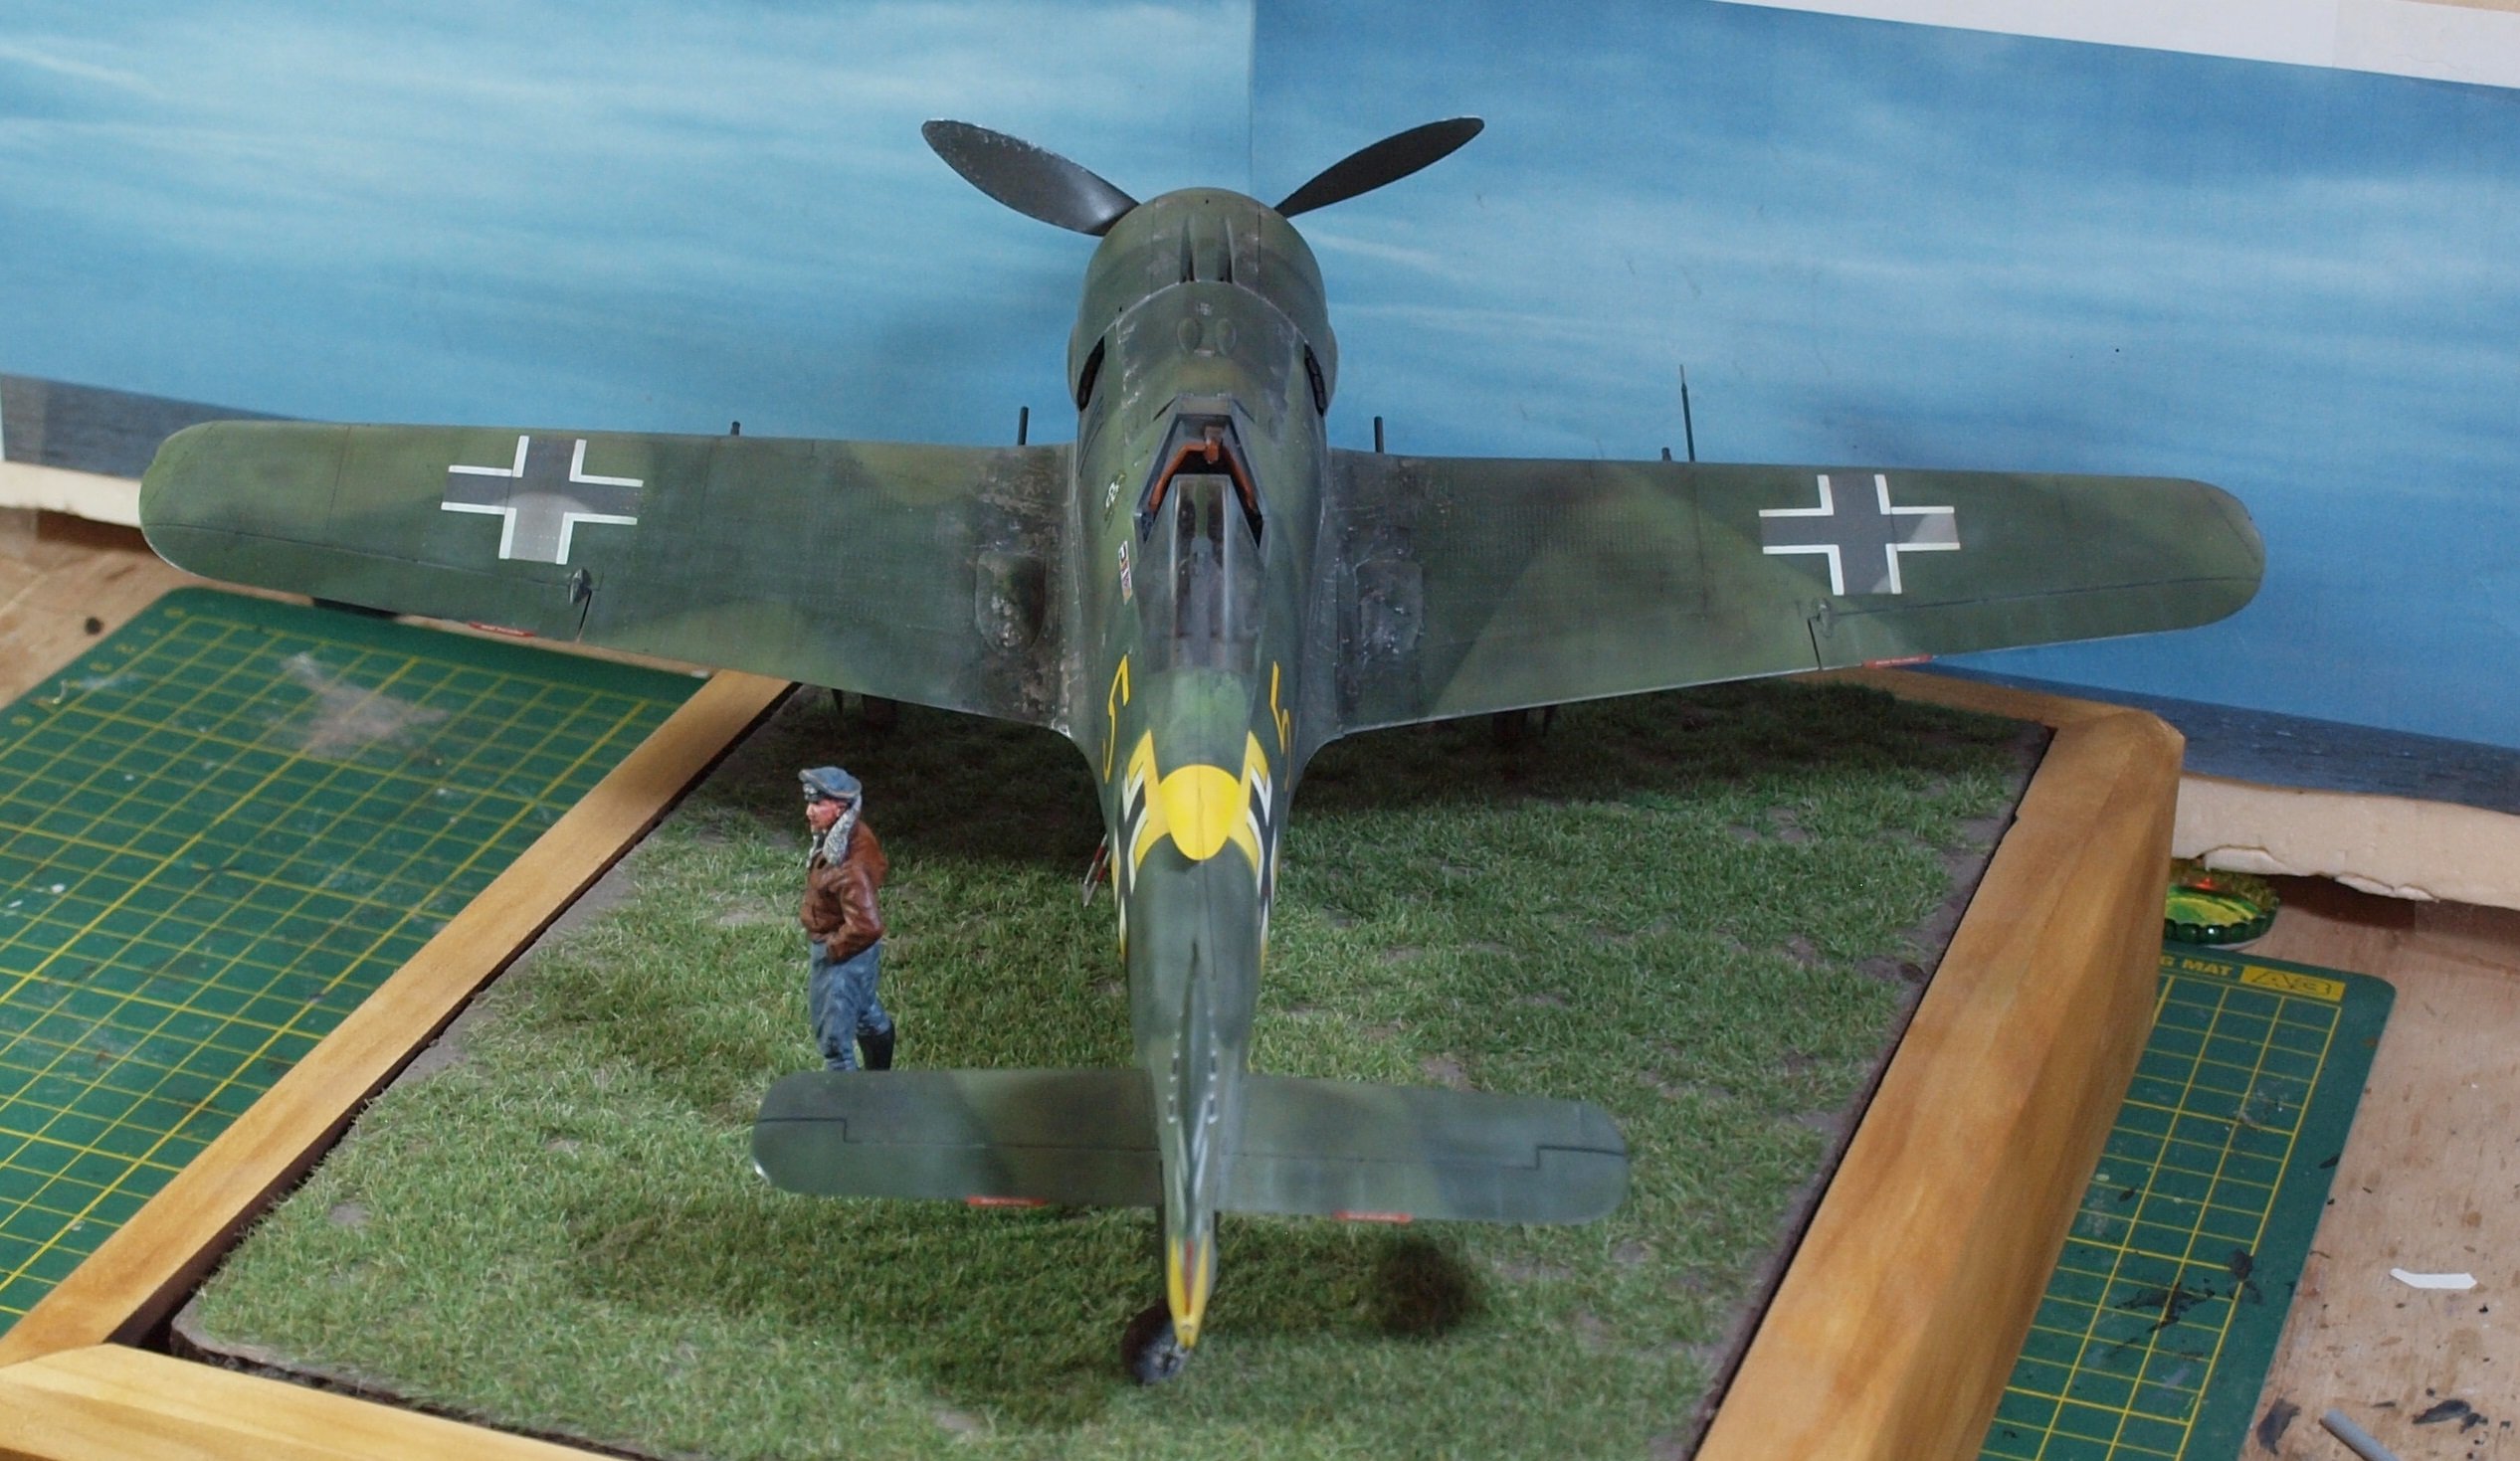
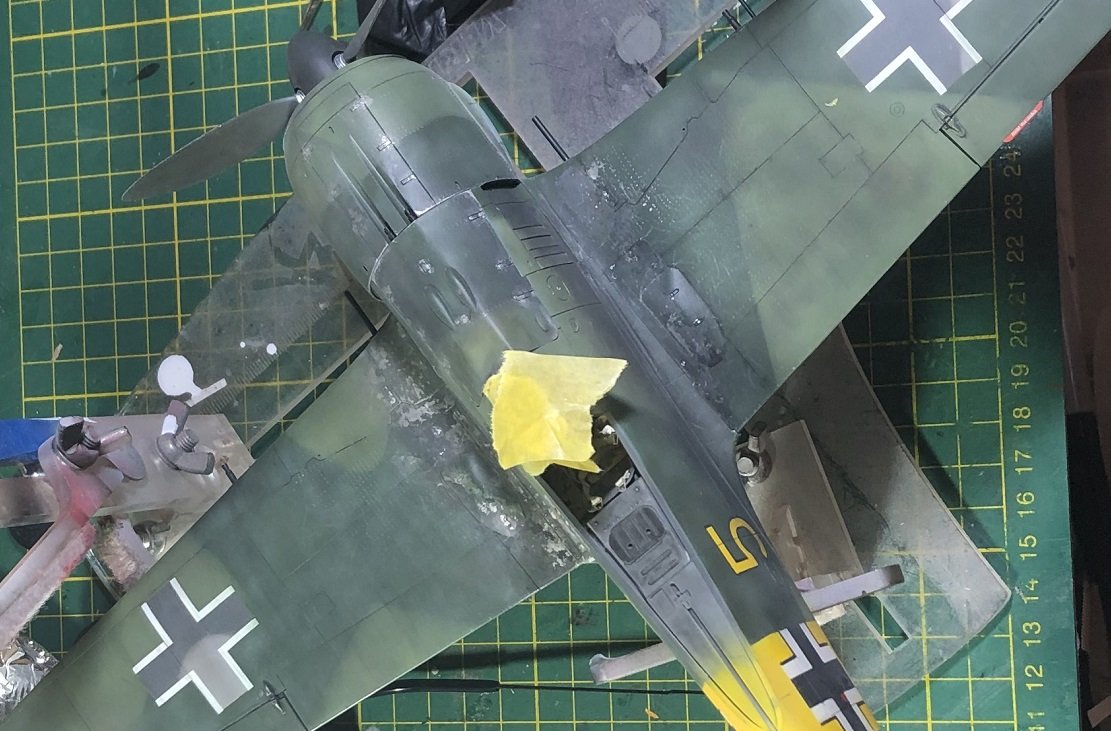
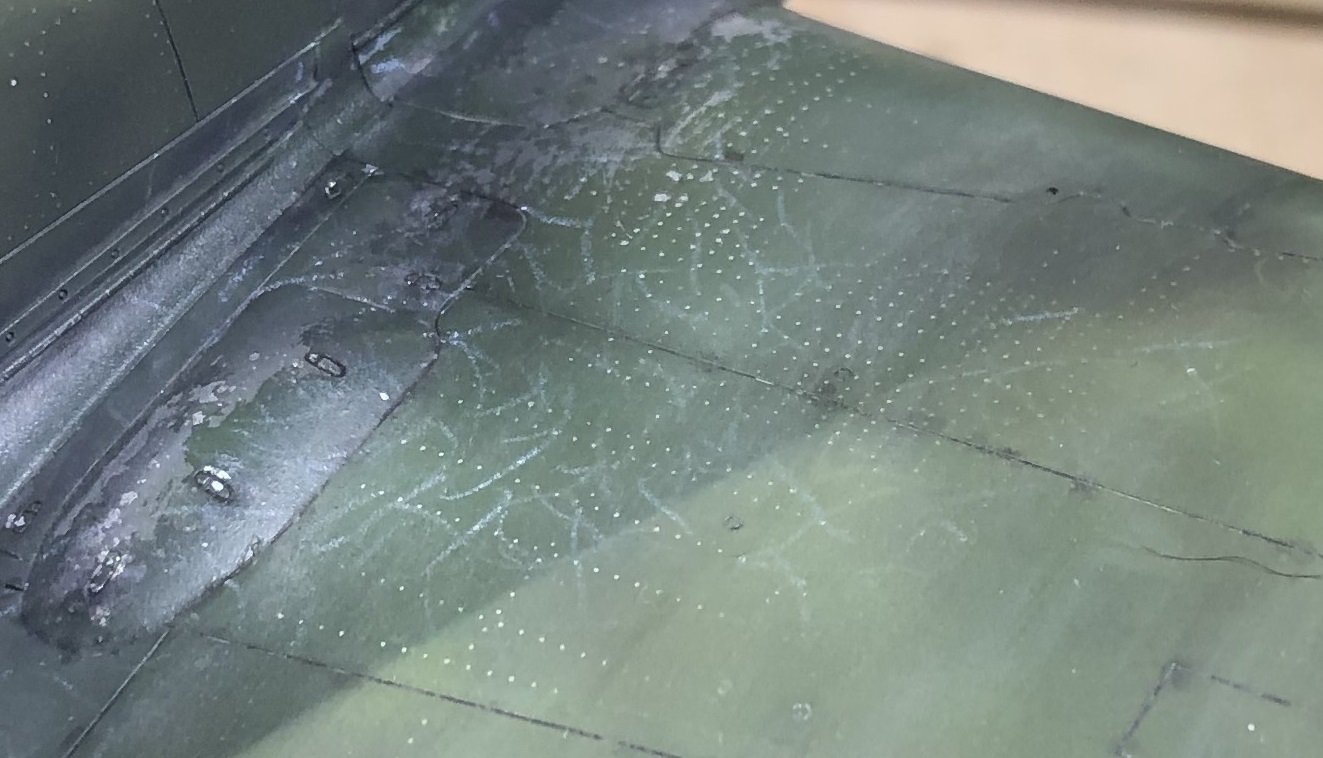
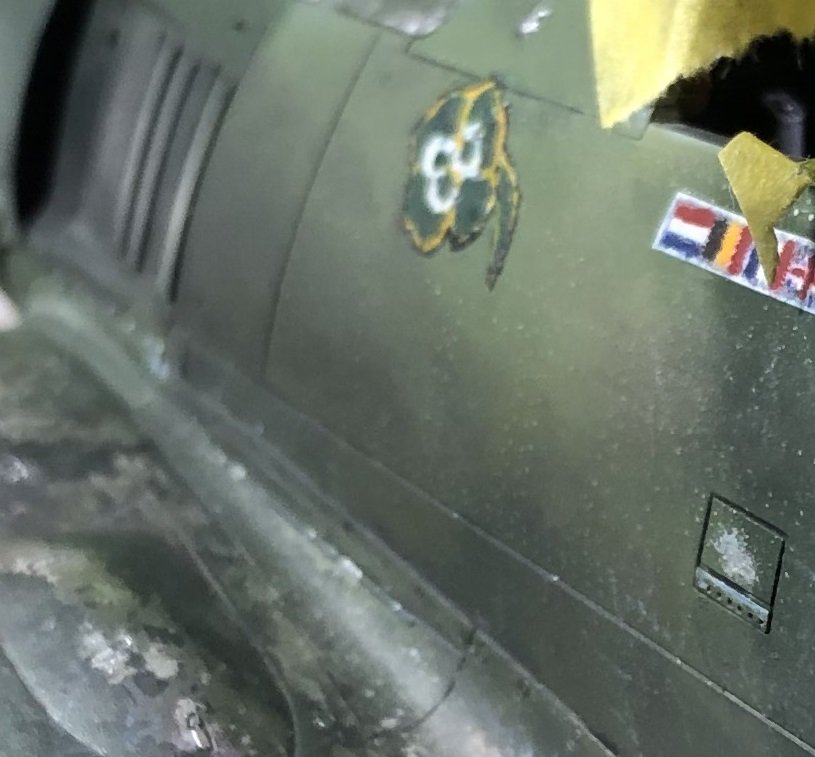
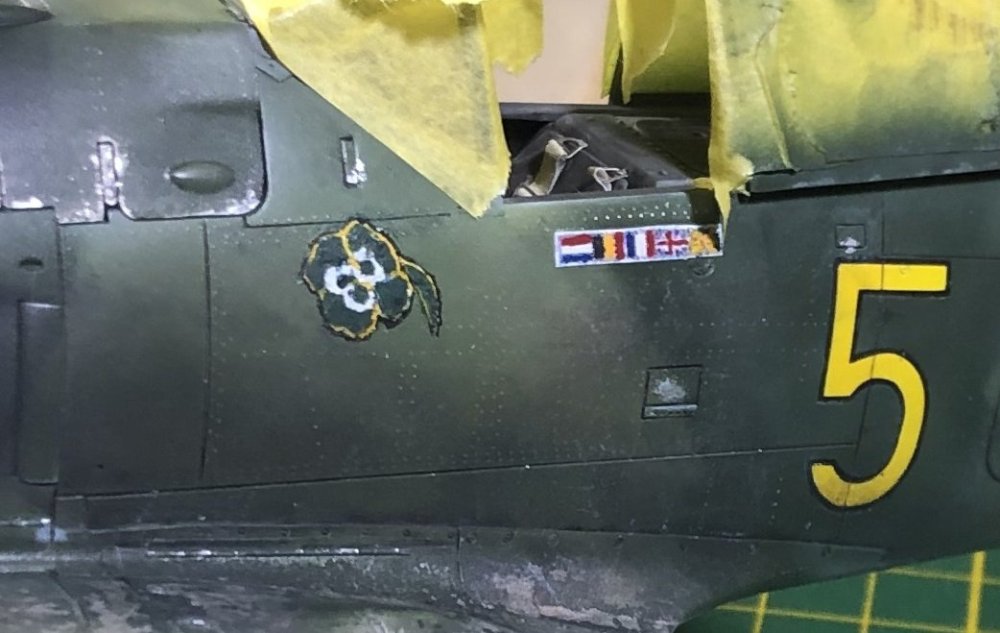
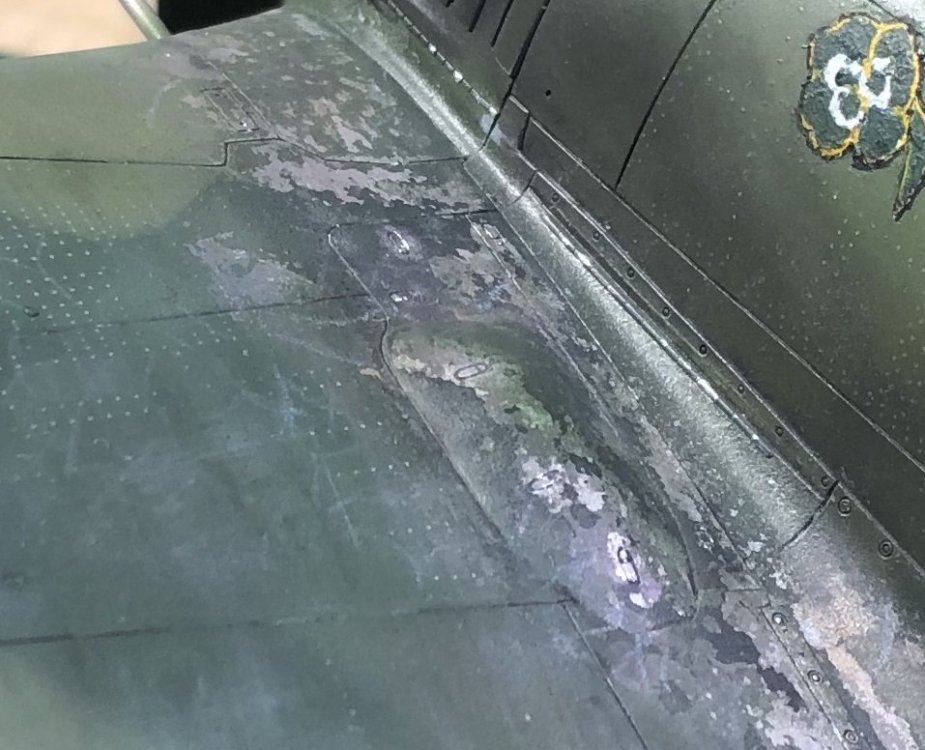
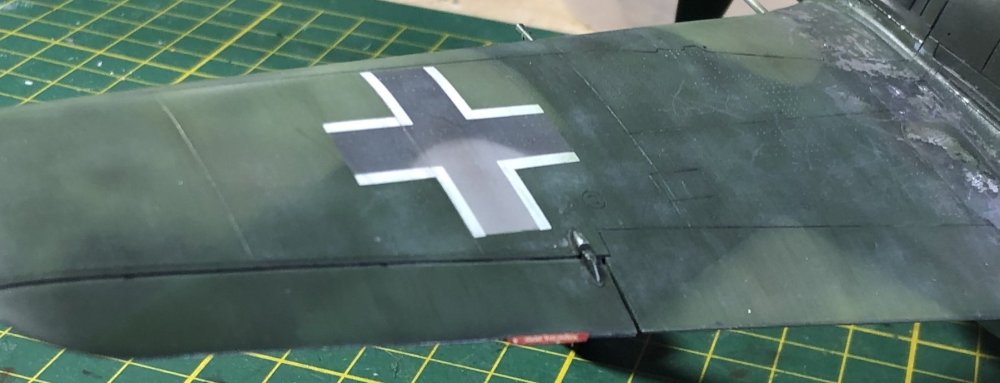
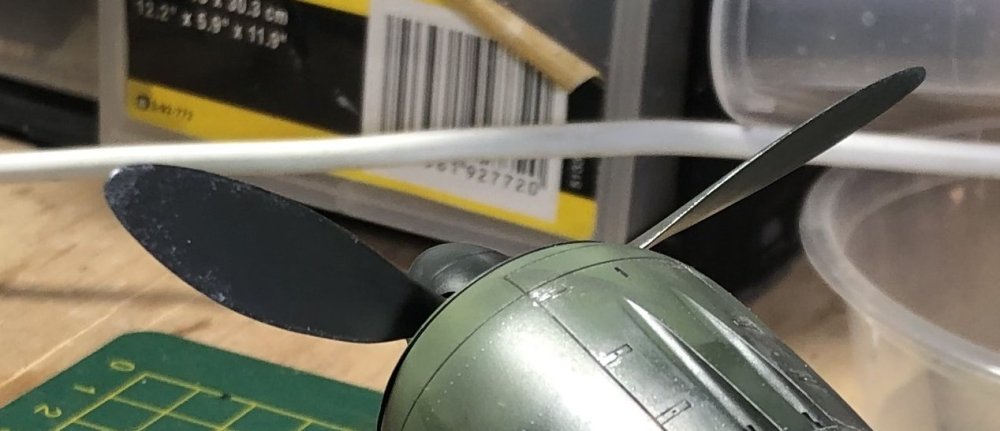
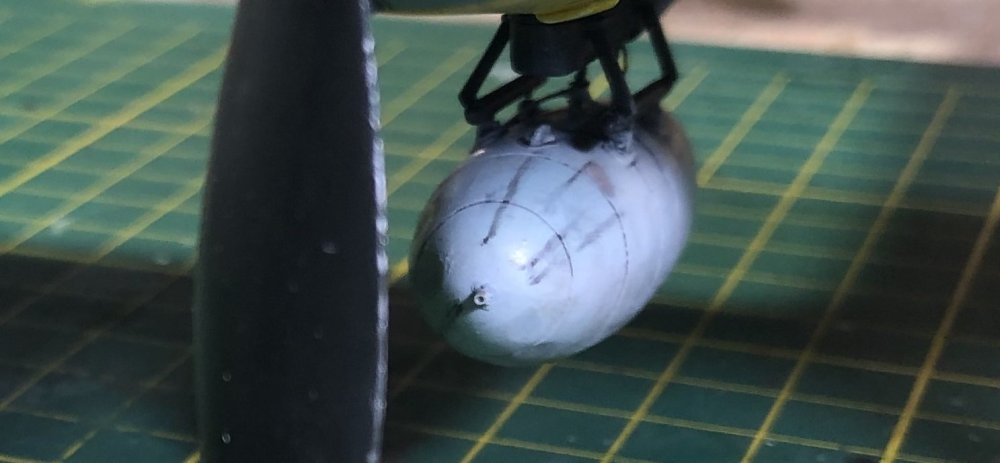
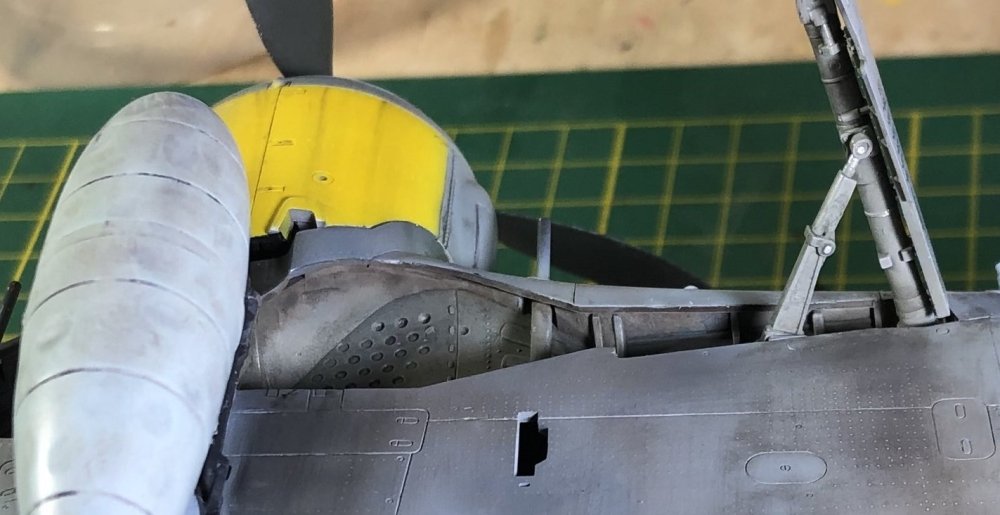
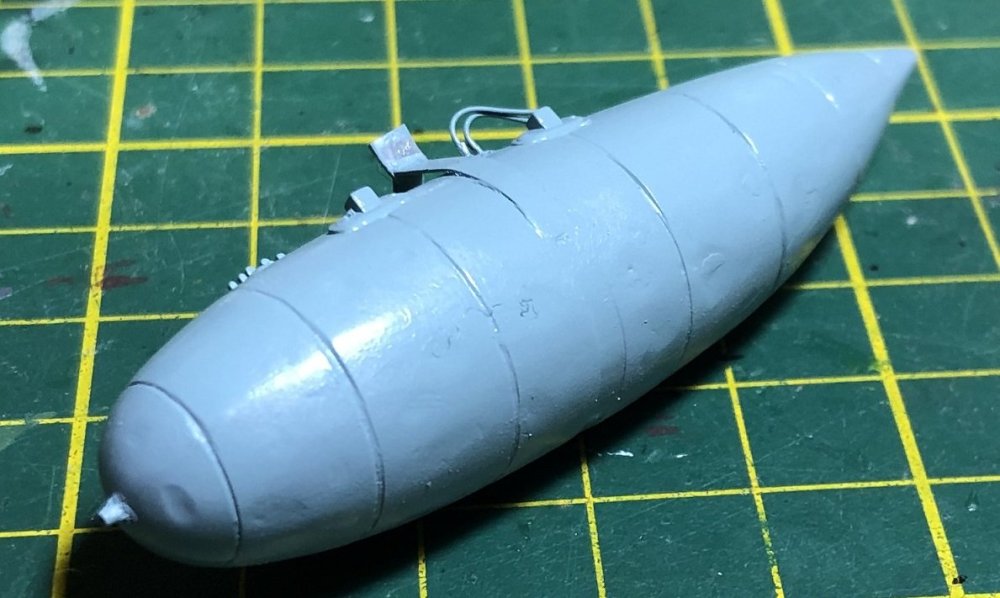
Hi everyone, This will be a photo heavy update. For the last couple weeks I have been trying to put a patina on this aircraft. I made my own decals for the two personal markings on this machine. Unfortunately, the ink ran and had to be supplanted with paint. From a distance they look ok. In macro... not so much. The gun and engine covers are often seen heavily chipped. I tried to do the same with hairspray chipping in two layers followed by chipping applied in aluminum paint with a very finely tipped brush. The same process was done on the walkway at the wing root. I tried to show the original Luftwaffe camo under the appropriated Soviet colors. I generally don't do much to upper wings. But I wanted to add a patina of 'used' here. In the hollow cross area, the original camo wasn't painted over... so all of the sources say. The Eagle Parts tailwheel was turned to the side to provide visual interest. It has been shipped, and the wheel has been weathered with oils and pigments. Scuff marks were added to the win Sponge chipping and paintbrush chipping of the propeller blades. I also tried to add a patina to the blades... so they wouldn't be so boring. The fuel tank, dented, weathered, and attached to the ETC501 rack. The wheels were weathered with oils and pigments... there will be more pigments later. I didn't use many decals. The tab decals are among the few examples. Often, exhaust smudges were wiped off by maintenance crews. I tried to replicate this with dark oils... to make the paint look soot-stained. The wheel wells got a heavy dose of 'dirt'. It probably would have been better applied had I done it before assembly. And finally another view of the fuel tank. Thanks for looking!


-
Renault RE20 Turbo - Tamiya - 1/12
GazzaS replied to DocRob's topic in LSM 1/35 and Larger Work In Progress
Very nice work with those decals, Rob. Cartograpfh... love em! -
1/16 scale Tiger VI Ausf E early build
GazzaS replied to CrankyCrafstman's topic in LSM 1/35 and Larger Work In Progress
Tons of brilliant work, Ron! -
The new work area looks wonderful. Enviable.
-
Kitty Hawk 1/35 SH-60B Seahawk
GazzaS replied to Peterpools's topic in LSM 1/35 and Larger Work In Progress
Despite all of the extra work, Peter... it looks good. -
Final Countdown Tomcat done!
GazzaS replied to ScottsGT's topic in LSM 1/32 and Larger Aircraft Ready for Inspection
Fabulous job on that one! -
What is on your bench right now ? Share a picture :)
GazzaS replied to Martinnfb's topic in Modelling Discussion
That looks really great. How do you keep your colors from either looking like they were applied by brush, or disappearing? -
Thanks Rob. I've done the same... but even after multiple applications of Xtra thin, it neve3r looks quite right.
-
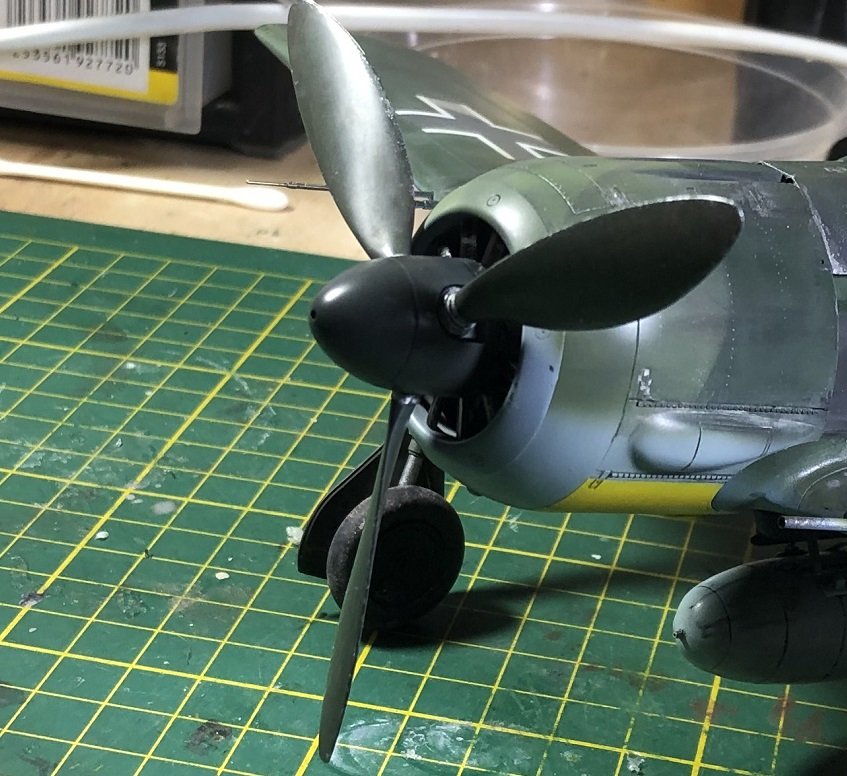
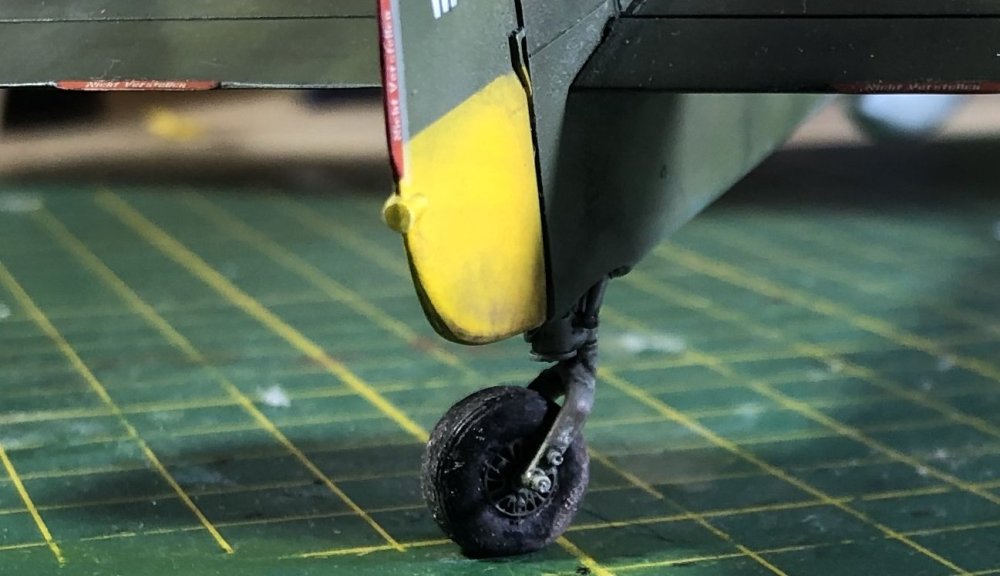
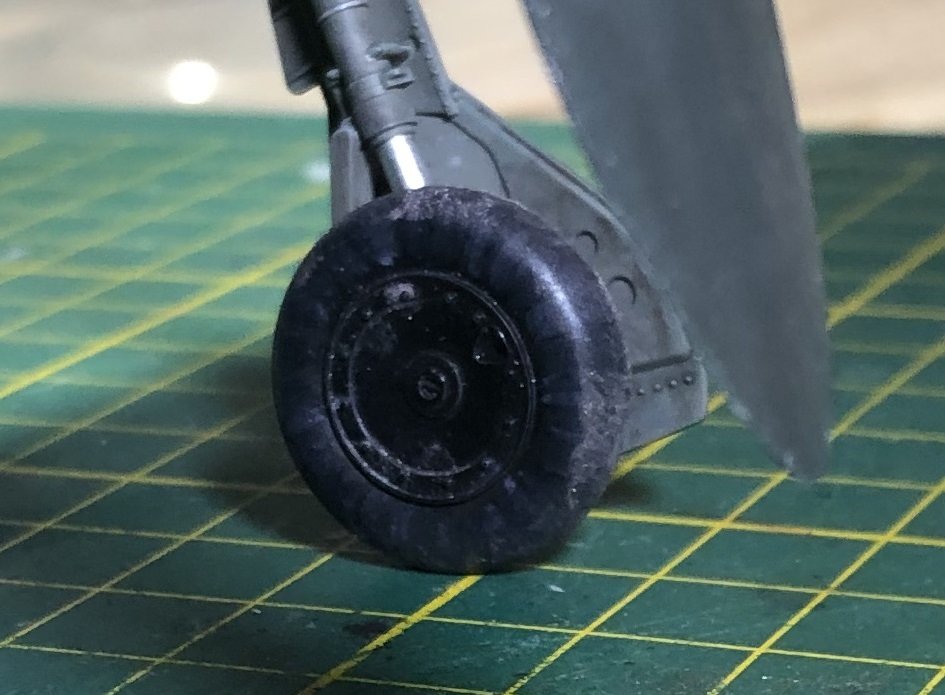
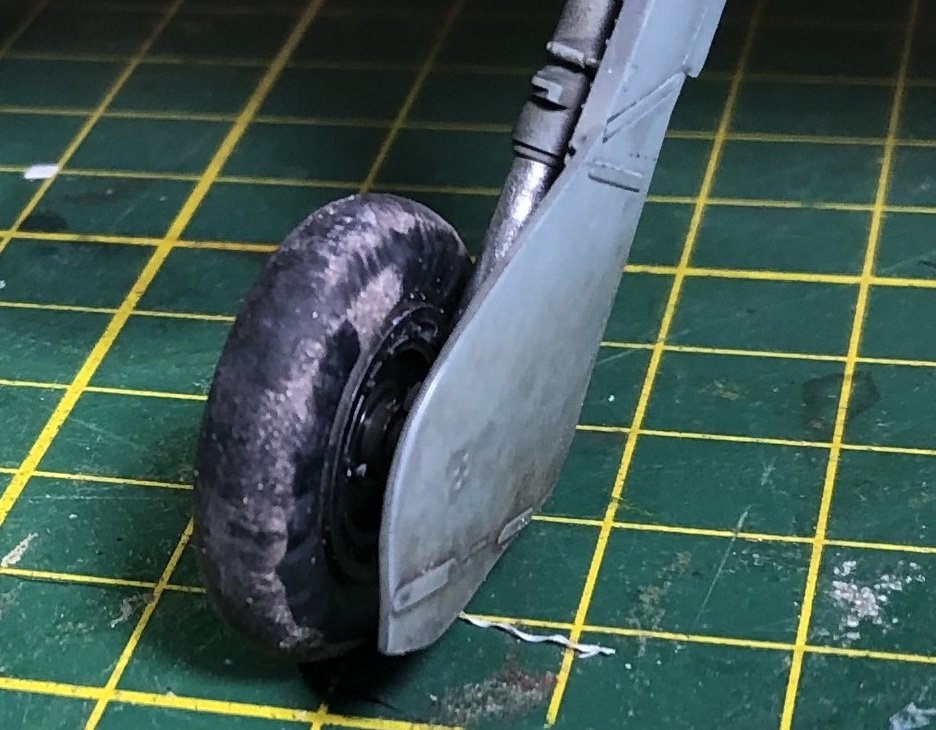
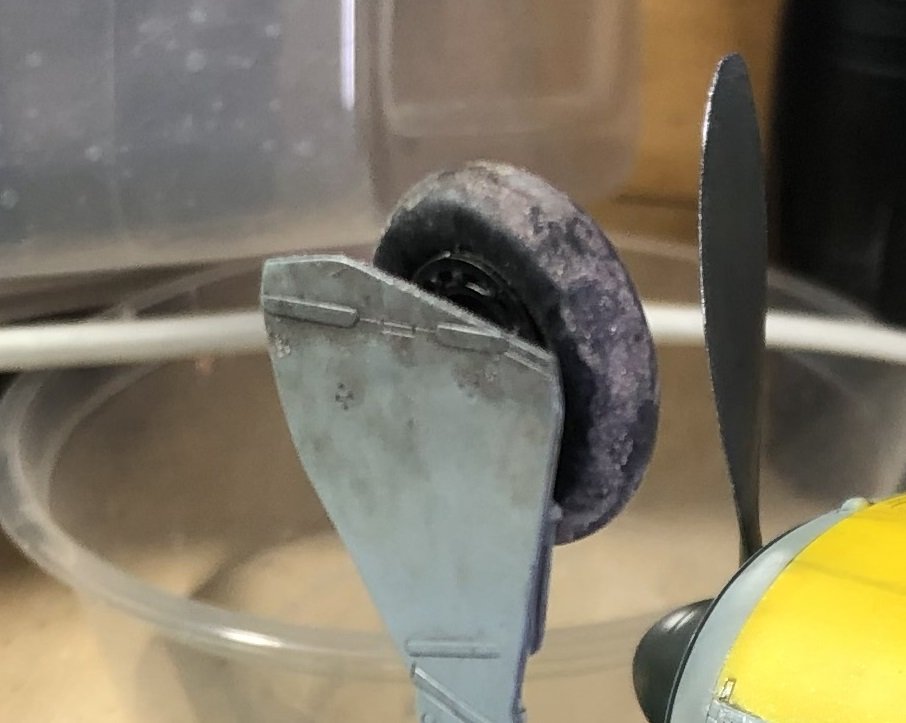
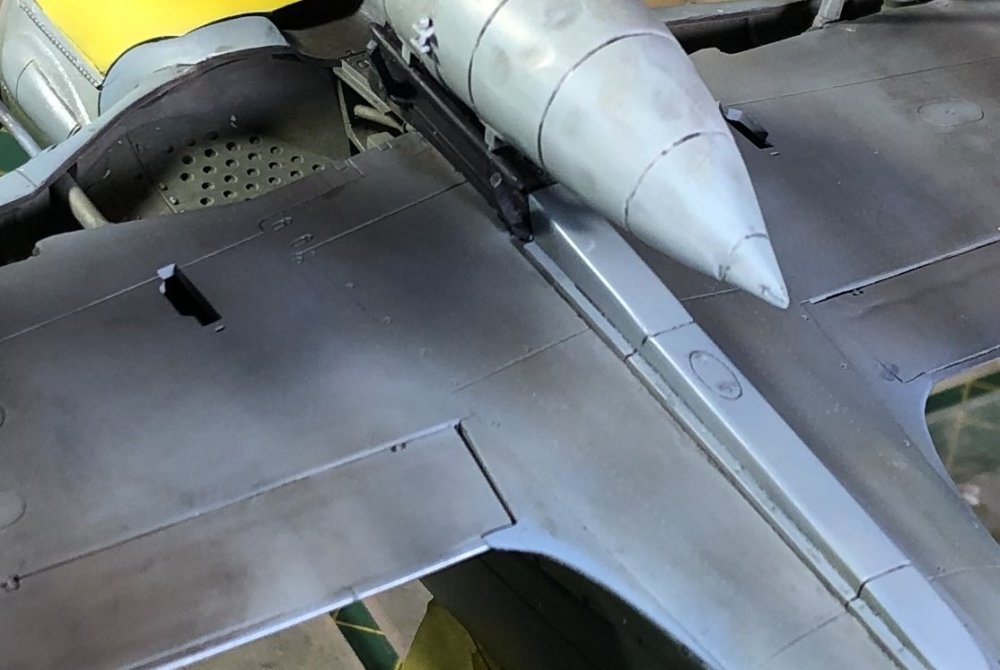
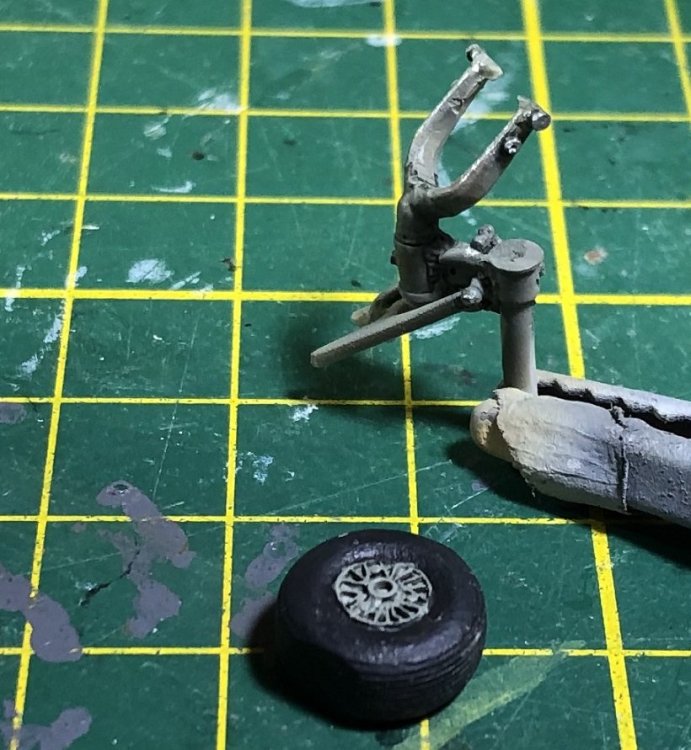
Hi everyone, My slow pace lately... means I'm not getting much done. I did a bit yesterday because this bird needs to get done. A lot of time was spent detailing the kit drop tank. I added fuel lines, reconfigured the drop strap, and made a ton of dings and dents. Hopefully weathering will make it look better. The difficult thing about denting is that most dents we might make by hand either too rough, or too deep. So, I needed to fill them some and the water based filler didn't always come away the way I wanted. I also did some work on the Eagle Parts tail wheel supplied by the great guy that sold me the kit. I also did some work with oils on it as well as some chipping. This is really a sweetly detailed part. It will get a bit more chipping done to it. as well as weathering on the tire. Finally the underside of the bird. After a few years, I've been able to get braver and braver each time, adding more dirt and grime underneath. I want to do more, but I'm getting to the "should I?" point. The wheel wells and LG legs will definitely get more. I've kept the ETC 501 rack cleaner than the rest to show it's temporary use on the bird. Happy modelling!
-
Great looking Mossie, Kevin!
-
Kitty Hawk 1/35 SH-60B Seahawk
GazzaS replied to Peterpools's topic in LSM 1/35 and Larger Work In Progress
Great start on the build, Peter. Best hopes for your missus. -
Renault RE20 Turbo - Tamiya - 1/12
GazzaS replied to DocRob's topic in LSM 1/35 and Larger Work In Progress
Oh yeah... the engine looks much more real. -
Tamiya Mosquito FB Mk VI 60326 - 1/32
GazzaS replied to Bomber_County's topic in LSM 1/35 and Larger Work In Progress
Awesome looking work! This kit really says what they can bring to the table. Wish they'd pop more 1/32 aircraft. -
Revell/Hasegawa FW-190D-9 next up
GazzaS replied to JohnB's topic in LSM 1/35 and Larger Work In Progress
Looking good, John! -
You've really added a lot to this one Jeroen. Looks amazing.
-
My wife is close to the hoarding type. Whereas the only things I keep are books and models. Whenever I get a model I tell her: "I got you a Messerschmitt" or "I bought you a panzer". She's not delighted... but as we both have jobs and we have separate bank accounts and I never tell her how to spend hers, there isn't much either can do. I can tell you I wasn't pleased three weeks ago when she decided we needed a new set for the dining room. The other set was fine. I may let necessity dictate what I do with my earnings... but I won't let another person. As far as dealing with your stash... Are you the member of a modelling club? Recently a widow contacted my club about disposing of her late hubby's built and un-built. Some were sold within the club, and the rest went into the bin. You can make some arrangements with other club members... or maybe get a fridge magnet for skip bin hire. A 'skip' is a large, open at the top, metal bin that they drop off in your front yard here and collect a few days later. I don't know what they would call them in the US. Dumpster is the closest thing I can recollect. If you can make arrangements, perhaps it will ease her mind.