GazzaS
-
Posts
6,396 -
Joined
-
Last visited
Content Type
Profiles
Forums
Events
Gallery
Everything posted by GazzaS
-
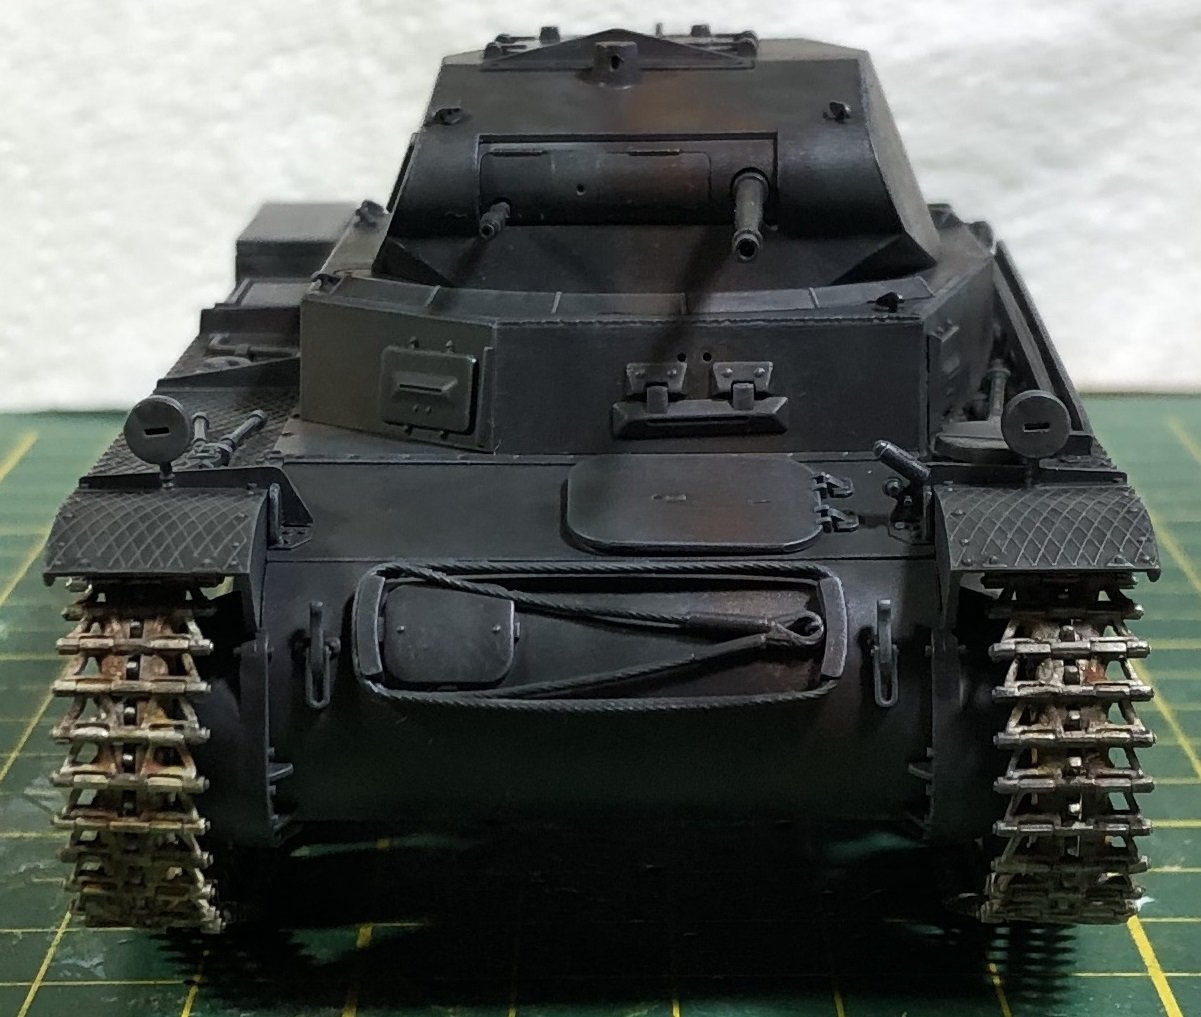
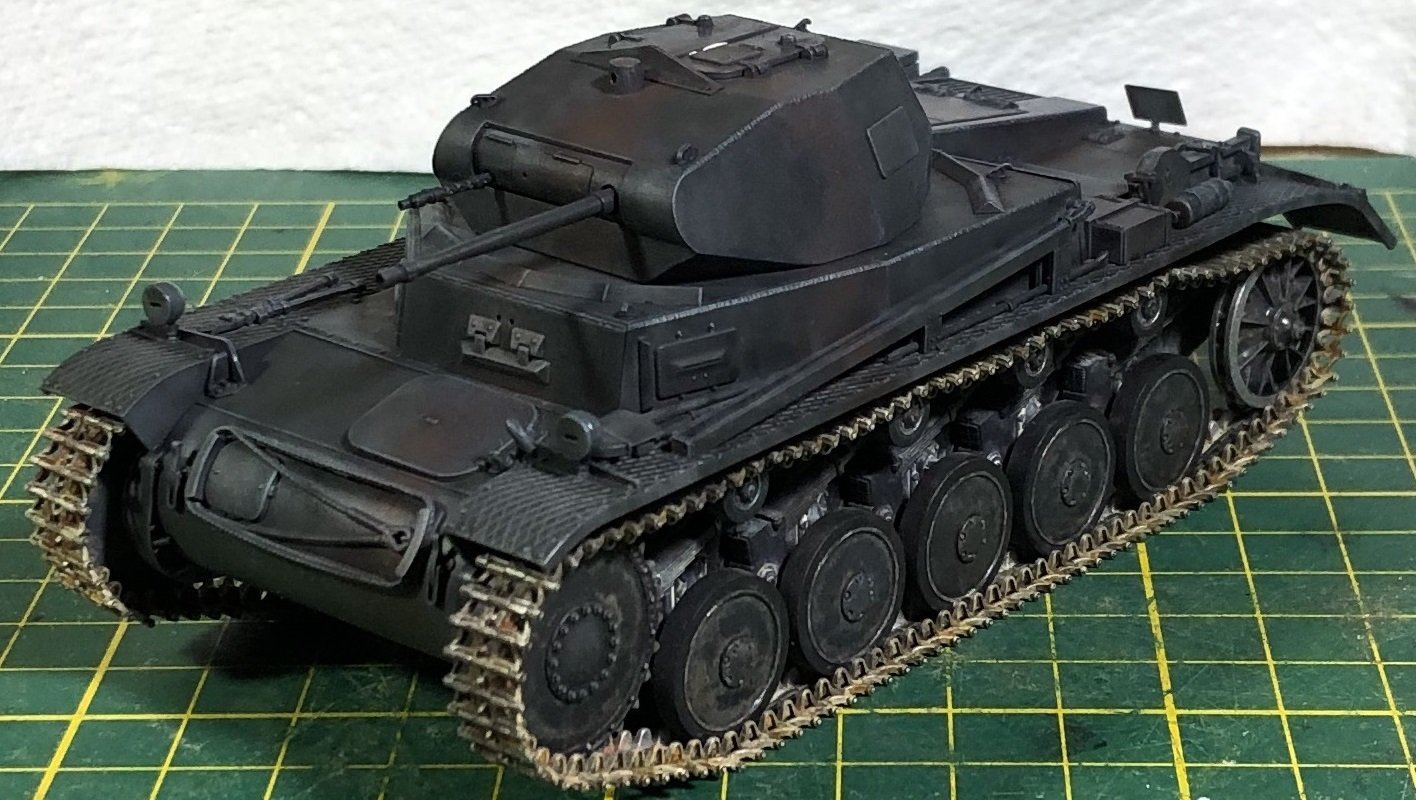
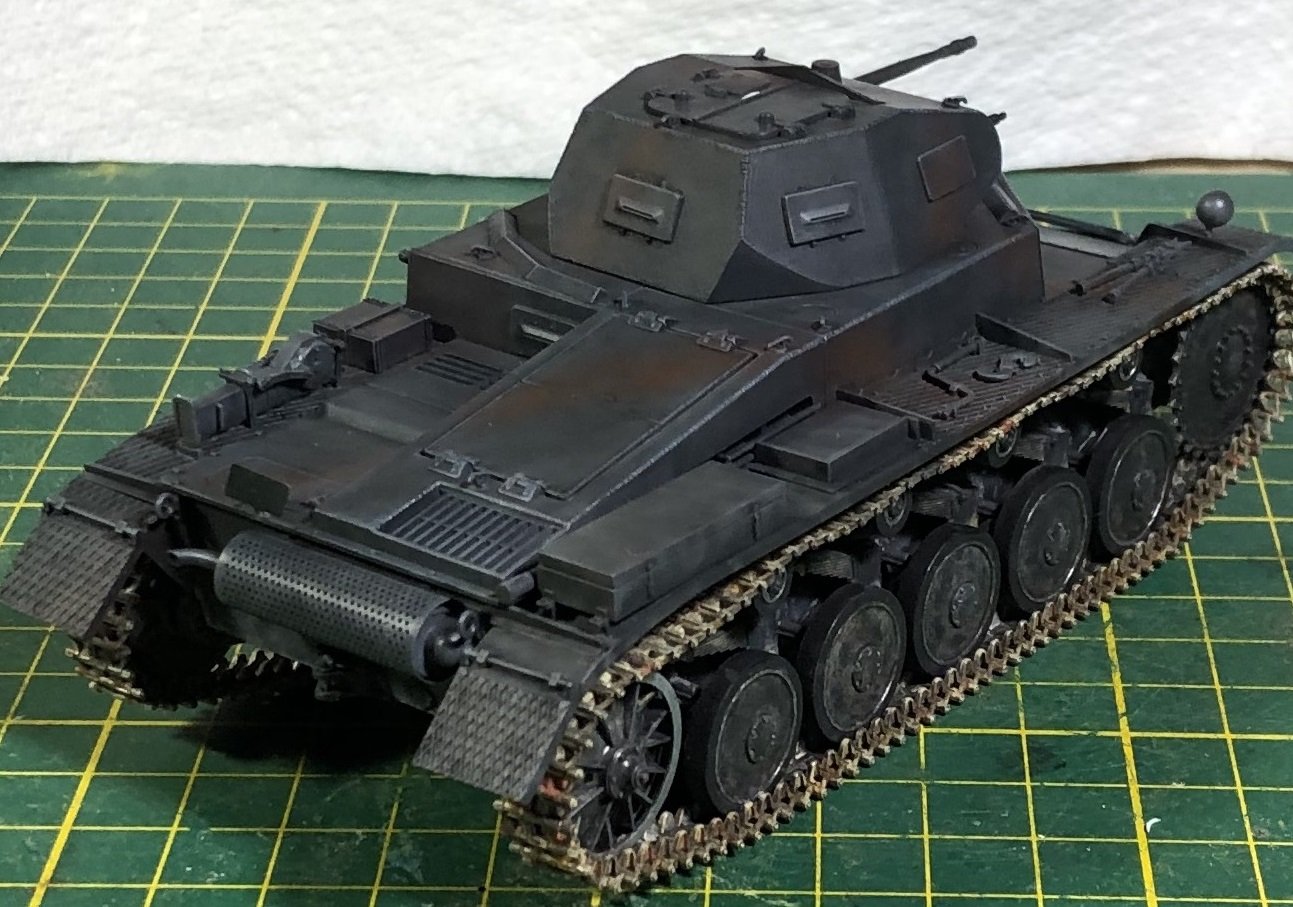
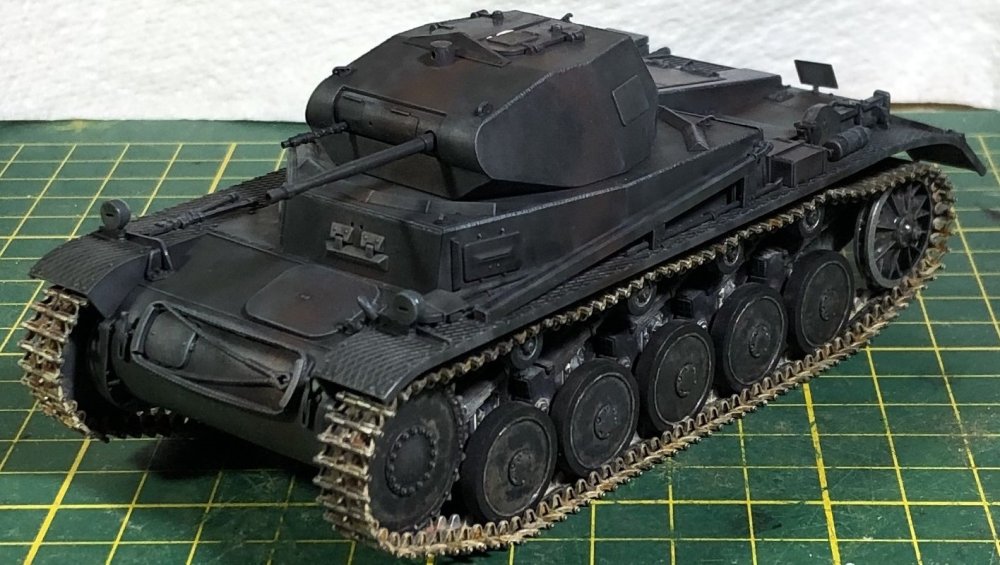
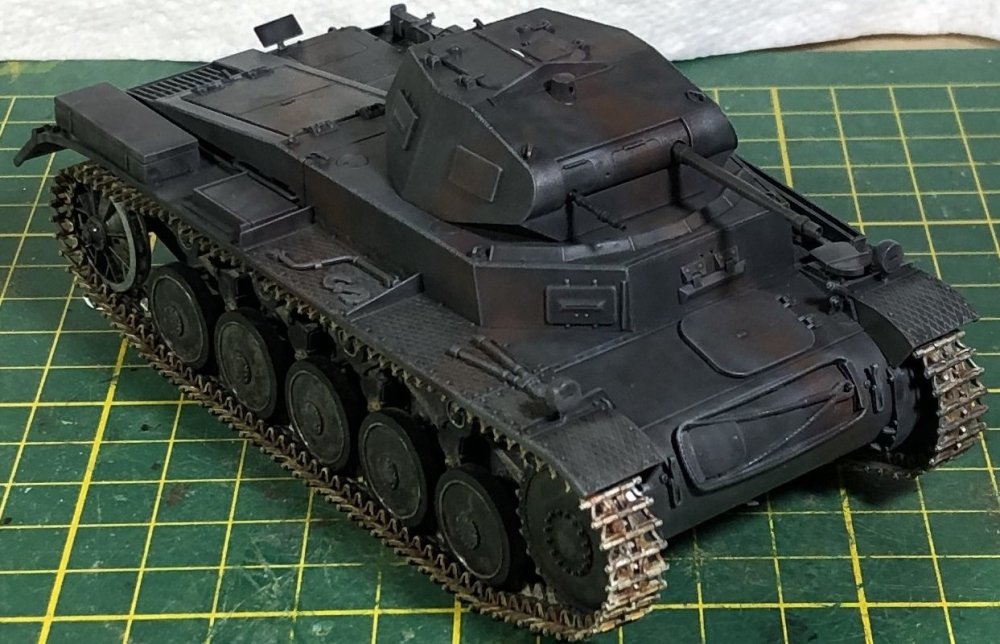
Thank you, Chris. I don't do a lot. Just a dirty brown wash and then I glue them down to force wrinkles into them. They're a bit too thick to hold wrinkles on their own.
-

What is on your bench right now ? Share a picture :)
GazzaS replied to Martinnfb's topic in Modelling Discussion
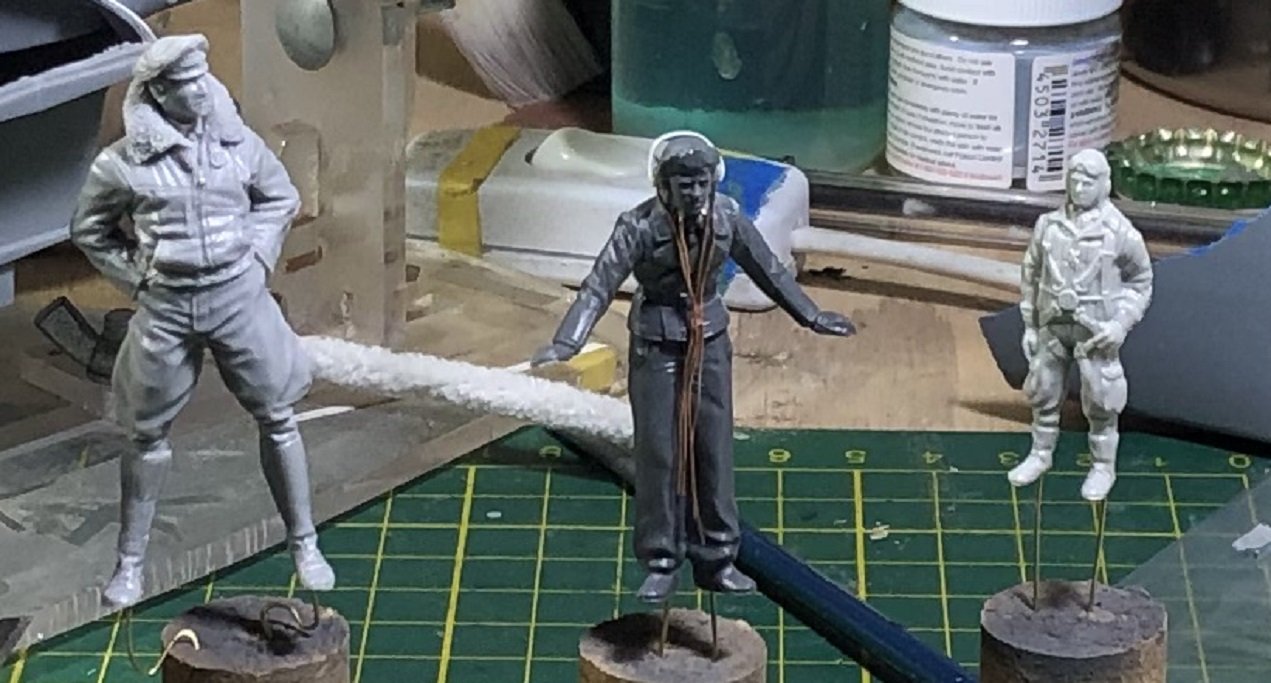
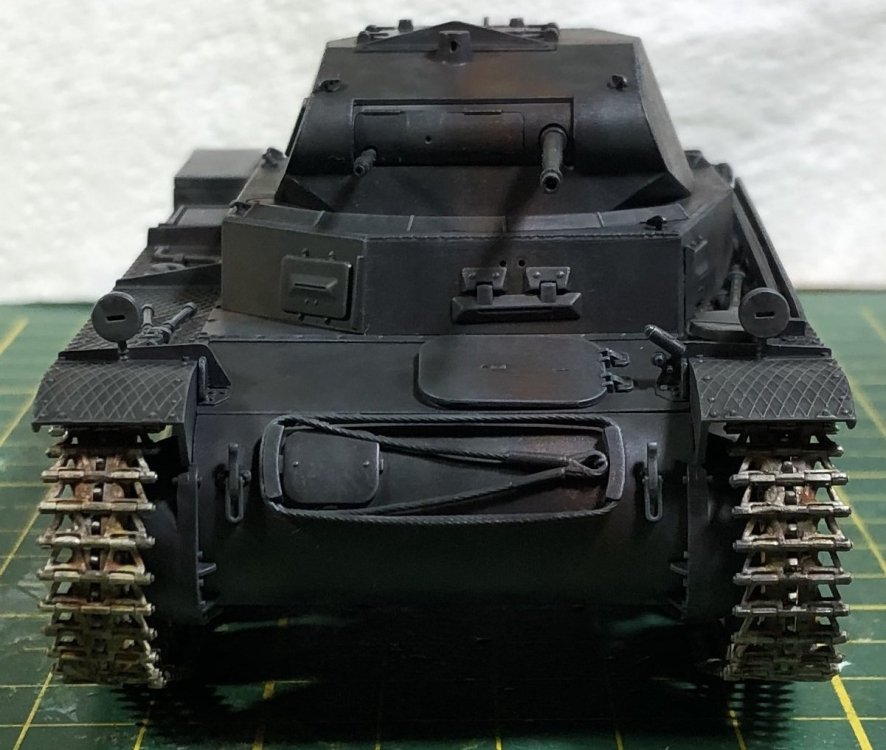
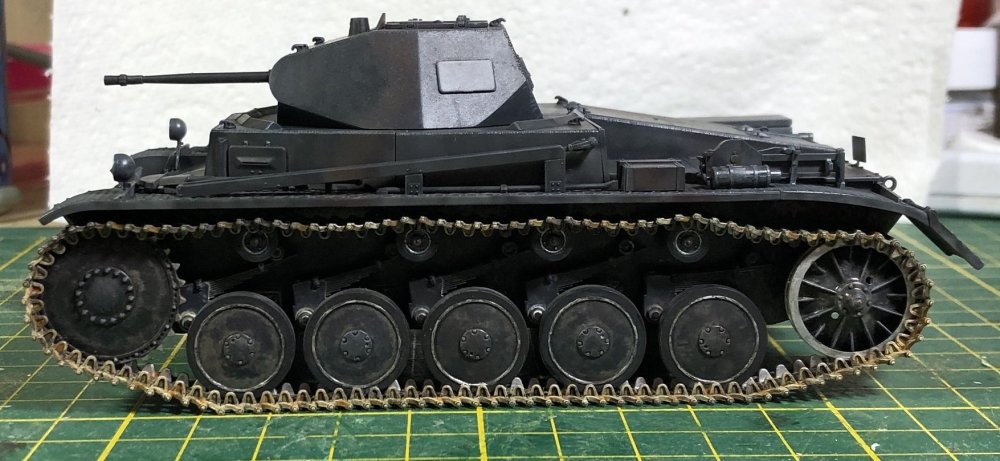
More that some figures are a bit out of scale. I don't imagine there were many FW pilots that tall... and no IJN pilots that tal, either. The tanker... utterly believable. -
What is on your bench right now ? Share a picture :)
GazzaS replied to Martinnfb's topic in Modelling Discussion
Three pilots in 3 scales. The flyboy is 6' 3" in 1/32 scale. The Panzer commander is 5' 6" in 1.35 scale. And the Japanese Zero pilot is 6' and a tiny bit in 1/48 scale.
-
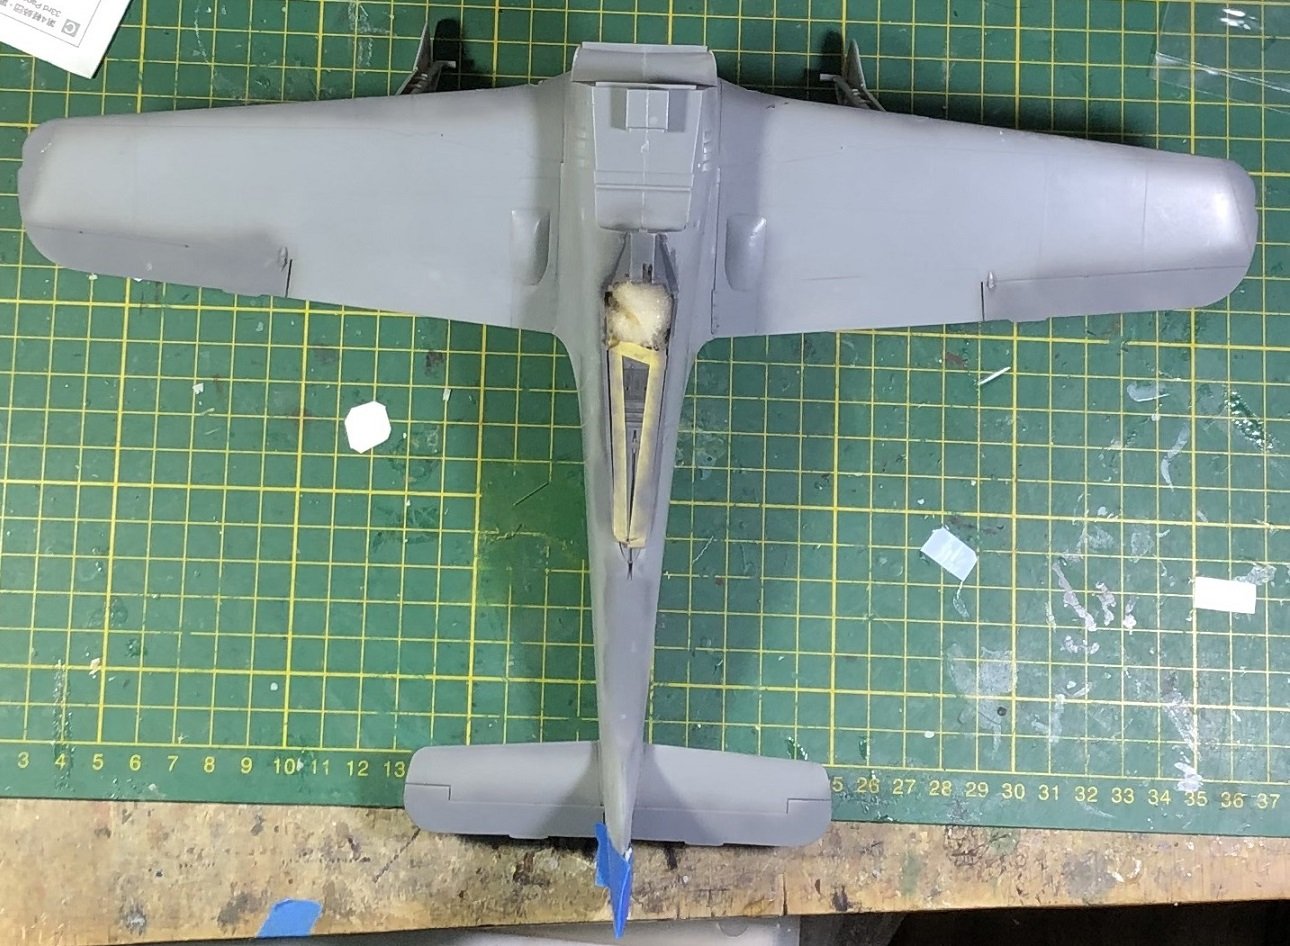
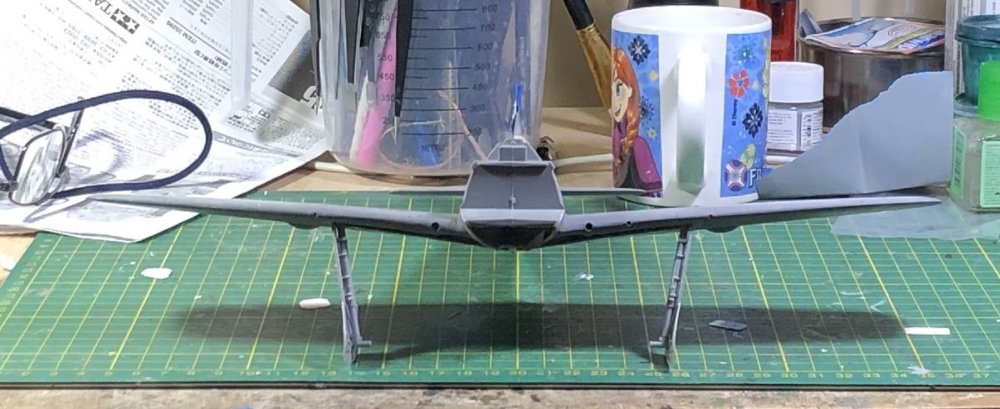
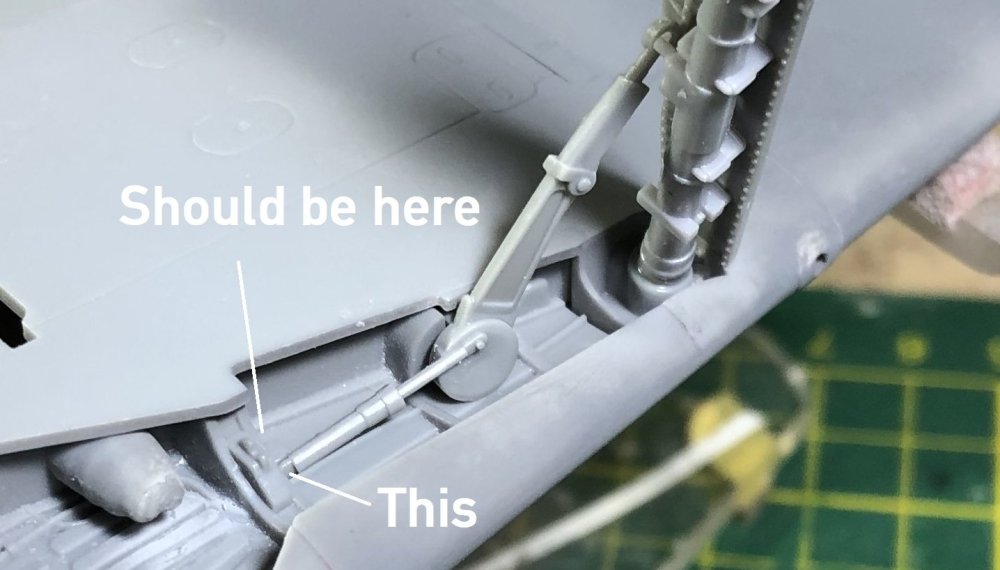
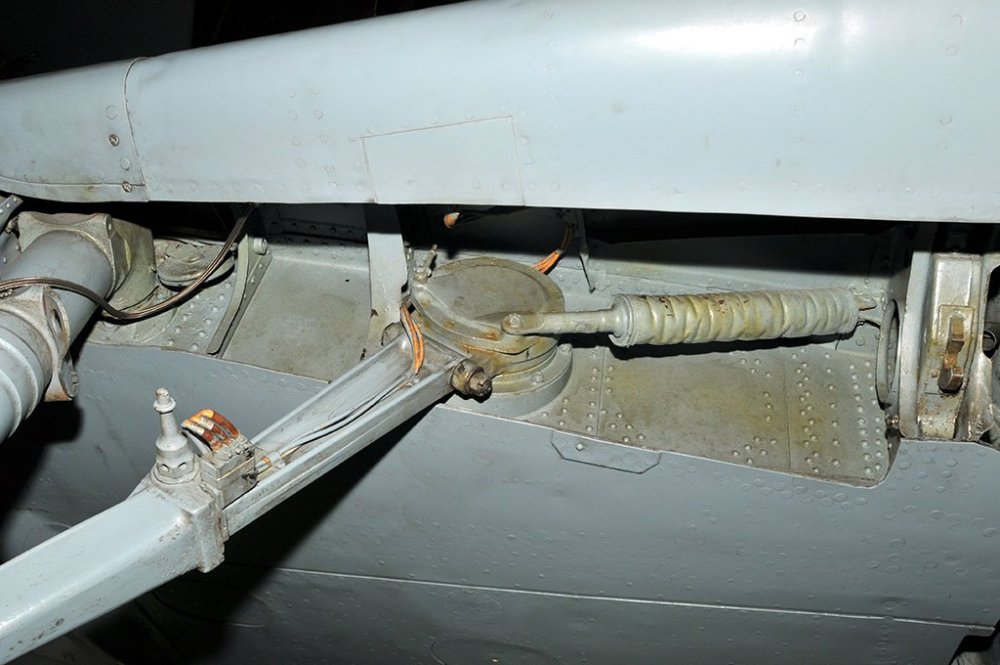
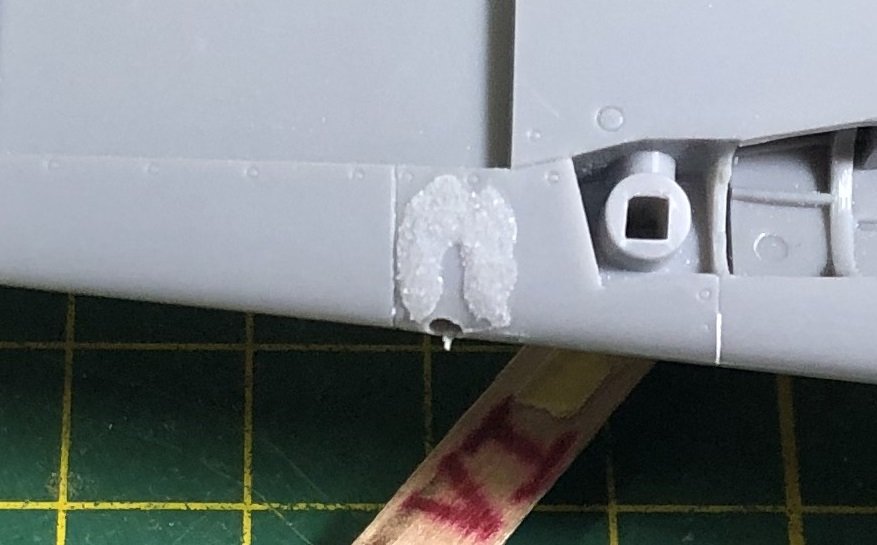
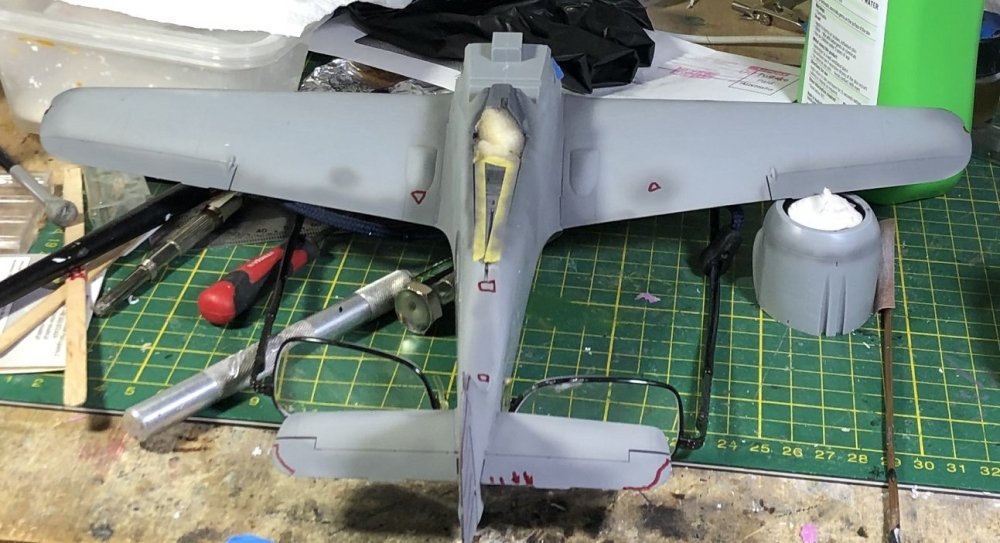
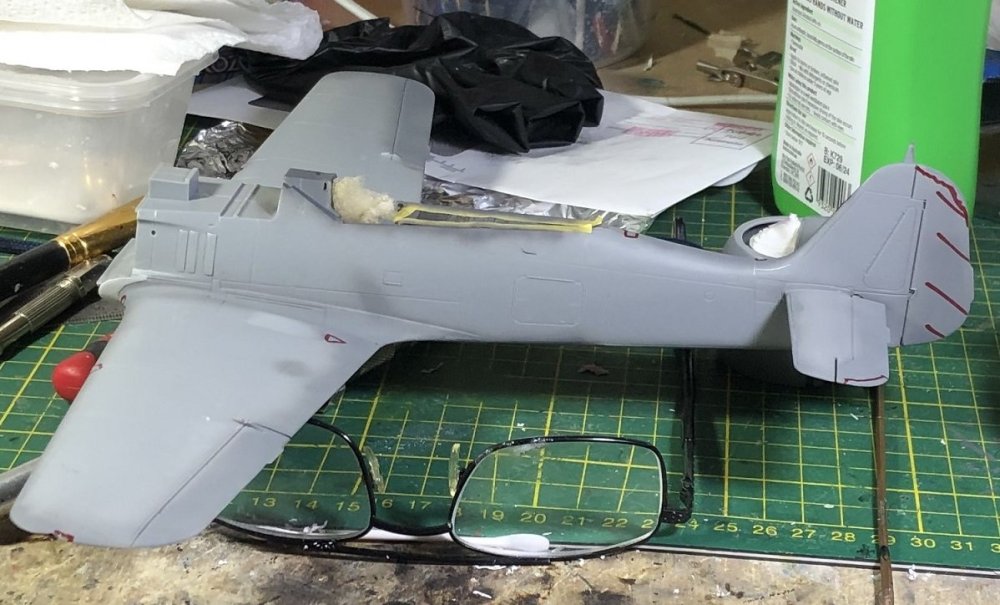
After gluing the main LG in place, I let them dry overnight. I don't usually do this, but I didn't want any possibility of tweaking them while the glue and plastic are still in a molten state. Checking them this morning revealed I had done a fair job. Both wingtips were 102 mm from the cutting mat with no wheels on. Then I used the grid pattern on the cutting mat to check alignment. Of course, what the camera shows will be different than what my eyes saw. Now... I have to admit something here. On every FW 190 kit I have ever built, I have had trouble placing the support arm. Sick of the problem, I decided to seriously investigate before I committed to gluing. Here is a pic of the real thing... And here is a pic of the way the kit goes together without applying force or shaving parts. The main problem may be the thickness and shape of the molded part of the wheelwell. So, now I will try to change that without making it too ugly. I can't just bend the parts into place because that would look all kinds of wrong. I hope I can do it without having to modify the wing surface. How do you guys do it? I know some of you have built this kit already...


-
Arado 234 Nachtigall on Speed
GazzaS replied to DocRob's topic in LSM 1/35 and Larger Work In Progress
Rob, A man after my own heart. Sanding is a great way to make your color scheme so much better. I've been doing it for over a year now and think it is the greatest unused technique out there. I've recommended it to others, but have had some of them say 'no-way'. Looks splendid and a great place to start weathering. -
Thanks, guys... your putty expenses will drop dramatically.
-
Arado 234 Nachtigall on Speed
GazzaS replied to DocRob's topic in LSM 1/35 and Larger Work In Progress
Looks awesome, Rob! -
End of an era. Rode in one back in 89.
-
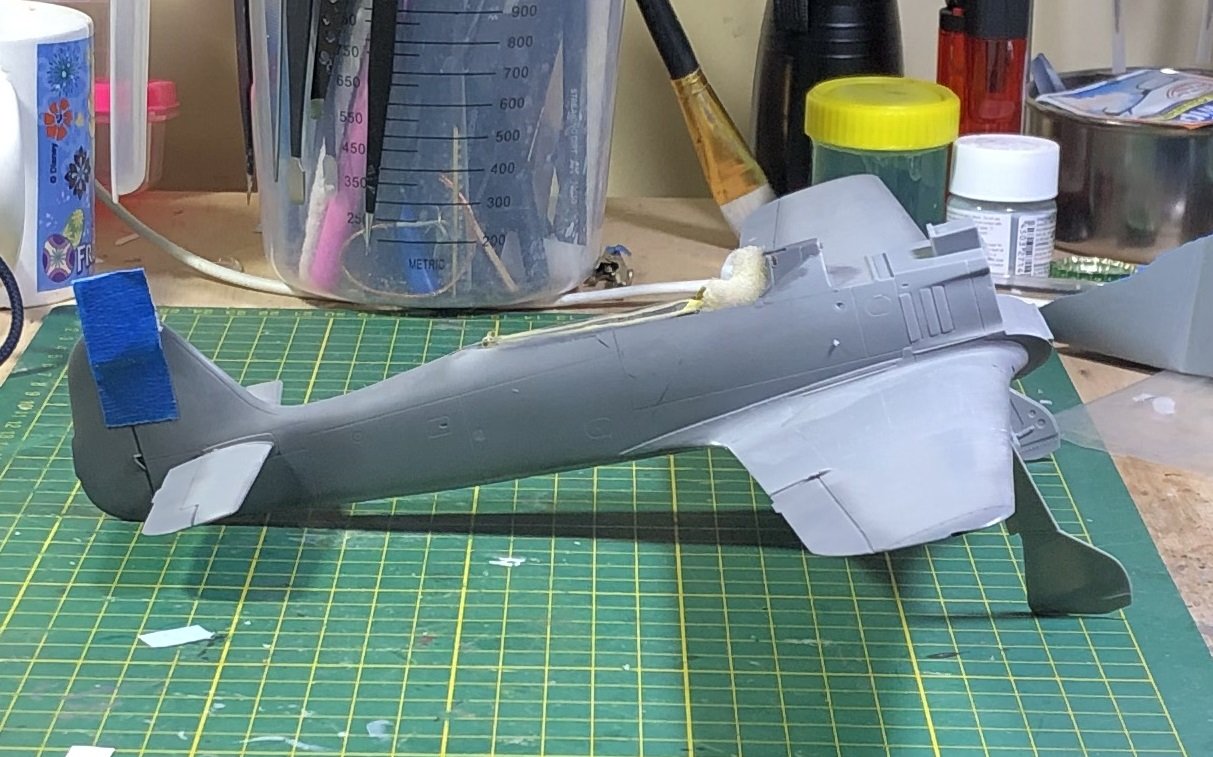
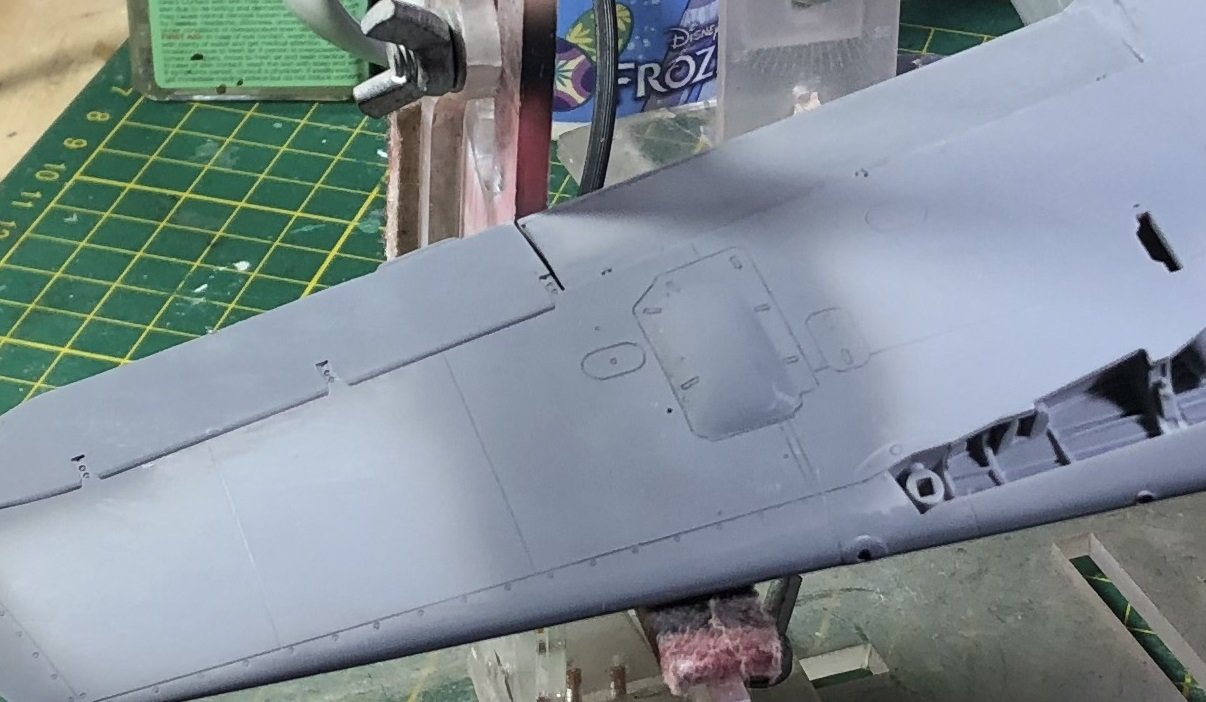
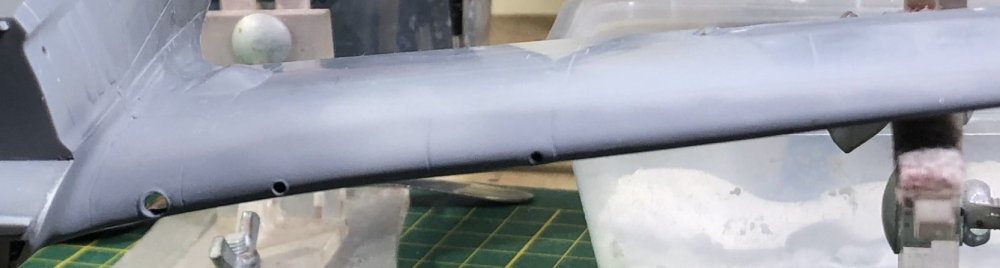
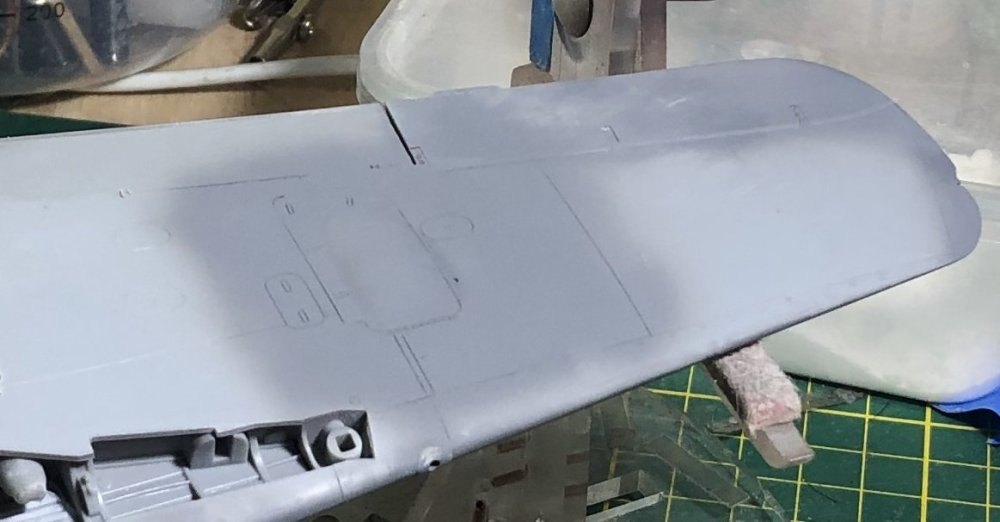
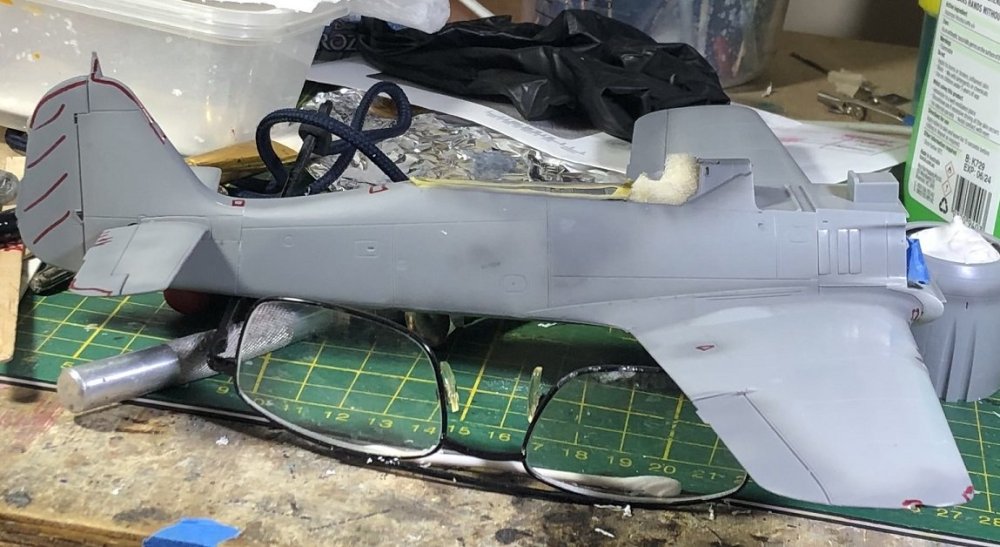
Small update today. A workday today... I hoped to get home and attach the LG... maybe paint the spinner and blades. But then I remembered that I still had to affix the MG-FF ammo drum bulges for the A5 version. As someone alluded, the fit of these is less than perfect. But, using my mix of CA and baking soda... as well as my electric toothbrush sander, I got them cleaned up in and hour or so. Here are the leading edges of the wings, post cleanup: I'm quite happy with the leading edges. And here are the underwing bulges: These look ok until a shadow falls a certain way. But I don't think the shadow will show once the model is up on her feet. In a moment of weakness I ordered the HGW surface rivets. They're specific to the kit. Hopefully HGW will make more sets for other 1/32 kits coming out. Thanks for looking.


-
Haha…. Thank you. I didn’t remember that voice until I heard it today.
-
Thank you, Ron.
-
Are you sure the missus doesn’t have some? I know a lot of ppl use it for baking and as a deodoriser in the fridge. A teaspoon will go pretty far… It will change your modelling life. No more waiting overnight for putty to dry. Ready in seconds. Just ensure you don’t let it sit for too long as CA will get much harder than the surrounding plastic in 8 hours. Truly, I had all of those blemishes fixed 5 hours after the update. For really shallow dings, I drill a hole so that the CA is firmly anchored. It is possible to sand poorly anchored CA right out of the hole. I don’t really care for it for the dorsal wing/fuselage seam. The main reason being, that trying to rescribe the seam line is very difficult because the fuselage is in your way. Even if you have a great chasm to fill…. It can be ready to sand in seconds.
-
S-Boot Fantasy starring Airfix's 1/72 scale "E-Boat"
GazzaS replied to GazzaS's topic in Archived GB's Sub Forum
Thank you, Phil. -
Bolivian AF Cavalier F-51D done
GazzaS replied to JohnB's topic in LSM 1/32 and Larger Aircraft Ready for Inspection
Well done, John! -
Arado 234 Nachtigall on Speed
GazzaS replied to DocRob's topic in LSM 1/35 and Larger Work In Progress
Ooh... glad to see paint on it, Rob. Looks nice and clean! -
Another one? I didn't even know you finished the first.
-
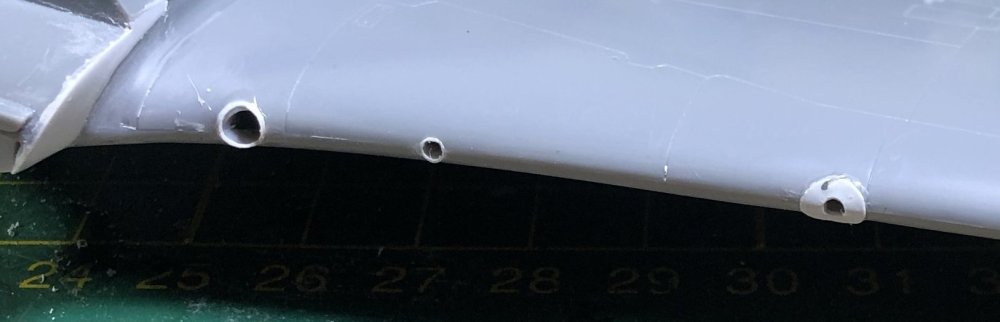
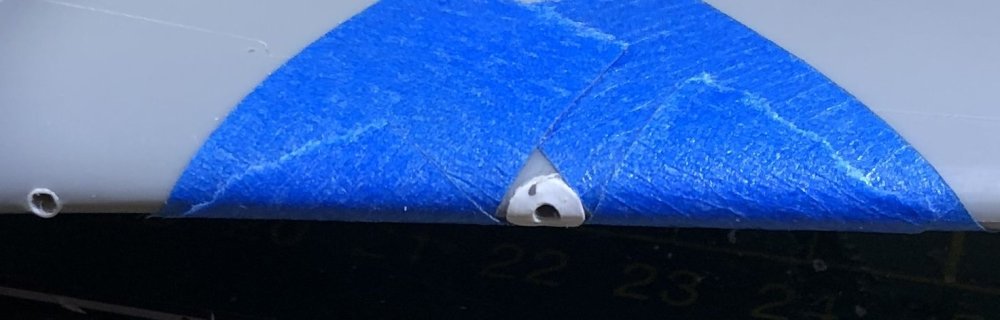
Welcome back to another update... Special thanks to those who provided pics or links. If you'r building the A5 version, you'll have to fill in the panel lines associated with the outboard MG 151's associated with the A6-8. I used CA with baking soda dropped in to speed drying. Then I used Evergreen sheet and tube to make the details on the leading edges around the gun barrels. Working around that camera opening has been tough. I don't want to remove the raised detail. I taped all the way around the reinforcing ring to prevent sanding the edges off while I thinned it. Now comes my least favorite time in aircraft modelling... blemish check. So, I think I'll be gone for a while... until I can get all of these marked errors cleaned up. Ciao babies!

-
Well done, Bill!
-
Yeah... I wanna do that small detail. My original question was about the MG-FF apertures which have a much heavier reinforcement... a la these pics that were given to me at TOS:
-
What is on your bench right now ? Share a picture :)
GazzaS replied to Martinnfb's topic in Modelling Discussion
Thank you! 1/35. -
Supposed to be an MC.202 in the works, too.
-
Thank you for the pics, Martin! Great ones they are, too. Now I just have to decided how visible to make the reinforcing rings. Might do them as decals so that the thickness is uniform.
-
Thank you, Peter. Just another one of those nasty surprises from an old kit to fix. I might never had noticed had I not read somebody elses wip.
-
What is on your bench right now ? Share a picture :)
GazzaS replied to Martinnfb's topic in Modelling Discussion


-
That was helpful, Rog. Thank you. Now I just need a close-up of where the MG-FF comes out of the leading edge of the wing.