GazzaS
-
Posts
6,396 -
Joined
-
Last visited
Content Type
Profiles
Forums
Events
Gallery
Everything posted by GazzaS
-
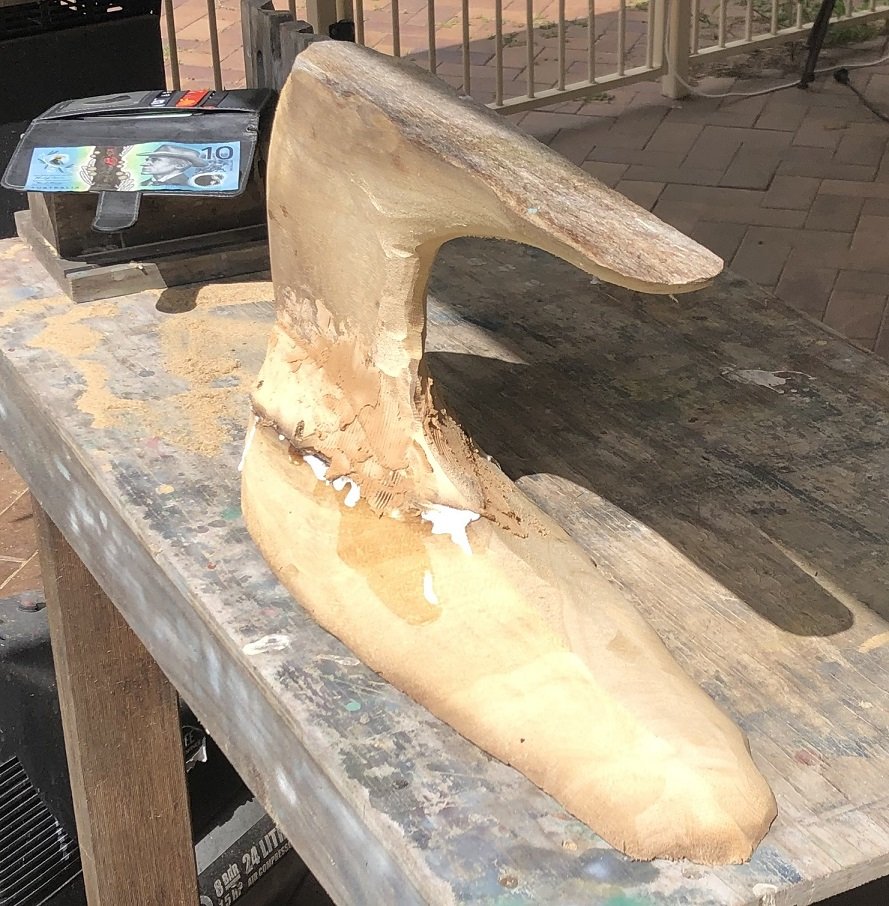
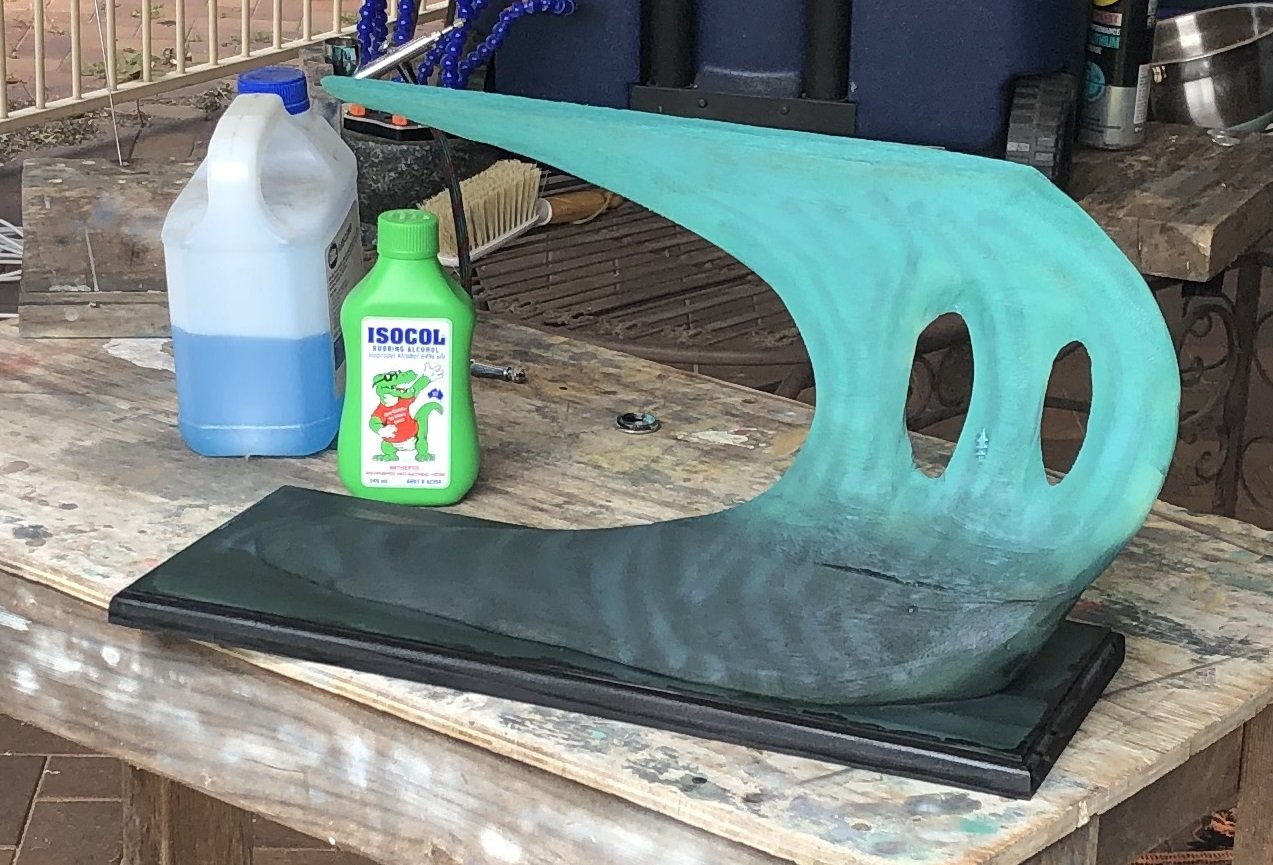
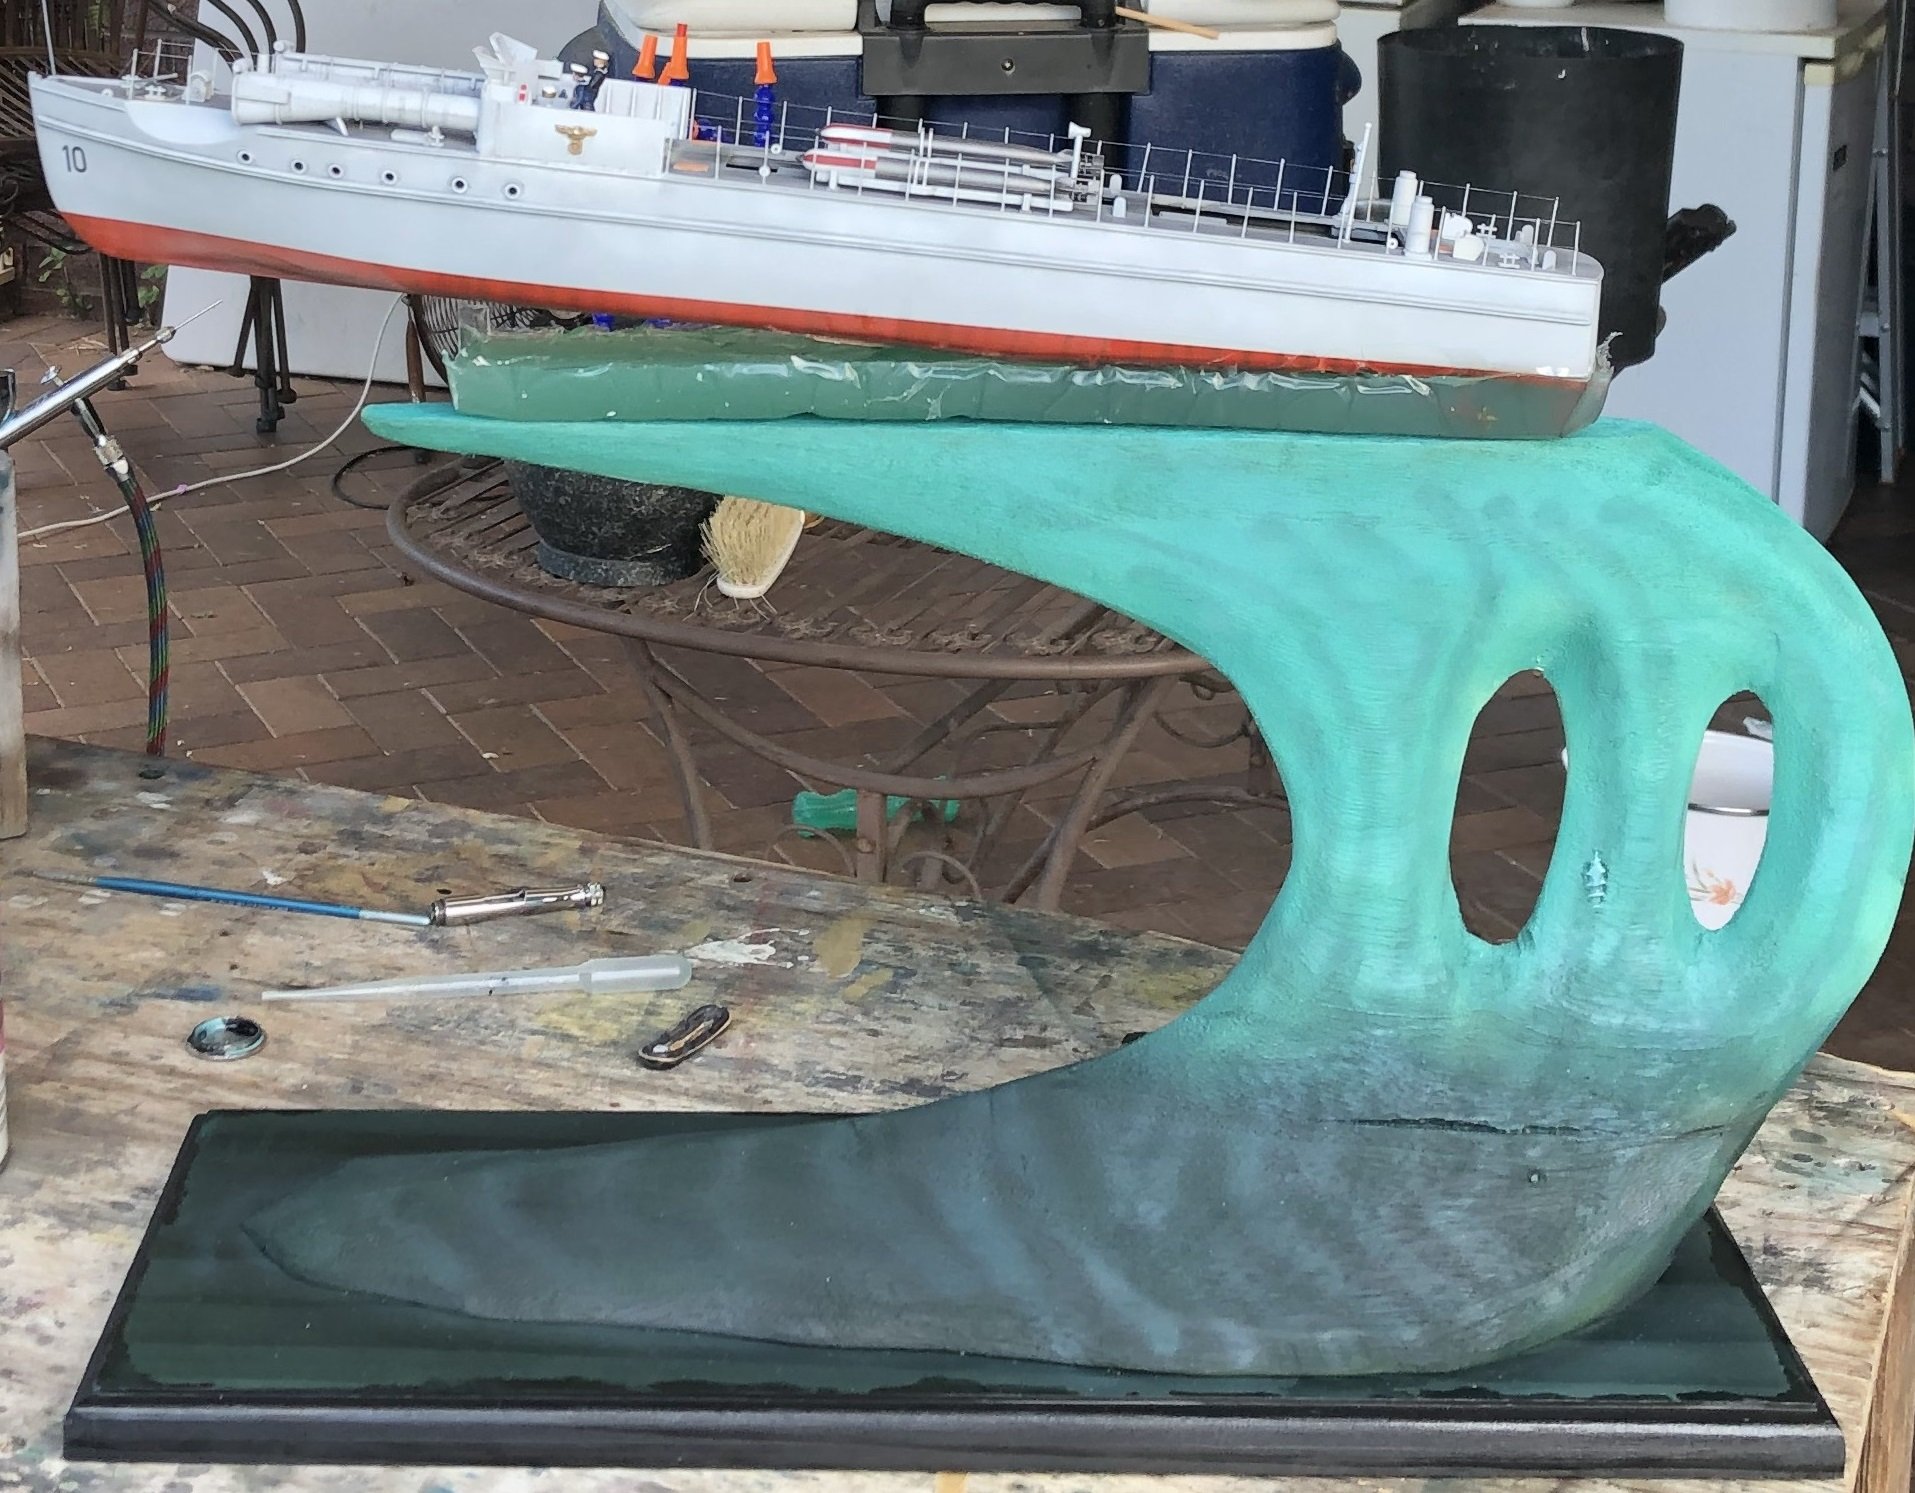
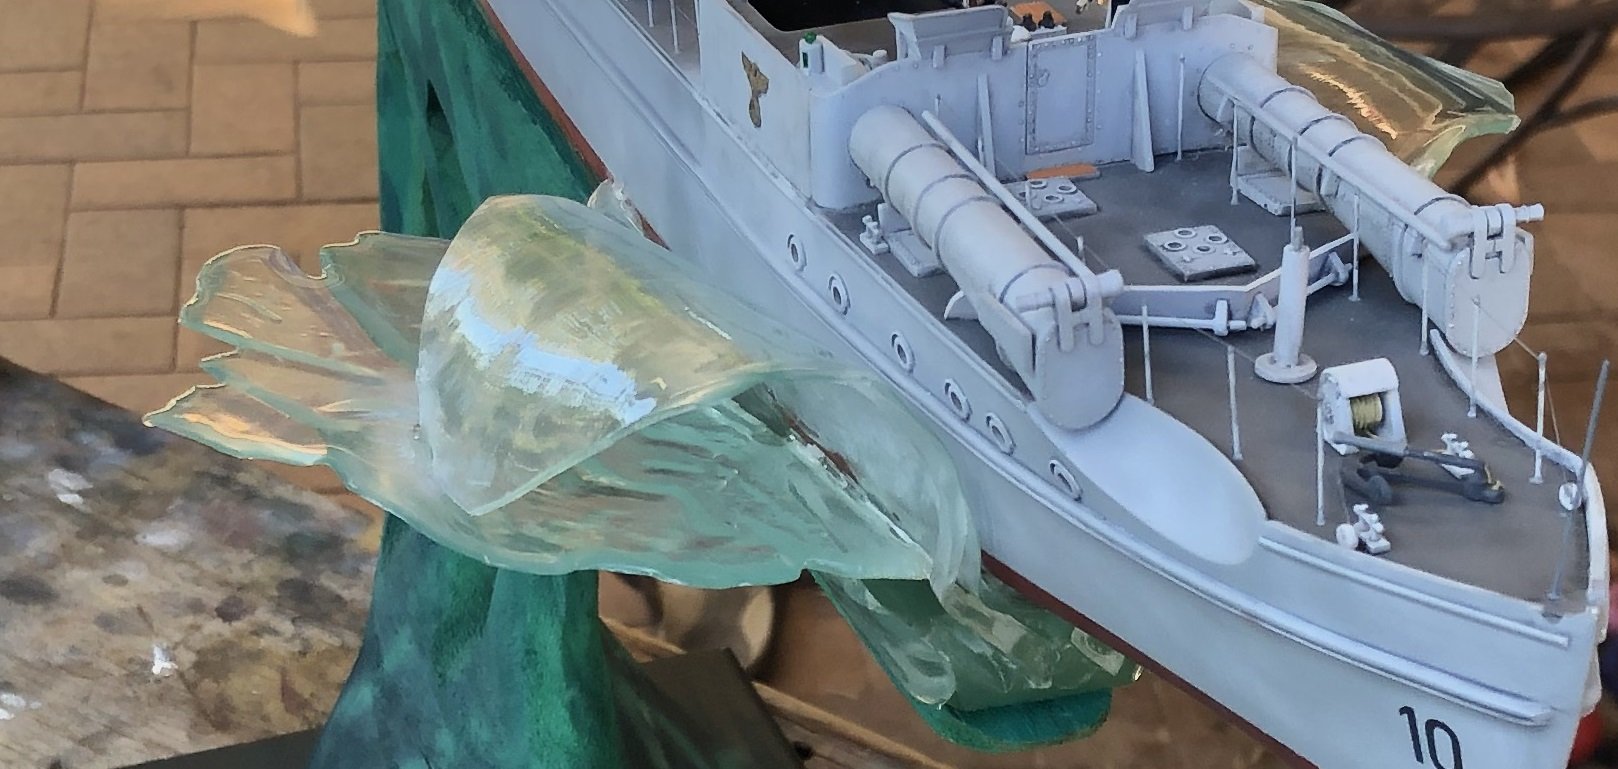
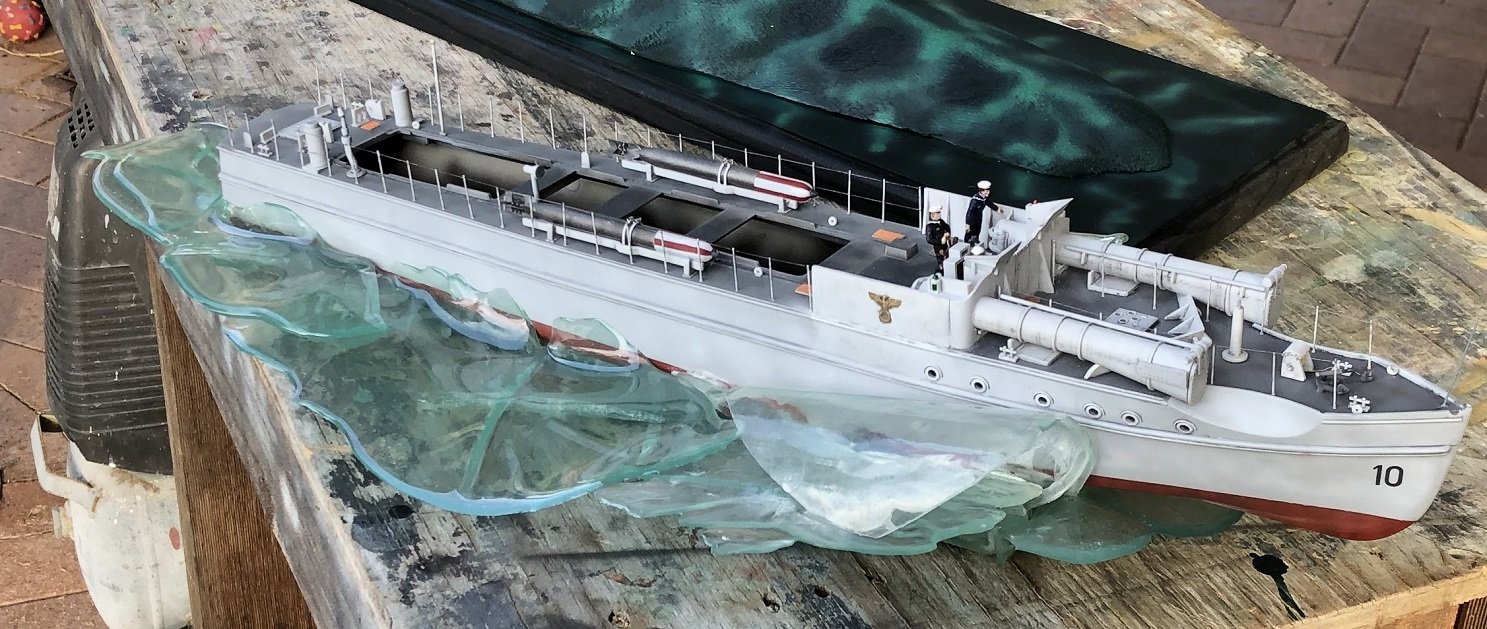
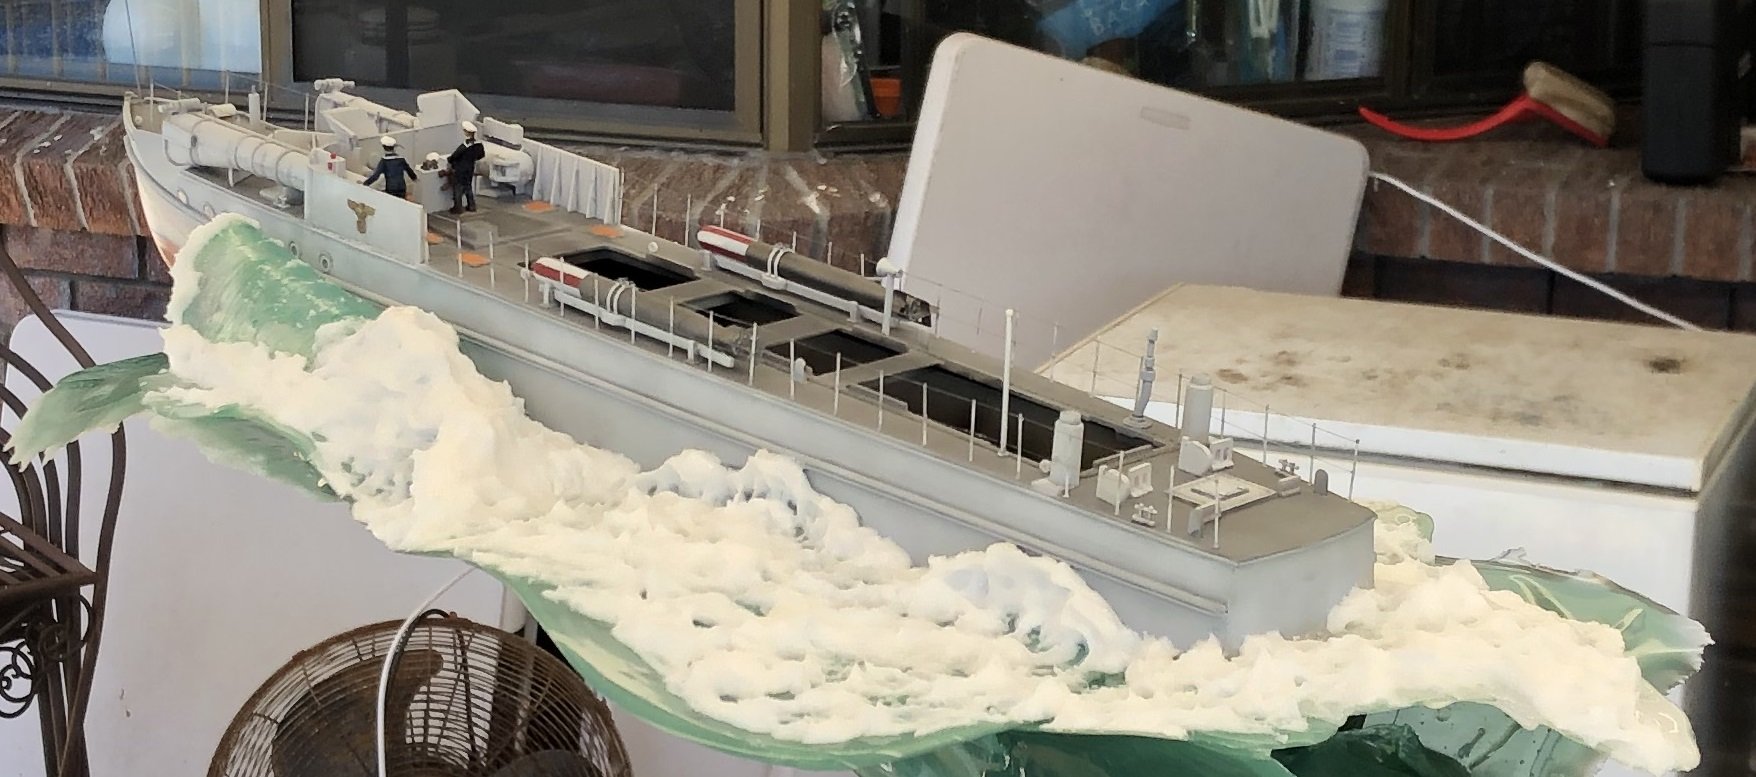
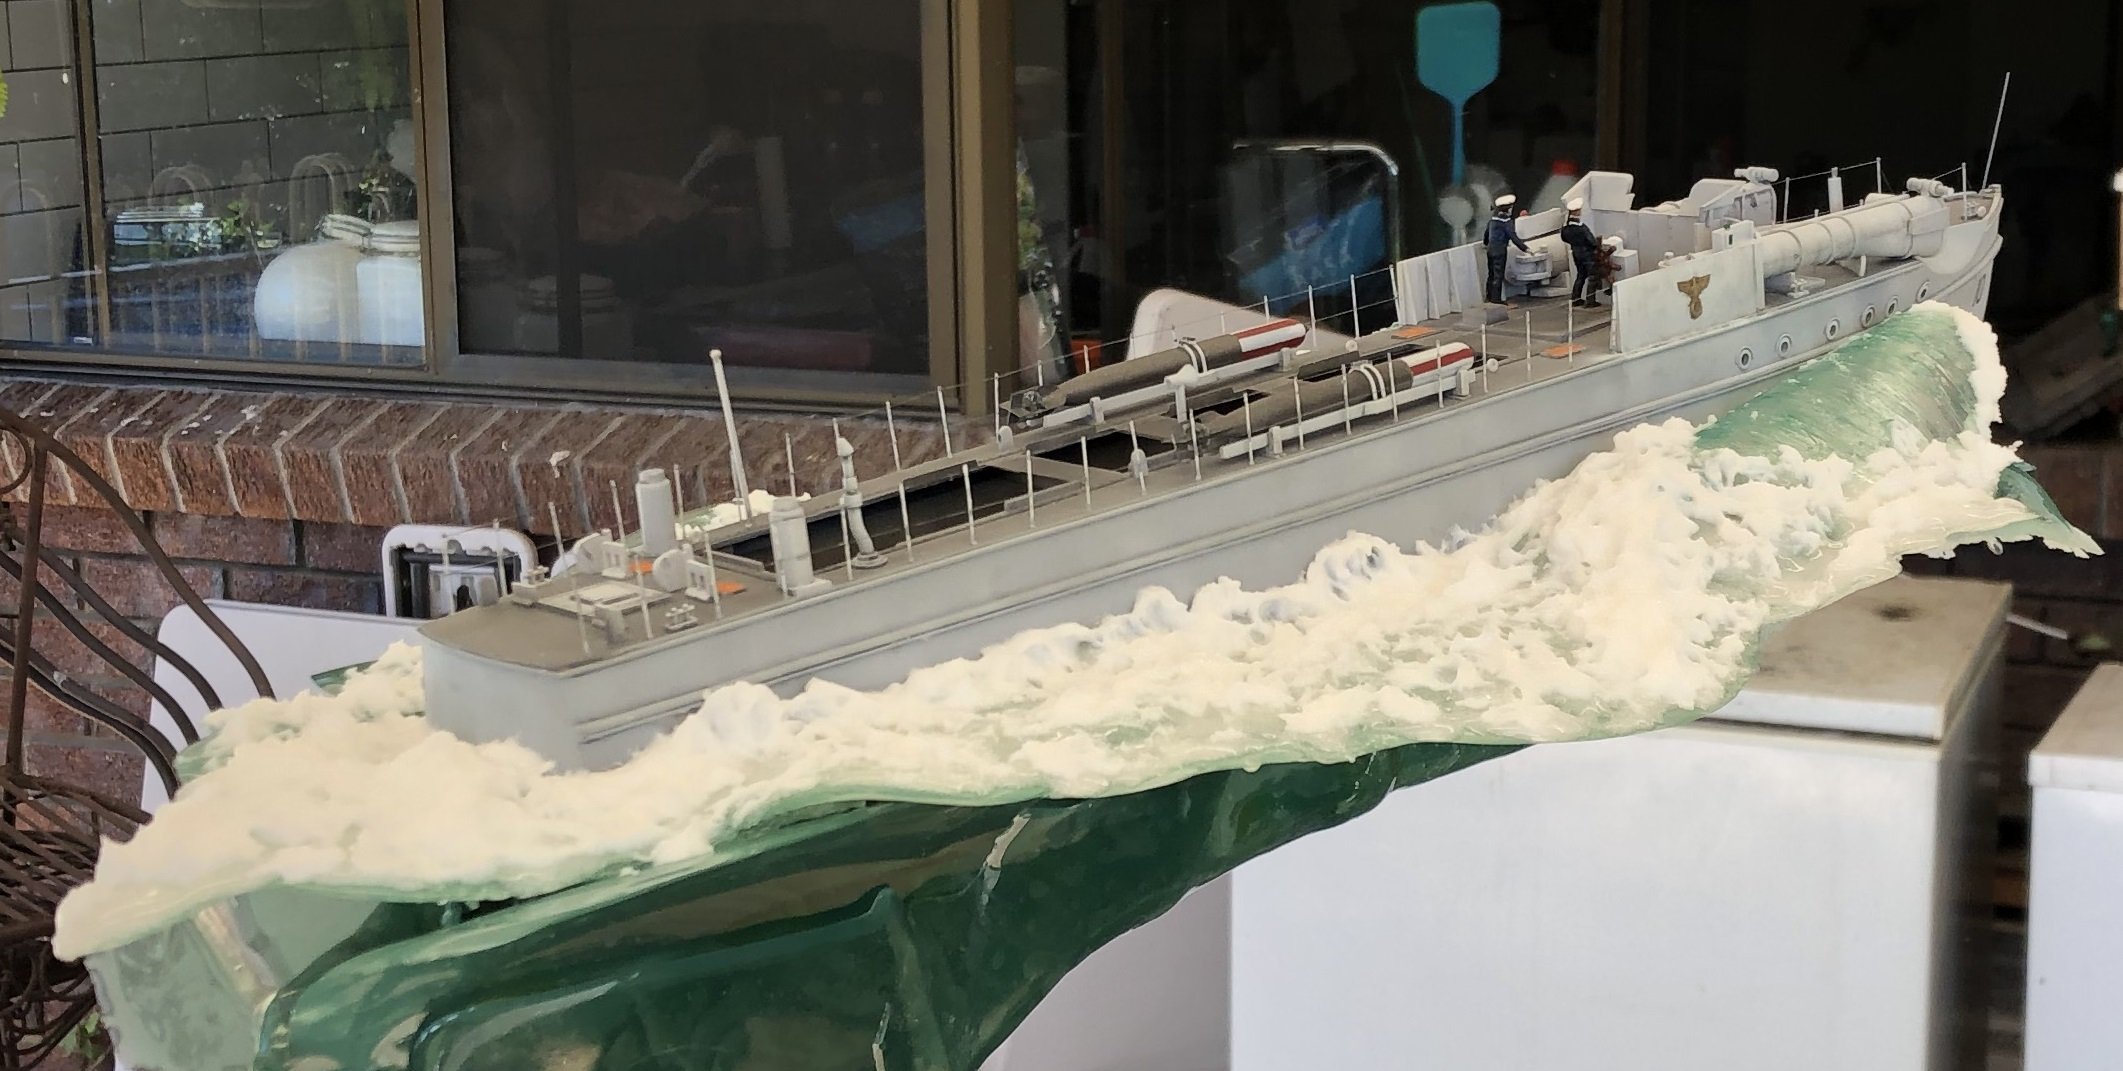
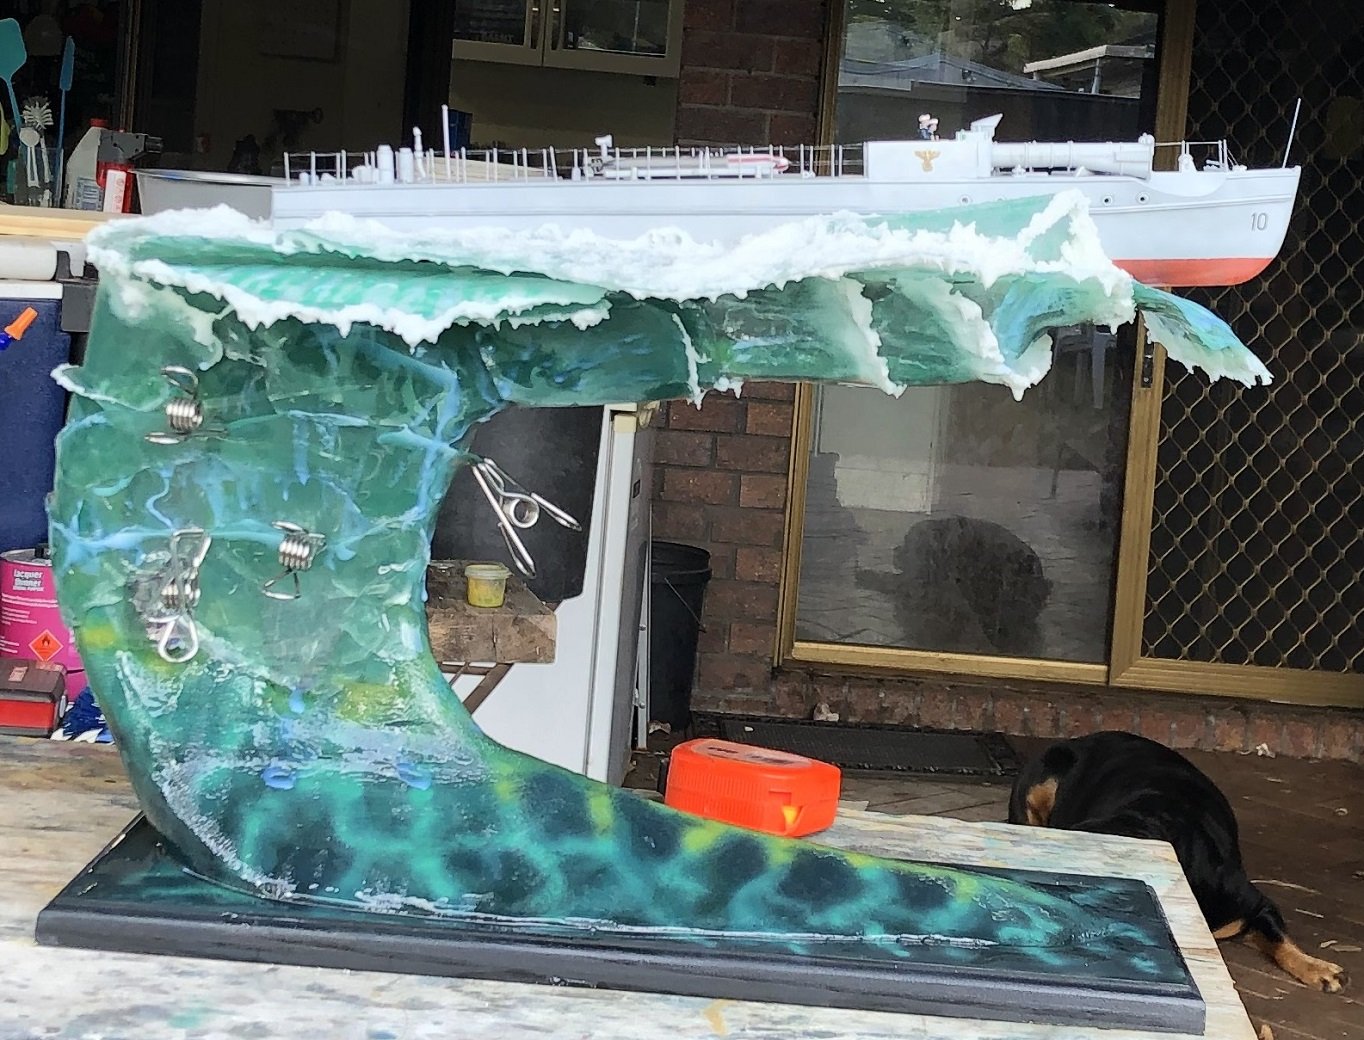
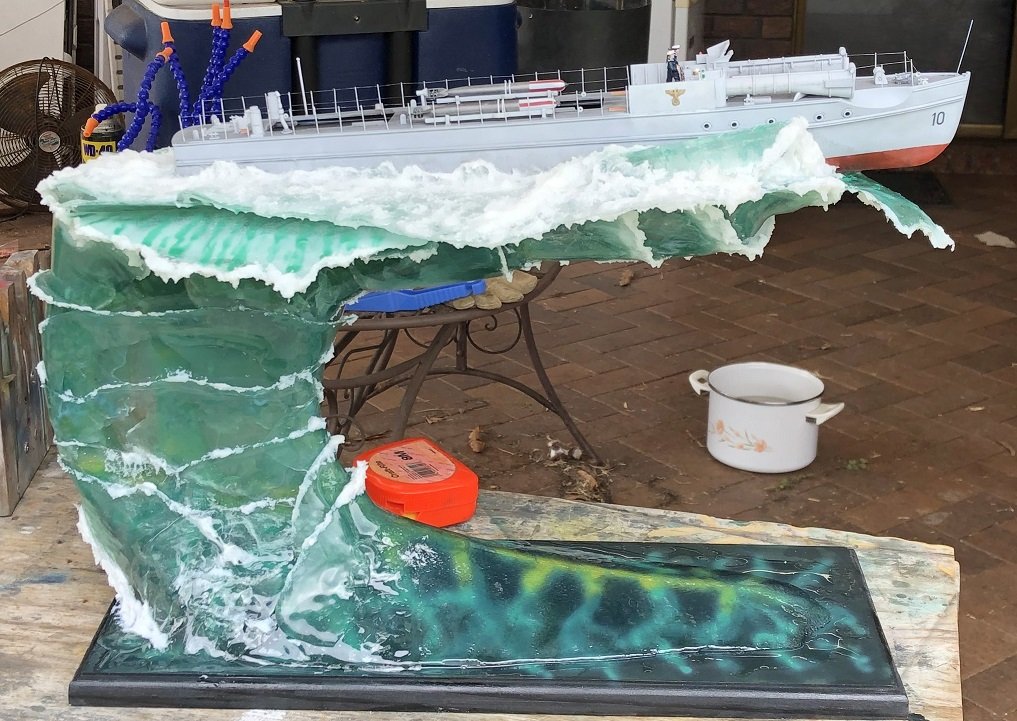
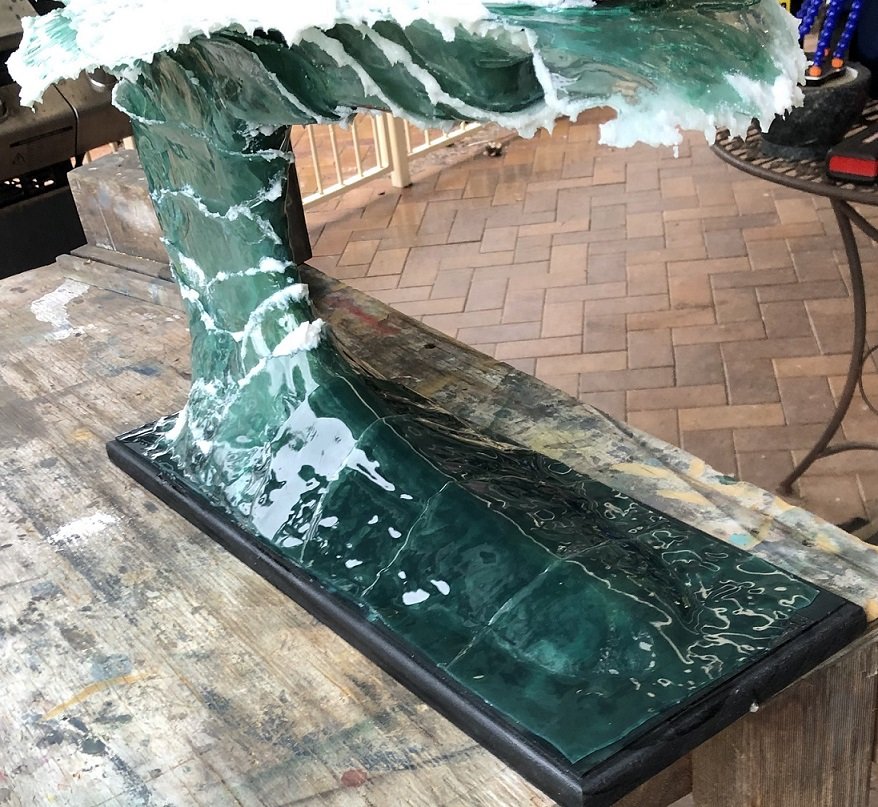
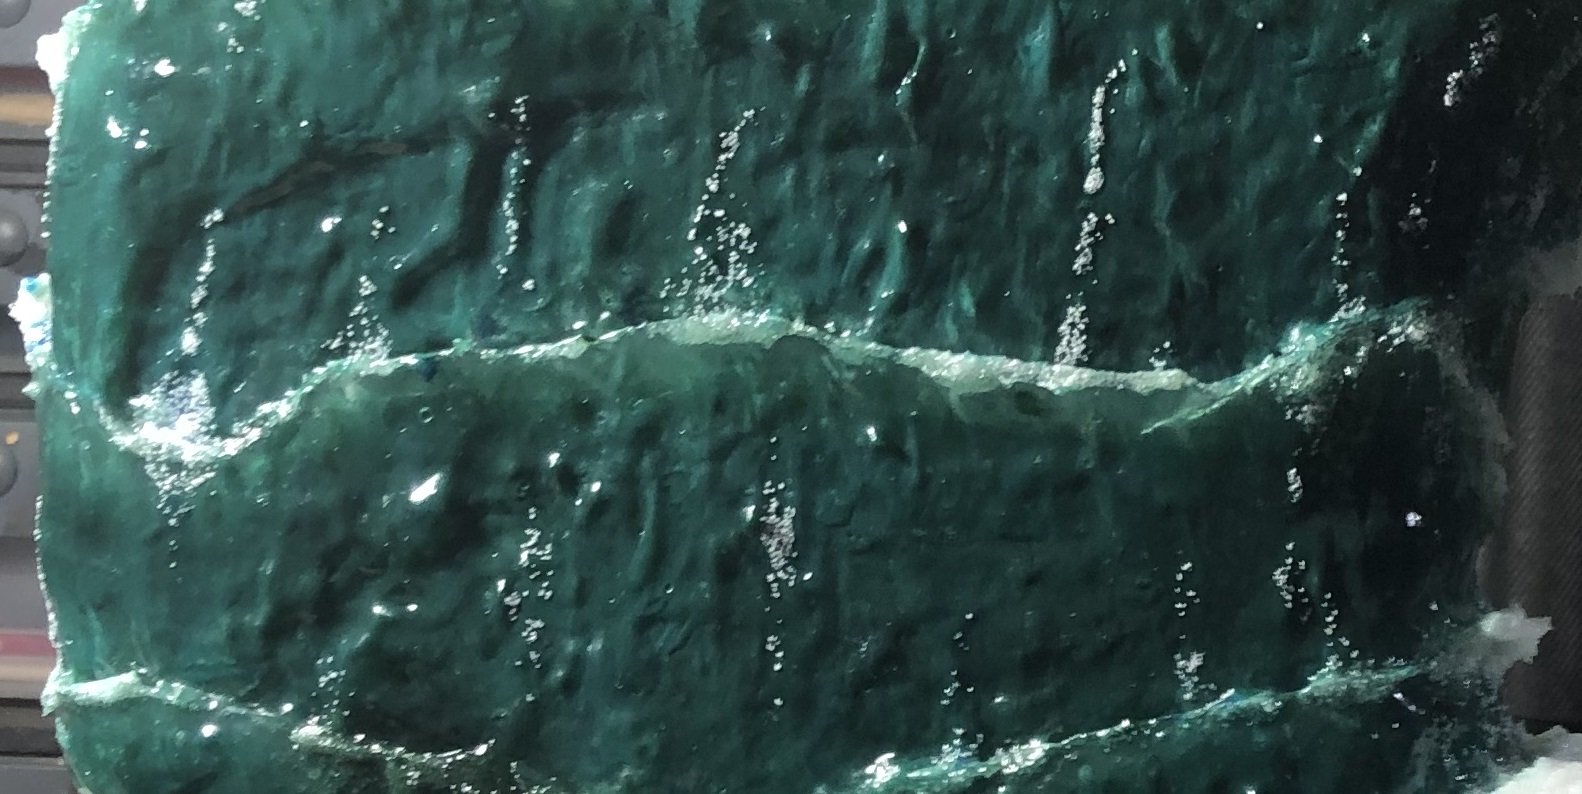
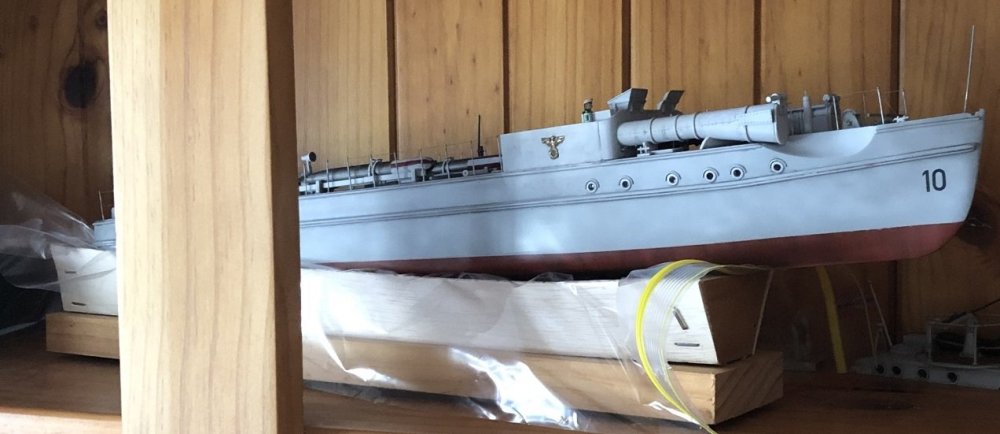
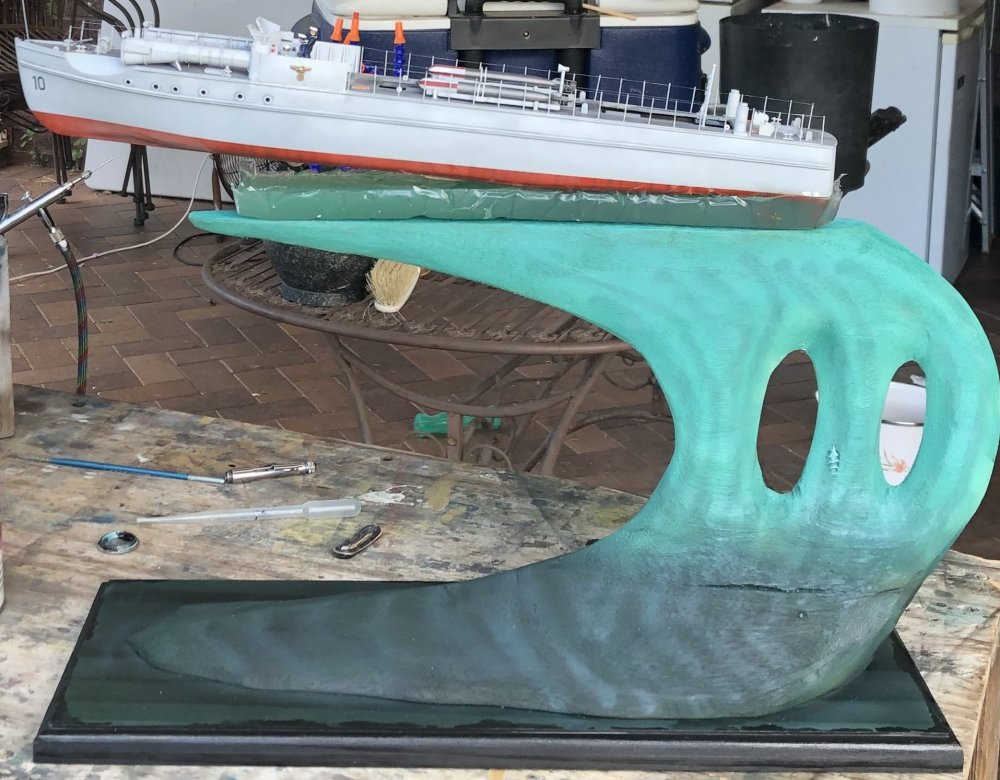
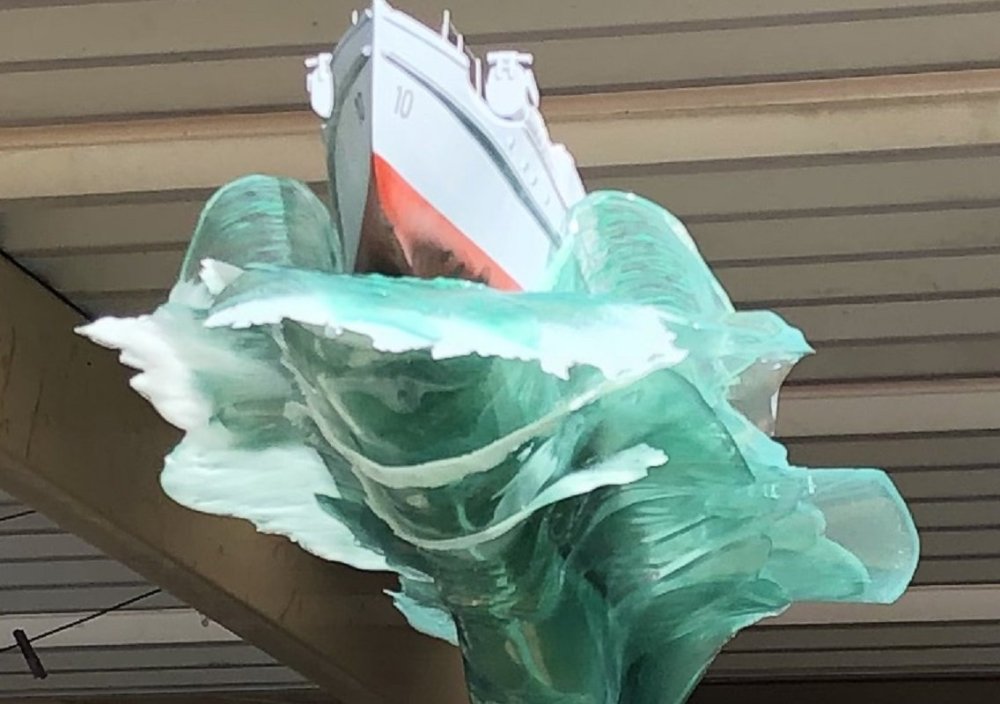
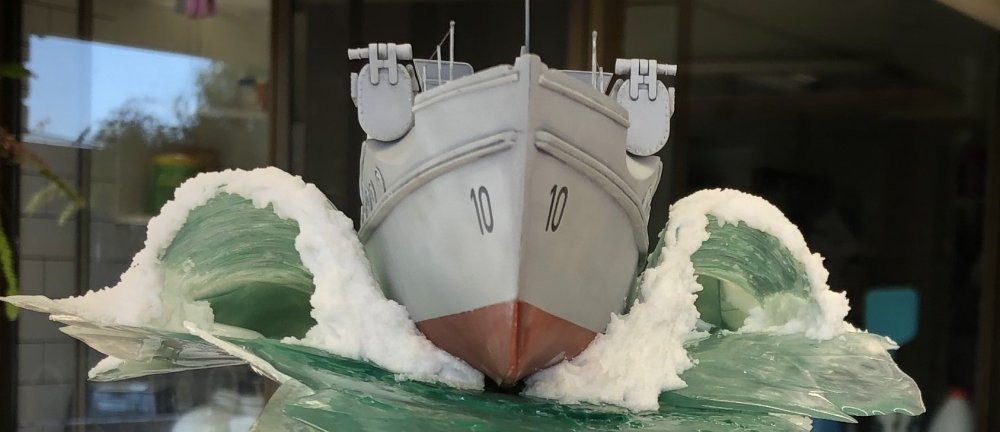
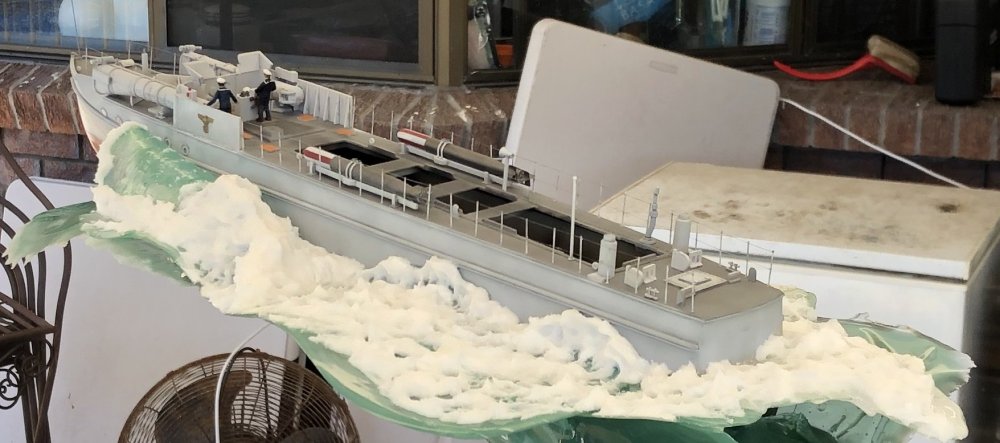
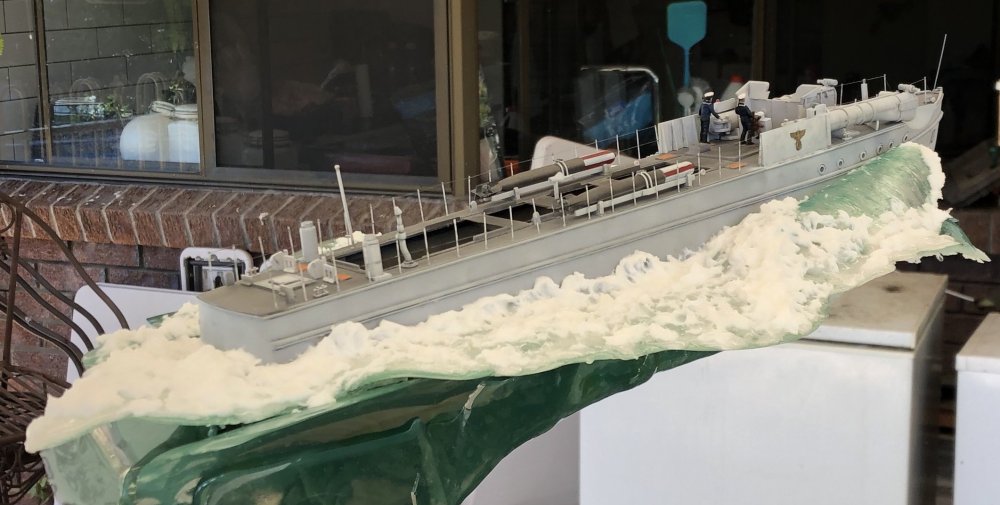
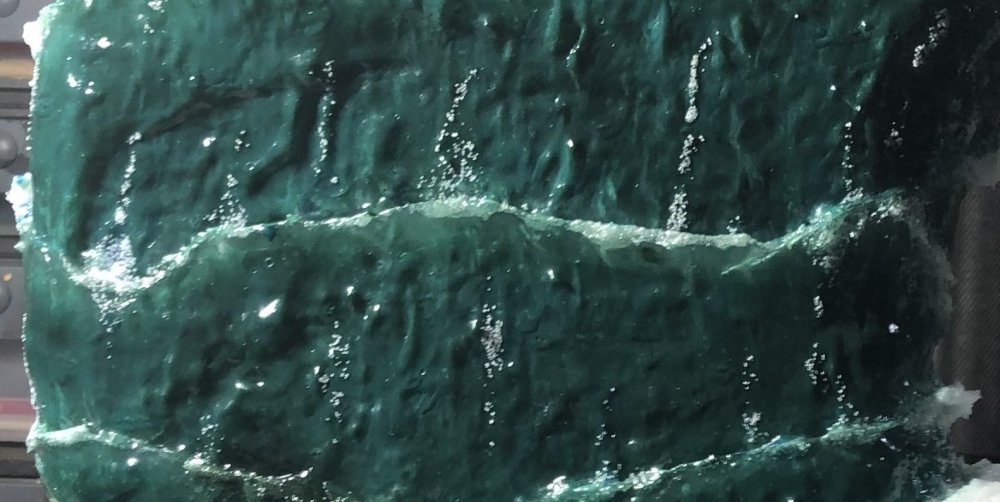
Some of you guys will have realized that my modelling content has been rather limited, lately. I've have been working on this build, though. I wanted to give you RFI photos today. But the weather would only make a duck happy, and by the time I was ready for photos, the best light of the day was gone. The weather tomorrow is supposed to be the same. When I bought this kit two years ago, I envisioned a raised water base. Something to make it different from most water bases. I wanted to show it at our big show in August.But the first year passed with me unable to get to the boat. Originally I envisioned a boat and waves riding a tightly packed palisade of clear, bent acrylic rods colored by Tamiya clears. But this year, I decided to pass on the acrylic rods as they would be be difficult to bend, cut, and weld together and still look like water. The group build gave me impetus to come up with a plan to make this build a reality. But like all visions, you start with bare bones and then spend forever filling in the holes. Adding supporting effects to make what you are doing look real. Tweaking and fine tuning until you can start to believe it yourself. So now I will show you a bit of the evolution of the water base. It's quite large. The vertical wave is made of Chinese coffin wood. Very light and much more workable than balsa. It would sit on a rectangular piece of pine which I painted with cheap tube acrylics. I had to make a mold to support the boat at a proper angle to suggest speed. Unexpectedly I almost melted a hole in the bottom of the boat. Almost.... At this point I decided the pare down the base a little as it was much too big for the boat. You might notice under the tips of the torpedoes that the keel has disappeared. Pouring resin sheets was a tedious task... Mix. Tint. Pour. Wait 6-8 hours... then they were flexible and sticky enough to stick to the frame without glue... but whenever I missed the window I used either CA or clear epoxy. I started with the bow waves... and positioned them poorly. Up to a point, I could add the 'waves' while the boat was not yet attached to the base. I had to work from the top down... which is pretty unnatural when you need to finish on a flat plane... White foam is made with snow flocking. This way you can make waves with foamy edges. And while waiting for resin sheets to cure, I could add foam using snow flocking and heavy clear acrylic medium to add shape and substance to the waves. It takes weeks to do this stuff. On one Friday night, I poured waves at 8pm. Went to bed, got up at three...attached the waves to the framework and poured more waves. At noon I attached those waves to the frame... and was too tired to want to model. Eventually the last wave was laid... I only wasted a few waves. It was a difficult process. You pour it into a shape something like you think you need... and then fluid dynamics takes over and gives you a shape it wants. But it does it slowly. So, you walk away and a few hours realize that most of them look like nothing you planned. One movement I wanted to convey was the upward movement of water... There there are bubbles and foam arising... 'So, that's it for now. Hopefully tomorrow I can get some decent lighting. The size of the thing makes using my bench lights impracticable. And all of the other lights in the house are pretty weak. Happy modelling!


-
 Doing a great job on both kits. PE slows me down... I really dislike working with it, so often find other things to do than sit at my bench.
 -
RNZAF Corsair completed
GazzaS replied to JohnB's topic in LSM 1/32 and Larger Aircraft Ready for Inspection
Very nice work on this one, John. I like the difference between it and the usual US birds. -
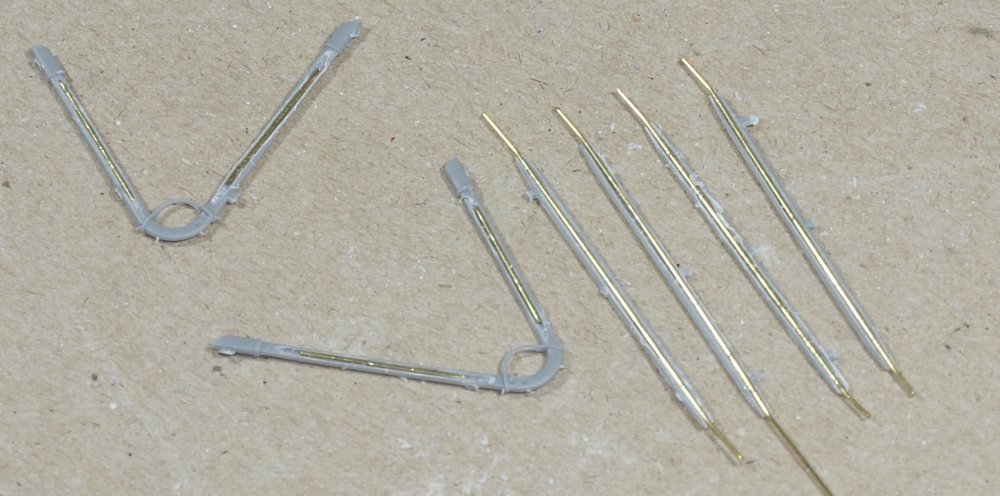
Don't be afraid to start with a WNW kit. Roden will test you skills and patience and might make you swear out of WWI. The simple reason is: contact area between struts and surfaces. A roden kit will require you to drill into the struts and insert metal pins. And it will still be weaker than the joints of a WNW kit which gives you large contact points between strut and flat surface. I will attach some pics to demonstrate what I had to do with my last roden build. You can see how many pins I used and how much plastic I had to gouge out to add strength and stability. That being said, you can still come out with a nice result. Albeit after much more effort and cursing... if you're the cursing kind. Just to help you visualize the strength differential, I will illustrate with words. If you attach the upper wing of your Roden kit and let it dry overnight and turn the plane on it's back, the top wing will fall off if you aren't holding it with your other hand. On a WNW kit, the wing will stay in place even if you take your hand away. Also... there is a much great chance of buy a kit with a warped upper wing if you go Roden. This is truly a case of you-get-what-you-pay for. Another Roden fault... their decals are trash. You might be able to use some of the smaller ones easily... but the big national markings rarely make it in one piece from paper to model. Good luck!

-
Looks great, John. Will you ever do a Red Army version?
-
It looks great, Peter. Four mustangs in one year... pretty lofty goal.
-
When a photo really changes your conception of size...
GazzaS replied to GazzaS's topic in General Discussion
Good old times.... notice the guy in the smoking section, -
Never thought of them as this 'cozy'.
-
Great looking results so far, Tom! This is my favorite British bomber.
-
Love it, Phil! Looks great!
-
Special Hobby P-400 Airacobra 1:32
GazzaS replied to shadowmare's topic in LSM 1/32 and Larger Aircraft Ready for Inspection
That looks great! Always loved this airframe. Love the dirty look. -
Is the Trumpeter kit the one that has the wheel wells out of place?
-
What is on your bench right now ? Share a picture :)
GazzaS replied to Martinnfb's topic in Modelling Discussion
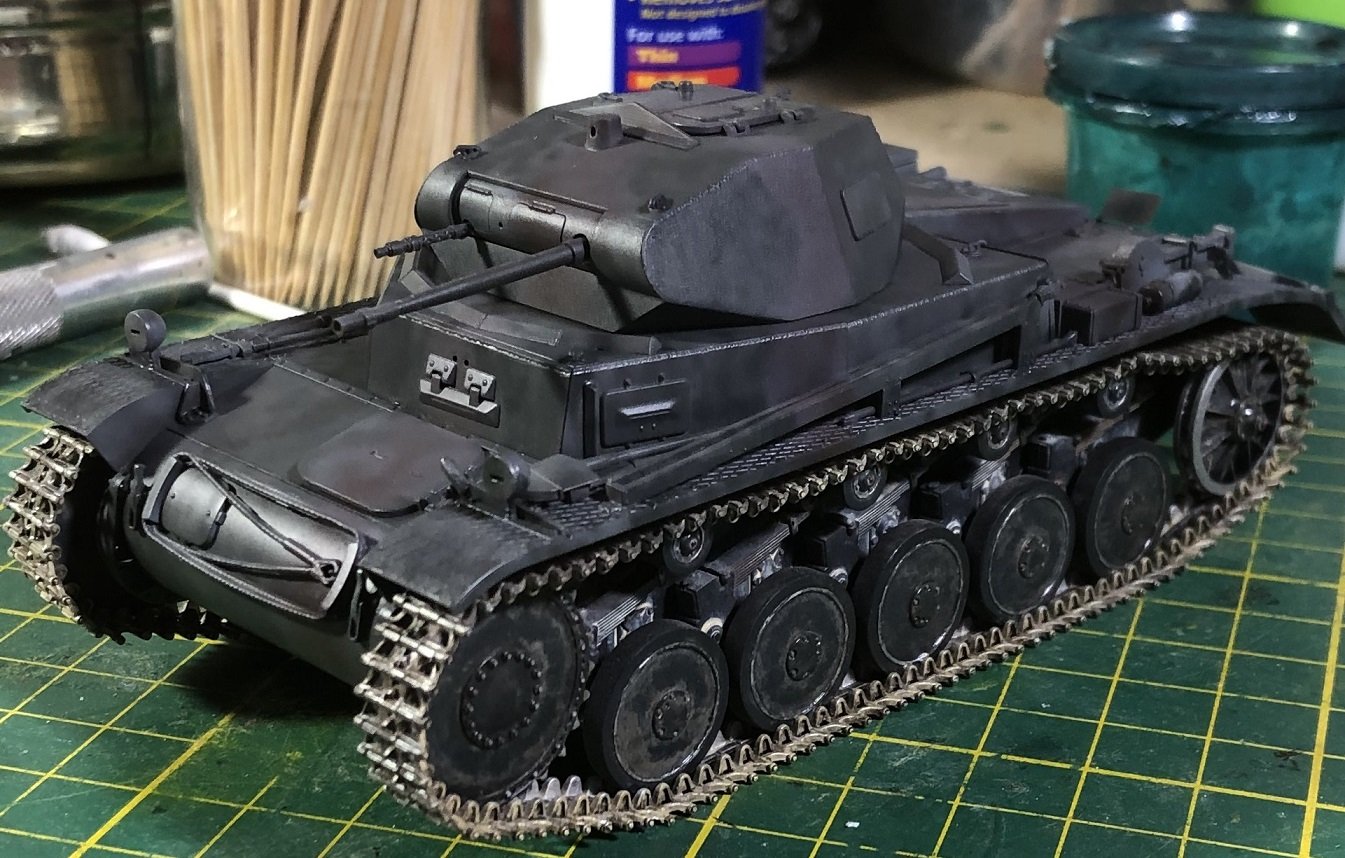
I'm involved in 2 local group builds as well as our get-wet build. Here is one of them... Tamiya OOB.
-
We need something to use our crayons on. I must be gifted.
-
Tamiya Mosquito FB Mk VI 60326 - 1/32
GazzaS replied to Bomber_County's topic in LSM 1/35 and Larger Work In Progress
That cockpit looks awesome, Phil! -
USAAF Beaufighter Mk VIf
GazzaS replied to Pete Fleischmann's topic in LSM 1/35 and Larger Work In Progress
That radio room looks awesome! Between the ply and electronics... you almost have me convinced that it's the real McCoy. -
Arado 234 Nachtigall on Speed
GazzaS replied to DocRob's topic in LSM 1/35 and Larger Work In Progress
Nice looking details, Rob. I've never had an opportunity to model the Walther rockets. Thanks for showing the way. I've discussed island life with the missus, briefly. Her and her mother went to Norfolk Island, and she said it was wonderful, with a temperate climate - that we should move there. And the cows have right of way on the streets and roads. And all I was thinking about were models, modelling supplies, and internet connection. There's isolation... and then there is i-so-la-tion. The little island is 1,500km from me, and over 1,000km from Auckland, NZ.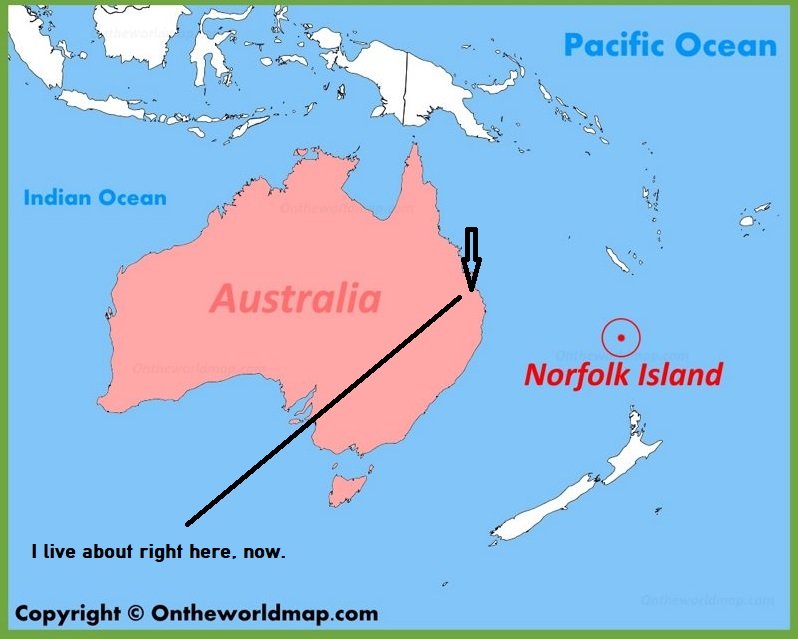
-
すごいよ、アーニー!
-
Great job, Kevin!
-
I will, buddy.
-
Dang, you guys get a lot of stuff. No wonder why half of ya got to hide it from the missus. In a bit of a buying freeze. Paying for my trip to AusArmorfest has flattened my savings. Somehow they took the payment for car rental, lodging, and tickets out of my credit card all at once. https://www.ausarmour.com/
-
I think trying to be exact is a waste of time without examples to compare with. I have lightened my RLM 02 with pale gray to do the job... I have also used Tamiya IJN gray to do the job of RLM 02... and nobody has noticed. Won't nobody be able to tell.
-
This is what happens when you read a lot.
-
I swear every time I drop something... which is often. Though the scariest drops are when the xacto rolls off the bench with my bare feet below... then the sound isn't so much swearing as a sound of fear and dread.
-
Wow, there are ppl that still use tube glue? I have the Contacta with the thin metal applicator... but rarely use it.