BlrwestSiR
-
Posts
9,173 -
Joined
-
Last visited
Content Type
Profiles
Forums
Events
Gallery
Everything posted by BlrwestSiR
-

CF-104D Triple Sick
BlrwestSiR replied to BlrwestSiR's topic in LSM 1/35 and Larger Work In Progress
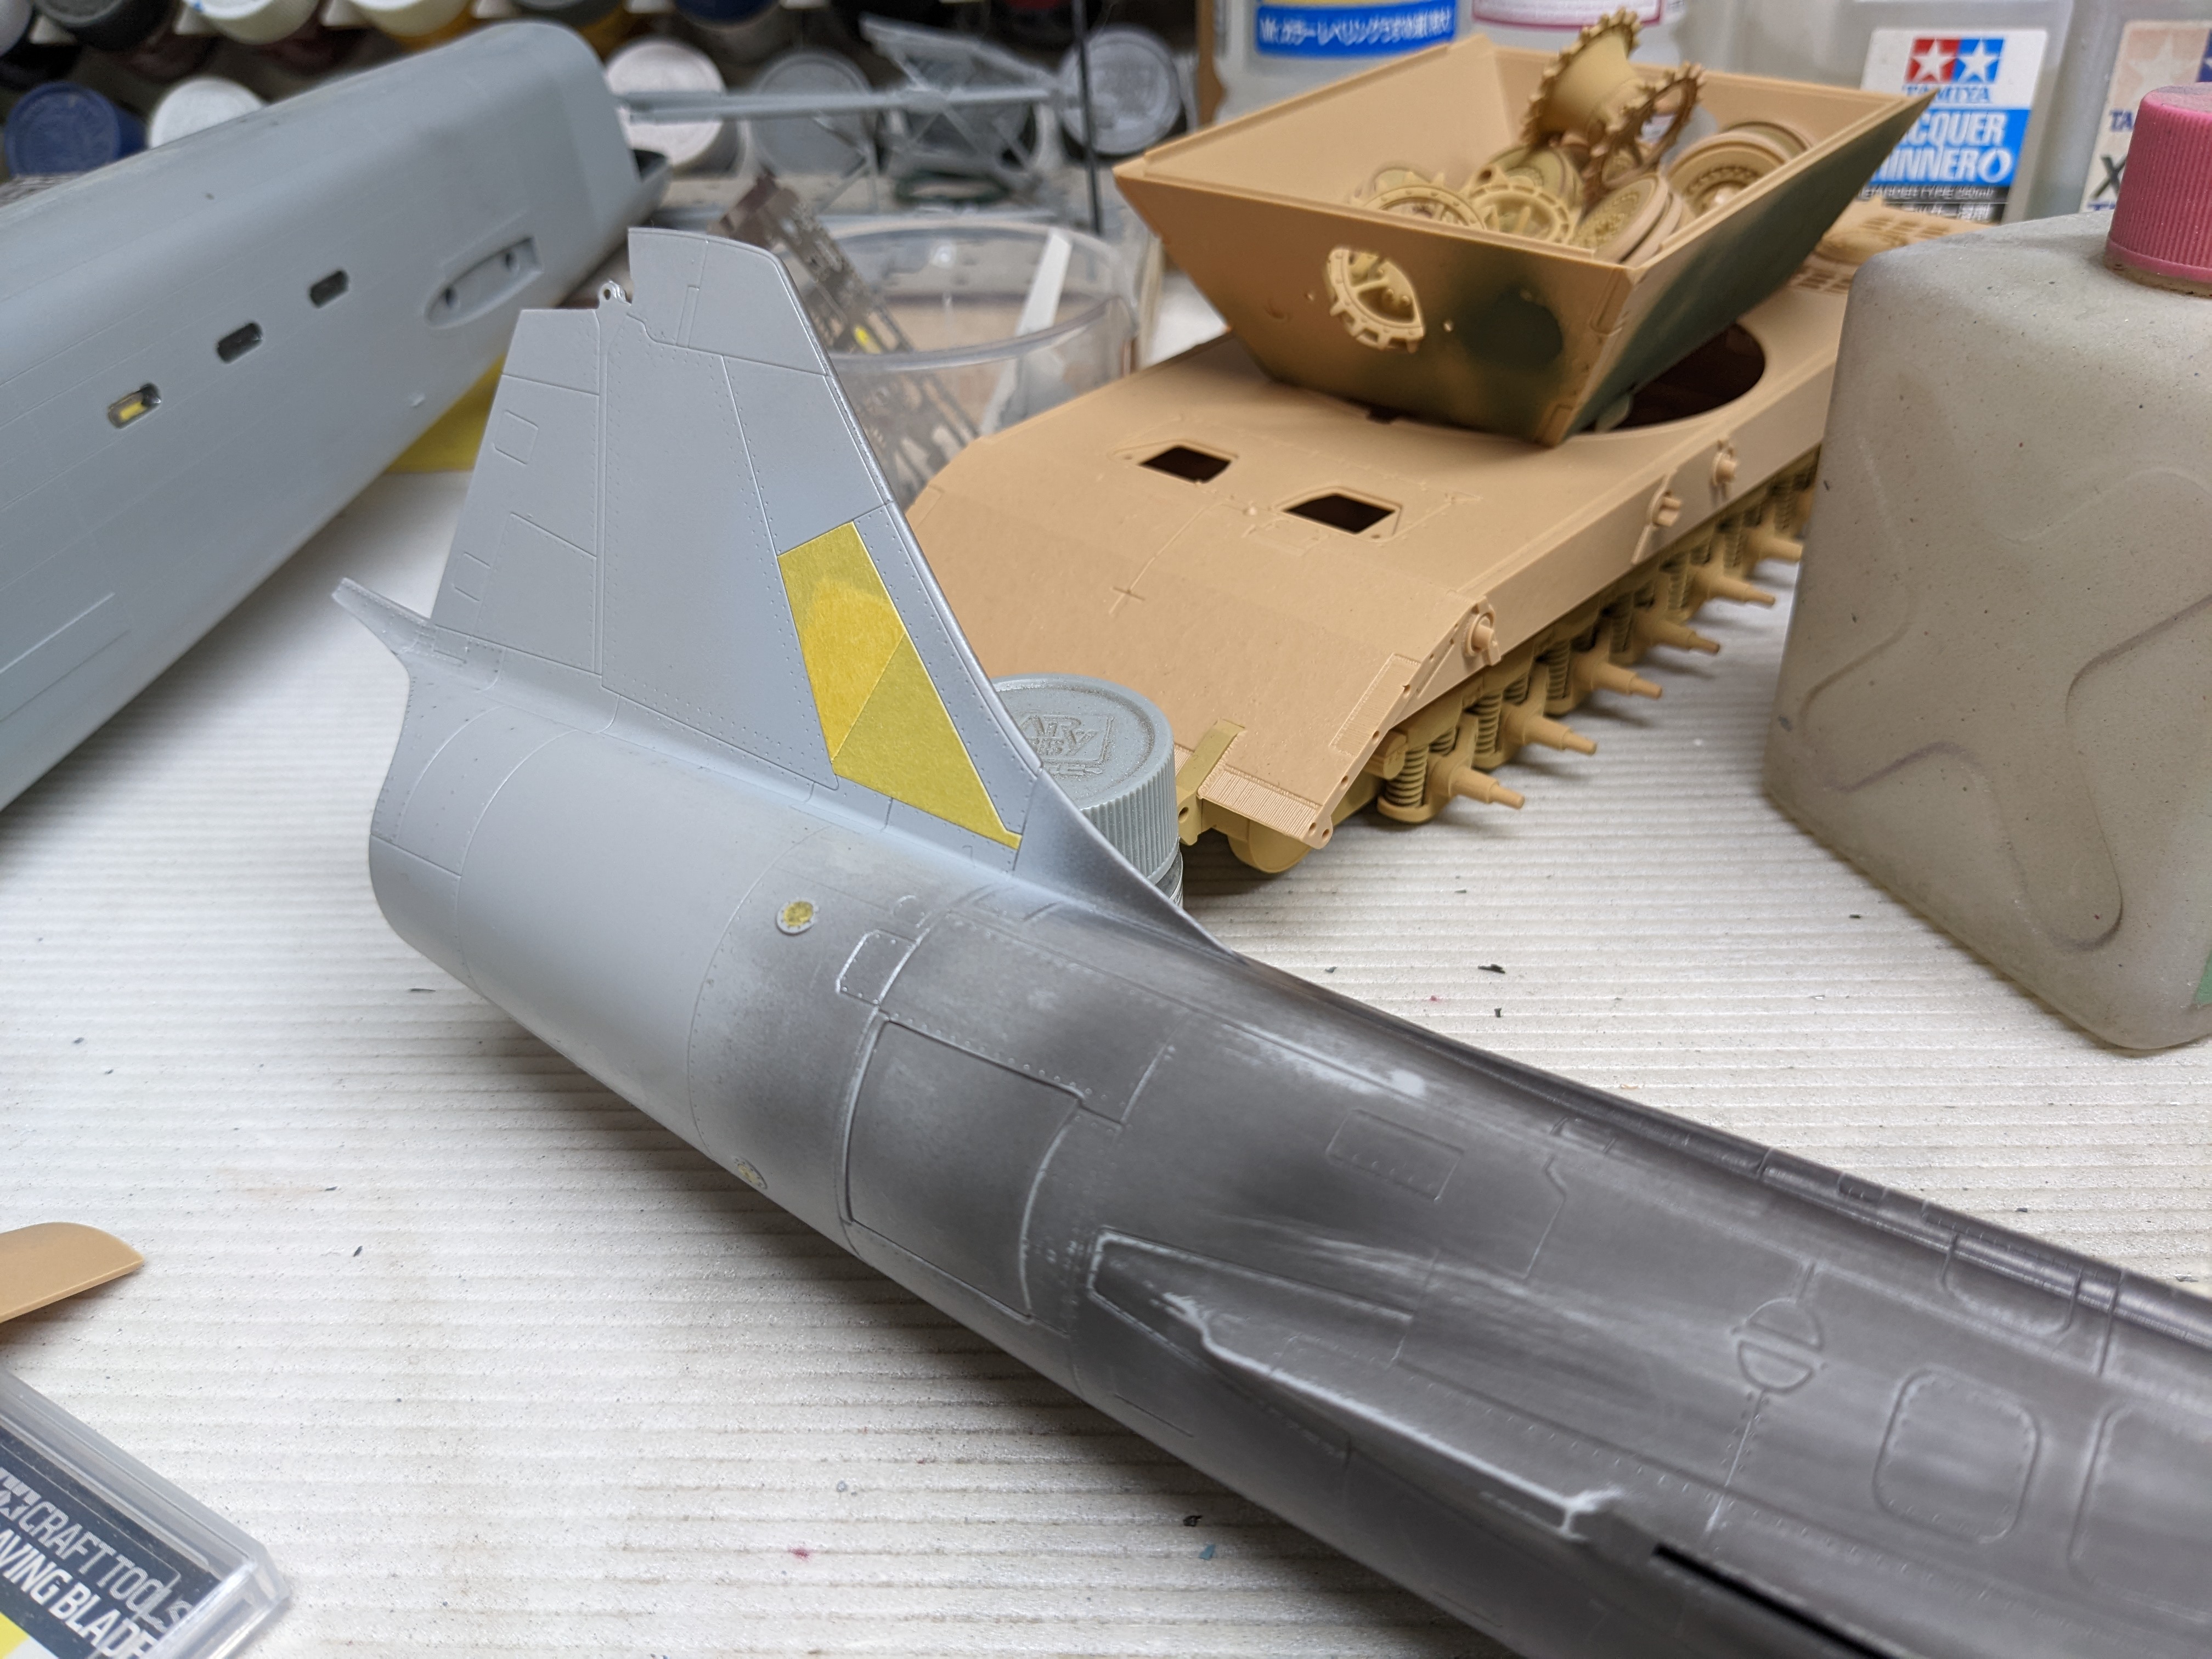
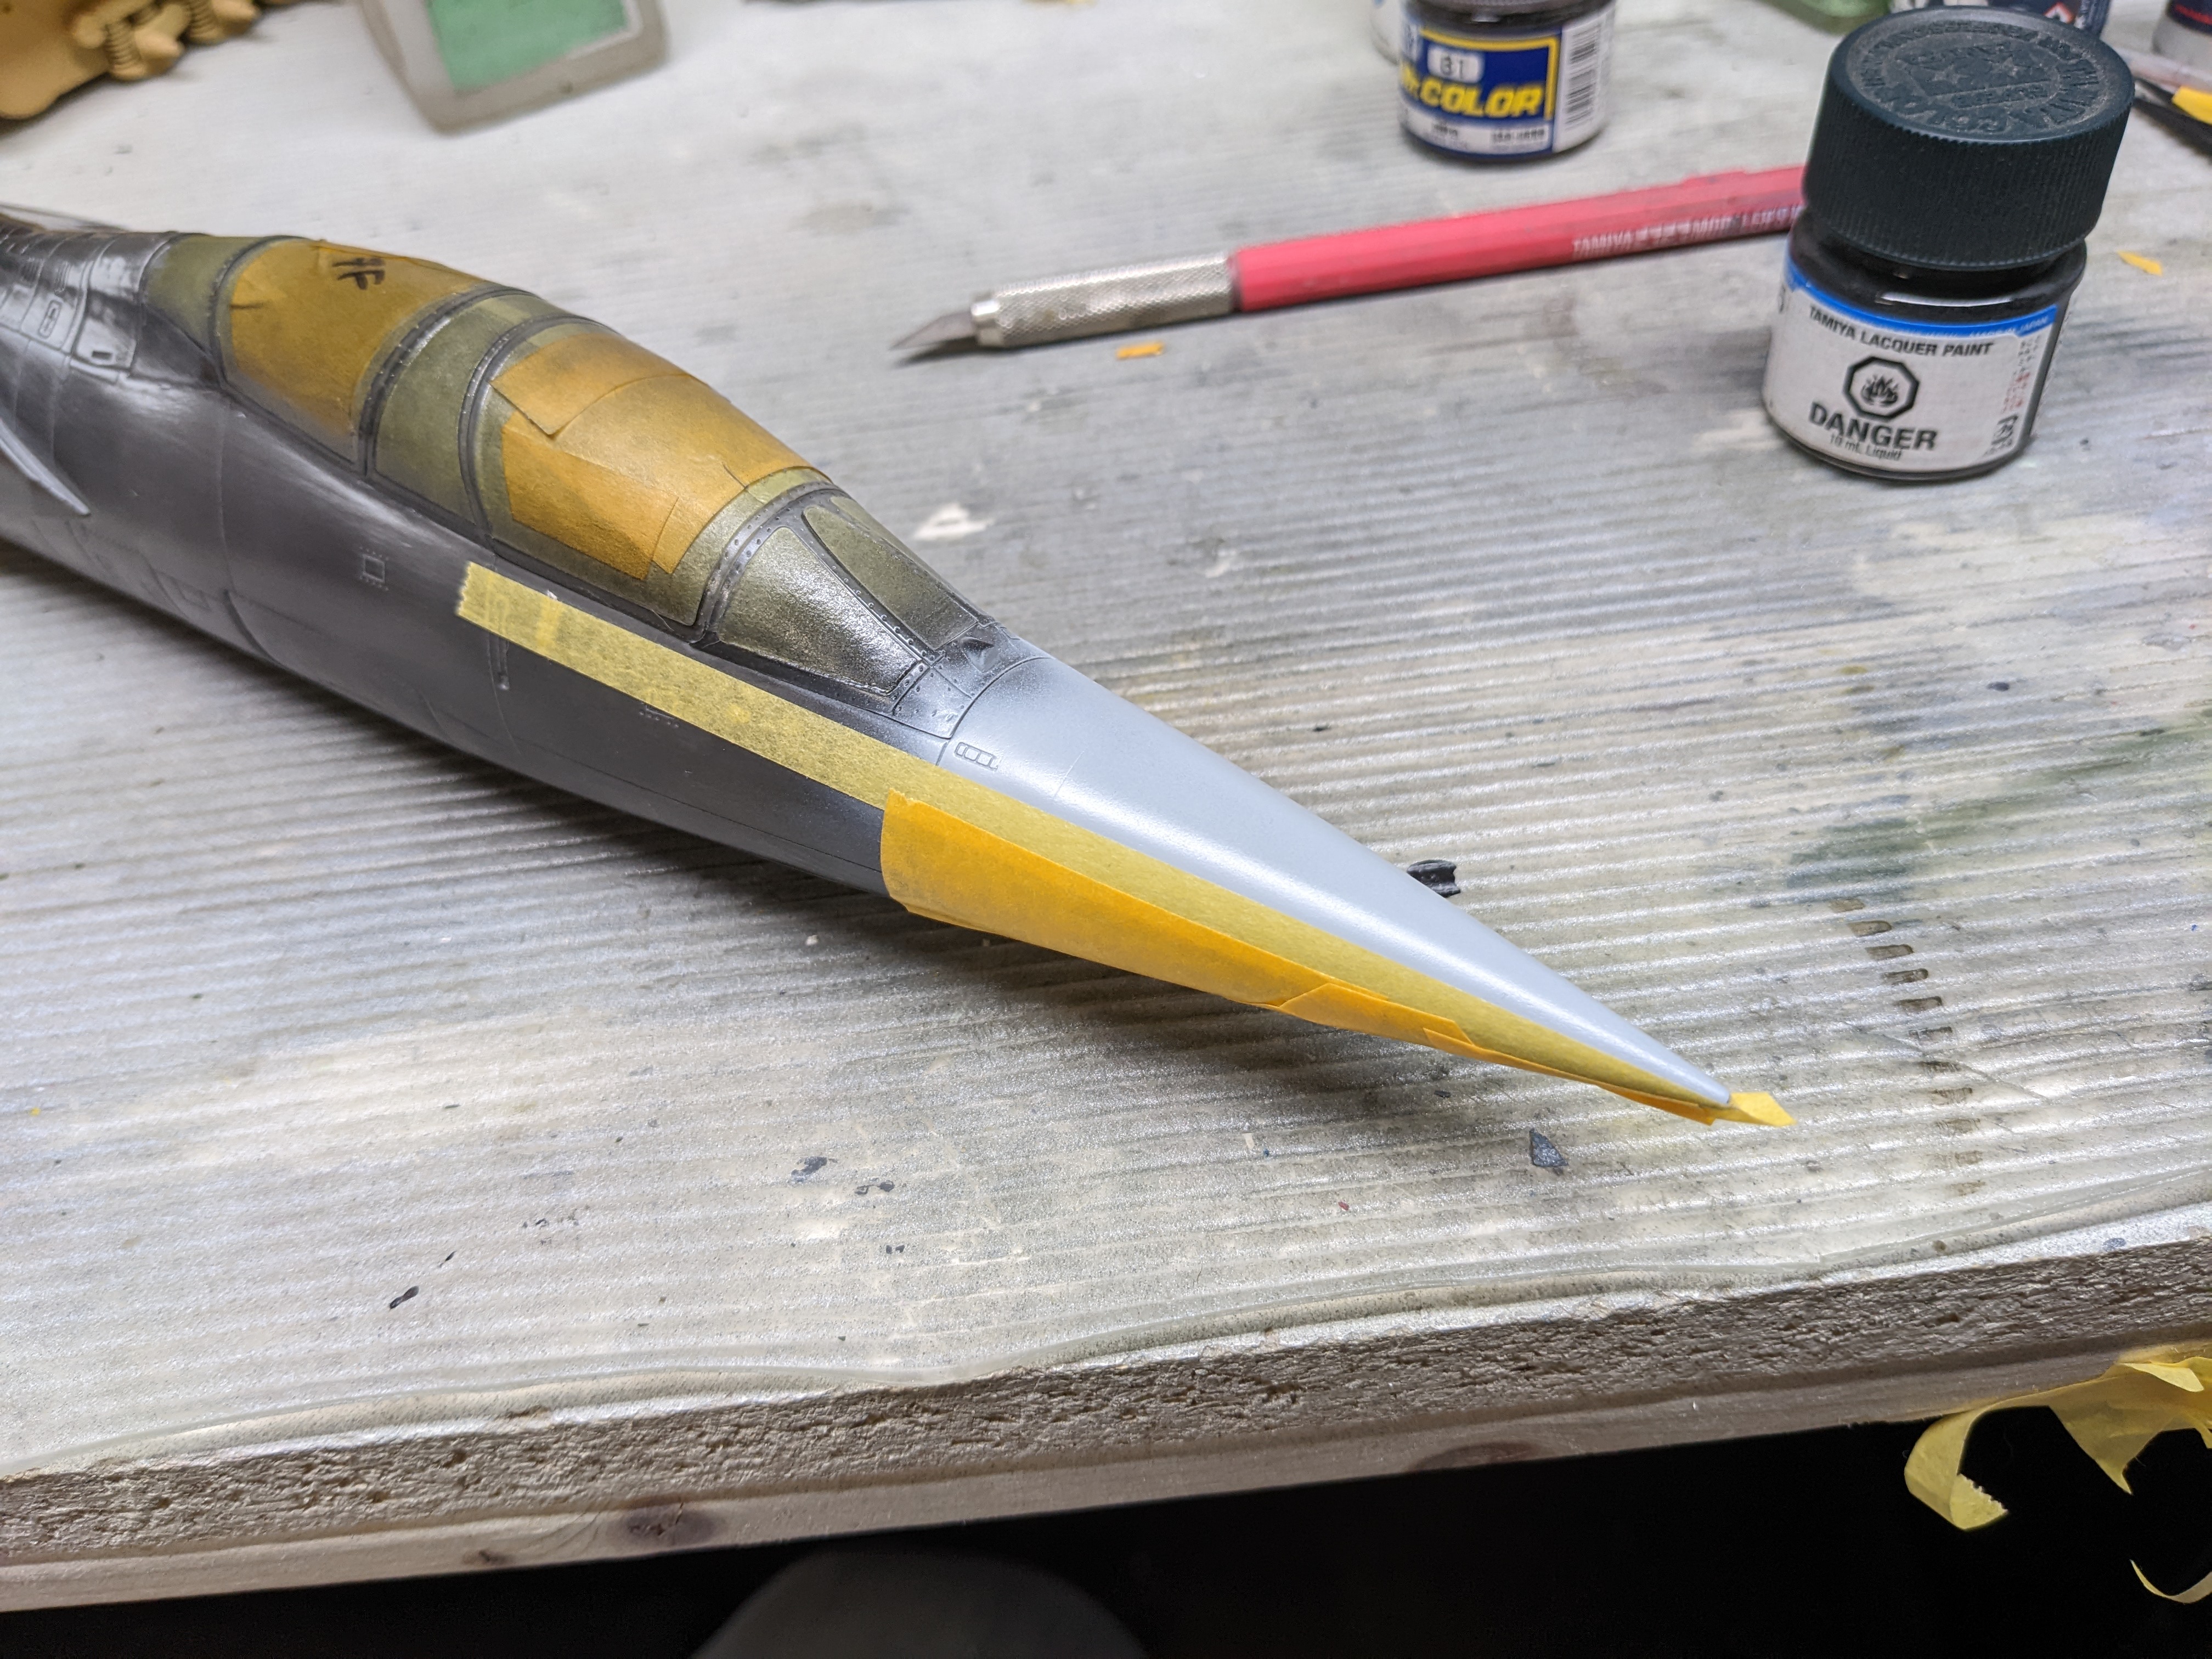
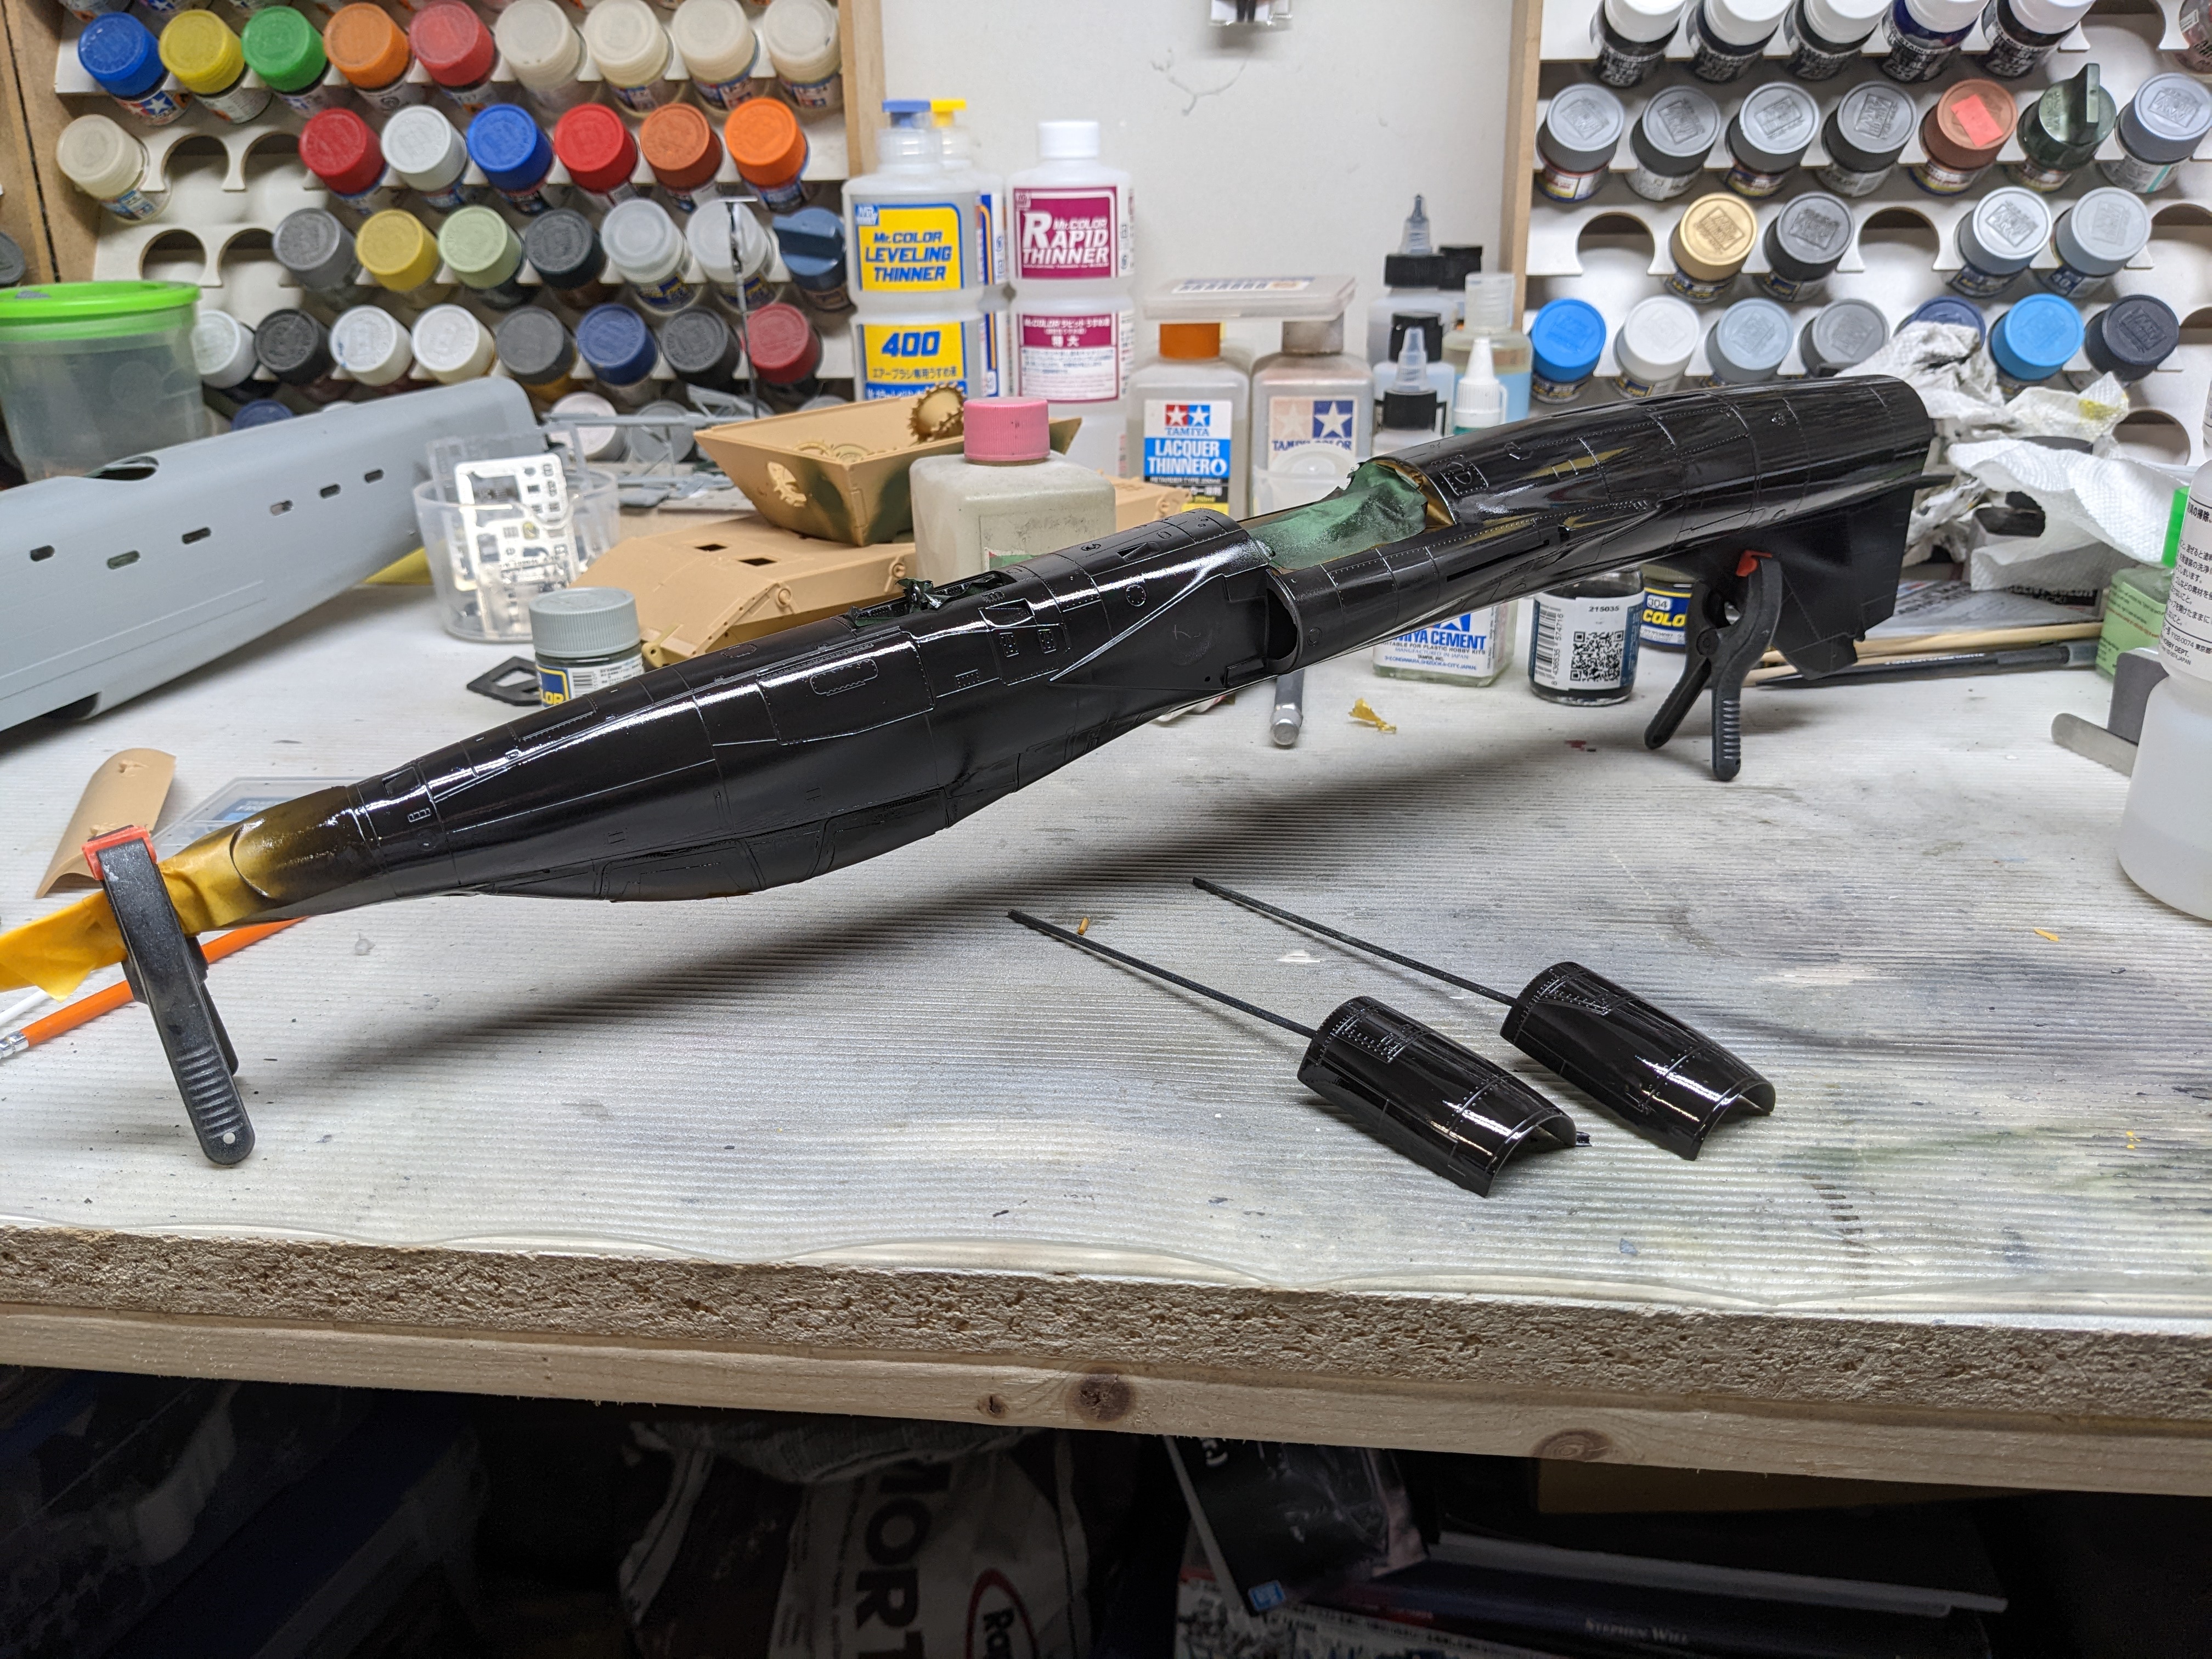
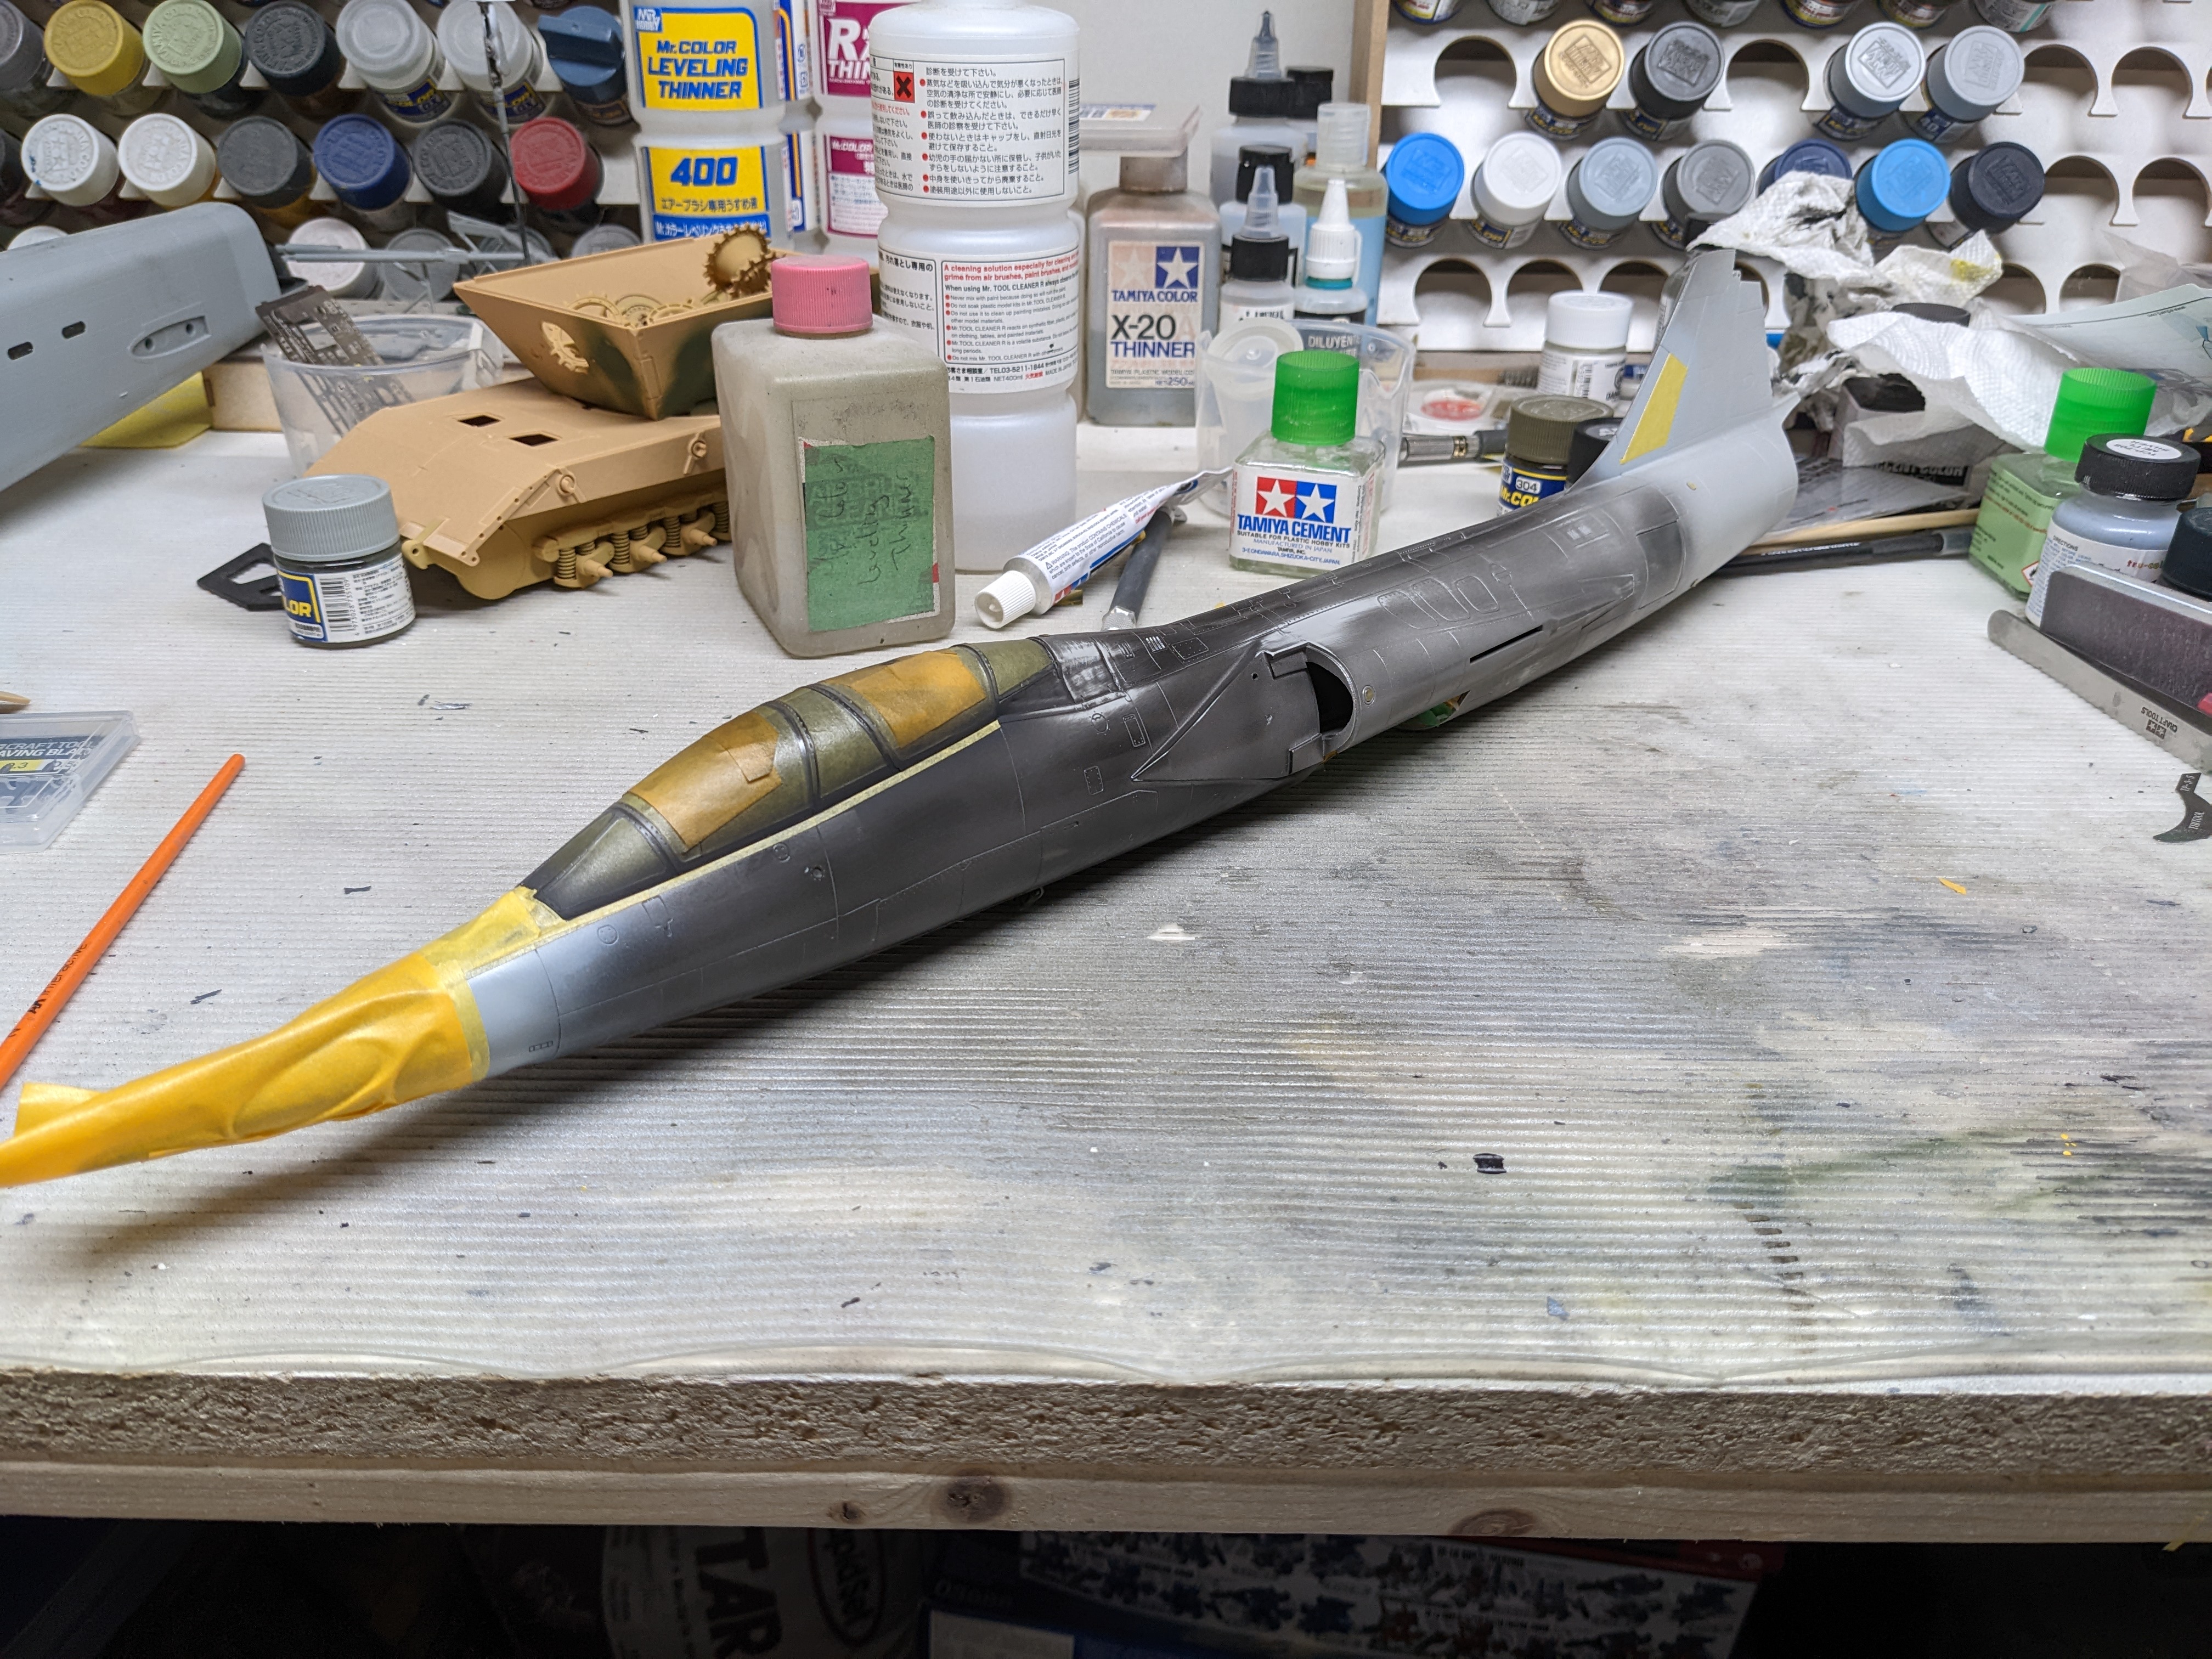
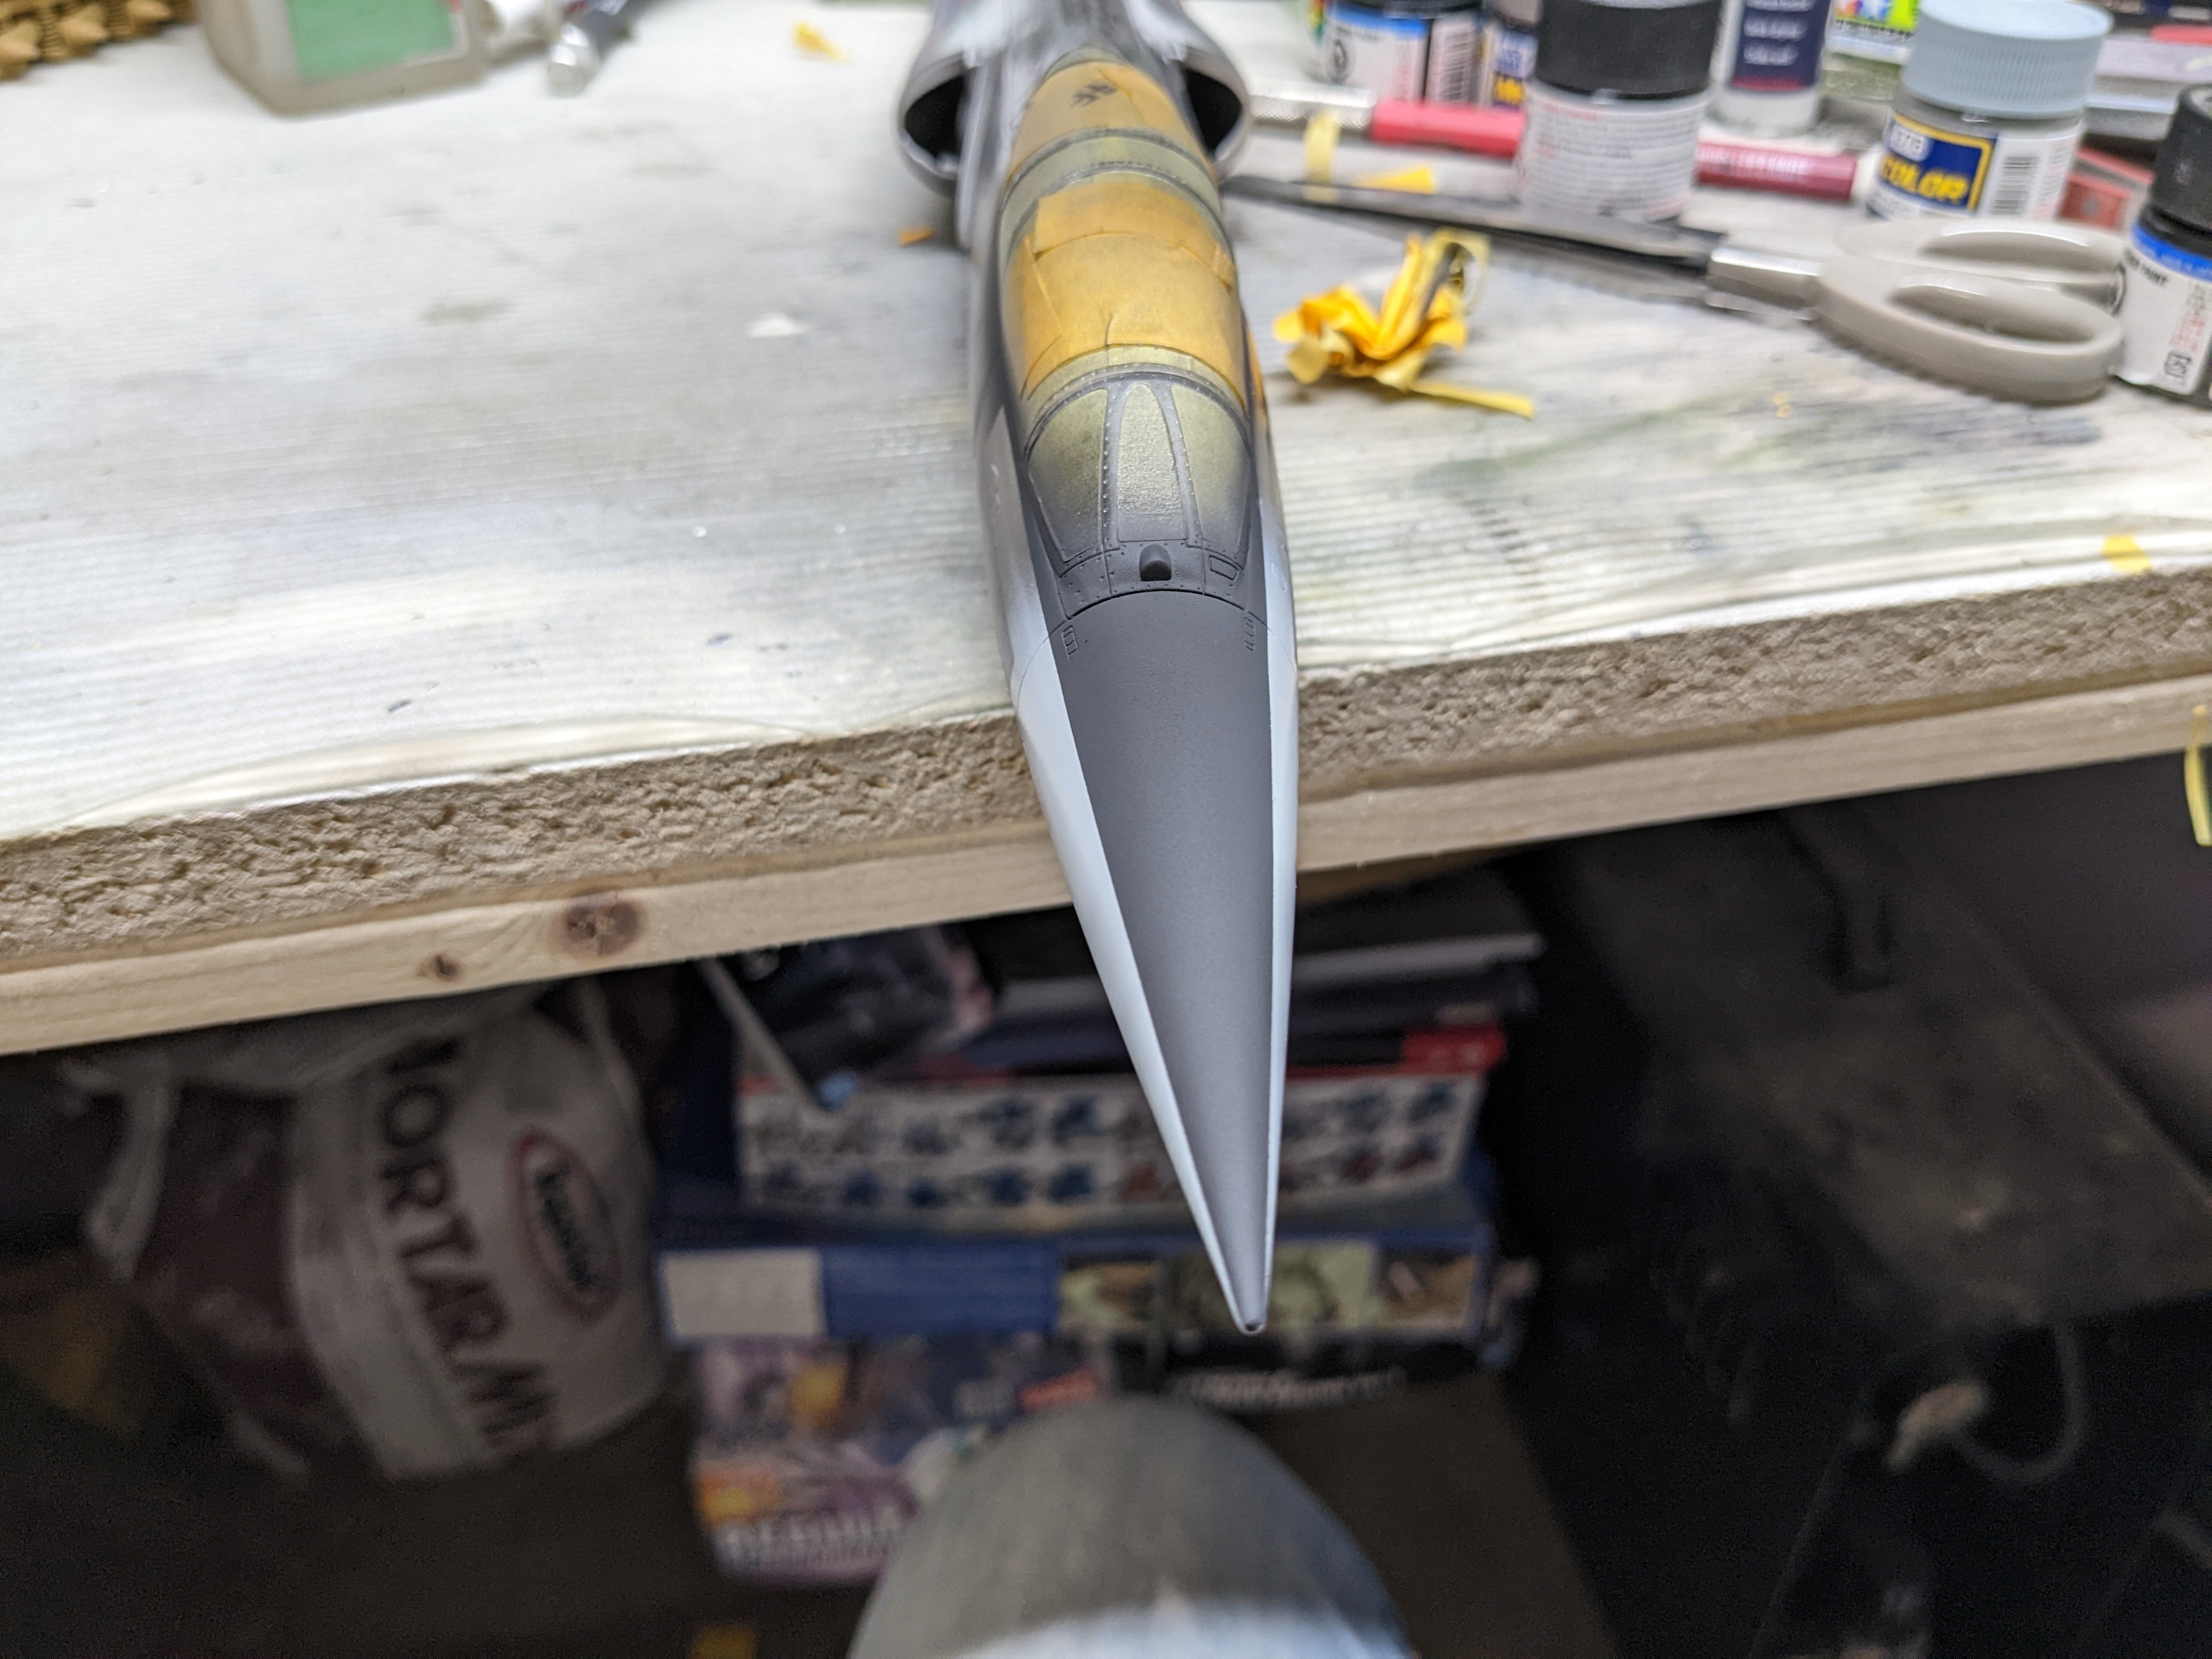
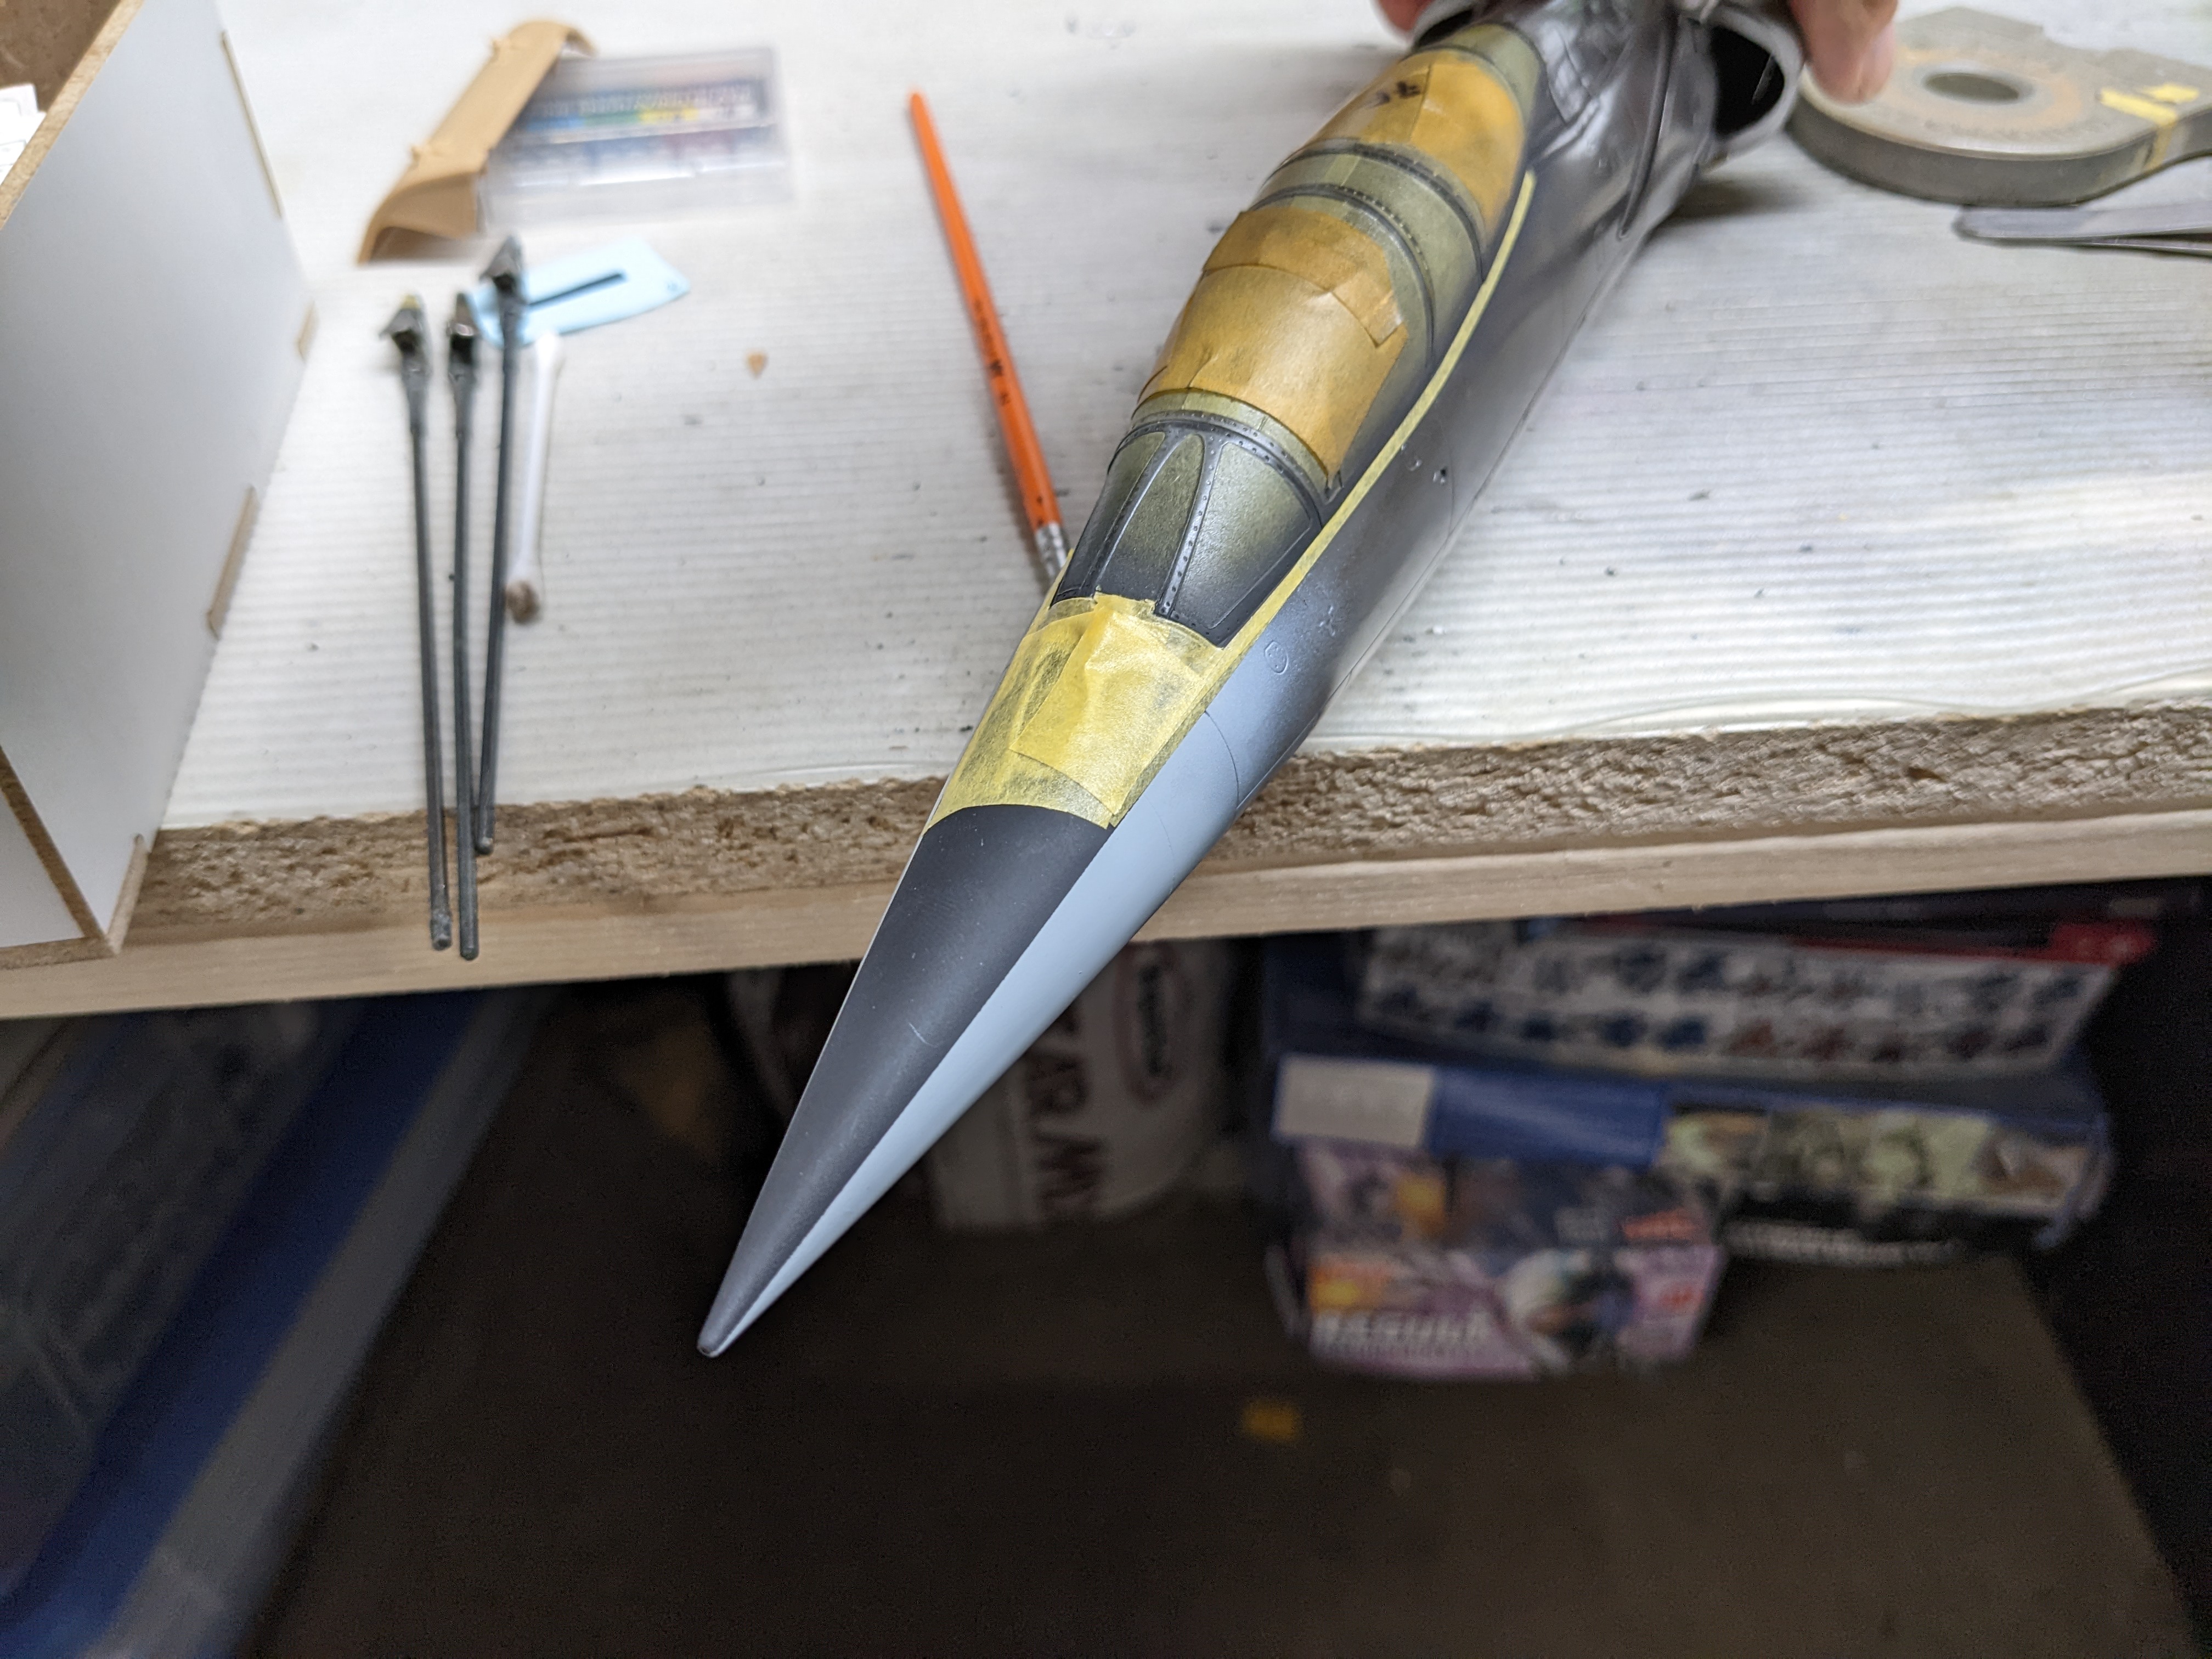
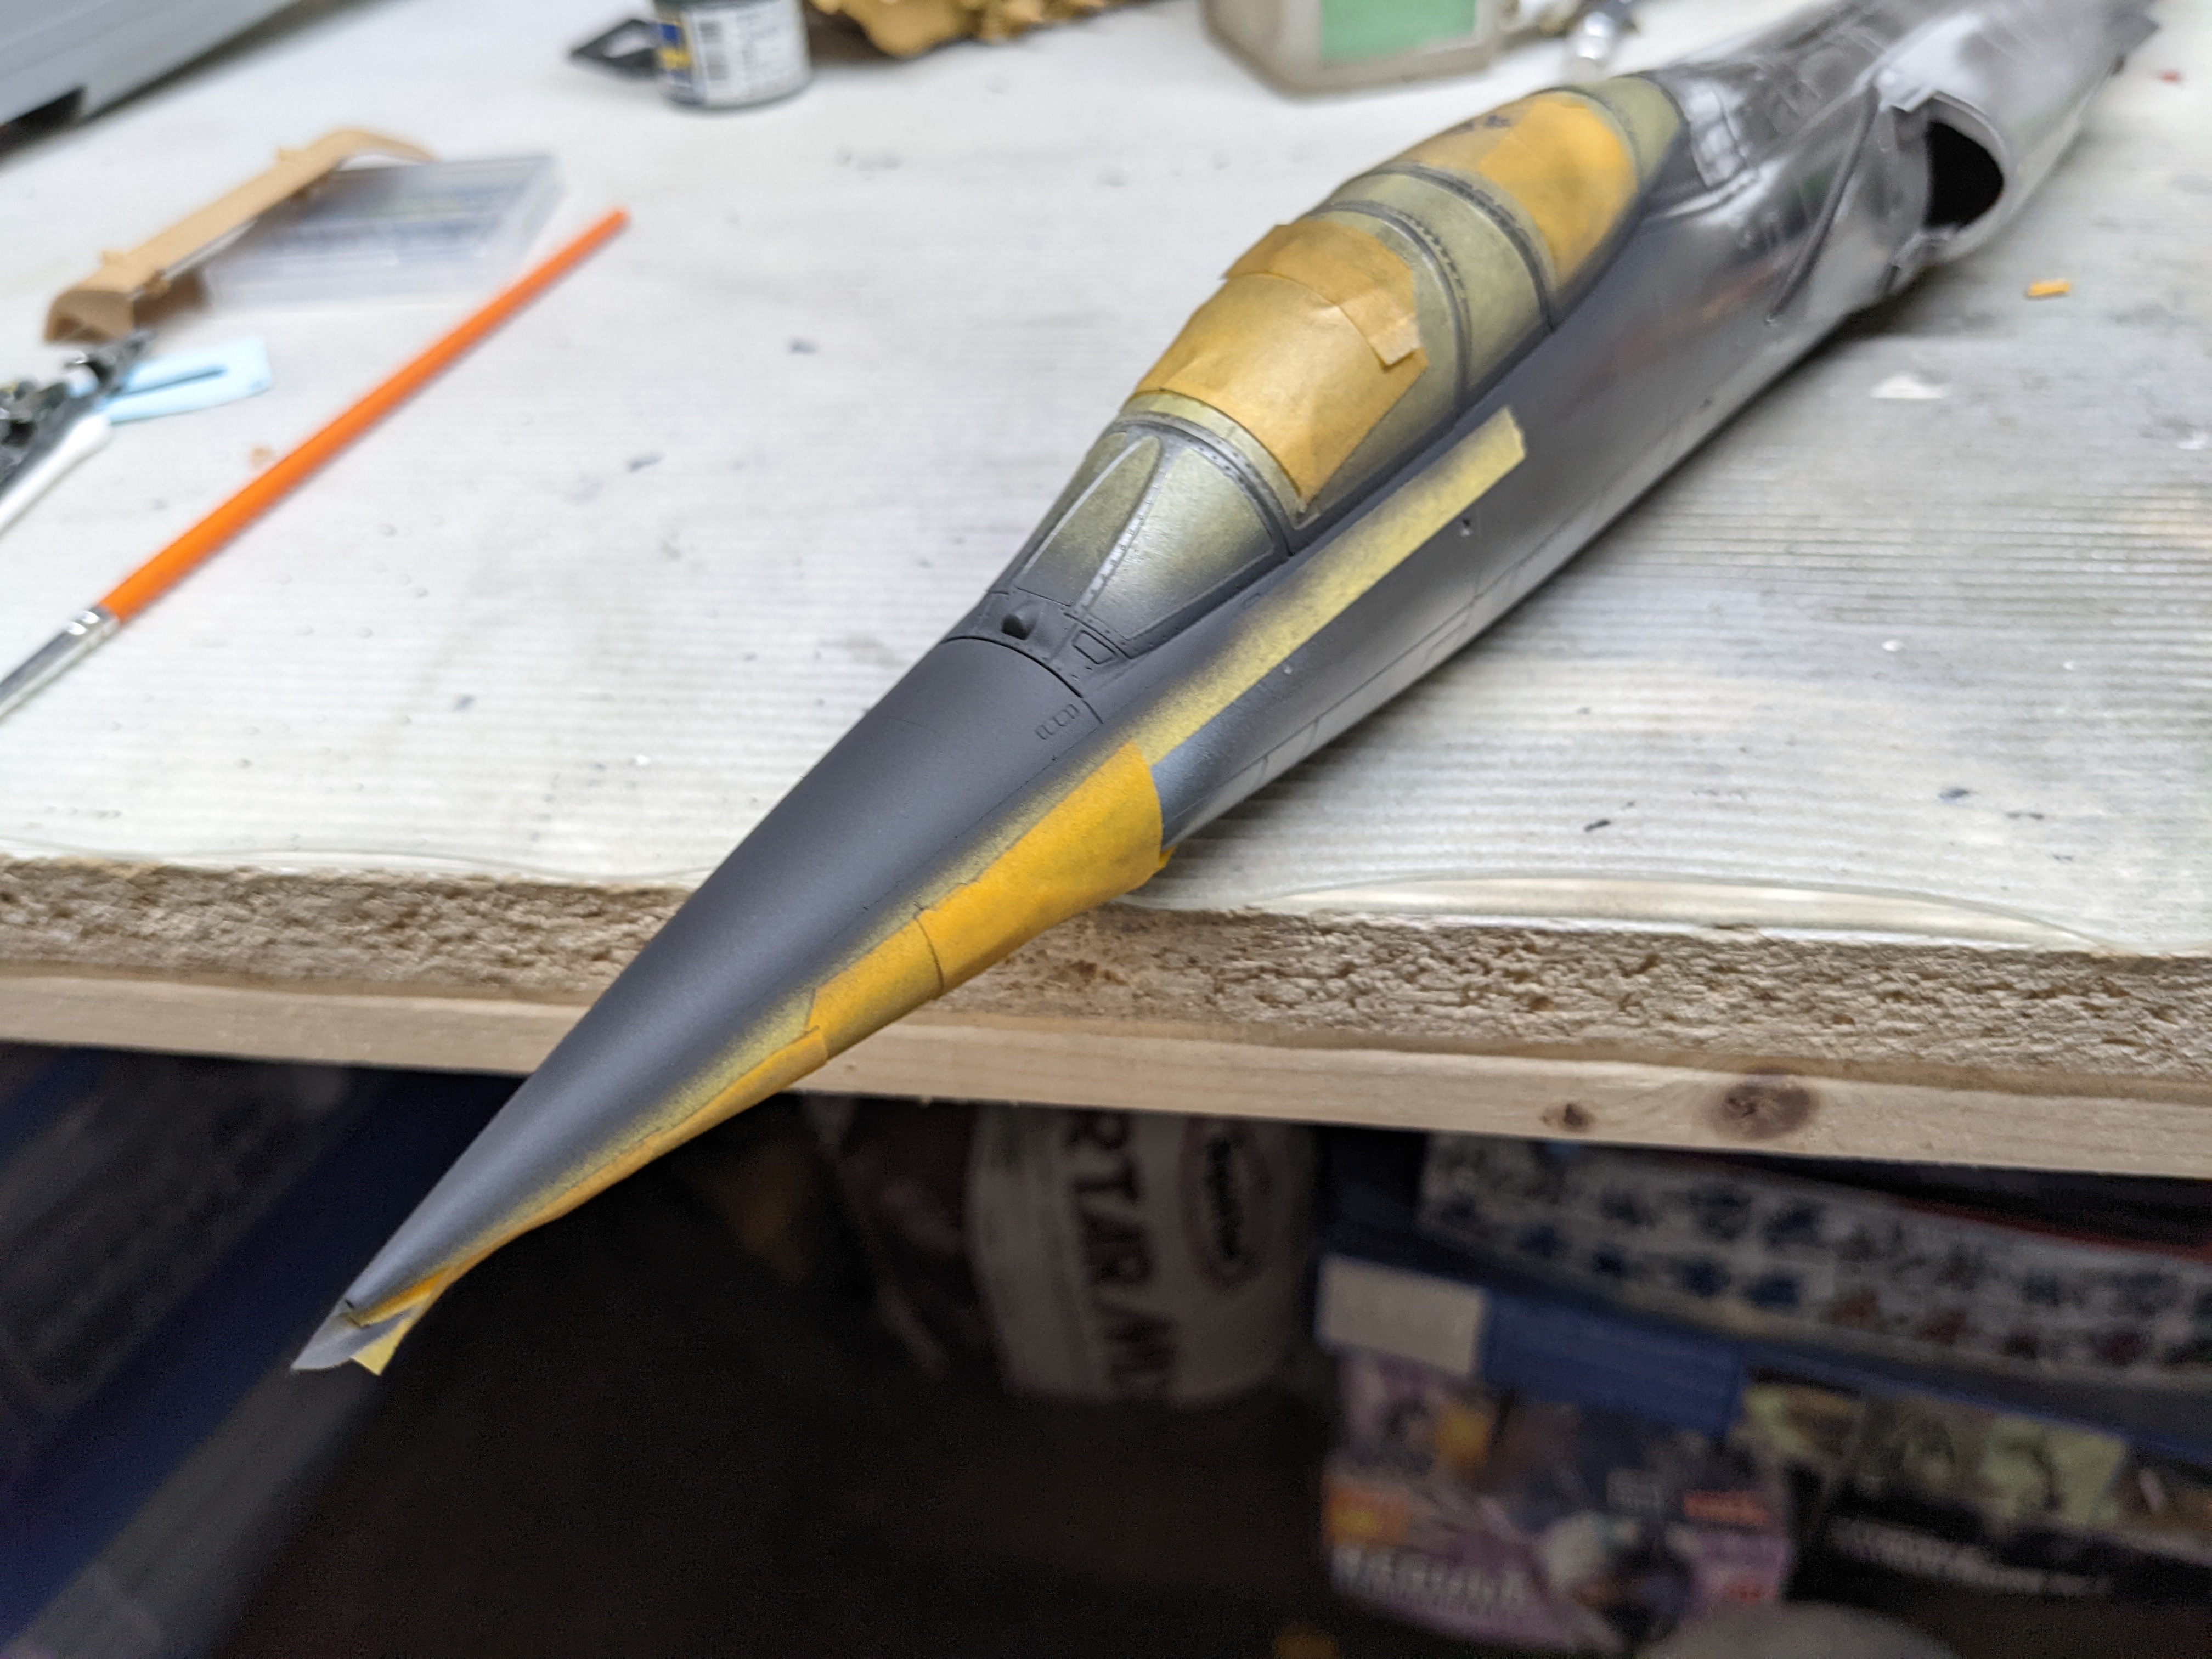
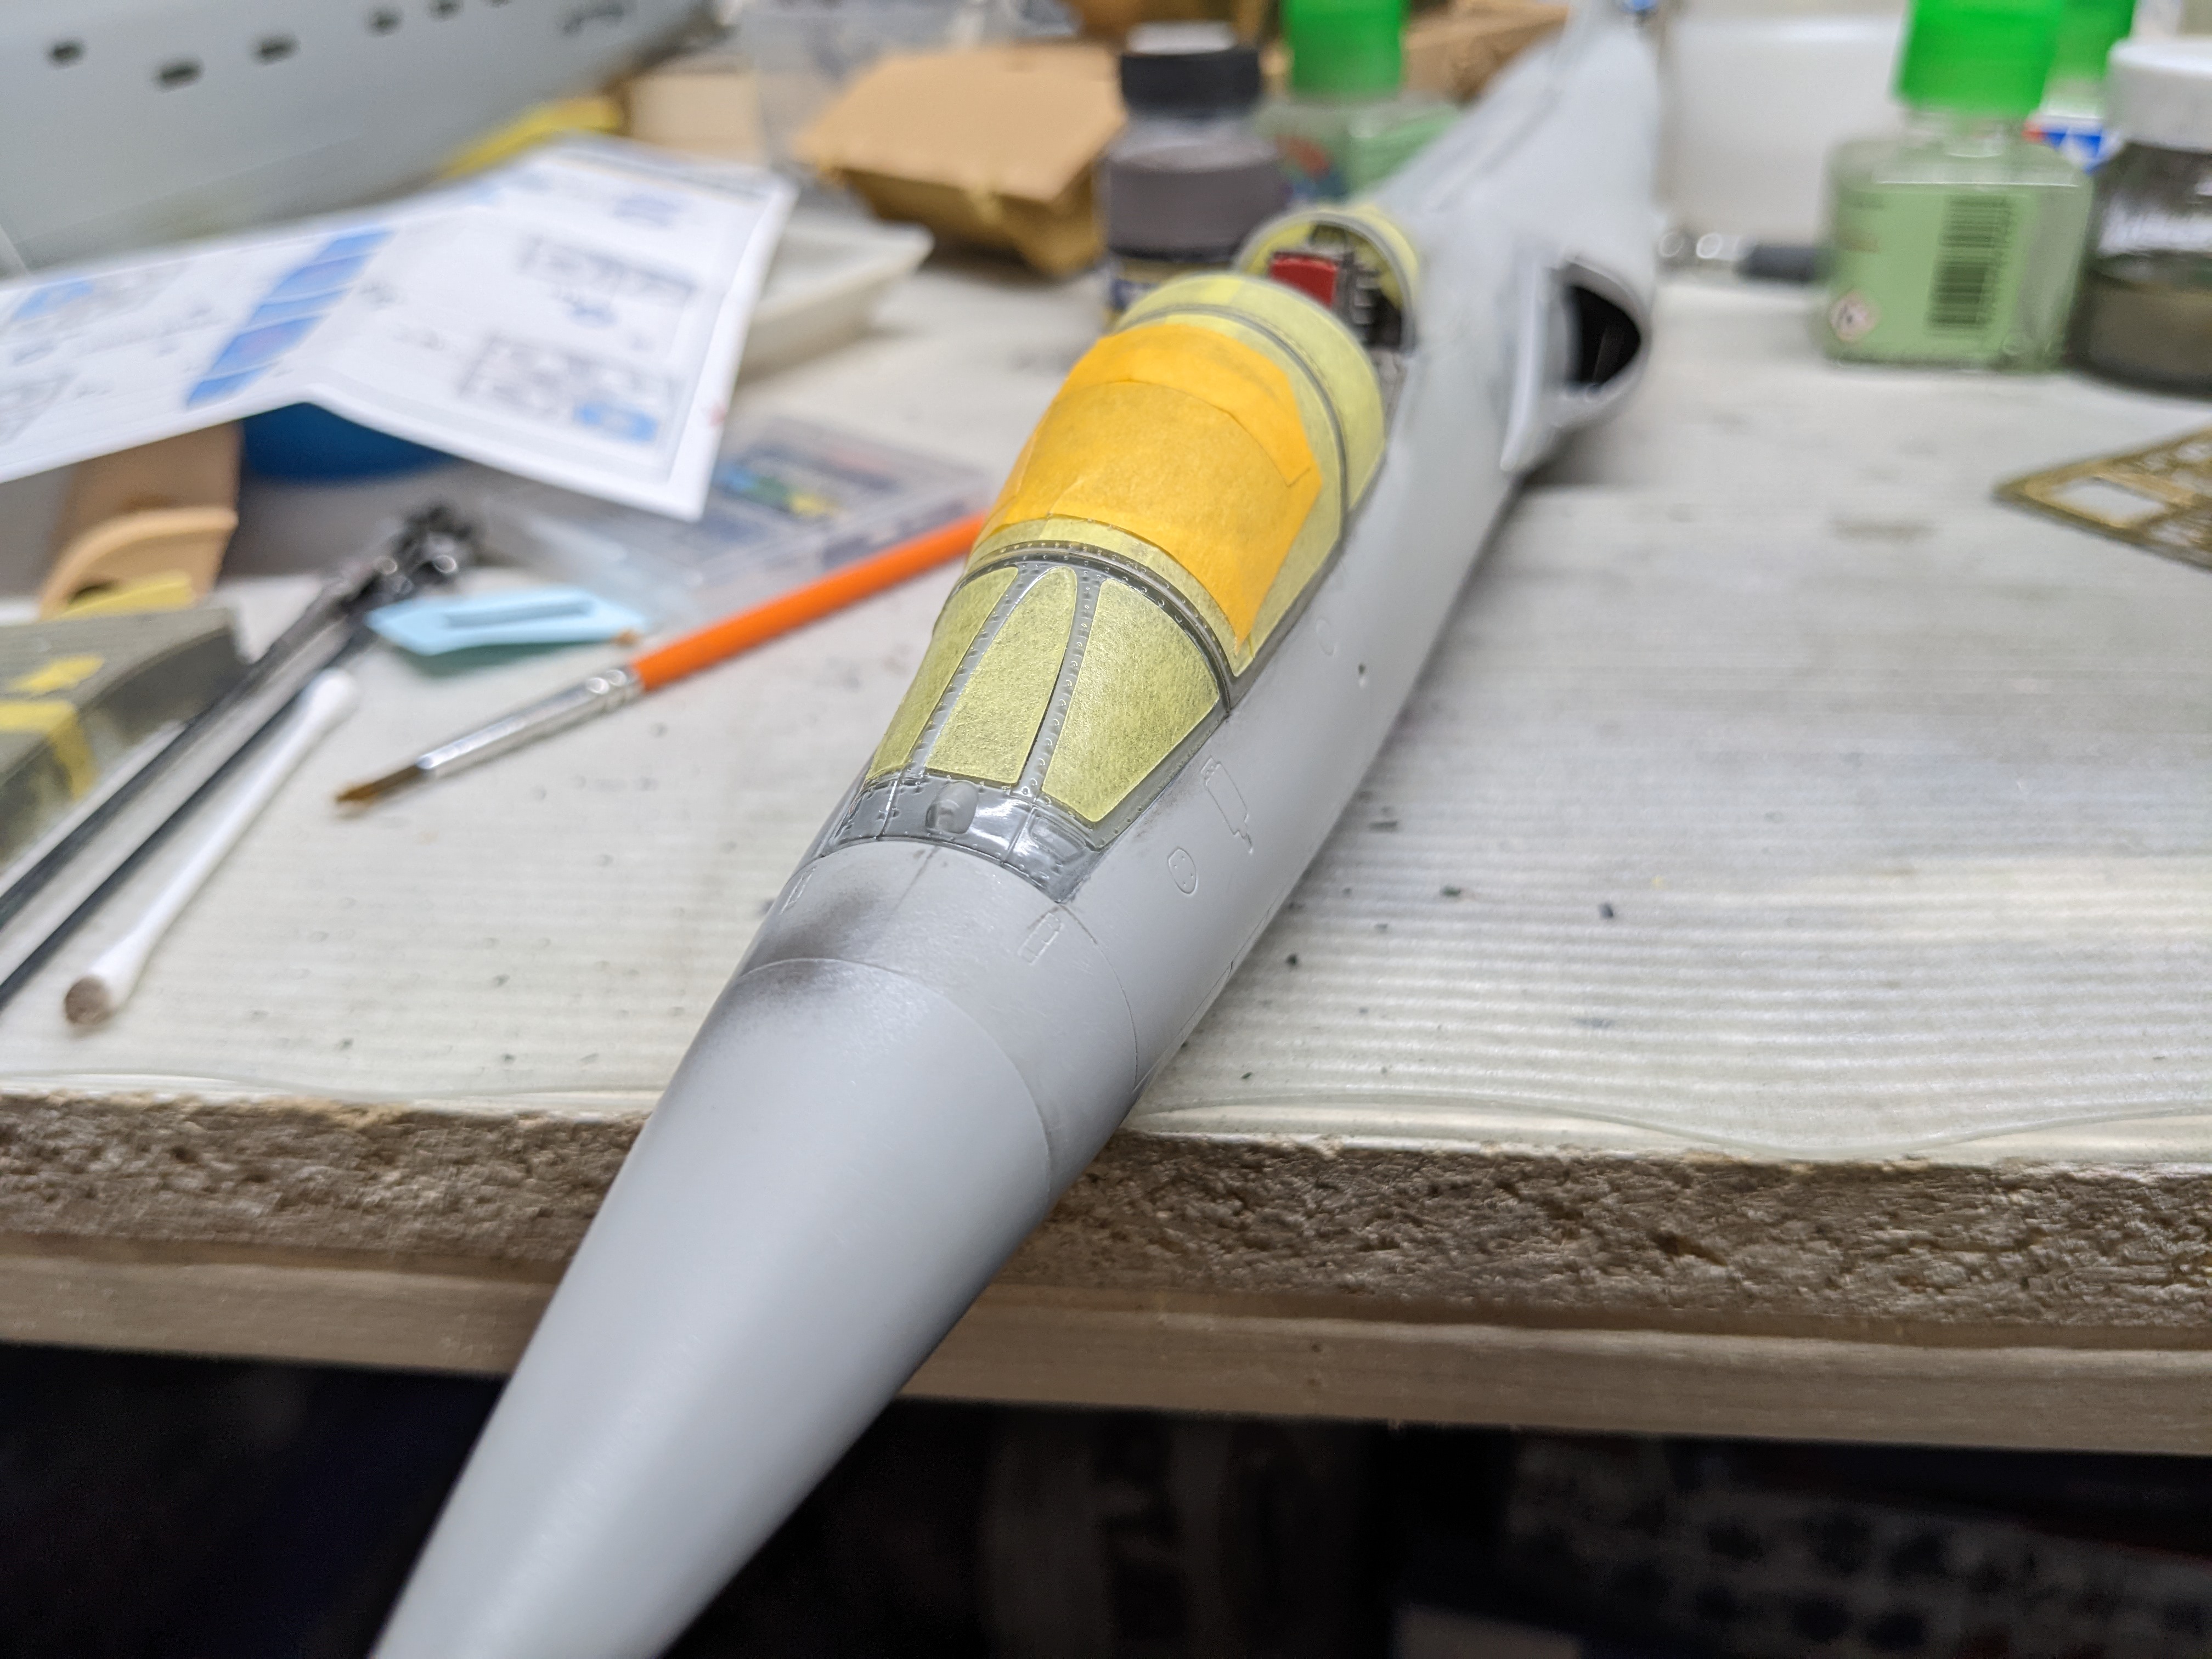
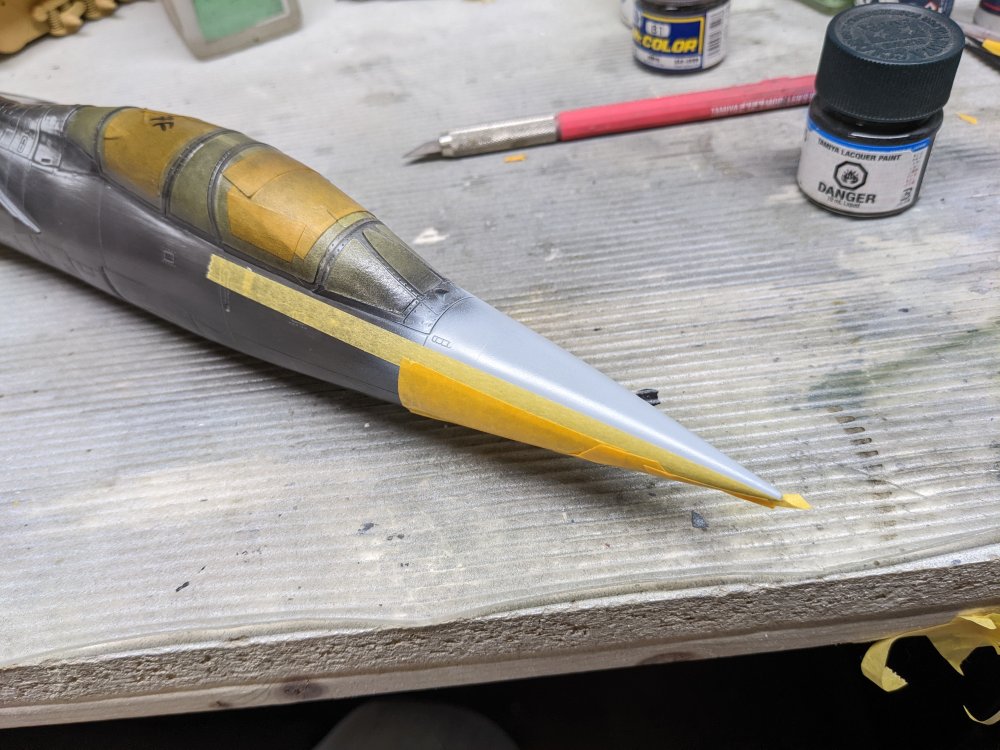
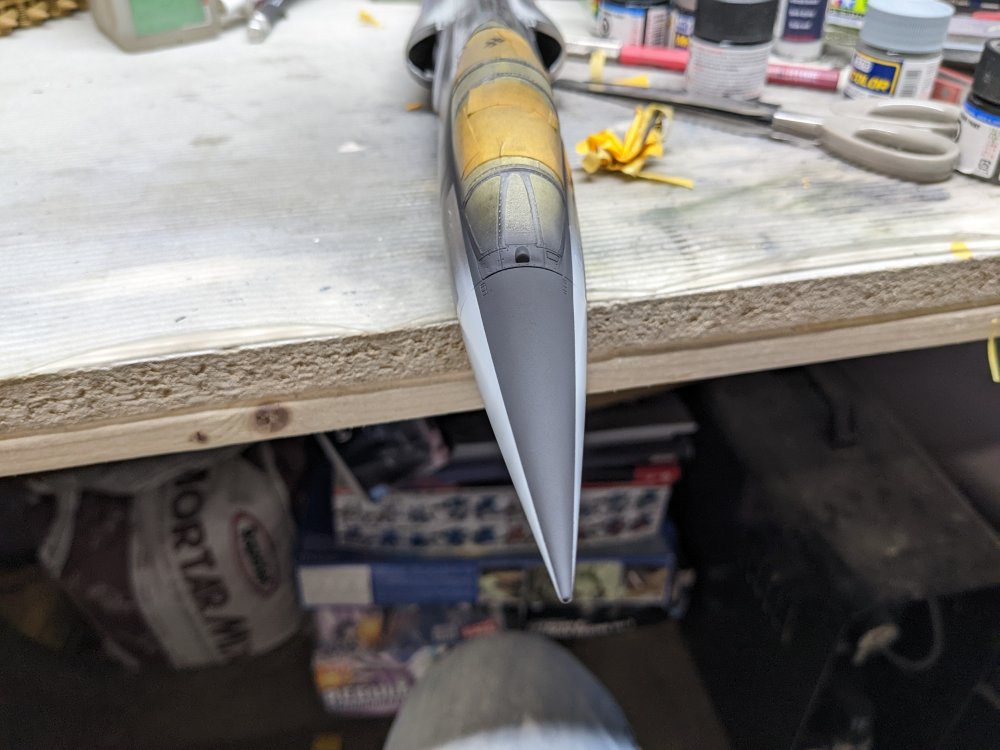
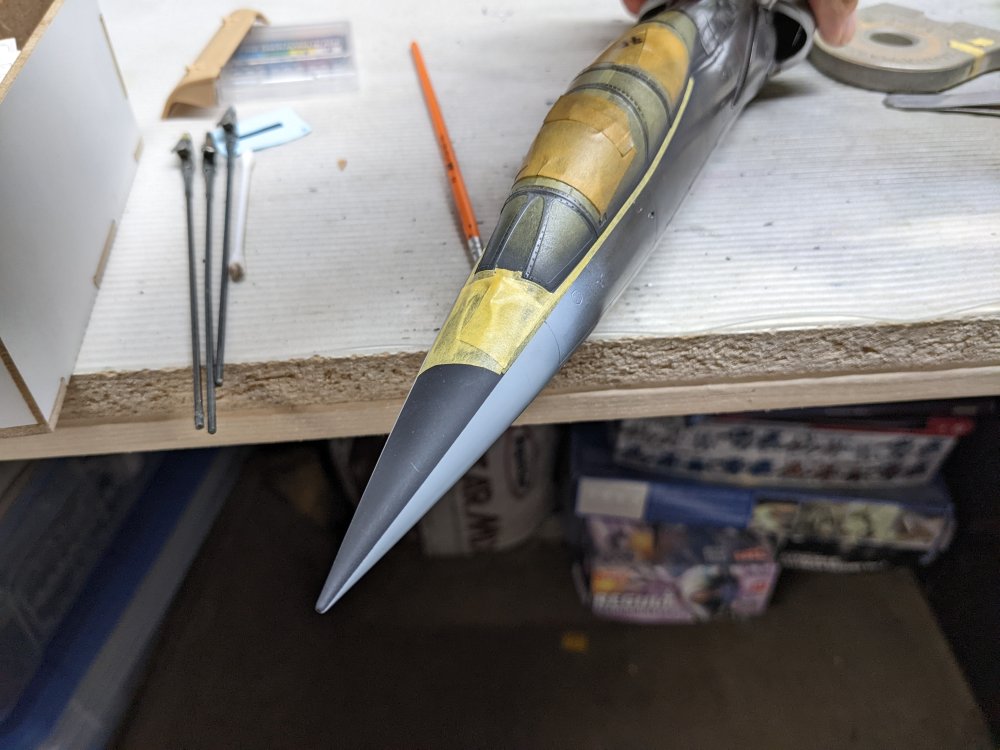
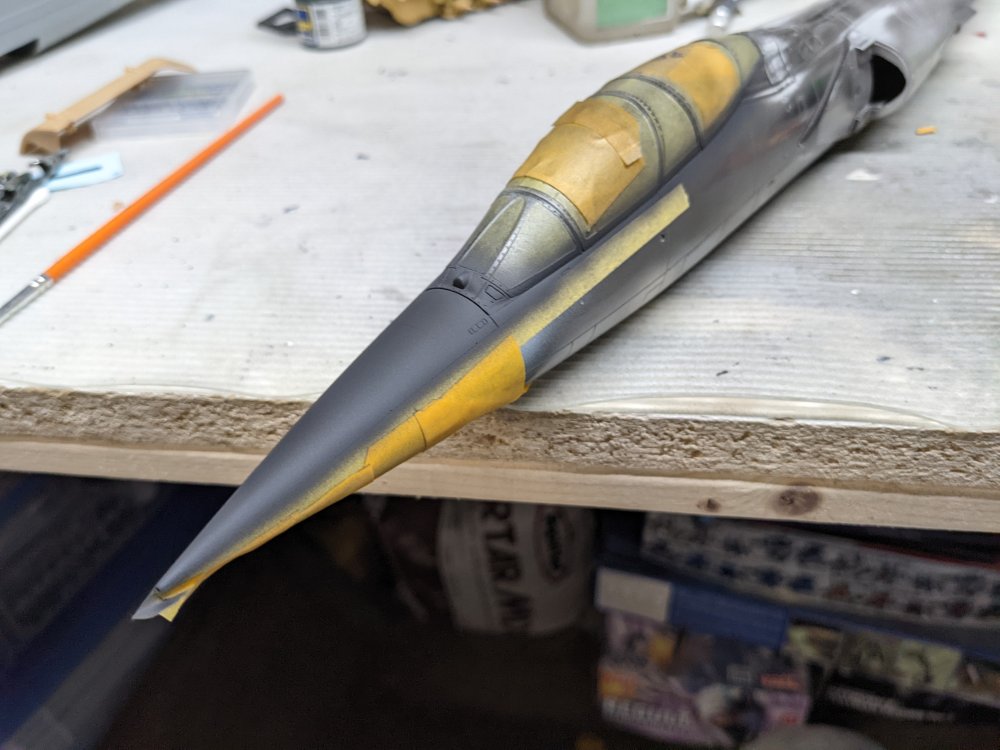
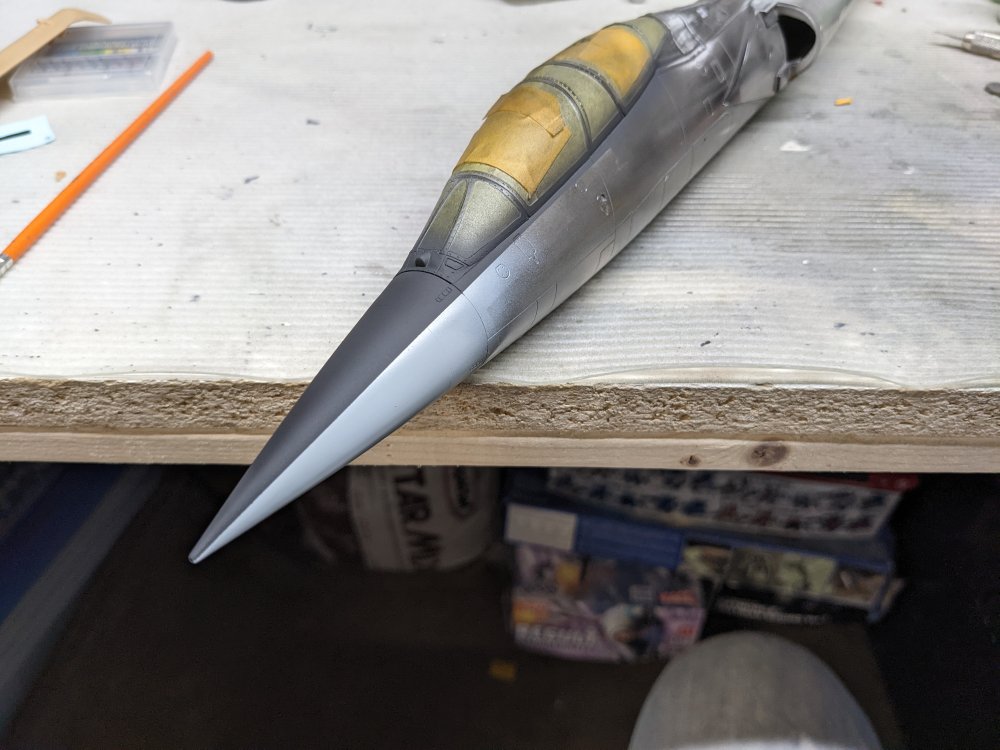
Last thing I did last night was spray the nose and a panel on the vertical tail in Voodoo Grey. I figure this will help minimize the amount of masking I have to do over top of the NMF. I then masked off and sprayed the anti-glare panel. This goes all the way up to the co-pilot's canopy. Then I masked that off in preparation for the black base coat. Here's the black base coat on. I did the intakes at the same time. This stuff is shiny!


-
CF-104D Triple Sick
BlrwestSiR replied to BlrwestSiR's topic in LSM 1/35 and Larger Work In Progress
The primer is fairly translucent not to mention thin. I thought it was a lacquer based on how thin it was but reading the label (who does that?!) it turns out it's an enamel. -
Great looking model Rob. The excellent finish to a challenging paint scheme is the real highlight. Carl
-
CF-104D Triple Sick
BlrwestSiR replied to BlrwestSiR's topic in LSM 1/35 and Larger Work In Progress
Peter, the primer is AK Xtreme black primer. It's just I've only applied a thin coat to see where any flaws might still be. -
CF-104D Triple Sick
BlrwestSiR replied to BlrwestSiR's topic in LSM 1/35 and Larger Work In Progress
That's true. It was quite the hanger queen. -
CF-104D Triple Sick
BlrwestSiR replied to BlrwestSiR's topic in LSM 1/35 and Larger Work In Progress
Oh and forget the kit decals for an RCAF jet. They're all wrong. If you can find them Canuck decals did a great sheet for the kit. -
CF-104D Triple Sick
BlrwestSiR replied to BlrwestSiR's topic in LSM 1/35 and Larger Work In Progress
Not so much slow as I keep getting onto other projects. Plus kids and a puppy conspire to reduce my bench time. The Italeri kits aren't bad. Some details are a bit soft but this is my second one. I did a single seater as an Italian Tiger Meet one. If you start with the G/S kit, you should be able to turn that into an early RCAF plane. The cockpit and the burner can are probably the weakest parts of the kit detail wise. Lots of AM options out there for both but avoid the Aires 'pit. It's as wide as the exterior of the fuselage so no idea how you're supposed to make it fit inside. -
CF-104D Triple Sick
BlrwestSiR replied to BlrwestSiR's topic in LSM 1/35 and Larger Work In Progress
Well, preliminary coat of primer is on to see if I need to do any fixes. I see a couple but they're mostly cat hair I missed. Once those are done, I'll do a full coat of primer.
-
CF-104D Triple Sick
BlrwestSiR replied to BlrwestSiR's topic in LSM 1/35 and Larger Work In Progress
Thanks Rob! Definitely not the sort of thing you expect to run into when you're out walking the dog. -
That looks great Scott. Great read on the spraying of Mr Color leveling thinner. I've done it a couple times in the last but will give it another try and see how it works. Carl
-
Been there lots of times. If you need the ones with the flash suppressors, I may have a set.
-
Only a few? I better start working faster then or you'll catch up to me.
-
Shows why they called her the Beast. Nice to get to a point where the plane is identifiable as one. Carl
-
Yeah, my boys went talked about tanks for a few weeks and then when they were at the LHS they bought the Meng Toon tanks. I think it spurred an interest in history in our oldest son as he's always watching WWII documentaries these days.
-
Phil, Girls Und Panzer is a Japanese anime (animated show) where learning to drive and fight in various WWII tanks is a girl's collegiate sport. The main story is about an all girls high school (that's located on a Japanese WWII aircraft carrier for some reasons) who have to win their championship match in order to prevent the school from closing. They have to learn to drive, maintain and fight in their tanks. Most are German tanks but there are teams that only use British, American and Russian tanks. The animation is well done and it was fun to watch. It's fun to watch a Tiger do a Bootlegger turn with sparks flying from the tracks. Completely not plausible but fun.
-
What is on your bench right now ? Share a picture :)
BlrwestSiR replied to Martinnfb's topic in Modelling Discussion
That looks great Rob. Nicely done. Carl -
I think I mentioned it before but when Girls Und Panzer was on Netflix my boys watched it. They then spent weeks talking about Panzer III and IVs plus some of the other tanks. It's why I have the Dragon T28 in the stash.
-
CF-104D Triple Sick
BlrwestSiR replied to BlrwestSiR's topic in LSM 1/35 and Larger Work In Progress
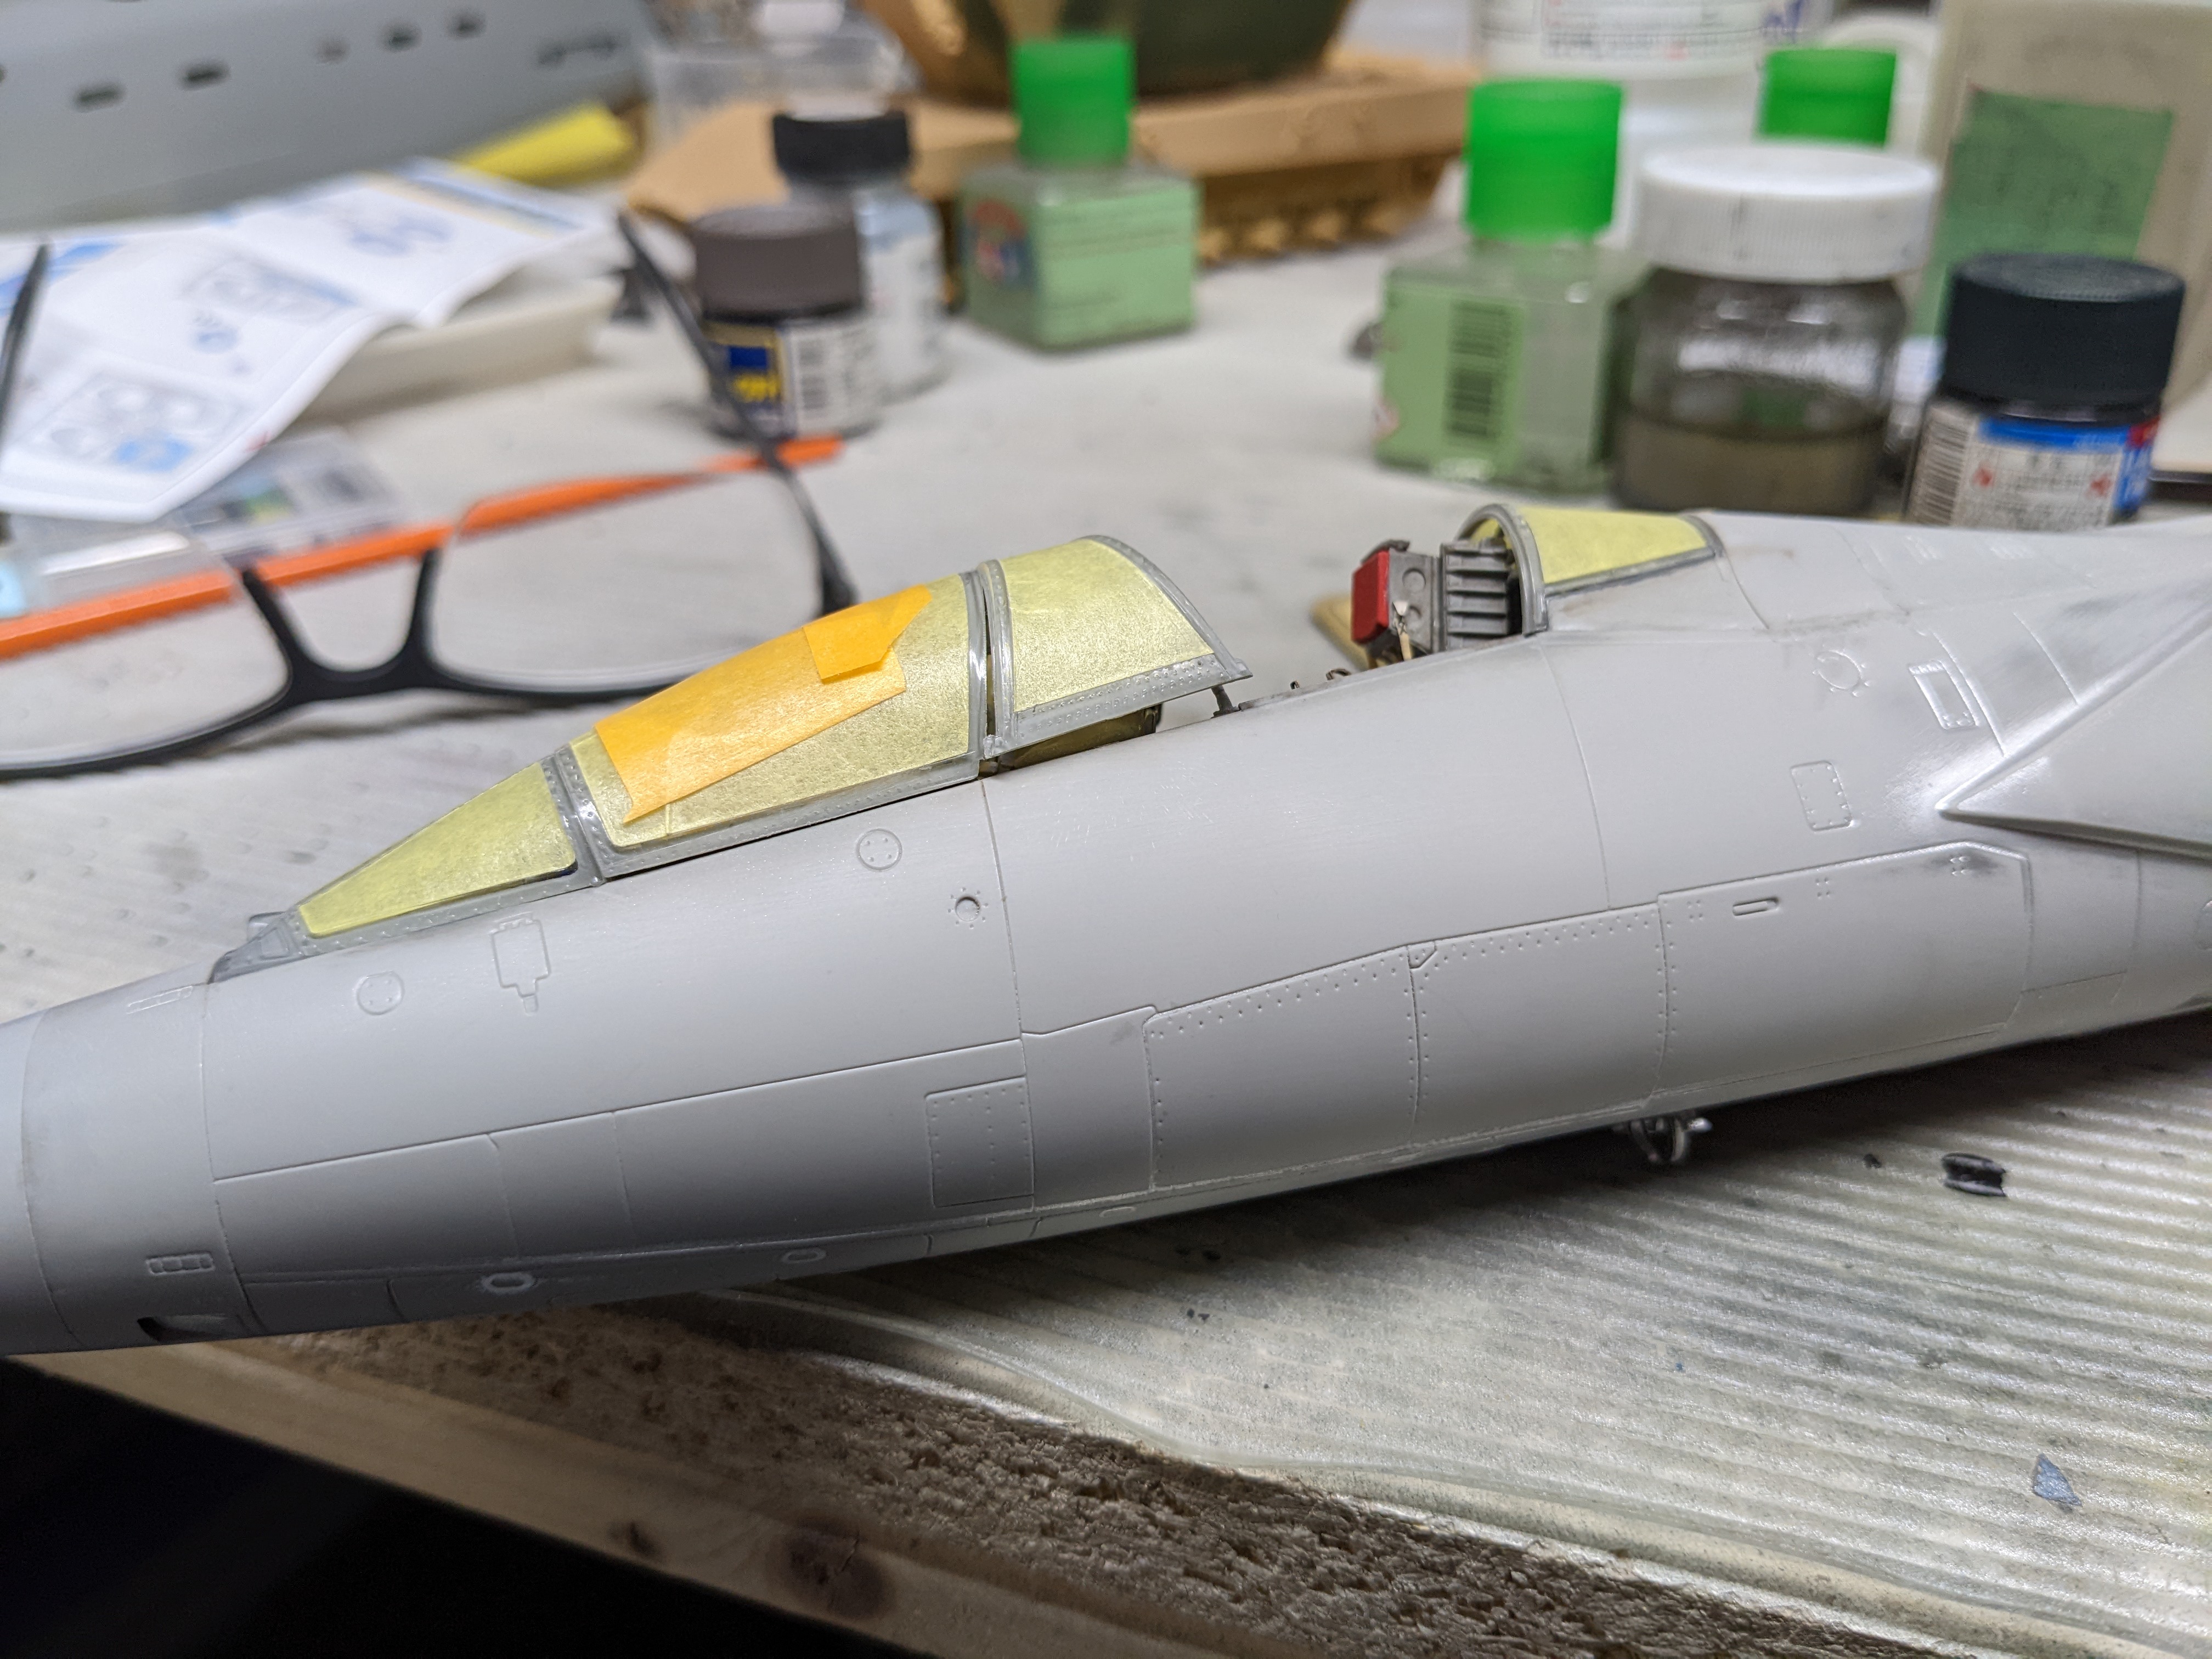
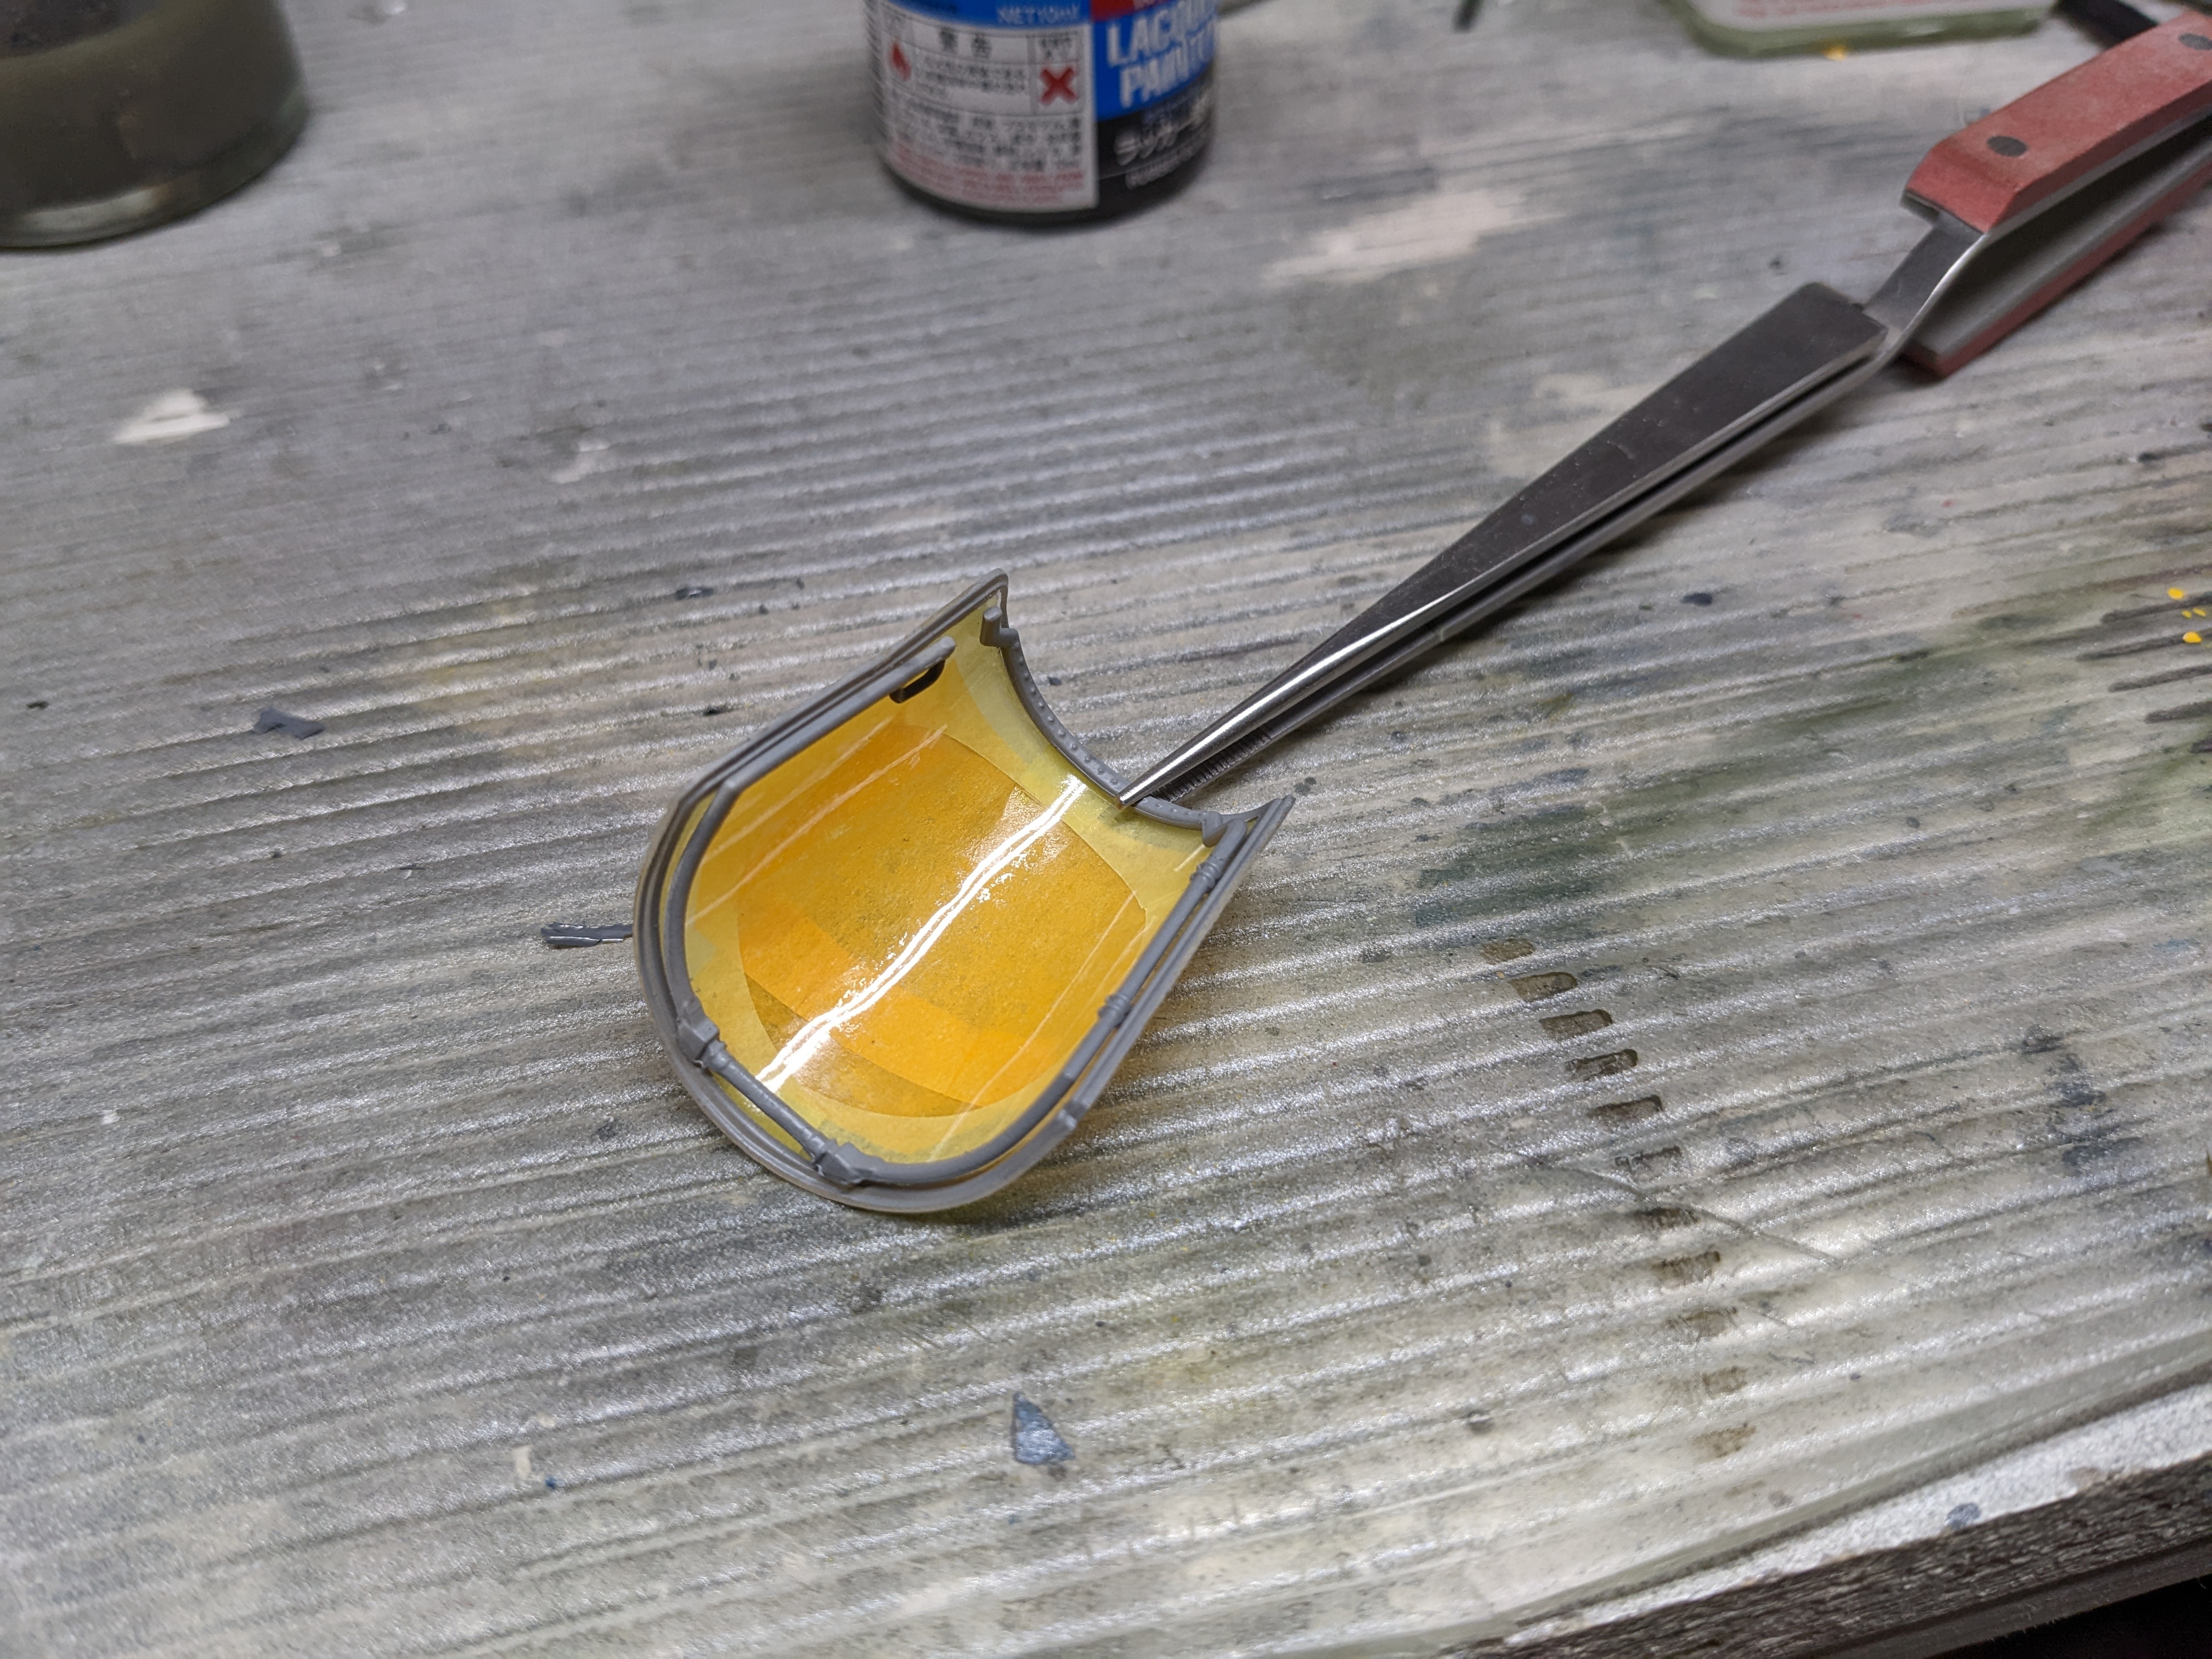
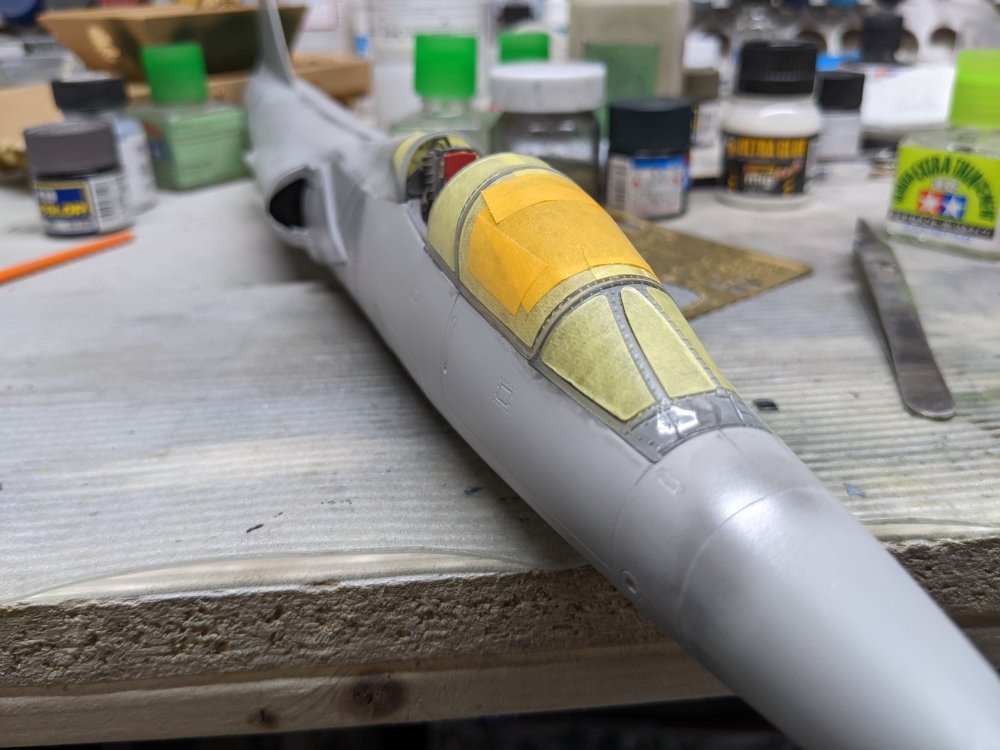
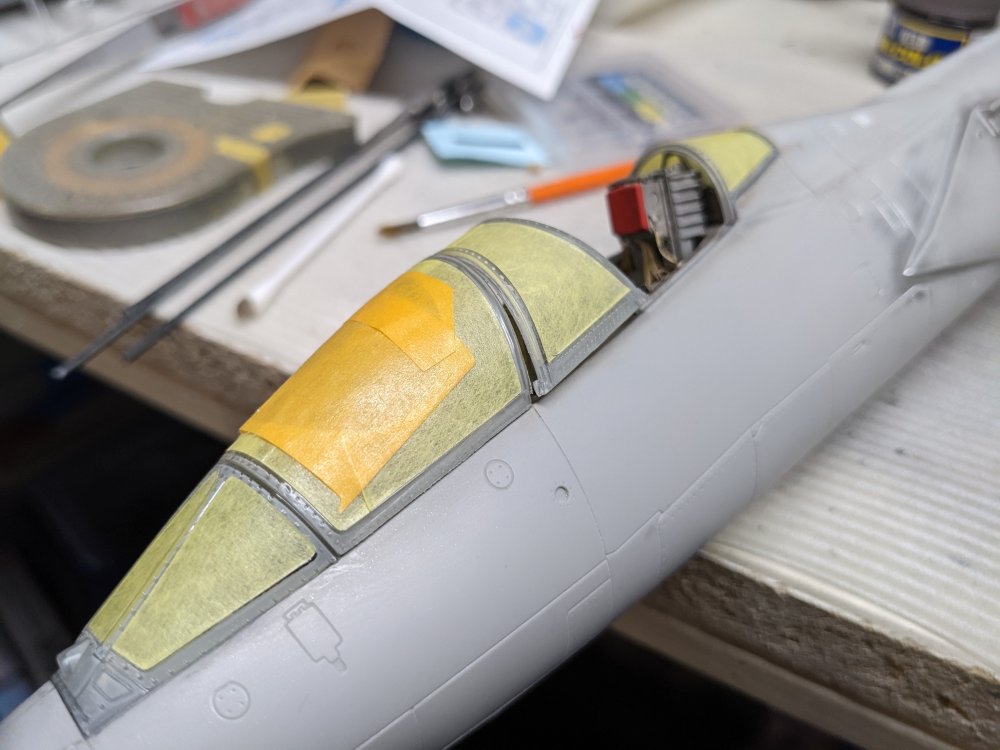
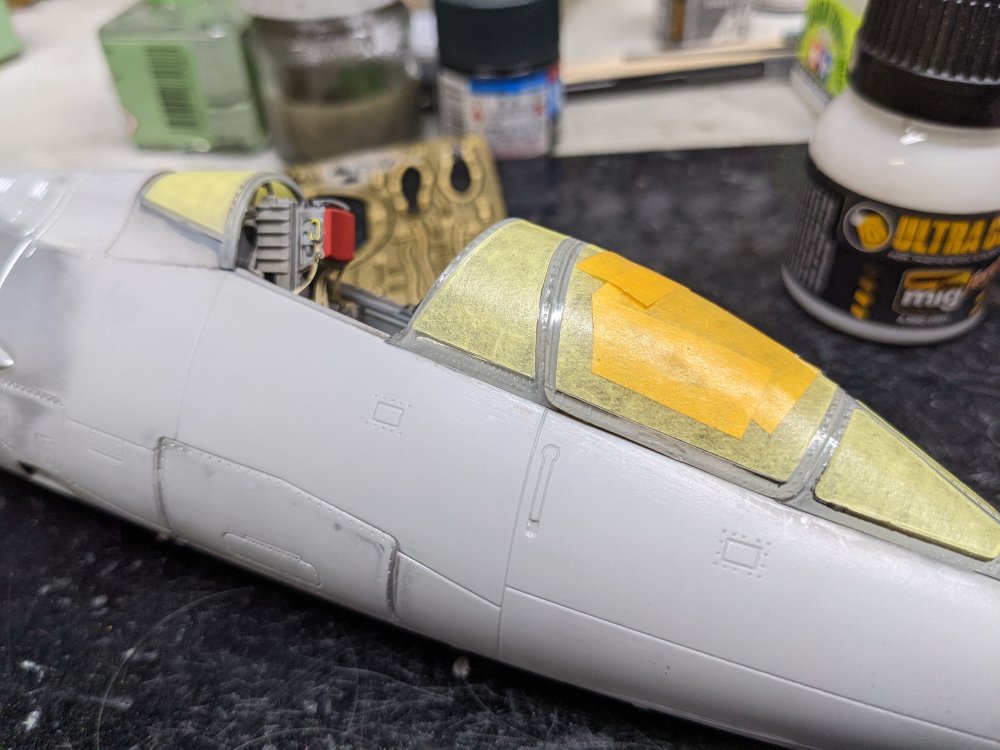
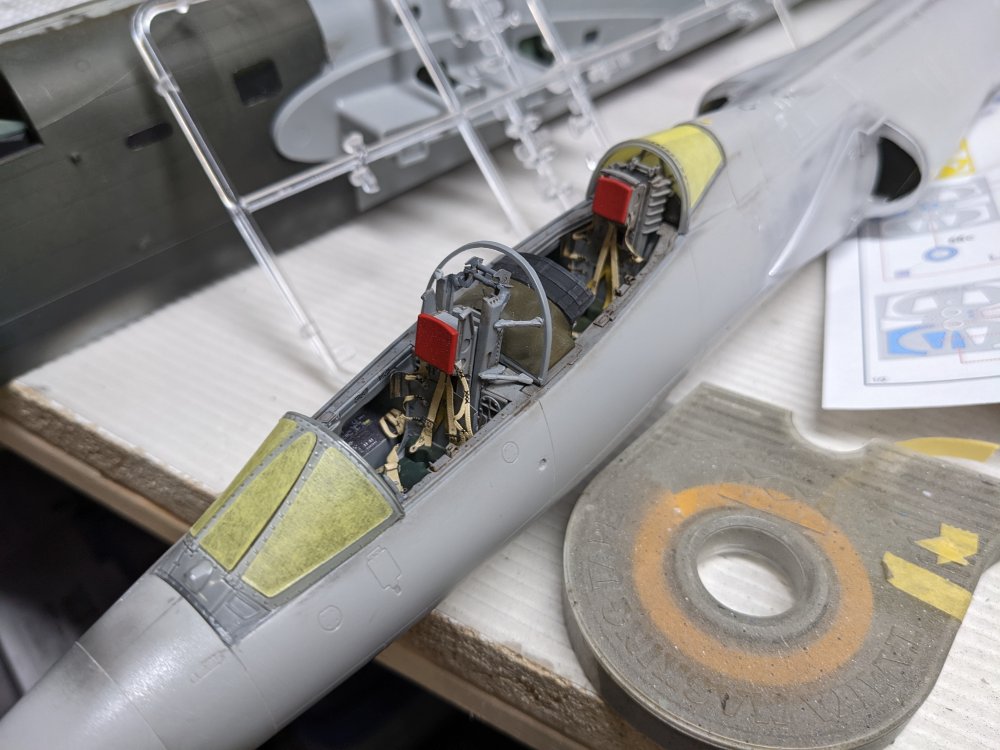
Turns out the pilot's canopy was warped in a couple different directions so it's been a case of carefully glue one section at a time. Same with the centre part. After the right side dries, I took a closer look at the left and it was slightly worse than expected. With lots of gentle pressure, I got it in place. I used Tamiya Extra Thin Quick Set cement to expedite things. With that done, I got to the pilot's canopy. I dealt with the bulge on the side followed by the remaining sides. This went a bit faster. Here's a view of both side with everything aligned finally. So far anyways.

-
CF-104D Triple Sick
BlrwestSiR replied to BlrwestSiR's topic in LSM 1/35 and Larger Work In Progress
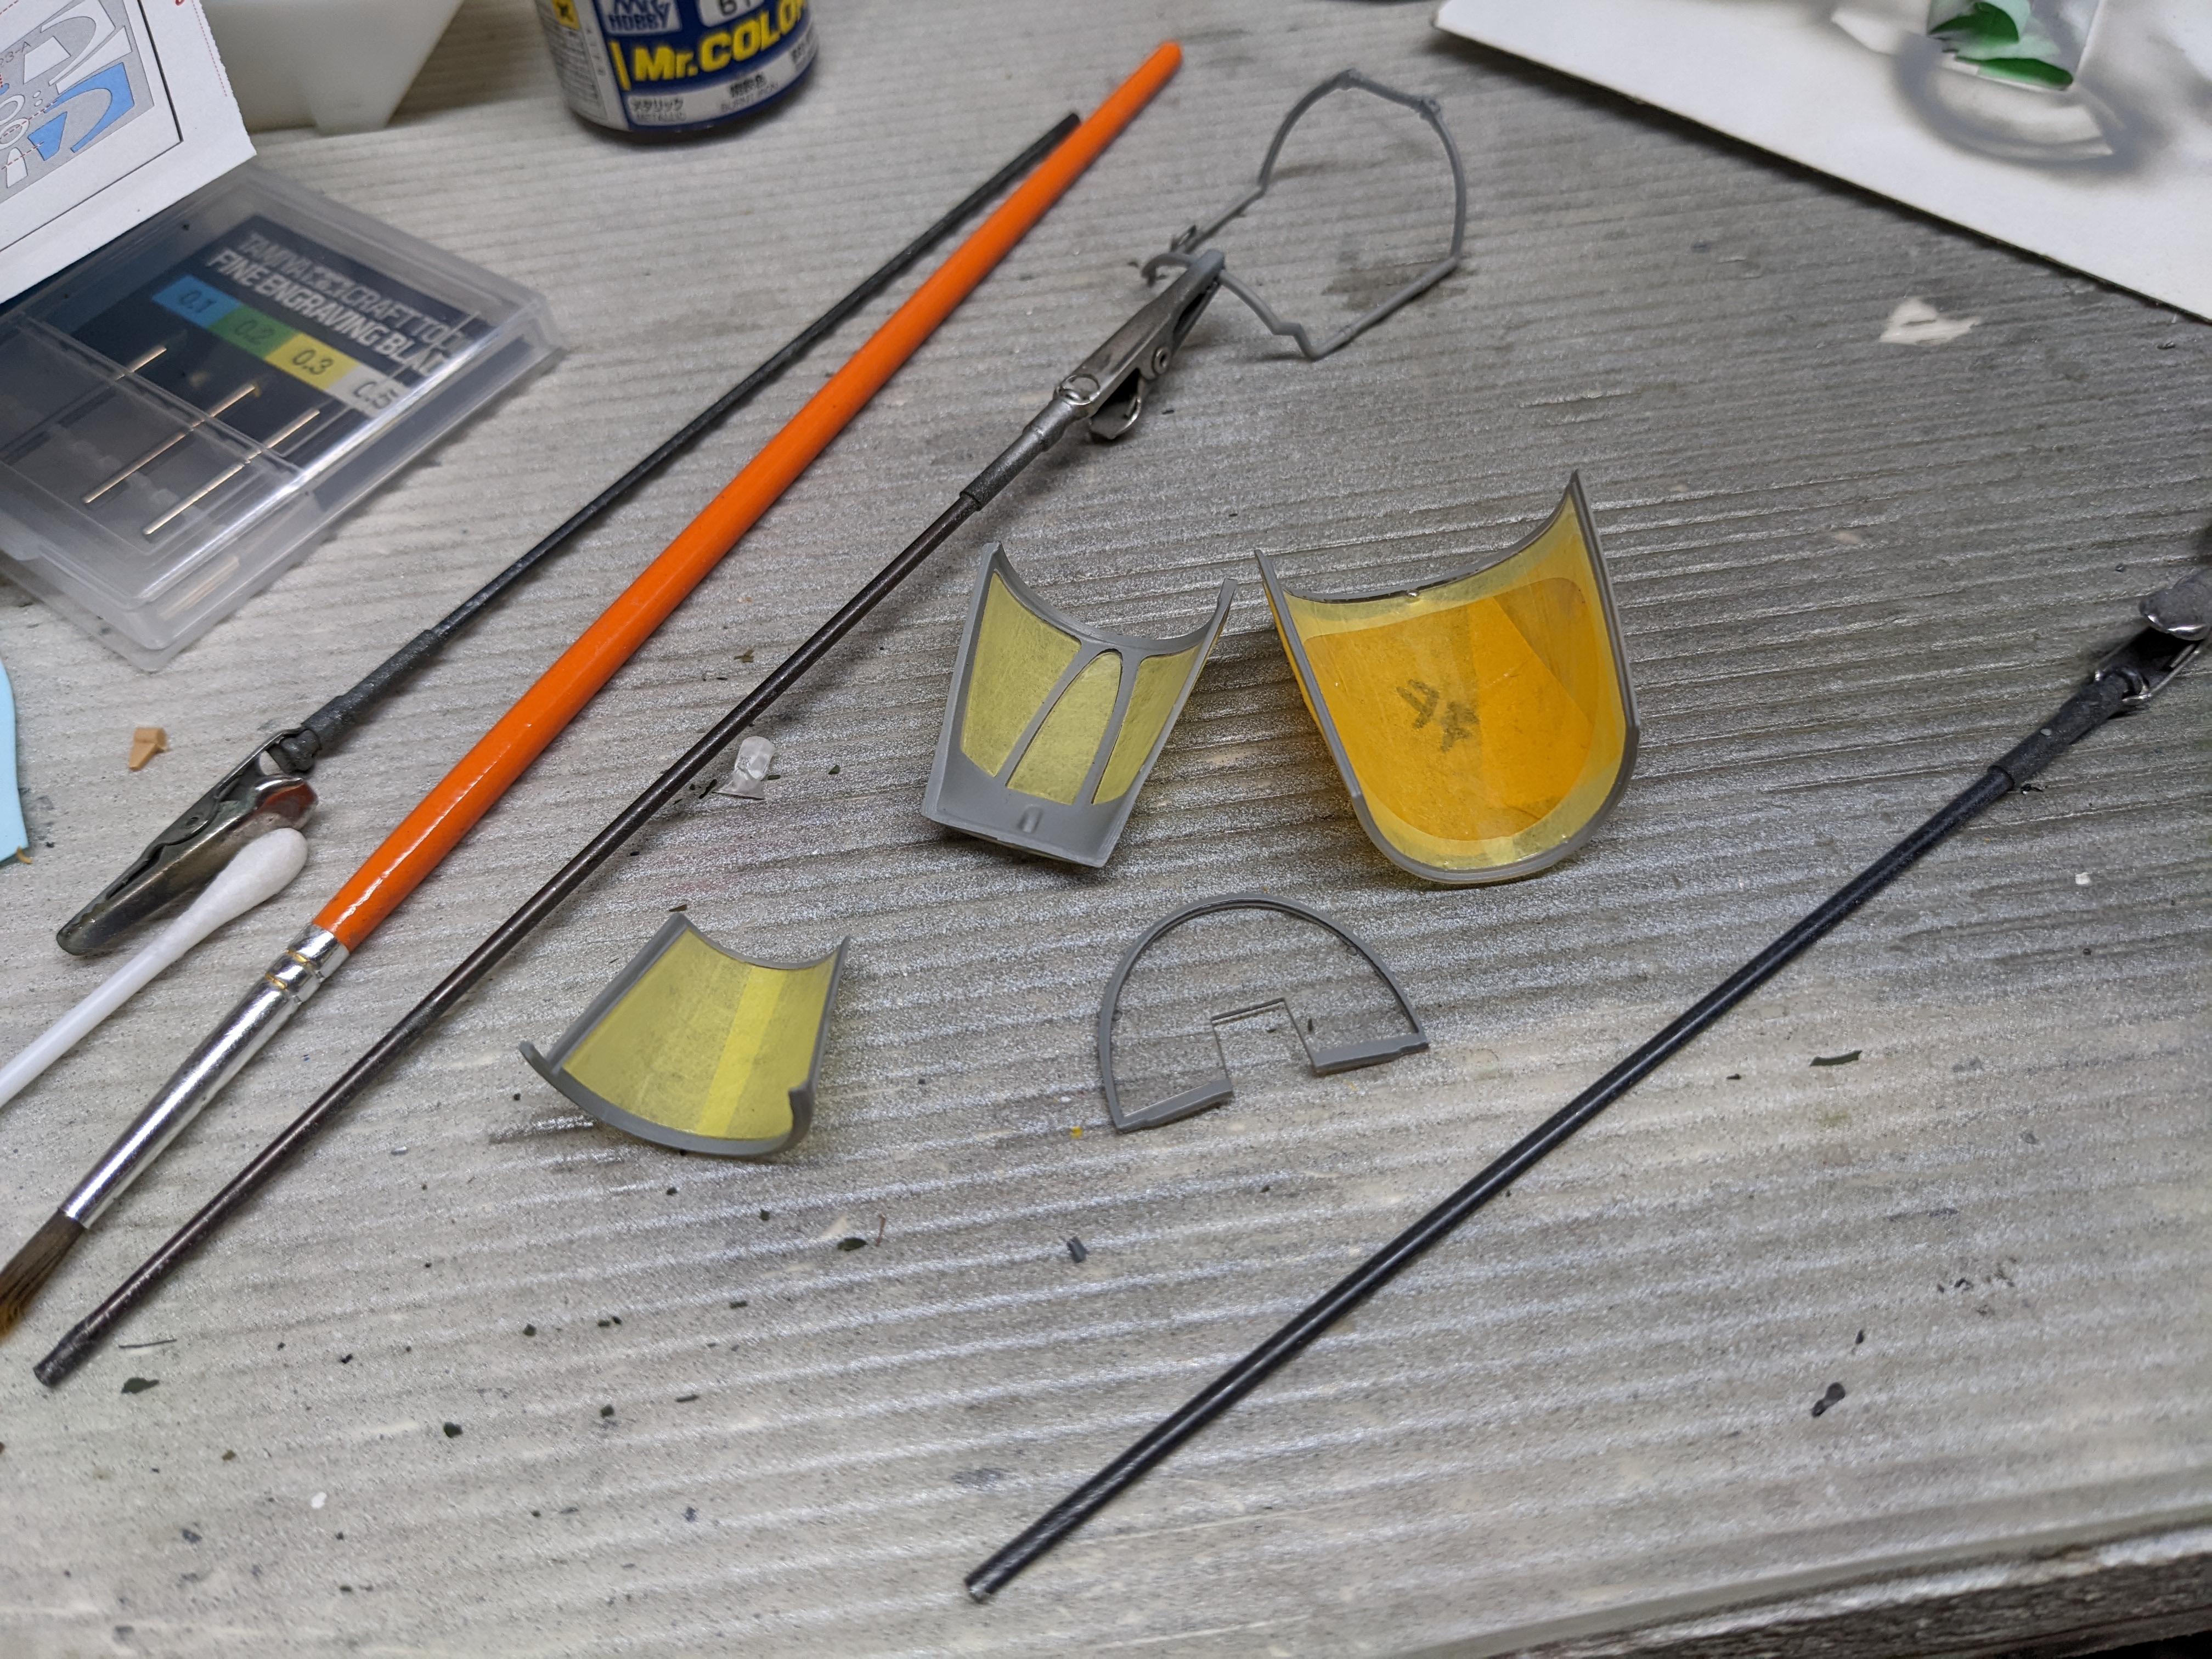
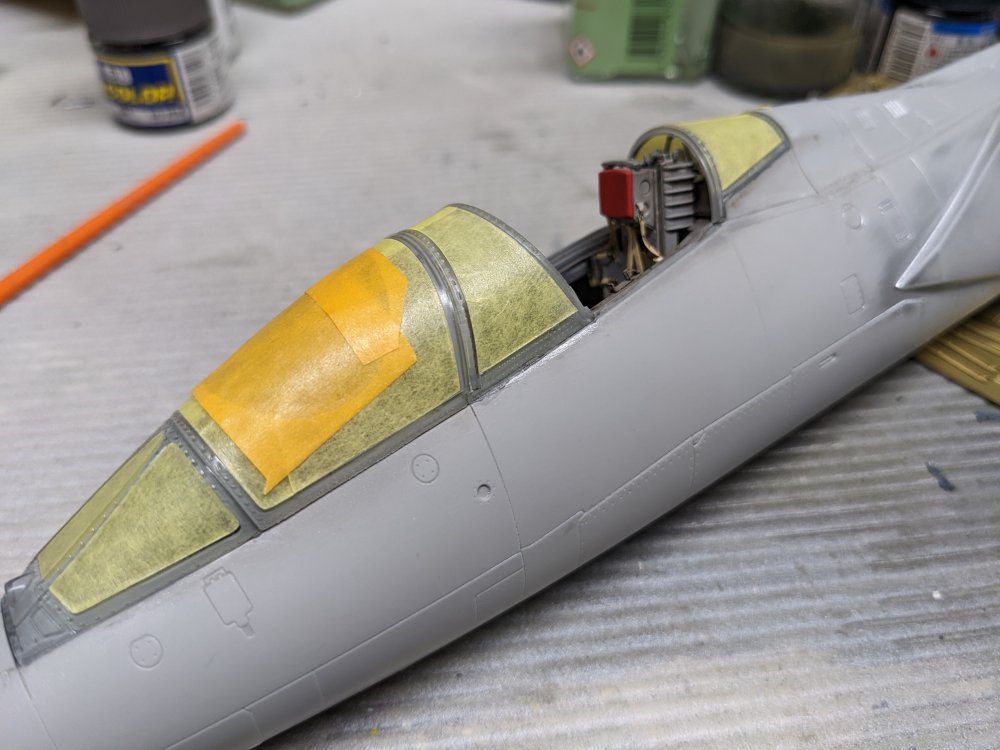
More canopy work. Here's the pilot's canopy. There's an internal frame to add. Once that had dried, I added the rearview mirrors. The straight bar on the internal frame is meant to mount to the ejection seat rails. It goes between the hooks on the top. After I got it in place, I fitted the fixed centre section. I glued one side first. The pilot's canopy will need some finessing to get into proper place. With the right side glued in the correct spot, the left side is a bit off. Once the right side dries, I'll have to carefully get this into place before committing to glue.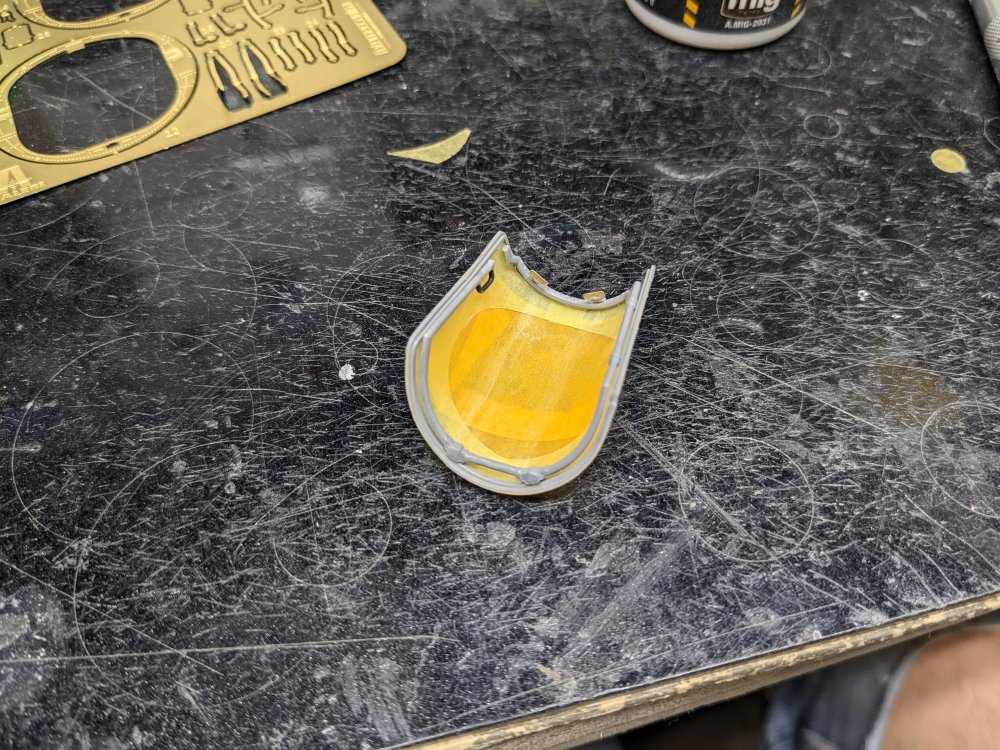

-
1/32 Short Stirling
BlrwestSiR replied to ThomasProbert's topic in LSM 1/35 and Larger Work In Progress
Amazing work Tom and fast too. I think I've managed a couple canopy bits in the same time frame. -
CF-104D Triple Sick
BlrwestSiR replied to BlrwestSiR's topic in LSM 1/35 and Larger Work In Progress
Thanks Peter! The funny thing is, Jimmy got all excited by the fire trucks and lights and people we had to take him to an offleash park and let him run. So our original idea of a short walk ended up much longer. The front canopy was a perfect fit. In fact, when I dry fitted it, it popped in and was held in place by friction alone. The opening parts and the fixed centre section are a bit more vague though. They're going to need some careful fitting. -
CF-104D Triple Sick
BlrwestSiR replied to BlrwestSiR's topic in LSM 1/35 and Larger Work In Progress
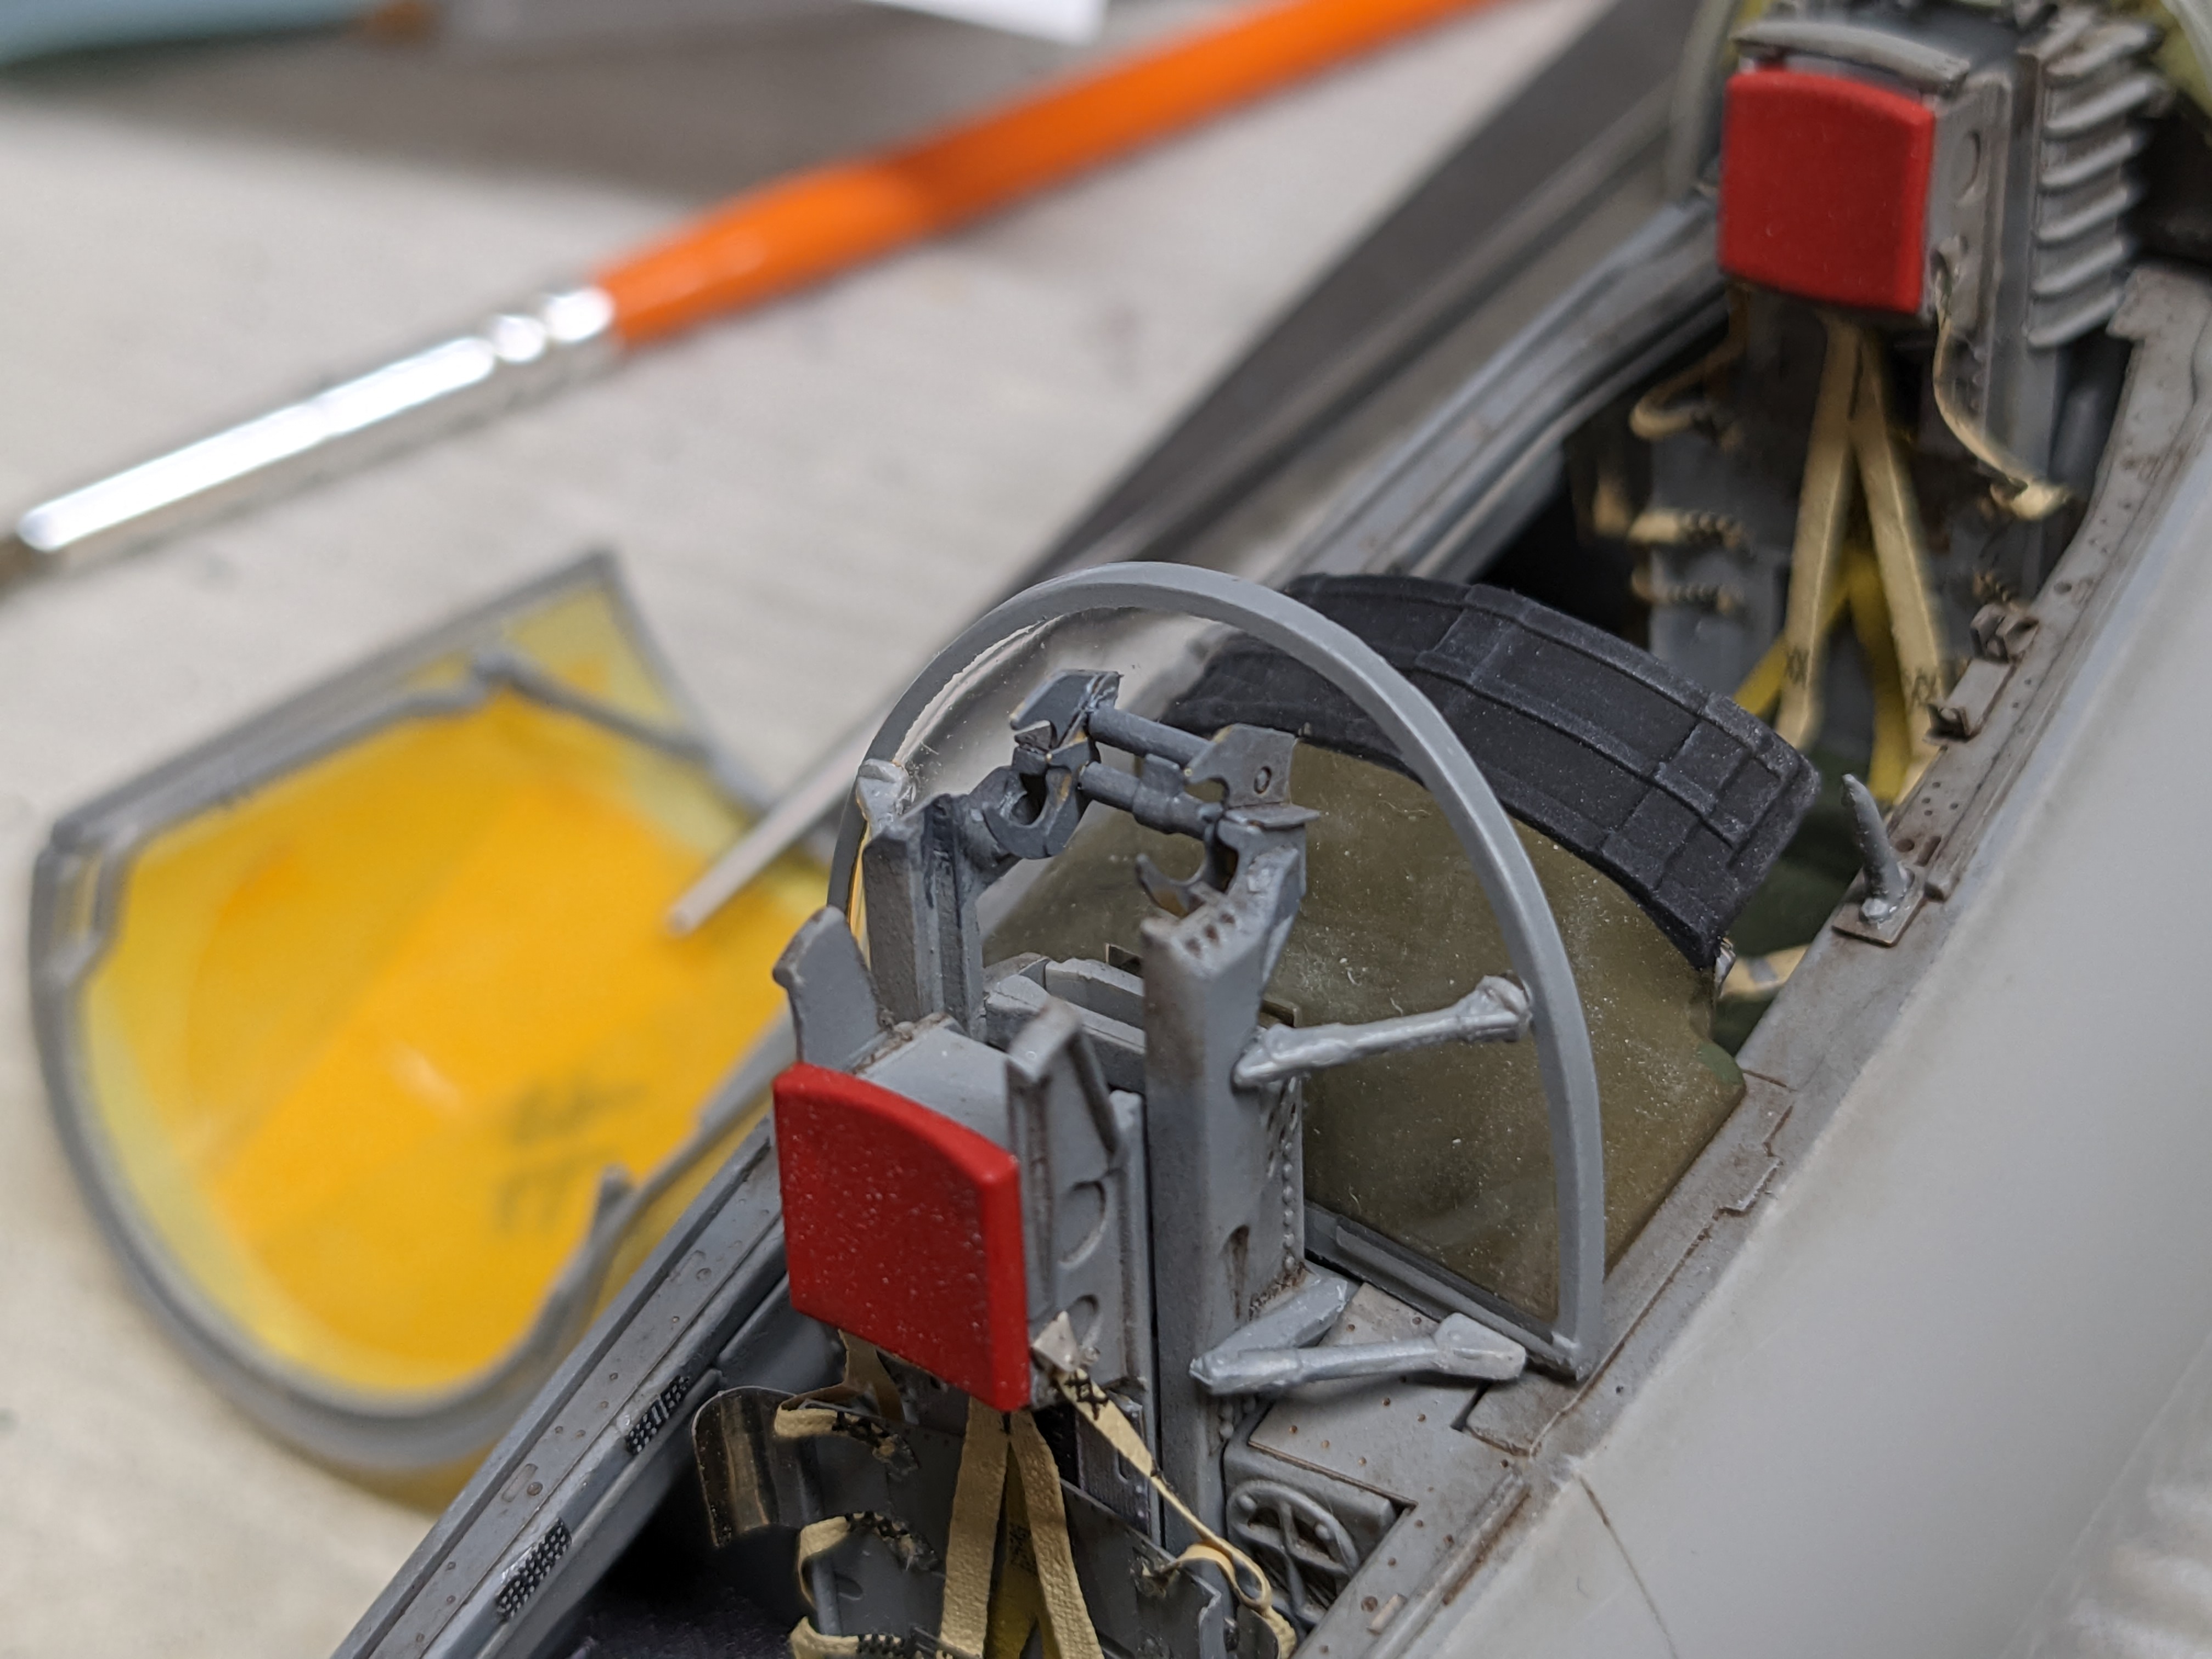
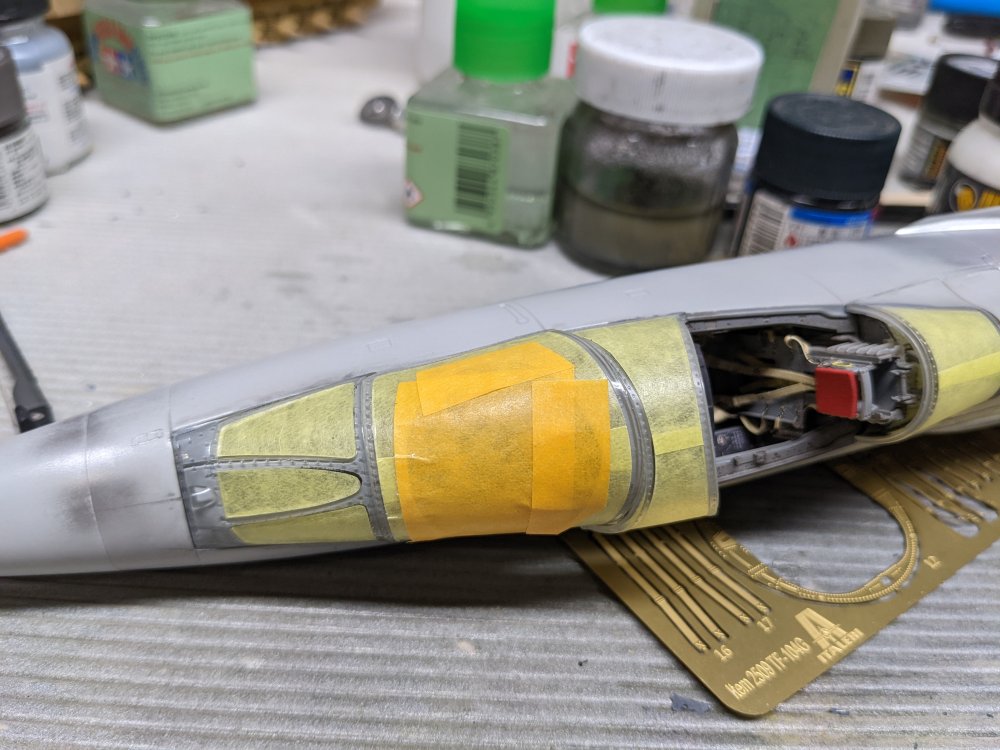
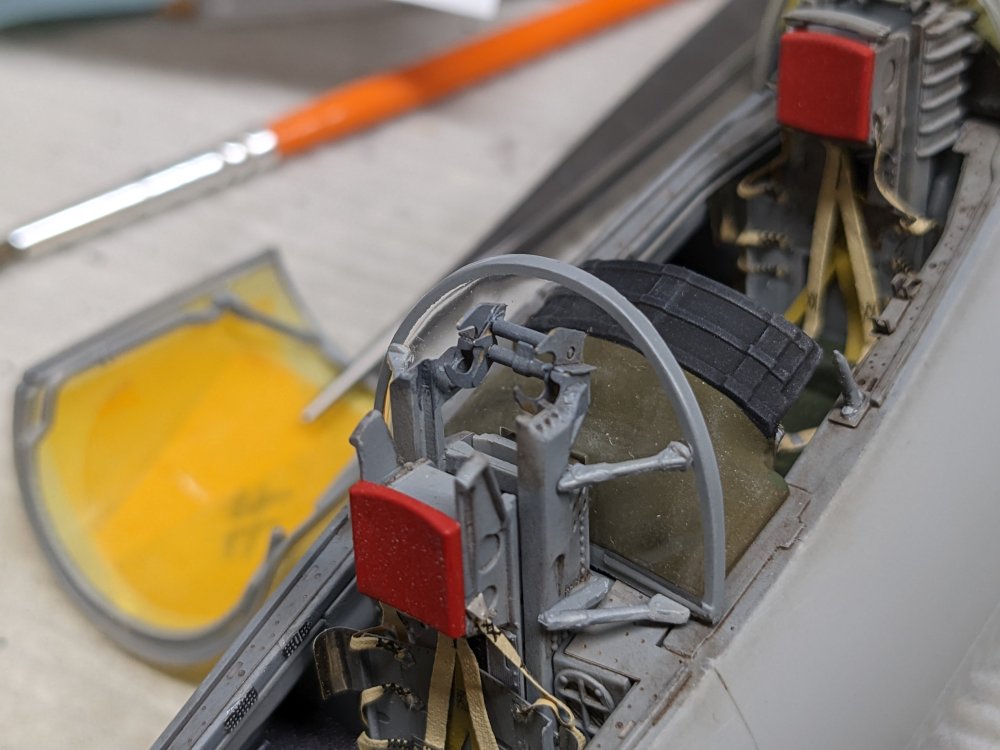
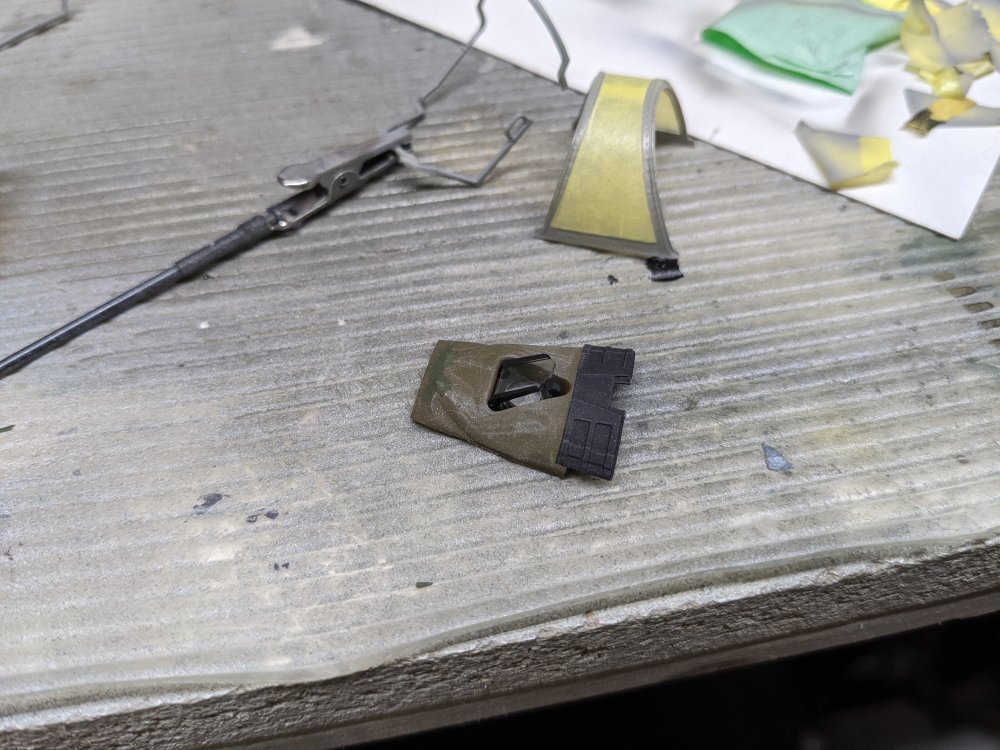
Interesting evening last night. Sue and I were out walking Jimmy, I'm getting texts from Martin when we come across a couple people looking at a house. There's a fire on the porch and at first, I'm thinking it's an odd and dangerous place for a fire bowl. Then I realize the folks watching are calling the fire dept. I look closer and realize there's no fire bowl but that a table is burning. I try to find a hose but nothing around. Sue sees that there's some people in the house next door so I bang on their door. A young woman opens the door and I ask if she has a hose as their neighbour's house is on fire. Her roommate hears this and runs to grab an extinguisher and hands it to me. At this point we all see there's a guy on the porch passed out drunk. How he didn't get burned I have no idea but he wakes up and gets out of there just in time. Using the extinguisher I got the fire out just as the fire department arrive. They made sure everything was safe and took our names down and thanked us. The homeowner did the same. Thankfully no one got hurt and we ended up with an eventful walk. So after all that, I got a bit of bench time in and removed the masks from the inside of the canopies. There's also a blast shield that goes behind the pilot's seat. I then added the HUD glass to the pilot's coaming. I then started on flying the clear bits on, starting with the canopy and the rearmost section. I also added the blast shield and the supports for it. There's a decent amount of detail in the kit OOB. It's unfortunate that some of it is let down by the inconsistency of the detail.
-
CF-104D Triple Sick
BlrwestSiR replied to BlrwestSiR's topic in LSM 1/35 and Larger Work In Progress
Peter, the plastic has a sort of spongy feel to it if that makes sense. It's like the clear plastic you find in kids toys which has some give to it rather than being hard. -
It will be interesting to see both kits side by side, especially since they're from the same source master pattern.
-
What is on your bench right now ? Share a picture :)
BlrwestSiR replied to Martinnfb's topic in Modelling Discussion
Rob, the camo looks fantastic. It looks like the marker has worked, at least from a consistency and application viewpoint. Hopefully it dries well and you can get an even finish.