BlrwestSiR
-
Posts
9,225 -
Joined
-
Last visited
Content Type
Profiles
Forums
Events
Gallery
Everything posted by BlrwestSiR
-

CF-104D Triple Sick
BlrwestSiR replied to BlrwestSiR's topic in LSM 1/35 and Larger Work In Progress
I haven't seen the Future silver but have the current one (just called silver) and it's much glossier. 😄 -
Gunze makes several markers for model use. They're called Gundam Markers and come in various widths and colours. Tamiya used to have some.but I haven't seen them in a long time.
-
CF-104D Triple Sick
BlrwestSiR replied to BlrwestSiR's topic in LSM 1/35 and Larger Work In Progress
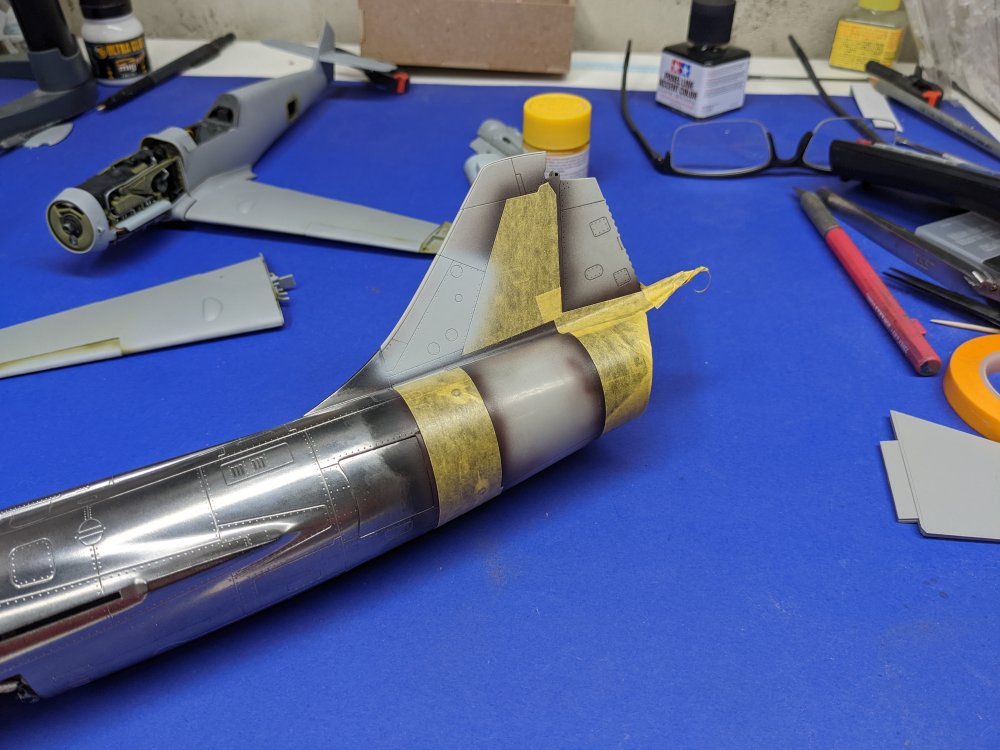
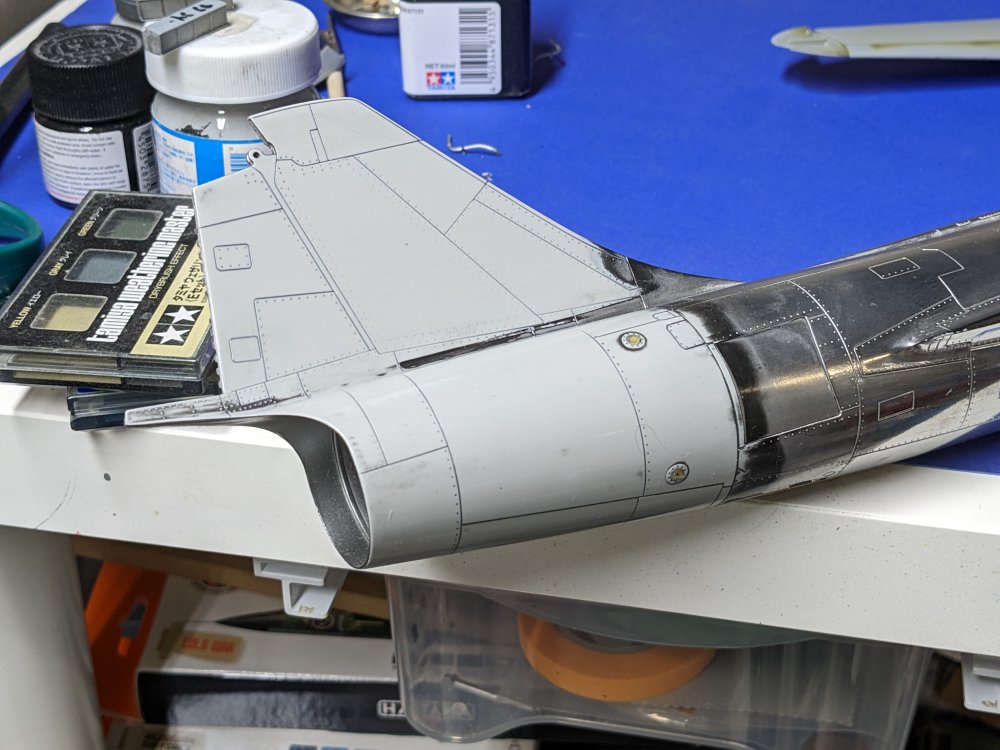
Thanks Peter. I initiated Plan C and stripped the paint off the tail. I then sprayed TruColor Titanium on the relevant panels on the rear fuselage. These were masked off and I sprayed Mr Color Previous Silver (that's what it's called). This time things worked out.

-
What is on your bench right now ? Share a picture :)
BlrwestSiR replied to Martinnfb's topic in Modelling Discussion
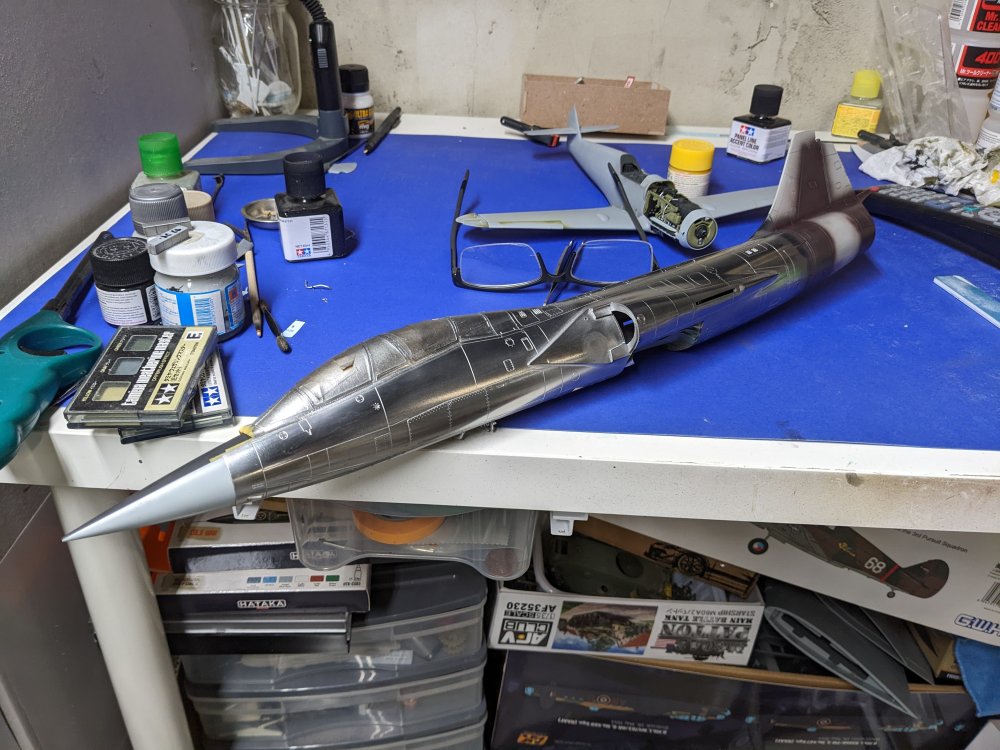
Thanks Phil. It's Alcad Polished Aluminium over a black base coat. It's fragile so I tried to paint all the other panels first. -
What is on your bench right now ? Share a picture :)
BlrwestSiR replied to Martinnfb's topic in Modelling Discussion
The CF-104 never left the bench but I took a quick break from the ZM 109 to fix the paint on the tail. Now she just needs wings. Anyone got some Red Bull?

-
If you need thinner rolls of tape, look for Aizu tape. It's the same material as Tamiya tape but comes in widths as narrow as 0.4mm. I've used that width to mask the stripes on ejection seat handles. Going the opposite direction, Dolphin tape is available in much larger widths and is relatively cheap. I picked up a 1" wide tool at my neighbourhood paint shop for $10 CAD. It's the same size as most tools of green painters masking tape. Again it's the same as Tamiya tape. Lastly, be wary of the cheaper Chinese brands. I used some on my F-104 and the residue left behind was unbelievable. I've had to strip the the model where I'd applied it and it was only on for less than a day. Carl
- 5 replies
-
- 4
-

-

-
- tamiya
- zoukei-mura
- (and 1 more)
-
The texture is most likely from the EDM process's used to cut the moulds. I don't know if they can be further machined/polished after being cut that way. Obviously the clear sprues have been polished or those would be frosted so it may have been a cost factor?
-
What is on your bench right now ? Share a picture :)
BlrwestSiR replied to Martinnfb's topic in Modelling Discussion
Very nice half-track! -
It definitely could be left out. Along with a lot of other parts but I want to see how it all fits together.
- 90 replies
-
- 2
-
-
-
- zoukei-mura
- 109
- (and 1 more)
-
I'm glad the build review is being so helpful. As for the.tailplane, it's been given a further sanding so it doesn't look so rough. Otherwise it would look like they used zimmerit on the tail.
- 90 replies
-
- 4
-

-
-
- zoukei-mura
- 109
- (and 1 more)
-
Thanks Bill! Like I said earlier I'm slowly catching up to your build. As for the gear mounts, hopefully this pic helps you out. You can see the tabs on the mounts and where they connect to the firewall.
- 90 replies
-
- 4
-
-
-
- zoukei-mura
- 109
- (and 1 more)
-
Nice job Bill. I'm almost at the same point in my build. Carl
-
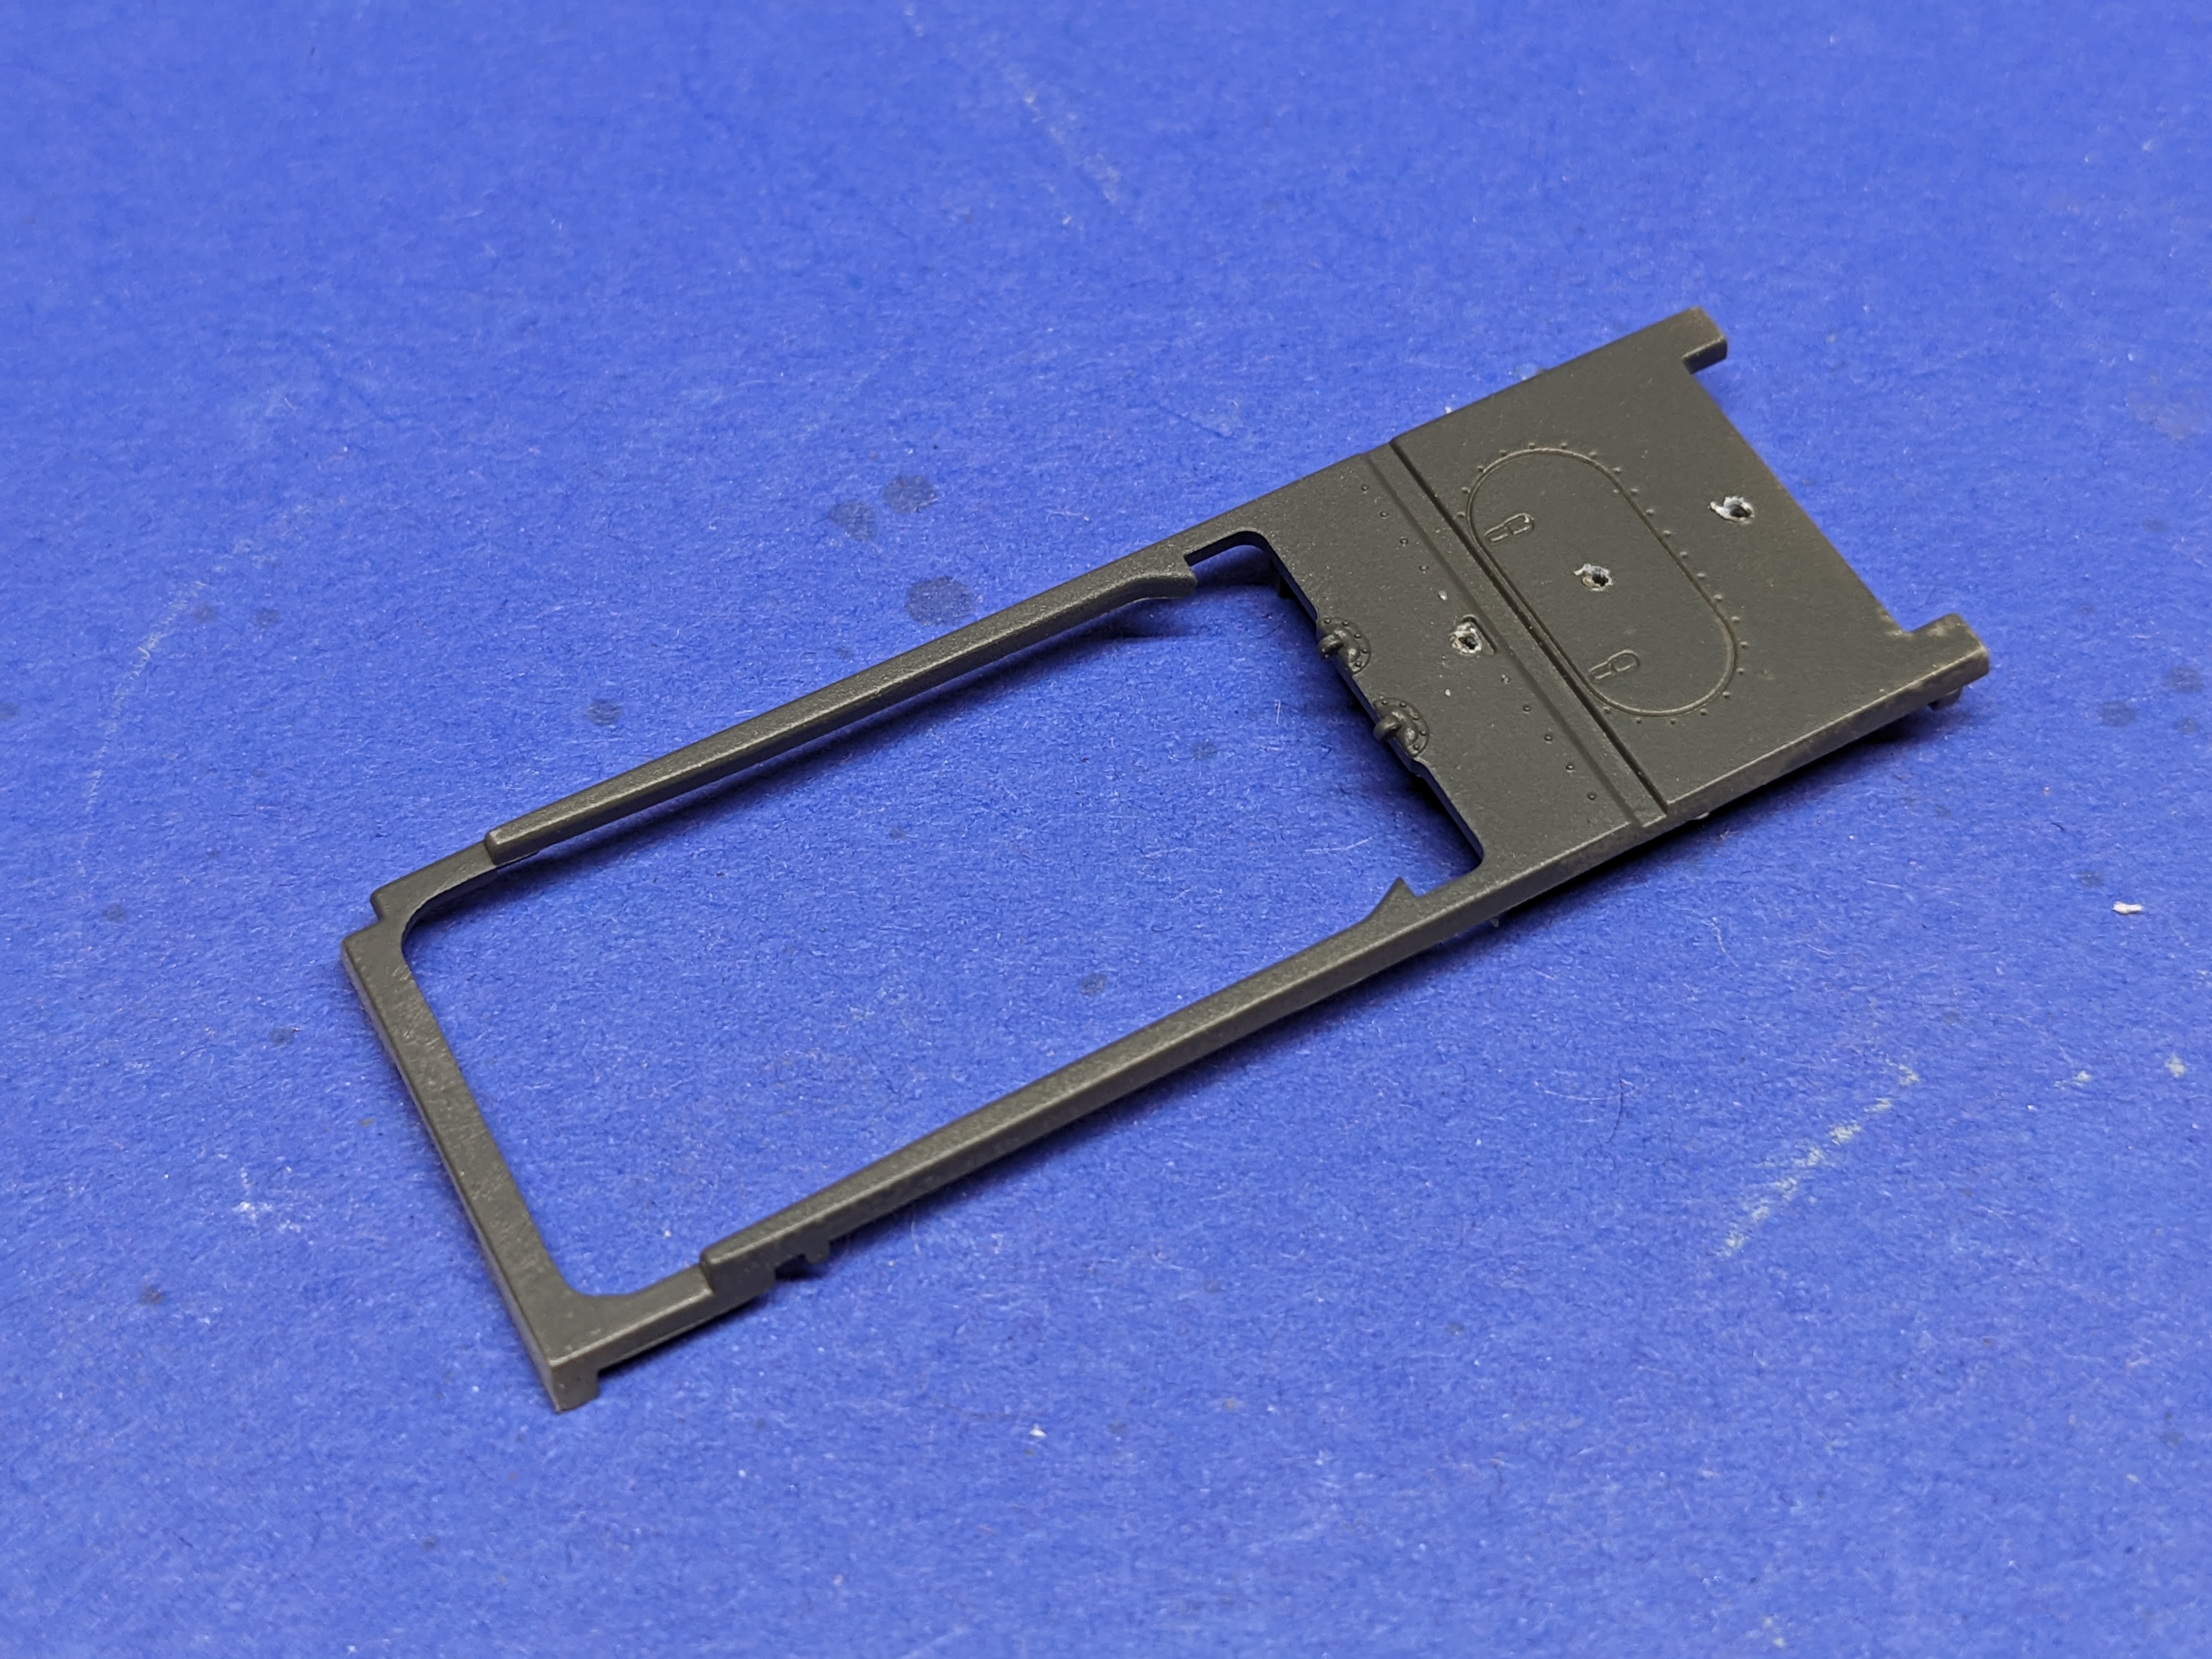
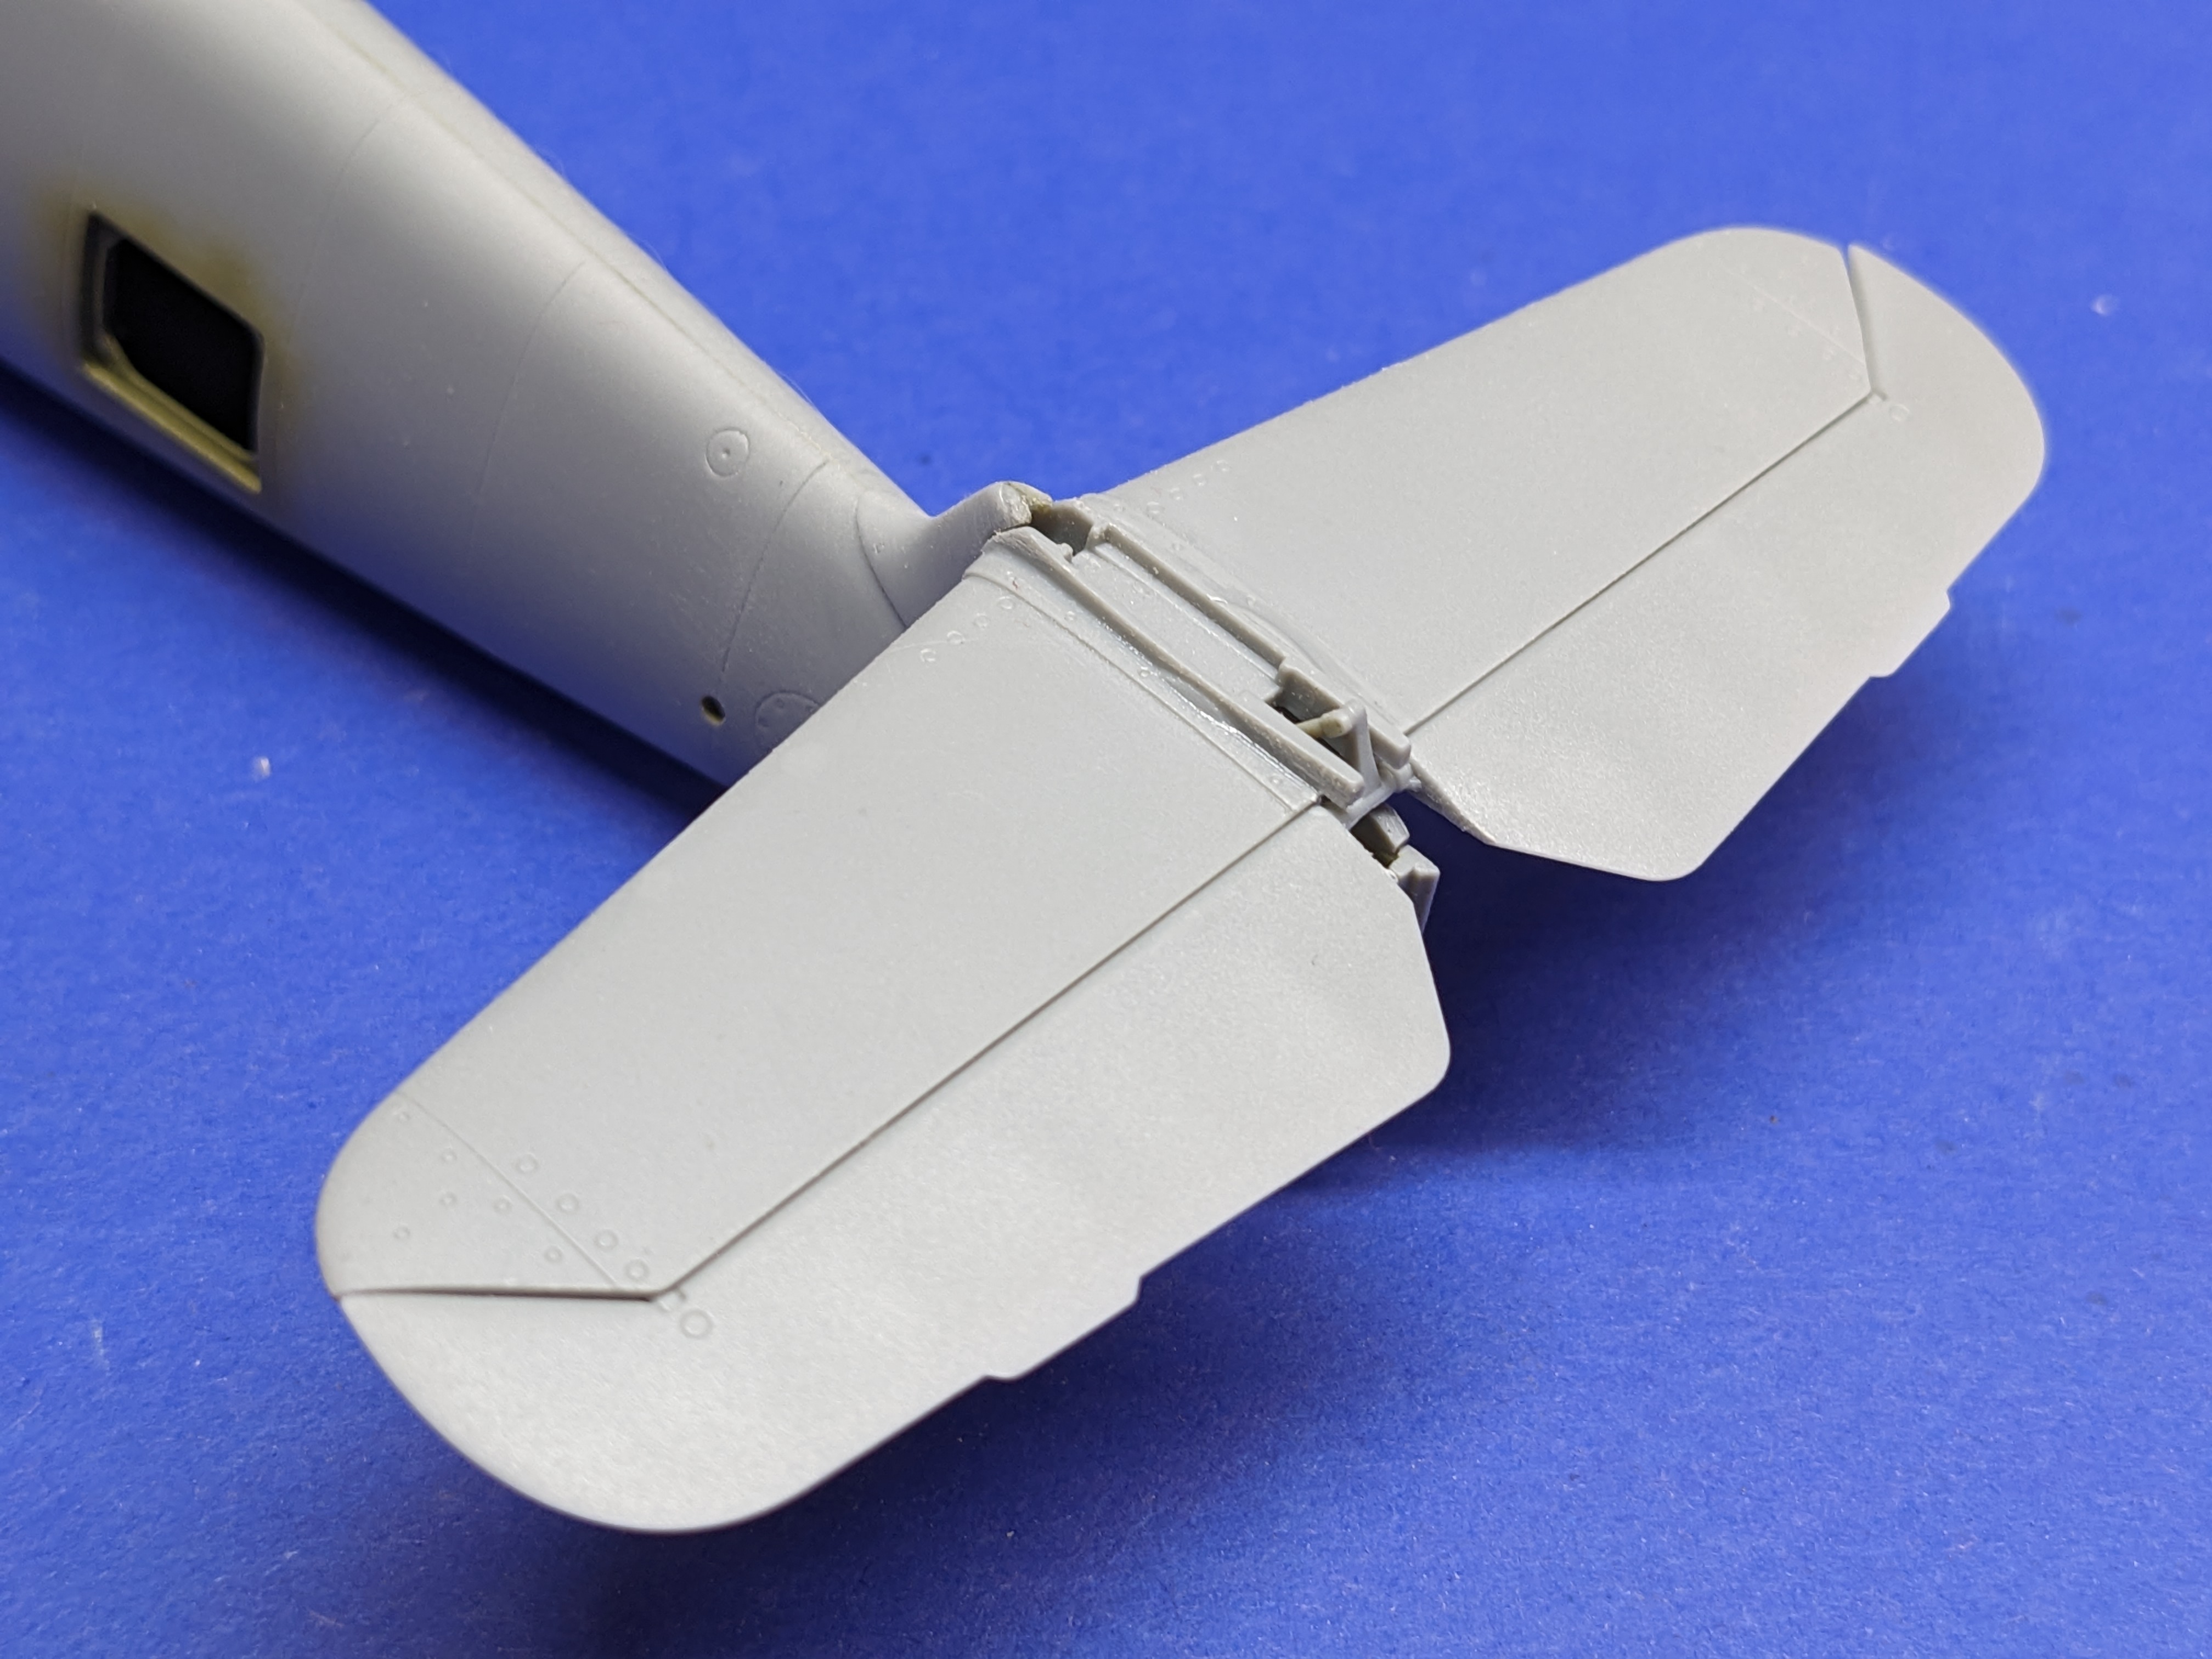
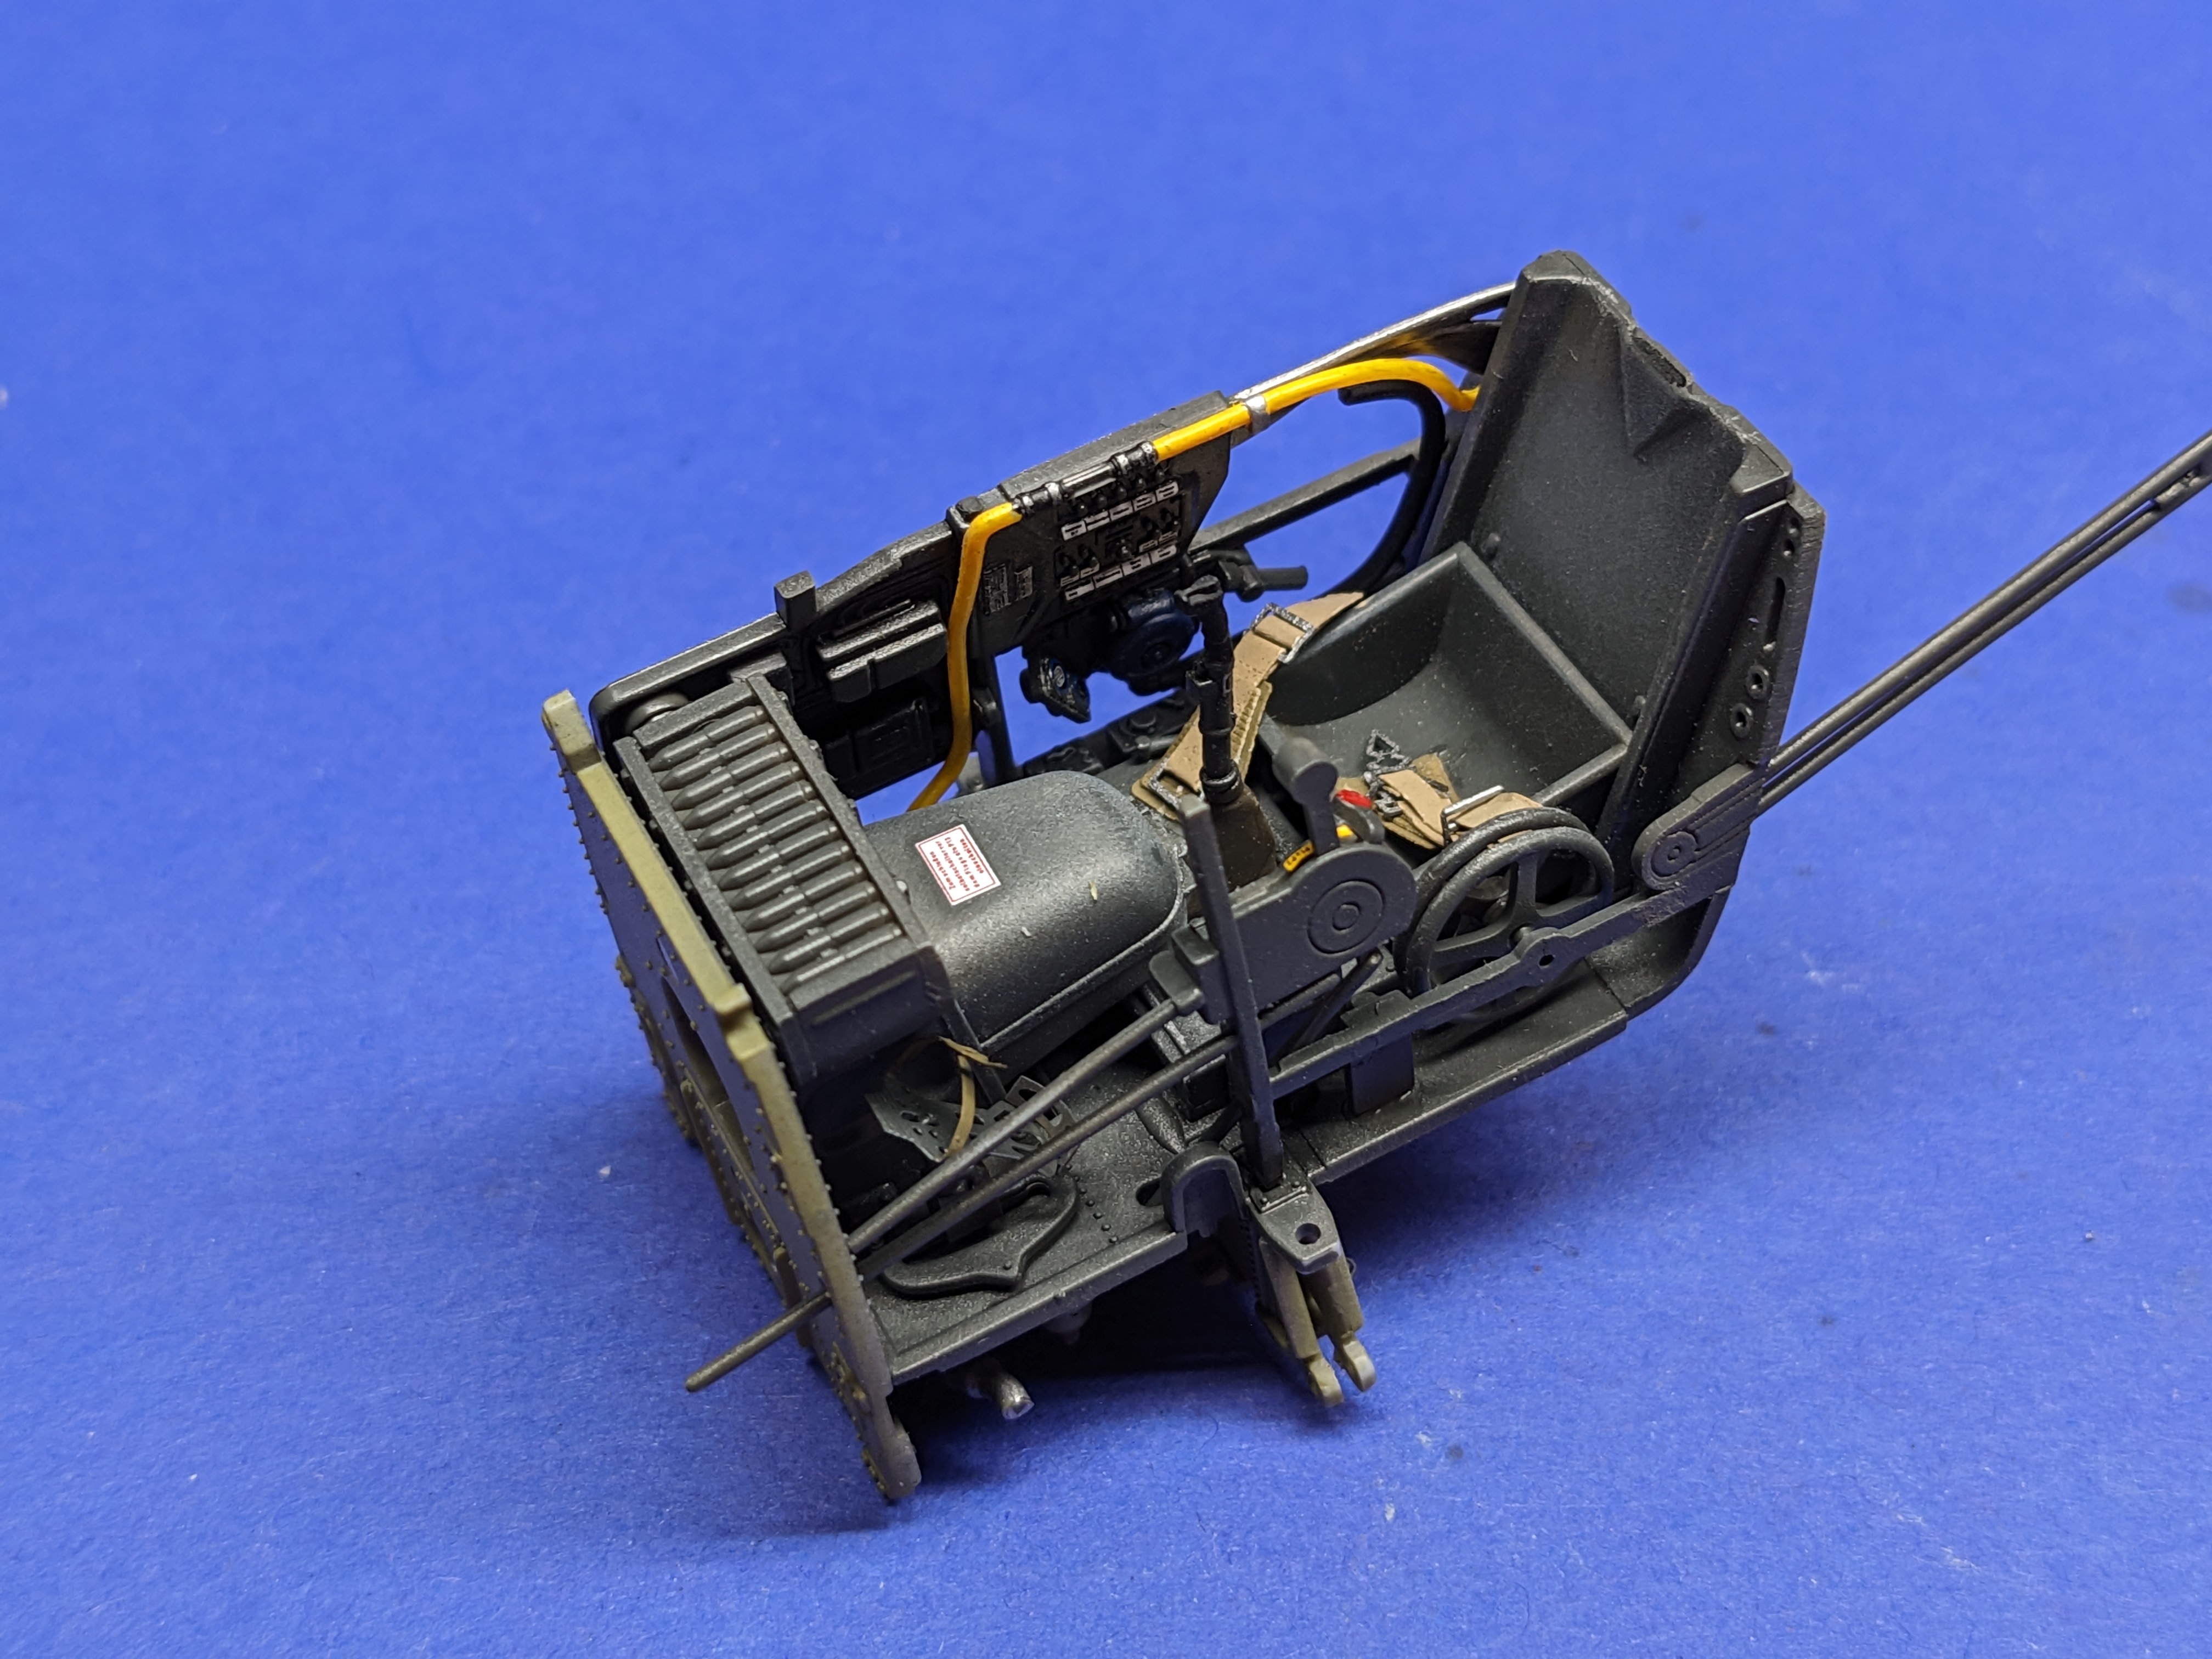
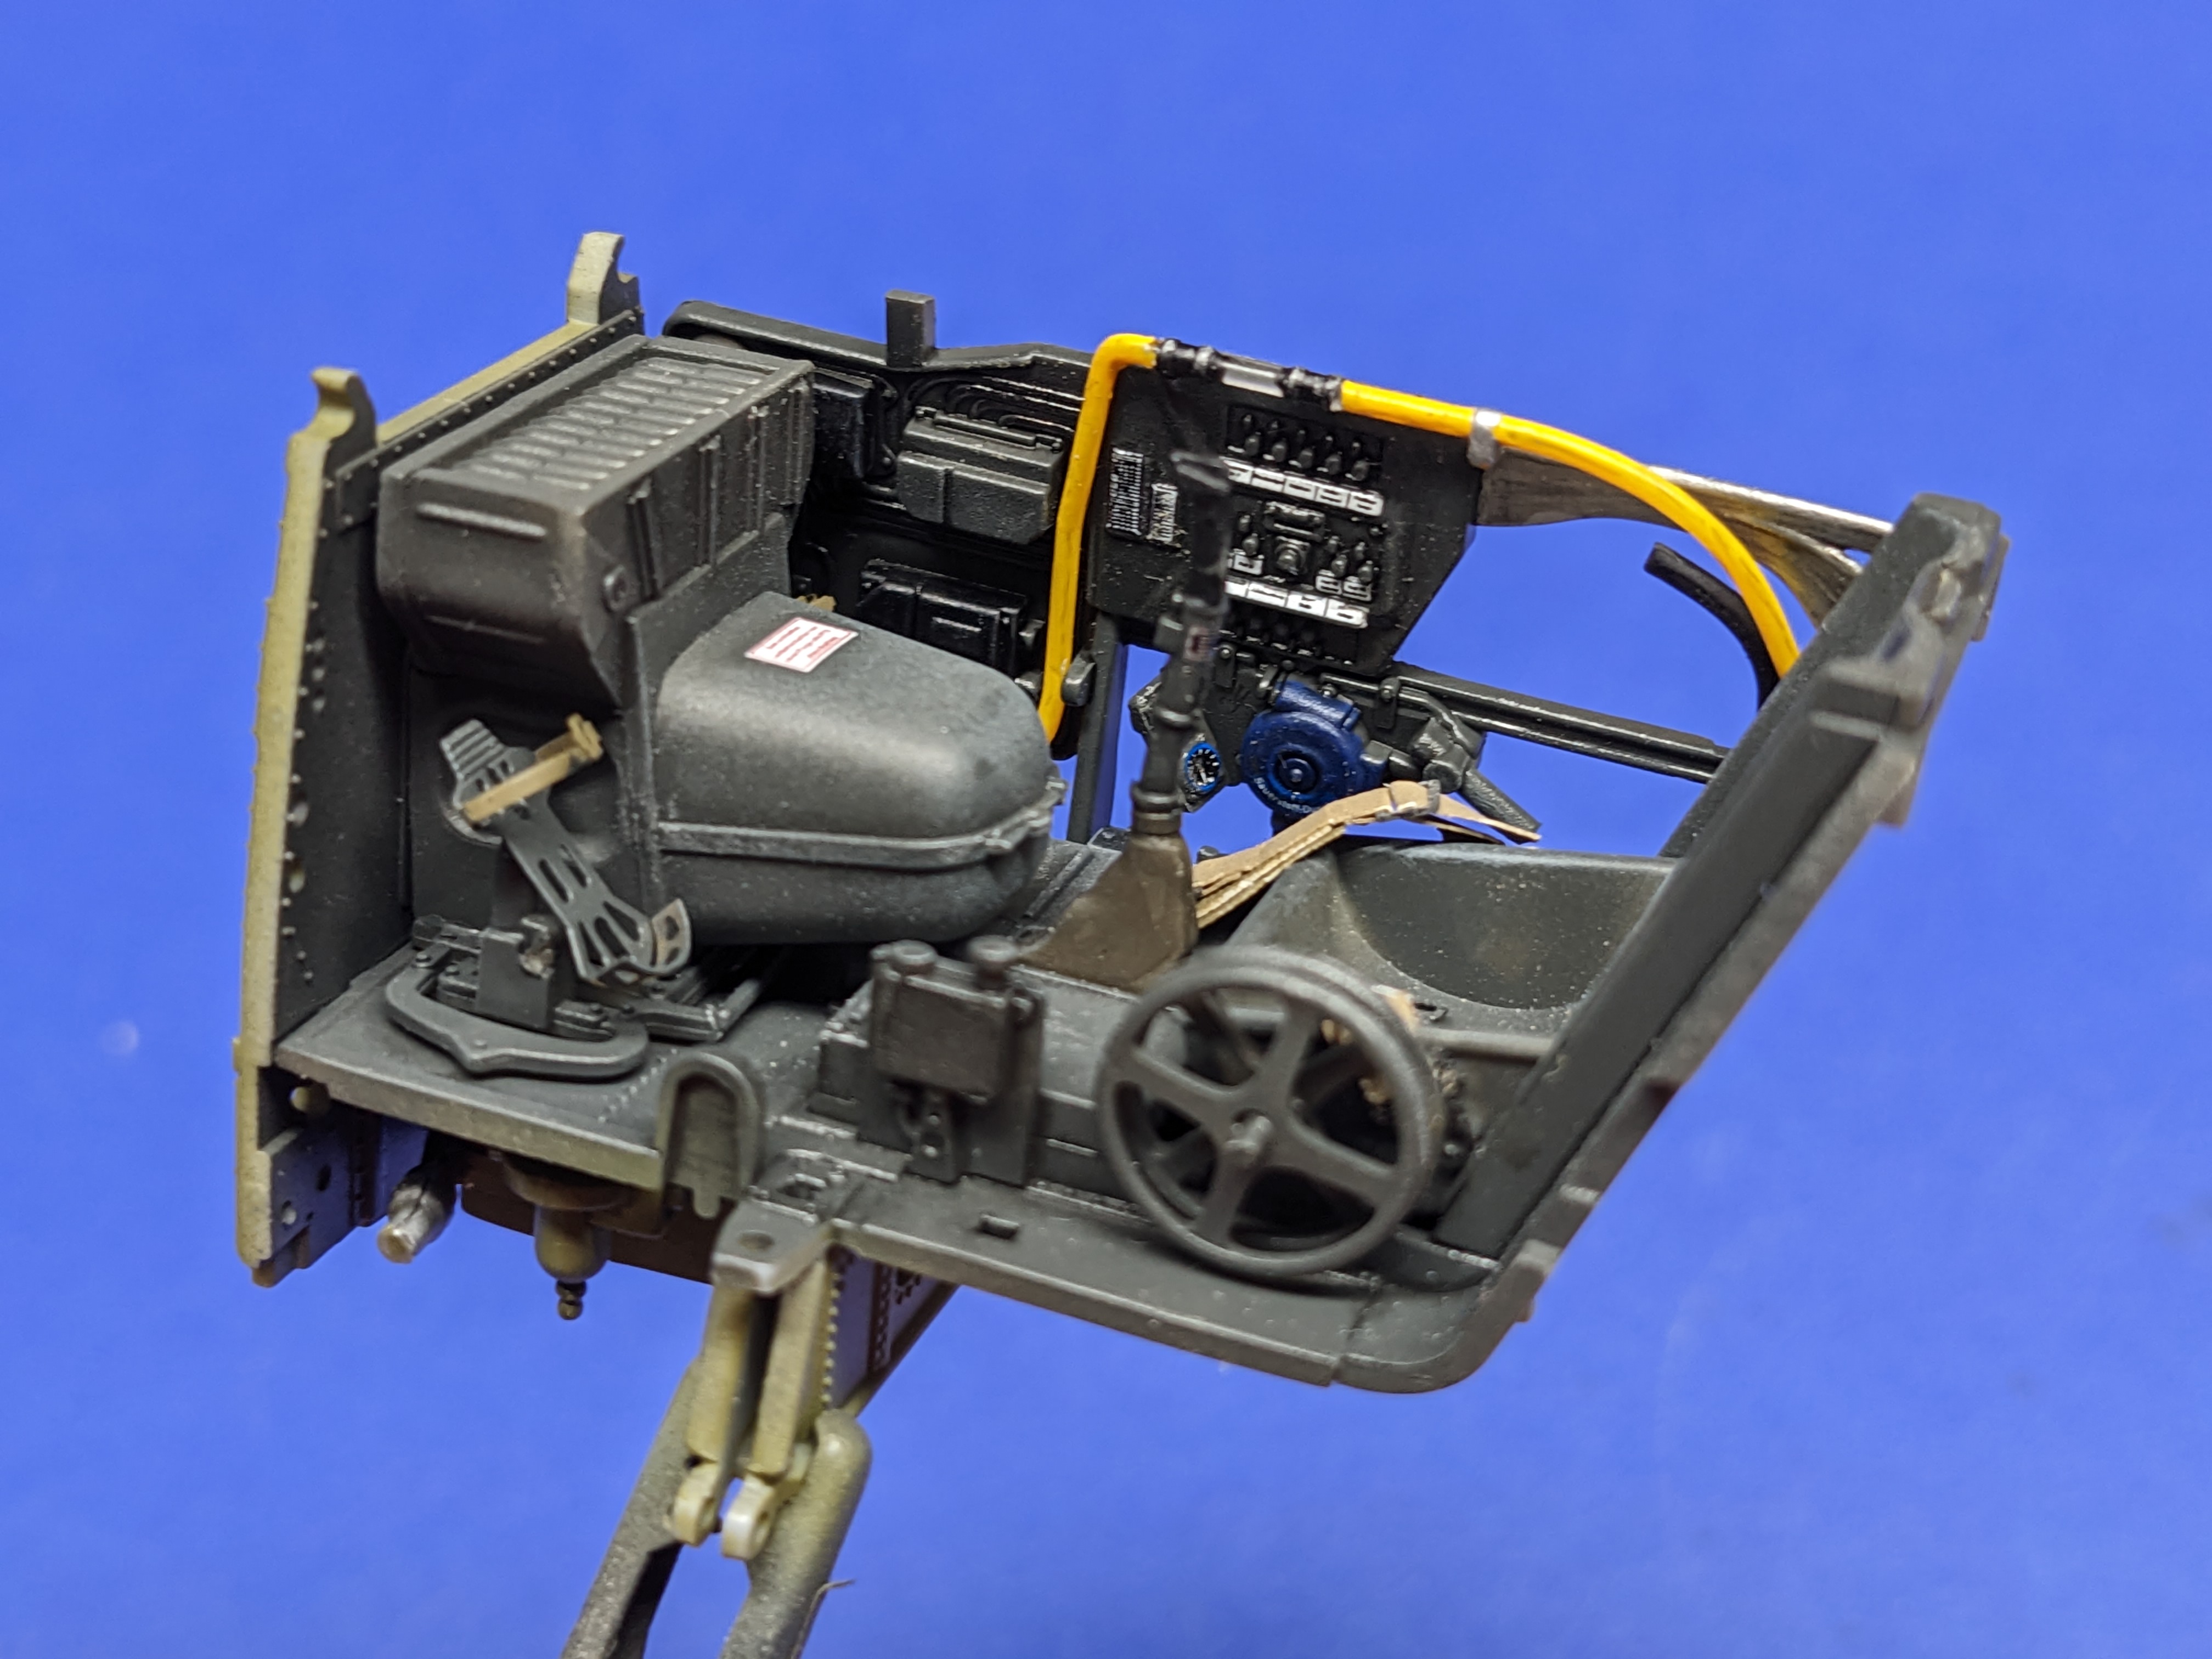
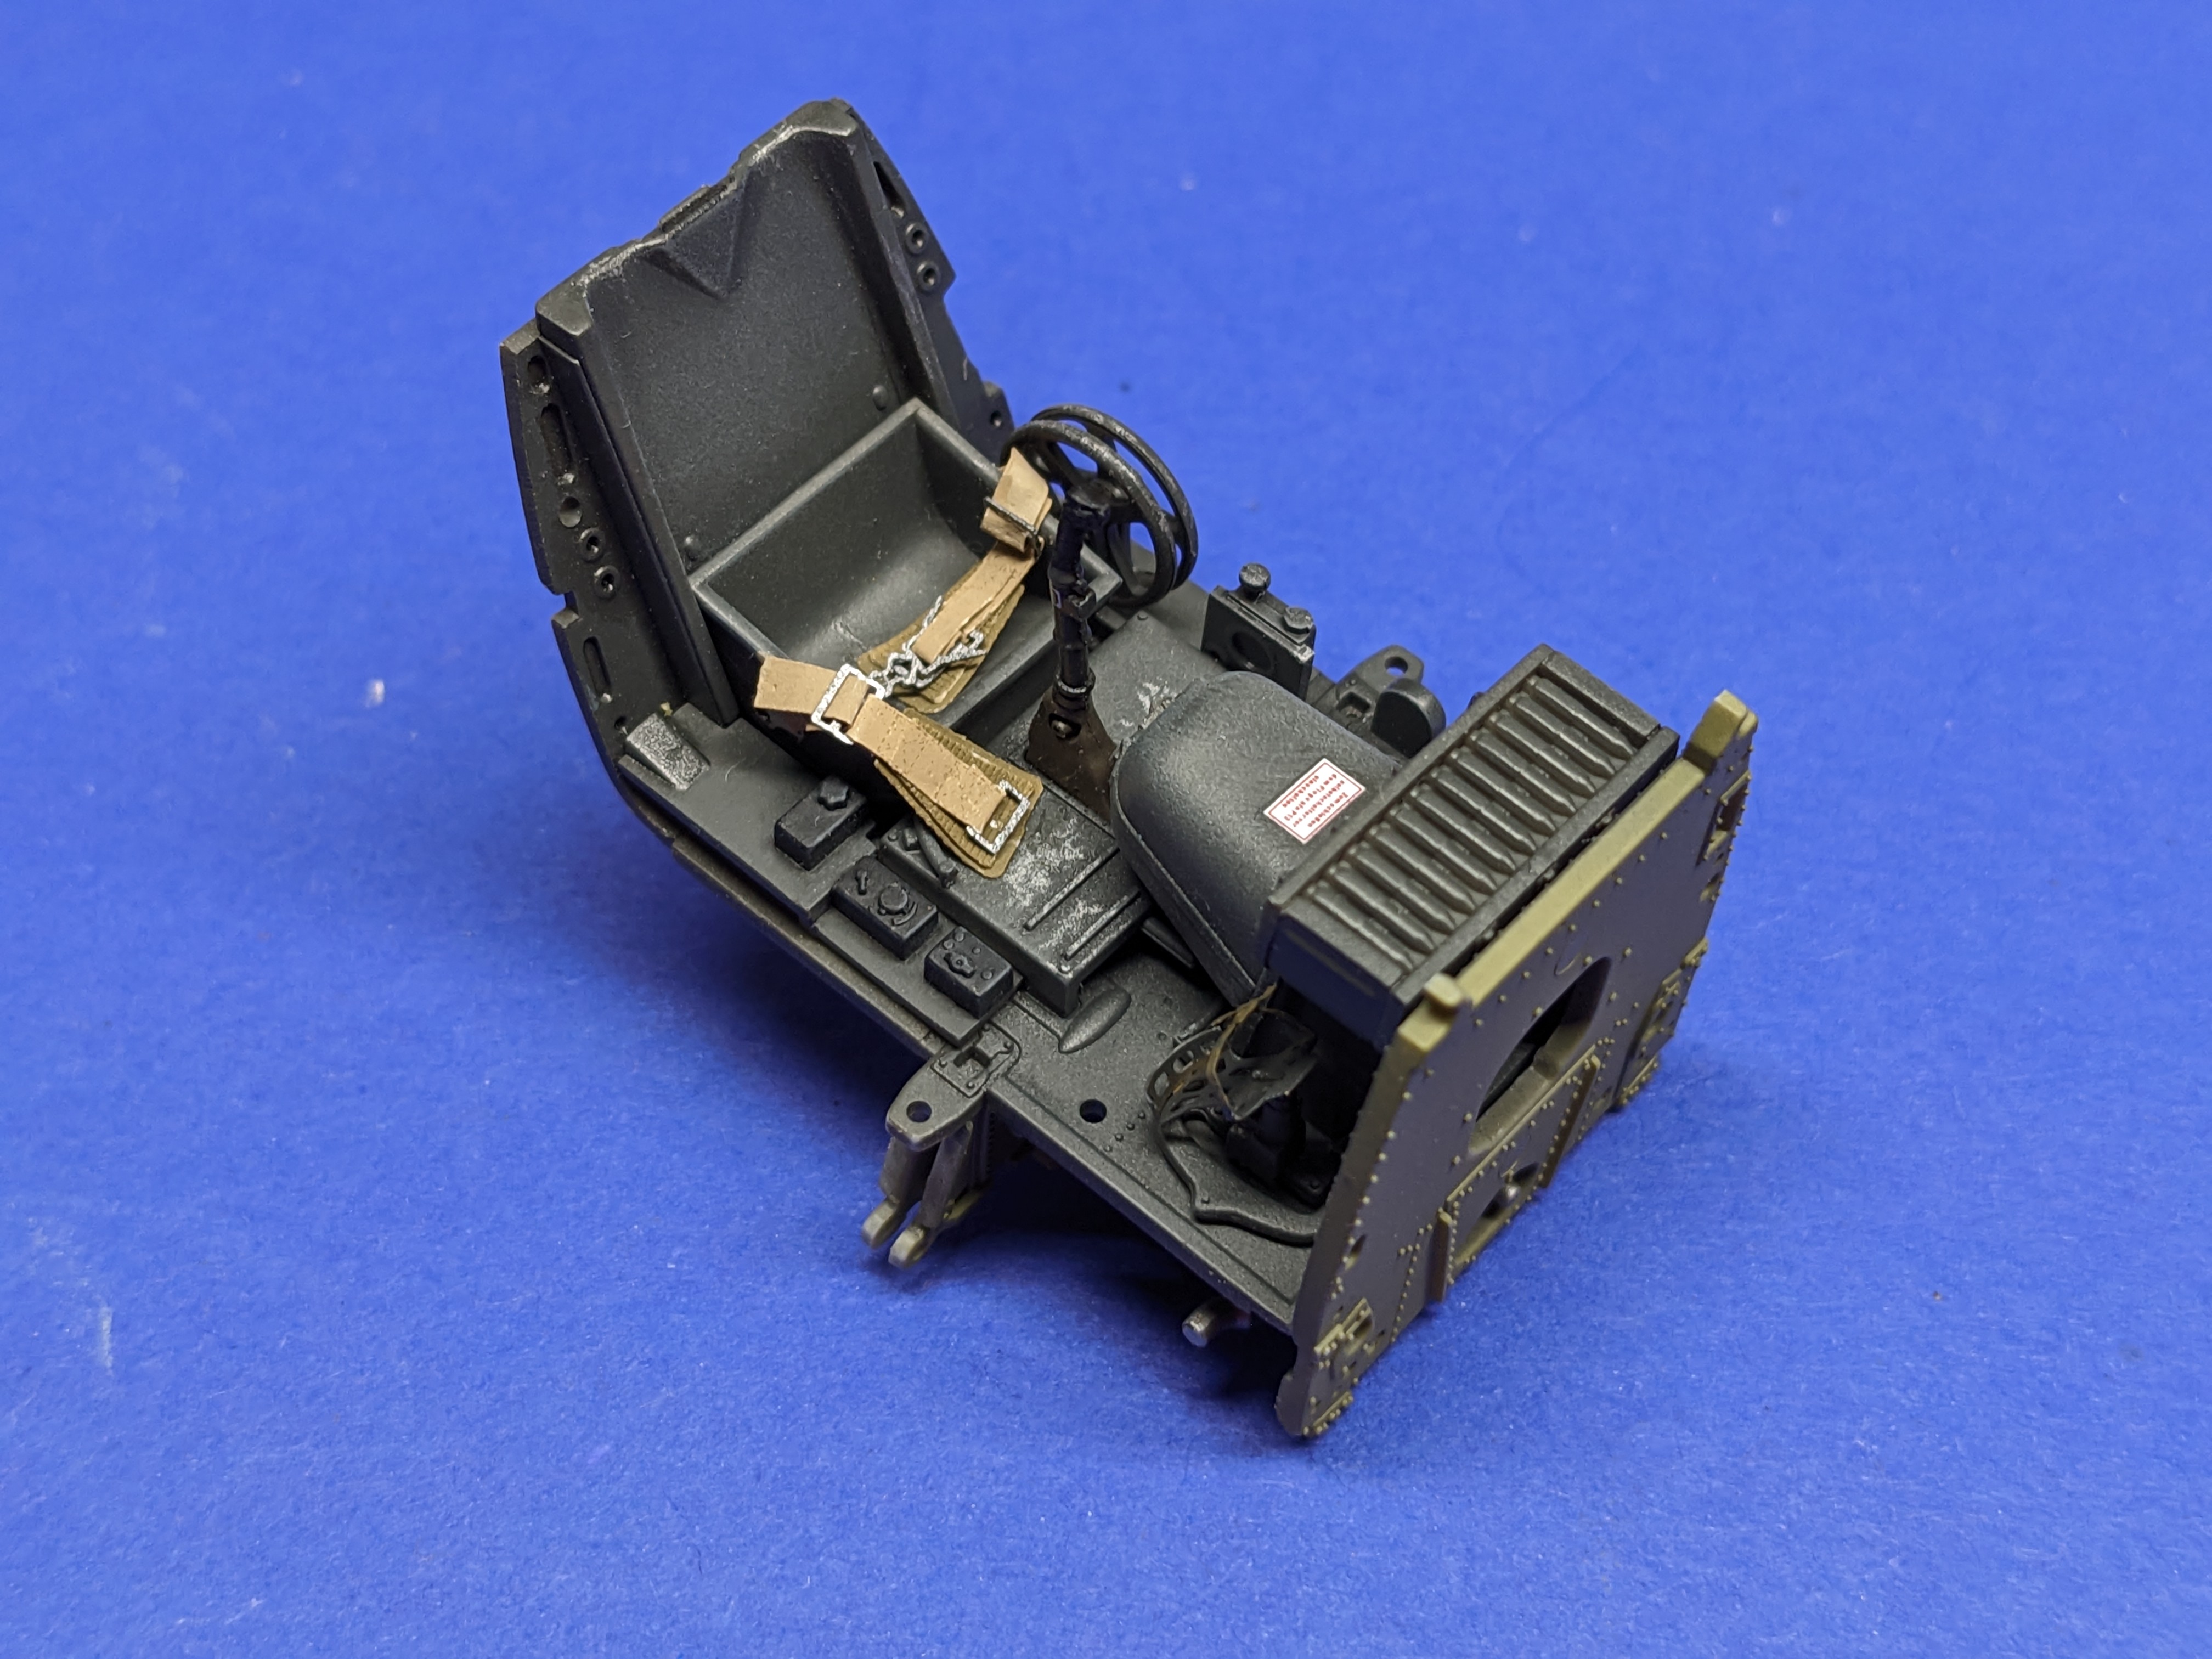
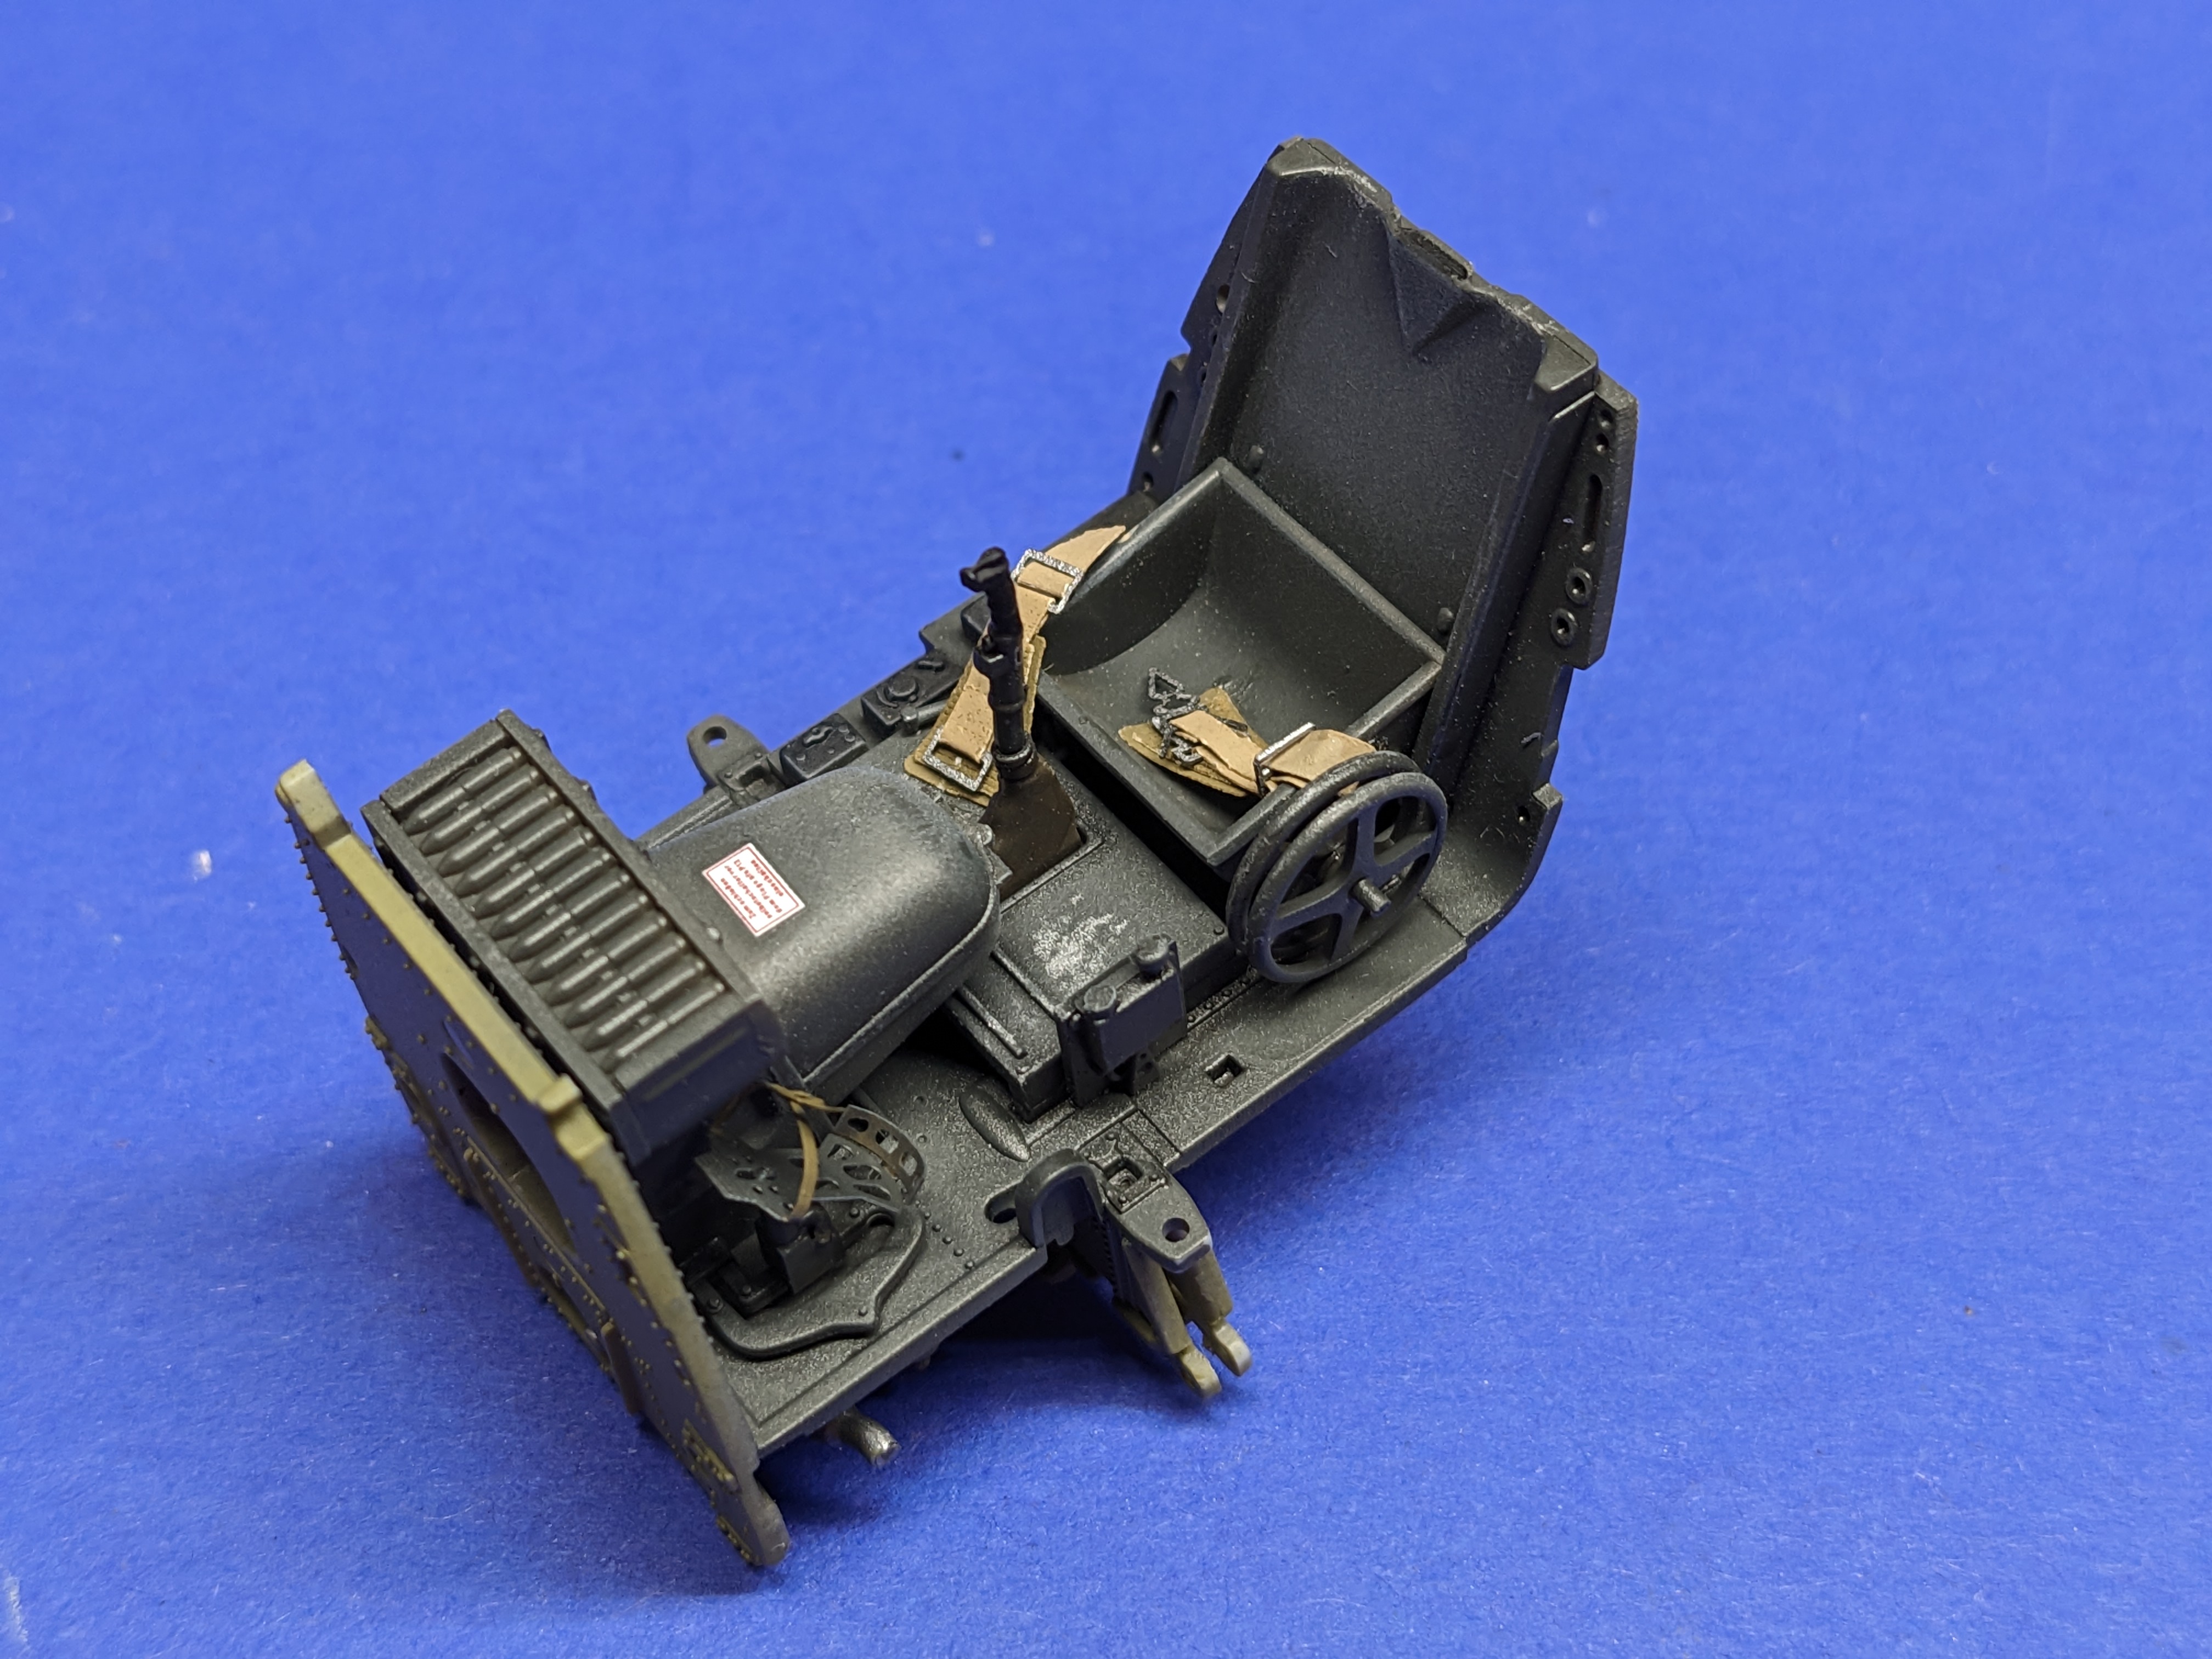
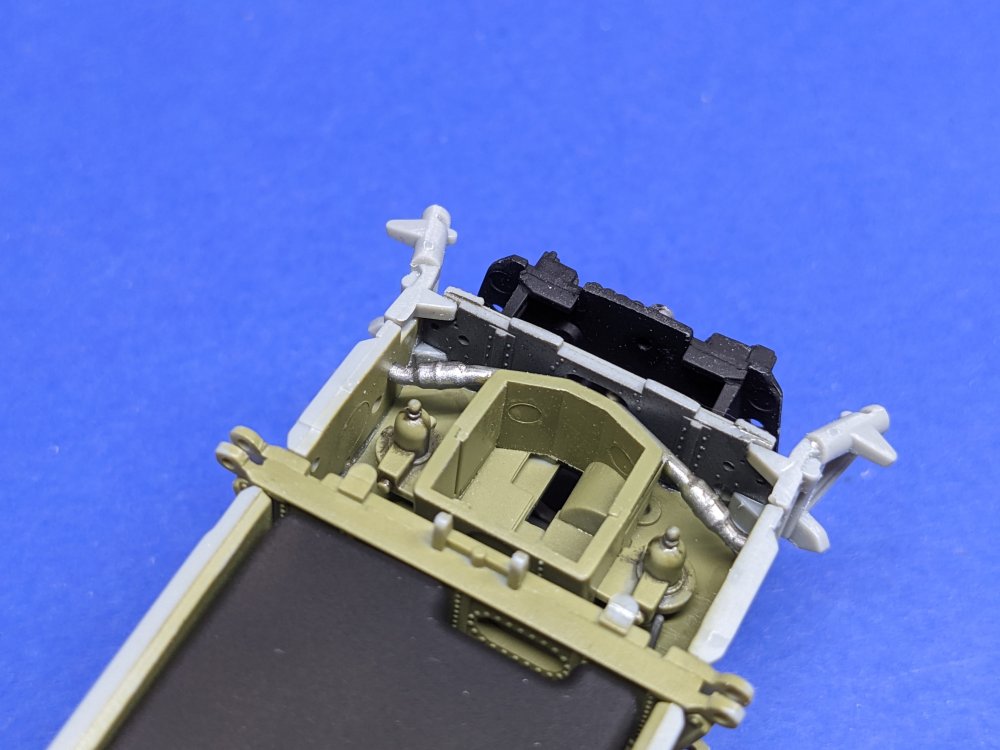
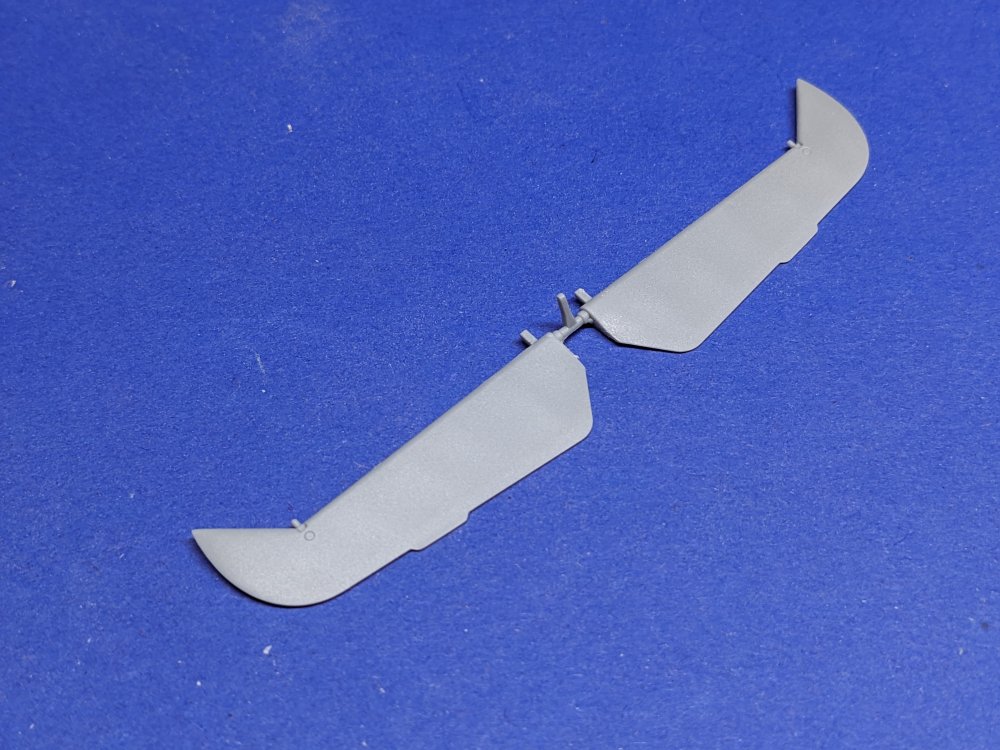
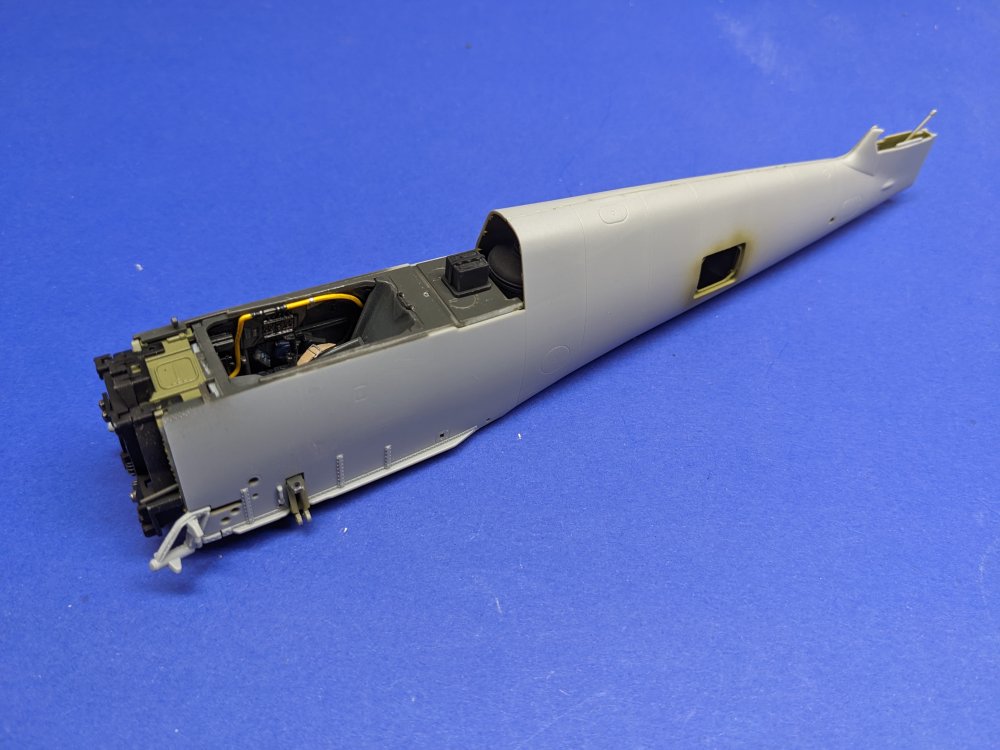
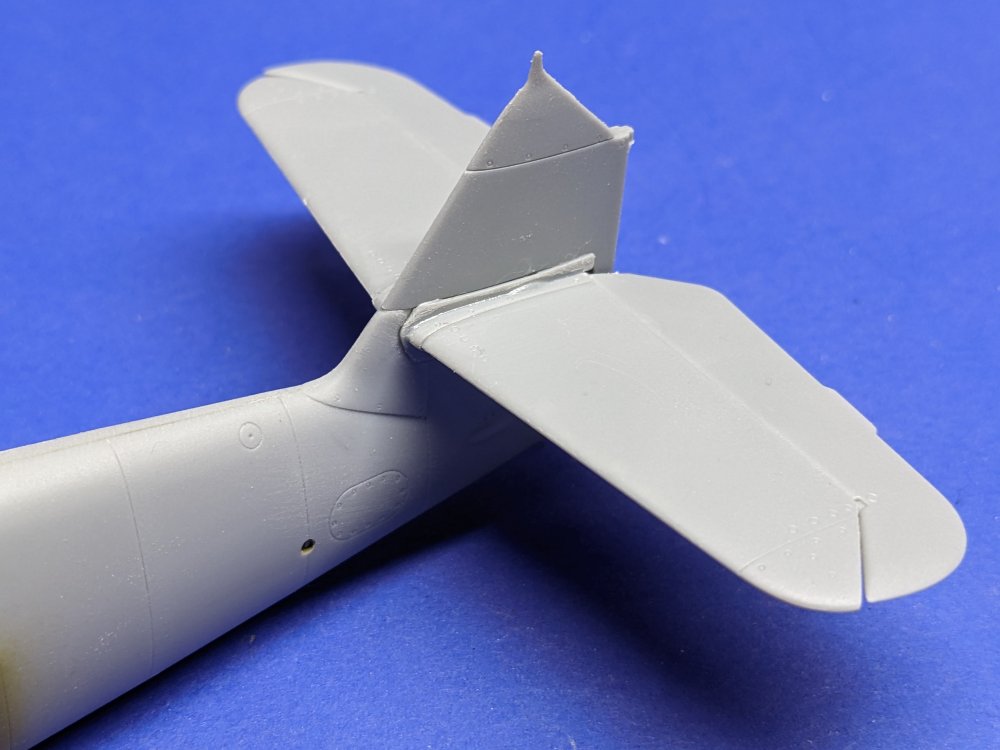
The cockpit coaming needs some holes drilled in it for the battery. This is clearly marked in the instructions. Time to close up the fuselage. The cockpit was glued to the right side. The fit is very good. It is best to scrape paint off any joints to keep it that way. I left the fuselage tank out for the movement as this allowed me to apply cement from the underside and keep all the joints tight. The tank can go in after the fuselage is together. All closed up. There are a couple very small seams that took a quick sanding to remove. The tailplanes are one piece so a quick sanding off of mould lines and it was ready to go. I then attached them followed by the vertical tail.


- 90 replies
-
- 10
-
-
-
- zoukei-mura
- 109
- (and 1 more)
-
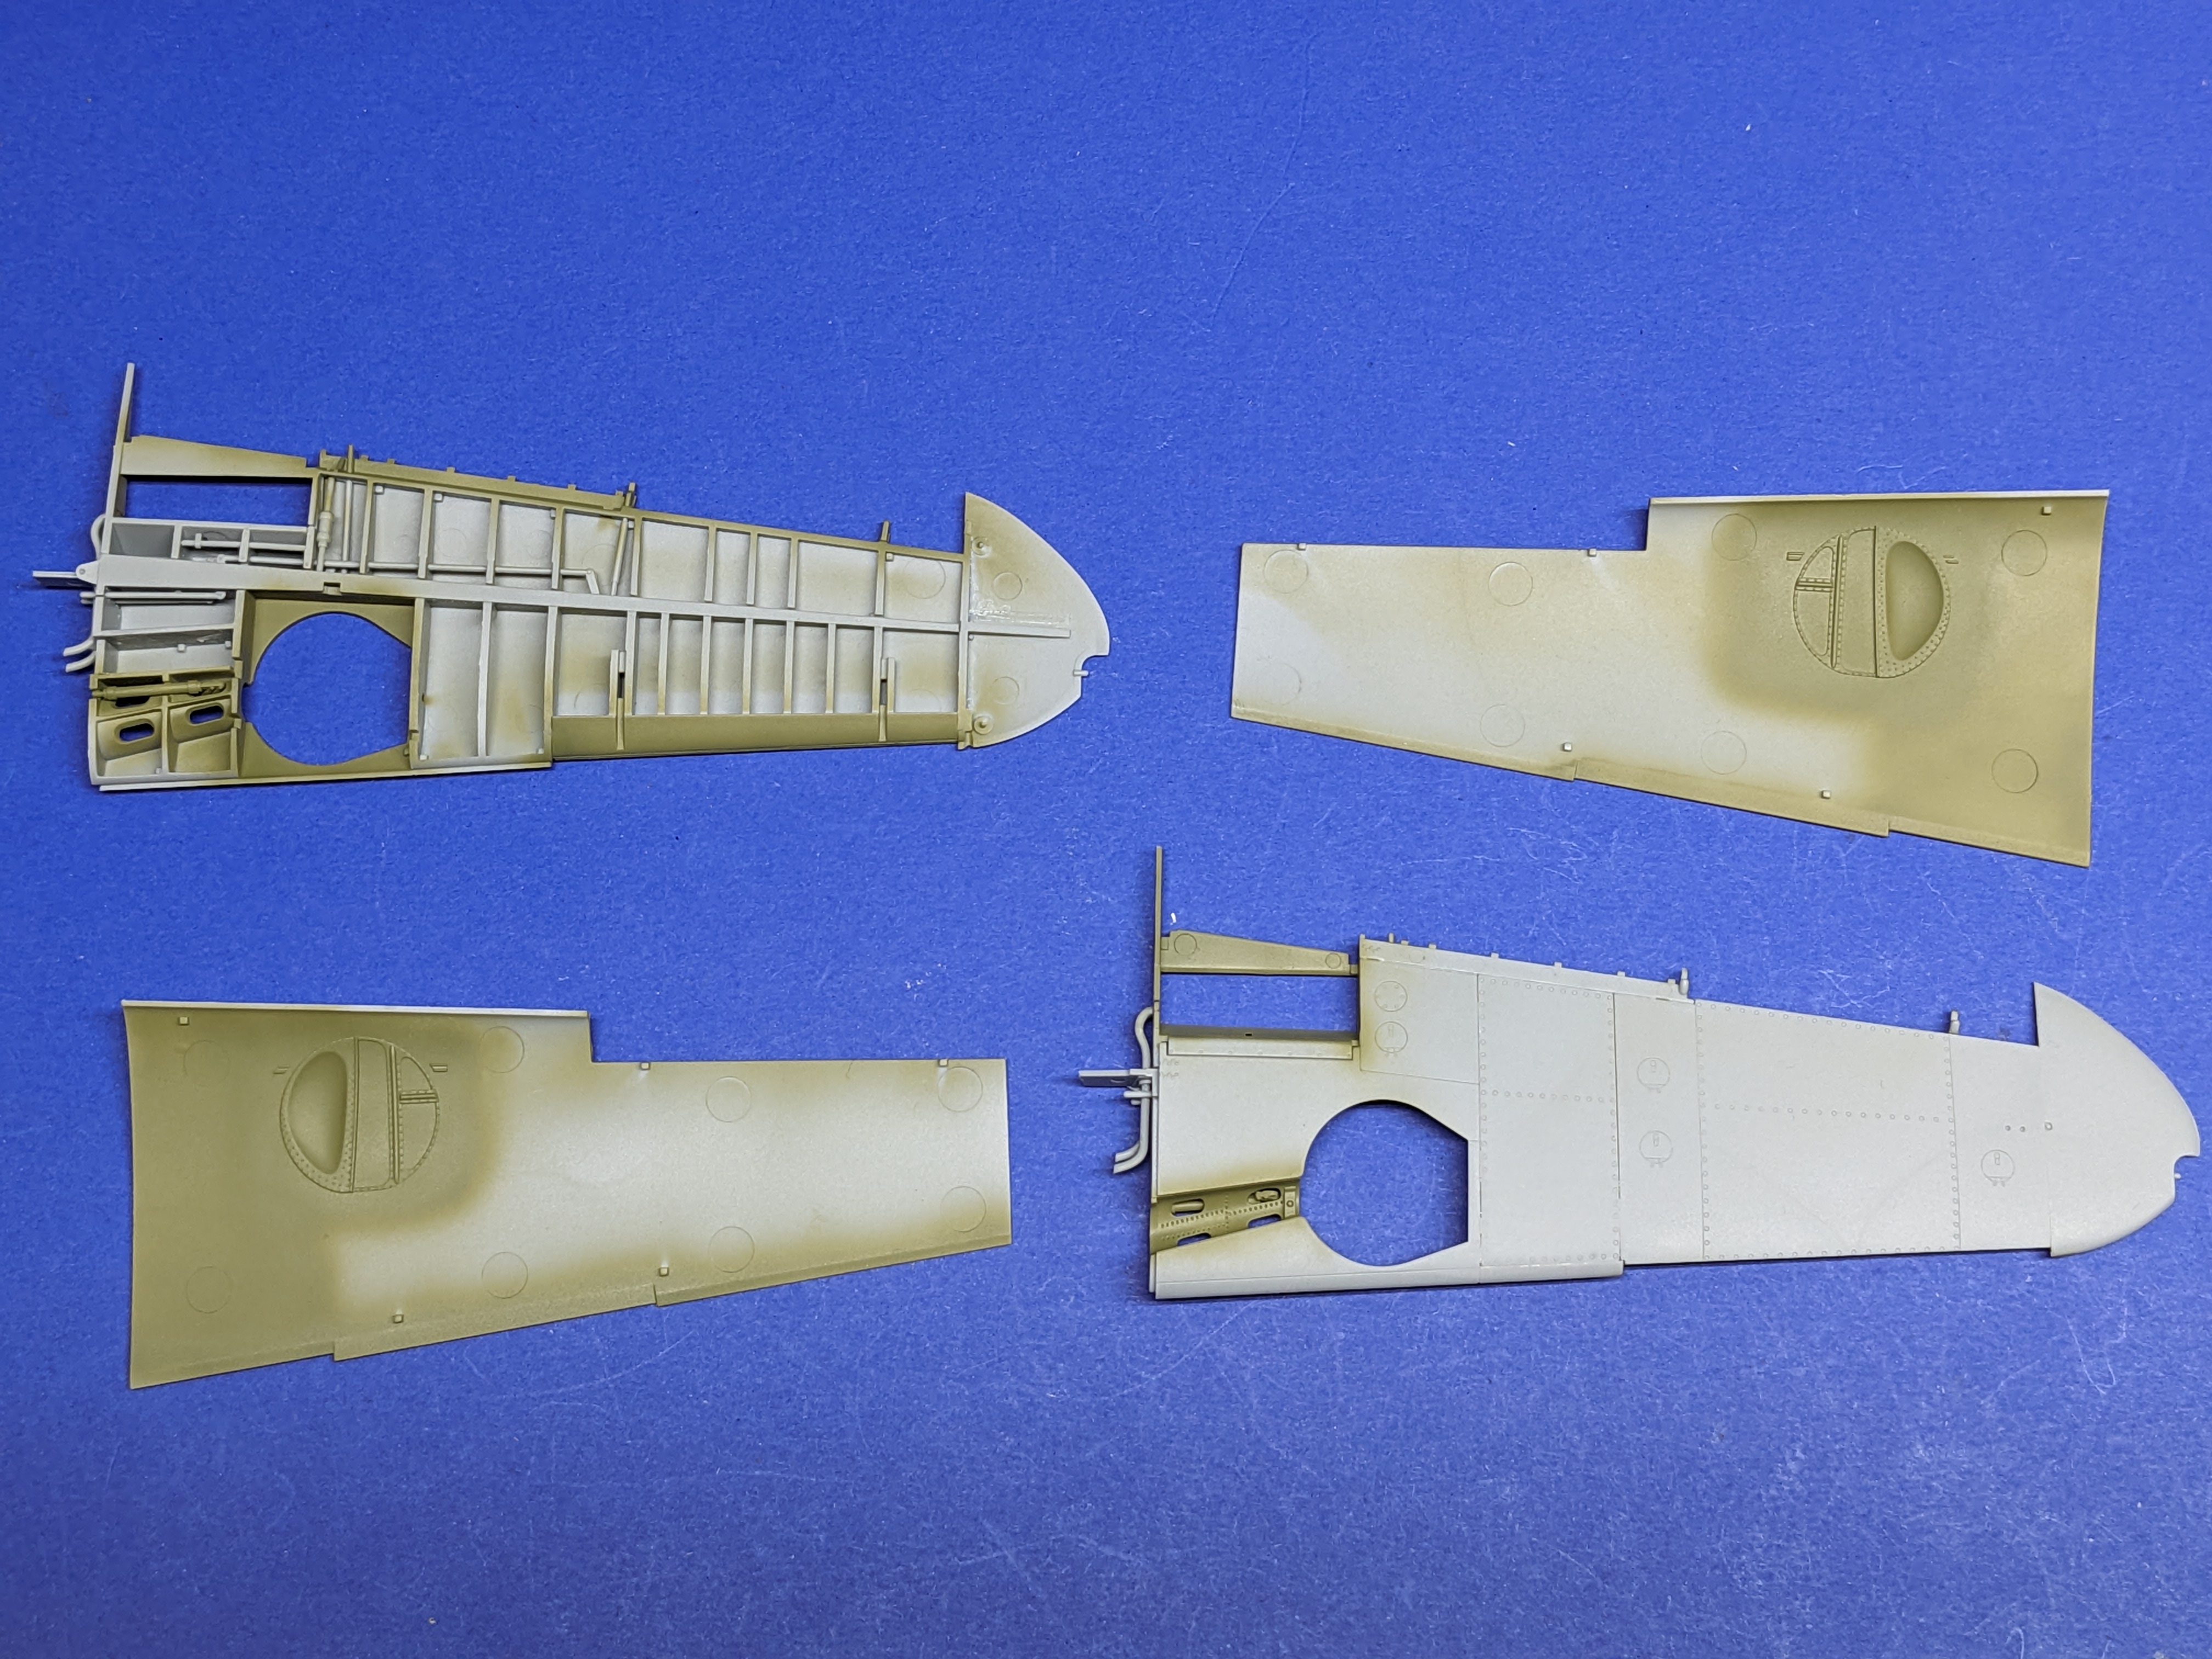
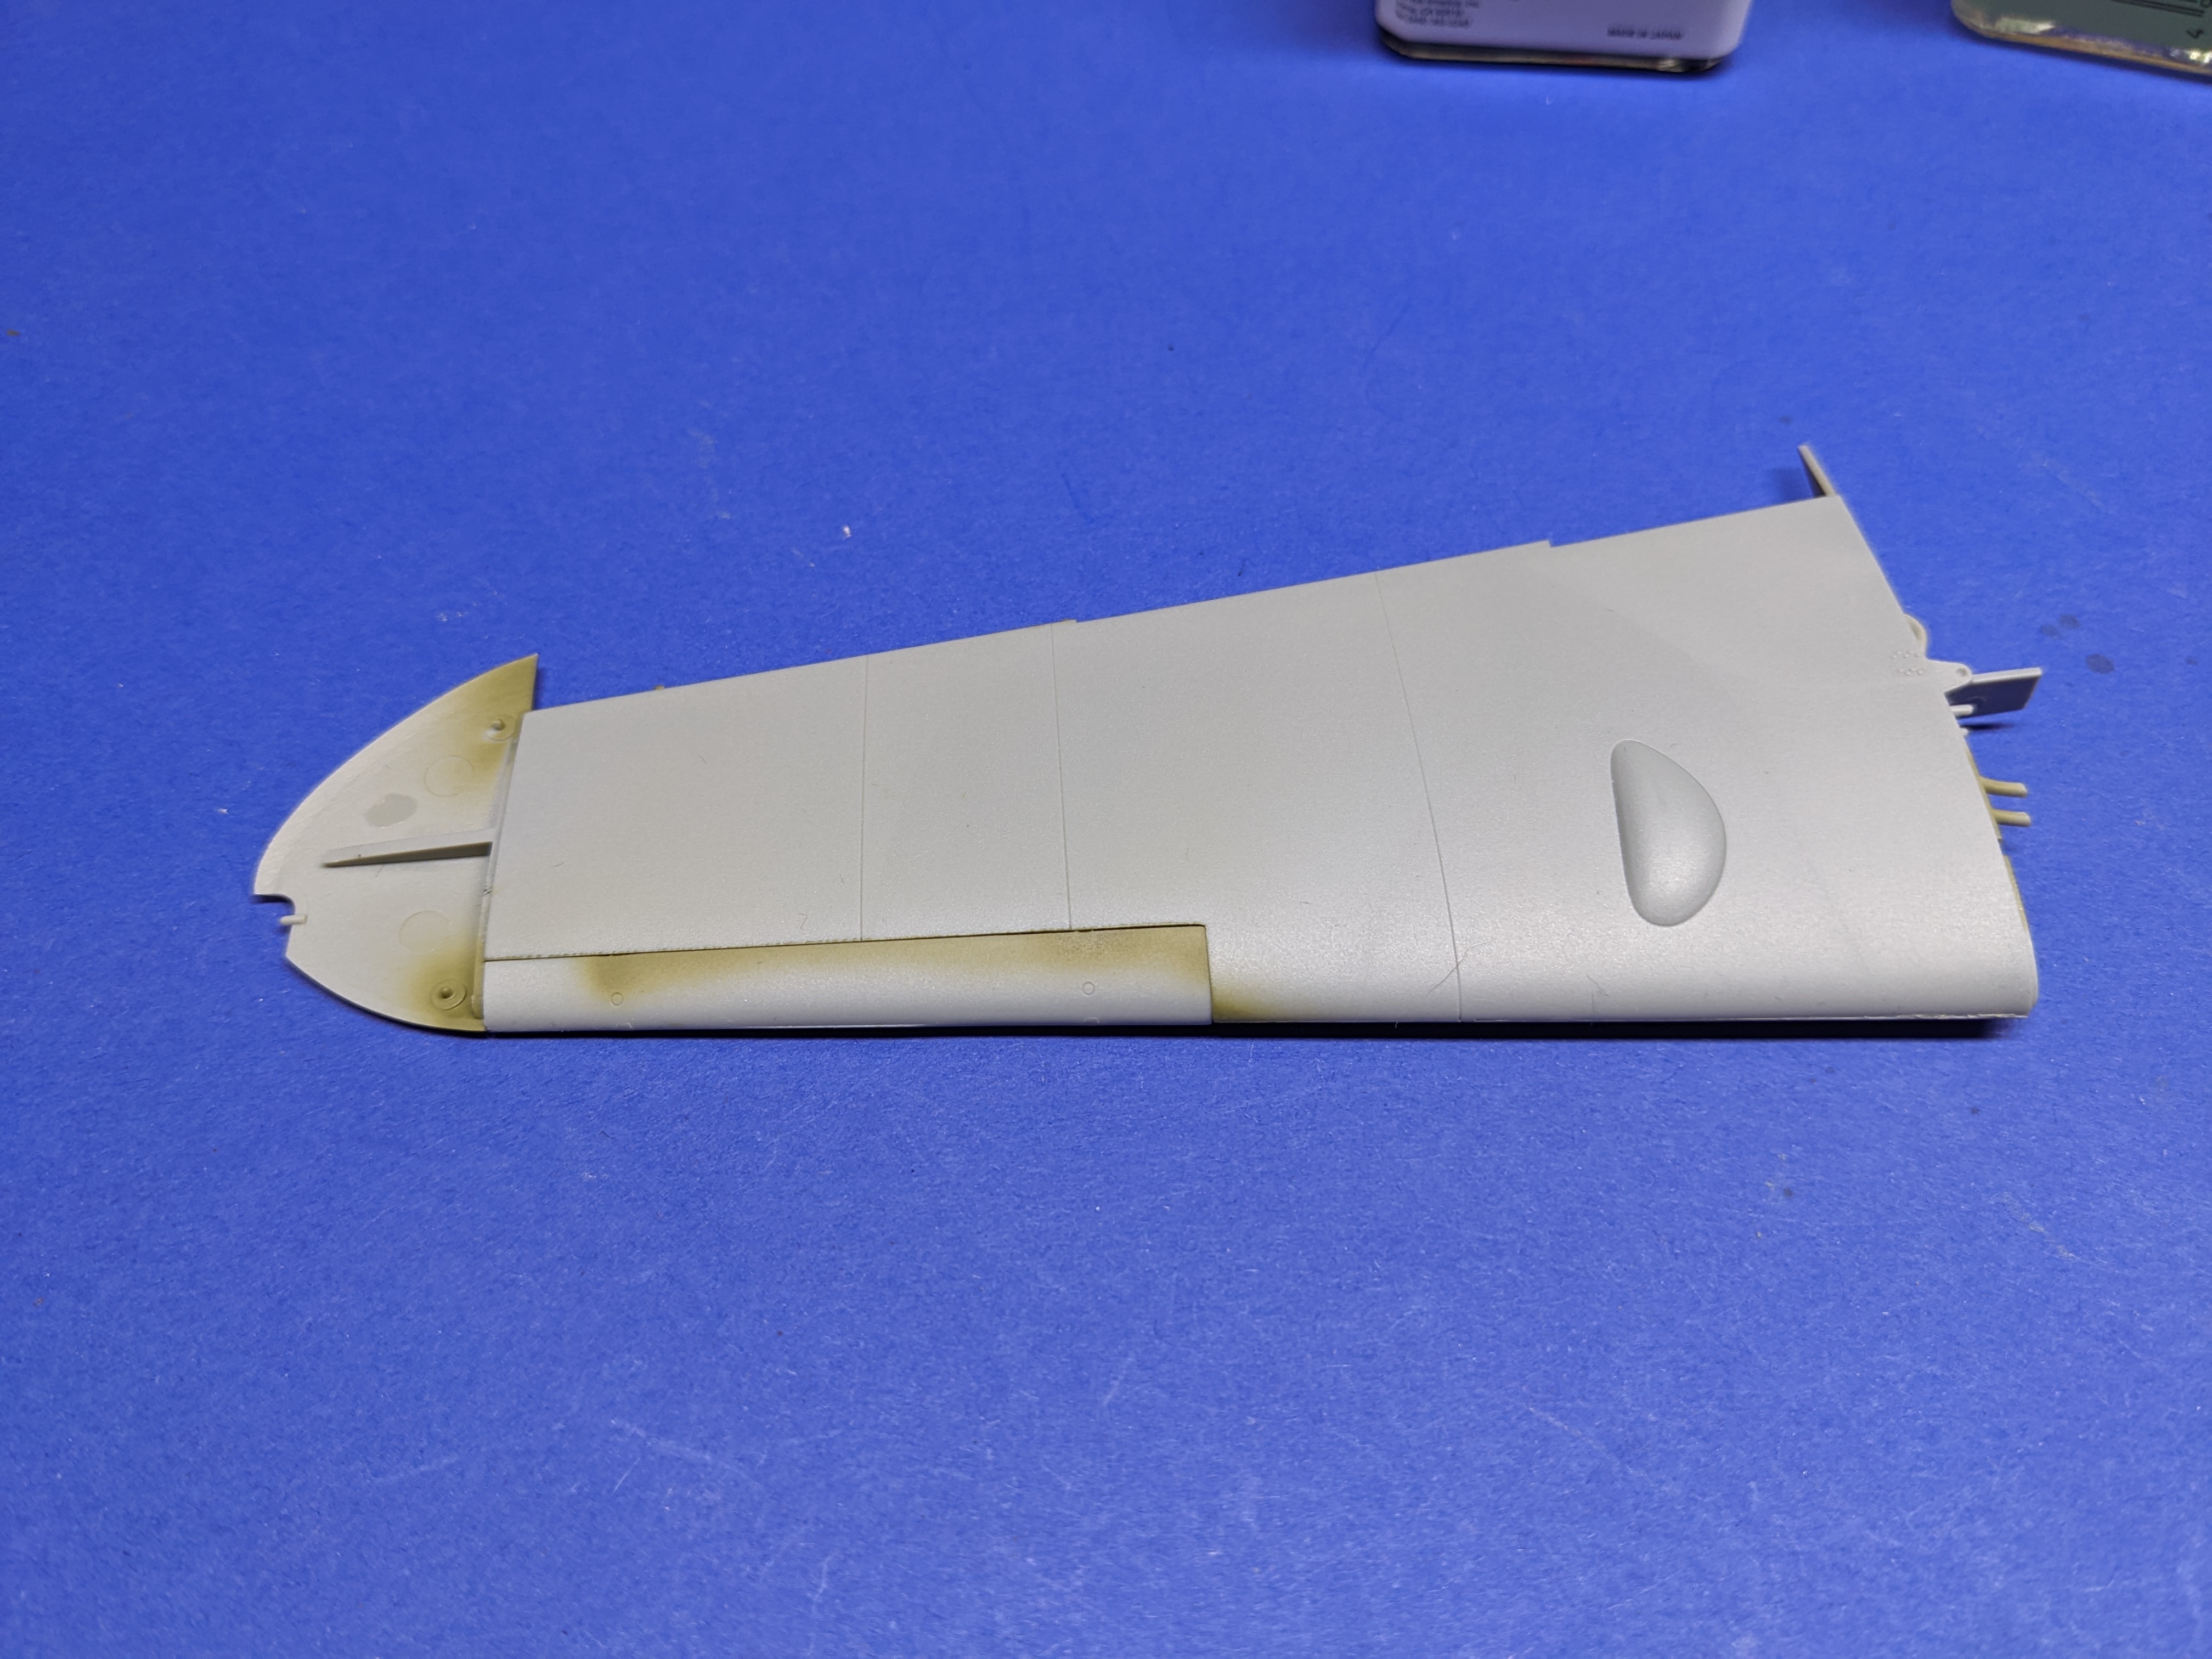
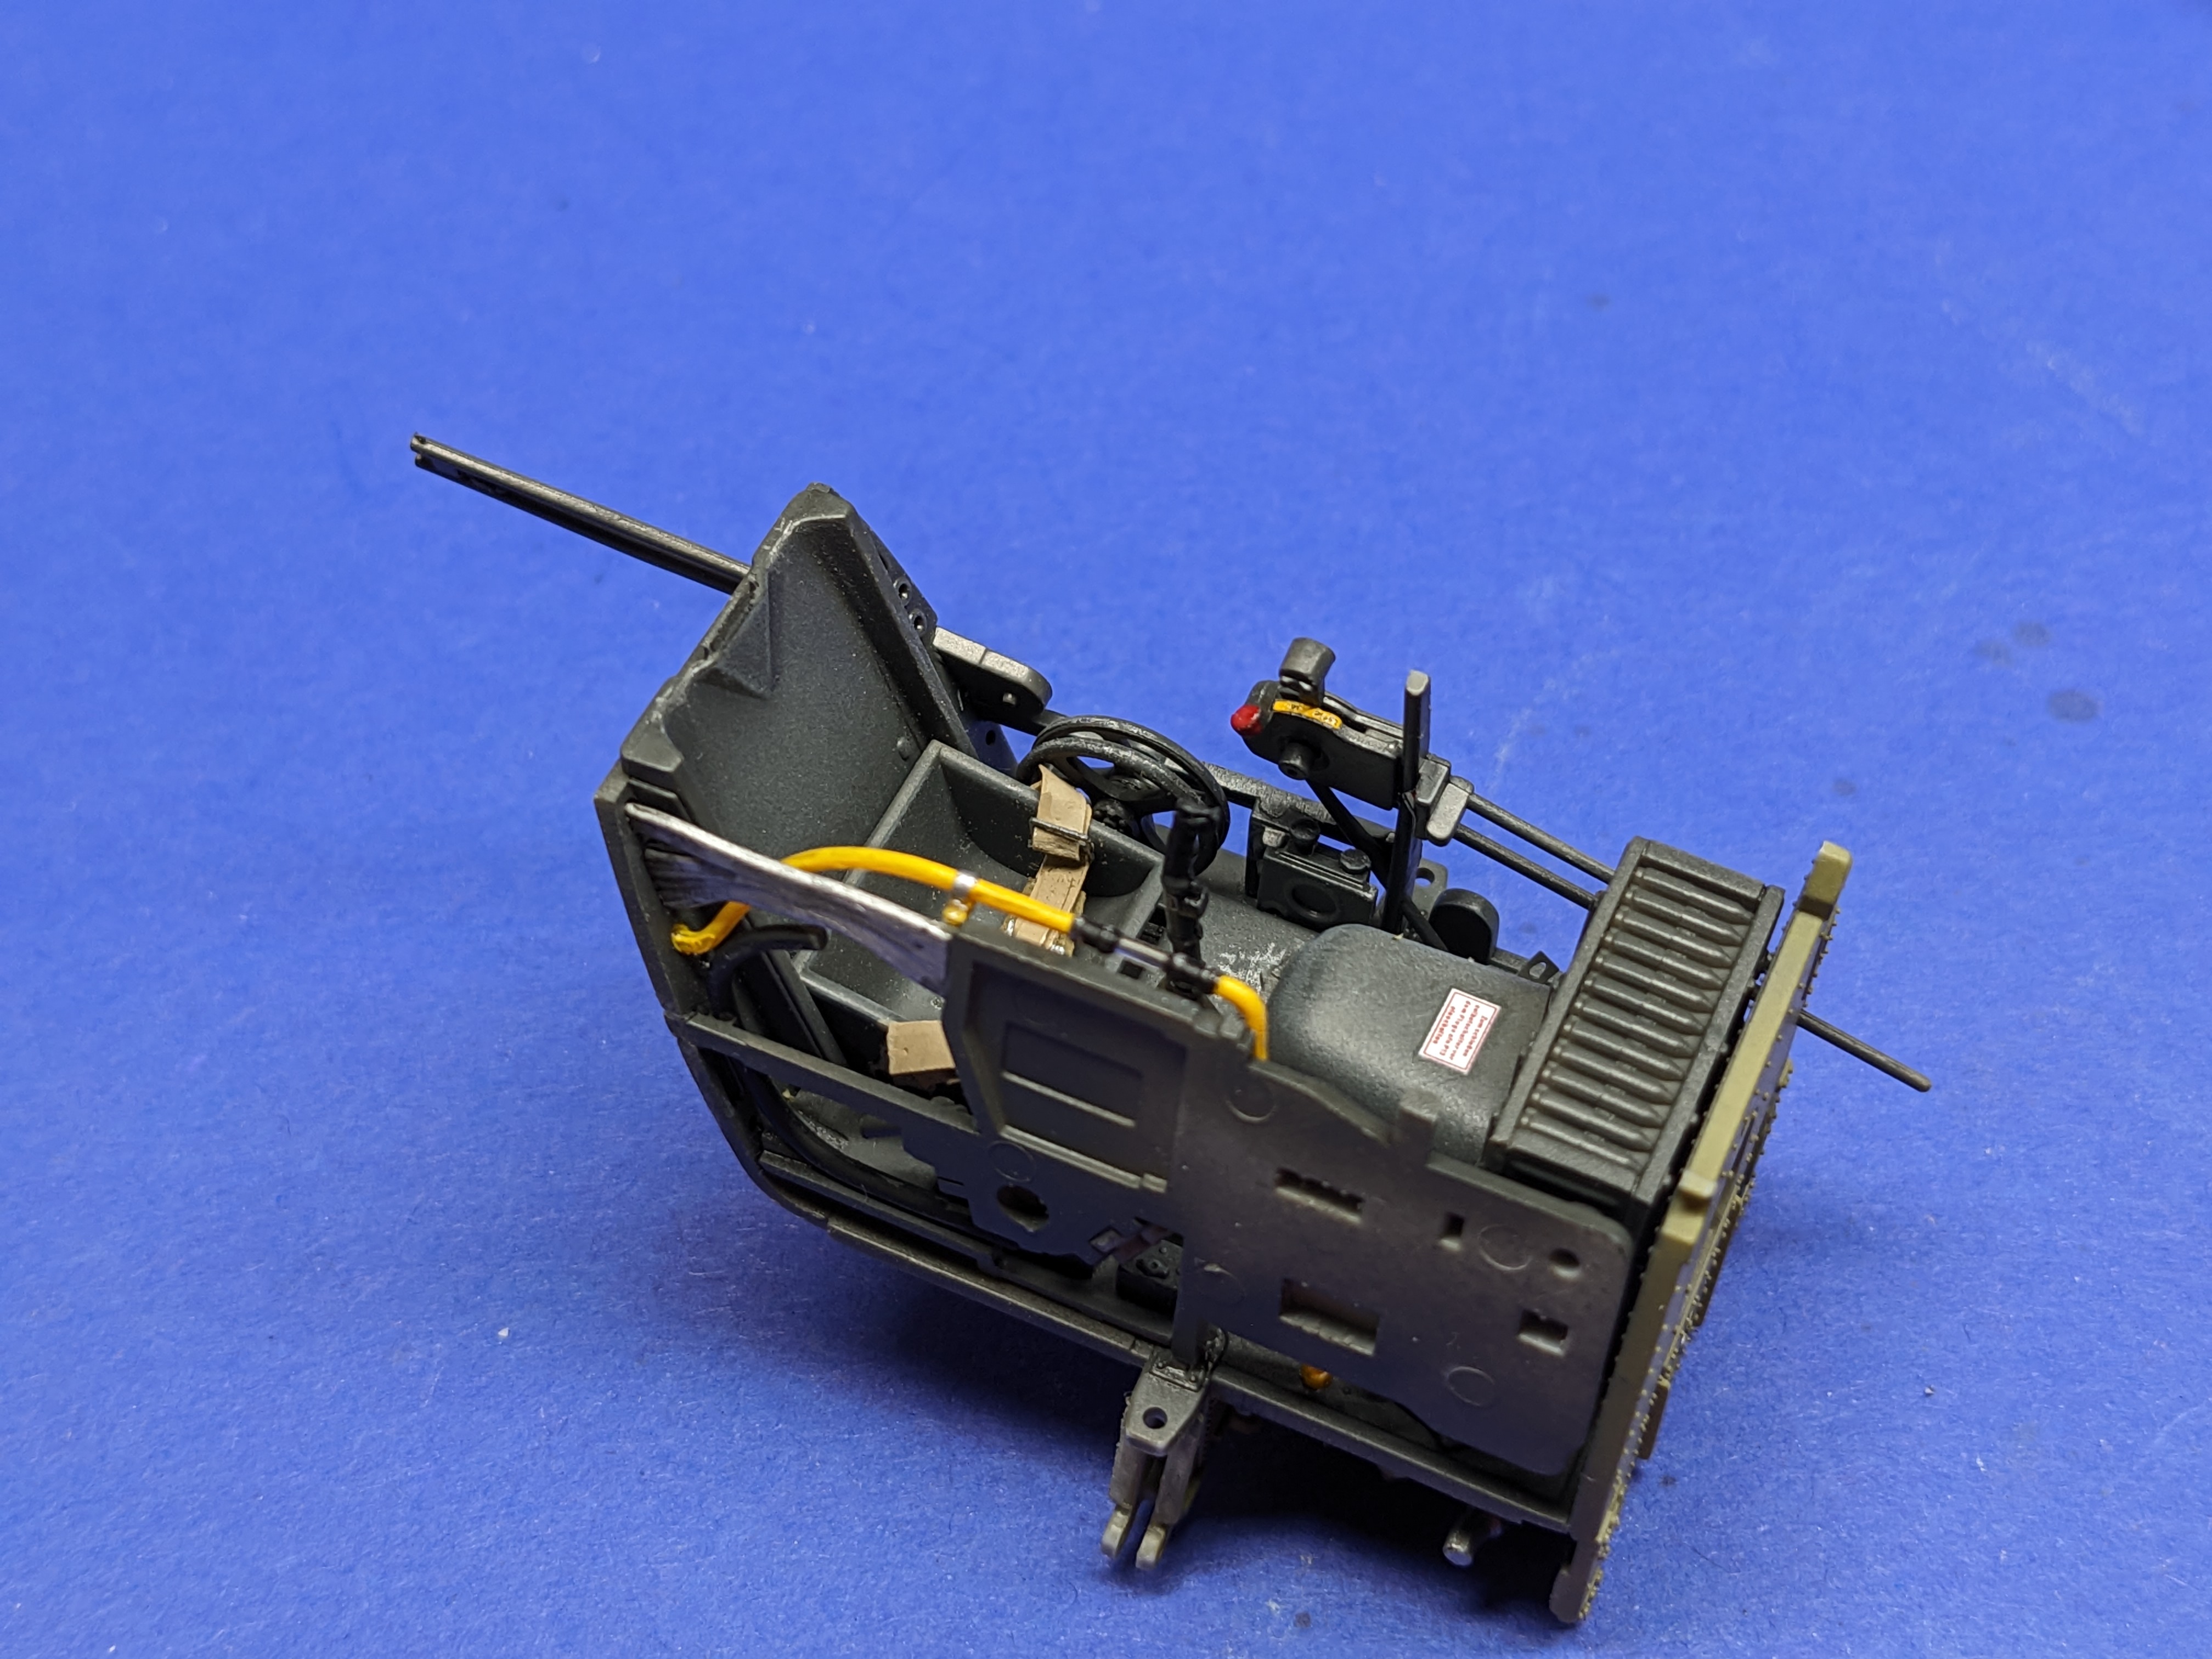
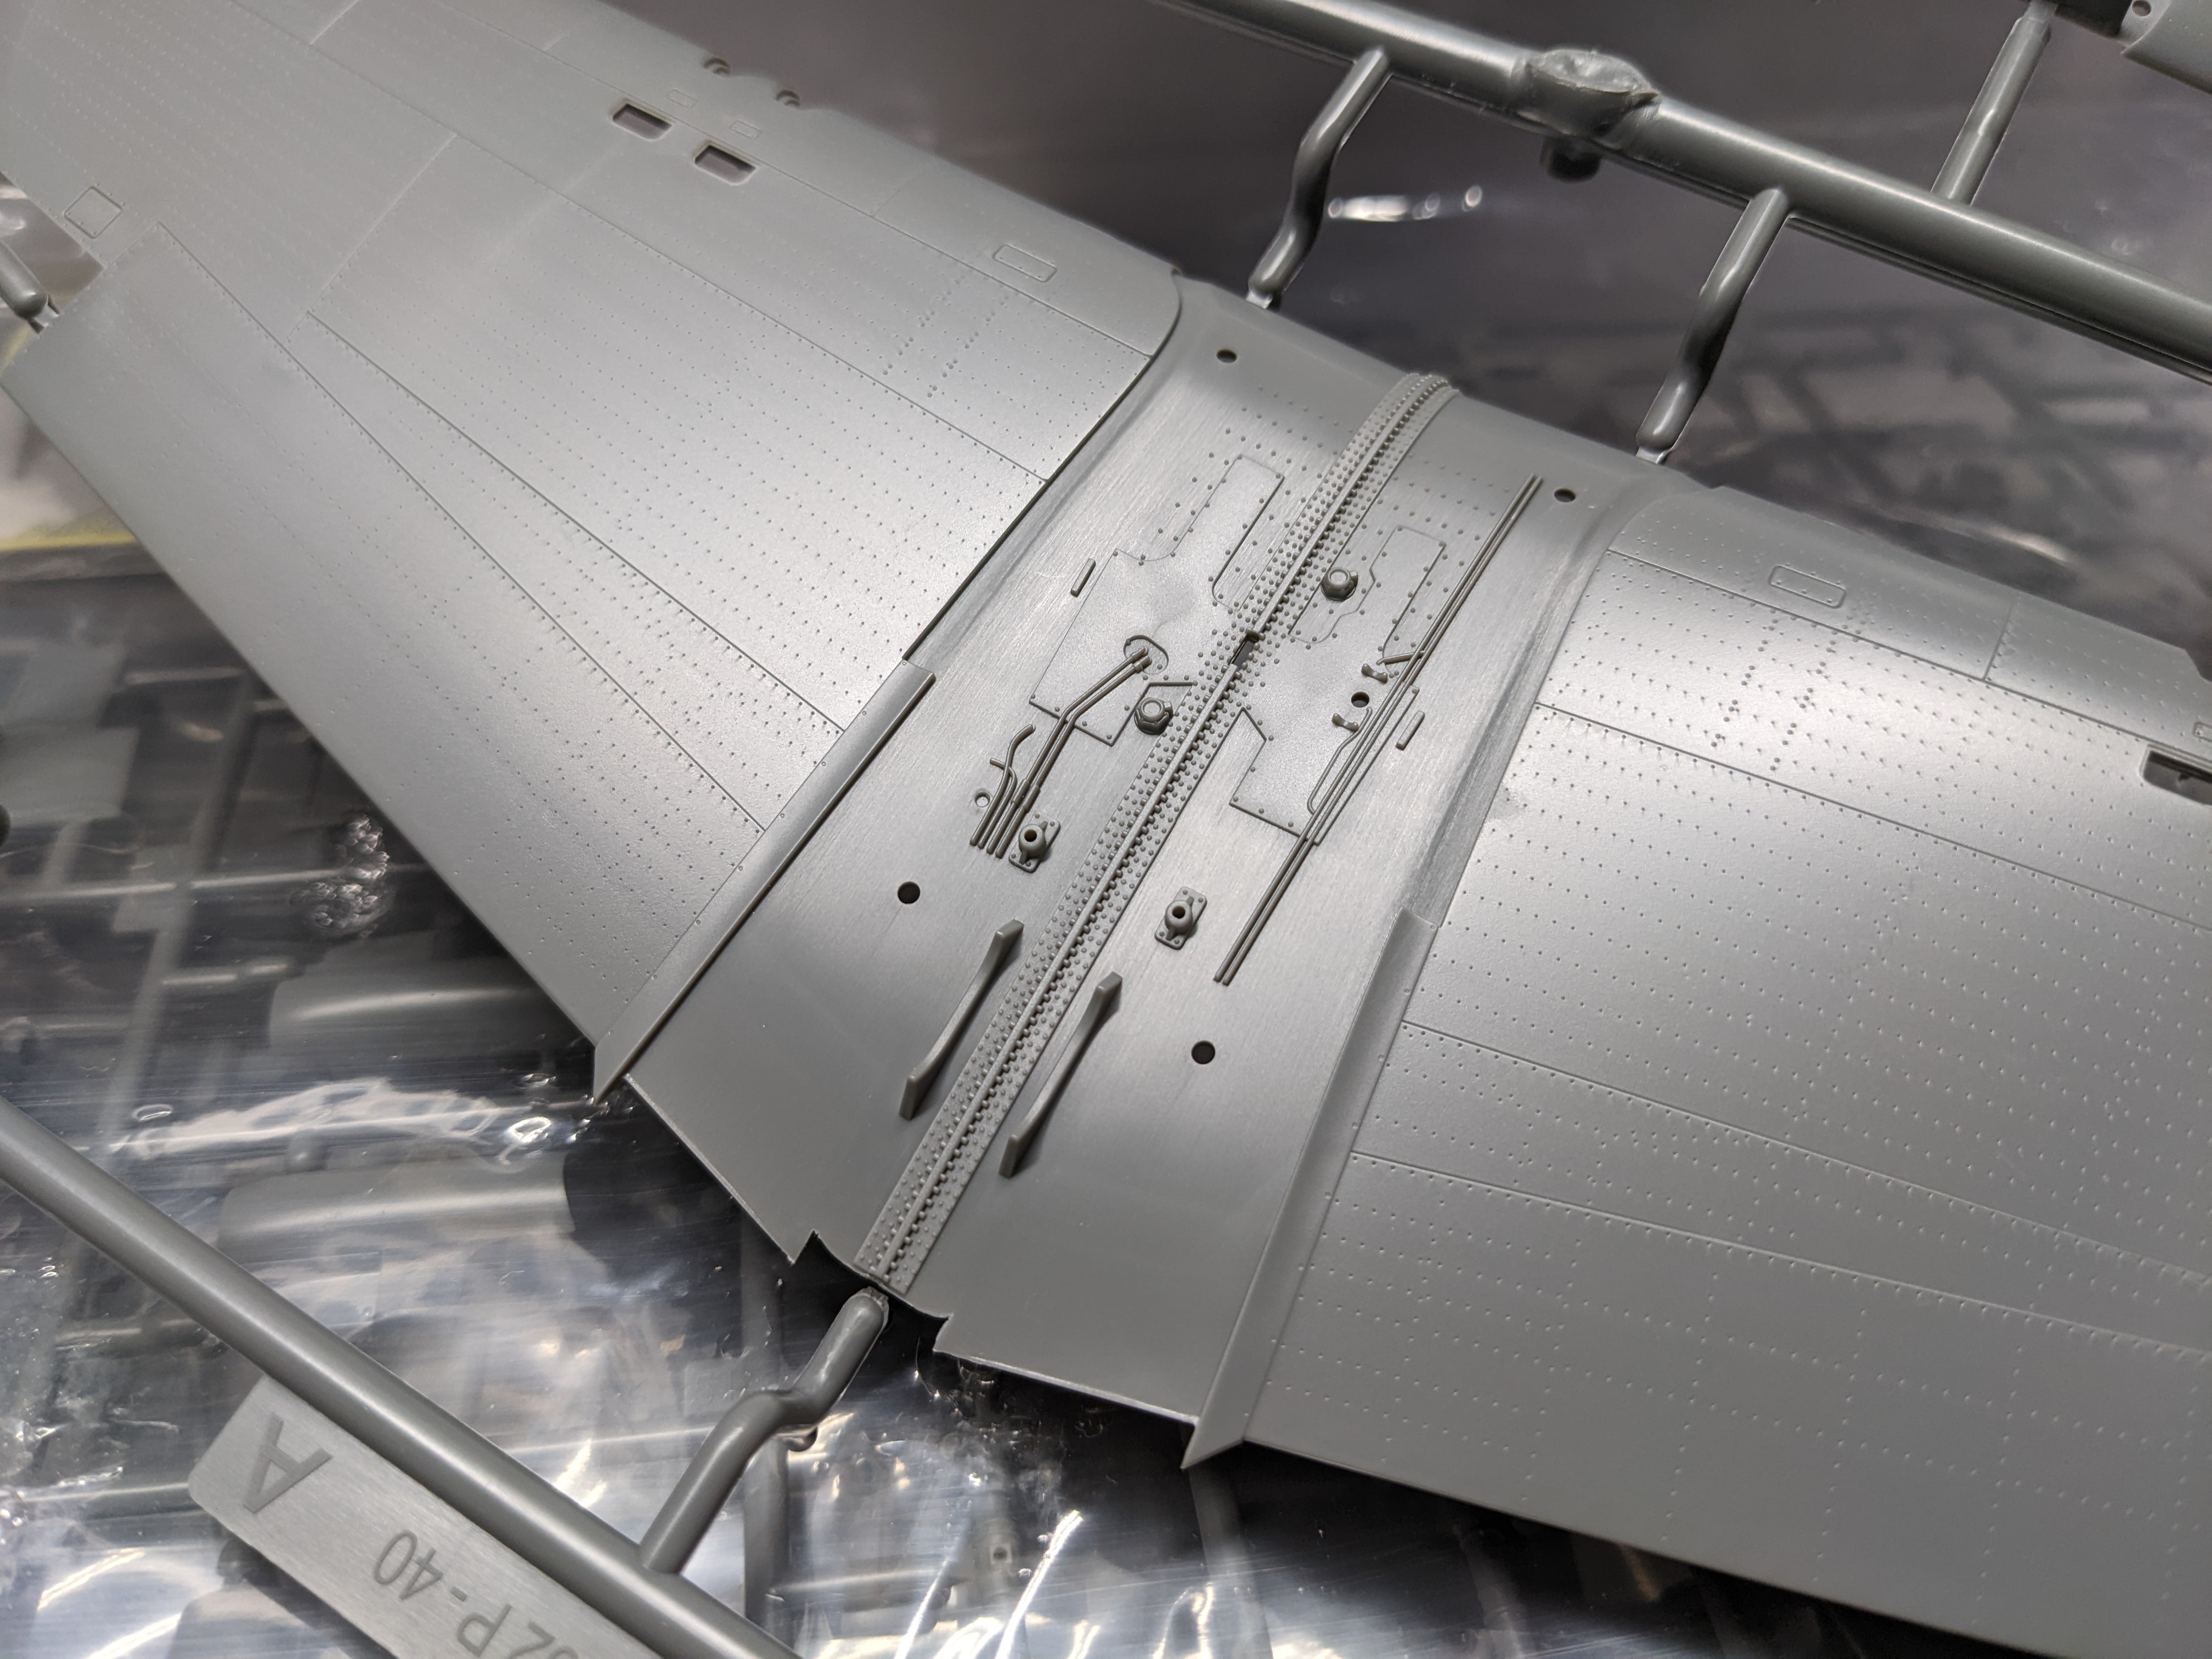
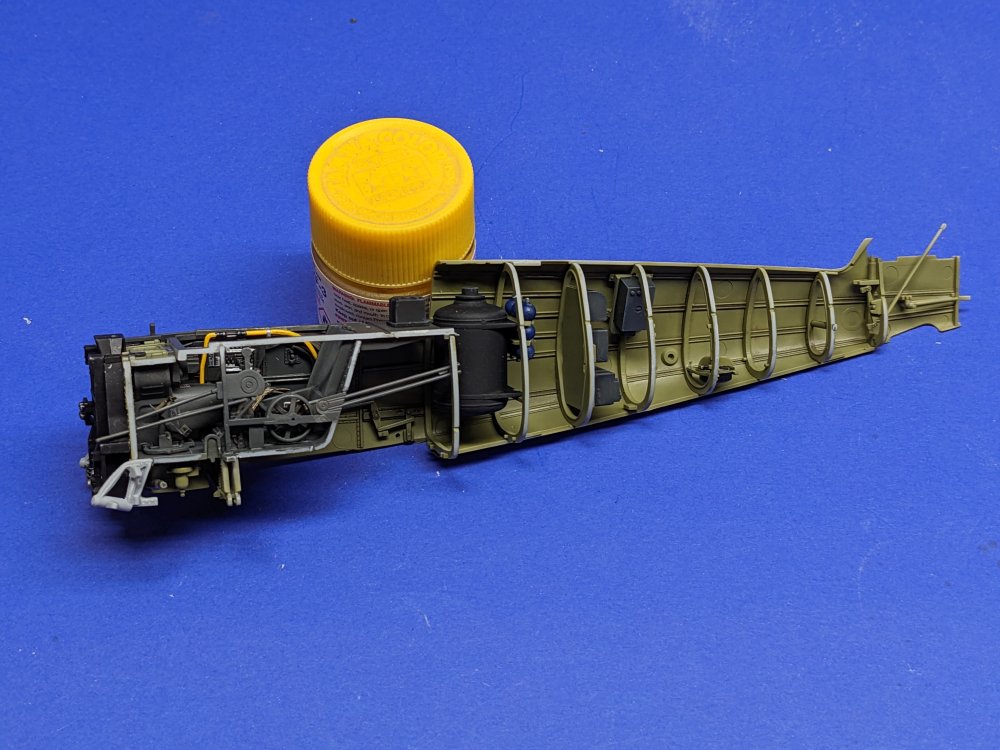
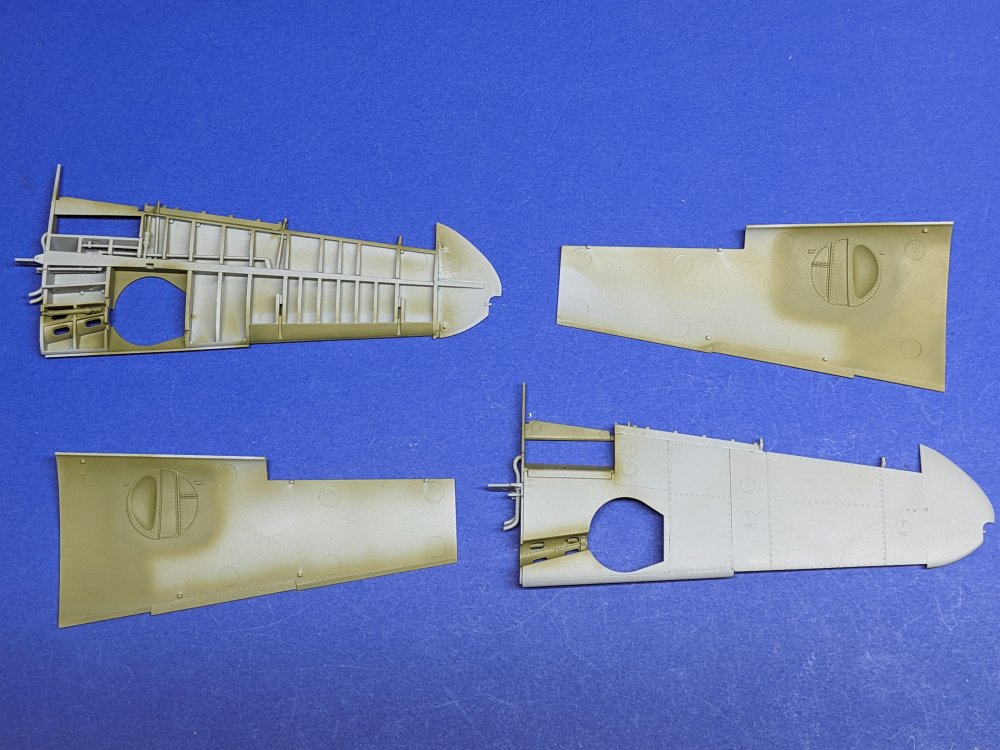
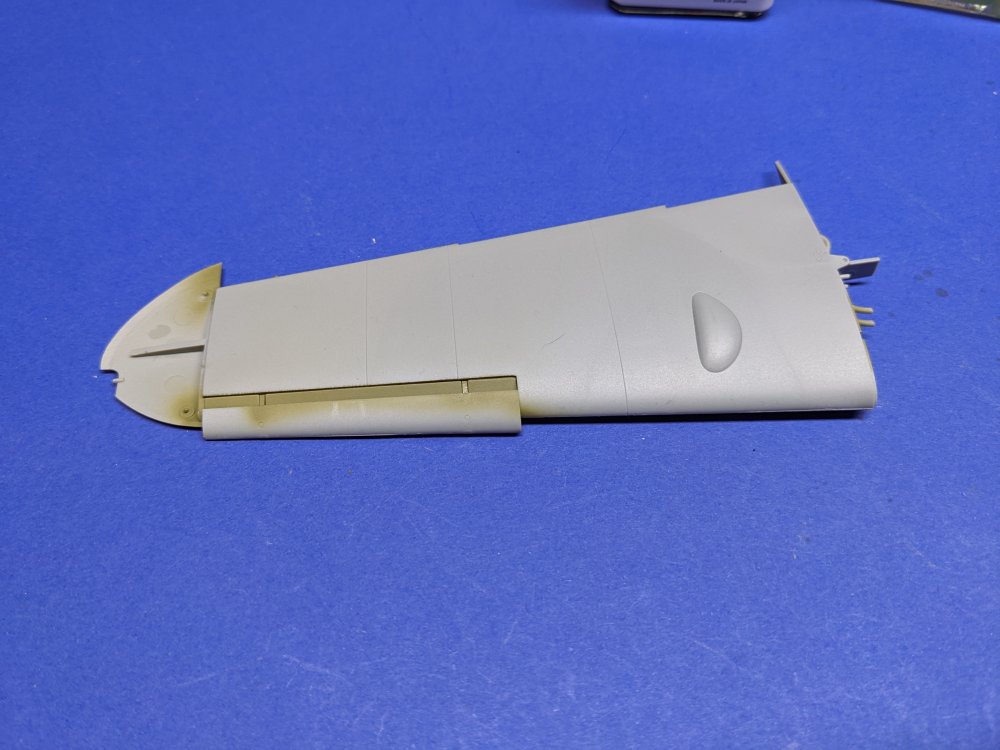
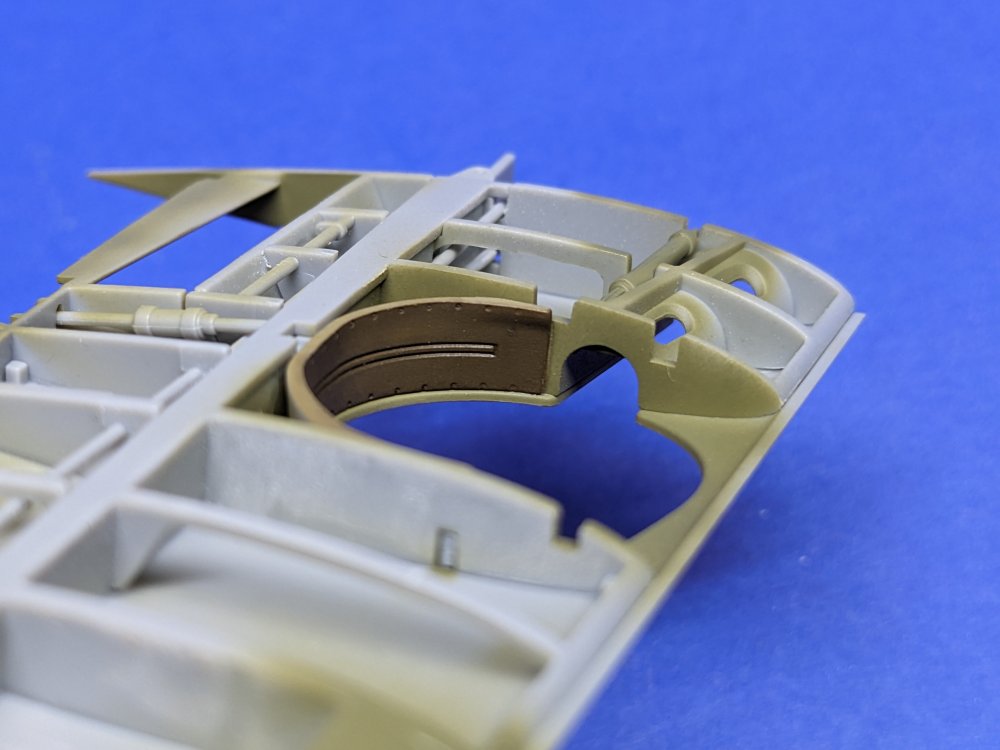
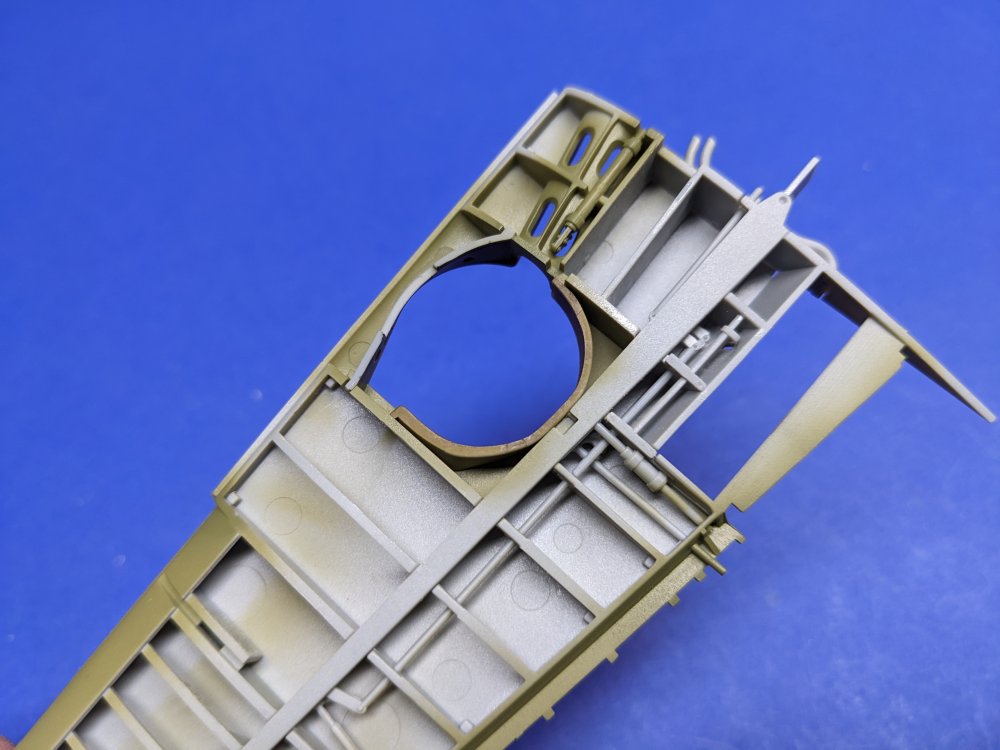
While this was drying, I continued on the wings. The interior was sprayed in RLM 02. Leaving the MLG bay walls until now was the right choice in my opinion. It not only made them easier to paint but also allowed me to better line them up with the bay opening in the lower wing. They also have to be aligned with an upper part that fits against the top. When you add the upper wing skin, don't forget to have the slat in place. If you're careful with the glue, the slat will work after assembly.

- 90 replies
-
- 9
-
-
-
- zoukei-mura
- 109
- (and 1 more)
-
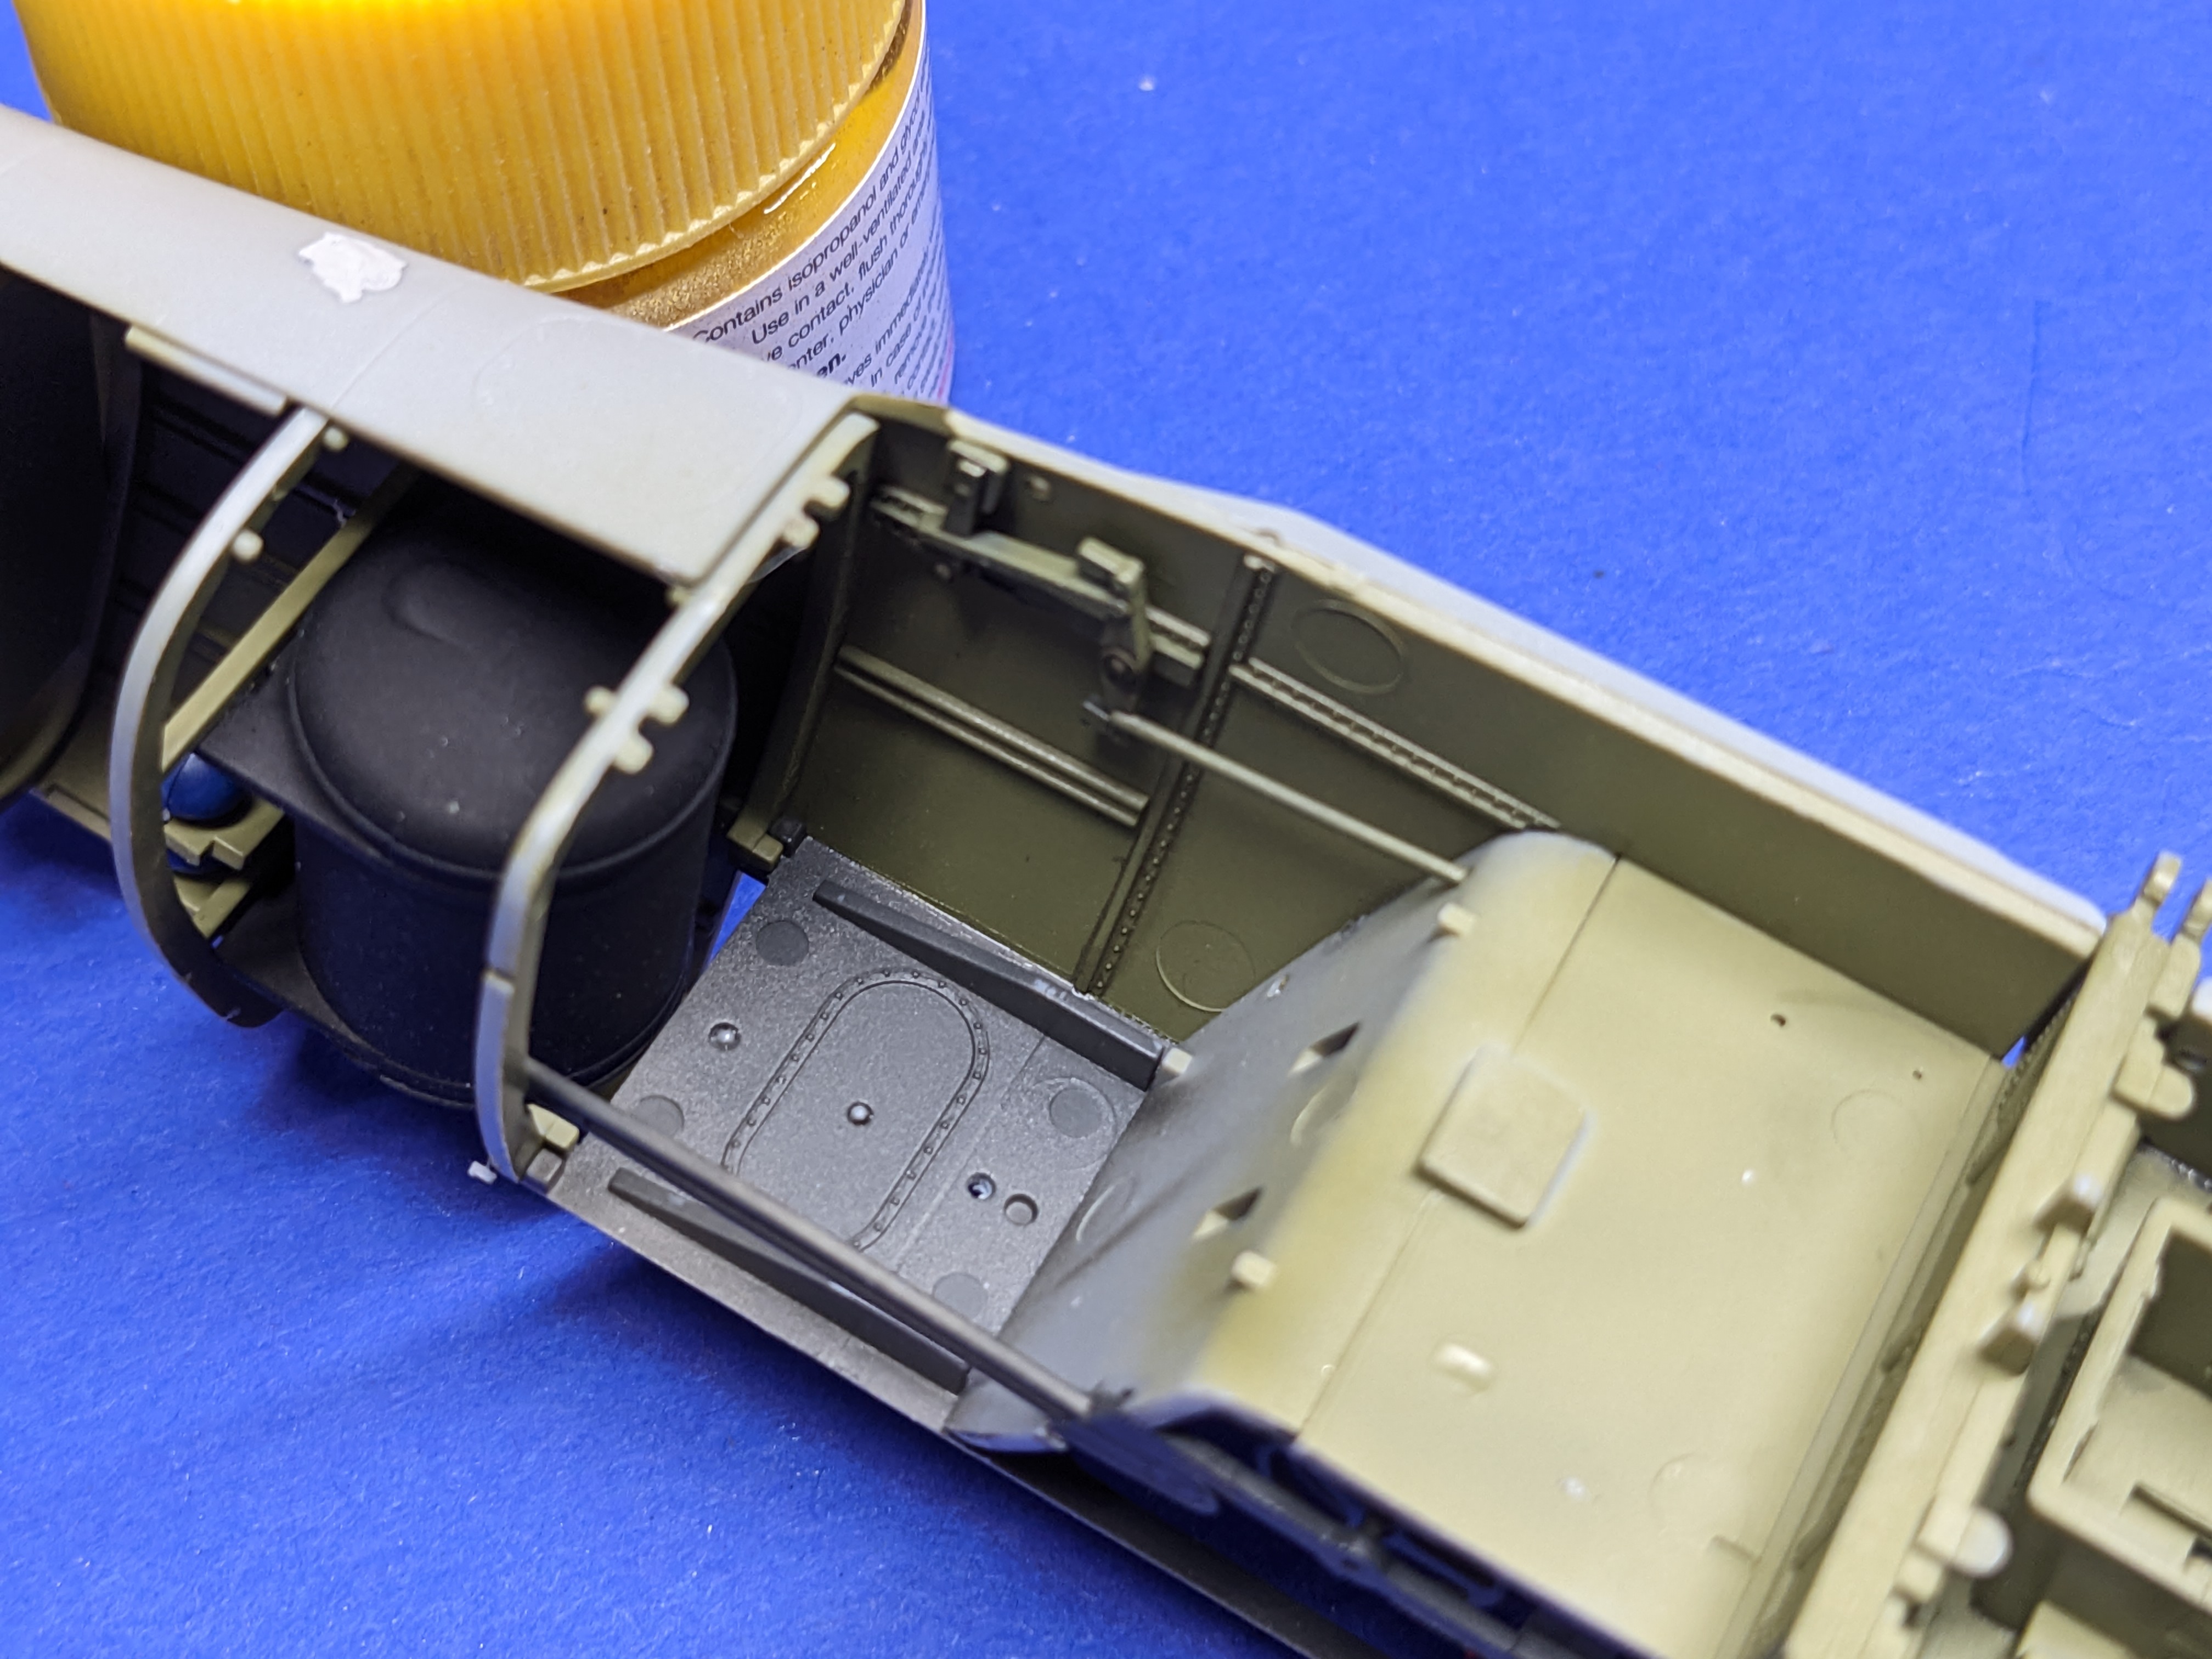
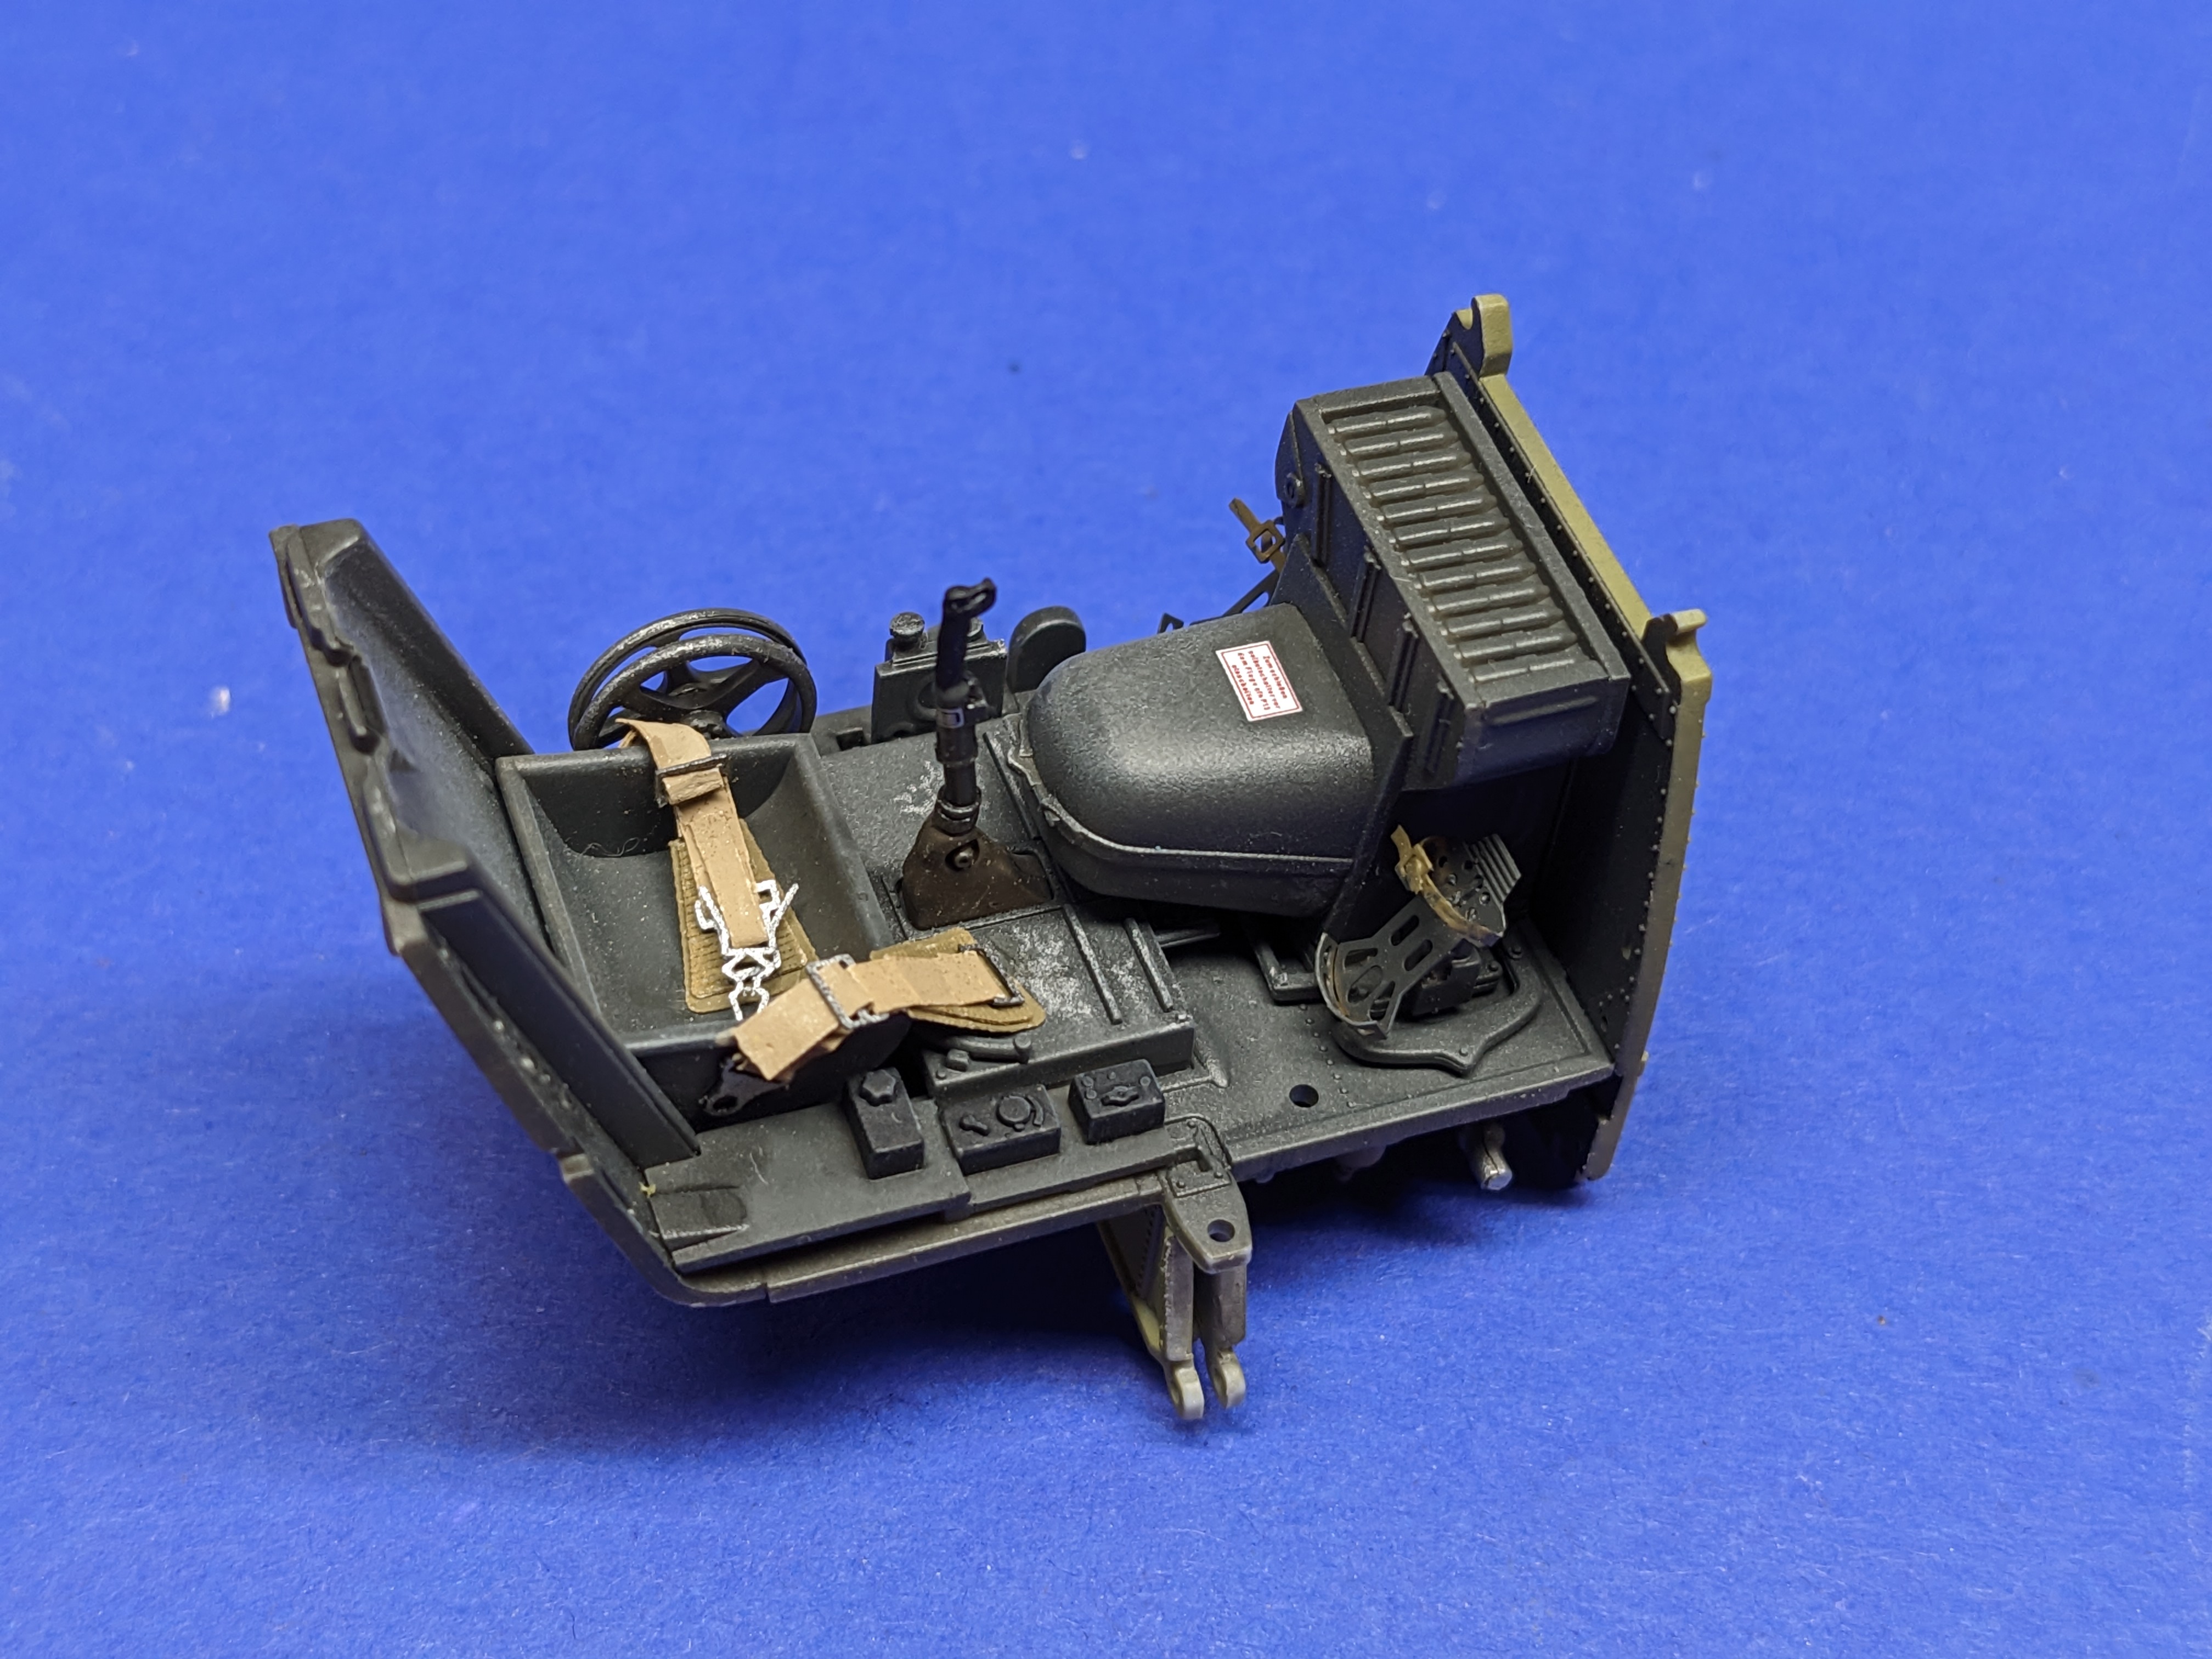
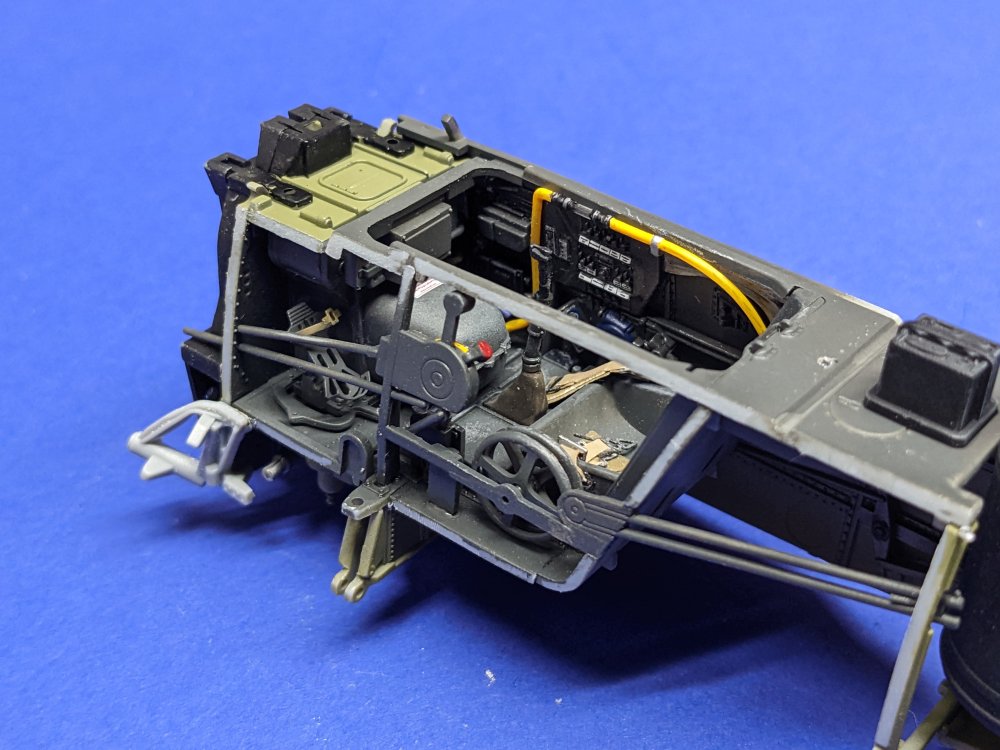
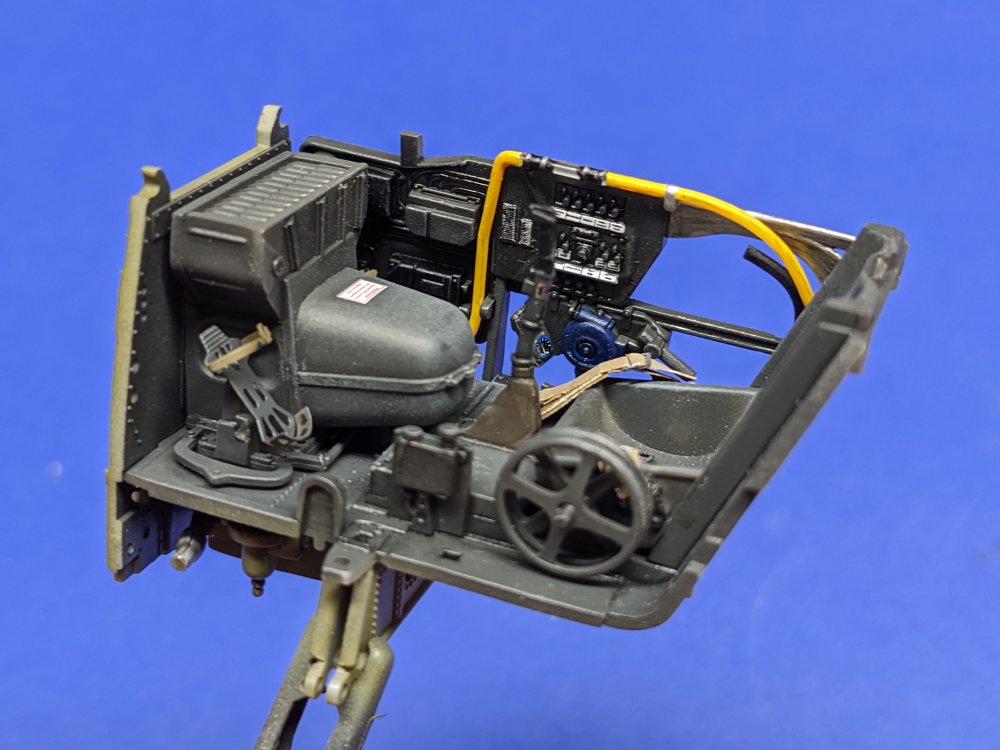
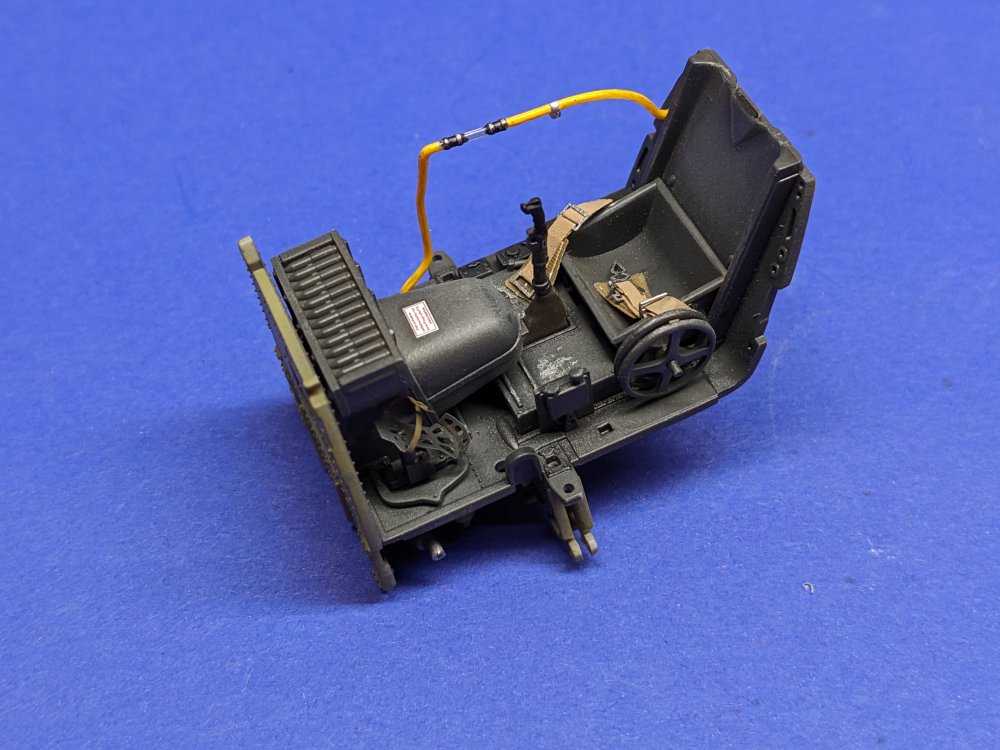
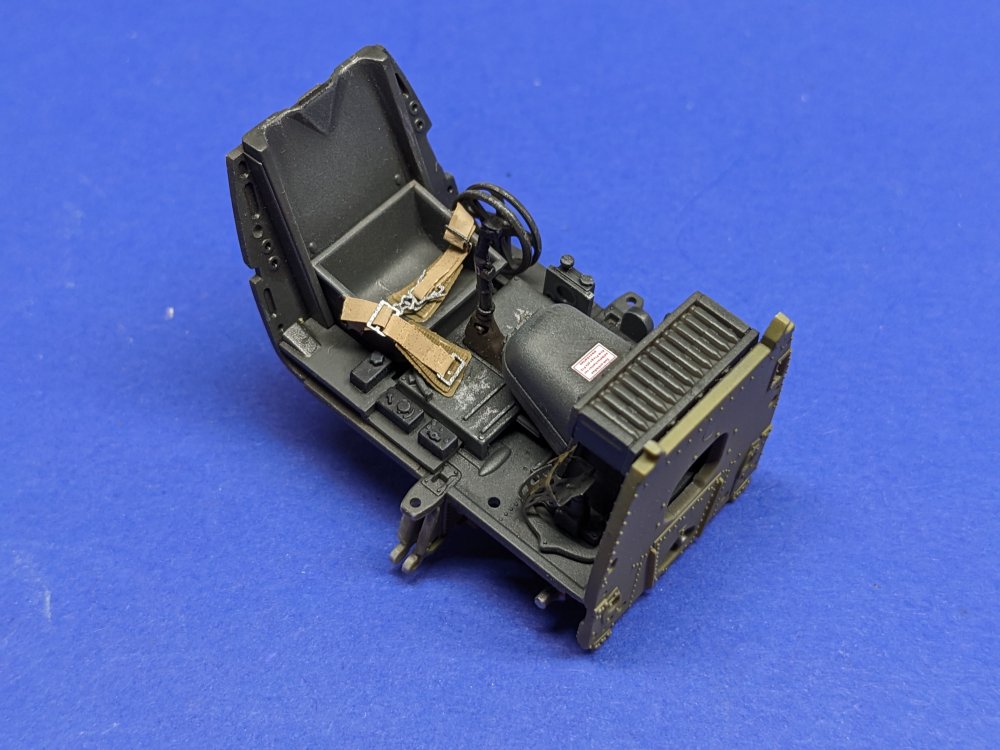
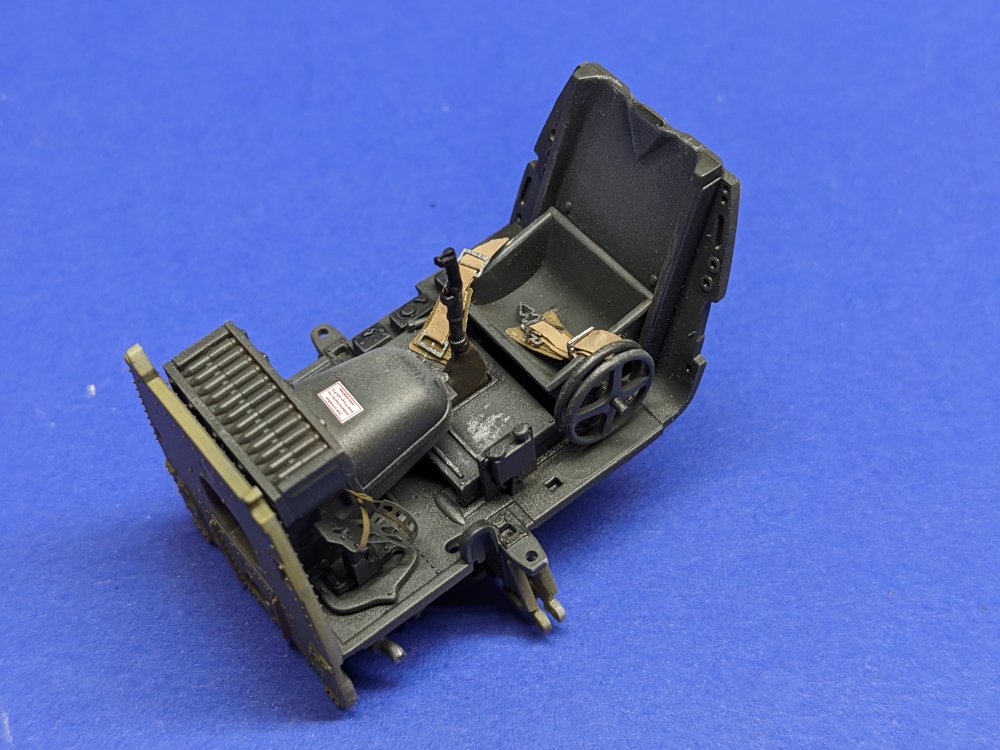
Prior to installing the belts, I did a bit of weathering to the cockpit. I then installed the lap belts. It would have been easier to install the left side belt either before you put the seat in or before the wheels on the left side are attached. I then finished the cockpit assembly. First I added the fuel line. Then the cockpit side panels were each attached in place.


- 90 replies
-
- 9
-
-
-
- zoukei-mura
- 109
- (and 1 more)
-
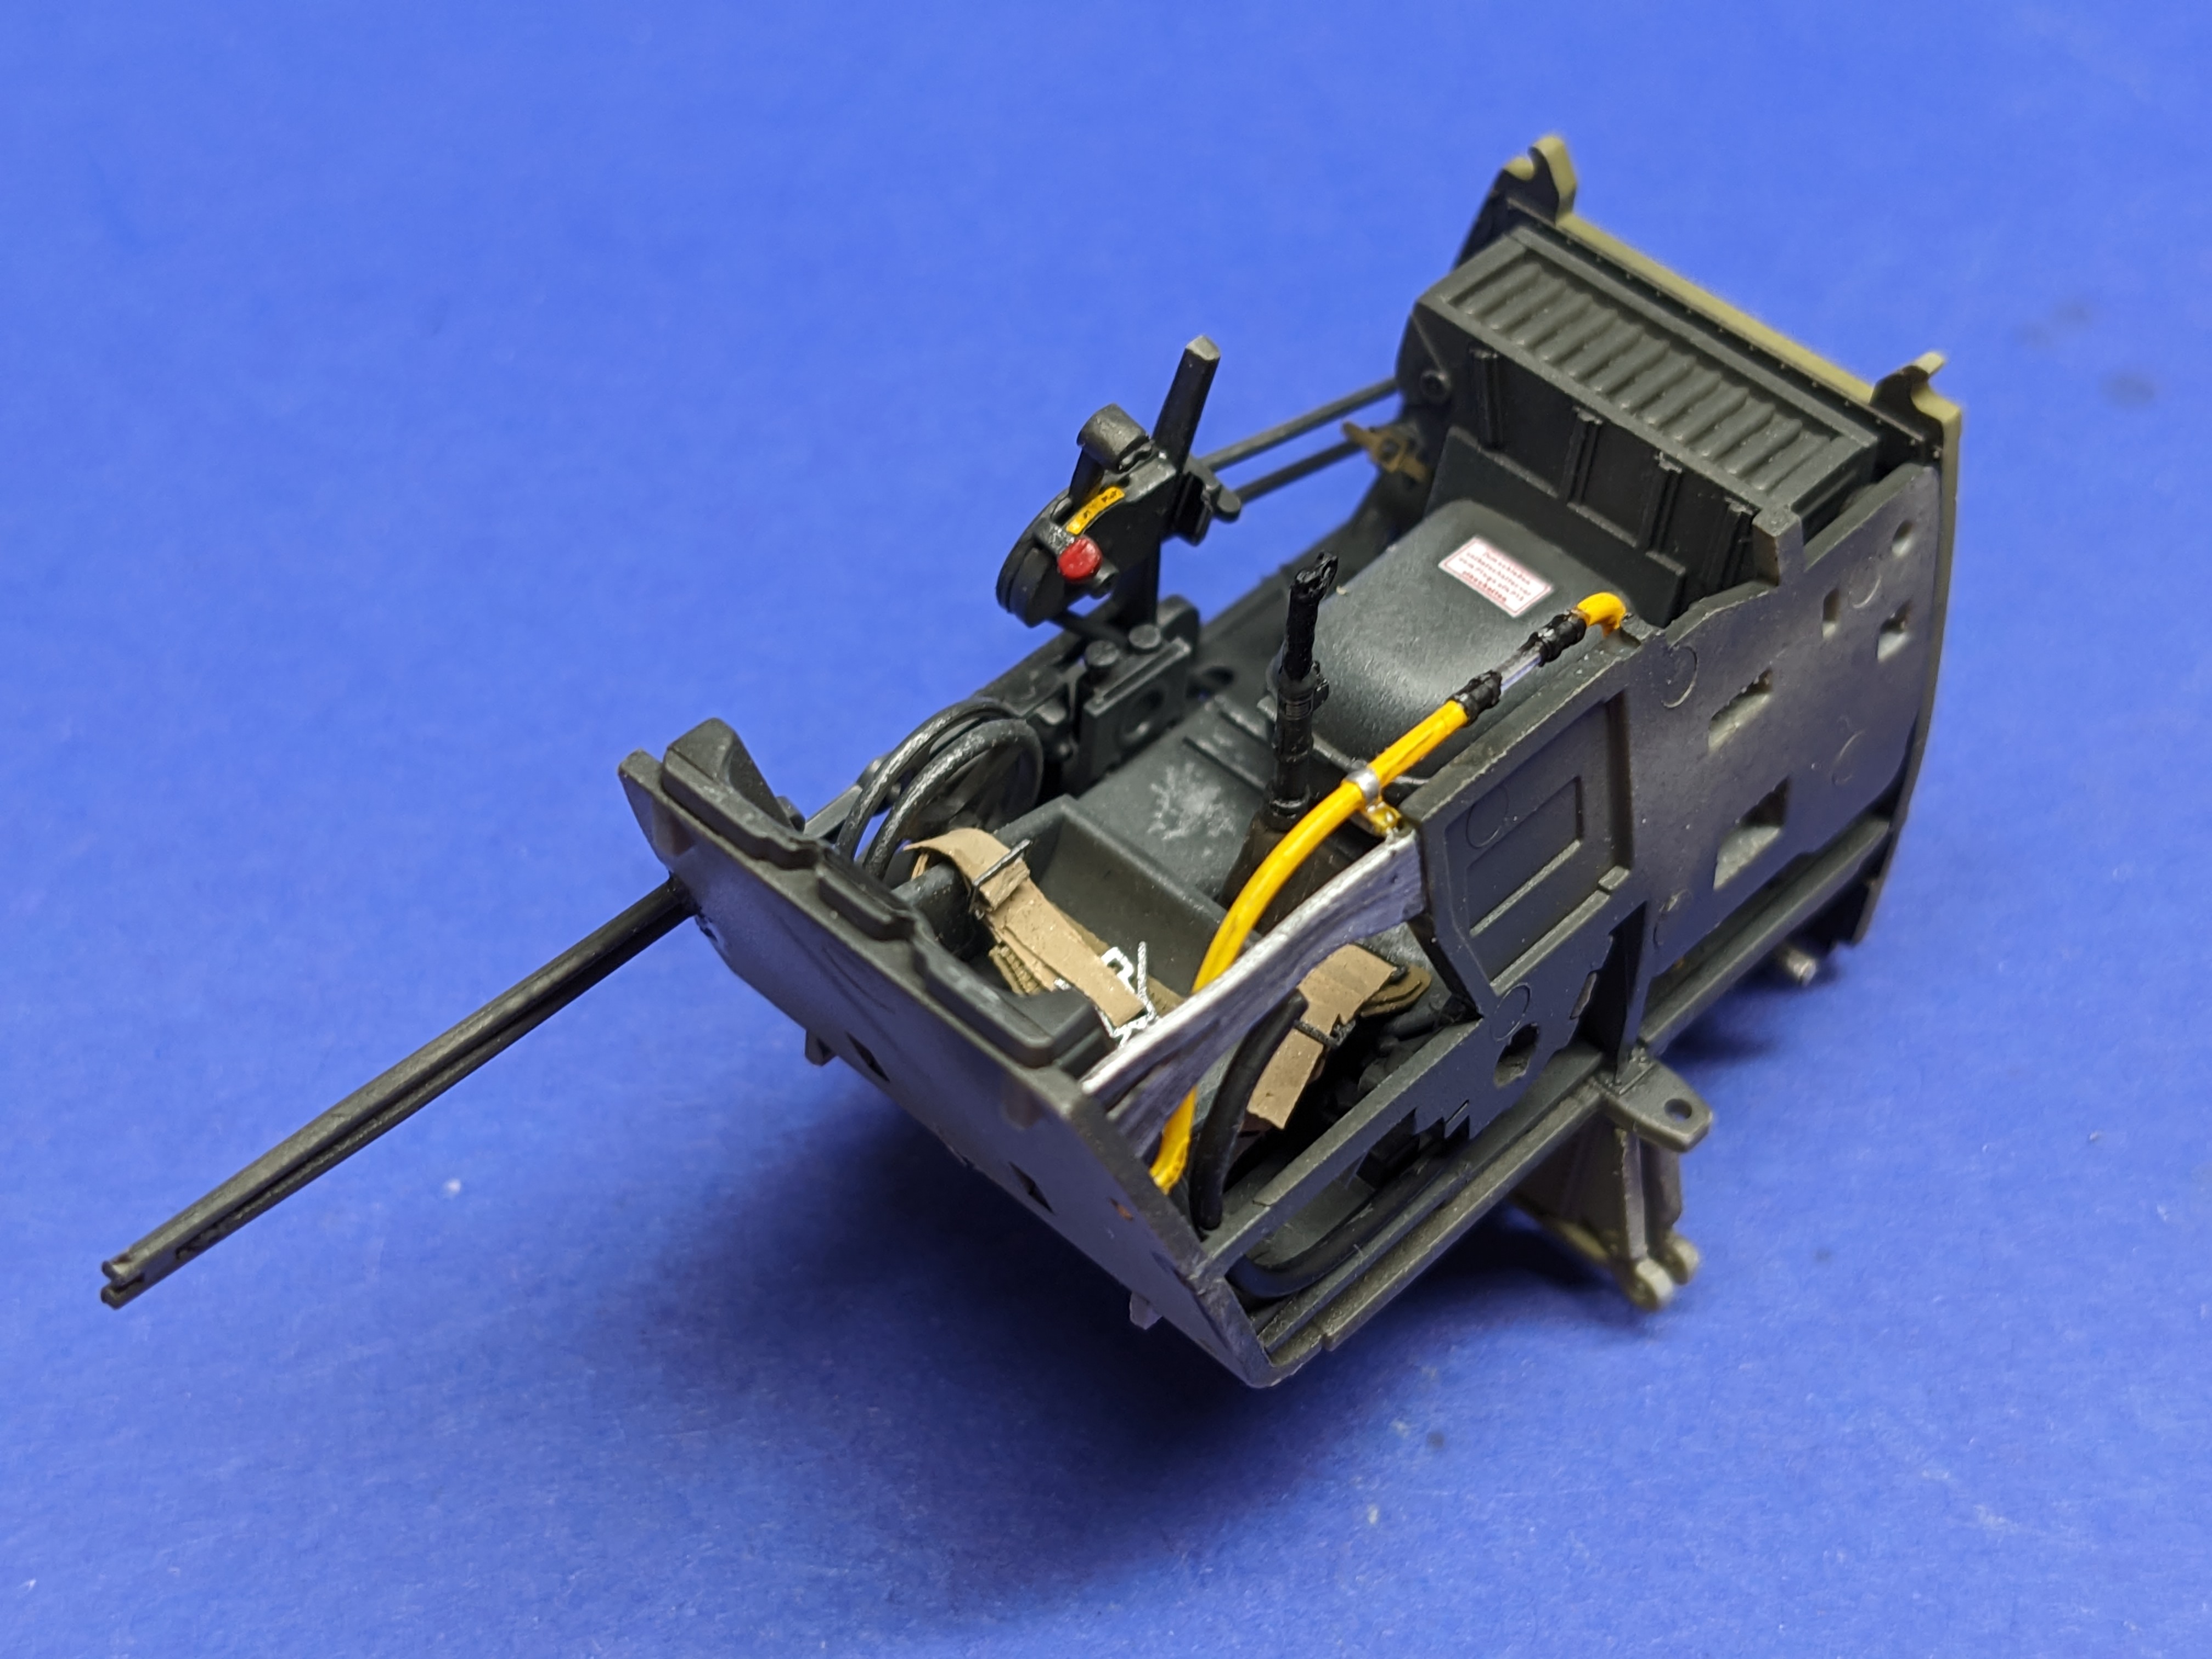
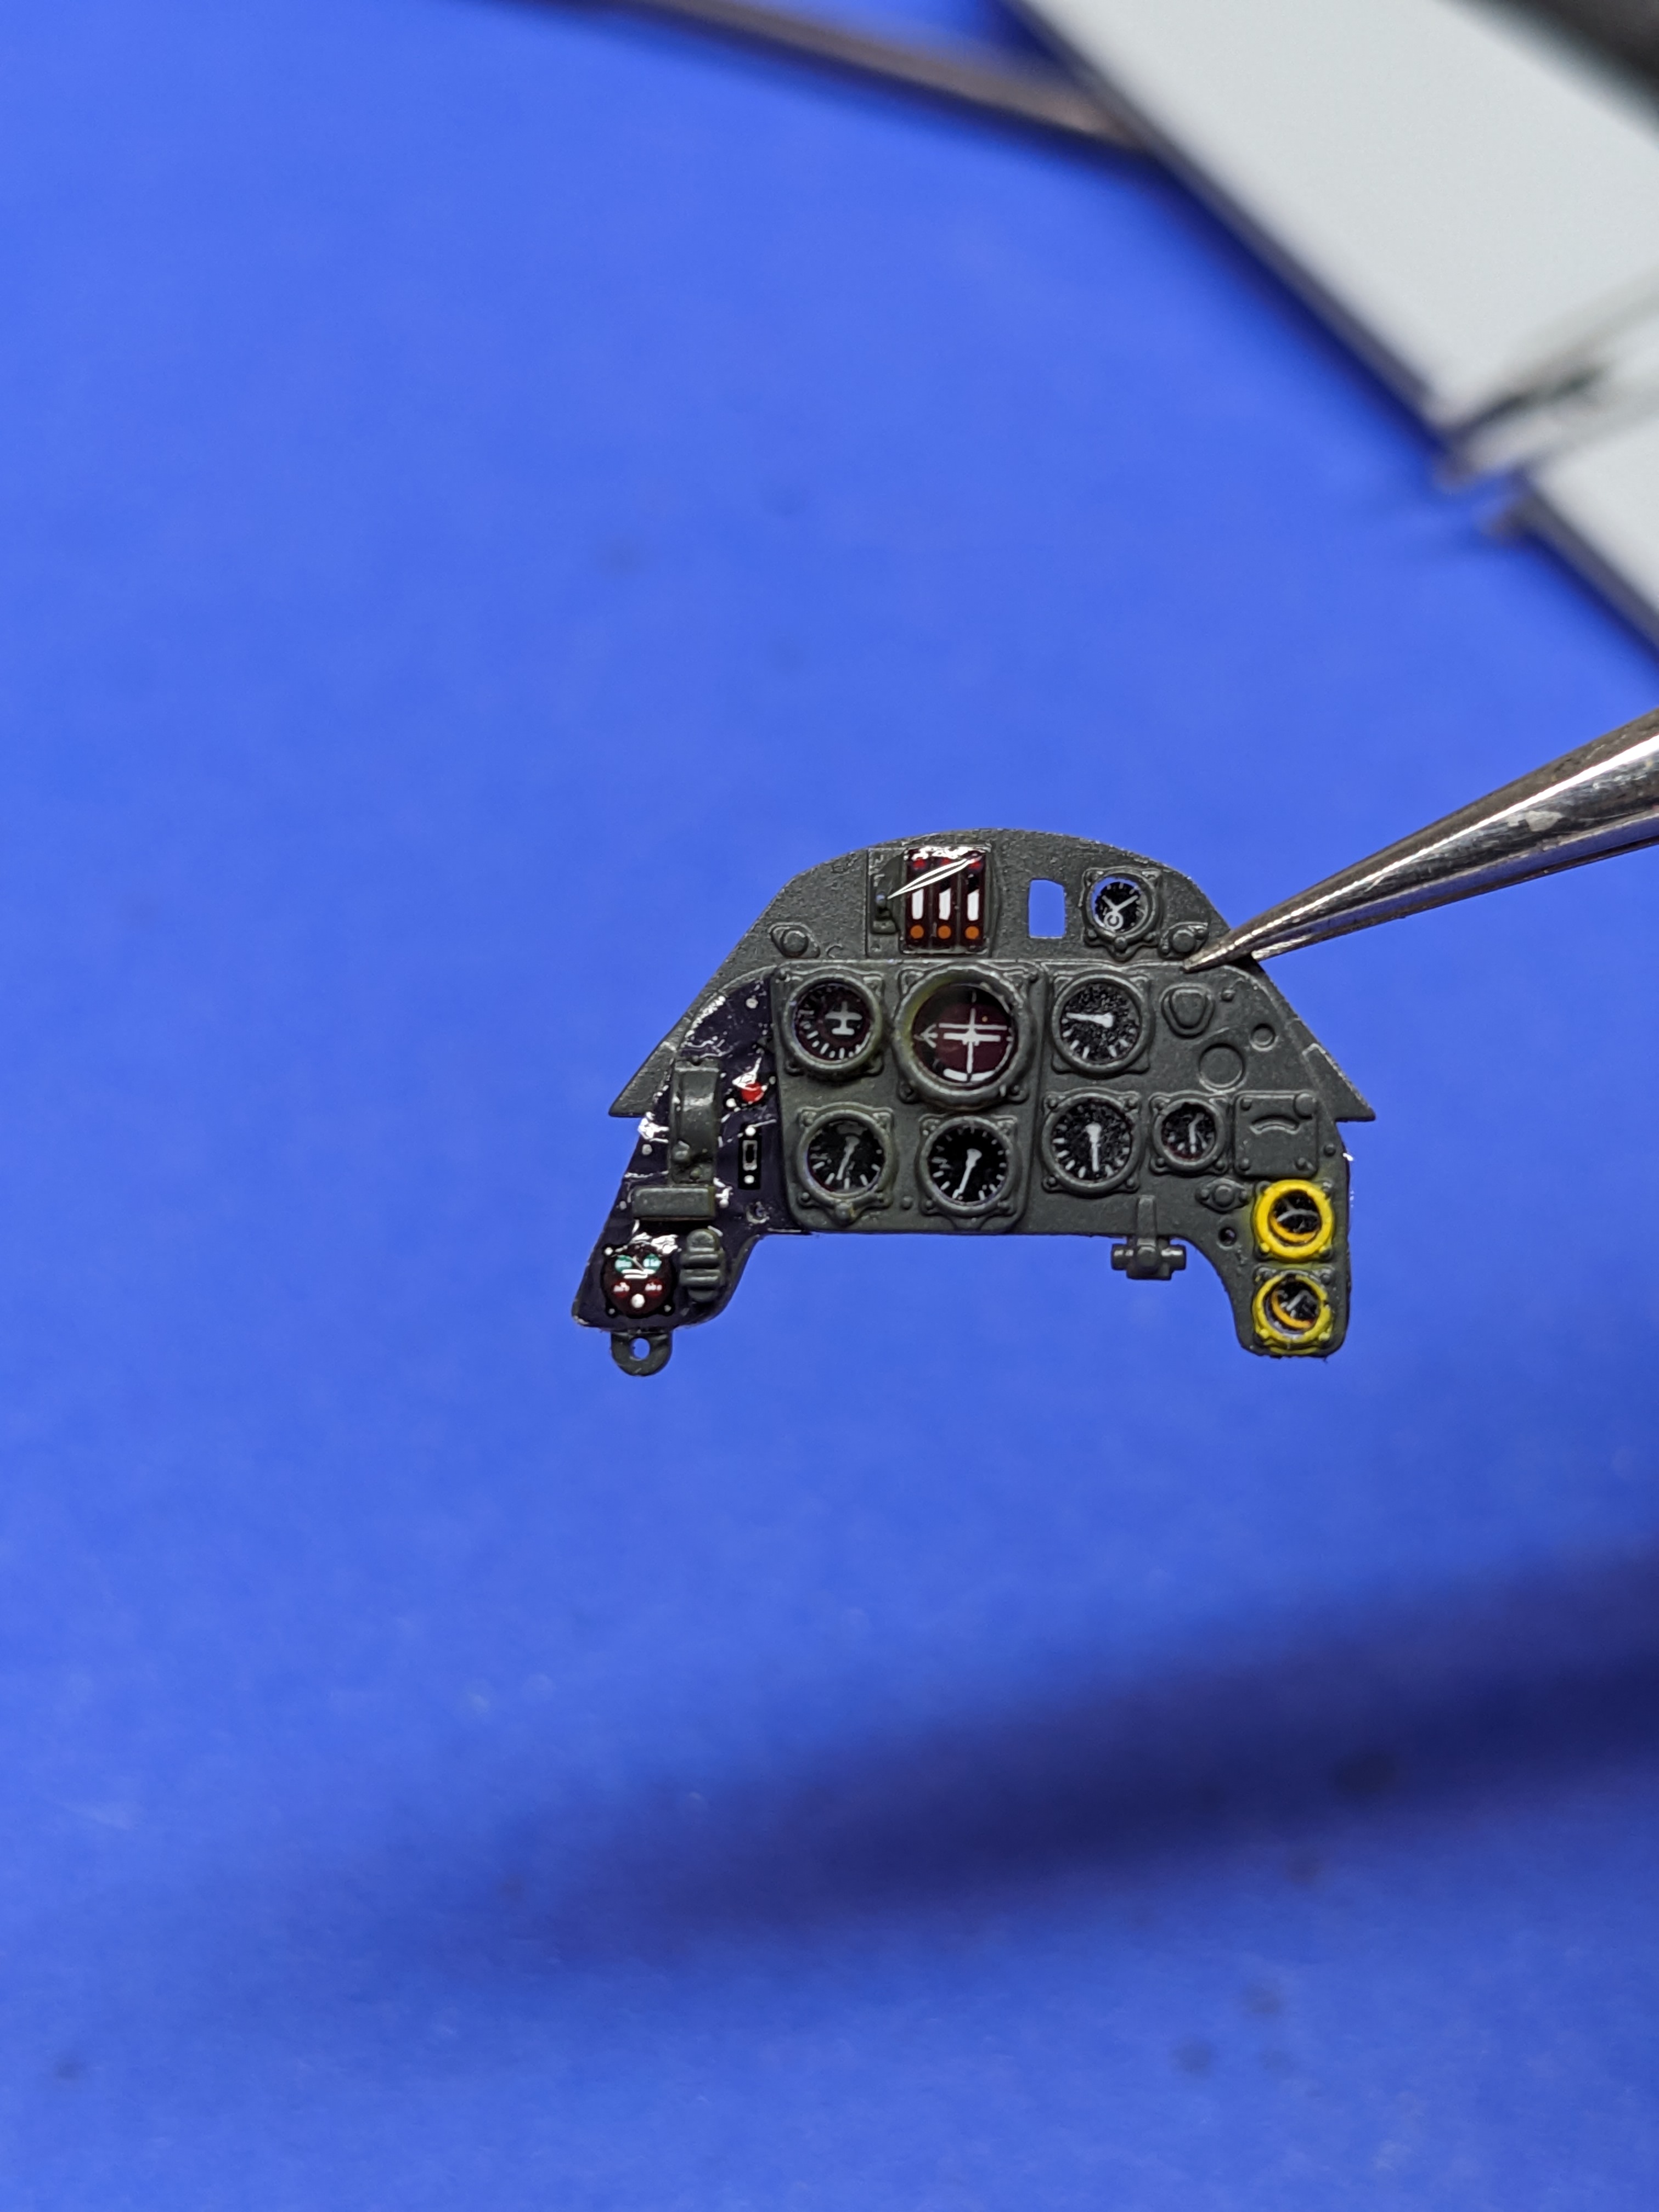
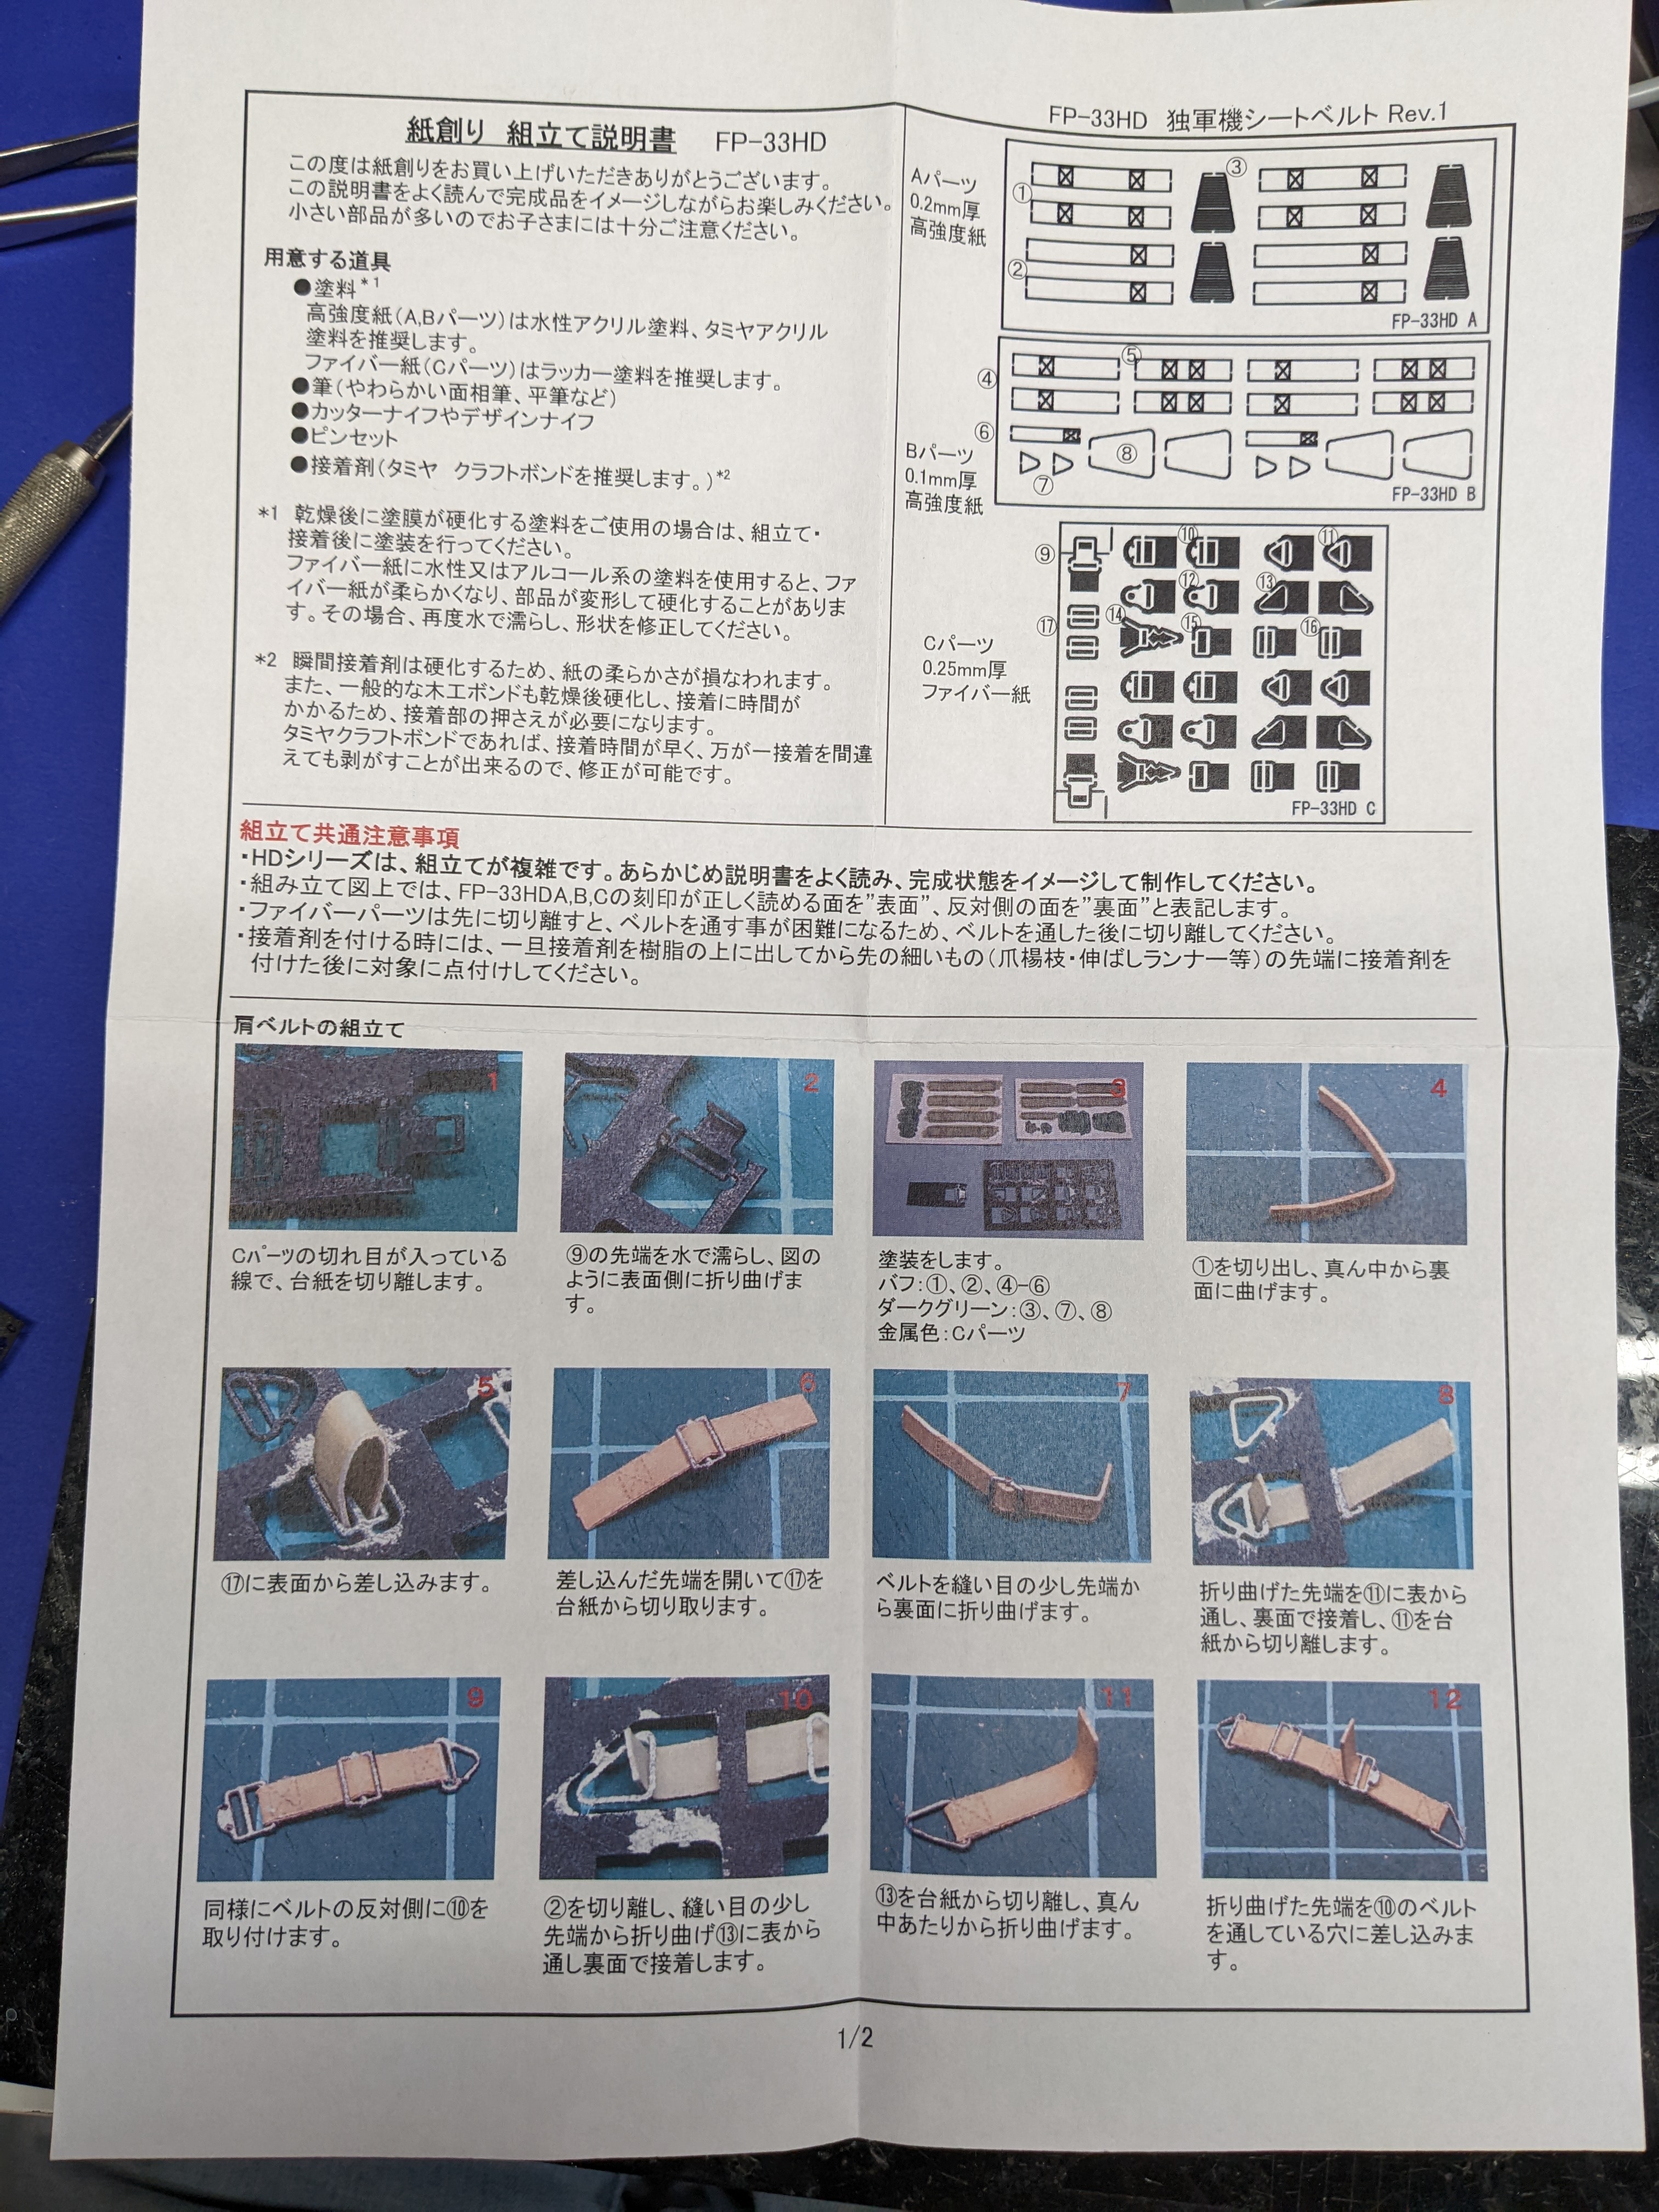
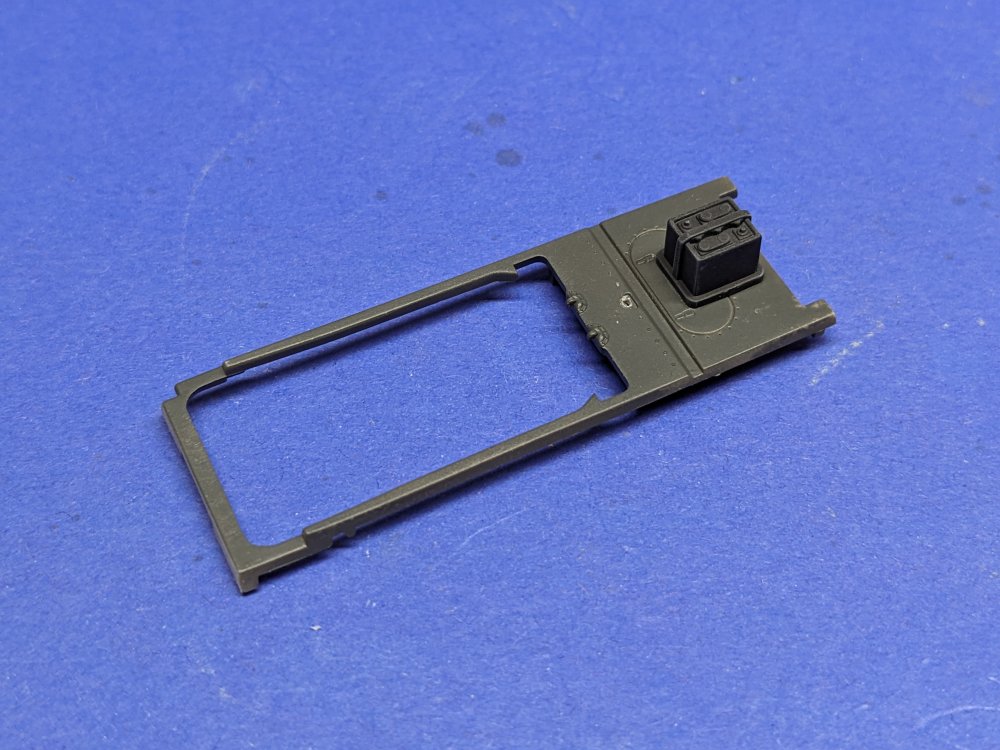
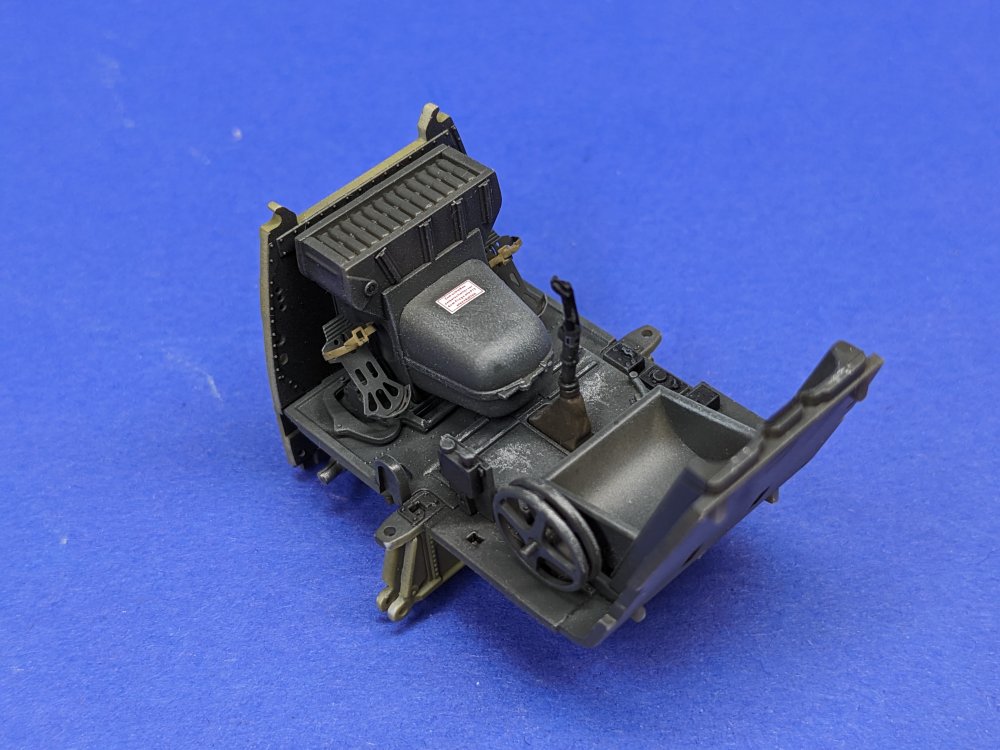
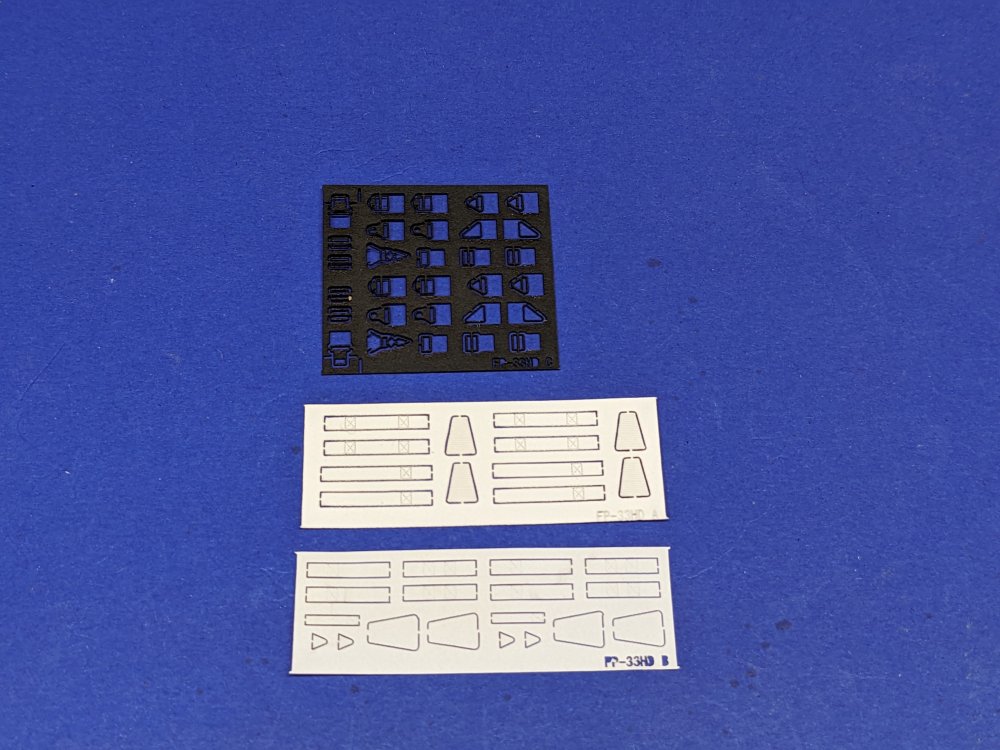
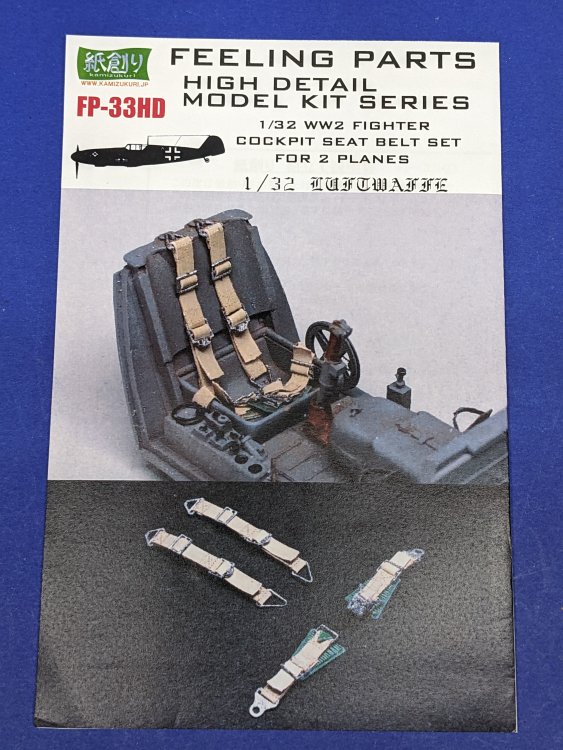
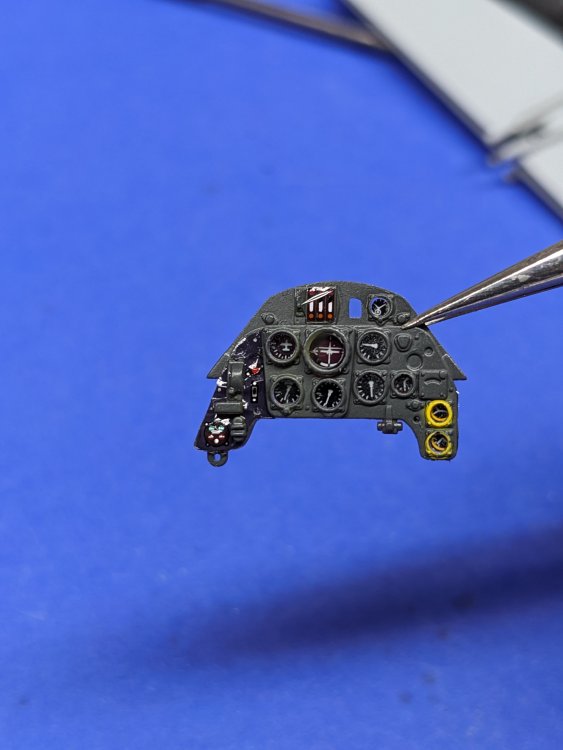
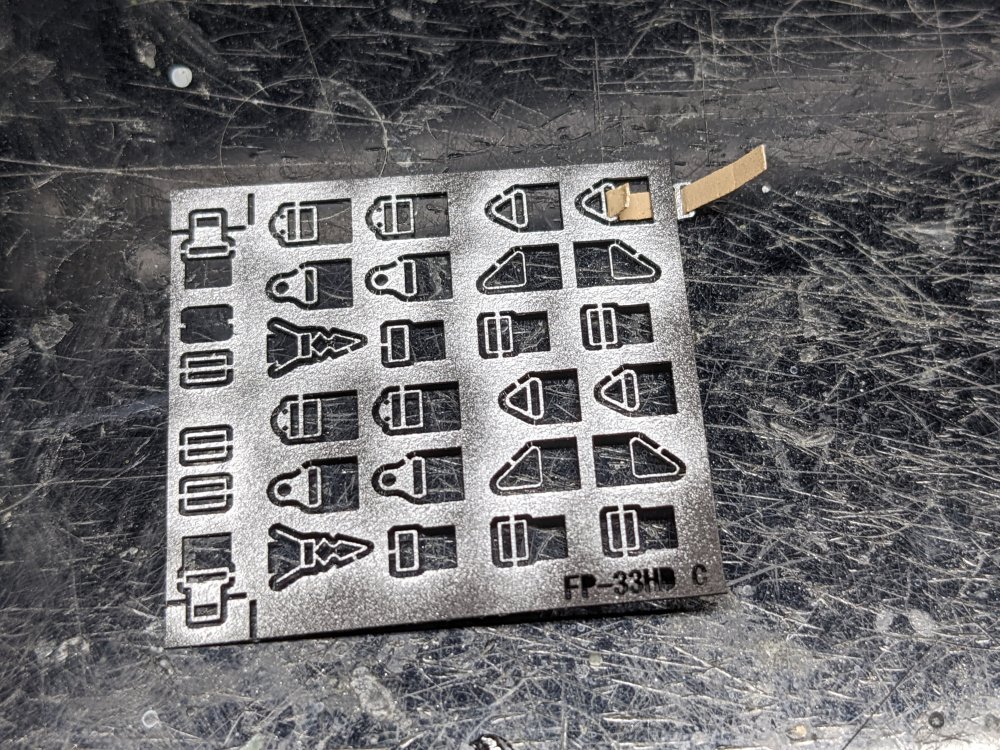
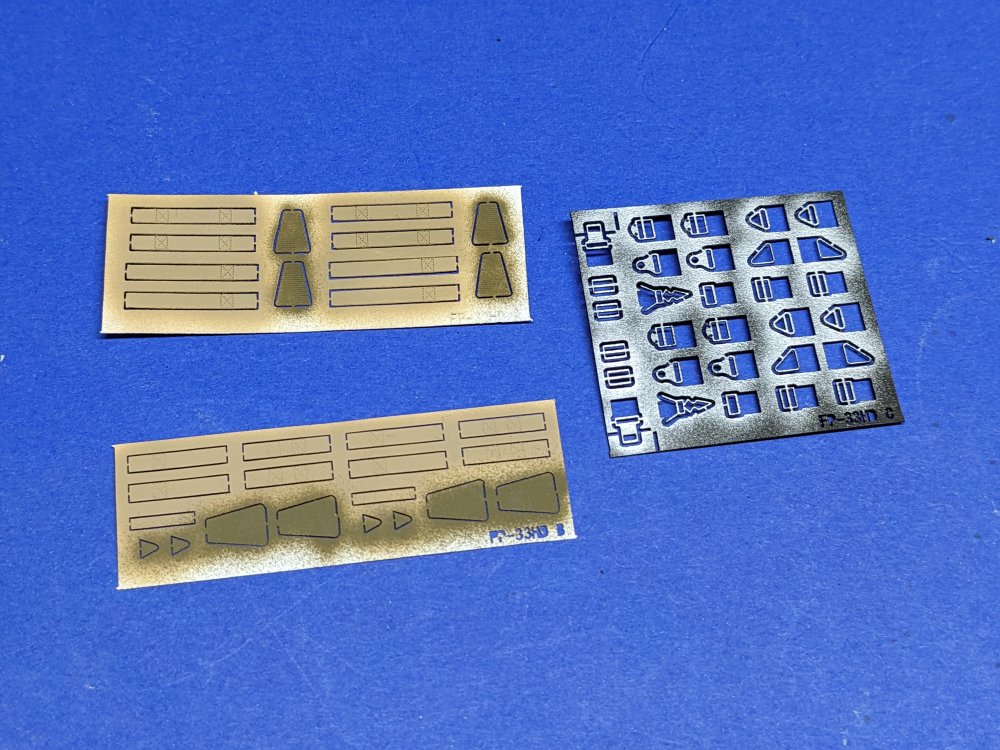
Time for an over due update. The IP is done now. I applied the decals to the backside of the clear panel. I used some Tamiya Super Strong decal solvent and it did a great job making them stick and conform. I also applied a decal not on the instructions to the left side of the panel. This had some markings on it that helped to spruce up the IP a bit more. @DocRob, the IP details are a bit on the soft side but not that bad. They could be sharper, but I think with a wash and dry brush they're ok. As there are no seat belts provided in the kit, I elected to use a set from Wako/Feeling. Each pack has two full sets of seatbelts and are about $6 from Japan. The belts are a similar material to HGW ones but come unpainted. The best part of these belts is that Wako has laid out the buckles so that you can not only thread the belts through them while they are still attached, but even fold over and glue the tabs down before removing the buckles. You can see this in the larger spaces to one side of some of the buckles. Also, they have a full routing diagram so you know how to thread the buckles and where they go. Here's the belts and buckles with a coat of paint. One last thing to note. The buckles are made from plastic and not PE so they need a bit more care in handling.

- 90 replies
-
- 7
-
-
-
- zoukei-mura
- 109
- (and 1 more)
-
Don't you hate it when they use 4WD?
-
Special Hobby Whirlwind
BlrwestSiR replied to Peterpools's topic in LSM 1/35 and Larger Work In Progress
The Whirlwind looks great Peter. Glad to hear the decals went on without a hitch. -
Catch any?
-
GWH Curtiss P-40B; The Flying Tigers
BlrwestSiR replied to Peterpools's topic in LSM 1/35 and Larger Work In Progress
Here you go.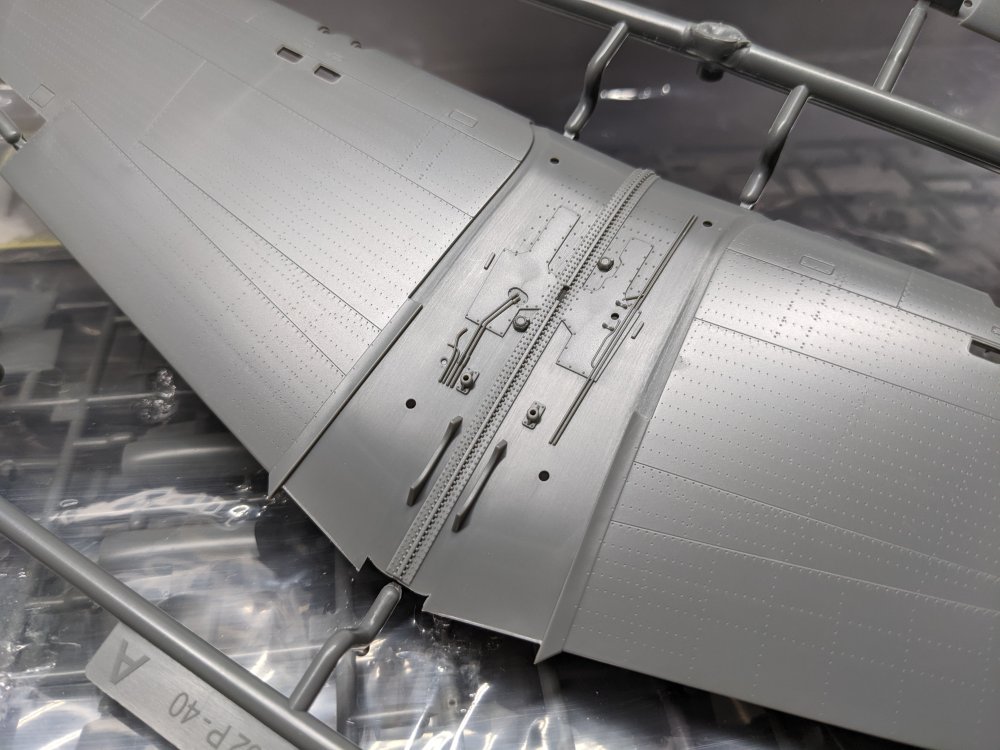
-
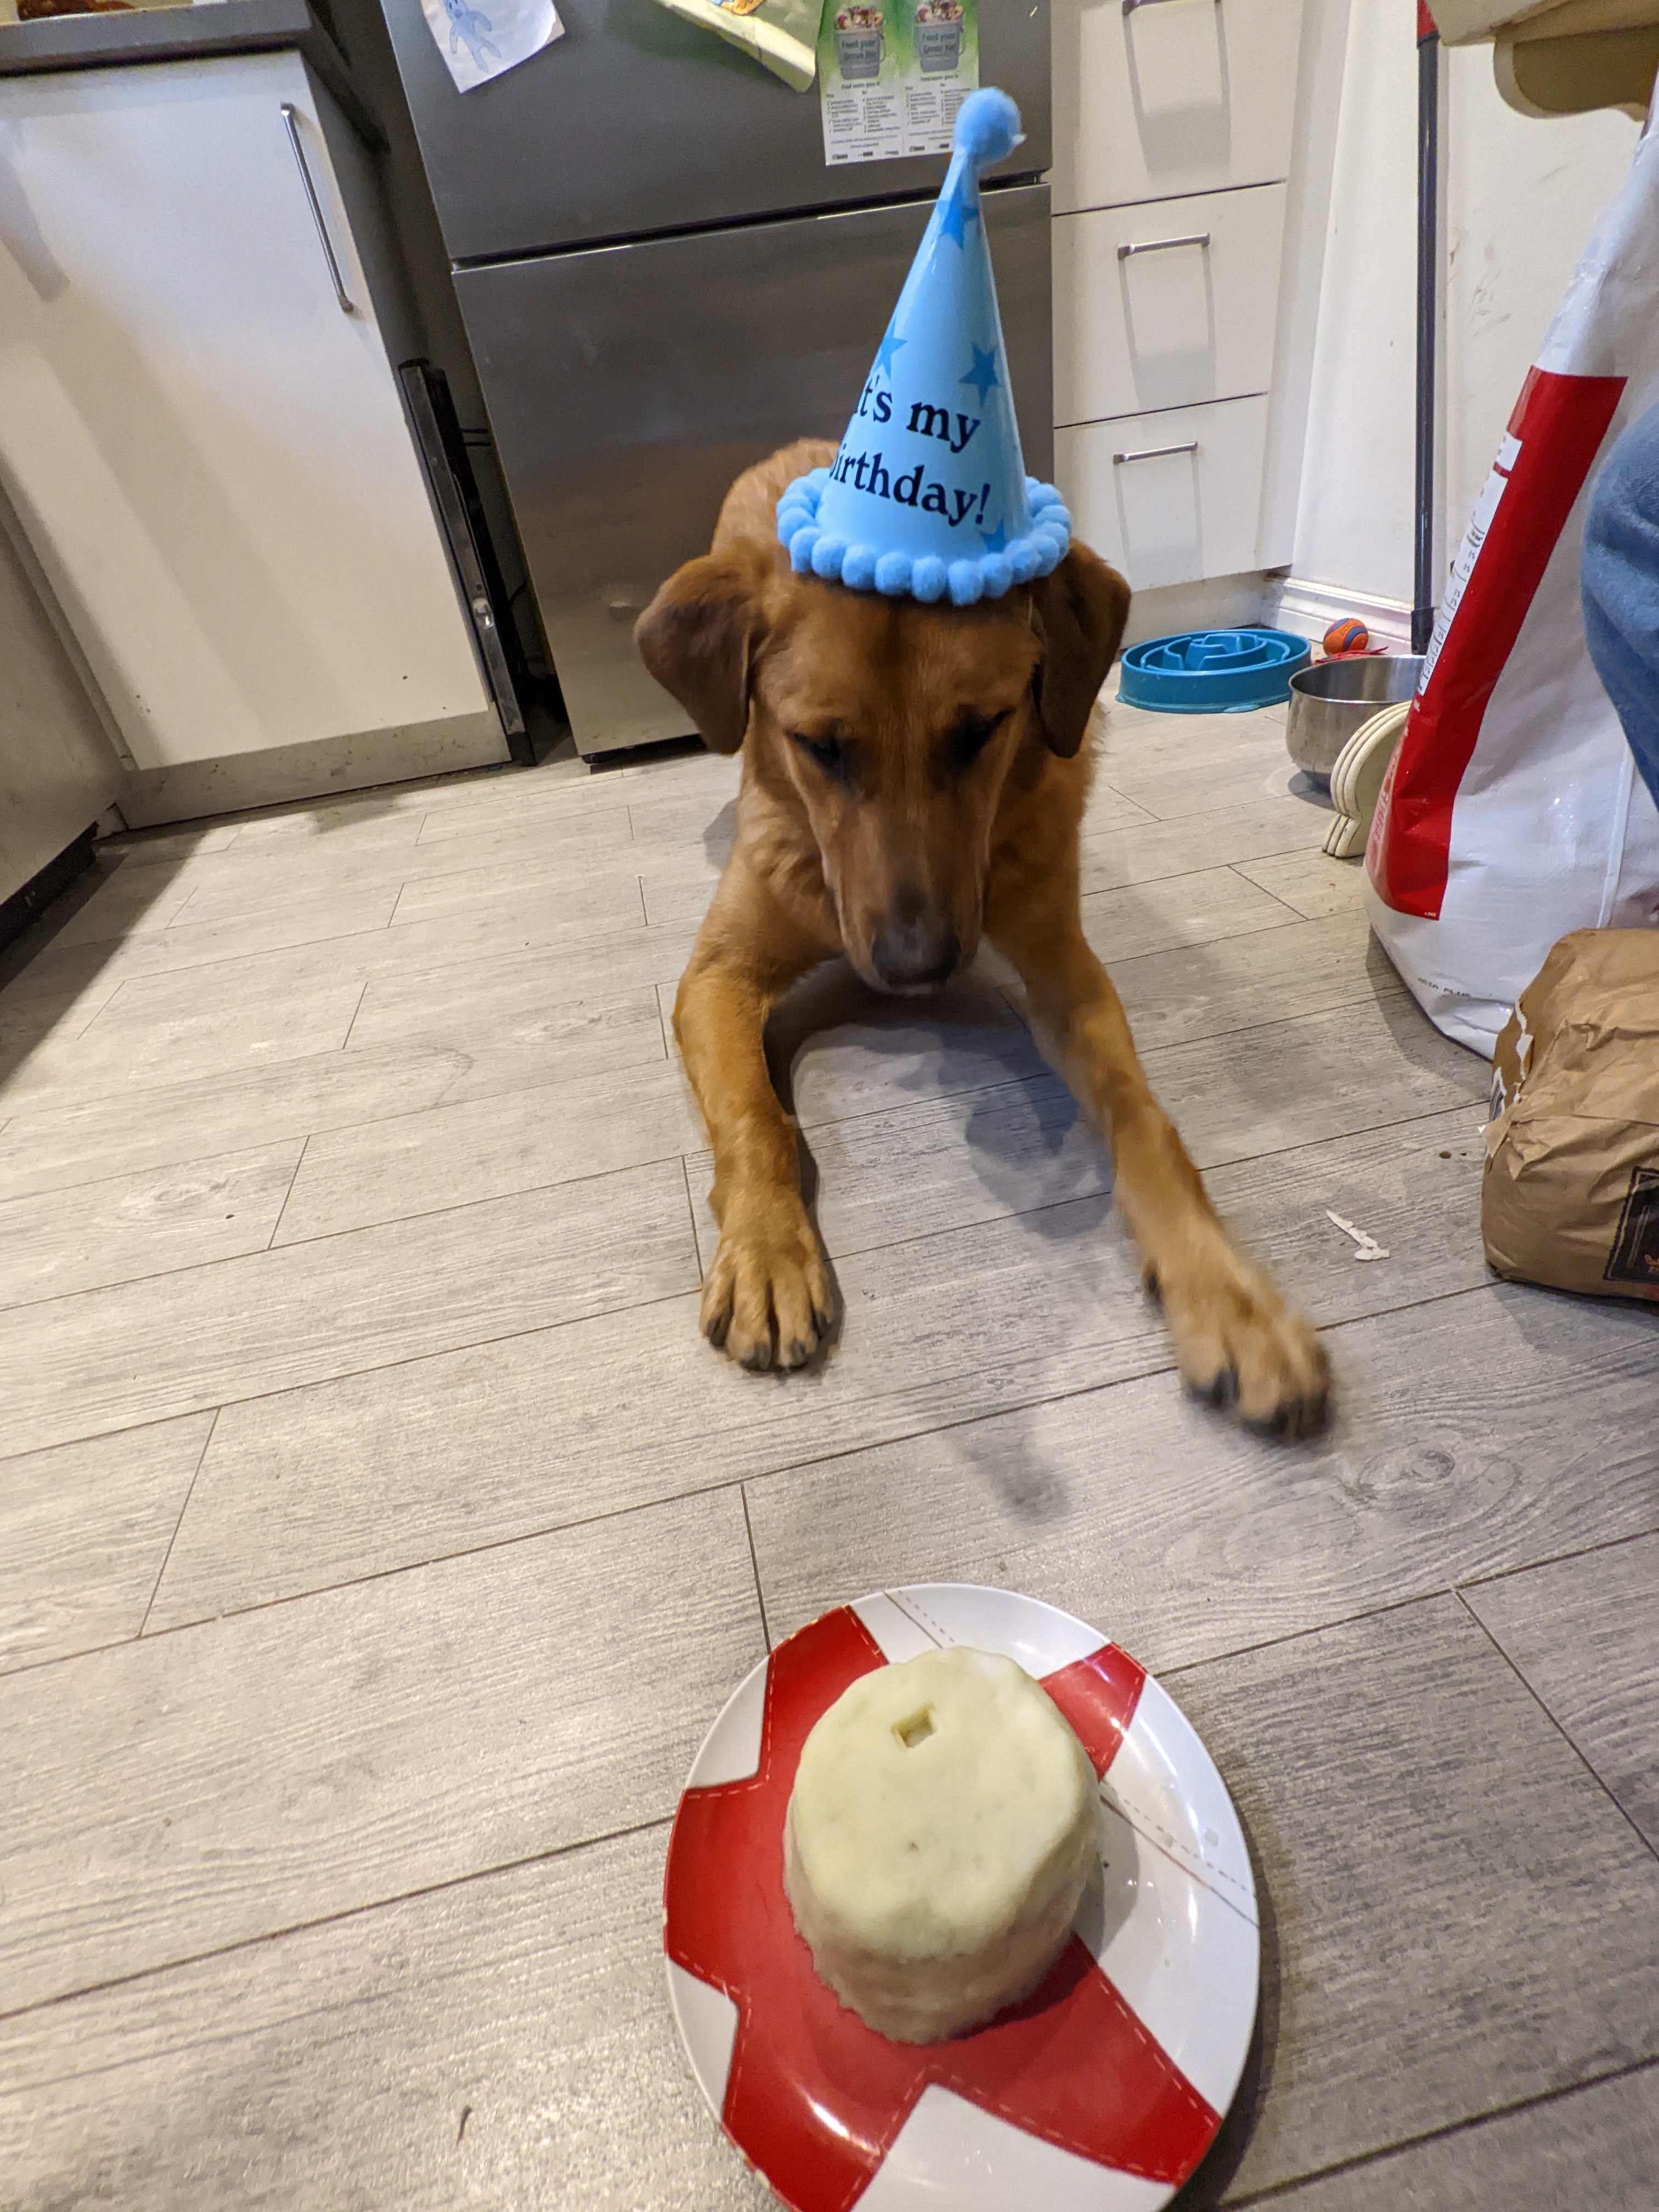
"The things I have to do for my birthday cake"

-
Great build Martin! Still can't believe it's 1/72. Carl
-
The F-35 is out in Dec. My LHS is taking pre-orders with a discount. Might just bite.
-
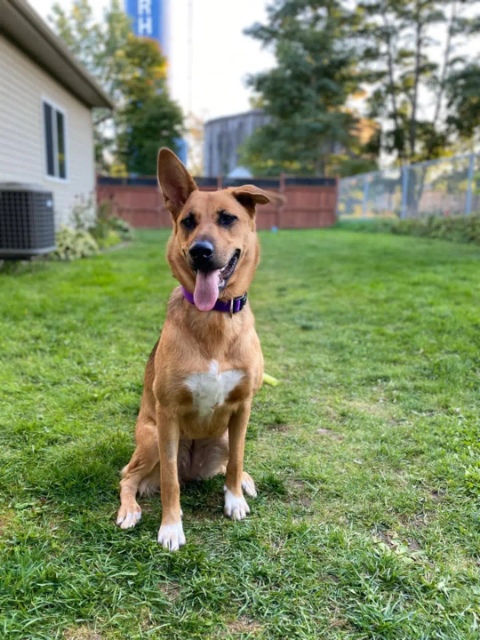
This goofball is 1 years old today. Here's his two sisters.
-
F4U-1A Corsair Tamiya 1/32
BlrwestSiR replied to DocRob's topic in LSM 1/35 and Larger Work In Progress
Great work on the Corsair and enjoy your vacation. Carl