BlrwestSiR
-
Posts
9,138 -
Joined
-
Last visited
Content Type
Profiles
Forums
Events
Gallery
Everything posted by BlrwestSiR
-

Tamiya 1/35 M26 Pershing Build Thread
BlrwestSiR replied to RalphSarc's topic in LSM 1/35 and Larger Work In Progress
That looks great. So tempted to get one now. -
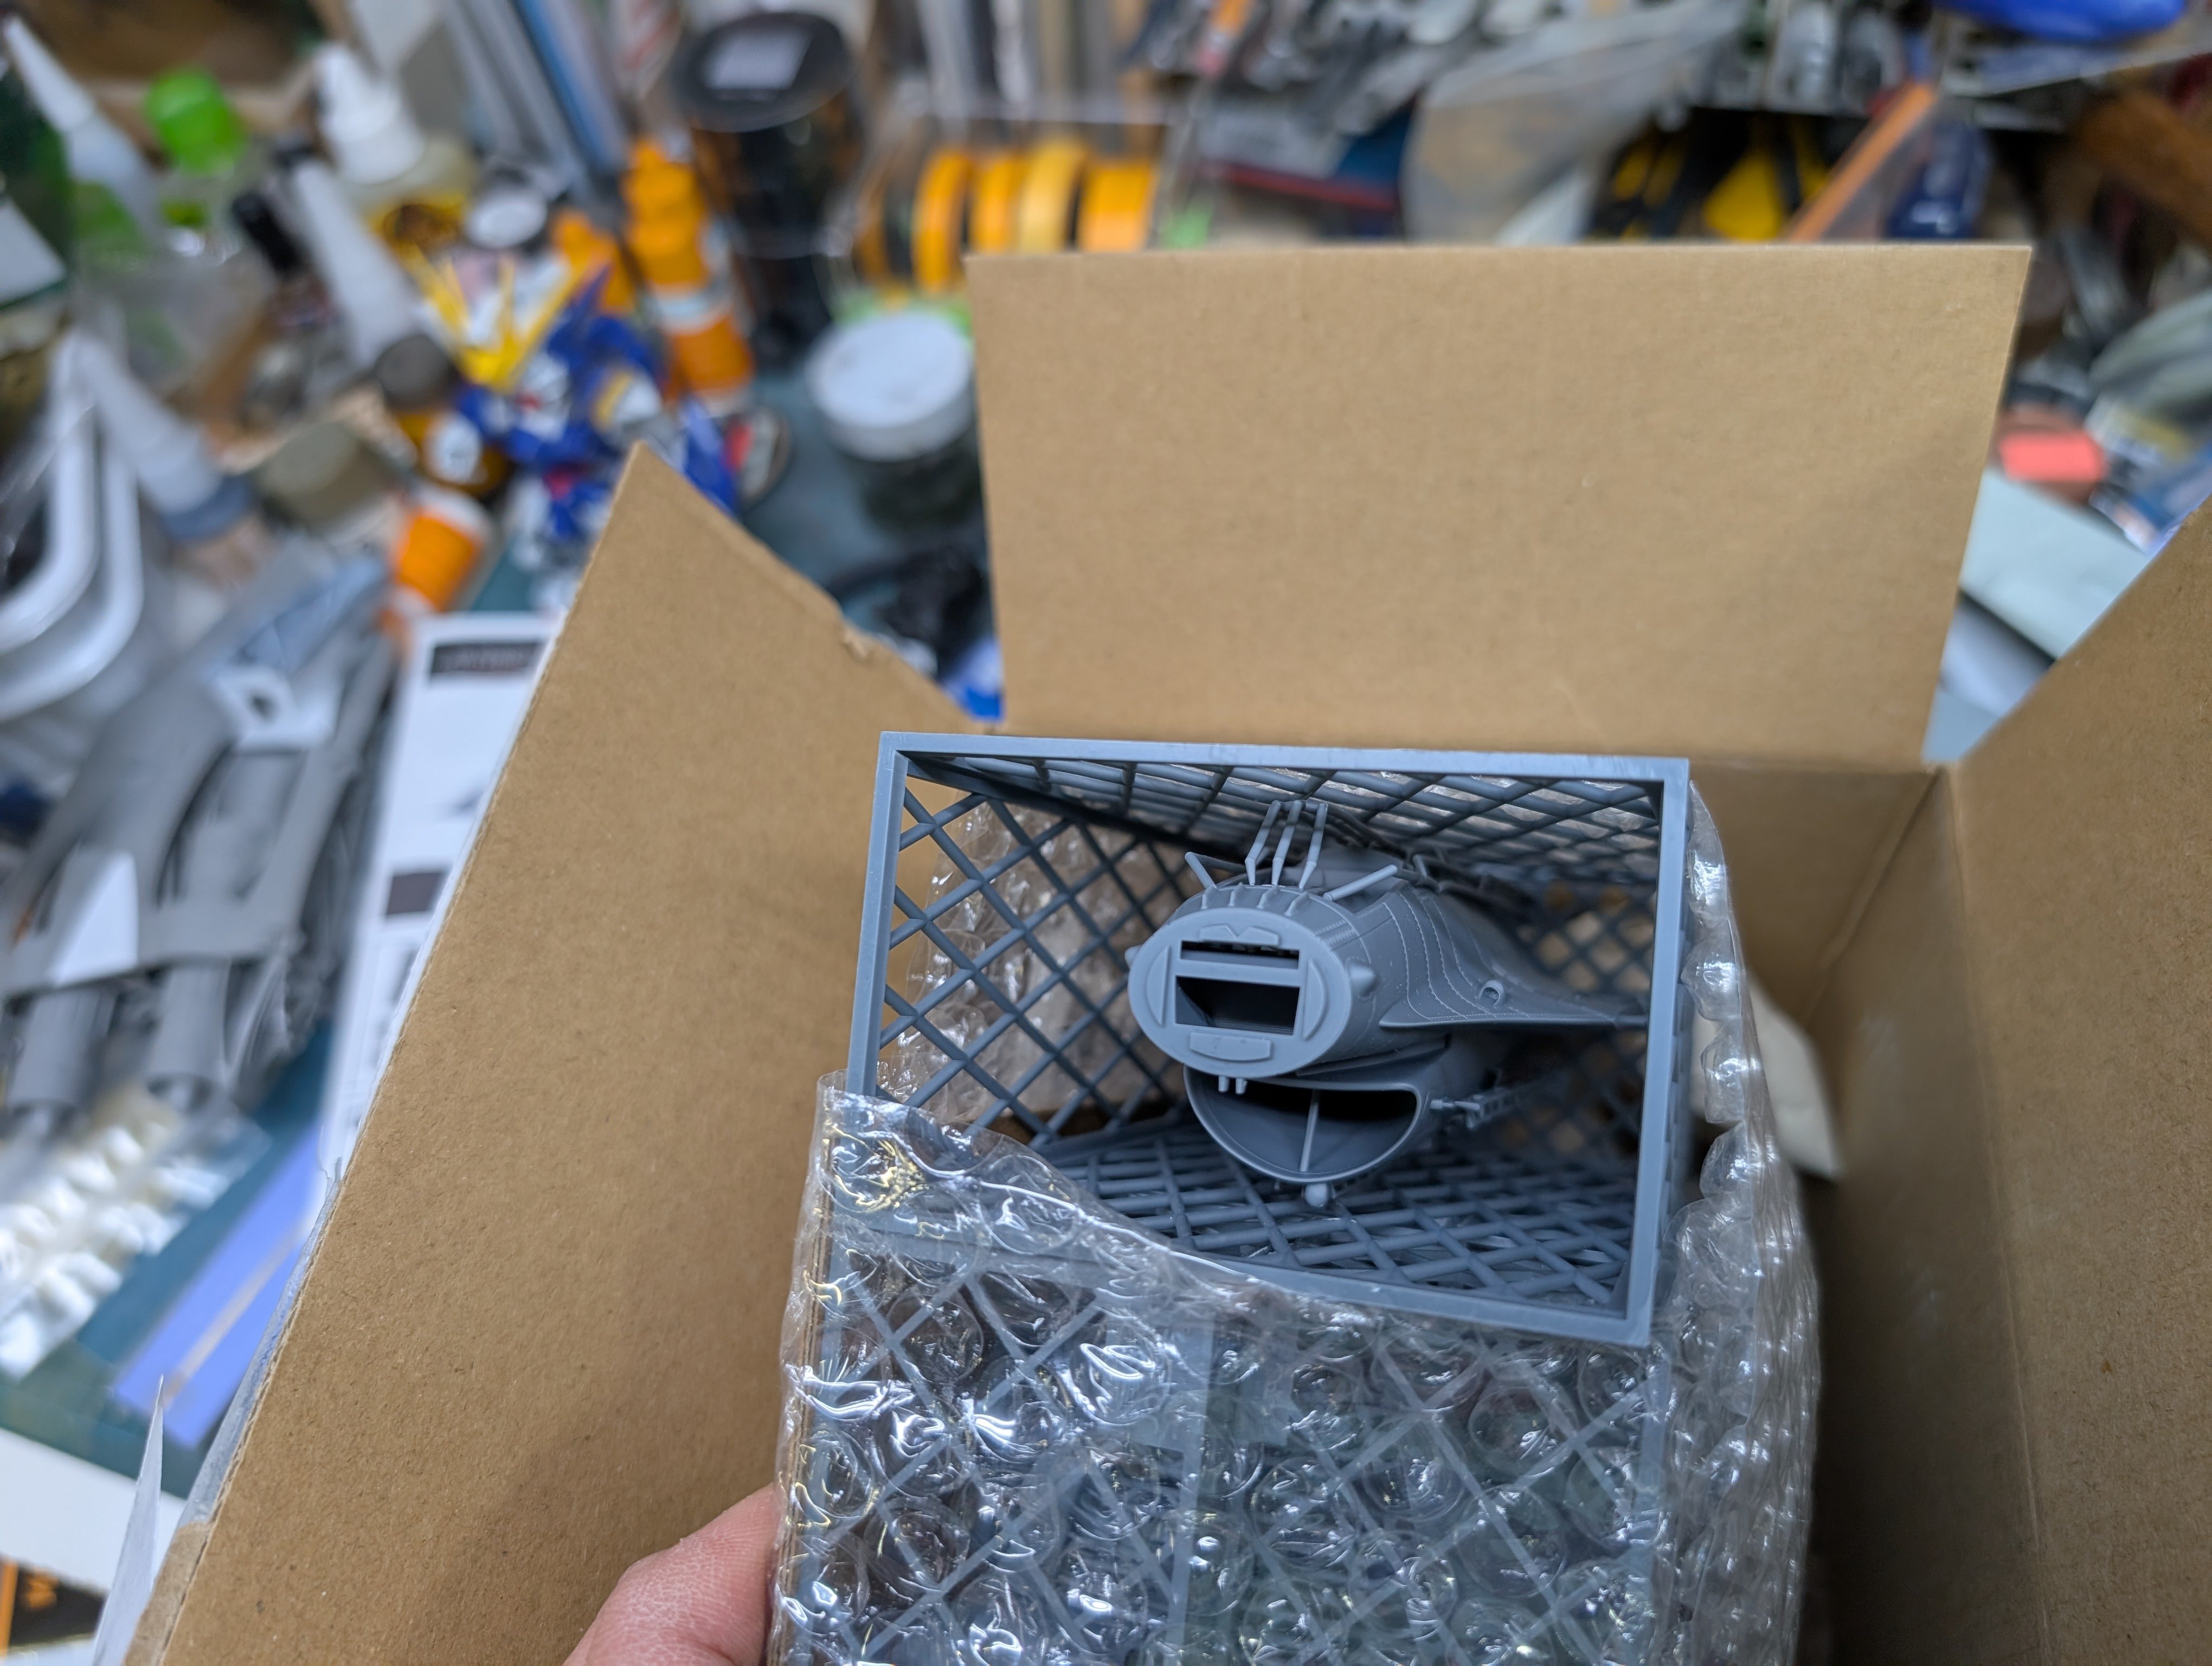
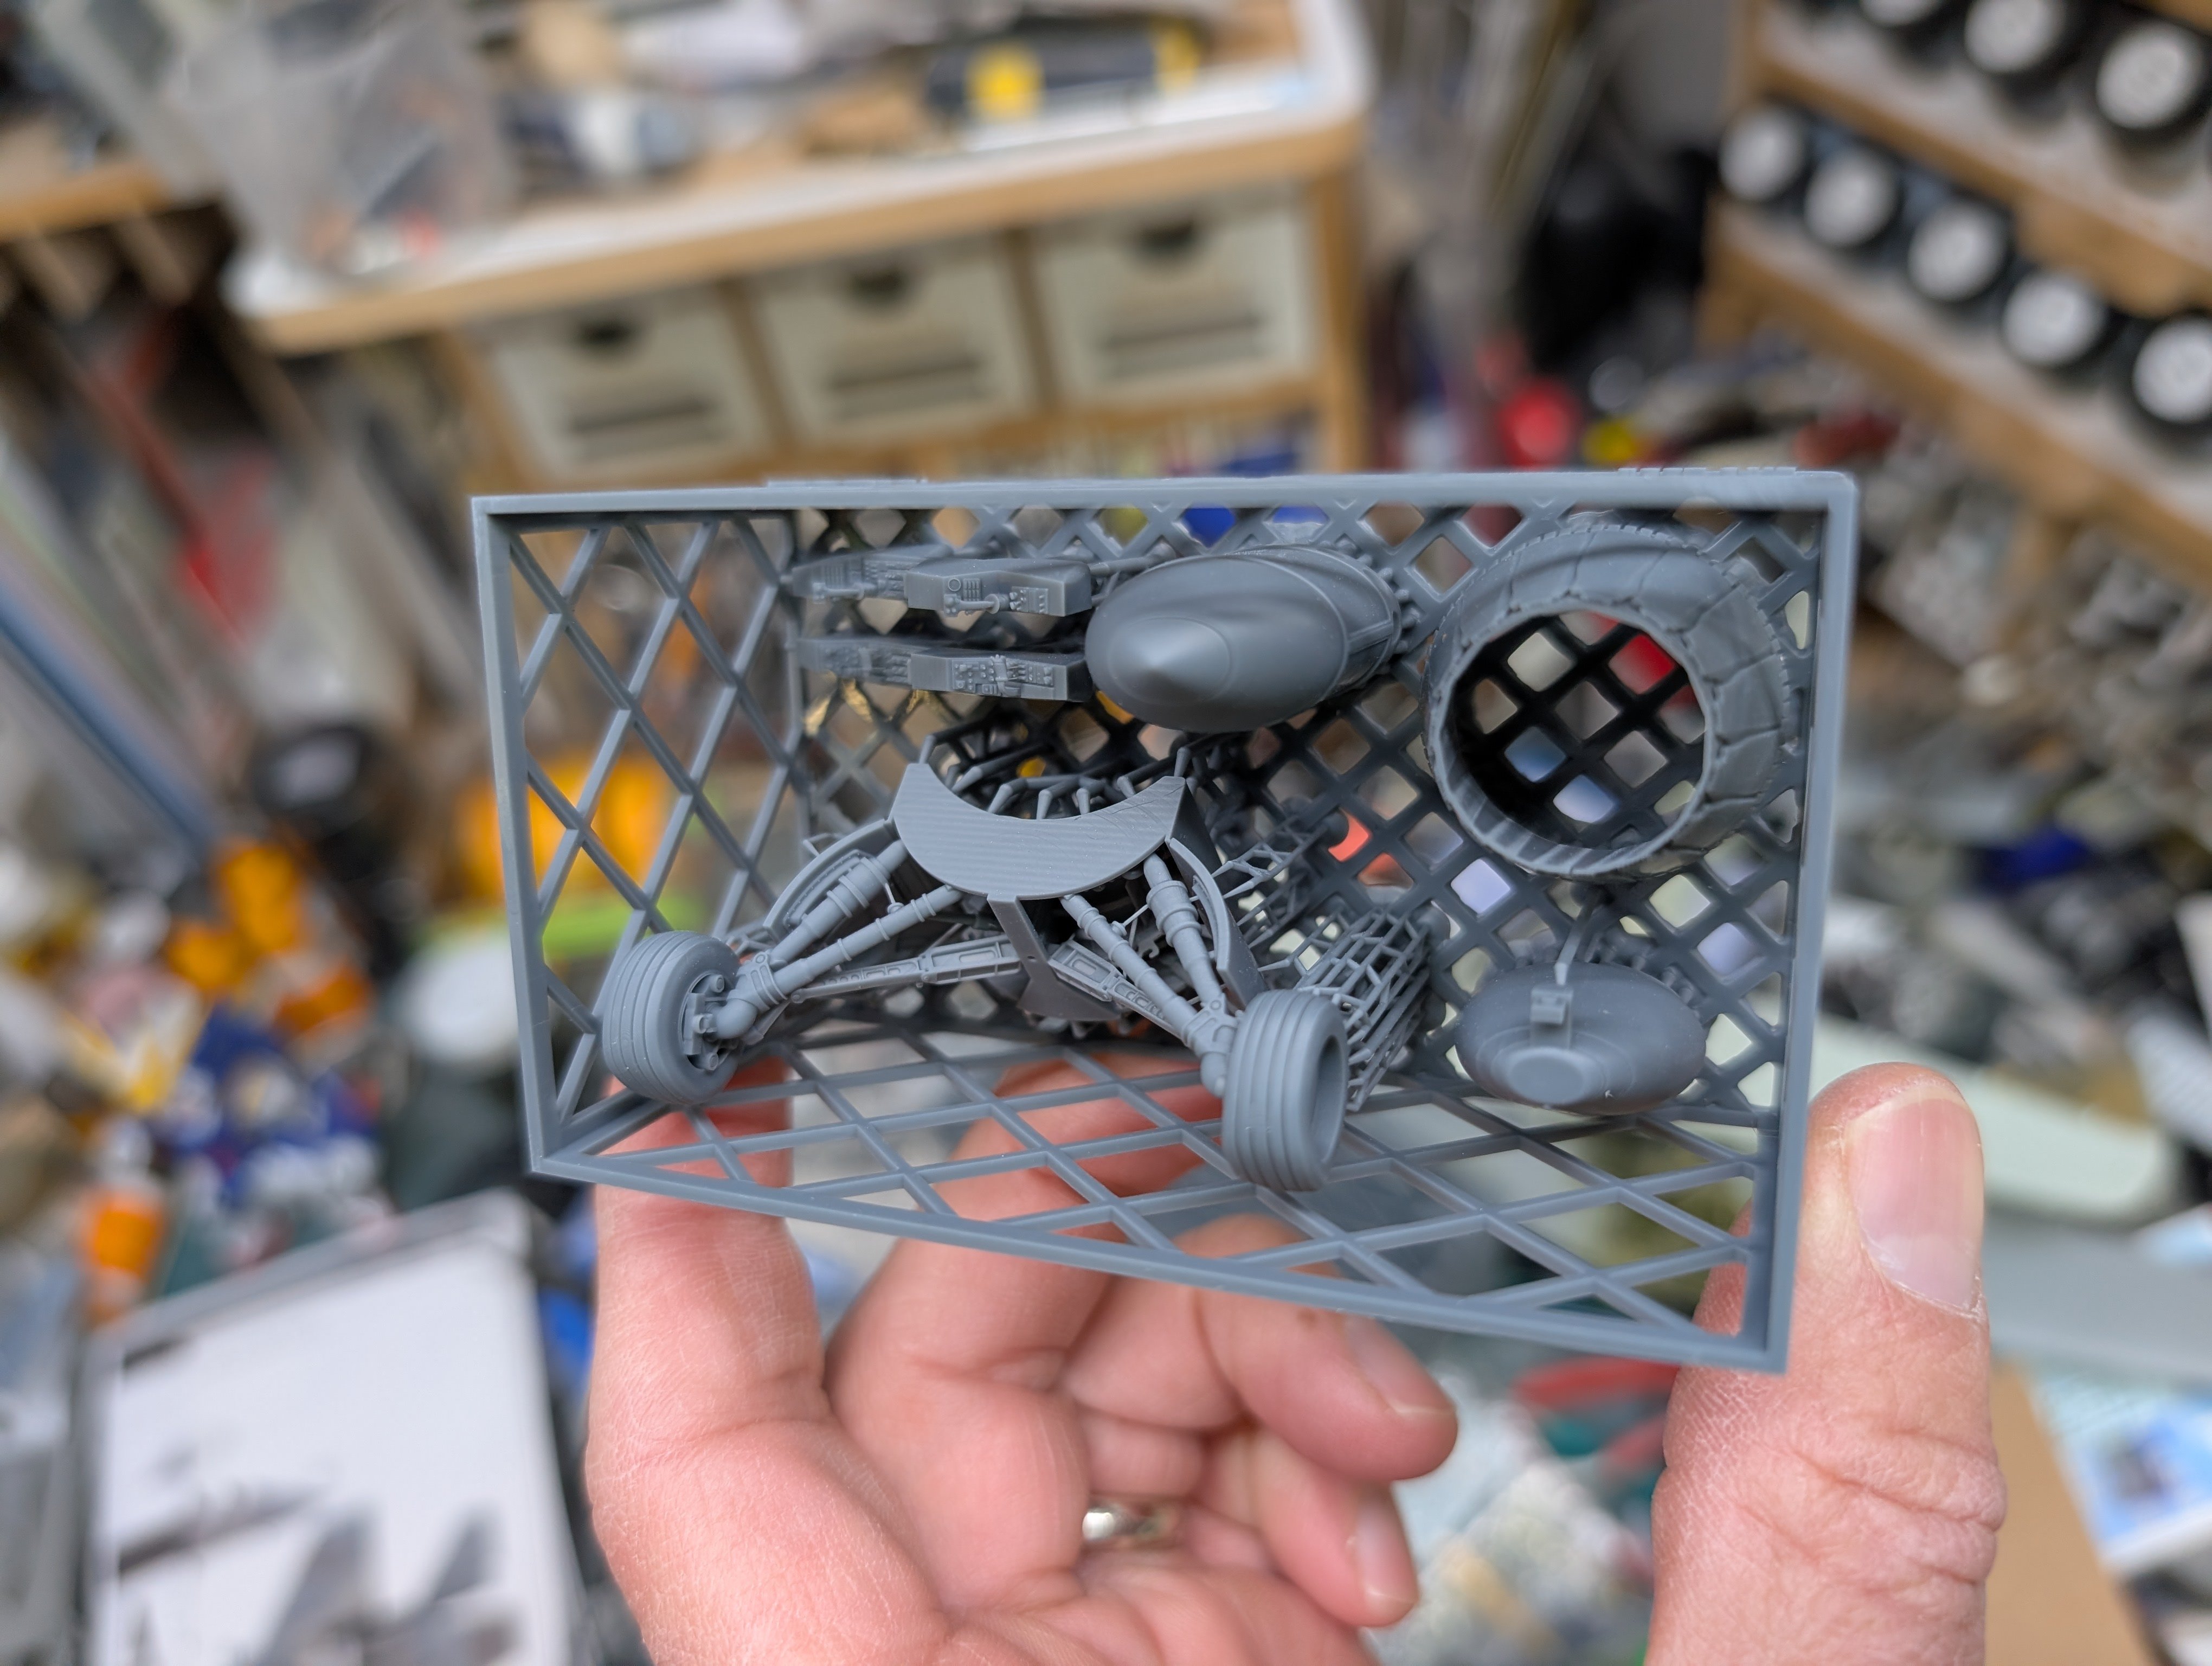
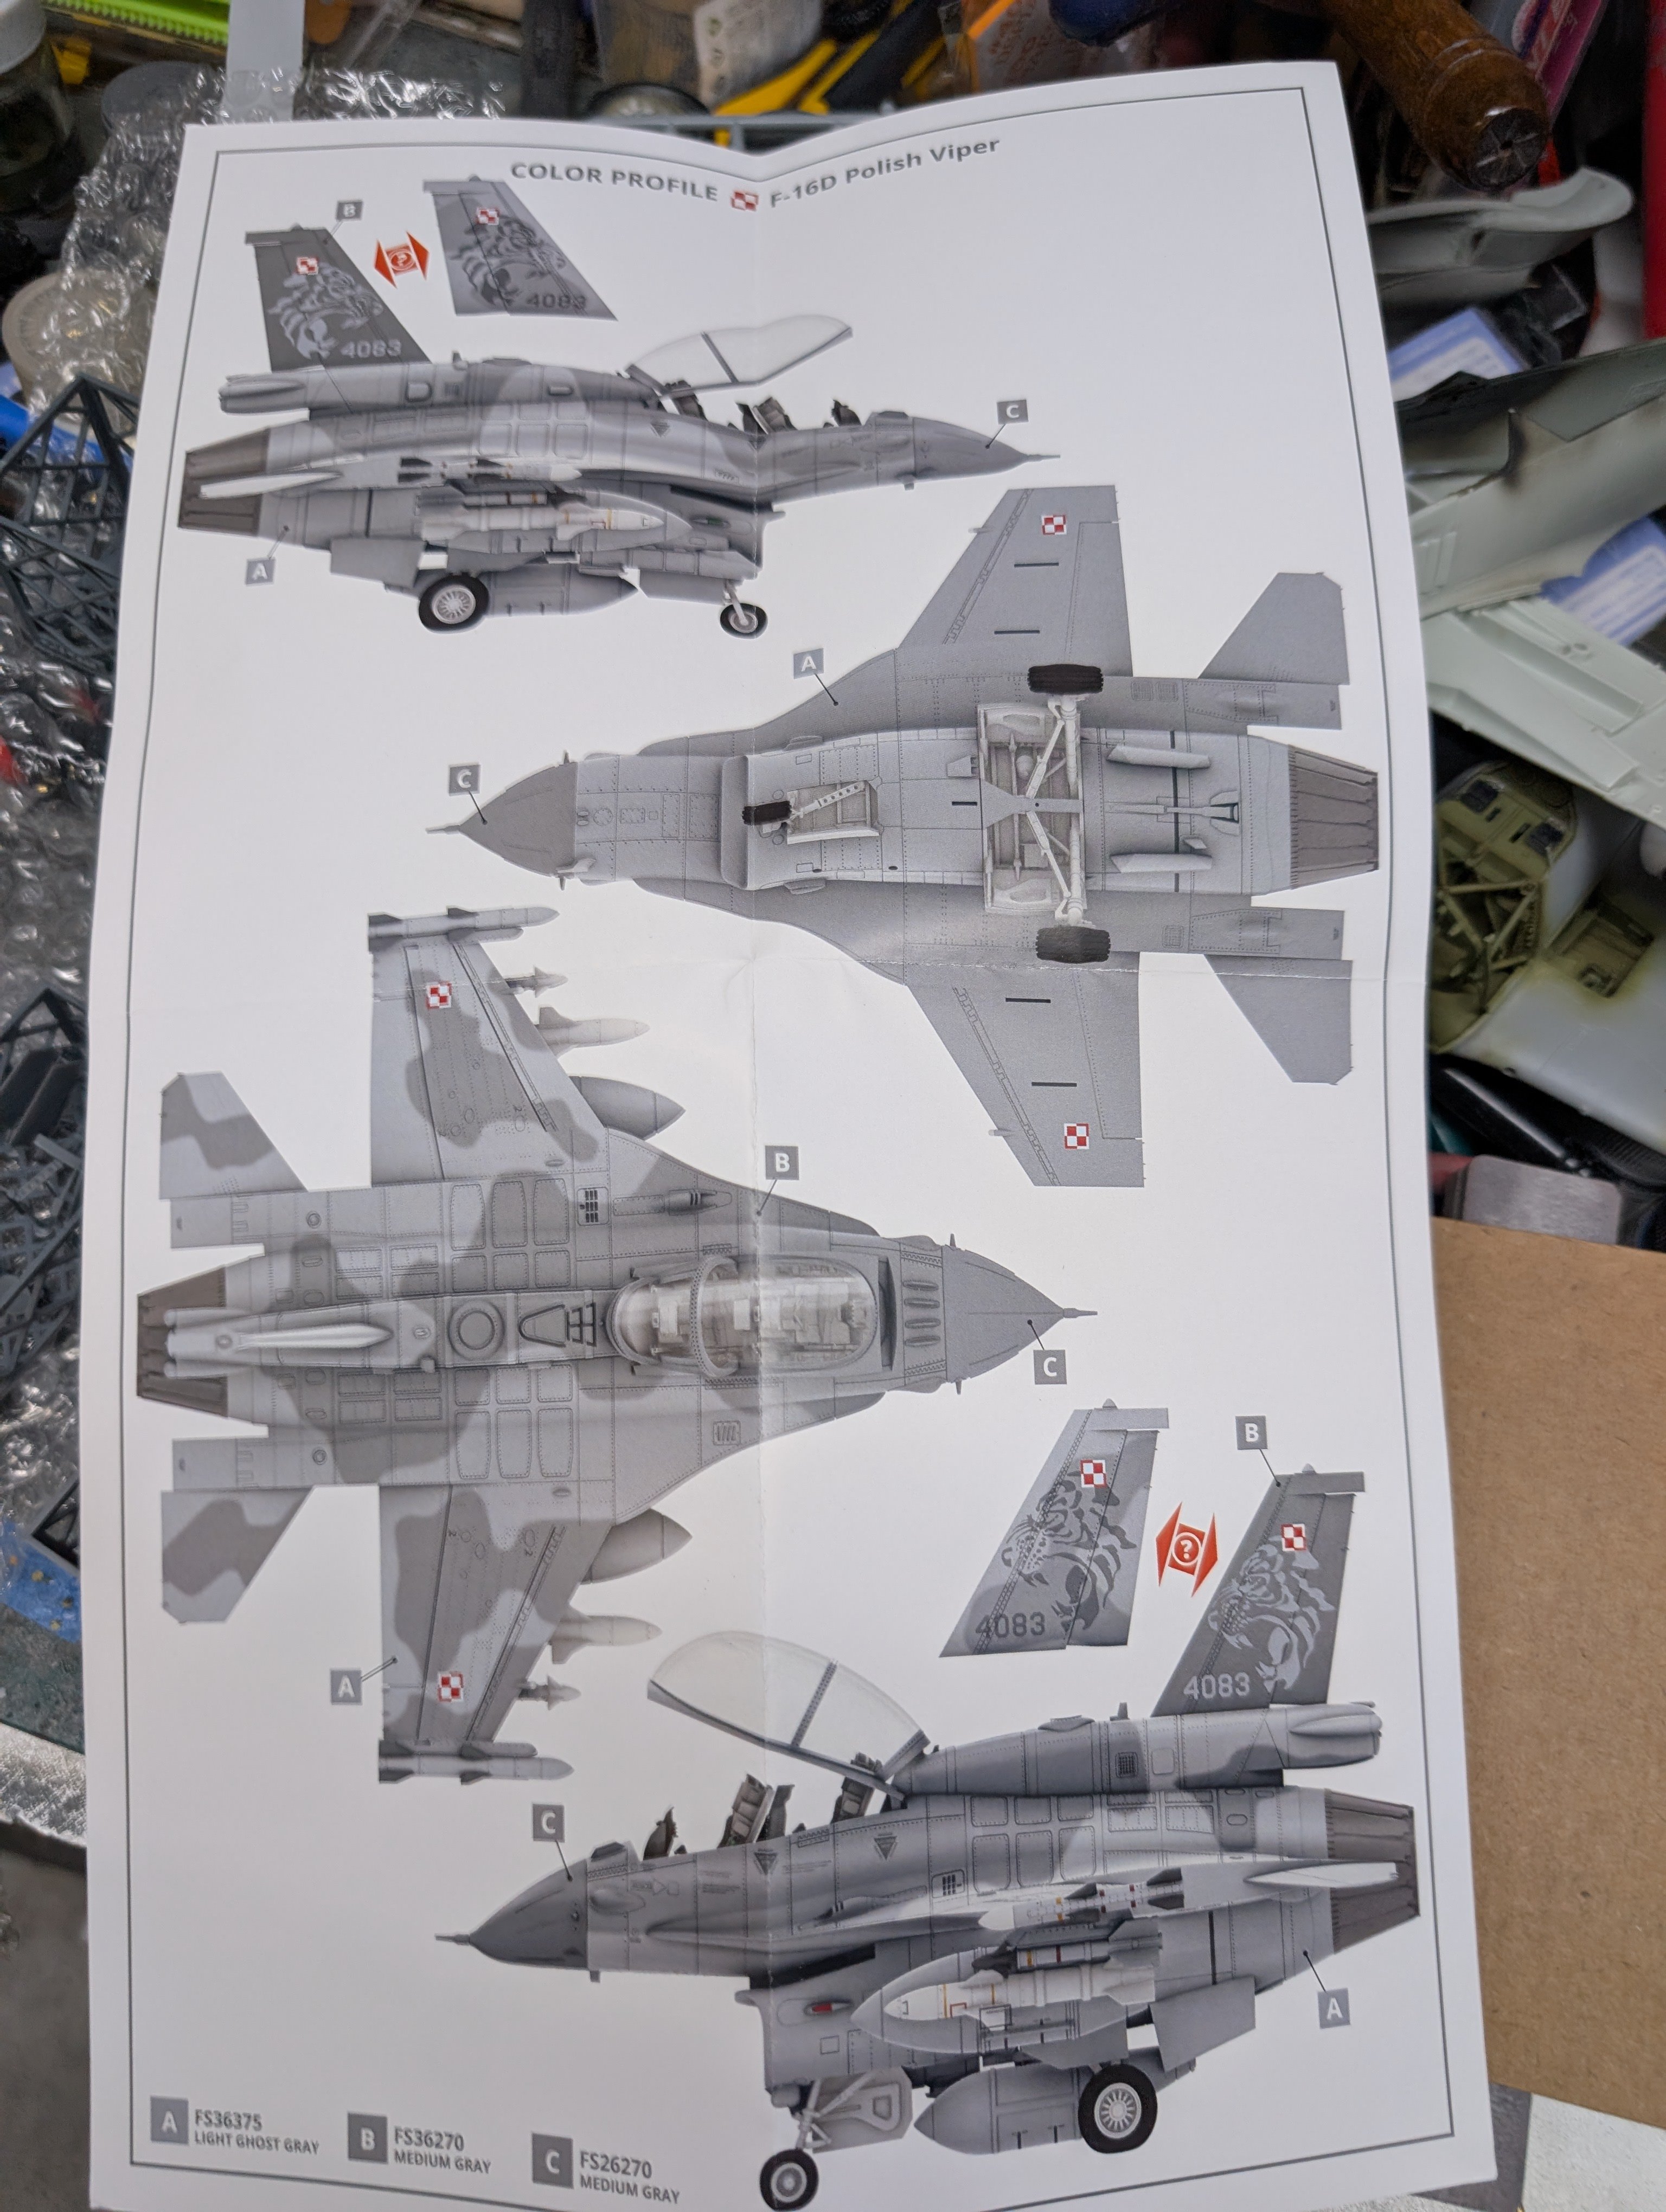
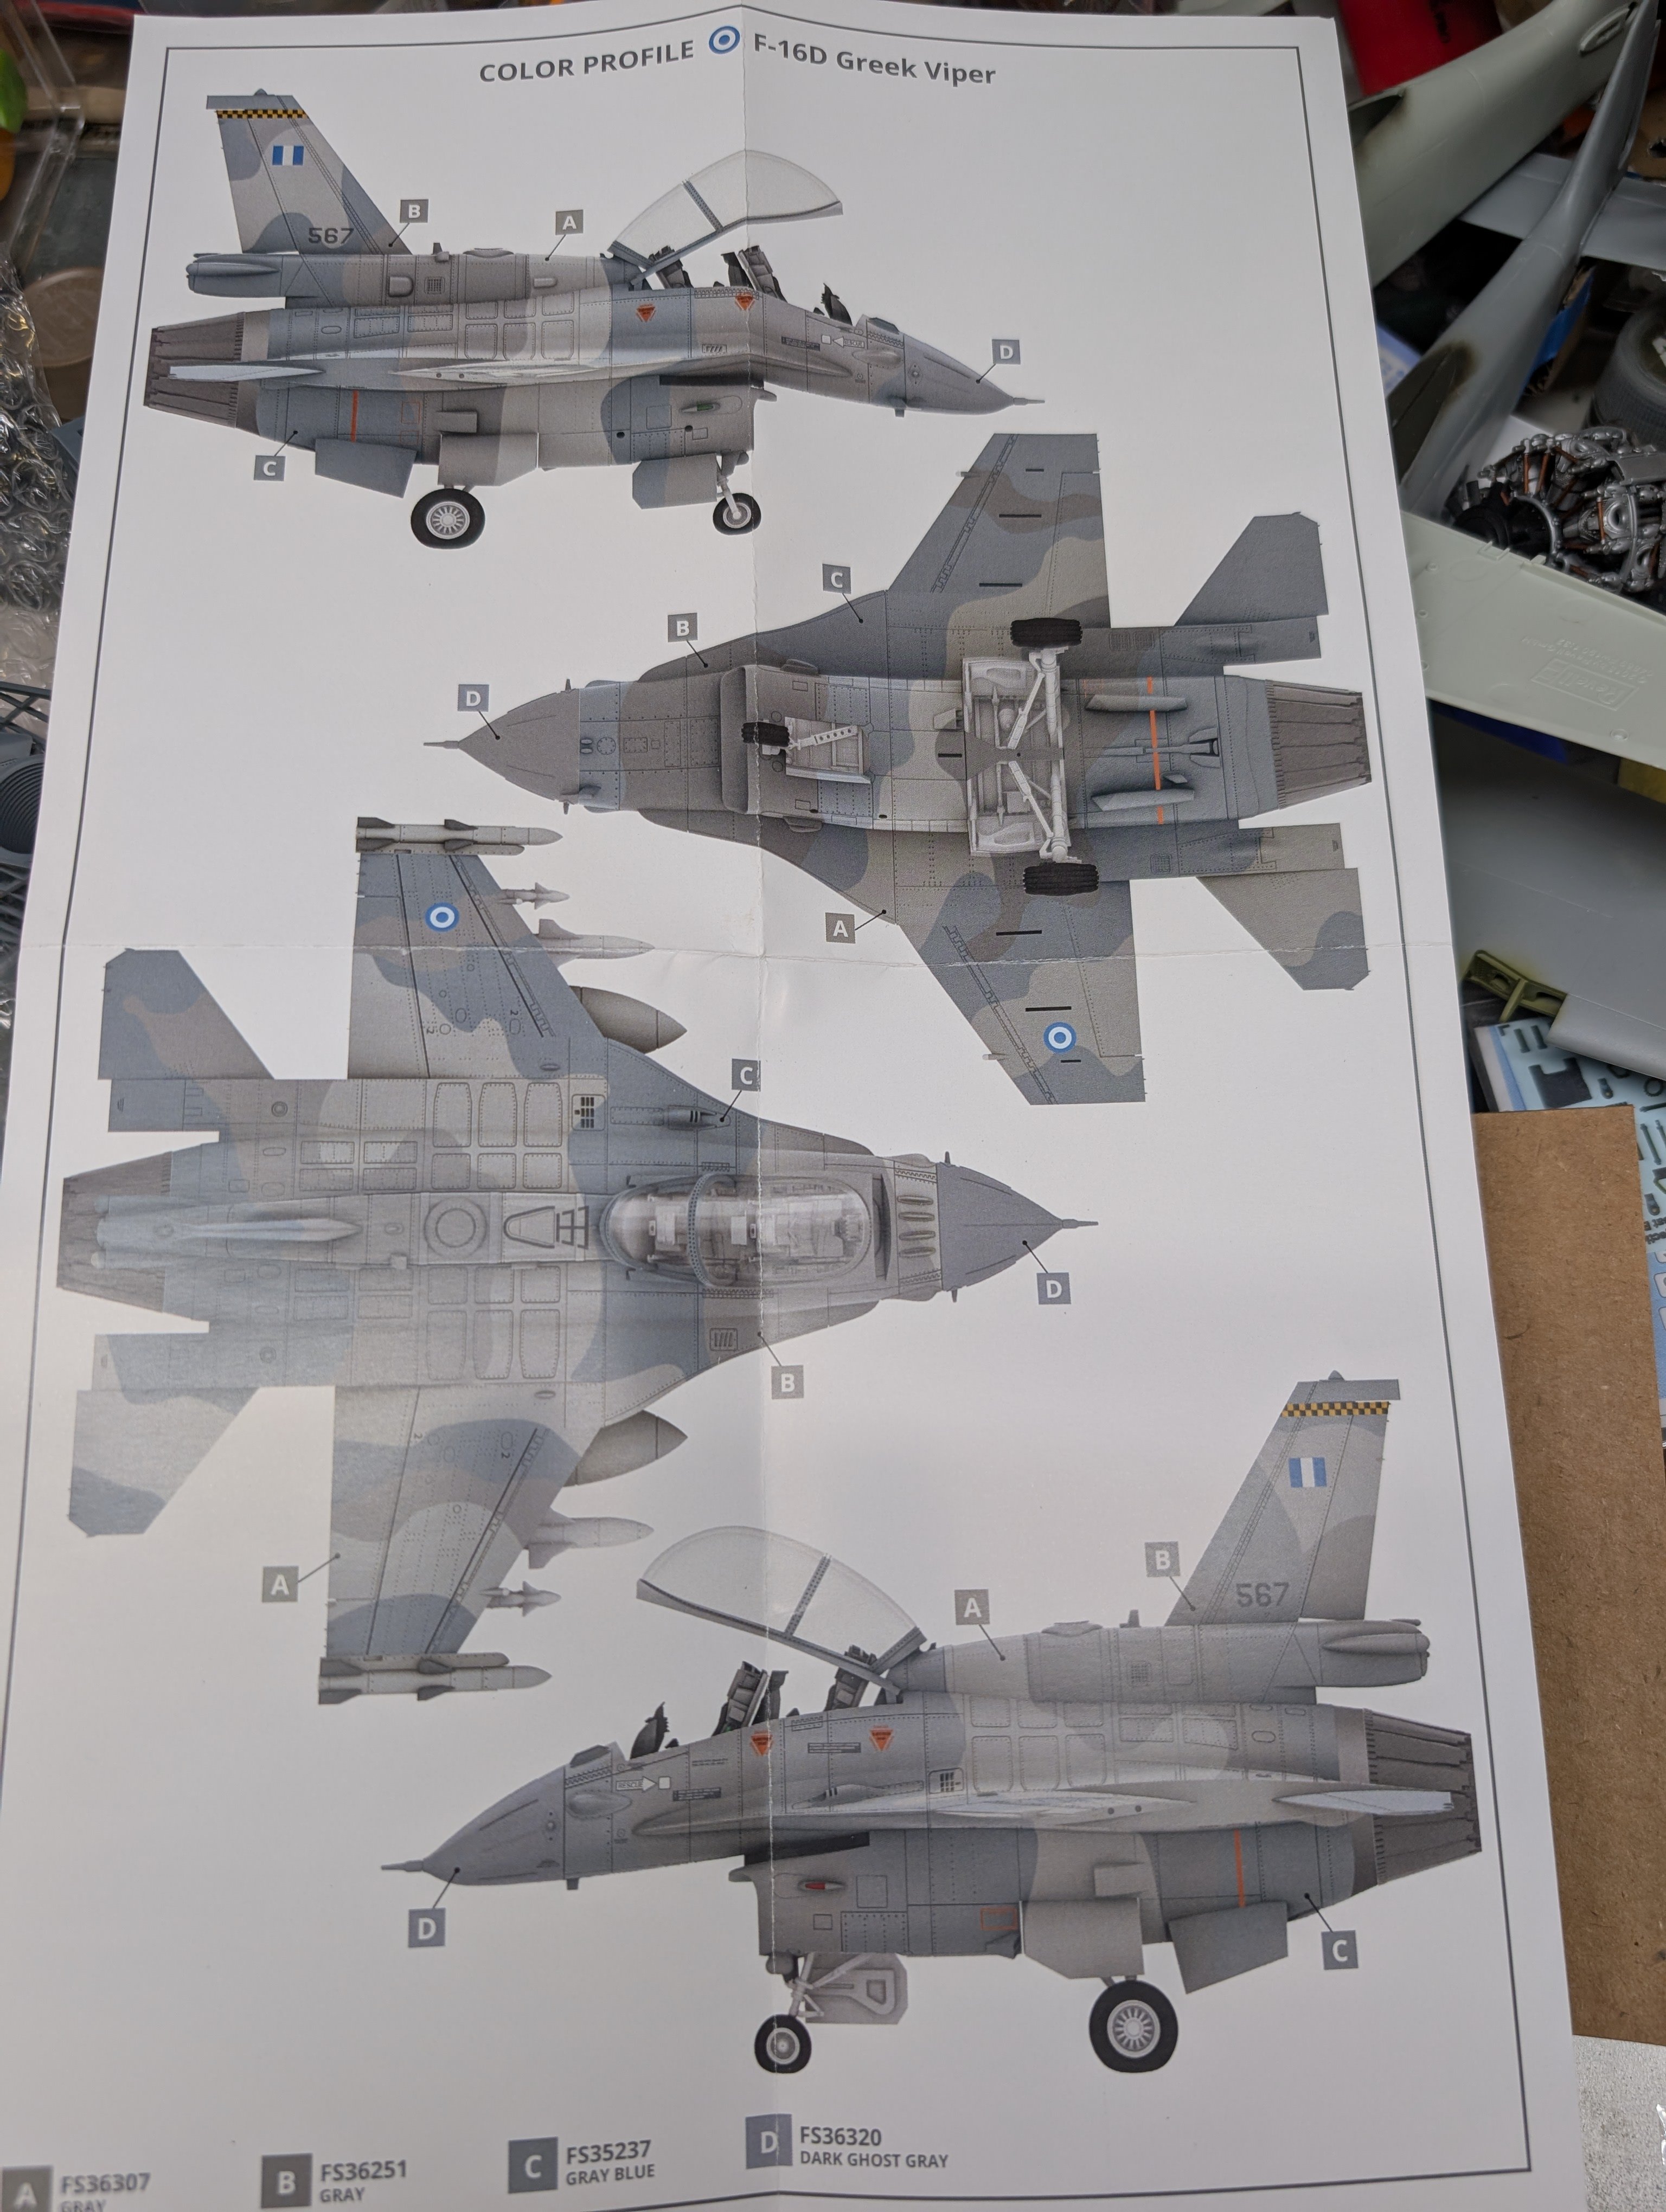
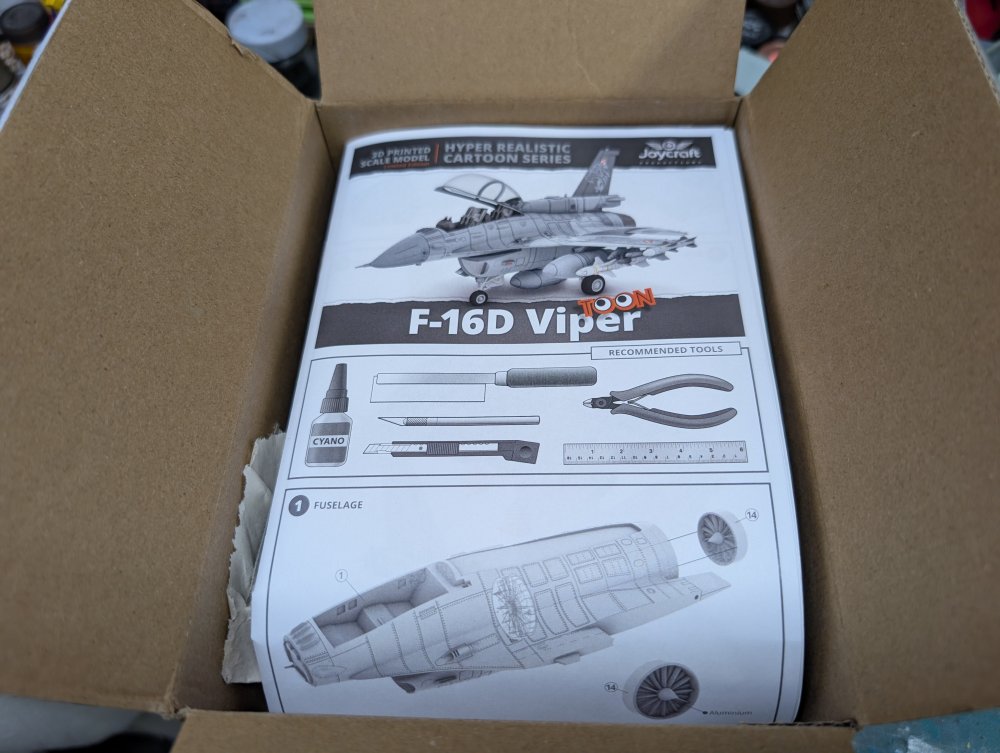
I finally got my order from Joycraft Models. After it got sent out, it went on a bit of a tour thanks to a mis-routing. Then throw in the snowstorm and it took a bit longer than expected to arrive What's inside the box? Thankfully not Gwyneth Paltrow's head... Details look really nice. Optional.markings for either a Polish Tiger Meet F-16 or a Greek one. Joycraft is the company that has announced the 1/32 Tutor Snowbirds kit coming out later this year. So I think this bodes well for that kit. Carl


-
Nice progress on the paint job. Hope the flooring is progressing too. How was the snow fall? We ended up with 61 cm of snow from yesterday to this morning. Apparently a new record for Toronto. Carl
-
Having only done the ZM Spad, I'm curious what the challenges are with the Trumpy one? As for the snow, we just got hit with 61 cm of the fluffy white stuff. Kids got a snow day today so they're making the most of it. Carl
-
What is on your bench right now ? Share a picture :)
BlrwestSiR replied to Martinnfb's topic in Modelling Discussion
I used my usual Dispiae nippers. I hadn't thought of a razor saw and there wouldn't have been enough room to get one in between the nubs. -
What is on your bench right now ? Share a picture :)
BlrwestSiR replied to Martinnfb's topic in Modelling Discussion
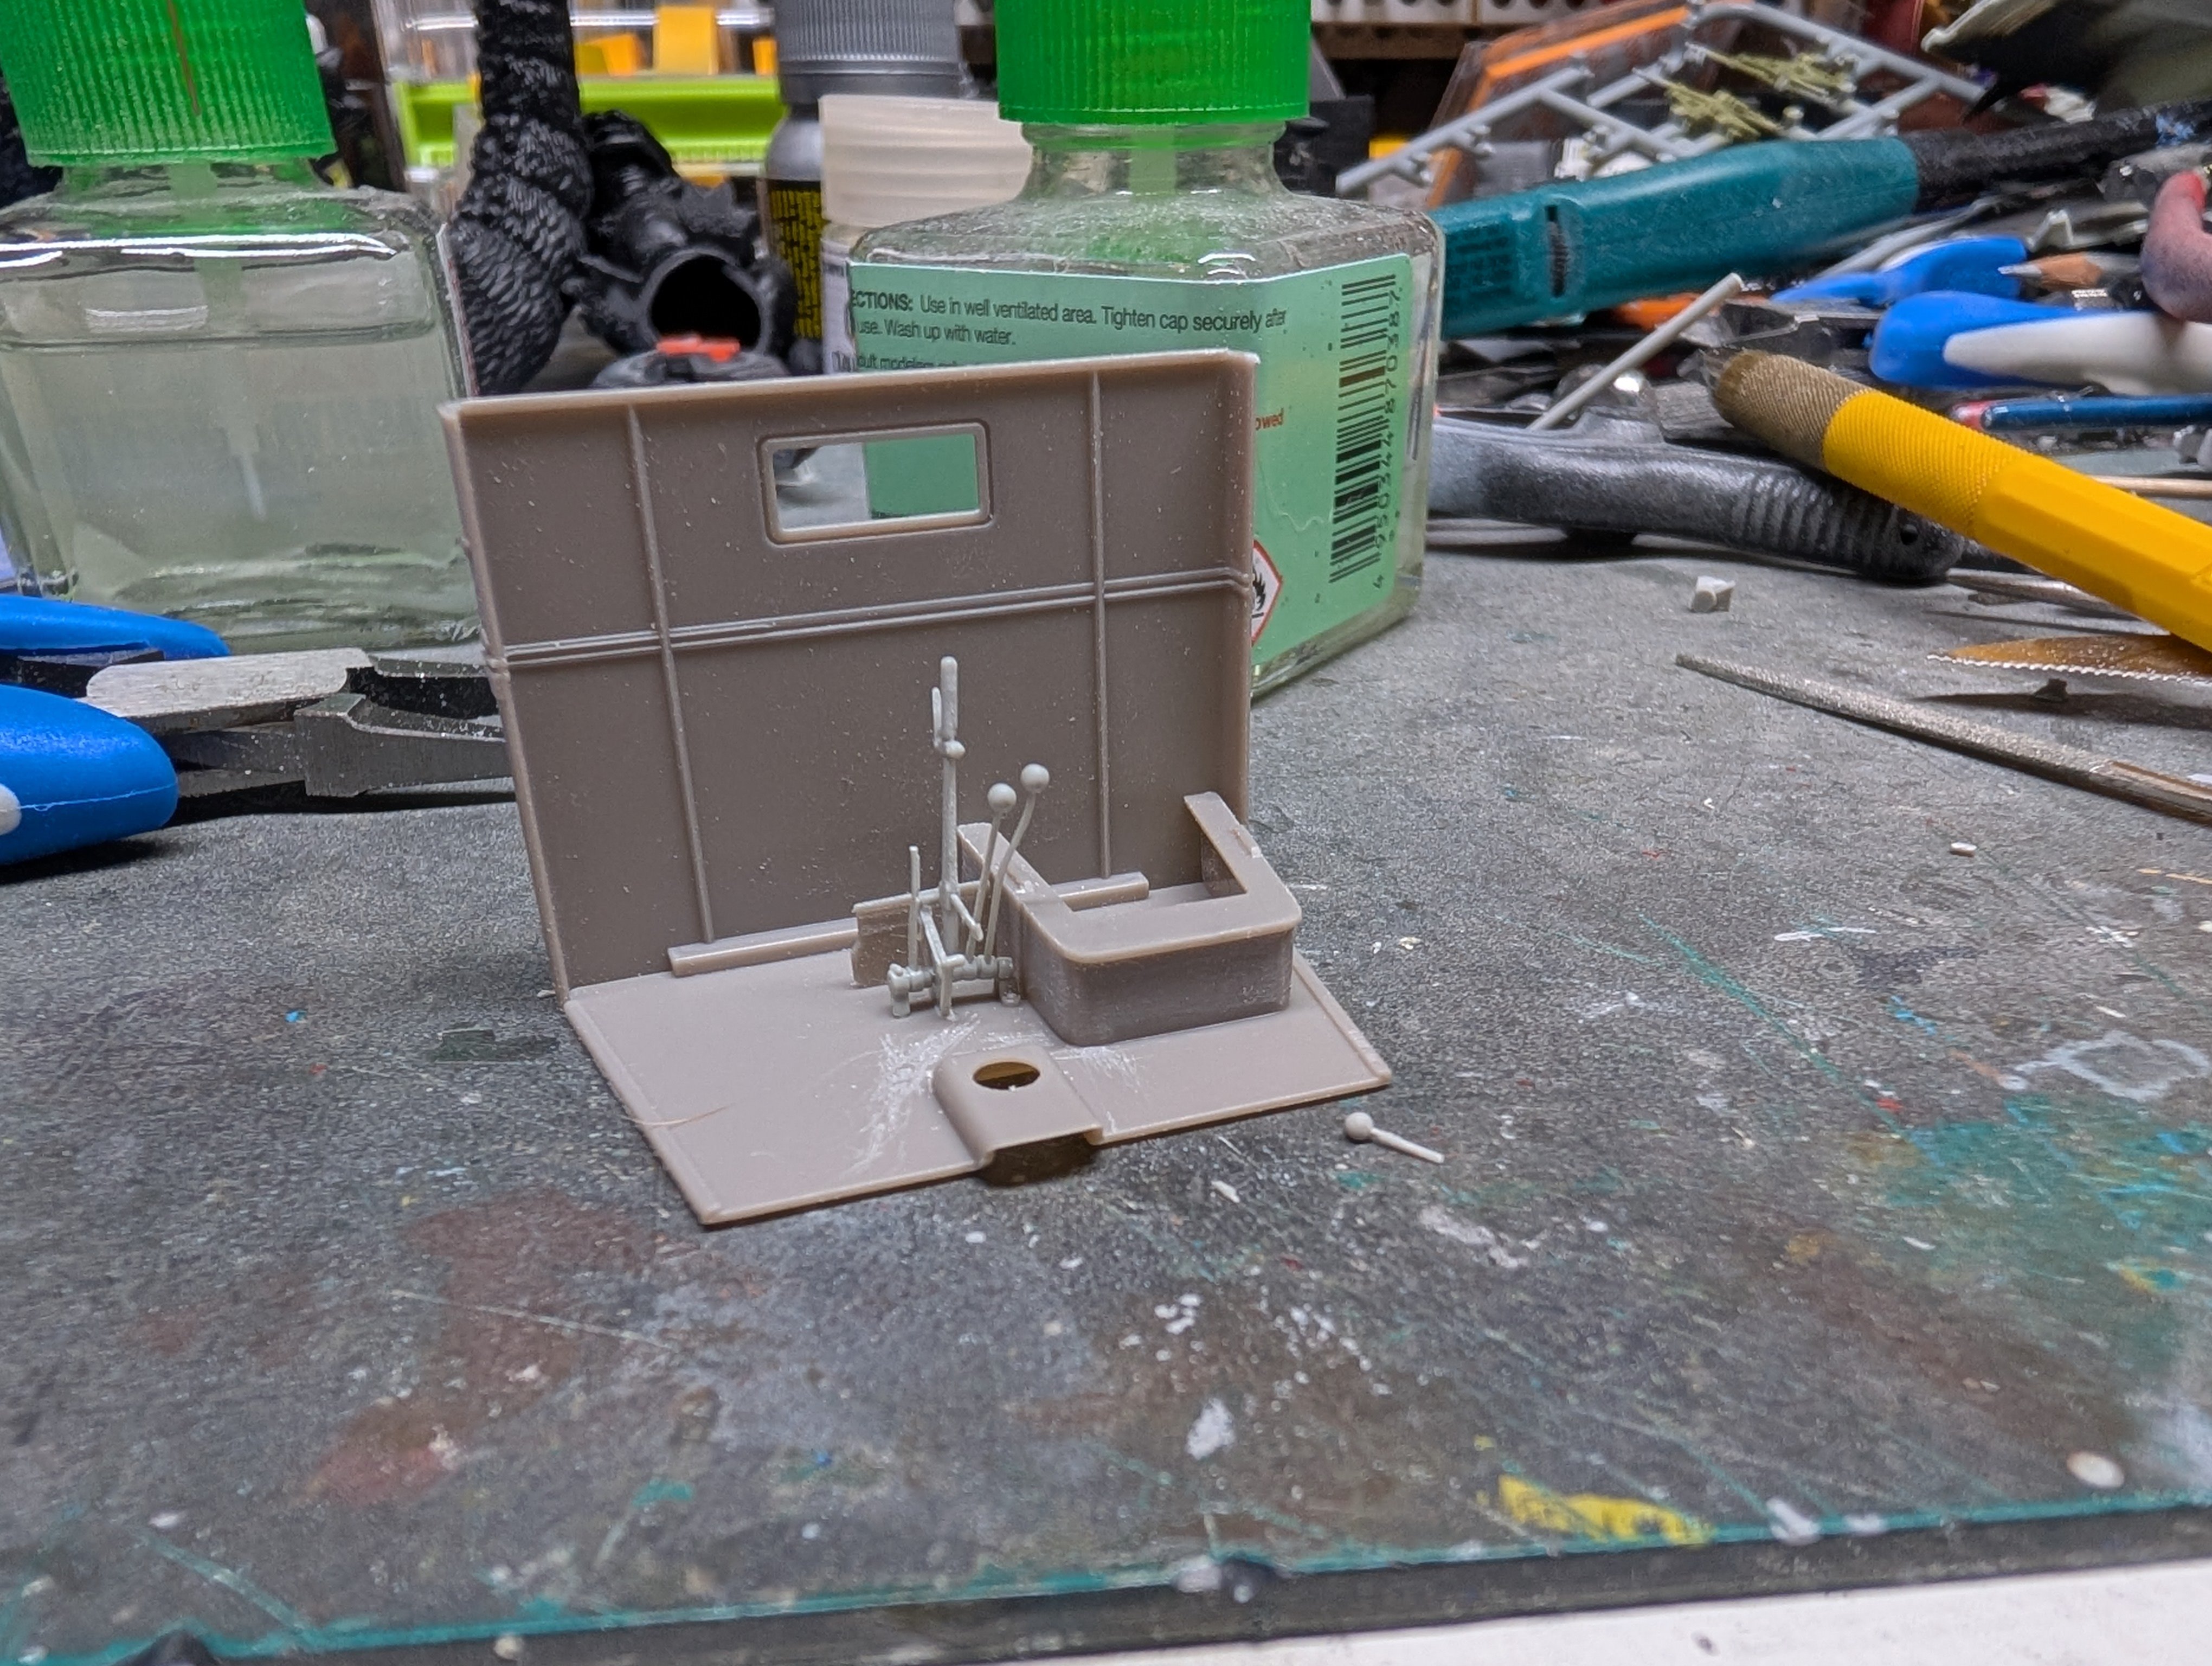
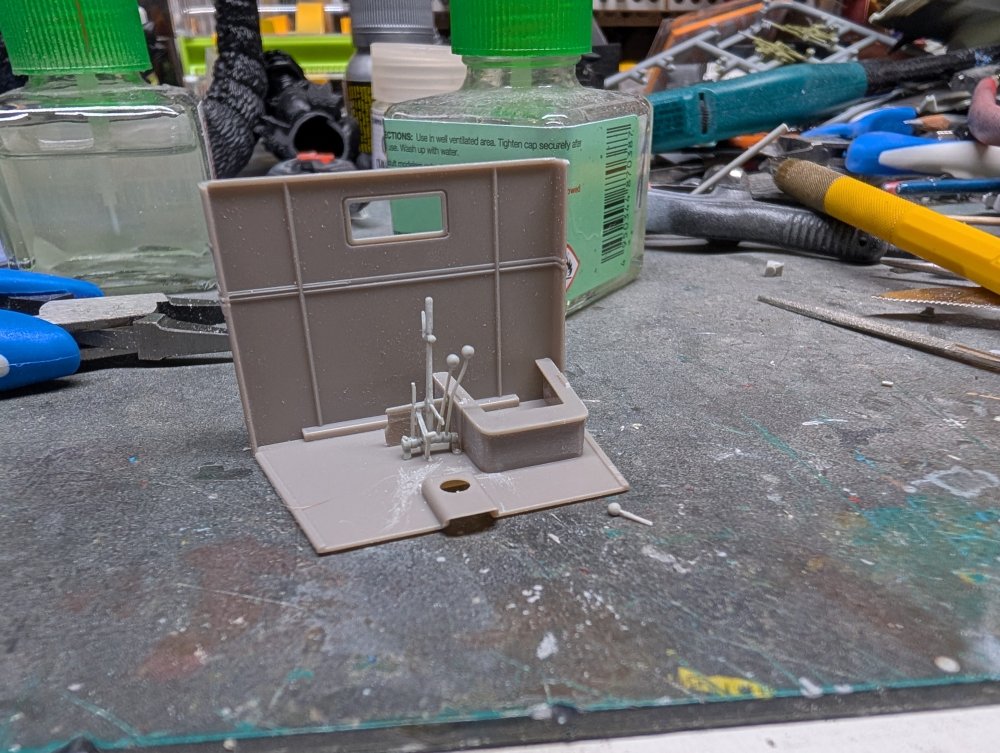
Pure luck. Trying to glue them together, I broke one into three pieces. The stubby one on the left. Still need to add the last piece once the first two dry. You can see it in front of the cab floor.
-
What is on your bench right now ? Share a picture :)
BlrwestSiR replied to Martinnfb's topic in Modelling Discussion
Success! Although I'm not looking forward to sanding the nubs off.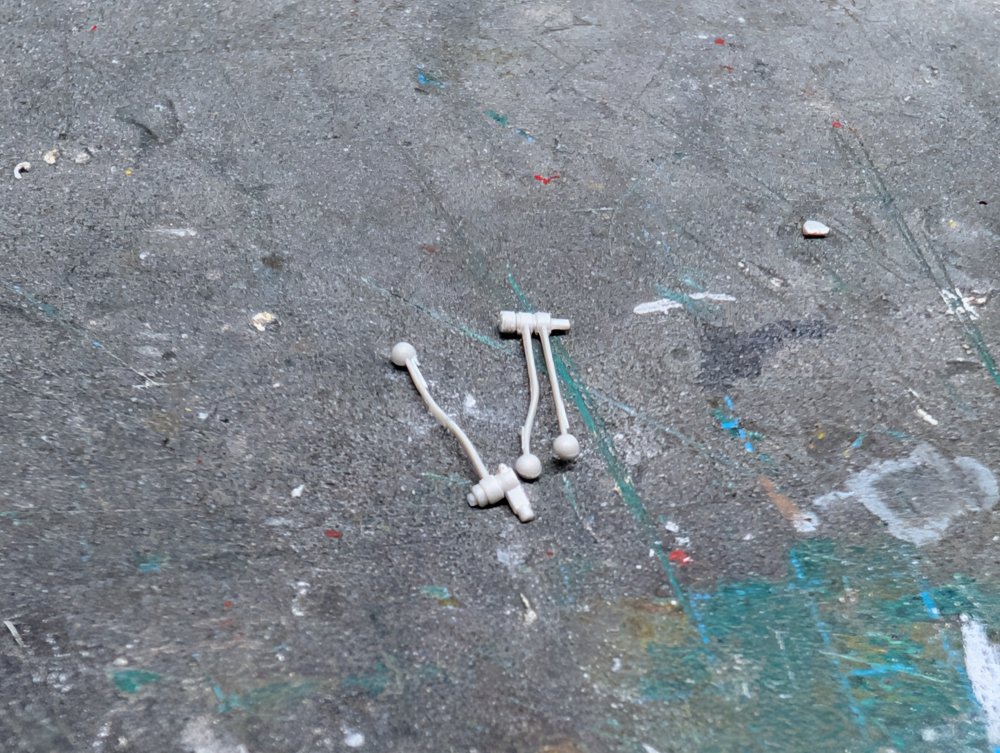
-
HurricaneMkIIc-Fly Models-1/32
BlrwestSiR replied to KevinM's topic in LSM 1/35 and Larger Work In Progress
Kevin, it looks like I may have cheated a bit. I subbed some plastic rod I place of a couple of the kit parts. I was able to use the control stick. Also, I glued the fuselage halves together first and then inserted the cockpit in from underneath. I like PCM kits too. Built their Spitfire IX and Hurricane and have a few of their Spitfire XIVs in the stash. -
What is on your bench right now ? Share a picture :)
BlrwestSiR replied to Martinnfb's topic in Modelling Discussion
Trying to figure out how to remove the shifters from the sprue without breaking them. To say the connection points are a bit big might be an understatement.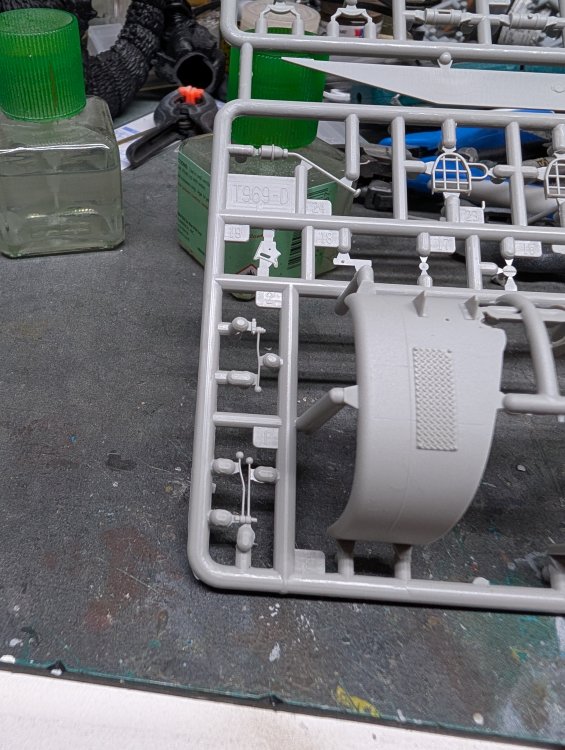

-
1/32 ME-262A-2a/U2
BlrwestSiR replied to JeroenPeters's topic in LSM 1/35 and Larger Work In Progress
How to use AI for good... Amazing work. -
What is on your bench right now ? Share a picture :)
BlrwestSiR replied to Martinnfb's topic in Modelling Discussion
With the temperature outside -25°C, I spent some time at the bench.and got the engine installed. Definitely follow the instructions and don't glue the engine mount crossmember until this step as I had to adjust the location to make it align with the engine. With a test fit of the wheels.
-
What is on your bench right now ? Share a picture :)
BlrwestSiR replied to Martinnfb's topic in Modelling Discussion
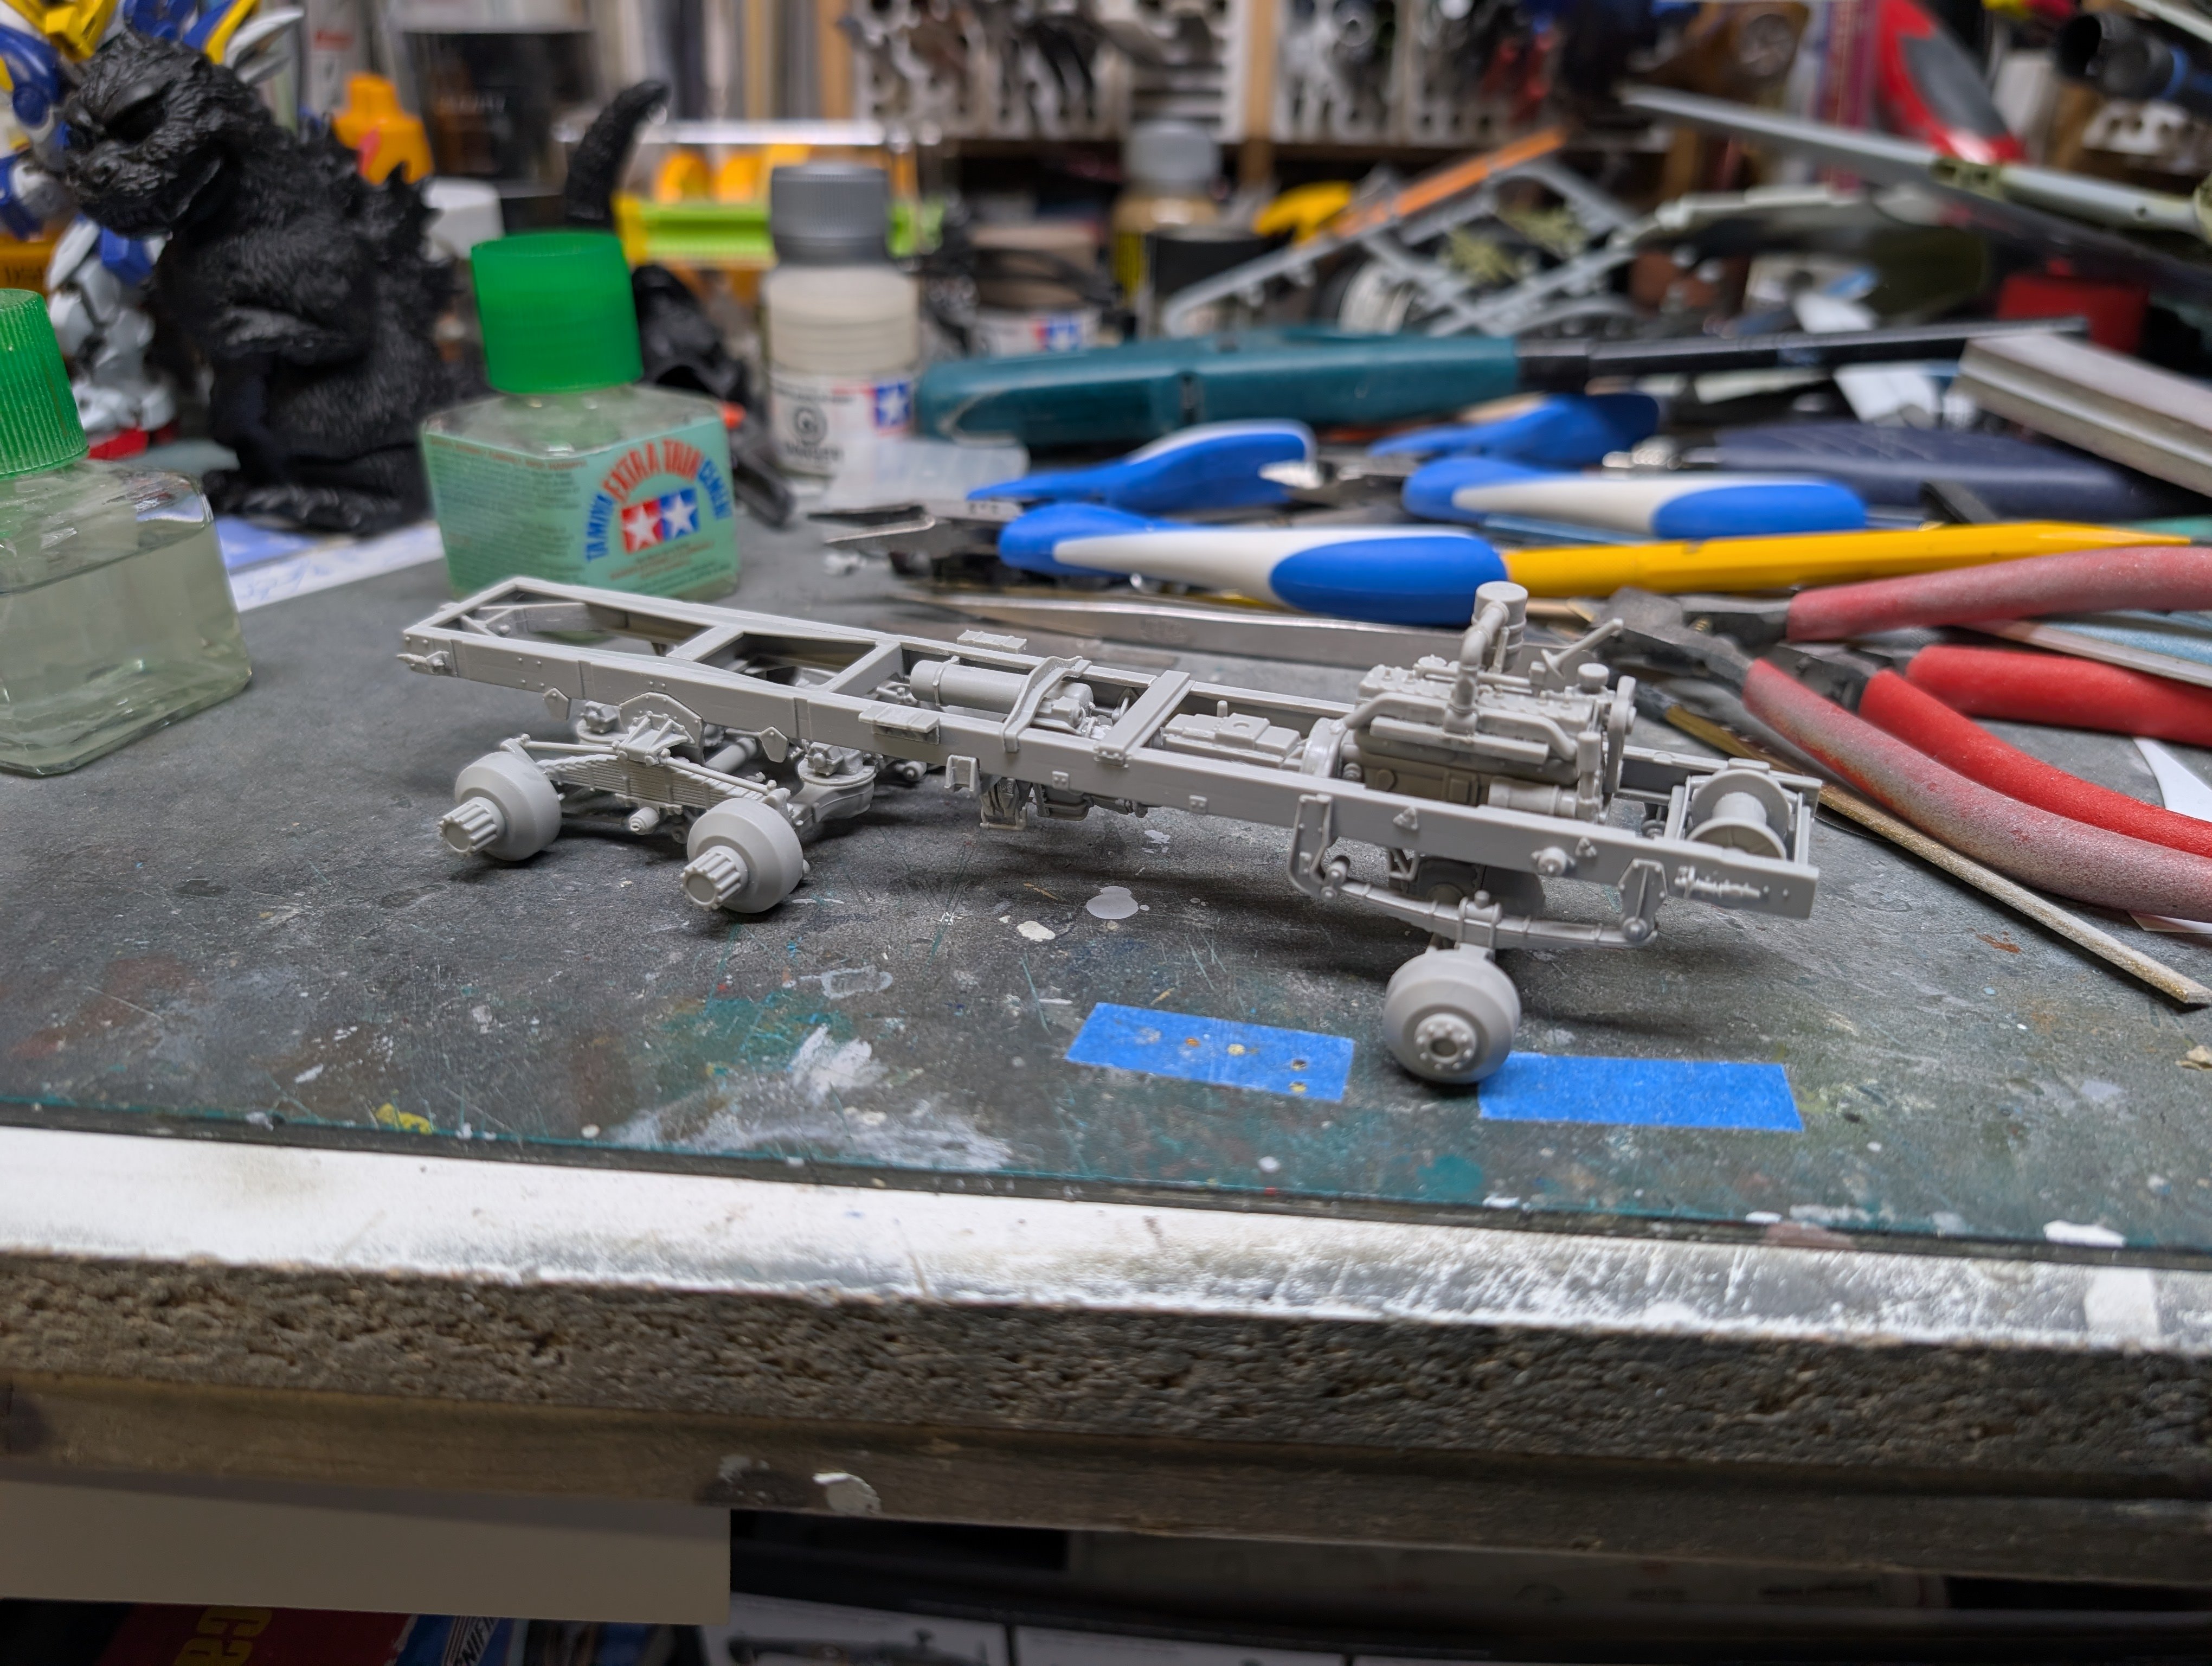
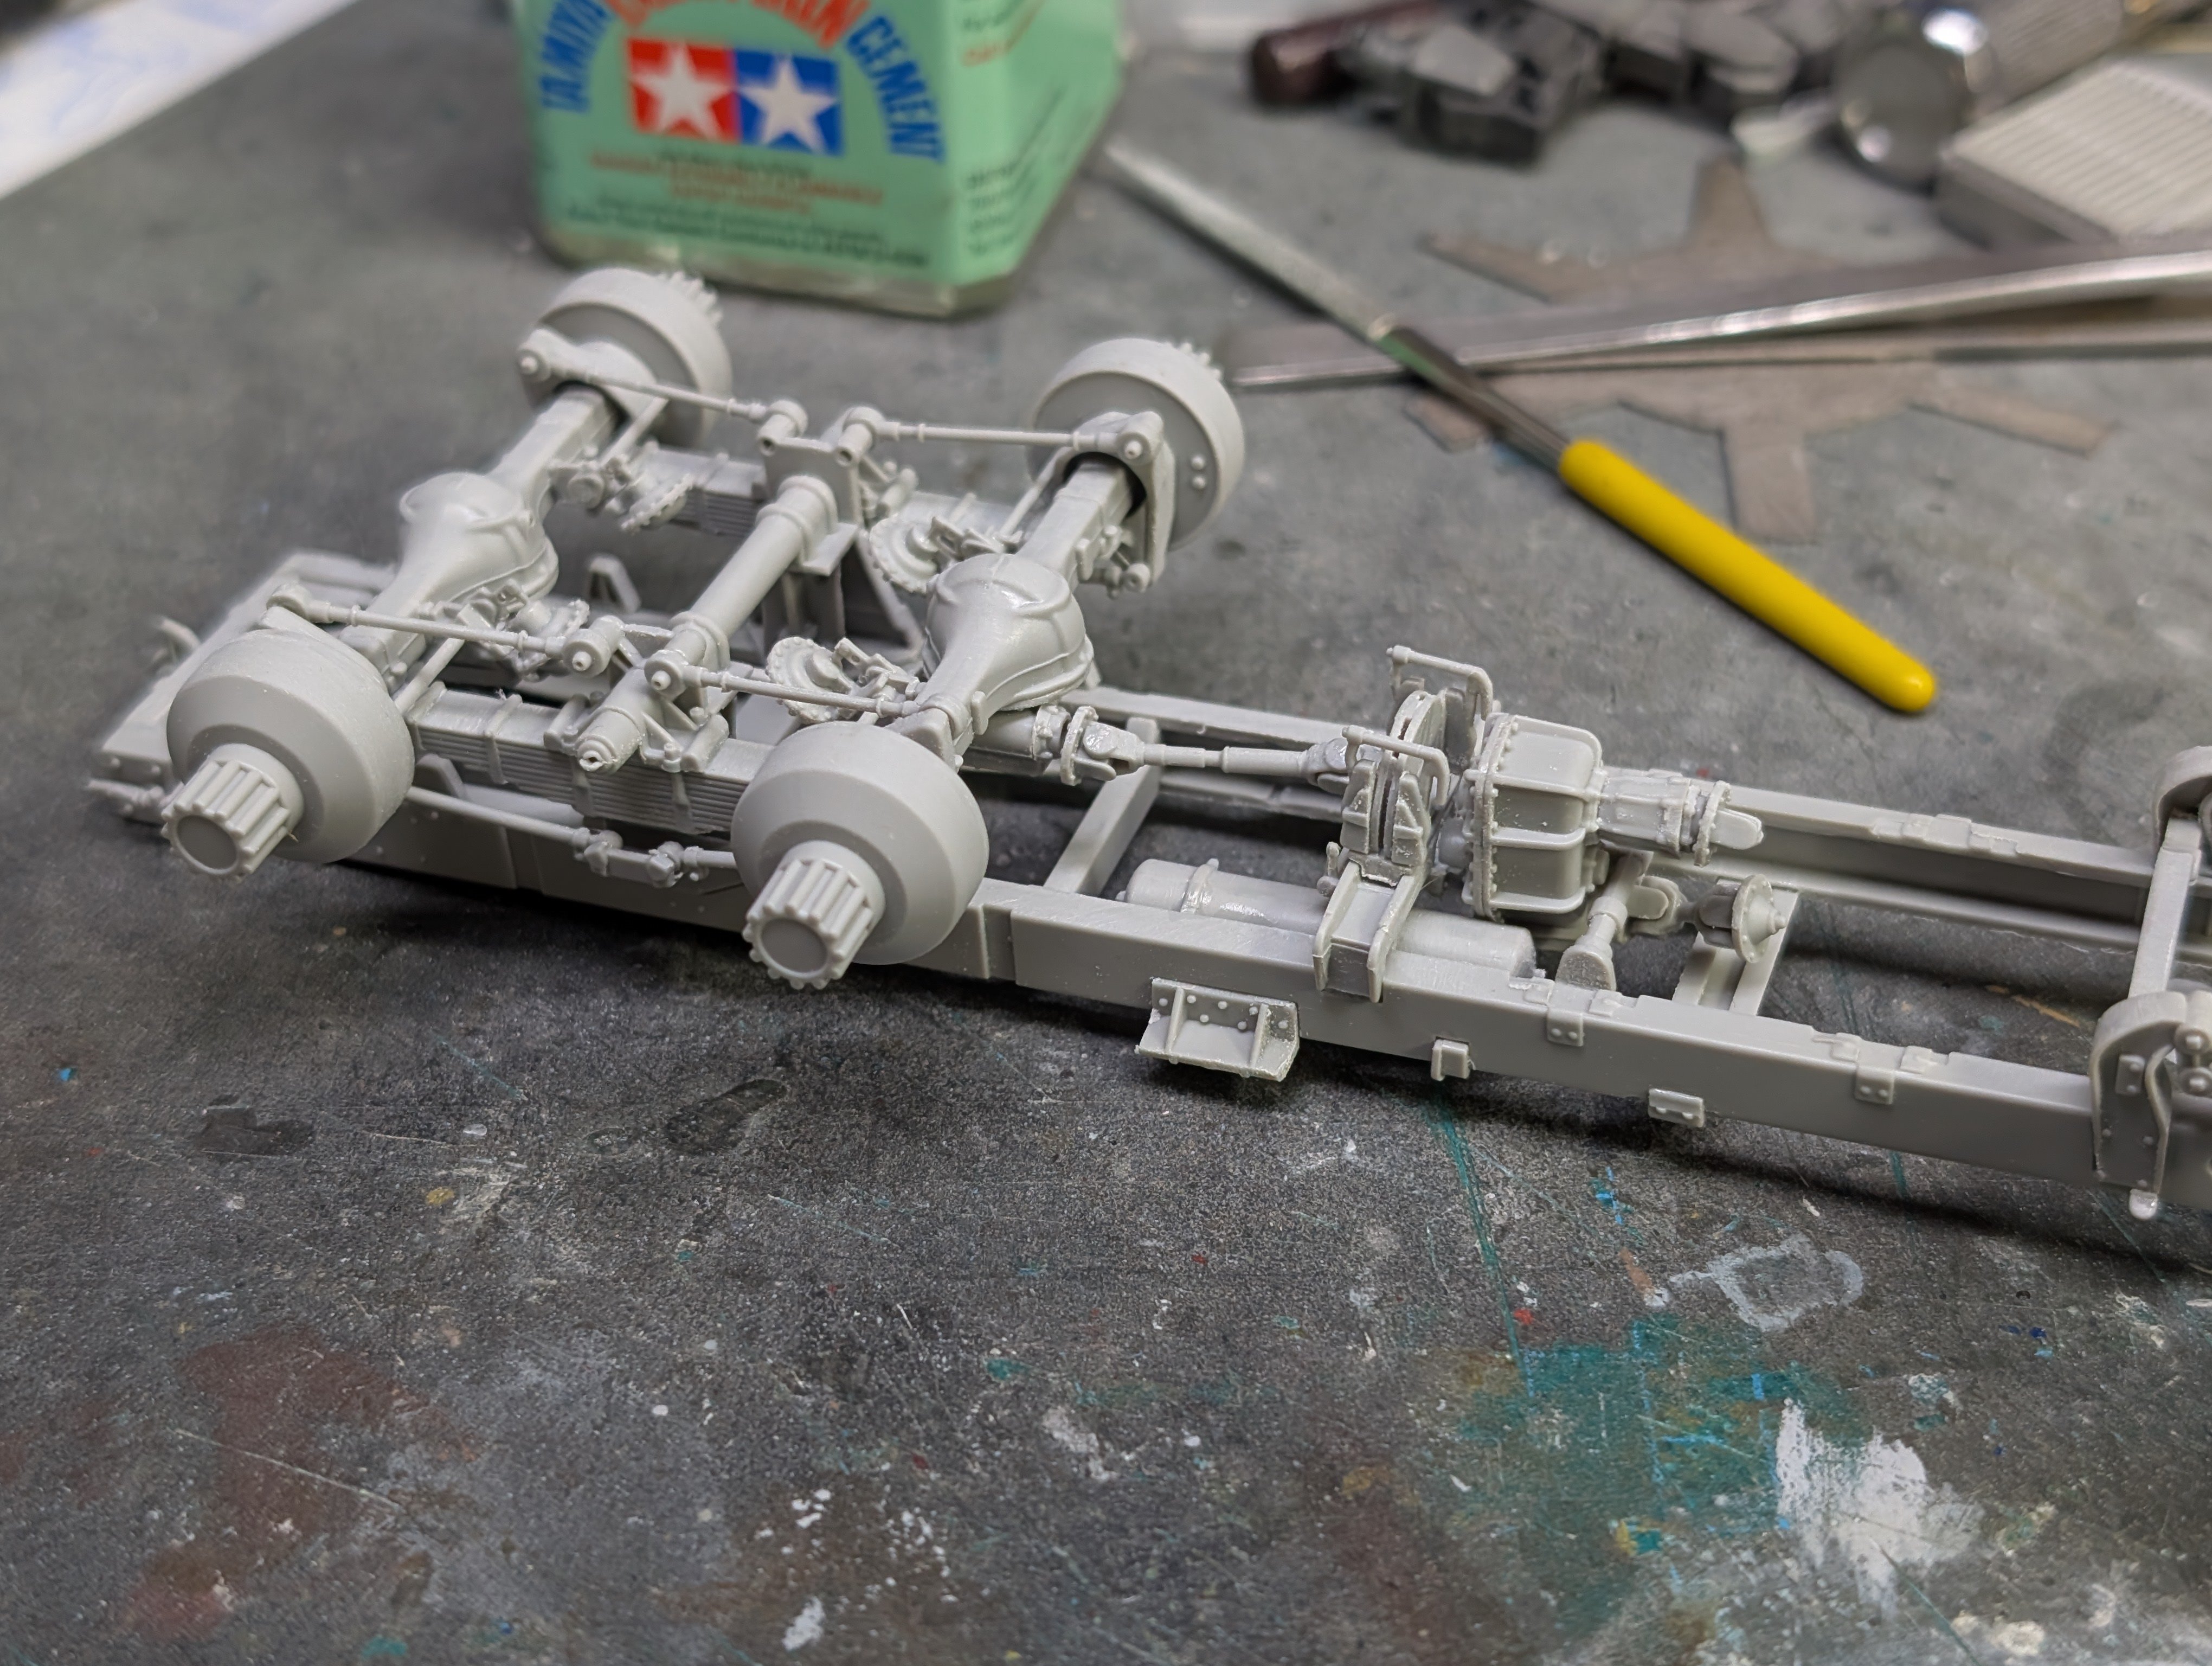
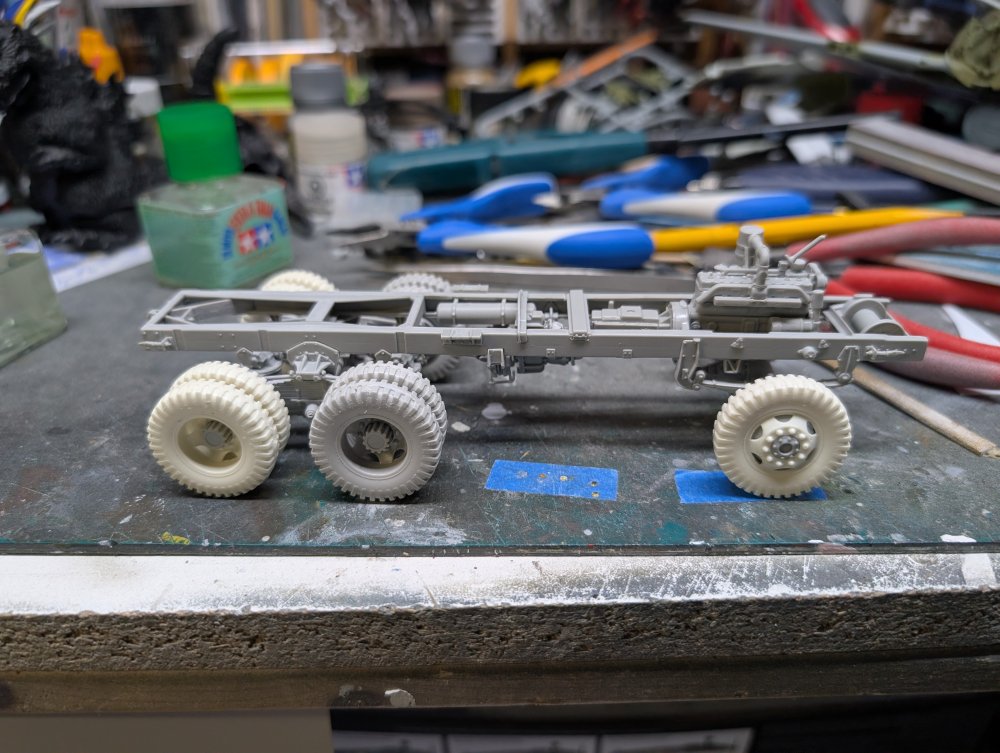
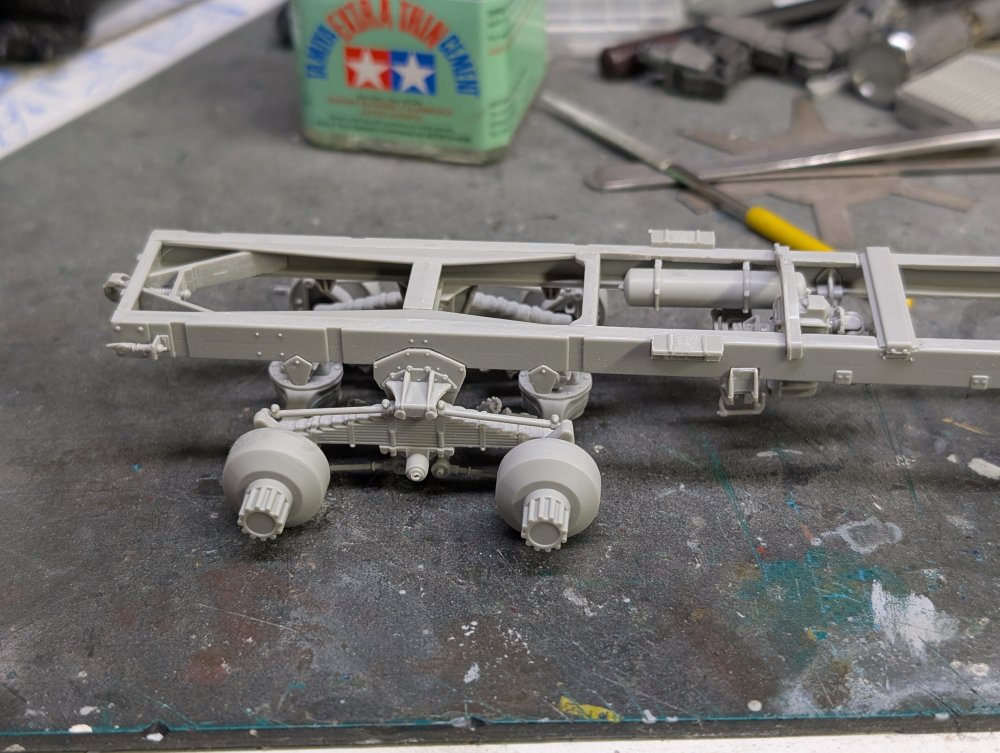
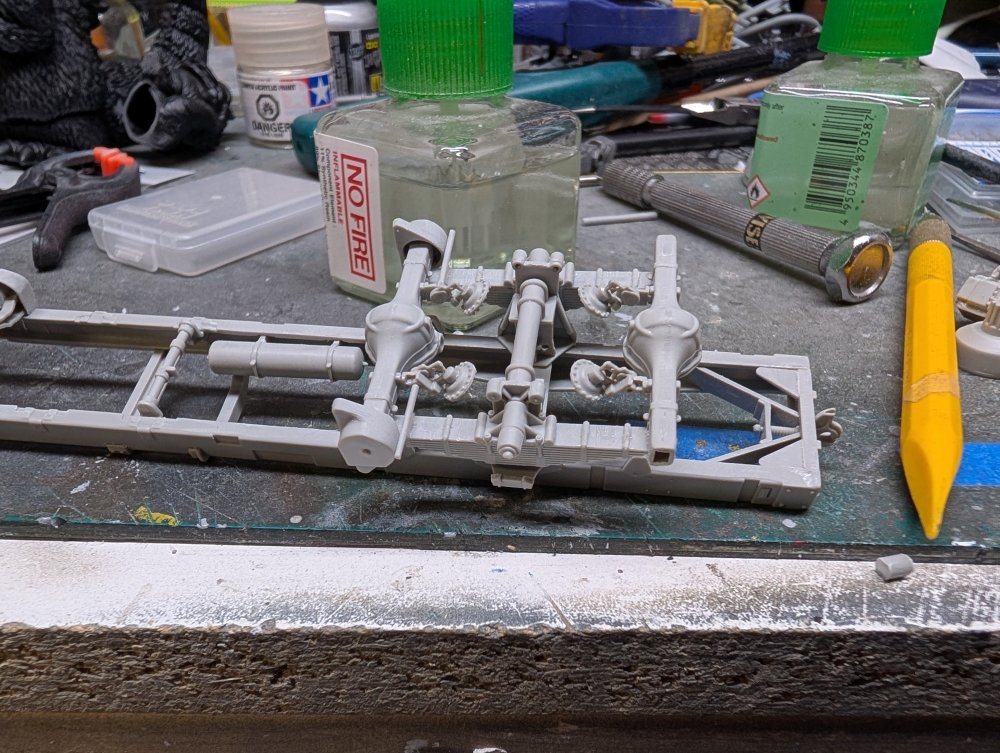
I got some more work done on the Diamond T. The rear suspension is now done with the various linkages and drive shafts installed. I've also assembled and installed the transfer case. With the linkages in place, the suspension no longer articulates so I made sure to get it as level as possible.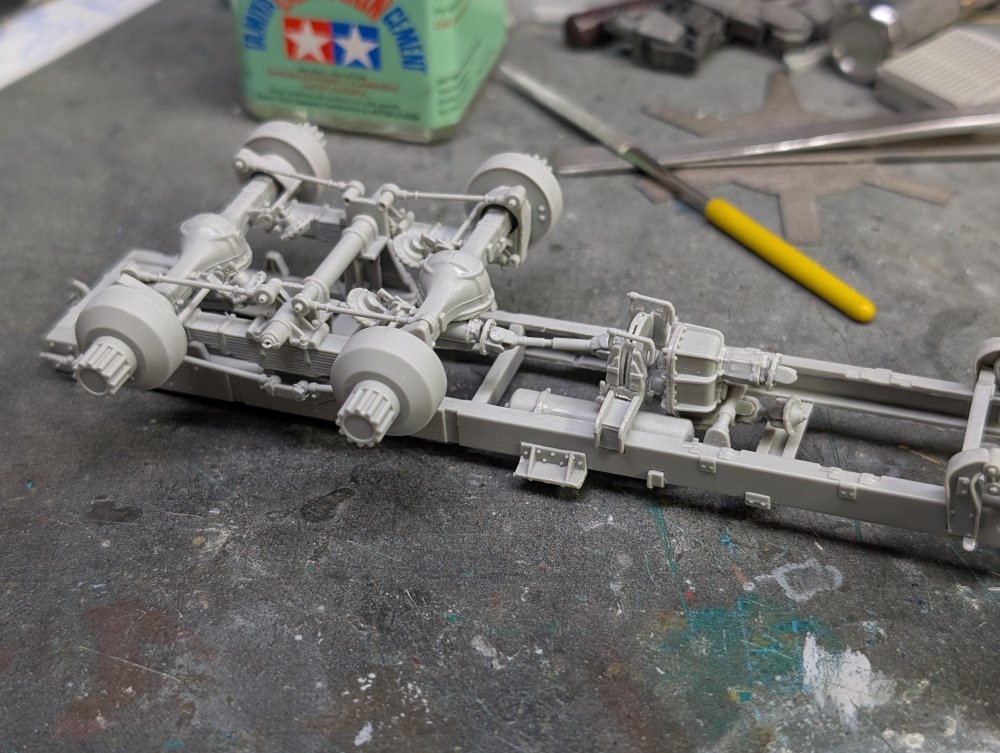
-
HurricaneMkIIc-Fly Models-1/32
BlrwestSiR replied to KevinM's topic in LSM 1/35 and Larger Work In Progress
I think the kit has a bad rep. I built one a few years ago and didn't have any issues with it. The biggest thing I found was making sure that the main gear bay casting is thin enough to fit under the cockpit. I didn't need much putty either. It certainly went together better than the PCM kit. Carl -
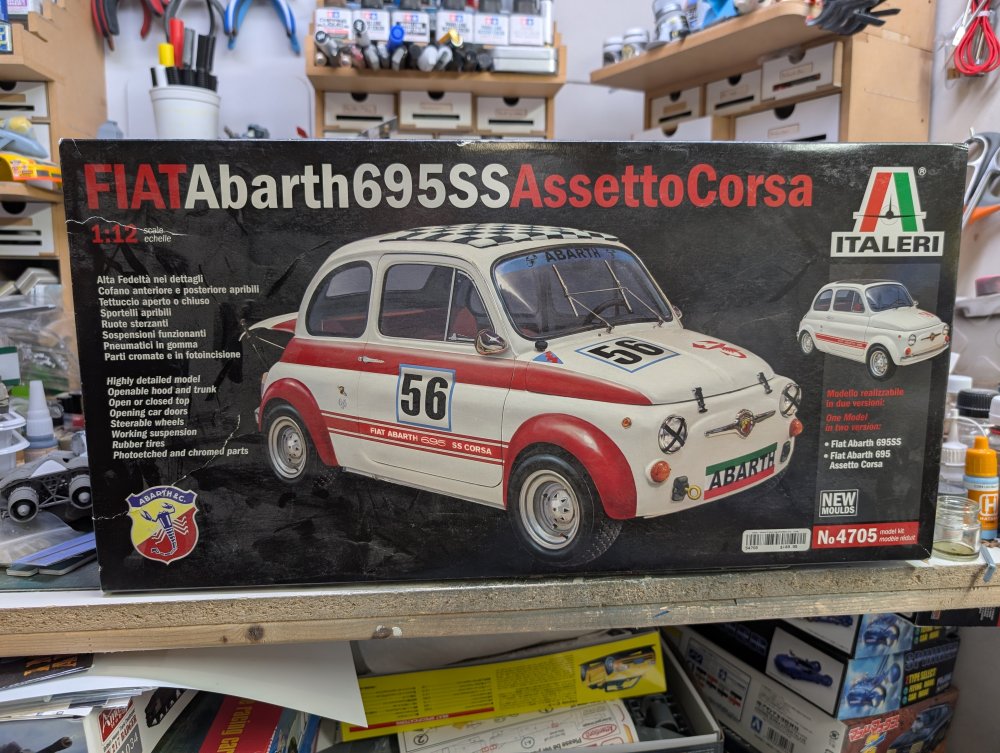
Paul, I'm hoping it's not too bad a kit. I know on the base Fiat 500 they've done some updates to the kit so that it either goes together easier or fits better. We'll see when I get to it I suppose.
-
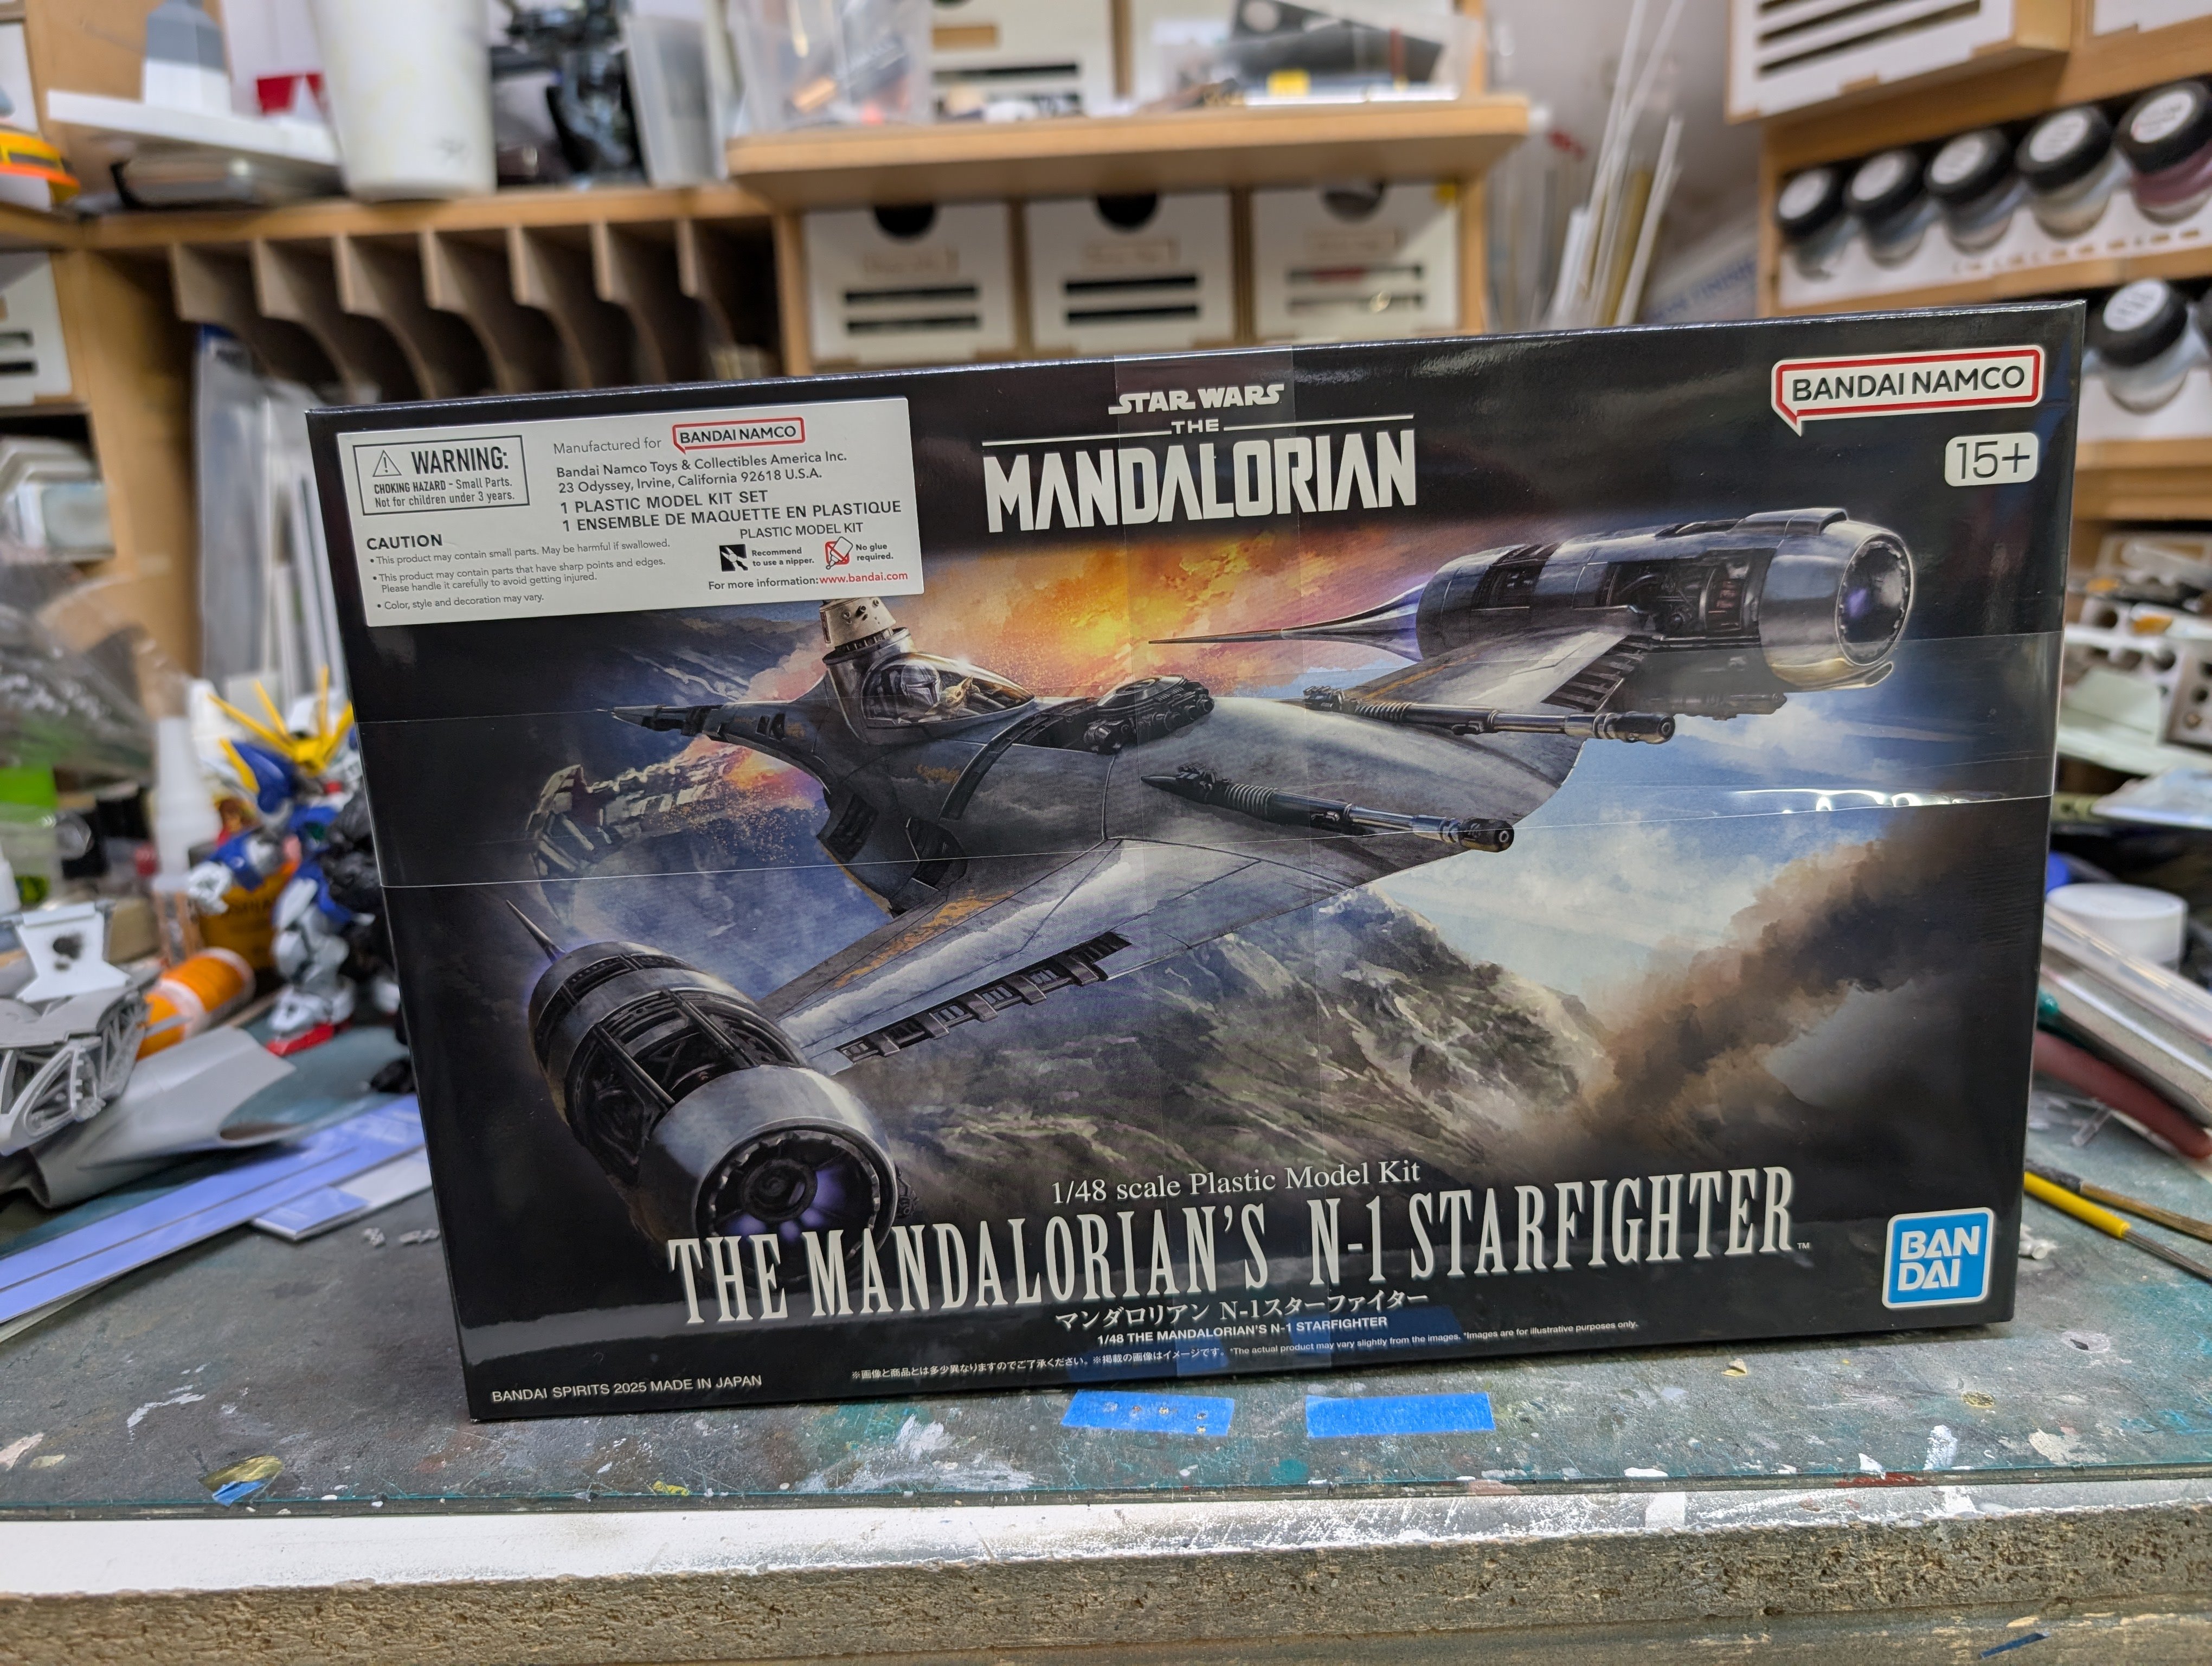
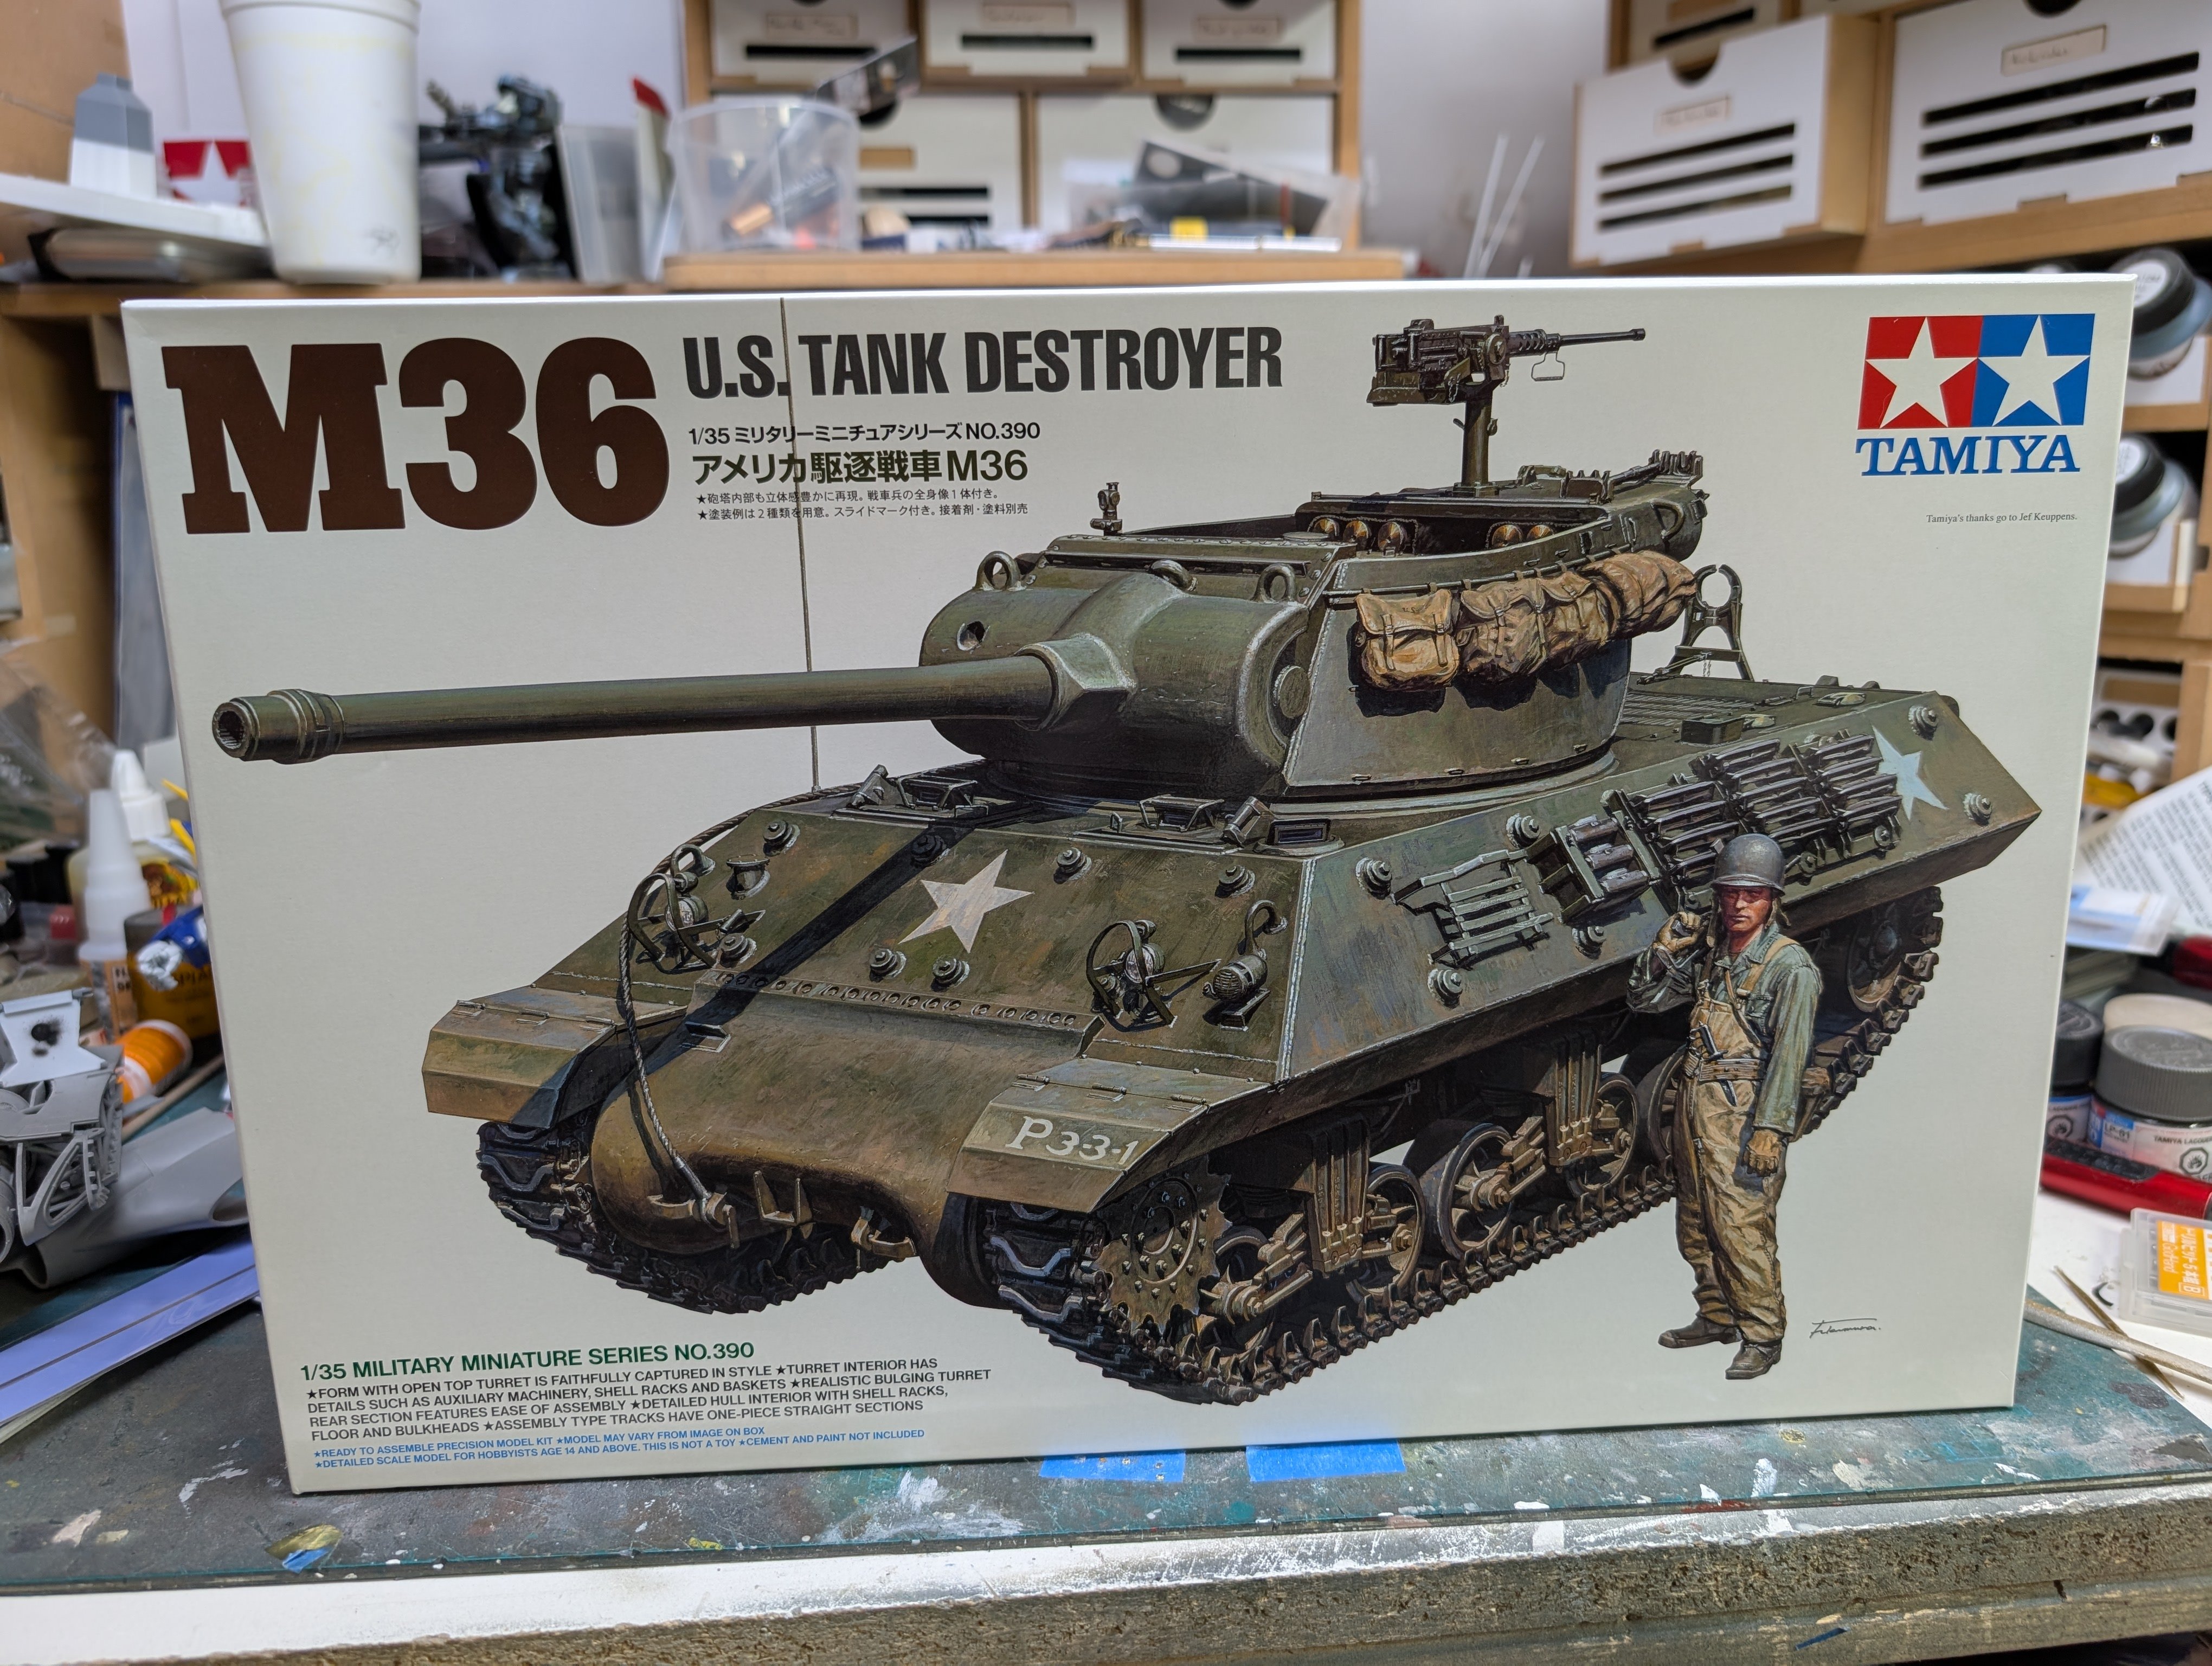
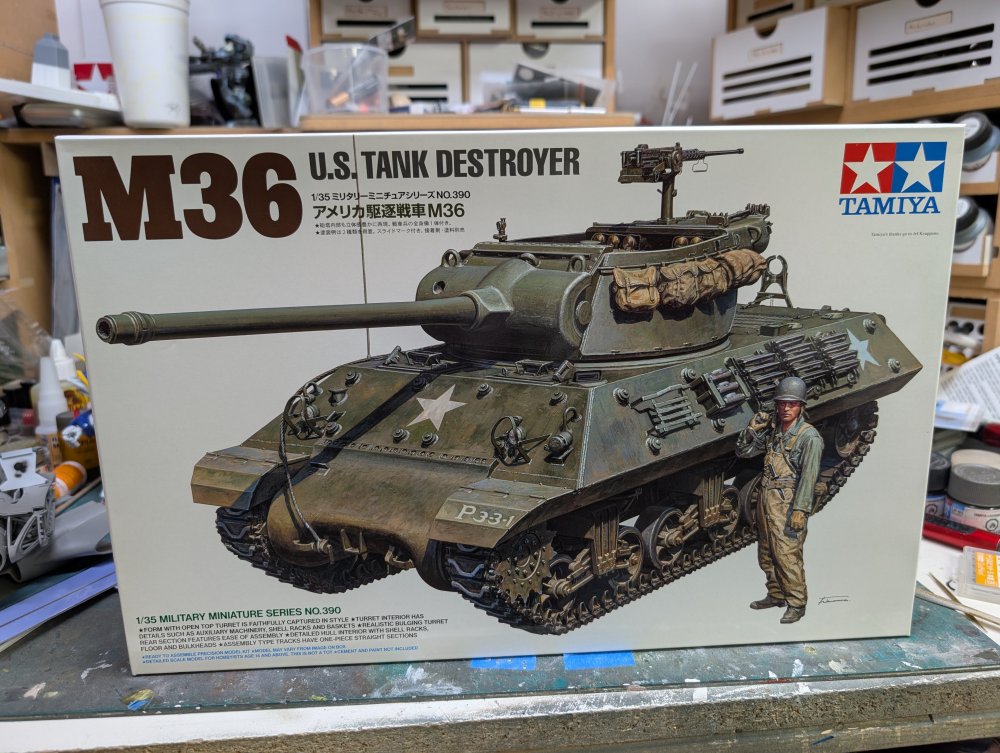
I picked up some kits that I'd ordered from my LHS. First up is the modified N-1 from The Mandalorian. It's 1/48 unlike most of Bandai's Star Wars kits. Next up was a Fiat Abarth. I've wanted one for a bit and when they had it on sale during Boxing Day, I added it to my pick up pile. Finally while there, there were several kits on clearance and one was the recent Tamiya M36. Oh and one more thing. It seems Tamiya X20A thinner has been recalled by Health Canada for not being labeled correctly and not having a child proof cap. So grab it while you can as they don't know how long it'll be before it's available again. Carl

-
I was my LHS today and they had close to a dozen cans of Tamiya red oxide primer. Quite possibly the last ones in the country as Tamiya spray cans got banned by Health Canada last year. There was a similar quantity of Mr Surfacer in red oxide too. I wish there was a way to ship them to you, if have picked some up. Carl
-
Kaiyodo ARTPLA 1/35 P.K.A. Kangaroo work in progress
BlrwestSiR replied to Count0's topic in General Discussion
An excellent looking MaK build. Carl -
What is on your bench right now ? Share a picture :)
BlrwestSiR replied to Martinnfb's topic in Modelling Discussion
The Thunder Models Scammell Pioneer is a nice kit. The fit is better than this one and it's just as detailed. Thunder Models also does the Ward La France wrecker I mentioned previously. The Tamiya 1/14 trucks are impressive too. I saw a built up Heavy Wrecker in Hong Kong and that has some presence. I've got the Tamiya Bruiser in the stash, my Grail RC kit. It has a metal ladder chassis, actual leaf springs and a 3 speed transmission. -
What is on your bench right now ? Share a picture :)
BlrwestSiR replied to Martinnfb's topic in Modelling Discussion
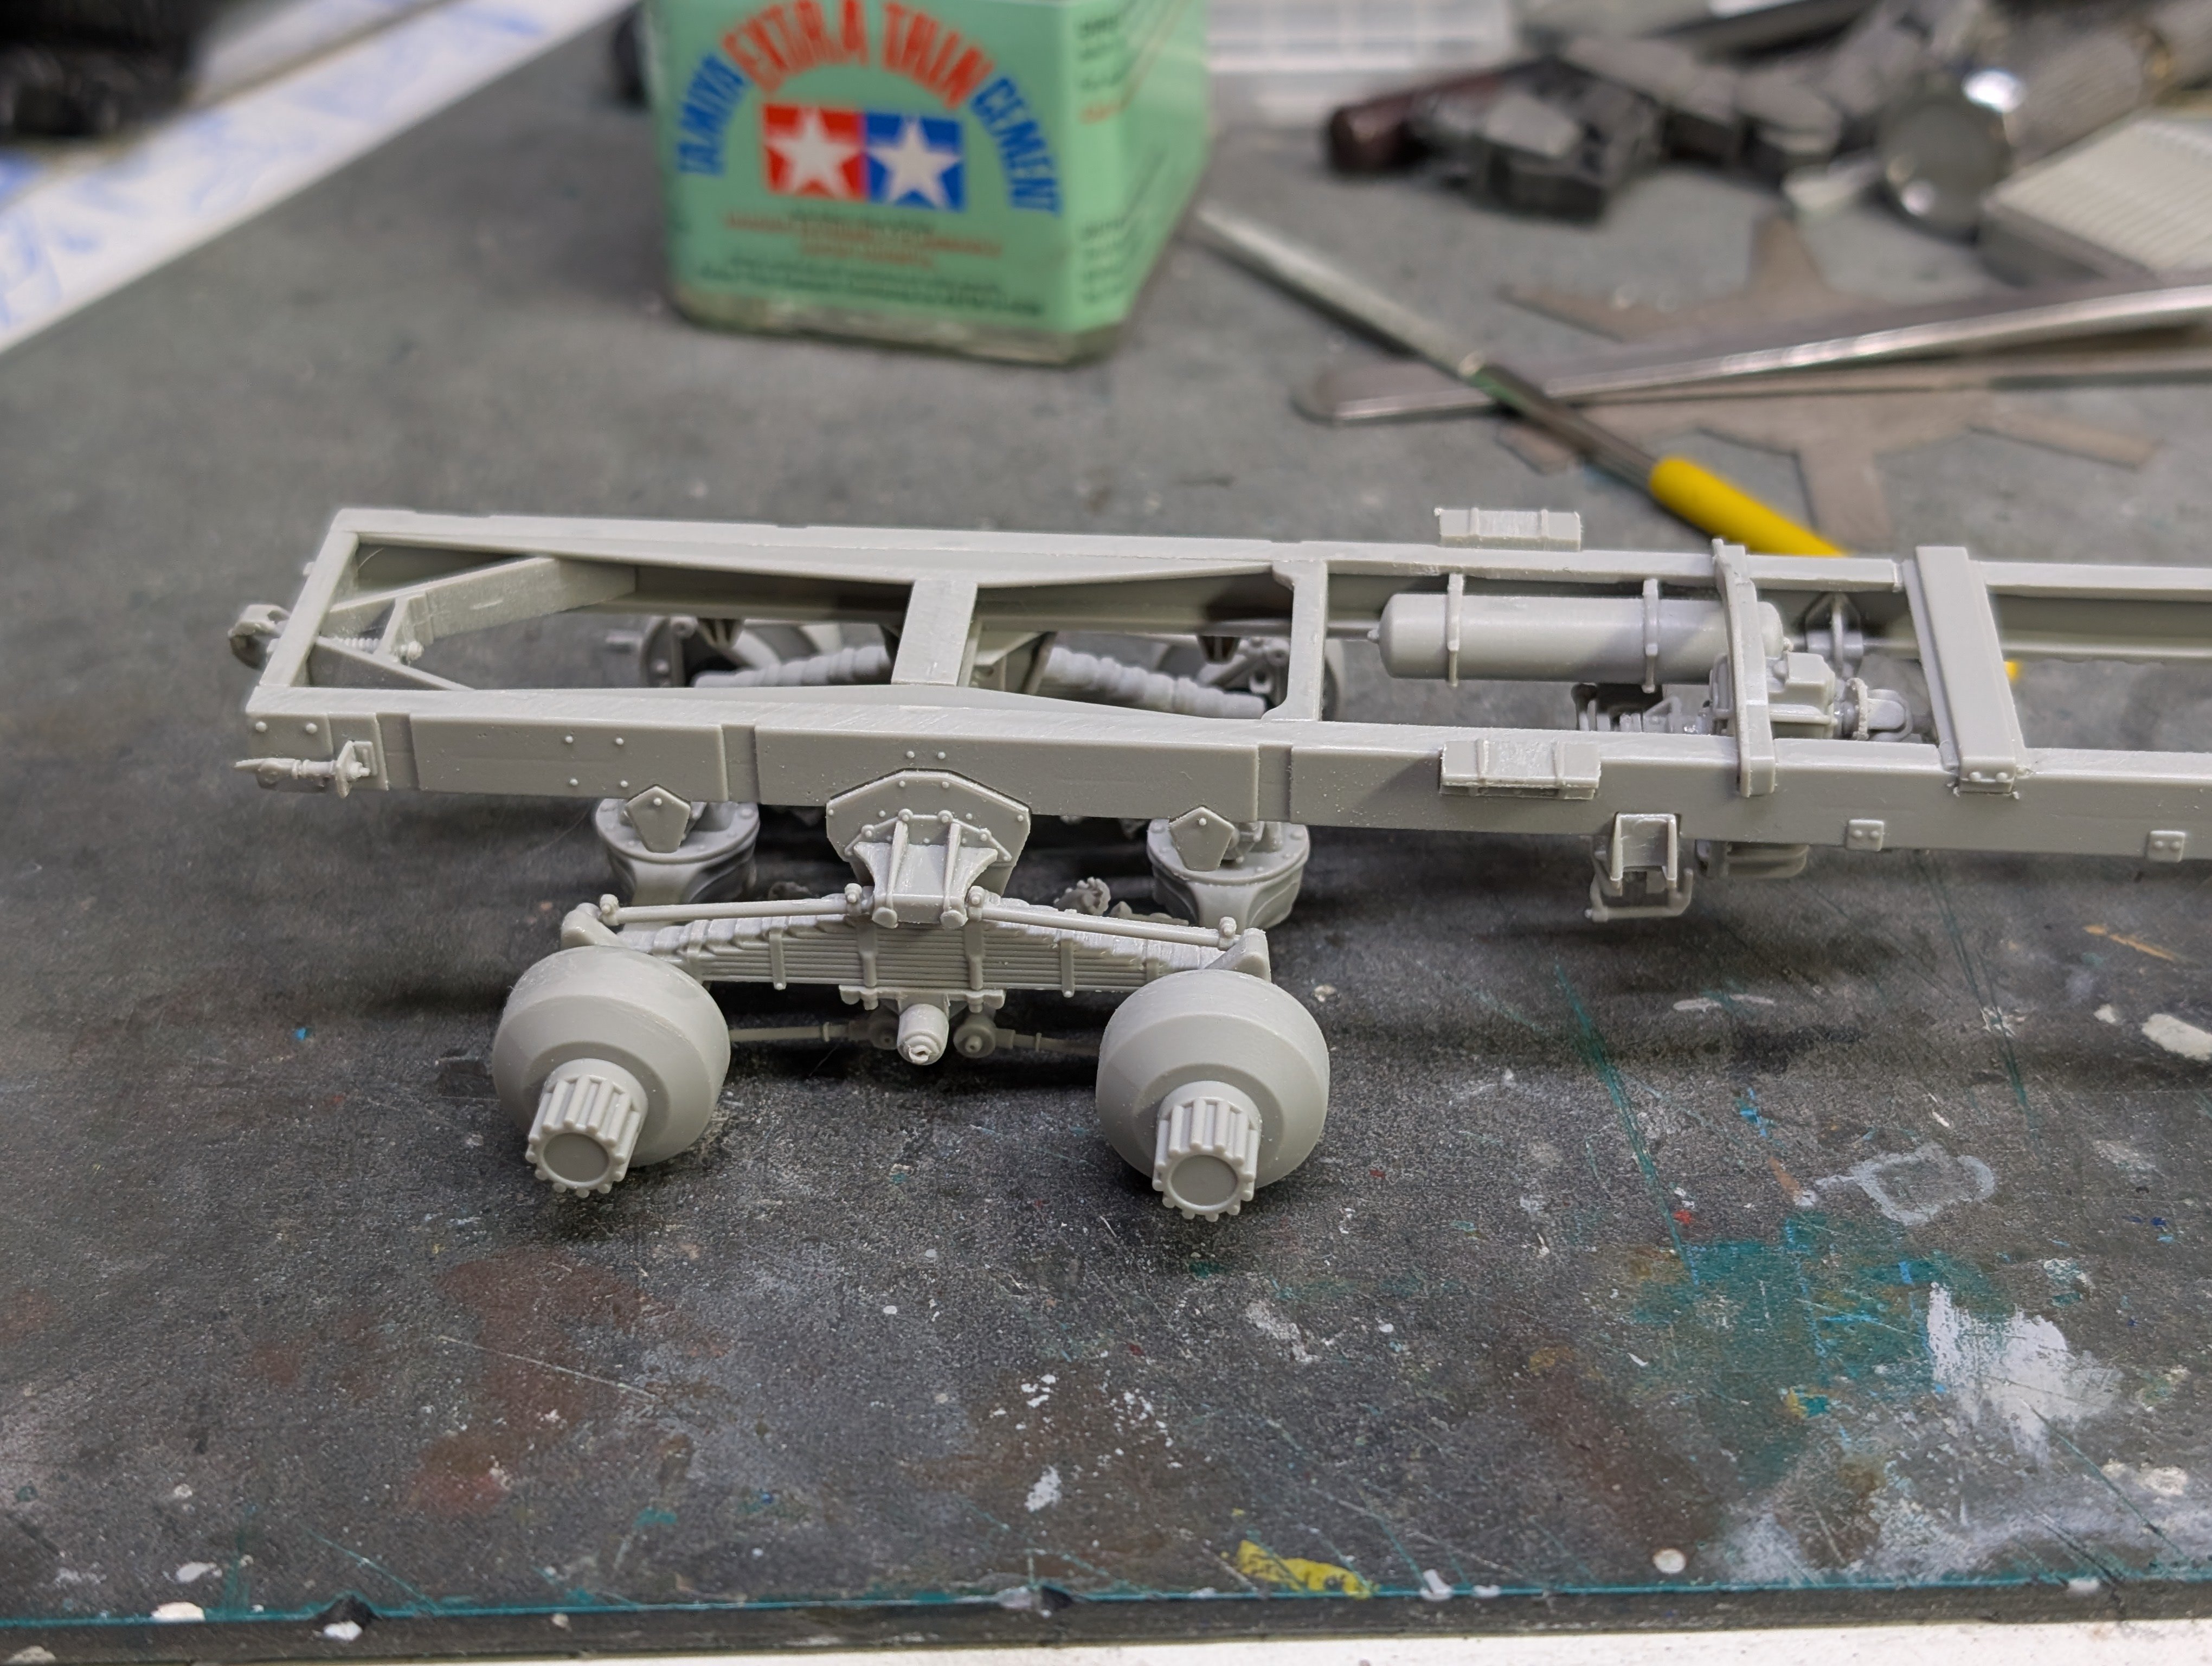
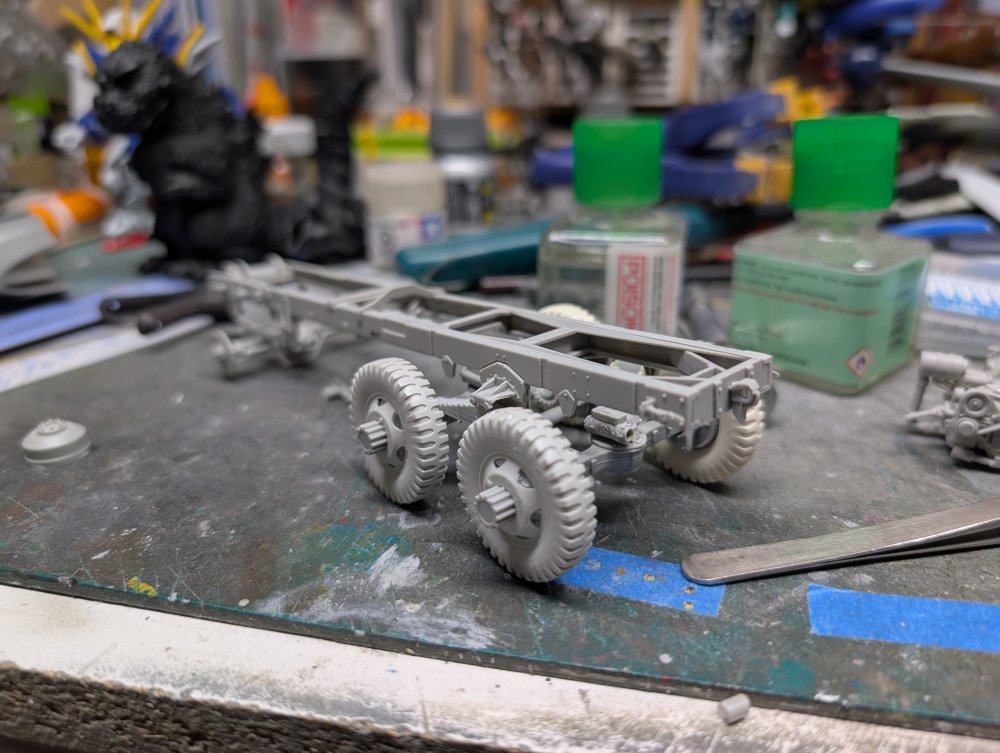
More work done on the Diamond T. Rear suspension is done except for the linkages. I decided now was a good time to make sure things are square and did a test fit of the wheels. I have the resin ones but they're just copies of the kit wheels with no additional detail so probably not worth the money.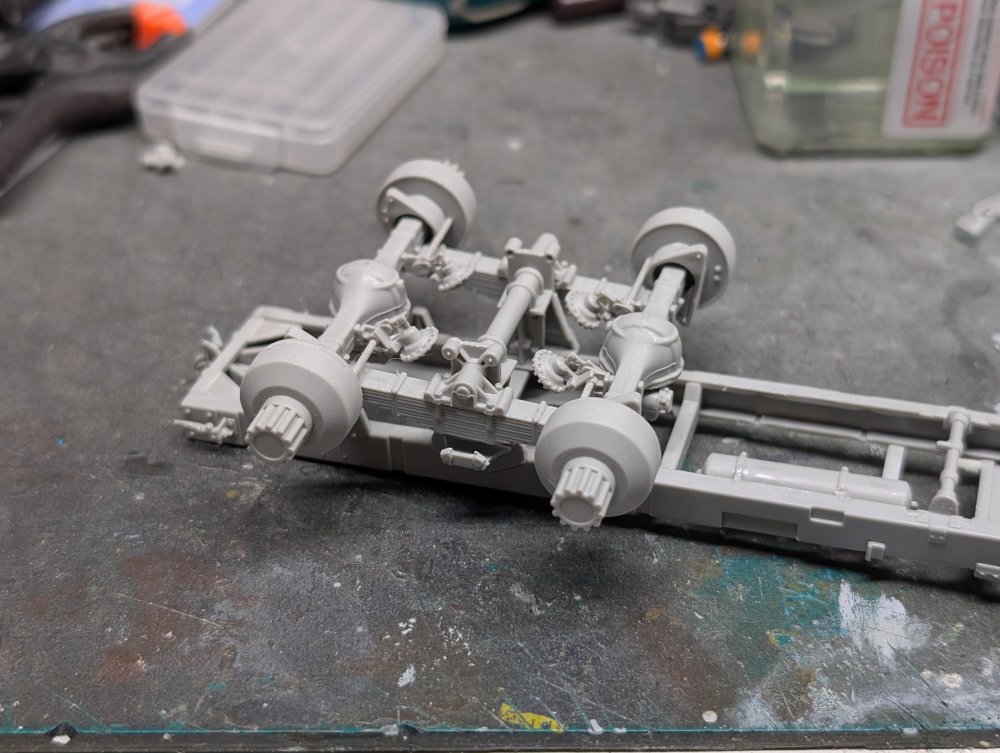
-
What is on your bench right now ? Share a picture :)
BlrwestSiR replied to Martinnfb's topic in Modelling Discussion
I remember building the original M2 release with the interior. Don't recall a motorized version either. The updated ODS one looks nicely detailed. Same with Handsy. -
Isn't that a missile?
-
What is on your bench right now ? Share a picture :)
BlrwestSiR replied to Martinnfb's topic in Modelling Discussion
It's the Mirror Models Diamond T. I have the Thunder Models La France wrecker in the stash as well. -
What is on your bench right now ? Share a picture :)
BlrwestSiR replied to Martinnfb's topic in Modelling Discussion
It's definitely not small, especially since it's 1/35. -
What is on your bench right now ? Share a picture :)
BlrwestSiR replied to Martinnfb's topic in Modelling Discussion
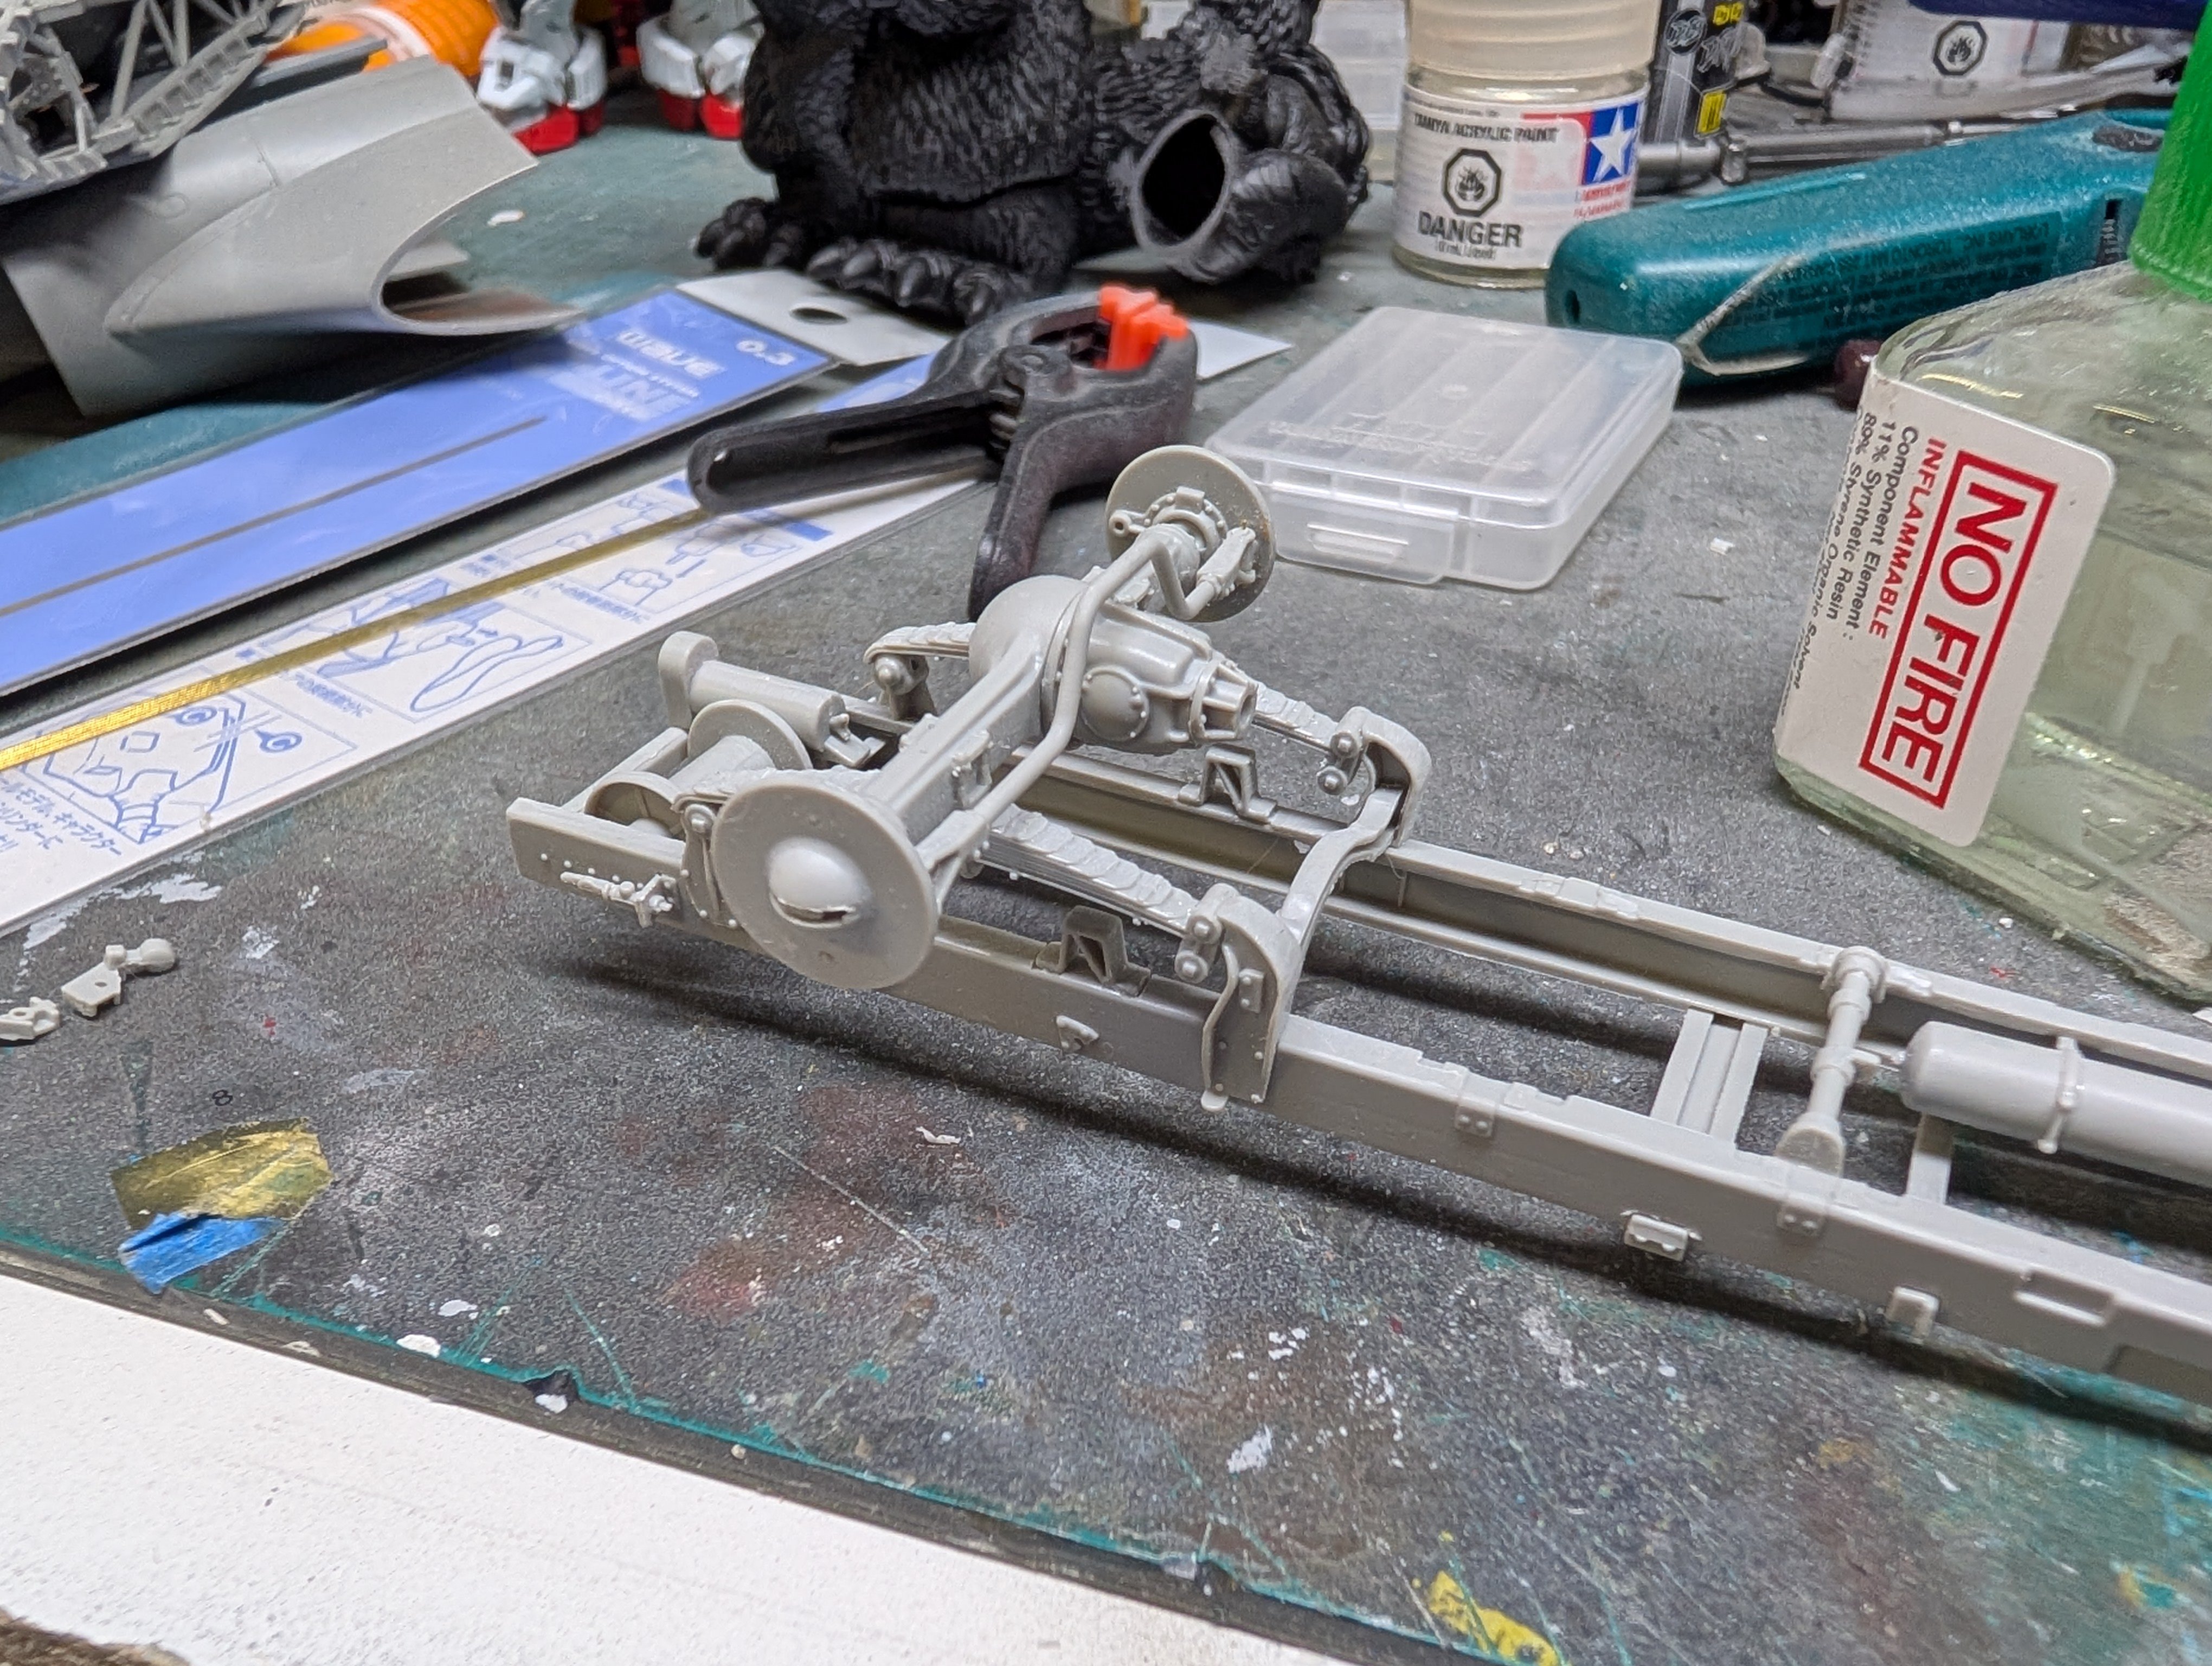
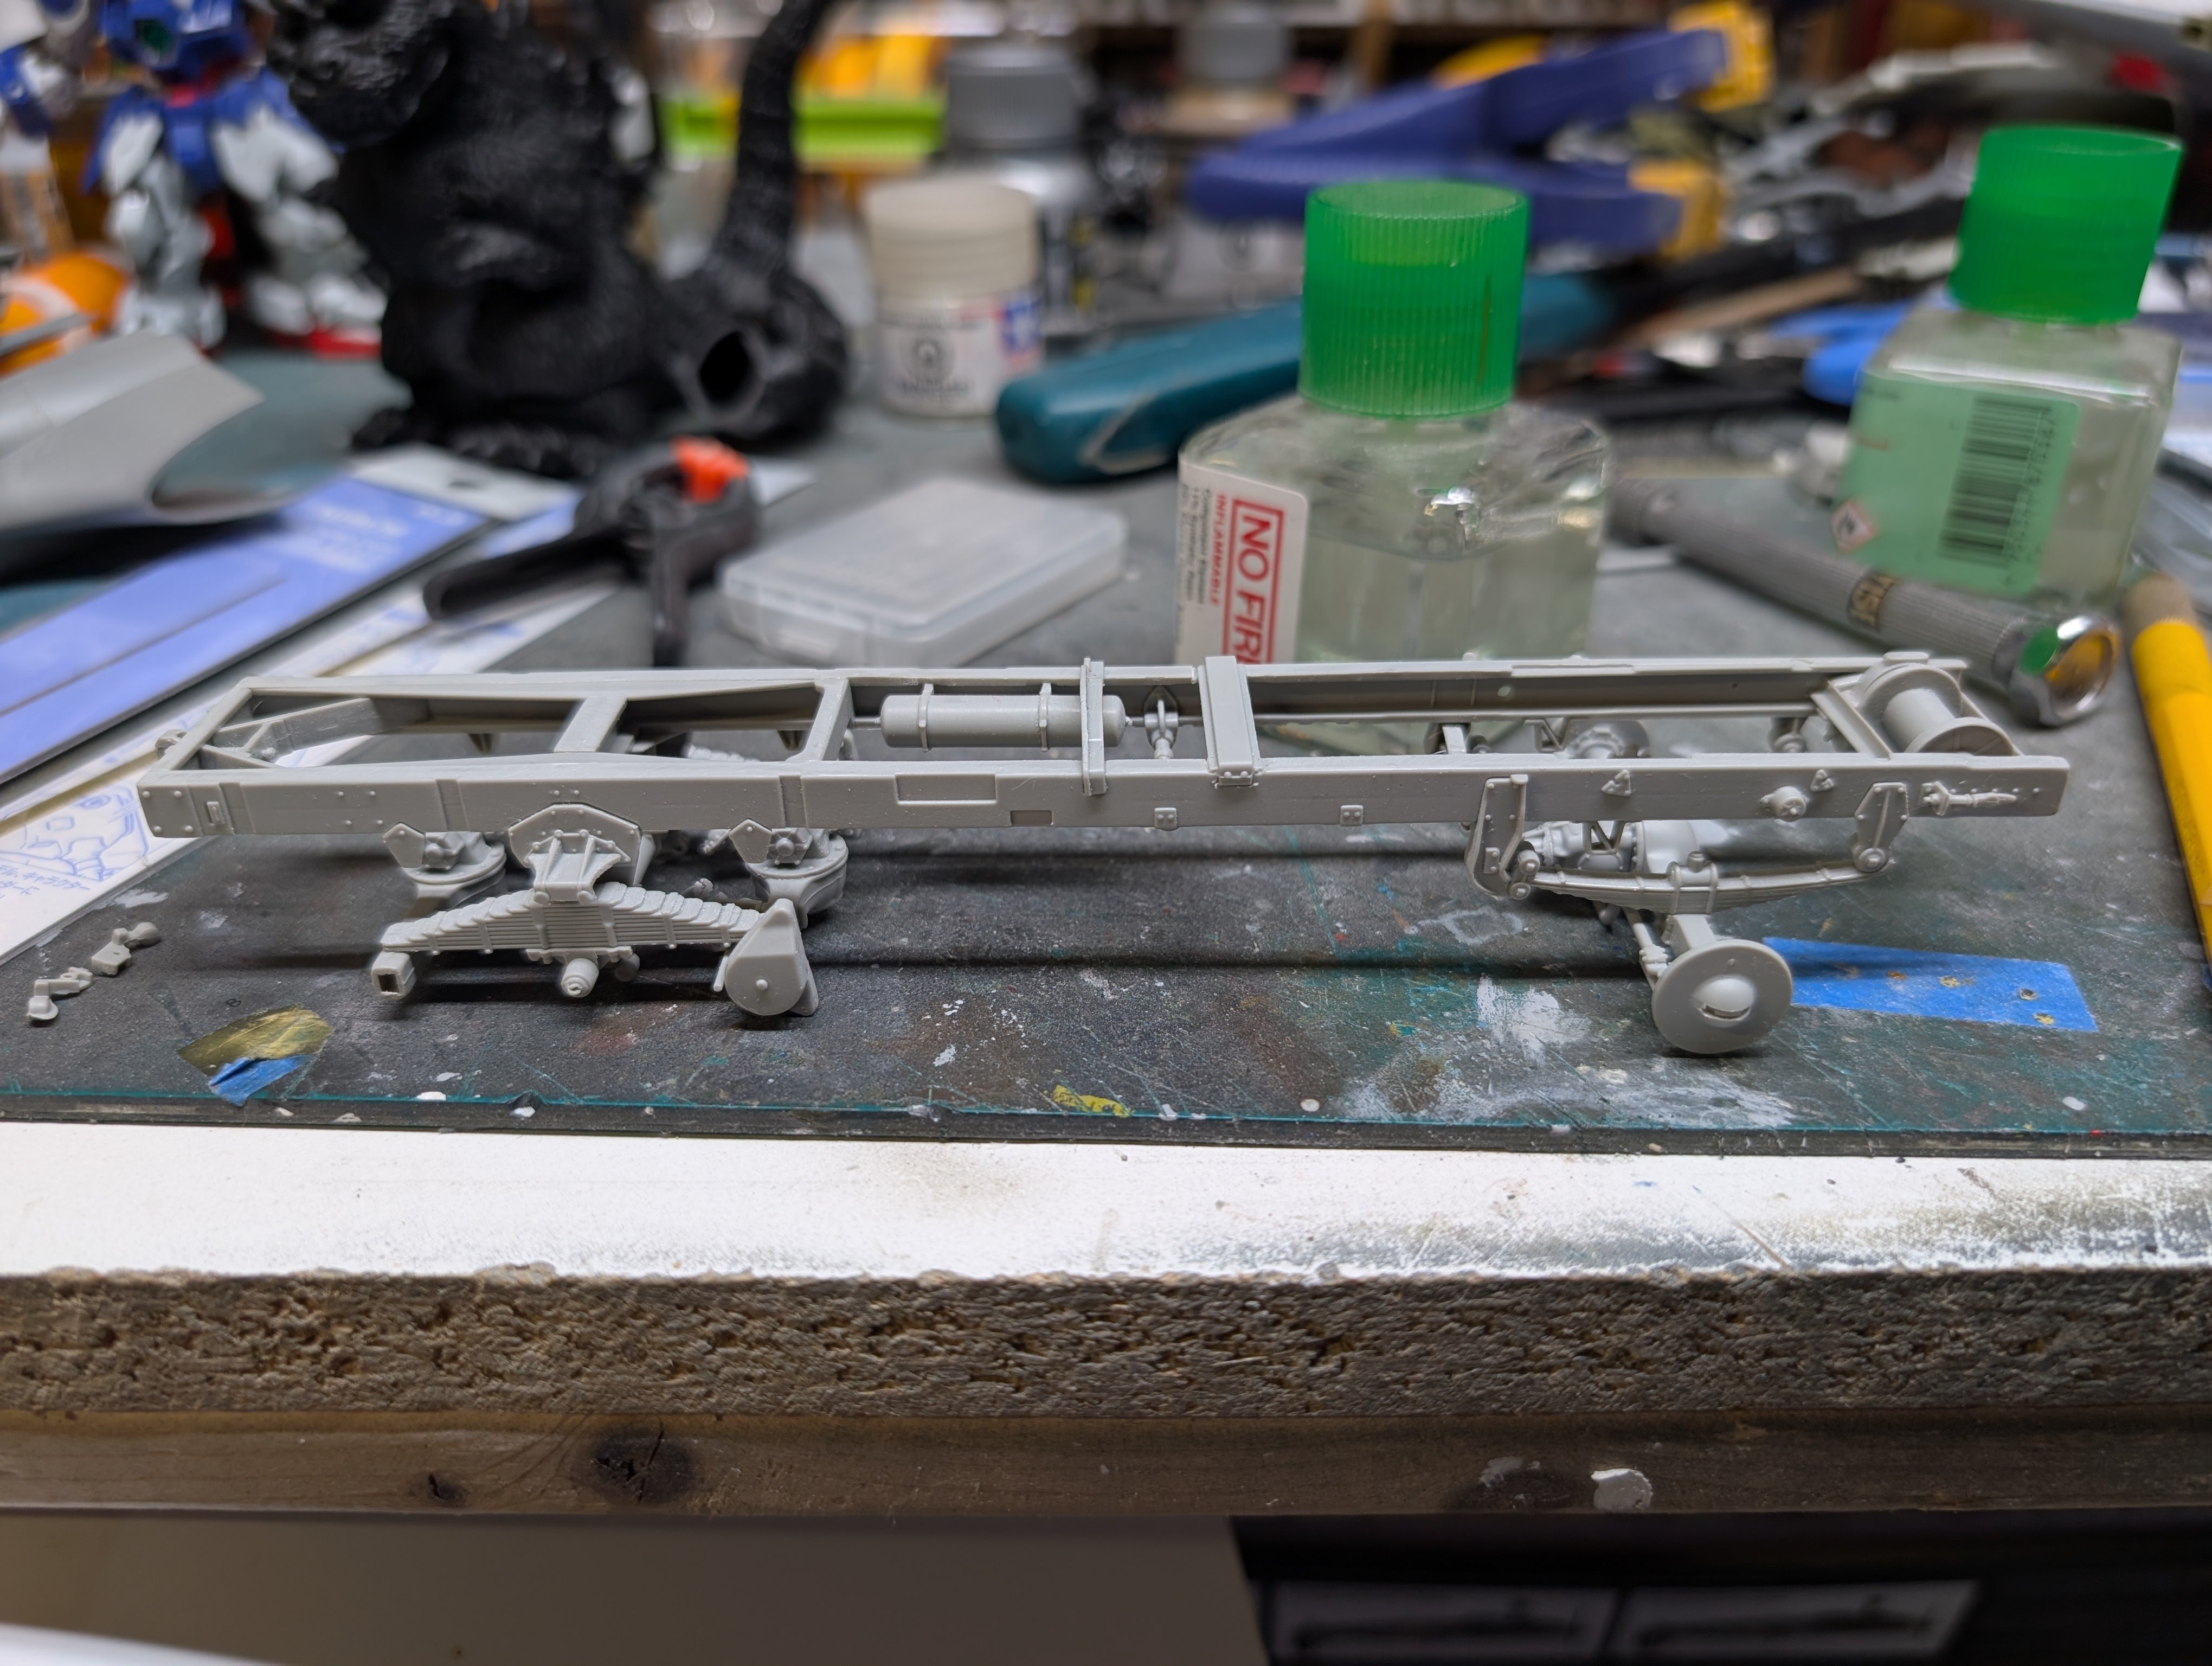
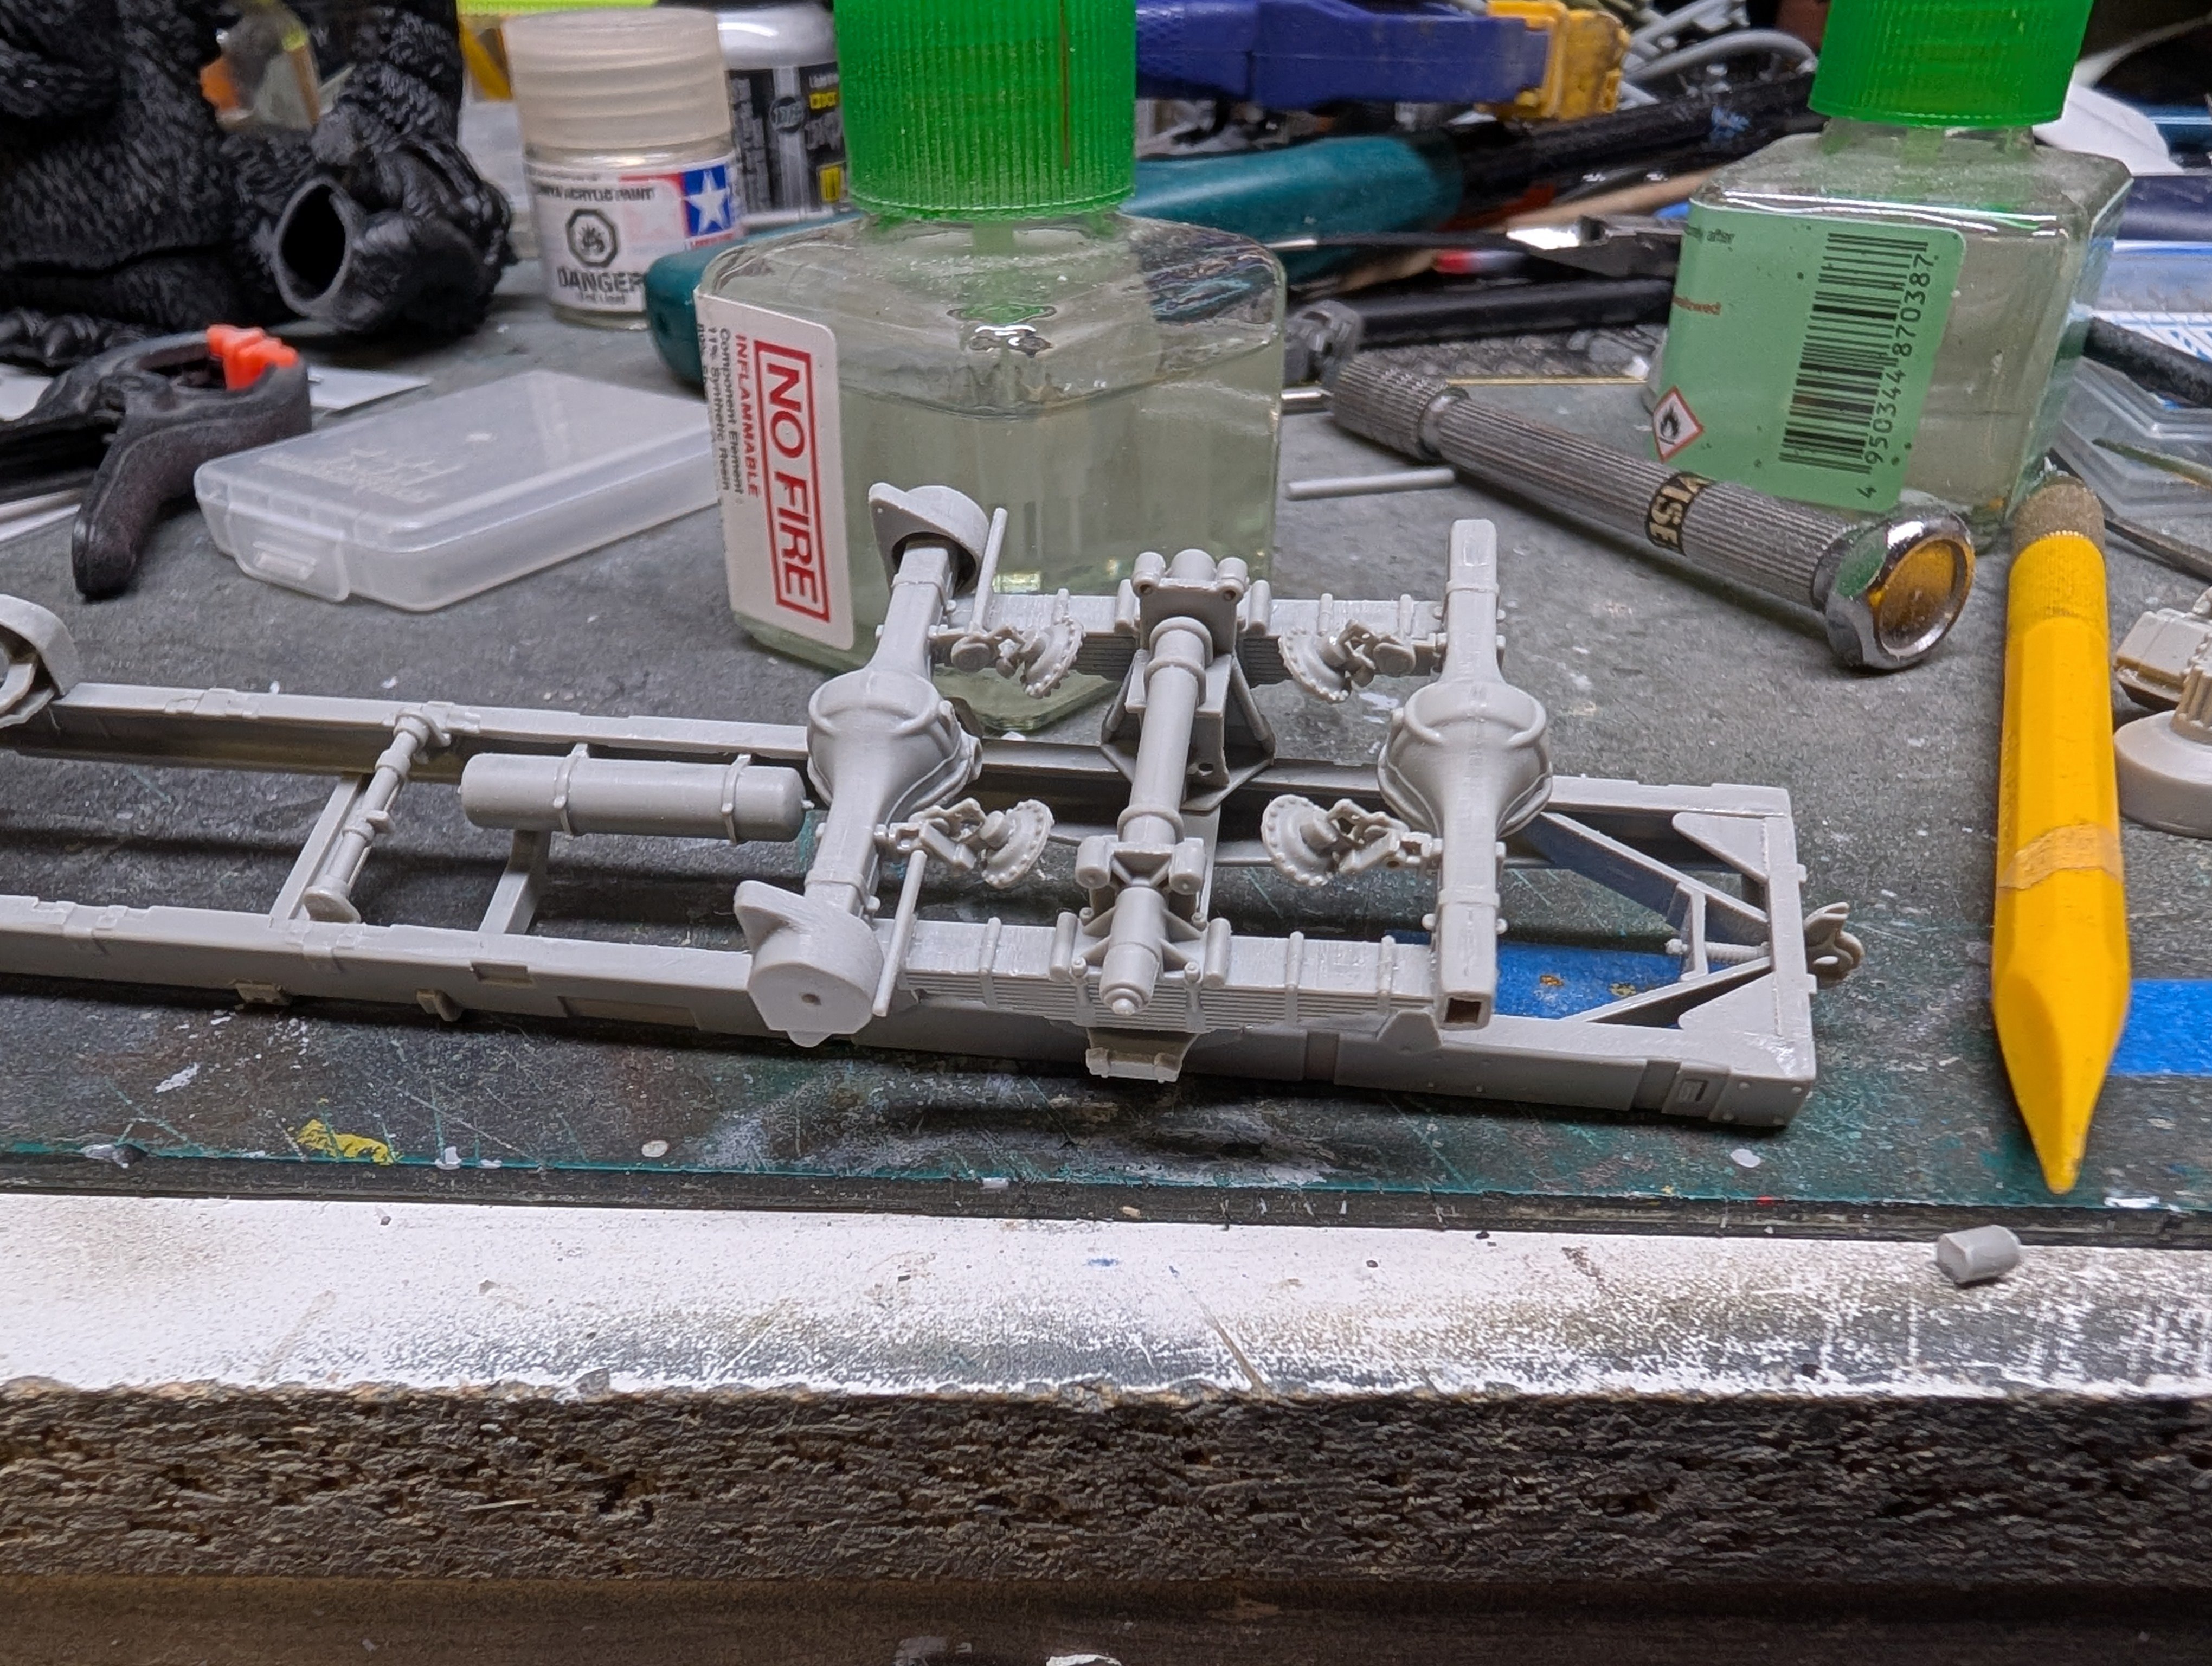
I've finally got to spend some time at the bench after getting back from our big family trip. I'm continuing to work on the Diamond T wrecker. Definitely not an easy kit but for some reason, I'm still enjoying my time working on it. The front suspension is together. I used some 0.3 mm brass rod to make the steering posable. The rear bogies are almost done. I've lost track of how many parts there are here but it's a silly number. The bogies pivot for the moment but once the linkages get fitted, it'll be locked in place. I might use some brass rod and make it posable as well. We'll see. Here's an overview of the chassis so far.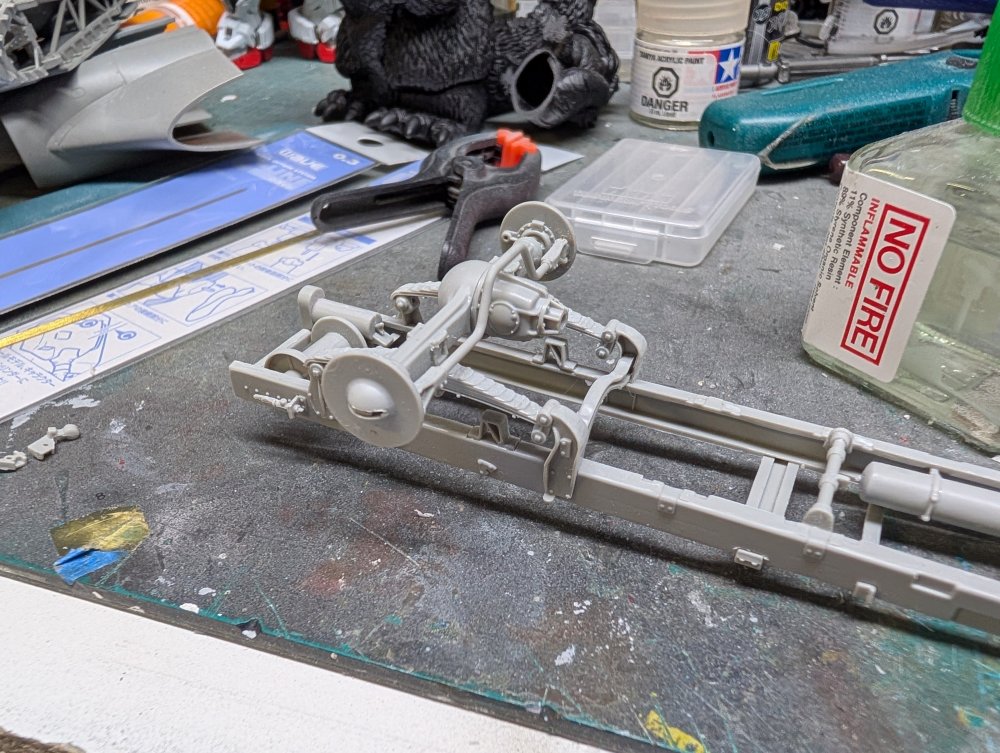

-
Tamiya Spitfire VIII converted to a VII
BlrwestSiR replied to denders's topic in LSM 1/35 and Larger Work In Progress
Nice start there Dave. What's the red tool in the upper left of the photo? By the colour, I'm presuming it's made by Dspiae. Carl