
RalphSarc
-
Posts
2,143 -
Joined
-
Last visited
Content Type
Profiles
Forums
Events
Gallery
Everything posted by RalphSarc
-

Revell 1/48 F-86F Sabre Jet Build Thread
RalphSarc replied to RalphSarc's topic in LSM 1/48 Work in Progress
My air brush and a long air hose on a month keeps the dust free!! -
Excellent video!! Thanks for sharing!!
-
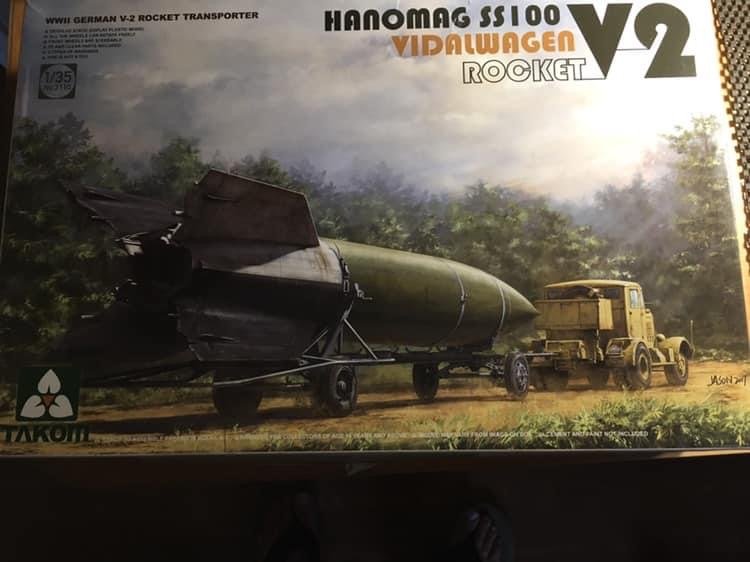
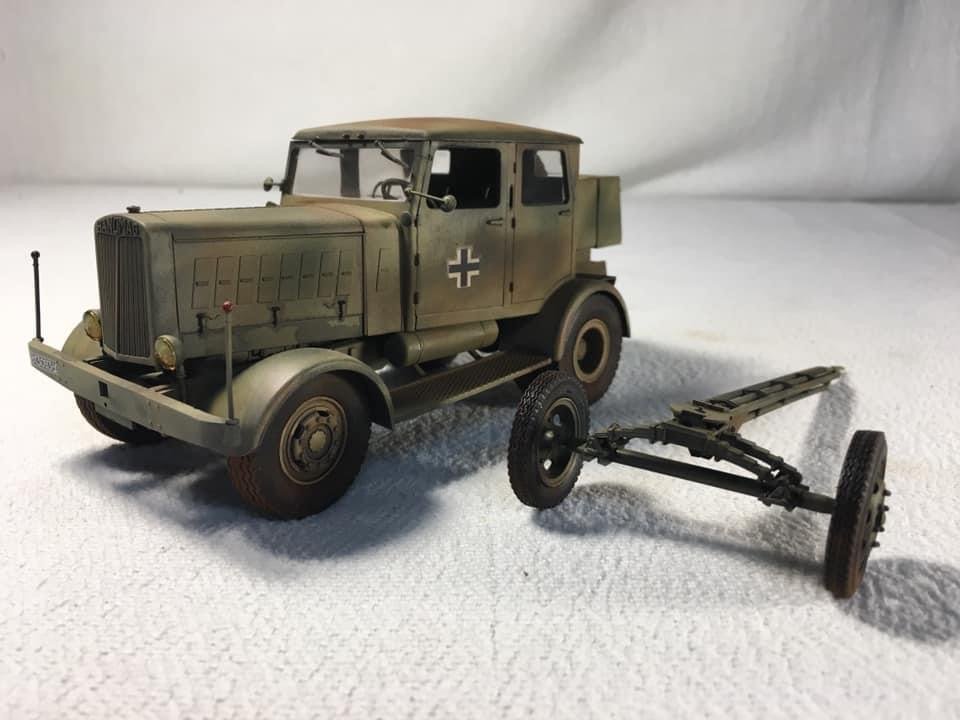
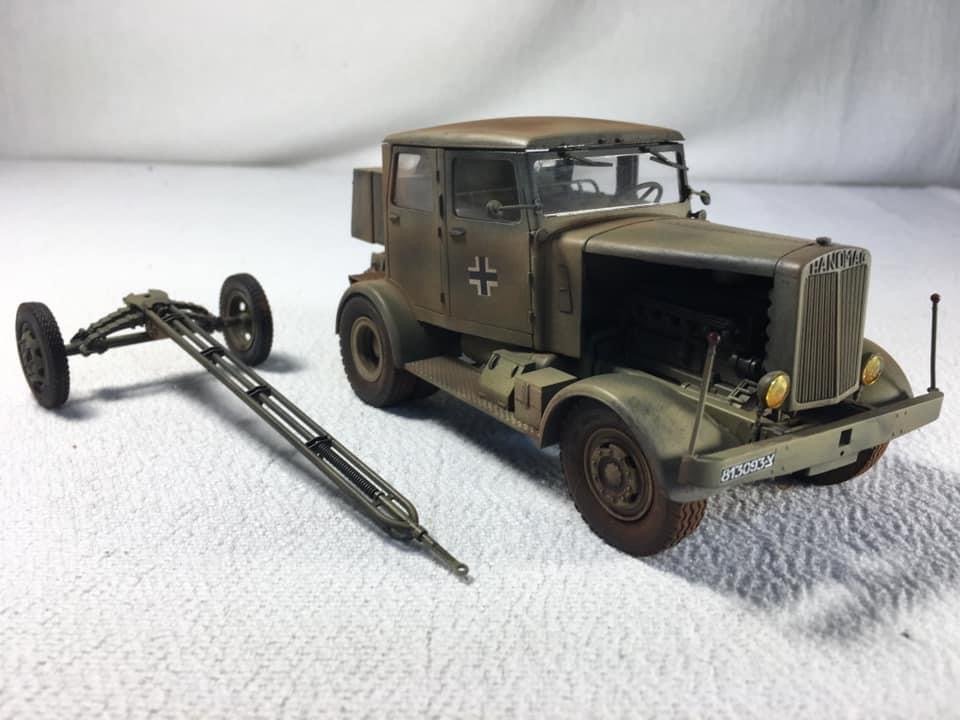
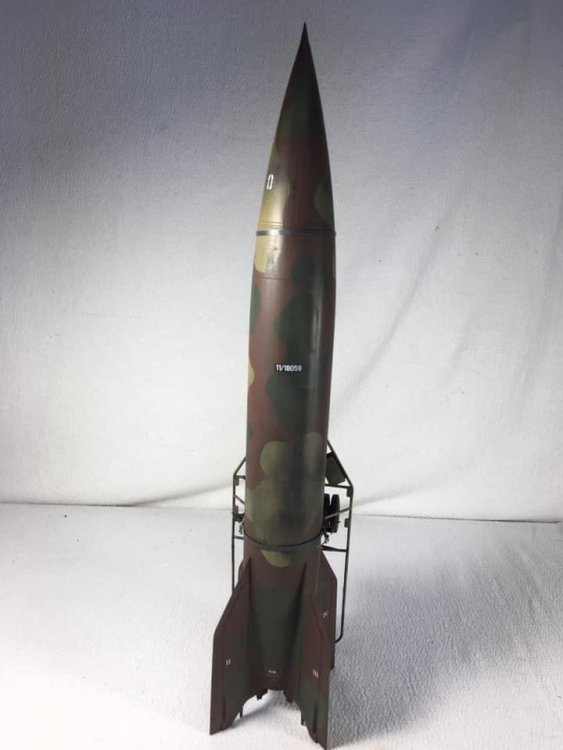
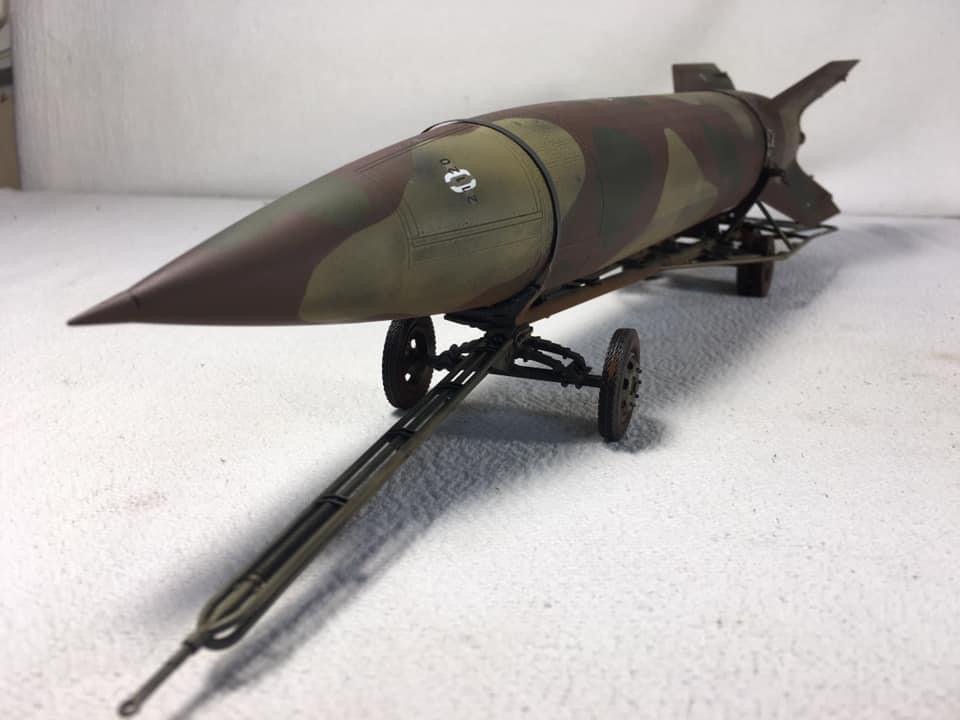
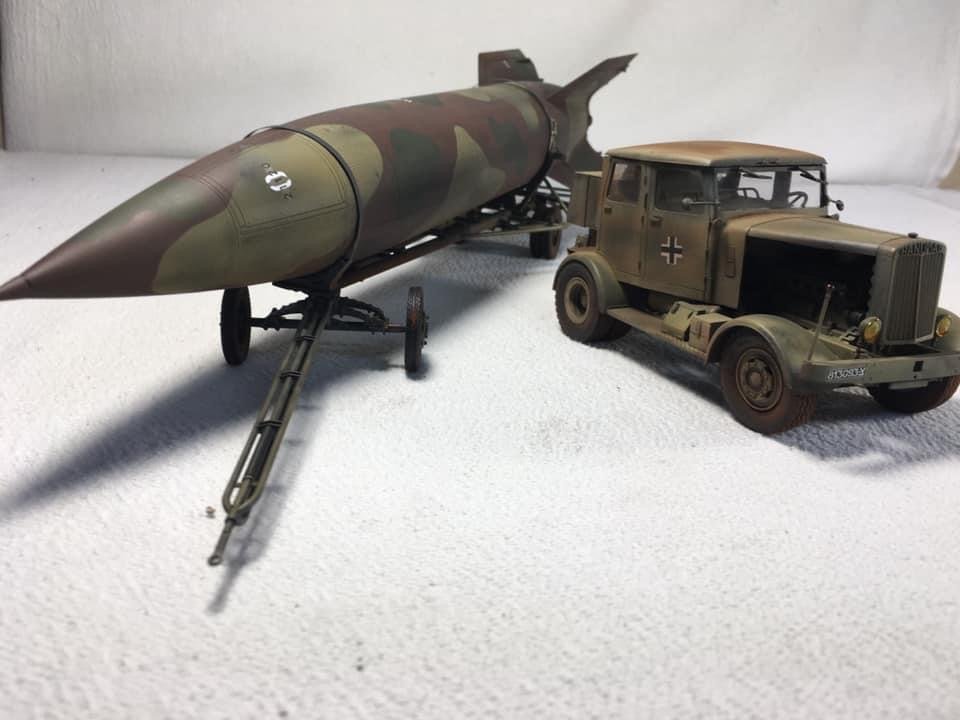
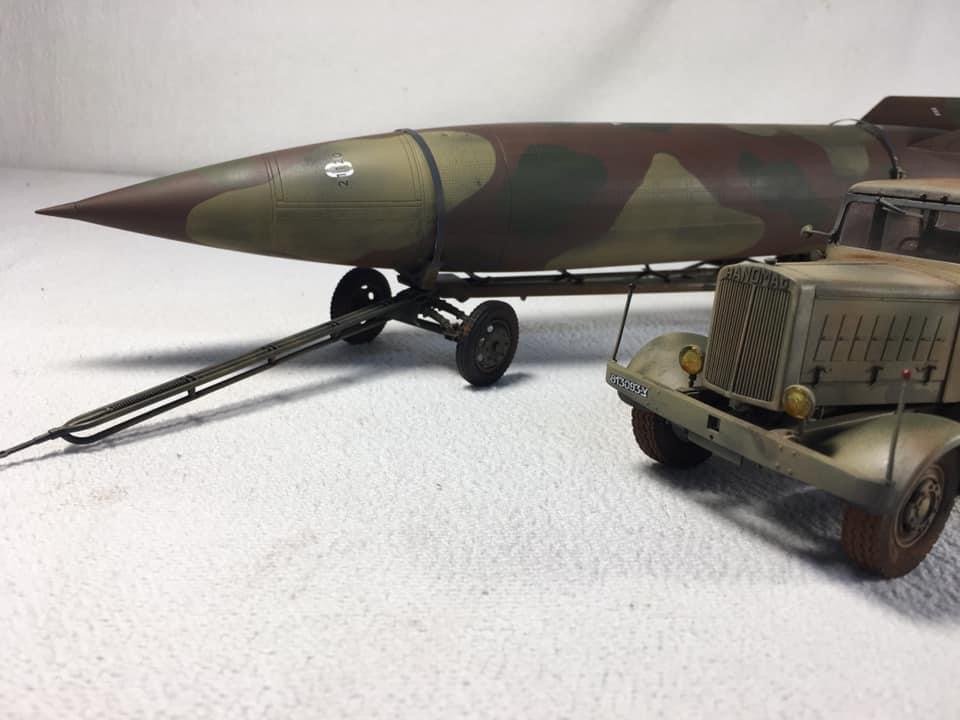
Takom 1/35 Hanomag SS100, Transport Trailer and V-2 Rocket. Beautifully engineered kit, perfect fit and great fun it comes highly recommended.
-
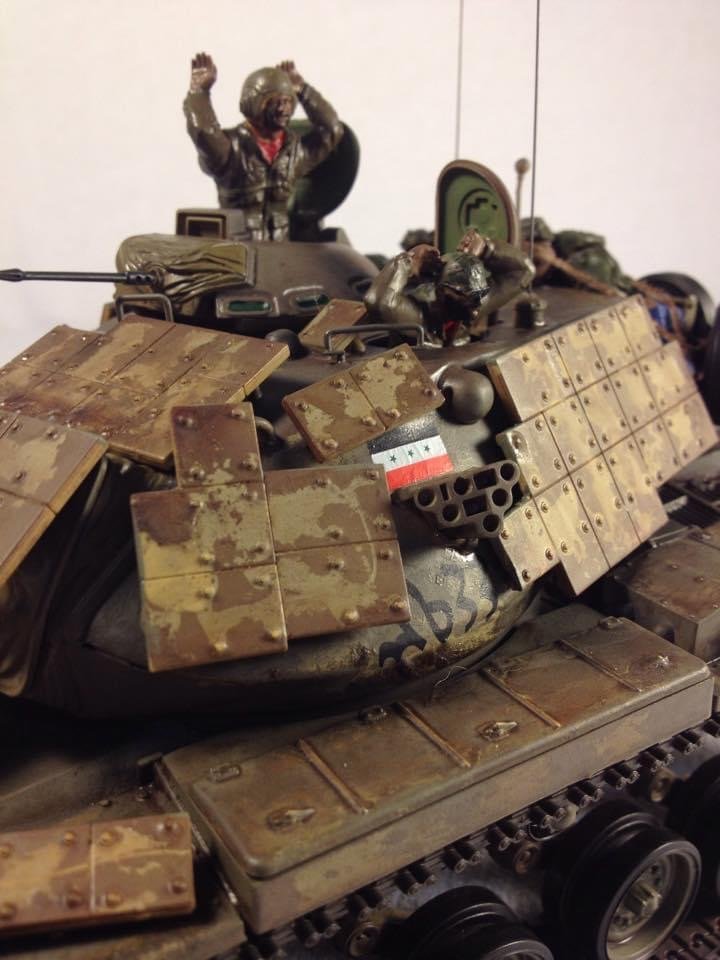
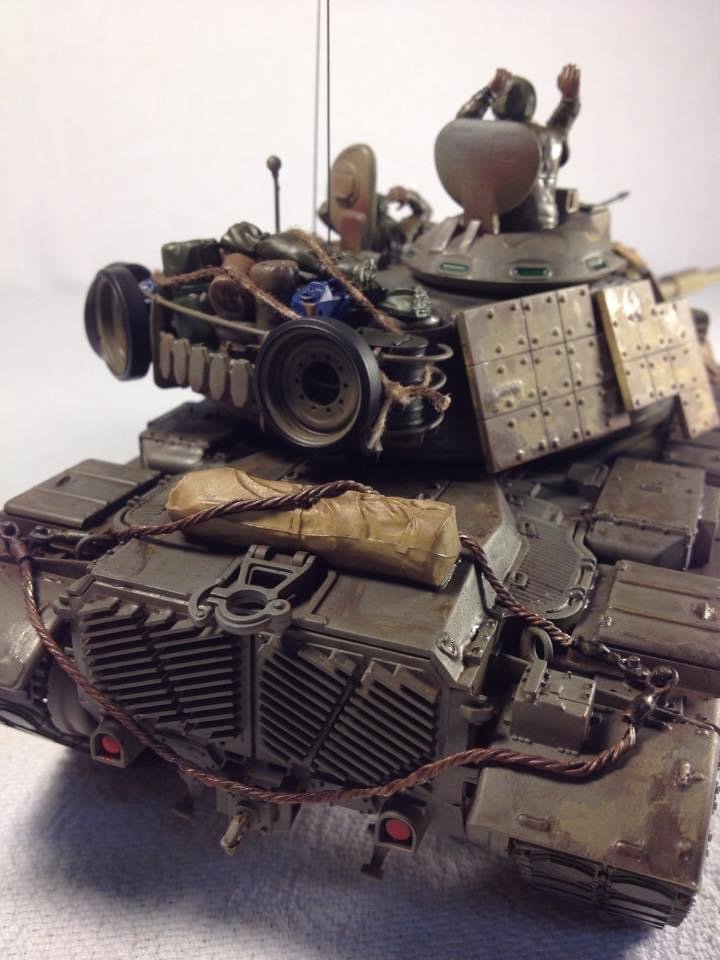
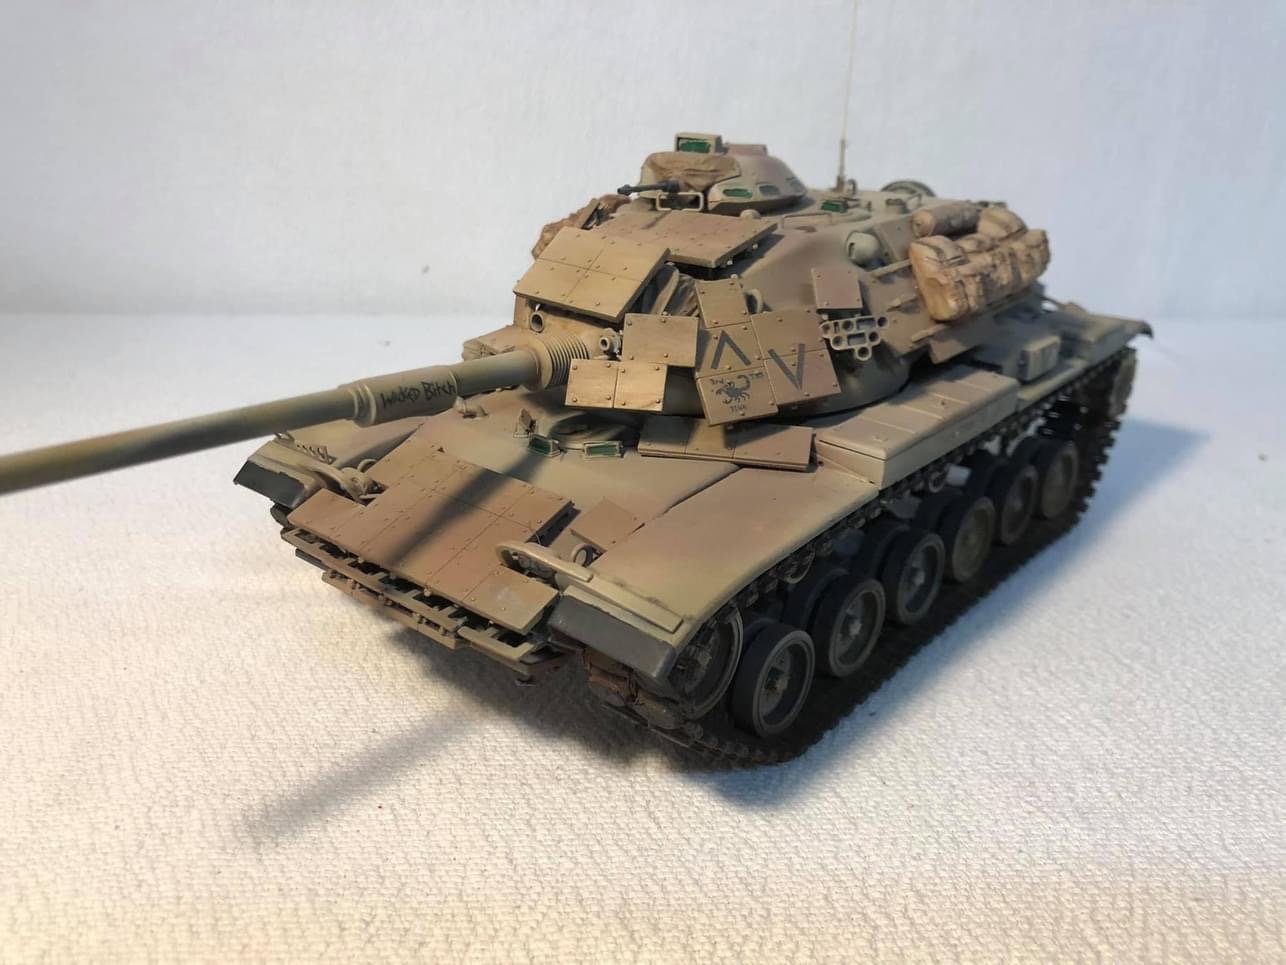
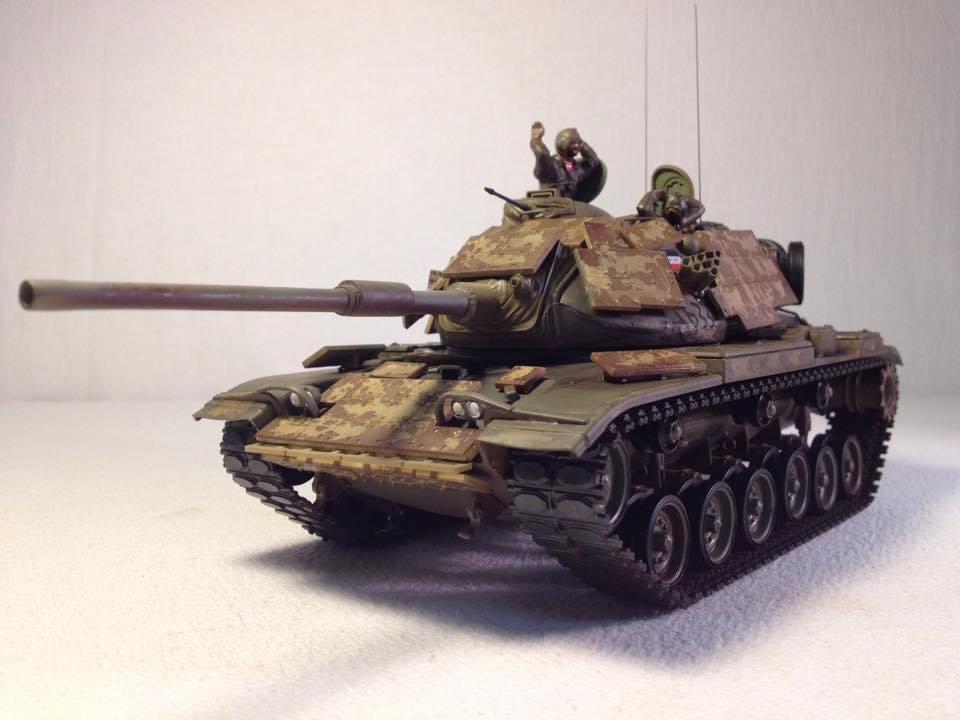
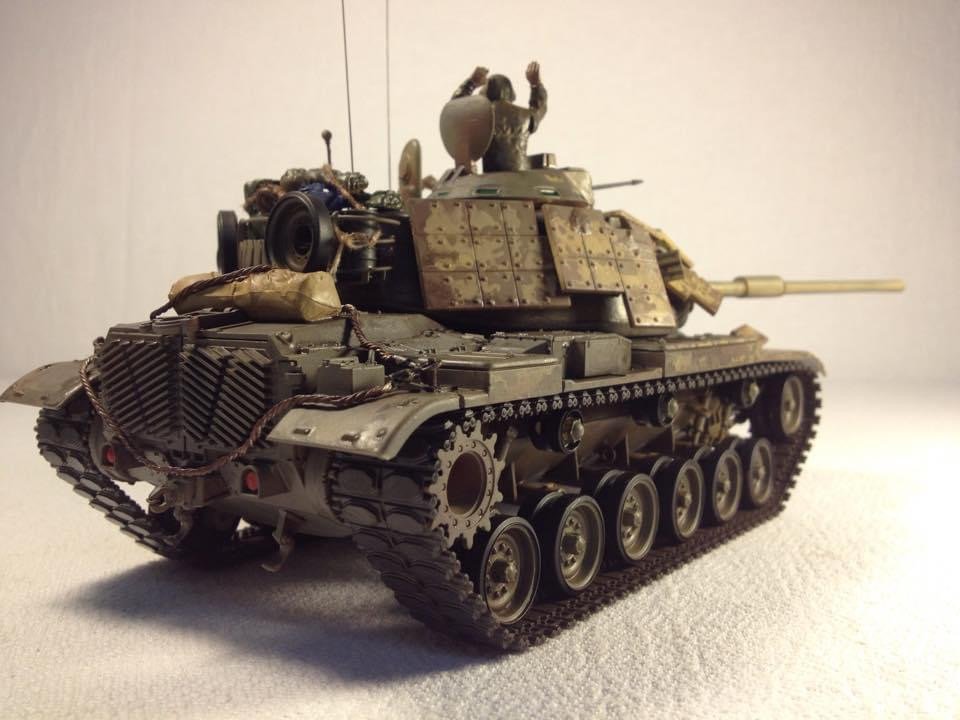
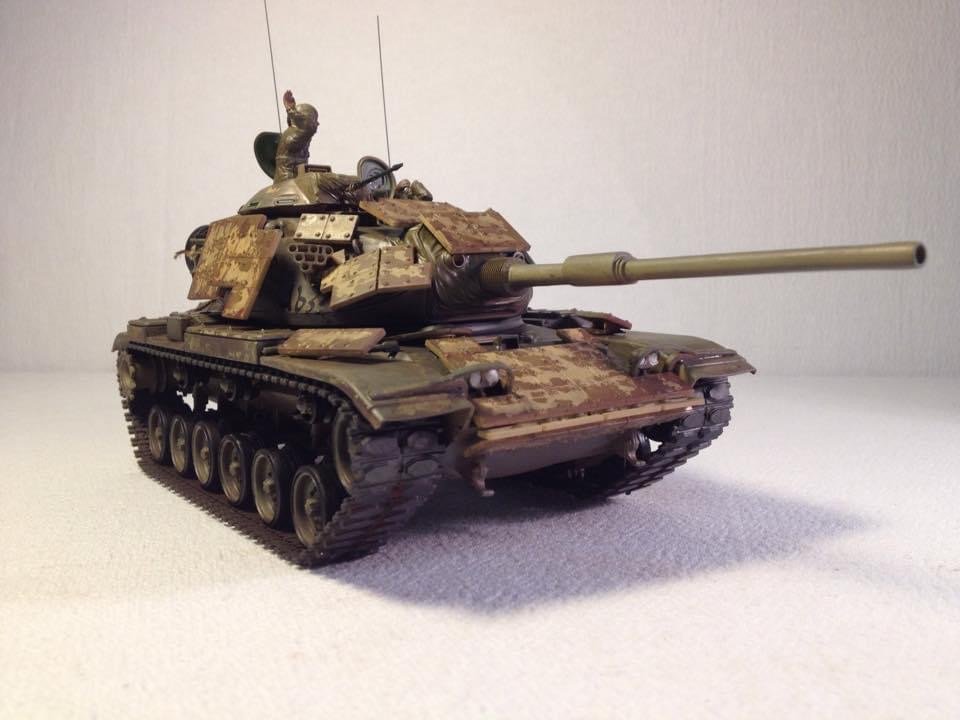
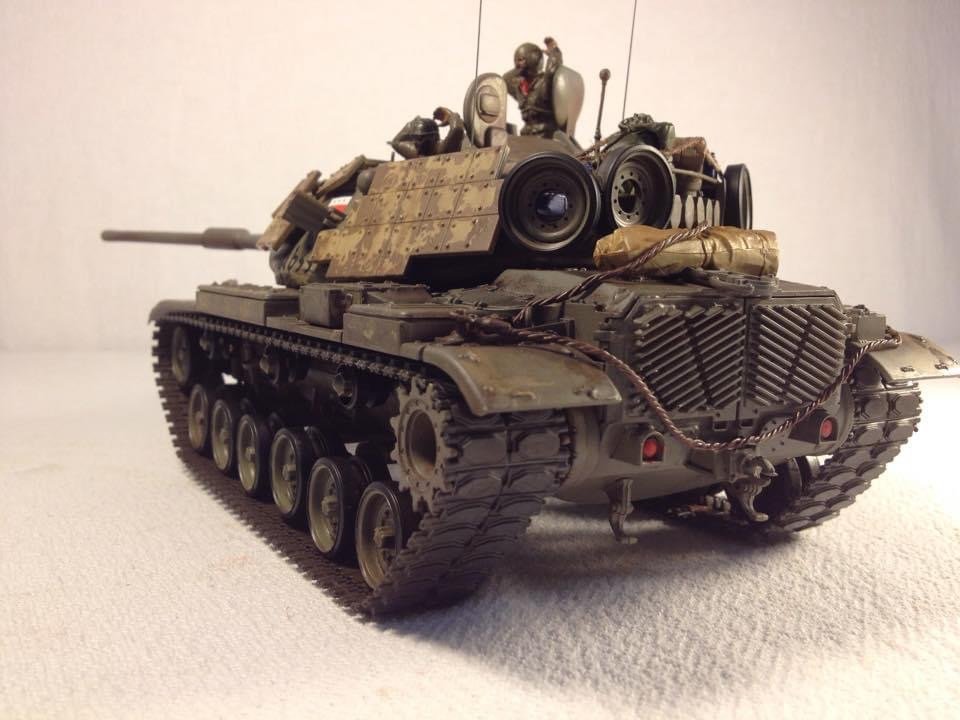
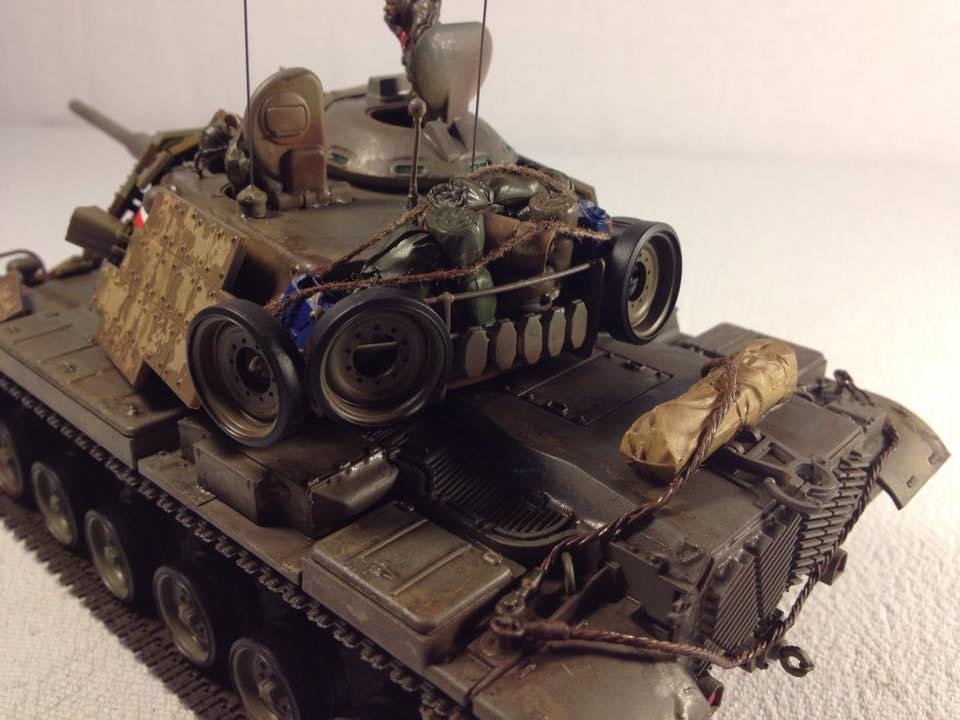
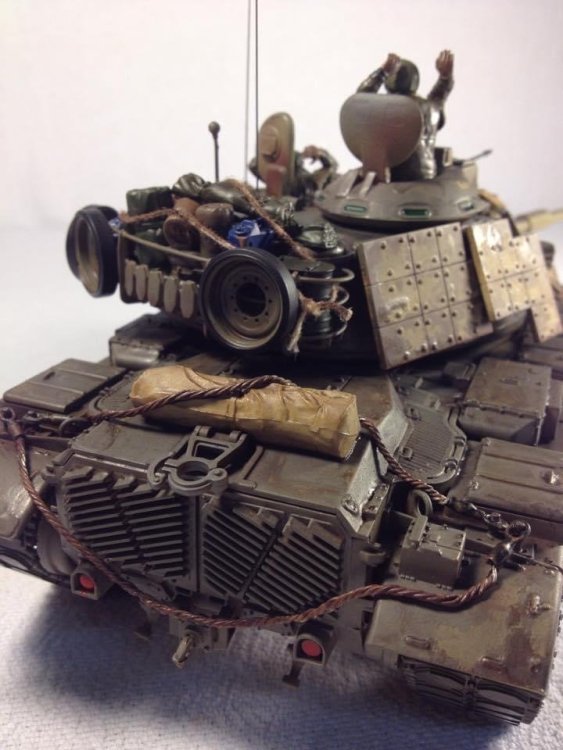
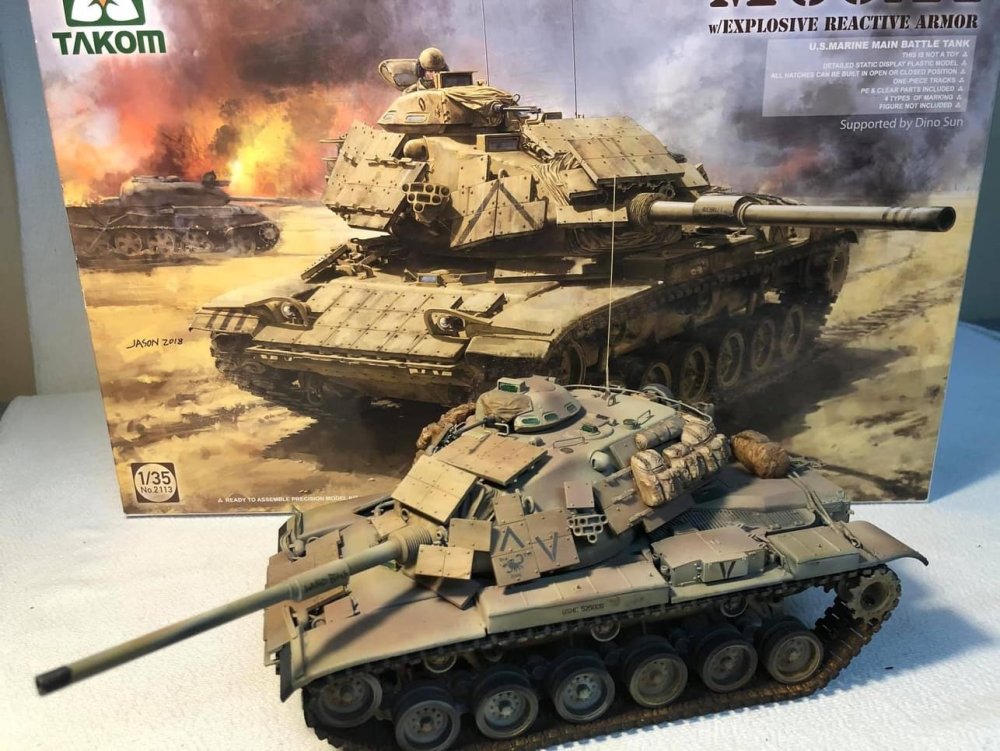
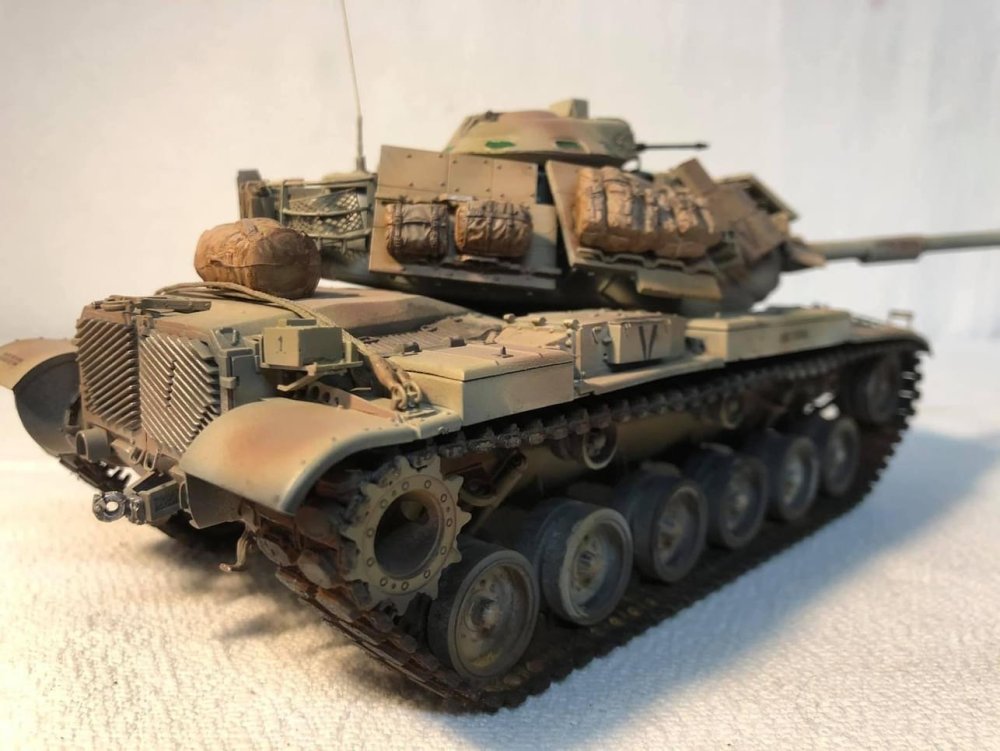
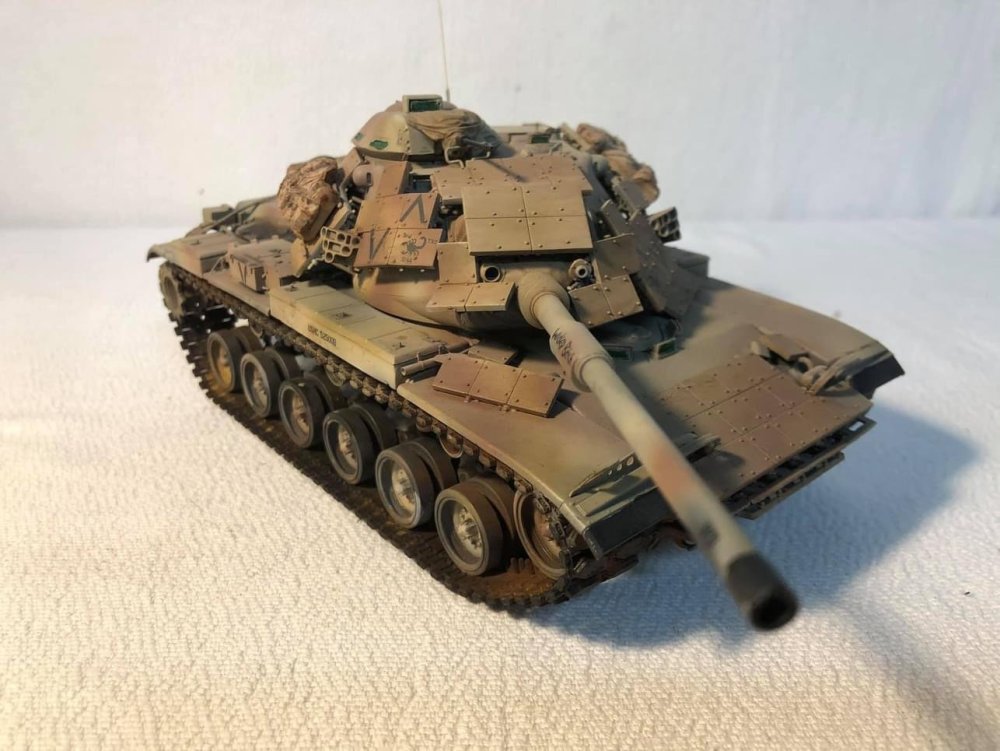
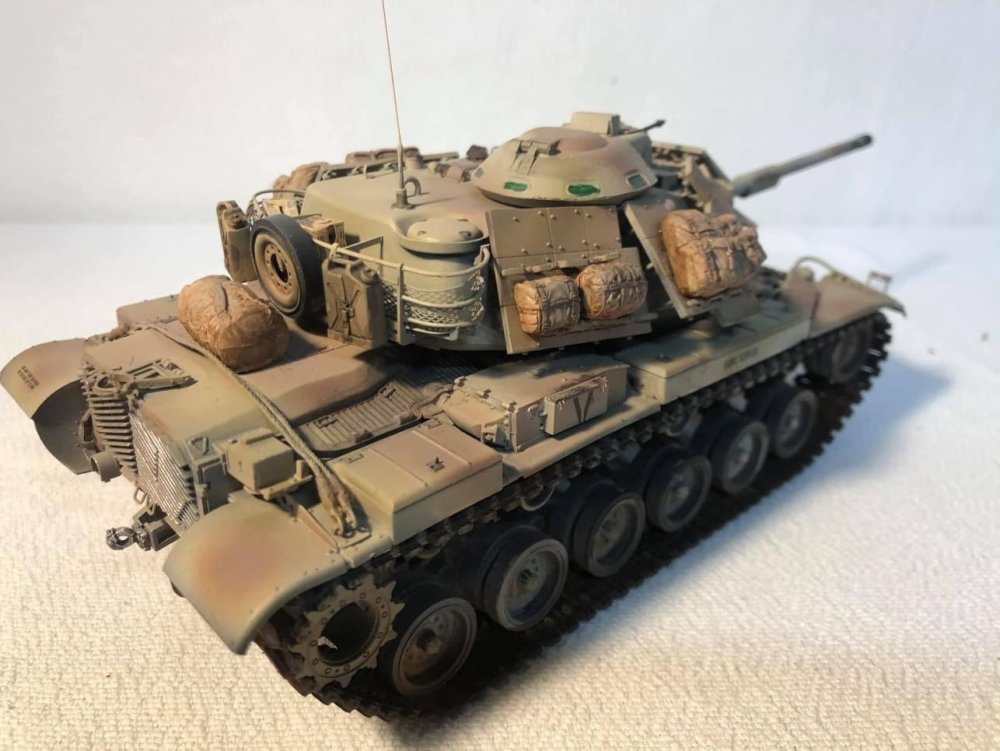
Just finished a M60A1 Battle Tank with Reactive Armor which is part of a diorama depicting a captured Iranian tank and its Iraqi crew surrendering to US Forces as they entered Baghdad!

-
- 2
-

-
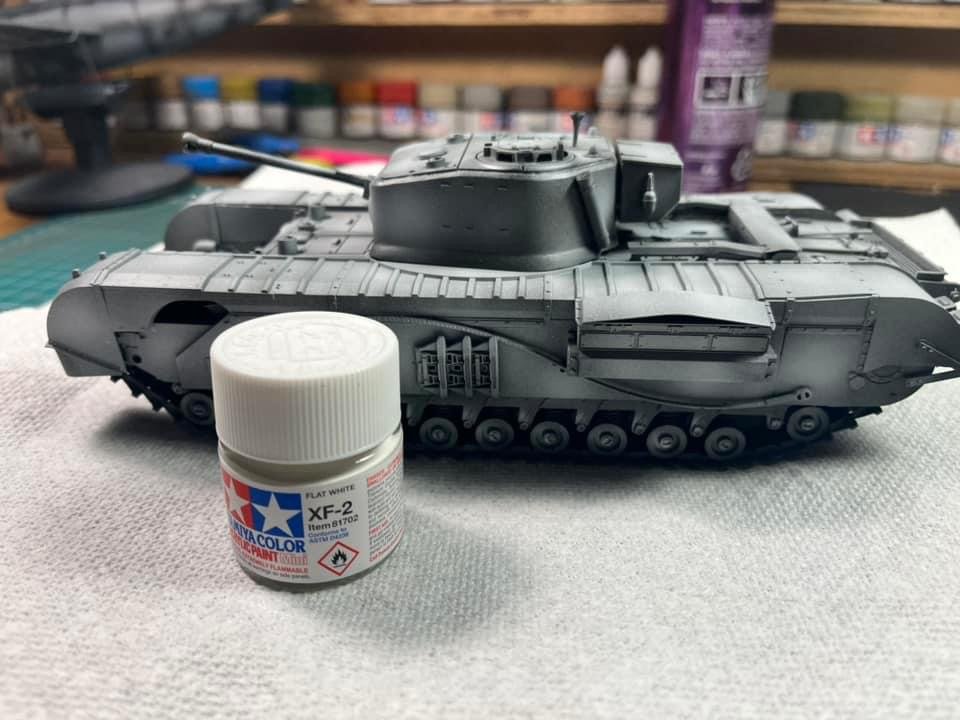
This morning with the help of some warm water and several stiff bristle brushes I began the technique of removing some of the XF-2 Flat White which recreates the wear you’d see in the winter white wash camouflage as the crew moved around the outside of the upper hull and turret either entering or exiting to Churchill, performing maintenance, loading ammunition etc. Hope I captured the technique?
-
White wash coat of XF-2 Flat White.
-
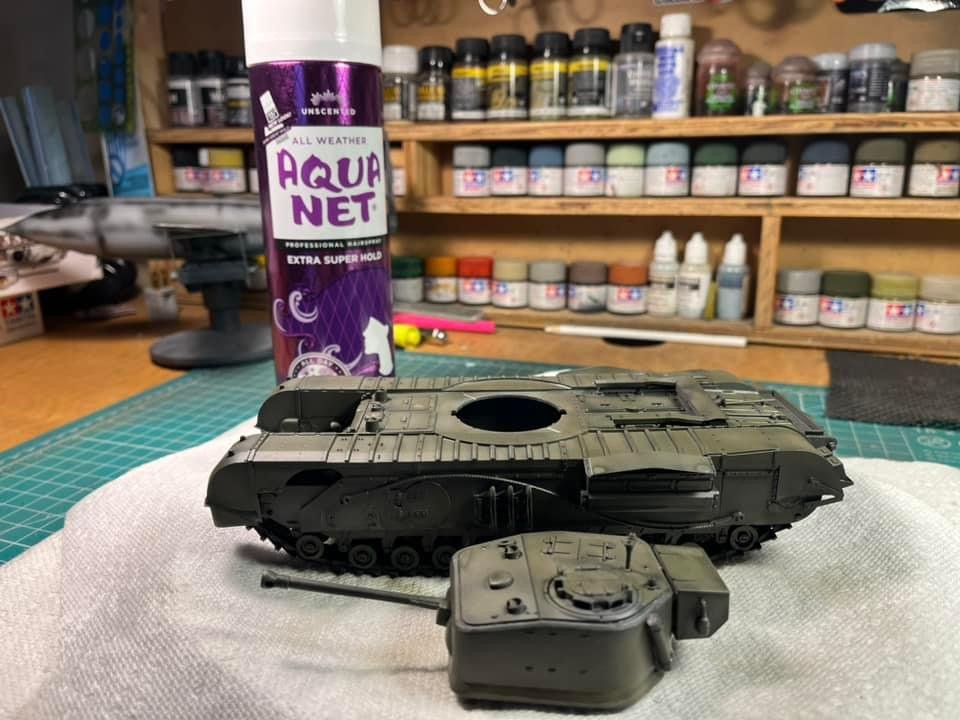
Hairspray coat!!
-
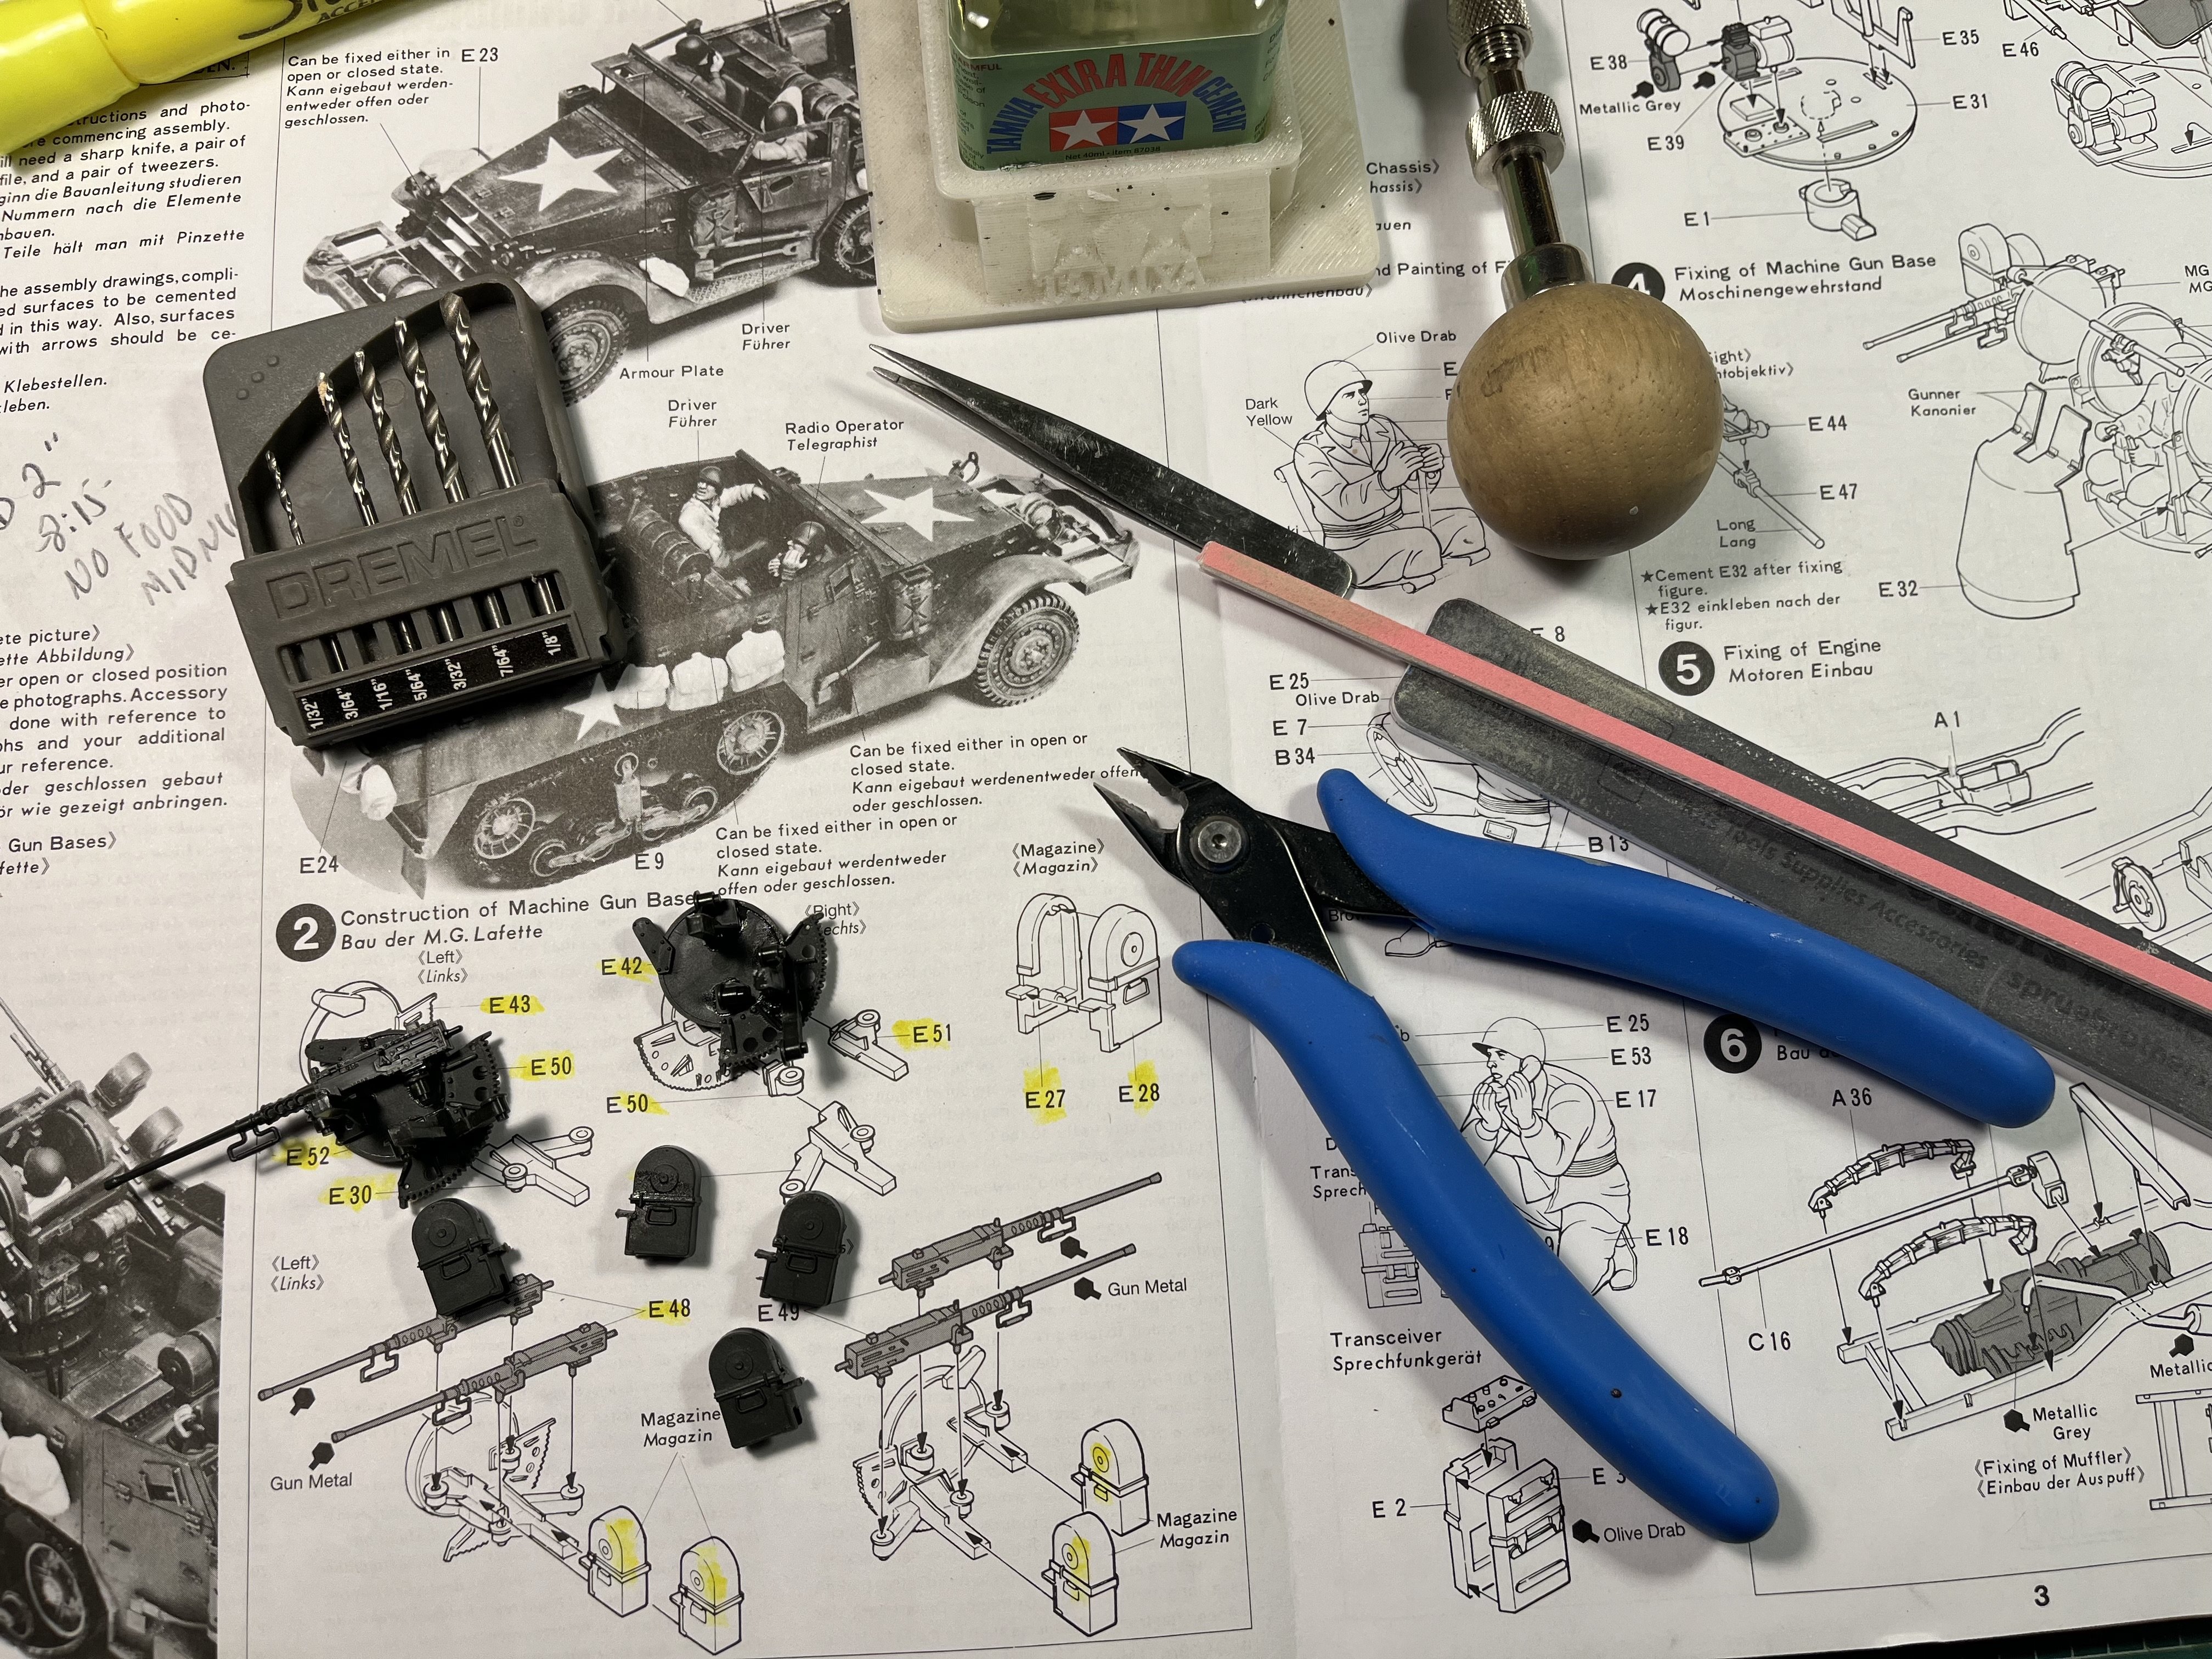
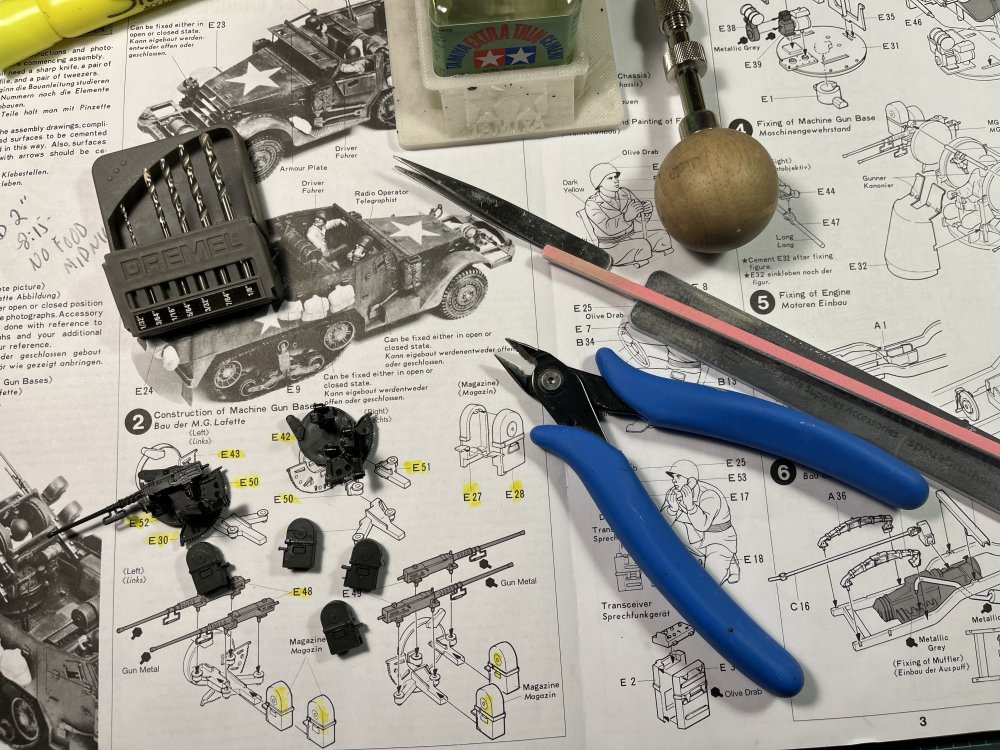
Began the fiddly work of assembling the gun mount in step 2. I’m trying to address any seam lines as did the builder in the YouTube videos I posted. I was going to drill out the 50cal barrels but sadly I don’t hand a pin drill bit that small.
-
Oh cool!! I had no idea. Maybe I’ll enter once I return from our Florida RV trip in March!!
-
I’ve have that kit also. Love the dozer blade!
-
Thanks so much. It was a fun build.
-
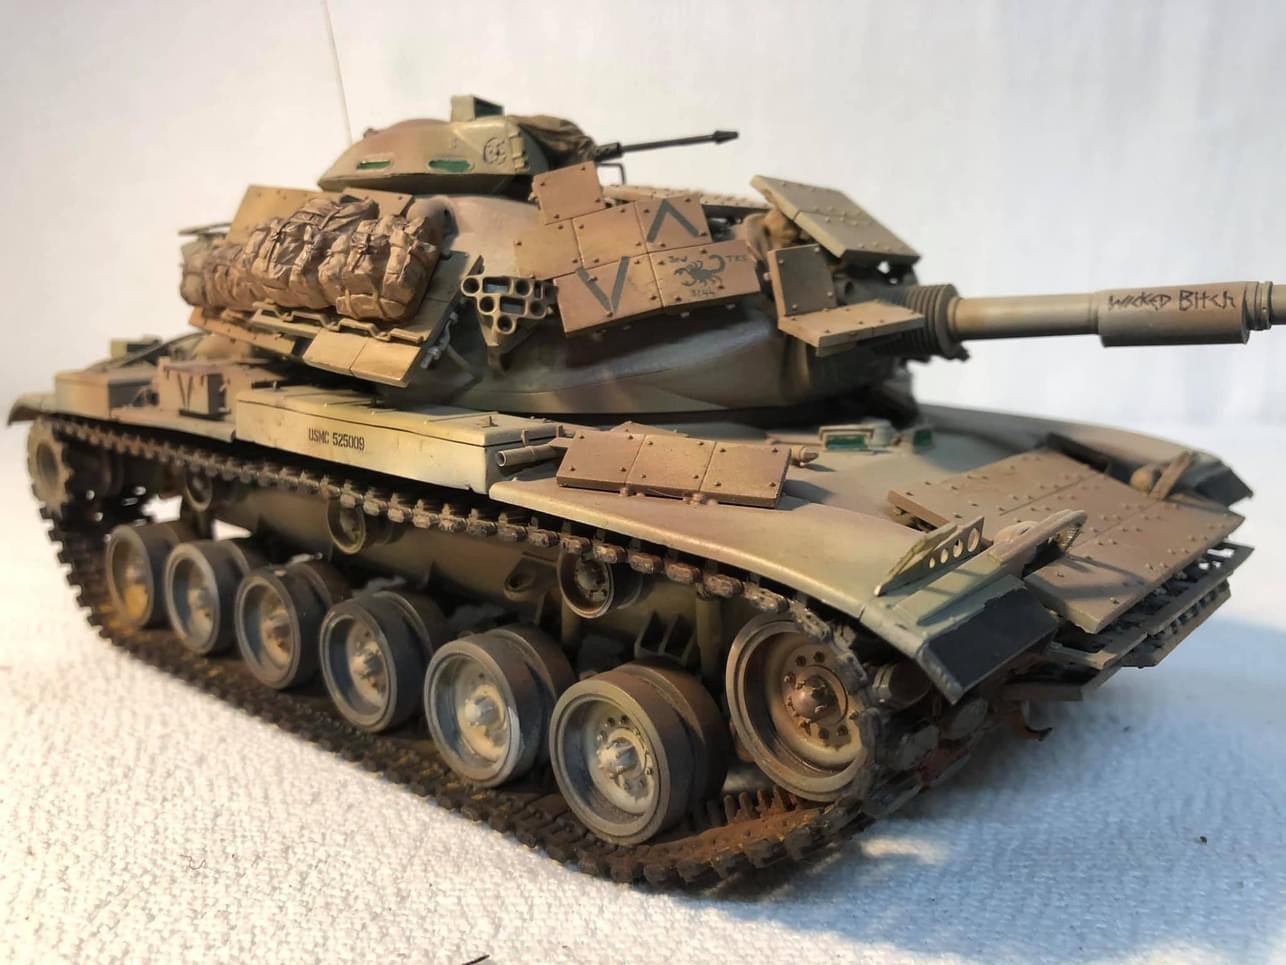
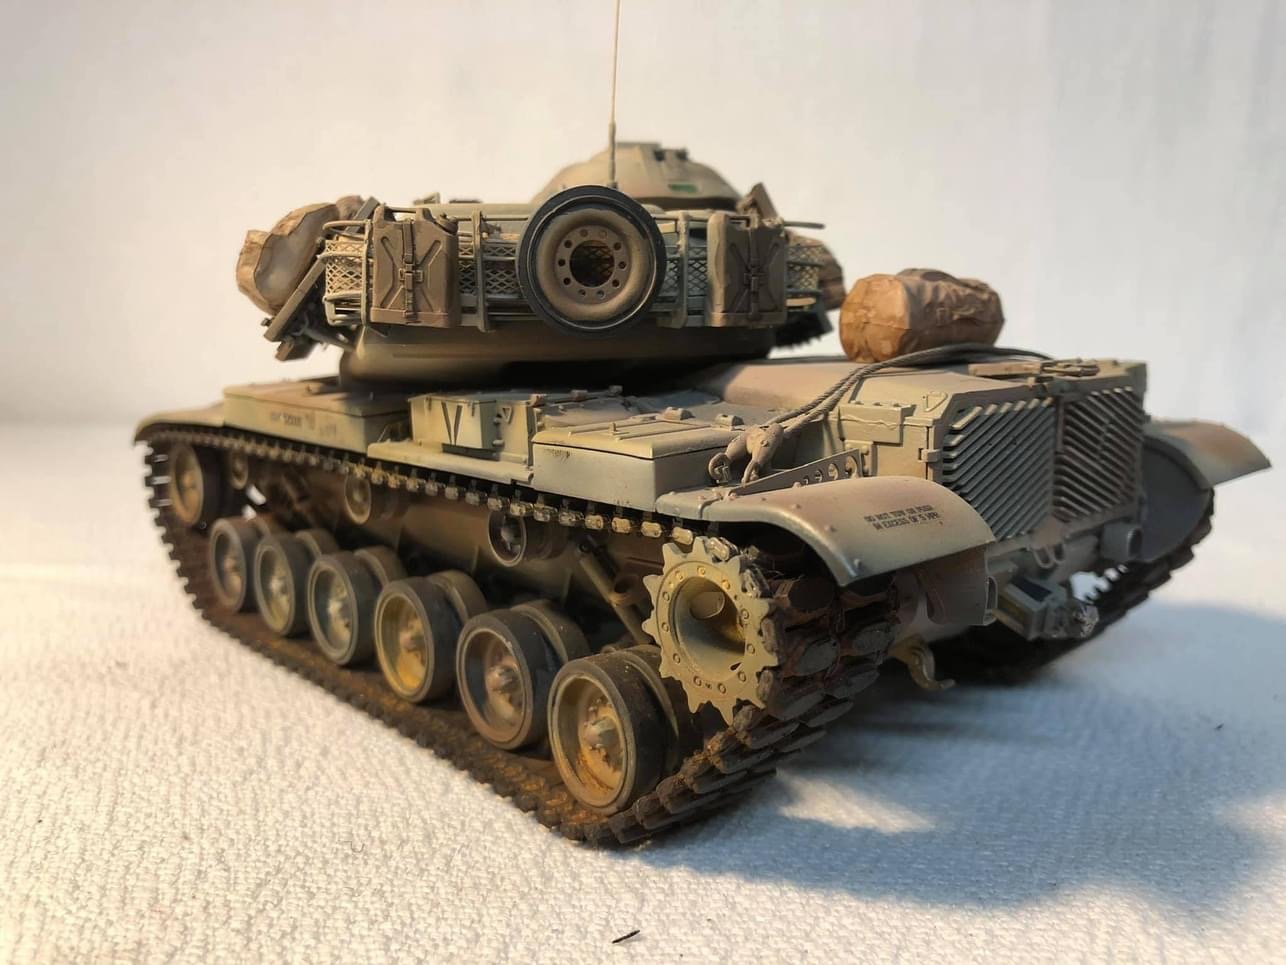
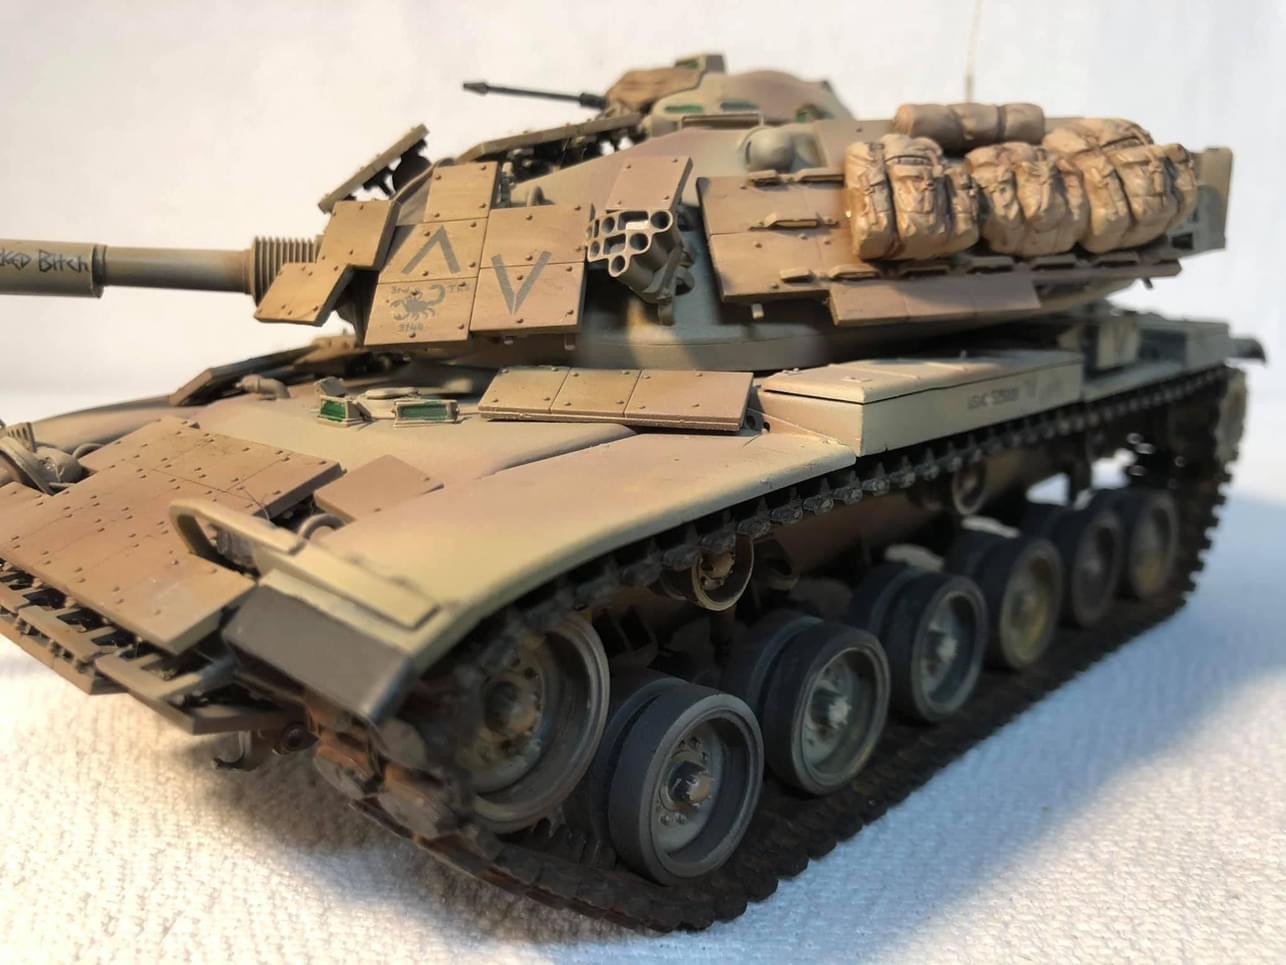
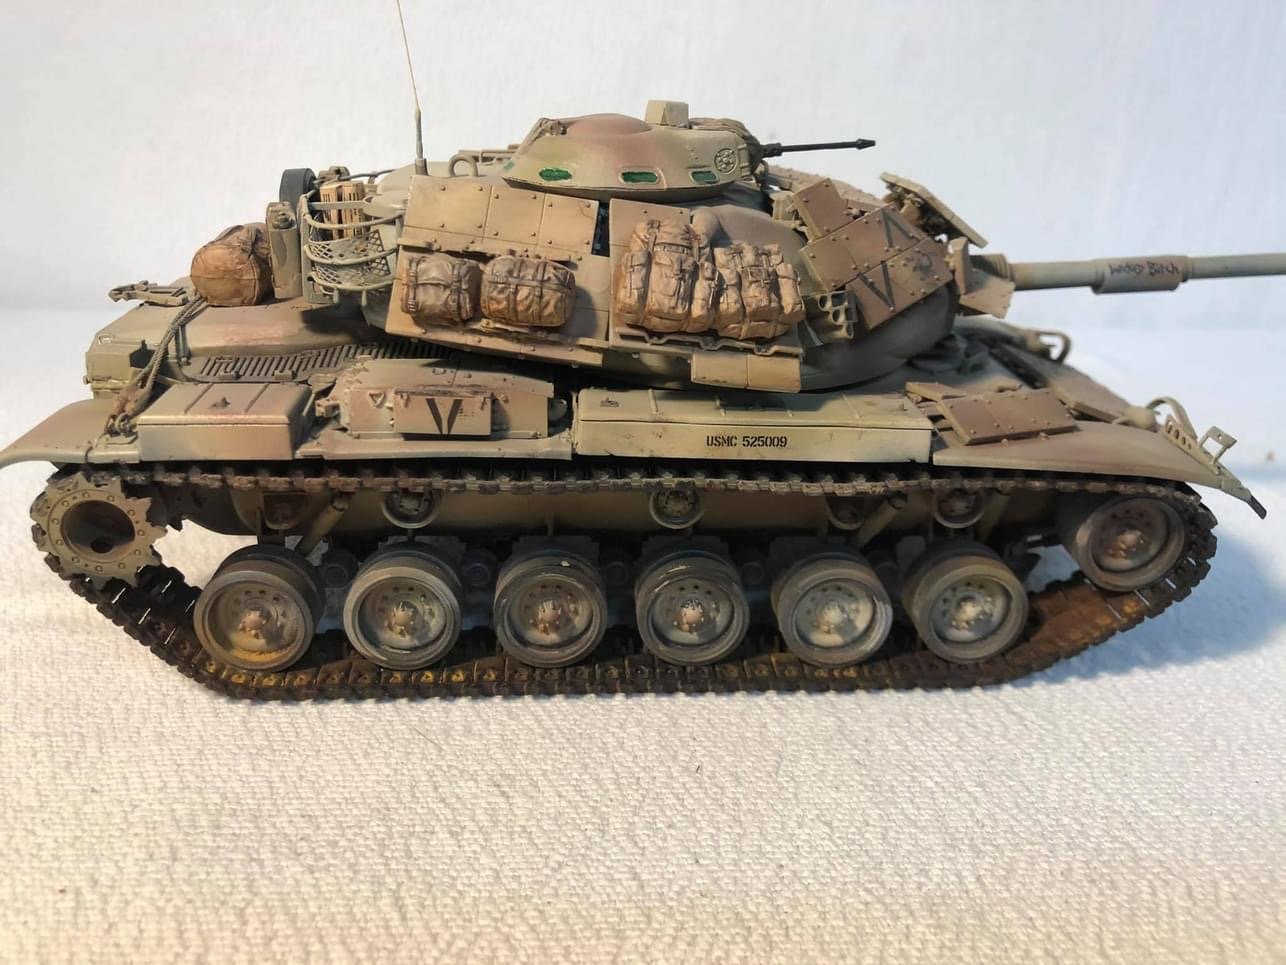
Takom 1/35 M60A1 (Complete 2/5/2021) Although the support brackets used to mount the re-active armor panels were endlessly fiddly this was a fun kit to assemble and comes highly recommend to those who enjoy armor kits.


-
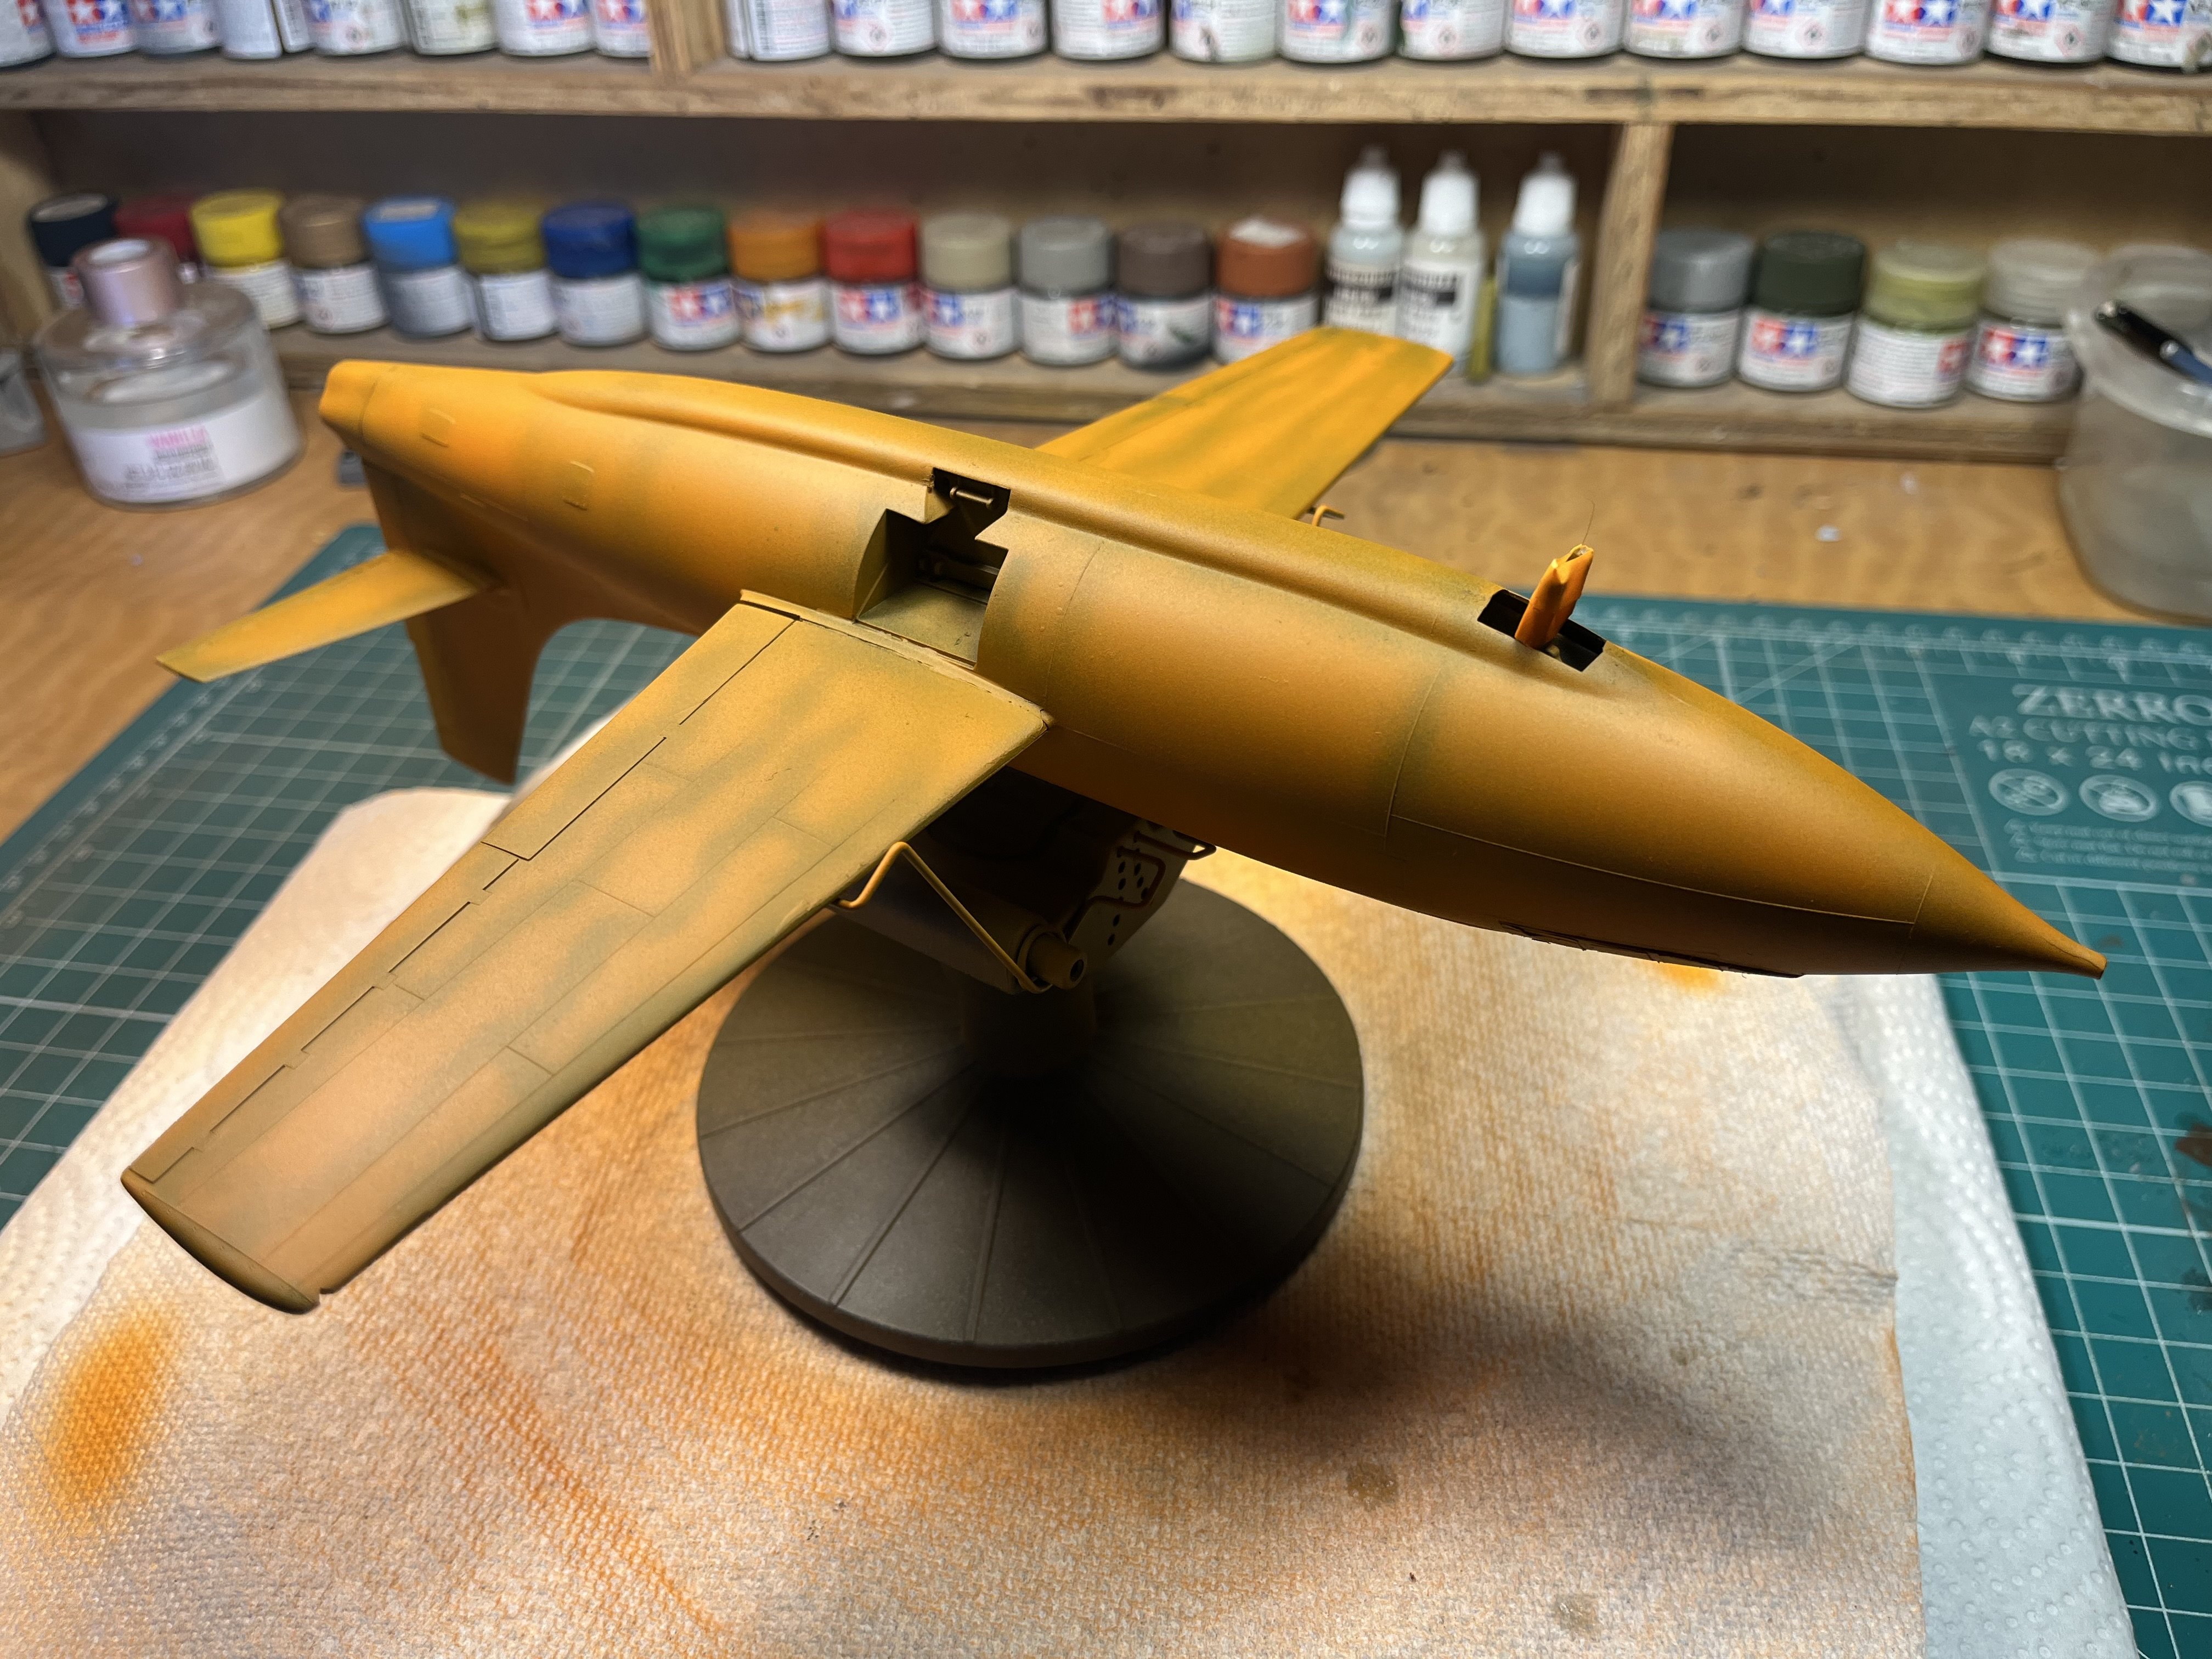
Revell 1/32 Bell X-1 (Glamorous Glennis)
RalphSarc replied to RalphSarc's topic in LSM 1/35 and Larger Work In Progress
50/50 mix of distilled water and Vallejo Orange Fire thinly applied seems to be working well. My I-Phone is seeing a more yellow color but I assure you it’s definitely orange and honestly more true to the original color that my first build ten years ago.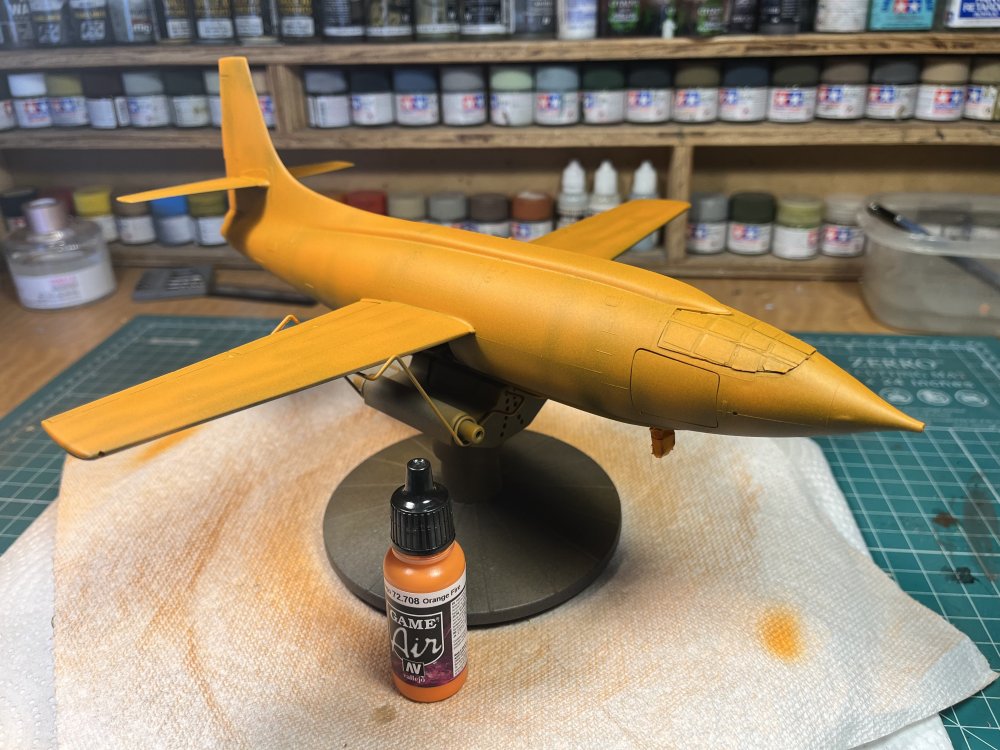
-
Should be fun builds!
-
Thanks Panzer. I’ve watched several YouTube builds, one straight out of the box, and your right it’s a very old kit but I thought all three would be fun to build especially eliminating all the numerous seams lines etc. I be thought I’d throw some stowage and tarps at it too.
-
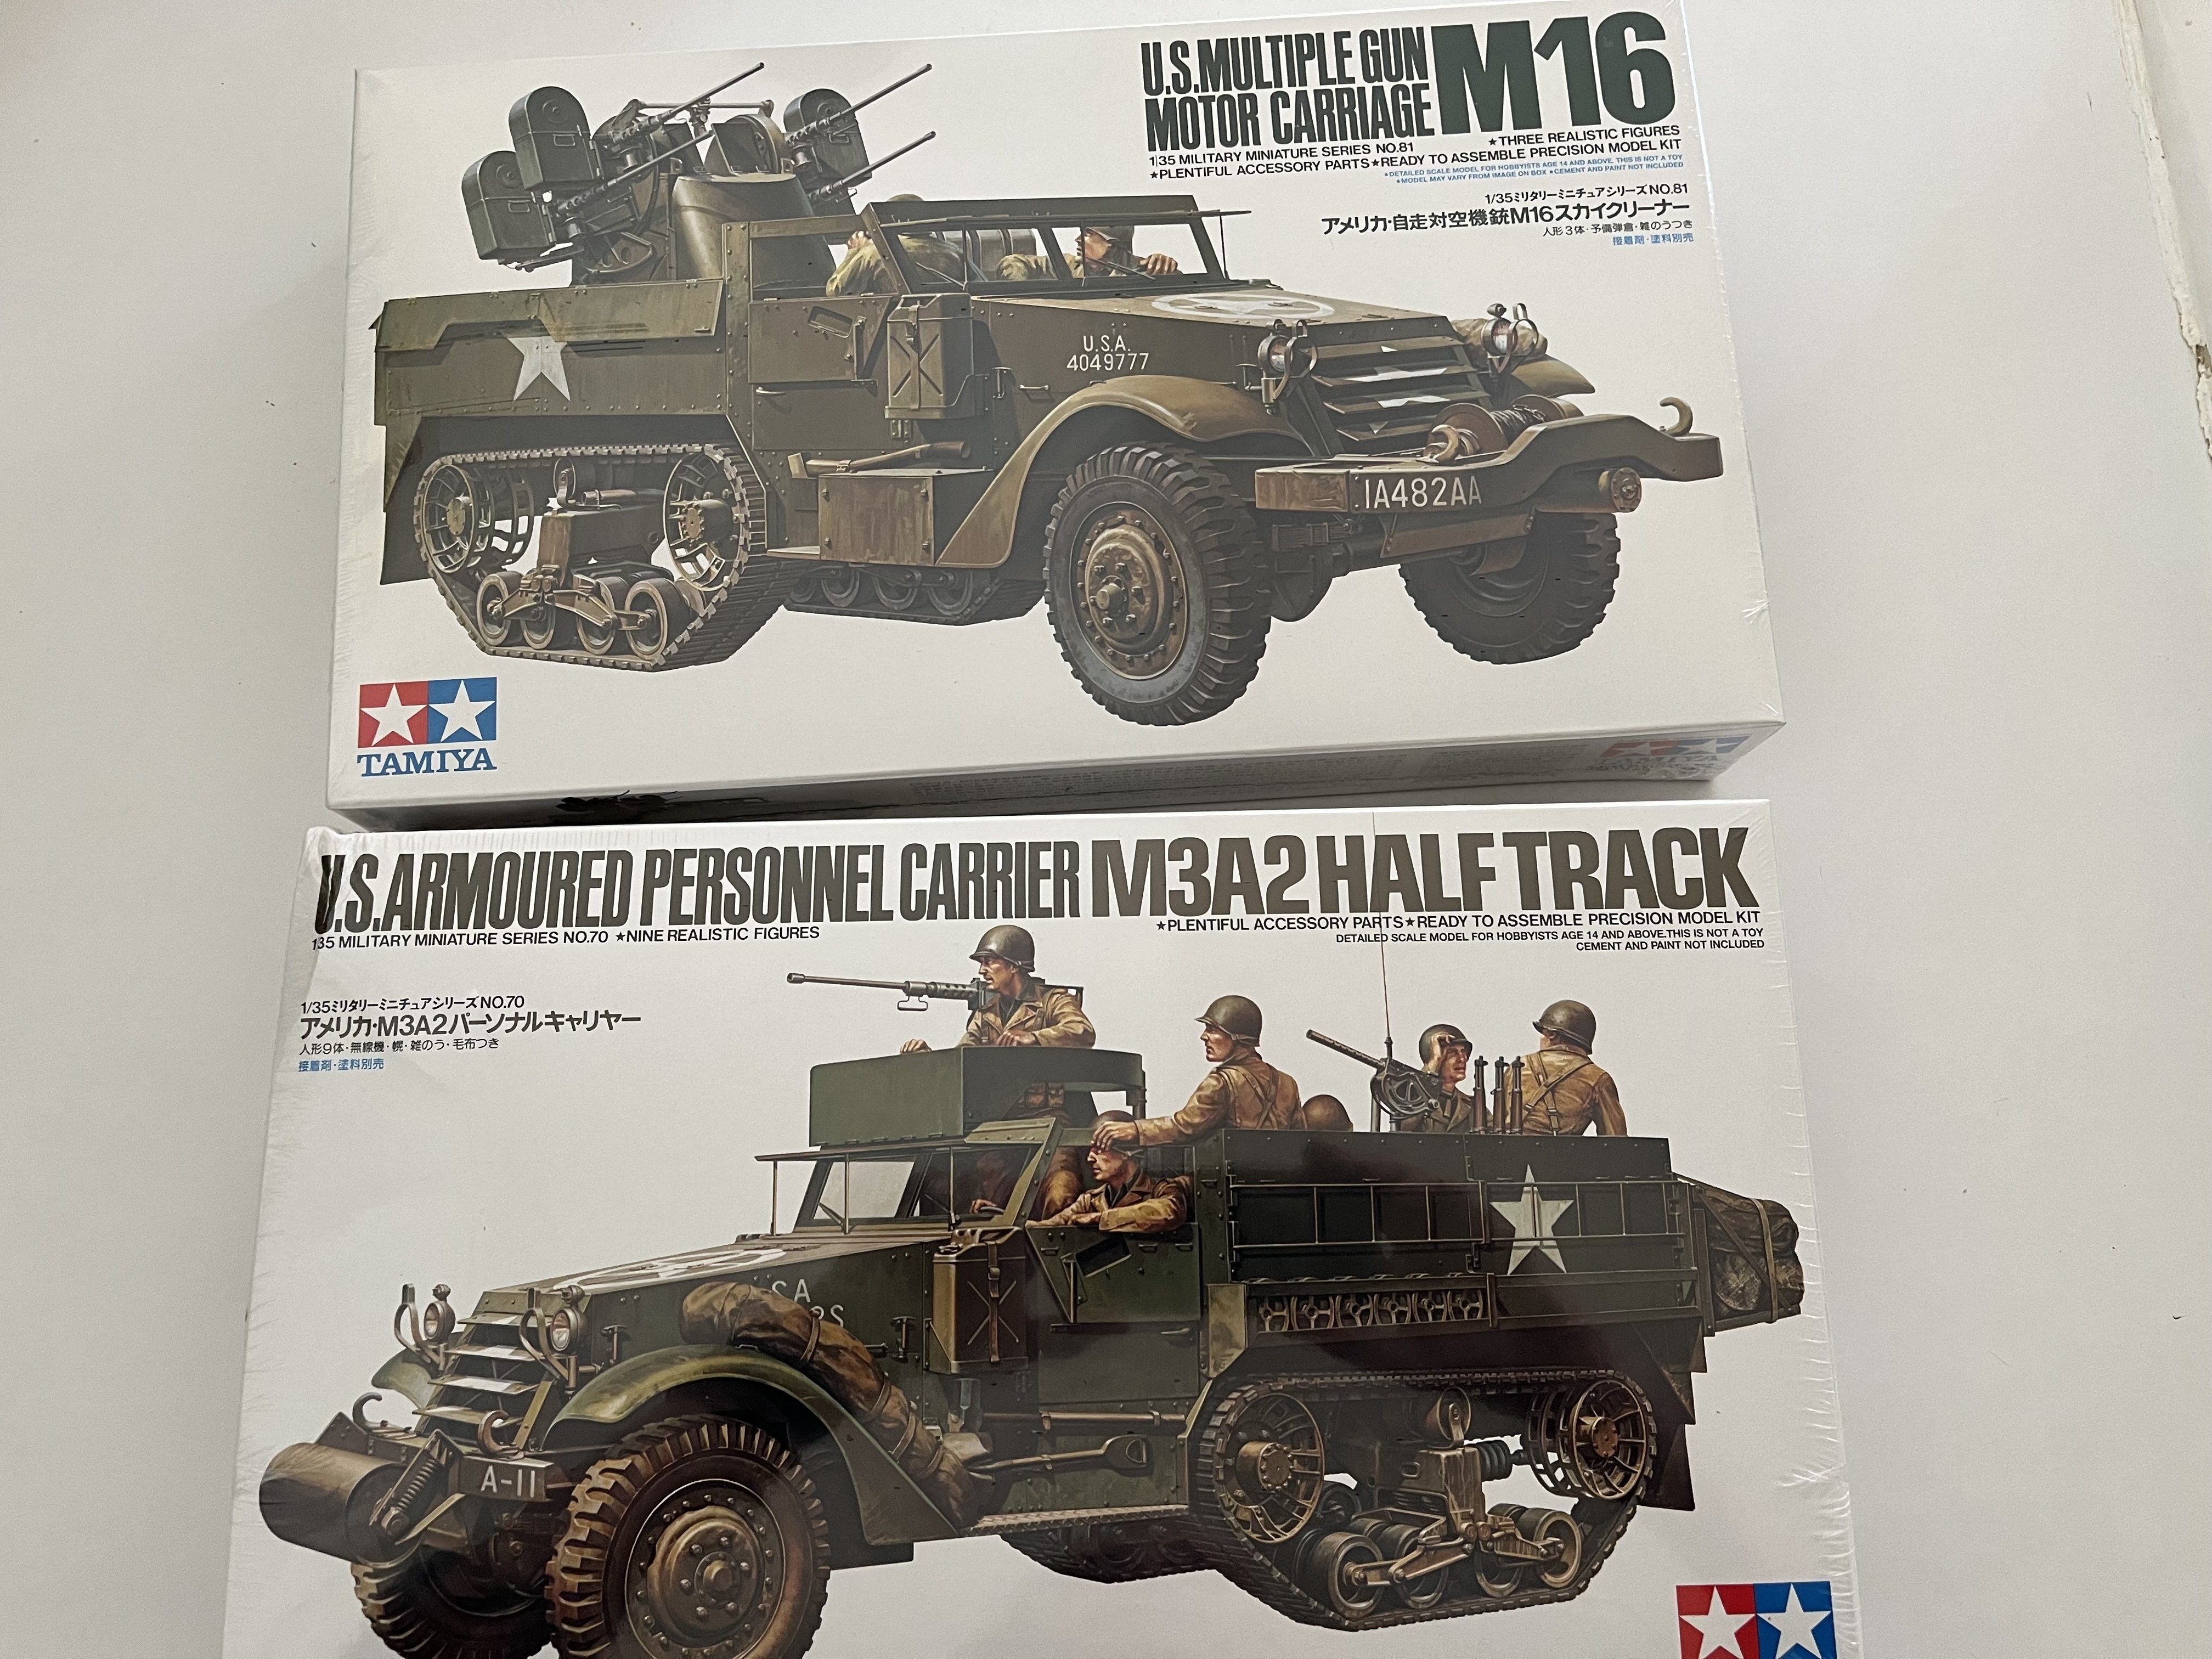
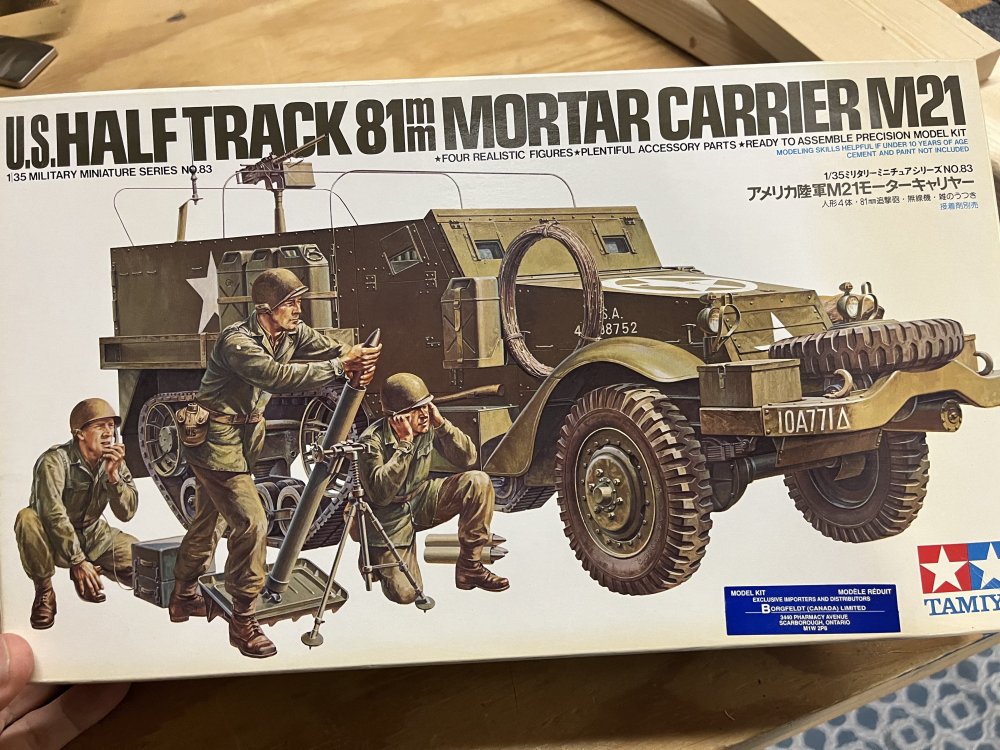
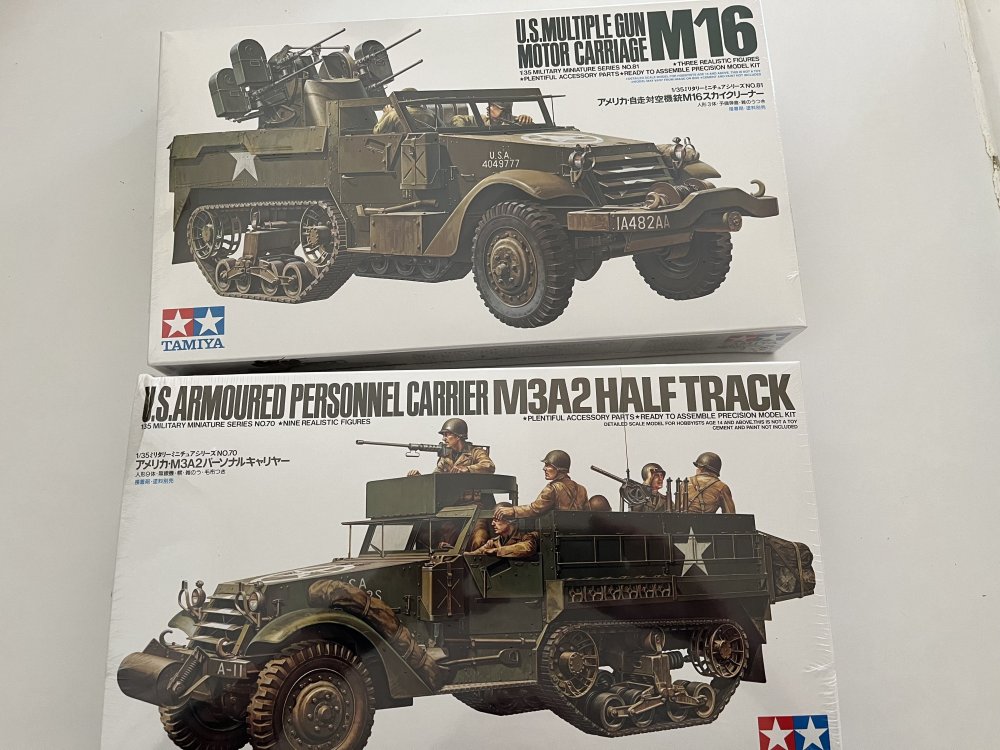
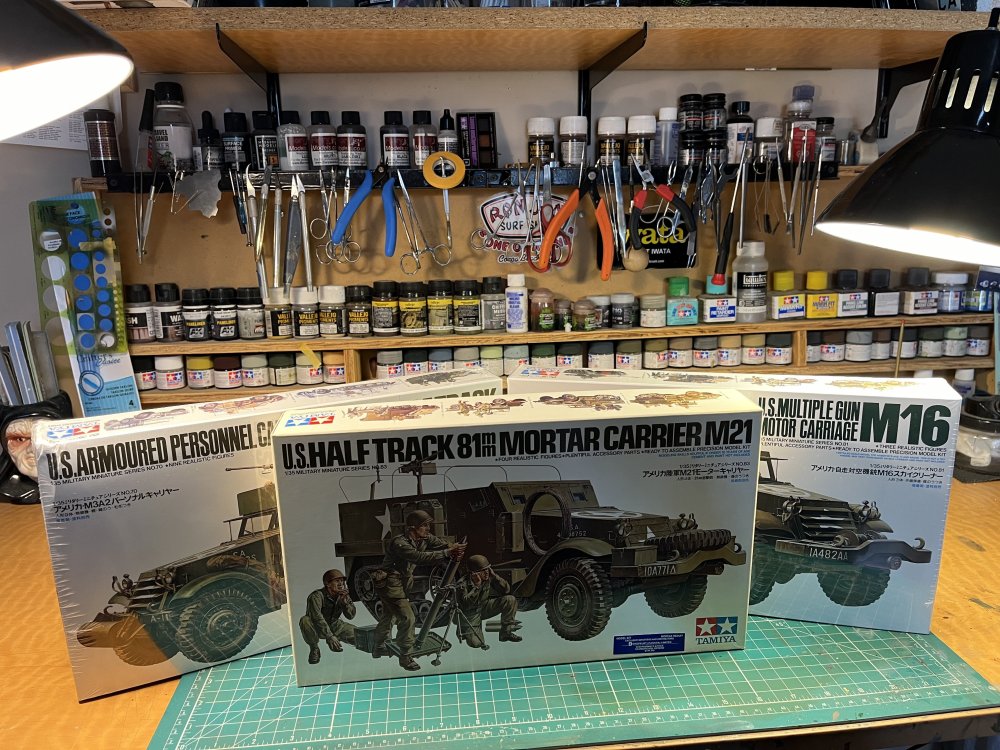
While rummaging in my stash the other day I was surprised to find that I already owned a Tamiya 1/35 US Halftrack. Of course this was after I had excitingly order two more vis eBay!! Now I have three, lol!!

-
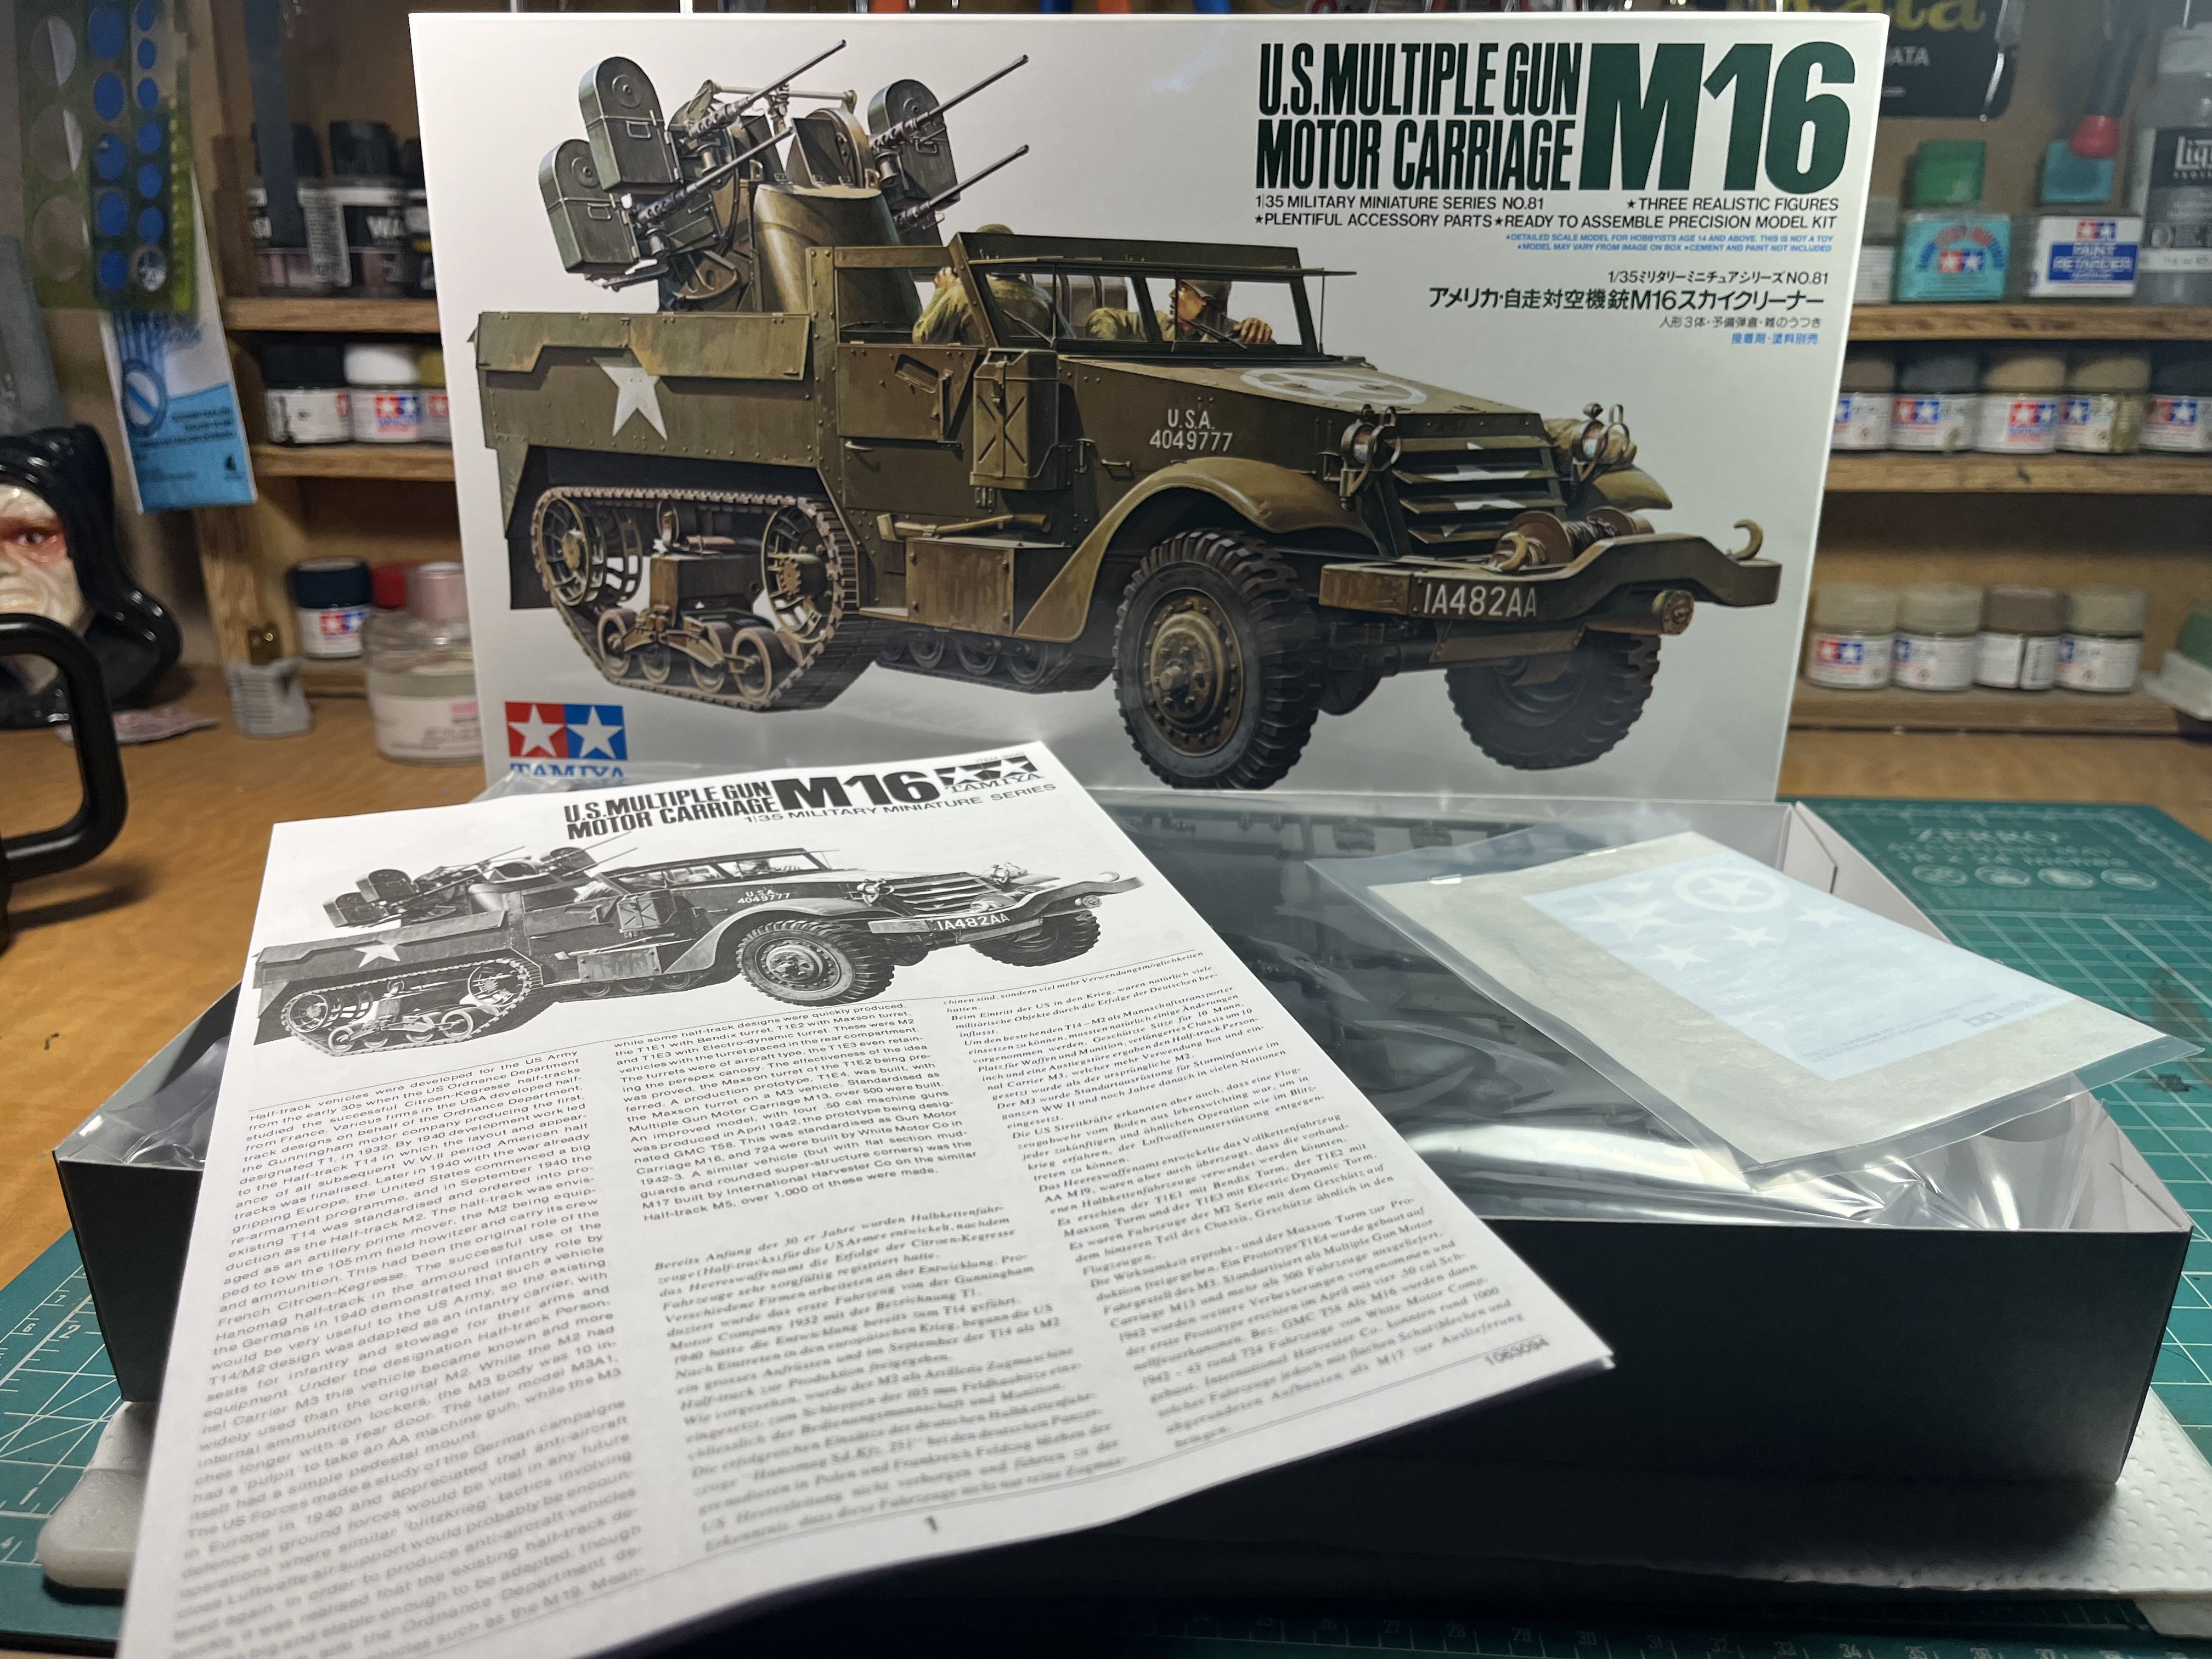
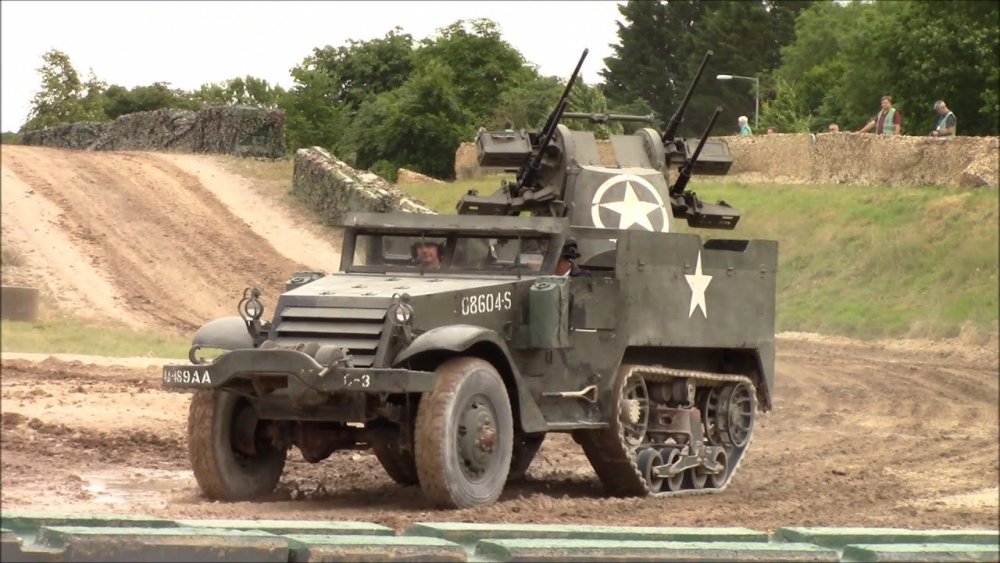
Tamiya 1/35 US Multiple Gun Motor Carriage M16 Halftrack Quad, (“Meat Chopper”) Build Thread. The M16 Multiple Gun Motor Carriage, also known as the M16 half-track, was an American self-propelled anti-aircraft weapon built during World War II. It was equipped with four .50 caliber (12.7 mm) M2 Browning machine guns in an M45 Quadmount. 2700 were produced by White Motor Company from May 1943 to March 1944, with 568 M13 MGMCs and 109 T10 half-tracks being converted into M16s as well. The chassis was derived from the T1E2 chassis, an earlier version of the M13. Based on an M3 half-track chassis, it replaced the M13 MGMC half-track after early 1944. As aircraft became more advanced, the usefulness of the M16 was reduced. In the Korean War, it was relegated primarily to the ground-support role, being put out of service in the U.S. Army in 1954. Nicknamed the "Meat Chopper", the M16 was famous for its effectiveness against low-flying aircraft and infantry, making it extremely popular with soldiers. It was used by the United States Army, the British Commonwealth, and South Korea. A similar version of the M16, the M17, was based on the M5 half-track and exported via Lend-Lease to the Soviet Union.

-
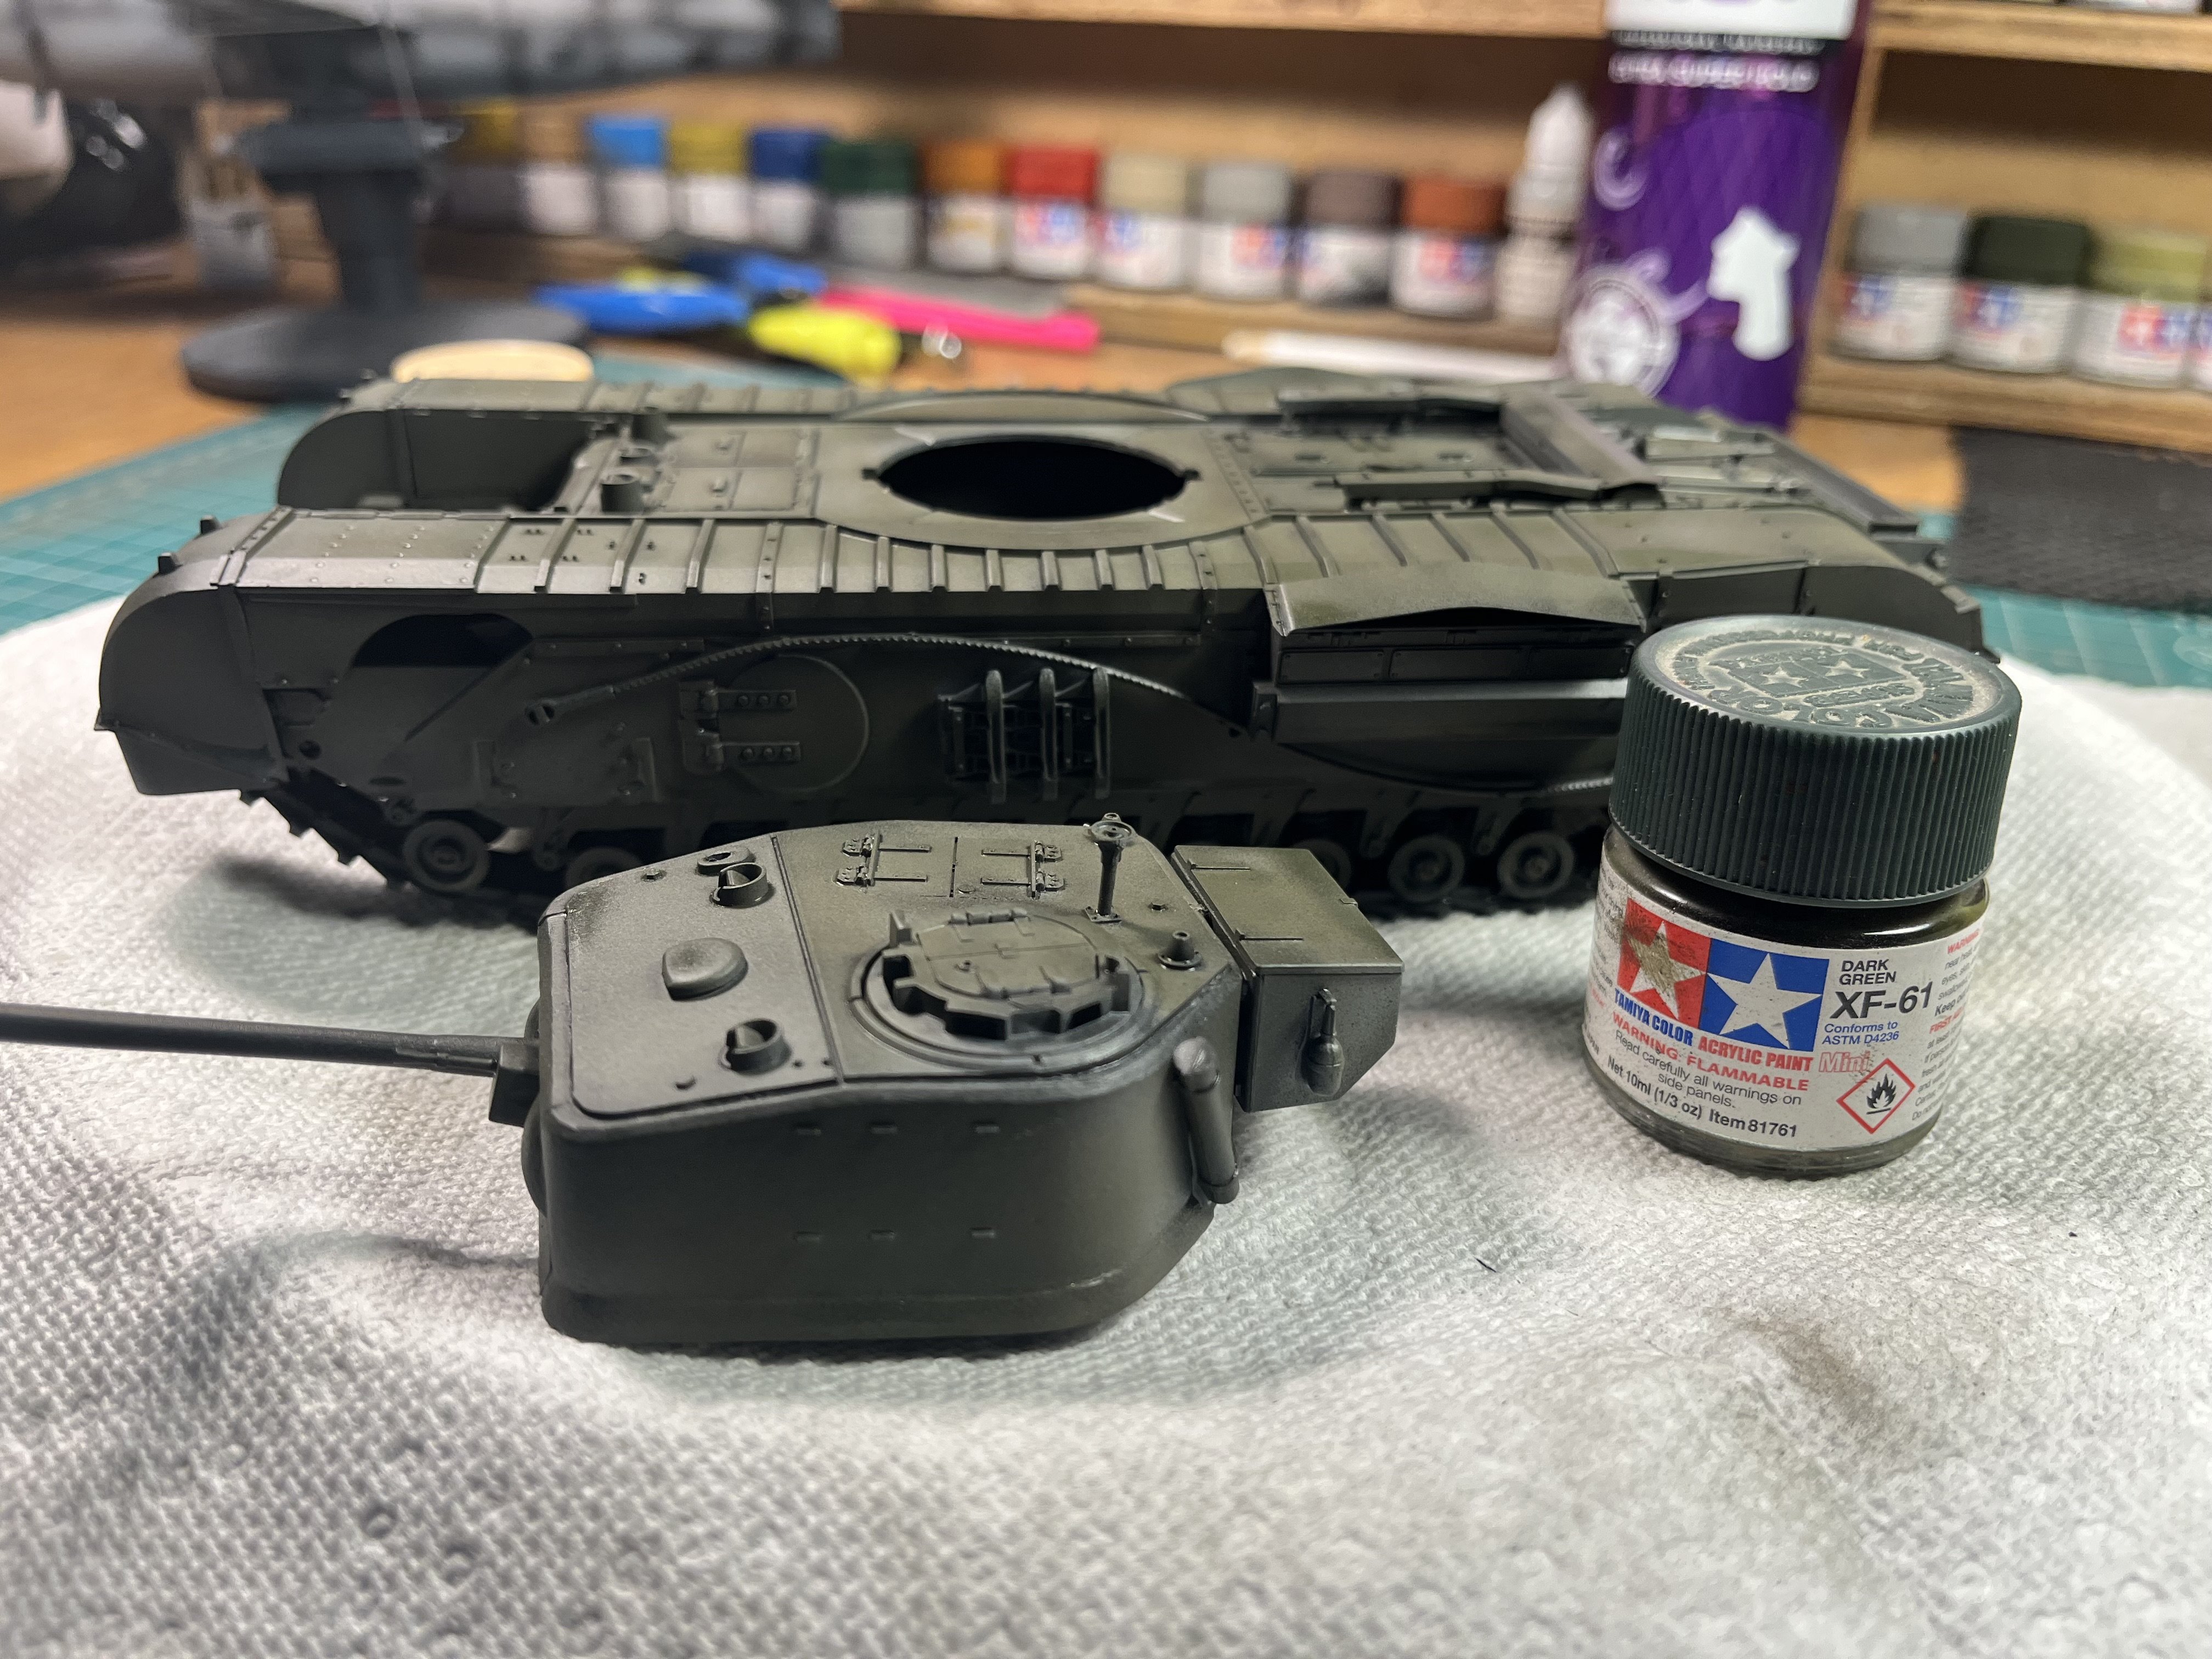
Base coat of XF-61 Dark Green.

-
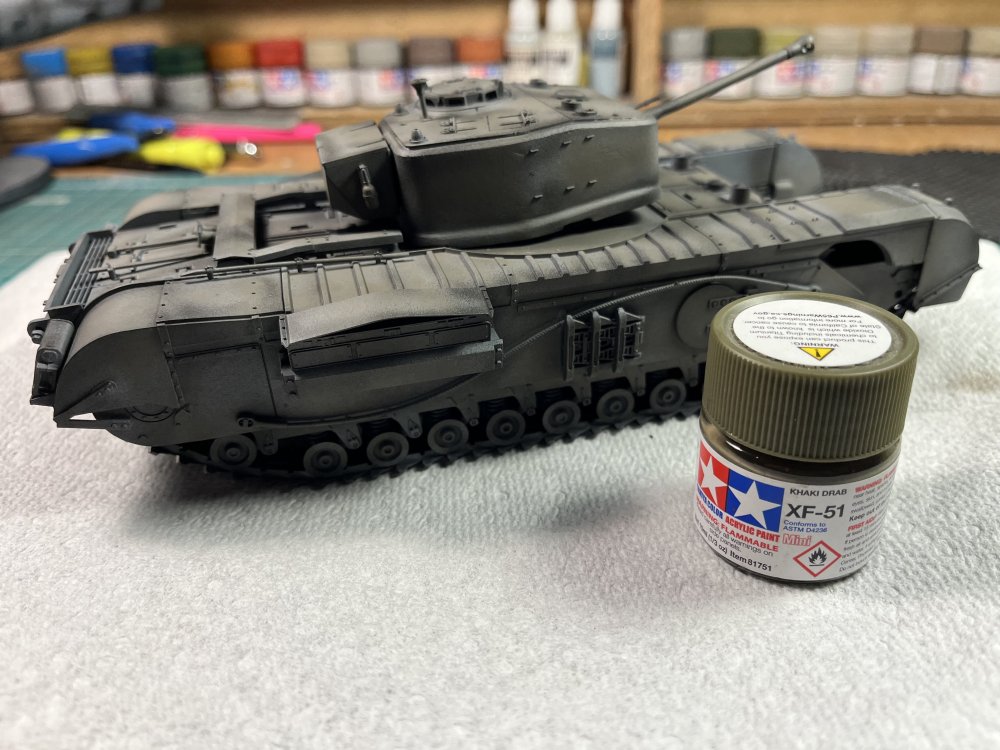
A bit of color shading with XF-51 Khaki Drab.
-
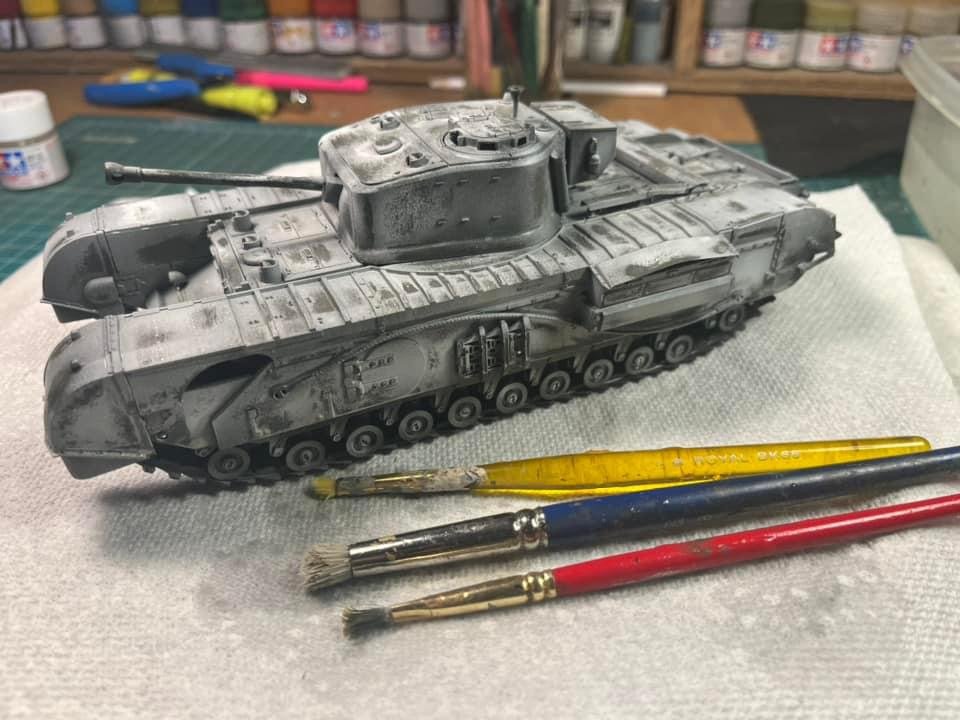
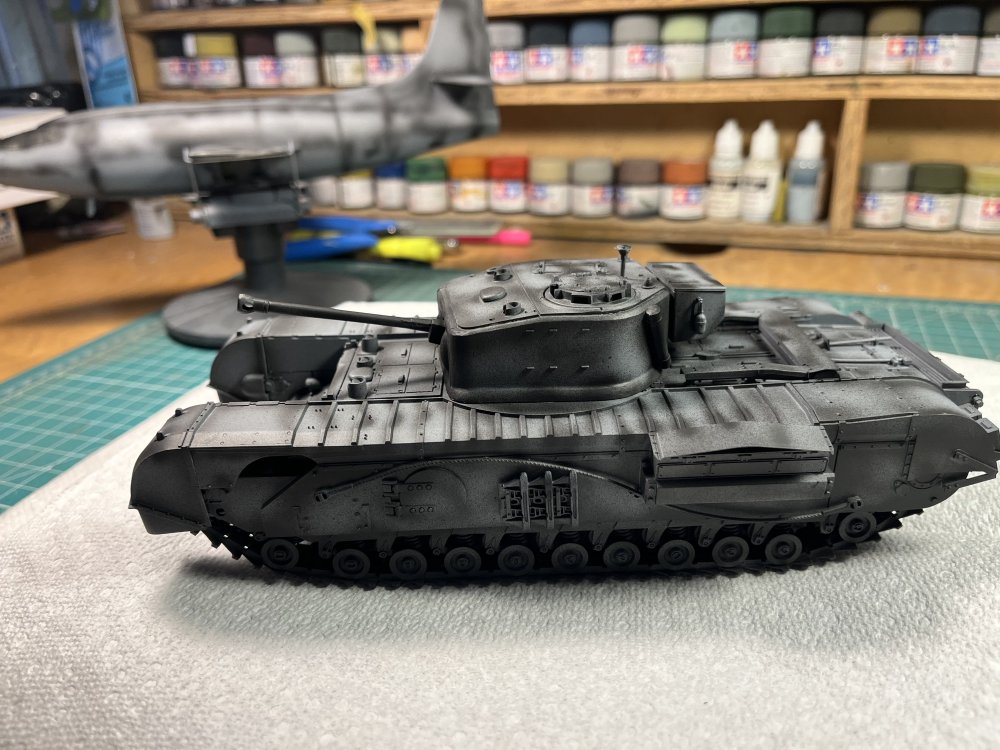
It cost me Sunday lunch for the paint shop staff but they stayed long enough to pre-shade the Churchill!
-
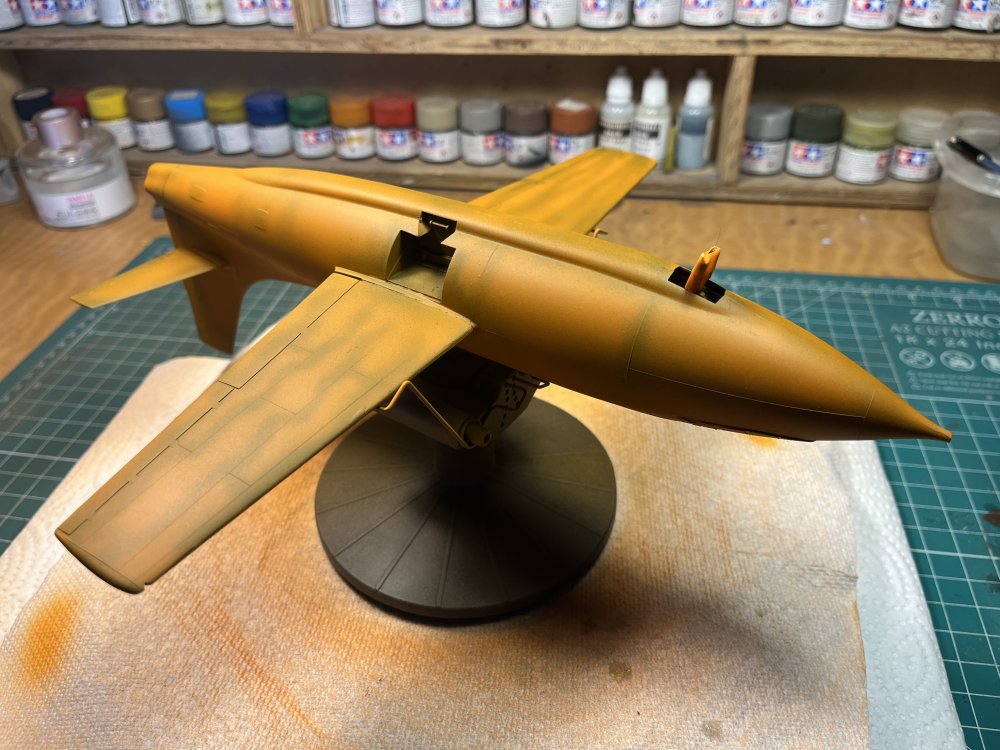
Revell 1/32 Bell X-1 (Glamorous Glennis)
RalphSarc replied to RalphSarc's topic in LSM 1/35 and Larger Work In Progress
Thanks so much. I’ve enjoyed build the kit for the second time. -
Revell 1/32 Bell X-1 (Glamorous Glennis)
RalphSarc replied to RalphSarc's topic in LSM 1/35 and Larger Work In Progress
Thanks Peter. We’ll see how the orange paint lays down!! Fingers crossed!! -
Revell 1/32 Bell X-1 (Glamorous Glennis)
RalphSarc replied to RalphSarc's topic in LSM 1/35 and Larger Work In Progress
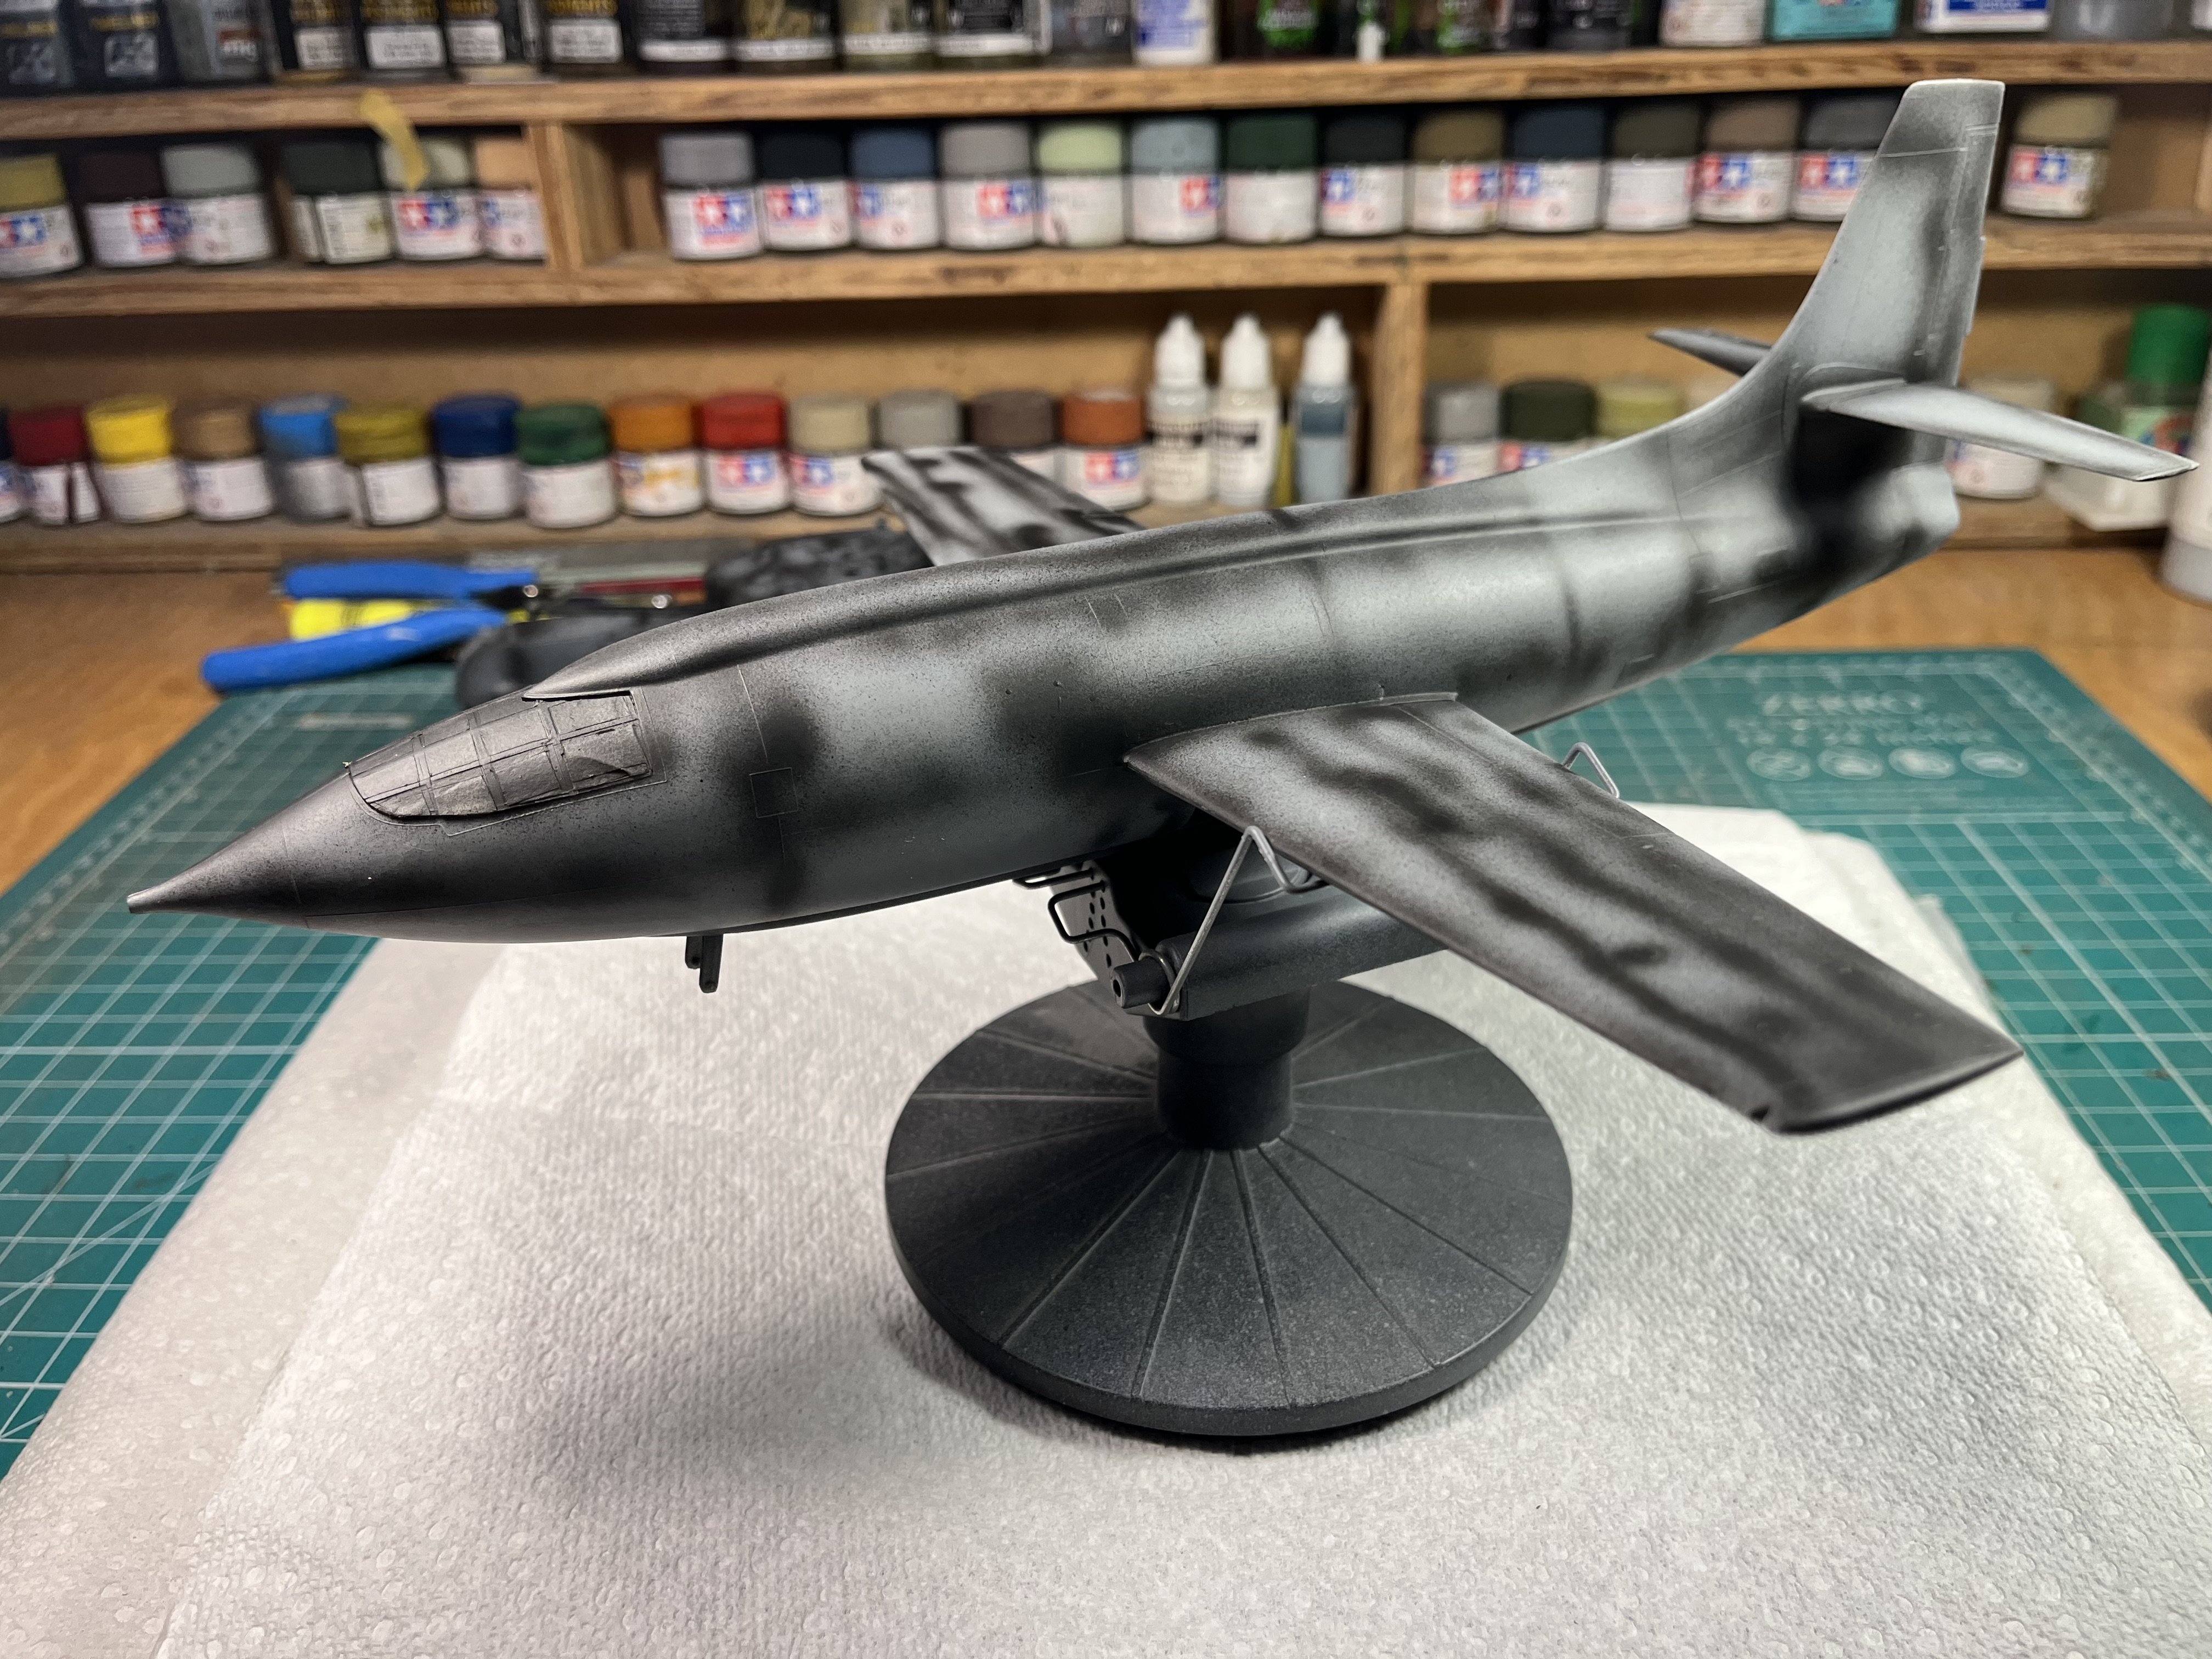
During a rare Sunday appearance the paint shop crew was kind enough to pre-shade the Bell X-1.
-
Revell 1/32 Bell X-1 (Glamorous Glennis)
RalphSarc replied to RalphSarc's topic in LSM 1/35 and Larger Work In Progress
No but the orange is pretty close according to museum photos but in do like that international orange shade!!! -
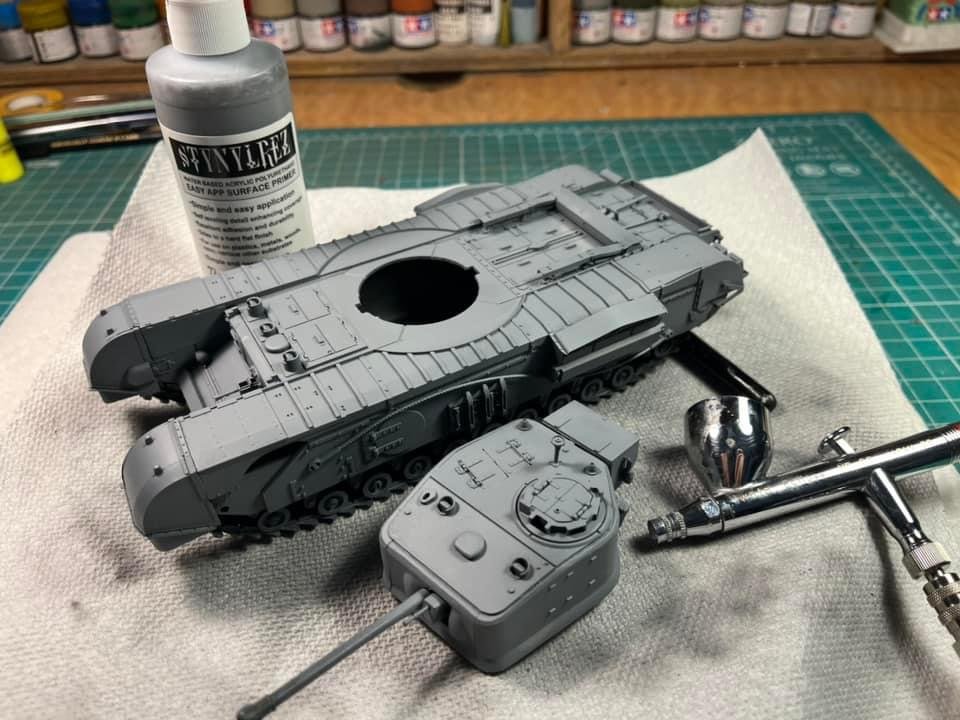
The paint shop crew was working a very rare Sunday and were kind enough to prime the Churchill for me. Evidently they are falling in love with Stynylrez primer after realizing it sprays much better thinned about 25% using X-20A thinner.