Wingco57
-
Posts
3,925 -
Joined
-
Last visited
Content Type
Profiles
Forums
Events
Gallery
Everything posted by Wingco57
-
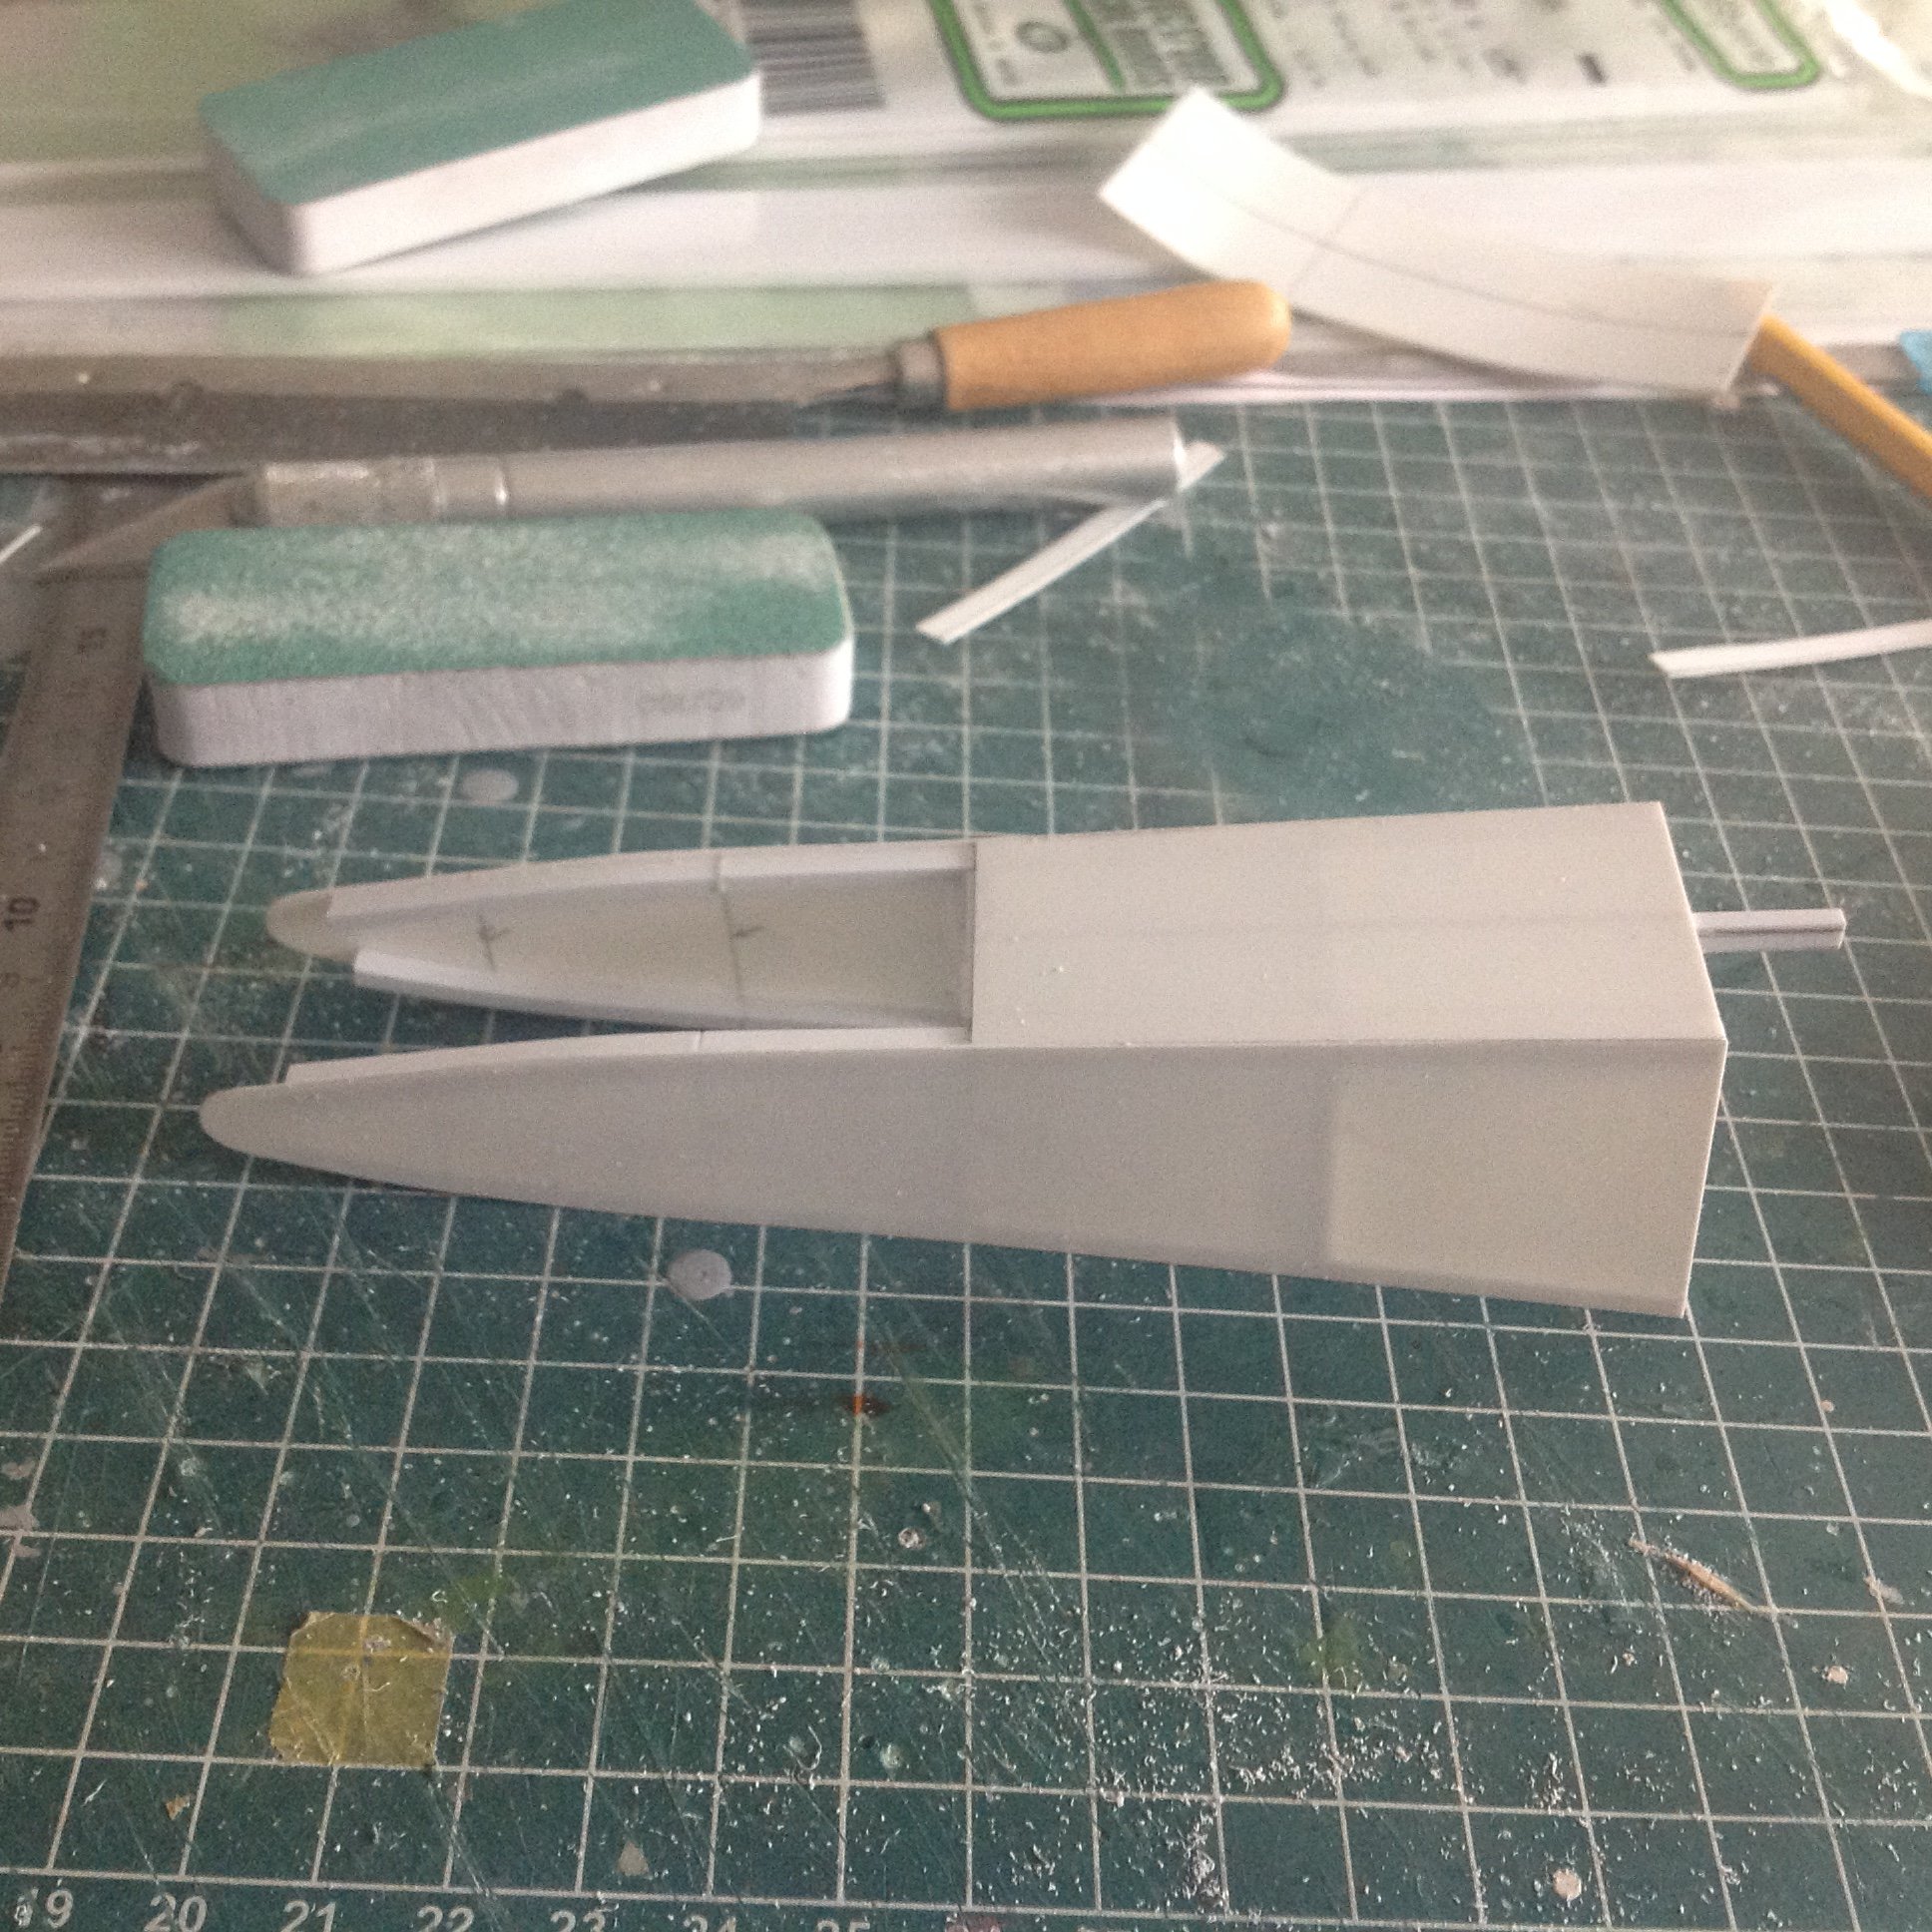
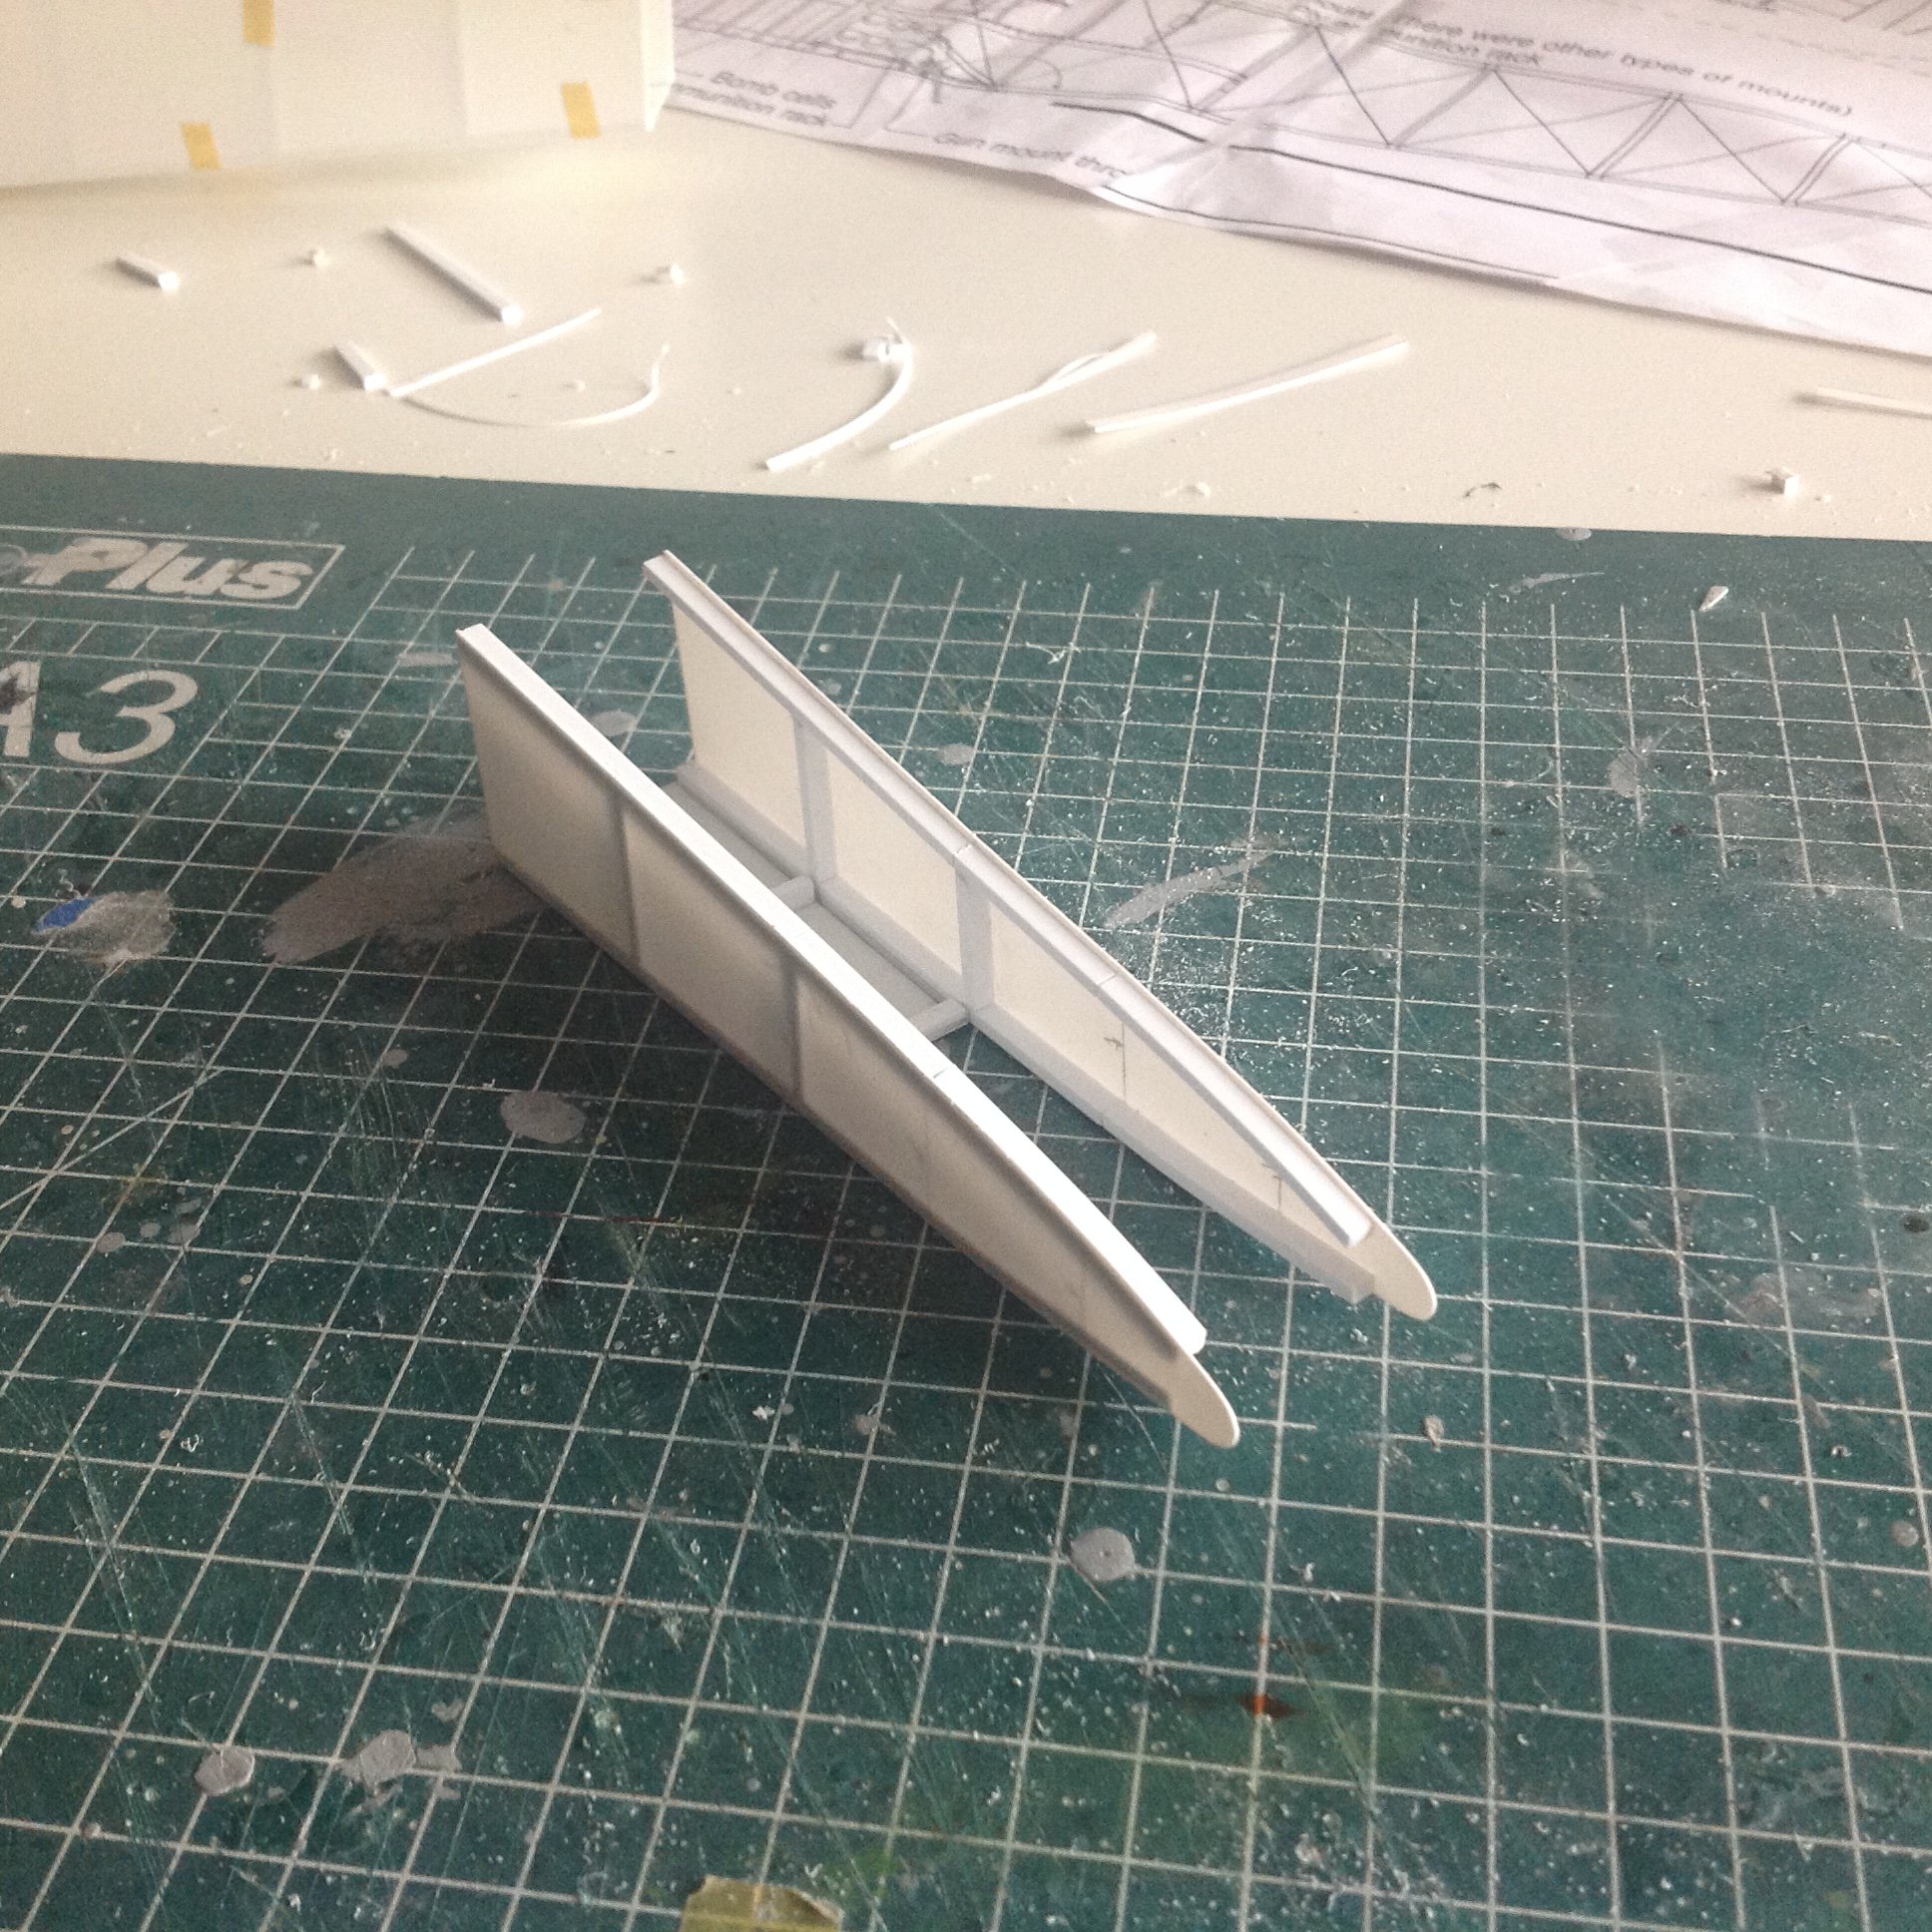
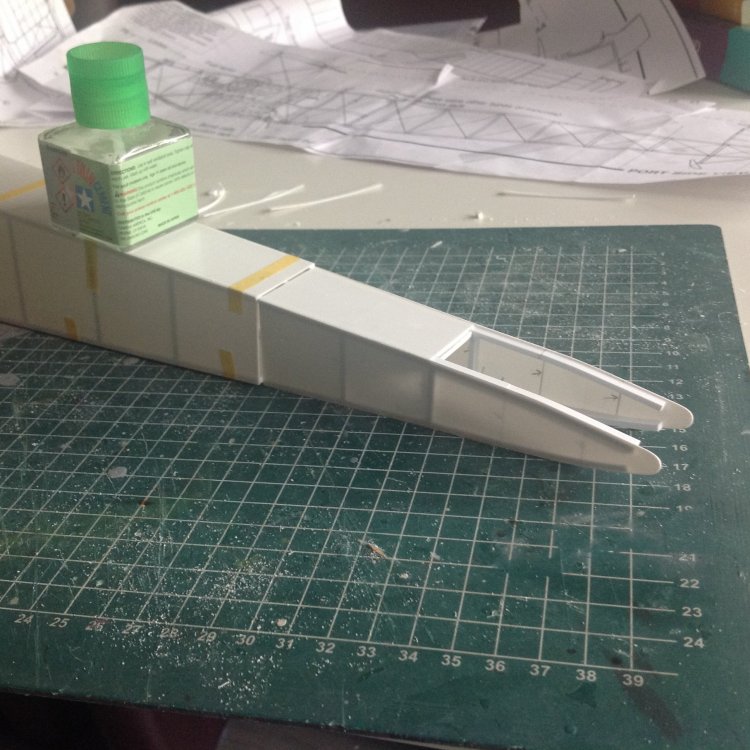
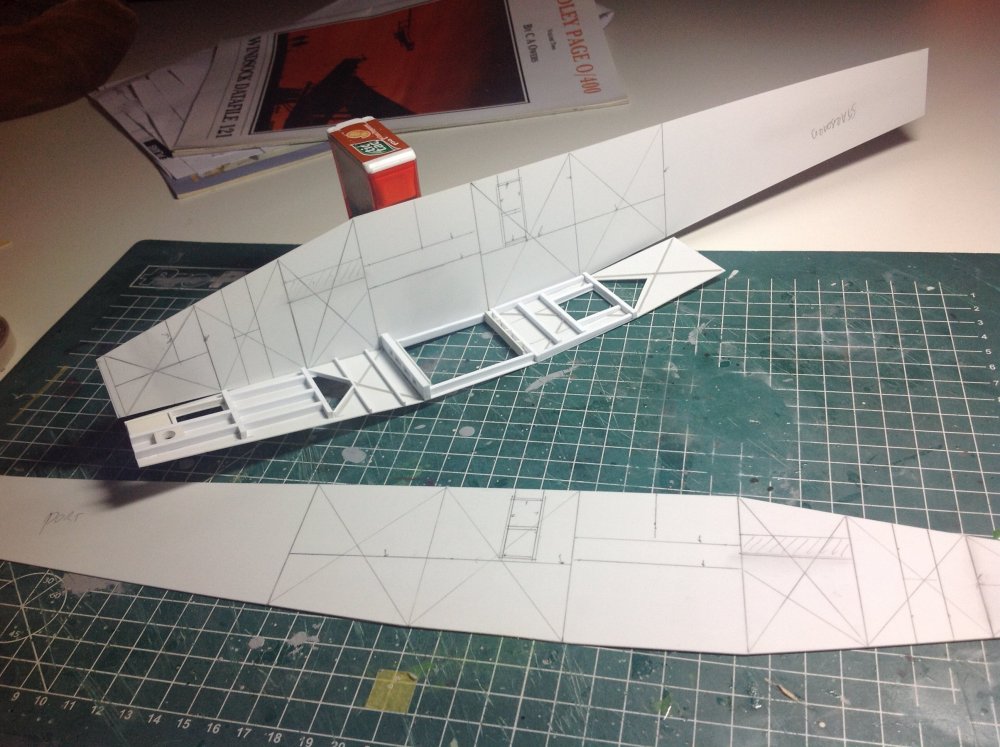
 Hi Gus, That is possible but would make the tail too heavy. In the meantime I think a possible solution is to skin towards the extreme tip and make the last bit from solid plastic. Here's the current progress on the tail. Some strenghtening still needs to be build in to support the tailplane but I let the pics do the talking, and the obligatory beercan is included too. No Heineken or Bavaria as we do our shopping at Lidl Cheers Cees


-
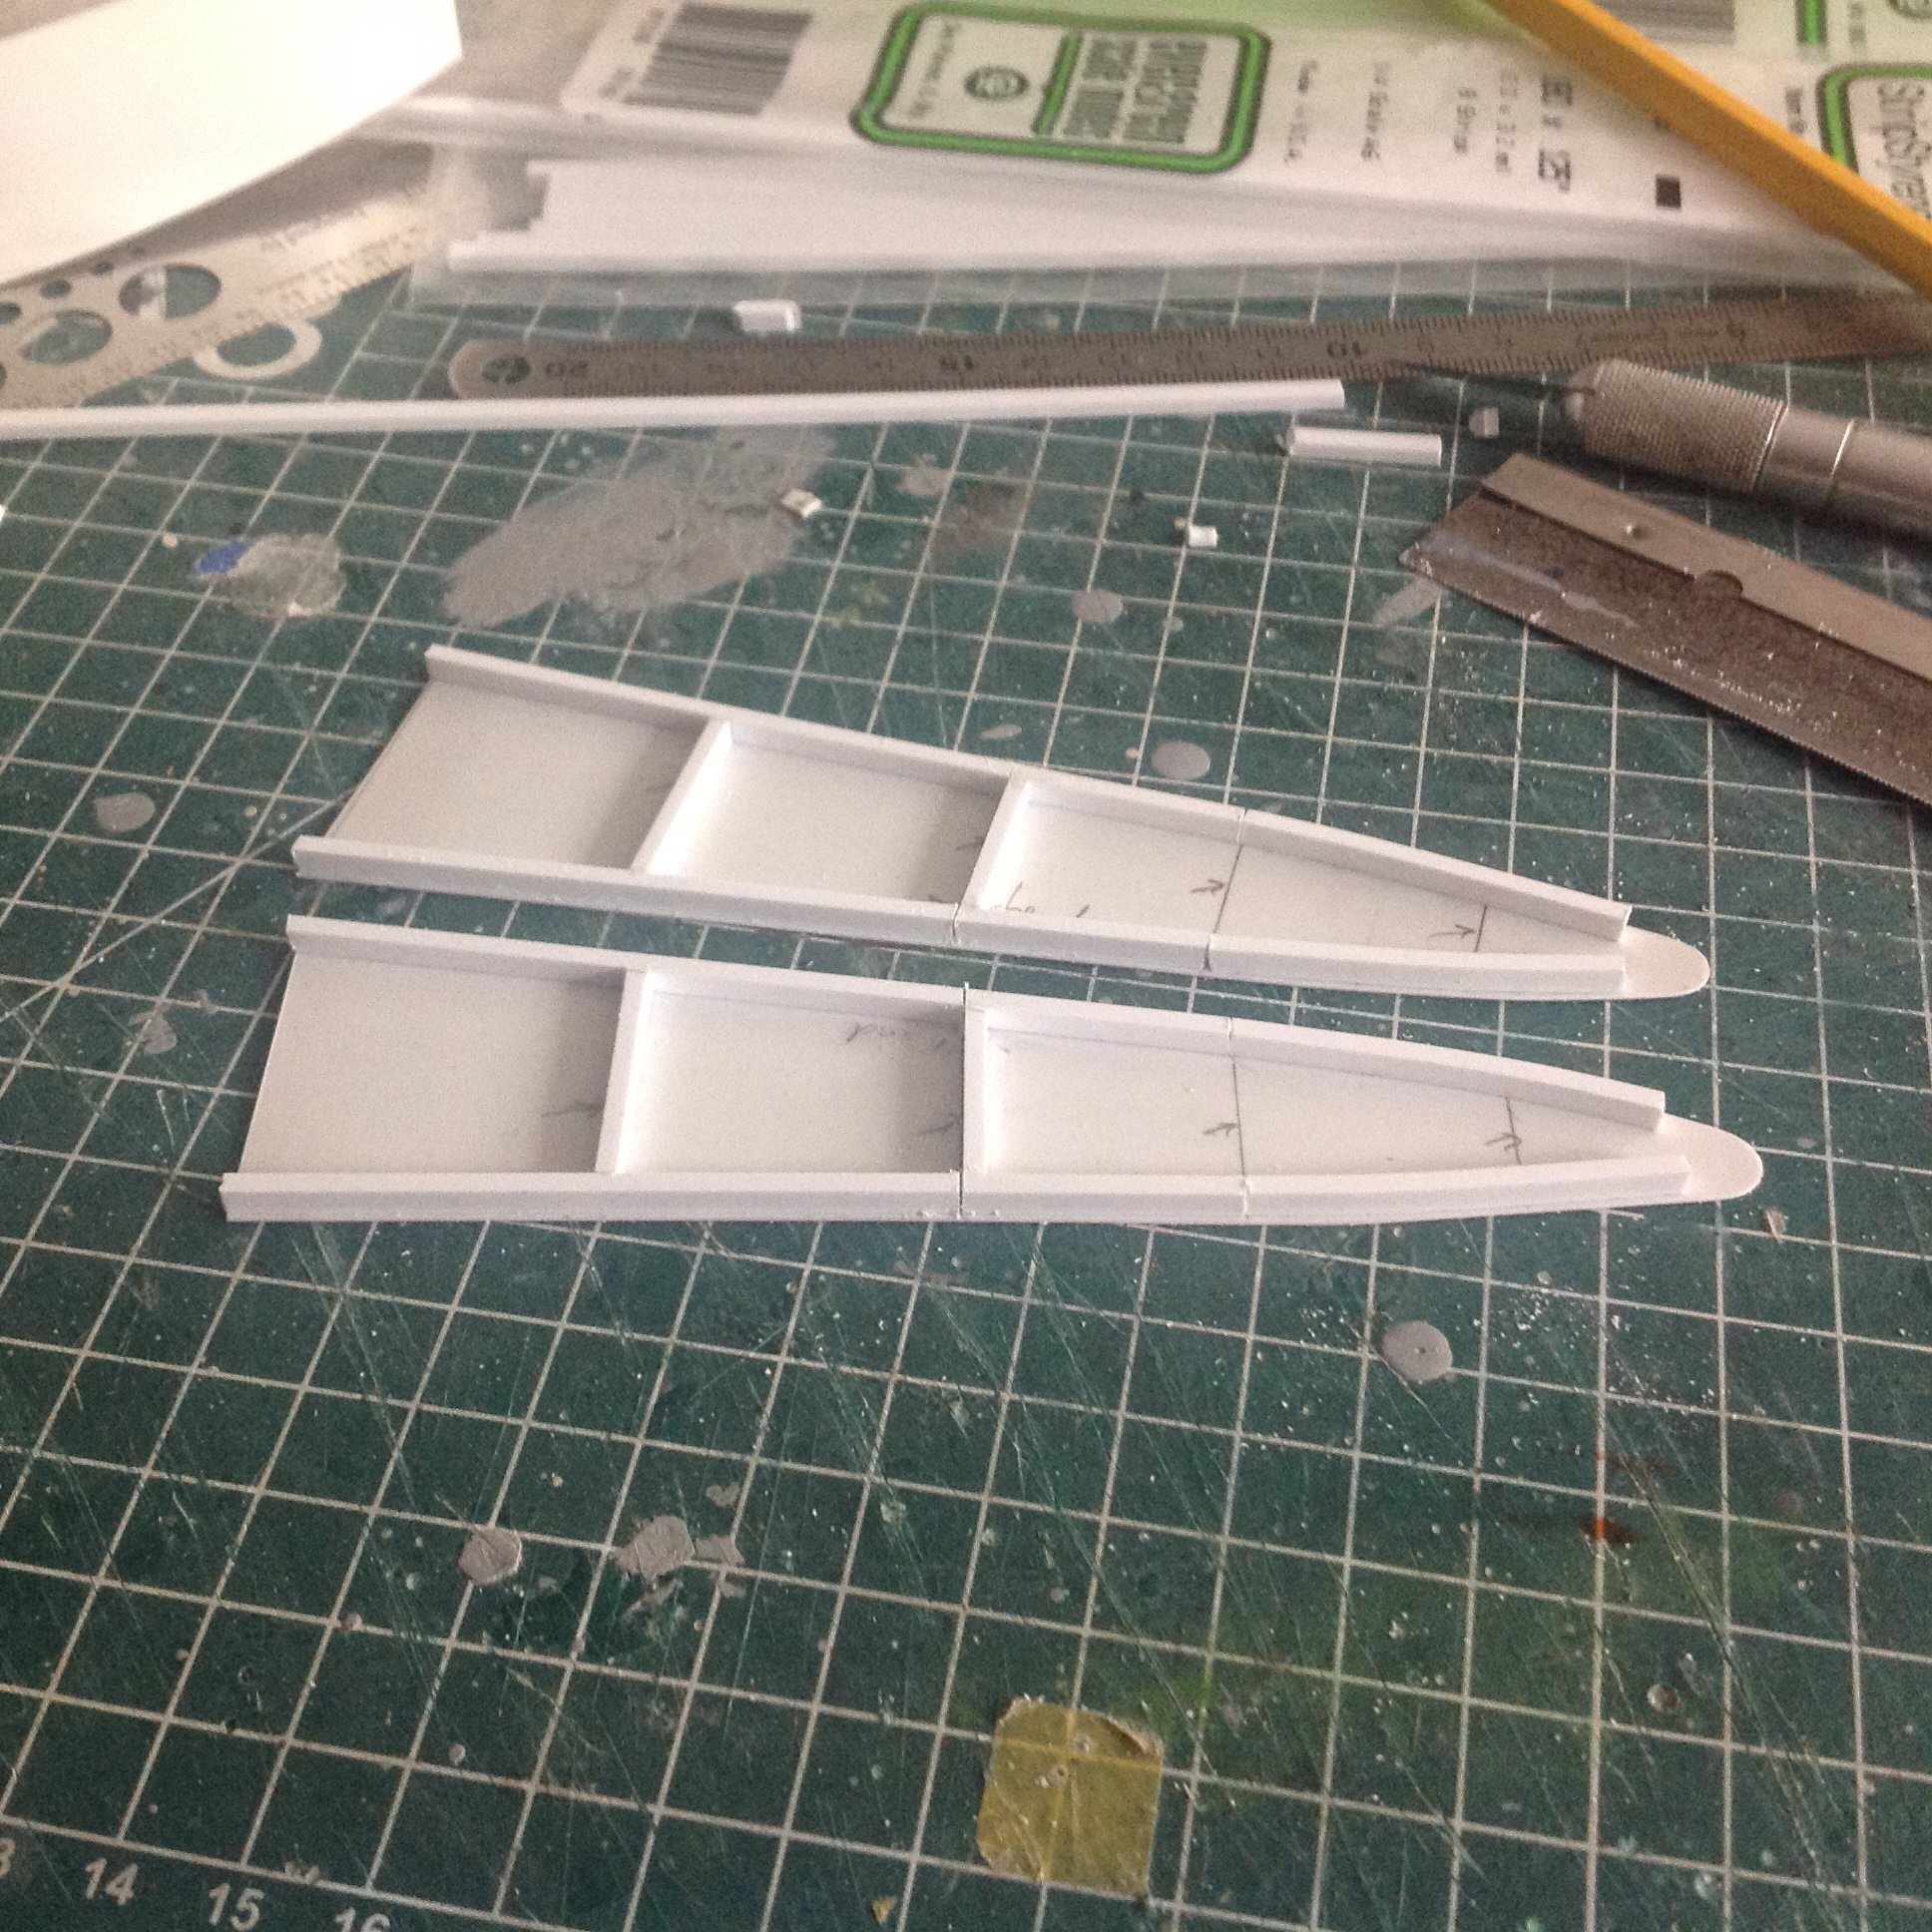
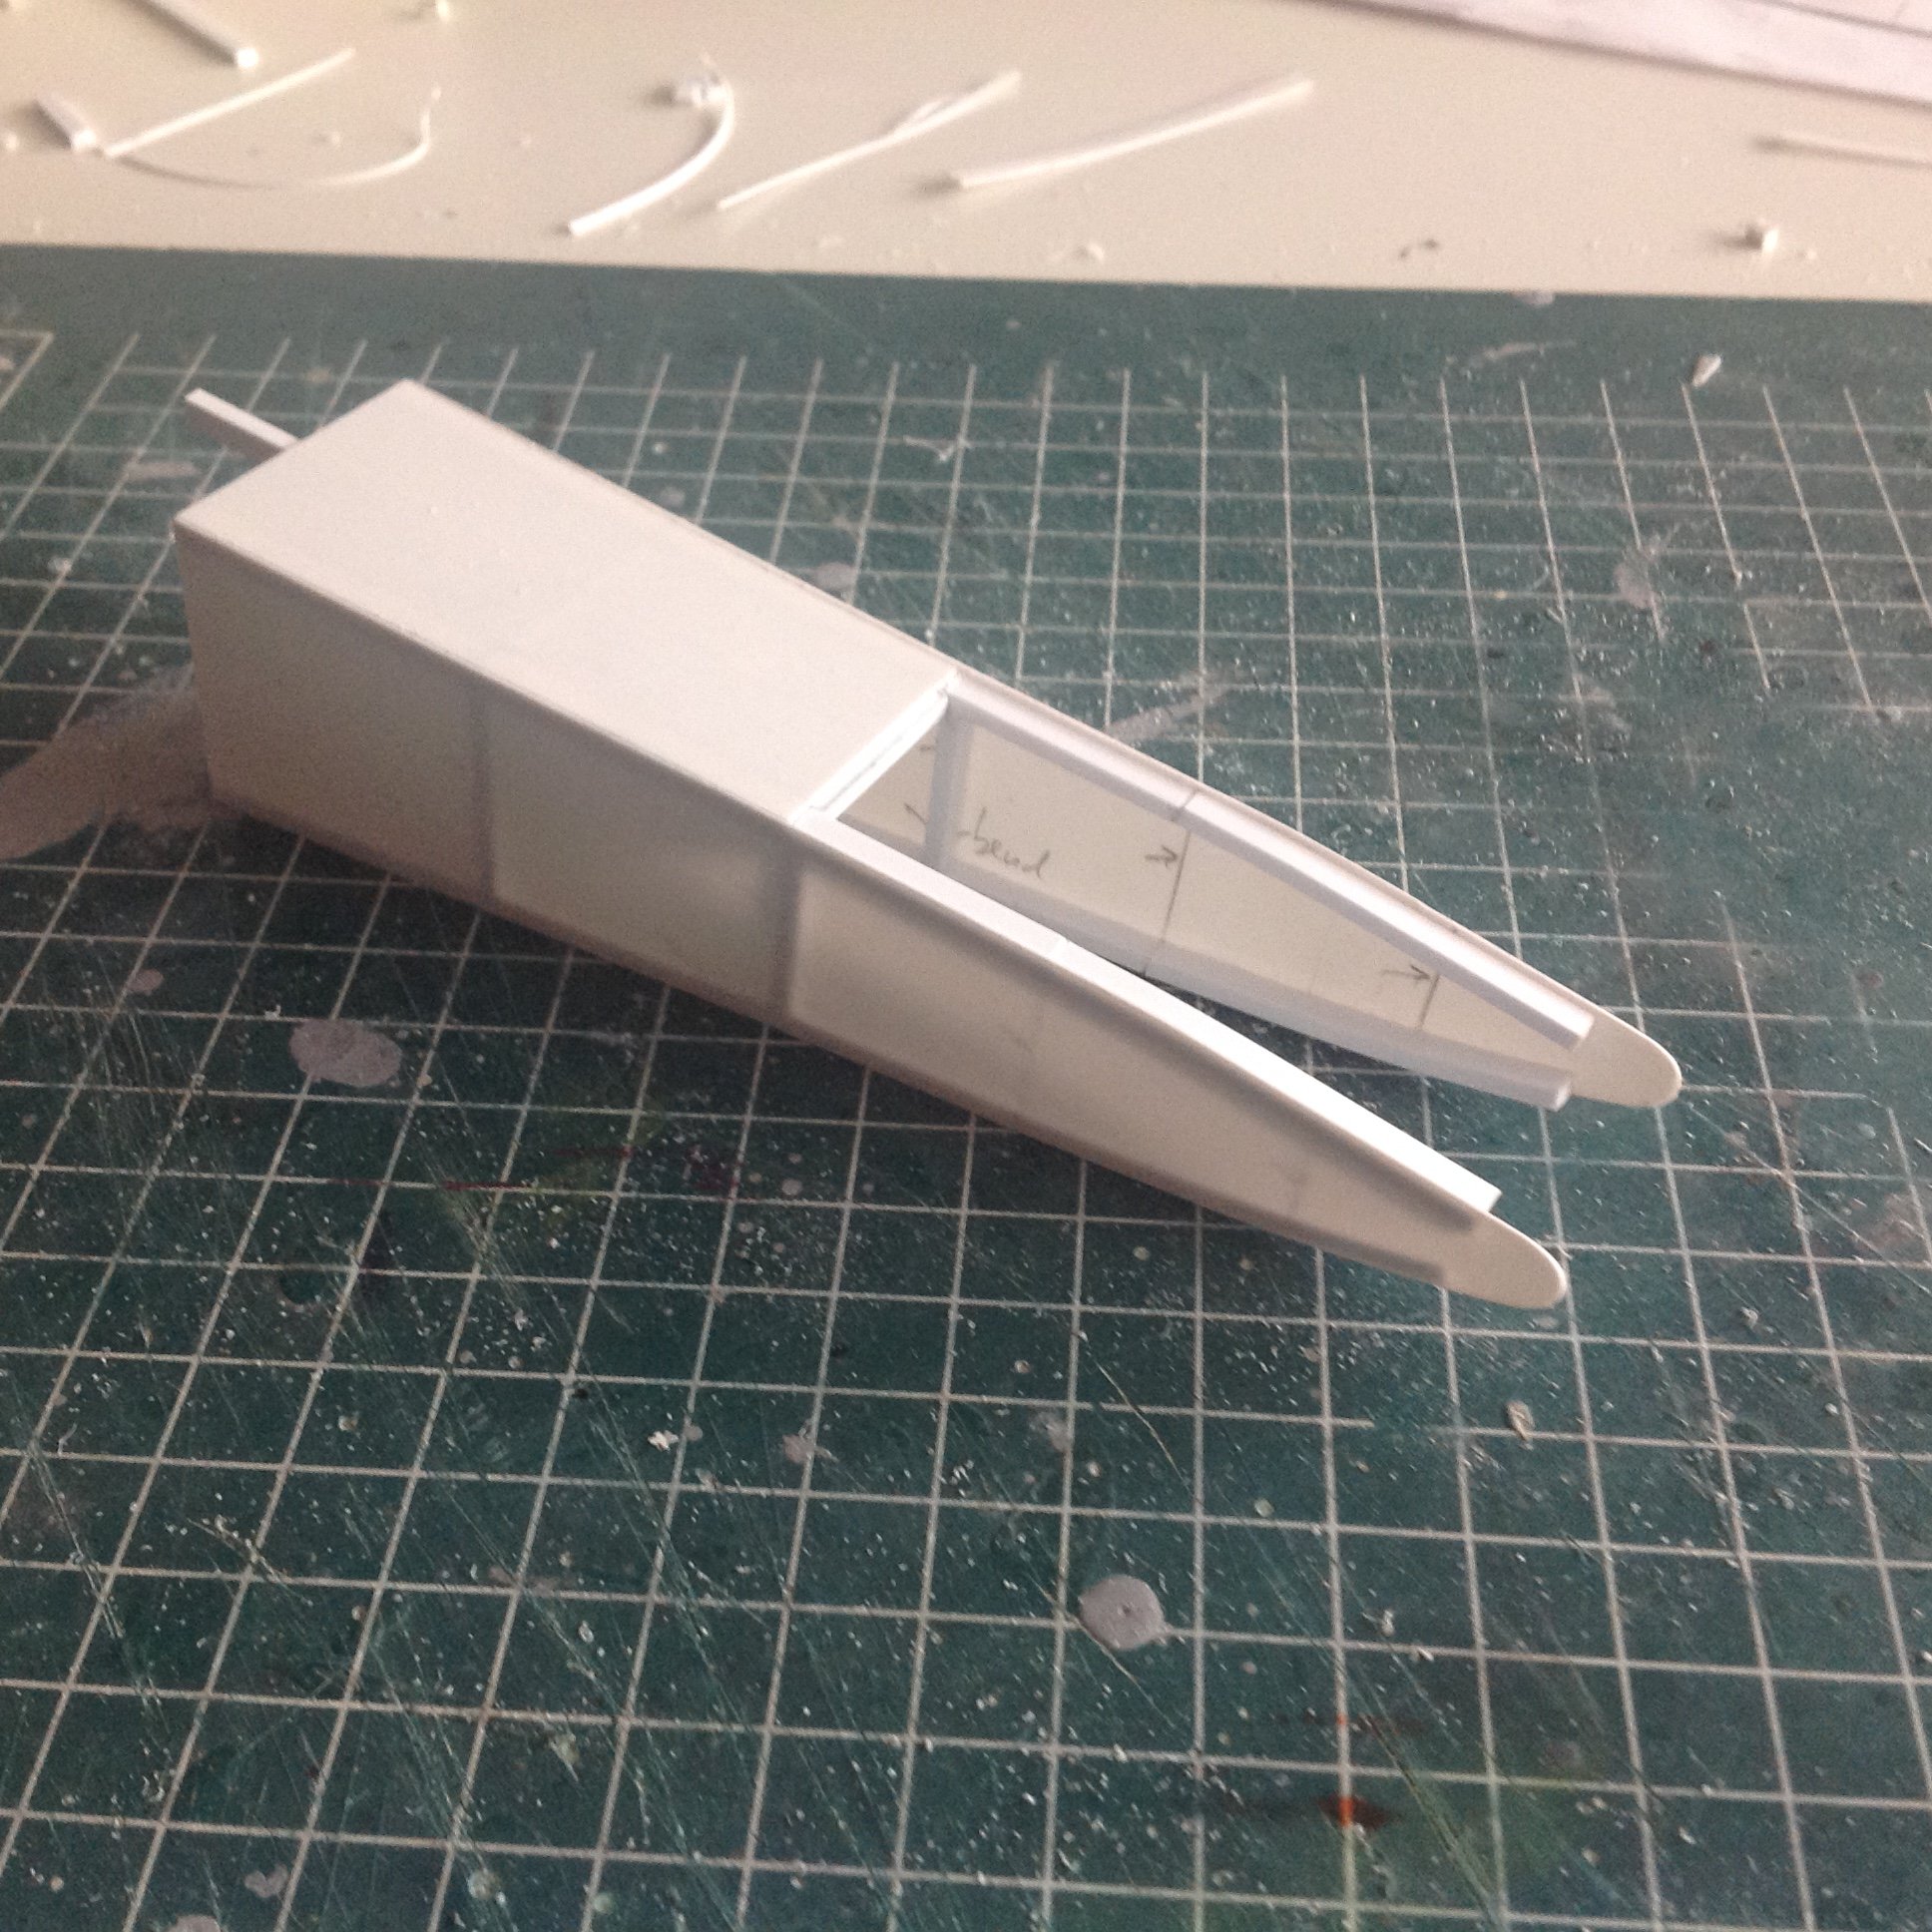
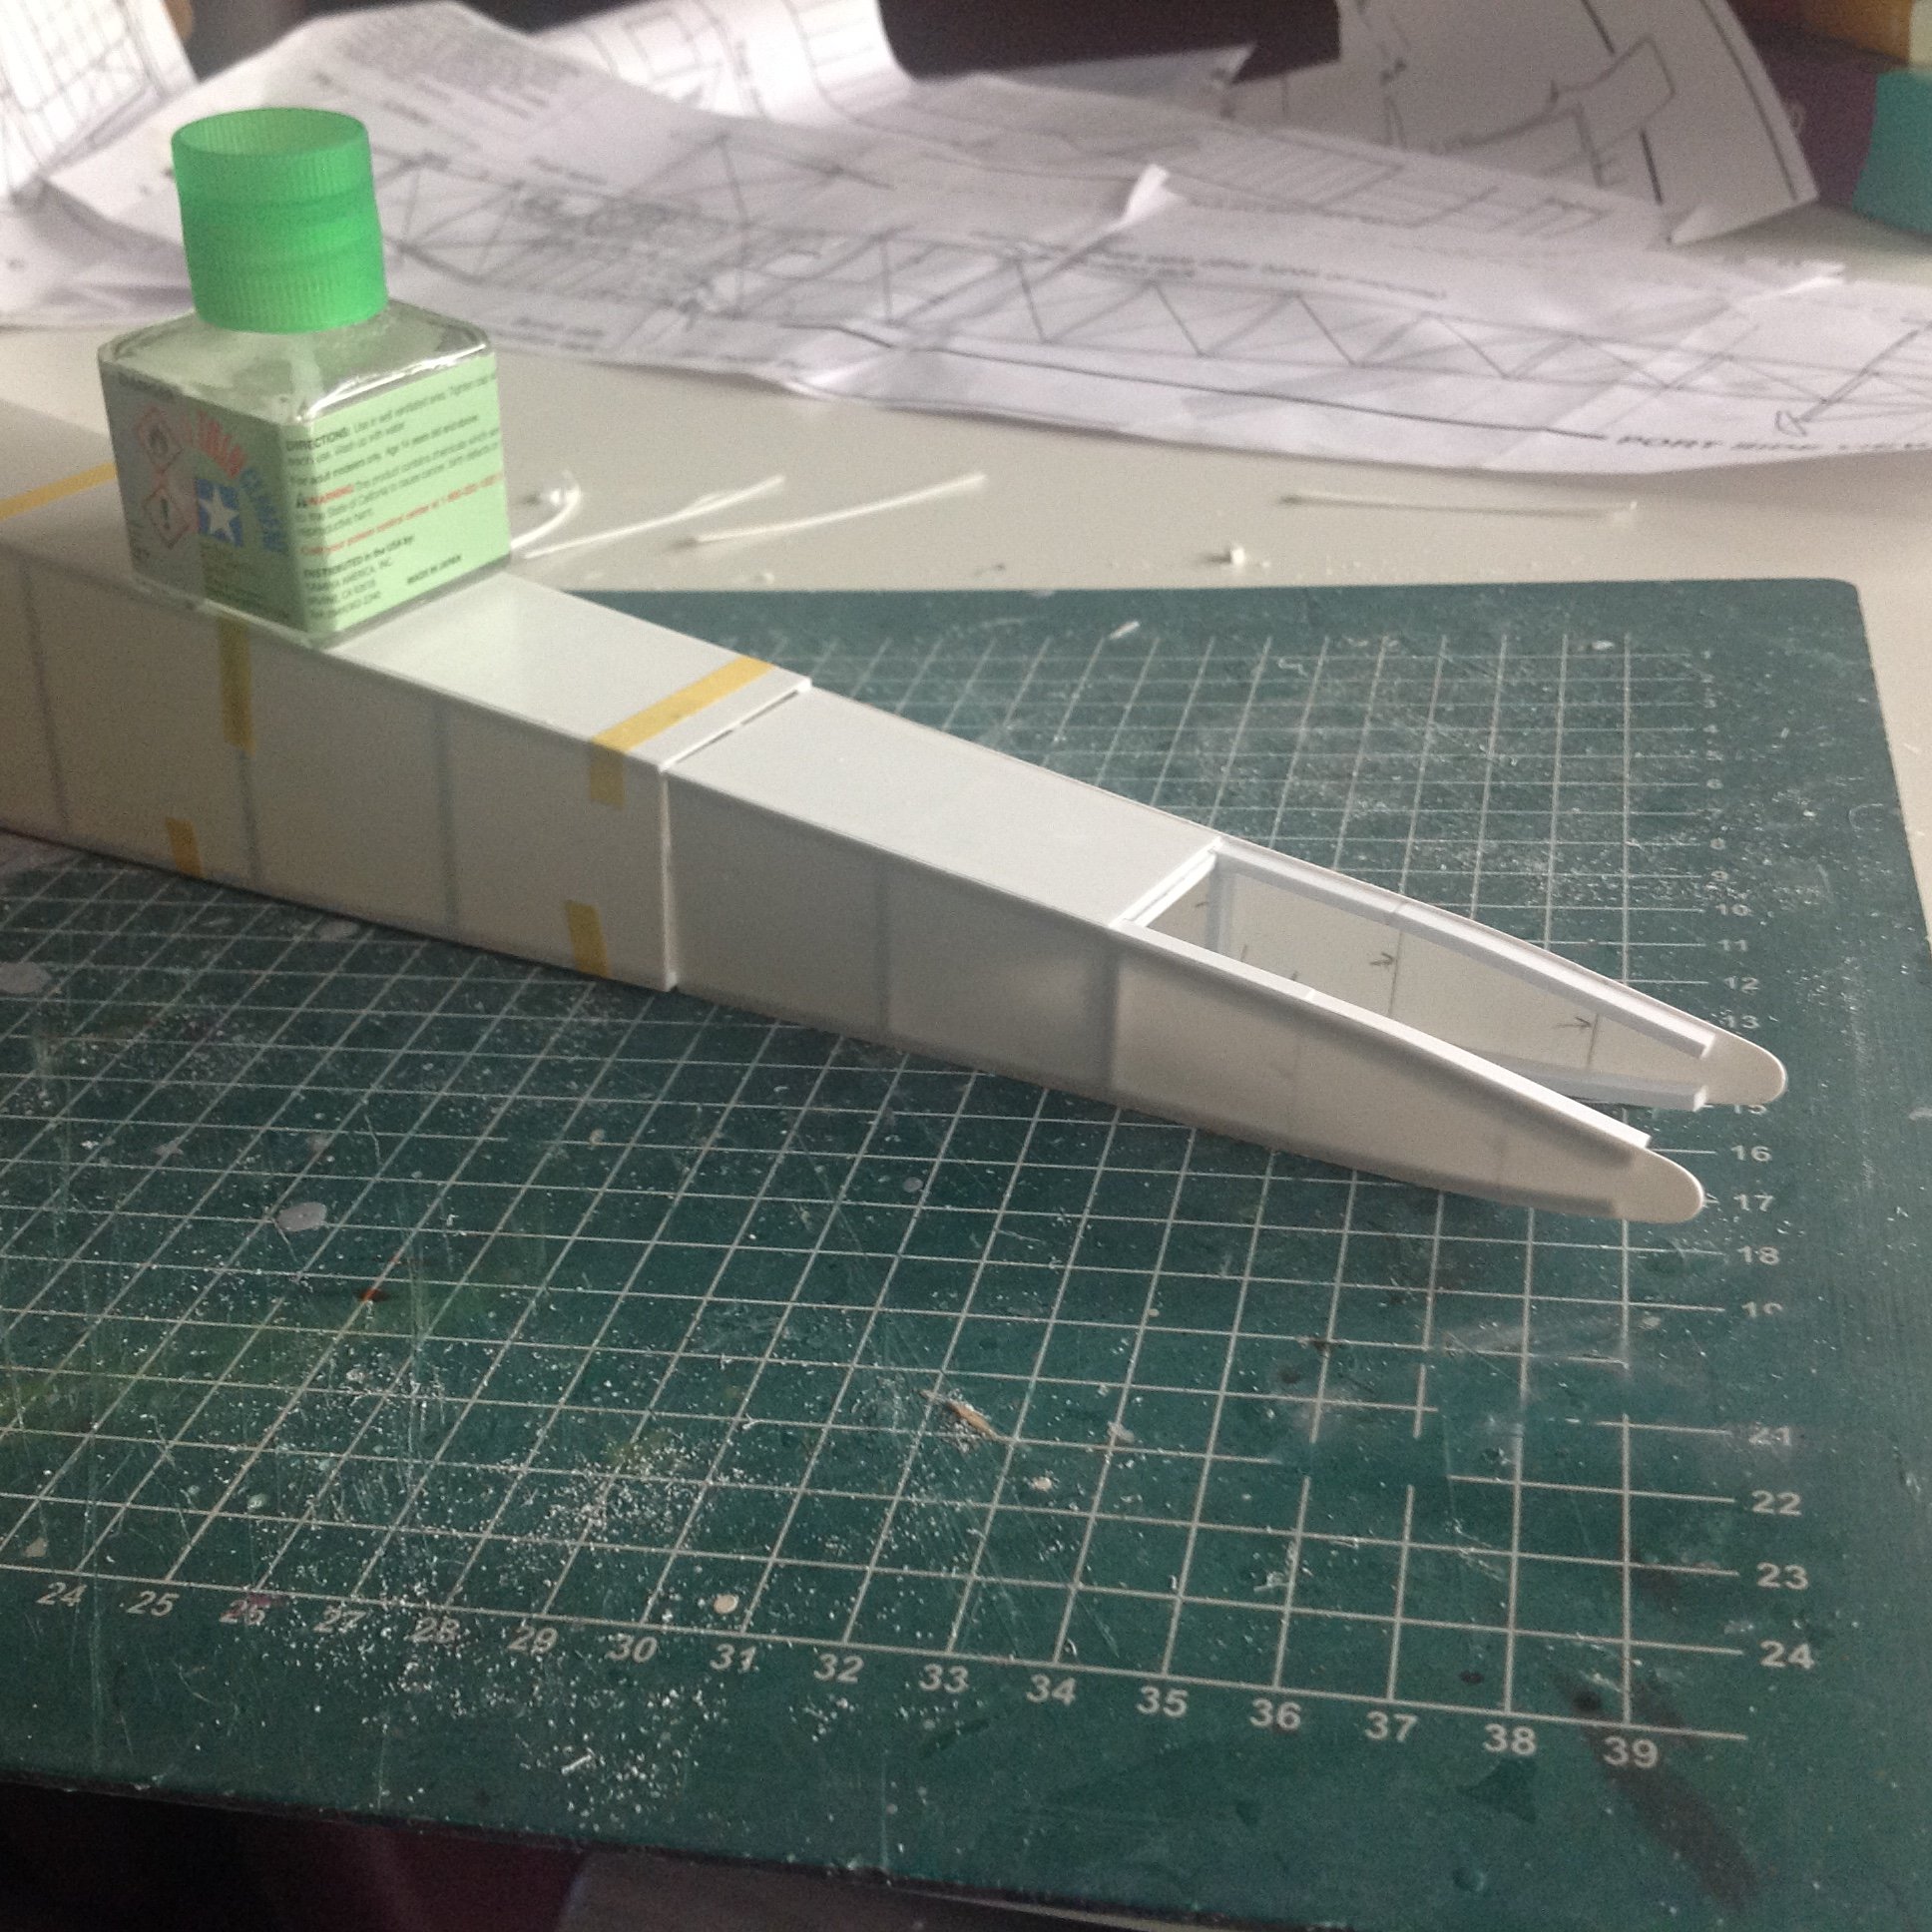
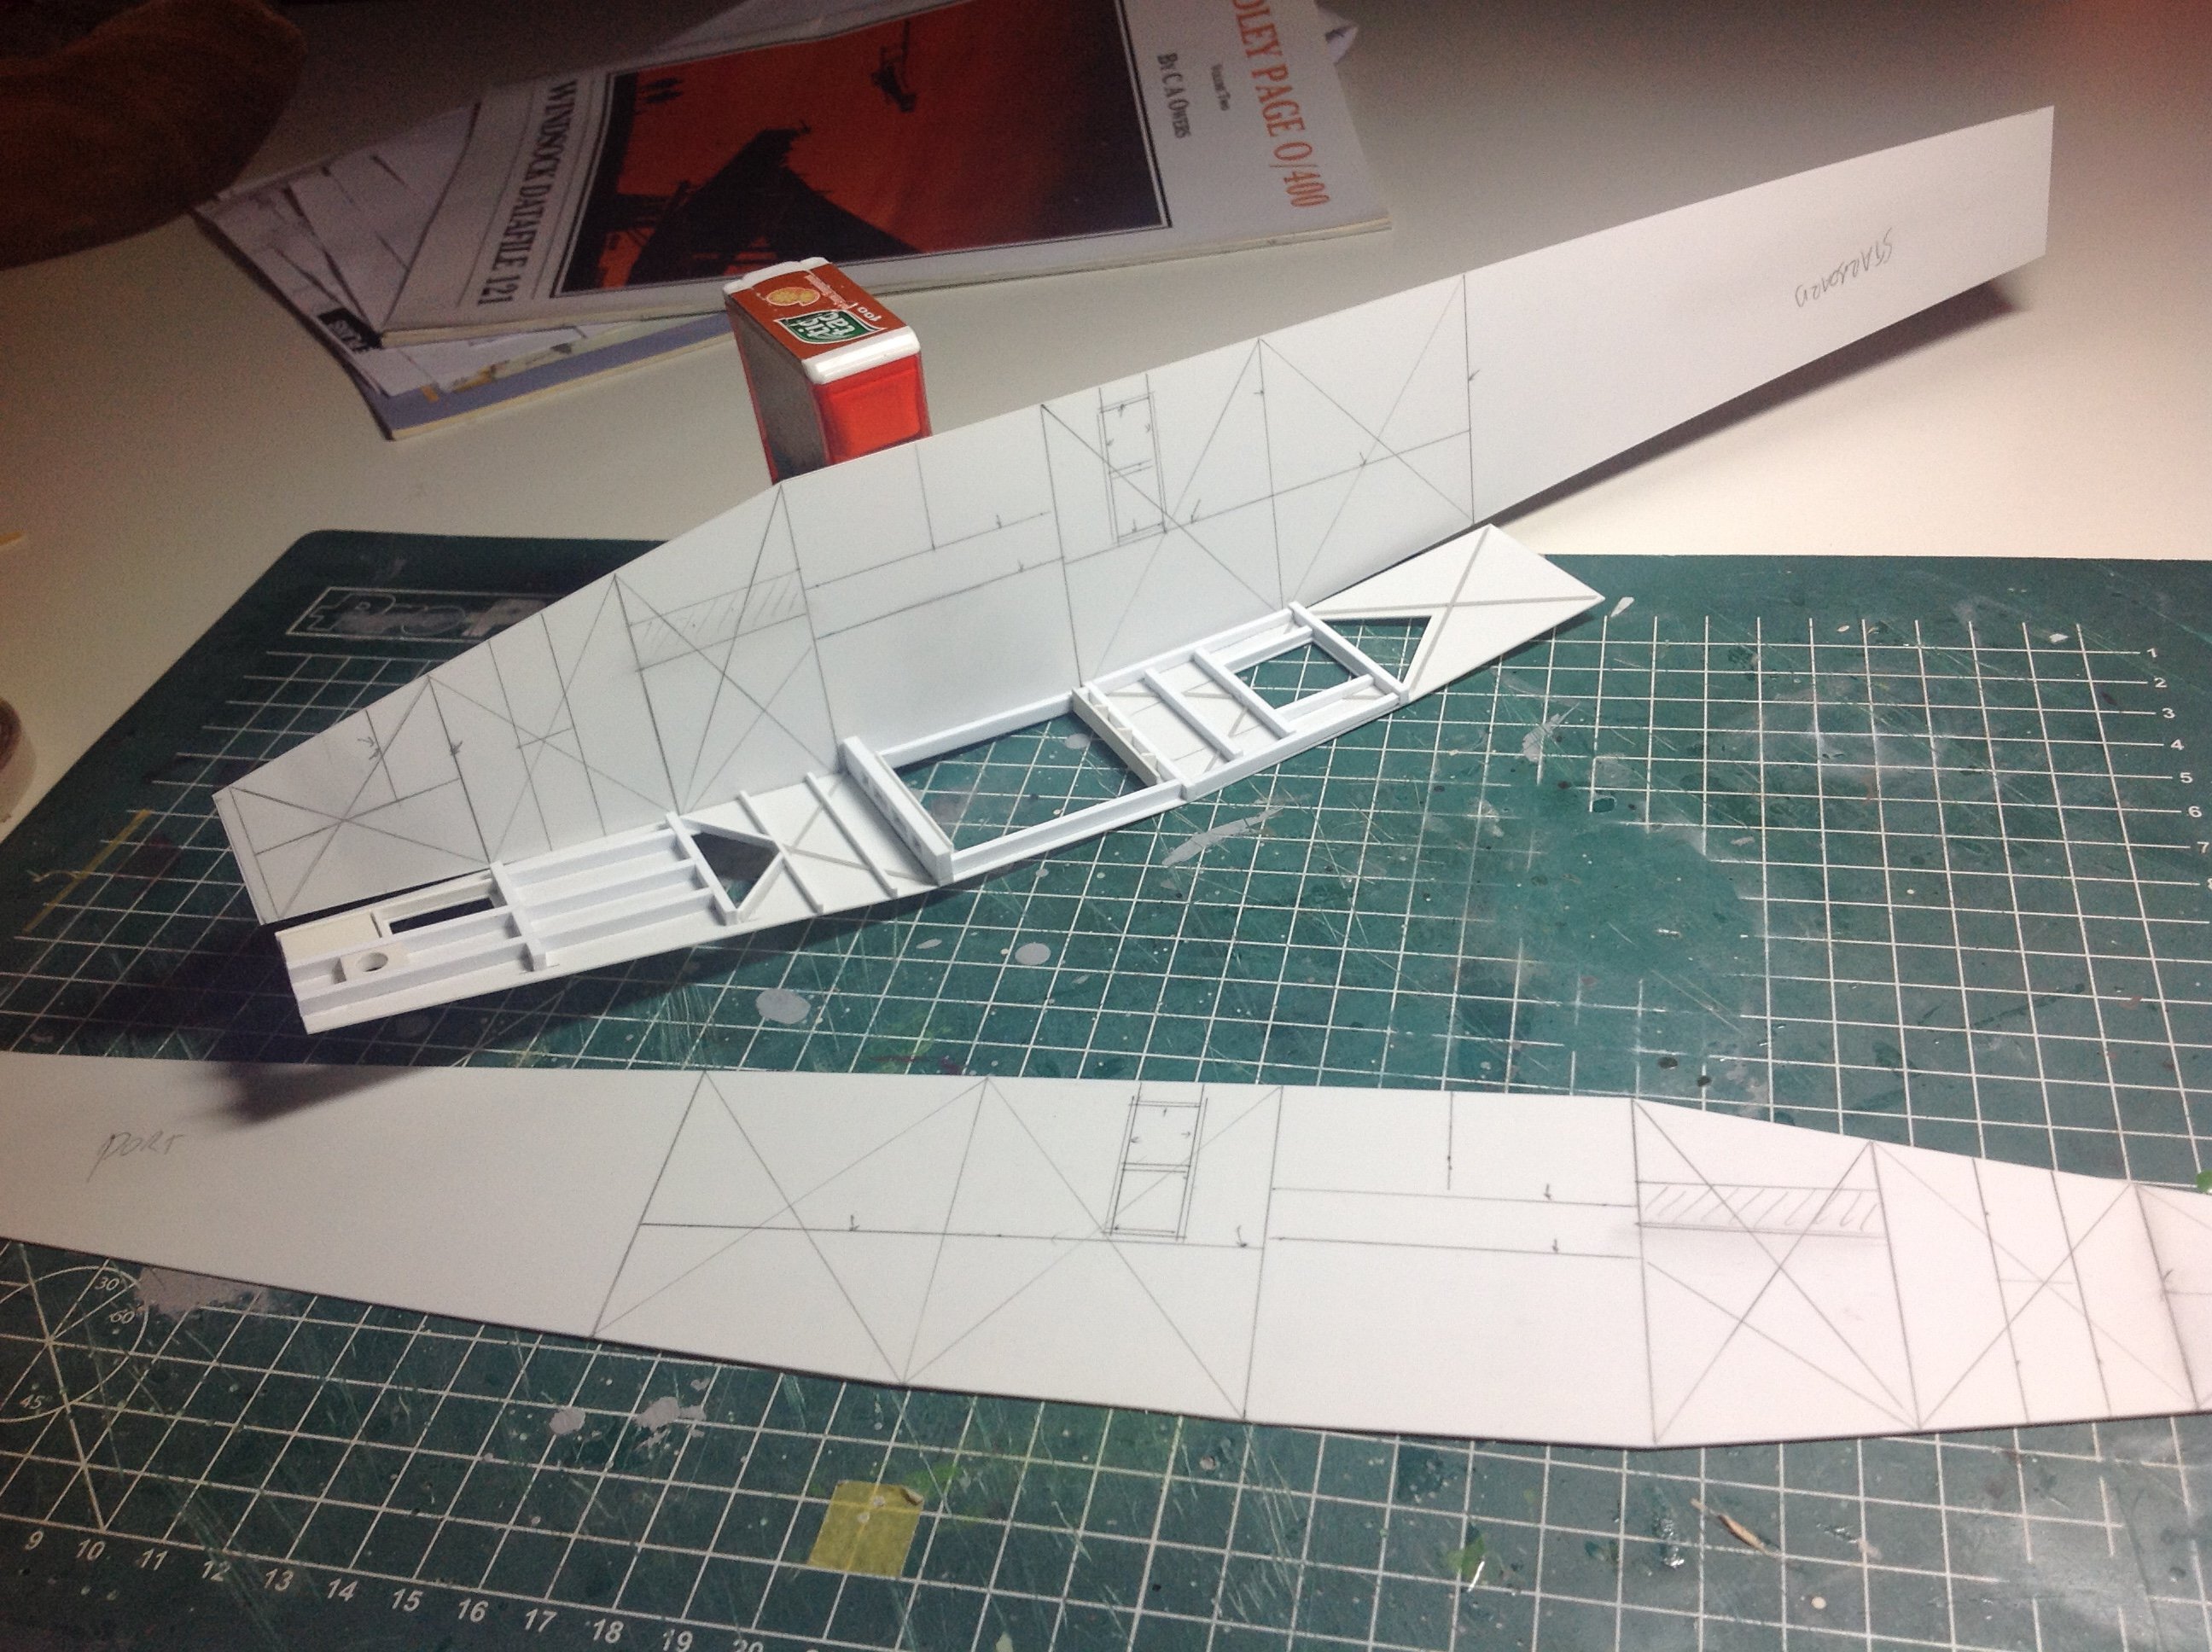
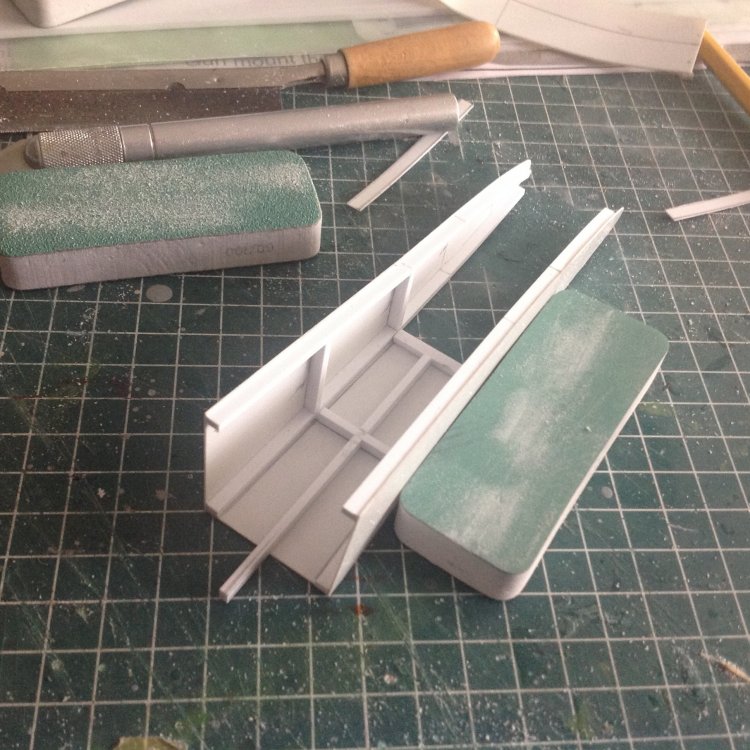
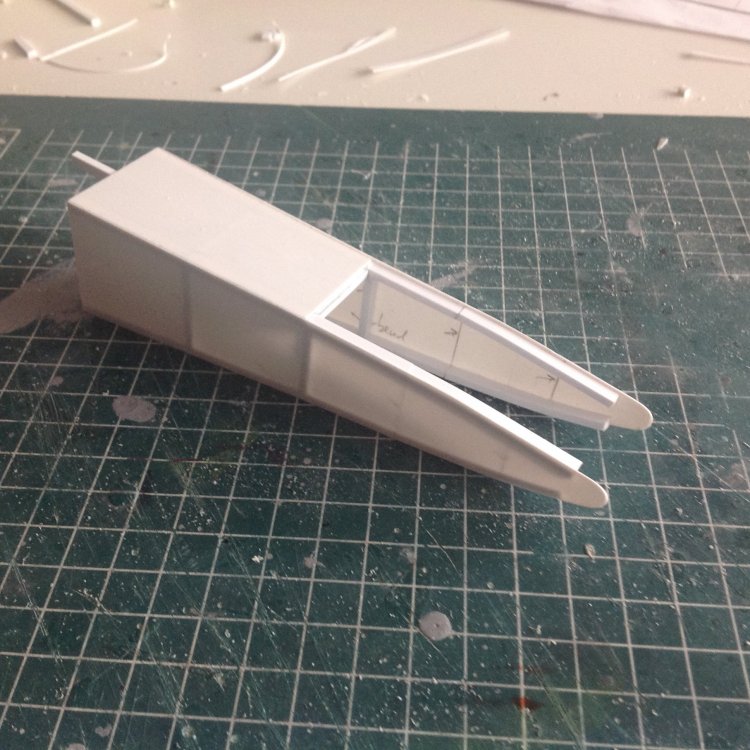
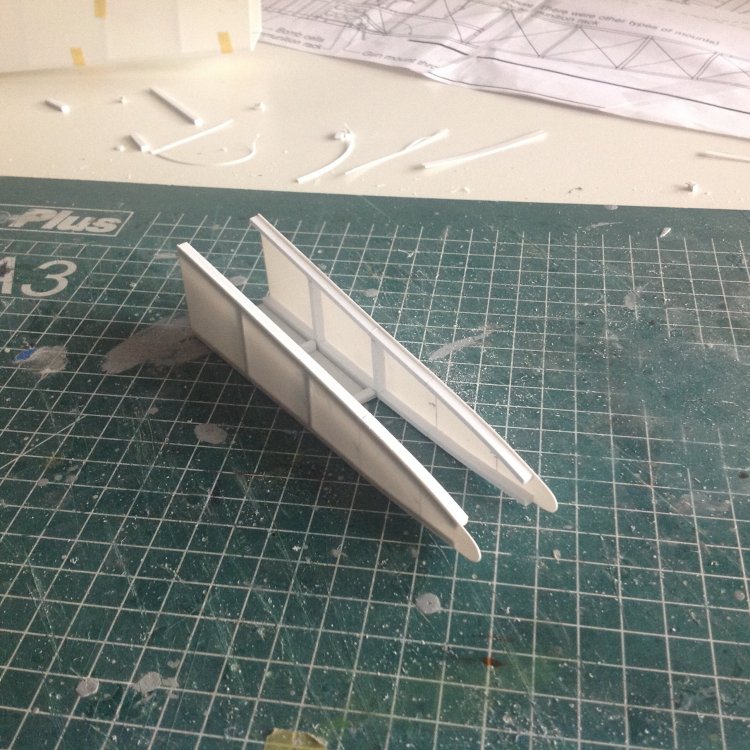
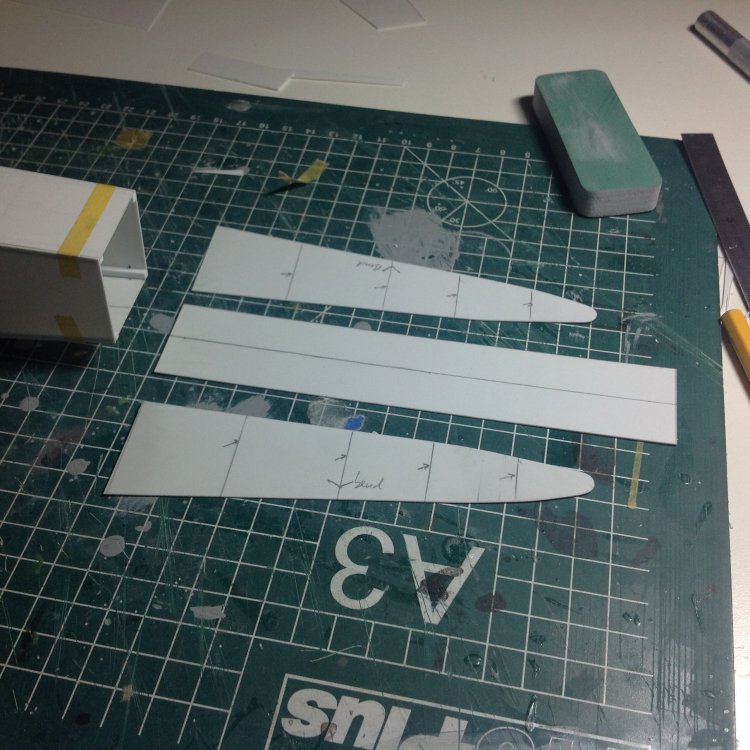
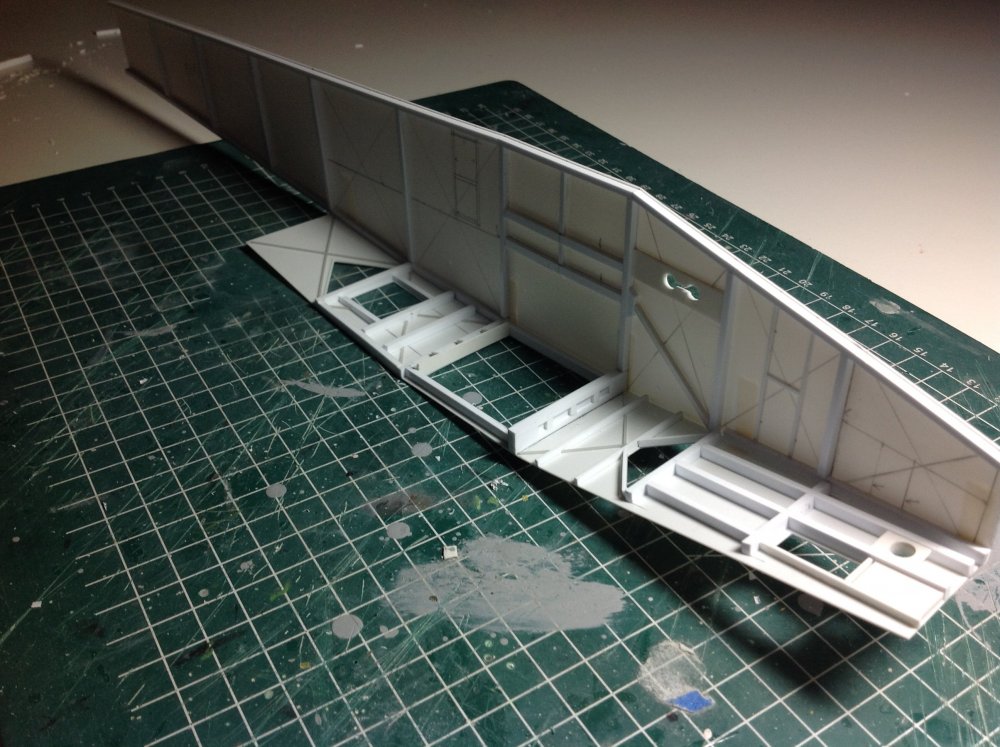
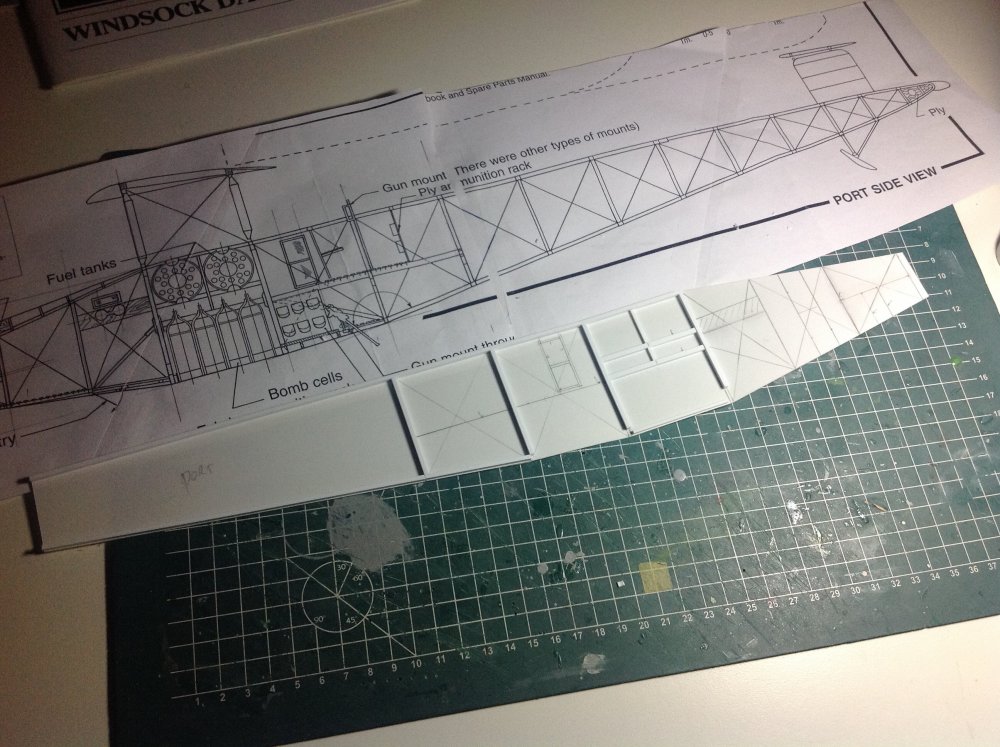
Good idea, first buy the beer...cans though. Been working on the extreme tailsection. this has no parallel top and bottom sides along the whole lenght. It tapers from the joint and just in front of the tailplane it becomes parallel. Makes sense so the tailplane is rectangular. Construction is similar as the front but need some strenghtening built in to be able to support the tail at some point. The extreme end has a very tight curve which might be a problem but I can also make this solid plastic. We'll see about that one later. Cheers Cees

-
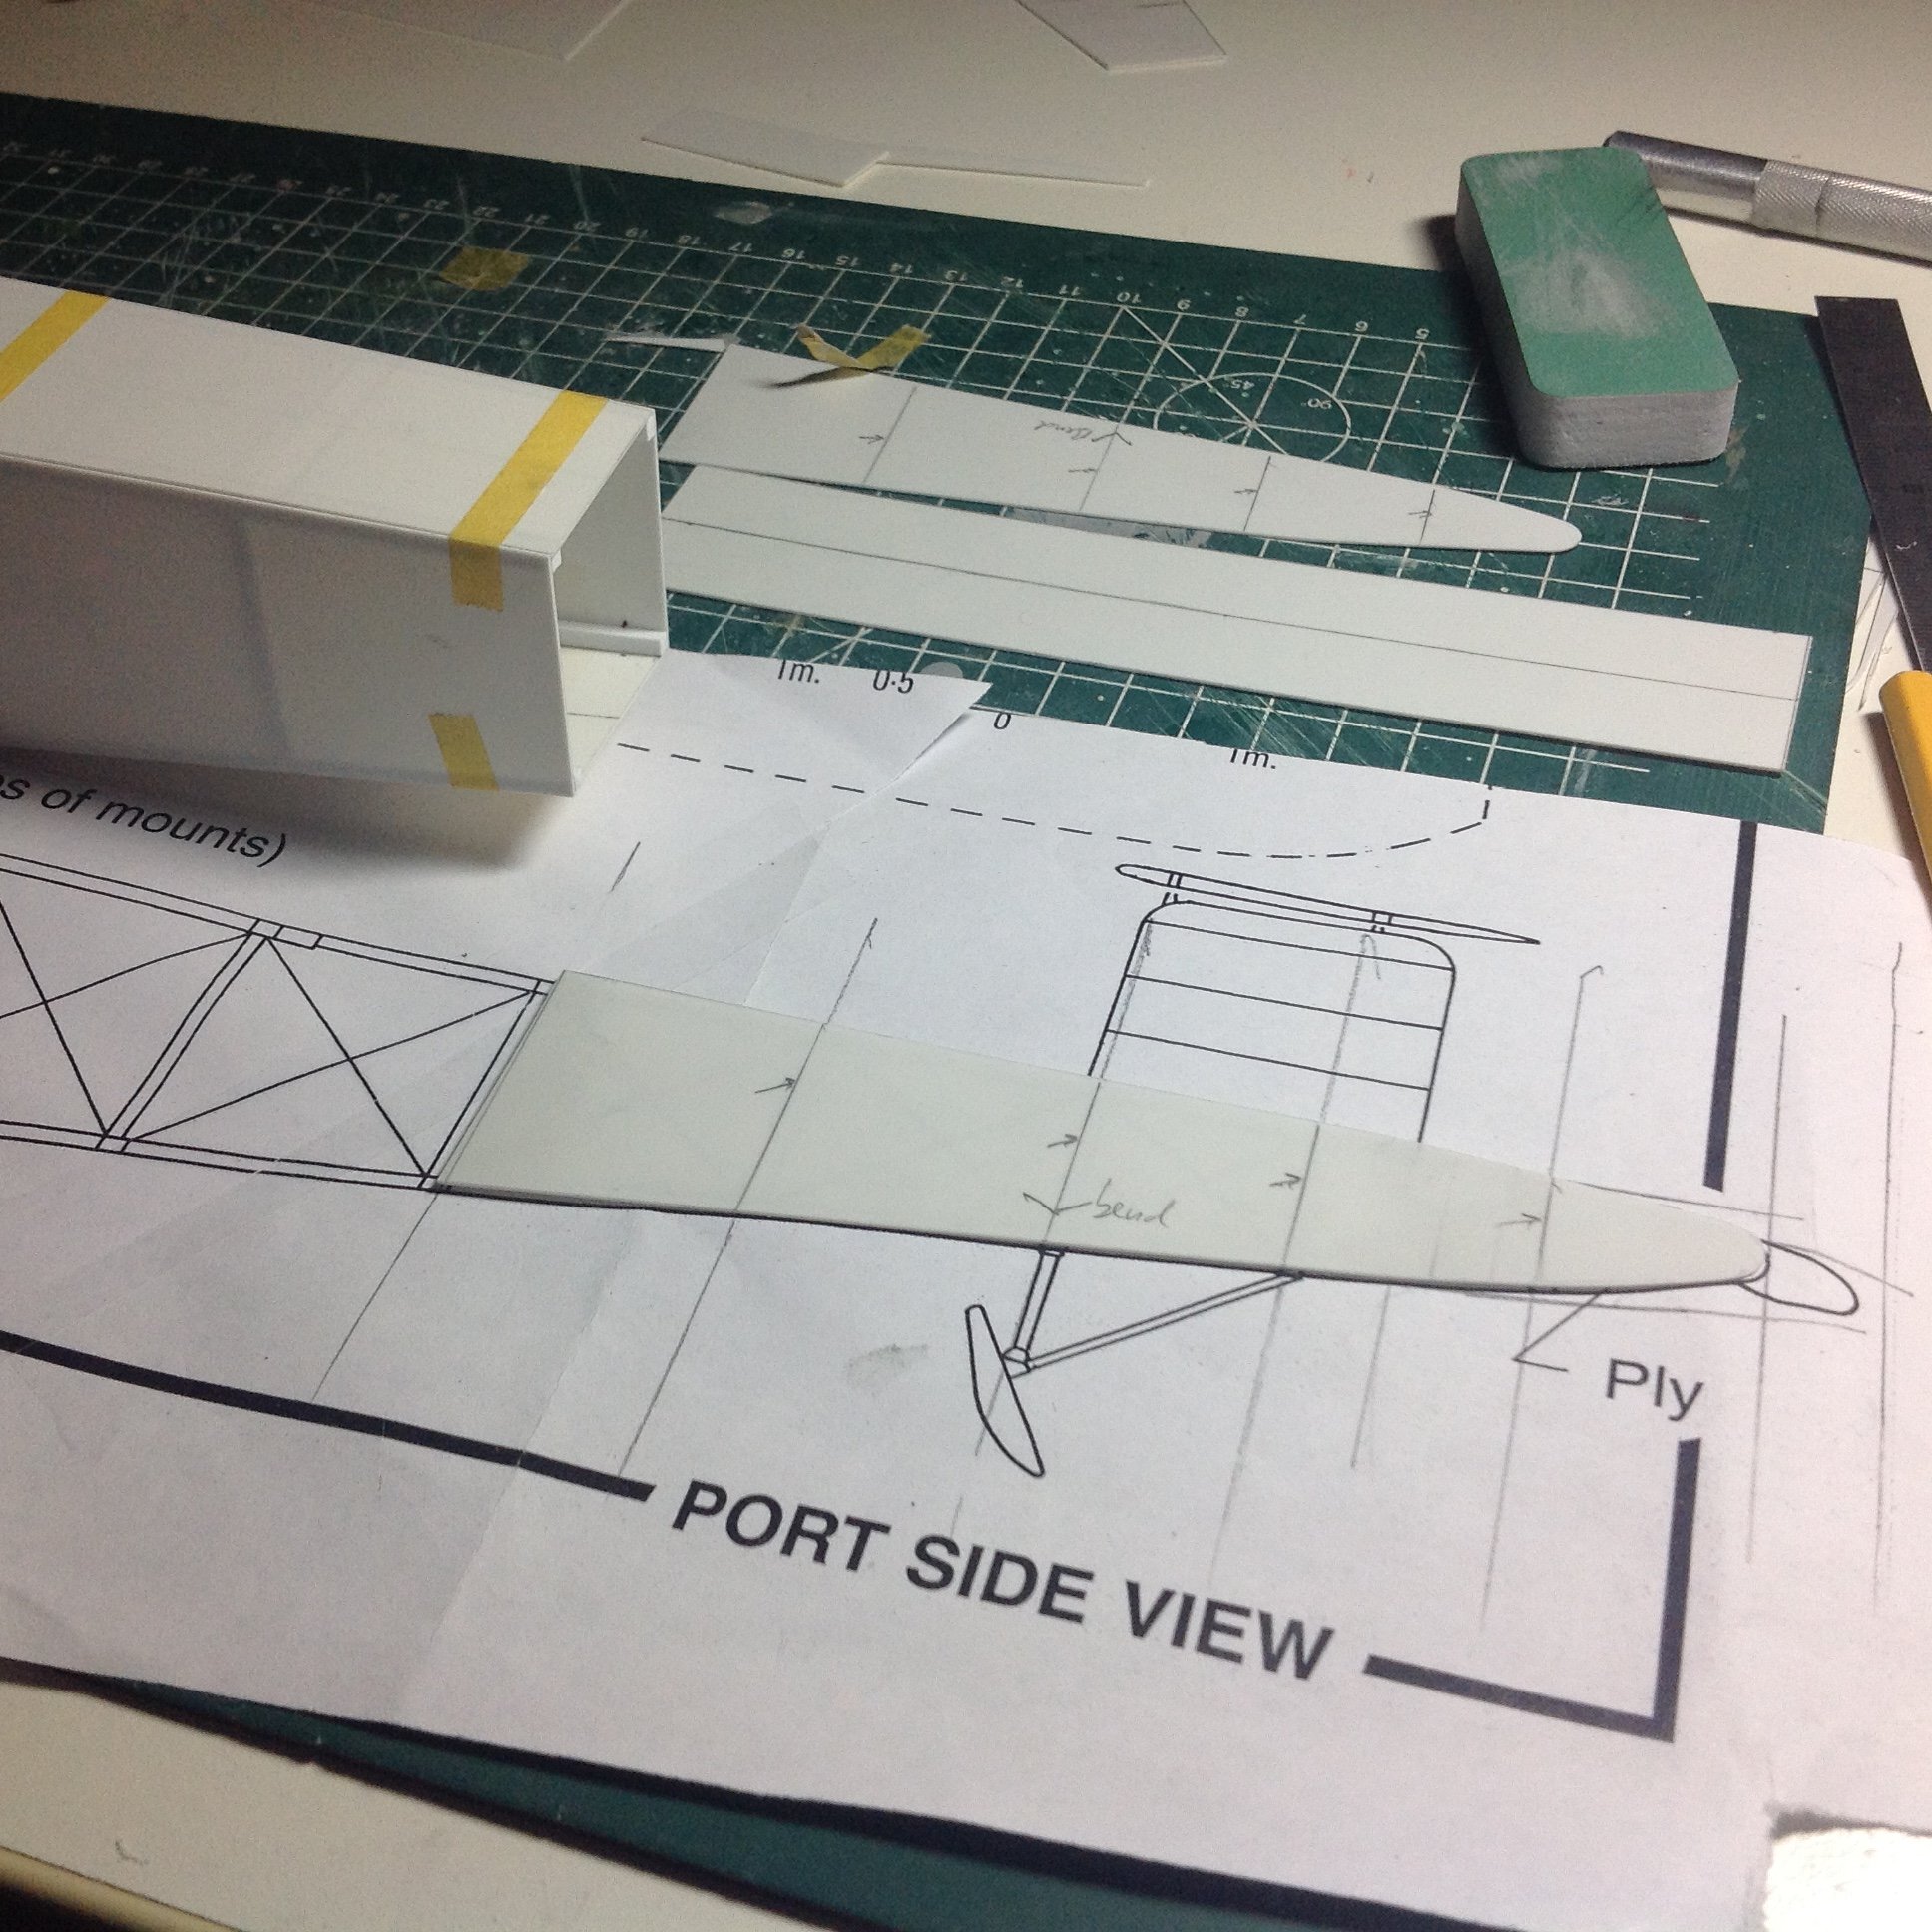
Smallish update. The top section covering the area between the dorsal gunner and from where the top fuselage slopes down has been made. Also an attempt has been made to make the forward sloping section. This is a very suble shape where the one end is dead flat and then the sides start to curve down but very slight, The thin plasticard I use is quite rigid and difficult to shape. Perhaps beercan aluminium is a better option. Any ideas? Cheers Cees
-
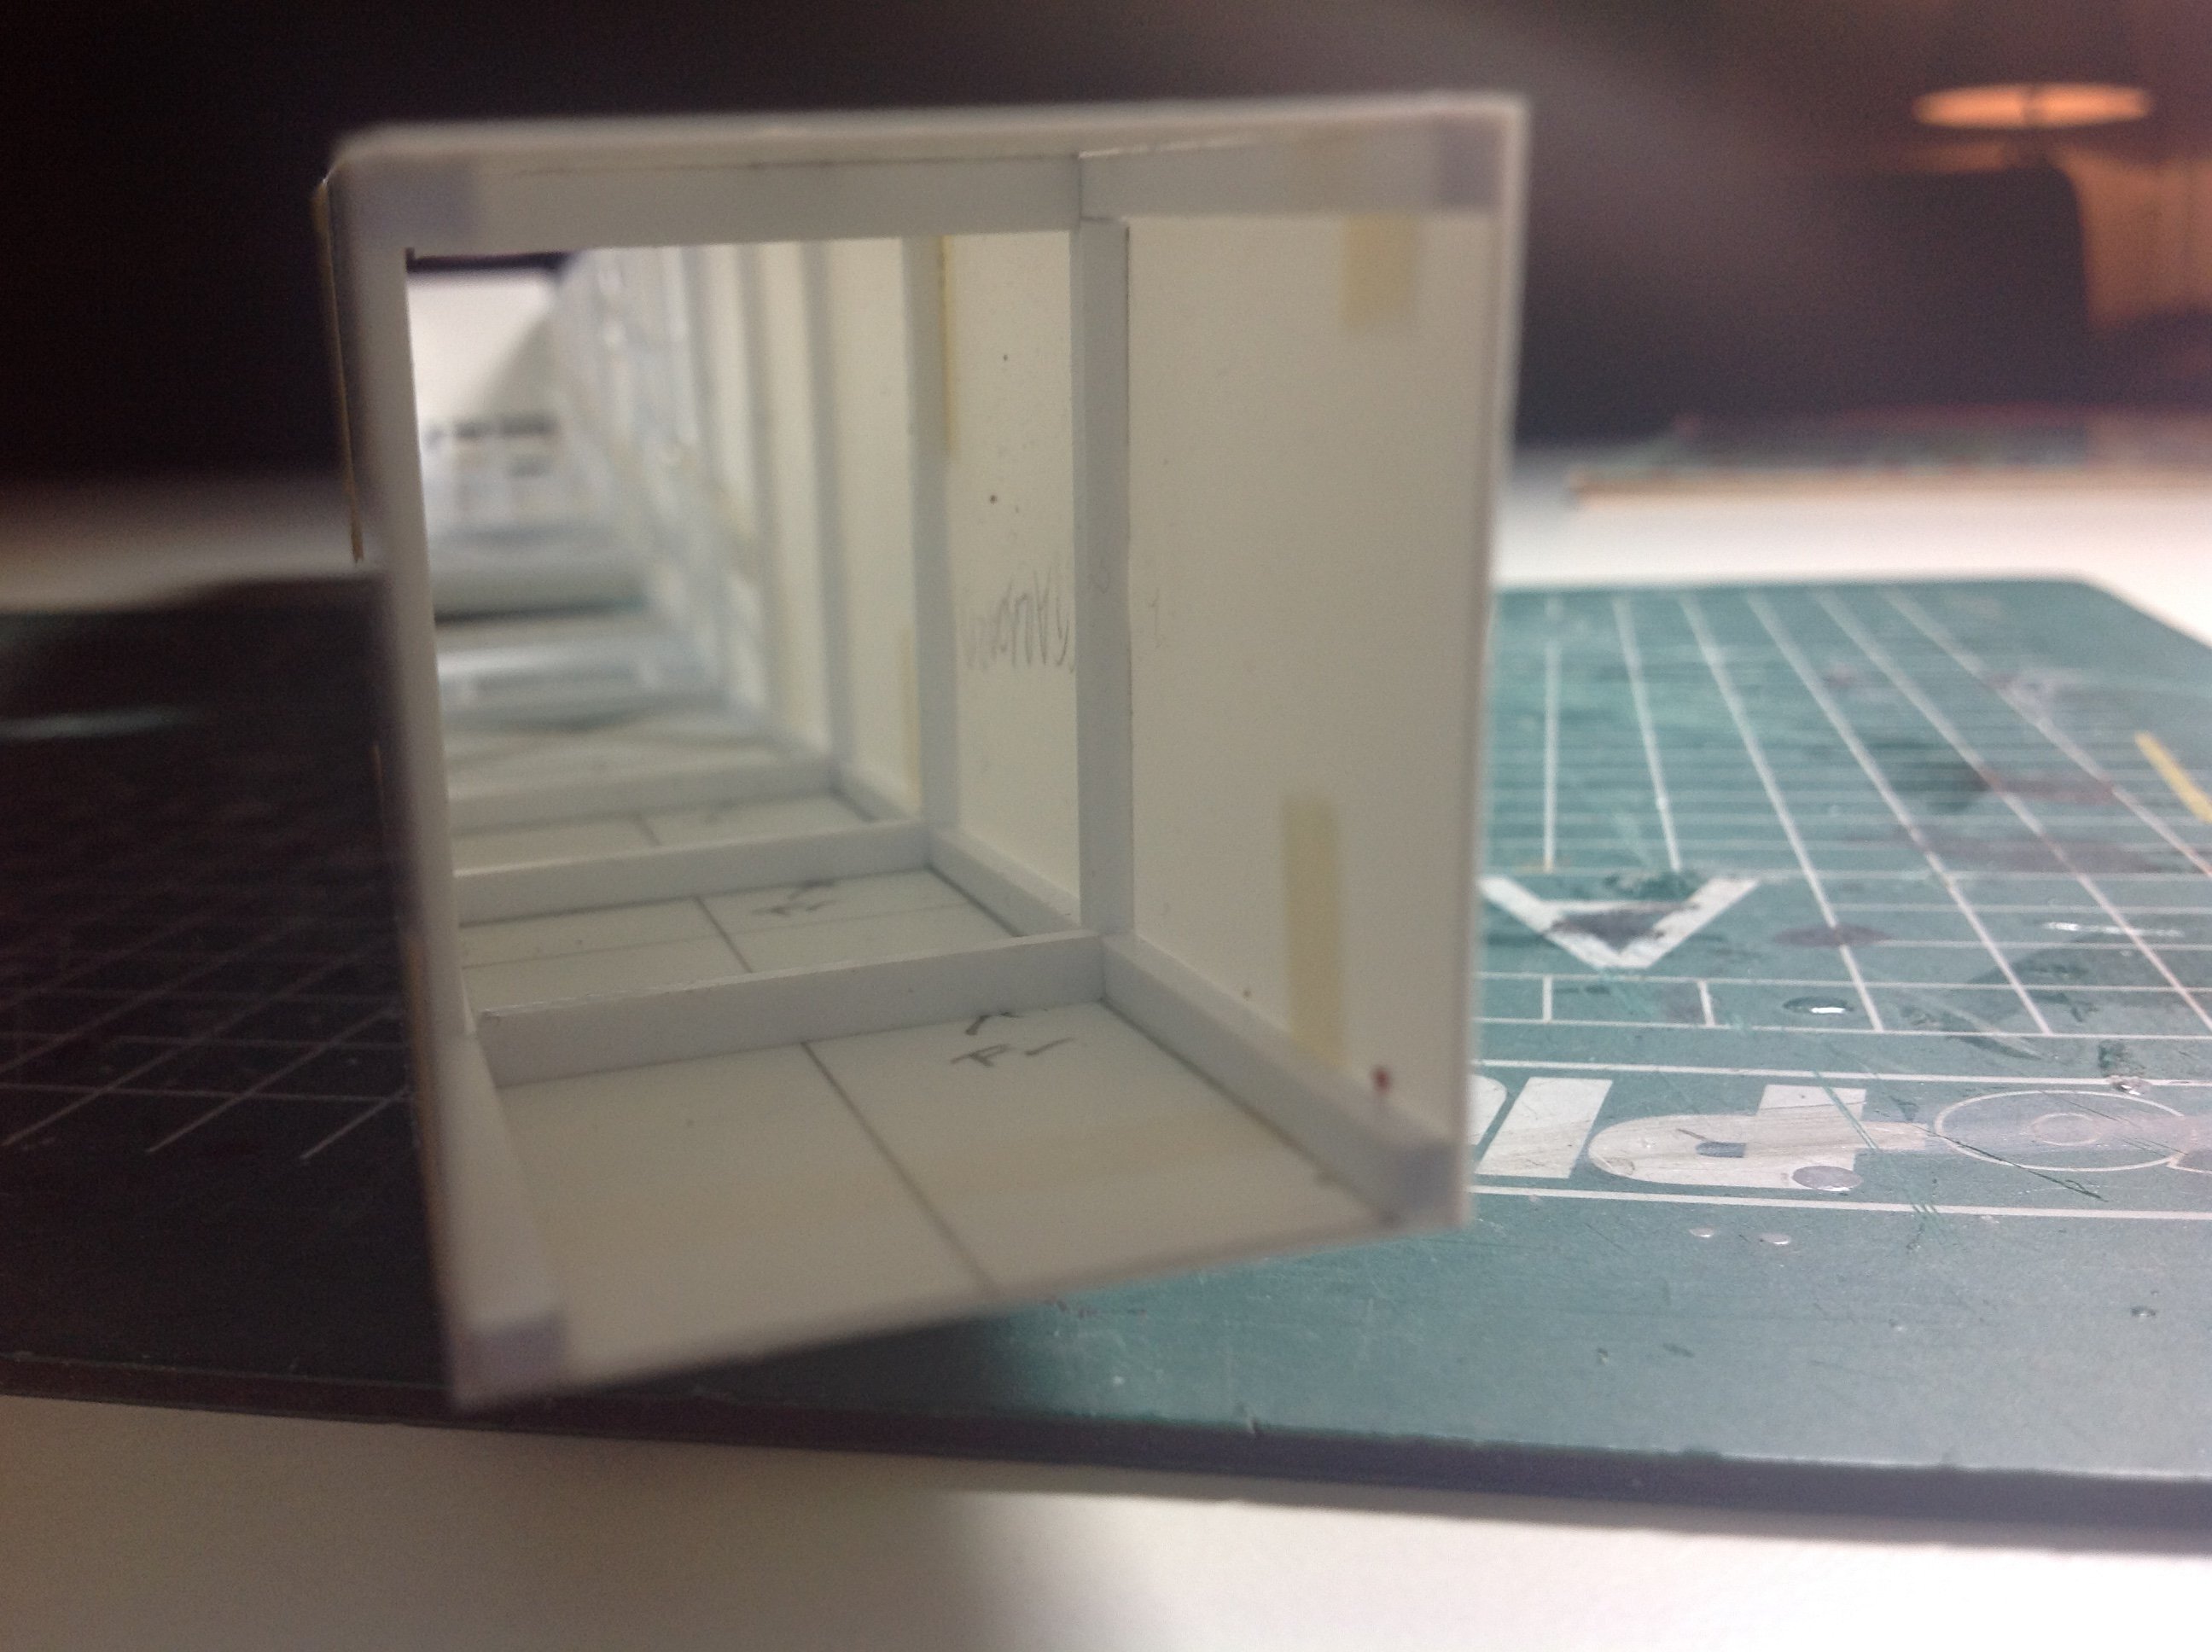
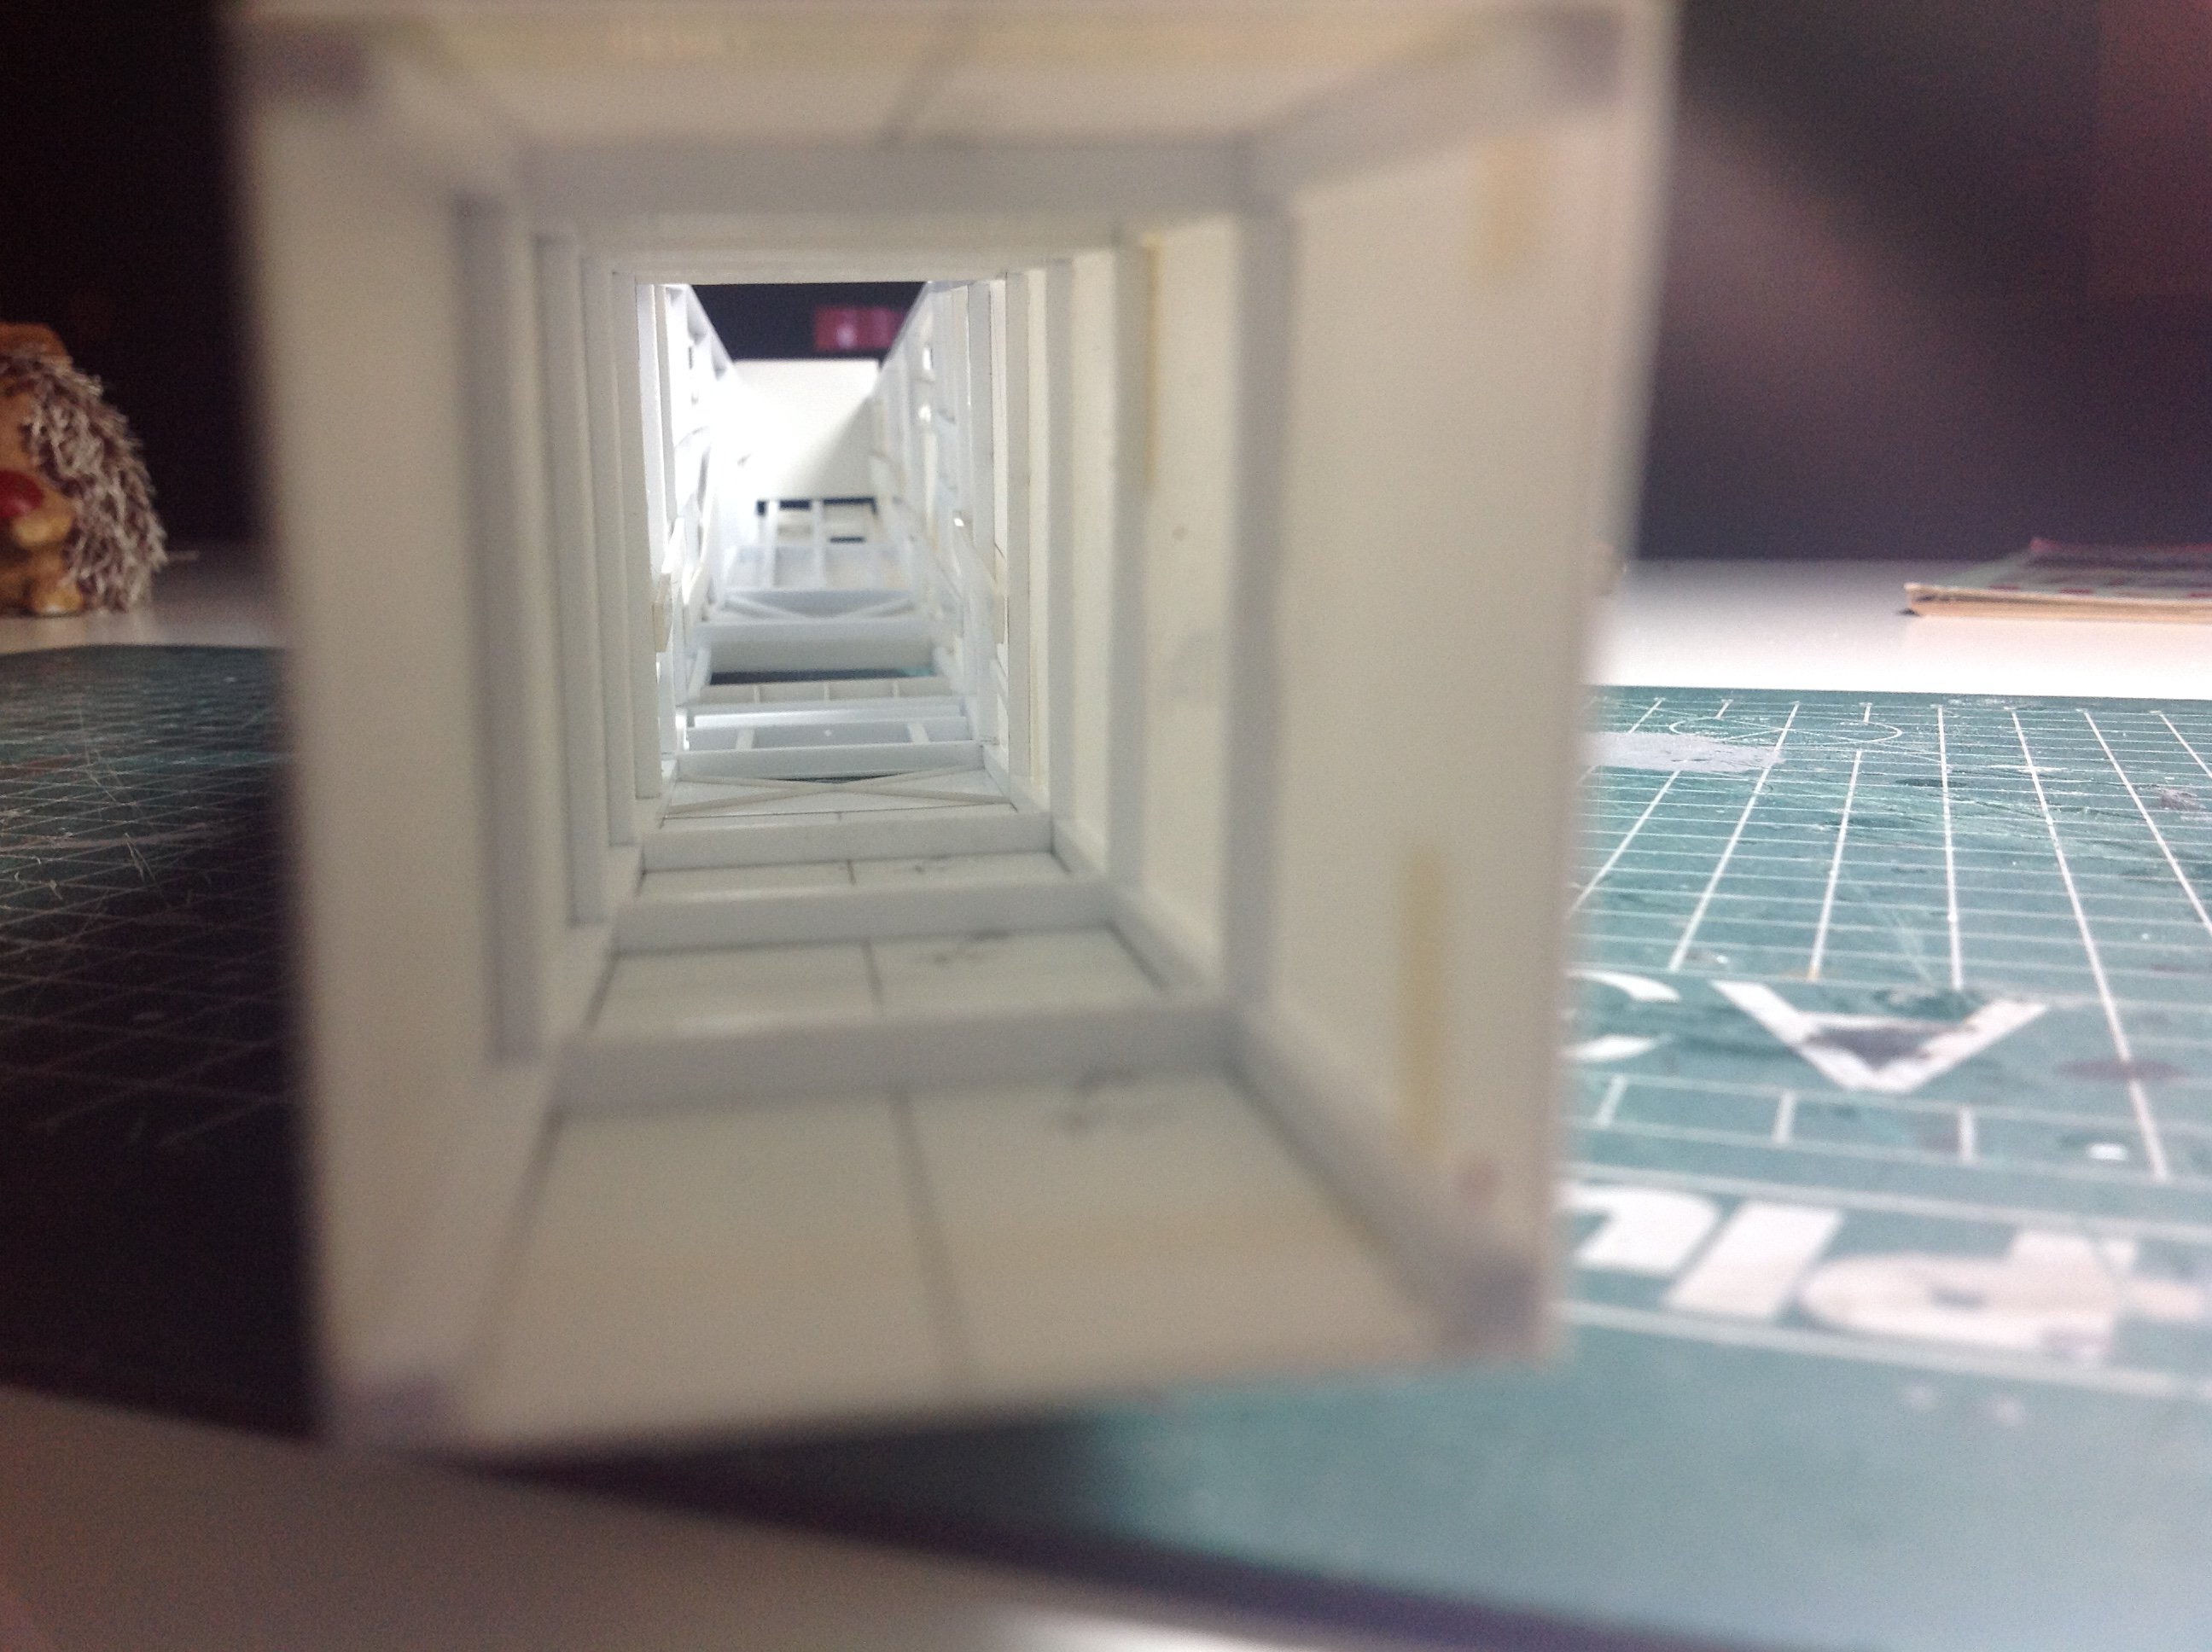
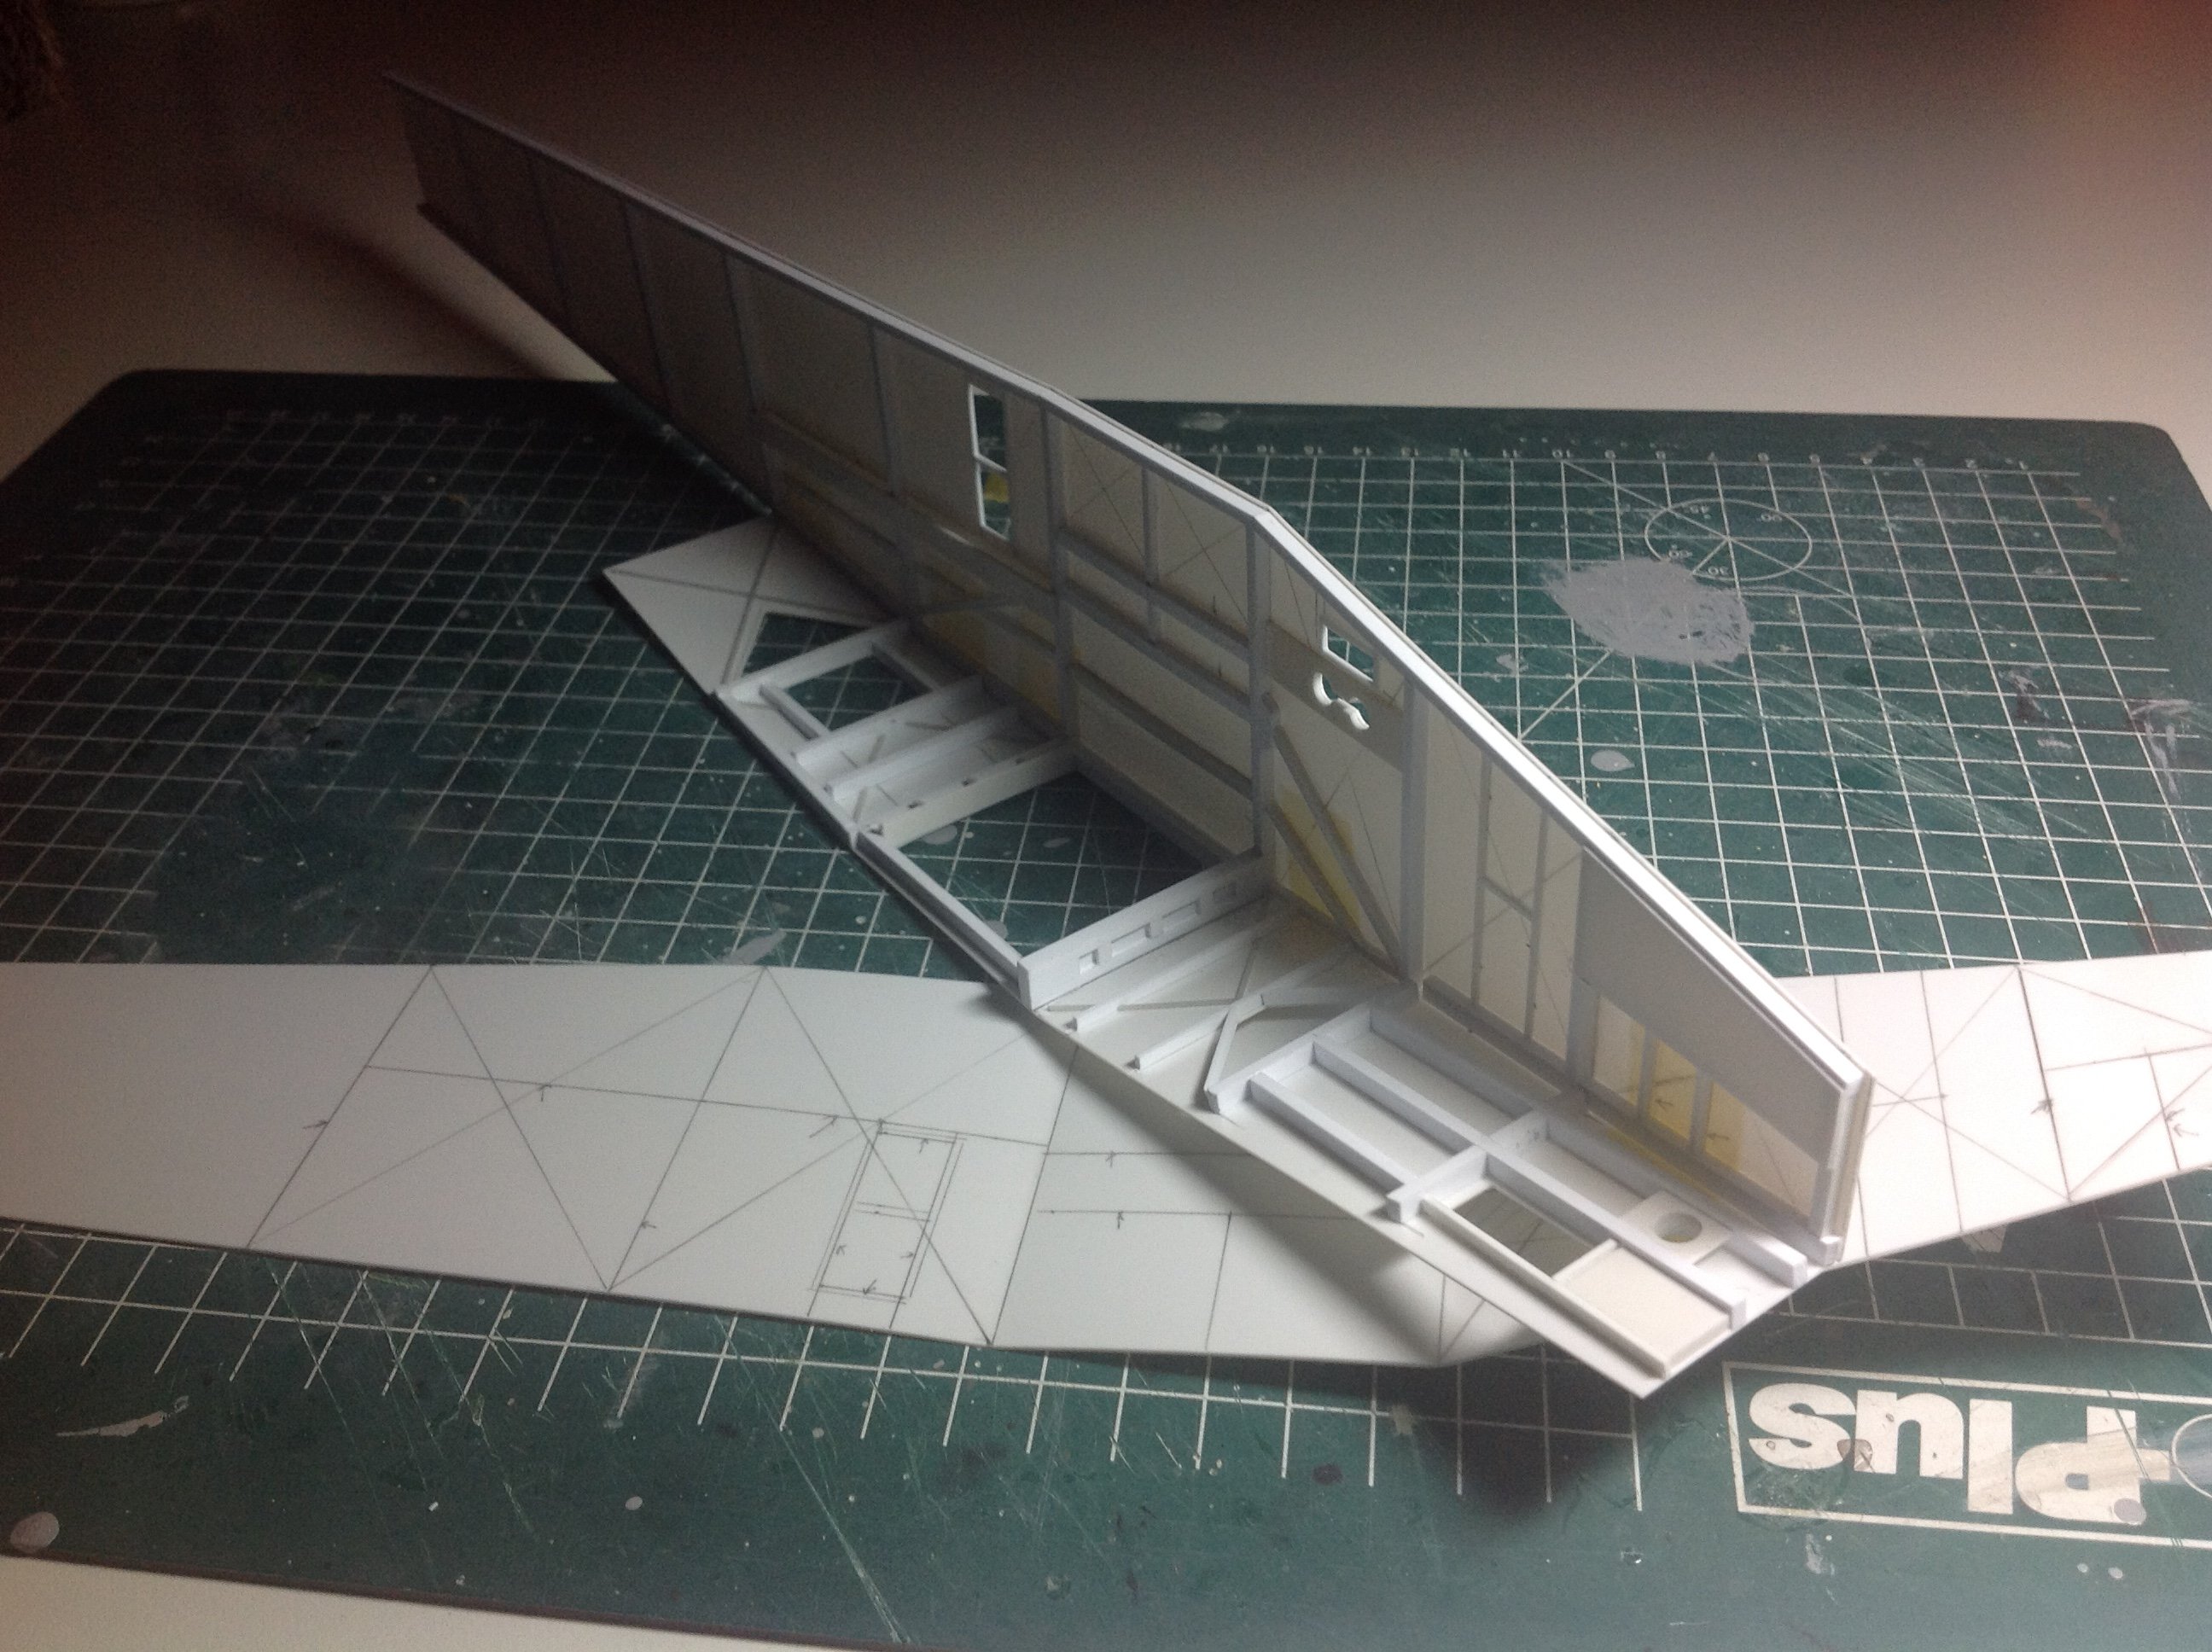
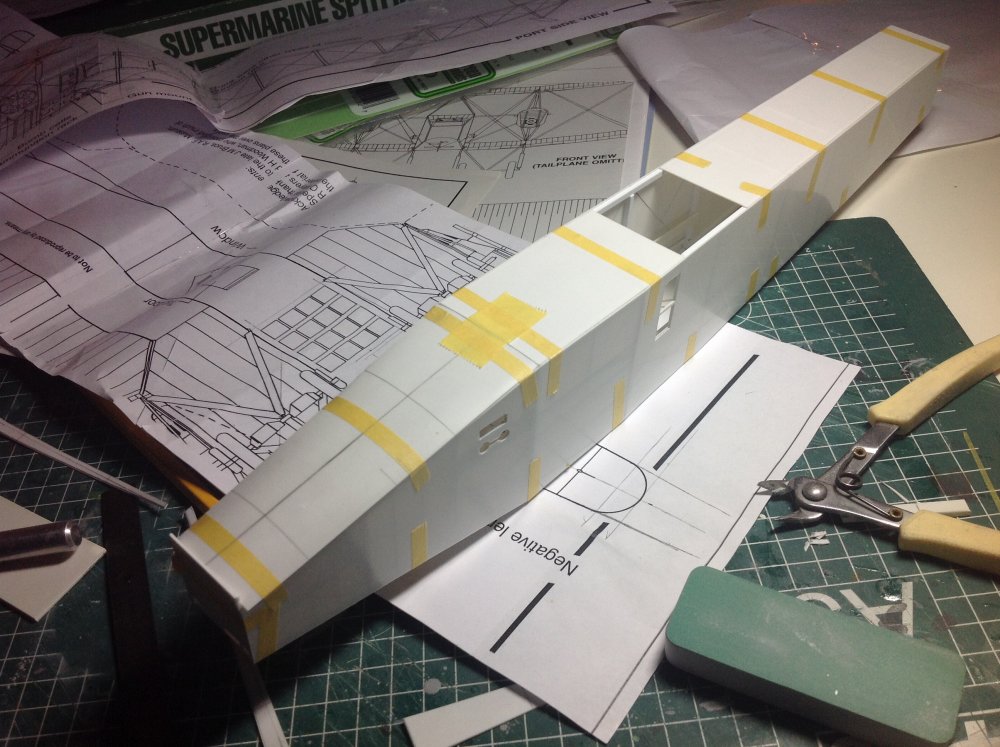
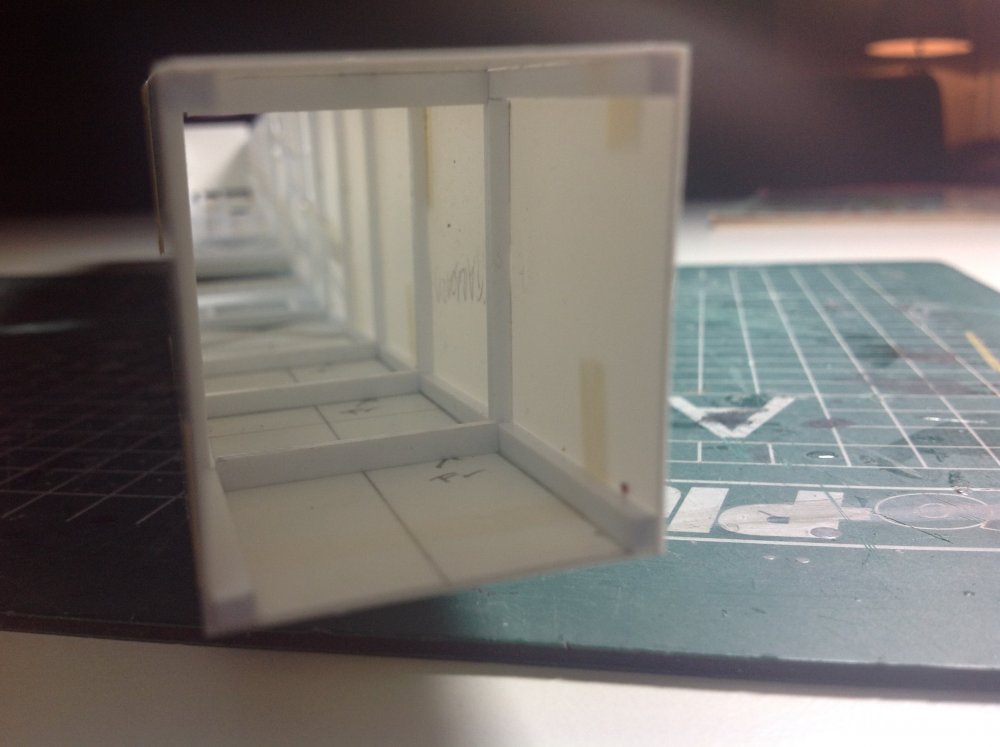
There is a bulkhead just aft of the gunner positions so that will effectively blank the rest of the tail off, but the reason why I did the structure towards the tail is to let it show through the very thin plasticard to create the illusion of linen over wood. Cheers Cees
-
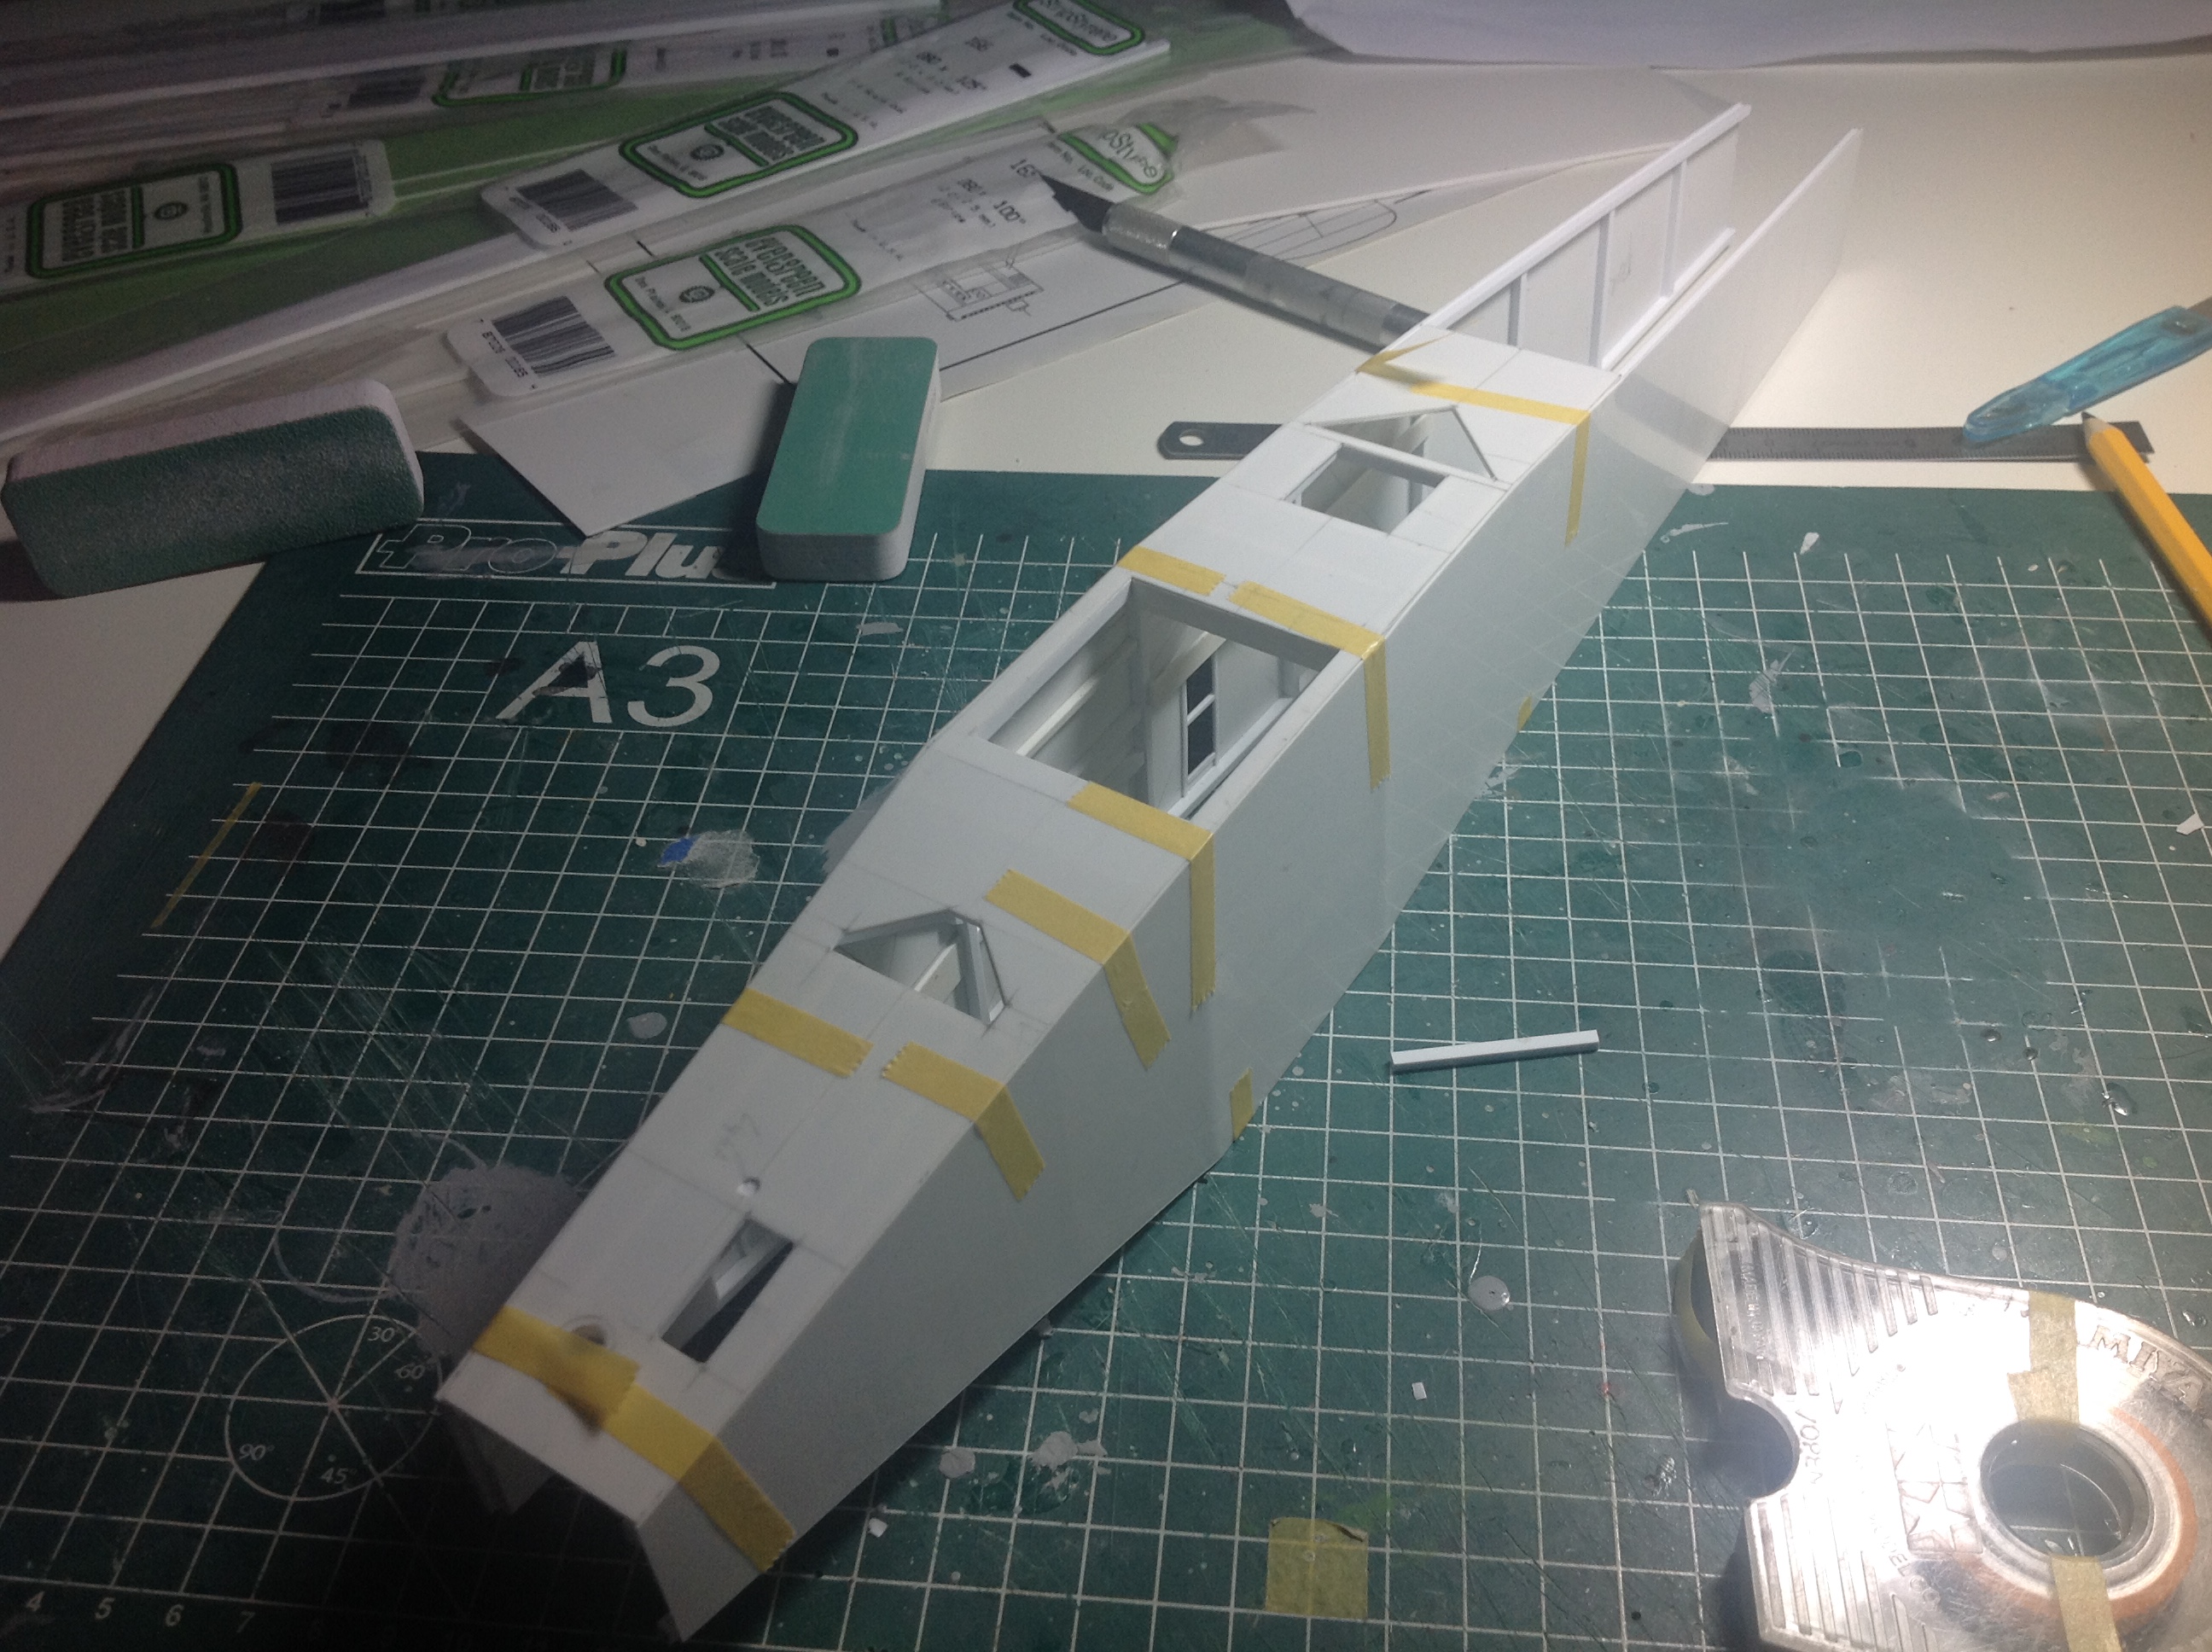
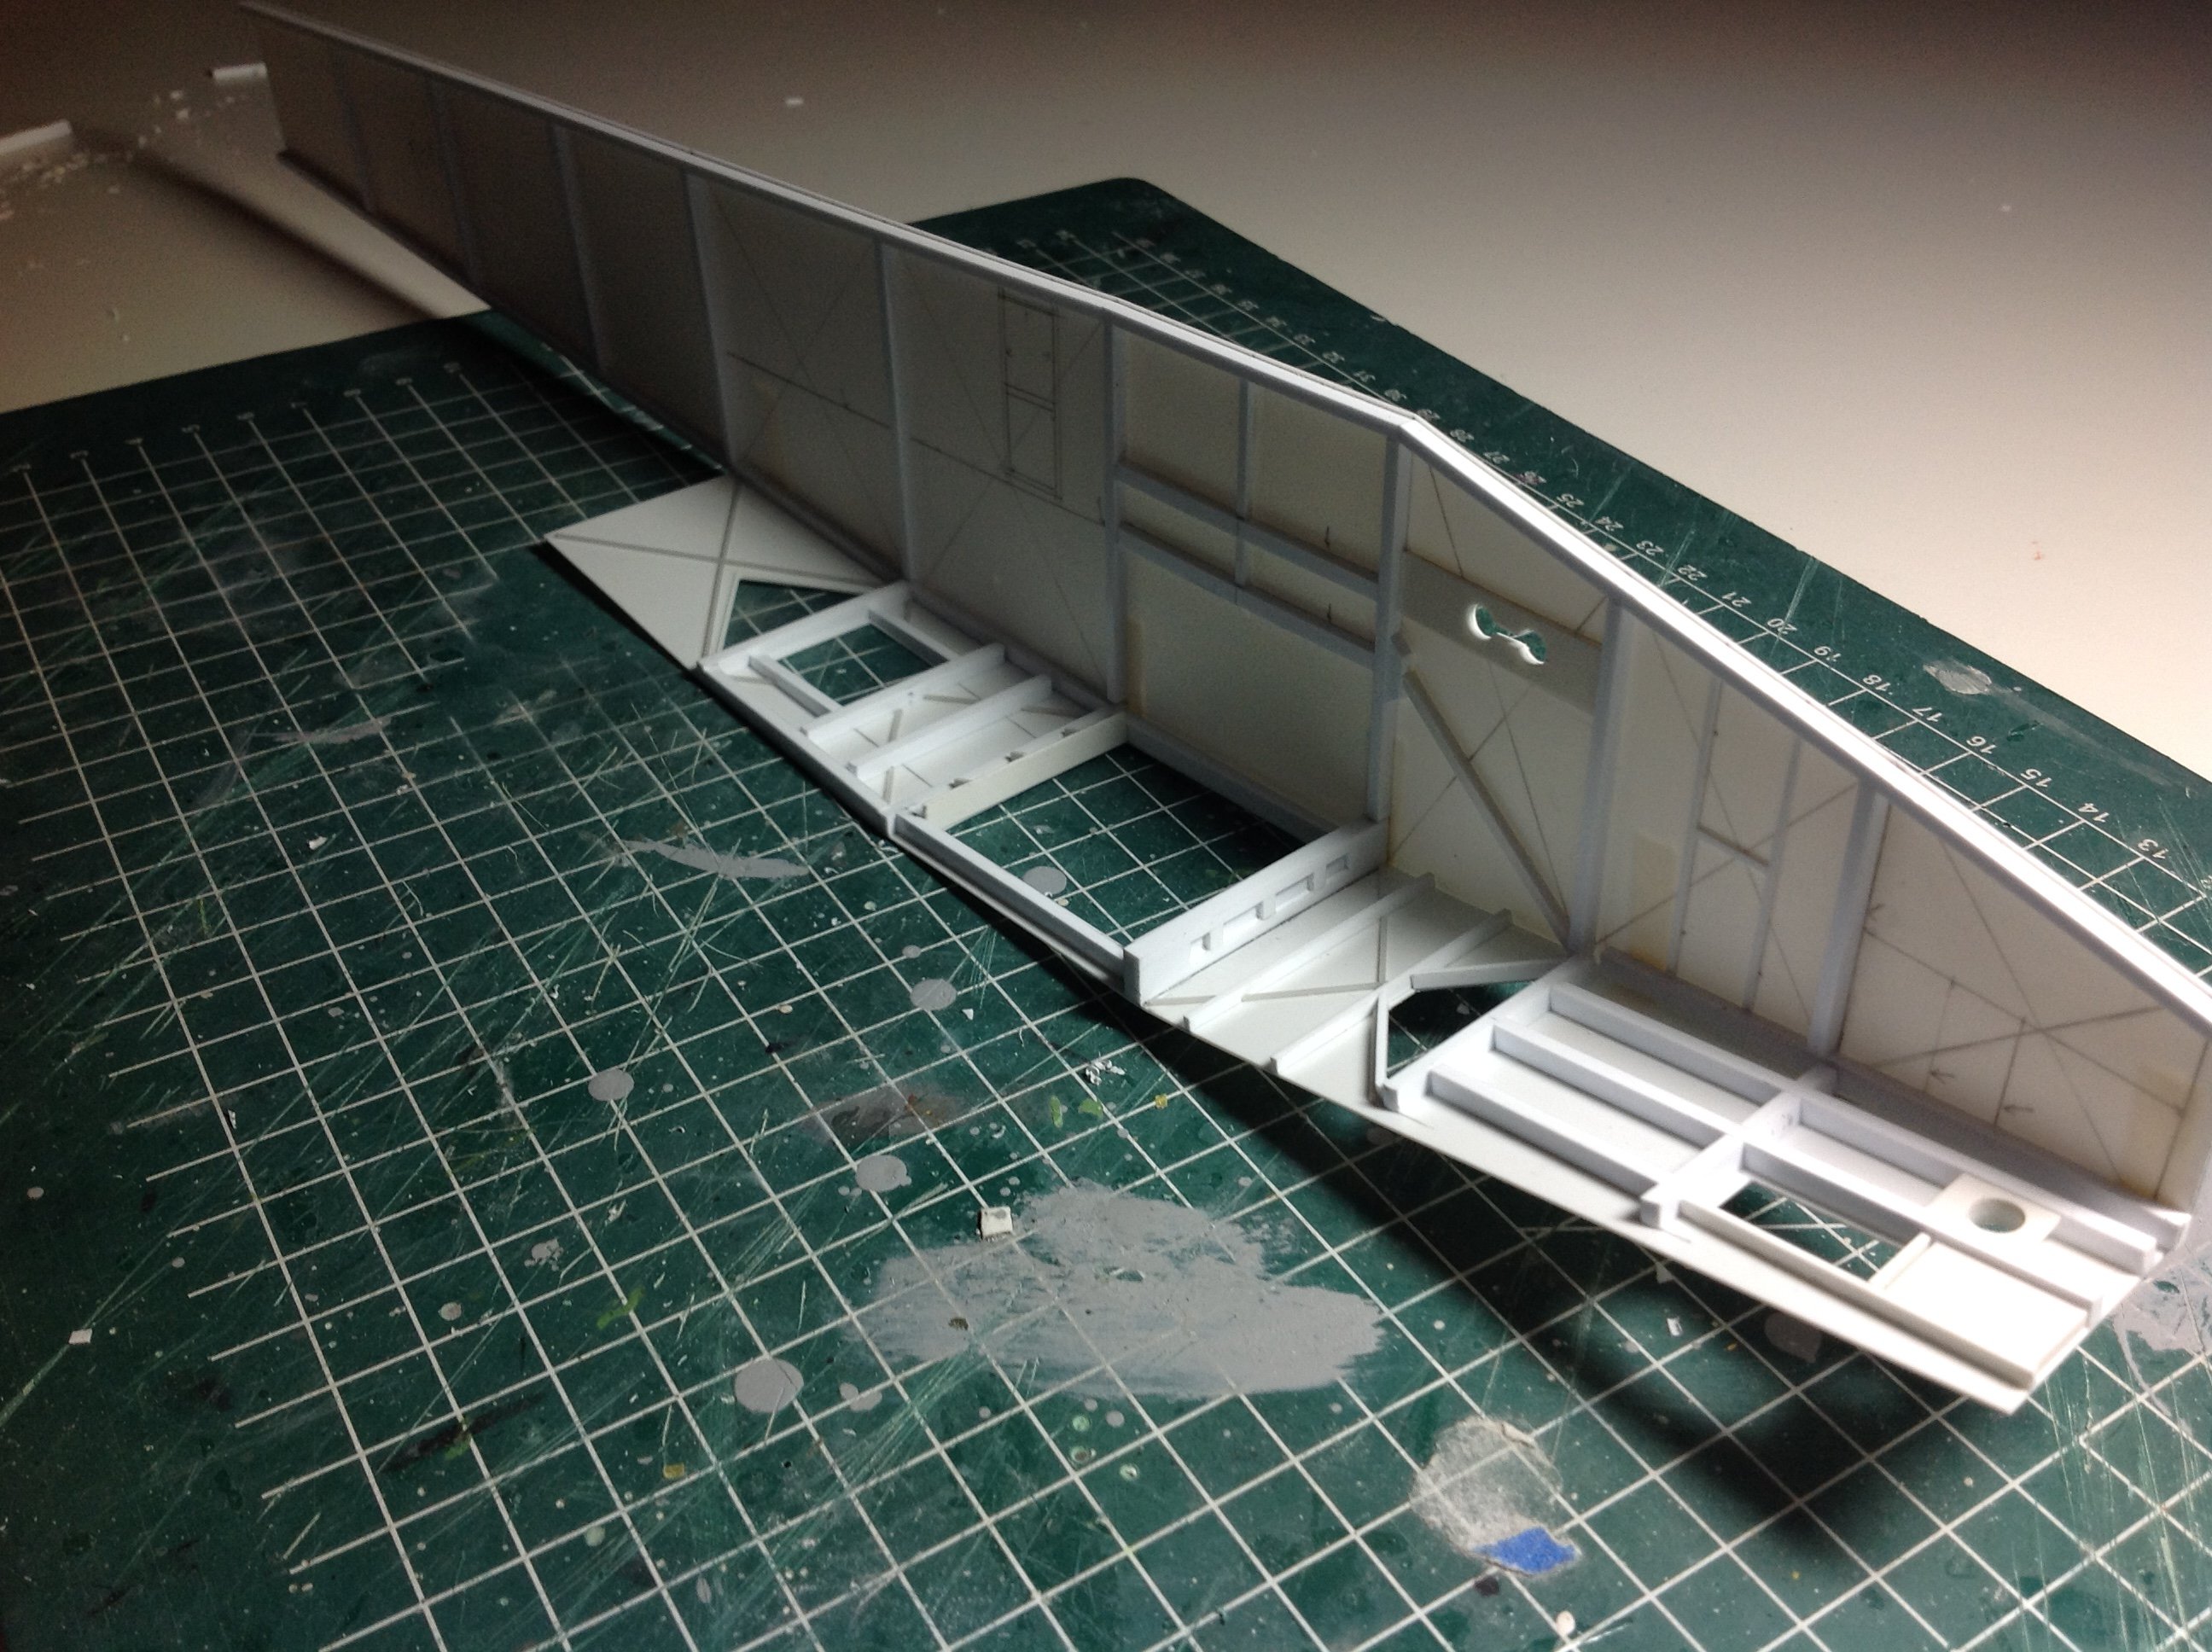
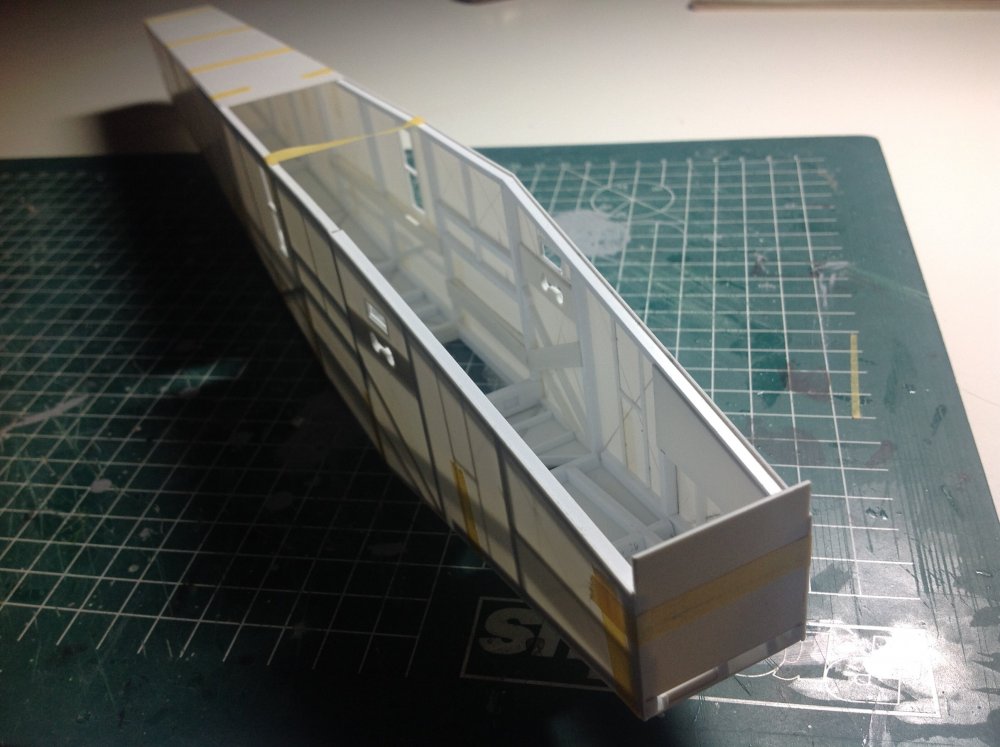
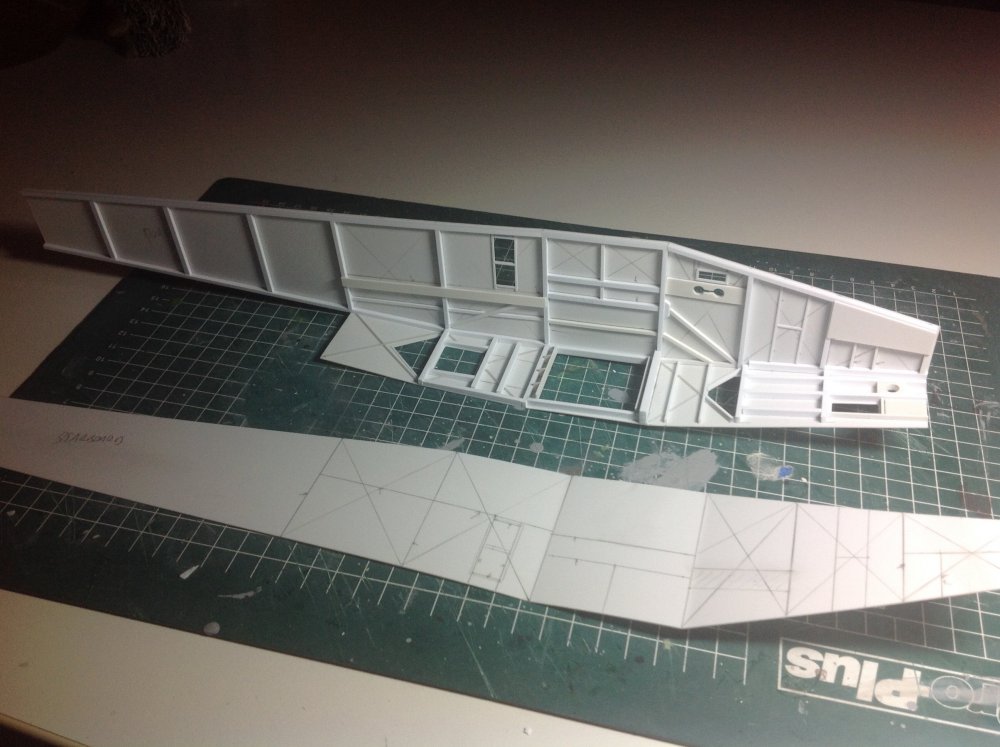
Indeed, but it is nice to know they are there. And usually when you do not build those details at some point you notice you haven't. The airframe is growing fast with the top and bottom rear fuselage panels having been made. With the crossmembers fitted they really stiffen up the structure. And if you press the thin sheet over the underlaying structure you can actually get the illusion of wooden frame under fabric covering. Be gentle though, too much pressure and you hear a cracking sound. Next is the top covering the cockpit, this is a complex shape. We'll see how that turns out. Cheers Cees

-
"oooomph" Thank heavens for that, couldn't bear to see another wingless bird. Hehe Keep it up Jerry. Cees
-
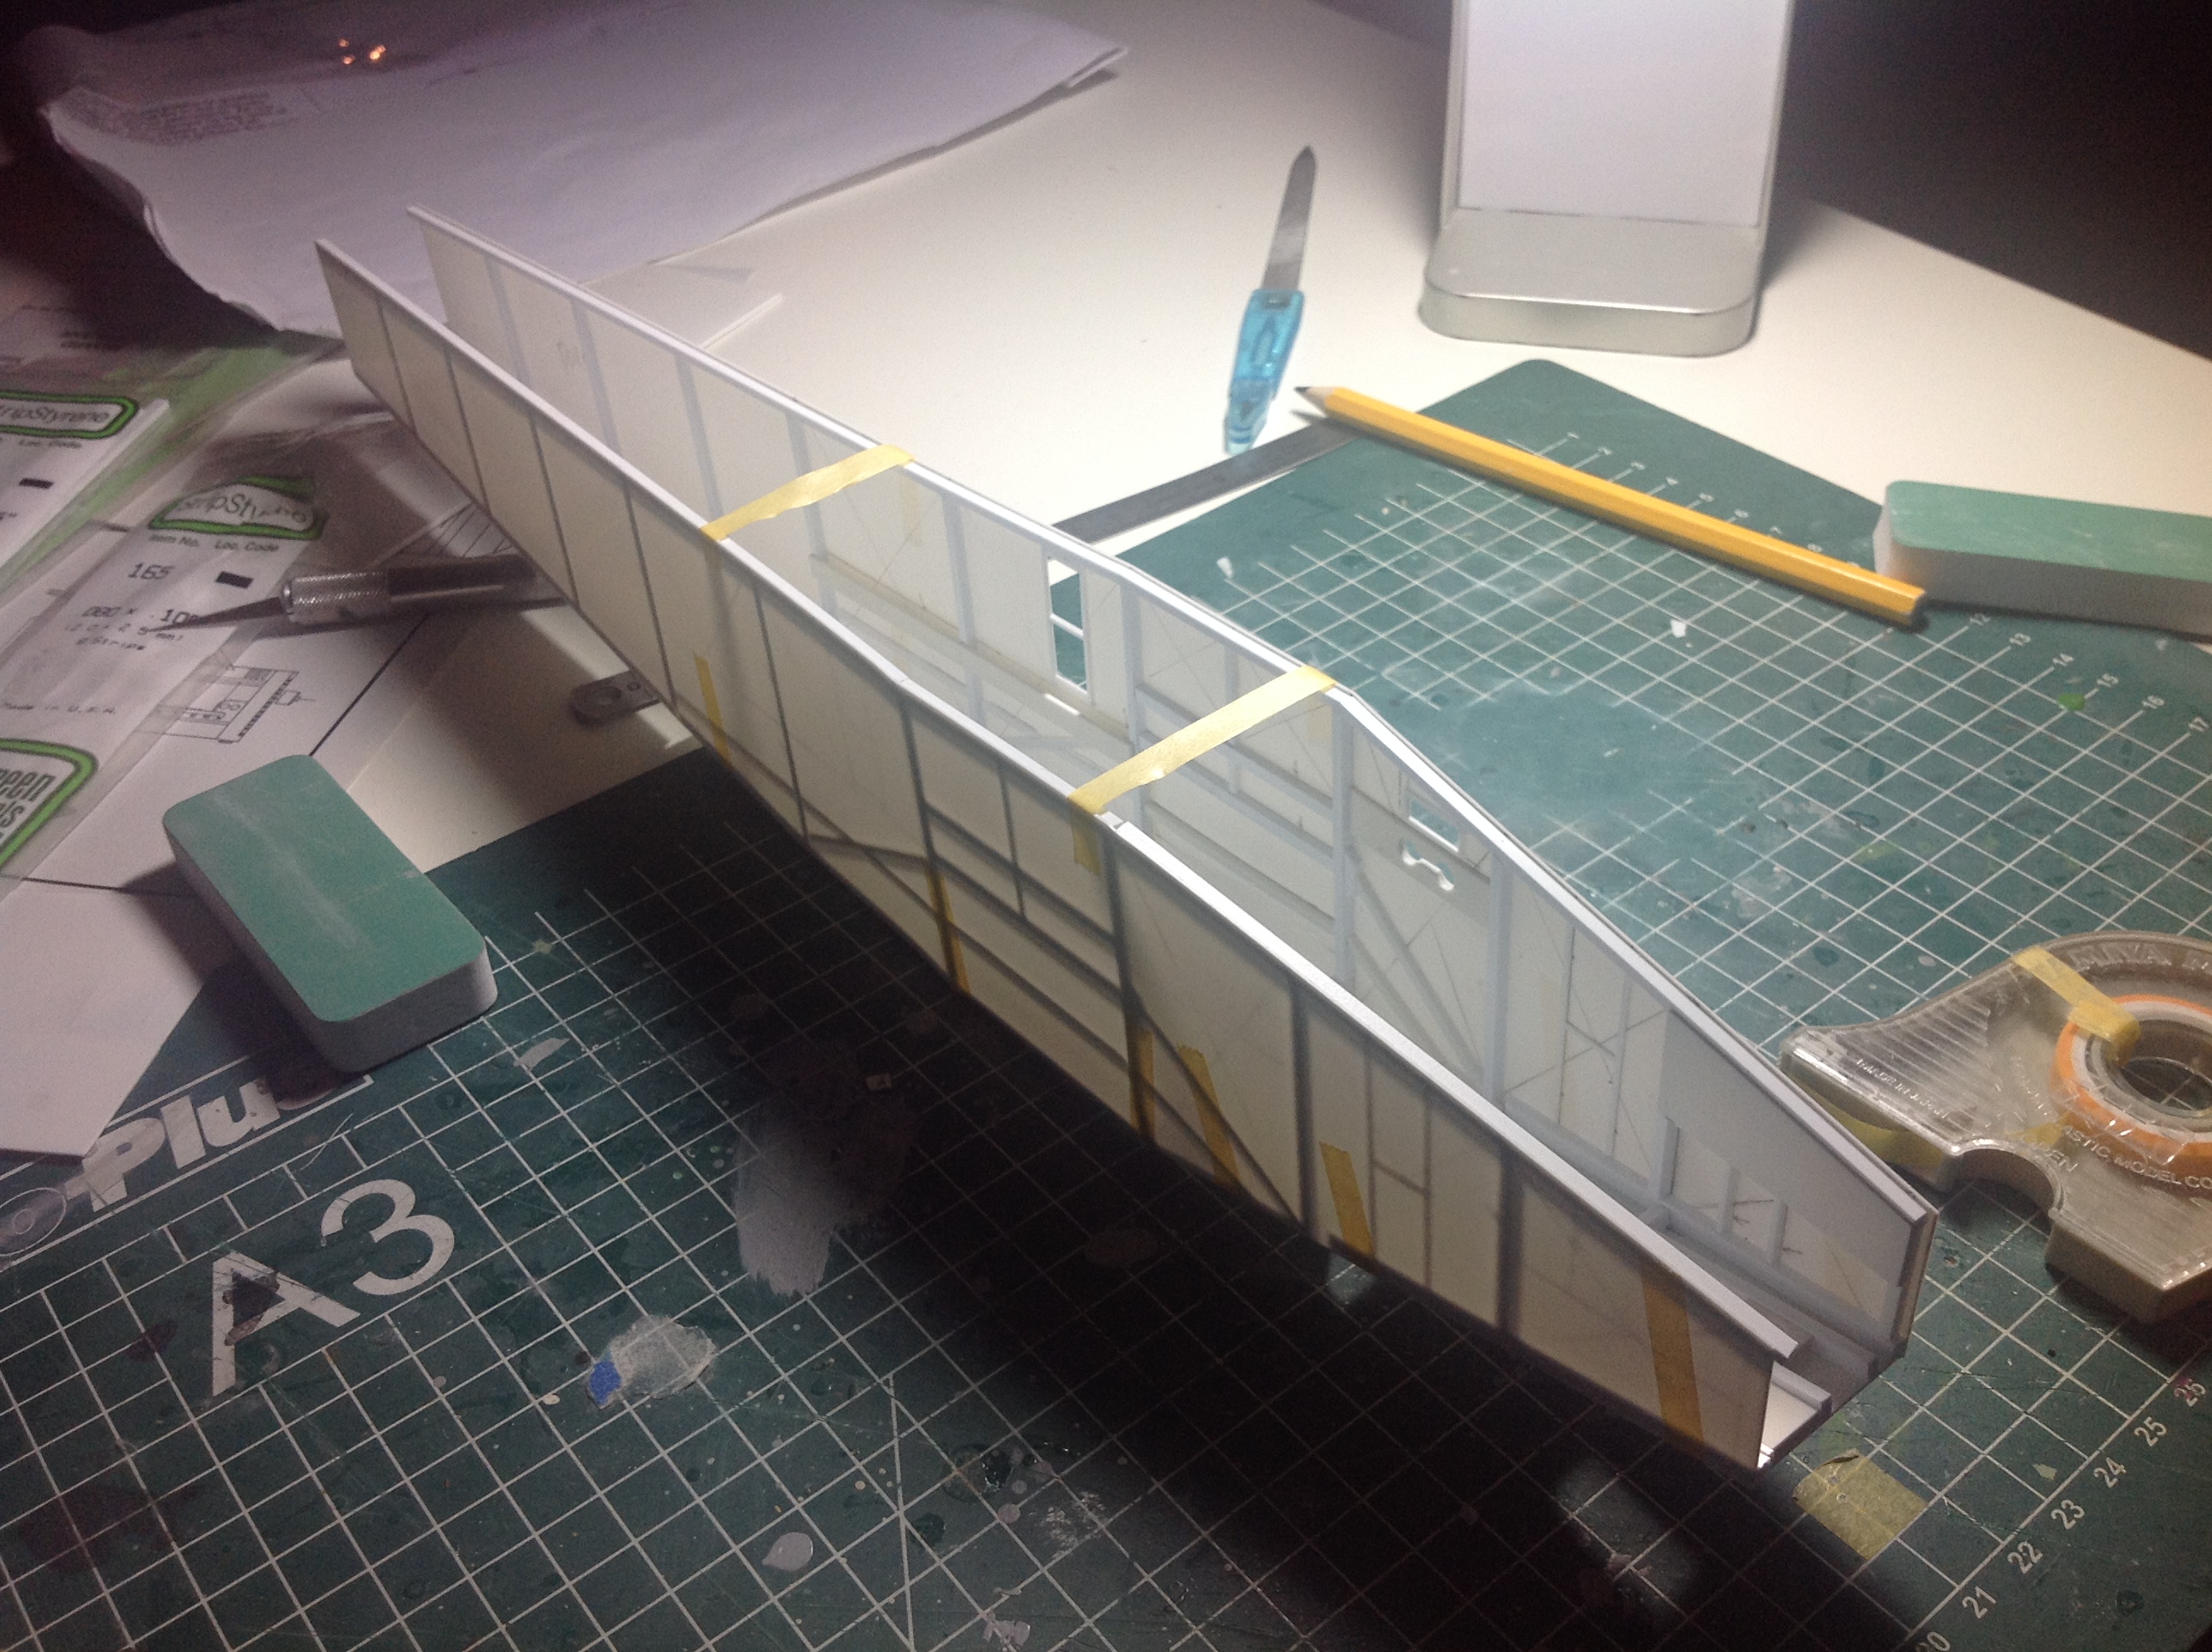
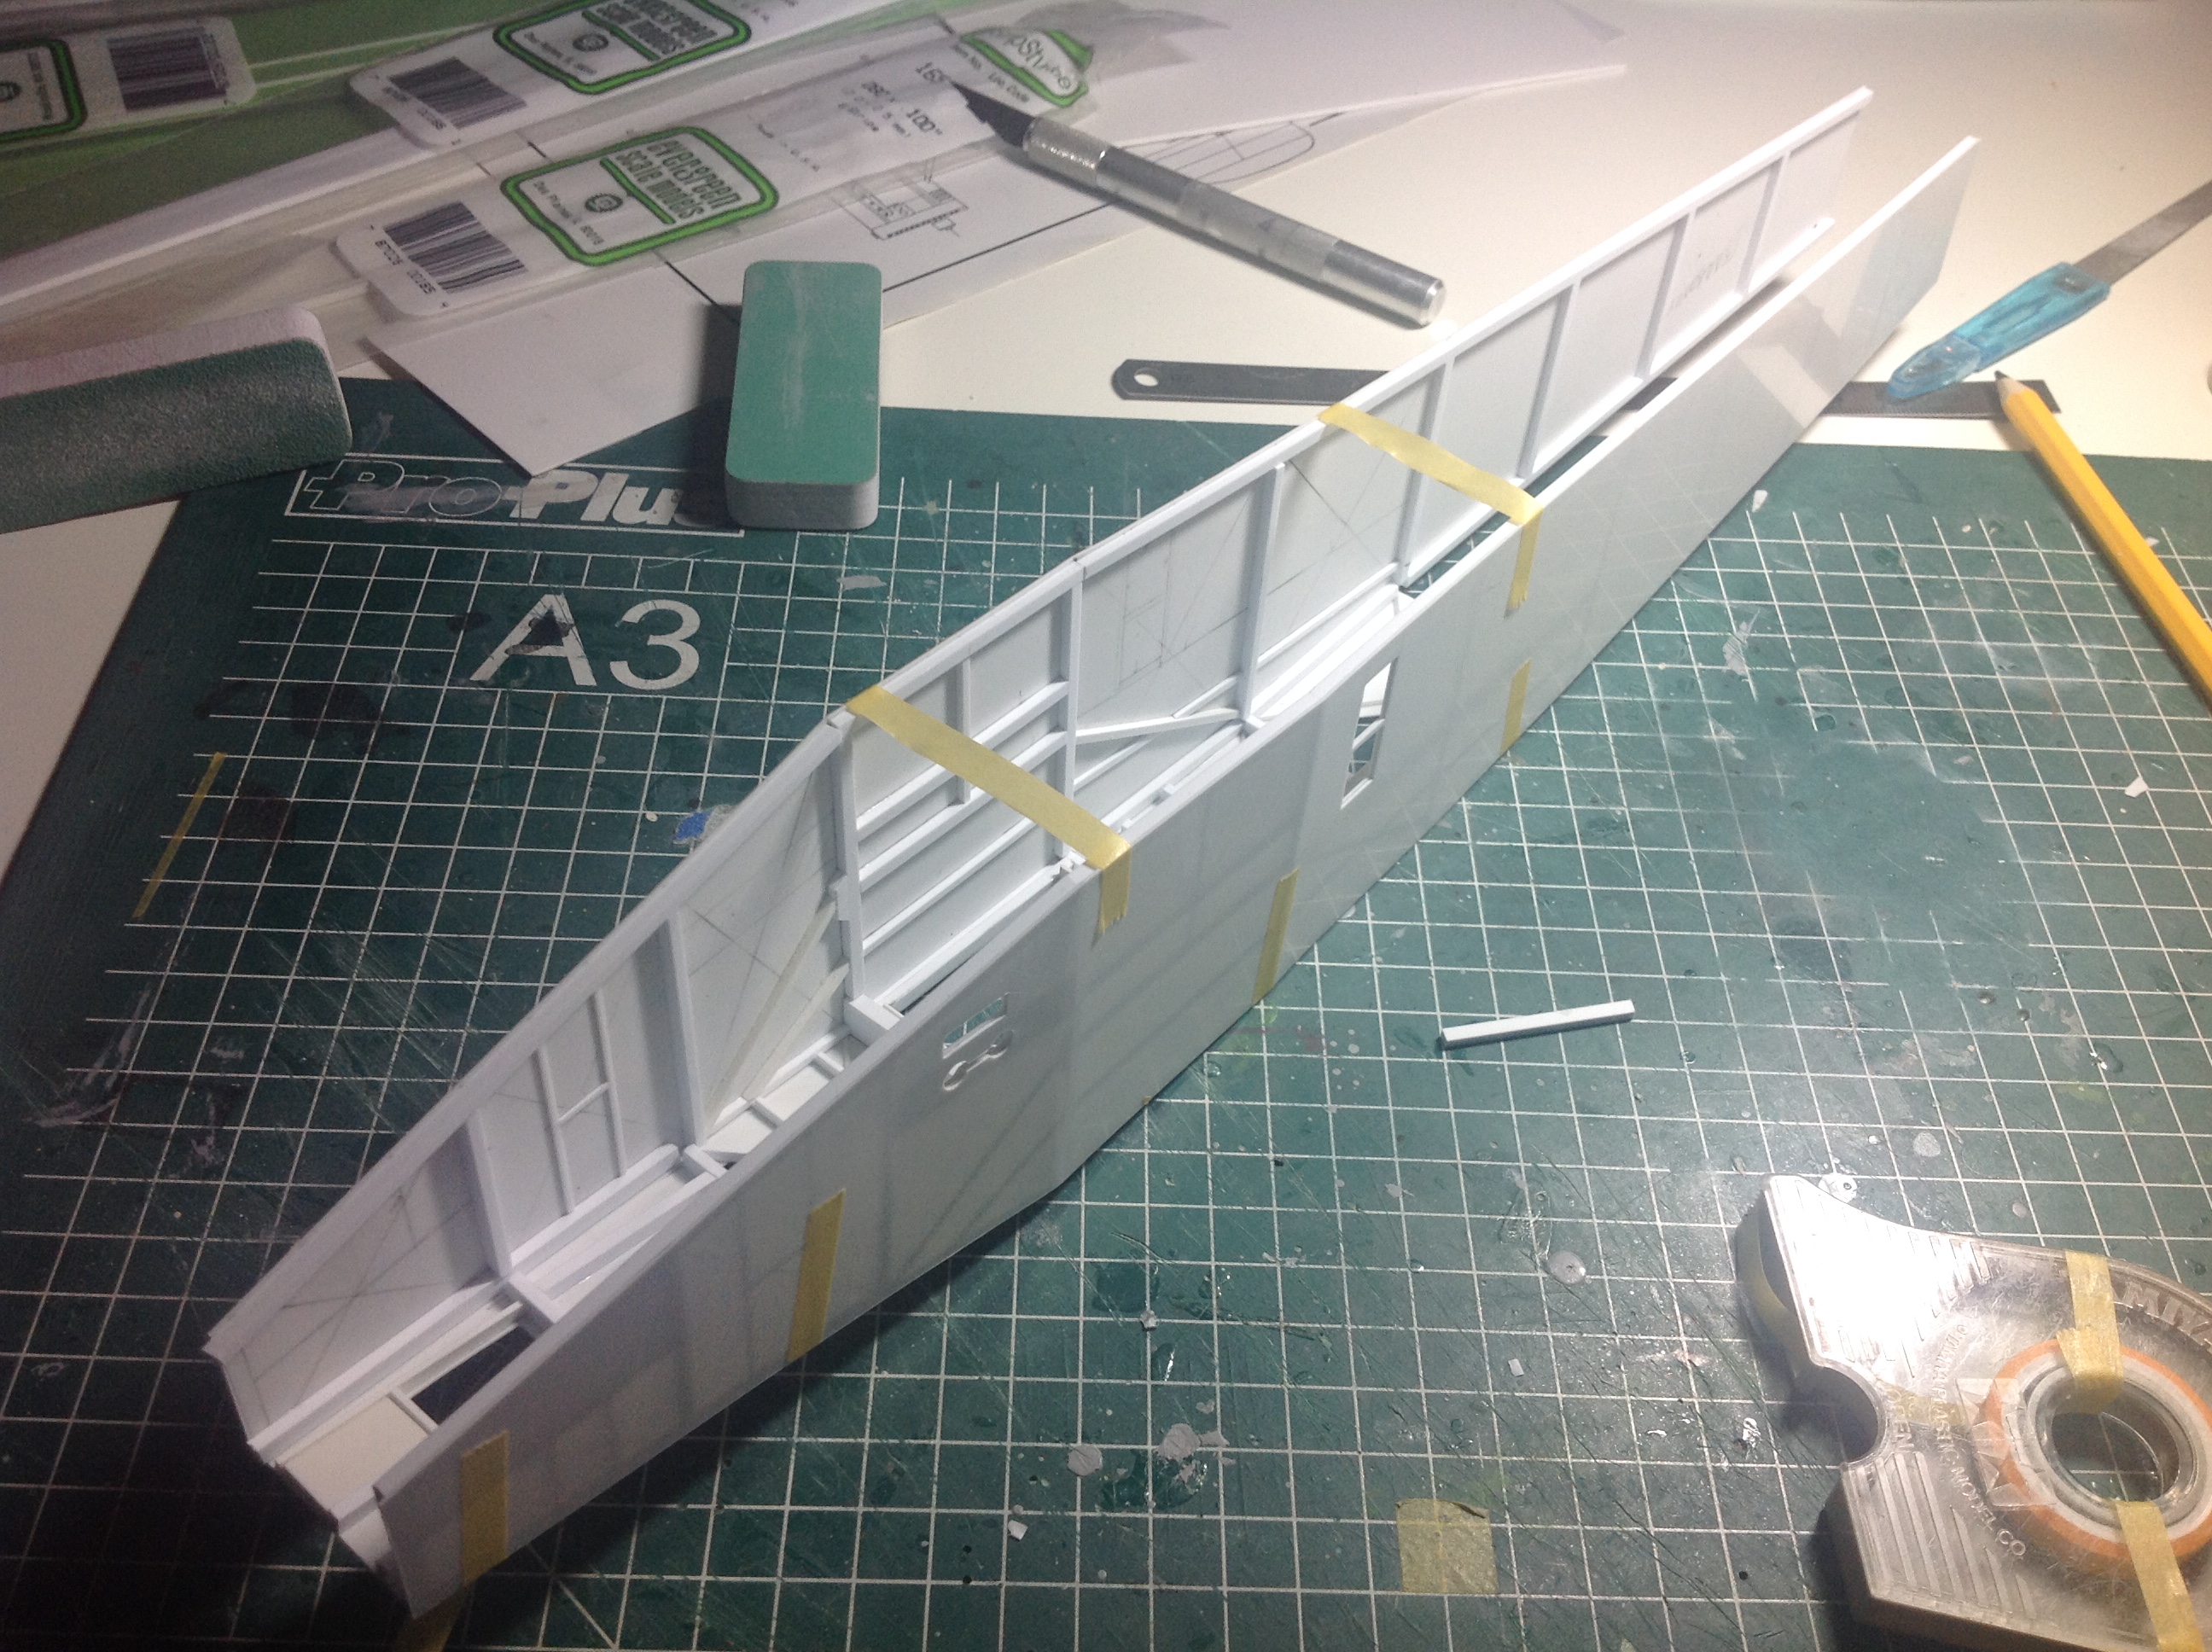
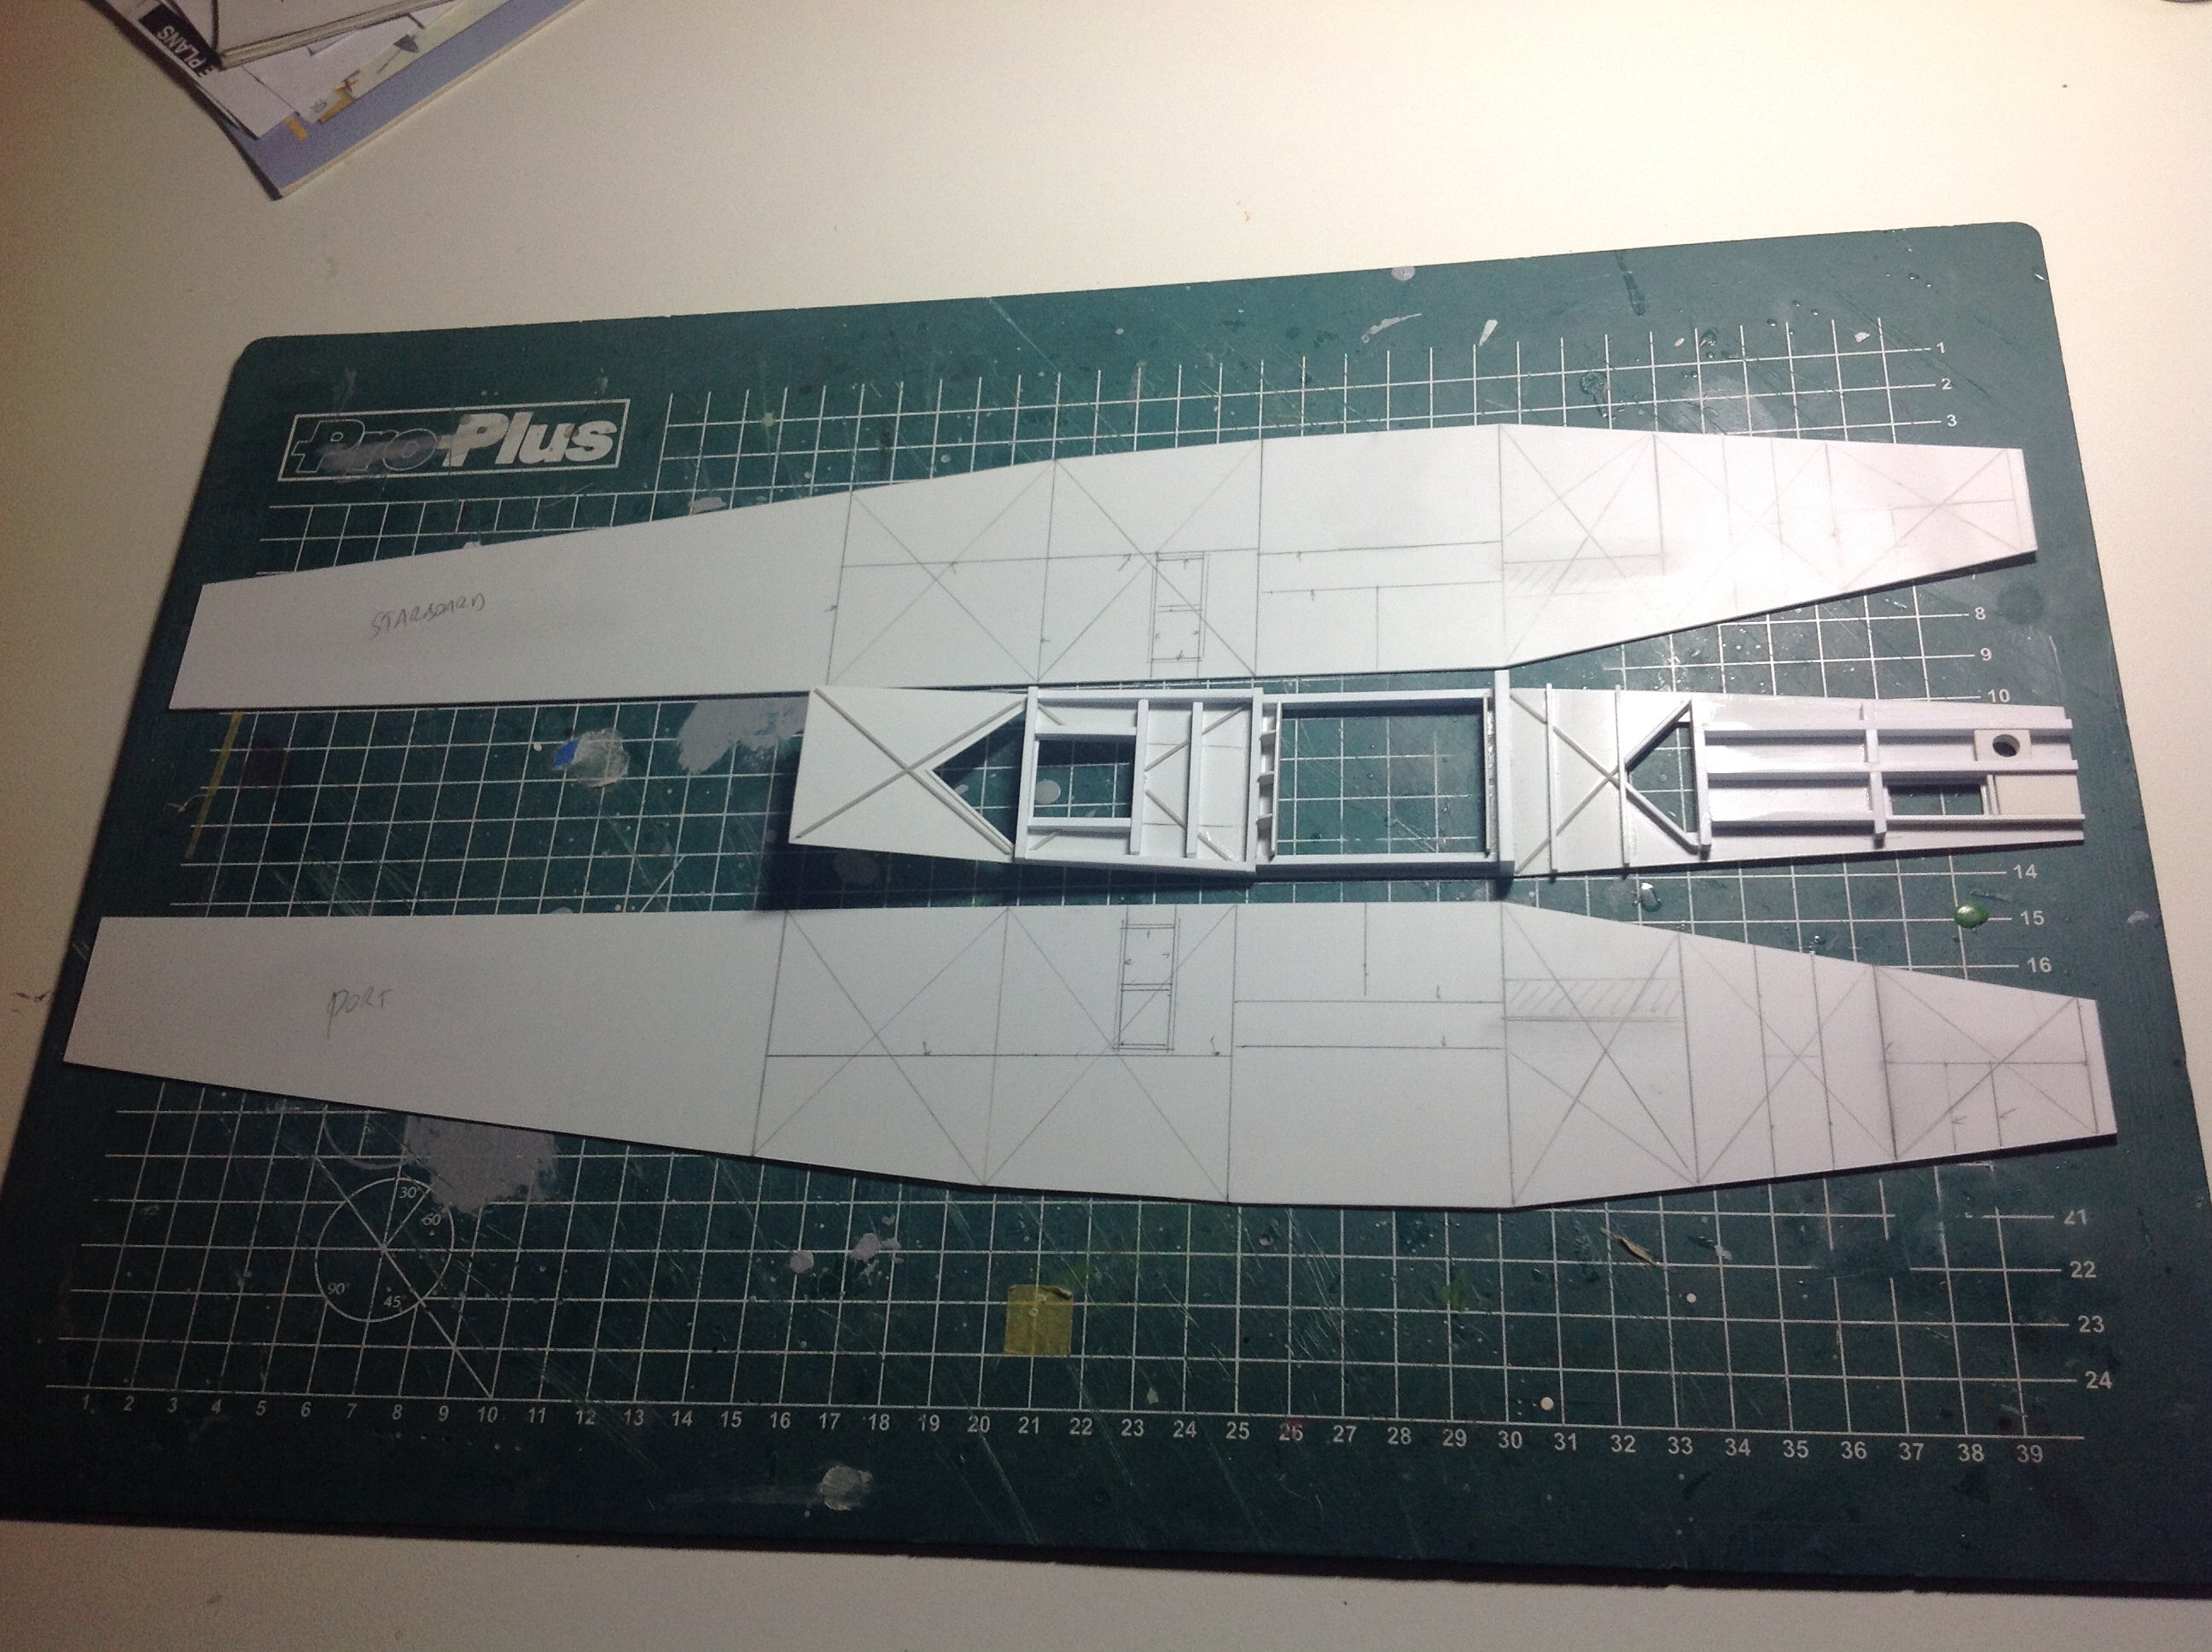
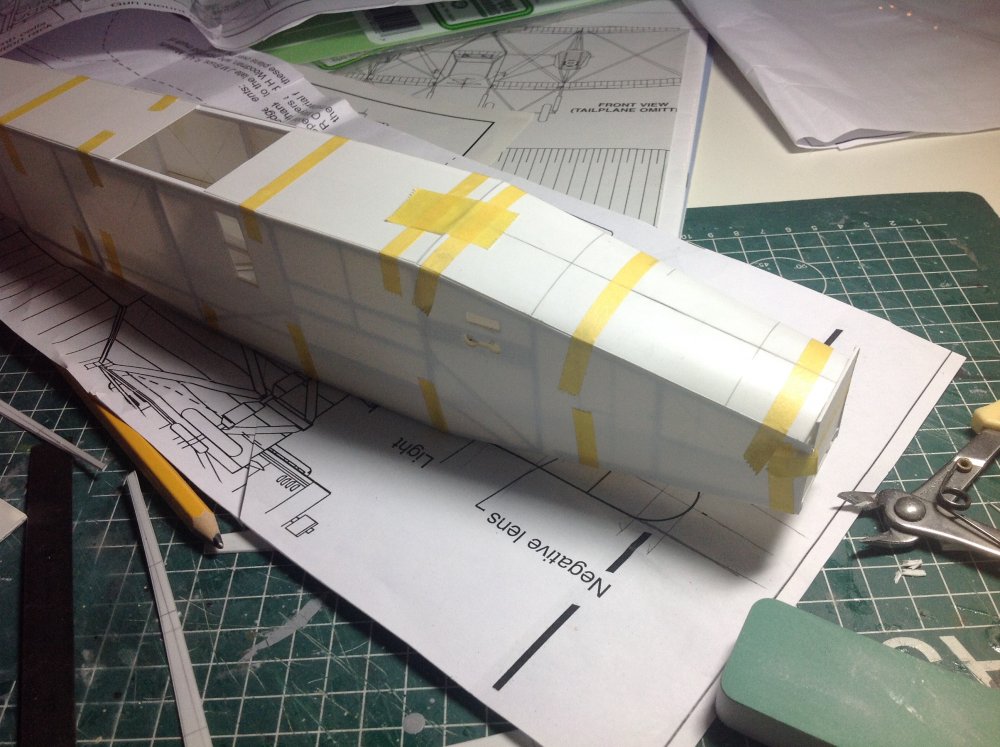
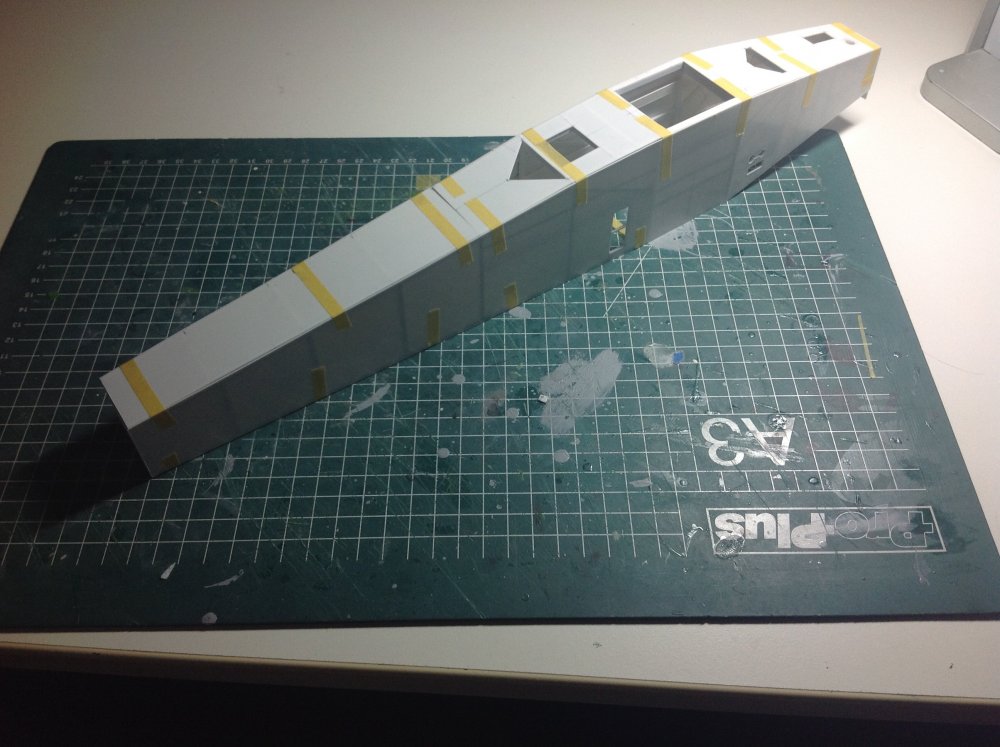
This afternoon another IPMS SIG RAF/USAAF modelling session took place, a great opportunity to get some work done. The starboard half is nearly finished. Bot sides fit neatly on the bottom part. Progress is up to speed. Cheers Cees


-
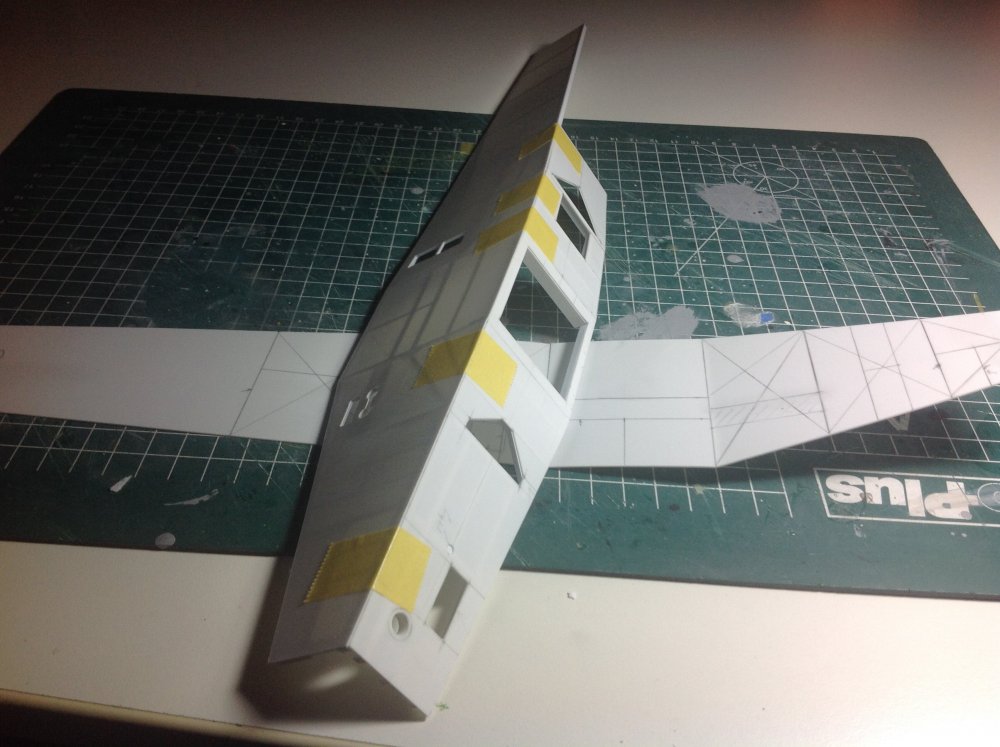
Some more progress. The portside is almost finished apart from a few details and the diagonal rigging wires. Those will be fitted after painting. Also make sure everything is straight and true to avoid fitproblems later on ( guess how I know). The starboard side is next. When that is finished the paining stage is reached as the area beneath the slatted floor panels, which have still to be made, need to painted as the space between the boards is quite wide. Cheers Cees

-
Wonderful, but how do you keep everything true and square, and more important to the proper ratio? It is all too easy to make the parts bigger than they have to be. Cheers Cees
-
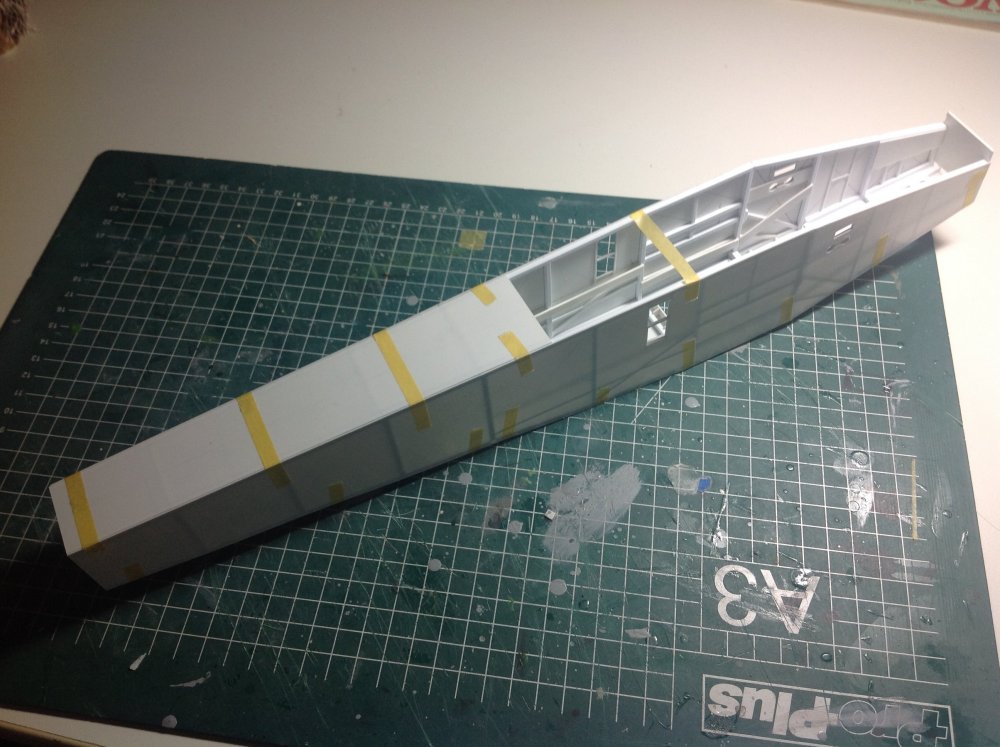
Hope so. Some more progress. Sticking strips is very relaxing. A very familiar shape is emerging. Cheers Cees

-
Trumpeter 1/32 F-14D Super Tomcat
Wingco57 replied to petertohen's topic in LSM 1/35 and Larger Work In Progress
Hi Peter, Welcome to LSM, you sure do know how to make an entrance. The Tomcat is one great looking beast, especially in 1/32. You can upload photographs to the forum just by clicking on the paperclip in the lefthand corner of the posting thingy. Cheers Cees -
Profimodeller Fi103 V1
Wingco57 replied to JeroenPeters's topic in LSM 1/35 and Larger Work In Progress
Things without wings? -
Tamiya F-4J Phantom VMFA-451 "Warlords" WIP
Wingco57 replied to a topic in LSM 1/35 and Larger Work In Progress
Where do you get a spare fuselage from, Danny? Cheers Cees -
Thanks, working on it. Cheers Cees

-
What a nice package. As you mention the option to install glass into the separate framing would make glueing without smearing very interesting to say the least, or possibly using Future might be helpful here. Cheers Cees
-
Airfix hawker typhoon Mk.1B 1/24
Wingco57 replied to coolboxx's topic in LSM 1/35 and Larger Work In Progress
Thanks, it looks great. -
Profimodeller Fi103 V1
Wingco57 replied to JeroenPeters's topic in LSM 1/35 and Larger Work In Progress
Same here, wonderful, it looks like a little weekend project but it has taken you several months and a few more grey hairs. But you got there in the end and the result is wonderful. Cheers Cees -
Beautiful, something I would chicken out of on the Manchester and upcoming Lanc. Chees Cees
-
Petr, any updates on the Whirlwind, Typhoon and Sea Fury projects. Forgive me for being very excited about those. Cheers Cees
-
Revell spitfire mk.IXc
Wingco57 replied to coolboxx's topic in LSM 1/32 and Larger Aircraft Ready for Inspection
Your first RAF WW2 build? Could have fooled me, I love the patina and weathering. What's your opinion of the Revell kit? Cheers Cees -
Airfix hawker typhoon Mk.1B 1/24
Wingco57 replied to coolboxx's topic in LSM 1/35 and Larger Work In Progress
Both -
Trumpeter 1/32 A1-J Skyraider
Wingco57 replied to WattsNZ's topic in LSM 1/35 and Larger Work In Progress
What's the yellow disc? Cheers Cees -
Spitfire IXc - Skalski Circus - April 1943
Wingco57 replied to Clostermann's topic in LSM 1/35 and Larger Work In Progress
Wow that is totally and utterly fantastic. I hope you didn't get freezebrain from eating too many icecreamlollies. Cheer Cees -
Tamiya P-51 Mustang "Betty Lou"
Wingco57 replied to antonio argudo's topic in LSM 1/35 and Larger Work In Progress
Looking good already, so you will represent the aluminium skin and the painted aluminium puttied wings. Looking forward to see how you progress. Cheers Cees -
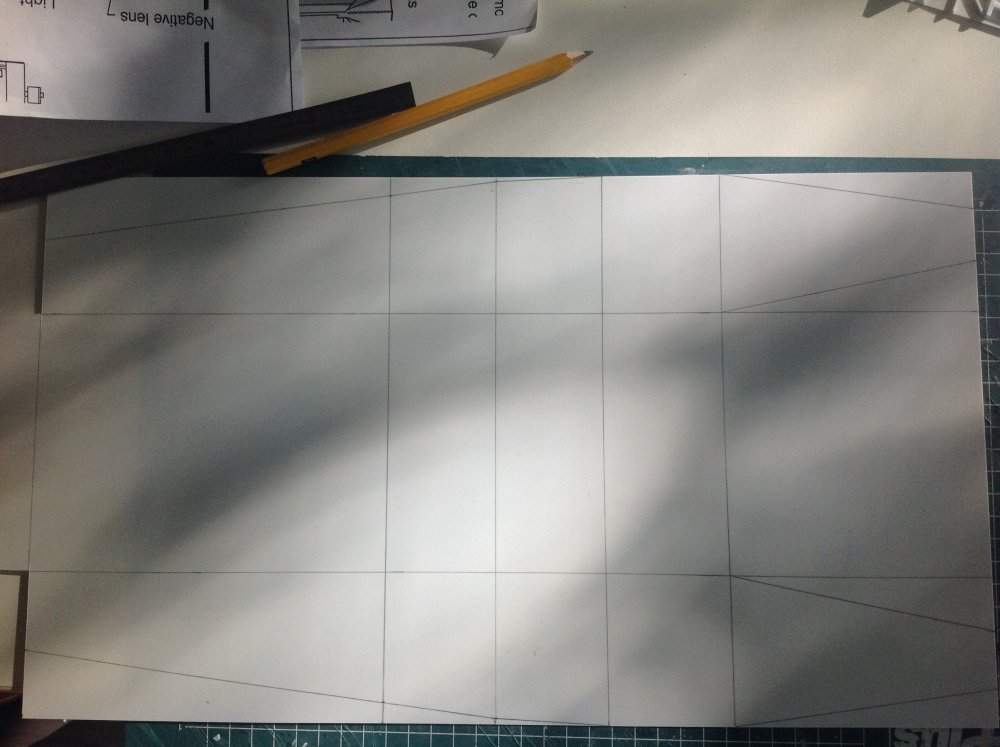
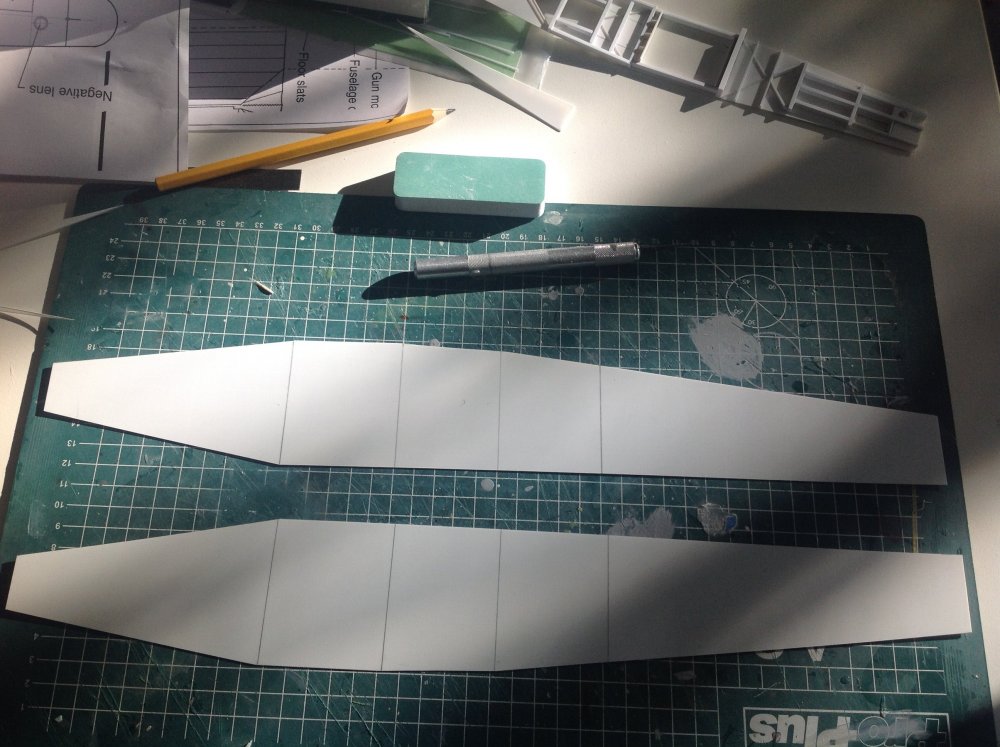
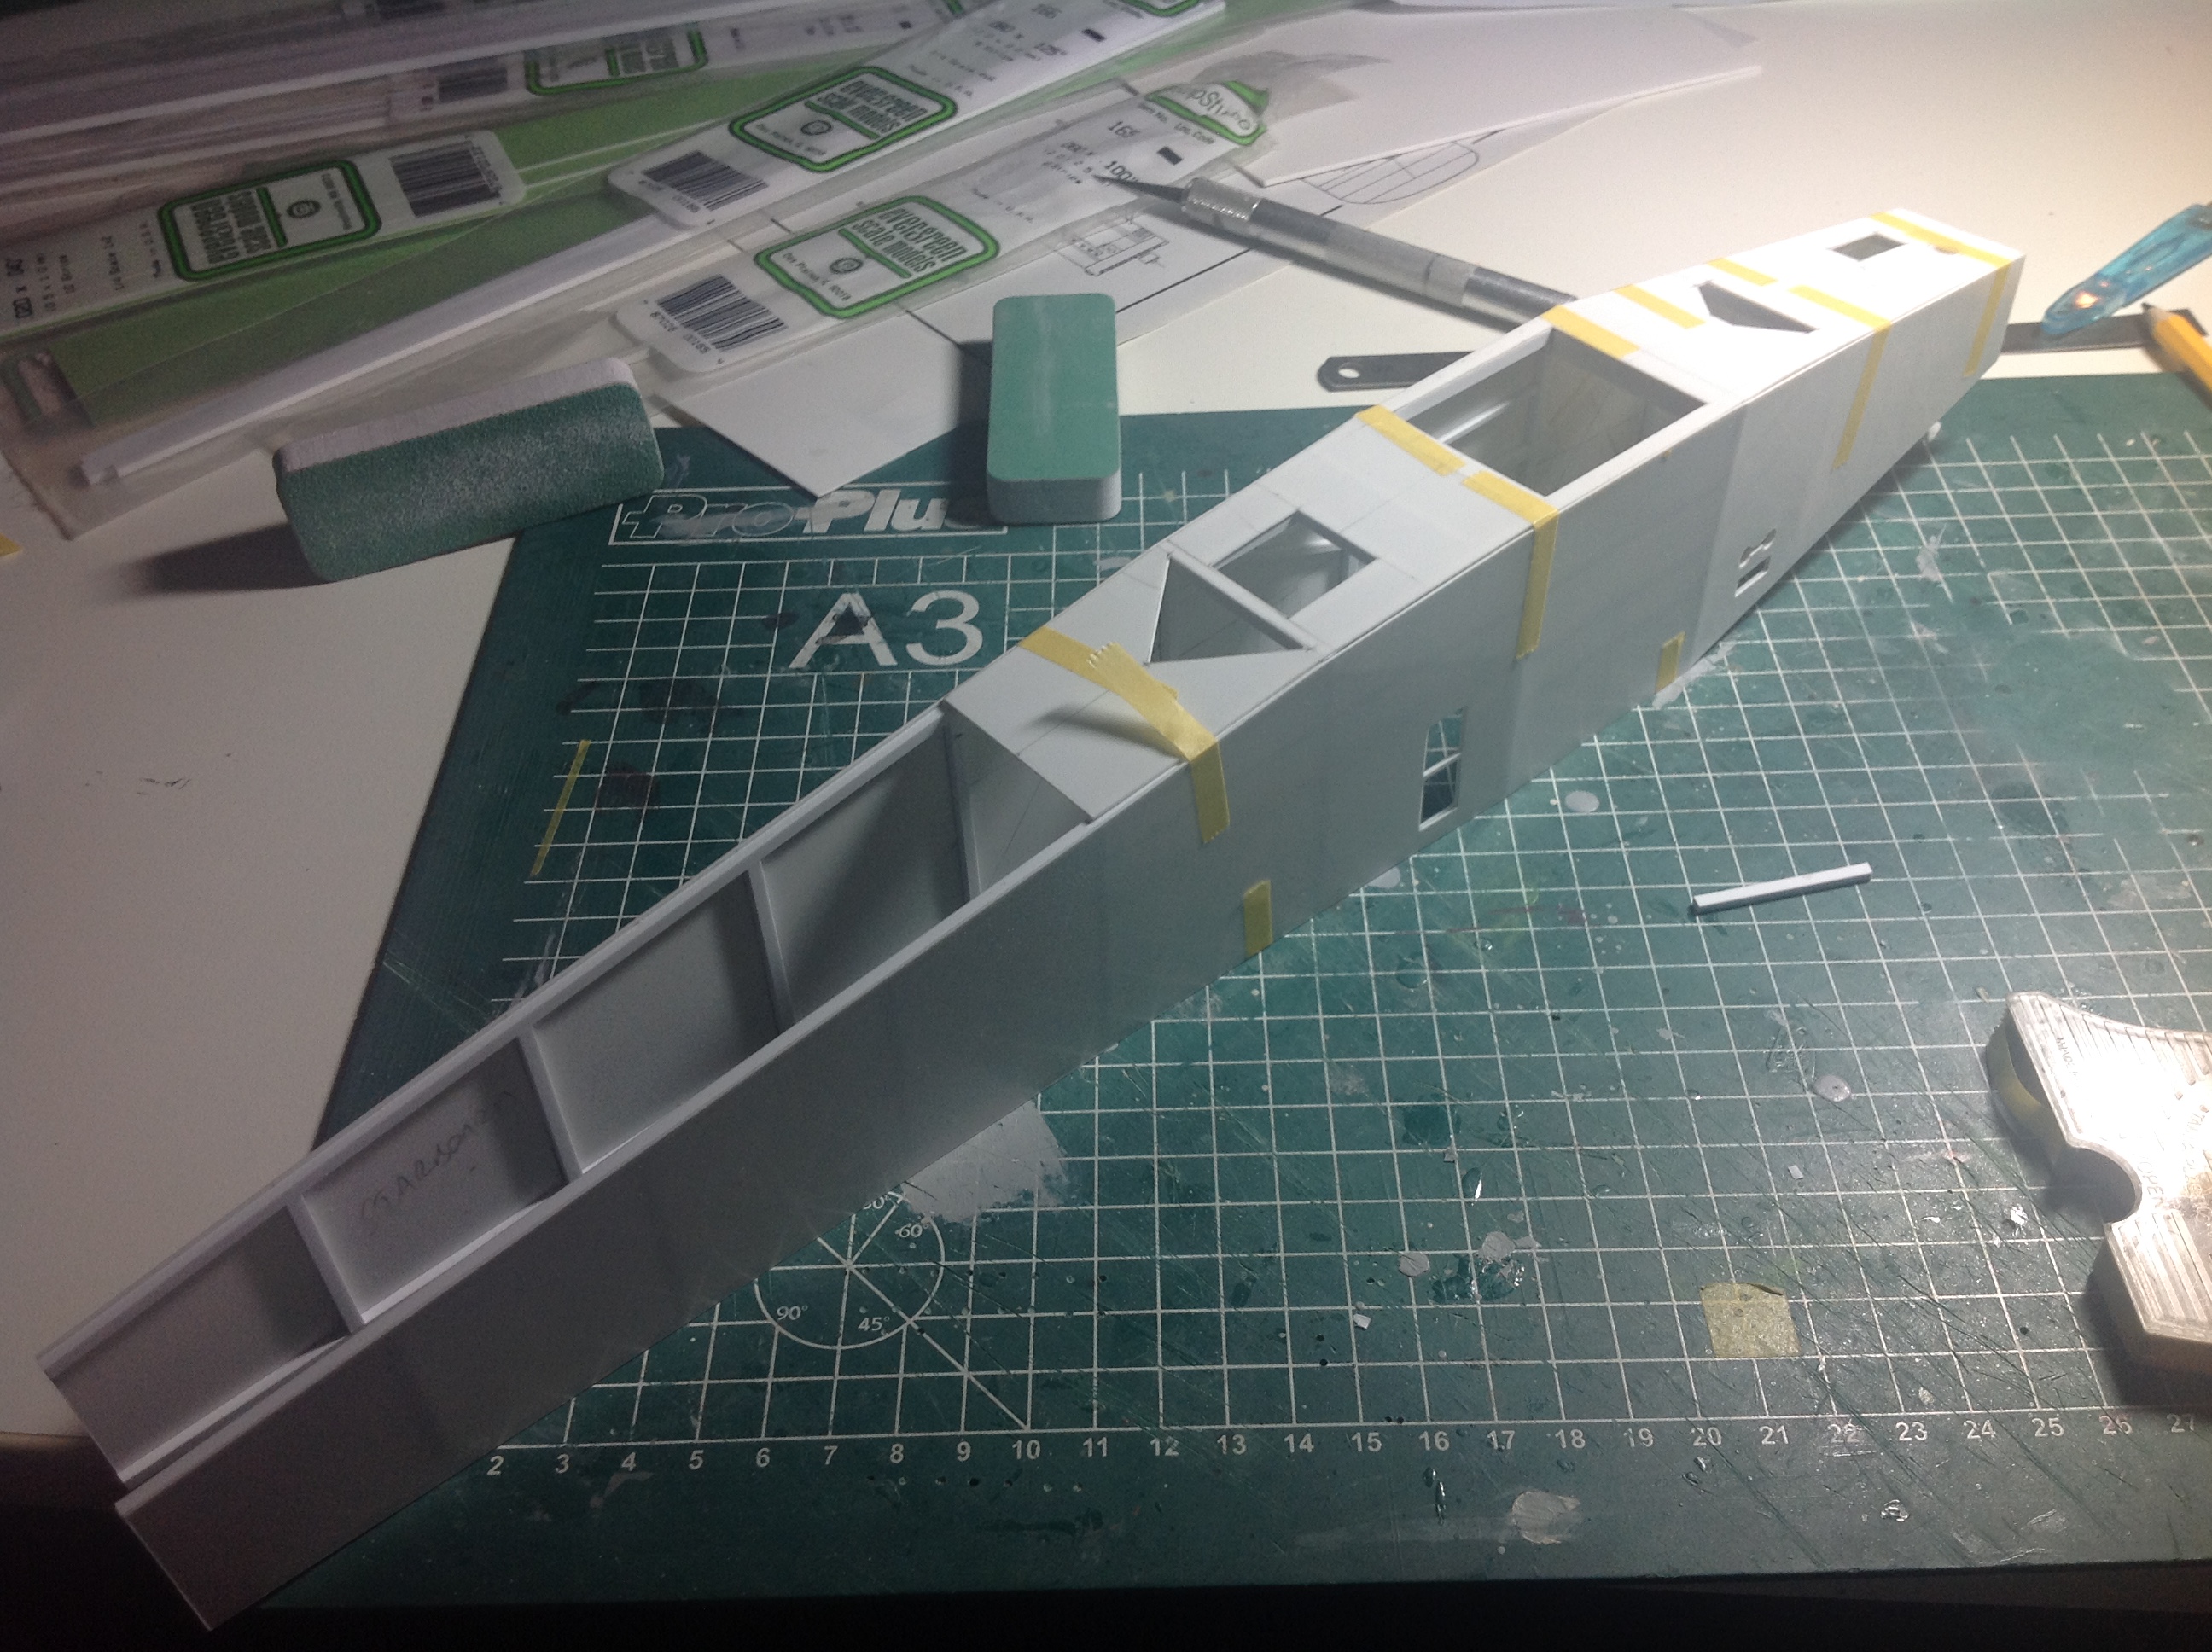
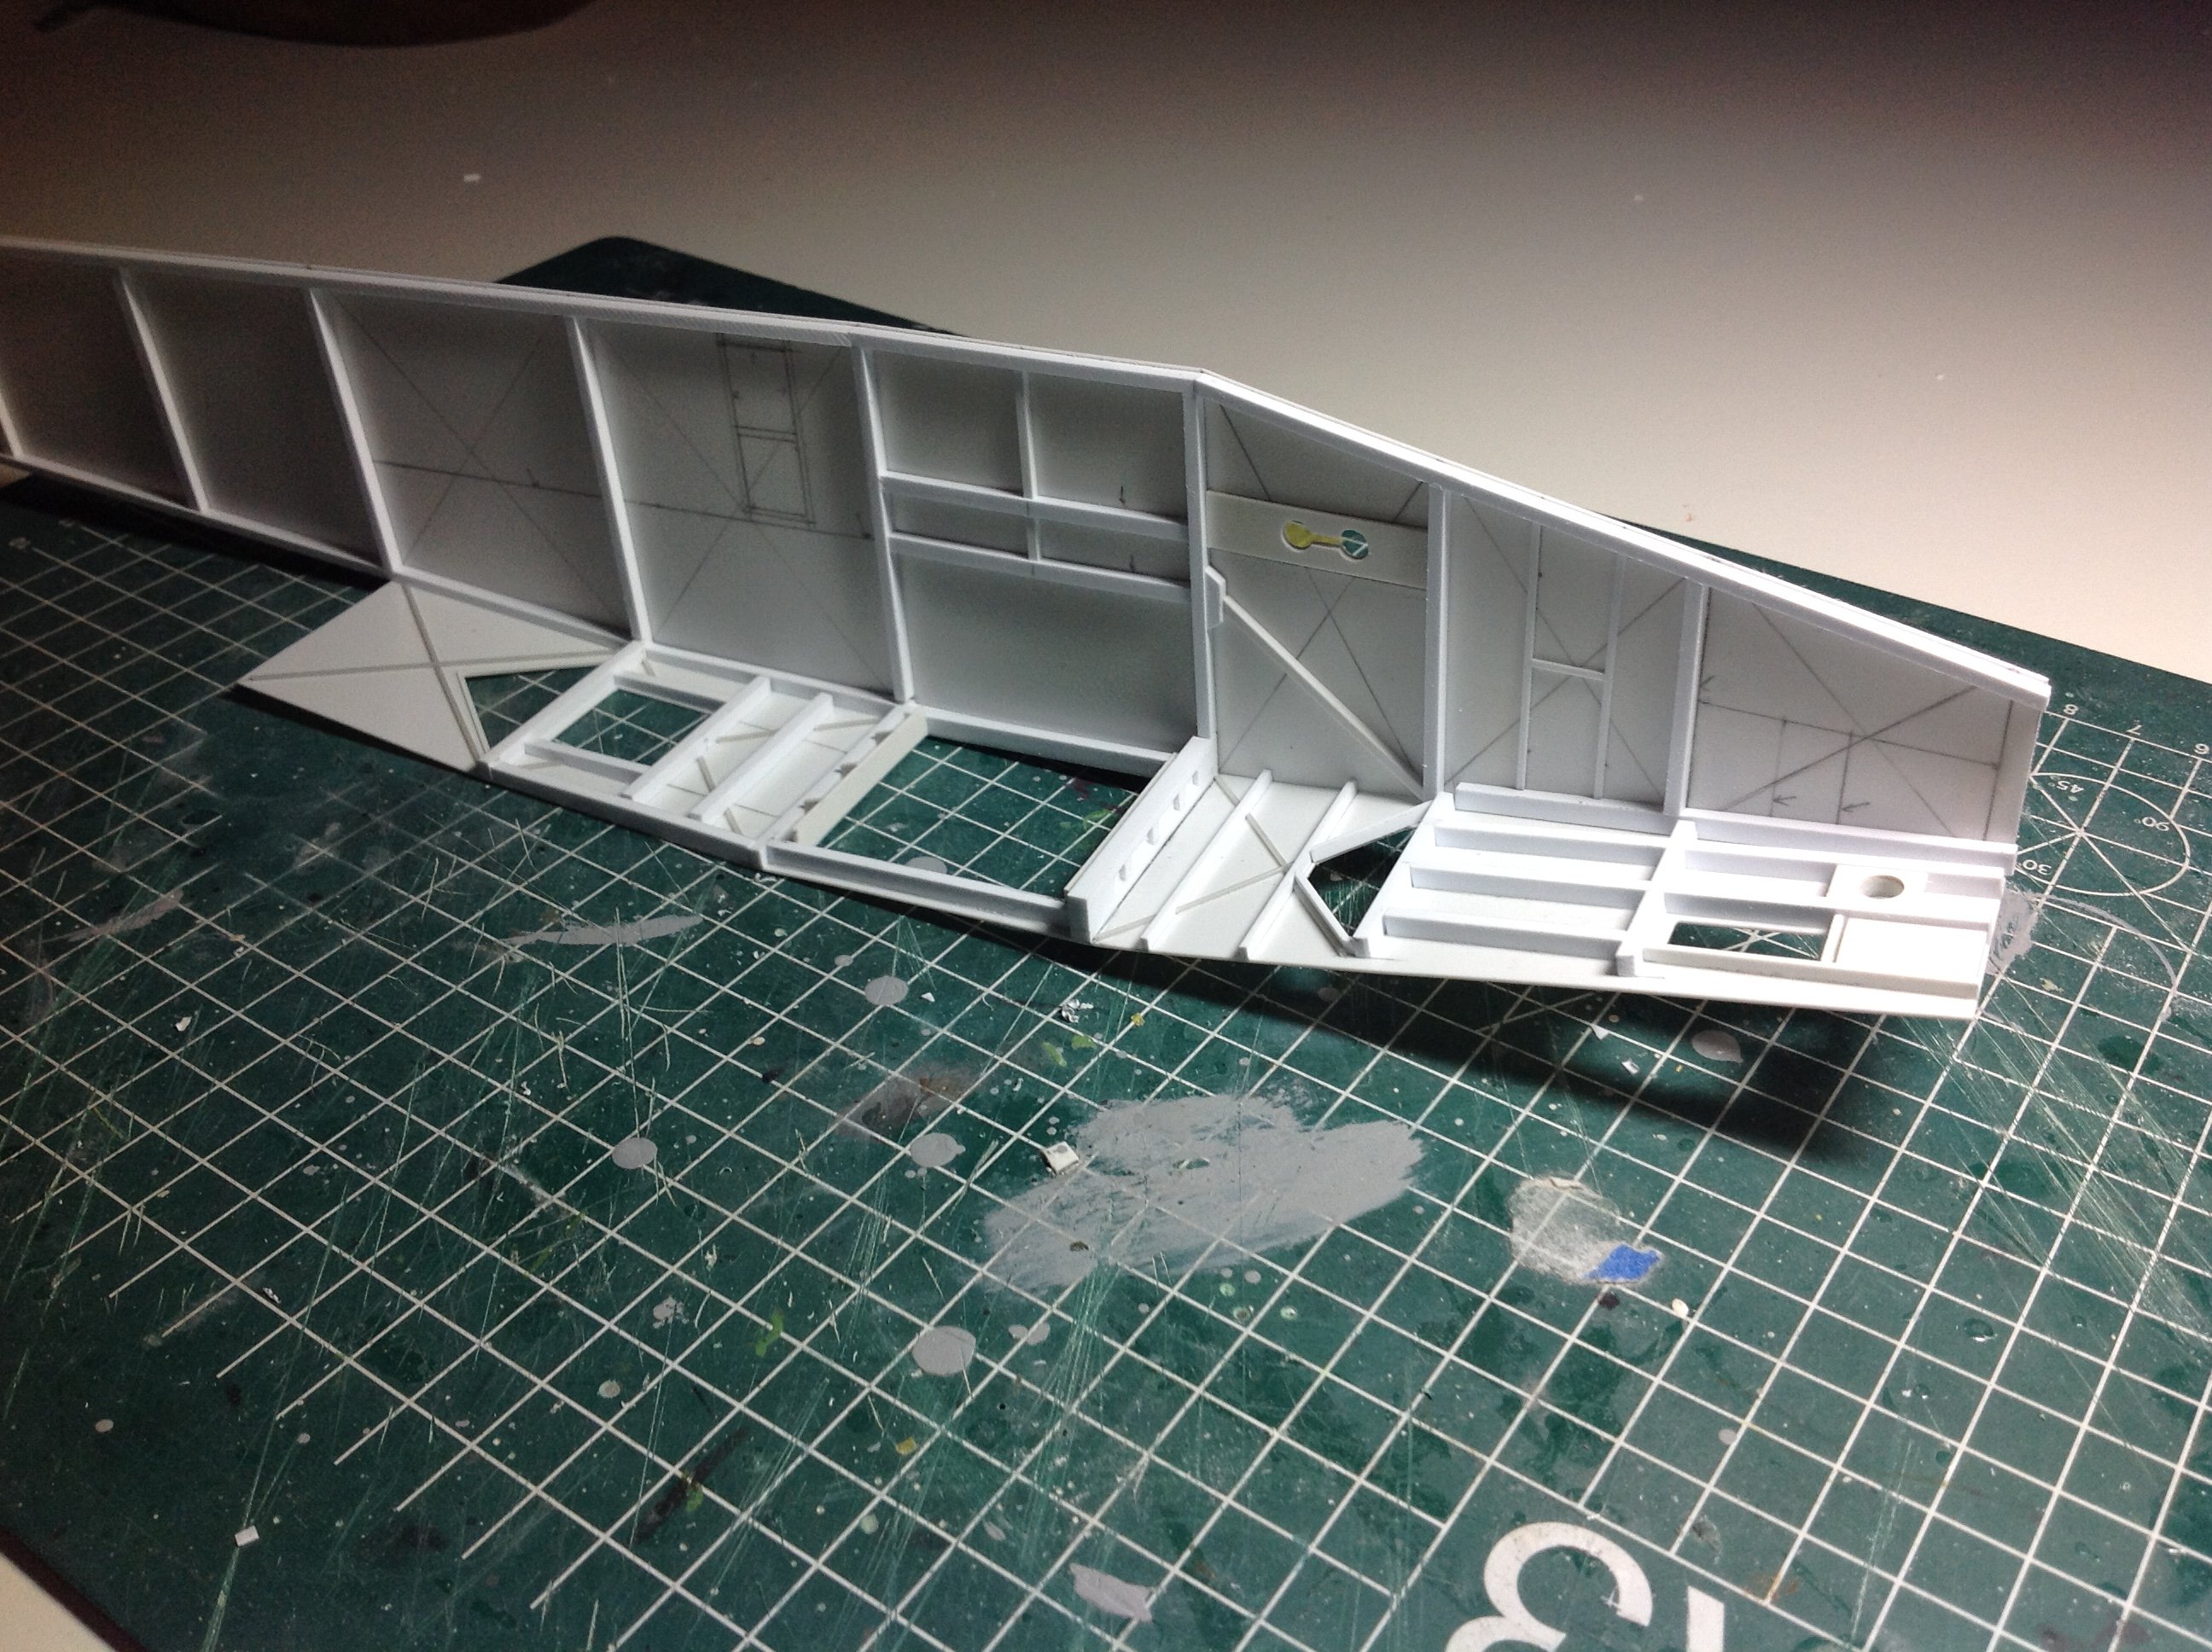
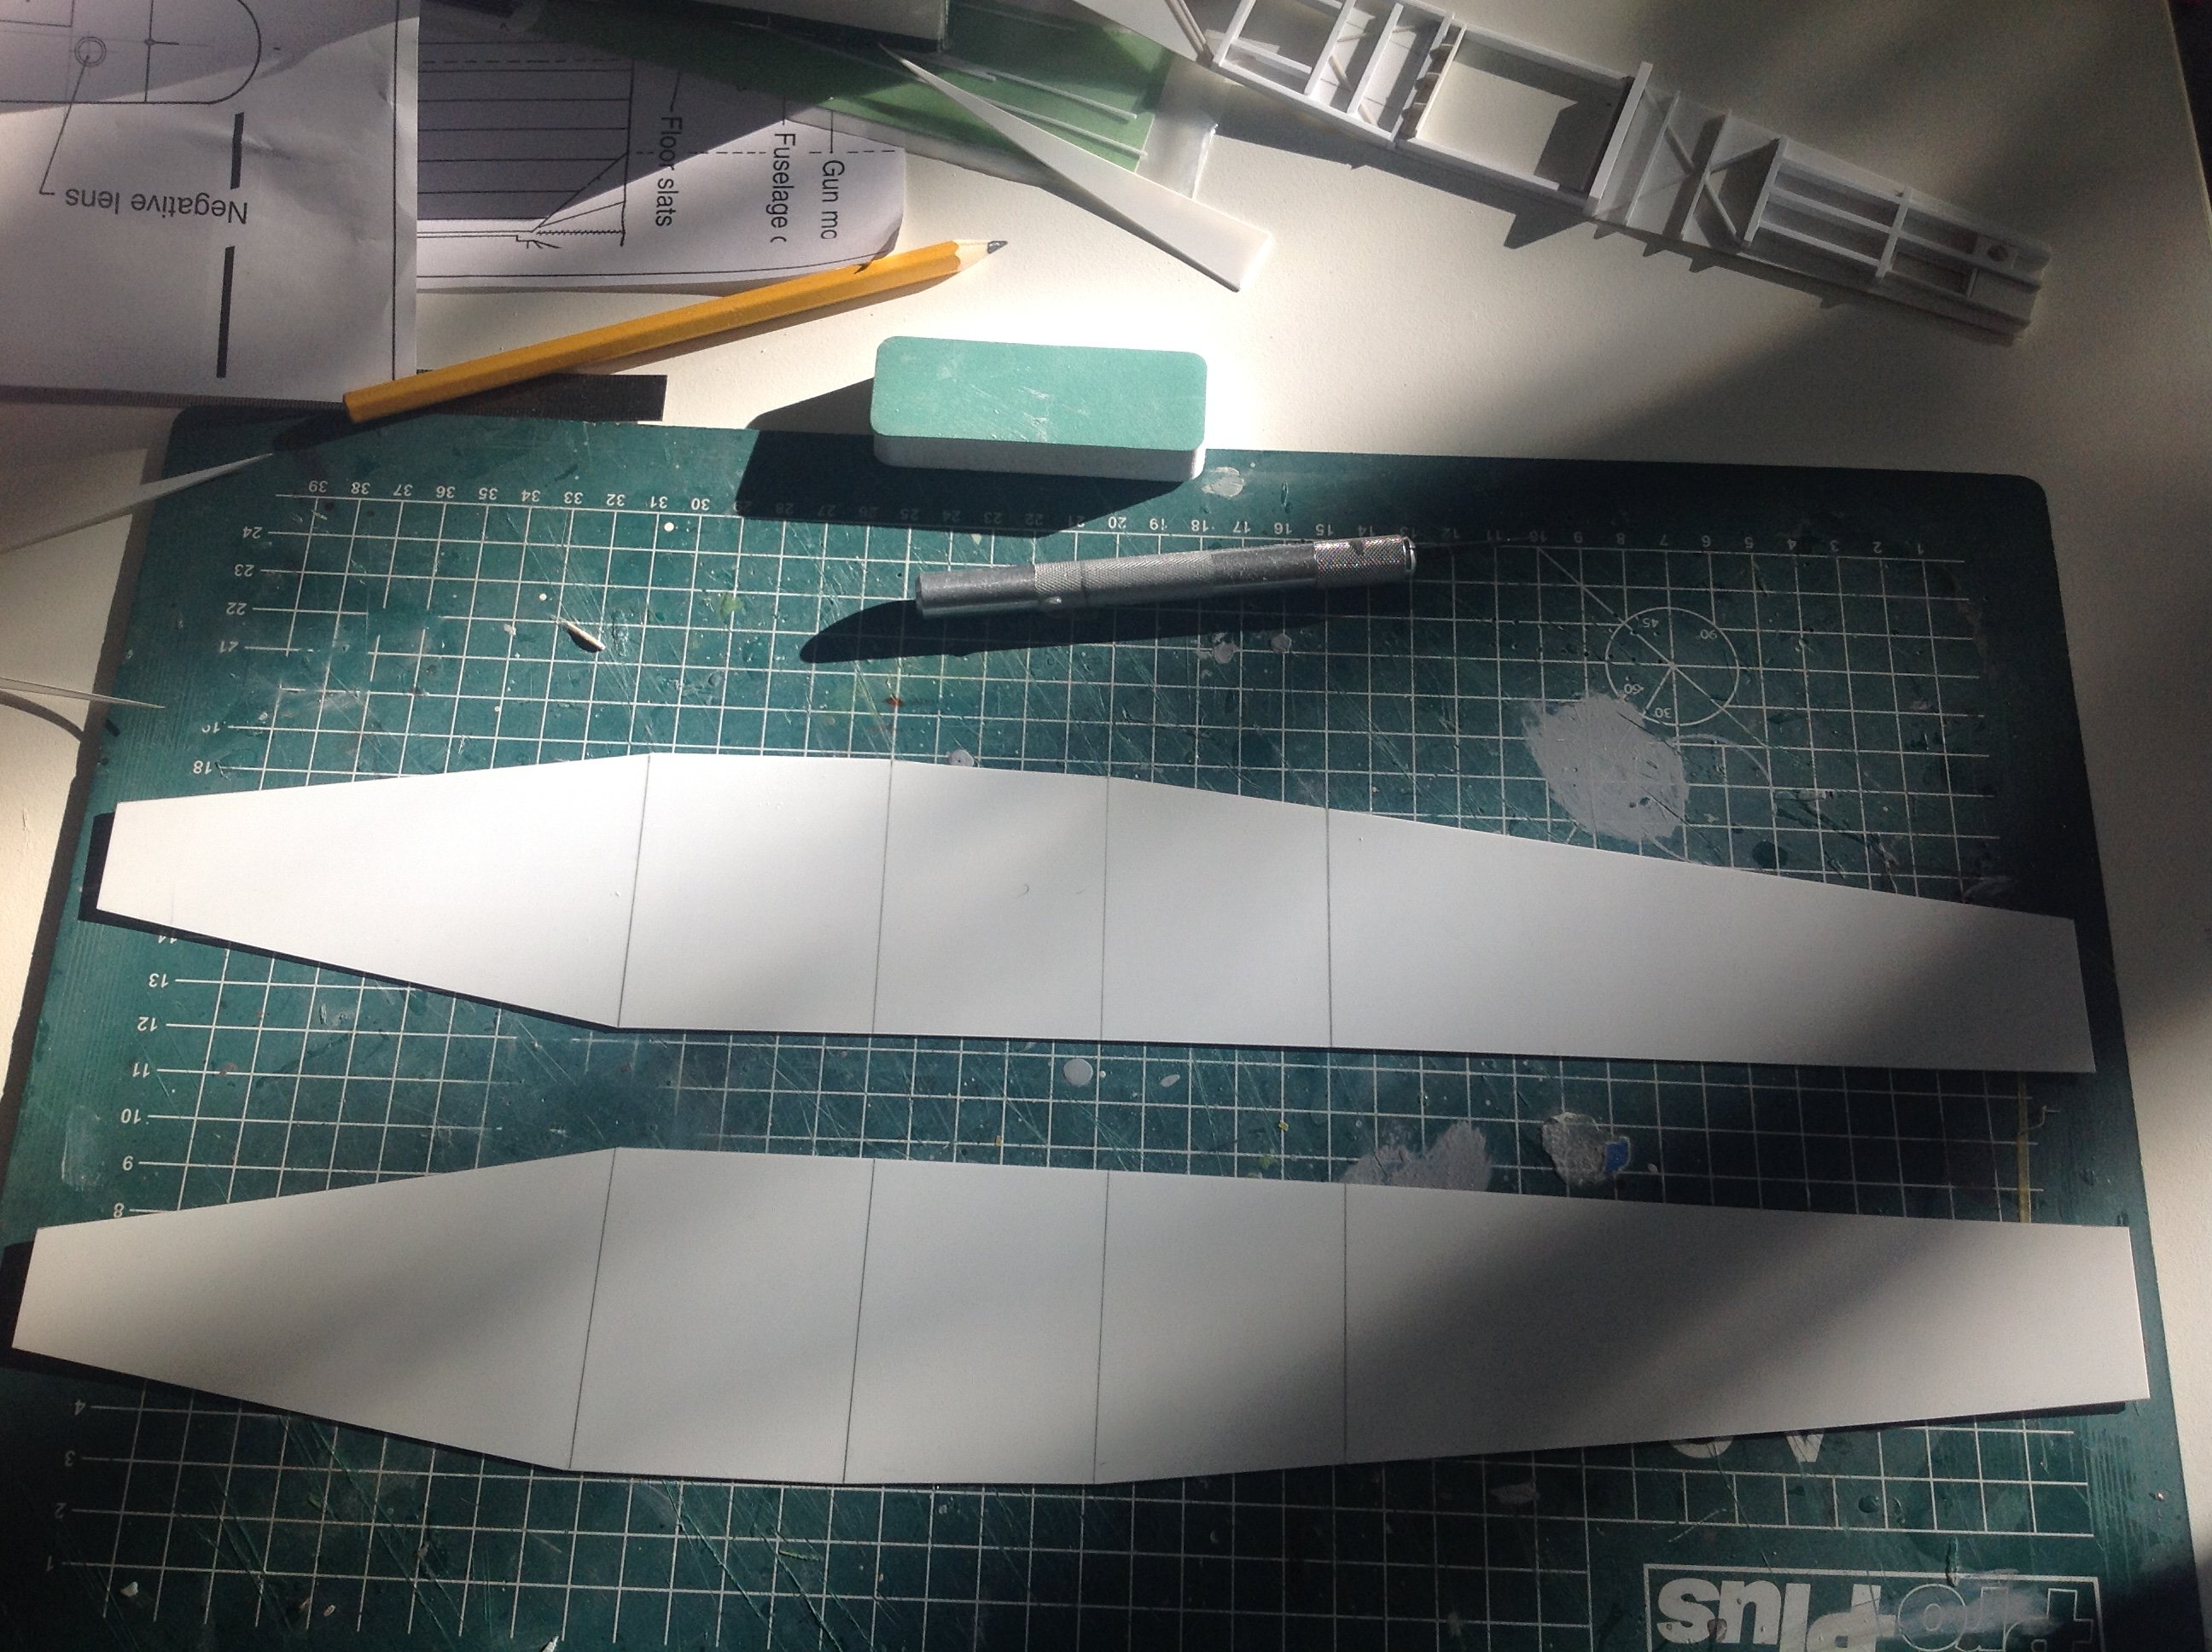
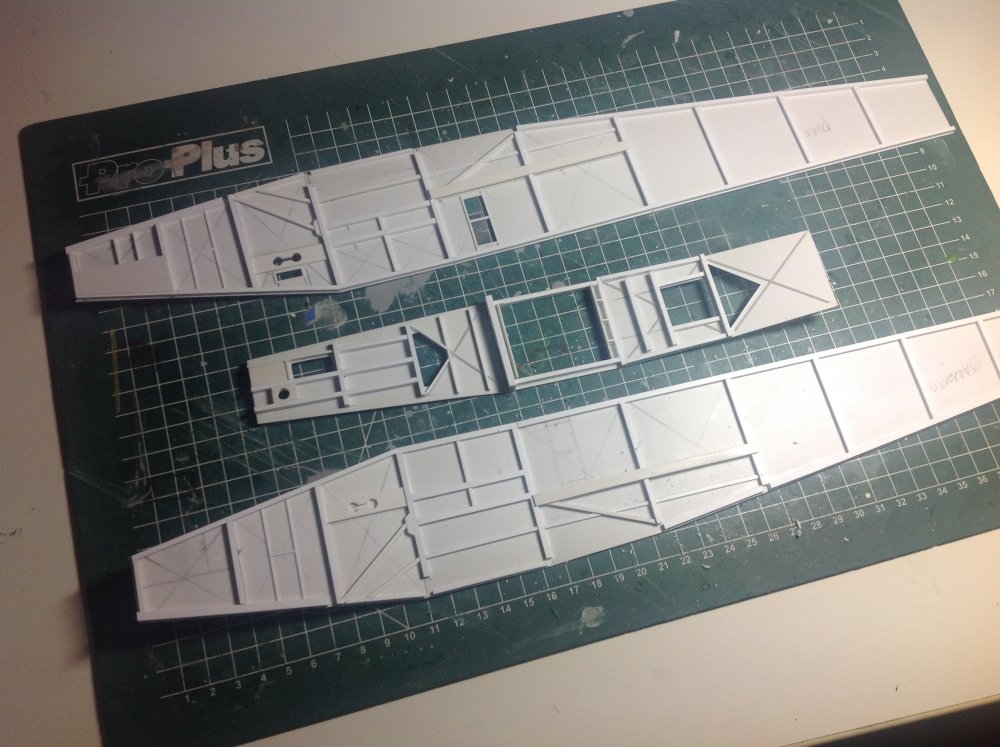
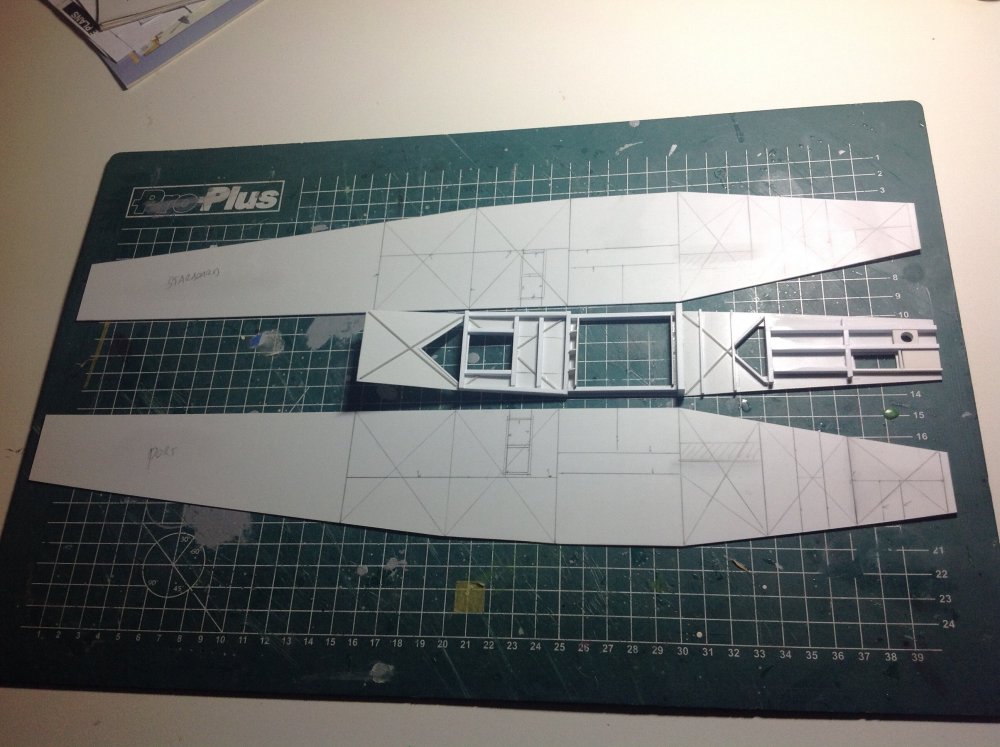
Well, if you have an itch, start scratching... Marking out the fuselage sidepanels and then cutting them out. It is very important to keep both sides an identical mirror image from each other to keep the final fuselage square and true. I noticed from my previous attempt. After that it is the fun part, building up the interior structure using Evergreen strip. Until next time. Cheers Cees