DocRob
-
Posts
7,048 -
Joined
-
Last visited
Content Type
Profiles
Forums
Events
Gallery
Everything posted by DocRob
-

Israeli Mirage III C with Atar9C
DocRob replied to Kaireckstadt's topic in LSM 1/35 and Larger Work In Progress
Good to know, otherways, it would lead to panicked outcries like: 'I said flaps down, not up...' . Than god for international standards. Cheers Rob -
I feel the need... for Shake and Bake... Tamiya StuG
DocRob replied to GazzaS's topic in LSM 1/35 and Larger Work In Progress
I'm sure you will Gaz, your whitewash looks great and will be enhanced by the use of oils. For the washable white, I'm not so sure, I haven't tried the stuff and it will be tested thoroughly before use. If it fails, it will be hairspray too . Cheers Rob -
Zoukei-Mura P51D Mustang SWS No 4.
DocRob replied to Bomber_County's topic in LSM 1/35 and Larger Work In Progress
I just found a new product from HGW. It's a masking set, unfortunately for the Tamiya kit, for masking the body panels. If they fit, that could be a serious time saver for a NMF bird. P-51D MUSTANG - SURFACE PANELS MASK - 1/32 - MIR/32008 (hgwmodels.cz) Cheers Rob -
Zoukei-Mura P51D Mustang SWS No 4.
DocRob replied to Bomber_County's topic in LSM 1/35 and Larger Work In Progress
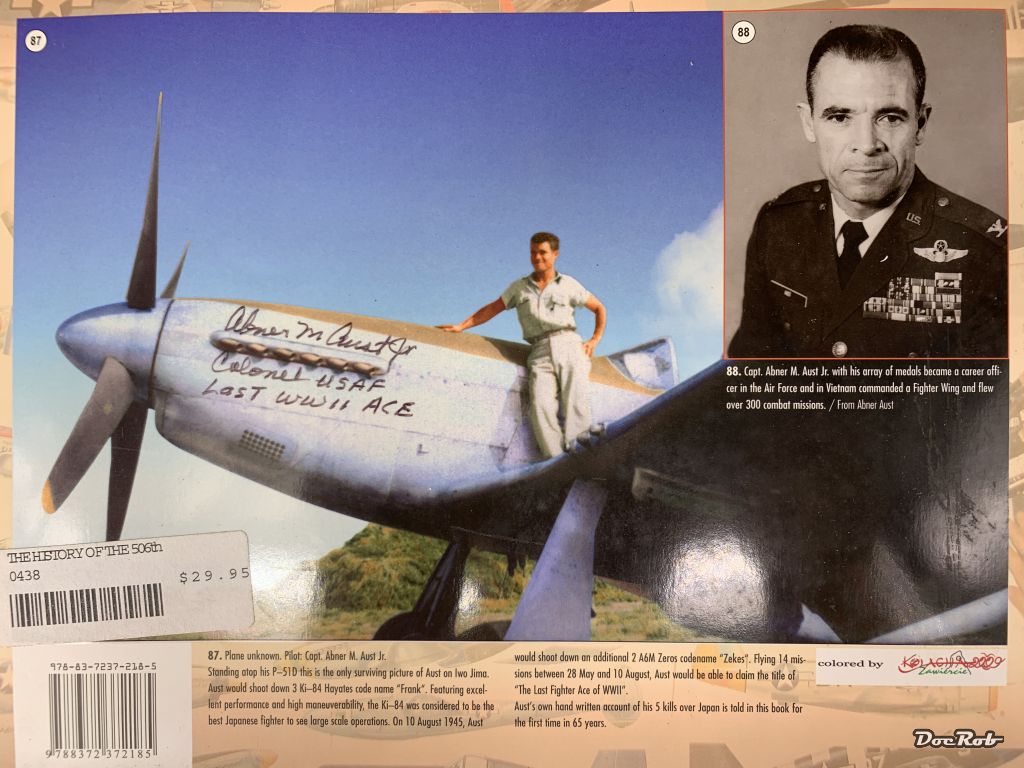
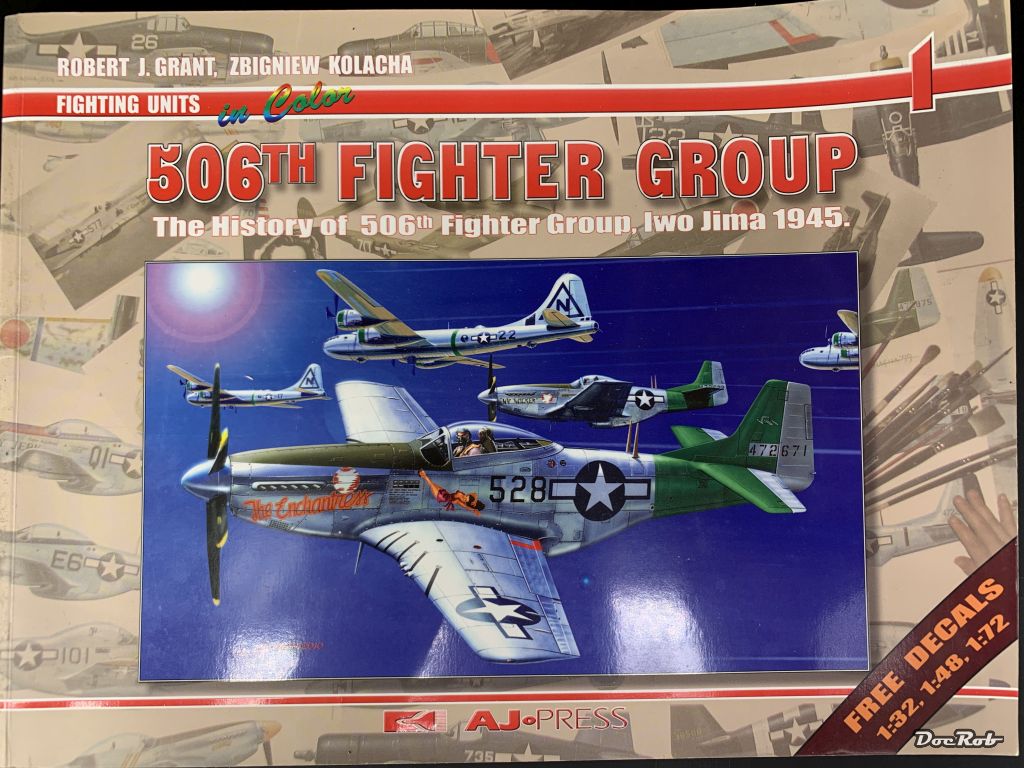
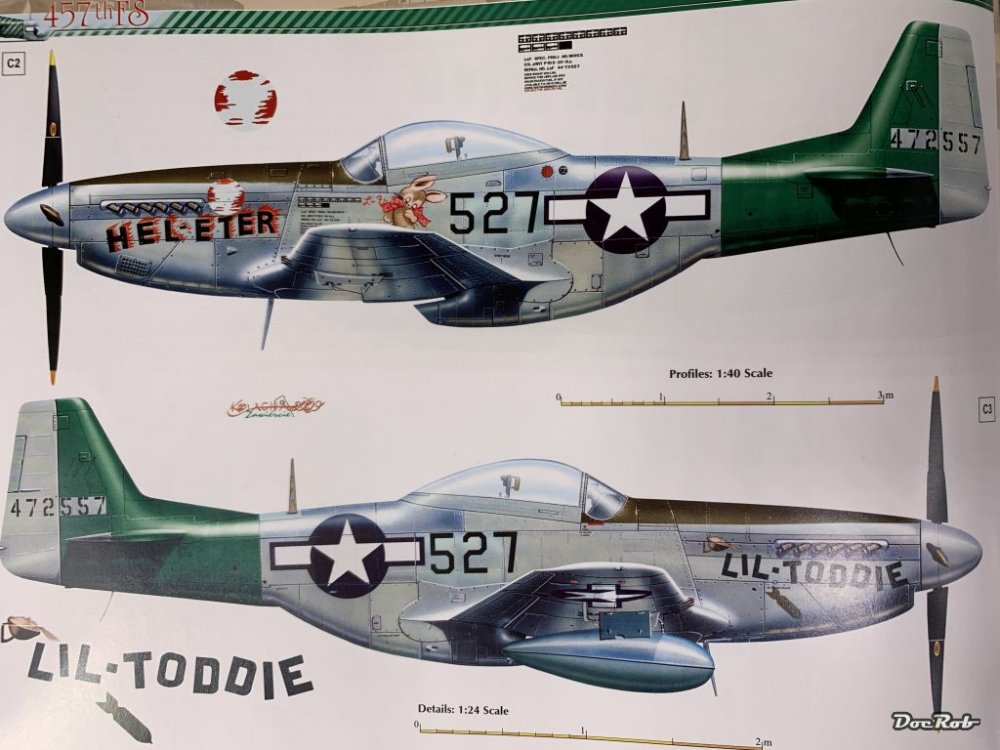
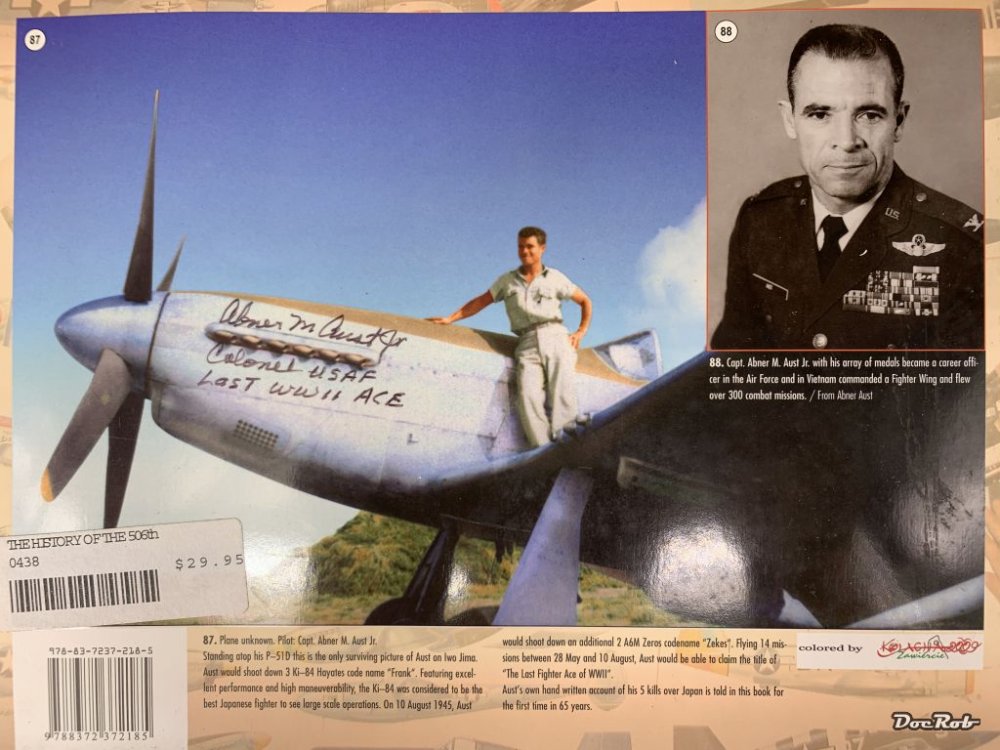
When I visited Planes of Fame in Chino, California some years ago, I bought a book about the 506th Fighter Group, signed by Abner m. Aust, the last WWII ace. If I do a NMF Mustang, it will be one of the schemes in the book. Luckily the decals are included for some of the planes in different scales and they are printed by Techmod, which is a good sign. Cheers Rob This is the book These are my favorite schemes: This is the signed back cover

-
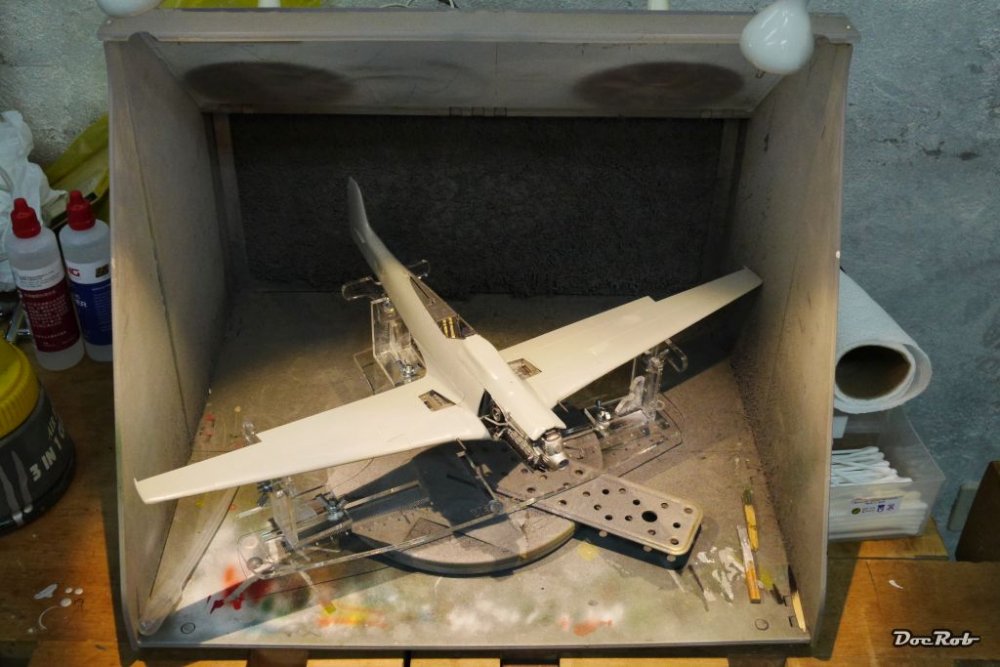
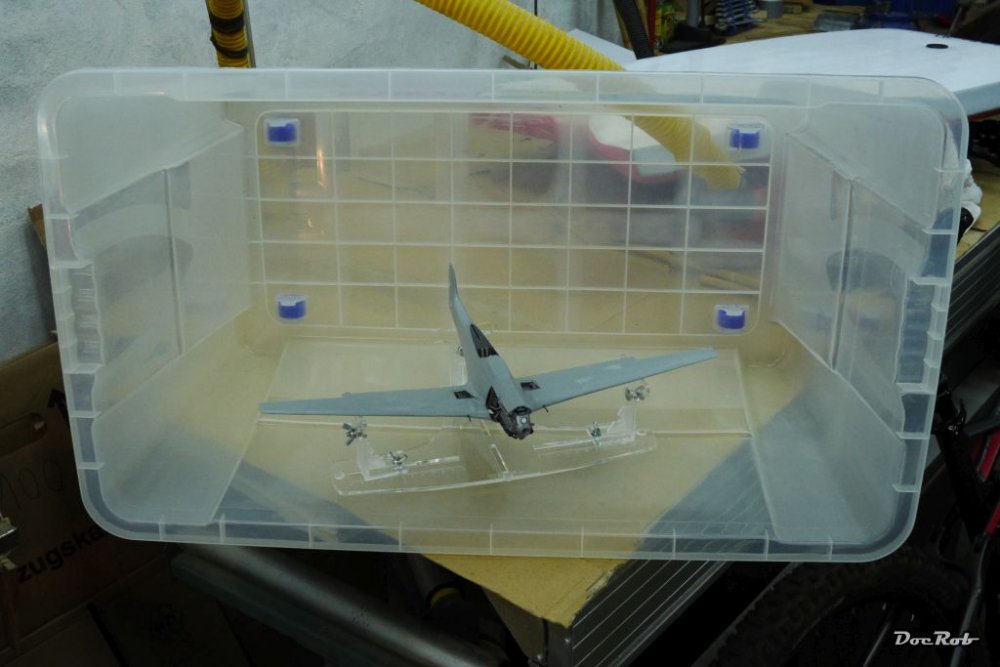
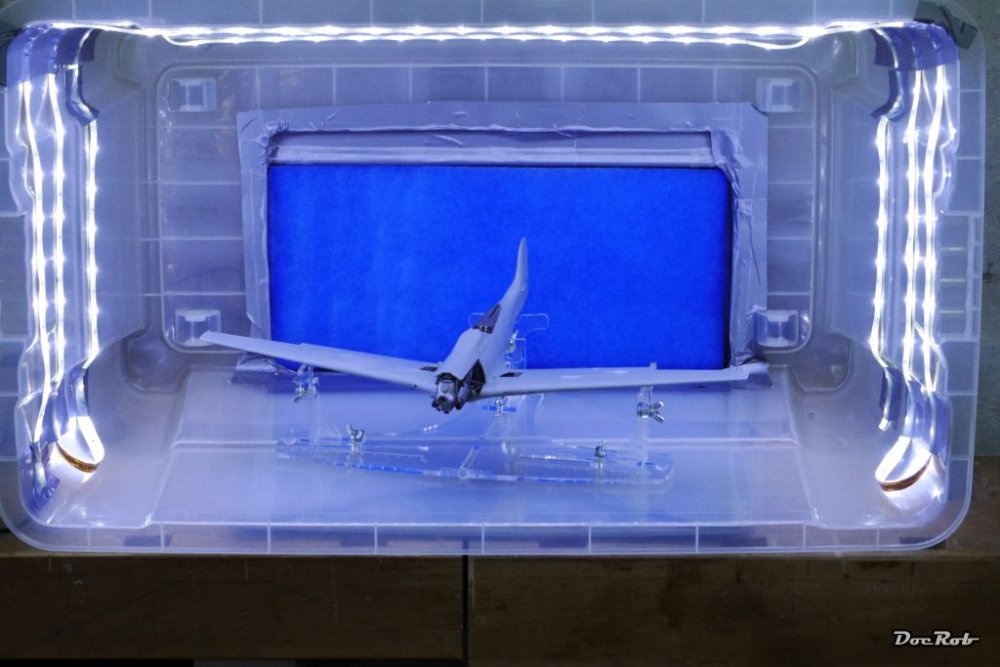
Very interested to see your aluminum results in your WIP. I had to enlarge my spray booth to and used the good working fan of the old one with a transparent plastic container as the new booth. After some cutting and duct-taping, I added some flexible LED strips around, finished. The booth still works t my satisfaction after three years of use and was a real cheapo. Cheers Rob Old one not fitting the ZM TA-152 Better Finished
-
Nice progress on the U boat. The wooden deck looks great as does the Flak. Do you plan to substitute the turret railings? They seem to be a bit oversized and shouldn't be to hard to replace with brass. Cheers Rob
-
Israeli Mirage III C with Atar9C
DocRob replied to Kaireckstadt's topic in LSM 1/35 and Larger Work In Progress
Exactly the right decision, to stay away from black for weathering. The way you did it, it remarkably pops and brings everything to live. For removing oil colours, I use cotton swabs only on a few occasions. I prefer a flat midsized brush, which has a good holding capacity for paint and thinner. This makes the oil effects more controllable, as you can play with the amount of thinner and the dampness of the brush. As a side effect there is less plastic trash, for which some sea turtles will be thankful. Cheers Rob -
Gracias Carl, as this paintjob requires a thorough plan, it's easy to do a step by step. Until now, everything was easy and redoable, now comes the make or brake part . Cheers Rob
- 100 replies
-
- 4
-

-
- hasegawa
- ammoknight
- (and 1 more)
-
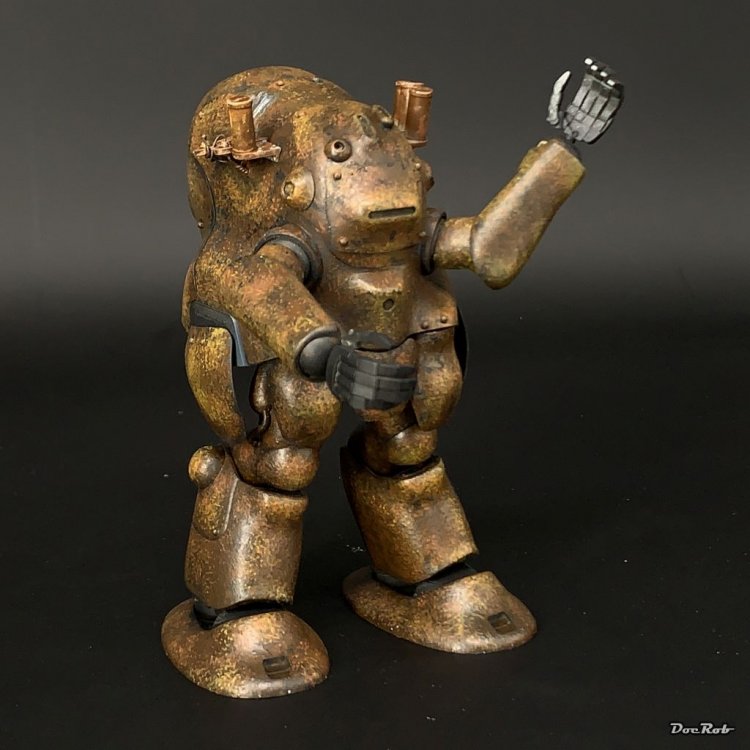
Thanks Gaz, but what you see is the chipping . The idea is, to apply the colour onto the rust and leave it partly uncovered, where the corrosion won the battle. I will use a fine brush, applying the paint in little strokes and dots and build the colour up this way, at least, that's the plan. Cheers Rob
- 100 replies
-
- 6
-
-
- hasegawa
- ammoknight
- (and 1 more)
-
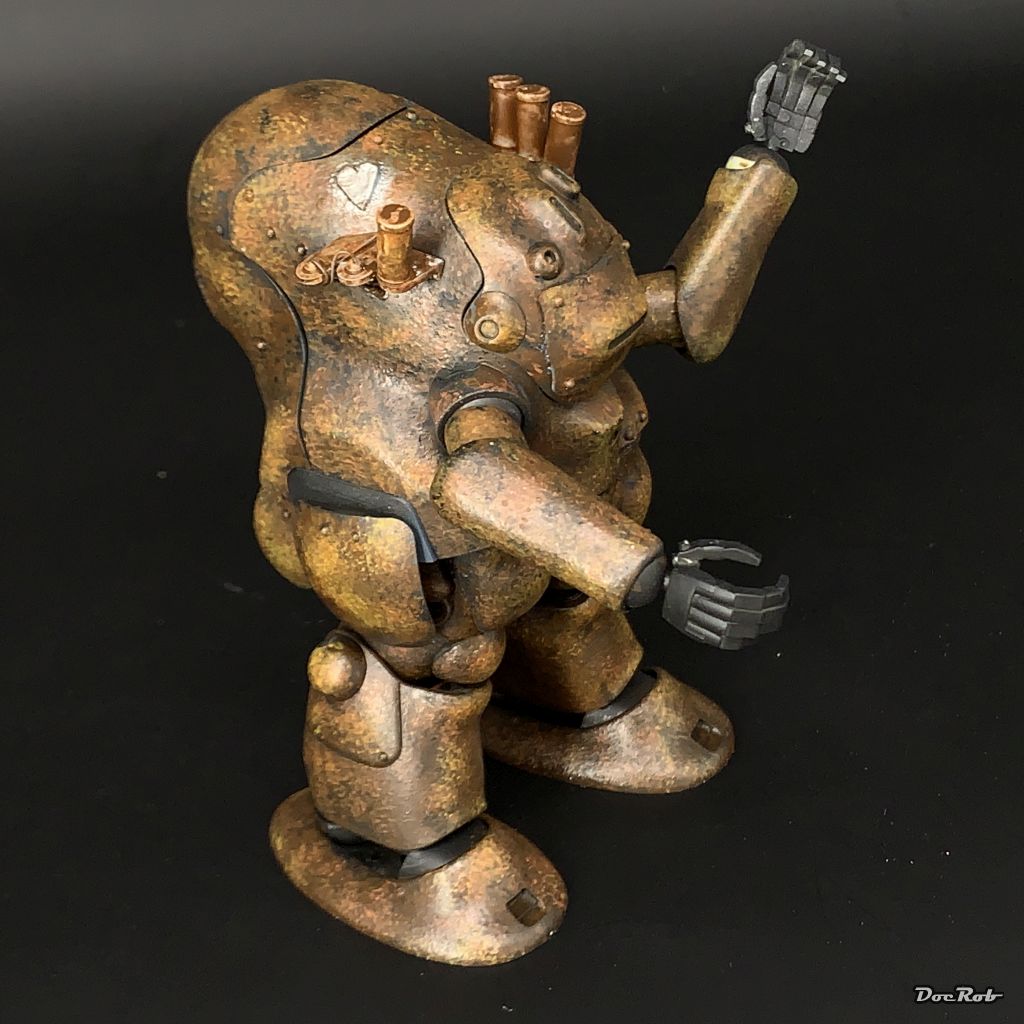
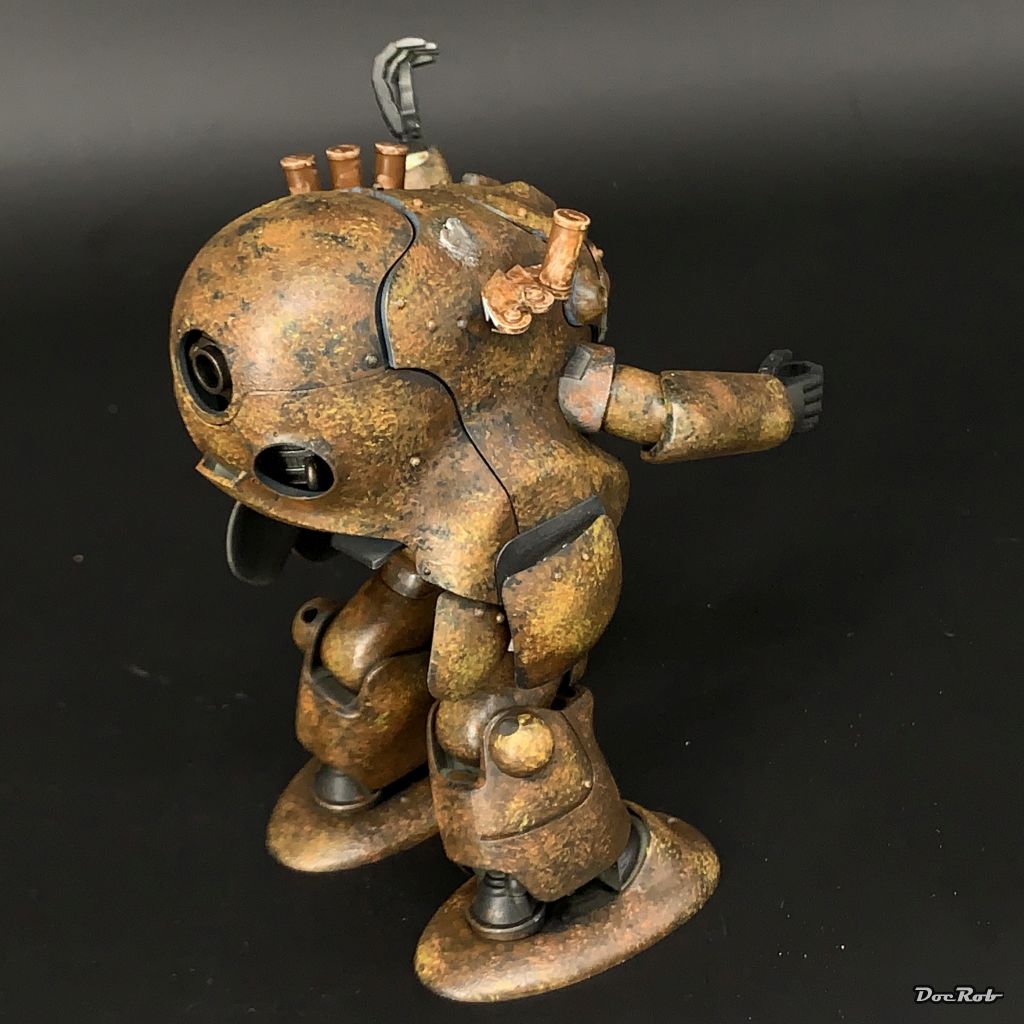
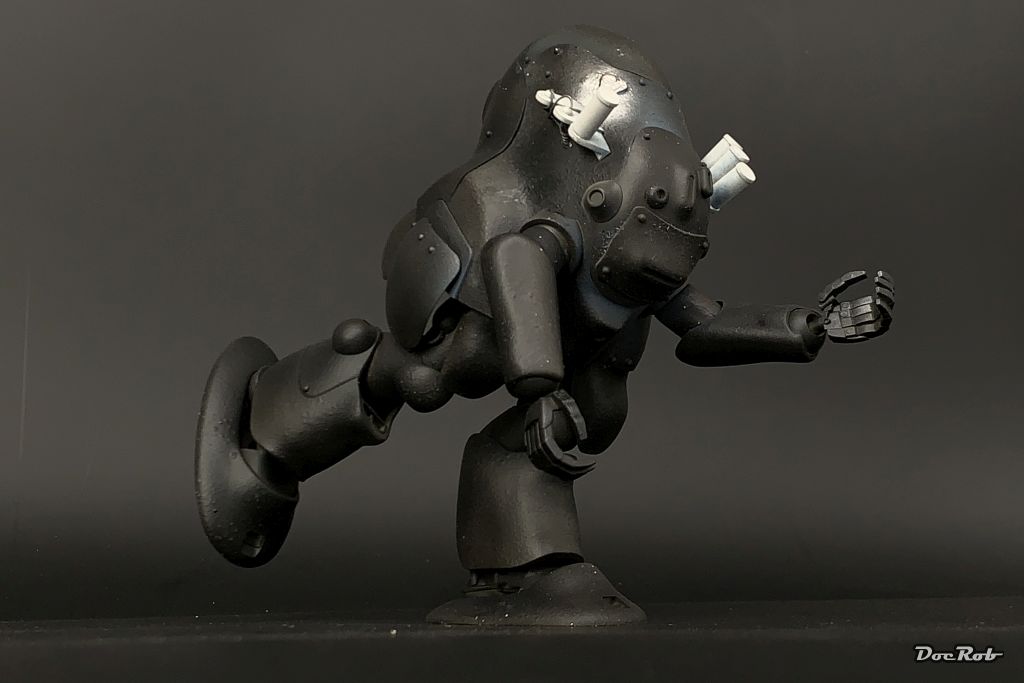
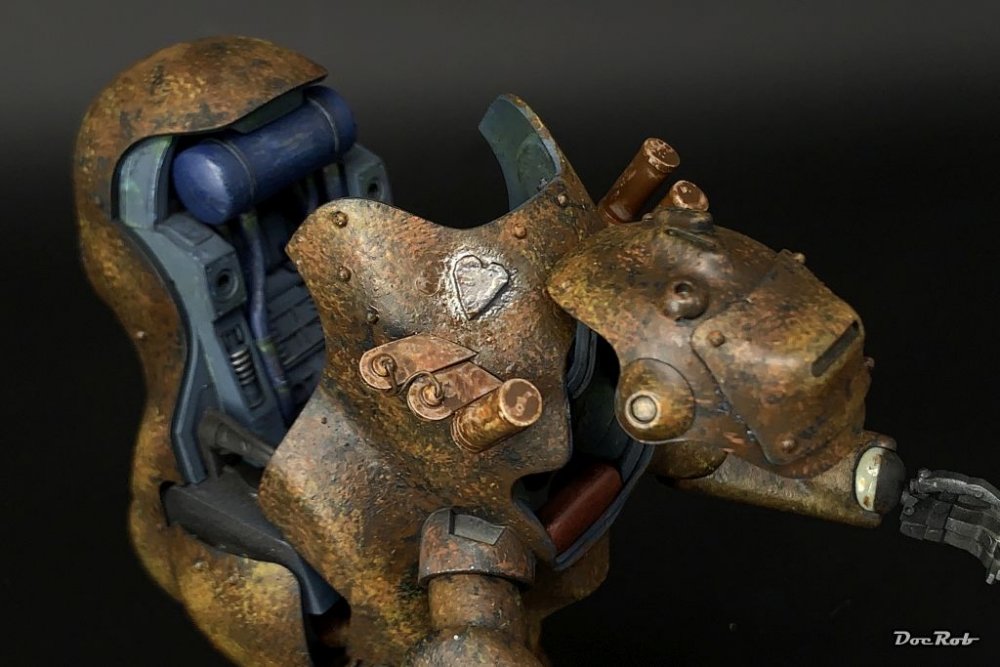
Thanks for the encouragement Kai. Yesterday, when I was taking the photos, I thought about a powersuit left to rot in a muddy lake, replicated by acrylic water with lots of algae and other vegetation around. Let's wait and see, there is a second Ammoknight in the box, ... Cheers Rob
- 100 replies
-
- 5
-
-
- hasegawa
- ammoknight
- (and 1 more)
-
I feel the need... for Shake and Bake... Tamiya StuG
DocRob replied to GazzaS's topic in LSM 1/35 and Larger Work In Progress
The winter wash looks perfect, you can't beat hairspray for these type of camo, although, I will at least try the washable white on a dummy part. Good to know, that Panzer Putty is such a menace with lacquers. I used it with acrylics until now and had no problems at all. Like Kai said, the residues will be mostly hidden and a nice winter camo needs a healthy dose of slush and mud . Cheers Rob -
Congrats Gaz, under the matte coat, everything clicked together, you built a beauty. Isn't it fully rewarding to have a build with so many obstacles ready to display. Like Kai said, I like the chosen plane with its unique scheme. Cheers Rob
-
PCM Focke Wulf FW 190 A-1/A-2/A-3
DocRob replied to GazzaS's topic in LSM 1/35 and Larger Work In Progress
Great fix with the canopy. and a nice journey to follow your build, but as an 'Alter Preuße', I will be in the front row of your next build. With brass and rigging involved, which only raises even more interest. Cheers Rob -
Zoukei-Mura P51D Mustang SWS No 4.
DocRob replied to Bomber_County's topic in LSM 1/35 and Larger Work In Progress
Looking comfortingly good Phil. You are my current dummy, like we say in surfing , if the air is clear with your build, my cowardly me is starting mine. Progress is looking fine and what is to resist, with the powerful lines of a Mustang. Looking at yours, I may change my plan for building it as a British Mustang IV with camo to a NMF one. Cheers Rob -
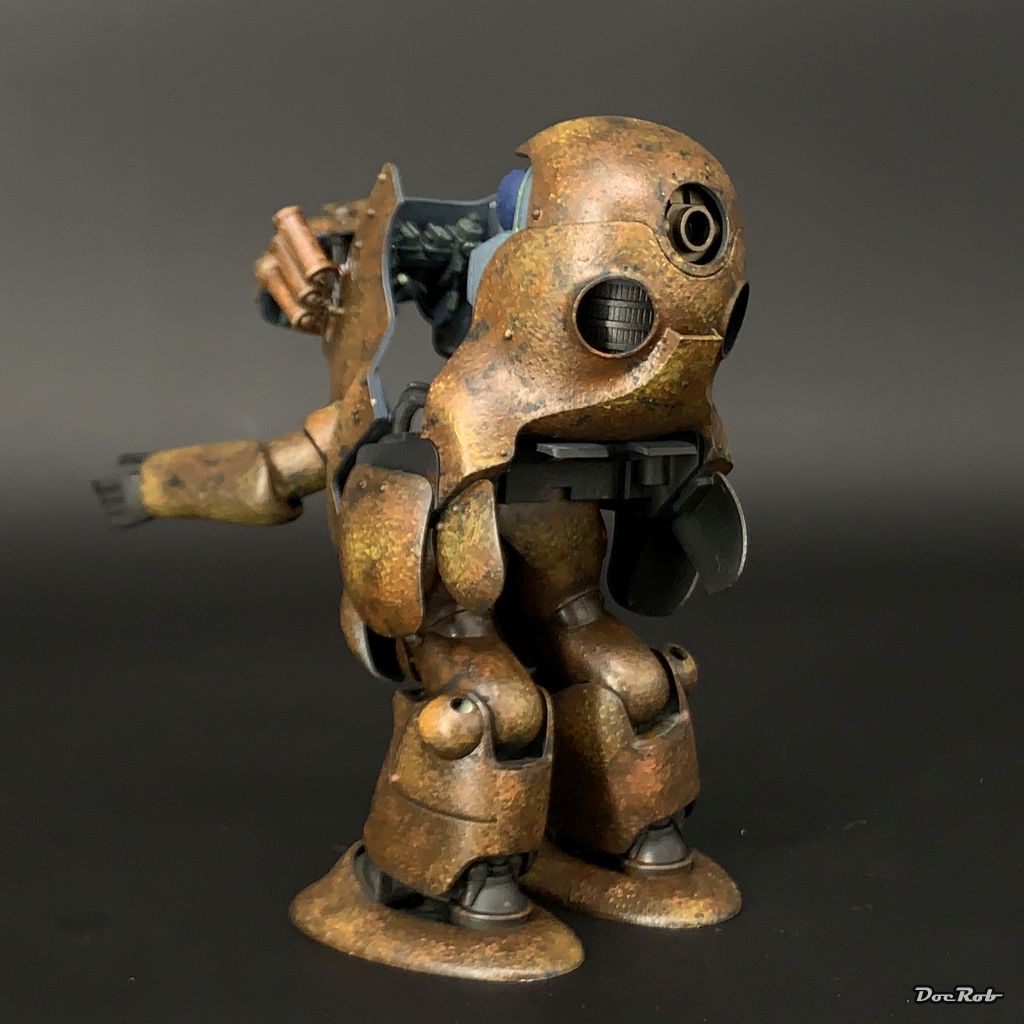
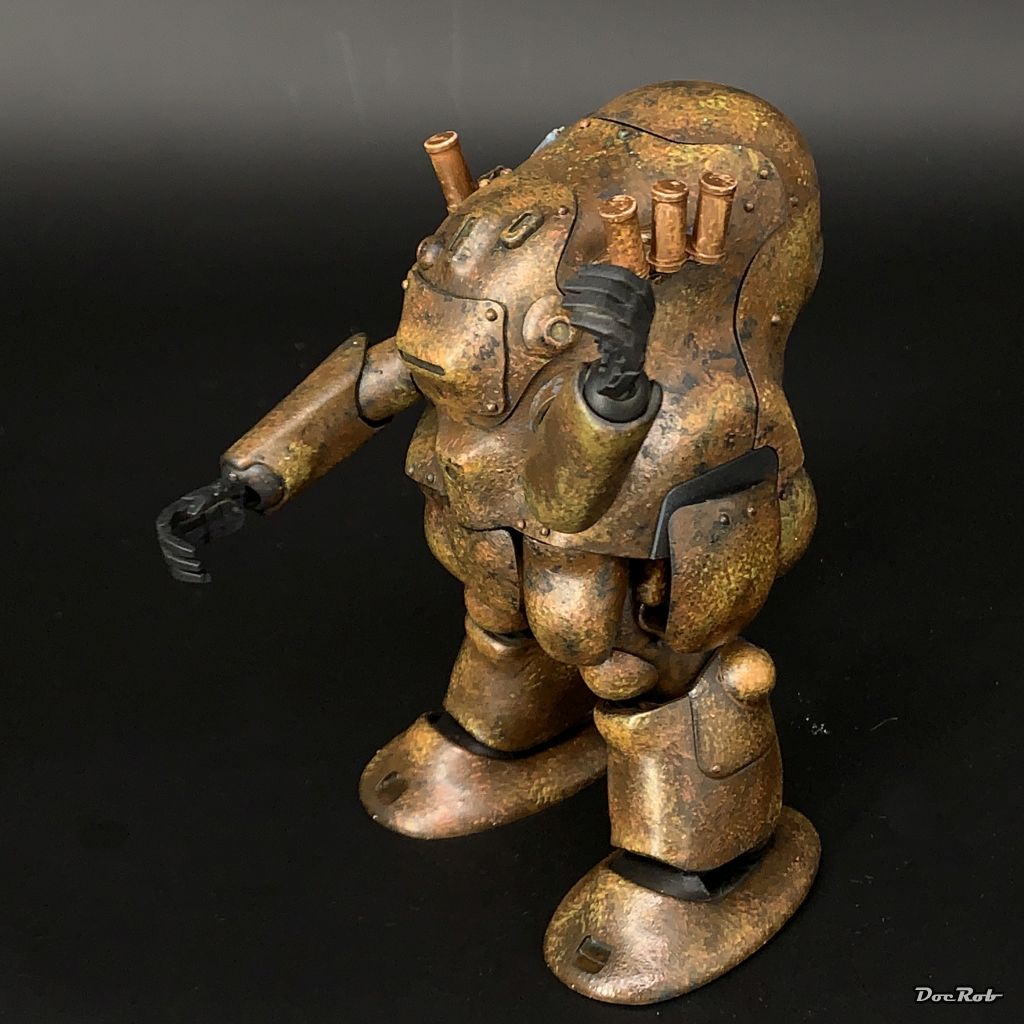
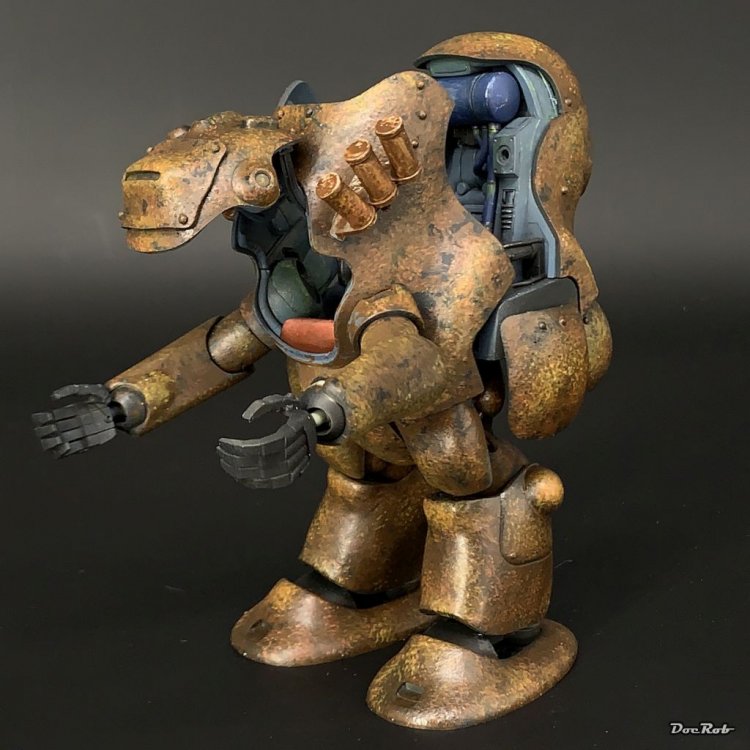
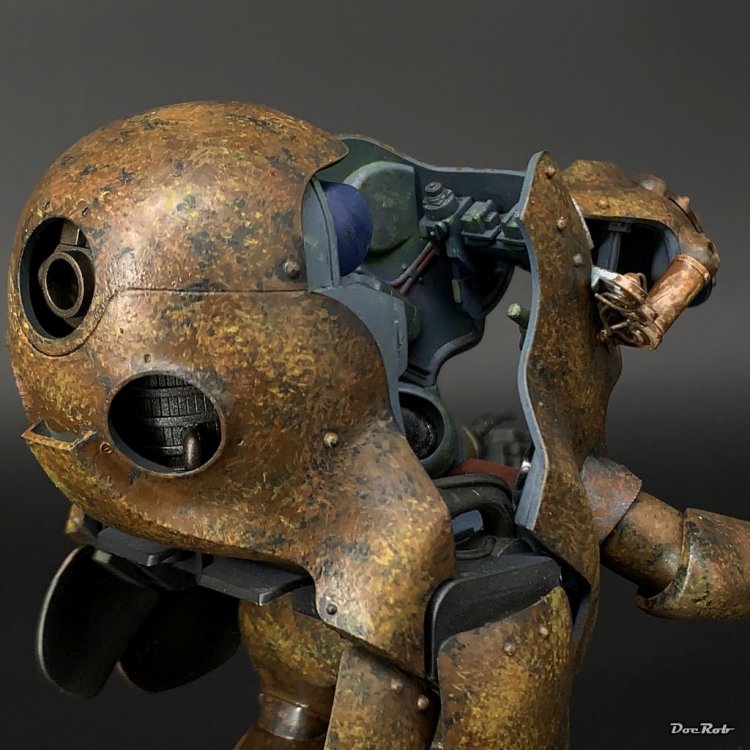
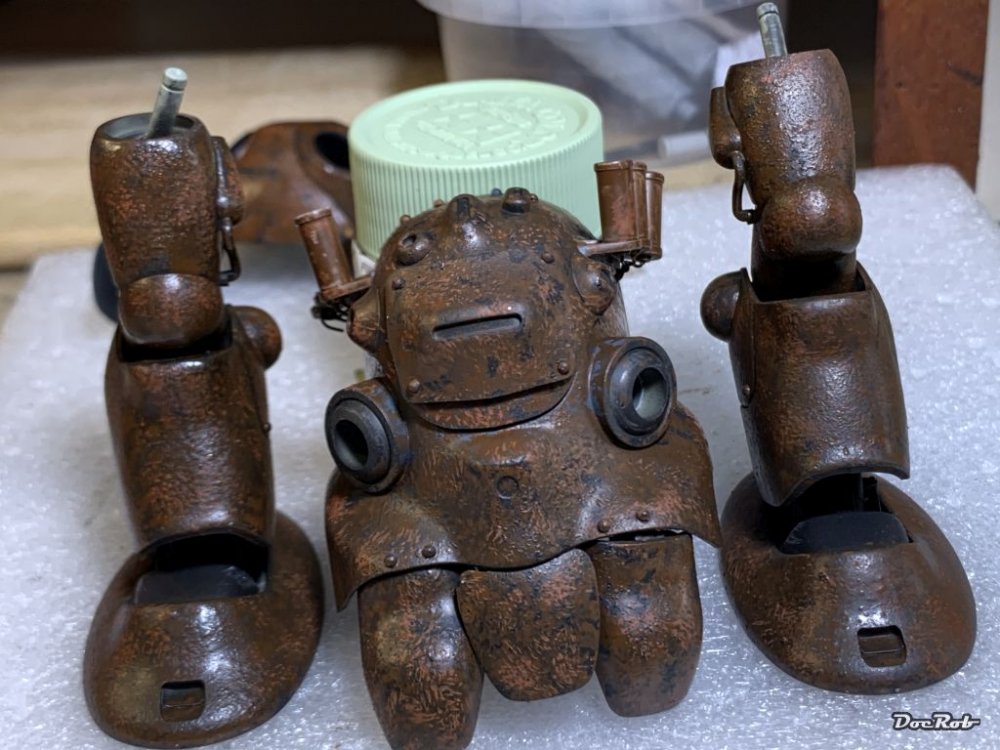
With most kits, I apply the base colours on a coat of primer and then add the effects like rust and others onto it. The only exception in my builds is the use of the hairspray method, which I really like for heavy weathering exactly for the fact, that it is right, building up the layers like on real subjects and erase layer(s) above. With the Ammoknight, I try something different. I build the layers of paint and rust up from the lowest layer, being primer, corrosion being the second layer and the base colour being the upmost. It's an experiment and the powersuit with it's organic shape and the 1/20 scale seems to be the perfect canvas. The difficulty I see for the next step of painting is, that there is no room for mistakes, because it's essentiell, that the colouration must be coherent on the hole body and there is no taking back. I'm not sure, if I can master that, but will try. Meanwhile, there are some pictures of my stomp footed friend, who looks, like he had a great time somewhere in a lake . Cheers Rob


- 100 replies
-
- 8
-
-

-
- hasegawa
- ammoknight
- (and 1 more)
-
Thank you Kai and Kev, this is a pure fun project for me and I like to be able to go a little over board, because the used techniques will help in other cases, used a little more restrained. Cheers Rob
- 100 replies
-
- 8
-
-
- hasegawa
- ammoknight
- (and 1 more)
-
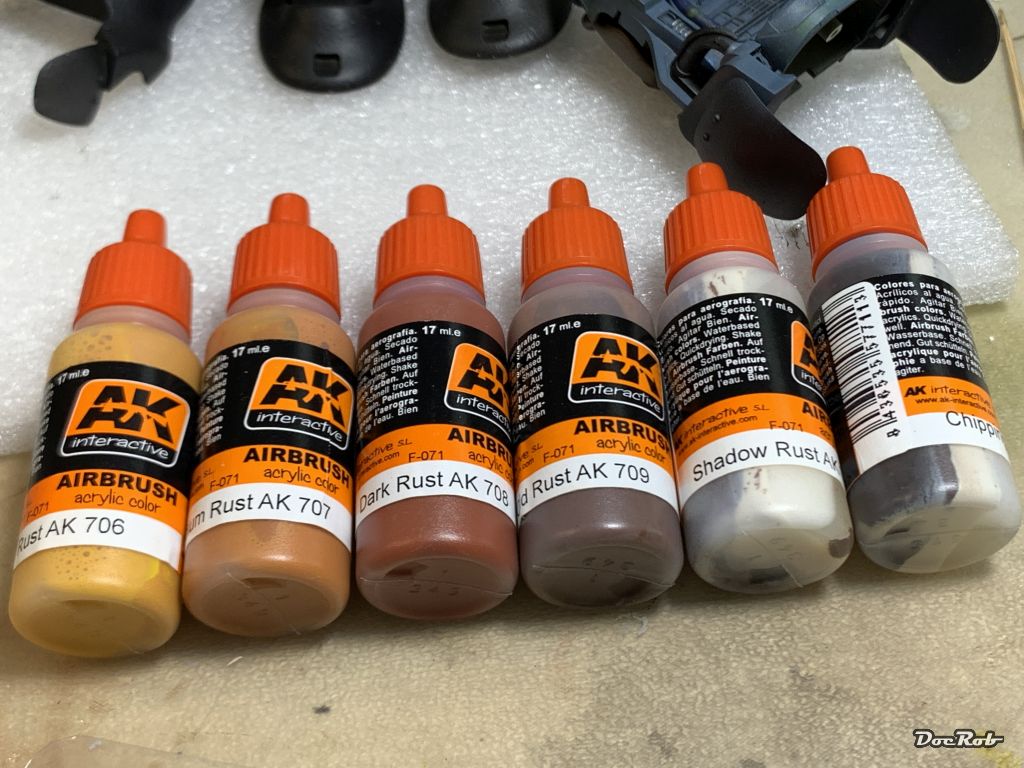
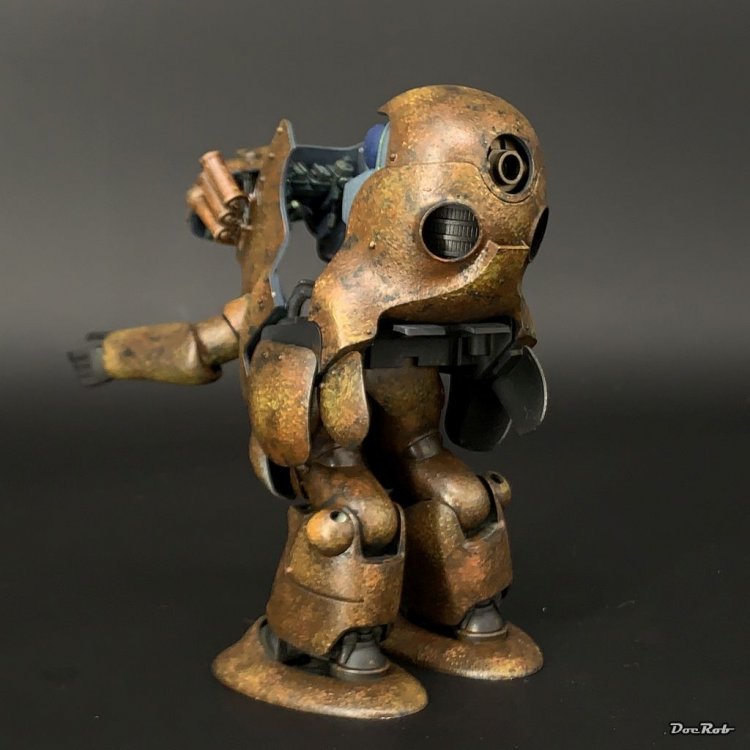
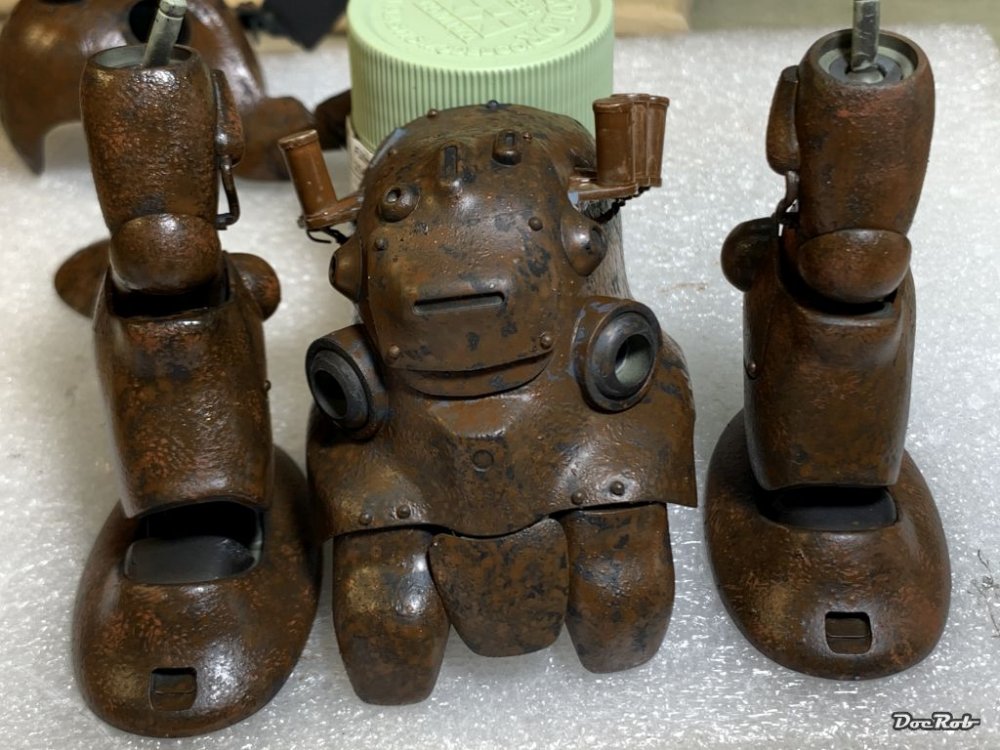
Let's see, how fast this thing corrodes. First of all, I used an AK rust colour set, which generally was up to the job with the exception of the two darkest shades, which literally hardened in separated components and were beyond stirring up. I've never encountered something like this, with the other four colours being completely usable. First layer of rust dabbed on with the darkest shade, using a stiff old brush. The legs already received their second coat, a tad lighter. This base coat was a bit more liquid, to cover larger areas of the suit. As ugly as it is, I used the second colour, with slightly less area to randomly cover. I turned the brush permanently between my fingers, for hindering repeating patterns. With the third and fourth shade, always using a lighter colour, I covered even less area and used it more dryly, while dabbing on. I also emphasized the contours of the powersuit a little, unnecessary but fun. Cheers Rob

- 100 replies
-
- 10
-
-
-
- hasegawa
- ammoknight
- (and 1 more)
-
Please WIP this strange looking flying thingy. It looks like it has been part in the notorious films of the Sharknado series . Cheers Rob
-
Fw190A-8 3/JG1 crash Vreeland
DocRob replied to JeroenPeters's topic in LSM 1/35 and Larger Work In Progress
Nice work on the engine, hatches and wheel wells. This will be a stunner. You have to love these Brassin engines. I have one for my FW as well, but still think of a second one, for display purpose. Cheers Rob -
Nice haul Bill, The Hansa Brandenburg is a beauty and great to build, the Pfalz, I missed to buy and this is one of two or three WNW kits, I'd still like to add to my stash. Well the Pup, never had real feelings for her, but you will make her a masterpiece. Cheers Rob
-
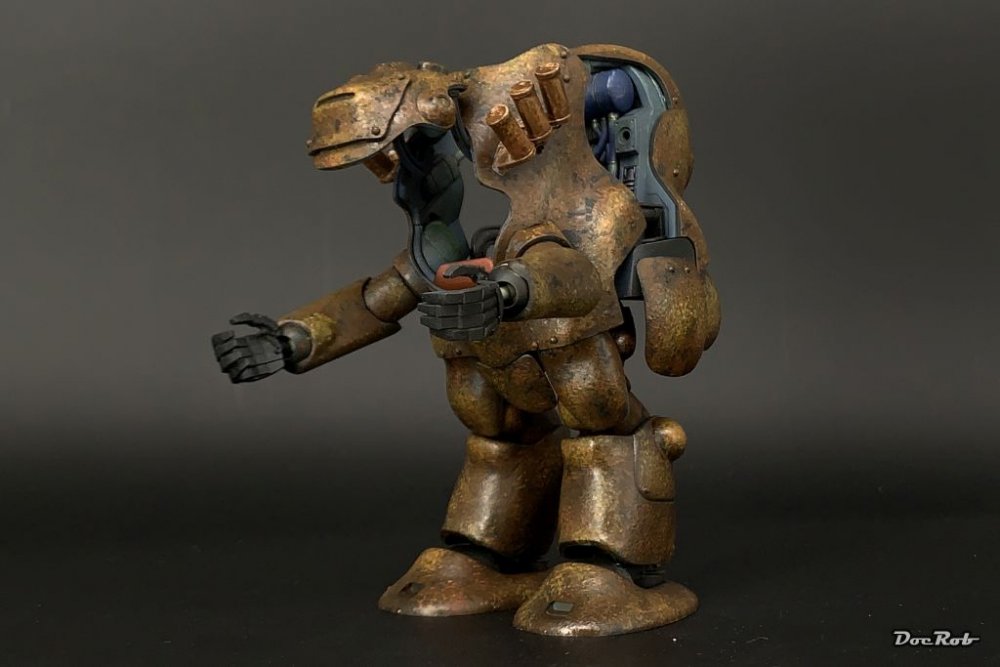
Thanks Kai, flying is no option here, the power suit has no jets, so stumbling would be a possibility . The welding lady will be shown later, while painting her. Always good, to have some late attraction, when interest lowers . Cheers Rob
- 100 replies
-
- 7
-

-
-
- hasegawa
- ammoknight
- (and 1 more)
-
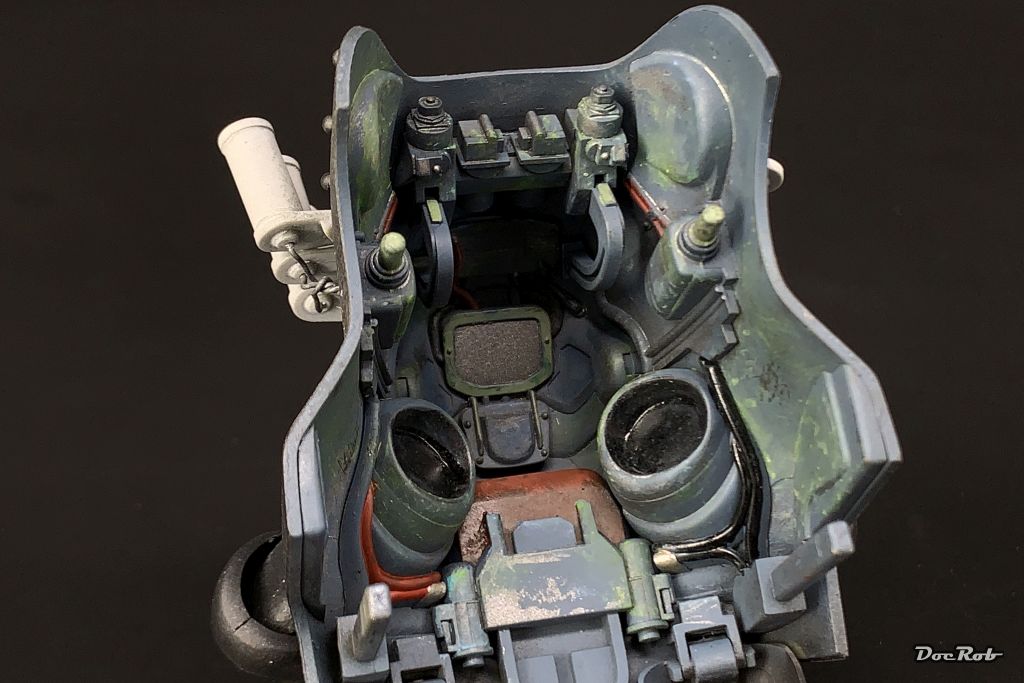
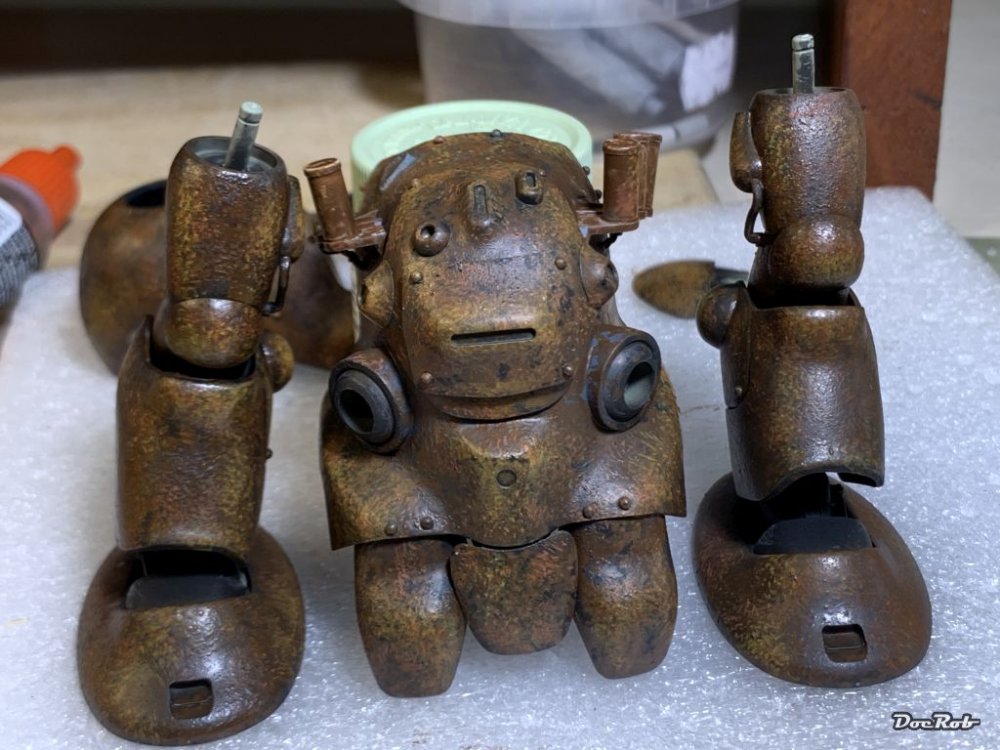
I prepared all the parts for receiving the base layer of randomly stippled rust, before the second colour layer will be added. This is the completed front side interior with visor (for now, I may add some loose wires and debris later) With the posable arms and legs, you can go for a bowling dio, or even break dance Cheers Rob


- 100 replies
-
- 10
-
-
-
- hasegawa
- ammoknight
- (and 1 more)
-
Israeli Mirage III C with Atar9C
DocRob replied to Kaireckstadt's topic in LSM 1/35 and Larger Work In Progress
The tubing is looking great Kai and thanks for the info bit about the flow directions. Cheers Rob -
Separate the men from the boys . Like W. C. Fields said: "Always carry a flagon of whiskey in case of snakebite and furthermore always carry a small snake." Cheers Rob
-
If you may allow, Folkwulfe, I want to place an OT comment here, because the subject was stressed in this thread by our moderators. We have a Non-LSM-place for WIP's and finished models, so why make exceptions. I never found myself humiliated by placing my small scale builds there. The new path lacks definition also. Up to wich size a non LSM-kit is Non-LSM or is a very small LS-kit like a Kettenkrad possibly Non-LSM. I don't want to provoke a LS argument here, but I can't see the point of the change of view. Anyway, I'm looking forward to see the U boat getting a great overhaul, wherever it is placed here. Cheers Rob