DocRob
-
Posts
7,137 -
Joined
-
Last visited
Content Type
Profiles
Forums
Events
Gallery
Everything posted by DocRob
-
I use a digital kitchen scale for an approximate nose weight. If you slip on the wings and stick in the undercarriage or lay something under the wings, where the struts will be, you can weigh the tail and add a bit extra for security and minor components which will later be added. Cheers Rob
-

Atlas Cheetah E Scaleworx Conversion
DocRob replied to GusMac's topic in LSM 1/35 and Larger Work In Progress
This is a smooth looking bird, now sporting a smooth coat of primer. I can't wait to see the Cheetah in it's colorful paintjob. Cheers Rob -
Hi Kai, you're welcome. Normally I glue a tiny eyelet (made by thin wire or casted from Gaspatch) into pre drilled holes first. Then I take the tube (aluminum or brass off an inner diameter of 0,3 mm, outer diameter of 0,5 mm with a length of 3 mm or 5 mm) and thread the fishing line (Maxima Chameleon with 0,12 mm diameter) first through the tube, then through the eyelet and again in the opposite direction through the tube again. The second pass through the tube is a bit fiddly and it's necessary to clean the tube's holes out properly with a 0,3 mm drill. The fiddle pays off, because when you tauten the fishing line in the end, it's almost self securing. With a drop of CA the line is finalized. You can buy pre cut tubes from Bob's Buckles, or cut them yourself from Albion Alloy tubes. I have used aluminum tubes from Bob, but these are no more available. Now I use brass, which I blacken chemically. The fishing line (it's the 2LB variant) is available at the big A for example and I use it, because with it's brownish color, it fits great to most of the models. The benefit of this laborious method is, that the rigging itself makes the biplane model stronger and more rigid. Cheers Rob
-
Awesome start, the cockpit is looking great with all the added detail. With the paintjob you created a little gem. Cheers Rob
-
I have one, but never used it for my biplanes, because I found it easier to rig the upper wing completely without being attached and after attaching the upper wing the more fiddly part starts only on the lower wing. I second the thoughts of Gaz, it's best to work on a dummy for the first time. You have to find the method wich suits you best. For 32 scale elastic rigging was not my option for different reasons. I prefer metal tube with an inner diameter of 0,3 mm and loop a fishing line through which has a diameter of 0,12 mm. This setup is almost self securing and enhances the models rigidity. For 48 scale, I have used bot, fishing line and elastic thread with PE fittings. Cheers Rob
-
Sorry Gaz, you didn't understand the game. It's all about getting an excuse for drinking, ...ups, I hit that guy again, cheers,... Cheers Rob
-
What is on your bench right now ? Share a picture :)
DocRob replied to Martinnfb's topic in Modelling Discussion
Indeed, it's a great kit and to me it's the F-3 version with the three tone camo which rocks, I don't care for boring GSB schemes of later versions. Cheers Rob -
You are a brave man Peter and your P-39 will look great, given what is to see right now. It's good to hear, that you build and paint the P-39 to such quality, where you said, some month ago, that would have been impossible. Modelling is always about decisions and it's always a good idea to adopt to the obstacles of a kit and the KH P-39 seems to be no easy breed. I'm eagerly peeping in, as I have a Special Hobby one and learn a lot about the type here. Cheers Rob
-
What is on your bench right now ? Share a picture :)
DocRob replied to Martinnfb's topic in Modelling Discussion
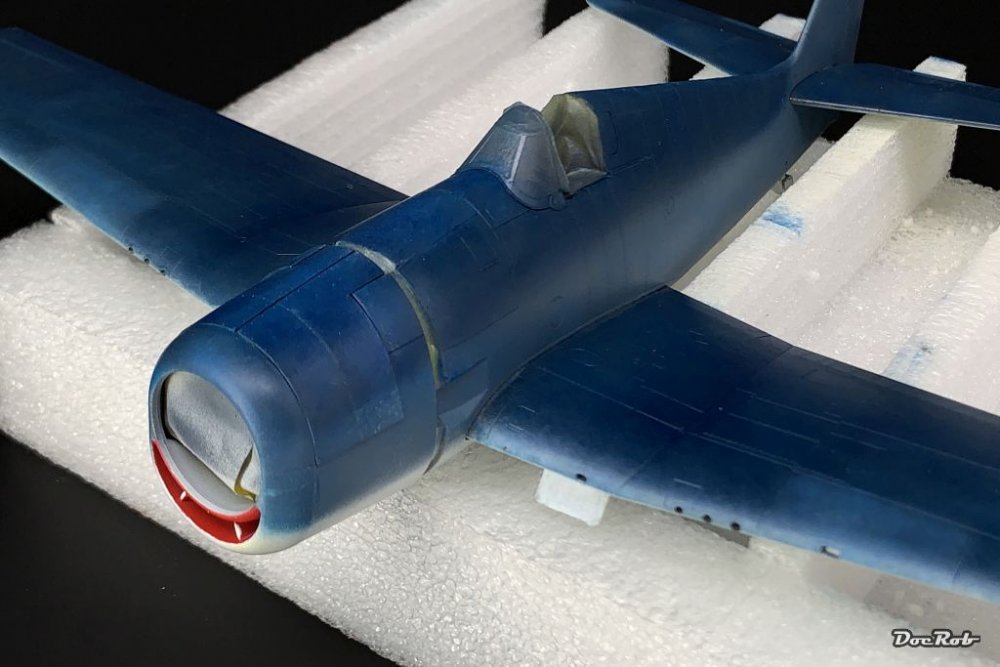
Ohh, cool, Rob made a white on white pic . Not quite, I used tan and light blue gray shades of oil color to work on the lower fuselage. Like the rest of the fuselage, these colors were dabbed on nearly unthinned, but in very small quantities and than dabbed multiple times till the effect was satisfactory. This enabled me to emphasize panels, cast some slight shadows and reduced the effect of overspray. I had some fingerprints on the cowlings, thanks to slow drying oils and a slightly rough surface of the 3D printed cowls and went a bit further with my oil paneling. The front got white teeth and when everything has dried, I will gloss coat the Hellcat for decaling. Cheers Rob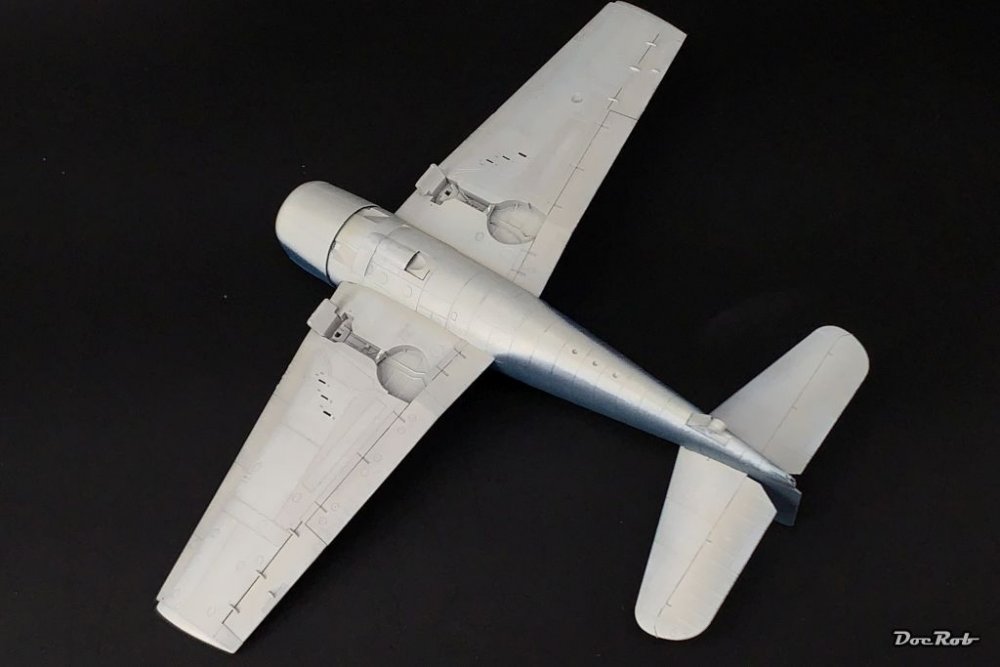
-
Atlas Cheetah E Scaleworx Conversion
DocRob replied to GusMac's topic in LSM 1/35 and Larger Work In Progress
I had mixed results with AK's older Acrylics (Not the Real Colors and not the 3rd Gen) and thinner. Some mix with Mr. Levelling Thinner, some went goo. When I use the AK's, I try first, mixing them on a small sheet of plastic. Cheers Rob -
Nice and subtle like Peter mentioned, your Alb is getting better and better, I love the busy side shots of the fuselage, where all the details and different materials show. The skull integrates itself more organic now and only just distracts a little from the nice wooden prop . Cheers Rob
-
What is on your bench right now ? Share a picture :)
DocRob replied to Martinnfb's topic in Modelling Discussion
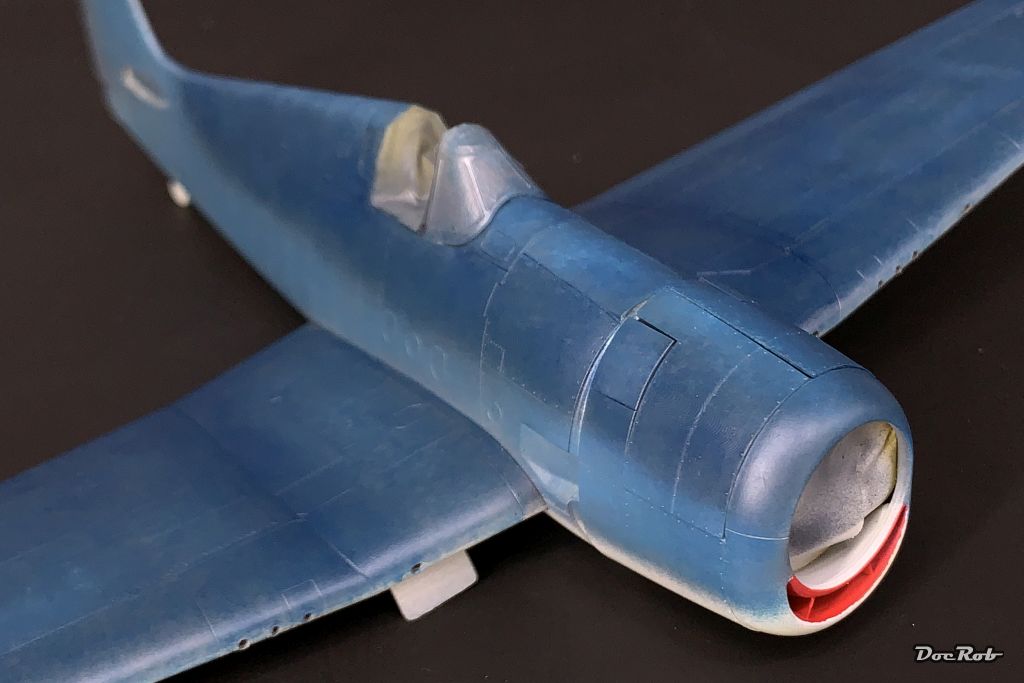
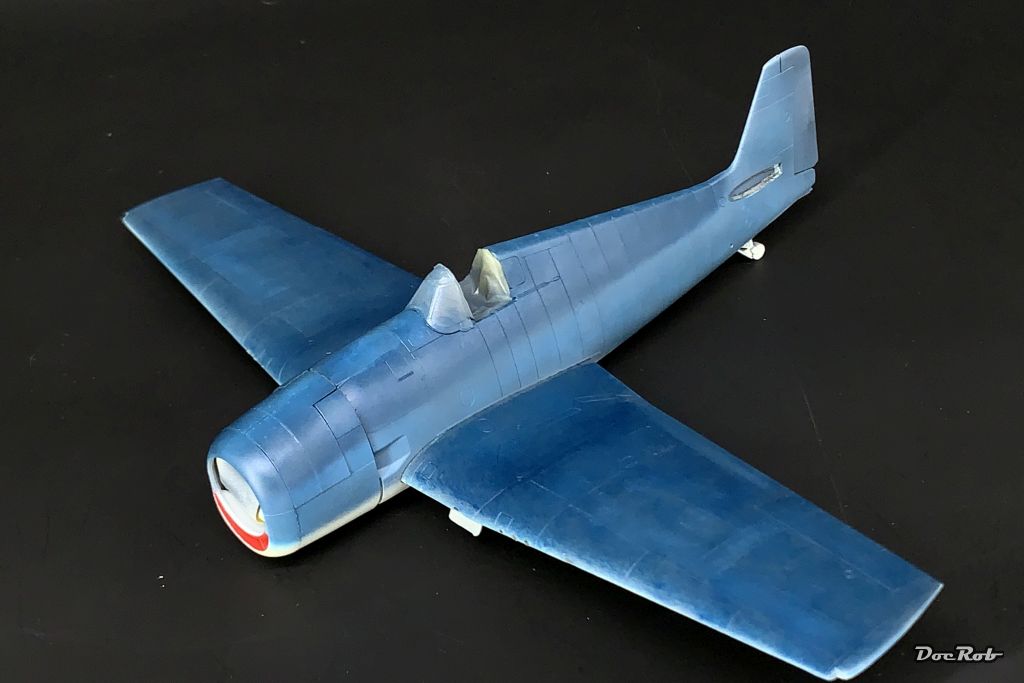
Amigos, I lave oil colors. As longer I use them, the more I like them. I applied a deep blue, a medium blue and some light bluish grey in dots, emphasizing panels, light and shadow vaguely. Then I spread the oils with thousands of little dabs, to get a slightly uneven coverage. The synthetic saw brush was very carefully dampened wit fast drying thinner from time to time. Dabbing wise, I built up some fine layers of paint, with the base color still shining through, but got what I wanted an accentuated and more vibrant color rendition. Cheers Rob Ughhhhh The final result looks better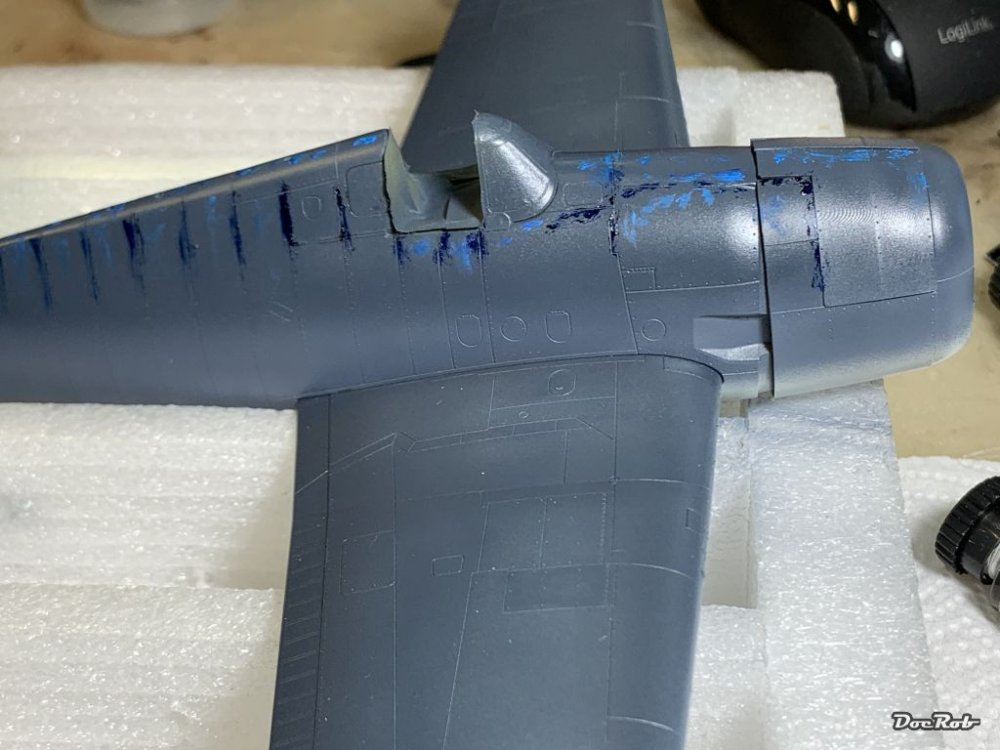


-
Atlas Cheetah E Scaleworx Conversion
DocRob replied to GusMac's topic in LSM 1/35 and Larger Work In Progress
The 'Plane of Pain' club inaugurates Cheers Rob -
Ferrari 330P4 Open top 24Hrs Daytona 1967
DocRob replied to mark31's topic in LSM 1/35 and Larger Work In Progress
I'm not much of a car bum and don't care a bit about more modern Ferraris, but this is a true beauty with all the curves in the right place. I will buckle in and follow your build. Cheers Rob -
That's a gorgeous build and paintjob and like Ernie said, quite unique. The girl looks great while doing a feet first slide and reaches the base safely . Cheers Rob
-
Two little Brewsters, now a Buddy Build.
DocRob replied to Clunkmeister's topic in LSM 1/35 and Larger Work In Progress
Your Brewster seems to be more than worthy to be finished Ernie. Seeing the seams inside the cowling, I would tend to option one, finish the build and lay on a beautiful paintjob to hinder the eyes of the beholder to wander to deep into the innards . Cheers Rob -
That is some impressive stuff, you are showing here. The depth of detail is breathtaking and your paint- and decalwork is perfect. Not the least your work, inspired me to think about building a 1/12 car and I ordered a Tamiya Porsche 935 last week. Cheers Rob
-
It really does, the tracks will be fiddly and the chosen scheme is a bit boring, but that aside the plastic on the sprues looks great and the additional goodies are perfect for a little vignette with those nice figures. Cheers Rob
-
What kind of pics do you desire Harv? There is a review video on Youtube: Sprue Review Meng 1/35 M4A3 Sherman 'Victory Kiss' Limited Edition - YouTube Tell me if you need more info. Cheers Rob
-
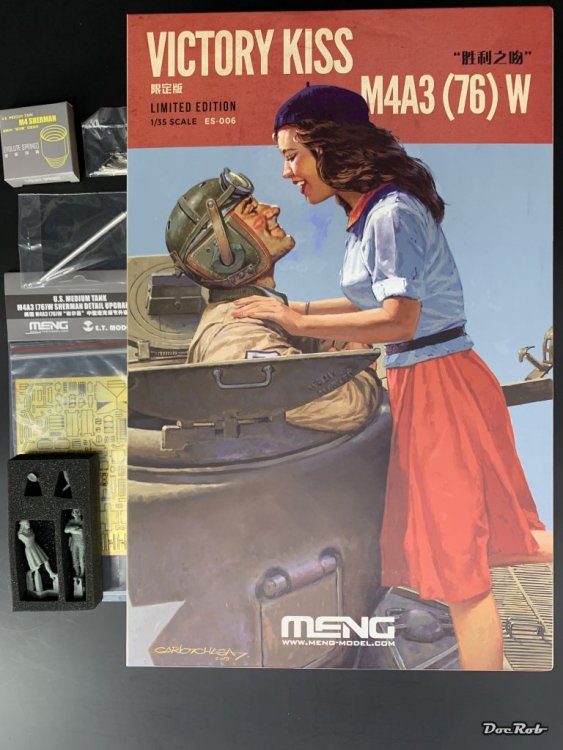
Today the kit of Mengs M4A3 arrived in the 'Victory Kiss' limited edition. It includes the Meng model with workable tracks, metal track pins, metal coils and a metal barrel. Additional there is the shown PE set by ET and last but not least, the two fine casted resin figures of the commander and the Mademoiselle. I got the kit for less than half the regular price, including shipping, so it would have been a crime to resist. Have I mentioned the great boxart Cheers Rob
-
Do you mean this particular version, Ron. The Wessex is available in 32 scale from Fly in two variants and there is a third variant announced. Cheers Rob
-
Takom Panzerkampfwagen I 1/16 scale... with figure
DocRob replied to GazzaS's topic in LSM 1/35 and Larger Work In Progress
This guy looks a little wired, but as he seems to be in DAK livery you could sculped a scarf around the head as a protection from a sandstorm. I have the Spanish PZ. I variant with Breda gun in my stash, so I'm naturally interested in how yours went together. Cheers Rob -
Israeli Mirage III C with Atar9C
DocRob replied to Kaireckstadt's topic in LSM 1/35 and Larger Work In Progress
That nozzle looks great and appears to be metal made after painting. I switched completely to Xtreme metals from AK, which are pure gold to me, but there are two Alclad's which I can't substitute, exhaust manifold and jet exhaust. The Alclad titanium looks also better than the Xtreme metal one, but it's so fragile, that I don't use it anymore. Cheers Rob -
I liked it the way it was, but it's hard to tell from the pics, with the lightning being completely different. Cheers Rob
-
Atlas Cheetah E Scaleworx Conversion
DocRob replied to GusMac's topic in LSM 1/35 and Larger Work In Progress
I'm with the guys here Gus, your resin work is awesome and will make the Cheetah look great and different from the 'normal' Mirage. Cheers Rob