DocRob
-
Posts
7,138 -
Joined
-
Last visited
Content Type
Profiles
Forums
Events
Gallery
Everything posted by DocRob
-
Very nice, the pit looks awesome Peter. It's good to see some 72 scale planes here. I have only a handful in my stash, but will build them along the others. The only thing, which never seem to work for me, is the fast in between build. There is no scale / time factor in my projects . Cheers Rob
-
This putty stuff is moving a lot with gravity. It's a bit better to work with, if you use thinner rolls of the putty and add some contoured paper mask fo protection and you should spray immediately after application. Cheers Rob
-

Wingnut wings Hansa Brandenburg w.12 1/32
DocRob replied to Mihailo1994's topic in LSM 1/35 and Larger Work In Progress
Your Hansa Brandenburg will look awesome. I went the same way, using the Aviattic Lozenge for mine and they were a joy to work with. It's a great kit, where you can concentrate completely on painting and weathering. I'm eagerly looking forward for your progress. Cheers Rob -
Fw190A-8 3/JG1 crash Vreeland
DocRob replied to JeroenPeters's topic in LSM 1/35 and Larger Work In Progress
Très cool. Cheers Rob -
1:32nd scale Ponnier M.1
DocRob replied to sandbagger's topic in LSM 1/35 and Larger Work In Progress
Thanks for your effort. I made my own struts, by flatten brass tubes between wooden blocks in a vize, but would definitely buy a Strutter, when available. I searched the net for one, for some years now and look forward to a new release. The Ponnier looks great, it's an interesting plane with all these aerodynamic cowlings and hub and you do it justice, your own marveled trademark way. Cheers Rob -
Thanks Nick, the biggest problems were indeed with the bigger and multi colored wet transfers, with the exception of the large US insignia, which went on problem free. On the MIG, I used them only as stencils and they performed well, with only tiny lifts, which would be normal on a big grey Soviet beast. With the Hellcat, I removed the wet transfers, which was not so easy, because they adhered very well, exactly 1 mm beside a lifted part and fitted the supplied Cartograph decals over, as best as I could. I will give them one more chance, possibly, when I build my F-4B Phantom, where they could make life much easier, as you can apply stencils grouped in places. Anyway, your P-40 build is exceptional and fun to follow. Keep up the great work. Cheers Rob
-
Great tutorial, and you are lucky, that the HGW's worked so good for you. I had lots of problems with these last week, which almost ruined my actual Hellcat build. I did everything according to the manual (or like you described) and had lots of wet transfer lifts, while removing the carrier film very carefully. If the stay on, like on my prop too, they look great, but to my eye, the product does not have reliable results, specially the larger wet transfers, like the cat fangs and eyes were problematic. The stars and bars and small stencils worked better. I switched to decaling then. I tattooed my Mig-31 with myriads of stencils and had only little lift probs, but on two different occasions, the wet transfers were not usable or to put it positively, they are for the friends of heavy chipping . Cheers Rob
-
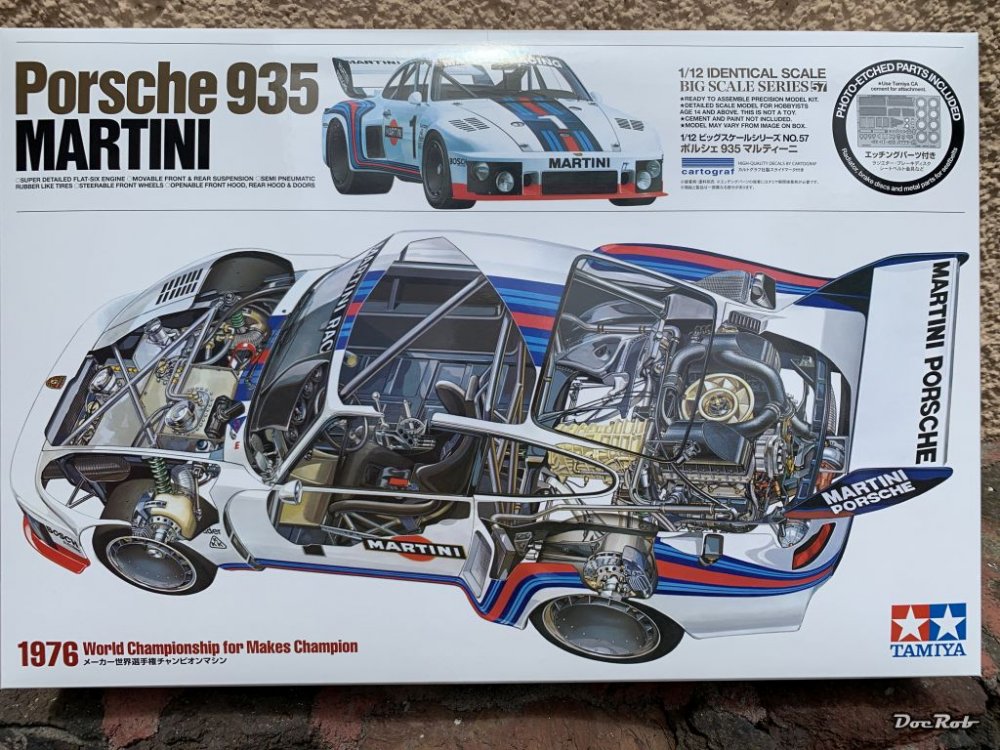
I was aware of this set, but will not spend that kind of dough . I will decide later, if the Porsche will be build oob or will receive some extra goodies. I thought about a road car conversion too, but I think the 934 would have been a better base for that and then there is this intriguing Martini scheme. Cheers Rob
-
Yes, that one too. I only built a smaller version of the Constitution at the time and can't remember which company made it. I didn't paint the black plastic, but the white stripes were brush painted and the lower hull received some Humbrol copper enamel by brush as well. Happy times. Cheers Rob
-
Today, I freed our postwoman from a heavy burden, which was partly inflicted, by at least some of you. I will not particular raise my finger in the direction of a guy, whose name begins with m and ends with ark , who has shown some incredible 1/12 car stuff here lately. But that's only part of the story. When I was twelve, the Tamiya Jägermeister Porsche came out and led to my nose being permanently flattened against the glass front of the LHS, but there was no way, I could afford the kit by the time. As I'm not especially a car guy, the interest faded after some years a bit, but never completely, but I missed all the later releases of the kit too. Now I found the Tamiya 1/12 Porsches re-released with added PE for a decent price, which couldn't have been much more, than it was in Deutsch Marks by the time, so what to do? Exactly, buy one, but I have an enormous dislike of Jägermeister, so I chose the Martini 935, which suits me, being a cocktail aficionado much better, especially the extra dry variant. And then it was here, it's a very huge box and opening it, feels a bit like Christmas, it is packed full of quality stuff. On first fast inspection, I wouldn't have thought, that the kit is only merely a decade younger than me. If you are not totally bored about me blabbing, I share my theme based personal anthem with you. Remember, the Reverend is always right Reverend Horton Heat - It's Martini Time Cheers Rob

-
What is on your bench right now ? Share a picture :)
DocRob replied to Martinnfb's topic in Modelling Discussion
That's a fierce piece of armor. The paintjob looks great. Can't wait to see the beast with tracks on. Your build and Carls remark reminded me, that there is a Churchill AVRE sleeping in my stash. Cheers Rob -
Das ist der Hammer Gaz, . It's hard to pick out well made details in this overall beautiful result. That maybe sums it up, everything fits together, representing a stunning Albatros, with a beautiful and uncommon scheme. Cheers Rob
-
Israeli Mirage III C with Atar9C
DocRob replied to Kaireckstadt's topic in LSM 1/35 and Larger Work In Progress
Masking is better than reworking and the best is PAINTING, so close now, Kai. Your subassemblies look gorgeous and the Mirage will be a stunner soon. I had once a slight clouding effect with Mr. Masking Sol Neo on a canopy which I gave a Future bath before. The masking fluid was on the canopy for some weeks. Now I tried the water based Mr. Masking fluid and have to see how this worked out on my Hellcat canopy. It's a bit thinner compared to NEO and a bit less smelly. You know exactly, when you have used a certain word, like rework, too often while posting, when exactly these letters on the keyboard are broken . Cheers Rob -
1:32nd scale Ponnier M.1
DocRob replied to sandbagger's topic in LSM 1/35 and Larger Work In Progress
I second that, you can never have enough stability with these fragile airframes. Nice work with the brass as always, Mike. Cheers Rob -
What is on your bench right now ? Share a picture :)
DocRob replied to Martinnfb's topic in Modelling Discussion
Muchas Gracias Amigos, there are some scratches here and there and some paint damages to repair, but it seems the Hellcat will be finished soon. The hardest part was, that a pure pleasure build was spoilt in an unexpected way. I still cannot believe, how god these HGW wet transfers adhere only a millimeter distanced from where I pulled the transfer loose while removing the carrier film with the utmost carefulness. Cheers Rob -
Wingnut wings Hansa Brandenburg w.12 1/32
DocRob replied to Mihailo1994's topic in LSM 1/35 and Larger Work In Progress
That wood interior looks great, and the detail on the IP is exceptional. Will you add levers to the switches on the left side? I used some lead wire on my build, which I flattened with pliers. It's a great kit and I'm sure you will the build. Cheers Rob -
What is on your bench right now ? Share a picture :)
DocRob replied to Martinnfb's topic in Modelling Discussion
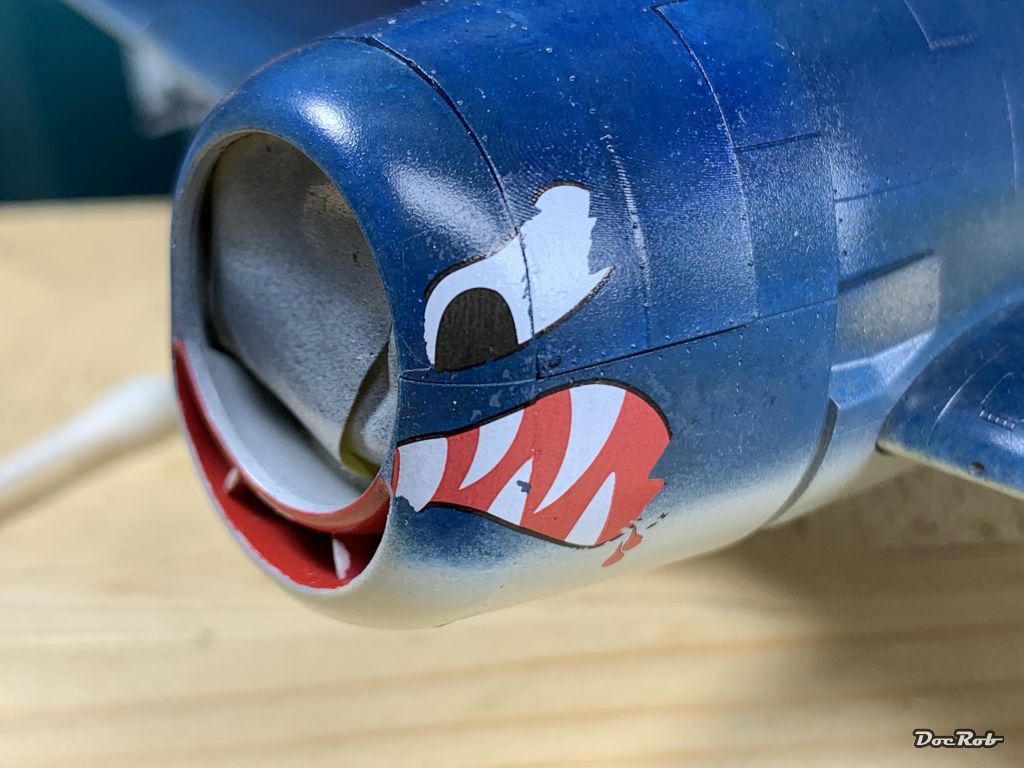
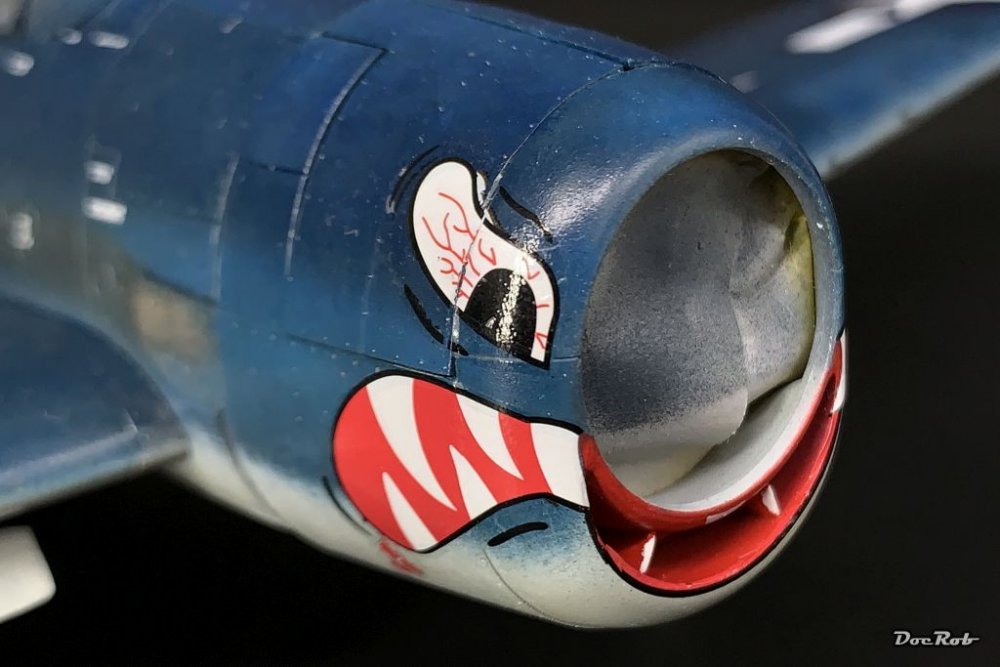
The Hellcat is save for the moment and was not converted to real flying duties. After calming down a little yesterday, I partly scratched the residues of the HGW wet transfers away. Interestingly the parts which were still on the Hellcat adhered pretty strong. I carefully applied the eyes and mouth over these parts. This was made more difficult, because I had to cut the eye decals, to have the cowling panels removable. Luckily, I found some 3's in my decal stash, which meant I could depict the plane I intended. Today I had some only partly funny hours with the stencils. They were not so far from a E-4 Phantom by the time . Cheers Rob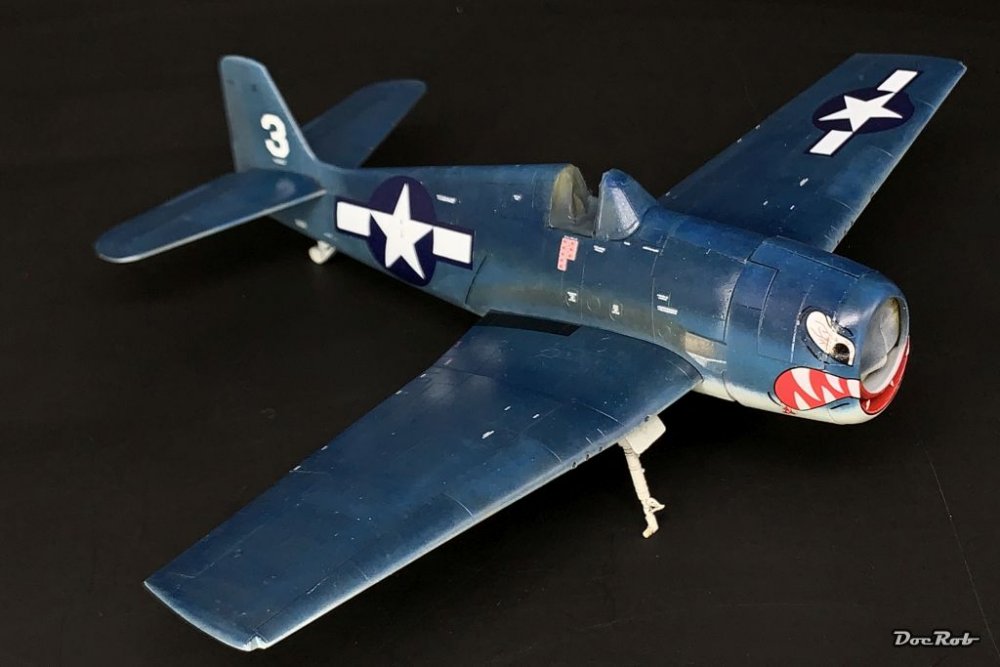
-
What is on your bench right now ? Share a picture :)
DocRob replied to Martinnfb's topic in Modelling Discussion
No need to be sorry, I just wanted to point out, that I'm not that kind of idiot to leave such a prominent fingerprint, but idiot enough, to not flatten out the 3D print structure . Seriously, on the finished model the cowling panels will be removed, to have a better look at the Brassin engine. I only wanted to have the panels painted and decaled correctly, that's why they 're on. Cheers Rob -
What is on your bench right now ? Share a picture :)
DocRob replied to Martinnfb's topic in Modelling Discussion
Indeed, that's what I call a cluttered bench . I prefer the old school vernier calipers too, the digital ones suggest an accuracy, which they don't really have. BTW, I recognize the fuselage halves among all the clutter. I have mine pulled out too, to play a little through the drying times of my Hellcat build. I won't build a very special version of the PZL like you, but plan a different approach with the paintjob, using only oil colors and metal waxes for the finish, 95% airbrush free. Let's see how this works out. Cheers Rob -
What is on your bench right now ? Share a picture :)
DocRob replied to Martinnfb's topic in Modelling Discussion
It's not a fingerprint, its some print structure from the Brassin cowling, but I had the same amount of damage on the front cowling ring, wich was gloss prepared plastic, without any blemishes. It's as you and Carl mentioned, the product is not reliable and therefore to avoid. Cheers Rob -
Indeed fantastic Gaz, enjoy the view, unblocked by the upper wing. Later some of the detail will be hidden in eternal shadow. Cheers Rob
-
Fw190A-8 3/JG1 crash Vreeland
DocRob replied to JeroenPeters's topic in LSM 1/35 and Larger Work In Progress
I feel your pain, having for the moment ruined my 48 scale Hellcat with HGW's wet transfers. My result was more or less the same, 20% of the transfers were lifted by the carrier film, uncool . The inventory pic looks like a magazine shot, great. Cheers Rob -
Your Beaufighter is a beauty, sporting a nice paintjob and weathering. I have thought about buying a Tamiya Beau lots of times, but have skipped it, because I hope that someone will develop a decent one in 32 scale. Cheers Rob
-
What is on your bench right now ? Share a picture :)
DocRob replied to Martinnfb's topic in Modelling Discussion
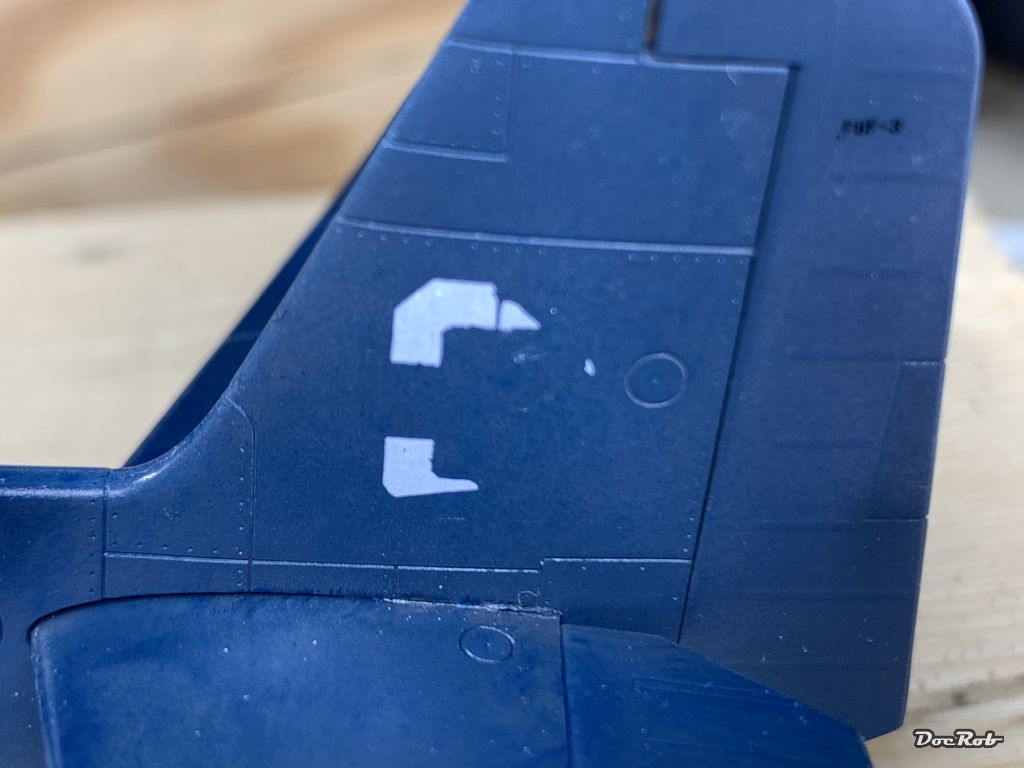
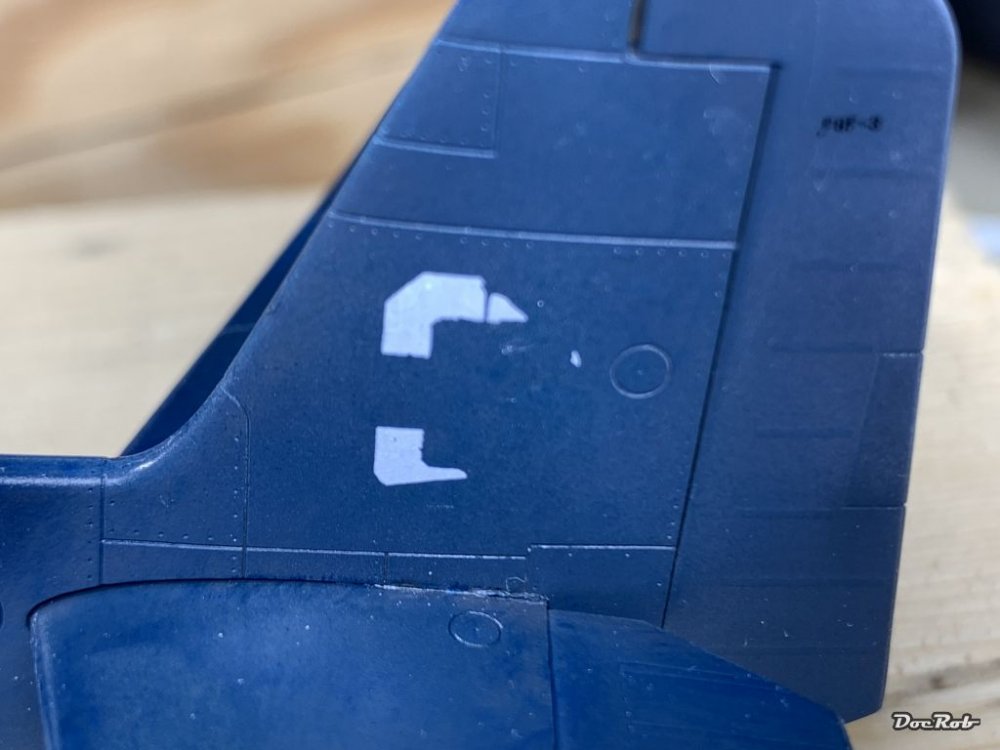
Hola Amigos, today I'm deeply frustrated and nearly made my Hellcat a lawndart. Again it was a HGW product which failed to deliver. I get more and more annoyed by their partly useless products. It started with the unusable wooden paper parts, terrible seatbelts (normally they are good), unbelivable fragile wooden decals for the Hansa Brandenburg, unfitting vinyl masks, ... For the Hellcat, I had a set of wet transfers for the markings and stencils and after applying everything according to the manual, it looked like this, when I removed the carrier film. This was supposed to be a three, on the other side the wet transfer lifted completely. Luckily the large Stars and Bars and some other wet transfers stayed intact and if they do they look like tattooed on. I have used HGW wet transfers on my MIG-31 build where they were fragile but manageable. The preparation process was the same, it shouldn't be a rookie error. I 'm not sure what to do about it. I have the Cartograph decals for the Hellcat, but it's a different plane they depict. I have to clean the complete nose for re-decaling and then I have to strip some other wet transfer to change the plane. Cheers Rob
-
Share how COVID-19 Quarantine has affected you.
DocRob replied to 1to1scale's topic in General Discussion
I got my first shot of Pfizer one and a half week ago. Yes, they are fast on my tiny island with the vacuna. They even started with the 40's to 50's group this week, me belonging into the group of the 50's to 60's. I felt a little weak in the afternoon and on the next day, it was like somebody smacked me on to the arm lightly and that was it. Only one of many others getting the injection, felt bad for two days with some fever and cold symptoms. It's strange that the Spaniards on my island seem to just take the injection as soon as possible. It's the foreigners here, which hesitate, foremost the Germans and the Dutch, where everybody is soooo special (starts with the food, you wouldn't believe, what can possibly be harmful to your body ) and self centered and some other things which accumulate to what Hubert said. I'm not negating the risk of post reactions, even dramatic ones in some cases, but for my thinking it's about being a part of an intact society, to protect others and help to not spread the desease anymore. Ayyyy, what's itching there in my arm. They lousy implanted that brain control chip ------- STRG-ALT-DEL . Sorry, had to be said. Cheers Rob