DocRob
-
Posts
7,048 -
Joined
-
Last visited
Content Type
Profiles
Forums
Events
Gallery
Everything posted by DocRob
-
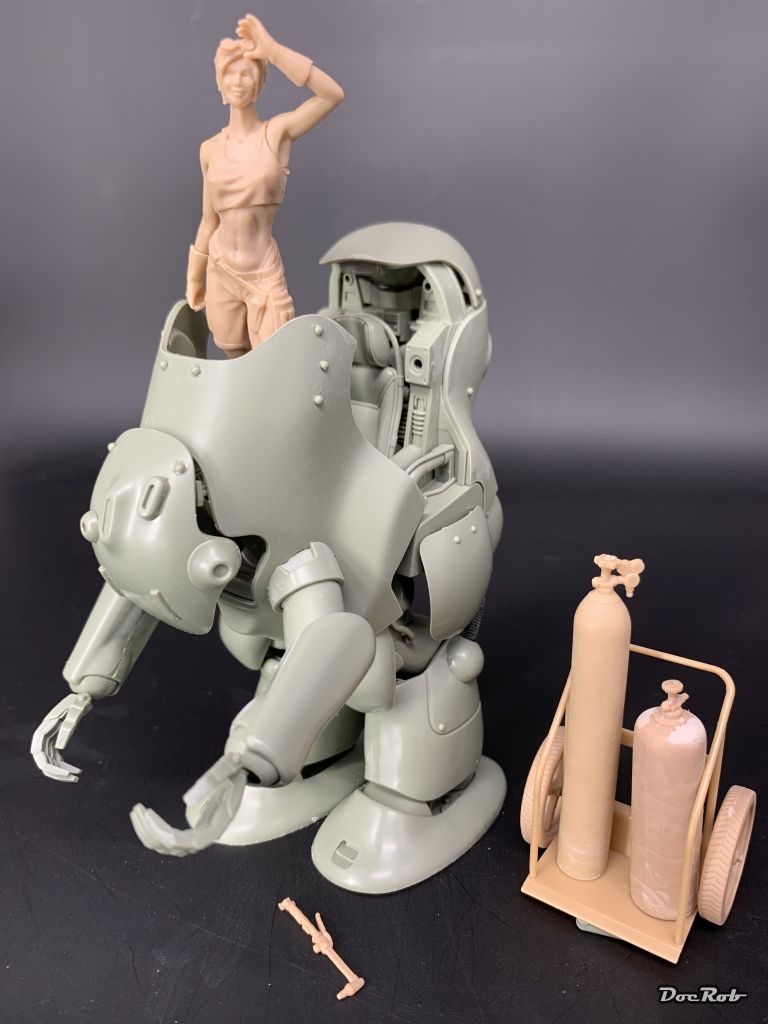
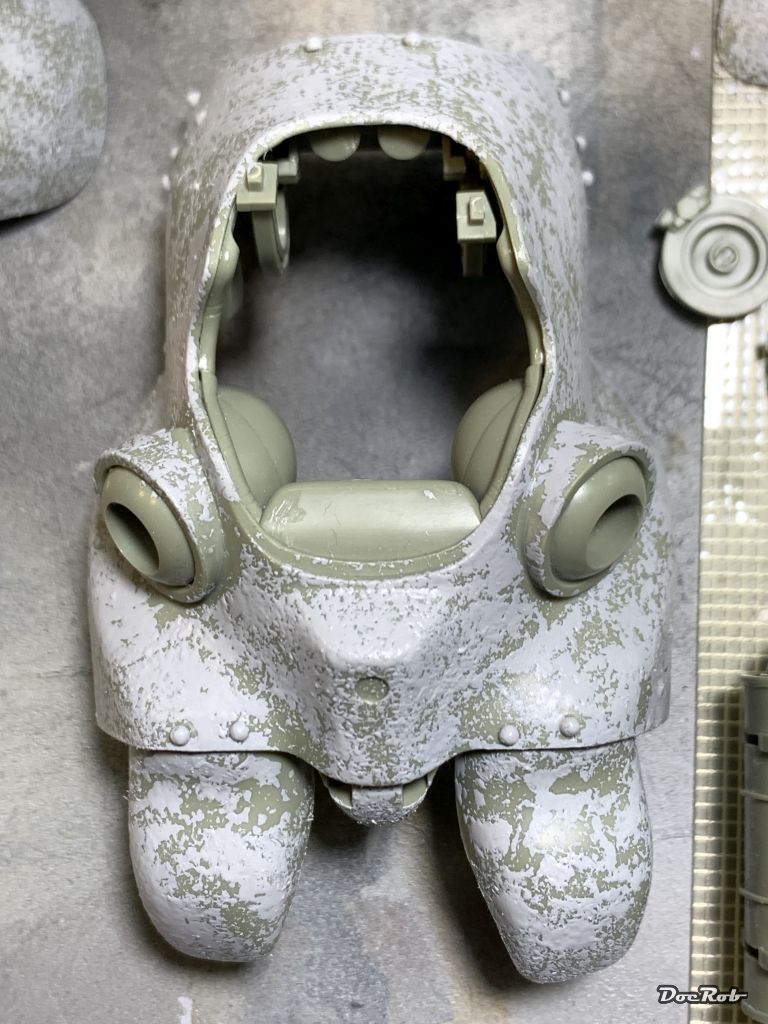
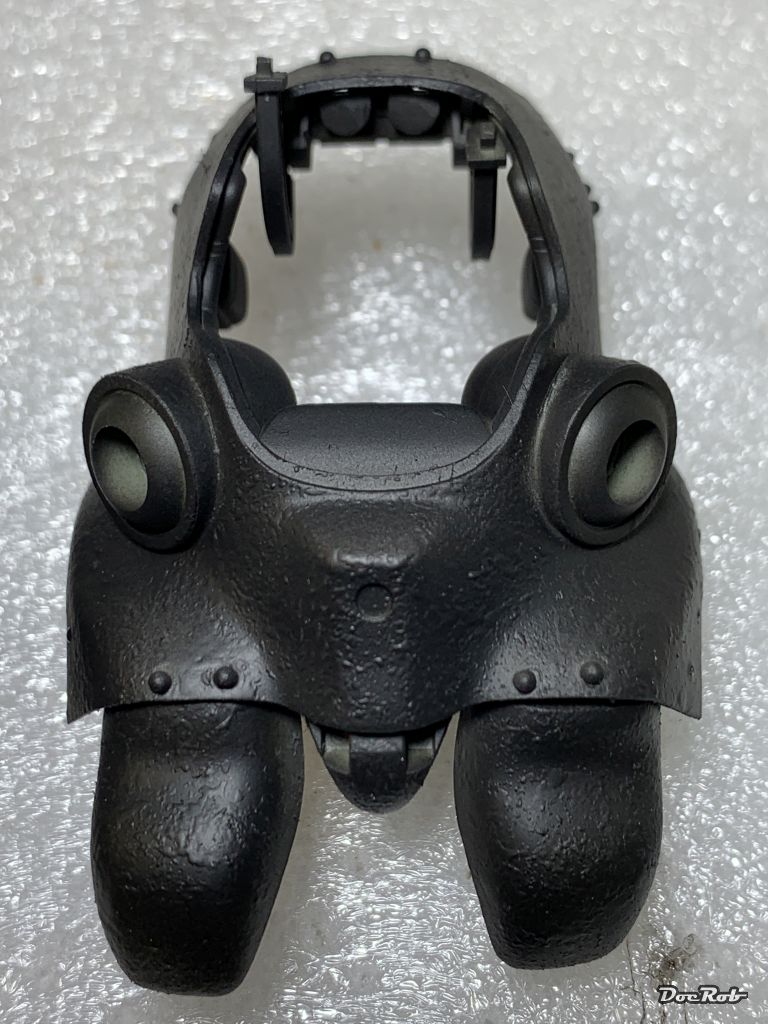
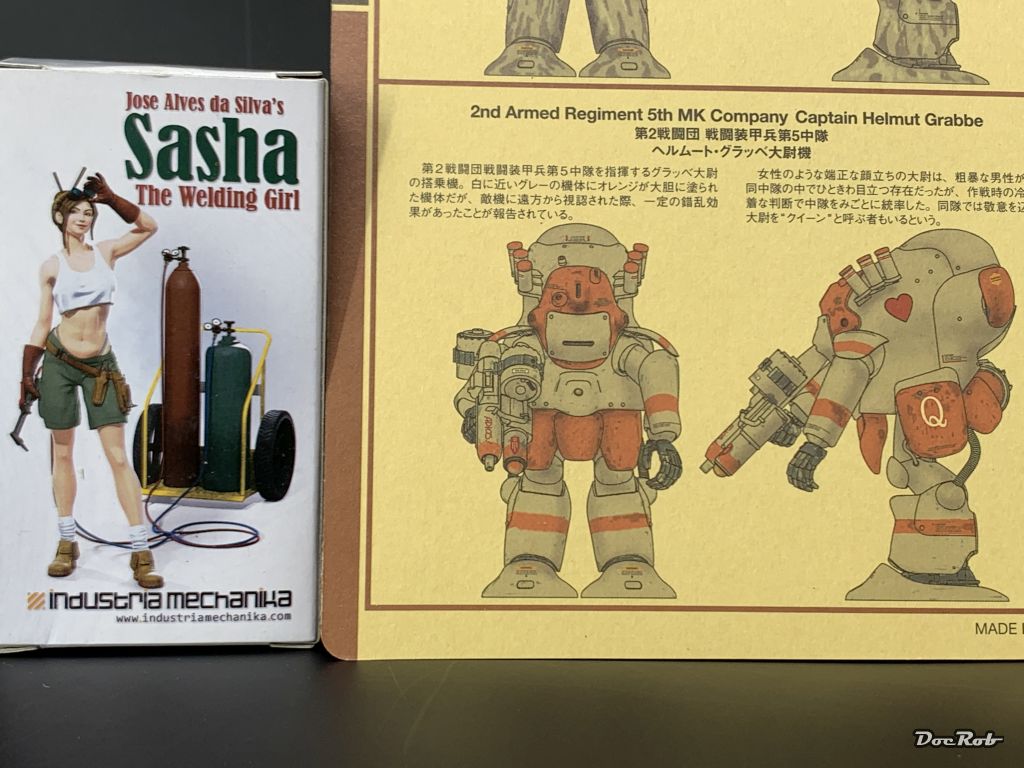
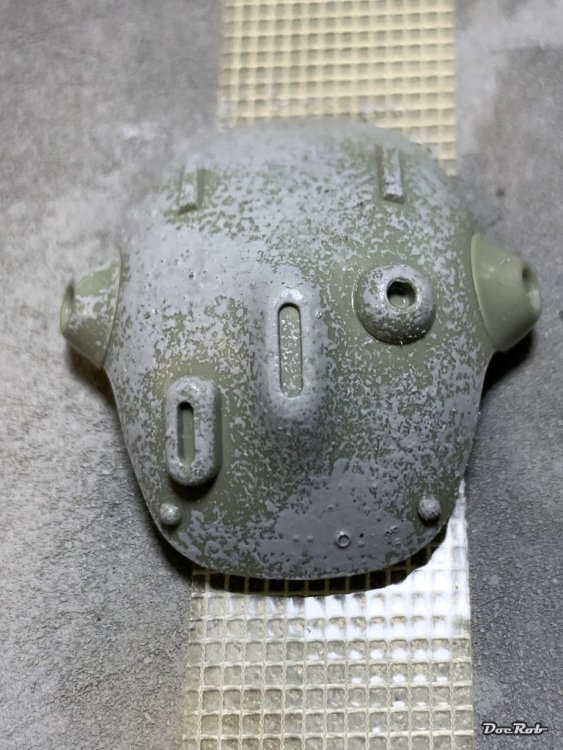
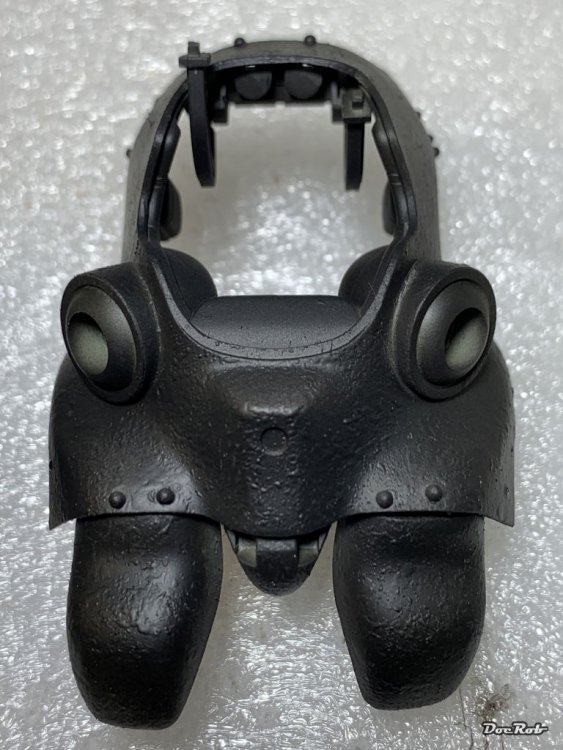
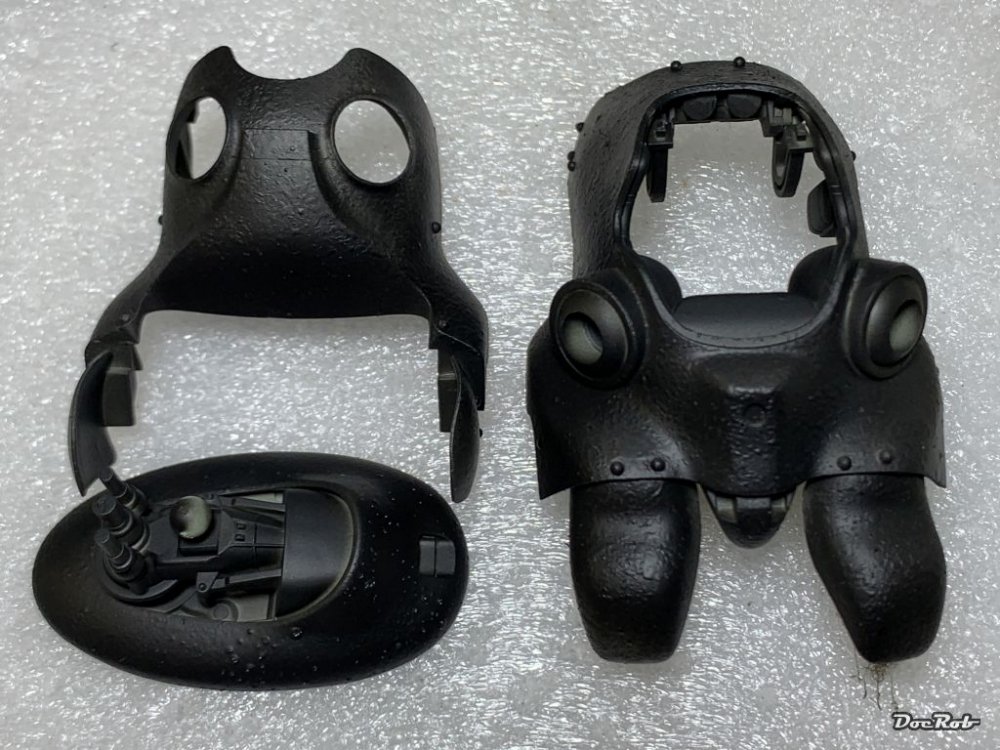
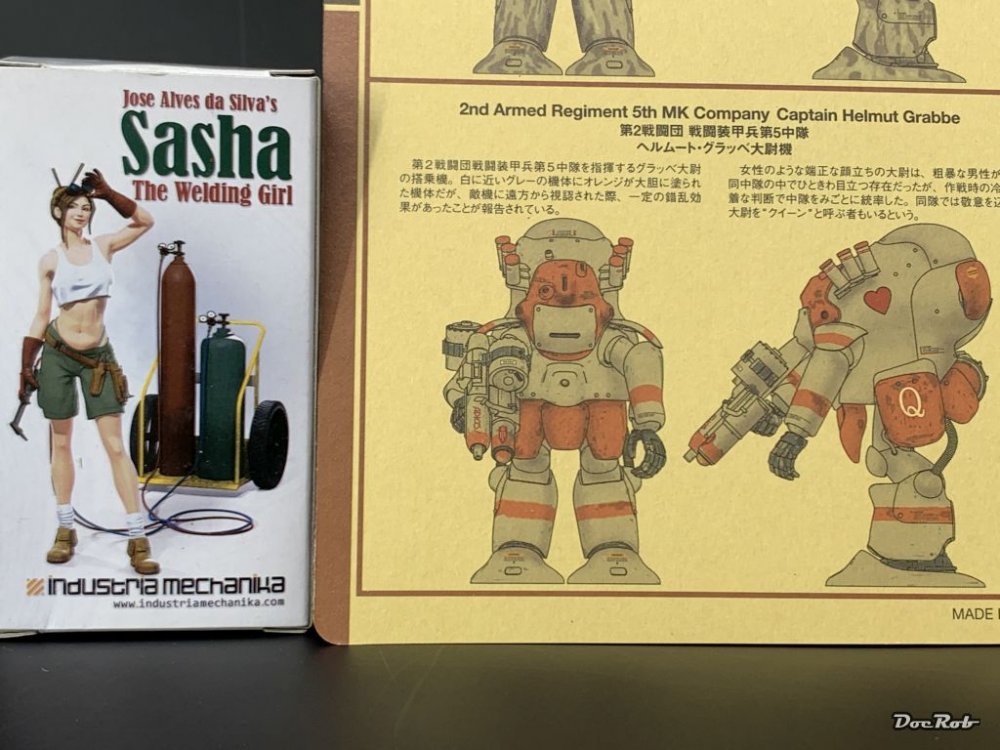
 Welcome to the future, a knight, maybe it's history, noooo, its sci-fi. These Ammoknights are a sidekick to the Maschinenkrieger or Ma.K or ZbV 3000 universe and I spare you the banal story behind, because it's irrelevant for the project I have no idea, if there is any interest in a WIP of that kind. First of all it's not about building, because all building was done in a day and was a very simple affair. The fit of the kit parts is very good and to make painting and weathering easier, all subassemblies can be snapped together without gluing, quite comfortable. The only extra work went into the seamlines of the arms and legs, where I used Tamiya extra thin glue in a left tiny gap, between the halves, then being pushed together with some force, so that some glue dries on the surface and can later be sanded away, result, no gaps at all. What this WIP will be about is painting and weathering, where I will incorporate some new adventures. My plan is to brush paint the Ammoknight with a layering technique of different type of colours, let's see, how this works out. The little scene will include the opened Ammoknight powersuit and Sasha the welding girl, patching the worn and beaten knight up after battle. If you have guessed, that this will involve metal, rust, grime, flaked paint and some sex appeal, you're right. Like on most of my builds, I have a very detailed picture in my head, showing the finalized project and like always, I'm curious about, if I'm able to deliver. The scene will look like this Today I started with the base layer and wanted to create a surface of badly pitted metal, cast with bad quality, corroded and worn. For the first time, I applied a corresponding surface layer on a kit, using Mr. Surfacer 500 and dabbed the texture on, with different types of sponges in random patterns, which led to this. Next step was checking the result with black primer, which will be the base for all things to follow. My test pieces looked so promising, that I coated all the parts in Alclad's black micro filler, Here are the results on some of the main body parts and it came out exactly how I wanted the look. Cheers Rob

- 100 replies
-
- 12
-

-
- hasegawa
- ammoknight
- (and 1 more)
-
Bent wing bird- Tamiya F4U-1A
DocRob replied to BlrwestSiR's topic in LSM 1/35 and Larger Work In Progress
Great progress Carl, always a great feeling to close the fuselage without issues. Your de-hooking solution is also spot on. Cheers Rob -
I feel the need... for Shake and Bake... Tamiya StuG
DocRob replied to GazzaS's topic in LSM 1/35 and Larger Work In Progress
On the first pics, your STUG looks like covered with dark caramel sauce, sweet . I like the resulting camo though and think it's well worth the effort. I worked on a winter STUG project in an early phase as well, with only most of the Zimmerit applied. My plans for the winter camo were to use washable white colour by Ammo of Mig, applied by brush, to hinder overspray. I haven't tested the method until now, but will post the results. I like hairspray chipping and have used it to my liking on several occasions, but never decanted the stuff. Two or three passes, directly from the can were sufficent, depending on the planned effect. Cheers Rob -
PCM Focke Wulf FW 190 A-1/A-2/A-3
DocRob replied to GazzaS's topic in LSM 1/35 and Larger Work In Progress
I had the same thoughts like you concerning bright colours and was also quite satisfied with creating lighter and darker spots, be it replicating light and shadow or abrasion or bleaching by the sun, with oils. I think it's a great way of post 'weathering' and yours look great. Sometimes you can achieve similar effects with Pigments too. I did that, pronouncing the wing spars of my otherways plain pfalzgrau Pfalz D.III I may try another approach on my 1/20 Ammoknight, using another brush only technique, which I found, use many of the larger scale sci-fi modelers. It sure is way overdone for your Focke, but I thought I should mention. Ma.K Weathering Camo - Free Hand brush Mr Color by Lincoln Wright - YouTube Cheers Rob -
Fokker E.V / D.VIII Parasol Mikro Mir 1/32
DocRob replied to DocRob's topic in LSM 1/35 and Larger Work In Progress
Cunning, I never thought about that method, thanks for mentioning it Jeff. On the 1/72 Fokker it wouldn't have been an option though, because I think this only works with brass rods in the struts, no option for 1/72. Anyway, it's a great method for pre aligning struts on biplanes and I will store it on my brain harddisk. Cheers Rob -
Fokker D.VIII Razor Wing Jasta 6
DocRob replied to DocRob's topic in LSM 1/32 and Larger Aircraft Ready for Inspection
It's a pleasure Mike. I live on a tiny island with nobody around having an interest in modelling. I don't do competitions, I build only for myself. I have only you to communicate about my loved hobby and I like the idea of a forum about giving and taking and to me LSM is such a place with friendly members and great discussions. The build of the Fokkers, I covered a bit closer than others, as I learned a lot while doing it. The formerly dreaded building of brass struts is now in my repertoire as is the general handling of completely decaled fuselages or wings. It's trail and error sometimes. On an older WNW build, the Hansa Brandenburg, I wanted to use wood decals and failed miserably. As the build progressed, I used the oil colour technique for wooden parts for the first time and liked the flexibility and relative easiness of the process. I have to confess, that I never used WNW lozenge. The 1/32 Fokker and the Hansa Brandenburg and my SSW twins in 1/48 were covered in Aviattic slear backed Lozenge, which is pure joy to work with. robust and I like the colour rendition. They have the benefit of a slightly woven underground, very cloth like. The clay wash, I use, helps to blend the colours better. The only kit lozenge, I used, were th decals for the tiny Arma Fokker. They were printed by Cartograph and were good to work with, albeit not as good as the Aviattic's. Be warned, If I really start with the Duchess of Kingston, I will be fishing for information . Cheers Rob -
Fokker E.V / D.VIII Parasol Mikro Mir 1/32
DocRob replied to DocRob's topic in LSM 1/35 and Larger Work In Progress
Thanks Carl, be grateful to your boys for lifting the burden. Cheers Rob -
I banned myself from FB, livelong . Cheers Rob
-
Fokker D.VIII Razor Wing Jasta 6
DocRob replied to DocRob's topic in LSM 1/32 and Larger Aircraft Ready for Inspection
Thanks Gaz, after building the Siemens Schuckert D.III twins in 48 scale last year, it was only logical . Honestly, I have a weak spot for the design of the Fokker D.VIII and could be tempted to build another one in 1/32 in bright yellow with black diamonds all over the fuselage. While I started with the large one, I became aware, that there is the tiny Arma kit out there and ordered one. As there were some subassemblies finished parallel, finishing the little one was a no brainer to me and normally I hate redundancy. It will not happen again very often, that I will do parallel build, though. Cheers Rob -
Fokker D.VIII Razor Wing Jasta 6
DocRob replied to DocRob's topic in LSM 1/32 and Larger Aircraft Ready for Inspection
Thank you Kai, I'm looking forward to take some outdoor pics on a mirror, which show the upper and underside at the same time. Cheers Rob -
Fokker E.V / D.VIII Parasol Mikro Mir 1/32
DocRob replied to DocRob's topic in LSM 1/35 and Larger Work In Progress
Thanks Peter, macro pics can be cruel, but it also shows the areas for improvement in future builds. Cheers Rob -
Fokker E.V / D.VIII Parasol Mikro Mir 1/32
DocRob replied to DocRob's topic in LSM 1/35 and Larger Work In Progress
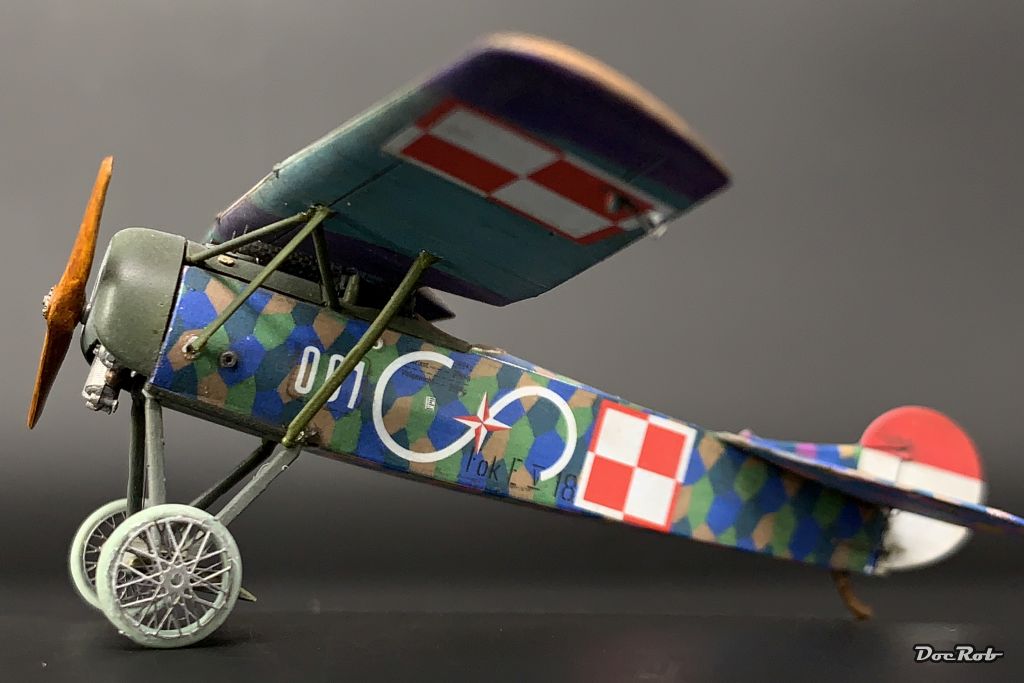
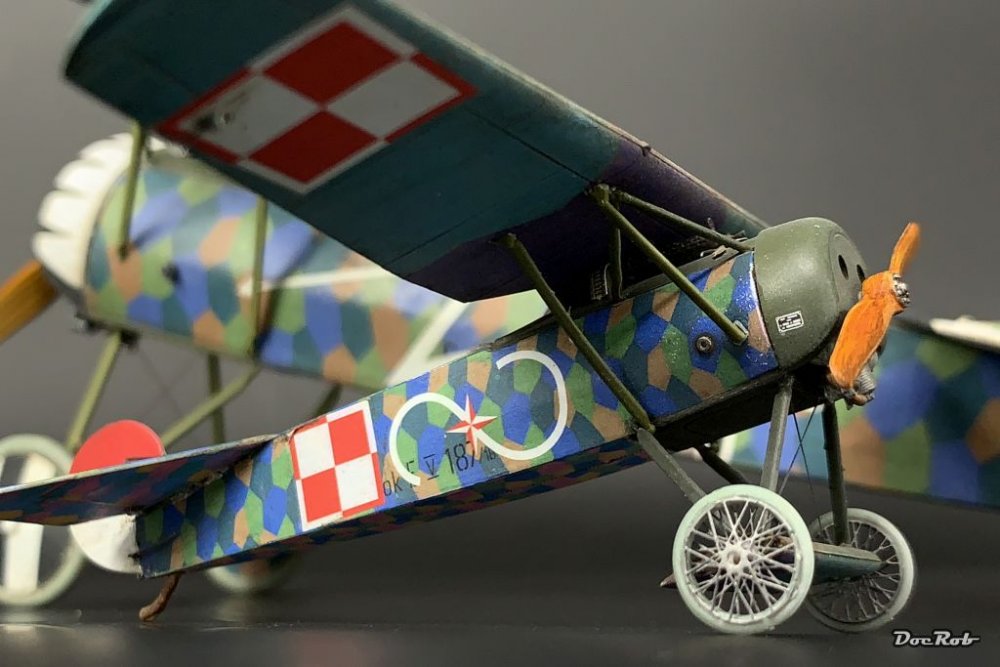
Thanks Hubert, I actually was tempted by the chosen scheme, because of the spoked wheels. It made the D.VIII appear different. One problem with the kit is, some of the PE parts appear to be a little to big. I used a template to bend the cone and the rim was closed, but the spokes were still too large in diameter. The non bent inner spokes have the same issue. With my unmacroed 55 year old eye, it looks ok, as the diameter of the wheel is less than 10 mm and if my eyesight betters, I will change them to covered wheels . Cheers Rob -
Of course, it seems obvious, but the rest of my stash threatens to take over the power in my house. Let's see who wins . Cheers Rob
-
I think you are right, but I was too much in the Lozenge business lately, that I'm afraid, I decal the hole hull with plank wood decals instead of using the supplied pear wood . The comparison with WNW is obvious, they are simply top shelf in every aspect, like Vanguard Models. Cheers Rob
-
Fokker E.V / D.VIII Parasol Mikro Mir 1/32
DocRob replied to DocRob's topic in LSM 1/35 and Larger Work In Progress
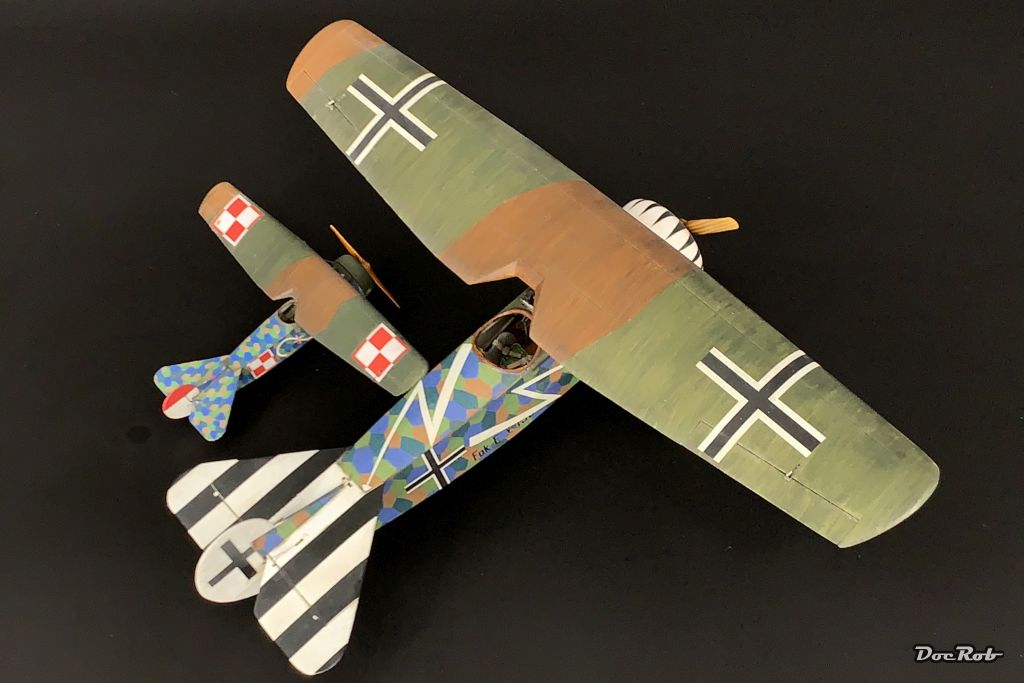
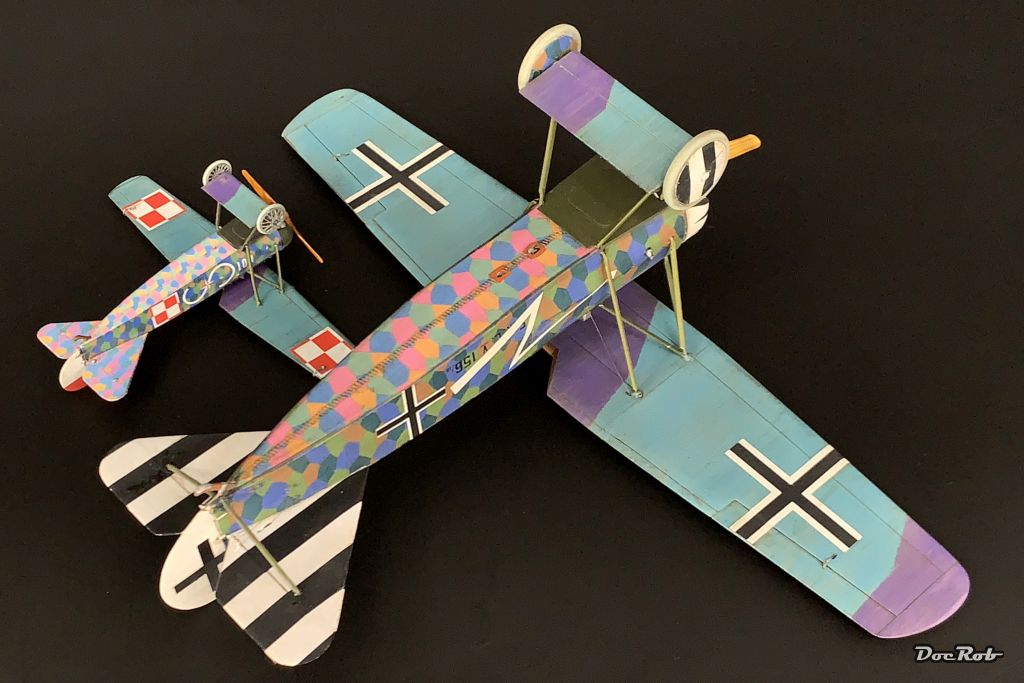
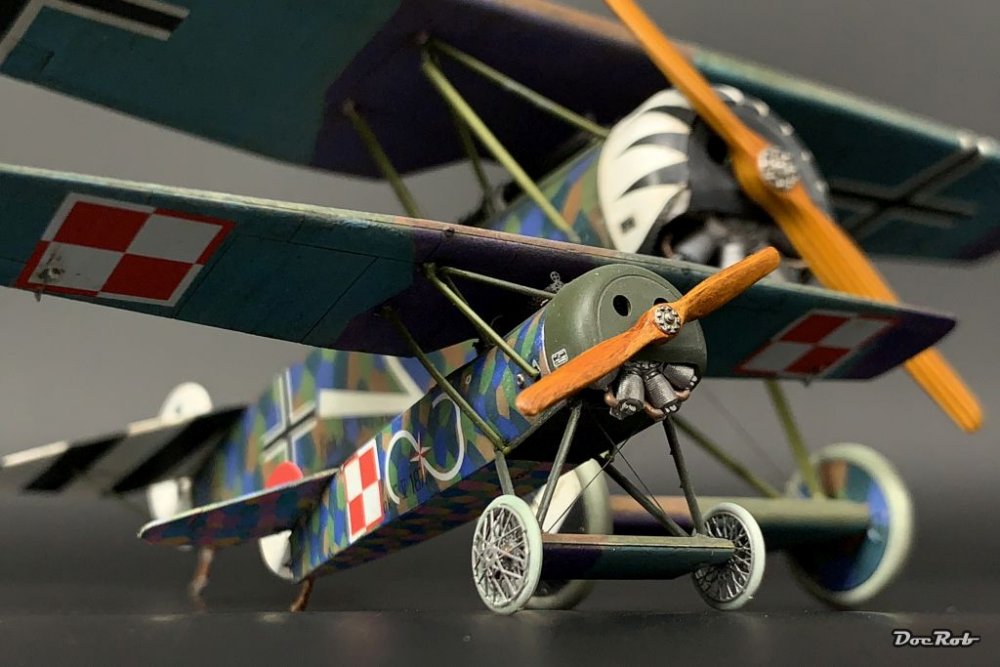
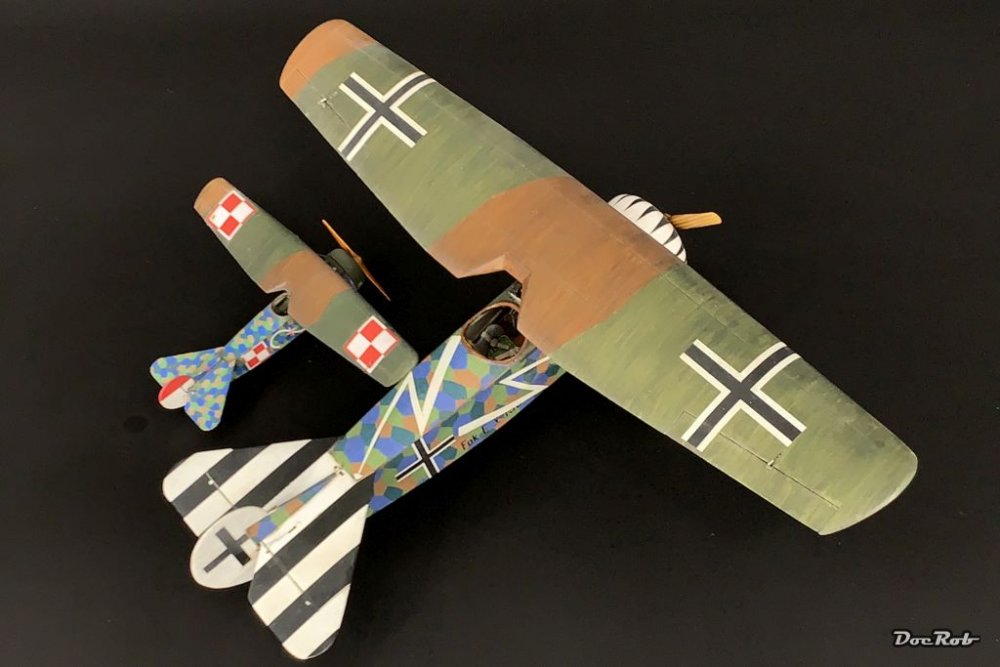
Thanks Kai, I actually added some pictures of the two Fokkers together here. Fokker D.VIII Razor Wing Jasta 6 - LSM Aircraft Finished Work - Large Scale Modeller Cheers Rob -
Fokker D.VIII Razor Wing Jasta 6
DocRob replied to DocRob's topic in LSM 1/32 and Larger Aircraft Ready for Inspection
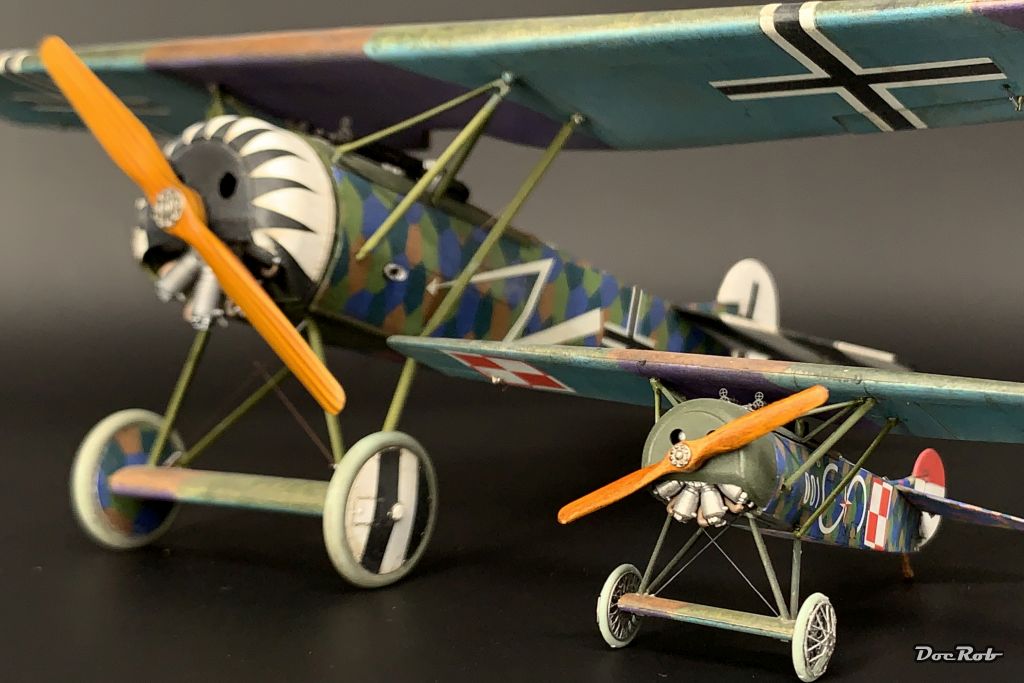
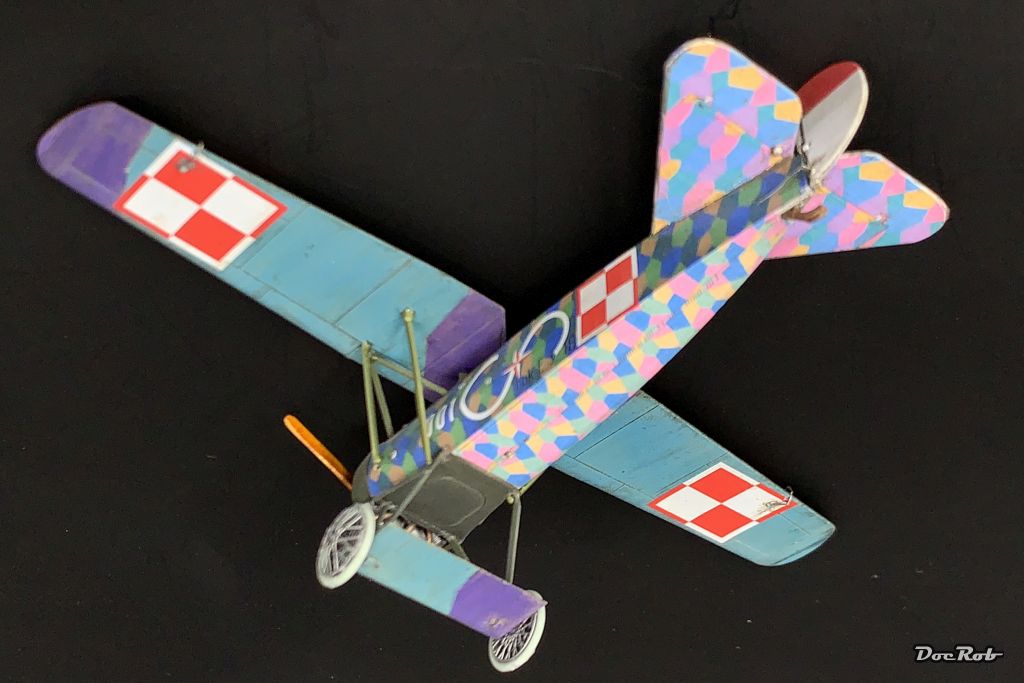
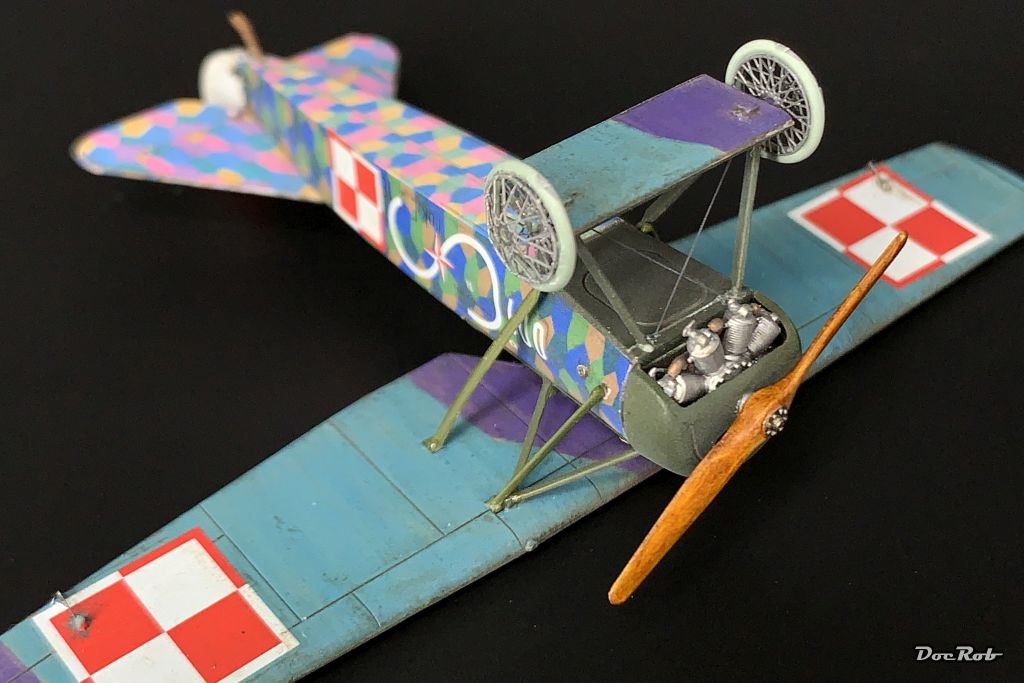
My Fokker D.VIII family has a new sibling ready for show. It's the Arma Hobby 1/72 expert variant of the kit. As I made some of the steps, like painting the wings with that strange streaked camo parallel, it was only logical to finish the small one along. When the water will be sunny and foremost less windy, I will add some outdoor pics. Cheers Rob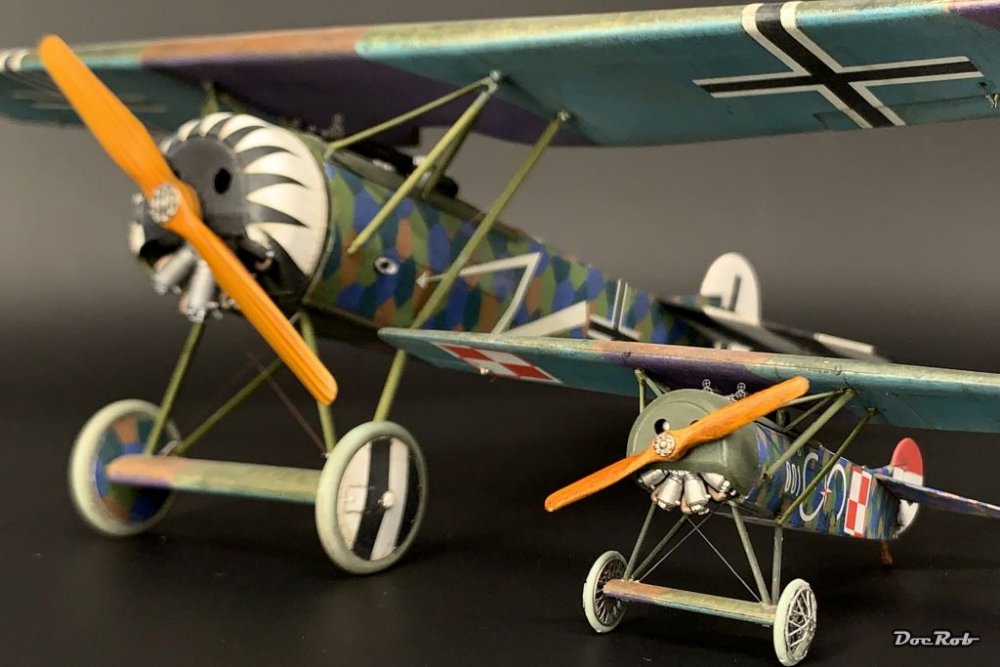


-
Fokker E.V / D.VIII Parasol Mikro Mir 1/32
DocRob replied to DocRob's topic in LSM 1/35 and Larger Work In Progress
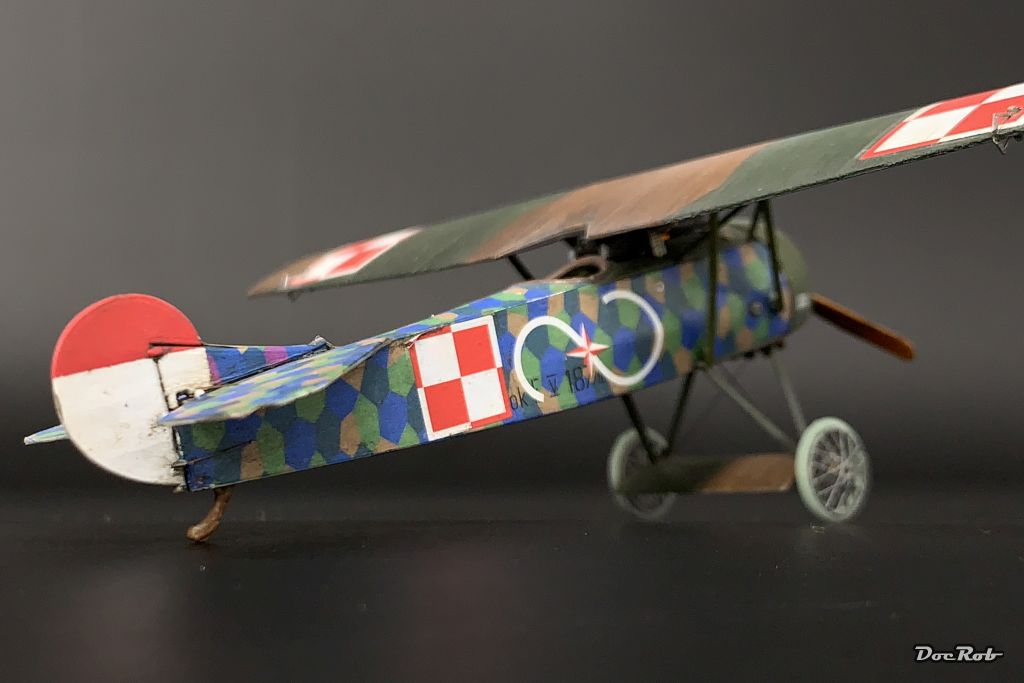
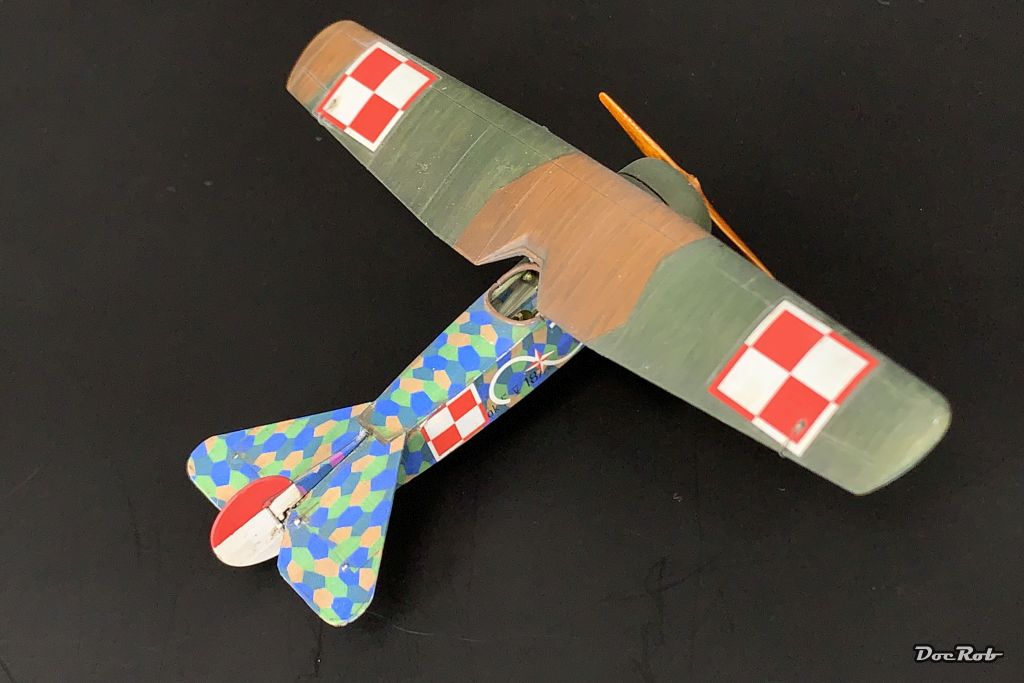
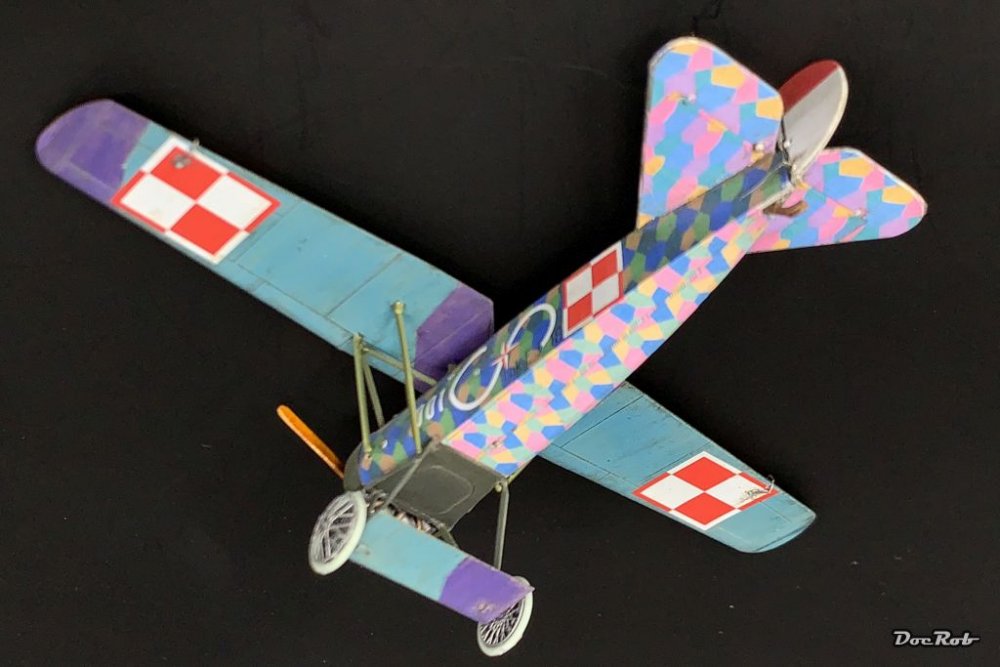
Finally the 1/72 Fokker D.VIII is done. The assembly of the wing was a little nightmare, fitting ten points on the different struts at the same time in the right angle and make it durable. The angle of the wing is a bit off as a result, but I decided against to break the parts away and try another time with the same possibility of misalignment. I added the wheels and the prop, which was sprayed desert yellow, received an oil colour treatment and then some clear orange from AK brushed on. When you see the pics, be gracious, as this thing is as big as a grasshopper and the macro lens unveils all the tiny blemishes. Cheers Rob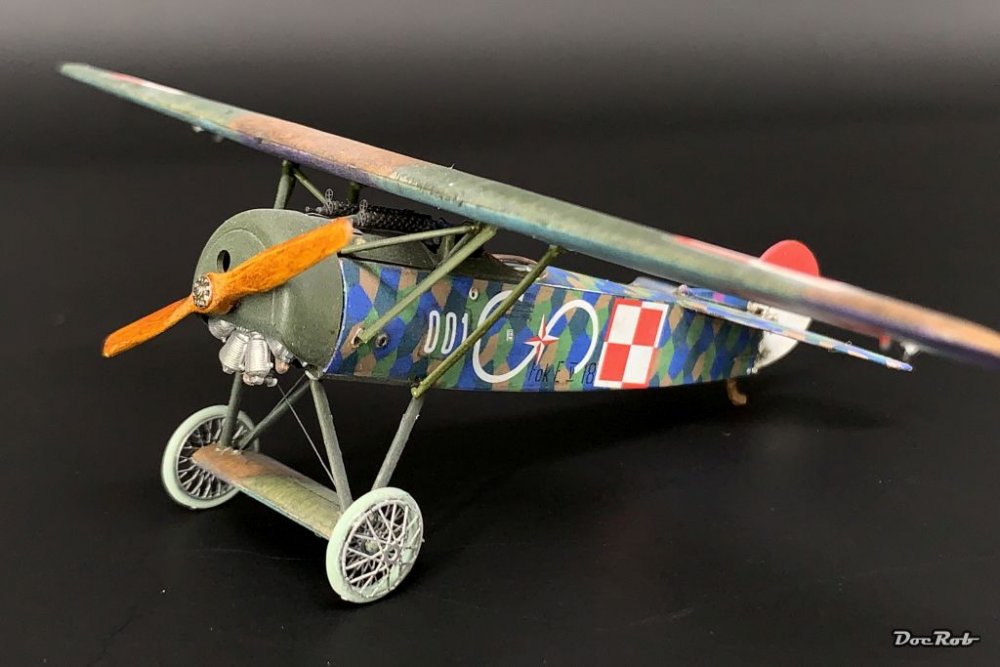


-
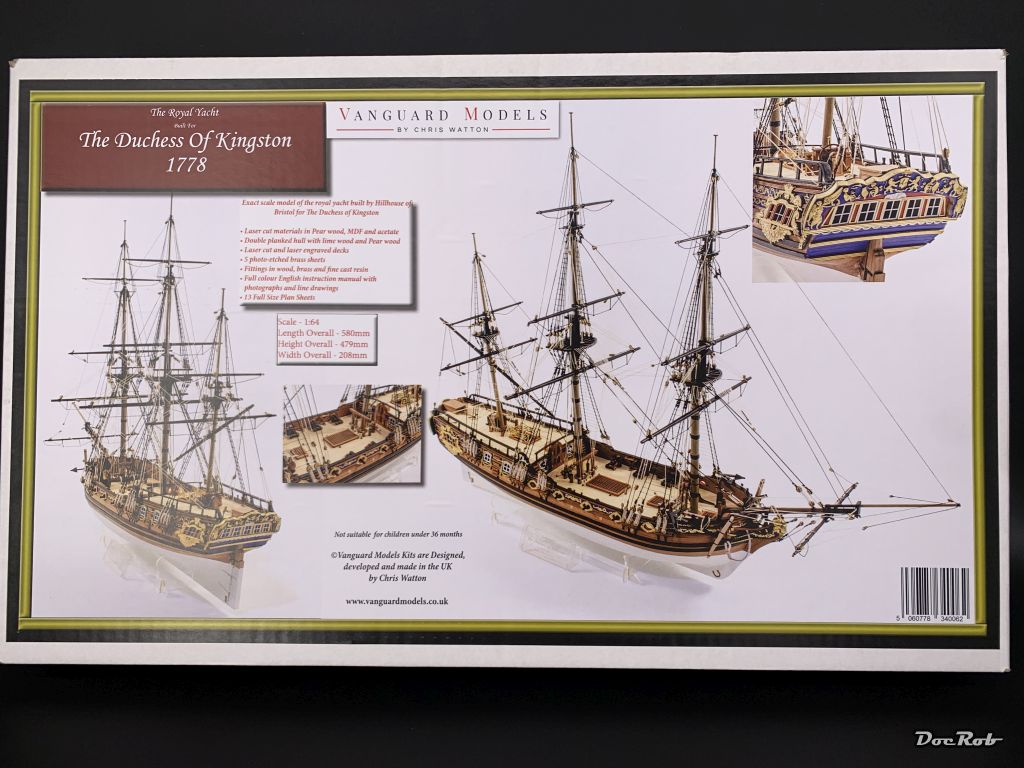
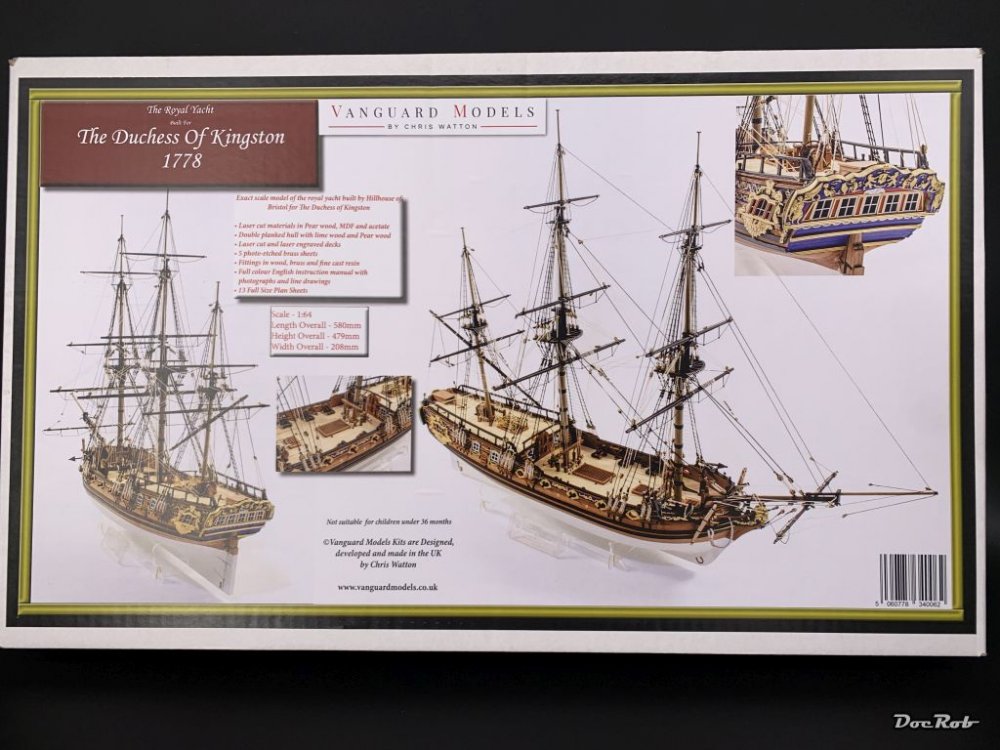
It took more time to get to my tiny island, than the original would have needed for the trip, but finally my Vanguard Models Duchess of Kingston arrived. The immense delay was caused by UPS, seemingly not being able to handle the Brexit shakes well. The box contents oozes quality out of every pore. This kit looks so much better right out of the box, than all other wooden ship kits, I have seen. The only question is, do I start right now,.... Cheers Rob
-
I feel the need... for Shake and Bake... Tamiya StuG
DocRob replied to GazzaS's topic in LSM 1/35 and Larger Work In Progress
That will look great under a winter camo with some abrasions here and there. Cheers Rob -
1:32nd scale Roland D.VIa
DocRob replied to sandbagger's topic in WW1 1/48 and larger Ready for Inspection
Another beauty, congratulations Mike. You captured the elegant shape of the airframe with it's klinker planking like an old Viking ship, perfectly. Like others, it was not the most success full of planes, but you have to hand the style award to the Germans, with the Roland and the Pfalz D.III. Along with the beautiful rendered lozenge and figures in their believable poses, it makes for a great result. Cheers Rob -
Israeli Mirage III C with Atar9C
DocRob replied to Kaireckstadt's topic in LSM 1/35 and Larger Work In Progress
This pit looks superb, lots of detail and lived in, like it has been in daily use. The F-16 is one of the few planes, where the bulb canopy seem to work like a magnifier, so effort well spent. Cheers Rob -
What's the violation about, parking too many Master brass sets in one box? Cheers Rob
-
PCM Focke Wulf FW 190 A-1/A-2/A-3
DocRob replied to GazzaS's topic in LSM 1/35 and Larger Work In Progress
That's what I call evidence . Cheers Rob -
PCM Focke Wulf FW 190 A-1/A-2/A-3
DocRob replied to GazzaS's topic in LSM 1/35 and Larger Work In Progress
Like the Dude said in 'The Big Lebowski' about his rug, 'It really tied the room together'. That's what the blending mist did. By reducing the contrast, it enhanced the reality appearance, great. With the exhaust staining, I'm with Kai, a little too much for my liking and the density of the side stains doesn't reduce to the end of the staining marks. Cheers Rob -
Fokker E.V / D.VIII Parasol Mikro Mir 1/32
DocRob replied to DocRob's topic in LSM 1/35 and Larger Work In Progress
Thanks Gaz, steady hands, an optivisor and a sharp blade did the job. I didn't dare to grind with power tools . Cheers Rob