DocRob
-
Posts
7,048 -
Joined
-
Last visited
Content Type
Profiles
Forums
Events
Gallery
Everything posted by DocRob
-

What is on your bench right now ? Share a picture :)
DocRob replied to Martinnfb's topic in Modelling Discussion
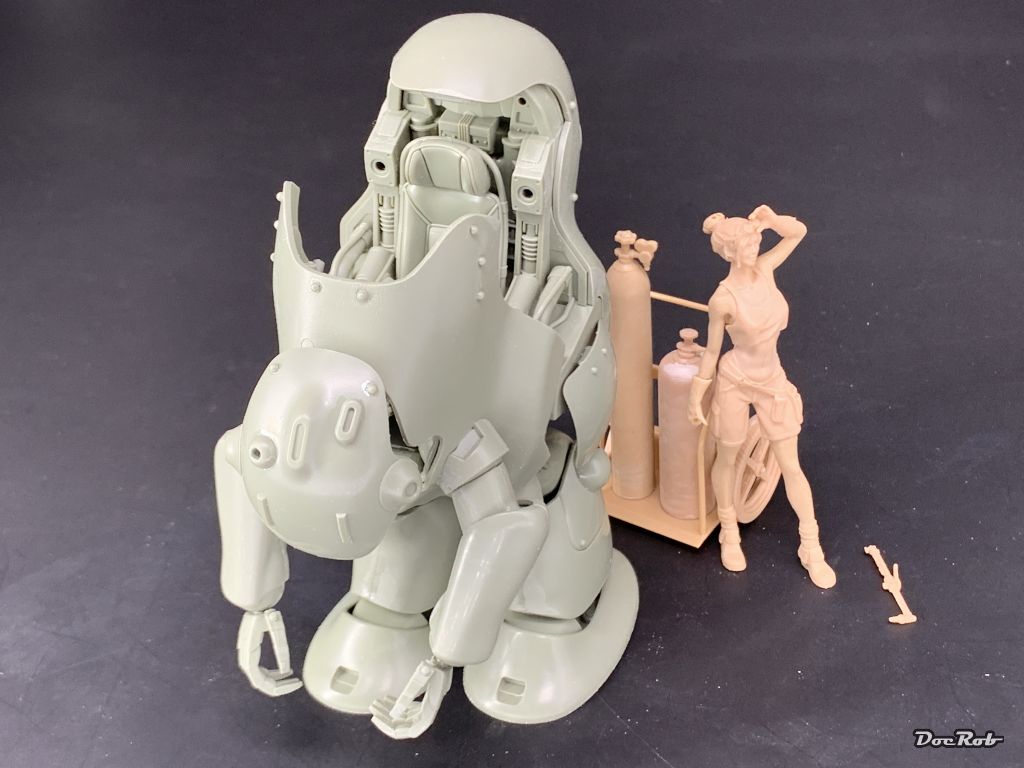
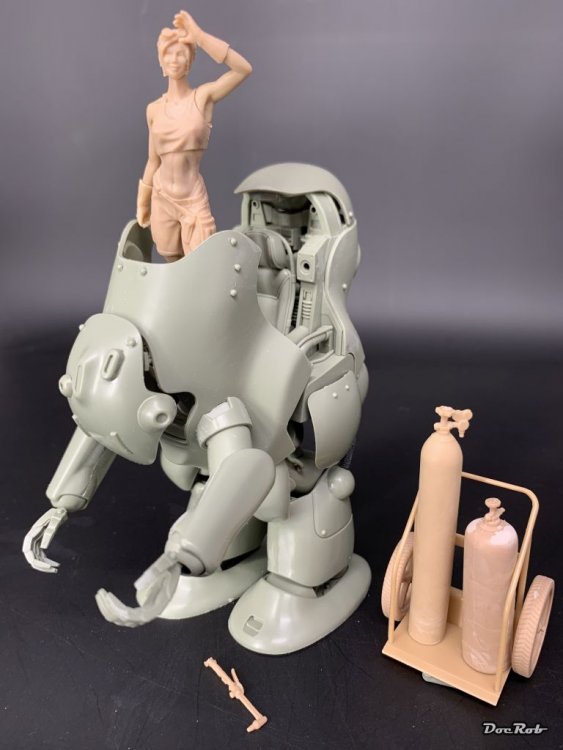
Exactly, Sasha the welding girl from Industria Mechanika, among some other of their great kits in my stash. I've seen pictures of Brick Work figures as well as Honemits figures, but don't like them too much. I seem not to be able to find the poses, I'm looking for and I'm not that deep into the babe thing, at least not in resin . Sasha is an exception here and the idea that she will wield on a heart shaped patch on a battle suit is in my head since years. The figure itself seems to be of a special type of resin. It's a little soft, almost vinyl like, but highly detailed. Same goes for the wielding cart, which needs no glue, due to the slightly flexible material. Cheers Rob -
What is on your bench right now ? Share a picture :)
DocRob replied to Martinnfb's topic in Modelling Discussion
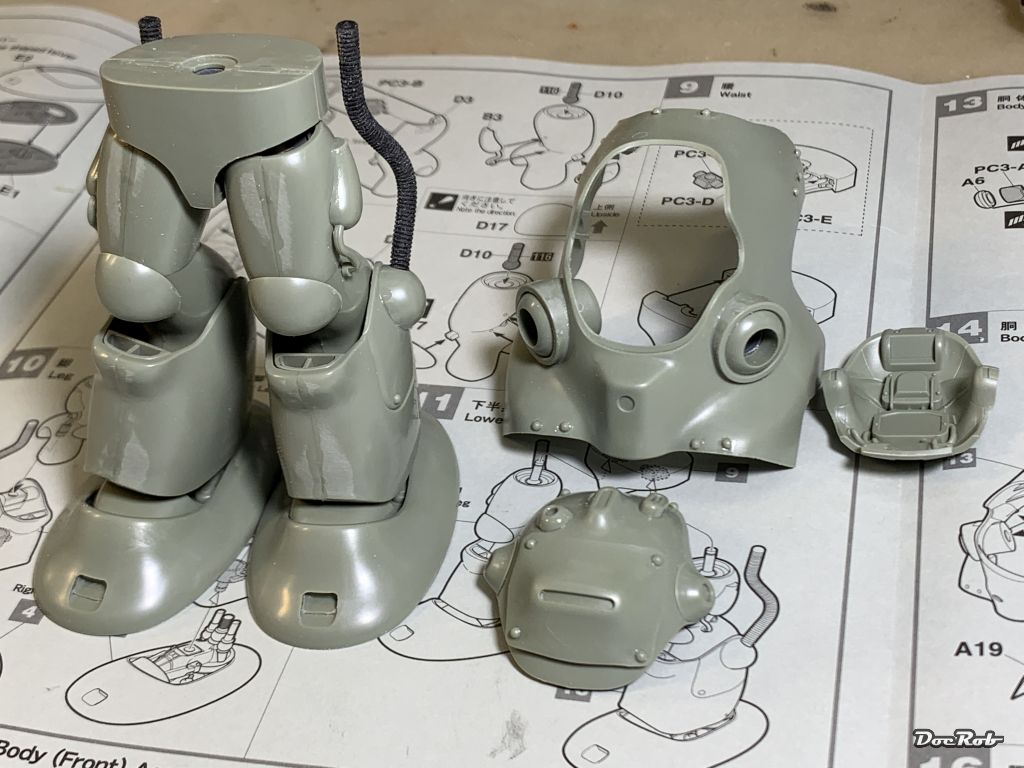
The assembly of the Ammoknight is done so far. It's possible to build it in a day. Painting and weathering will take a bit longer, but will be supported by a kit design, which allows to detach all major subassemblies with polycap connections. On the pics, everything is only dry fitted and some parts are missing, because they will be painted separately. The included pilot figure is bad and has no arms and is only usable with the suit closed. The position of the welding girl is not decided yet, but more likely as in the first picture, patching up the battle suit. Cheers Rob
-
What is on your bench right now ? Share a picture :)
DocRob replied to Martinnfb's topic in Modelling Discussion
Nothing to worry about Phil . In short: Most of these kits were designed by the Japanese artist Kow Yokoyama back in the 80's for the now defunct Hobby Japan magazine. Under the name SF3D or Ma.K (Maschinen Krieger ZbV3000) these comics were transferred into plastic kits by the Japanese company Nitto, most in 1/20 scale. Nitto lost the license to produce these kits, by the end of the collaboration with Hobby Japan and most of the old kits made an big increase of prices on the second hand markets (do I hear WNW?). Since 2008 Hasegawa started to issue different new tooled kits of the series, followed by the company Wave, which incorporated some of the old Nitto plastic. Therefore it was possible to enter into the Ma.K universe with a manageable invest, where for a long time there only existed mostly Japanese garage resin kits, hard to find and quite pricy. For further backgrounds and some great artwork, just search the net, which is full of related content. Cheers Rob -
What is on your bench right now ? Share a picture :)
DocRob replied to Martinnfb's topic in Modelling Discussion
And I thought, they could have casted the 20 to 30 nut bolts onto my battle suit, instead of letting me cut them from the sprue, cleaning and gluing them on. I'm a sissy . -
What is on your bench right now ? Share a picture :)
DocRob replied to Martinnfb's topic in Modelling Discussion
It's a Hasegawa MK-44 Ammoknight kit. There are two battle suits in the box, with different weapons. So far, I like the fit and engineering. It builds like a breeze. The firs one will be part of a little dio, the second one, well, ..., I have some ideas. Next week, I will receive a 1/20 MAK Küster (similar to a Kröte), which is based on the old Nitto kit. Cheers Rob -
What is on your bench right now ? Share a picture :)
DocRob replied to Martinnfb's topic in Modelling Discussion
And now, to something completely different. Just for the building and later painting and weathering fun, I started this little fellow. What a change to the Mikro Mir plastic of my recent Fokker build. Cheers Rob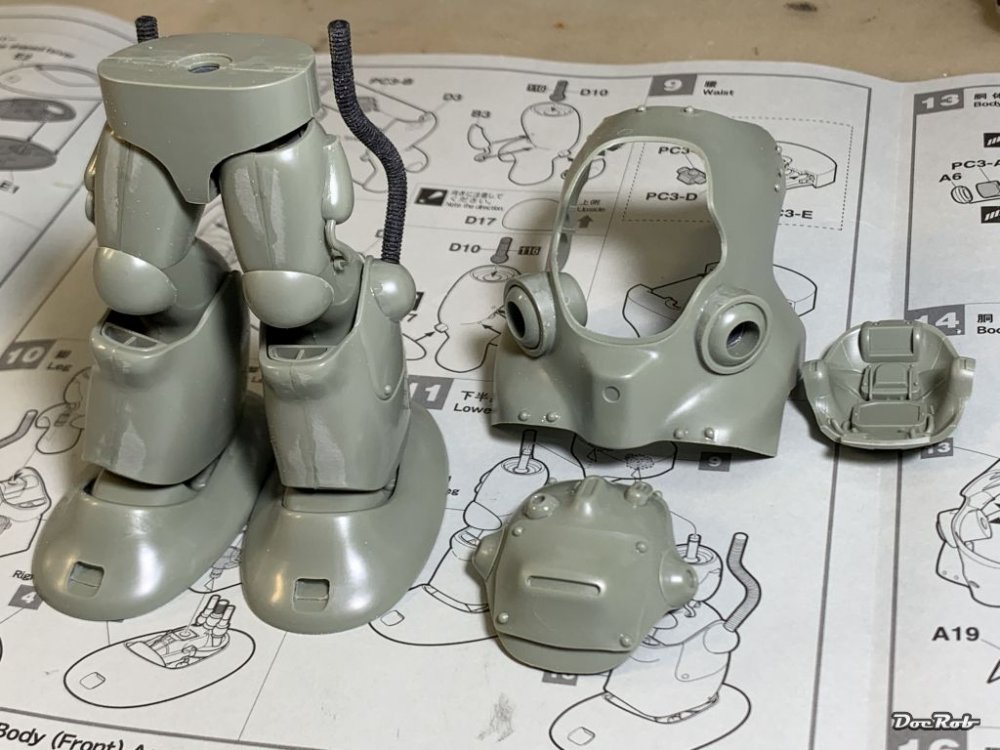
-
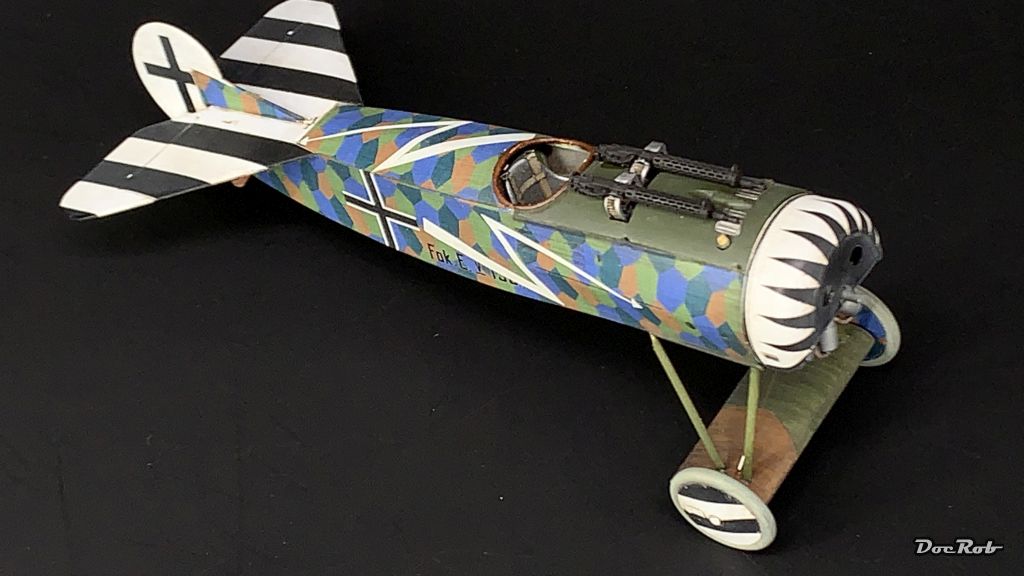
Fokker E.V / D.VIII Parasol Mikro Mir 1/32
DocRob replied to DocRob's topic in LSM 1/35 and Larger Work In Progress
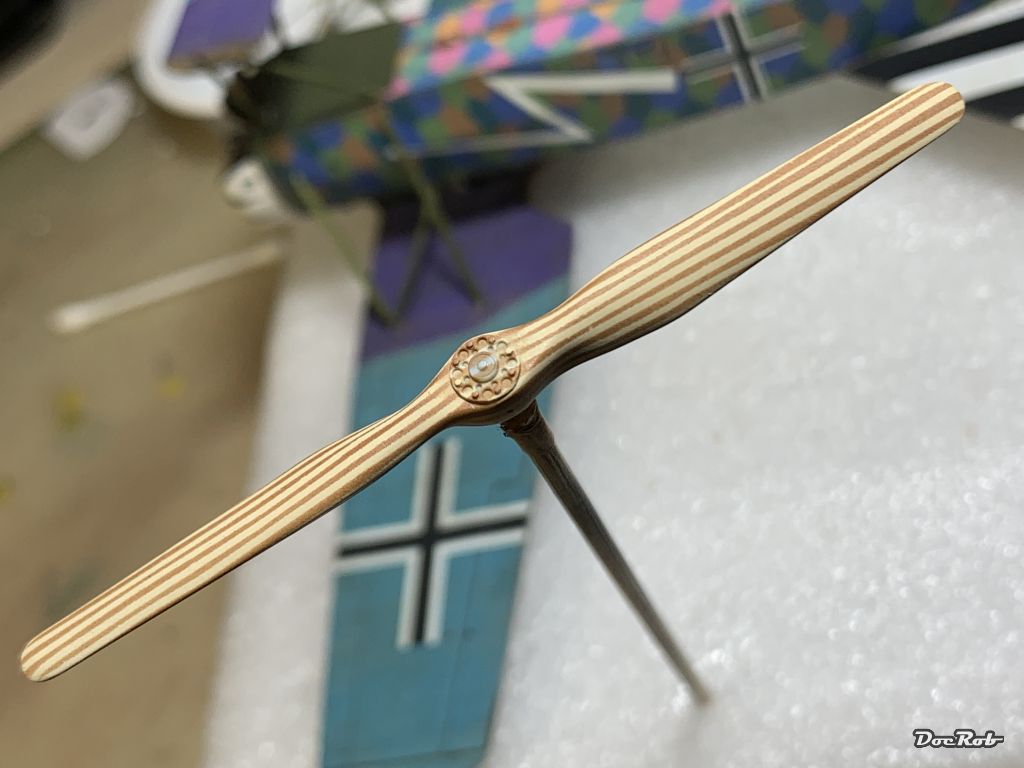
Thank you Peter, the prop came out ok, but for the future, I have to give the method some thought, because it looks, - err -, well striped. If you laminate a propeller from wood strips, the form dictates, that the laminated strips would be unequal in surface size. As this would be a big task to mask correctly, I may experiment with the real thing and carv my own props, if I can lay my hands on some proper wood. Cheers Rob -
PCM Focke Wulf FW 190 A-1/A-2/A-3
DocRob replied to GazzaS's topic in LSM 1/35 and Larger Work In Progress
My first canopy polishing job with my Proxxon ended with said canopy hitting a wall in a distance of five meters and was scratched beyond usability . Cheers Rob -
Caldercraft Brig Badger 1:64 (wooden ship model) - complete
DocRob replied to Landlubber Mike's topic in Non LSM 'WIP
How on earth could your formidable build of the Badger have passed my attention, maybe it was caused by Christmas blindness due to heavy abuse of spirited liquids. The Badger looks simply gorgeous and there are lots of great details to spot. I love the look of the deck, with the slight variations in the colour of the planks and, like Ernie mentioned, the realistic appearing sails. I have ordered a Duchess of Kingston kit from Chris, which still is in the claws of that terrible transporting service, called after what you say, when something bad had happened. First I thought, 1/48 would have been the better scale, but wooden ship modelling refined itself a lot in the last twenty years and the amount of possible detail was enhanced by the use of photo etched parts, resin instead of metal cast, and finer woodworking in the kits. I'm looking forward to start the DUK as my next winter project and hope it suits my skills, as I only have a half build 1/48 kutter on my list. Please Mike, keep us in the loop with your future builds. Cheers Rob -
This looks so real. I will store your pictures and use them as a guideline, when I build mine, but I'm sure, my result will be a bit more simplified . Cheers Rob
-
PCM Focke Wulf FW 190 A-1/A-2/A-3
DocRob replied to GazzaS's topic in LSM 1/35 and Larger Work In Progress
Nice Gaz, with these tiny parts, it's easy to mill the holding hands as well. the landing gear will look great with all the extra effort. Cheers Rob -
Fokker E.V / D.VIII Parasol Mikro Mir 1/32
DocRob replied to DocRob's topic in LSM 1/35 and Larger Work In Progress
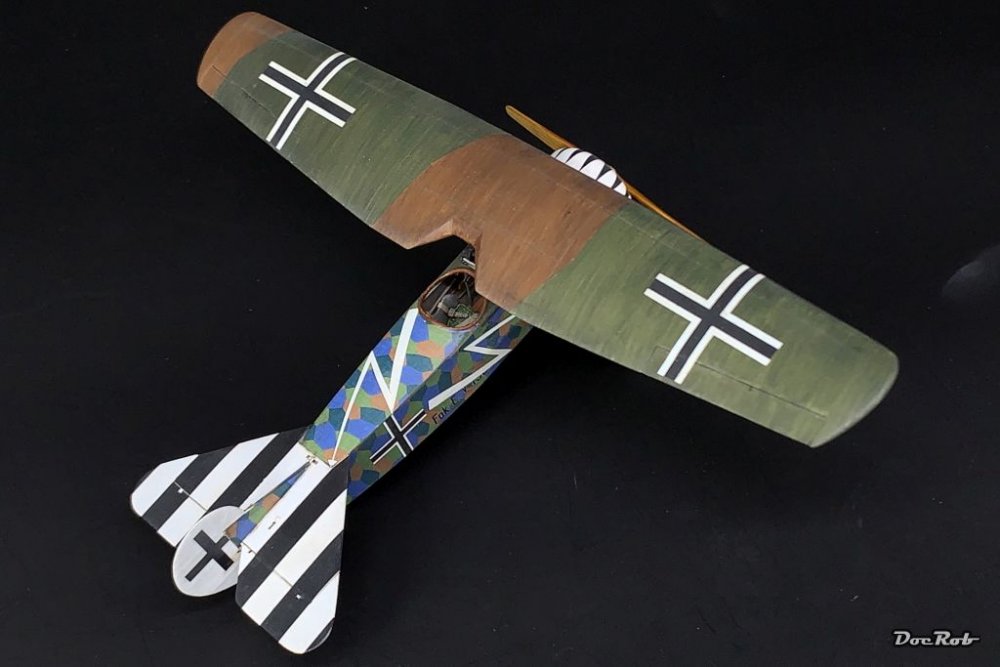
Thanks guys, it's always a great feeling to close in on the finish line with such a demanding built and I personally like like the result with the razor edge Fokker. This build gives me a very positive feeling about complicated future projects. It's a true confidence build. Cheers Rob -
Fokker E.V / D.VIII Parasol Mikro Mir 1/32
DocRob replied to DocRob's topic in LSM 1/35 and Larger Work In Progress
Thank you Gentlemen, it feels good to have mastered this important step with the Fokker. Rigging will not be overly easy, but compared to other planes of the time it's sparse. The prop was made the fast and easy way this time. I made no grain and stain details with artist pencils or further weathering. I felt, that a wooden propeller, where literally your life is depending on, was well maintained or changed rapidly with any damage noticeable. Cheers Rob -
Tools, tools, toooooooools, I rewarded myself for my actual build and self promised better rigging. The tweezers will help doing that. I added a razor saw, to have something between a scalpel and my fine saw for resin and possibly future woodwork along with a mini mitre tool. Cheers Rob

-
Fokker E.V / D.VIII Parasol Mikro Mir 1/32
DocRob replied to DocRob's topic in LSM 1/35 and Larger Work In Progress
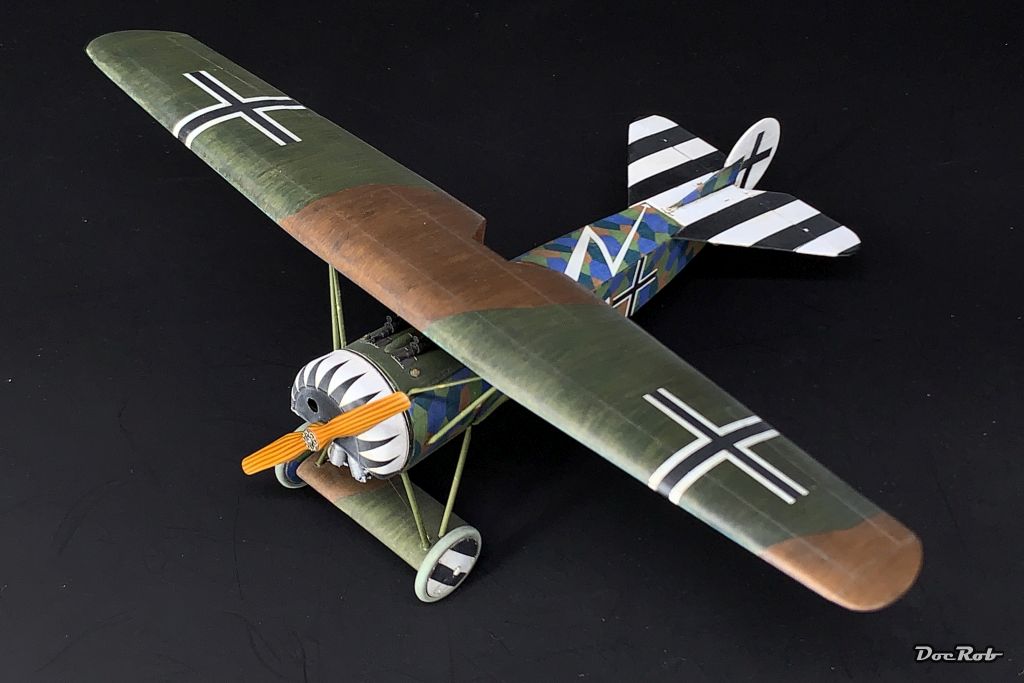
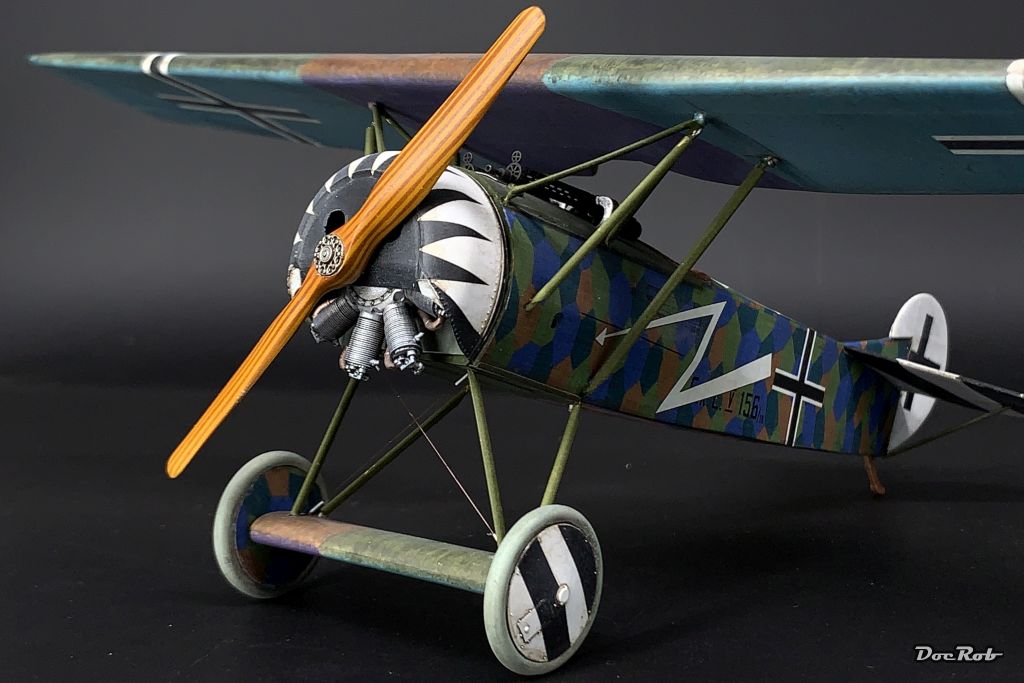
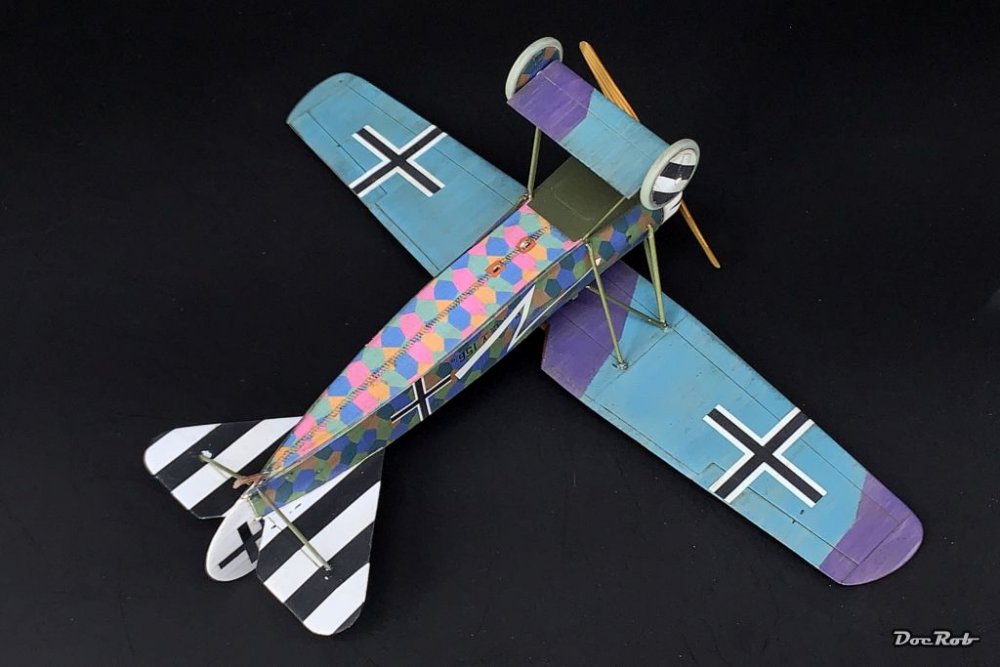
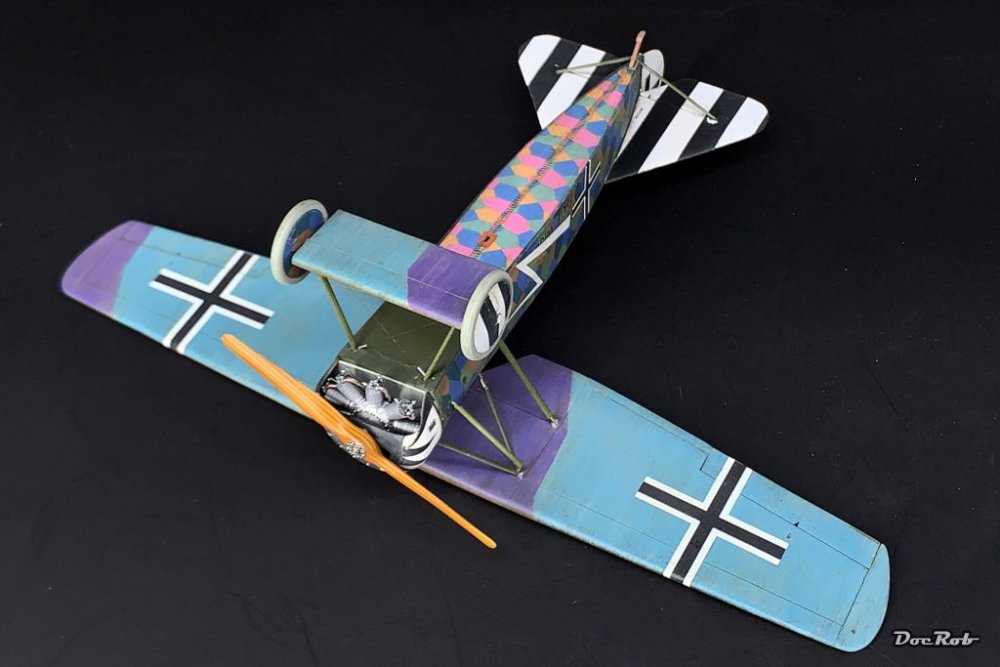
The CA on the wings was cured by then and it starts to look like a razor winged Fokker D.VIII. The alignment of all the struts was not so easy and will need some extra work later. In all there were four straight struts and the two V-shaped ones, which meant adjusting 14 joints with CA at the same time, to have the possibility to wiggle all the angles correct. All of that without breaking delicate parts. It's done now luckily and it is pretty sturdy. Now everything looks complete, but isn't. The steering horns for rudder and ailerons are next, with the necessary rigging, which is prepared. Cheers Rob

-
Fokker E.V / D.VIII Parasol Mikro Mir 1/32
DocRob replied to DocRob's topic in LSM 1/35 and Larger Work In Progress
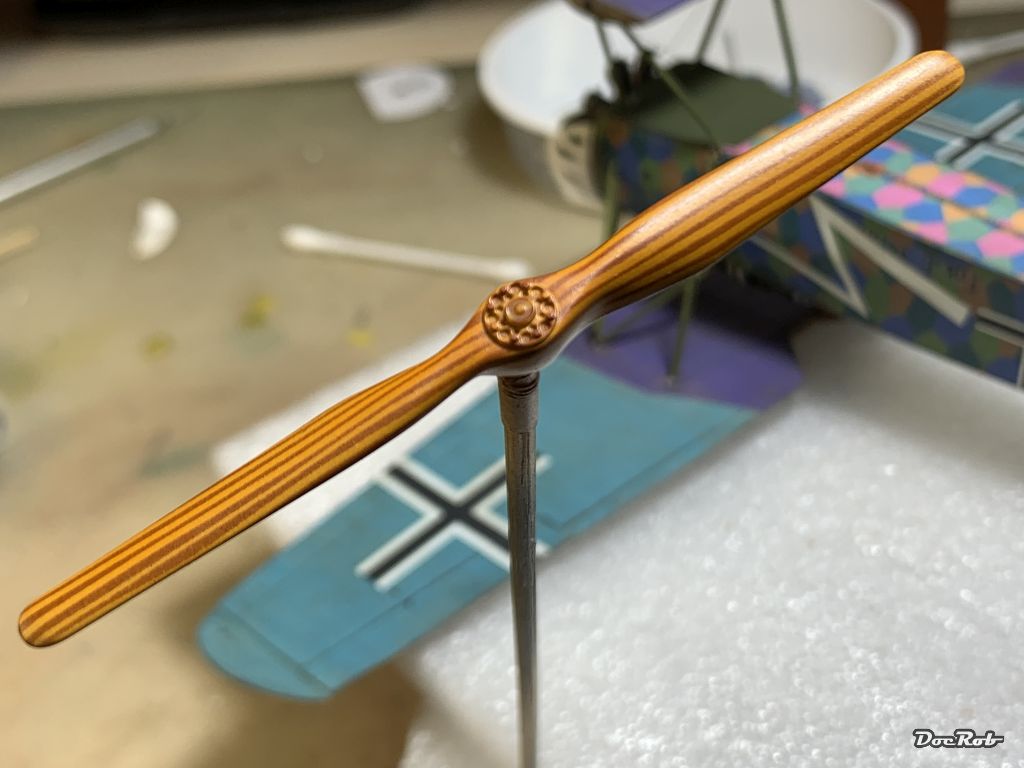
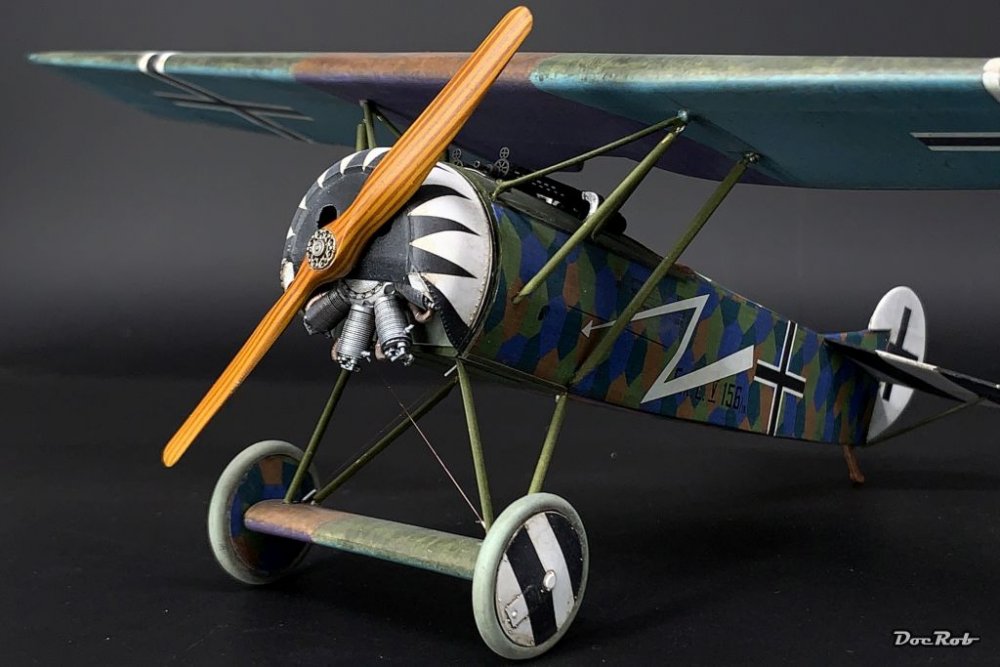
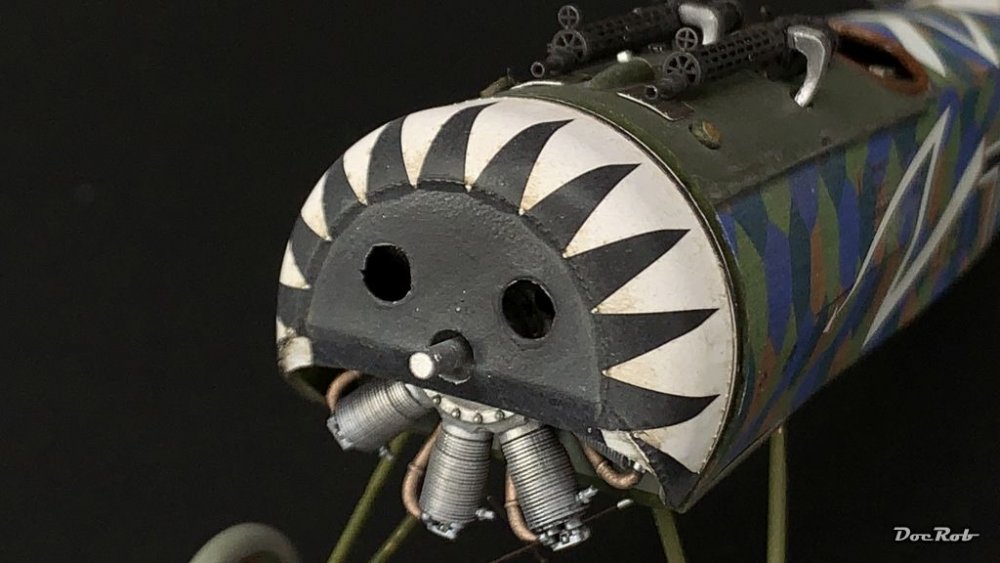
While the glue on the wingstruts cured after everything got aligned, which proved harder than thought, I painted the propeller in my typical way. The propeller itself was taken from a WNW Fokker D.VII, because detail was crisper and it needed less filling. - First a coat of Buff, followed by masking type which I cut 0,5mm wide on my template. - Then a coat of red brown and away with the masking tape. Finally a coat of clear orange diluted with IPA. The hub was spryed later in steel and received some panel liner. Cheers Rob


-
Fokker E.V / D.VIII Parasol Mikro Mir 1/32
DocRob replied to DocRob's topic in LSM 1/35 and Larger Work In Progress
Thank you Peter and again, good to have you back here and hopefully full recovered soon. I have to admit, that I don't know what POA means. Kits like this Fokker keep me alive modelling wise, it's demanding, tempting, fascinating with lots to learn and for sure, never boring. I start a kit out of a fascination for the real thing for different possible reasons. That means, I don''t care about, what the quality of a kit is. In this case, it's about close to perfection in terms of building fun. Cheers Rob -
Israeli Mirage III C with Atar9C
DocRob replied to Kaireckstadt's topic in LSM 1/35 and Larger Work In Progress
That pit looks gorgeous with all that etch detail. The seat appears to be very big in the tub on the last pic, but will look great, when painted. Cheers Rob -
Fokker E.V / D.VIII Parasol Mikro Mir 1/32
DocRob replied to DocRob's topic in LSM 1/35 and Larger Work In Progress
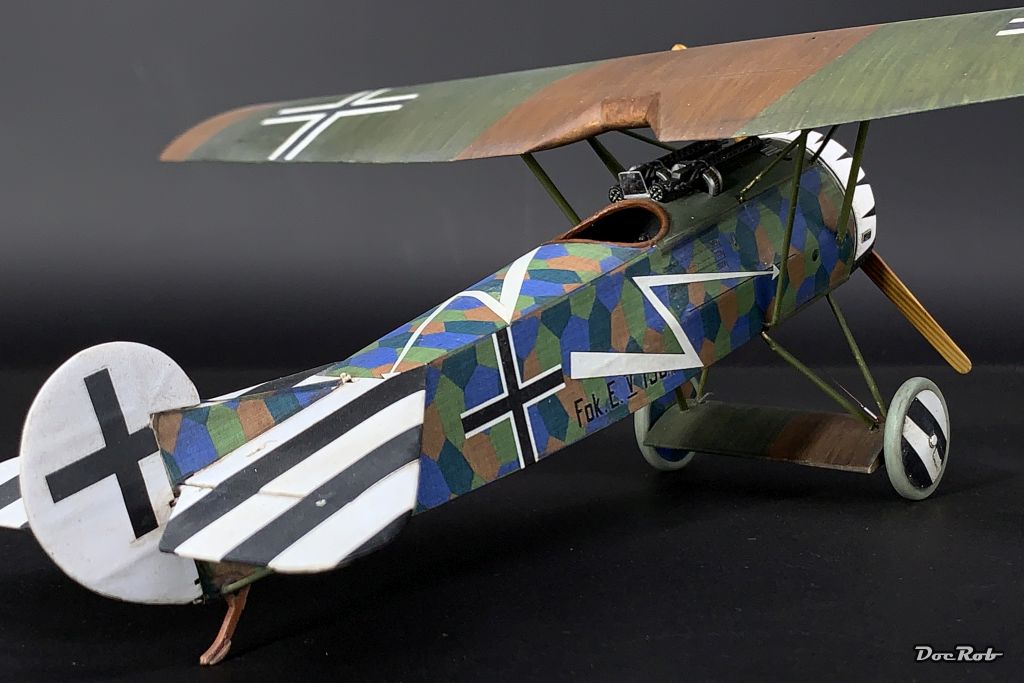
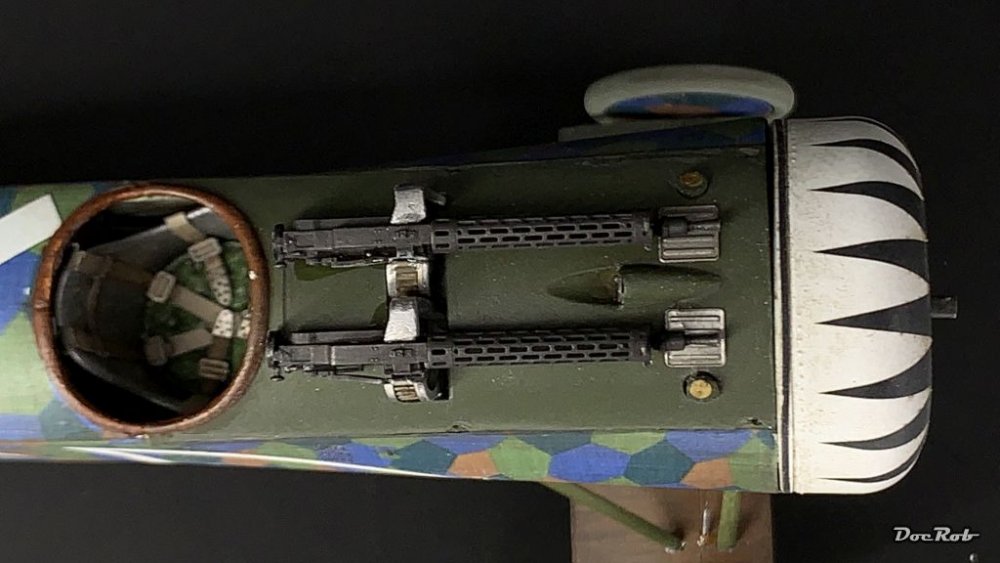
Muchas Gracias Amigos, it is indeed a challenging kit, but I've seen worse and it's a forgiving kit too, because the plastic is soft and good to work with and beside some abysmal parts, other parts are very good. For instance, the fuselage is not easy to get into the right shape, but the cloth surfaces and the stitching looks perfect out of the box, better than most other kits I have seen. With patience and good planning it's not that hard to get a decent result, where the used AM also helped a lot. The blast panels should have been painted the same colour than the top of the fuselage, but after I airbrushed them in Aluminum as a base for chipping, I decided to let them that way for better contrast. Cheers Rob -
What is on your bench right now ? Share a picture :)
DocRob replied to Martinnfb's topic in Modelling Discussion
This is very interesting to follow. Your example shows, what is possible with 3D printing, if you are willing to put in the effort. I will not completely rule out to get into 3D printing in the future too, but I doubt it. When I was young and computer were the latest wow and heating a room in wintertime, while getting some 640X480 pixel pictures rendered, I made 3D animations with Lightwave for the pure fun. Like modelling, it was demanding, you needed tons of surfaces for rendering, dozens of plugins for cloth or hair rendering,... Here you have the Synthesis of two time consuming hobbies in designing and printing and modelling, what else can be the result, than pure fun. Thank you for letting us old school blokes peek into the new possibilities which lay in 3D printing. Cheers Rob -
Fokker E.V / D.VIII Parasol Mikro Mir 1/32
DocRob replied to DocRob's topic in LSM 1/35 and Larger Work In Progress
Thank you guys, seeing the pictures, there are still some areas, which need to be taken care of. Surprisingly, these glitches are visible on a photo and I haven't spotted them on the real thing, even using a magnifier sometimes. I hope you will catch up with your great P-51D soon Phil, but hey, to have a job counts for something too in these times. Modelling is just a hobby and if there is time and will, it will sneak back into your live. Cheers Rob -
Fokker E.V / D.VIII Parasol Mikro Mir 1/32
DocRob replied to DocRob's topic in LSM 1/35 and Larger Work In Progress
The weapon deck got some attention today. The Gaspatch Spandau 08/15 are a joy to work with. You have to add the barrel only. No fiddely eyesight in PE, just careful painting with well thinned colour, not to kill the fine detail. The ammo feed was borrowed from a WNW Fokker and then the 08/15's were attached. On the front side, I installed two PE blast panels from the Aviattic set, which I left painted in aluminum to add a little contrast. Cheers Rob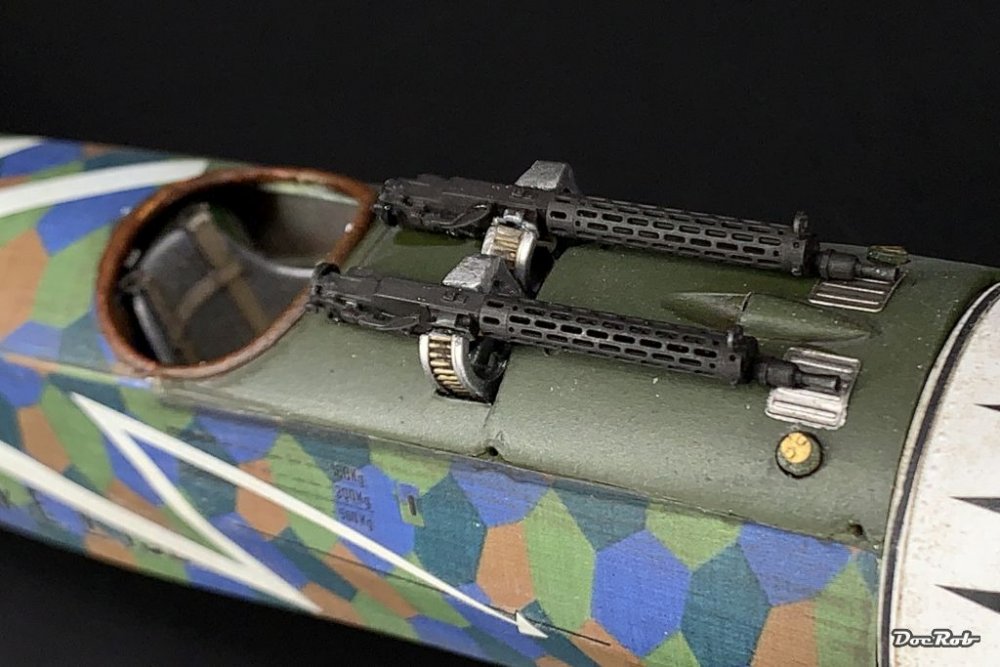


-
Fokker E.V / D.VIII Parasol Mikro Mir 1/32
DocRob replied to DocRob's topic in LSM 1/35 and Larger Work In Progress
Thank you Jeff and you are absolutely right, there is so much to learn from our members here. LSM is a brilliant resource, fast and reliable. Cheers Rob -
Wow Carl, you build faster, than I can respond to your great build . The hull looks very good with the added PE details and modulated colour. All these extra tracks must have been a burden for the undercarriage, but they sure add some drama. Cheers Rob
-
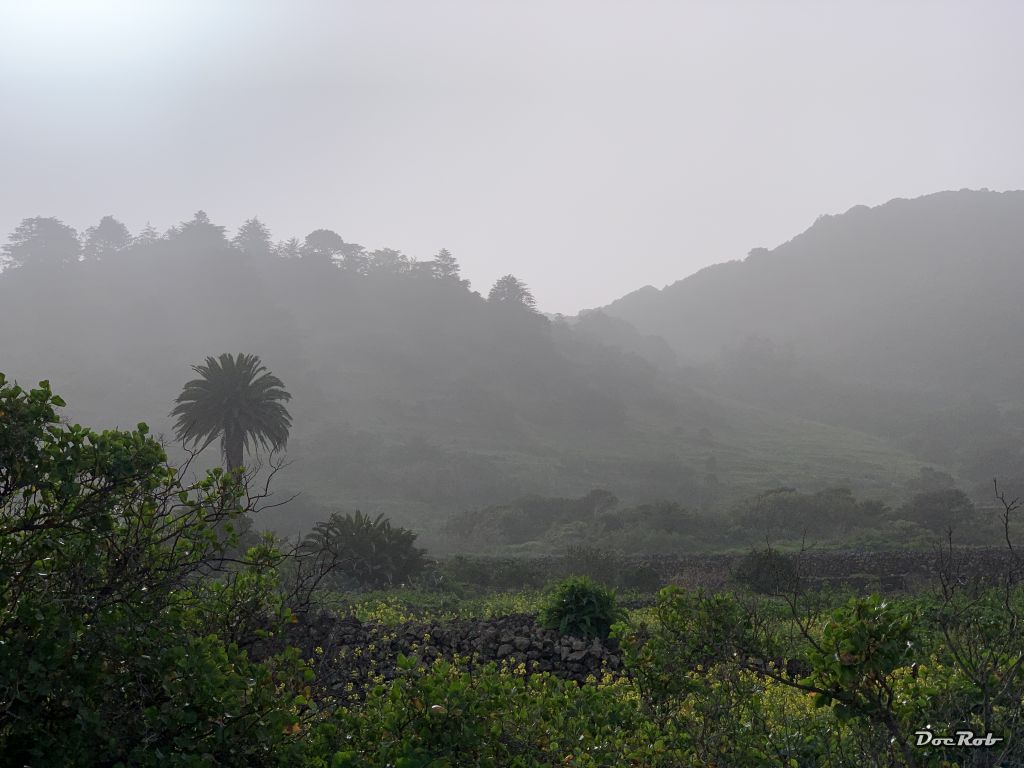
Snow in Texas, that's weird and with the power shut downs, I believe it's horrible situation, specially with a young one in the house. We had ice on our mountain roads last week, which is pure horror, given the steepness and was a first for me. Now we have one of our famous and feared sandstorms (Kalima), so no airbrushing today. The storm is not so bad this time, but all the dunes of the Sahara are up in our sky. That is how it looks from the garden . And this is the AQI (Air Quality Index) for today, which is normally all green and below 30. It's better to stay inside these days and close all doors and windows and try not to inhale too deep. At least it's not cold . Cheers Rob