DocRob
-
Posts
7,048 -
Joined
-
Last visited
Content Type
Profiles
Forums
Events
Gallery
Everything posted by DocRob
-

Zoukei-Mura P51D Mustang SWS No 4.
DocRob replied to Bomber_County's topic in LSM 1/35 and Larger Work In Progress
Nice, bring it on.... Cheers Rob -
Seeing your recent catch, I can understand that . Cheers Rob
-
Thank you Bill, quite a trip down memory lane, kit wise. Are you planning a WIP of the Schwinn. It would be interesting to see, how this will work out. Cheers Rob
-
The painting stage begins. I prepared all the parts and glued some wire into pre drilled holes on the inside of the rims and drilled holes into the axles too. That makes painting easier and helps to make the wheel assembly stronger, when time comes. All parts were primed with AK's Xtreme Metal black gloss primer, as I plan to use a coat of their Polished Aluminum for the metal parts like rims and bumpers and as a basecoat for the body, where I mask it later for the head- and taillights and maybe the middle body line will be masked, as a metal trim. I decided against Chrome, because it's too shiny for the finish, I have in mind. The body looks a little wired with the Polished Aluminum on top, but after drying and masking it will receive a coat of Tamiya red. Cheers Rob


-
Definitely something else. Could you possibly add some in box pics? I would love to see, how the spokes look and how they tackled the details. Many moons ago, I nearly bought a 1/9 kit of a racing bike by protar. The Schwinn is a cool looking classic with that skinny old fashioned steel frame, I loved, how these forks worked on cobblestone. If anybody would produce a replica of my first MTB, A Trek single track, I would buy it in an instant. Cheers Rob
-
The off road capability of the Niva is unmatched. It's a different concept than most other 4x4's. It's small and relatively light, so the small engine is perfectly capable. As with the Panda, the wheels are on the corners, not much hindering steep climbs. It weighs a little more than the Pandas and Jimnys, which helps in some situations, were traction is needed. The heater is the most outstanding feature of seemingly all Ladas. They work fast and relentless. Until last year, you could buy new ones in Germany. They got some extra care from the importer, starting from better corrosion protection, up to the complete expedition package. I think there are some left, but bringing them to the US might prove hard, not to think of exhaust regulations. In Germany the Niva has a relatively big fan base. It's cheap, forgiving, easy (sometimes often) to repair. Many forest workers or hunters own one. Cheers Rob
-
Very nice and thoughtful detailing with your PZL. I really like the scratched fairings, which give the plane a definite early 'Tintin' comic book look of elegant between war kites. Thanks for the warnings about the fiddlyness of the kit. I will keep that in mind for mine, when time comes. Cheers Rob
-
Zoukei-Mura P51D Mustang SWS No 4.
DocRob replied to Bomber_County's topic in LSM 1/35 and Larger Work In Progress
Sorry Phil, my ZM Mustang IV will be a shelf queen for a while, I have too many other projects in line. Cheers Rob -
Zoukei-Mura P51D Mustang SWS No 4.
DocRob replied to Bomber_County's topic in LSM 1/35 and Larger Work In Progress
Exactly what I thought, I have only one in my stash though, the Mustang IV. Cheers Rob -
Not exactly 'Black Friday' related, but browsed the Aviattic website today and found that there were three 1/48 Gotha G.V from AZ/Hippo left, along with Aviattic night Lozenge, Gaspatch Parabellums and Lukgraph bombs. These were sold out the last times I searched and I had buried my hope to get one. Now there are only two left and a gap has been closed for me, not being able to score a WNW Gotha G.IV. I know the build will be painful, but hey, sometimes I have to test myself. Cheers Rob
-
Nice and dusty Phil, the look reminds me of objects in the sand close by the sea, salt and dust caked, I love that effect. I will to store that idea, using water on pigments for some future projects. Will there be a figure leaning out of the hatch?
-
What is on your bench right now ? Share a picture :)
DocRob replied to Martinnfb's topic in Modelling Discussion
That's not a bench, it's a vacuum . Meanwhile you can try to use the tip of a scalpel for cleaning up the tubes. Cheers Rob -
Thanks Phil, it's only my third car kit. The others were styrene though, a Tamiya 2CV in 1/24 and a 1/32 Mercedes by Diopark, a great but not so easy to build one. With most of the Tamiya kits, you can't go wrong, easy to build and most of them are well detailed. Cheers Rob
-
Thanks Fran, there was another built by El Mariachi, I spotted. Yesterday I cut the glass panes out of the pre printed clear acetate, a step, I was not really looking forward to. In the end, the printed shapes matched the resin frames very good, at least there is hope to get the windows glued in properly after painting. I also finished the front axle and now am closing in on the painting stage. Cheers Rob
-
Right down my alley. It's not the first time I'm eying a Lukgraph kit, but until now, I ordered only a beautiful casted rotary engine from them. The Friedrichshafen could be my first full resin plane I guess. Cheers Rob
-
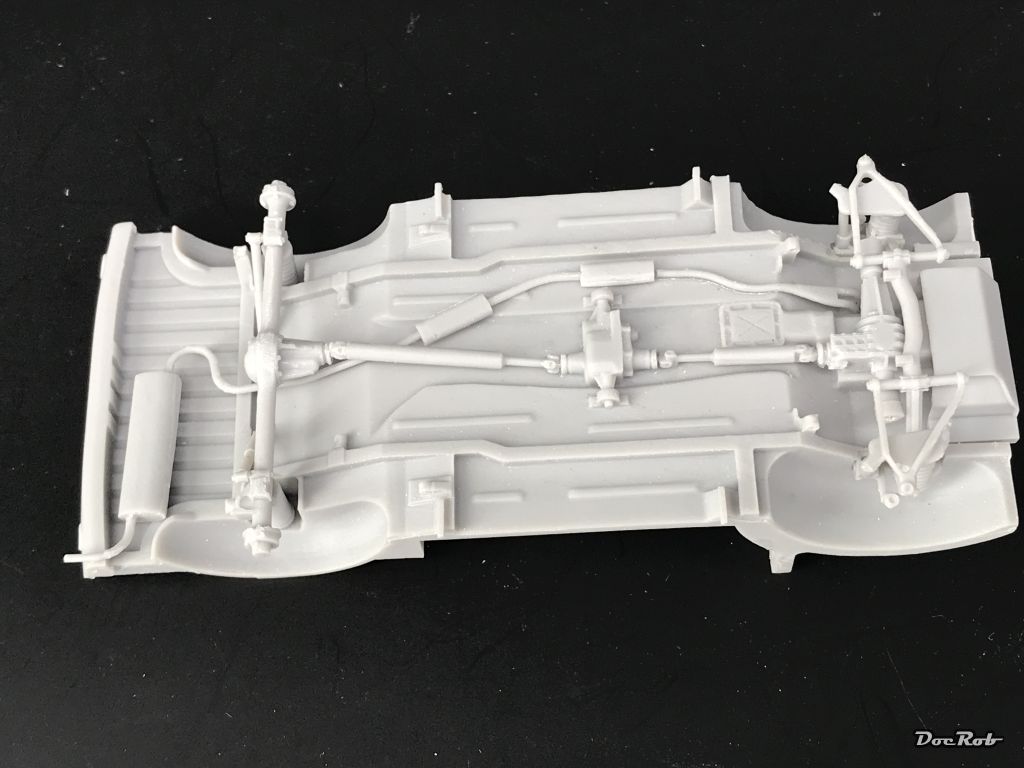
Thanks Carl, it was easier than thought. Uneven gaps between parts are a true to scale replica of Russian assembly quality . Cheers Rob
-
As I drew a blank with the Cowboys game, bad team, bad deal, I nearly bit on a WNW Salmson, which was not discounted. But kept away from it, when I thought about flat wire rigging. I have a Camel and a Snipe in stash, that's enough of British flatliners , but the Japanese scheme... Cheers Rob
-
Thank you for your kind words Maru. To build, paint and weather these great models by WNW makes it easy to shine for the modeler. They are such a great canvas quality wise, it would be a shame to fail. Cheers Rob
-
Drinking yes, beer at the moment, go Cowboys . Cheers Rob
-
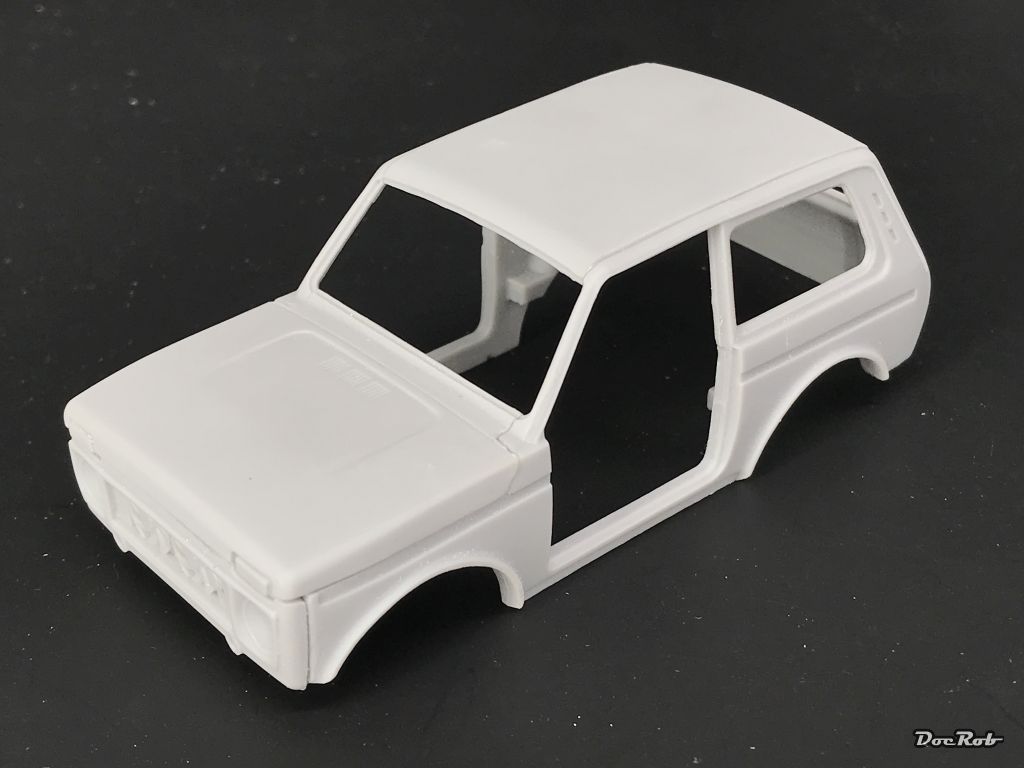
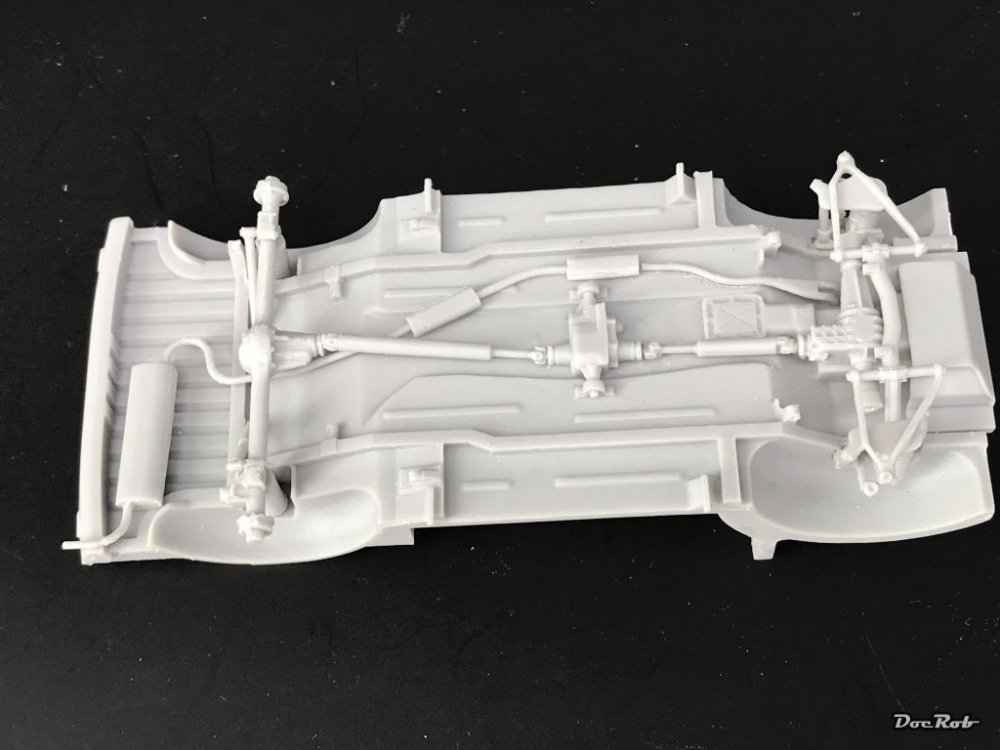
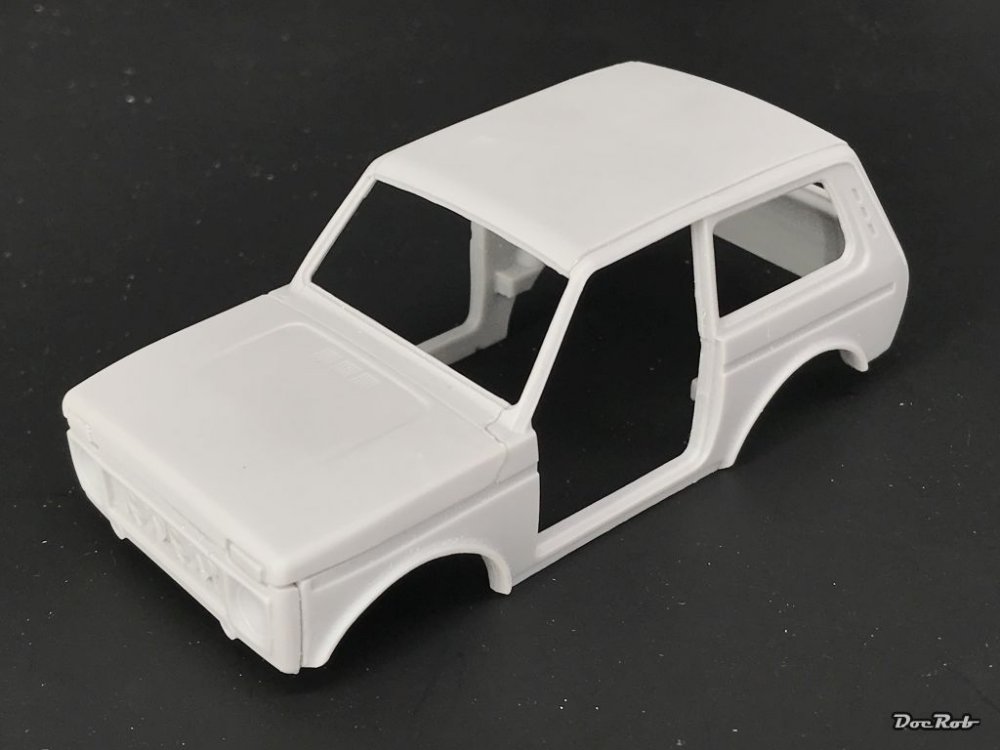
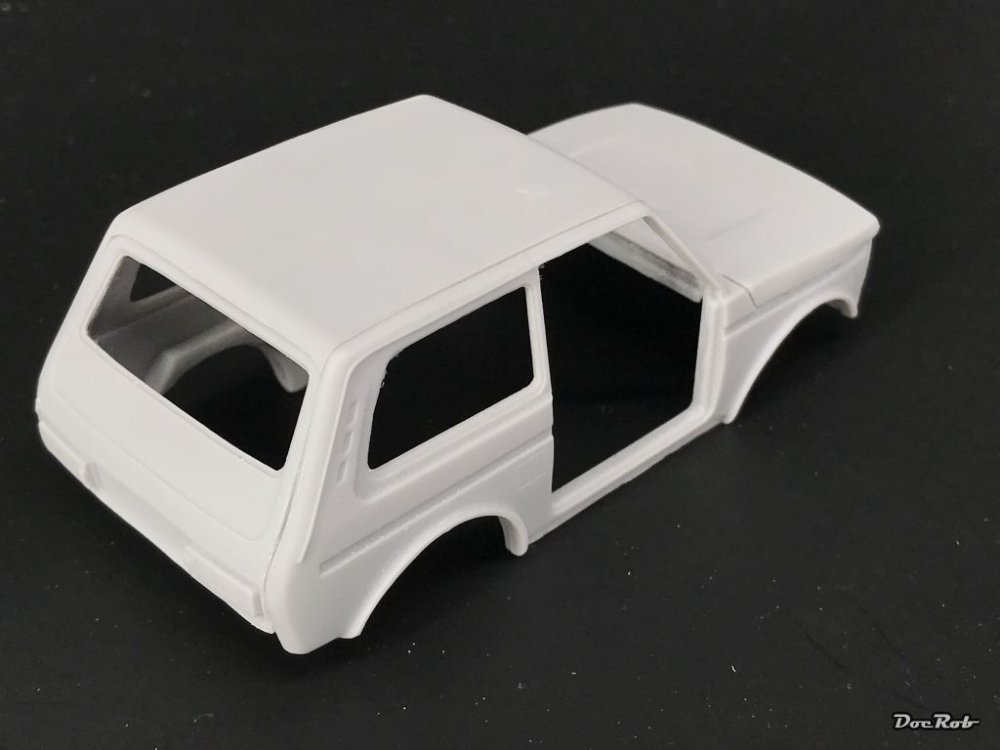
After some problems with water plumbing in the house and some stormfronts, first hot sandstorms to be followed with one day pause by a northern storm with rain, I found some time to continue with the Lada. I cleaned all the mayor components and started assembling the body. First I glued the hood to the sides, added the front for rigidity and after a lot of test fitting and cutting added the back door with the chassis loosely fit as a template. Last was the roof. General fit of the parts was good, but a lot of test fitting and sanding was necessary to get a good result. Next was the chassis with multi part front axles, rear axles, suspension and exhaust. The design of the parts is mostly well thought through. It starts to look like a real Lada Niva . Cheers Rob
-
What is on your bench right now ? Share a picture :)
DocRob replied to Martinnfb's topic in Modelling Discussion
One of the coolest rally cars ever, if not the coolest, a driving wedge with only one purpose, win and it shows, stunner, forget about actual design. Cheers Rob -
A pin wash to my eye doesn't have to be darker than the surrounding base colour. I tried lighter tones on different occasions and liked it a lot. the effect is obviously the opposite of a dark pin wash emphasizing shadows. In natural light panel borders may also produce a little highlight against the base colour, which could be replicated, by using a lighter grey tone for panel lining. Grey would keep the tonal balance, with some olive panel wash you might get interesting effects too. Just a thought... Cheers Rob
-
A good looking girl at a model convention, you made my day . Cheers Rob
-
1:32 scale - Nieuport N.28C1
DocRob replied to sandbagger's topic in LSM 1/35 and Larger Work In Progress
Now that's a kicking mule , bravo. Cheers Rob -
Nice work with the details like the aerials Gaz. The black to me is impossible to judge on the pics. It looks really good to me on the indoor pics and I hope the uneven distribution of black patches will remain under a sealing coat as well as the matte look. By the time you demask crossings and markings it will come together, with the contrast of the markings, I'm sure. Cheers Rob