DocRob
-
Posts
7,048 -
Joined
-
Last visited
Content Type
Profiles
Forums
Events
Gallery
Everything posted by DocRob
-
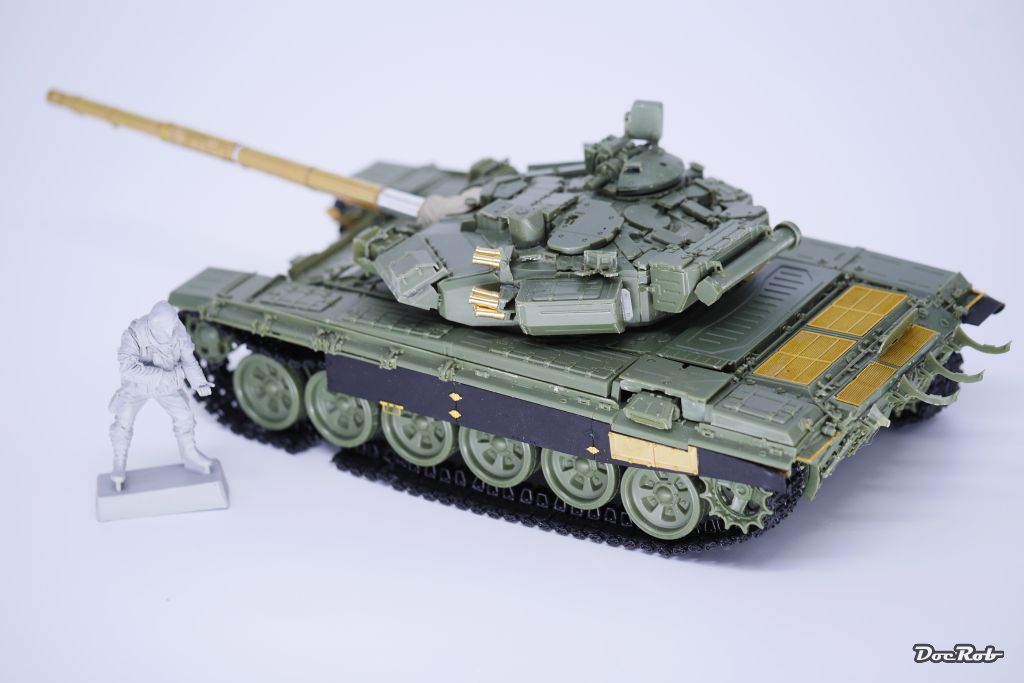
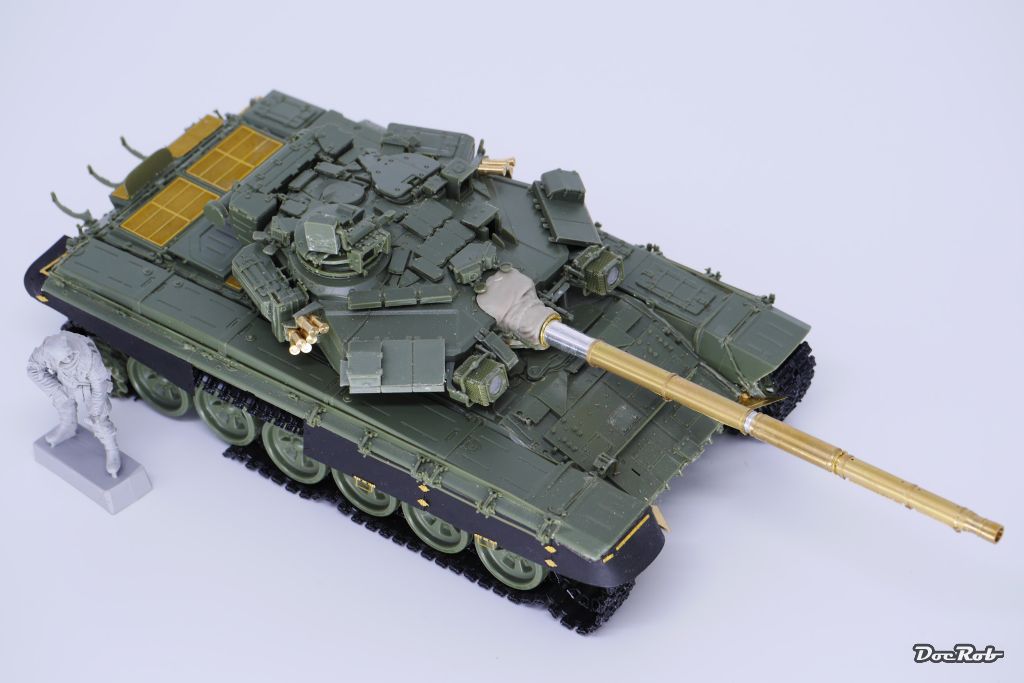
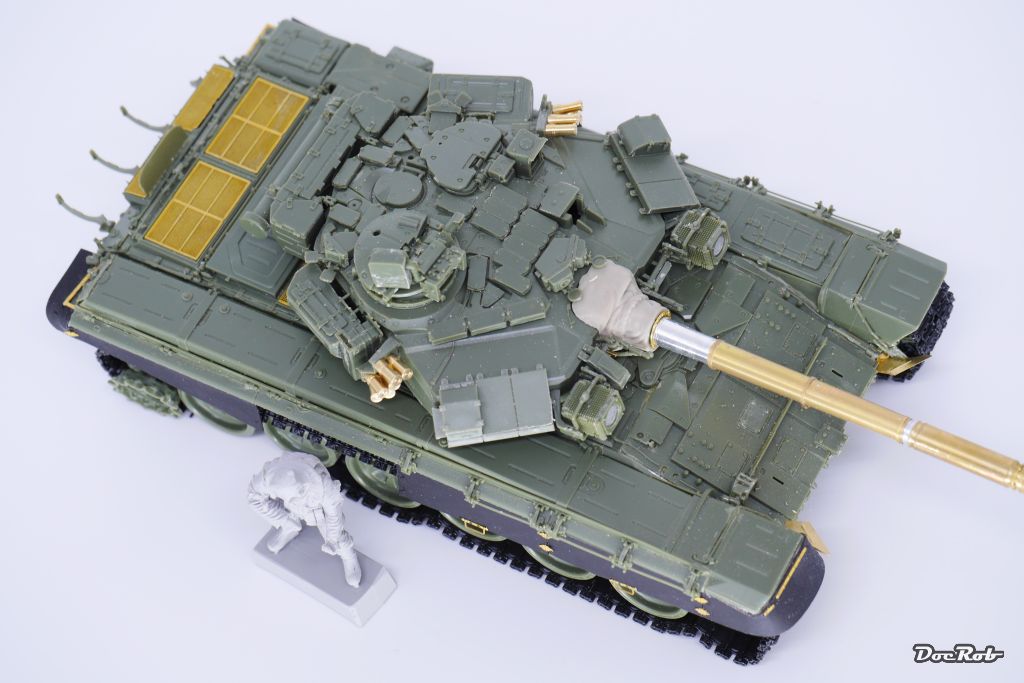
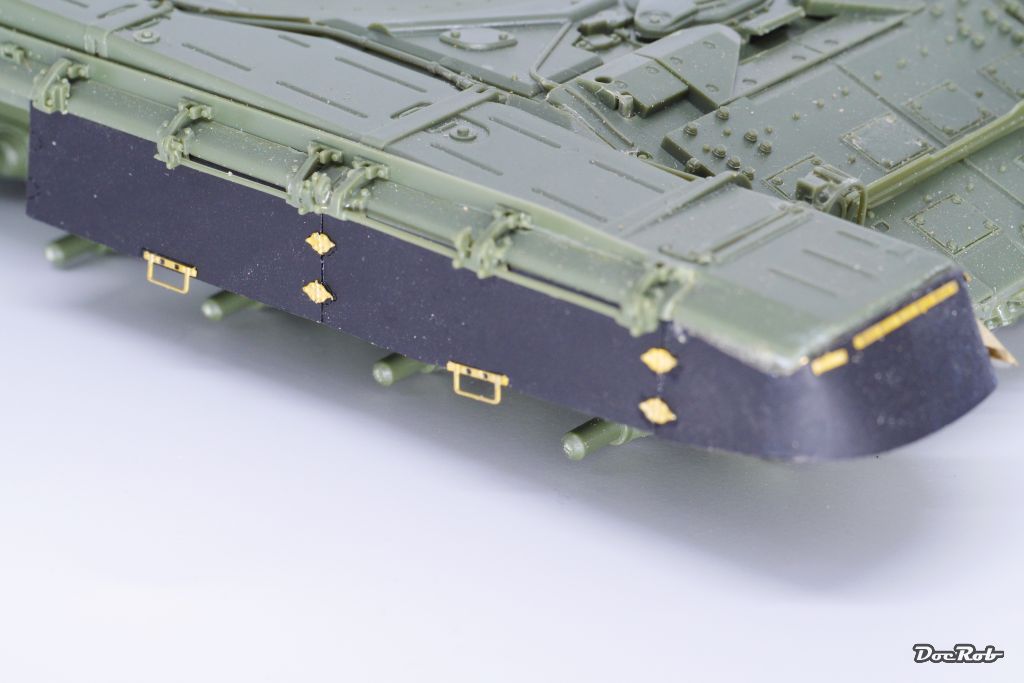
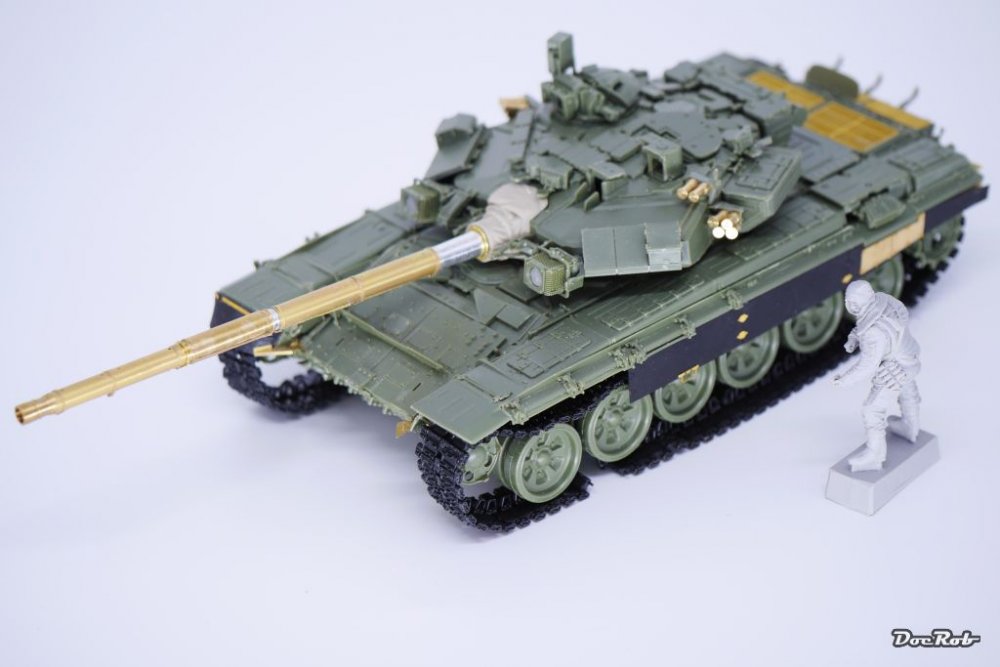
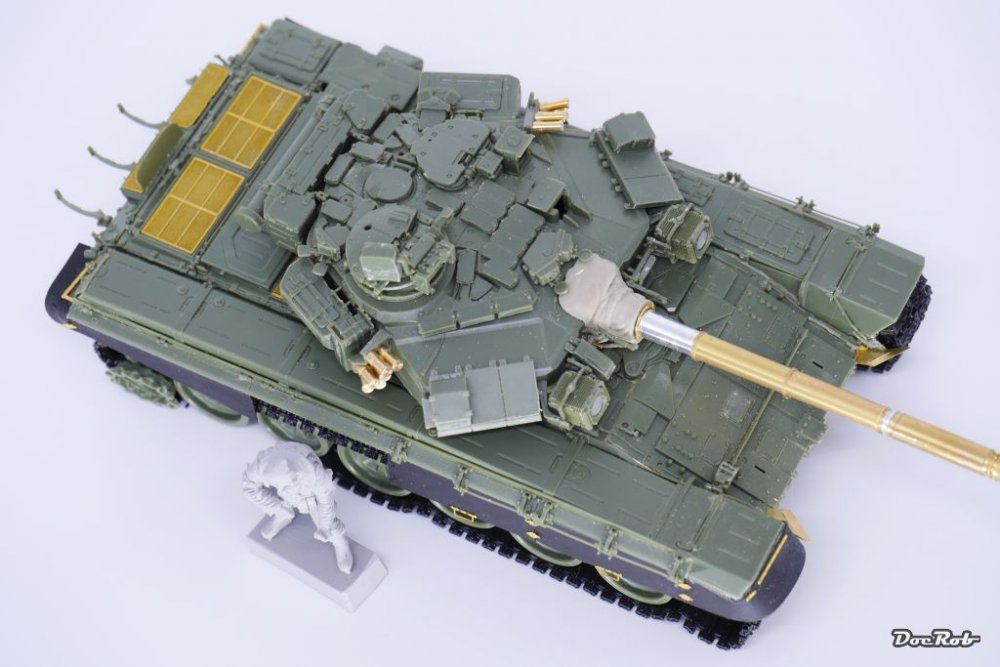
Hi Folks, bad weather leads to more benchtime, so the assembly of the T-90 is finished. I left out the antennas and AA-gun and some tiny handles and the sensor lenses. These will be added after painting. Wow, nearly 1.500 parts, no kit I built had more, but mainly putting everything together was without struggles, the kit is well designed, albeit some parts could have been a little bit more refined or sections not broken down in too many single parts. The finished kit is hard to handle, some parts fell victim to my clumsy paws. The good thing is that you can add and remove almost every wheel with the mud-skirts mounted, with the exeption of the back toothed drive wheels. I broke an axle while trying, the other was easier added with detaching the sideskirt a little. The tracks are just fiddled in for optical and practical test. The beast got company by a hooded Russian soilder, who will be up to his knees in mud and snow beside the tank. The figure is casted by Corsar Rex and detail is excellent, but there are some tiny bubbles and the barrel of the not shown Kalashnikov was broken. Cheers Rob


-

TA-152 Zoukei Moura Finally Done
DocRob replied to DocRob's topic in LSM 1/32 and Larger Aircraft Ready for Inspection
Thank you Rick, there were some serious demons connected this time, but while taking photos of the result you tend to forget... . Cheers Rob -
Great review about a very interesting subject. I can see a steam punk conversion with my blurring eye, sweeeeet. Cheers Rob
-
Yes Gus, I think so and weathering will be even more funny. I will try to show that beast mud caked and snow and ice covered and this will make small mistakes in the paintjob disappear .
-
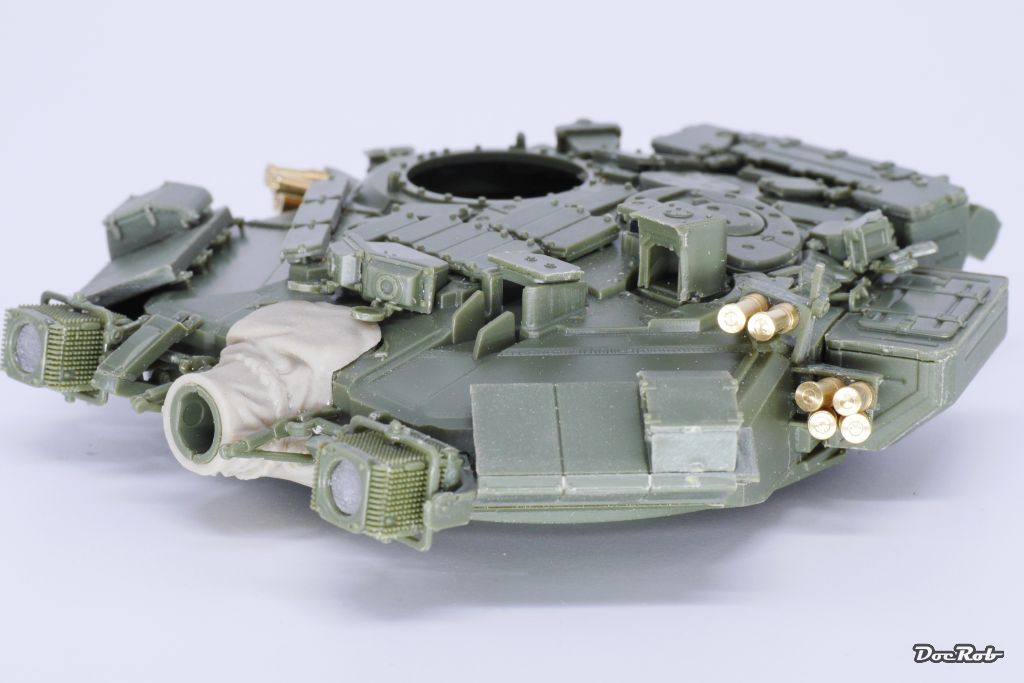
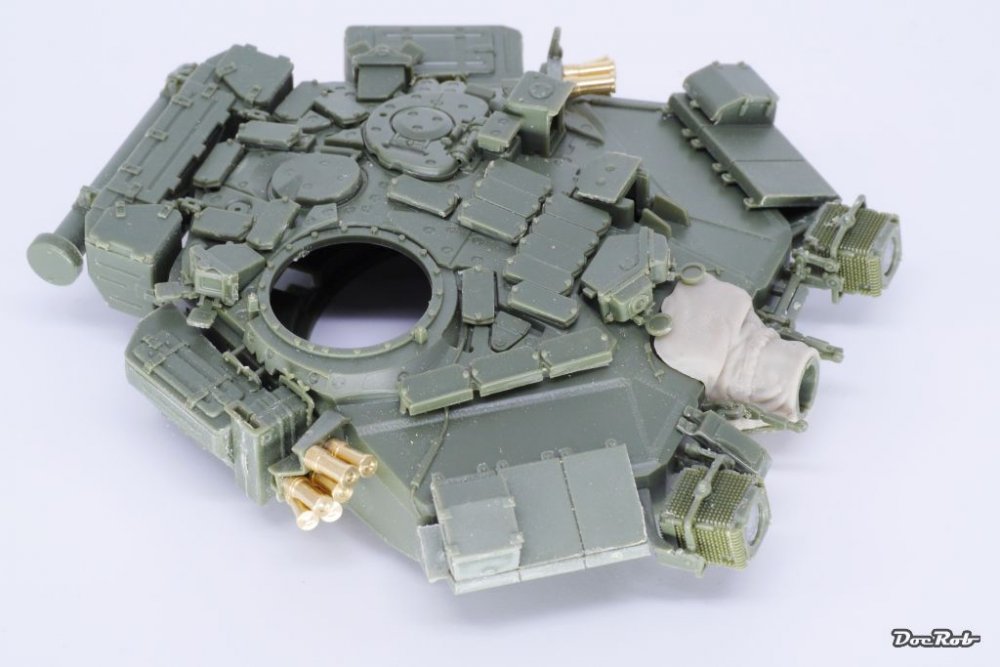
If you, like me, thought of russian tanks as a rather simplistic affair, I altered my opinion while assembling this one. The turret only took me four days to (more or less) finish it. Of the 1500 parts of the tank, seemingly 500 went into the turret. There are sensors everywere and lots of ERA tiles are to mount, often with multi part substructures. There is a lot of cleanup to do, but in the end you get tons of detail. The brass smoke dischargers were included with the Voyager barrel and look way better than the plastic ones. I more or less abandoned the idea of using precut masks for the camo, because of the huge amount of parts and details, it seems like my freehand airbrush skills will be tested. The clear parts for the sensors will be added with SKP coloured lenses or reflective foil after painting. Cheers Rob

-
MH 60 s Knighthawk Academy 1/35
DocRob replied to shark64's topic in LSM 1/35 and Larger Work In Progress
Impressive work and great attention to detail, love it. Cheers Rob -
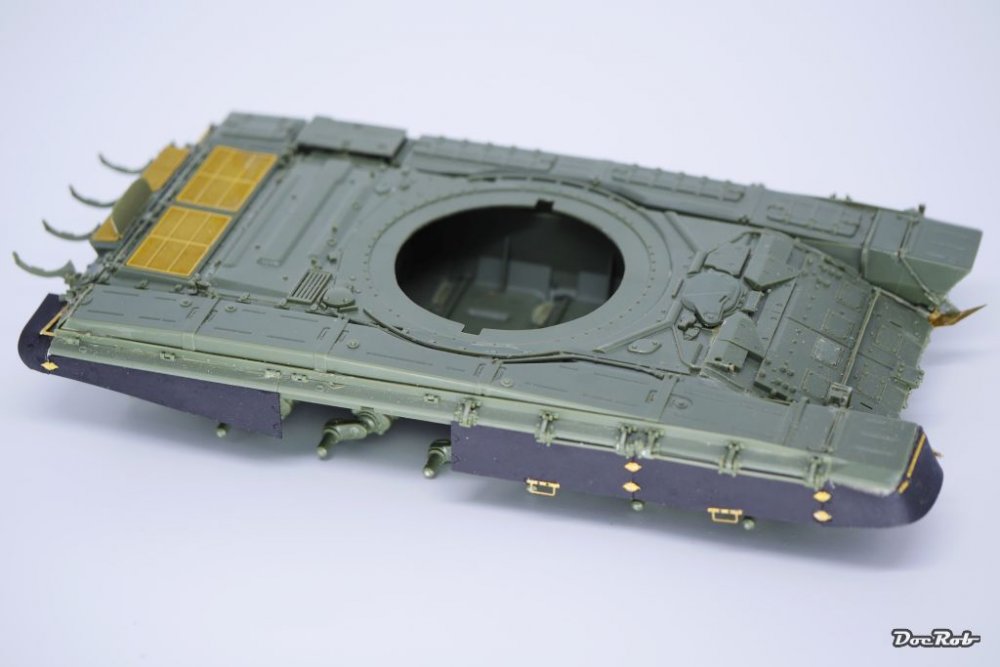
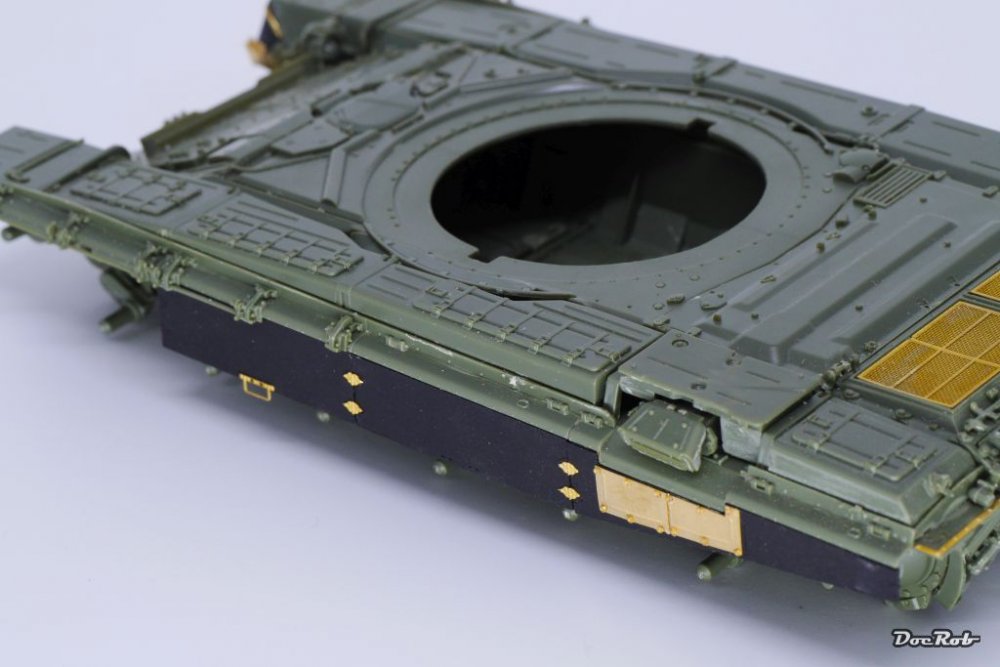
Long time no see on this one, other projects kept me sidetracked, but finally I have some small steps to show for the T-90. I finished the rubber side skirts, using rubber ones from Tetra Works, because it looks more rubberish, than these provided in plastic. I plan to chip lots of paint away on them to show the black rubber. The parts left out are lost due to the harsh conditions this tank will be shown in. You need some patience to assemble these side skirts and there is no real need to do so, as the kit ones look good, but for me it was easier to show wear and loss of parts this way. Cheers Rob

-
TA-152 Zoukei Moura Finally Done
DocRob replied to DocRob's topic in LSM 1/32 and Larger Aircraft Ready for Inspection
Muchas gracias Senhores, it was great to have you with me during that build by the way of encouragement. Cheers Rob -
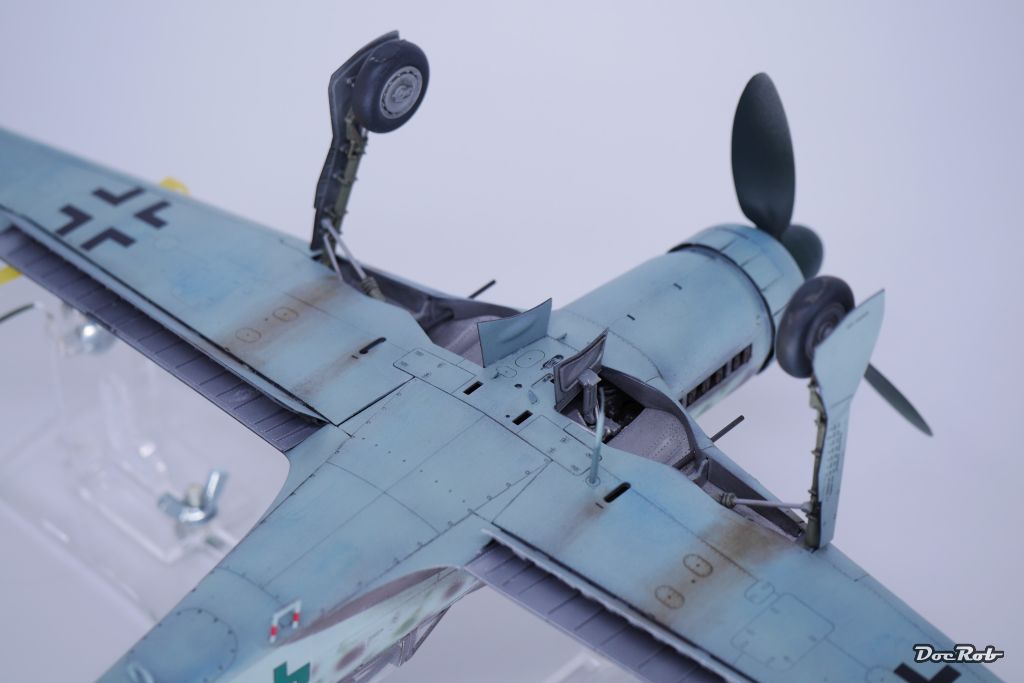
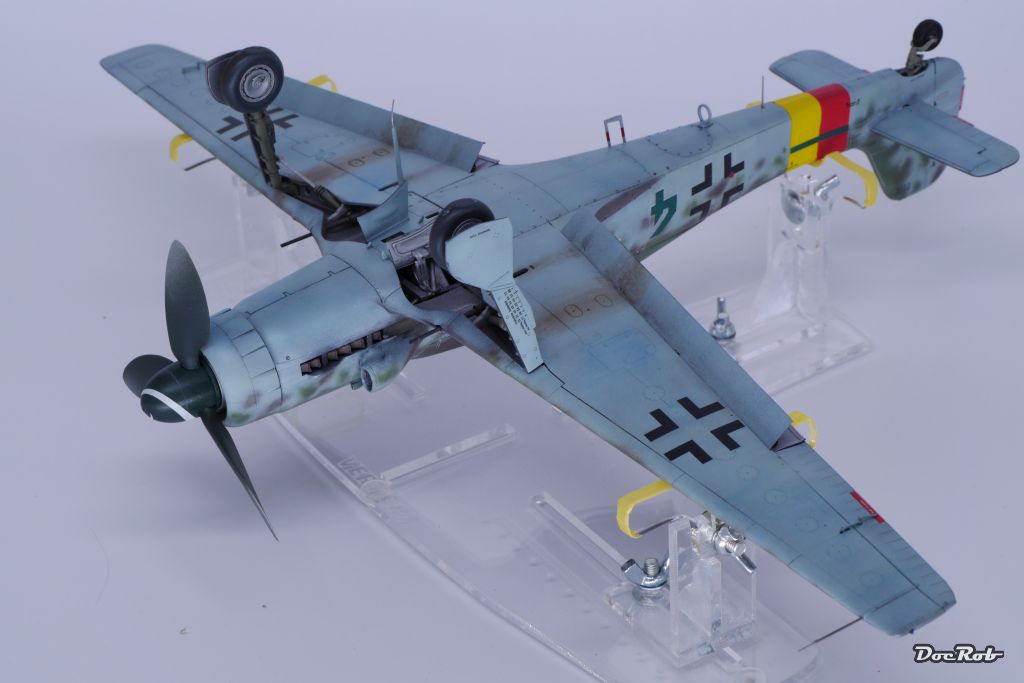
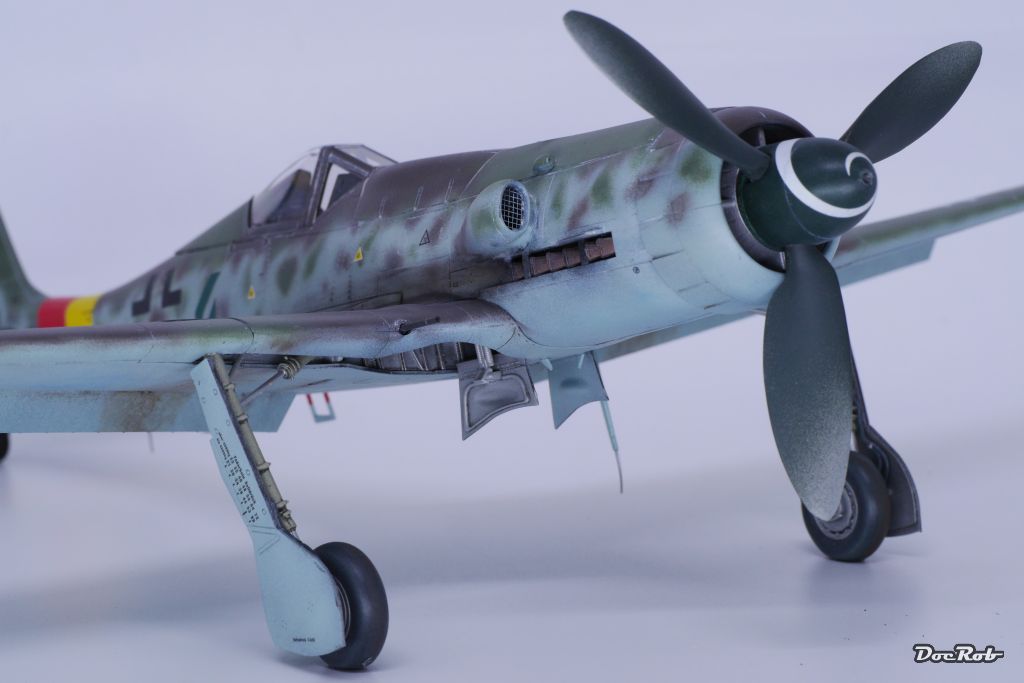
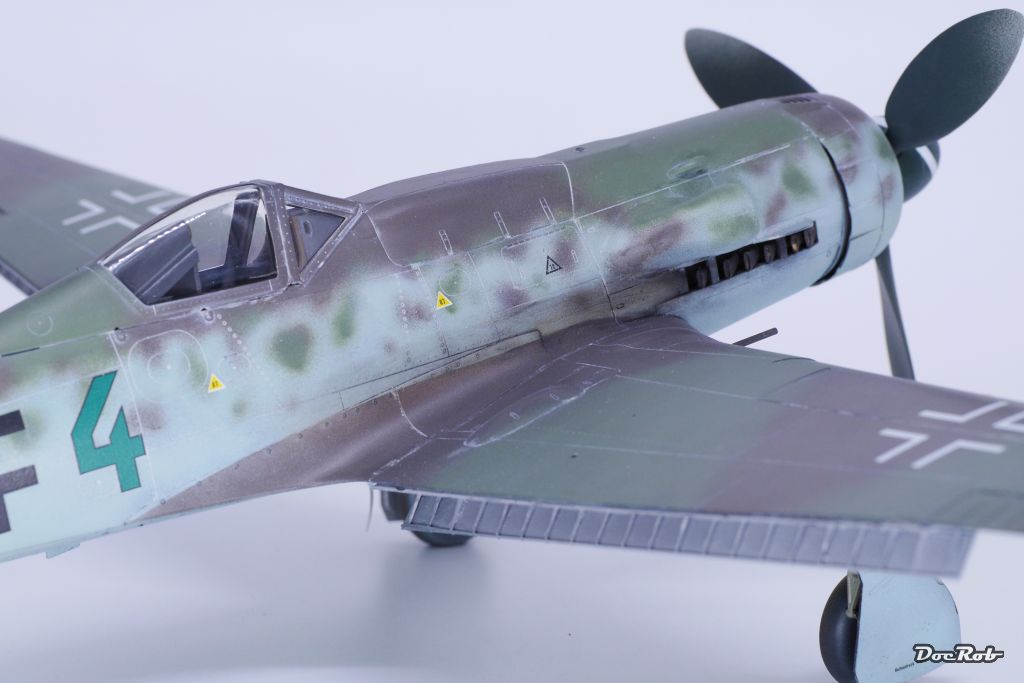
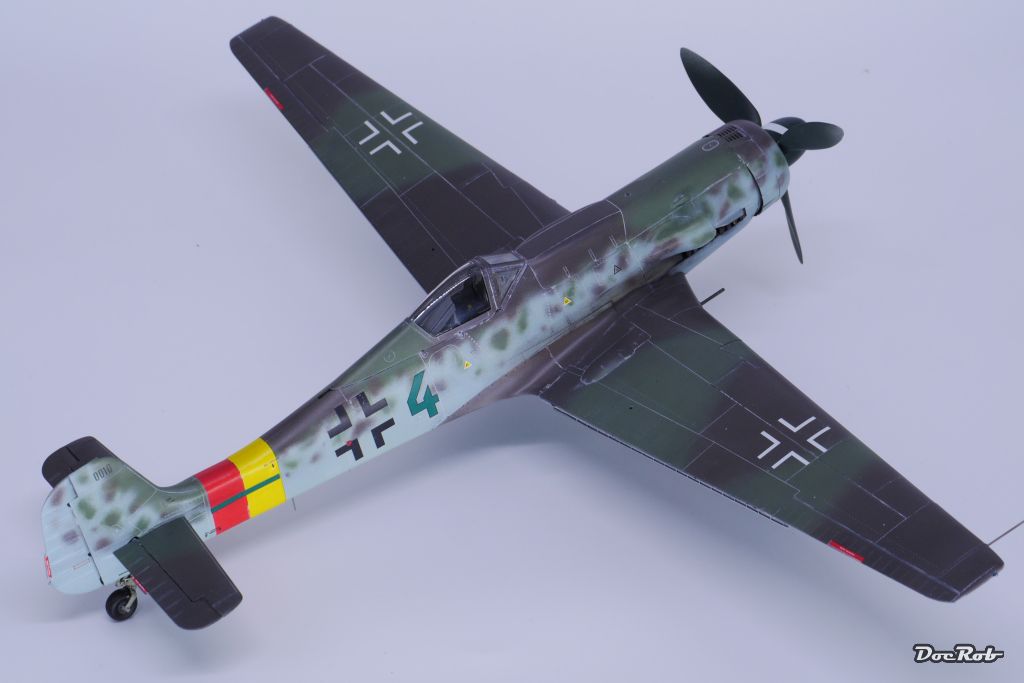
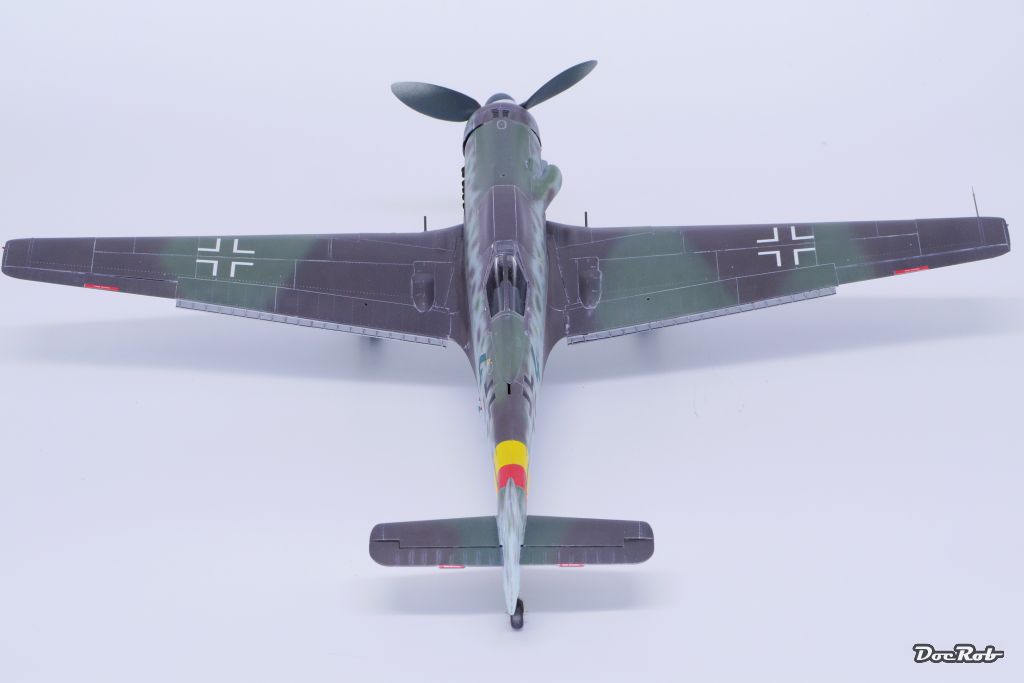
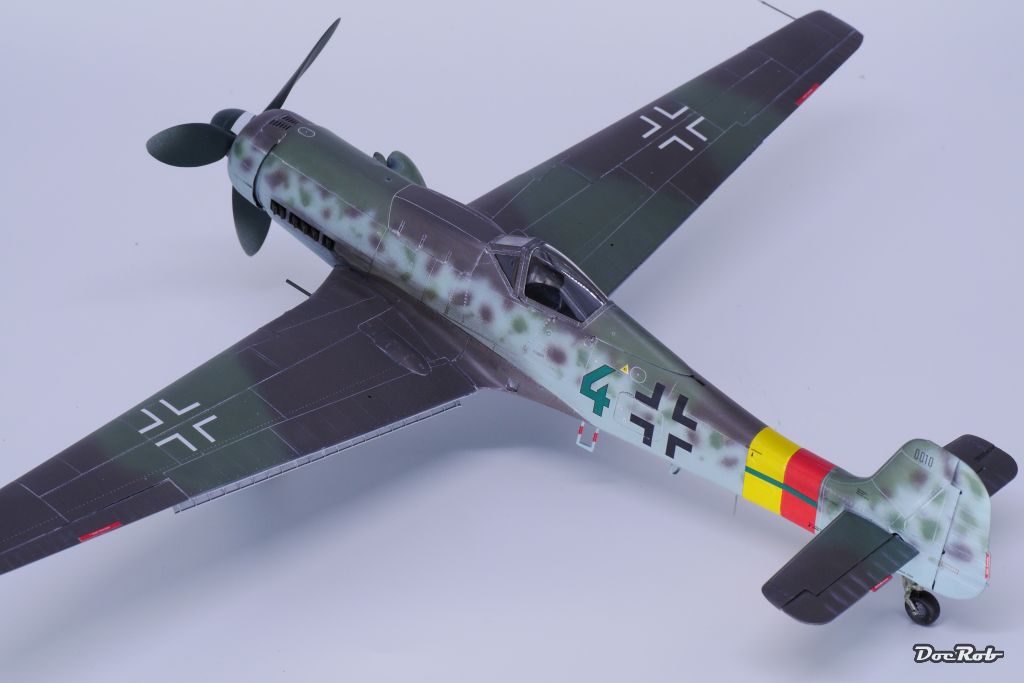
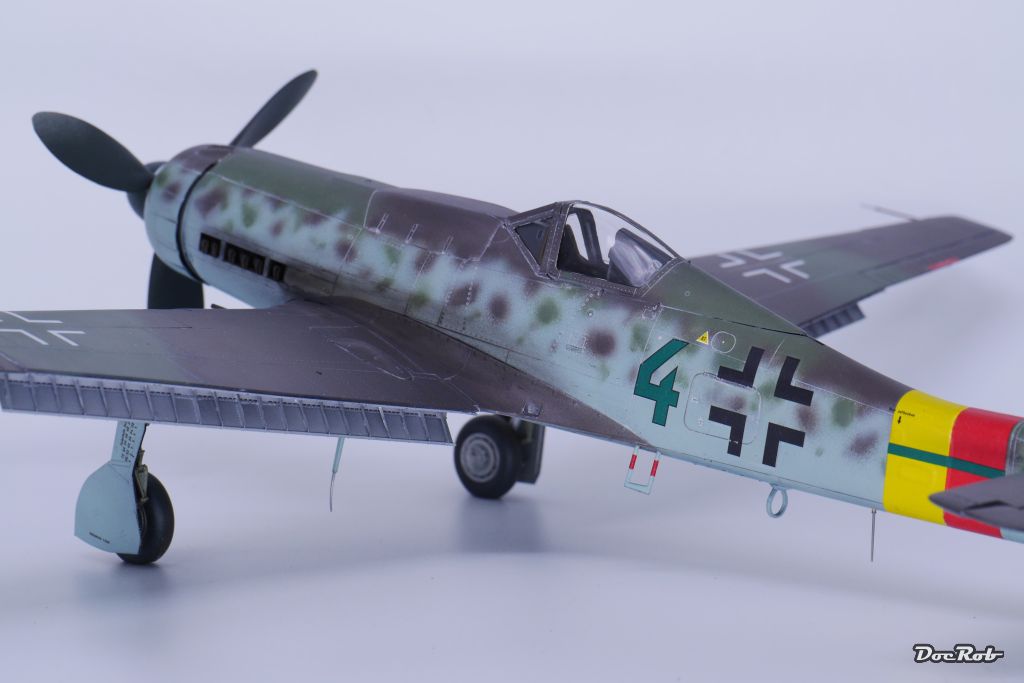
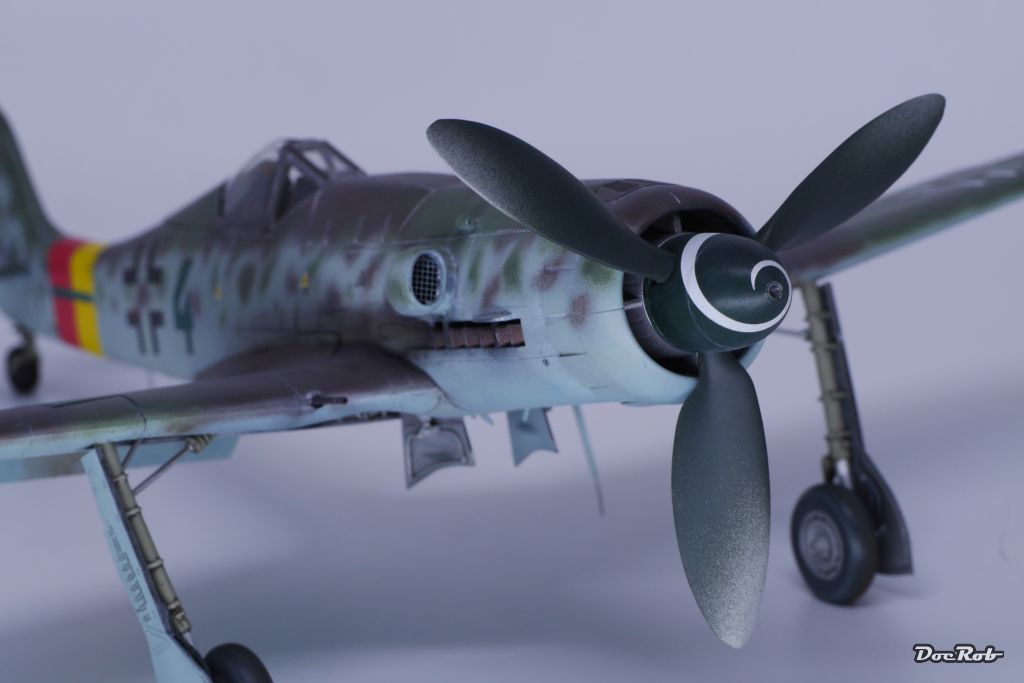
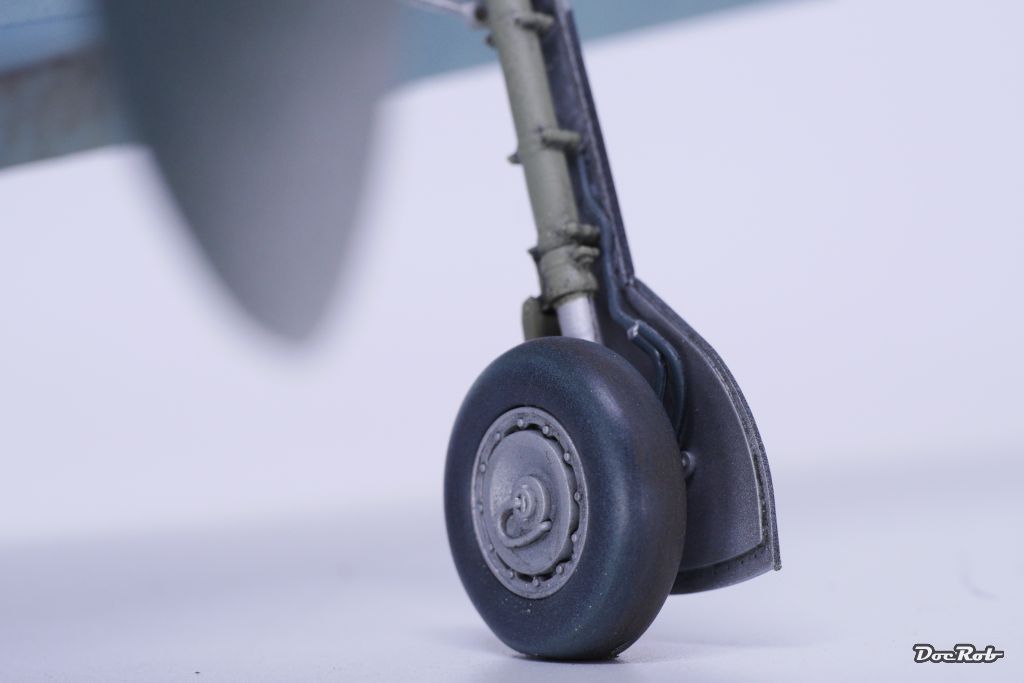
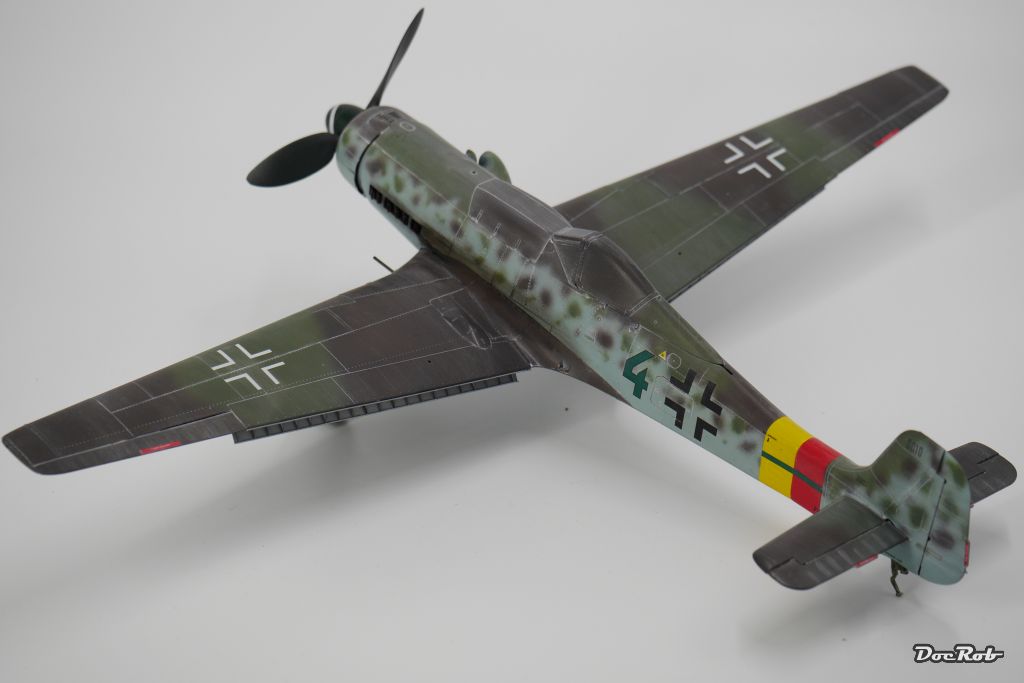
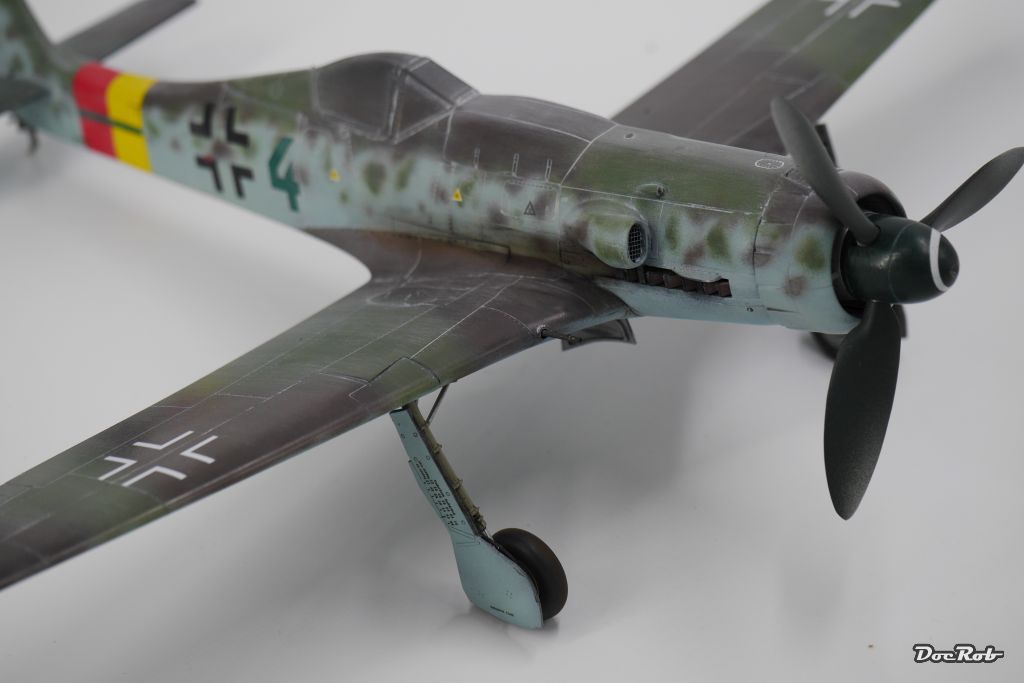
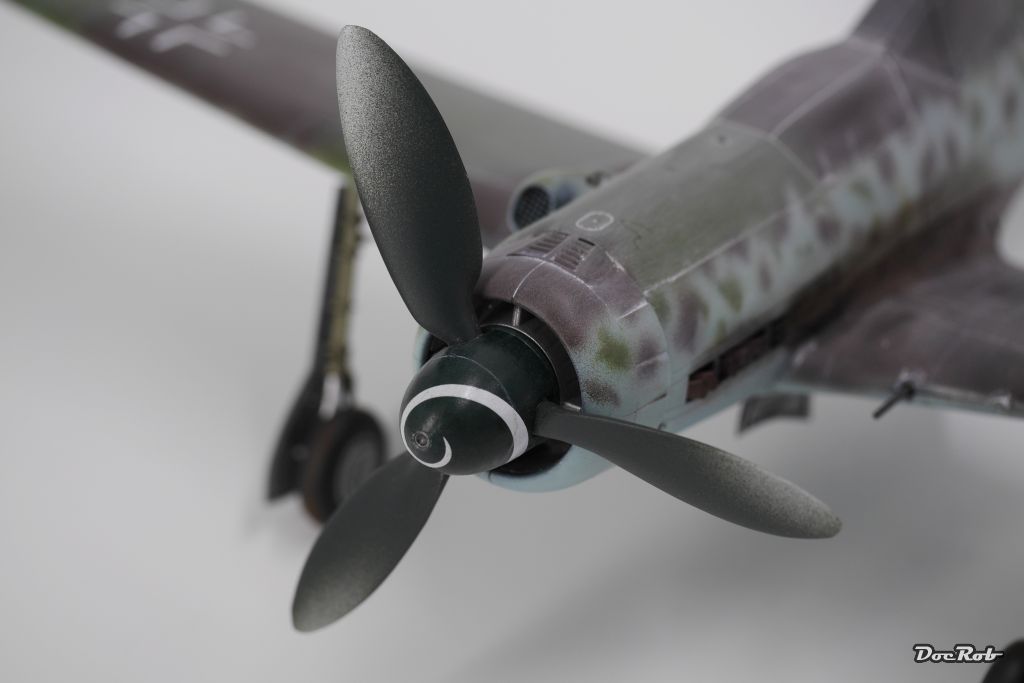
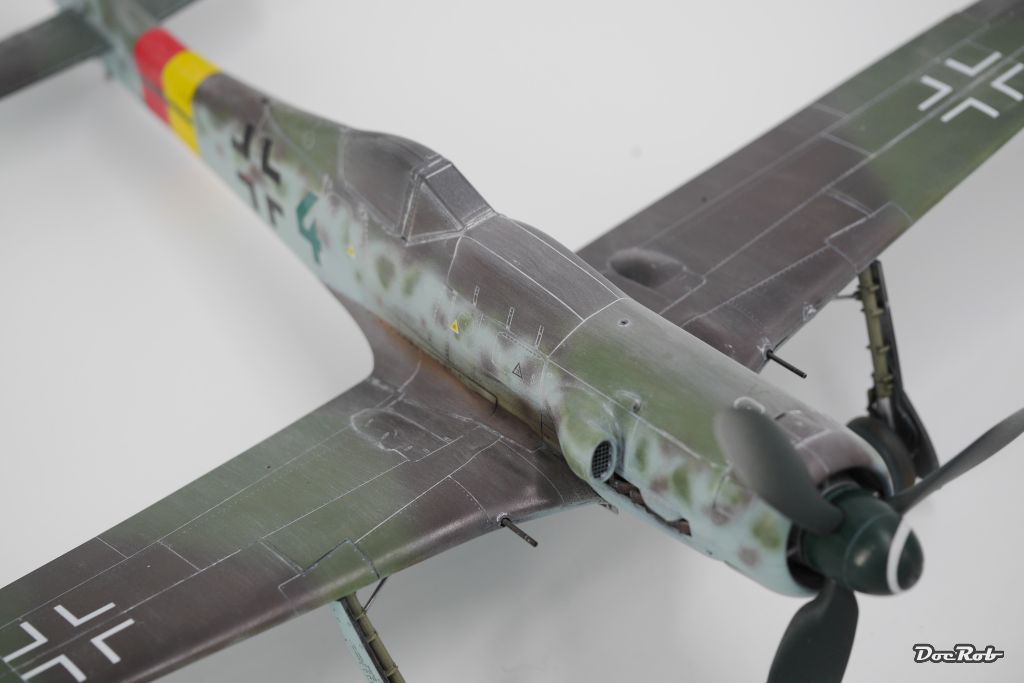
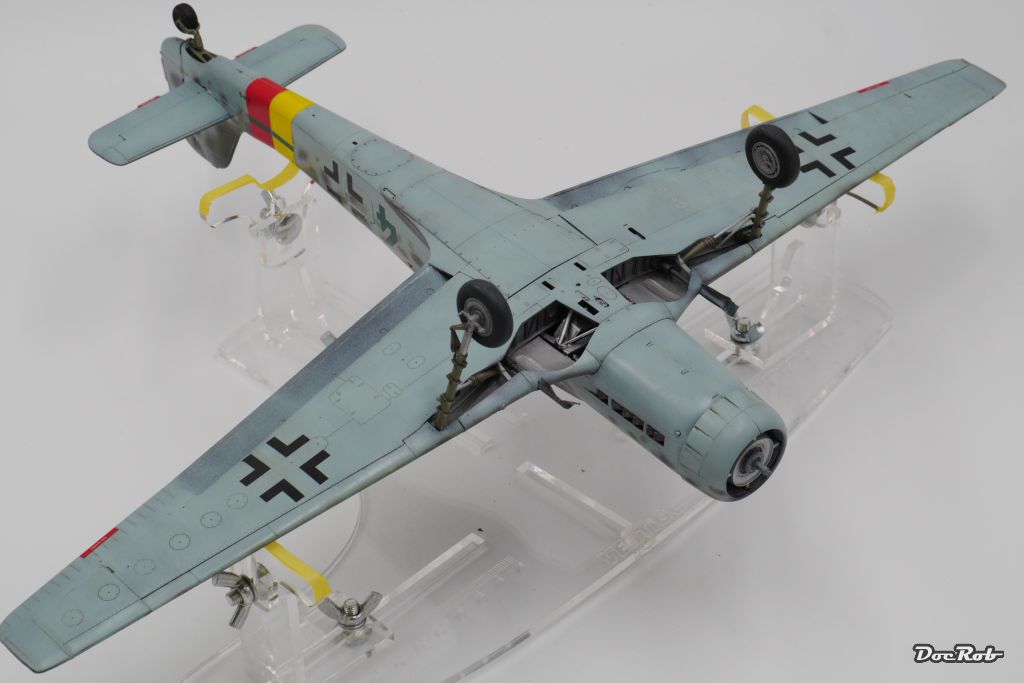
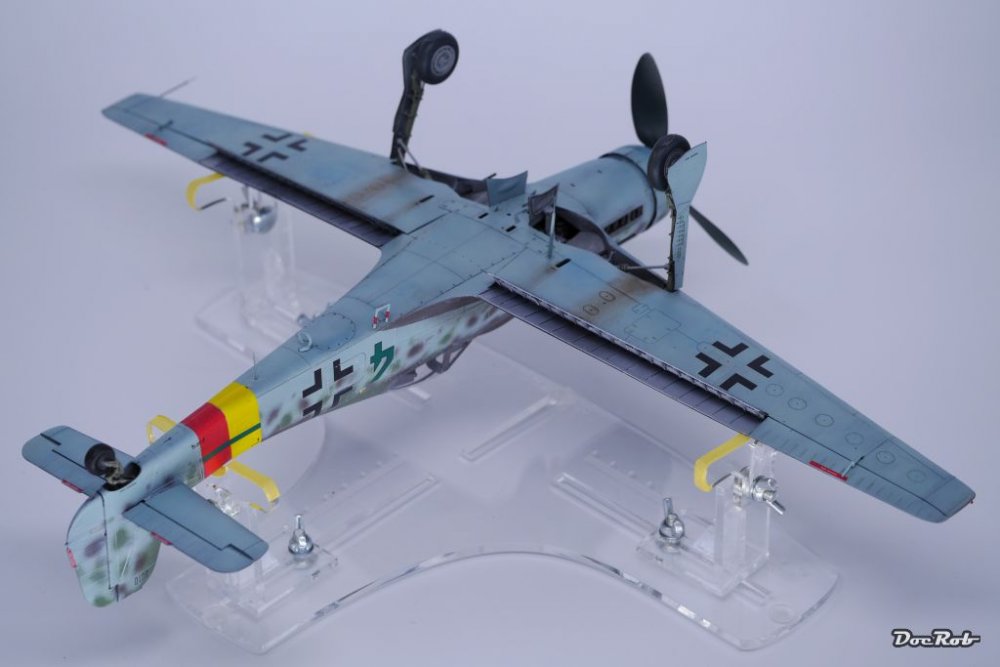
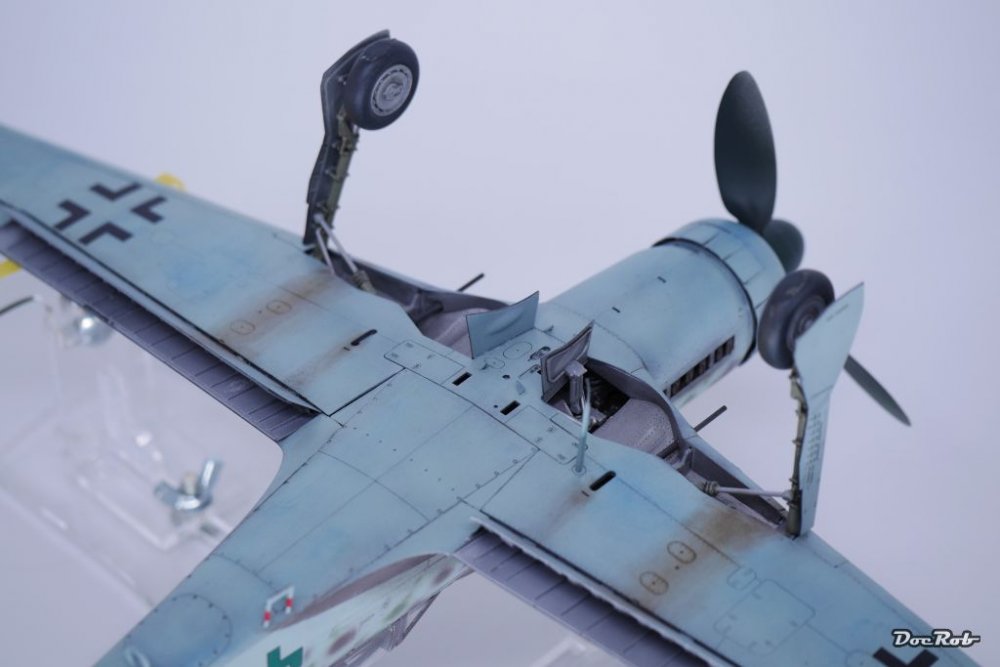
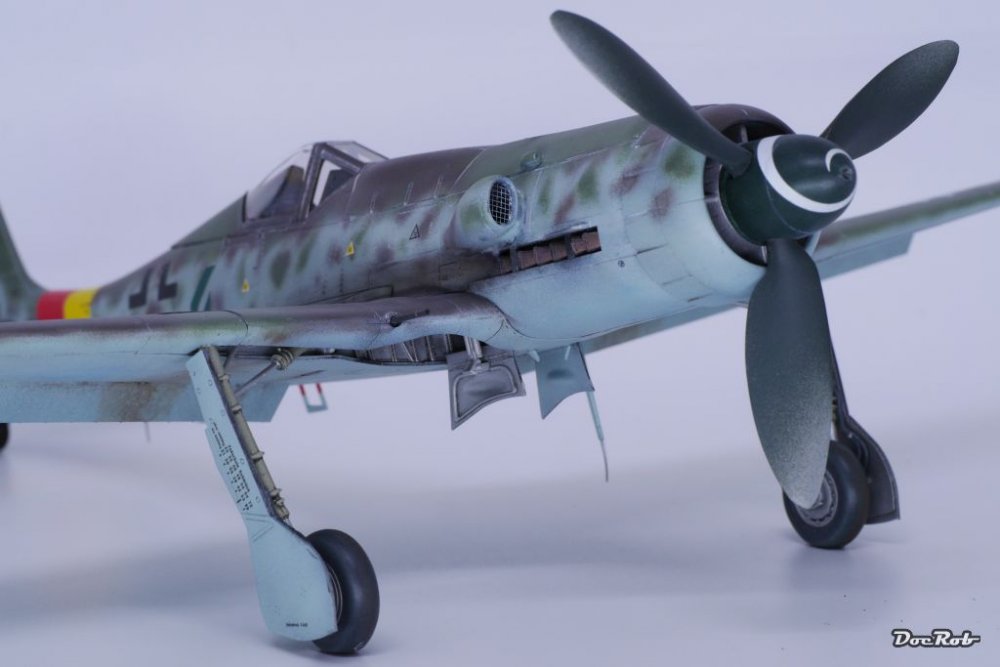
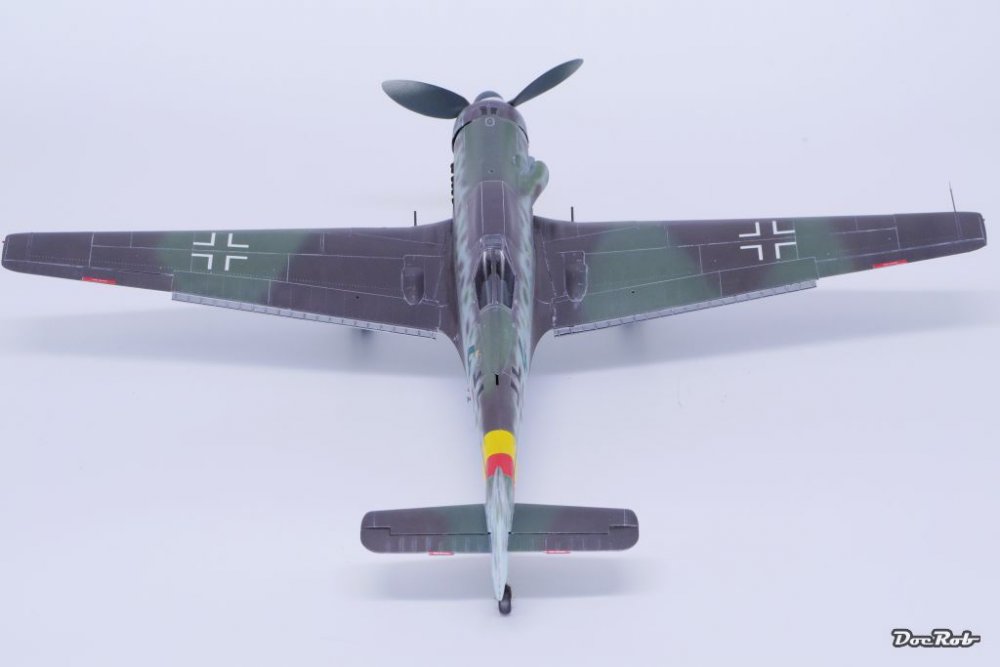
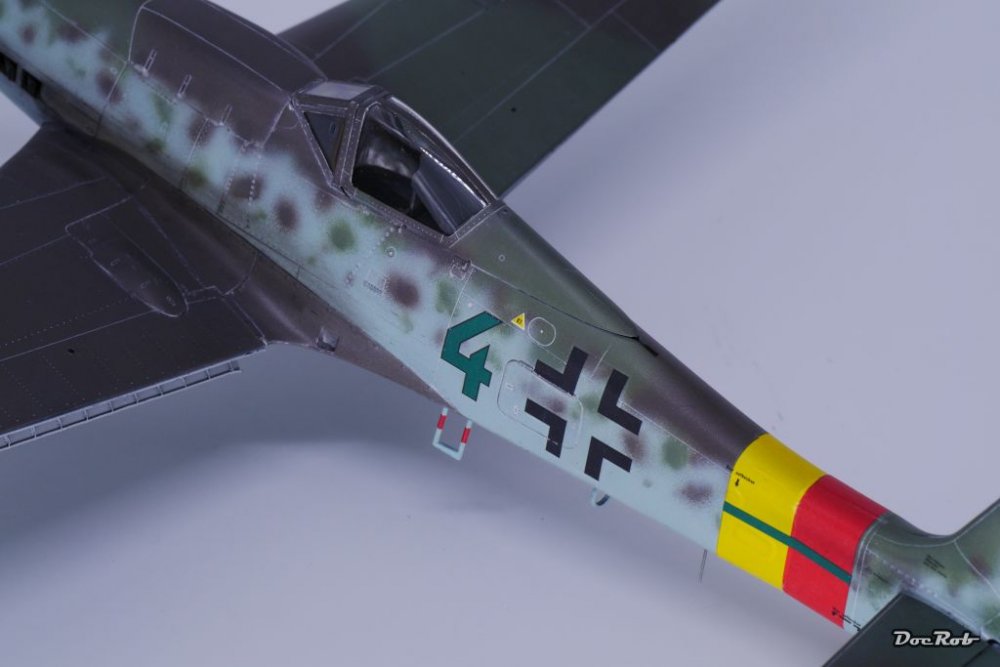
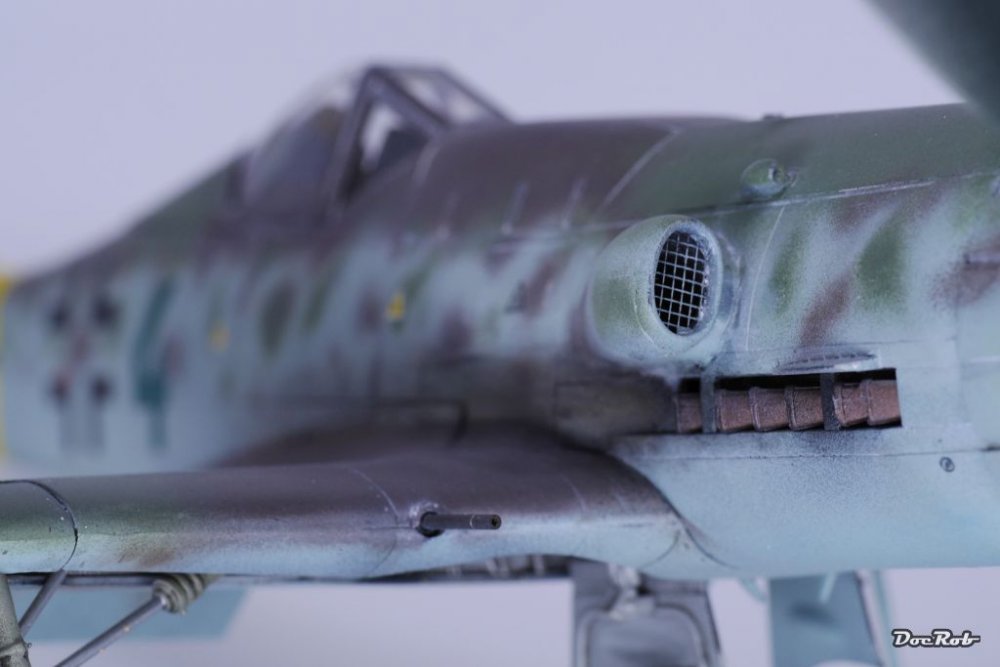
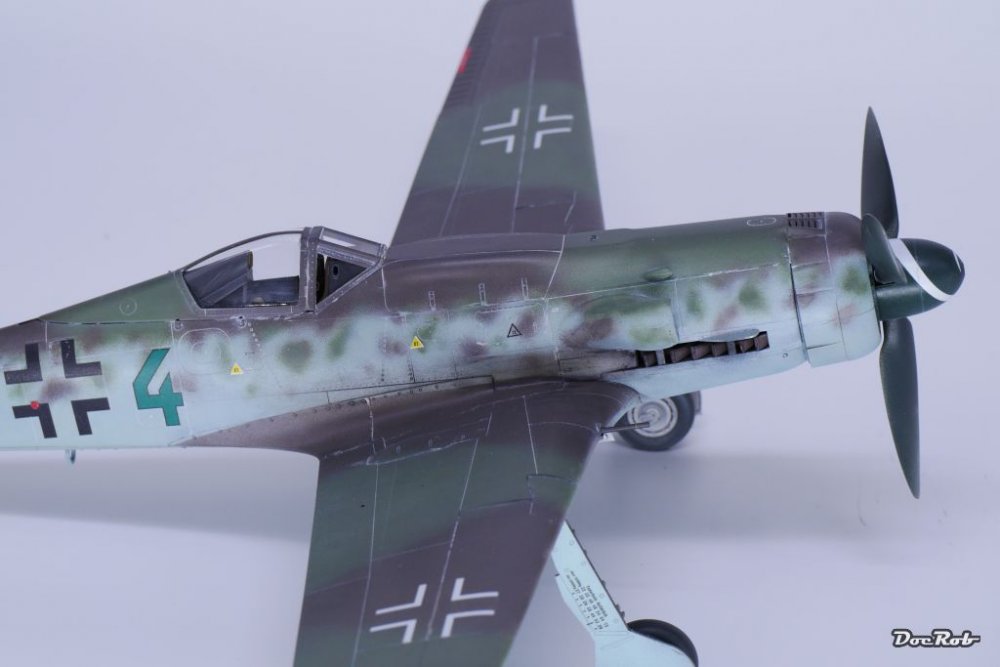
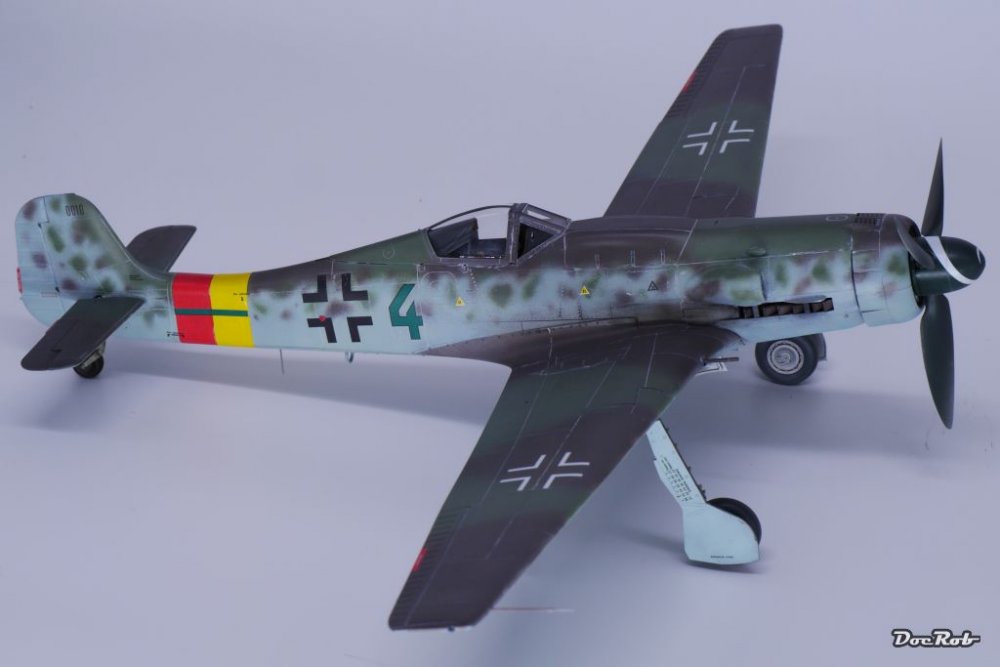
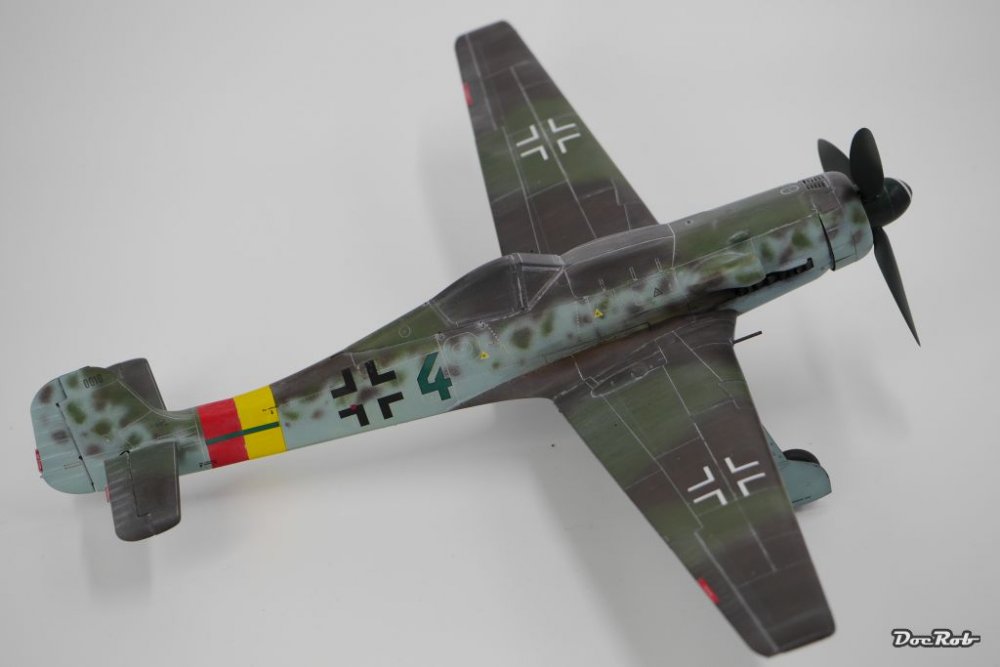
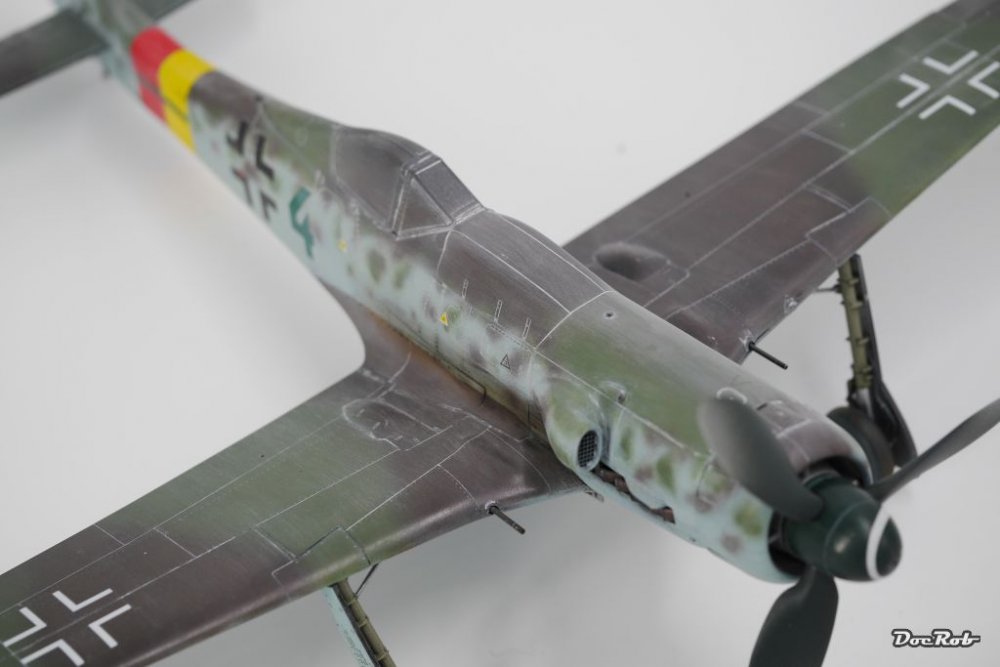
Ladies and Gentlemen, finally I got the ZM TA-152 done. This build was not free of troubles and I'm somewhat relieved, that this bird is finished now. If you are interested into the 'how to's' you will find the 'WIP' under that link https://forum.largescalemodeller.com/topic/5340-ta-152-zoukei-moura-132-my-first-zm/ I had lots of fun through that build, but there were moments of sheer frustration, even to the point of nearly abandon the project. Because of that I will show some pro and cons. Pro - Interesting subject, most subassembleys are well detailed - Great presentation of the kit with nice boxart in a sturdy box, everything is well and safely packed, and a great manual in colour and style. - Canopy masks are included and you get details like brake lines (nicely reproduced) and two pilot seats, one with sufficient reproduced seatbelts and a complete engine. - Decals were good, complete with stencils and great to work with (with the exception of the yellow and red fuselage ring, because big opaque markings are better painted). Cons - This kit is overengineered, there are lots of subassembleys to show with opened cowlings, but because of that it is a nightmare to get everything aligned properly - There are some flaws in the continuity of the manual, specially with the assemble of the engine with it's struts into the fuselage - You have to be a hardcore test fit junkie as a result of the above mentioned - While detail is generally good and sharp in most places, some parts look almost toyish (Oxygene tanks, the guns, parts of the cockpit, rudder pedals) - Price, I can see, that this kit is worth some bucks and many thoughts and engineering has flown in, but to me personally it is to pricey for the troubles you get while building Used aftermarket products and how I liked them - The PE-flaps from ZM are definetly worth the extra cash, if you are willing to ruin your nerves while bending, glueing and preparing the wings for the installation - The metal guns, aerials and pilot tube are a definite must, specially the barrels - The resin wheels are weighted, so they are a must for me too - The metal gear struts are bueno, but the plastic ones are not bad either, so it's up to you - The interior PE from ZM is a nice addition, but when you deciede to close the canopy not many will be seen. - The exterior PE from ZM was useless to me, the included parts for the wheel covers are nicely reproduced in plastic and most of the hinged cowlings show not so nice detailed inner parts of the TA, so it's not worth the (big) effort - The Concept Notes printed by ZM are a nice and well made source of reference and modelling advices, but sometimes I wished I had a magnifier, because of the tiny fonts In the end the bird looks differently than planned. I found no way to let the engine cowlings removable, not even with the extra PE-hinges, so I glued them in place. What I learned from this build is that test fitting a lot is the only way to get this one done and that some models unexpectedly force you to permanently be open to changes during the building progress. And last but not least, never trust a primer which dosen't smell horrible, but thats has nothing to do with Zoukei Moura. The german camo was a first for me and it went on ok. The best about it is, that I no more fear complicated paintjobs, so lets start with the ZM HE-219 UHU. Wait a minute it's from ZM and I need a little rest from them . Here are some pictures I hope you will enjoy Cheers Rob


-
TA-152 Zoukei Moura 1/32, My First ZM
DocRob replied to DocRob's topic in LSM 1/35 and Larger Work In Progress
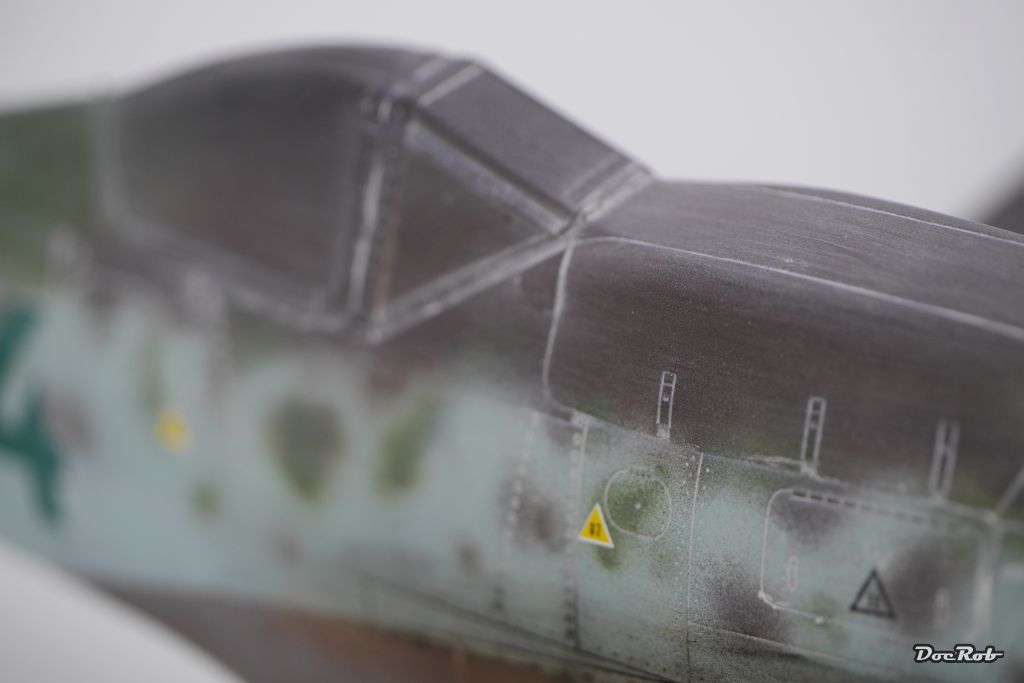
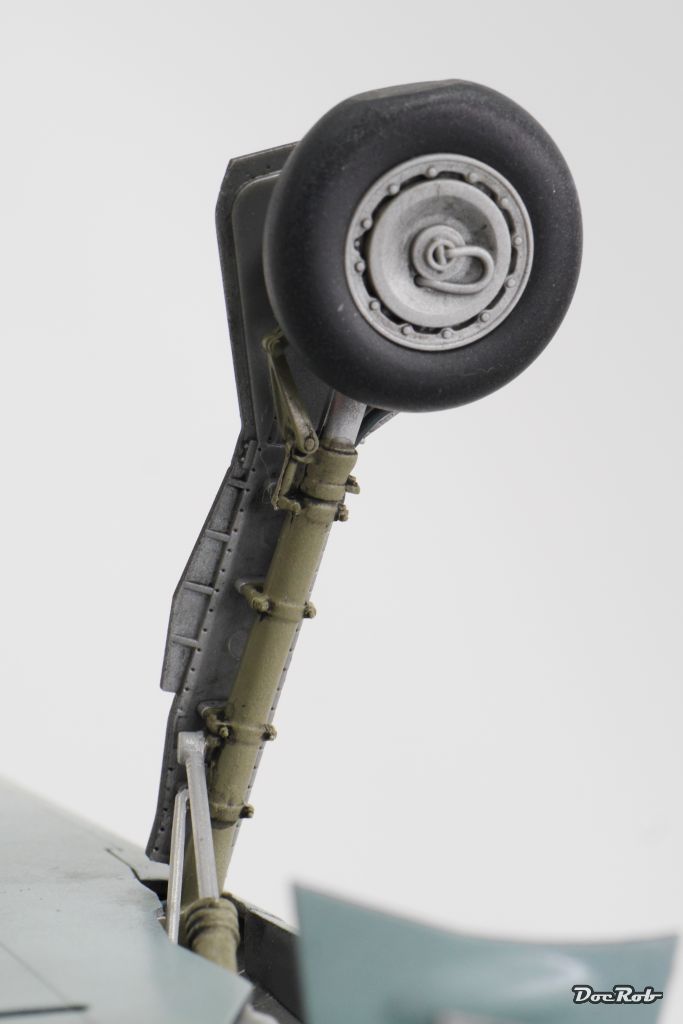
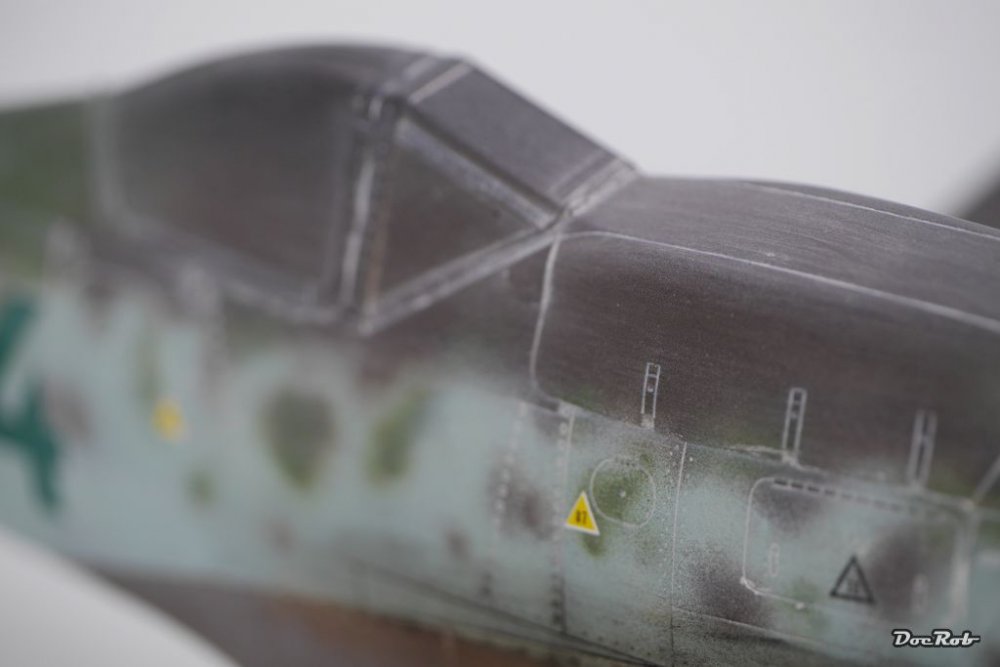
Thank you shark and all the other supportive guys and gals? I can see the finish line of that build now. When I finish, i finish all out, which means while finishing I'm breaking a lot of parts. In this case I lost one of the flaps (repaired on the pictures) and the tailwheel. That will be added later, when the varnish is dry, together with the aerials, pilot tube and nav lights. After chipping a little with crayons, pencils and some Tamiya Aluminium I added lots of different pigments to the different surfaces. The lower side was treated with bright blue and some brown and near white pigments to enhance colour richness, than some brown tones where added to simulate dirt from the wheels. The upper parts where treated with chalk white and some brown tones to achieve the icy effect, which I really like. Different browns and black where added for the exhaust fumes. The pictures do not show the final coat with my trusted 75% Future and 25% Tamiya Flat Base varnish, which has a little blending effect in the way of toning down a little. Next step might be the Finished Work section. Cheers Rob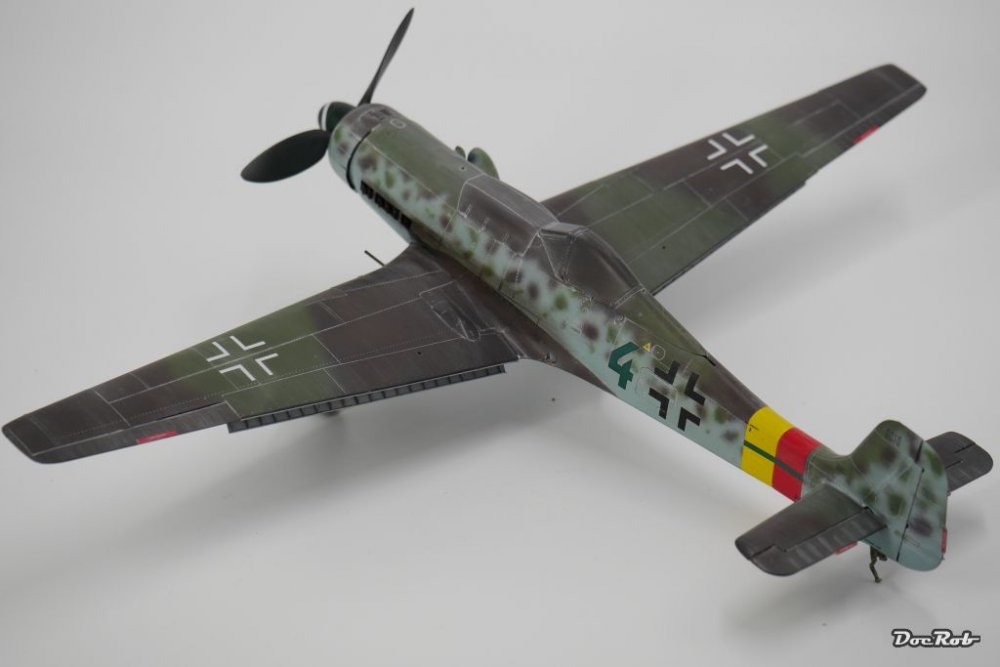


-
Special Hobby's Fiat G.50 1/32 scale
DocRob replied to GAJouette's topic in LSM 1/32 and Larger Aircraft Ready for Inspection
Hi Gregory, that's a nice looking Fiat you built there. The paintjob was a daunting one I guess, but the result justifies the effort. How did you manage to get all that dots evenly distributed? Cheers Rob -
TA-152 Zoukei Moura 1/32, My First ZM
DocRob replied to DocRob's topic in LSM 1/35 and Larger Work In Progress
Finally the lower flaps got installed, the finish line is in vicinity. Nothing went wrong on Frightday the 13th. Painted the aerials and the ladder and pilot tube, but these will be mounted after the chipping, dirt, grime and exhaust fumes. Cheers Rob

-
Wow, what an epic build. That much filth in as much detail seemed to me impossible before I saw your 'Betty'. This truck seems to sream 'no more abuse in these harsh Siberian conditions'. I raise my hat, being a witness of such very fine scratch building abilities and congratulations that you fought your way through that build. Cheers Rob
-
Hi Rick, this is only an Iphone comment, more details after the 35mm shots . Nice and clean build with a lot of greatly executed details like the turnbuckles and nav lights. Cheers Rob
-
TA-152 Zoukei Moura 1/32, My First ZM
DocRob replied to DocRob's topic in LSM 1/35 and Larger Work In Progress
Hi Gus, indeed, after all the troubles we got a little closer, the 152 and me. In the end she will look totally different than planned, but she will look ok at leas, and a lot of lessons learned with that kit too, the most important of all, you have to finish no matter how . Subtle differences in the shade of washes are easily explainable with the potential bigger amount of shadow on the lower sides. Sometimes we modellers are a little bit crazy, one of these days there will be light guided paneling or something like that. I have some imaginations about a bleached, sun beaten and dusty A-7 in my mind, please bring it on. Cheers Rob -
TA-152 Zoukei Moura 1/32, My First ZM
DocRob replied to DocRob's topic in LSM 1/35 and Larger Work In Progress
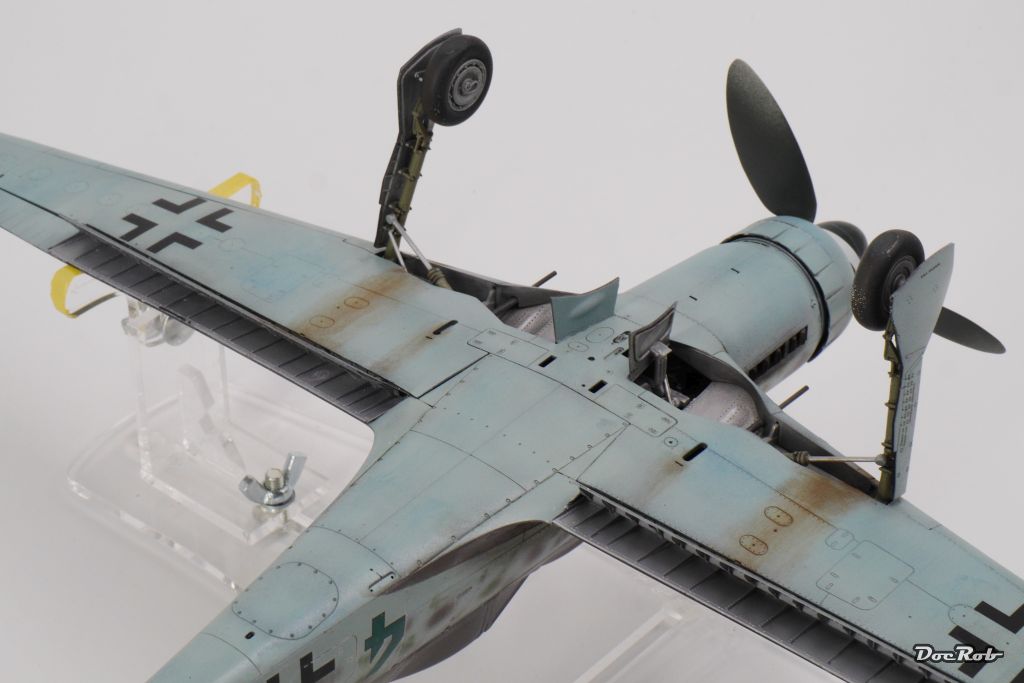
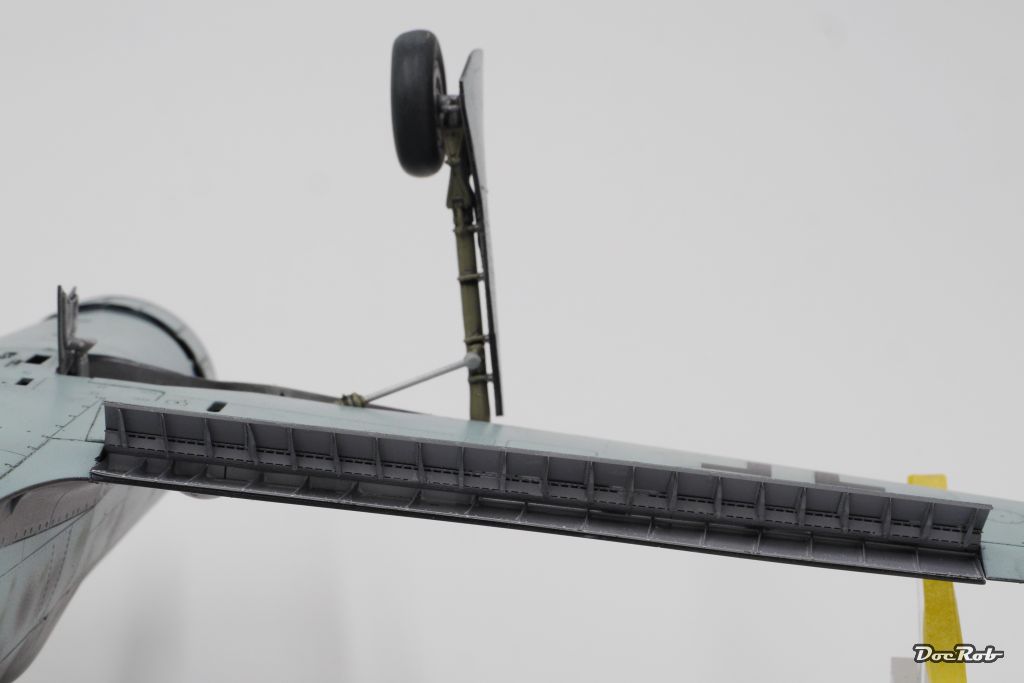
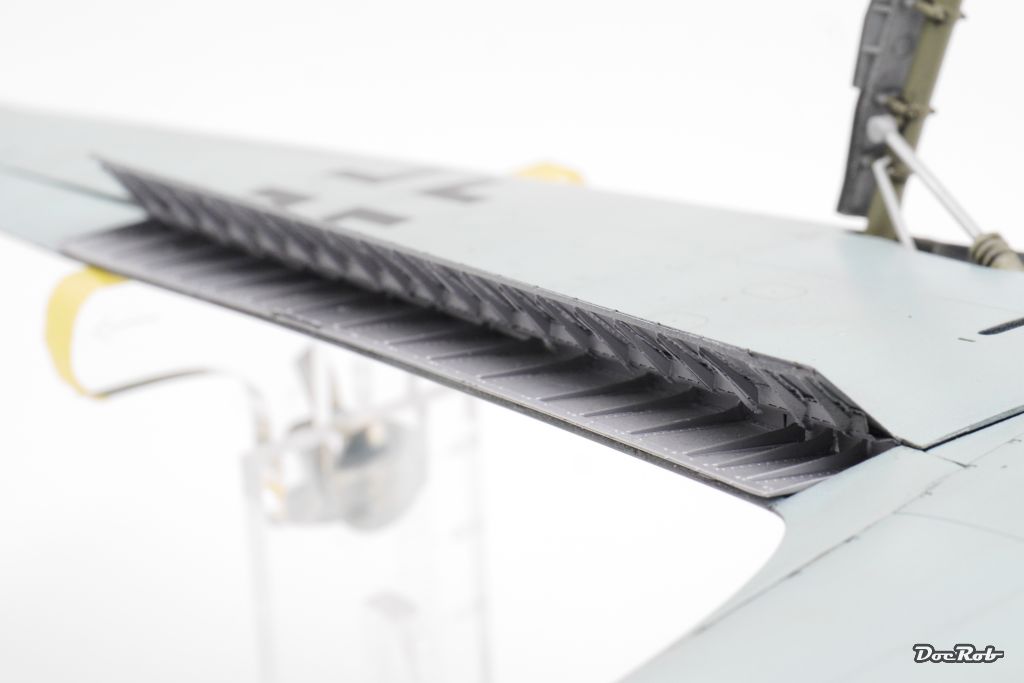
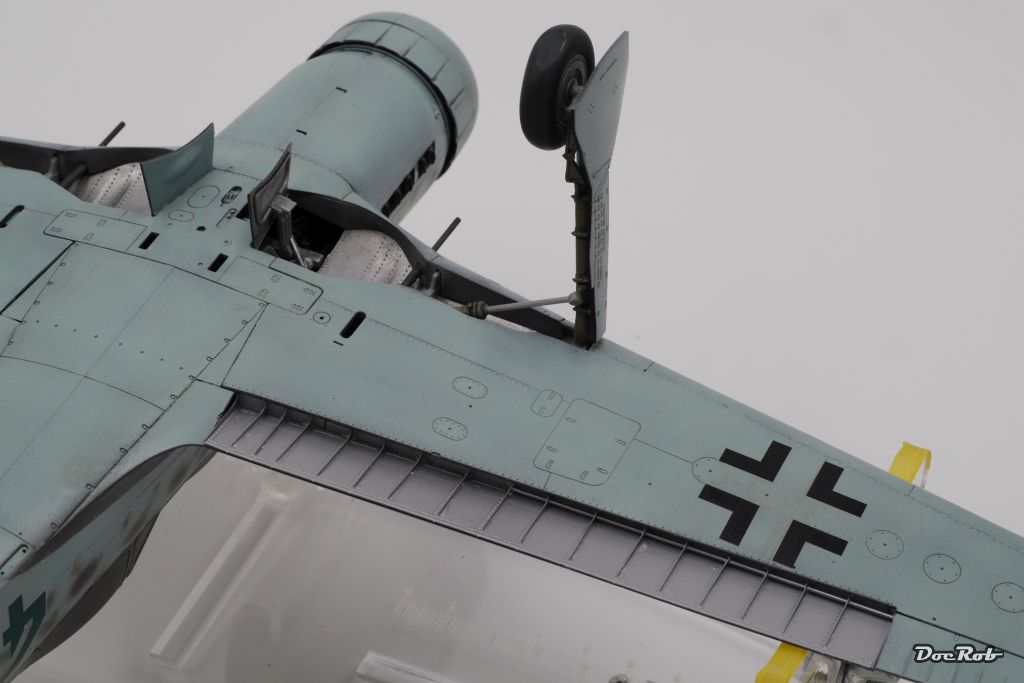
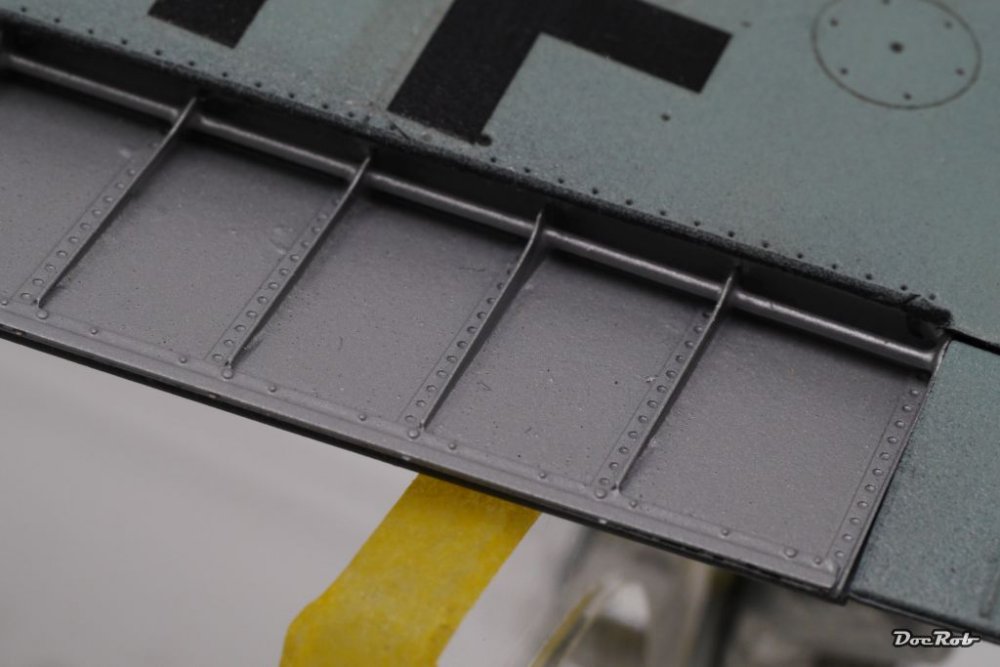
Hola Senhores, I found some time to do a little detail work. I added the delicate upper PE-flaps into their wing sector. They add a lot of detail compared with the kit parts. If you go through the trouble building this ZM TA-152 you should be fit enough to do the extra bending and glueing. It's not an easy task, but (nearly) nothing is easy with this kit. Keep in mind that installing the flaps is best done late in the build, but be sure to have them test fitted a lot, because there is a lot of inner wing material to be removed for a good fit, not a good idea to do this after painting. It's best done while you fit the different wing parts. I have done it after assemblying the wings and there were a lot of different tools needed and a lot of force involved (and some swearing) to do it properly. I also added the wheelbay covers and brake lines (yes they are included in the kit and nicely detailed) to the metal wheelstruts. This subassembly is one of the gems of that kit, well detailed, well engineered, well fitting and sturdy, so don't plan to build yours in flying mode, you will miss that . The extra brass barrels are not painted, they are blackened in some toxic fluid, specially for that purpose. I use that for blackening Friul's and other brass stuff and it works great. You can get that blueish liquid cheap in stores for Tiffany lamps by the litre and the results looks so metal, because it is. If you soak the metal parts in the poison it's importand to shake a little, because airbubbles are your enemy here. The oleos where sprayed in Alclad chrome and where looking the thing, but got a little dull while masked. Maybe I will polish them a little with some Uschi chrome pigments Cheers Rob


-
Yeah, I'm stunned to. Great review of a historical not so important plane, which on the other hand technically and engineering wise was some years ahead of the pack and some years were a lot in these times. A masterpiece in reality and it seems like the kit will do it justice. I will definetely get me one, or maybe two and leave the wings off in one build. Cheers Rob
-
Somebody is on fire here, that is an awful lot of stunning work, chapeau. Your "how to" for the antennas is great and even includes some magic, like drilling a 1.2mm hole in a 1.2mm tube, i like that. And what it shows is the will to do things right, even if there are many difficulties to solve. Your cockpit is marvellous and well researched like the hot seat mechanism. You put a lot of effort into this one and you took the same route to document that and this is a treasure for us, because your build shows a lot of answers to the often asked questions arise Thanks for that Cheers Rob
-
TA-152 Zoukei Moura 1/32, My First ZM
DocRob replied to DocRob's topic in LSM 1/35 and Larger Work In Progress
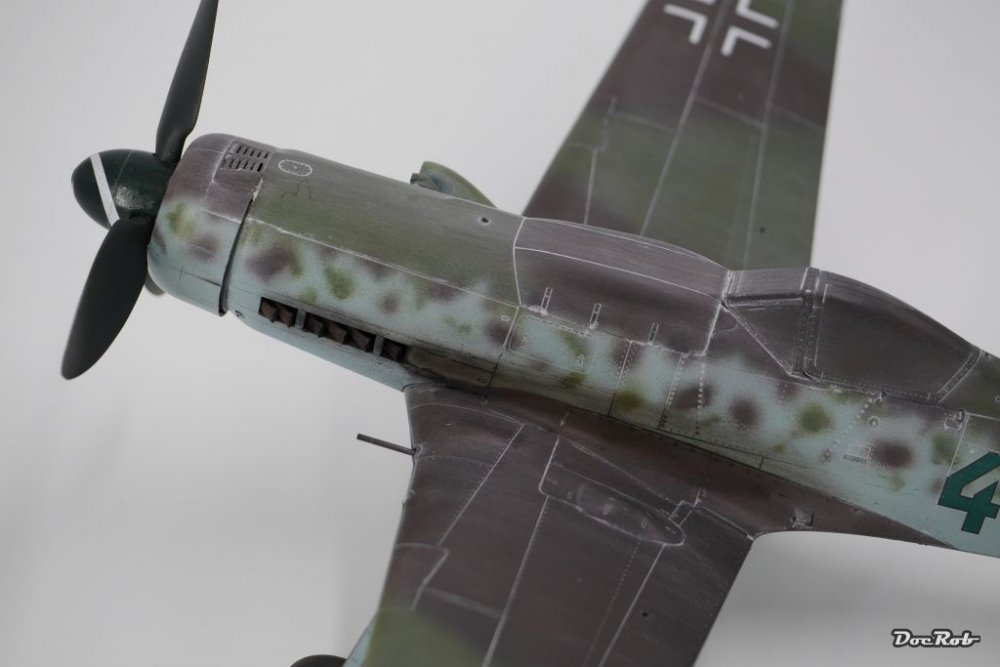
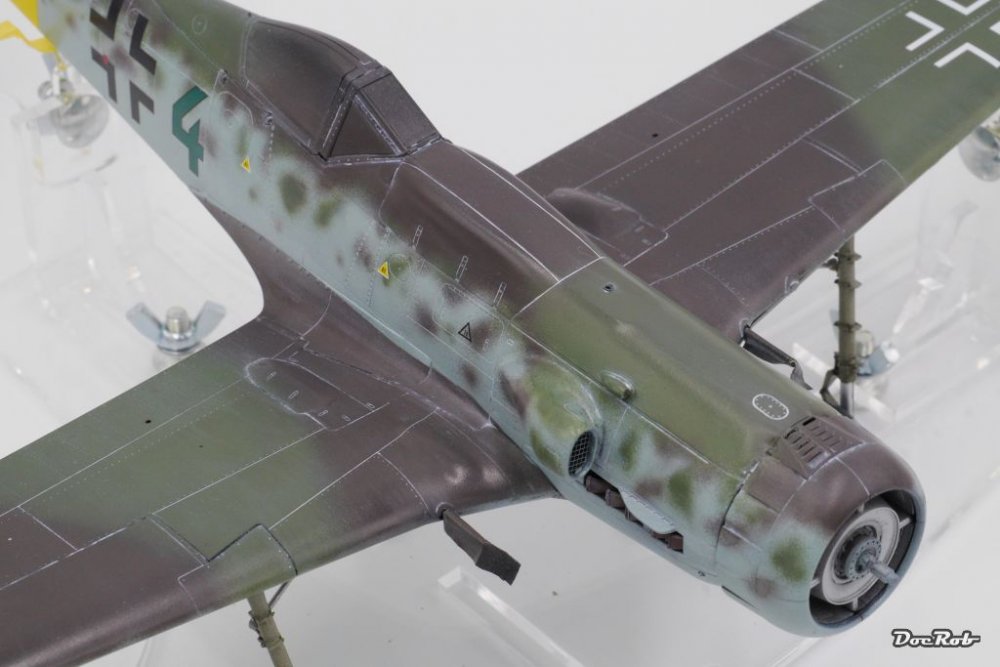
Thanx guys, the pale wash, actually it was made for representing salt stains on ships, was the most interesting one I tried on the TA. The darker ones were barely noticable on the upper camo. After applying I made up the story with the freezing conditions the bird was used in. Story follows used effect, so to speak , but in the end I convinced myself of that and at least this was symptomatic of that build of many changes and altered decisions. I'm not so convinced in using different tones of washes, even after doing so. You always have the problem of "bordering" and washes tend to flow very easily. On the sides of the fuselage, where the dark dots are, it's easy to understand the problem and why should in reality a gap between panels look different on the upper side, than on the lower side, it's a mixture of shadow and external influences (dirt, corrosion, paint abraision)? You see, thinking one way and doing the opposite became my second nature during that build Cheers Rob -
TA-152 Zoukei Moura 1/32, My First ZM
DocRob replied to DocRob's topic in LSM 1/35 and Larger Work In Progress
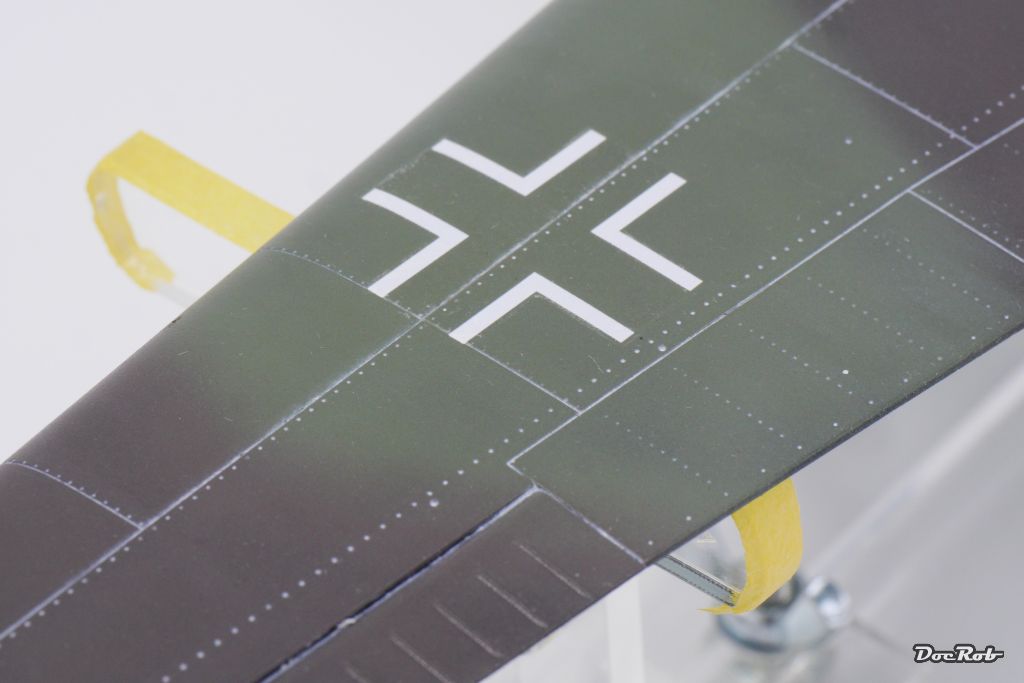
Hi Folks, I found some benchtime to start the weathering. i did some experiments with different washes for the upper side and decided to use a very light grey tone. On the pictures it looks harsher than it looks in real light. The near white tone resulted also because the real TA's would have been in action in harsh winter conditions in the beginning of 1945 near Berlin, so a little icey appearance should fit. For the lower side i used a grey-blue wash and a black one for some subassemblies like the wheelstruts. Chipping is next and will be sparse, because there was not much time to chip for these birds, but some dust, splashes and spills will be added. Cheers Rob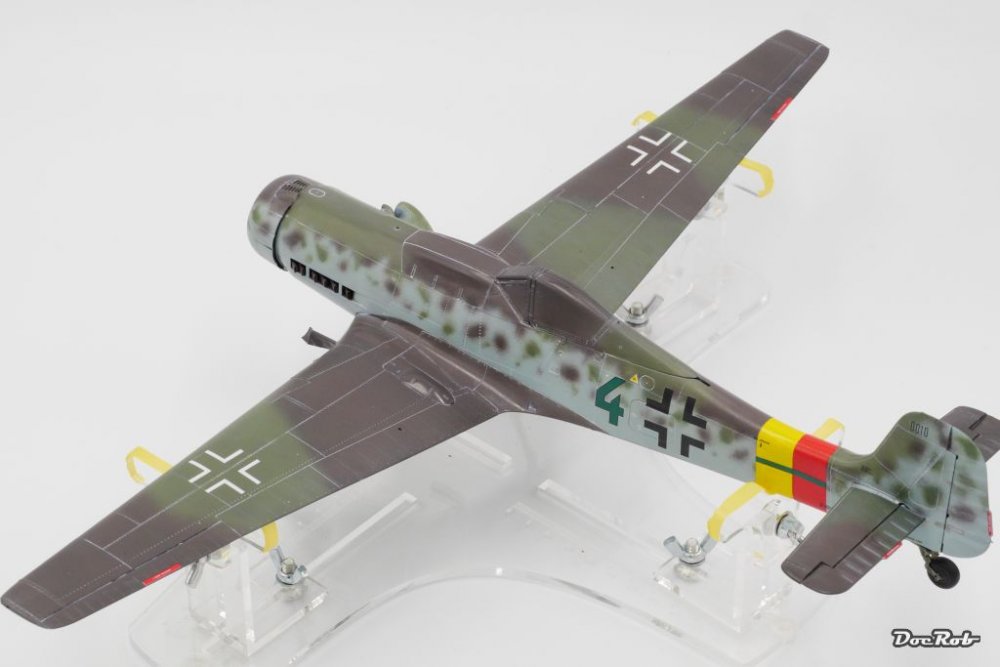


-
Hi Gus, that's what I call progressing. The paintjob looks great and I really like the result of using masks for the insignia. Cheers Rob
-
1/48 Wellington Mk.X (He727 NA-K)
DocRob replied to JeroenPeters's topic in LSM 1/35 and Larger Work In Progress
That's some serious brass bending,hopefully you don't decide to close the bomb bay doors Cheers Rob -
Airfix 1/24 Typhoon Diorama
DocRob replied to WattsNZ's topic in LSM 1/32 and Larger Aircraft Ready for Inspection
I figured out who is manufacturing your mechanic. It's an interesting company from France which is specialiced in 3D-printing. They carry a lot of useful figures in different scales. Quite pricy, but I will check them out, specially because the carry 1/24 figures. The name of the company is reedoak.com. Cheers Rob -
Go Rich go, can't wait to see that beast finished. Good that you solved your supply problems. I could tell you stories about getting supplies on my little island which would give you bad dreams . Cheers Rob
-
Airfix 1/24 Typhoon Diorama
DocRob replied to WattsNZ's topic in LSM 1/32 and Larger Aircraft Ready for Inspection
What a nice build and an interesting story to back that up. Great weathering, that bird looks realy used as it should. Who manufactures the guy in front, inspecting the coolers? Cheers Rob