DocRob
-
Posts
7,045 -
Joined
-
Last visited
Content Type
Profiles
Forums
Events
Gallery
Everything posted by DocRob
-
Bummer with the ban, Carl, I have the same situation since years and some weeks ago, I was about to smuggle a can of TS-44 into my flight baggage from Berlin, because there is no substitute for this color to find and it has to match some car decals. I didn´t do it in the end and have to mix now. Cheers Rob
-
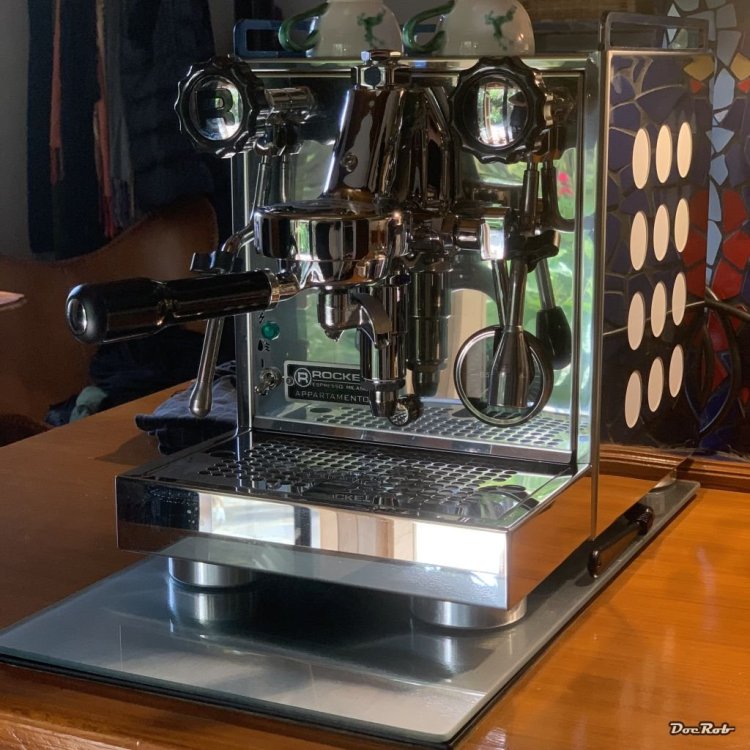
This is my coffee machine, since my trusty Rancillio Silvia passed away two years ago. It´s a Rocket Appartemento with two boiling circuits, one for coffee and one for steam, so no waiting time for cappuccino. I buy excellent coffees, where ever I can get them, but drink mostly a very good Colombian decaf, roasted by Barcomi´s Berlin. It´s a sacrifice to my blood pressure, but one, which is easily made, because the coffee is excellent. Cheers Rob
-

AK REAL COLORS MARKERS ....are they cheating or smart ?
DocRob replied to PanzerWomble's topic in Hints & Tips
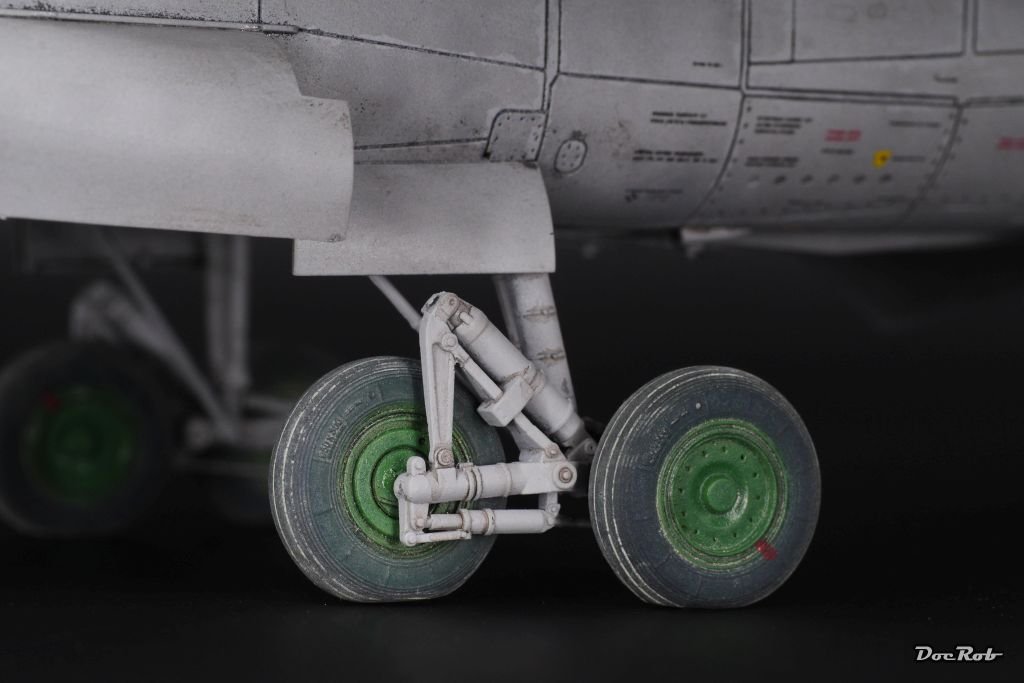
Well, no pictures of my masking fetish, sadly, but some exemplary wheels, which were painted in multiple shades of black for my MIG-31 build. Cheers Rob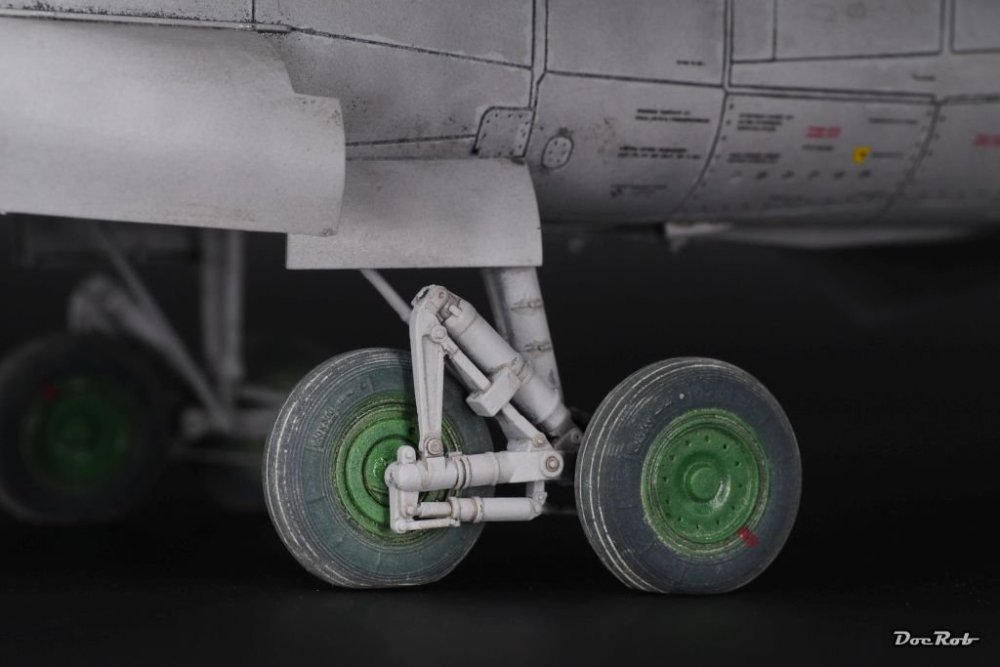
-
AK REAL COLORS MARKERS ....are they cheating or smart ?
DocRob replied to PanzerWomble's topic in Hints & Tips
I´m a bit dogmatic when it comes to tires. I mostly substitute them for resin ones, if available and I airbrush them with multiple shades of near black from my trusty Lifecolor set. I usually cut my own masks, but that might be a fetish thing with me. I just believe, a black tire never looks the same black all over, so no alternative for me. Cheers Rob -
Looking good, nice drybrushing to enhance the contrast FA. Cheers Rob
-
What is on your bench right now ? Share a picture :)
DocRob replied to Martinnfb's topic in Modelling Discussion
Nice Carl, never heard the term catio before, but it fits. We got a cat in out garden regularly since some days. It is from neighbors, but seems to like our garden better. Since our dog has passed away in August, he´s taking over now. Cheers Rob
-
Fantastic job with the stringback, PW. You have to look very closely, to detect, it´s 48 scale. Glad the Prym rigging worked out. Cheers Rob
-
Eduard Bf 109F-4 Yellow 7 Ellen RFI
DocRob replied to CANicoll's topic in The Sandbox Ready for Inspection.
This very unusual camo came out great, Chris. I also think, that your weathering did the job perfectly. BTW, I guess, the name of the plane should be "Ellen". It looks like it´s written in old German handwriting. Cheers Rob -
Another one bites the dust - Maschinen Krieger Friedrich - 1/20
DocRob replied to DocRob's topic in The Sandbox Group Build.
Sounds to me like a perfect canvas to don one in dabbing and the other in hairspray or multi layer hairspray technique, Paul. Cheers Rob -
Another one bites the dust - Maschinen Krieger Friedrich - 1/20
DocRob replied to DocRob's topic in The Sandbox Group Build.
That seems to be a nice kit and something different for sure, Peter. I remember the fun you had with your last railroad building project. One of these days, I have to build something like this too. My father had a huge HO train diorama in the cellar of our house. It was about 150 square meters and he was building it forever, but never finished it. I never liked his approach of sparse details and huge amounts of trains and always asked him, if I could high detail only one square meter of it to my standards, but that never materialized. Cheers Rob -
Another one bites the dust - Maschinen Krieger Friedrich - 1/20
DocRob replied to DocRob's topic in The Sandbox Group Build.
Thank you Paul, I´m sure the dabbling technique can be used on tractors, etc. The scale shouldn´t be too small, but 1/24 must be perfect. The MaK kits from Hasegawa and Wave are cheap in Japan, that´s where I ordered most. The apron, well, I actually never missed it . Cheers Rob -
Your 109 looks absolutely fantastic, Chris. I like the chalked and slightly toned down appearance a lot. I used chalks often with earlier builds and liked the "steerable" effect. The only downside, the chalk emphasized the borders of the carrier film slightly on the Balkenkreuze of the fuselage side. Cheers Rob
-
1:32nd scale Airco DH.2
DocRob replied to sandbagger's topic in LSM 1/35 and Larger Work In Progress
Fantastic as always Mike. I am eagerly awaiting the rigging phase, as I have a Fe.2b in my stash and more than once, I wanted to start, but shied away, because of the rigging. Cheers Rob -
Thank you for posting, PW, I knew most of the pictures from their Airfix boxes and they are instant classics. The Zero and the Helldiver, I can´t remember, but I had the B-29 in my clumsy fingers and made a blob of plastic out of the kit . Cheers Rob
-
Another one bites the dust - Maschinen Krieger Friedrich - 1/20
DocRob replied to DocRob's topic in The Sandbox Group Build.
You are absolutely right PW, I would be long out of the hobby, if there weren´t new challenges all the time. Sometimes, there is only an idea, about how a certain subject should look in the end as a guideline. The process is then developed according. I once build a 1/32 scale PZL P.11, only to see, if it is possible to paint a plane kit convincing only with brush and oil colors. Cheers Rob -
Another one bites the dust - Maschinen Krieger Friedrich - 1/20
DocRob replied to DocRob's topic in The Sandbox Group Build.
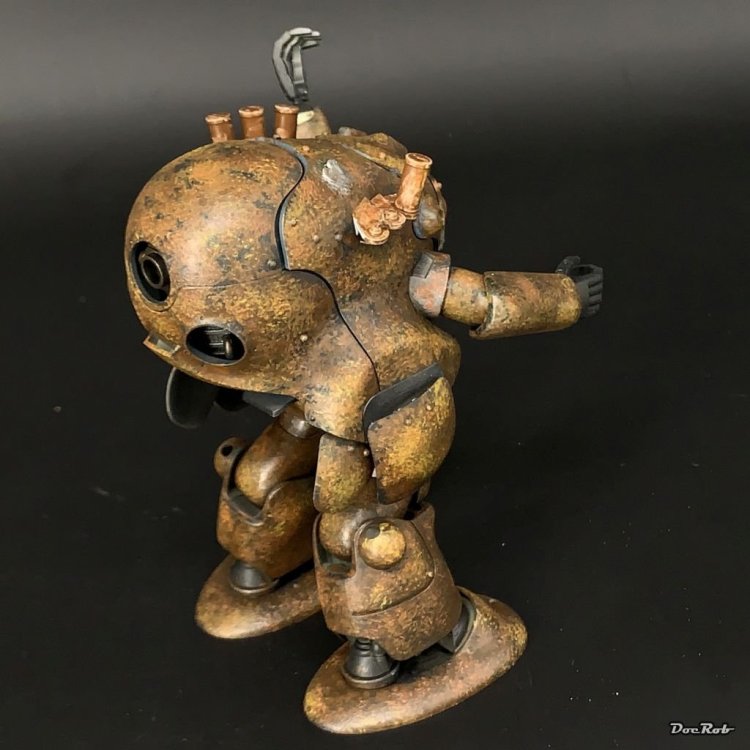
Yup, he has seen some action, therefore the need to patch him up a bit. Cheers Rob -
Another one bites the dust - Maschinen Krieger Friedrich - 1/20
DocRob replied to DocRob's topic in The Sandbox Group Build.
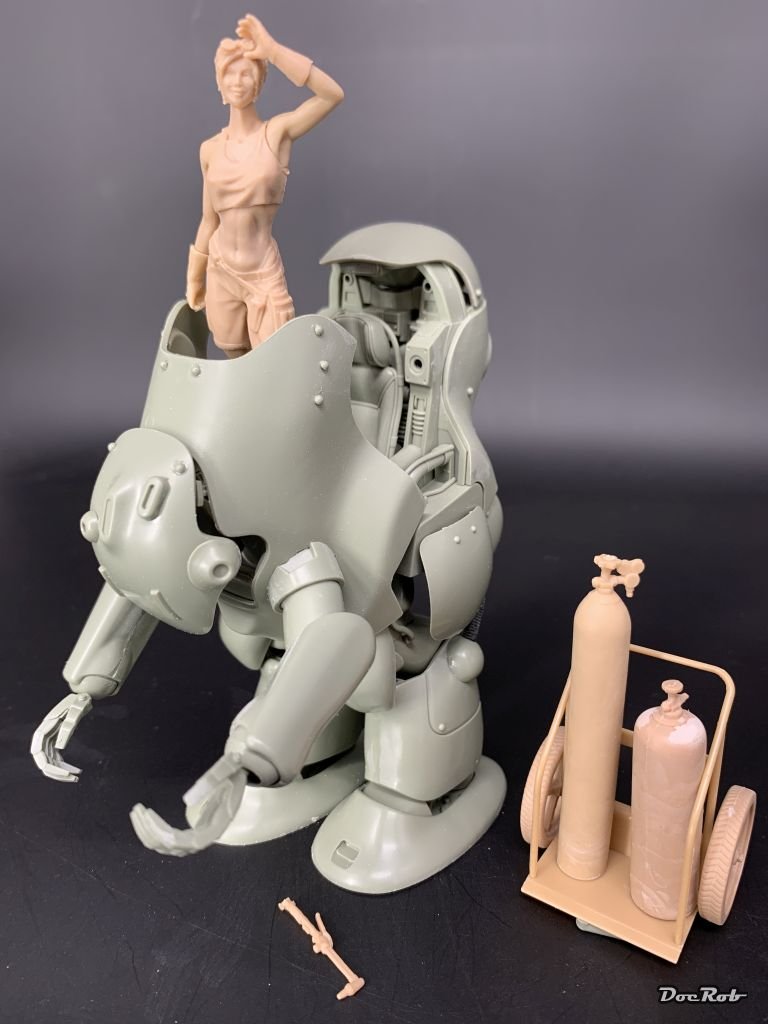
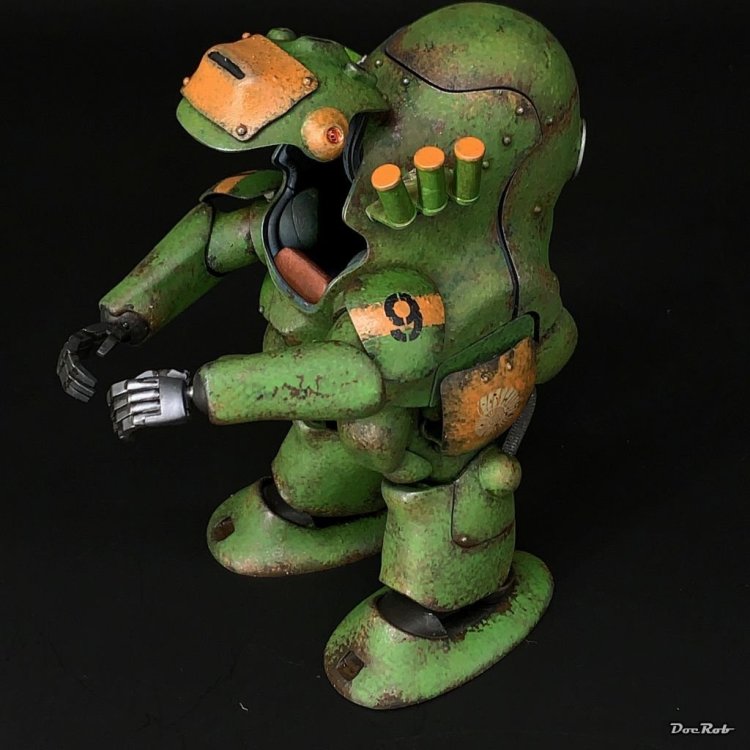
Thank you Mike. Like you, I always try to keep an open eye on new techniques, here in the forum or on YT or other places. I then try to adapt these techniques to my liking and abilities. I don´t like to be dogmatic about what skills I use to achieve a certain result, meaning, the result is important and somehow, I have to reach that goal. I always have a picture of a finished project in my head and that is my goal, no matter what. Certainly some projects are a bit to ambitious and stall or need to be altered, but that´s part of the game. I built my Duchess of Kingston wooden sailing boat sans rigging and also found, that many learned techniques from plastic modeling helped a lot, but the ultimate necessity is a quality approach, no matter what kind of modeling I do. Fantasy objects help to free yourself from to many fixed aspects and help widen the view, I ever found. What you said about building up thin layers, specially with figures is absolutely right, but I found it very hard to do it right with figures. The culprits are first me and my clumsiness, sometimes blotchy results with acrylics, which doesn´t blend like I want and with oils it´s a whole different game. One reason, the above shown AmmoKnight isn´t finished, is the figure, I planned to go with it. I tried my best to paint her up, but wasn´t satisfied. The welder girl was supposed to have welded the heart shaped patch onto the torn AmmoKnight, but this has to wait, till my skills are up to it. Cheers Rob
-
Another one bites the dust - Maschinen Krieger Friedrich - 1/20
DocRob replied to DocRob's topic in The Sandbox Group Build.
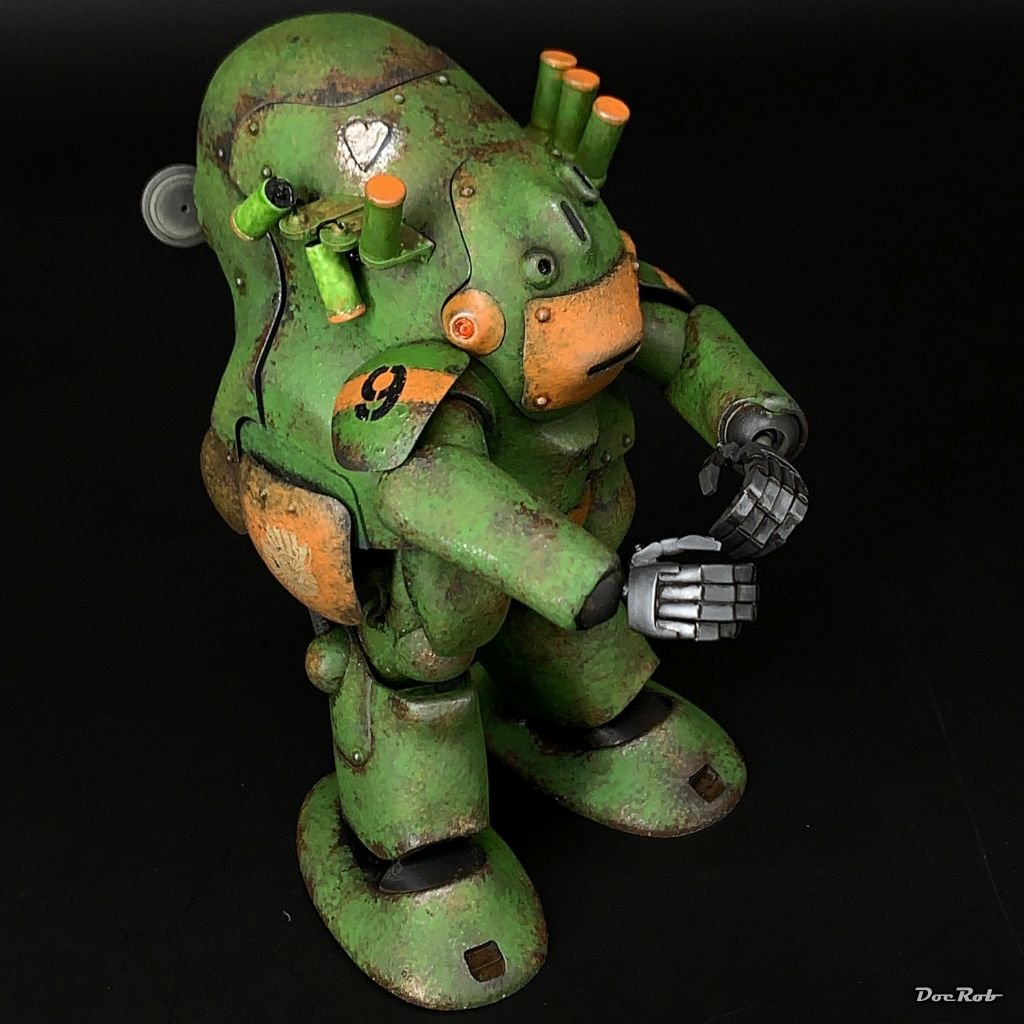
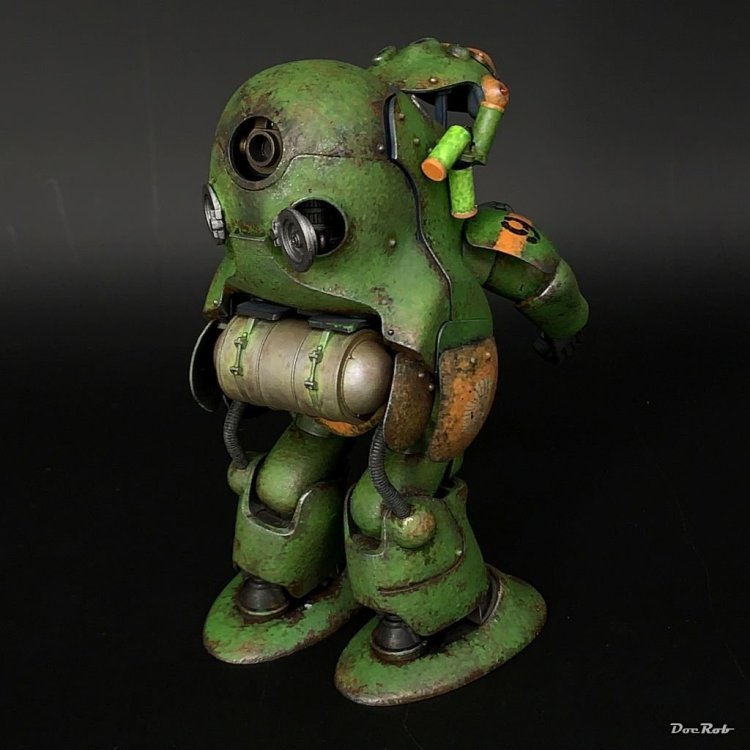
What Peter said about the spice of life, is absolutely true. I really like to learn something new with every build and to challenge myself somehow. I even started modeling projects, only as a canvas for a new technique. My first build out of the vague Ma.K universe (shown below) was only to learn a new technique of painting for example. The color on this Kampfanzug was only dabbed onto the suit in many layers to achieve a deep and uneven paintjob, with the weathering included. I could never build only planes or the umpteenth Tiger tank and yes, sometimes I first shy away from a demanding new project, but at a certain point of progress, normally the flow sets in and I enjoy the build. In so far Chris, I build what I want, without limits, I couldn´t really enjoy the hobby without that free spirit. Cheers Rob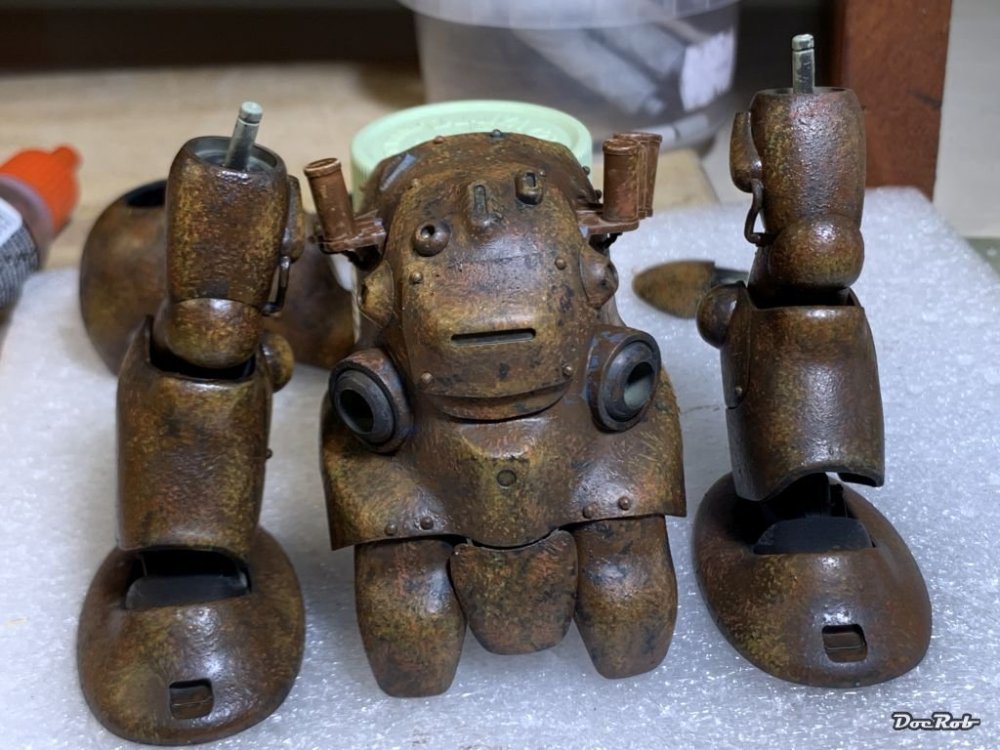


-
Wow, Peter, the level of detail, you show is amazing. I wouldn´t worry too much about the panels and how they fit. This thing is not built for Mach 2 speed, there were other design margins enforced. Cheers Rob
-
1/48 Eduard F2B in the Middle East
DocRob replied to PanzerWomble's topic in The Sandbox Group Build.
Looks promising with the Prym, PW. It almost looks like steel with the light color. Glad you jumped first into the pond and I can follow up with my first British WWI plane. Cheers Rob -
At the moment there is only the 87 edition available from Salvino´s, Peter. It seems, Monogram made an `84 Vintage NASCAR – Salvinos JR Models Cheers Rob
-
Another one bites the dust - Maschinen Krieger Friedrich - 1/20
DocRob replied to DocRob's topic in The Sandbox Group Build.
Thank you Peter, I get bored very easily with repetitions, so for me changing subjects, scales and materials is a must to keep on. As most times, I have a picture in my head, how everything should look in the end, let´s wait, if I can fulfill that. There still is a maybe option with the planned dio in form of a sinister looking Neuspotter, but no details as of yet . It´s a bit of a shame to park the Cobra, but on the other hand, time is spars at the moment and the Cobra needs full attention. Cheers Rob -
Another one bites the dust - Maschinen Krieger Friedrich - 1/20
DocRob replied to DocRob's topic in The Sandbox Group Build.
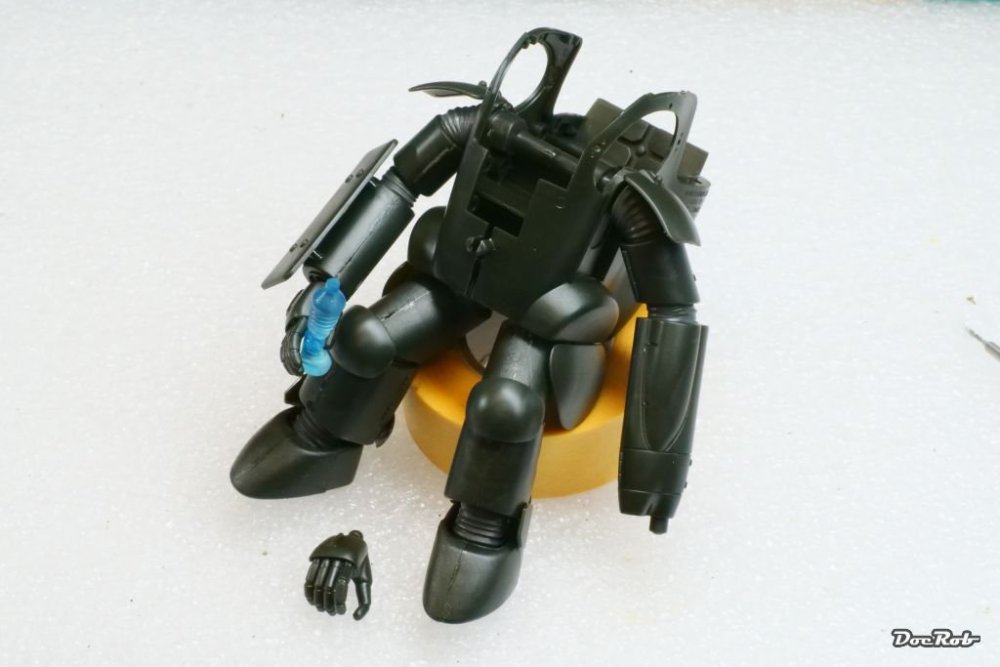
Well, it´s about time to actually do something with my planned Kampfanzug. I built up arms and legs and parts of the body, which is only fit loosely, to determine, how to fit the extremities for later positioning. The fit of the kit is very good so far and the limbs are connected via vinyl elements to keep everything moveable. I got two different left hands to choose from, but found this one perfect, to hold the squeezed empty PE-bottle. I have to plan the painting of the interior and figure - ahem - the rest of it, to be precise and started to mask the side windows, which unfortunately have tobe mounted at a very early stage. That said, many parts are intersecting and depending on the right sequence to be build in. The outer side of the windows is protruding, so I adhered a double layer of Tamiya kabuki tape onto it, sharpened the contour with a fingernail and cout around with a fresh blade. One layer was left on the outside, the other went onto the inside of the opposite pane and vice versa. Inside and outside masking done. Cheers Rob
-
Good, that the printing of the landing gear worked this time with the reinforcement inserted. Thank you for the detailed description of your printing process. I may have to look into that myself. It´s not that I´m completely out of the dark, as I produced 3D animations in Lightwave, when I was young. I had a "real" 486 processor by this time and rendering the results took weeks. I learned to design 3D objects then, but there was no need for accuracy, it only had to look good. Cheers Rob
-
Sorry Chris, I meant the `72 Charger, that is the one I have. Cheers Rob