DocRob
-
Posts
7,045 -
Joined
-
Last visited
Content Type
Profiles
Forums
Events
Gallery
Everything posted by DocRob
-
There is not only Gundam out there, to leave the trotten path, Mike. You could also try Maschinen Krieger. There are tons of kits out there in different scales, but mainly in 1/20. Main producers are Hasegawa and Wave, but there are many other brands available. Most are 1/20 scale, which give a lot of freedom, when it comes to painting experiments, others are in 35 scale, which naturally allows some bashing and dio opportunities. The mainstream kits are of the same quality, Carl described. i once build a Hasegawa AmmoKnight as a stipple on brush painting experiment and loved the scale and the kit. I have some more in stash and welcome the variety. Cheers Rob
-
Only some days a bit off the forum and bang, your beautiful Corsair is nearing the finish line, Peter. Your paintwork is perfect as ever, I love your soft edge camo. I feel with you about the navy colors. I think for my Corsair and Hellcat builds, I researched and tested more colors than ever before. Recently I mainly use, what AK offers with their Real Colors, which mostly look about right. Generally, I think, plane´s colors weren´t too unique in the field, depending on the theater, the age, the maintenance and color availability. Pictures of the time are sometimes hard to read and leave a lot of room for interpretation. Lighting and refraction are also to be considered. Decaling looks spot on and I have another reason for your first misting clear over the decals. At this late stage of a build, I wouldn´t like to ruin my decals with hot color / thinner mix. A misted coat dries fast and reduces the risk of the chemicals affecting the decals. Cheers Rob
-

What is on your bench right now ? Share a picture :)
DocRob replied to Martinnfb's topic in Modelling Discussion
1/35 leaves a lot of possibilities, Peter... Cheers Rob -
What is on your bench right now ? Share a picture :)
DocRob replied to Martinnfb's topic in Modelling Discussion
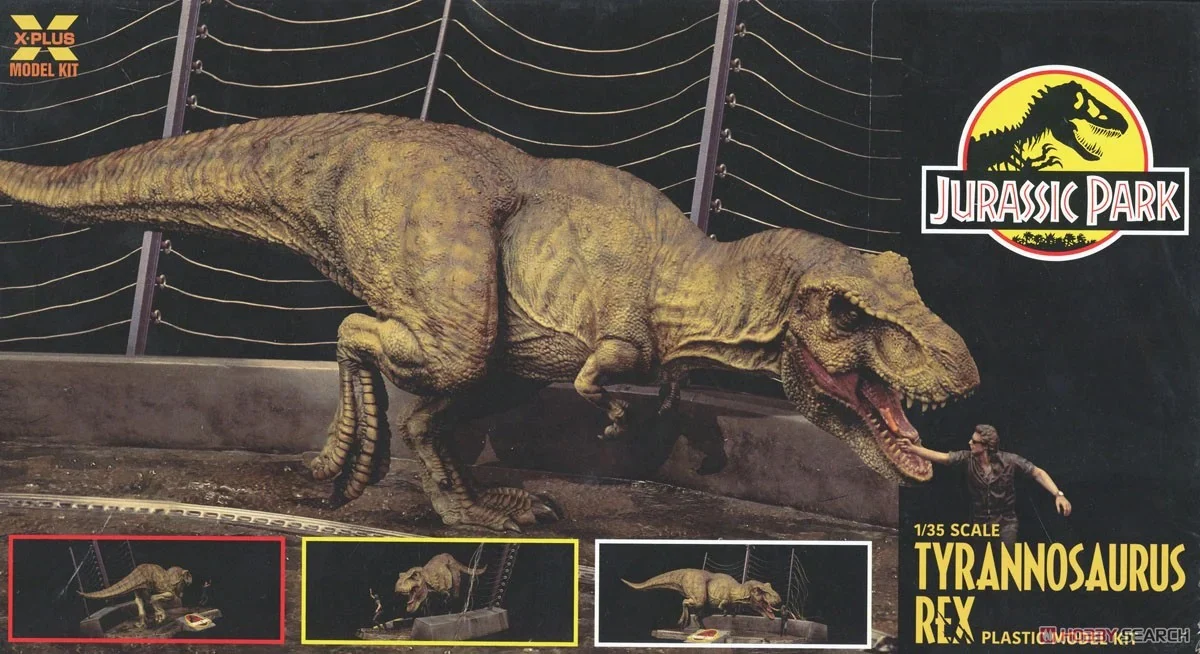
I will enter the dinosaur universe as well soon. X-Plus from Japan produces this beauty in 1/35, but I will wait for the even more sexy Spinosaurus. Cheers Rob

-
Nice collection Carl and lots of diversity. My production was a bit low this year, but some of the projects were really time consuming. Cheers Rob
-
What did you find under the Christmas tree?
DocRob replied to Martinnfb's topic in General Discussion
I´ve two of these still to build along with a bunch of goodies. I would fancy the Mig boxing with Indian markings, they are so colorful. They look like great kits. Have fun with your two arch enemies Gus . Cheers Rob -
What did you find under the Christmas tree?
DocRob replied to Martinnfb's topic in General Discussion
My only reason for hesitation is, I don´t like the turbo era engines. I´ve built the Renault RE20 and the engine is somehow uncool. I´ve no love left for these minimal ccm max turbo blast type of thingies, but that would be the same with the announced MP4/4 Nice catch with the Lancia, Carl, a true icon, but I would have gone white. Cheers Rob -
What did you find under the Christmas tree?
DocRob replied to Martinnfb's topic in General Discussion
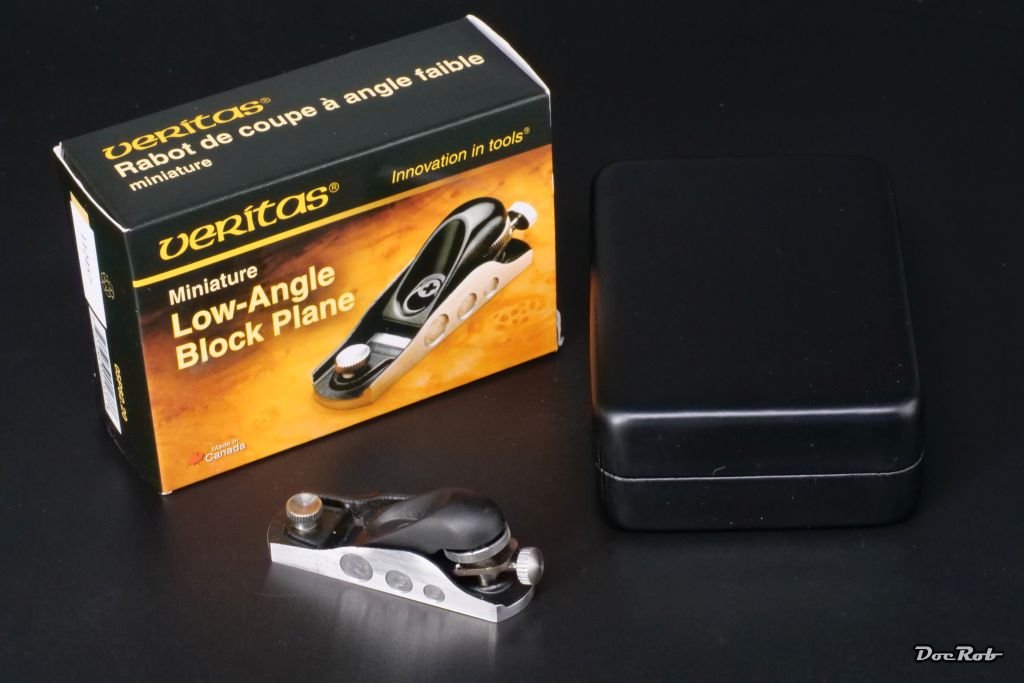
Not a lot modeling wise, but may help myself to the 1/12 Nunu Lotus 99. We had a quiet Christmas with our son, great food and Barbecue and some tiny wave surfing and great snorkeling. One little gem for me showed up on our present table, a Veritas mini Block plane, which hopefully will ignite my urge to stay focused with my wooden model ship builds. Cheers Rob
-
Sorry, no FB and will never have. Cheers Rob
-
Zoukei-Mura P51D Mustang SWS No 4.
DocRob replied to Bomber_County's topic in LSM 1/35 and Larger Work In Progress
Don´t throw them away Phil. I like the Xtreme Metals a lot, most of them spray very well and are more robust than Alclad. My only issues were with Titanium, which didn´t adhere very good. Alclad chrome looks a bit better than Extreme Metallics chrome, which I tested a lot with my Renault RE20 build. I recently sprayed a NMF 1/48 Lightning with Alclad´s polished Aluminum, which also is a bit better then Extreme Metals, BUT, I only used the Alclad, because I deliberately chose a paint scheme, which omitted masking after the NMF. In the WIP, I described my testing and base coating with Tamiya LP gloss black and the application of polished aluminum. Like Peter suggested, I keep the air pressure relatively low and if you go for a high shine finish, very fine layered application is the way to go. You have to reach the point, where the blackness of the base barely disappears. Flooding is no option for high shine finishes, no matter if it´s Xtreme Metal or Alclad. The only real letdown with Extreme Metals from AK is the black base, which can ruin a model completely. I threw my bottles away and will never use them again. Cheers Rob -
I´m just back from Christmas surfing with our son, tiny waves, warm water and cold rain
- 2,035 replies
-
- 4
-

-
- car related stuff
- anything about cars
- (and 6 more)
-
Zoukei-Mura P51D Mustang SWS No 4.
DocRob replied to Bomber_County's topic in LSM 1/35 and Larger Work In Progress
I´m thinking the same like Carl, Xtreme Metal colors are more durable than Alclads, but I wouldn´t trust them as a base for extensive masking. But what´s even worse is the Xtreme Metal black base. I had only bad results with this stuff. sticky forever and just a bad base and possibly the cause for your bad results with the NMF. I would strip the stuff, using thinner and start from the beginning. I binned my Xtreme black base and use Tamiya LP gloss black instead, which is perfect for the job, sprays well, dries fast and is durable and truly high gloss. I thin it with 2/3 of leveling thinner. Cheers Rob -
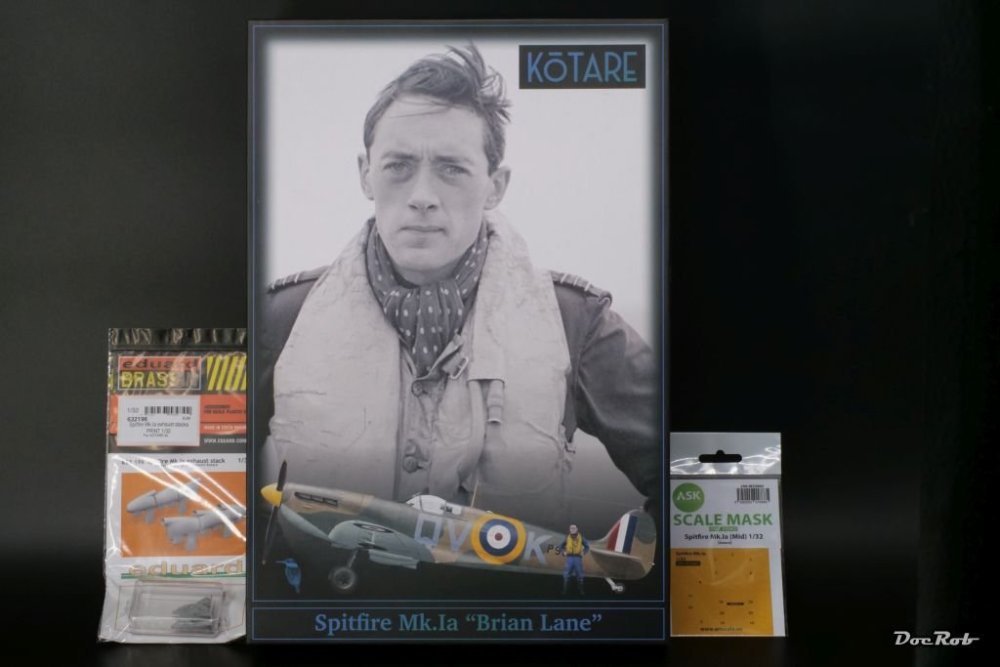
@Spitfire beat me to it, my first 1/32 Spitfire and after browsing through the box content, I have to say, I´m very impressed with the quality of molding. The low parts count should make for an easy build with half of the total effort going into the cockpit. The kit seems a bit pricey for a plane sans engine, but I appreciate the seemingly well researched background, great manual, Cartograph decals and in my case, resin figure I will build it oob with the only addition of 3D printed exhausts made by Eduard. I will use AK Real Colors and may try to spray the camouflage freehand, using my new Infinity Giraldez´s edition with it´s spraying guide. Cheers Rob
-
Take care with Mr. Color GX100 mixed in plastic jars with leveling thinner. I had very bad results while spraying, with kind of a frosting effect. I guessed, it had to do with using a plastic jar for mixing, because after using a glass one, it sprayed beautifully. I never encountered similar probs with lacquer colors, only with the clear gloss GX100. Cheers Rob
-
Exactly my thinking Hubert, sacrilege, I will burn in hell, if I dare and I´m still not decided, but hell ain´t a bad place to be and this conversion is somehow so cool, that hell freezes over . It´s only plastic in the end, I won´t do something like that to a real one. Cheers Rob
-
McLaren MP4/6 Ayrton Senna Fujimi 1/20
DocRob replied to DocRob's topic in LSM 1/35 and Larger Work In Progress
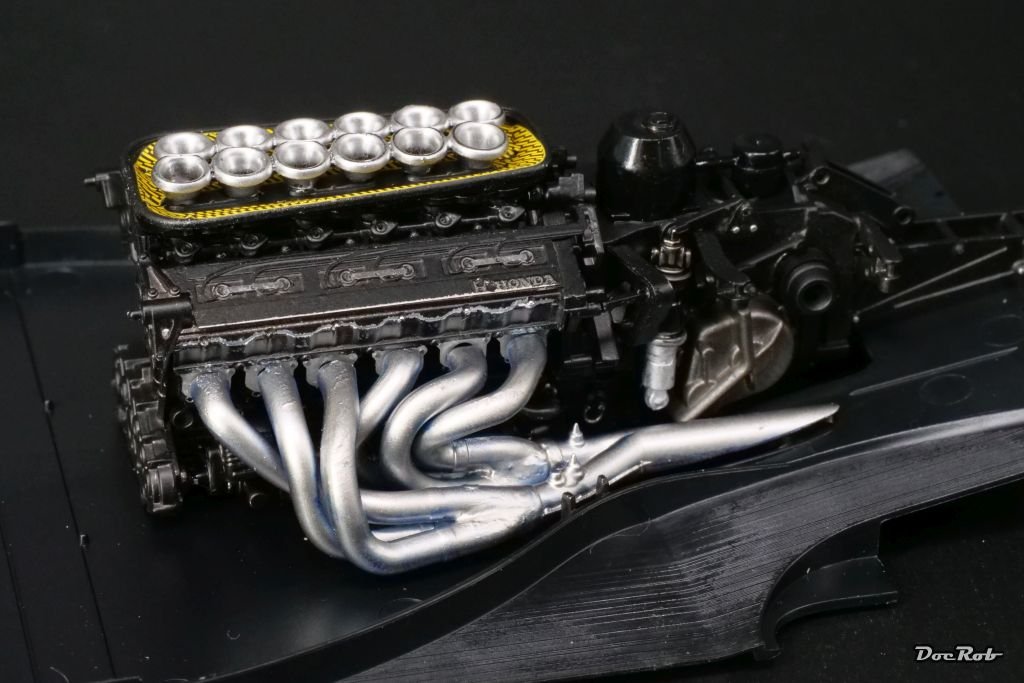
Thank you Carl and Peter, the exhausts were even worse with the 1/12 Tamiya Renault, it seems, it´s the phase of the build, which you have to master with F1 kits. With airbrushing the different shades, I went more for depth, then for heat coloration. The pictures of used engines didn´t show many heat induced colors, but a brownish silver look and that was what I tried to reproduce. If there is not a lot of heat color staining, it is a sign for well designed components without too many heat traps involved. Cheers Rob -
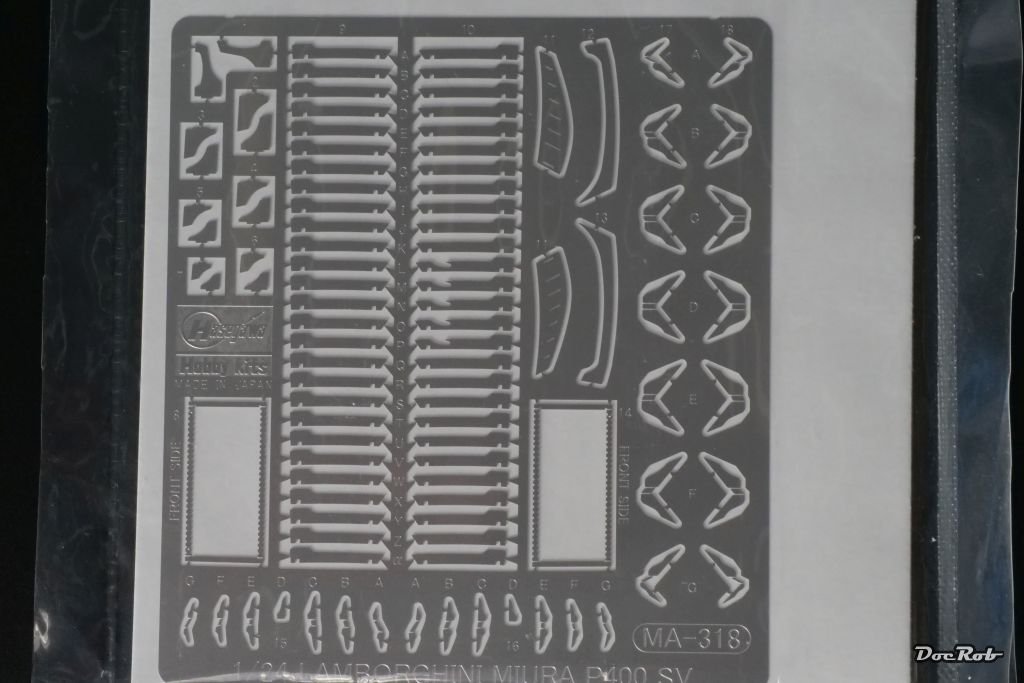
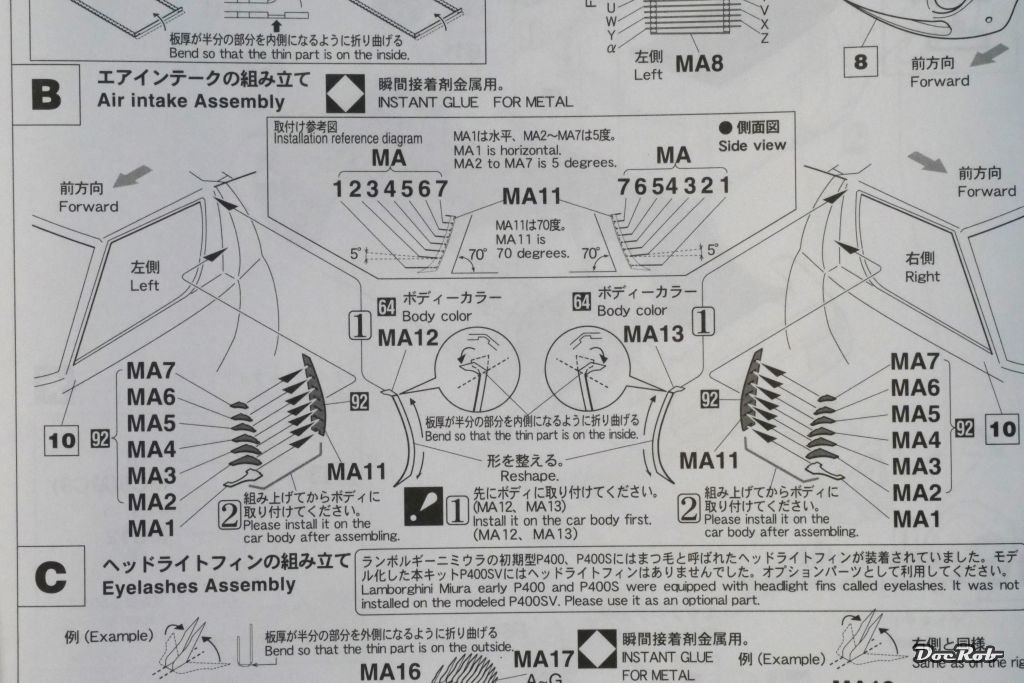
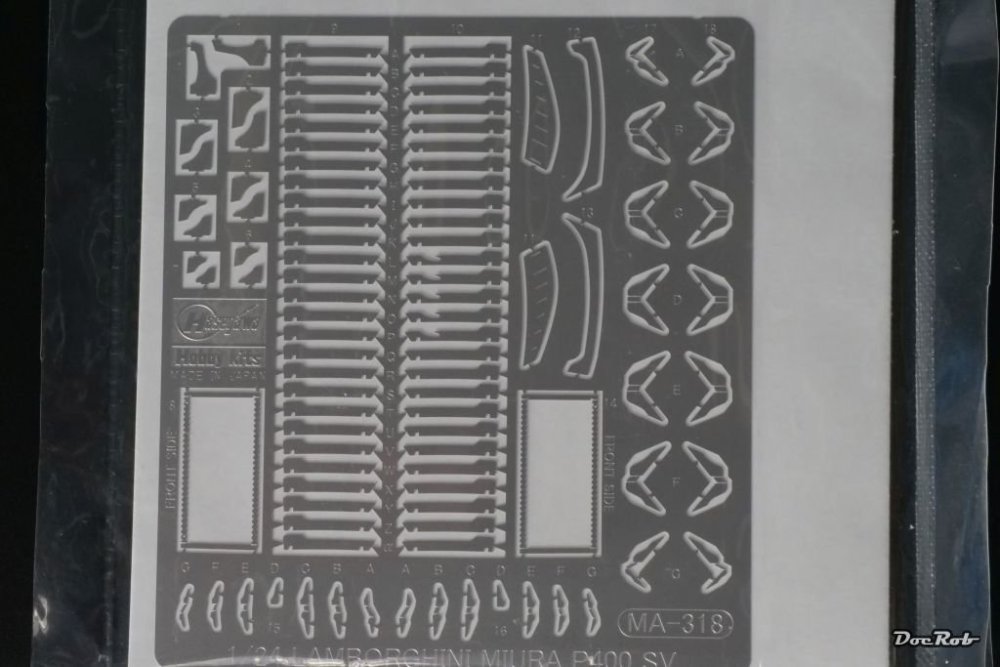
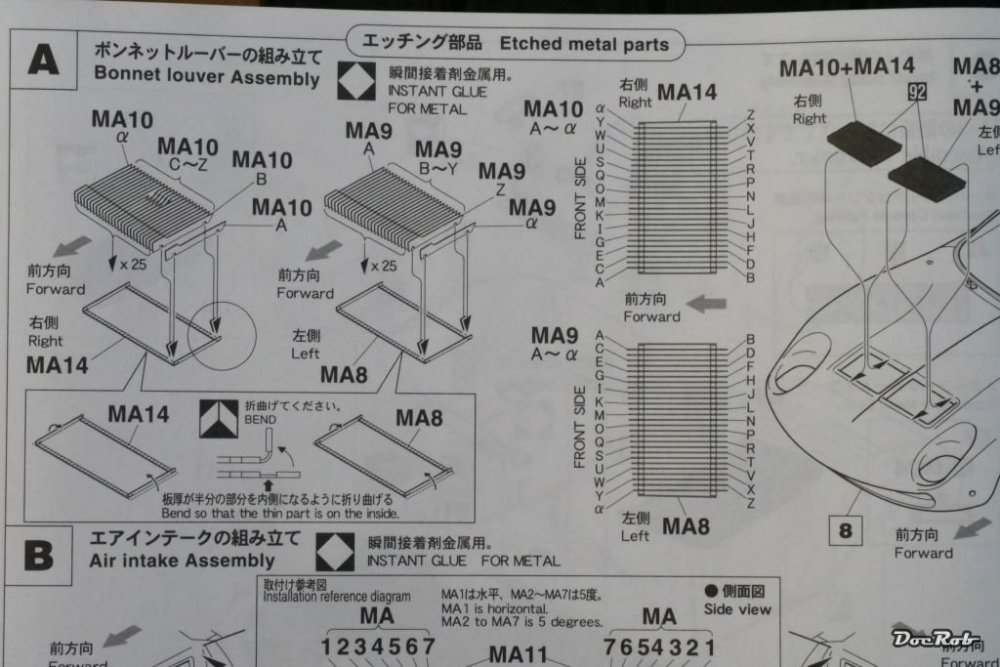
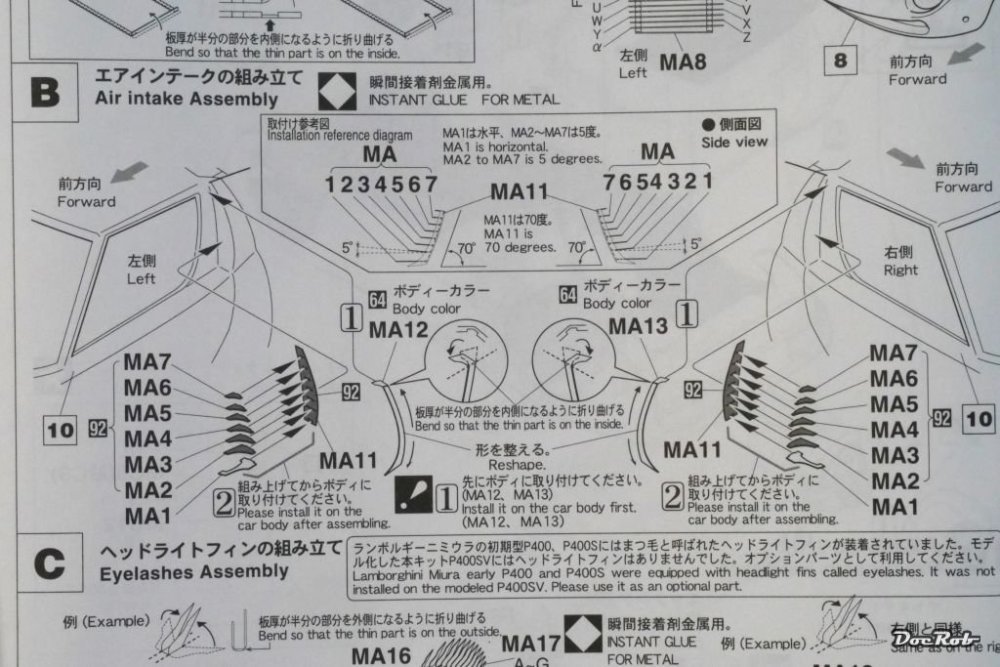
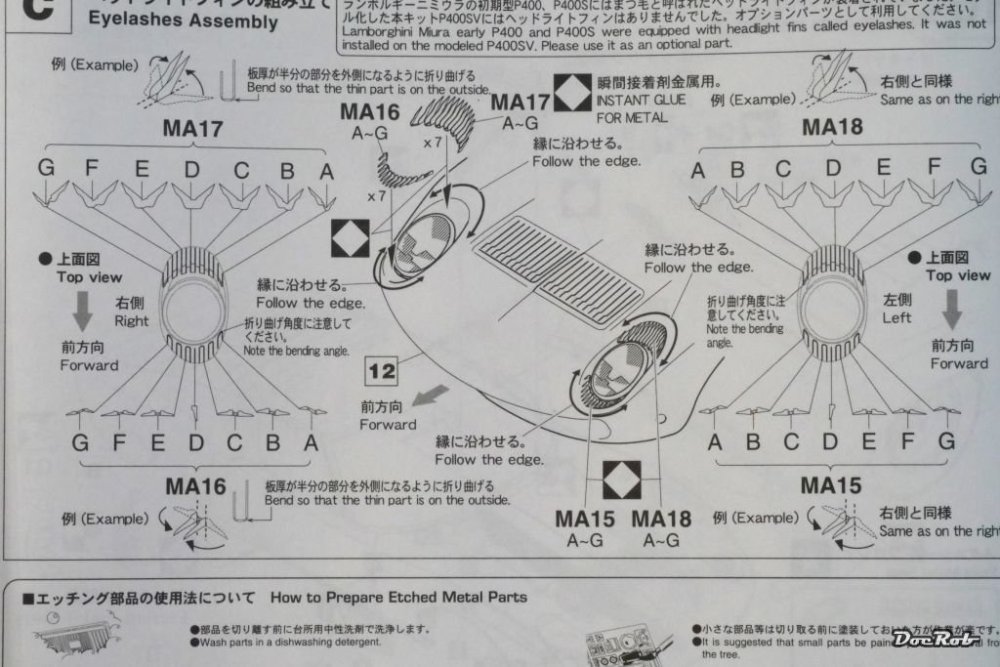
You´re welcome Carl. I guess, the PE is designed by Top Studio, like with other Hasegawa car kits. And this is the assumed fiddly process to put all these grilles together: Cheers Rob
-
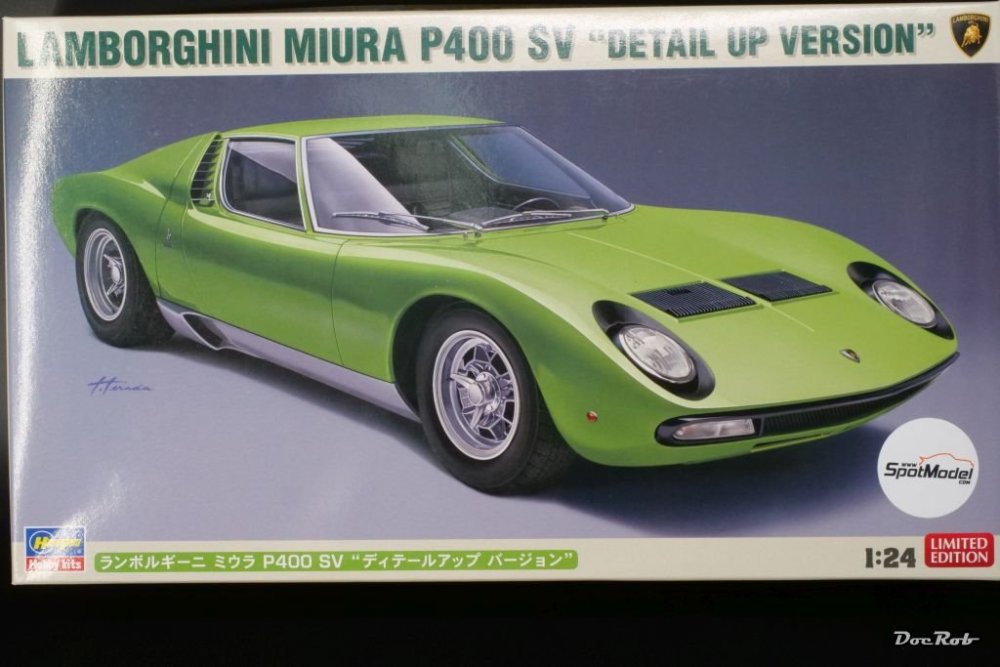
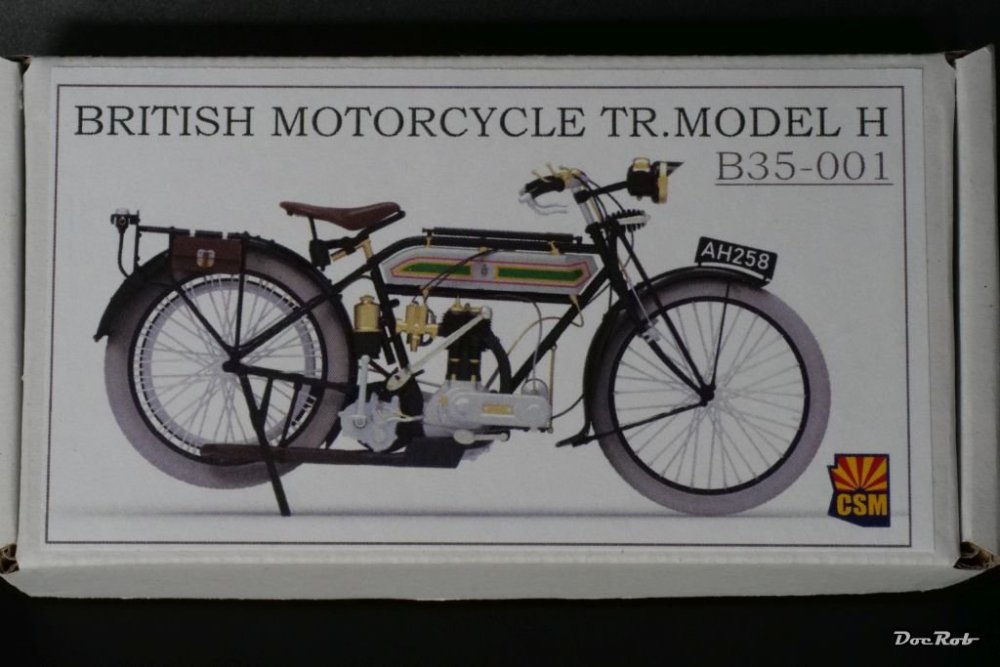
This bike kit by CSM is a gem. It has the finest spokes, I ever saw on a model kit. The parts are 3D printed and luckily they are mostly cleant up, I hope, I doesn´t blow parts away, while airbrushing, this is extremely fragile. To test my paitience even further, I received the Hasegawa Lamborghini Miura kit, along some Streetblister colors. This edition of the kit has oll the venting grilles made up from tiny PE parts, not only theese on the hood and behind the doors, but also the intakes around the headlights , we will see, how this works out. Cheers Rob
-
McLaren MP4/6 Ayrton Senna Fujimi 1/20
DocRob replied to DocRob's topic in LSM 1/35 and Larger Work In Progress
This kit is fighting me back all the way. I start to think, I´m the problem and this doesn´t feel good. Oh yes, this should be a mojo restorer feelgood project, Argh . Like always with my F1 builds, the exhaust assembly was a pain and I didn´t help myself, by adding the PE seals. The engine is not glued into the body pan, I only added it for the exhaust´s alignment. The exhausts were ´puttied´with CA and painted with AK Extreme Metals colors. First stainless steel, then metallic blue for the shadows and finally with pale engine exhaust for general highlighting. The effect isn´t too visible on the photo, but looks stainless to my eye on the kit. Cheers Rob
-
McLaren MP4/6 Ayrton Senna Fujimi 1/20
DocRob replied to DocRob's topic in LSM 1/35 and Larger Work In Progress
Indeed the world has changed a lot, Peter. But to me it´s not all bad. On my tiny island, the problem would have been the same twenty years ago, albeit without the possibility of online shopping . Like you, I miss the stroll to the LHS a lot and I do this, when I´m visiting Berlin. but here there were no LHS and there still are non. The nearest one, a tiny shop on my neighbor island went awol some years ago. In general, I have good experiences with online retailers, mostly good prices and service, but like you said, it can be difficult to receive all the goods from one hand. I have lists for planned projects, where I see, what I need and can buy it in advance, when I shop for other things. I have to plan even more, because we buy VAT free under 150€. The VAT is not the problem, if you shop for more, it´s the fees, which make it unattractive. On the other hand, to me this is not only about modeling and counts for all other goods, which need to be `imported`, it became normal and is the price for living a bit more remote. I´m willing to pay this price, but sometimes, it can be a pain. Cheers Rob -
Great work on your Fury, Carl. I just caught up and learn about your very effective trouble shooting. She will be a beauty. Cheers Rob
-
McLaren MP4/6 Ayrton Senna Fujimi 1/20
DocRob replied to DocRob's topic in LSM 1/35 and Larger Work In Progress
Thank you Carl, I tried to use the non removed plating to my advantage, after the frustration. I used a toothpick to scratch the black away for silver details and used different coverage layers of black for adding some depth to the mostly black engine. The engine looks more worn on the pics for whatever reason, I´m after a 90% new look with the McLaren. I can feel your happiness about having a LHS in your area. I enjoyed that a lot, back in my Berlin days. Here, I order stuff sometimes, and when it arrives, I sometimes half forgot what I ordered . Projects involve a lot of planning ahead and a well stocked cave on my island, nothing is more mojo draining than waiting for a jar of needed color for two or three weeks. Cheers Rob -
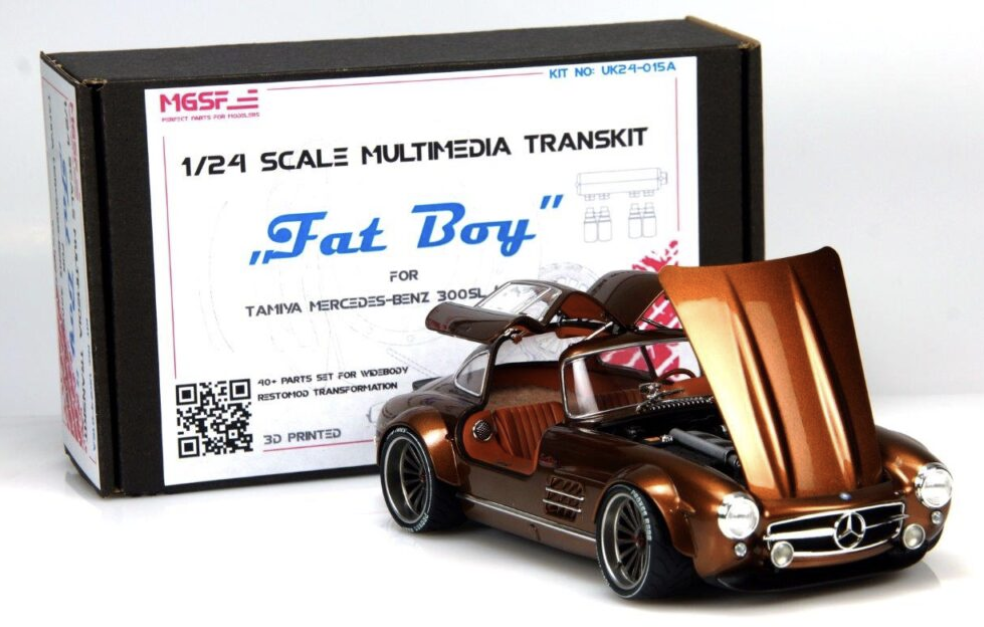
The SL 300 will be build more or less oob or using the Fat Boy conversion from MGSF, which looks loke this: Cheers Rob
-
1:32nd scale Hanriot HD.1
DocRob replied to sandbagger's topic in LSM 1/32 and Larger Aircraft Ready for Inspection
Very nice and skillfull build Mike. There was some extra work involved, but it payed. The little dio is an eyecatcher. Cheers Rob -
McLaren MP4/6 Ayrton Senna Fujimi 1/20
DocRob replied to DocRob's topic in LSM 1/35 and Larger Work In Progress
No Peter, I will look in my stash, if I had to buy a new jar, it will took me two weeks to get here minimum, that´s too slow, even for my pace at the moment . Cheers Rob