
krow113
-
Posts
927 -
Joined
-
Last visited
Content Type
Profiles
Forums
Events
Gallery
Everything posted by krow113
-
Thanks Hub! Thanks Doc! ...and whats up Doc!? No ' Too bad you cant see it" comments !? LOL!!
-
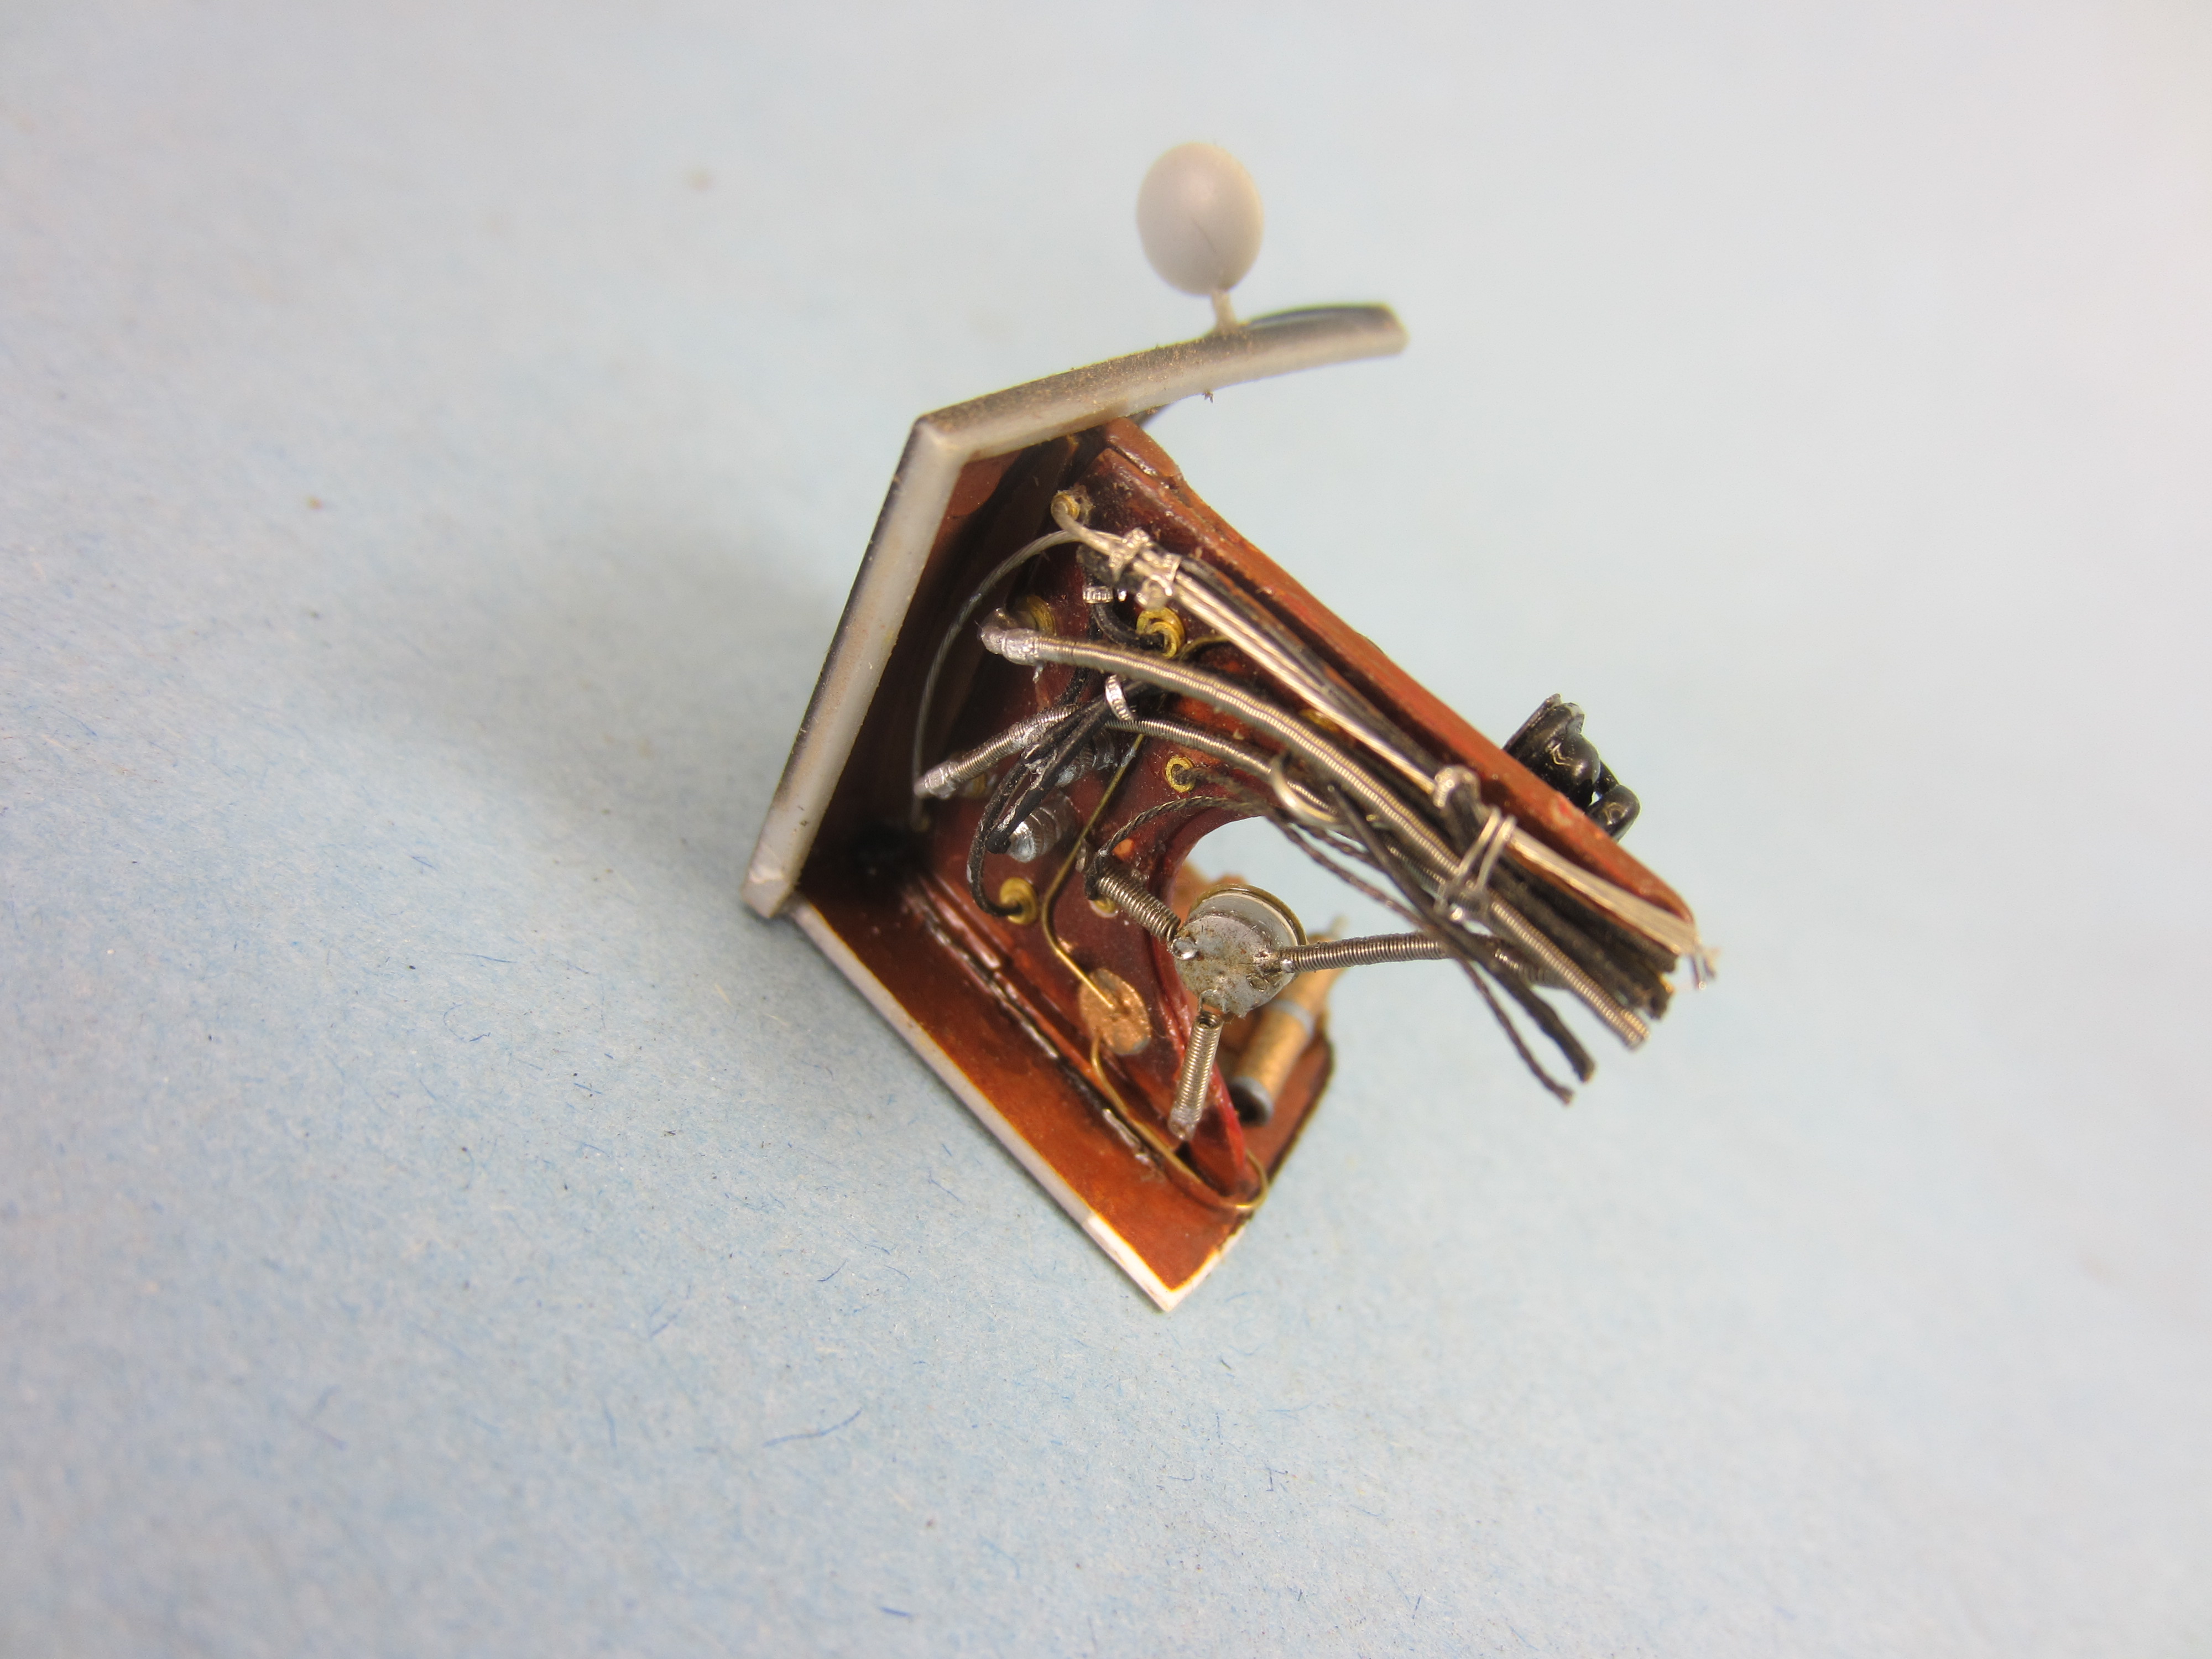
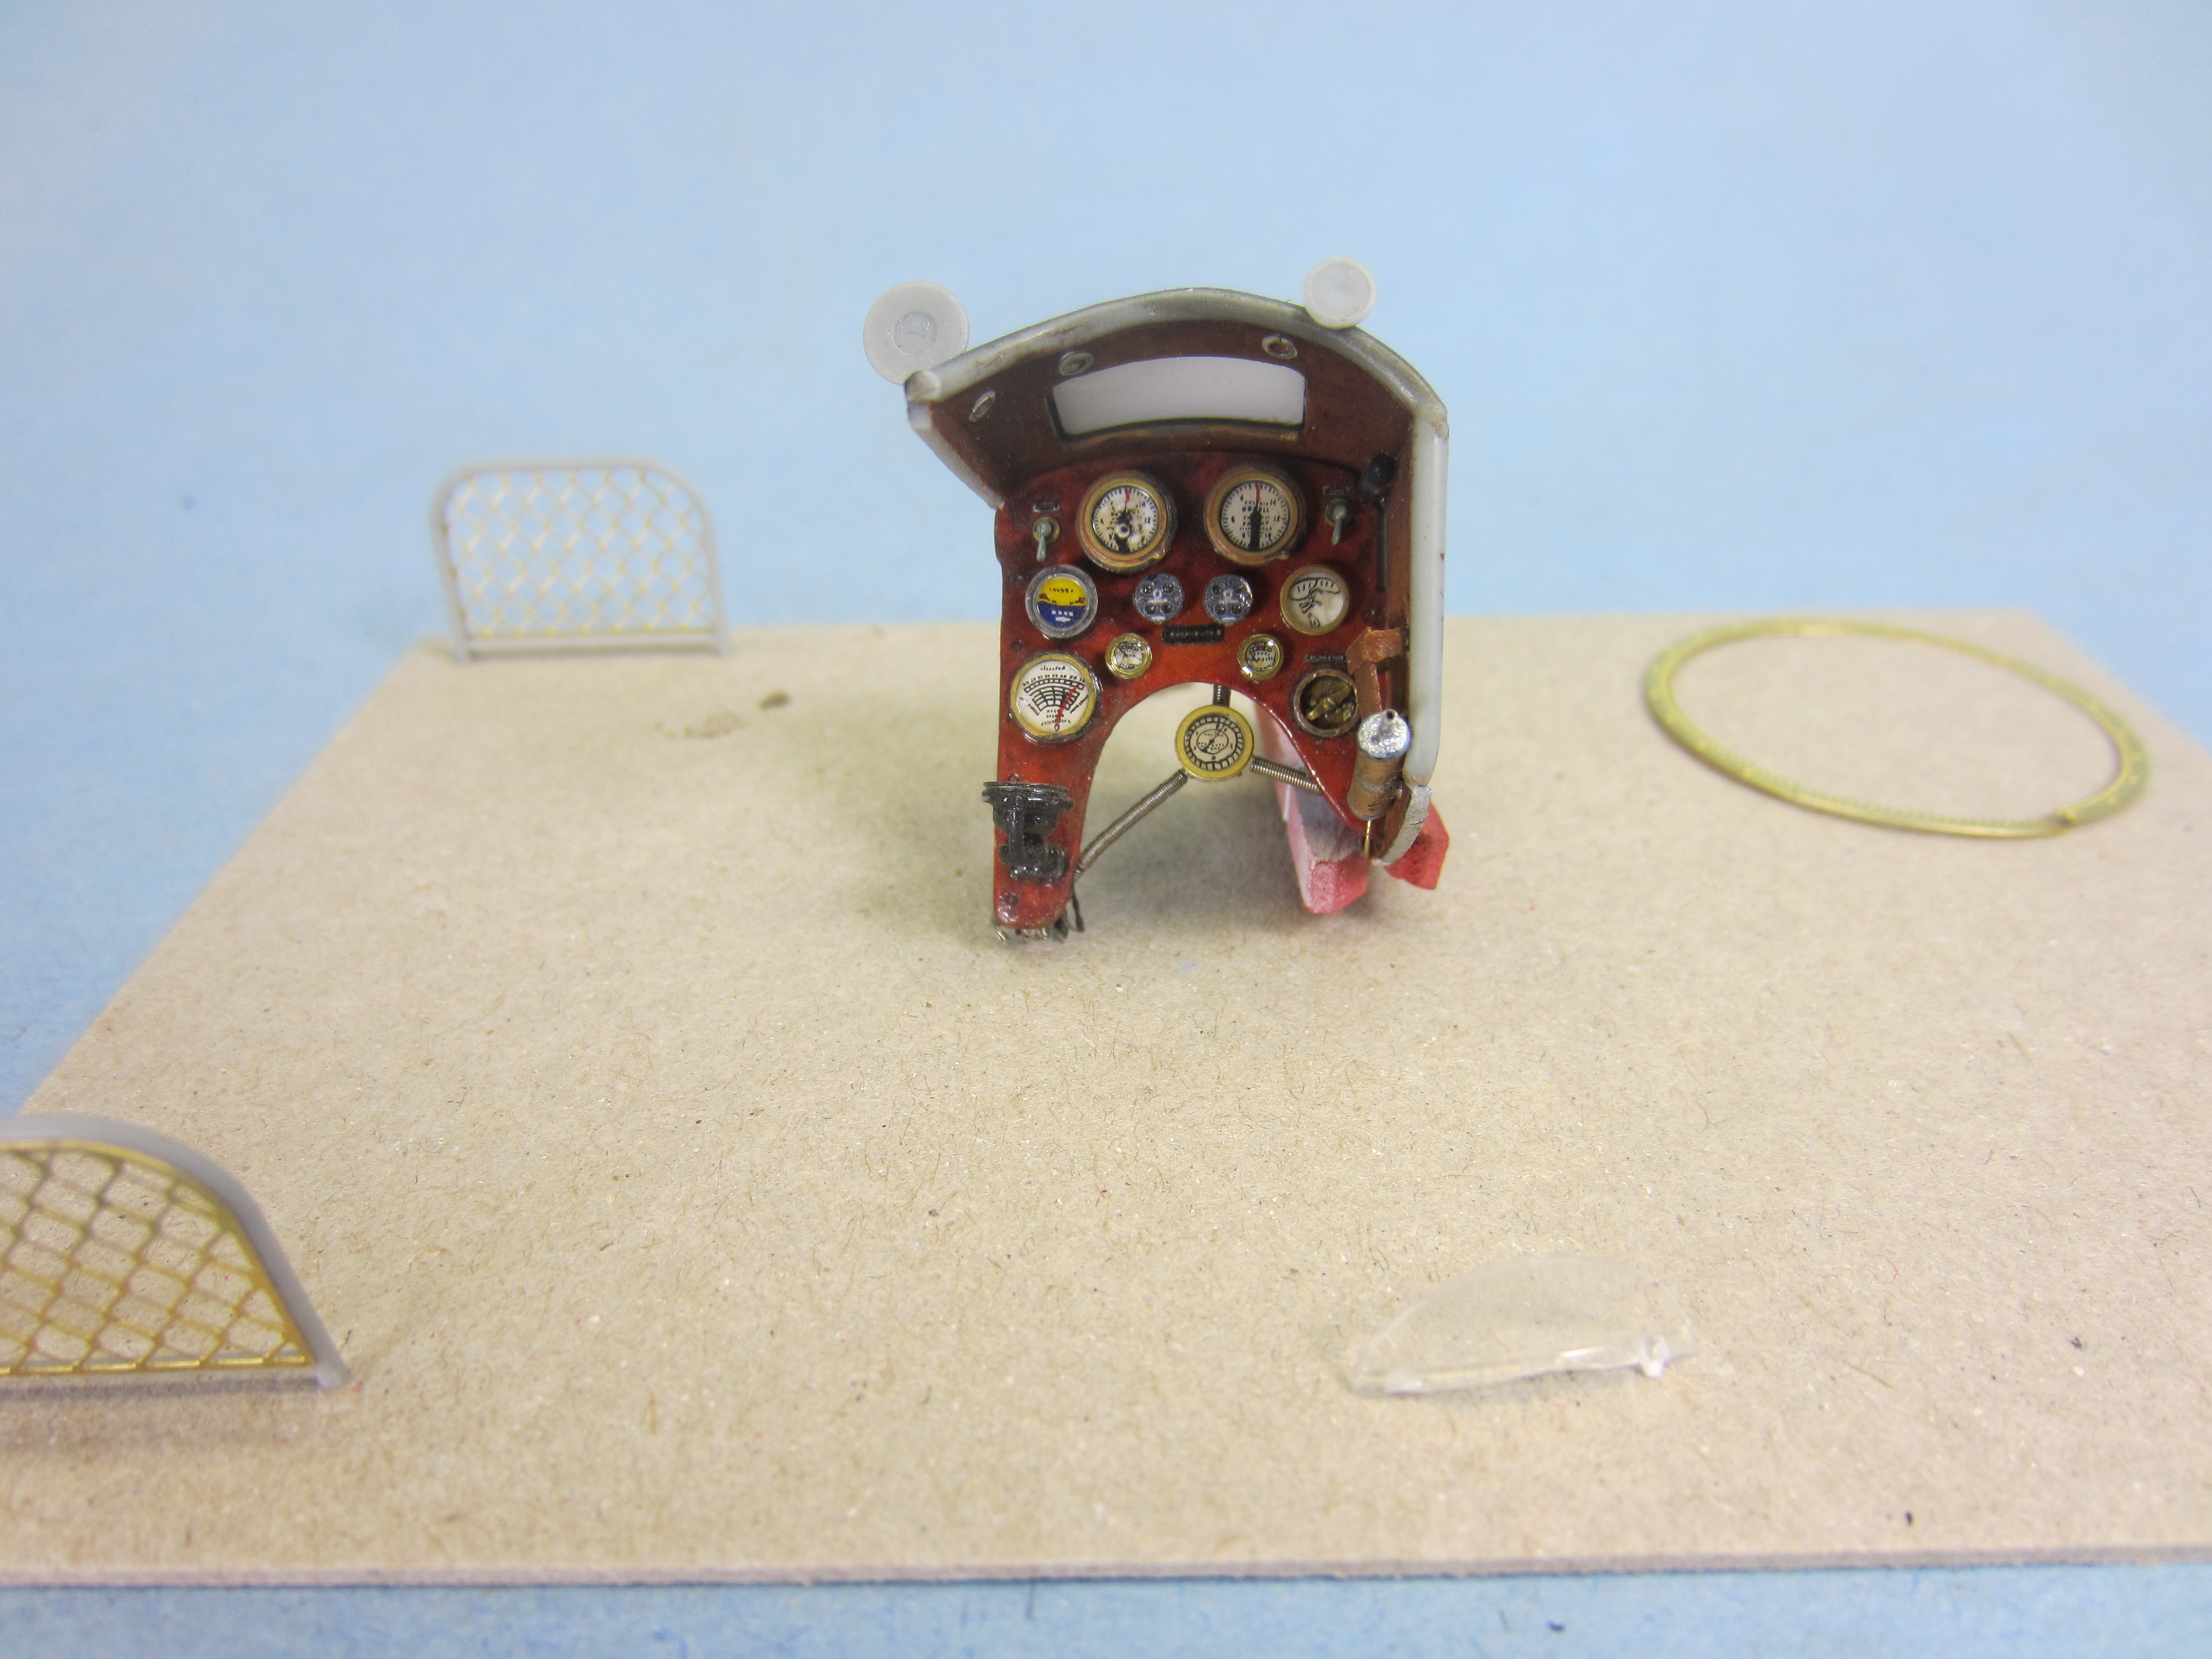
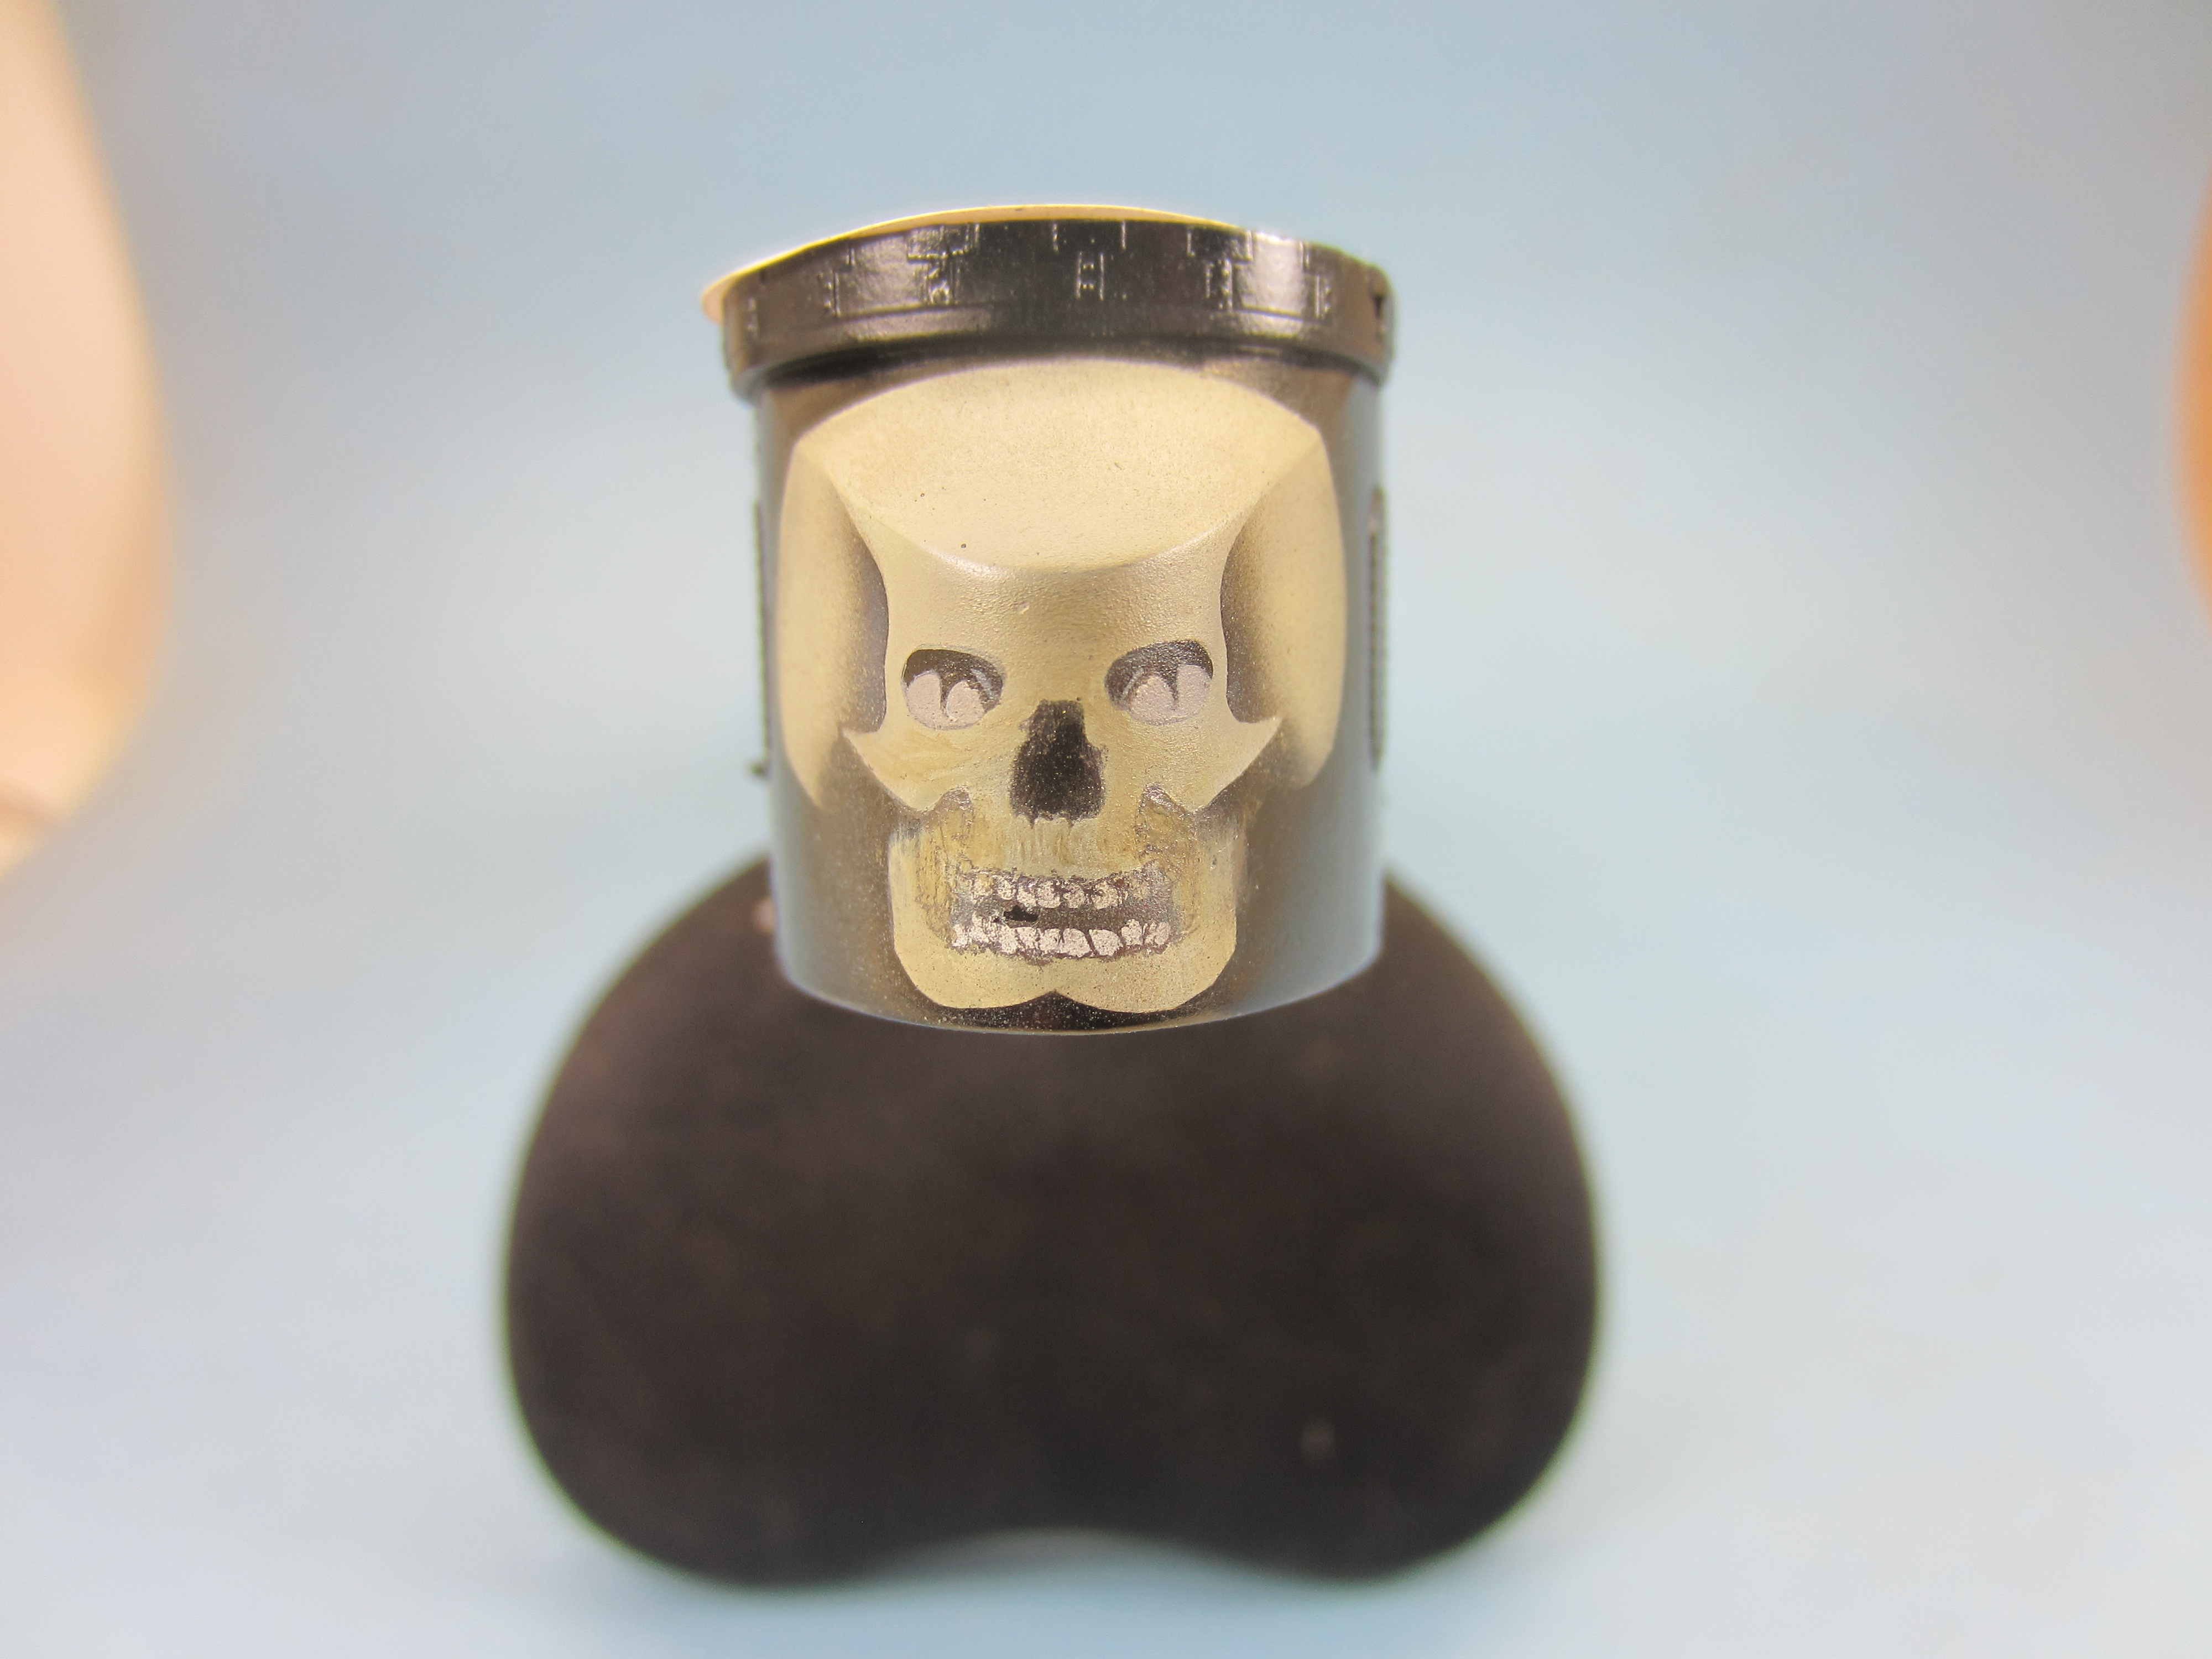
Thanks GAz. A few more... These pics help me to see whats missing too. Like the pump handle ,a part lost almost right out of the gate Additions include lighting , map 'basket' , toggles and piping, and everything on the back , this piece will be removable for inspection. The piece is perhaps a cube 1.25" in size.


-
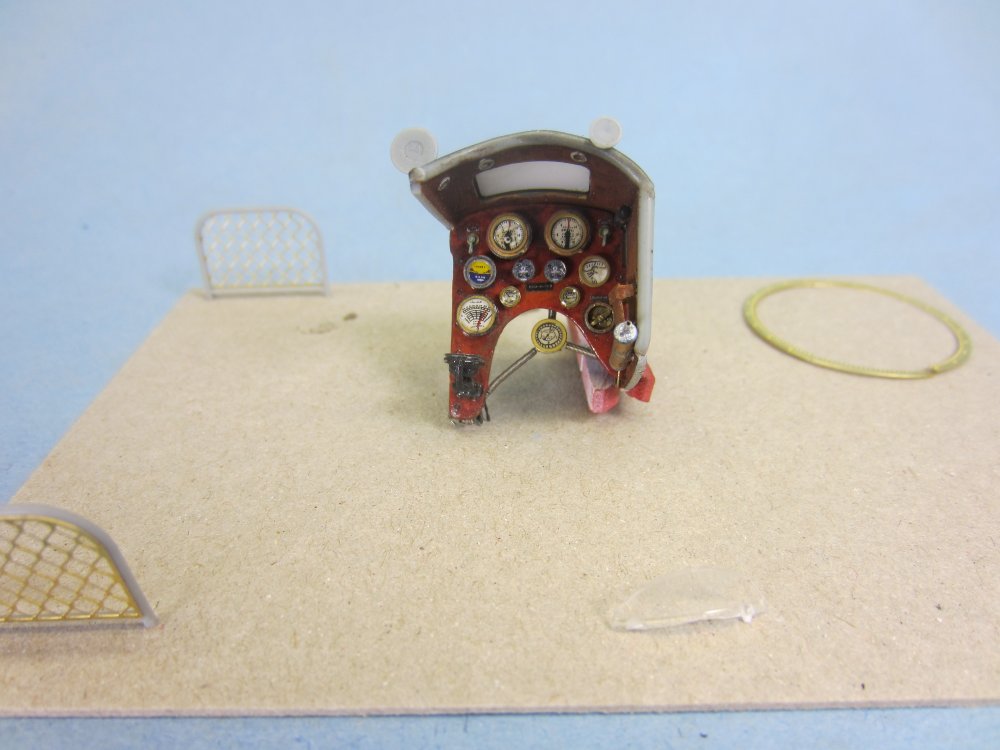
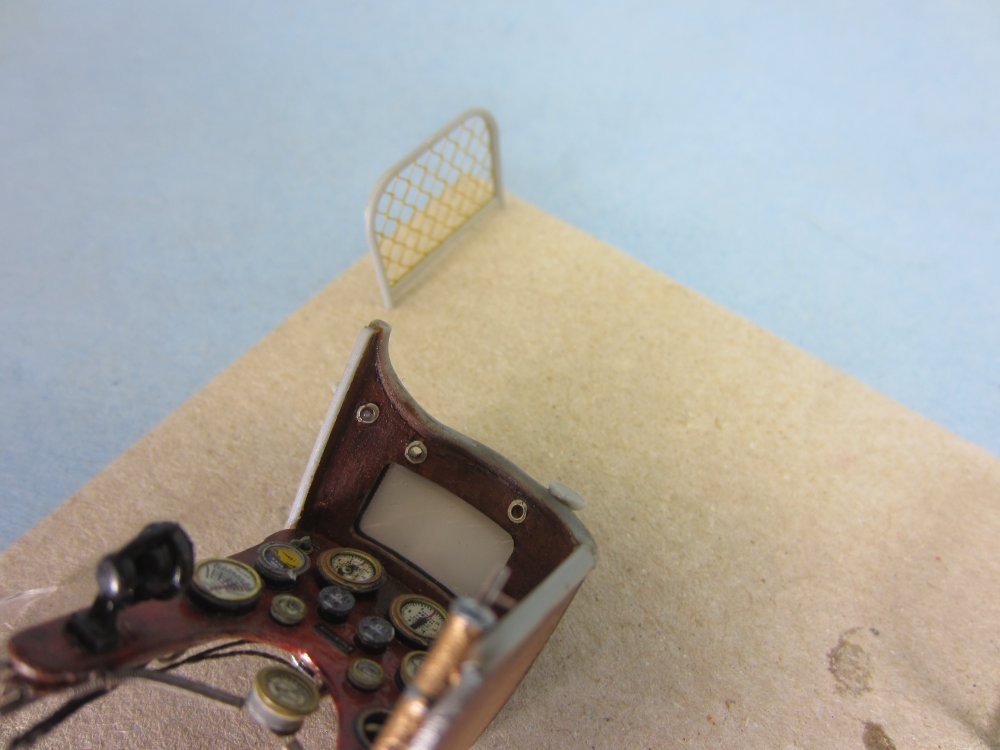
Pushing on with smaller details , fuse wise , mirrors and windshield specifically. The windshield needs to be addressed early , earlier than I did as it is pretty much the worst fitting part in WNW history. It has an acute mounting angle , with tabs top and bottom as well as 2 mounting ...lumps... cant think of any other way to describe them. Fit it as soon as you start work on the instrument panel area. The mirrors were fitted by drilling the marked hole inside the ip box , and guessing where the lip mounted one goes. They are angled as I angle the mirrors on my Harley slightly upwards and to the outside. P/E bezels were used to replicate flanges for the left mirror and the windshield: Thanks for lookin".
-
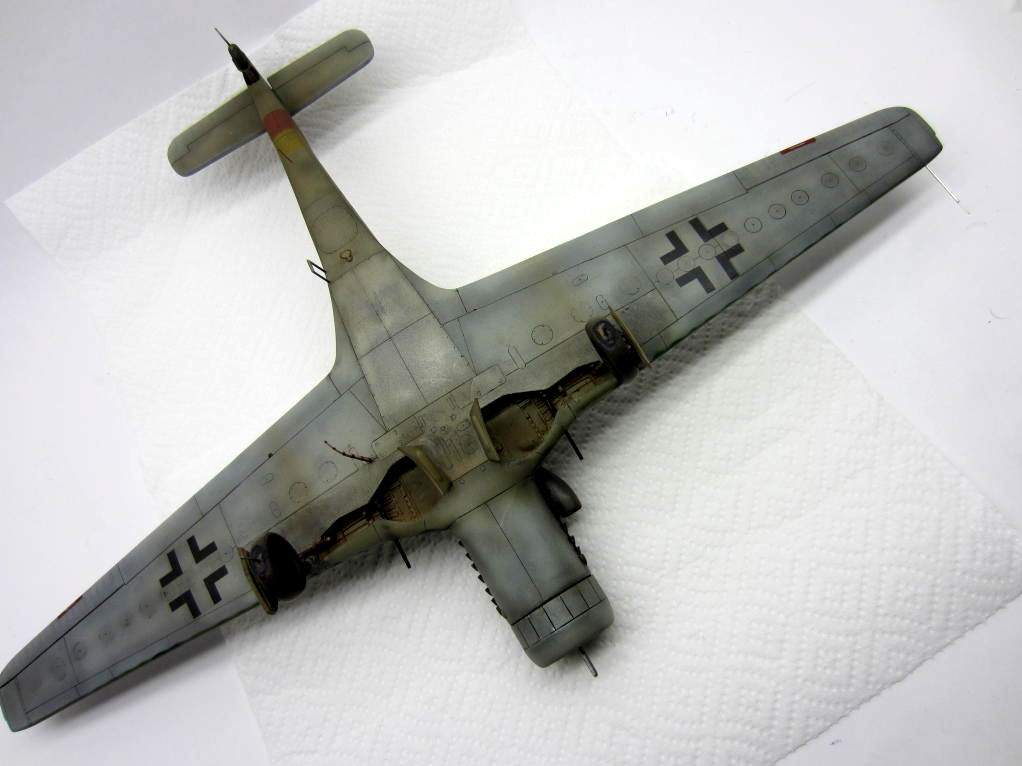
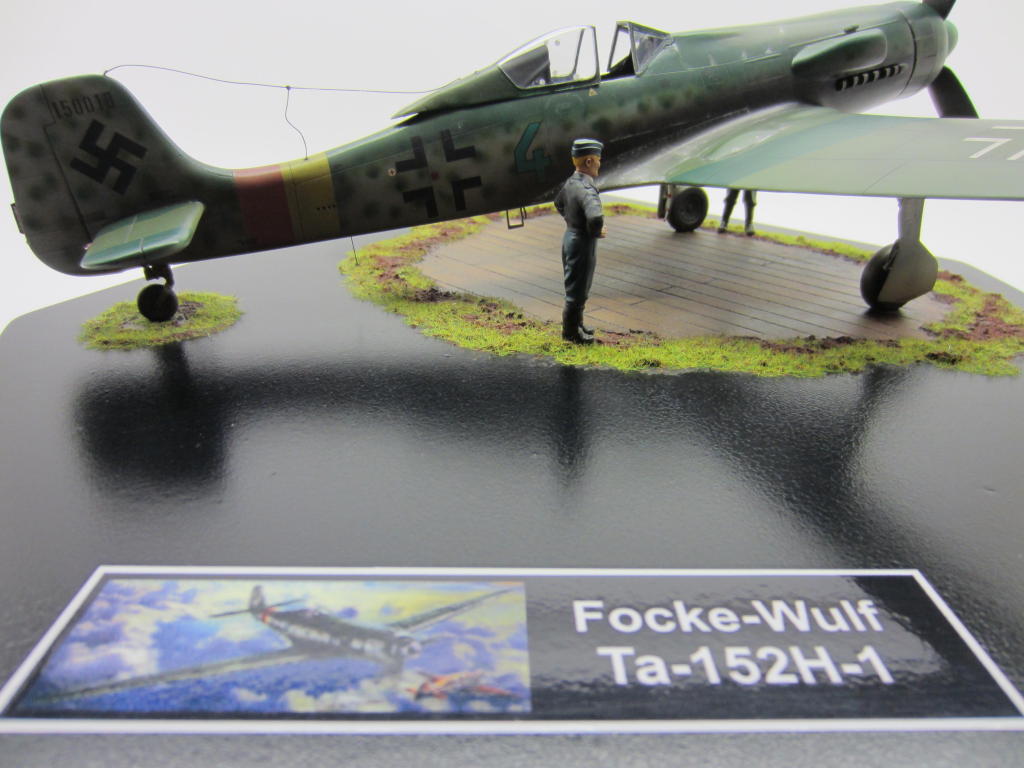
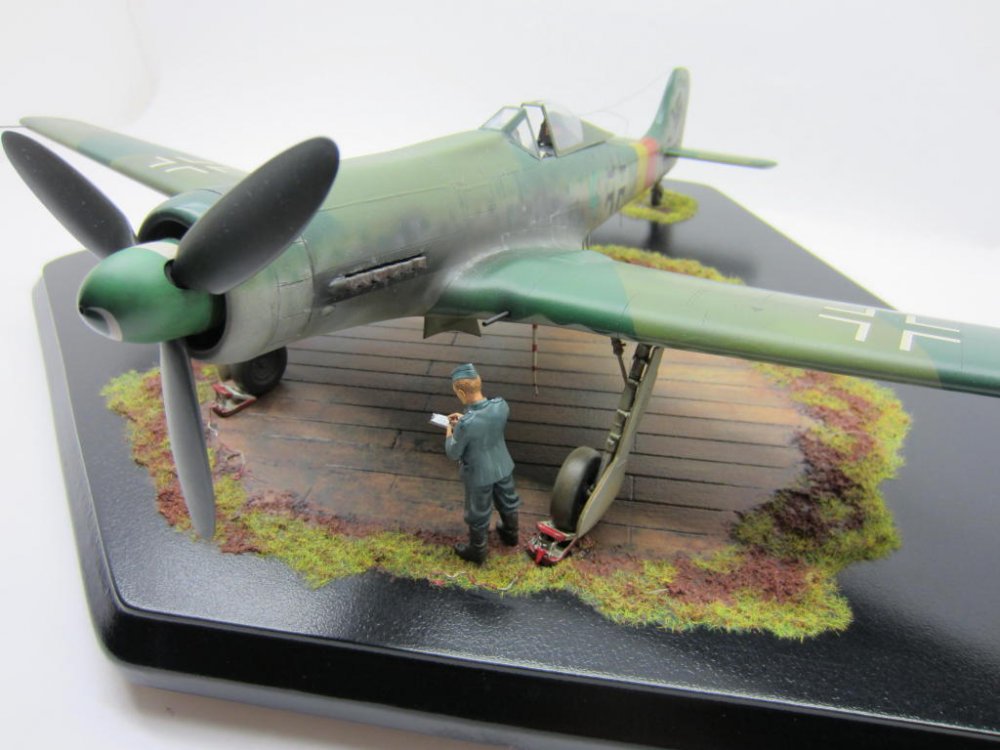
I was just reviewing the pics of the 152 and came across this one of the finished underside:

-
No No stretch as the material is actually a metallic substance.
-
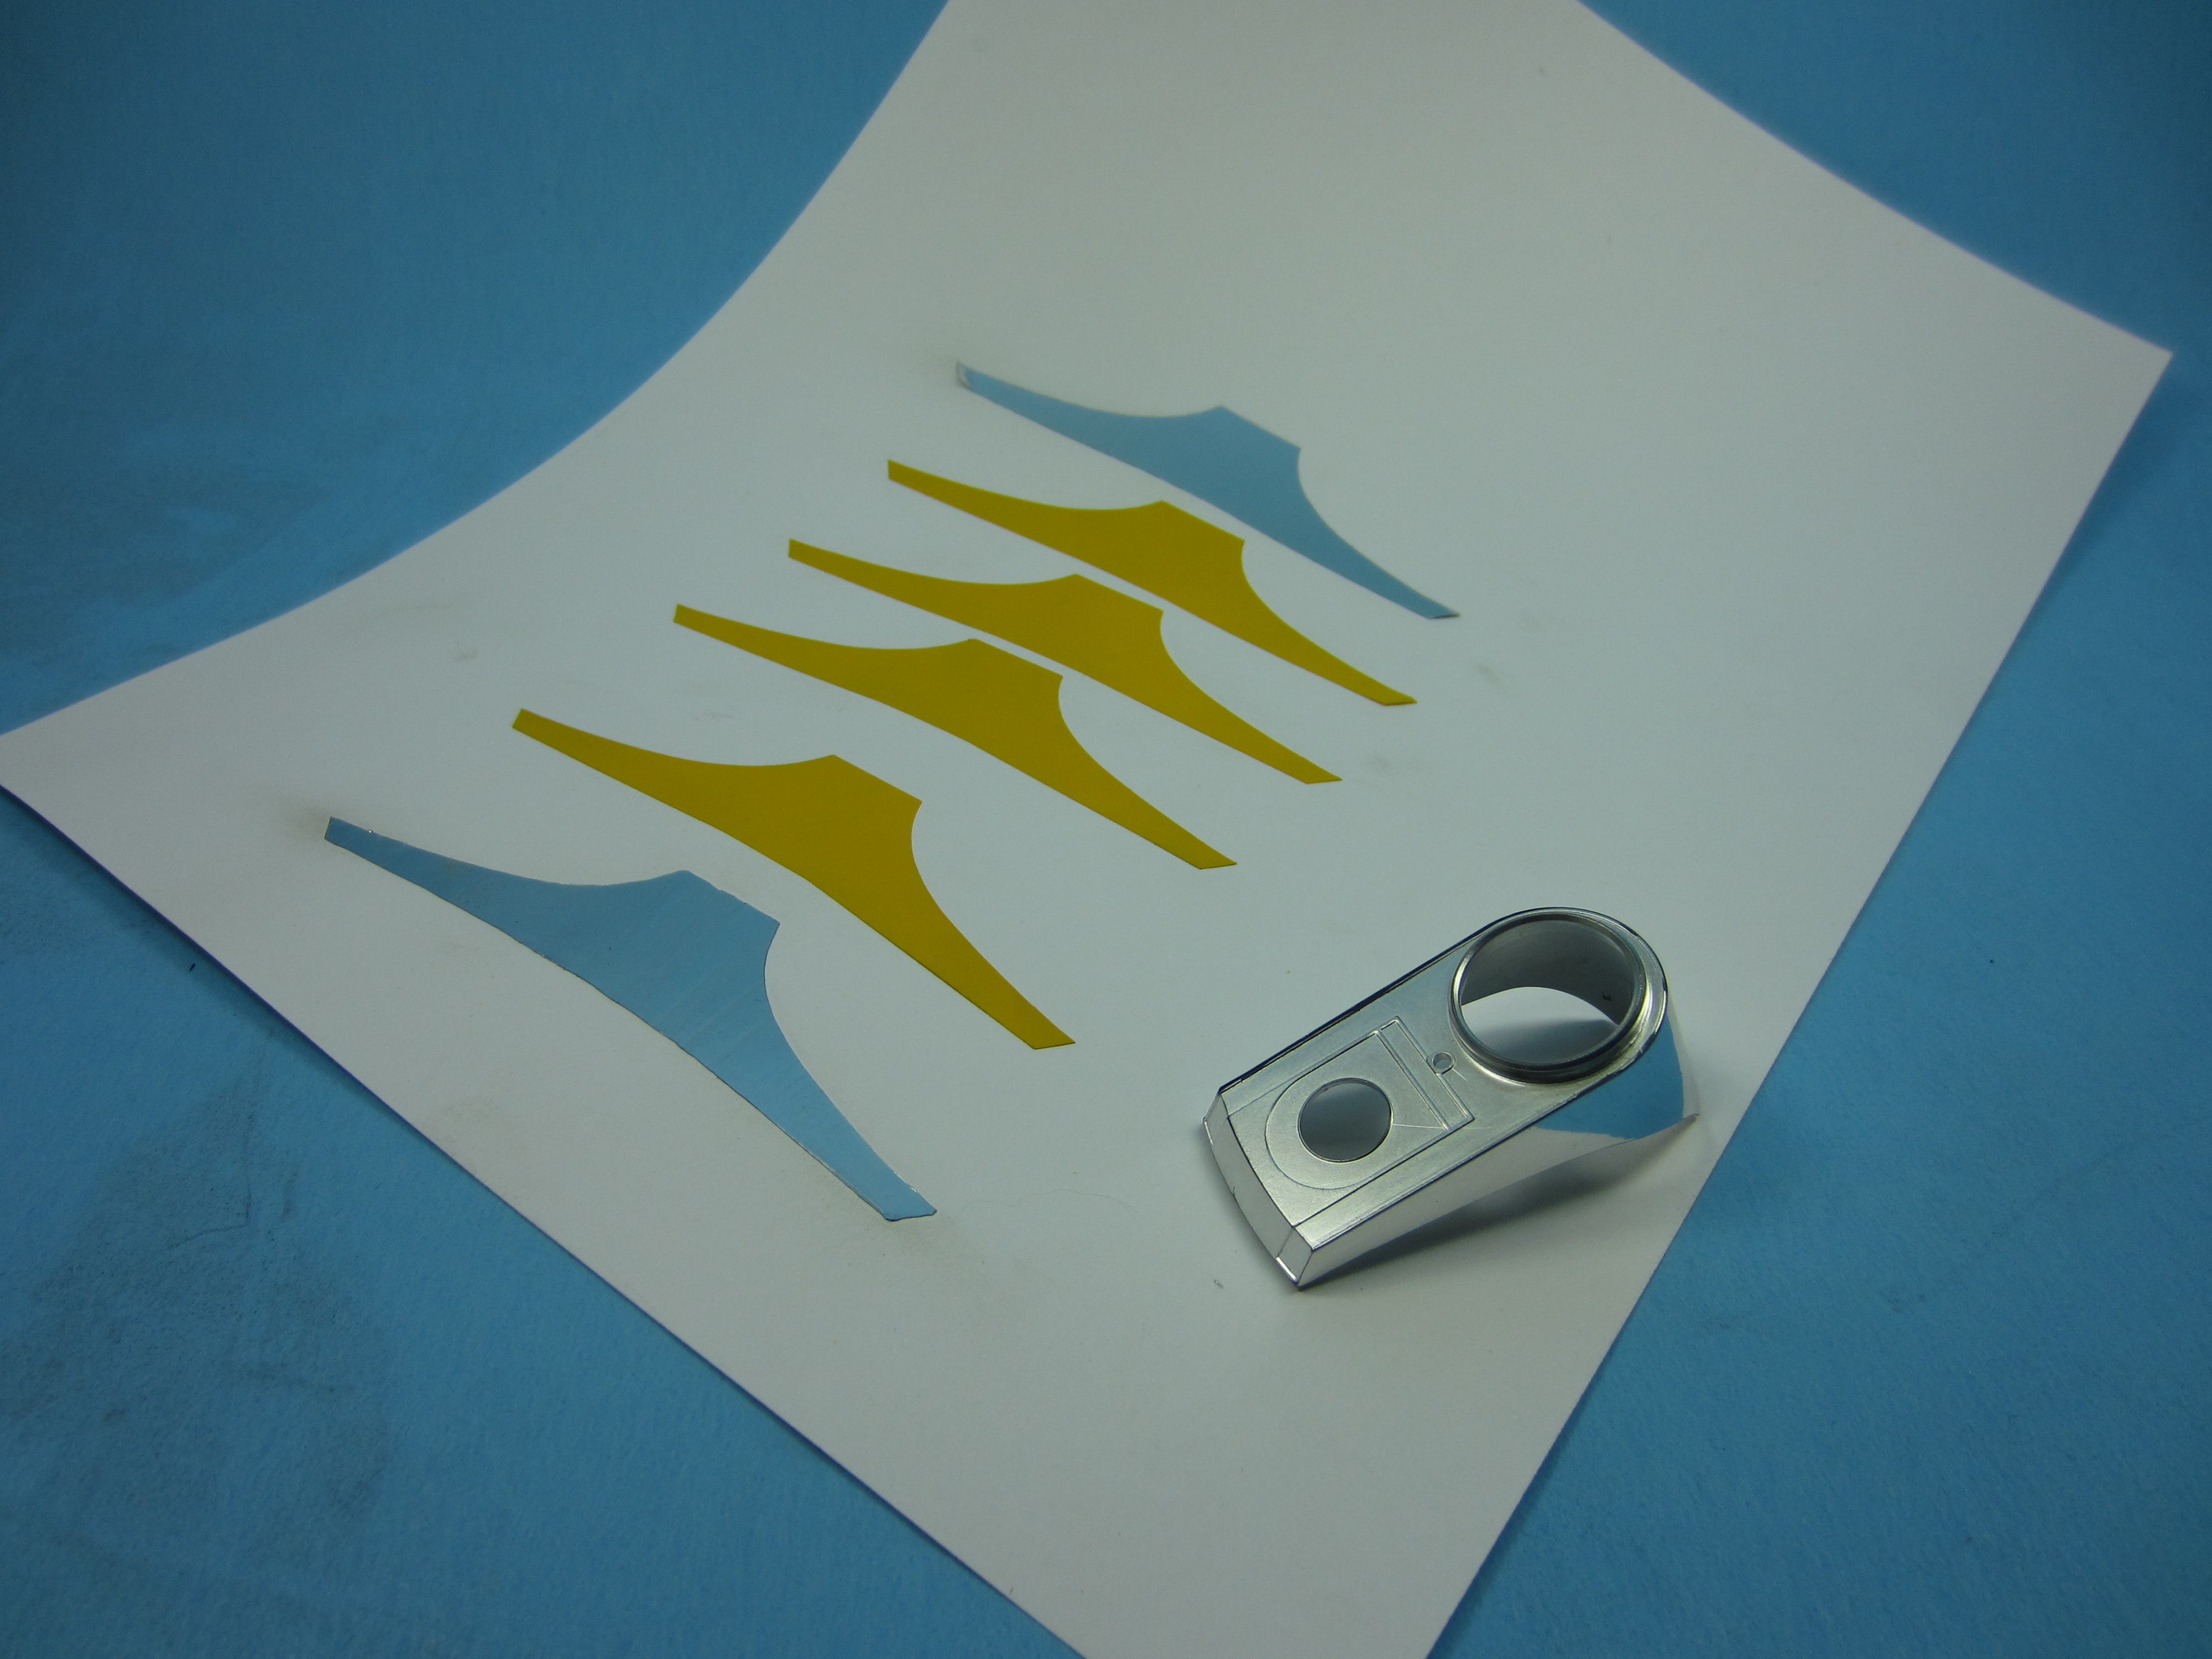
Ask a sign guy for some chrome vinyl , can be cut on a plotter or punched out. The chrome on my Fat Boy Lo showed a flow line from the casting, I used the chrome vinyl to wrap the outside: Any sign shop should sell you a piece.

-
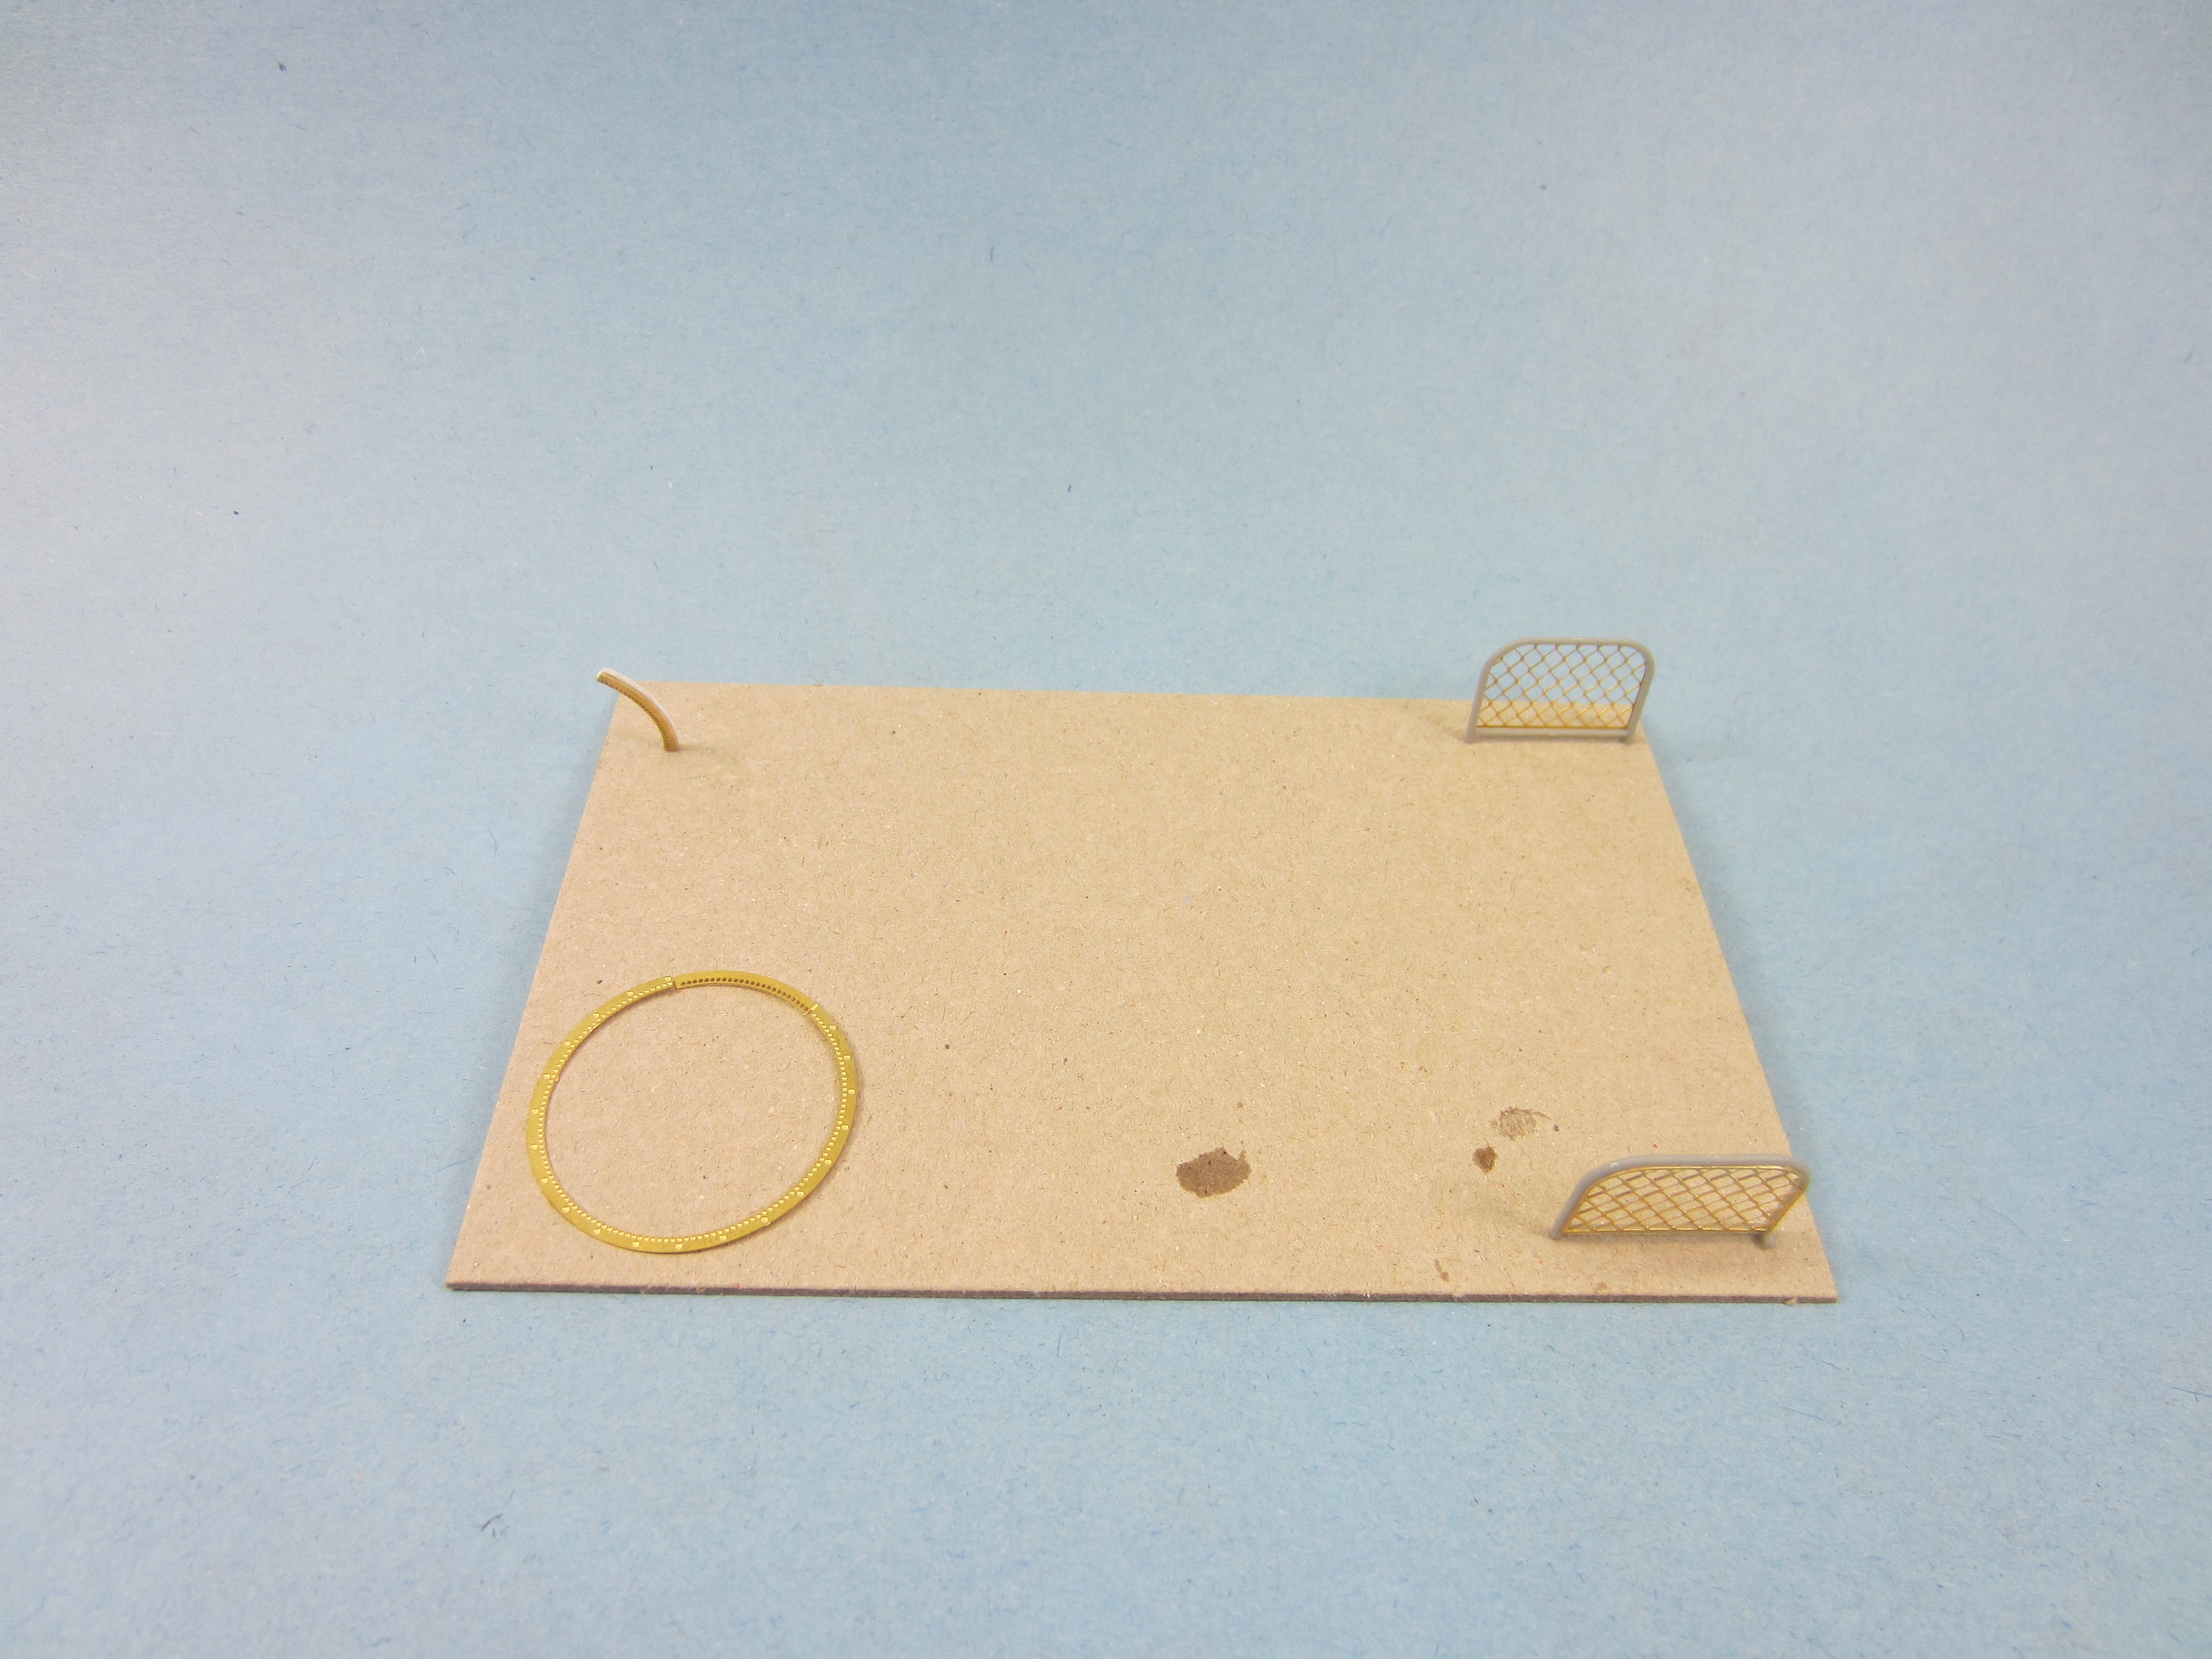
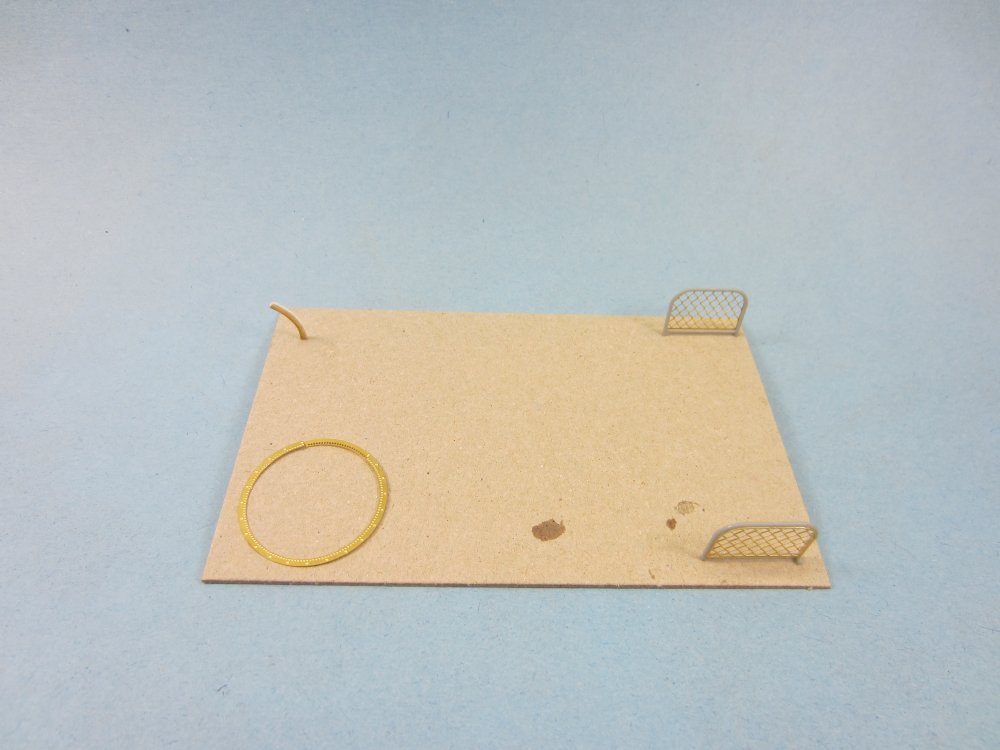
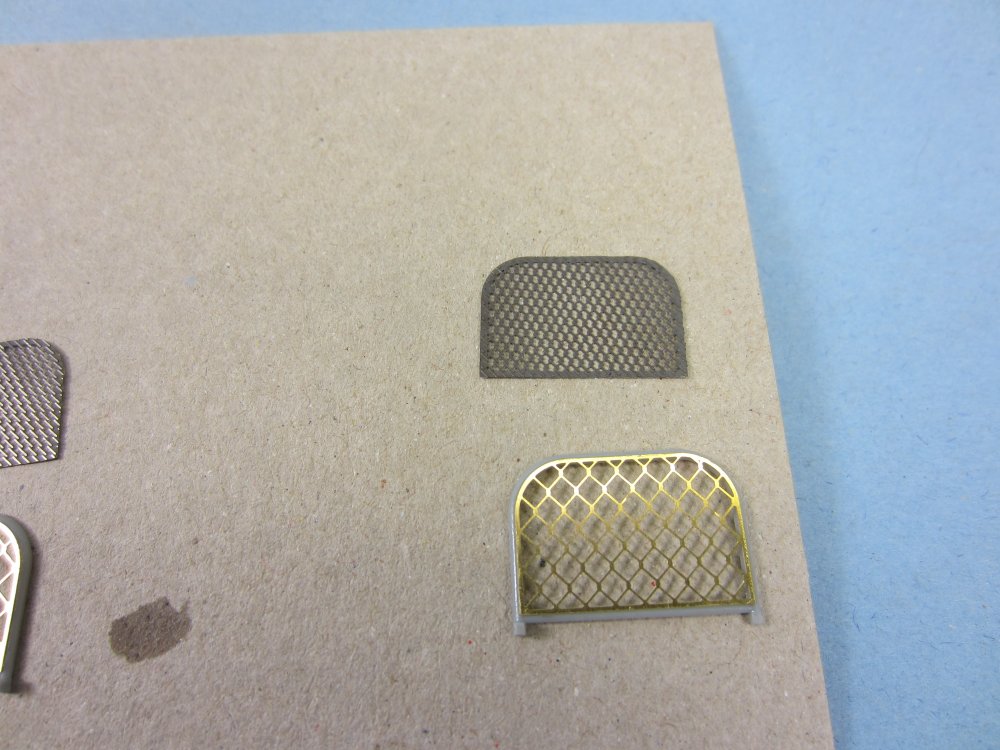
Thanks Gaz. And like I say , if you wanna incinerate your p/e to the point of material compromise , watching as the material changes forever into a limp , smoking banana skin , then fill yer boots! Anyway here are some more fuse details , assembled and carded for paint: The upper left is the gunring 'door' , the ring , and the kit prop debris guards. I chose the kit p/e for the guards as the aftermarket set has proven to be almost useless , here are one of the a/m guard screens: Zero ref pic for the a/m screen , lots for the kit screen.
-
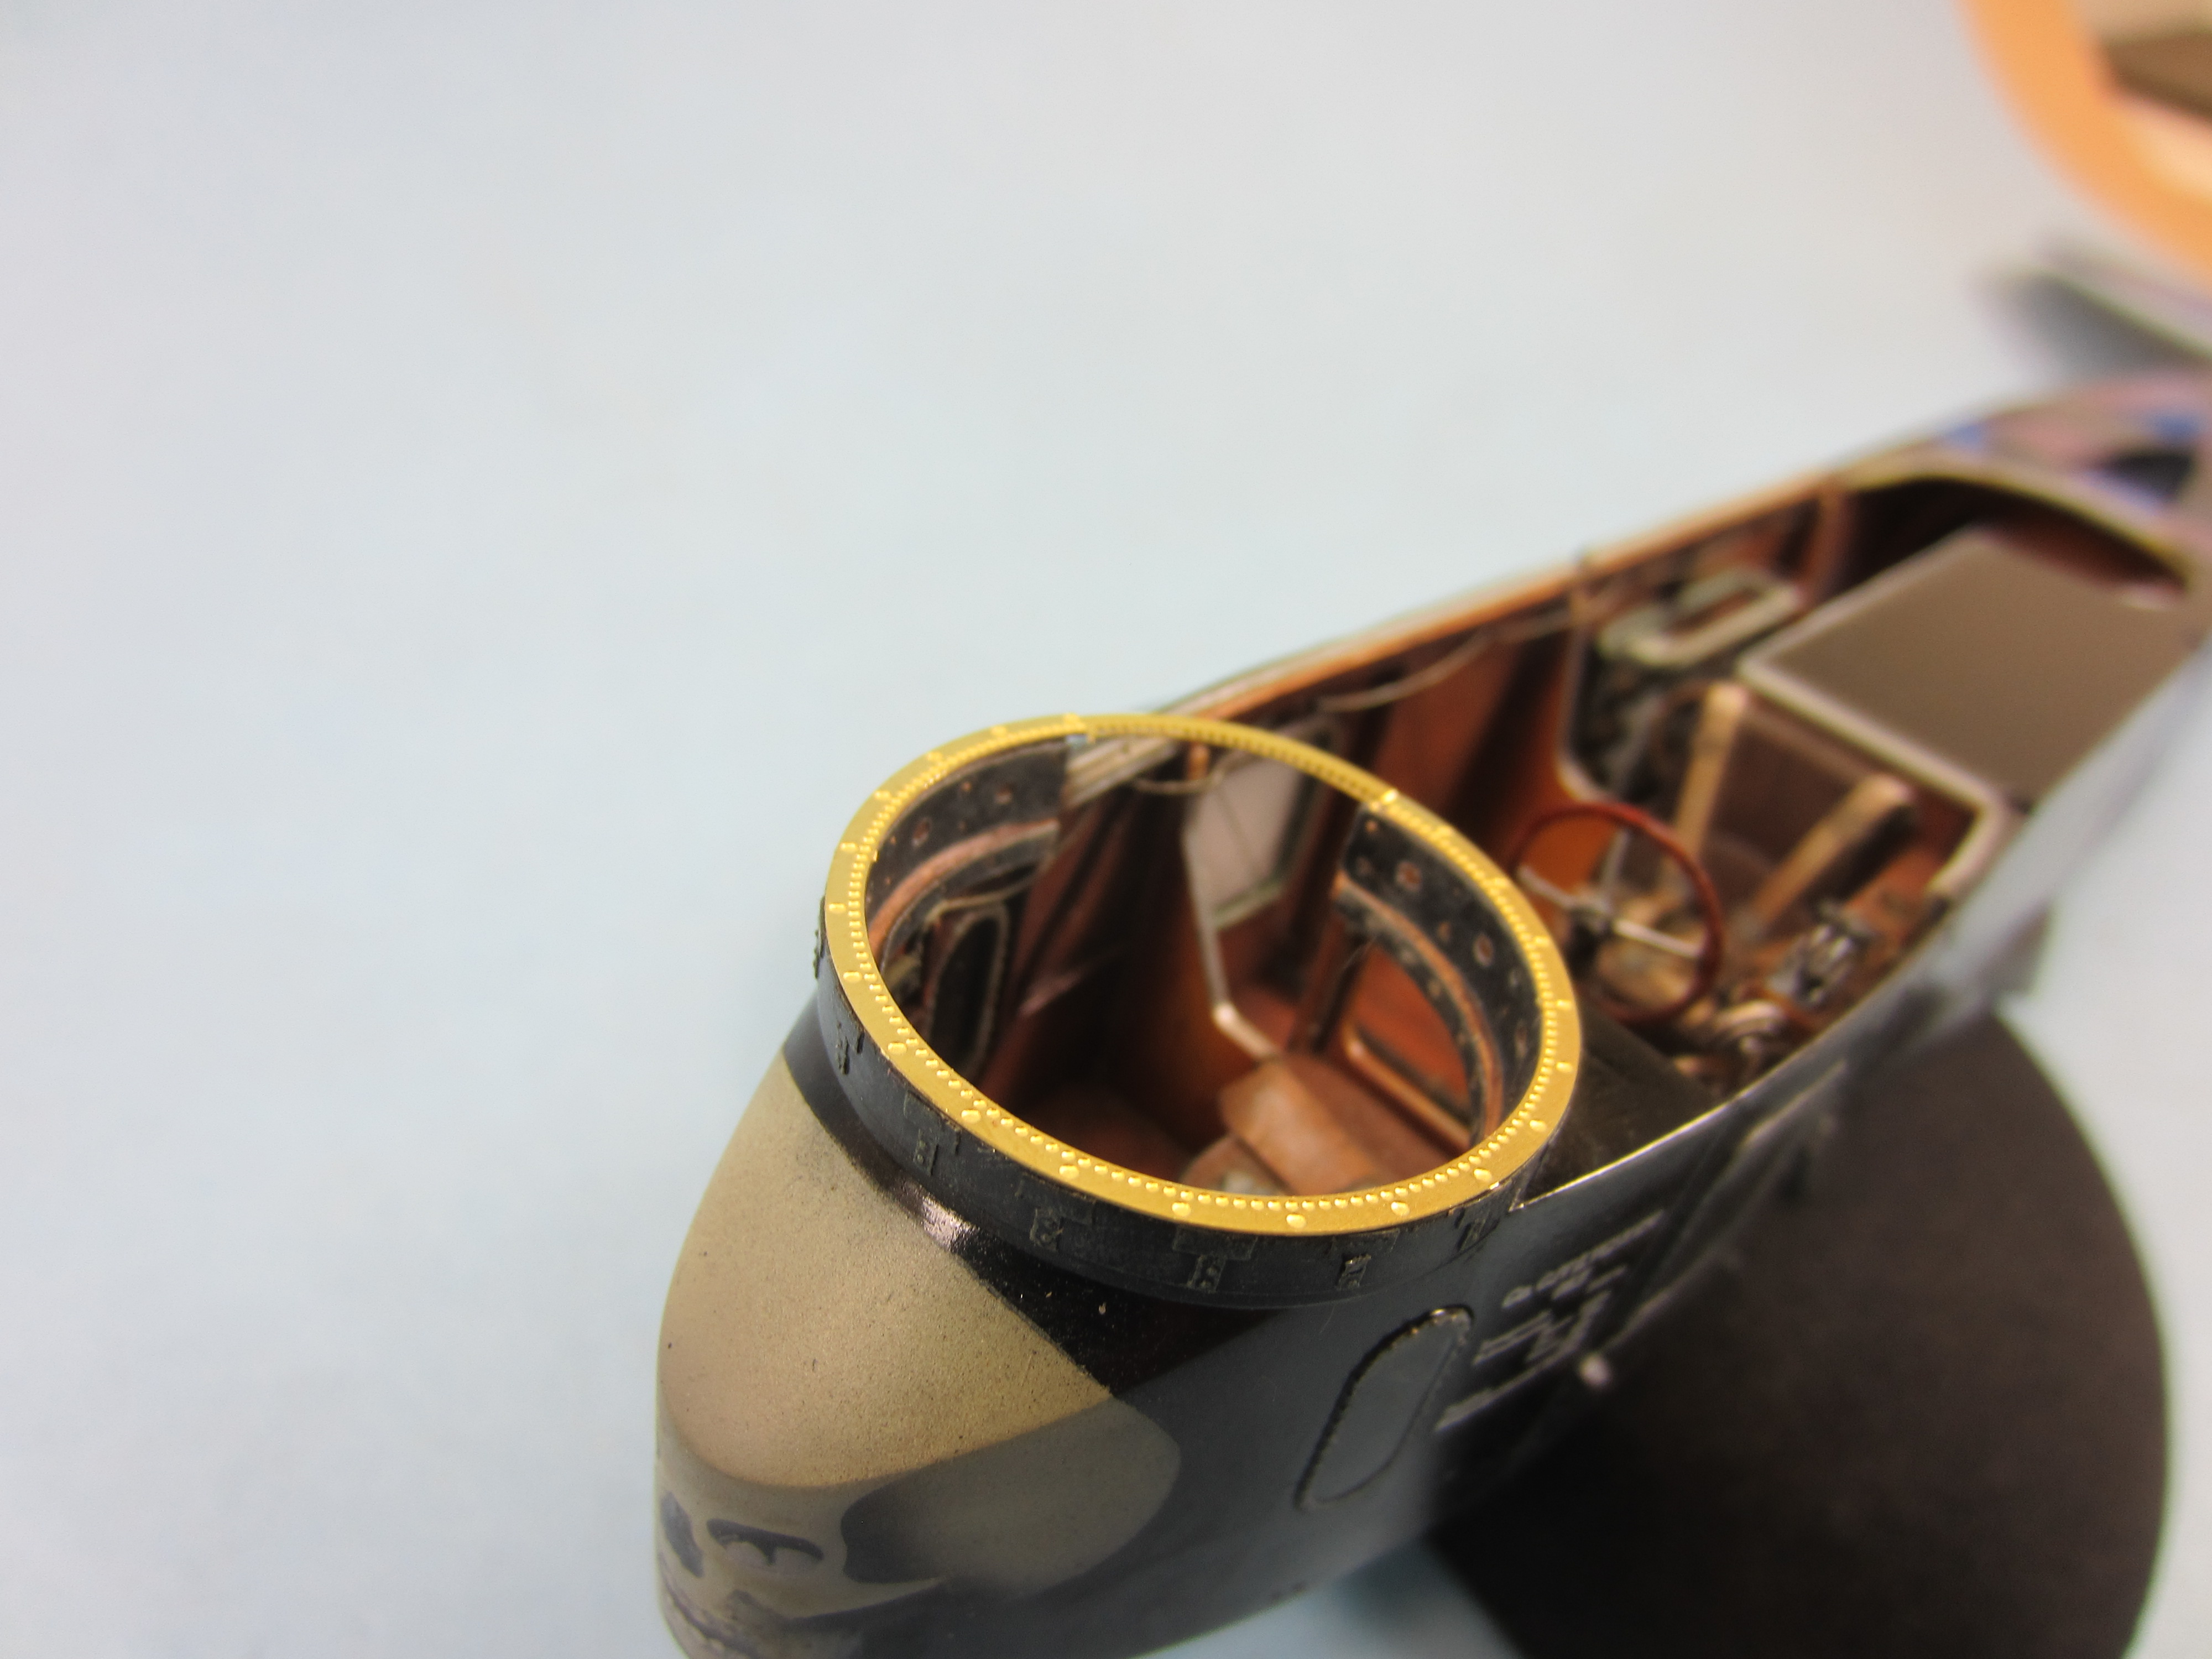
Thanks harv. Gun ring detail goes in and the p/e ring itself plopped on for a look: Pretty nice p/e piece. I think someone said " annealing" in 2010 on a model forum , and thereafter many burgeoning modelers began melting the pi$$ outtta every scrap of p/e they could get their torch on. My metal work experience gives me a little more insight into metal bending . I did try annealing some p/e and was not happy with the result. I've never done it again and really dont see the need for it. Annealing can compromise the structure and worst of all you cant come back from it. Practice bending past your desired profile to see the metal come back to where you want it. I think in the toughest of profiles , with multiple bends or contours , maybe anneal but try the work with the metal prior to frying the living hell out of it.


-
It appears that any deviation from tight business practice is resulting in closure during this engineered crisis. OBC management style , personal vindictiveness in the workplace and poor customer service ? GONE . GONE . GONE. Some real survivors gonna be showing up this year.
-
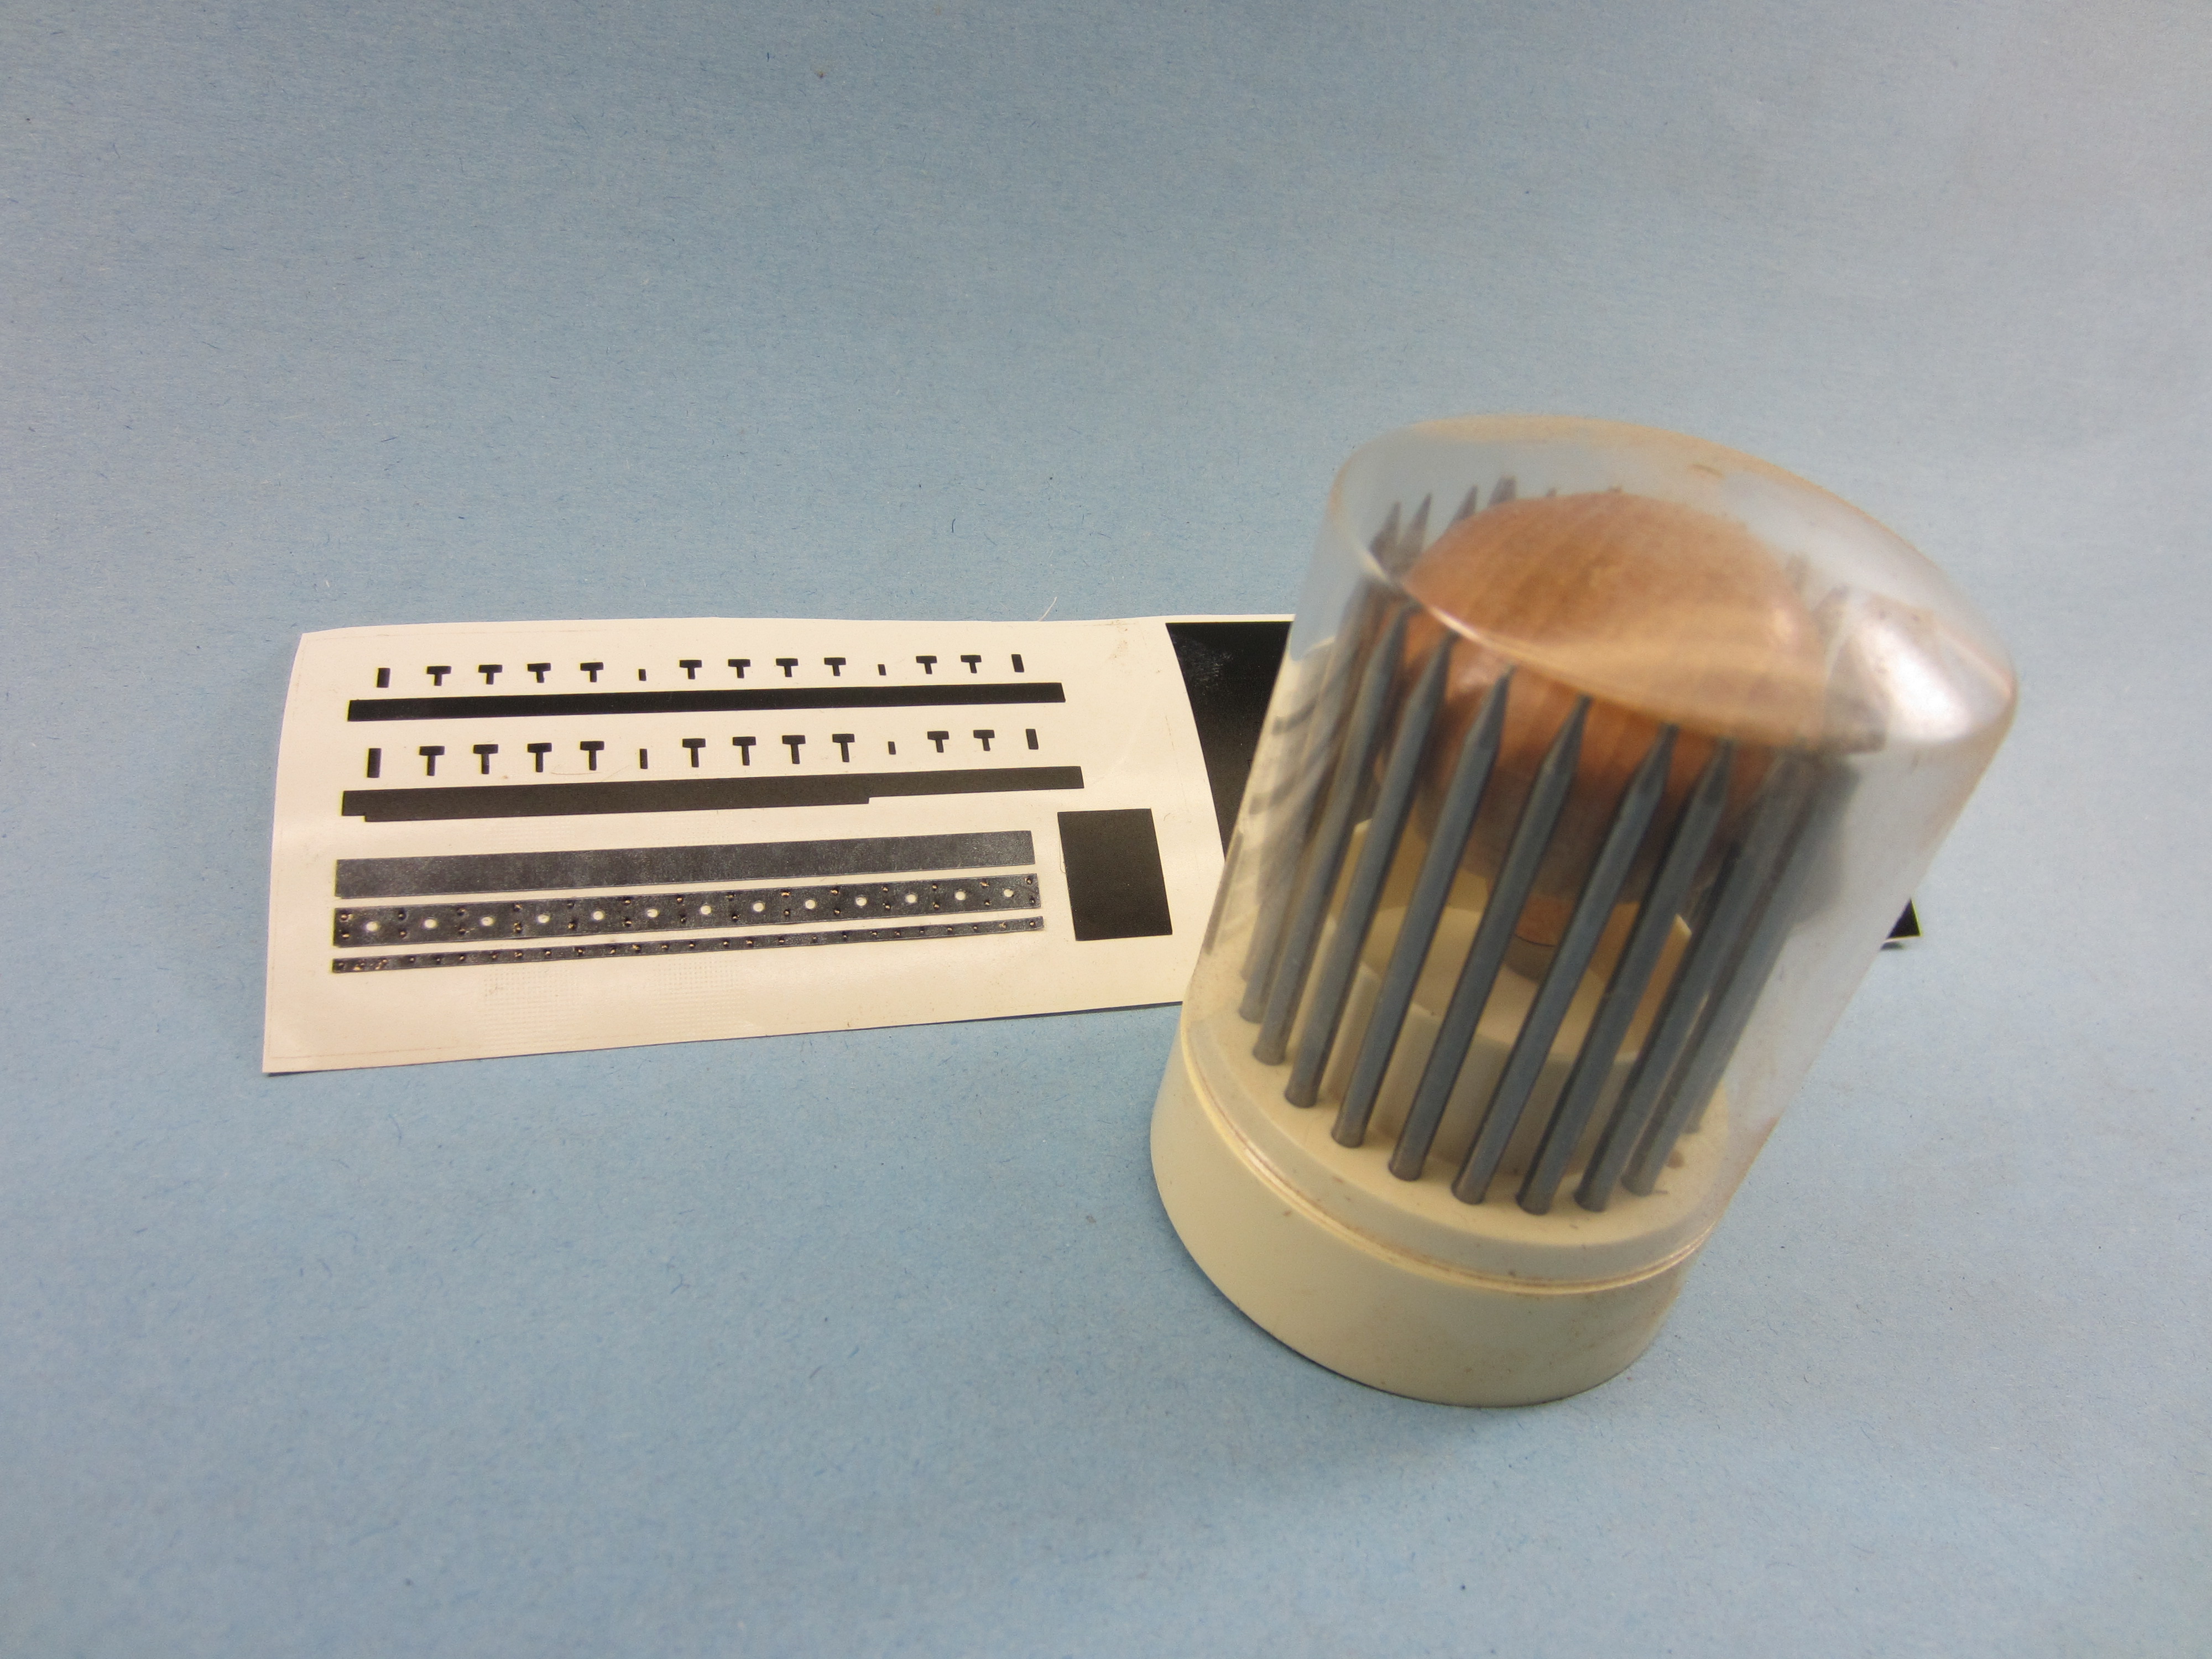
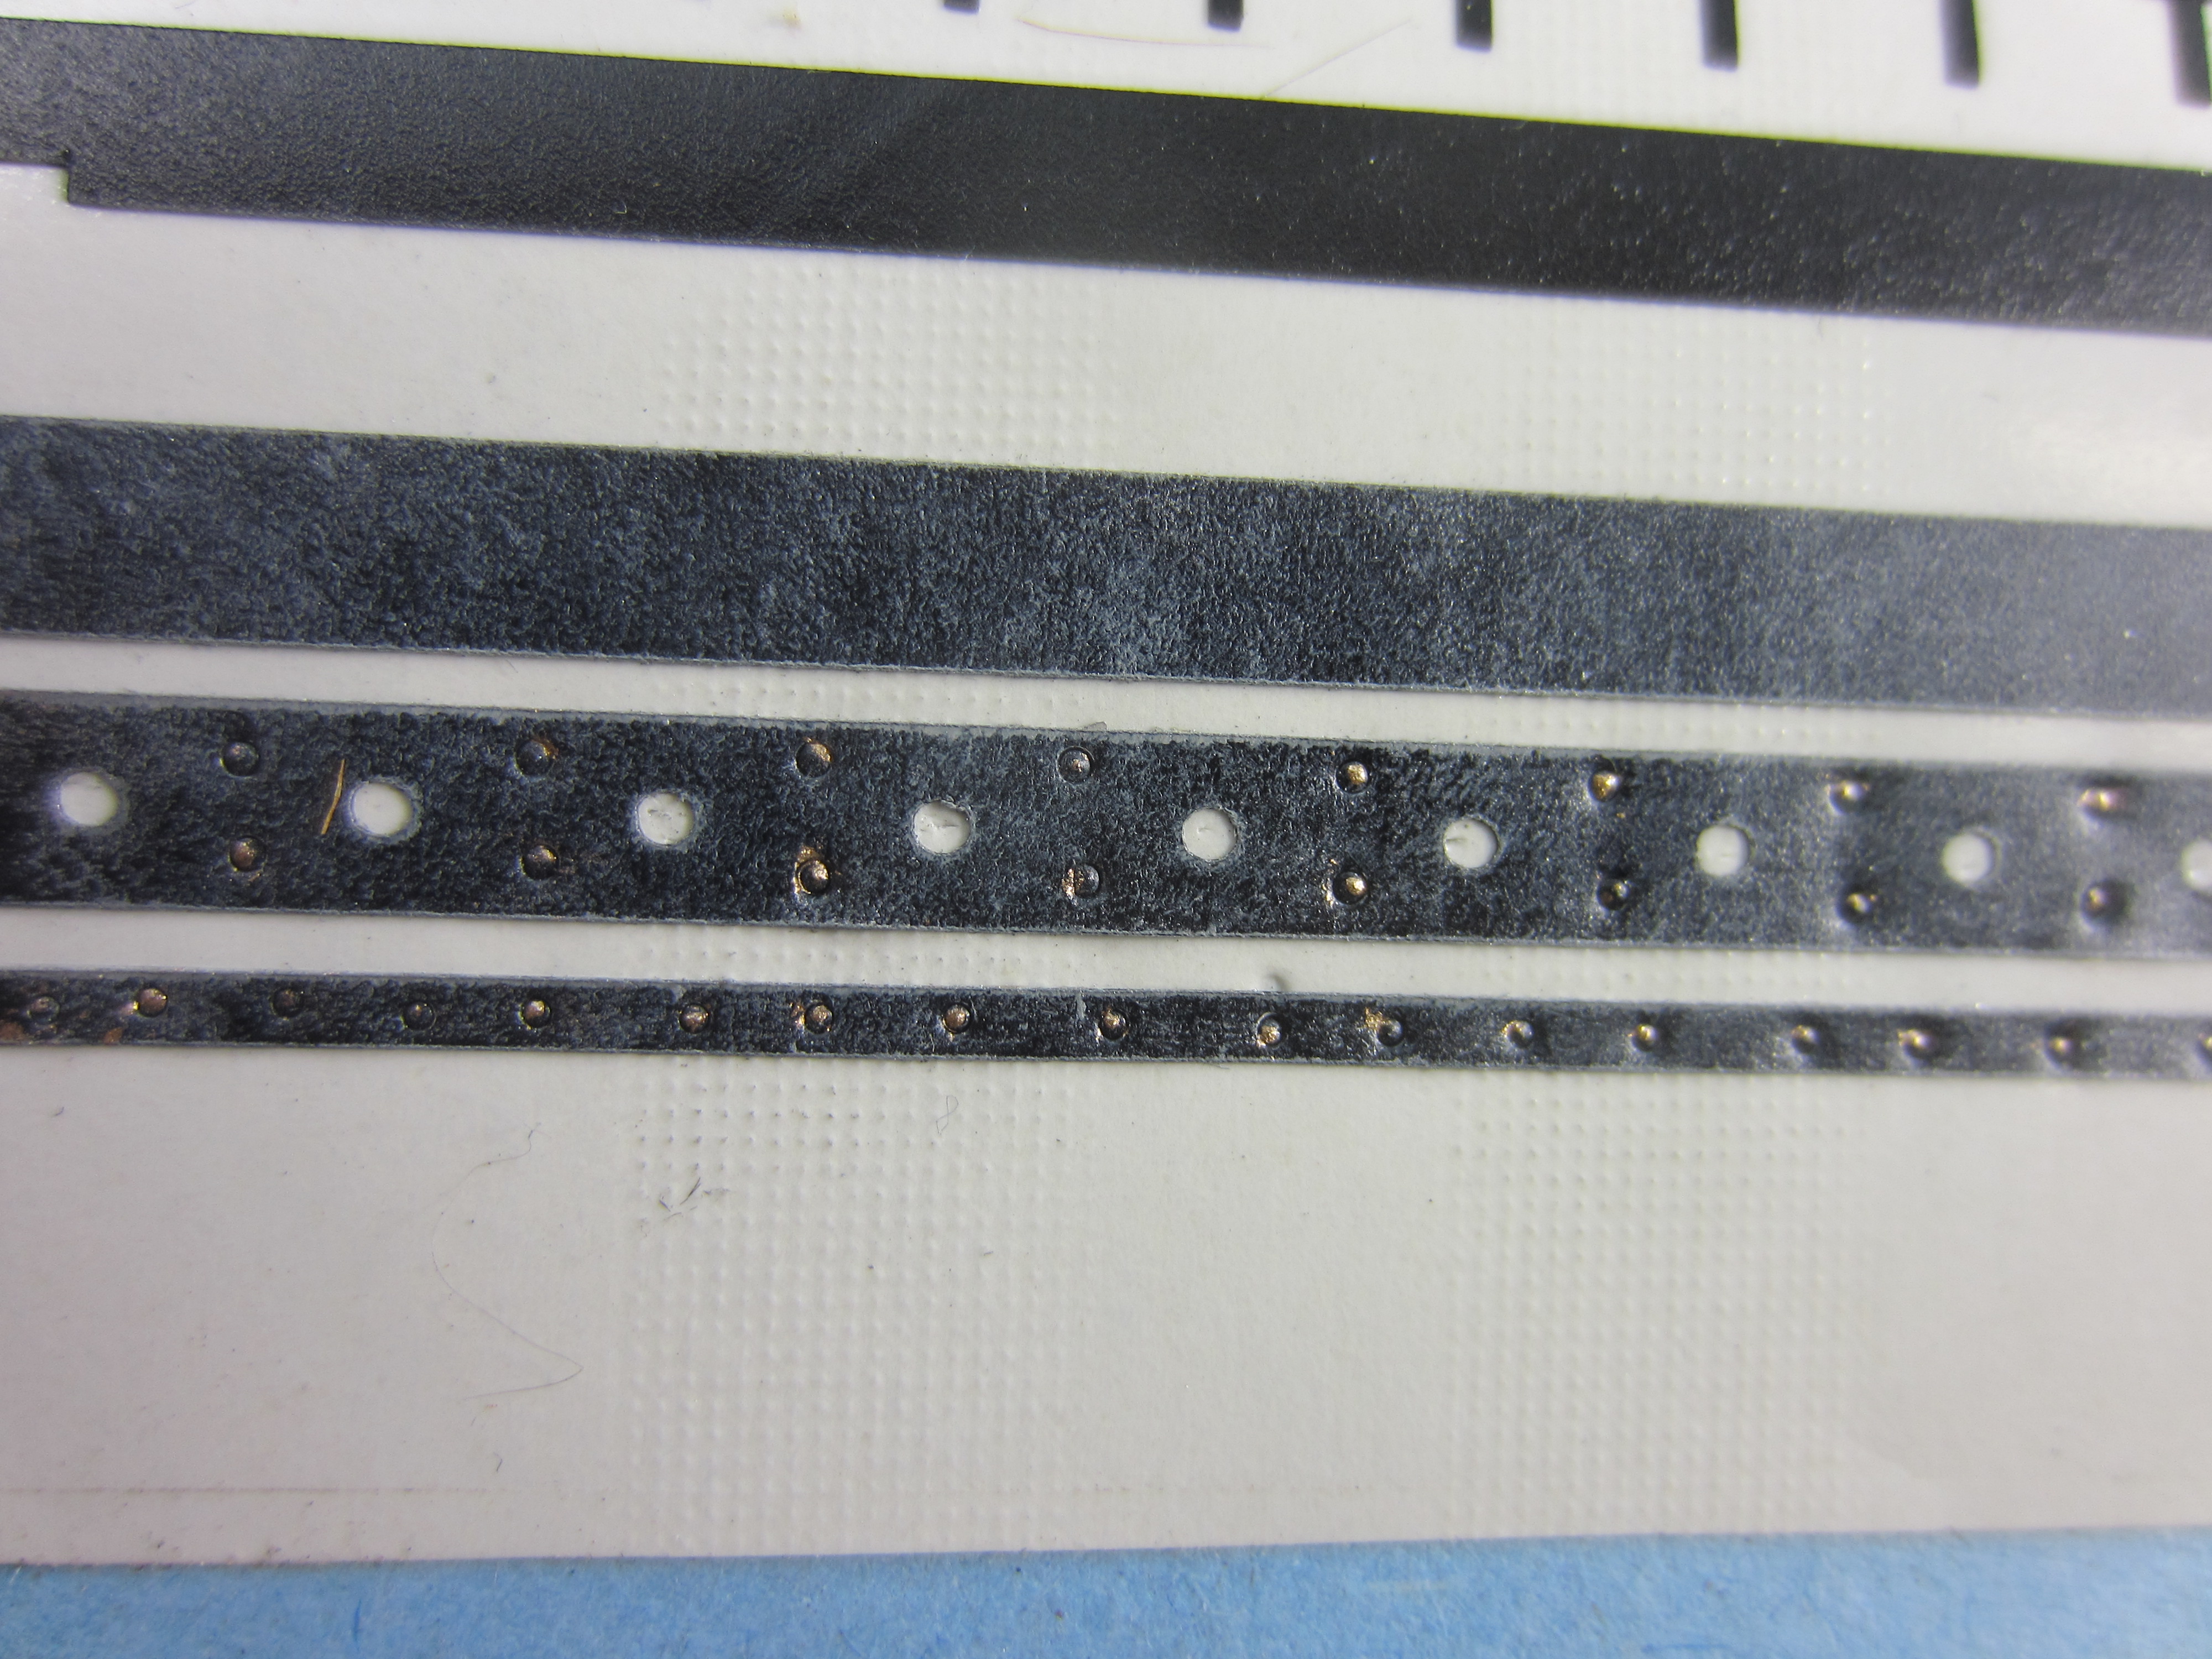
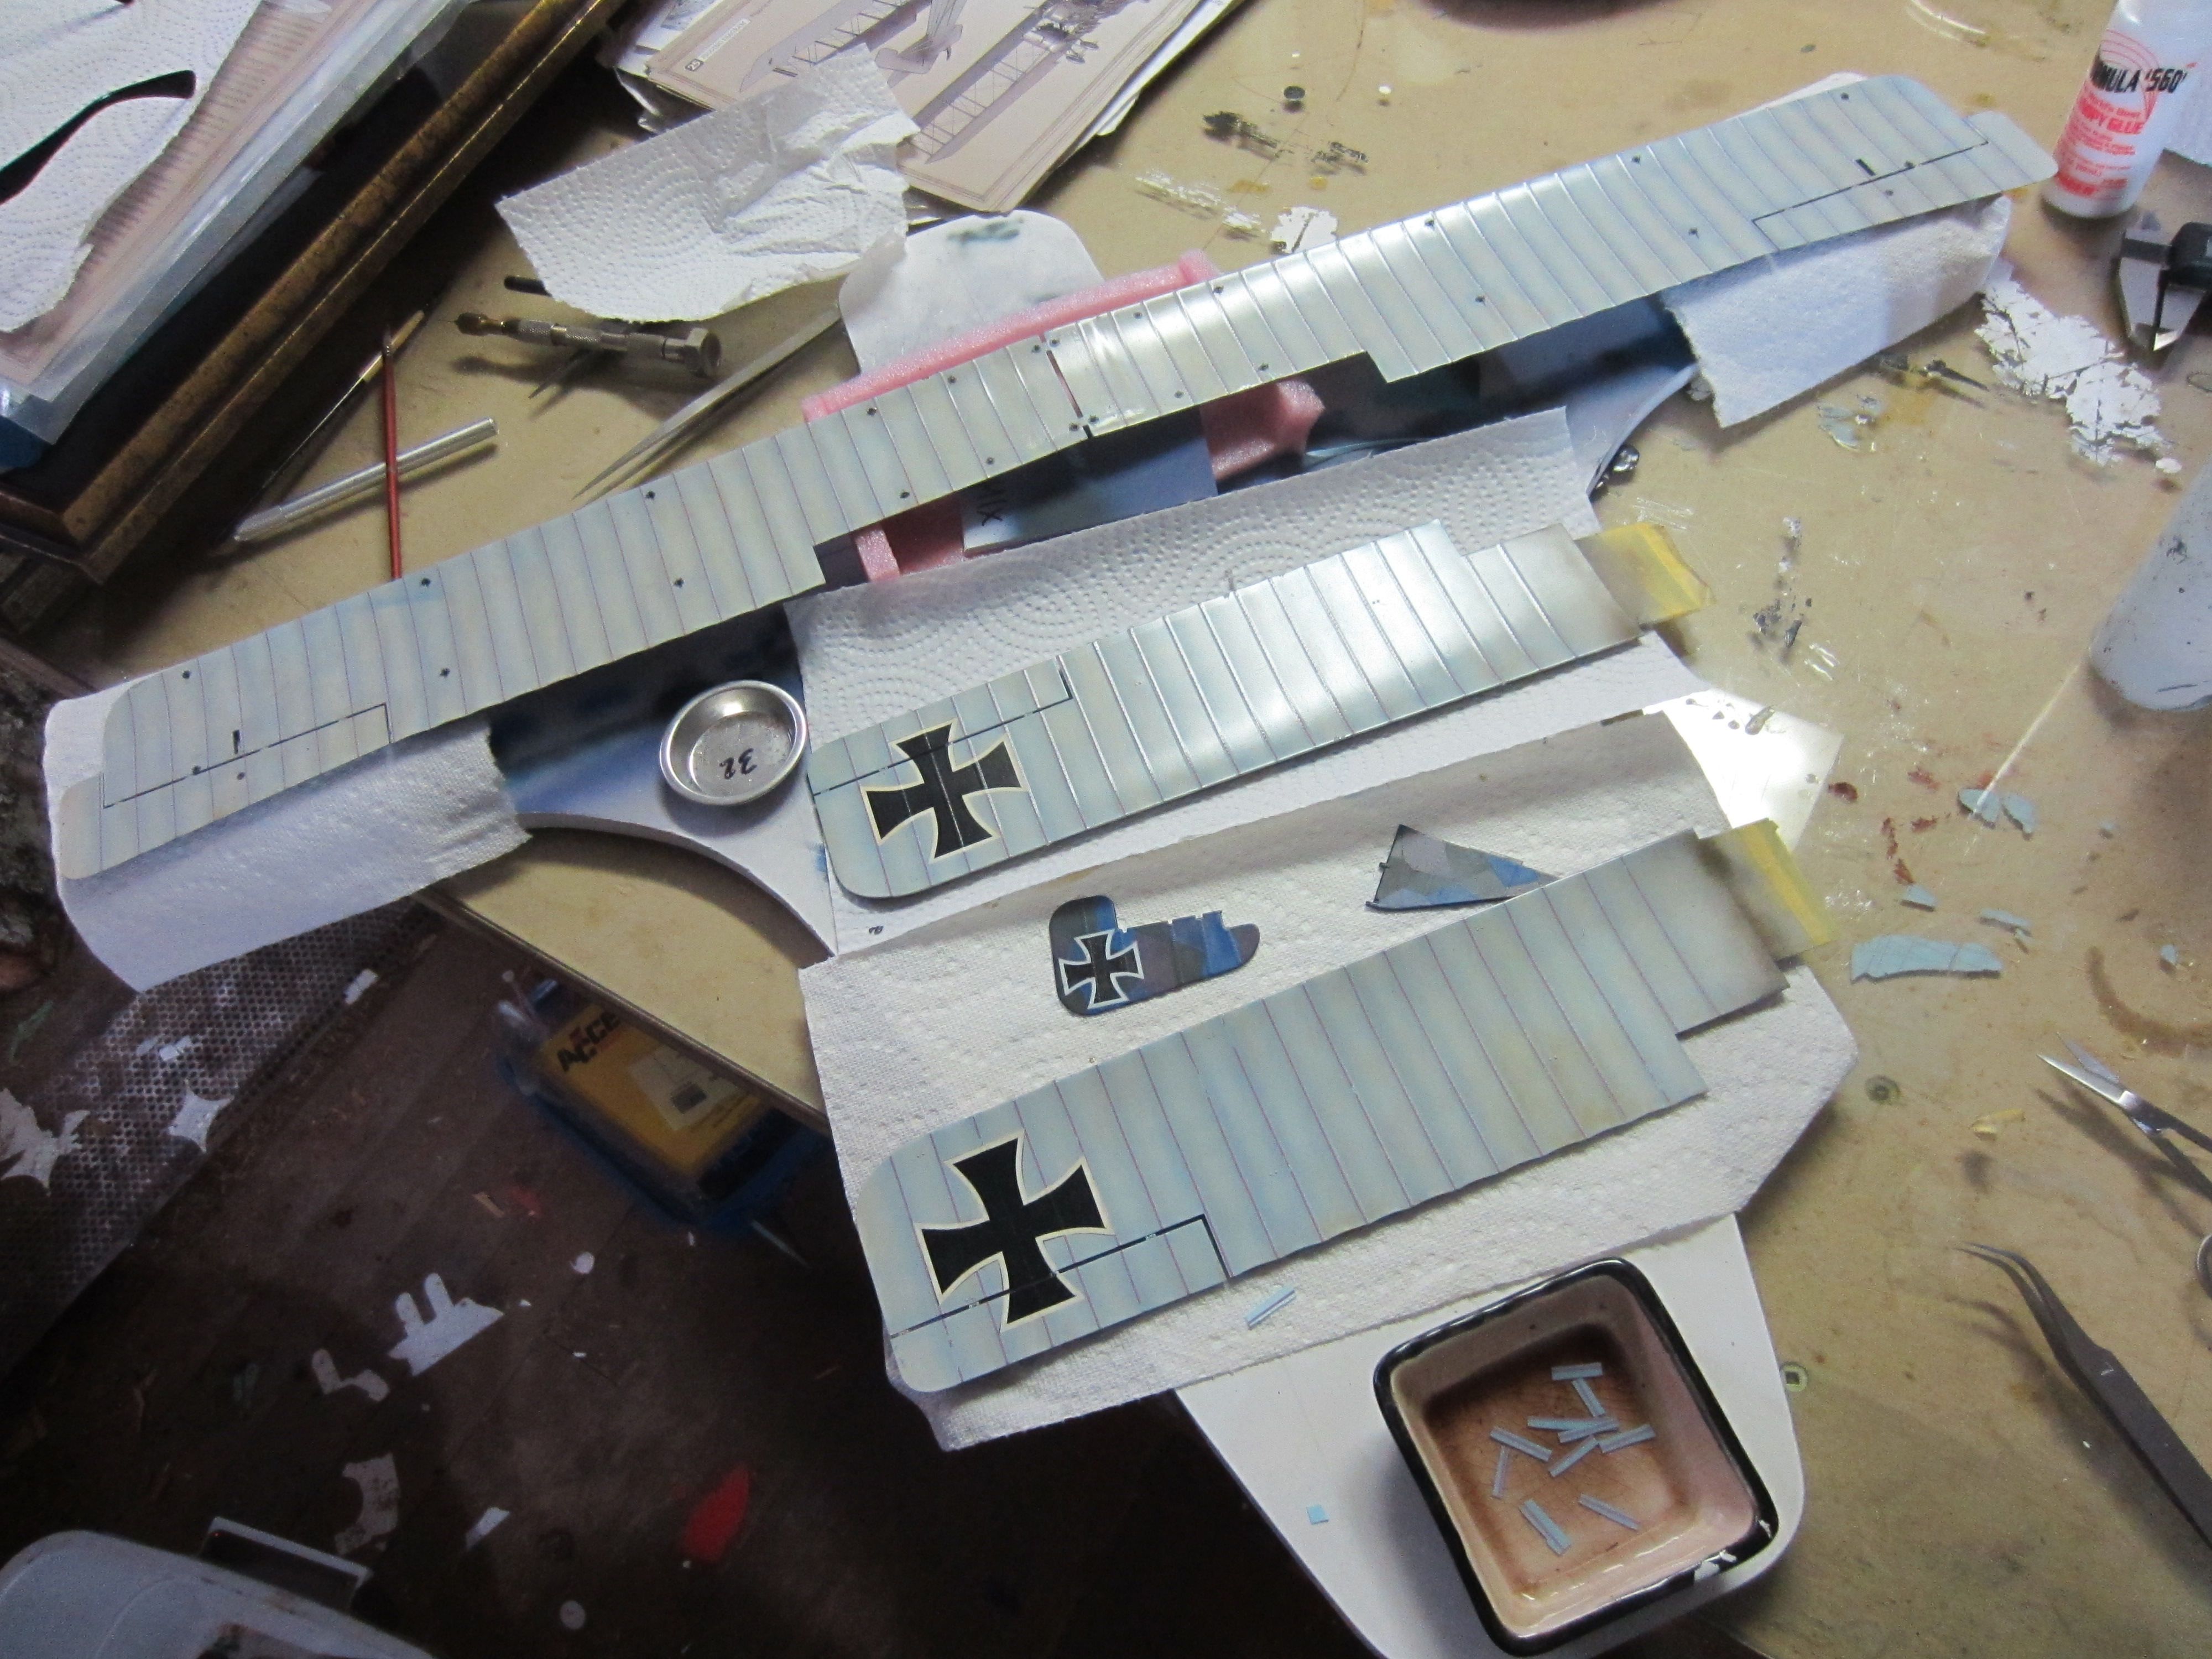
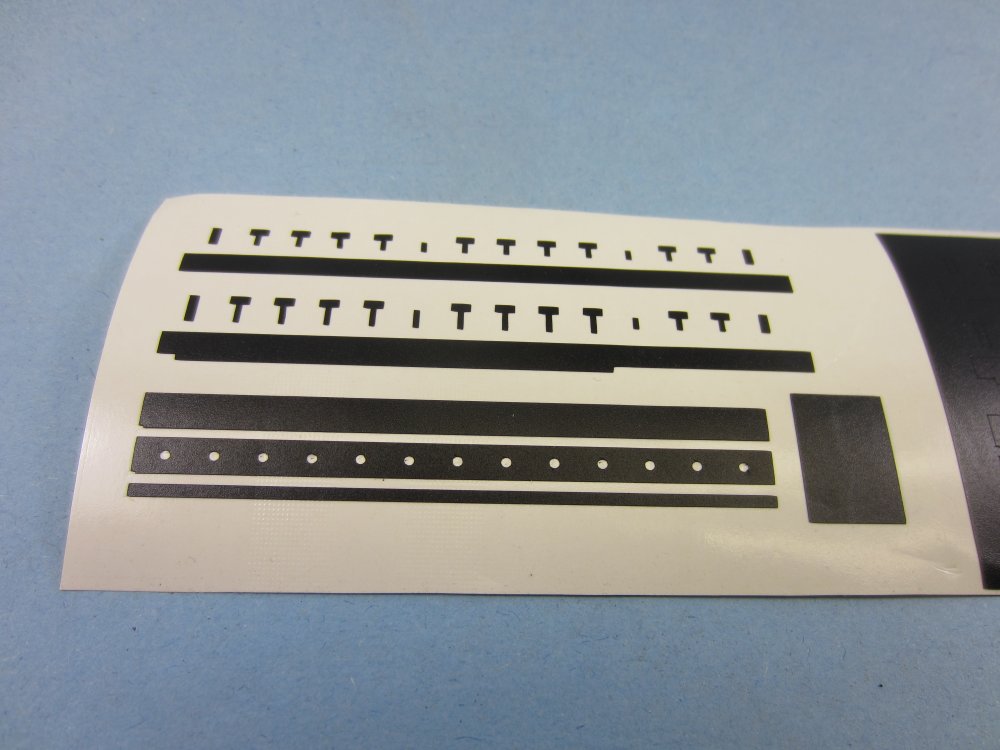
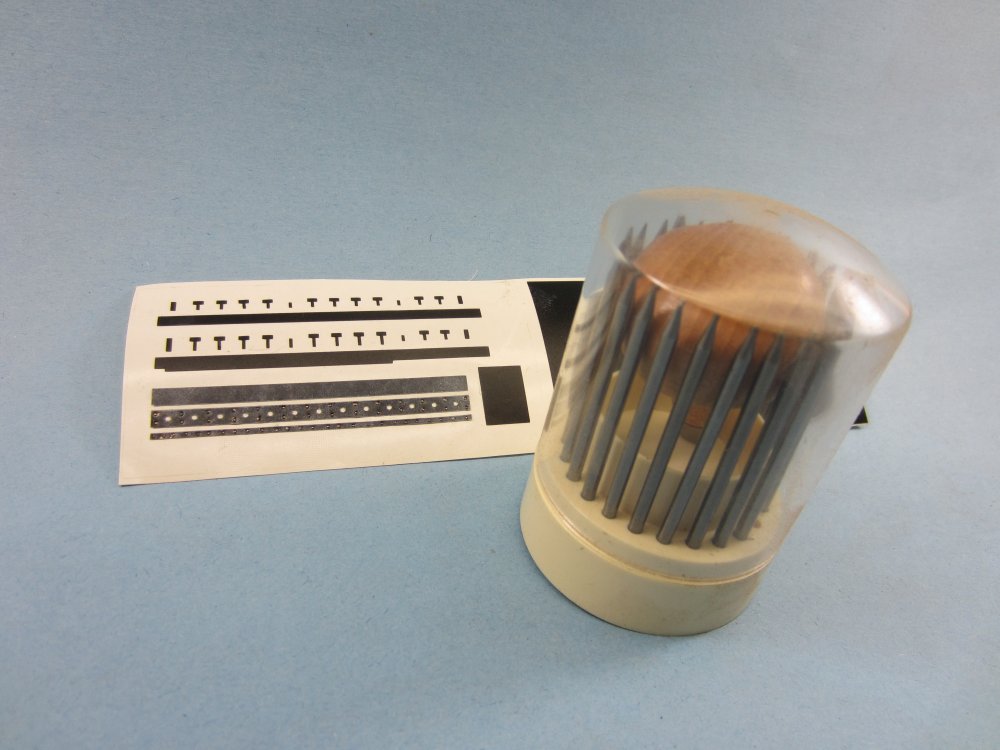
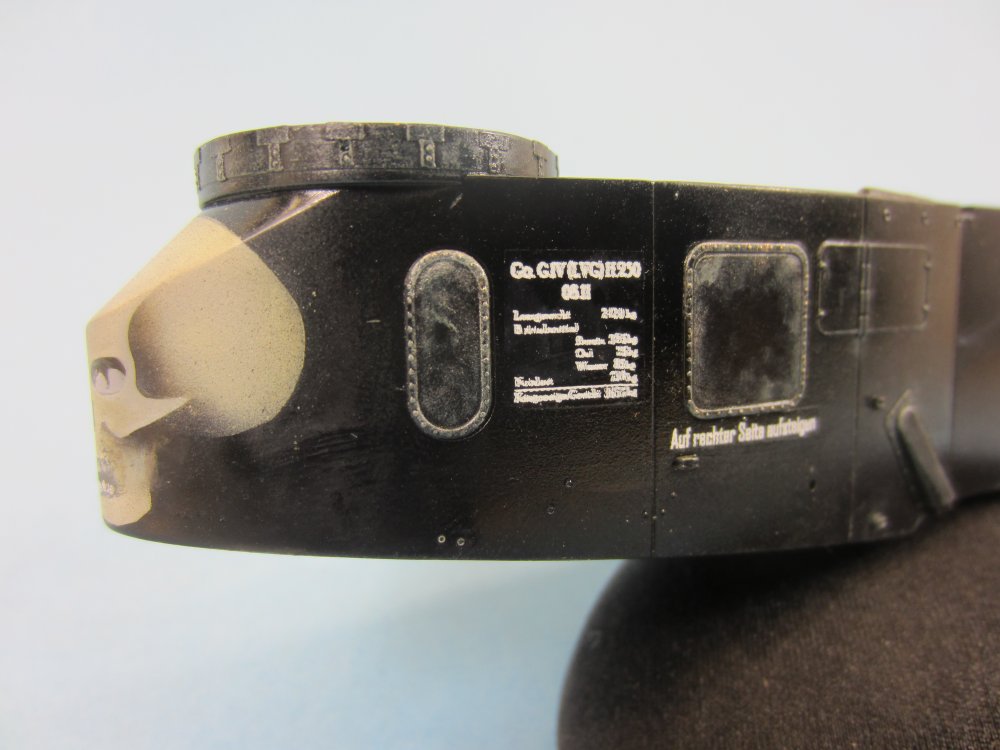
Detail addditon continuation. Specifically the re-inforcement for the Becker cannon. Exterior detail was added from flat black vinyl cut on my sign cutter . The same for the interior re-inforcement details. Here is the cut vinyl: The rectangle to the right is the panel under the fuse that gets in the way of a good fuse joint , sand it off and apply the panel after. Details added with a beading set: Triple drybrush ; light grey , silver , and copper on the hardware heads: A diff procedure the vinyl is self adhesive and will be clear coated. After that we'll see how flexible it can be. These are to go inside the gun ring as support for the Becker install. There are ancillary issues to installing a Becker , these were prototype 20 mm cannons , there fore ongoing work would be done as the weapon was tested. Pics show 2 diff gun rings with diff details for the cannon install. Again mine are an amalgum of available details.
-
lol just a tad more detail!
- 31 replies
-
- 3
-

-
- model factory hiro
- mclaren
- (and 1 more)
-
I only gave it up cuz I have an MDC Typhoon !, and a Fisher anniversary Sea Fury! No way all three will get built in my lifetime! Honest! lol!
-
I have both and its a tough call picking which one to do! PCM gets the nod at this point.
-
Thanks Ernie. My canopy broke halfway through the work. PCM sent me a replacement within 4 days , I think they were watching the work on Swanny's forum! I have many of their kits. I remember they came in and began the upgrade to what was then available in 1/32 . Certainly they paved the way for the Tamiya Spits and the ongoing 1/32 trend. Classy packaging , cool instructions , nice resin , clear parts accurate moulding etc , what more could a guy want? The 152 was a real fun one to do , I have the early Hurri up next . With the close examination of the parts , I concluded PCM supplies more plastic than needed. This too after watching some work get done on the Hurri,; one guy had it slathered in putty , blaming the kit , I though no way I'm gonna do that ! Other guys had it put together well enough , but I remember the 152 ; cutting away plastic to make the parts fit optimally. Just my own personal observation.
-
I think they are great. Built but one , the Hurricane next.

-
Lancaster ND644 in 32nd scale
krow113 replied to FME erk's topic in LSM 1/35 and Larger Work In Progress
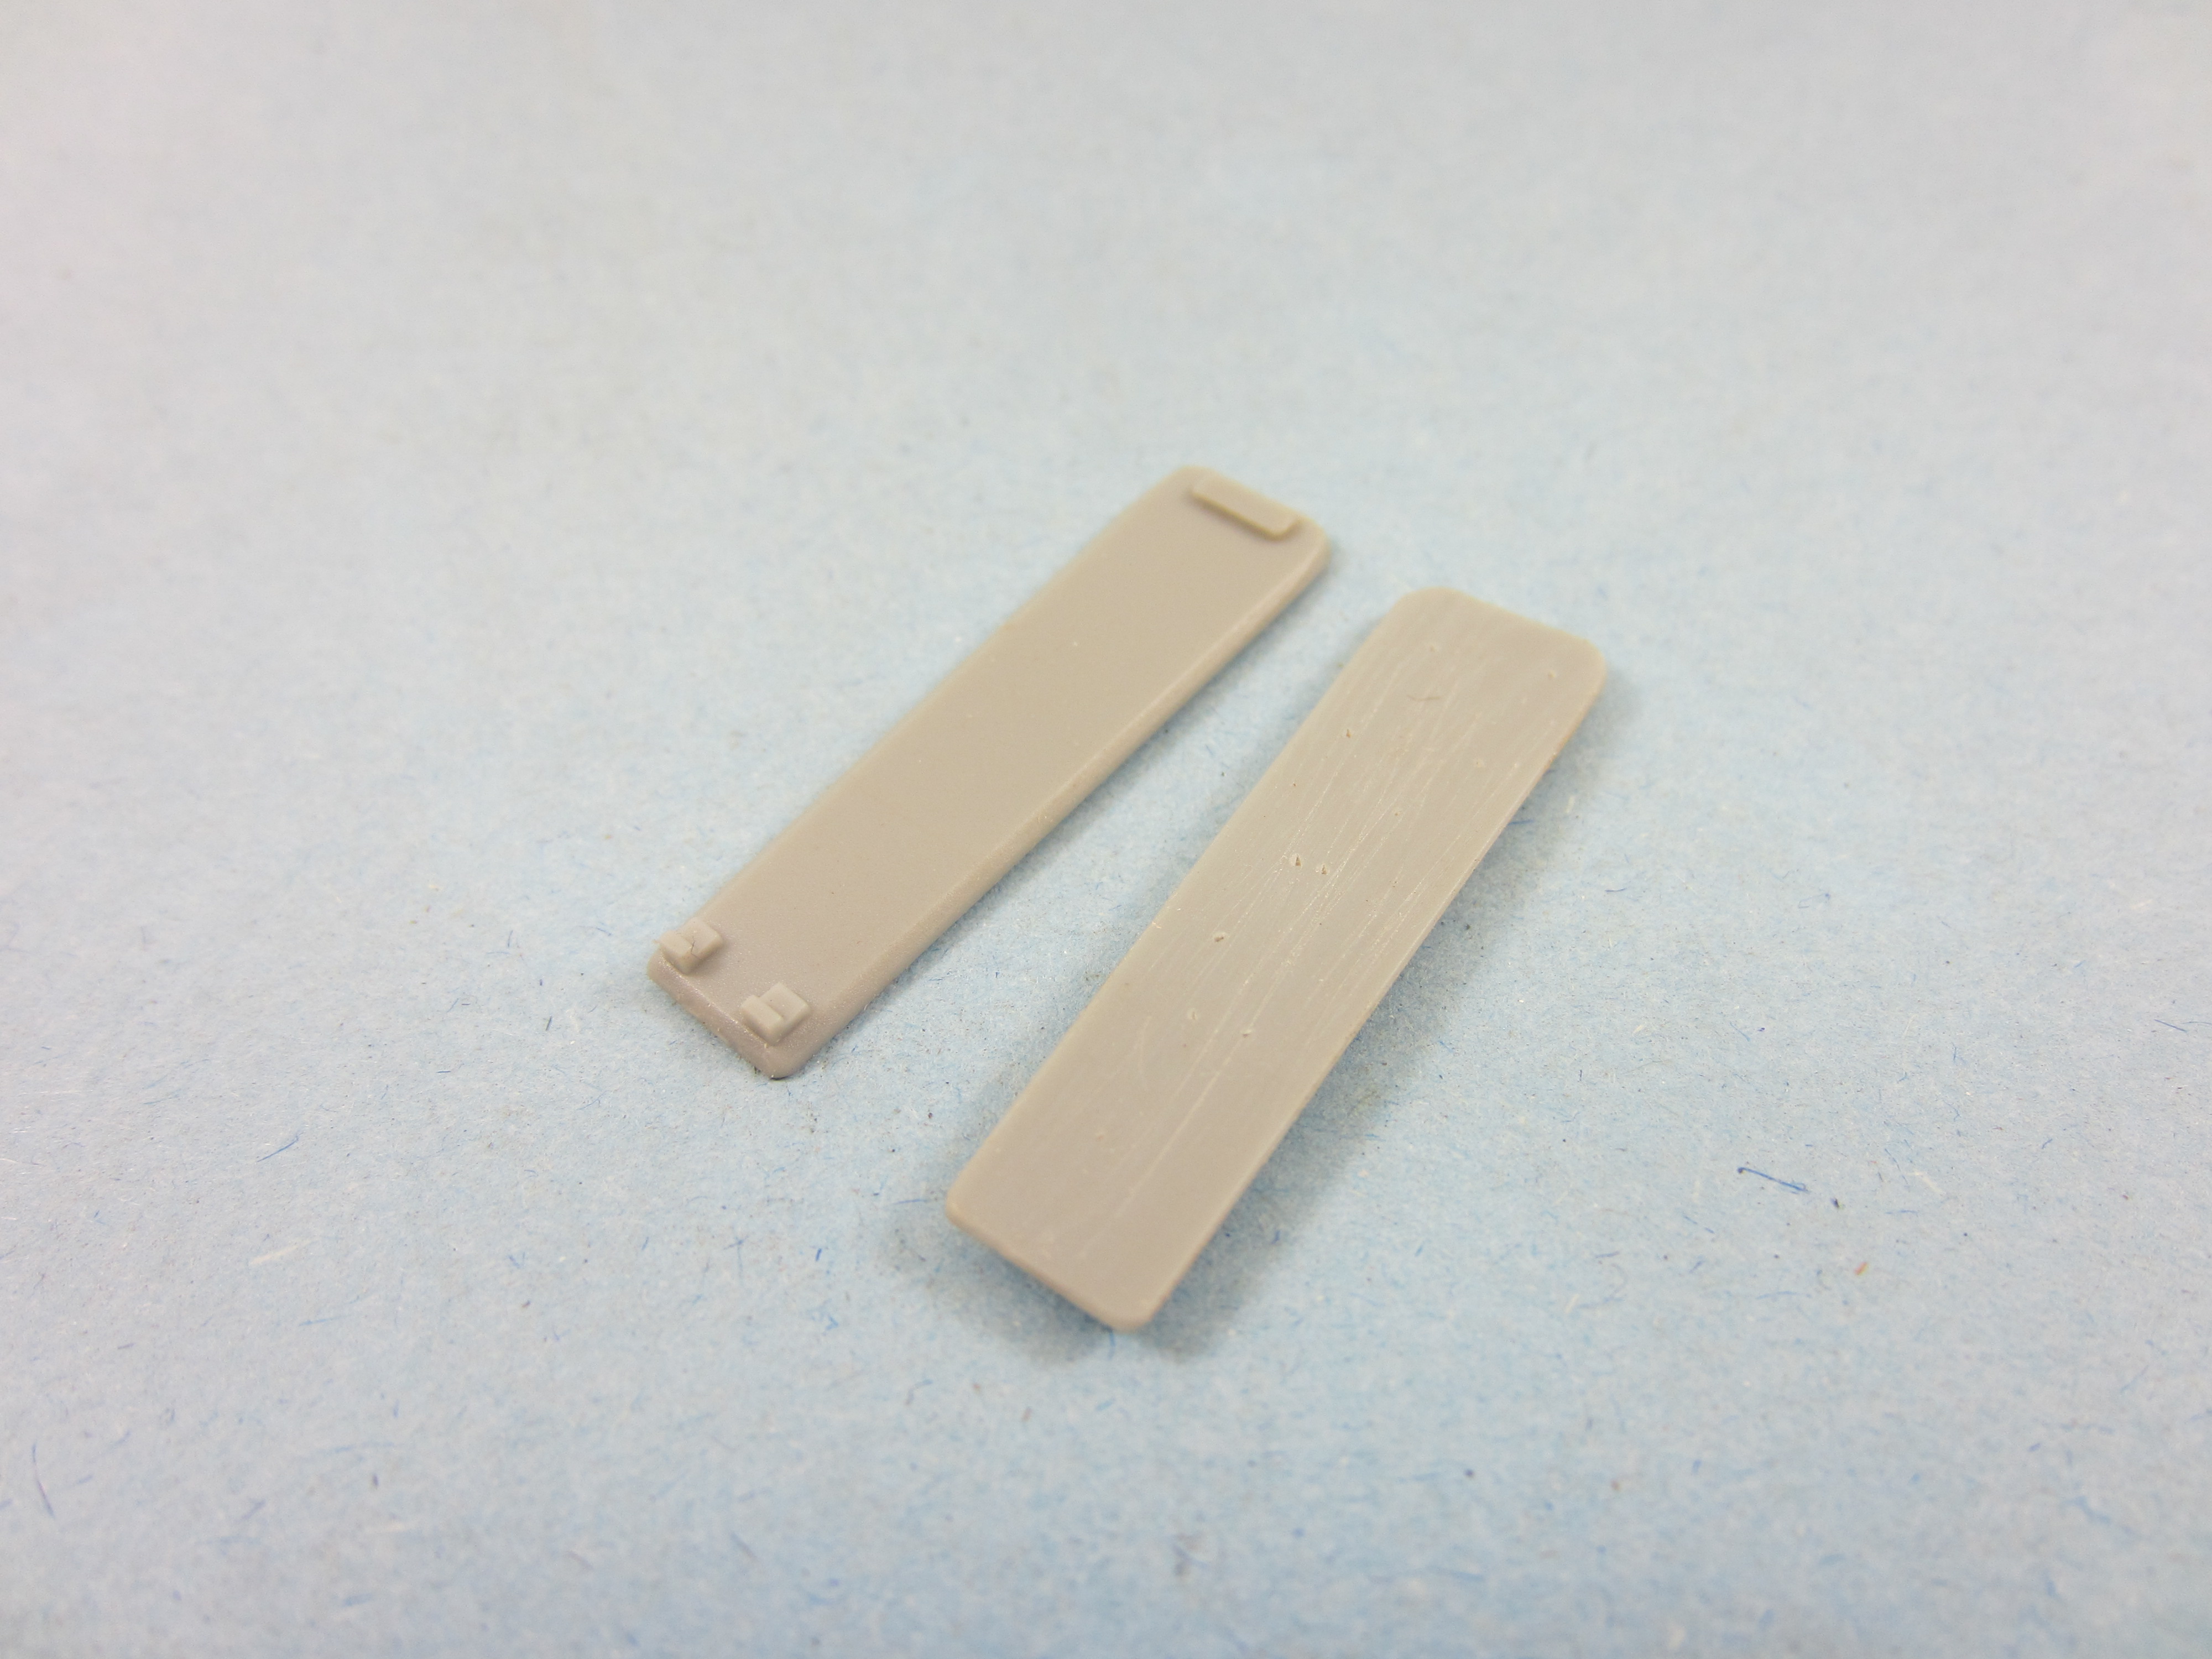
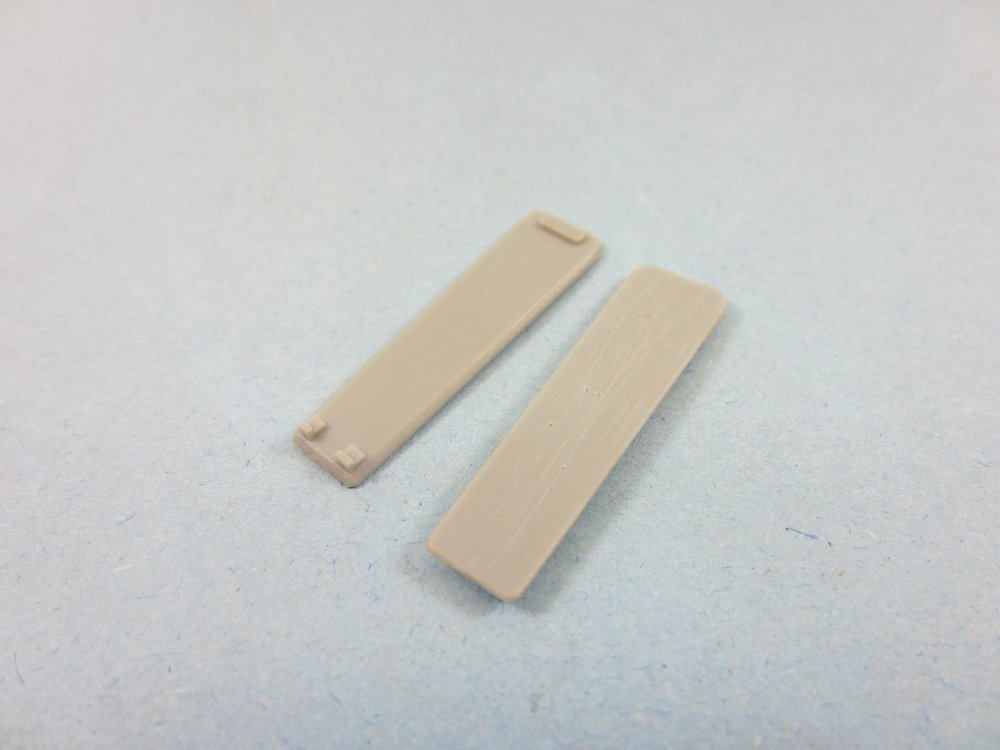
Ouch! Thats a nasty break. Sand off that strip on the bottom and replace it with plastic card for strength. -
LOL Thanks Ernie. However the custom printed ALPS decals may not make the cut. I'll make the decision tomorrow: I like the idea of guards for the control cabls along the fuse . I took the kits and modded them into what i would consider serviceable: The single mount is the top
-
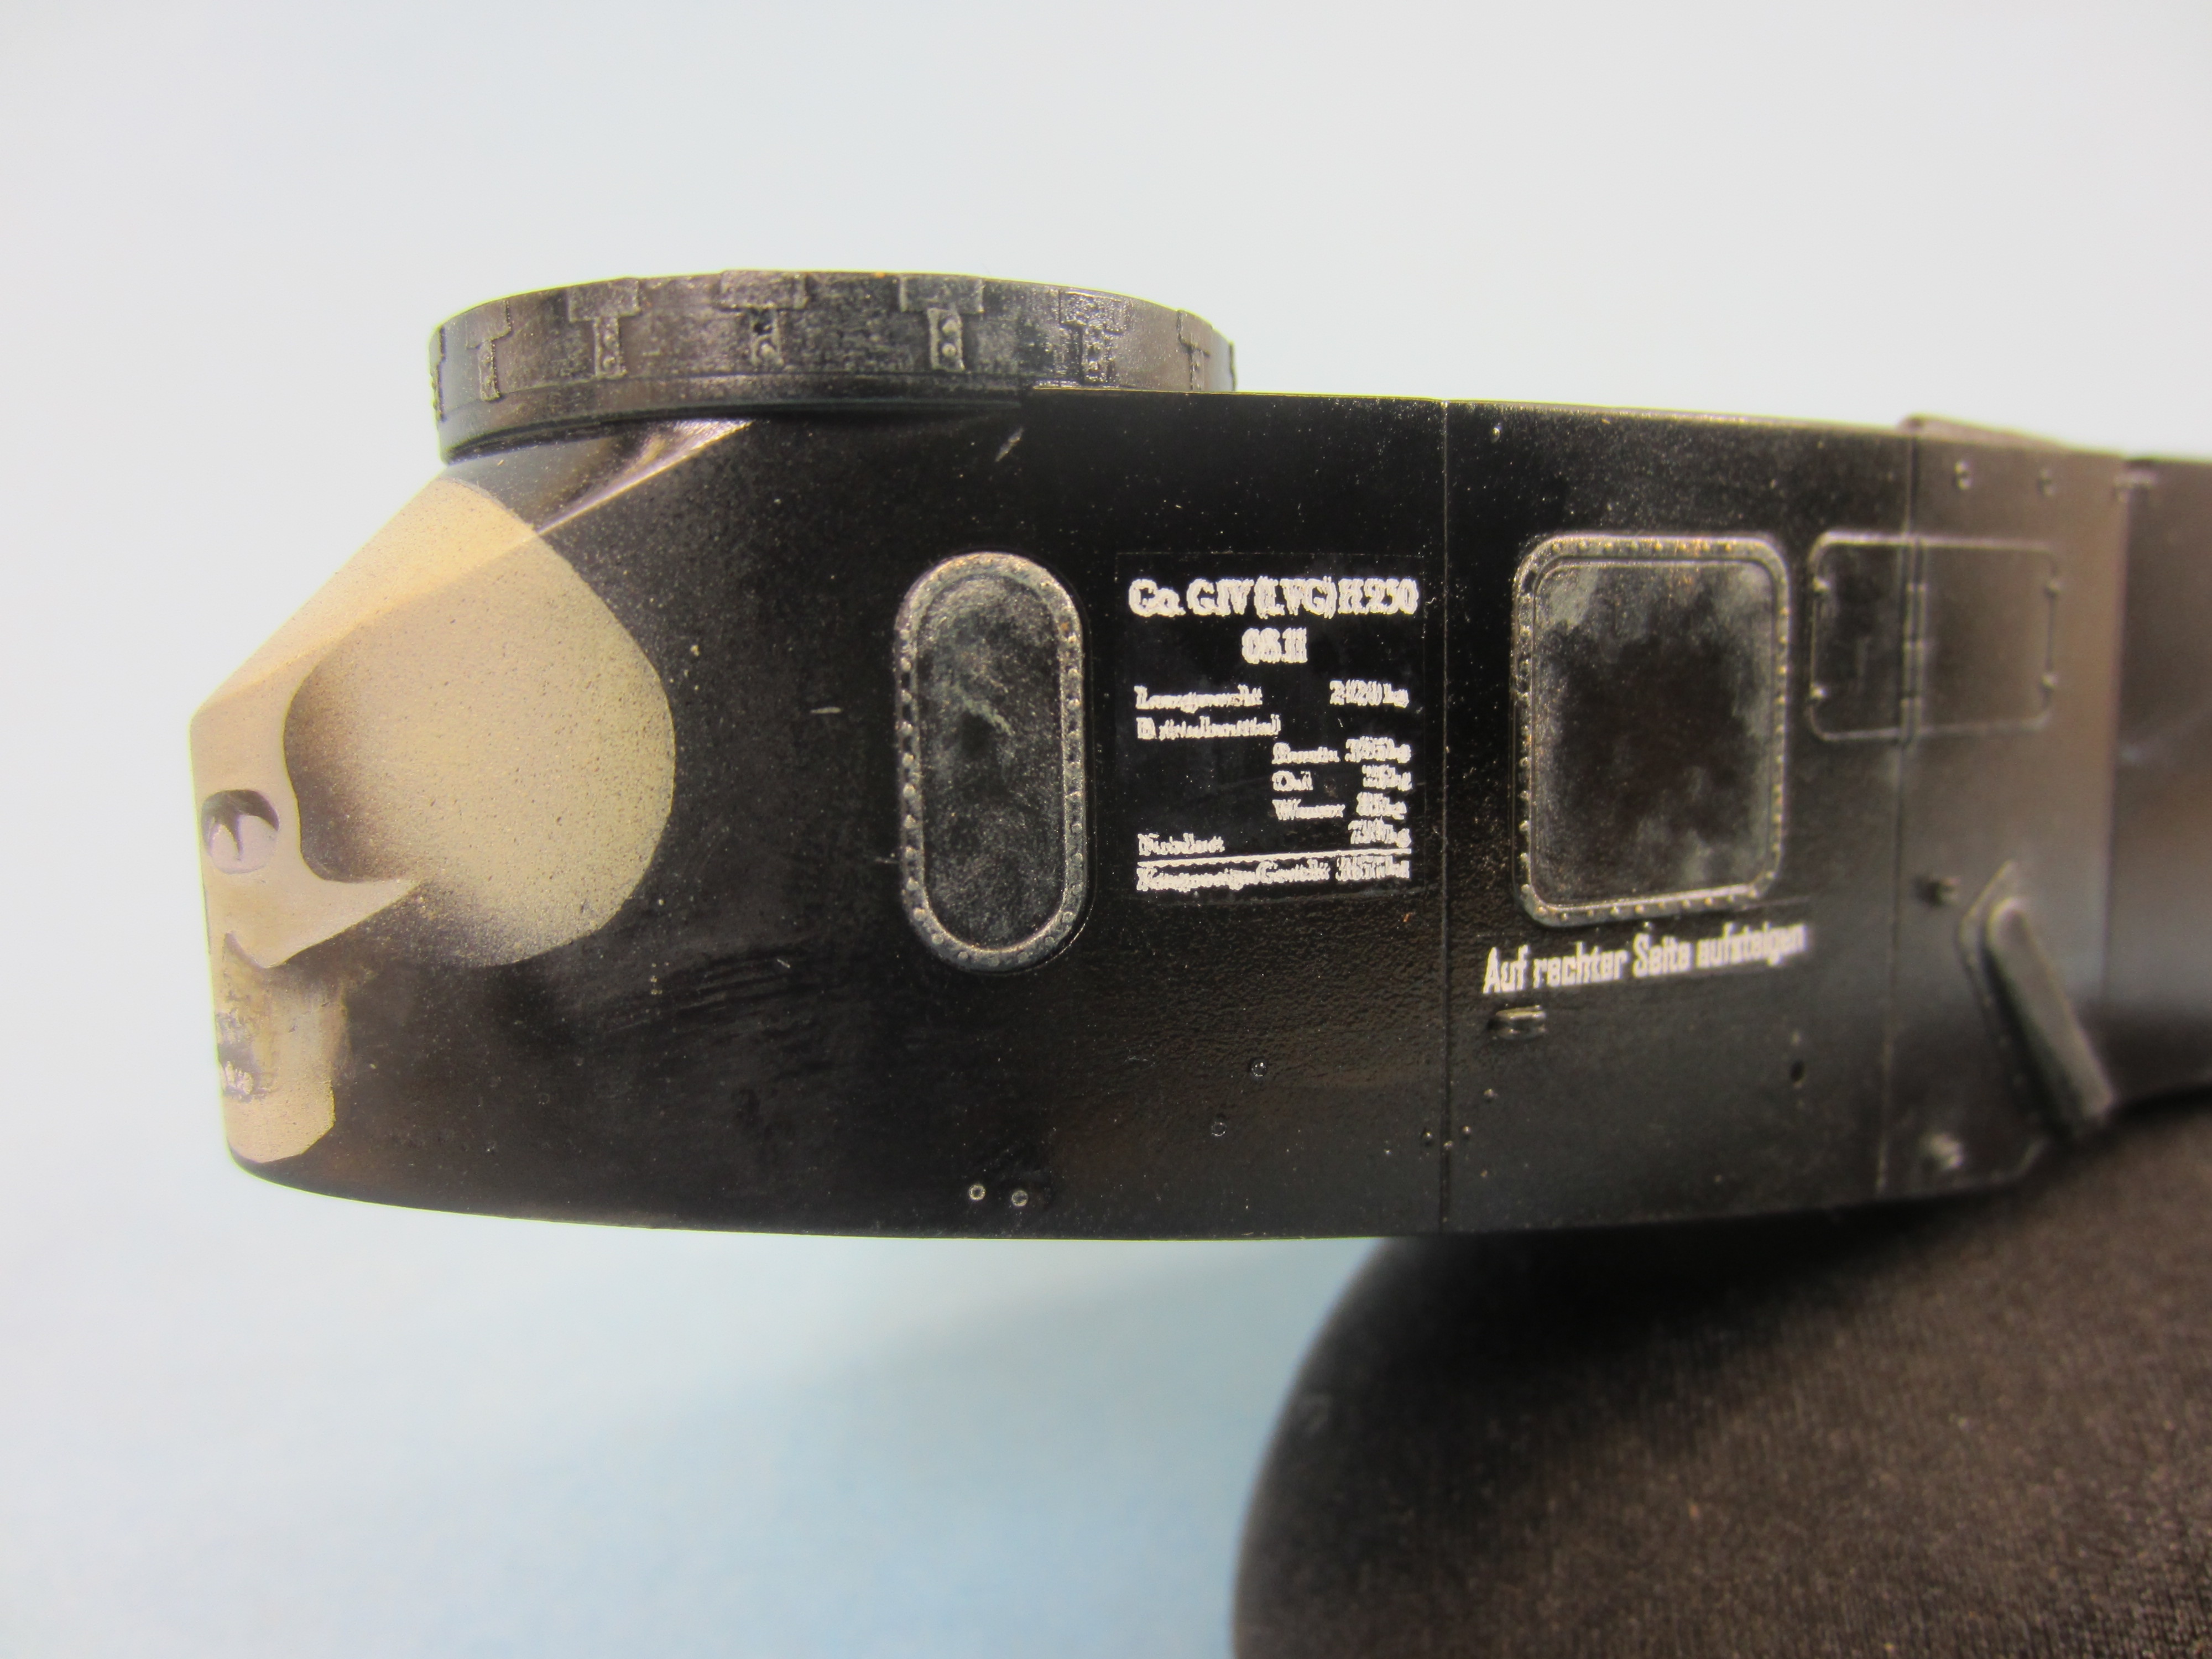
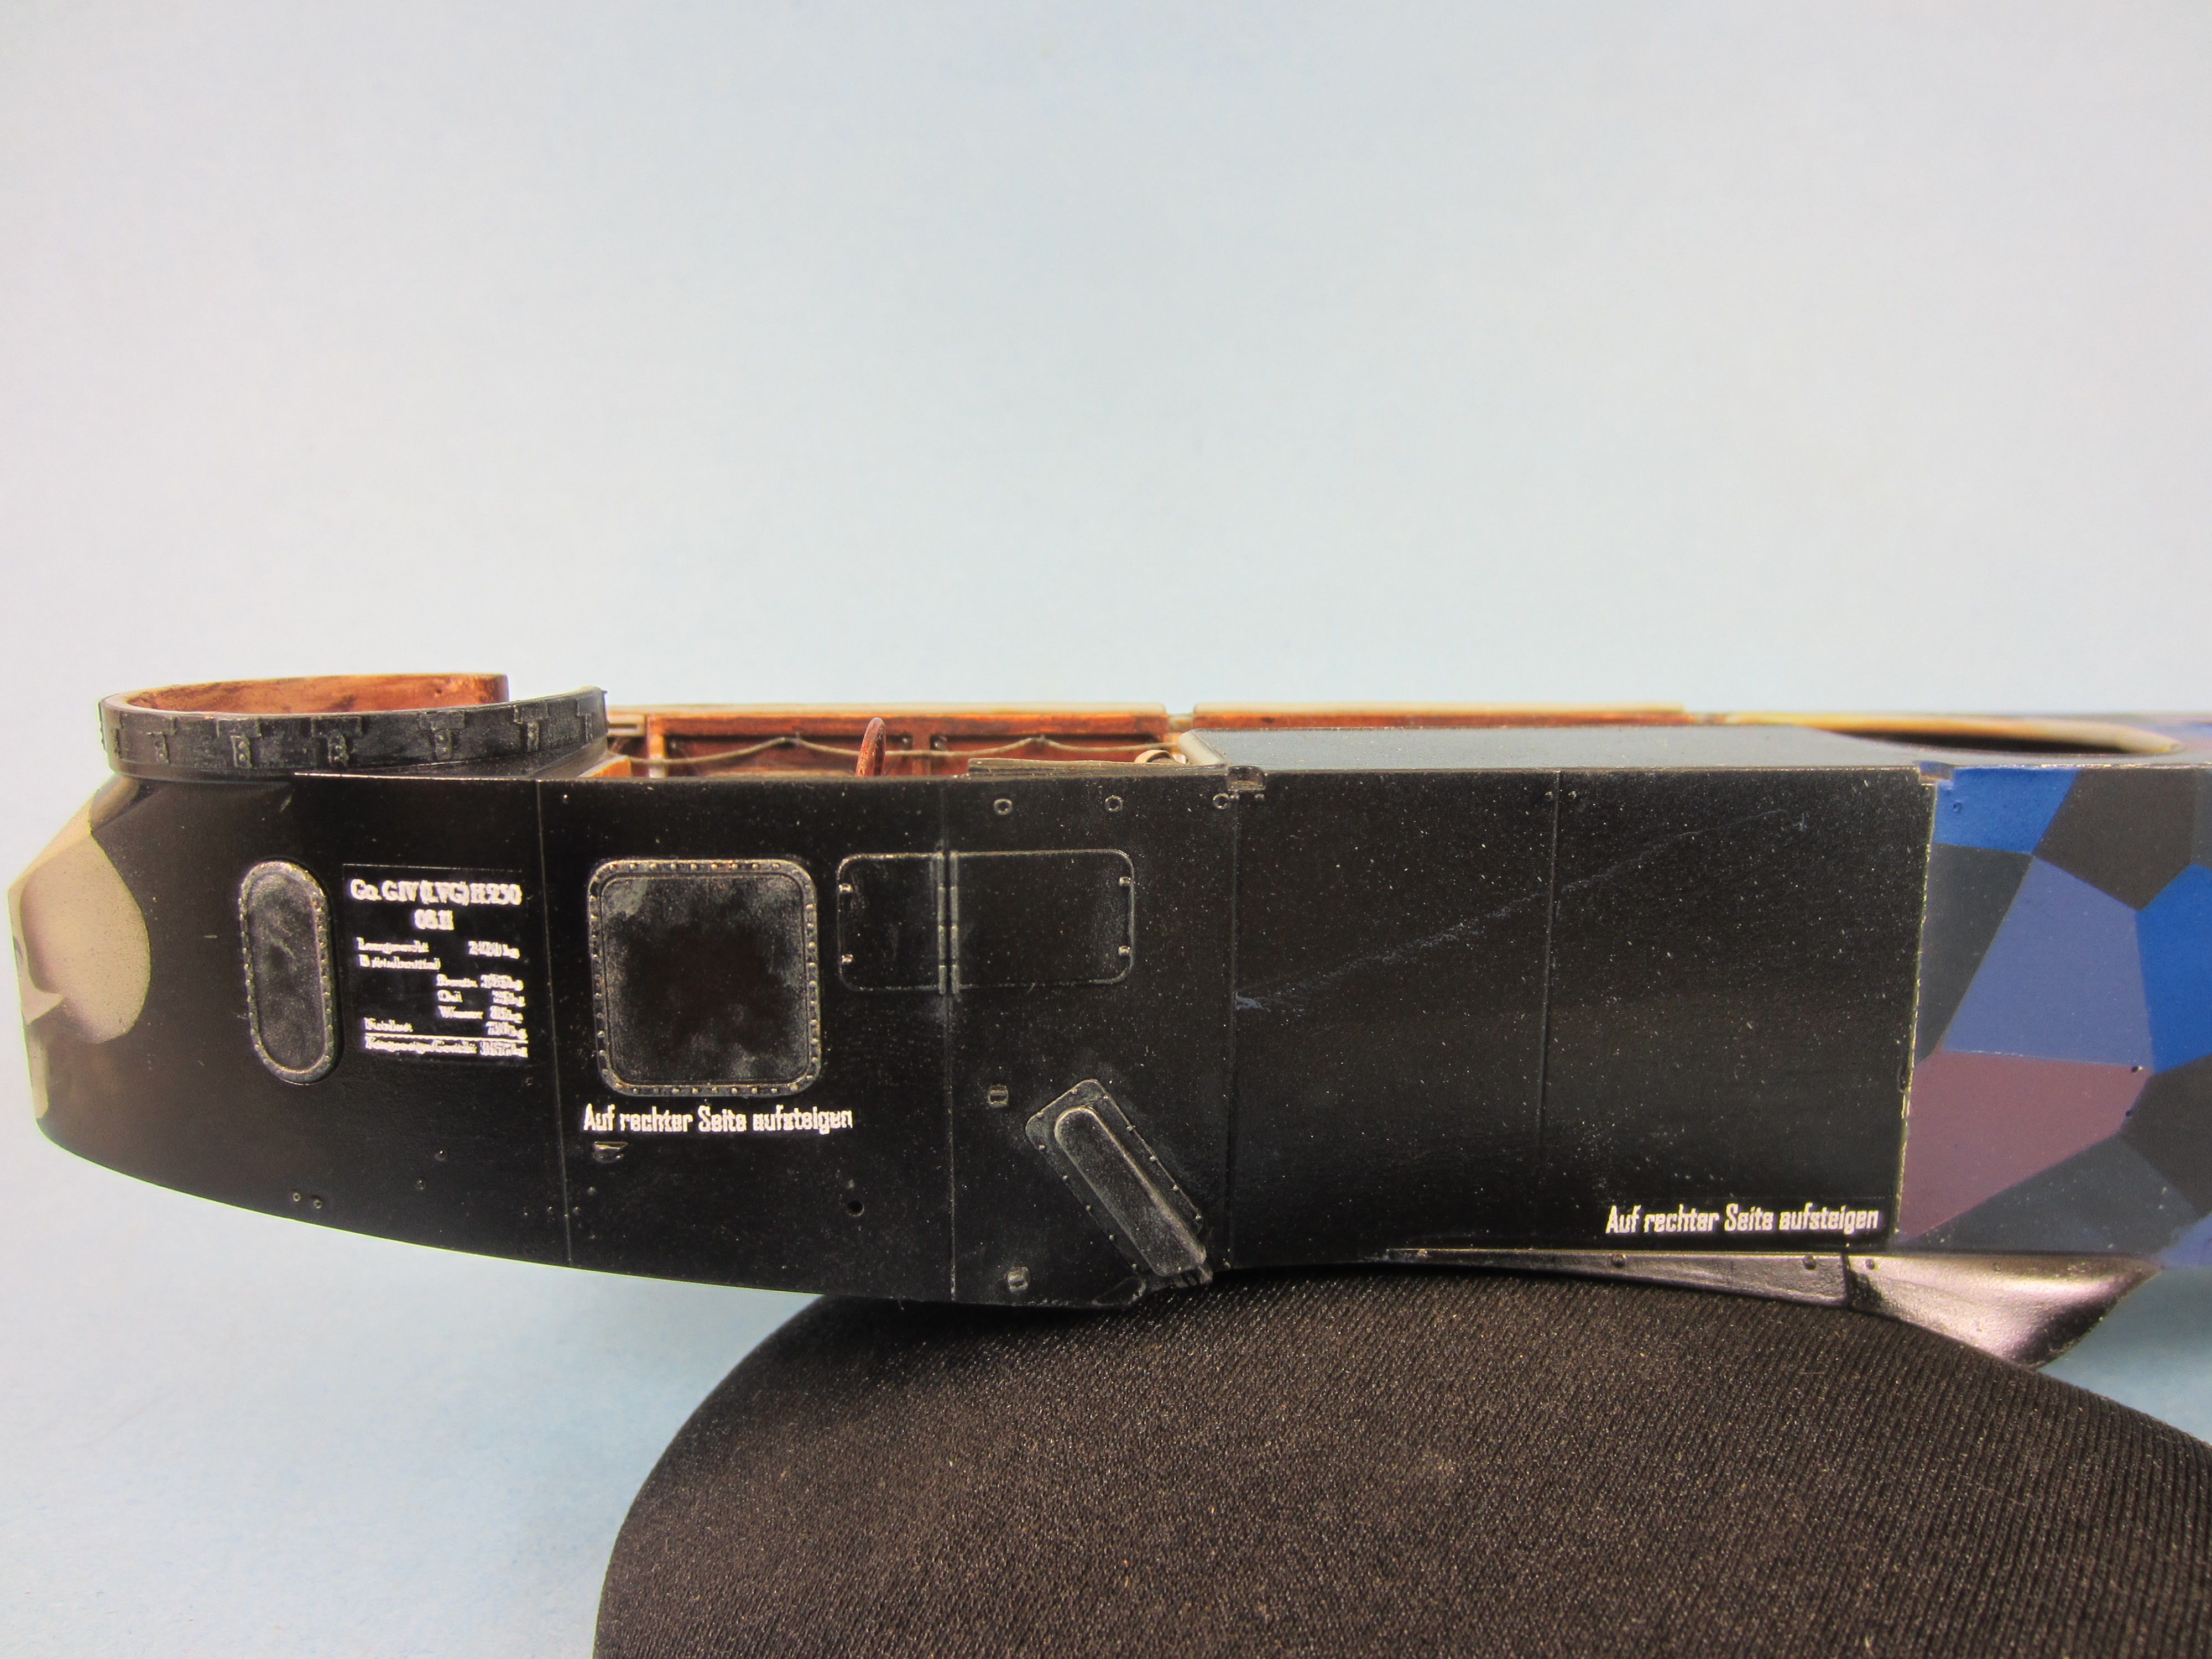
Thanks Jeff. Some decals I had made , printed in white , for load out and entry warnings. Referenced from available pics.

-
I have a white cat too.
-
Just looking at a 1/32 Lear jet from Jetmad.
- 161 replies
-
- 3
-
-
- greatwallhobby
- italeri
- (and 6 more)
-
1/6 scale Honda police motorcycle Question
krow113 replied to belugawhaleman's topic in General Discussion
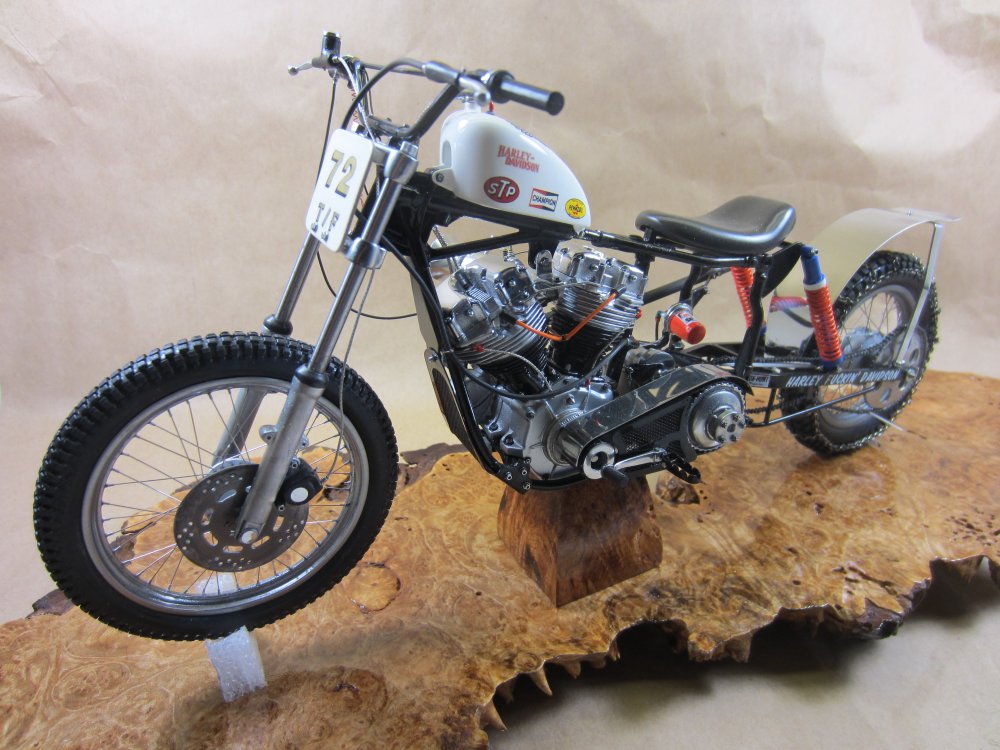
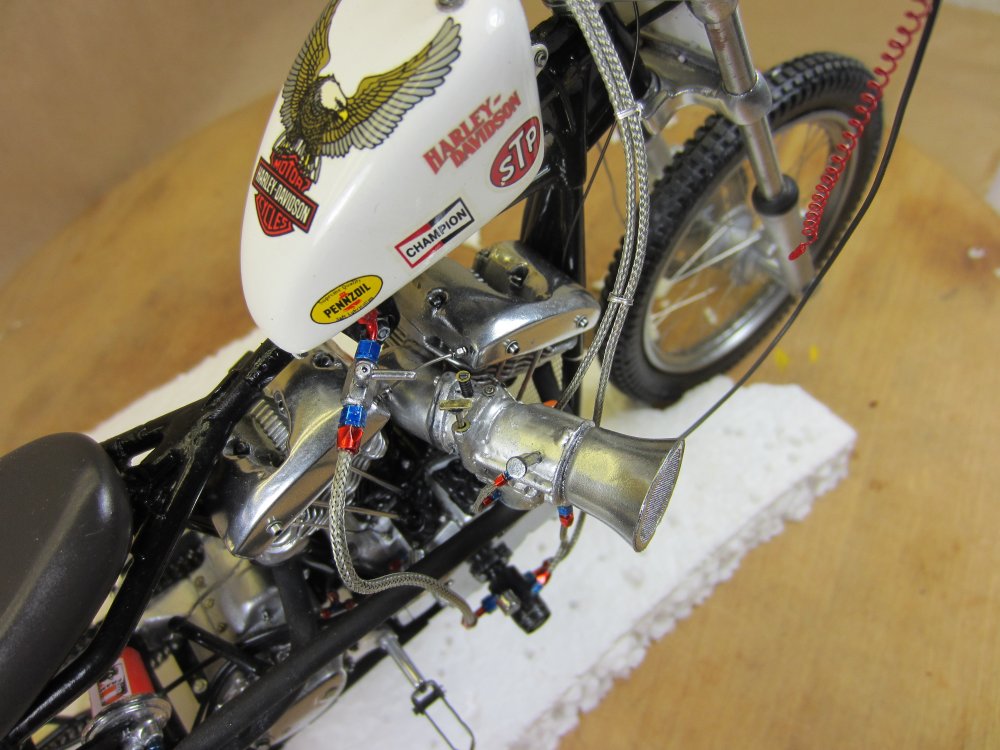
Cop bikes are a big meh! Here's what I did with Revells; 1970's Top Fuel Harley Hillclimber: Waaaay more fun and interesting.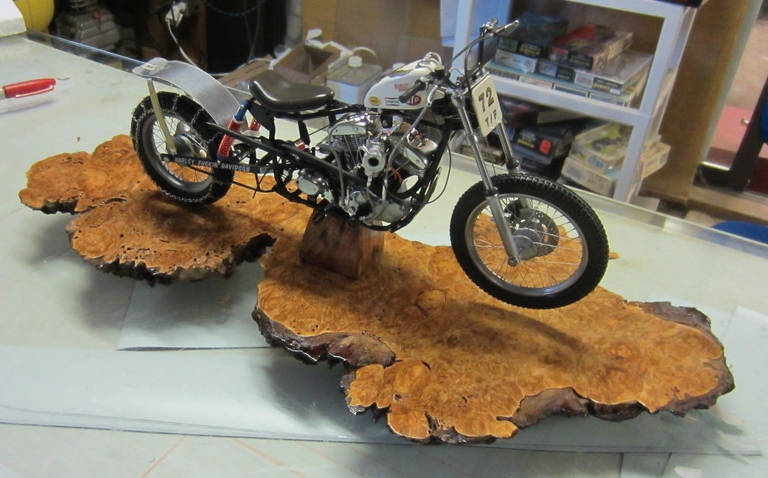
-
...that plier and tweezer rack is sublime...
-
but , but , but thats no diff than usual! and coping is spelt , well , you know...
-
Share how COVID-19 Quarantine has affected you.
krow113 replied to 1to1scale's topic in General Discussion
The scenarios I related at the beginng of this scamdemic are starting to be realized. Politicians exempting themselves from the rules. Entitled being exempted from the rules. ( From a headline regarding an RCMP's funeral) With the confirmed scams that have been run on The Herd in the past and the obvious self entitlement of those in power , its only a matter of time until The Herd has had enough. How many peeps have lost their homes? How many peeps have lost their business? Not any of the entitled , thats for sure. How many multi-millionaires are now billionaires because of this? Are the rich exempt from all aspects of this situation , except profit? Cue the "Let them eat cake" statement which was obviously oblivious to reality now as it was then comment any time! I fear 2021 will be the backlash year. -
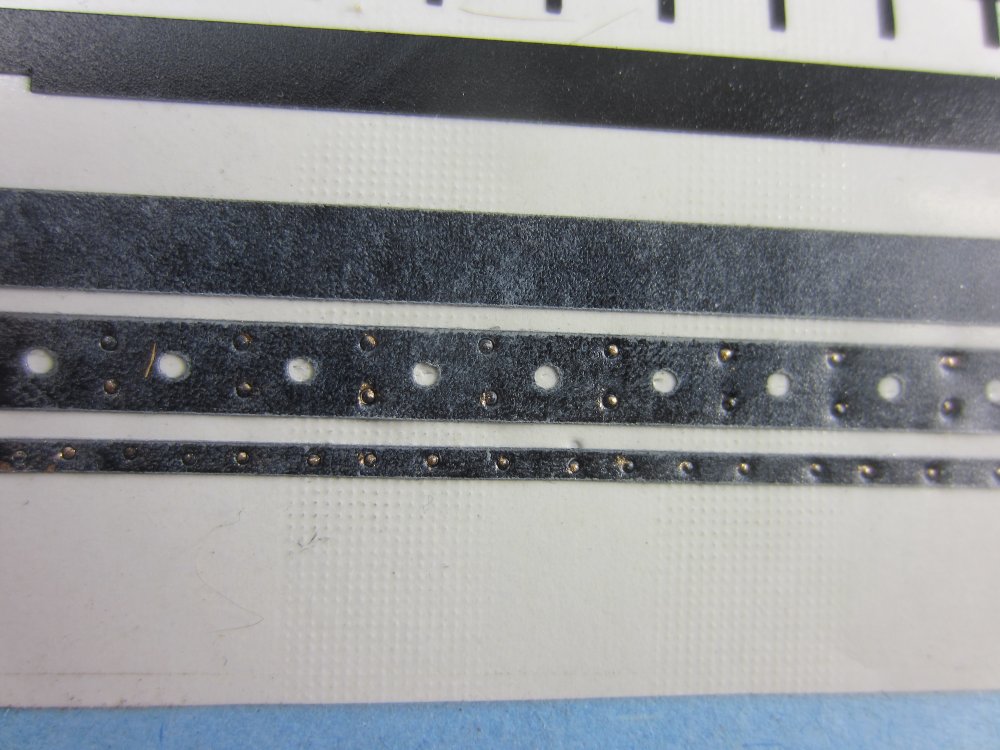
Thanks Jeff and all others daring to view the work... Not much visual input this time. 40 odd eyelets have been glued in the top wing. A double glueing , initially with a small amount of canopy pva then a thinned down application to wick the adhesive deep into the holes. Rib tape cleanup , paint touch up and a lotta lines to be attached. I am contemplating gluing the struts into the bottom wings , this means attachment isnt far off.