BlrwestSiR
-
Posts
9,209 -
Joined
-
Last visited
Content Type
Profiles
Forums
Events
Gallery
Everything posted by BlrwestSiR
-

Tamiya Spitfire IXe with ModXXX
BlrwestSiR replied to BlrwestSiR's topic in LSM 1/35 and Larger Work In Progress
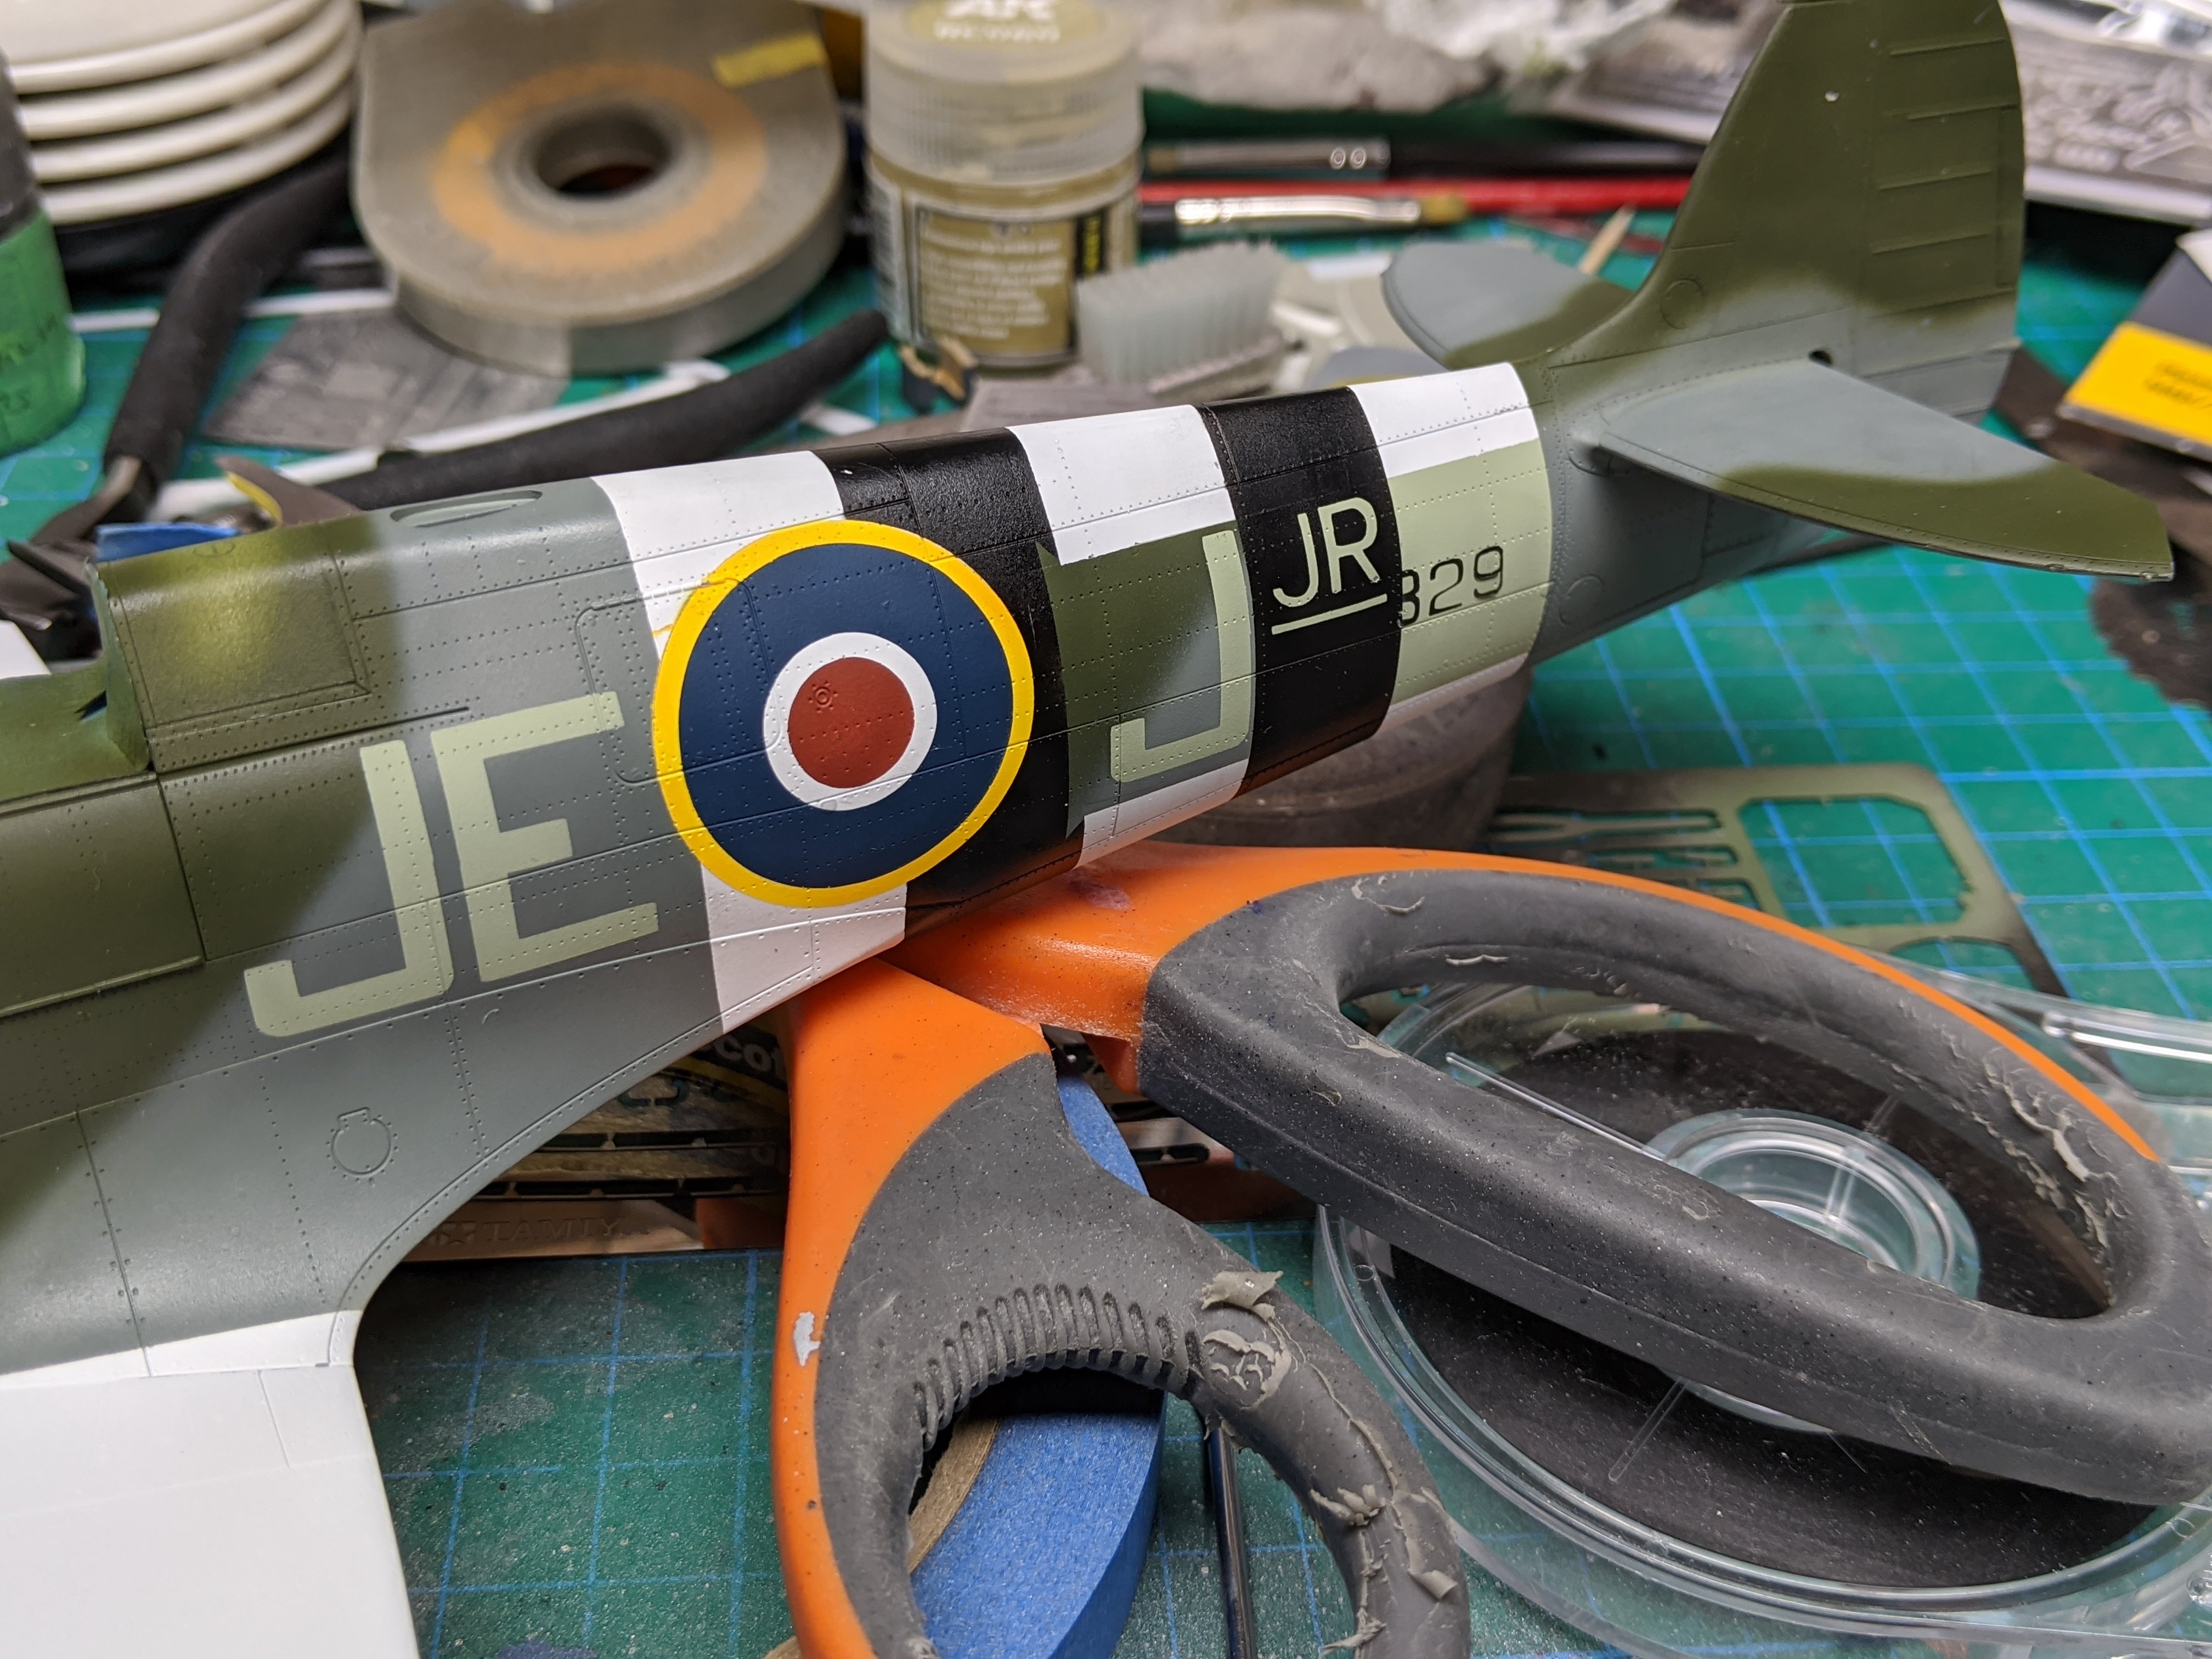
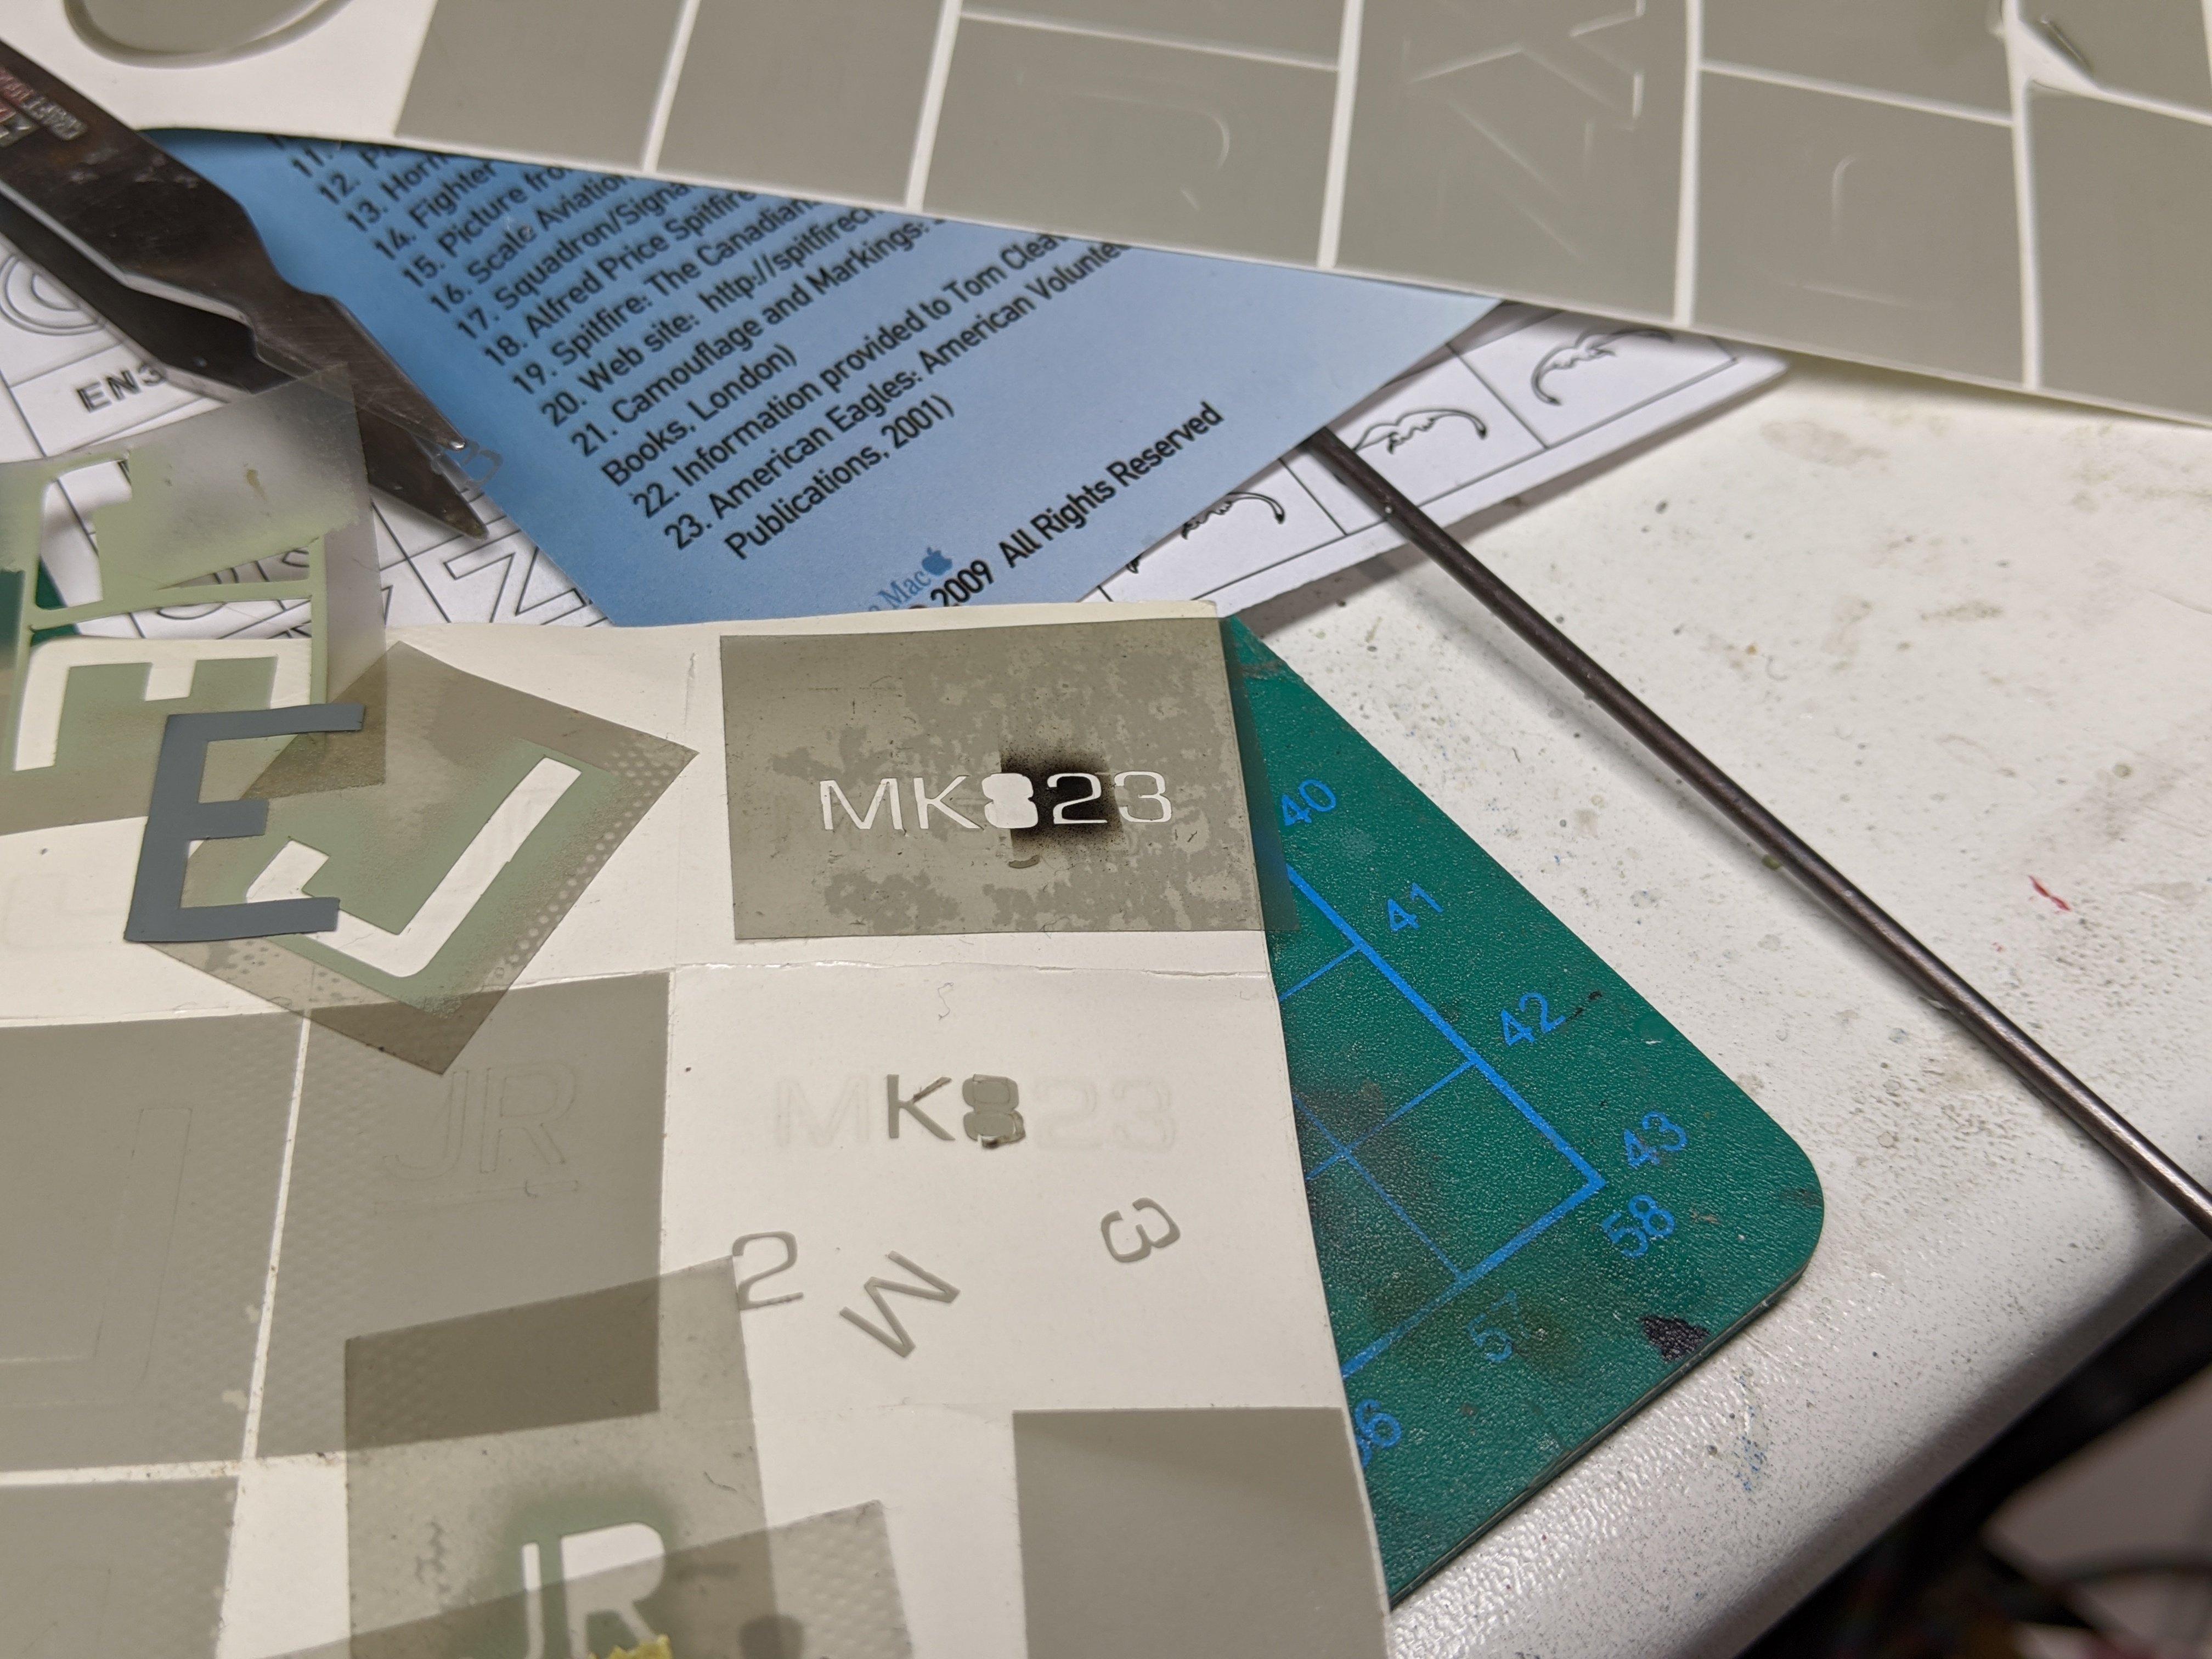
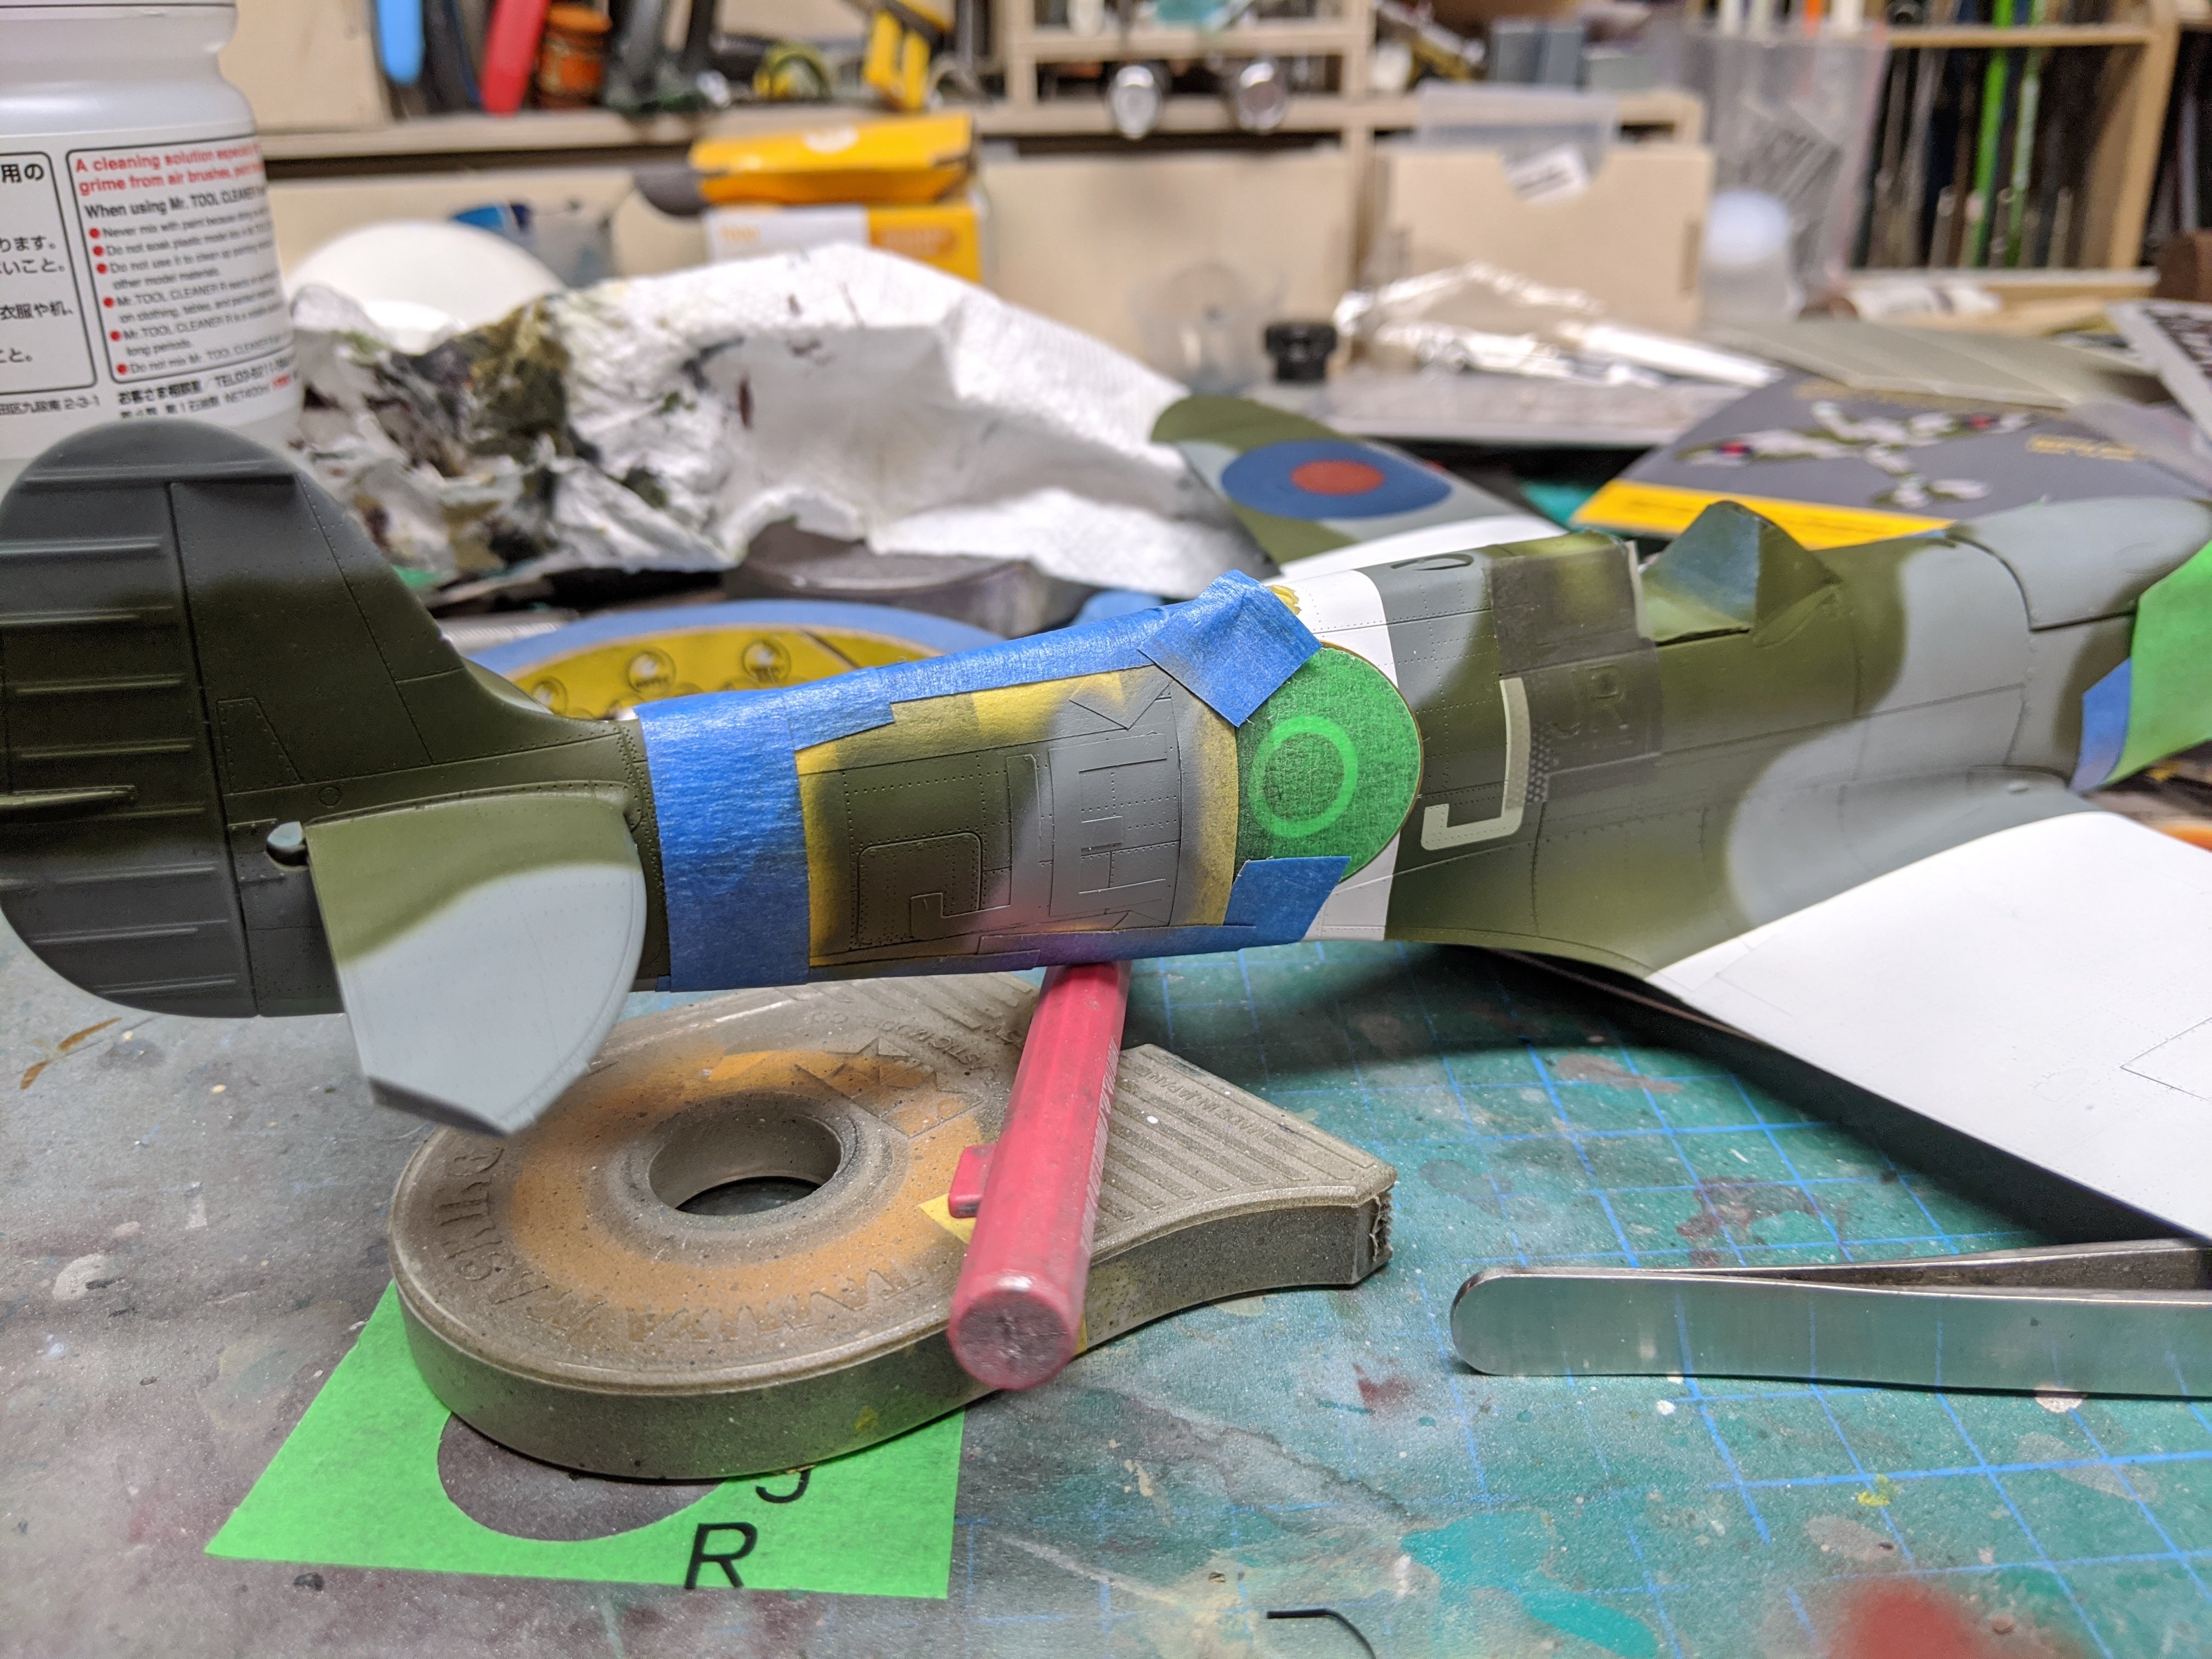
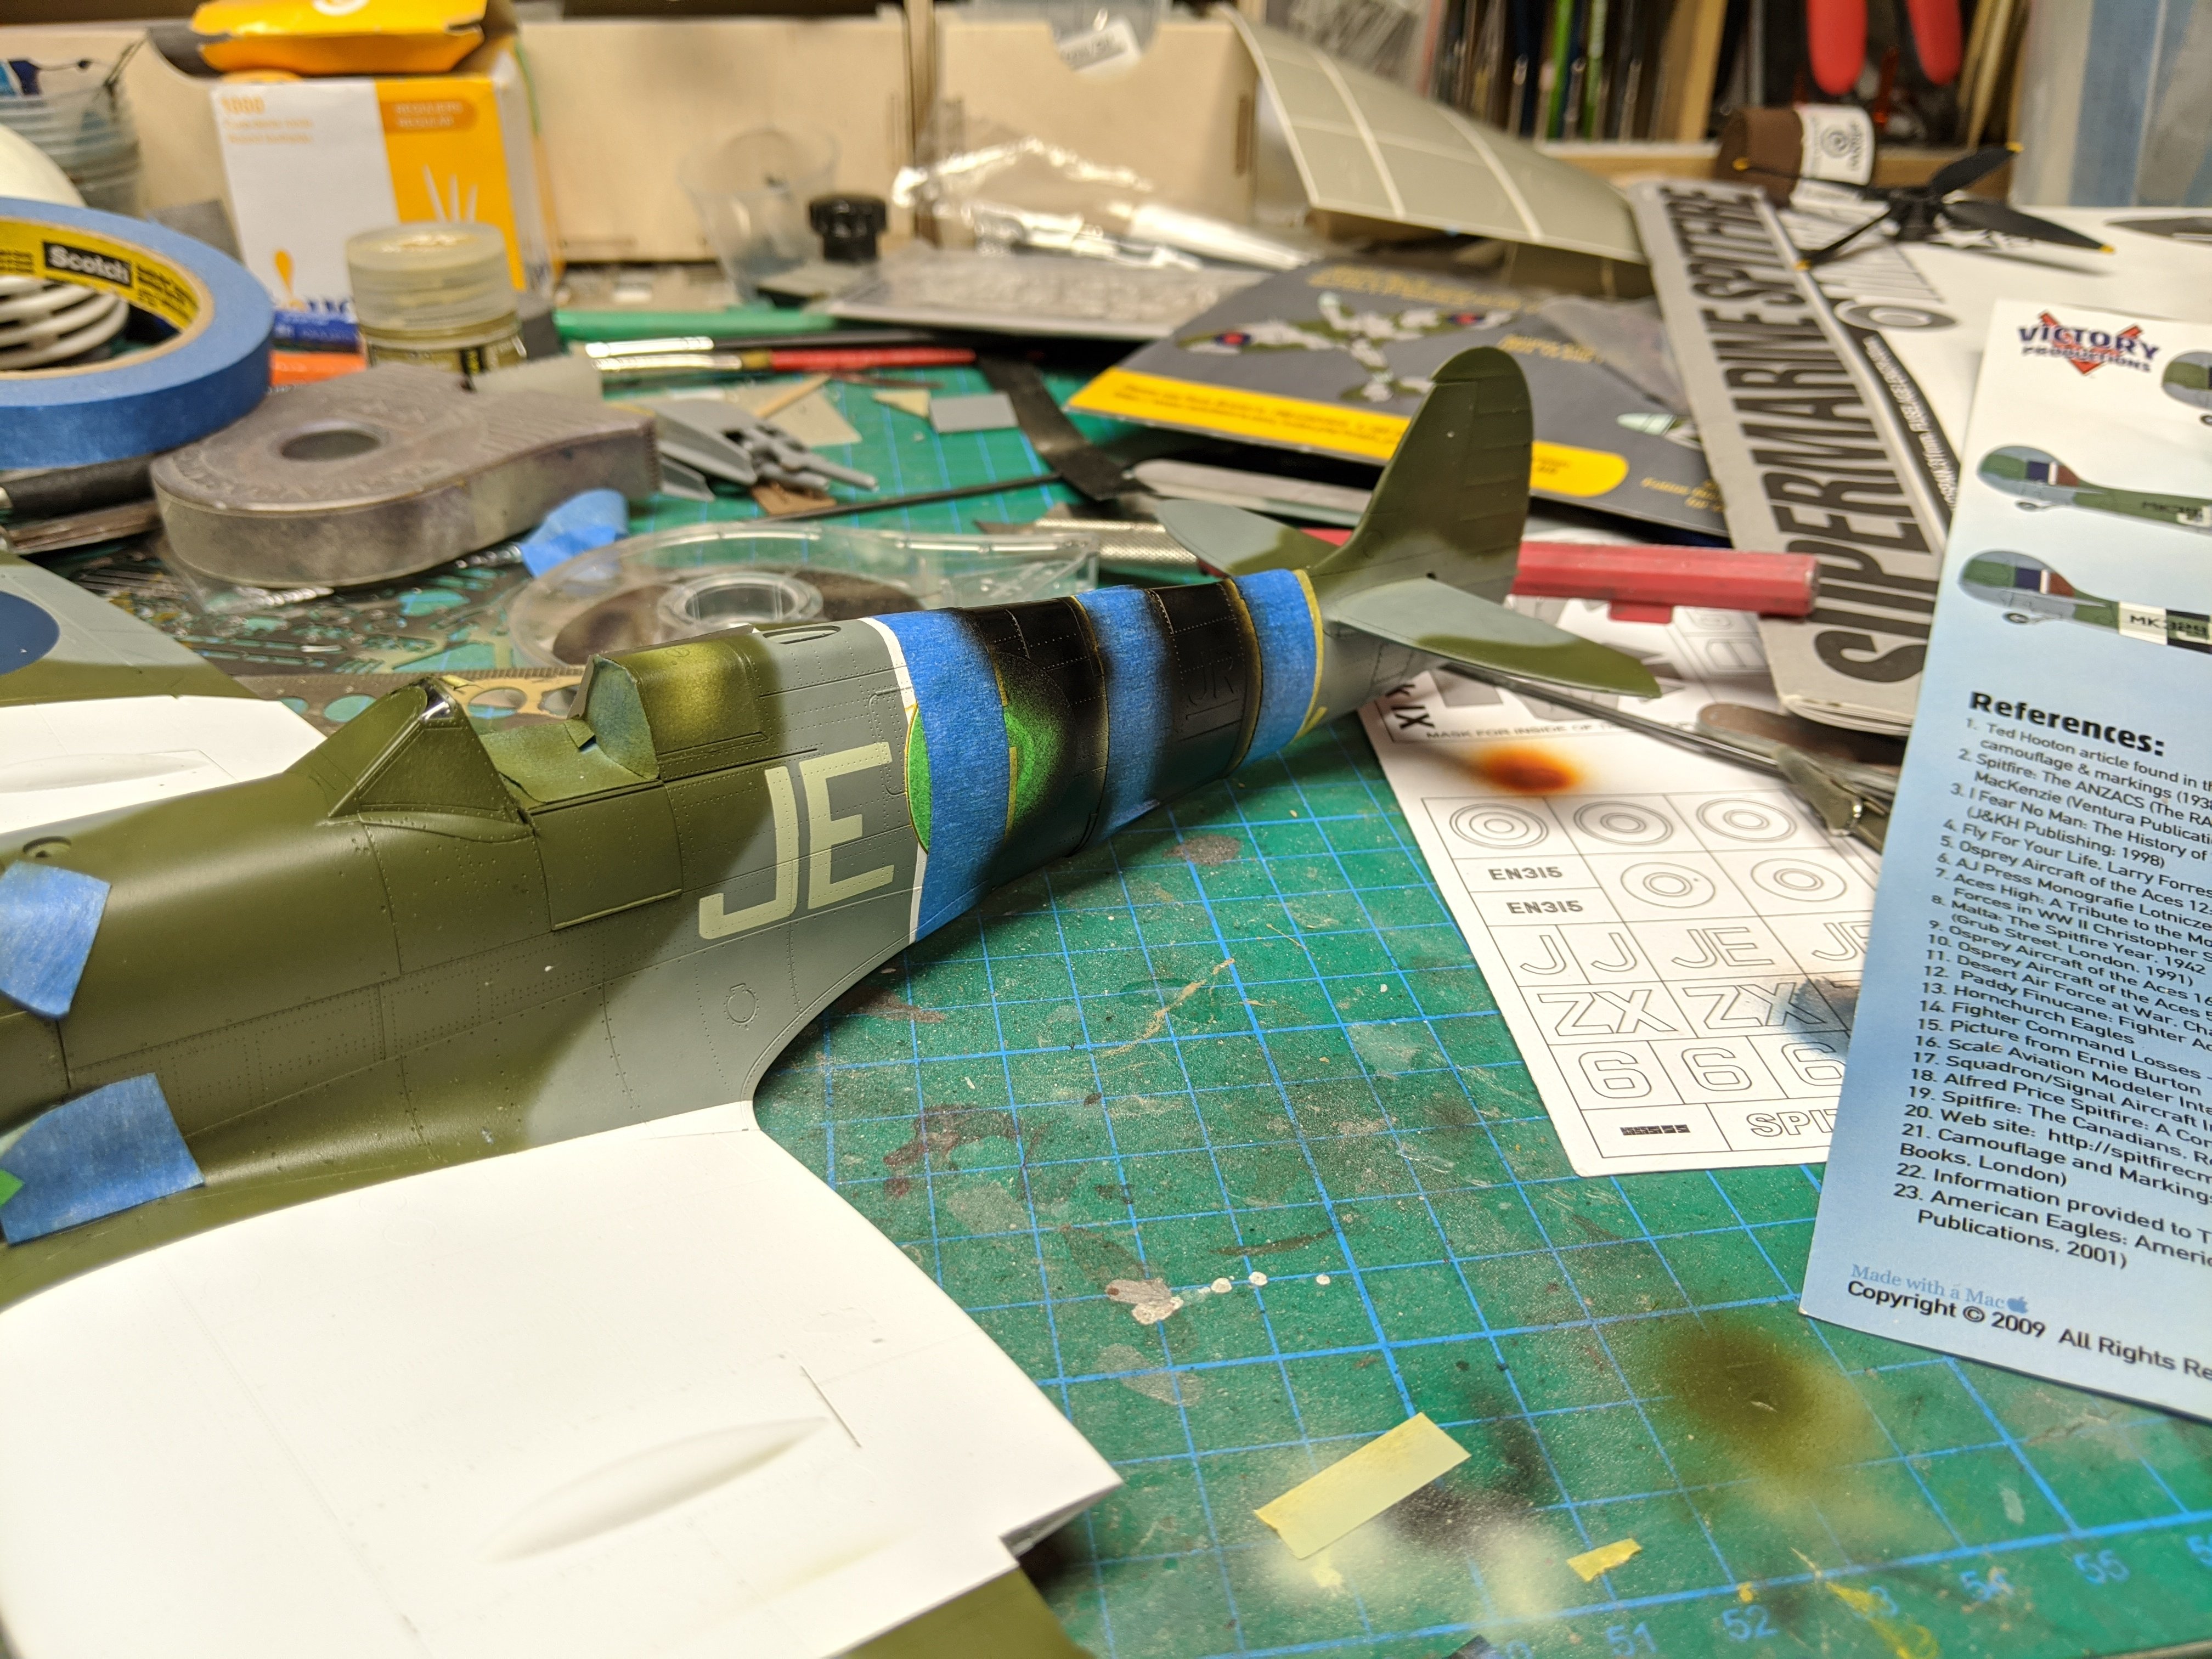
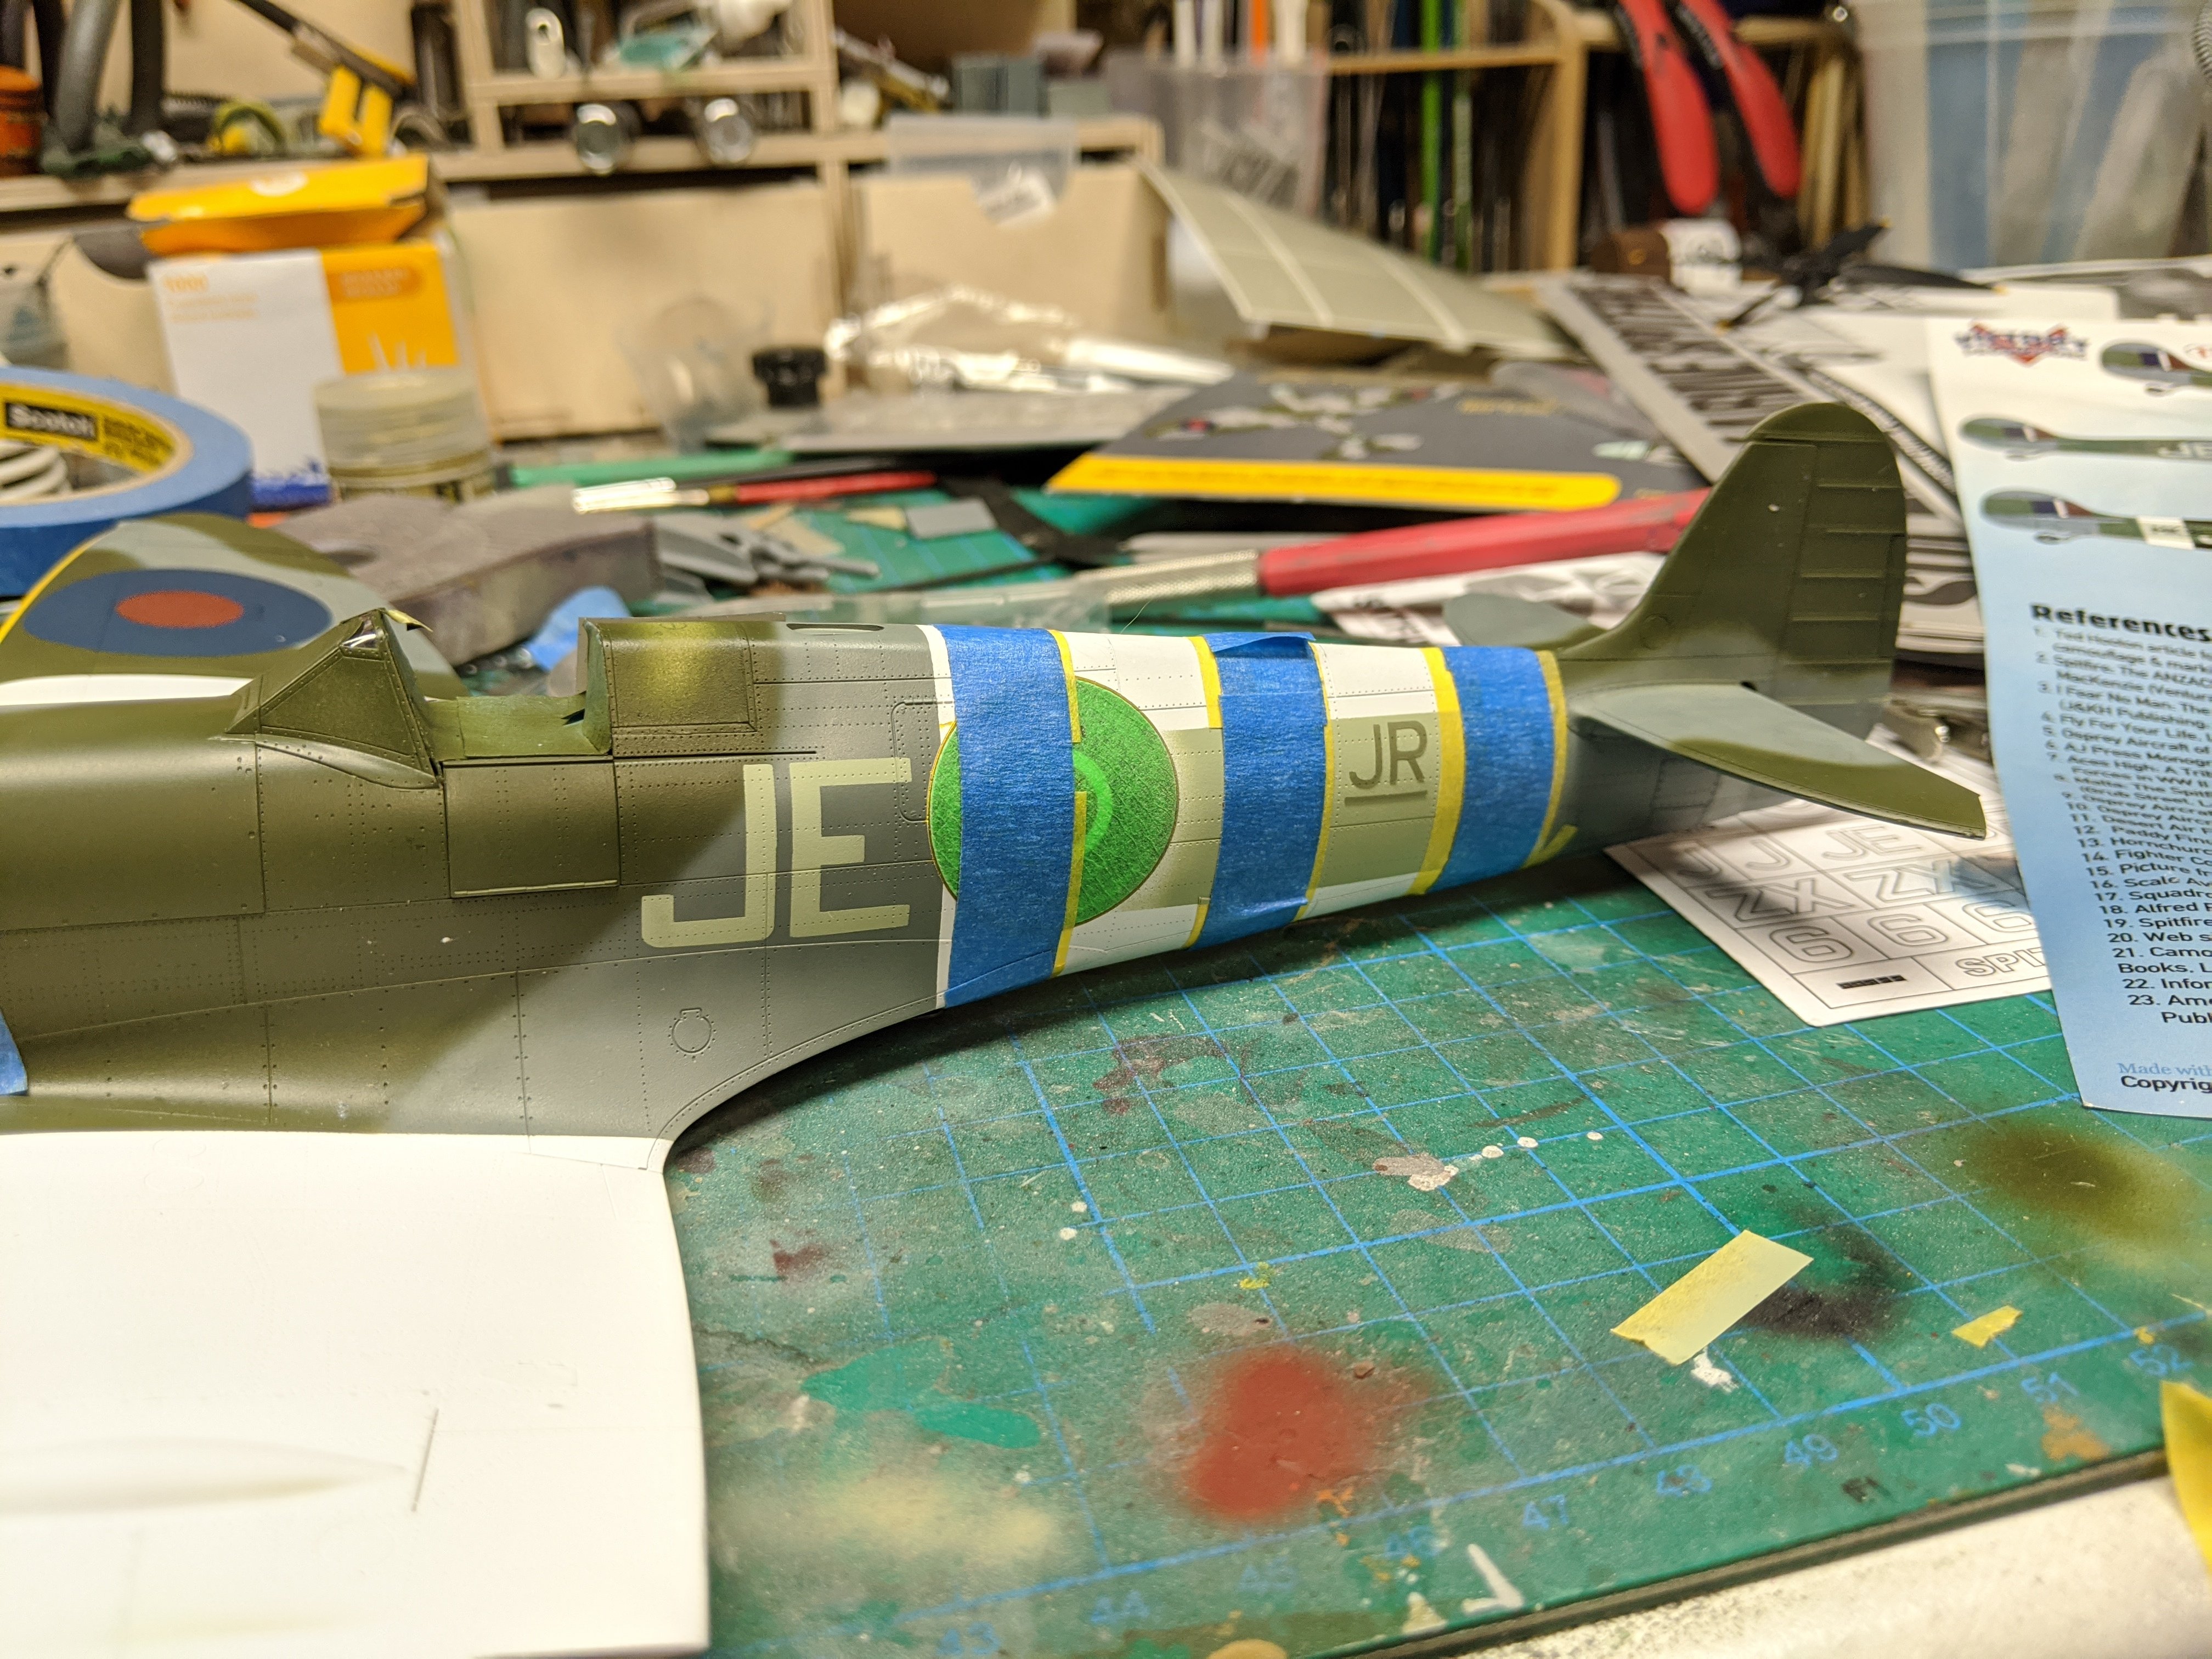
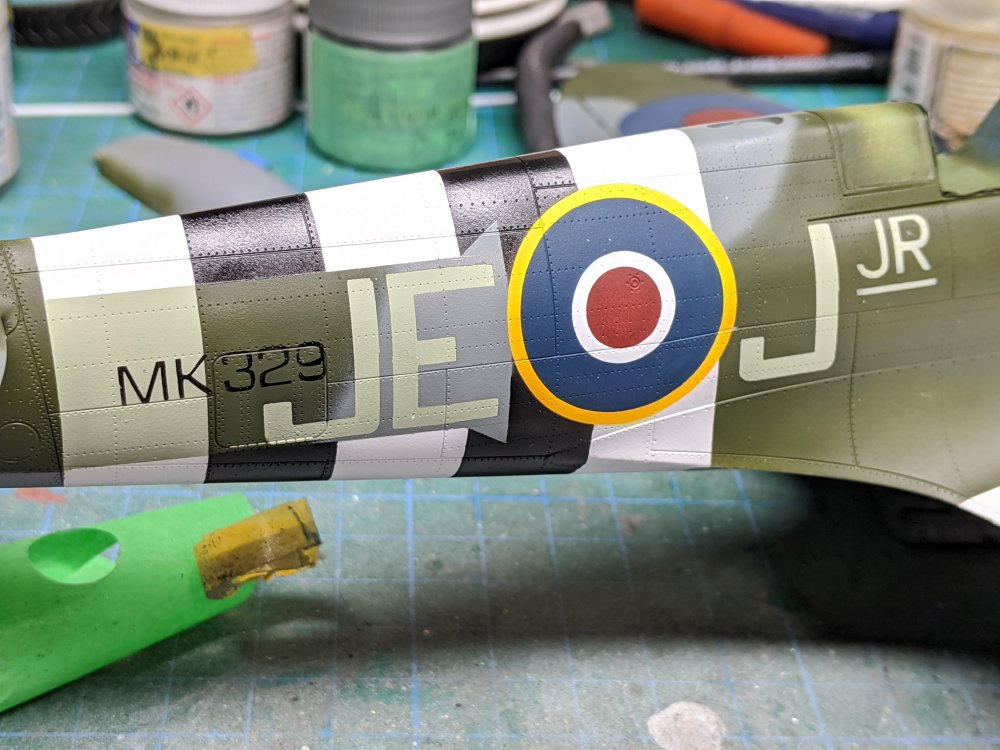
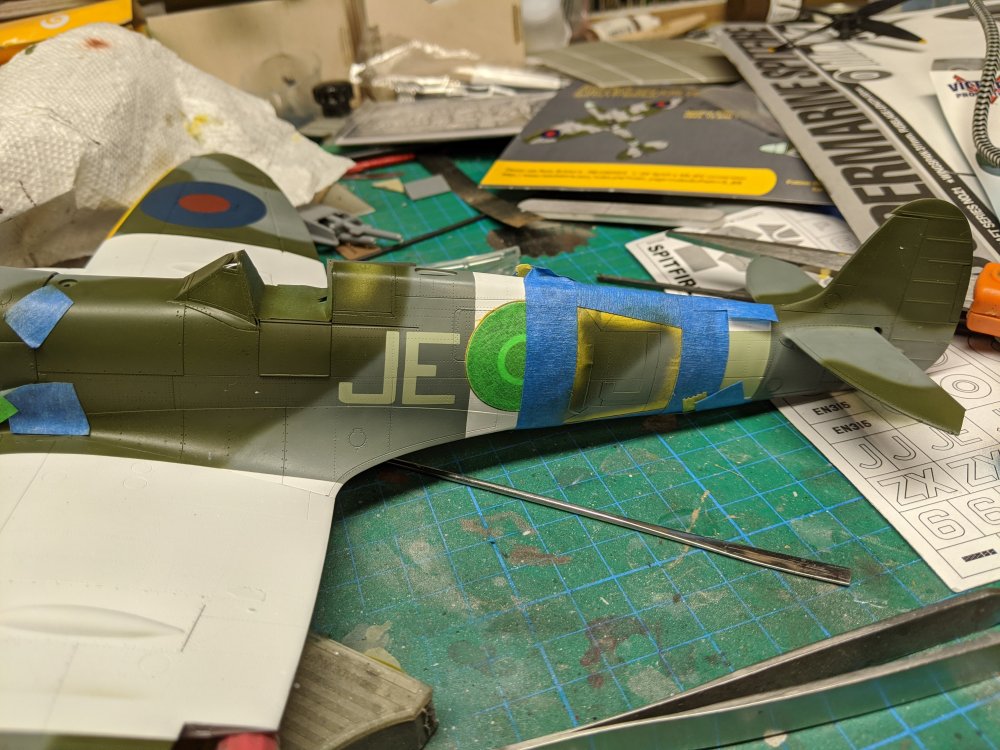
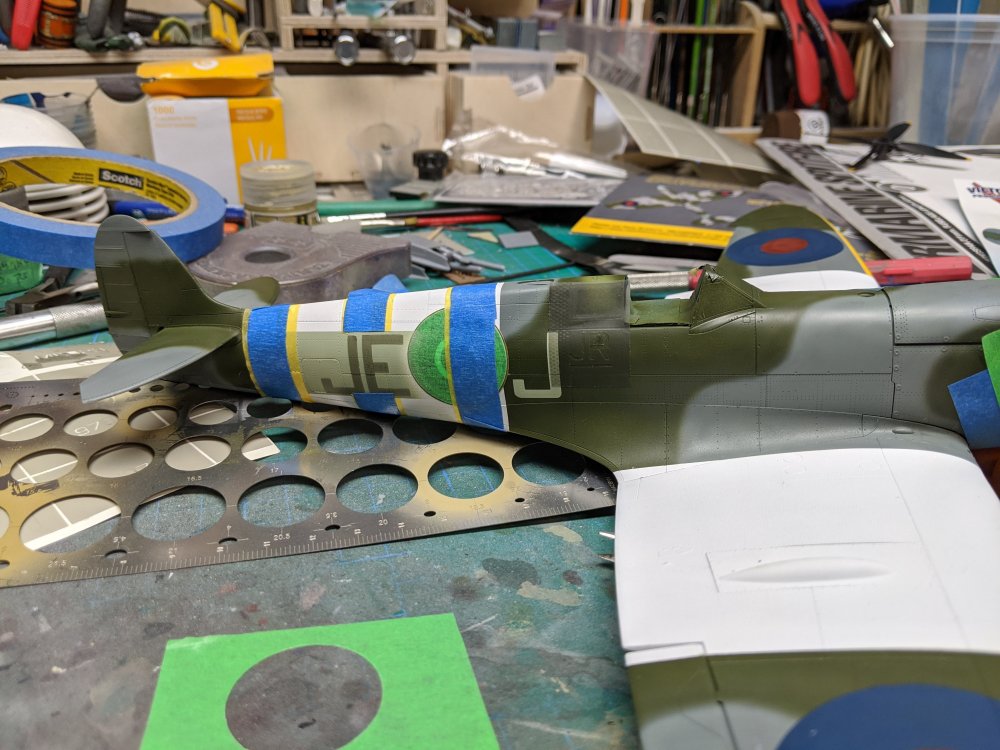
Here's where it really got fun. The tail number for JE-J Jr was MK 329. For some reason, Profimodeller made their mask for the tail number MK823. Not sure where they got that one from. So I had to make that into the proper number by taping off individual bits of the mask and getting the correct number. Now all that's left are the wing stripes.


-
Tamiya Spitfire IXe with ModXXX
BlrwestSiR replied to BlrwestSiR's topic in LSM 1/35 and Larger Work In Progress
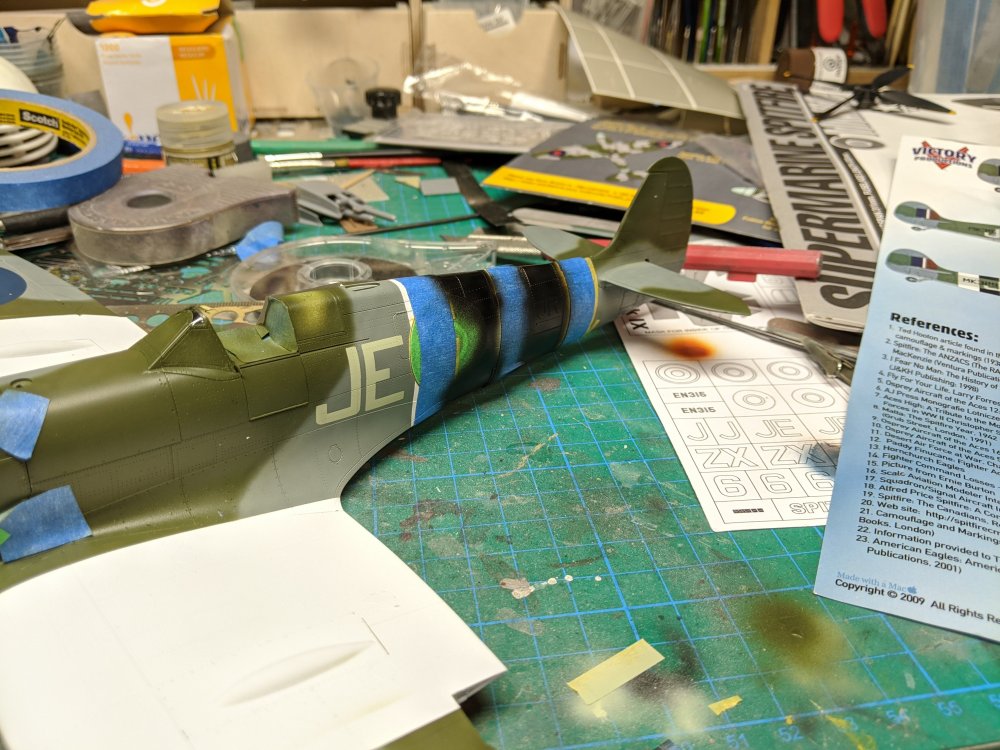
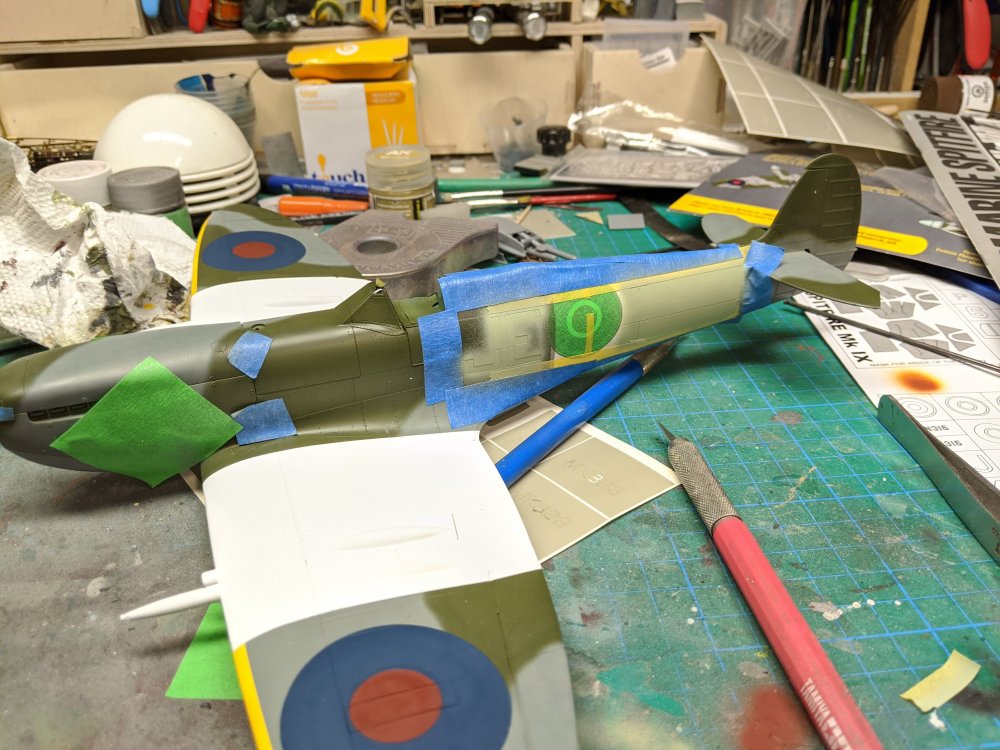
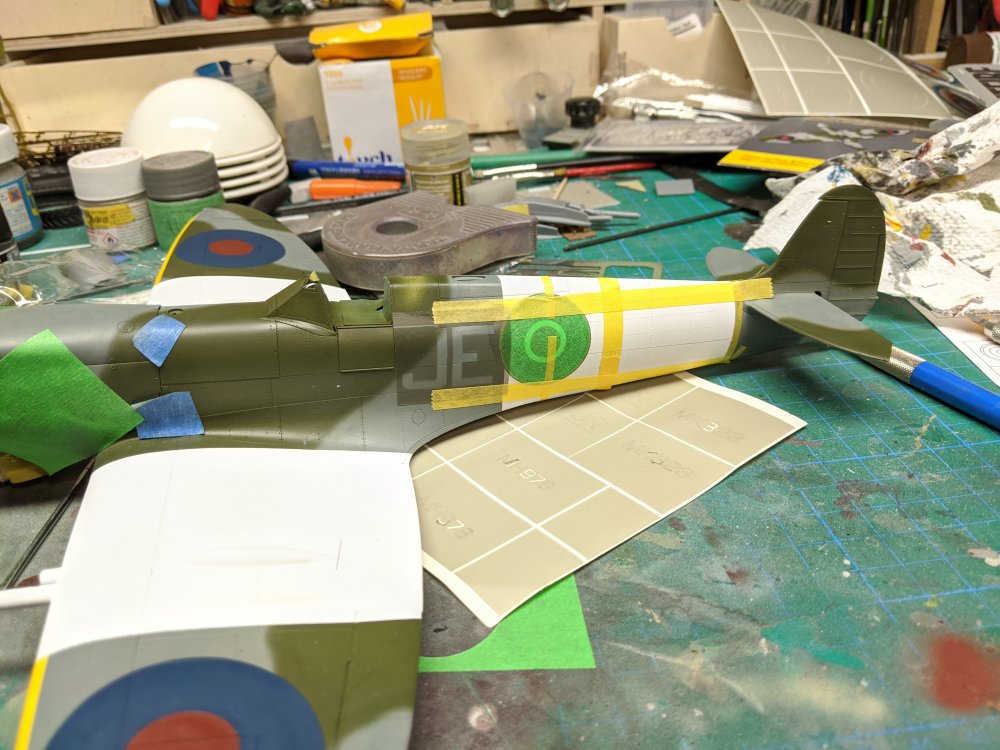
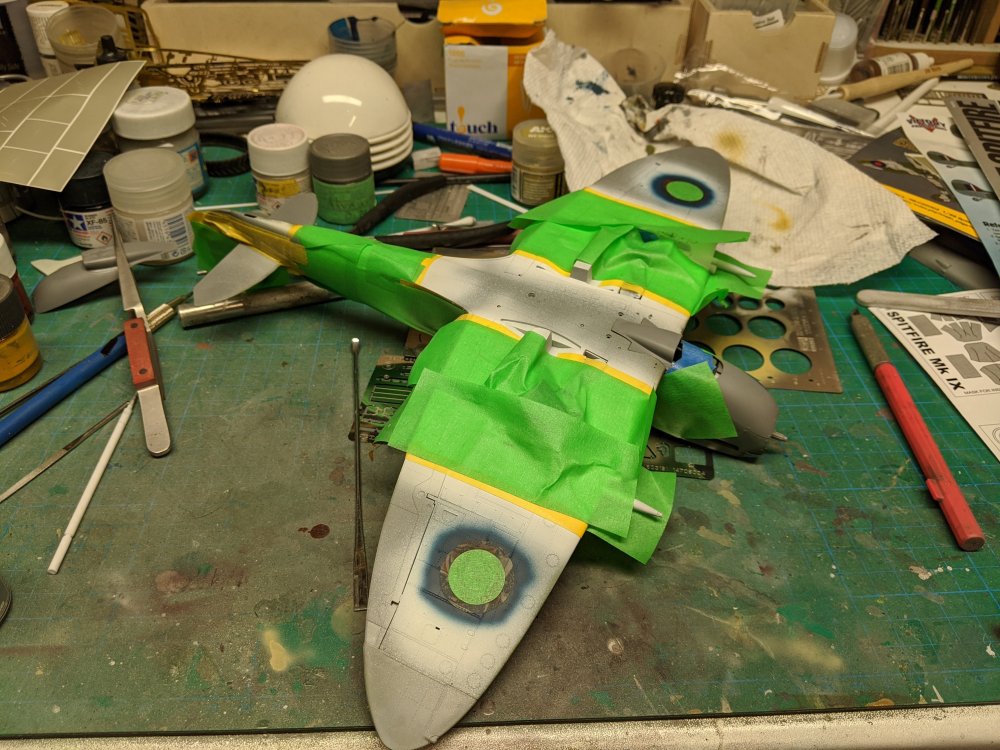
So it turns out I either made things really difficult for myself with the fuselage codes or there really was no other way around doing them. First step was to mask things off for the codes. I then sprayed the Sky for these. Then I masked over these and painted the black stripes. Once the black stripes were done, I masked over those and filled in the negative spaces where the base camo showed through.

-
Wait for the big battle sequence. You're going to get goosebumps from that one.
-
So Ernie, are you going to build the rest of the plane to put the cockpit into?
-
HK Models Do-335 A-12
BlrwestSiR replied to JeroenPeters's topic in LSM 1/35 and Larger Work In Progress
Should be lots of fun to watch. -
1/32 Revell Bristol Beaufighter build
BlrwestSiR replied to CrankyCrafstman's topic in LSM 1/35 and Larger Work In Progress
What they said!!!!! -
What is on your bench right now ? Share a picture :)
BlrwestSiR replied to Martinnfb's topic in Modelling Discussion
A-7 Corsair? -
Tamiya Spitfire IXe with ModXXX
BlrwestSiR replied to BlrwestSiR's topic in LSM 1/35 and Larger Work In Progress
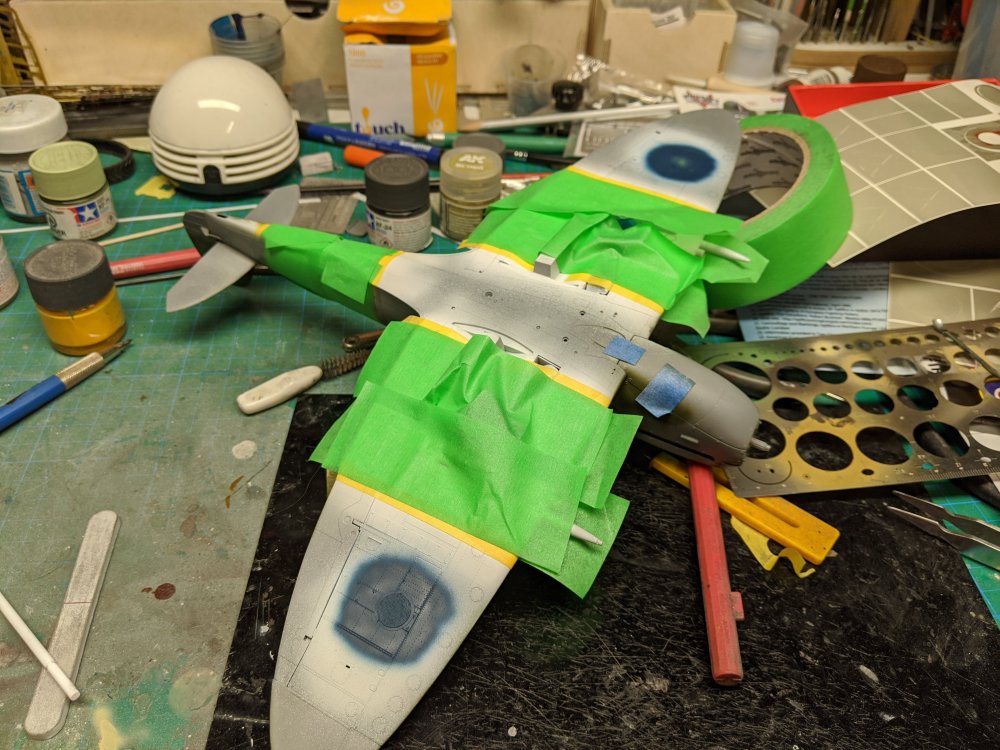
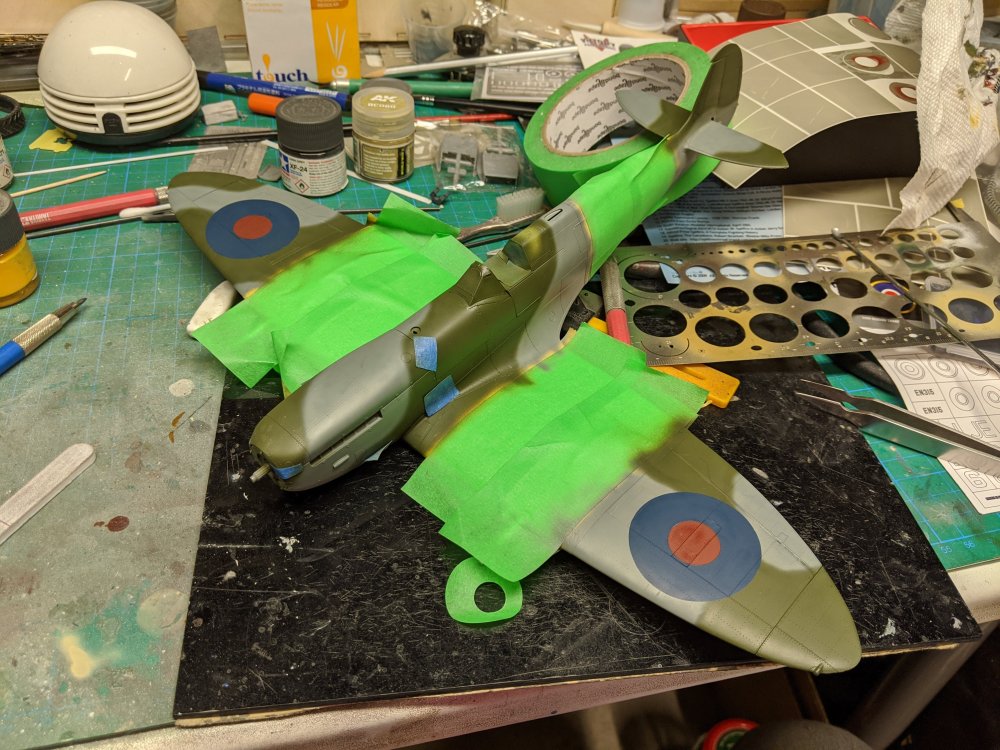
I then used some mixed Tamiya paints for the roundels colours. I then finally painted the undersides and removed the majority of the masking tape on the fuselage. Next up will be finishing the invasion stripes and the fuselage codes. -
Tamiya Spitfire IXe with ModXXX
BlrwestSiR replied to BlrwestSiR's topic in LSM 1/35 and Larger Work In Progress
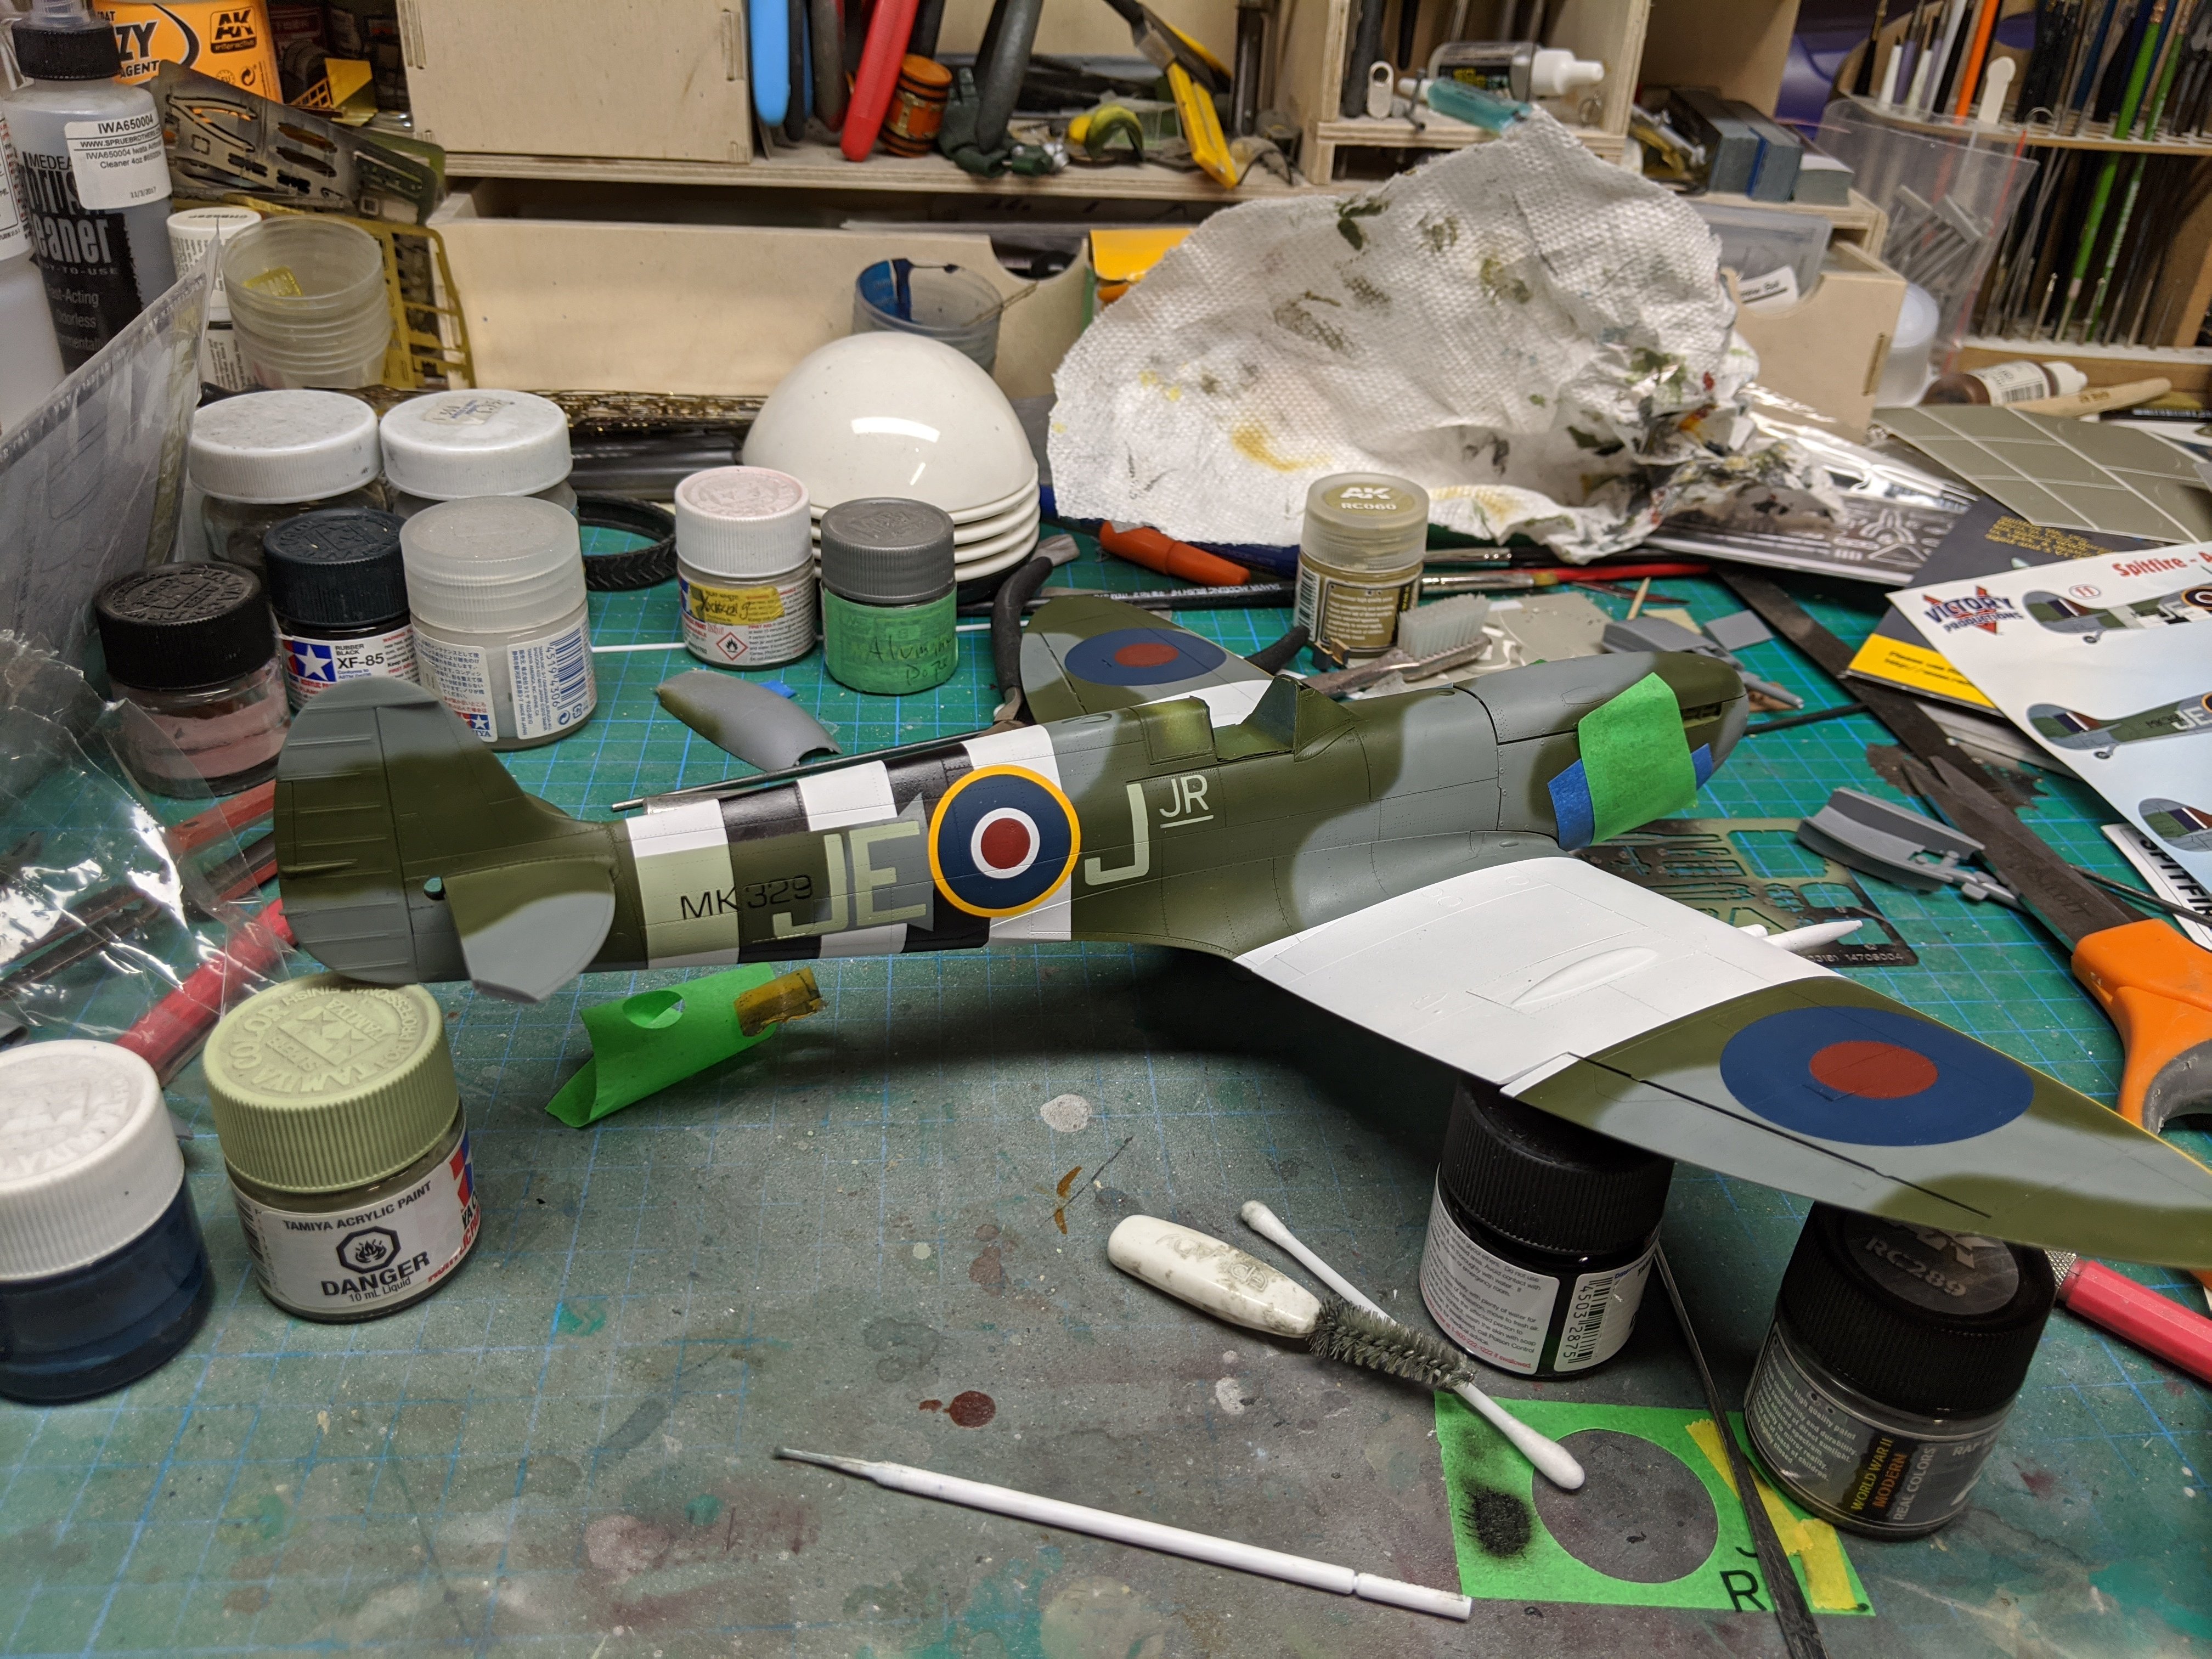
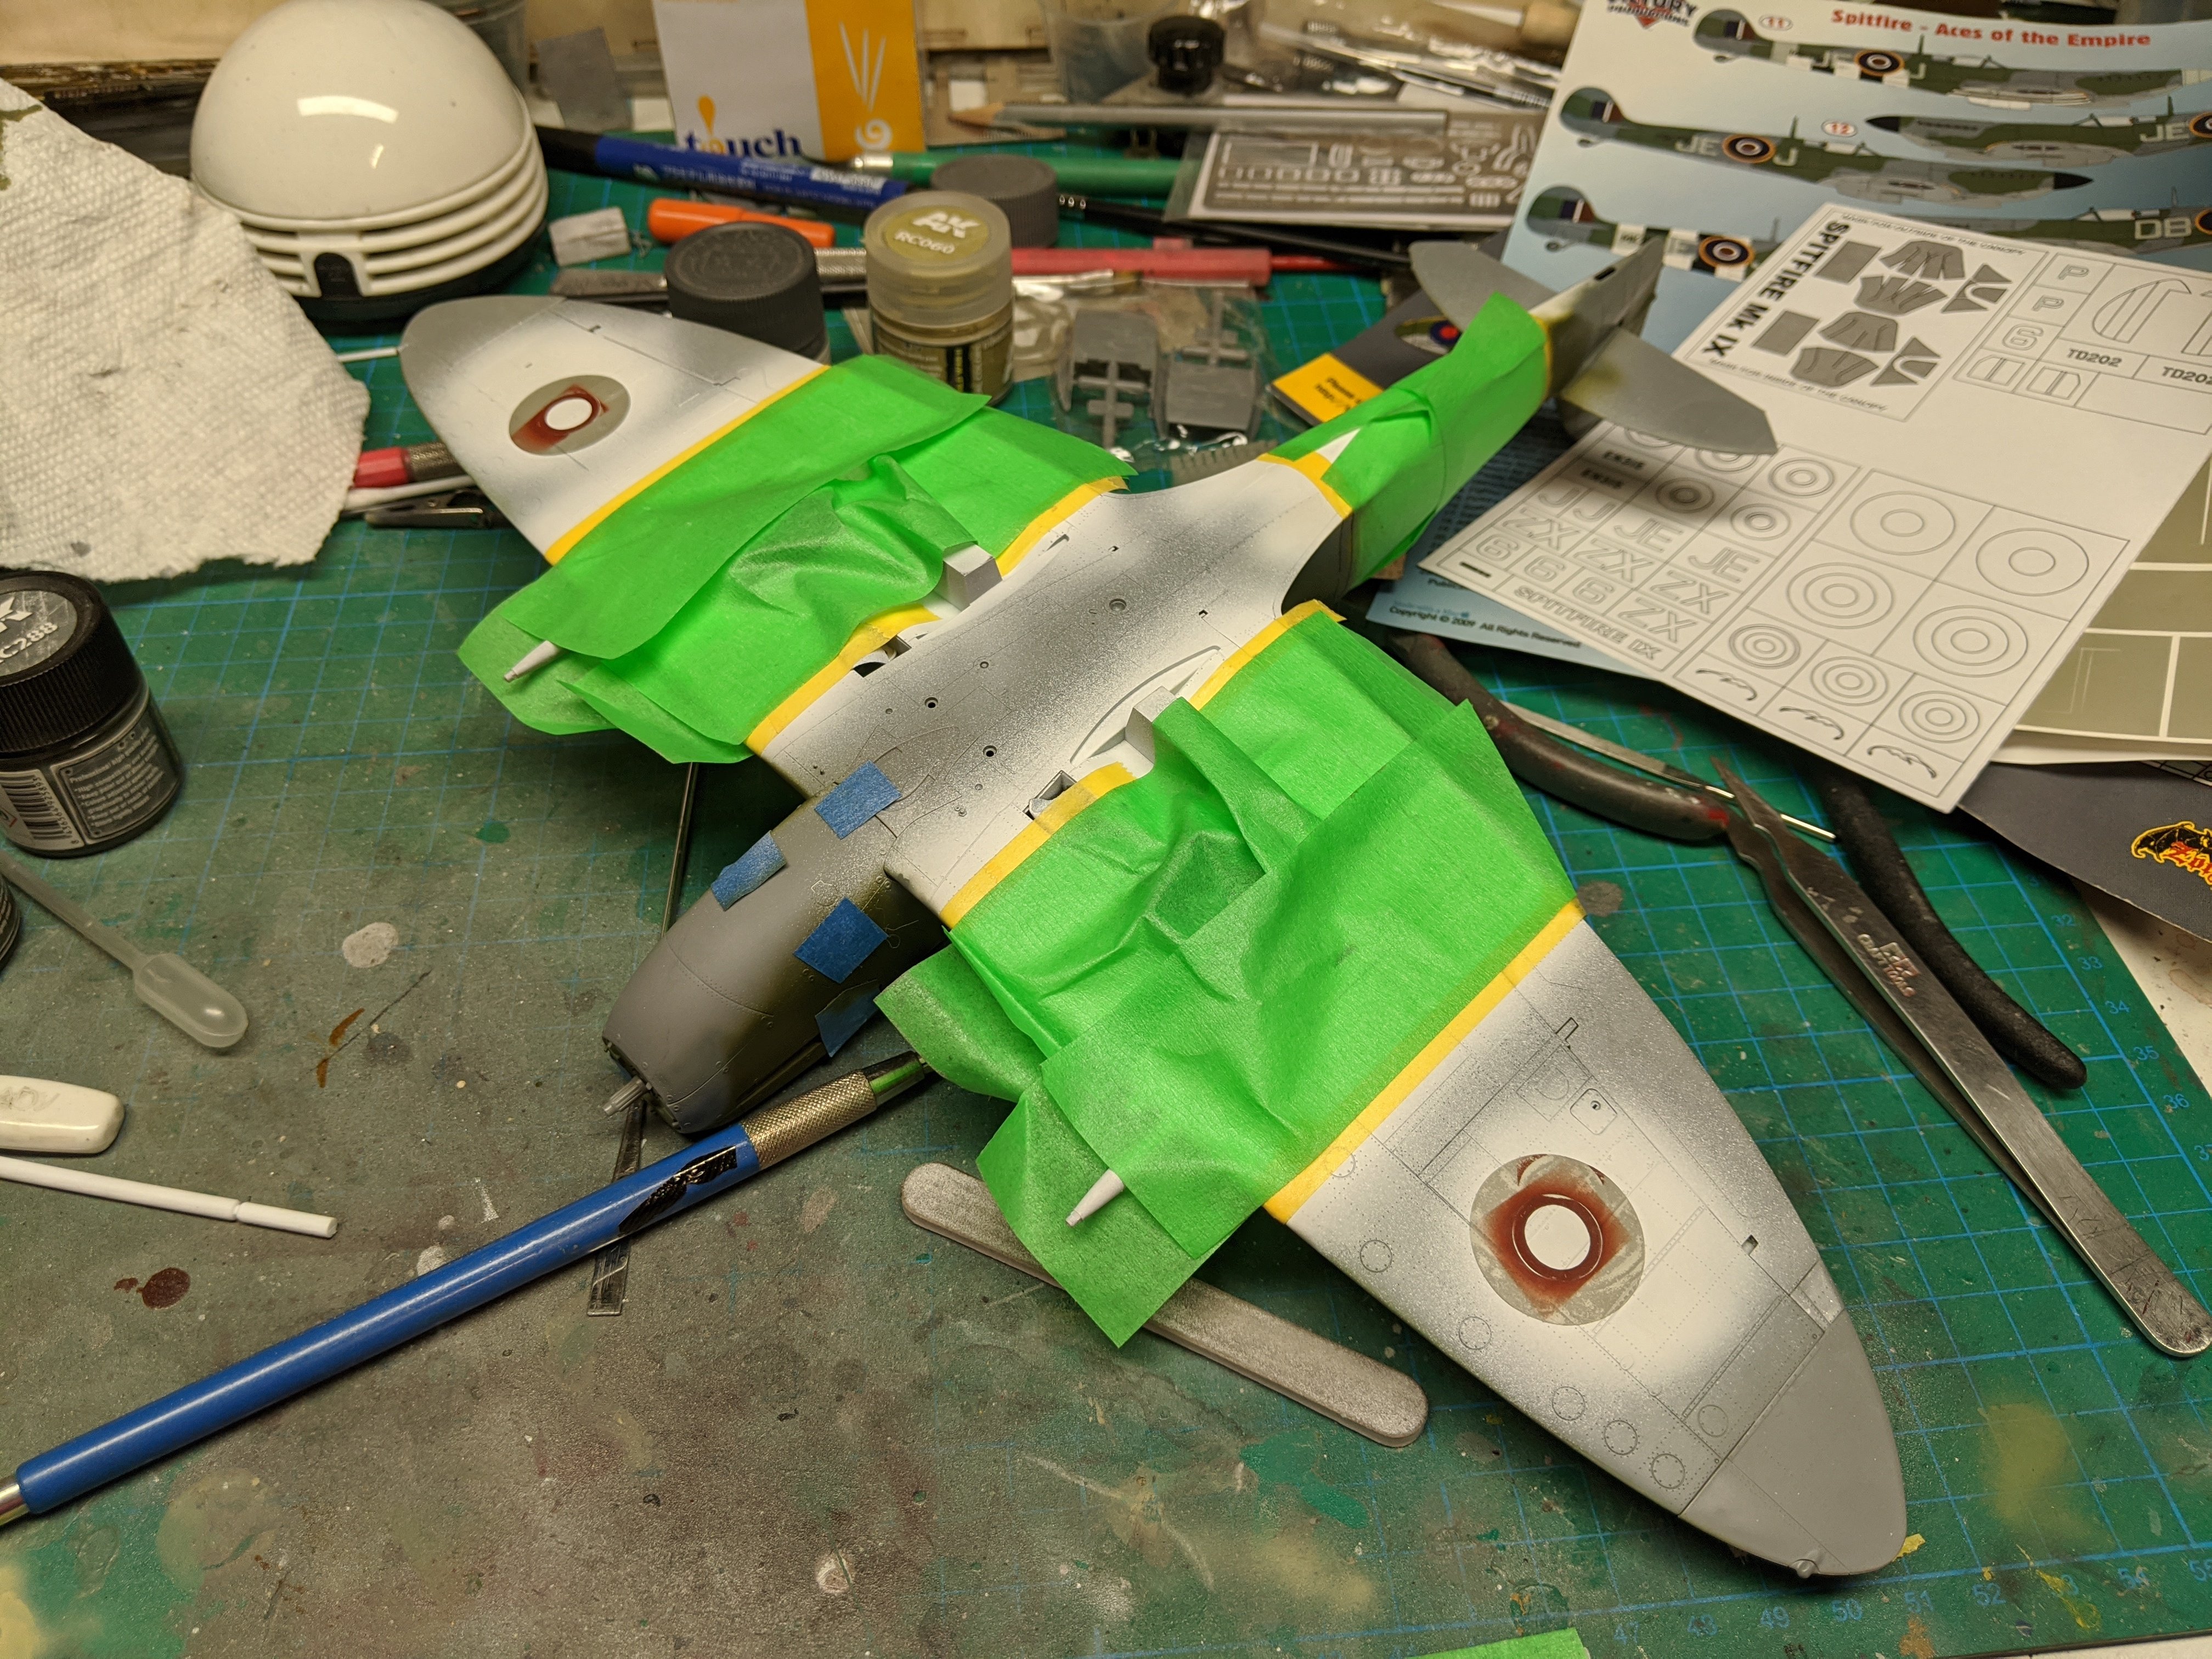
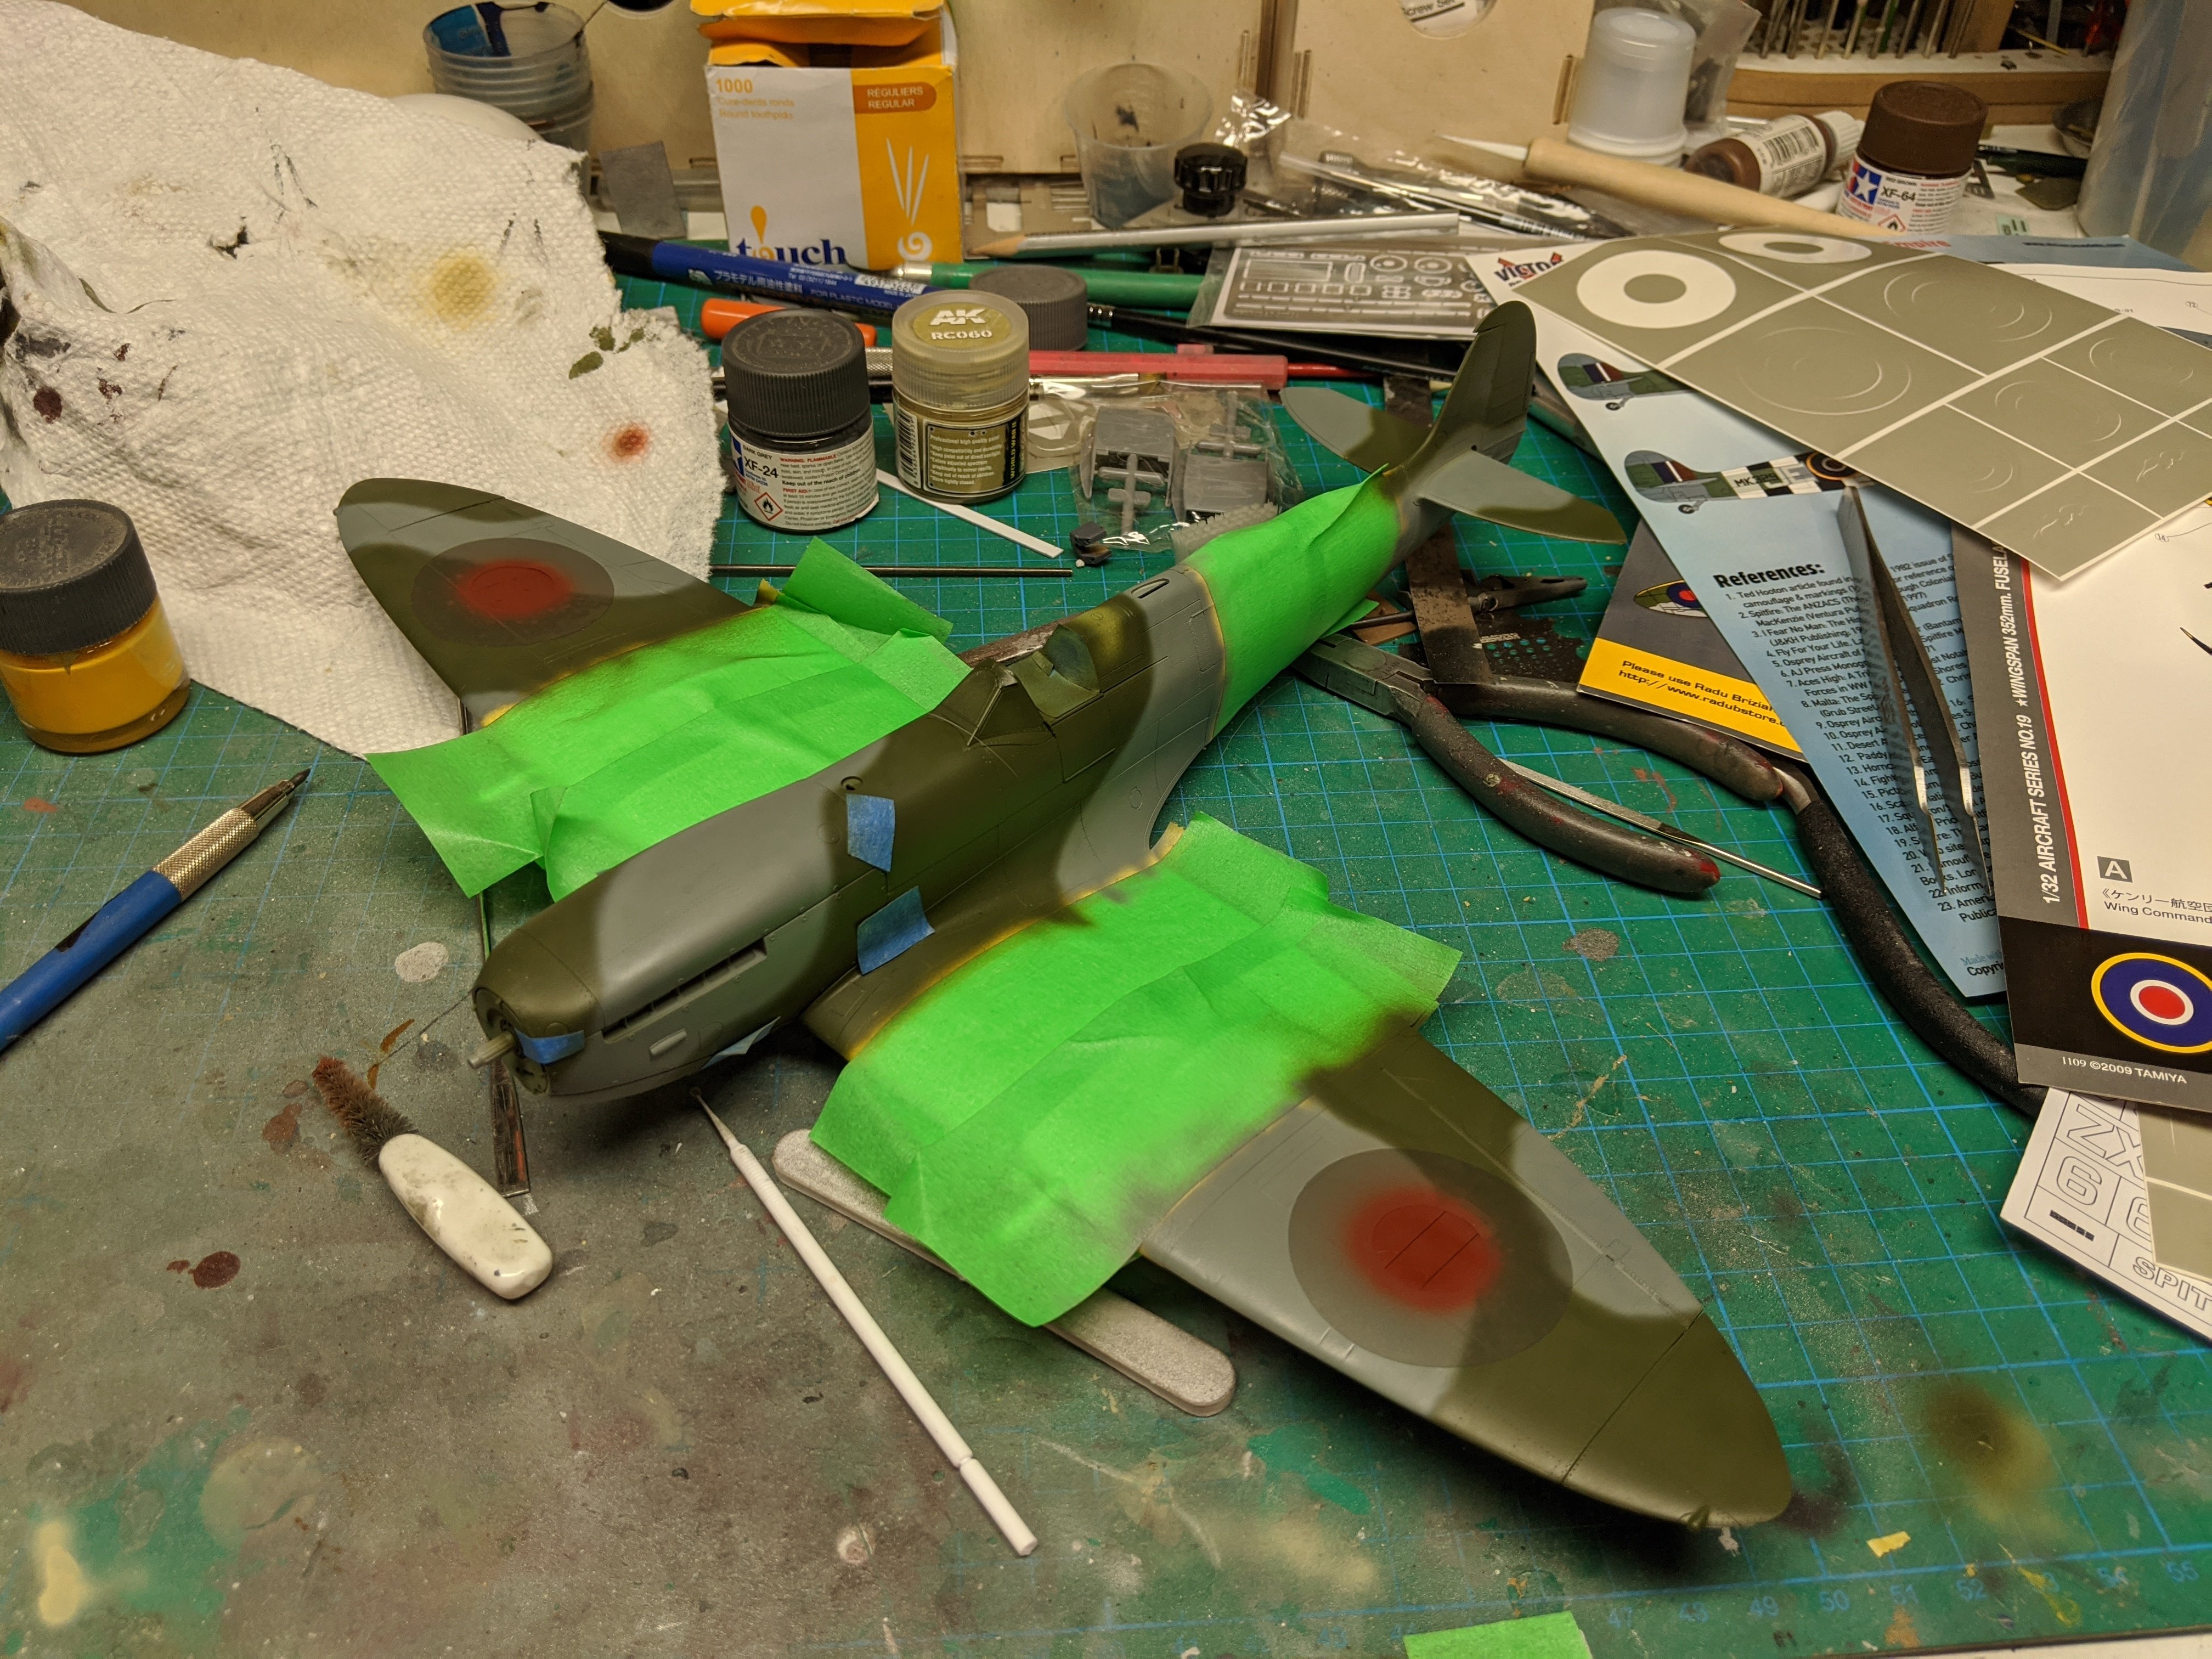
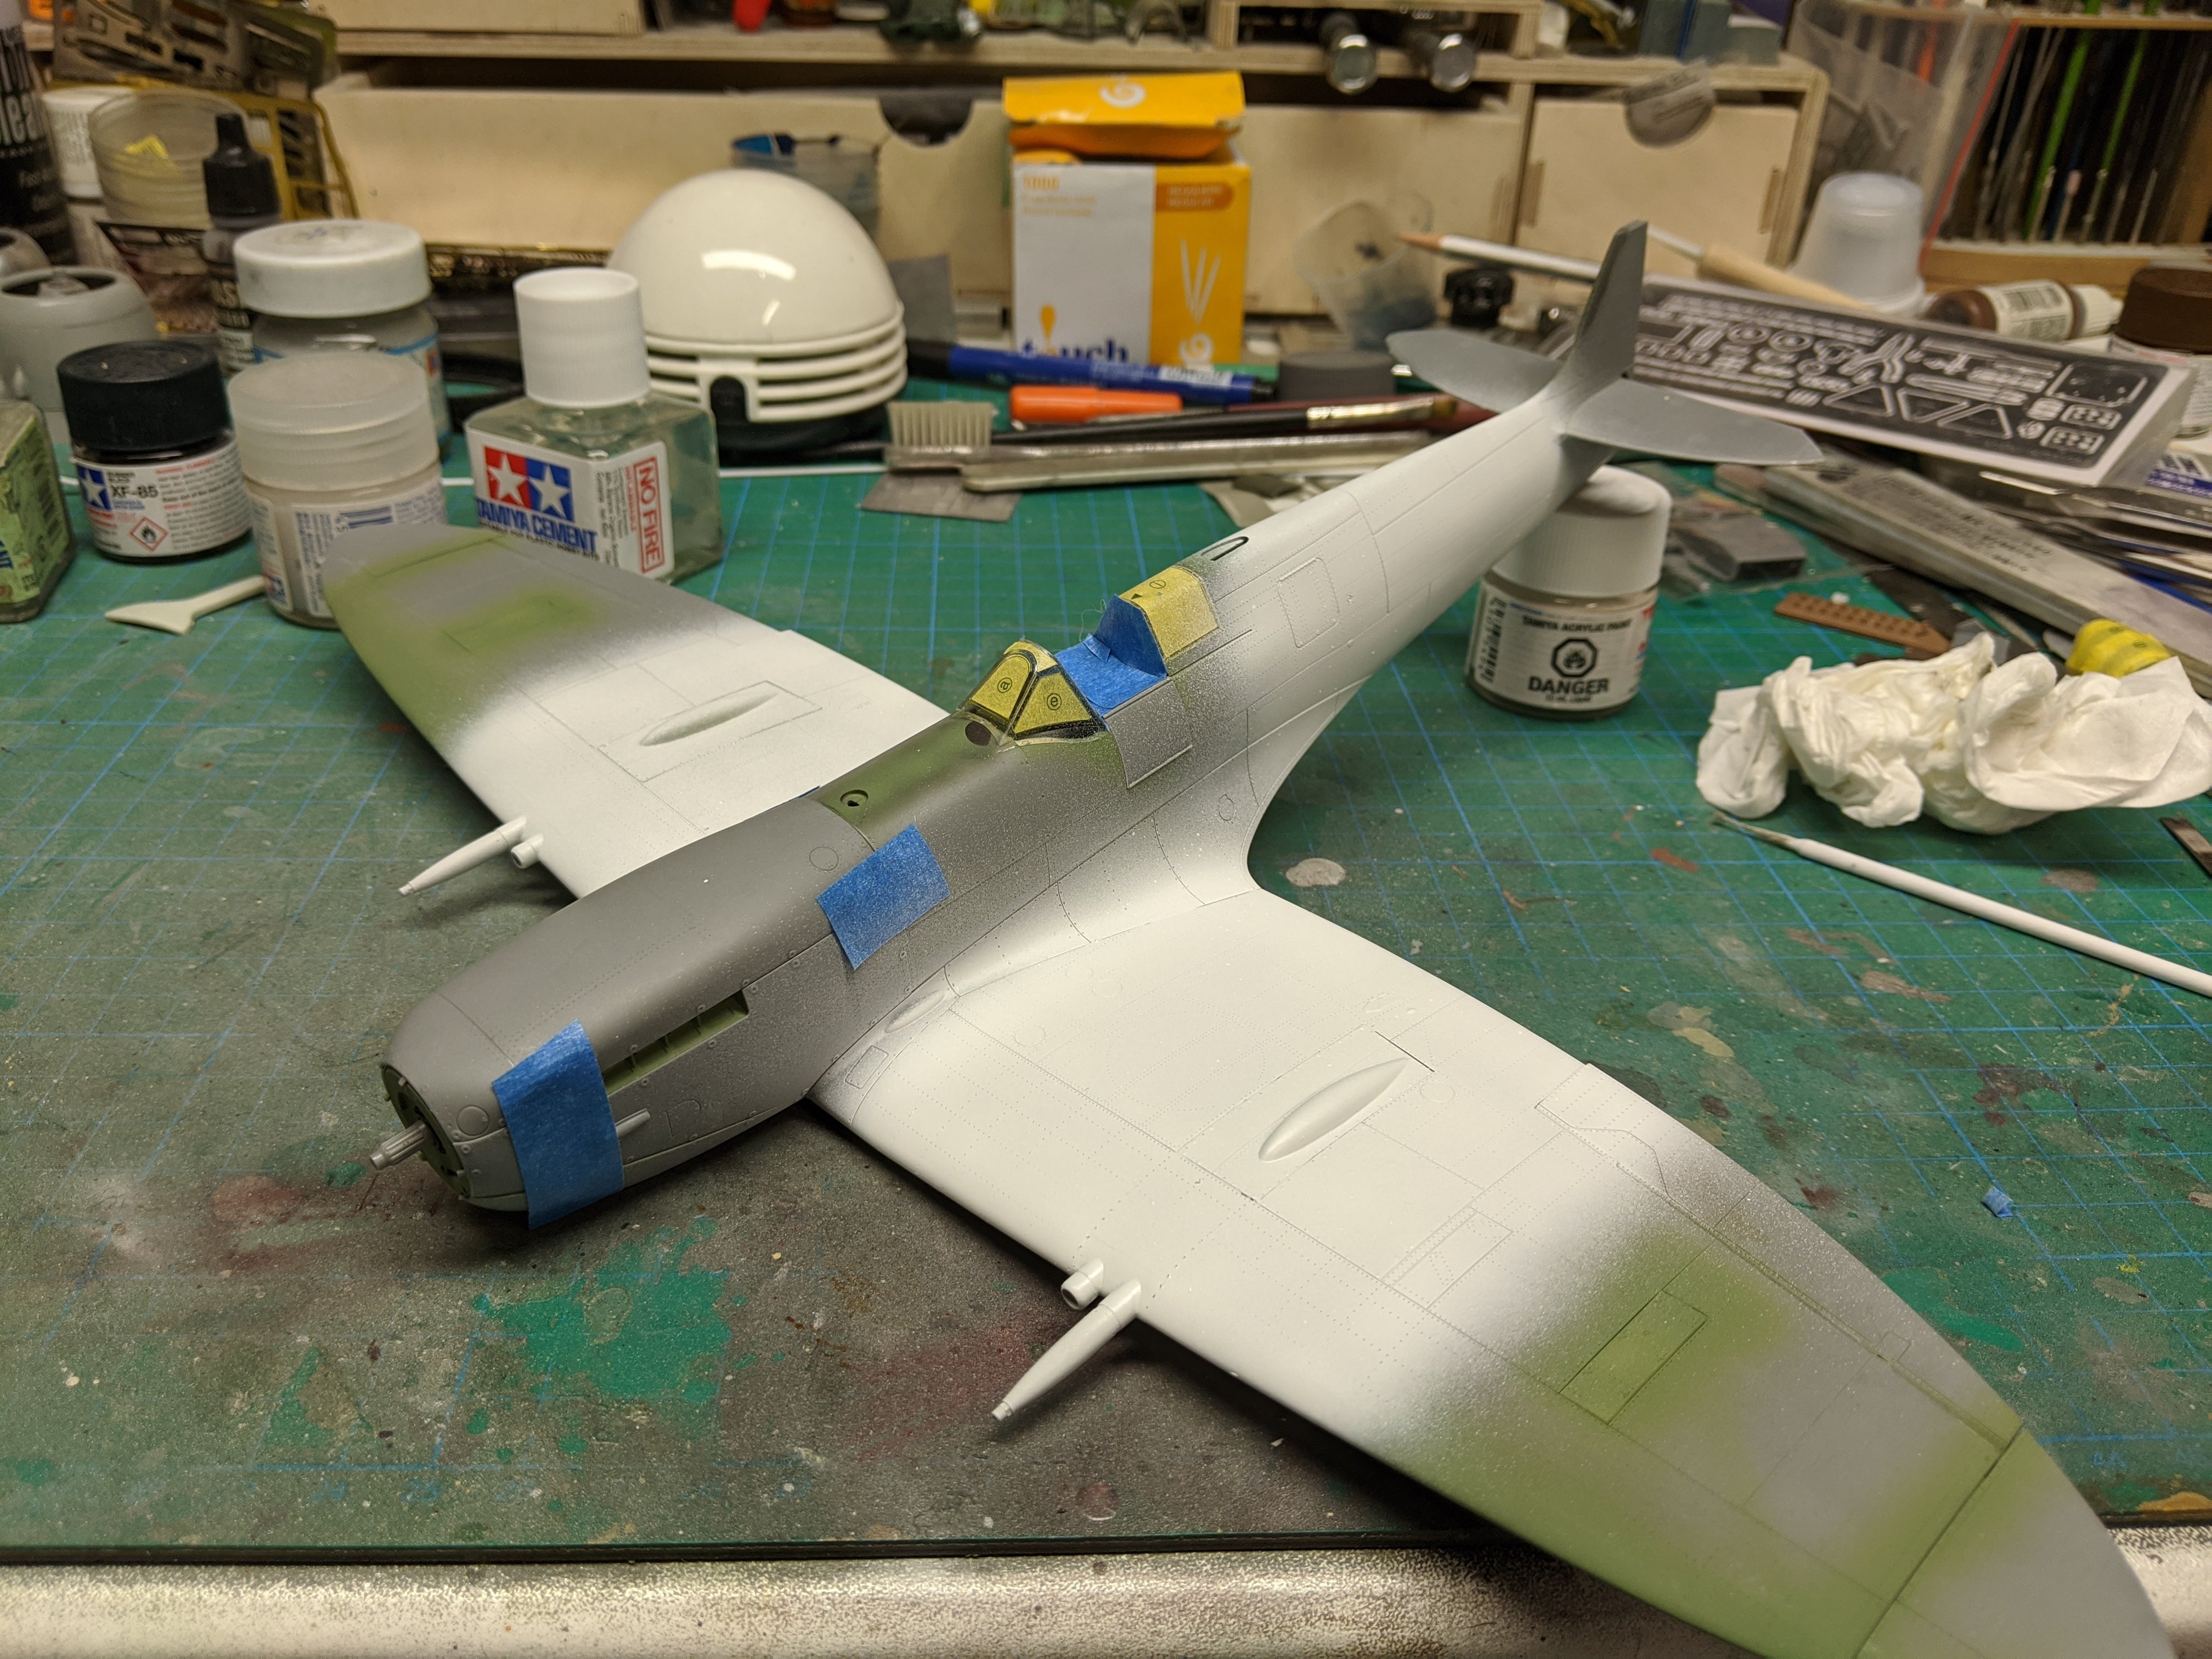
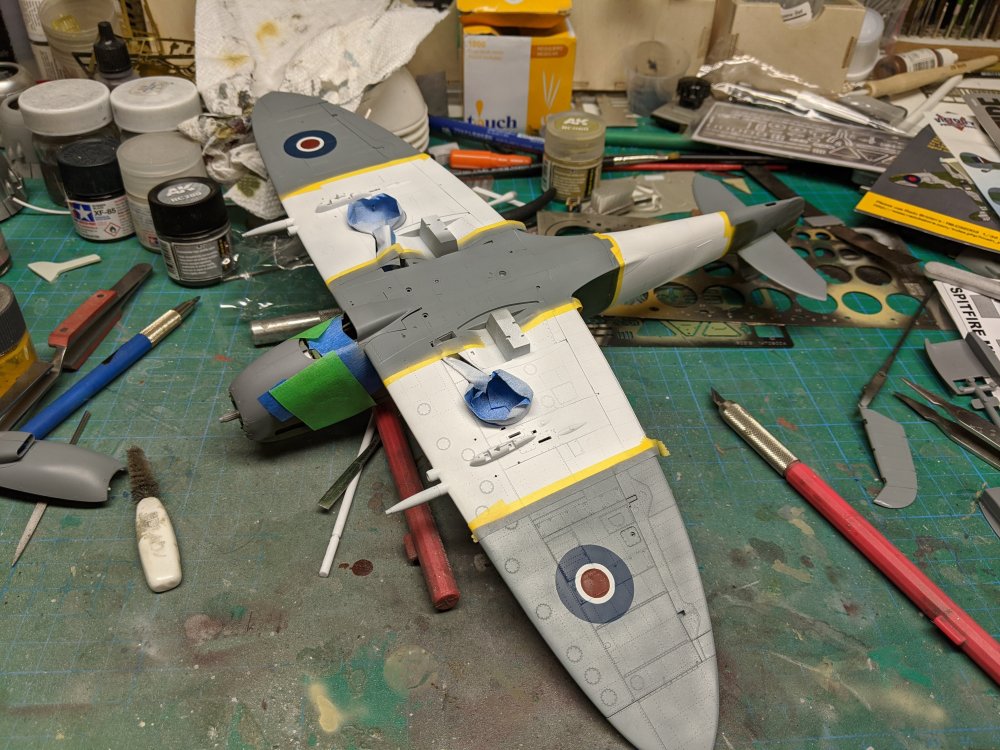
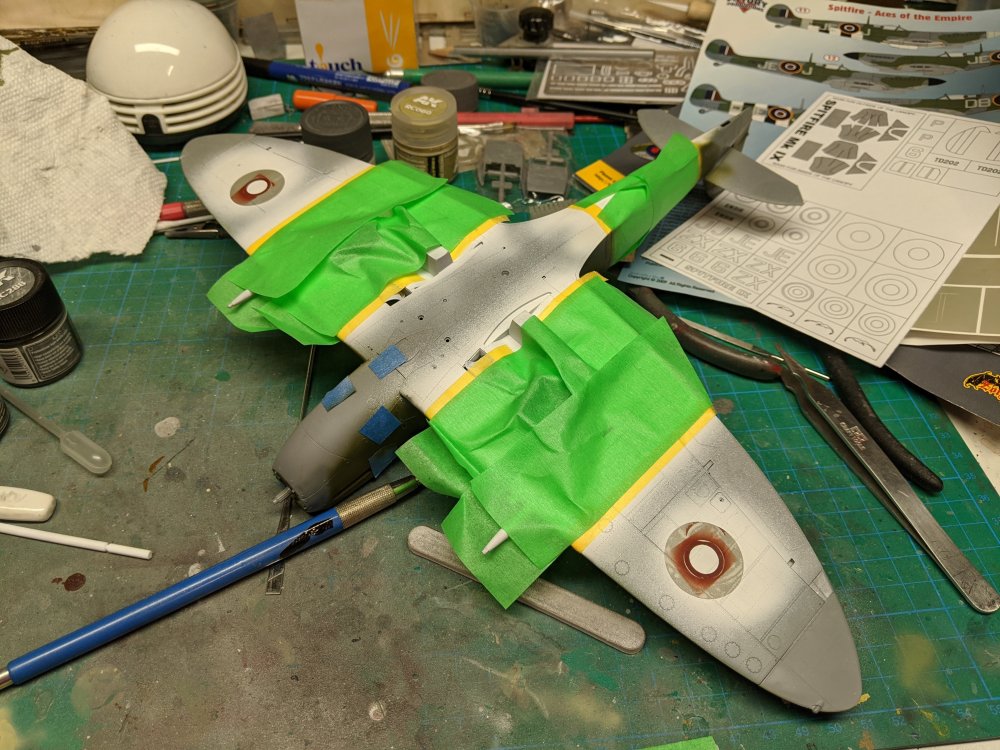
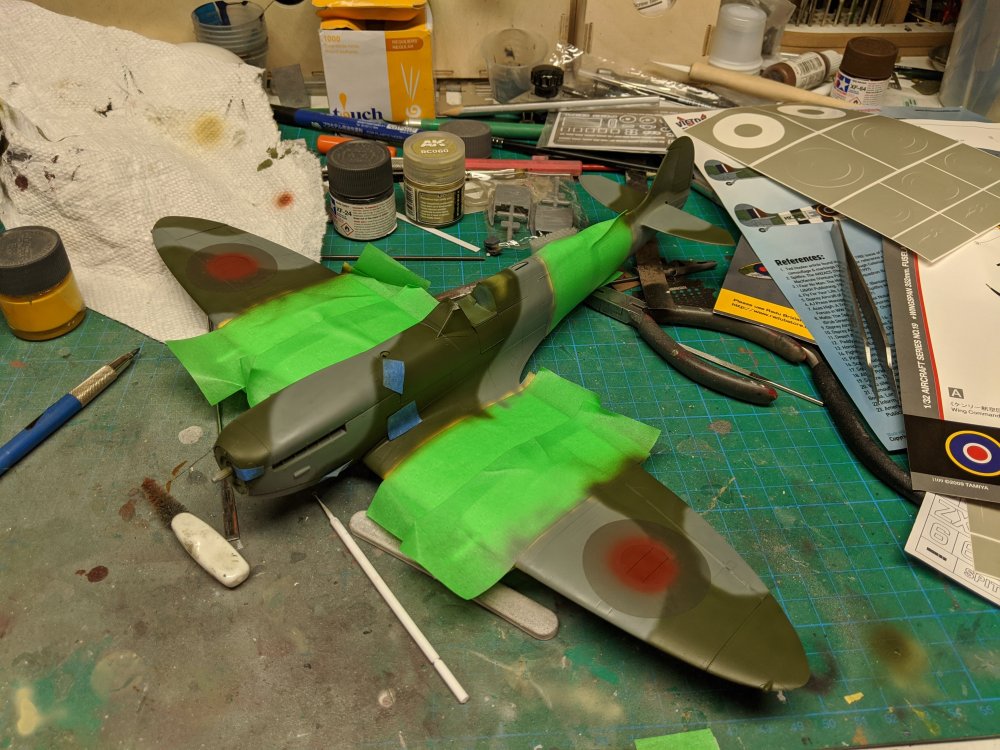
Turning to the plane, I finished assembling the engine cradle. The Merin was then installed and I finished the kit included plumbing. The power egg was then installed onto the fuselage. I also fitted the fixed sections of the canopy and masked them off. The removable cowl panels were put into place to act as masks for the engine and to get a consistent camo scheme. Working a bit differently this time from an painting perspective, I started with the in stripes. I've generally done these after the camo scheme. After masking off the borders, I started on the camo. I'm using AK Real Colors for this. I should have started with the Ocean Grey as I ended up with some touch ups over the green. For the RAF roundels, I prefer to use masks and airbrush these. The ones I used were a mix of Montex and Maketar ones. Some were used on previous builds but still fine. -
Tamiya Spitfire IXe with ModXXX
BlrwestSiR replied to BlrwestSiR's topic in LSM 1/35 and Larger Work In Progress
Well, with all my posts in "What's on your Bench?" I thought it best I find and update the actual build thread. First up are the barrels themselves. On the original pair I did, I had sanded off the bands that hold the barrels together. Whoops. Thankfully the barrels came in sets of 4 so I had an extra pair. I gave the barrels a quick stain using a Vallejo wash. They were then airbrushed with Tamiya clear orange. I then masked off and painted the cooper bands in black. -
What is on your bench right now ? Share a picture :)
BlrwestSiR replied to Martinnfb's topic in Modelling Discussion
Indeed, if you're careful they can be reused. -
What is on your bench right now ? Share a picture :)
BlrwestSiR replied to Martinnfb's topic in Modelling Discussion
Here's the rest of the main camo paint all done. Unmasked: Just have the invasion stripes and fuselage codes left.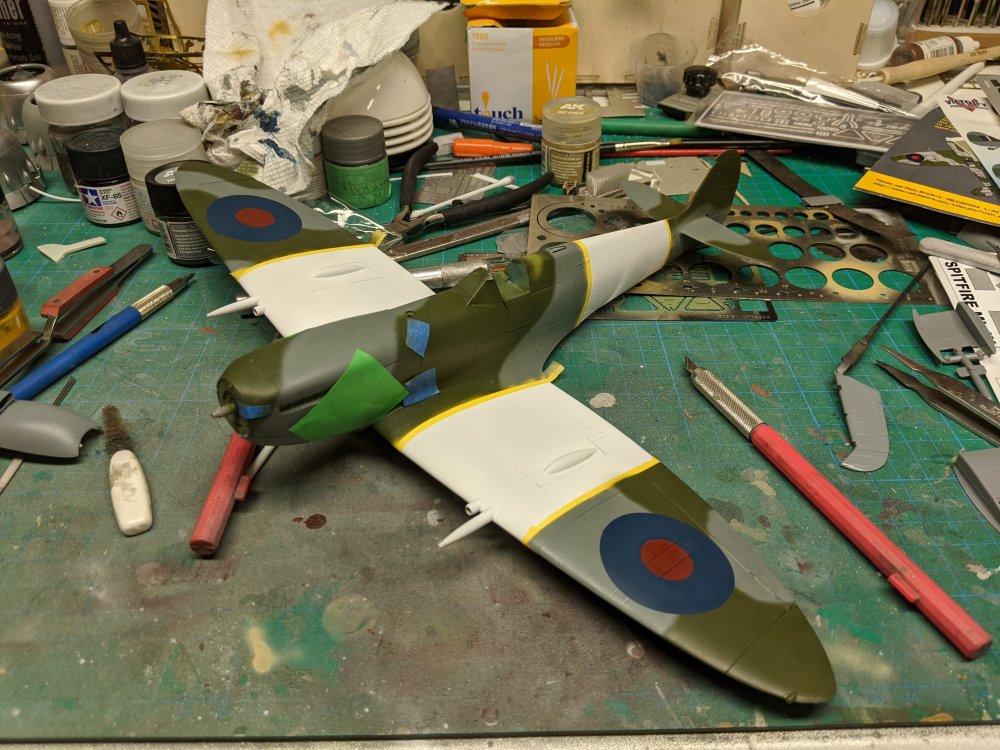

-
What is on your bench right now ? Share a picture :)
BlrwestSiR replied to Martinnfb's topic in Modelling Discussion
I'm managing to stick to one build for the moment so I've some more progress on Jr. I've been reusing old paint masks for the roundels. So far there hasn't been any issues.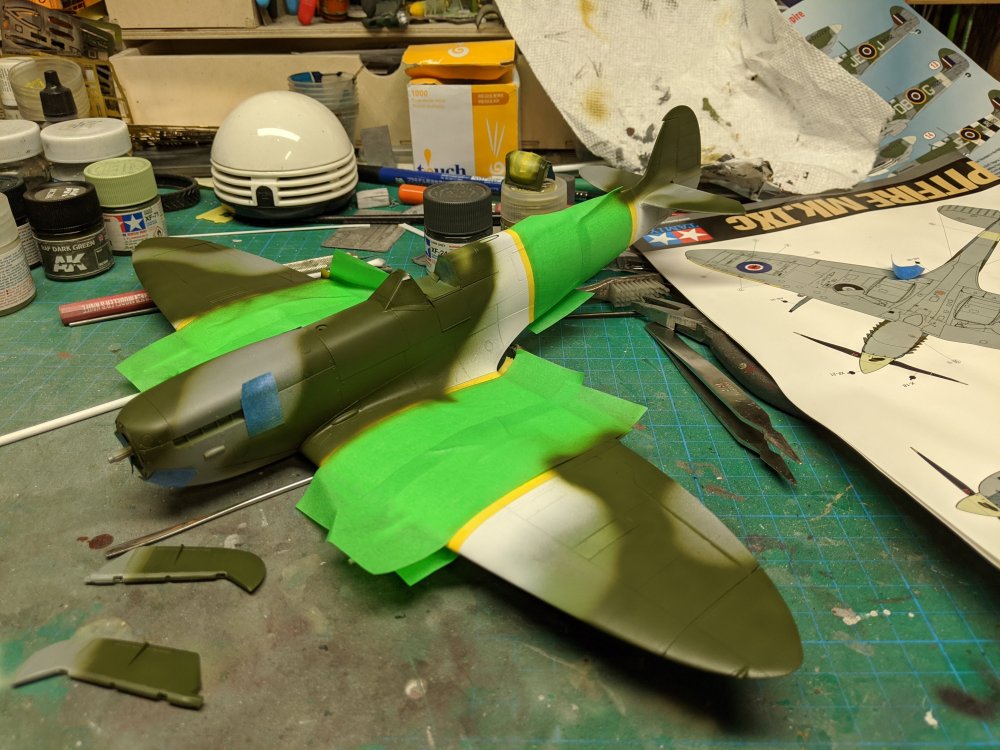
-
How Many Model Shows Will be Cancelled this Year?
BlrwestSiR replied to GazzaS's topic in General Discussion
These guys might have some good ideas: -
What is on your bench right now ? Share a picture :)
BlrwestSiR replied to Martinnfb's topic in Modelling Discussion
I don't think this is what the Germans had in mind when they named their tanks after cats.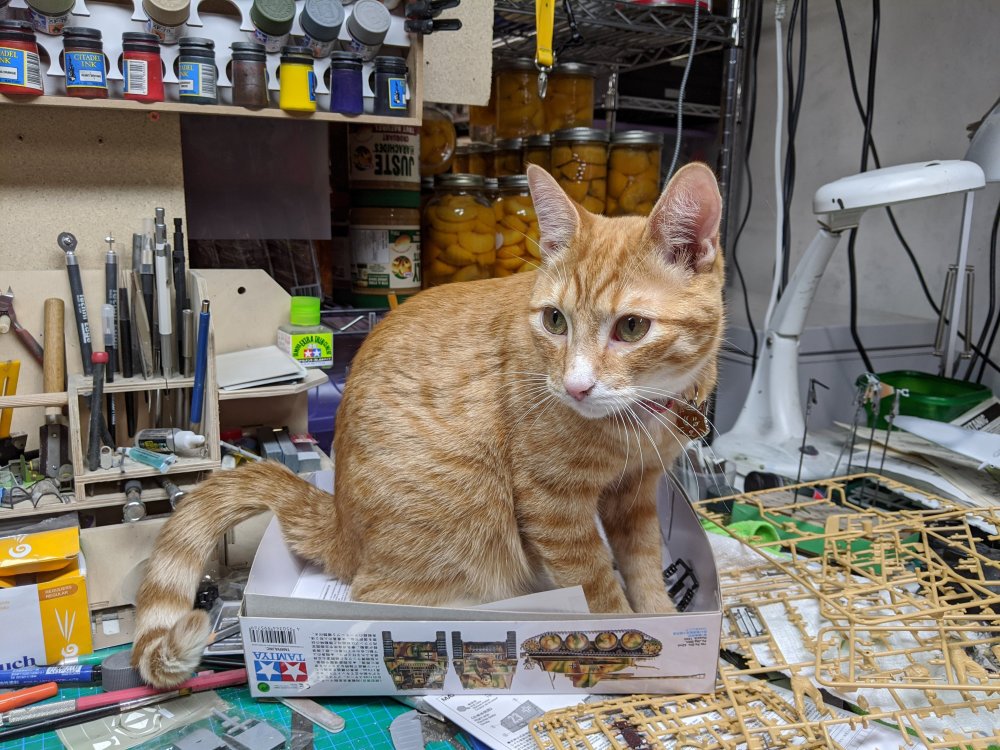
-
What is on your bench right now ? Share a picture :)
BlrwestSiR replied to Martinnfb's topic in Modelling Discussion
I see you're having to share bench space with your daughter. My boys have taken over half my bench. -
What is on your bench right now ? Share a picture :)
BlrwestSiR replied to Martinnfb's topic in Modelling Discussion
Started flinging some paint since there's not much else I can do these days.
-
How Many Model Shows Will be Cancelled this Year?
BlrwestSiR replied to GazzaS's topic in General Discussion
It looks like the border between Canada and the US is going to be closed to non essential travel in the next day or so. My cousin last night decided to postpone her wedding which was supposed to be in 2 weeks. She has family in the Netherlands and my sister and her family live in Wisconsin so they wouldn't have been able to make it either. Meantime, I'm hoping I can get my dad to stop working. He's considered high risk due to his health, works as an interpreter at the largest airport in Canada and someone on his staff tested positive for COVID 19. He can't be that scared of spending time with my mom could he? -
No problem Martin. Yup, those are from the Italeri G kit. I've also got the D which I'm planning to build in RCAF markings.
-
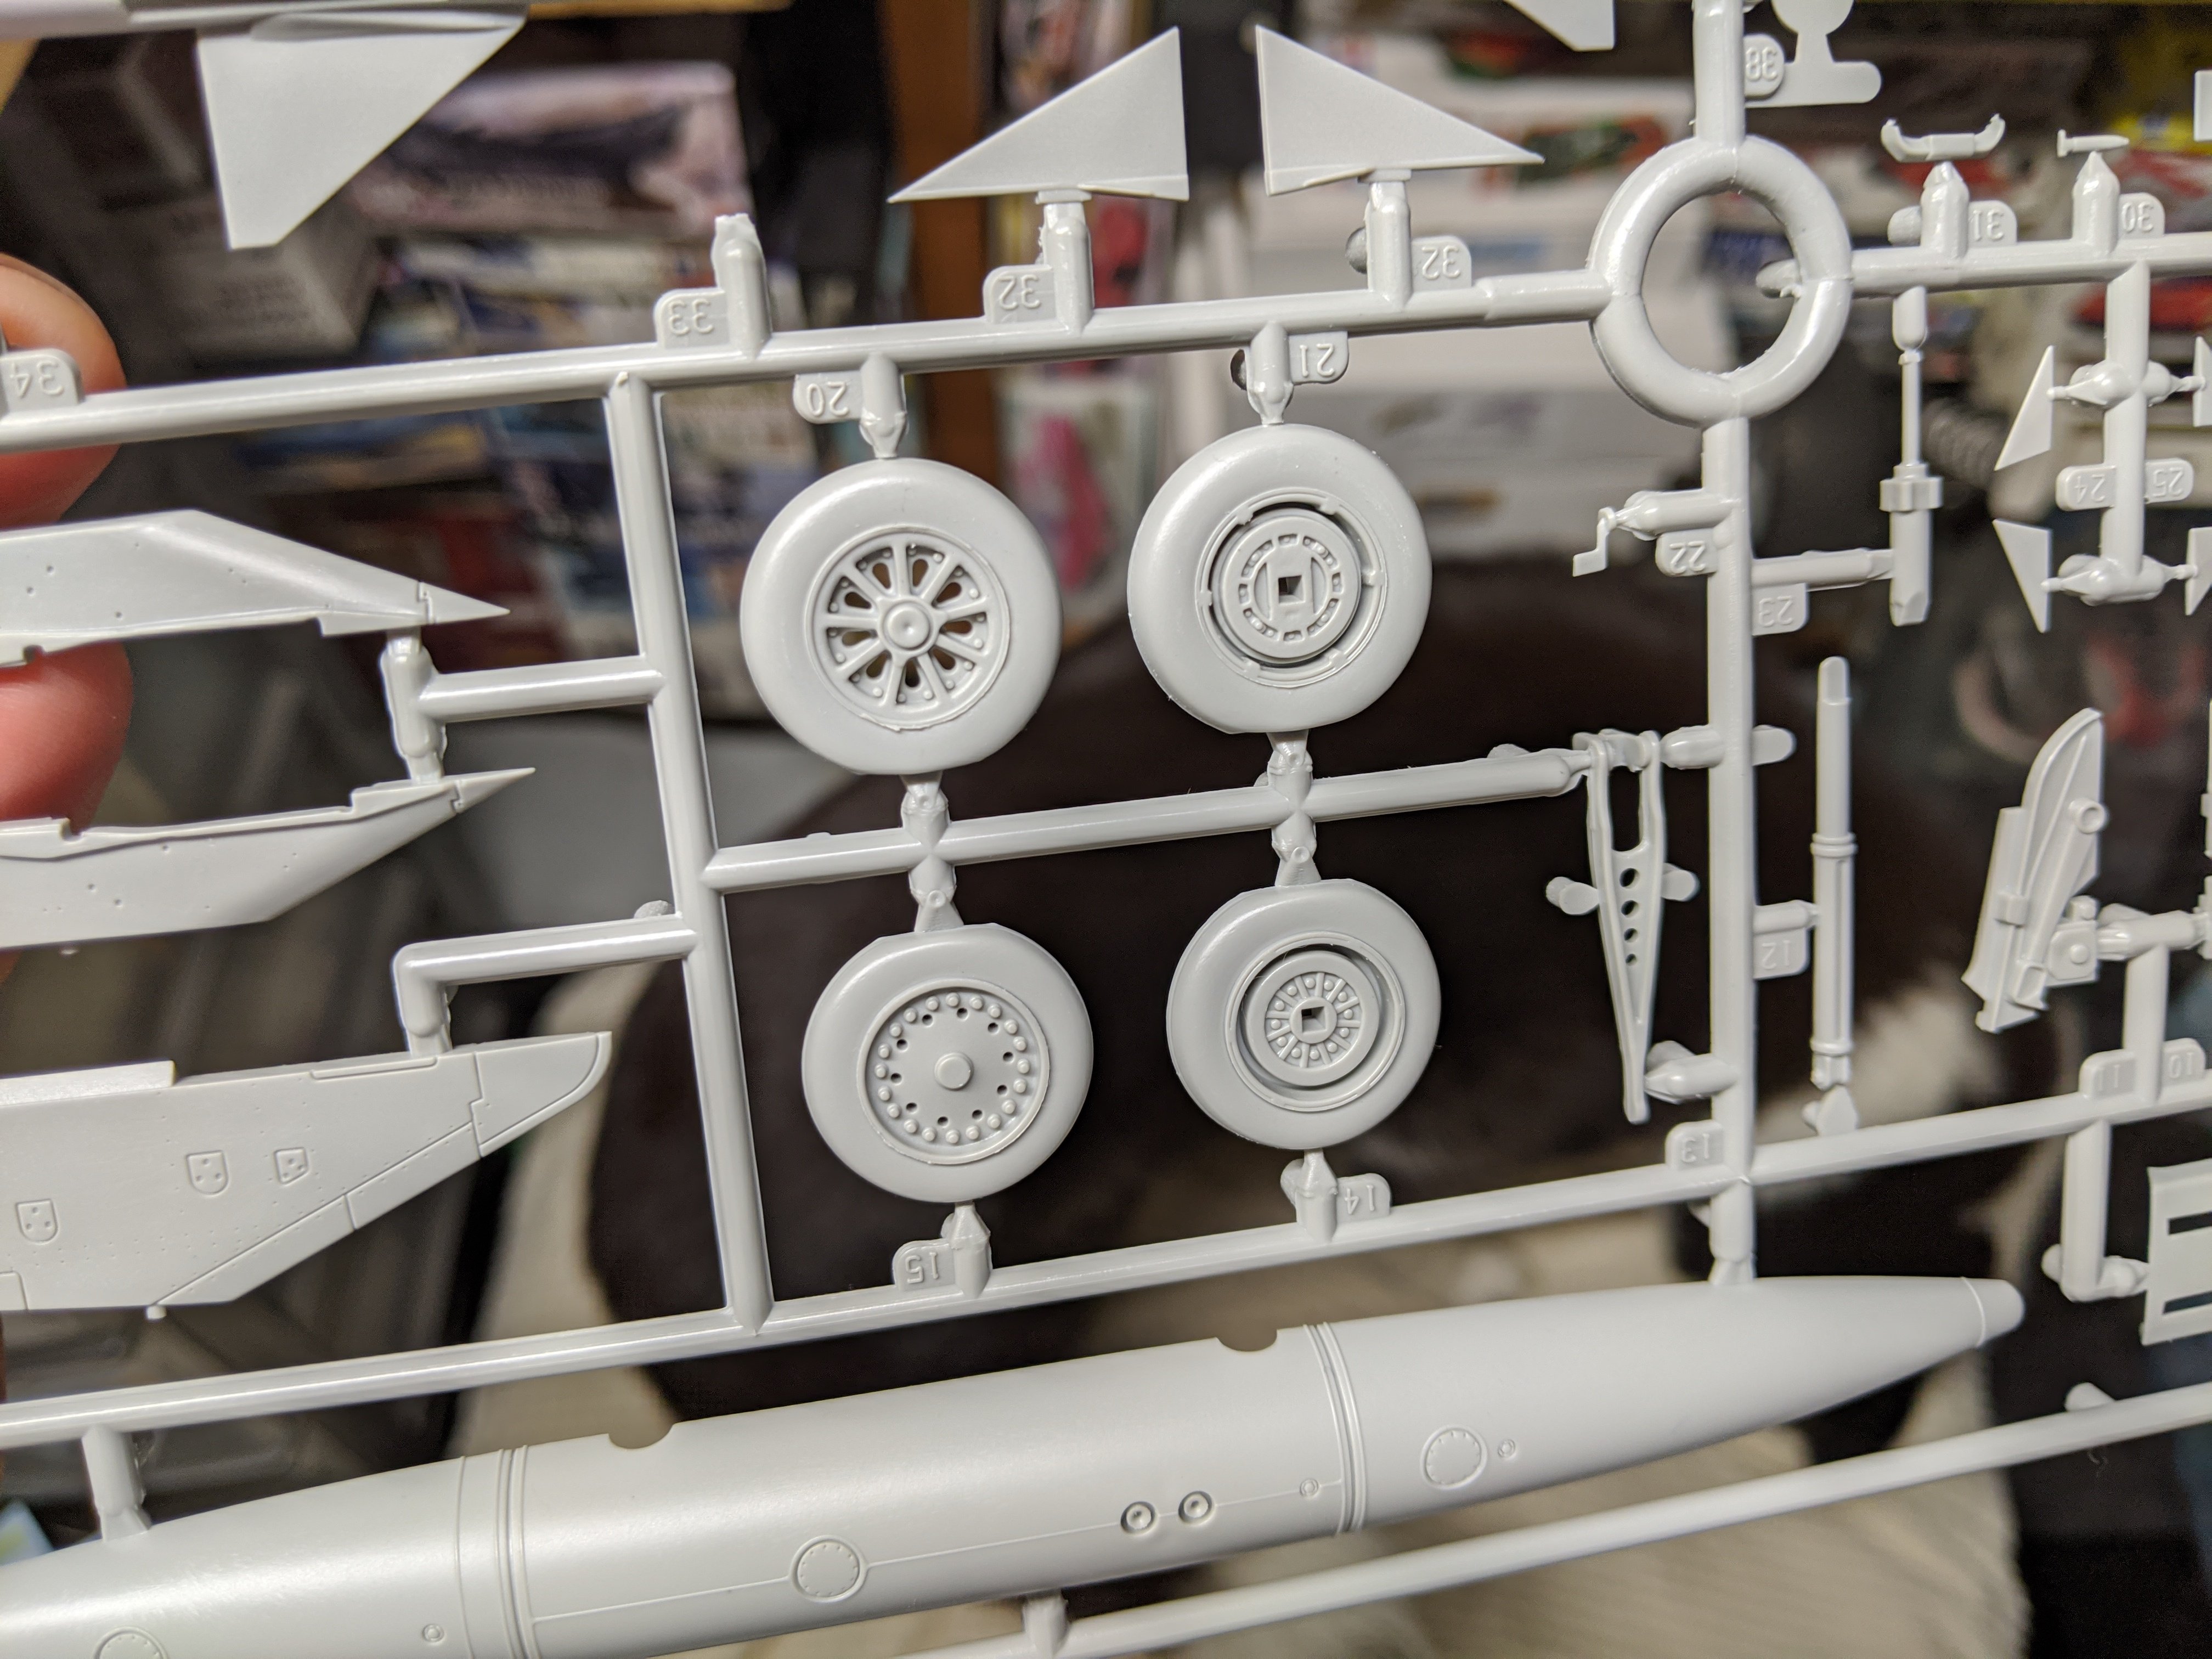
Martin, if these wheels are any better than the Hasegawa ones, let me know. I can send you a set.

-
What is on your bench right now ? Share a picture :)
BlrwestSiR replied to Martinnfb's topic in Modelling Discussion
JE-J Jr is back on the bench. The engine is done and installed. I found some misplaced parts too.
-
The RCAF flew some N models too out of BC. If I get the chance, that's the one I'd build. Carl
-
Aaarrrrgggghhhhh! I keep losing things!
BlrwestSiR replied to 1to1scale's topic in General Discussion
PS. I lose stuff all the time that I've put away for "safe keeping". -
Aaarrrrgggghhhhh! I keep losing things!
BlrwestSiR replied to 1to1scale's topic in General Discussion
If you still can't find them, let me know and I'll send you mine. Carl -
Knowing Martin, he's probably already sanded them off and rescribed the whole kit while I was posting.