BlrwestSiR
-
Posts
9,209 -
Joined
-
Last visited
Content Type
Profiles
Forums
Events
Gallery
Everything posted by BlrwestSiR
-

Need help deciding my next Tamiya kit.
BlrwestSiR replied to 1to1scale's topic in Modelling Discussion
I'd say the F-16 as well. Carl -
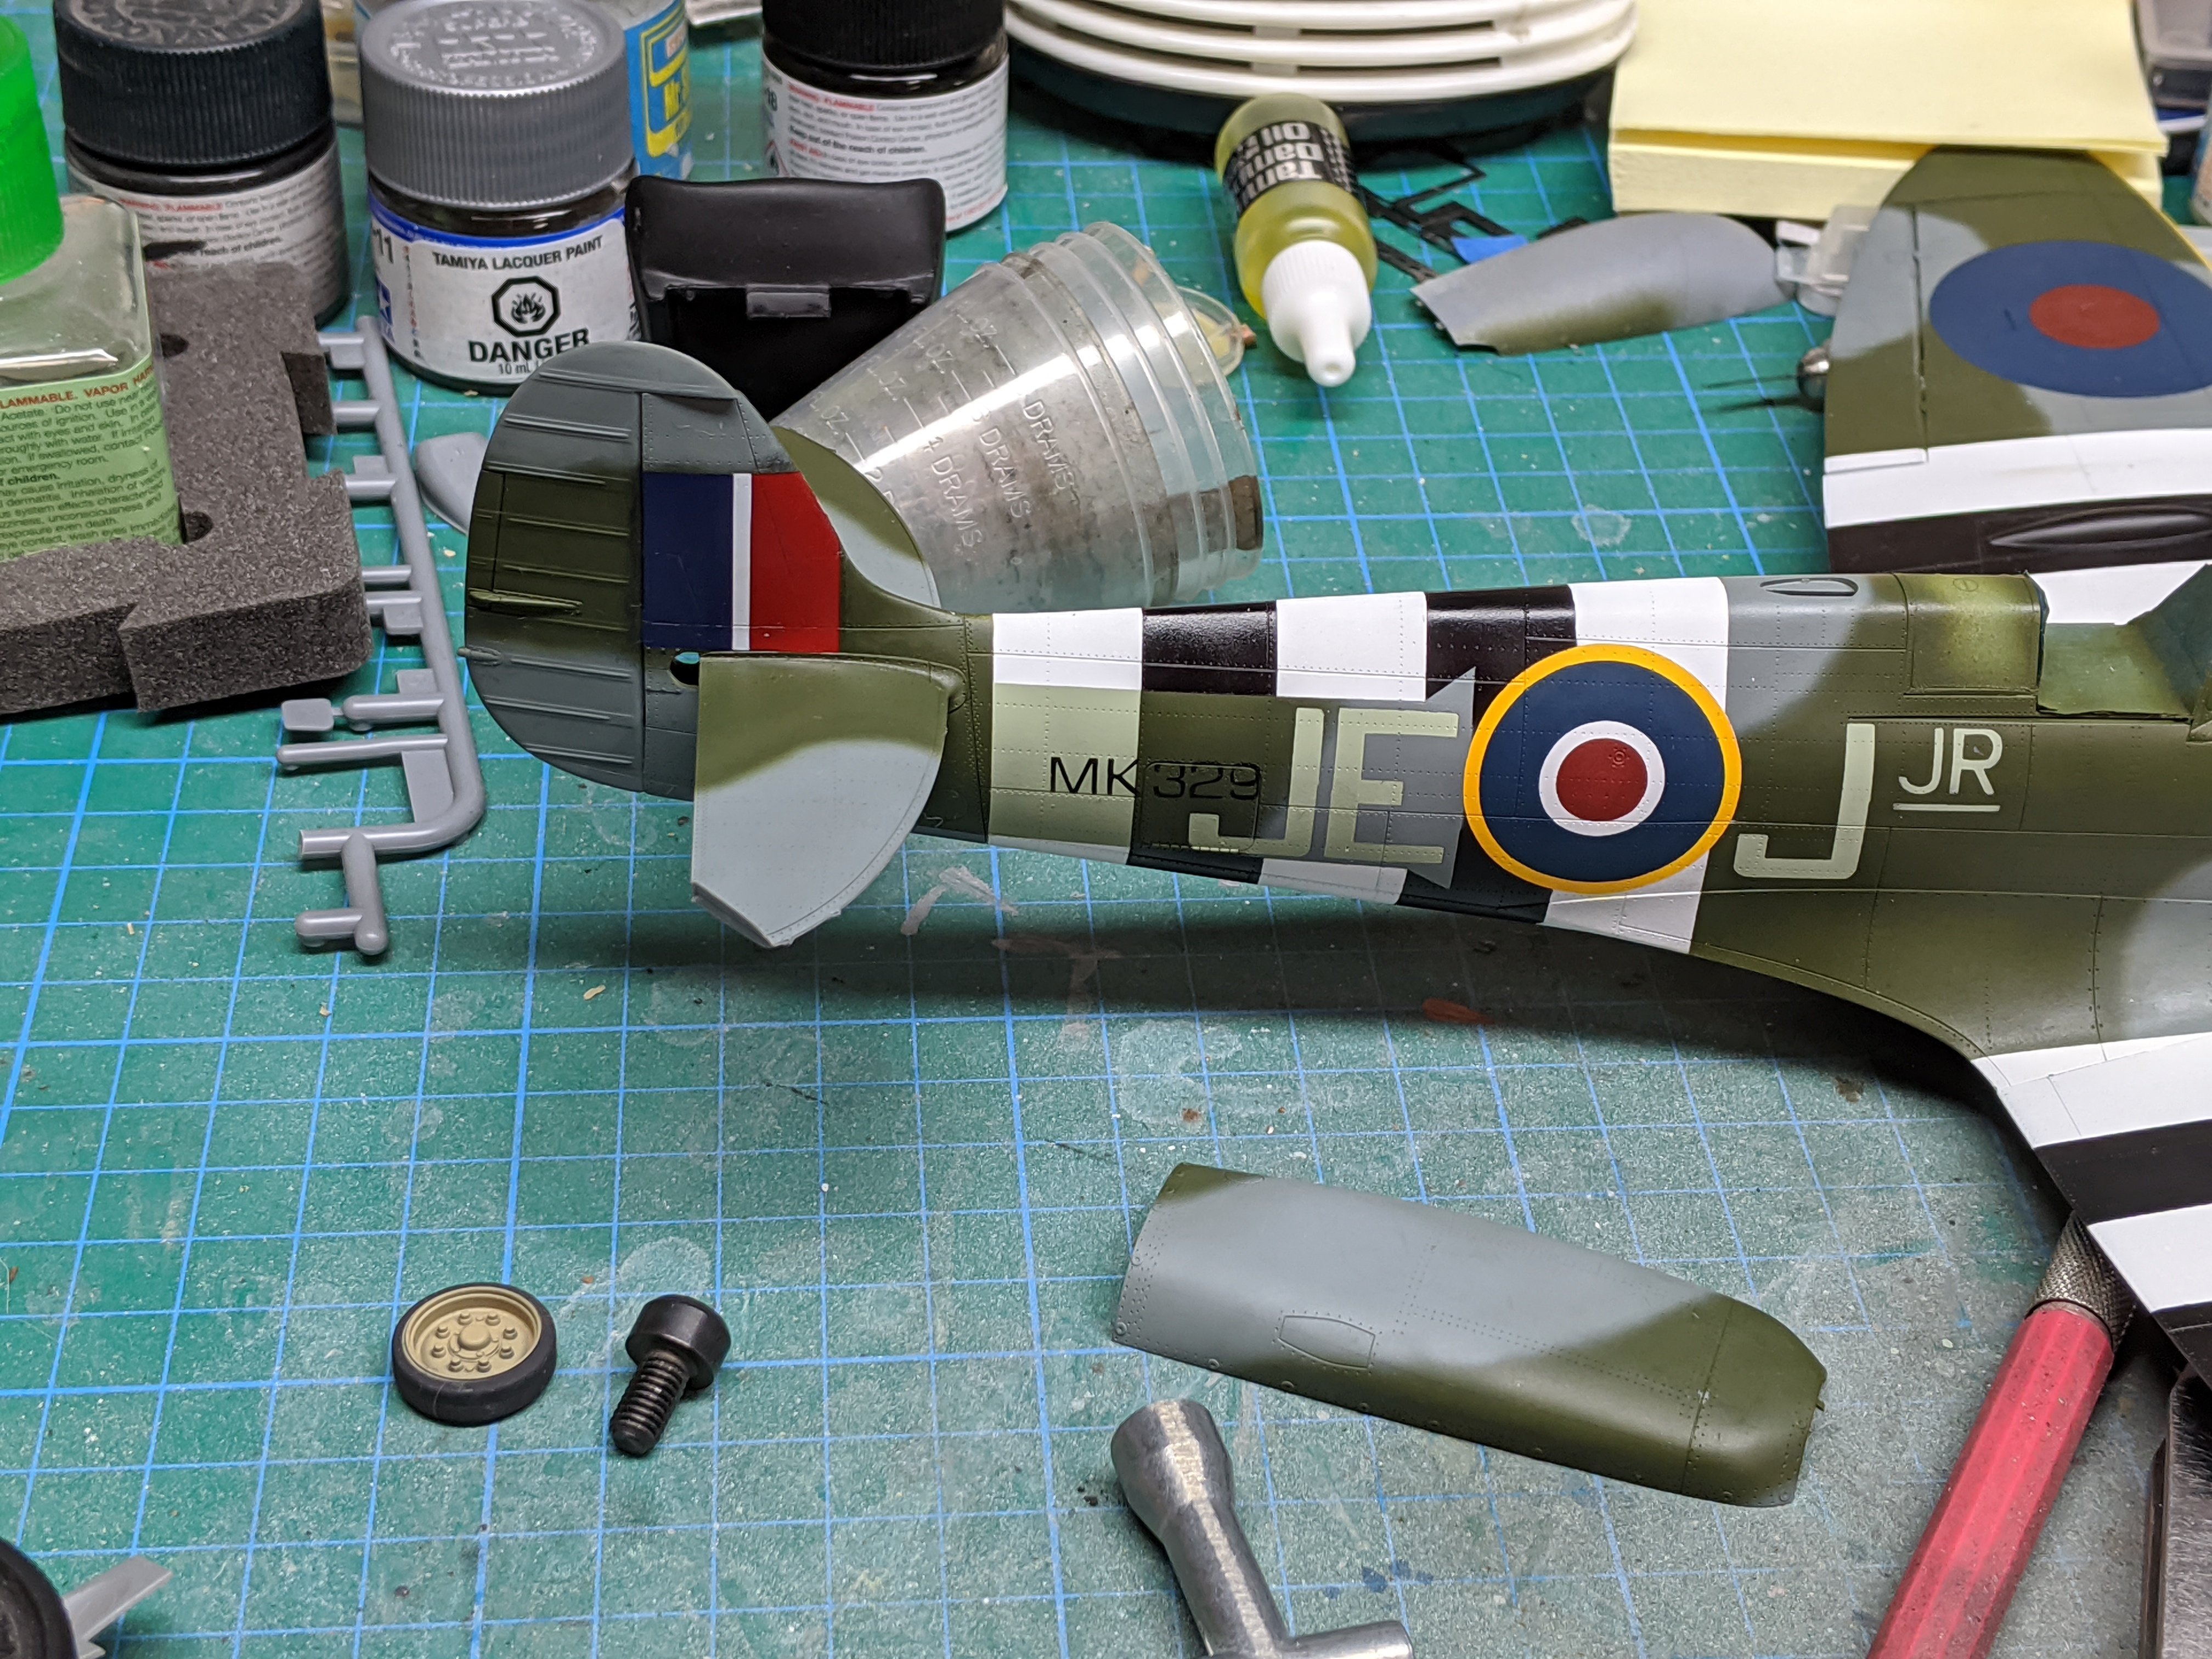
Tamiya Spitfire IXe with ModXXX
BlrwestSiR replied to BlrwestSiR's topic in LSM 1/35 and Larger Work In Progress
I got lazy and used decals for the fin flash. Worse than lazy, I used the kit decals... Hopefully this doesn't bite me in the butt too much.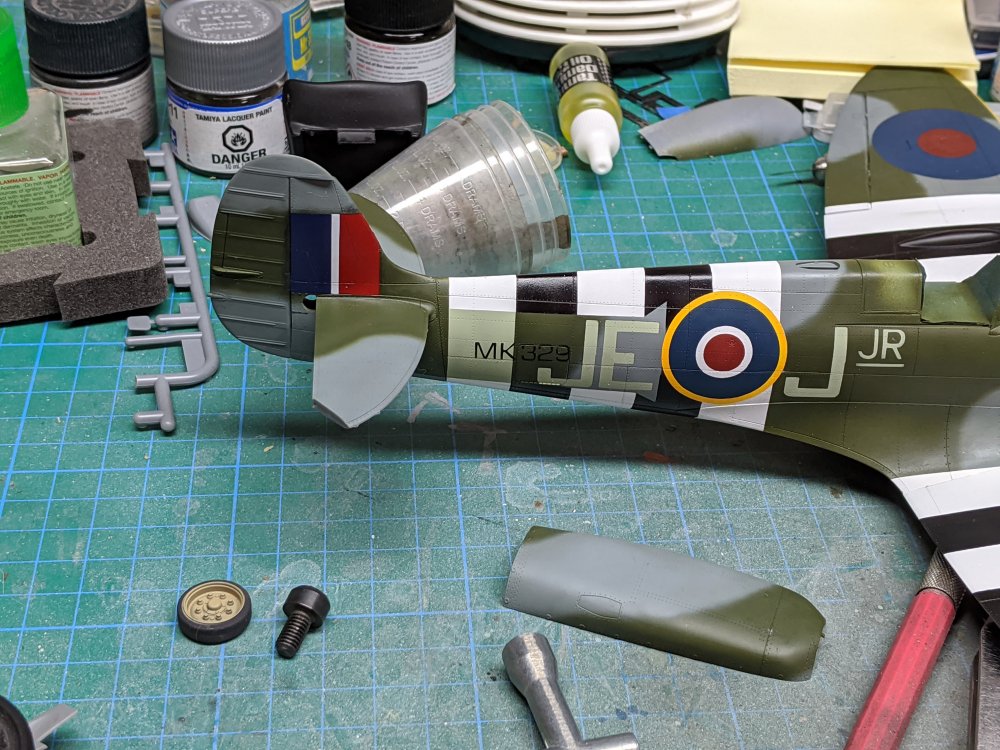
-
Some nice progress there Harv.
-
Tamiya 1/35 Marder III
BlrwestSiR replied to BlrwestSiR's topic in LSM 1/35 and Larger Work In Progress
It certainly is. Will have to see about stocking up again once it's safe. -
What is on your bench right now ? Share a picture :)
BlrwestSiR replied to Martinnfb's topic in Modelling Discussion
Still working on the GT-R.
-
Share how COVID-19 Quarantine has affected you.
BlrwestSiR replied to 1to1scale's topic in General Discussion
Not sure on that one. I've got two boys, 9 and almost 7. They've been out of school for 2 weeks already. Normally this wouldn't be a big deal for me as a stay home dad. I'd just take them to the park or a movie or some other attraction. The problem is they're all closed. Thankfully we have a backyard and deadend laneway they can play in. But it's getting tough though. Carl -
Hasegawa BF109F-4- finished!
BlrwestSiR replied to BlrwestSiR's topic in LSM 1/35 and Larger Work In Progress
Good news! Cleaning up around my bench I found the missing canopy section. So this should be back on the bench soon. Carl -
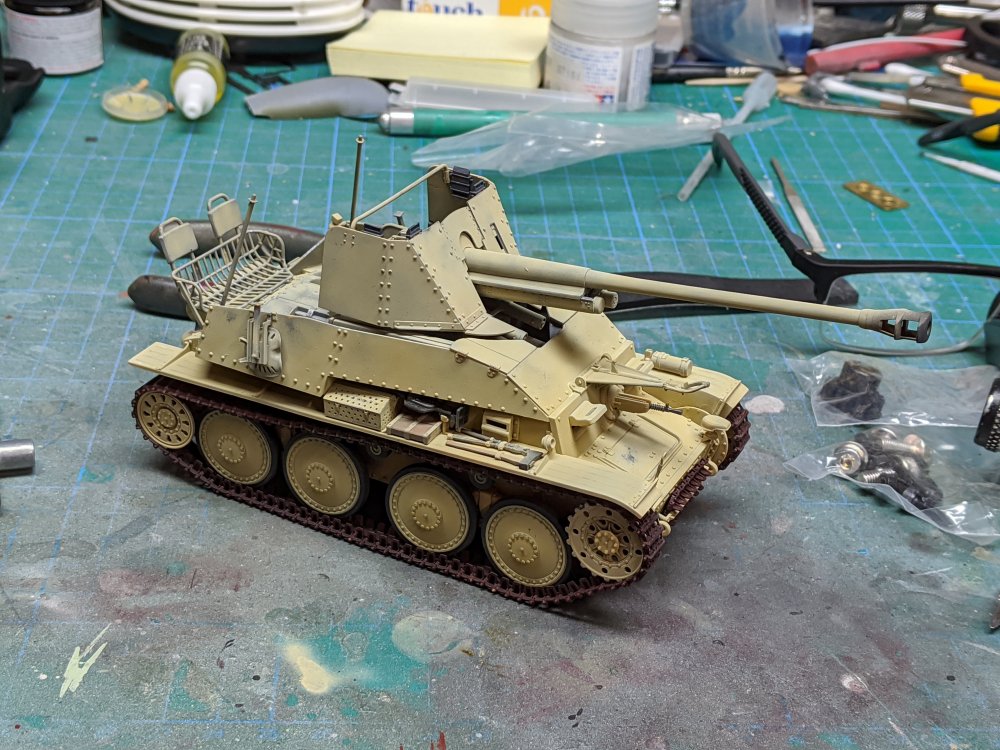
Tamiya 1/35 Marder III
BlrwestSiR replied to BlrwestSiR's topic in LSM 1/35 and Larger Work In Progress
Ok, I've joined the turret and hull.  Next up are decals and some weathering.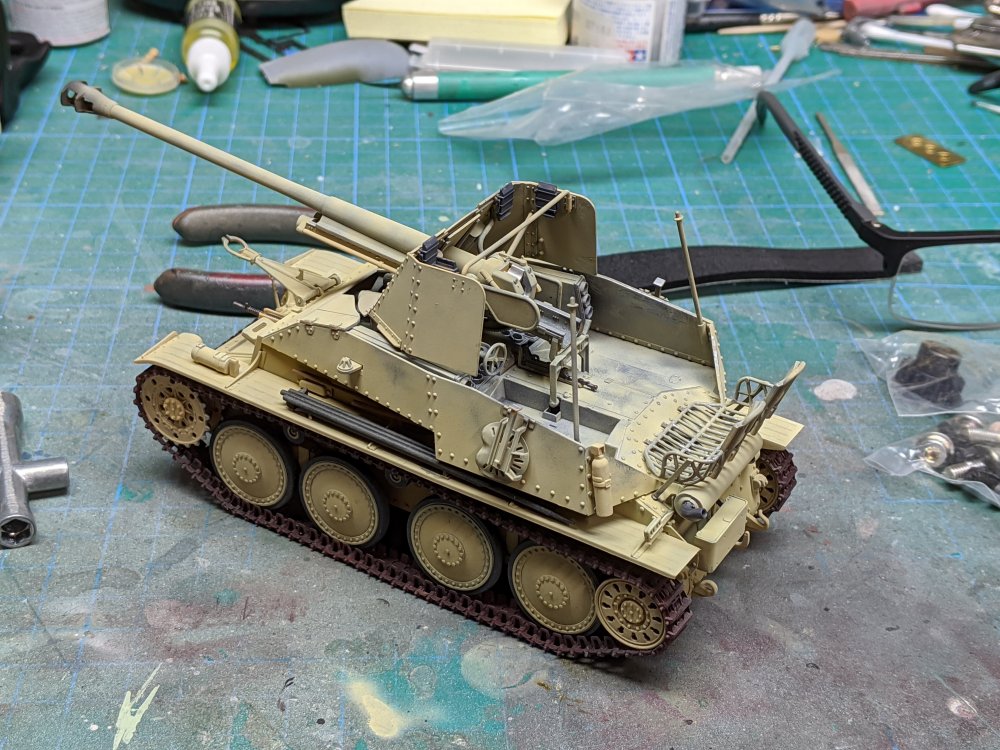
-
Stunning detail! Carl
-
Anyone know if there are AM bulged bomb bay doors available for the HK Lancaster? I'm looking to do the wartime VR-A Lancaster and it had the bulged doors. Failing that, if anyone know of some plans available I may give a try at making some. Thanks, Carl
-
HK Models Do-335 A-12
BlrwestSiR replied to JeroenPeters's topic in LSM 1/35 and Larger Work In Progress
Somehow I completely missed that you were building the two seater. I thought for some reason this was the night fighter variant. Anyways, nice job on fixing the moulding defects. Carl -
IBG models PZL P.11c. Finished
BlrwestSiR replied to Clunkmeister's topic in LSM 1/35 and Larger Work In Progress
That's a very impressive looking cockpit Ernie. Are you going to paint it? -
What is on your bench right now ? Share a picture :)
BlrwestSiR replied to Martinnfb's topic in Modelling Discussion
StuG? -
IBG models PZL P.11c. Finished
BlrwestSiR replied to Clunkmeister's topic in LSM 1/35 and Larger Work In Progress
The more I see of this kit, the more I'm liking it. It's definitely got the correct way to PE bits. Carl -
It's an easy mistake to make with Tamiya being the Japanese distributor for Italeri and re-boxing many of their kits.
-
Actually Tamiya did a new tool Hetzer about 4-5 years ago. It's quite a step up from the much older Italeri one. https://www.perthmilitarymodelling.com/reviews/vehicles/tamiya/tam35285.html The Eduard Hetzer was their own kit too and included a full interior but I found it incredibly fiddly to build.
-
What is on your bench right now ? Share a picture :)
BlrwestSiR replied to Martinnfb's topic in Modelling Discussion
Phil, the Tempest looks great. I'd say the patch would be fine. Adds to the weathering. -
They certainly seem that way on a first look.
-
Tamiya now makes a Hetzer as well. One is on my wants list after trying to deal with the Eduard one.
-
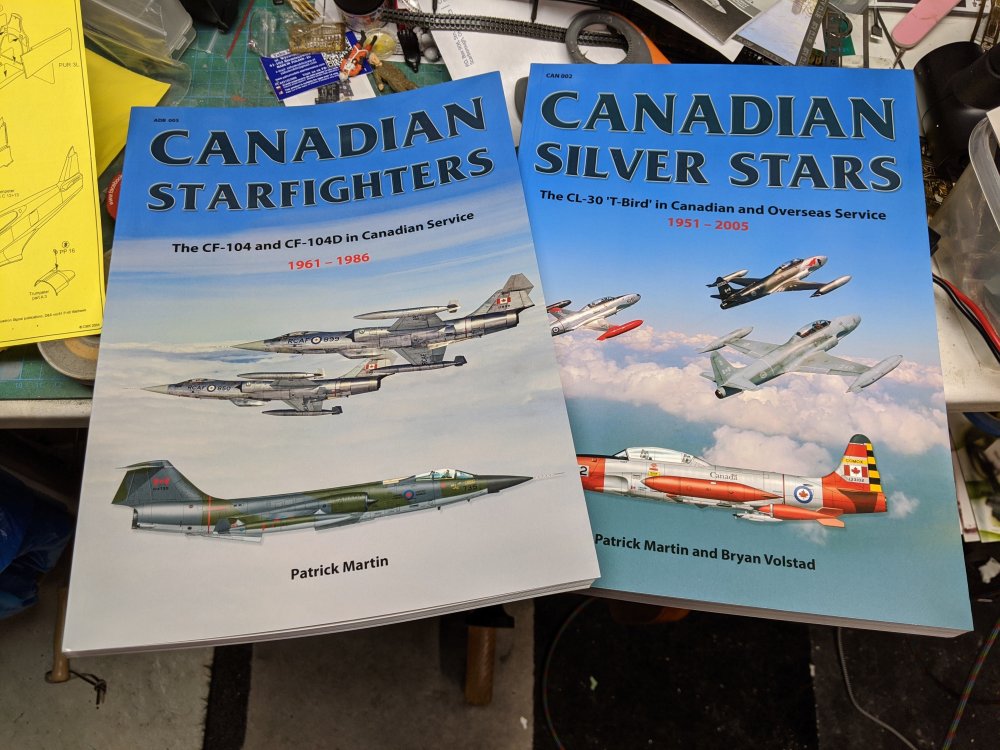
Picked up a couple books. The one on Silver Stars is too late for my build but still worth reading. The Starfighter one will be handy for my CF-104D. Carl
-
Nice to see that it should work out for most single engine planes in our scale.
-
Share how COVID-19 Quarantine has affected you.
BlrwestSiR replied to 1to1scale's topic in General Discussion
There used to be one next the toilet in my parents' house. To this day, I still don't know why they kept it there. -
What’s on your 2020 modelling shopping list ?
BlrwestSiR replied to HubertB's topic in General Discussion
Me too! And a -1D to go along with it. Just need to figure out when I'll do them. So true for many people. Sue is the primary wage earner in our home and with me already a stay at home dad, it's made things a bit easier. The part time work I had while the kids were in school is gone so that's my modelling budget with it. Likes others on here, I've got a decent sized stash and there's stuff I've got preordered and paid for to get my new car smell fix. Back on topic, prior to the current situation, I had just a couple kits in mind. - Italeri 1/12 Lancia Delta - Special Hobby Whirlwind Carl -
Why did I know you'd be the one to bring up Girls und Panzer? Nothing like watching a Tiger 1 do drift turns. I wanted to get the big T-28 tank after watching the film. The Dragon kit is hard to find these days. The BT-42 scene is great fun too. Carl
-
IBG models PZL P.11c. Finished
BlrwestSiR replied to Clunkmeister's topic in LSM 1/35 and Larger Work In Progress
Great pics Ernie. I was looking at the pedal assembly and thinking no way that'll work but you've proved it goes together the way they show. This is definitely a labour of love for the kit designers.