DocRob
-
Posts
7,043 -
Joined
-
Last visited
Content Type
Profiles
Forums
Events
Gallery
Everything posted by DocRob
-
Thanks Martin, amazing stuff and something in the gallery, I've seen before right here . Cheers Rob
-
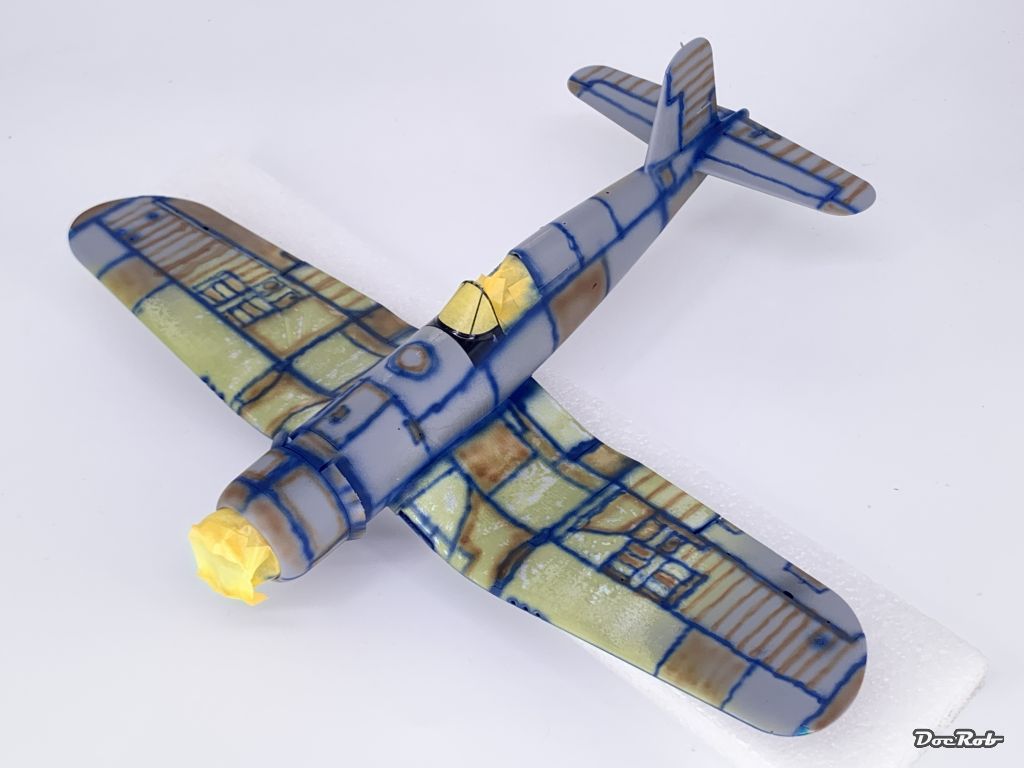
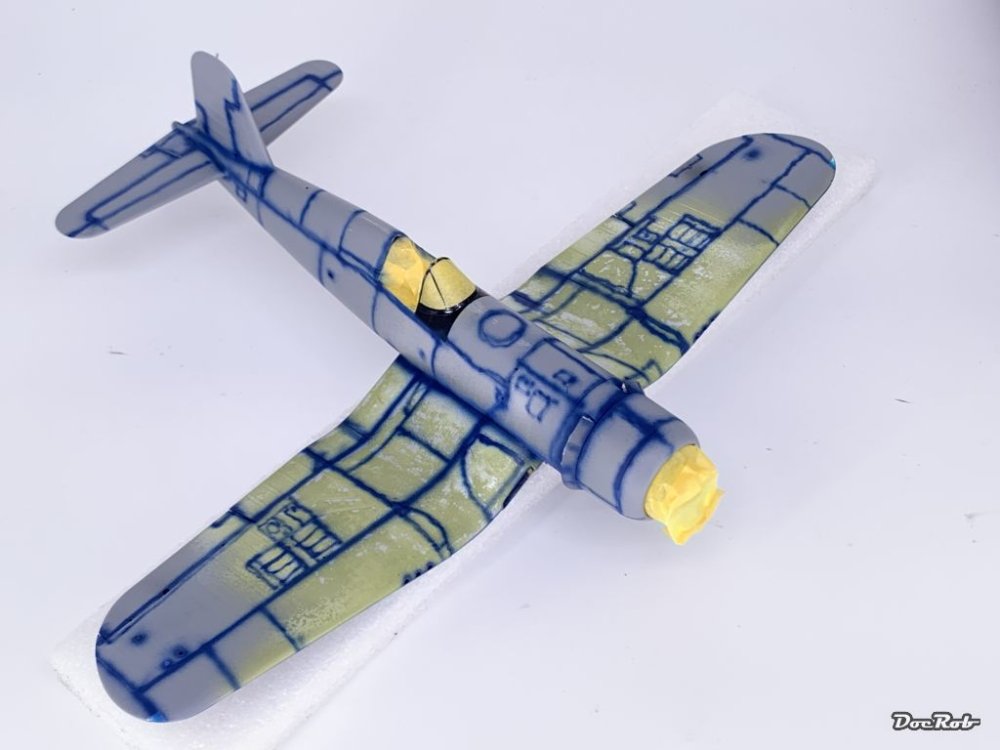
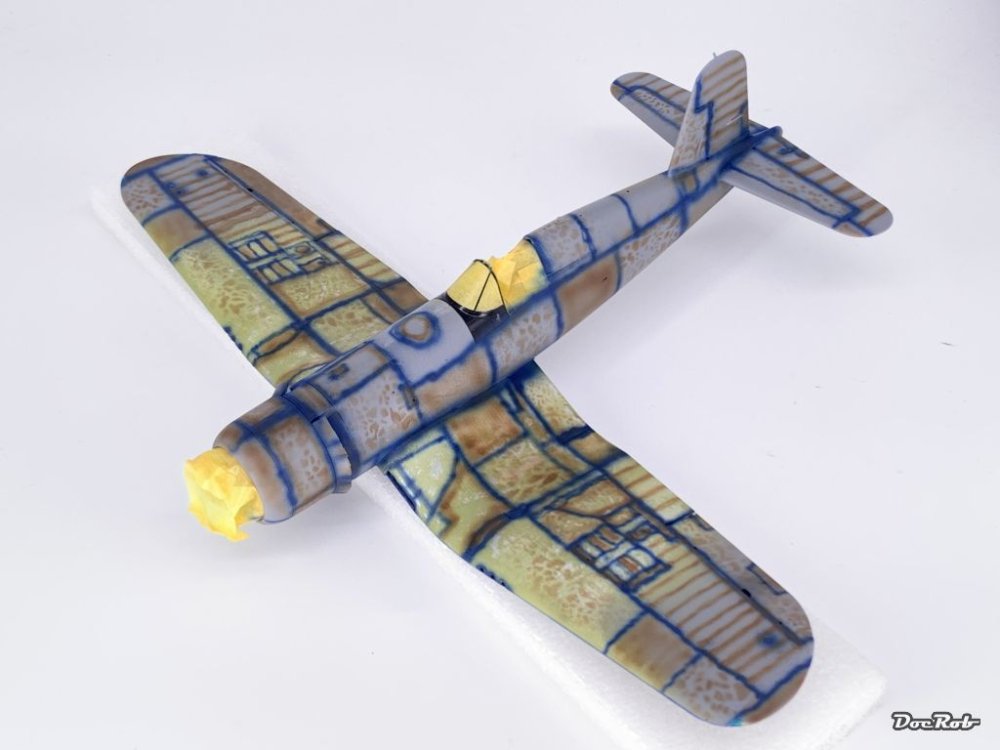
Pre shading time or how do I let my plane look silly . I have used a multiple color pre shading approach on different builds and always liked the effect. Black shading looks mostly too stark to me and using blue and brown in this case compliments the camo colors. To let the effect work, it's absolutely essential, to work in very translucent layers onto the pre shading until you reach the desired effect. I hope, I can achieve this, never used AK's Real Colors before on wings and a fuselage. Panel lines got airbrushed in blue for harsh contrasts. Followed by red brown for other panels and structural lines and some panel accentuation. At last some red brown splatter, applied with a splatter mask, to break the monotony in the larger panels. Funky, isn't it ? Cheers Rob

-
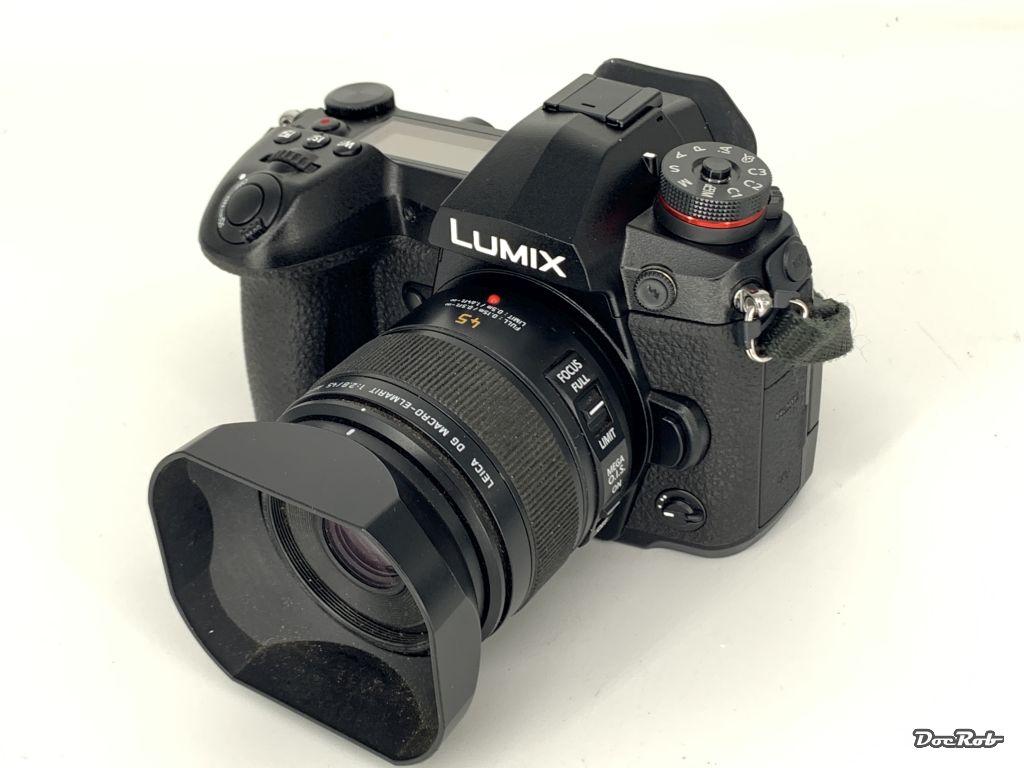
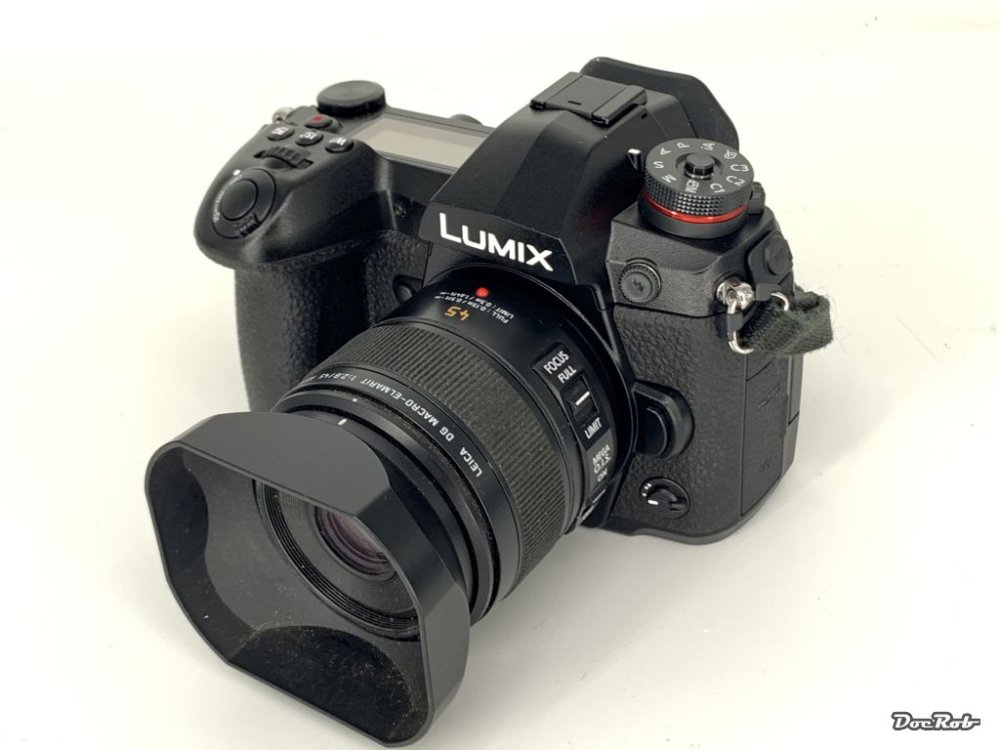
This new delivery is not directly connected with modelling, but will be used for hopefully better modelling pics and others of course. Sinc three years, I was waiting for a new photo camera from Panasonic Lumix, as the new high tech models have video written all over them. With a good price tag, I decided to opt instead for a Lumix G9, the last of the brand ultimately dedicated to photography, albeit a decent video camera too. I know about the shortcomings of the micro four third, like unreliable, slow autofocus, bad depth of field rendering, ... but the system has a lot of benefits too and I own a lot of lenses for the system like the Leica macro on the picture. The new one has among many things a huge viewfinder, which I find very important, a top display, which is handy for tripod photography and advanced stuff, like in camera image stacking. Cheers Rob
-
Amaizing stuff, love the washing machine and the bike. Who produces that stuff? Cheers Rob
-
 This becomes better with every update, Gary. I like the weathering and the blending of the decals and markings. Good to hear, the 1ManArmy masks work well, as I willuse them on my actual Corsair build, which means soon, hopefully. Cheers Rob
 -
Y’all still good on Dec 1 GB start, or wait till Jan 1?
DocRob replied to Clunkmeister's topic in Modelling Discussion
Hmm, good question, I don't know. Well I have to finish the Corsair first and the later winter will be reserved for the rigging of the Duchess of Kingston. If I take part, I think a December start would suit me better to squeeze the Schnellboot S-38 in. Cheers Rob -
Alien, the best sci-fi movie ever, Aliens, one of the best creature horror movies ever. I praise the time, when sci-fi got dirty. I remember having seen Alien, fileteen years of age when it came out and the shock shelled audience after the movie leaving the cinema quitely. Some staff member offered 'After Aliens' refreshing towels foiled with a dedicated Alien print. Luckily no uniform CGI in these golden years of cinema. Nice haul Carl, but the colors .
-
Thanks Peter, but the effect of wear will not show that stark under the tri tone camo, but it will be a weathered bird. Cheers Rob
-
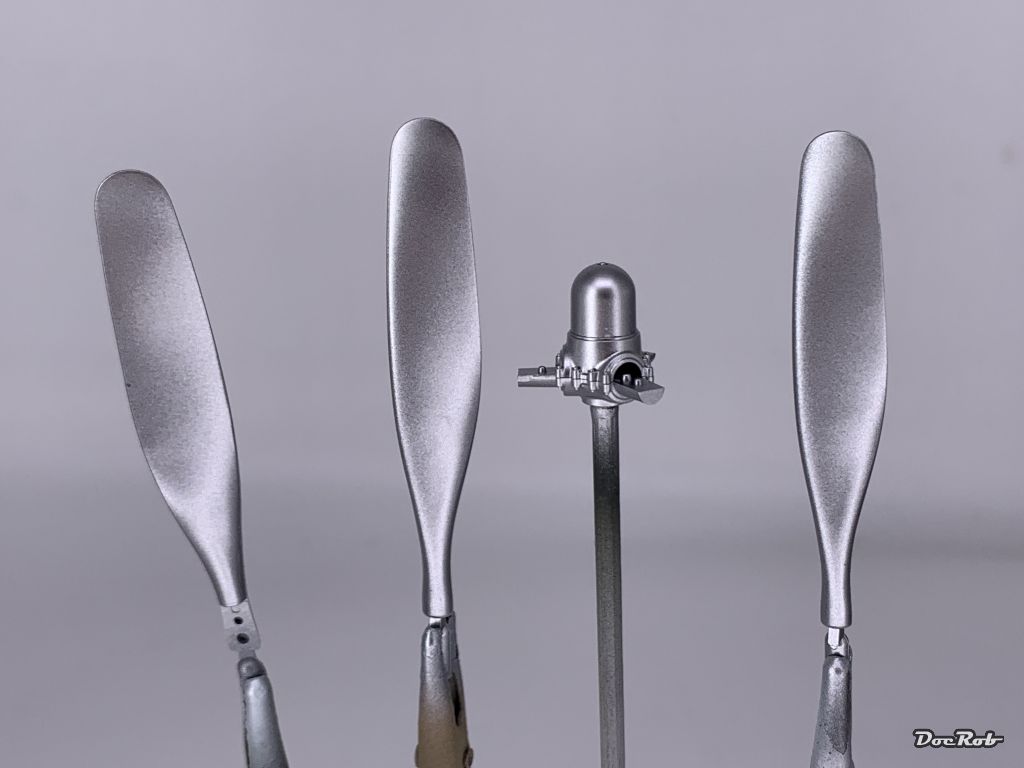
The next step after letting the hairspray thoroughly dry on the aluminum coat was to apply the primer color, interior yellow-green and let dry again. Then it was chipping time. I dampened the area with water, applied with a flat brush and let it soak for some minutes. After that, I used the same flat brush and abrased the interior green, emphasizing panels and areas of heavier wear. In some areas, I used wetted sandpaper as an addition. This may look like a bit overdone, but there will be pre shading on top, followed by the surface color, which will largely reduce the effect, as it only shows in later to chip areas. After drying, I will save the primer chipping with a gloss coat and proceed with pre shading. One question remains, were the middle flaps made by aluminum or cloth coated? Cheers Rob


-
This looks very promising, seems to be a nice kit, at least at first sight. Cheers Rob
-
Thanks Carl, your finish looks great, let's see, how mine turns out. Cheers Rob
-
Thank you Kevin, that is interesting material. I wouldn't use pure black for a prop in general. I rarely ever black in modeling. The propeller will be sprayed NATO black. Cheers Rob
-
I use the direct upload function, the forum supplies and like it a lot, even more after the PhotoBucket-disaster. What I do is to run my pics through the batch function of IrfanView, where I reduce the size of my pics to about 100-200 KB and apply my logo automatically. Works great for me. Cheers Rob
-
Very nice progress with the washes applied. I like the grade of dirtyness, it looks right to my eye. Your idea about adding a lengthening guide for the HGW belts is great, I hope they will read this. I usually build up the longer belts from the middle on, fiddling in the end buckles last and then glue the middle with the possibility to adjust the length a bit, after checking with the pilots seat as reference. Cheers Rob
-
Hasegawa F-104 finished
DocRob replied to JohnB's topic in LSM 1/32 and Larger Aircraft Ready for Inspection
Glad yours doesn't turn into a lawn dart, John. Your Starfighter looks absolutely beautiful and crisp in it's finish. If I ever build one, it can only be in NMF, which let the plane look so pure. Cheers Rob -
How are the odds, that the stash additions got build ever, compared to the slots, Hubert ? Cheers Rob
-
1:32nd scale Sopwith Dolphin
DocRob replied to sandbagger's topic in LSM 1/35 and Larger Work In Progress
I considered this technique too, as it is less tedious, then to mask all spars, then pre shade, ... . On my finished builds, I went the hard way, because I envisioned, the spars are prominent and should look highlighted, instead of darkened. On translucent linen, you could argue, that it's cast shadow, which looks darker, but with opaque surfaces, I don't know. On most planes of the time, there are enforcement strips applied, which might cast a slight shadow too. I looked at many historical pictures and have to say, on some the risen spars look lighter and on some darker, hmm. I might get persuaded to try the easier method for my next build, because the effect looks good in the end. Cheers Rob -
Thanks Gary, there are two new sprues and some clear parts (obviously) added to the Birdcage kit, mostly addressing internal parts for the cockpit, the canopy, the tail wheel section and some smaller stuff. Cheers Rob
-
Thanks Jeroen, it's still not finished, but I will post some newer pics, where the applied dust filters the camo a bit. I tried to put the Lancia on a cobblestone base for the pics, but it was nearly invisible then . Cheers Rob
-
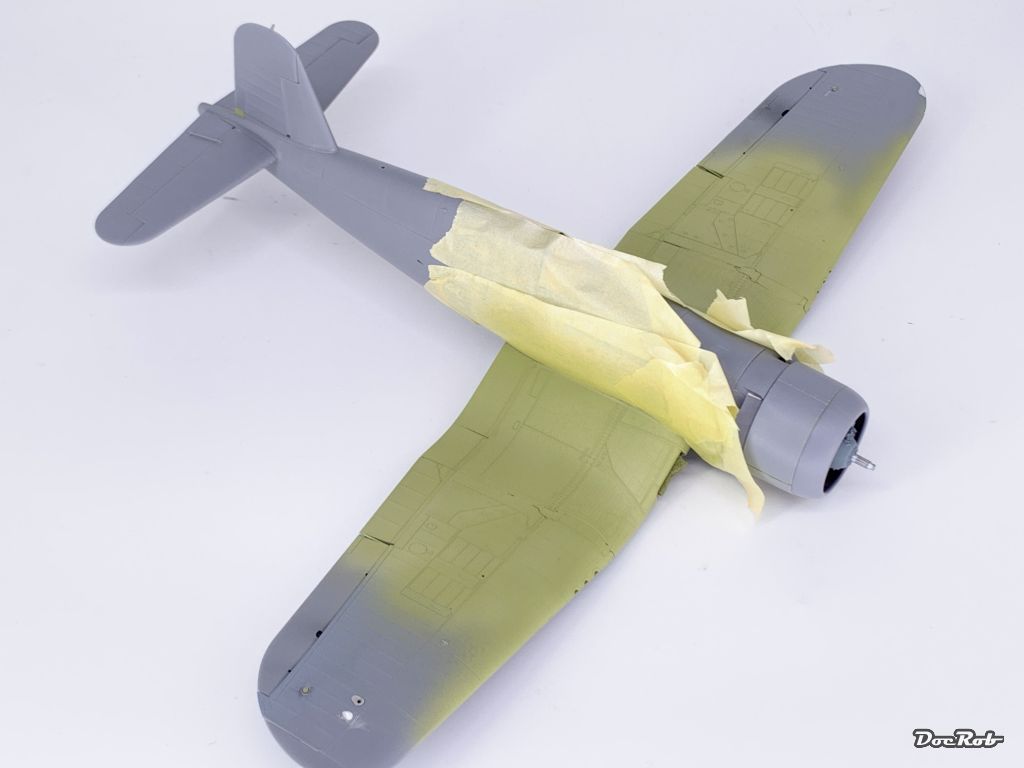
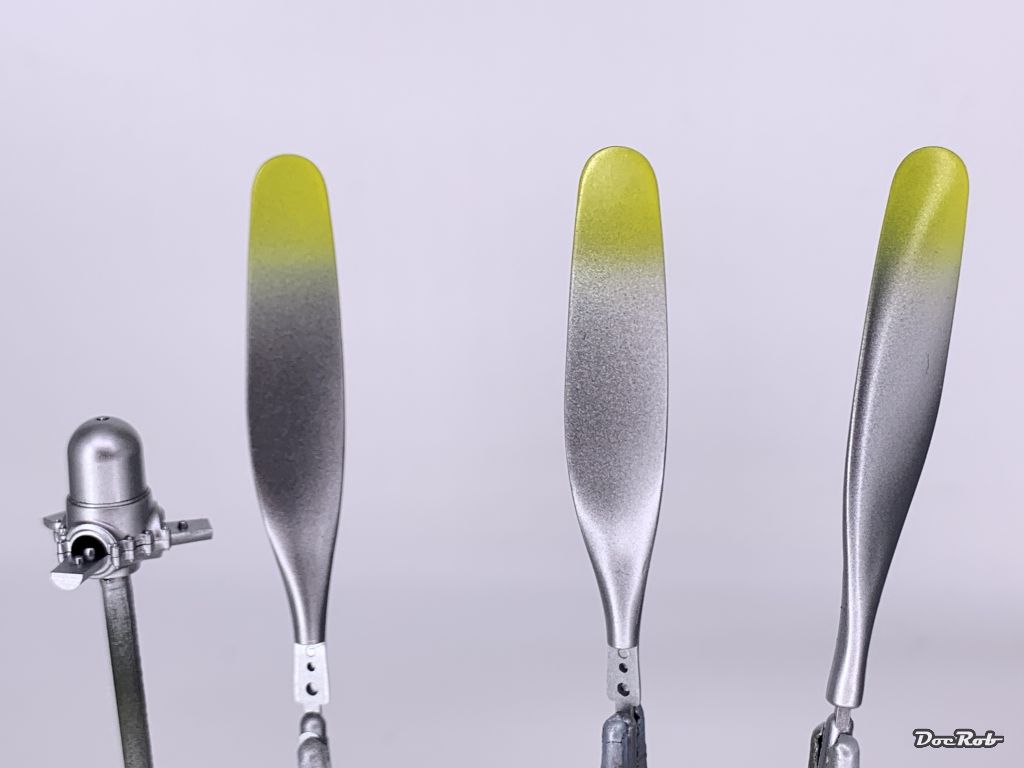
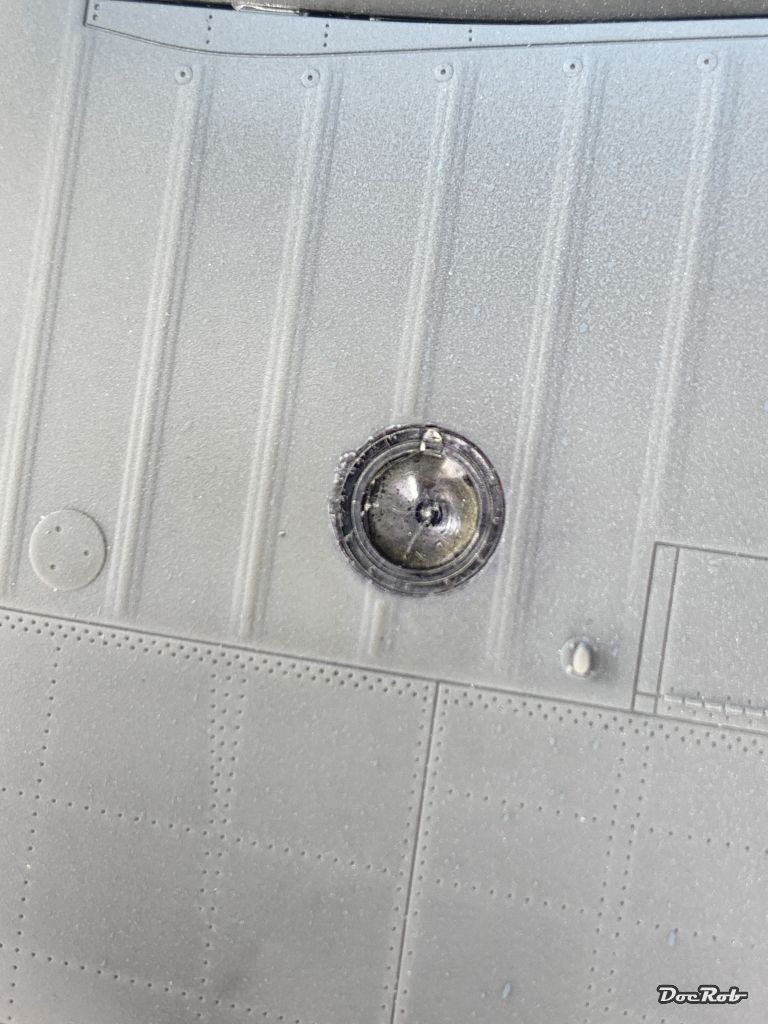
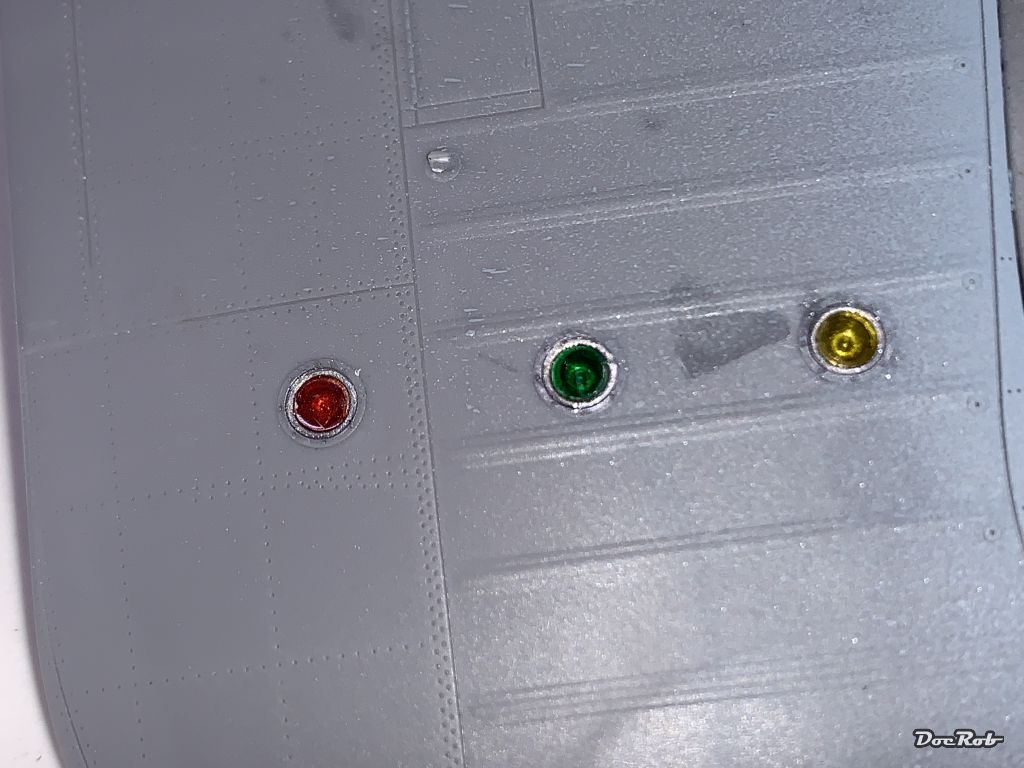
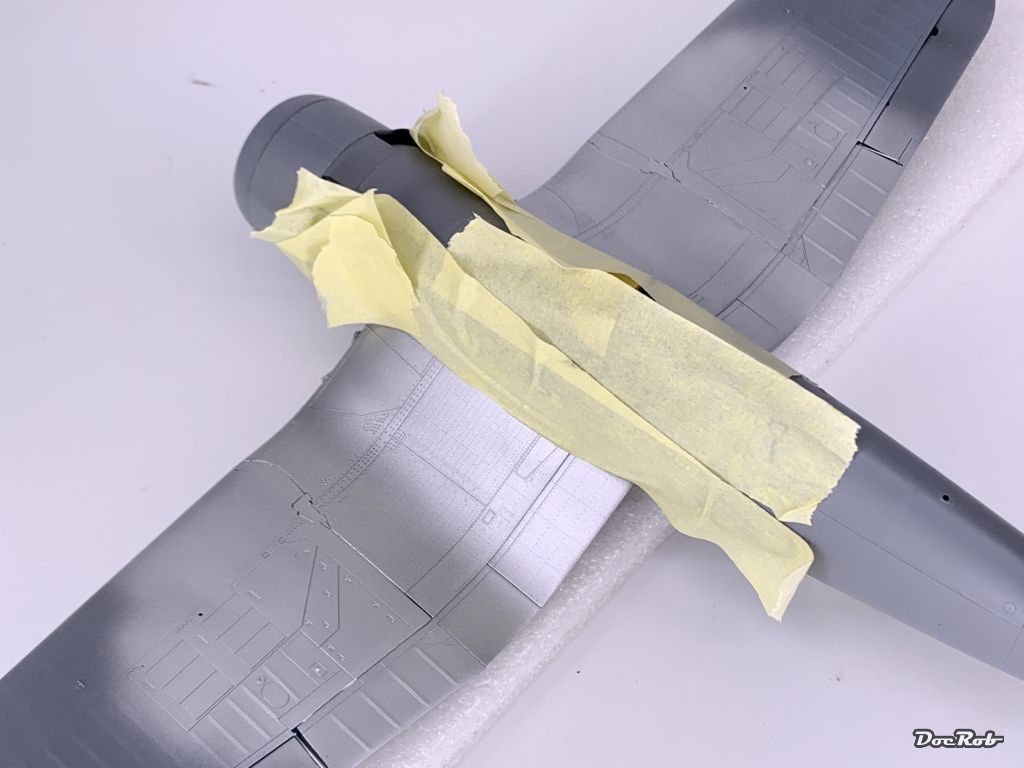
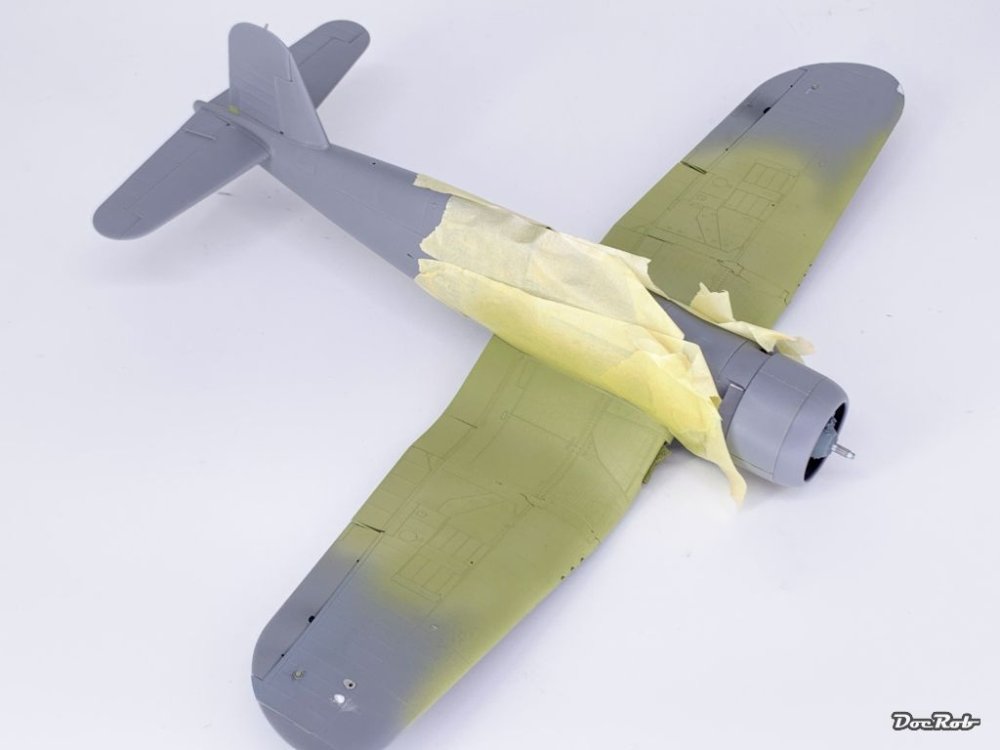
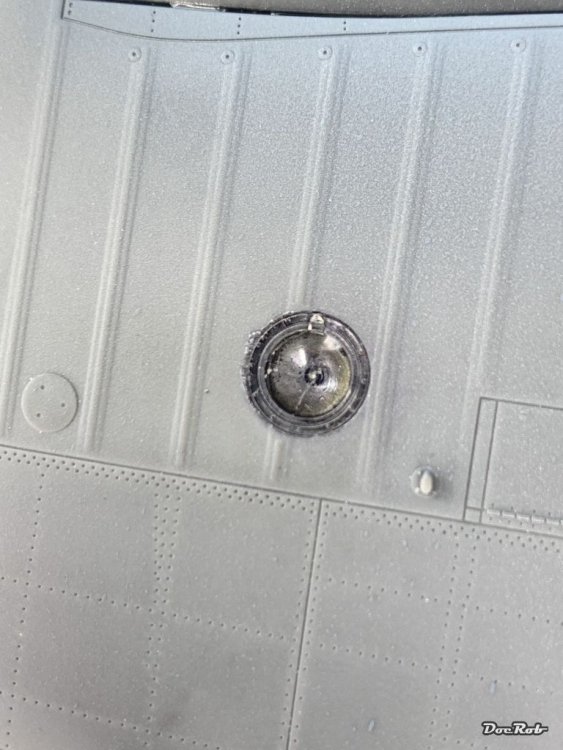
I'm actually preparing and planning my paint sequence. In order to do so, I will apply a lot of wear to the wing roots and like in the real world, I sprayed some dark aluminum on followed by a coat of hairspray. Next will be primer color, then chipping through the primer onto the aluminum, then sealing everything under a protective gloss coat, pre shading and -mottling, hairspray again and then the tri tone camo with all the galore. That's the plan at least and I hope, I don't paint myself into a corner . As a side project the propeller got treated similar. First dark aluminum, then hairspray, then yellow for the tips, hairspray again. Next will be masking the yellow tips off and apply some Nato black. It's hard to say, but sometimes I hate the precision of Tamiya kits. Why, for example with the landing light, the fit is so tight, that my very cautiously applied Contacta Clear splashed a bit, when the clear part snapped in, bummer. Now I have to find a story, why this soiling happened with the real one. For the multiple lights on the Corsair, I use my trusty Uschi van der Rosten chrome pigments, which give a very realistic shine for the reflectors. I also tried Molotow's chrome markers, but they failed again The formation lights got the same treatment, except for the clear colors applied before. Cheers Rob


-
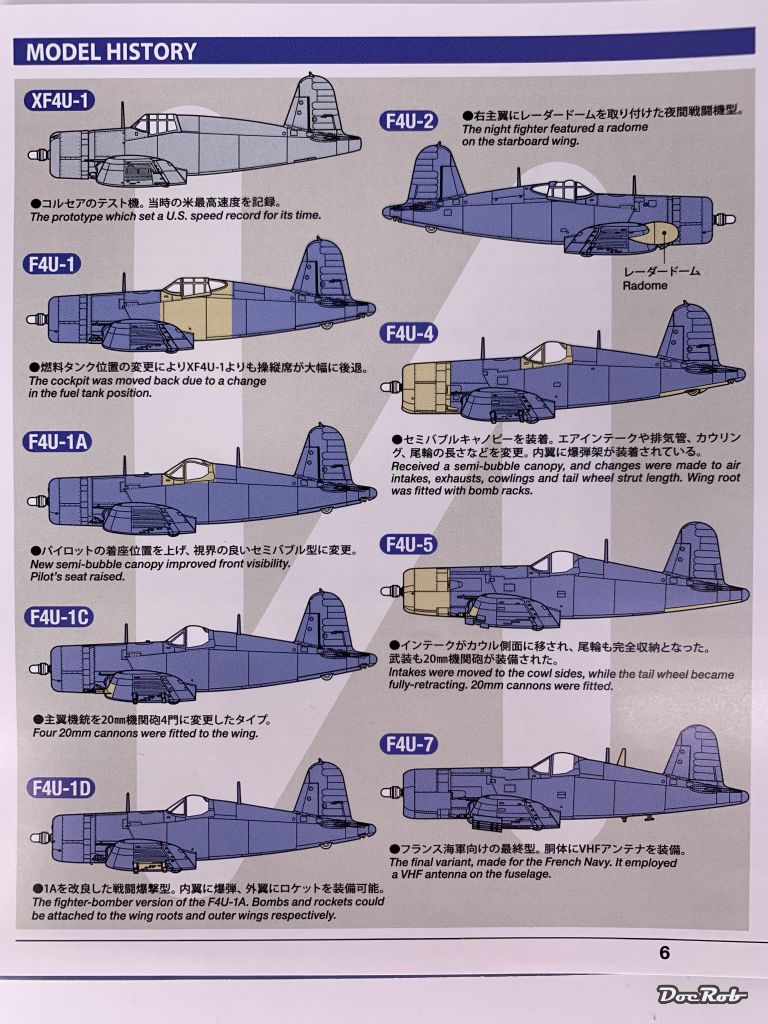
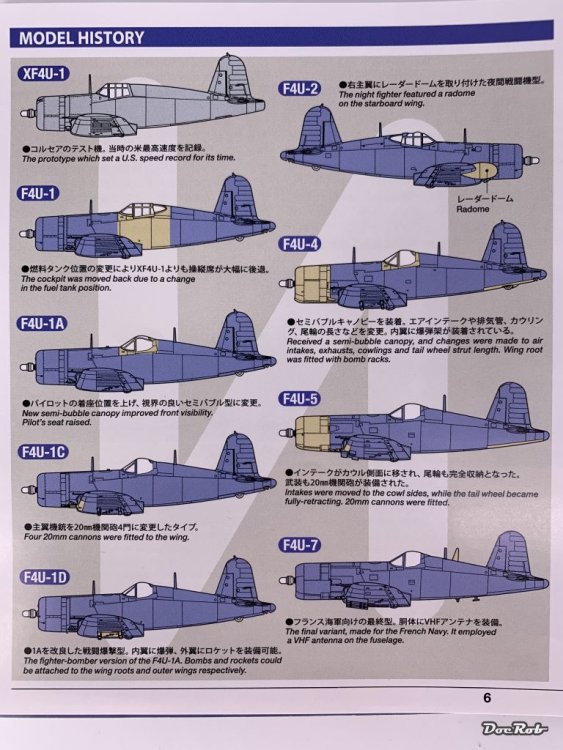
Muchas gracias amigos, let's hope for the best, I can't afford fogging or color bleeding onto that canopy. @GazzaS, If you mean the difference between the Birdcage and the later bubble canopy, I think the main reason for the change would have been the poor vision the Birdcage canopy allow, especially during carrier landings. The later models like mine have the pilots position risen by eight inches, which made a different design approach necessary. The overall vision bettered too, obviously. I'm not an expert, identifying the differences of the later models, but Tamiya provided some comprehensive information about the changes made to the corsair during their life span. Cheers Rob
-
I really like that speckling effect, Gary. Is it truly speckled or applied with a sponge? How do you perform your speckling. I am always afraid to use the airbrush with a low pressure setup, because I fear some unwanted blobs of color. It might be correct, but to my eye, the underside of the nose section looks too clean, compared with the rest of the fuselage. Cheers Rob
-
I'm absolutely not an 'on the sprue' airbrusher, but make few exceptions when necessary. I always find spots of weak coverage, when I do. With the Falcon, it seems like the way to go, you can't place enough clips on your desk, without creating havoc. Cheers Rob
-
Good you saved the Starfighter John. With the new paintjob it looks marvelous with that shiny aluminum finish. Can't wait to see it fully decaled. Cheers Rob
-
What is on your bench right now ? Share a picture :)
DocRob replied to Martinnfb's topic in Modelling Discussion
Nice Kevin, exactly the scheme, I have planned for my 1/32 DR.I from Roden. Good luck with the streaking. Cheers Rob