DocRob
-
Posts
7,127 -
Joined
-
Last visited
Content Type
Profiles
Forums
Events
Gallery
Everything posted by DocRob
-

What is on your bench right now ? Share a picture :)
DocRob replied to Martinnfb's topic in Modelling Discussion
I do, I don't have a large scale Spitfire in my stash, only two MK. 16 in 48 scale with some PE and resin. I never built a Spitfire so I'm considering. Cheers Rob -
Revell P-51 racer #69 done
DocRob replied to JohnB's topic in LSM 1/32 and Larger Aircraft Ready for Inspection
Again, a beauty John. The sleek lines of your Mustang can only be surpassed with closing the canopy. The near monochrome paintjob enhances the racehorse looks. You inspired me to build a racer too, but it sticks in the not so fast mail / customs since over a month. Cheers Rob -
Revell P-51 racer #69 done
DocRob replied to JohnB's topic in LSM 1/32 and Larger Aircraft Ready for Inspection
That's what modeling nerds associate with 69 . Cheers Rob -
Nice one, I built that MIG some years ago, it's one of the best kits, I ever build. I only found the bang seats too big. Cheers Rob
-
Sorry amigos, I've overseen the pencil thing, too much things to do in the moment. I use the AK pencils since some time and I do like them. Like Gary said not a lot sticks to the surface, when you use them dry, but you can highlight panel borders with them. On the Corsair, I used them dry for the dotting and there are differences between the pencils, some leave bigger marks than others, means are softer. I then blend them either with a flat brush or my fingertips and if that's not enough, a dampened cotton swab. With other builds, I used them with a dampened tip and that's where they really shine. You can dab them on and blend them with moist brushes or swabs. They work almost like a multi-colored wash then and this is what i really like. You can work with a palette of colors, which keeps it interesting to the eye. One example is the inside of this Skoda RSO drivers door, where I used the dampened pencils and blended them, simulating light and shadow Or again the interior of the Ammo Knight, where I used them dry and dampened. Of course a matte surface helps, on a high gloss polished surface nothing sticks. Cheers Rob

-
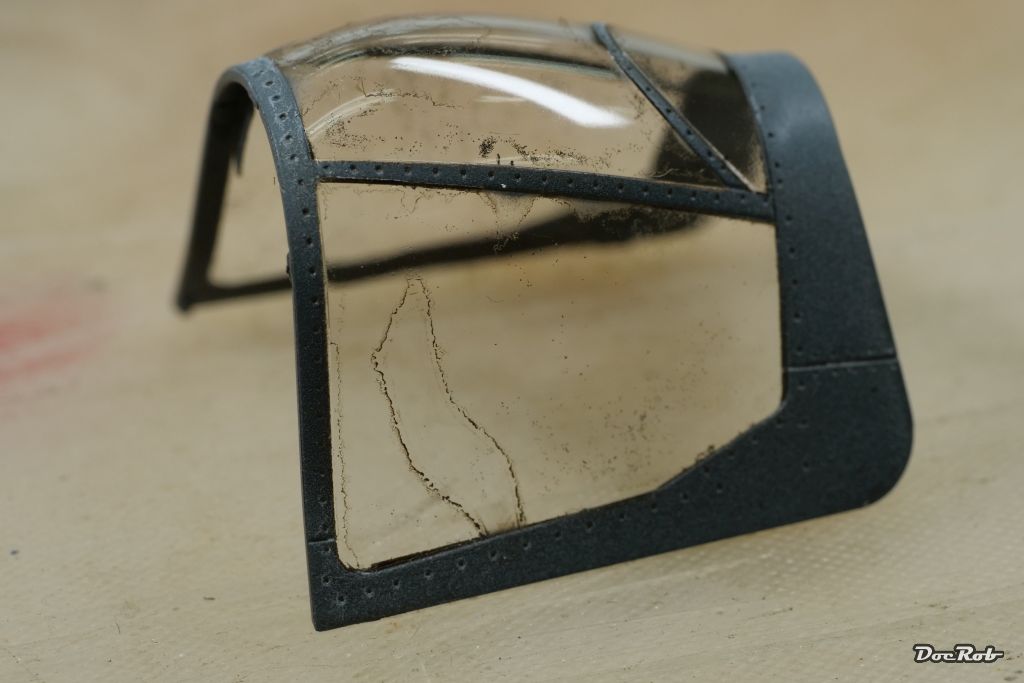
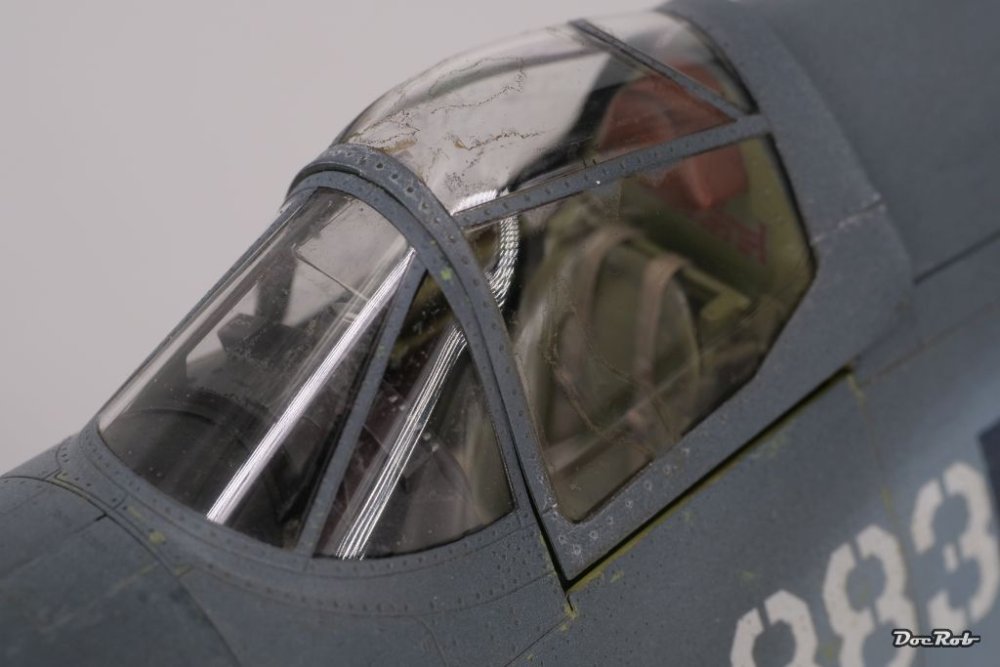
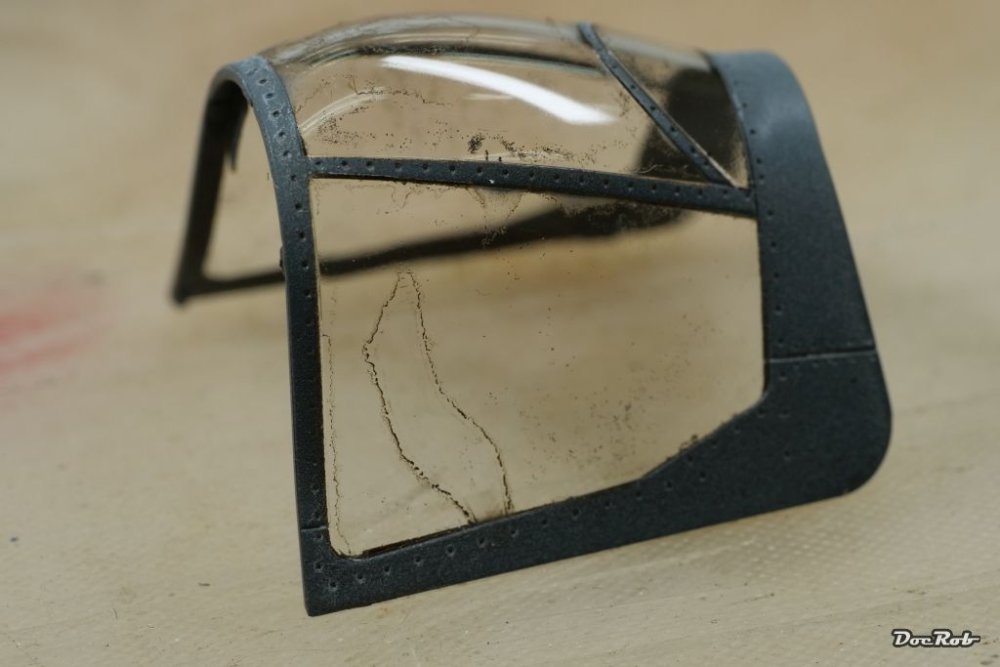
Thanks Harv, let's see how it looks in the end, I don't like unpleasant surprises that late in a build. Thank you Gary, I often use metal pigment onto painted parts. It may not sound right, but it somehow looks so, giving these parts a metallic appearance. mostly I finger rub a tiny bit of Uschi van der Rosten steel pigment carefully onto the surface. With the delicate undercarriage, I use a flat brush. I refined the technique with this build and relly liked the results. Tamiya extra thin has it's ways to creep everywhere if you are not careful. In my case there is no capilar effect. The residues are sometimes in the middle of the panes and in the case of the armored glass, where masked off completely with the windshield. What little bleeding there was on the borders of the masks was color and it was easy taken care off with a toothpick. I think it's lacquer / thinner fumes, because for example the lower fuselage window was masked from the outside and the residues were on the inside and that with the cockpit opening masked but of course not air tight. The Flory wash couldn't be the culprit, as I didn't smear it onto the windshield. Thank you Peter, I remember the discussion we had. I think it was on my KI-61 Hien build, where I first used lacquers for airbrushing. I took very great care with my masking, but somehow the thinner seemed to have gone through. Painting the cockpit glass of the model might help, if you remove the masks quickly. The downside is, it will always look different, if you don't go through all the weathering stages with the canopy. Next time when I have an extra canopy, I will try, if a bath of Pledge will alter the situation. I haven't done it with the Corsair, because the clear parts were absolutely crystal clear and I saw no need. I never had these issues using acrylics. Cheers Rob
-
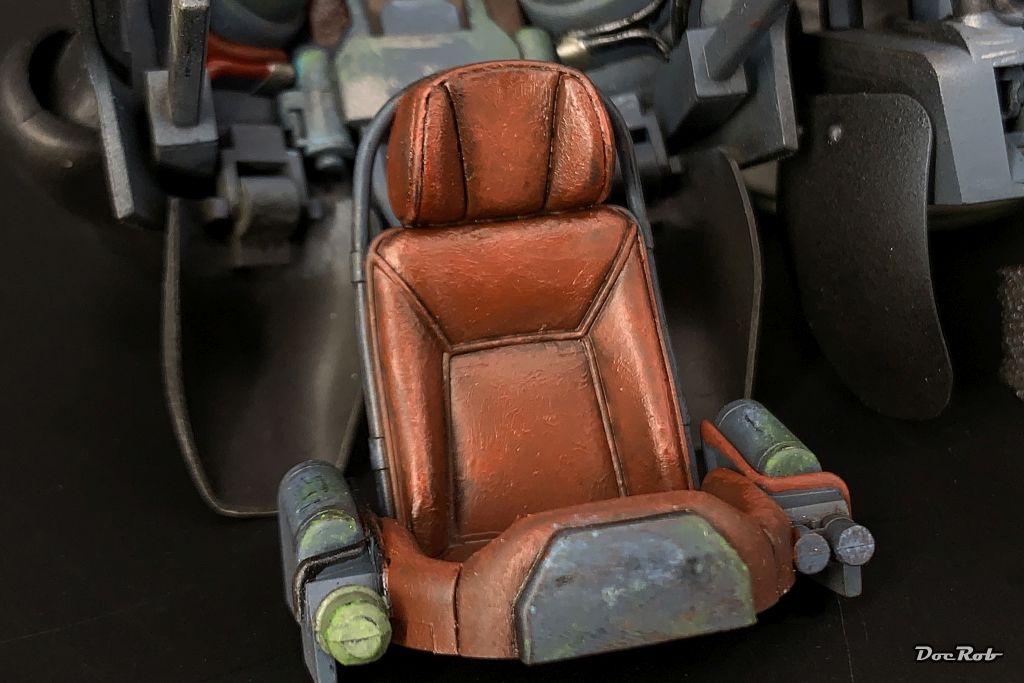
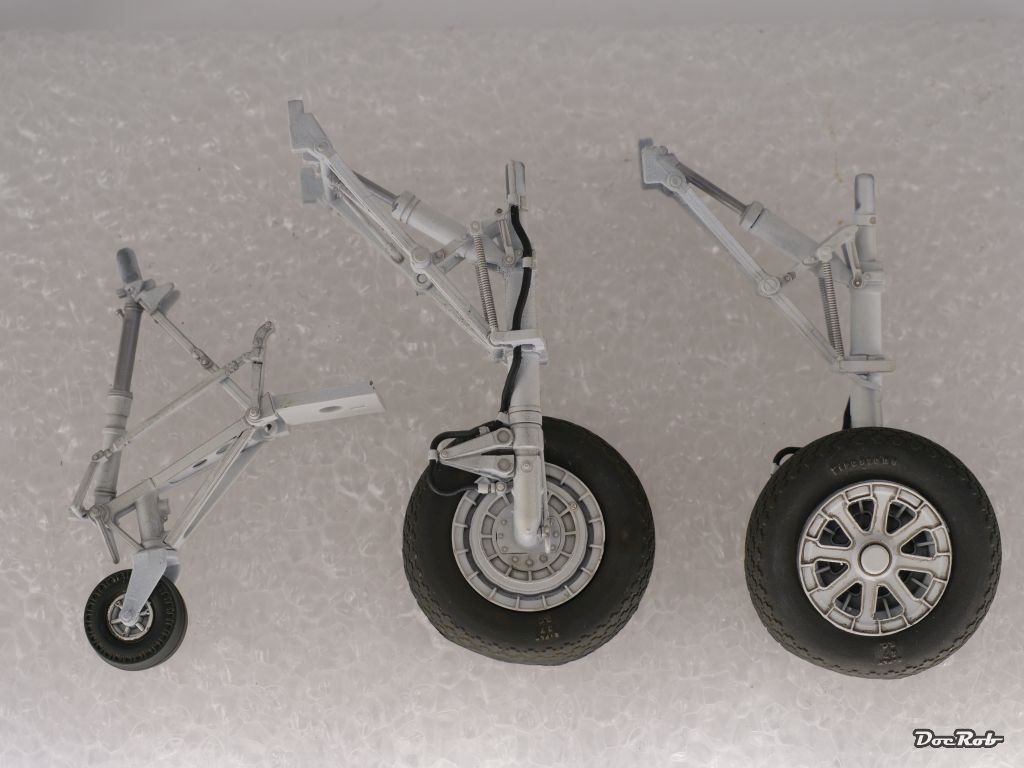
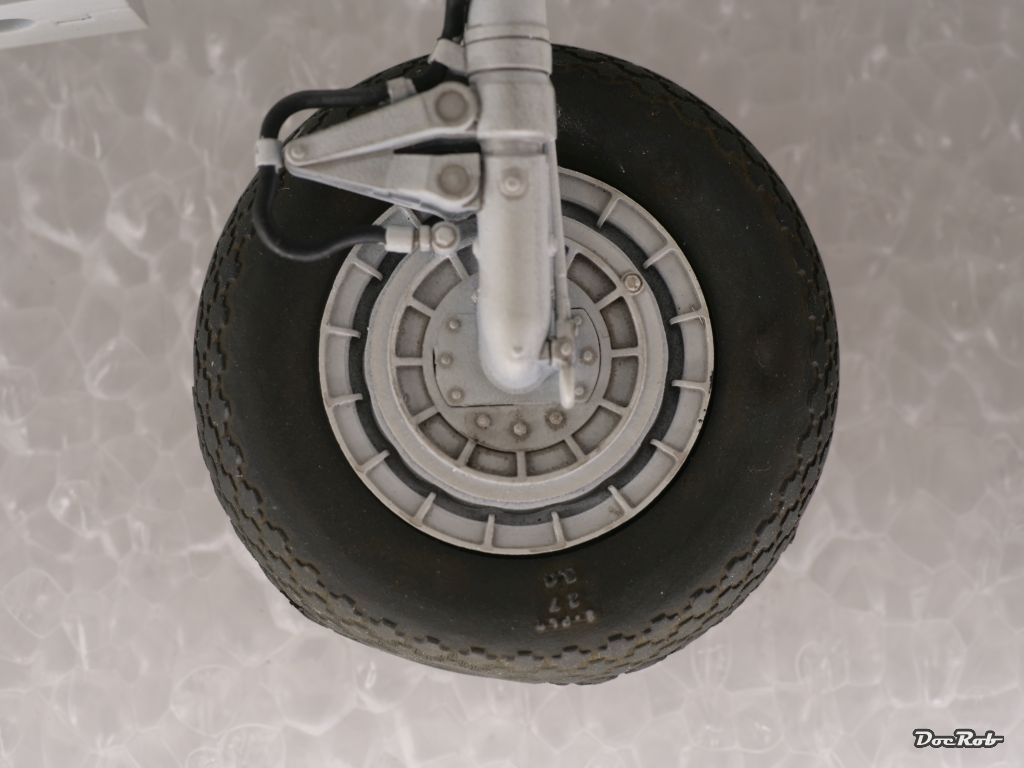
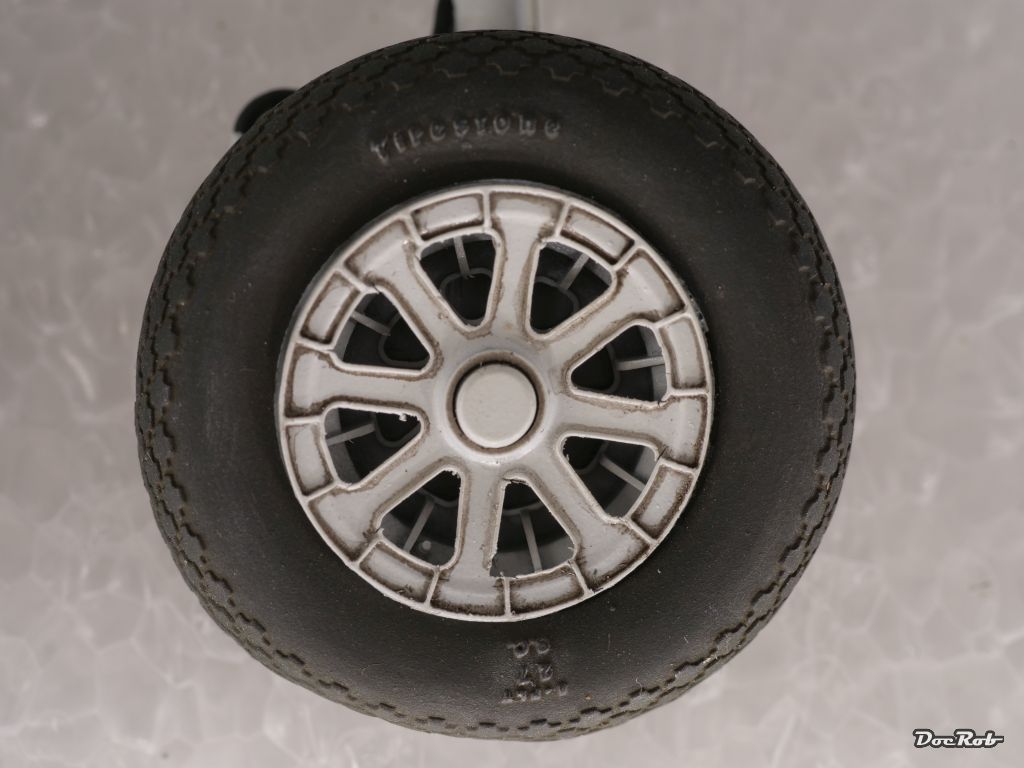
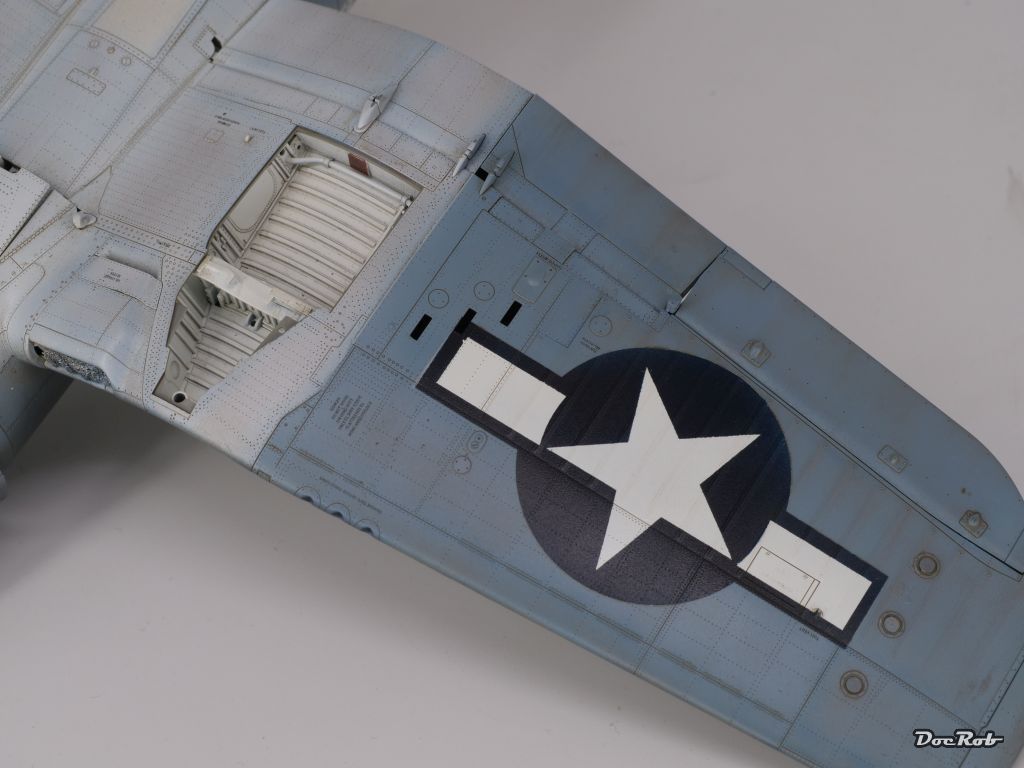
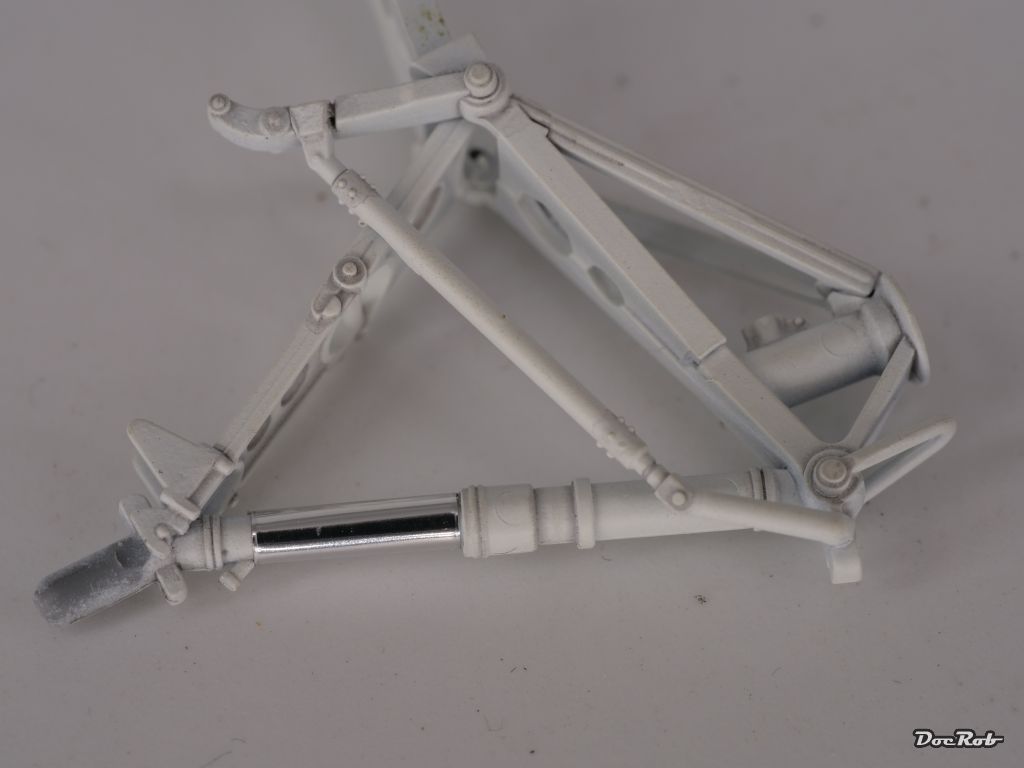
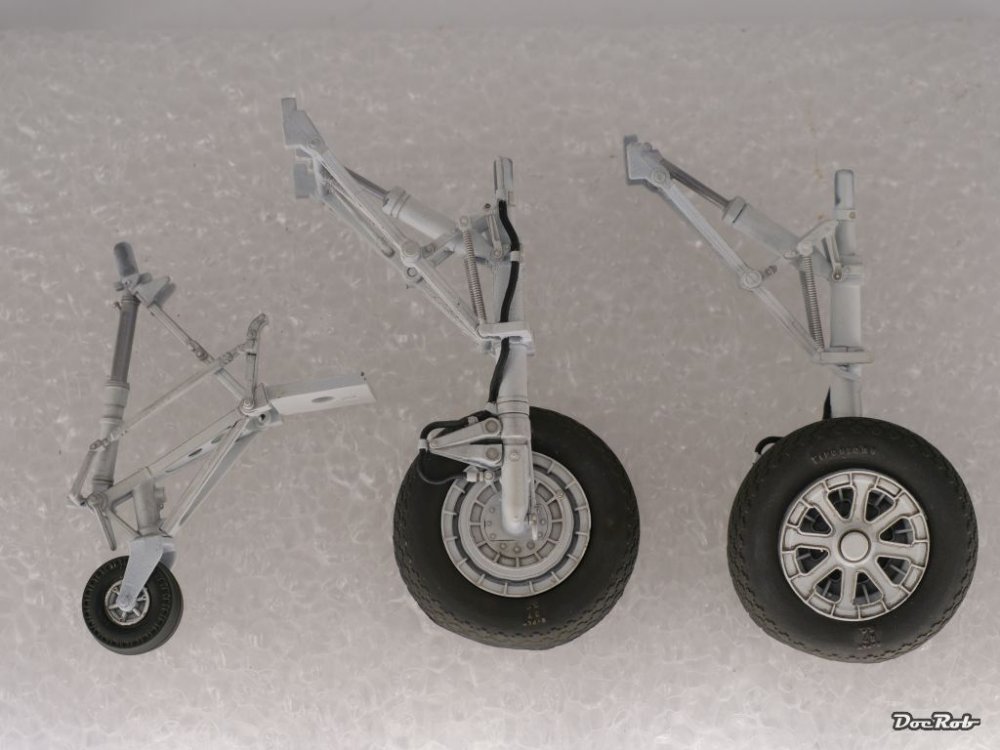
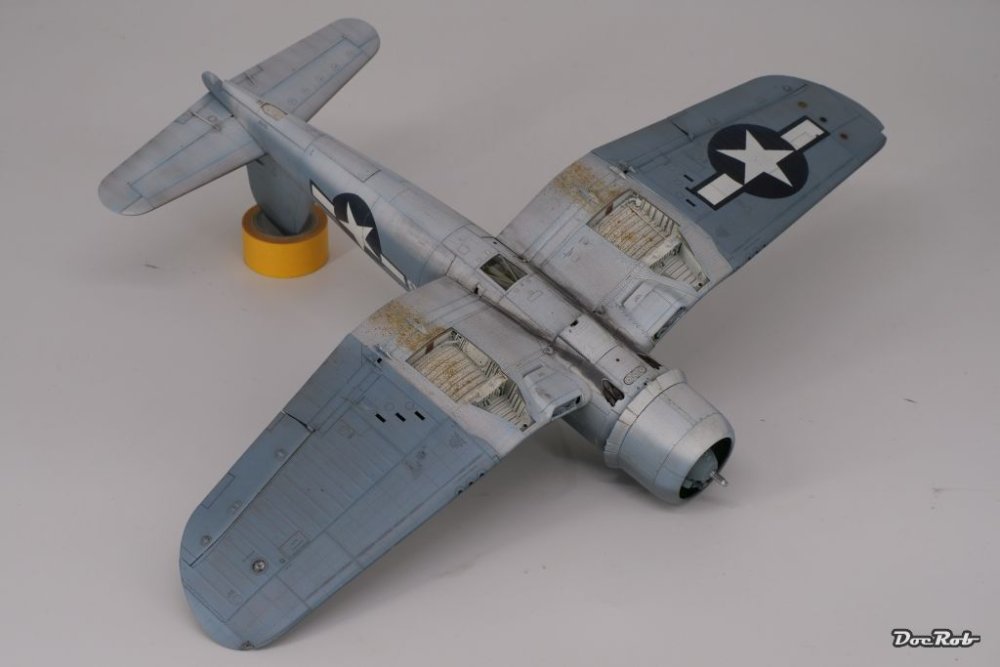
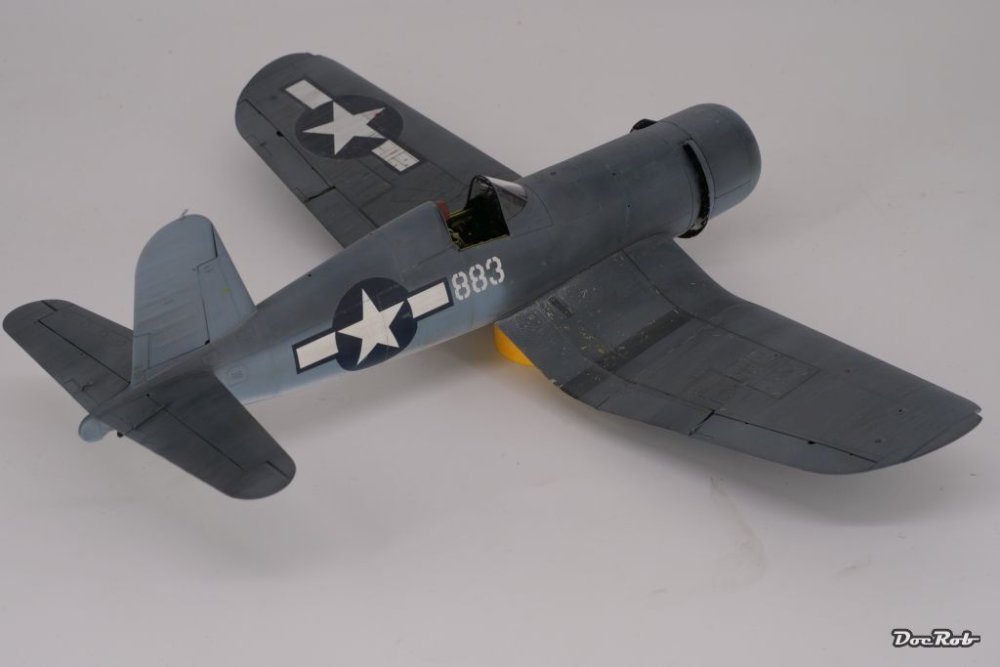
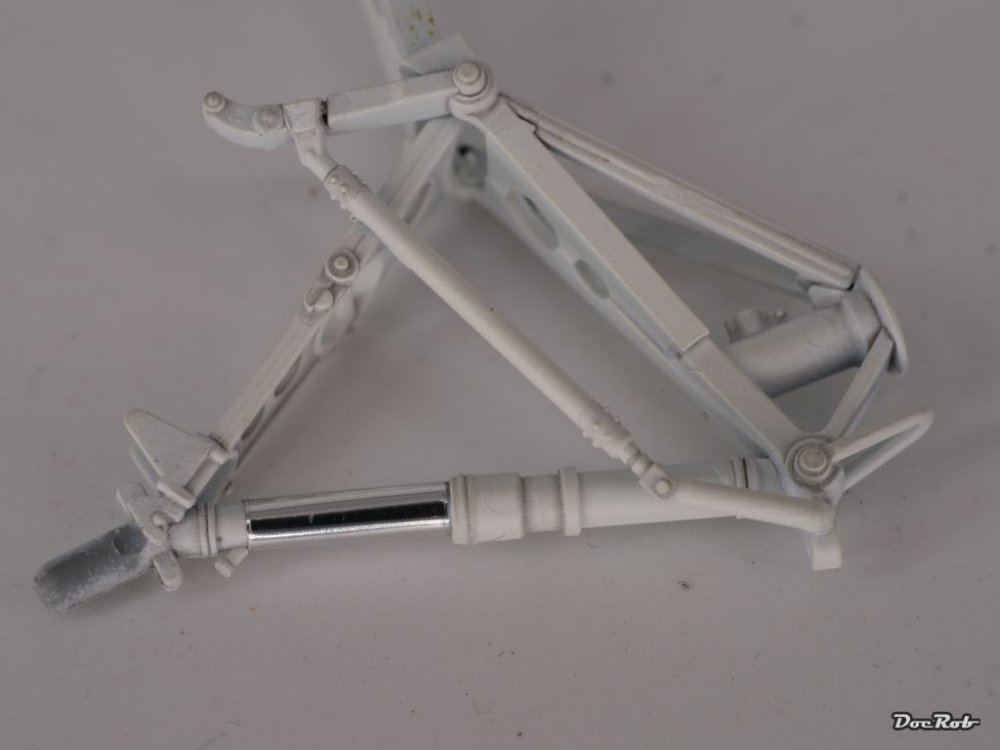
An hour ago, I almost binned the Corsair. I hate fails and I hate re-dos and after removing a lot of masking material, I almost reached that point, but told myself to lean back and take a deep breath. What happened, I don't know exactly. I had residues on all the transparent parts, which were masked with the most possible care. No bleedings, but possibly grey misted residues from the lacquer colors and their thinners, which went through the masking material. I also masked the radiator openings around the cowlings with blue tack, that went goo and is very hard to remove. It took about an hour to get rid of half of it. The good thing, I wear a respirator mask. I don't want to know, what these stuff would have made with my brain without it. I tried to clean the canopy with a cotton swab and wooden toothpicks and it worked luckily. The greater problem were the other transparent parts, like windscreen, lower fuselage window, and armor glass with gunsight, which were glued in place. I carefully removed them and cleaned them. Before all these troubles, I matte coated the plane with Tamiya's flat clear lacquer, but it was still too shiny for my taste, maybe semi matte, but not flat. Out with the Pledge after drying, added 30% of Tamiya X Flat clear (never more) and sprayed again. Now the Corsair looks like this. To relax a bit, I continued with the undercarriage, which received some washes, followed by iron pigments rubbed on, to get a painted metal feel and finally, I had to re do the pistons, which were chrome taped. The tape is not made to adhere to small diameter parts, as it loosened itself and I had to remove it. Instead, I used my trusty Uschi chrome pigments to let them shine a bit. The tyres were airbrushed in two different near blacks, one for the flanks and one for the running surface and than pronounced with pigments., which is my usual practice. The wheels are from Eduard and much better than these rubber thingies supplied with the kit. Cheers Rob


-
Great work Mark, love the soldered frame. Absolutely not my cup of tea, but interesting nontheless. Cheers Rob
-
What is on your bench right now ? Share a picture :)
DocRob replied to Martinnfb's topic in Modelling Discussion
Nice Martin, love it. Cheers Rob -
GWH Curtiss P-40B; The Flying Tigers
DocRob replied to Peterpools's topic in LSM 1/35 and Larger Work In Progress
She's shaping up beautifully. The primed plane looks smooth as silk and your repairs of the cowling area proved successful. It's a bit of of a downer, not to finish her on the good wave you caught lately. Cheers Rob -
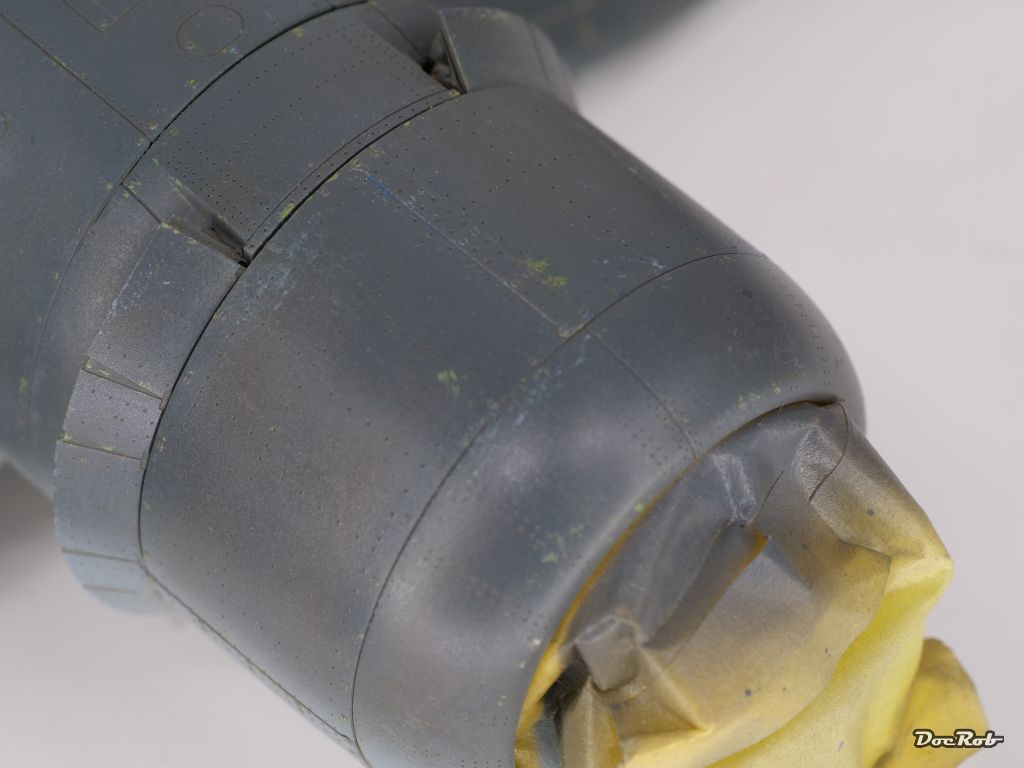
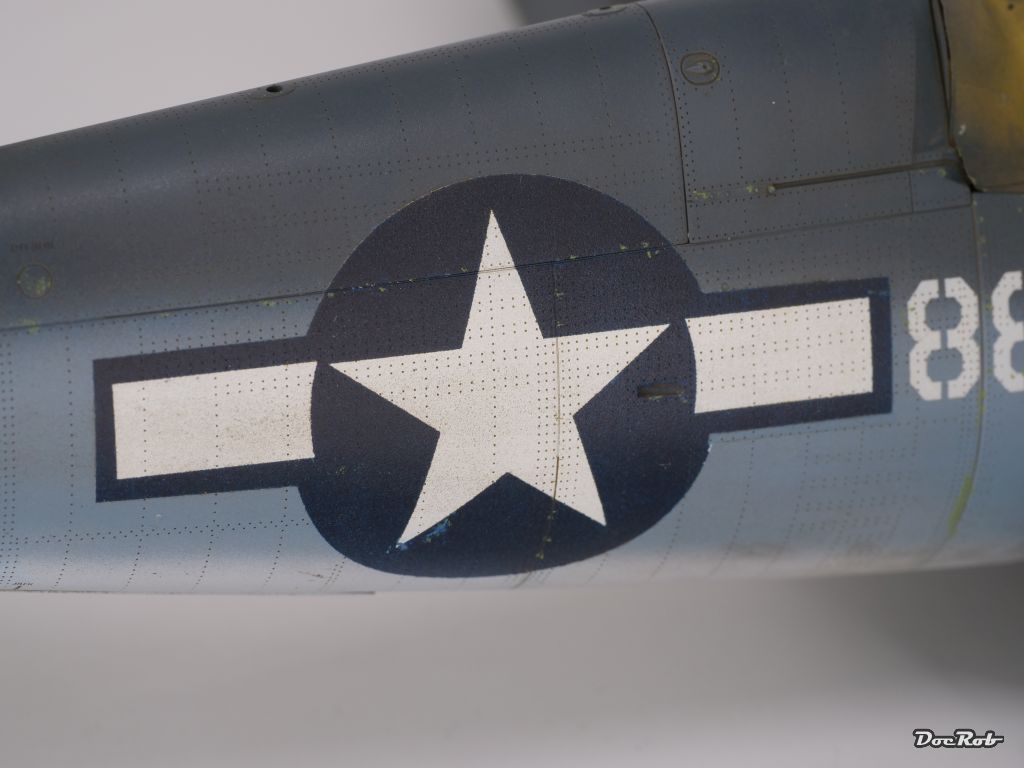
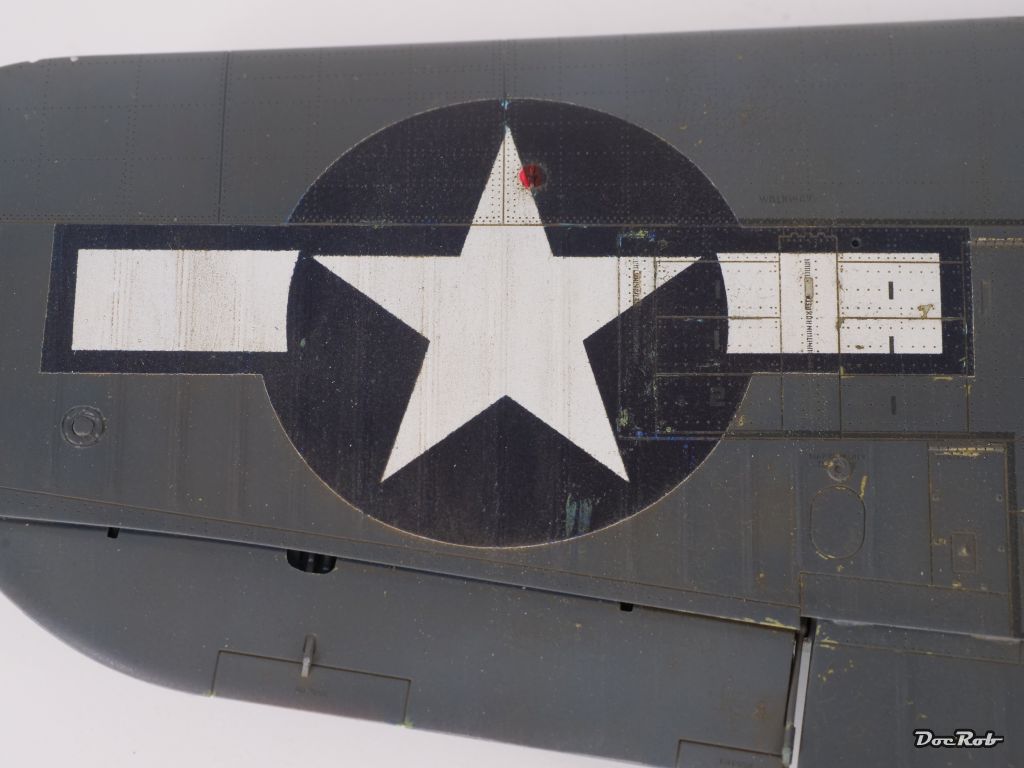
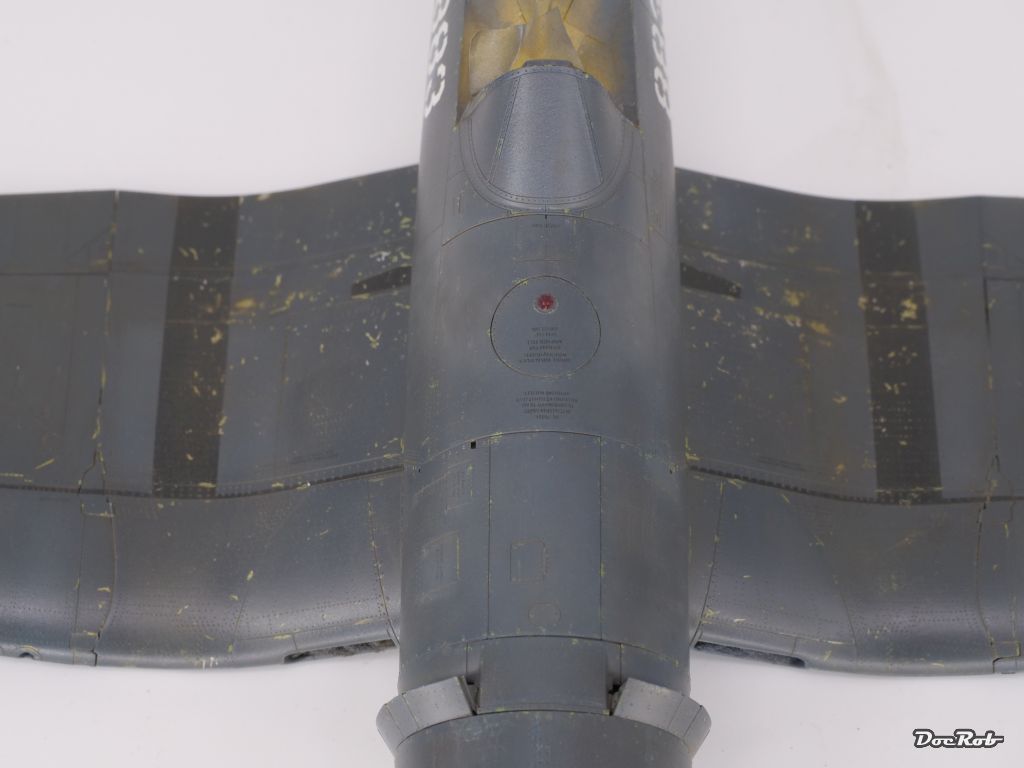
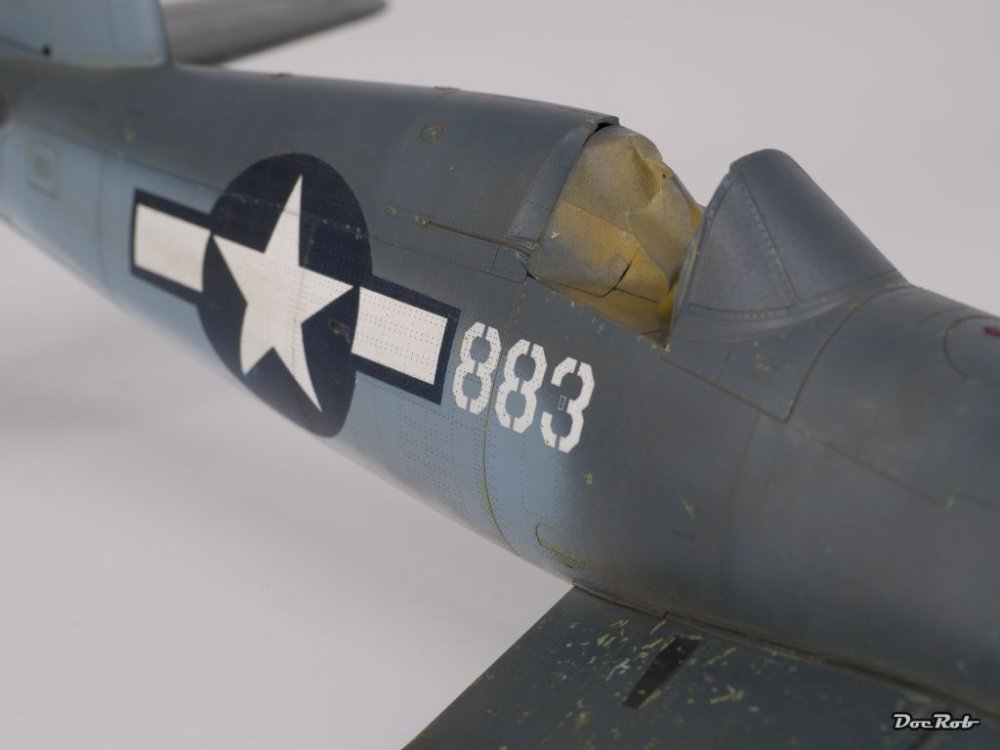
Some more weathering done. I've seen many corsair builds, where the whingroots were weathered and chipped like hell and the fuselage, nada, not a bit. I did some brush chipping with interior green and then added a variety of other stuff, to let especially the top color look a bit more interesting. I used AK's pencils in different grey and blue shades, creating chips and various dots everywhere. I used an old brush and dry brushed some of the intermediate blue for highlighting onto the darker blue. Then I used Tamiya's weathering pastels in different light colors and dabbed these onto the rivet lines and then brushed them smooth. This simulates an oil canning effect a bit and can best be seen in the spine section of the plane. I dabbed more pastels onto the upper parts of the fuselage to resemble sun bleached parts. Fine sandpaper was carefully used for some abrasion effects. I like the result now and will wait for a day or two and decide then, if I find something is left out. Weathering has to be logical and well believable distributed, where it helps to lean back and evaluate a bit. The results show better to the real eye than on the photos, but I will show some anyway. Cheers Rob


-
Thanks Martin, I tried all my chrome colors and found them not qualified for the job and remembered then, that I bought a roll of chrome tape lately. What better moment to check it out. The dull assembly will receive furthr love with some chipping and some oil dots. Cheers Rob
-
Sorry, double post due to failing internet connection. Cheers Rob
-
Thank you amigos, I do like the Flory washes for everything, except a completely clean aircraft with only some panel lines and rivets to pronounce. But they are good for all grades of dirtyness. In the moment, I ponder, how to continue. I will apply some chipping to the fuselage, oil leaking, exhaust smoke, some mud splatters around the wheels, but maybe, I start with some more post shading with oils for the darker sections, to create more depth to the surfaces. Cheers Rob
-
Today, I muddied my Corsair up with Flory's dark grime wash, a clay based liquid, which I applied over the whole airframe, after adding a drop of soap for better distribution, with a flat brush and let dry for about half an hour. The stuff is dried by then and looks totally grimy and dead flat. Then, I wiped the excess away with a dry piece of cotton cloth in the direction of the airflow and the very fine clay stays in all the panel lines and other crevices. The best part about this wash, you determine the grade of dirt or you can remove it completely wiped down with water, if something went wrong. It's clearly more visible on the lighter underside, but also noticeable on the darker upper side. The good think, my pre shading is still full visible. As a break, I made some detail painting on the landing gear, adding the brake lines and other tiny bits and pieces (not shown) and chromed the cylinders with AK's chrome tape for the first time. It worked ok, a bit more adhesion would have been great on these parts with small diameters, but it looks chrome to me, so thumbs up. Cheers Rob


-
Muchas gracias amigos, but the next step will be not so clean, in some minutes, I will apply Flory's clay wash onto it, a messy affair, hopefully with a convincing outcome. Cheers Rob
-
Thanks Carl, that helps indeed. I wouldn't have thought, that the ingenious American engineers where in need of high tech solutions, like applying tape, to get their crates sealed . Sounds that the Corsairs where leaking like British motorcycles of the sixties. It's interesting though, why it's only the Corsair, where the tape is so often applied, but that's maybe caused by the positioning of the oil tank. Cheers Rob
-
Good to see you back on the Würger. What's not to like about the rivets Harv, maybe except the slightly off orientation . Cheers Rob
-
The Falcon is looking great, but the ME-109 is no match or have I missed something about it entering hyperspace ? Cheers Rob
-
Thanks guys, I was considering to do more chipping but made a compromise, as I didn't want to use the same hairspray technique on the fuselage, I have to do the chipping there by brush and it has to fit the wing chipping, not so easy to do. Obviously these land based Corsairs were heavily weathered, giving the conditions they flew in. I want to have a worn look, but not too heavy. In 32 scale overboarding weathering can look a bit strange, when there is no denting or oil canning or whatever superficial damages would appear to go with the chipping. @BlrwestSiR, Carl, do you know what the white tape is applied for? All pictures of my crate don't show any, but others have them applied. Cheers Rob
-
What is on your bench right now ? Share a picture :)
DocRob replied to Martinnfb's topic in Modelling Discussion
Sorry to hear that, but I made that memo to myself long time ago with Montex masks and vinyl masks in general. The stuff shrinks, has to much flex, when applying and they don't stick in tight corners. I had no issues with residues though. Vinyl is good for records but not as a masking material. Maketar, 1ManArmy, Eduard and sometimes HGW kabuki mask are very good and trouble free. Cheers Rob -
Pz.Kpfw.I Ausf A - Dragon 6356 - 1/35
DocRob replied to Bomber_County's topic in LSM 1/35 and Larger Work In Progress
Nice Phil, you obviously don't need a lot of paint for this one. Cheers Rob -
Your Schwalbe is a beauty, Chris. I like the subtle, blended in look of the painting and weathering and there are lots of details to catch the eye. Cheers Rob
-
Great work on the Jug, John, I love the scheme and the way yours came out with these great looking invasion stripes. I built mine as Dottie Mae some years ago, but it was a very close competition between the schemes. One critical point in the otherwise trouble free build, I found was the cowling to fuselage fit, which looked a bit strange. I did some surgery there to make it look right, especially in the side view. Cheers Rob
-
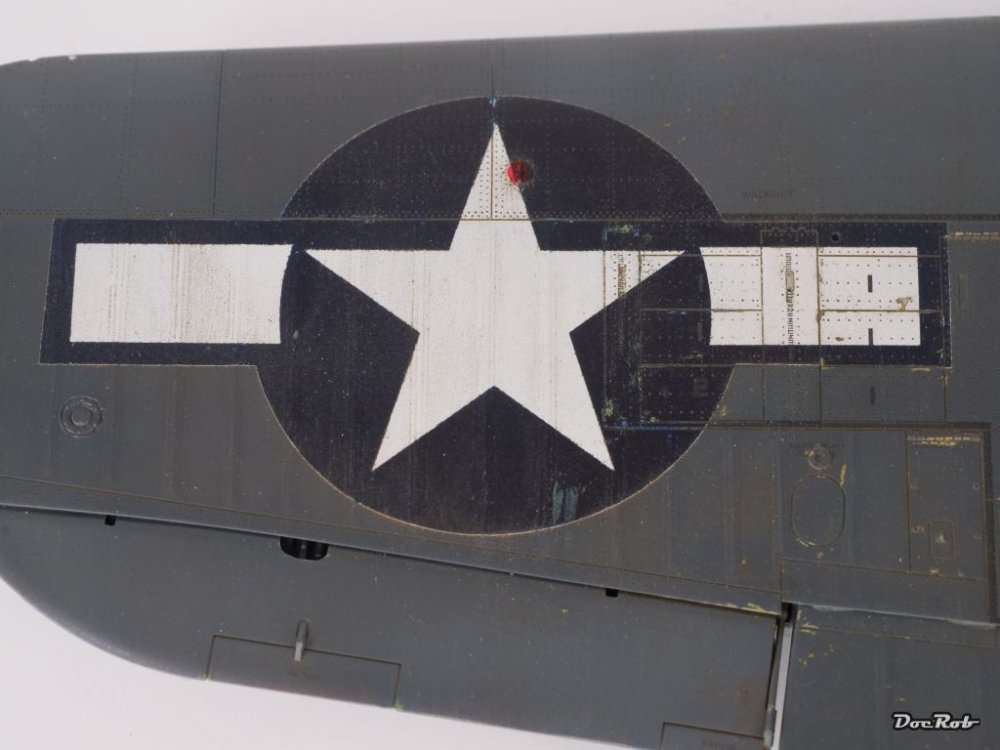
Thanks Peter, it might look a bit too harsh now, but that will be blended with washes and further weathering. The good thing with masking is, you can weather through the walkways, insignia and stencils. That's more difficult with decals. Cheers Rob