DocRob
-
Posts
7,127 -
Joined
-
Last visited
Content Type
Profiles
Forums
Events
Gallery
Everything posted by DocRob
-
 Thank you, you are absolutely right, with some time passing, the obstacles and issues to the end of the build fade away and there is some satisfaction. I usually dip my canopies in Future as well, but these parts were extremely clear, so I skipped it. I have no idea how a futurized canopy will react to lacquer fumes. Blue tac is out of my masking arsenal as well, I will use it only to hold pieces in place temporary, where it was of great use to me in the past. Cheers Rob
 -
Thank you Peter, the blue of the Corsair's is the perfect canvas for layered painting techniques. I can't wait until yours is off your shelf. John is right, when he states, you can't have enough Corsairs. Cheers Rob
-
You are a brave man Carl. Your PE work looks great and I have a blueprint for what's awaiting me, if I start mine and the 'if' hasn't become smaller . Cheers Rob
-
Yup, I know, I don't loose stuff normally, not even forget where everything is, but sometimes, it seems like hitting a bad streak, where the youngest house problems meet the hobby in a bad way. Cheers Rob
-
Well the GB doesn't start on good terms for me. Today, I choose to build the Schnellboot S-38 for the GB and started to cut and glue some plastic, when I noticed, that the complete PE is missing. I chose S-38 mainly, because with the last heavy rain, some water entered my workshop and soaked the box completely (luckily only this one). I removed everything from the box and now, even after two hours of searching, no PE showed up. I knew where I stored it, but it's gone. Most of the PE parts are substitutes for plastic parts, but others would have to be scratched. Cheers Rob
- 27 replies
-
- 11
-

-

-
ProModeler 1/48 PBY-5A Catalina + Goodies, RFI
DocRob replied to CANicoll's topic in Let’s Get Wet Group Build.
Like Gary, I love the PBY and Im looking forward to your build. You will need a steel rod for the in flight display, this will be a heavy bird. I had only the guts to buy (not build ) a 1/72 one. I really like to see, how you master the black finish and weathering, not easy to do I guess. Cheers Rob -
What is on your bench right now ? Share a picture :)
DocRob replied to Martinnfb's topic in Modelling Discussion
The blending looks a bit unusual, but nonetheless has it's own character Gary. I like the pit with the belts stored away and the wiring job with the engine looks spot on. Cheers Rob -
I will follow your build with eagerness, Hubert. The Cutlass looks so Buck 'Dannyish / Dan Cooperish' to me. I don't know, if these pilot comic heroes were named equally in other countries, but in the Germany of my youth, there was the Zack magazine, where sequels of their stories were printed in. I bet there was a Cutlass involved in these stories as much as many early jets, so the design is a bit of a drive down memory road. I wish you luck with this unusual plane's build. Cheers Rob
-
Wow Mike, what a cool project, I will follow your progress closely as it was my initial thought to build a Walrus from exactly the same kit, but floating and fishing a dinghy with pilots out of the water. After I see what you'll throw at us, I'm happy, that I changed my mind . Cheers Rob
-
Great choice Kevin, can't wait to see this developing through your knowingly hands. I'm tempted to build the S-38, but there are so many PT or MTB's already in the GB. Cheers Rob
-
Italeri 1/35 Elco 80' Torpedo Boat PT-596
DocRob replied to Bomber_County's topic in Let’s Get Wet Group Build.
Phil this will be epic and I will follow your build closely. I was too cowardly to even consider my LS Vosper boat for the GB. Interesting to see, that they have different type of guns with very similar calibers (37 and 40 mm). There must have been a reason, otherwise it would be illogical to carry different types of ammunition. Cheers Rob -
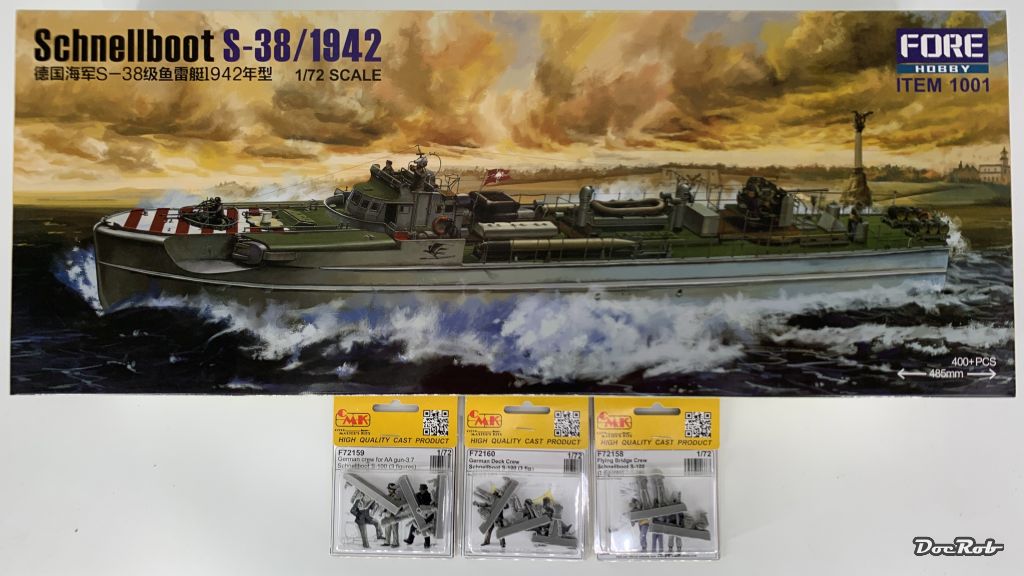
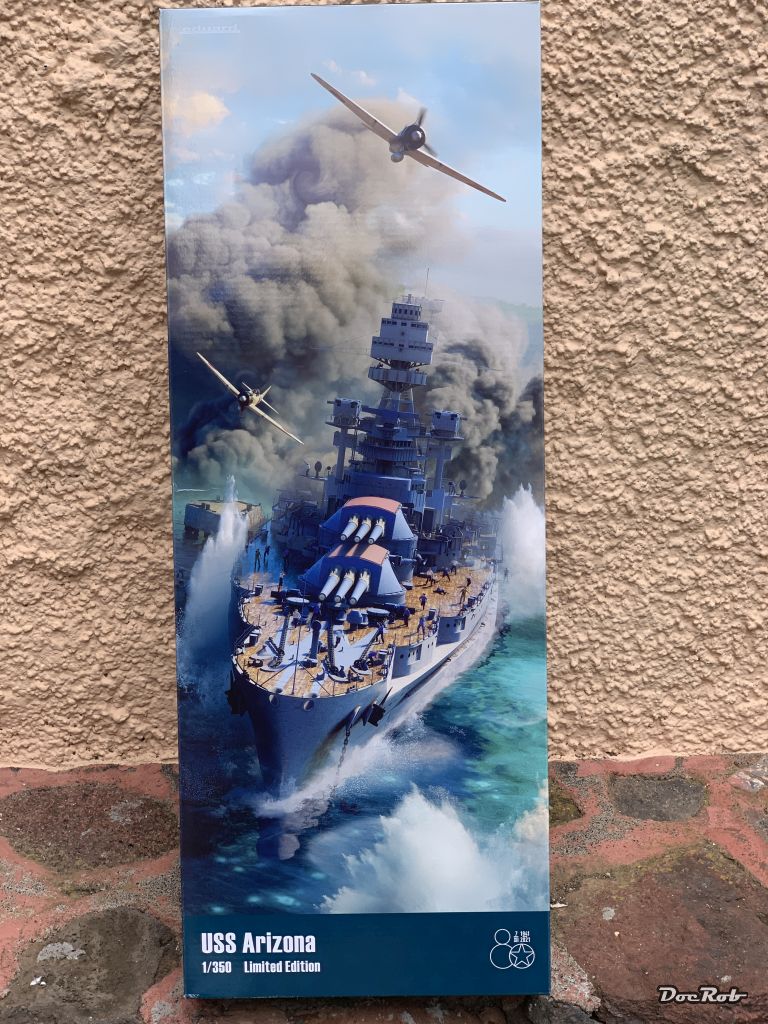
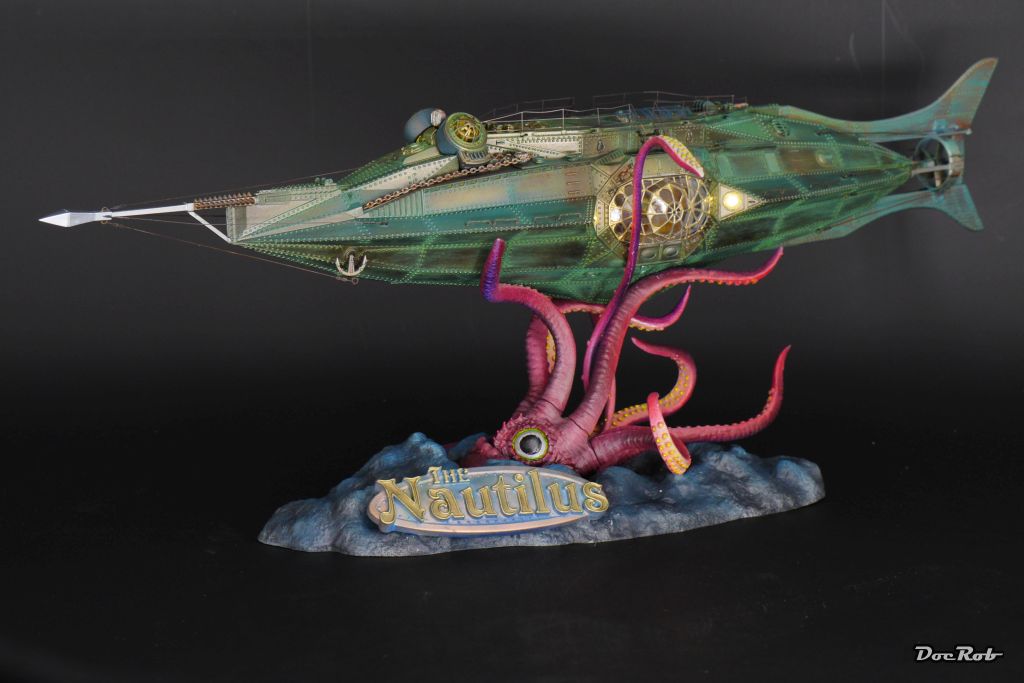
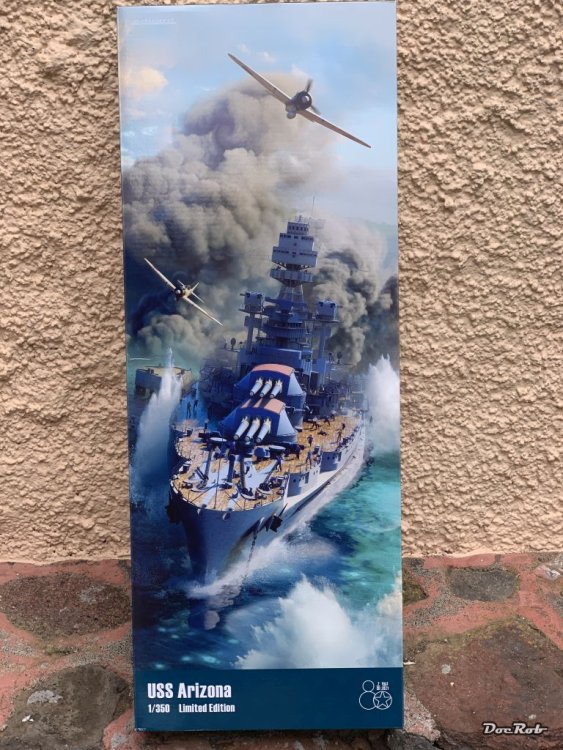
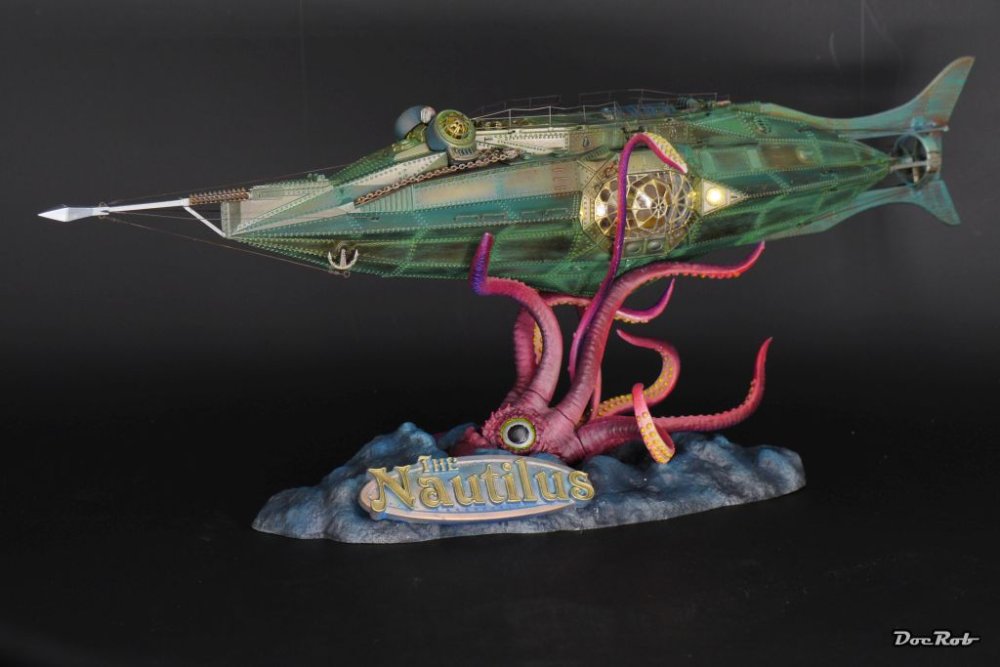
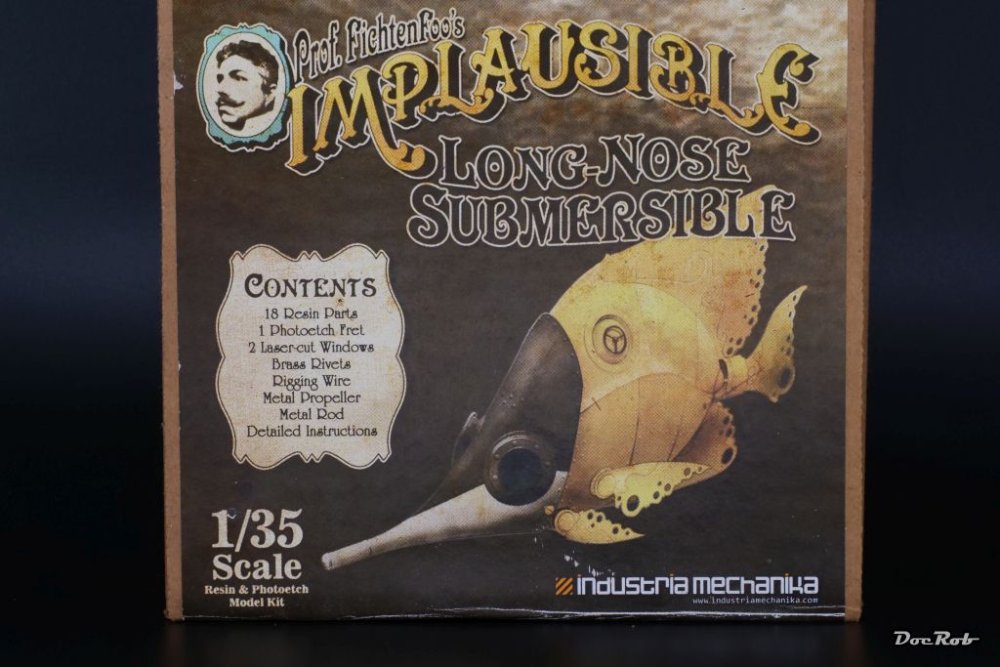
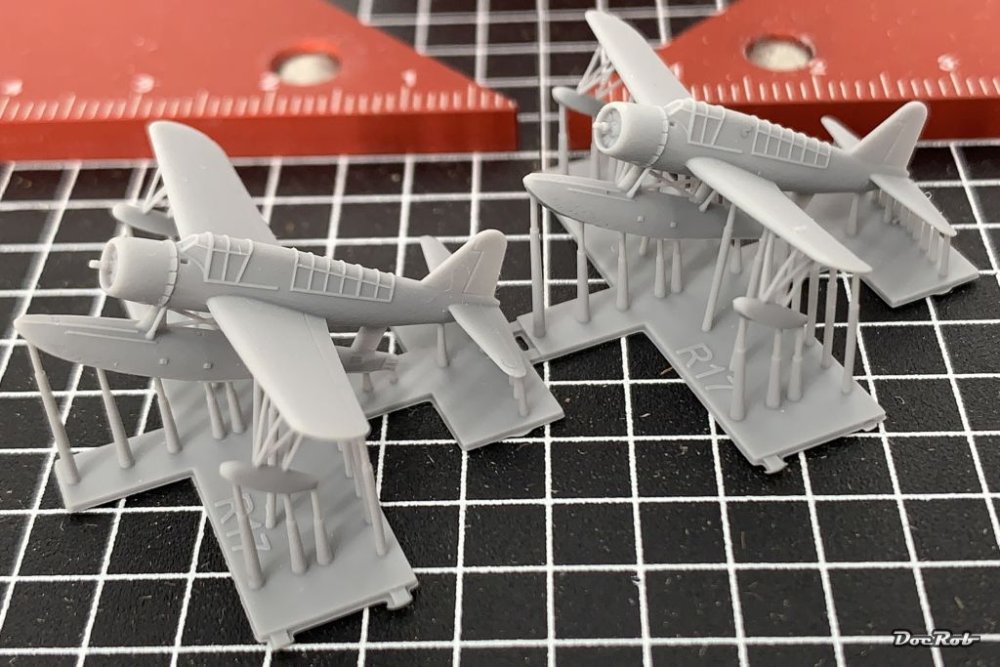
Nice Gary, when I was a kid, I saw it in the Airfix catalog and wanted one. Never happened, but now I will peep into your build. Are you up to skill level 4? CmK has some nice figures, as well as Scale 75, I'm still not decided about my entry for the GB. What do you think? My original plan was to build the Schnellboot S-38 from border along with figures from CMK and Scale 75 (not on the pic) I also have a soft spot for steam punk subjects and would love to build this resin and metal kit of a submarine with copper surface and burnished brass fins. The plan is to have the sub integrated into a delicate underwater dio, which will be no part of the GB. I always wanted to test m patience with a 1/350 ship build and there the USS Arizona came to mind. The Eduard limited edition has enough brass and printed parts in it, to hide the shortcomings of the original kit, hopefully. I added a wooden deck and Ion's 3D printed crew members. Cheers Rob


-
And a nice cigar too, happy new year to you all. Cheers Rob
-
Y’all still good on Dec 1 GB start, or wait till Jan 1?
DocRob replied to Clunkmeister's topic in Modelling Discussion
Happy new year to all of you, I have to admit I have a bit of a hangover, maybe some Seelbachs too much I have a frightening arsenal of AM for my Vosper. It's my only Italeri kit, as I despise the company. An old company, with a huge portfolio and so many bad kits, it's a shame. I wanted one of their LS boats though and the solution was, to substitute as much of the base kit as possible. The Italeri crew was never an option for me. I bought all the AM maybe 10years ago and some of the extras may be hard to find now. Cheers Rob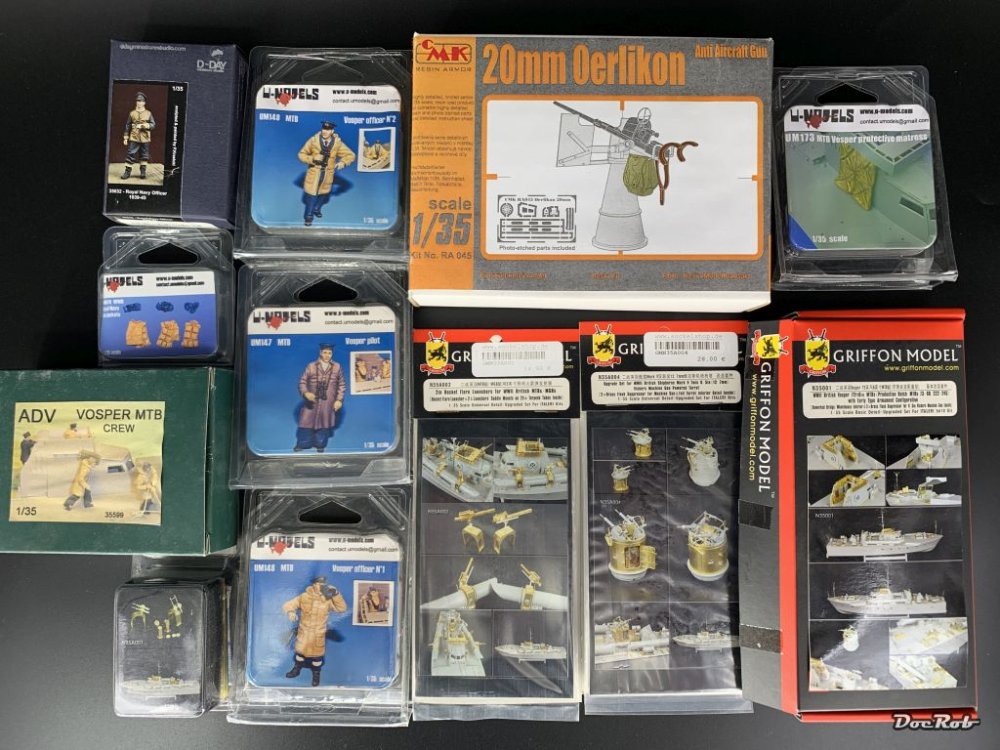
-
Y’all still good on Dec 1 GB start, or wait till Jan 1?
DocRob replied to Clunkmeister's topic in Modelling Discussion
I have the advanced set and never considered the Vosper kit for the GB for exactly this reason . To add some more pain, I have a lot of resin figures for the boat. Cheers Rob -
Yup, me But this one will be different. Cheers Rob
-
I employed the method of deduction Peter. I could see which circuit was affected, it was one of two in my workshop / man cave. I disconnected all machines and other consumers and still had the fuse jumping. It had to be the lighting, the sockets, the junction boxes or the wires in the wall (worst case). I disconnected the ceiling lighting (easiest to detect culprit) and woosh, the rest worked again. Tomorrow, I will work my way in logical order backwards from lamp to lamp and renew the luster terminals by the way to a better standard. I'm always unhappy, when fuses jump out, but also very happy that they did, instead of something smoldering somewhere. Unnecessary to say, I'm not an electrician, but I accumulated some skills over the years and have my analytical engineering background, which helps a lot. I could do with a little more peace on the house side for a while, where the subjects accumulate a bit too much for my taste in the moment. First plumbing, then entering water through extreme heavy rain on Christmas, now the Lighting issue and all this in the middle of a storm with lots of clean up to do. Can't wait for a better beginning of the new year. Cheers Rob
-
Thank you John, so much praise from His Corsairness . The Tamiya Corsairs are surely the cherry on the modeling cake, engineering wise. Peter made me curious with him saying, the Mossie is even better. Cheers Rob
-
Today I have to be the electrician, as one circuit in my workshop failed tonight . Up to search and rescue now. Sometimes it feels, like i stepped on the foot of a Voodoo priest. Cheers Rob
-
Thank you Hubert, I'm still undecided about the GB. The submarine is very tempting, but only one piece of a huge underwater diorama plan, which I have in mind since years. The Schnellboot S-38 was my initial choice, as there are not many built from the Fore kit and I like larger scales in ship modeling. The USS Arizona is a new candidate, after opening the box some days ago and browsing through the subpar plastic, which will luckily substituted by lots of PE and printed parts. I like to try new things and I have never built a 1/350 ship with all the galore. But there is the Duchess of Kingston rigging looming, a project, I definitely want to finish this winter. (Un)Luckily the bad season here often takes until June. Decisions, decisions. Cheers Rob
-
Thank you Gary, some Corsair builds I have seen, some very good ones, better then mine, looked a bit out of scale weathering wise to my eye. My goa was a worn bird, but not completely neglected. The prop for example is only weathered slightly, because I believe, that such an important part would be maintained properly. I always try to imagine how wear would show, being it with the airflow, through use and maintenance or fading in the sunlight and try to depict that. Yes, the finishing steps can be testing, specially when the bad mojo accumulates in details and you feel like, the further I dig in, the worse the probs become. The finish line is what you declare it to be, not what should be appropriate . Cheers Rob
-
Amazing john, looks like I have cut less parts from sprues . You are a real building machine without neglecting the quality. Do you ever eat? Cheers Rob
-
Sorry Peter, the Mossie will have to wait a bit, there are lots of other projects attracting my interest way more, but first it's decision time about the GB subject: - Fore Models Schnellboot S-38 in 1/72 along with a crew. - Industria Mechanika's Long Nose Submersible, a steam punk mini submarine resin-brass-kit in 1/35 - USS Arizona from Eduard which is based on a Hobby Boss in 1/350 kit, with added metal barrels, tons of PE, printed parts and a wooden deck Or I continue with the rigging of my Duchess of Kingston build and skip the GB I'm eager to see what you do with the Kingfisher. I regretted not to have bought the LS one, when it was available. My only Kingfishers are part of my USS Arizona boxing, nicely 3D printed in 1/350 Cheers Rob
-
Thank you Peter, I have the Mossie in my stash along with a ton of AM, so this pleasure is still to come. But first I have to decide if and with what kit I enter the GB. Cheers Rob
-
Thank you Scott, I was not rushing the build towards the end so much as to encounter numerous problems, like stained canopy and windscreen after mask removing, fogging clear coat (luckily tested before), too well fitting clear parts, which wouldn't click into position, without leaving glue stains, chrome foil, which didn't adhere, gooey residues from blue tack, which needed hours to remove and a lot more after a trouble free build and painting phase. I don't like bad surprises that late in a build and try to optimize my process with good thorough planning. Seems like I failed a bit here . Cheers Rob