1to1scale
-
Posts
1,767 -
Joined
-
Last visited
Content Type
Profiles
Forums
Events
Gallery
Everything posted by 1to1scale
-
Well, as the title says, I woke up today, took my son to school, then started wondering what I should do. I of course have errands to do this week, but it’s sort of odd, not having a job to report to. So far, it’s been coffee and donut, then cleaned the glass in the car. After I run to the bank, I may go back to work on the Mustang and see about getting it in primer. Hmmm....this is just weird.
-

Hobbycraft F6A D-Day - Ready for inspection!
1to1scale replied to 1to1scale's topic in D-Day 75th Anniversary Group Build
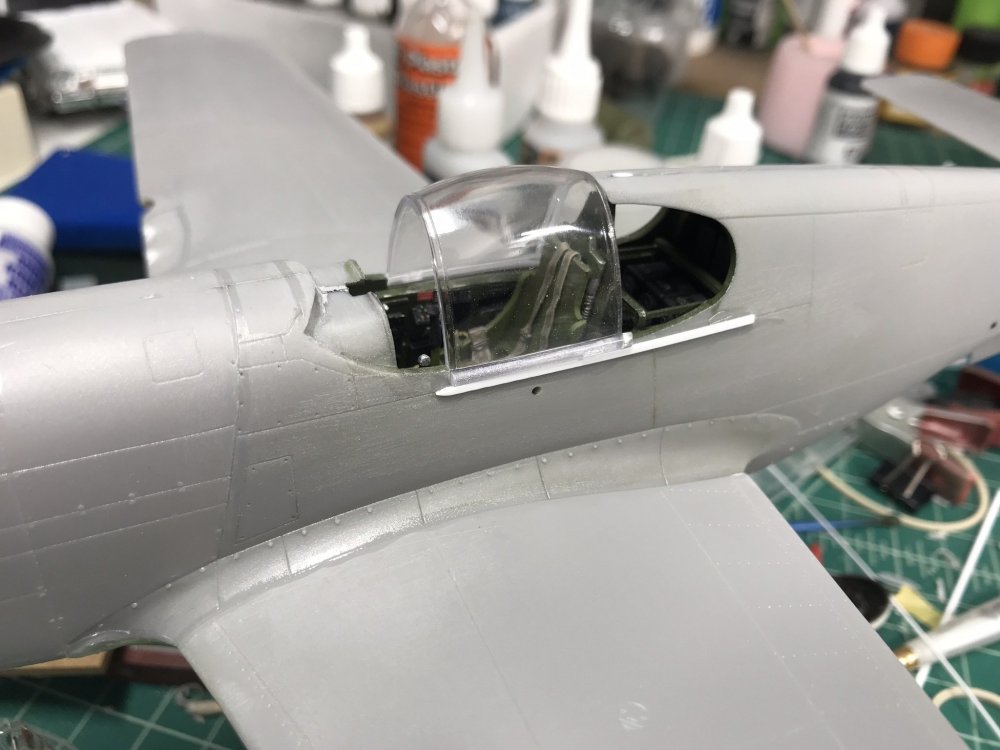
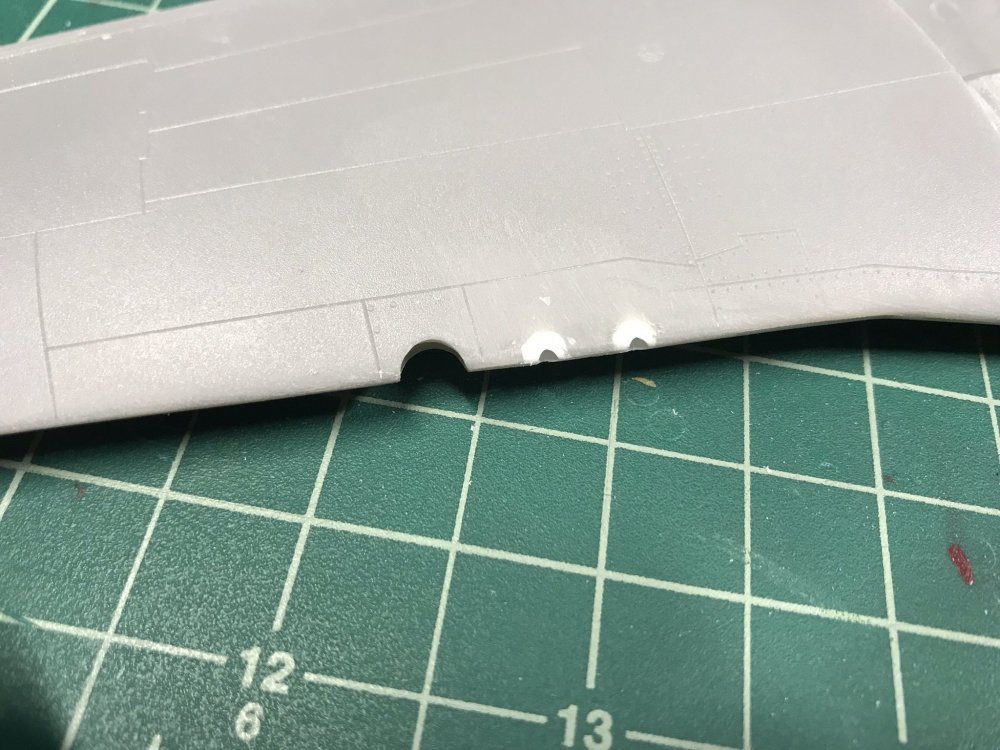
No primer yet, still have a few little issues to fix, like there are a few spots where the panel lines were “oops’d” on to the next panel, and I guess they just left the molds unrepaired. I also have to figure out what to do with the canopy, it does not fit over the back of the fuselage, just on the cockpit. I may have to end up gluing it in place, or just leaving it removable. Not sure if I can modify it to be a little thinner. I also need to go back and figure out how to remove a seam line from the tail gear, as it glued in the fuselage now. -
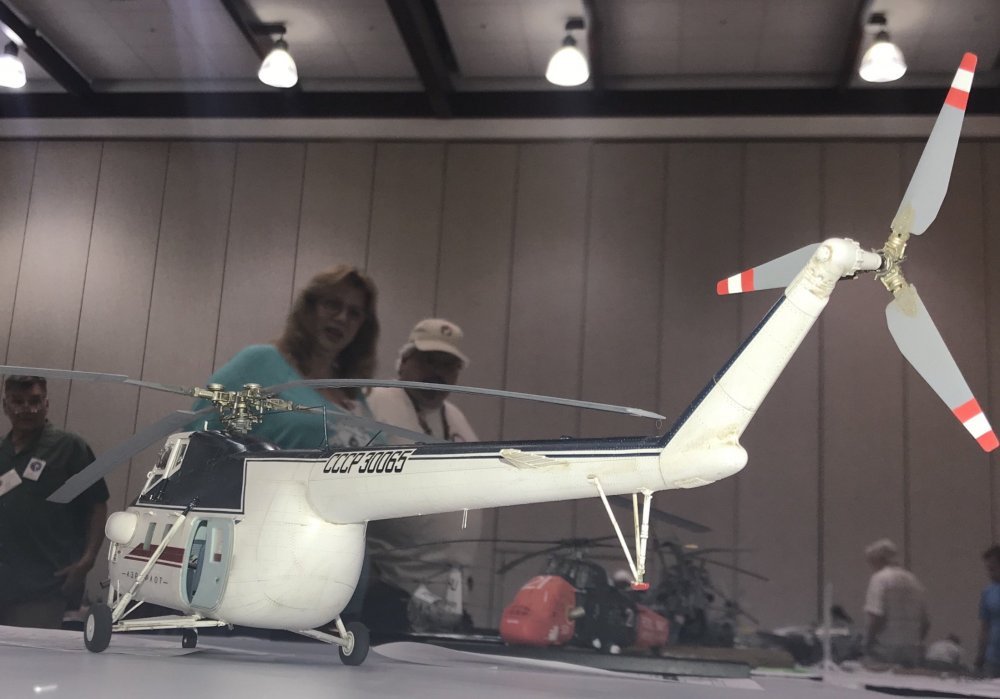
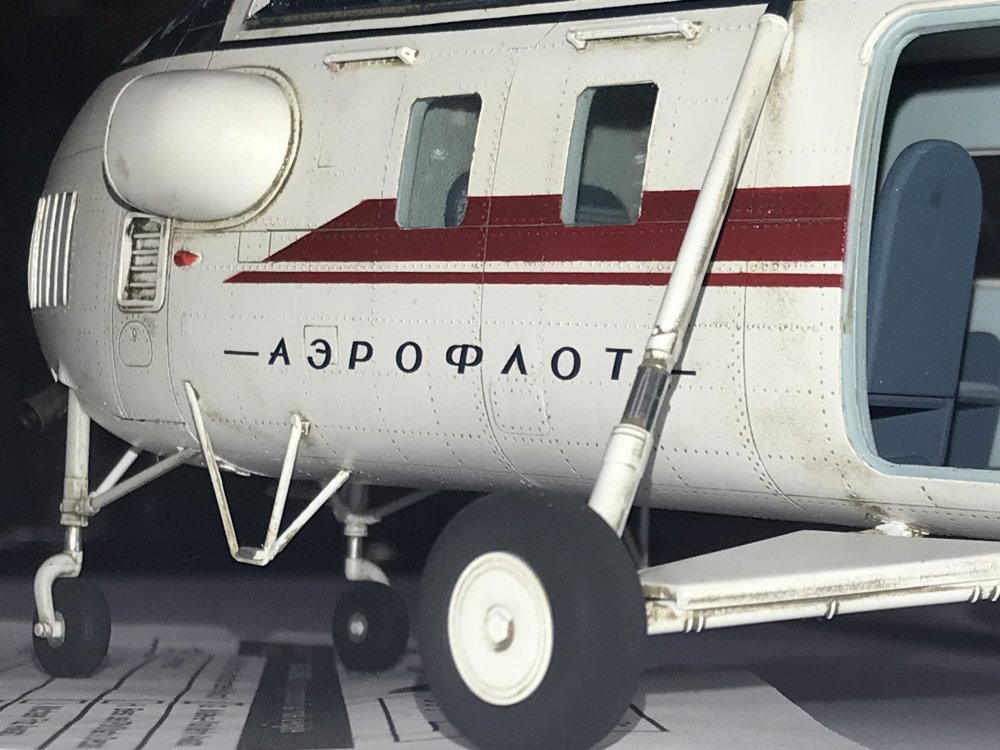
Thanks. Yes, travel was precarious. I actually have the main and tail rotors removable, the fuselage was set upside down into a cardboard box cut to fit around it. Then I put the whole thing into plastic tub, the main rotor was stuck to a 24” x 24” piece of pegboard with layers of foam that had flaps, so it was like a giant envelope. It worked well, however both the tub and pegboard disappeared from under the tables, the model ended up riding home on the passenger seat of my car. I had used furniture foam when I moved across the country, but it had started to stick to the paint. I recommend using a layer of Tamiya tape between the foam and model. I was able to scrape he foam bits off the models, so it was not a disaster, but I would not do it again. coincidentally, at the Chattanooga show, ZM started selling flat pack model transport crates. I bought the twin size one for $18. Next show, I am gong to try it out.
-
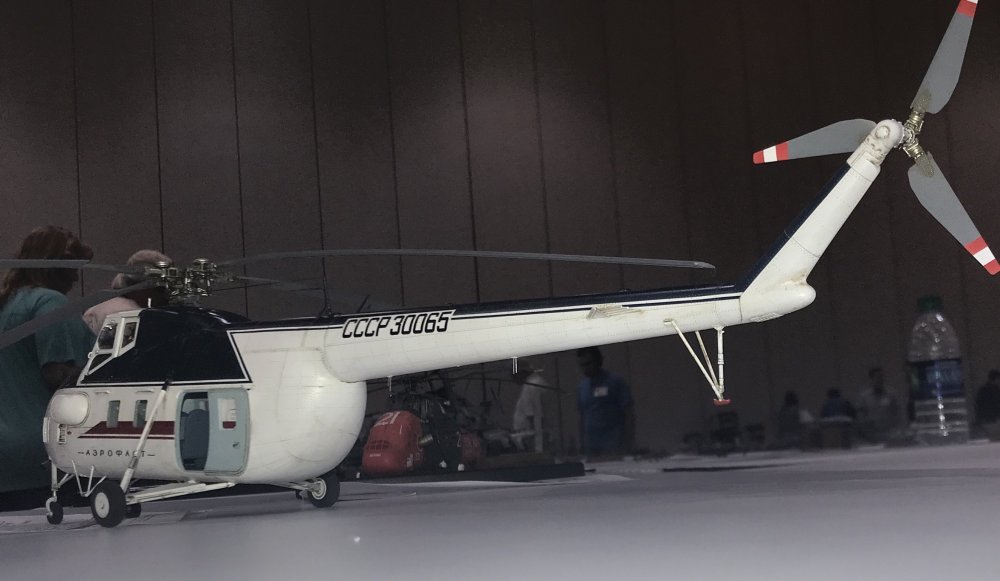
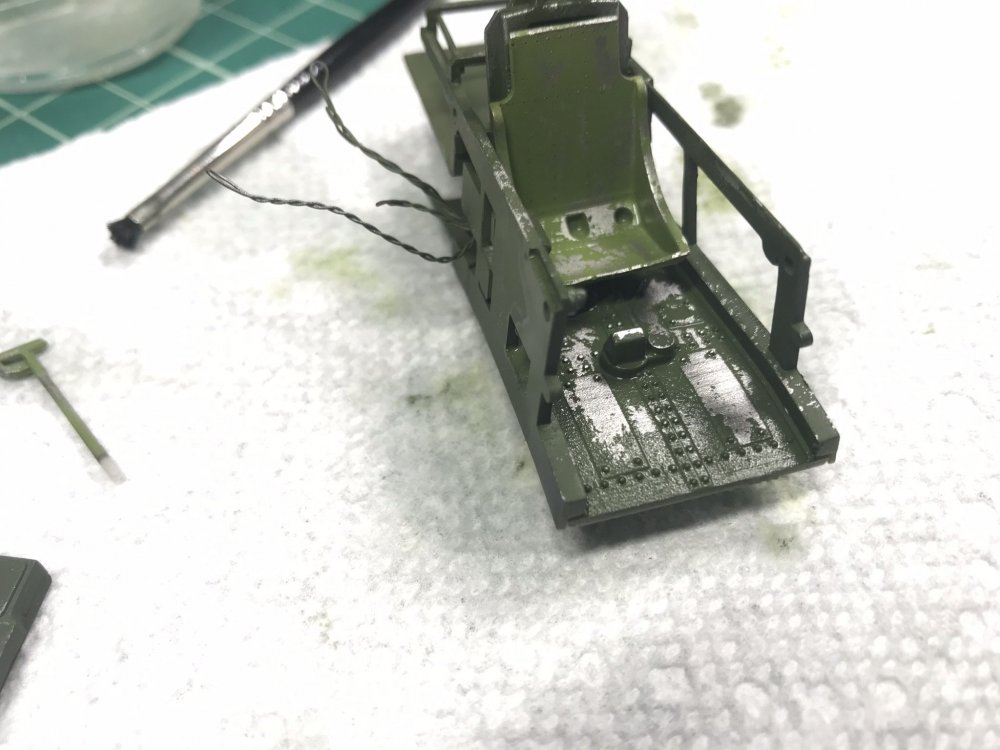
I just realized I never posted anymore on this thread, so I’ll make an update. I am using some of Ernie’s photos, since I am not finished yet, I don’t have a finished thread yet. I need to go back and clean up the wash in several areas, add the main rotor nut I forgot, and fix the antennas that the judges broke at the show. I also need to add a thinner antenna wire, this thing looks like it belongs on a suspension bridge. After I get it fixed up, It will be heading to the Middle Tennessee IPMS show in November.

-
I got the best gift of all! After 14 years of service, today is my last day. Back to the old job search...
-
PCM's TA 152C as Racer
1to1scale replied to GazzaS's topic in LSM 1/32 and Larger Aircraft Ready for Inspection
Awesome paint job, where did you get the masks? Its too bad they were all scrapped, that would have been a nice racer. -
Has any one built a WNW DH2?
1to1scale replied to Grunhertz's topic in WW1 related items and accessories
On the other end of the spectrum, you don't have to use either, you can rig a plane using justthe WnW method, just glue ez-line into the holes. Simple and still looks ok. I built my Snipe this way and it looks god on the shelf. I know it won’t win any contests, but I’m happy with it. -
Interesting pic on Copper State Page.
1to1scale replied to Clunkmeister's topic in Modelling Discussion
What is it? -
Hobbycraft F6A D-Day - Ready for inspection!
1to1scale replied to 1to1scale's topic in D-Day 75th Anniversary Group Build
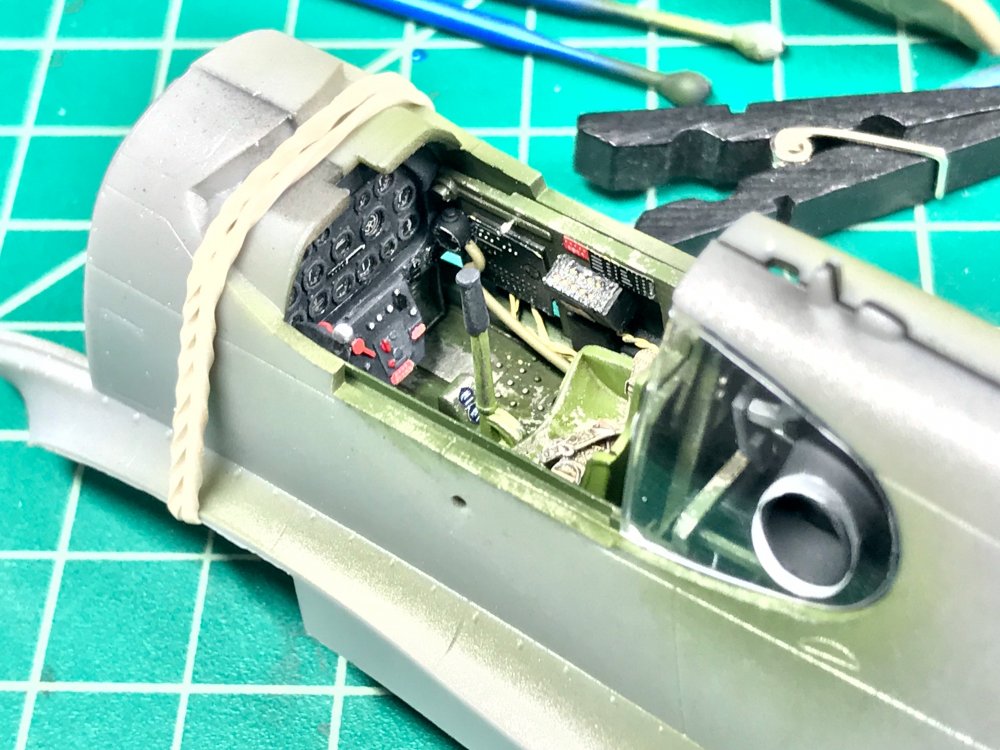
Looking at pictures, I saw that there is no canopy rail provided in the kit, pe would have been better, but I made some with plastic stock.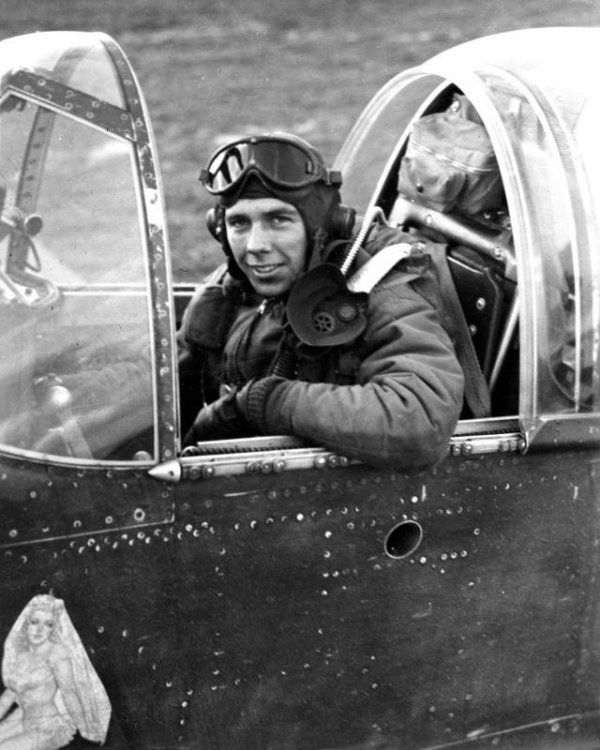
-
Hobbycraft F6A D-Day - Ready for inspection!
1to1scale replied to 1to1scale's topic in D-Day 75th Anniversary Group Build
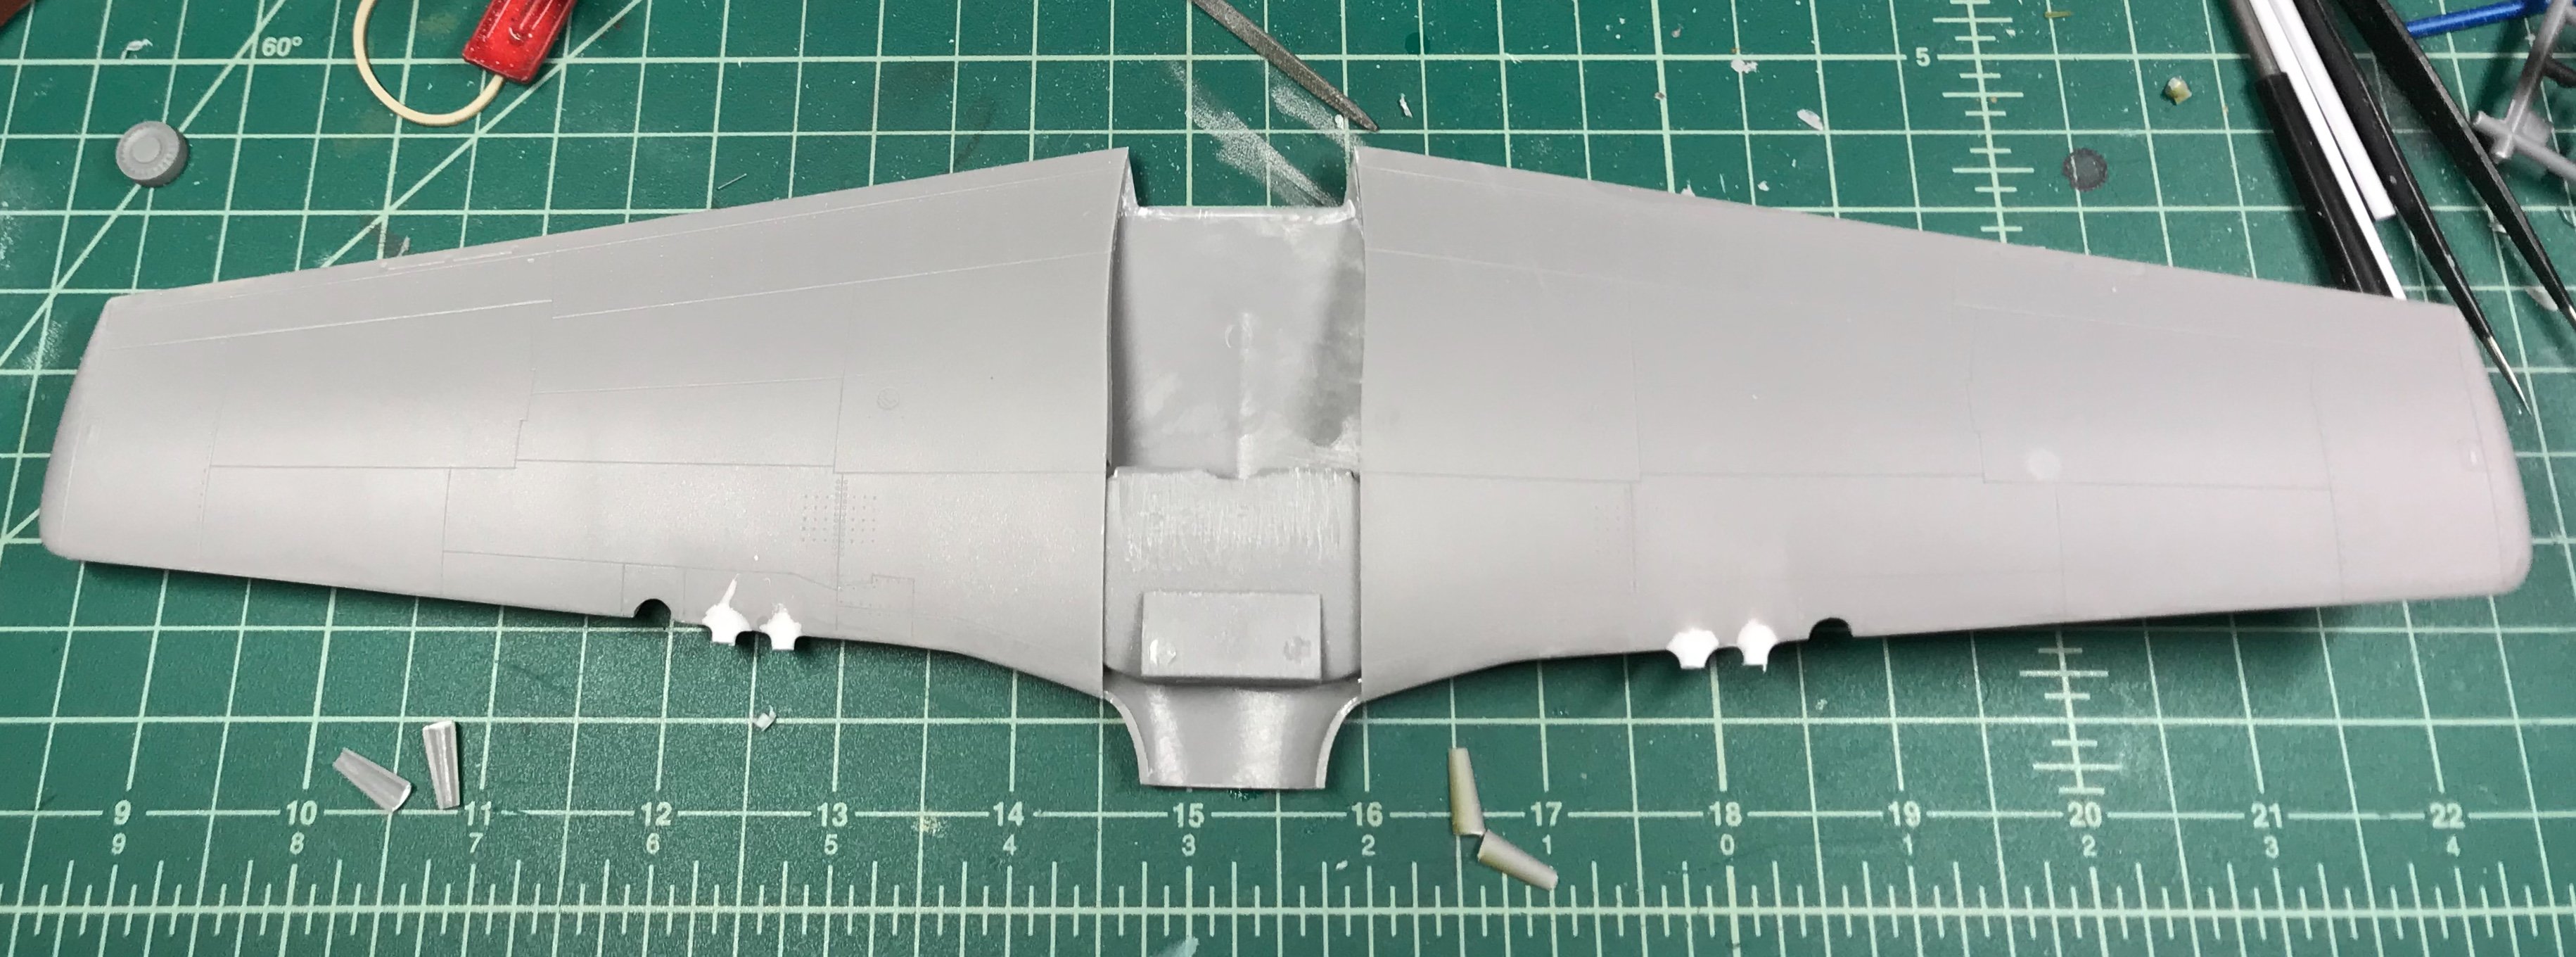
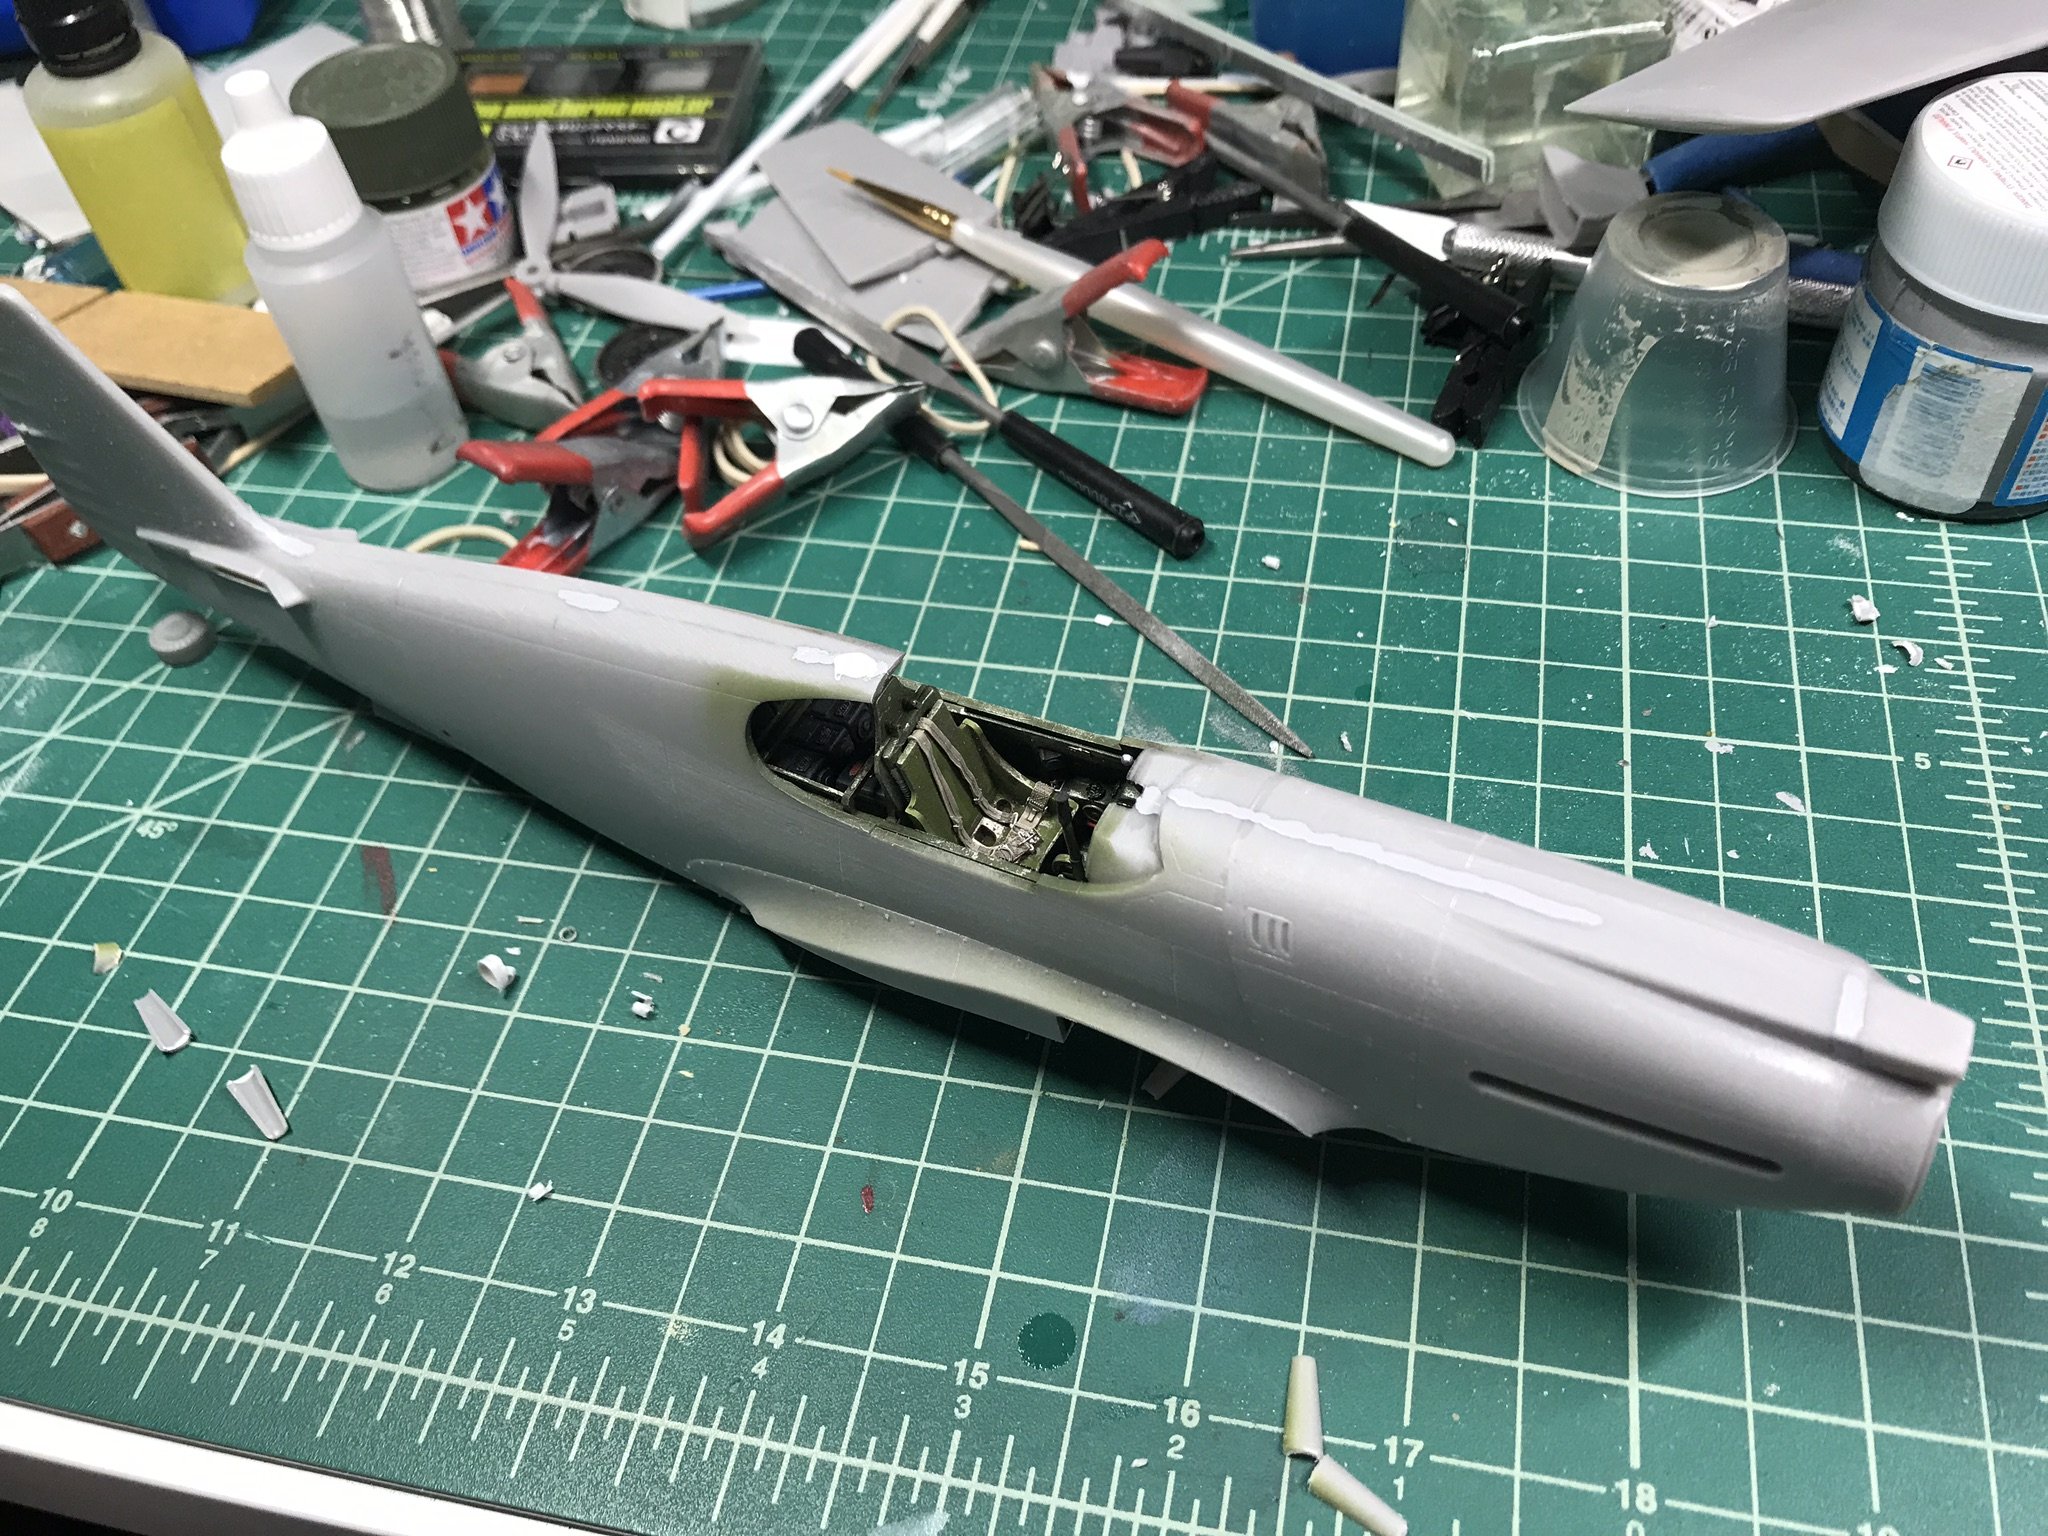
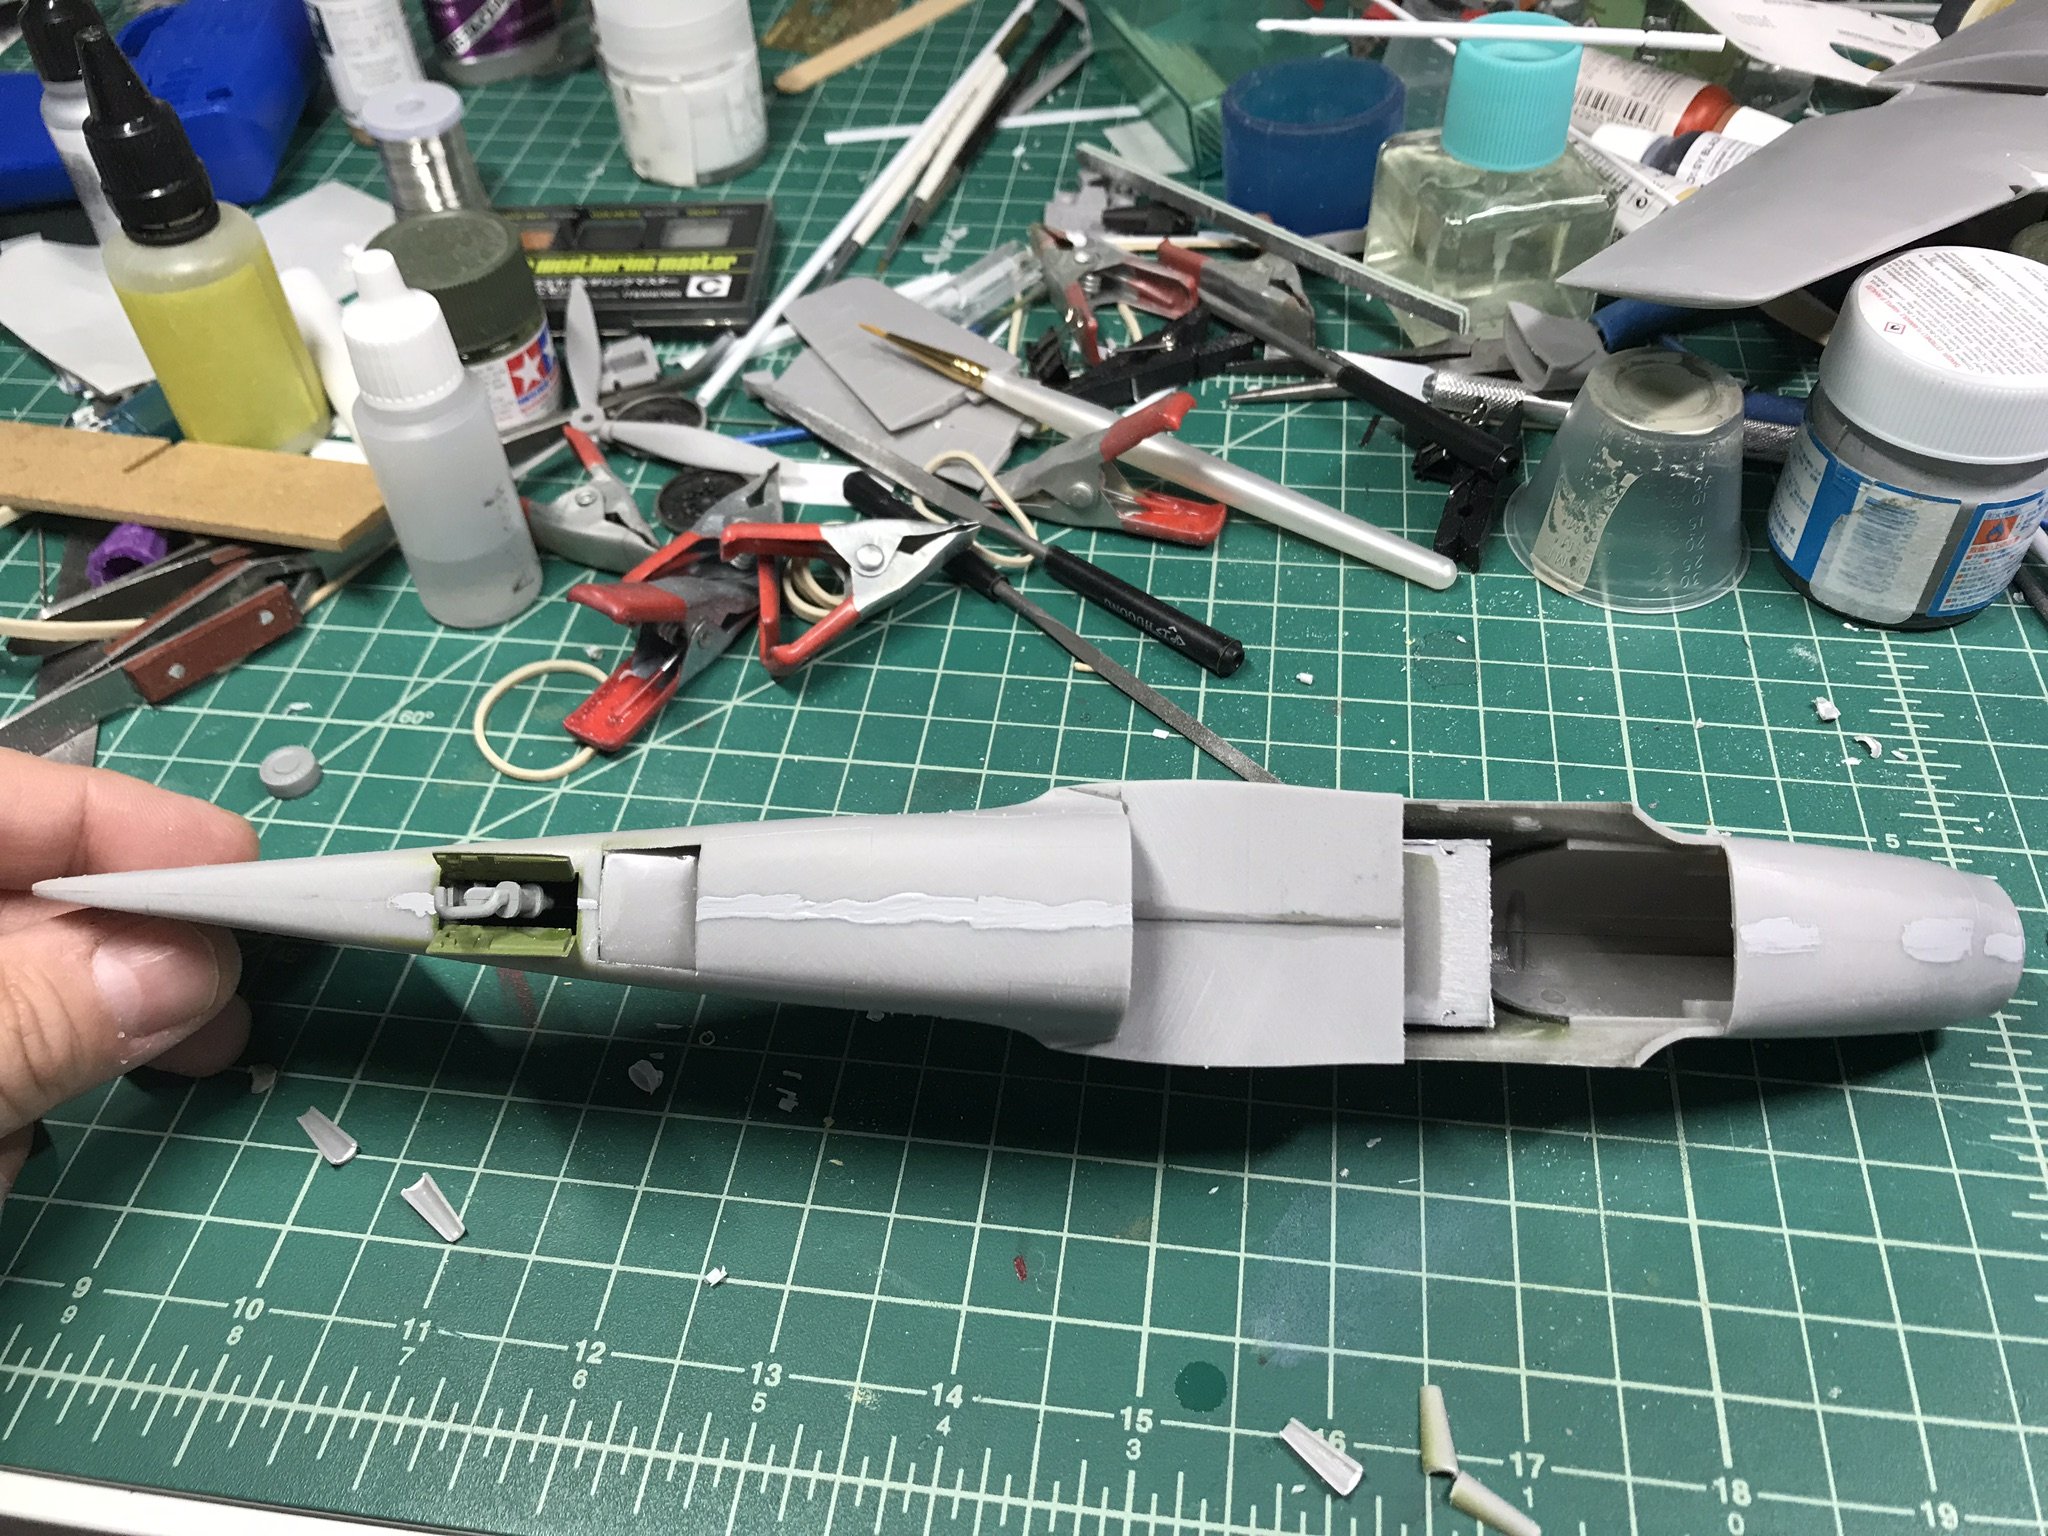
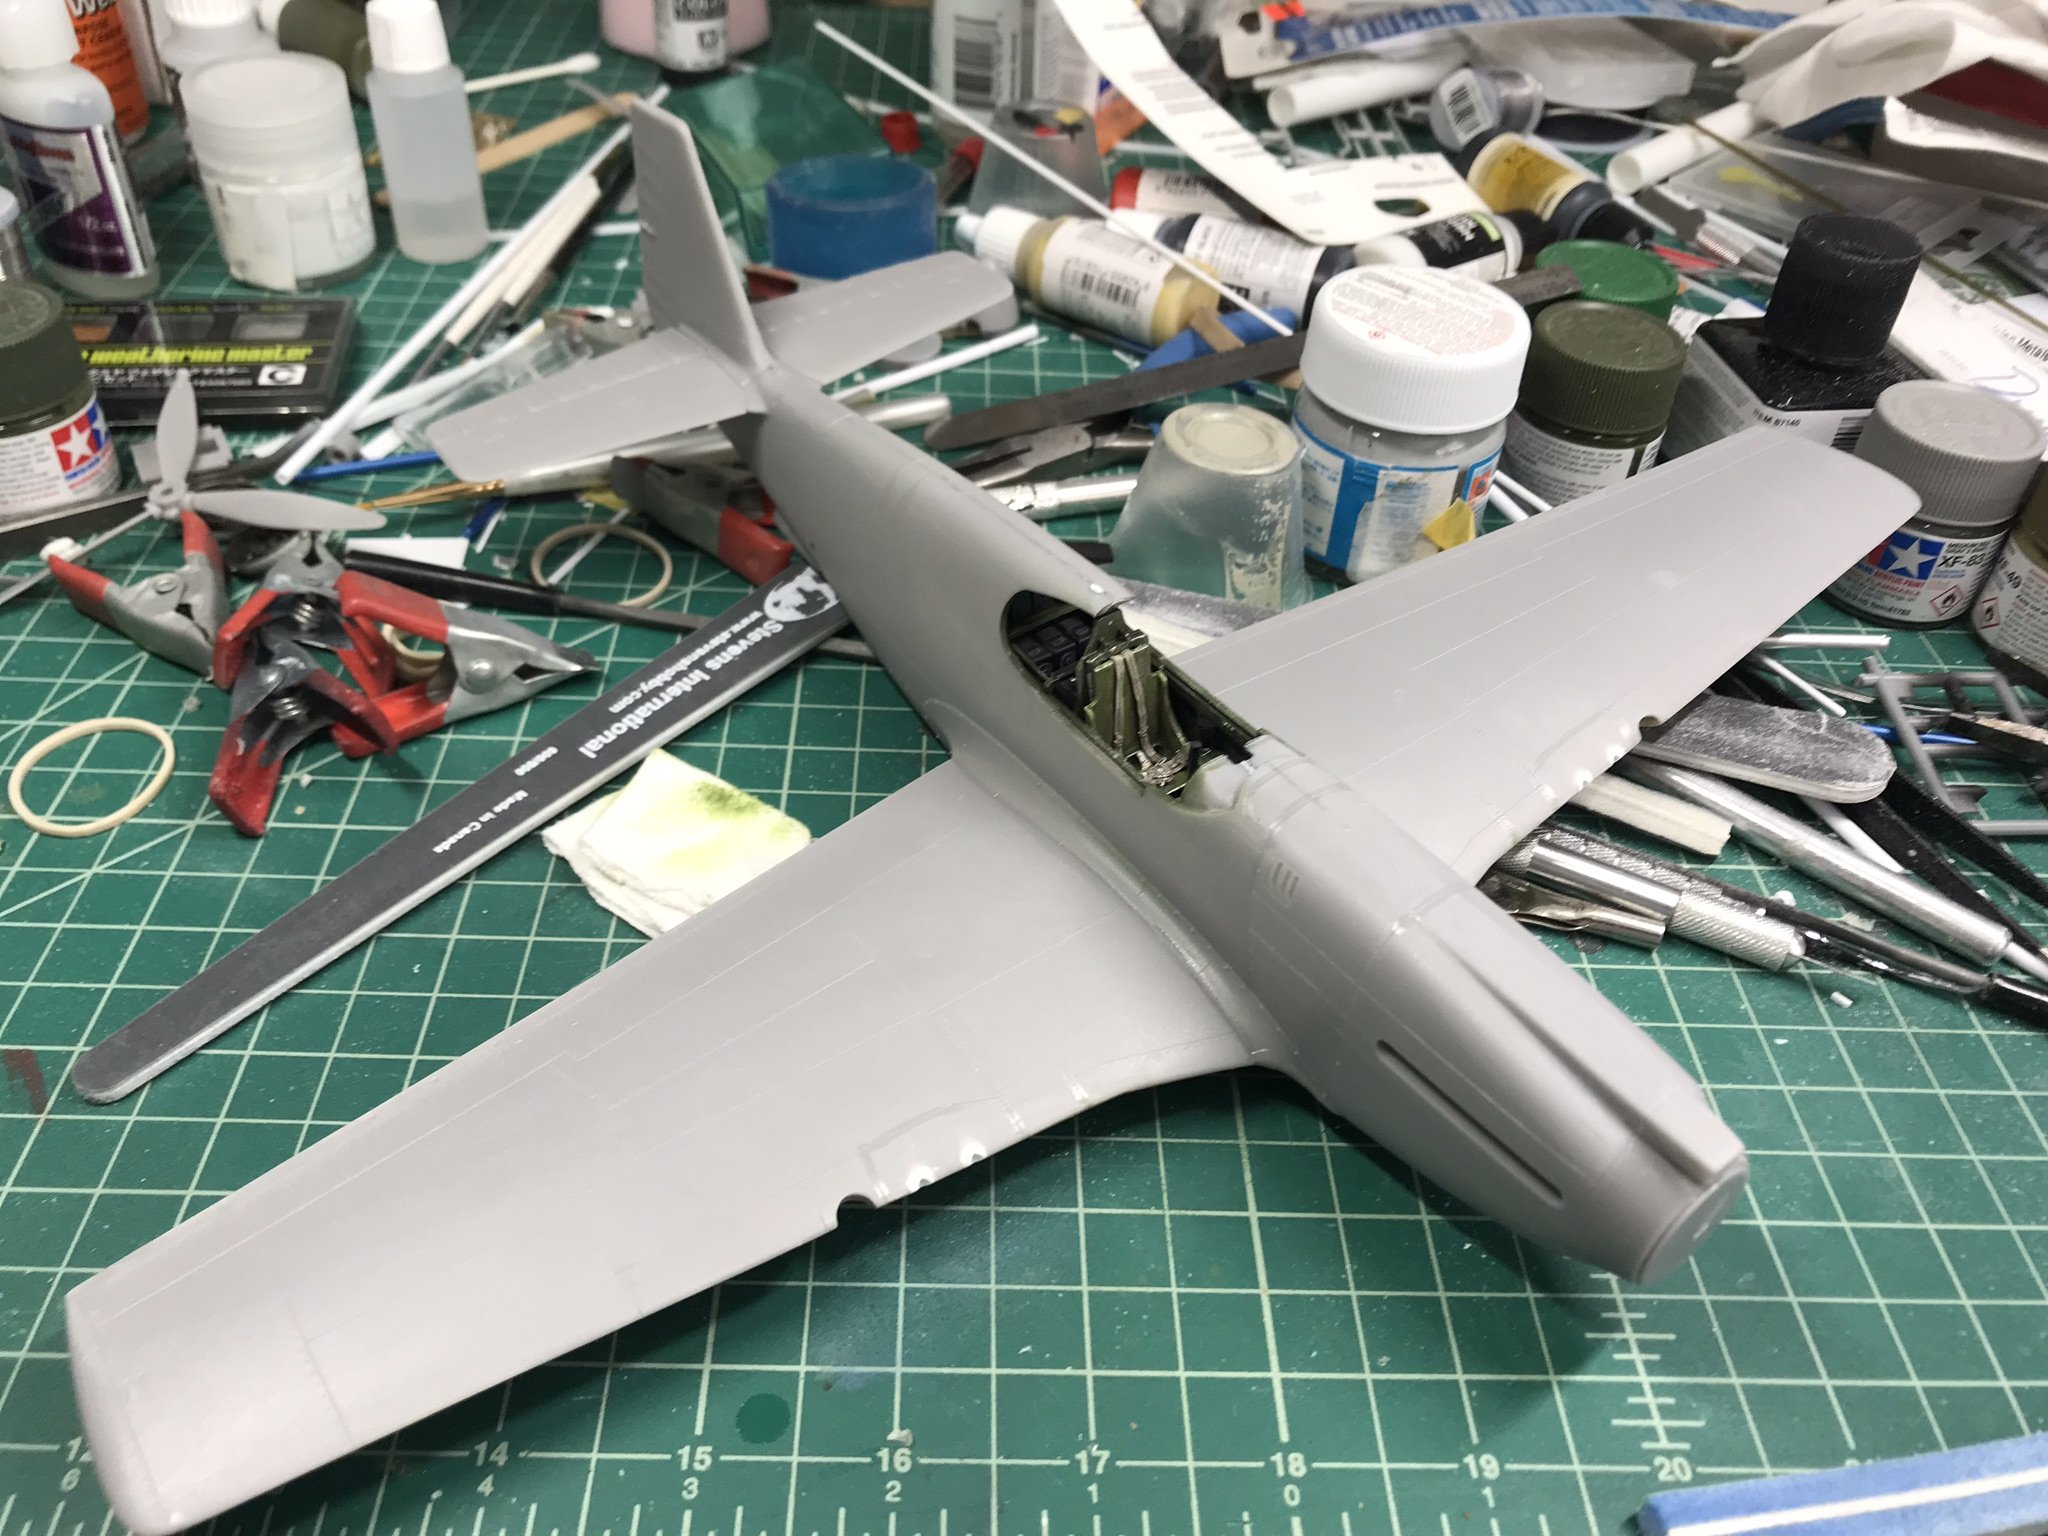
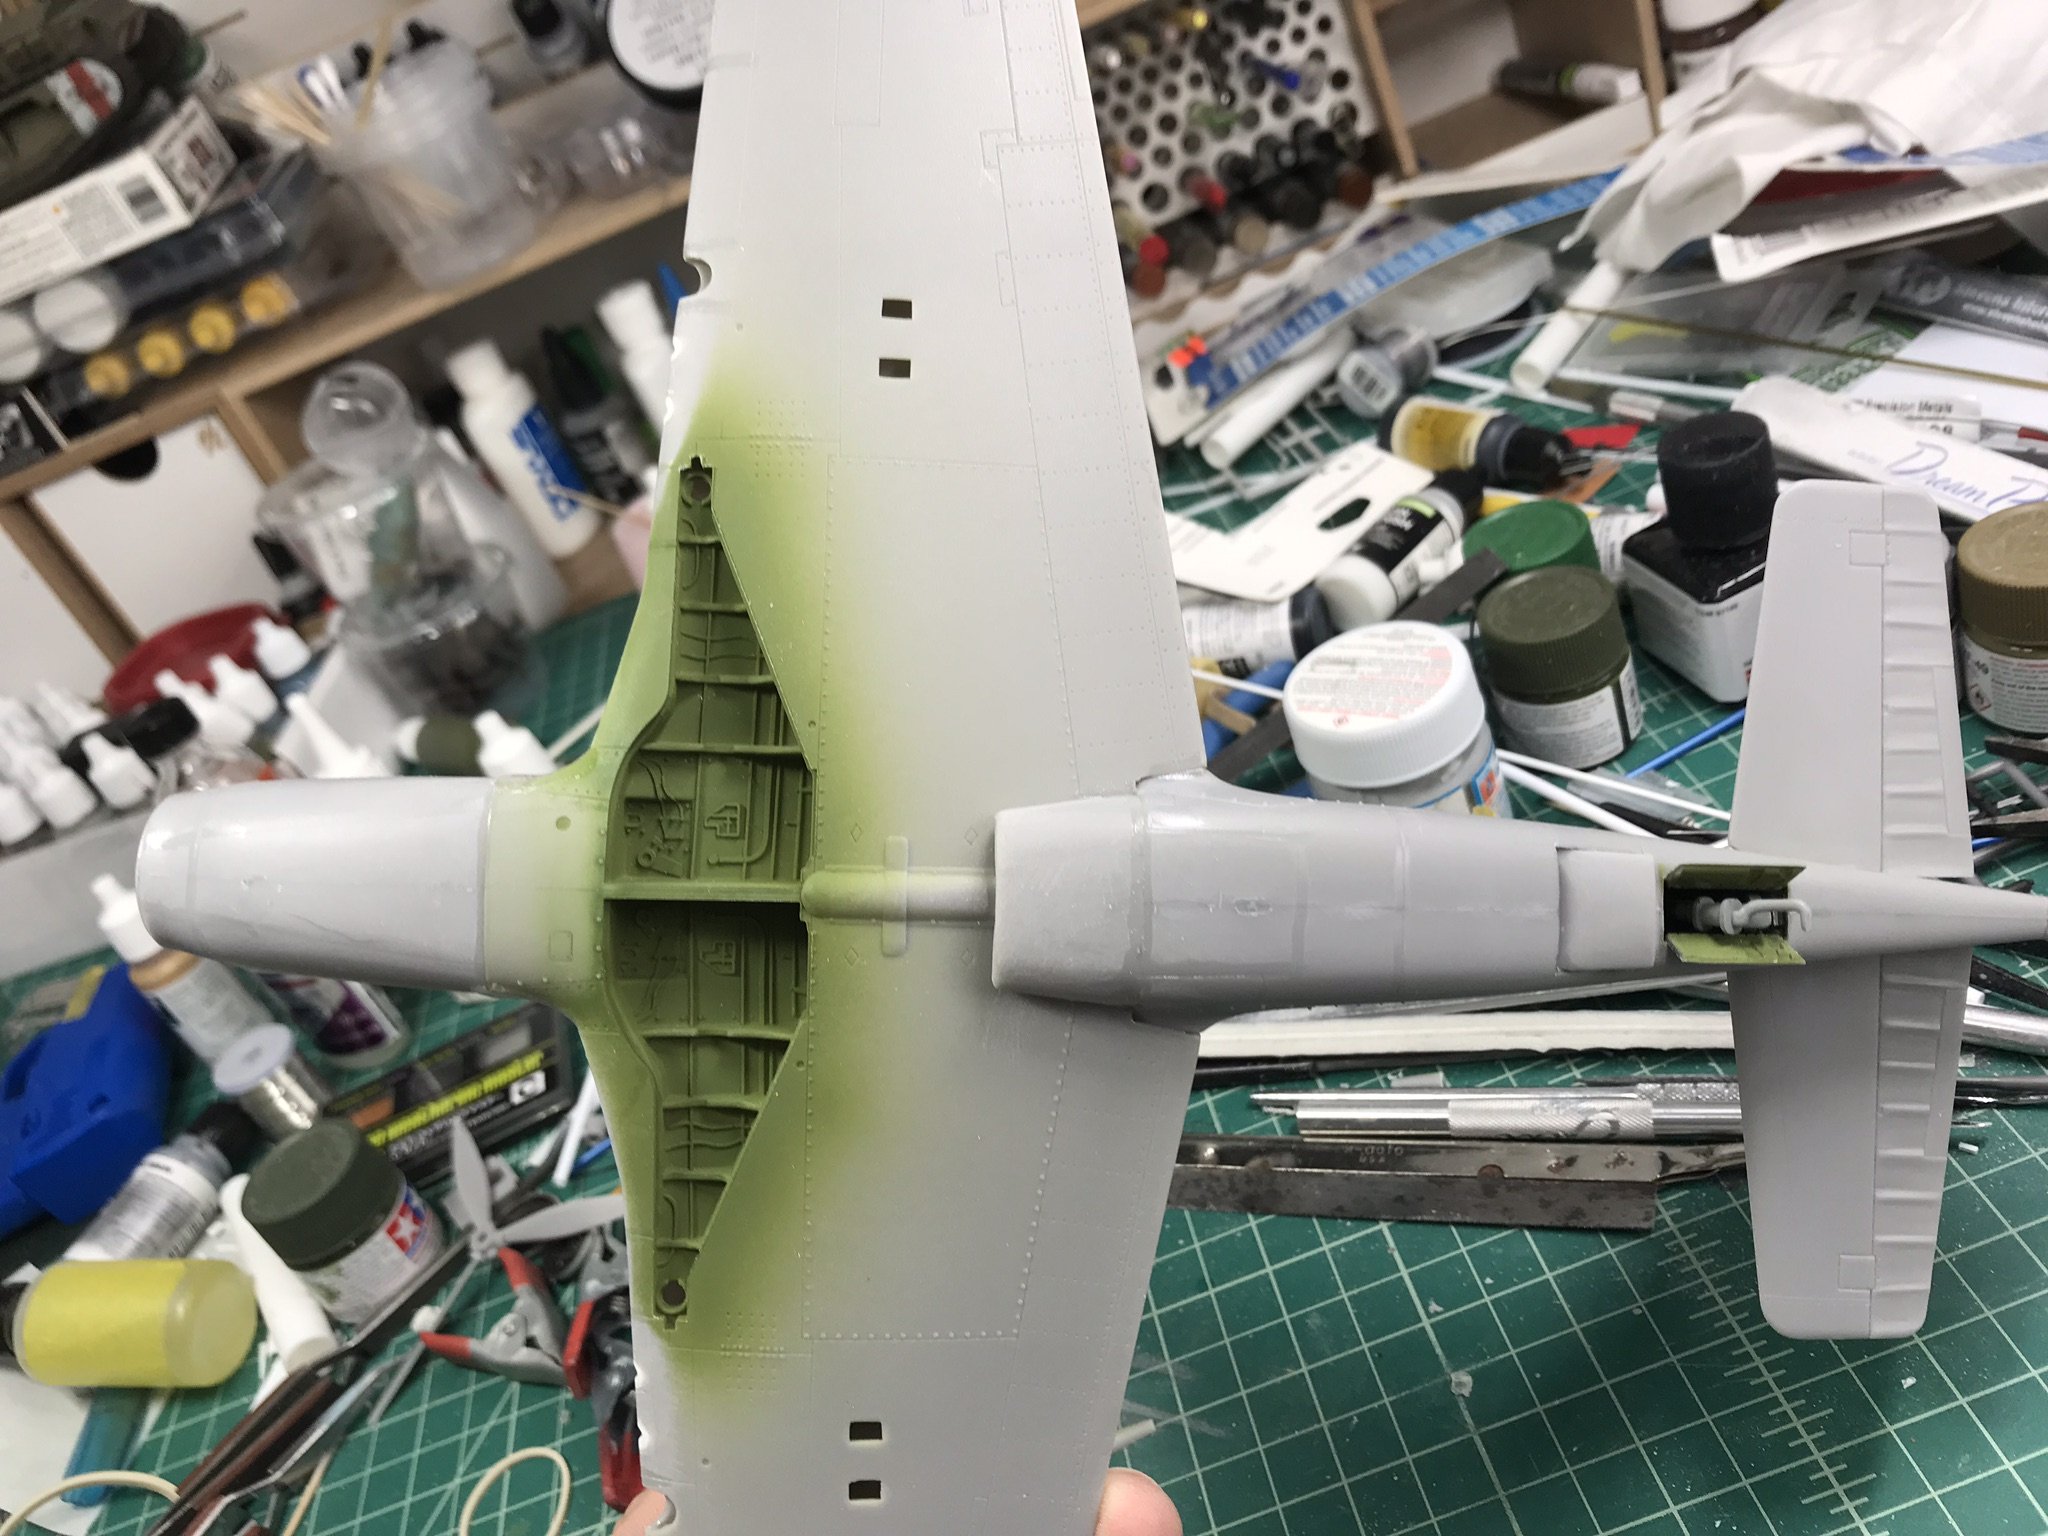
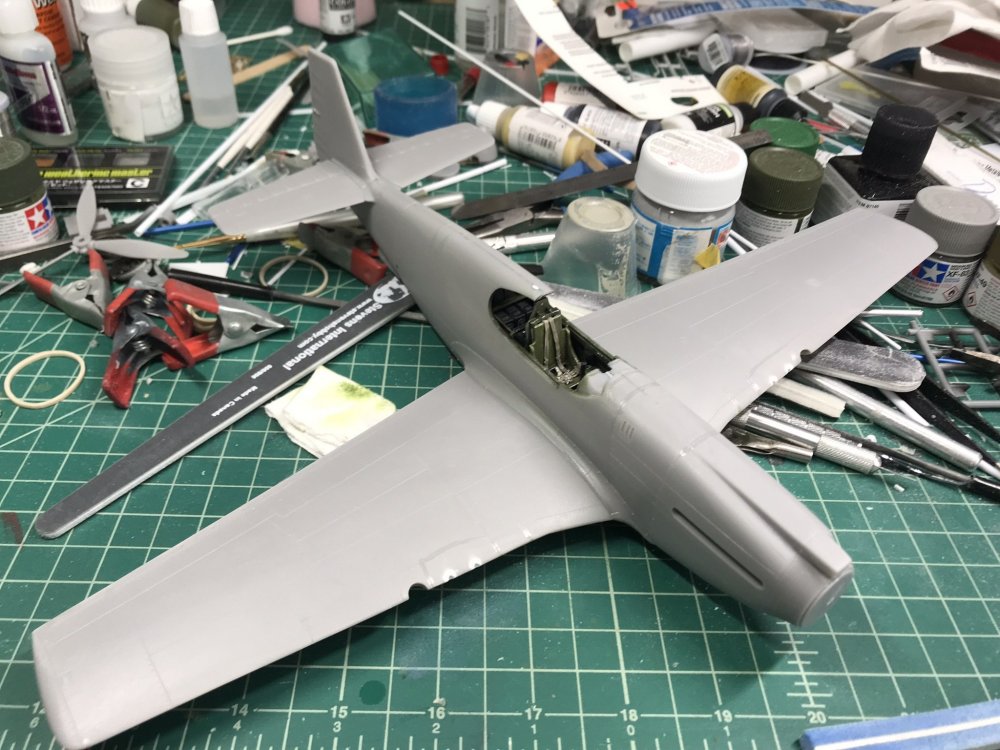
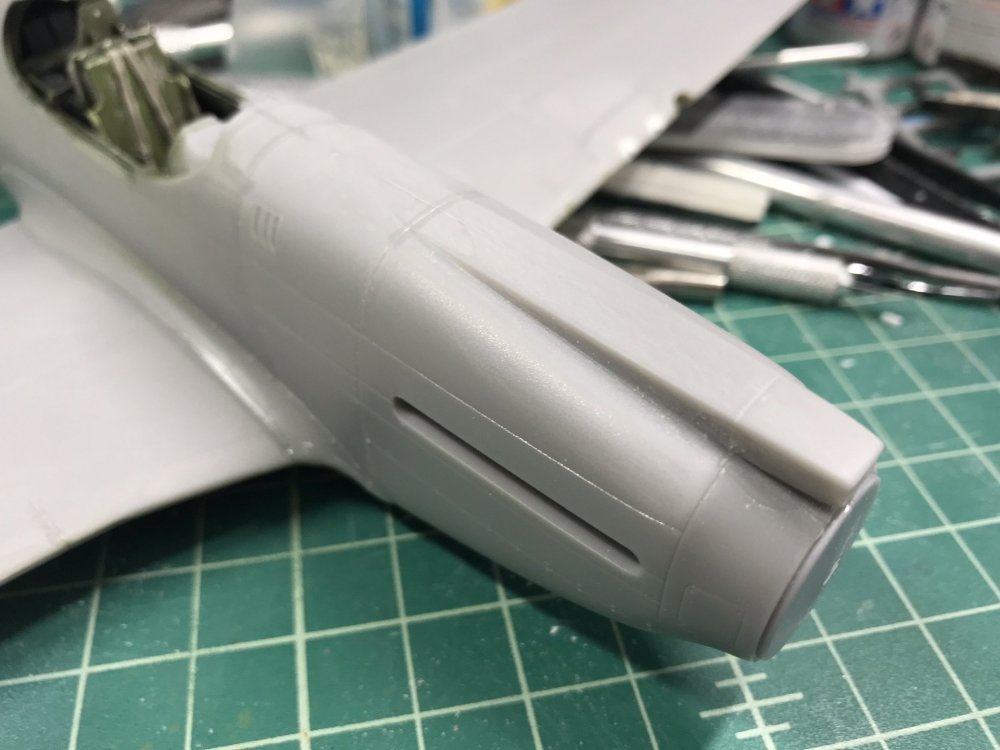
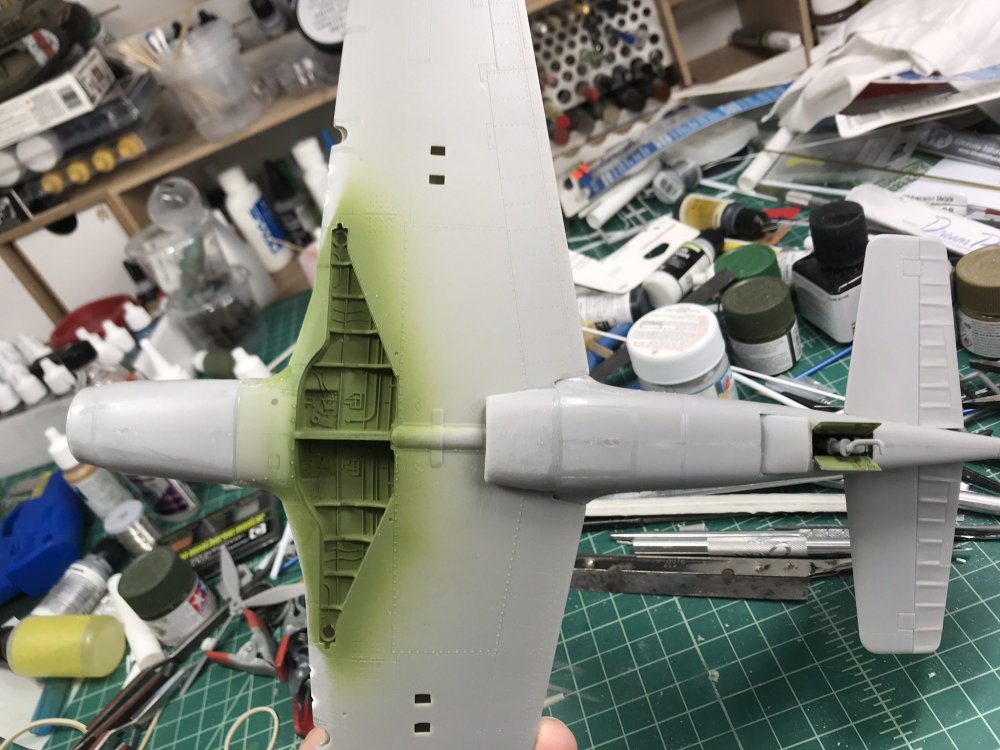
More update pictures, funny thing is, I used less filler than on the Hasegawa P-40. Looks like it’s getting primer tomorrow.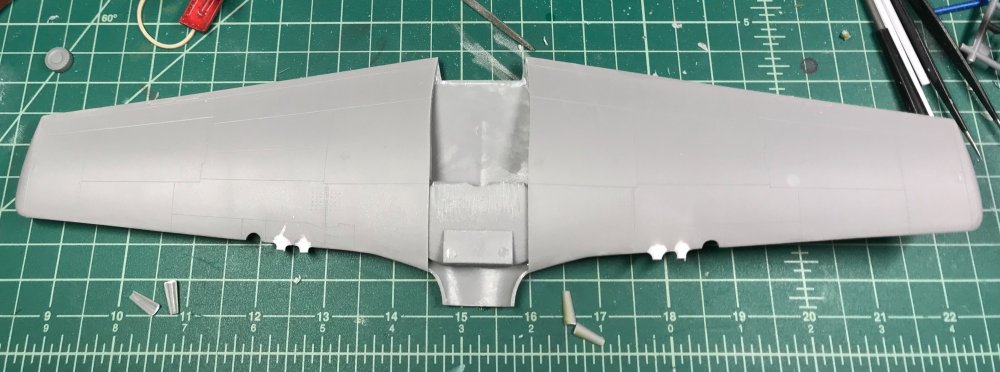


-
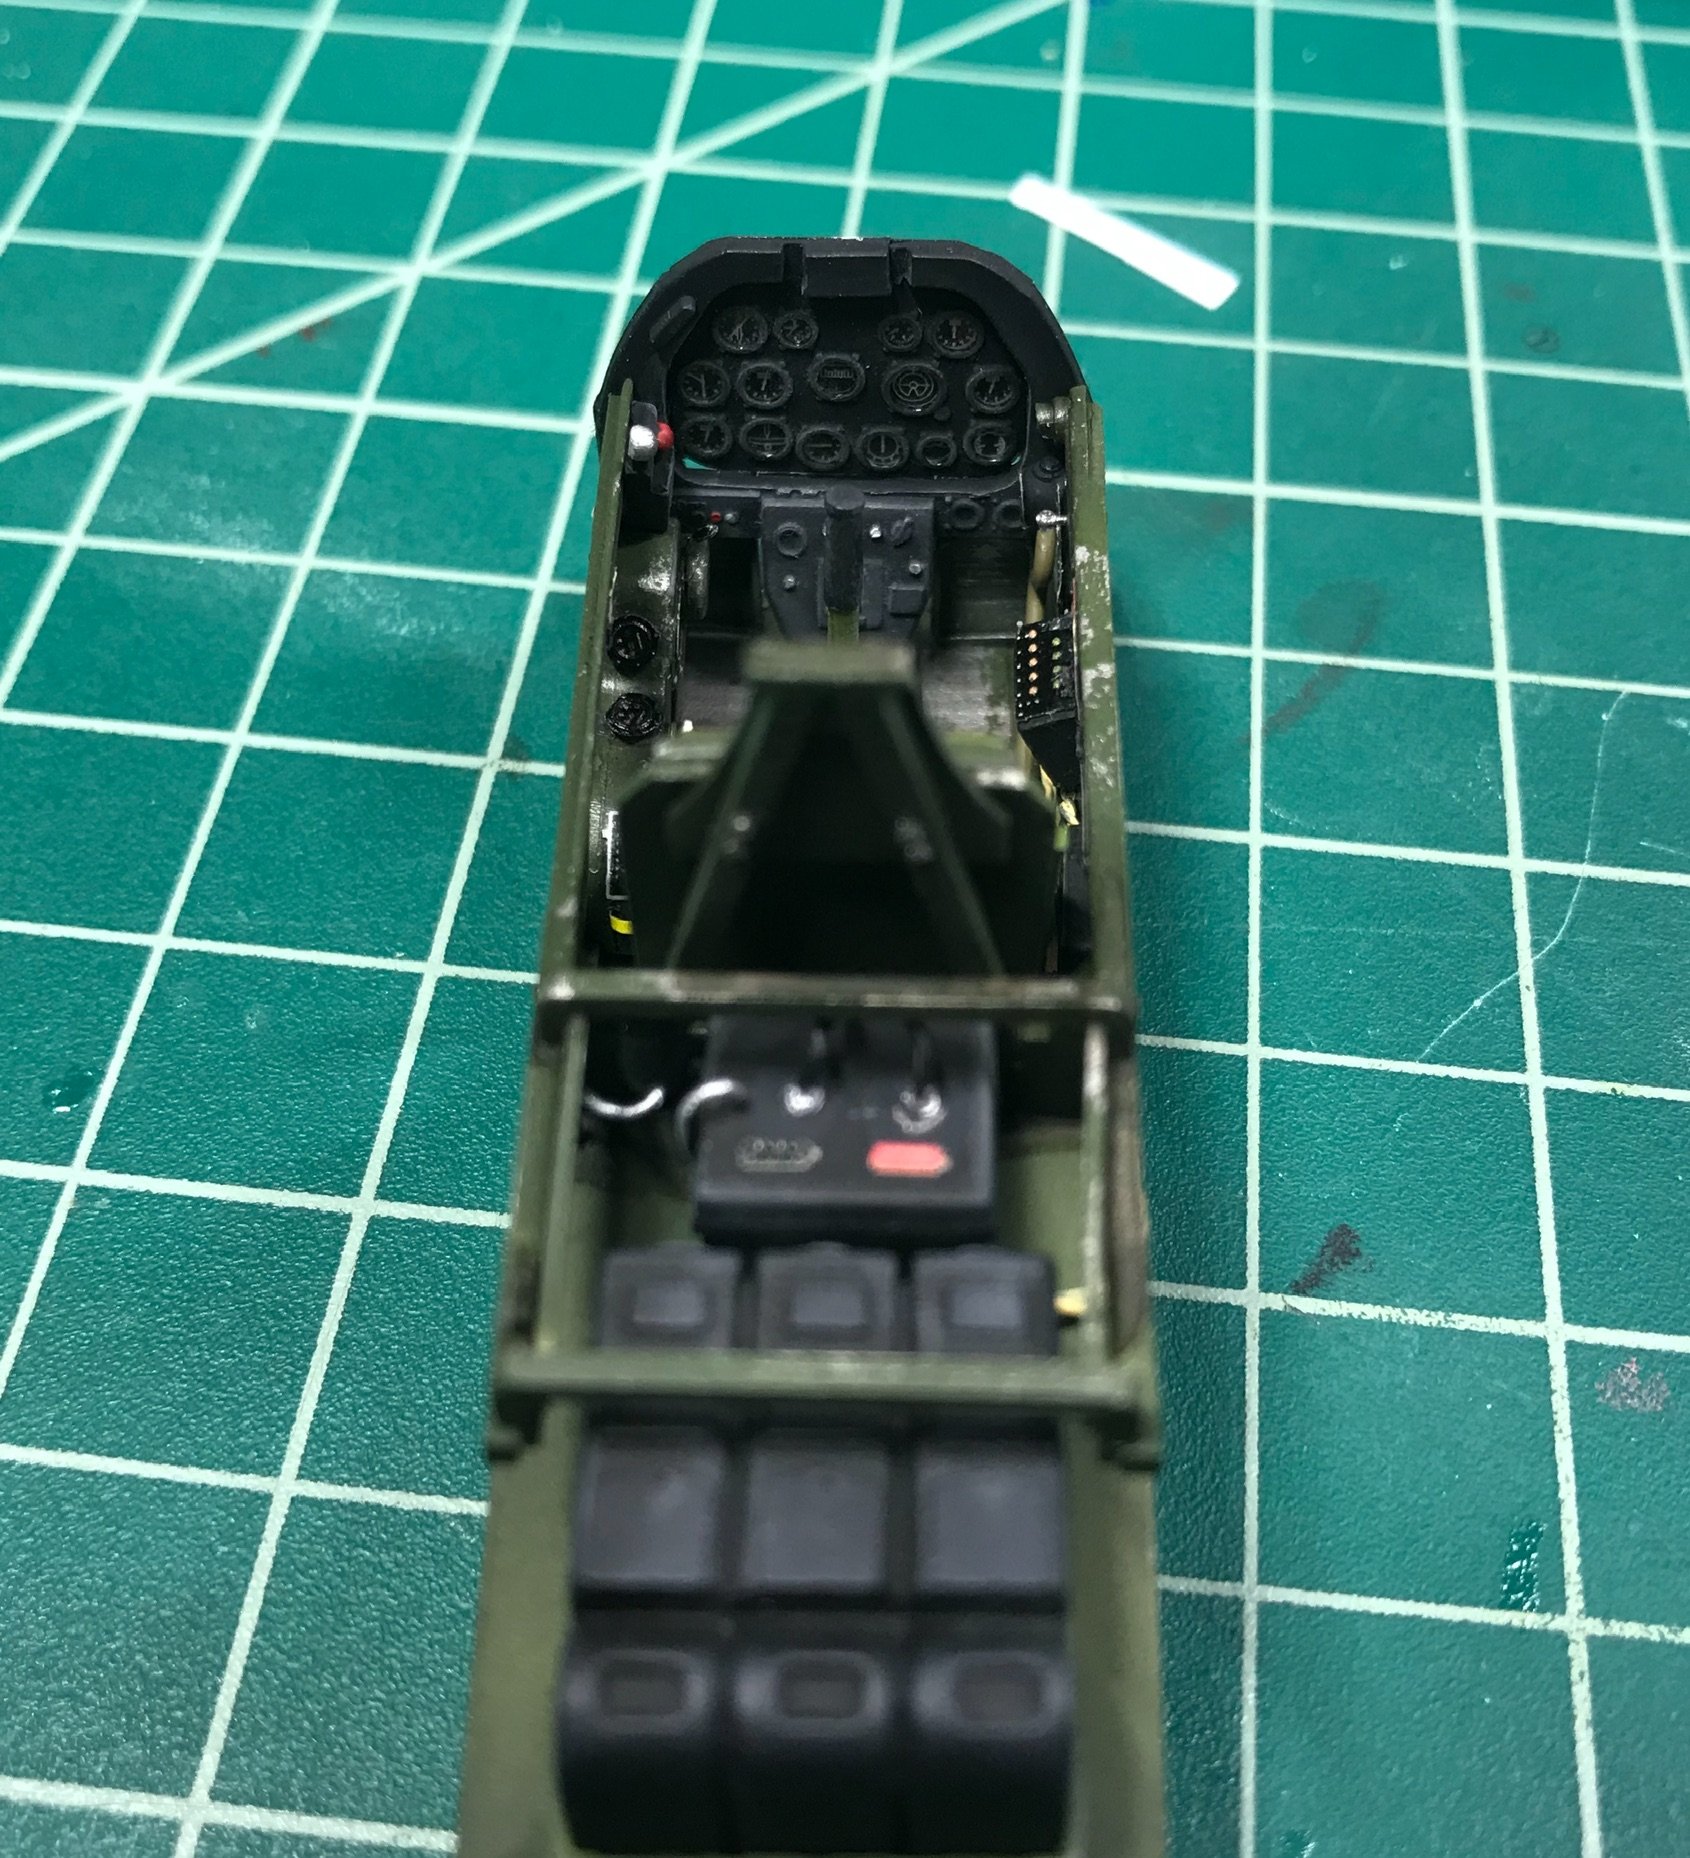
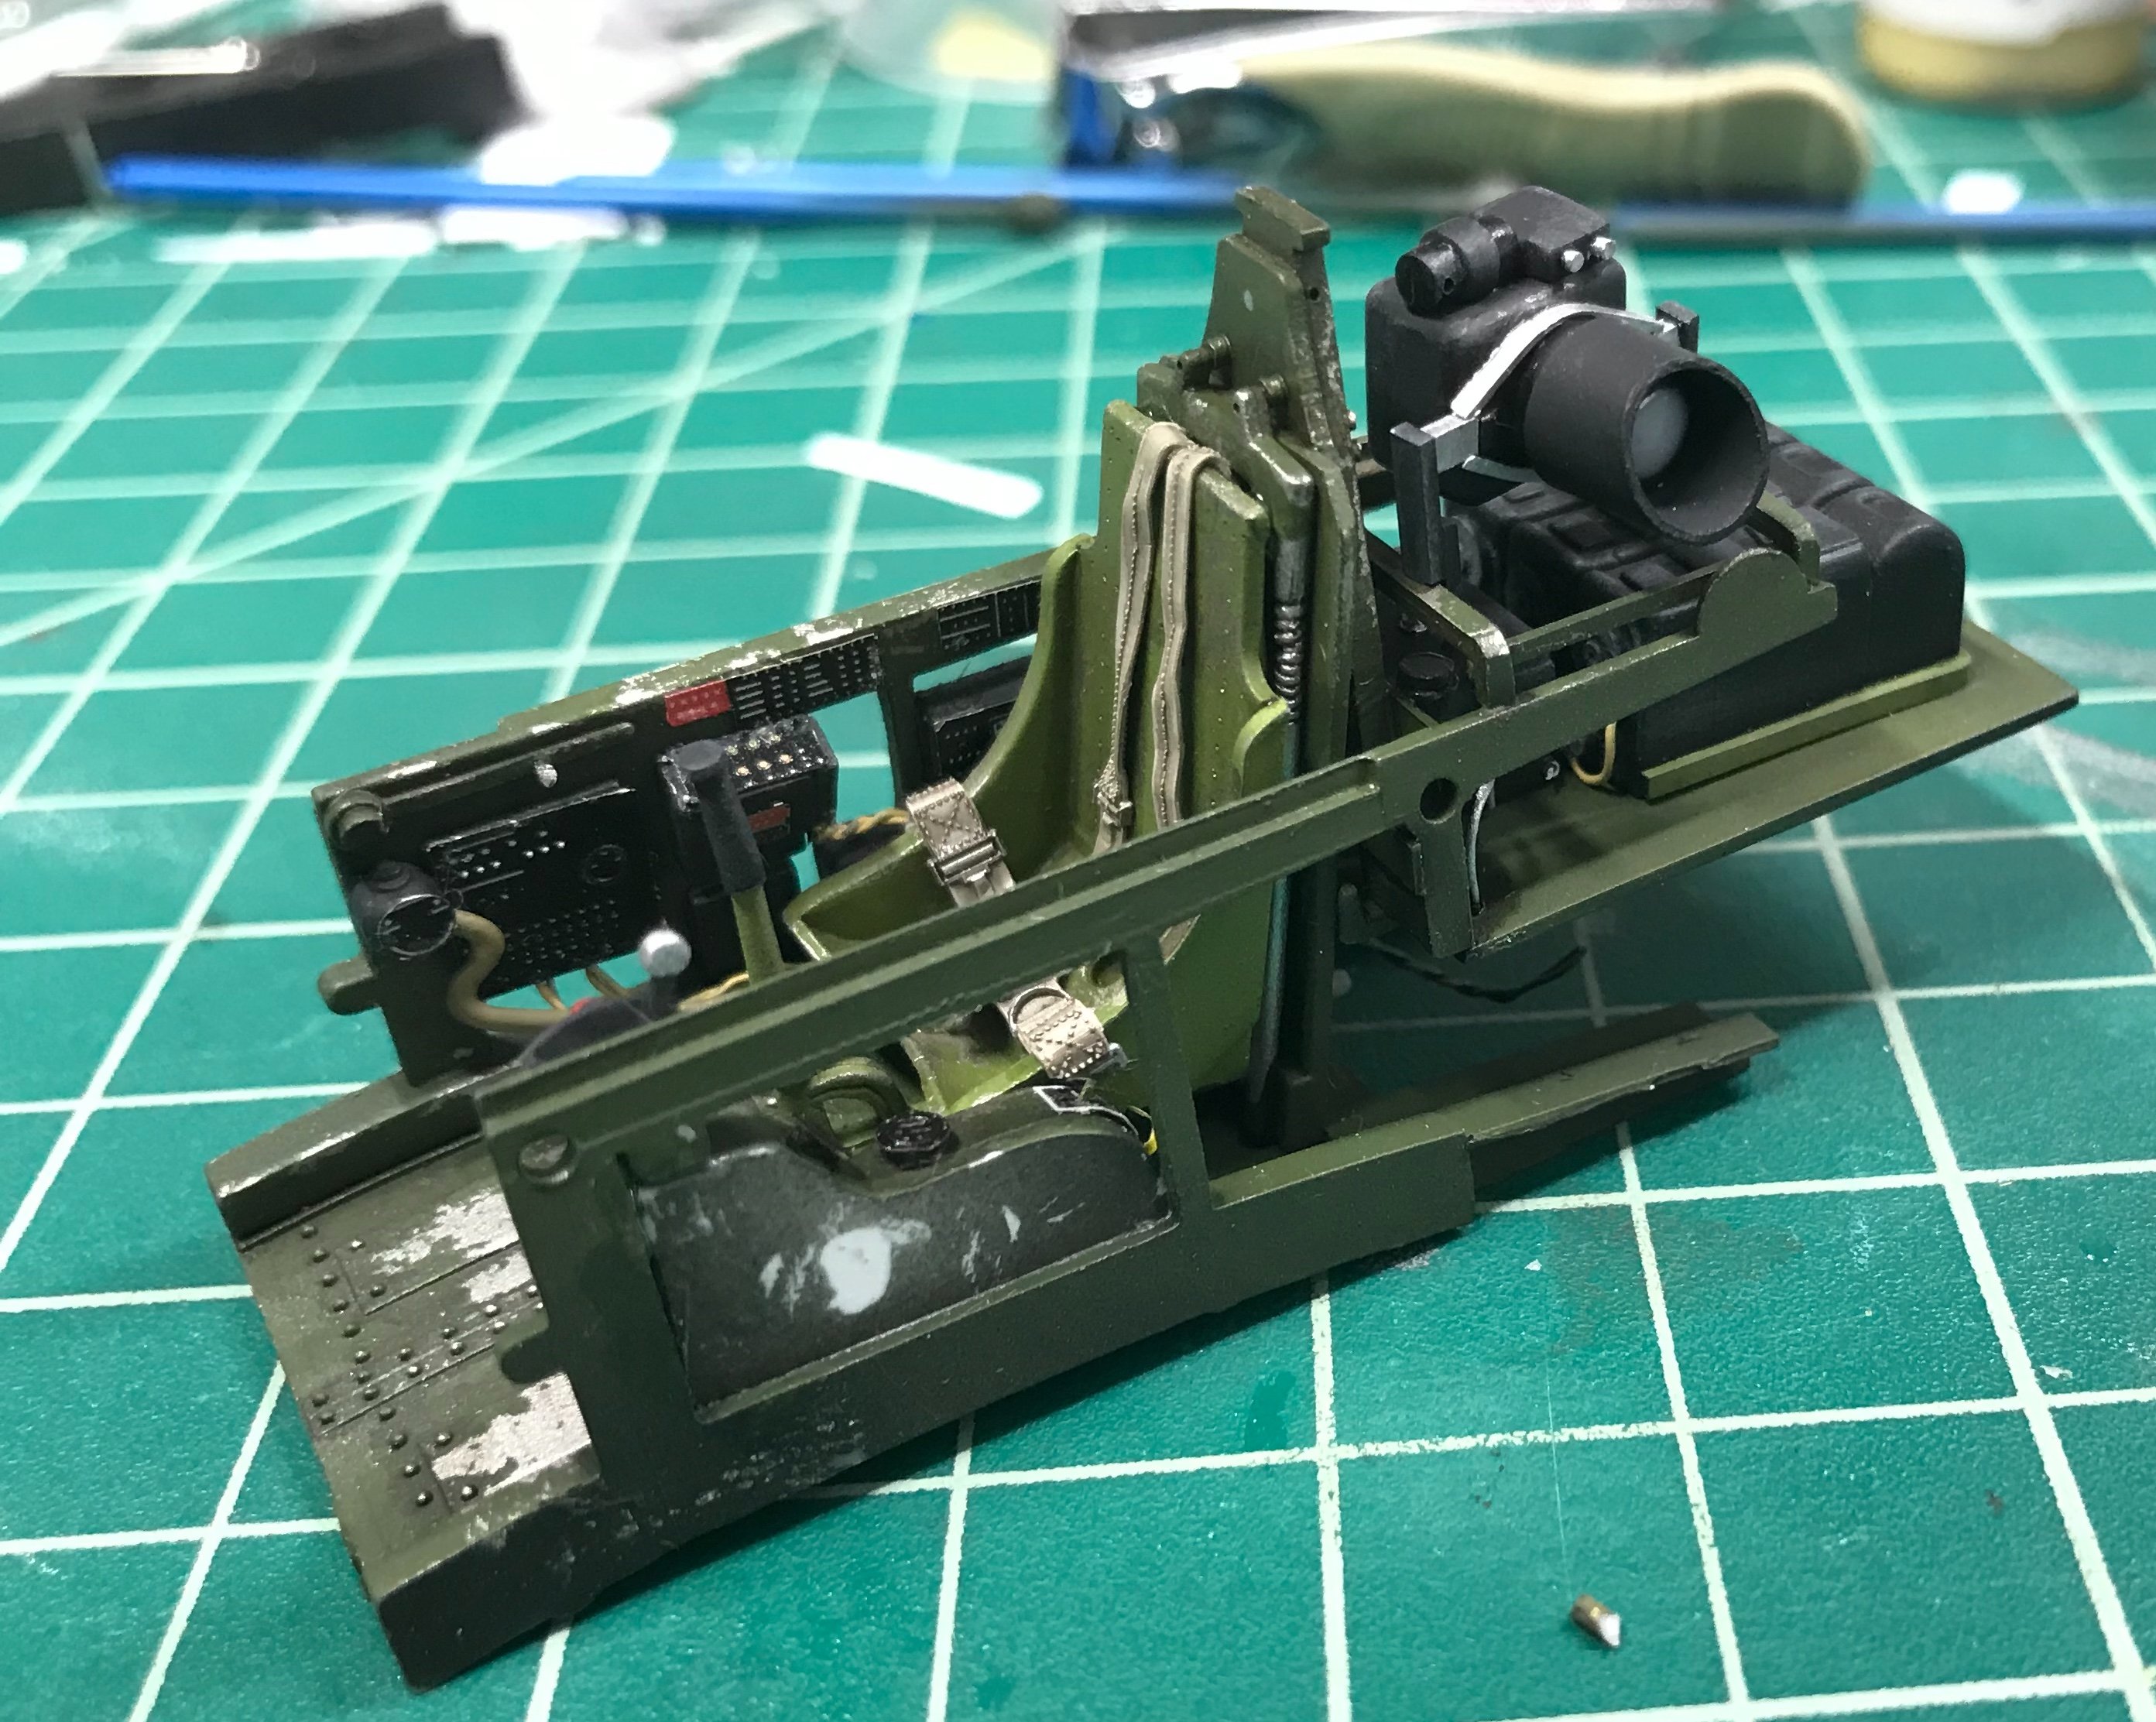
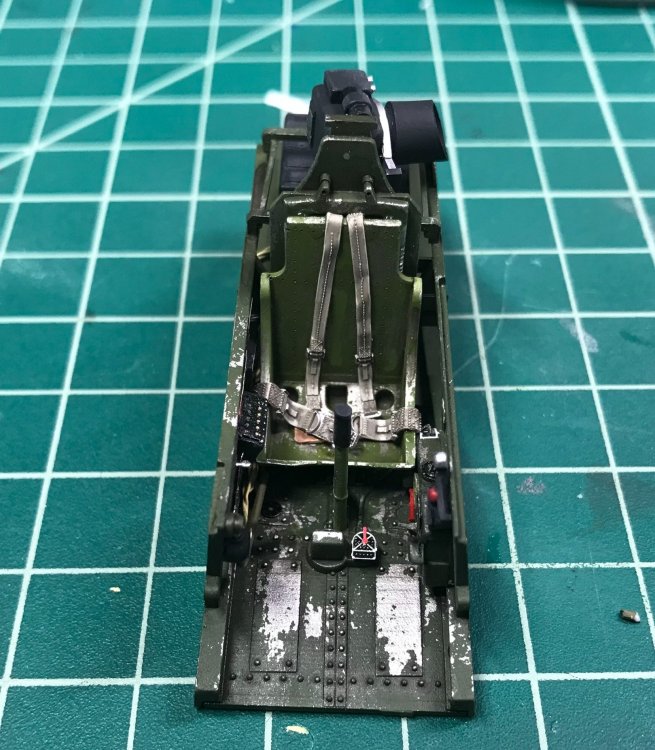
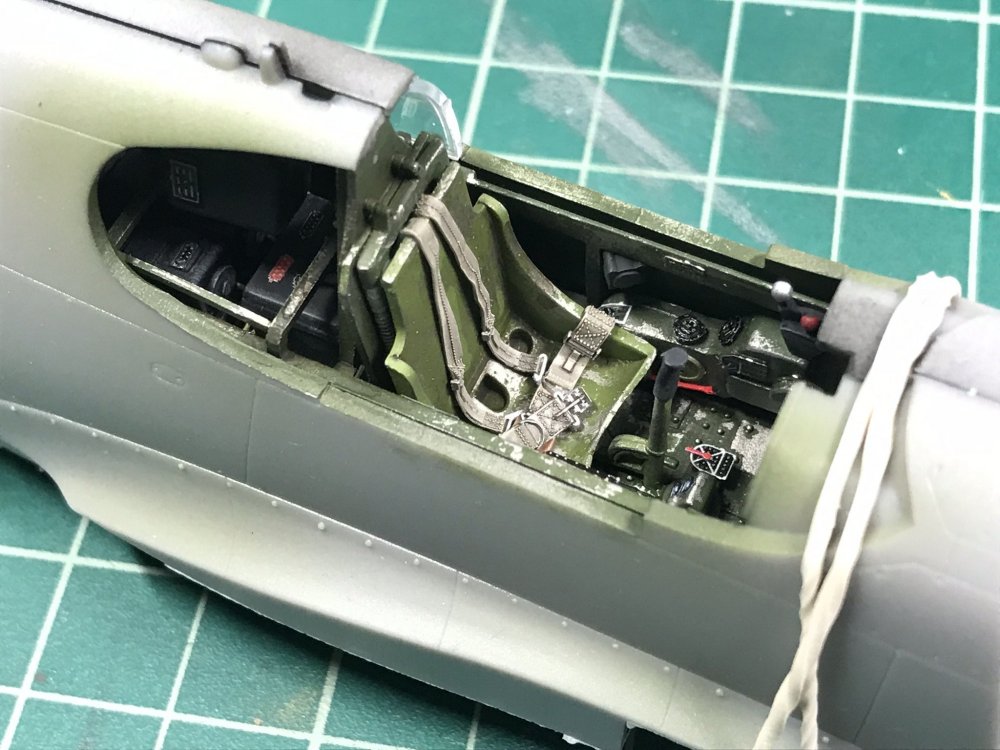
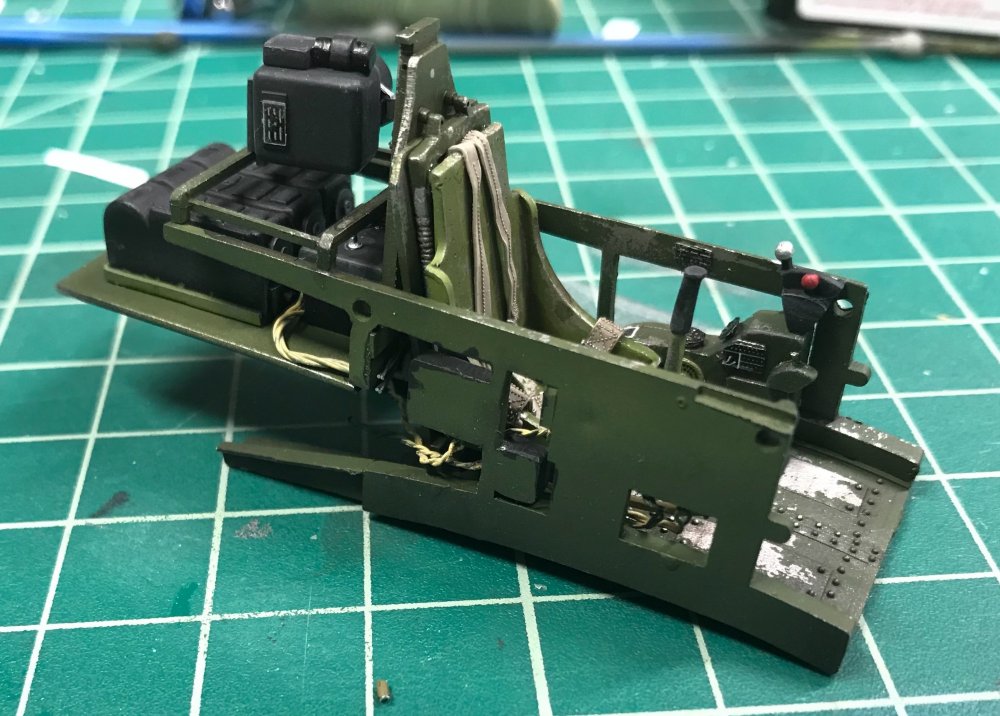
Yes, i have, but you really need to go very dark on a green color. I tend to go with a complimentary wash with a color, for instance, I use Dark brown with greens, gray with blues and yellows, blacks with grays, etc. The odd thing is, using dark green on green looks sort of odd, don’t ask me why, but it does not look right. I prefer dark browns. i used Tamiya Dk brown wash on this, and gray pastels on the black bits. I did use dk brown color n the belts, but I should have used a more medium brown.
-
Time for another CORSAIR! LOL
1to1scale replied to JohnB's topic in LSM 1/35 and Larger Work In Progress
always a good show. -
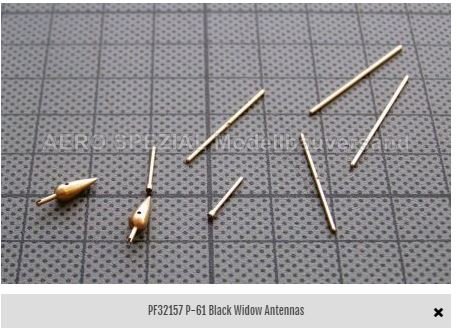
Profimodeller makes them, maybe master too?
-
You guys are wimps, I had gray shag installed in my office! It build up your scratch building skills. If a part flings off the bench, i don't even bother looking for it.
-
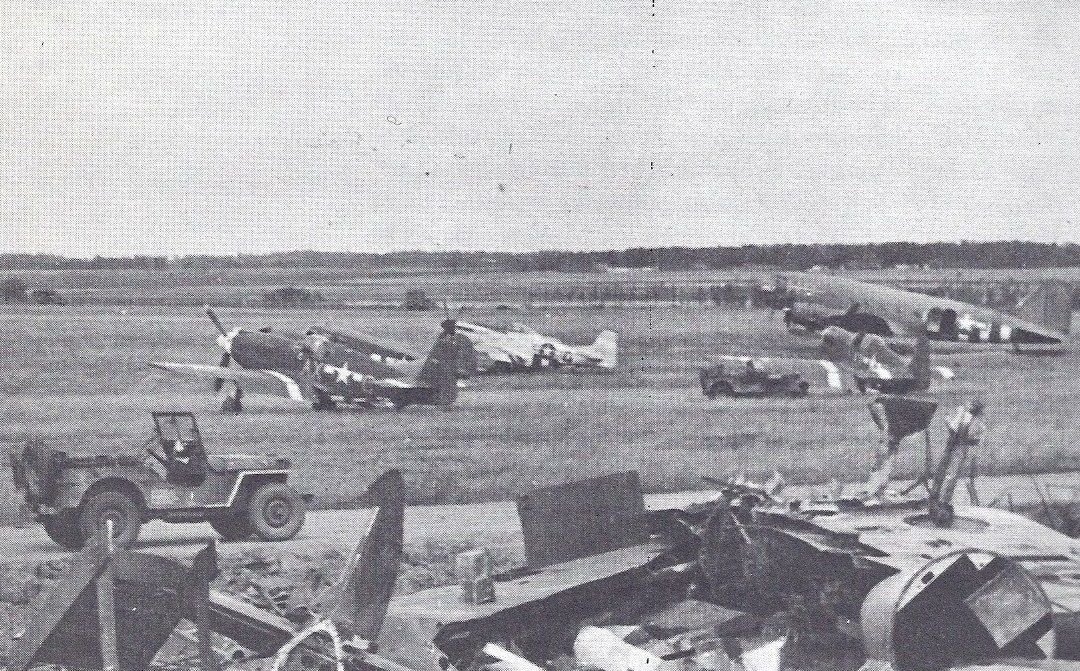
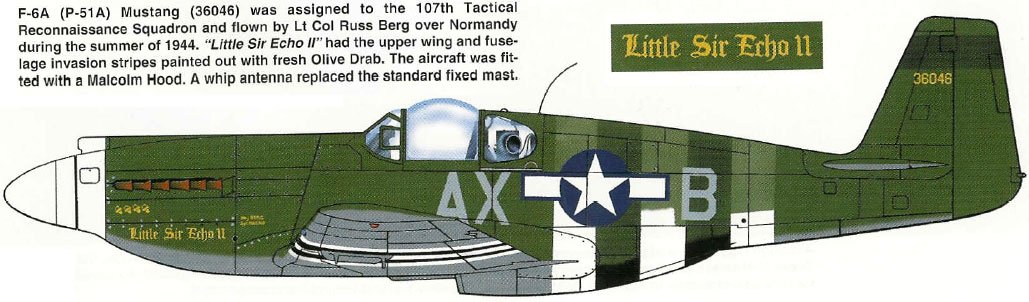
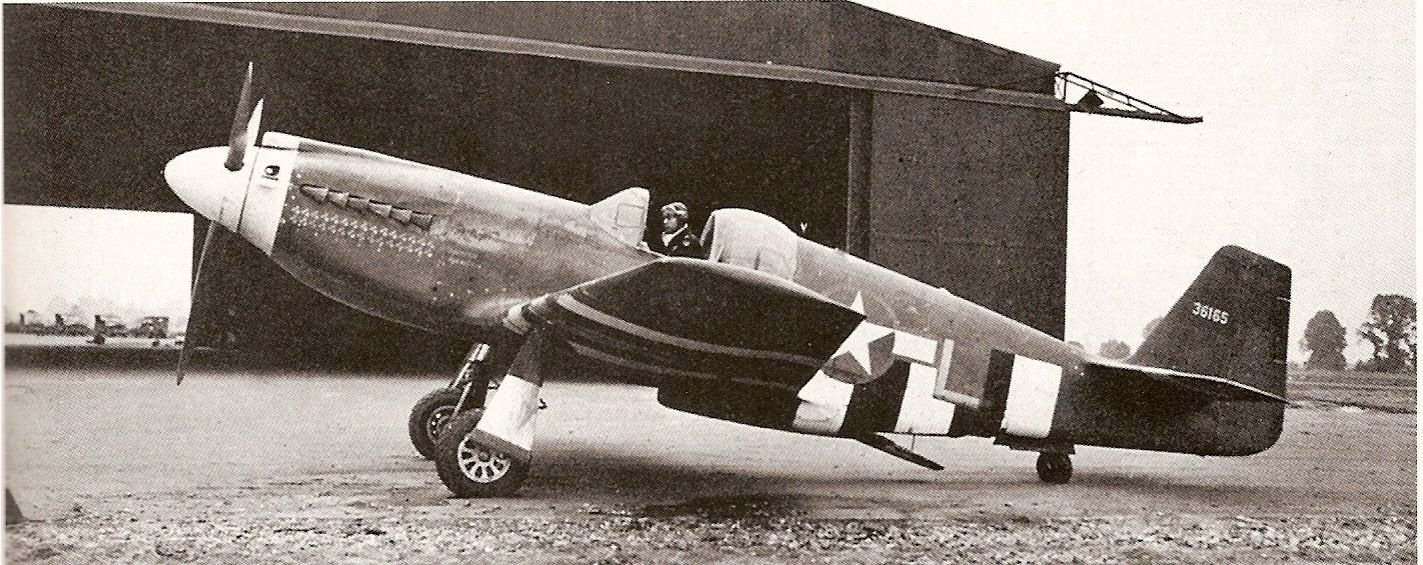
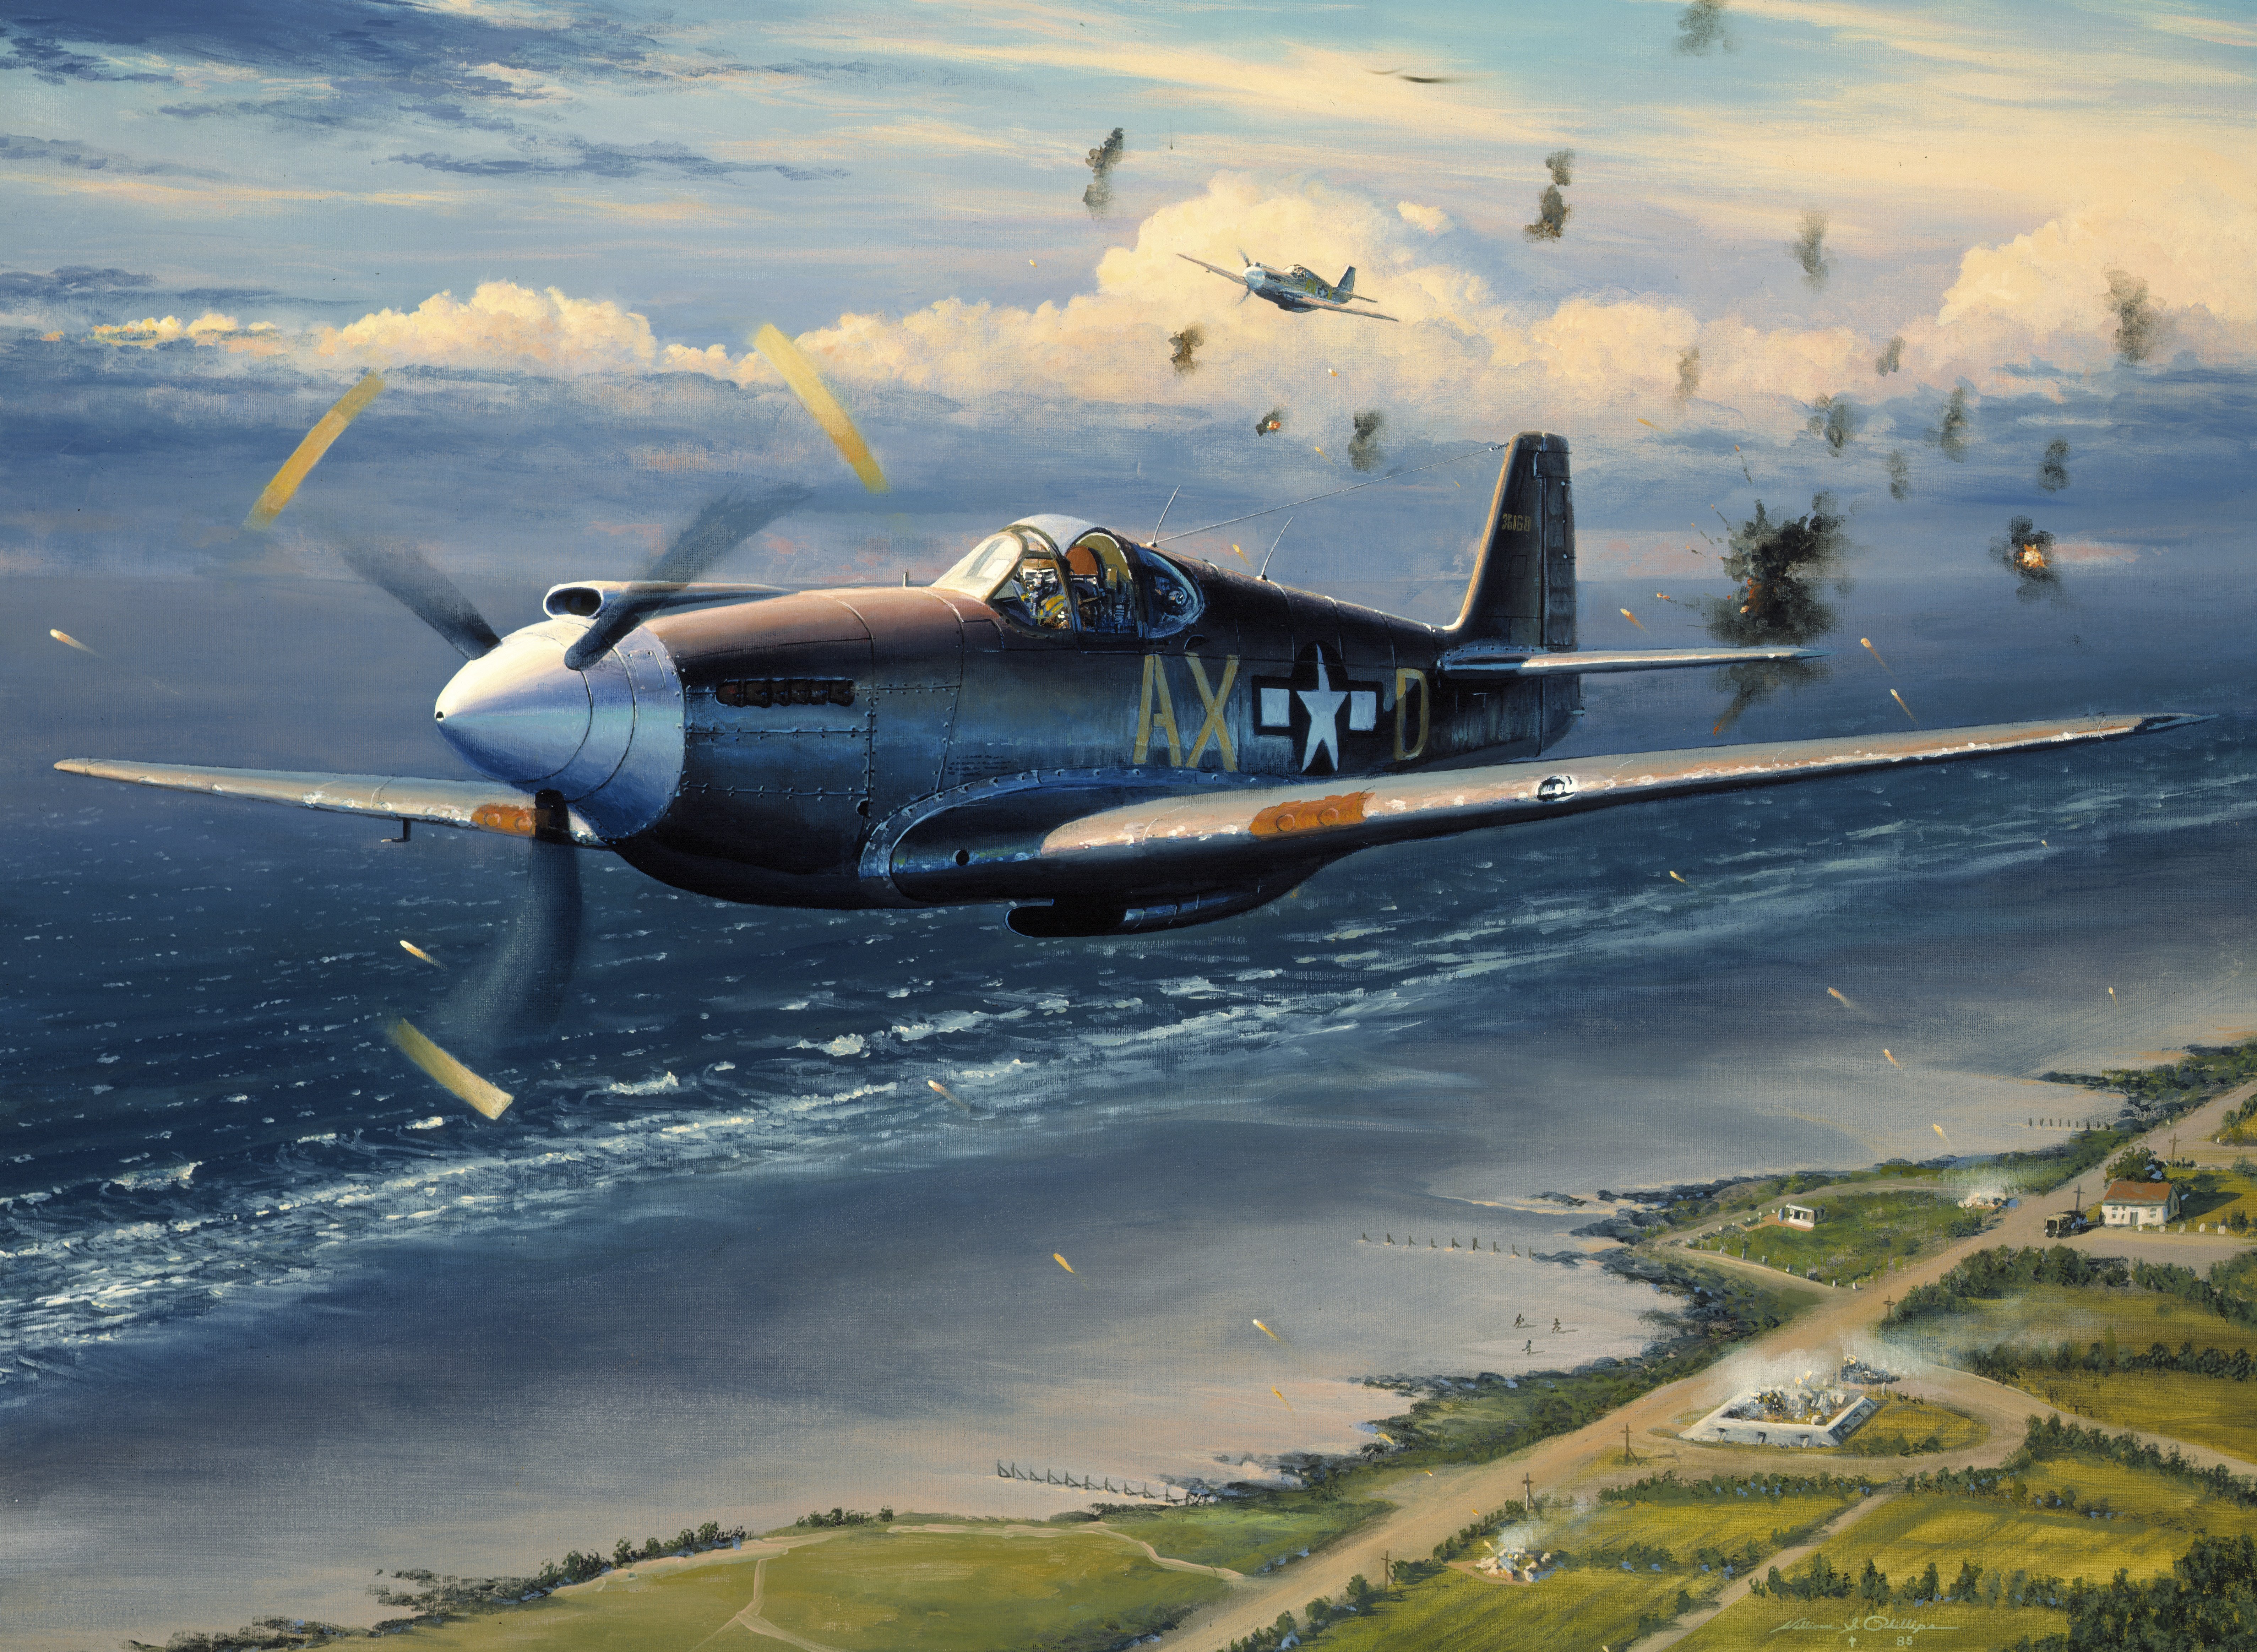
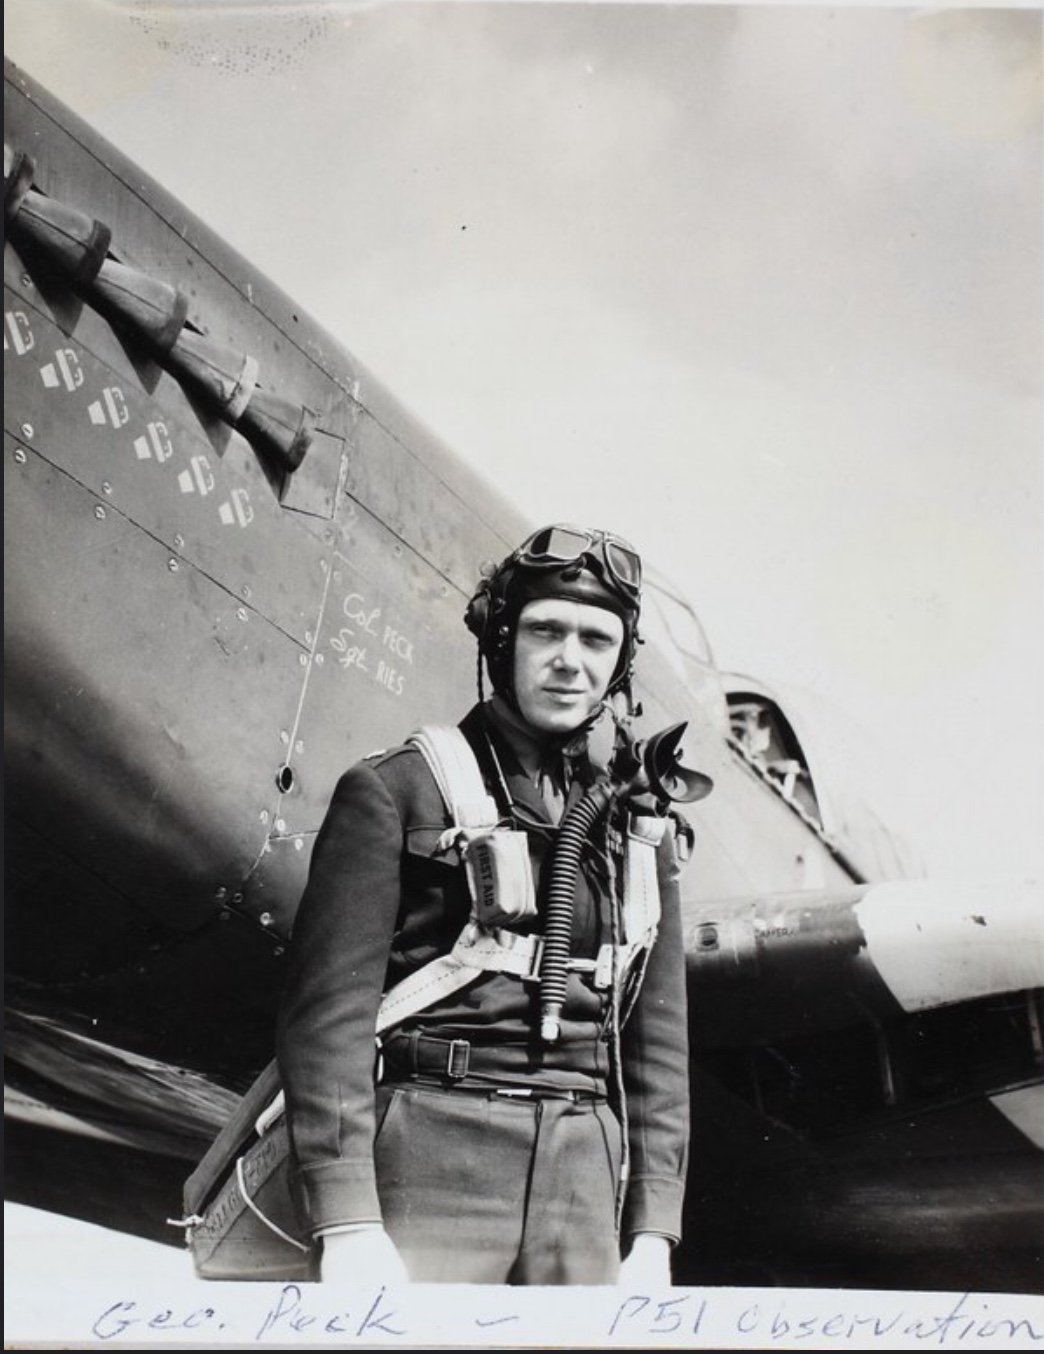
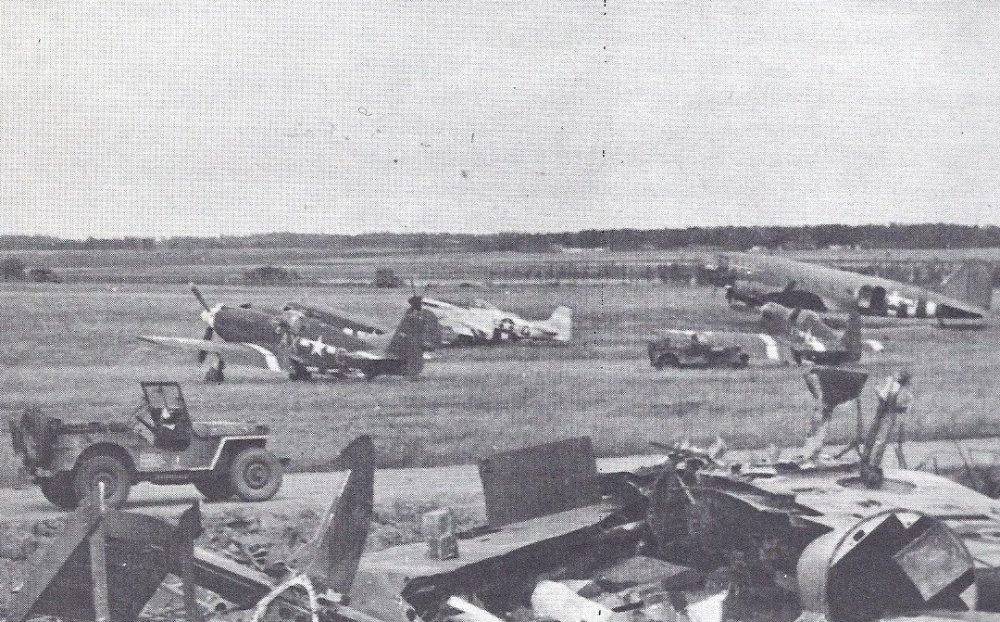
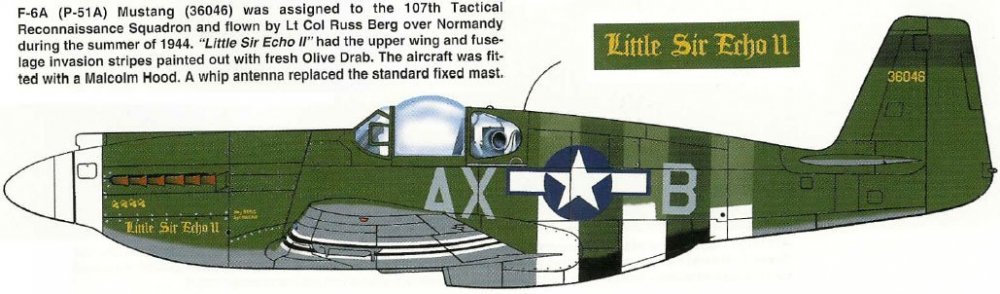
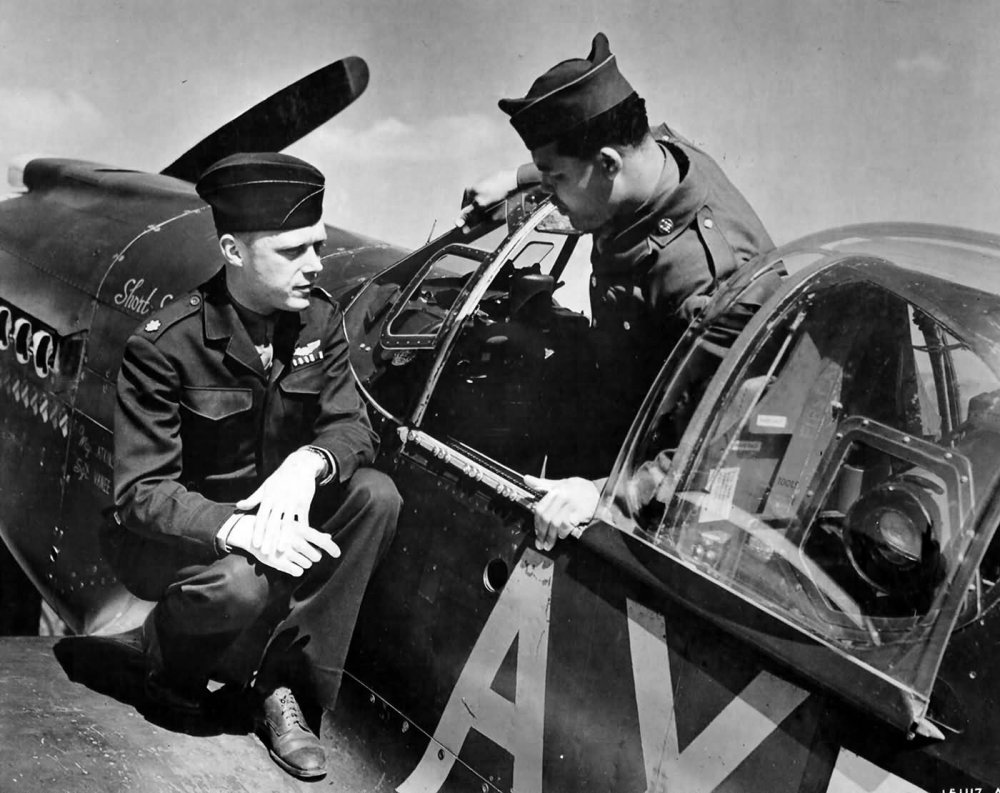
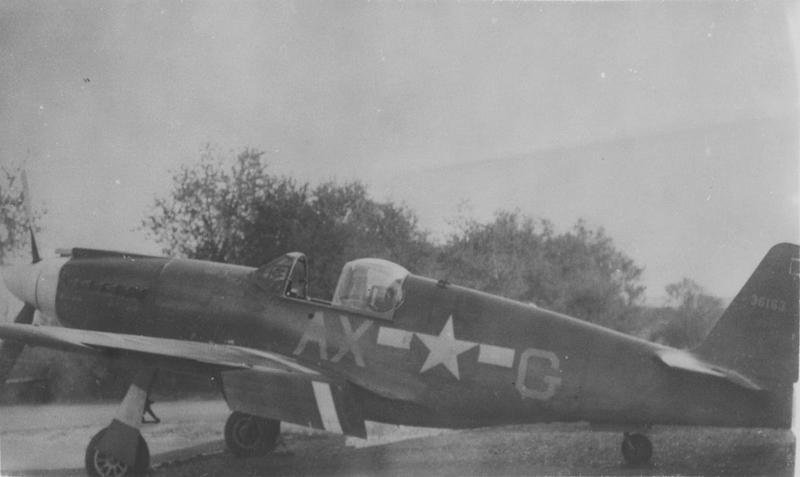
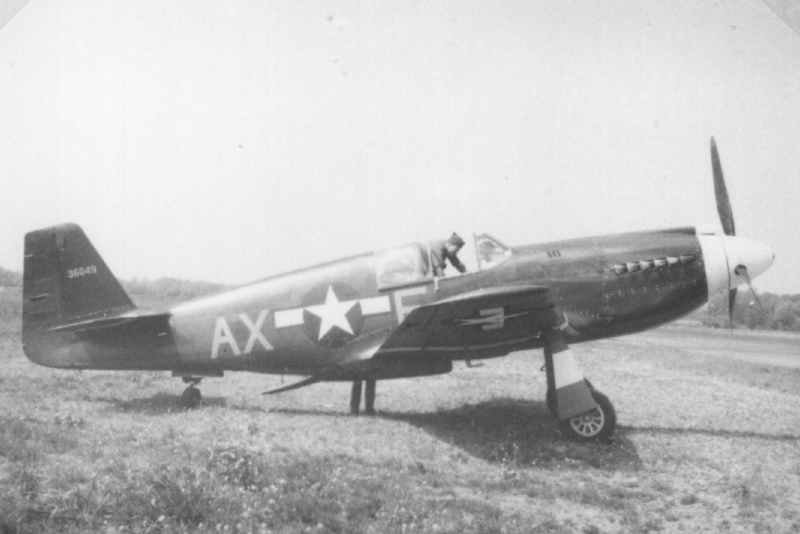
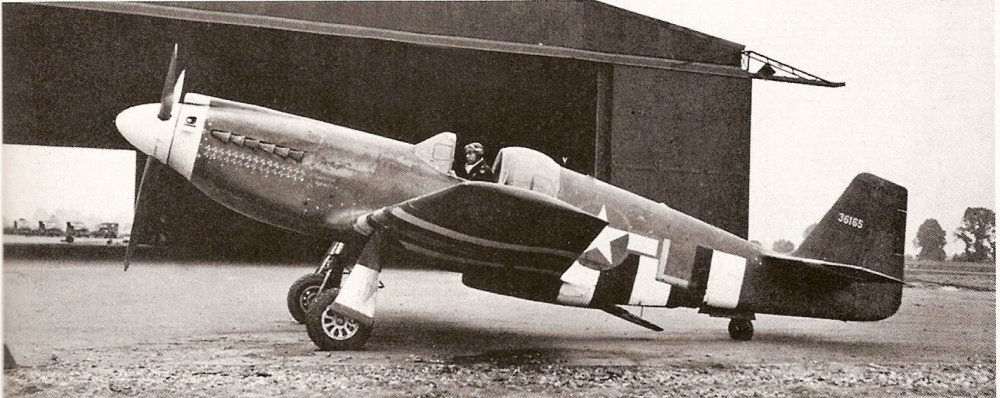
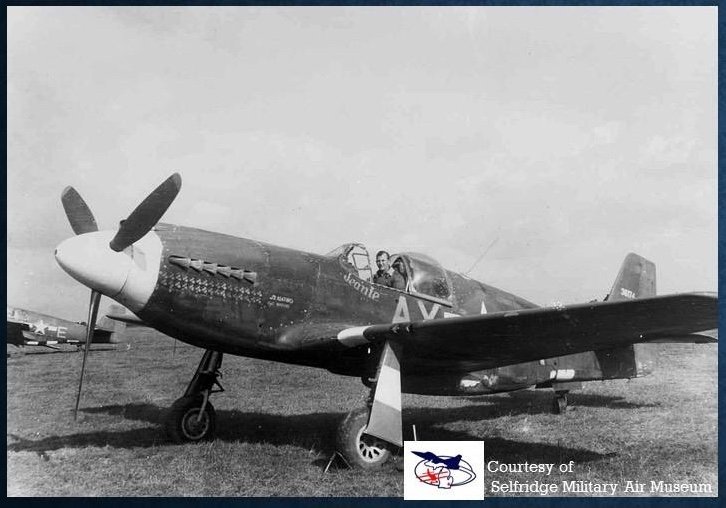
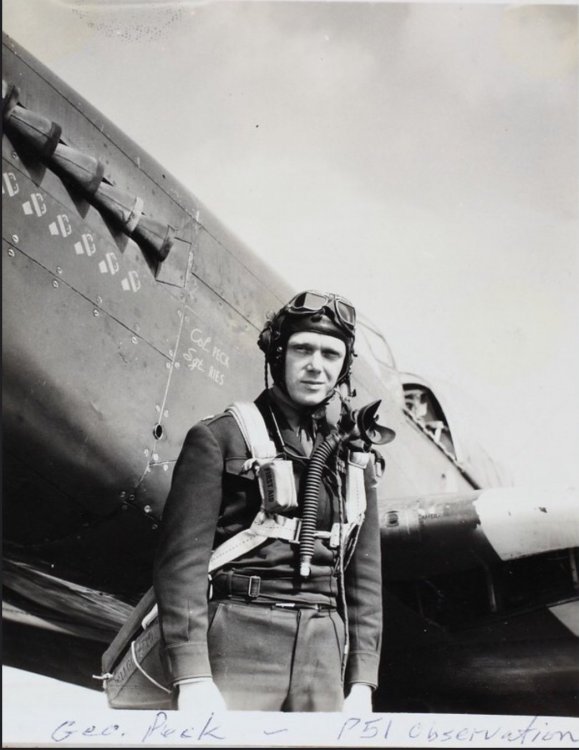
I have been compiling as much info as I can find on these mustangs, but there is almost none. I have a few books that offered some details, but not a lot on the individual Mustangs. All of the D-Day F6A’s were originally British spec and updated for the invasions, most had Malcom hoods that I could tell. I have been able find little if any photos of these aircraft. Here is what I have been able to figure out, any additional pics or info you have would be appreciated. F6A Mustangs AX-B 36046 “Little Sir Echo” Pilot - Lt.Col.Russ Berg. UK, August 1944. This F-6A was assigned to the 107th Tactical Reconnaissance Squadron and flown by Lt Col Russ Berg over Normandy during the summer of 1944. 'Little Sir Echo II' had the upper wing and fuselage invasion stripes painted out with fresh Olive Drab. The aircraft was fitted with a Malcolm Hood. A whip antenna replaced the standard fixed mast. AX-C 361?? AX-D 36160 Aircraft 436160 (10th TRS, 67th TRG, 9th AF) was involved in ground accident at RAF Middle Wallop airfield, Hampshire, England Jan 24, 1944(45?). Aircraft badly damaged, unknown if repaired. AX-E Or AX-F 36049 AX-G 36163 AX-H 36174 “Jeanie” AX-L 36165 AX-Q and AX-? 36??? AX-? 36??? “Short S????” LtCol George Peck with Loe Louis


-
Trumpeter P-47D Razorback
1to1scale replied to crazypoet's topic in LSM 1/35 and Larger Work In Progress
Nice! That’s a lot of tubing! -
Hobbycraft F6A D-Day - Ready for inspection!
1to1scale replied to 1to1scale's topic in D-Day 75th Anniversary Group Build
Thank you. The rest of the kit should be a breeze. -
Hobbycraft F6A D-Day - Ready for inspection!
1to1scale replied to 1to1scale's topic in D-Day 75th Anniversary Group Build
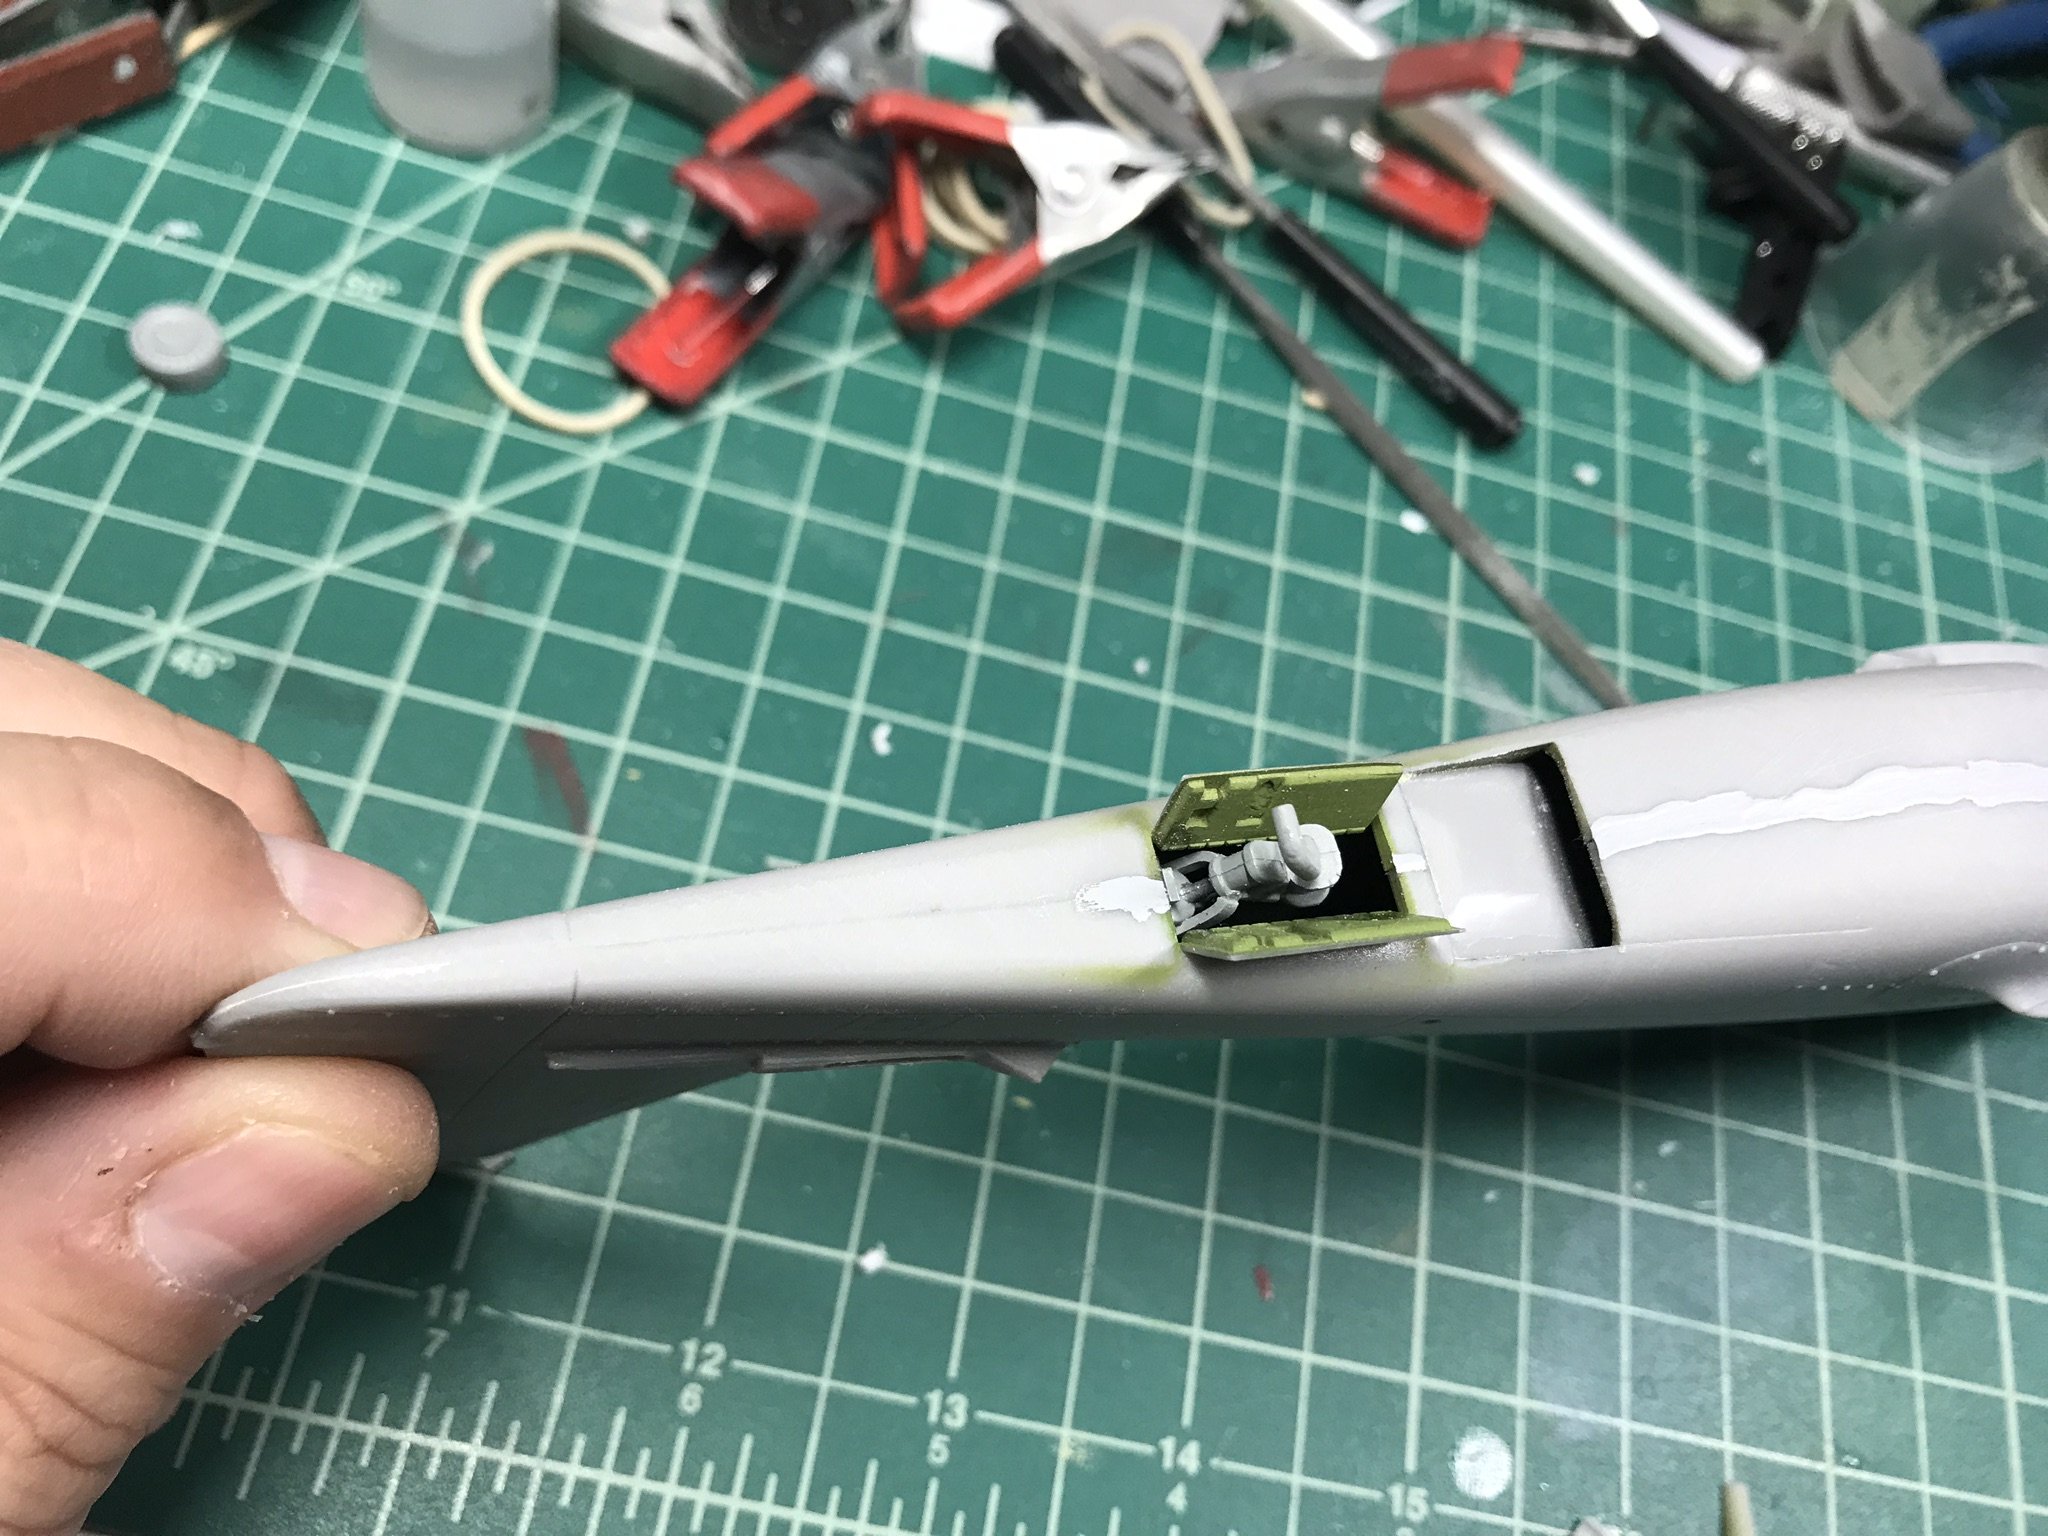
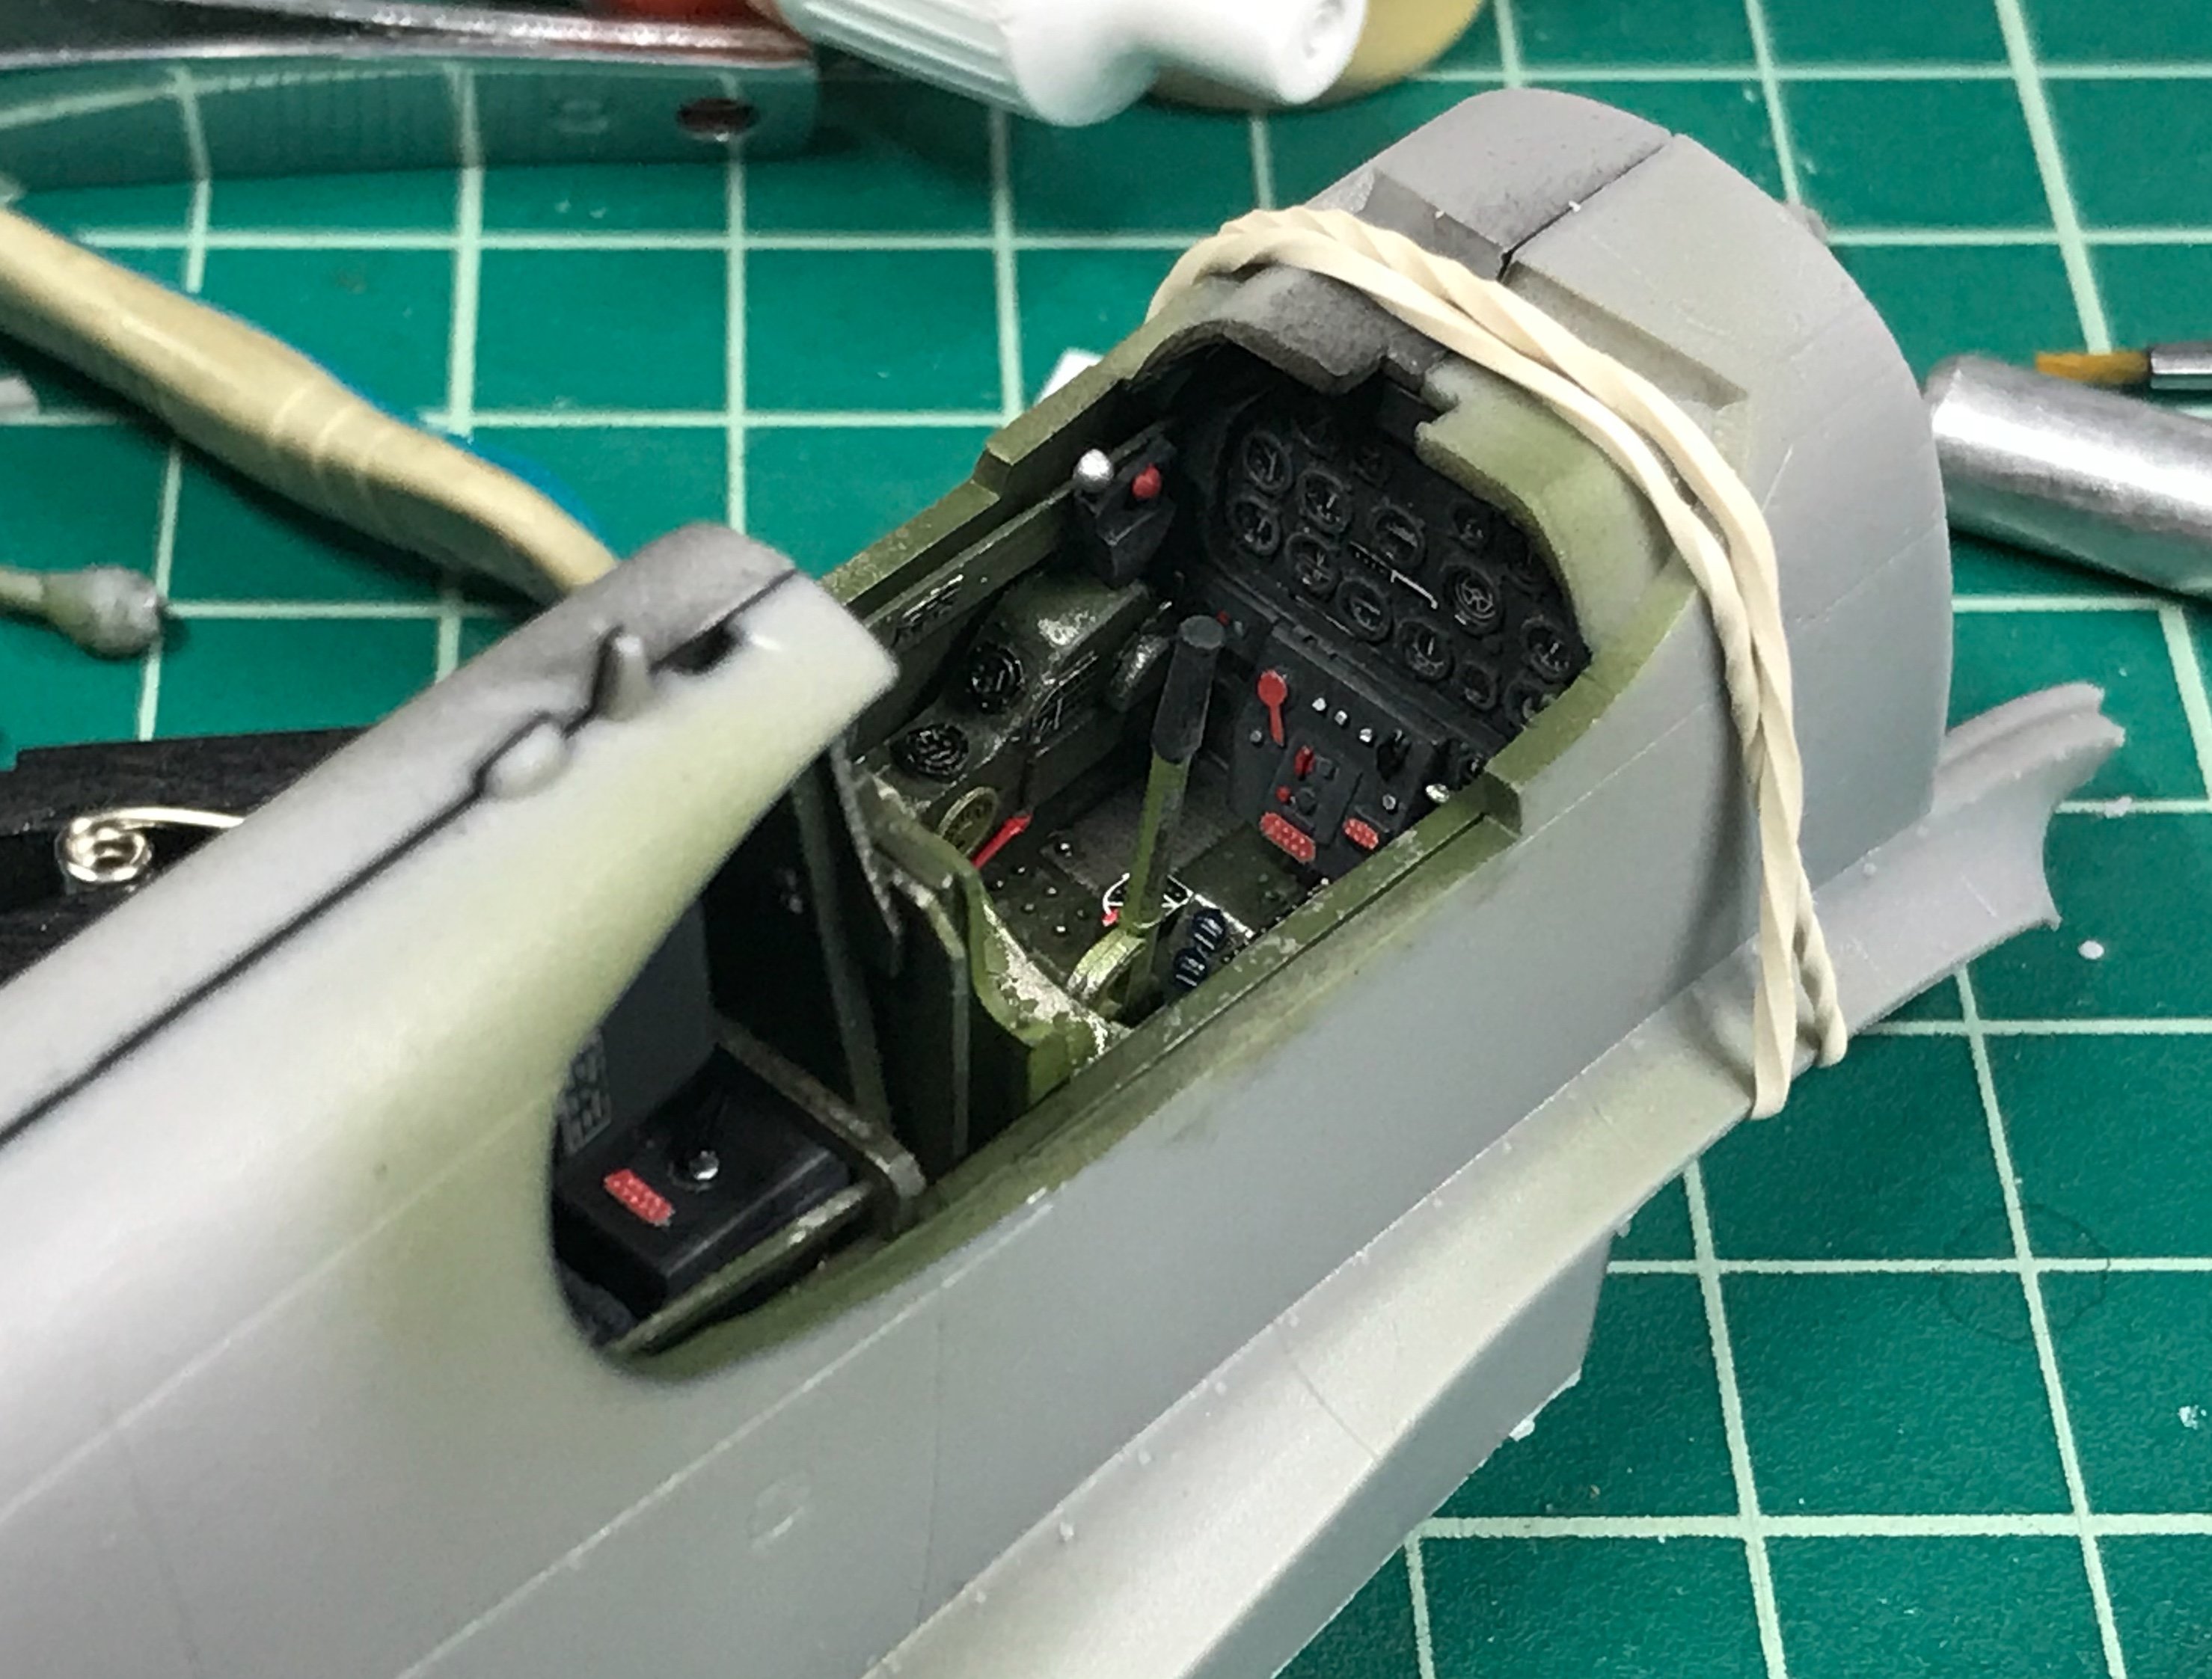
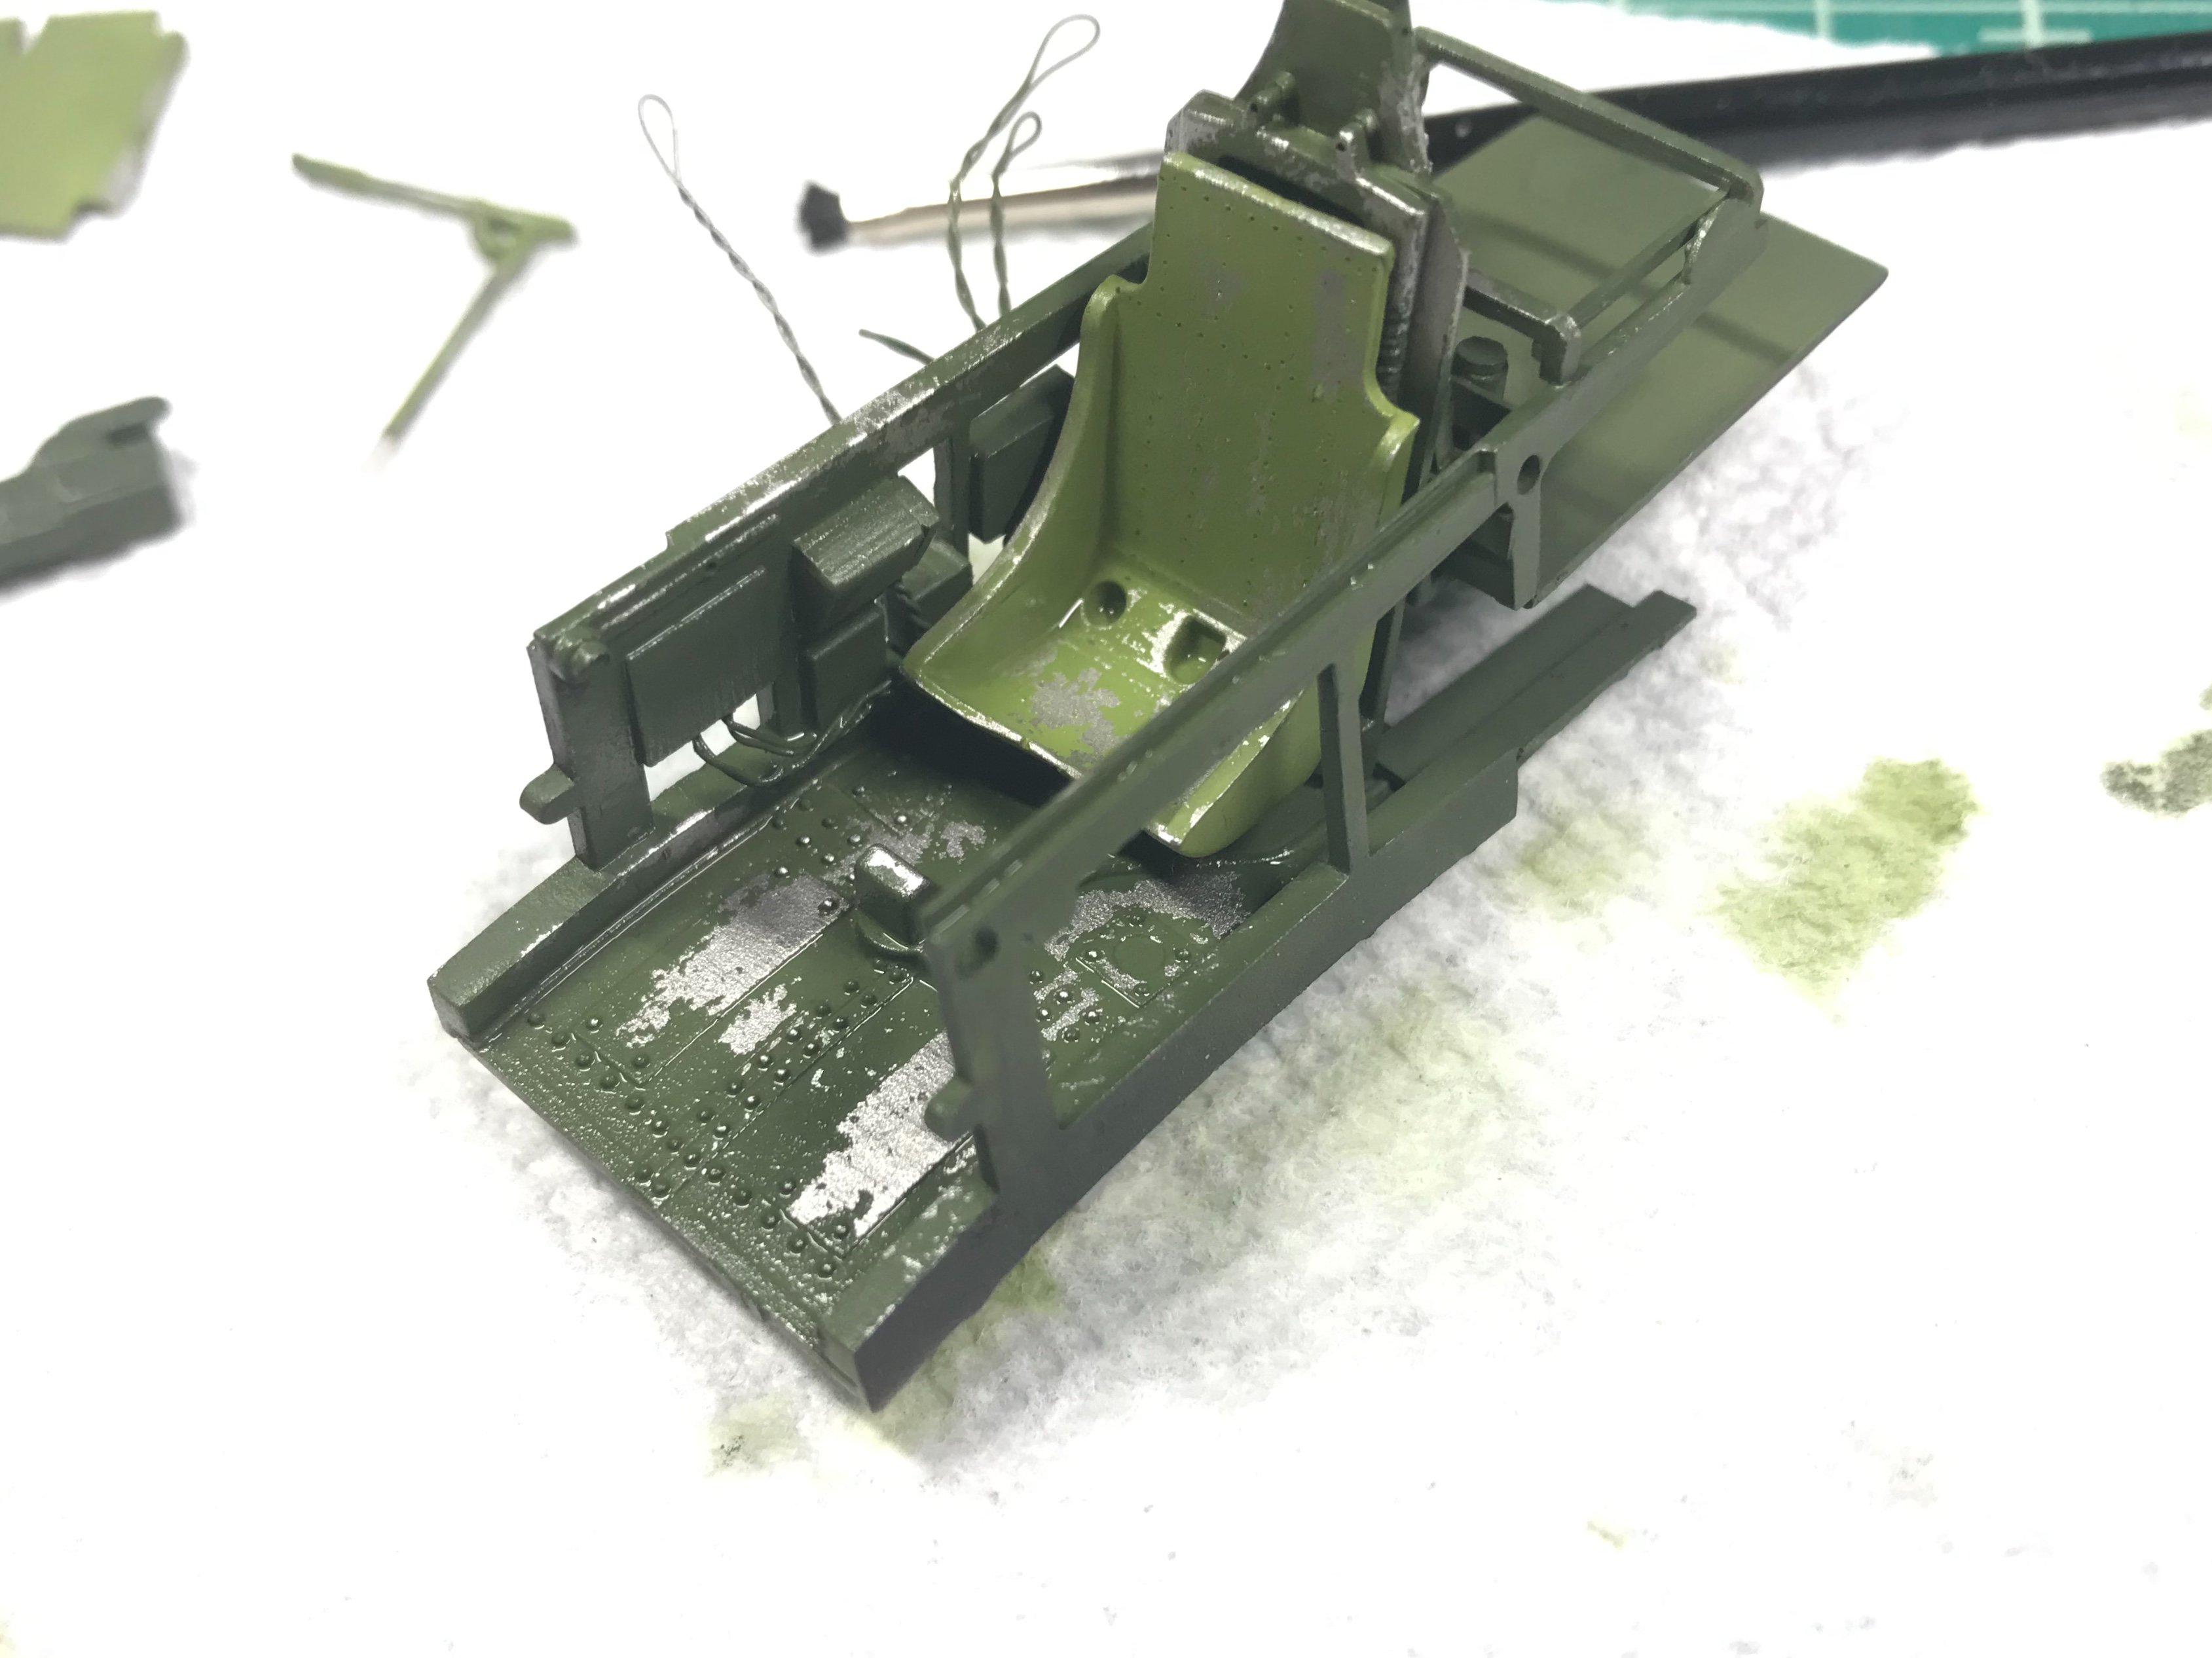
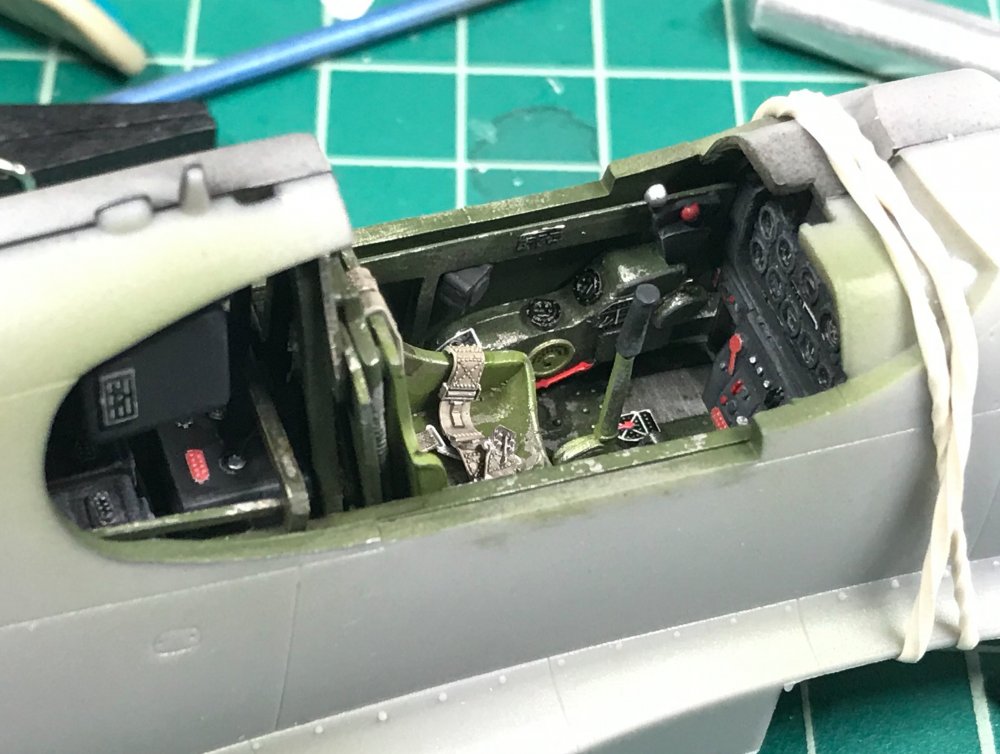
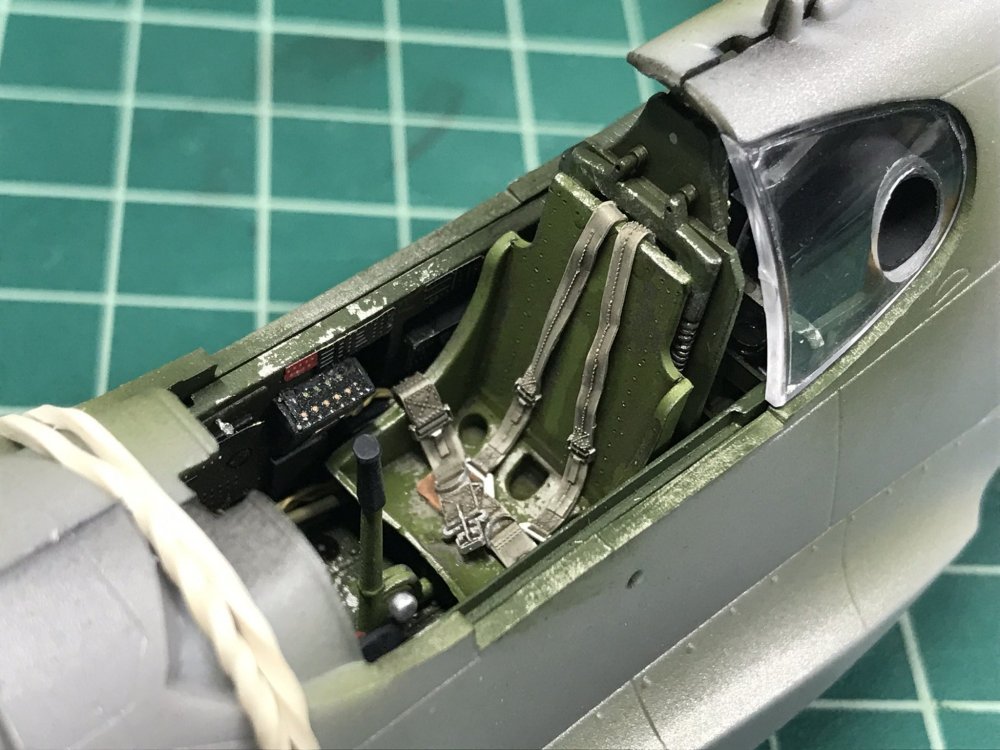
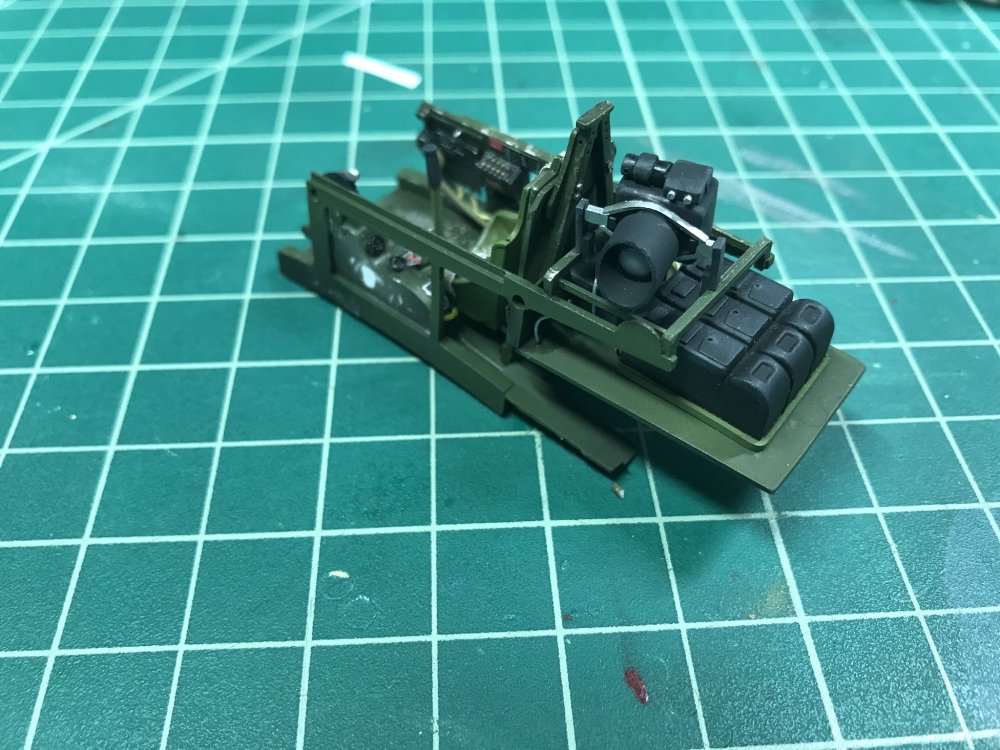
I started to close up the fuselage today, however, I discovered some fit issues. So back to some trimming. The fit issues were with the rear portions behind the armor plate. I had to trim the receiver board and camera mount, luckily, the cuts can’t be seen. I am also not very pleased with the self adhesive Edward PE, a couple pieces keep popping off. I’m going to have to give them a few dabs of CA. This was also the first time I used Fine Molds seat belts. I like them, they can be folded and painted, real quick. I started to built Edwards 97 part PE seatbelts, but i just did not have the patience for them, and remembered I had these. I like them. I did manage to get everything to fit, and I started to fit the wings. A little bit of sanding off burrs, and the wing gaps were amazingly tight. Things are rocking along now!
-
I'm not an expert, but I believe that early schemes, Silver and silver/black/white schemes had silver wells, and later with green/brown camo had sky undersides and wells. I think later gray/green planes had interior green. I believe the gear was always silver. Maybe someone here is a bit more of a spitfire expert.
-
Wingnut's Floating Gotha
1to1scale replied to seiran01's topic in LSM 1/35 and Larger Work In Progress
very nice! I can smell the tar. -
Hobbycraft F6A D-Day - Ready for inspection!
1to1scale replied to 1to1scale's topic in D-Day 75th Anniversary Group Build
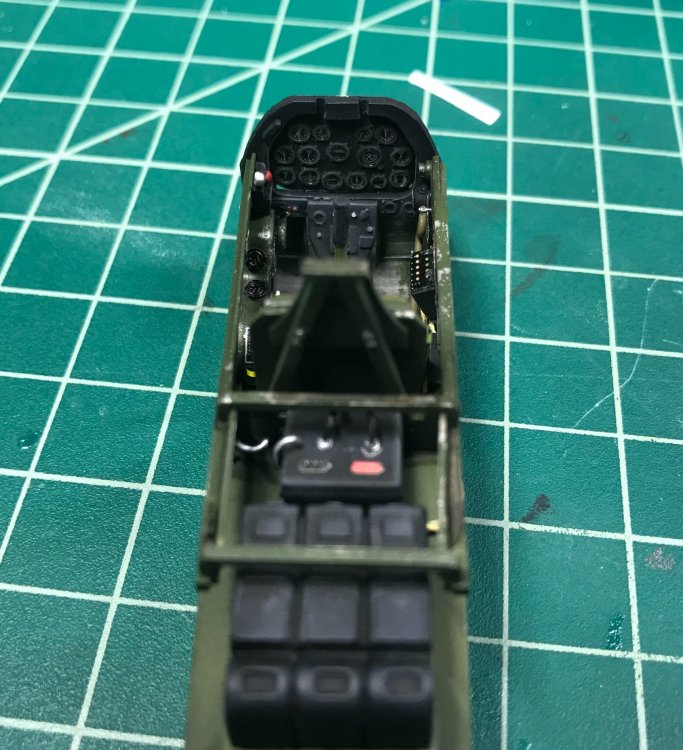
Long day of painting, PE, and weathering. Tomorrow I hope to get the IP done and get it all installed in the fuselage.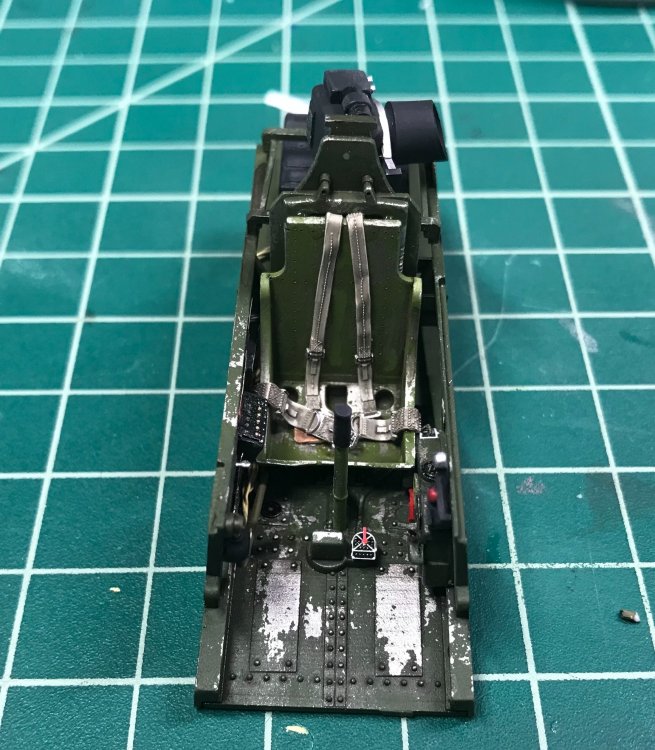

-
PCM's TA 152C as Racer
1to1scale replied to GazzaS's topic in LSM 1/32 and Larger Aircraft Ready for Inspection
very cool, maybe we can get a "racer" table for LSM at the Nats next year! I am inspired by your build and Tony's. -
Hobbycraft F6A D-Day - Ready for inspection!
1to1scale replied to 1to1scale's topic in D-Day 75th Anniversary Group Build
I have been saying that for a long time, everything is pretty accurate, just lacking in definition. This is the second hobbycraft mustang I built, didn’t need a resin cockpit for either. I hope sombody buys he molds and re-issues the kits. -
Hobbycraft F6A D-Day - Ready for inspection!
1to1scale replied to 1to1scale's topic in D-Day 75th Anniversary Group Build
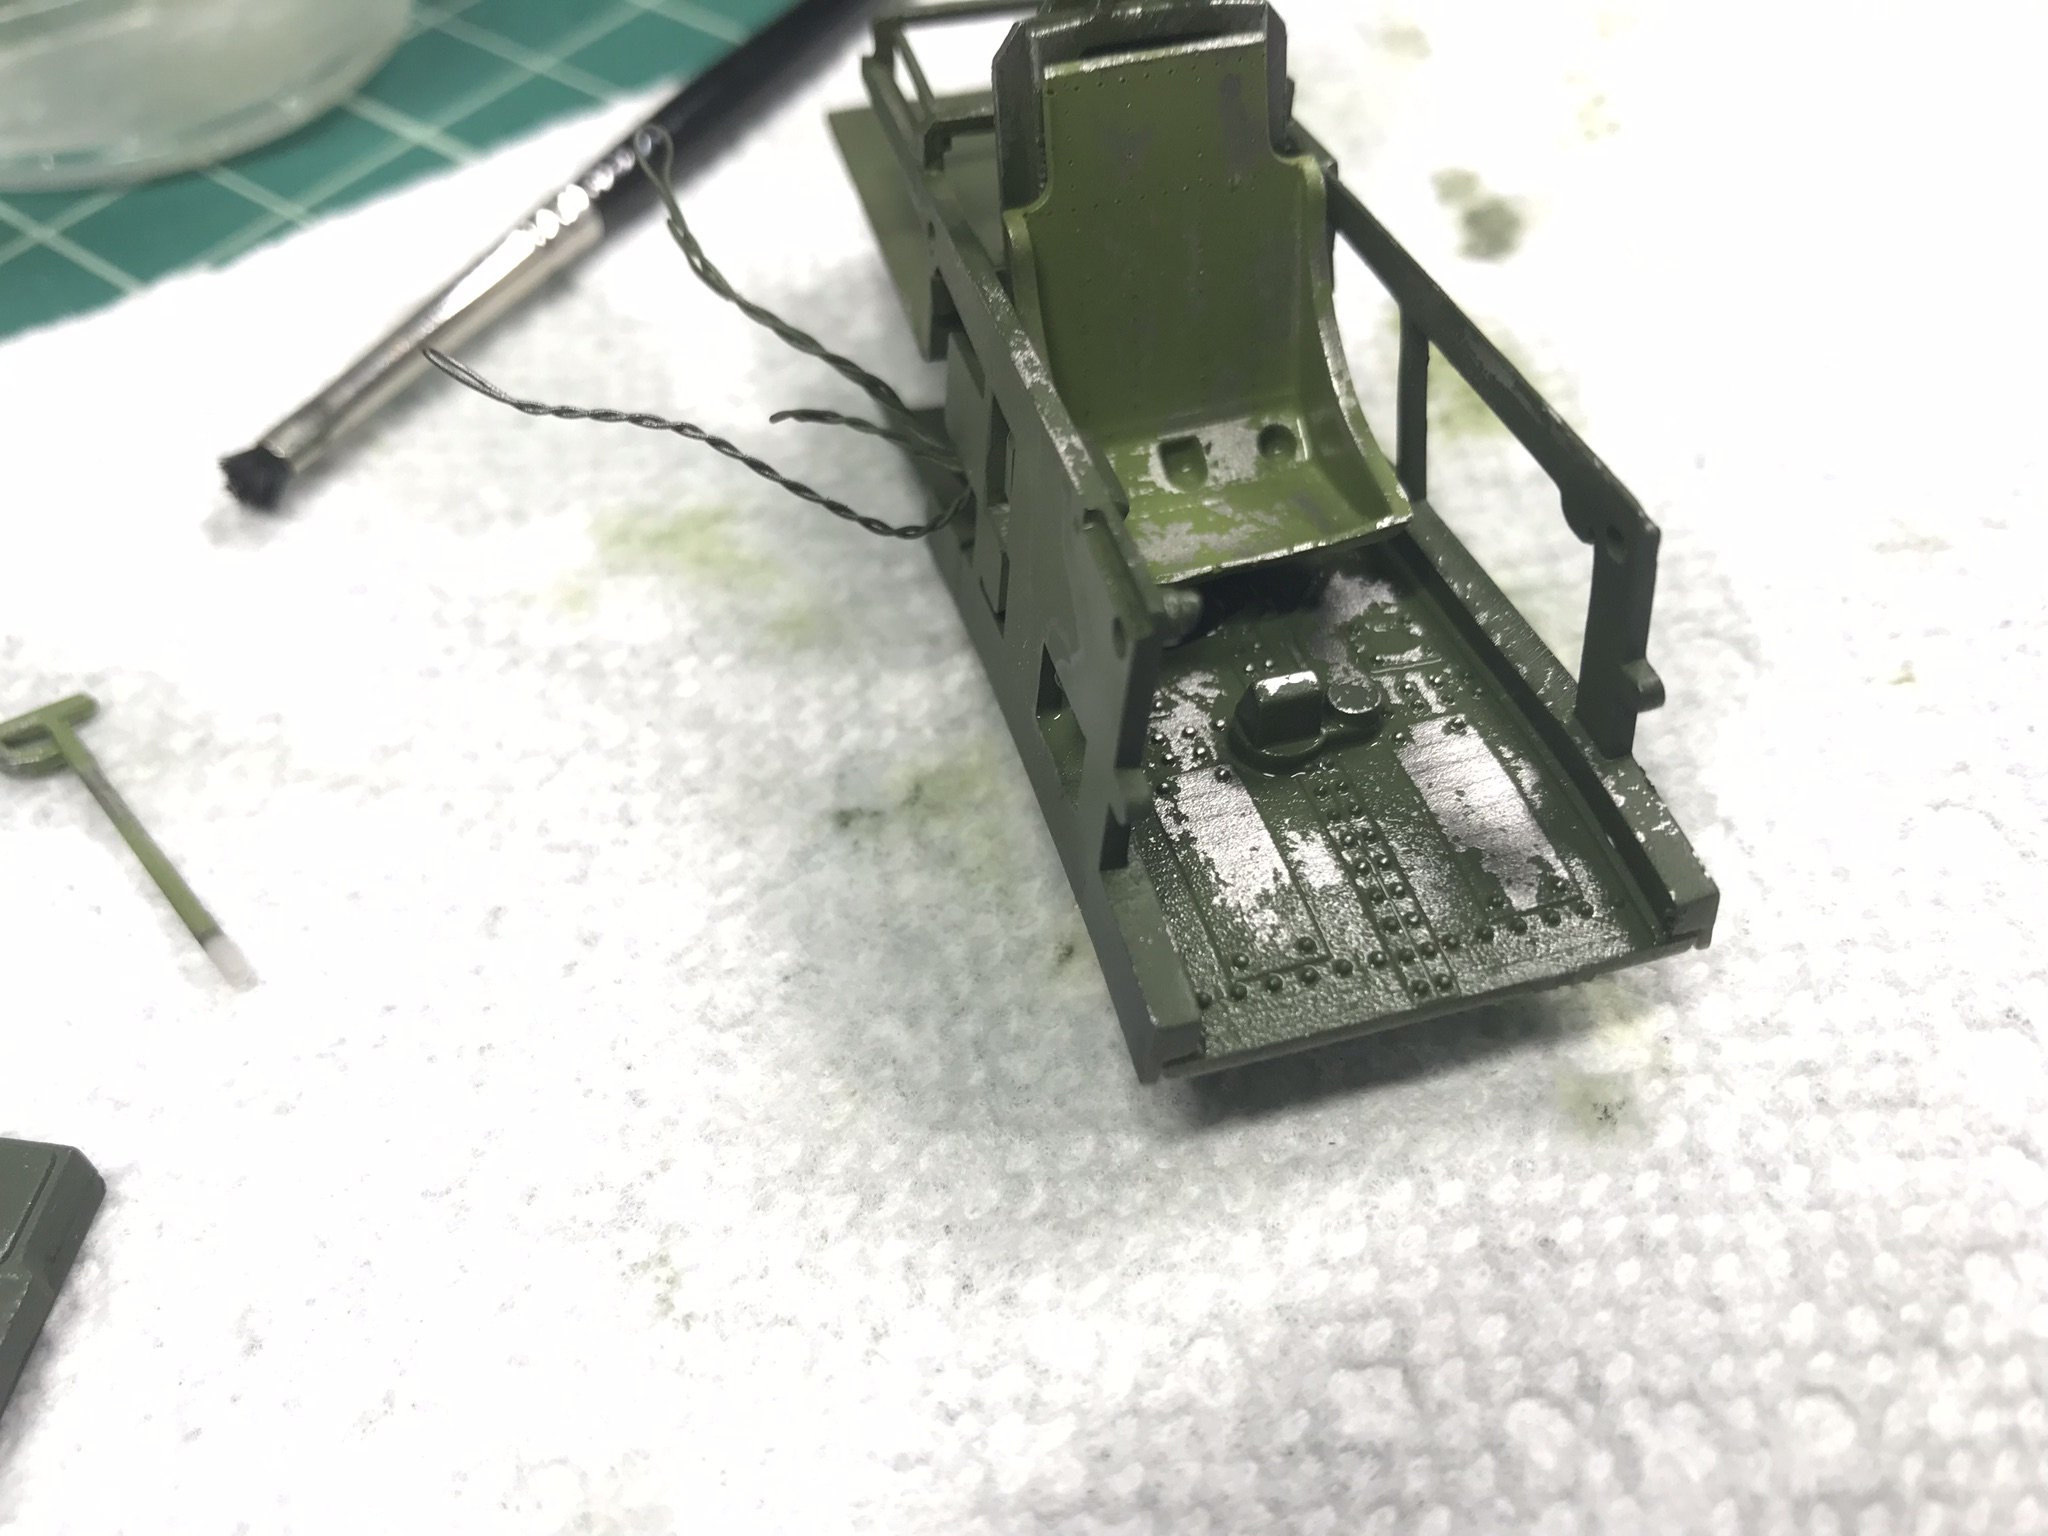
Did paint this morning and went straight to chipping, just waiting for it to dry so I can shoot clear on it.

-
1/32 Trumpeter F6F-5 Hellcat
1to1scale replied to Ryan's topic in LSM 1/35 and Larger Work In Progress
Thank you for getting rid of the girder rivets on the back wall! They were hurting my eyes!