GazzaS
-
Posts
6,396 -
Joined
-
Last visited
Content Type
Profiles
Forums
Events
Gallery
Everything posted by GazzaS
-
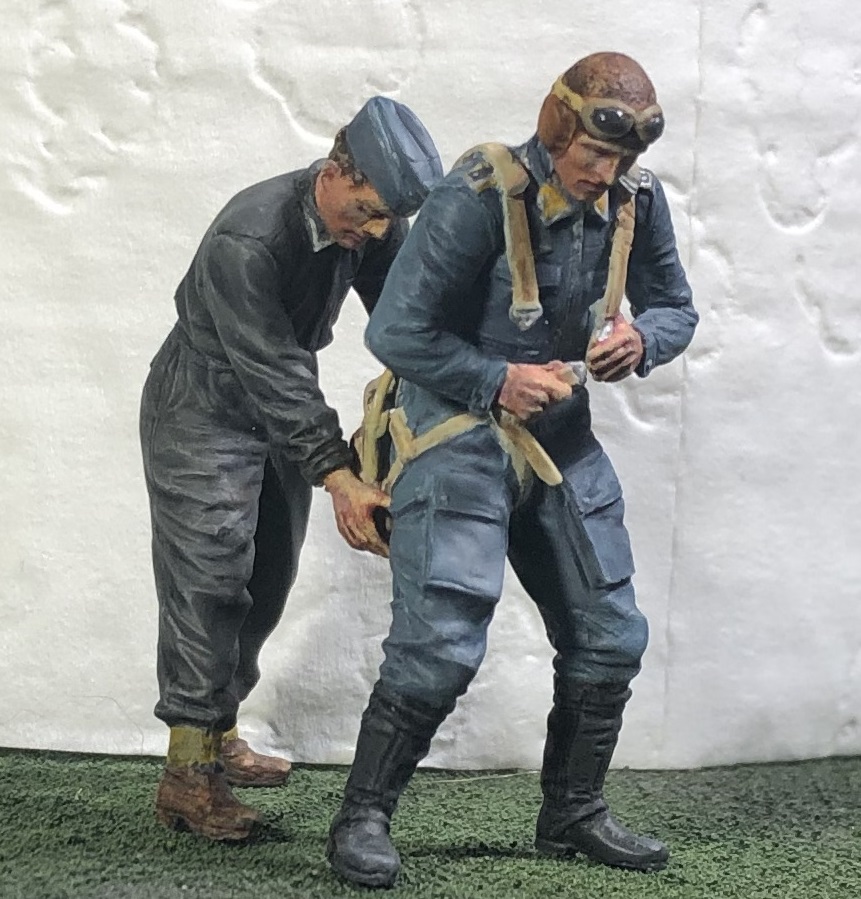
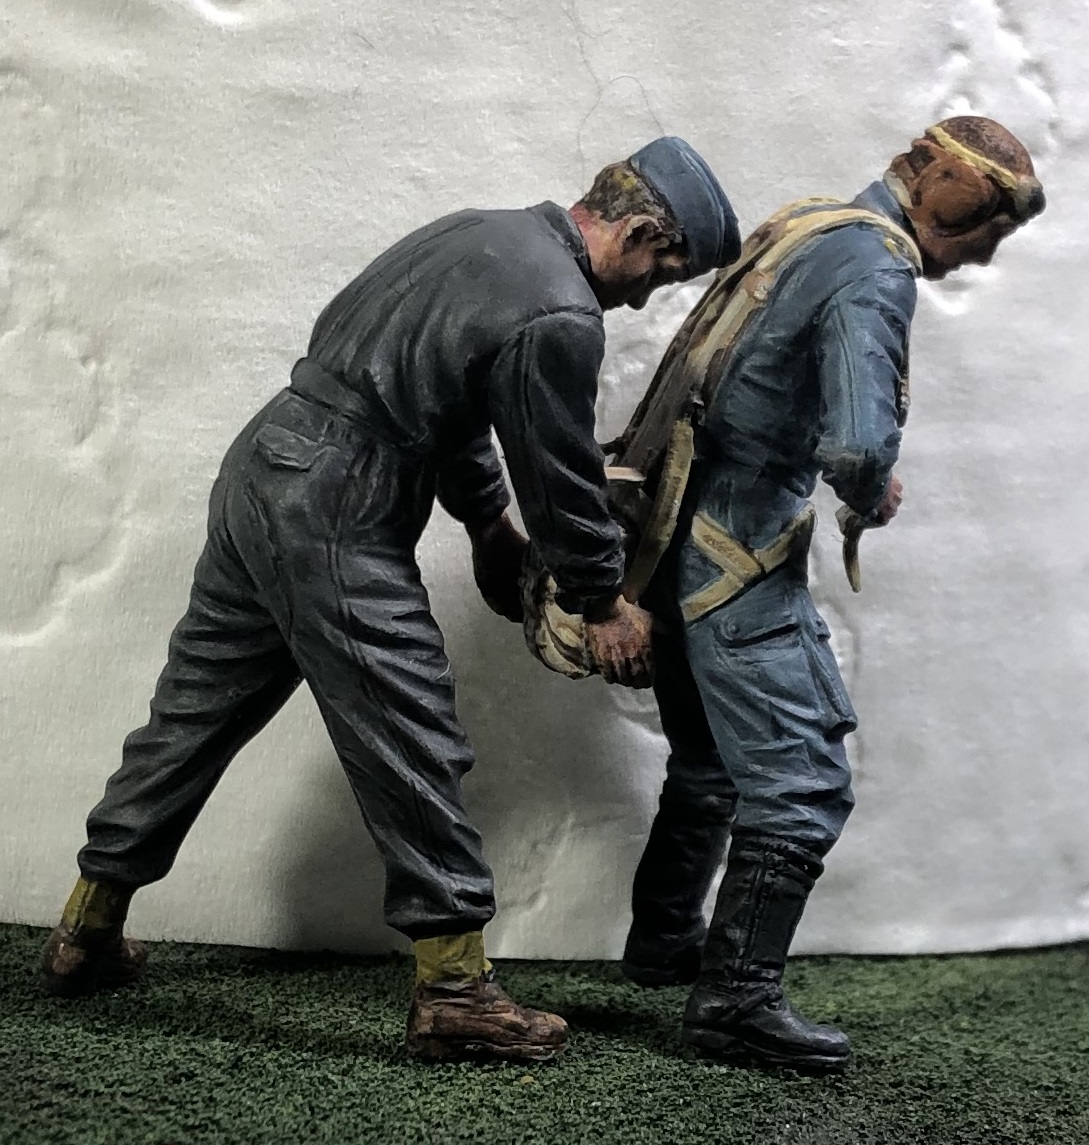
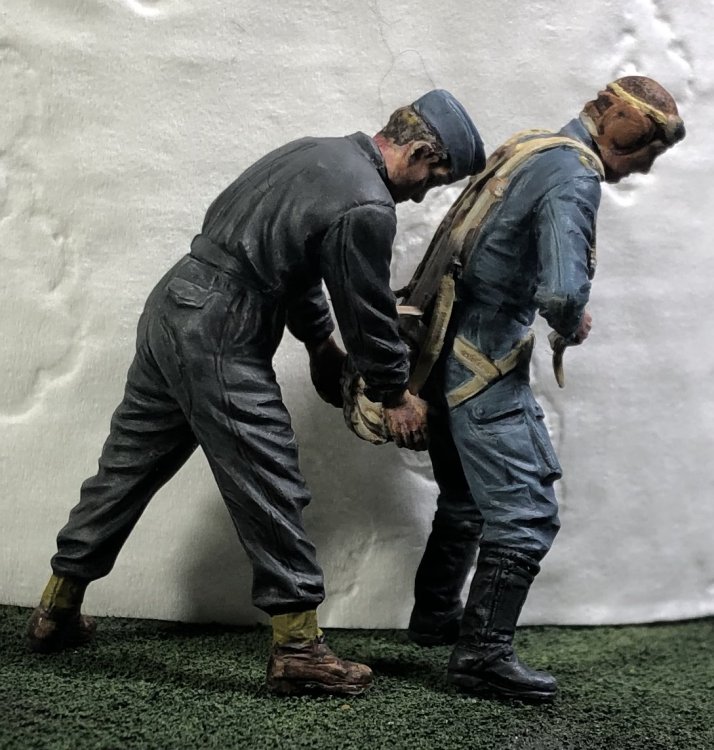
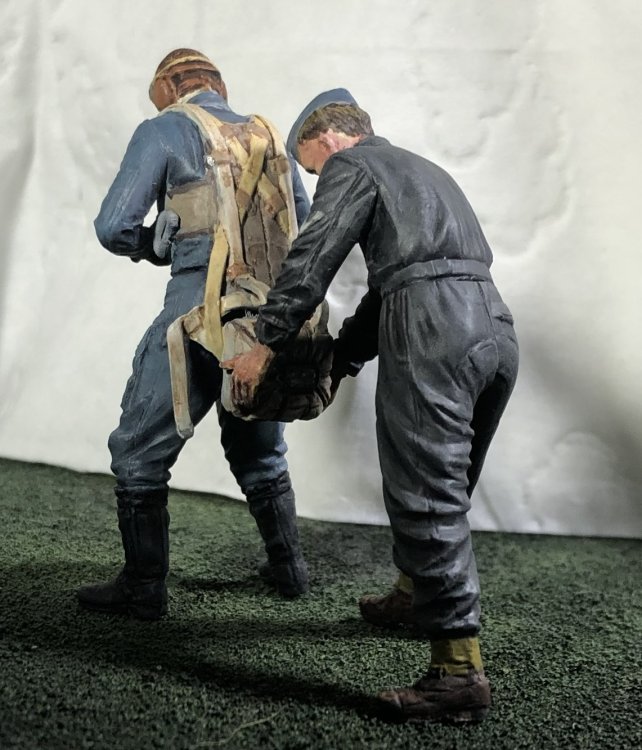
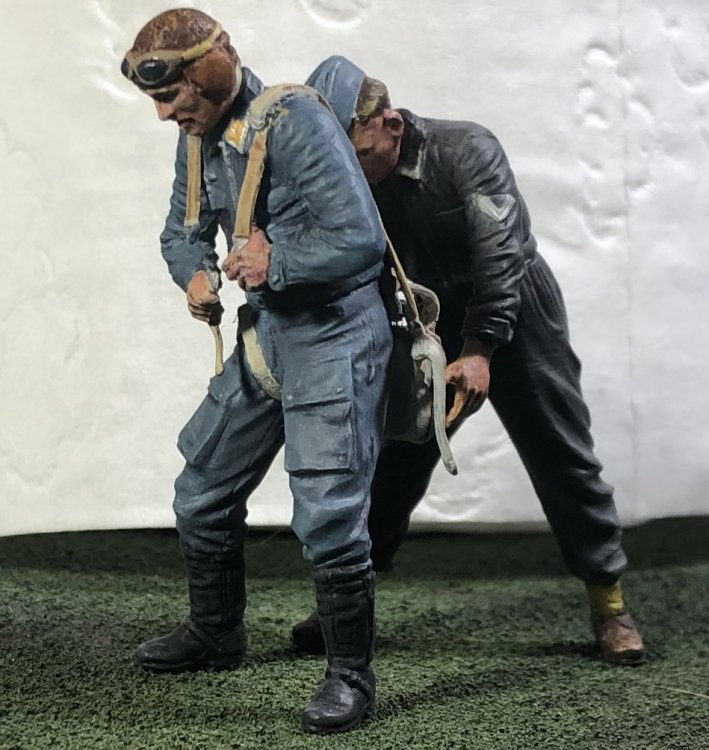
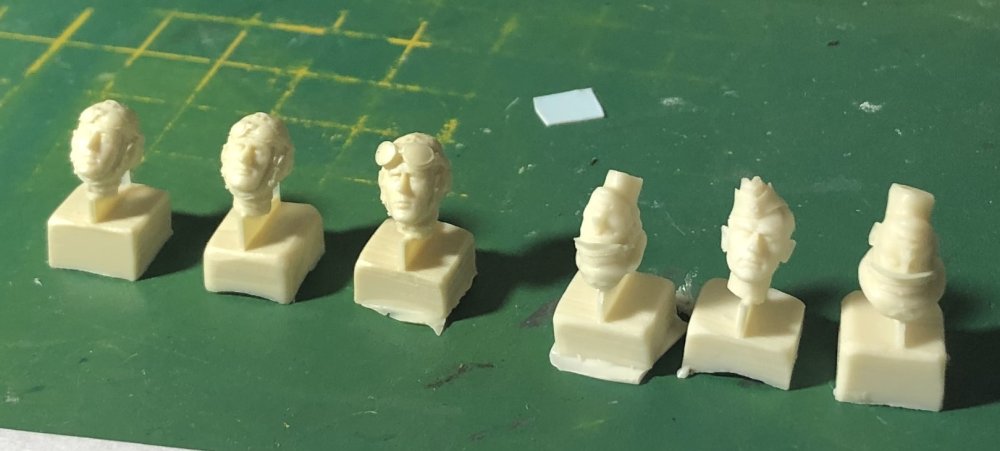
 HI everyone... I'm close! So close. So close that I won't post any aircraft pics and spoil... the ummm... surprise. But I am done with pilot and ground crew guy. Here they are... \ My figures still suck... I painted all of the uniform details by hand, using my reading glasses combined with my visor to eneable me to paint the tiniest of marks. You might be able to see that my pilot Feldwebel has three sets of wings on his yellow collar patches. And the canvas of the parachute. I hate painting canvas. It always looks different than the way I want. Either too yellow, too brown, or too white. PITA. Anyway. Happy modelling!
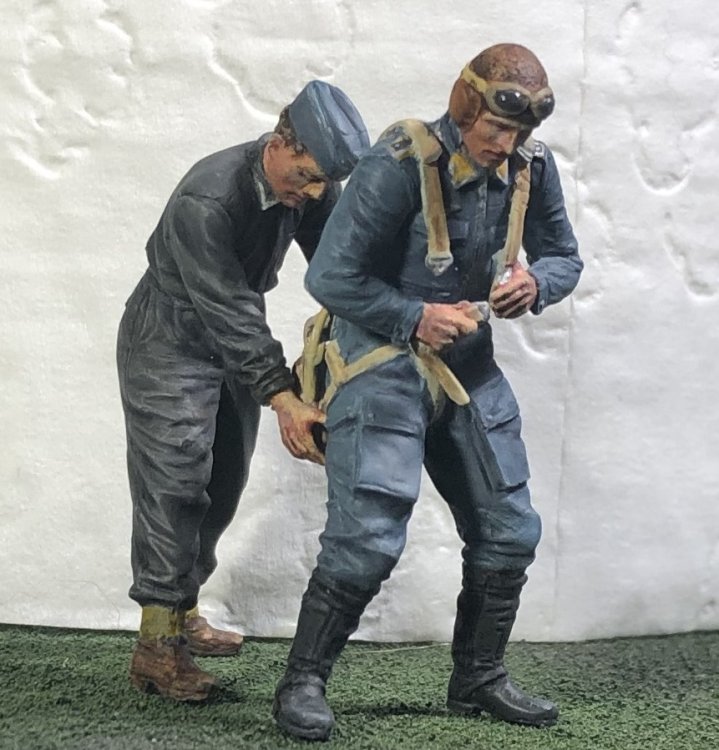
-
HK Models 1:32 A-20G Test Sample - WIP
GazzaS replied to Fran's topic in LSM 1/35 and Larger Work In Progress
Will love watching! -
Ooh... PE frame! I'd be running for cover. My father likes truck models. Me... not so much. But I will be looking in.
-
Closing the store?? Awe shit man... that sucks. Are you transferring to another place? But your paintwork is lovely.
-
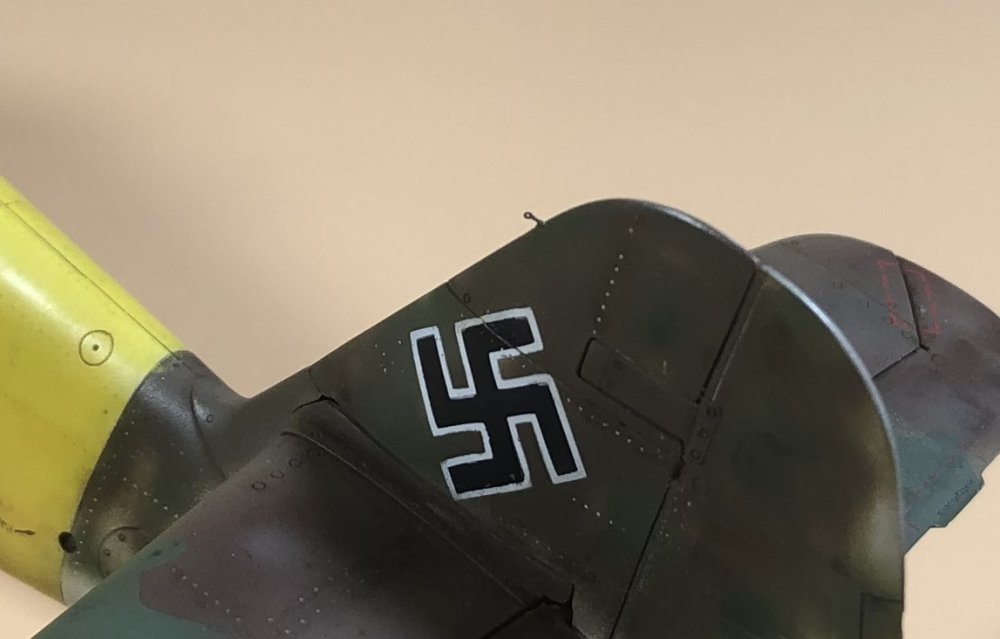
Love your paintwork! Monochrome schemes are always a challenge. Glad to see Luftwaffe insignia neatly applied, too.
-
GWH Curtiss P-40B; The Flying Tigers
GazzaS replied to Peterpools's topic in LSM 1/35 and Larger Work In Progress
Peter... Whatever the problems... It looks like it should. Like a shark ready to pounce. And you're paving the way. I found guys who were working on their ZM 109's after me worked things out differently than I did with better results. The kit does sound over-engineered. One thing I don't like is having all of those barrels protruding when there is so much more work to do. I also like that you took the sensible steps to replace PE with card. Keep up the good work! She'll look brilliant with that big, menacing AVG grin. -
Oh, Oh!!! We forgot to mention the biggest thing! The Revell main landing gear are trash. Weak with a split construction that makes no sense. I used brass gear on my kit, and then bought another set by SOW for the G-10 in my stash.
-
Thank you, Kevin! I had to look, and I think that red line disappeared with the E-model. You did however, help me to realize I;d forgotten some LG decals.
-
Still more expensive than the Revell kit. But more accurate, and generally a fun kit to build.
-
Oh yeah!
- 2,035 replies
-
- 6
-

-
- car related stuff
- anything about cars
- (and 6 more)
-
Looks the same as the old one. Guess it couldn't get any stealthy-er.
-
The cost is probably not dissimilar once the AM is added in.
-
Thank you, Chris. Very kind words.
-
Fisher F9F Twogar done
GazzaS replied to JohnB's topic in LSM 1/32 and Larger Aircraft Ready for Inspection
Wonderful job, John! -
Thank you, fellas.
-
And yet some people over at TOS act like Revell makes good models.
-
Barracuda, Alleycat, and Quickboost are your friends. This is my recent revell G6 build.
-
I'm in. With a $50 USD equivalent voucher from the winner's preferred store providing it can be wrangled online. Otherwise, Hannant's. Postage of kits from AU is horrible.
-
Would the airflow be smooth at all points around the cowl? Or is there a step where the airflow has to change to move around it?
-
Fisher Twogar back on the bench
GazzaS replied to JohnB's topic in LSM 1/35 and Larger Work In Progress
Ooh, very nice, John! -
Though I don't have the model in front of me... Is there a step?
-
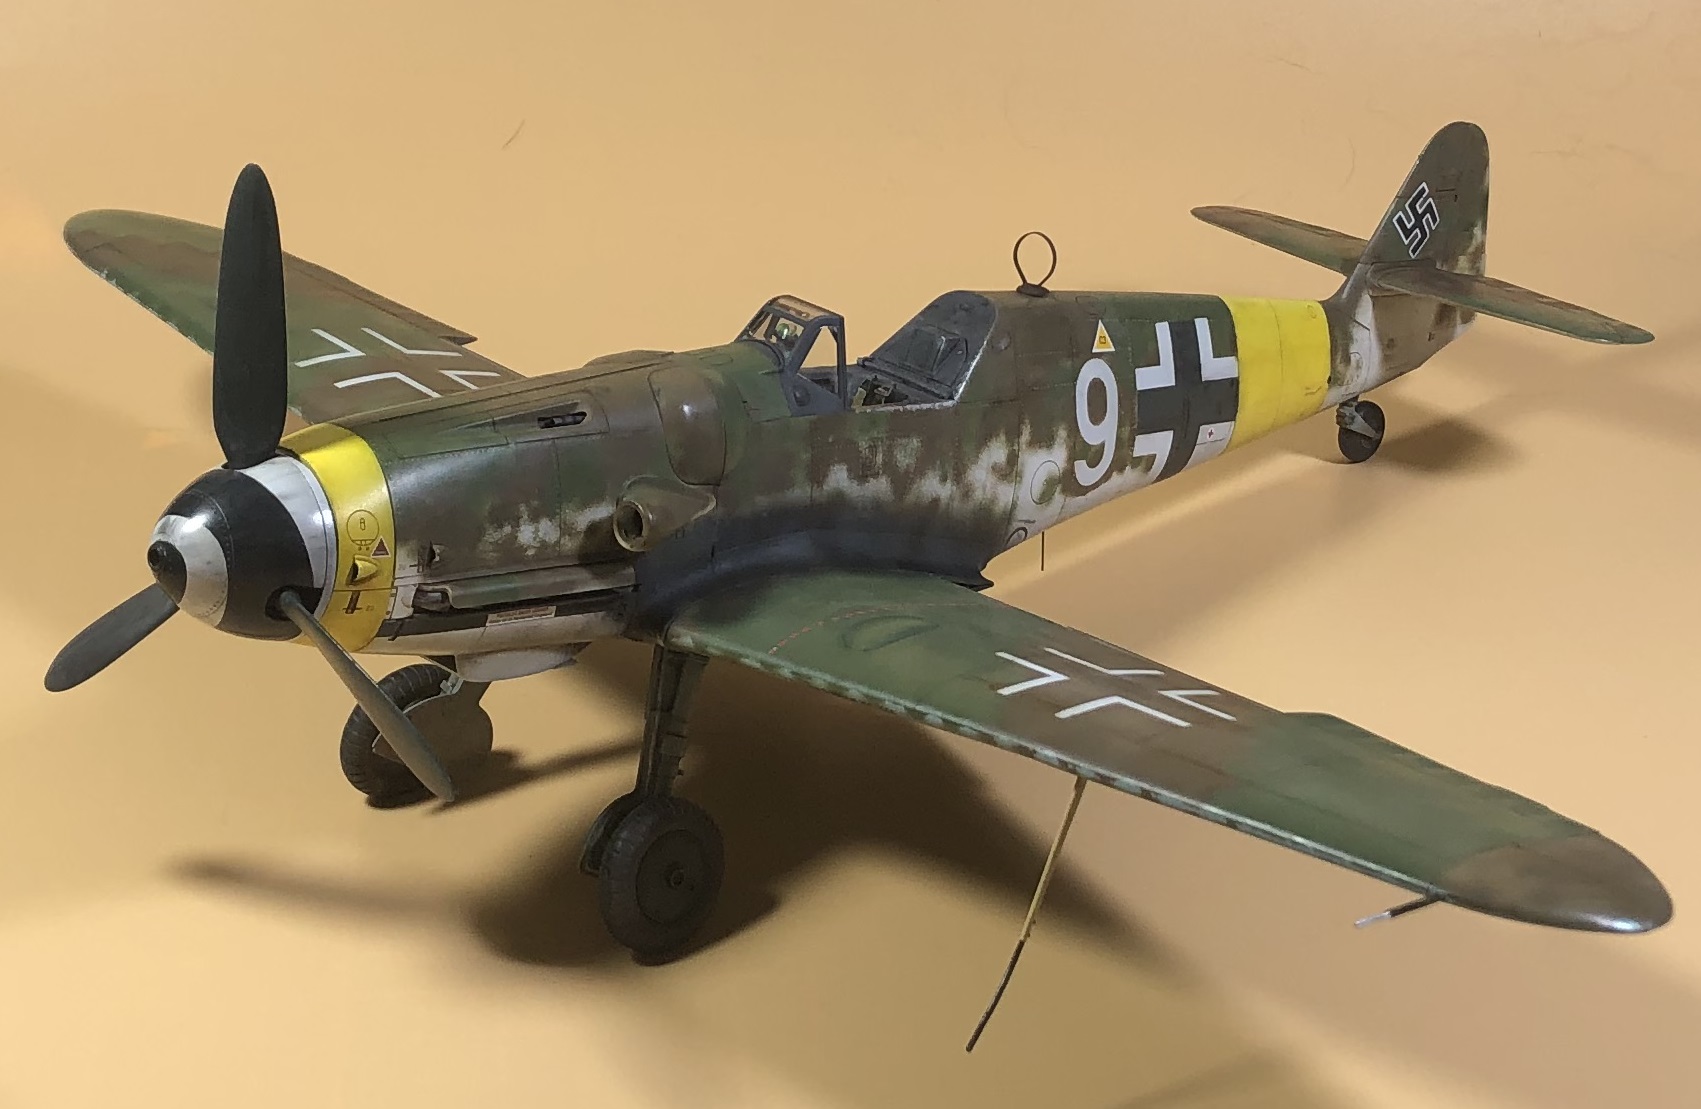
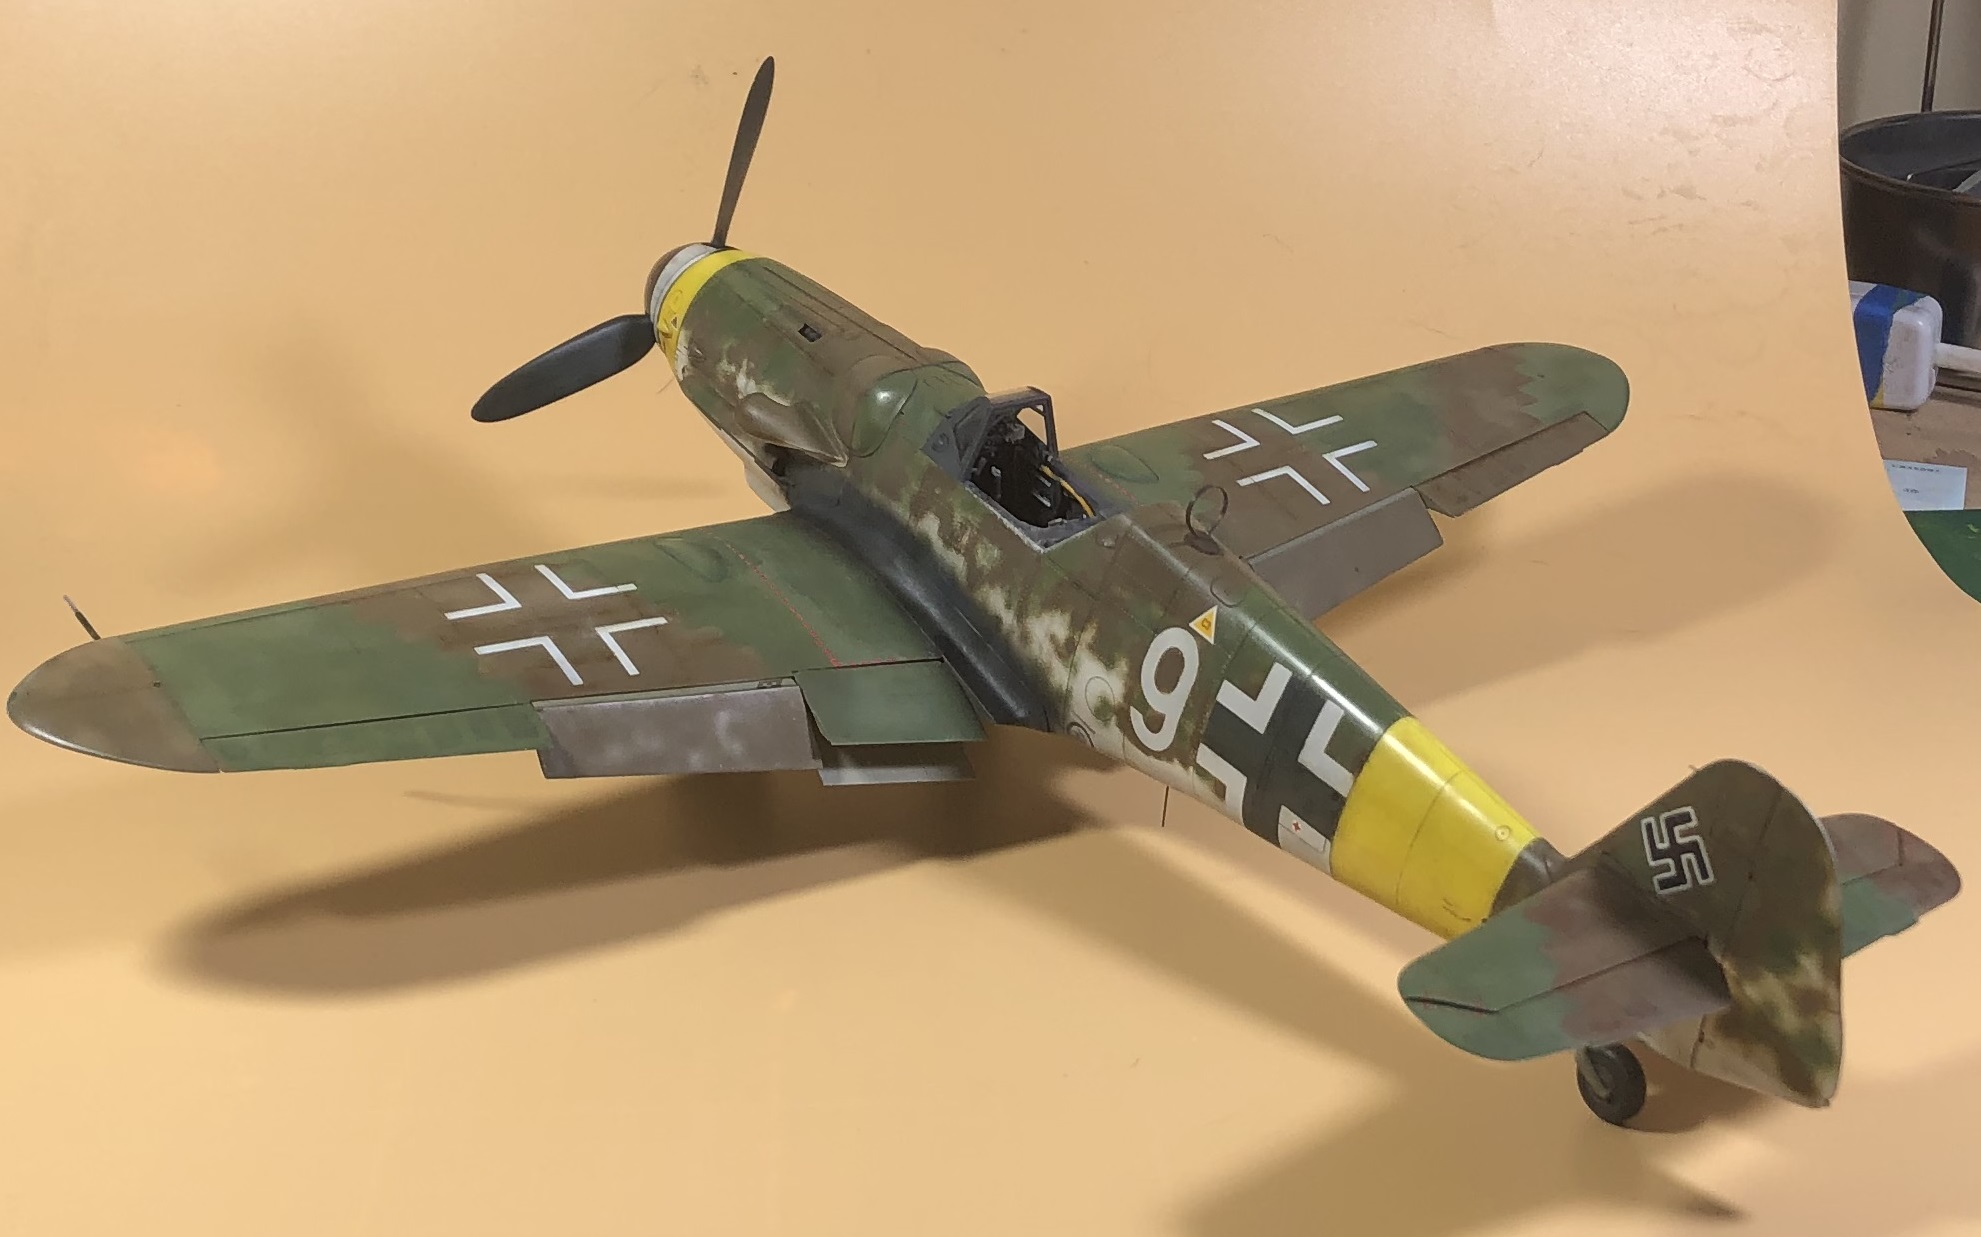
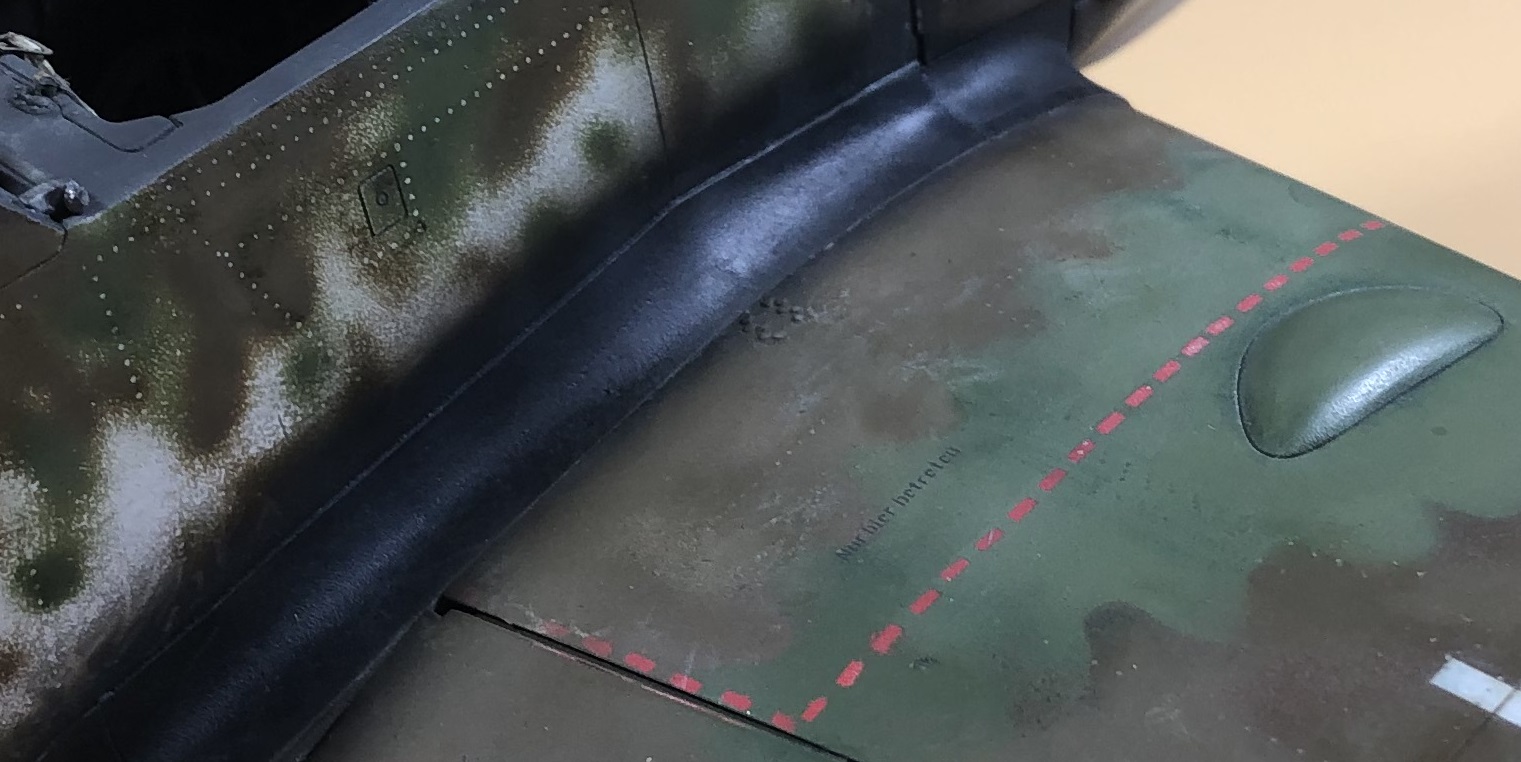
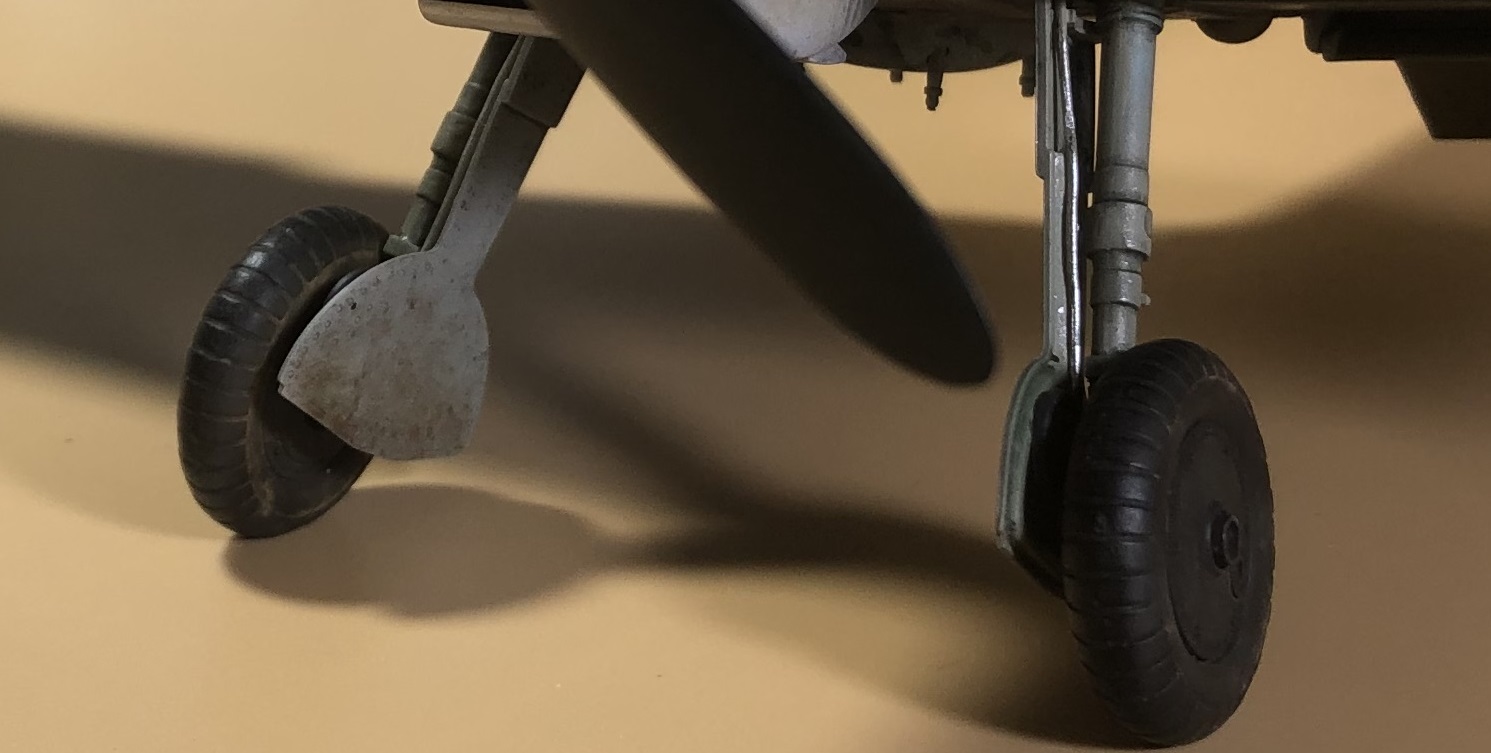
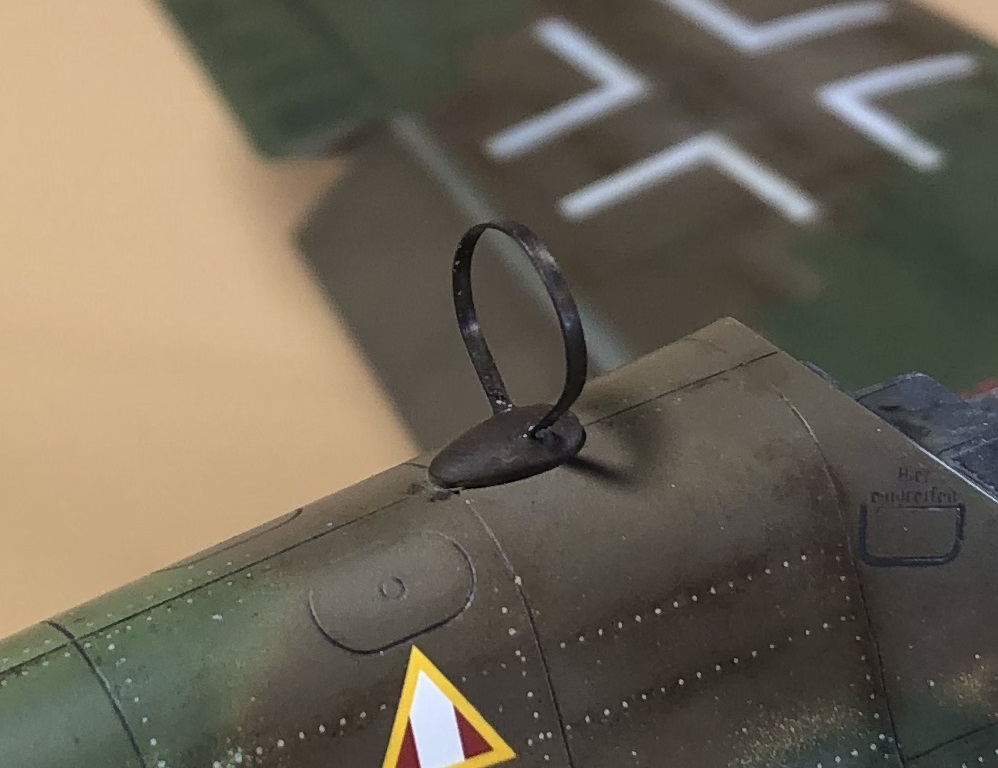
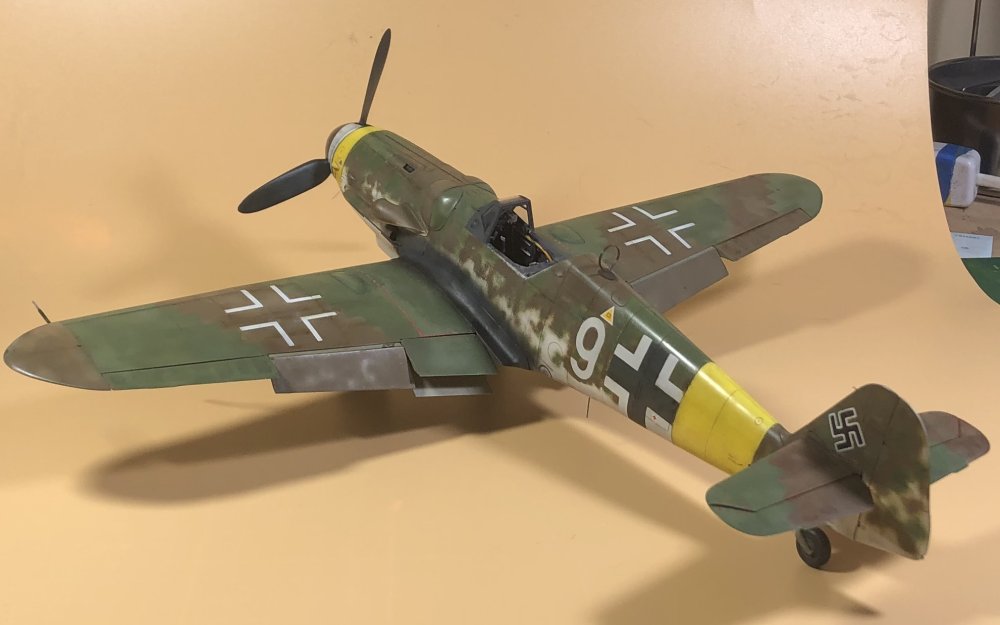
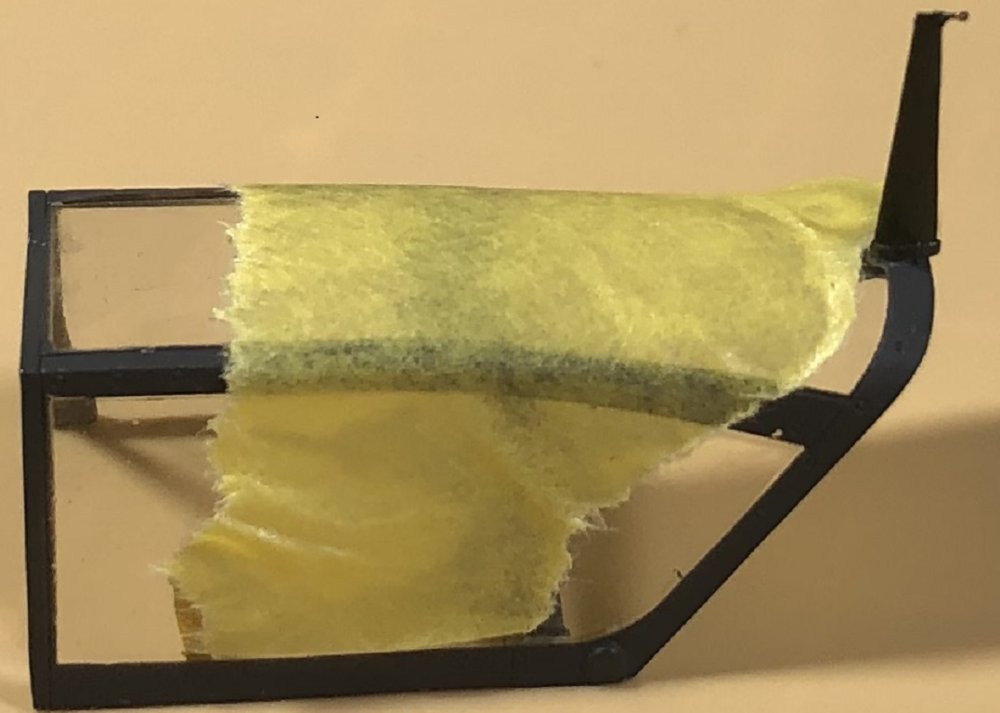
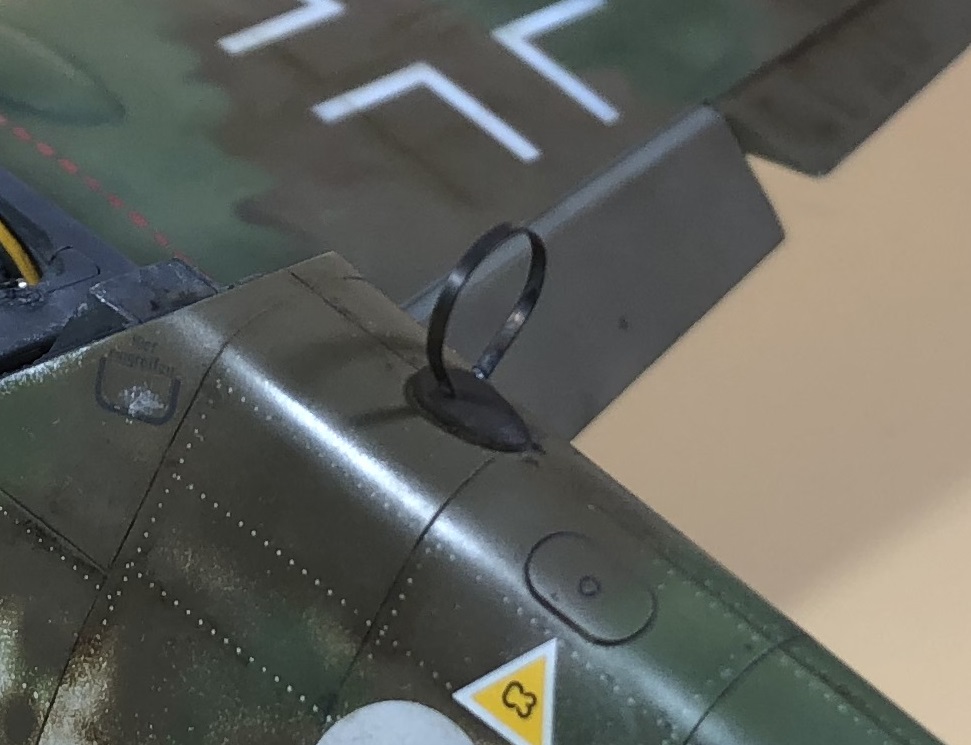
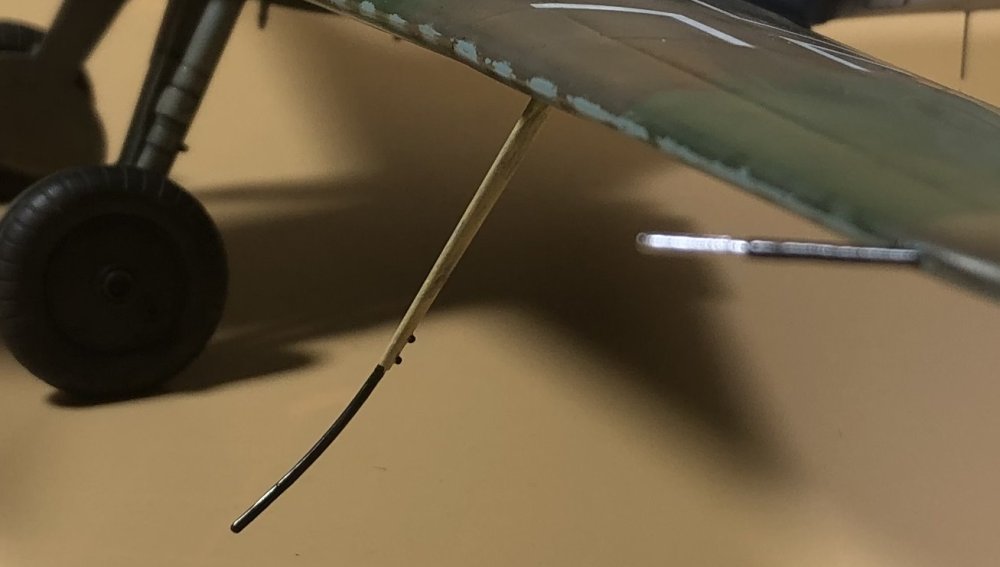
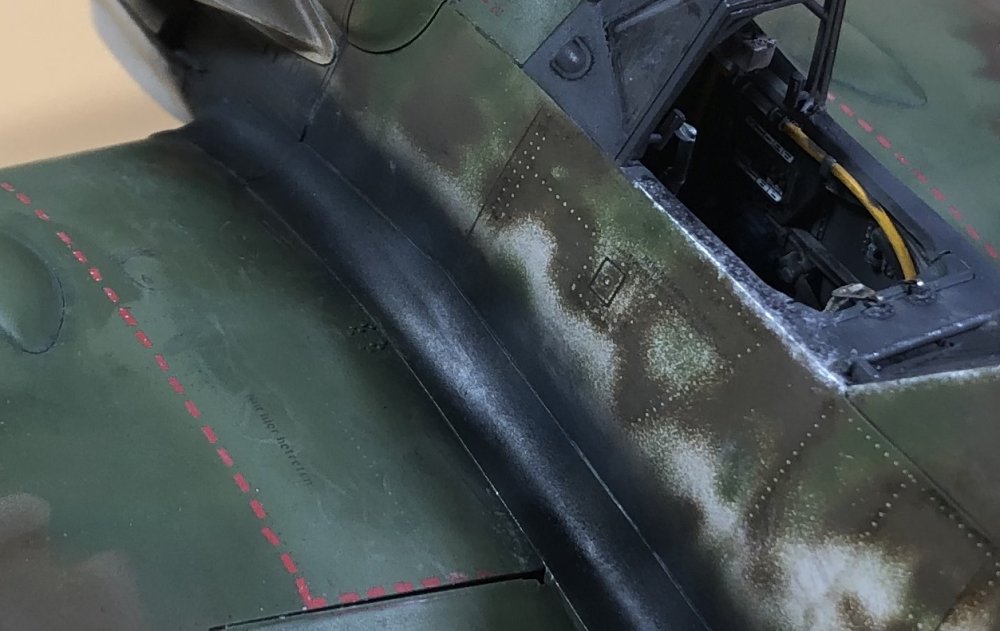
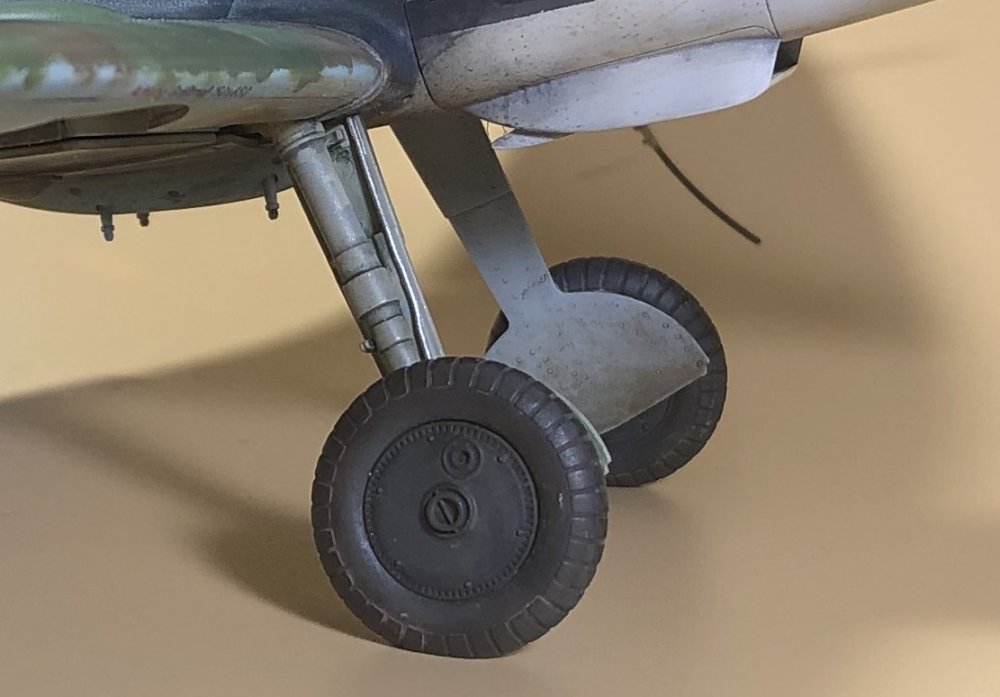
Guys, Thank you for your earnest replies. I waited for a week, and the more times I looked at my result, the more I hated it. So part of today's update will show my new results. I started by sanding back the earlier attempts at scuffing. I left enough of it in place to hint that some slight paint damage has occurred. I may still change it later. My next tasks were to add all of the protruding parts common to Luftwaffe fighters late in the war. I had four different DF loops on this machine. The original, two brass, and the final one, Stainless steel. The original DF loop broke when I lost control of the machine and my lap prevented it from making it to the floor. The fragile plastic couldn't outlast my clumsiness. And the two brass DF loops either got knocked off repeatedly, or because of their softness were continually getting knocked out of shape. So I thought to myself... "I'll fix your wagon!" So, I have these Stainless steel wheel stencils which are on a fret. And the thinnest pieces of the fret are just narrow enough for the job. Notice the nice blued color? I hot-blued it by heating it red hot, and then dropping it into olive oil. So I can avoid painting it. I also had to worry about how I was going to attach the antenna radio aerial. I hate the simple expedient of just drilling a couple of holes. It just seems wrong in larger scale. I've had a love affair with Bob's Buckles since I first used them to rig a WNW kit. Just don;t tell Mrs. Buckles. Here, I have attached the eyelets to both the antenna mast and the vertical fin. The largest and most frail protuberance is the Morane Mast and the pitot tube. According to the regulations the aerodynamic wooden fairing was to be left in a natural color with a clear varnish for protection. I painted the metal parts RLM 71. I saw somebody do it with red and white stripes like the nightfighters had on their lower aerials... But I haven't seen any photographic evidence of it. This is a plastic kit part. Mucho Fragilico. I also weathered the wheels and wheel well covers so that they would fit in with my very dirty underside. I really wanted the wheels to appear much dirtier. But weathering over black... and trying to be subtle about it... Gives weak results. But I can live with that. Finally... A couple overall shots. You can see I didn't forget the FuG 25 IFF aerial under the rear fuselage. Thanks for looking... ...and as always, your comments are appreciated. Happy Modelling!


- 436 replies
-
- 10
-
-

-
Me: Honey, where can I get head? Her: Canada! Yep... a long way to go... But I got some. From those fine people at Ultracast. All Luftwaffe 1/32 scale pilots.
-
Very nice, John.
-
GWH Curtiss P-40B; The Flying Tigers
GazzaS replied to Peterpools's topic in LSM 1/35 and Larger Work In Progress
Wow, Peter, great update. Dunno ow I missed it. Love the cockpit floor. Looks very crisp and clean.