GazzaS
-
Posts
6,396 -
Joined
-
Last visited
Content Type
Profiles
Forums
Events
Gallery
Everything posted by GazzaS
-
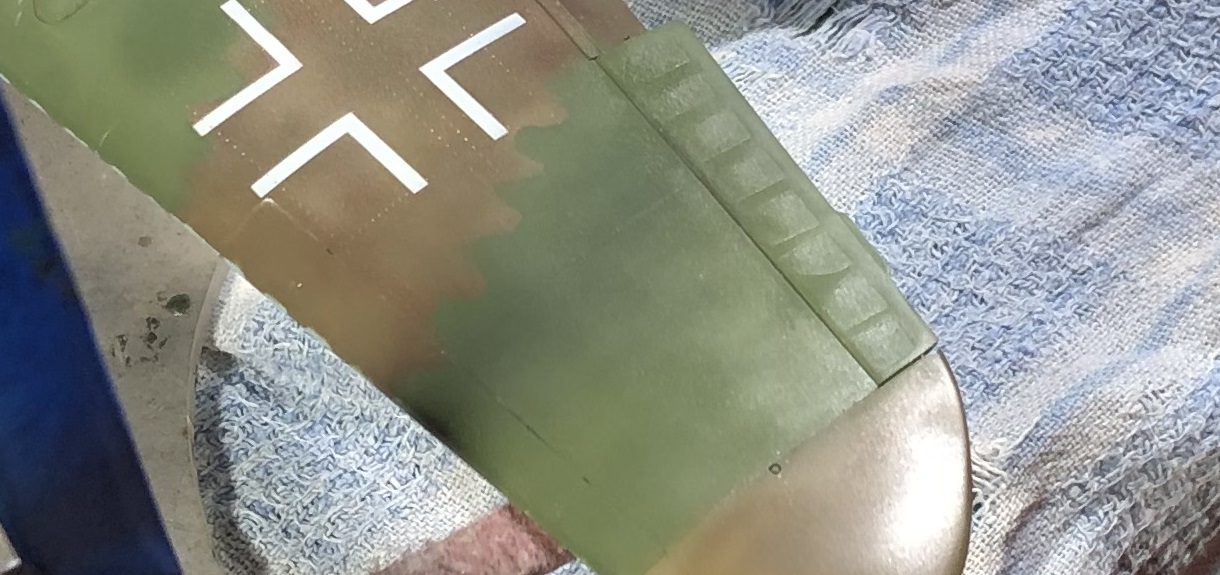
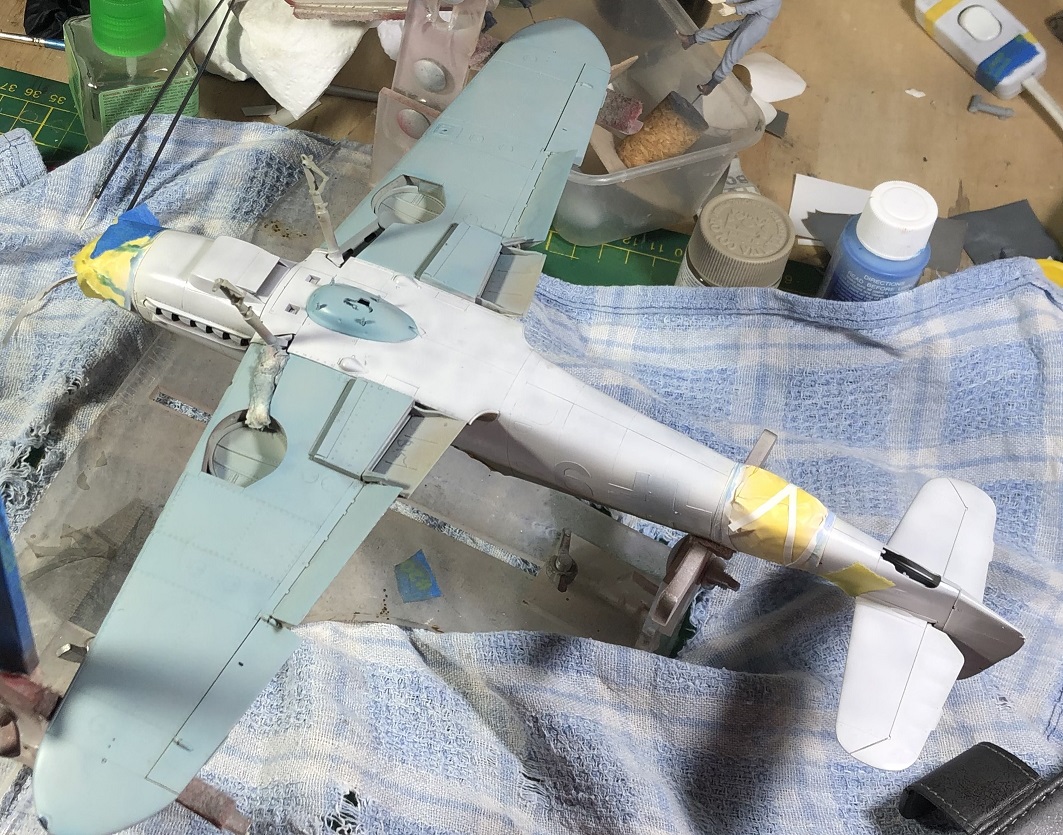
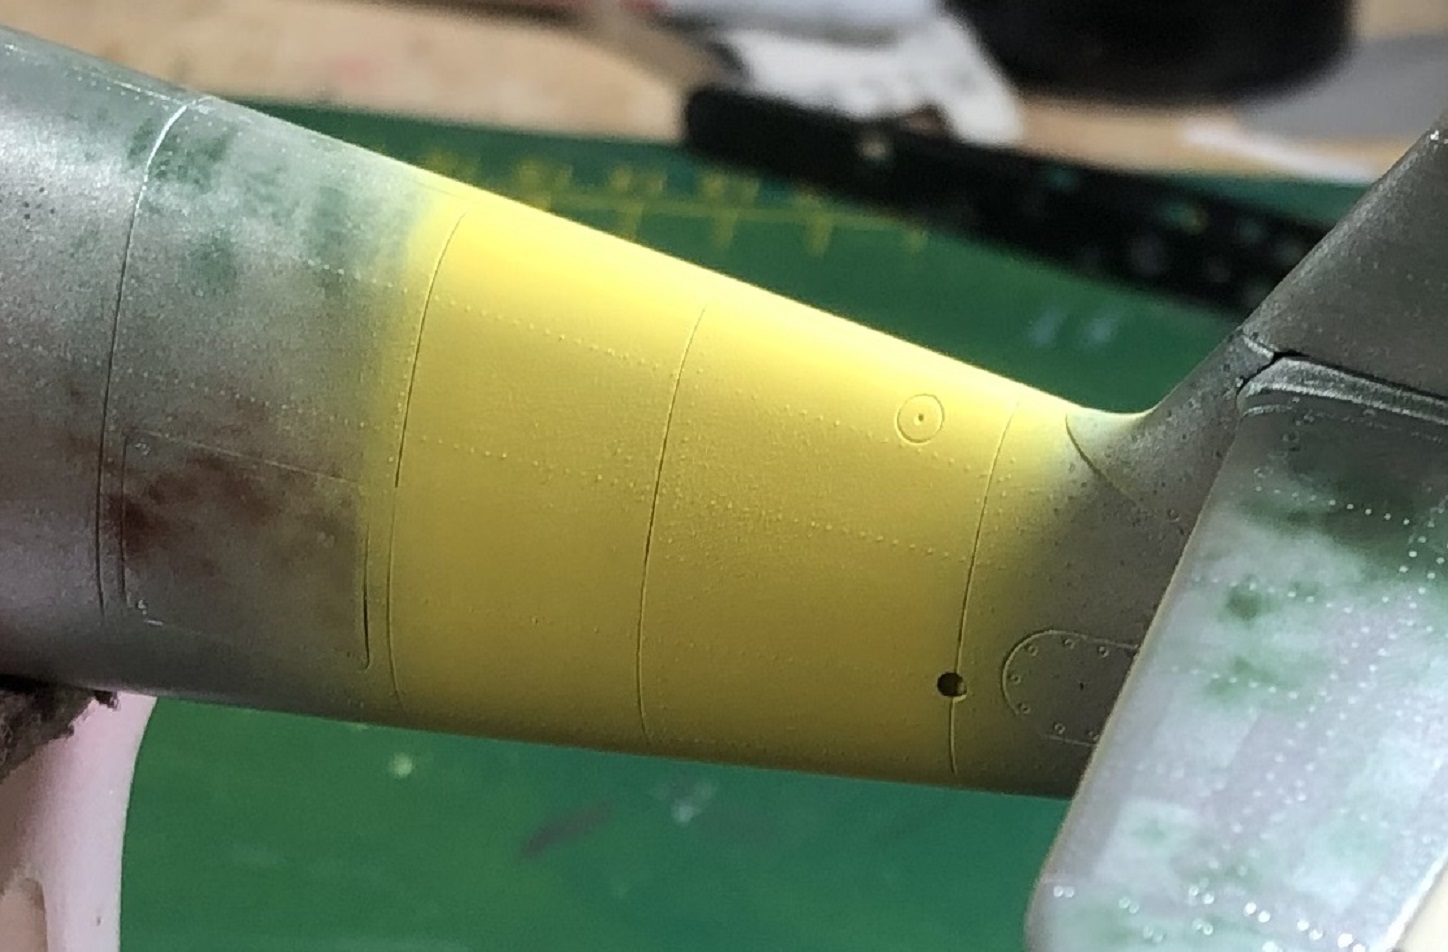
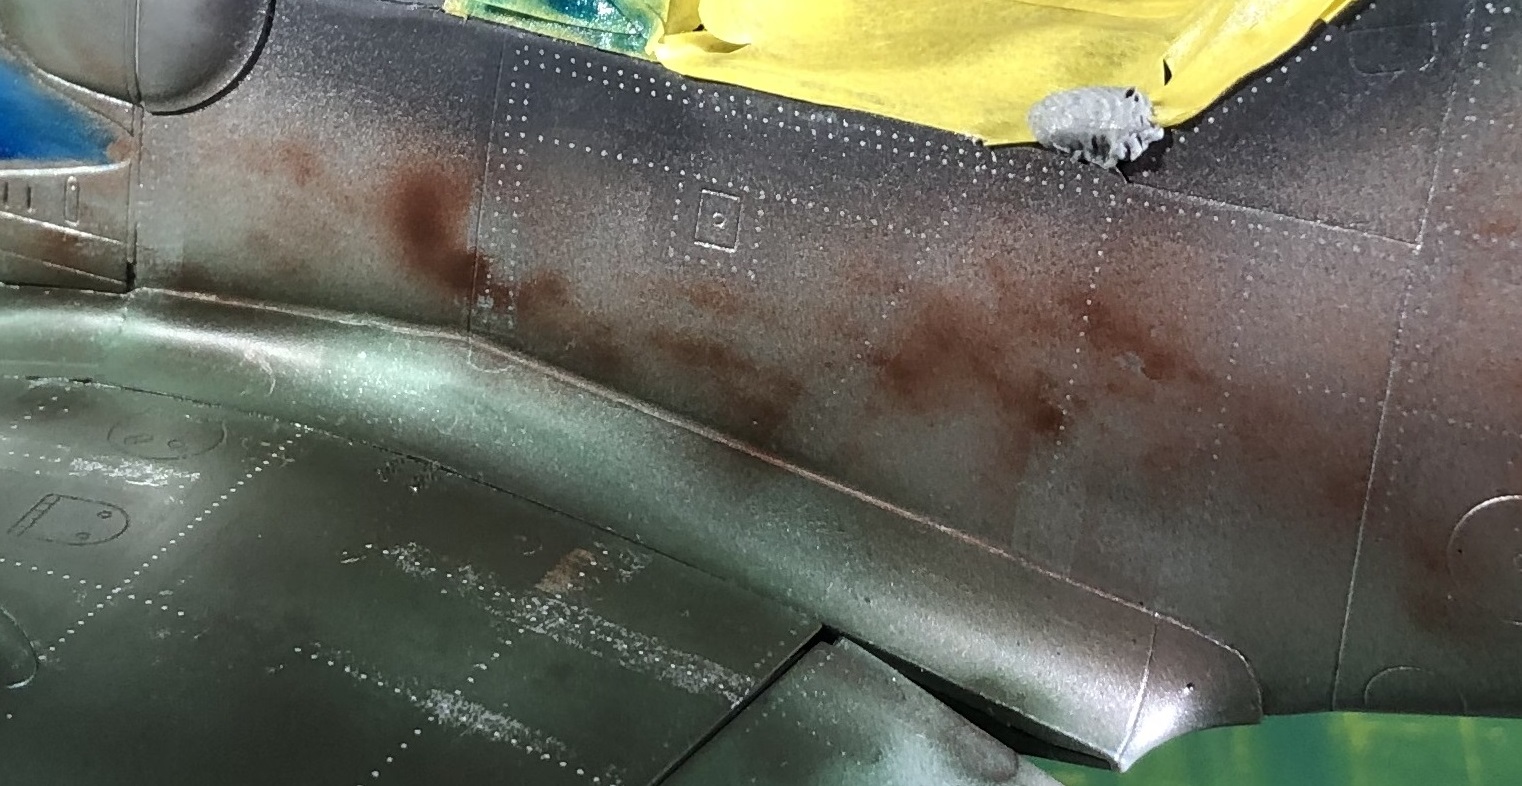
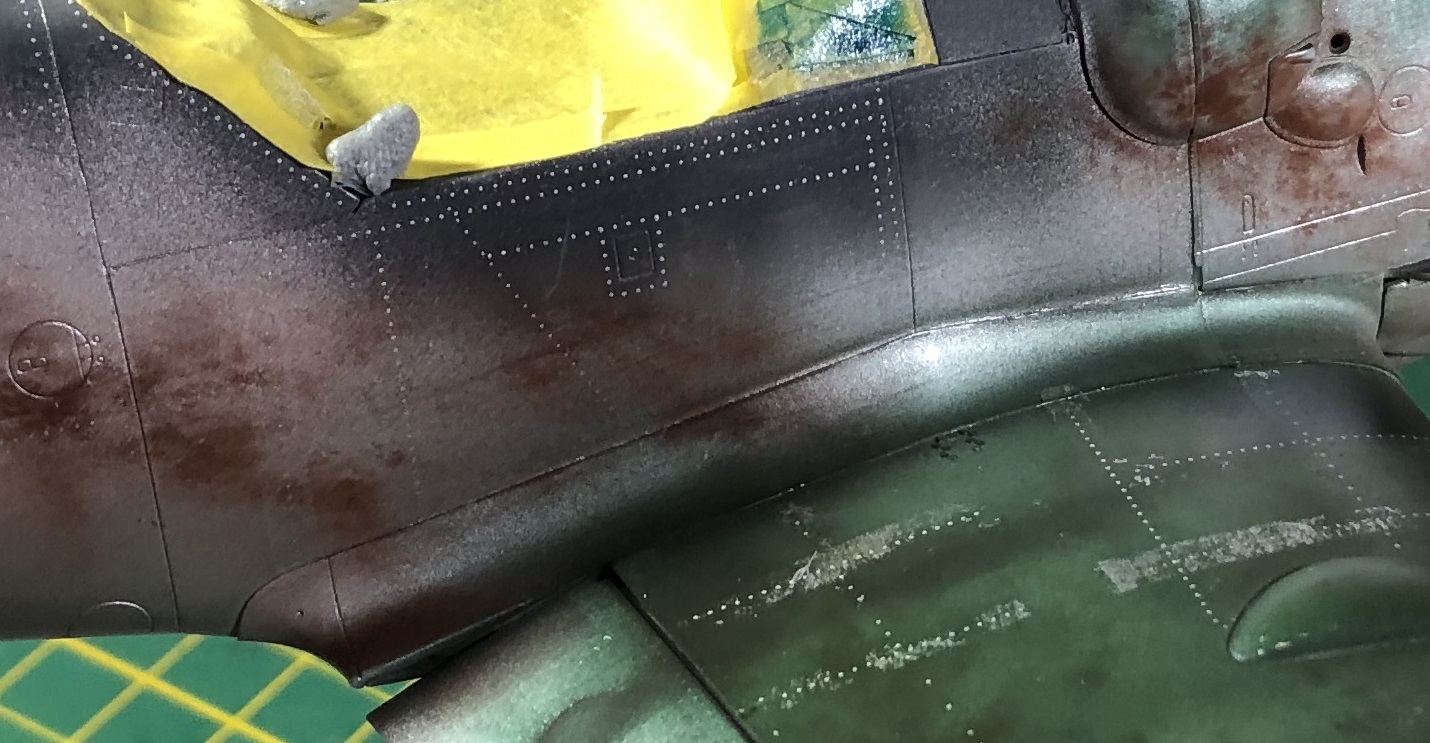
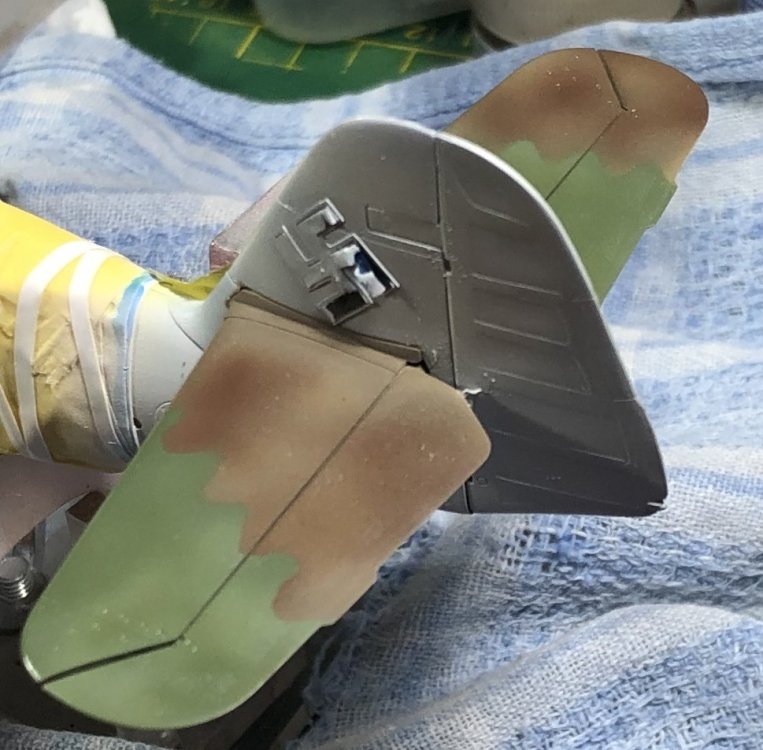
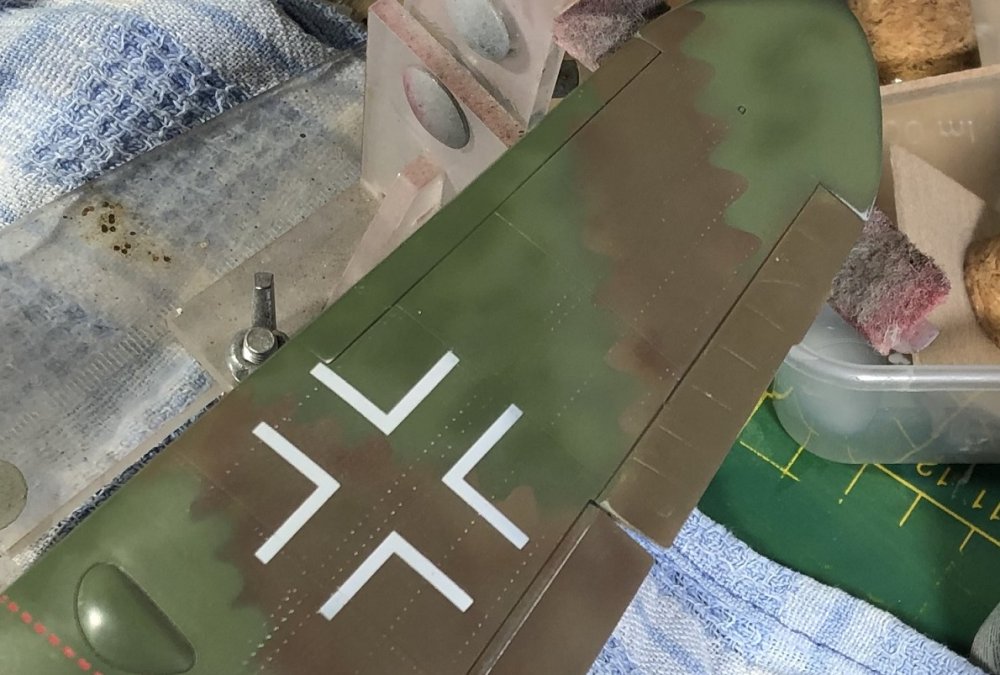
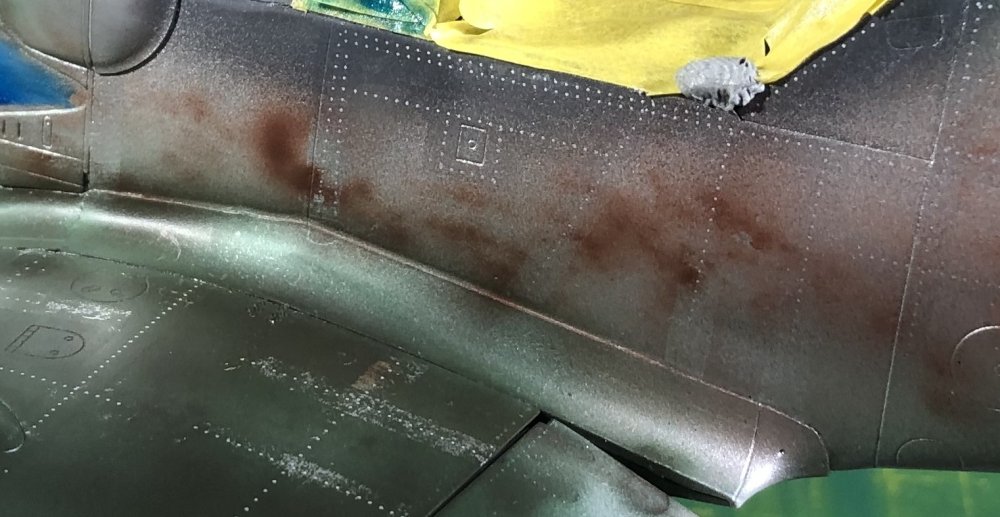
 Surprise... another update.... I'm sure somebody wanted to see how the painted effects on the control surfaces looked. Sometimes you can see it... sometimes you can't... Just like IRL. Weathering will make them easier to see, I imagine. Obviously, painting is not completed, yet. Also note, the paint colors are modulated. There were three tones of both upper colors applied. There are no transparent areas. Rivets sow through because I have done some sanding to find them and neaten the finish. Most will get painted over again. Now... onto the section I'll refer to as advanced learning. Lesson one... sometimes you can't see the carrier film from the rivet lines that you missed until you cover them with paint. Lesson two... raised rivets make it more difficult for your masks to stick to the model. You can see on this walkway marker what has happened. I'm gonna have to repaint that area and use the decal. Everything is in an ugly stage. I'm sick as a dog, but can't lay around all day while the model ages.
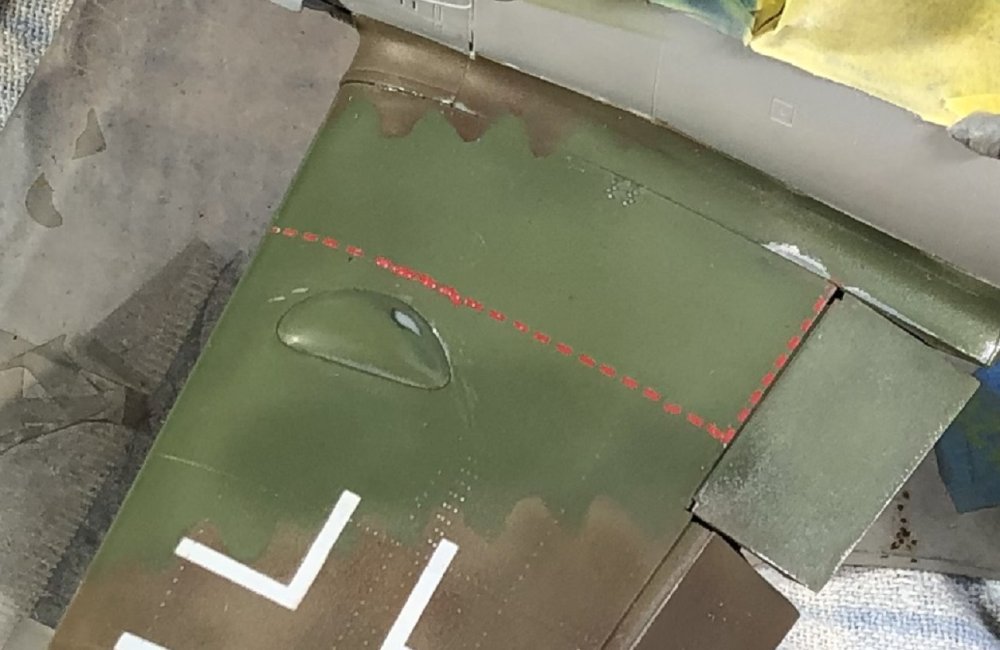


-
- 2,035 replies
-
- 2
-

-

-
- car related stuff
- anything about cars
- (and 6 more)
-
Pz.Kpfw.I Ausf A - Dragon 6356 - 1/35
GazzaS replied to Bomber_County's topic in LSM 1/35 and Larger Work In Progress
The Takom Pz I is a nice kit. Workable tracks. You either want the hatches closed or a figure to fill the hole. But if you complete your 1/35 kit, you might as well move on to a Bren Gun Carrier next. I hear they have an insane number of teeny, tiny track links. -
That engine is looking beautiful, Rob. There are so many engine pics on this page I had trouble sorting them out.
-
I bought 2 sets plus all three sizes of lined sheet. But I will probably never use one of the lined sheets as the rivets are too far apart. But now... I need to order more of the right size... aka the one with the smallest pitch.
-
With my limited experience, I'm not sure exactly how much paint it takes to make them disappear. I fear making them disappear altogether.
-
Yes... we're both going to find out. For masking I used Tamiya stretch tape for curves, and Frog brand masking tape which I de-tacked twice on my pants. I will tell you one thing, though... Microscale liquid mask will lift the rivets right off. I accidentally got a blob of it on a couple of rivets... so I gently cleaned them with a water-moistened Q-tip. Took the still wet mask and rivet right off.
-
Every bird of prey must go through an awkward stage where his plumage is less than appealing...

-
Man... that is a tiny car.
-
Thank you Rob. As you know... it only takes one step to plunge headlong down the rabbit hole.
-
There is an online tutorial already. And here are some personal experiences I noted over at TOS: First thing they tell you is to remove the translucent paper. But here you have to be careful. Because sometimes the translucent paper is better stuck to the clear transfer sheet than it should be. So what you end up doing is removing the clear transfer sheet from from the rivets. So that when you dip what you have left in the water, your rivets float away. I have an entire sheet of rivets where I cannot remove the translucent sheet. But don't be alarmed, they still work. Just don't remove the white paper. So how do you know when not to remove the white paper? Two ways. Number one: It's difficult to get it to start to separate. Number two: If you get it to separate, and the underside is shiny. Like plastic shiny. That means you have lifted the transfer sheet as well. If you do get them to separate correctly, the underside of the white paper will have a satin sheen. Number two: The rubbery transfer sheet stretches. It is quite easy to distort your pattern of rivets. So, unlike a decal, if you hold one end down and pull on the other end, you can accidentally ruin your pattern by pulling too hard. Thirdly: They go from unsticky to stuck real fast. When that happens and you want to move them, don't pull hard... you will stretch something out of place. To refloat the transfer, quickly apply a brushful of Mr. Mark Softer.
-
Harv, Czech it out yourself: https://hgwmodels.cz/en/27-sets
-
P-51 Skyczar 363FG Staplehurst ALG June 1944
GazzaS replied to nmayhew's topic in LSM 1/35 and Larger Work In Progress
The end result is very appealing. Definitely one of the better painted NMF jobs. Well done! -
Are there any of these destroyed in combat, yet?
-
I see a huge difference between building a model vice professing or promoting an ideology or political belief system. Some rules are ridiculous. F@ck the cancel culture.
-
Wnw post war Ninack in Pheon decals.w
GazzaS replied to Drdave's topic in LSM 1/32 and Larger Aircraft Ready for Inspection
Brilliant work, Dave! Lots of good color modulation happening there. -
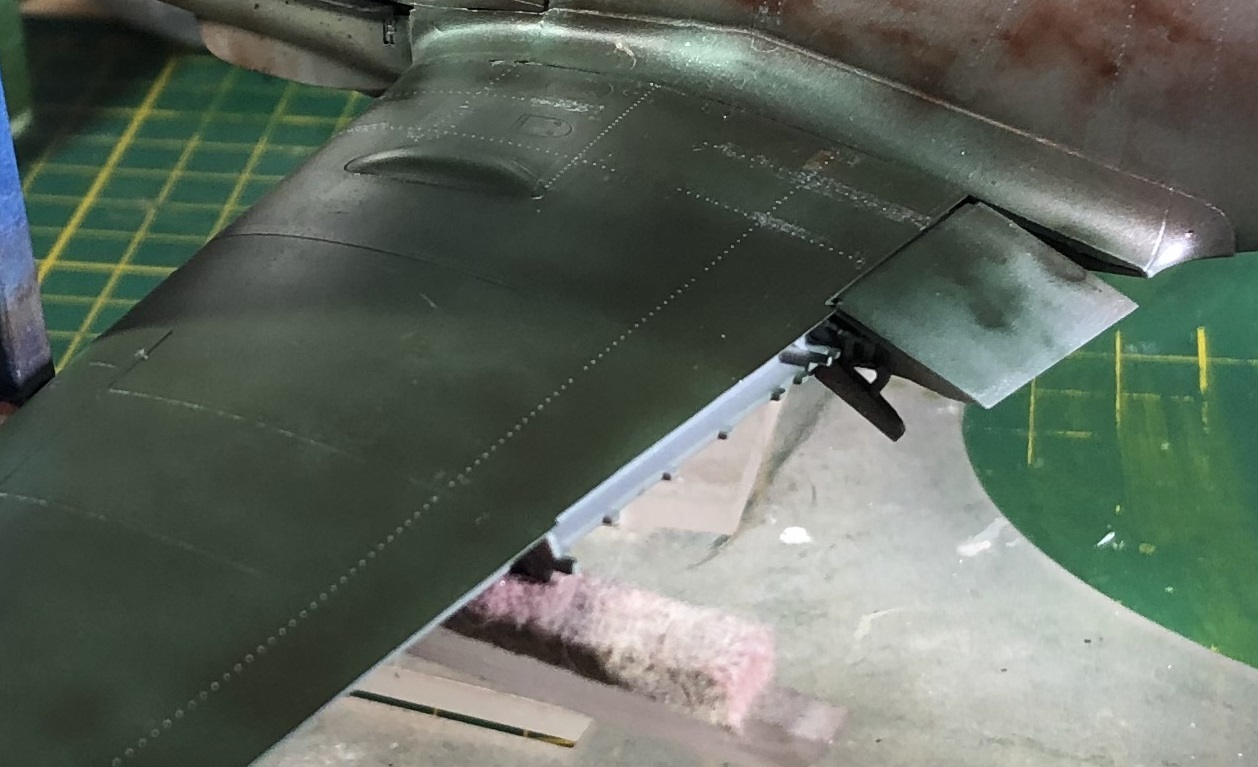
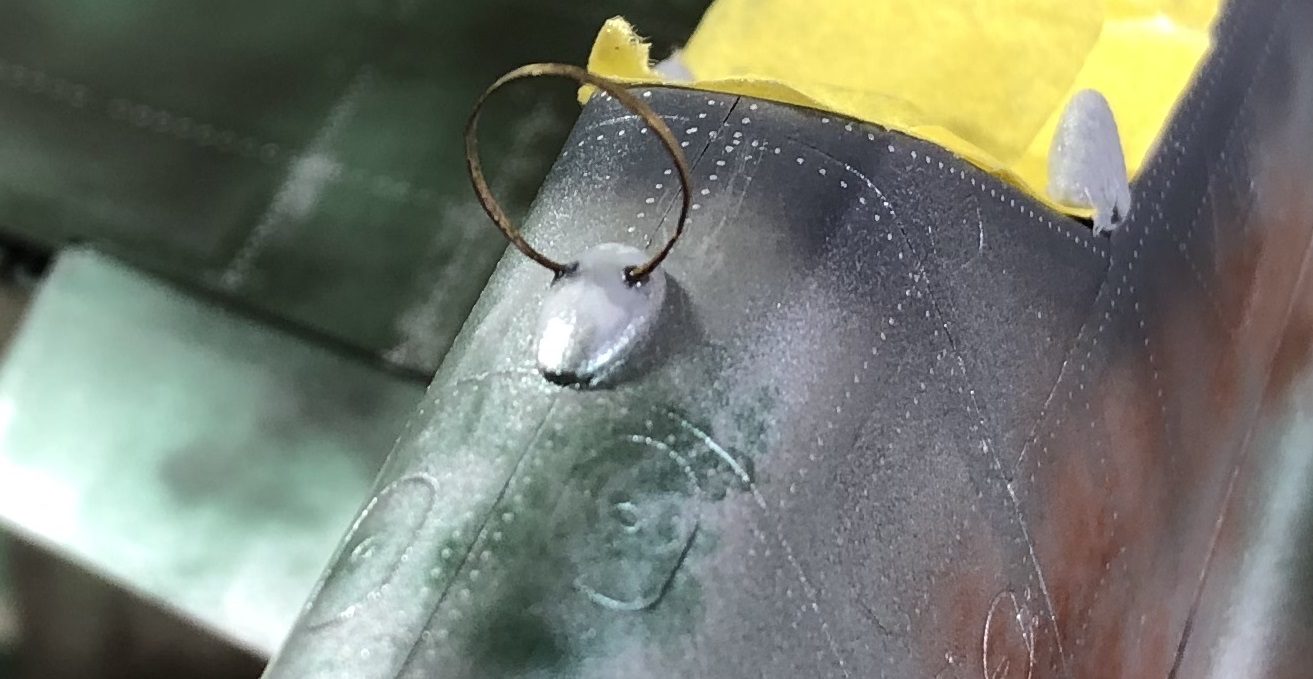
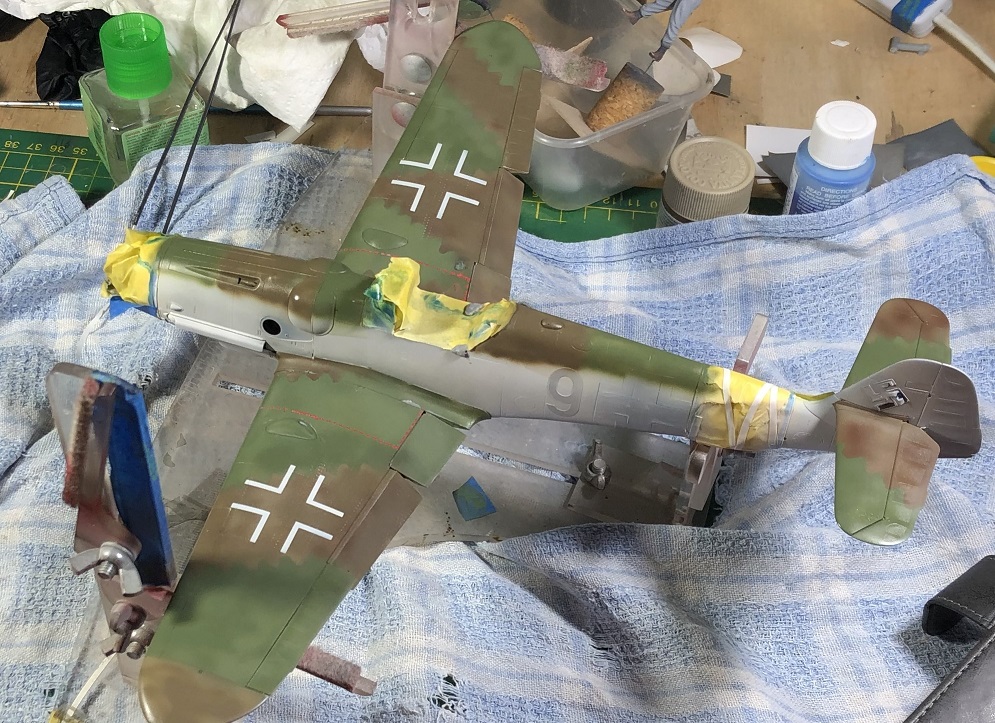
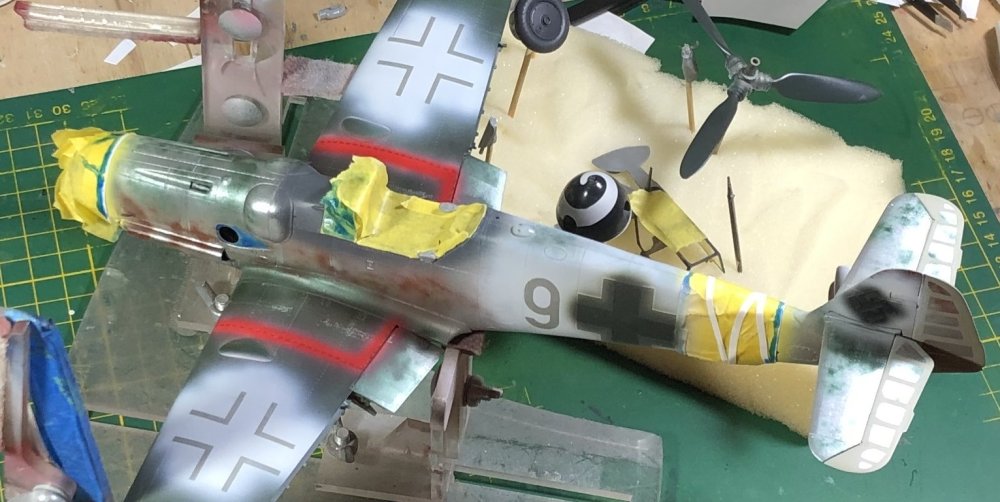
Hi All... I have laid my last rivet... for this kit, anyway. I added more paint to the wing to make laying the last rivets easier.... and the older rivets virtually disappeared. And I have re-fashioned a DF loop from a piece of PE fret. The finest, thinnest piece of brass I had... Because those DF loops... even in 1-1 scale... are mighty thin. I didn't try to lay every line of rivets on the upper wing. The only ones that will be bared there will be in the walking area. Nicht Betreten! I dare say that I can add the rest of the control surfaces and start painting. Happy days!


- 436 replies
-
- 10
-

-
-
What is on your bench right now ? Share a picture :)
GazzaS replied to Martinnfb's topic in Modelling Discussion
I have an Adolf Galland figure. My skill at depicting very dark hair is not there. But the blue thing... made me think. -
The key is magnification, my friend. I have reading glasses of various strengths.... and if that isn't enough, I have a visor to add. And powerful bench lighting.
-
What is on your bench right now ? Share a picture :)
GazzaS replied to Martinnfb's topic in Modelling Discussion
Does a hint of blue deepen the black? -
If I remember correctly I did it in 1/72 scale when I was a kid. Didn't weather it, tho.
-
Out of curiosity, JohnB... Have you ever done this one?
-
Thank you, Peter.
-
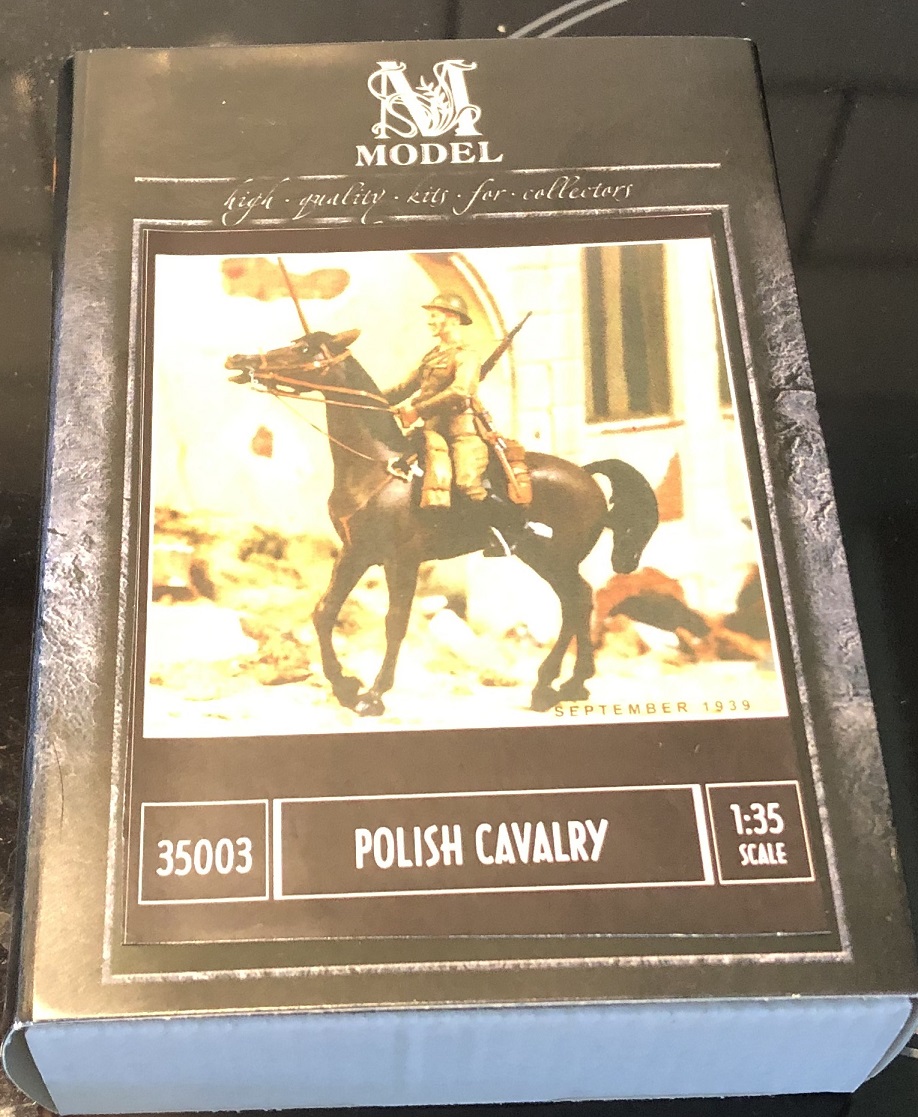
I found a 1/35 Polish Cavalryman circa 1939. ... more about him, later.