BlrwestSiR
-
Posts
9,091 -
Joined
-
Last visited
Content Type
Profiles
Forums
Events
Gallery
Everything posted by BlrwestSiR
-
The toughest part of a Tamiya Spitfire build. I think it's the panels being so flimsy and having only that tiny tab on them to align the that makes it such a pain.
-

What is on your bench right now ? Share a picture :)
BlrwestSiR replied to Martinnfb's topic in Modelling Discussion
Same here. It's been so dry so far. Until the other day. -
What is on your bench right now ? Share a picture :)
BlrwestSiR replied to Martinnfb's topic in Modelling Discussion
We have a bit. We're the middle of 4 row houses and they were the first homes built on the street. Their original use was as hotels for the horseracing track that existed here originally. By hotels, they were ones where the rooms were rented by the hour. There's a historical plaque at the end of our street with more details about the racetrack itself. I'll try to grab a pic of it the next time I'm walking the dog. When my sister lived in Paris, her walk up apartment was over 400 years old. It was around the corner from La Bastille so I can only imagine the history of her old building. -
What is on your bench right now ? Share a picture :)
BlrwestSiR replied to Martinnfb's topic in Modelling Discussion
Thanks Jeff! No permanent damage. The basement is all concrete so no drywall to worry about either. Most of my stuff is off the floor for that very reason. We've gotten used to it. The problem is our house was built in 1894 and it's settled crooked. So part of the foundation wall at the back ends below ground. So when the water pools at the back, it comes over the top of the wall and into the basement. We've made a few changes outside the house to help mitigate the situation and it's worked until all the rain the other day. The laneway behind our house flooded too but we weren't impacted by that. The kids had fun though. -
What is on your bench right now ? Share a picture :)
BlrwestSiR replied to Martinnfb's topic in Modelling Discussion
No pics but the other day we got a month's worth of rain in 30 minutes. As a result, we had a minor flood in our basement. Our house is crooked so the floor slopes 13" from the front to the back. As a result, I had a river run through my work area for a bit. So I had to put everything on my bench and move the rest out of the way. Our basement is mostly unfinished so what didn't drain away I used a Shop Vac to clear up (about a gallon total). The rug I have down for my dog was drenched though so that's outside drying in our 40° heat. I should be back up and running this weekend. Carl -
WNW Fokker D.VII (not in-box) scheme
BlrwestSiR replied to GazzaS's topic in WW1 1/48 and larger Ready for Inspection
Fantasia looking build Gaz. The masking work you did for the markings was great. Carl -
Can't help you on the pic issue but the Spitfire looks good. I'm tempted to get another one. Which would cause me to dip into my Corsair fund. Dilemma, dilemma. Carl
-
Schwerer Plattformwagen Type SSYS
BlrwestSiR replied to BlrwestSiR's topic in LSM 1/35 and Larger Work In Progress
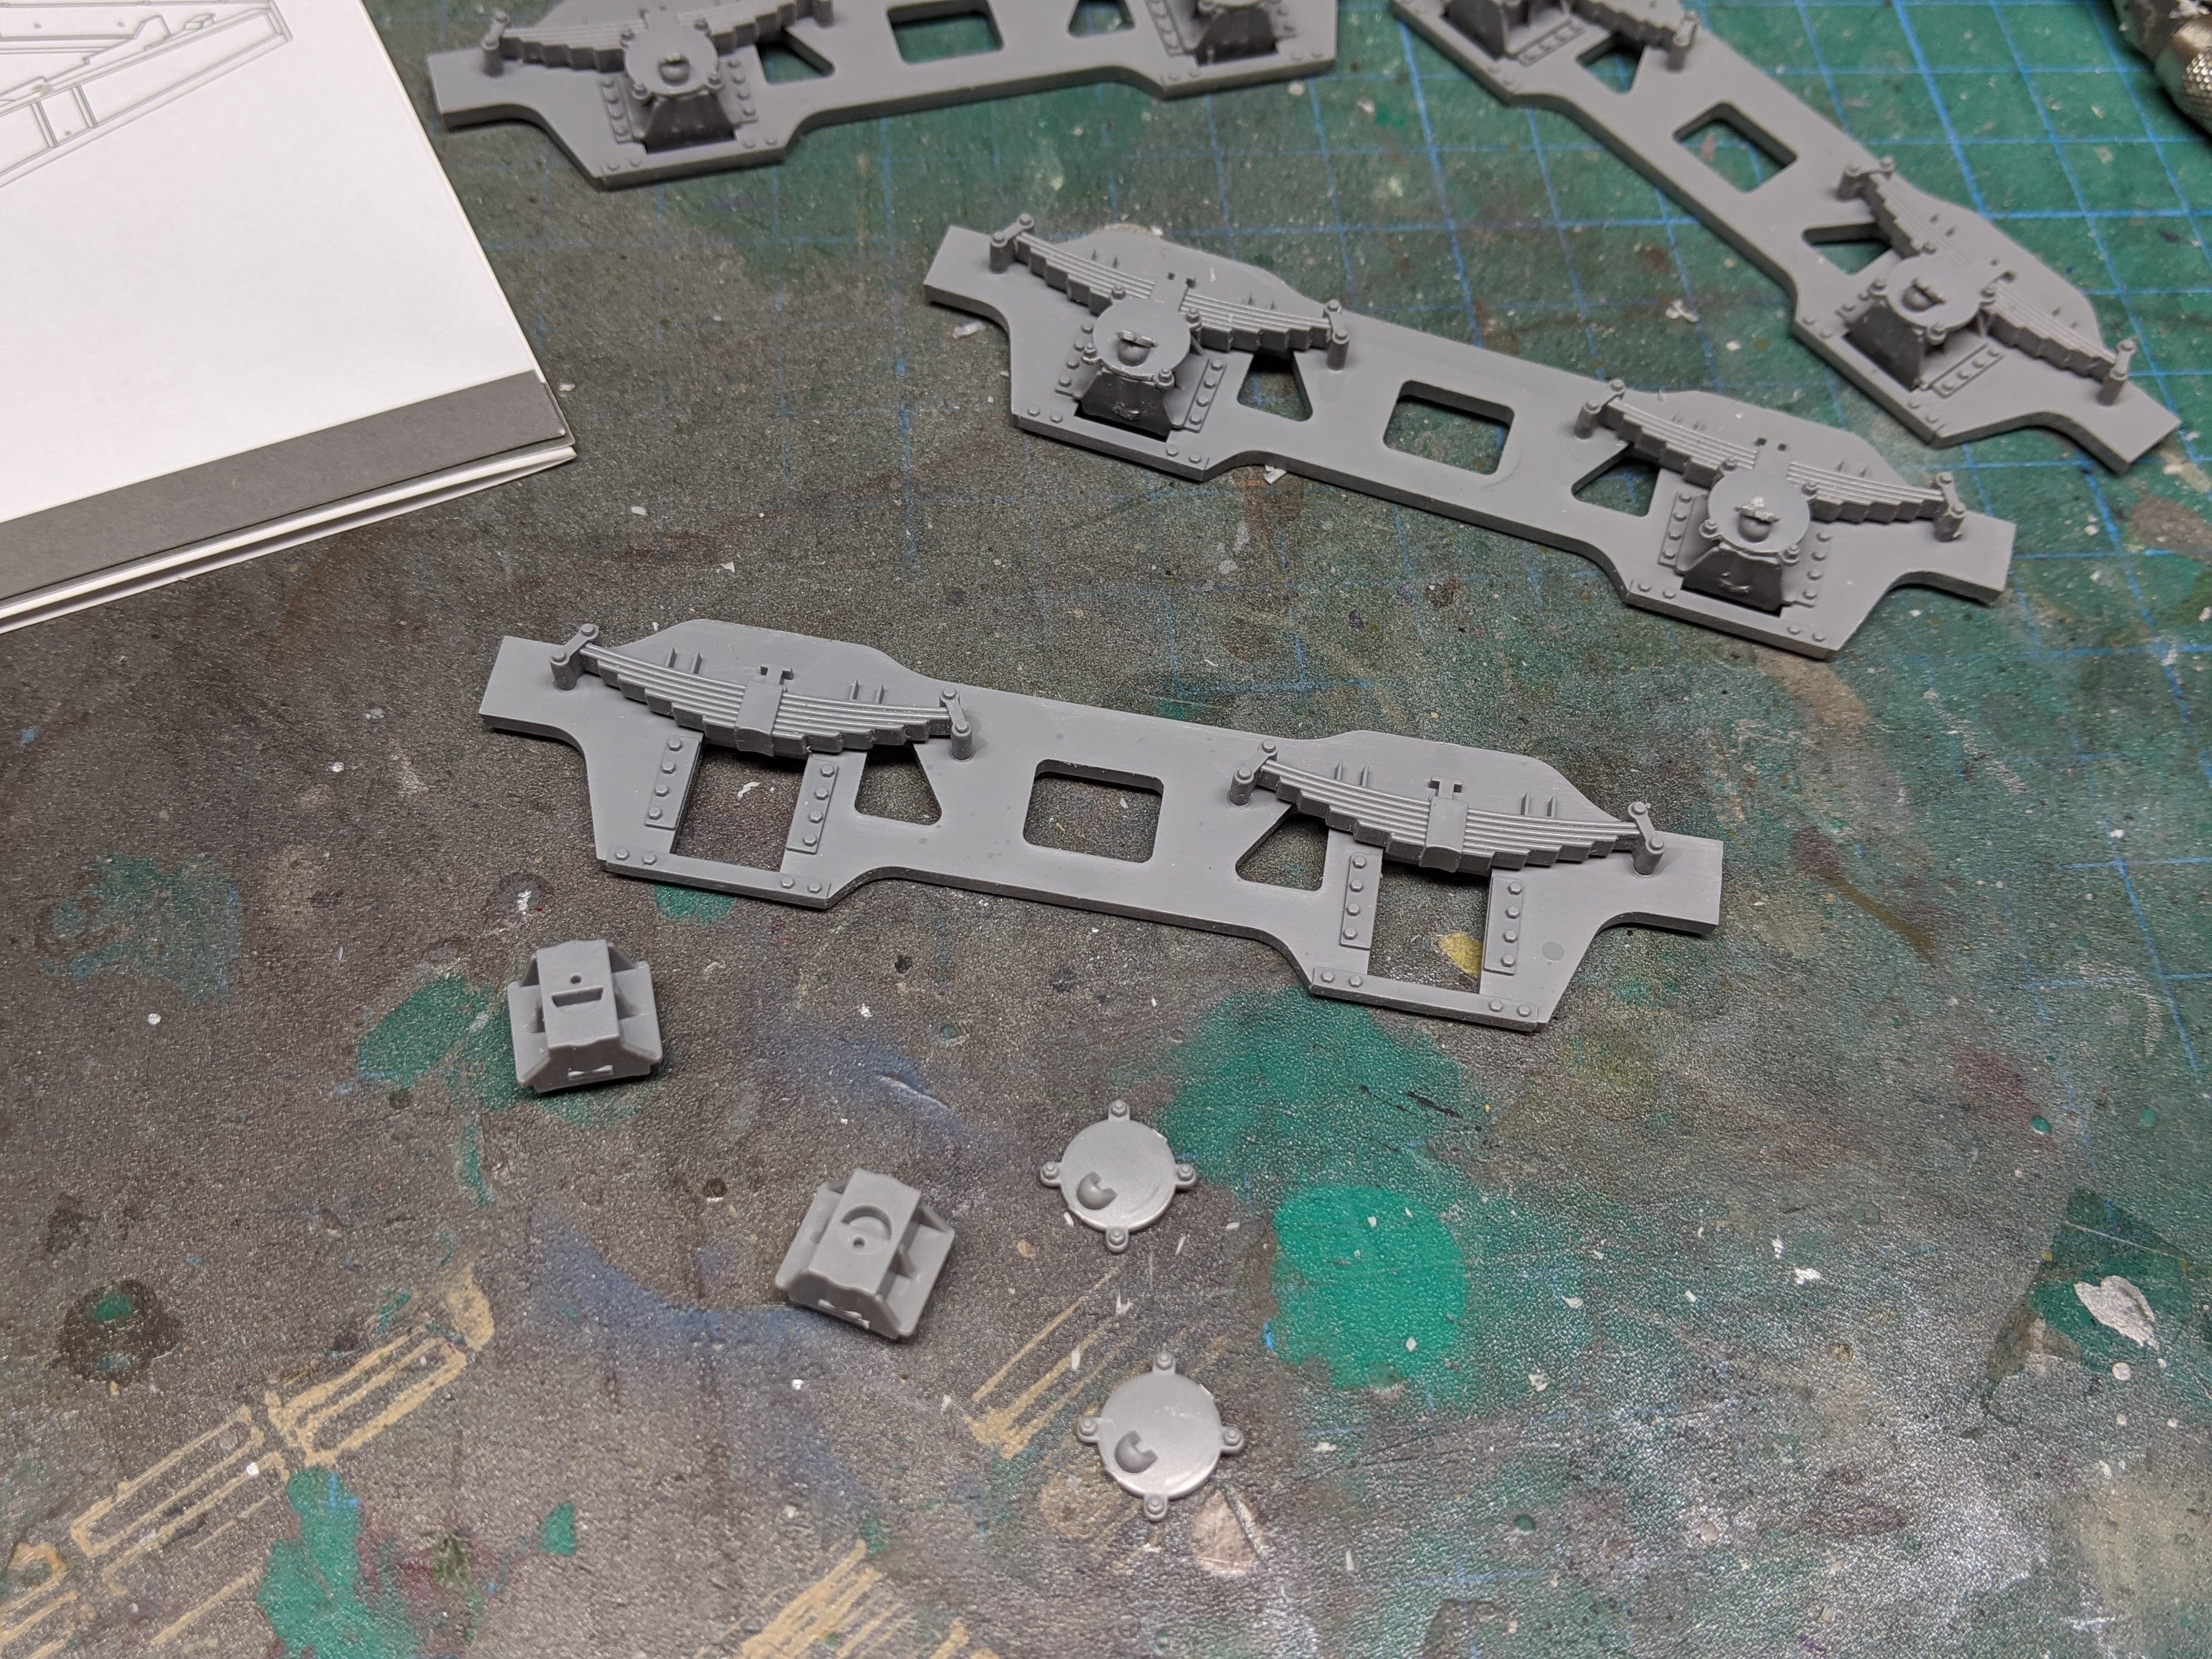
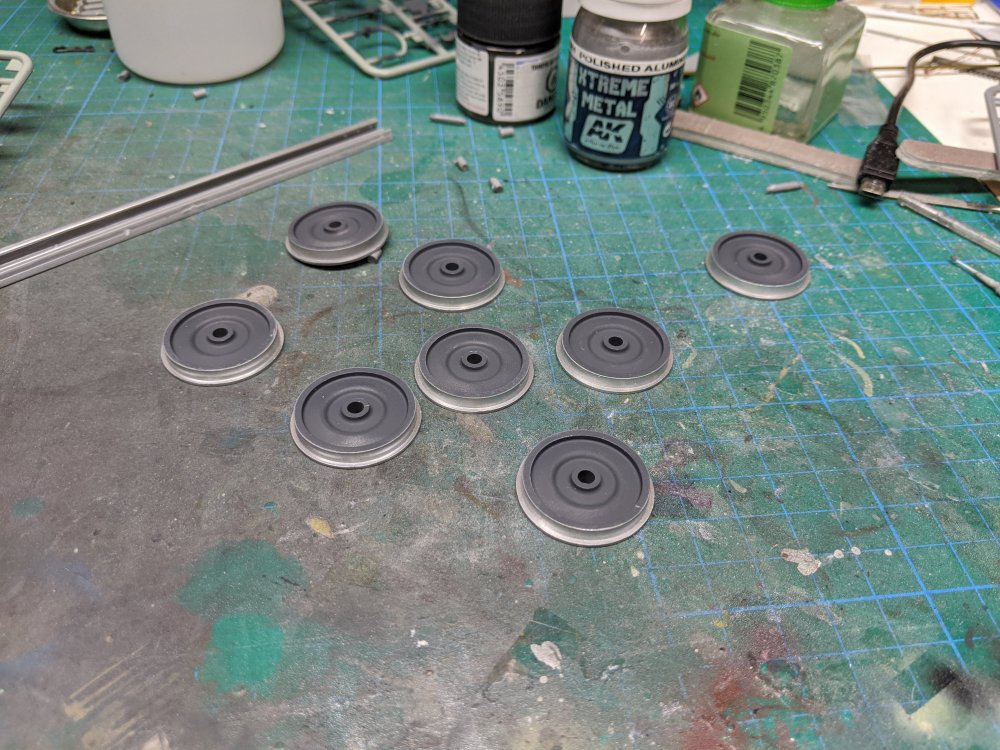
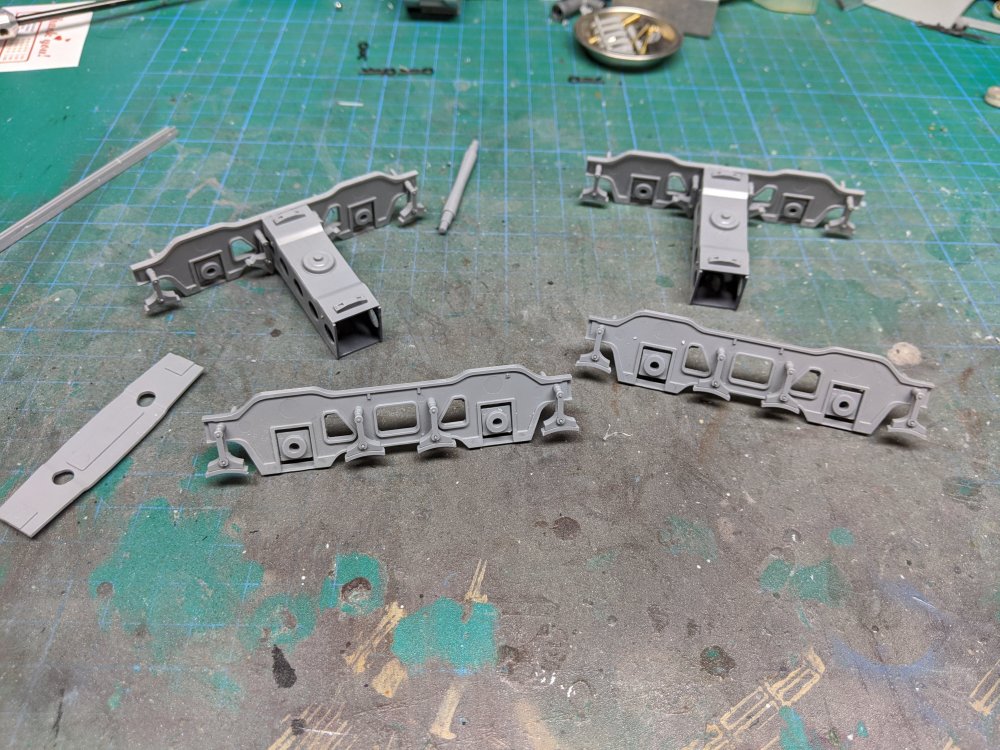
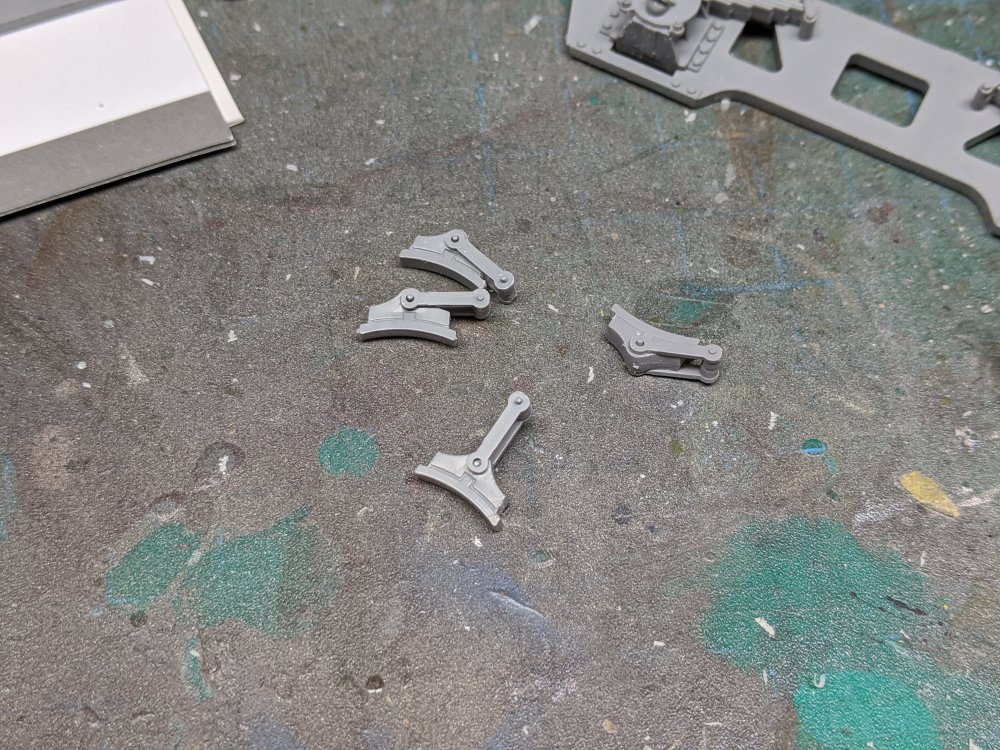
I've been plugging away at the build. I finished the major subassemblies on the trucks/bogies. I then started on the wheels. I painted part of them in polished steel and then masked them for the German grey. Or rather, the other way 'round after looking at the photos. I then joined the two halves of the bogies. Next up was the endplates and their bracing. This is where I got confirmation that the railcar is indeed ABS plastic. I initially glued the braces on using regular Tamiya cement (the white bottle) as it's tacky and has a bit longer working time. Well the parts fell apart without a singles glue mark. So I switched the Tamiya Extra Thin and no problems after that.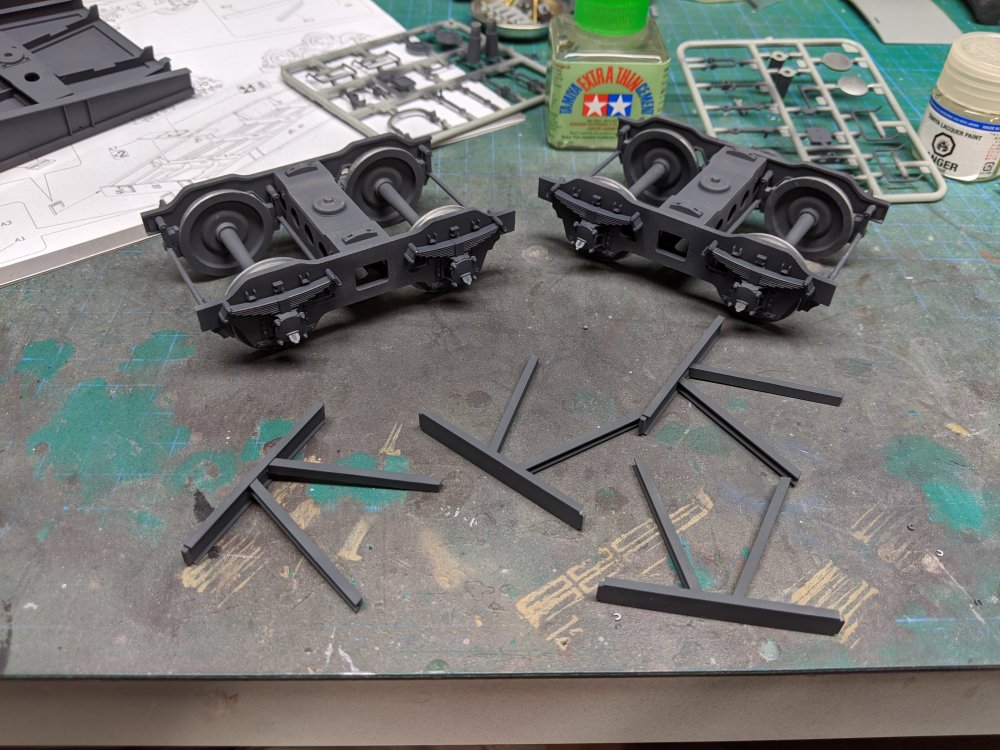
-
Glad it got to you safely. Now we can do a GB and build Corsairs at the speed of JohnB! Carl
-
Happy birthday Wolf! Carl
-
I built the Airfix Sherman and LCM combo as a kid. I staged many amphibious landings with those. Carl
-
Ernie, it'll be a great tribute to him. If anyone does, you've got it in to do it.
-
Schwerer Plattformwagen Type SSYS
BlrwestSiR replied to BlrwestSiR's topic in LSM 1/35 and Larger Work In Progress
Jeff, thanks for the offer. I'm going to keep this one simple so I don't burn out. So far, it's been fun. Want to try and keep it that way. The amount of stuff folks here know firsthand or know where to find it is awesome. That and the willingness to share it. Carl -
Ernie, absolutely no apologies needed. Sorry to hear about Joy's Dad. Glad to hear she was there for him. We'll be here when you're ready. Carl
-
Phil, you might be right on that one. I'll most likely do a build thread when I get to the kit. Still want to finish the He219 and the rail car first before I tackle anything else. Carl
-
Ha-1112 K1L Tripala ‘Der Stern von Afrika’
BlrwestSiR replied to JeroenPeters's topic in LSM 1/35 and Larger Work In Progress
Looks really nice Jeroen. Good save on the fairings too. Carl -
Schwerer Plattformwagen Type SSYS
BlrwestSiR replied to BlrwestSiR's topic in LSM 1/35 and Larger Work In Progress
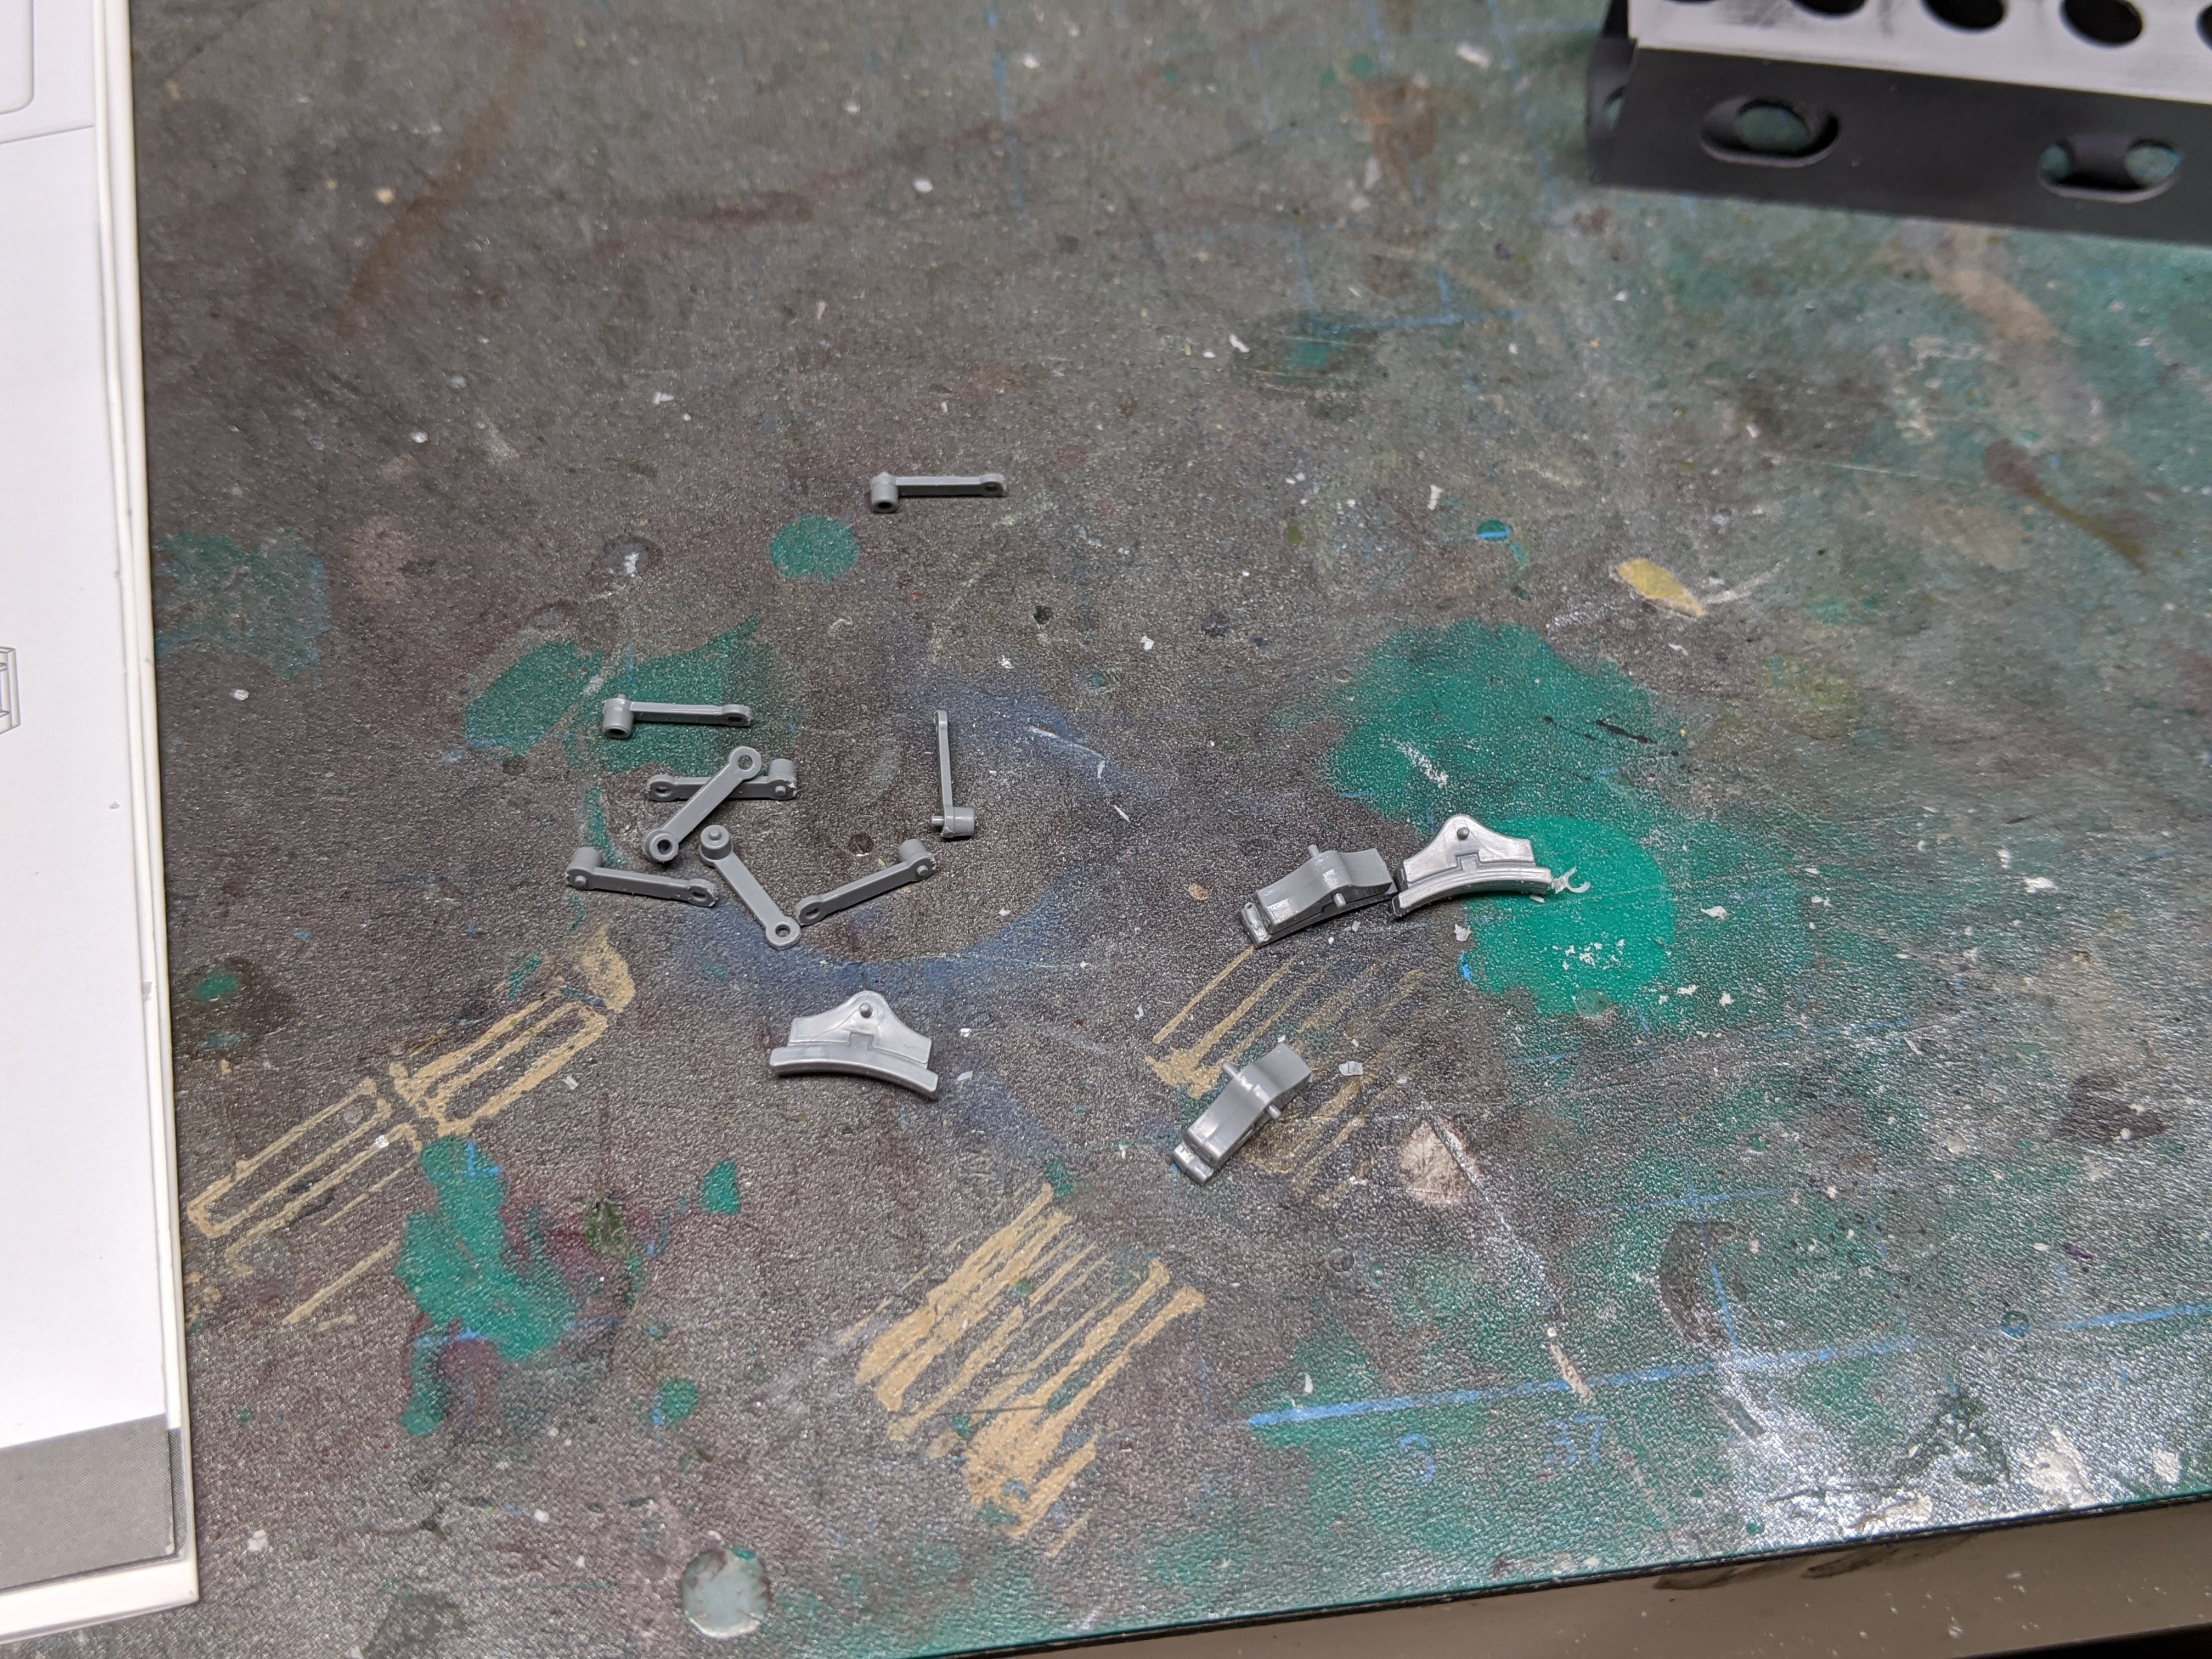
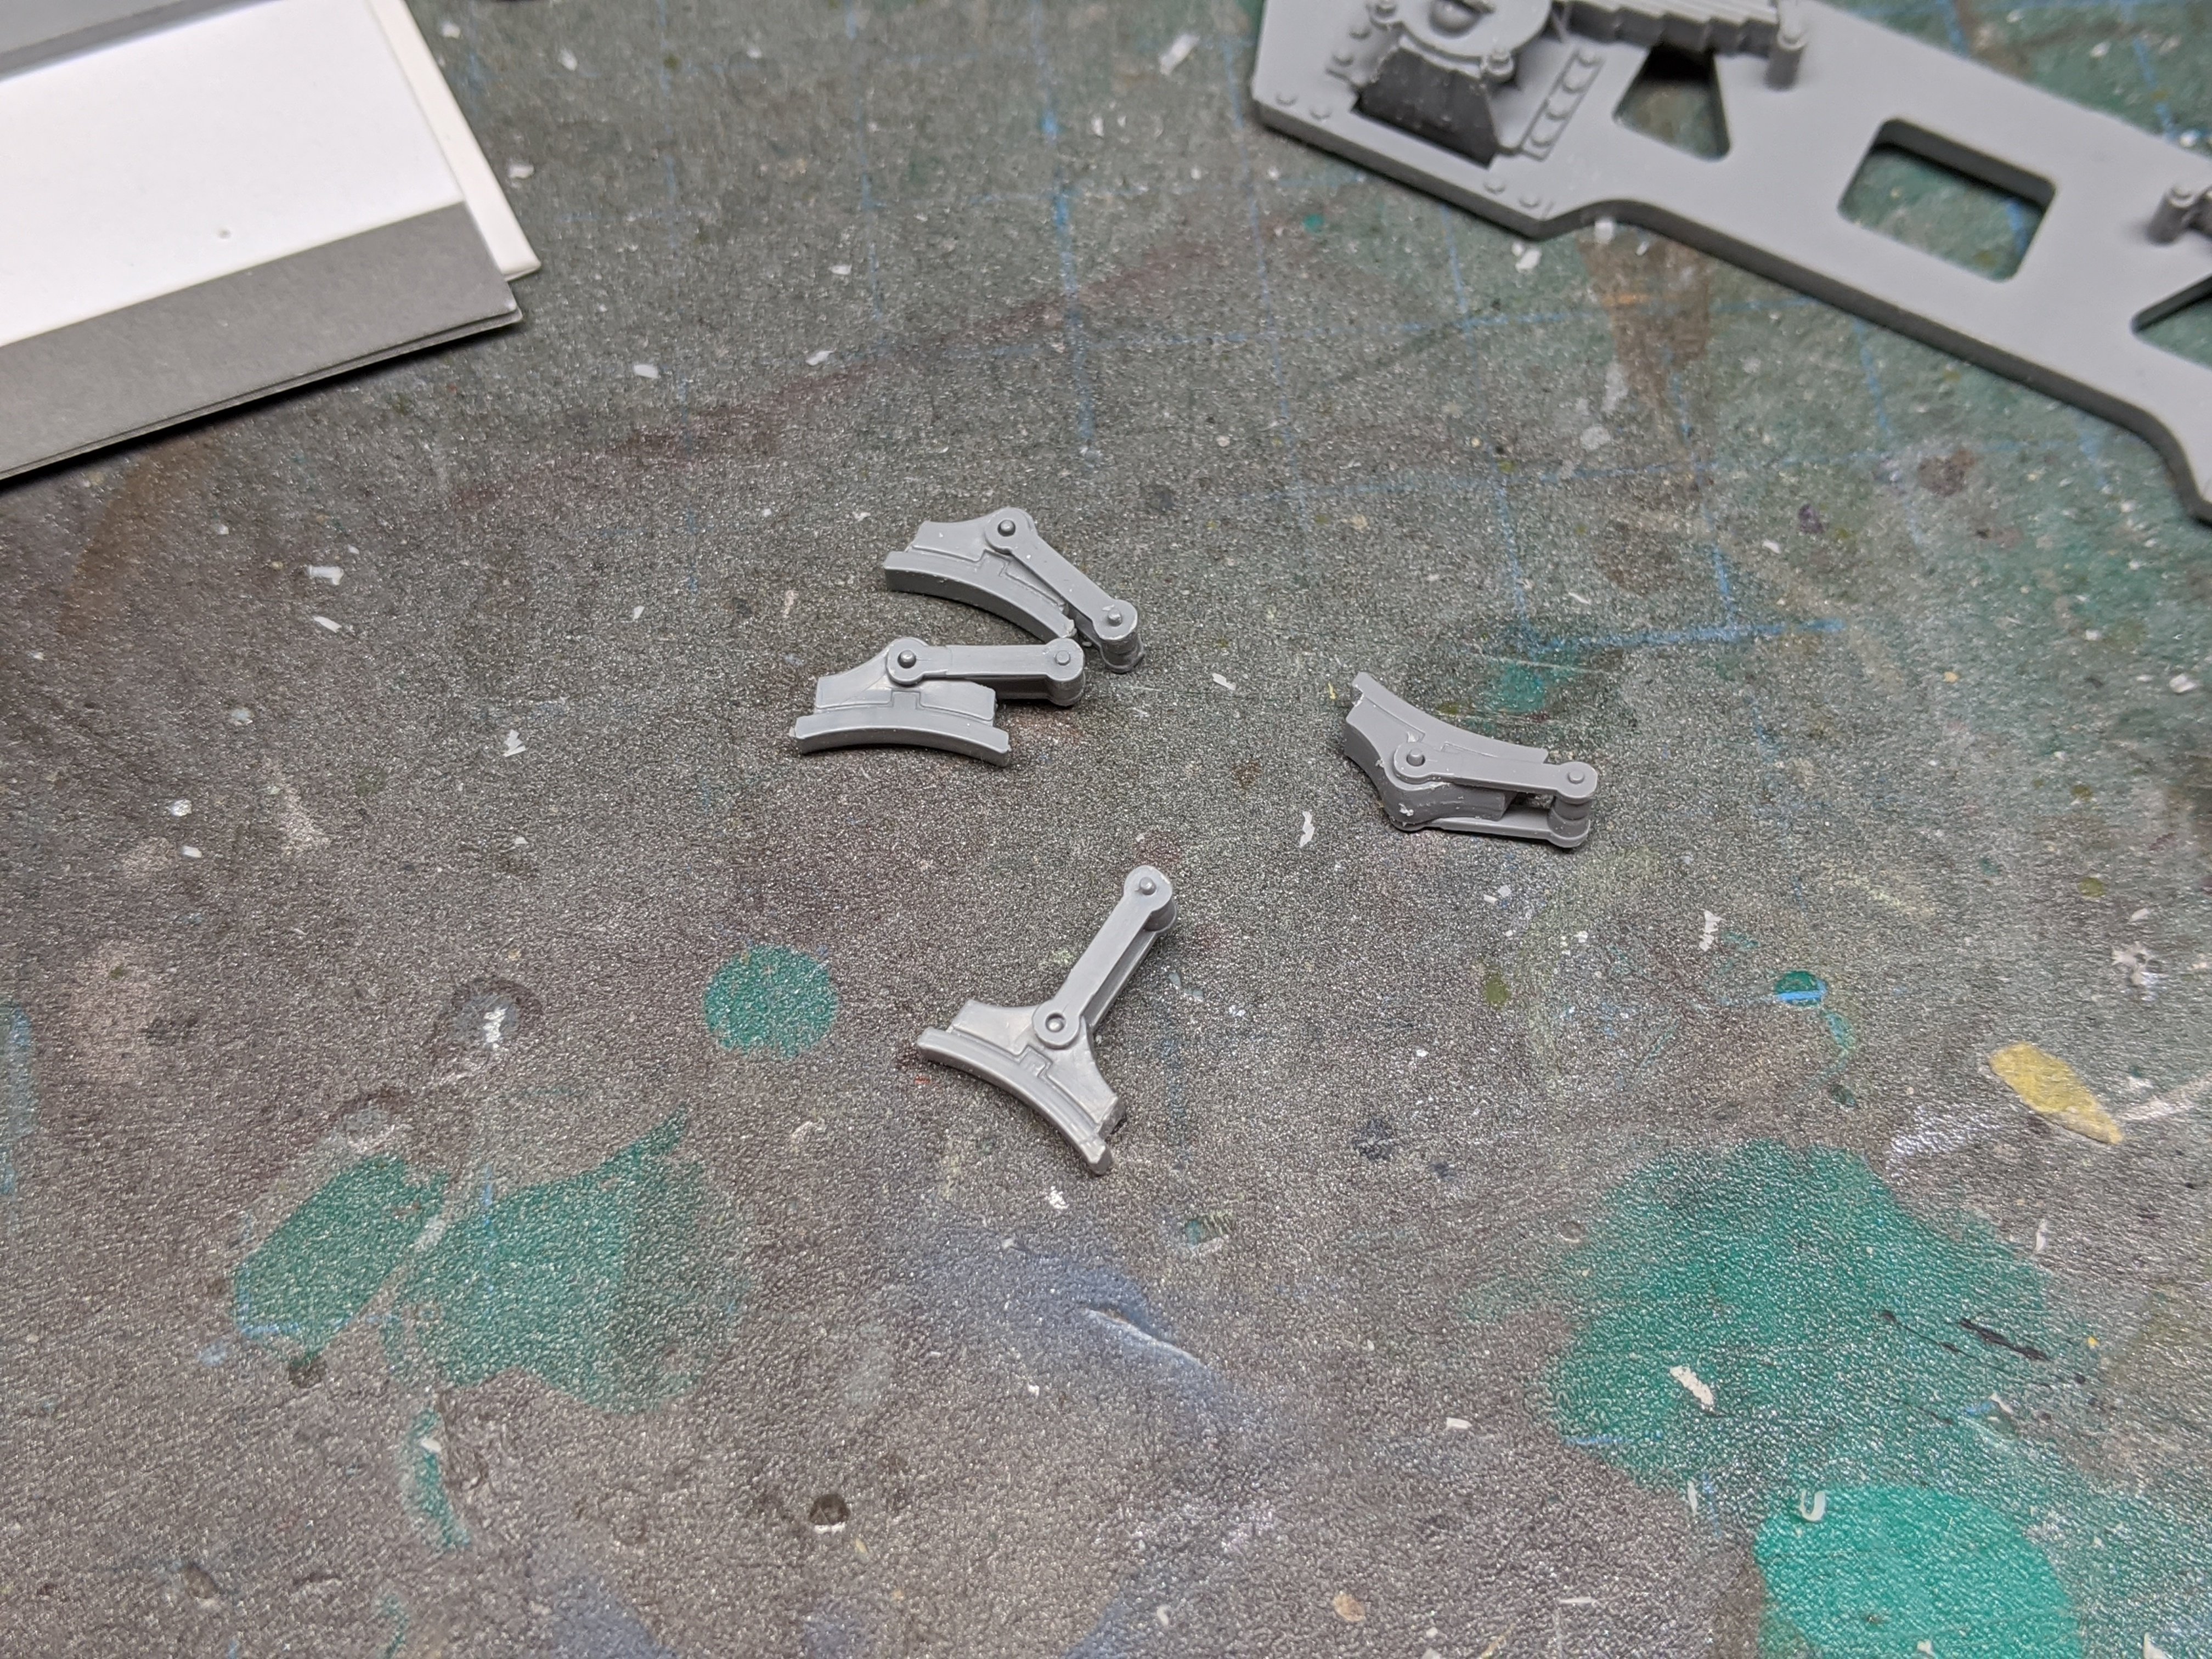
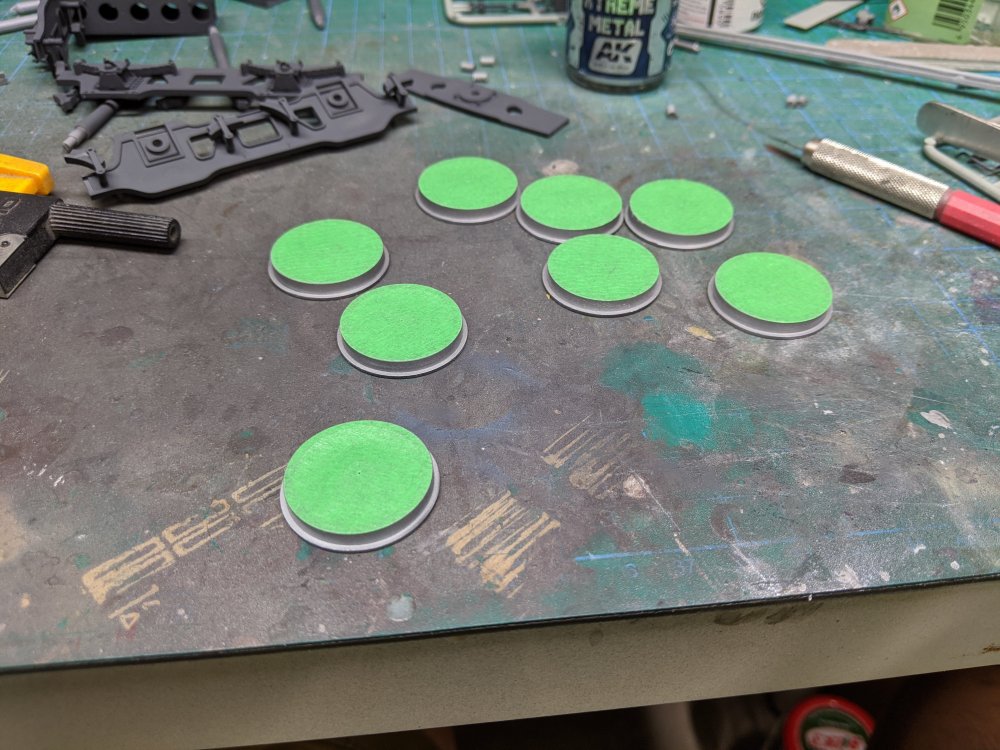
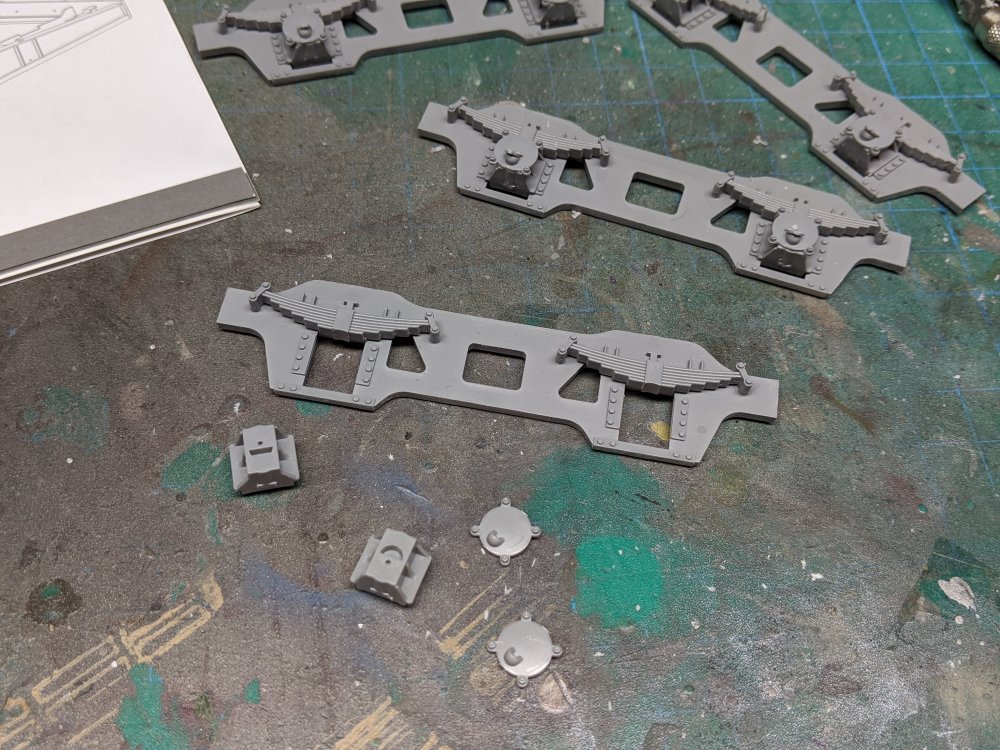
Ok, I've been working at the rail car a bit more. I started on the trucks. There's a decent number of parts for each one. The leaf springs are separate and just need a scrape with a hobby knife to remove the mould seams lines. On the back side, there's brake to added. . The instructions show that the shoe is handed and what to look out for to make sure you assemble it correctly. 4 down, 12 to go.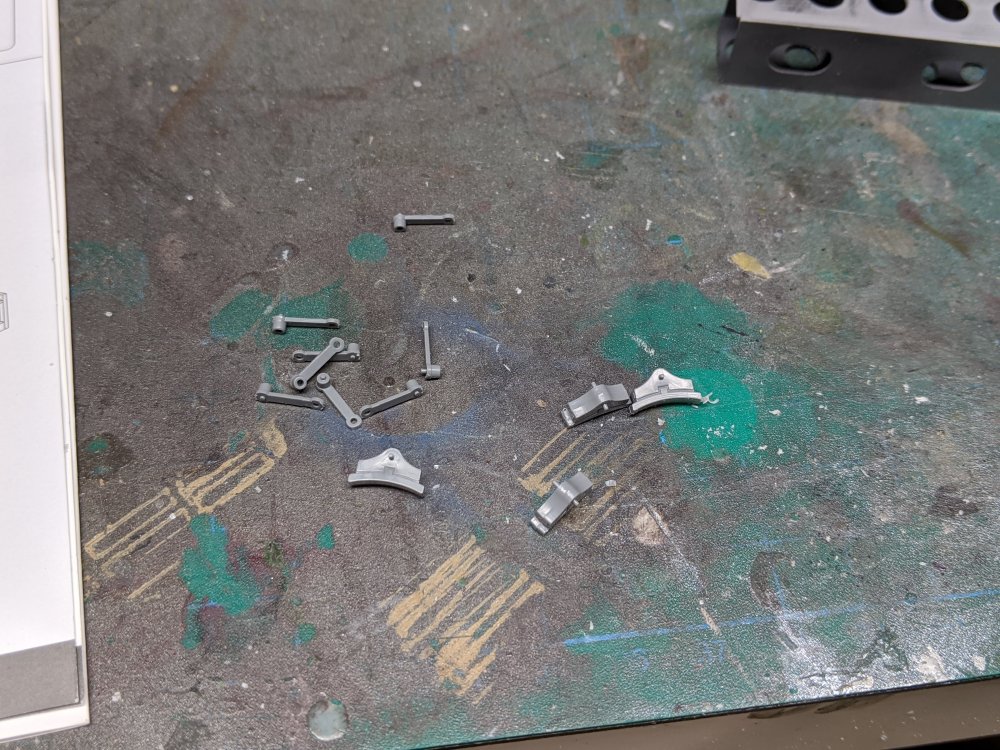
-
Nice! I just picked up the Miniart Grant Mk II kit last week. It'll be interesting to see the difference in build up. Are you going to do the Caunter paint scheme? Carl
-
Happy birthday Martin!
-
1:32 Revell AR196 Arado
BlrwestSiR replied to Slim_ShadyTwo's topic in LSM 1/32 and Larger Aircraft Ready for Inspection
Really nice build. I just picked up the twin float version so I'm curious how you found the multipart canopy? Some folks have complained about it. Carl -
Schwerer Plattformwagen Type SSYS
BlrwestSiR replied to BlrwestSiR's topic in LSM 1/35 and Larger Work In Progress
There's a section of track and railroad ties but no bed to out them on. So I may try to make that. Thanks Harv! Something really different for me. -
Really nice. Same here, I don't think I've seen another one of these before. Carl
-
Share how COVID-19 Quarantine has affected you.
BlrwestSiR replied to 1to1scale's topic in General Discussion
Here in Toronto, they've just passed a bylaw that if you're in a public place indoors, you must wear a mask. The same applies for taking public transit. We finally got on the down side of the curve and they want to keep us there. Carl -
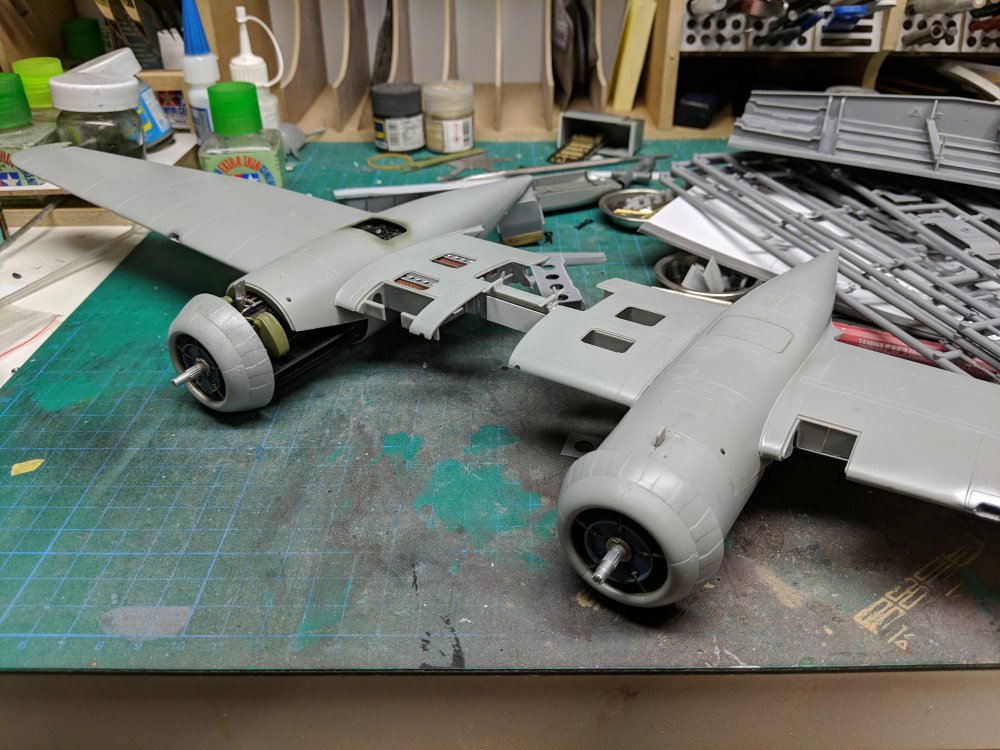
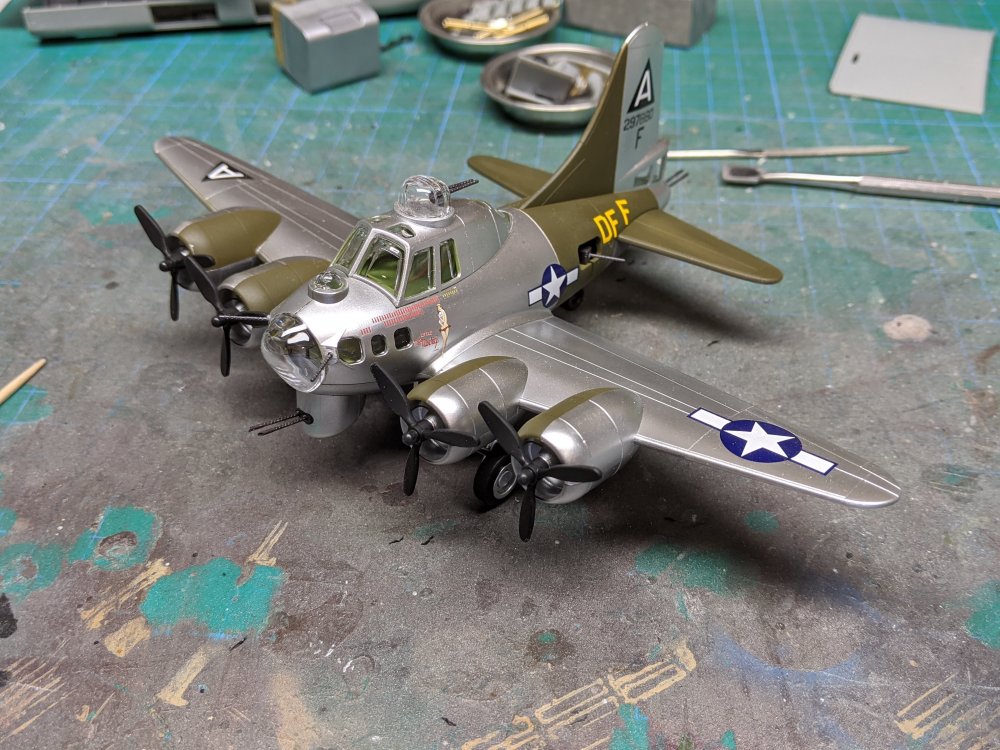
What is on your bench right now ? Share a picture :)
BlrwestSiR replied to Martinnfb's topic in Modelling Discussion
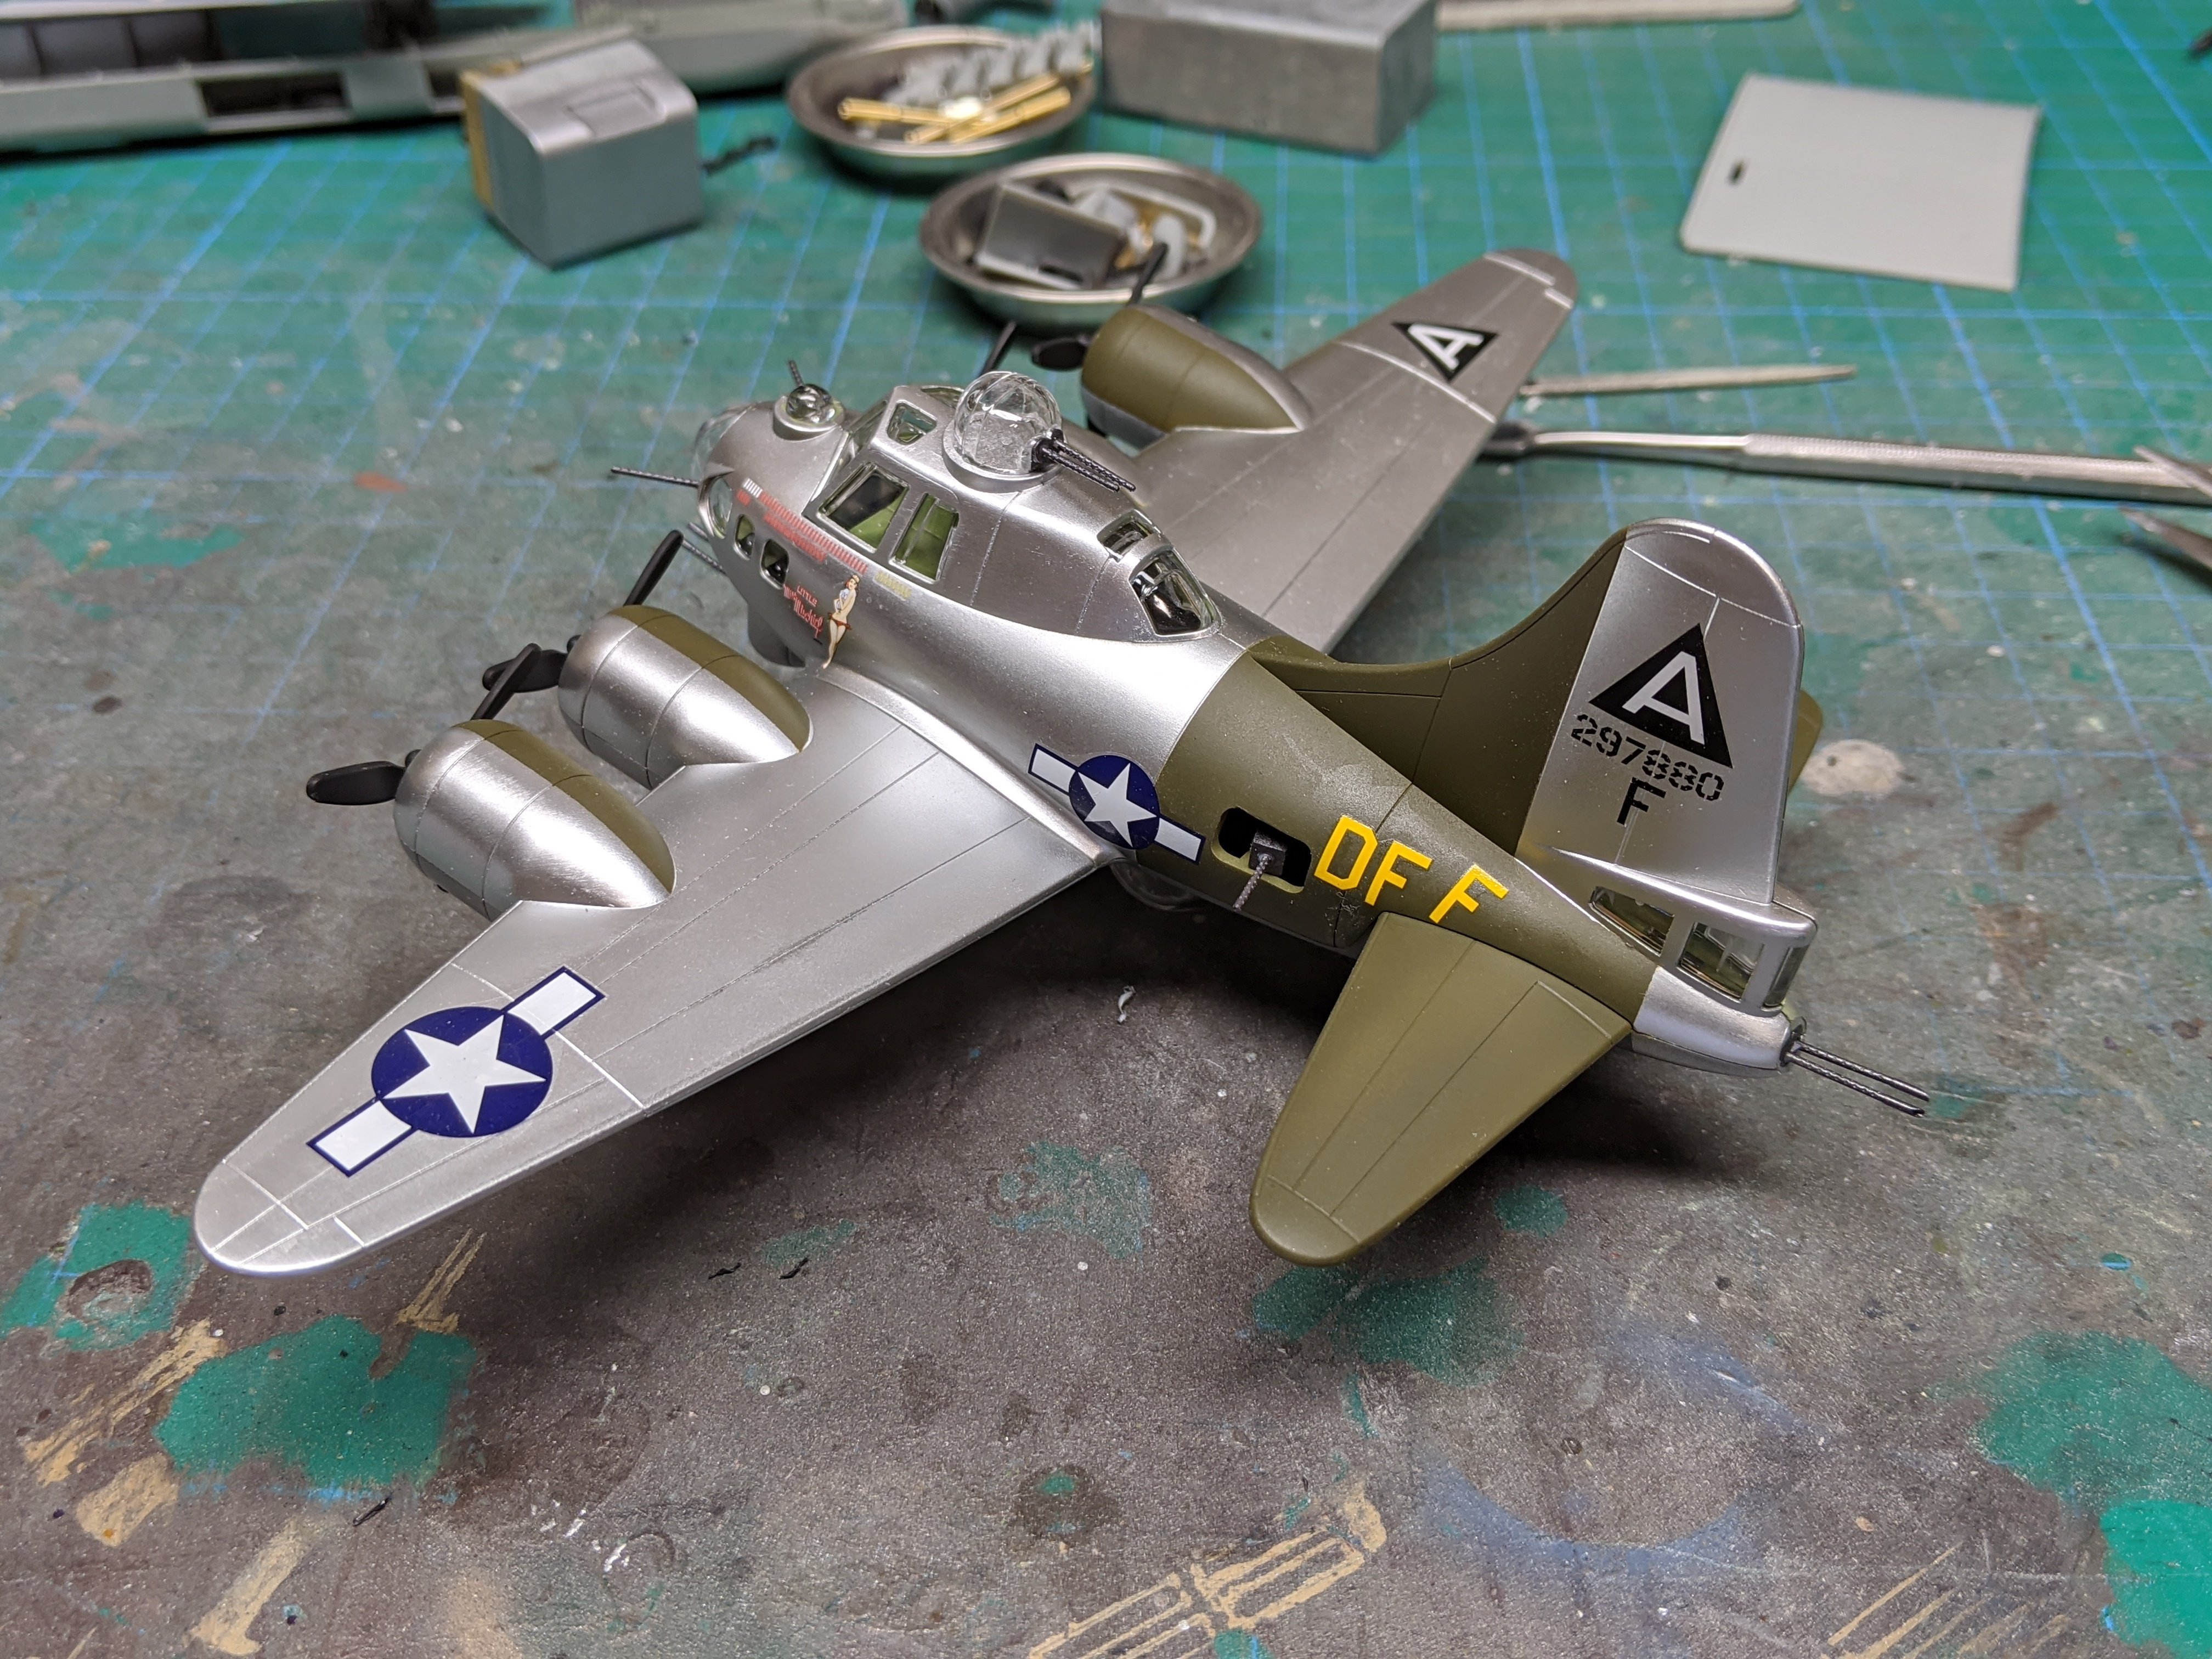
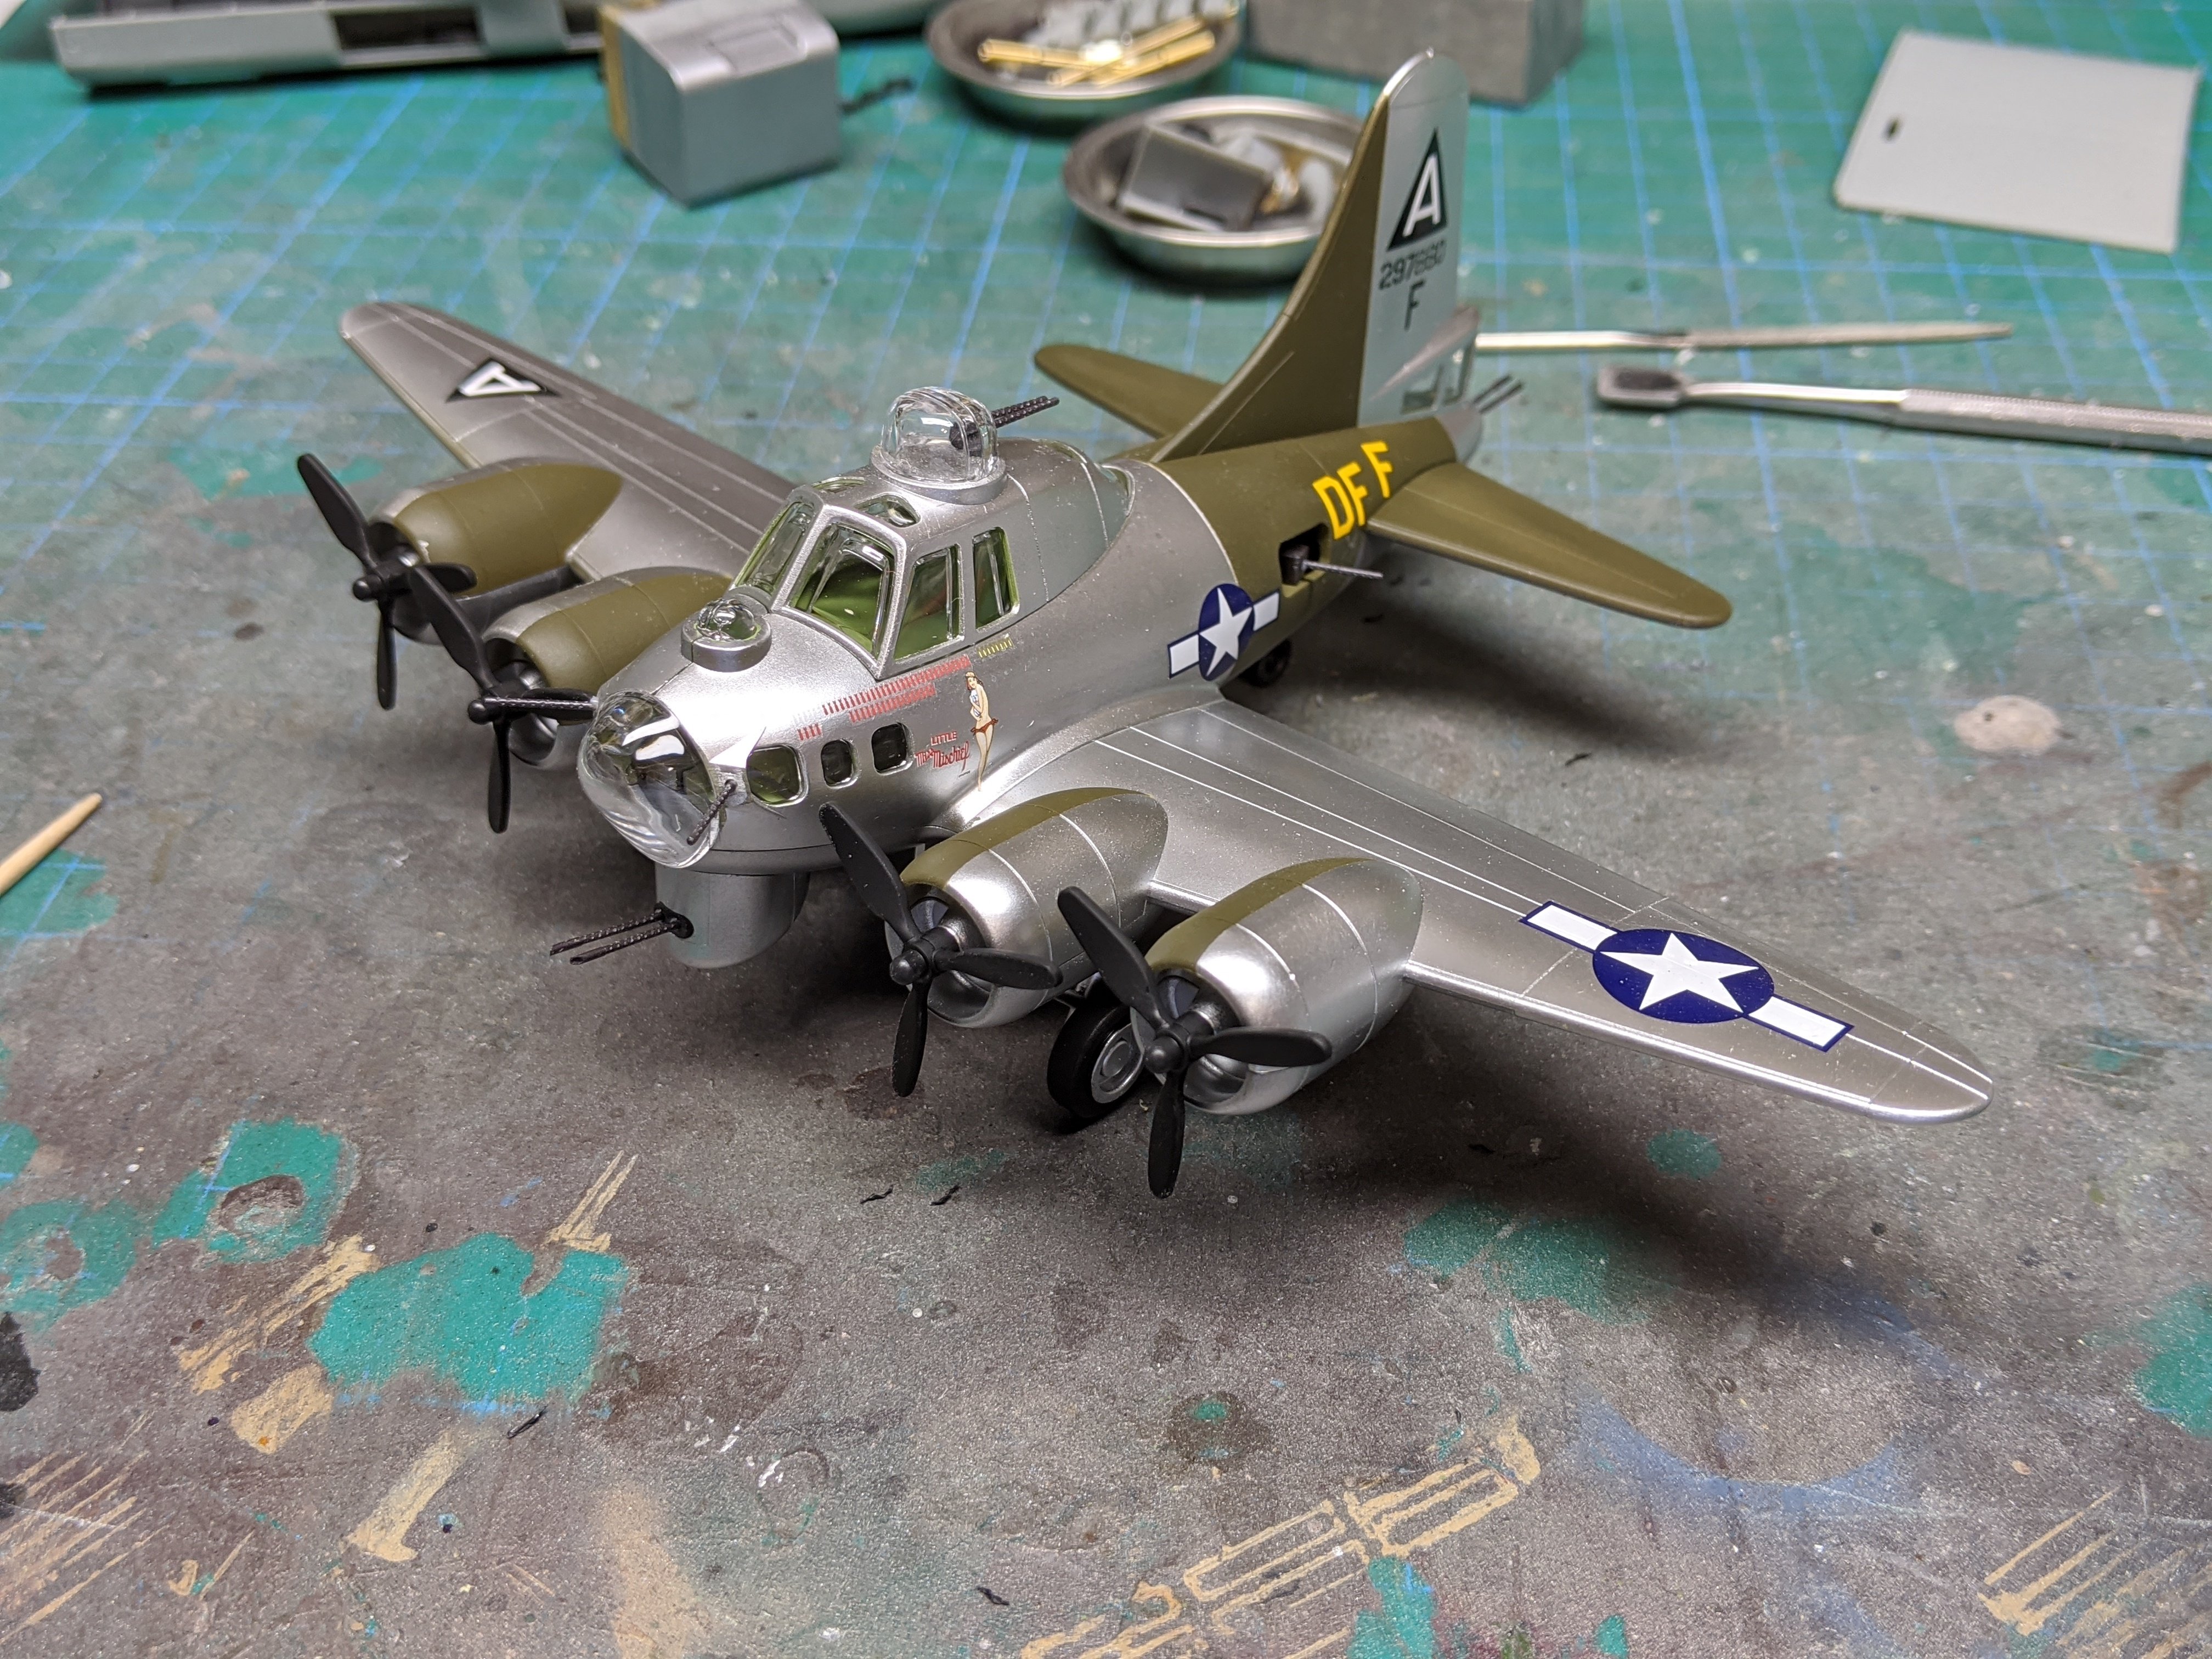
Finished the B-17 this afternoon. I used Aires resin gun barrels to replace the moulded on ones. A nice fun build.
-
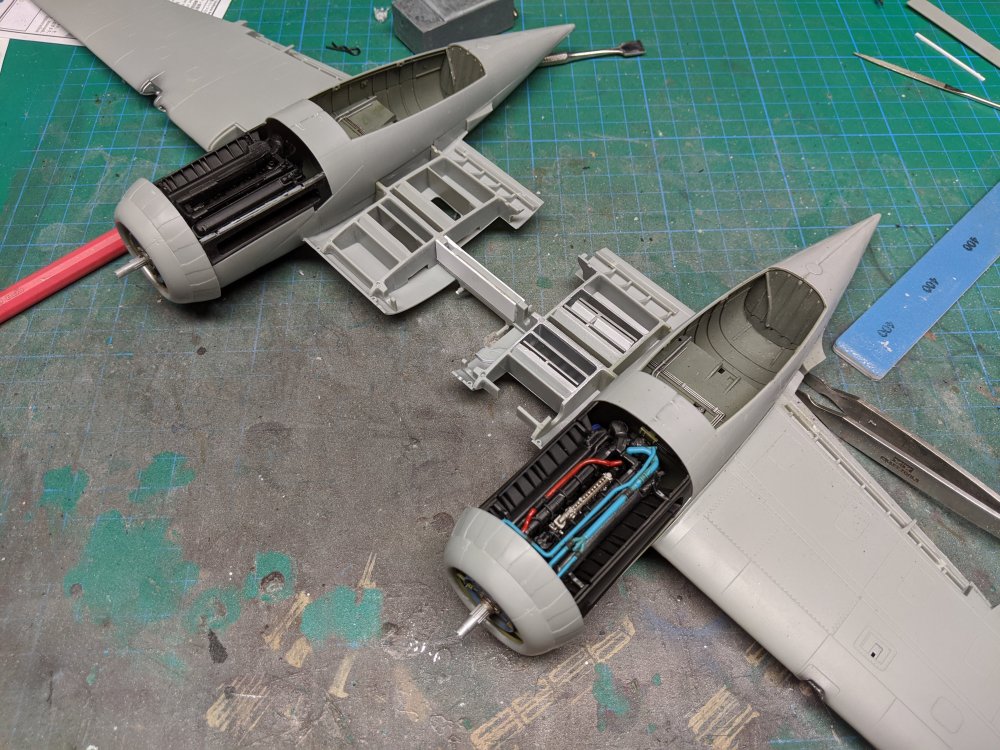
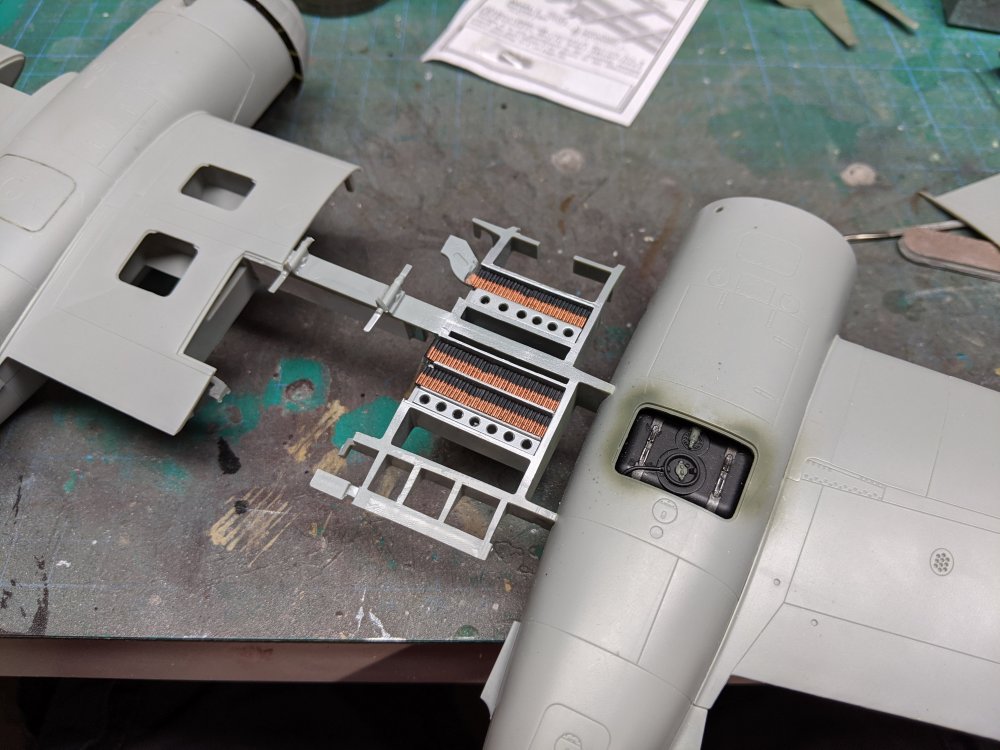
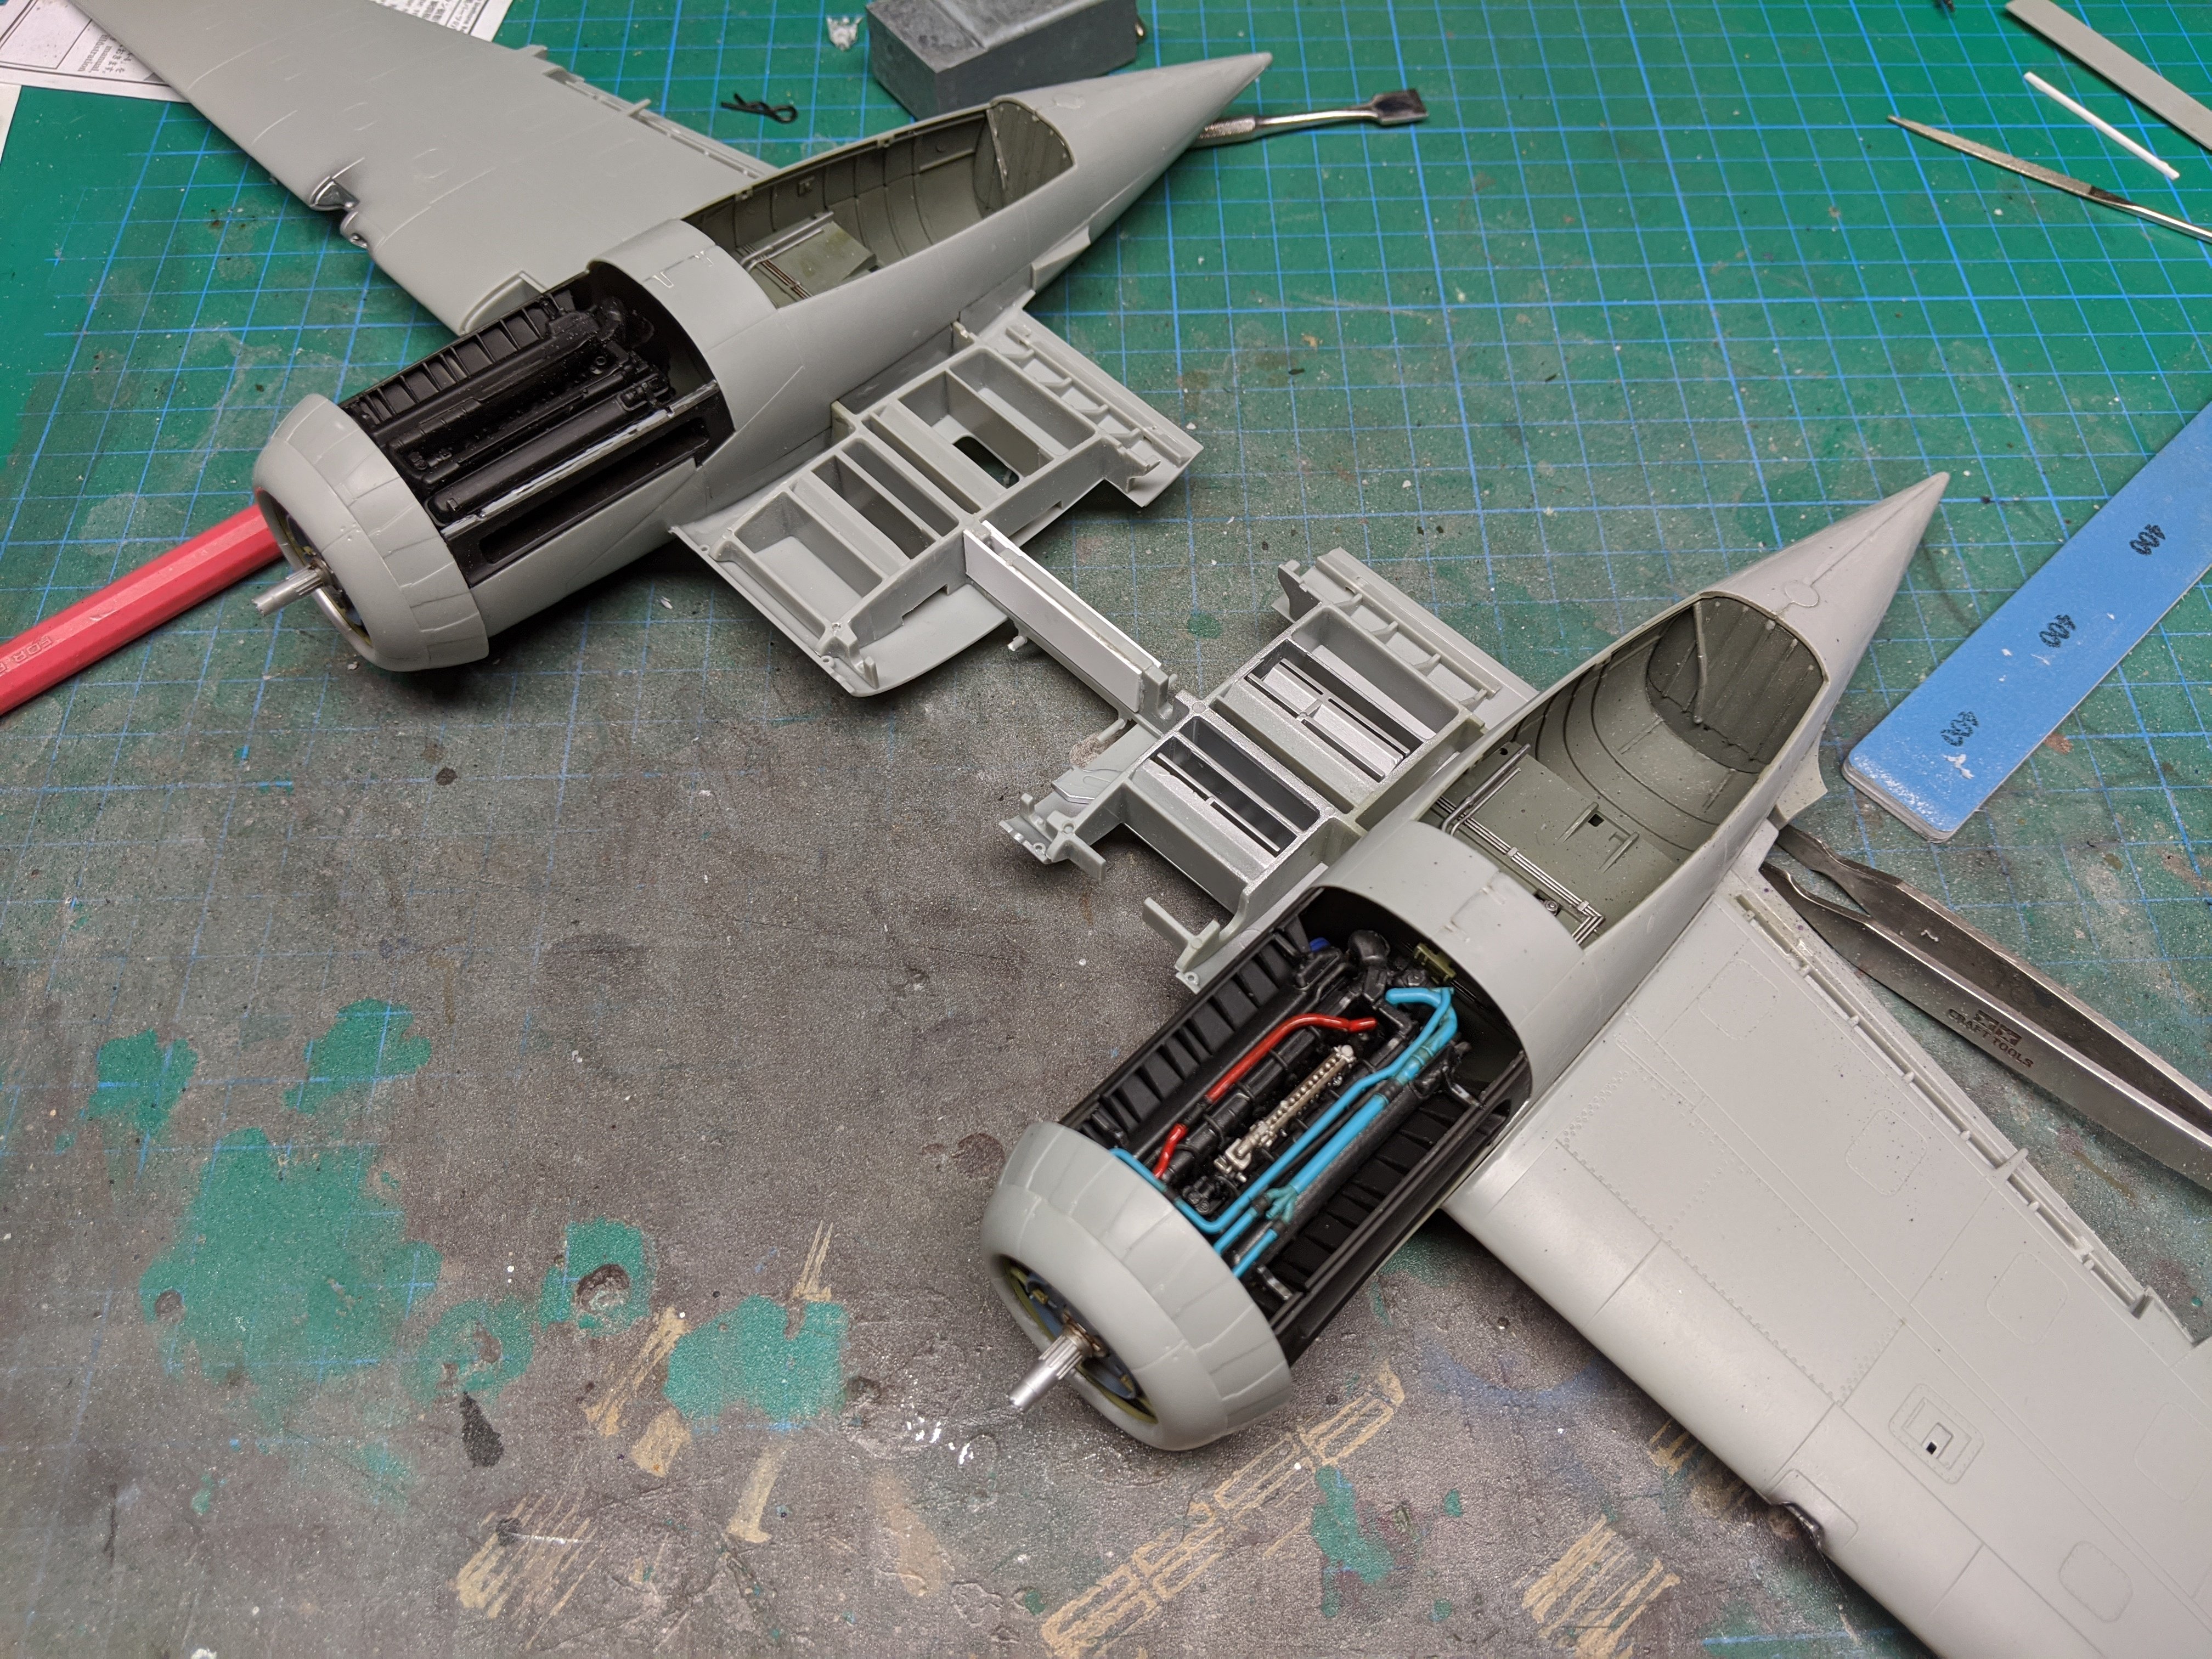
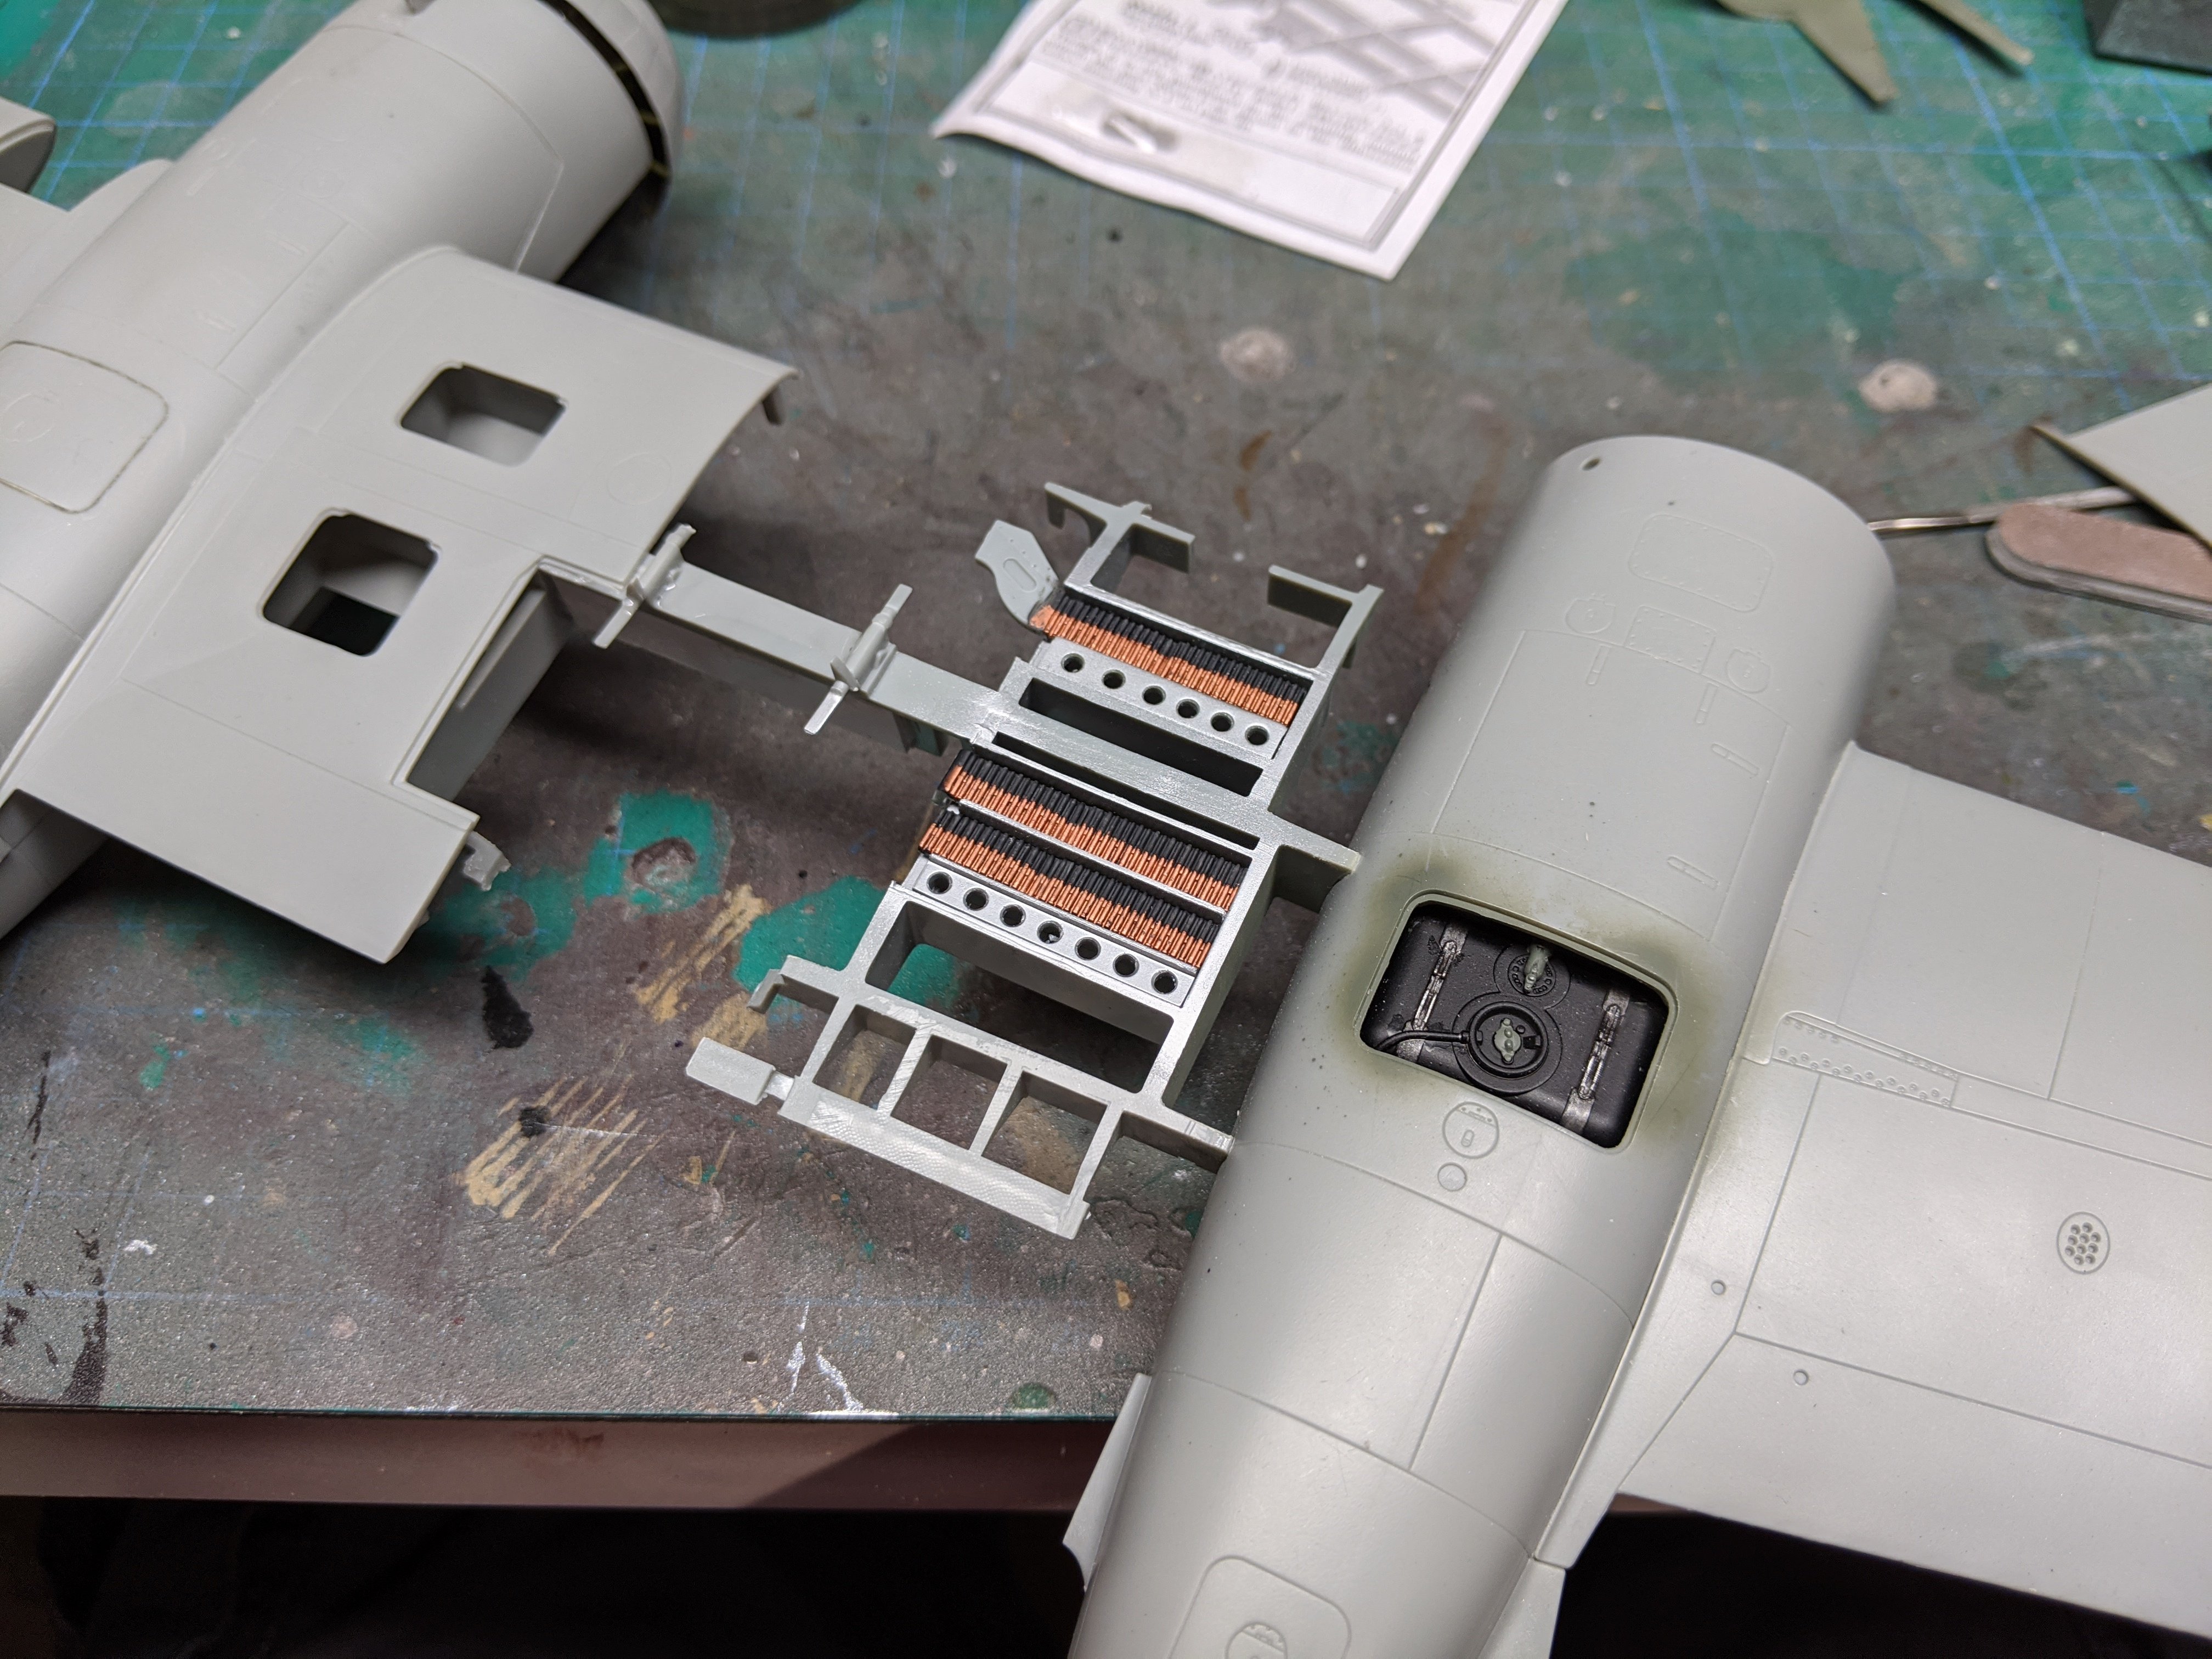
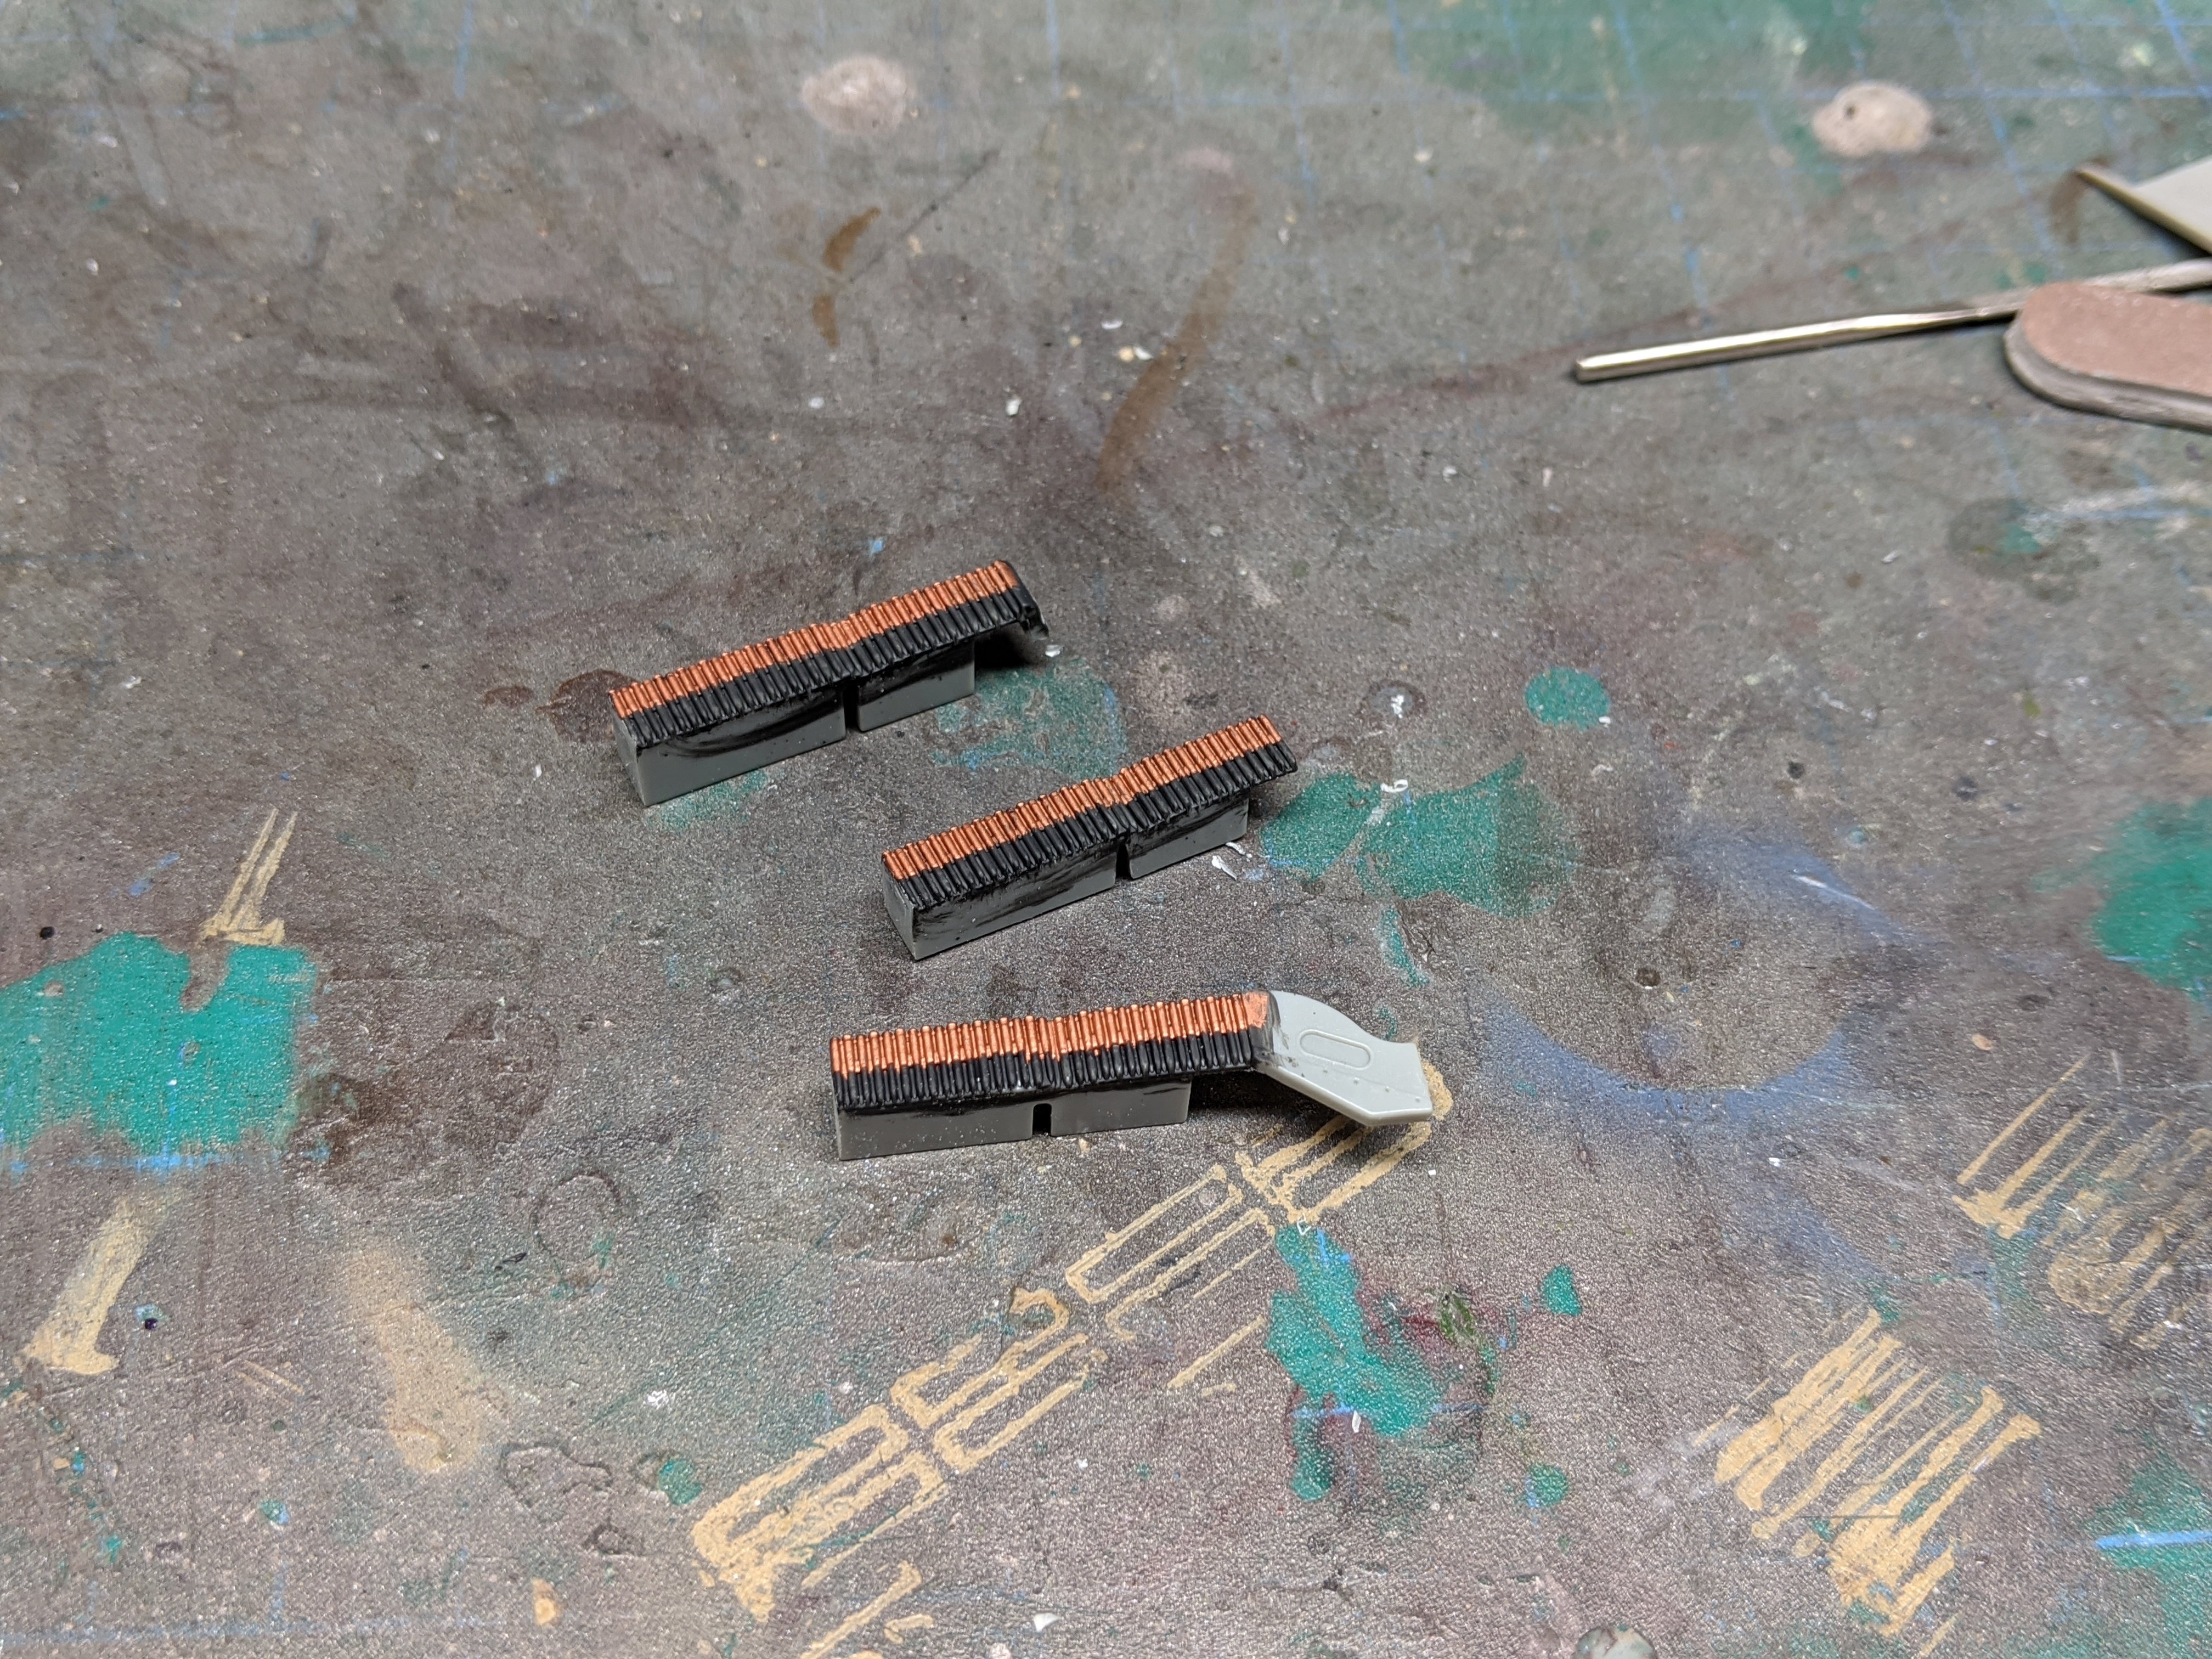
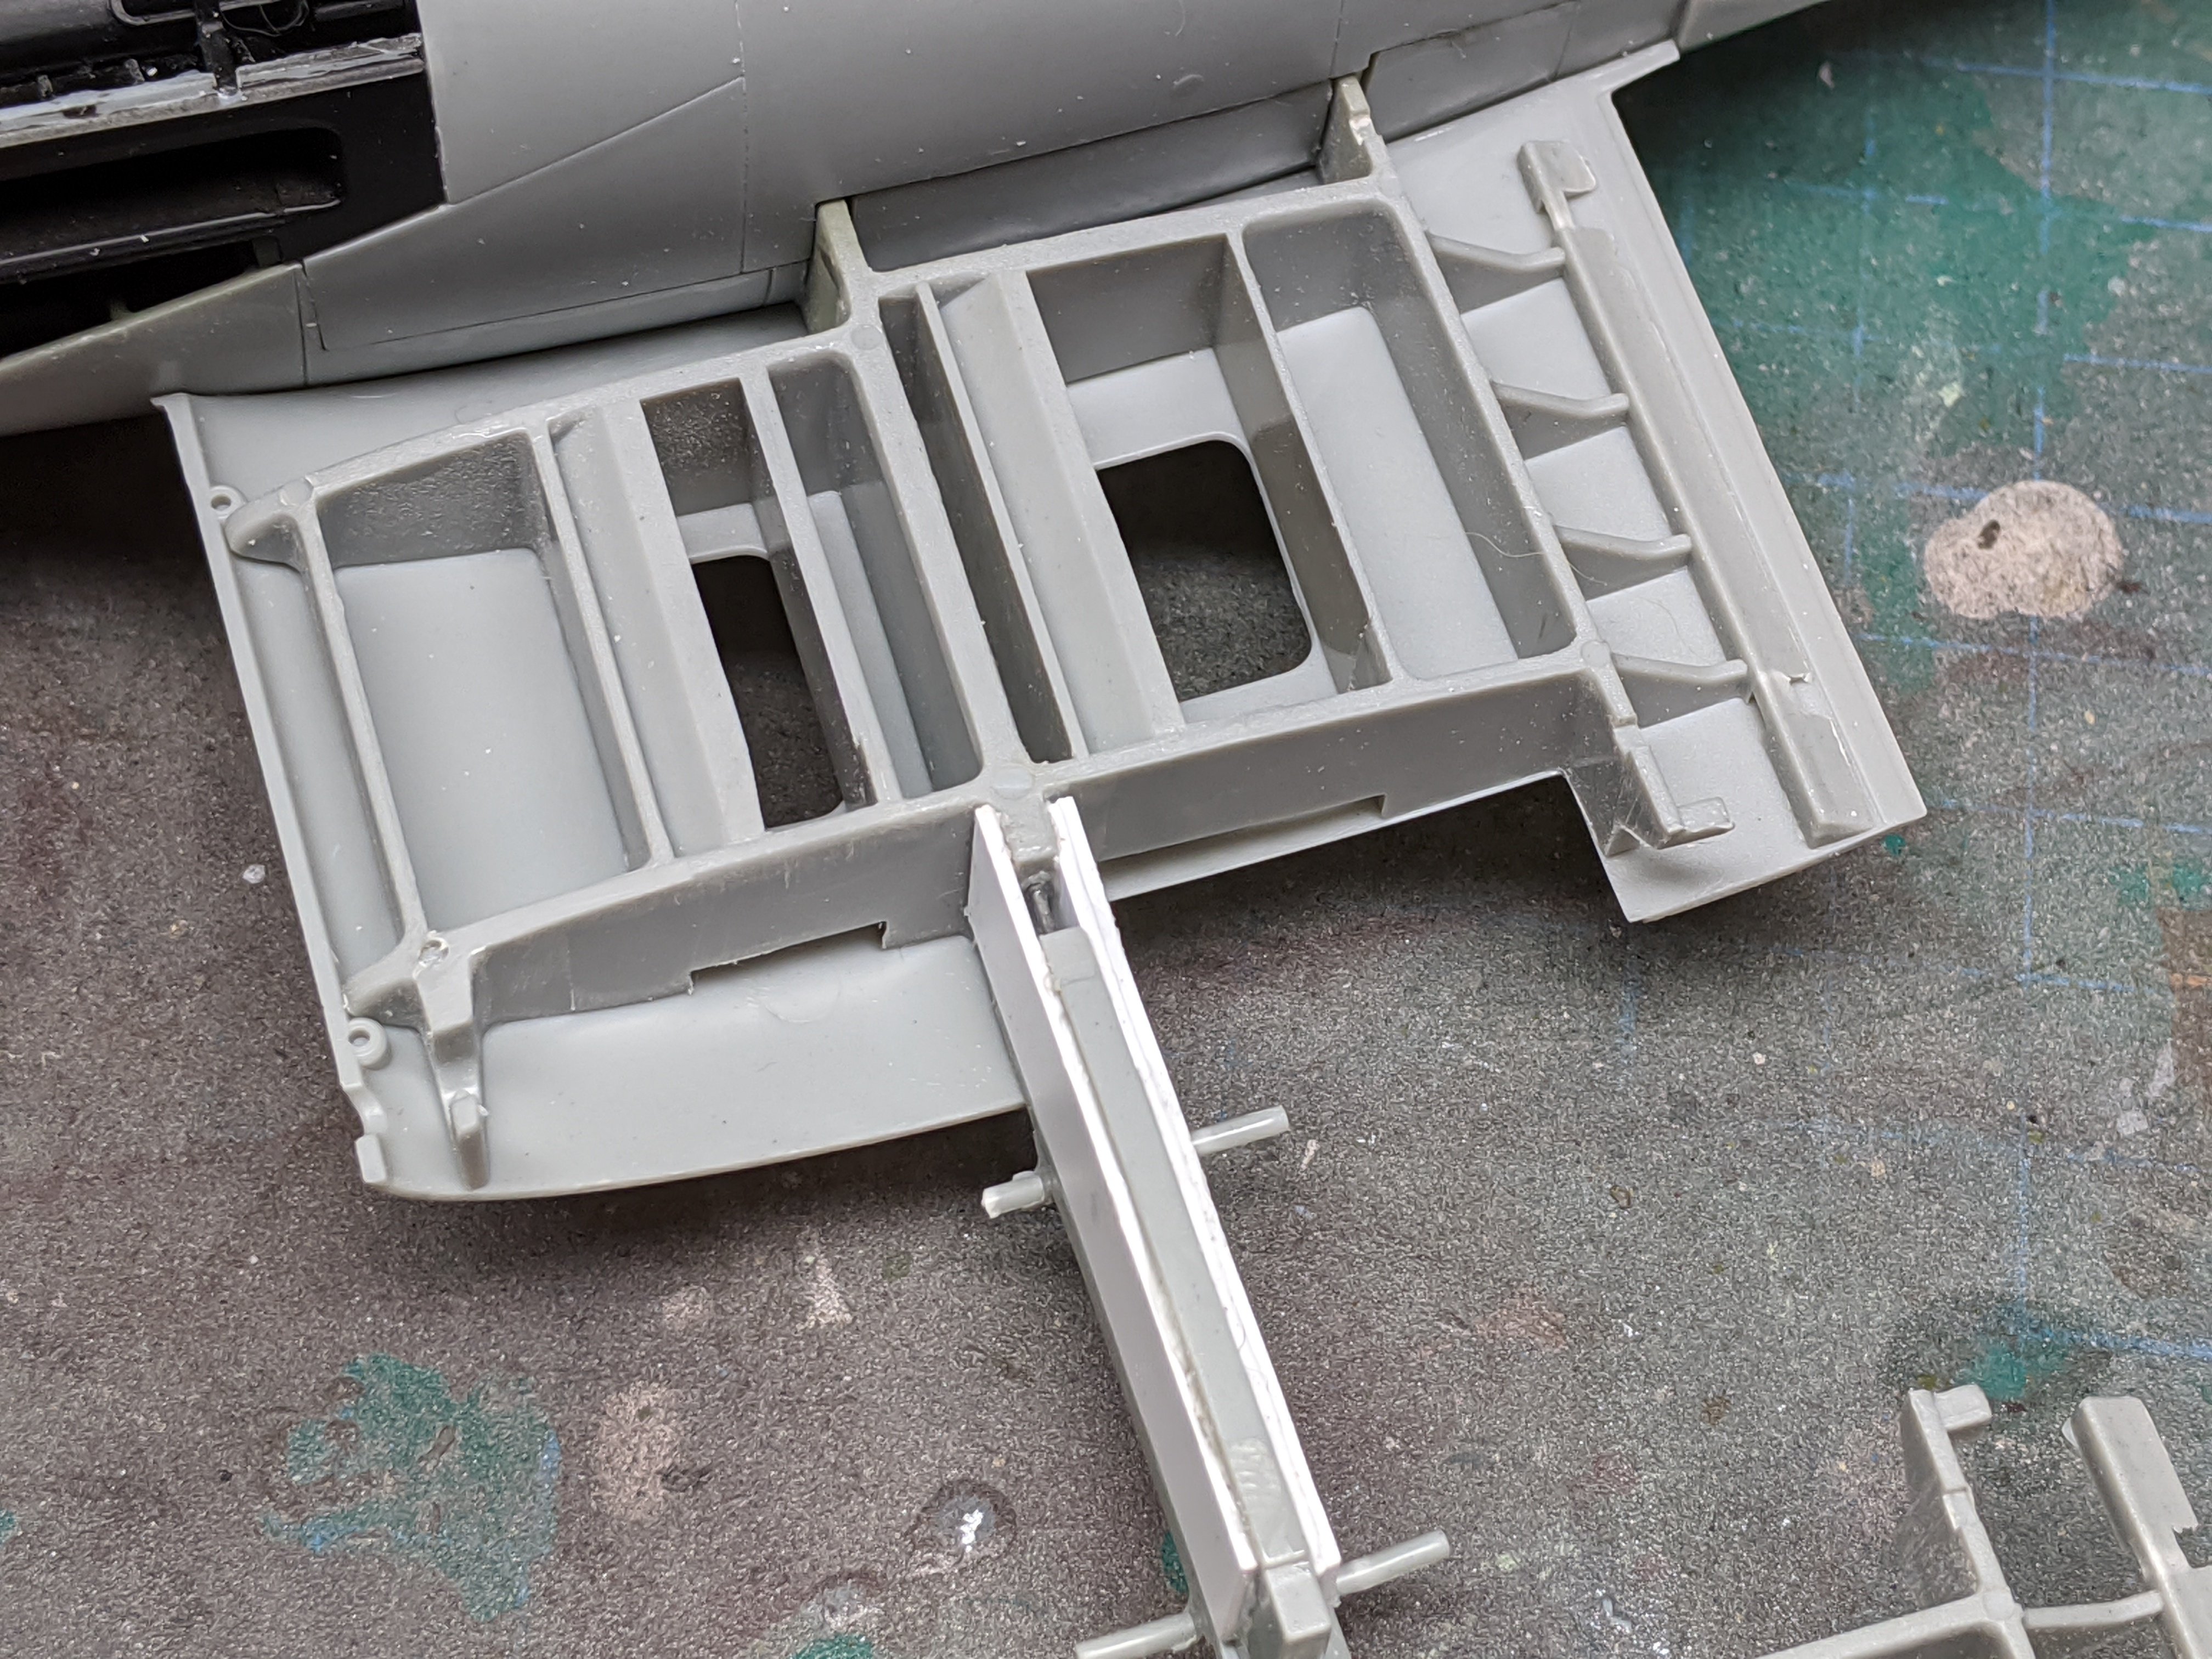
Ok, time to show the 219 some love. After the wing fix dried nice and solid, i added a second sheet of styrene to stiffen it up. I then started on the wing root guns and ammo cases. I then added the right side engine to the wings. From the underside there will be some of it still visible There's much less from the top. I aslo fitted the engine covers to the port engine. These required a bit of finessing but went in place as designed. Hopefully the right side will go as smoothly and still be removable.