DocRob
-
Posts
7,043 -
Joined
-
Last visited
Content Type
Profiles
Forums
Events
Gallery
Everything posted by DocRob
-
Thank you John, these Corsairs are pieces of beauty, as a kit and in real live. Kit wise, I think this is absolutely top notch with injected styrene. Cheers Rob
-
Cool thang Martin, I bought a disc sander from Proxxon last year, which really helped for my wooden sailing boat build. I wouldn't use it for resin though. Just too many particles in the air, even with the vac cleaner added. Cheers Rob
-
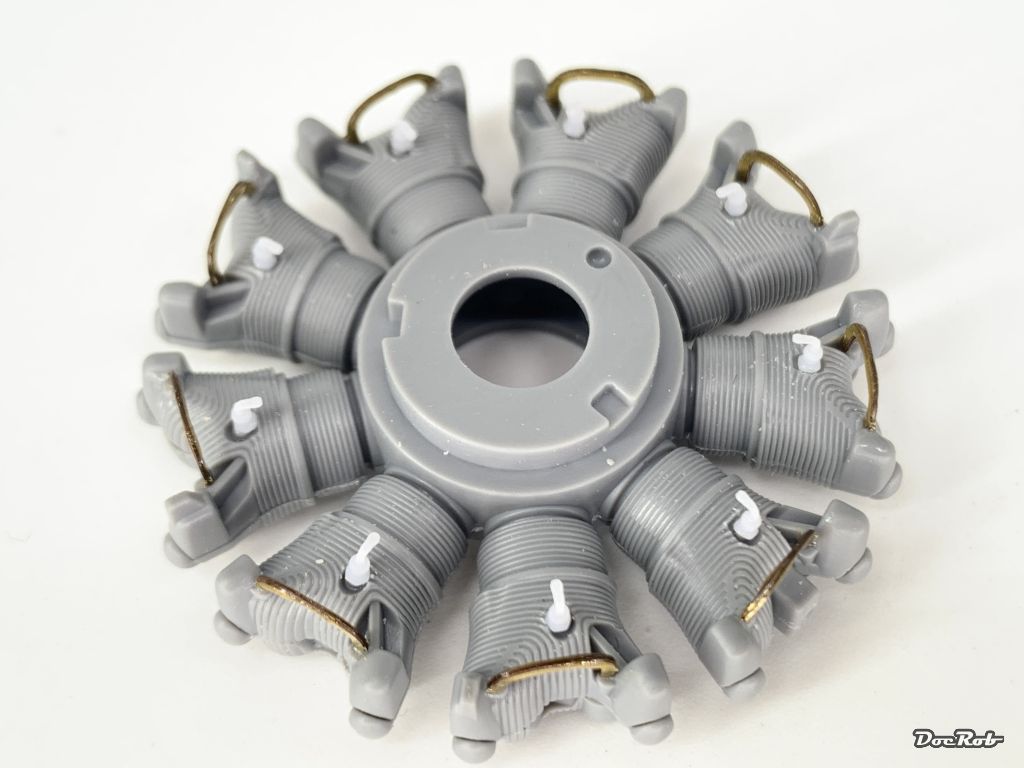
Meanwhile I finalized the last preparations, before painting the engine. I glued on the spark plugs, cut flush from the resin sprue and added the oil? tubing on the top front of each cylinder. These are made from folded pe, which were left from my Corsair build 15 years ago. To let them appear more tube like, I applied CA glue with a toothpick to the folded front sides, to prevent a visible gap. Cheers Rob

-
This is, what I have planned for my Monkey, Paul. I will use Tamiya's lacquer paints, which are great to work with. They can be thinned with Mr. Levelling thinner without problems. I usually mix them up to two thirds of thinner and one third of LP-color. I used Tamiya's Lacquer paints on different occasions and they are perfect for car and motorcycle modelling. My Ford GT and my Ducati Panigale build of last year were exclusively painted with LP-colors. The most tempting and simultaneously rewarding part of bike builds is the replication of the different materials with their typical shine and reflectivity, like plastic and metal. Modern bikes call for more than chrome and aluminum, you have different types of steel, light metals like aluminum, anodized or not, titanium, magnesium, right down my alley Cheers Rob

-

ICM Munich crisis Gladiator.
DocRob replied to Drdave's topic in LSM 1/32 and Larger Aircraft Ready for Inspection
Thank you Dave, I will keep your recommendation about the axles in mind. Your Gladiator has a perfect finish to my eye, congratulations. Cheers Rob -
P-51 Skyczar 363FG Staplehurst ALG June 1944
DocRob replied to nmayhew's topic in LSM 1/35 and Larger Work In Progress
I like the layered NMF effect a lot. I used splatter masks and steel sponges on non-reflective surfaces so far, but never on aluminum. The chipping fits the state of the aluminum, so far so good. Cheers Rob -
Gary the Riveter , nice job with these tiny nuisances. It will look fantastic under some paint. Cheers Rob
-
Hasegawa Ki44 Akeno flight school.
DocRob replied to Drdave's topic in LSM 1/32 and Larger Aircraft Ready for Inspection
Another fine build. I like the paintjob, as it's hard to get a NMF finish weathered realistically. The spills though, I don't like too much , but that's nitpicking. Cheers Rob -
ICM Munich crisis Gladiator.
DocRob replied to Drdave's topic in LSM 1/32 and Larger Aircraft Ready for Inspection
Again, very nice Dave. Were there any difficulties through the build?. I have the same kit and plan to build it soon, but in silver dope livery. What's the meaning of the Munich Crisis title in relation to the Gladiator? Cheers Rob -
WNW DFW CV For a Free Ukraine!
DocRob replied to Drdave's topic in LSM 1/32 and Larger Aircraft Ready for Inspection
Very nice, painting and weathering are up to your usual high standard. Cheers Rob -
I have the same in stash, along with a dedicated decal sheet for some special versions of the monkey. It will be a fun-in-between build for me in the next time. Cheers Rob
-
Wnw post war Ninack in Pheon decals.w
DocRob replied to Drdave's topic in LSM 1/32 and Larger Aircraft Ready for Inspection
Well worth showing the pics Dave . A great build and paintjob, but the interaction between the figure make your Ninack stand out. Cheers Rob -
Wnw post war Ninack in Pheon decals.w
DocRob replied to Drdave's topic in LSM 1/32 and Larger Aircraft Ready for Inspection
Unfortunately, your pics don't show. A shame, given your usual brilliant work. Cheers Rob -
What is on your bench right now ? Share a picture :)
DocRob replied to Martinnfb's topic in Modelling Discussion
Inks are definitely worth trying them. I tried them once on my figures for my Skoda RSO dio, to enhance the leather effect of the shoes and belts. I wanted a worn blackish brown look with a little leathery shine and liked the effect. The ink wasn't mixed into the color, but added on top of it. Cheers Rob

-
What is on your bench right now ? Share a picture :)
DocRob replied to Martinnfb's topic in Modelling Discussion
Maybe not, but it enhances the creepy noir effect 'Frank Miller' style. BTW.: I think about using small amount of inks in colors for tinting effects for some time. When time comes, I will try that. Cheers Rob -
What is on your bench right now ? Share a picture :)
DocRob replied to Martinnfb's topic in Modelling Discussion
A true badass cruiser Carl, but somehow, I would have liked a hint of blue in the black. Cheers Rob -
That's maybe so, but No. 49085 a generic Luftwaffe set is still available. The steel ones aren't bad either. The later ones are ultra thin and bend easily. Not to say there is a set (No. 48085), including an IP for the Tamiya ME-262. Personally, I wouldn't leave seat belts out in 48 scale like Gary, but before struggling with the HGW belts, I would choose simpler options. For 32 scale it's another story, nothing beats HGW here and I build up a lot of them. Cheers Rob
-
Coming together nicely Bill. I hope your tail fix will works and you continue to cruise with the build. I think, you maxed out the possibilities with the IP, but the plastic itself looks soft and toyish to my eye . Cheers Rob
-
1:32nd scale Lloyd C.V
DocRob replied to sandbagger's topic in LSM 1/32 and Larger Aircraft Ready for Inspection
Again absolute flawless work. Plane and setting are beautifully rendered to your usual high quality. The plane is a beauty and you rendered the materials perfectly, specially wood and canvas. Cheers Rob -
Nice work Sasha, I will follow closely as I have the Royal Class 109G boxing from Eduard in my stash. You can build anything out of this box from G2 to G14 and there are some really uncommon paint schemes included. I was thinking about option I for one of the two planes, monochrome as well. Bez názvu - 1 (eduard.com) Cheers Rob
-
Very nice progres with the innards of the Schwalbe, Chris. I like the cockpit detailing and gun area, but couldn't live with the IP. I have to build a 262 (I have two in stash) but I imagine that the bubble canopy allows a nice view inside. If you use the pilot figure you can skip the seat belts. HGW belts are a bit fiddly to assemble specially in 48 scale, but there are easier options, Eduard has different kind of belts in their program in etched and printed steel and Superfabric. All easier to build up and sufficcient for 48 scale. Cheers Rob
-
Very interesting Gary. I can't wait to see all the riveting and masked control surfaces under some paint. Cheers Rob
-
They are only glued to each side using CA, Carl. That should hold up. First I thought about threading thin wire through the braided thread, but that would enhance the diameter too much. My Anyz thread is labeled as 0,5mm diameter. I don't know if they have thinner variants. Cheers Rob
-
Thank you Mike, the bad thing about Tamiya kits, you have to deliver. They are so good, that fail is inacceptable and everybody news that . The good news, the kits are so well designed and sharply detailed, that fail is very unlikely with only a bit of effort. Still nursing the plague, but I hope that will become better the next days. Cheers Rob
-
P-51D Bardahl Special 2022 finished
DocRob replied to JohnB's topic in LSM 1/32 and Larger Aircraft Ready for Inspection
Oh, great, the rivets / fasteners didn't show that well on the other pics, but look great on the last one, perfect. Cheers Rob