DocRob
-
Posts
7,127 -
Joined
-
Last visited
Content Type
Profiles
Forums
Events
Gallery
Everything posted by DocRob
-

Done - F-4EJ Kai Phantom - The Last of it's Kind ZM 1/48
DocRob replied to DocRob's topic in LSM 1/48 Work in Progress
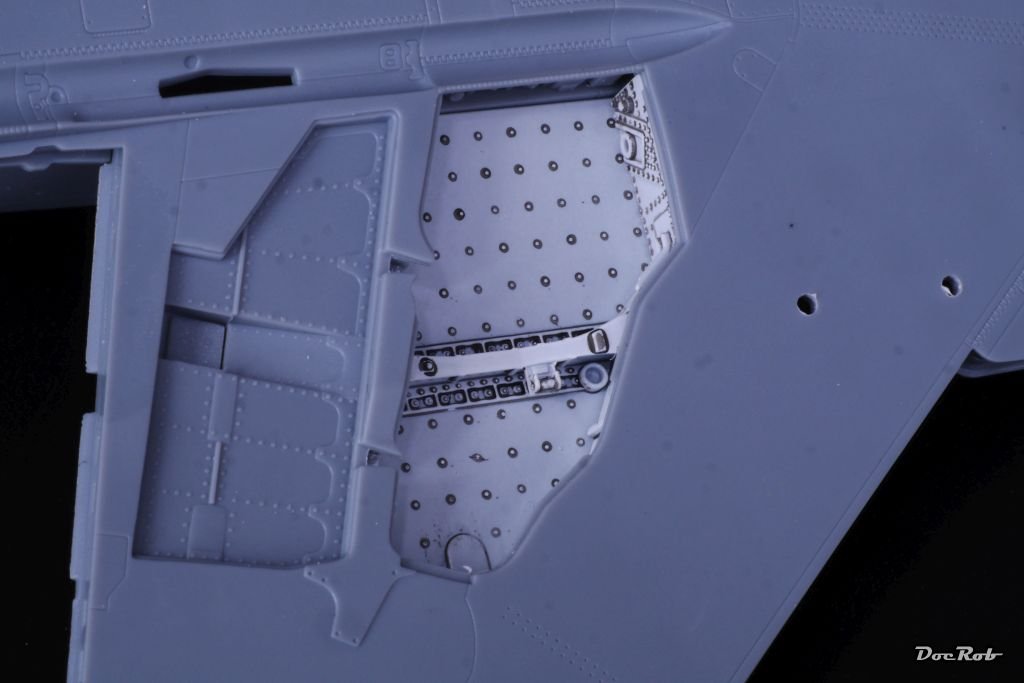
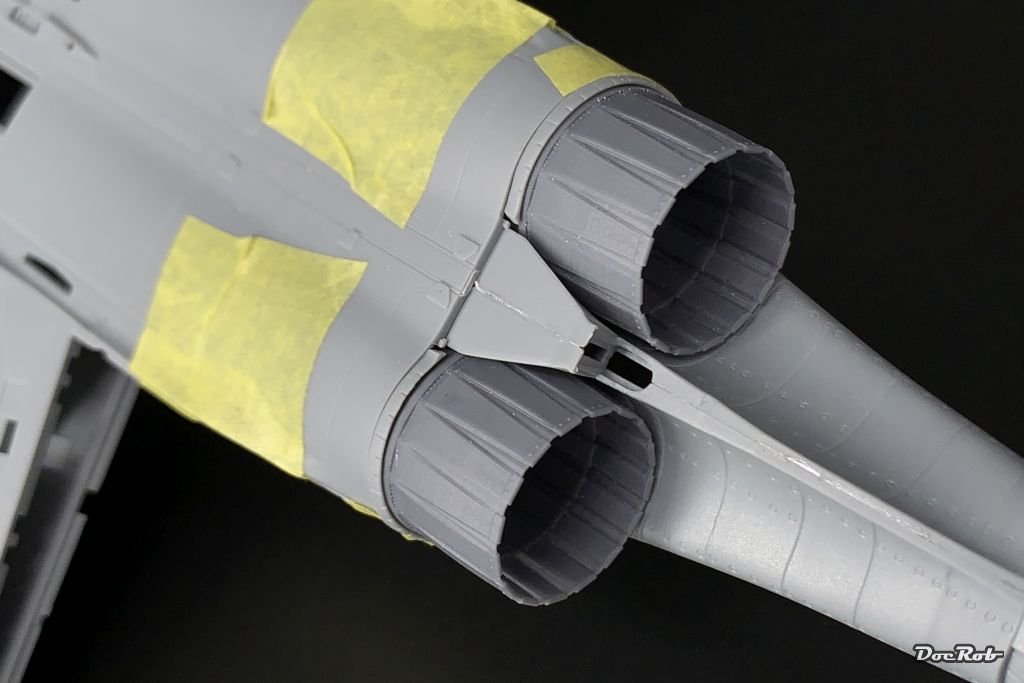
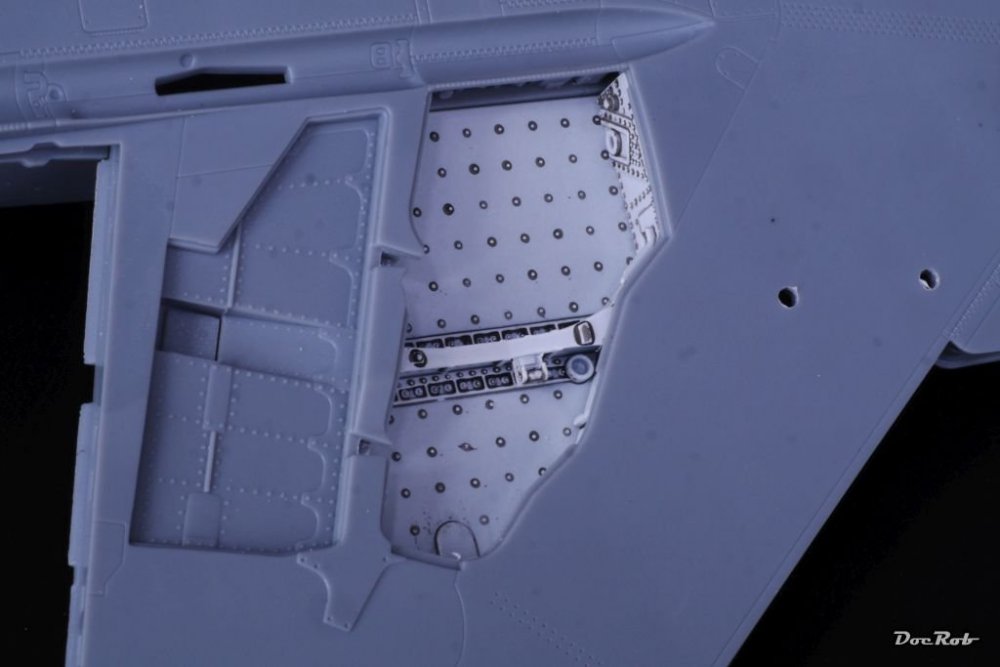
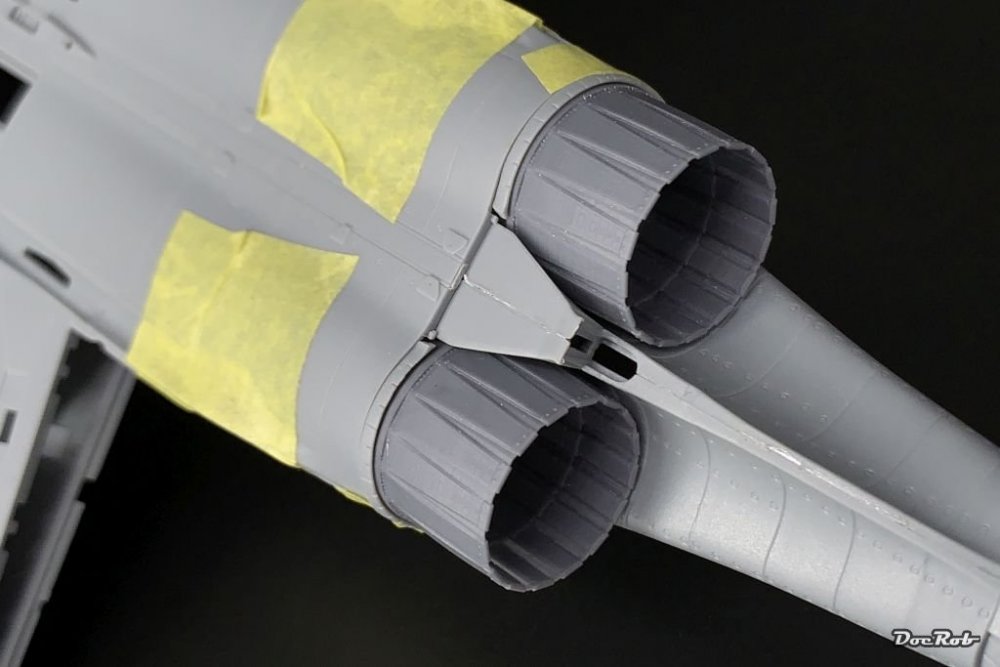
Today, I glued together the wings and fuselage and everything went together gap free and with a snap in the right place. Before that, I made sure, the wheel wells were prepared, painted gloss white and accentuated with black panel wash. I'm after a relatively clean paintjob with high contrasts for this build. The resin engines where assembled and received dabbed on black and concrete pigments on the inside. I applied these with a sponge, cut to fit and cotton swabs. I may intensify the effect later. Cheers Rob


-
Done - F-4EJ Kai Phantom - The Last of it's Kind ZM 1/48
DocRob replied to DocRob's topic in LSM 1/48 Work in Progress
Cheers Rob -
Done - F-4EJ Kai Phantom - The Last of it's Kind ZM 1/48
DocRob replied to DocRob's topic in LSM 1/48 Work in Progress
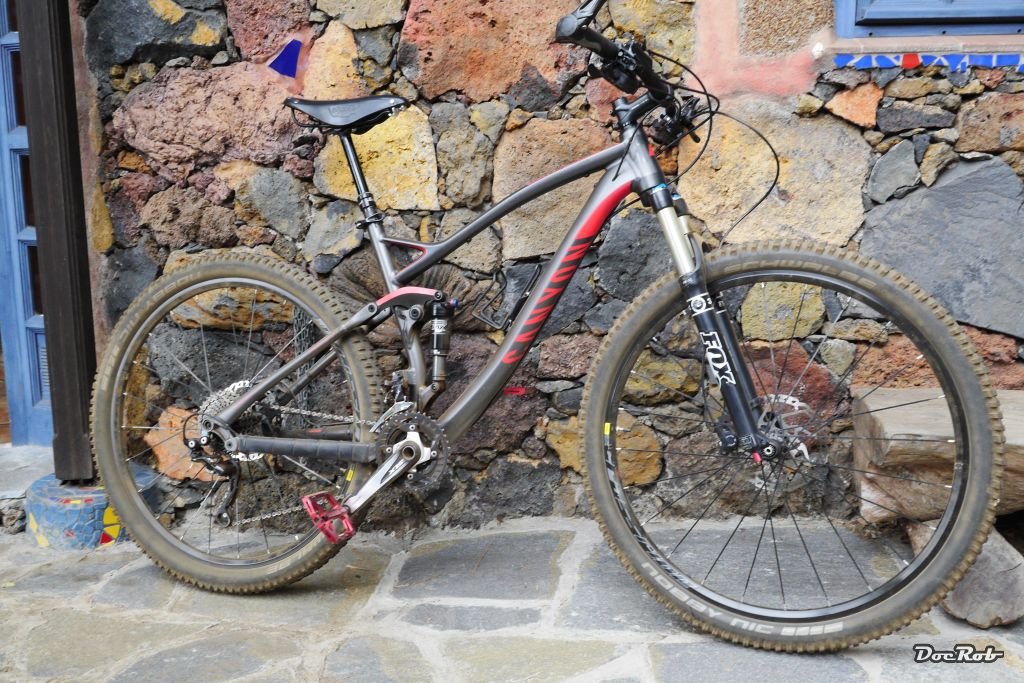
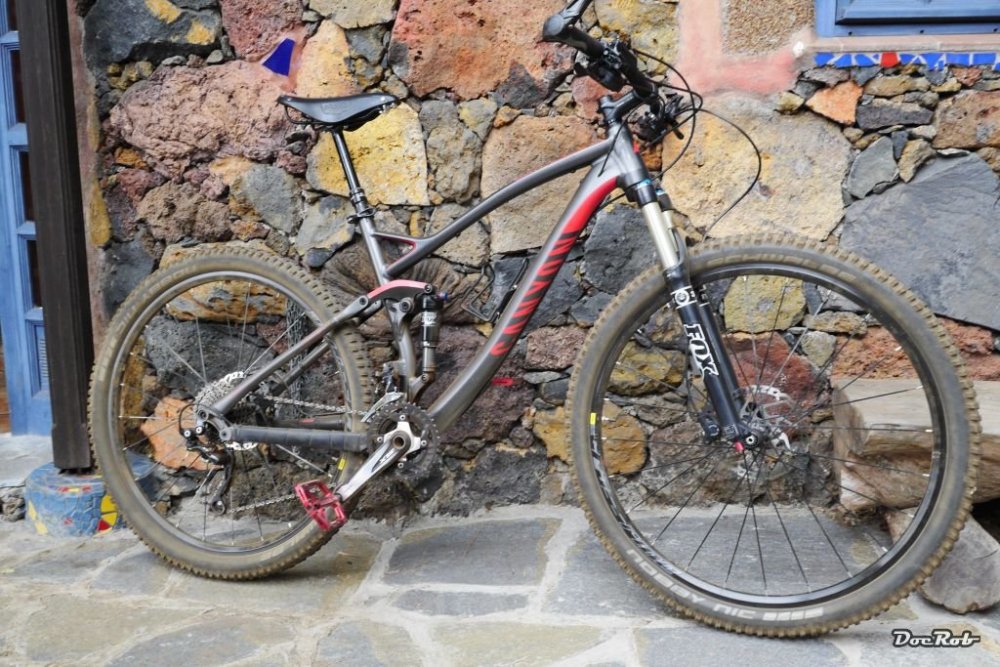
Thank you Carl, you seem to be really bike addicted. The TI cruiser looks great in it's simplicity. I'm a metal guy, when it comes to bikes. I don't like carbon, but Aluminum and Titanium. At best I like steel frames, of course not for every bike, but the possibility to create slim frames, rigid and with flex is fascinating. A friend here on my island owns a bike shop and rental along with guided MTB tours. For a long time Canyon was his main supplier, so he sells the bikes after a year or two for a great price and they are perfectly maintained. I think, I will exchange the Canyon soon for a bike a bit more to my liking. Here I don't like road biking and for the terrain you need relatively fat and large tires, as most of the tracks are very steep and extremely rocky. I'm not the best of all offroaders, the bigger fatter wheels give some security. Cheers Rob -
Done - F-4EJ Kai Phantom - The Last of it's Kind ZM 1/48
DocRob replied to DocRob's topic in LSM 1/48 Work in Progress
Thank you Kai and Peter, they are not ready yet, but I have to admit, reproduce materials is one of my favorites in modelling and metals are top on my list. Cheers Rob -
Done - F-4EJ Kai Phantom - The Last of it's Kind ZM 1/48
DocRob replied to DocRob's topic in LSM 1/48 Work in Progress
That's a great collection of bikes Carl. I've got four bikes, but two of them are in Berlin. One I gave to my son, an old but perfectly intact Trek single track MTB classic with a Shimano DX (The best they've made ) equipment, which I used as a messenger back in my student time in Berlin and a custom made street bike which I use, when visiting Berlin. Here on my island, I have a Canyon full suspension bike and a Stephens fully E-MTB, which is a great addition, as the hills here are really steep and the motor enhances the possible routes by far. With this bike, I can go uphill offroad, which is impossible with a normal MTB. The Canyon bike sports an old Brooks leather saddle with almost the same weight as the rest of the bike The Stephens is a beast, a really durable MTB with 150 mm travel and way more stable than the Canyon with shorter wheelbase Cheers Rob
-
Fw190A-8 3/JG1 crash Vreeland
DocRob replied to JeroenPeters's topic in LSM 1/35 and Larger Work In Progress
Wow, how subtle and translucent you layer your paint is simply amazing. Cheers Rob -
I have a 1/72 Special Hobby Helldiver in my stash, along with an Eduard Big ED PE set. Man that's a frightening sight, but one day, with a potent magnifier.... Cheers Rob
-
Done - F-4EJ Kai Phantom - The Last of it's Kind ZM 1/48
DocRob replied to DocRob's topic in LSM 1/48 Work in Progress
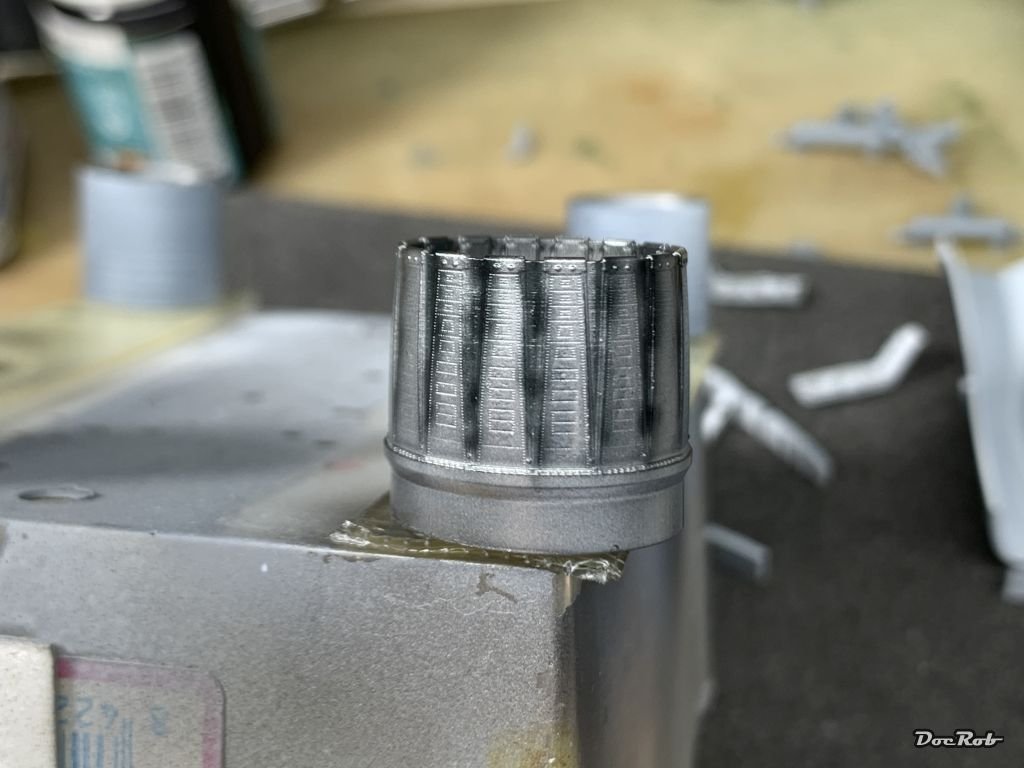
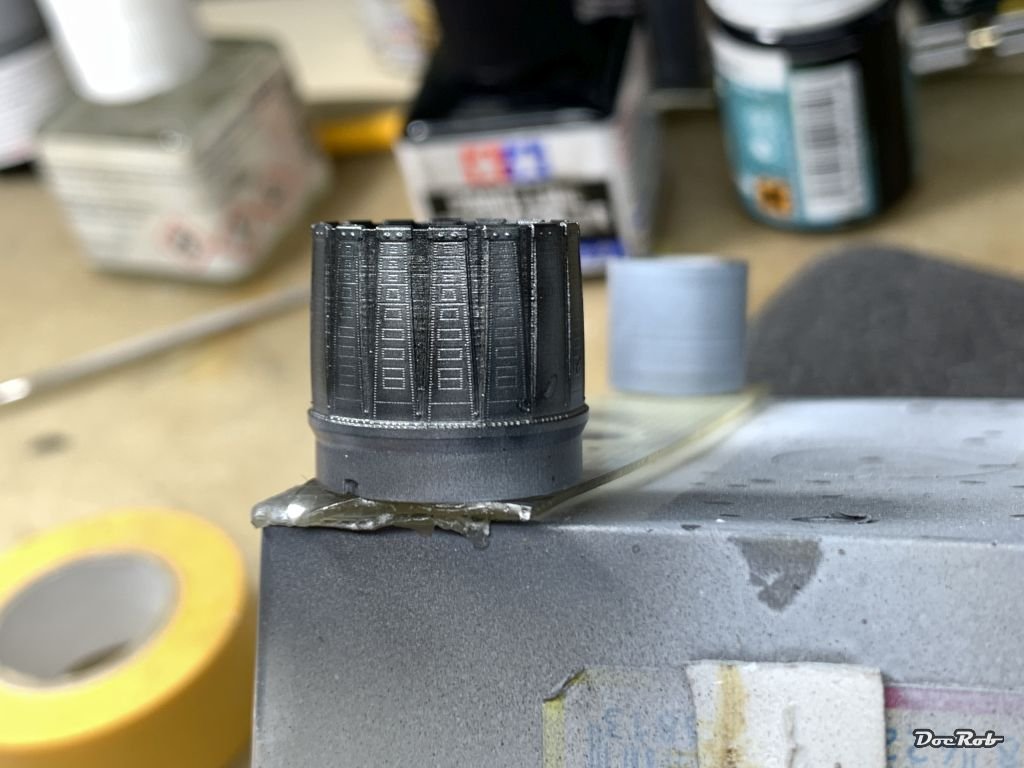
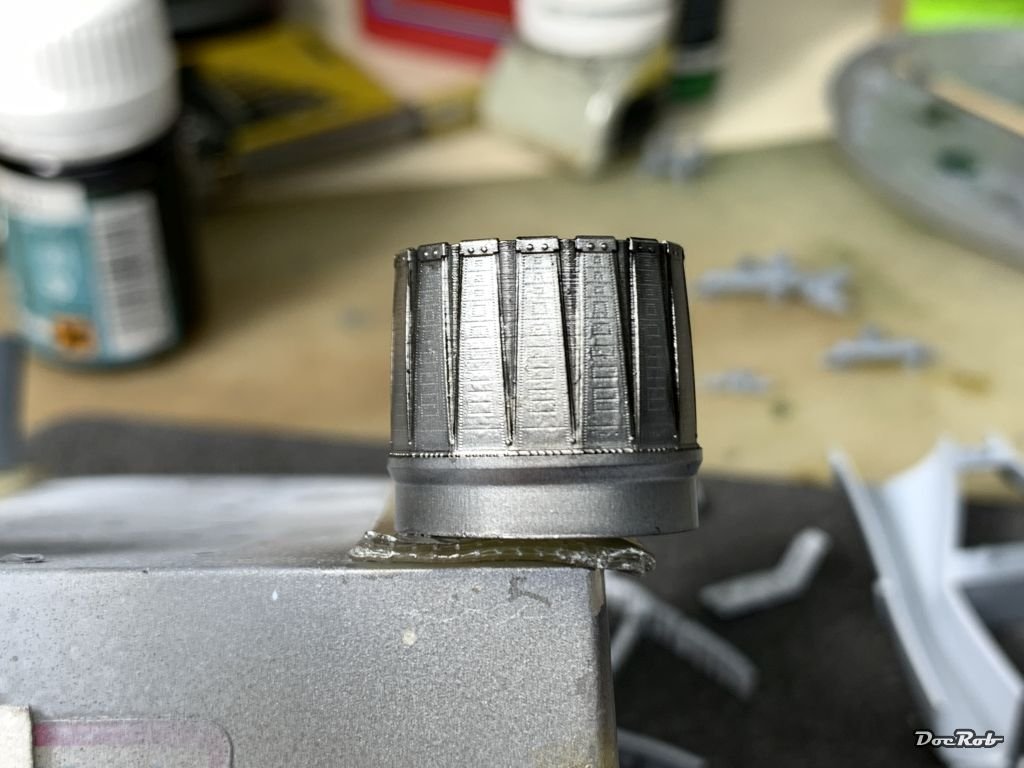
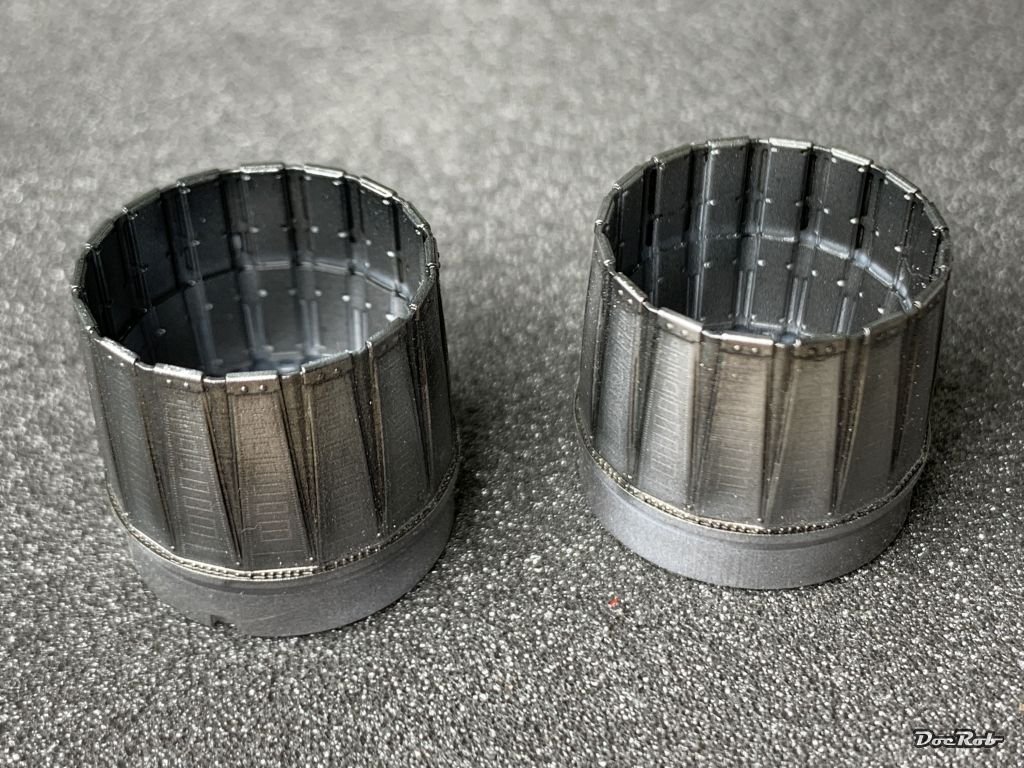
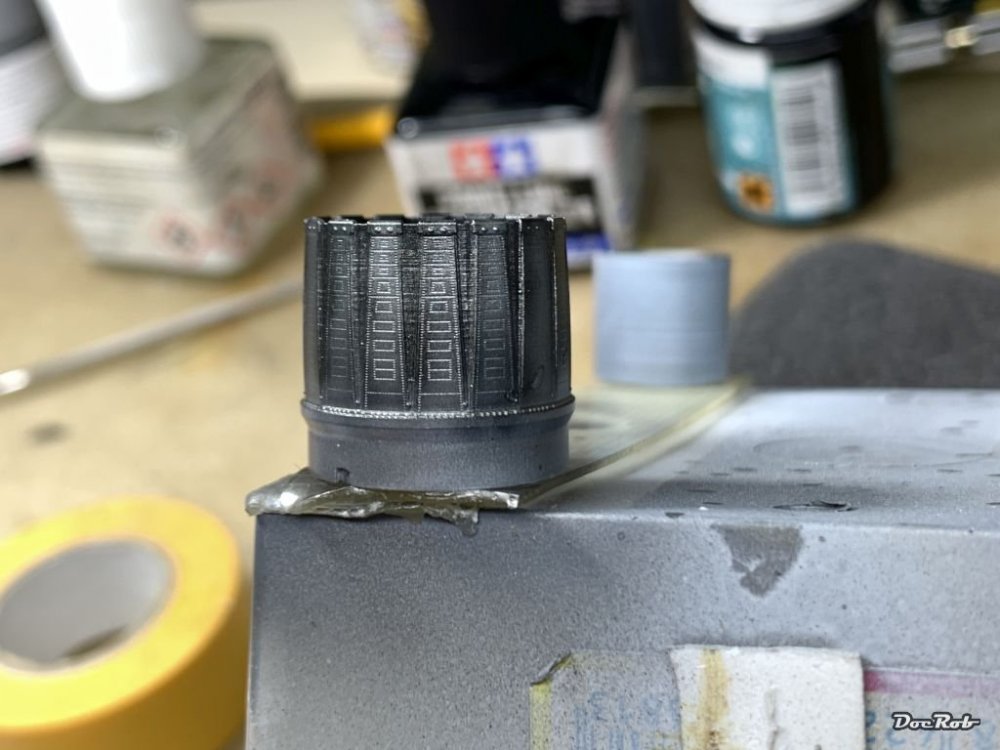
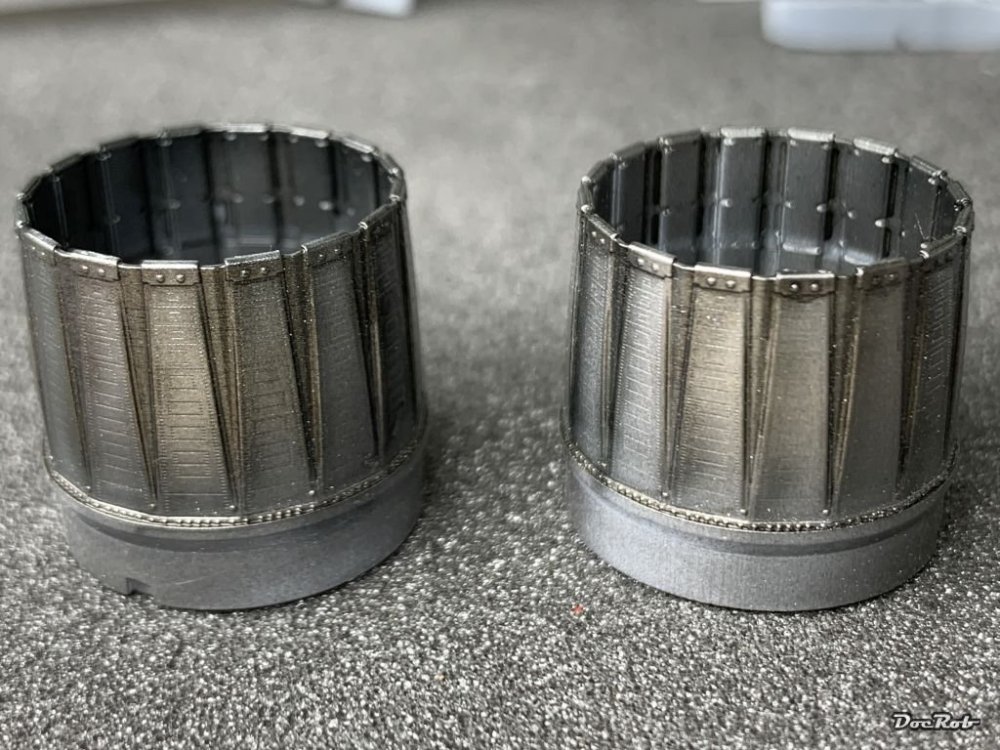
The first stage of metal painting started with a lot of masking. I kabukied the tail and some parts of the fuselage, which were then sprayed stainless steel. The panel lines on the tail were cut along the panel lines with a sharp blade, which is simpler than doing it the other way around, if you have good panel lines at least. The nozzles received a bit more attention, with all colors used were from AK's extremely good Xtreme Metals range. 1) First I sprayed the nozzles and all other parts of the engines Metallic smoke 2) Then the recesses of the nozzles were sprayed Jet exhaust from very close. 3) Some Black panel liner was brushed on to make the effect a bit more evenly. The panel liner made masking each nozzle panel superfluous, luckily. 4) Next ,I applied Titanium, only misted onto the outside of the nozzles with a flat angled airbrush. 5) Black Panel liner was used on the recesses inside and outside the nozzles. 6) Finally, I applied some Iron Pigments from the Uschi range with a cotton swab, to get a nice metal finish and eliminating even the slightest spray grain. After step 2, expectably ugly Step 3 with first panel liner treatment 7 Titanium sprayed on And finally, done for now after more panel liner and the cotton swabbed Iron pigments. The inside will be randomly provided with very matte pigments in smoke and white ash color and maybe some pigments on the outside as well, depending on the genera appearance. Cheers Rob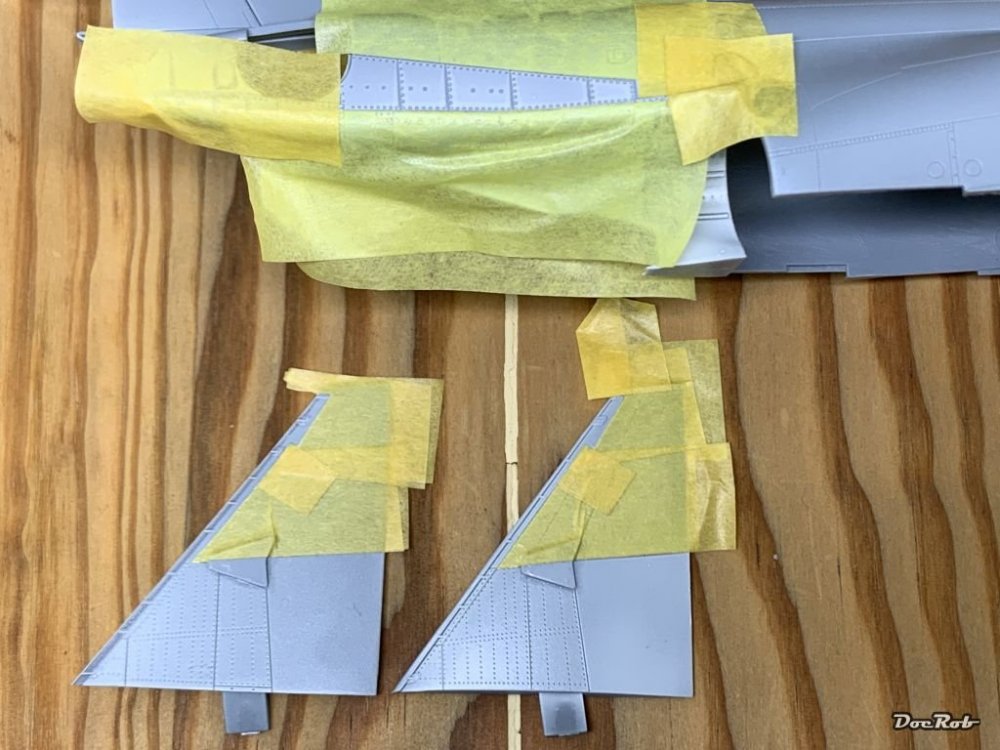


-
Done - F-4EJ Kai Phantom - The Last of it's Kind ZM 1/48
DocRob replied to DocRob's topic in LSM 1/48 Work in Progress
I'm sure you like it, because it's a KAI Phantom . I feel a little jittery with guys around, who know their Phantoms. Can't get away with too many mistakes . Cheers Rob -
617 Sqn Tornado Dambuster 70th
DocRob replied to Kaireckstadt's topic in LSM 1/35 and Larger Work In Progress
This will be a busy looking cockpit, Kai. I love the detail work and the pilots look absolutely fantastic. I only have a set of pilot/gunner from PJ in 48 scale. They are ok casted, but the 32 guys, you made the surgery with are super detailed. Cheers Rob -
Done - F-4EJ Kai Phantom - The Last of it's Kind ZM 1/48
DocRob replied to DocRob's topic in LSM 1/48 Work in Progress
Muchas gracias hombres, metal painting and finishing will be interesting. I hope, I can make it look right. Cheers Rob -
Not exactly background music, but raw powered post punk electro clash by the Prodigy. I took out my DVD from this 2011 Concert and was blown away, not only by the music, but by the atmosphere of a long lost time. Sweaty, energy and whatever fueled concerts, which develop their own dynamic. Farewell good times of live music. Cheers Rob
-
Done - F-4EJ Kai Phantom - The Last of it's Kind ZM 1/48
DocRob replied to DocRob's topic in LSM 1/48 Work in Progress
Thanks Peter, I haven't planned a lot of weathering, as the paint scheme cries for a clean plane. I will weather the metal parts around the nozzles and tail a bit though. Cheers Rob -
Done - F-4EJ Kai Phantom - The Last of it's Kind ZM 1/48
DocRob replied to DocRob's topic in LSM 1/48 Work in Progress
Back to the Phantom after all that surf babbel. I prepared parts for the next sub assemblies, like the inside of the air intakes, the engines with burner cans, the fuselage and tail and the wheel wells. All these parts were airbrushed with the formidable Tamiya LP gloss white, in case of the wheel wells as base color and in case of the later to metallize parts as a primer. I hope, it will proof as a durable base coat, as it's sprayable very thin and high gloss for optimal priming without loosing detail. Cheers Rob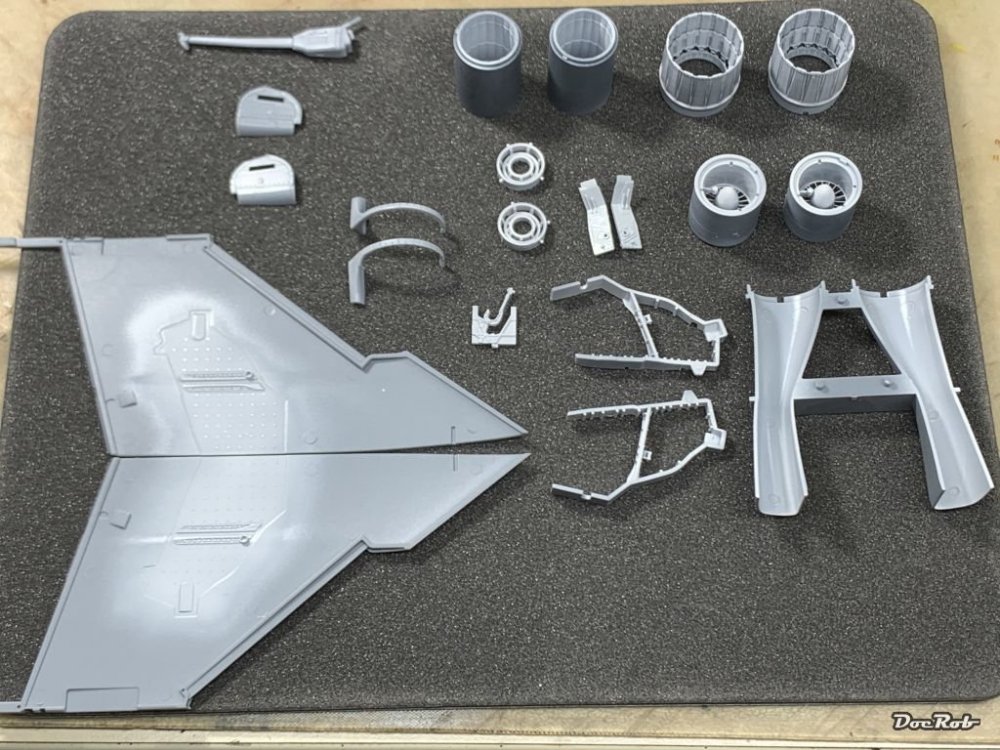

-
Done - F-4EJ Kai Phantom - The Last of it's Kind ZM 1/48
DocRob replied to DocRob's topic in LSM 1/48 Work in Progress
Mostly it is, actually I need sports to counterbalance good food, nice drinks and of course modelling, where I sit hunched over my bench. I guess we all know . Cheers Rob -
What is on your bench right now ? Share a picture :)
DocRob replied to Martinnfb's topic in Modelling Discussion
I like them a lot, man, it's 48 scale and macroed in. They will look perfect and I think a little emphasis on the cheeks is a good thing to do in this scale, because it renders the faces a bit more 3D. Cheers Rob -
Done - F-4EJ Kai Phantom - The Last of it's Kind ZM 1/48
DocRob replied to DocRob's topic in LSM 1/48 Work in Progress
Yeah, I know, I started surfing, when most guys end their surfing career, but I know lots of older surfers here in Europe, even on my island. I may not be the archetypical surfer dude anymore, but it helps to stay healthy and in good shape. I hate to be a fat sofa fart almost as much as I dislike indoor sports, especially working out in a gym. So for me it's surfing, running, mountain biking and swimming, with the only indoor concession of some Yoga hours indoors, which I can really recommend. Cheers Rob -
Done - F-4EJ Kai Phantom - The Last of it's Kind ZM 1/48
DocRob replied to DocRob's topic in LSM 1/48 Work in Progress
Don't be Phil, surfing on my island can be less satisfying, than having to build, lets say an Italeri kit . The waves are often a messy affair combined with fierce winds (surfers do hate wind), where I go into the water only for physical exhaustion, knowing there is not much to gain in the way of riding waves Hawaiian style. Often the next wave is nearer to you than you think Phil. I don't know about your area, but Cornwall definitely has better waves than my island. Give it a try in a good surf school, it's fun and there is no better beer in the world as a post surf beer, to erase the salty taste in the mouth. Cheers Rob -
Done - F-4EJ Kai Phantom - The Last of it's Kind ZM 1/48
DocRob replied to DocRob's topic in LSM 1/48 Work in Progress
Thanks Peter, I'm not that young anymore, being 56 now. Surfing has changed for me surely with age, but you can compensate lesser power and agility with better wave selections, due to experience. Another good thing, being more mature is, I don't have to prove anything. When surfing in Portugal, I met people, who were surfing with 75 years of age. I hope, I can do that as well. Cheers Rob -
Done - F-4EJ Kai Phantom - The Last of it's Kind ZM 1/48
DocRob replied to DocRob's topic in LSM 1/48 Work in Progress
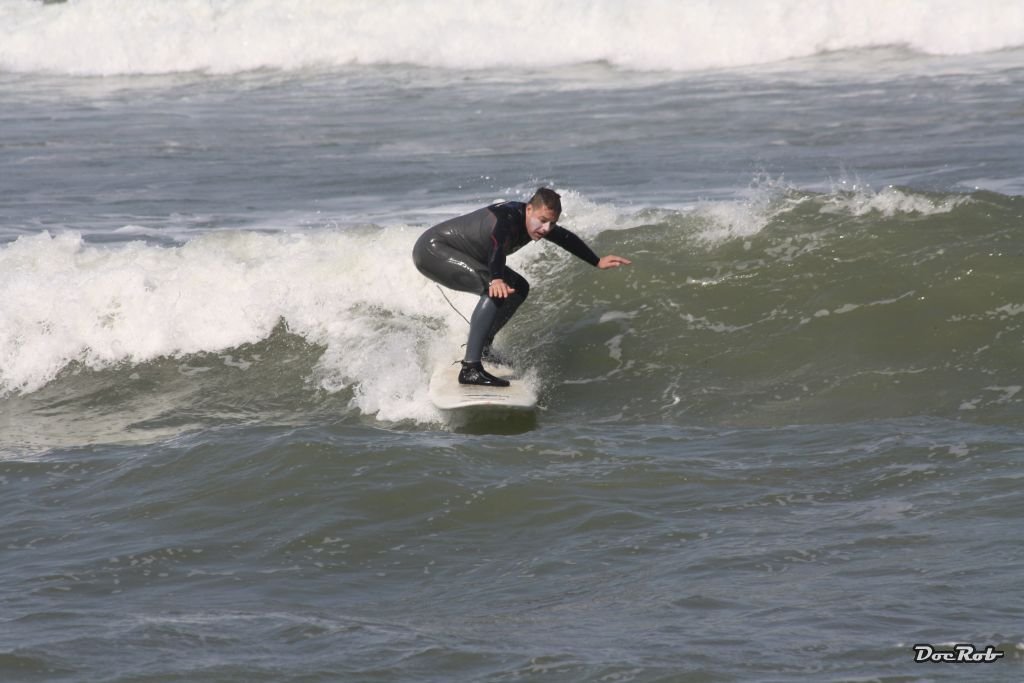
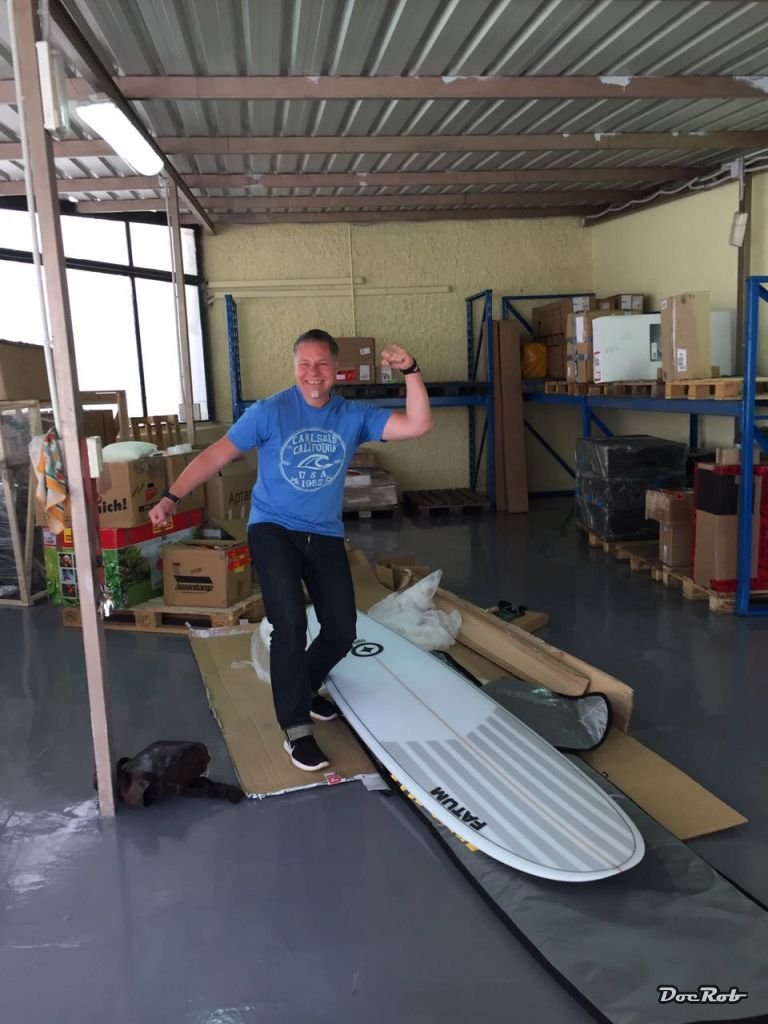
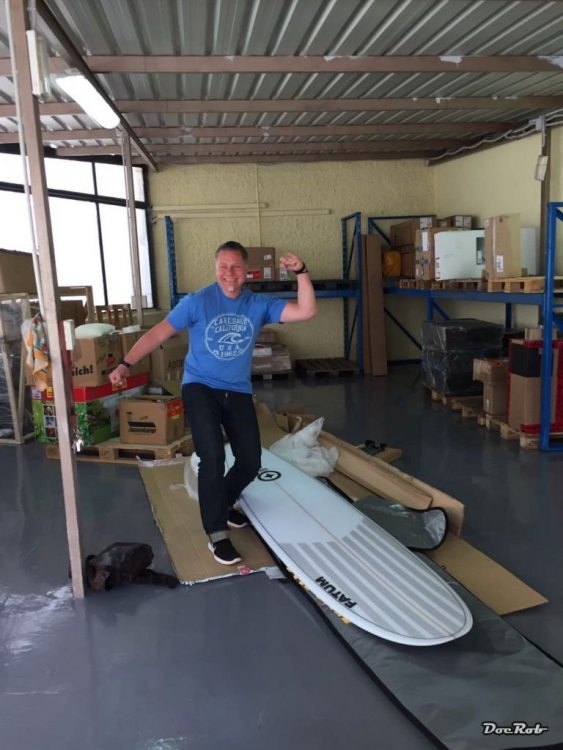
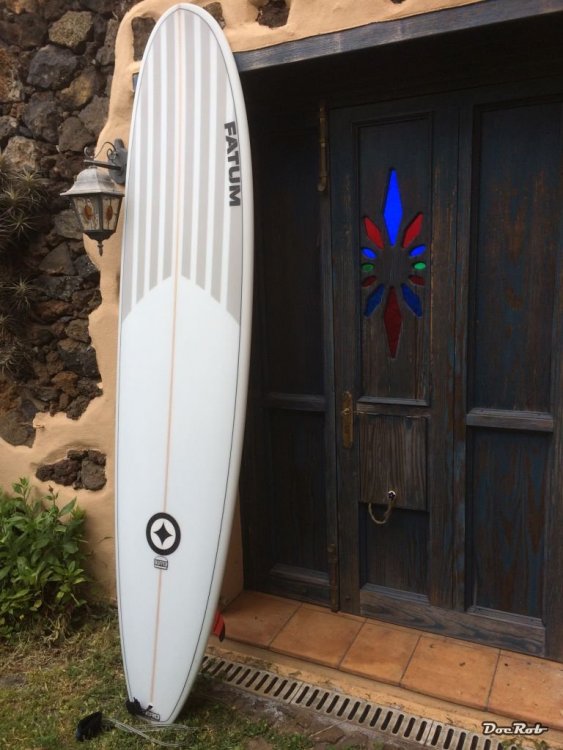
Pretty curious / suspicious, those guys from surfers paradise . This year was a very bad year surfing wise, I was in the waves maybe 15 times, last year, there were maybe 100 sessions. The good thing on my island is, you have the waves almost for yourself, the bad is, it's because the waves are mediocre at best. We have perfect waves from the north and the west very often, but due to the rocky shape of my island there are no even slightly save spots. Only yesterday, two tourists died on two different places of our north shore, because they were swept from the cliffs by huge waves. I have to go to where it's halfway save and that's the east, where the waves are mostly formed by wind and have bad quality and often more than one direction . Since I normally surf alone I found no actual pics and lots of times, I use the bodyboard, because you can have more fun in lesser quality waves. In the moment it's a bit wild in the north, as mentioned above and too small in the east, but my son is here for a week, who is a surf instructor and we will try to catch some waves with him the next days. All I found is an old pic taken in Portugal some years back, when I was a bad surfer (I started with 42 years) and in mediocre physical shape (Berlin livestyle and work ). Luckily, I'm in better shape now and a better surfer too, at least in the sense of the Gentlemen's Hour written by Don Winslow). Here I picked my Portugal custom made board up in Tenerife five years ago. Board at home, well close to home, as it's home is the sea. Cheers Rob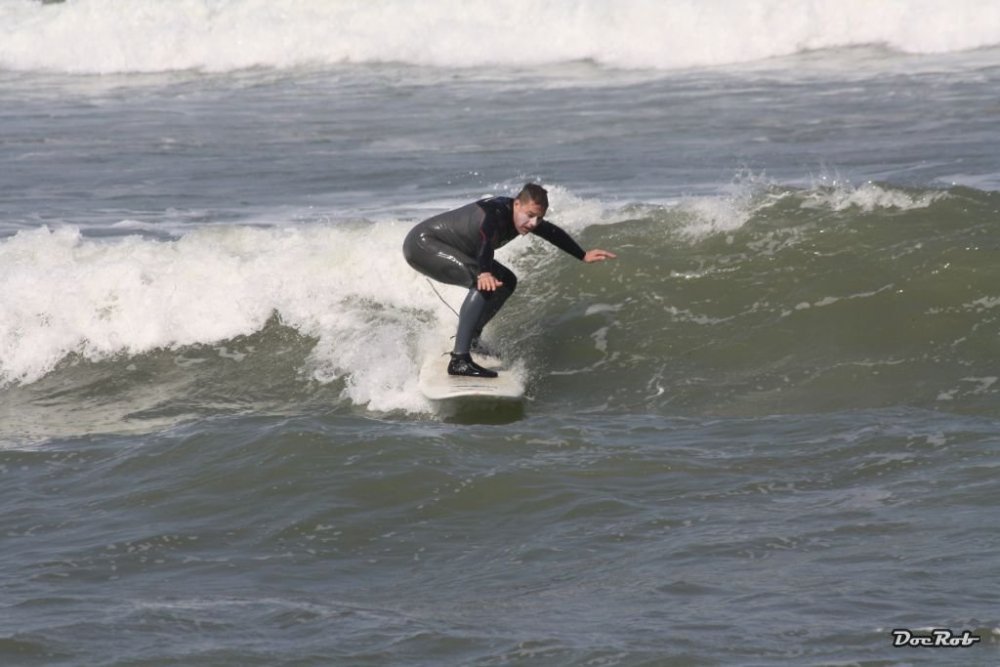
-
Done - F-4EJ Kai Phantom - The Last of it's Kind ZM 1/48
DocRob replied to DocRob's topic in LSM 1/48 Work in Progress
More like Christmas celebrations, I guess. Actually working on this kit is fun and there is so little time at the moment. I hope in some days, there will be more bench time, but until then, it's Christmas (and post Christmas) time with good eating, some surfing and swimming to counter the nightly drinking . Cheers Rob -
617 Sqn Tornado Dambuster 70th
DocRob replied to Kaireckstadt's topic in LSM 1/35 and Larger Work In Progress
The cockpit is looking great, Kai. You will add some pilots, nice. Cheers Rob -
Done - F-4EJ Kai Phantom - The Last of it's Kind ZM 1/48
DocRob replied to DocRob's topic in LSM 1/48 Work in Progress
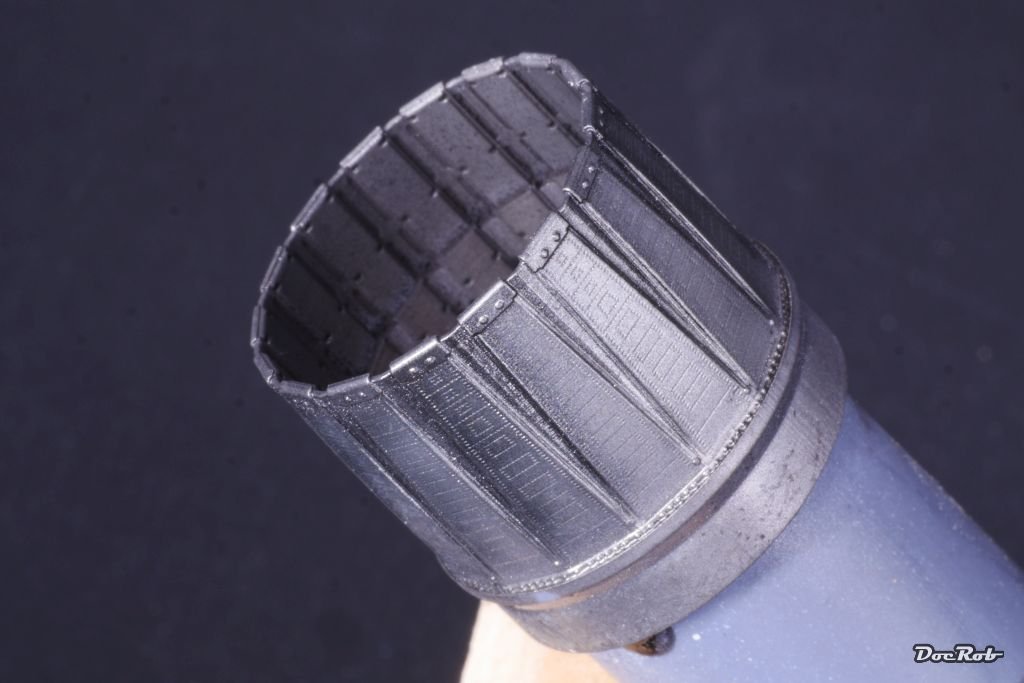
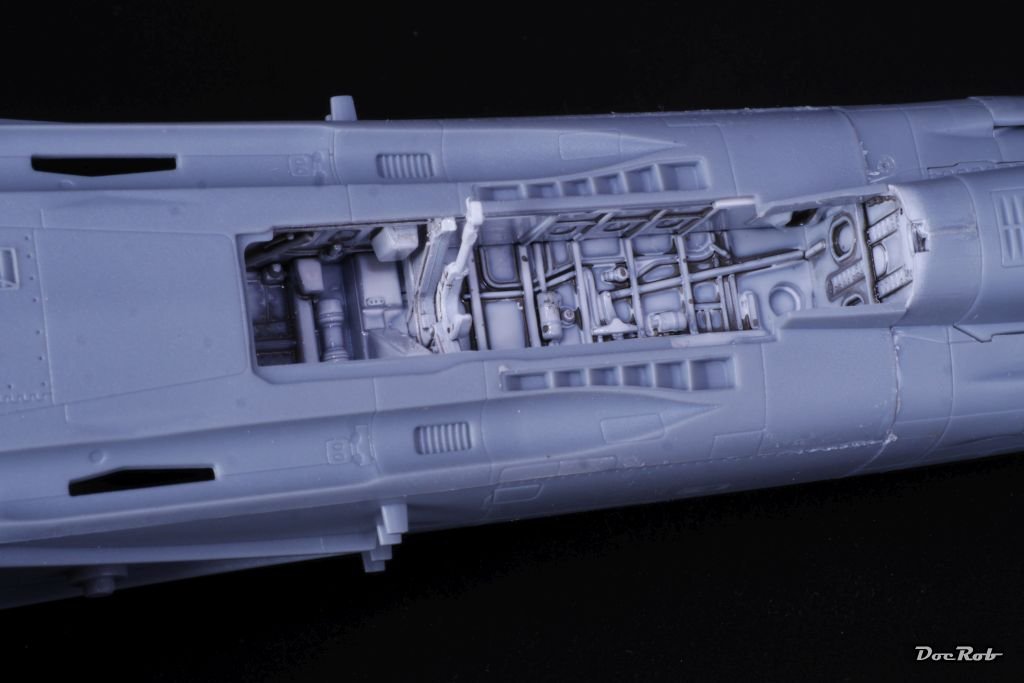
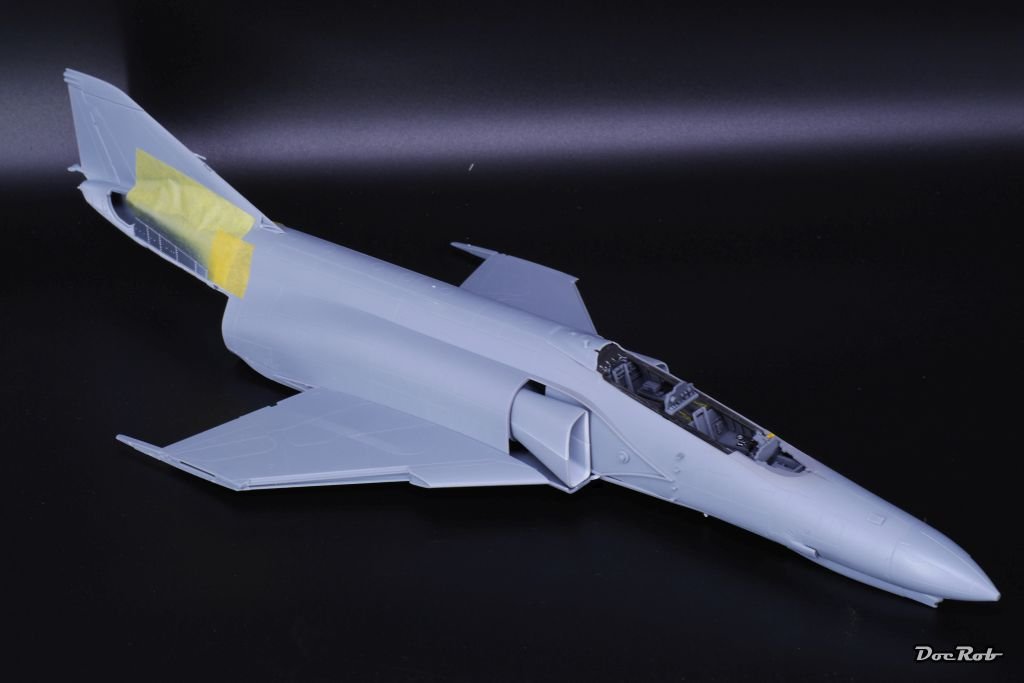
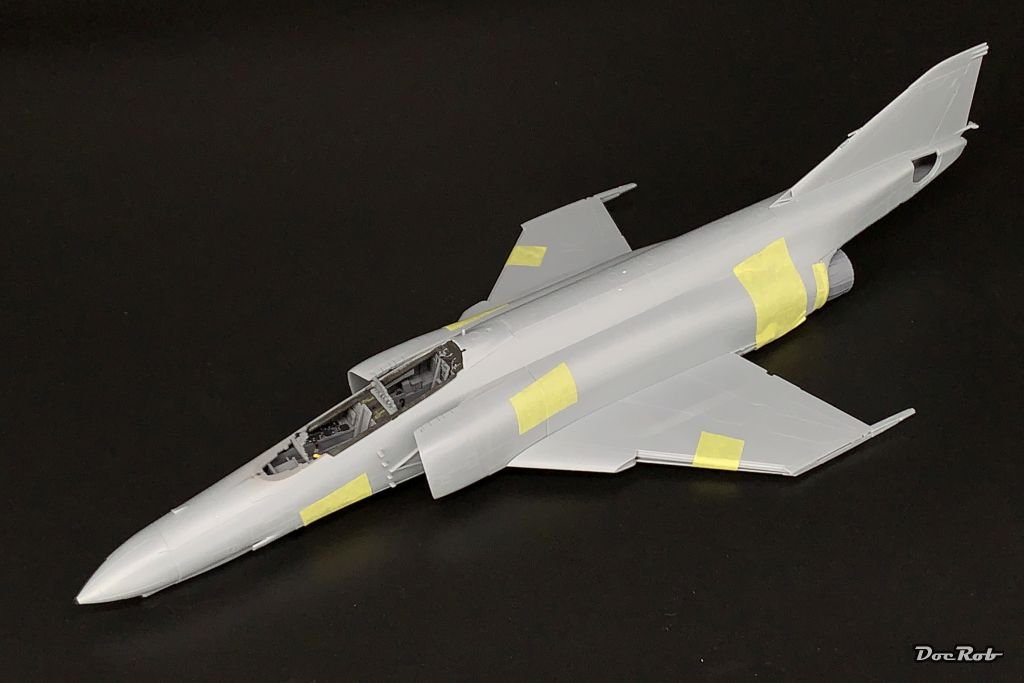
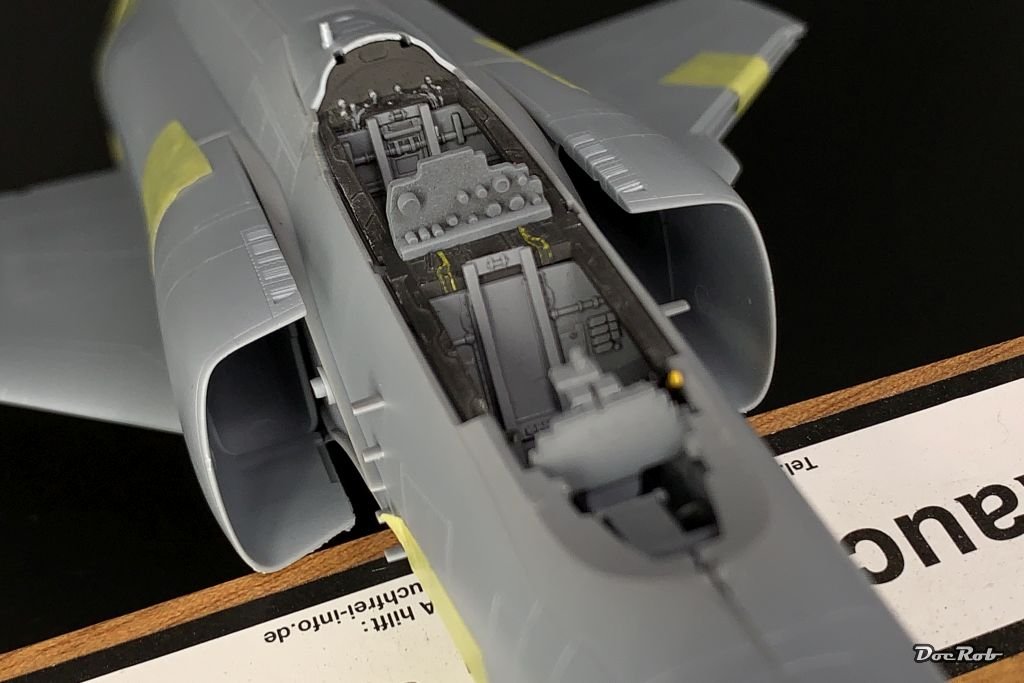
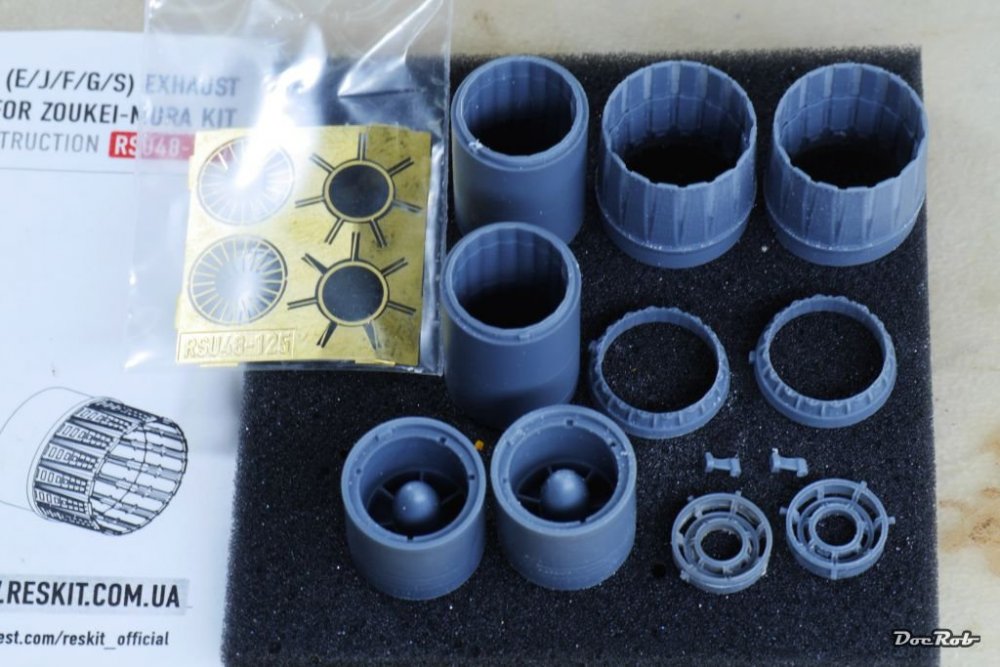
Next on my build are the engines, which I will substitute with Reskit burner cans. The kit parts are not bad, but the resin detail is far superior and thinner which represents the real thing better. There was some cast block cutting necessary, which was simple with most of the parts, except with the cage like parts on the lower right side, which proved to present a little challenge. Due to bad packaging, the spider like right PE parts were broken and I won't use them. The Reskit burner cans protrude into the fuselage, so it is necessary to leave the supplied jet engines out and perform some advanced test fitting to see, if everything lines up. The diameter of the Reskit nozzles is maybe a millimeter to large, It's a close fit, but maybe, I have to remove some material. By the way, I checked the wing fuselage alignment and how the air intakes fit. I have to say, I'm amazed about the tight fit, with a submillimeter wiggle room to close small gaps, that's the way, I like it. The front edge of the air intakes is also thin enough for my liking. The Kai Phantom takes shape with the help of some tape. Cheers and a very happy Christmas Rob

-
Done - F-4EJ Kai Phantom - The Last of it's Kind ZM 1/48
DocRob replied to DocRob's topic in LSM 1/48 Work in Progress
Thanks Phil, it's a fun build with good engineering and fit until now. You are right about the manual though, it's a bit overdone for my liking, showing every little detail from tree different angles at least. Color would help with color, if ZM had printed their manual in color, it would have been a breather, so it's a bit confusing. Cheers Rob -
Damn Peter, that's bad, but are you sure there is no way to use some blue tack and stick the backside of the fans to a long rod and insert them through the engine openings? The pit looks perfect though. Cheers Rob