DocRob
-
Posts
7,127 -
Joined
-
Last visited
Content Type
Profiles
Forums
Events
Gallery
Everything posted by DocRob
-

Revell P-51D Mustang - 2nd time around
DocRob replied to Peterpools's topic in LSM 1/35 and Larger Work In Progress
Very nice silver bird, Peter. The yellow tail looks very prominent now, but with the decals on, it will blend better. Cheers Rob -
What is on your bench right now ? Share a picture :)
DocRob replied to Martinnfb's topic in Modelling Discussion
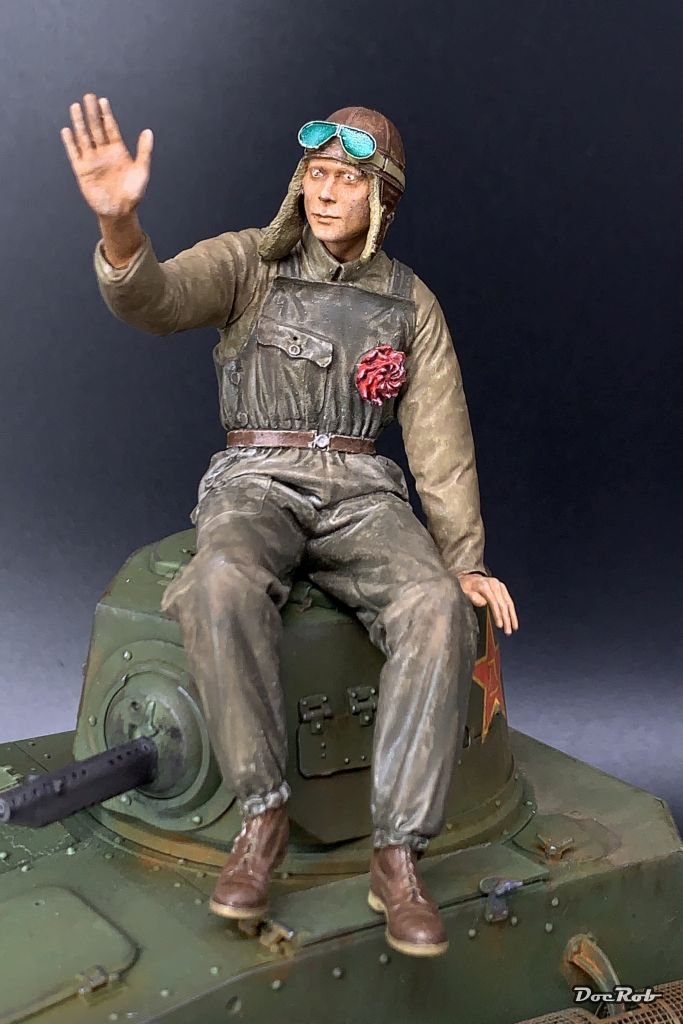
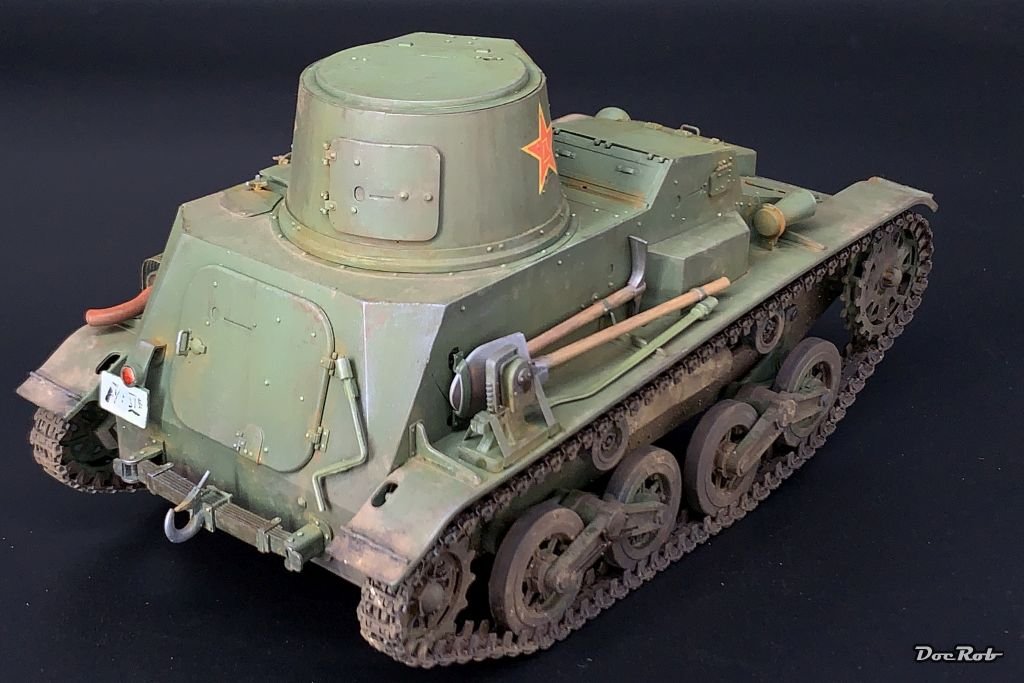
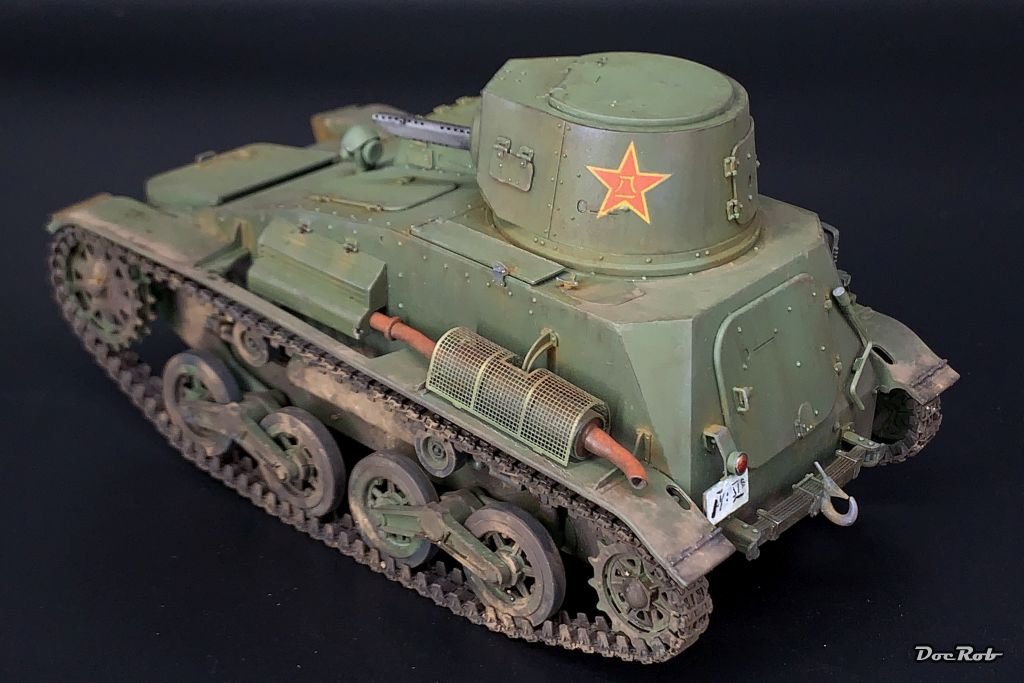
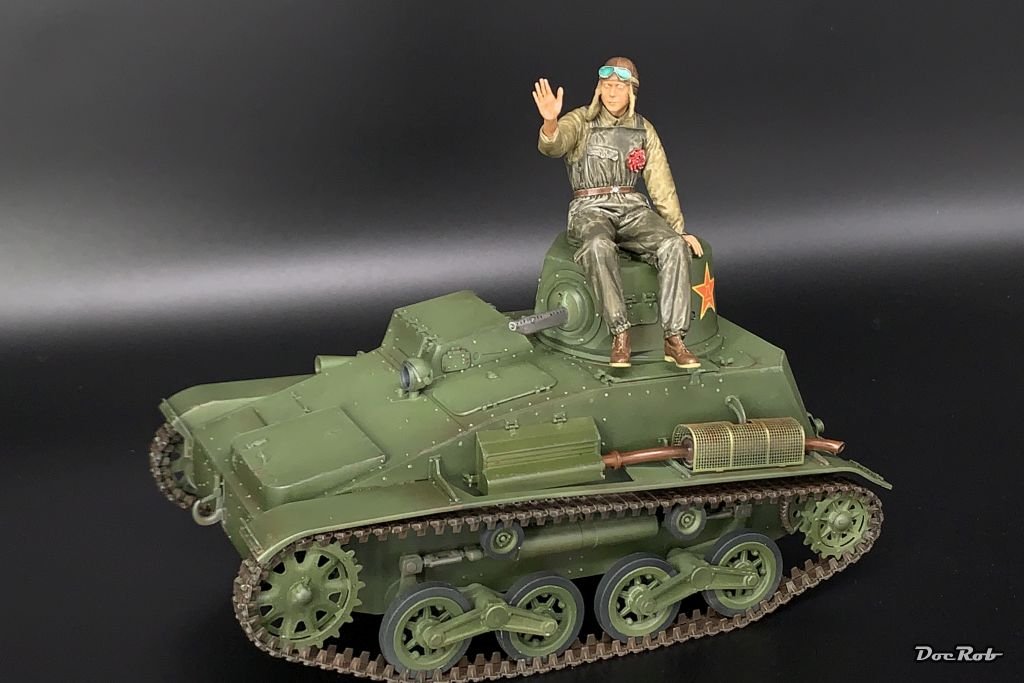
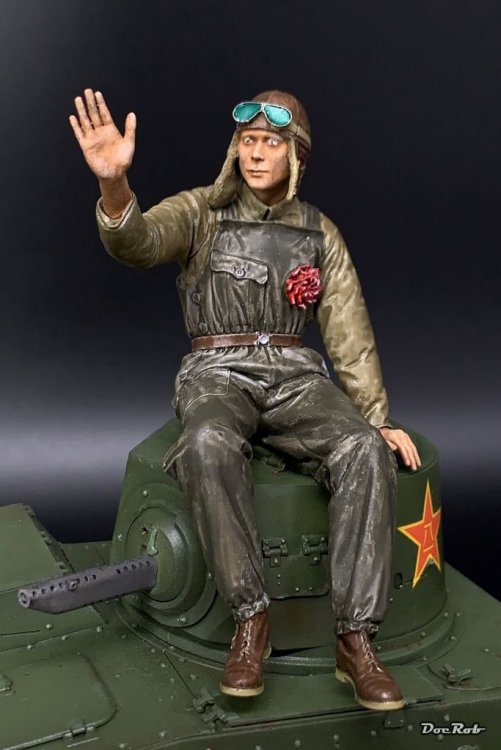
It's time to wave a good by to this project, in which I never was so much into, but can't really say why. I repainted some parts of the figure, specially around the eyes and I leave them as they are. As a homework, I will force myself to some bust painting soon. The clothes got matted and dusted a bit. The Tankette received several kinds of washes, streaks and deposits, oil and grease stains, mud washes and pigments in different earth colors, partly blended with mineral spirit. Then again some metal pigments and lastly, the tools. I will let everything dry till tomorrow and see if I have it in me to continue. Cheers Rob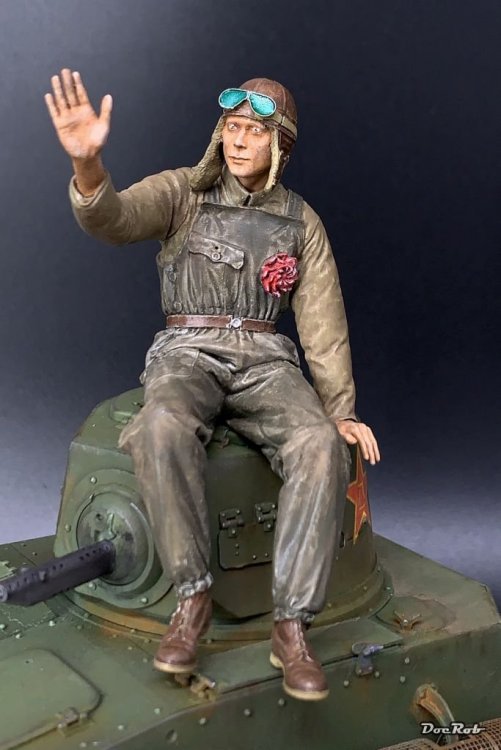

-
It takes some effort, to make something new look believable old and used and you mastered that greatly Gus. There are lots of detail on that beast to catch the eye. Cheers Rob
-
There is a new Cobra in town. I'm absolutely not a heli guy, but when ICM release their Cobra kits, I was tempted. I didn't order immediately ant his proved to be a good decision. Special Hobby has lately release the AH-1G Cobra ‘Early Tails over Vietnam’ Hi-Tech Kit which is ICM plastic with lots of goodies added, like in- and outside masks, color PE for the pit, resin and 3D printed parts, mainly for the cockpit and trolley and new decals. I reserved mine as a preorder for lesser dineros than the original ICM boxing. Special Hobby - AH-1G Cobra ‘Early Tails over Vietnam’ Hi-Tech Kit - Plastic kits Cheers Rob
- 161 replies
-
- 7
-

-

-
- greatwallhobby
- italeri
- (and 6 more)
-
No probs at all. Cheers Rob
-
Mono-Chrome 1/16th Scale Stug III ausf G
DocRob replied to Folkwulfe's topic in LSM 1/35 and Larger Work In Progress
Since it seems that all the other parts of the tank, front, back and sides are already glued in place, you could leave the roof unglued and decide later. If the fit is as good as you say, there is no loss, doing it this way. Scratching and painting a complete interior with top access only would make me a bit nervous, though. I would likely add a figure or two and disguise the innards this way. Cheers Rob -
I would have gone a similar way like you did with the masking, using the Kabuki ones, applying them after a coat of the first camo color. Naturally you get some areas with two color coats, that's why I would skip pre shading and do all modulation work afterwards. Like your approach, I like to spray more complicated patterns without too many details added to the build. What you did looks very convincing and I'm eager to see how your build progresses. Cheers Rob
-
Mono-Chrome 1/16th Scale Stug III ausf G
DocRob replied to Folkwulfe's topic in LSM 1/35 and Larger Work In Progress
Awesome beast so far, makes me wanting one. Cheers Rob -
Nice build, painting and presentation, chapeau. Cheers Rob
-
Looks like a ton of work, but will pay off in the end Harv. Cheers Rob
-
What is on your bench right now ? Share a picture :)
DocRob replied to Martinnfb's topic in Modelling Discussion
Gracias Hombres, I know, the eyes suck. I had another go at them yesterday, but to no avail. I think I will perform some plastic surgery and cut the goggles from the leather cap . Cheers Rob -
Revell P-51D Mustang - 2nd time around
DocRob replied to Peterpools's topic in LSM 1/35 and Larger Work In Progress
Smooth and shiny Peter, with NMF it's all about preparations. Like you, I really love the Tamiya LP colors, since I tried them on different occasions over the last half year. The gloss black goes down very smooth and shiny, perfect for metallic coatings. I thin as well with Mr. Levelling Thinner, but with a ratio of 1/3 paint and 2/3 thinner. As the thinner and color are relatively aggressive, I mist over a first coat, which dries quickly under the airstream and hinder the mix to destroy plastic and/or decals. After that, I spray a wet coat, which perfectly levels itself. Cheers Rob -
What is on your bench right now ? Share a picture :)
DocRob replied to Martinnfb's topic in Modelling Discussion
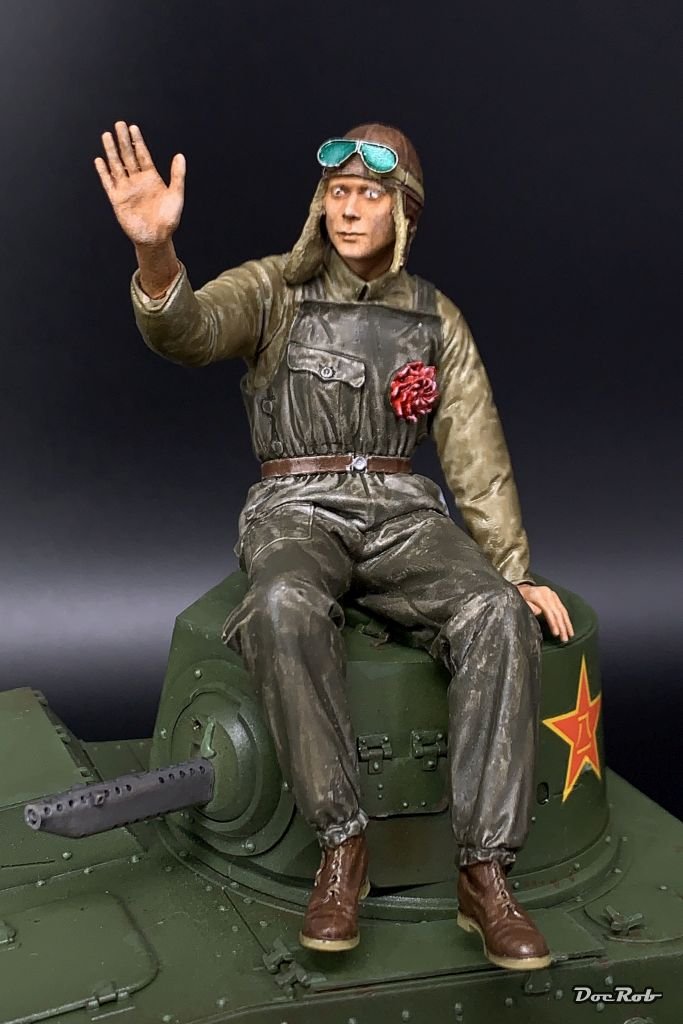
Thanks to both of you. It was my first try with the Archer decals. I had high hopes, using them, but stalled while trying so. The biggest problem is, they are printed onto the decal carrier, which is not cookie cut. That would 've made it easier to slide the tiny thingies off the backing paper. The other prob is, they are very fragile and I damaged some, while trying to position them. Another thing, I didn't like was, that I bought a set, which Archer claims to be used from 54 mm up. This figure is double the size and the smallest supplied eyes are barely small enough. Enough ranted, the very well casted or printed figure deserves better. Maybe I give it another try with trusty old hand painting. Cheers Rob -
What is on your bench right now ? Share a picture :)
DocRob replied to Martinnfb's topic in Modelling Discussion
Thanks Hubert, I did exactly that with the right eye. I cut the iris to fit, a bit on the lower side and a bit more on the upper side. The left eye was ruined through the many tries of getting it right though. I think I will make an eyepatch for the right eye as first, it looks cool and second, I cant see that eye anymore. Cheers Rob -
What is on your bench right now ? Share a picture :)
DocRob replied to Martinnfb's topic in Modelling Discussion
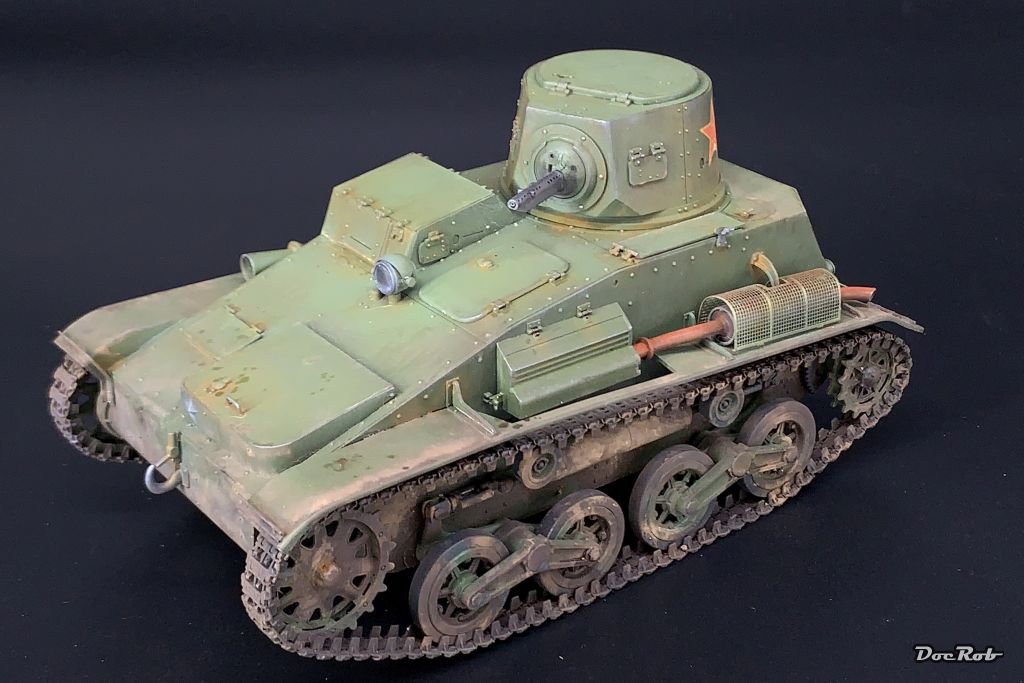
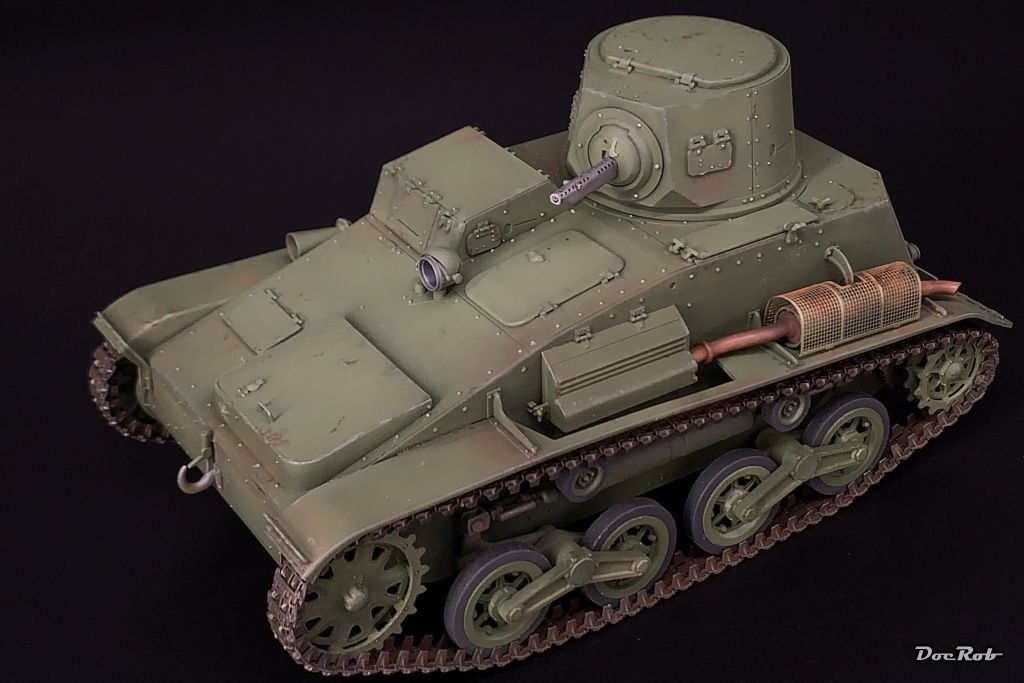
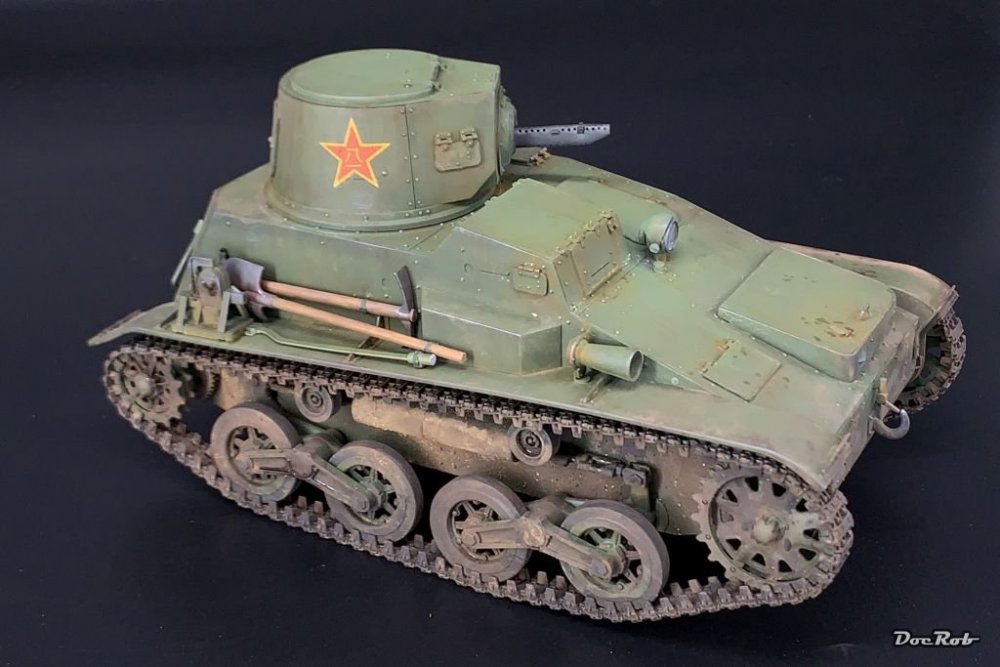
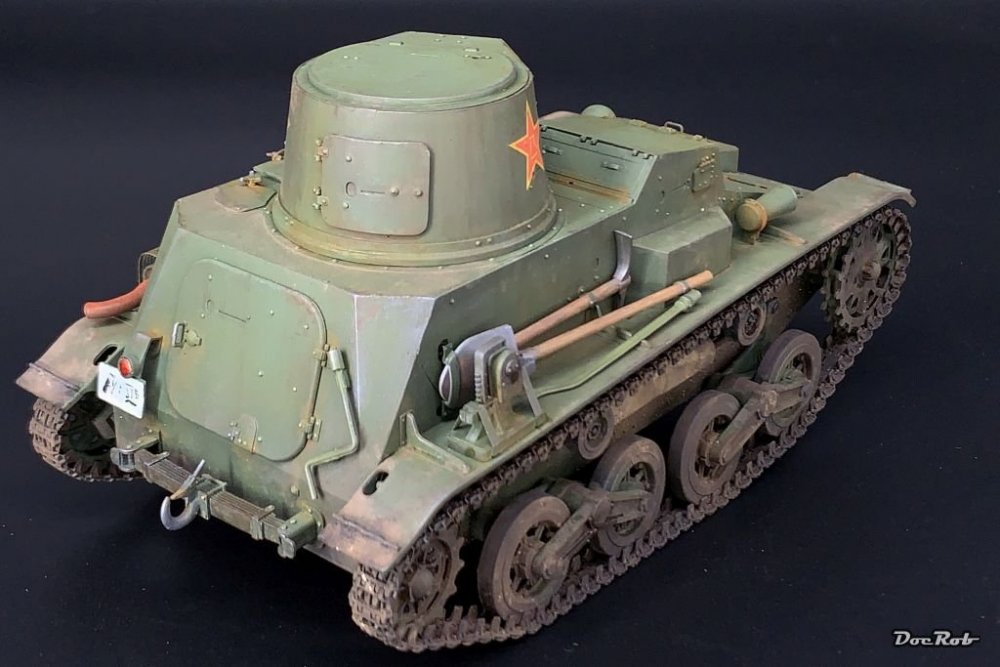
On with the Chinese Tankette. The thing got a gloss coat for decaling and dark brown panel liner and will be flat coated for further weathering. I painted the figure with the base colors, which shadows and more highlighting to follow, as well as appropriate dulling. Cloth very matte leather with a slight shine,... The worst were the eyes, where you can see the right eye being painted very bad. This is caused by umpteen repaints due to me being not able to place the Archer eyeball transfer in place and in one . These decals need to be cut all around the iris and slightly more on top and bottom. the micro decal has then to be slid from the transfer without being destroyed, a nearly impossible task, at least for me. It worked by accident on the right eye with the second try, but the right took six tries, before I surrendered, destroying the eye and surrounding face multiple times. Boy, do I love the idea of decaling eyeballs . Cheers Rob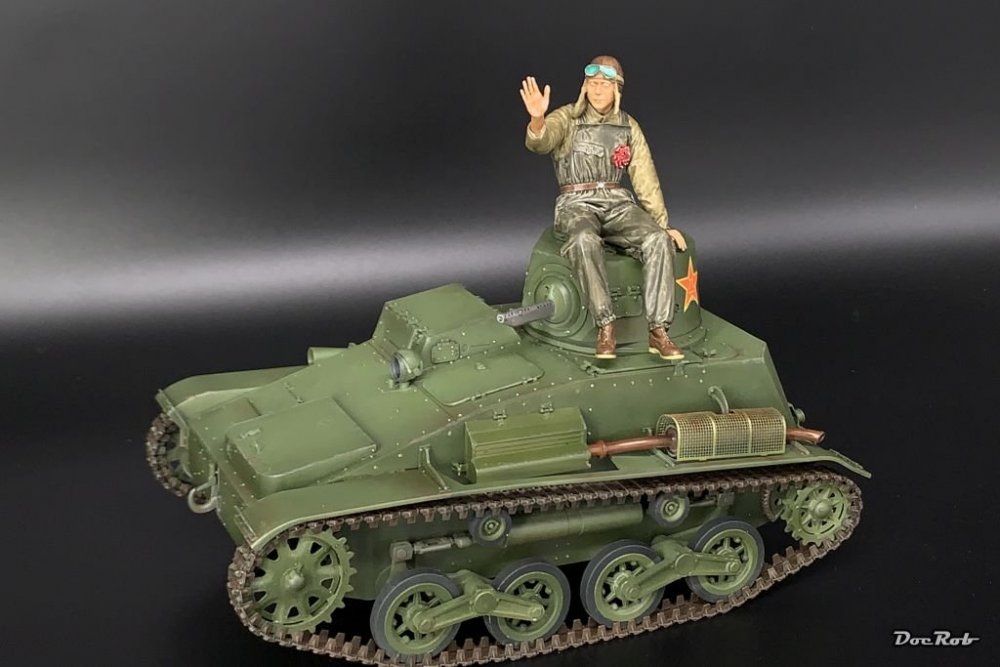
-
I wish you luck Phil, when I used Micro Mask, it always disappointed me, but I never used it on panes. The most annoying part was to get rid of it, as it adheres too strong, at least at detailed parts. Maybe it's of use on the glasshouse. Cheers Rob
-
RCAF Liberator GR Mk VI
DocRob replied to BlrwestSiR's topic in LSM 1/35 and Larger Work In Progress
Nice piece of 3D Tetris Carl, luckily your version sports less turrets, than others . Cheers Rob -
Mono-Chrome 1/16th Scale Stug III ausf G
DocRob replied to Folkwulfe's topic in LSM 1/35 and Larger Work In Progress
Your build looks great so far and it's quite a behemoth. It's a very tempting kit and there will be more 1/16 Stug's available in short time. My only venture in this scale was the Takom Chinese Tankette and I have to say, I like the scale and the opportunities which lay in, painting- and weathering wise. Cheers Rob -
Mono-Chrome 1/16th Scale Stug III ausf G
DocRob replied to Folkwulfe's topic in LSM 1/35 and Larger Work In Progress
Heller has the same kit in it's portfolio and they claim 1300 +x parts, whatever that means. Cheers Rob -
RFM Panzer IV Ausf H (Early) - Complete
DocRob replied to Bomber_County's topic in LSM Armour Finished Work
Very nice Phil, all around. Your IV looks positively busy, with the great paintjob and weathering. The worn Schürzen add to the appearance. Cheers Rob -
Rye Field M4A3E8 "project"! LOL
DocRob replied to JohnB's topic in LSM 1/35 and Larger Work In Progress
With the Shermans, there is another player in the game with Asuka. They have lots of different versions and a good reputation. I haven't built one yet, but have one in stash and the kit looks tamiyaesque on the sprues. It has rubber band tracks, which I will substitute on mine. Cheers Rob -
What is on your bench right now ? Share a picture :)
DocRob replied to Martinnfb's topic in Modelling Discussion
Yeah, it's the Takom 1/16 one Martin. I have the Chinese version, which sports rubber tracks and a very nice resin figure of a sitting Chinese tanker. Cheers Rob -
What is on your bench right now ? Share a picture :)
DocRob replied to Martinnfb's topic in Modelling Discussion
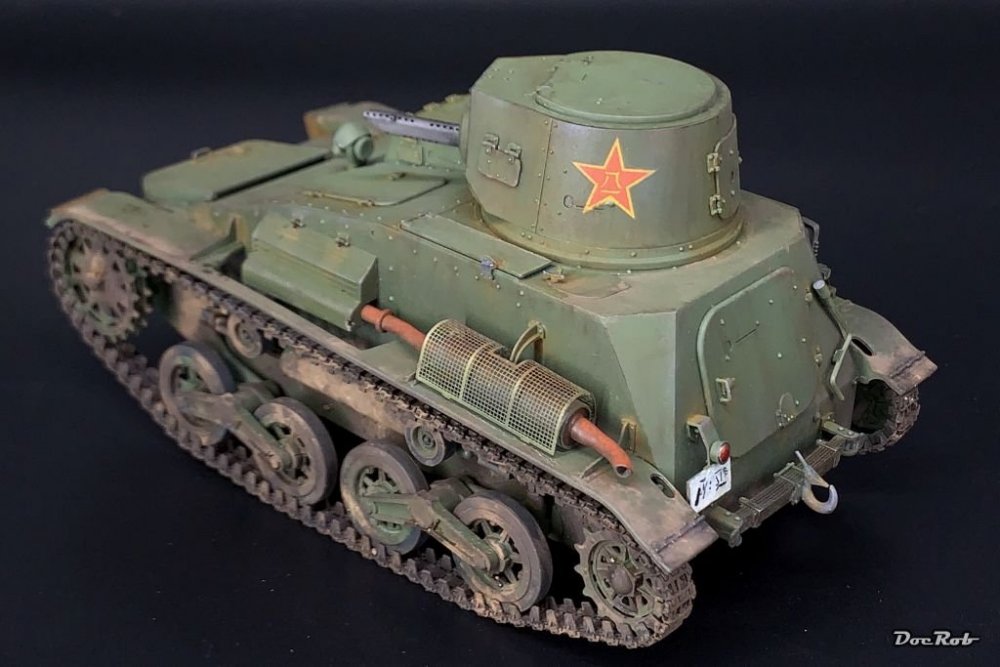
Only to show, that I'm still modelling, but on a very reduced schedule in the moment. The Tankette received tracks, exhaust, machine gun and the first layer of weathering, which included some work with pigments and a brushed on highlighting of all the rivets and some other bits and pieces. All green camouflaged surfaces, were carefully finger rubbed with a tiny bit of steel pigment. It's barely visible, but somehow gives the painted plastic a heavier appearance. Cheers Rob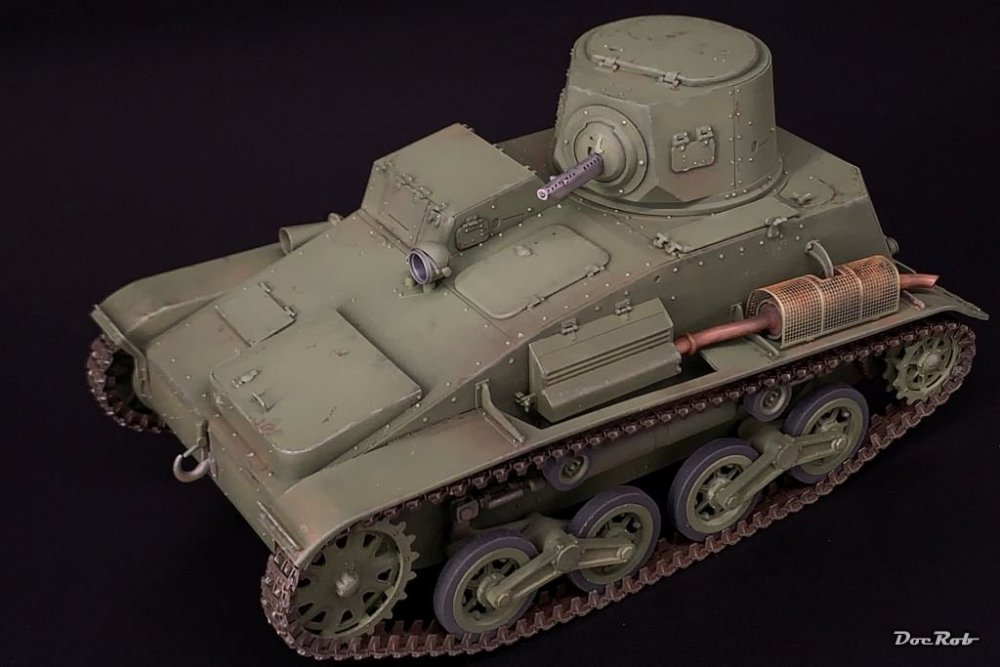
-
I'm sorry to hear about your gruesome flu Hubert. All the best to your wife and to you. Cheers Rob
-
What is on your bench right now ? Share a picture :)
DocRob replied to Martinnfb's topic in Modelling Discussion
You had Dackelbauch on your bench for dinner . I'll take the turkey every time . Cheers Rob