DocRob
-
Posts
7,126 -
Joined
-
Last visited
Content Type
Profiles
Forums
Events
Gallery
Everything posted by DocRob
-
Take care, could be a mini Facehugger from Alien. Cheers Rob
-

Done - F-4EJ Kai Phantom - The Last of it's Kind ZM 1/48
DocRob replied to DocRob's topic in LSM 1/48 Work in Progress
Thanks Martin, it was, after half the peeling was done, I was about to bin the thing, but I too much want to finish the Phantom. The good thing, I learned a lot again, this time about scary things like sanding canopies and later polish them. These Tamiya polishing compounds are so good and real canopy savers. I will try their polishing wax, which is still in the mail somewhere, on the finalized canopy outside for a high shine result. -
What is on your bench right now ? Share a picture :)
DocRob replied to Martinnfb's topic in Modelling Discussion
If your looking for a 17, this is the go-to kit, ICM plastic with all the goodies and decals. I will pull mine from the shelf soon. Cheers Rob
-
Done - F-4EJ Kai Phantom - The Last of it's Kind ZM 1/48
DocRob replied to DocRob's topic in LSM 1/48 Work in Progress
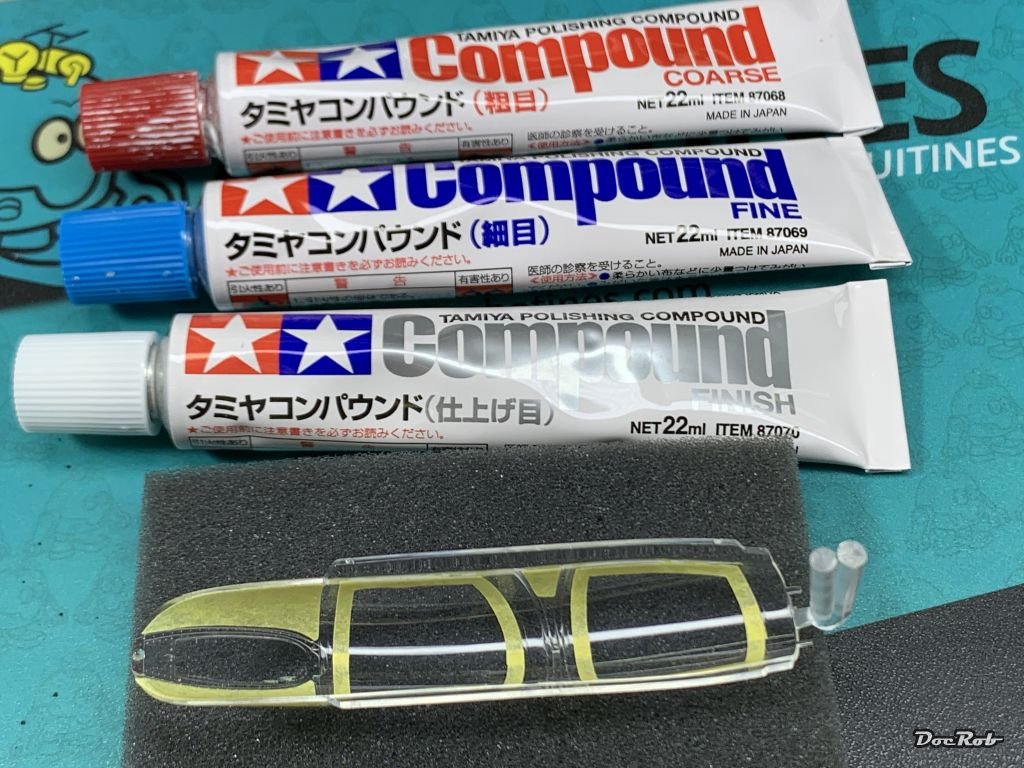
Bad things happen, in modelling and otherwise. When I peeled off the masks first thing in the morning, I was shocked, how well the liquid mask stuck. It was from a new bottle of Mr. Masking Neo, stuff I used before often. I had to use flattened wooden toothpicks to remove the gum and after an hour of frustrating peeling, the canopy looked like a total mess, scratches and smears everywhere, unusable. First, I thought about using alcohol, not for me, to clean up, but fear to smear the color and still had to deal with the scratches. Miraculously my eyes went to the Tamiya polishing set, still on my bench and I tried it on the canopy from coarse to fine and lastly finish. It worked. The colors were not smearing and I removed all the scratches and residues that way, indeed a miracle and made my day. This stuff is a phenomenal canopy saver, which is highly recommended by the way. Lessons learned, the liquid mask seems to bite into the polished canopy surfaces and I will use Kabuki to fill in the final masking from the outside for the black exterior color. Cheers Rob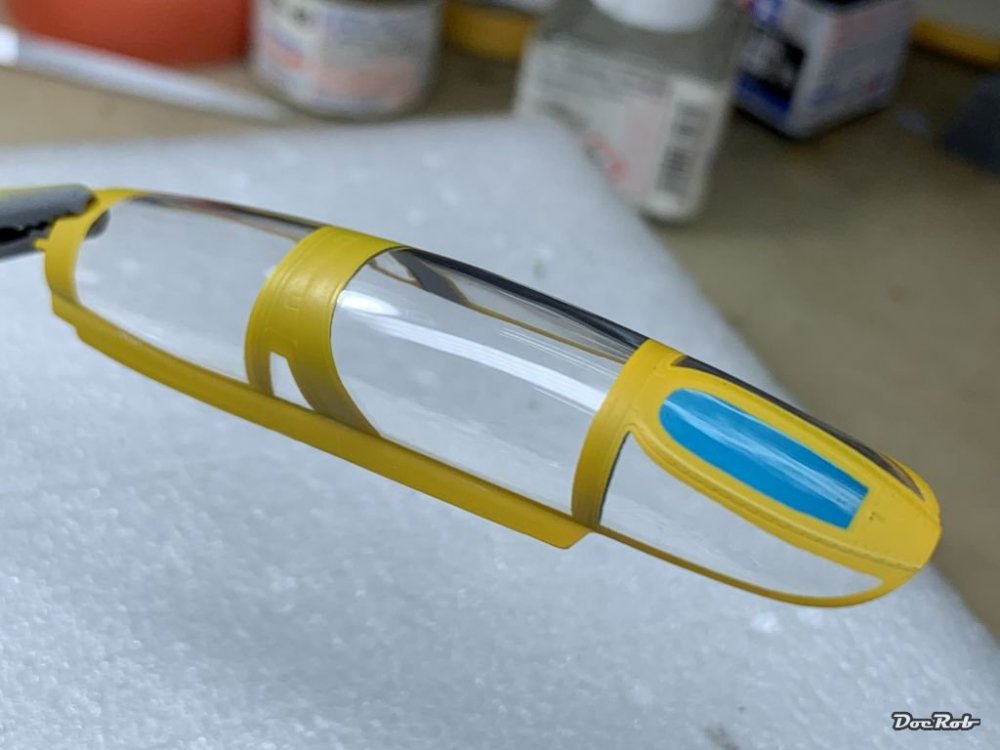

-
Dragon Panther A with Zimmerit
DocRob replied to GazzaS's topic in LSM 1/35 and Larger Work In Progress
Looks perfectly regular irregular to my eye. With paint on and normal viewing distance it will shine. Cheers Rob -
copper state models 1:32 Caudron G. III - Copper State Model
DocRob replied to Fran's topic in Aircraft Reviews
I have sworn to myself, that I will let the Caudron pass, as I did with the 48 scale seaplane. I have the Fe.2b from WNW in my stash with the strong intention to build it. Another stringback? I'm a weak guy and I've to honor the braveness of CSM, who supplied me with some of the finest kits in the last year. Thanks for the review Fran, very well made. Cheers Rob -
Done - F-4EJ Kai Phantom - The Last of it's Kind ZM 1/48
DocRob replied to DocRob's topic in LSM 1/48 Work in Progress
Thanks Martin, it's not unmasked yet . The good thing, If I fail with the closed canopy, I can use the open version for a second try. Generally, I have to say, the clear parts are not the strong side of the kit. details are softer in parts and there is a slight blur, even more noticeable in the one piece canopy, not to mention the scratch. I've seen worse of course, but I expected a bit more, given the quality of the rest of the styrene. The softness is noticeable on the canopy sides, so maybe ZM made a compromise with preventing a middle seam in mind. Cheers Rob -
Done - F-4EJ Kai Phantom - The Last of it's Kind ZM 1/48
DocRob replied to DocRob's topic in LSM 1/48 Work in Progress
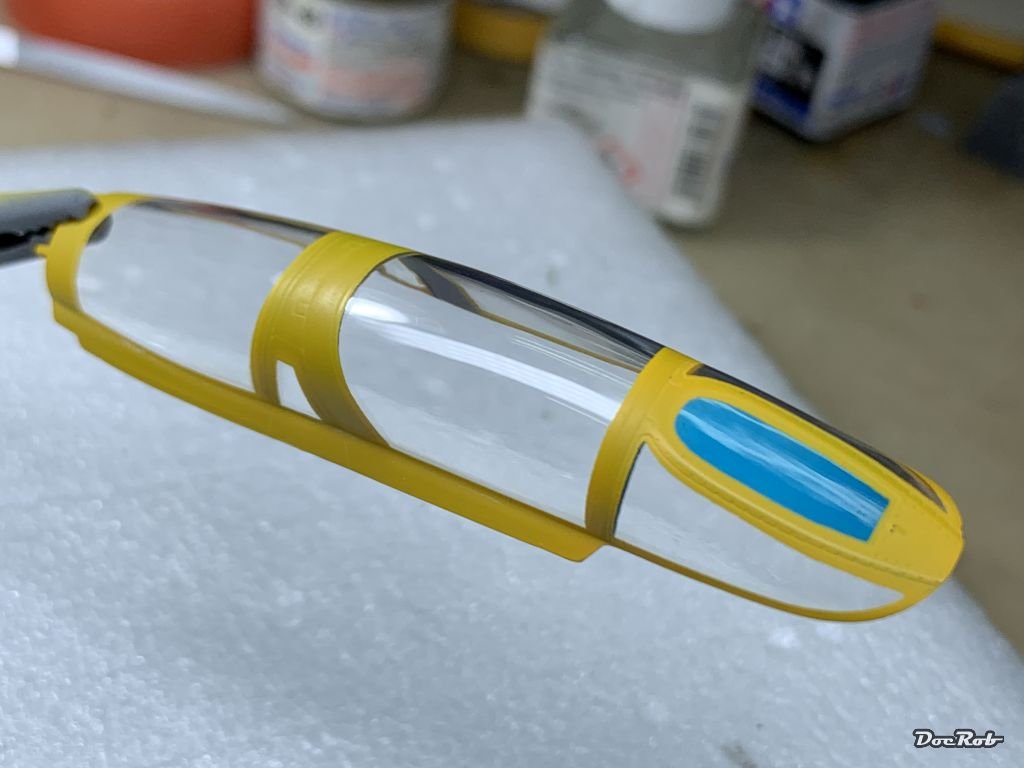
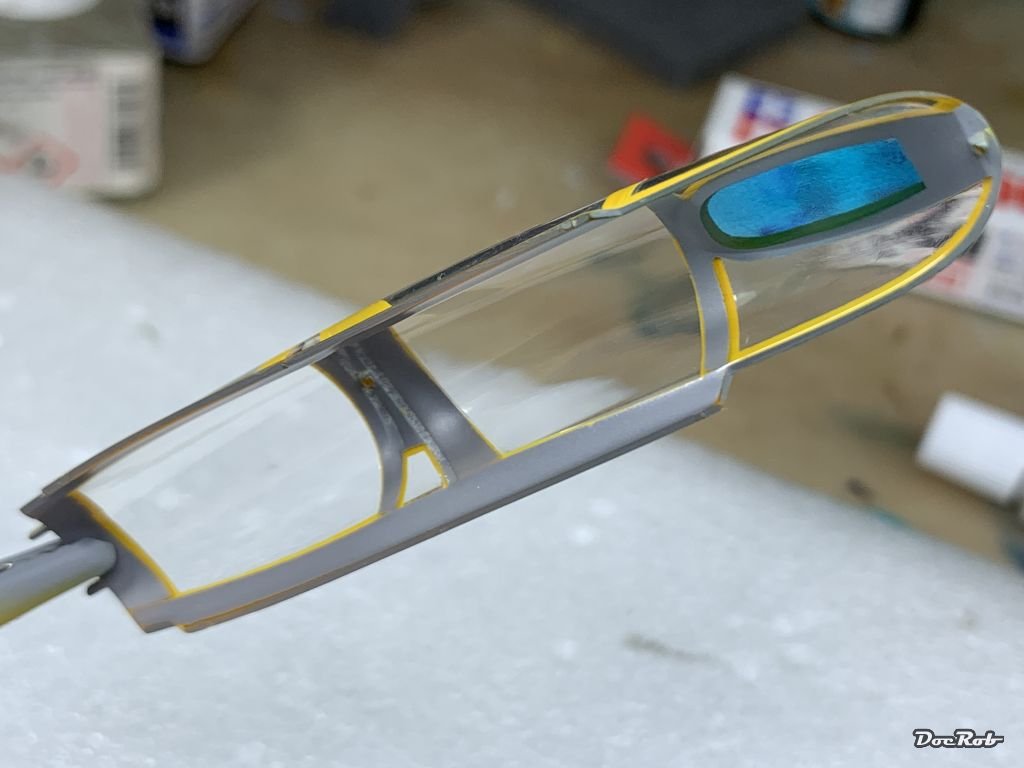
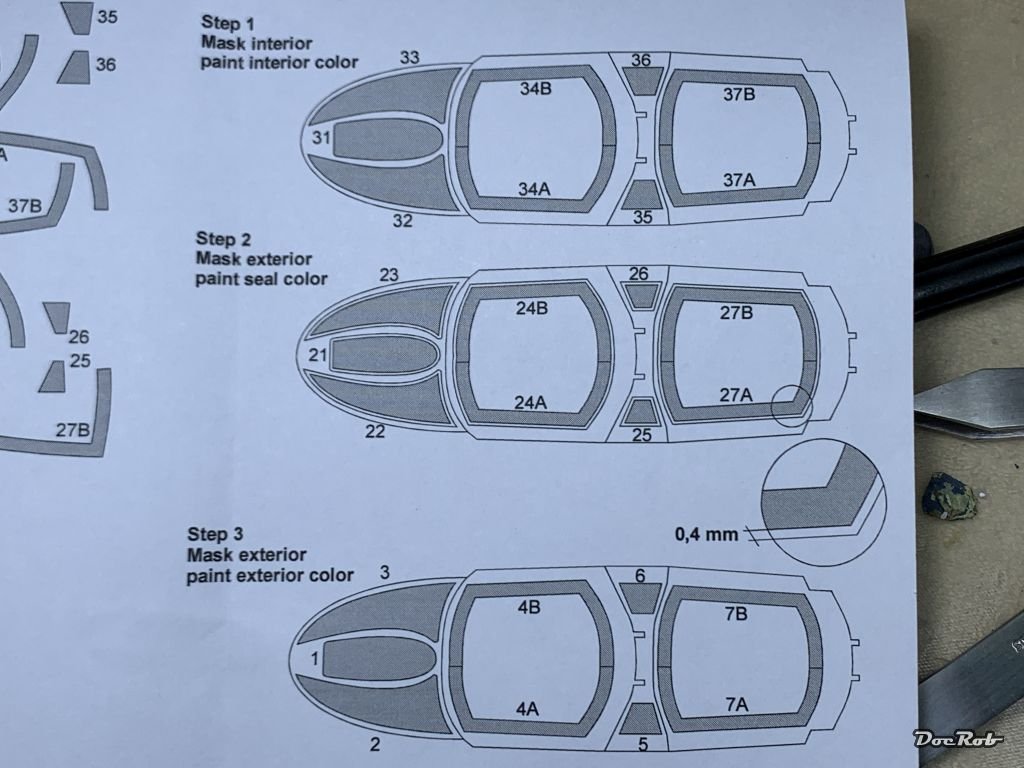
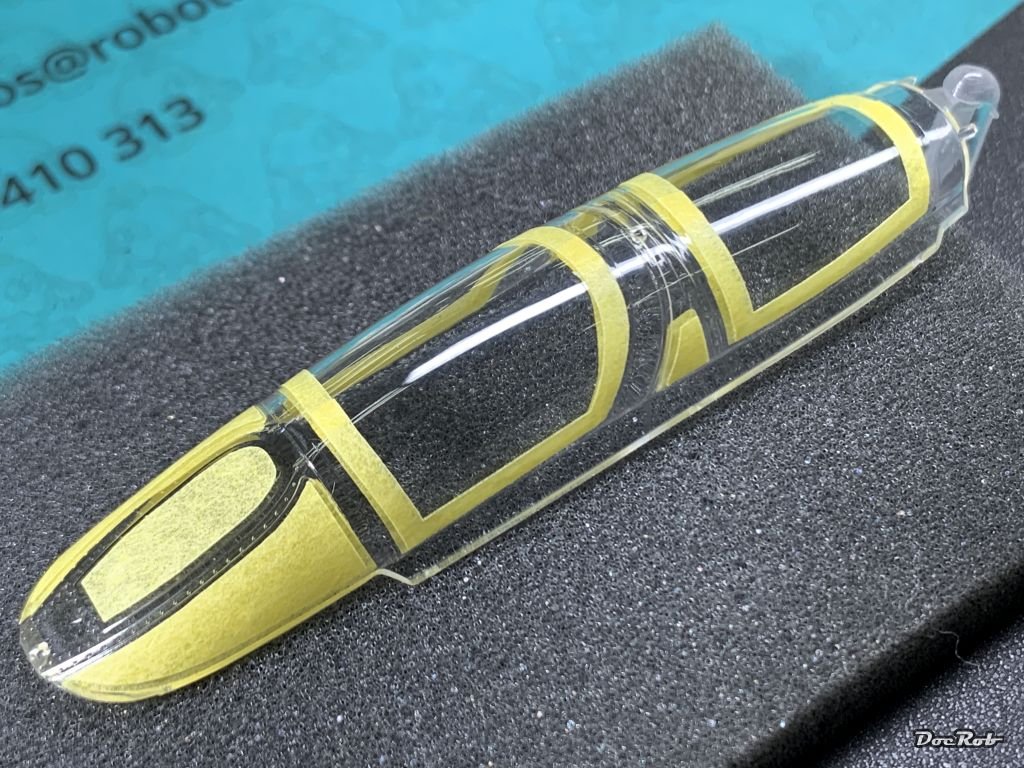
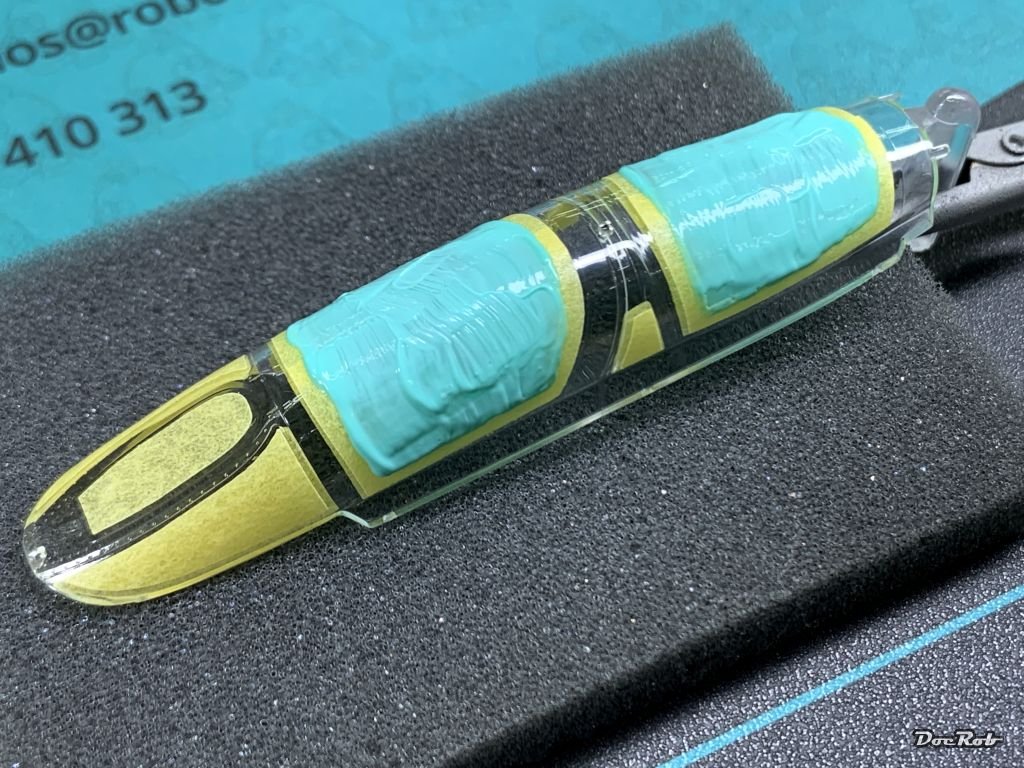
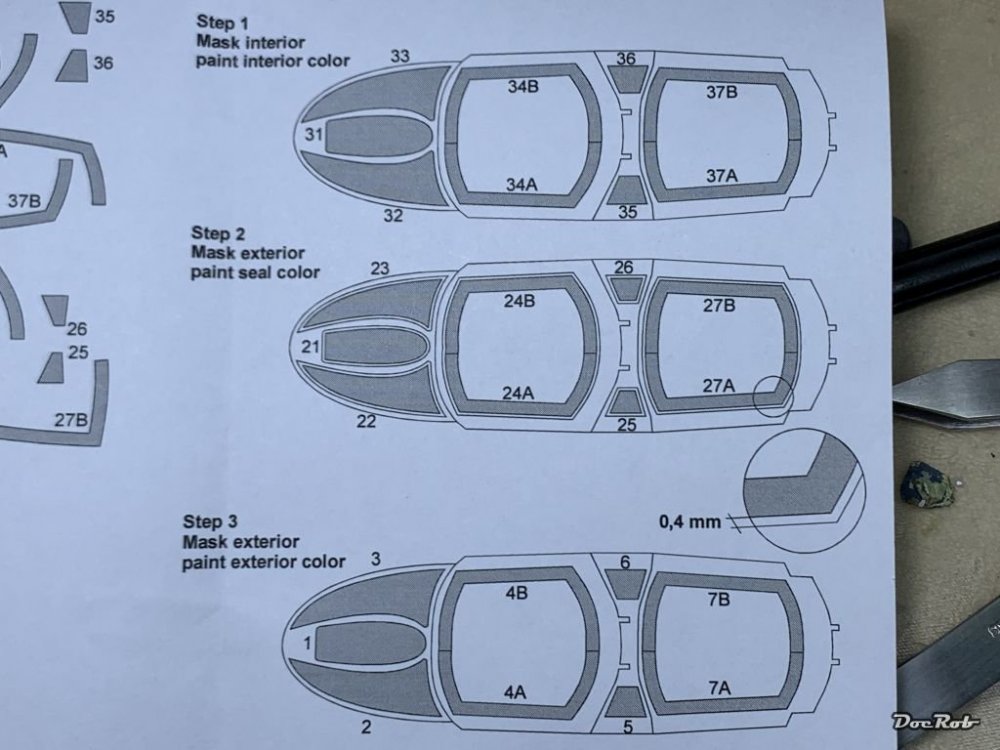
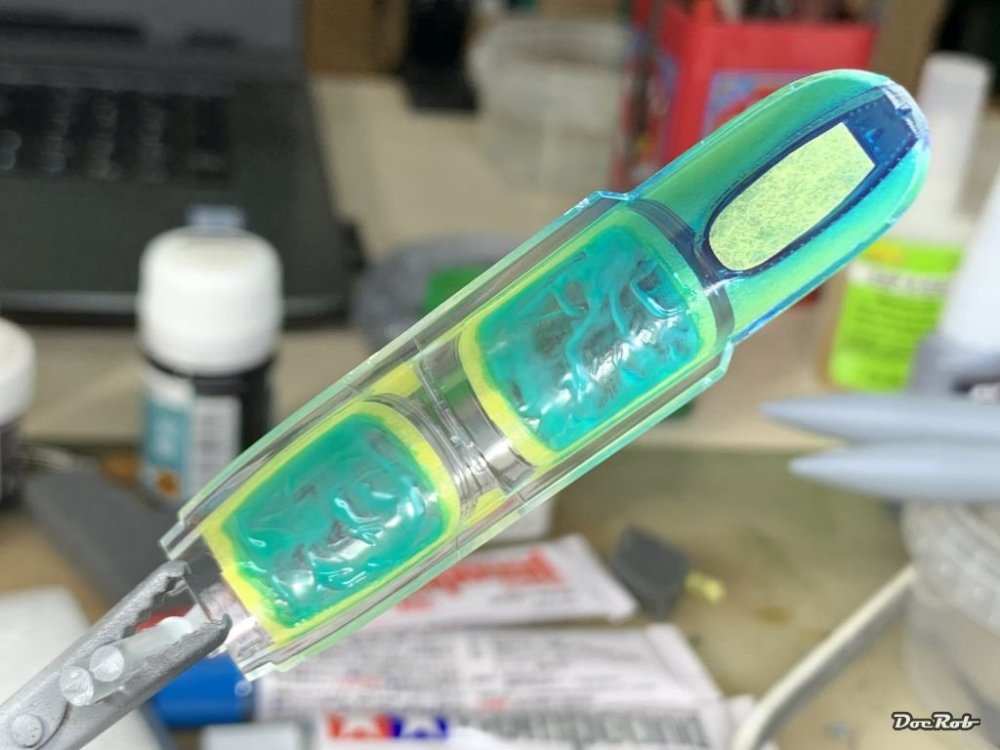
Whoosh, change of plans. Instead of torturing myself with masking for the blue wings and cockpit section, I tried to be a bit meaner to myself and start with the canopy. At first I found some tiny scratches on my just unpacked closed canopy and then another larger one. I decided to build the cockpit closed, so it was time for wet sanding with 8000 grit paper and then polishing with the Tamiya polishing pastes. The masks I use are from NewWare and include three sets, for the inside, for the seals on the outside and finally the exterior color. First I applied the inner masks with the exception of the to tint windsreen Next I applied the outside seal masks and covered the main canopies with liquid mask, inside and outside. Then sprayed the windscreen with thinned Tamiya clear blue from the inside. Applied the inner windscreen mask for protection. And finally sprayed the outside seal yellow and the inside dark sea grey. Next, the masks will be removed and the canopy installed, after inserting the bang seats and some more cockpit detail and then masked again from the outside with the third set of masks for the exterior color. I'm lucky that I studied in a university for some years, as the process and the mistake free processing made my head swirl . The masks fit and adhere perfectly and are a definite recommendation. Newware has other sets, without the sealing, if you prefer using the provided decals or decide not to depict the seals. Cheers Rob


-
I think we have two things happening here. First being the use of foul language, after the removal of the post, which I think caused the ban. I feel that 99% of us know how to behave and have the senses, what language is appropriate in a forum full of members with different backgrounds, lives and interests beside modelling. In reality, I like how this aspect works here, between model talk, some joking and teasing and of course OT stuff. OT is always problematic, specially when it washes into modelling threads and it needs some instincts to keep the balance. Second, is a bit more complicated to my eye, even here in LSM. To my understanding, this is an open minded place, where you exchange knowledge, techniques, product reviews, gossip, etc., on a subjective base or on a felt objectivity of the author. There are lots of members here, who don't mind, if their threads are used, to widen the subject. That can be everything from personal experiences, pics, links, critique, etc.. What I cannot say, is how much you 'own' your own threads. Is it only because I started lets say a WIP, that no other slightly off topic posts is allowed and where starts a topic to be OT? Is it an added historical picture, I already had in my reference and therefore do not need it? This s only a slight appeal about the joy of an open minded forum. In fact to my liking there are a few members, presenting WIP's or some other threads, but merely contributing to other's threads. Personally, I would like a bit more of interaction, but I understand, everybody has a different approach and time frame to the hobby and LSM. Generally speaking, I like it here and I like the typical laissez faire atmosphere, but maybe there are some open topics which need to be discussed about forum culture. I invite everybody to add critique, pics, opinion, jokes, own or others experiences, techniques, help or whatever to my threads. Cheers Rob
-
That's the one. Here in Europe it's still available in places. Cheers Rob
-
What is on your bench right now ? Share a picture :)
DocRob replied to Martinnfb's topic in Modelling Discussion
Pure wow, Gaz, the macro lens is not your enemy anymore . Cheers Rob -
C'mon, build that toaster and WIP it please. As I have the same one in stash, I'm eager to see how this thing builds up. If I remember right, I added some brass substitutes for the barrel and MG's. Cheers Rob
-
There are alternatives for the lazy ones. Yahu has the Mk. I and Mk. II IP made from printed PE and Kelik, seemingly a Reskit sidekick, has a 3D decal version, with added seatbelts. I will buy the latter and try it on mine. It's called Mk. II, but as far as I see it, it's the Mk. I IP, same which is used in the J8 as well. Cheers Rob
-
You had it coming, when you named him Kaiser, which degrades you automatically to his subject . Cheers Rob
-
Tamiya 1/32 F4U-1A Corsair VF-17 #5
DocRob replied to Daywalker's topic in LSM 1/32 and Larger Aircraft Ready for Inspection
Very nice and grimy bird. I really like the translucent marbled paintjob. Cheers Rob -
I absolutely hate these Mexican kidnappers. No sense of decency there, they put you on fancy ships, serve Mojitos and Enchiladas and leave you on precious beaches. What was the ransom to bail out, a WNW Felixstowe? Poor Martin, what a sad story . Cheers Rob
-
617 Sqn Tornado Dambuster 70th
DocRob replied to Kaireckstadt's topic in LSM 1/35 and Larger Work In Progress
Very nice and what a relief, that you don't seem to have fallen into the usual Italeri blues. The Tornado must be a better kit than these other patience testers. Cheers Rob -
One of the better excuses Ryan , welcome back. We are waiting for some half finished WIP's, so it's not only me . Cheers Rob
-
What is on your bench right now ? Share a picture :)
DocRob replied to Martinnfb's topic in Modelling Discussion
Two zeros are changing everything of course , sad to hear though. Cheers Rob -
OcCre BR 18 Bavarian Dream
DocRob replied to Quintillius's topic in LSM 1/35 and Larger Work In Progress
Nice problem solving, I would have also thought about rod length, when the engine itself is running fine, but I like the way, how you actually figured it out. Cheers Rob -
What is on your bench right now ? Share a picture :)
DocRob replied to Martinnfb's topic in Modelling Discussion
Harv, I'm a bit astonished about 15 albums been called a collection and I'm a bit confused about your total living space, when 15 albums take too much space. Like a modelling stash, 15 signifies a few random items, not a collection . A broken heart because of the space equivalent of two pizza boxes sounds like a bad deal to me. I promise you, you will buy a turntable soon and weep for the lost vinyl. Cheers Rob -
Done - F-4EJ Kai Phantom - The Last of it's Kind ZM 1/48
DocRob replied to DocRob's topic in LSM 1/48 Work in Progress
Meanwhile, I continued with the Phantom applying the base colors onto the fuselage and lower wings. There is not much to show, as the upper and lower color are not much contrasting to the plastic, so no pics. The good news, the used Tamiya LP colors sprayed expectedly smooth and fine. It's the first time, I use matte shades of the LP range, but I have no complaints. The colors used were Light- and Dark Ghost Grey (LP-36 and LP-37). After drying, there will be an extensive masking session for the black wings, canopy area, nose cone and tailwings. Cheers Rob -
Done - F-4EJ Kai Phantom - The Last of it's Kind ZM 1/48
DocRob replied to DocRob's topic in LSM 1/48 Work in Progress
Being from West Berlin, I know these boxings from VEB only from pics. Are you sure it's silver color, not glue? Cheers Rob -
Done - F-4EJ Kai Phantom - The Last of it's Kind ZM 1/48
DocRob replied to DocRob's topic in LSM 1/48 Work in Progress
Thank you Kent, I remember the times, where I used diluted paints from different brands for metallics, which had a grain as coarse as street asphalt. Alclad's were a big step forward and some of their shades still have a better finish than Extreme Metal colors, but the latter are the complete package to me, durable, resistent, maskable and easy to use. Cheers Rob -
What is on your bench right now ? Share a picture :)
DocRob replied to Martinnfb's topic in Modelling Discussion
I never thought about the value of my kits. I buy them to build them and even when I know, that some will never be built, I would not sell them. I bought them for a purpose, had an idea, how to finish them. I guess, I'm kind of a hoarder. It's the same with my vinyl's, I sometimes I look for the raise of their prices, specially the rare ones, but would never sell one, because I bought them for their real purpose, to be heard. Cheers Rob