DocRob
-
Posts
7,137 -
Joined
-
Last visited
Content Type
Profiles
Forums
Events
Gallery
Everything posted by DocRob
-

What is on your bench right now ? Share a picture :)
DocRob replied to Martinnfb's topic in Modelling Discussion
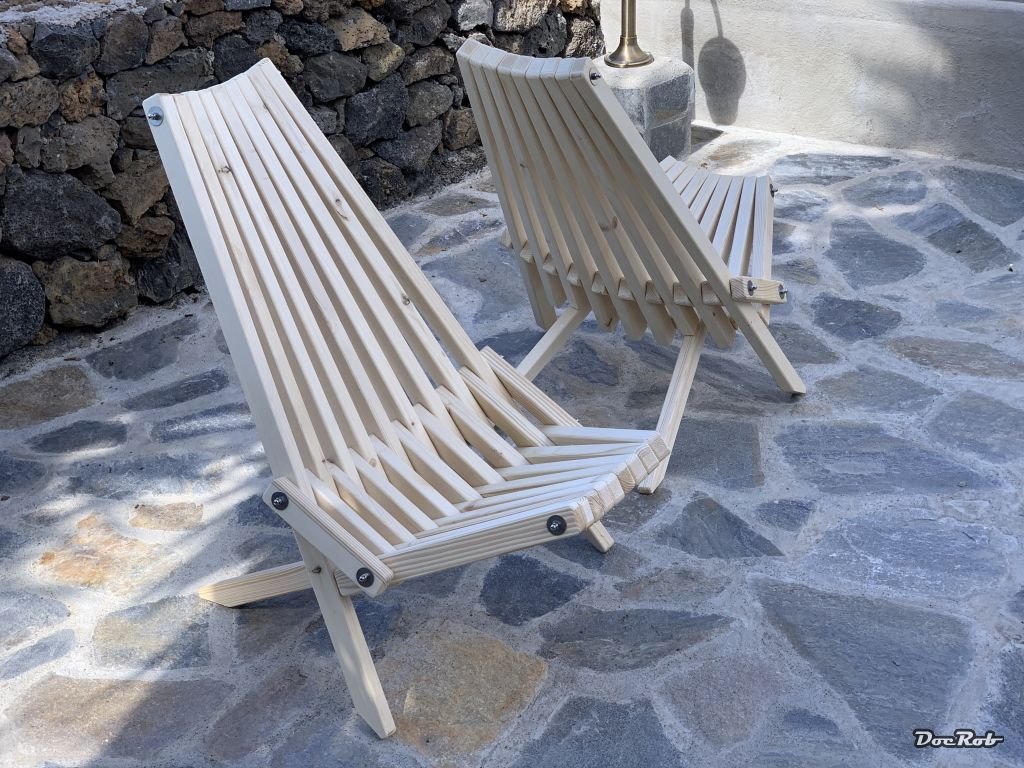
Thanks Peter, these chairs are comfortable and easy to build compared to the Adirondack chairs, I built two years ago. Cheers Rob -
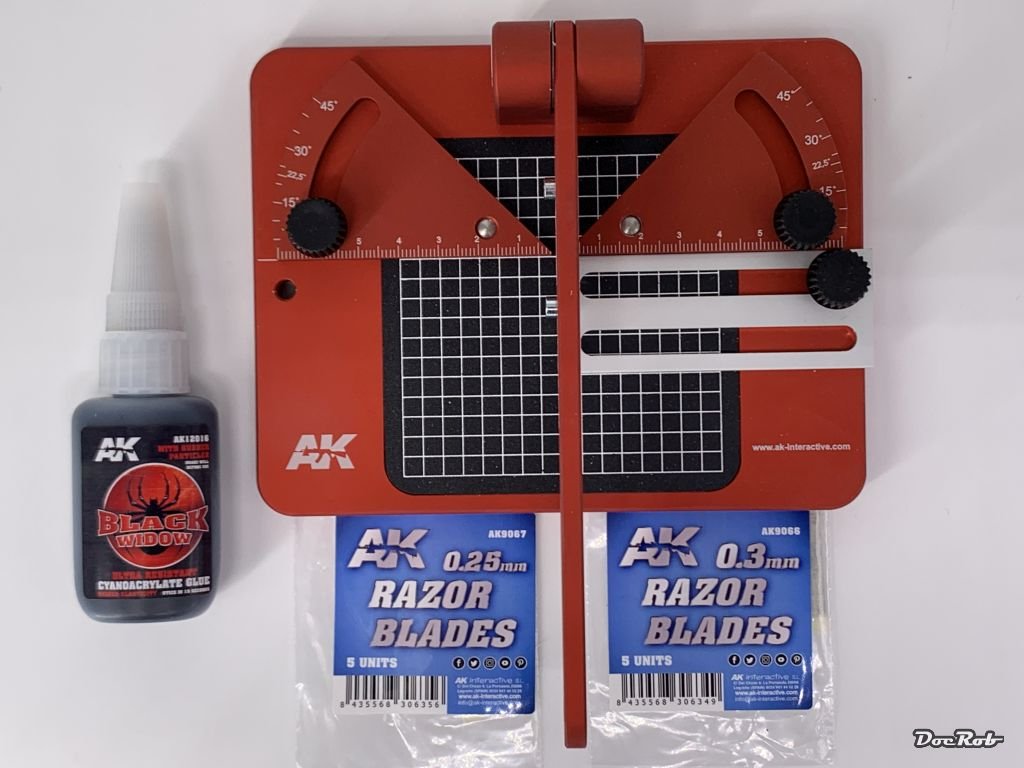
Thanks Peter, I hope I'm able to cut wooden planks for my sailing boat project with the cutter, without squeezing the wood. The wood is not thick, but it needs precision cuts. Cheers Rob
-
What is on your bench right now ? Share a picture :)
DocRob replied to Martinnfb's topic in Modelling Discussion
Thanks Gus, in the moment we have a great summer, but we have harsh conditions here too, lots of humidity, wind, fog and then everything changes to dry heat, not perfect for softwood as well. I built some Adirondack chairs two years ago from a very durable wood, but I have to rework them this year. The new chairs are foldable and will be stored inside, when the weather turns bad. The new built sea view terrace is more a summer terrace, because there are cruel winds blowing in winter time and we will use the place for a winter barbecue only on days with no more than a breeze with a Kamado barbecue, which distributes a lot of heat. Tha Canary Islands are called the islands of eternal spring only for the tourists, it can be pretty rough here, specially northern bound and up in the mountains. I do feel cold more often here, than I felt in Berlin, where the houses are better insulated and better heated. Cheers Rob -
What is on your bench right now ? Share a picture :)
DocRob replied to Martinnfb's topic in Modelling Discussion
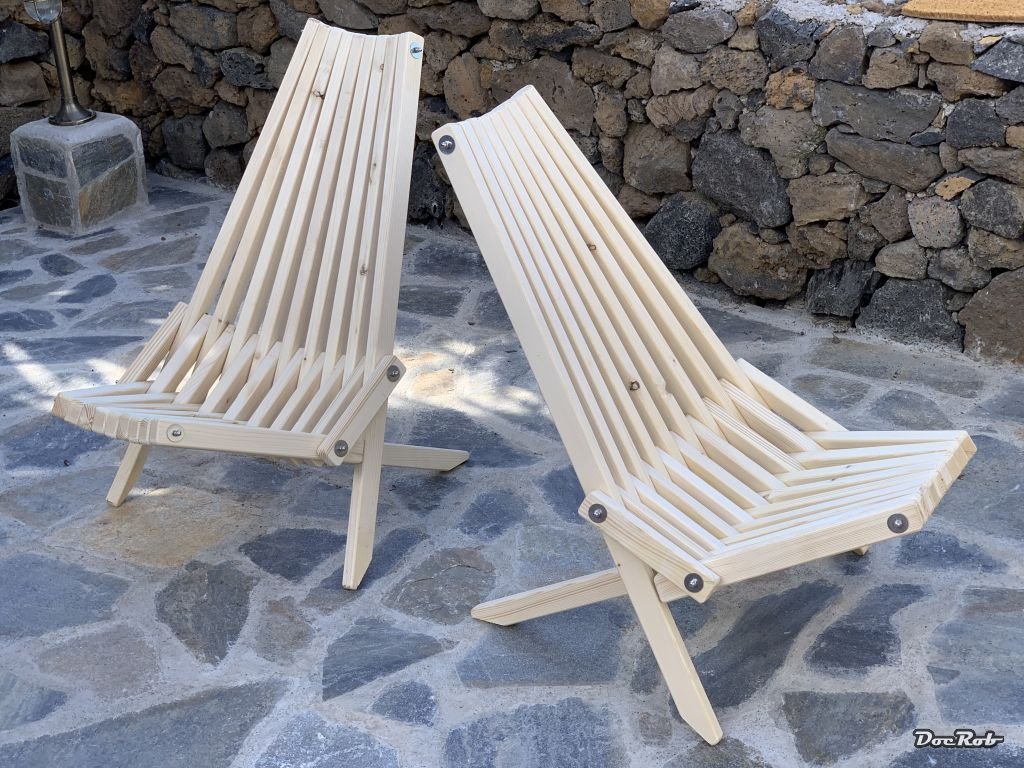
Thanks Carl, I used the following plans, but they are in German. If you have questions about the plans you can PM me. I followed the basic measurements in the description, except, I used threaded rod of 6 mm (M6) stainless steel and drilled the holes in the wood with 8 mm diameter. In all the construction took three days, it's a relatively easy build. Tipps & Tricks: Kentucky Stick Chair (senotto.de) You can buy this kind of foldable chair as well, for example in the Netherlands. Fieldchair | Weltevree - order now, free shipping within EU From this company I bought the sheepskin with a leather loop, to attach the skin to the chair. Cheers Rob -
What is on your bench right now ? Share a picture :)
DocRob replied to Martinnfb's topic in Modelling Discussion
Actually it's off the bench right now, because it's ready. Two 1/1 models of Kentucky Stick Chairs, which I built over the last week. Another summer project, which will be a present for my wife's birthday, to use on our new sea view terrace. For colder days, you can put some sheepskins on. Cheers Rob

-
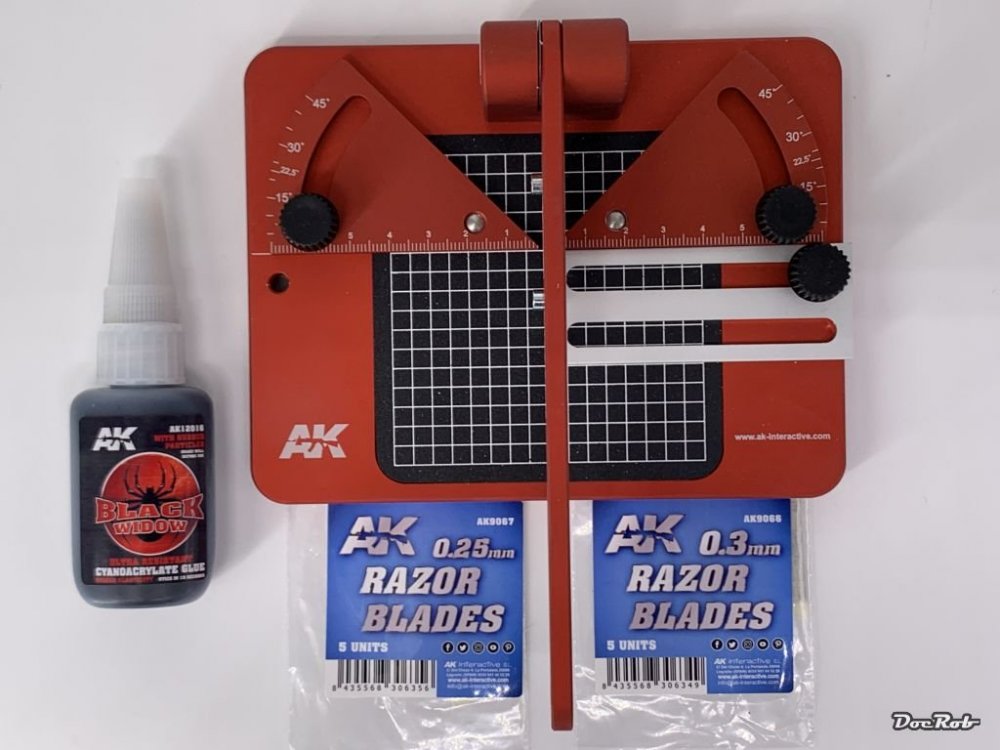
After a long journey, the Mitre cutter appeared at my door today. The first package from AK was lost somewhere, but they immediately sent me a new packet. Very good service, I have to say. The cutter should be the same as the DSPIAE one but branded by AK. Cheers Rob
-
Happy birthday Bill, you got yourself a beauty. I will build Gabriels Fokker on your box, but have a different D.VII boxing with the decals from Lifelike.
-
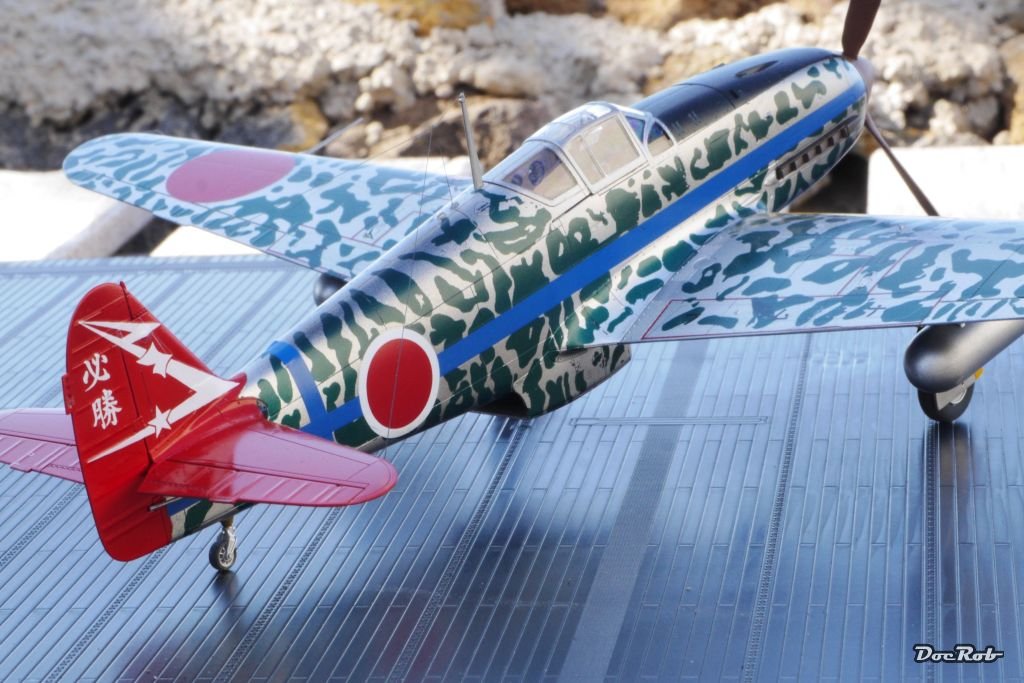
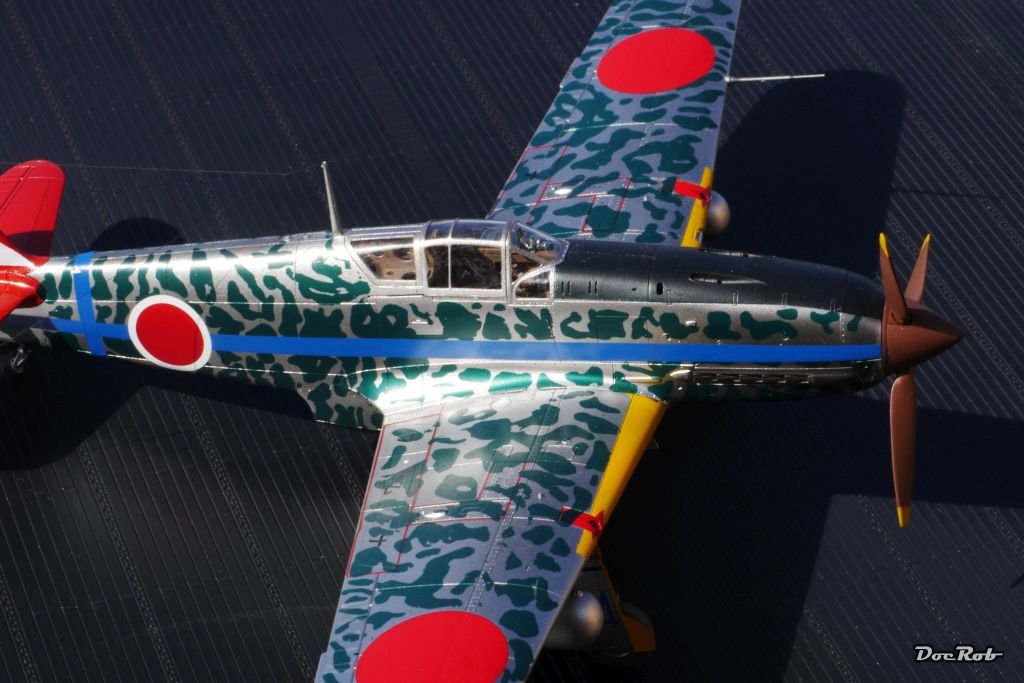
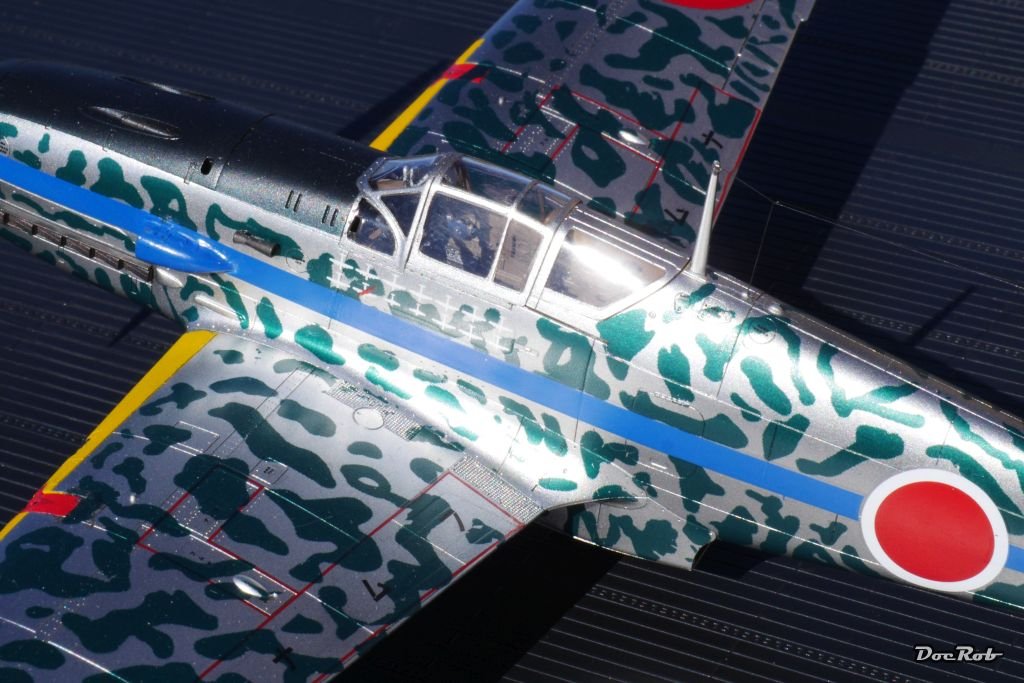
Summer project Kawasaki KI-61, Tamiya 1/48
DocRob replied to DocRob's topic in LSM 1/48 Work in Progress
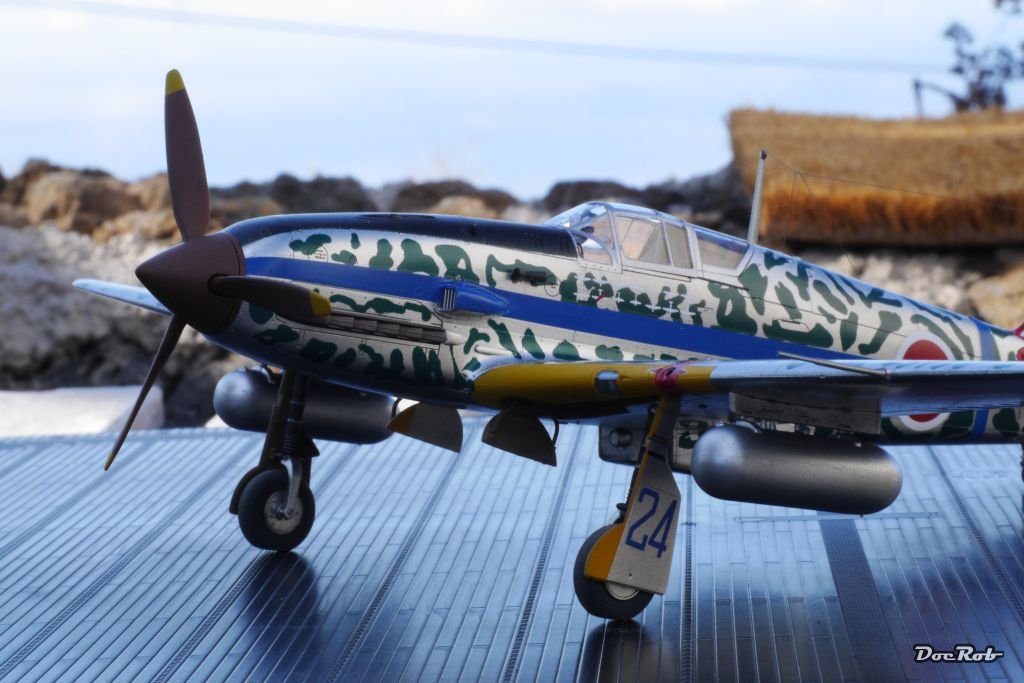
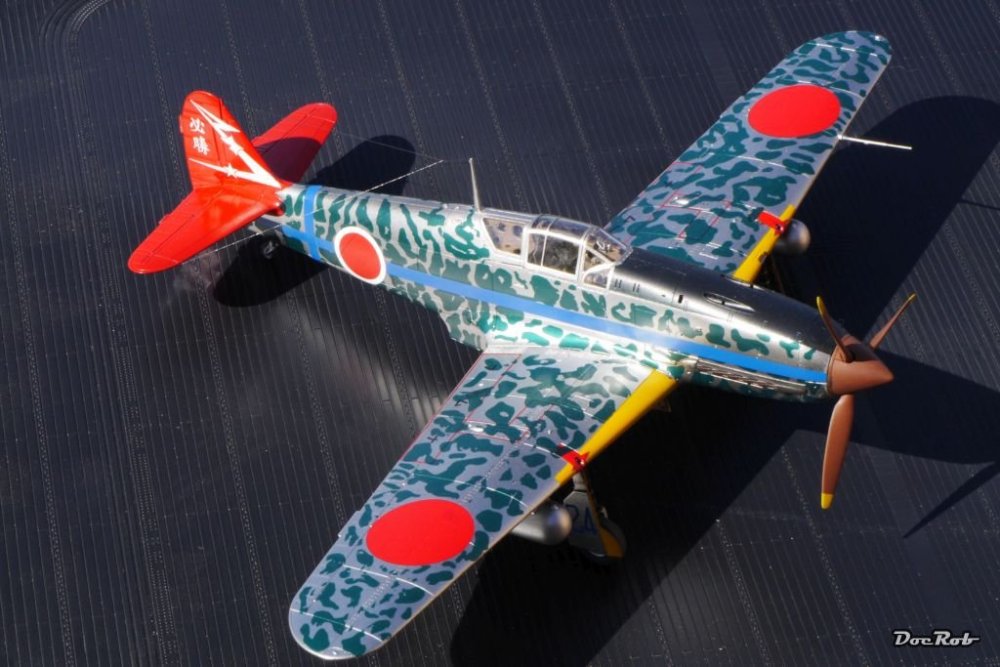
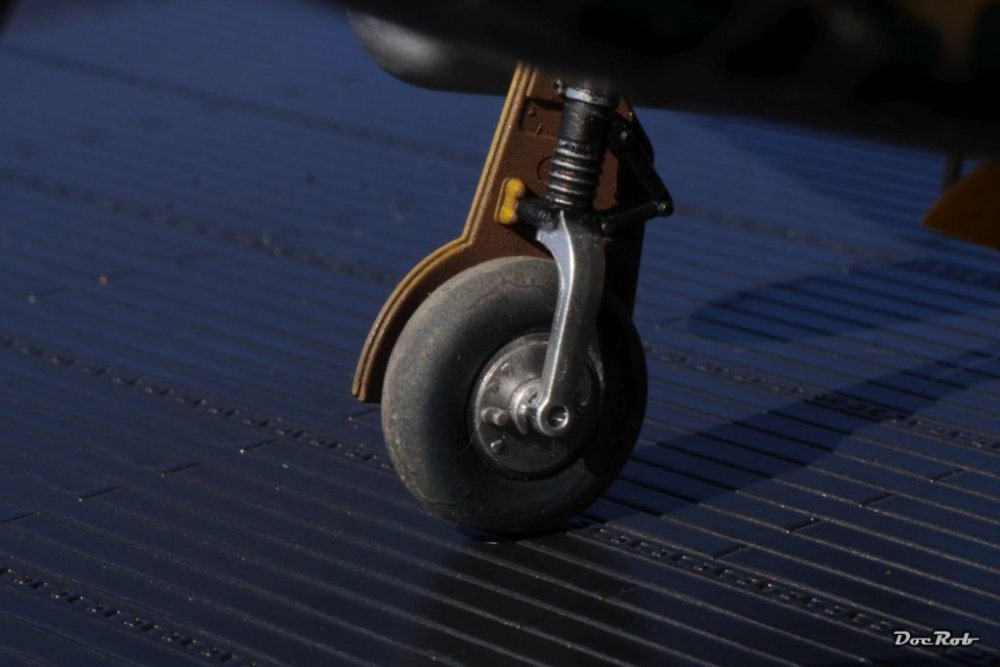
The Kawasaki is done, luckily so, the summer is not . It was ment to be an easy build and it was, the kit is perfectly engineered and a joy to assemble. Painting and specially applying the wet transfers were a bit harder, with the HGW product partly failing for the fourth time, I used them. All in all, the outcome isn't perfect, there are some residues on the canopy, which I couldn't remove and I didn't weather or panel lined the plane, because I was afraid to destroy the camo. In the display case though, it is a colorful addition and the build was a laid back summer experience. And this is for Kai Cheers Rob


-
F-4J(UK) - Tamiya (1/32)
DocRob replied to ThomasProbert's topic in LSM 1/32 and Larger Aircraft Ready for Inspection
In the moment there are some Phantom builds around here, different in scale and in version. Your British version looks fabulous and I like the low contrast scheme, paired with that black fin. The FOD covers are another eyecatcher. Cheers Rob -
Israeli Mirage III C with Atar9C
DocRob replied to Kaireckstadt's topic in LSM 1/35 and Larger Work In Progress
Wow, what a great looking Mirage. The paintjob is stunning and very contrasting. You see, all the extra work paid off at last and I raise my hat, to you being tough enough to fight the very bad base kit. Cheers Rob -
I'd like to buy a ticket for the ride. I love the fugly Wessex and very often was close to purchase the Fly kit. After seeing Shark's build here, I iced my plans, but that needn't to be forever. Can't wait to see, what yours will look like. I have the 1/48 incarnation of the HH-34J from Gallery models, which I plan to build as a German Bundesmarine SAR. I heard it's a good kit and should be a good start into the bigger Wessex. Cheers Rob
-
Interesting planes, great pics. Thank you for taking us on the tour Carl. Cheers Rob
- 14 replies
-
- 4
-

-

-
- sault ste marie
- bushplane
- (and 1 more)
-
RFM Panzer IV Ausf H (Early)
DocRob replied to Bomber_County's topic in LSM 1/35 and Larger Work In Progress
The Panzer IV looks well built Phil, can't wait to see it in final colors. I always opt for spraying things separately, but nearly never on the sprues. I've never build a Schürzen wearing vehicle, but really like to do so. I have a Jagdpanzer IV with mesh Schürzen and a less than half build STUG. Cheers Rob -
Great looking P-38 Phil, congratulations. I'm very pleased to hear (and see), that the Academy kit is doable and not only this, you achieved a very beautiful result here. Painting is flawless and I'm inspired to start mine sooner than planned. I have an Academy with goodies (later model in NMF) and the Tamiya waiting for me. Cheers Rob
-
What is on your bench right now ? Share a picture :)
DocRob replied to Martinnfb's topic in Modelling Discussion
Do we expect an acrylic water using underwater display for the non land based version, Carl? Cheers Rob -
CF-18 439 Sqn Tiger Meet
DocRob replied to BlrwestSiR's topic in LSM 1/35 and Larger Work In Progress
Great work on the intakes and of course the absolutely gorgeous looking pit. It's a good idea to strengthen the joins on such a big bird, to have a better control of the gaps and a sturdier plane in all. You may start to raise a tiny bit of interest in me into a plane, I never had any love for, shape ways. Keep on with your good work Carl. Cheers Rob -
You will love them Peter, except maybe for the smell. They spray perfect. Be prepared to use even more thinner than with acrylics. I use a ratio of 1/3 LP-color and 2/3 Levelling thinner or Tamiya Lacquer thinner. Cheers Rob
-
Who reads all these stencils in reality . Great work Peter, missiles and tank are looking bueno. Having built two Tamiya kits in a row, I found one rare letdown with them. It's the color callouts. When there are lots of different colors and detail work involved, it can be quite confusing with all these X-, XF-, LP-, TS,... Please Tamiya print your manuals in color. Cheers Rob
-
Gottfreid Weiroster Bf 109G6 R6 Revell 1/32
DocRob replied to GazzaS's topic in LSM 1/35 and Larger Work In Progress
These are the most important days in modelling, they are the foundation to cash in at the previous work the next day and have great results. Like Kai said, the gunsight looks perfect. Cheers Rob -
Bronco 1/35 Type XXIII U-boot
DocRob replied to BlrwestSiR's topic in LSM 1/35 and Larger Work In Progress
This boat (I remember you trying to sell us the story, that the boat followed you home ) will eat up a lot of space when displayed, but it's well worth it. Beside the great build and looks, I admire your will to give desperate and lost kits a new home. I always remember your story, when my wife has this fierce view, when I receive a new kit. One day, I will tell her... Cheers Rob -
Gottfreid Weiroster Bf 109G6 R6 Revell 1/32
DocRob replied to GazzaS's topic in LSM 1/35 and Larger Work In Progress
I can't understand, how companies can interpret shapes completely wrong, when there is an original plane at hand (given the G4 and G6 are equally shaped in this area). In the end Gaz, it's a bit like my canopy with distortions. You put a lot of research, effort, work and money into the kit. Finish it, and you'd be surprised, nobody will note the issue (except us ). Luckily it's the bottom side. Cheers Rob -
Summer project Kawasaki KI-61, Tamiya 1/48
DocRob replied to DocRob's topic in LSM 1/48 Work in Progress
Inter It's always interesting to see the motivation of fellow modelers and what is driving them through the sometimes painful process of building a kit. You are very lucky Peter, that you have a wife, supporting you with your hobby and accepting the display shelf in the house. My situation is a bit different, my wife accepts my hobby, but would never support me. She likes to see me doing things with passion and dedication, but has no understanding for all the money, I spend on the hobby and has a general dislike of weapon thingies, which I can understand. It's not only because of her, that there are no kits displayed in our houses, I wouldn't like that either. We have a very special shaped and decorated living area, where kits simply wouldn't fit in. This status quo is ok for me and sometimes, I manage to get my wife involved into a specific model related subject, when I achieve to address her professional pride, being an engineer for technical risk management on a very experienced and advanced level . It takes some minutes then for her to mind, that she have been tricked in and we both have a laugh. If I follow the lead, you are leaving with your avatar, for example a Piper Cub would be not too difficult to build from scratch or based on a wooden kit. With 3D-printing on demand, even the complicated sub assemblies like engine or interior are in reach. Obtaining scaled technical drawings of the better known types shouldn't be a big prob either. C'mon Peter fulfill your dream and let us peek in. Cheers Rob -
SBD-3 VS-6 Midway
DocRob replied to Rod Bettencourt's topic in LSM 1/32 and Larger Aircraft Ready for Inspection
What a sad story behind your marvelous build Rod. Painting and weathering looks perfect, as are the pictures. Cheers Rob -
Summer project Kawasaki KI-61, Tamiya 1/48
DocRob replied to DocRob's topic in LSM 1/48 Work in Progress
Great and atmospheric pic Gaz, but the canopy looks distortion free . Looks like it has Hasegawa origins. Cheers Rob -
Summer project Kawasaki KI-61, Tamiya 1/48
DocRob replied to DocRob's topic in LSM 1/48 Work in Progress
Thanks Peter, I don't like unsolved mysteries, at least with modelling. It's an error prone hobby and a lot is about fixing the errors. That puts understanding of the situation in focus and mostly, through analyze a problem, you will conclude and find ways to solve the problem. Not in this case, because I can't find the possible source of the problem, but as I have written, so be it. Honestly, I have to admit, I have a display shelf in my workshop, but the reason for that is not displaying my builds, but storing them more space efficient, than in boxes, where they eat a lot of space and are prone to damage. The shelf gets more and more crammed and sometimes, I give away a kit as a present for friends. Mostly, after a build is done, I loose interest in the kit, with only some exceptions. The only model, I will display somewhere in the living area will be a wooden sailing ship, when done. For me it's about building, painting weathering and challenge myself with new techniques, materials or processes, after finishing, the air is out. Does it make sense? To me it does, because I really enjoy the building process as a calming and focusing time and in the end, there are some of my builds, I'm really proud off. Cheers Rob