DocRob
-
Posts
7,016 -
Joined
-
Last visited
Content Type
Profiles
Forums
Events
Gallery
Everything posted by DocRob
-

Summer project Kawasaki KI-61, Tamiya 1/48
DocRob replied to DocRob's topic in LSM 1/48 Work in Progress
Inter It's always interesting to see the motivation of fellow modelers and what is driving them through the sometimes painful process of building a kit. You are very lucky Peter, that you have a wife, supporting you with your hobby and accepting the display shelf in the house. My situation is a bit different, my wife accepts my hobby, but would never support me. She likes to see me doing things with passion and dedication, but has no understanding for all the money, I spend on the hobby and has a general dislike of weapon thingies, which I can understand. It's not only because of her, that there are no kits displayed in our houses, I wouldn't like that either. We have a very special shaped and decorated living area, where kits simply wouldn't fit in. This status quo is ok for me and sometimes, I manage to get my wife involved into a specific model related subject, when I achieve to address her professional pride, being an engineer for technical risk management on a very experienced and advanced level . It takes some minutes then for her to mind, that she have been tricked in and we both have a laugh. If I follow the lead, you are leaving with your avatar, for example a Piper Cub would be not too difficult to build from scratch or based on a wooden kit. With 3D-printing on demand, even the complicated sub assemblies like engine or interior are in reach. Obtaining scaled technical drawings of the better known types shouldn't be a big prob either. C'mon Peter fulfill your dream and let us peek in. Cheers Rob -
SBD-3 VS-6 Midway
DocRob replied to Rod Bettencourt's topic in LSM 1/32 and Larger Aircraft Ready for Inspection
What a sad story behind your marvelous build Rod. Painting and weathering looks perfect, as are the pictures. Cheers Rob -
Summer project Kawasaki KI-61, Tamiya 1/48
DocRob replied to DocRob's topic in LSM 1/48 Work in Progress
Great and atmospheric pic Gaz, but the canopy looks distortion free . Looks like it has Hasegawa origins. Cheers Rob -
Summer project Kawasaki KI-61, Tamiya 1/48
DocRob replied to DocRob's topic in LSM 1/48 Work in Progress
Thanks Peter, I don't like unsolved mysteries, at least with modelling. It's an error prone hobby and a lot is about fixing the errors. That puts understanding of the situation in focus and mostly, through analyze a problem, you will conclude and find ways to solve the problem. Not in this case, because I can't find the possible source of the problem, but as I have written, so be it. Honestly, I have to admit, I have a display shelf in my workshop, but the reason for that is not displaying my builds, but storing them more space efficient, than in boxes, where they eat a lot of space and are prone to damage. The shelf gets more and more crammed and sometimes, I give away a kit as a present for friends. Mostly, after a build is done, I loose interest in the kit, with only some exceptions. The only model, I will display somewhere in the living area will be a wooden sailing ship, when done. For me it's about building, painting weathering and challenge myself with new techniques, materials or processes, after finishing, the air is out. Does it make sense? To me it does, because I really enjoy the building process as a calming and focusing time and in the end, there are some of my builds, I'm really proud off. Cheers Rob -
Summer project Kawasaki KI-61, Tamiya 1/48
DocRob replied to DocRob's topic in LSM 1/48 Work in Progress
Muchas gracias Amigos, for your input and reasoning. I will change my approach . The KI-61 just made it back from intercepting B-29's at high altitude and there is still some ice from condensation onto the canopy, that easy . Nope, it's not and I'm wondering about myself. I don't display my builds and you are the only bunch, I'm showing what I do, so why do I care? I cant explain it, but I do. For this build, which was more planned as an easy summer distraction and a camo experiment, I will leave it now as it is, but I'd like to understand what happened, to be prepared for the future. Normally I dip my canopies in Pledge, but didn't do it this time, because the parts were crystal clear and distortion free. It was the first time, I used HGW's Kabuki masks, but nothing ran under the masks and the distortions seem to be no glue residue. I used Revell Contacta Clear for all my canopy works and never had issues. I think, it's very similar to thinned white glue for wood and not very aggressive or fuming. As I said in the beginning, I will try another approach, it's a summer build, it's a cool plane, juuuuust relax and have fun. What was that all about...? Cheers Rob -
Israeli Mirage III C with Atar9C
DocRob replied to Kaireckstadt's topic in LSM 1/35 and Larger Work In Progress
Beautiful and very detailed, the cockpit area looks positively busy. Cheers Rob -
Summer project Kawasaki KI-61, Tamiya 1/48
DocRob replied to DocRob's topic in LSM 1/48 Work in Progress
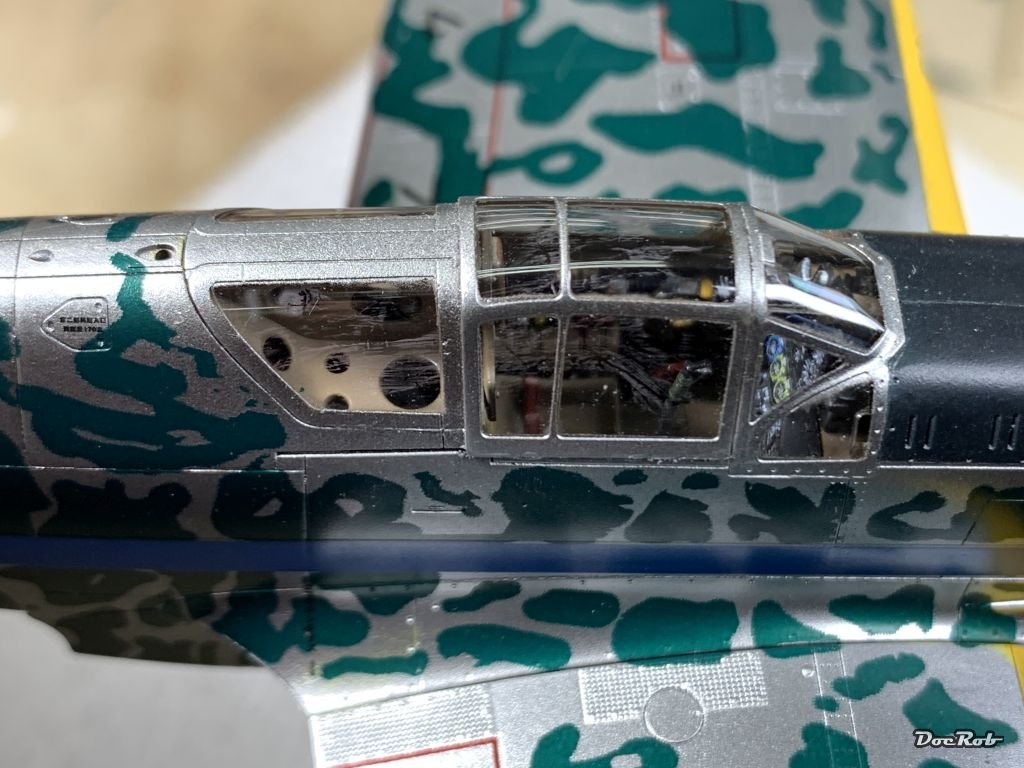
My frustration is starting to rise, the canopy fogging or smearing isn't solved easily. First I tried to clean with a cotton swab, to no avail, then brushed on some Pledge onto one pane, the one on the left in the pic, nothing. After further inspecting, it almost seems, the distortions are in the clear plastic or inside, for whatever reason. I tried to dismount the main canopy part with the help of a blade, but couldn't get it loose without fearing to destroy it, which enhanced my confidence into Revell Contacta glue, which I hadn't before. I'm running out of options, is this really the point, where I have to accept the distortions, or to put a putty made tarp on the canopy, brrrrr. The middle and aft part of the clears is supplied for an open representation of the KI-61, but to install them, you have to change the fuselage mounted railings, which are different for open and closed canopies. Oh, by the way, the distortions are definitely not scratches and they are visible on nearly every pane, on some barely noticeable on others more. Gaz, I would appreciate a pic of the real thing having distortions on the canopy, for whatever reason. Cheers Rob
-
Simply stunning Peter, your Phantom looks like the one on the boxart, super smooth and refined. The panel lining is like it should be with the chosen look, very fine. Cheers Rob
-
Summer project Kawasaki KI-61, Tamiya 1/48
DocRob replied to DocRob's topic in LSM 1/48 Work in Progress
Haha, great one Gaz. Would the Japanese have known about HGW's wet transfers, they would have invaded the Czech Republic instead of fighting against China, only to get a bad batch of copycat airbrushes. Cheers Rob -
Summer project Kawasaki KI-61, Tamiya 1/48
DocRob replied to DocRob's topic in LSM 1/48 Work in Progress
Thank you, I guess the Otaki build experience was quite different from the Tamiya one. Building was a breeze with absolutely no issues. Muchas Grazias Gaz Thank you Peter, I will evaluate the canopy prob today and decide then what to do about it. The spot on the underside was caused by me, while cleaning away a tacky spot with a cotton swab dabbed in a hint of alcohol. It worked without problems on the extra tanks, but here, the aluminum color darkened. Repared with the True Metal wax, it looks like new. Cheers Rob -
Summer project Kawasaki KI-61, Tamiya 1/48
DocRob replied to DocRob's topic in LSM 1/48 Work in Progress
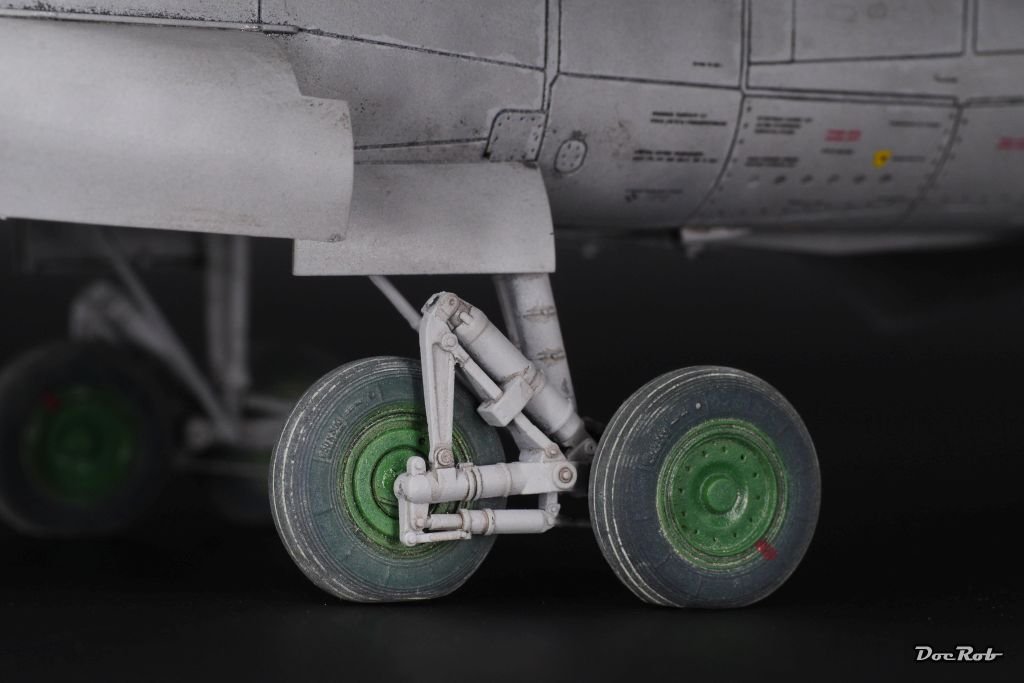
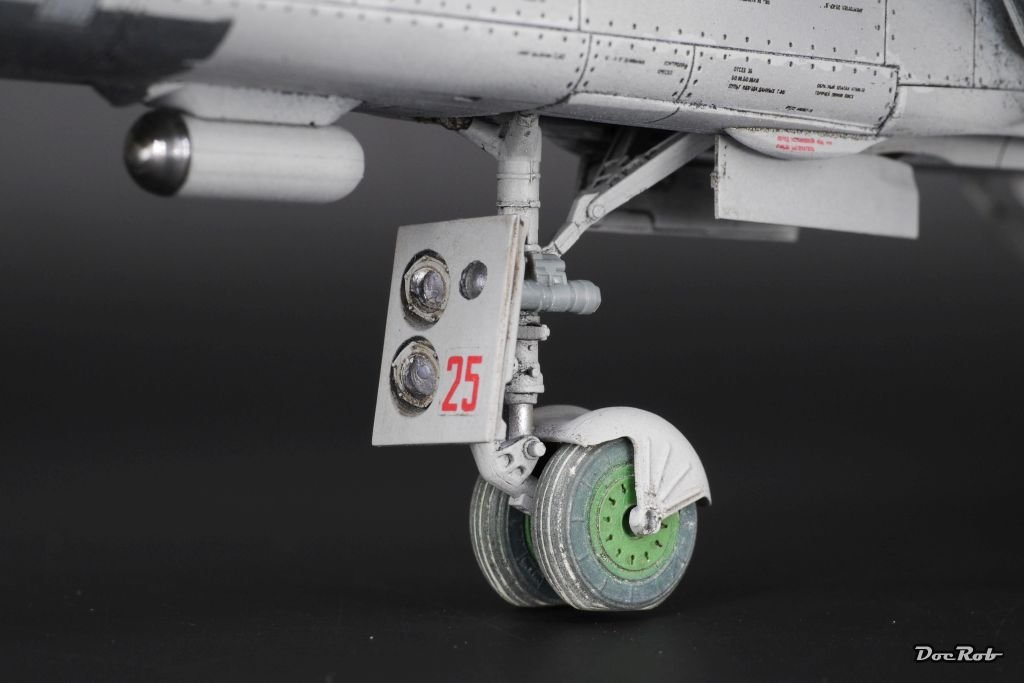
Dankeschön Kai, I will not clean the canopy with thinners, because I'm afraid, to smear the color while doing so. I have no idea, what caused the slight fogging, maybe it's residues of the HGW Kabuki masks, maybe it's caused by hot paint, in this case Exteme Metals or a combination. Concerning the wheels, I will post some pics later, which in this case are not very spectacular, as I used the simple kit wheels, but I show the effect on the wheels of my Mig 31 build. The flanks of the tires are sprayed in a bluish black, the contact area with a grey brown black. Then I apply rubble Pigments from MIG. The tire colors I use are from a Life Color set with six different near blacks, which is really handy, because I rarely use pure black in my builds. Cheers Rob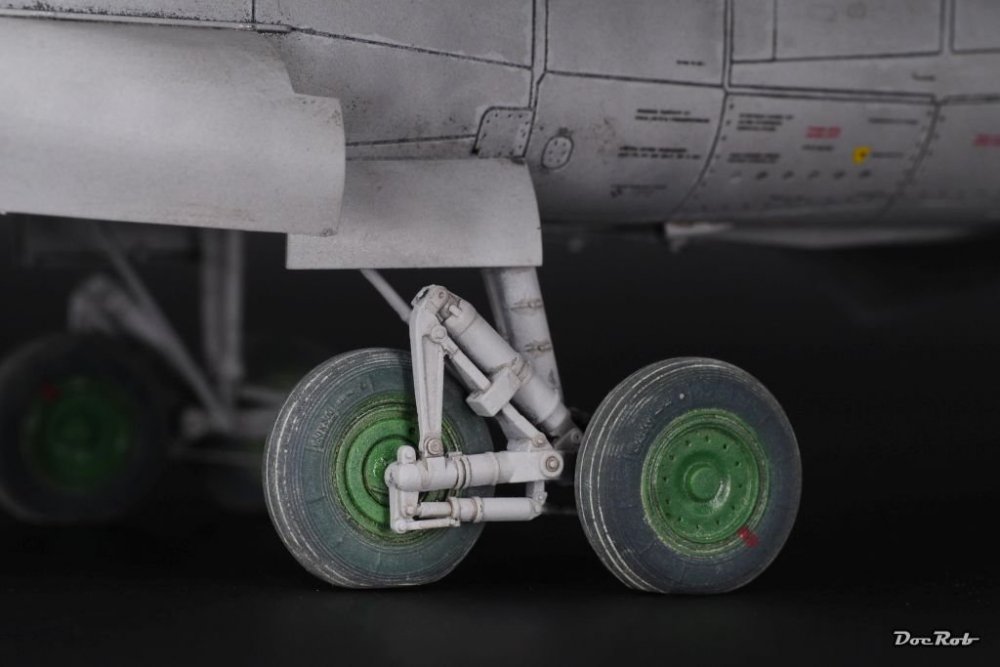

-
Summer project Kawasaki KI-61, Tamiya 1/48
DocRob replied to DocRob's topic in LSM 1/48 Work in Progress
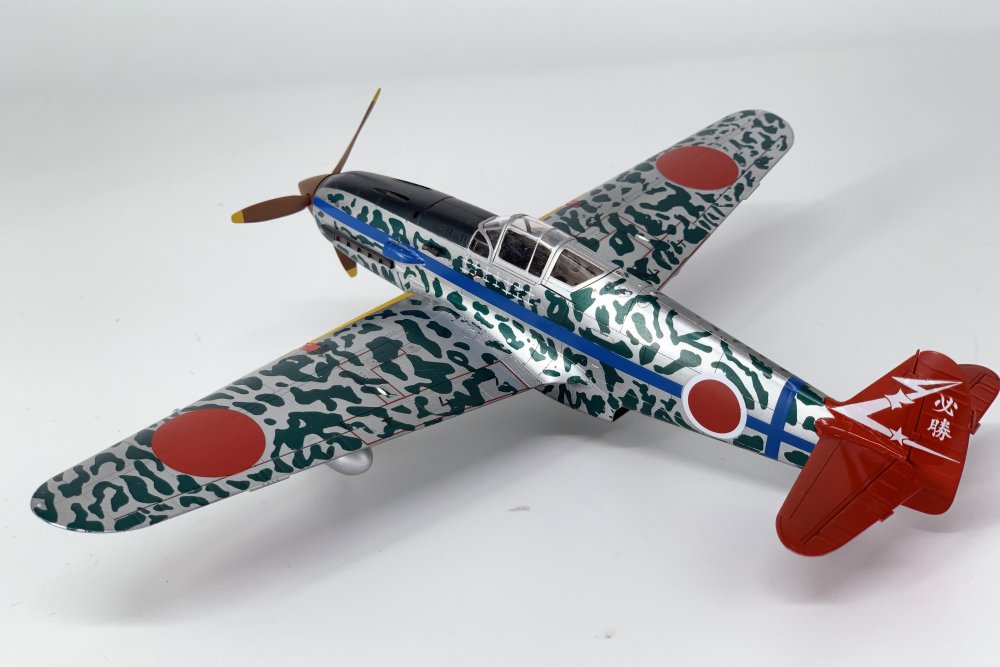
Muchas gracias Gus, it looks indeed a bit like a parrot, no real camo effect here. Cheers Rob -
Summer project Kawasaki KI-61, Tamiya 1/48
DocRob replied to DocRob's topic in LSM 1/48 Work in Progress
Phew, summer can be cruel, we had a heat wave for a week, which meant, I had to concentrate mainly on other things, like watering the garden and hiding from the sun, but did, poco a poco a bit of detail work on the KI-61. I painted and slightly weathered the spinner and prop, painted the undercarriage, where the wheels received my typical two tone look of near blacks with different hues and then some rubble pigments. The extra tanks and exhausts were added, which were painted black for their covers, followed by Alclad's jet exhaust and then Uschis steel pigments. All the barrels were applied and got a steel pigment treatment. On the bottom of the fuselage, I somehow had a big dark spot in the NMF, which looked horrible. I decided against respraying, because I didn't want to mask on all the decals and wet transfers, so I tried carefully to rub on AK's true metal aluminum wax, which fixed the prop very good, the shine is very similar to the sprayed color. After removing the masks, I found some smears on the canopy, very lightly, but annoying. I don't know, what I do about it, maybe first I will try to clean a bit more with cotton swabs and if that doesn't work, I may brush on some Future, which I haven't use to dip the clear parts in, which I normally do. Here she is, with some little things to do, but closing in. Cheers Rob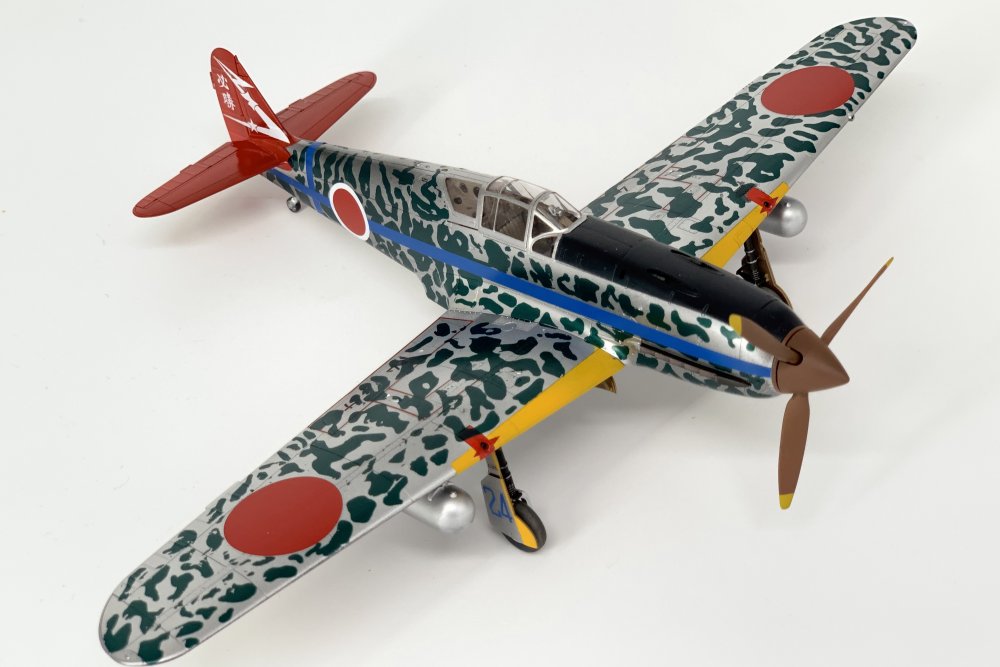
-
Israeli Mirage III C with Atar9C
DocRob replied to Kaireckstadt's topic in LSM 1/35 and Larger Work In Progress
I'm not sure Kai, The photo is taken under harsh low light, as the shadows indicate and what I called reflection, represents the form of the ladder perfectly. On the other hand, there should be a reflection on the left spar of the ladder too, which isn't. Maybe the pilots entering had greasy knees and that's what causes a spotty shine . Cheers Rob -
Congratulations on your award, well earned and we had the benefit of accompany the build. Nice loot, must be great to browse the merchants on a show, a sensation, I'd really like to share . Cheers Rob
-
Tamiya LP colors are lacquer based, where x-colors are acrylic. I used the x-colors since years and really like them thinned with Mr. Levelling thinner, mostly with a fifty-fifty mix ratio. For some car projects, I wanted an even more durable coating, which is promised with the LP-colors and they behaved great. Sprayed heavily thinned with a ratio 2/3 thinner and 1/3 color, they spray ultrasmooth and are very robust. I use Tamiya lacquer thinner or Mr. Levelling thinner for the LP's The downside is, they are more expensive, because they run trough the airbrush like Alclad, they smell worse than the X-colors and the range of colours is much smaller, specially, when it comes to camo colors. I discovered them with my Ford GT build and to me, that's where they belong, primarily cars and motorcycles and maybe NMF for planes Cheers Rob
-
Israeli Mirage III C with Atar9C
DocRob replied to Kaireckstadt's topic in LSM 1/35 and Larger Work In Progress
I wouldn't use a too matte coat Kai, seeing your last picture, there clearly is a reflection of the yellow ladder to be seen. Cheers Rob -
Thanks a lot Harv, for uploading the pics and for the virtual tour of the event, an event I had planned to visit, firstly. Bummer with the Rio, I used to stay in the Red Rocks Hotel, when in Vegas, a great place, a little bit off the trotten pathes and you have to see the entrance of the Bowling Alley, pure style. Cheers Rob
-
Great work John, specially with the slightly marbled three tone camo. Have you polished the canopy and turret, as it shines so intense on the pics? An interesting plane for sure, which has the nose of a fighter and the frame of a bomber. Cheers Rob
-
Bronco 1/35 Type XXIII U-boot
DocRob replied to BlrwestSiR's topic in LSM 1/35 and Larger Work In Progress
Hi Carl, I hope you had a nice round trip, but good to have you back at the bench. Nice detailing there with the railings and wires. Cheers Rob -
1:144 E-2C Hawkeye (Revell kit and RetroWings propellers)
DocRob replied to marcopreto's topic in Non LSM 'WIP
Welcome to LSM and nice scratch building with the Tiny Hawkeye. Like Gaz here, I specially like the hubs and am a little envy of your lathe . Cheers Rob -
Israeli Mirage III C with Atar9C
DocRob replied to Kaireckstadt's topic in LSM 1/35 and Larger Work In Progress
Nice spotting Sherlock, as Gaz said, these details add to the appearance of an opened canopy in LS. Cheers Rob -
Decaling looks great, as the whole bird does with them applied. I was very pleased with how the Tamiya decals performed on the KI-61. They are thick, but they blend in with some Micro Sol and the very small amounts of carrier film is nearly invisible and a coat of gloss might hide it completely. Good decision on the part stenciling Peter. On a weathered bird you can go all out with the stencils, which are disguised under some tear and grime, but stand out with a lot of unwanted contrast on a clean plane. Cheers Rob
-
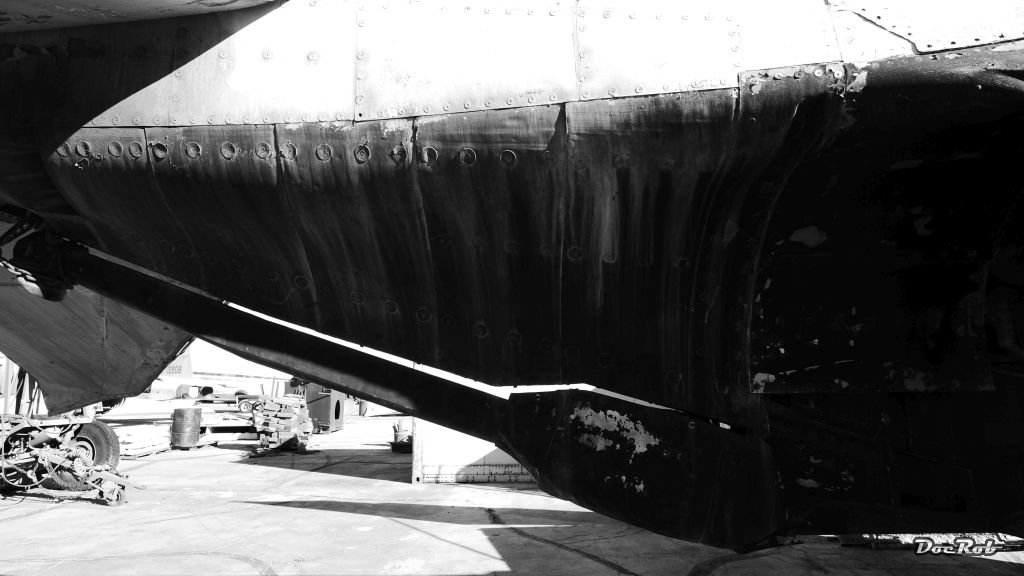
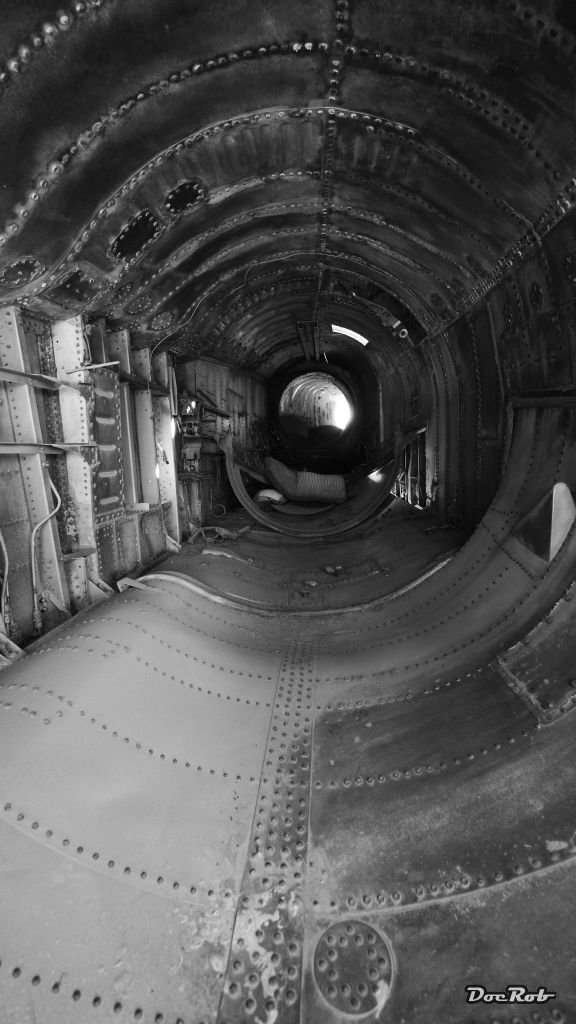
A bit more weathered, but with a good view of the rivets. Taken in Chino, California. Cheers Rob


-
With that speed, you are spoiling the good experience John . Beautiful and smooth paintjob, I have a soft spot for US-Navy three tone camo, it's much more appealing than GSB. Cheers Rob