DocRob
-
Posts
7,016 -
Joined
-
Last visited
Content Type
Profiles
Forums
Events
Gallery
Everything posted by DocRob
-
To be honest Martin, there is some other great European stuff, not new, but good, like Zebda from Toulouse, France (The vid is titled Paris 2019, but the concert is from 2003) And finally my actual summer hymn, Gorillaz - Désolé ft. Fatoumata Diawara. The fabolous Faoumata or short Fatou from Mali makes great vinyls of her own, worth to explore too. Cheers Rob
-
This guy is great, I know his music since the late 80's when he was part of the Band Mano Negra. I've seen some concerts in Berlin and Barcelona, he/they surely know to entertain. Here is one example of their raw power, a bit like the early Clash, latin flavored. Cheers Rob
-

Ford GT II - The Fast and the Novice - Tamiya 1/24
DocRob replied to DocRob's topic in LSM 1/35 and Larger Work In Progress
Yeah, I know about these masked repops, Tamiya seems to be eager, testing the patience of their customers . Cheers Rob -
Eduard F6F-3 Hellcat, USS Princeton, flown by Gordon Arthur Stanley in 1/48
DocRob replied to DocRob's topic in Non LSM 'WIP
Thank you Kai, the 48 scale stuff is well hidden here . I still have to rework some areas, like the exhaust stains and maybe I add the pilot climbing into the cockpit as planned, along with the to paint carrier deck base. Cheers Rob -
Israeli Mirage III C with Atar9C
DocRob replied to Kaireckstadt's topic in LSM 1/35 and Larger Work In Progress
Way better Kai, it looks perfectly now. At least it's not a Greek plane, which often look like a flying trashcan . Cheers Rob -
Ford GT II - The Fast and the Novice - Tamiya 1/24
DocRob replied to DocRob's topic in LSM 1/35 and Larger Work In Progress
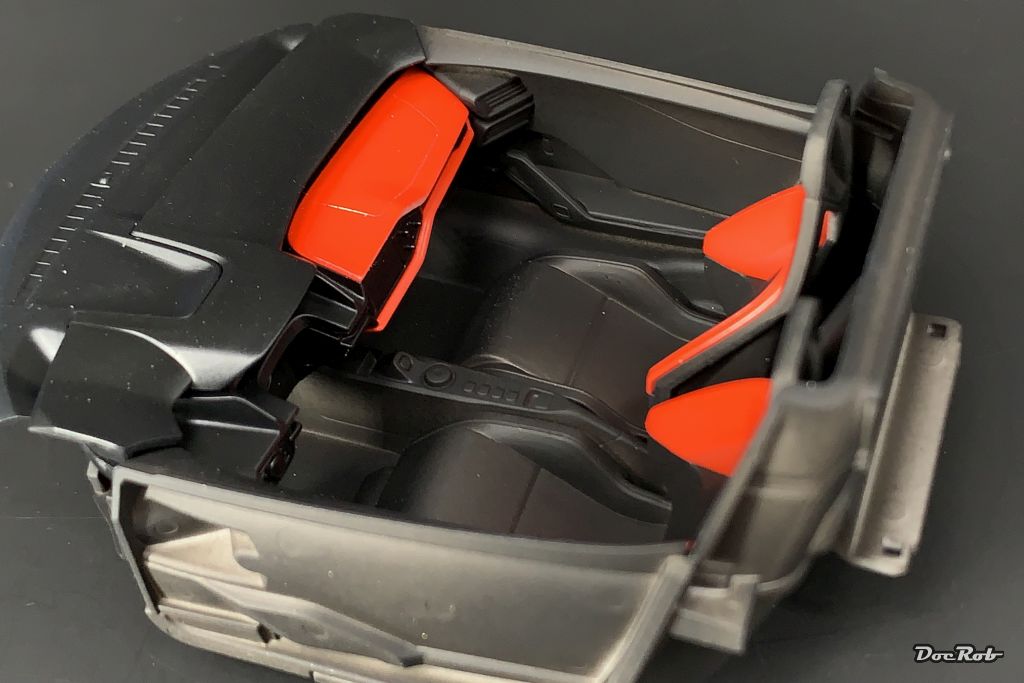
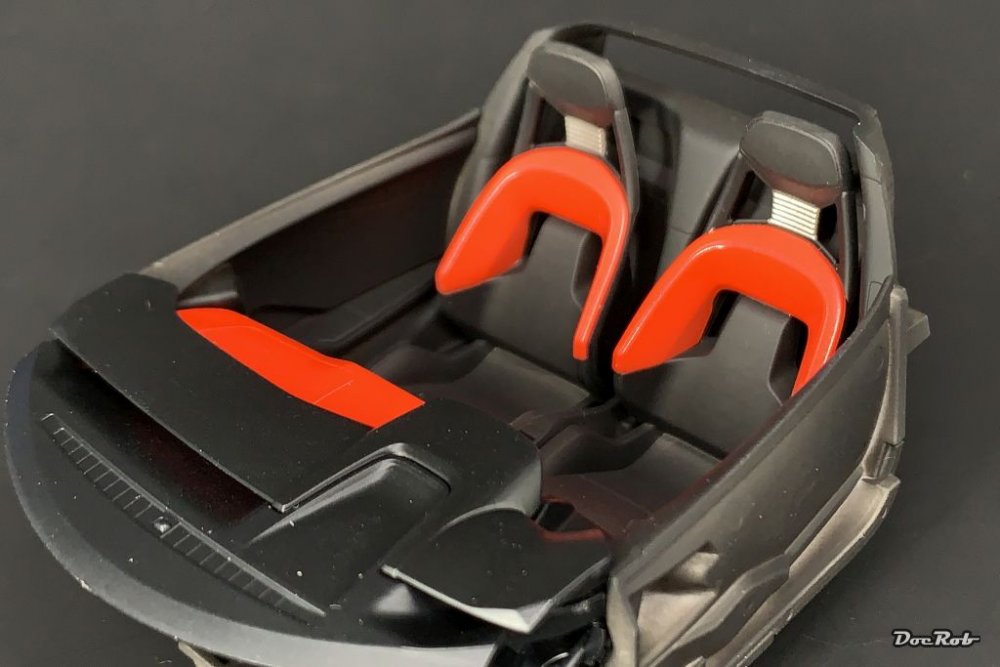
Muchas gracias hombres, painting the Ford is actually a lot of fun and quite a difference from plane and armor painting and weathering. I actually try to make it look NEW , which is new to me . The manual calls for flat white as a contrasting color on the interior panels, but while inspecting the pictures on the box, I saw one Ford with orange-red accents, that sealed it. Cheers Rob -
Ford GT II - The Fast and the Novice - Tamiya 1/24
DocRob replied to DocRob's topic in LSM 1/35 and Larger Work In Progress
He He, I'm a wanderer and sometimes, I surprise myself . I really enjoy, to let my thoughts drift, grab a thought, transform it into an idea, plan it in my brain and start it as a project, with an already made up picture of the final thing in my head. I have only a reduced interest into cars. I love my Jeep and classic cars in general, but am no car nut. Even if I had the money, I would never like to have a car like this in real live and modern cars mostly remind me of a piece of soap, with their uniform and boring shapes. The Ford is more like learning the mysteries of car painting techniques. I've seen 2K clear cote being used too and that is an option, if my Tamiya lacquer clear fails. First I have to get the process right and decide, if I polish the blue color and then gloss coat or if I first gloss coat and polish then, like Carl mentioned. I tend to the latter too. Damn right, you should force the Italeri engineers to a year of labor in Tamiya's halls. After that, they are positively brain washed. Cheers Rob -
Ford GT II - The Fast and the Novice - Tamiya 1/24
DocRob replied to DocRob's topic in LSM 1/35 and Larger Work In Progress
Thank you Carl, indeed it's good news, that Tamiya is pre-cutting the Kabuki and I hope it was not only a test with the Ford. I was also tending to glosscoat before polishing, as the surface of the mica blue is very smooth and I don't know, if I ruin more, than doing good, working directly on the blue color. I have a complete set of Tamiya's polishing compounds, which I plan to use for this build. Cheers Rob -
Takom Panzerkampfwagen I 1/16 scale... with figure
DocRob replied to GazzaS's topic in LSM 1/35 and Larger Work In Progress
Great tutorial, like Kai said. The cobbles look, well, -cobbly-, meaning perfectly uneven, like these ancient Berlin roads, I used to hate, when I was a bicycle messenger as a student. The woodwork on the frame looks the part too. Cheers Rob -
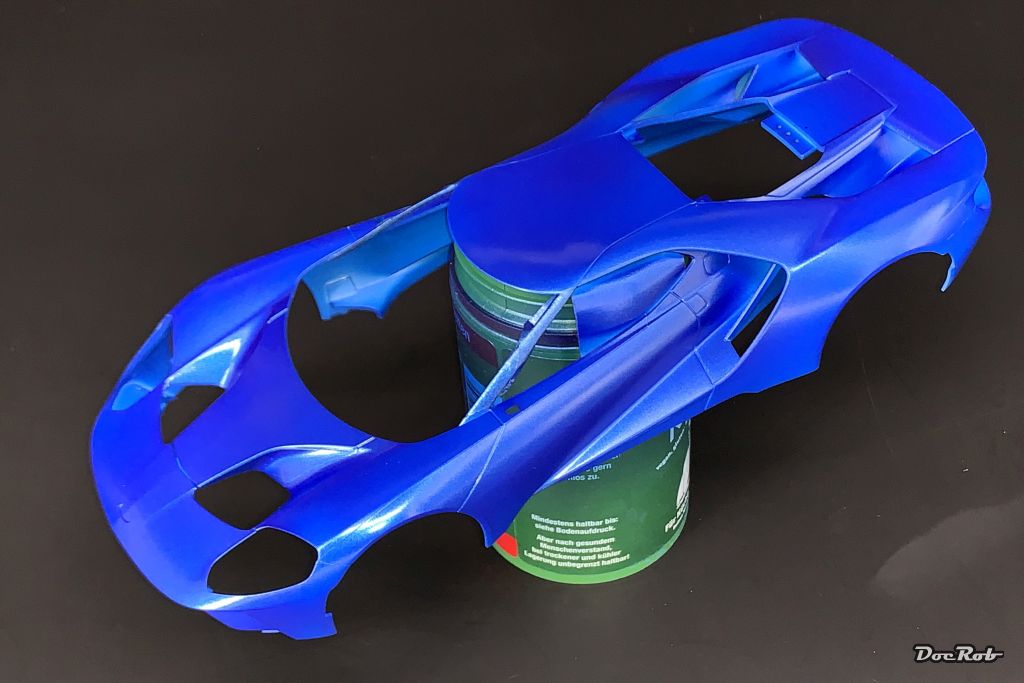
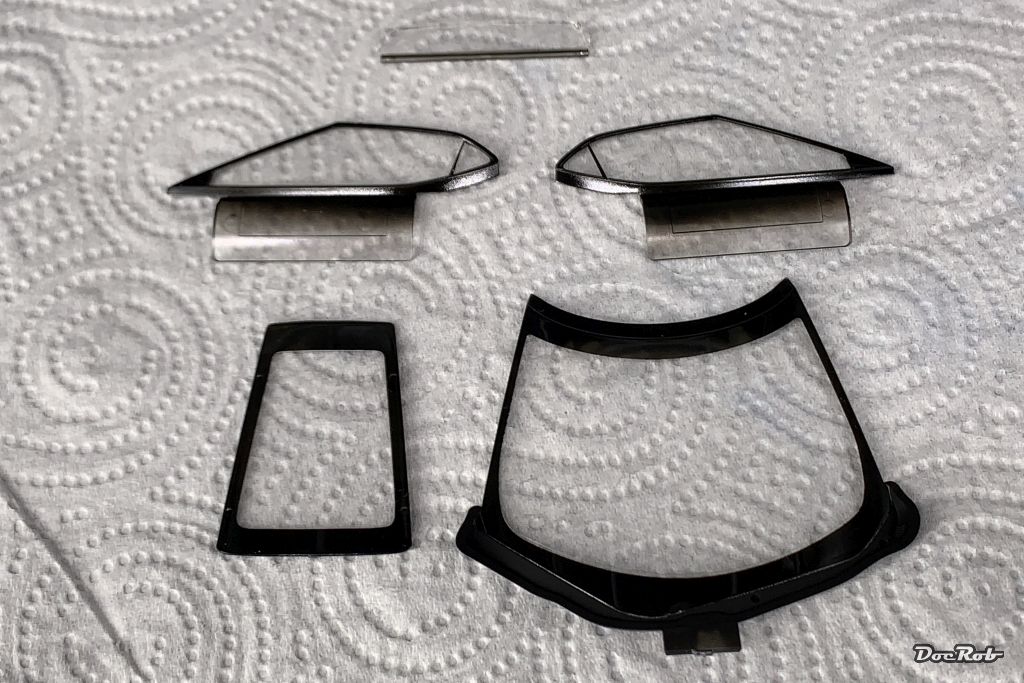
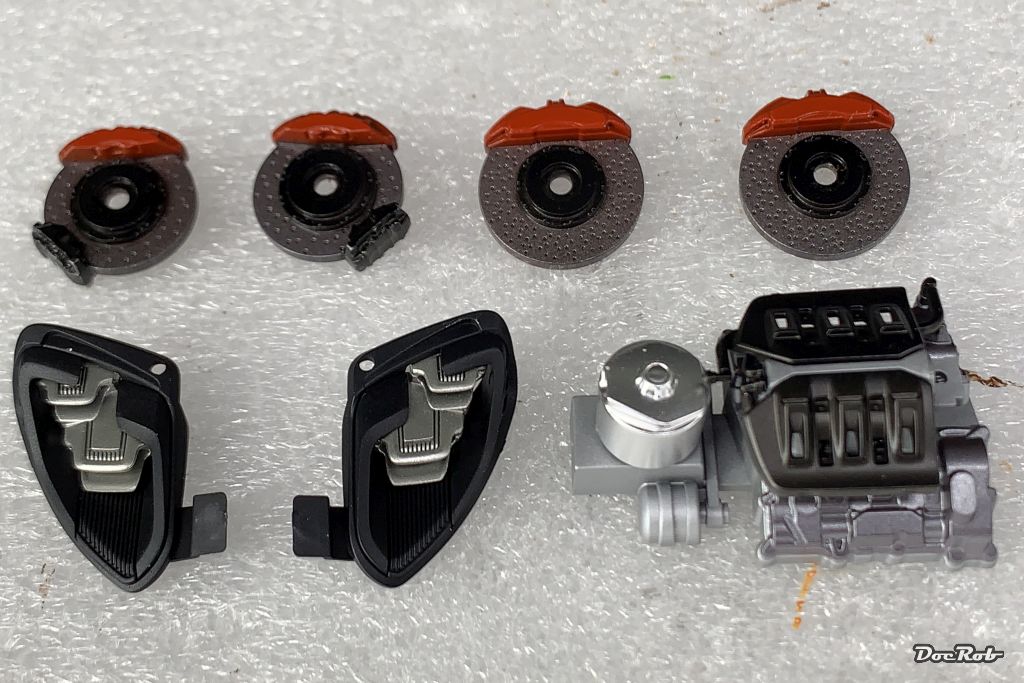
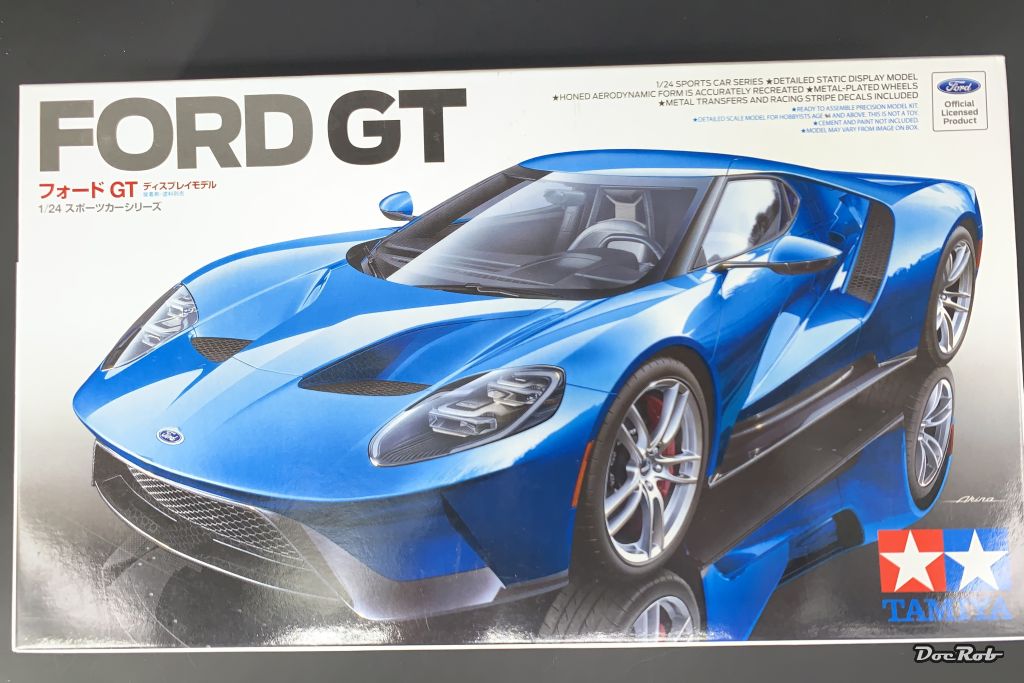
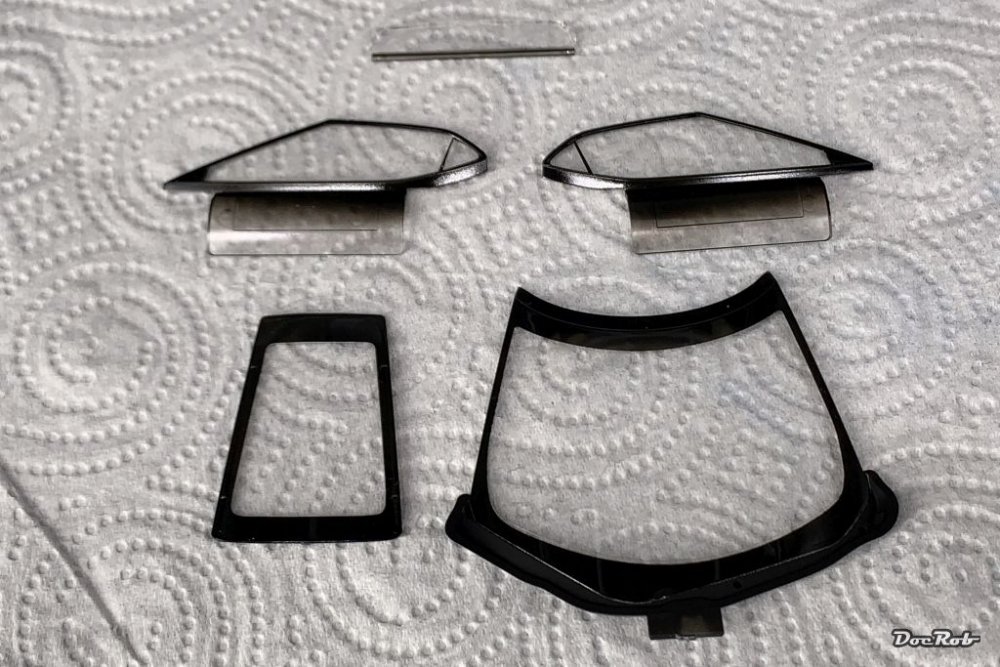
Hola fellow car lovers and modelistas, A while ago I got some relatively cheap car kits and among them was this kit of Tamiya's Ford GT MK.II. My first thought was to build it and give the body a paintjob made by rubbed metallic waxes from AK in bronze and copper tones, but then I bought an 1/12 Tamiya Porsche and a Lotus Ford type 79 and decided, to approach the Ford GT a little bit more serious, as a test mule for all these mysterious car paint techniques, I have no idea about. The kit itself is a gem, with great fit and clever engineering and goes together in a breeze, so this WIP-light will be about painting and finishing. The kit includes nicely flat chromed wheels, metal stickers and decals beside the plastic and pre cut (yes you read right) Kabuki masks for the windows. The kit is not overly komplex, so I cut all the parts from the sprues and cleaned them up, before painting. I decided to give Tamiya lacquer colors a shot with this build and until now, they behaved phenomenal. They spray absolutely flawless, fine grained and have the right finish. I used no primer and had no issues with these colors being too hot. First I managed some detail painting, which involved a lot of masking for the brakes and engine parts, with fluid or Kabuki masks. The LED-lights are great, the projectors sprayed with titanium silver and enhanced with black panel liner. The clear parts were masked with the supplied masks on the inside for windshield and rear window and from the outside in case of the side windows, to have different black shades for different materials. Hard to see on the pictures, the windshield got a lower frame sprayed matte black from the outside, which again involved more masking. Note the big tabs, which ensure, that there will be no glue stains on the window. Next was the interior and as a change from RLM66, I used different black tones, including matte and semi matte, some titanium accents on the seats and the orange red applications. Thrére are still some decals to apply. Then, I put all my courage together and sprayed the body with light heavy thinned passes of mica blue. The finish is very fine and even and I really like it as a base. Im not sure, being a car rook, how to proceed next. First polishing or first clear coating in preparation for the decal stripes, If you have suggestions, I'm really interested in. So far for now. Cheers Rob


-
ICM A-26B completed
DocRob replied to JohnB's topic in LSM 1/32 and Larger Aircraft Ready for Inspection
Noice, the NMF looks great, with it's dulled shine and accentuates the fine lines of your A-26. Cheers Rob -
Adriatic Models Wessex HU.5 Update parts in 1/32nd for FLY Wessex
DocRob replied to Winnie's topic in Aircraft Reviews
These sets look amazing. I thought about the Fly Wessex more than once, but I'm not much of a helicopter-guy, but who knows... . About these intake meshes. Maybe some Air funnel meshes, which are available for different historic Formula One cars are generally fitting and can be bend into shape. Here is an example: Air Funnel Mesh for DFV, Model Factory Hiro P-909 (2003) (scalemates.com) Cheers Rob -
Bronco 1/35 Type XXIII U-boot
DocRob replied to BlrwestSiR's topic in LSM 1/35 and Larger Work In Progress
On such a big model, it could be interesting to simulate the light cast of the surface waves on the upper hull sides, to get a bigger variety into the paintjob. That depends of course on the dio, maybe you could enhance the idea with the shadow of the preying B-24 . Cheers Rob -
Israeli Mirage III C with Atar9C
DocRob replied to Kaireckstadt's topic in LSM 1/35 and Larger Work In Progress
The paneling effect looks a bit harsh to my eye, but you said you will blend it further, so it will turn out nice, Kai. I use Infinity airbrushes as well, along with my old Rotring airbrushes, which have the slight advantage to be only one and a half action and therefore more relaxing to handle. I tend to cramp my fingers on lengthy airbrush sessions with my Infinity's. For Vallejo Air, I use the Rotring's exclusively, because they have a rounded protruding needle tip, which you can clean with a dampened finger. Generally I avoid Model Air more and more, as they are either to thin and do not cover well or they clog easily with less thinner. There is only a very small tolerance to get the mixture right, and they are very sensitive concerning thinners. Cheers Rob -
What is on your bench right now ? Share a picture :)
DocRob replied to Martinnfb's topic in Modelling Discussion
They do spray perfect Carl, and you can thin them heavily for building up layers very subtle. Yesterday I sprayed some silver titanium among others and I absolutely loved the result and this is my new goto titanium ahead of the good looking, but unbelivable fragile Alclad and the nice, but not perfect toned Xtreme Metal from AK. After trying on some sprues, I decided to spray the non body colors directly onto the plastic without primer. I had no reactions with the plastic at all, but will prime the body, wanting a durable coat for sanding and polishing. Let's see about the WIP, there are some very skilled car builders here and my time is a little sparse at the moment. Cheers Rob -
Takom Panzerkampfwagen I 1/16 scale... with figure
DocRob replied to GazzaS's topic in LSM 1/35 and Larger Work In Progress
Amazing, how the oils tie everything together. your progress is looking great Gaz. I discovered oil colors for varying effects over the last year and can't tell you, how I lived without them before. I plan to paint my PZL P.11 only by brush, using oil colors as an experiment. Cheers Rob -
What is on your bench right now ? Share a picture :)
DocRob replied to Martinnfb's topic in Modelling Discussion
Thanks Peter and indeed, the Ford GT kit is superb. I can only imagine, how hard it must have been to engineer the complicated body panels of the car, but they fall together. Building the GT is a breezer, painting and finishing will be the challenge here. I have absolutely no experiences with car builds and high gloss finishes, so the Ford is my test dummy, before I start more serious car projects. Cheers Rob -
What is on your bench right now ? Share a picture :)
DocRob replied to Martinnfb's topic in Modelling Discussion
Besides some chaos with the remainders of the Hellcat build, the started PZL, I opted for the 1/24 Ford GT from Tamiya as an in between project, to train my car painting skills. I wanted to test Tamiya's lacquer paints for cars and they are absolutely great. Thinned with two thirds of lacquer thinner they spray smooth and fine grained and the gloss black is really glossy. I cut all the parts from the sprues and cleaned them and will poco a poco airbrush everything. I haven't primed the painted parts and I'm not sure, if I will prime the body. It will be sprayed in metallic blue and hopefully has the same tone, needed for my Kai Phantoms fuel tanks. I'm not sure, if I WIP this build, as it's prone to failure, because, it's my first car build in ages and I will use lots of new techniques and materials. Cheers Rob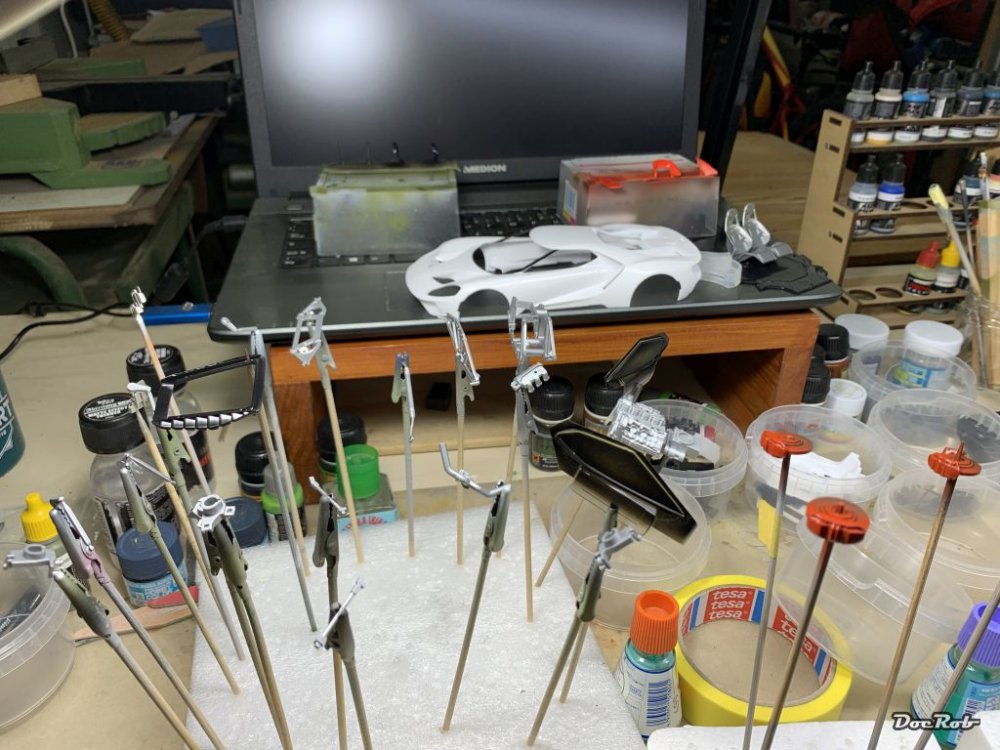
-
Mengnut Wings Fokker Dr. 1
DocRob replied to Wolf Buddee's topic in LSM 1/35 and Larger Work In Progress
The engine is looking great, with the beautiful metal shades and added detail. I have only the Roden kit in stash along with some goodies. I may buy a second Lukgraph engine for the DR I, the first was used in the Mikro Mir Fokker D.VIII and it's a splendid piece of 3D printing. The Mingweng engine doesn't need a substitute it seems, just the updates you added. Cheers Rob -
RFM Panzer IV Ausf H (Early)
DocRob replied to Bomber_County's topic in LSM 1/35 and Larger Work In Progress
That's why I always liked the Panzer III variants better, shorter chassis, less track links. Only 180 to go . Cheers Rob -
Atlas Cheetah E Scaleworx Conversion
DocRob replied to GusMac's topic in LSM 1/35 and Larger Work In Progress
This will be a bright scheme Gus, love it. If the white underlayed yellow is bordering against the other colors, you may can sand this back a little, carefully. This will look stunning in the end. Cheers Rob -
Eduard F6F-3 Hellcat, USS Princeton, flown by Gordon Arthur Stanley in 1/48
DocRob replied to DocRob's topic in Non LSM 'WIP
Thanks Phil, you should be tempted, it's a pure fun project and I guess, the 1/48 Eduard Hellcat is the best H-cat in any scale. It is an easy build and a great canvas for painting and weathering, with lots of schemes to choose and last but not least, it can be build out of the box, if you get a Profi Pack, with the PE included. Cheers Rob -
Takom Panzerkampfwagen I 1/16 scale... with figure
DocRob replied to GazzaS's topic in LSM 1/35 and Larger Work In Progress
Great work on the commander, I like the skin- and black tones in their variations. On the tank, I especially like the wheels and rims and the different dust tones enhancing depth of the undercarriage. Cheers Rob -
Eduard F6F-3 Hellcat, USS Princeton, flown by Gordon Arthur Stanley in 1/48
DocRob replied to DocRob's topic in Non LSM 'WIP
Thank you Peter, the Hellcat was a pure pleasure project, aside from the wet transfers problems, which made it easier to focus on painting and finish. Cheers Rob -
Takom Panzerkampfwagen I 1/16 scale... with figure
DocRob replied to GazzaS's topic in LSM 1/35 and Larger Work In Progress
Great detail painting with the comannders face. I don't see, why the given position of the commander would not be suitable, only because there are no existing photos. Seeing the guys on the river picture, I can't imagine, sitting upright unsupported in a shaking tank would use up a lot of energy to maintain the body tension. Interesting thought, put in a short phrase, I haven't layed that out to myself that clear. Now, that you set me on the track, I have to admit, being more of an artsy interpreter, or to use other words, mildly freestylin' . On the other hand, I think it's really difficult to judge from historic pics in general. I'm a photographer since 45 years and lots of things changed only in this period. I will figure some of the points, I think have influence. - B&W pics taken with an analog camera are not comparable to digital B&W pics, at least not with basic settings. There is a completely different kind of contrast, with analoge film tending to have dark areas darker. - Photographers often used filters for B&W analoge film, like Peter said, to further enhance contrast, or reduce light exposure, ..., which often leads to changing color saturations and hues. - You often have only hints about the circumstances the picture was taken, concerning light, exposure time, reflection,... - Often, not enough is known, about the pictured materials, like how reflective was a coating to the bare eye. - If you go further back in history, there were even different materials and processes to develop film material, with their individual footstep. - You can not now, if older pictures were post processed, they often are. I just named a few aspects here, which came to mind first, but there is a wide array of possibilities, which have an influence on the image of reality. The basic story is, every picture is a lie, intended or not. Photography seems so objective, but in fact is not, because of technical aspects or artificial aspects. Basically, that is, why I'm freestylin', I form a picture in my head, which is a combination of seen pictures and imagination or to use other words, an educated guess. Cheers Rob