DocRob
-
Posts
7,048 -
Joined
-
Last visited
Content Type
Profiles
Forums
Events
Gallery
Everything posted by DocRob
-

Das Kamel - Hansa Brandenburg W.12
DocRob replied to DocRob's topic in LSM 1/35 and Larger Work In Progress
Thanks Phil, I use Pledge floor cleaner with 30% added Tamiya Flat Base. Do not mix more than 35% of Flat Base into the mix, as it will cloud. It may even cloud with less, when applied too thick. The benefit of my method is, you have control over the grade of dullness from near gloss to dead flat. The other thing you have to take into account, that Pledge and other floor polishes sometimes react with other chemicals like decal softeners or lacquer thinners. Cheers Rob -
Das Kamel - Hansa Brandenburg W.12
DocRob replied to DocRob's topic in LSM 1/35 and Larger Work In Progress
The Kamel got a flat varnish and that helped to tone down the contrasts between the different Lozenge patterns. This will be the base for oils and weathering. Cheers Rob
-
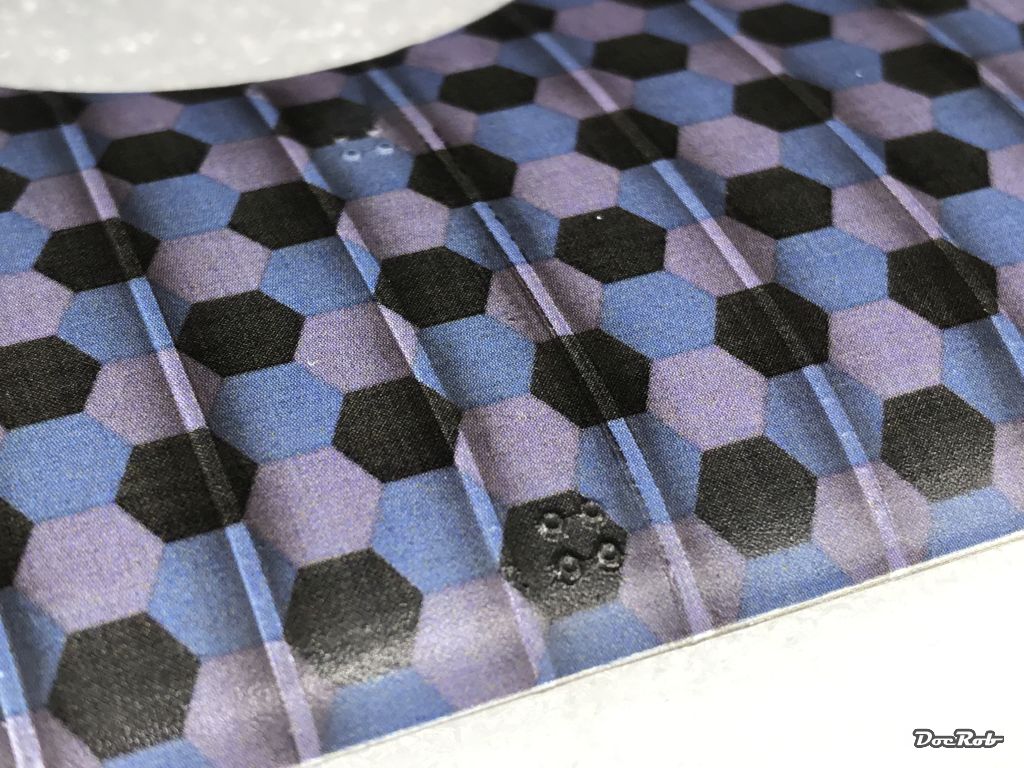
Das Kamel - Hansa Brandenburg W.12
DocRob replied to DocRob's topic in LSM 1/35 and Larger Work In Progress
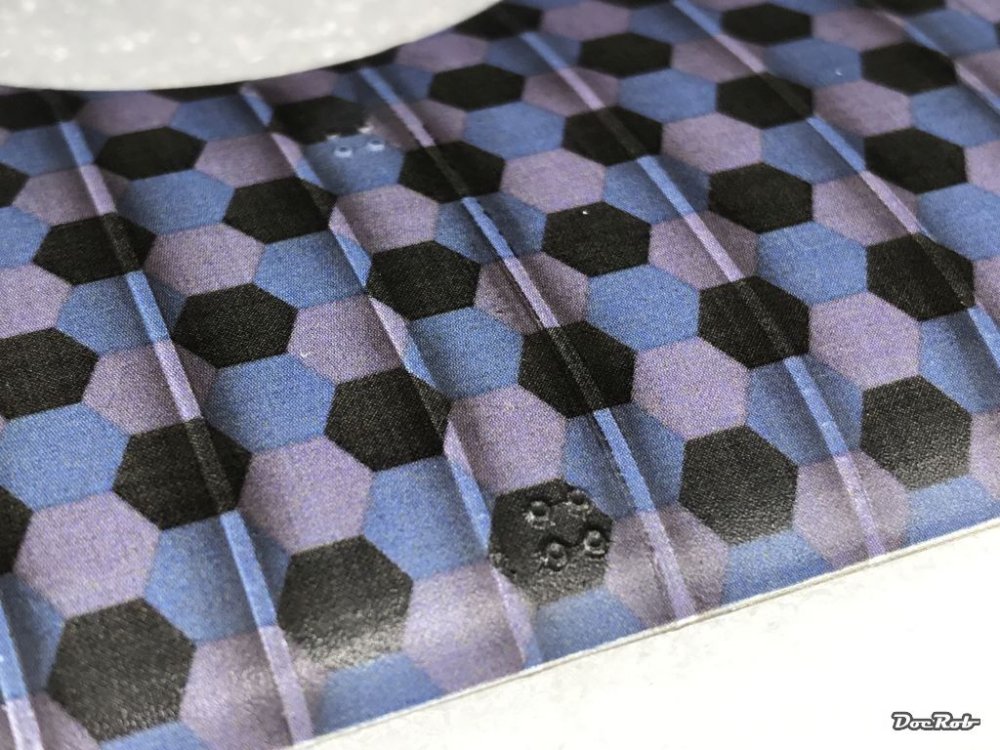
I completed decaling and varnished all surfaces with 70% Pledge and 30% Tamiya Flat, to get a n even surface for oils and other weathering steps. The numbers on the fuselage show some carrier film, which I wasn't able to get rid off. I hope, with some oils onto it, it will not show in the end. I have no idea what it is with me and the decals . Cheers Rob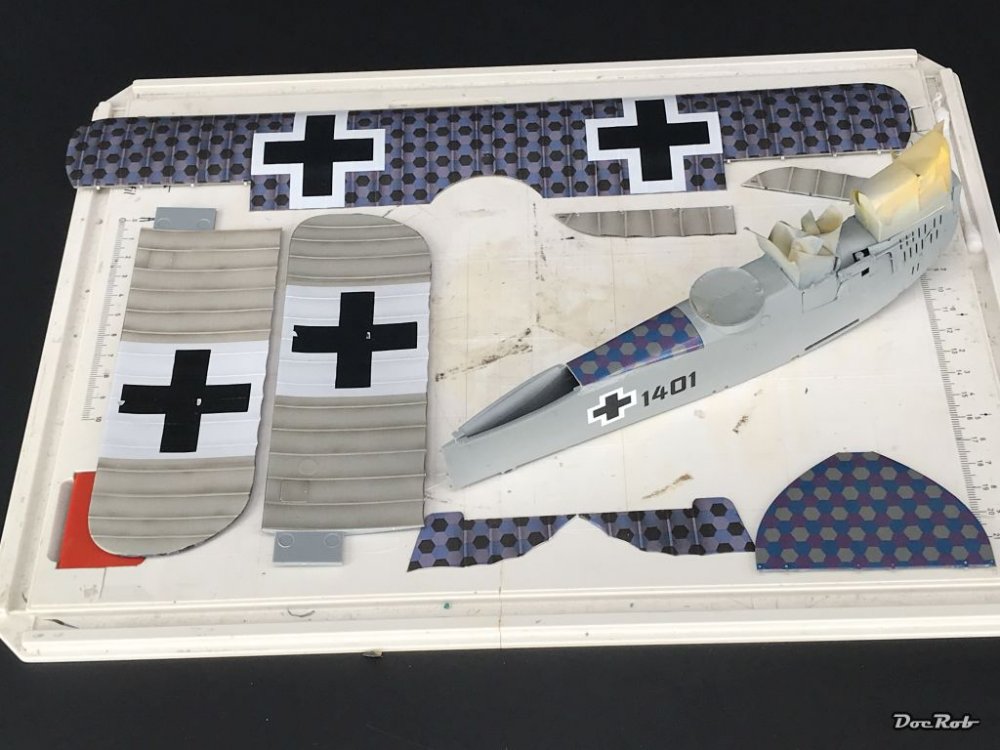
-
1:32nd scale - Bristol M1.c
DocRob replied to sandbagger's topic in LSM 1/35 and Larger Work In Progress
Great choice Mike. I have the same kit in stash for a far future build, so I'm naturally interested into your thoughts and efforts going into the Bristol. Cheers Rob -
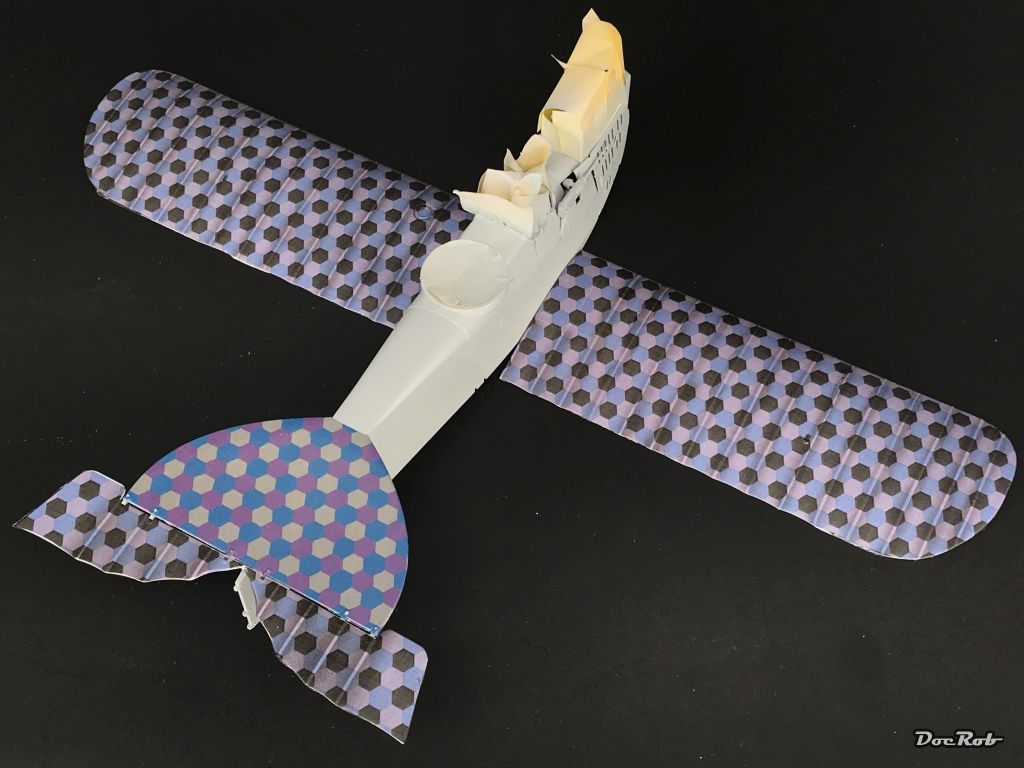
Das Kamel - Hansa Brandenburg W.12
DocRob replied to DocRob's topic in LSM 1/35 and Larger Work In Progress
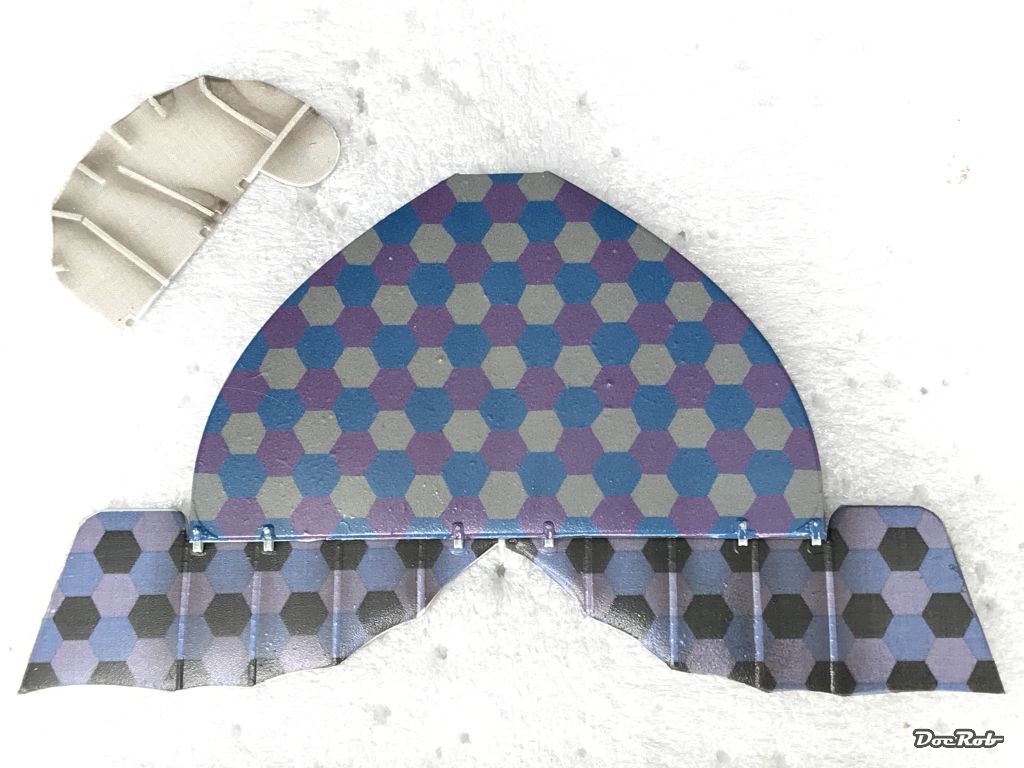
Sneak peak of the different Lozenge patterns, linen on the wings and rudders, painted at the tail and back of the fuselage (already applied now). I think I will use them like this and tone down the contrast with weathering. Cheers Rob
-
Das Kamel - Hansa Brandenburg W.12
DocRob replied to DocRob's topic in LSM 1/35 and Larger Work In Progress
Not much rigging with the Kamel, it will be a walk in the park. I think, when decaling is finished and sealed, there are not many more great obstacles in the way. Today I only managed to overspray the linen decals on the wings with a coat of translucent white, where the Balkenkreuze will be applied and on the rudder. I didn't dare to use Kabuki tape on the Aviattic decals and used post-it's for masking, which worked fine, without leaving any damage. Cheers Rob -
Like Gus said, your F4 looks great. Just one or two stencils to add... . Cheers Rob
-
Definitely looking more than ok. Can't wait to see it finished. I use Pledge with added Tamiya flat base for flat varnish. works perfect for me and while adjusting the mix, I get all shades of flatness with this combination. More than 35-40% Flat base in the mix will lead to frosting effects though, but 35% is perfectly dull. Cheers Rob
-
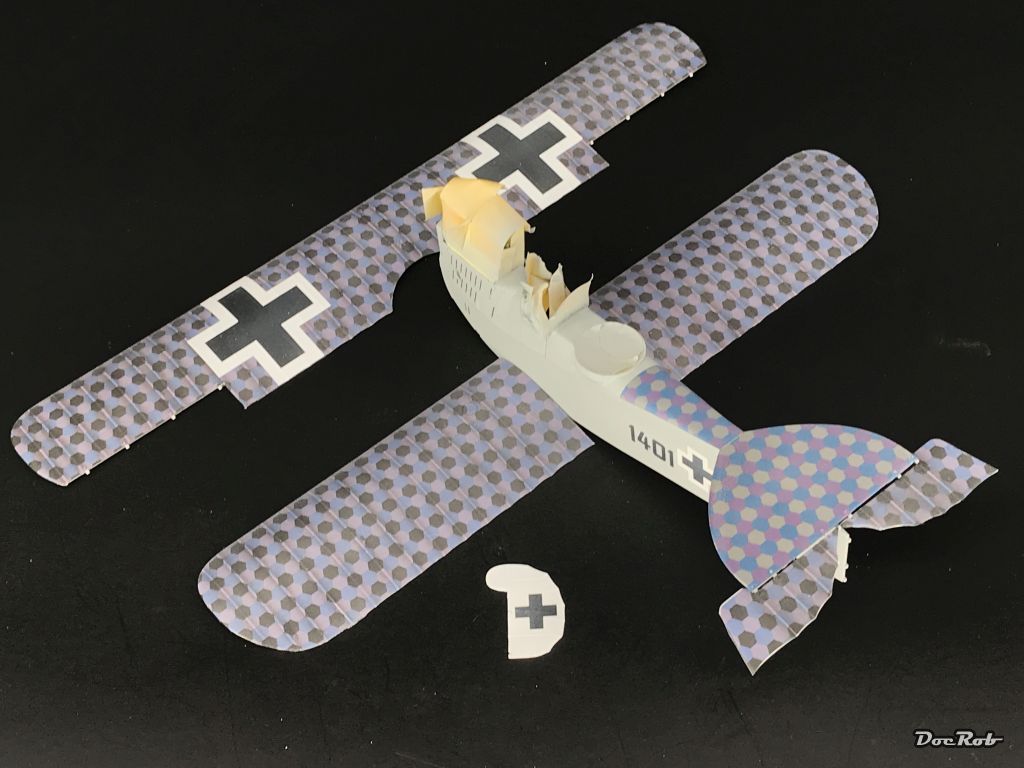
Das Kamel - Hansa Brandenburg W.12
DocRob replied to DocRob's topic in LSM 1/35 and Larger Work In Progress
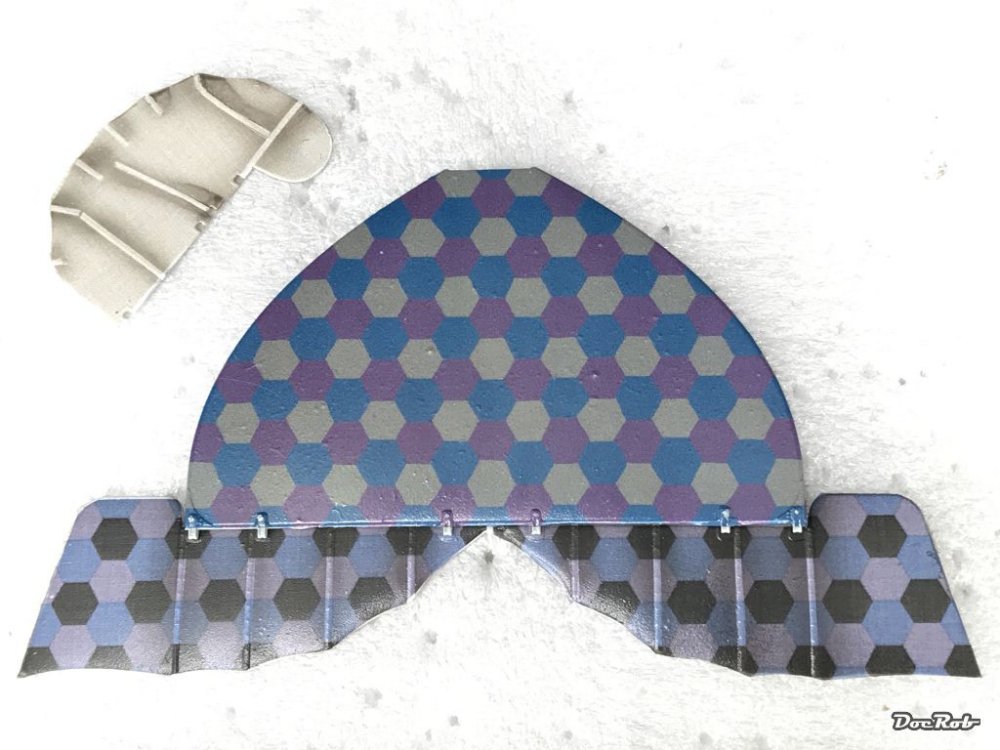
All the Lozenge and linen decals are applied and they behaved great. After all the cutting and thinking about aligning the Lozenge correctly, the Aviattic decals performed absolutely perfect. Good preparation is the key. For me the application with lukewarm water with a drop of liquid soap in it, is the way to go. Decal solutions were only used around the corners of the wings. I think, decaling and weathering the wings will be done, before mounting them to the fuselage For the tail, I used the kit supplied decal, because I want to show, that it is painted on wood instead of printed fabric on wings and ailerons. I'm not sure about the contrast, which was the reason, why I didn't apply the Lozenge decal for the back of the fuselage, which looks the same. I will check that, while putting the tailwing onto the fuselage, with the wings mounted, to see if it works for me. The rudder is only crudely prepared and will receive a translucent white overspray. Cheers Rob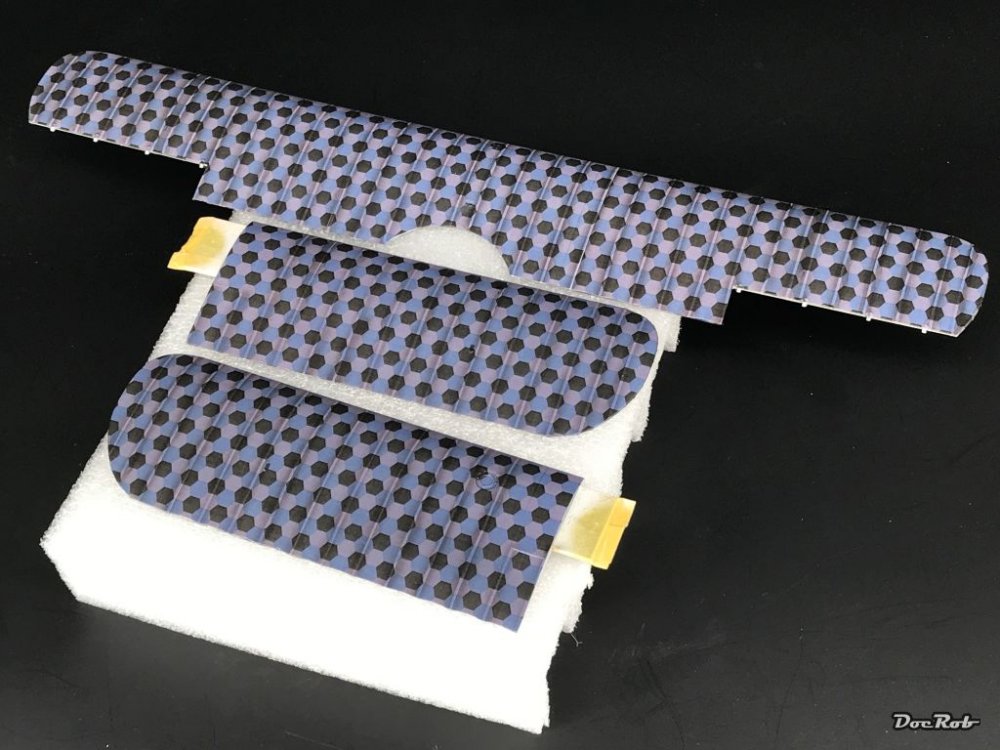
-
Tamiya P-51D, easy bake & shake.
DocRob replied to 1to1scale's topic in LSM 1/35 and Larger Work In Progress
You accumulated quite a bit of annoyance for yourself, given it's a shake and bake kit and even pre painted. Sometimes a seem to be easy going build goes south that way. In our hobby there is so much doom potential, specially around painting, decaling and finishing. We use highly sophisticated stuff in paints, primers, thinners, wet and dry transfers, glues, decals and their solutions, washes and filters, oils and pigments, that there are umpteenth possibilities to fail. The good thing though, with experience made, the next time you know how to bypass the obstacles, but I feel your pain. Cheers Rob -
Impressive stuff, always on the verge of destruction or beyond . The attention to detail is just great. Cheers Rob
-
Great idea Carl, but I don't like the look or (unnecessary) usage of carbon, being it for bicycle frames or just for optical appearance, but the Lozenge thing makes me thinking... Cheers Rob
-
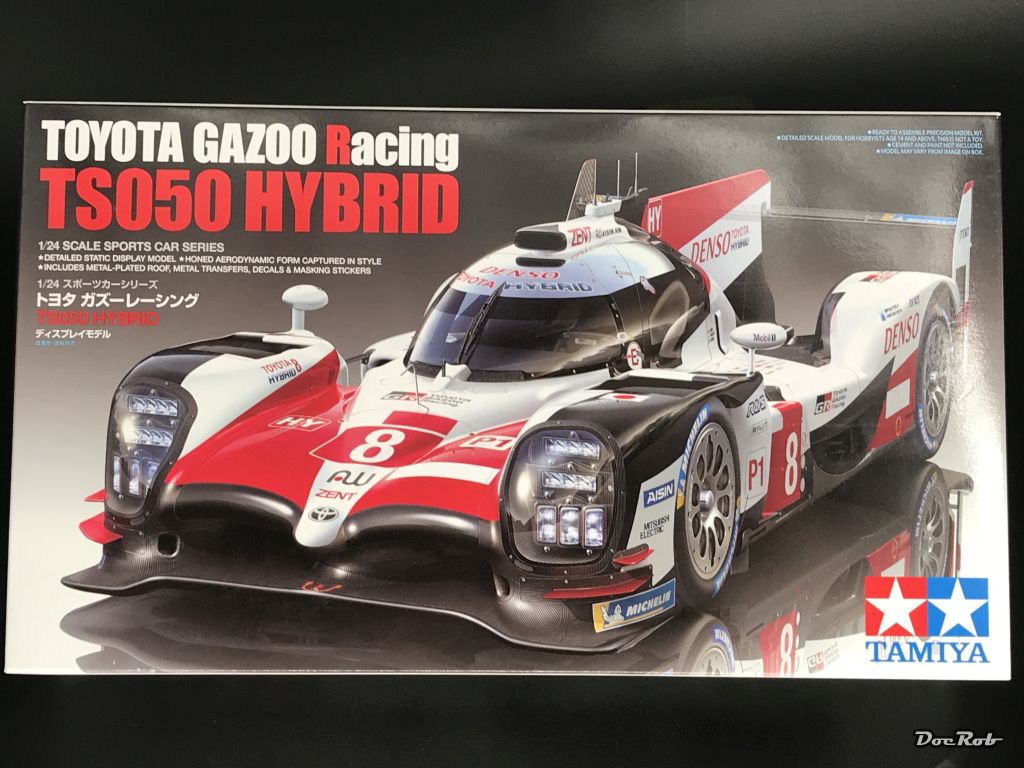
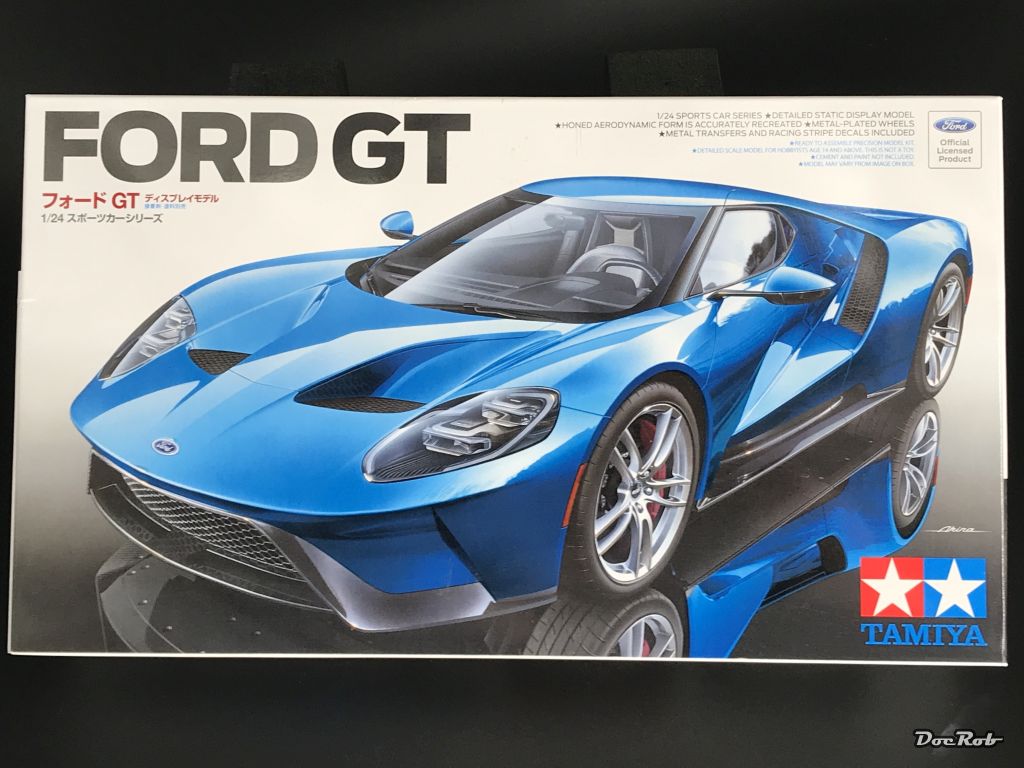
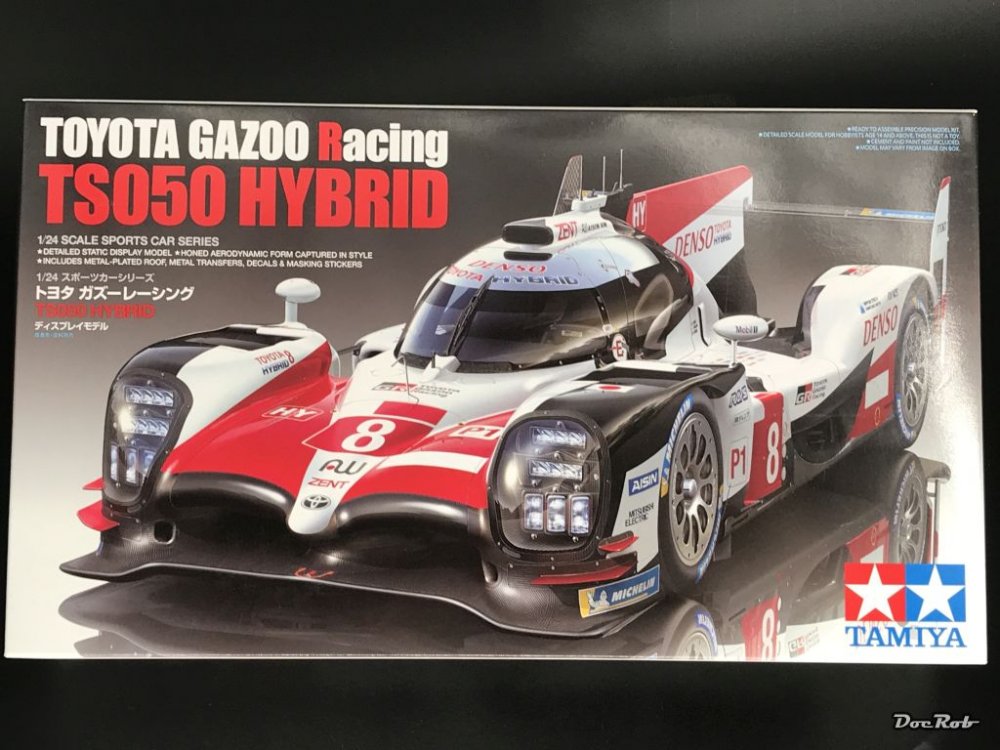
... and now to something completely different. Couldn't let these two pass for poco dineros. I will be way out of my comfort zone, as I only built a highly detailed Citroen 2CV in very bad condition some years ago. The only other car kit in my stash is my favorite, the goddess, a Citroen DS-21. I may do something different with one or two of these kits, to get more comfortable with. I thought about giving the Ford GT a bronze paintjob with patina on it . Let's see... Cheers Rob

-
1:32 scale Ansaldo 'Baby'
DocRob replied to sandbagger's topic in LSM 1/35 and Larger Work In Progress
This rigging with that cross section acorns looks terrible difficult to get aligned properly. Nice job with doing so. Can't wait to se the Baby finished. Cheers Rob -
The Venomous Viper...RFI
DocRob replied to 1to1scale's topic in LSM 1/32 and Larger Aircraft Ready for Inspection
Absolutely gorgeous, your Viper looks great. The way you broke the dull grey look with panel lining and weathering makes it special. There are so many details catching the eye, chapeau! Cheers Rob -
Very nice, the wings add some 'substance' to that otherwise skinny helo. Cheers Rob
-
1/32nd Heinkel 219 // Werner Streib crash At Venlo
DocRob replied to Rowdy's topic in LSM 1/35 and Larger Work In Progress
Very nice introduction to the forum, your wrecked canopy section looks very convincing. Is it a fictional project or are you working with photos? BTW, Welcome to LSM, the place to be for relaxed plastic nuts Cheers Rob -
One good thing about the covid thing is, that there is definitely more biking everywhere. On my island I saw so many people biking and hiking like never before. In my old home town of Berlin, lots of people commute by bike, better than sitting in a cramped subway. It gets harder to buy a new bike though, the shops have been robbed lately. When I was studying, I worked as a messenger in Berlin and bought one of the very early mountain bikes, a steel framed Trek single track, of course without suspension. I put slicks on for the job and had a very fast reliable ride, specially after the wall came down and we had to go to the east as well, with all the cobblestone roads and banged up tarmac. Definitely no place for race bikes. Anyway, the bike still exists and is in good shape, with an old Shimano DX shifter, which I always preferred to the XT and I gave the bike to our son. After a year or so, he went to a bike shop recently and was asking for a new bike and pointed some out. The guy in the shop was blown away, like how can you give that jewel away for a new bike. Since that visit, he sees the bike with different eyes and doesn't want a new one . Cheers Rob
-
Das Kamel - Hansa Brandenburg W.12
DocRob replied to DocRob's topic in LSM 1/35 and Larger Work In Progress
Thanks Carl, It's time consuming, but will show through the Aviattic decals. I hope I got it about right. , truly spoken, in our heart, we are all masochists, that's why we picked modelling as a hobby. The good thing with that boring masking and preshading is, that I'm not anymore afraid of rigging, which is tempting, but not tedious. Well, the rigging of the Kamel is even less frightening . Cheers Rob -
De nada Gaz, Your build looks promising. The pit is nice and I think you can see some of the detail, given the wide opening in the fuselage. I will follow, how you tackle the black scheme, as I never did one, beside the fuselage of a tiny 1/48 fighter. Cheers Rob
-
Tough decision, I guess. I did some biking too in our mountains the last days, it's very dry and dusty in the moment, some rain would be welcome. Yesterday I heard, that our big MTB race festival in November is called off, pity. Cheers Rob
-
Das Kamel - Hansa Brandenburg W.12
DocRob replied to DocRob's topic in LSM 1/35 and Larger Work In Progress
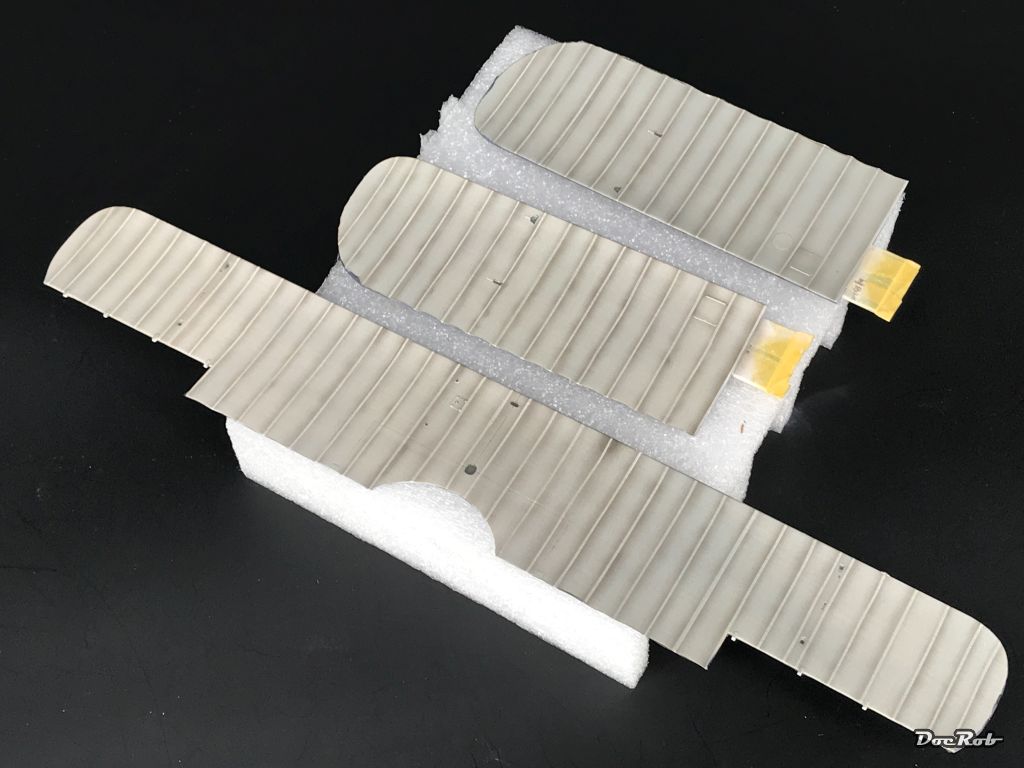
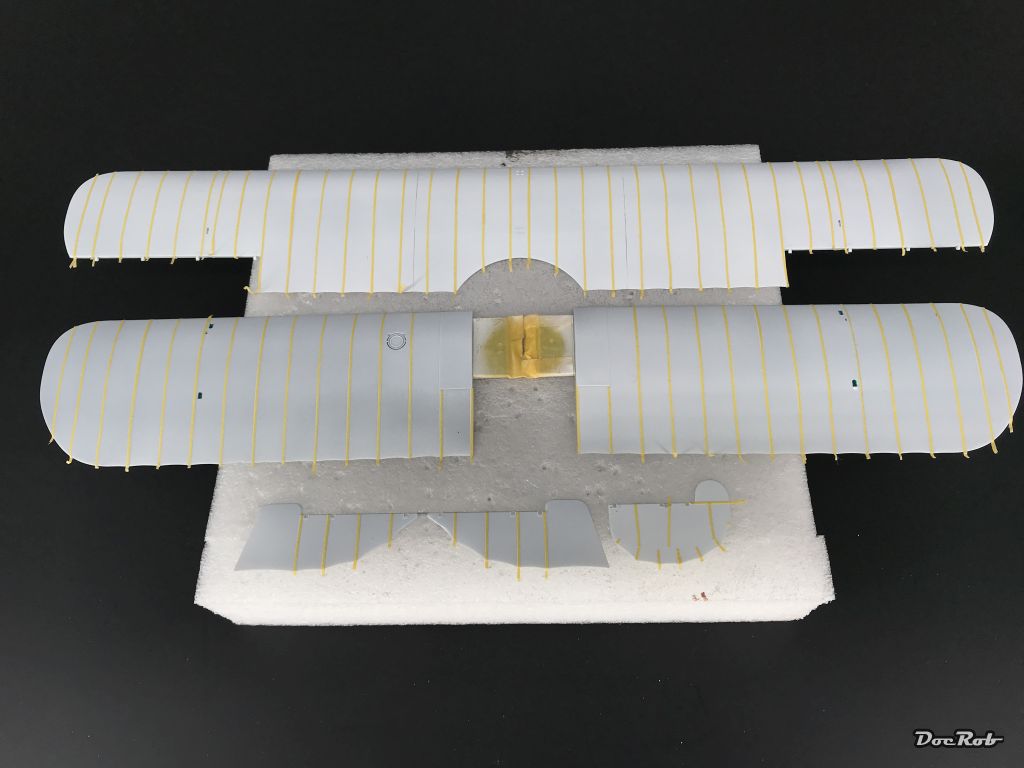
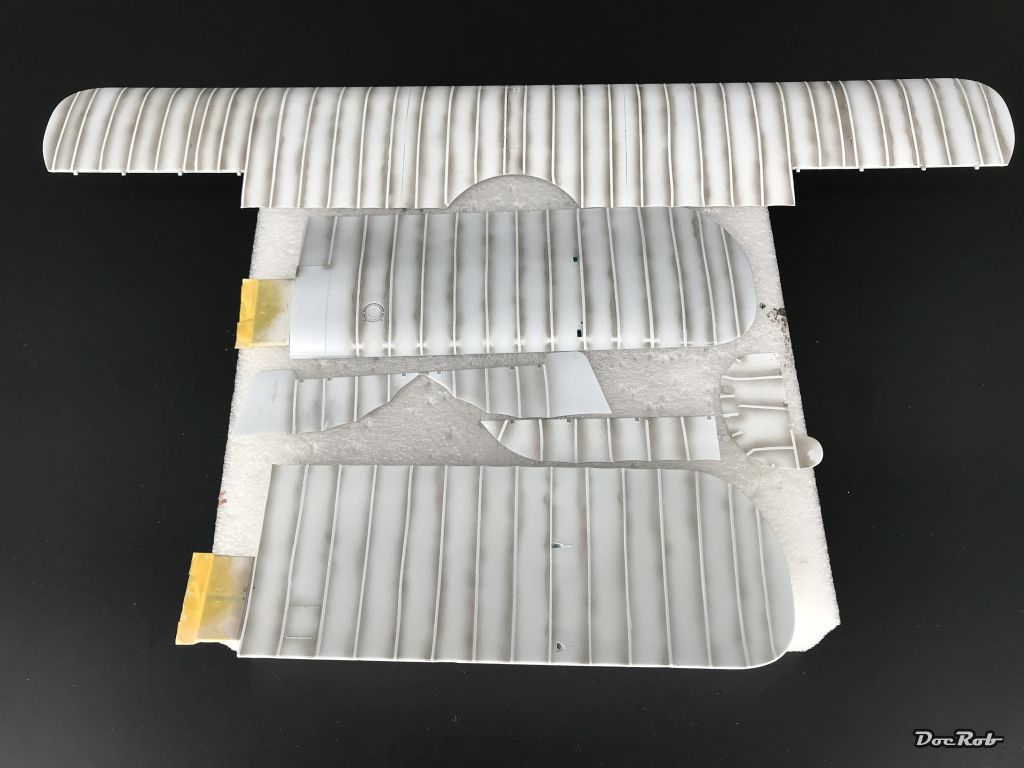
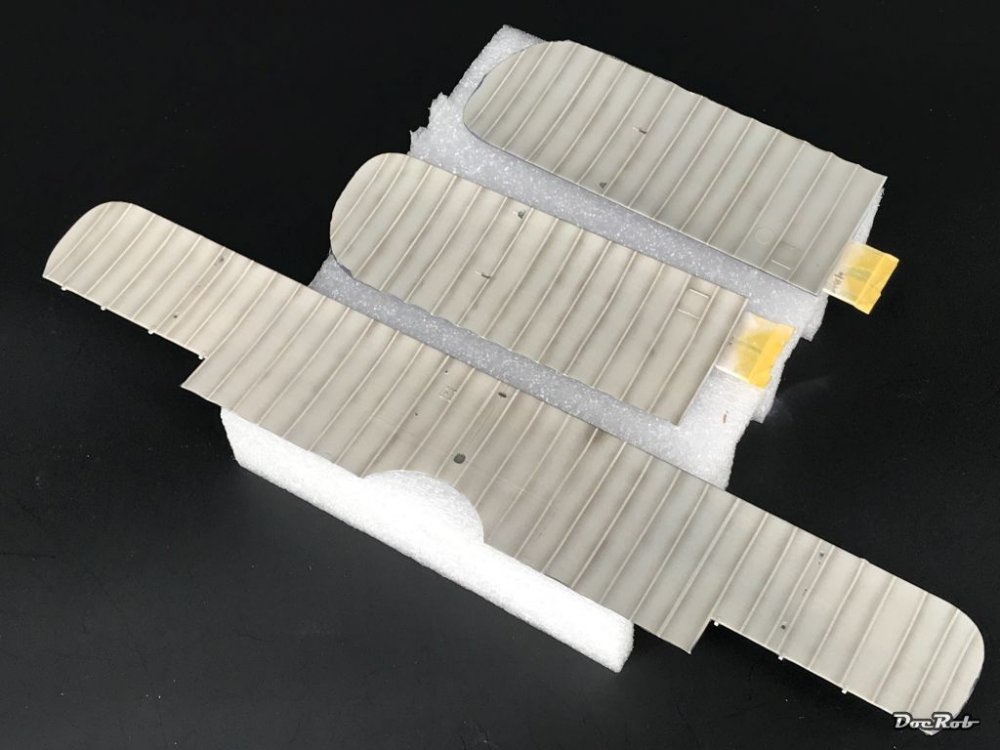
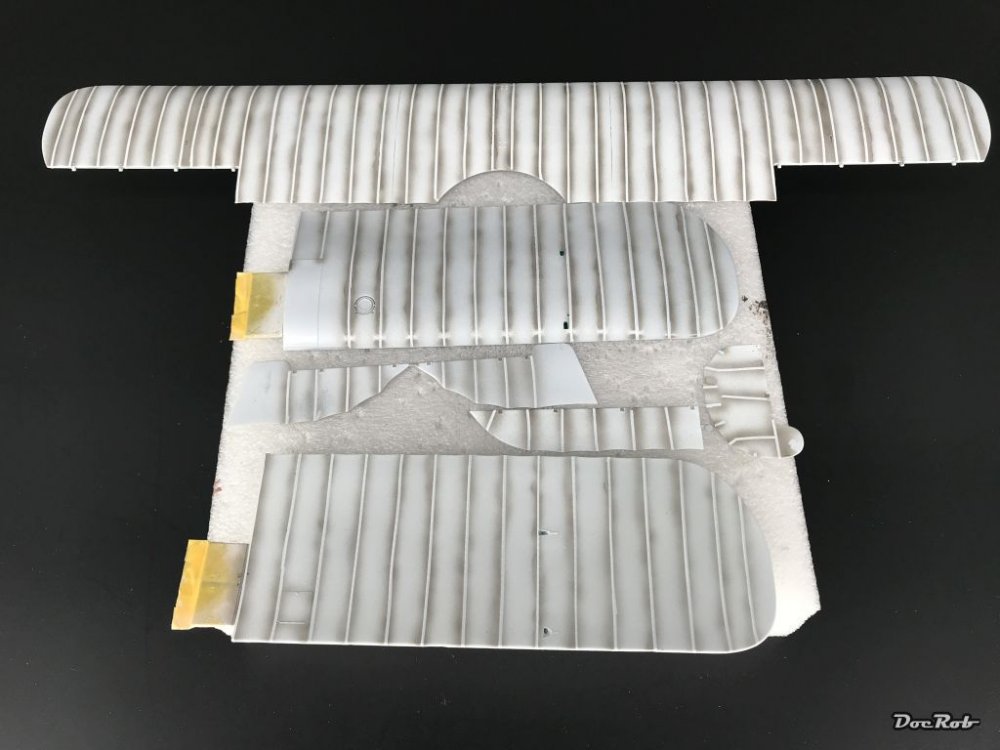
Sometimes there are steps in modelling, you get bored even thinking about them. The preparation for the Lozenge and linen decals were of such a kind. My pace building the Kamel slowed considerably down and I even started to do some work on a parallel build, which I rarely do. After putting aside the mental obstacles, I got myself to do the job. First I cut a zillion of 0,5mm strips and applied them on the struts of the gloss white coated wings, rudder and ailerons. Then I used a mix of thinner and Tamiya Smoke to airbrush onto the struts, to simulate the shadows / wear, later showing through the decals. I haven't done it too refined, to get a bit of an uneven look. My test with one aileron showed, that the Lozenge decals hide the preshading effect much better, than the linen decals for the underside, which led me to spray the shadows heavier on the upper side, as you might notice on the picture. Cheers Rob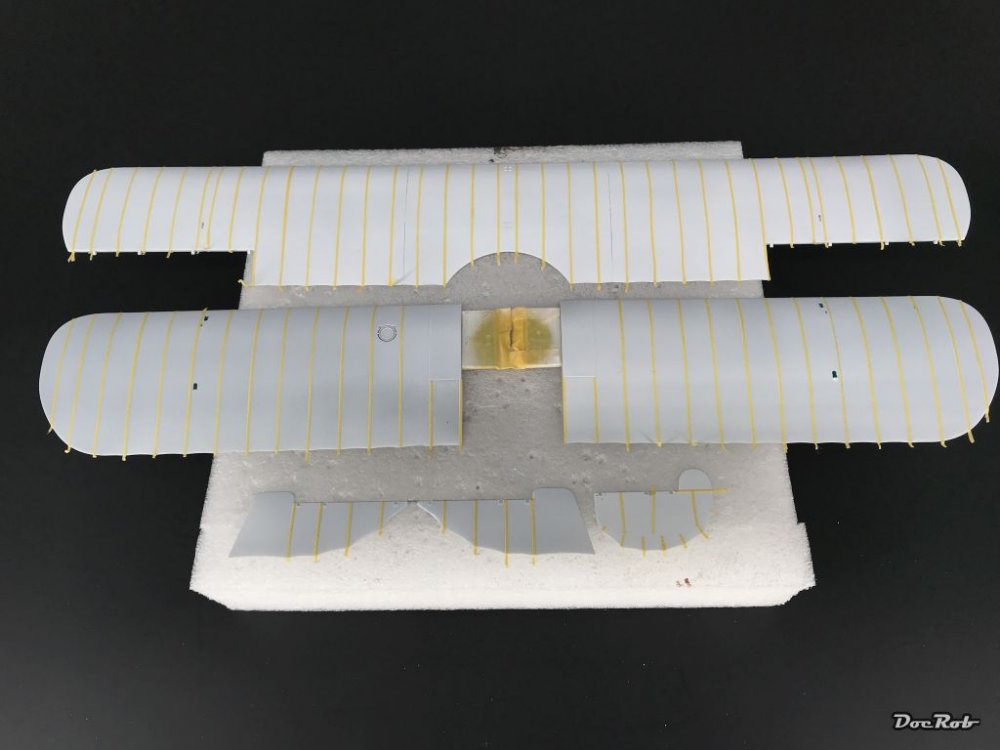
-
Easily done Cheers Rob
-
That's why I wear rubber gloves while spraying, hate to be dented by some thinner. Cheers Rob Definitely not in the 'from now on it will be knitting'-league, annoying, yeah, but easily solved. Cheers Rob
-
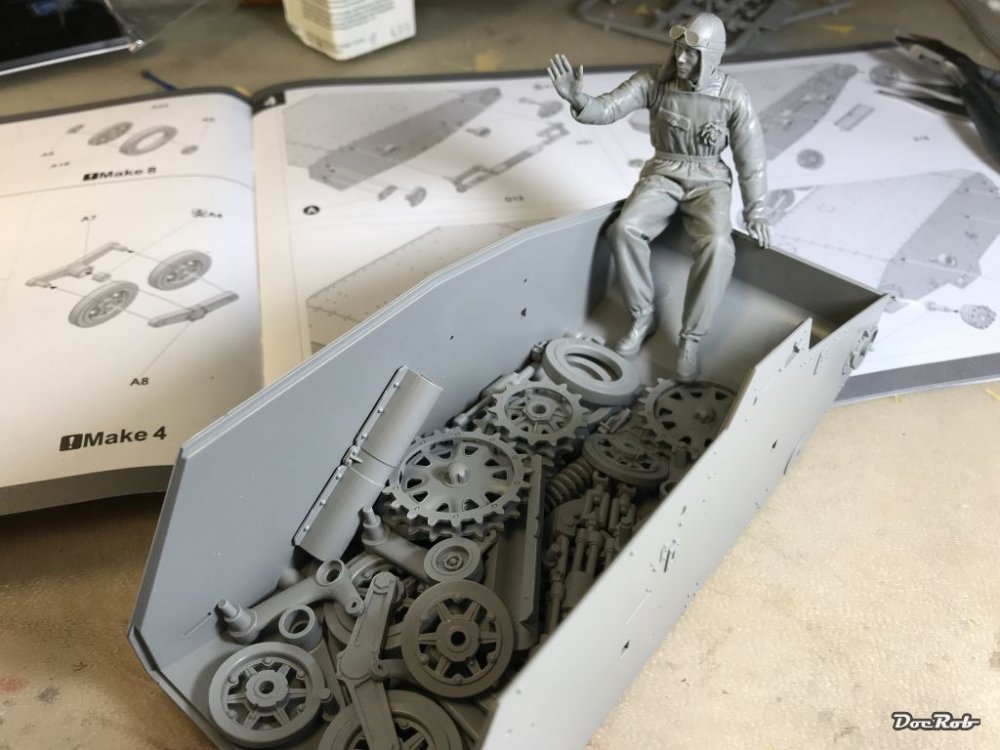
What is on your bench right now ? Share a picture :)
DocRob replied to Martinnfb's topic in Modelling Discussion
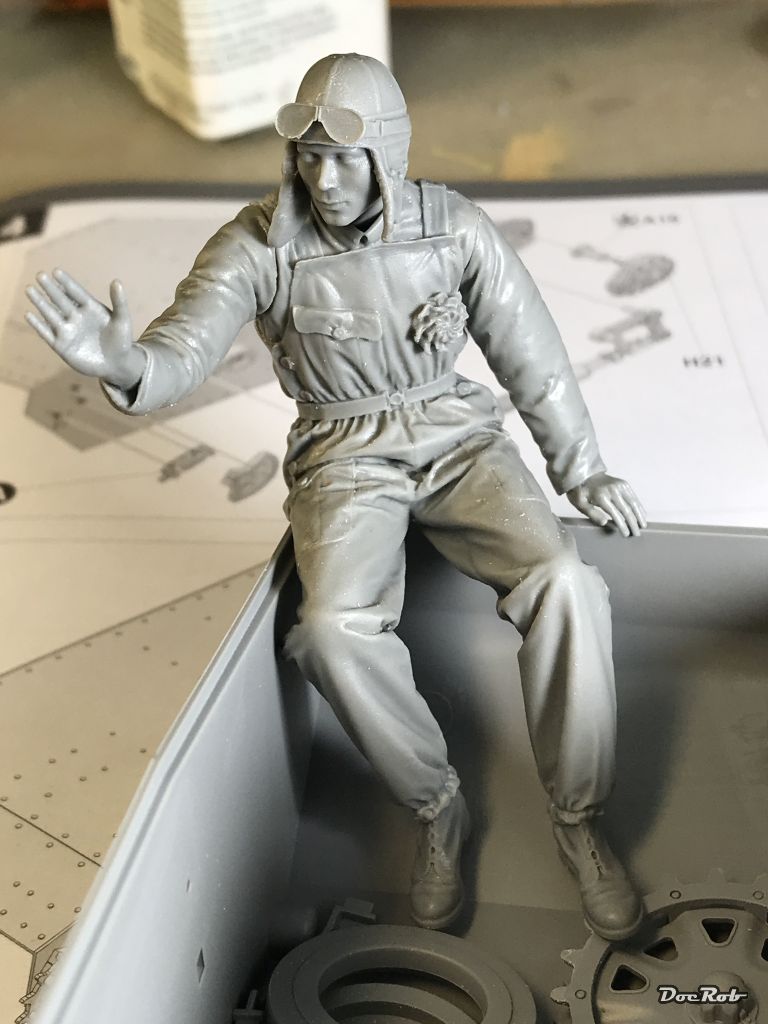
For a little distraction from the boring job of masking struts with 0,5 mm wide Kabuki and cutting decals to size on my Hansa Brandenburg, I toyed a little around with the tiny big Chinese Tankette in 1/16. The build will be fast, as there are not too many parts. There is a plastic spring in the middle of the mess, which make the suspension actually work. I cleaned all the parts for the running gear and took out the resin figure to accompany them. The figure is super detailed and will be fun to paint. I plan to try oils for skin and faces for a change, maybe for the uniform too. Cheers Rob