DocRob
-
Posts
7,048 -
Joined
-
Last visited
Content Type
Profiles
Forums
Events
Gallery
Everything posted by DocRob
-
He he, same here, but anyway, you seem to browse through the build. Like you, I prefer to prepaint tight spots, even if it's time consuming and the dreaded airbrush cleanings amass. Cheers Rob
-
Beautiful interior, the rigging looks great. Can't wait how you tackle the metal cowlings. I have some ideas how I will approach it, but these have to be tested when I'm on it. Cheers Rob
-
Looks completely fine to me, can't wait for your paint magic. Cheers Rob
-

1:32 scale Ansaldo 'Baby'
DocRob replied to sandbagger's topic in LSM 1/35 and Larger Work In Progress
It's weird sometimes with these browsers. I see your pictures (ever saw them) using Edge. I checked Chrome that moment and see your pics as well. Cheers Rob -
Might be the next one in line Harv, maybe I start parallel to the Kamel build. I browsed through the manual and the Tankette looks like an easy build, where I can concentrate on painting and weathering. Cheers Rob
-
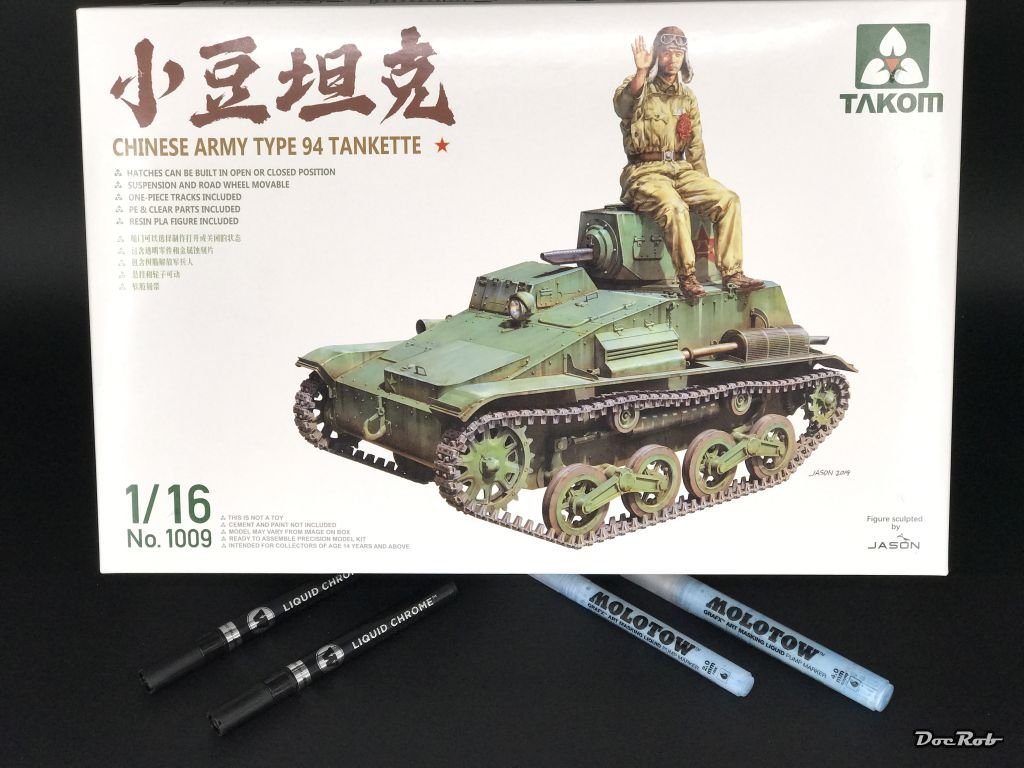
Today arrived this little big tank, a 1/16 scale Japanese tankette in Chinese service. There are some Japanese versions around too, but decided for the Chinese variant, because of the nice included resin figure (as far as I know, the others have normal injection plastic figures), the unusual subject and the monochrome scheme, where I want to train some effects on. The downside (if it is one), with this kit you get only rubber band tracks, where the other variants have single track links included too, which look very fiddly. The Molotow markers are different sized chrome pump pens and the blue ones contain masking fluid. I had the idea to use these masking pens for one of these difficult to airbrush French camos where I will try to use them for masking the before sprayed black borders, instead of brush painting these. Cheers Rob

-
Nice work on the Taube Bill, I will watch closely, because this might be one of my next WNW builds. Interesting way to tackle the struts differently on the upper and lower side. I will keep that in mind. For my build, I may use Aviattic linen decals, when these work ok on my Hansa Brandenburg and it seem like they do. Mine will be Scheme D, because of the contrasting linen wings and field grey fuselage. The museum one (B1) is attractive too, that would be my second choice. E is completely out, because it's a Bavarian plane, all others are from my old hometown of Berlin.
-
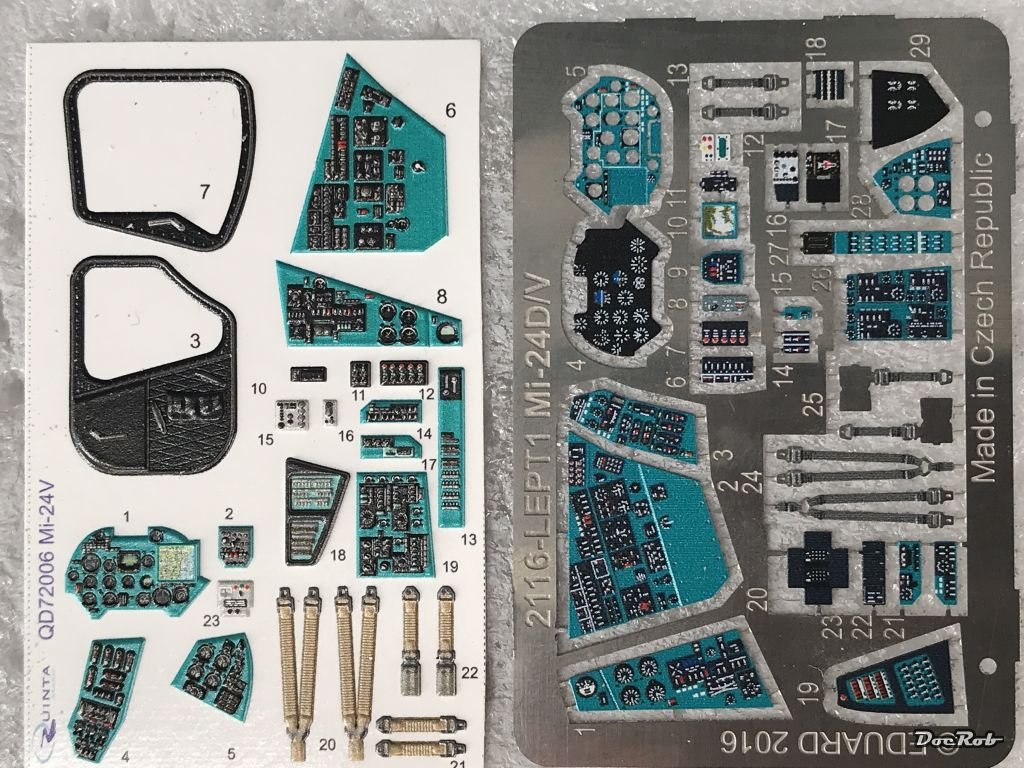
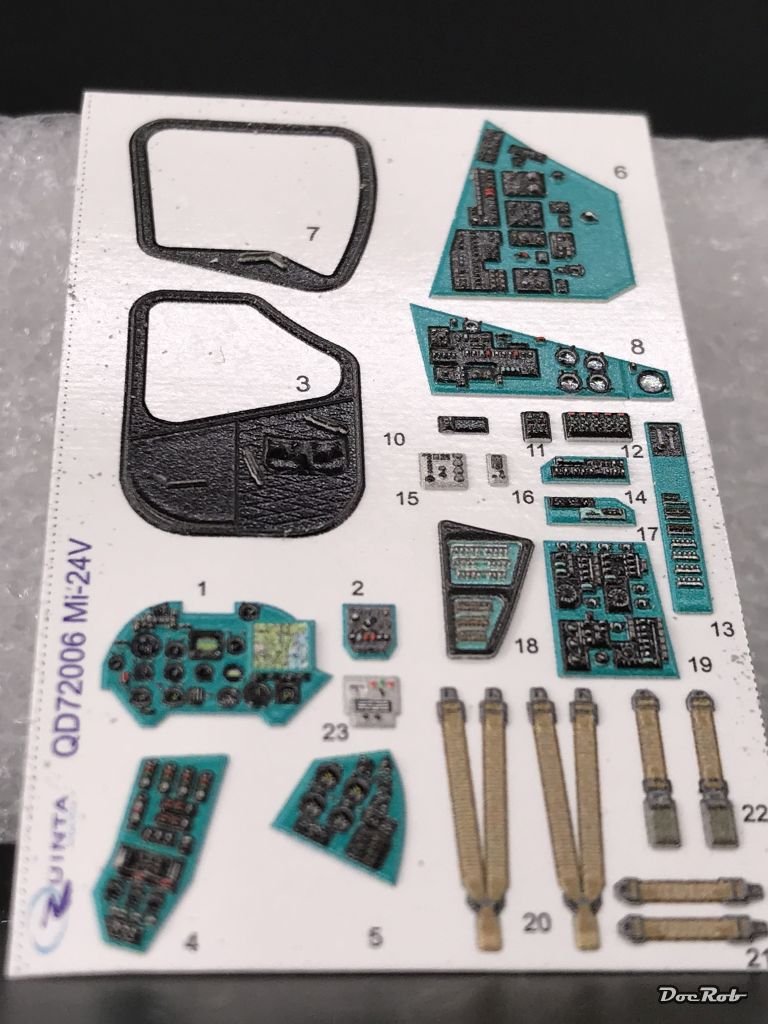
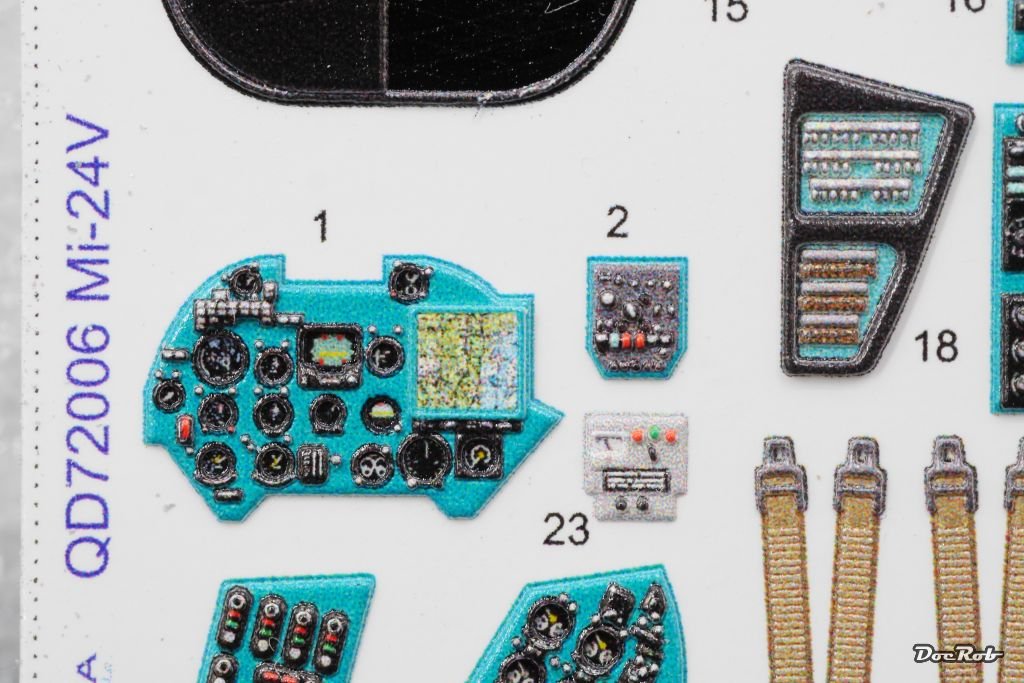
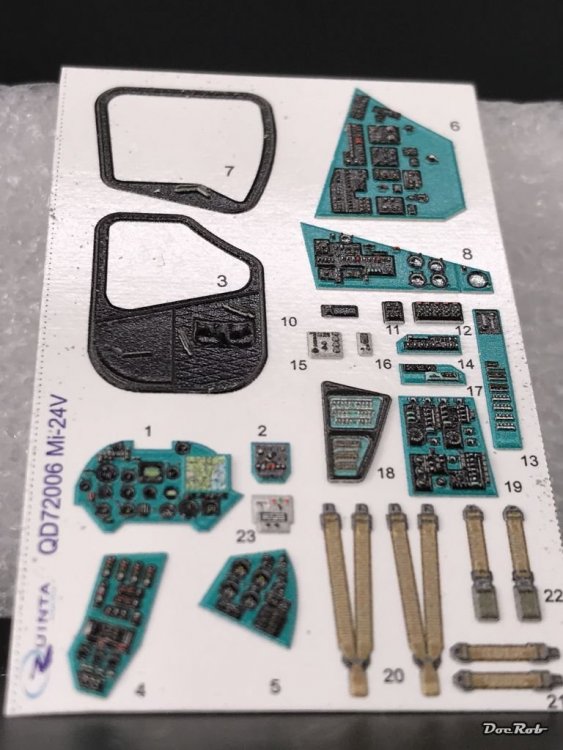
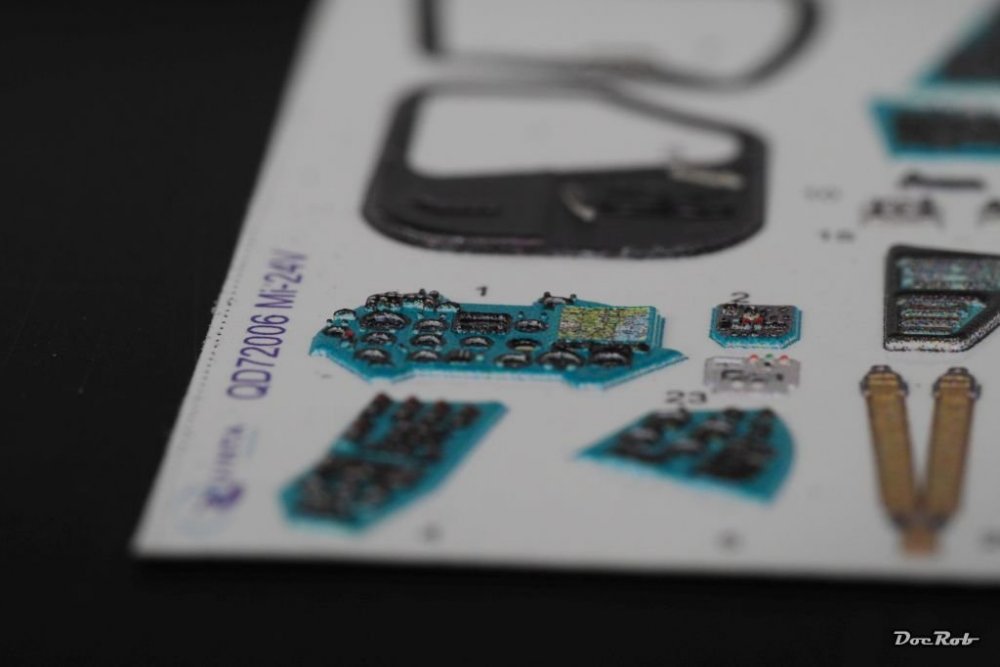
Speaking of the devil, look what the postwoman brought me today. It's the 1/72 Quinta set for my Mil-Mi 24 and the first pic shows the comparison with the Eduard PE. The instruments got some glazing to replicate glass cowering. When I will build the Mi 24, I will may make a built in comparison, because it's a Limited edition Eduard kit with plastic, PE and resin for to helicopters. At first sight the edge goes to Quinta, because they match my favorite turquoise better. This pic is heavily macroed, there is no raster visible to my unmacroed eye. You might be able to spot the 3D-charcter on this pic with different levels of height. Cheers Rob


-
HK Models Do-335 A-12
DocRob replied to JeroenPeters's topic in LSM 1/35 and Larger Work In Progress
You let the RLM66 shine in your pits, if that is possible . Nice work and beautiful detailing on the workplaces. Cheers Rob -
The decal job looks very smooth, like the underlying paintjob. No silvering, no nothing, which is the best outcome you can hope for with the trying duty of decaling. Your viper will look great in the end. Cheers Rob
-
Thanks to remind me, that my Quintas 'decals' for my 1/72 Mi 24 are still in the mail somewhere, since two month. The reasons have nothing to do with Quinta, it's about regulations here on my island, which conflicted with other products I ordered in the same package, namely Tamiya rattle can primer. When (if) they finally arrive, I will add some pics, because they look very promising on photos. Cheers Rob
-
1:32 scale Ansaldo 'Baby'
DocRob replied to sandbagger's topic in LSM 1/35 and Larger Work In Progress
Beautiful detail work on the back float with all the rigging and scratched details. The worn look of the linen fits perfectly. Cheers Rob -
Nice dio Gaz, with the figures and the fitting background. I actually nearly feel the heat radiating from the tanks. Cheers Rob
-
Share how COVID-19 Quarantine has affected you.
DocRob replied to 1to1scale's topic in General Discussion
That guy on the bear does everything for a good article in the press somewhere. Lately he stalled a little with mixing the wrong vaccine into the drinks of some of his not so well minded adversaries, with harsh side effects. If I were you, I would make a hot toddy out of your tea with the addition of some rum . Cheers Rob -
I have no idea about aquariums, other than I like to watch them and yours - err - your wives look great. It's a nice substitute for a holiday at the seaside. I can tell, because last Sunday I was swimming into the arms of a medusa, which burned like hell. It was one of these days, were I'm always very careful, when there is no wind, no waves and relatively warm summer water. The water seen through the goggles has a distinct look, completely transparent, but with a slight flicker near the surface, like heat on tarmac on these occasions, but there were only tentacles no body of the beast, very hard to see. Now after a week, it doesn't hurt anymore and the swelling went back to normal, so nor harm done, but I can appreciate to survey the fascinating maritime live through a piece of glass and guess looking at it has a perfect relaxing character. Cheers Rob
-
I did some partly gloss jobs on different models as a base for decals. If you can be certain that the covering flat varnish doesn't show different shines as an after effect you are good to go. I never had any problems doing so, but you can test it on a spare part with your usual gloss and matte varnishes to be sure. Cheers Rob
-
Das Kamel - Hansa Brandenburg W.12
DocRob replied to DocRob's topic in LSM 1/35 and Larger Work In Progress
Thank you Mike, this is only my second WNW build and beside my recently finished testbed SSW's in 48 scale, one of the rare excursions in the field of WWI aviation. As I gain more routine and confidence with every build, there is also also a rapidly growing fun factor, while building these kits. It's so rewarding to reproduce the numerous different materials and to see, how these flying machines actually work. You might have noticed, that I copied (what an ugly word ) some of your techniques with this build. I appreciate your generosity to give us the possibility to browse through your builds and the connected thoughts with your PDF-logs. My philosophy building kits, is normally not to replicate the last screw, like seen on the original, but make it look right to my eye and fulfil how I imagined the subject. That leaves some place for liberties and imperfections, which to me are completely tolerable. With the HGW products I have similar experiences like you. I had really good products, made by them with a special mention of the wet transfers of my recently built Mig-31, where I would have gone loco with all these stencils as conventional decals, and the care that would have amounted around them. Their seatbelts are unbeaten normally, but with this kit, even the seat belts weren't too refined, the decals over brittle as you mentioned and the PE was at least a questionable substitute. The benefit though is, that with the bad results I had with the decals, I learned wood painting, because I had to, and for the future I won't even look for wood decals, because it is frightening me anymore. Cheers Rob -
Das Kamel - Hansa Brandenburg W.12
DocRob replied to DocRob's topic in LSM 1/35 and Larger Work In Progress
Muchas Gracias Gaz. The Jig is very easy to work with, put on the Kabuki tape on the desired template width and slice it with a scalpel, done, much cheaper then ready cut tape in umptenth widths. I have another one for circles, wich I used for the gunner/operator station to cover. The stripe jig is by far the most used, specially for WWI purposes, like struts masks or to replicate laminated wood for props. Cheers Rob -
Das Kamel - Hansa Brandenburg W.12
DocRob replied to DocRob's topic in LSM 1/35 and Larger Work In Progress
Actually I don't miss Berlin at all, well, except for hobby stores, good bars, concerts and cinema. With Covid though, there are only the hobby stores left, so no, I don't miss Berlin . Another thing is the climate, winter, were I live in the northern mountains of the Canary Islands is mostly nice, often sunny and dry. The worst time is spring, where we have a lot of humidity and wind. Sometimes you feel colder with +10 degrees, than in a -10 degrees winter night in Berlin, where the houses are better insulated and heated and live here on the islands happens to be more outdoor than in a big city. Cheers Rob -
Das Kamel - Hansa Brandenburg W.12
DocRob replied to DocRob's topic in LSM 1/35 and Larger Work In Progress
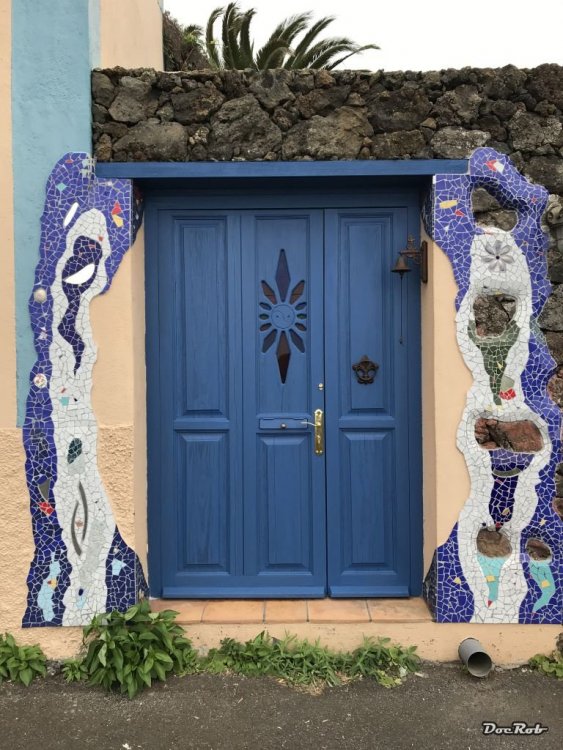
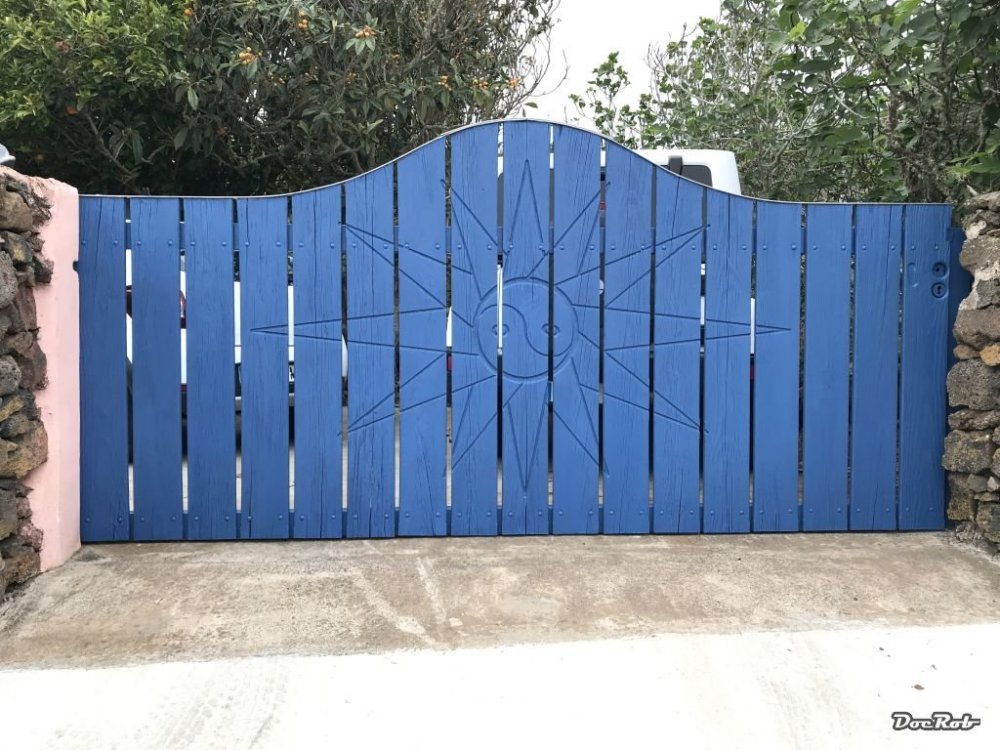
Thanks Phil, I have some time for modelling, but a lot of other duties in the garden and the house as well. Not so much painting in the moment, it's to hot most of the times, but a lot of watering the plants and gardening for hours and some work on one of the roofs. I finished some wood painting work lately with our main entrance and some other doors, with cobalt pigmented linseed colour. Linseed is perfect for our often hot, but even more humid conditions. This door gets all of it, wind and humidity from the outside and sun and dryness from the inside, sometimes it's nearly impossible to open the door, because of that. The scaffold and painting of the multi colored facade of the house will be next years business.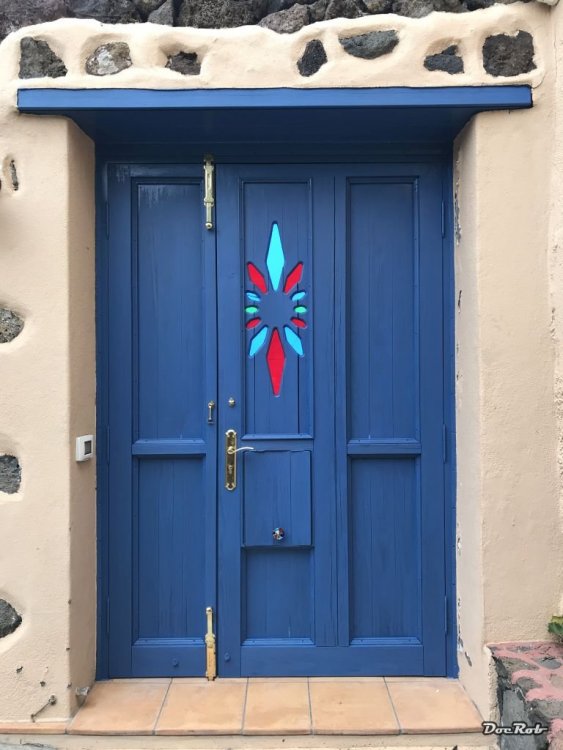
-
Das Kamel - Hansa Brandenburg W.12
DocRob replied to DocRob's topic in LSM 1/35 and Larger Work In Progress
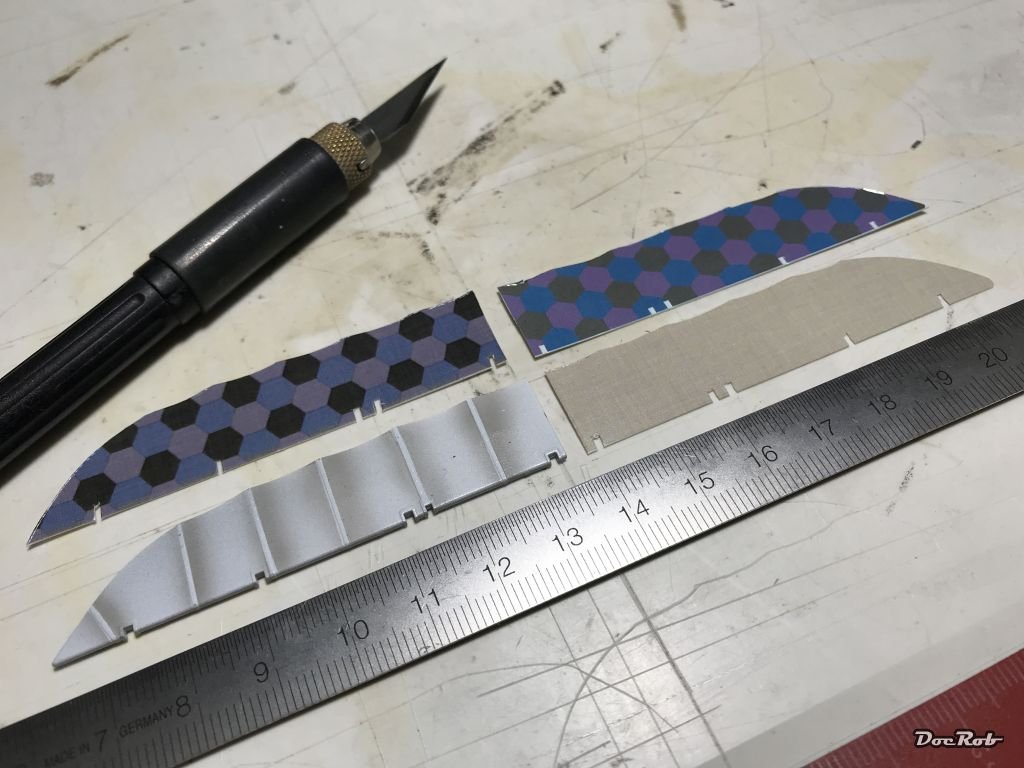
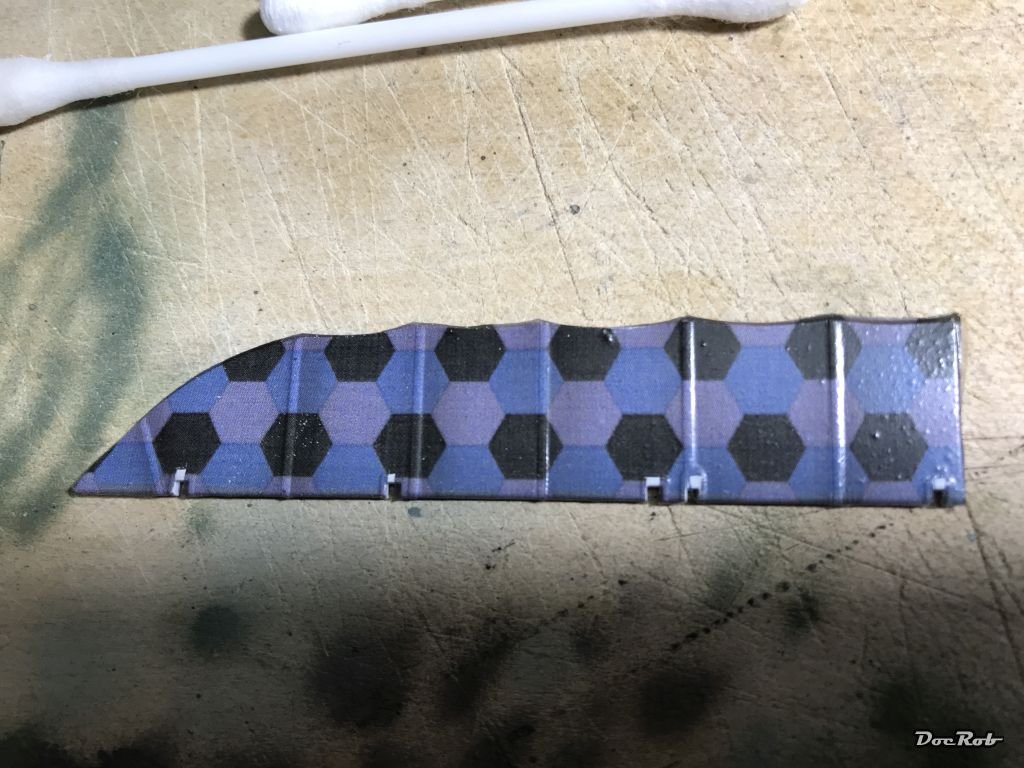
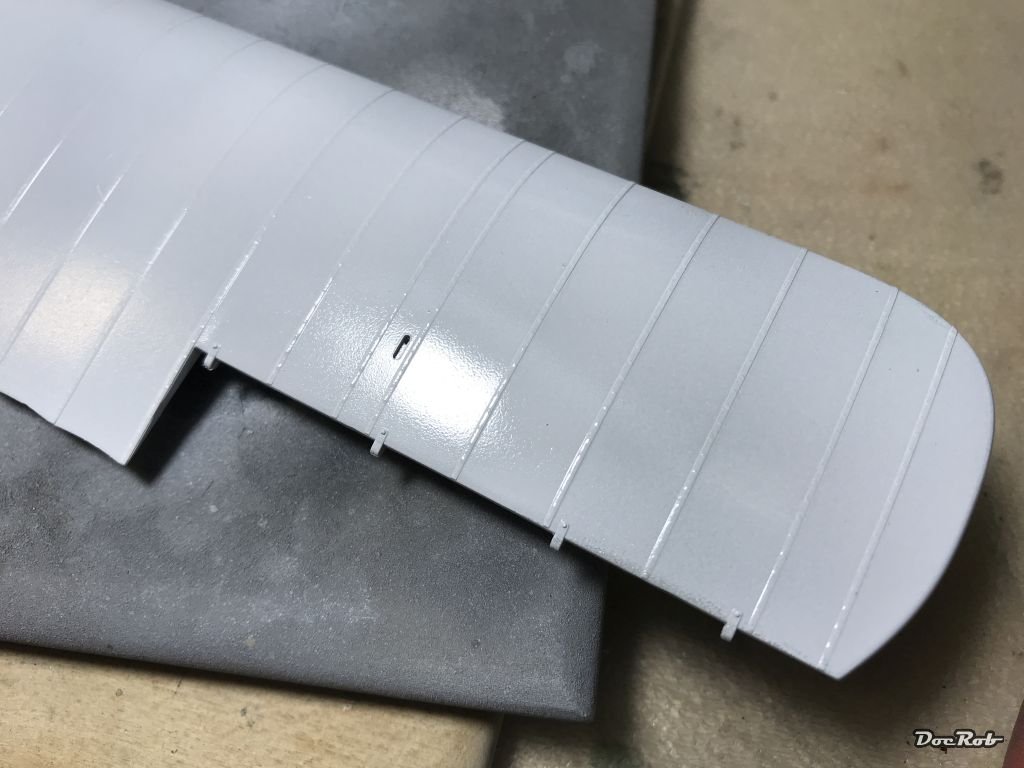
The fuselage and horizontal tailplane got a coat of Pledge as base for the Lozenge, crosses and numbers and then it was time to start something new. I worked with Aviattic decals on my SSW twins for a first time and was positively surprised, how good they performed. Given the 48 scale then, I didn't bother with preshading. This time, I decided to pre shade, which is a lot of work cutting 0,5 mm strips of Kabuki with my Voyager cutting template and apply these on the struts. I did a complete test of the process on one aileron. Then I cut the linen and Lozenge for upper and underside with the kit part and the WNW decal (above right) as a template. I cut the decals slightly wider than the WNW supplied ones, because I want to fit them around the corners better. The kit aileron got airbrushed with dilluted Tamiya Smoke Testing the method payed off, The result looks ok to me with the objection, that the preshading, which was equally airbrushed on the upper and lower side shows a lot more intense through the linen. For the next parts, I will take that into account and give the Lozenge side a little more shading Cheers Rob


-
Das Kamel - Hansa Brandenburg W.12
DocRob replied to DocRob's topic in LSM 1/35 and Larger Work In Progress
I have to think about using it as a primer, as well as it sprays, but have to do further testing. I'm a bit sensible when it comes to primers. To me they have to give a smooth surface AND a very high reliability concerning mechanical and chemical abuse. I will try that, but not on these wings, where it is only a gloss base coat for the decals. Cheers Rob -
Wow, your interior work looks really good. Love the colours and attention to detail. At least the Panzer III has some decent openings in the turret to peak in. Cheers Rob
-
Das Kamel - Hansa Brandenburg W.12
DocRob replied to DocRob's topic in LSM 1/35 and Larger Work In Progress
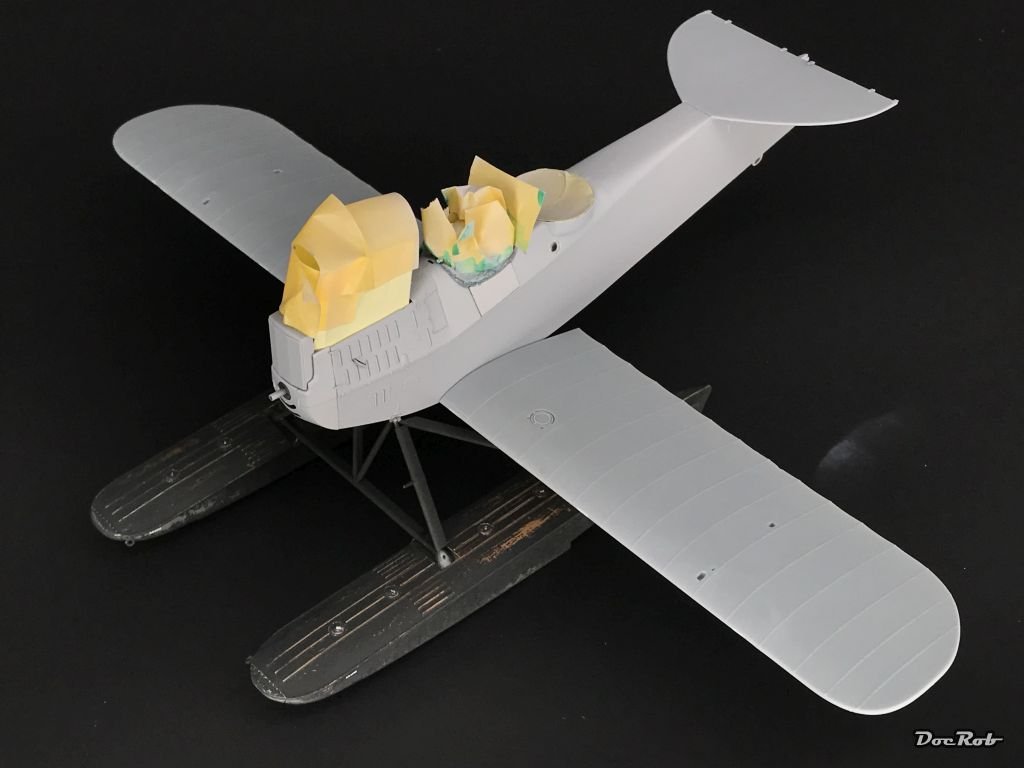
After gluing together floats and struts, I couldn't resist a sneak peak and put some of the main components together for a pic. Then I started the preparations of the wings and ailerons for decaling. All surfaces were rubbed with alcohol, because on the decal areas, I don't want to have an extra coat in the form of primer, just a high sheen gloss white coat. As I know, how tight the struts fit into the holes, I took great care to avoid getting colour to seep into these holes with liquid mask and pieces of toothpick, which beautifully serve as a drying rack as well after spraying. All surfaces which will receive decals were then airbrushed with a very thin mix of ca. one third of Tamiya gloss white and two thirds of Mr. Hobby levelling thinner. This is my new go to mix, because it doesn't build up much thickness and has a high sheen in the end, with just a little bit of polishing, when dry. I have to thank Ernie, to be so persistent with his praises for the leveling thinner, where nearly all my tries went south, but with Tamiya acrylics it sprays like a dream, and especially the gloss white has so much opacity, that you are able to thin it down that much. Cheers Rob


-
Das Kamel - Hansa Brandenburg W.12
DocRob replied to DocRob's topic in LSM 1/35 and Larger Work In Progress
Thanks Gaz, I'm not finished with these, I will add the environmental influences later . Cheers Rob