DocRob
-
Posts
7,055 -
Joined
-
Last visited
Content Type
Profiles
Forums
Events
Gallery
Everything posted by DocRob
-
You have to hand it to Dragon, they have a sense for drama with their box art on planes. Cheers Rob
-
Have fun on your trip, we wait anxiously for updates when you're back. Cheers Rob
-
Looking great, specially in 4BO and with a red star, which shapes the IV into a very unique tank. Cheers Rob
-
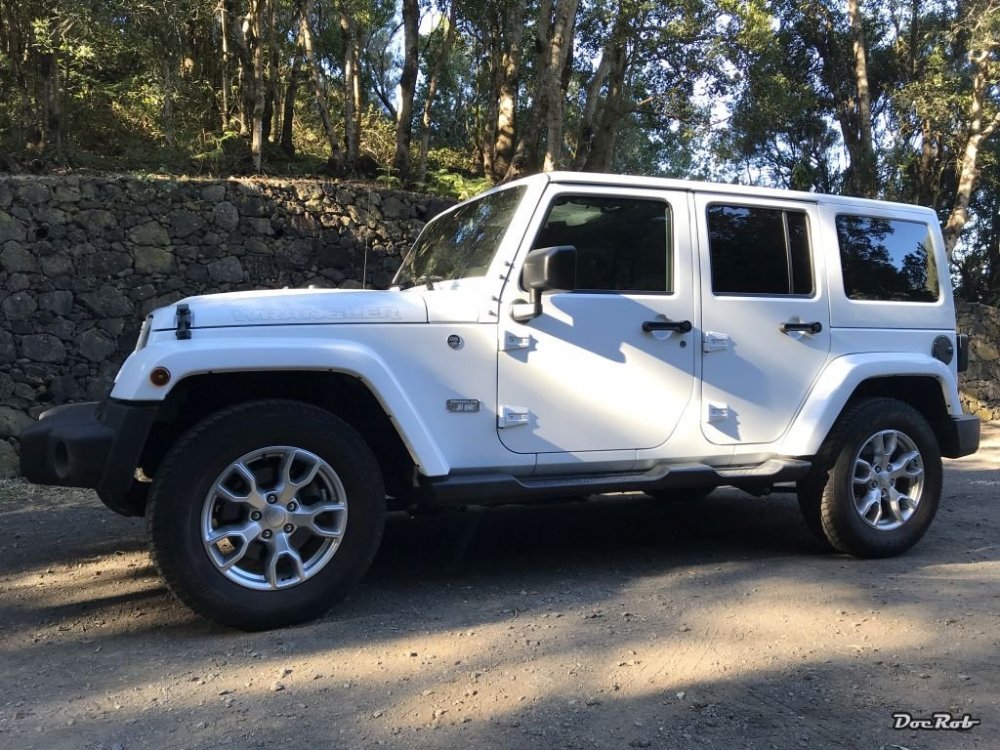
Well I have been a little nervous the last weeks and modelling was a little stagnant, but now I'm a happy guy. Yesterday I got my new ride, definitely LS. One of the last JK Wranglers with hard- and softtop near as new. Cheers Rob
-
The result is well worth the pain, this scheme looks amazing. Cheers Rob
-
Very nice work on your F-18 and the way to display in flight. Tipps, you want tipps for brush painting from us, I think at least I could learn a lot from your experiences painting large surfaces evenly by brush. Welcome to LSM and if you like stay non LSM (1/48) as we are open to every scale, material and preference. Cheers Rob
-
A PZL.23 Karaś would be great in our scale , dreammode off. Cheers Rob
-
I'm just happy to have finished my first GB in time, but if I remember it right, there were others, asking if there could be a prolongation. Why not, it's good to have a lot of finished kits for the GB. Cheers Rob
-
Very nice and clean work Jeroen, I've not much love for building helicopters, but this might be an exception. You can feel that the Flettner is not far from the drawing board, it looks rough and unrefined, in other words interesting. I can understand that it is a demanding kit, one of the kind 'where can I touch it while handling' Cheers Rob
-
Nice progress on the Behemoth, it seems like you have a kind of addiction for Greece subjects . Understandable, as they have the best weathering branch in the world , even the Greek crosses seem hand painted. Cheers Rob
-
 Nice work on the cabin floor. Never used MRP, but experienced the same using Alclads. These very liquid Colours seem to rush through the airbrush on the other hand they spray well and trouble free. Cheers Rob
 -
Bad news, on my kit there were enough. My manual says you need 81 links per side for the T-90A, could there be such a difference? In fact, I have maybe 20links left, if yours are the same type, but I think they get it wrong in your manual. Cheers Rob

-
Hasegawa P-47 in a week?
DocRob replied to Clunkmeister's topic in LSM 1/35 and Larger Work In Progress
It definitely is this kind of a kit, pure joy to build and get your batteries refilled. @ Martin, In my opinion lowering the engine doesn't fix the shape issue, because Hasegawa only got the lower part of the cowling/fuselage fit wrong shape ways. The upper shape seems ok. In lowering the engine you still miss the 'belly' contour of the lower fuselage. That was the original fit of my kit That is after sanding, reshaping and rescribing the lower fuselage part, tataaa, belly shape. Cheers Rob
-
Hasegawa P-47 in a week?
DocRob replied to Clunkmeister's topic in LSM 1/35 and Larger Work In Progress
Nice and fast work Ernie, I fixed the wrong shaped step on the bottom side of the fuselage in a very simple but to me effective way. I described what I did in my WIP. Cheers Rob -
I use it out of the bottle since years and never encountered problems. It dries glossy. you can use it as a clear coat or dip canopies in, to get a better transparency and hinder fogging to appear when glued. You can even use it as glue for thin foils or using a tiny drop on an Instrument panel, to replicate glass. It's great stuff. Cheers Rob
-
Heavy Metal , fierce looking Spit with a grim Eddie in, love it. Does it have a placard in the pit saying 'don't headbang while flying' ? Next up is Bat out of Hell? Cheers Rob
-
The engine looks great Harv, love the look of the cables and the brass tone. Cheers Rob
-
What do you consider is the meanest tank in history?
DocRob replied to Sir Desmond Glazebrook's topic in General Discussion
I know that stare . Cheers Rob -
Thanks Martin, that's an easy fix. Another thing which looks odd on my pics is the cleanness of the wheels. This also will be fixed through mudding and icing the beast in the next stage. It will be my first experiment with snow and self made icicles. Cheers Rob
-
What is on your bench right now ? Share a picture :)
DocRob replied to Martinnfb's topic in Modelling Discussion
A clear 10 on the wow scale. You start to get me interested into a subject, I normally wouldn't have cared about. Your attention to detail is out of this world. Seeing the nice shine of the brass, it's almost a shame to paint it later. Cheers Rob -
Hasegawa P-47 in a week?
DocRob replied to Clunkmeister's topic in LSM 1/35 and Larger Work In Progress
Nice little project. You can do it Ernie, I believe you could do it hiking in the Himalaya out of a backpack . Cheers Rob -
Arttystation bench system assem
DocRob replied to harv's topic in LSM 1/35 and Larger Work In Progress
Exactly my thought , some razzle dazzle pre-fabric. Harv, your command center would make Captain Kirk feel ashamed with his. It looks great and is a greater project, than some LS builds. Cheers Rob -
WnW Sopwith 2F.1 ShIps Camel.
DocRob replied to Bomber_County's topic in LSM 1/35 and Larger Work In Progress
Great start with your Camel and like Carl said, the IP is looking very nice. As I only have a Snipe in my stash, I'm out of your maybe GB, but I will keep buckled in, to see your Camel progress. Cheers Rob -
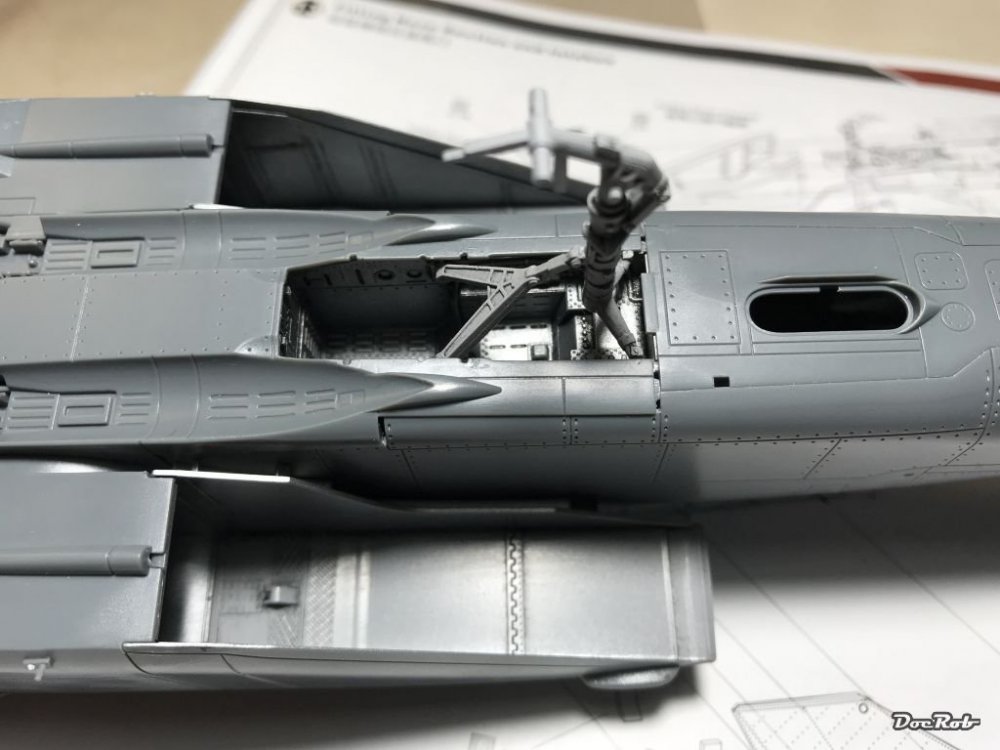
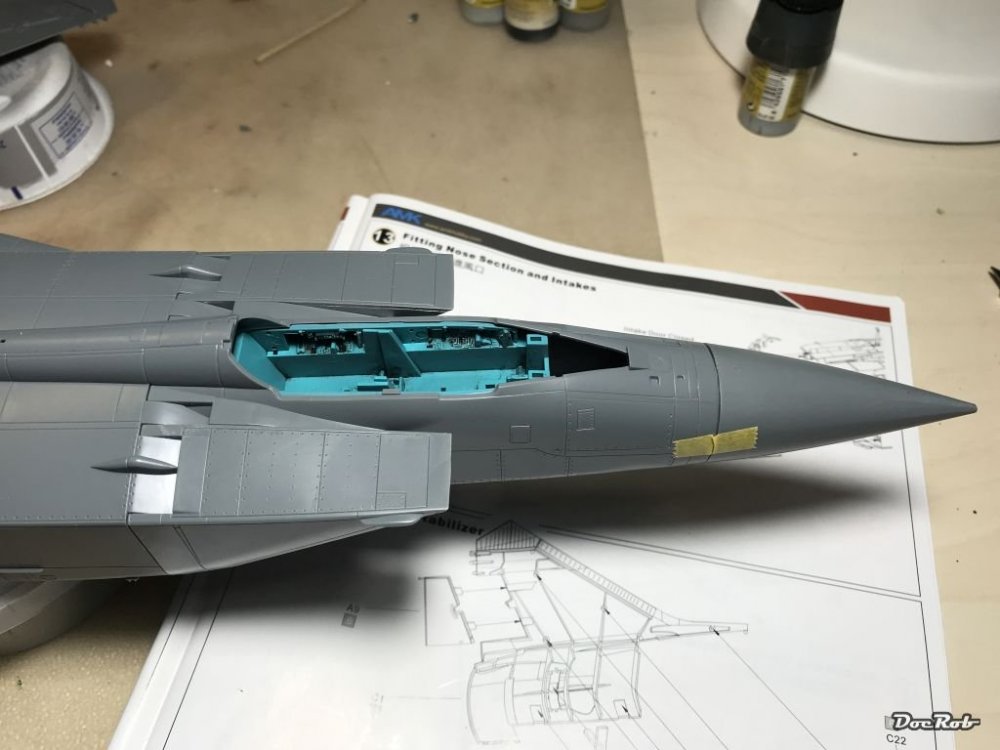
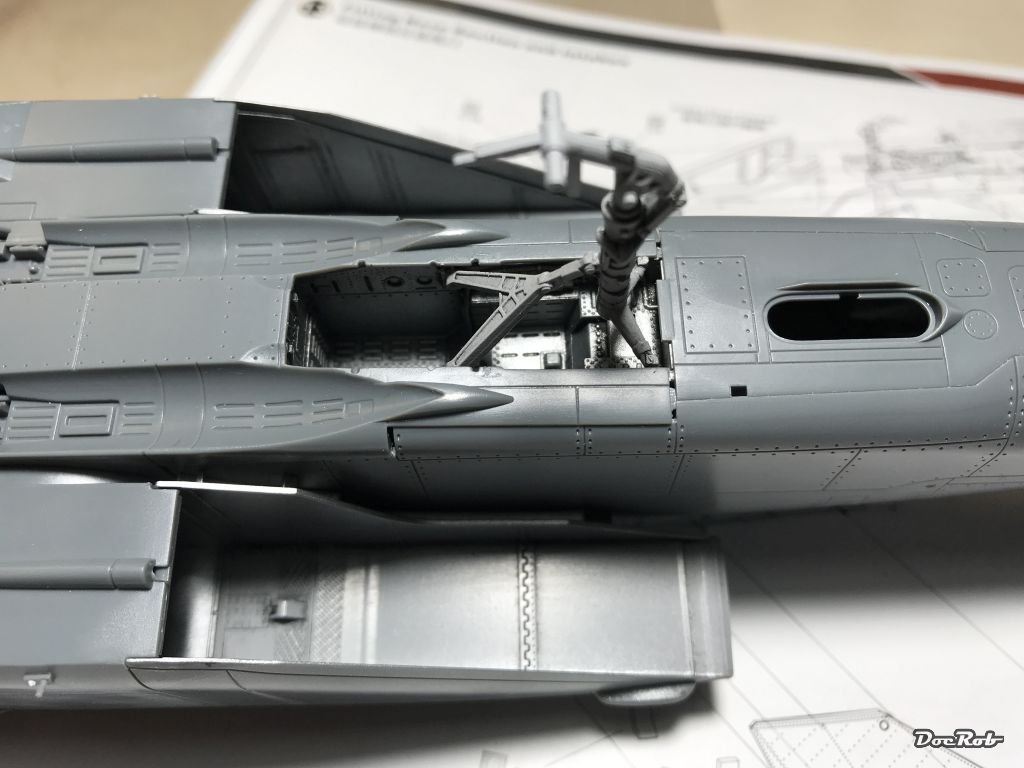
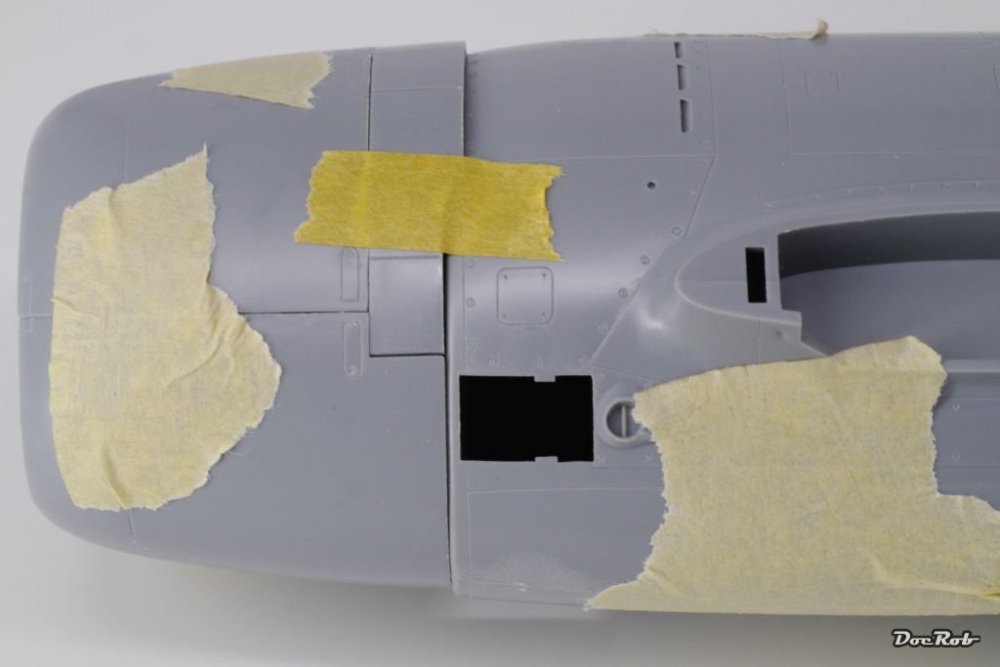
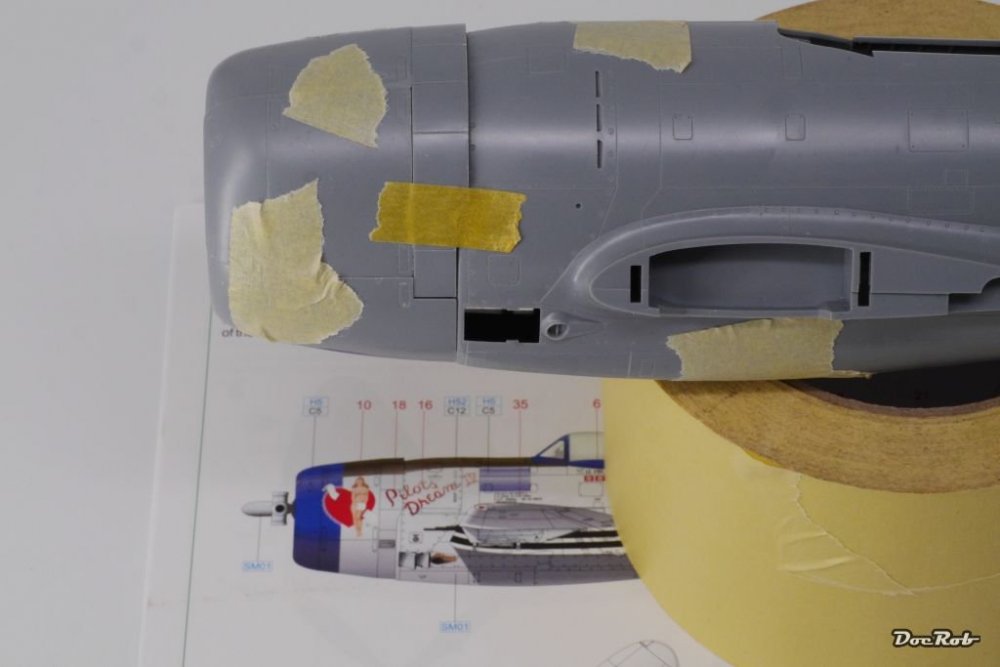
After a long test fitting session, there is definitely the first problem area of the build. The problem zone is, when you add the front fuselage to the back fuselage part. There is a gap in the lower connection as can be seen in the upper picture. It seems to be caused by the connection tabs of the back fuselage by not slipping under the front fuselage tub, even with force applied. Another possible reason might be, that the wheel well is a fraction too wide, I have to dig deeper here before grinding and filling. I tried to find the optimal sequence of construction and it proved best to first fit the front tub into the back fuselage, then add the air intakes (no problem here) and add the upper fuselage with wings last. But even so there is still a gap. Cheers Rob