DocRob
-
Posts
7,132 -
Joined
-
Last visited
Content Type
Profiles
Forums
Events
Gallery
Everything posted by DocRob
-
This is looking great, your way to depict different materials and textures is making your Gotha look exceptional. Cheers Rob
-
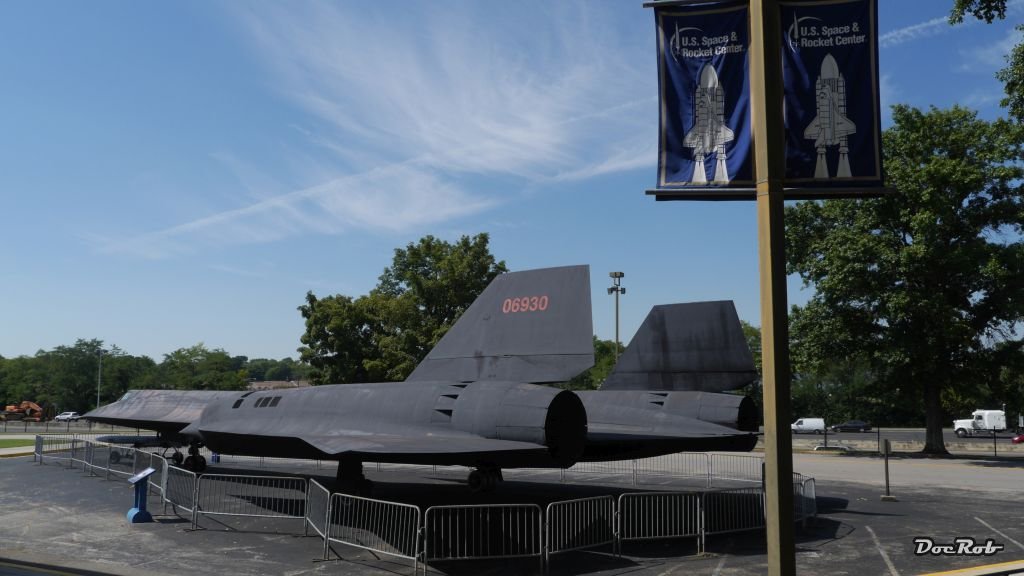
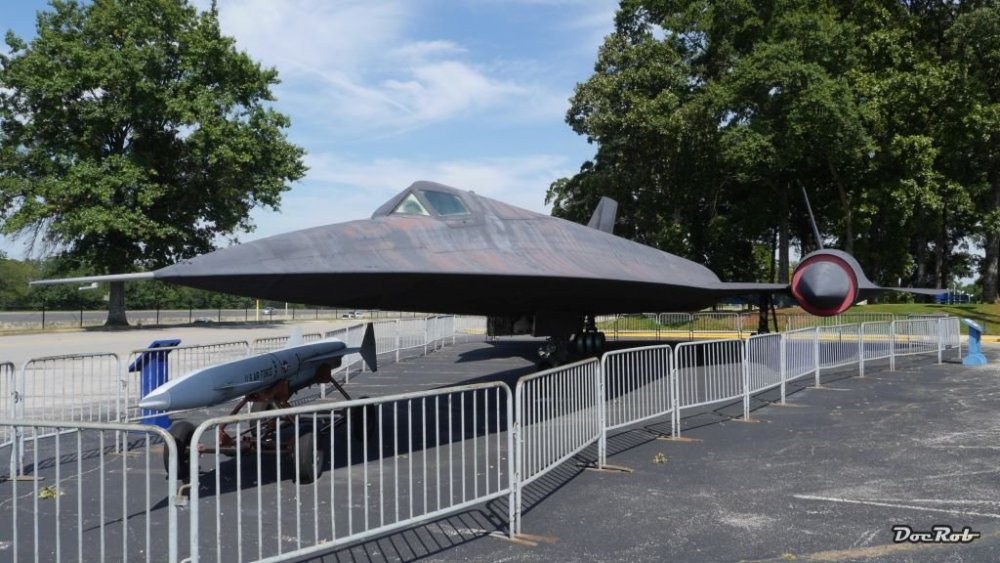
Normally 1/48 is not my prime scale, and modern jets aren't my cup of tea, but in case of the SR-71 I could make an exception after seeing one in Huntsville some years ago. It looks so badass . Cheers Rob

-
No worries, I like to learn and drift away. Cheers Rob
-
Looks promising and better than my TA-152 engine, but mine was not for showing, I had the cowlings closed. Cheers Rob
-
That is a good idea, just leaving it the way it was airbrushed does not feel right. I will do some detail painting and then decide what I will do. Thanks Harv, building this MIG is a breeze compared to other builds I had recently. Cheers Rob
-
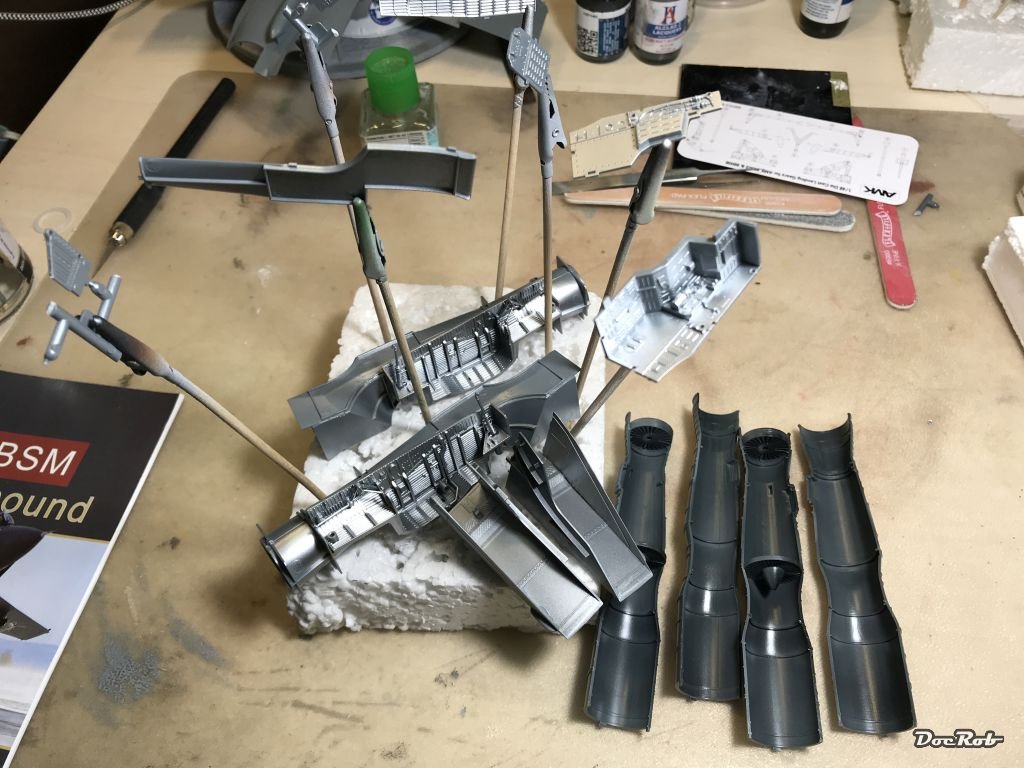
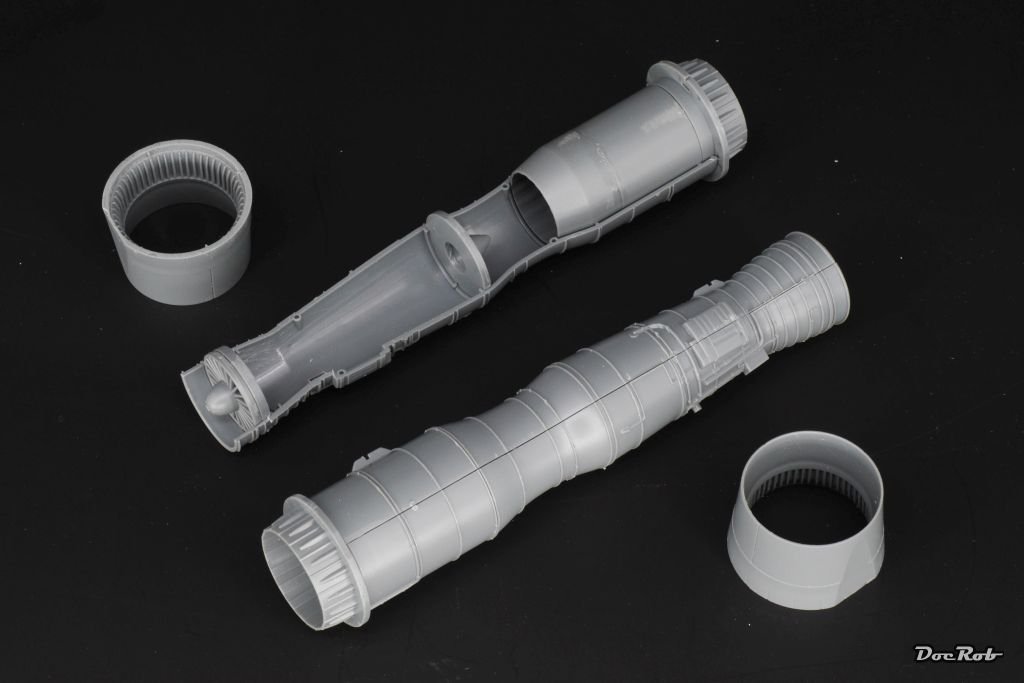
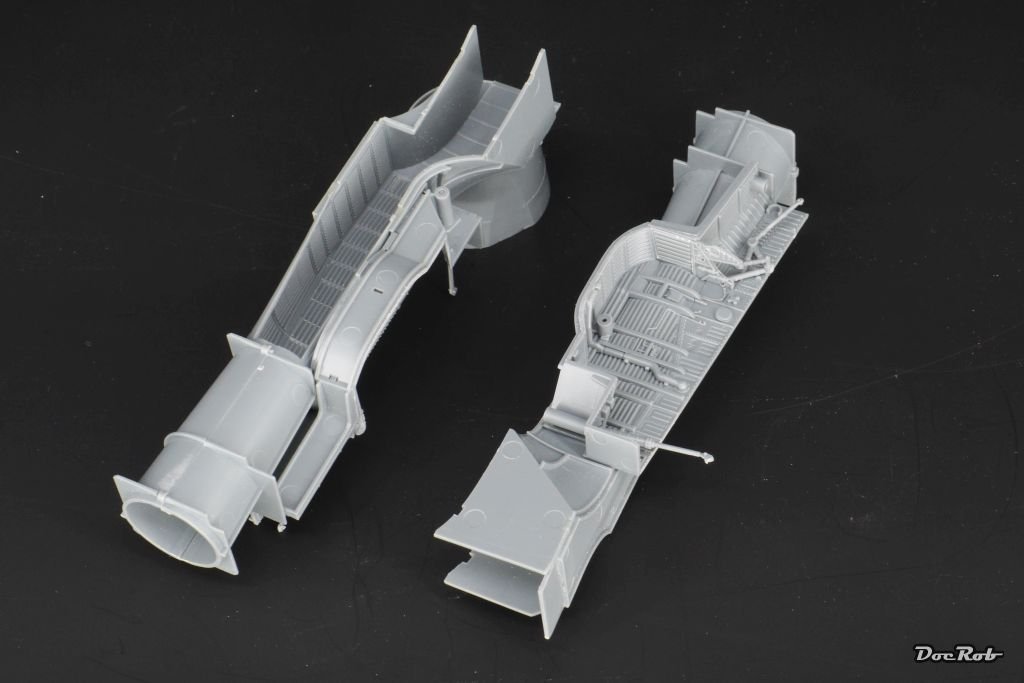
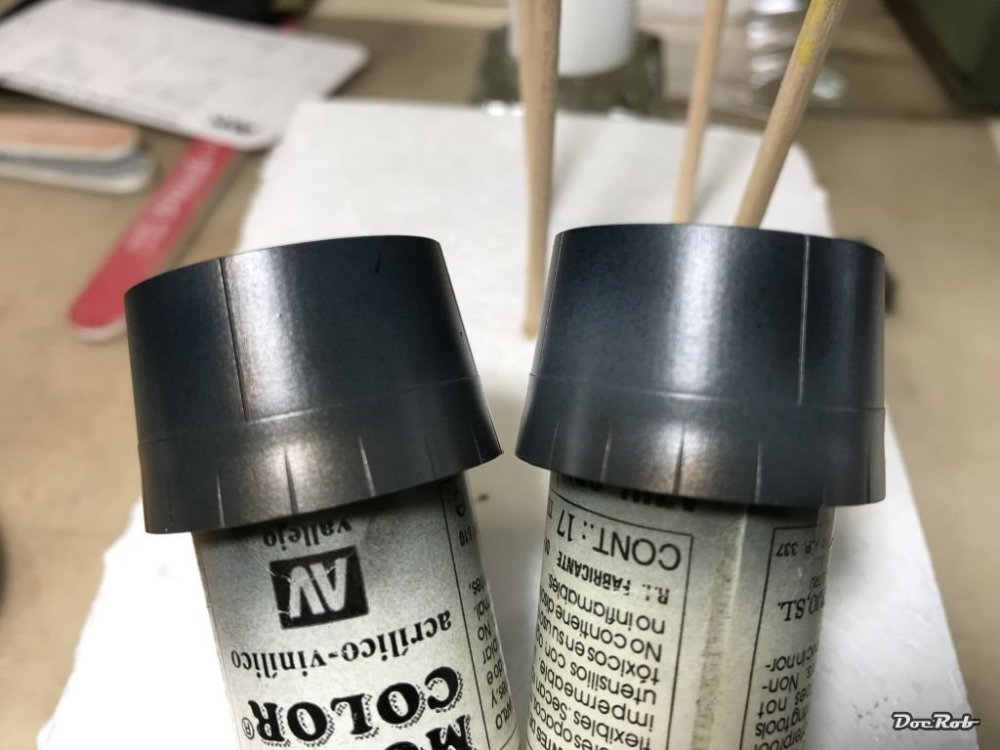
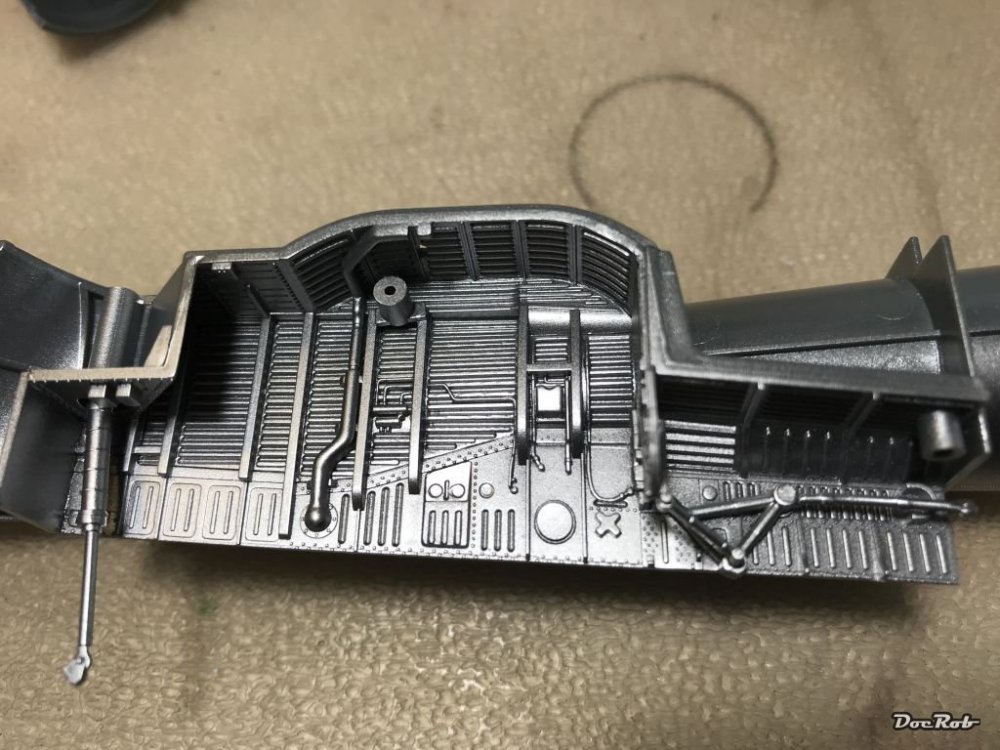
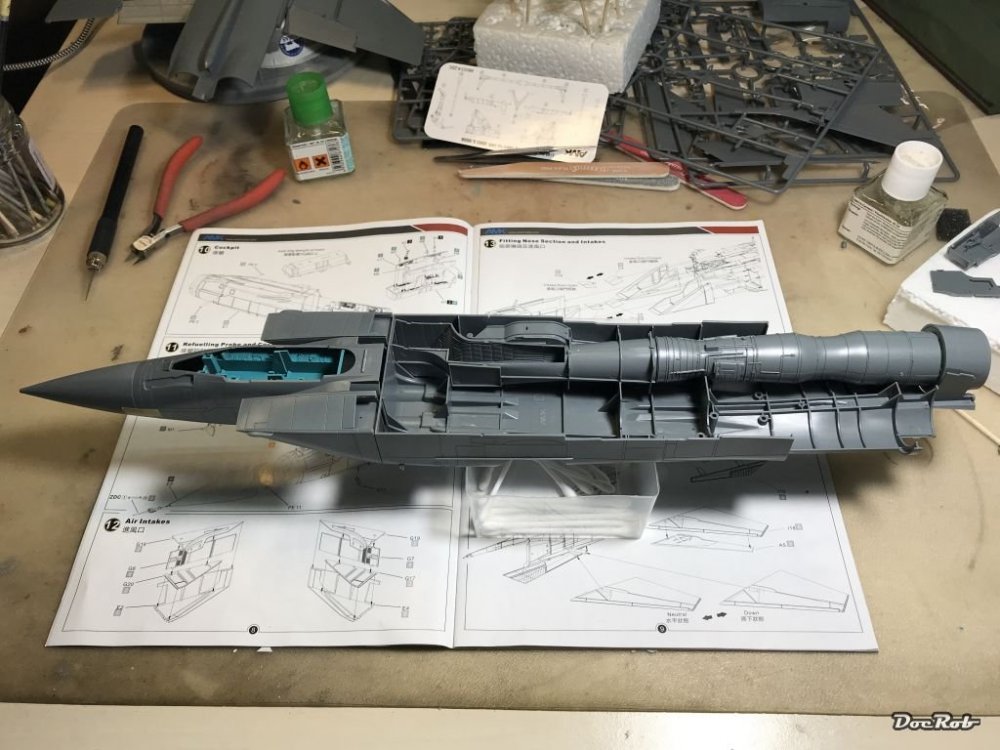
Today I sprayed the internal sub assemblies in different shades. For the air intakes and wheel wells I used AK's Extreme metal 'Dark Aluminum' and I haven't made my mind up, if I use a wash here, because the effect might be to stark, given the quality of the pars. The inside of the Jet engine was sprayed with AK's Jet Exhaust and will be added with some already painted parts in Radome green. The nozzles were firs treated a coat of Jet exhaust, then some pronunciation with Burned Metal and after that Clear Dark Blue and Clear Smoke of the AK Chrystal range, which are translucent. Until now I have used primer only for the metal gear struts, as the internal assemblies need no masking, a first for me, but it seems to work and you don't loose detail. Cheers Rob

-

Very late group build entry, Marder III.
DocRob replied to 1to1scale's topic in D-Day 75th Anniversary Group Build
Looking great, beside the headless crew . The wash brought a lot of life into the Marder. Cheers Rob -
Spitfire Iron Maiden build
DocRob replied to 1to1scale's topic in LSM 1/35 and Larger Work In Progress
Nice idea great execution. I love subjects which are off the trotten path and nearly helped me to this kit some weeks ago. Your monster cave pit looks great. The Revell cockpit looks not too shabby detail wise, shame that they missed out on the decals. Pure Heavy Metal dude. Cheers Rob -
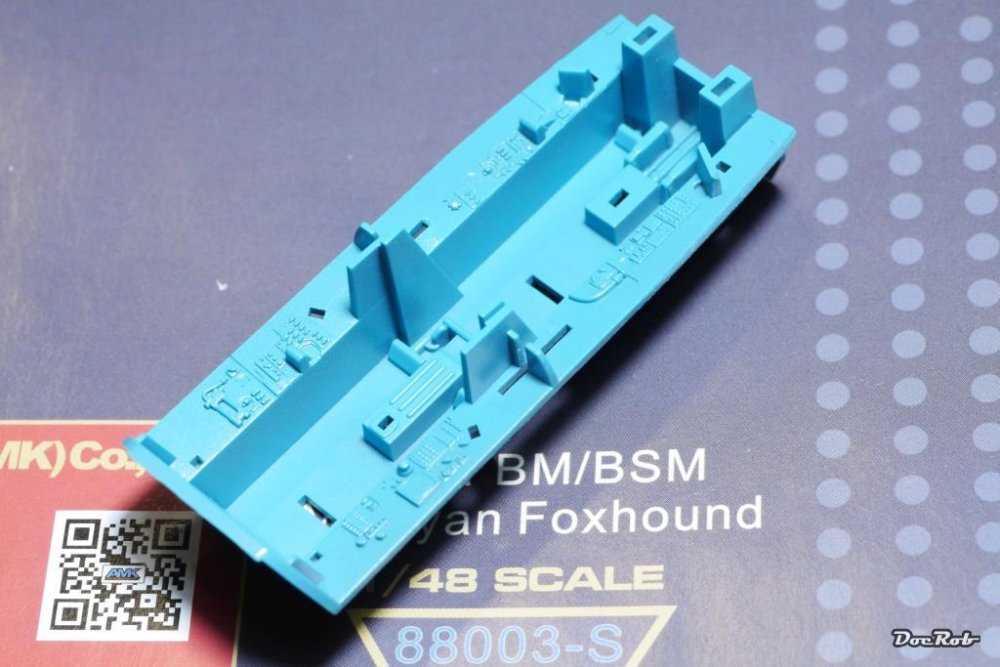
There is a special edition kit on the market, where all the goodies are included. It's the one I have with the number AMK-88003-S. This kit is a de - may - er , give it a try. Cheers Rob
-
You made it right at the finish line and your dio is looking great. The lifelike atmosphere and the ruined house are exceptional, congratulations. Cheers Rob
- 22 replies
-
- 3
-

-
- 6 pound anti-tank gun
- d-day 75th anniversary group build
- (and 3 more)
-
Thanks Ryan, I hear a group build looming, where I have a head start . Cheers Rob
-
I found the AK real Colour not very smelly, I use a spray booth and didn't notice any stand out smell. When I clean the airbrush, I did smell the cleaner with an agressive odor. Cheers Rob
-
Some minor works were done today like the air intakes, which, no wonder, fitted great and some priming of the metal wheel strut parts and then it was test fitting time, which seems almost senseless with that kit. I don't know if you ever had a test fit session nearly without adhesive tape. All major components are snap fit and only the nose cone needed tape. I had bigger gaps after trying to fit and glue parts, like with my dreaded Meng Komet. I raise my hat to the AMK engineers. Cheers Rob

-
Tamiya F-4J Phantom VMFA-451 "Warlords" WIP
DocRob replied to a topic in LSM 1/35 and Larger Work In Progress
Nice and thorough detail work Danny, good to see this one progress. Cheers Rob -
The full palette of horror. I felt a little dizziness while spraying and it was not the odor of the AK-paint . There is one example of psychological warfare against the own pilots. Cheers Rob
-
Thanks Gus, you recently finished your great Corsair Gus, but the Mig-31 in large scale is a different breed size wise. It's huge even in 1/48 and I would had chosen this scale, even if there would have been a decent 31 in 1/32 scale. I'm not dogmatic about scale, to me the subject has to attract me, but yes, I prefer large scale too, generally. Never heard the expression barf green before but it fits. I have the Citadel emerald in my paint rack as well, but found it to - yeah emerald. The AK tone is a little taken back on the colourful side and sprays exceptionally well. Cheers Rob
-
Don't be so cruel on yourself, only because there is no resin to grind . But some truth is there, because failing on a near perfect kit will us make feel worse than to destroy a super unrefined resin kit. Cheers Rob
-
Don't open the box Ernie, you're done instantly. Cheers Rob
-
Me to, thanx for raising the bar, so epic fail is the only possible option . Cheers Rob
-
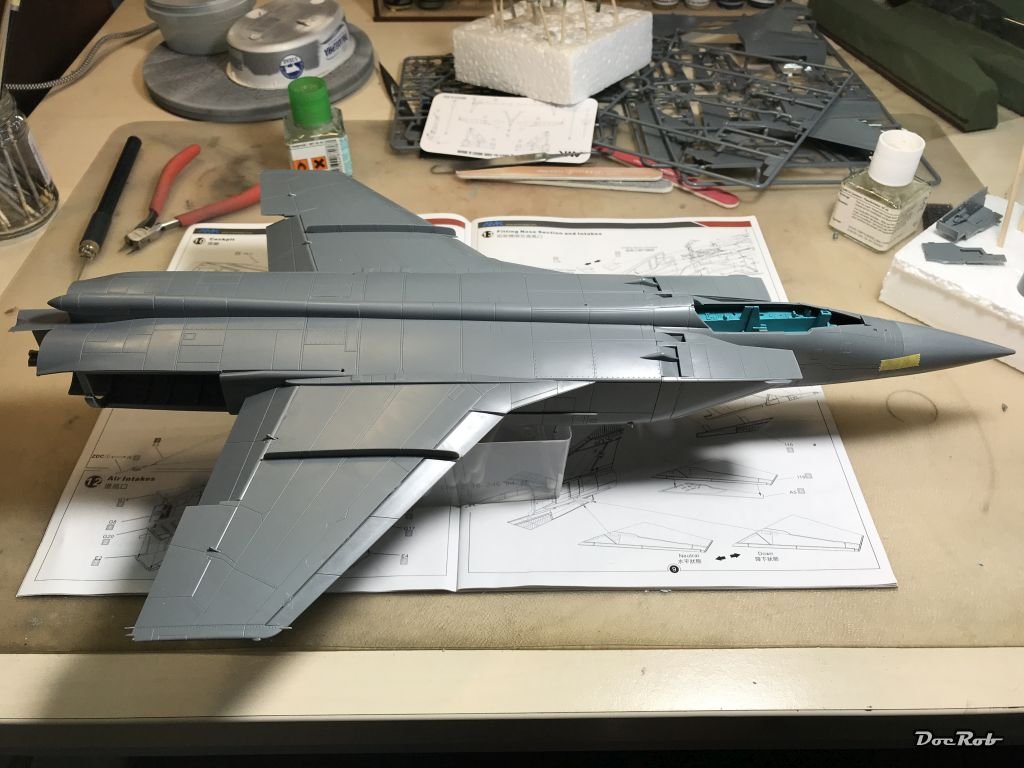
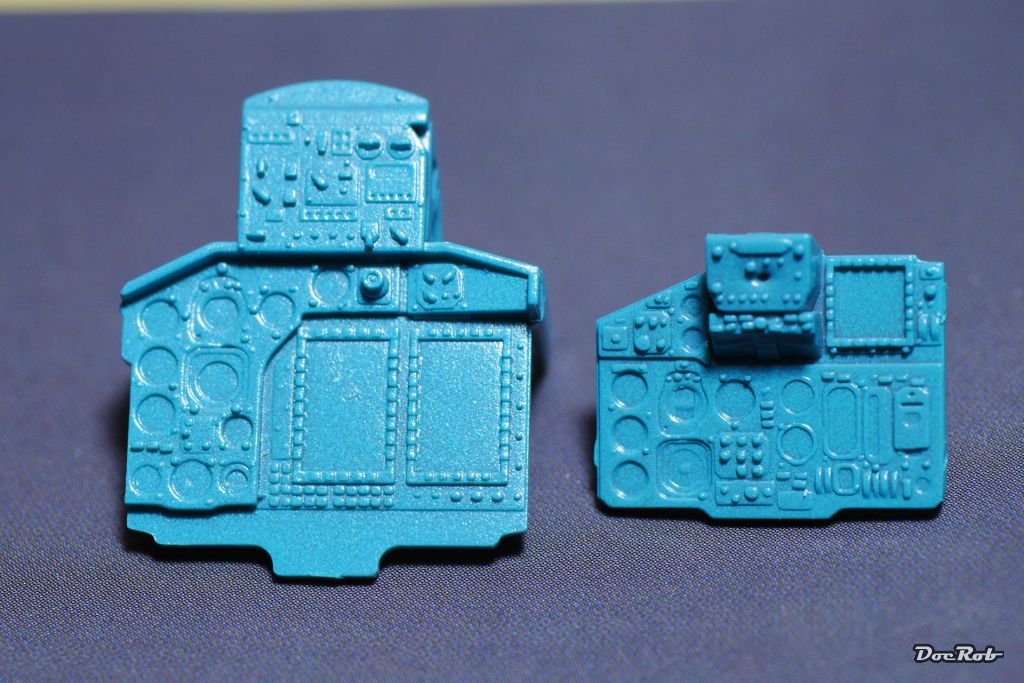
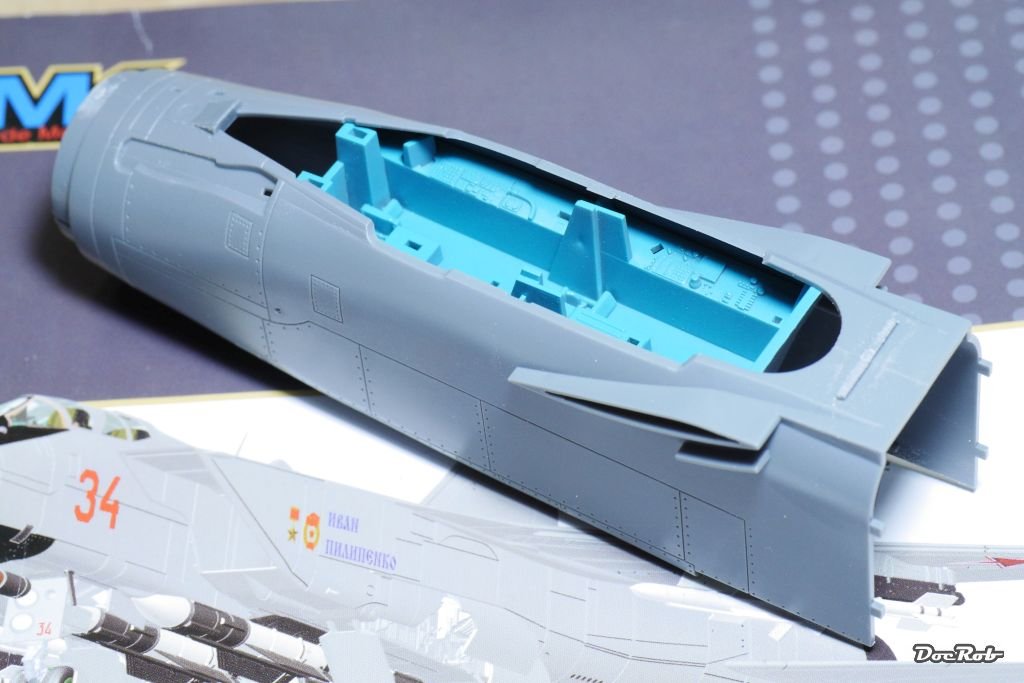
Hi Ernie, this kit makes you a believer, it is purely awesome, yesterday I had to tie my mouse hand on my back to not hit the buy button on their Tomcat. The only kit I remember being equally made was the Birdcage Tamiya and if I look at it design wise, I tend to give the edge to AMK here. They do everything to hide the seams. That paired with the snap fit accuracy of the parts makes it outstanding. The finished cockpit slides into the one piece front fuselage, which is such a great solution, no seams and again perfect fit. The supplied wheels are not the best and after sawing the Brassin wheels off their cast blocks, I'm lucky that I bought them. Today I finished building the wings, where two sets of flaps are included, neutral and lowered, Then I sprayed the wheel hubs and some engine parts Radome green and finally prepared the cockpit in that weird turquois shade, where I used my firs AK Real Color and it worked great. After a coat of Future I'm ready for decaling the pit. Cheers Rob


-
It is indeed, and I actually had no plans in building it now, I only opened the box and there was a voice in my head saying; 'build me'. Sounds weird, maybe, but may you have the same sensation . Cheers Rob
-
Hasegawa Nakajima Ki-84.
DocRob replied to Sir Desmond Glazebrook's topic in LSM 1/35 and Larger Work In Progress
Nice job on those two birds, can't wait to see them finished. Cheers Rob -
Depends on what your tank should look like. There are lots of 'fresh' spills on the Aluminum part (sharp contours), but no deposit grime on the whole engine. Looks to me like a relatively new engine with not so careful maintenance. Cheers Rob
-
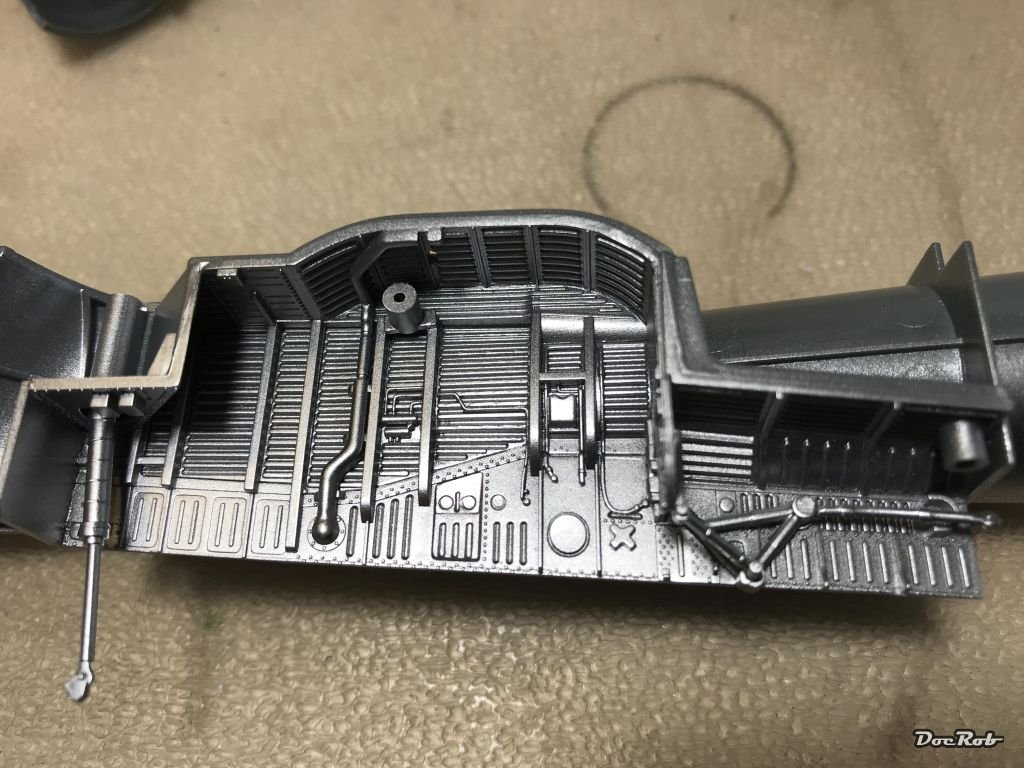
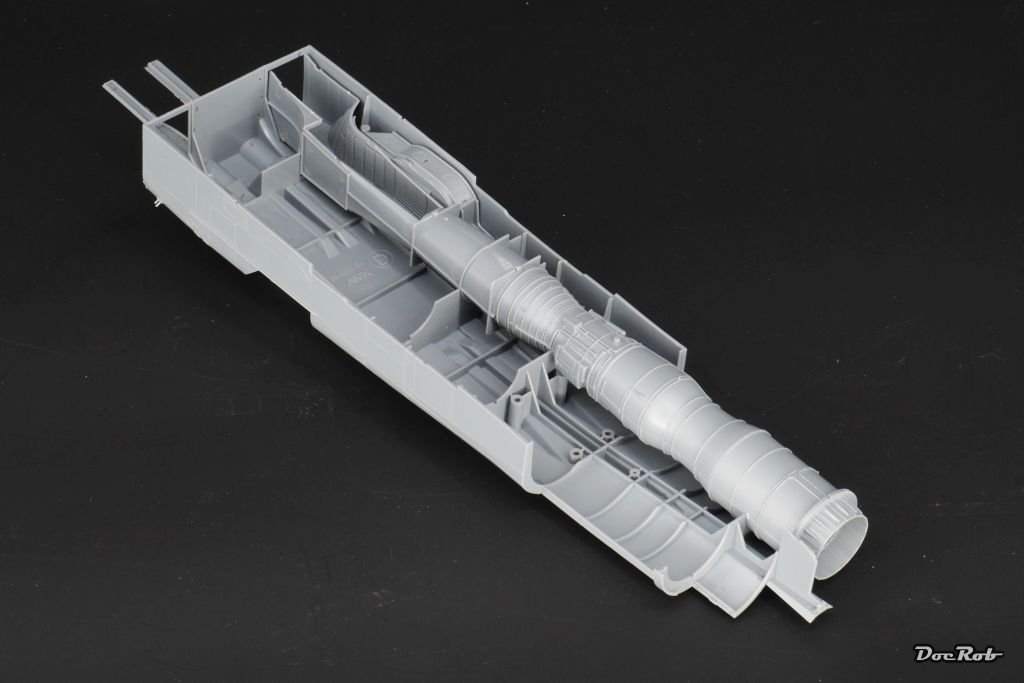
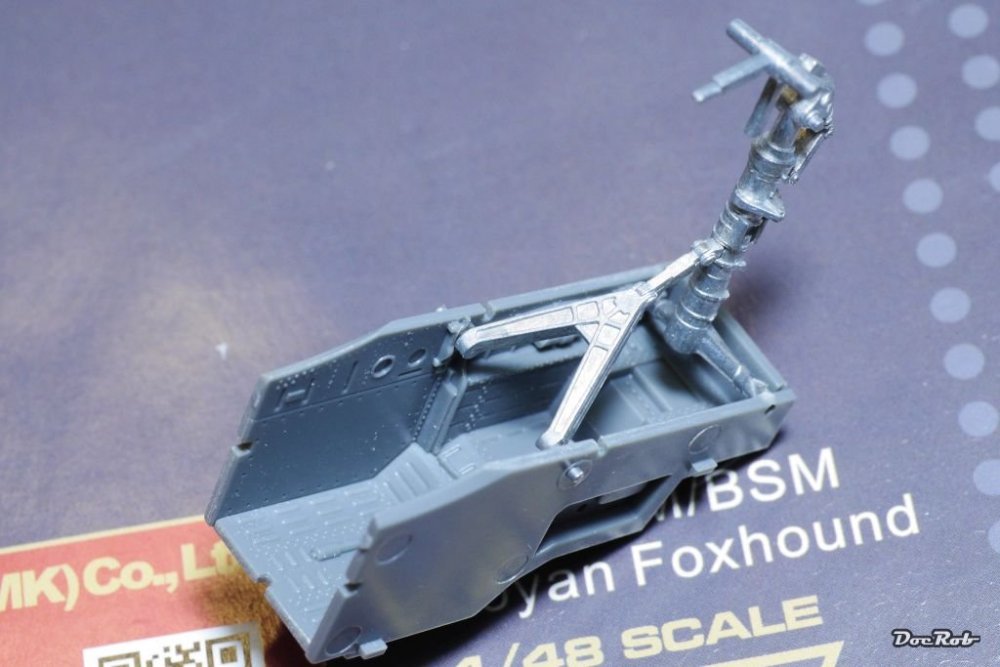
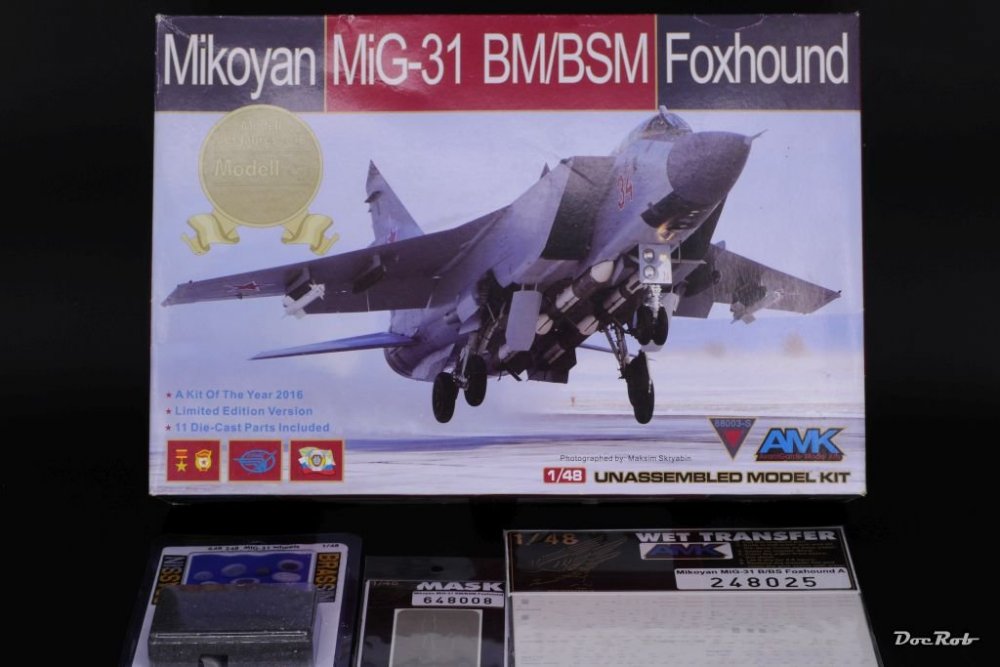
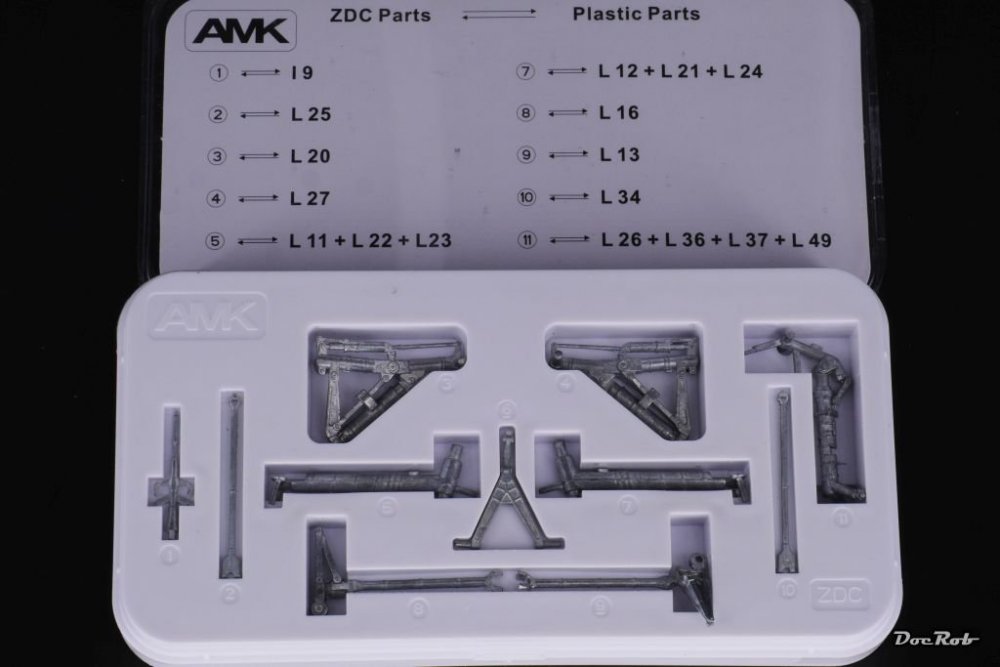
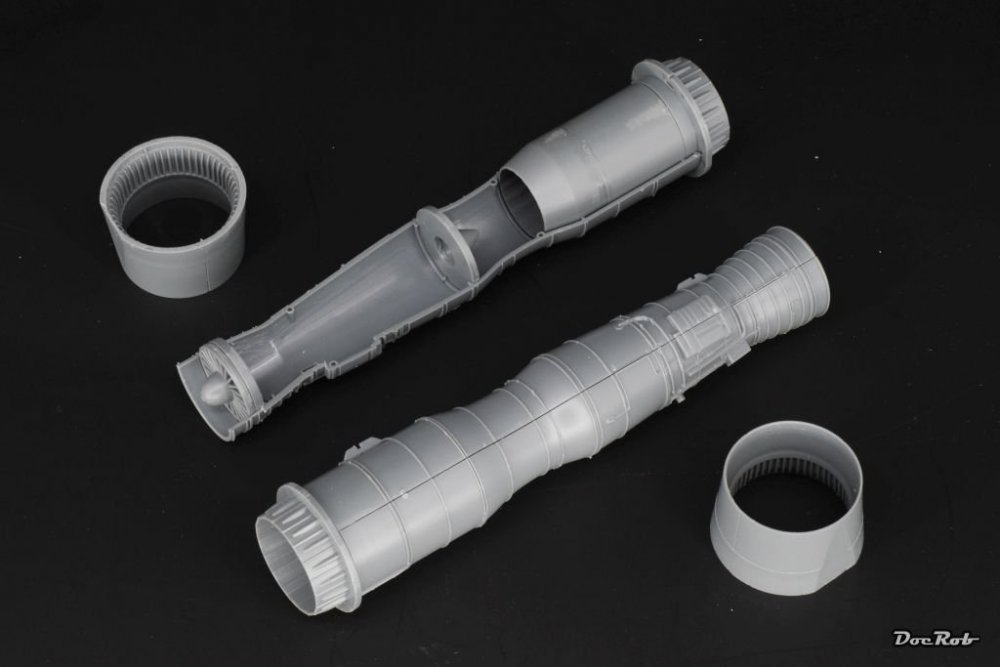
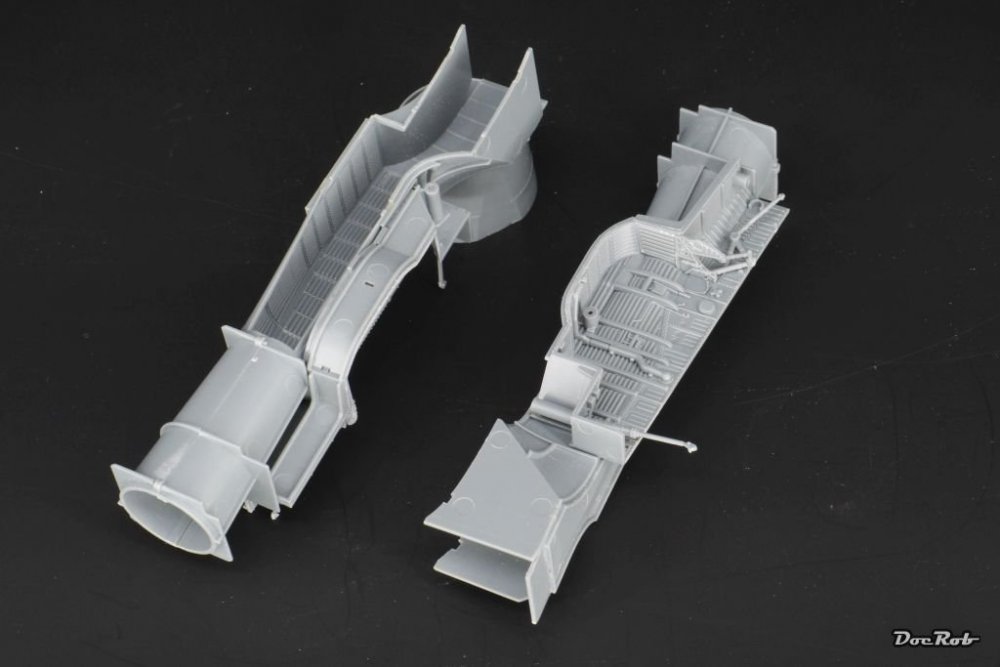
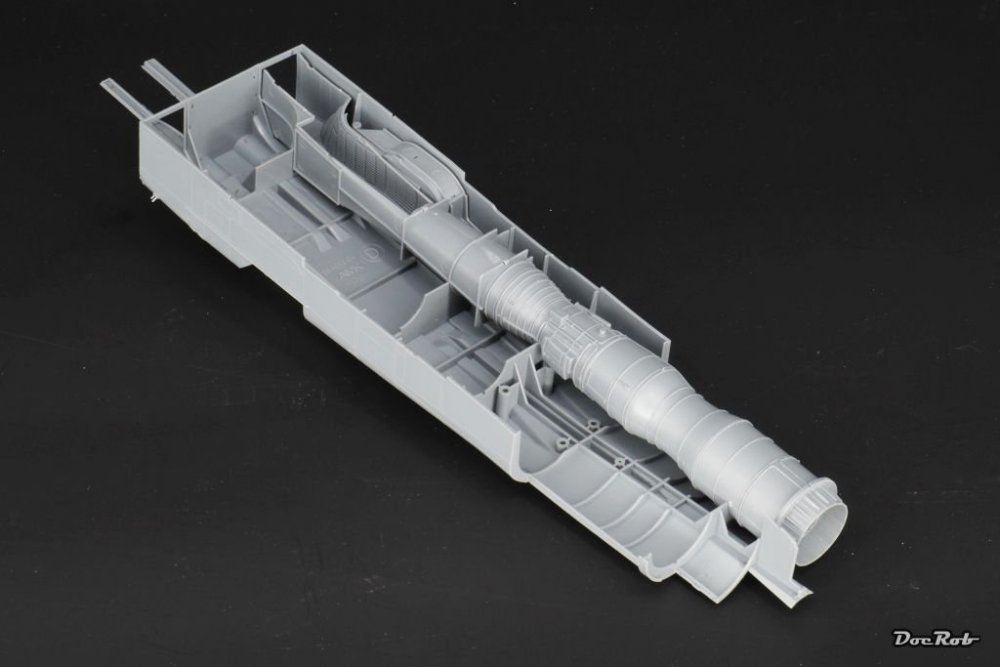
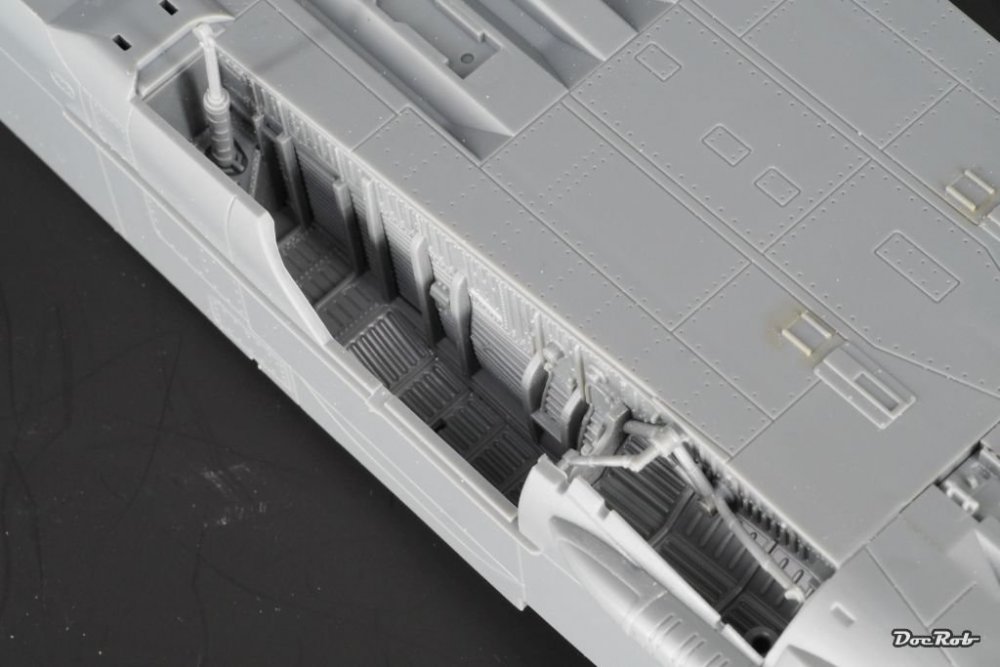
Hola Compañeros, today I was not sure what to do in my cave, till I remembered the sheer amazement, when I opened the box of my Mig-31 BM-BSM (Limited Edition) kit from AMK or Avantgarde Model Kits. besides the sprues in separated bags, there where some boxes included for special protection of the front fuselage tub, the weapon sprues and the upper fuselage. Than there was a plastic box containing superbly cast white metal parts for the wheel struts, which not only look better than the plastic, but sometimes make living easier, because multi part plastic affairs are cast as single parts. The metal is sturdy and not like this soft SAC stuff. Clear parts are doubled, one in -yeah, clear- one one version in a golden tint and there is a fret of PE The offering is so overwhelming, that there is only minimal need for AM. I bought Brassin wheels, which are definitely nicer than the supplied ones, Canopy masks from HGW and a big sheet of stencils as wet transfers made by HGW. My last more or less modern jet was and Eduard/Academy F15, with lots of fit issues and a stenciling nightmare, because I couldn't get the decals blended into the paintjob. I hope these wet transfers will behave better. When I started building the feeling of near perfectness continued. engineering is great, detail very crisp, the fit is very good and there is minimal cleanup to do. Most parts would just snap fit, you rarely have this with kits. The engines build up fast and are ready for painting. The wheel wells are a piece of art and are prepared for painting too. When you insert the sub assemblies into the fuselage components (snap fit again) and close up the fuselage everything is aligning well, with most of the seamlines hidden, vey clever. Up to this point the kit is a clear 10 on my wow scale and I'm not that easy to excite. Cheers Rob
-
Dragon Panther G late- quick build (?)
DocRob replied to BlrwestSiR's topic in LSM 1/35 and Larger Work In Progress
Looking superb, these Dragon Panthers are great kits, once you decided on the correct optional parts and after painting the wheels, the fun begins, except -tracks- . I guess yours is magic tracked. I built one years ago with steel wheels and have another late G in stash accompanied by a G2 Jagdpanther, but as good as Magic tracks are, I use metal ones on a panther, giving the visibility.. Will you enter it for the D-Day GB, the pace you have? Cheers Rob