GazzaS
-
Posts
6,396 -
Joined
-
Last visited
Content Type
Profiles
Forums
Events
Gallery
Everything posted by GazzaS
-
Rog... I'm talking about holes that could have been made with a 1/35 scale152mm gun. Not about blemishes that can be fixed with a lick of putty.
-

ICM A-26B completed
GazzaS replied to JohnB's topic in LSM 1/32 and Larger Aircraft Ready for Inspection
Another great one, JohnnyB! -
Nice Mustang... love the days when we didn't worry about sensors.
- 2,036 replies
-
- 3
-

-
- car related stuff
- anything about cars
- (and 6 more)
-
Rog, Check the mouldings on the turret of your Tiger. Particularly on the turret halves around the trunnions and escape hatch. There have been reports on facebook about bad workmanship.
-
Short Sunderland MkII
GazzaS replied to ThomasProbert's topic in LSM 1/35 and Larger Work In Progress
I keep hoping that there is another remedy other than another application of CA.... but I guess that's it. -
Atlas Cheetah E Scaleworx Conversion
GazzaS replied to GusMac's topic in LSM 1/35 and Larger Work In Progress
Looks sweet, Gus! -
Takom Panzerkampfwagen I 1/16 scale... with figure
GazzaS replied to GazzaS's topic in LSM 1/35 and Larger Work In Progress
Thank you, Kai. The thing about oils, is that you can control what your effect will look like, and have time to add to, remove, or change before they dry. Pigments on the other hand are dependent upon light, and harder to manipulate. White pigment is especially undependable. I've given up on them, except to tint earth effects. Thank you Peter. The real question is: "Where to stop?" -
Takom Panzerkampfwagen I 1/16 scale... with figure
GazzaS replied to GazzaS's topic in LSM 1/35 and Larger Work In Progress
Thank you all for the great and positive responses. Today I only achieved the second layer of oil dust:


-
Israeli Mirage III C with Atar9C
GazzaS replied to Kaireckstadt's topic in LSM 1/35 and Larger Work In Progress
Certainly looks the part, Kai! -
Mengnut Wings Fokker Dr. 1
GazzaS replied to Wolf Buddee's topic in LSM 1/35 and Larger Work In Progress
Some nice mods, Wolf. I don't think I've ever had the pleasure of watching a complete build by you. Looks like it should be interesting. -
Bronco 1/35 Type XXIII U-boot
GazzaS replied to BlrwestSiR's topic in LSM 1/35 and Larger Work In Progress
It's hard to change brands. I've only in the last two years added two brands that I'm working into my builds. I still rely a lot on Tamiya. -
Takom Panzerkampfwagen I 1/16 scale... with figure
GazzaS replied to GazzaS's topic in LSM 1/35 and Larger Work In Progress
Thank you, Peter. I fear I'll redo the base... it's kinda driving me crazy. Thank you Kai. Oil paints, my friend. -
Takom Panzerkampfwagen I 1/16 scale... with figure
GazzaS replied to GazzaS's topic in LSM 1/35 and Larger Work In Progress
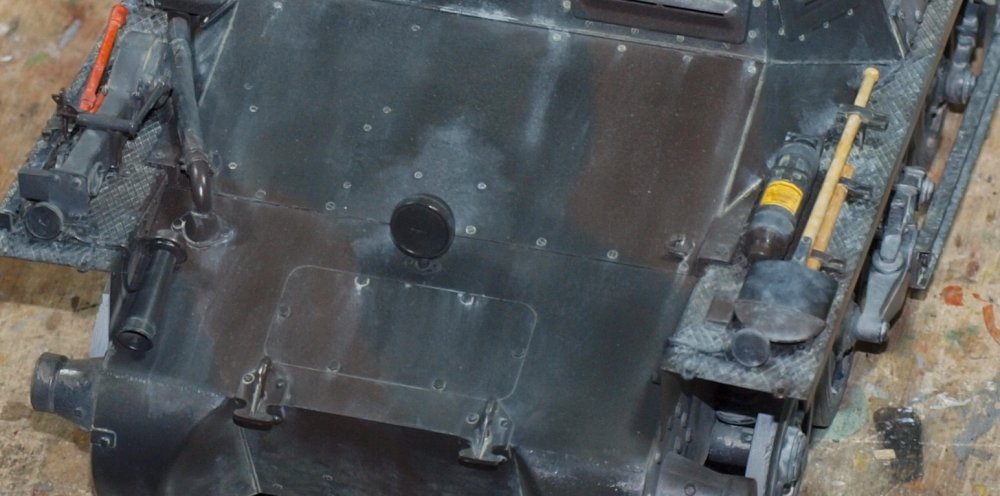
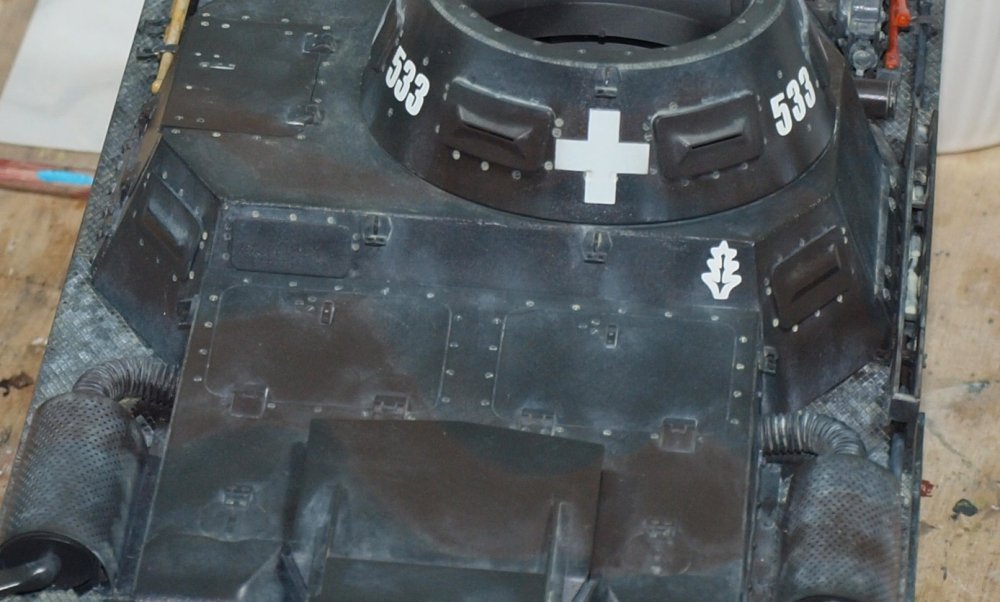
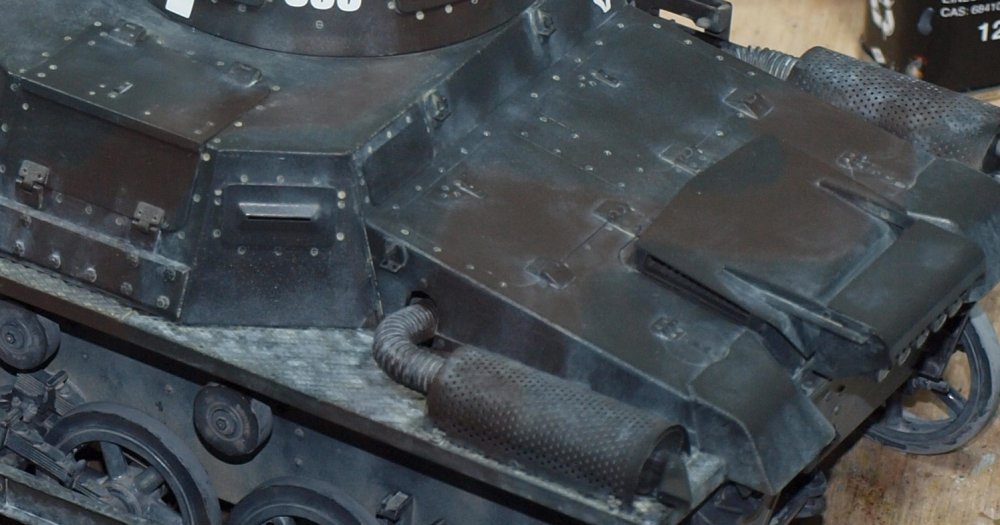
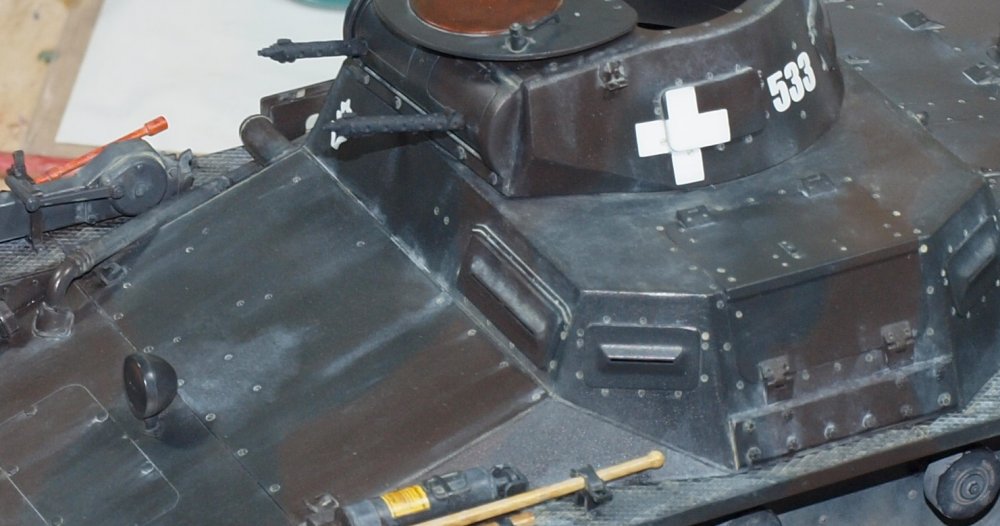
Thank you Rob! Speaking of dust... I started dusting the upper works today... These photos only show the first layer/coat/color of dust: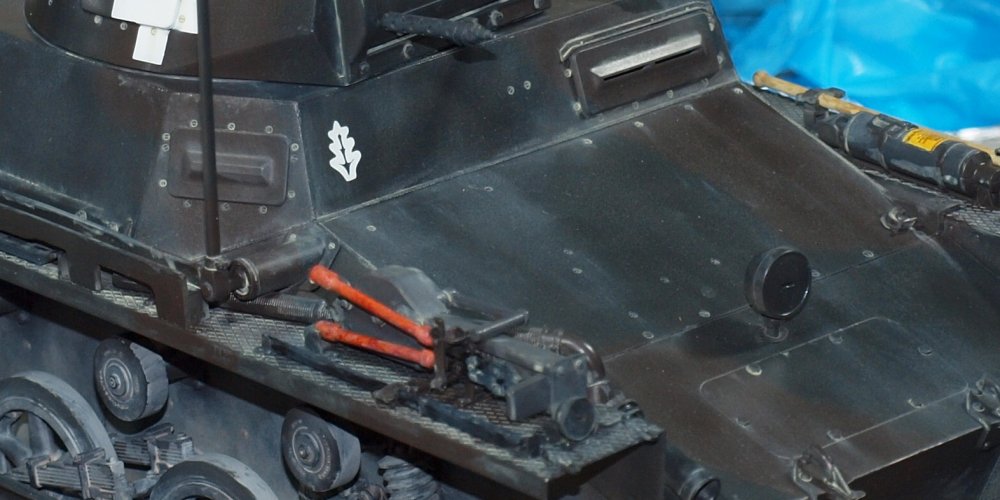


-
Mengnut Wings Fokker Dr. 1
GazzaS replied to Wolf Buddee's topic in LSM 1/35 and Larger Work In Progress
Looking forward to this one, Wolf! I have two in the stash. The engine looks nice. -
Bronco 1/35 Type XXIII U-boot
GazzaS replied to BlrwestSiR's topic in LSM 1/35 and Larger Work In Progress
Looking good, Carl! -
Ferrari 330P4 Open top 24Hrs Daytona 1967
GazzaS replied to mark31's topic in LSM 1/35 and Larger Work In Progress
Sharp work, Mark! -
German Panzer IV Ausf H
GazzaS replied to Daniel_Roxy's topic in LSM 1/35 and Larger Work In Progress
Nice work. Do you have access to an airbrush? -
Hah... thank you! I use Bob's Buckles for my WWI rigging and never thought of using them this way. Great tip!
-
Takom Panzerkampfwagen I 1/16 scale... with figure
GazzaS replied to GazzaS's topic in LSM 1/35 and Larger Work In Progress
Thank you, Kai! I only have speed because I am on holidays. I should have much more done... but I have lazy times, too. I take a month off every year to mentally escape obligation and the alarm clock. -
Israeli Mirage III C with Atar9C
GazzaS replied to Kaireckstadt's topic in LSM 1/35 and Larger Work In Progress
You did a fine job on the Lanc, Kai. I have every faith in your abilities! -
Takom Panzerkampfwagen I 1/16 scale... with figure
GazzaS replied to GazzaS's topic in LSM 1/35 and Larger Work In Progress
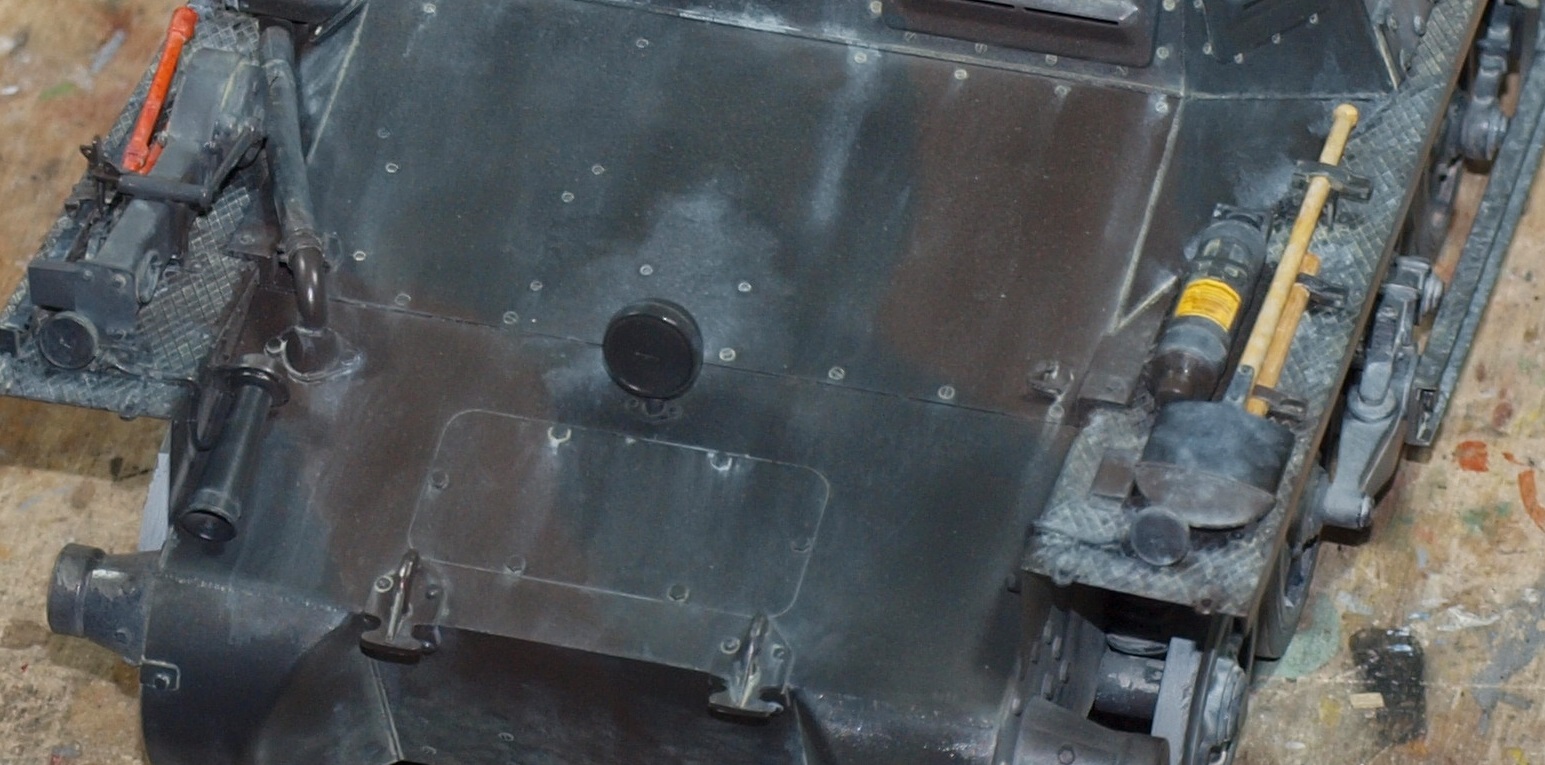
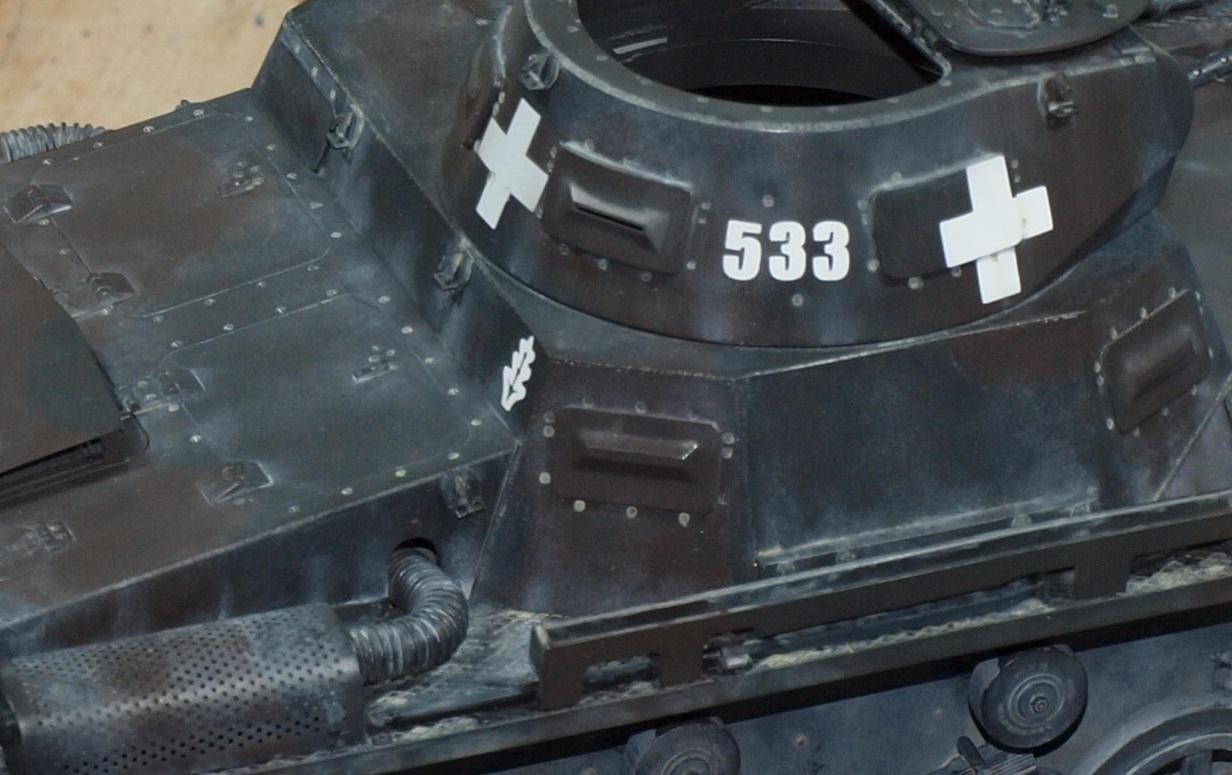
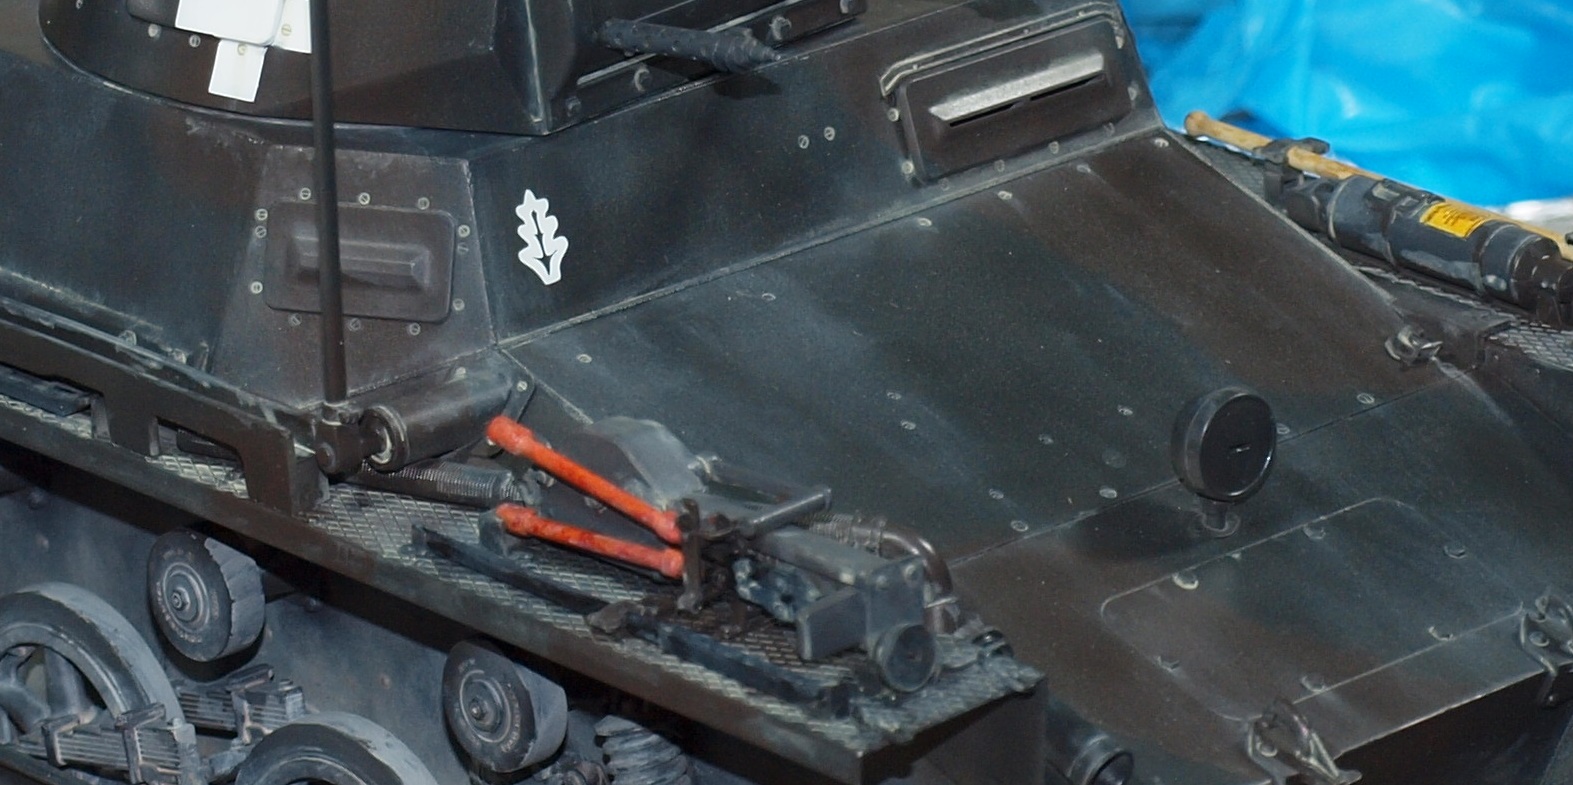
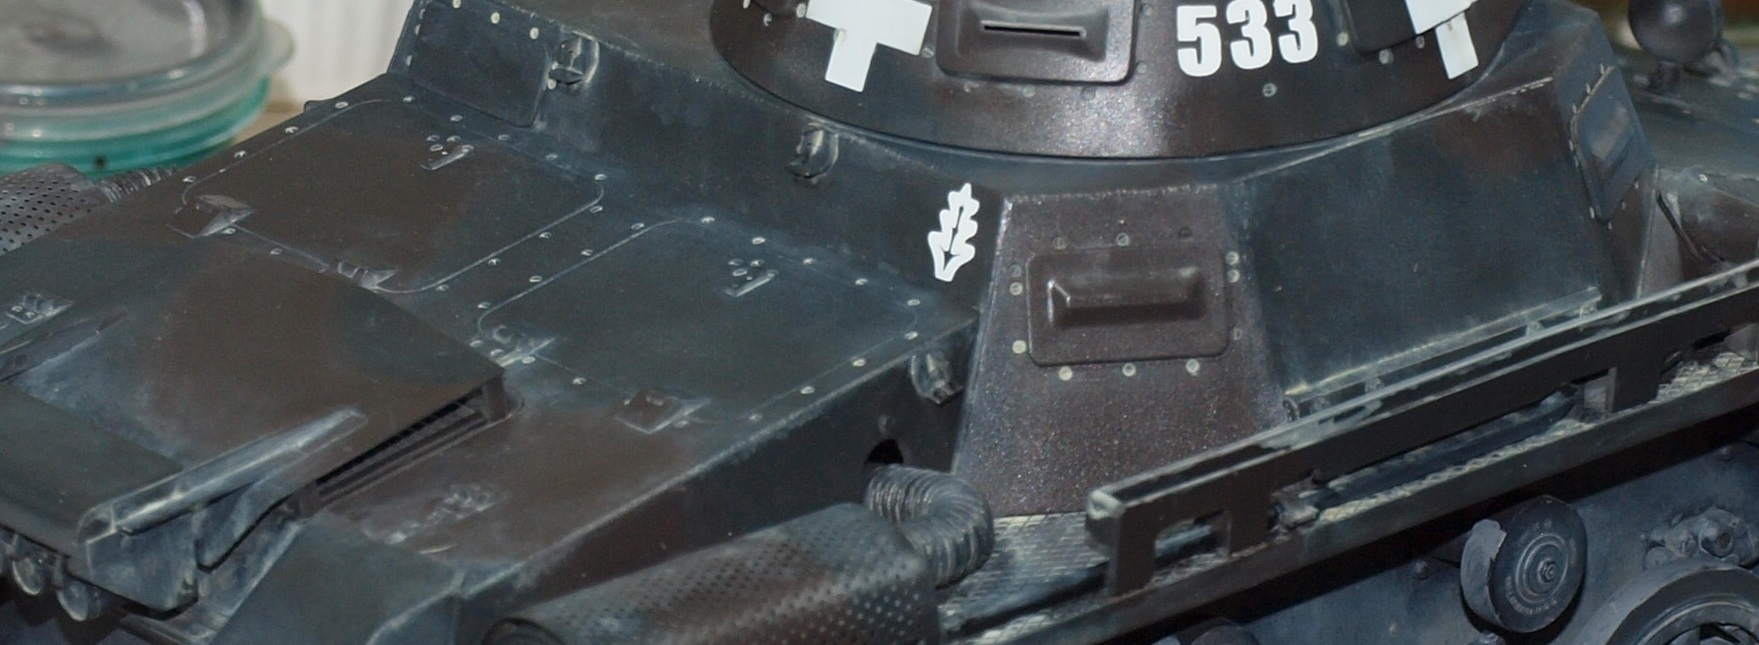
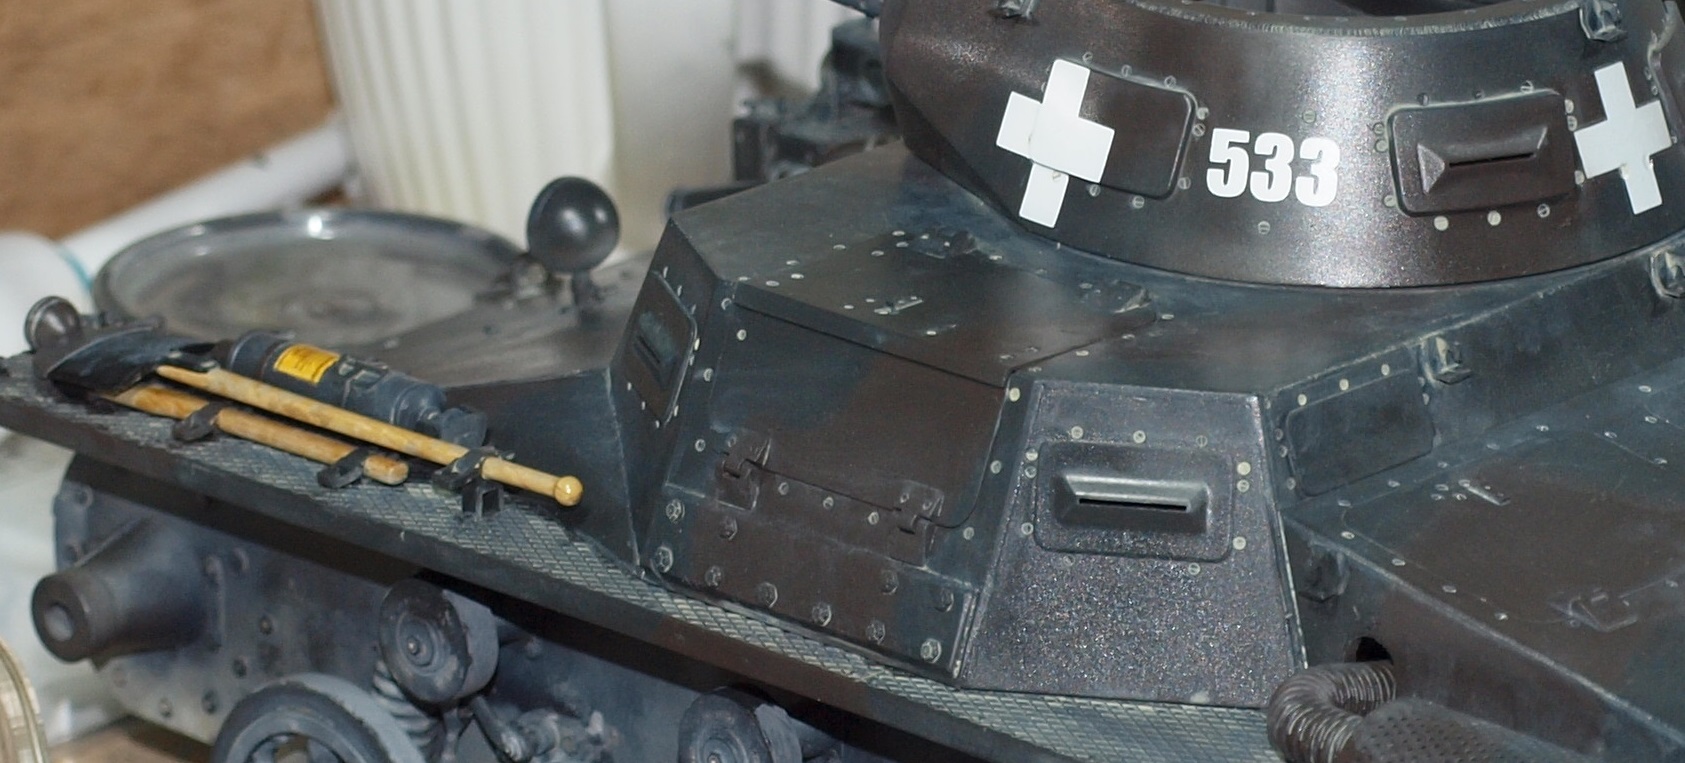
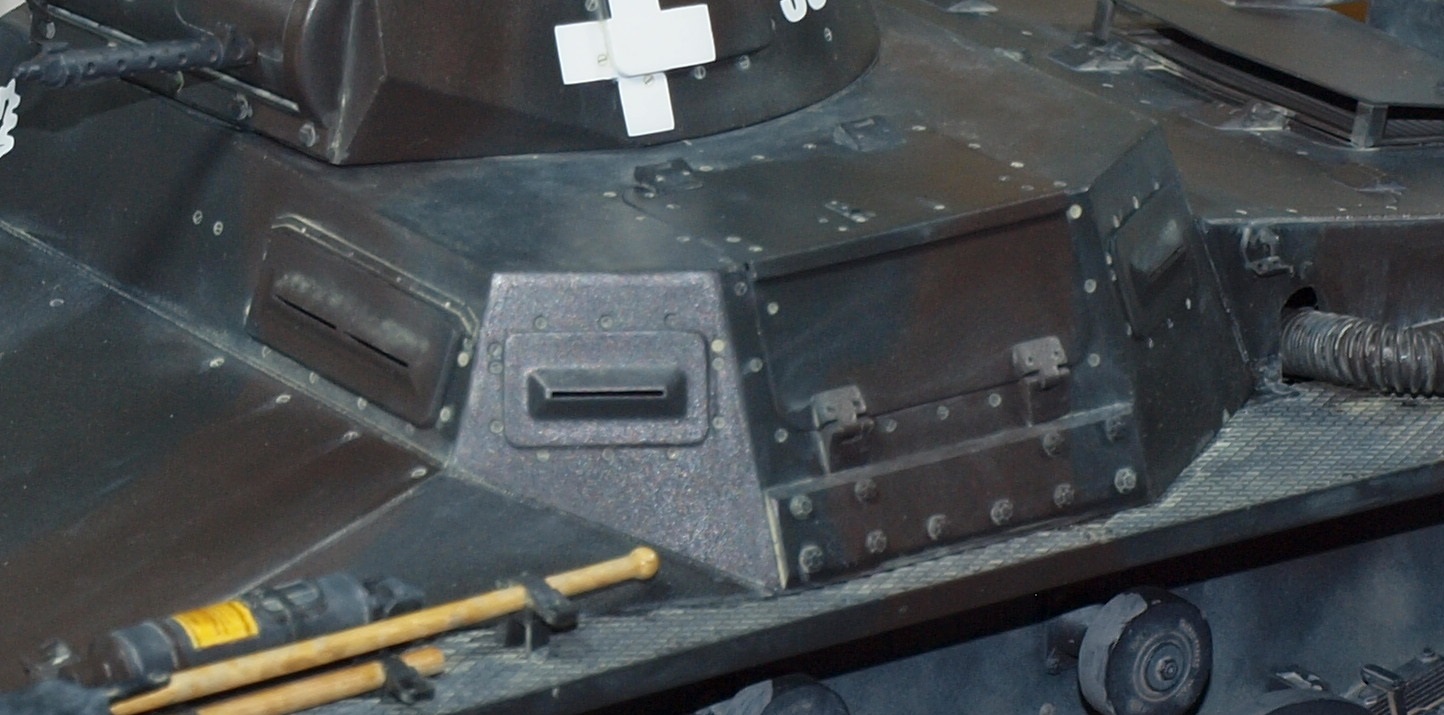
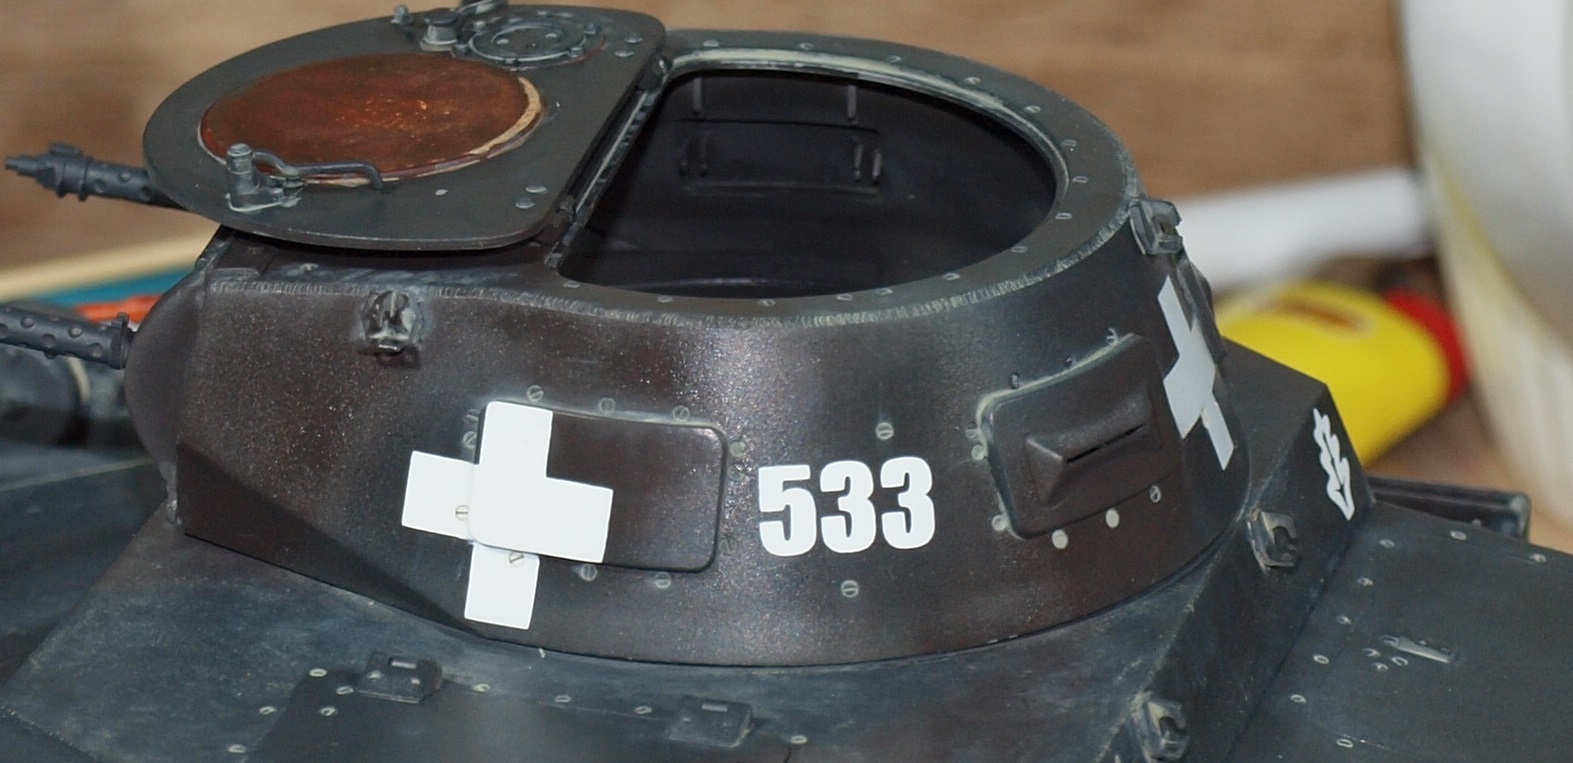
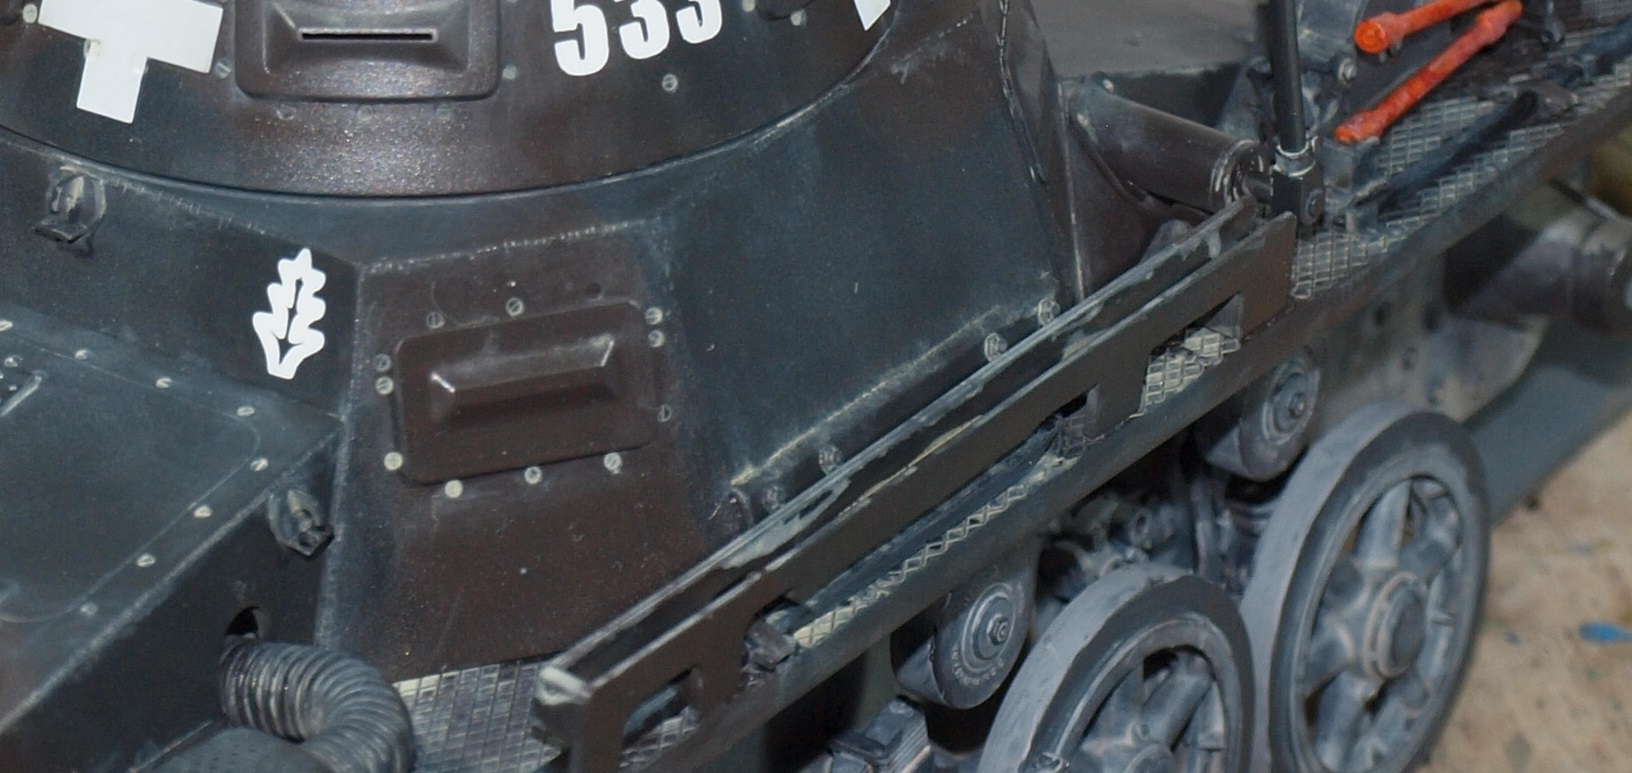
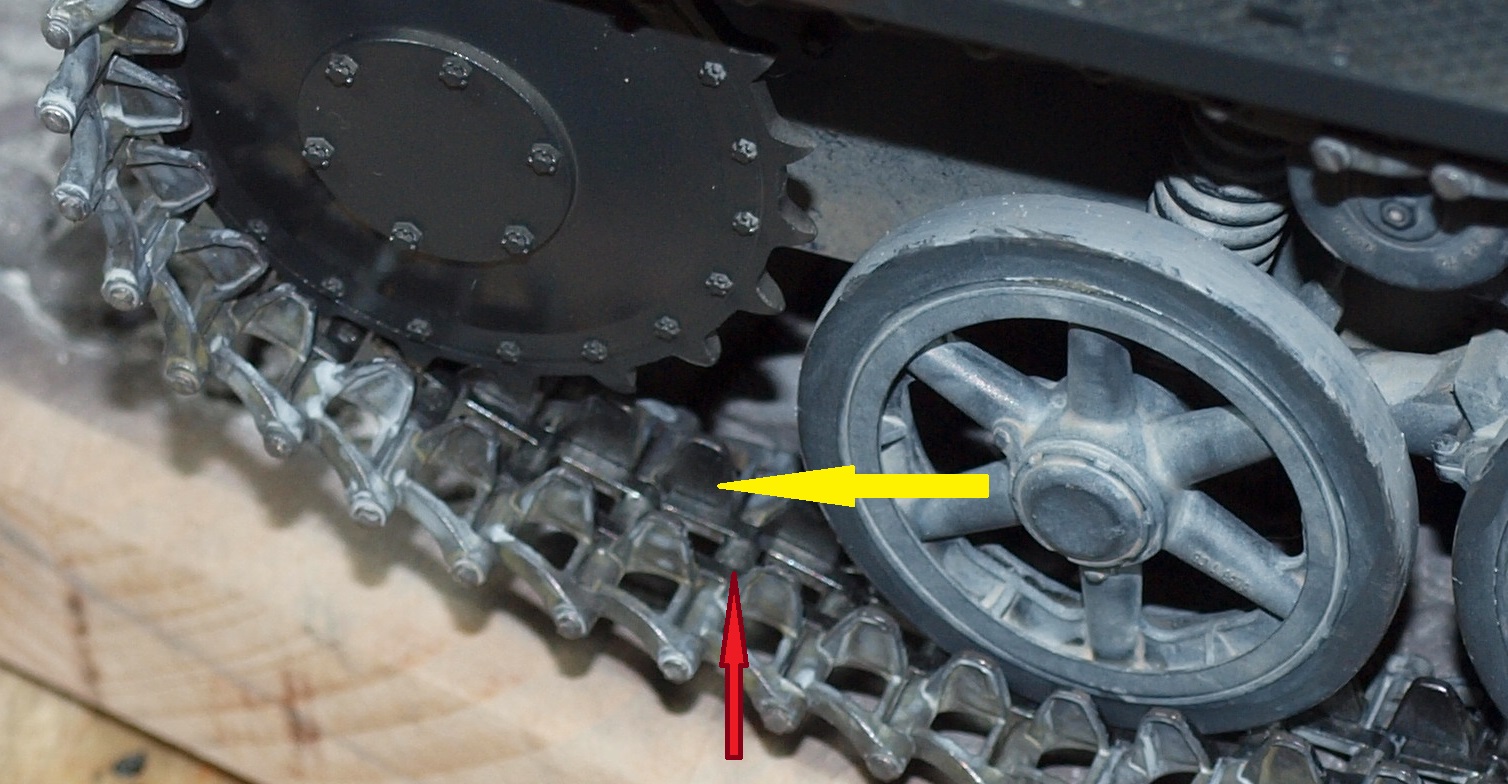
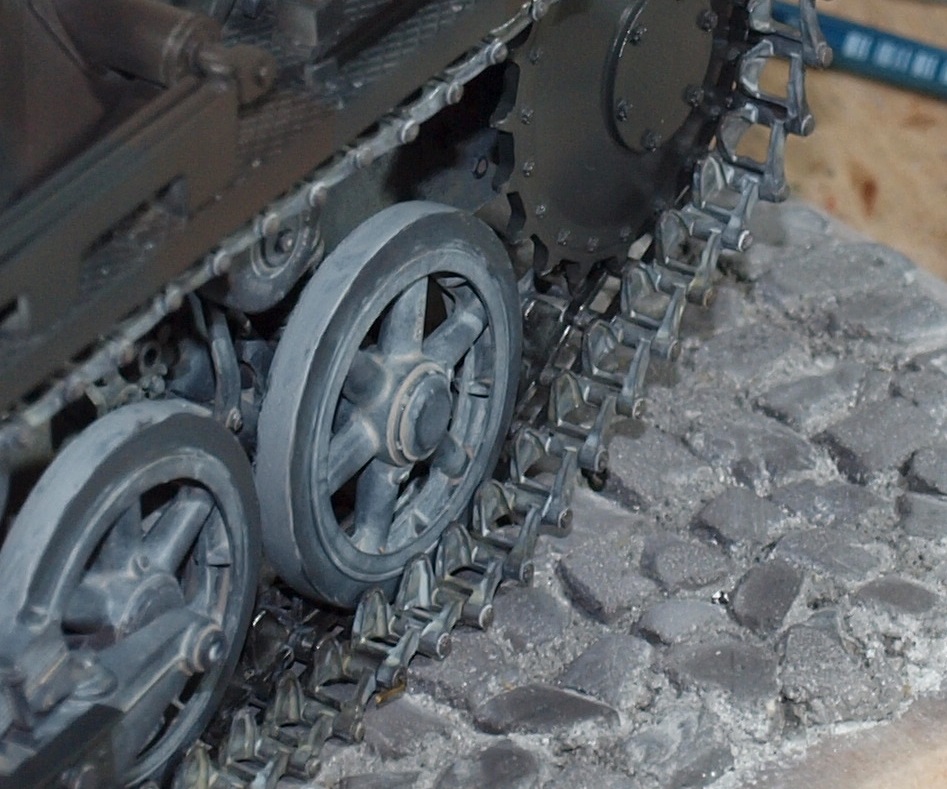
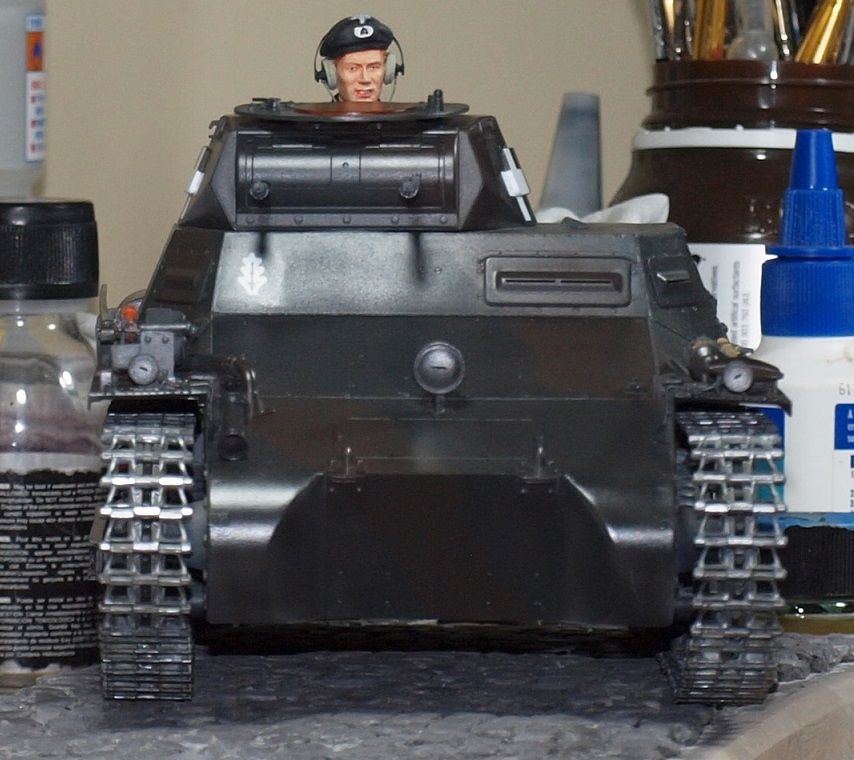
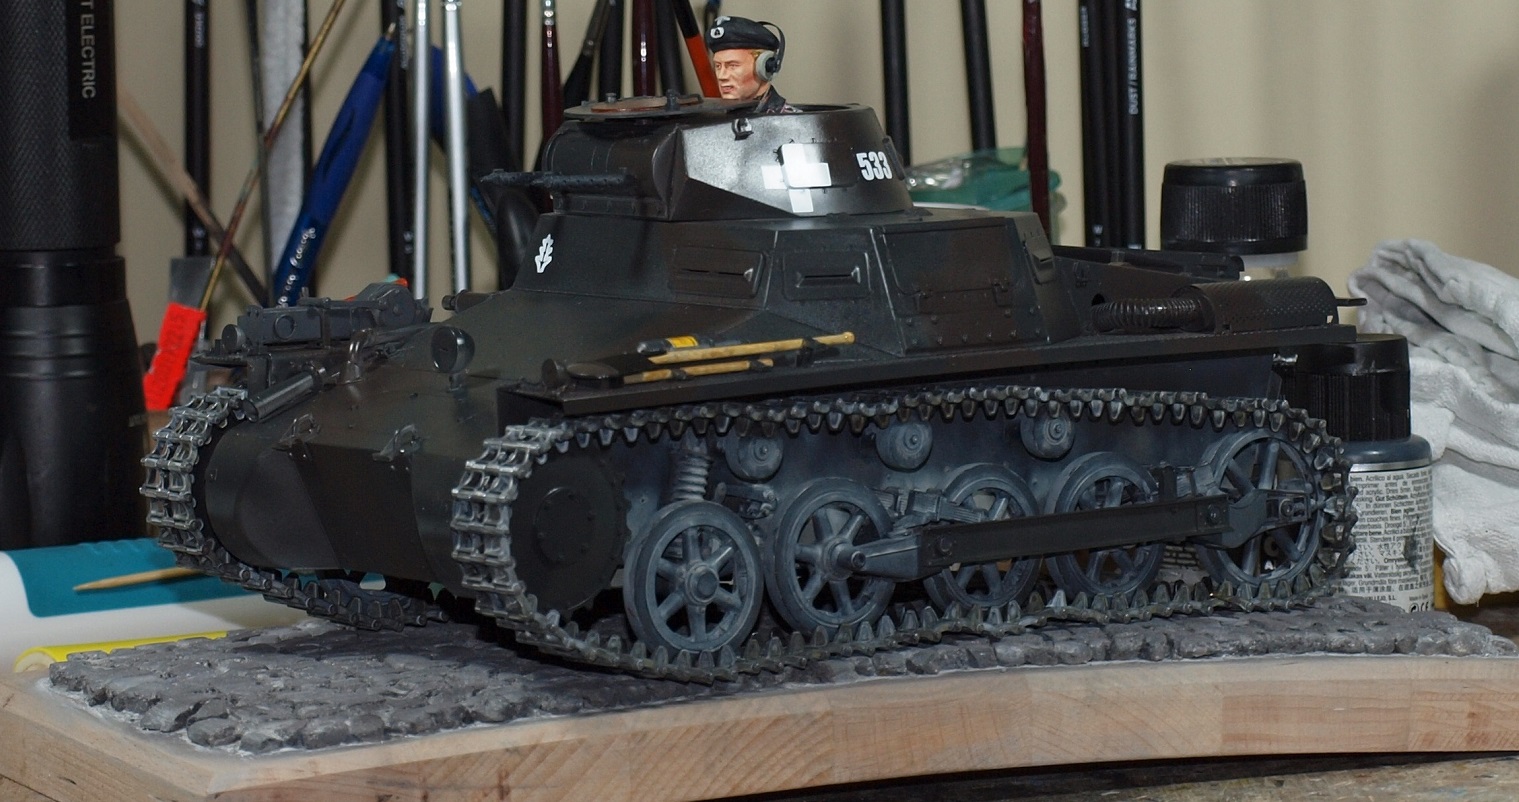
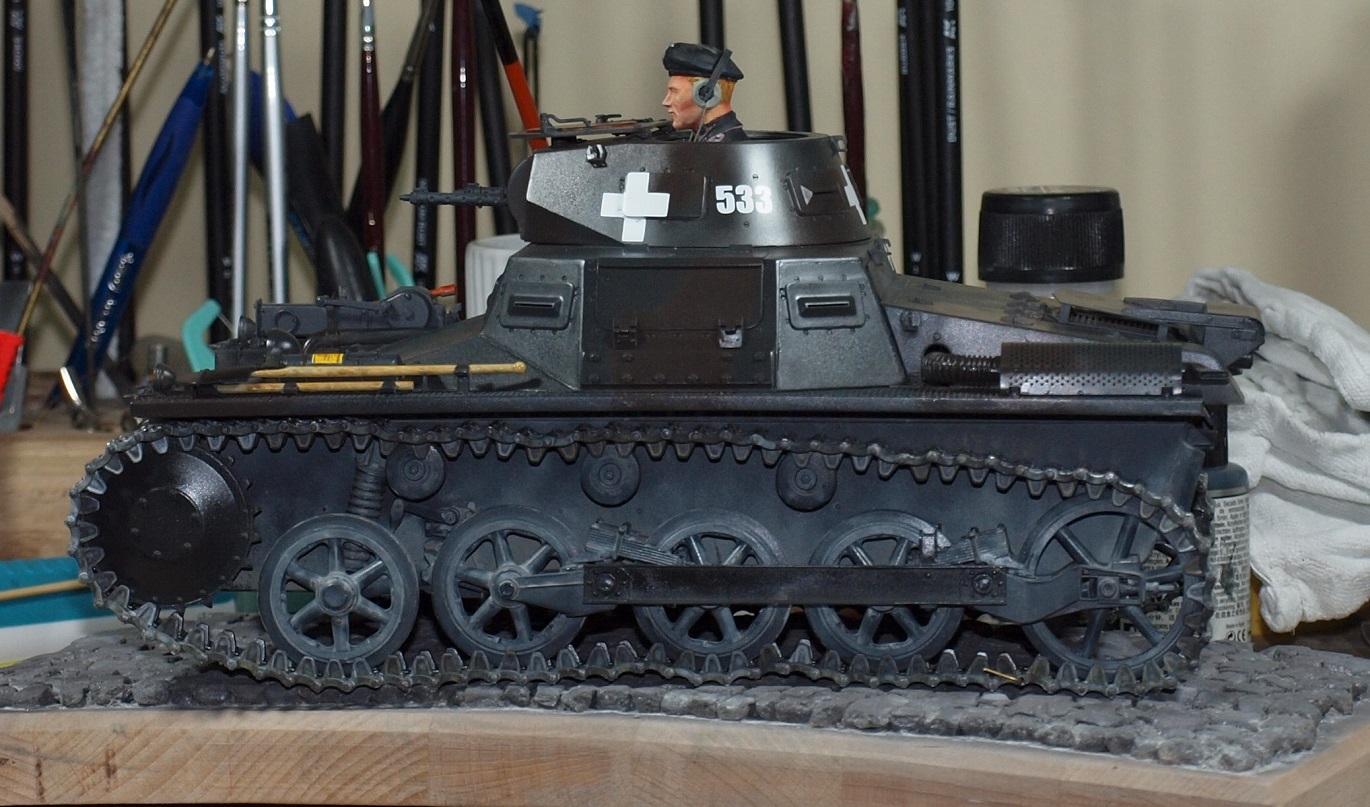
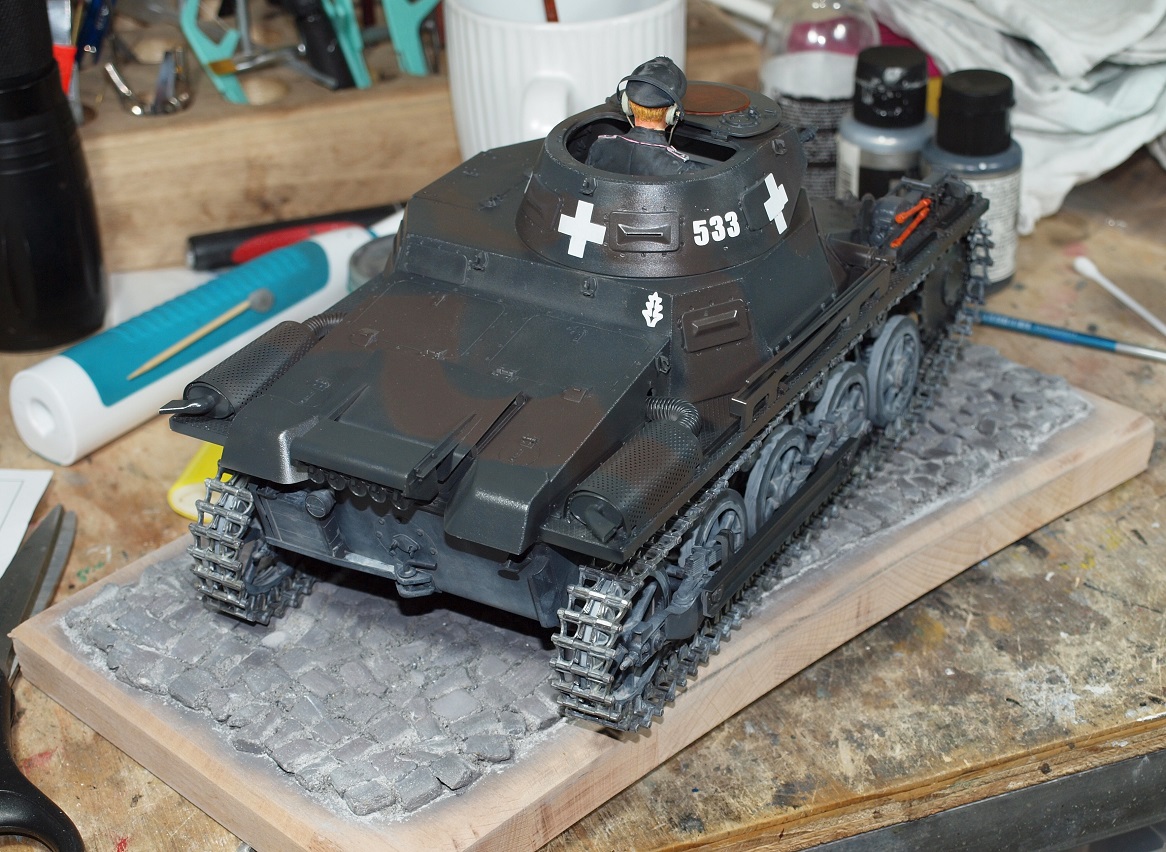
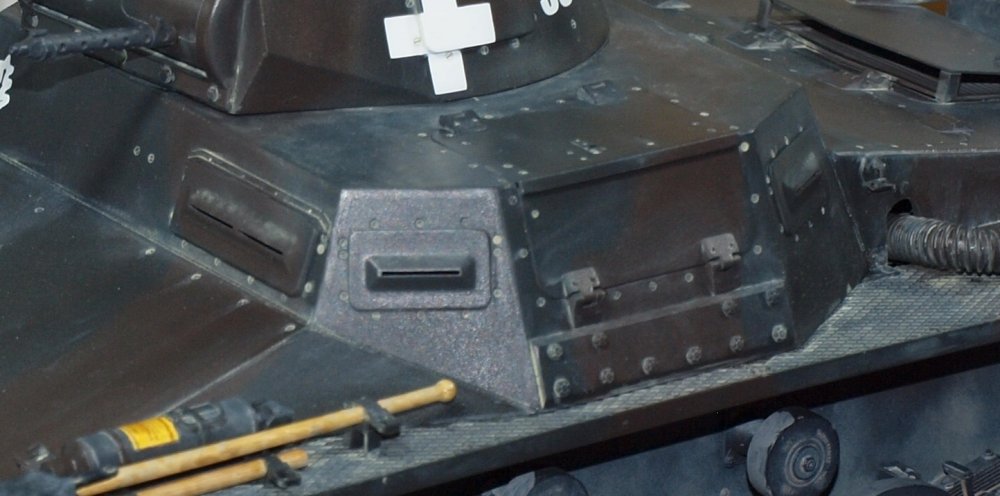
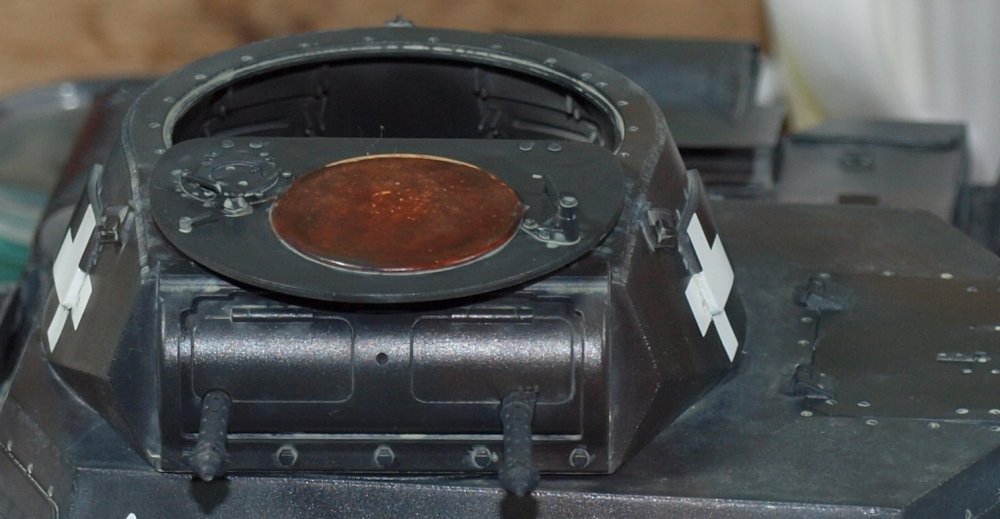
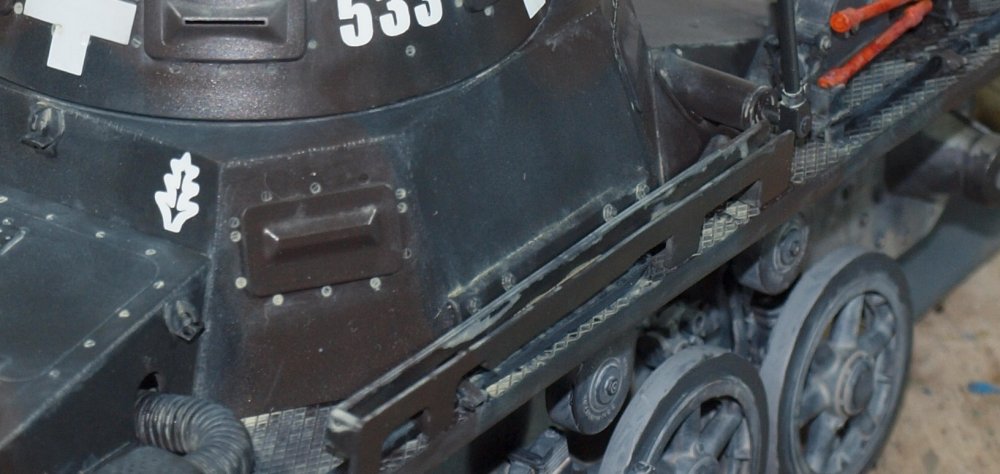
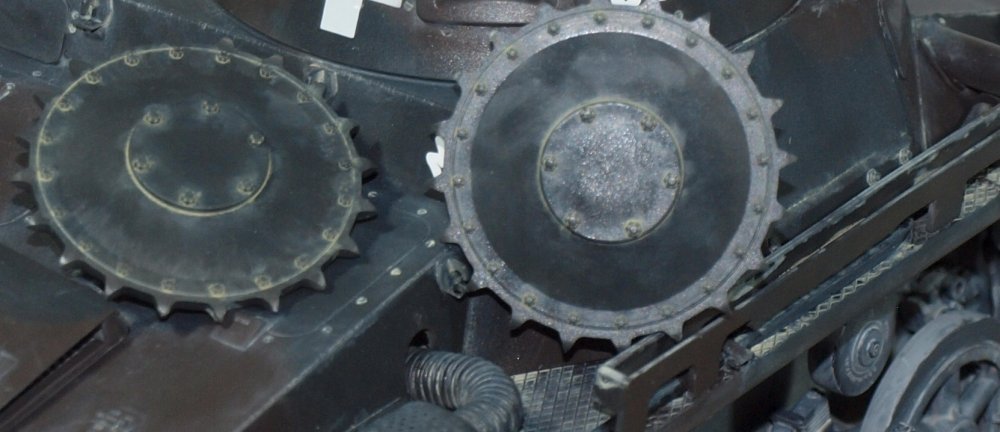
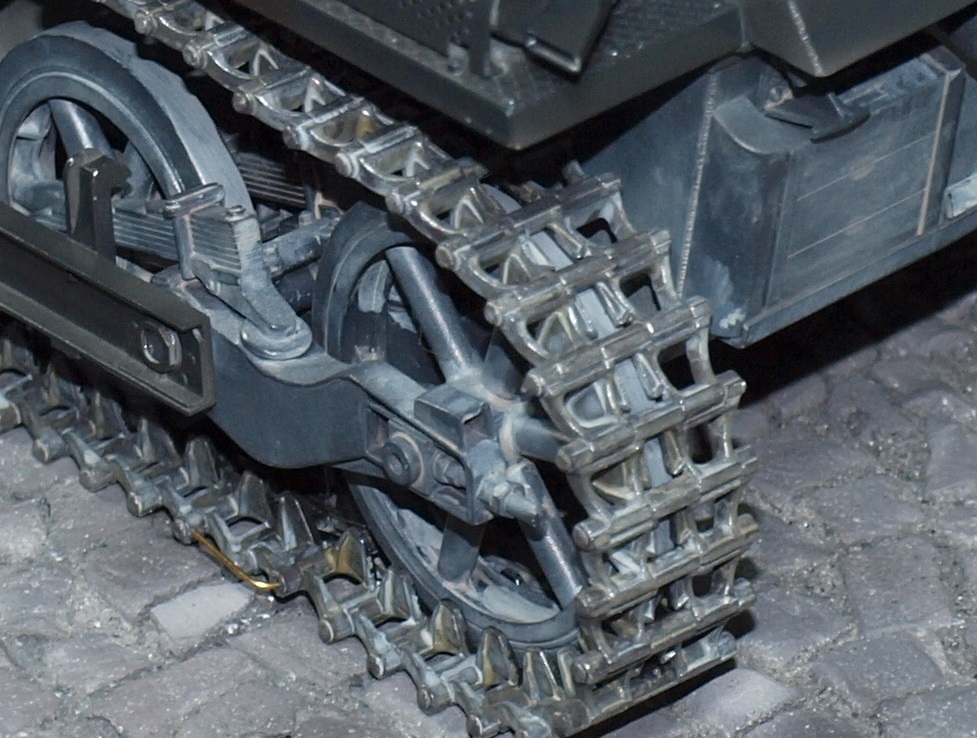
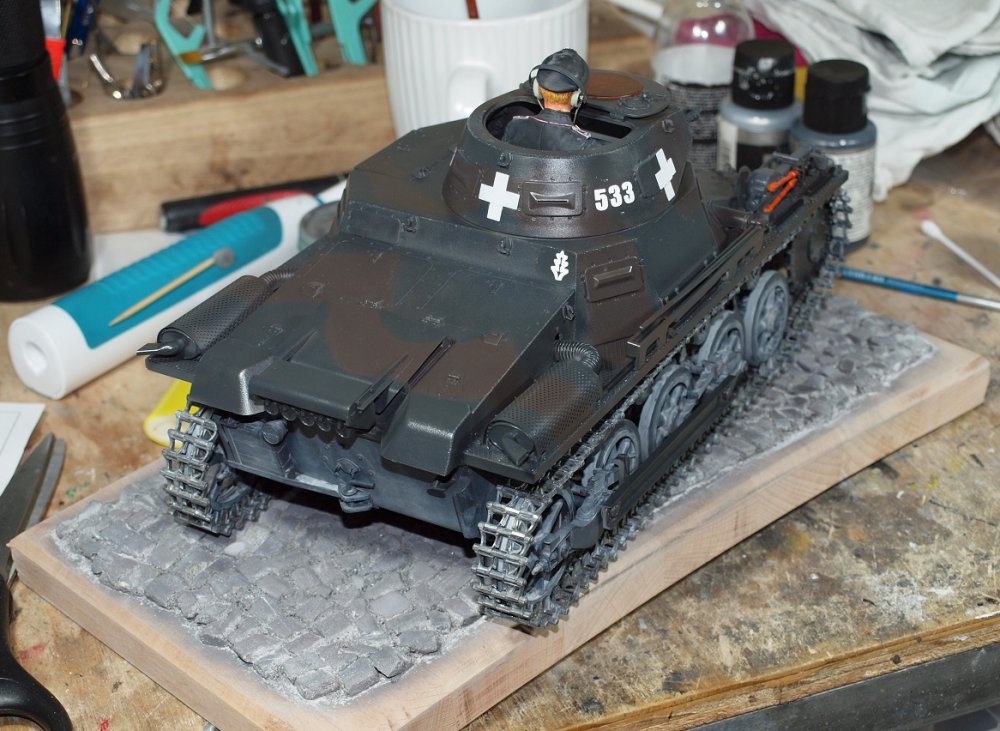
Well.... there's more. Despite watching 3 or more hours of modelling videos looking for informative as well as entertaining... I made some progress. I gloss coated the upper hull and turret, painted the cobblestones, grouted them with a mixture of poly filler and gray pigments, and worked on the tracks with acrylic paints. Although we're used to seeing muddied tracks from the Eastern Front, much of the time, tanks were on the roads. Road speeds were faster, and the bridges were on roads themselves. One of the failings of the German plan that led to the Battle of the Bulge, was that on the secondary phase, they were supposed to drive northwards whilst many of the roads trended more east to west. Walter Schuck, Luftwaffe Pilot wrote in his biography something to the effect that the pilots followed the roads to avoid getting lost... that even the vast number of aircraft wrecks were to be found along those same roads. For those reasons, I've elected to put the panzer on a road and weather the tracks appropriately. So, throughout the pics you will see shiny metal facets. The same facets you've seen on a hundred documentaries. Areas of blue steel where rubber has scrubbed away dirt and oxidation (red arrow), and dust and areas where the sprockets have polished the metal white (yellow arrow). Tomorrow, hopefully I will use brown and blue washes to make the dark steel look more steel like. As you can see above, there is an area of contact between the guide horns and the metal parts of the road wheels. On some historical photos you can actually see the rims polished to a high sheen. I'm still trying to reconcile myself to trying to make perfect, shiny metal circles, or leave them alone. I know that there are some who dislike the idea of all of that white metal... but if you look at pics... and watch documentaries... you cannot deny that they were there. Anyway... there is a fly in the ointment. My base warped. The water in the PVA glue caused warpage. It doesn't matter, really. ...chalk it up to experience. But here are a few pictures to show you how things will look: Despite the fact that the Pz I was the smallest of the German tanks, it had the largest commander's hatch. I didn't paint the interior a light color because I didn't want to highlight the lack of equipment in there. Happy Modelling!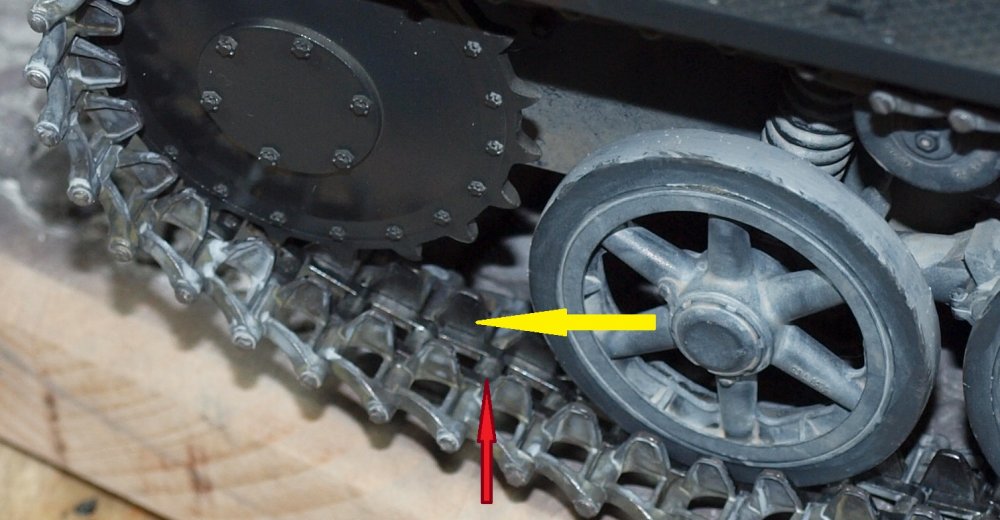


-
Takom Panzerkampfwagen I 1/16 scale... with figure
GazzaS replied to GazzaS's topic in LSM 1/35 and Larger Work In Progress
Thank you, Harv! -
Takom Panzerkampfwagen I 1/16 scale... with figure
GazzaS replied to GazzaS's topic in LSM 1/35 and Larger Work In Progress
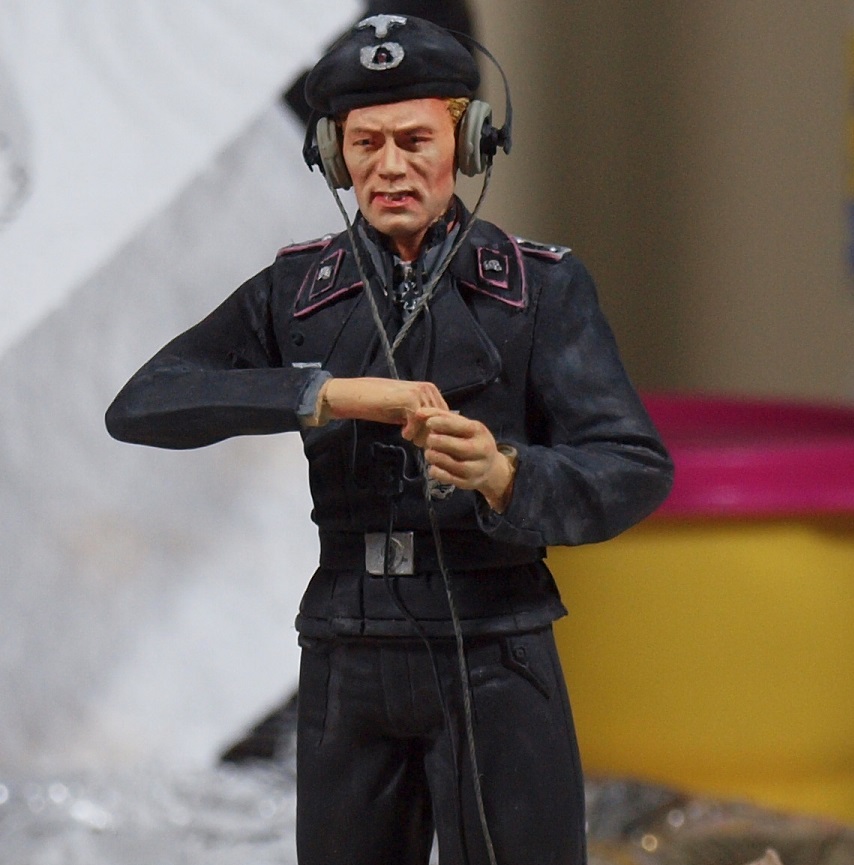
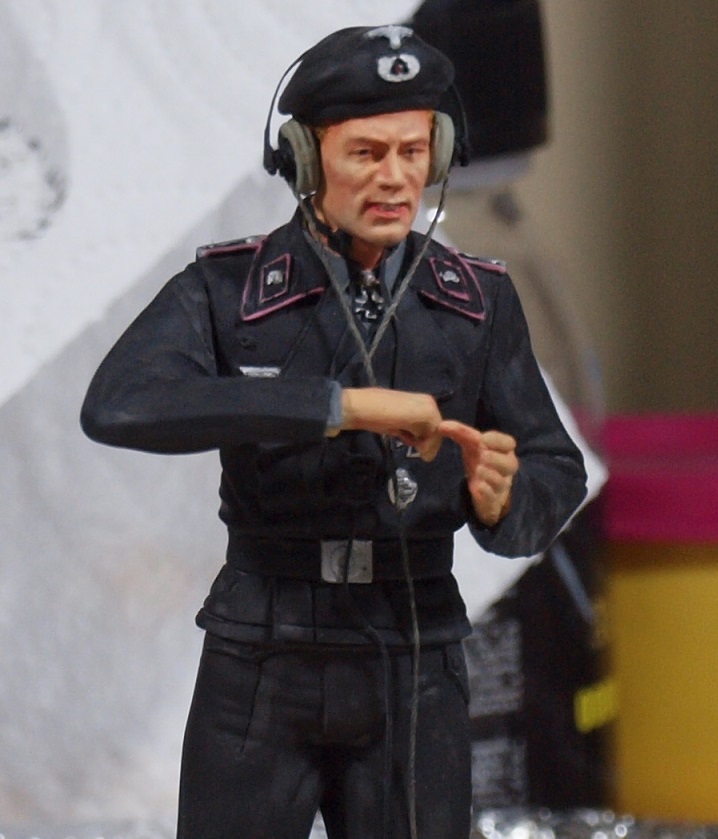
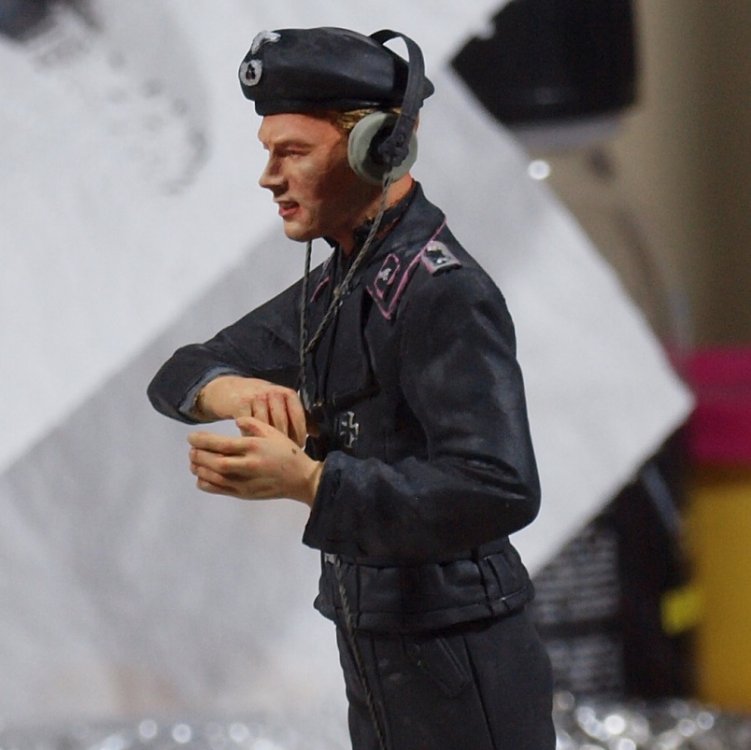
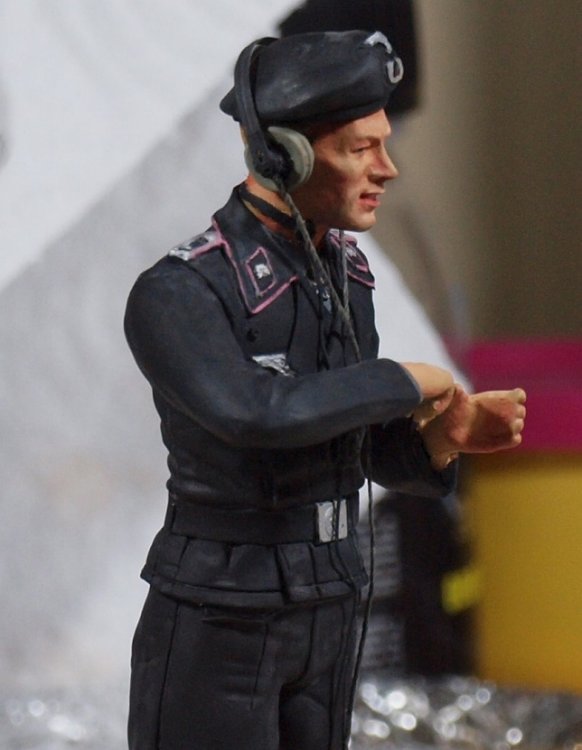
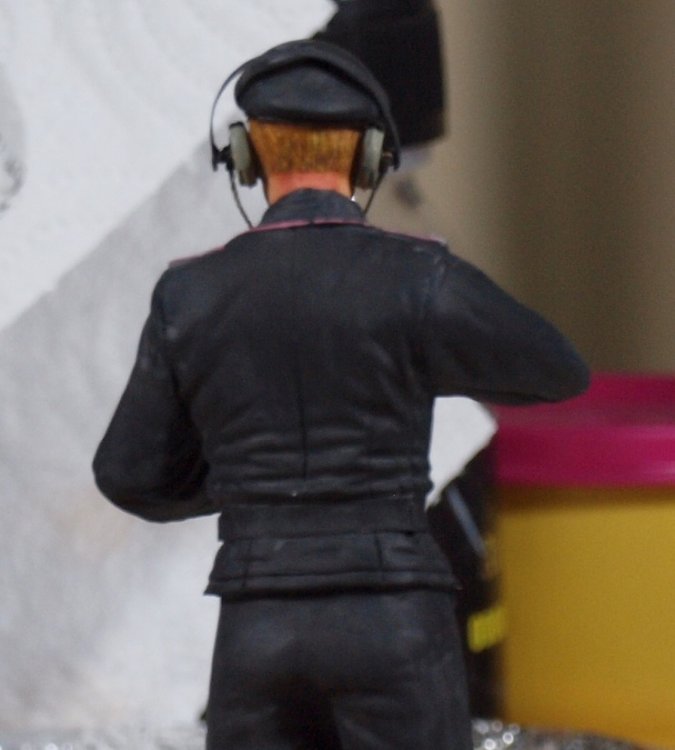
Herr Panzer Kommandant is matte coated... and therefor... done!

-
Israeli Mirage III C with Atar9C
GazzaS replied to Kaireckstadt's topic in LSM 1/35 and Larger Work In Progress
I like the look, Kai. Detailed but not contrived. -
Nice looking work, Frank!