GazzaS
-
Posts
6,396 -
Joined
-
Last visited
Content Type
Profiles
Forums
Events
Gallery
Everything posted by GazzaS
-

Short Sunderland MkII
GazzaS replied to ThomasProbert's topic in LSM 1/35 and Larger Work In Progress
It is great work. And... I don;t know why, but when I'm scribing, the tool often chooses to make detours. -
Takom Panzerkampfwagen I 1/16 scale... with figure
GazzaS replied to GazzaS's topic in LSM 1/35 and Larger Work In Progress
Thank you, Kai. I've left Knight's Cross and Oak leaves in place. As well as the other decorations. Removing them cleanly would be too difficult and time consuming. Thank you, Peter. -
Takom Panzerkampfwagen I 1/16 scale... with figure
GazzaS replied to GazzaS's topic in LSM 1/35 and Larger Work In Progress
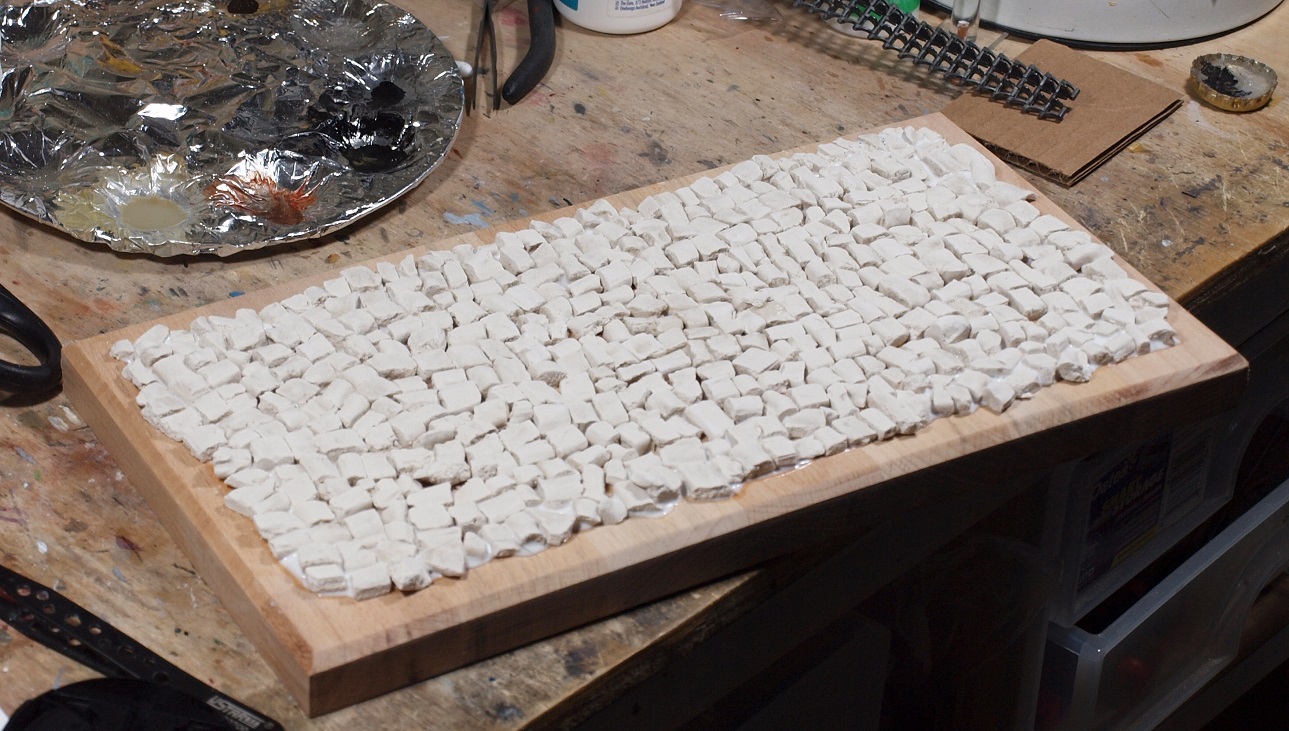
Merhaba, Efendis! Today I made a base for a friend who couldn't find one the size he needed. So, I decided to work on the base for my panzer. I decided to model a cobble stone road. I mixed some poly fille, poured it onto a sheet of baking paper, then scored it with a knife. Then, about an hour later I chopped it up with a knife which resulted in a lot of different sizes and shapes. I glued them to the wooden base with PVA... and they're drying. There are a few steps left before they're ready. The Tank will sit like this: Of course.... work continues on the Kommandant. I finished painting the uniform last night in various shades of dark gray, trying to bring out the details. Then, after letting him sit overnight, he got three black oil washes to unite the shades. Also, I did three dust washes on the tracks. Each dust wash was a different shade of dirty gray... but the pictures came out poorly. One problem with the figure... He's an early war guy and he's already got the Iron Cross 2nd Class, Wound badge, and Knight's Cross with oak leaves. And my research shows that the first Knights Cross with Oak leaves weren't awarded until 1940. Happy modelling!
-
What I'd like to find in my car...

- 2,036 replies
-
- 4
-

-

-
- car related stuff
- anything about cars
- (and 6 more)
-
Beautiful stuff, RichO!
-
1/16 "she's real fine my 359" big Pete
GazzaS replied to CrankyCrafstman's topic in LSM 1/35 and Larger Work In Progress
Impressive looking printed stuff, Ron. Love the hood ornament. I don;t think there is such a thing as a hood ornament that is too large. -
Gottfreid Weiroster Bf 109G6 R6 Revell 1/32
GazzaS replied to GazzaS's topic in LSM 1/35 and Larger Work In Progress
Thank you, Peter. I just don't feel much satisfaction doing cockpits. I rarely buy AM for them, and I'm usually disappointed by my results. There are others who seem to make them look beautiful and interesting. I'm hoping on this build that greater application will lead to greater satisfaction. But I'm definitely not looking forward to the PE seatbelts. -
Gottfreid Weiroster Bf 109G6 R6 Revell 1/32
GazzaS replied to GazzaS's topic in LSM 1/35 and Larger Work In Progress
Thank you, Kai. Luckily, this one landed on the desk, so I heard it. But once they hit the floor, it gets a lot harder. -
Gottfreid Weiroster Bf 109G6 R6 Revell 1/32
GazzaS replied to GazzaS's topic in LSM 1/35 and Larger Work In Progress
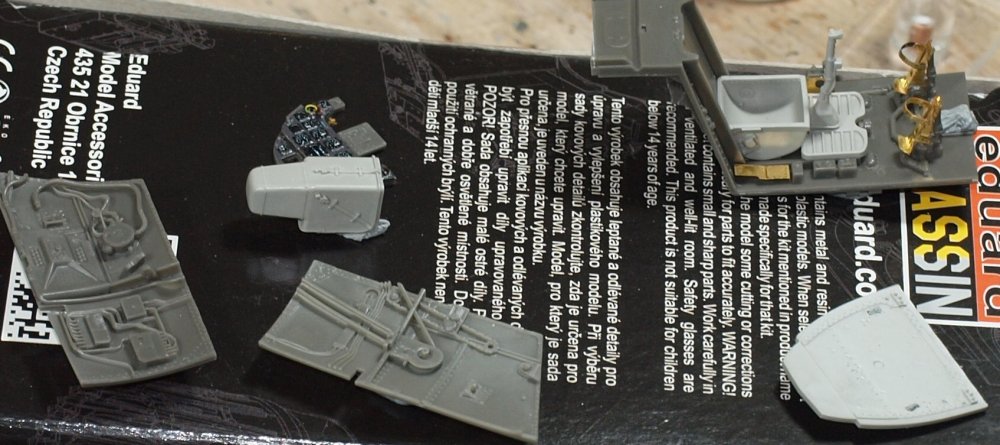
Welcome back, meine Herren! While I did a little work on the Panzer I today, both crewman and tank had paint that needed to settle. So... I started work on the cockpit of the 109. The Brassin set is quite comprehensive, with a colorful IP. I spent a lot of time folding and attaching an amazingly small amount of PE. One part even pinged off my tweezers but I heard it land on my bench. I picked it up only to realize that I had picked up the desiccated carcass of a tiny black ant. Fortunately I found it later. Had company for dinner, so my achievement for the day had to end there. Here are some very poor pics.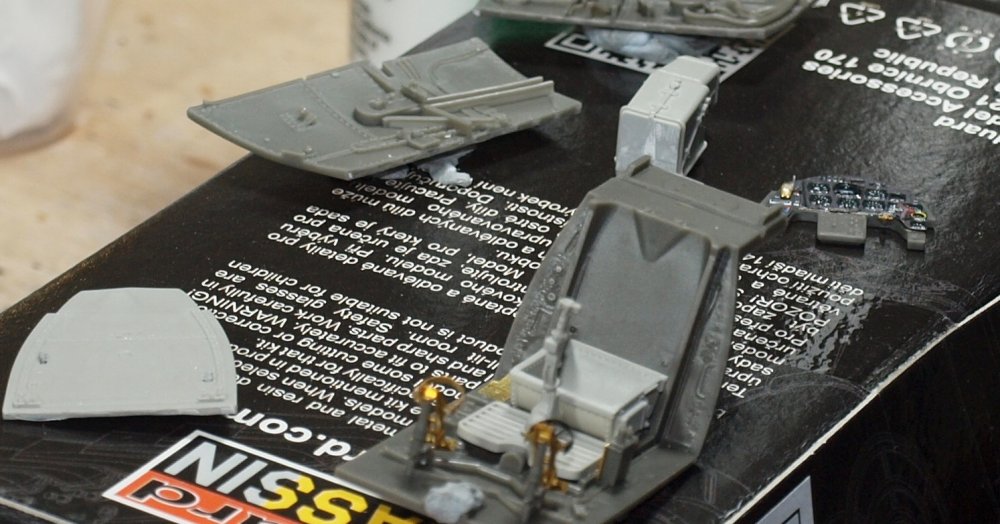
-
Takom Panzerkampfwagen I 1/16 scale... with figure
GazzaS replied to GazzaS's topic in LSM 1/35 and Larger Work In Progress
Thank you! I've always thought you a better painter than me, Peter. It's still a process of learning, and painting a a 1/16 figure that is well formed is a lot easier than trying to paint a 1/32 or smaller face. The well defined structures of the larger face basically tell you where to put the paint, and give you room to do so. The smaller face is the opposite and much harder. -
Atlas Cheetah E Scaleworx Conversion
GazzaS replied to GusMac's topic in LSM 1/35 and Larger Work In Progress
Looks nice. I like your plan... trying to spray yellow over blue or red... would be a nightmare. -
Takom Panzerkampfwagen I 1/16 scale... with figure
GazzaS replied to GazzaS's topic in LSM 1/35 and Larger Work In Progress
Thank you, Rob! A lot to think about... maybe too much. I can really only go with what evidence can be found. My colors are not far from color chips presented online to represent the period. The good thing is, that if I don't like the result, I can do the next model differently. -
Takom Panzerkampfwagen I 1/16 scale... with figure
GazzaS replied to GazzaS's topic in LSM 1/35 and Larger Work In Progress
Thank you, Kai! I'm quite happy with the face... as Uncle Nightshift says: "a great figure almost paints itself". -
Takom Panzerkampfwagen I 1/16 scale... with figure
GazzaS replied to GazzaS's topic in LSM 1/35 and Larger Work In Progress
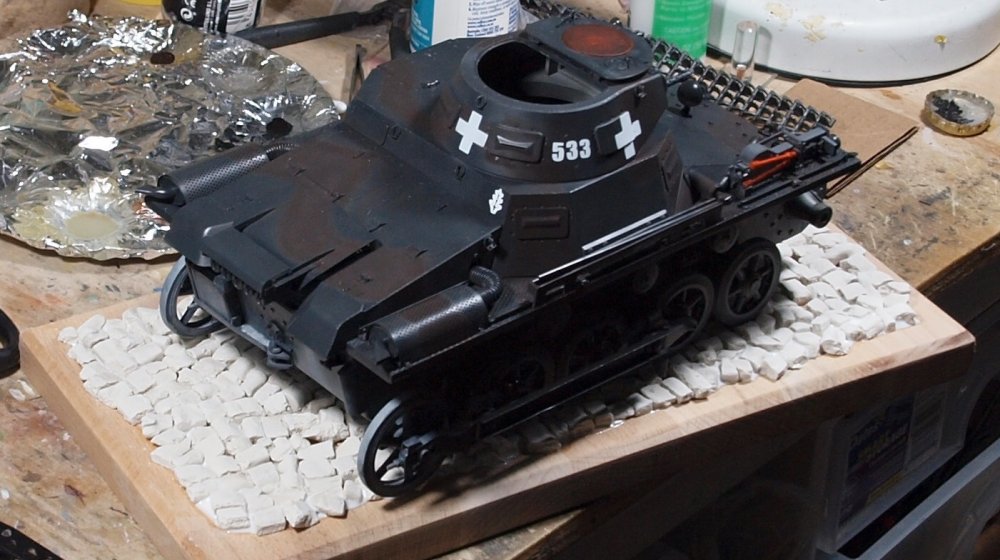
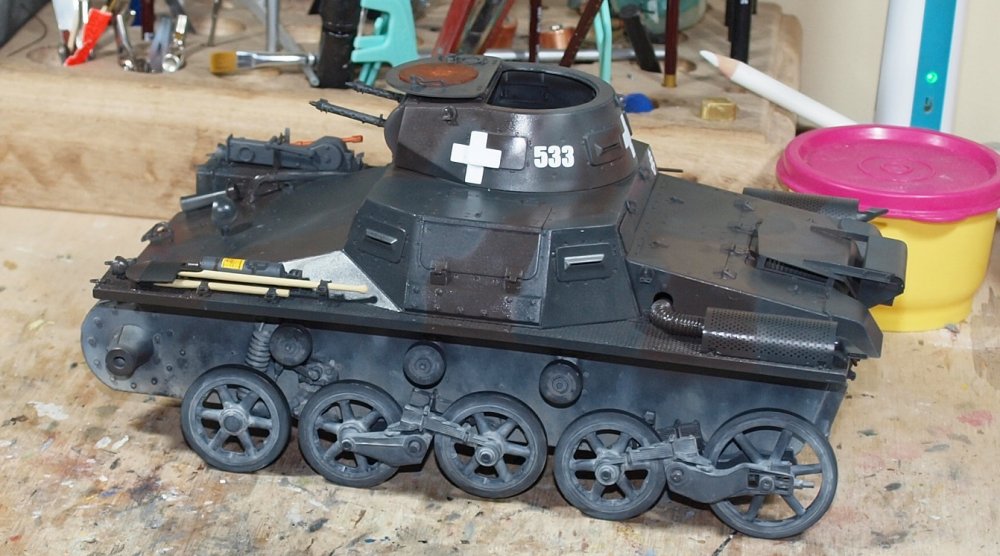
Buenos tardes! Face and detail painting... been struggling most of the day on it. Tomorrow, I'll do the wood detail on shovel and ax handle... then give it a clear coat to unify the paint surfaces on the tank. And I'll keep working on the figure. BTW...the flash makes the tank look lighter than it really is. I took a punt on the padded leather on the hatch being brown instead of black... that's my artistic license.
-
Looking pretty, John!
-
Israeli Mirage III C with Atar9C
GazzaS replied to Kaireckstadt's topic in LSM 1/35 and Larger Work In Progress
Wow! That is crazy pricing! I had to get an entire sprue from Airfix once. It was loose in a box with a little piece of bubblewrap. Fine broken parts that I had to replace with brass pins. But at least they didn't charge me since the sprue wasn't in the kit when I received it. -
Israeli Mirage III C with Atar9C
GazzaS replied to Kaireckstadt's topic in LSM 1/35 and Larger Work In Progress
Nice work on the pre-shading, Kai! -
Share how COVID-19 Quarantine has affected you.
GazzaS replied to 1to1scale's topic in General Discussion
See.... this is just madness. I'll bet the guy got the vaccination just so that he could travel... and now he is stuck in quarantine for two friggin weeks. I live in Queensland... And now it's like I dare not leave because I sure as hell don't want to pay for two weeks in hotel quarantine. -
Takom Panzerkampfwagen I 1/16 scale... with figure
GazzaS replied to GazzaS's topic in LSM 1/35 and Larger Work In Progress
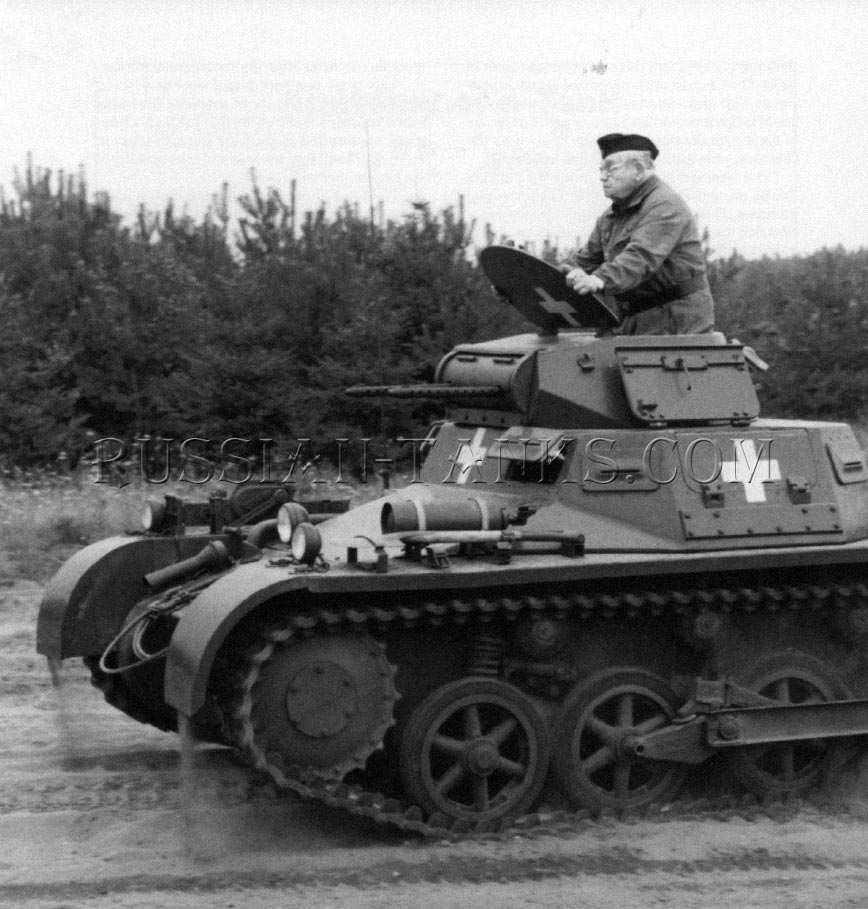
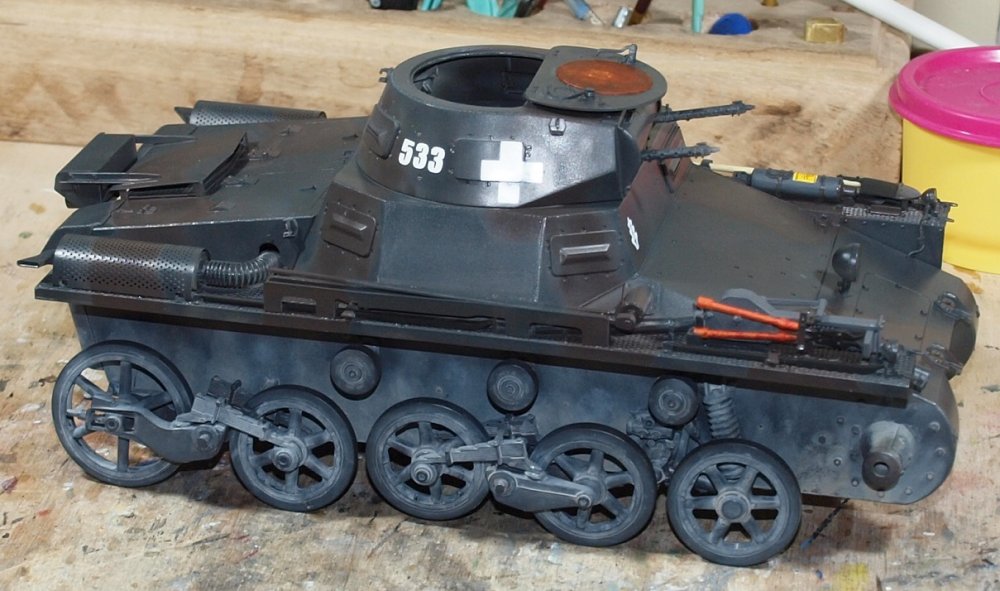
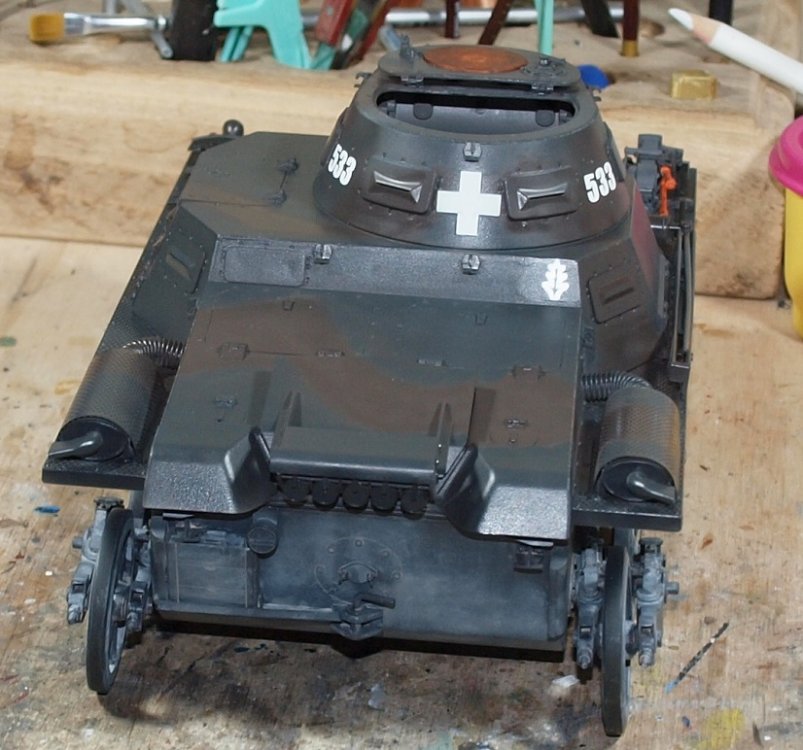
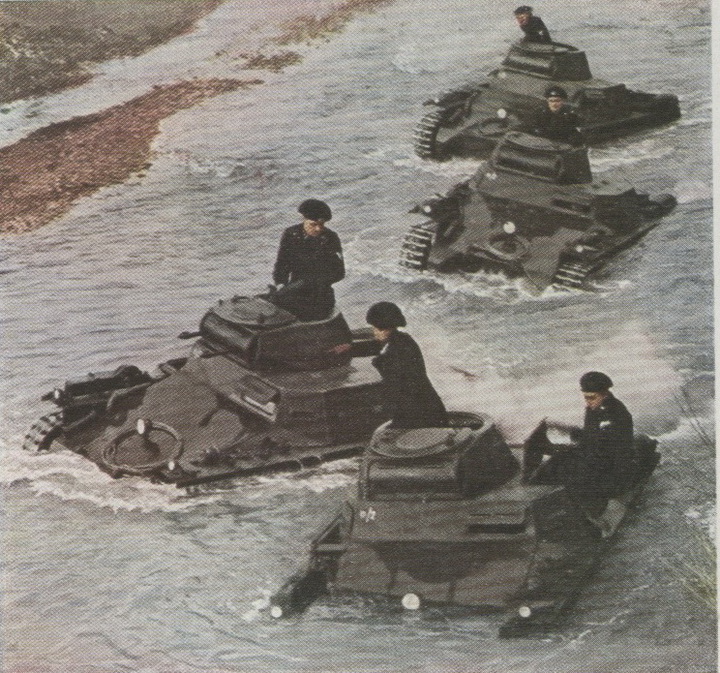
Anyway.... one step forwards, two steps back. This is a no-update update. 1. The figure. He is posed behind a vertical hatch.... Very t-34 ish. This is a problem. Because all of the photos in my books and online show only two possible positions. Either 3/4 open, like this: Or all the way open, like this: So, the hours I spent yesterday fiddle-farting around with the figure and hatch, looking for the perfect fit were wasted. So now... the figure will be buried deeper in the tank, with the hatch fully open. 2. The decals are thick, unresponsive to decal softener, and every bit of clear decal film sticks out like a pimple on the tip of your nose. ...so, I sanded them off, and made masks. I also primed and painted white areas for the new insignias... the paint is resting overnight. Speaking of the figure... I painted the red tones on his face today. I'll do the yellow and blue tones tomorrow. Anyway... Like Freddy Fender sang: "Wasted days and Wasted nights...." Hasta la Vista, Babies!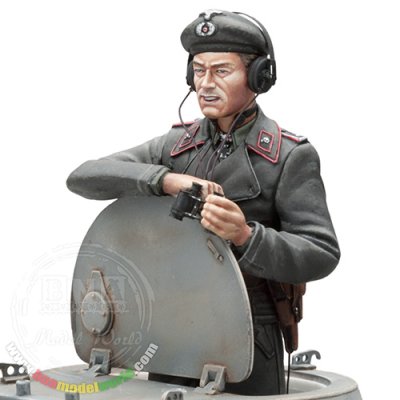
-
Takom Panzerkampfwagen I 1/16 scale... with figure
GazzaS replied to GazzaS's topic in LSM 1/35 and Larger Work In Progress
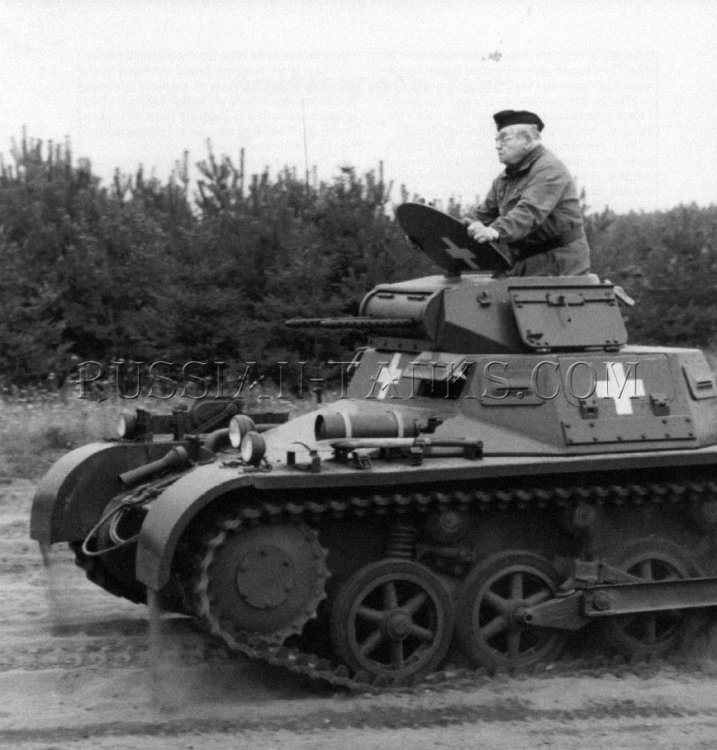
Thank you, Peter. What I'm really trying to accomplish. I understand that there are two sides of modelling. There is the historical reproduction side... and the artistic side. The goal of one is to perfectly emulate a scheme or situation, regardless of other considerations. Then the other wants to make something interesting to look at regardless of the facts presented in both print and photos. In this situation, there are lots of guys who have chosen the 'art' side, using lighter colors with greater variations between the dark gray and dark brown as in this picture below. Now... each to his own. My goal is to make an interesting model with a lot less obvious artistic license. Will it work? I won't know until I get there. I don't know much about photography. I had to do a websearch just to figure out how to take a b&w photo with my wife's Canon Olympus. The obvious tack for me to take was to take my own photos of the colors available and see how they compare in color and b&w. If one color virtually disappears, as they seem to in most historical photos, I figure I must be close.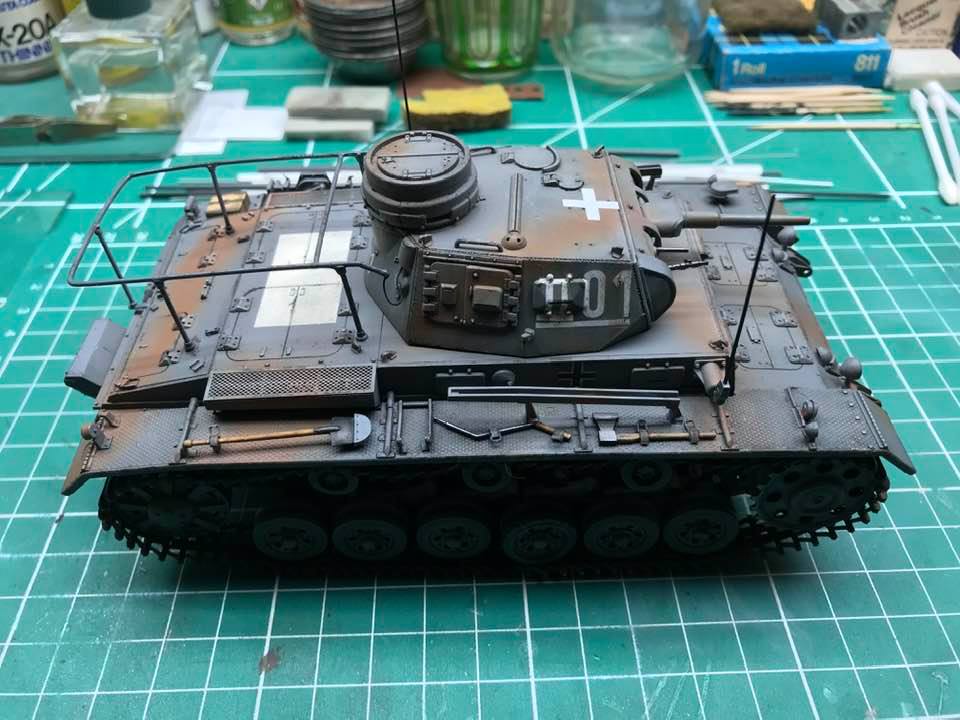
-
Peter... Glad to see the shape coming together!
-
Takom Panzerkampfwagen I 1/16 scale... with figure
GazzaS replied to GazzaS's topic in LSM 1/35 and Larger Work In Progress
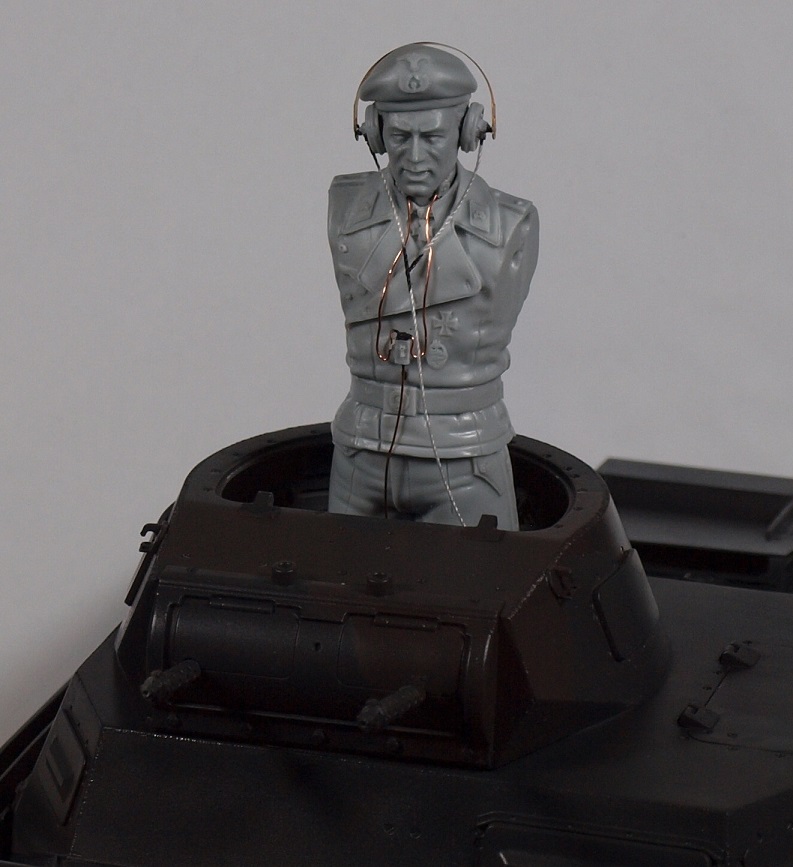
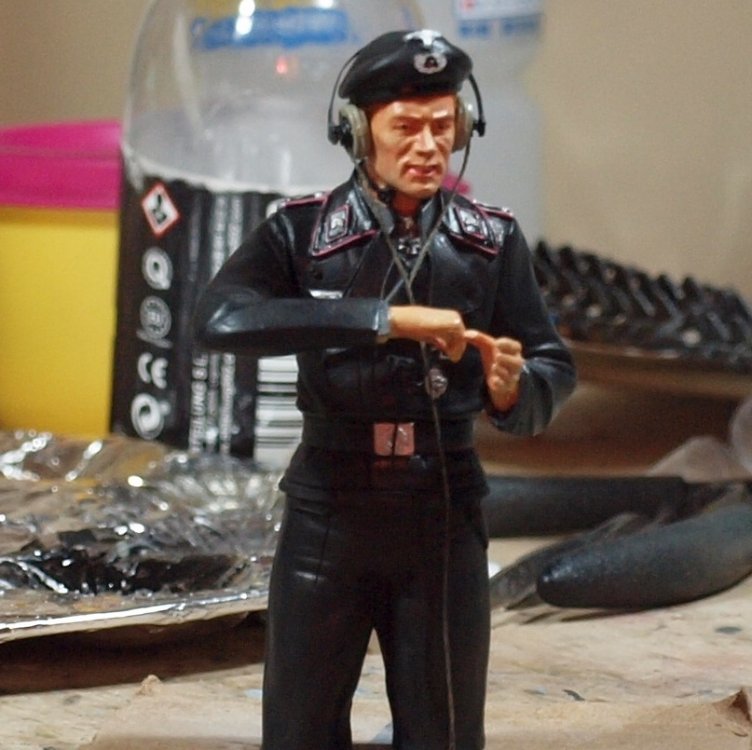
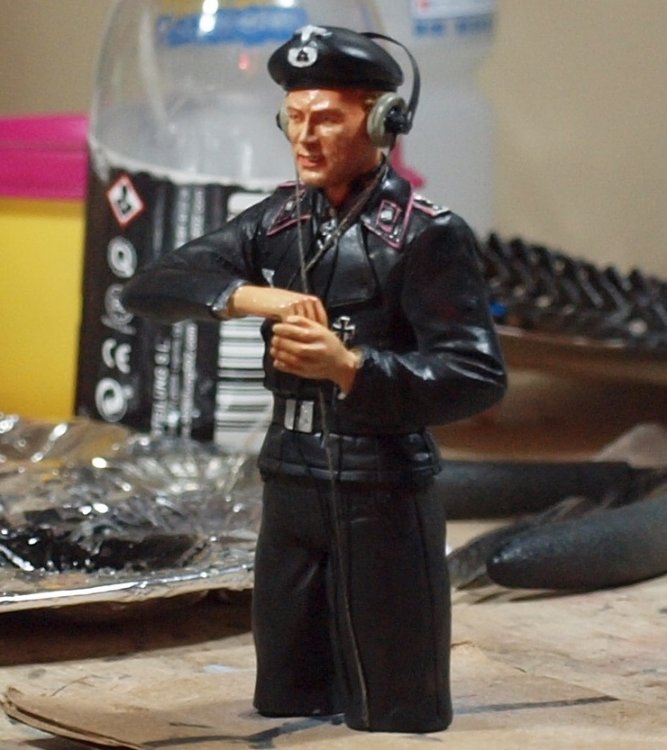
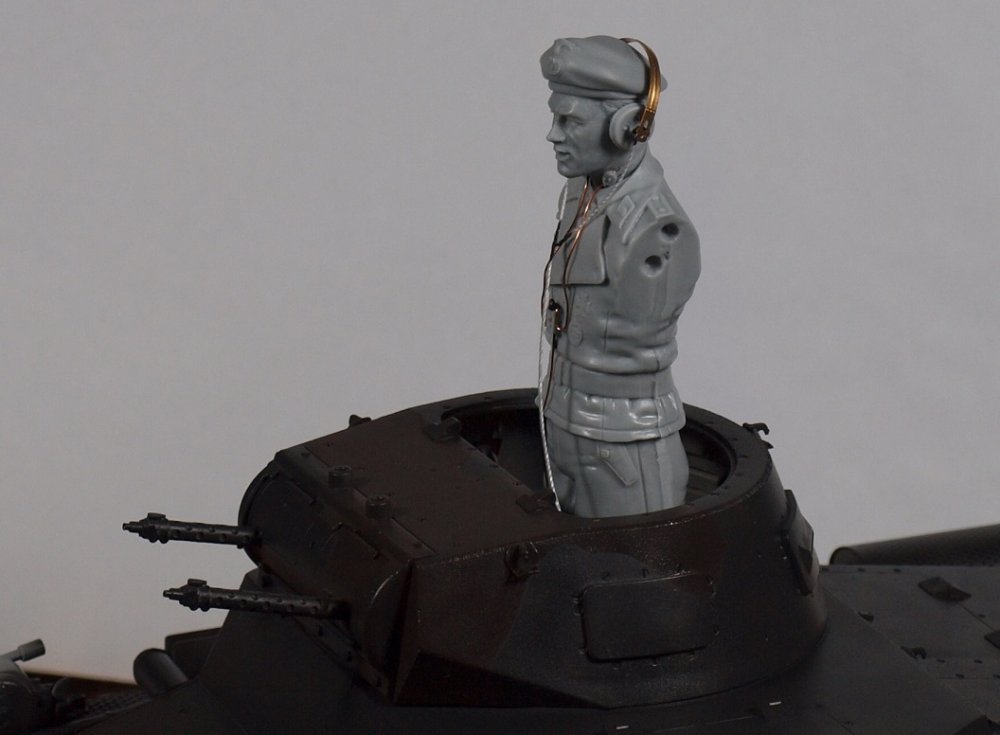
The figure is wired for sound, and the first dunkelbraun is on the turret. He was supposed to have some binoculars... but they aren't there. I'm afraid he's gonna have to steal the canteen from the other dude.

-
Takom Panzerkampfwagen I 1/16 scale... with figure
GazzaS replied to GazzaS's topic in LSM 1/35 and Larger Work In Progress
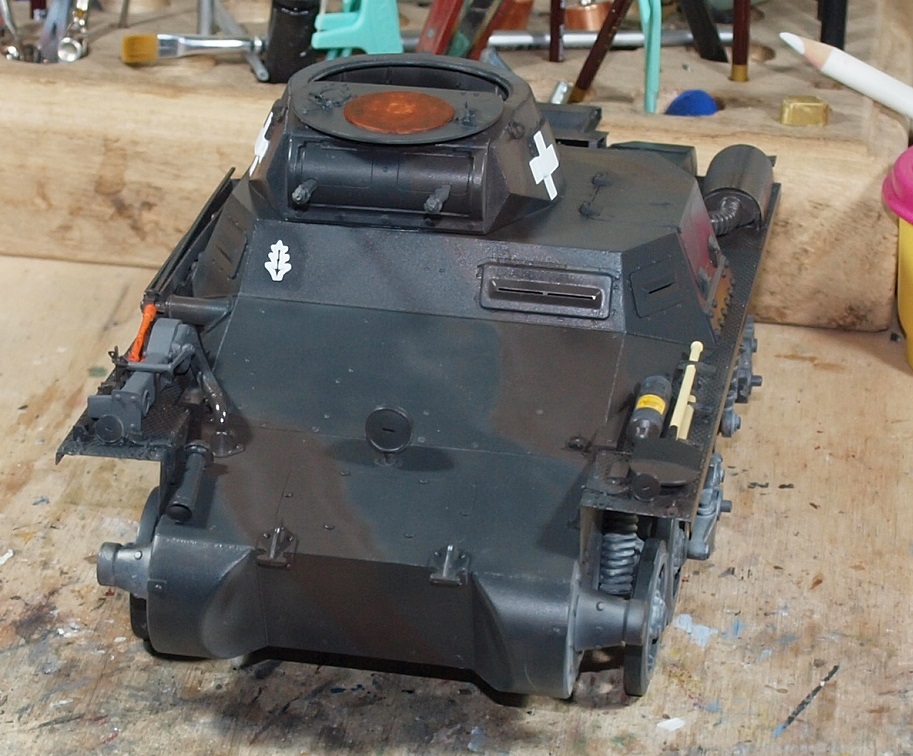
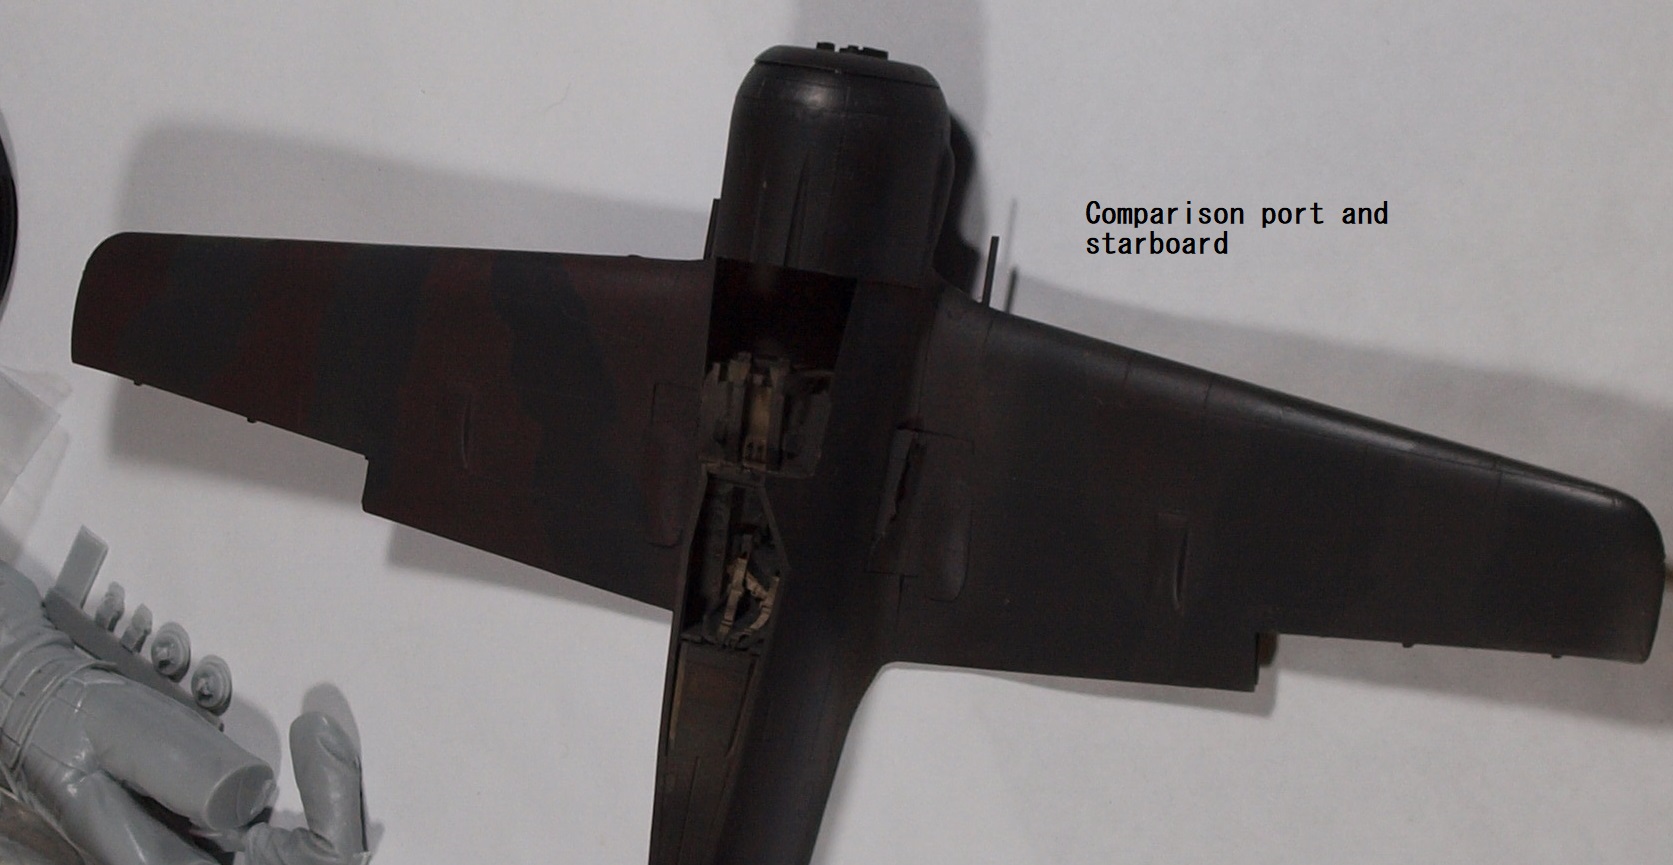
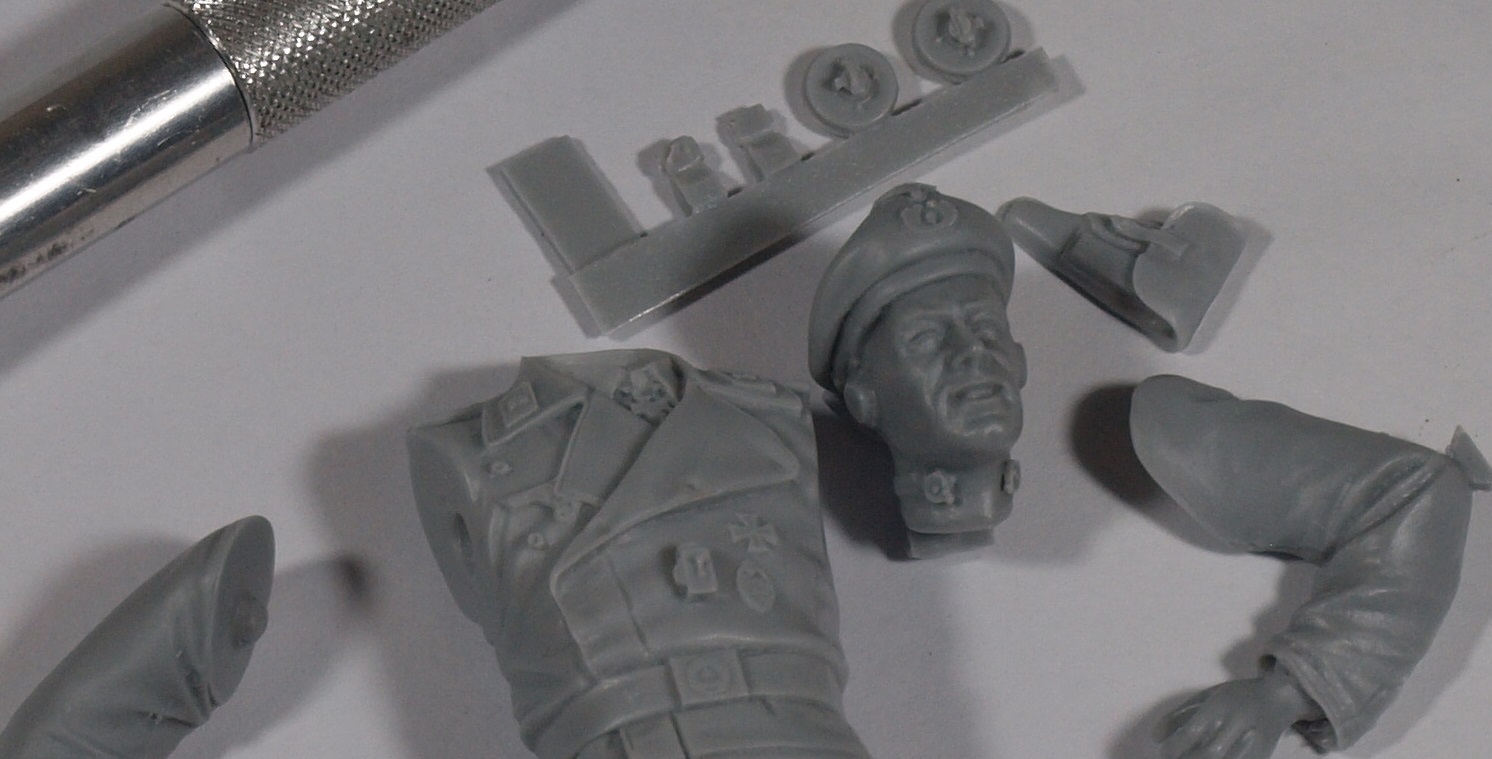
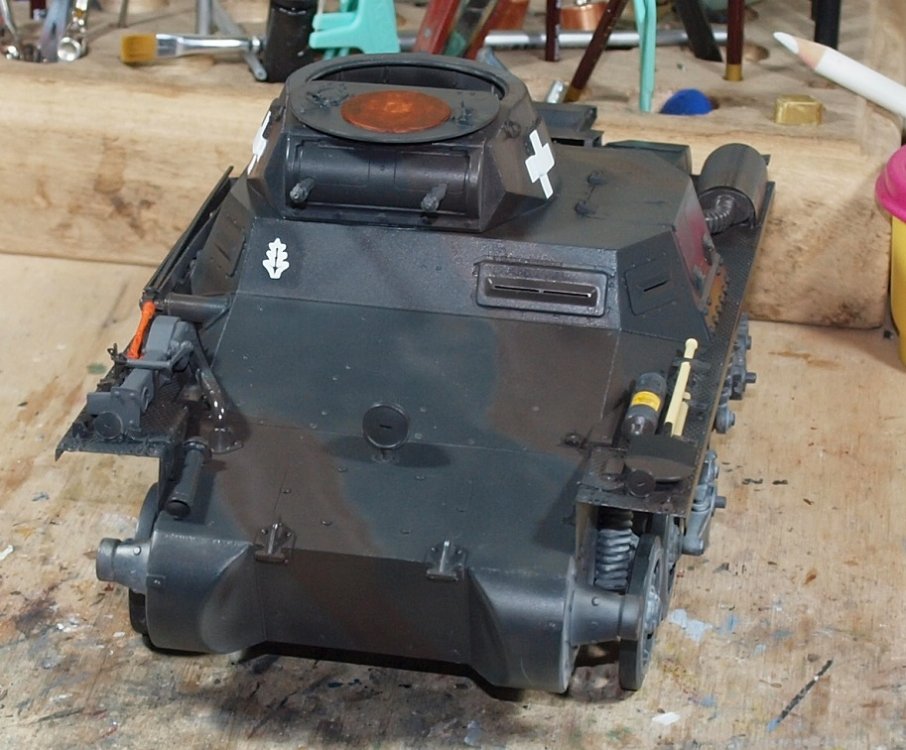
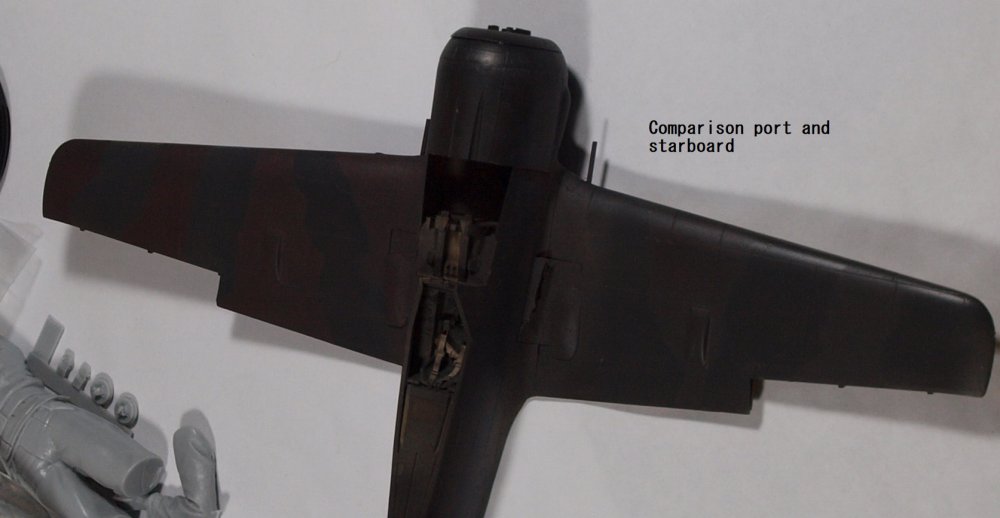
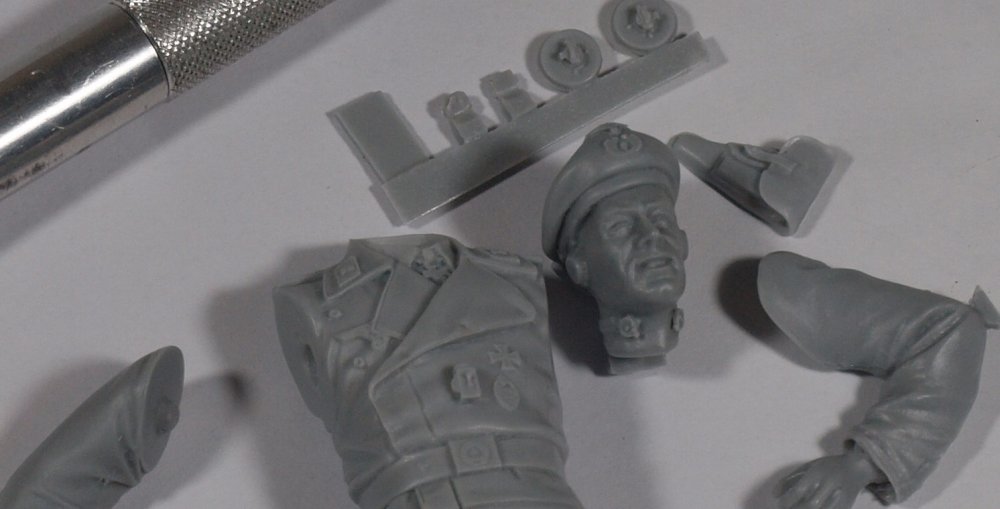
Thank you Peter! Here we go with the dunkelbraun test. The main goal was to have a color that didn't show up well in color, and virtually disappeared in B&W. Just like we see in historical photos. Here is a monochrome photo of the PZ gray with my 'track brown', both colors united under a matte coat. I was advised by a friend to go more brown, and here is the B&W result of that test. Obviously too brown ins too easy to see in monochrome. Just to give you an idea of the difference, here is a color photo of the two comparison tests together. Now... the camera in electric light doesn't pick up the brown as well as the naked eye. I played with the ISO a bit, but it didn't make much difference. And as you may have guessed, my Panzer commander has arrived: I think he looks nicely detailed and will add scale to the kit. Happy Modelling!

-
Nice! Glad to see some paint!
-
Eduard F6F-3 Hellcat, USS Princeton, flown by Gordon Arthur Stanley in 1/48
GazzaS replied to DocRob's topic in Non LSM 'WIP
Excellent result, Rob!