GazzaS
-
Posts
6,396 -
Joined
-
Last visited
Content Type
Profiles
Forums
Events
Gallery
Everything posted by GazzaS
-
Well... Happy birthday, Martin!
-

Revell/SH Hawker Tempest in 1/32-Finished
GazzaS replied to KevinM's topic in LSM 1/35 and Larger Work In Progress
Well done, Kevin! -
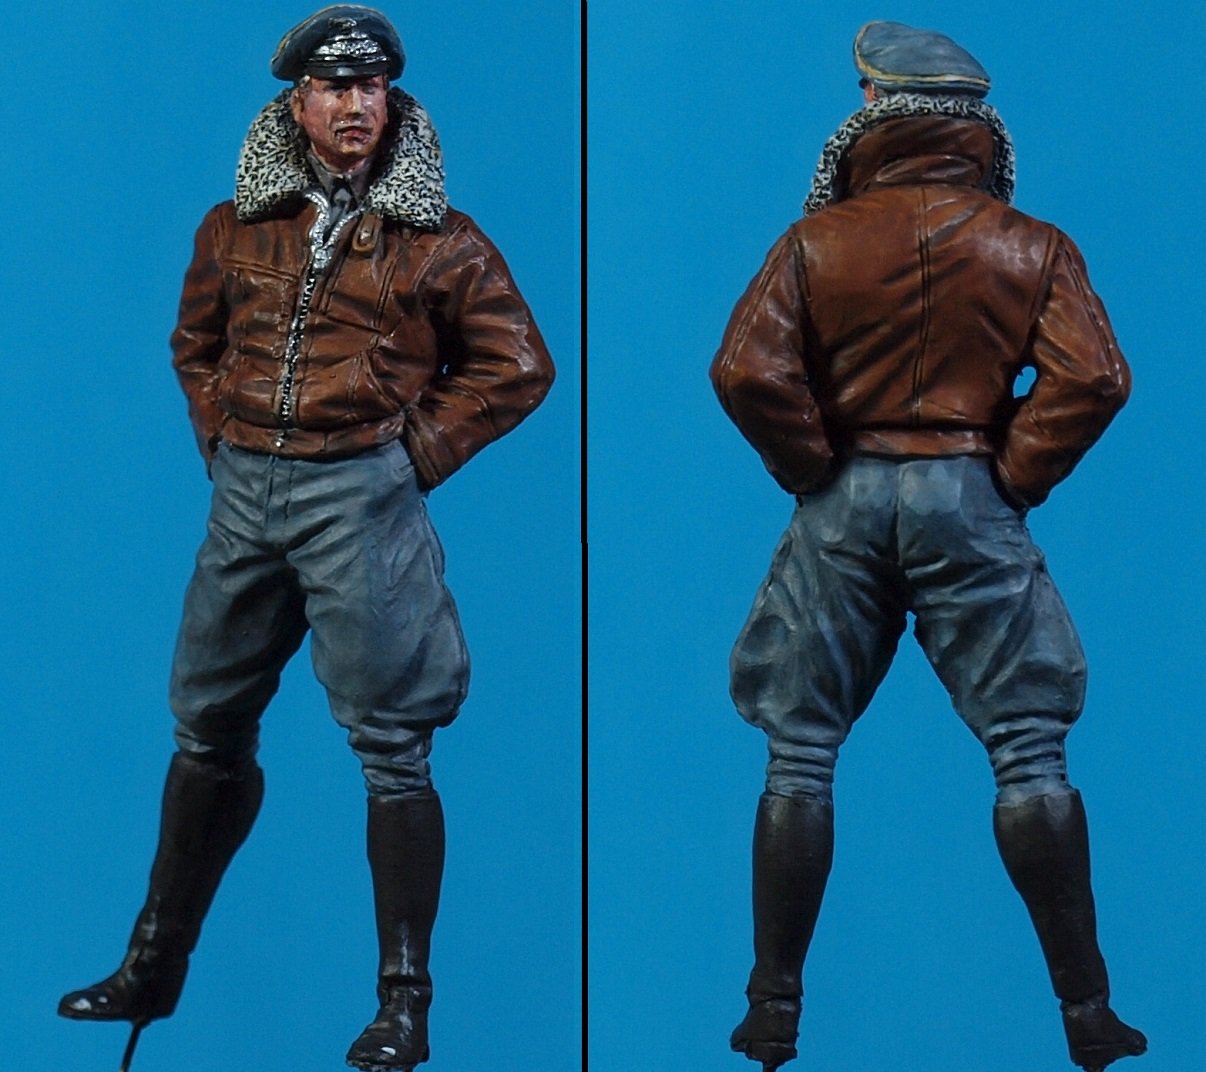
Spent most of my time at the club meet painting this guy's uniform with acrylics yesterday. Will do a pinwash later.

-
VFB-88 FG-1D completed
GazzaS replied to JohnB's topic in LSM 1/32 and Larger Aircraft Ready for Inspection
well done, John! -
Arado 234 Nachtigall on Speed
GazzaS replied to DocRob's topic in LSM 1/35 and Larger Work In Progress
with tanks and pod... I have to wonder what happened to overall speed. still, the model looks ultra excellent with all of that gear hanging off. -
Cool... looking forward to your WIP. Is anybody able to get new Quinta stock, though? I thought the war had closed the pipeline.
-
Arado 234 Nachtigall on Speed
GazzaS replied to DocRob's topic in LSM 1/35 and Larger Work In Progress
Brilliant Rob. I read years ago that one of the problems encountered in the night fighter version was caused by the glazed lower canopy. Airfield lighting, only turned on for the shortest time, was distorted by the shape of the glazing which lead to accidents. -
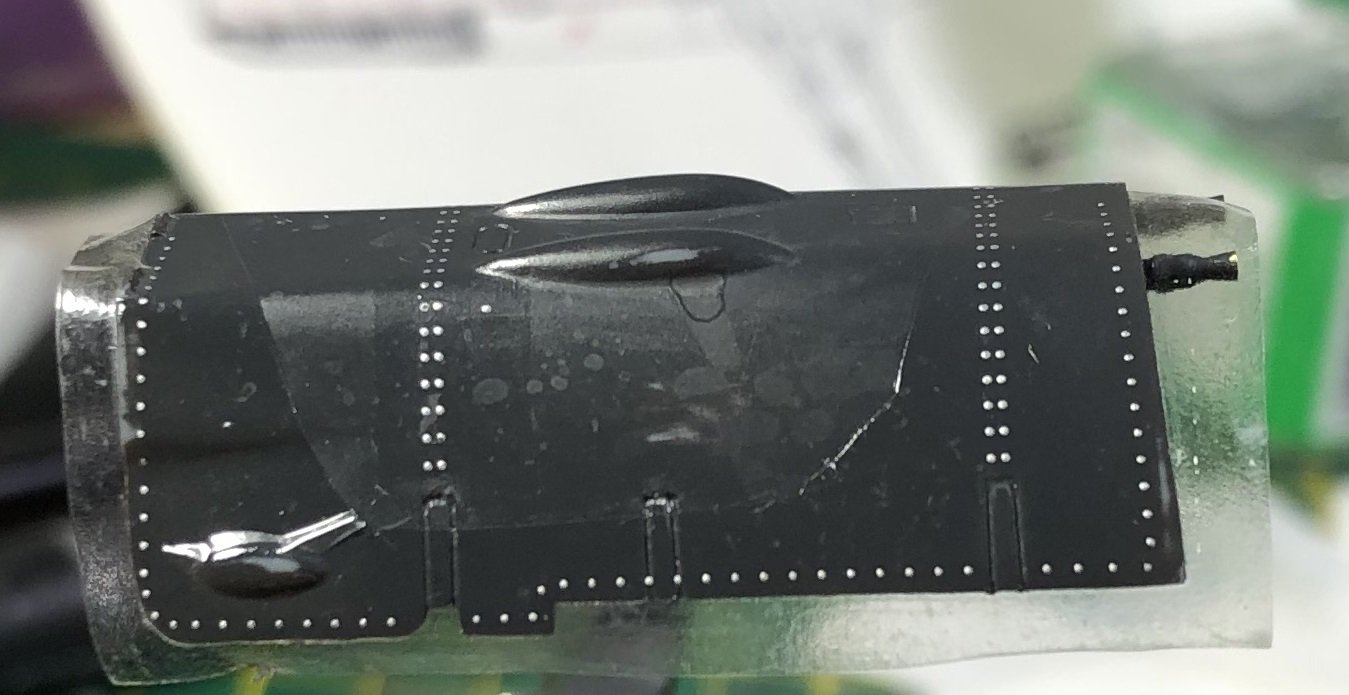
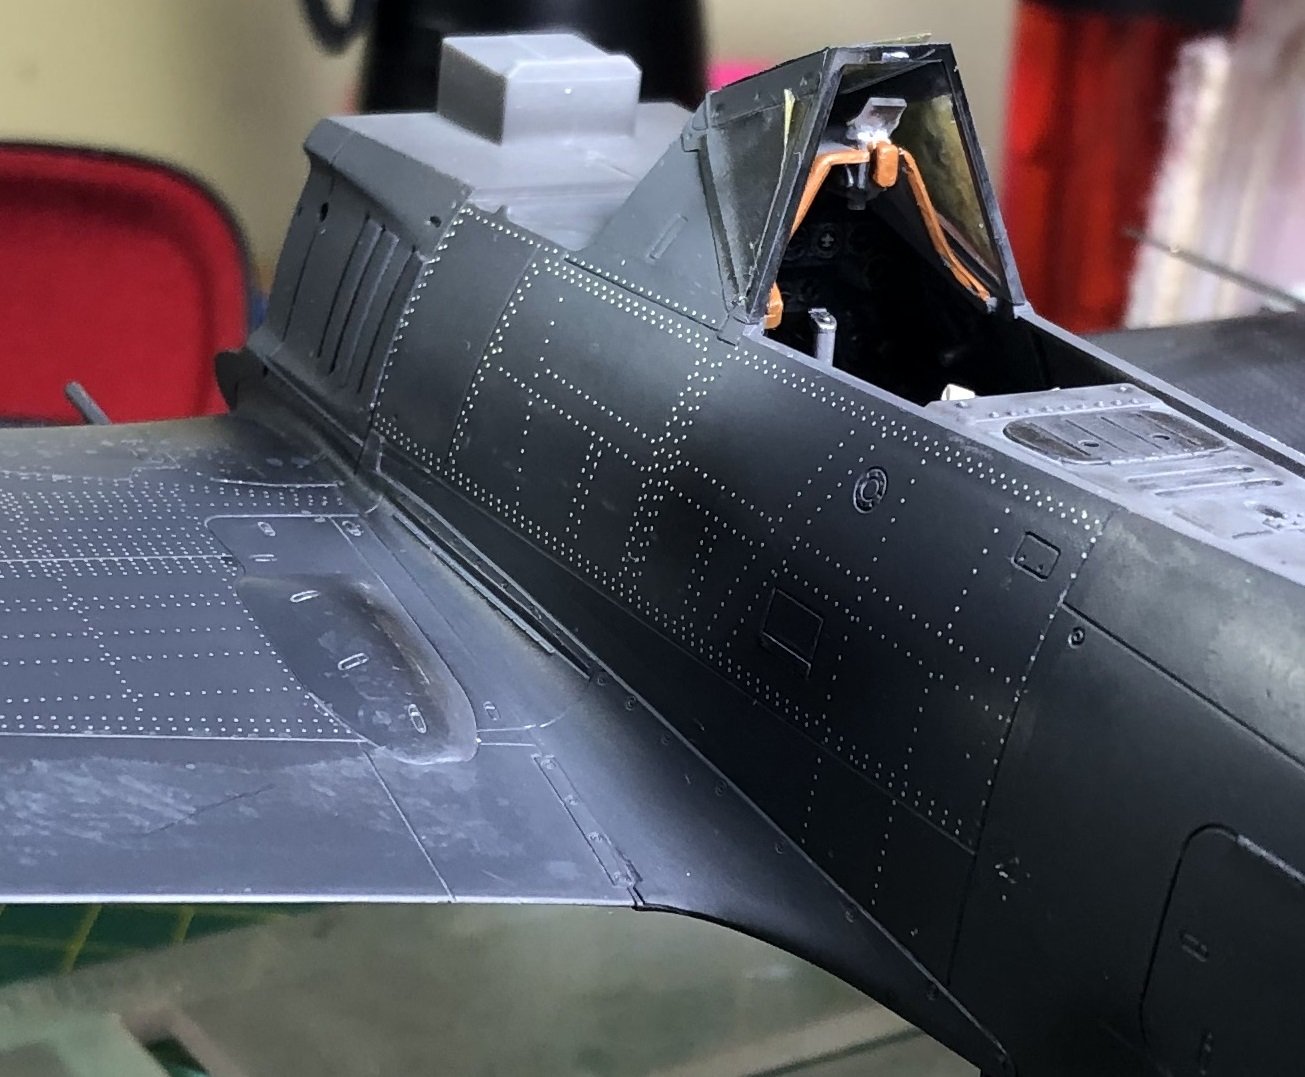
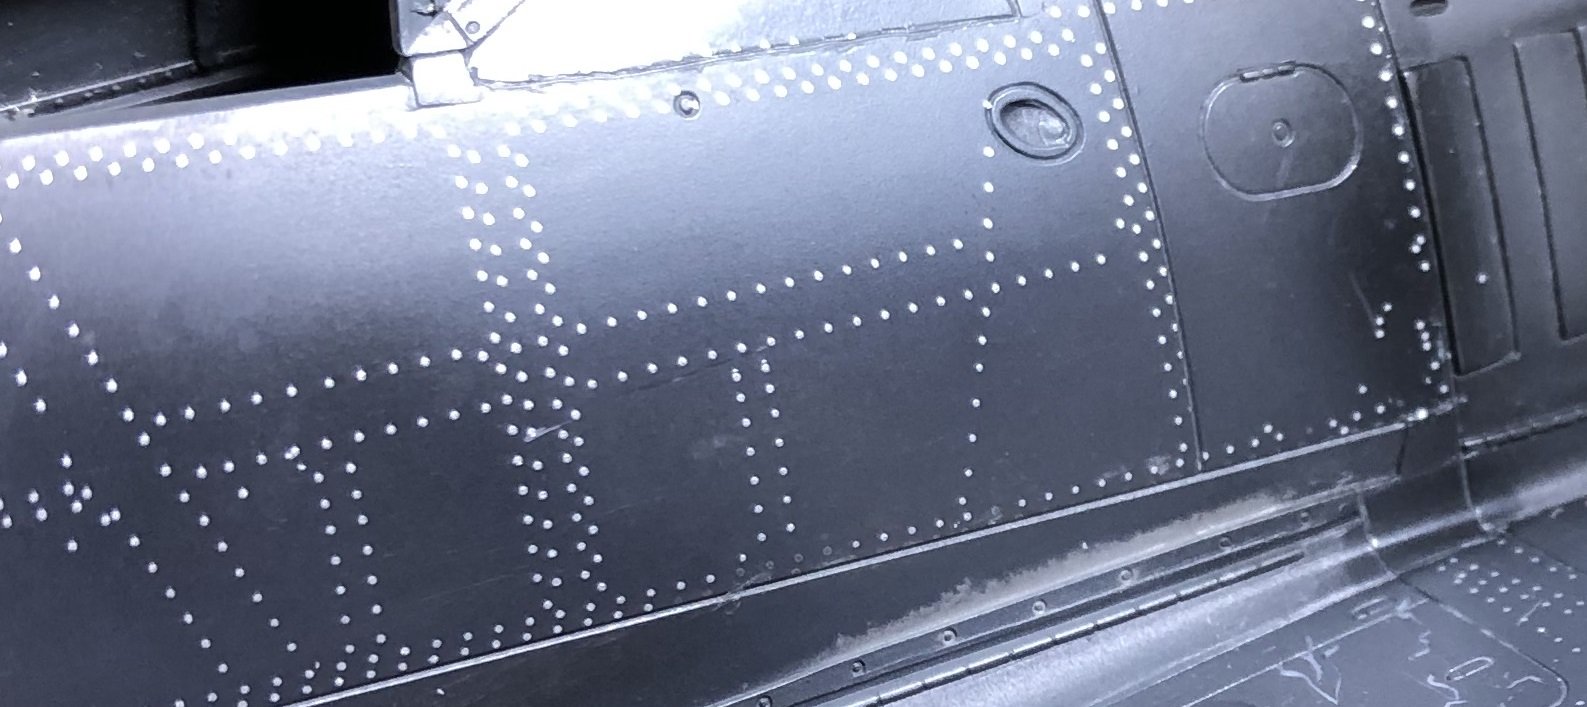
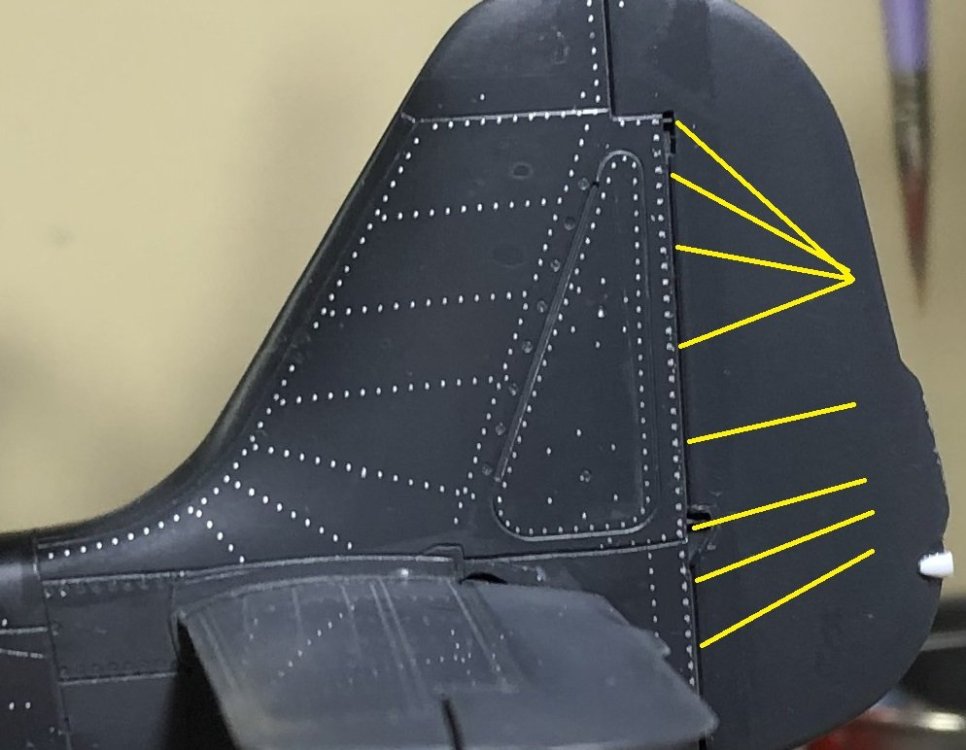
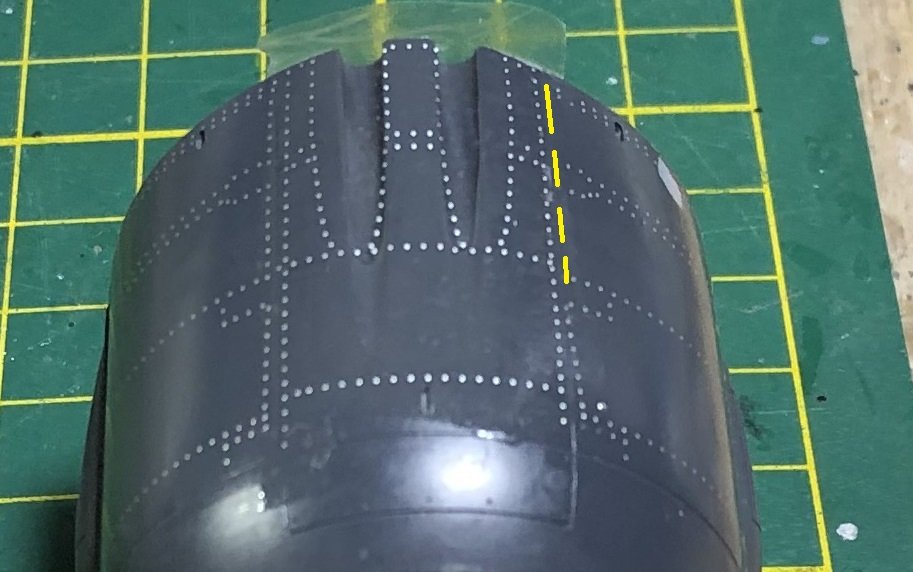
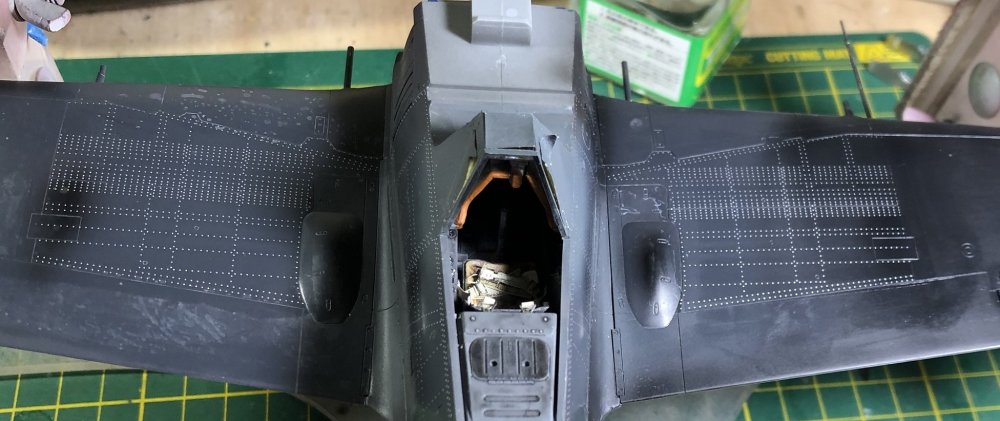
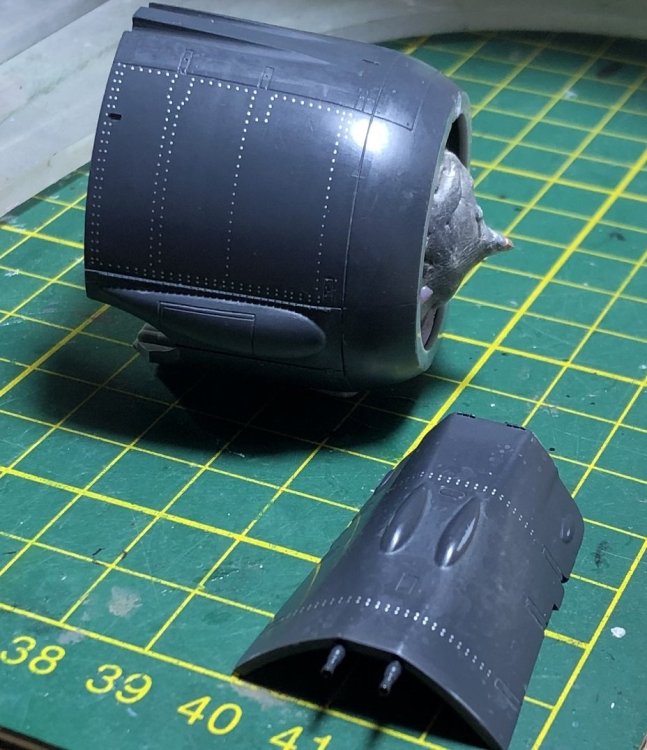
More HGW Rivets... There's nothing else... no cool painting tricks or fancy construction. So, if ya don't like HGW rivets or the patterns on the 190... have a great day! Anyway... .....about HGW rivets.... ....Working with them is like dating two women at once. You don't want them accidentally bumping into each other. So you have to work in segments. The other day, I laid down the outer upper wing panels and 1/2 of the dorsal fuselage panel aft of the cockpit, as well as the port horizontal stabilizer panel. So, that enabled me to do flanking panels over the guns and the flaps today. There are a couple lessons learned here... This panel over the MG's will have a lot of rivets showing when I am done. It was a panel that was moved often, so beat-up, it will be. If you follow the yellow lines you'll see rivets that look a bit rough. This is what happens if you don't get them down fast enough. They were on a narrow piece of carrier film, and ended up not looking so neat. Another point you may have to deal with is working with a close, but not exact version of the aircraft you're building. The rivet set if for the A8... so, here at the blast troughs, some fixing will be required. Speaking of fixing... you'll notice the yellow dashed lines. They are where an accident occurred. After putting on a panel of rivets, I set the cowling down, and the carrier film must have been jarred, slightly moving the panel and pushing the rivet lines up a tiny fraction. So, the remedy was to wet sand the out-of-place rivet line with 6k grit micro mesh. Easy. I'll just use a free line of rivets later. I'll have to do the same process around the blast troughs. Anyway... thanks for looking!


-
Eh... gonna leave it alone.
-
Trumpeter TBD-1 Devastator
GazzaS replied to Clunkmeister's topic in LSM 1/35 and Larger Work In Progress
I reckon it must be virtually impossible to make rivets in scale on a scale model. The HGW rivets are nice.... but a lot of work if your kit doesn't have a set designed for them. -
Arado 234 Nachtigall on Speed
GazzaS replied to DocRob's topic in LSM 1/35 and Larger Work In Progress
The model looks great. Odd thing about the masks. I'll try to make a mental note about the reaction... -
1/16 scale Tiger VI Ausf E early build
GazzaS replied to CrankyCrafstman's topic in LSM 1/35 and Larger Work In Progress
VEry nice interior details, Ron. -
Thanks guys. I should have known it. But I forgot. Because the pit of the 190 is so simple, I rarely even look at pics any more. But now you put a bug up my a55. I might have to do something about it.
-
N1K1-Ja Shiden Takara/Revell 1:32
GazzaS replied to shadowmare's topic in LSM 1/32 and Larger Aircraft Ready for Inspection
Great job on this one! -
One of those things we have to remember is that decals and transfers all have a shelf life. Ten years down the road, I'll bet any of these sitting in the stash won't be usable.
-
Thanks, Rob. The worst thing about the rivets is they sometimes just float off. It is even more likely to happen if you trim close to the rivet. As a consequence, I leave at least 5mm between the rivets and the trimmed edge of the carrier film. It's not like a decal where you want to get rid of the carrier film. But it really makes it difficult to get the sheets to lay correctly if your extended edge happens to lay over a raised detail. Removing the carrier film is a tedious process as well with this batch. On the 109, the carrier film came off pretty easily. But on this 190 it is a struggle.
-
Revell/SH Hawker Tempest in 1/32-Finished
GazzaS replied to KevinM's topic in LSM 1/35 and Larger Work In Progress
Awesome sauce! -
FG-1D VBF-88 USS Yorktown 1945
GazzaS replied to JohnB's topic in LSM 1/35 and Larger Work In Progress
Very sharp, John -
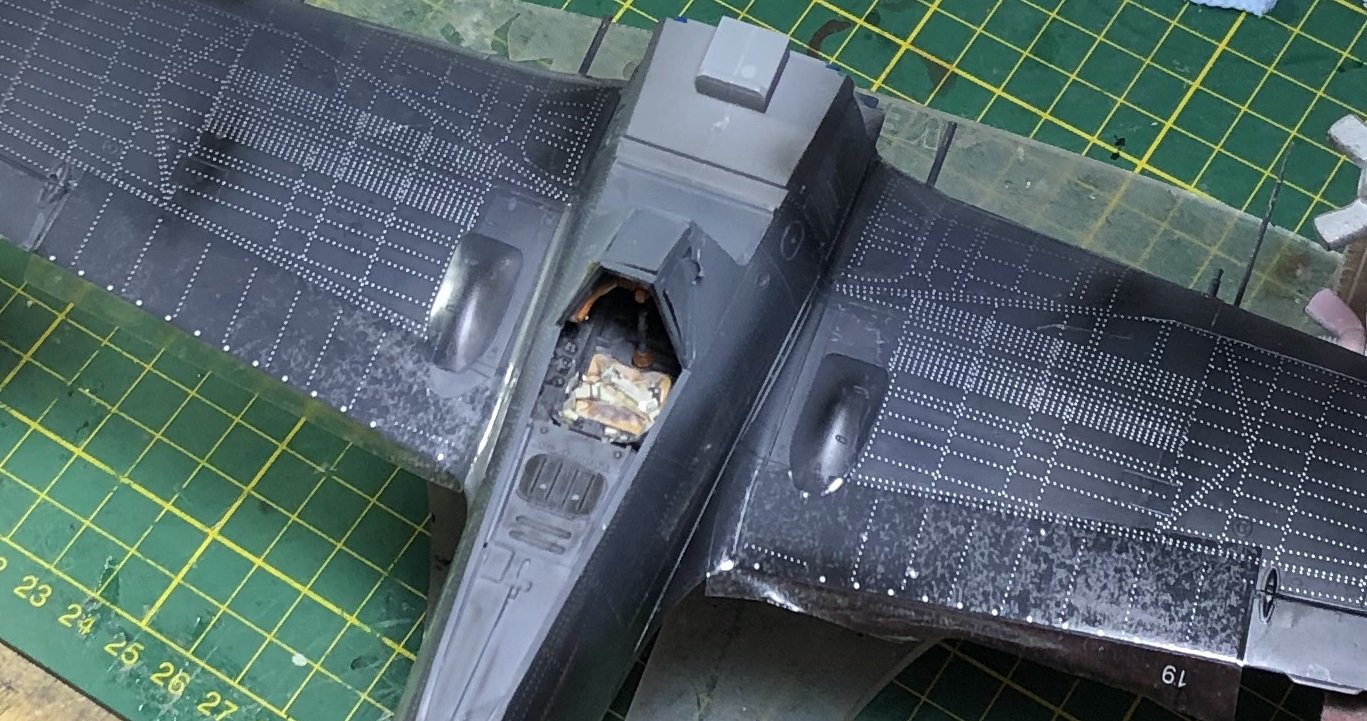
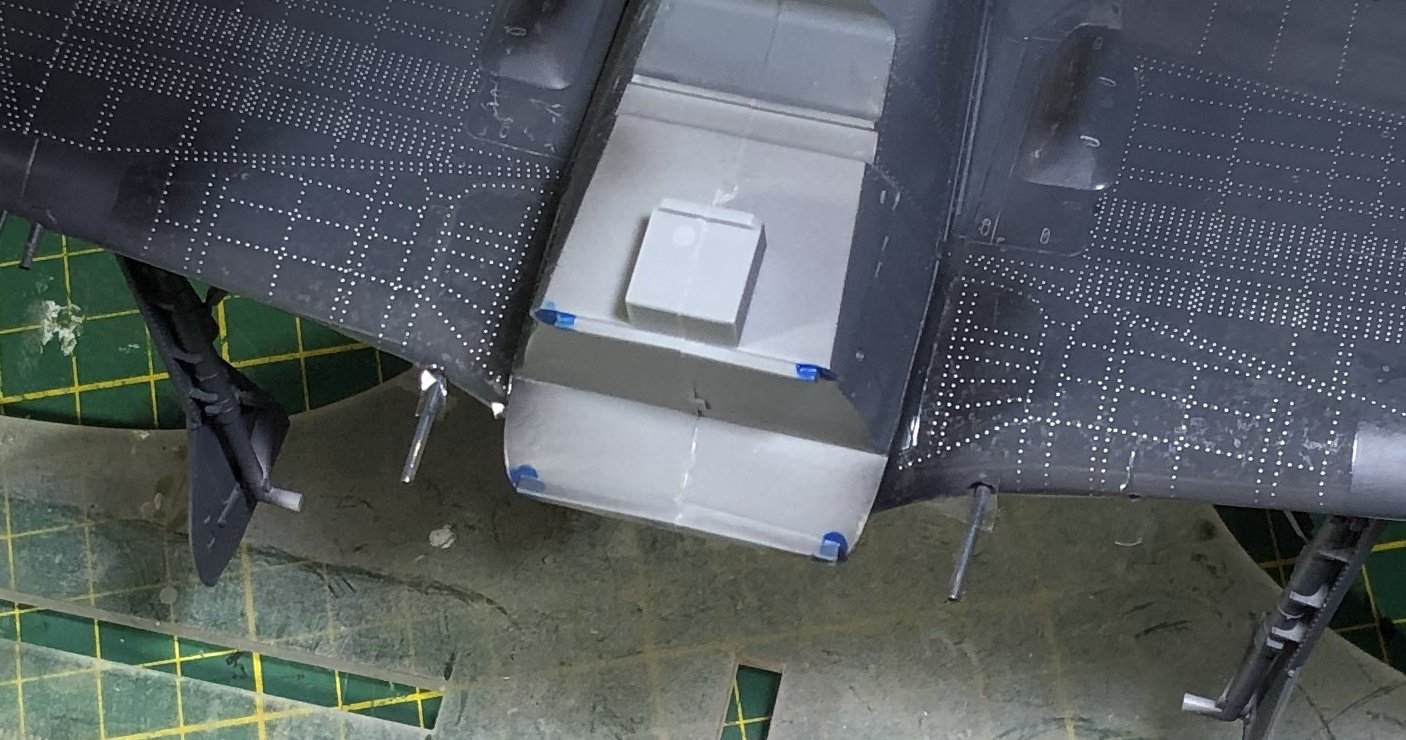
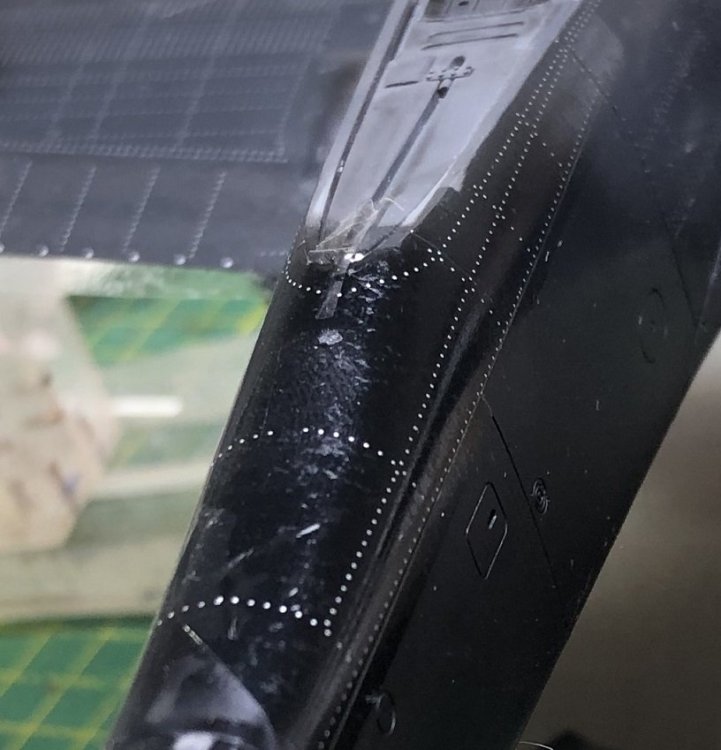
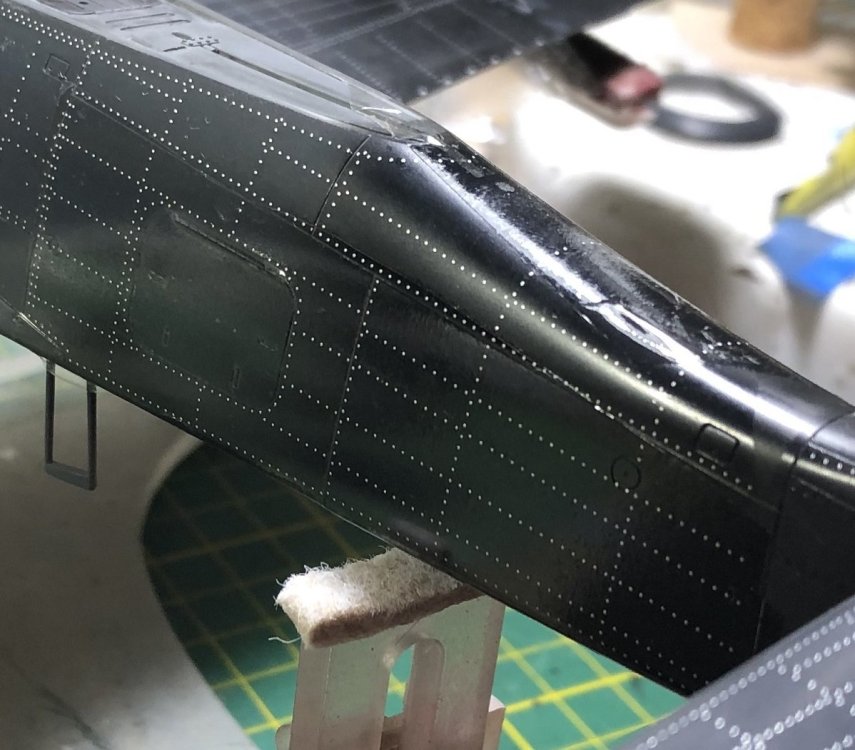
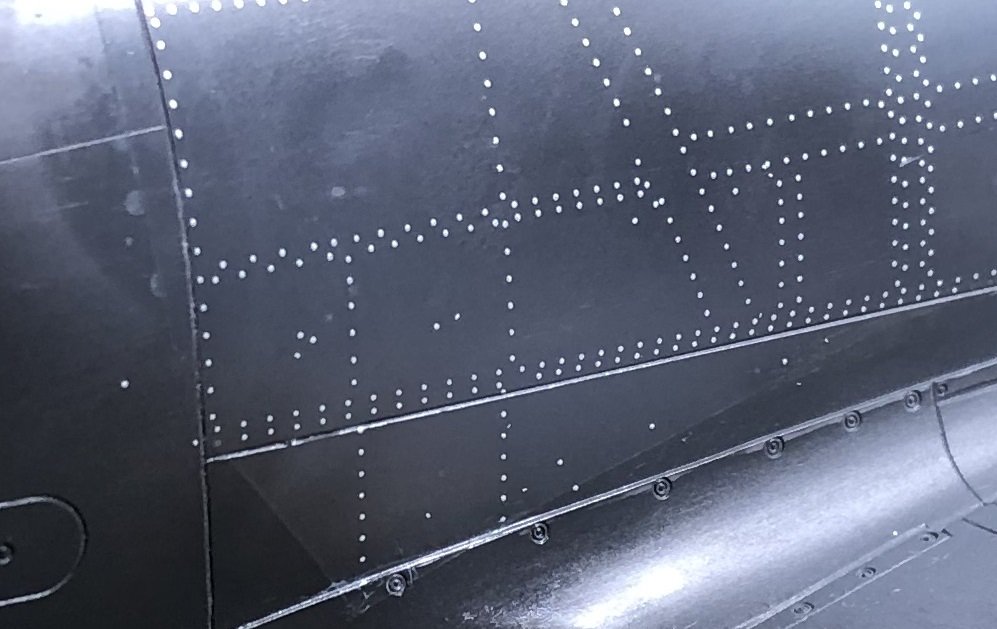
Alright... after the first round of HGW rivets. All I can say about HGW rivets is that I am unable to get consistent results with them. One panel will come out perfectly... and it's mirror image will have floaties... rivets that have drifted away from their allotted position. But they are so fine... that if you don't sand to make them show... they won't be seen. Here are some pics: I still prefer them to the rivet wheel.


-
Alright... after the first round of HGW rivets. All I can say about HGW rivets is that I am unable to get consistent results with them. One panel will come out perfectly... and it's mirror image will have floaties... rivets that have drifted away from their allotted position. But they are so fine... that if you don't sand to make them show... they won't be seen. Here are some pics: I still prefer them to the rivet wheel.
-
GB Award for modeling greatness decided
GazzaS replied to Clunkmeister's topic in Let’s Get Wet Group Build.
You are very generous, Ernie! -
All OOB Ernie except for gun barrels and seat belts... and a tailwheel winging it's way to me from Michigan.
-
Thank you, Chris! I only sand if there will be a chance of paint lift. And if you're masking, there's 50% chance that you will lift your paint and primer somewhere. Since I have used the combination of sanding with 1200 or 2k grits and plain Tamiya paint, I have had Zero paint lift. So, it's one of my golden rules, now.
-
Italeri 1/35 Elco 80' Torpedo Boat PT-596
GazzaS replied to Bomber_County's topic in Let’s Get Wet Group Build.
If you feel passionate about it, why not. I'm going to build the HPH BV-138 in 1/32 scale despite the fact that I have no room to display it. And then I will probably sell it, and ship it on a pallet if I can find a buyer. No way I would trust it to regular parcel handling. -
Another Tomcat, I know.
GazzaS replied to BlrwestSiR's topic in LSM 1/35 and Larger Work In Progress
I like jets in flight... looks better than on the ground...