GazzaS
-
Posts
6,396 -
Joined
-
Last visited
Content Type
Profiles
Forums
Events
Gallery
Everything posted by GazzaS
-
Look at all of those tiny imperfections on the fuselage. It wo8uld be cool to replicate that effect.
-
Such a short fuselage for that wingspan. No wonder they called it an SOB. I hope it gets one of those flamboyant navy schemes with lots of white.
-
Beautiful job, Peter! Stunning!
-

Ferrari 330P4 Open top 24Hrs Daytona 1967
GazzaS replied to mark31's topic in LSM 1/35 and Larger Work In Progress
Looks great, Mark! I do that polishing with aircraft models.... before weathering. -
Is it done yet? Sorry John... I expect some kind of tempo from you. Just kidding! I'm sure it'll be beauty when you're done.
-
Duchess of Kingston - Beauty of the Seas - Wooden Sailing Ship 1/64
GazzaS replied to DocRob's topic in Non LSM 'WIP
Even more distinctive! -
Looks like a great place for a scratch=built fillet.
-
617 Sqn Tornado Dambuster 70th
GazzaS replied to Kaireckstadt's topic in LSM 1/35 and Larger Work In Progress
Very nice masking work, Kai! Those LG look pretty awesome, too. -
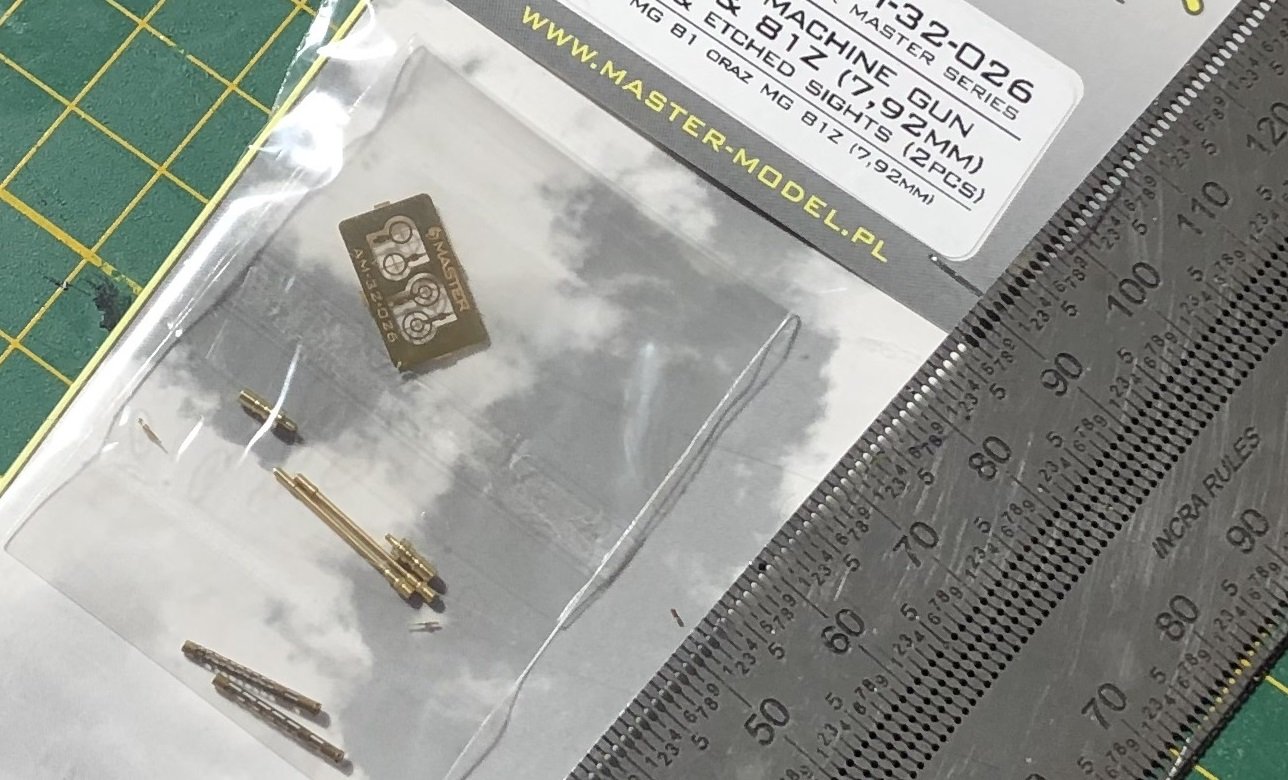
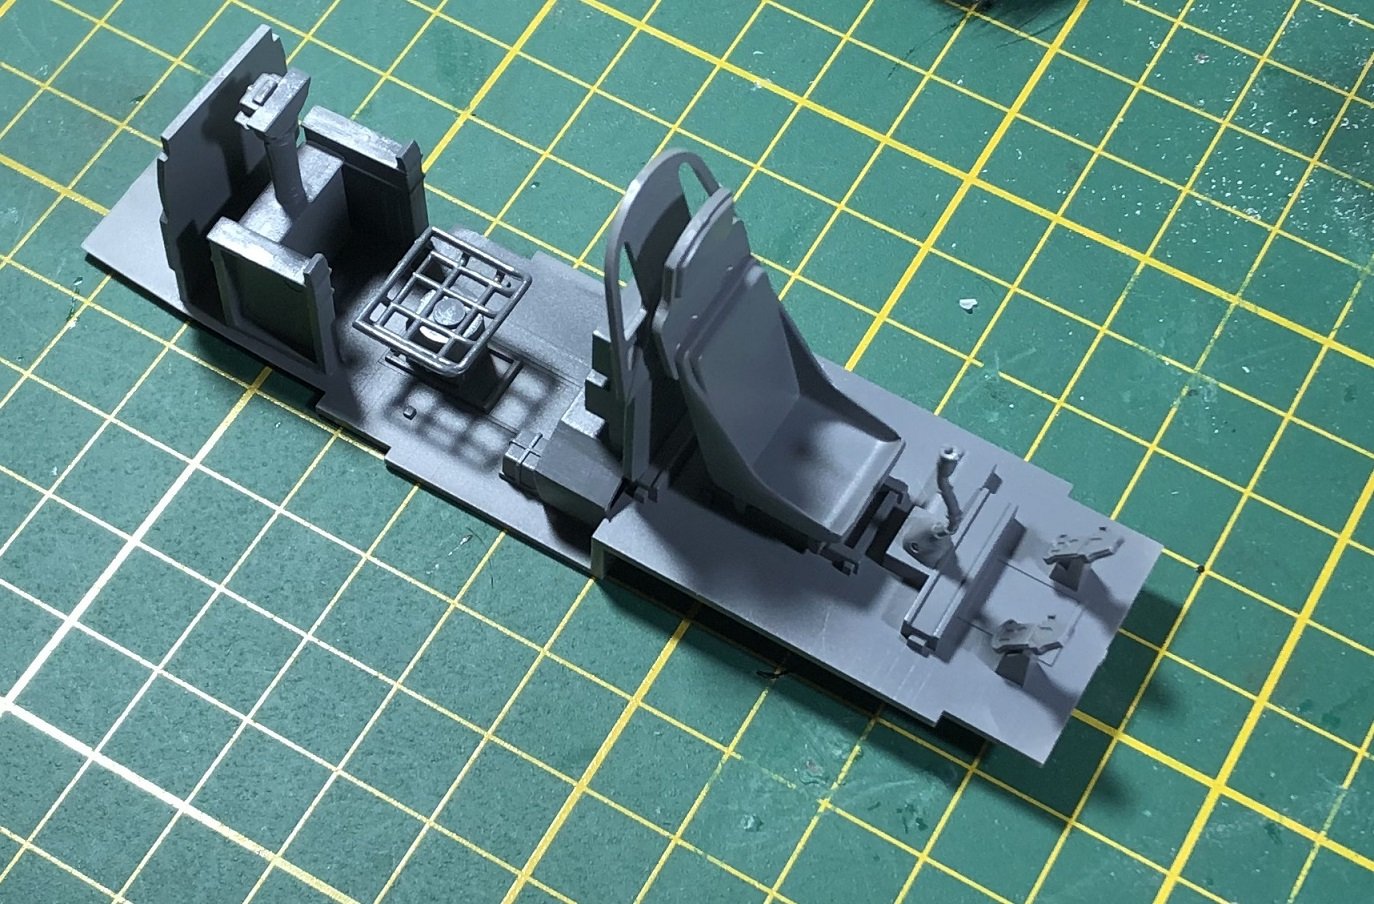
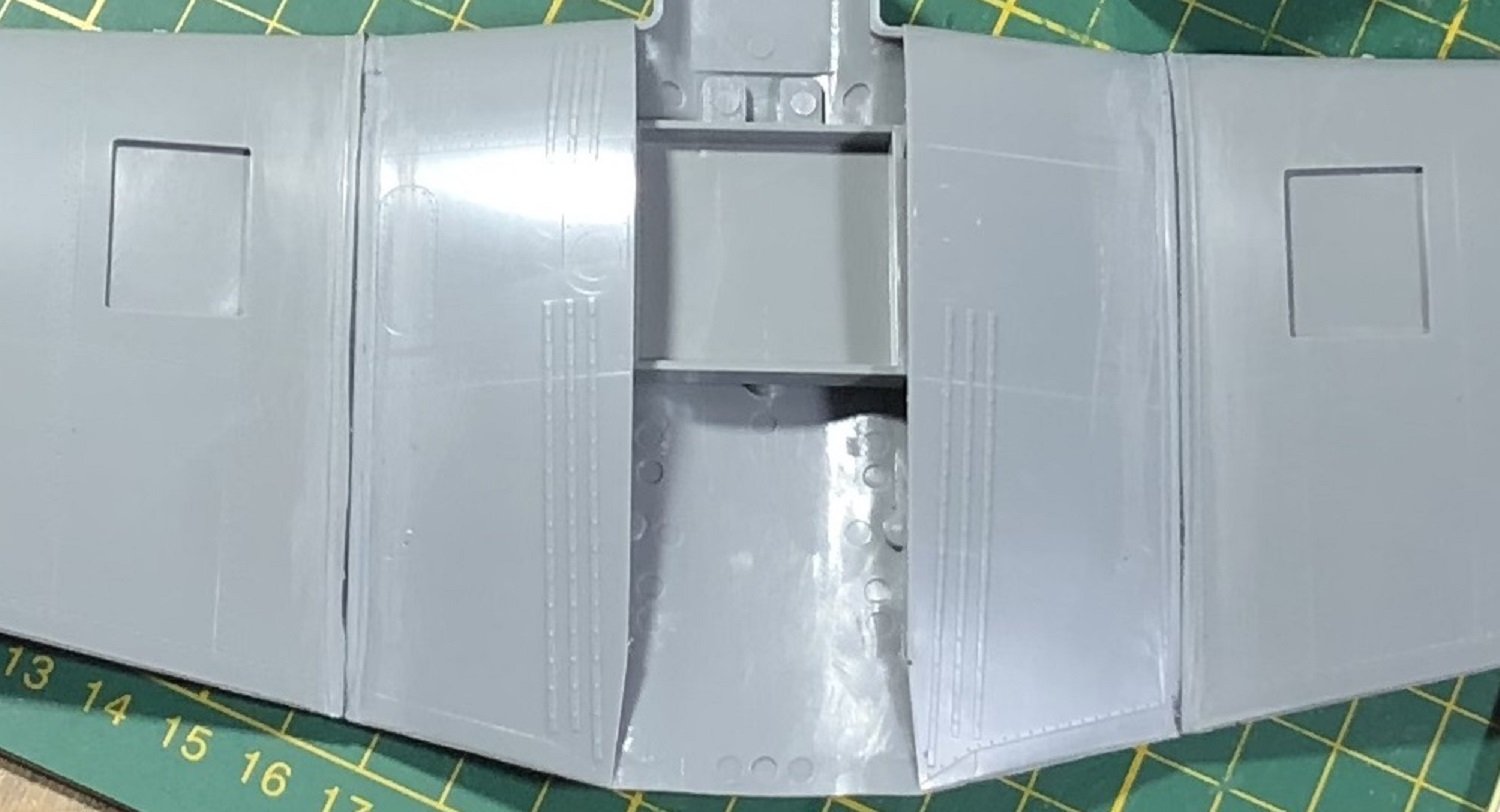
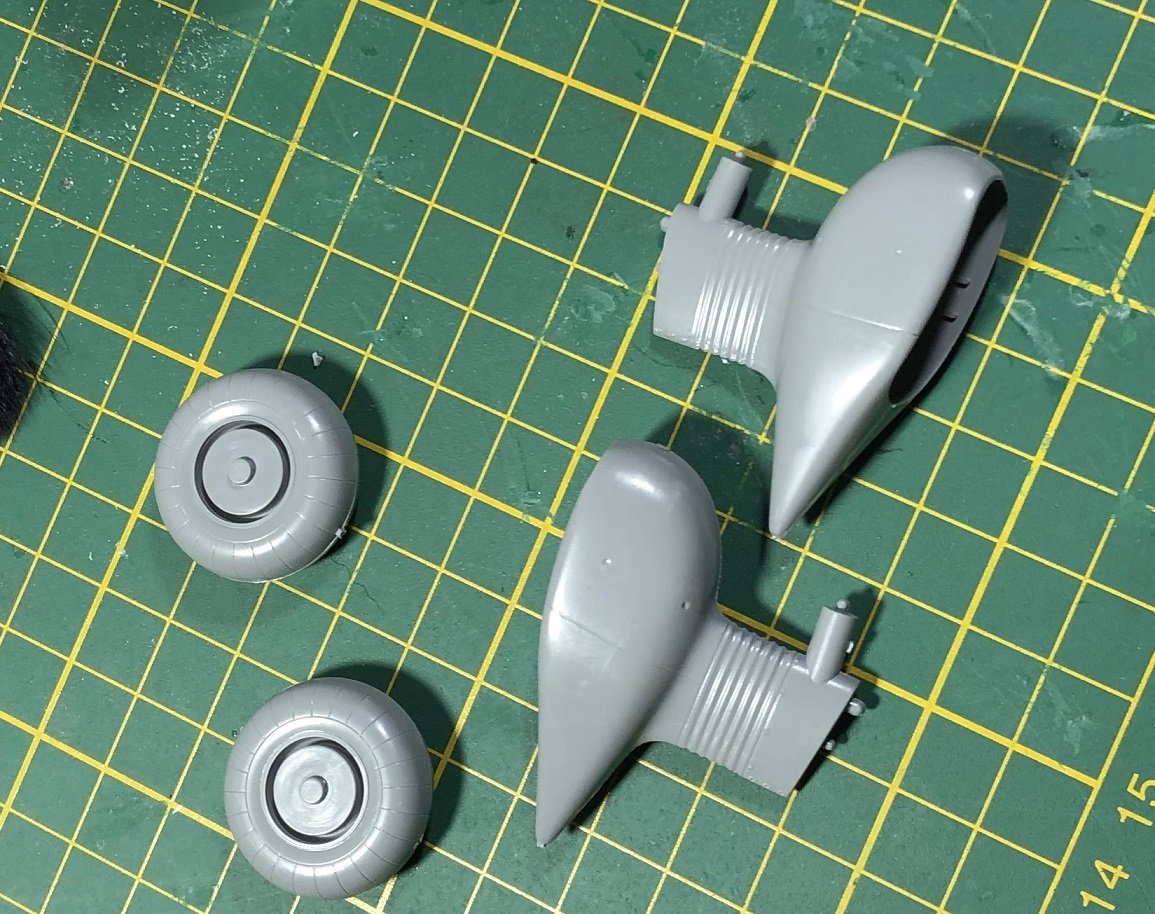
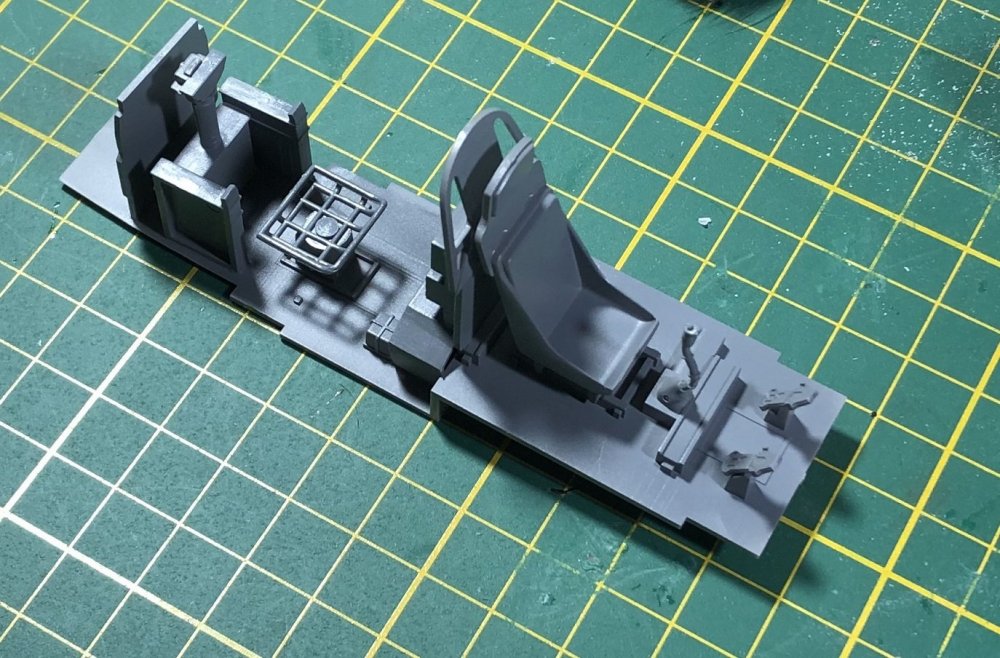
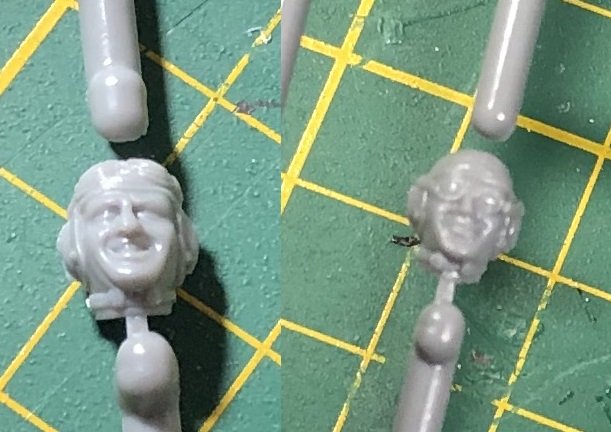
Well, thank you my friends for your enthusiasm. I have probably been a letdown as I have accomplished very little. There are a few reasons for this. One of the reasons is my repeated failure to do successful soldering on another build. It's the kind of failure that keeps you awake at night thinking about how to get past it. Anyway... Let's talk about the Stuka. Most of the time devoted to it has been at club meetings. I am a member of two clubs, and since I don't want to make too much mess in somebody else's space, I have restricted it to snipping, cutting, and gluing. Though I did do some work on it at home, yesterday. Today my Master Barrels MG81 z brass barrels and sights arrived today. No German plane looks right without external gunsights on their defensive weapons. The cockpit is relatively basic and here has been painted a medium gray so that weathering won't darken it too much. The basic bland look of the cockpit is inspiring me to put the flight crew in there. But their heads are pretty atrocious. The pilot looks very happy indeed, and the bordfunker (radio operator) looks like a character from Mad Magazine. I may steal some heads from another kit, I don't know for sure, yet. German pilot heads aren't easy to get hold of. I have ordered some ground crew, one of which may be sitting on the wing conferring with the pilot. Again, it's all up in the air at this point. Wheels and struts/spats... exciting stuff. I have found some pics with the Jericho Trumpets in place... I rather like the feature. The wing assembly is a bit ugly. The left 1/3rd required a bit of sprue to act as a spreader so that it could attain a closer profile to the center section. The black lines you see are composed of black CA and baking soda. I don't know why they didn't mold it so that the ends would slide into the narrow collars where the angles meet. I used tape around the 'collars' so that I wouldn't damage molded detail while sanding. I've been warned about fitting the LG. I guess I'll see when I get there. I'm on a month of holidays soon. Hopefully I can be more dedicated to the bench than I have recently. Thanks for looking!


-
Tamiya F-14 VF-2 Bounty Hunters
GazzaS replied to Bill_S's topic in LSM 1/35 and Larger Work In Progress
Nice work, Bill. I hate pitot tubes. I have no idea where the one has gone from my 1/32 scale Starfighter. -
Duchess of Kingston - Beauty of the Seas - Wooden Sailing Ship 1/64
GazzaS replied to DocRob's topic in Non LSM 'WIP
Looks brilliant so far, Rob! You're really making all of the details look exceptional. -
haha.... made me think of the Marriot logo:


-
Interestingly, Bill... this kit has some canopy decals for the inner strengtheners.
-
Duchess of Kingston - Beauty of the Seas - Wooden Sailing Ship 1/64
GazzaS replied to DocRob's topic in Non LSM 'WIP
Very nice. It would be interesting to know the differences between cutter, lighter, launch, dinghy, and plain old rowboat. -
Duchess of Kingston - Beauty of the Seas - Wooden Sailing Ship 1/64
GazzaS replied to DocRob's topic in Non LSM 'WIP
The boat looks great. Rob! -
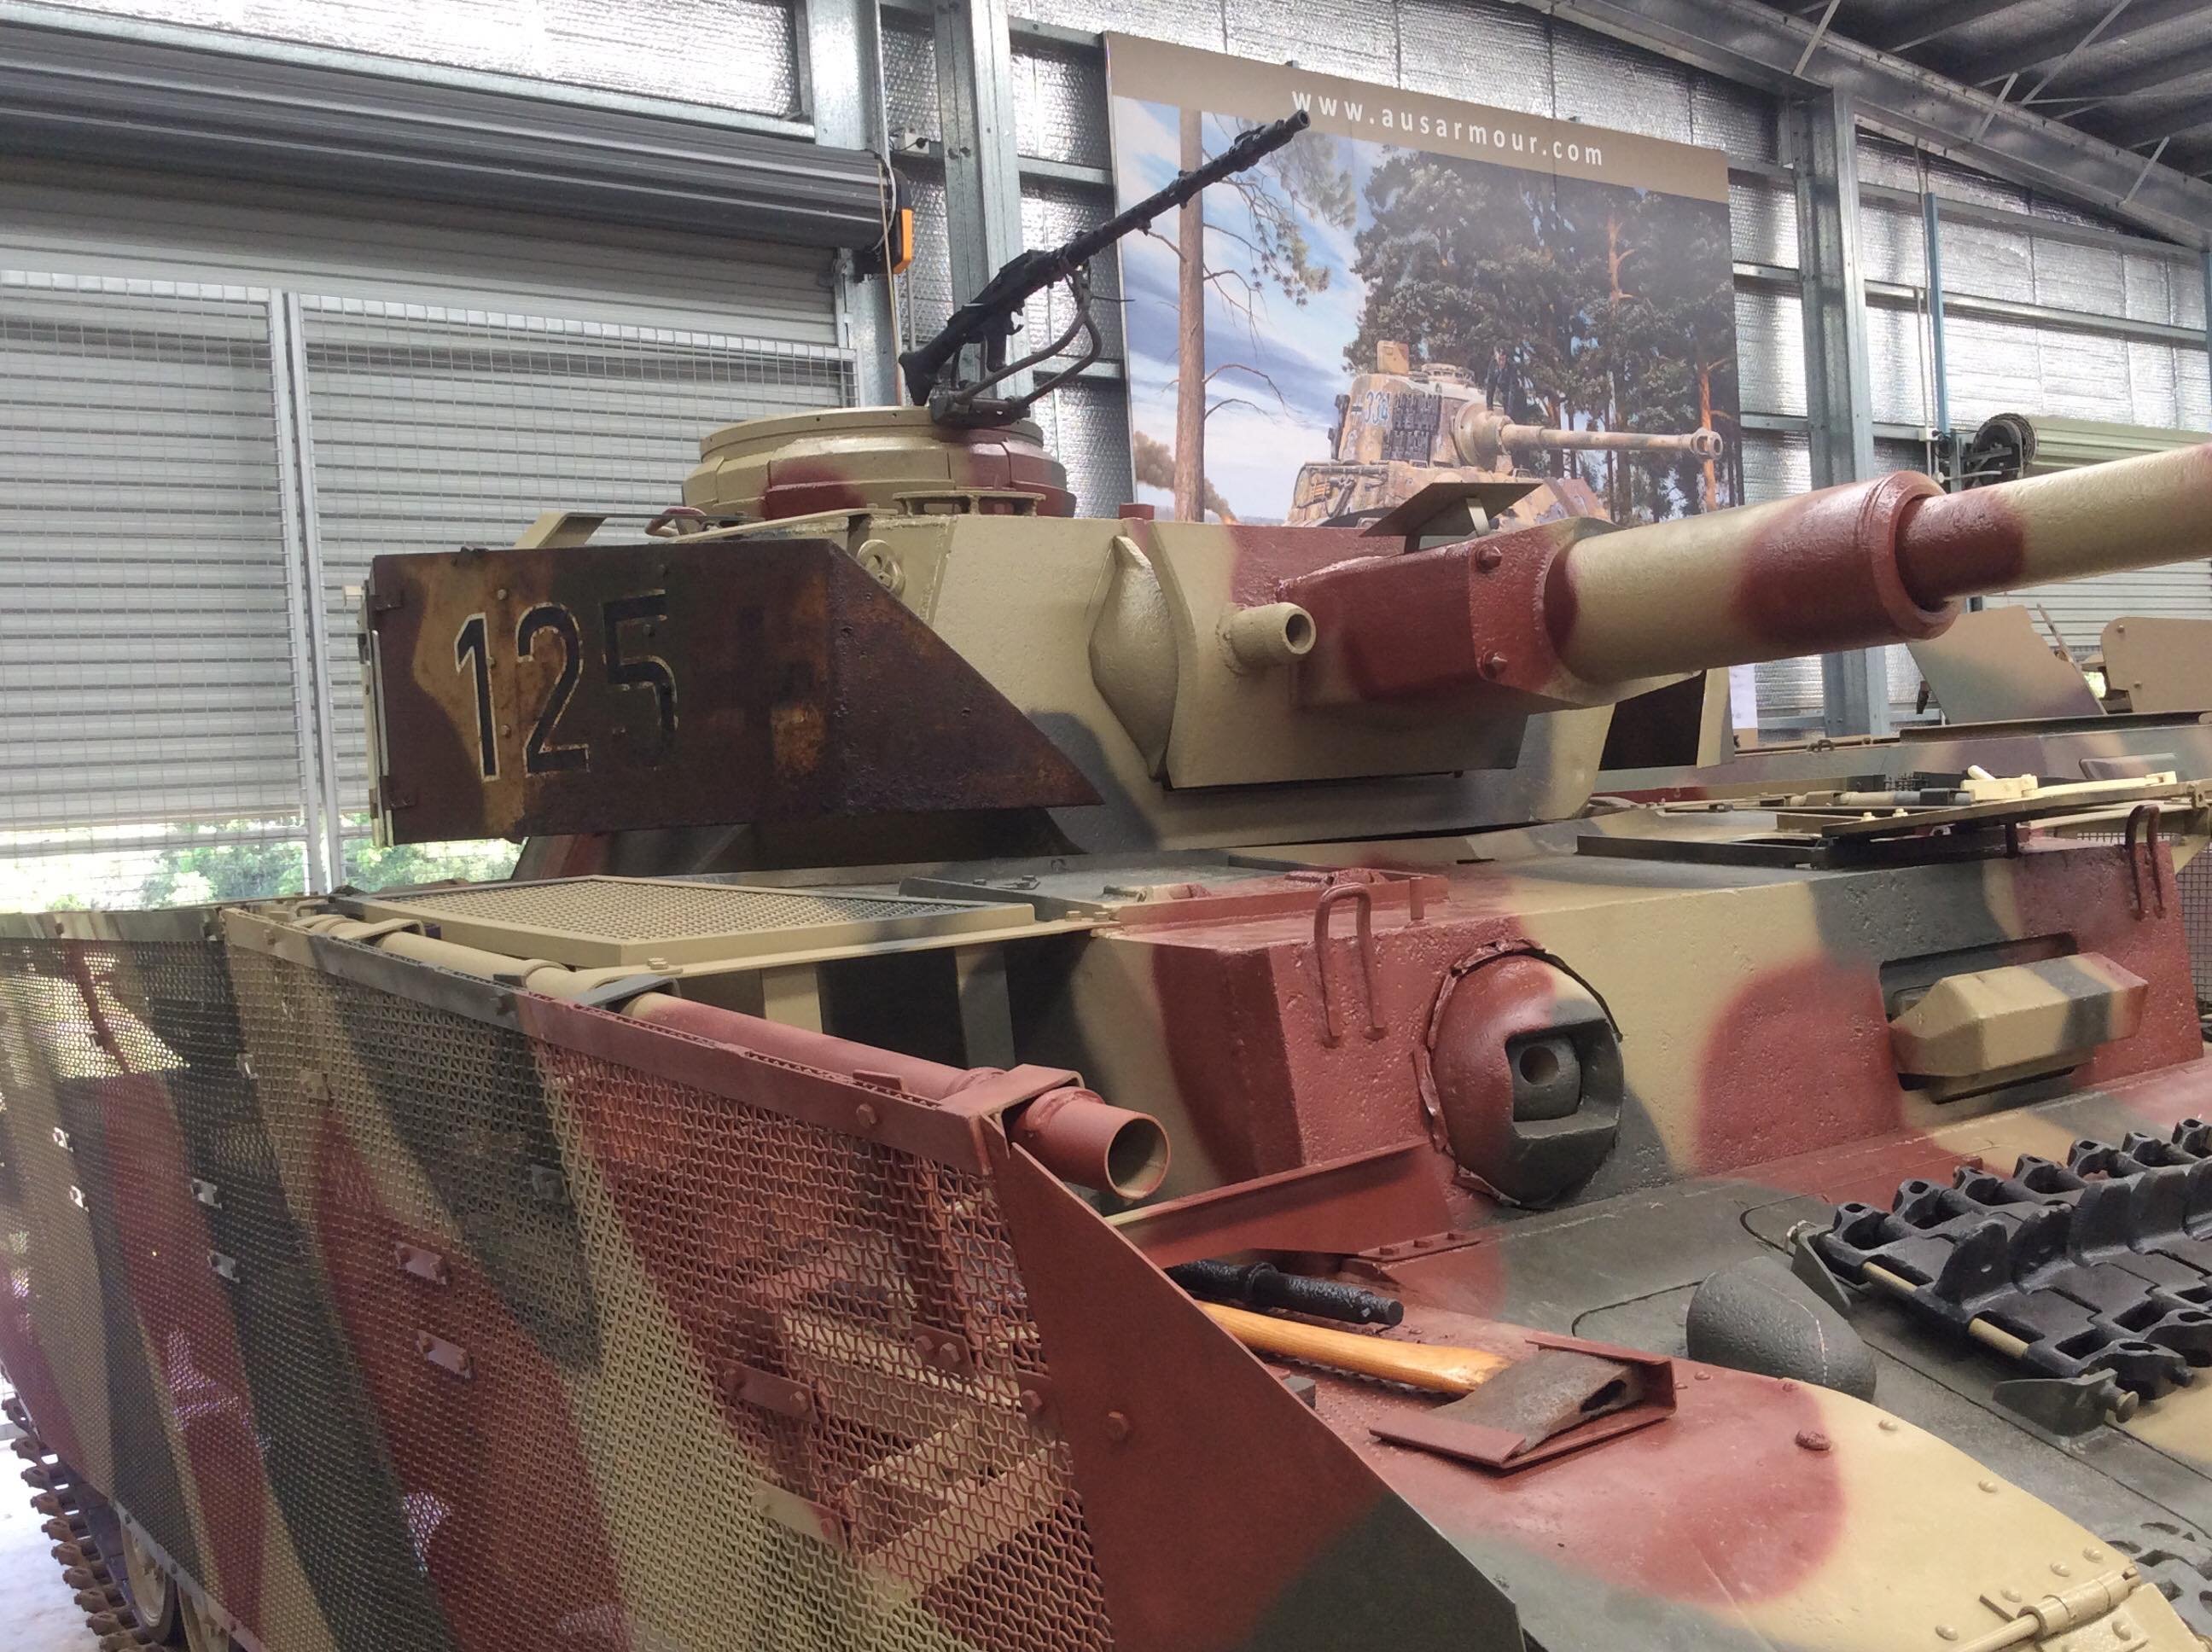
Dragon Jagdpanzer IV 70 (A) Kit 6015 COMPLETE
GazzaS replied to GazzaS's topic in LSM 1/35 and Larger Work In Progress
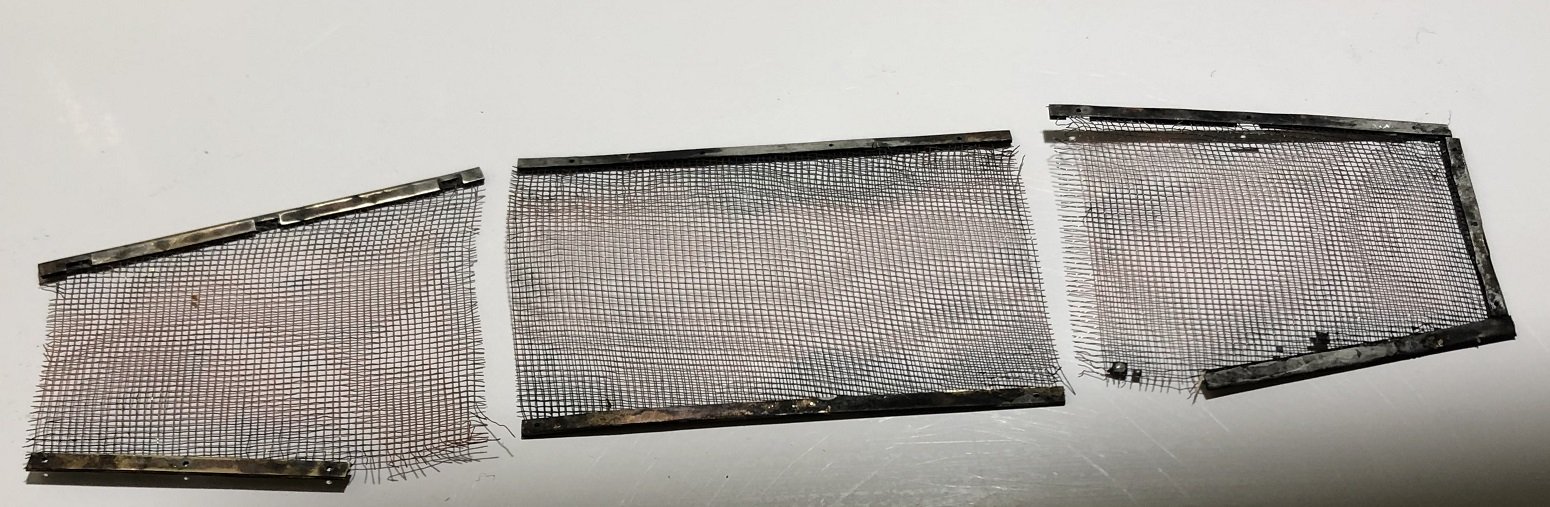
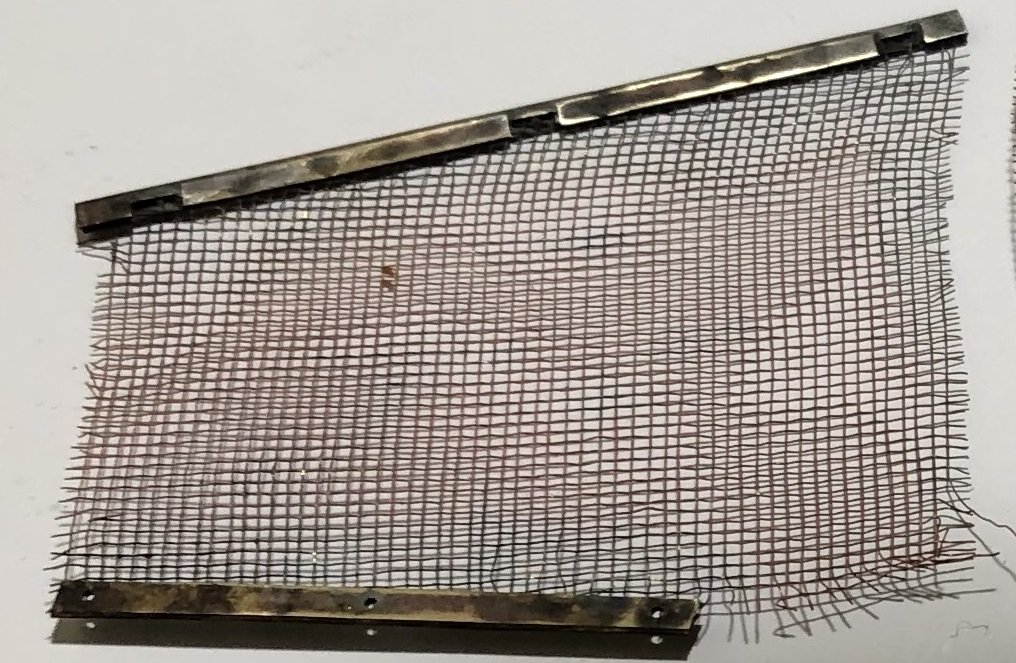
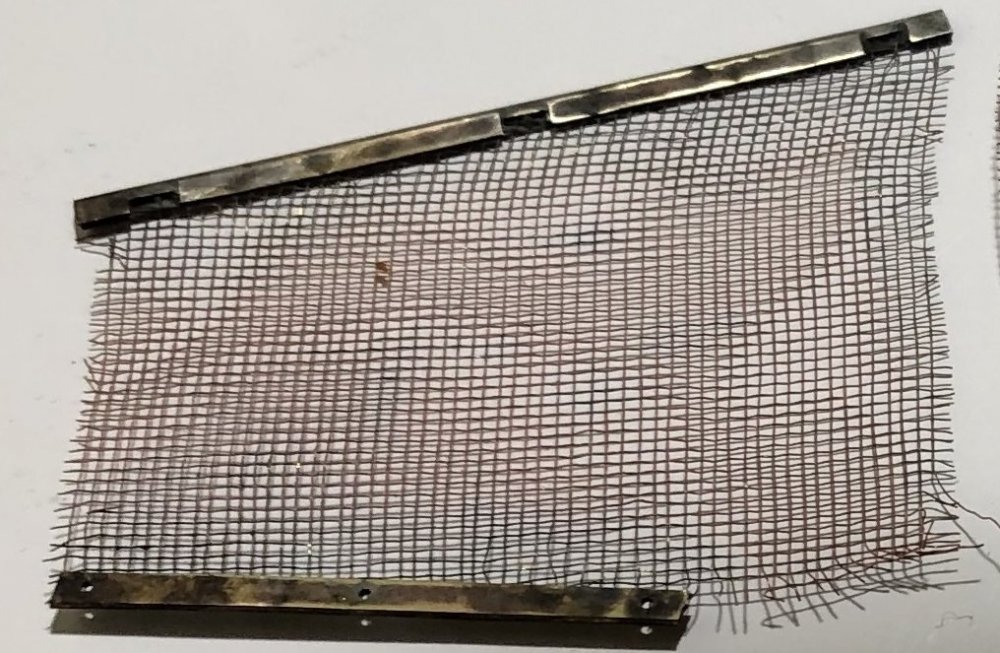
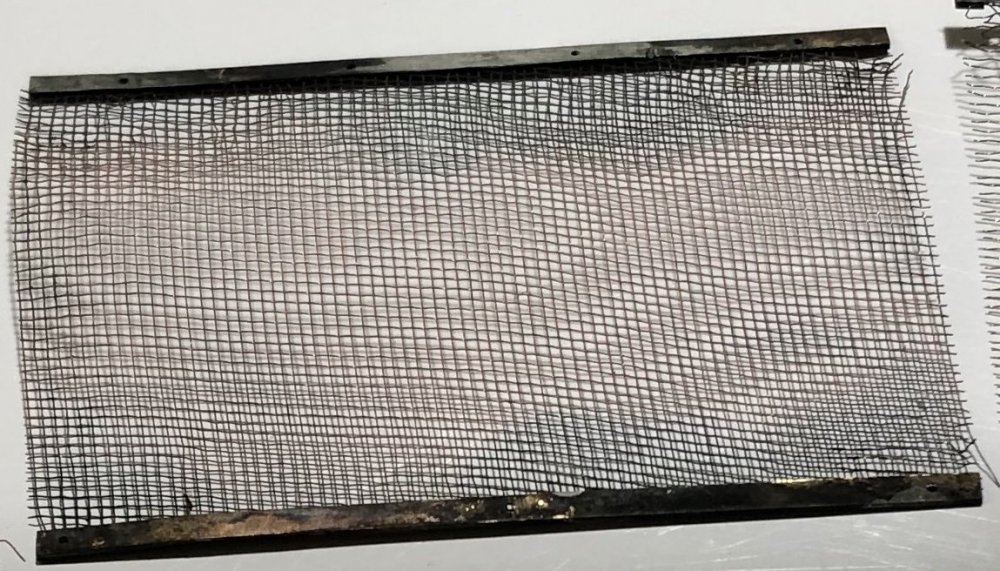
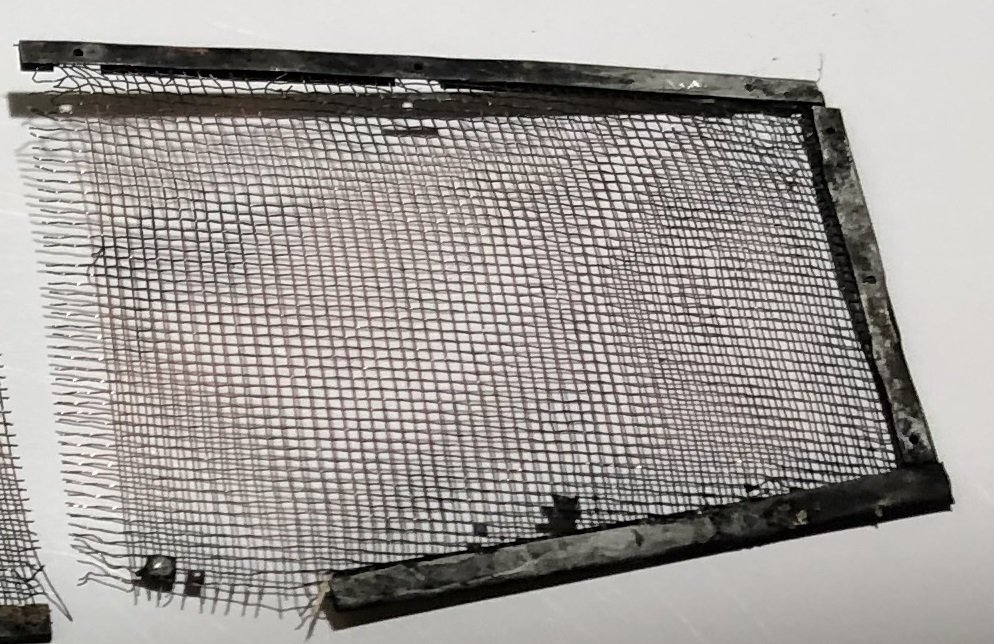
The $45 kit has the steel mesh. But having bought the brass mesh... I wanted to use it. -
ICM 1/48 He-111 H-6 N.Africa campaign-Finnished
GazzaS replied to KevinM's topic in Everything Ukraine Group Build
Very nice weathering up top! Depending on the amount of suffering you desire... The Jumo 211 could lose a fair amount of oil and belch a lot of... stuff.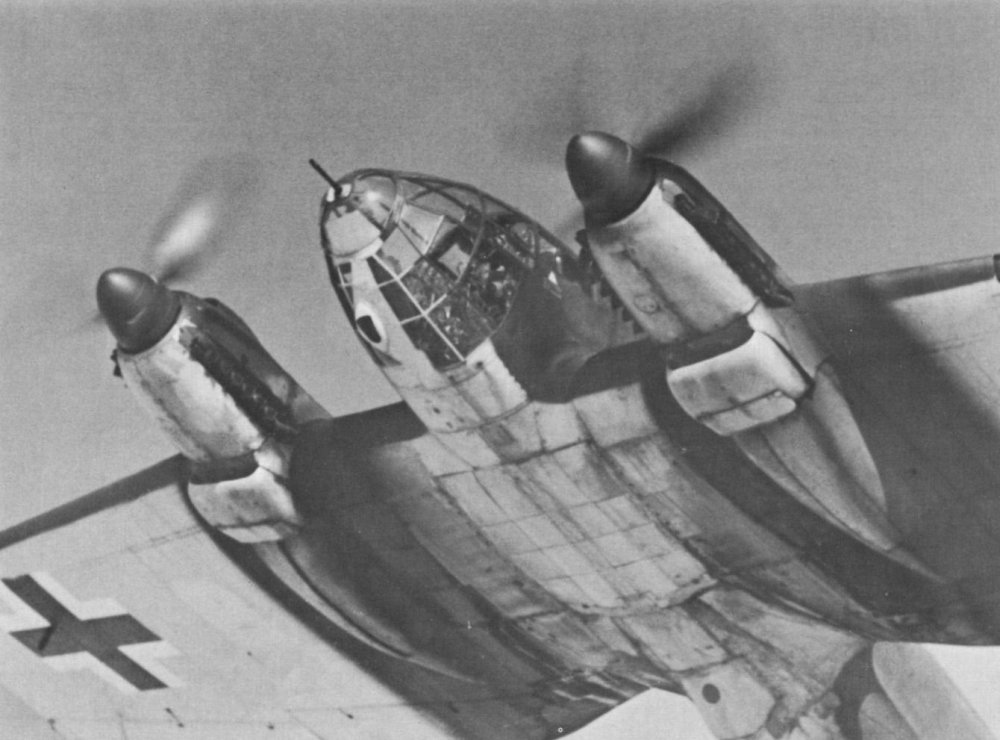
-
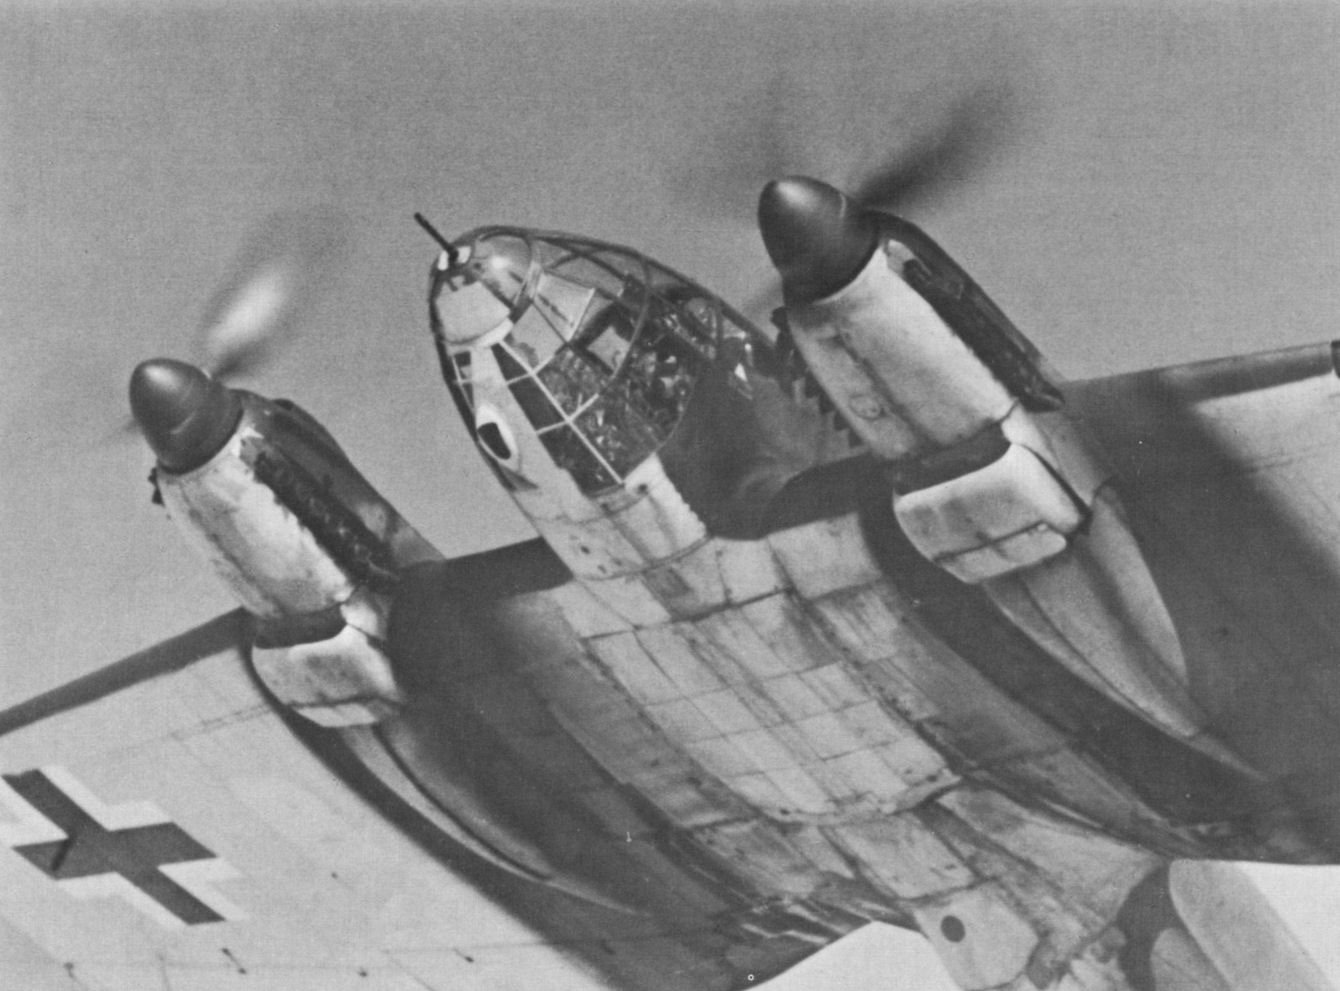
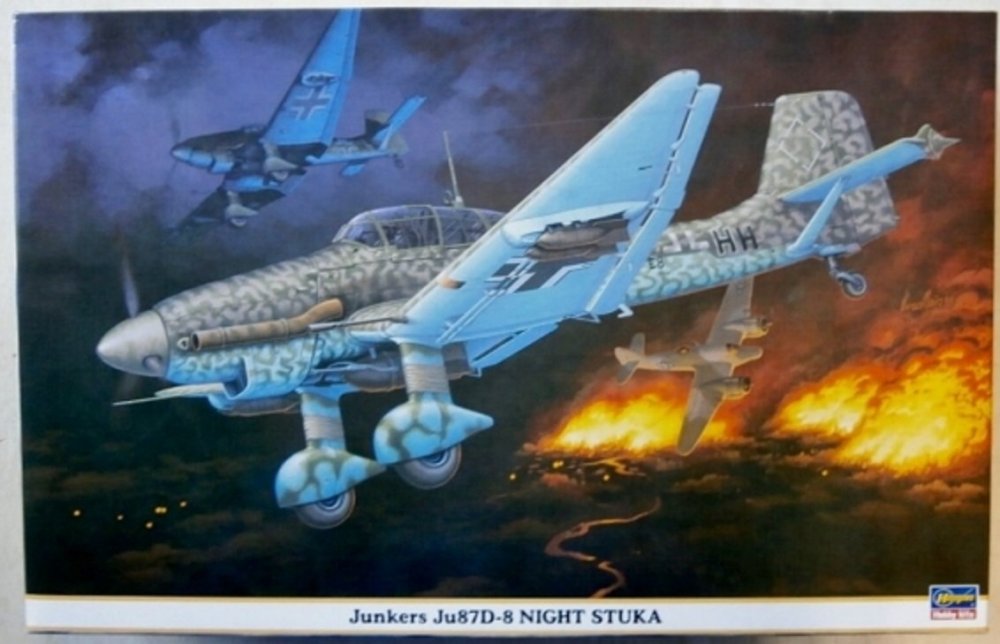
I've built four Ju-87's in my lifetime. The 1/48 Monogram Rudel G version. The 1/32 Revell B with the big snake decal. And a few years ago, the 1/48 Airfix B1. The first two were during my childhood, and probably pretty ugly. I was happy with the Airfix kit, but it suffered from a gravity related accident and ended up in the bin. This Hasegawa Kit is a Late D model, outfitted for nocturnal attacks. The kit is old, and the decals are yellowed. So I will only use a few of the stencils and fuel triangles, most likely. I'm not married to the late version anyway. The kit has all of the pieces to make any version except the G with it's twin 37MM guns. It even has the Jericho Trumpets. I hope you get to follow along!
- 13 replies
-
- 11
-

-
Dragon Jagdpanzer IV 70 (A) Kit 6015 COMPLETE
GazzaS replied to GazzaS's topic in LSM 1/35 and Larger Work In Progress
A Soldering lesson. Now, some very close images of nastiness... One of my mates at the club had another Dragon 70 (A) with photo etch for 45AUD. So, I bought it and married it's photo-etch to my #40 Gauge brass mesh. The way the photo etch is made, the modeller will bend it around the edges of the mesh and then fix in place. This is fine for mesh that doesn't move. However, my brass mesh is truly woven. So, every touch bends the ends and makes a general mess of the fine filaments. Then there are the filaments that escape via the unsealed edges. Very untidy. But this is the way it is when you have to fondle something as lively as woven brass mesh. So... What is the solution? My mind has been working on it while I was working at work today. What I will have to do is: 1. Fix a larger piece of mesh to a frame, ensuring all of the filaments are running north-south and east-west. I will do this with masking tape. 2. Attach new brass strips to the immobilized mesh. I prefer to use soldering as it is less prone to accidental detachment. 3. Solder 'mirror' strips on the other side of the Schurzen. 4. Seal the un-framed edges with CA. I tried to do this with solder, but apparently soldering mesh is very difficult according to my web-research. 5. Finally cut away the Thoma Schurzen piece from the overly large piece of brass mesh. 6. Attach additional hardware pieces required to hang the Schurzen from the vehicle. 7. Soak in pickle solution. A friend gave me some pictures of how Thoma Schurzen should look on a Pz IV. I'll attach a couple pics.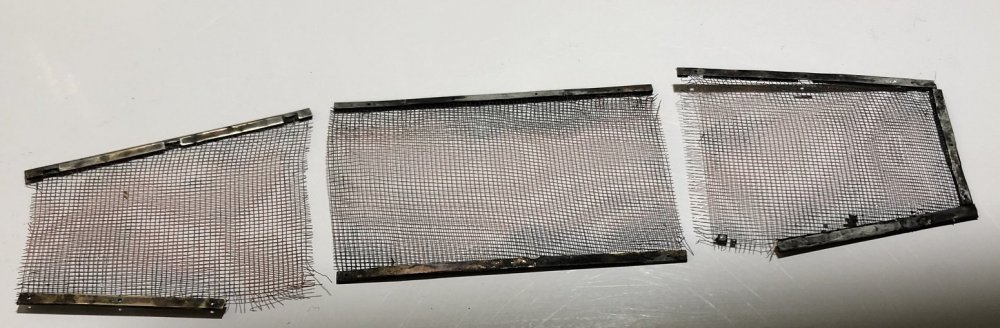

-
Ukraine International Airlines Embraer EMB 190
GazzaS replied to Peterpools's topic in Archived GB's Sub Forum
Wow! Great finish, Peter! -
Very nice work, Peter!
-
RCAF Liberator GR Mk VI
GazzaS replied to BlrwestSiR's topic in LSM 1/35 and Larger Work In Progress
Superb! -
Looking sweet, Bill!
-
Happy Birthday. Rob! Glad you had a great time and got a model!
-
Trumpeter F4F-3 Late - 1/32nd
GazzaS replied to Bomber_County's topic in LSM 1/35 and Larger Work In Progress
The only possibility I see is the 1/32 scale razorback. All of the rest... no way in hell.