BlrwestSiR
-
Posts
9,173 -
Joined
-
Last visited
Content Type
Profiles
Forums
Events
Gallery
Everything posted by BlrwestSiR
-
Peter, I'd consider Master brass barrels for the kit. They make a set ostensibly for the HK kit but there's no reason it wouldn't work on the Border kit. Border does include brass barrels but they oddly left the cooling jackets out so they're not truly usable. Other possible AM you could consider would be: -Barracudacast resin wheels and radios -Resin2Detail pilot's seat and controls -Belcher Bits bulged bomb bay doors depending on the specific plane you decide to model -Profimodeler does a pitot tube I believe. Not all of the above is needed but certainly are some mm ore options for you. Carl
-
Maru, we haven't met in person yet but I do remember the advice you gave me years ago shortly after my heart attack. It really left an impression on me and I appreciate it. Martin and I were actually talking about maybe sneaking over to Telford or one of the other European shows one day and meet up on your side of the pond. Hopefully that'll happen in the not too distant future. Carl
-

What is on your bench right now ? Share a picture :)
BlrwestSiR replied to Martinnfb's topic in Modelling Discussion
Nice work there Mark. I'm having a similar level of fun with decals on my Millennium Falcon. -
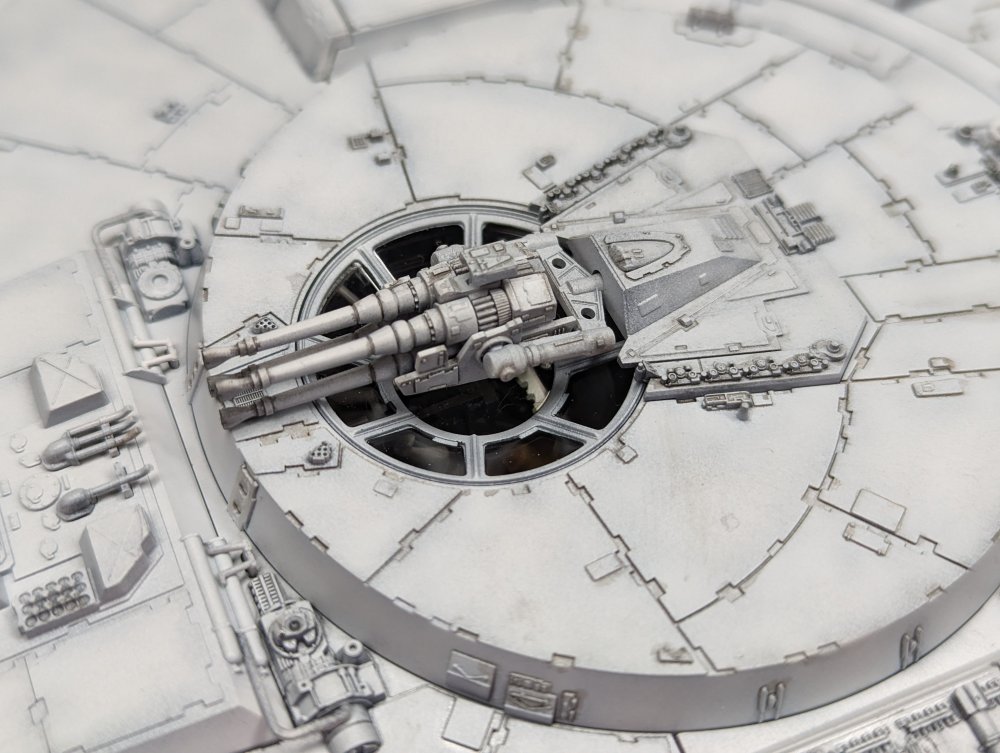
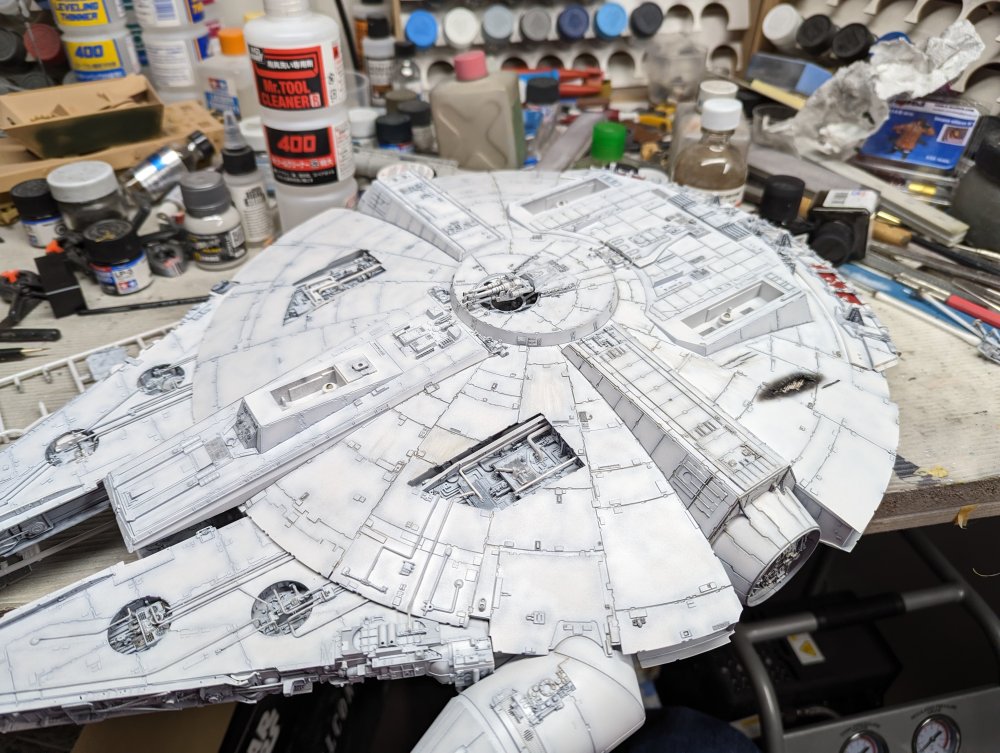
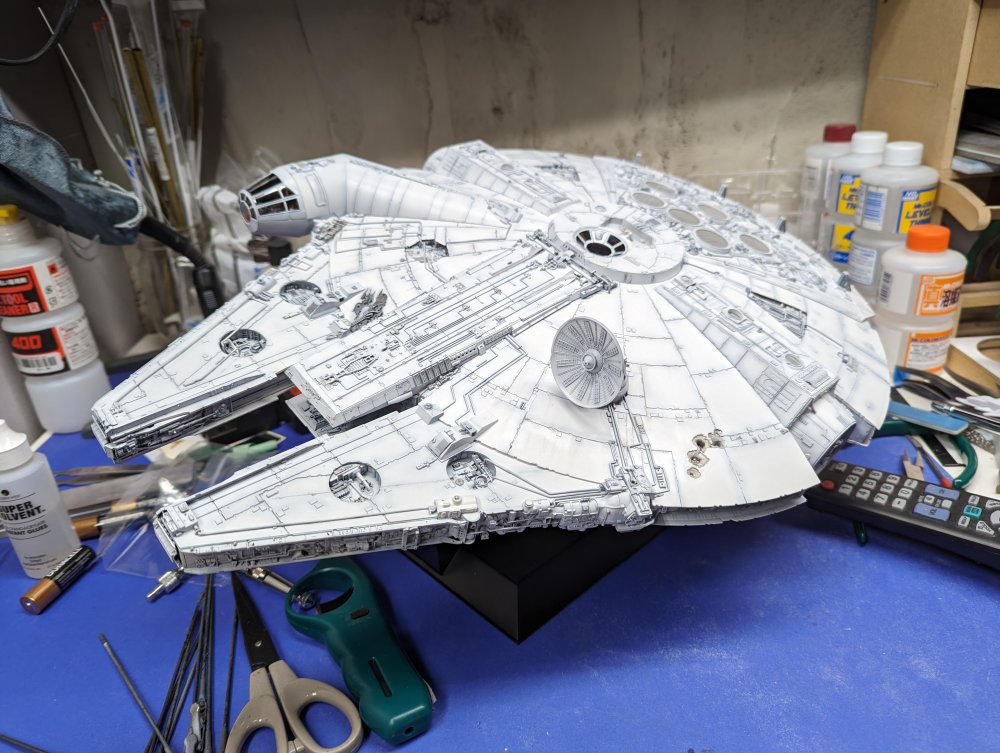
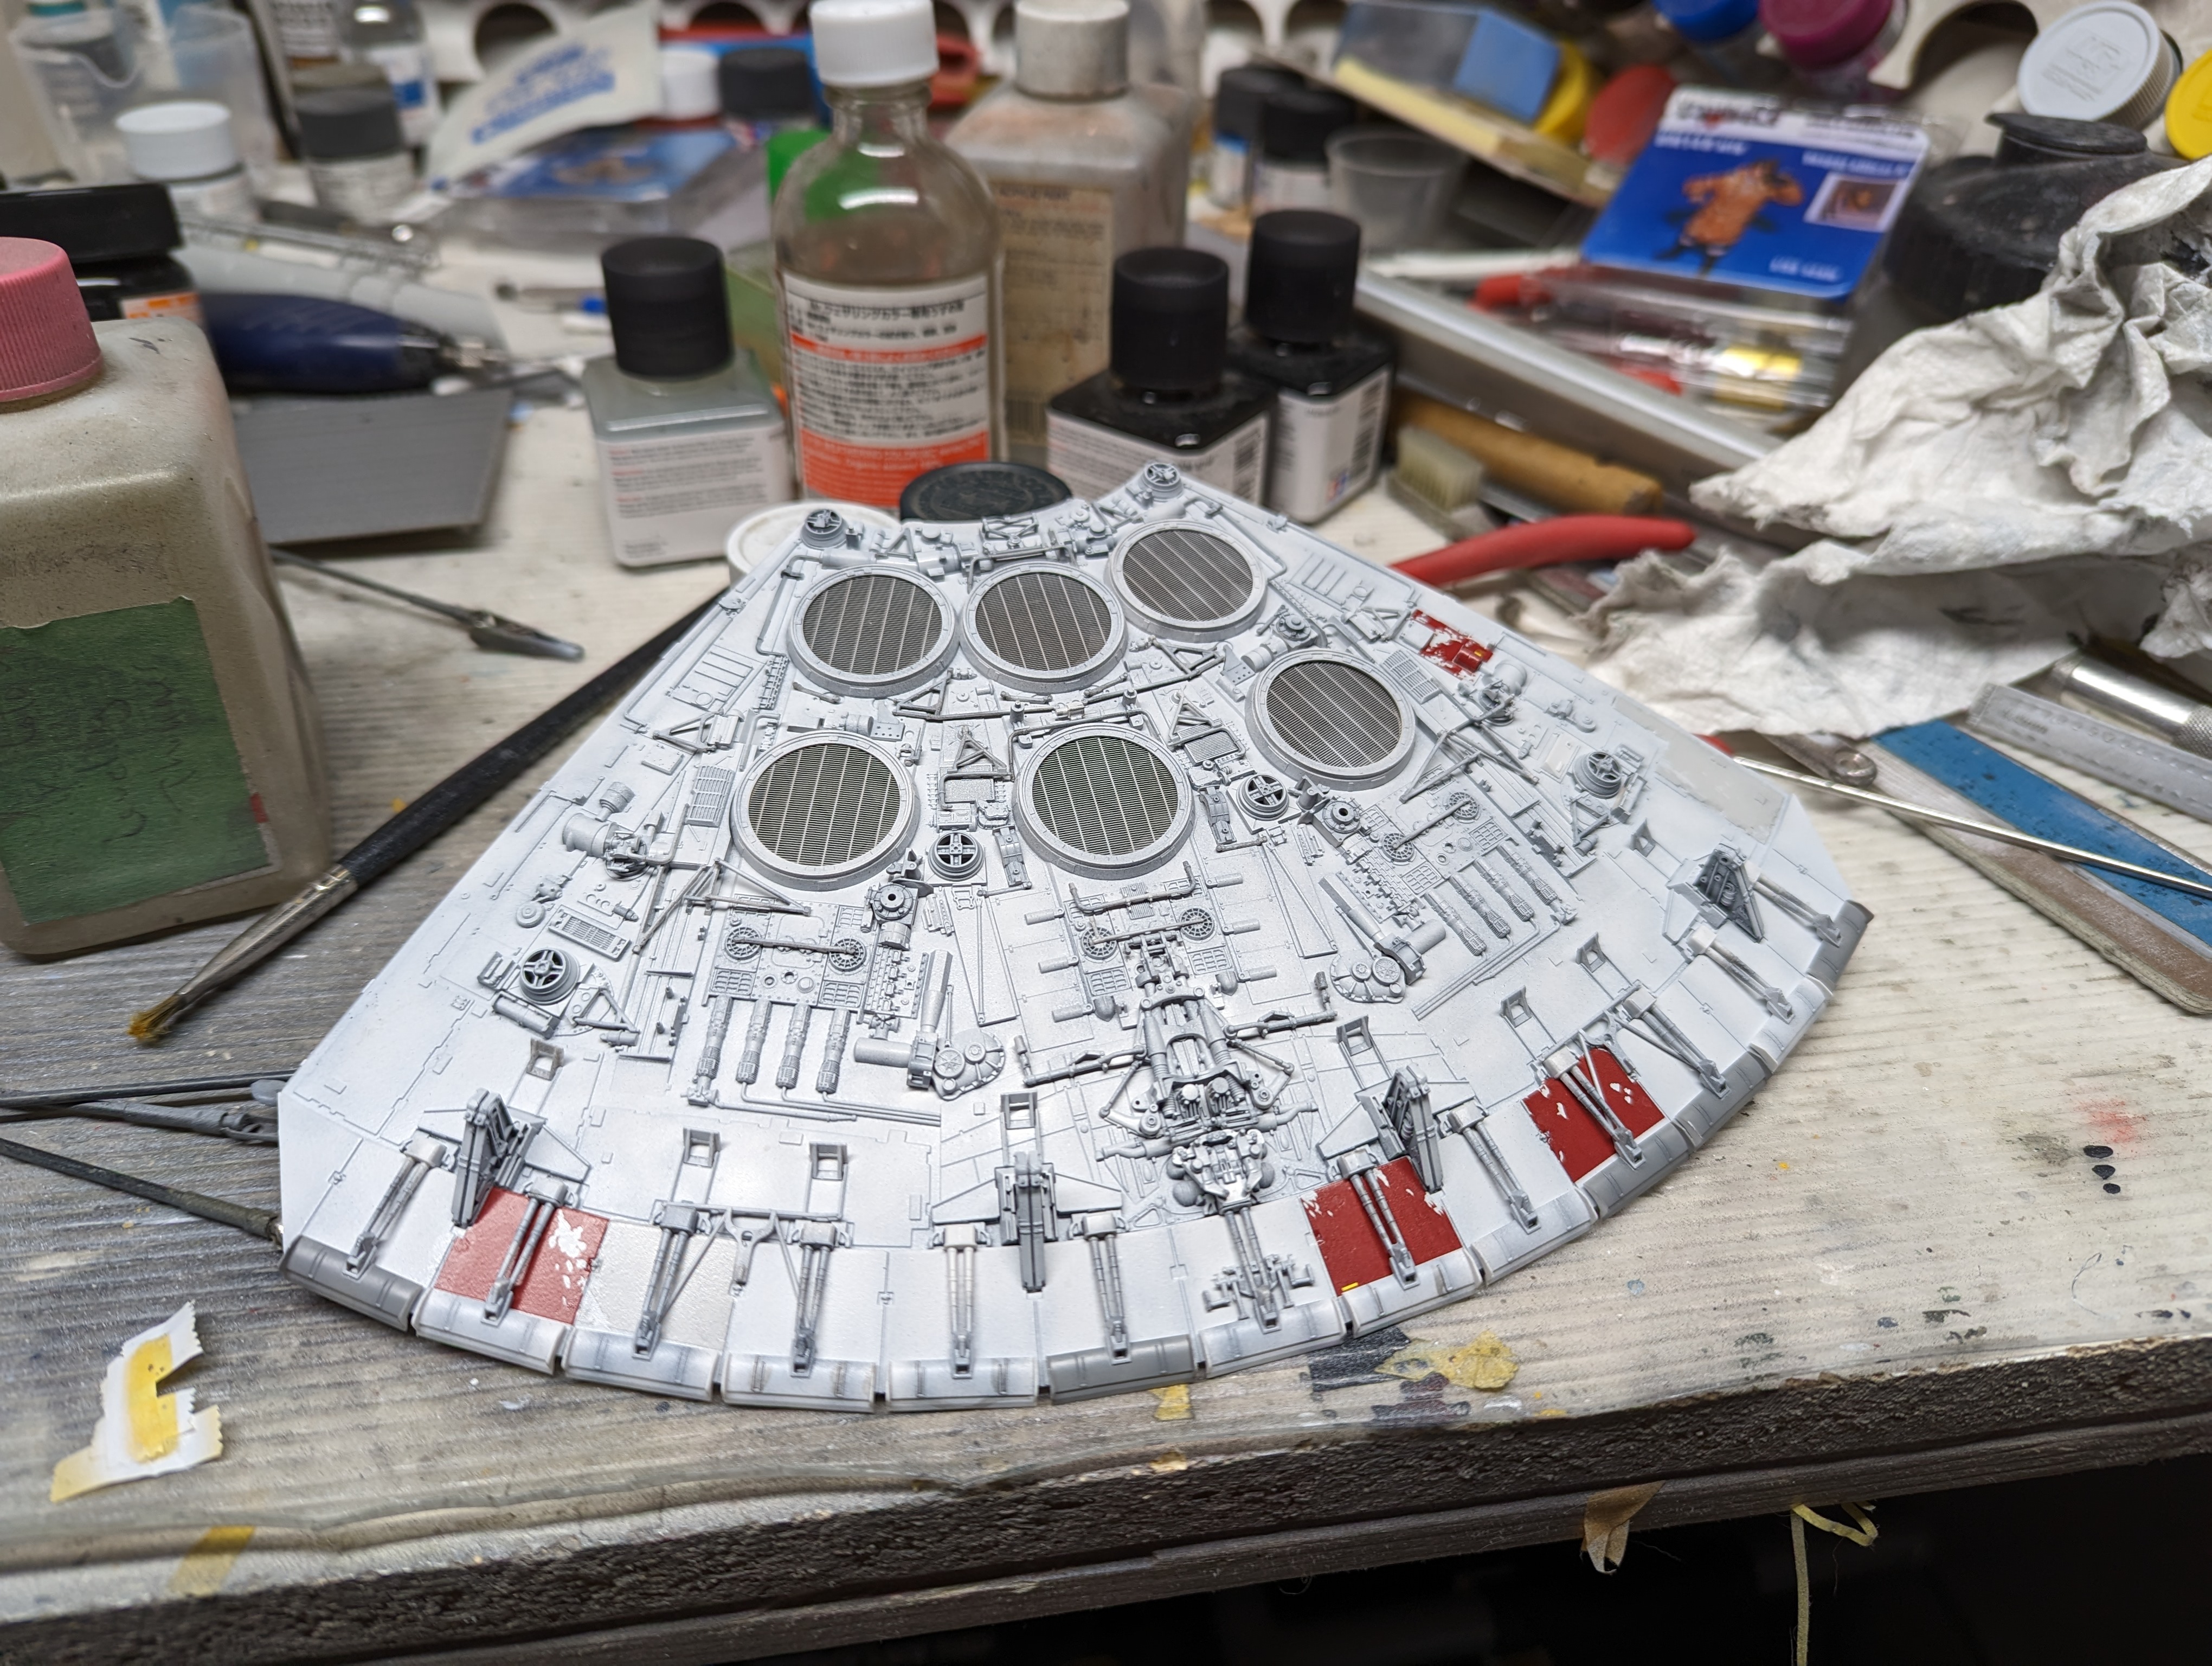
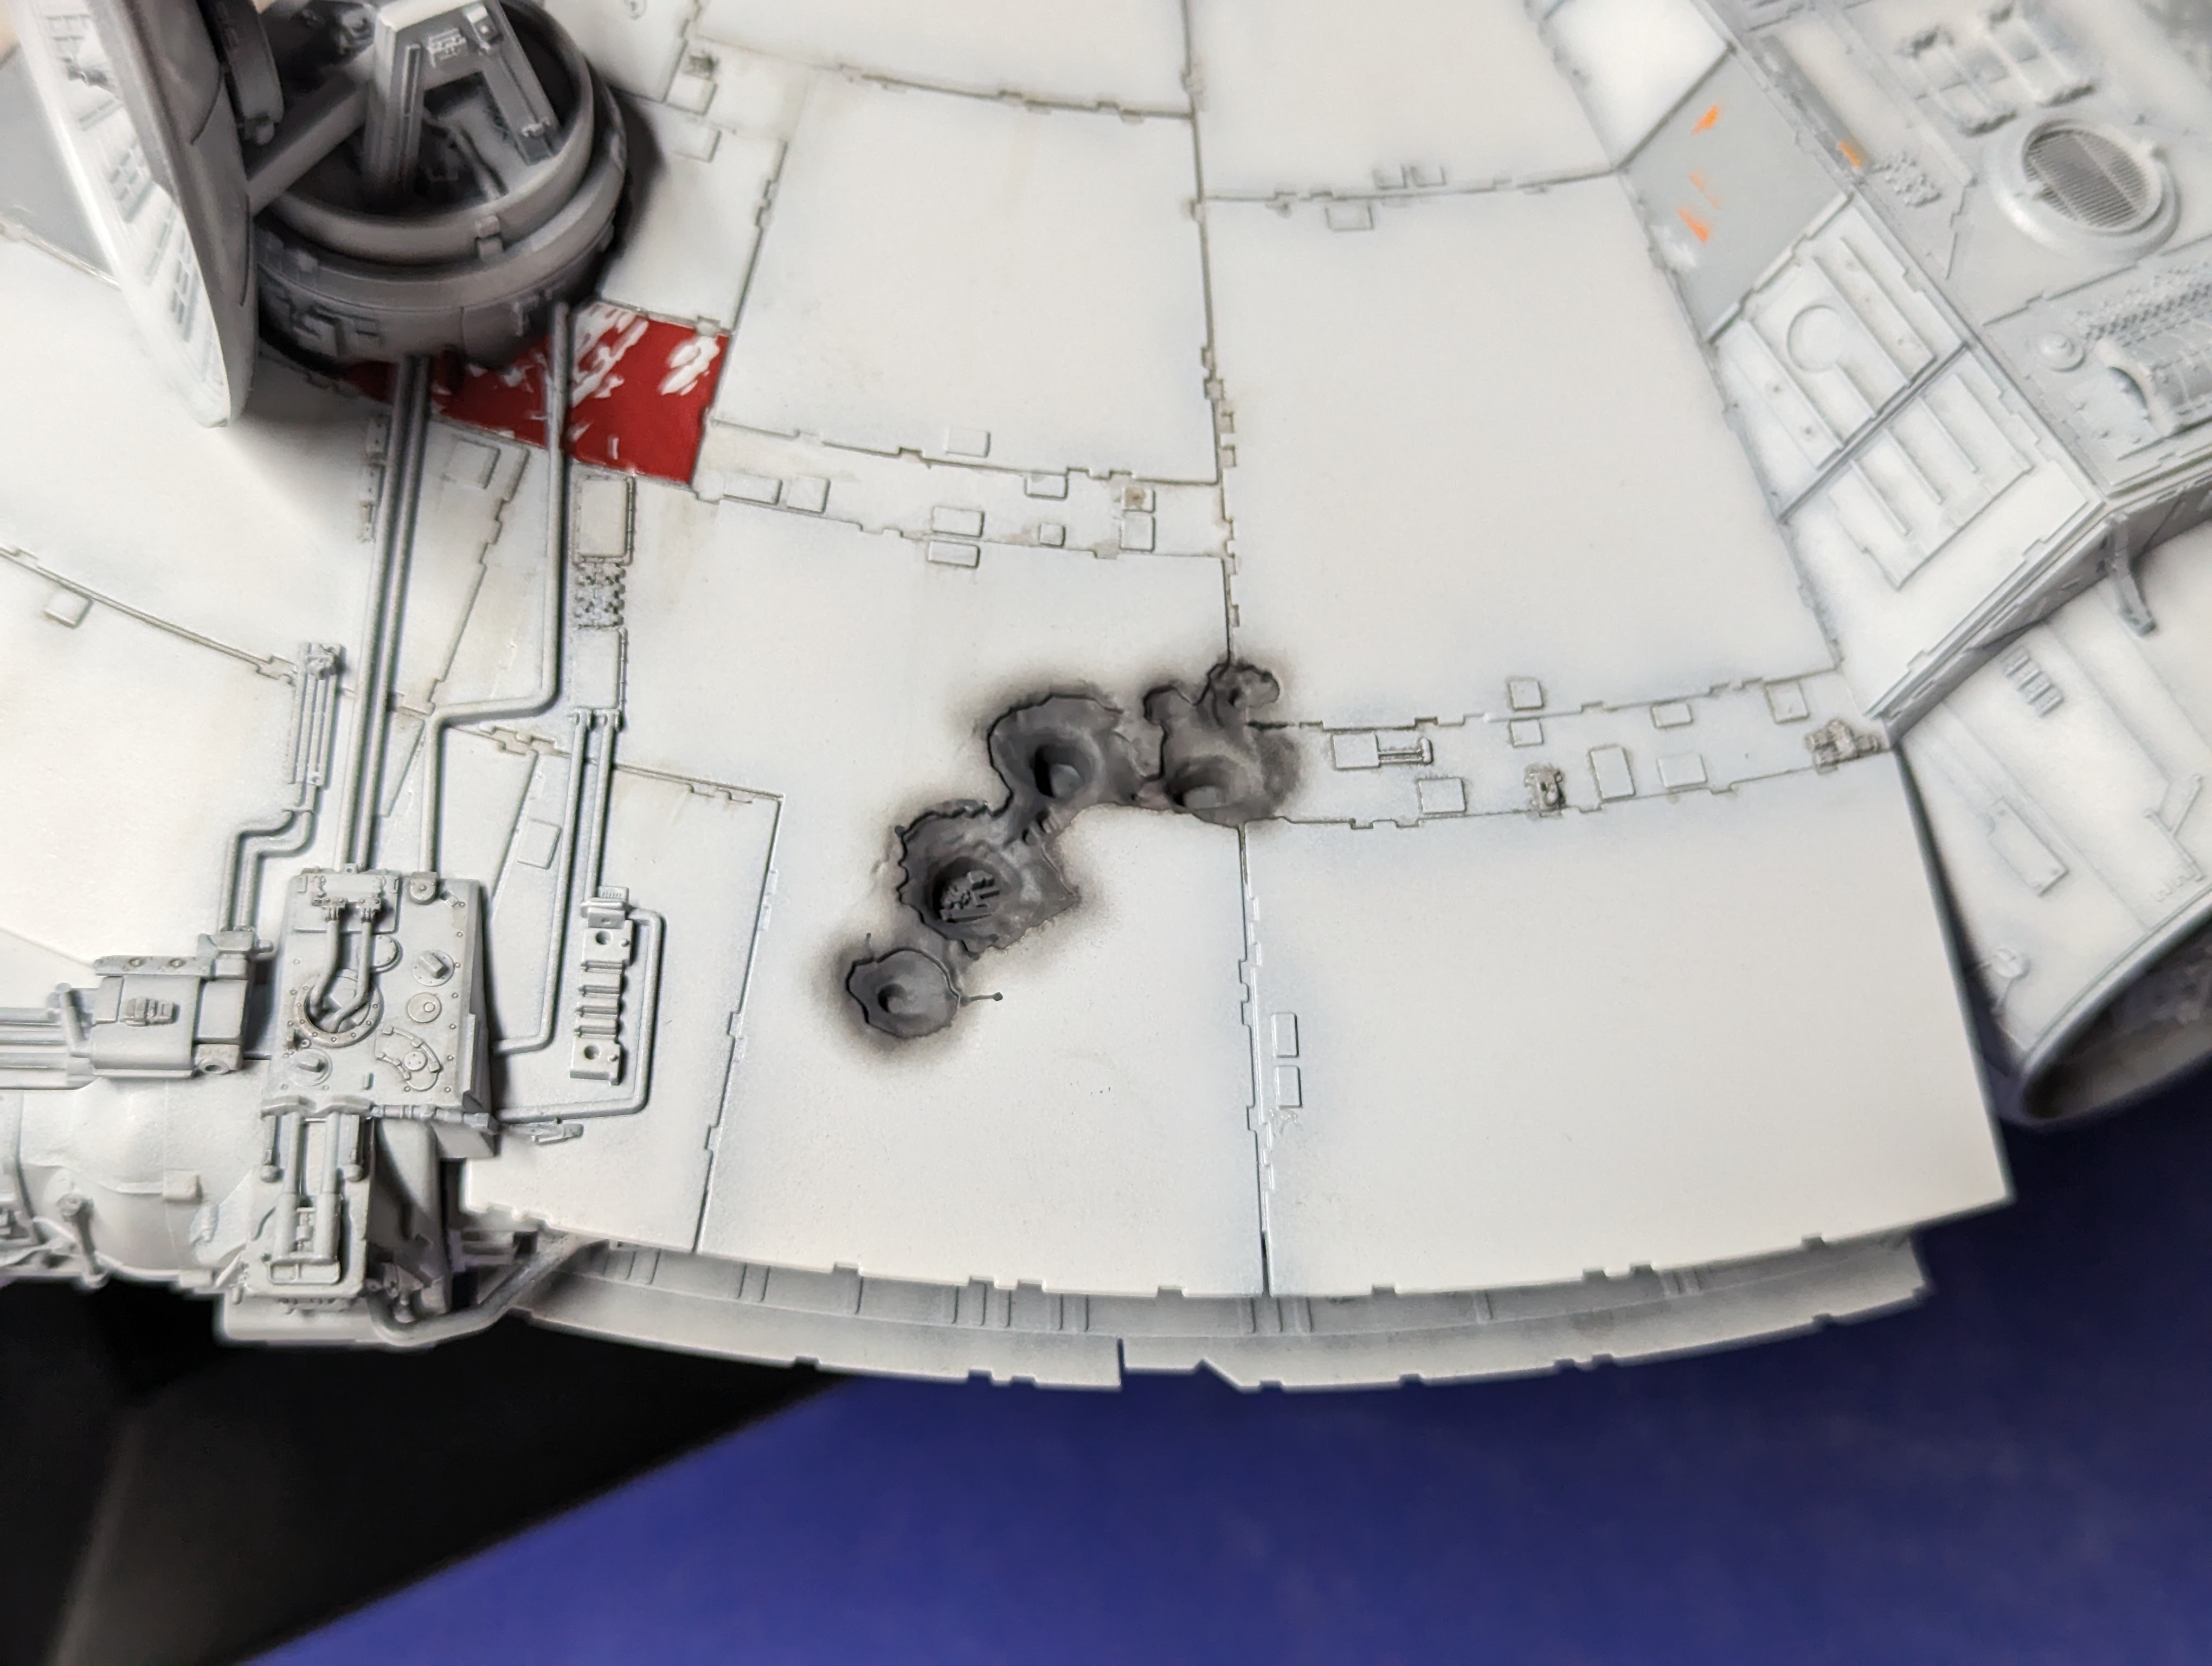
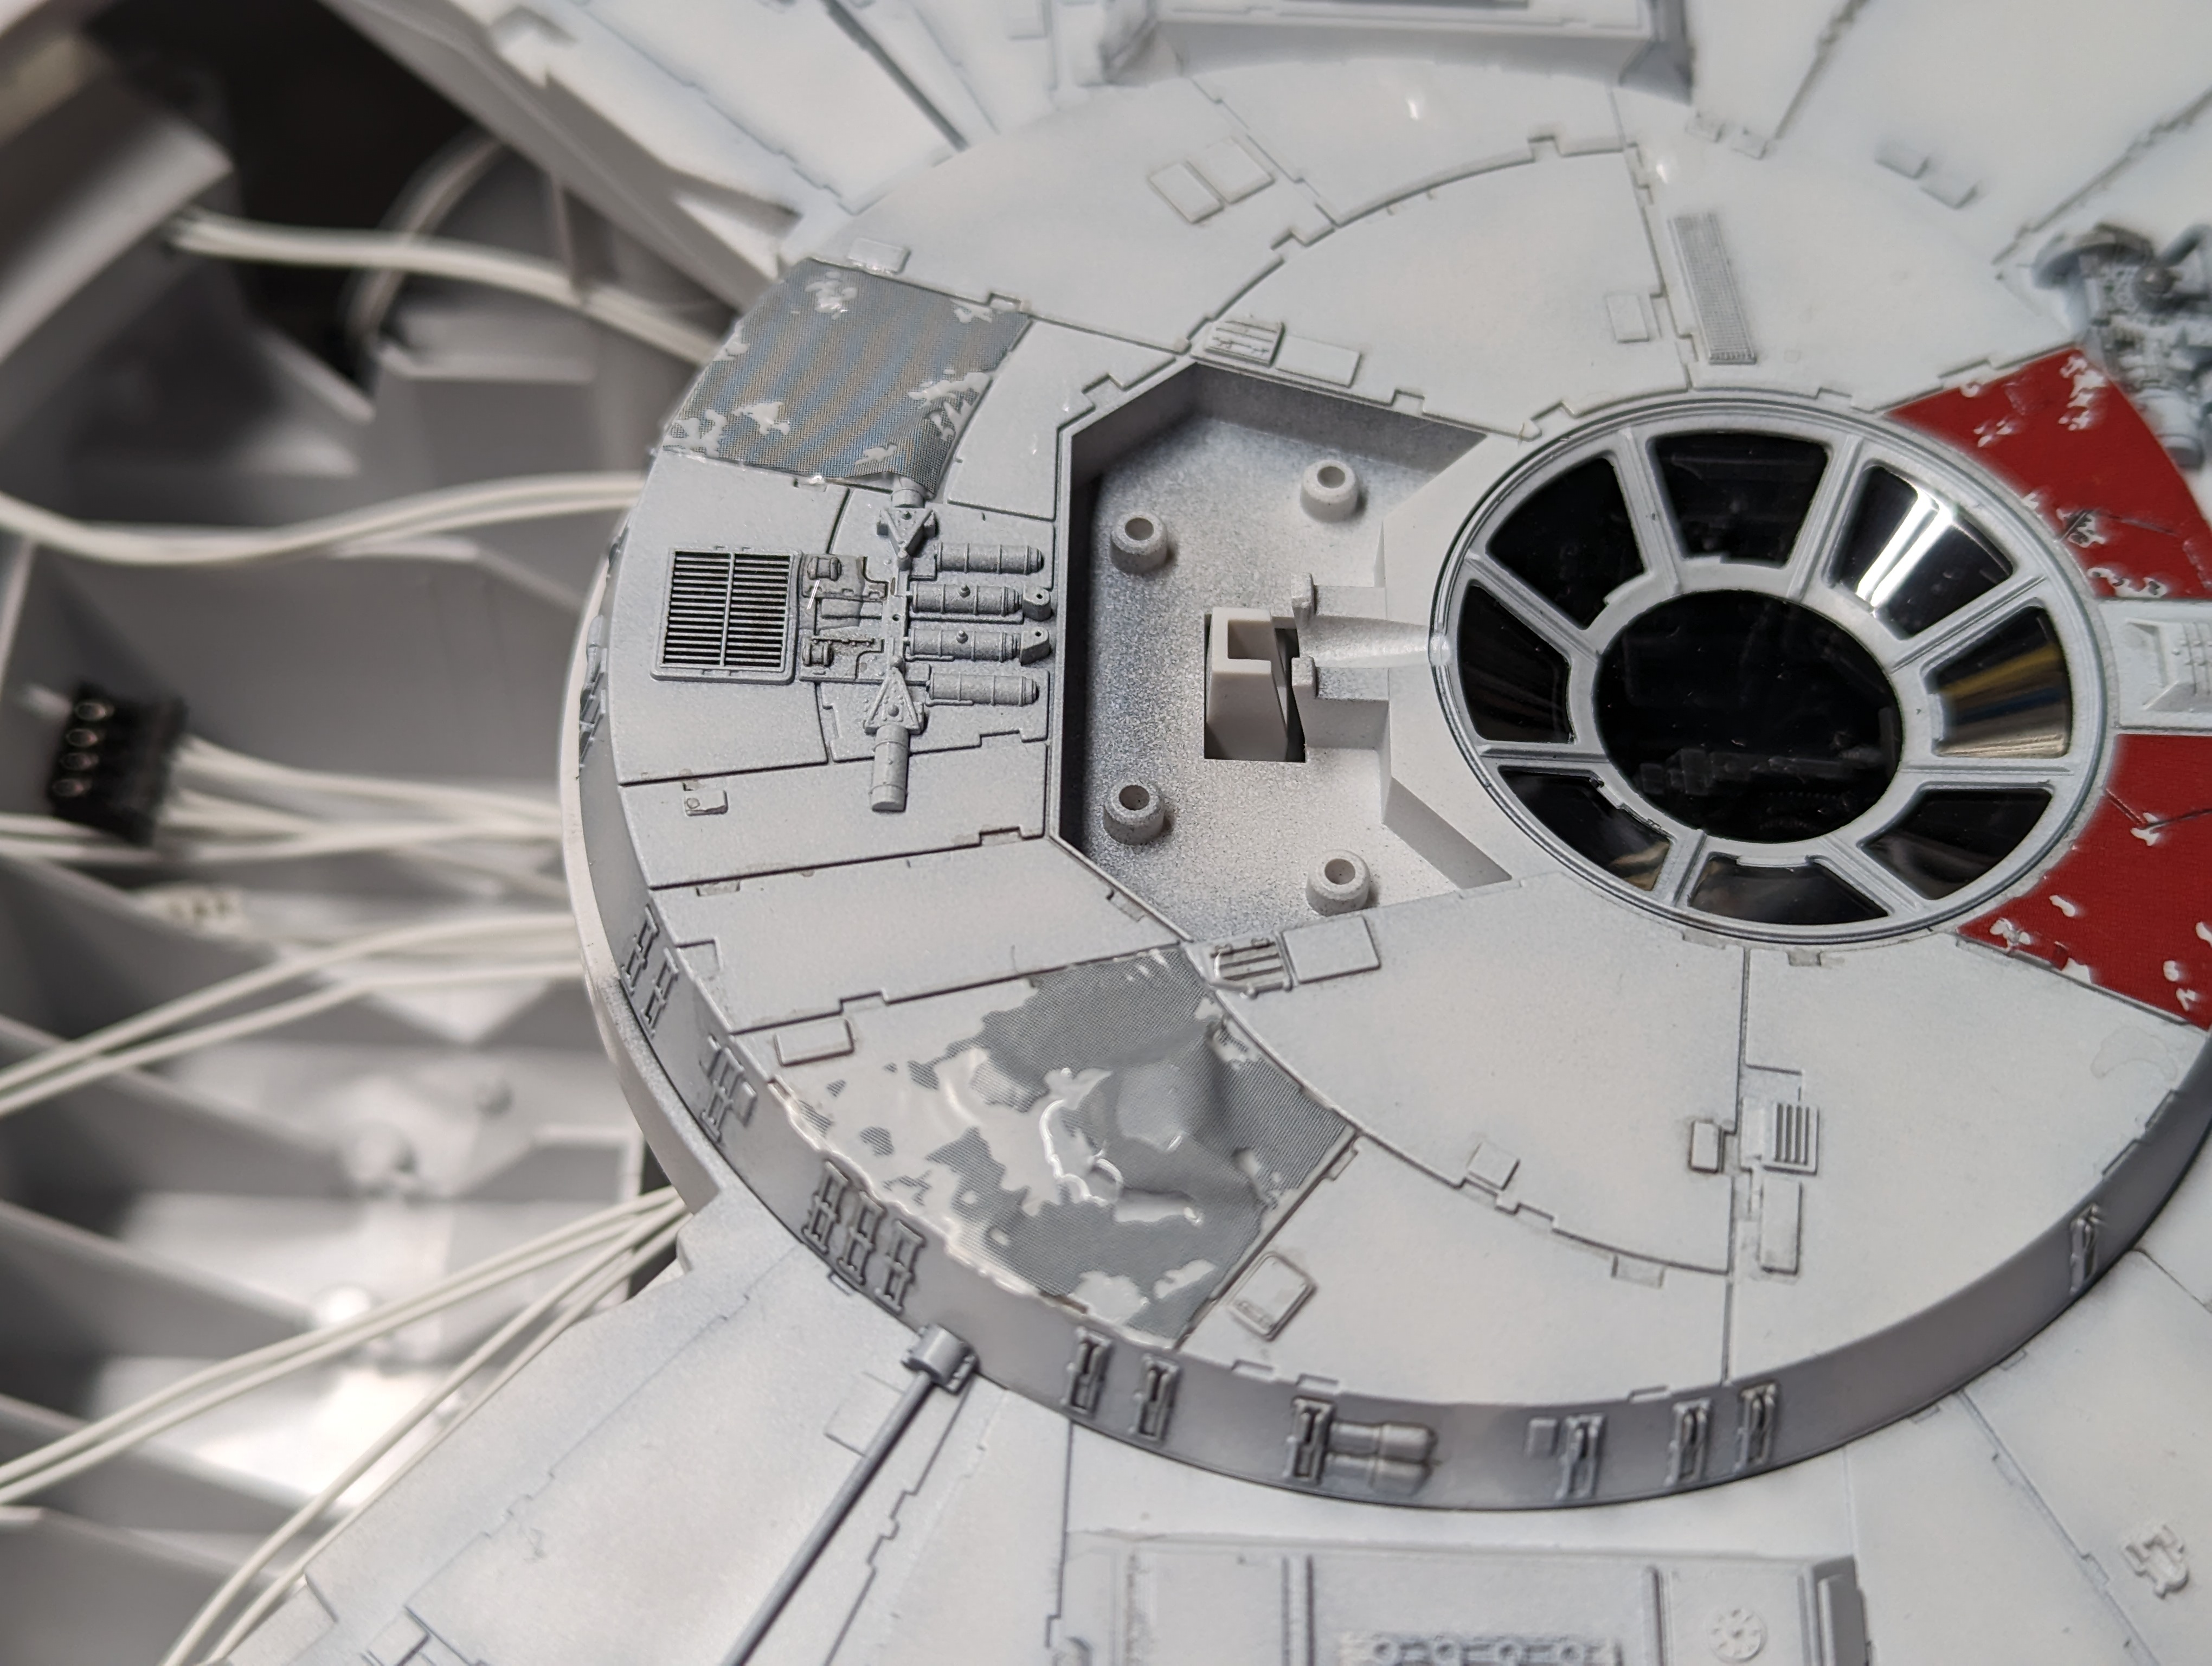
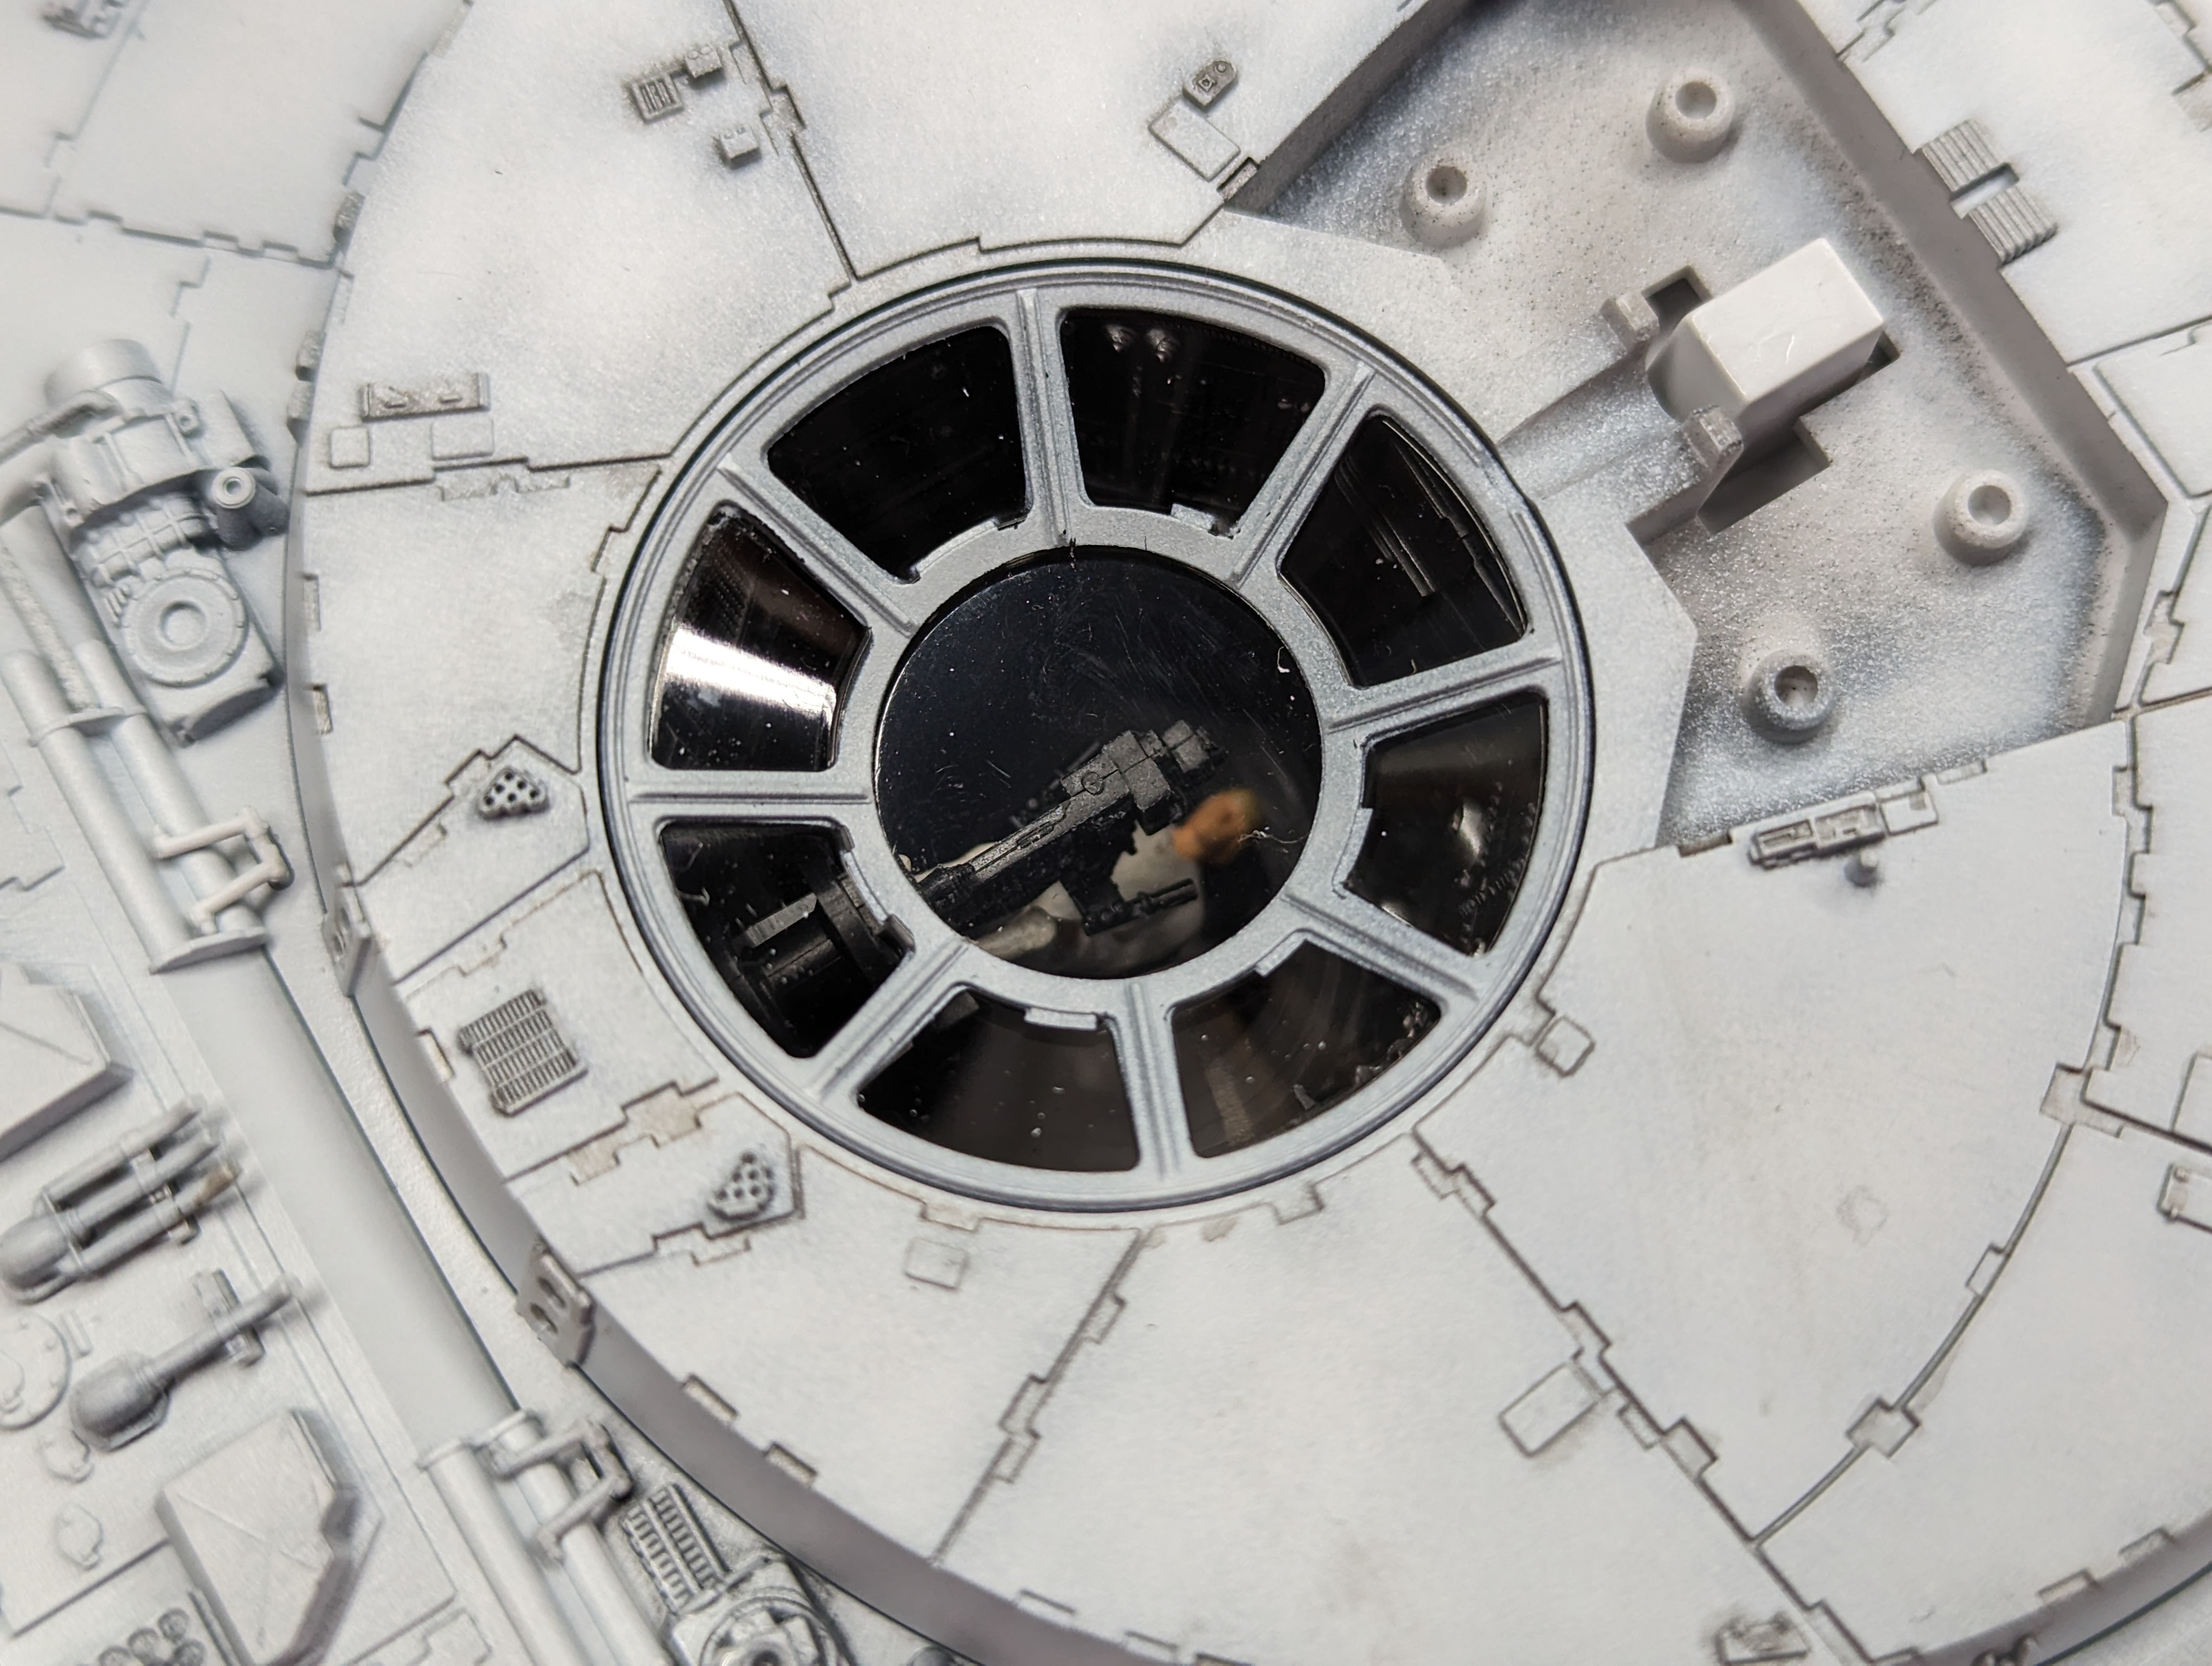
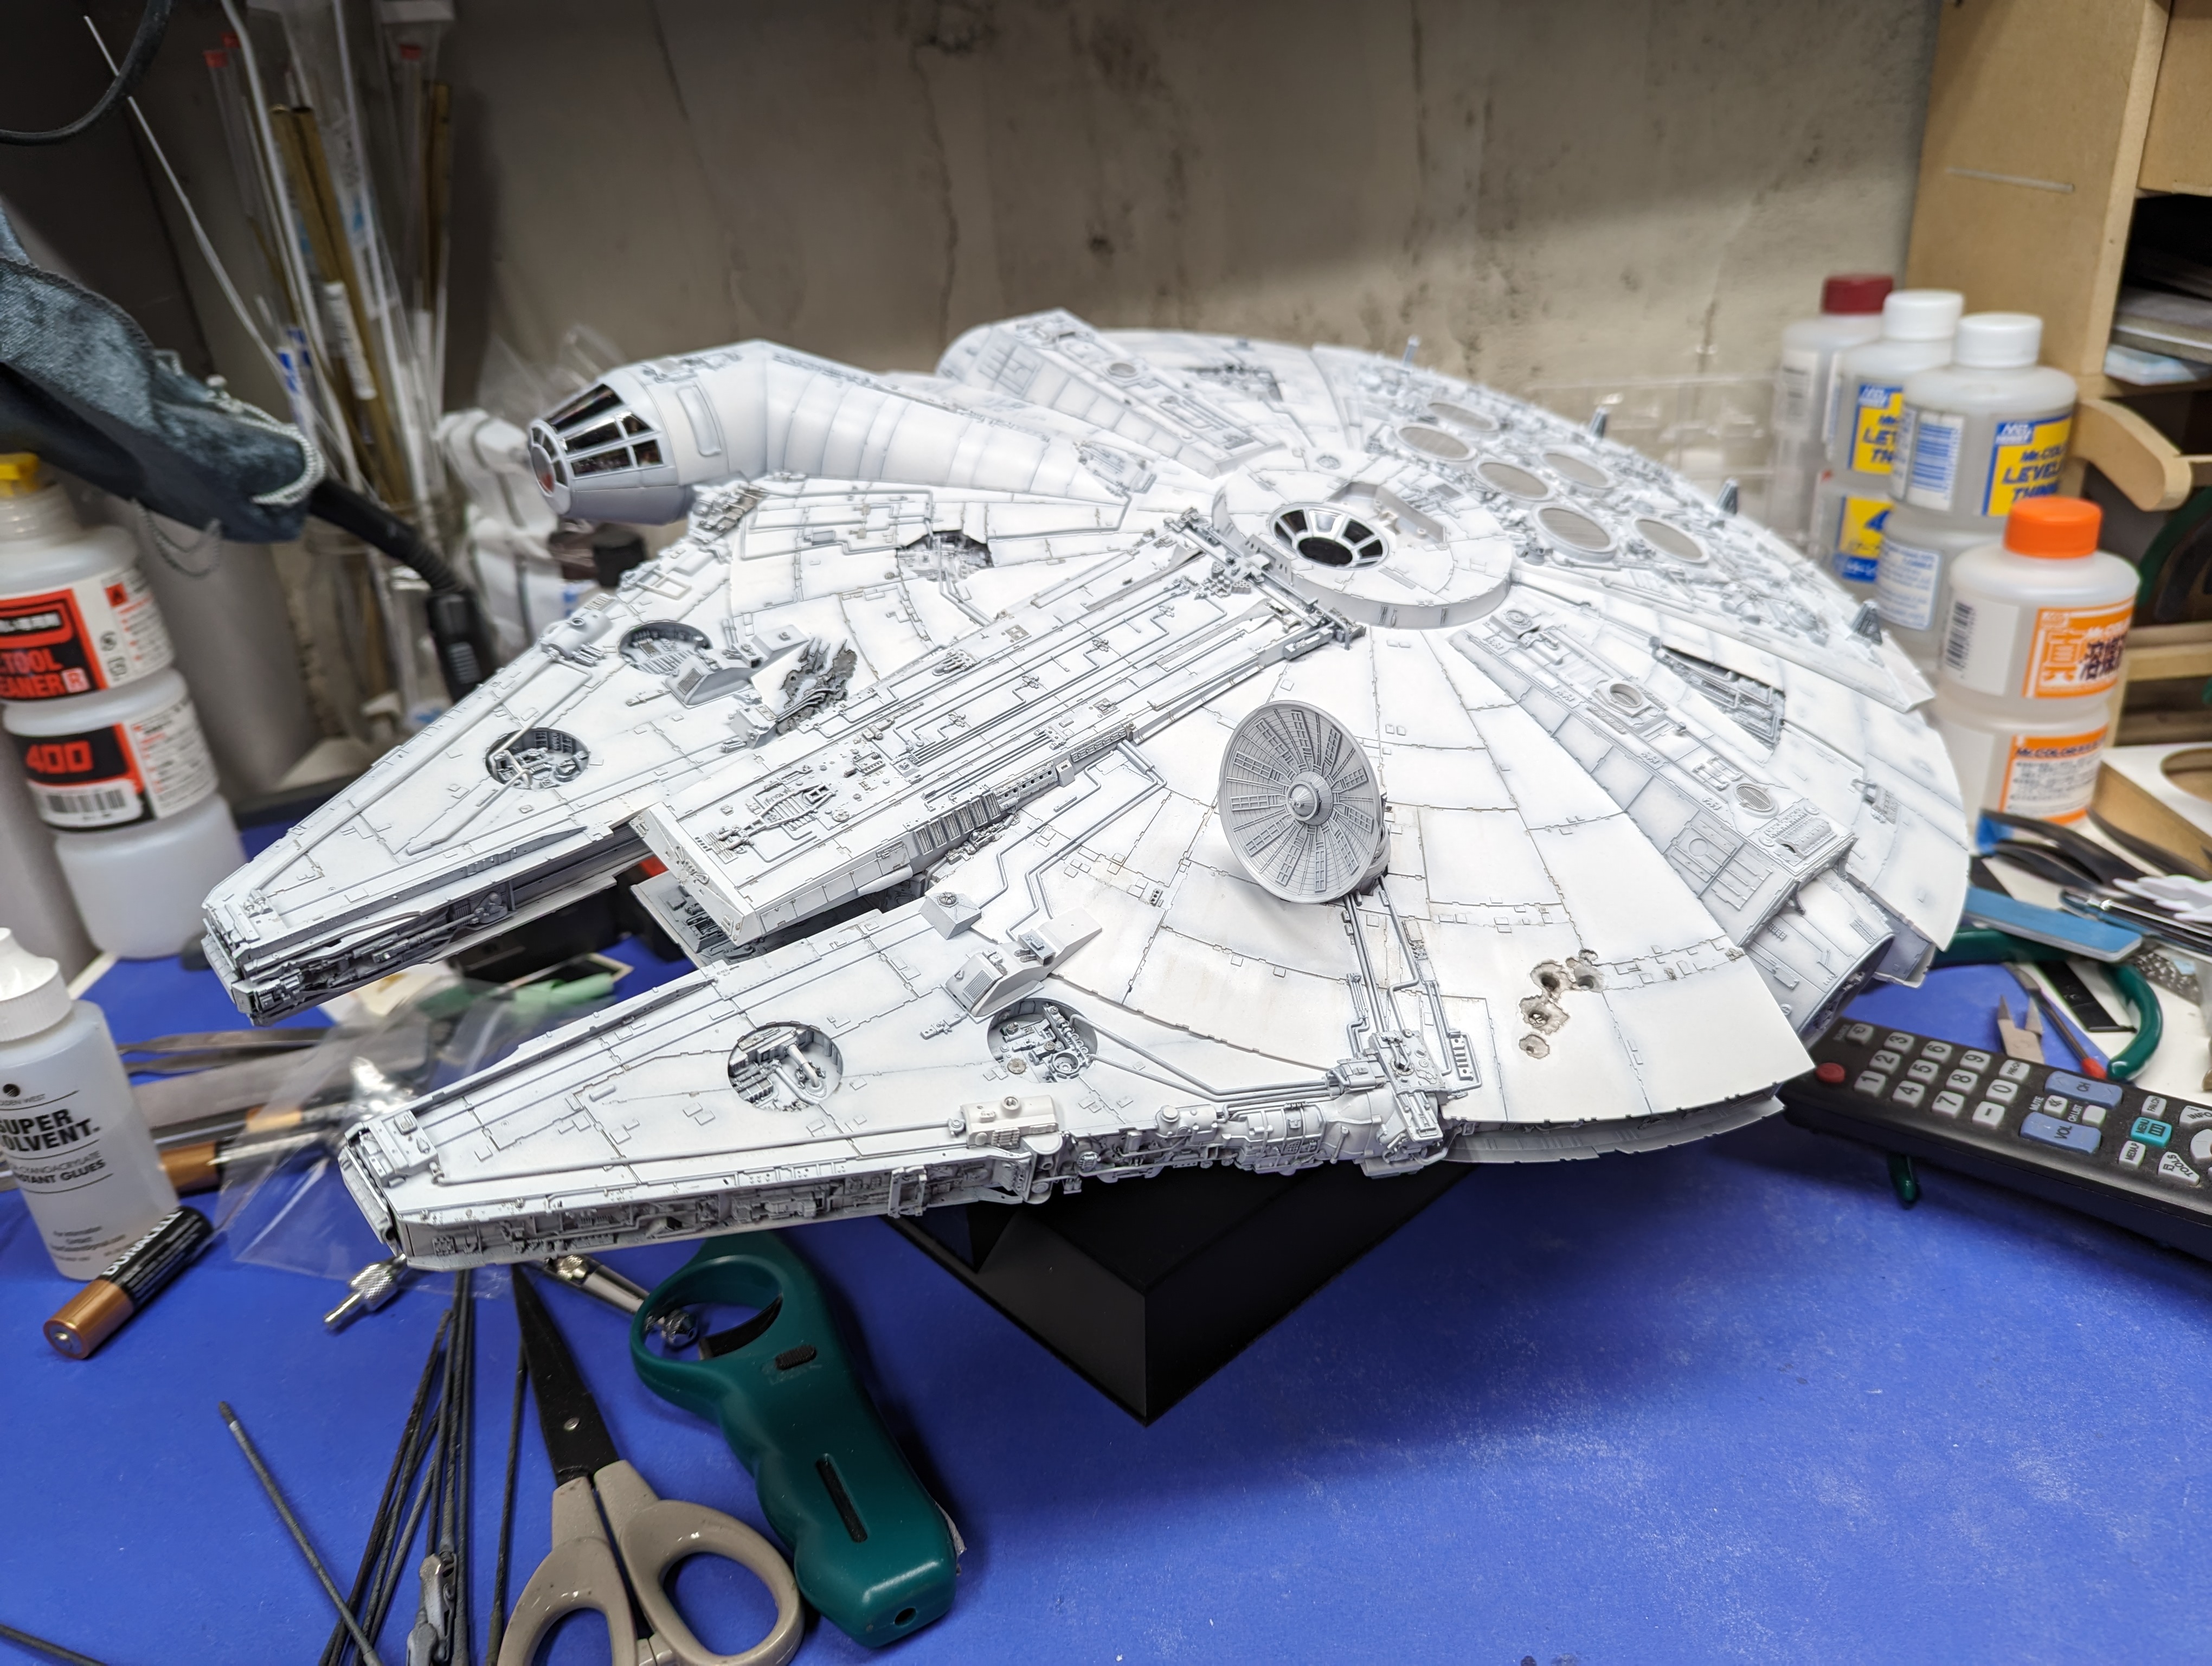
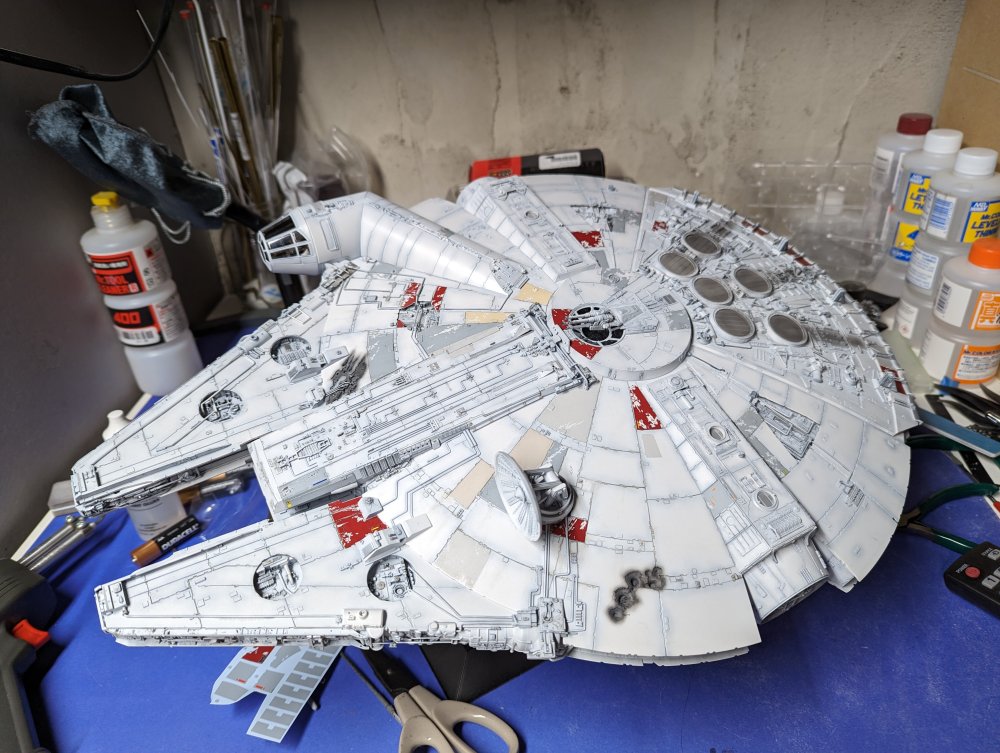
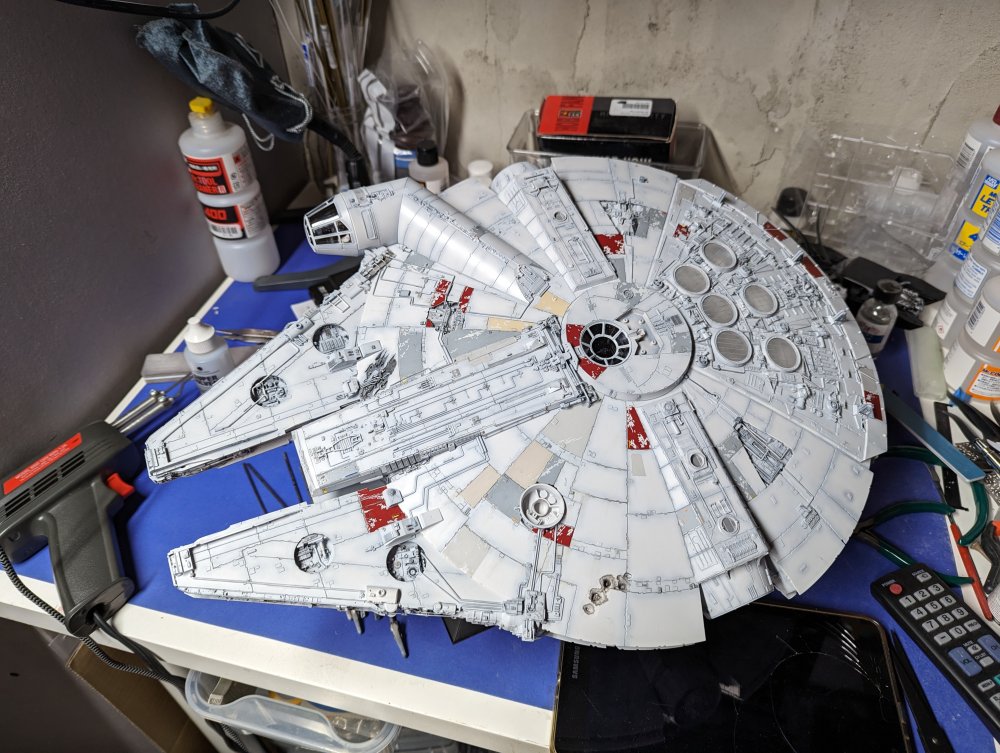
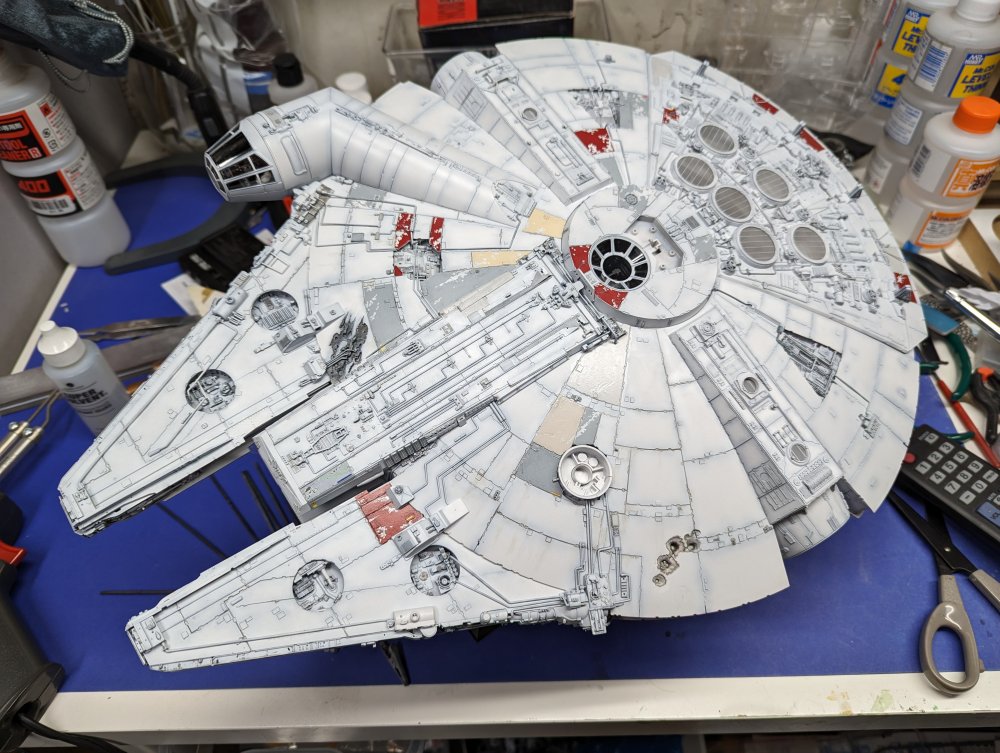
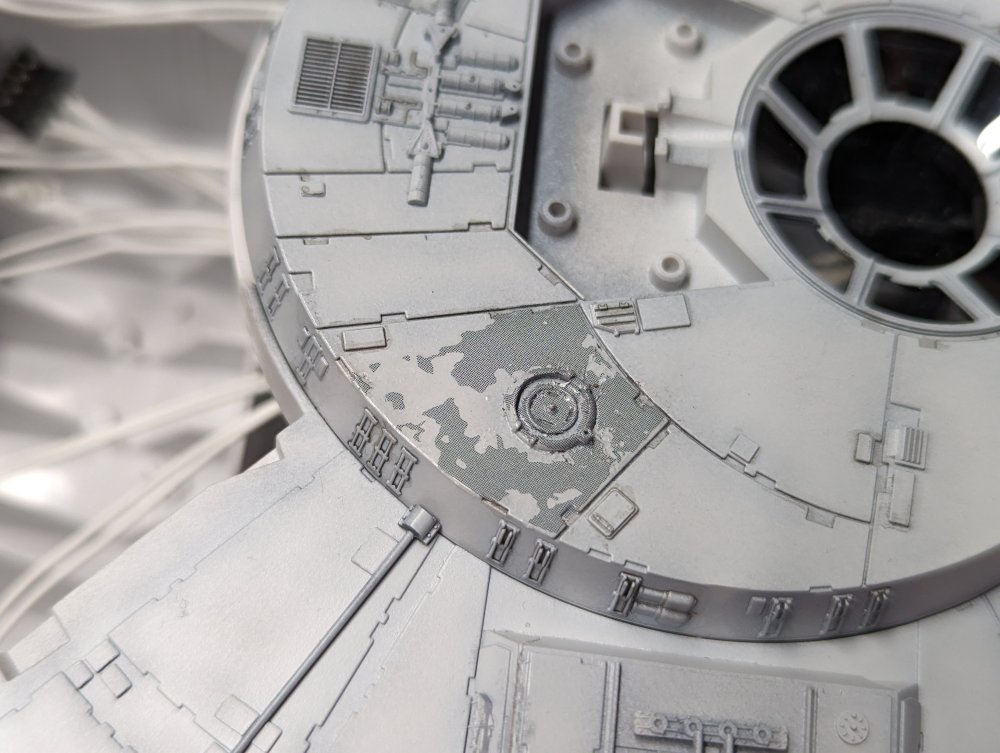
Ok, I've managed to hit a couple milestones in my build. First one, assembly is now complete. The upper turret was installed. I added the last parts to the engine deck. These had to wait until I had the decals in place. Next up, all the painting is done. The last bit was using my airbrush to add some exhaust staining to the engine deck. It's not as heavy as it sometimes appears but I'm fine with the lighter look. I also added some soot marks around the damaged areas of the hull. All the major decals are completed on top. Just a lot of smaller ones to add and then the lower hull. Hopefully by the end of the month I'll be done.

- 115 replies
-
- 14
-

-

-
Peter, I understand the space issues. I've got a pair of these behemoths, one from Ernie as well. There's an option with the Lancaster to have the wing separate between the engine nacelles. This is an actual joint on the real plane and they've included it in the kit to help folks with space issues. It also helps folks wanting to build a factory diorama that don't have space issues.
-
It really is a great kit. Built mine last year and have another in the stash.
-
Great looking Mustang Frank. Neat tip about the belts. Unfortunately Canadian bills are plastic so that won't work with our currency. Carl
-
Ernie, looks like a nice choice.
-
Excellent looking cockpit. I finally broke down and bought one of these kits, but the D version.
-
There's also a MkVa coming.
-
Peter, it's the most important celebration of the year especially for the Chinese. Just about every business closes down so their staff can go home. A couple hundred million people in China alone travel to be with family and it's truly insane to see. Think of Thanksgiving, Christmas and New Year's all rolled into one.
-
All the kits in my stash are built. Some are just more completed than others.
-
What is on your bench right now ? Share a picture :)
BlrwestSiR replied to Martinnfb's topic in Modelling Discussion
Nice display cabinet and collection of models. Broaching certainly looks cool on film, at least when they jump out of the water. Carl -
Haven't received any updates. With Chinese New Year having been on Sunday, I suspect the earliest they'll be ready to leave is in 3-4 weeks. Much of Asia shuts down for the New Year celebrations and stays closed for up to 3 weeks which I found out when I lived in Taiwan back in '93. One nice thing to make the wait worthwhile, if you pre-ordered the kit directly from Kotare, they're now throwing in a set of 3D printed exhausts as well as a copy of the box art. Carl
-
Welcome aboard folks! Tim, can't wait to see your helo builds. Are you getting any of the new 1/35 Apache kits? Would love to hear your thoughts on those. Rob, can't have enough mountain bikers on this forum. Although living in southern Ontario, are we allowed to call it mountain biking? Carl
-
Looks great. I'm glad you finished it so I could learn more about the Cent.
-
Revell P-51D "Short Fuse"
BlrwestSiR replied to JohnB's topic in LSM 1/35 and Larger Work In Progress
Nice start John. Guess it makes the waiting go by faster. -
What is on your bench right now ? Share a picture :)
BlrwestSiR replied to Martinnfb's topic in Modelling Discussion
Would love to see a Puff the Magic Dragon. Italeri is supposed to re-issuing their AC-119 this year. -
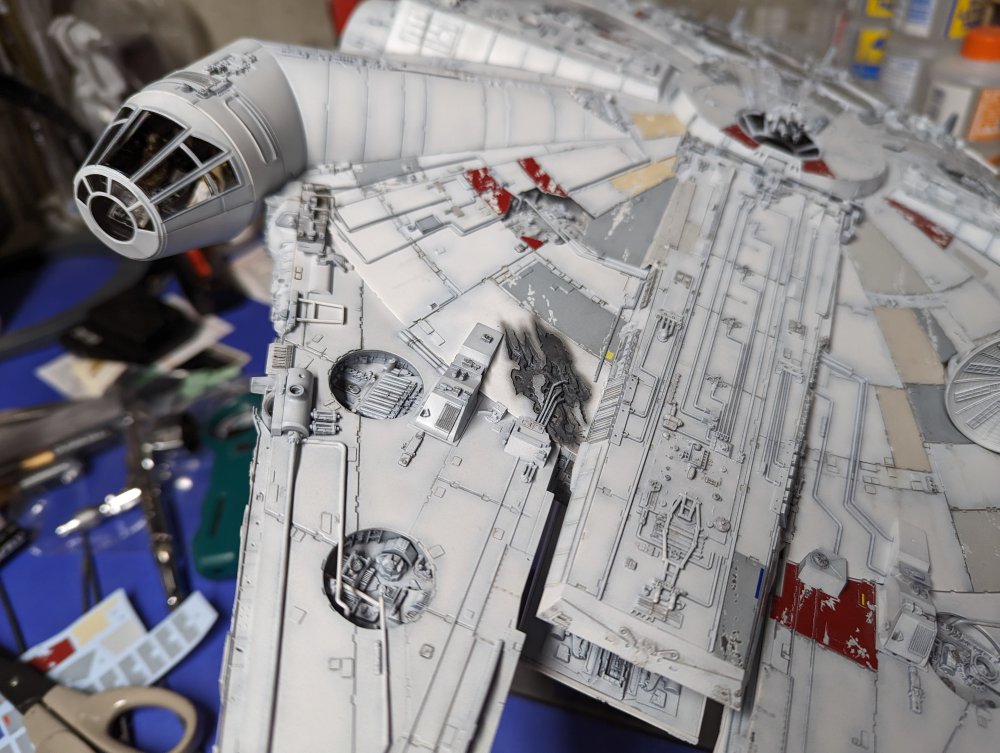
Rob, one of the oddest bits of weathering is the exhaust staining that goes on the engine deck. It radiates outwards and doesn't go in the direction of the airflow/spaceflow. But that's how they did it.
-
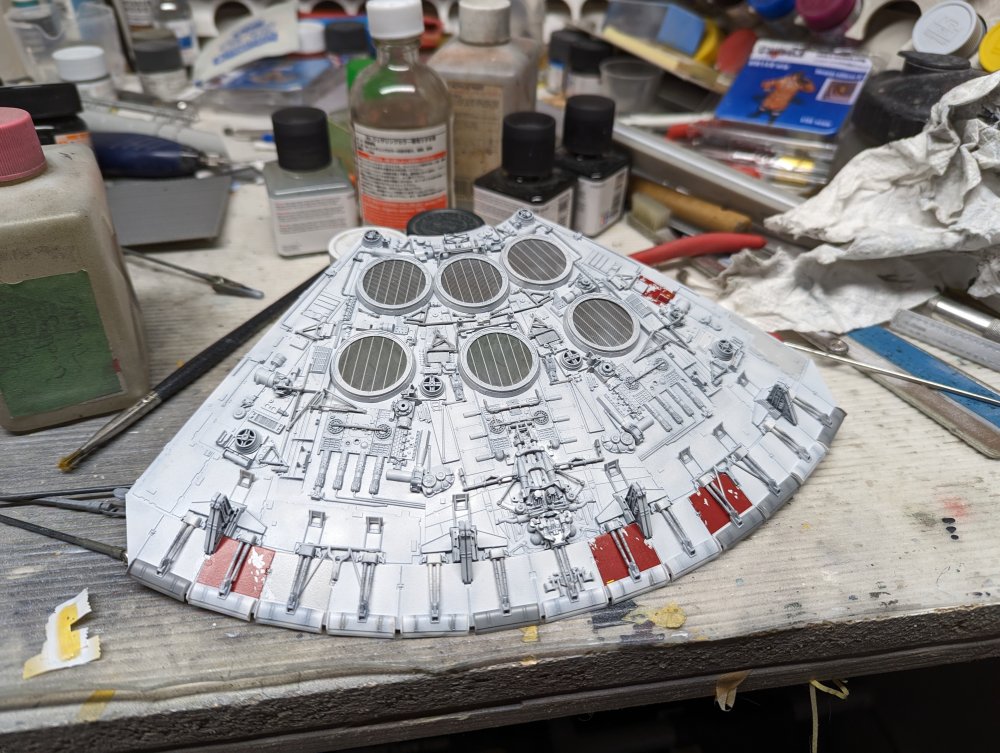
Thanks everyone! The paint work really has been a challenge which has now been replaced by decalling. And lots of it. 268 separate decals but some are duplicates that won't be used. I got some done today after work. I have to do a few at a time as some go next to others and I don't want to mess one up while applying another. Anything not in the base white is a decal. So many more to go.
-
Sorry to hear about Finn. We lost our dog Zoe in July last year. She was almost 14 and the perfect dog.
-
I was waiting for you to come up with something suitable. Didn't the Panzer IV have wading gear?
-
ProModeler 1/48 PBY-5A Catalina + Goodies, RFI
BlrwestSiR replied to CANicoll's topic in Let’s Get Wet Group Build.
Great job on the tail-ectomy. The fit looks really good for such a big graft. Carl -
Thanks Harv! I've started the decals on the engine deck. I then added some around the upper turret. There's going to be some challenges to get them flat. After a first coat of Tamiya Mark Fit Super Strong and some prodding and heat from an old hair dryer.


-
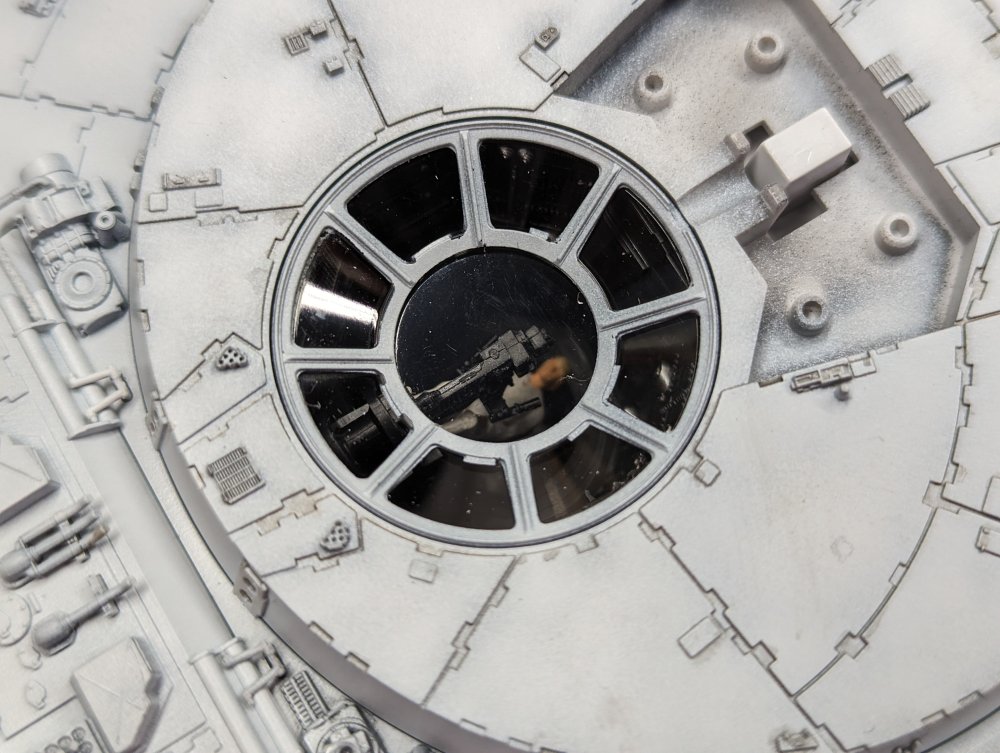
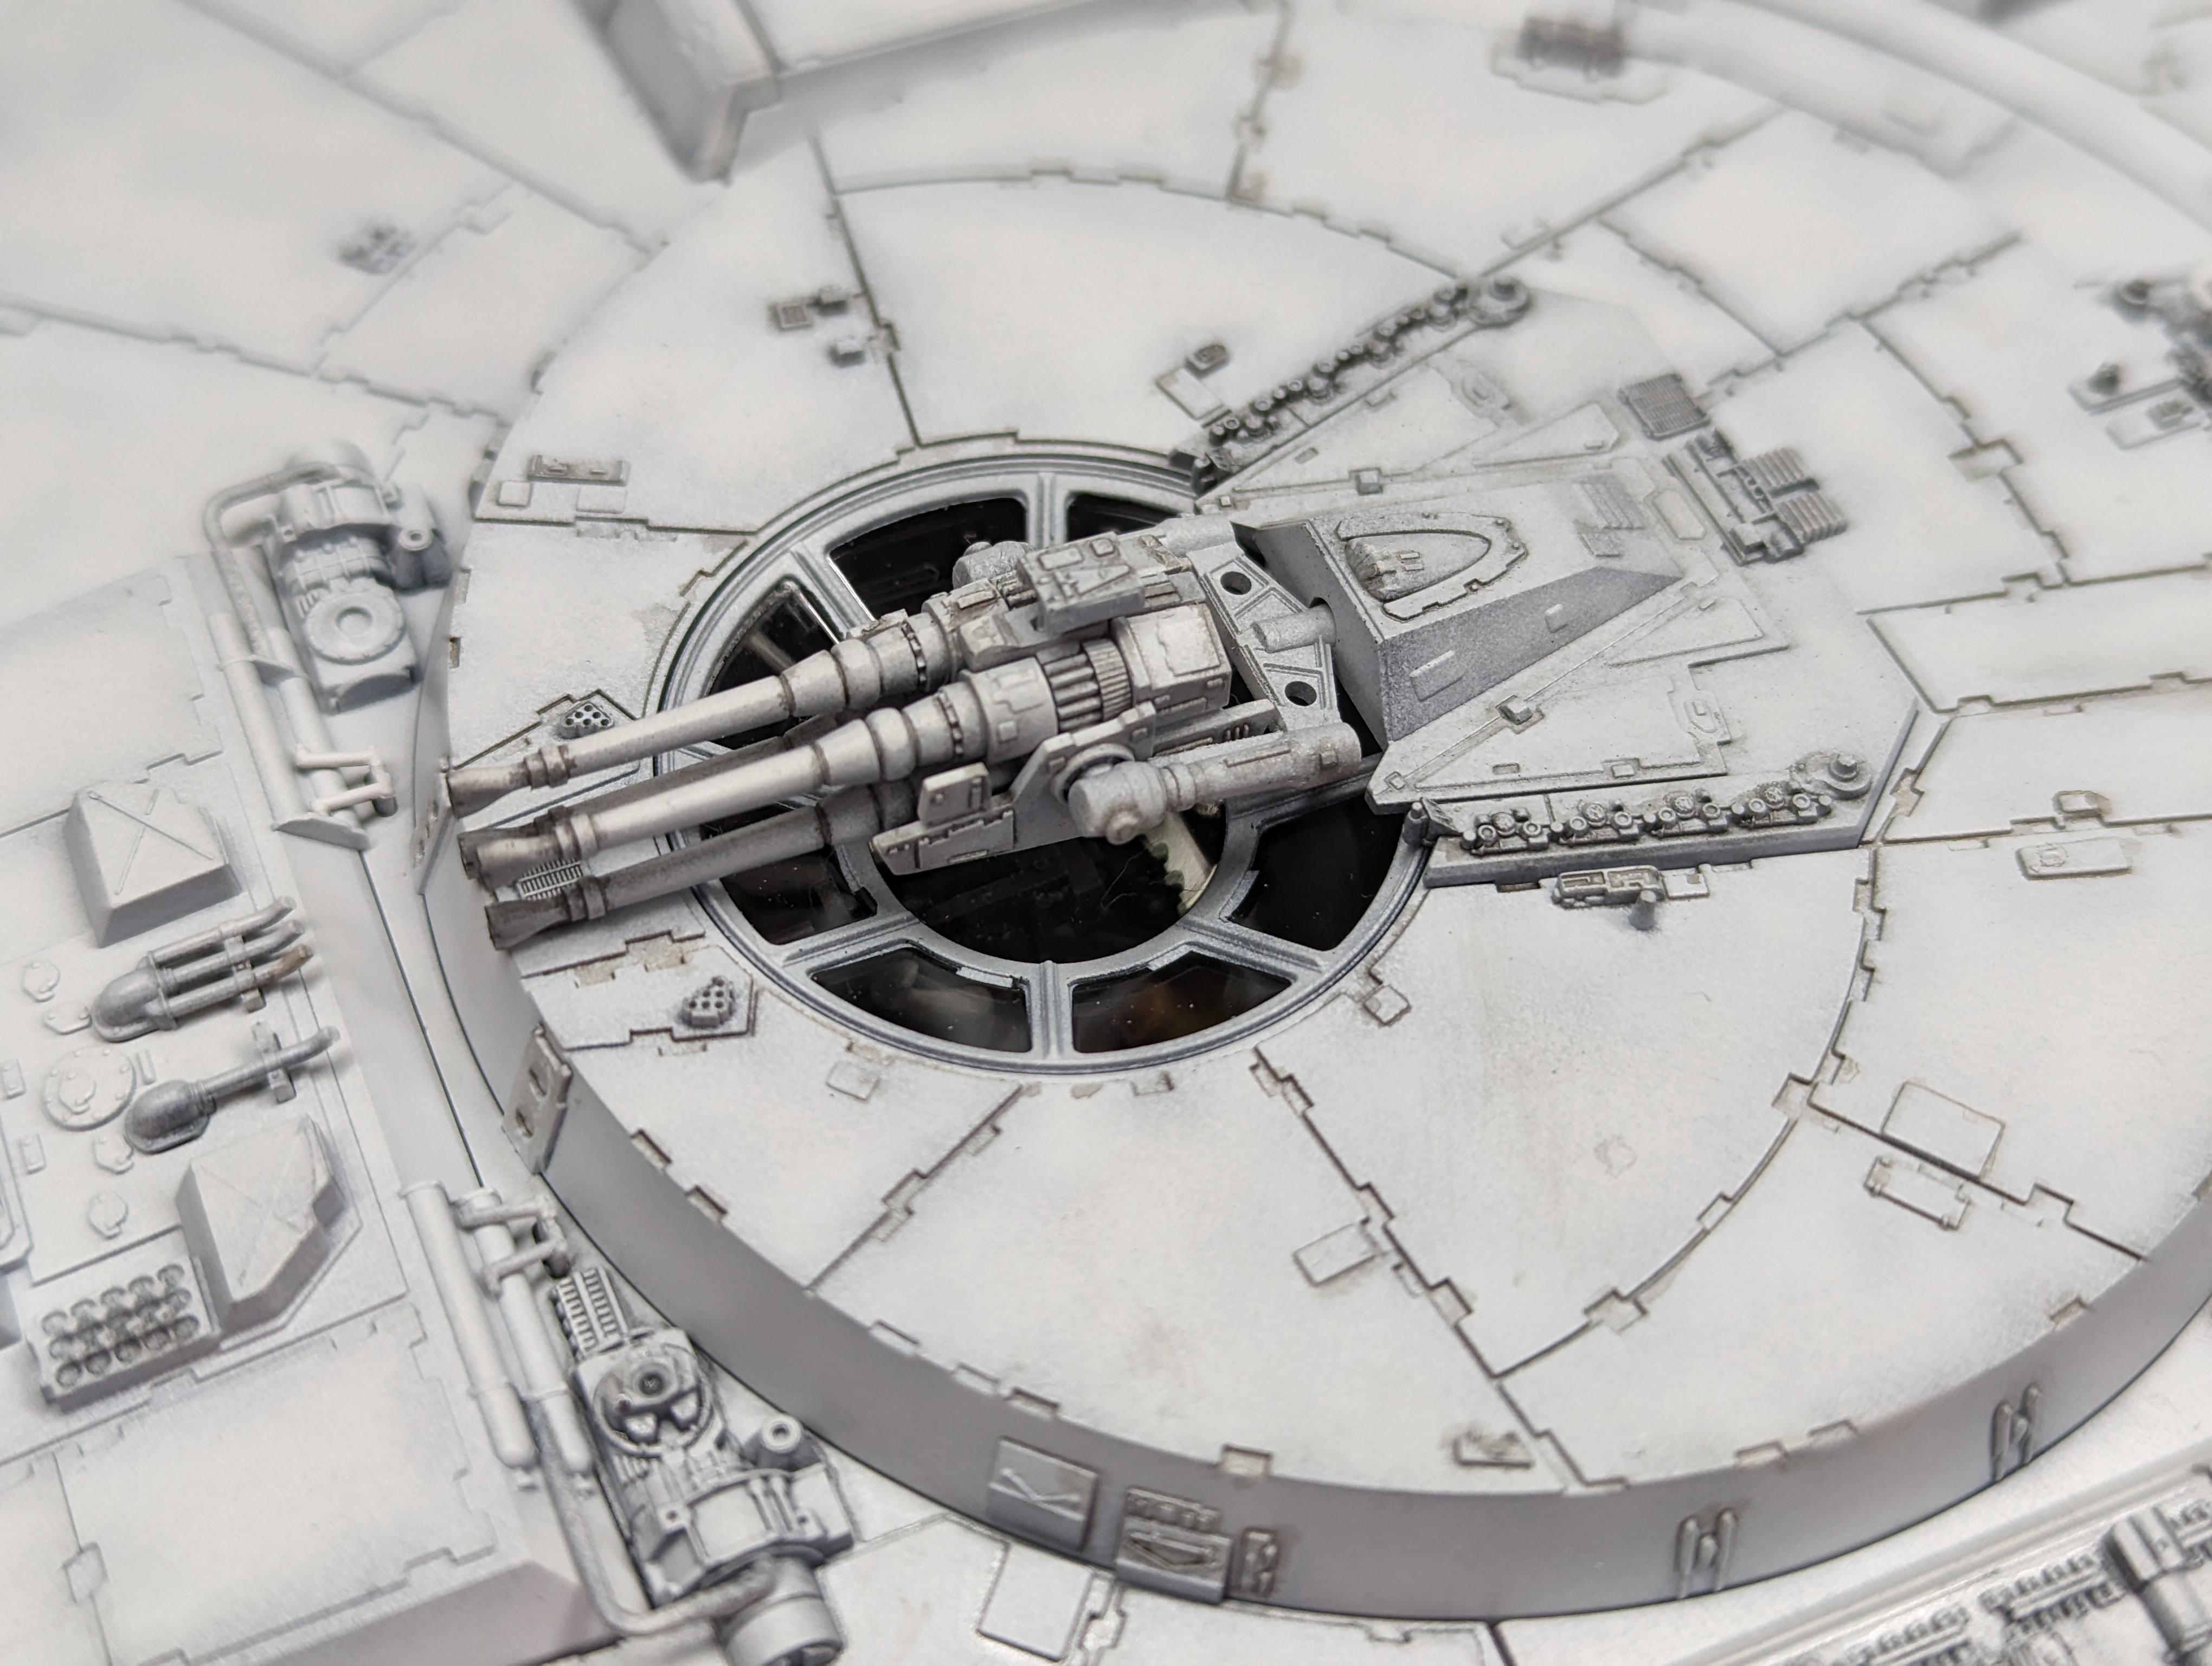
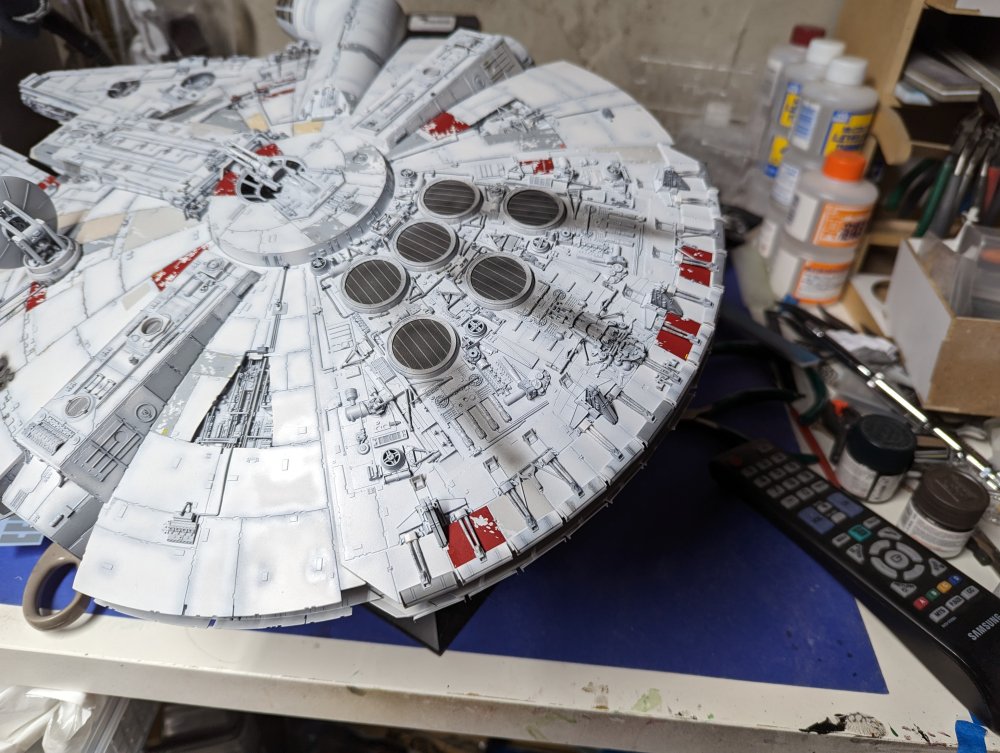
I managed to get some more done. Mostly peeling the paint masks off. Luke in the lower gunner's seat. I then mounted the quad gun turret which means you won't see anything underneath it. I started doing the panel line wash on the lower hull. It's mostly done now with just the mandibles left. And flipped over, here's the topside. It getting closer to the decal stage. All couple hundred of them.