BlrwestSiR
-
Posts
9,173 -
Joined
-
Last visited
Content Type
Profiles
Forums
Events
Gallery
Everything posted by BlrwestSiR
-
My boys are the same way. They really enjoy the big Lego sets. Our oldest wanted the Hogwarts castle set so much he saved up hm to buy it. It helped that the grandparents knew what he was doing and gave him a bunch of Lego gift cards.
-

39” 1/128 Seaview and Flying Sub
BlrwestSiR replied to ScottsGT's topic in Let’s Get Wet Group Build.
Nice job on the wiring. When I read the "Bright Lights" bit, all I could think of was the movie Gremlins. -
Rob, that's been one of the fun parts of the build: trying to identify the various kit parts they used in building the original filming model. Lots of tank parts and F1 car bits too.
-
Nice to see this Bill. My Kingfisher is not only also on the SoD but has it's own drawer in my tool rack for some of the completed parts. Just lost interest more than anything else.
-
Thanks Peter. The dynamic pose on the stand is what made me decide to use the figures. The kit stand is fairly static and just holds the model level. I only saw the movie a couple times in the theatres. The first was on a school trip. The second was when they re-released it with the two sequels and did a marathon showing of all three back to back.
-
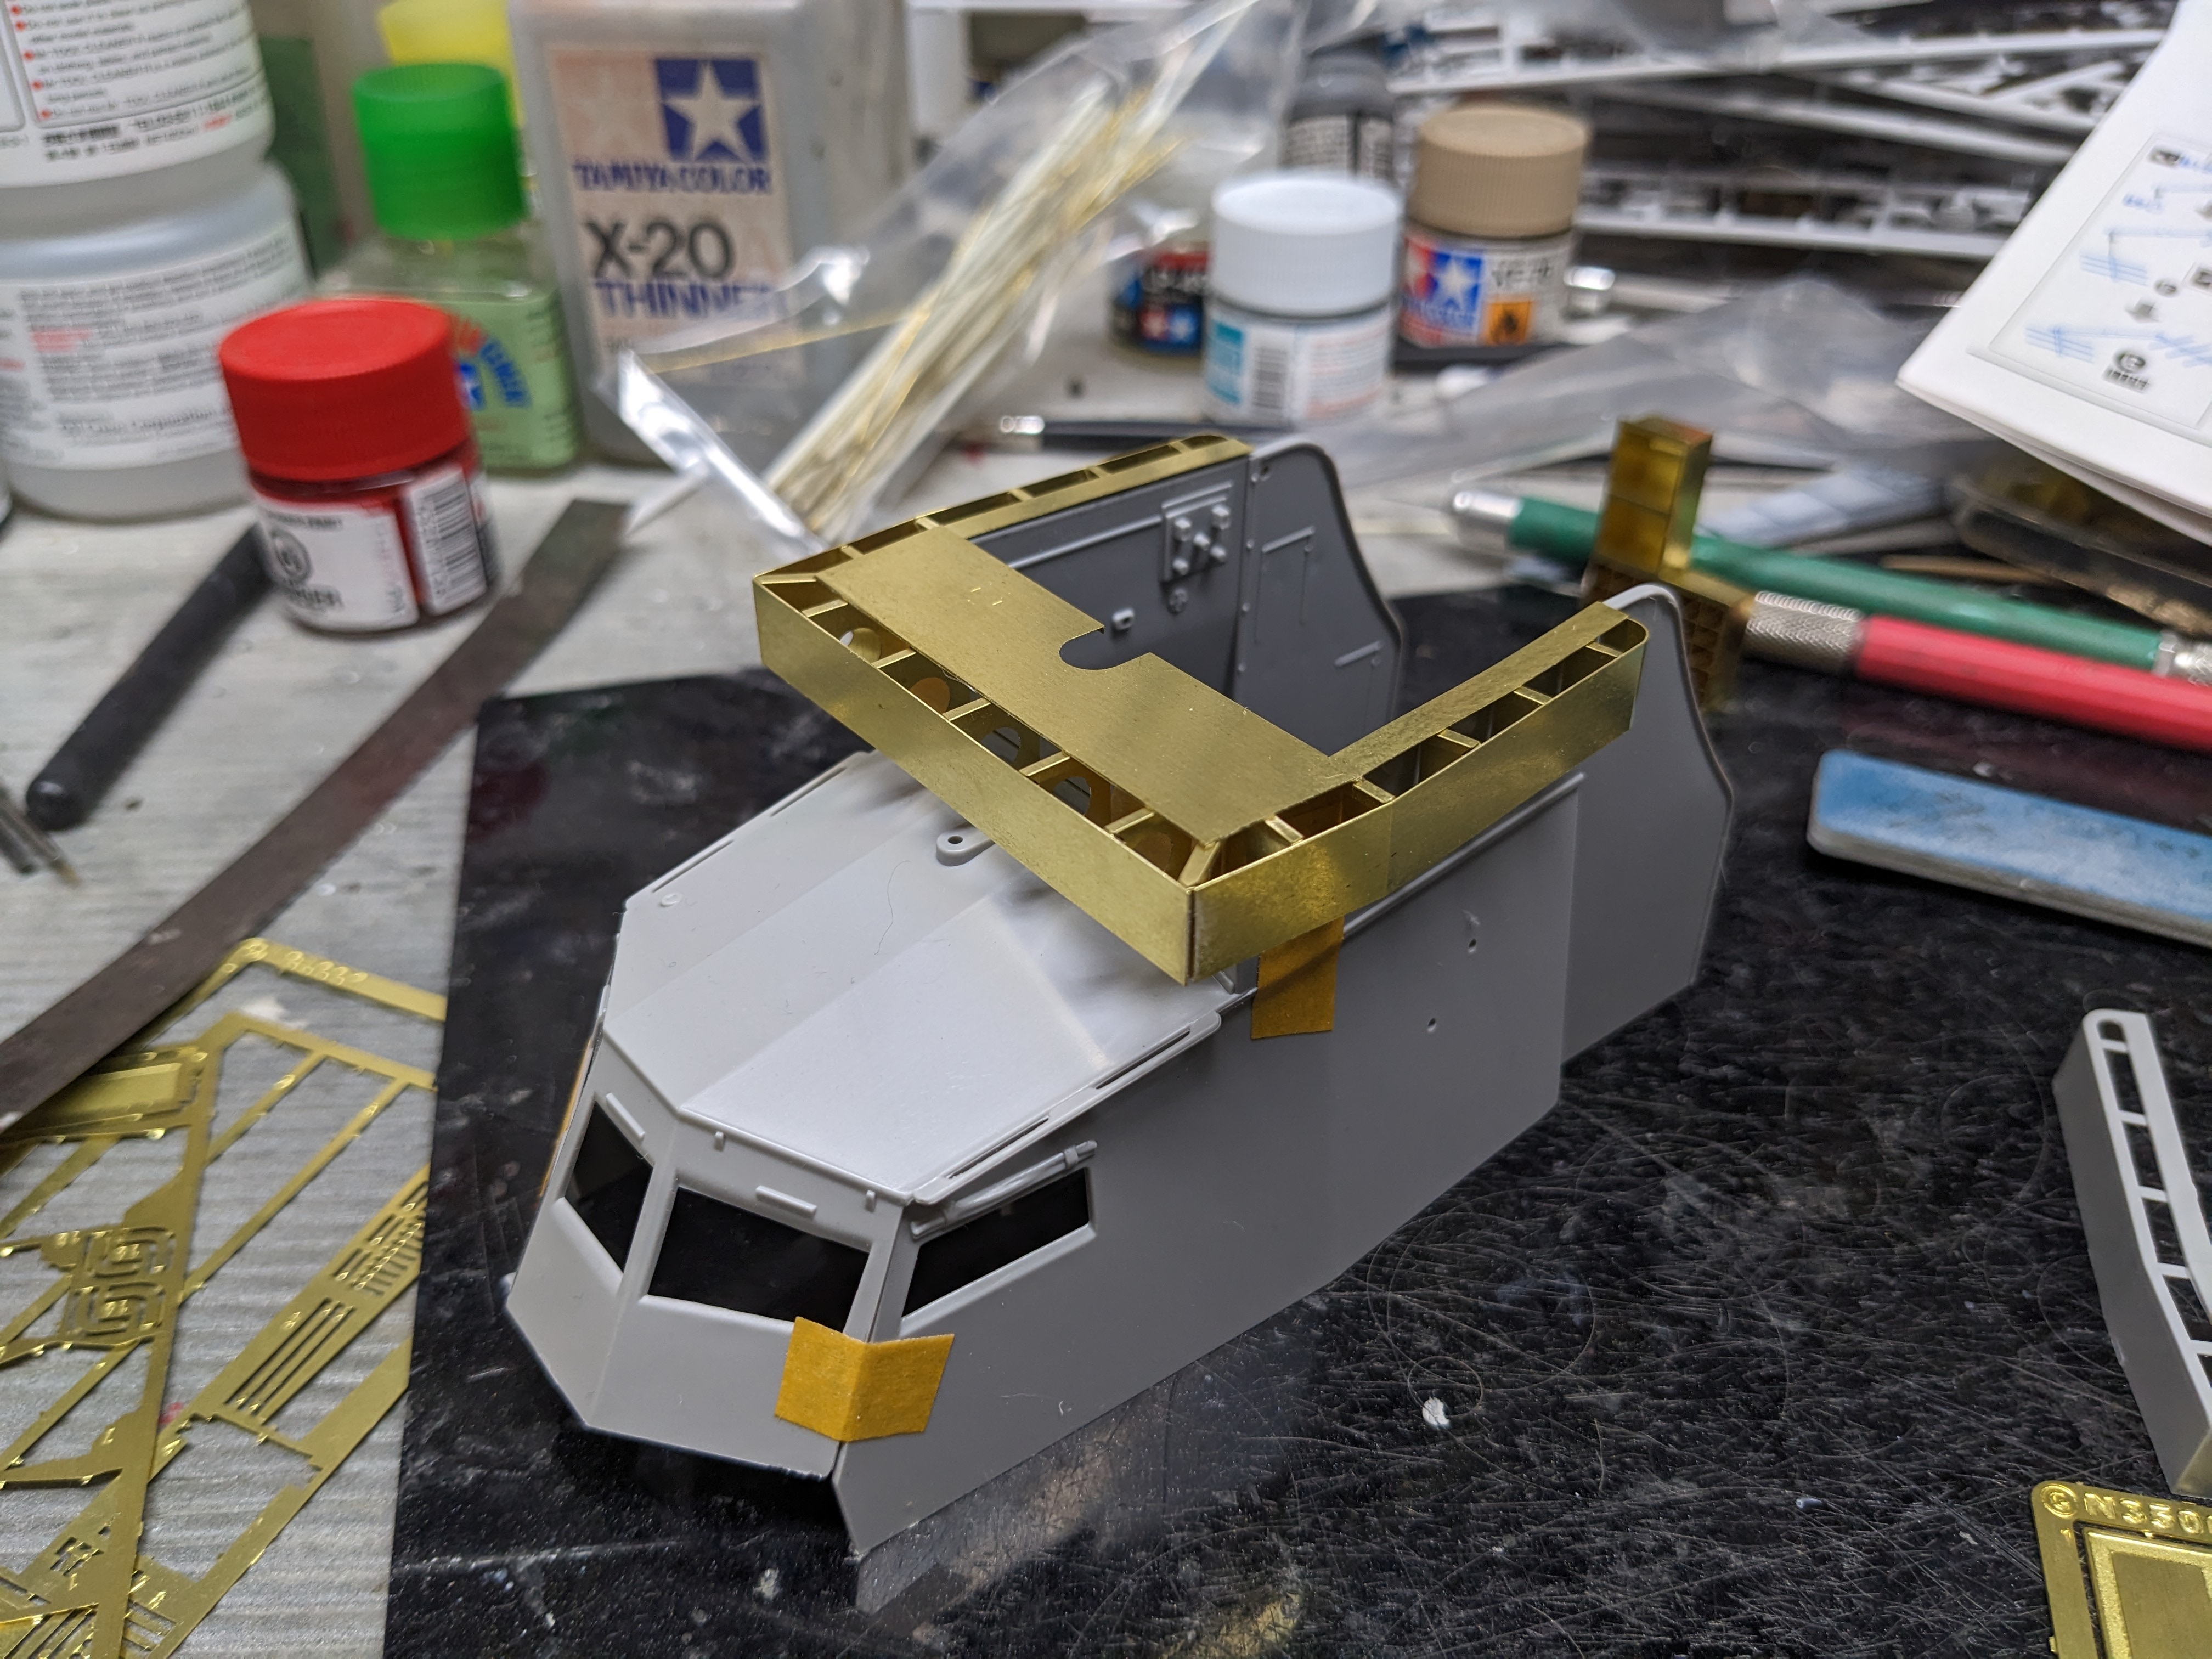
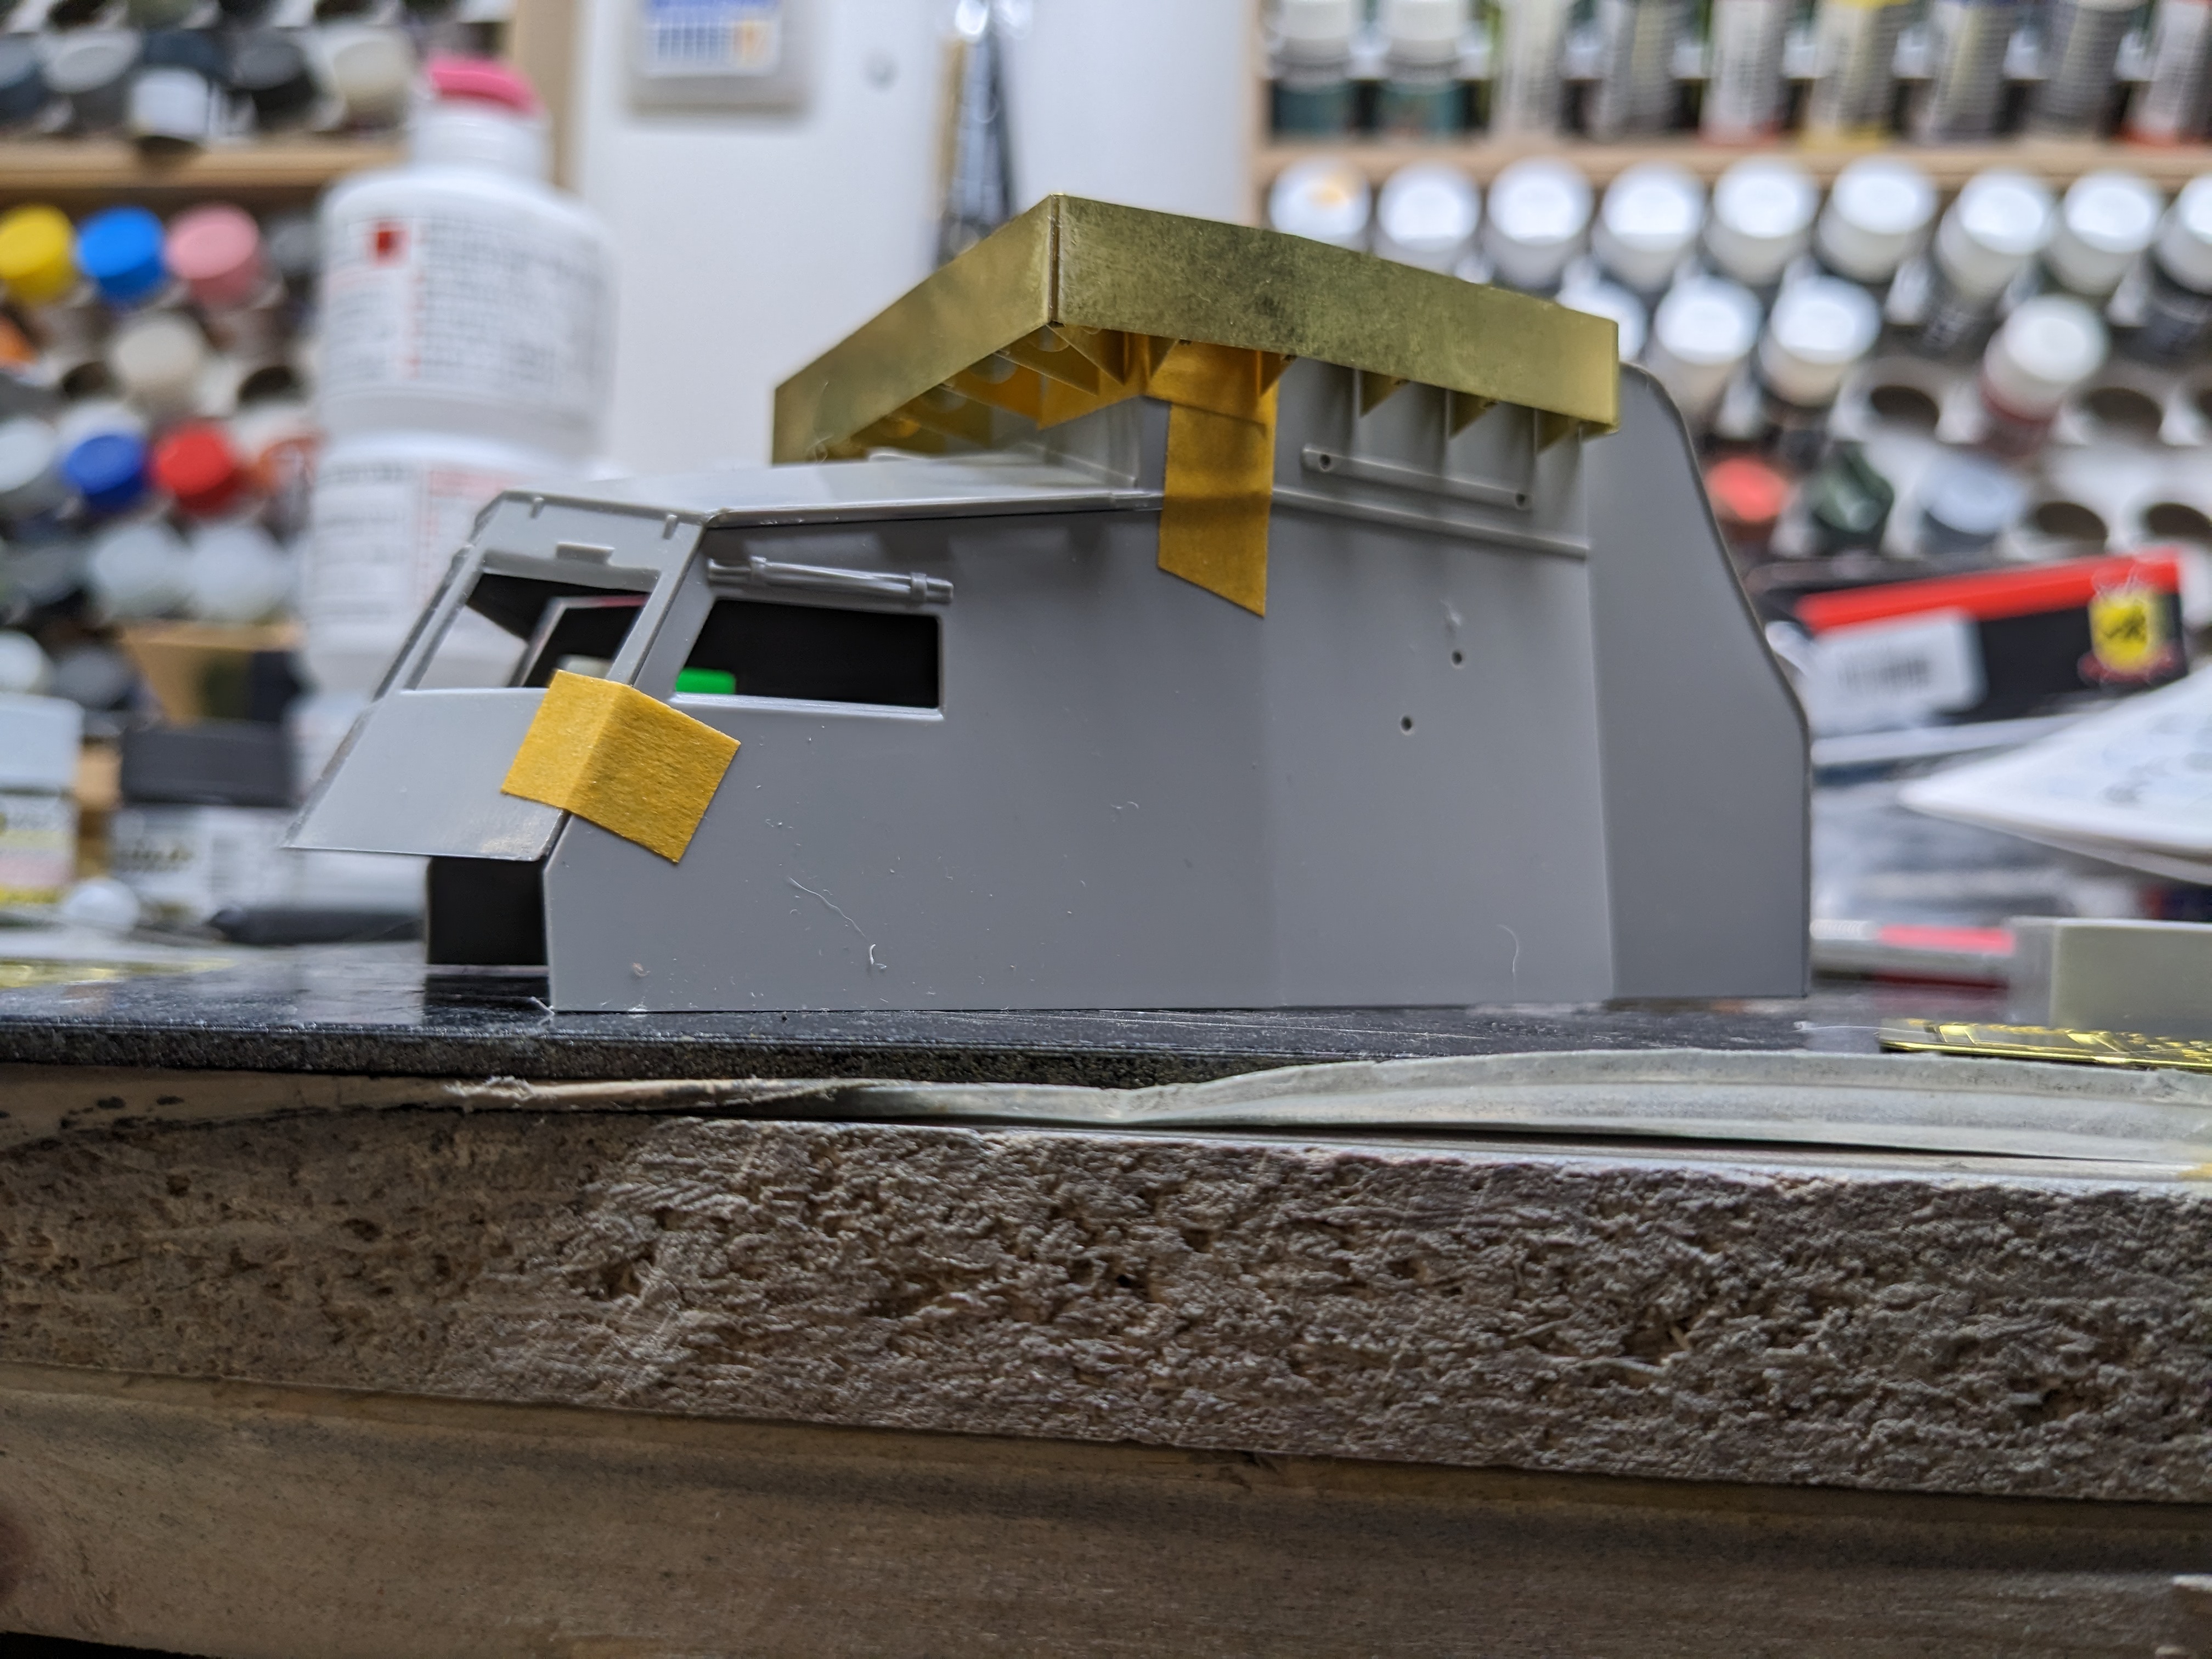
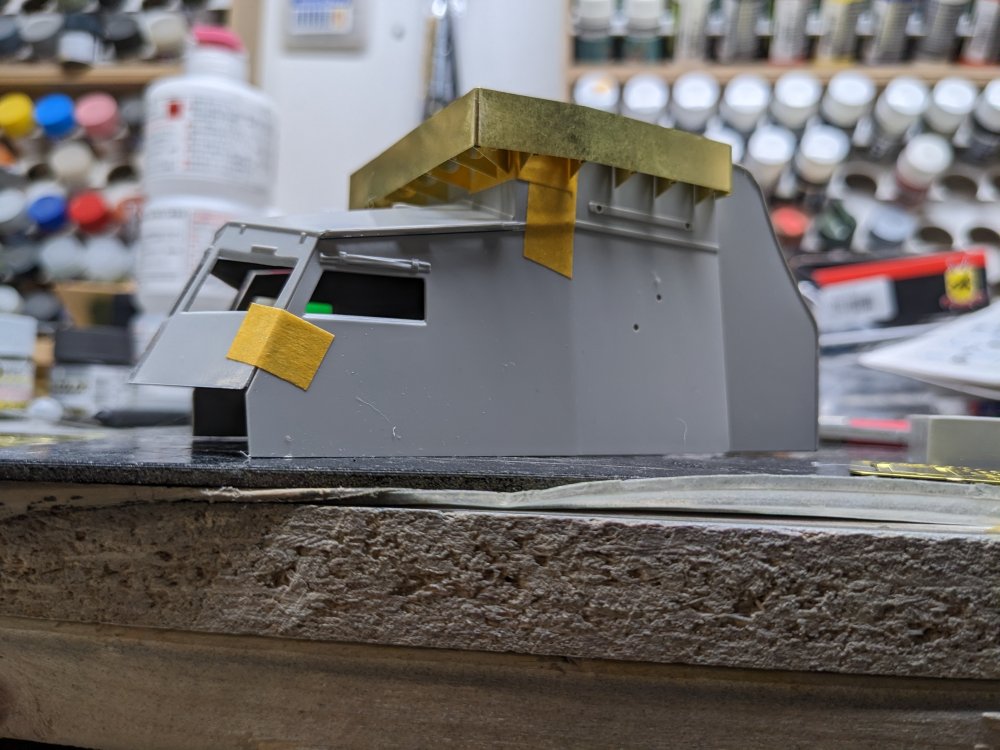
I mocked up the main cabin real quick with some tape and placed the flying bridge section onto it as a comparison of the kit part to the one I just made as well as check the fit. Stock: AM: The brass one definitely makes a huge improvement. I've also found a couple crew figures so have orders those.

- 103 replies
-
- 10
-

-
Thanks Peter! Can't wait to see you make a proper start on the Kingfisher. It took me a long time to figure out how to get decent results with PE. Mostly it was CA everywhere and badly made folds. Some proper tools really made a difference.
-
Thanks for sharing that Nick. It seems there's a few of these lurking in people's stashes. At the moment, I'll probably built 77 as I don't have much (any, in fact) reference material to pick another option. Some of the other camo schemes do look much better though.
-
Interesting talk about the appeal of Atlantic vs Pacific camo schemes. The tri-colour has always held an appeal for me especially compared to the overall GSB later in the war. At the same time, the white and grey Atlantic scenes carries a similar level of interest. Then you have the RN Temperate Sea Scheme...
-
Italeri 1/35 Elco 80' Torpedo Boat PT-596
BlrwestSiR replied to Bomber_County's topic in Let’s Get Wet Group Build.
Phil, it looks like Royal Models do a PE and resin detail set for the PT boat. There's one on eBay for sale at the moment. https://www.ebay.ca/itm/201564236121?mkcid=16&mkevt=1&mkrid=711-127632-2357-0&ssspo=d3gYxXf7SiS&sssrc=2349624&ssuid=J7xpuL_STvq&var=&widget_ver=artemis&media=COPY Lion Roar also do one but I can't find it anywhere at the moment. Carl -
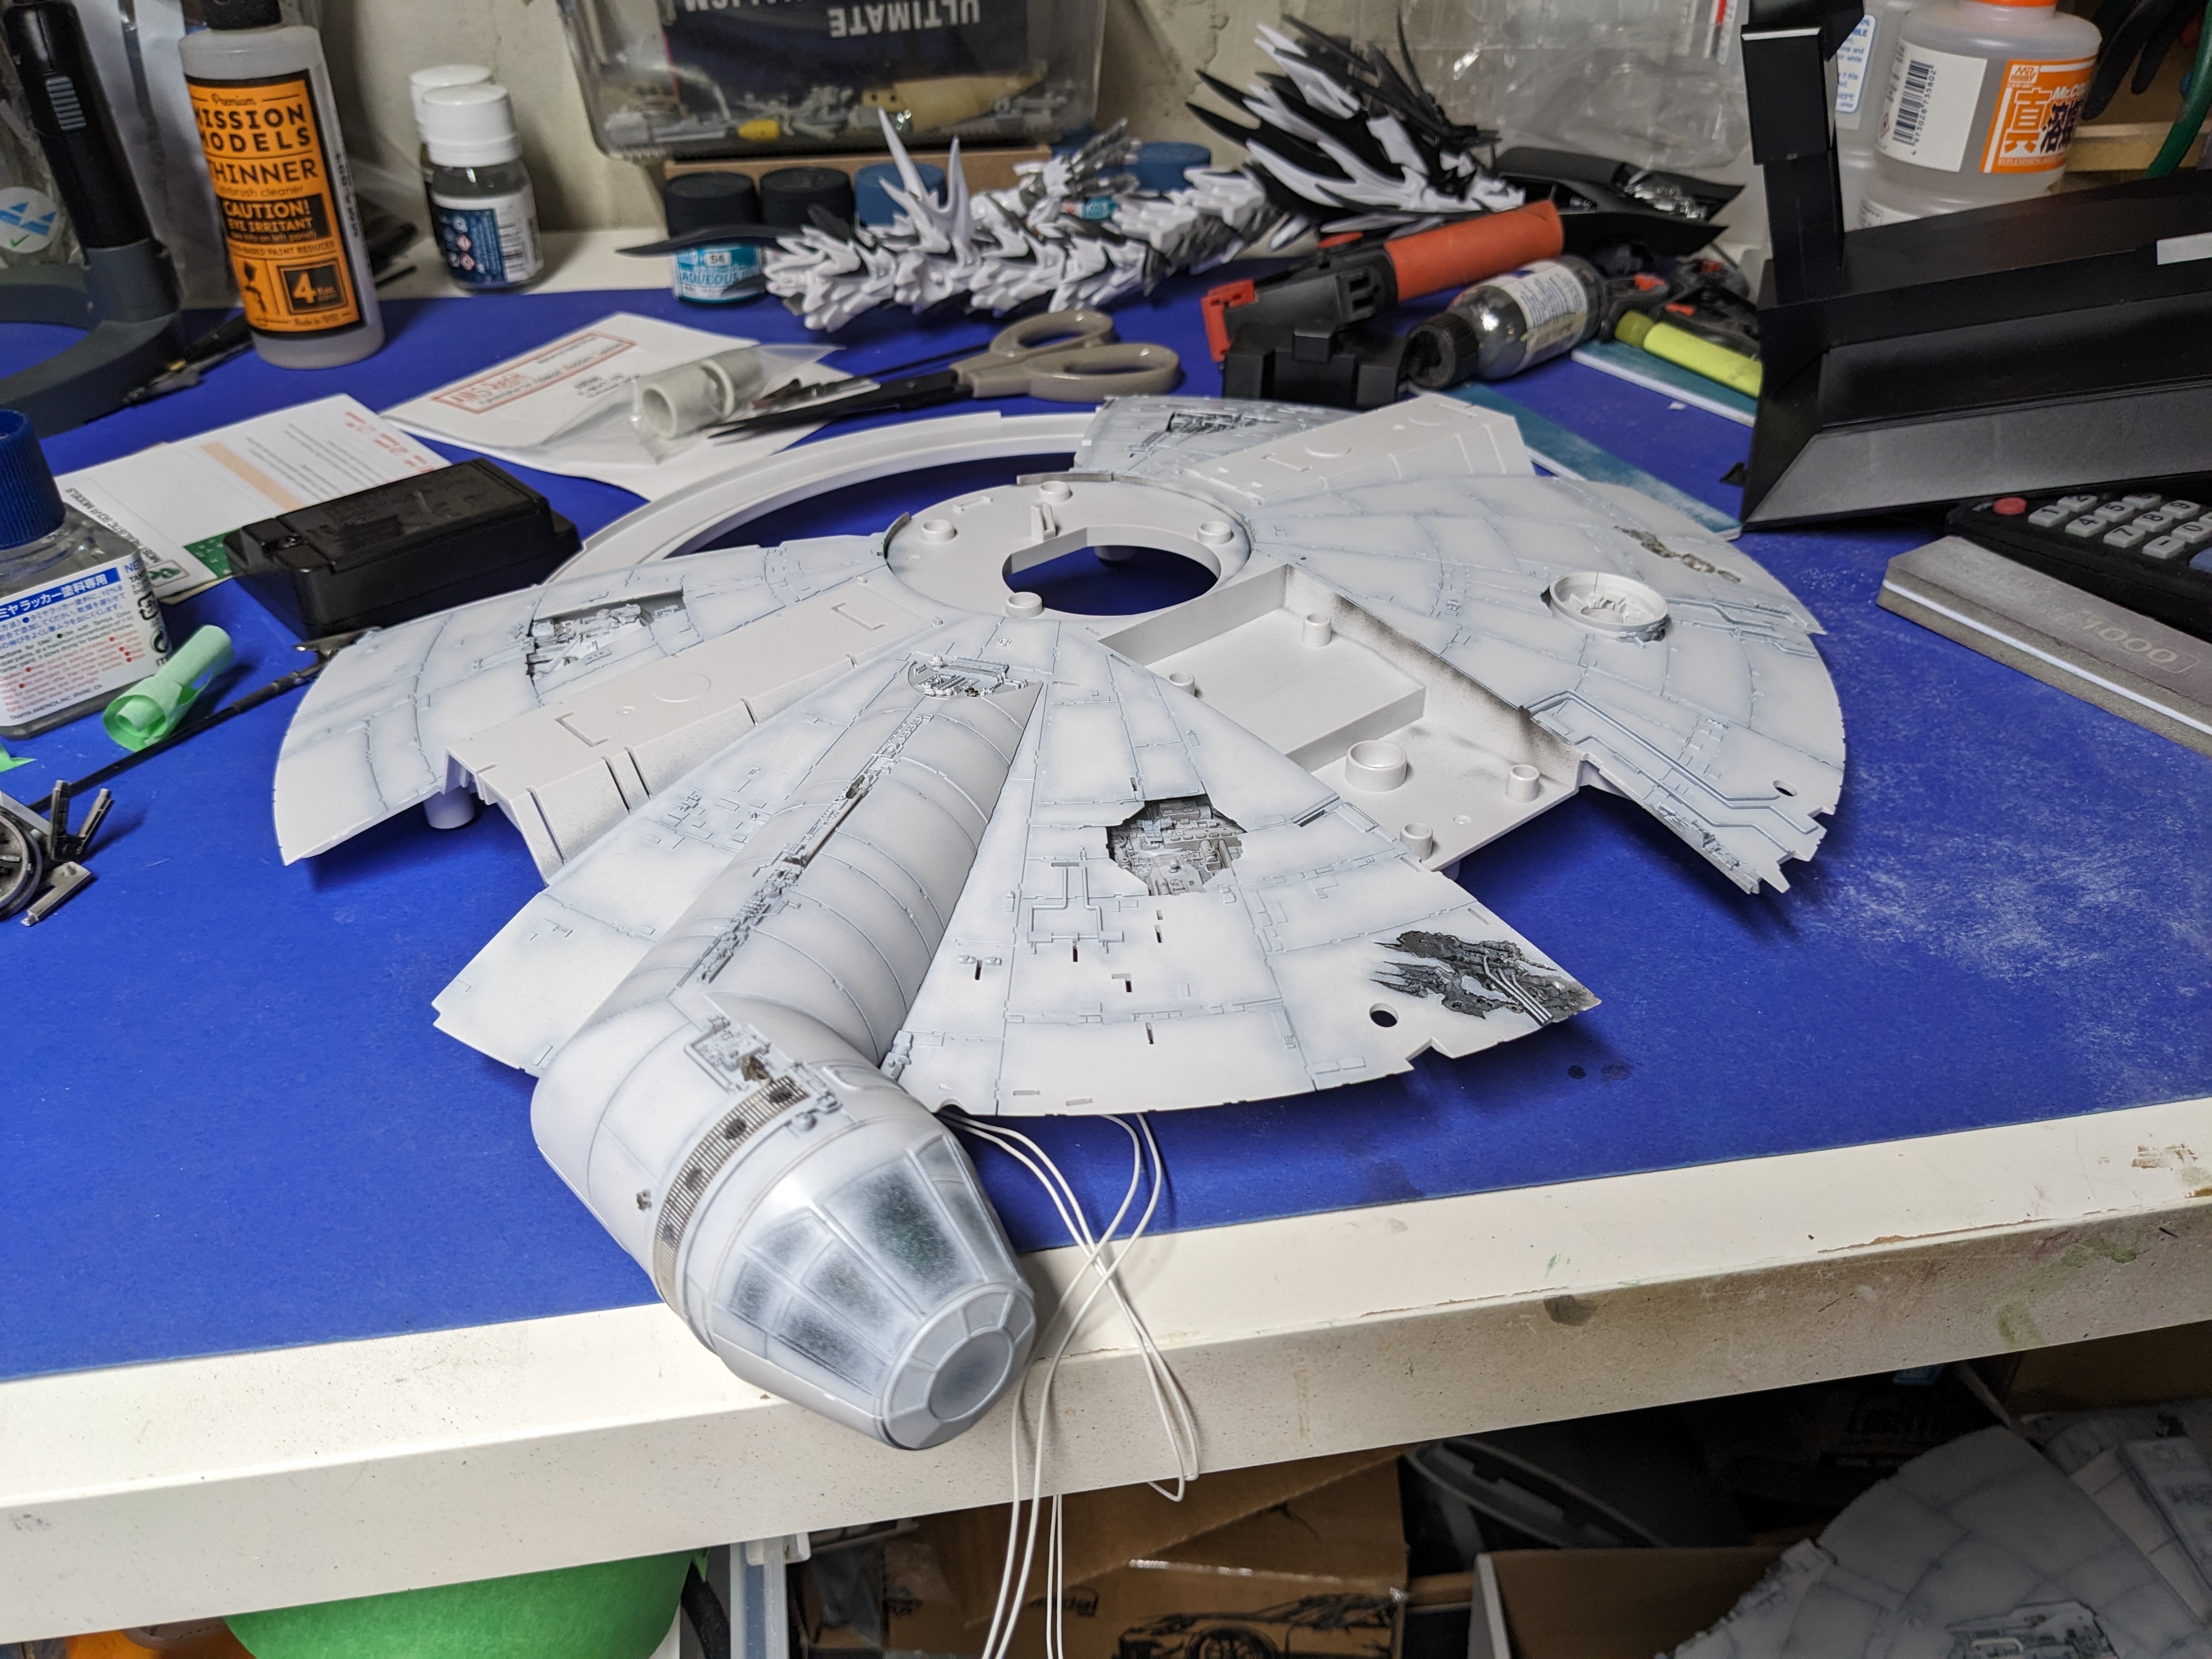
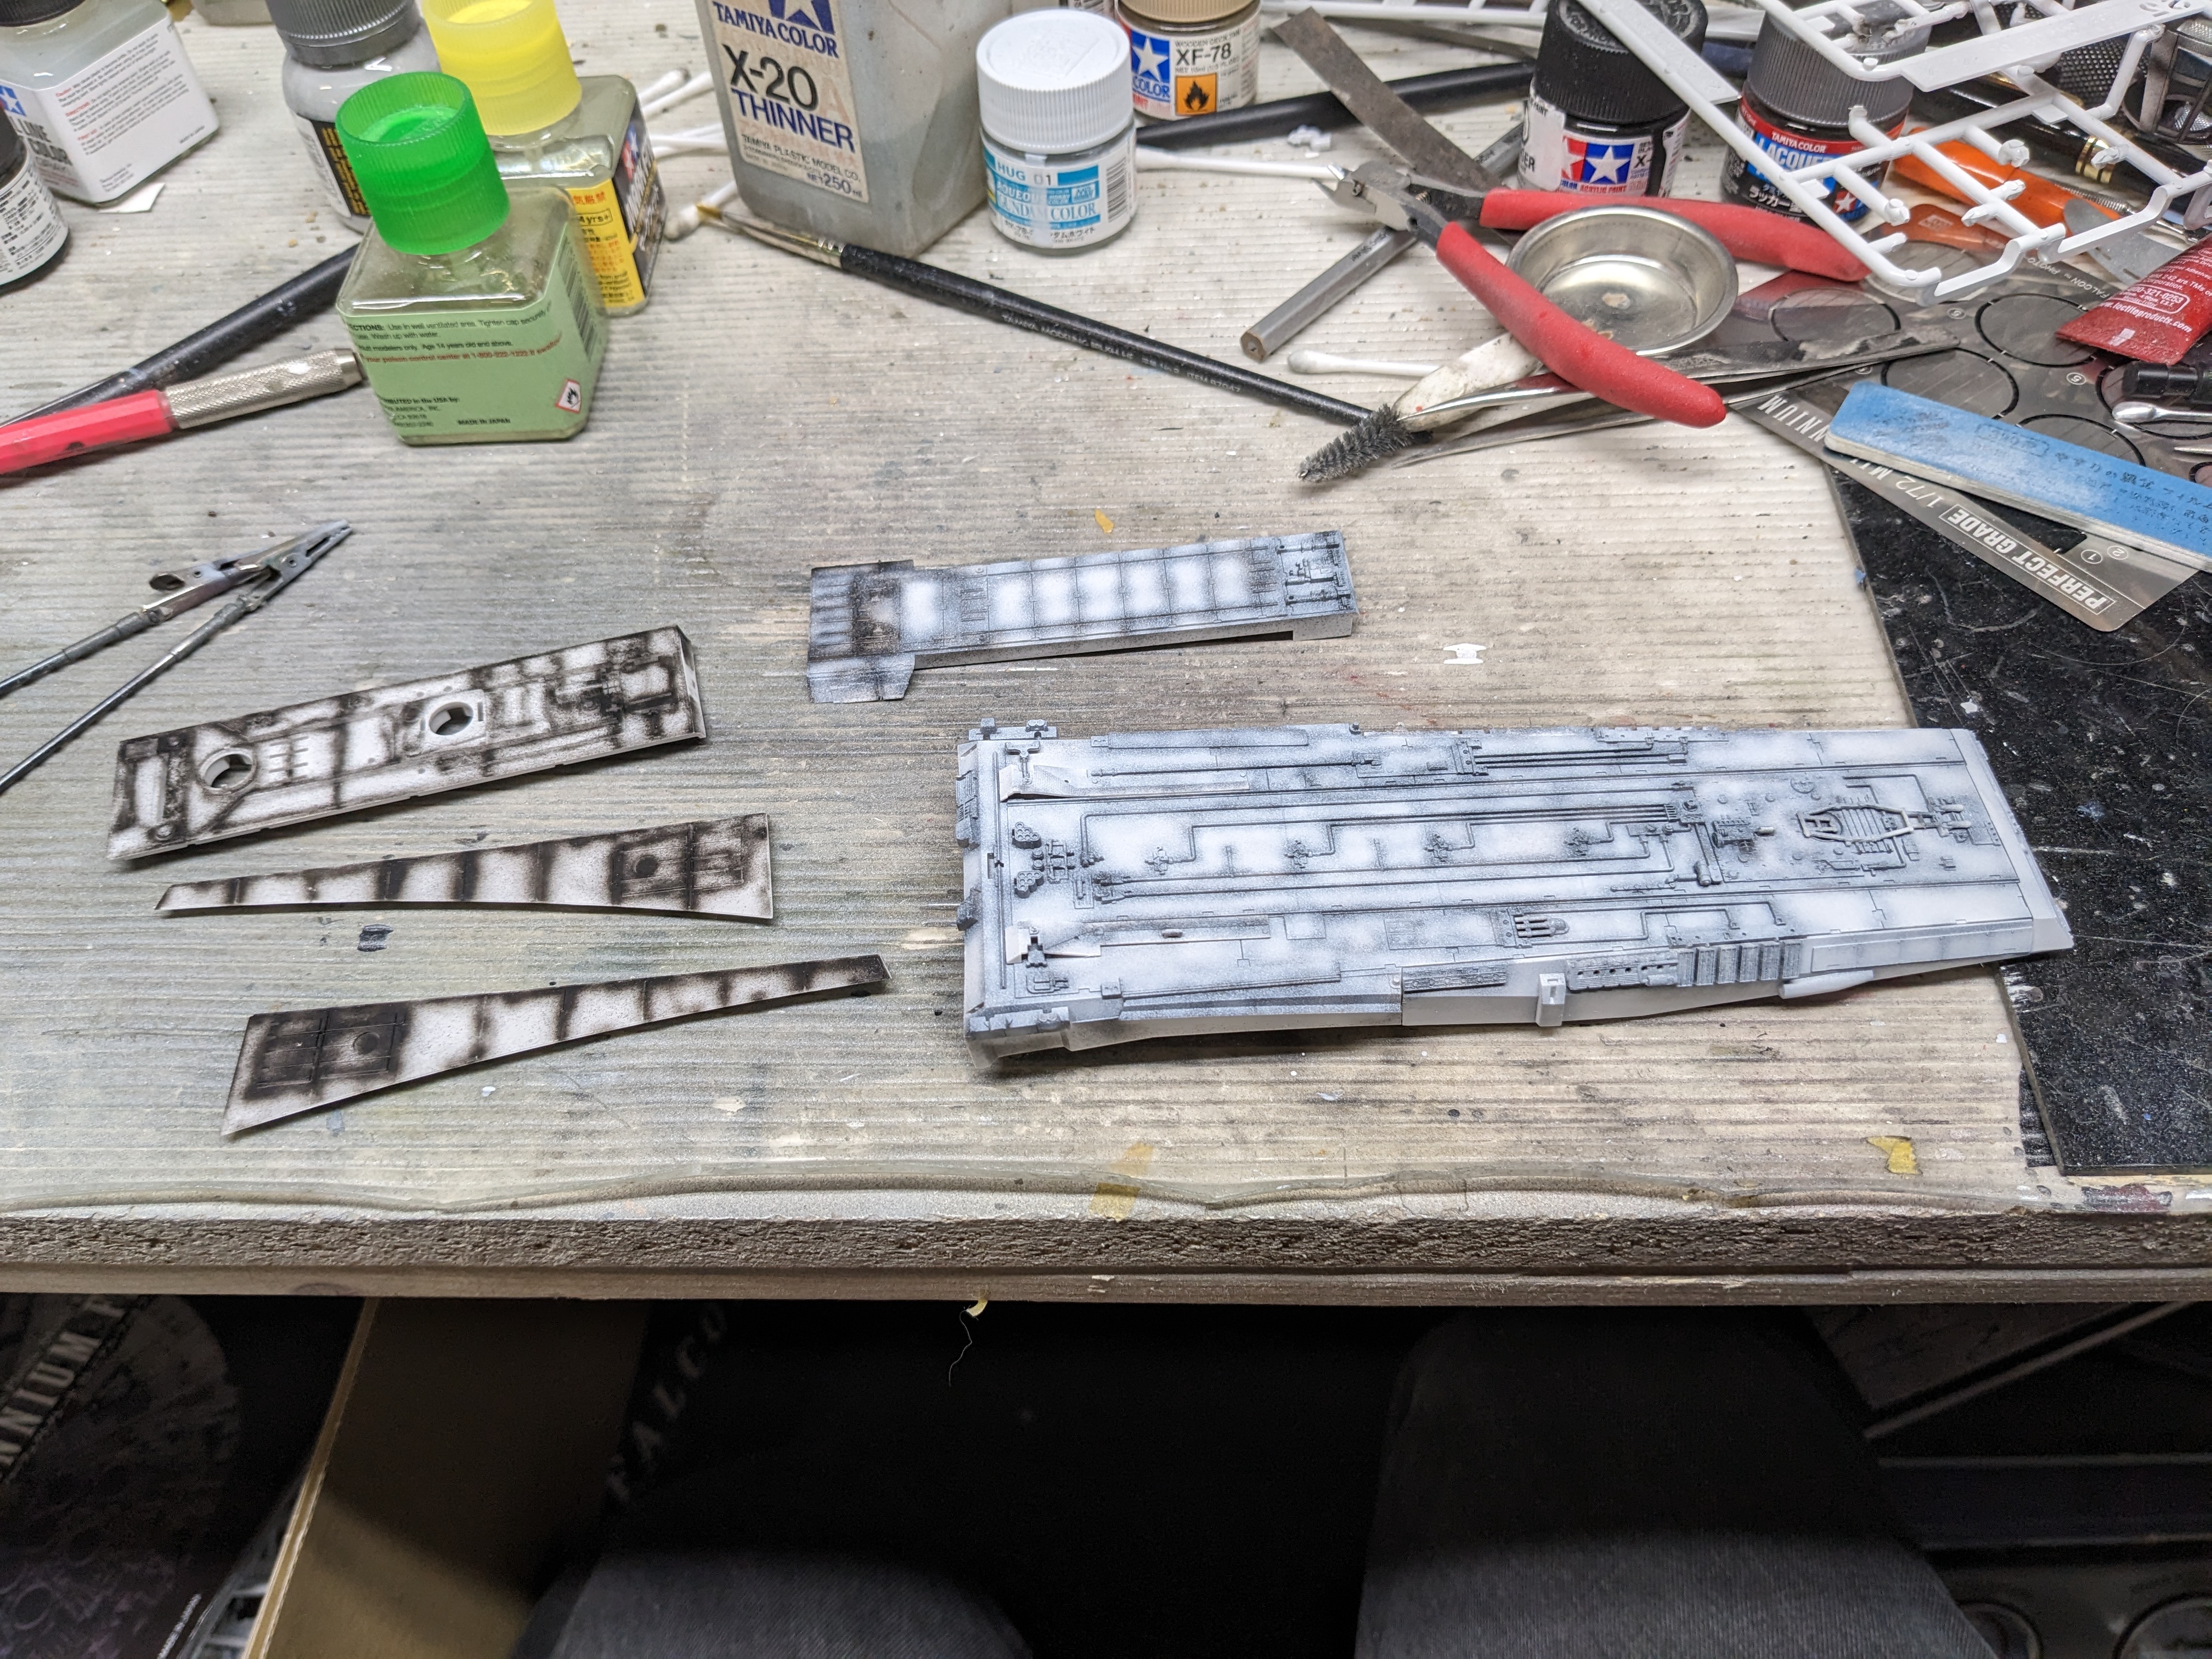
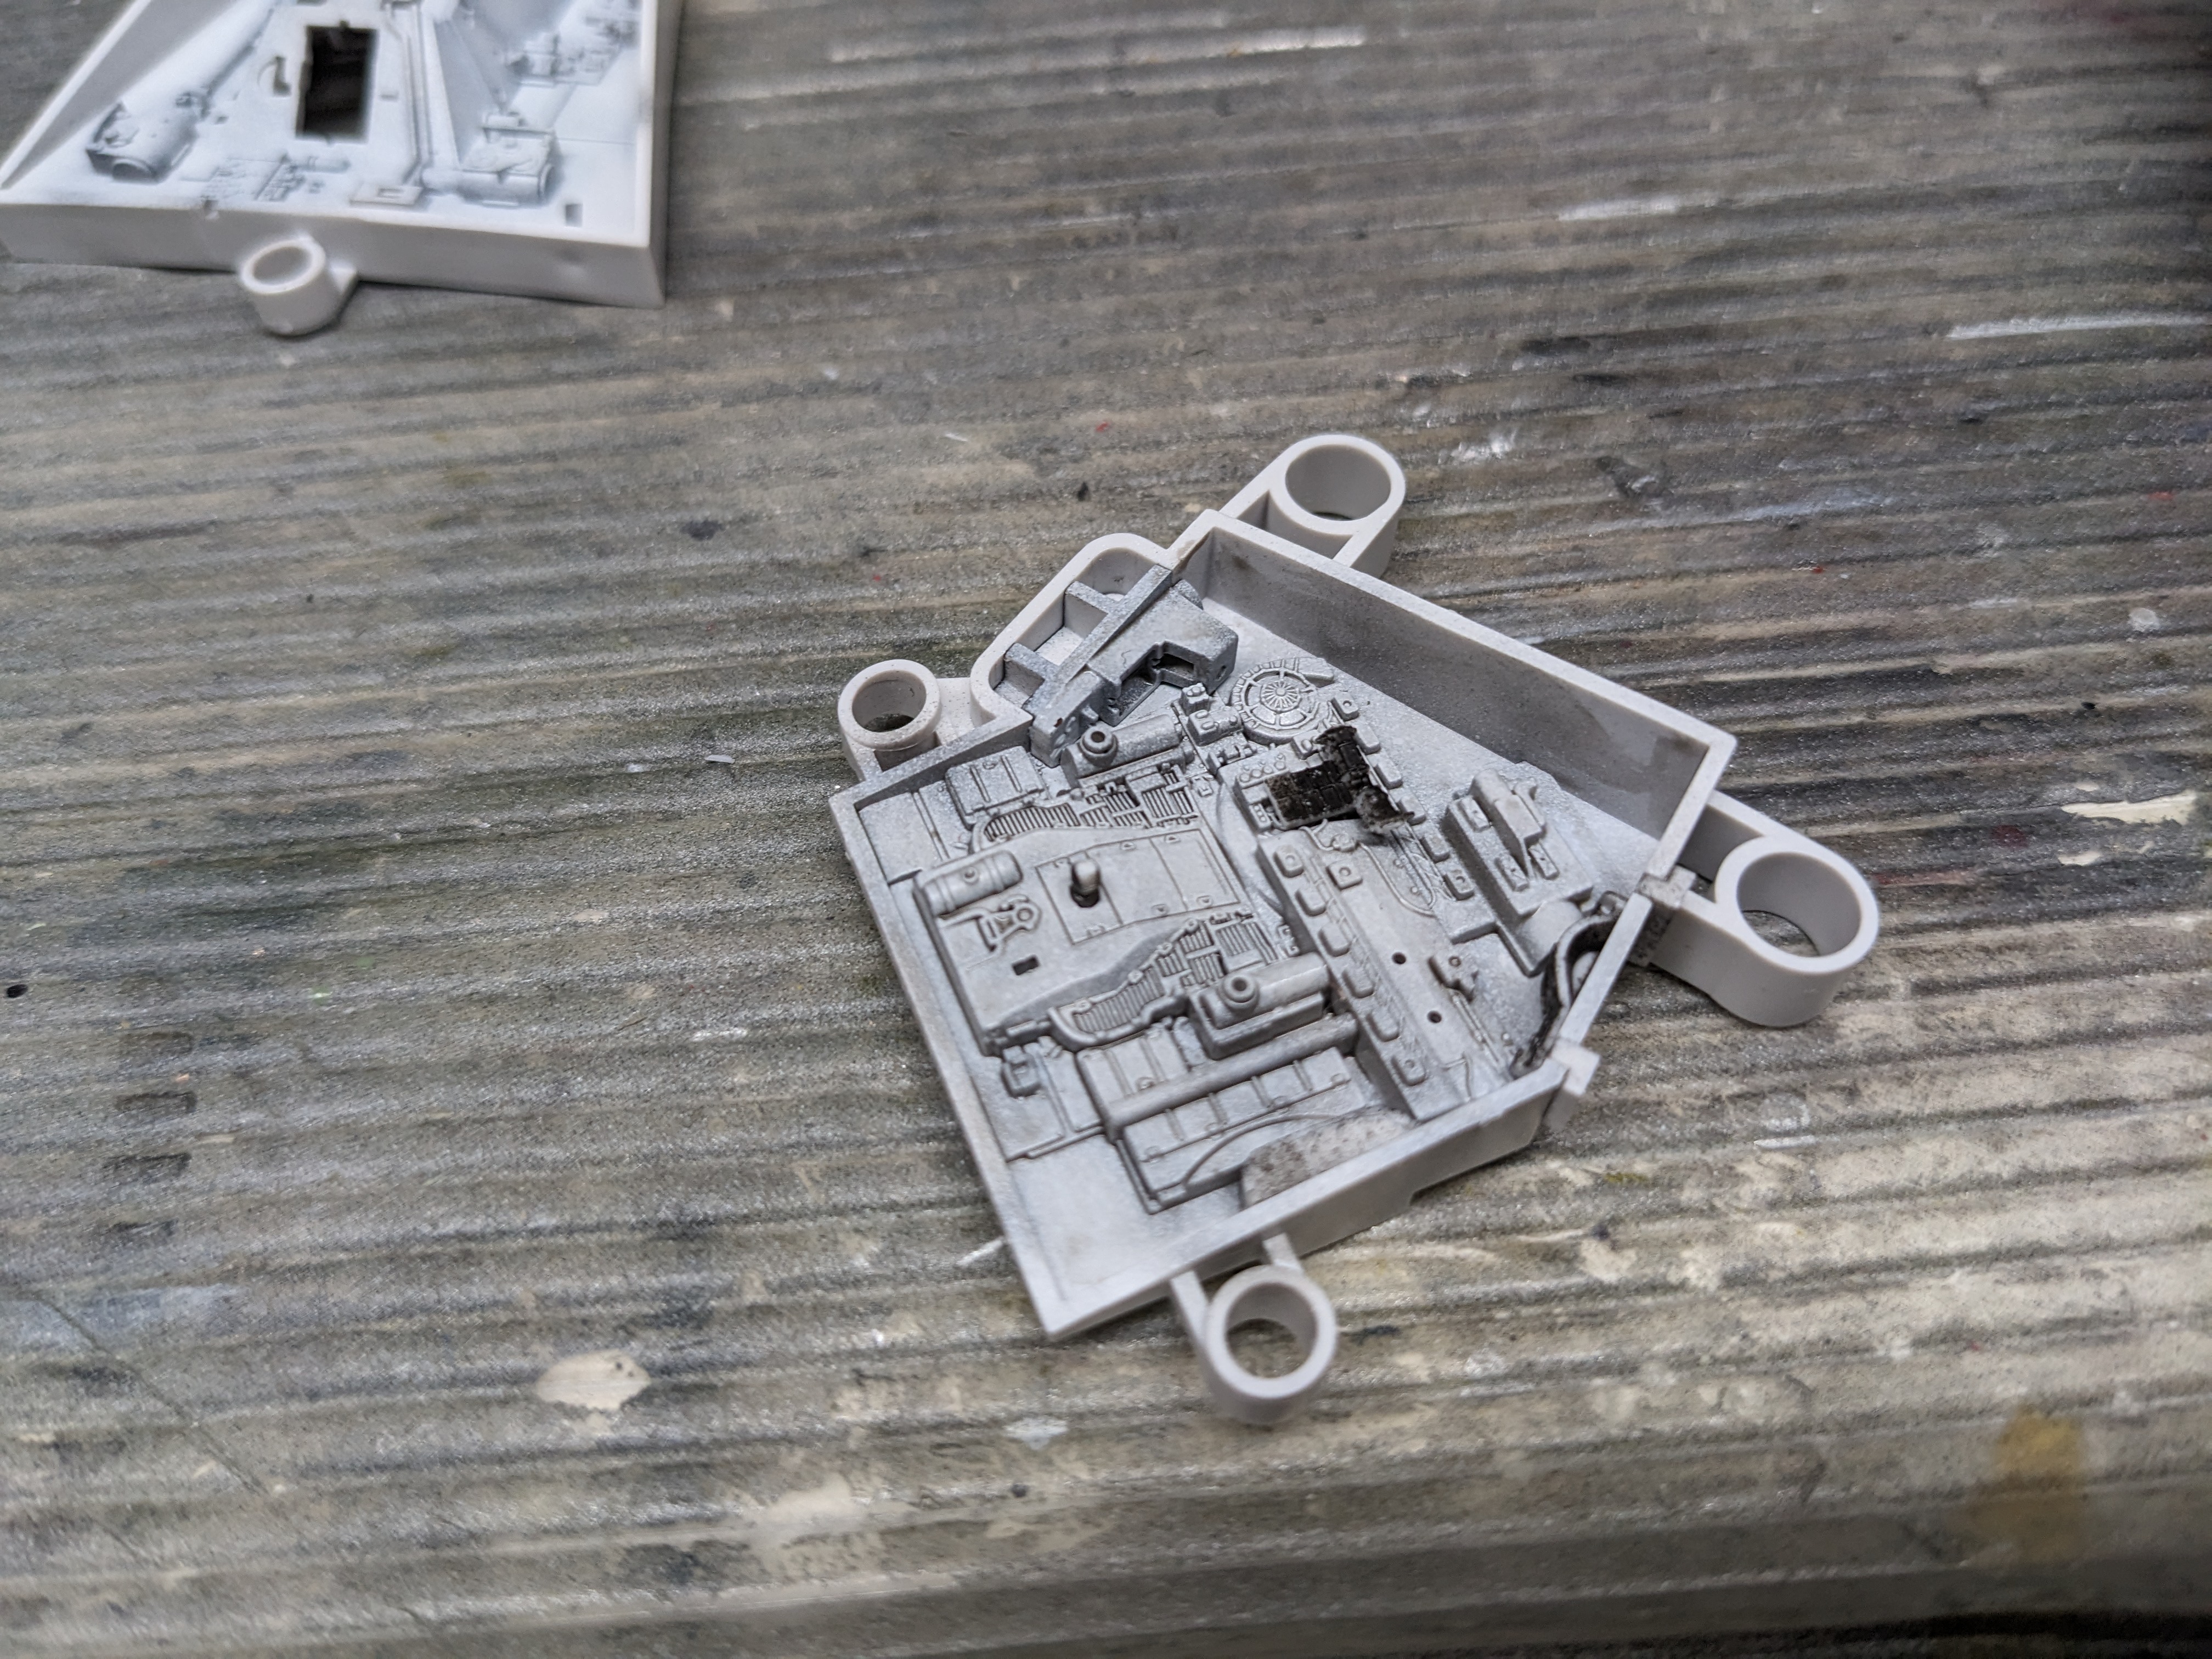
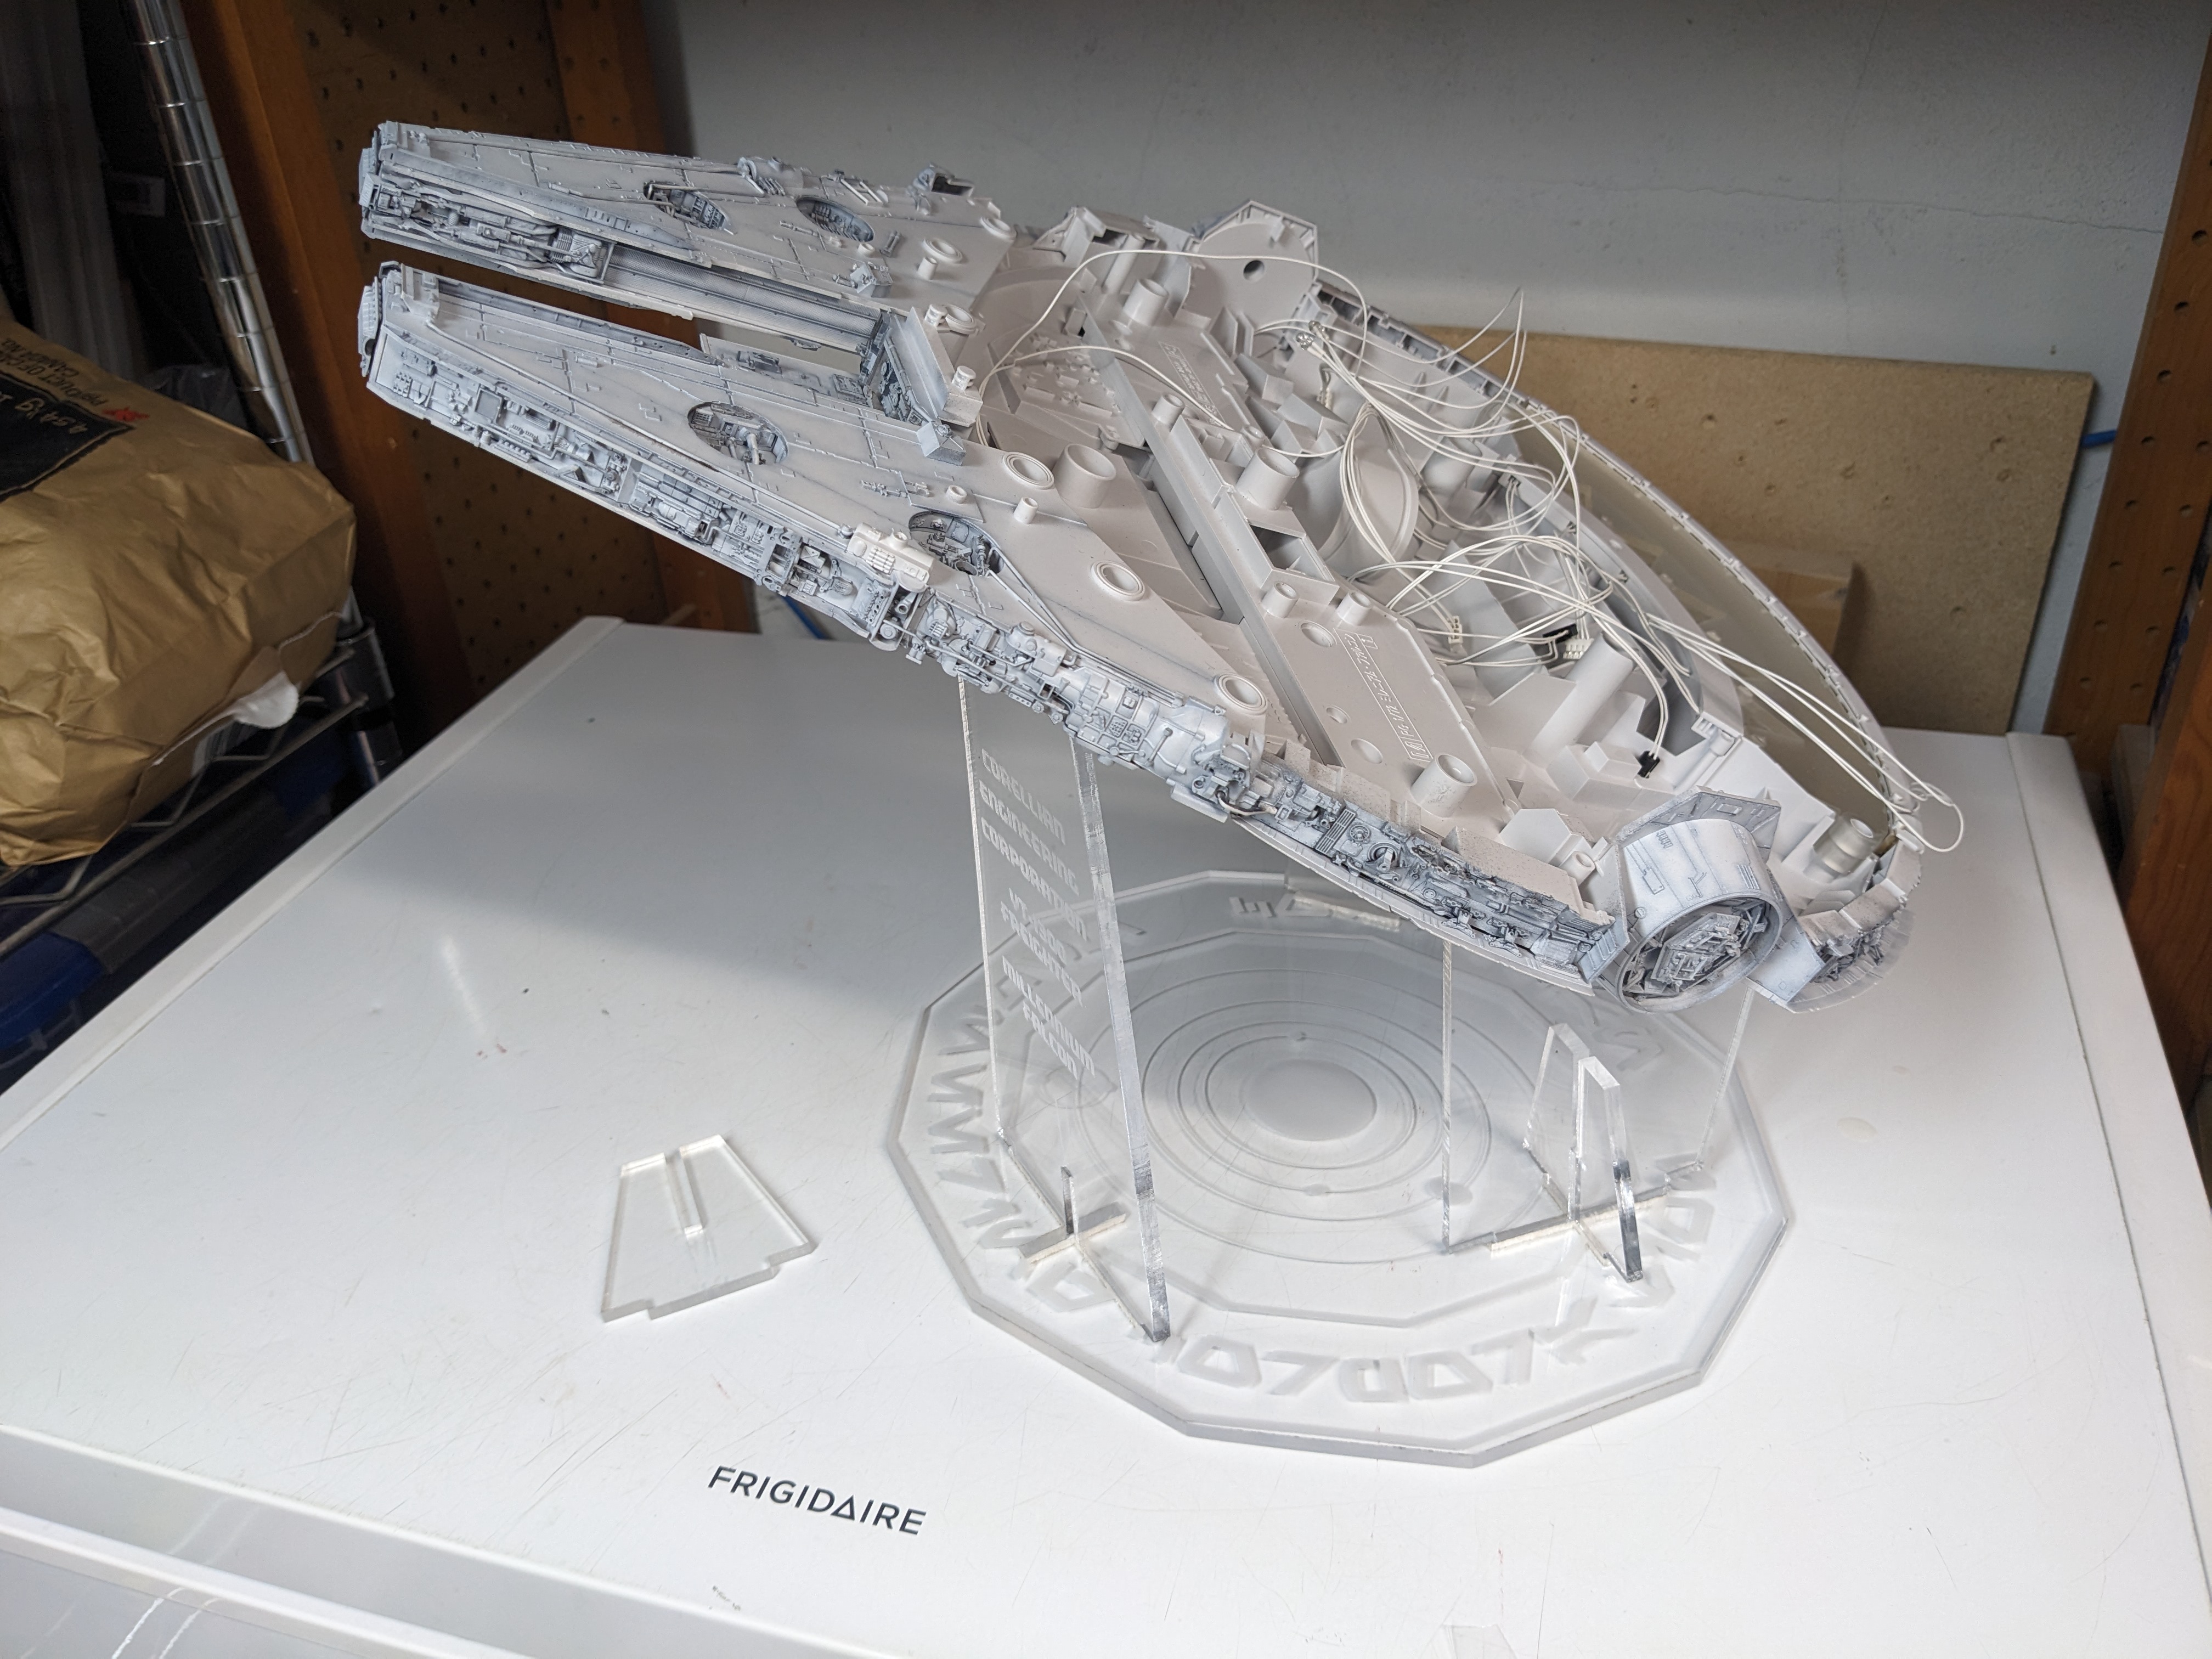
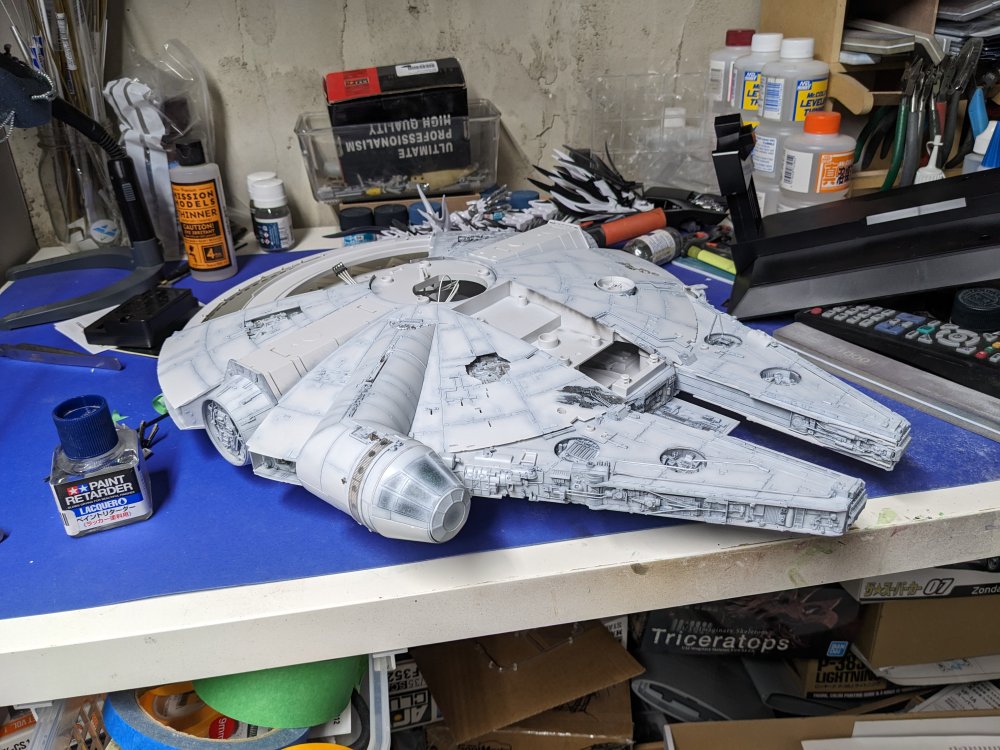
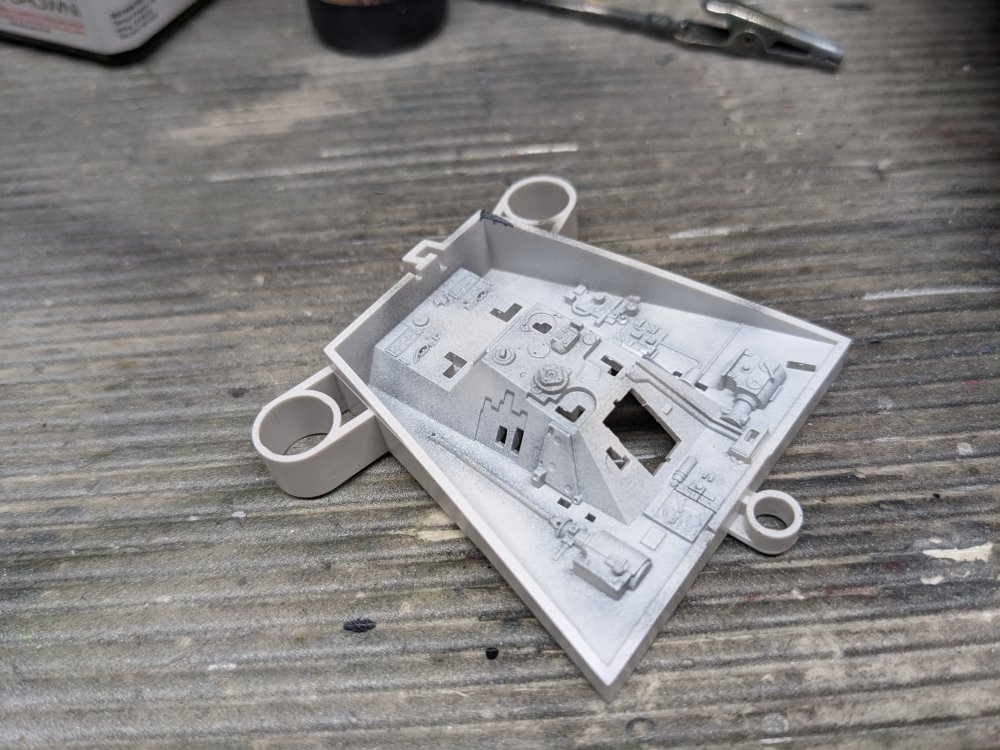
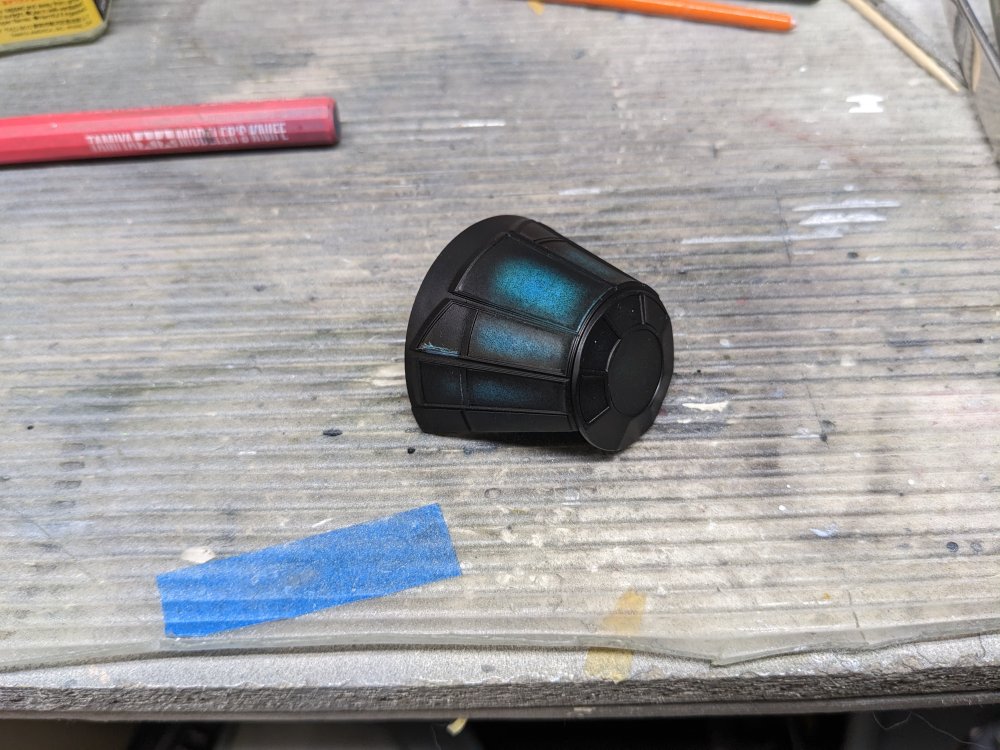
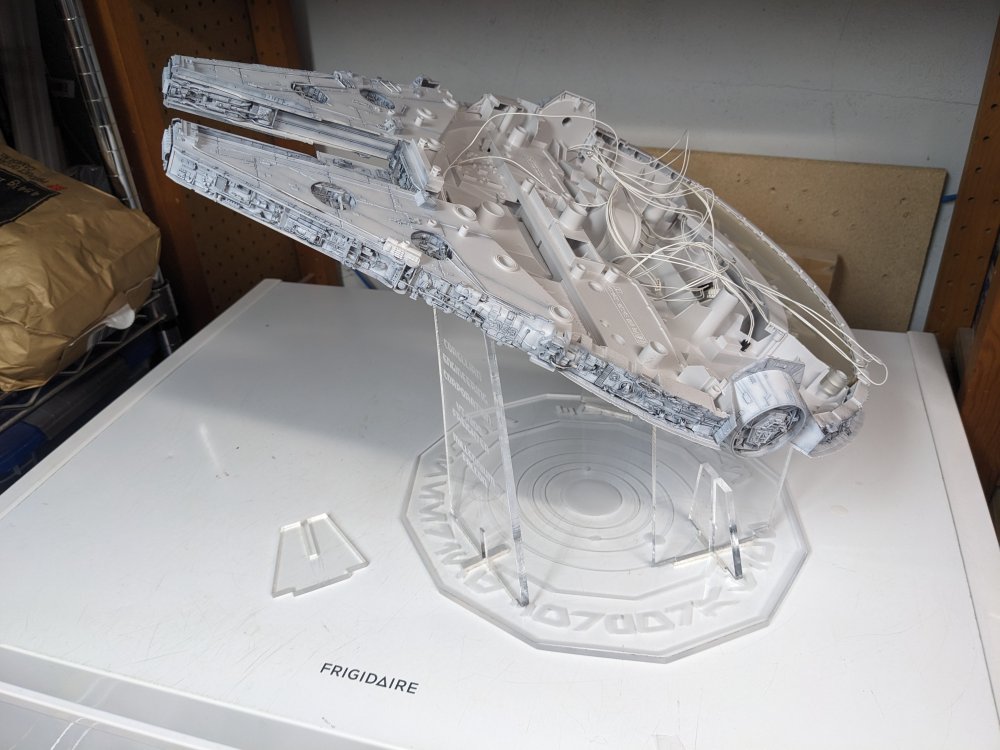
I painted the recessed bays on the upper hull and added them. The cockpit tube was finished and then I attached it to the upper hull. I then finally added the upper hull to the lower assembly. It's really starting to look like the Falcon. I also got the upper jawbox painted.


- 115 replies
-
- 10
-
-

-
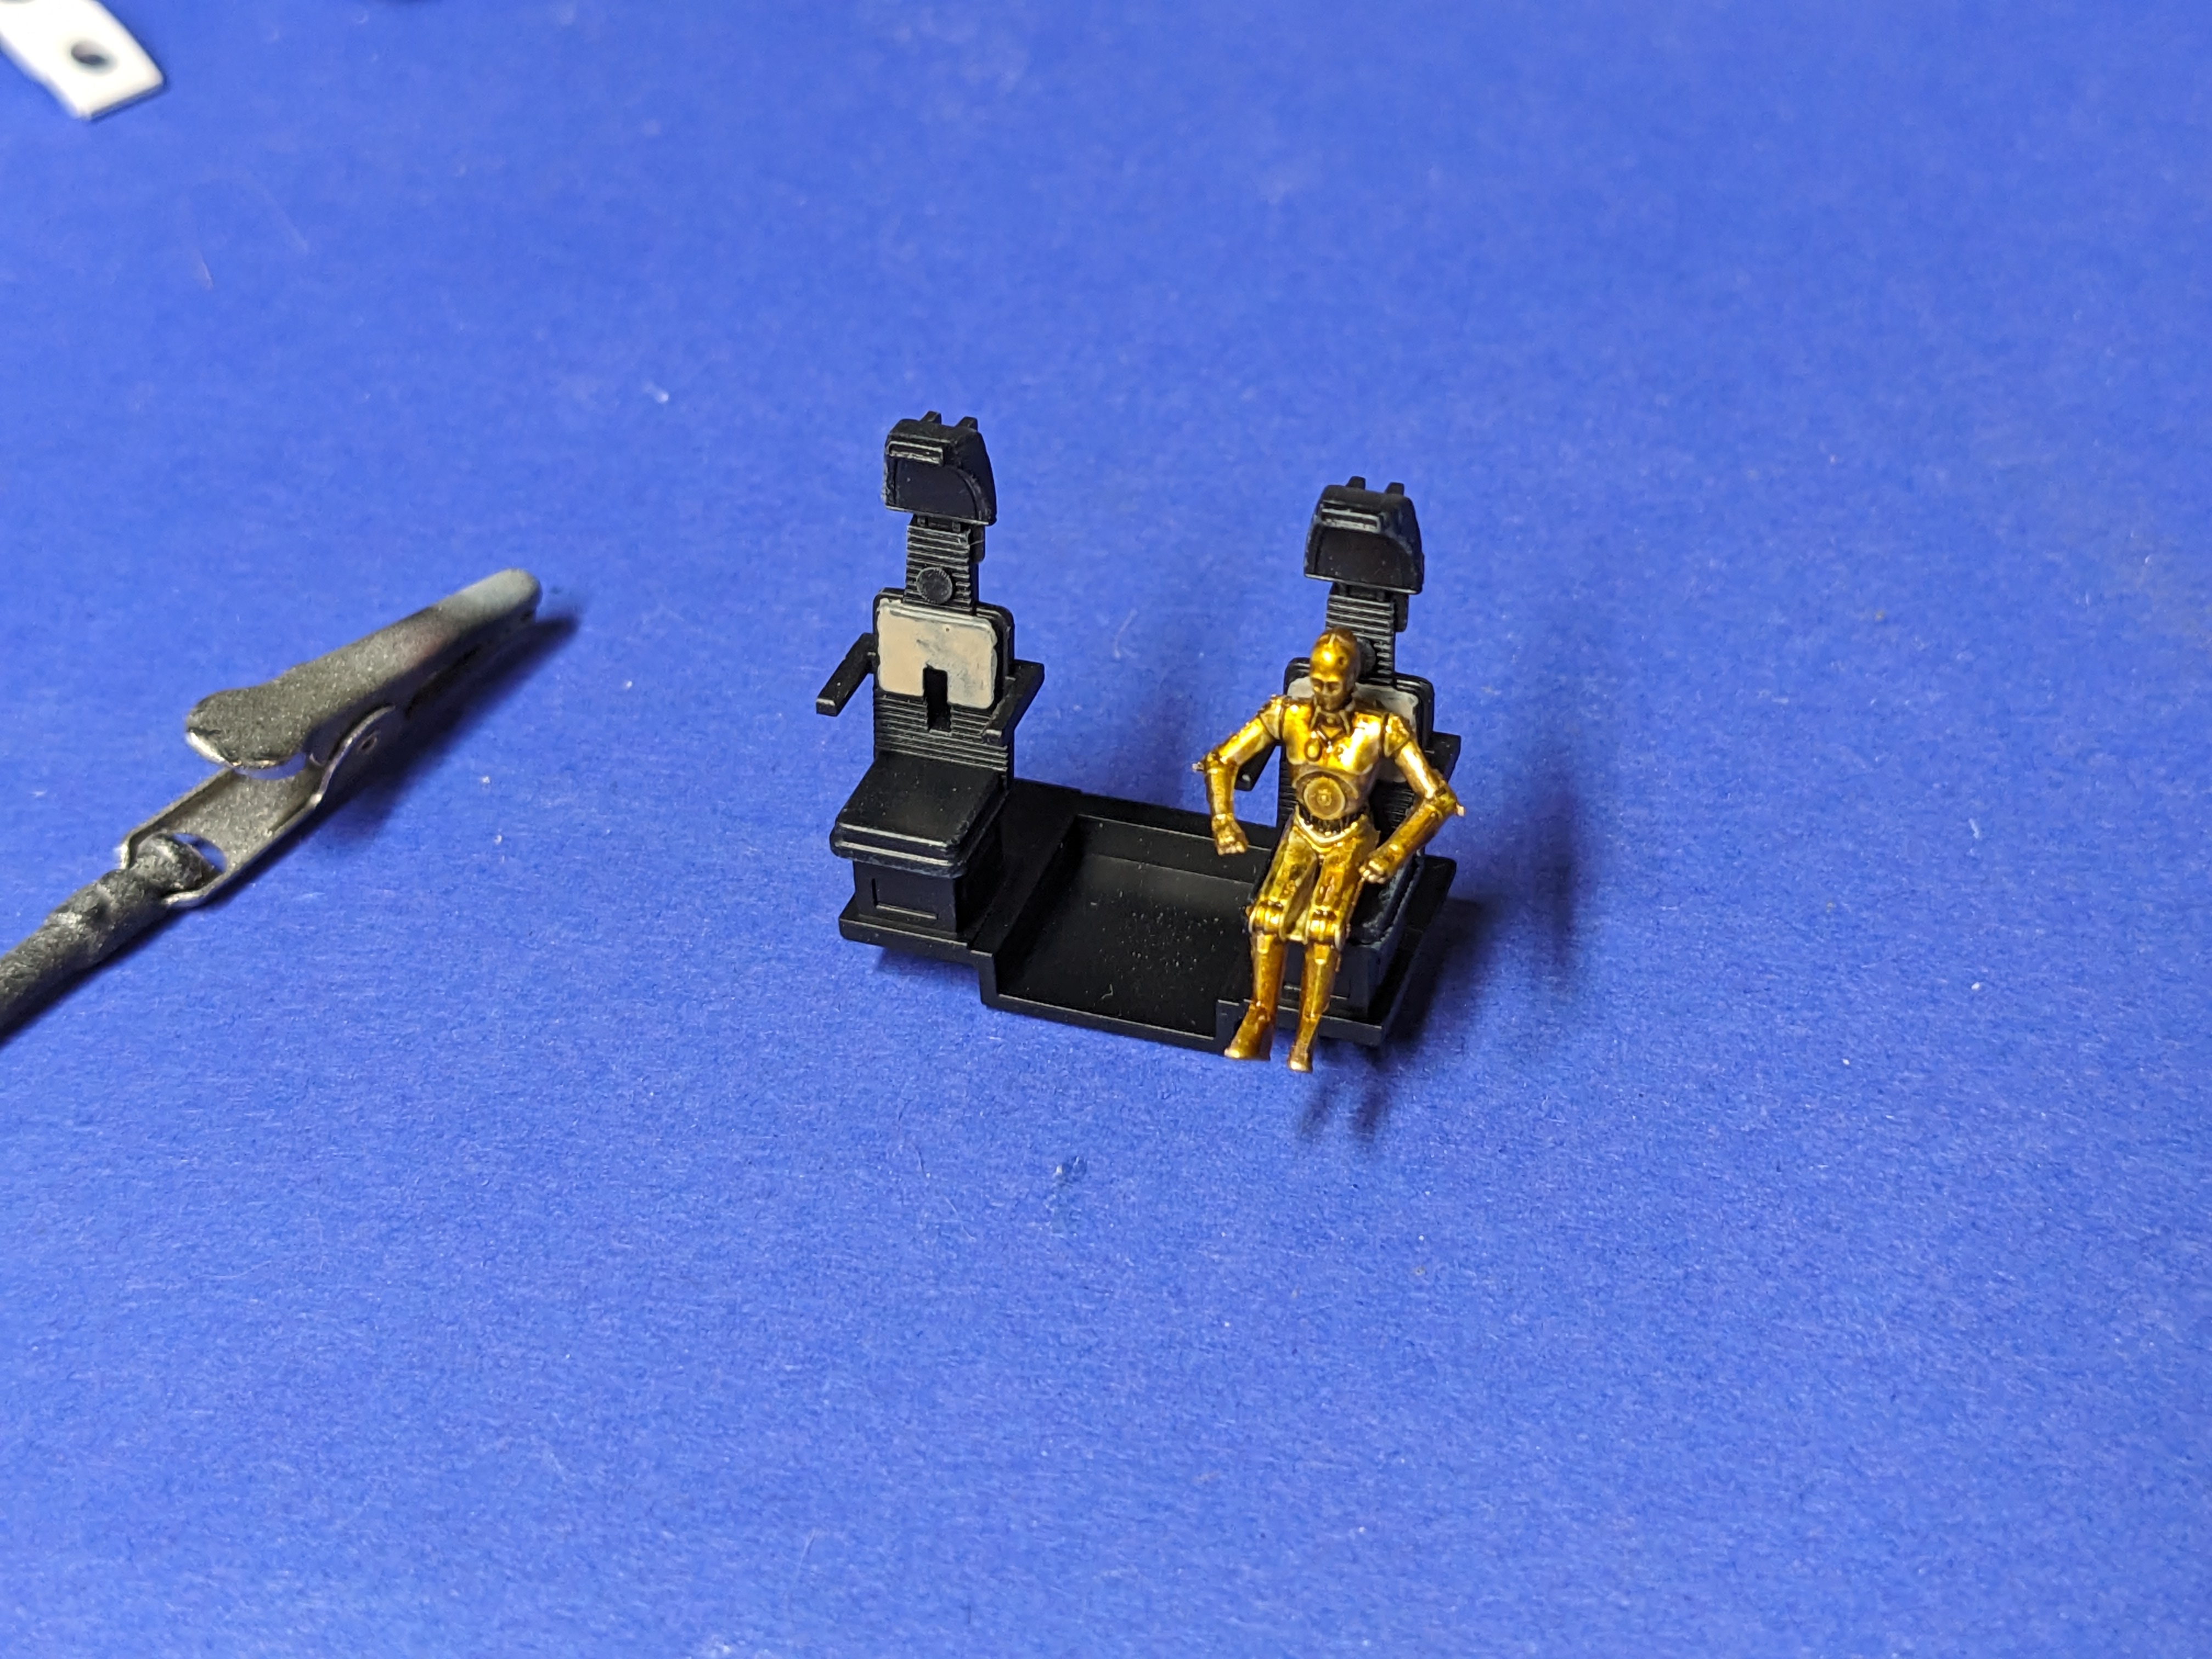
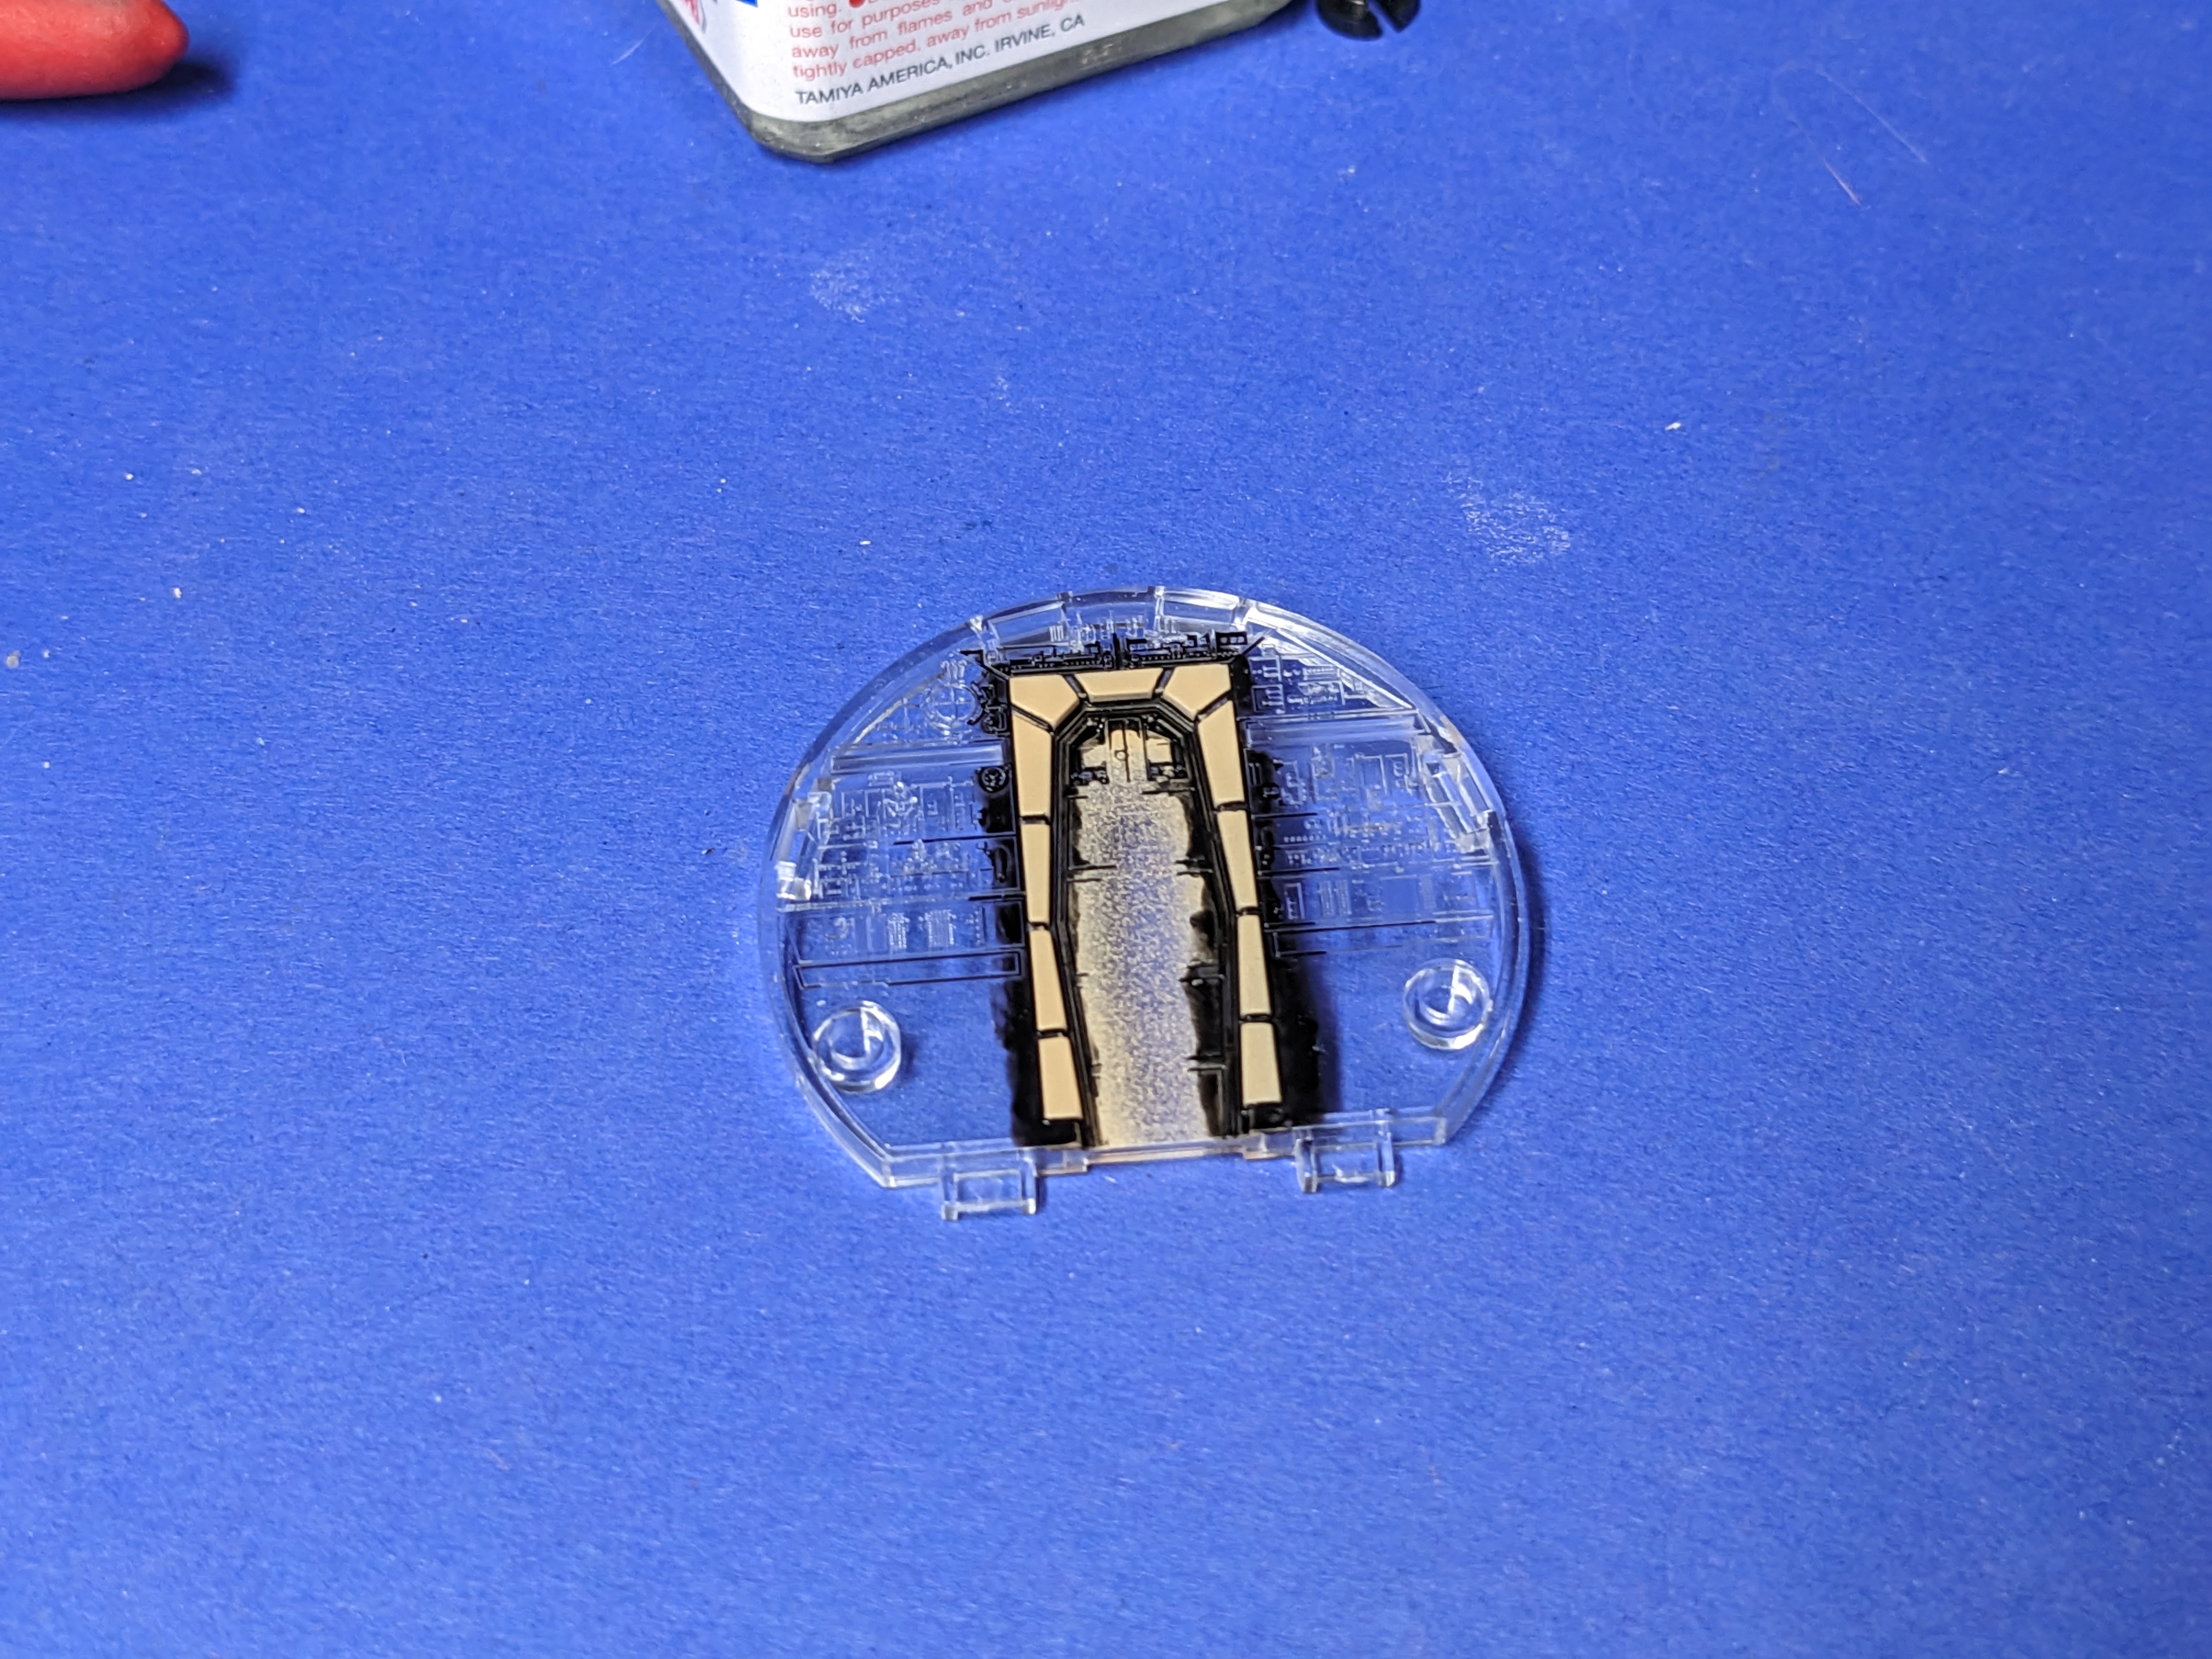
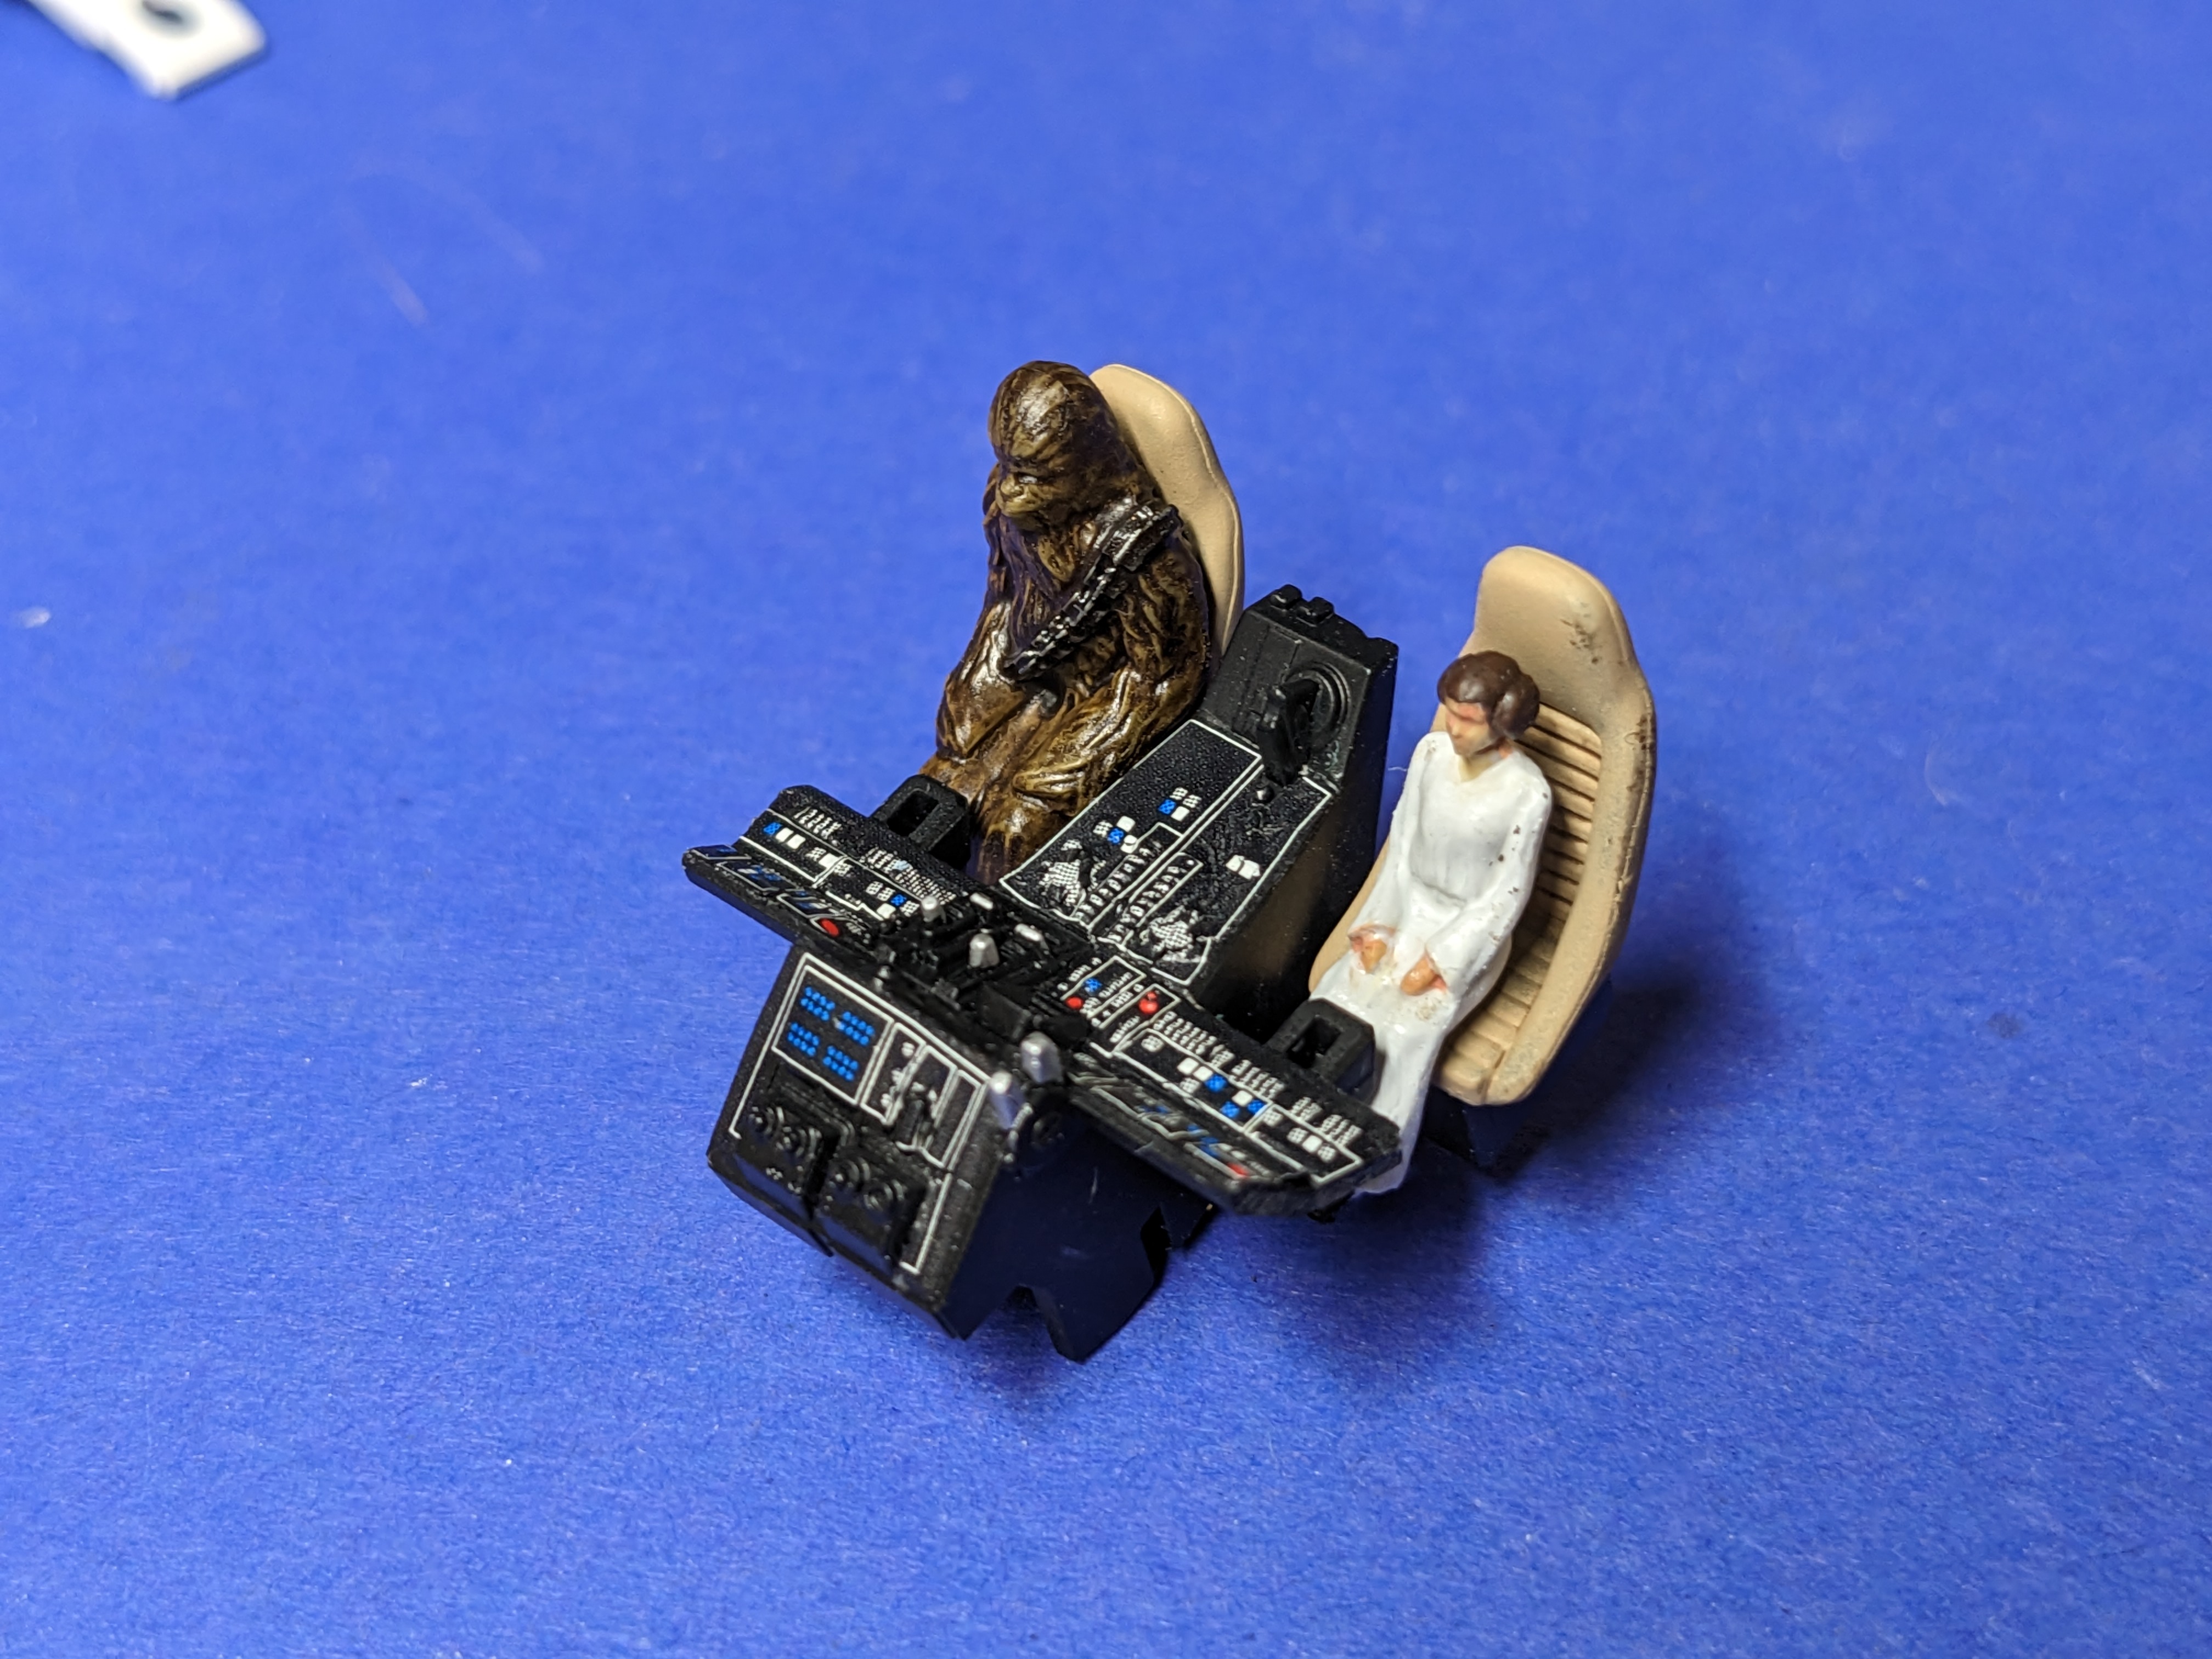
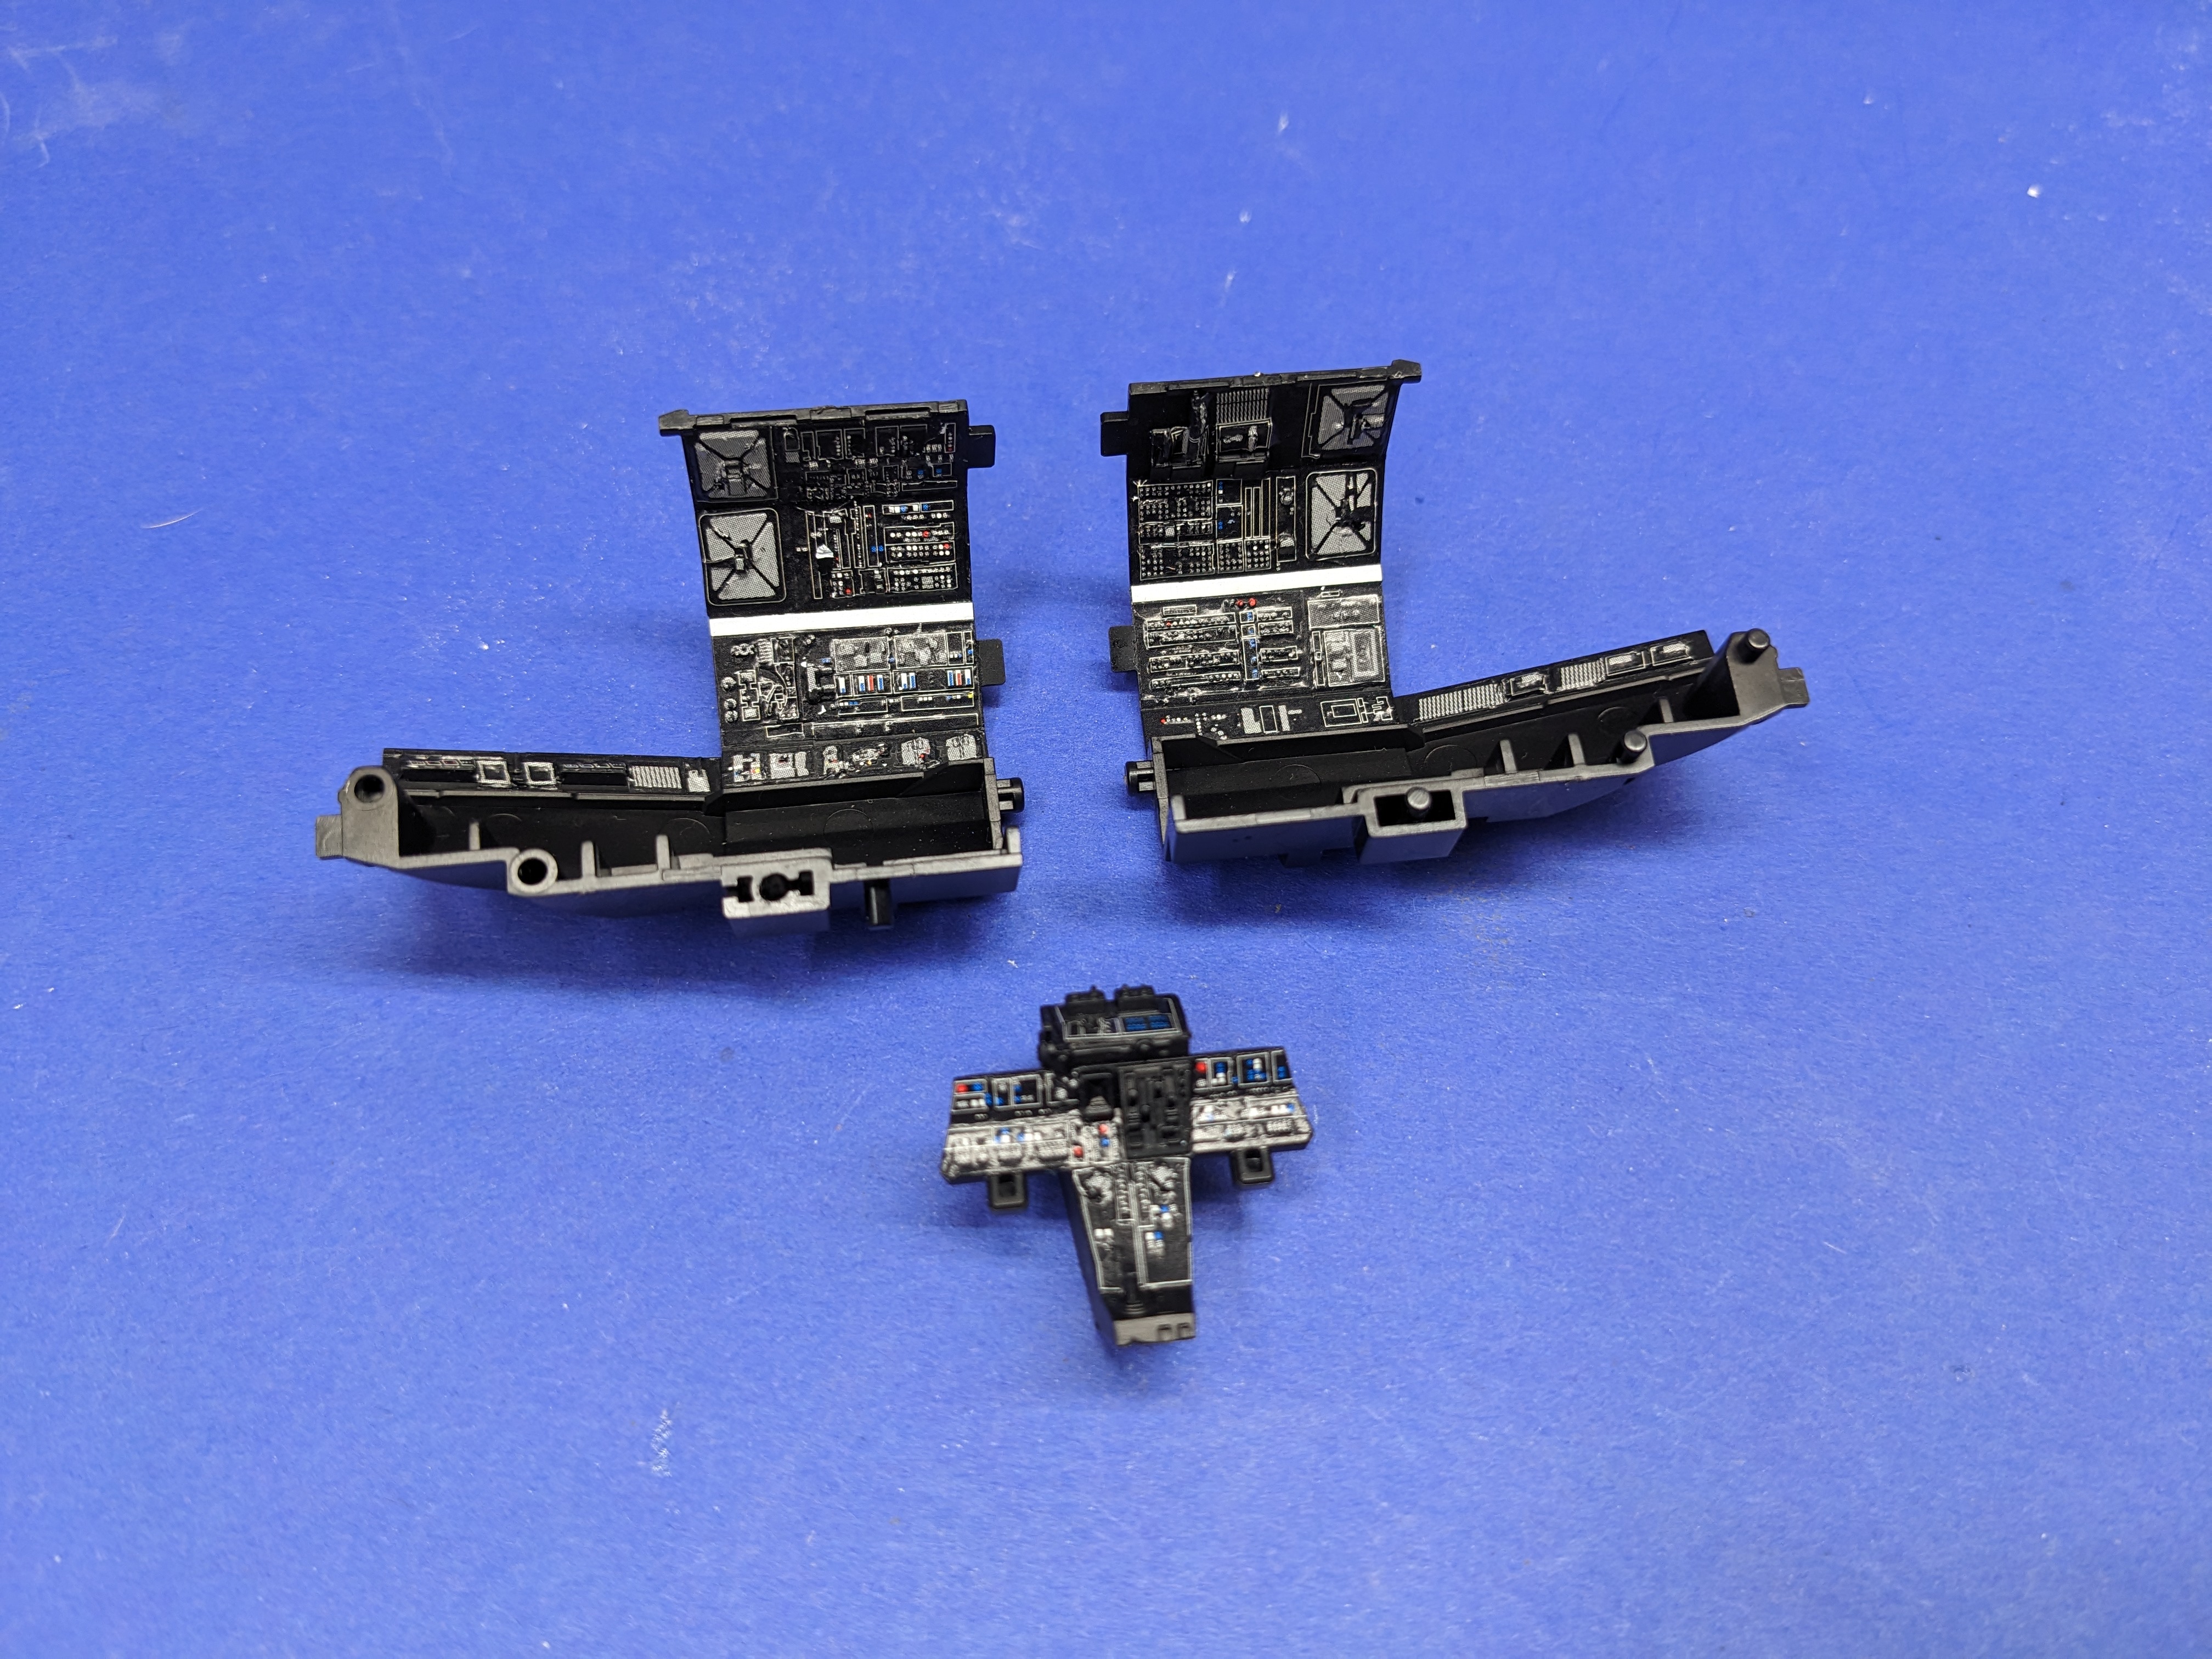
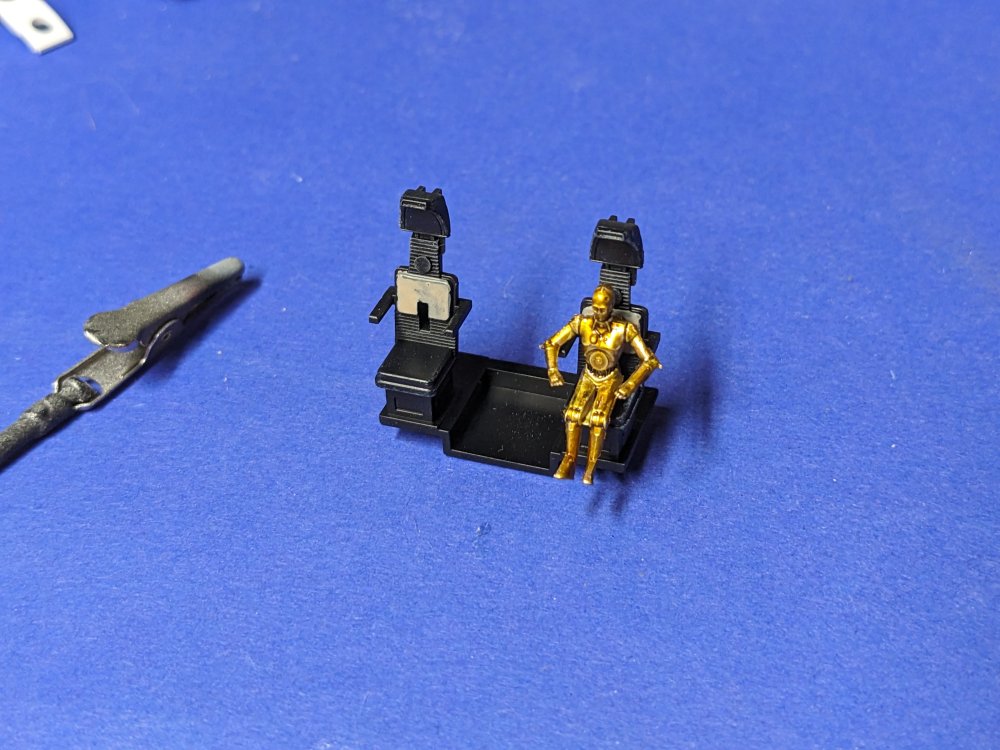
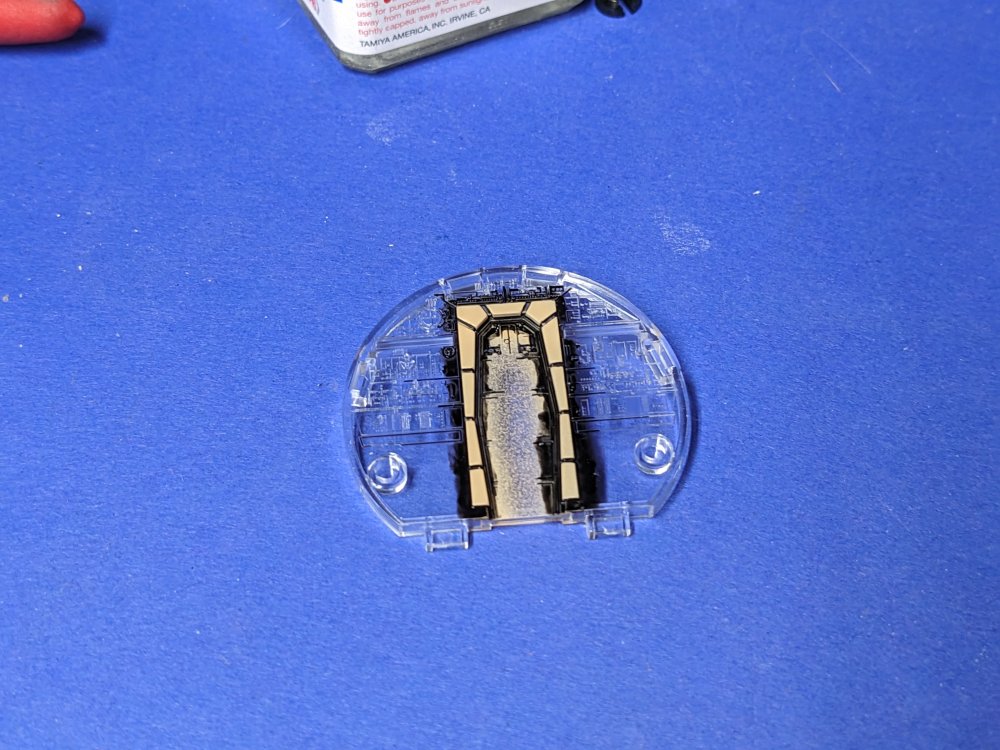
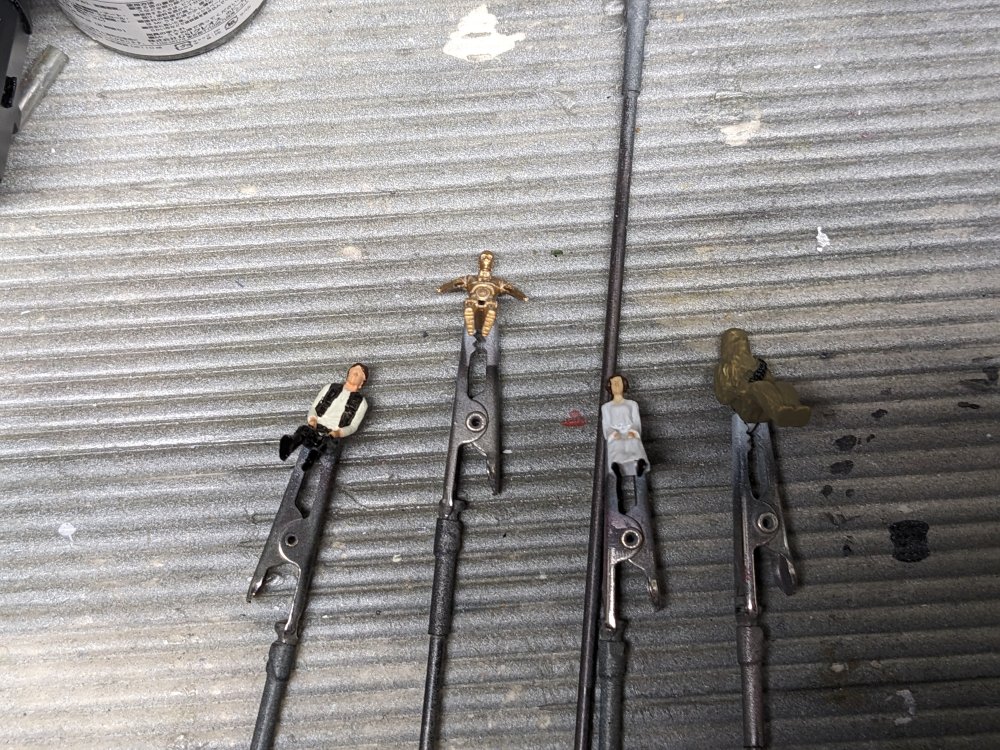
I thought I'd get more done over the Christmas break but even though I was off, we were busy with family stuff. I finally got the cockpit done. This was mostly applying various decals over some well detailed panels. I had to use a lot of decal solvent to get them to conform. I then painted the figures. I decided to use the crew layout from when the Falcon escapes from the Death Star. This puts Leia and Chewbacca up front, Han and Luke in the gunner seats. To fill the rear seat, I added C-3P0. The rear panel of the cockpit door I felt was a bit too deep to cover easily with the decal so I cut that part of the decal out and painted it. I oddly don't have any pics of the finished panel. Whoops. Finally I painted the canopy after masking it off. At this point, I found a clear stand I'd bought for the Fine Molds Falcon. The fit isn't perfect but it does hold the model so I might use it.


-
It's going to together nicely. Quick too. Carl
-
ProModeler 1/48 PBY-5A Catalina + Goodies, RFI
BlrwestSiR replied to CANicoll's topic in Let’s Get Wet Group Build.
Nice work so far Chris. I'm impressed by the paint still being good. I didn't get the Model Master Acryl paints to ever work for me. Many went off in the bottle before I could even try them and those that didn't, wouldn't stuck. Glad you've had success with them. -
Italeri M.T.M. "Barchino" 1:35 - Completed
BlrwestSiR replied to telepatu's topic in Let’s Get Wet Group Build.
Same here, this will be the first one I've seen done. -
39” 1/128 Seaview and Flying Sub
BlrwestSiR replied to ScottsGT's topic in Let’s Get Wet Group Build.
The yellow looks fantastic like the other have said. I've never had an easy time spraying gloss yellow. -
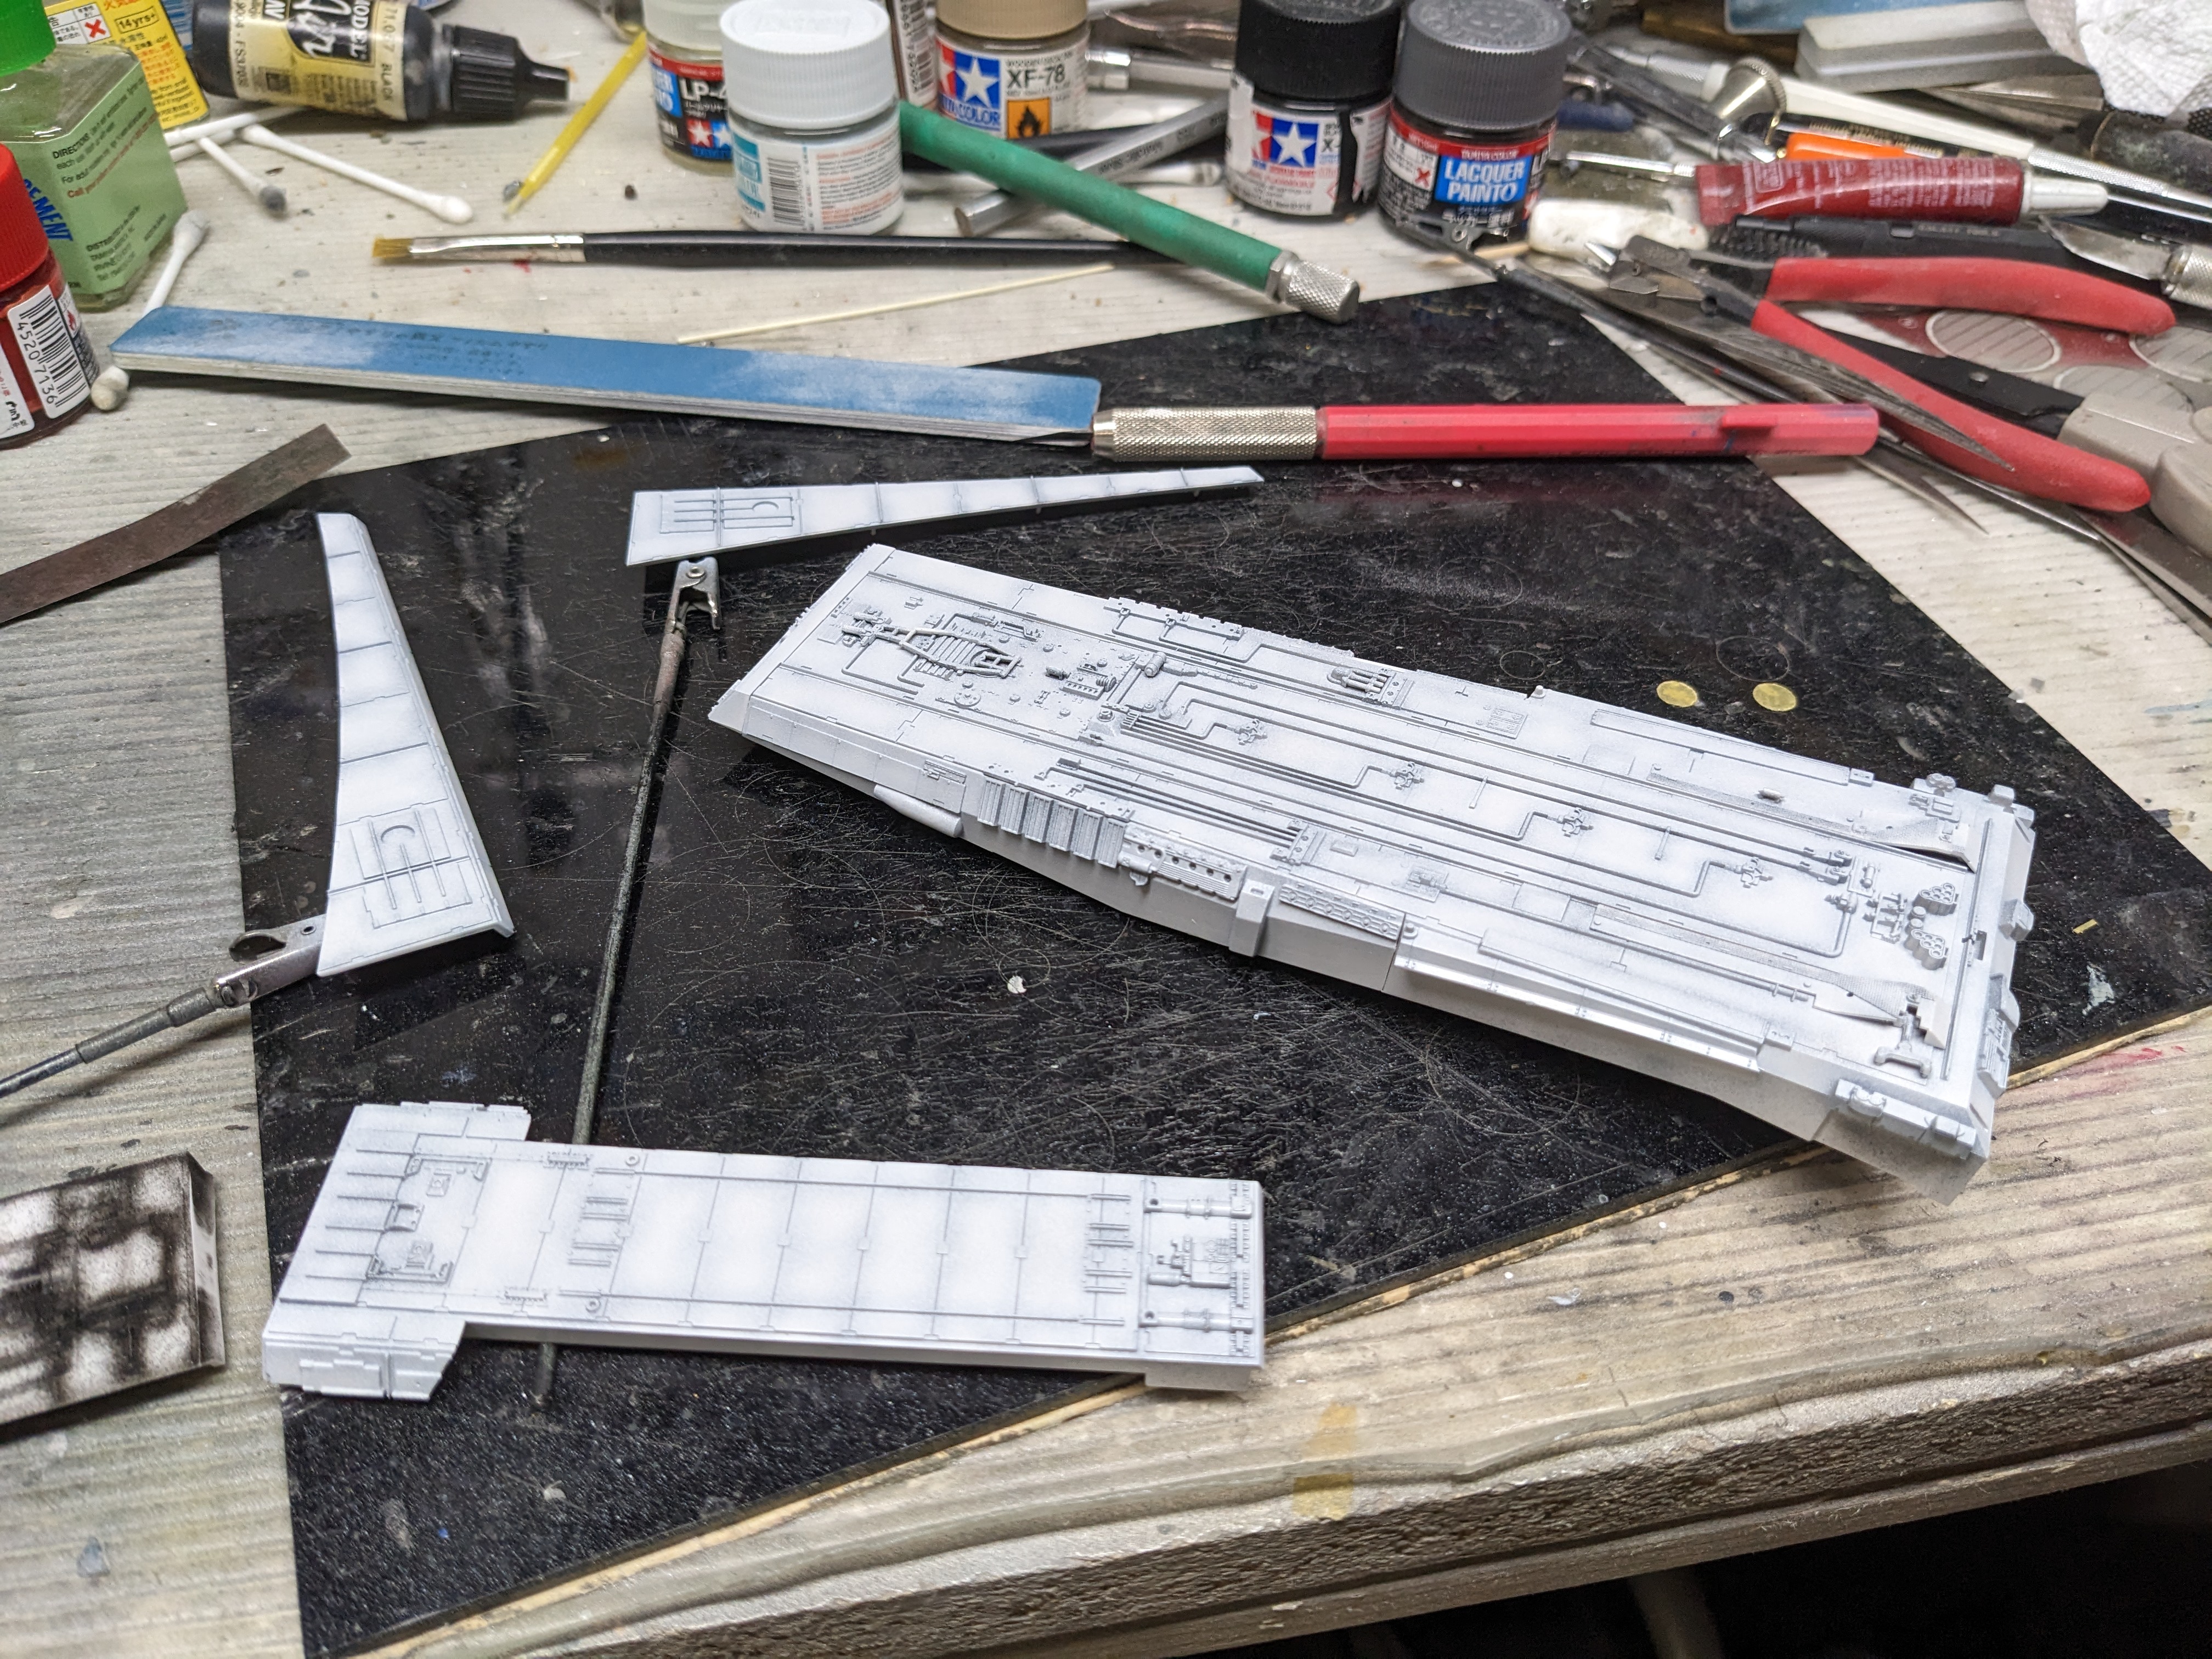
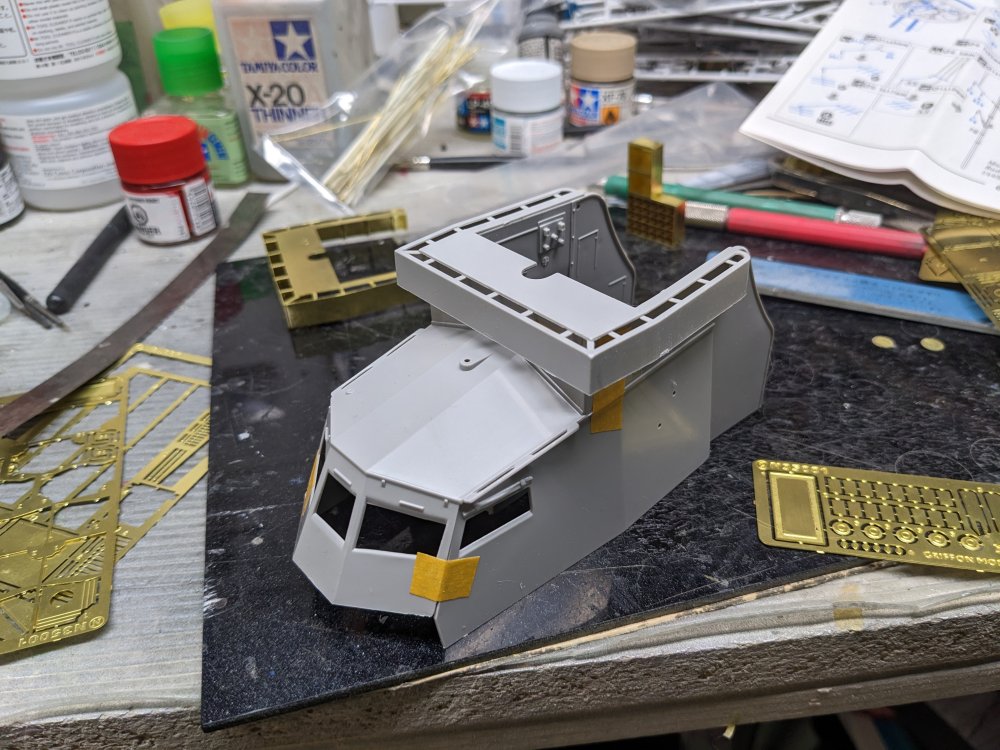
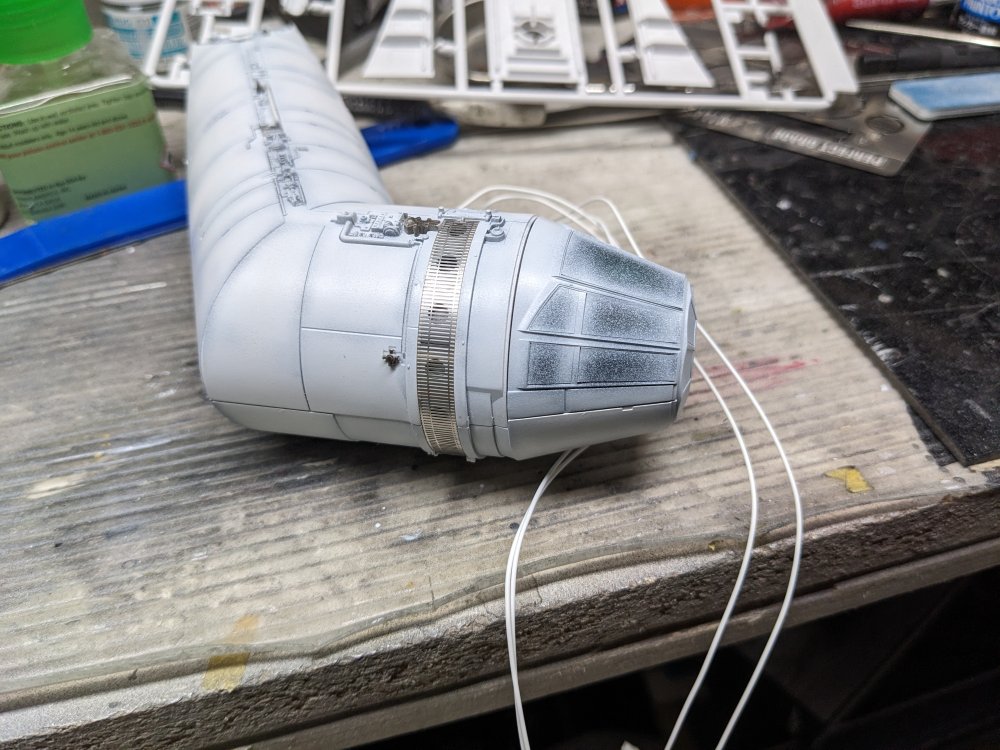
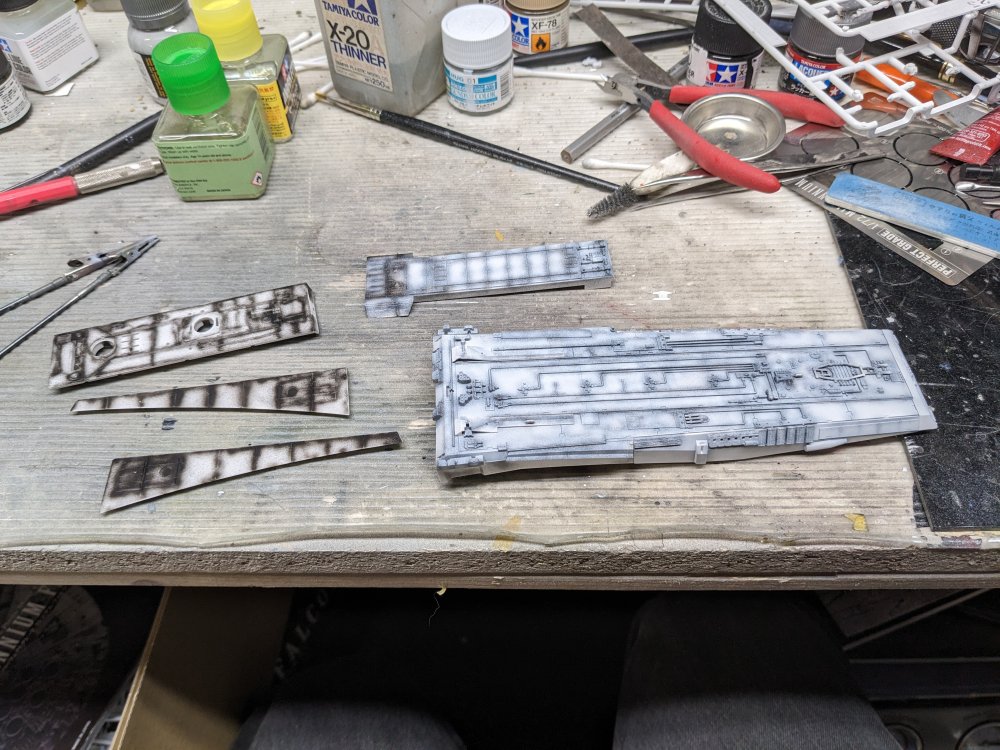
Thanks guys! This is definitely a challenge. I've been reading the instructions (sacrilege, I know) and there's more insanity to come. Like adding 156 bolts to the torpedo tubes. Anyways the flying bridge is done. That's about it for tonight. @CANicoll Chris, I'm using a CA applicator called the Glue Looper. It's a thin stainless hook that you dip in a puddle of CA and touch to the seam. It really helps keep the mess down.

-
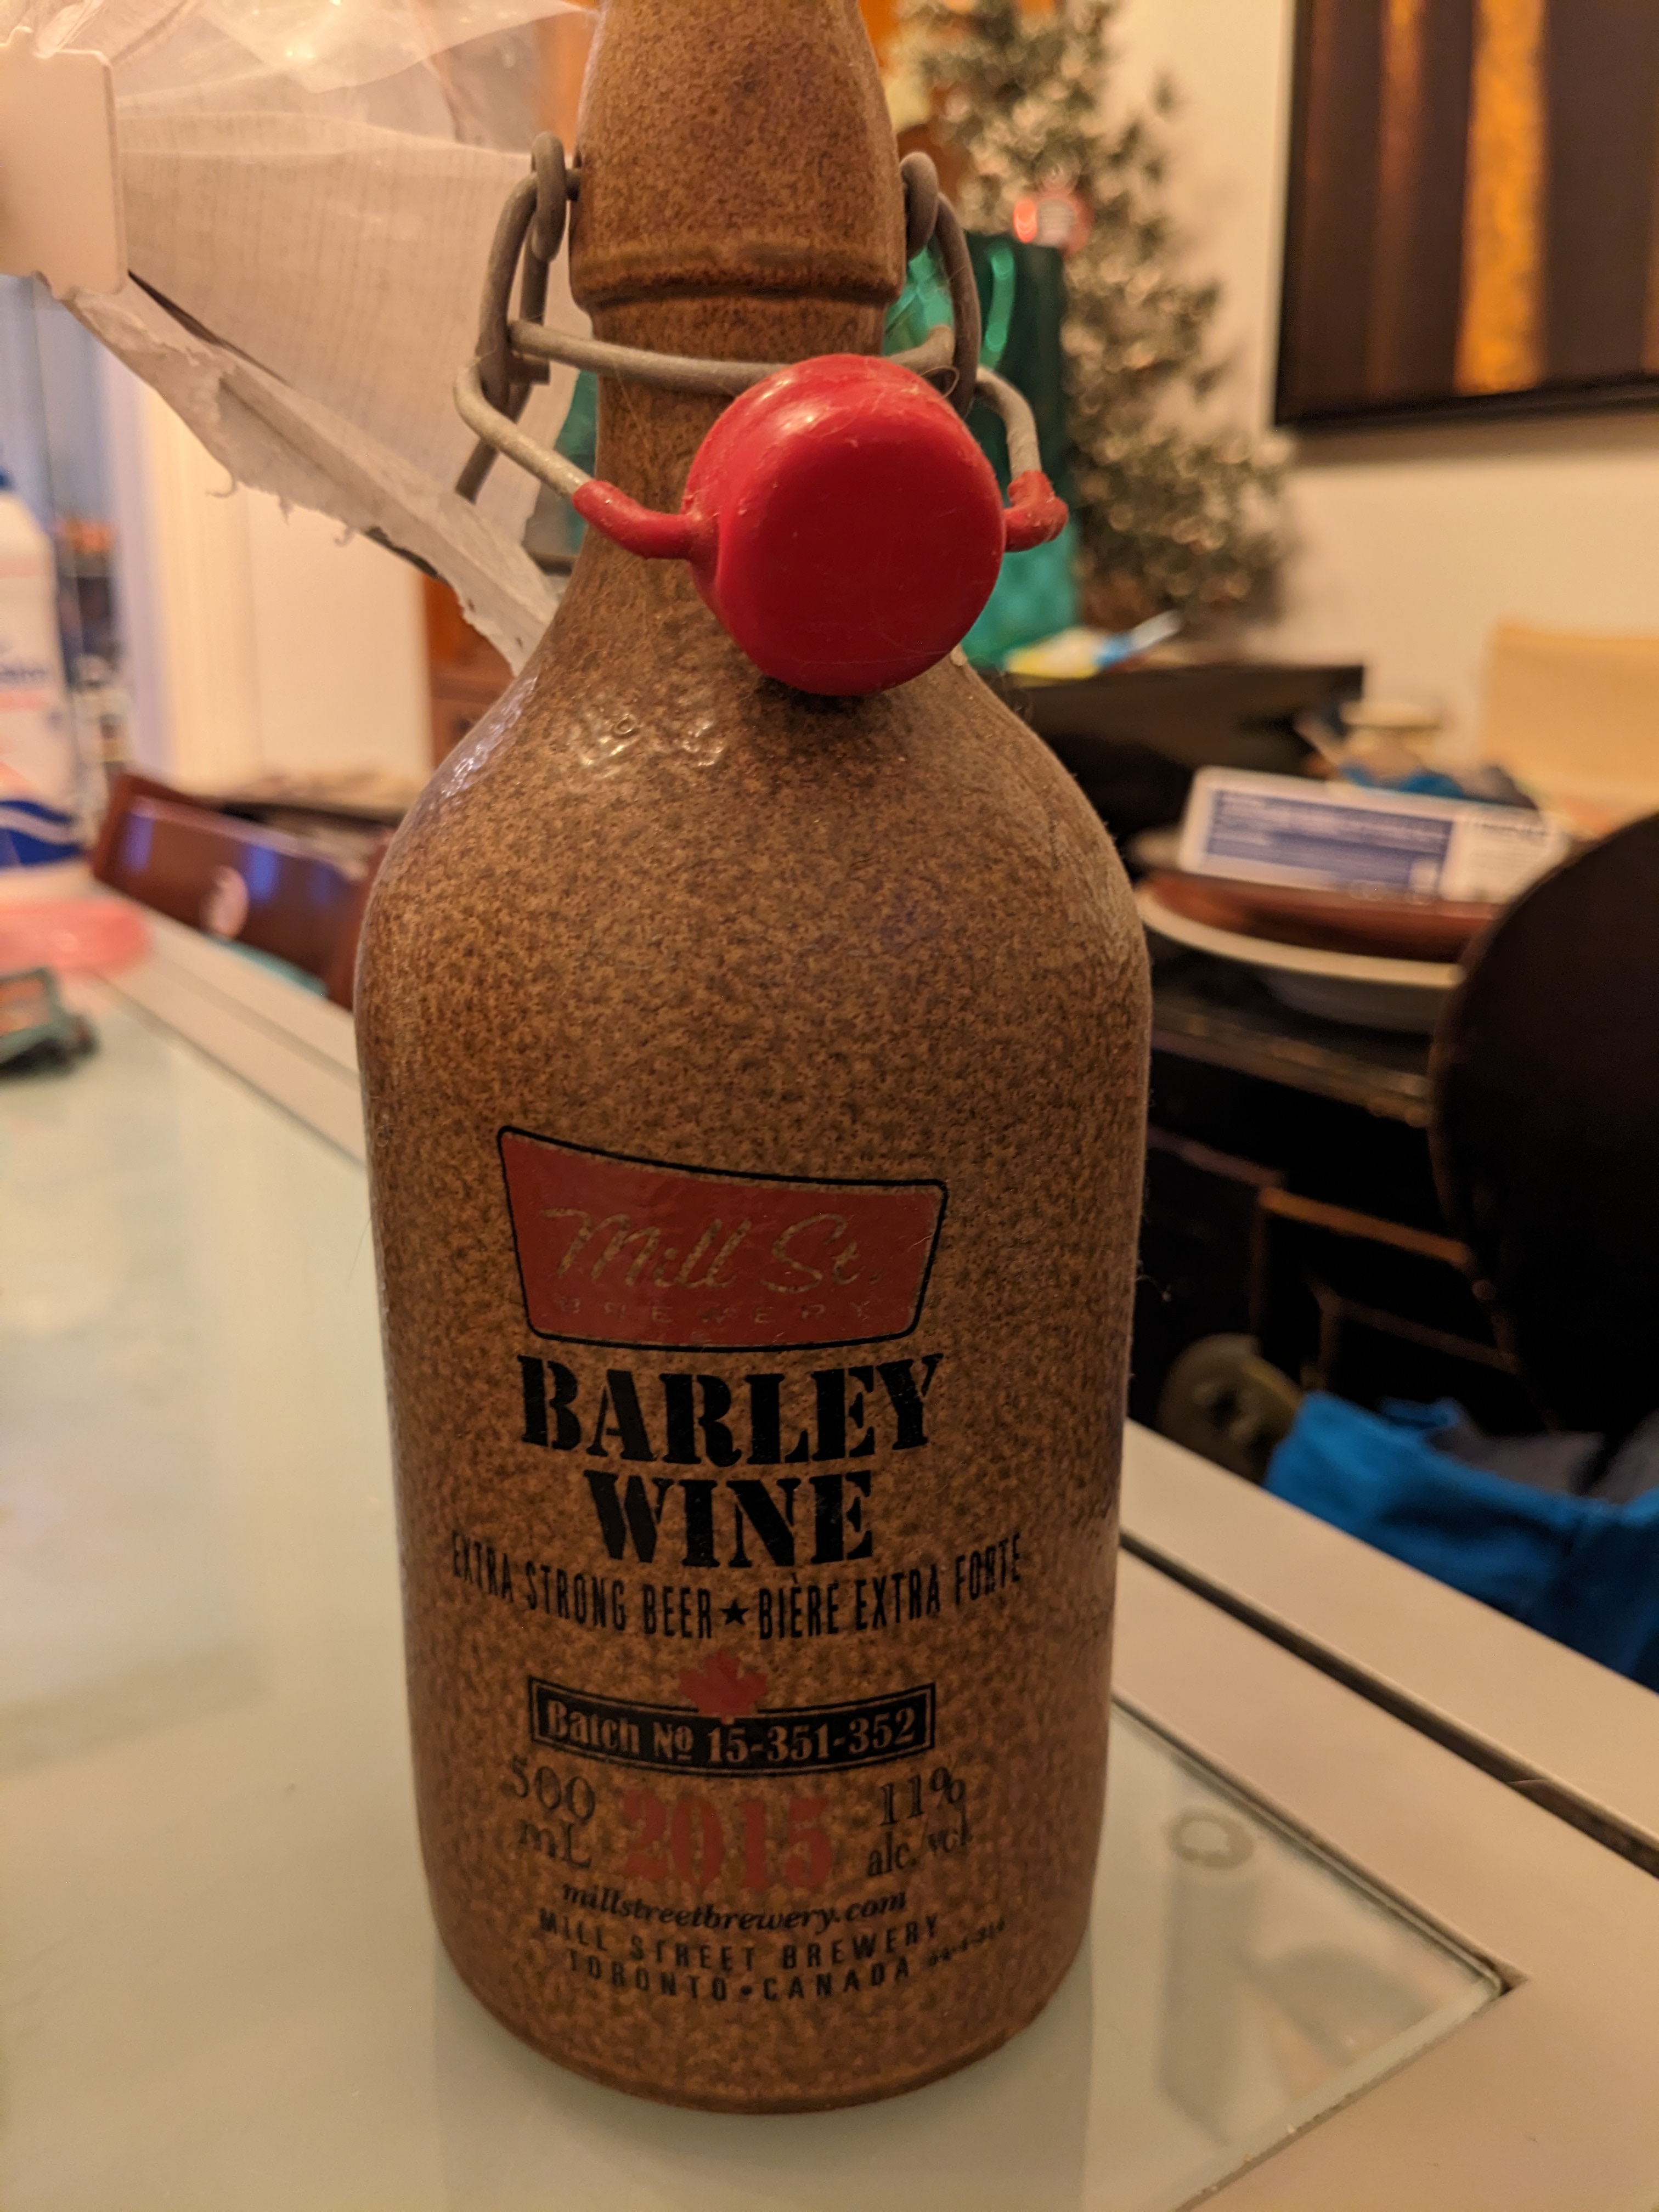
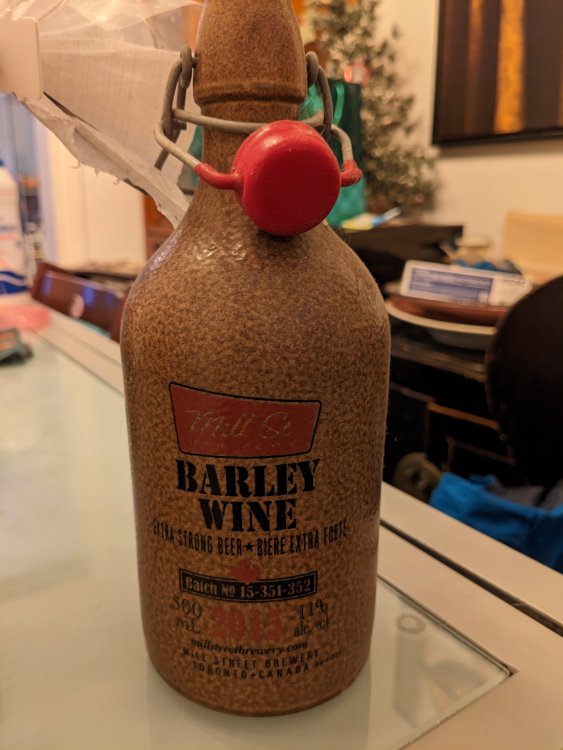
This one might scare you Hubert. I had it at Christmas after it's been aging since 2015. 11% which means they have to call it barley wine instead of beer. It's on the sweet side and very smooth.
-
Any word on the Infinity Kate and Val?
BlrwestSiR replied to Clunkmeister's topic in Modelling Discussion
As of mid Nov, the Val was still moving forward. https://m.facebook.com/story.php?story_fbid=150926154349323&id=100082958181041 -
We've got lots of torpedo boats so that's great to see.
-
Looks like you made it! Have fun in the sun.
-
I still can't believe I'm trying this build myself. So far, my plan is to build the PE replacements and if they come off okay, then I'll remove/replace the kit plastic part. That way I have an option to backtrack if needed.
-
Thanks! I'm using CA for now. I thought about soldering the parts but my soldering skills are not what they used to be.
-
39” 1/128 Seaview and Flying Sub
BlrwestSiR replied to ScottsGT's topic in Let’s Get Wet Group Build.
I've used both of their pre-made sets before. I'm still trying to figure how many lights I need and what size. -
ProModeler 1/48 PBY-5A Catalina + Goodies, RFI
BlrwestSiR replied to CANicoll's topic in Let’s Get Wet Group Build.
Great to see a PBY. With the original version of the tail, I don't think you can put enough weight in the nose to get it to sit level. I'm just remembering from when I did mine so many years ago. Carl