BlrwestSiR
-
Posts
9,173 -
Joined
-
Last visited
Content Type
Profiles
Forums
Events
Gallery
Everything posted by BlrwestSiR
-
That happened to me too but only on the tail. I was able to feather it out and not have to do a full re-paint thankfully.
-

What is on your bench right now ? Share a picture :)
BlrwestSiR replied to Martinnfb's topic in Modelling Discussion
The Enterprise is around 40" long from the front of the saucer to the end of the warp nacelles. Sue saw the saucer and said she felt it was too big. I think she likes th Falcon more since she didn't thank that was too big. Good thing as I have two more in the stash. I have a set of Aztec decals for the Refit and I think masks so if you're interested let me know. -
Thanks! It's going to be fun. Thanks Rob. I missed out when Fine Molds originally released their 1/72 Falcon kit so when they did a re-issue, I bought while I could. Then of course Bandai put theirs out. The way I rationalized that one is the Bandai one is the Falcon from Star Wars and the Fine Molds one is the later version from Empire Strikes Back onwards.
-
What is on your bench right now ? Share a picture :)
BlrwestSiR replied to Martinnfb's topic in Modelling Discussion
I saw the original on school field trip. They bussed the whole school downtown to a theatre to see it. I had the 1/350 Refit Enterprise but Sue felt it was too big so I sold it. I do have the Bandai one somewhere. -
Looks good there John. I took a similar approach when I painted my CF-104 so as to minimize masking over the NMF. Carl
-
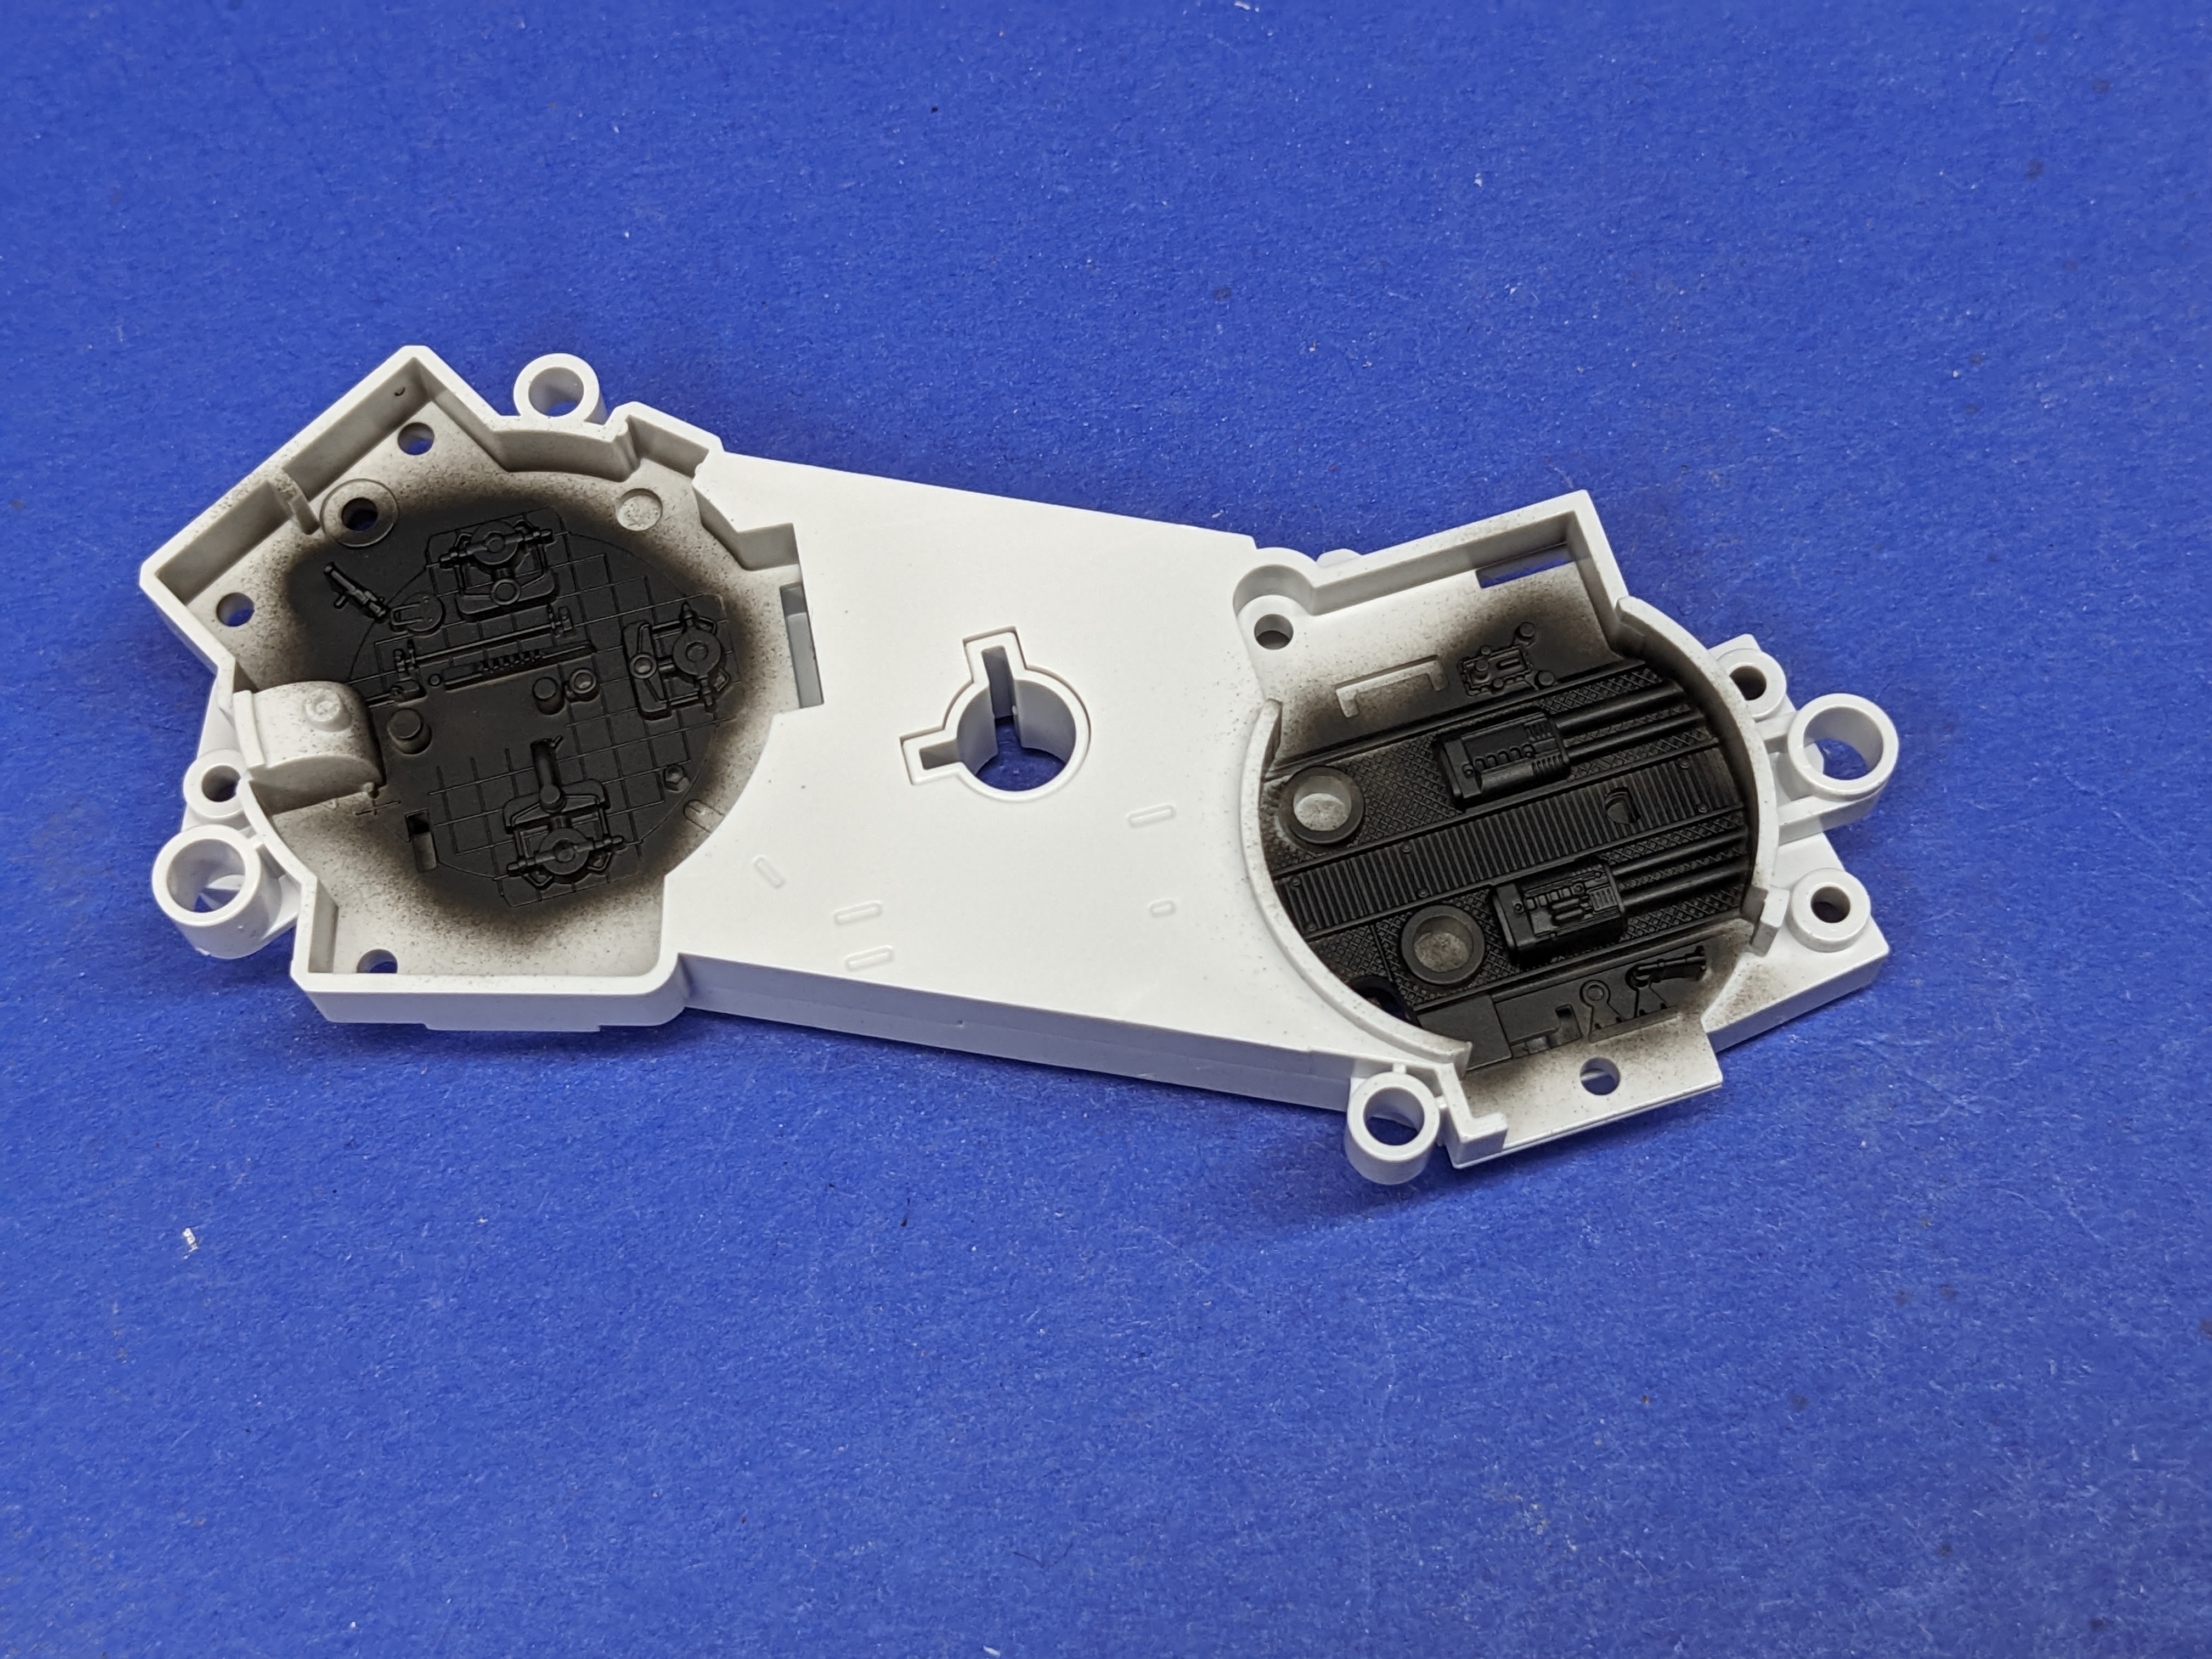
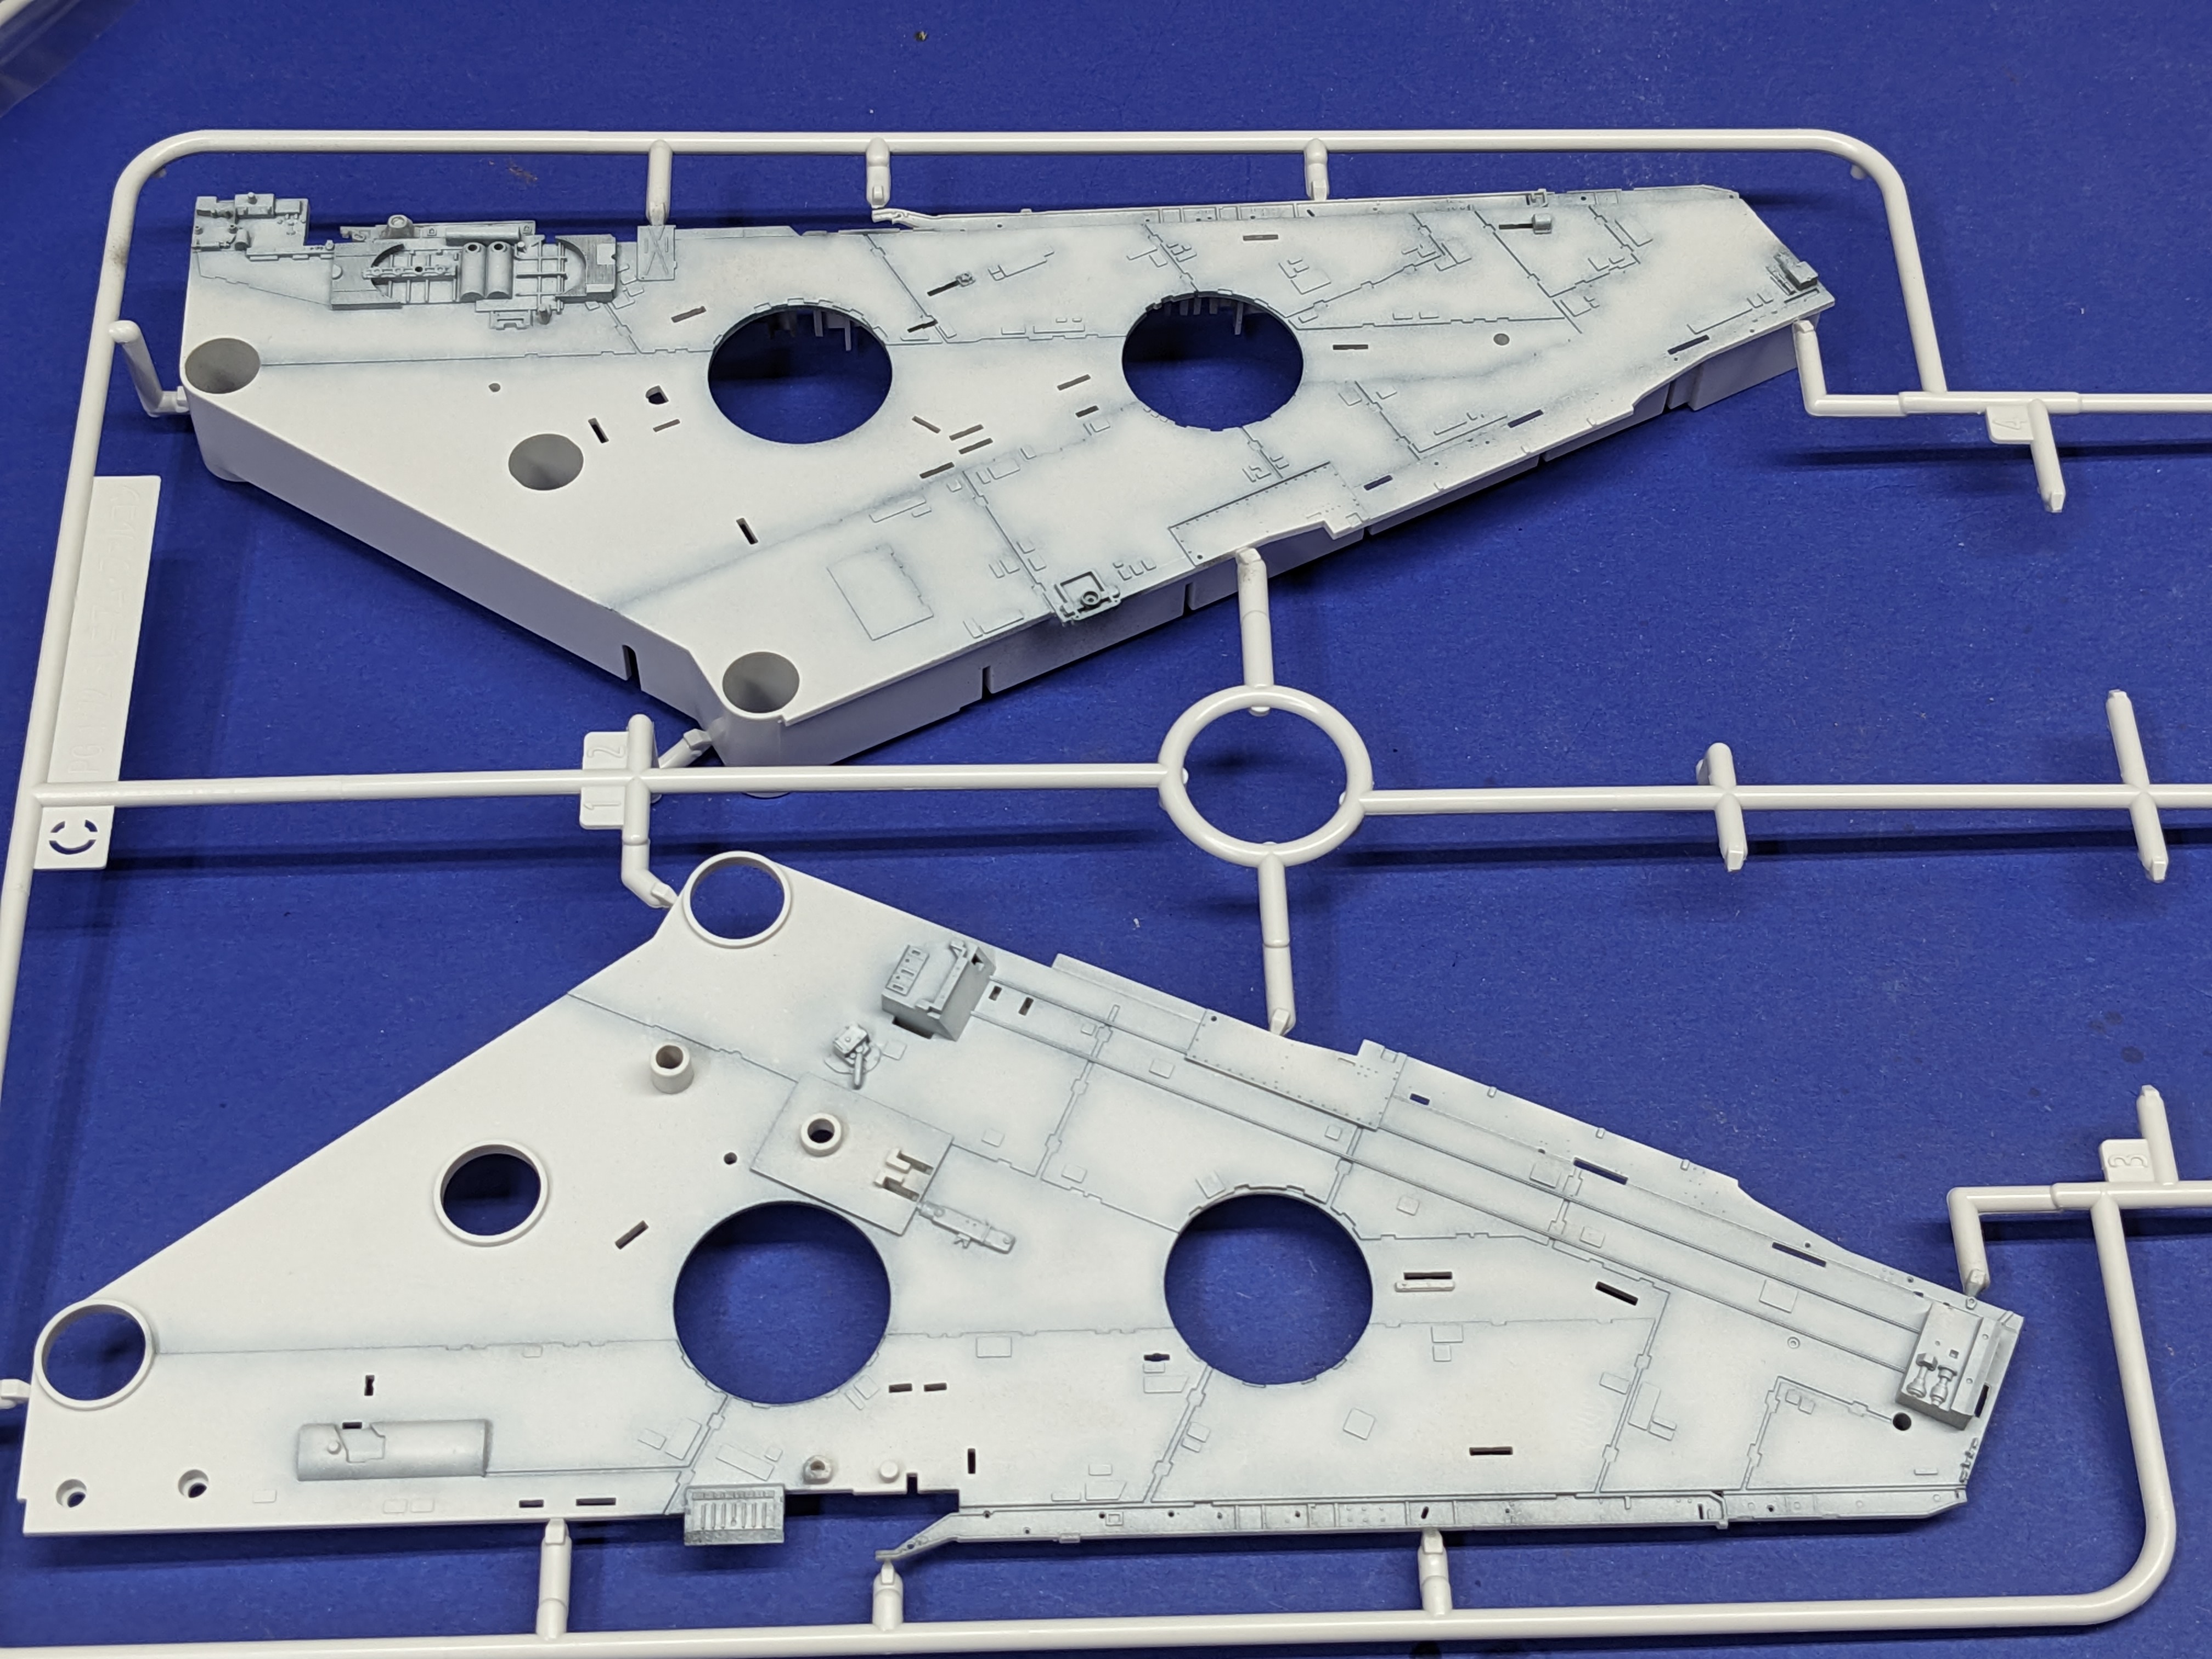
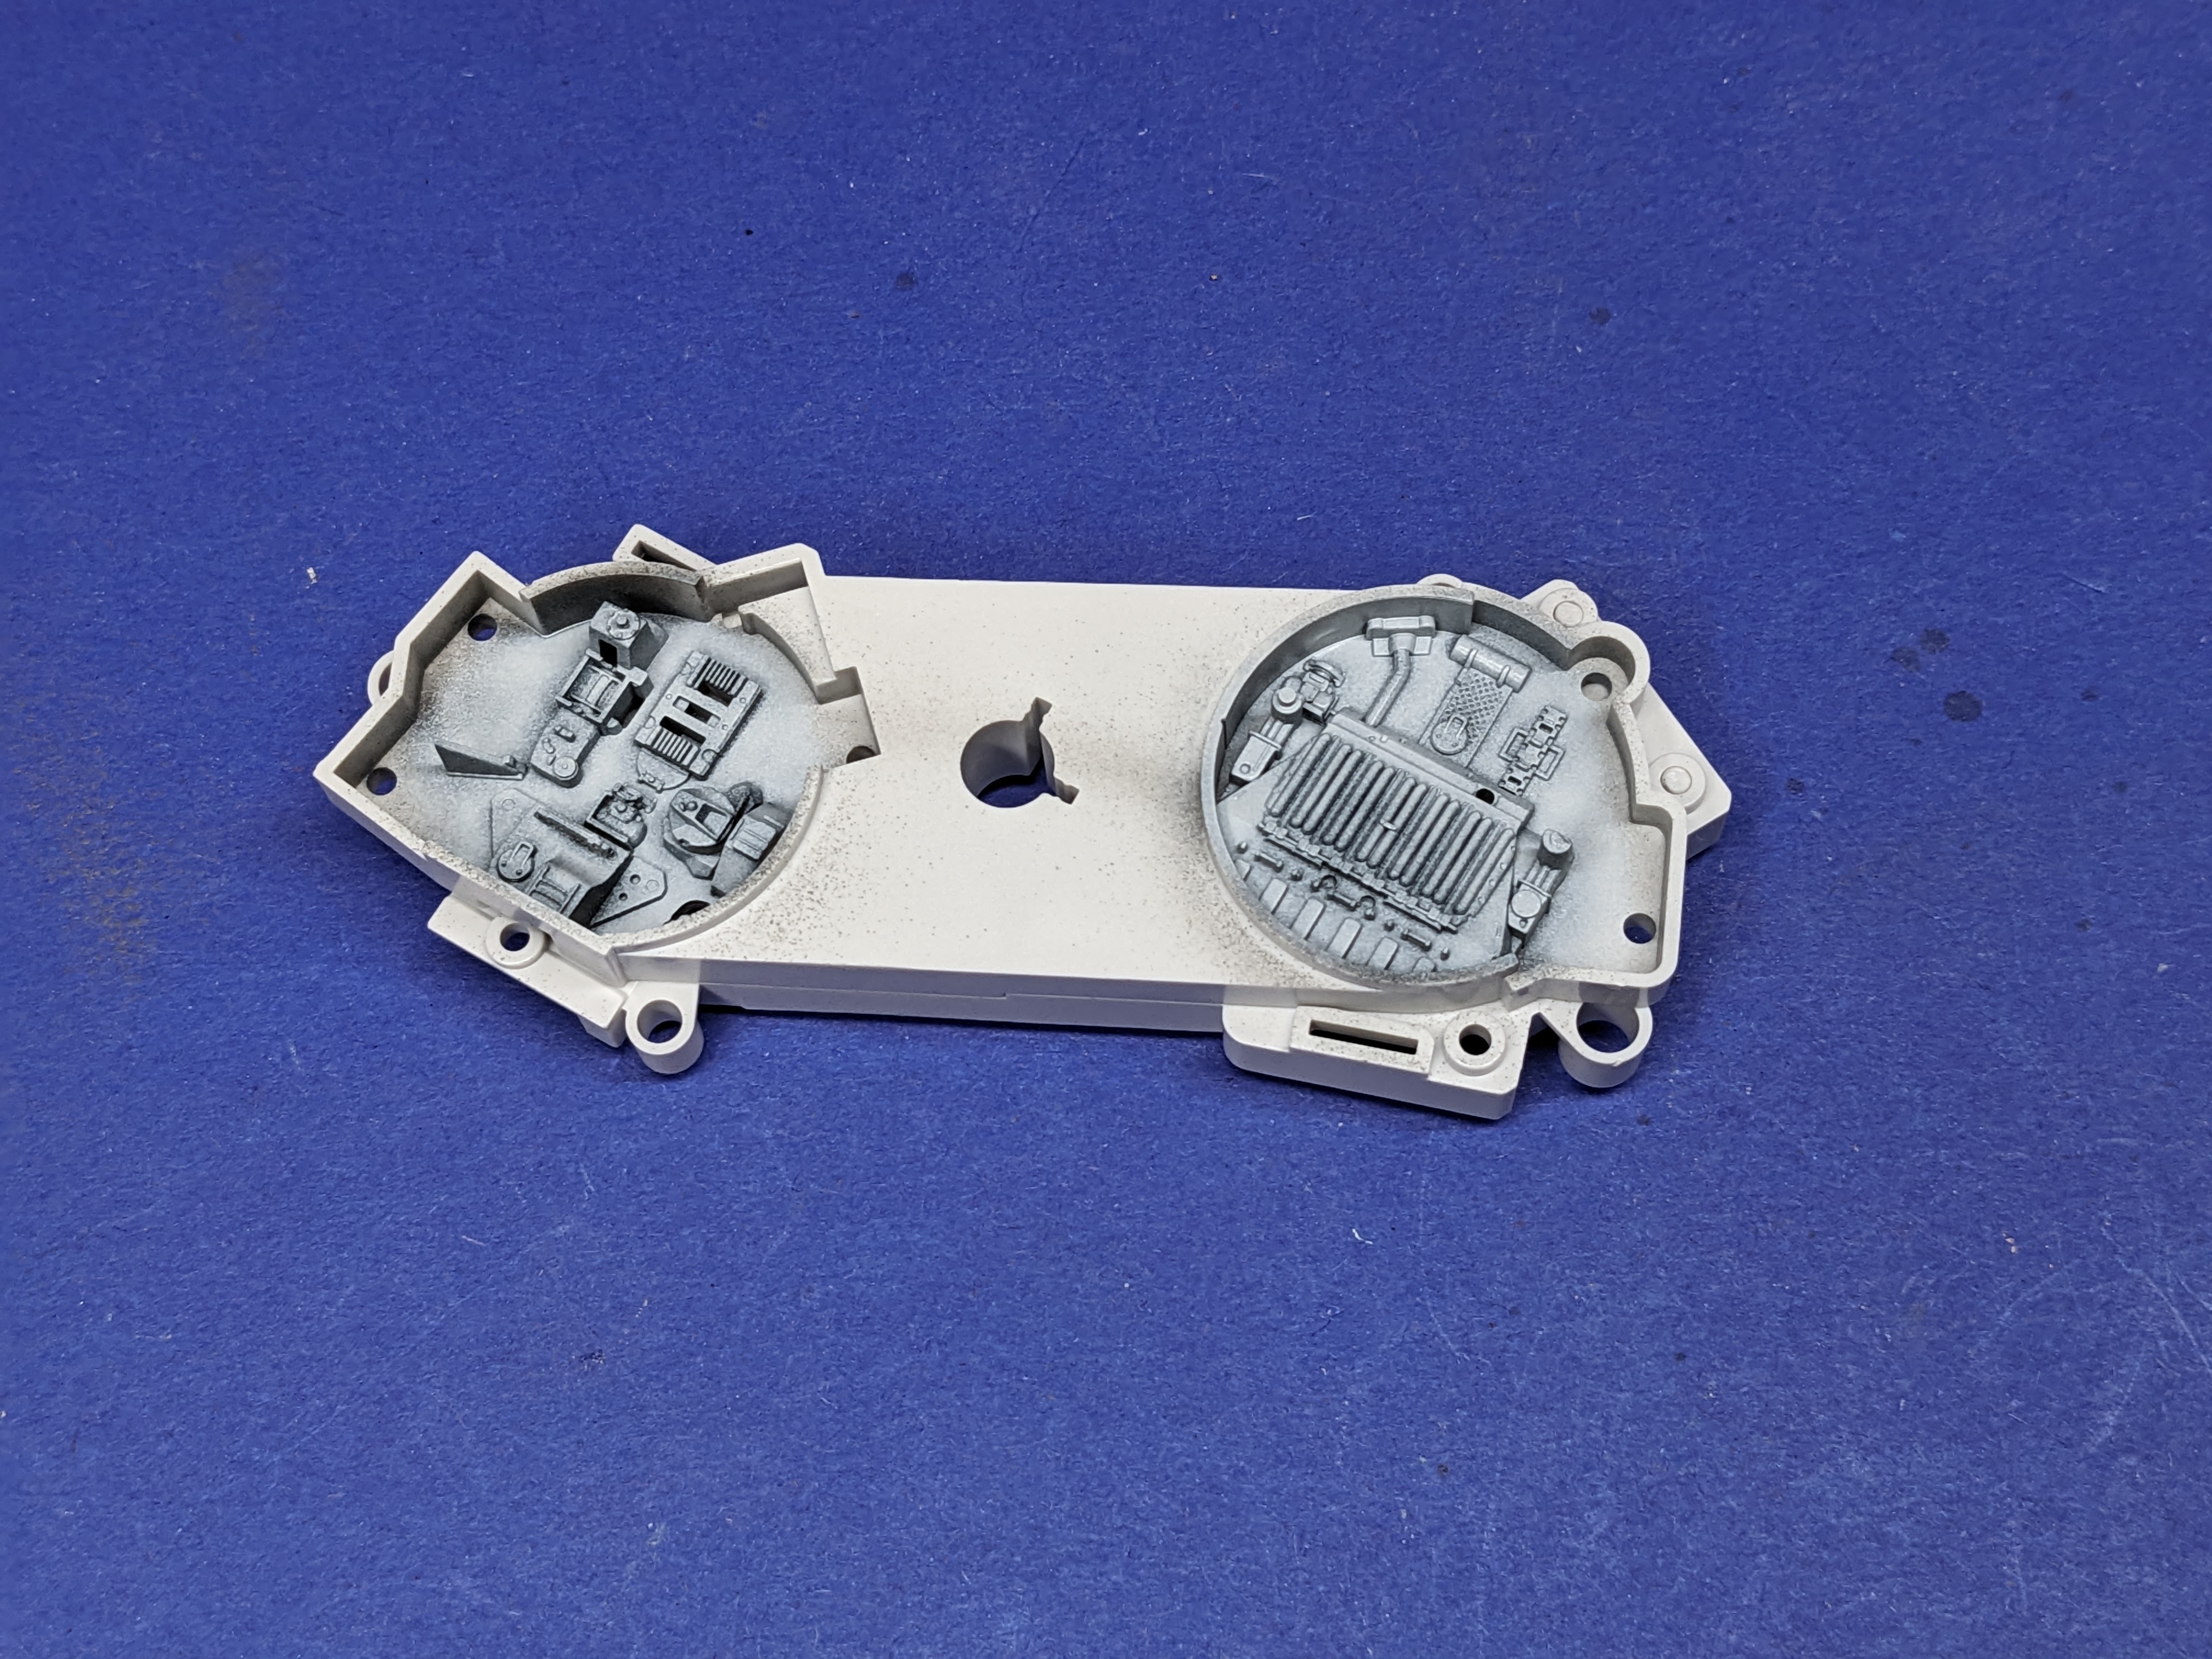
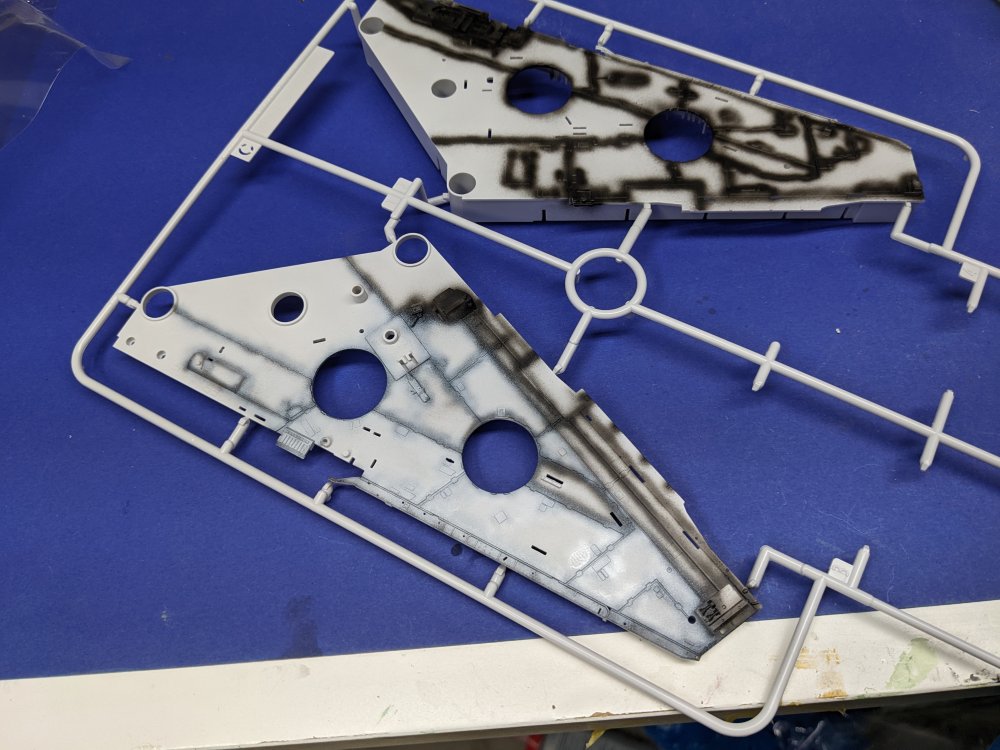
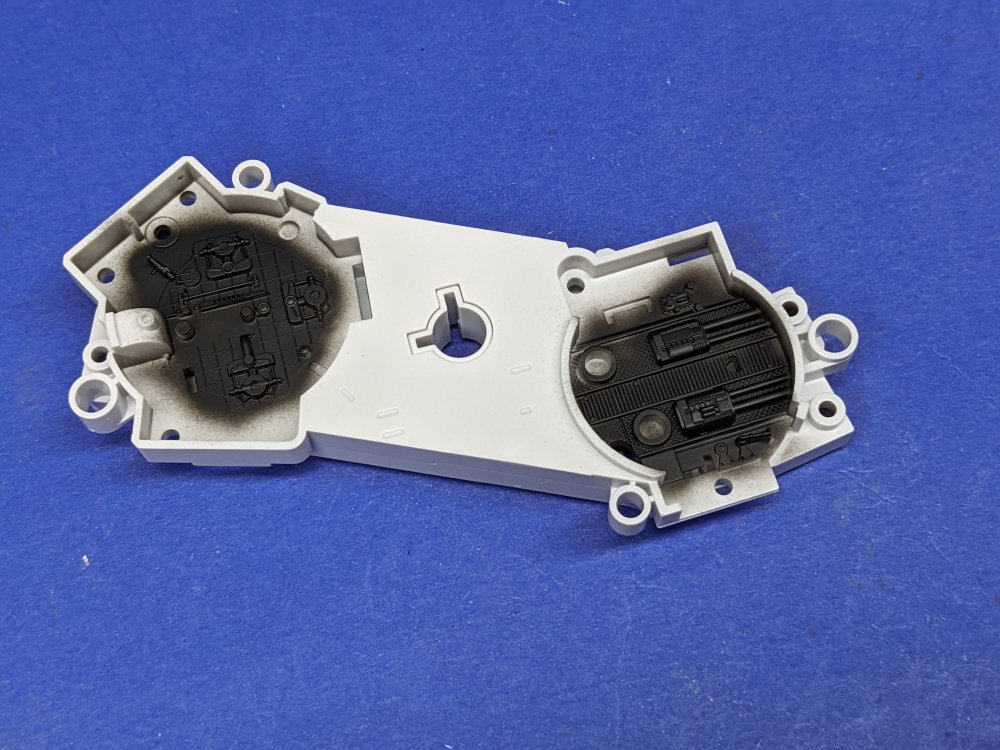
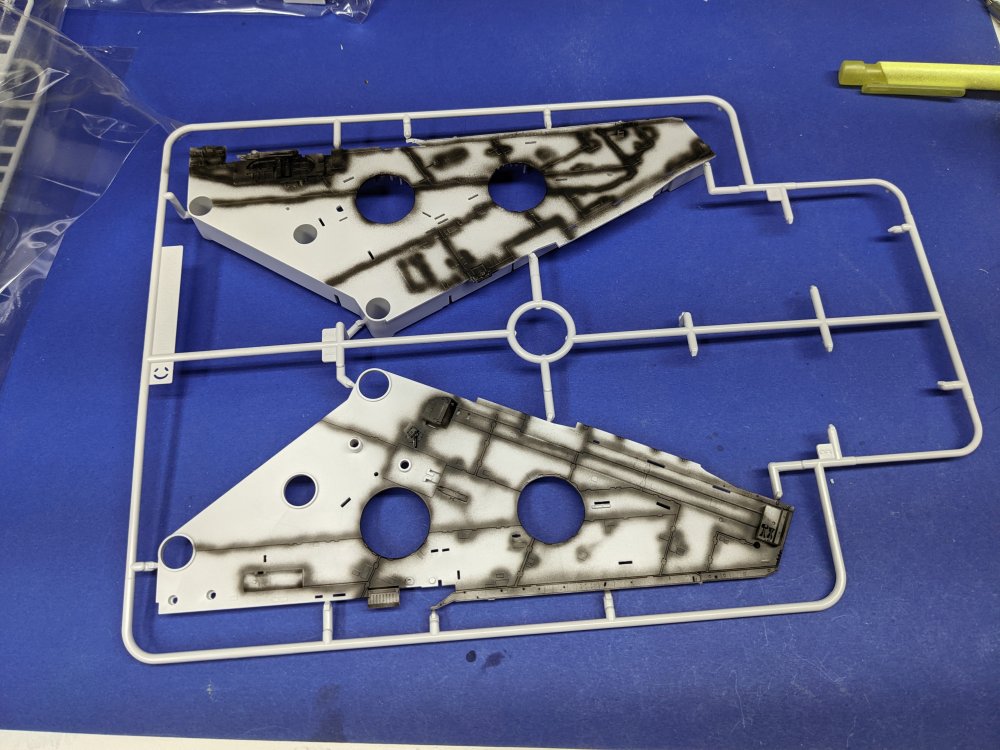
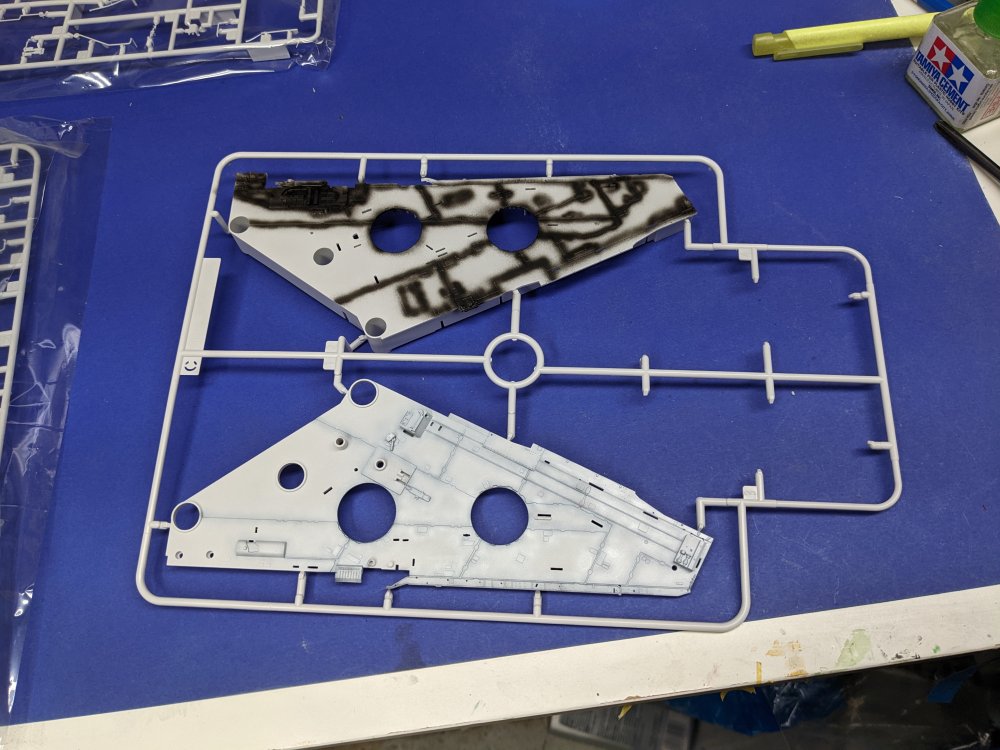
With the amount of parts in here, I'm planning on a OOB build. First up is one of the mandibles. I'm using the Aqueous Mr Surfacer for pre-shading and primer. For the paint, I'm using Gunze Gundam white as it I like the shade it has. One half done. Now the other. The maintenance wells were primed and then painted. There's over 20 parts in this section alone.


- 115 replies
-
- 11
-

-

-
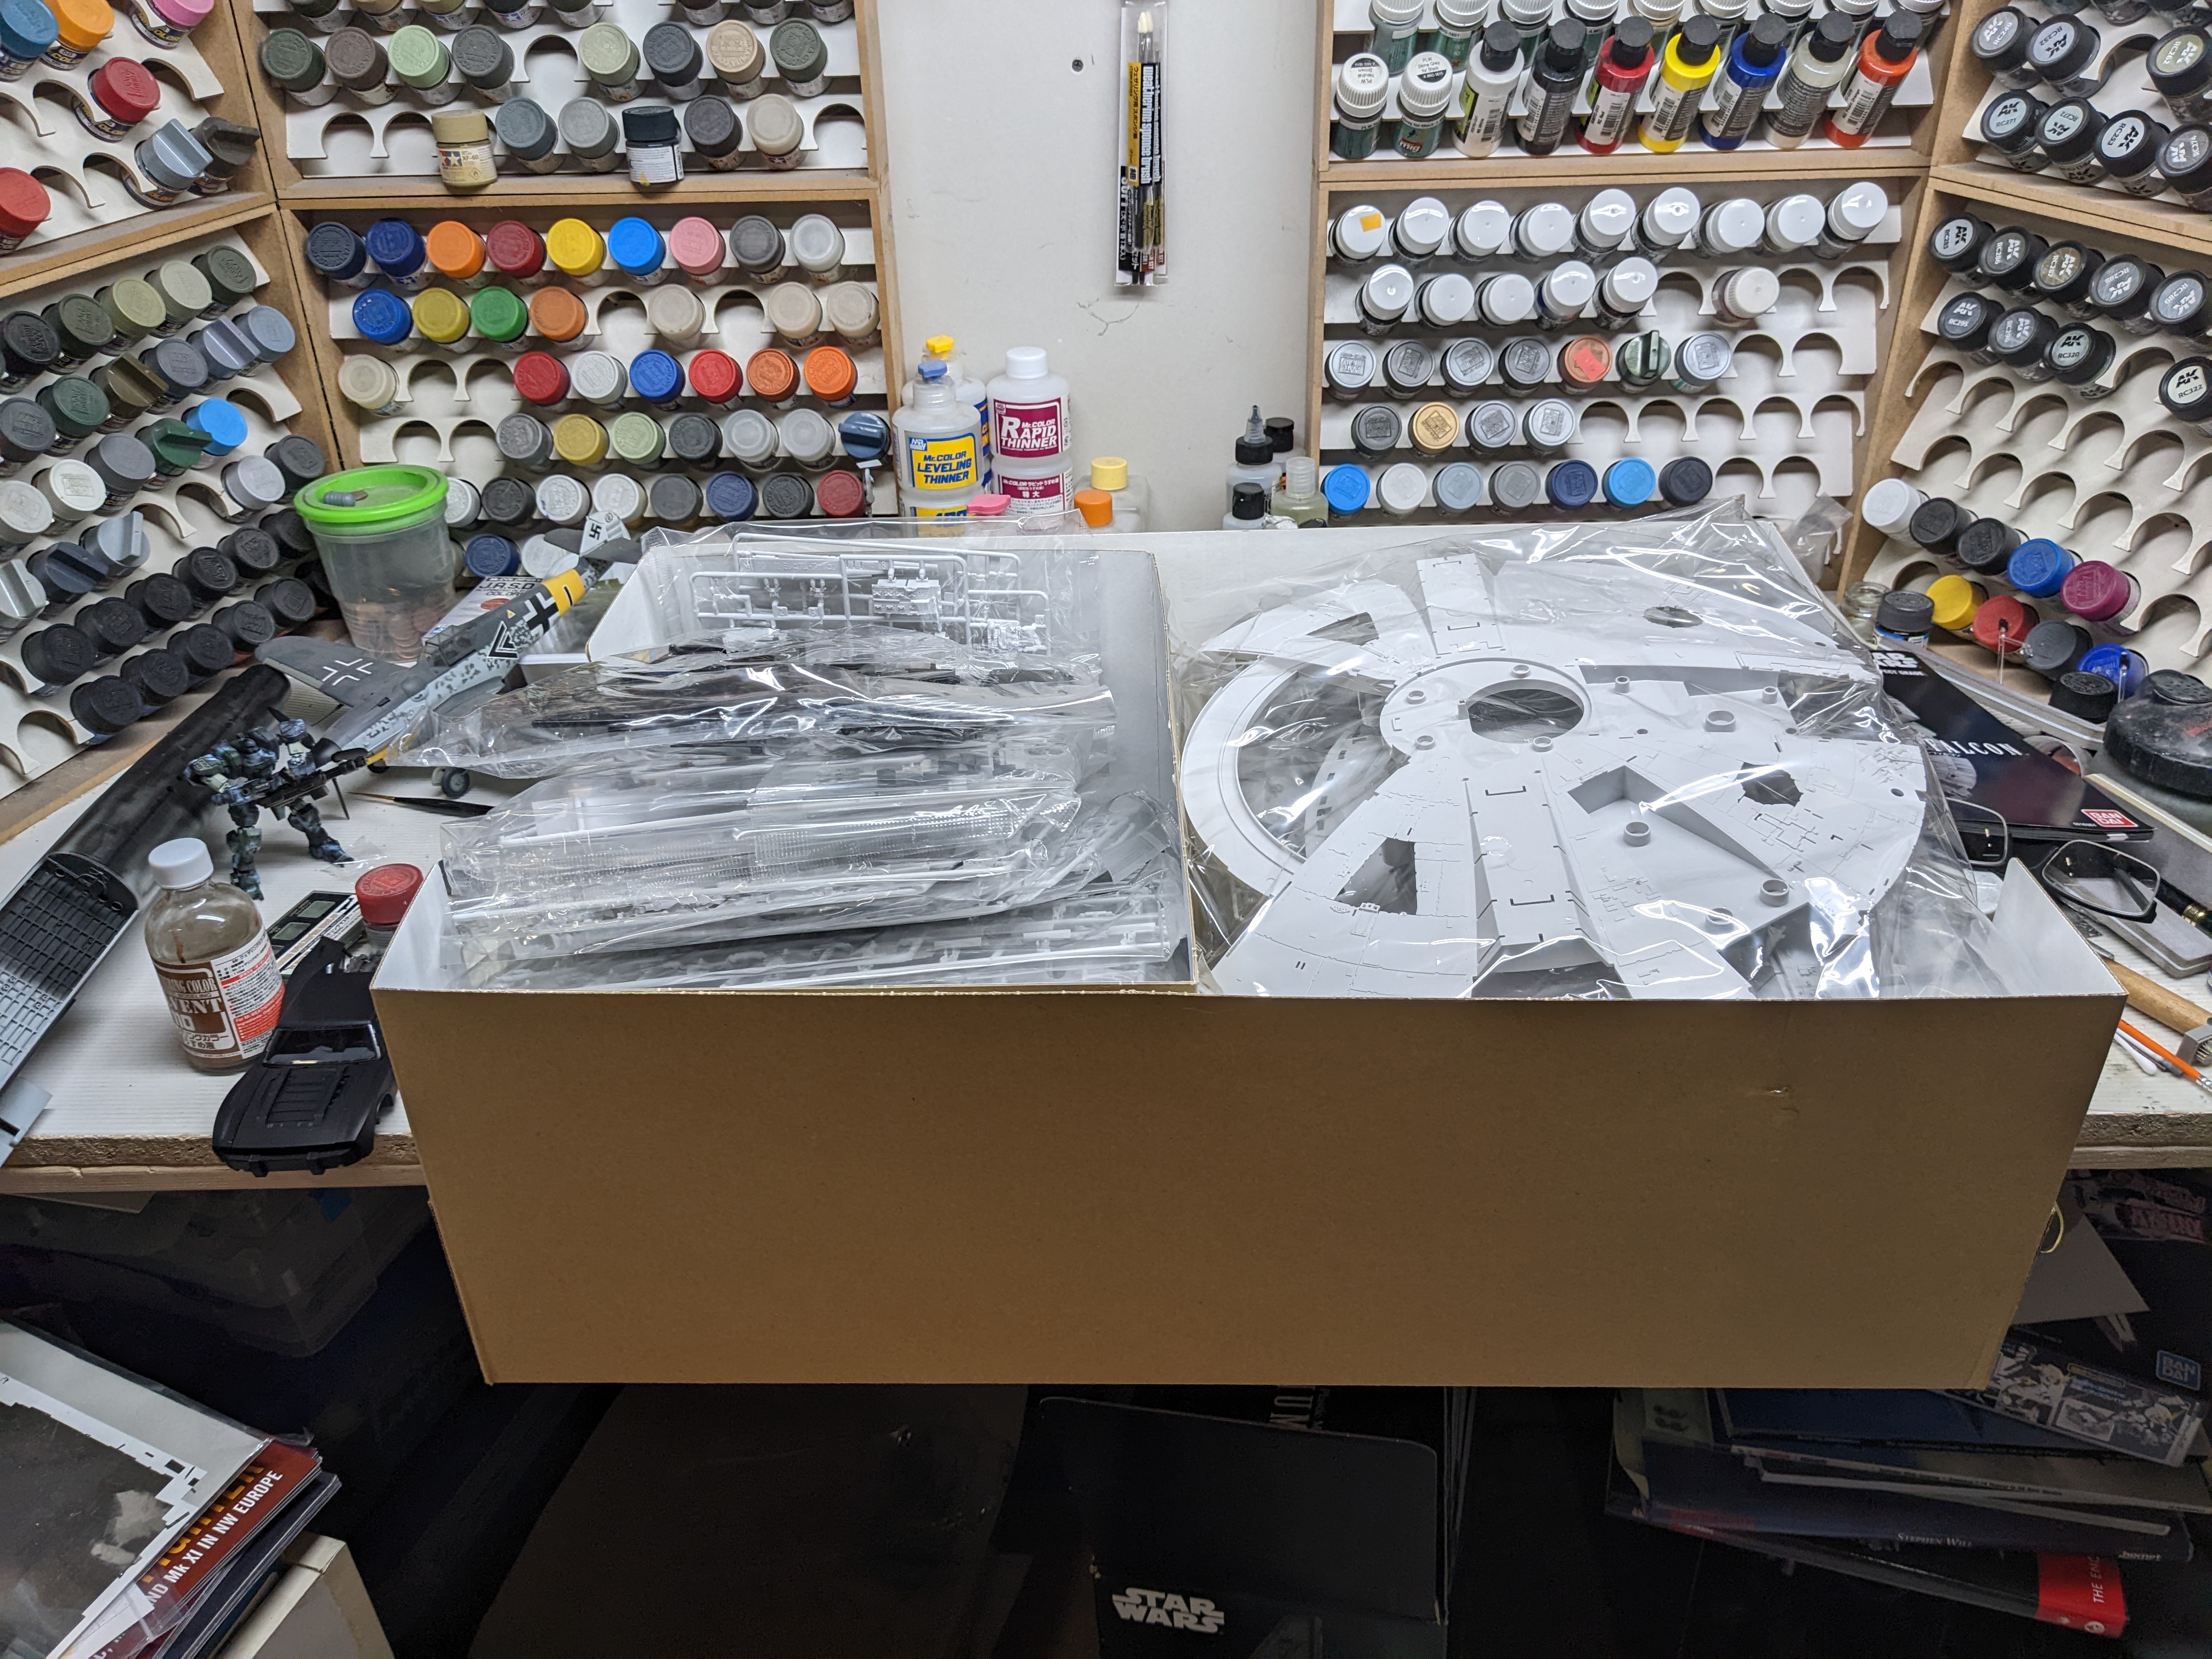
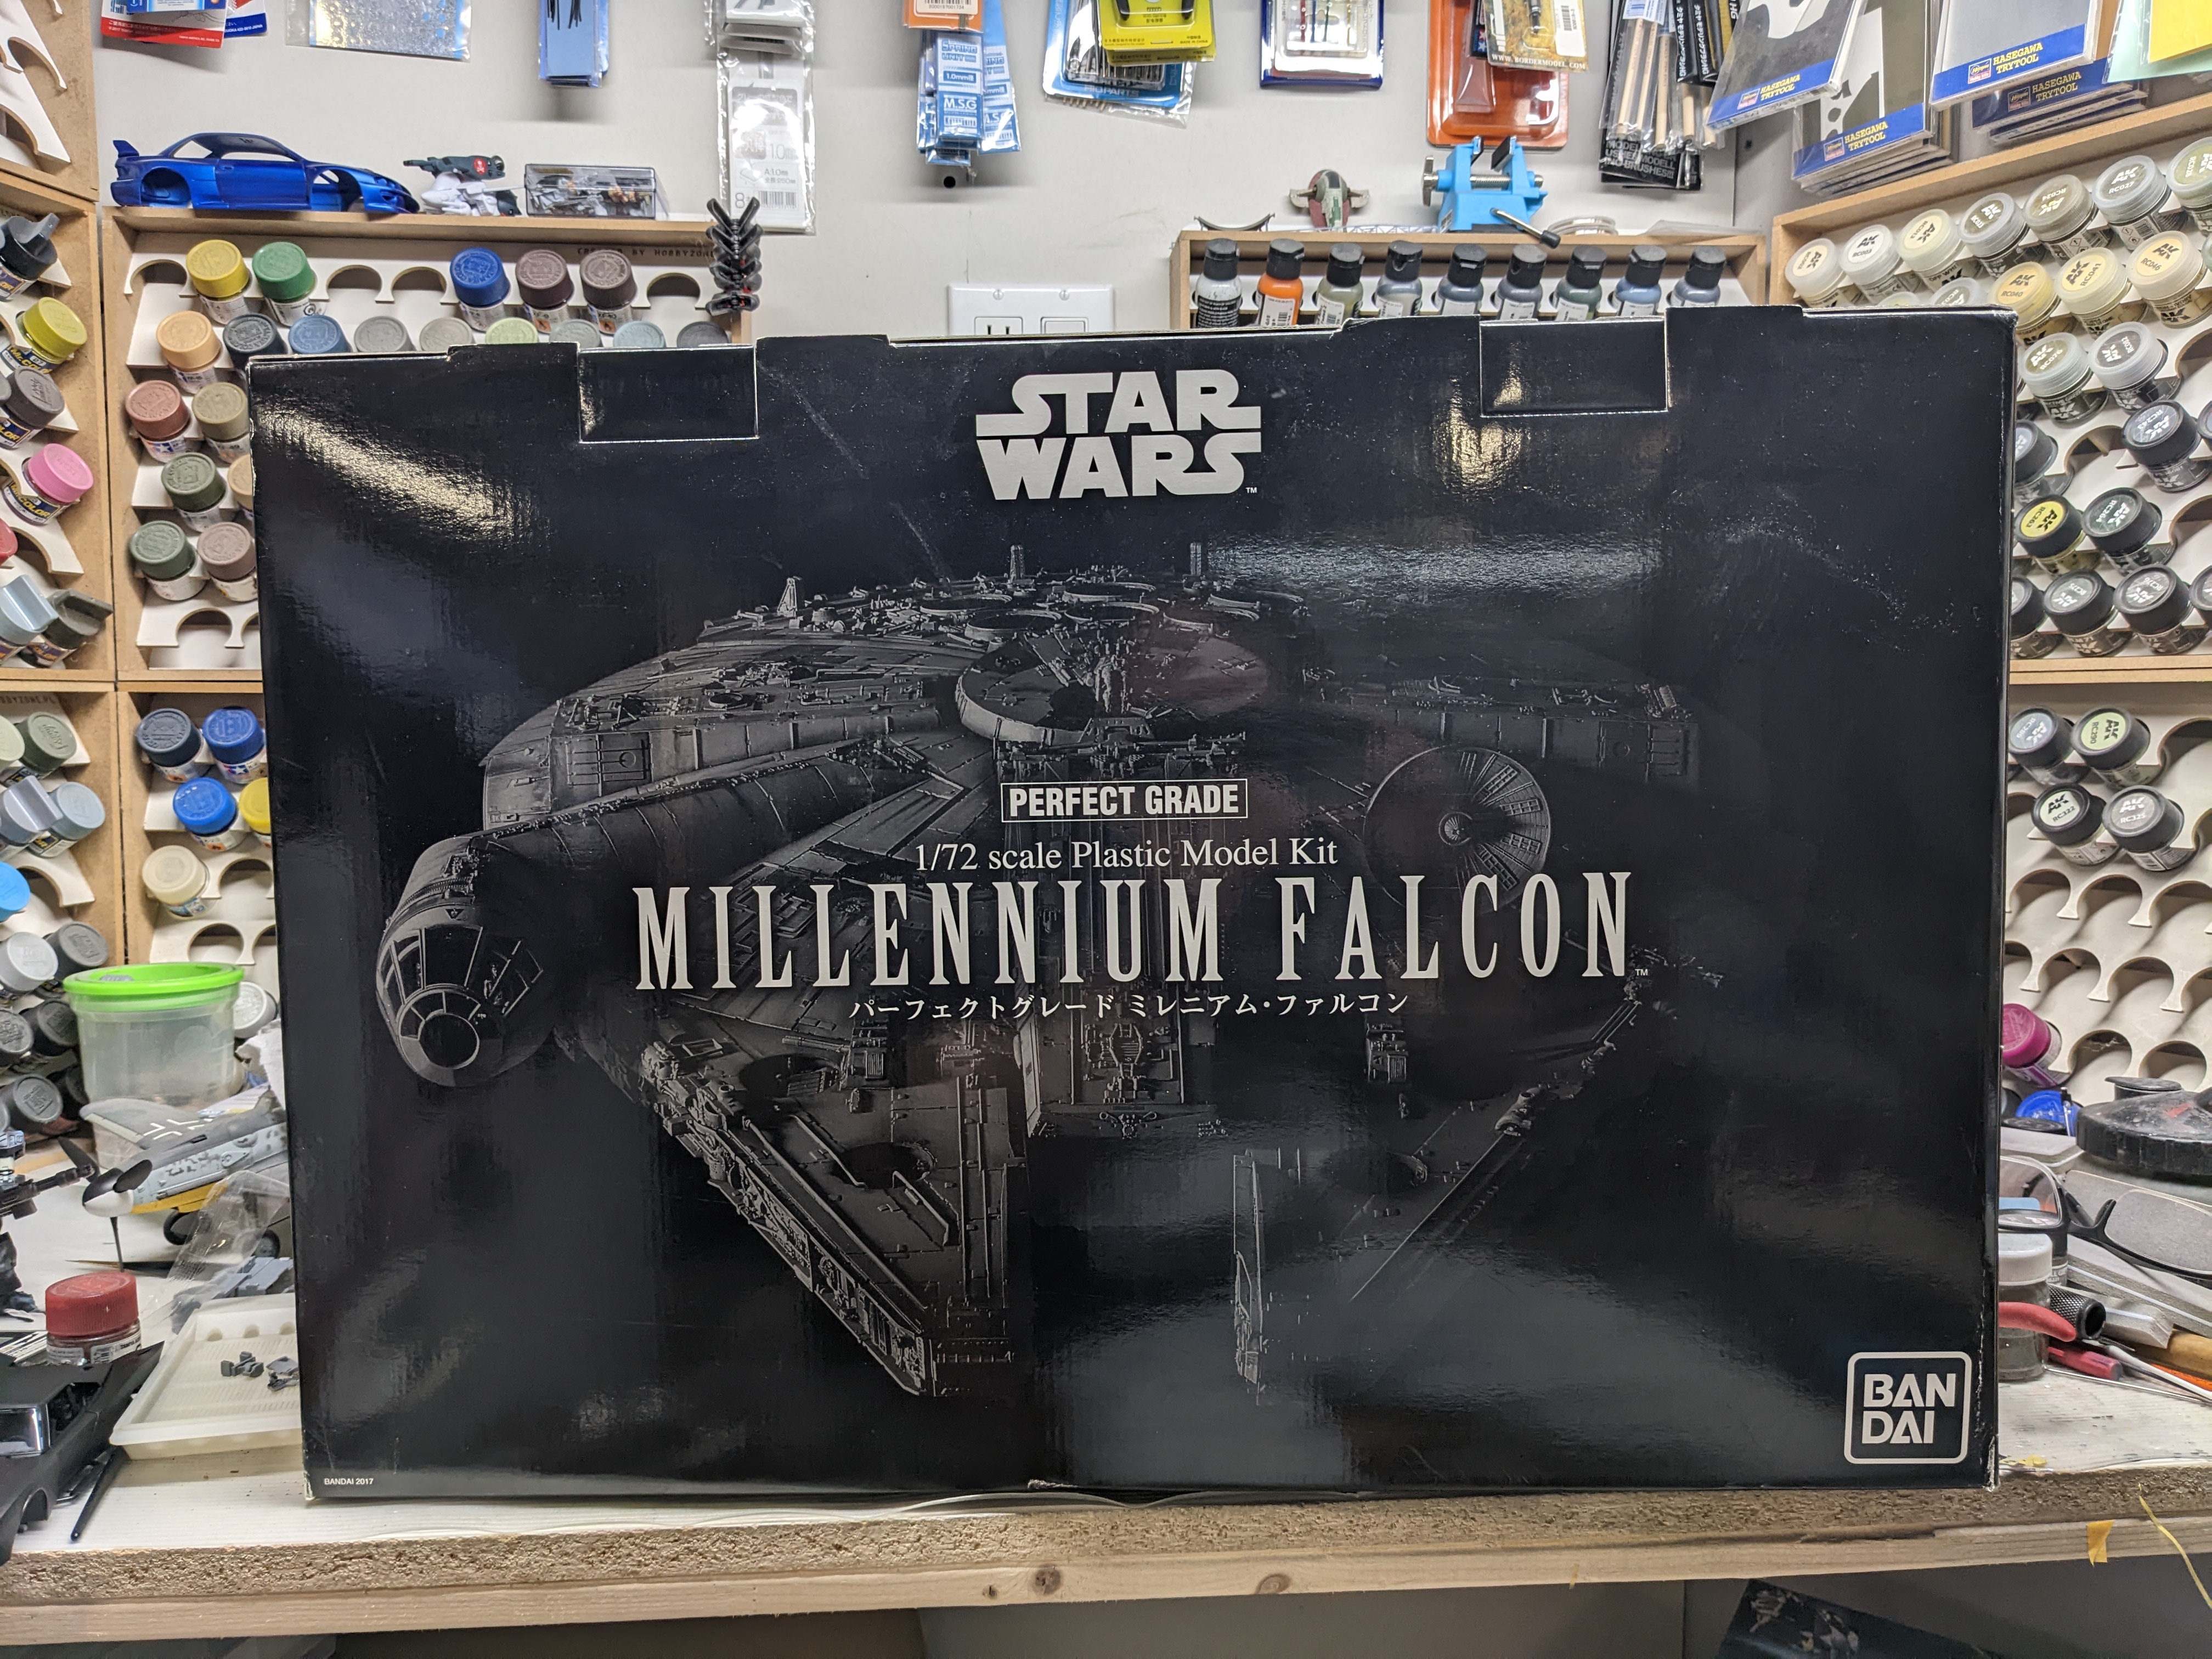
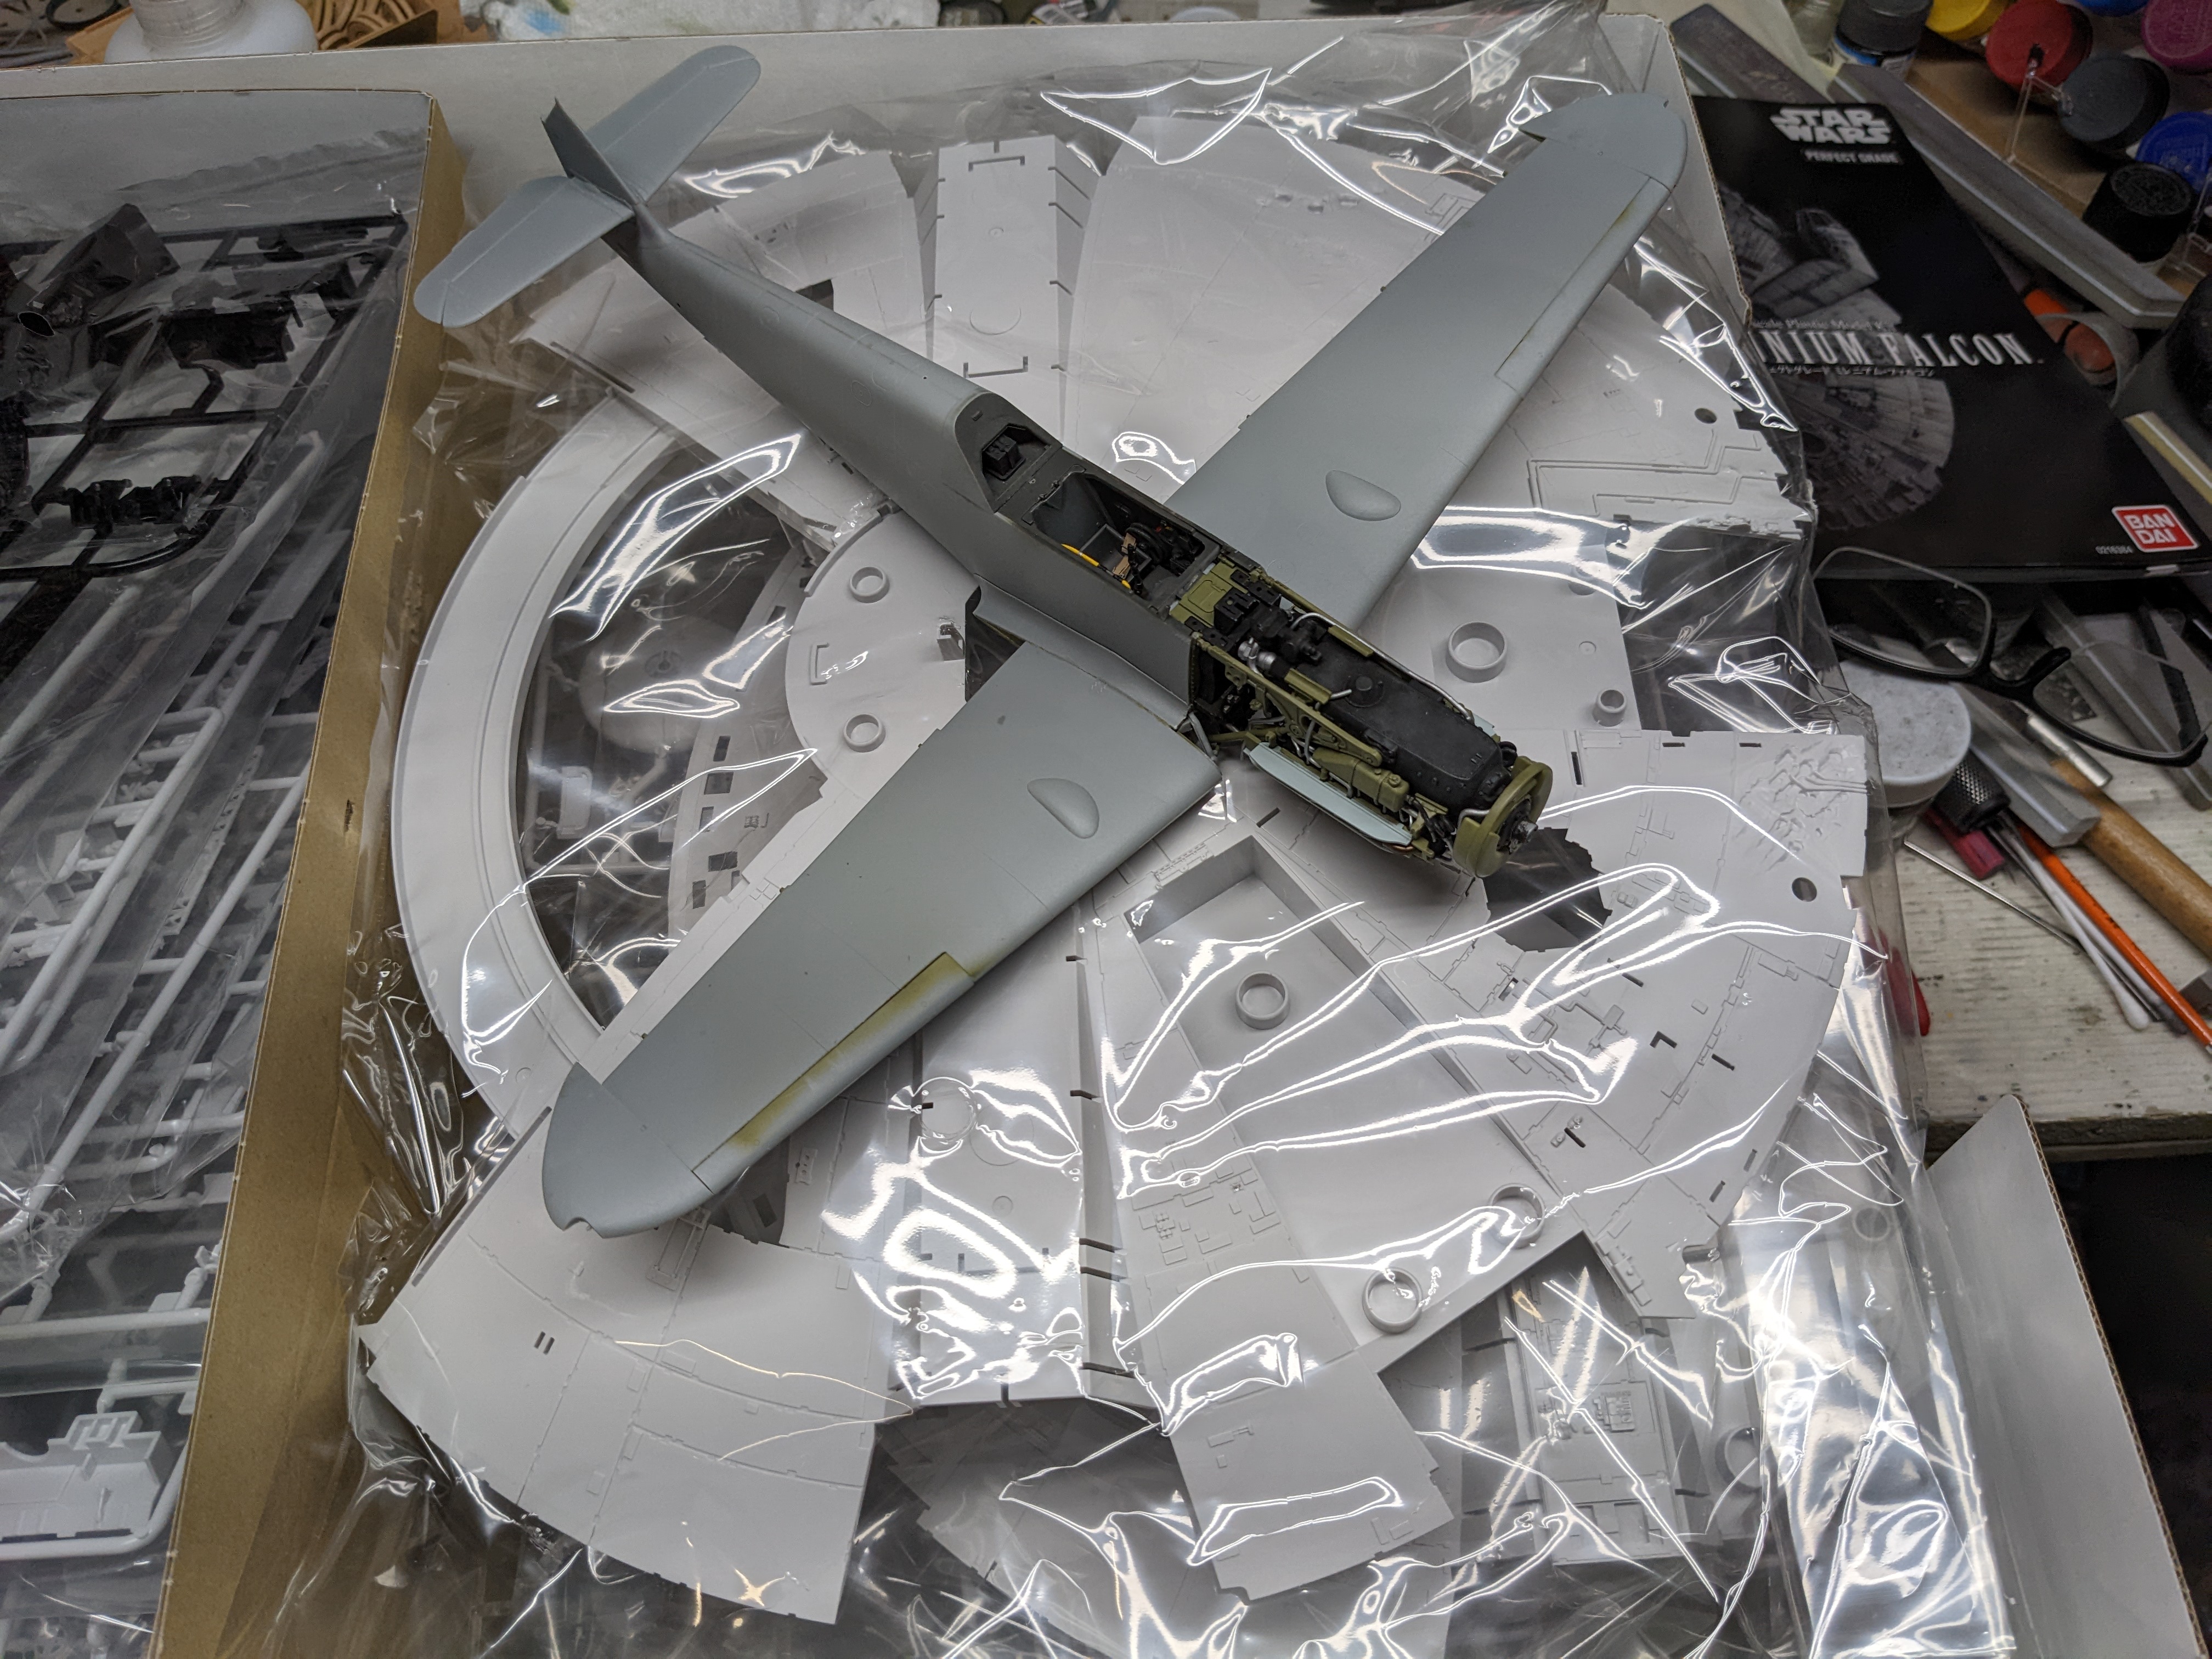
Probably not the usual build on here but I figured it's big enough. If not, mods feel free to move it to the appropriate section. Anyways, this is the Bandai Perfect Grade Millennium Falcon. Being the original release, it has a lighting kit, PE and decals instead of stickers. The box of sprues is big enough I'm going to have to leave it under the bench. Here's the ZM 109 on top of the upper main hull bit to give an of the size.


- 115 replies
-
- 10
-
-
-

-
Looks great Gary. Really nice job on the paint, weathering, rivets, well everything. Carl
-
Can you hide it and say the dog ate it?
-
Our cat liked to use it as a scratching post and shred it all. So we have to leave it in the closet.
-
Truly tragic for all involved.
-
I'd probably start with Eagle Editions and see what they have and go from there. Jerry Cranwell has put a lot of 109 decals out. Carl
-
What is on your bench right now ? Share a picture :)
BlrwestSiR replied to Martinnfb's topic in Modelling Discussion
I'd say it counts as large scale. Here's the ZM 209 for reference:
-
What is on your bench right now ? Share a picture :)
BlrwestSiR replied to Martinnfb's topic in Modelling Discussion
Okay, a long time coming. Biting the bullet and no more excuses...
-
Have you ever seen the video of the guy that made a submersible NCC-1701? Can't imagine the work that went into that. A diorama seems much more reasonable. Carl
-
That's been one of my biggest struggles with the stash. So easy to grab something new, glue a few bits together and repeat. I'm getting better about it but still not an easy reflex to fight.
-
RC sub conversion!!! I sae those when I was building my Bronco 1/35 Type XXIII kit. Like you said, next level and expensive.
-
Actually, I think it also depends on the gear design. I have a couple of the Tamiya Spitfires on SAC legs and they're still standing just fine. Close to 10 years for one of them. But the Spitfire leg is straight, not that long and doesn't have any weird bends or angles in it.
-
Nice, glad to see the all important beer fridge is there. Jeff, we wanted to build a 2 story garage but at the time it wouldn't have been approved. The city then changed zoning laws and started to allow them 18 months after.
- 2,036 replies
-
- 5
-
-
- car related stuff
- anything about cars
- (and 6 more)
-
What is on your bench right now ? Share a picture :)
BlrwestSiR replied to Martinnfb's topic in Modelling Discussion
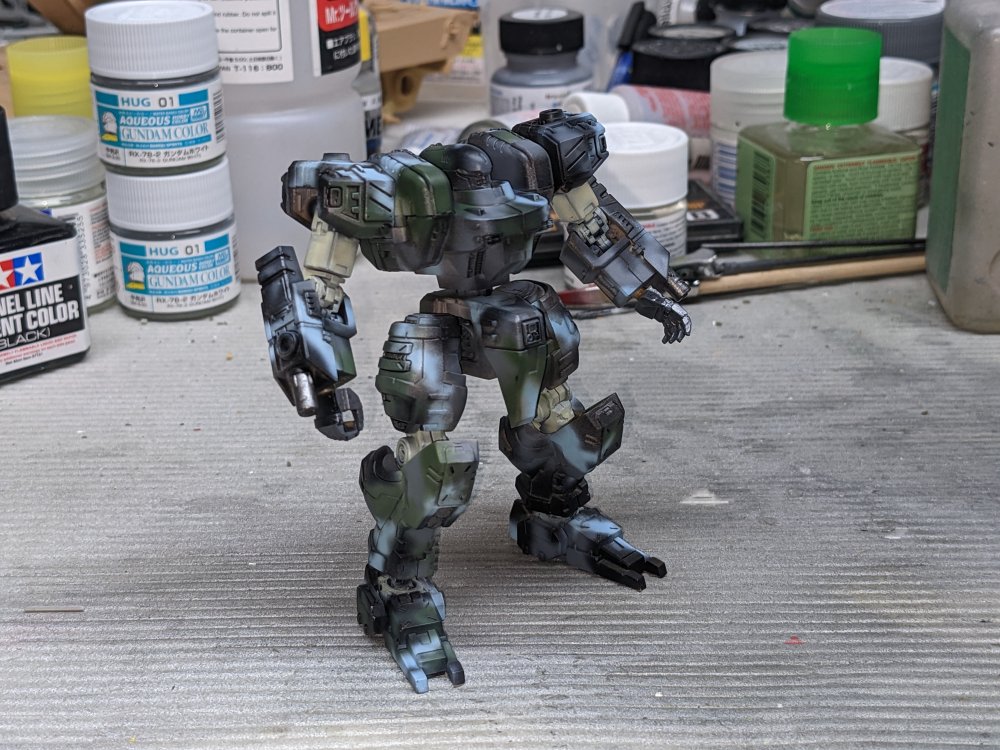
Playing with the airbrush and trying some completely freehand camo work.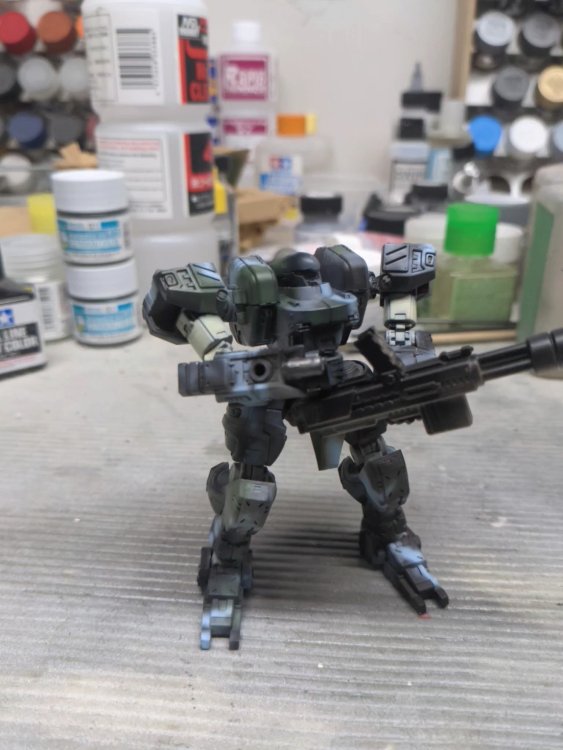
-
Fantastic new garage Jeff. Looks like you even have room for a lift. Or two. Carl
- 2,036 replies
-
- 3
-
-
- car related stuff
- anything about cars
- (and 6 more)
-
What is on your bench right now ? Share a picture :)
BlrwestSiR replied to Martinnfb's topic in Modelling Discussion
More pictures please. I've always wanted to see what these look like. Almost got a '70 Firebird for free. A friend of my mom's offered it to me but my folks didn't think I'd like it so didn't ask me if I wanted it. Rust free all original BC car too. -
Looks sharp!
- 2,036 replies
-
- 2
-
-
- car related stuff
- anything about cars
- (and 6 more)
-
I'd say it's big enough to qualify. The kit tail section is fat compared to the corrected one. The early version of the correction set came with a solid tail which made the model tail heavy and then some. Mike later made the tail in 2 hollow halves that were much lighter. Looks likes the 6A conversion has the later set. Belcher Bits is still around. They're mostly focussed on Canadian subjects. I believe he helped Ernie with the decals for his gorgeous Lanc build. Carl
-
Great pics Martin. Thanks for sharing Carl