
Fran
-
Posts
2,286 -
Joined
-
Last visited
Content Type
Profiles
Forums
Events
Gallery
Everything posted by Fran
-
I will keep you all informed.... But they don´t do aftermarket bits....
-
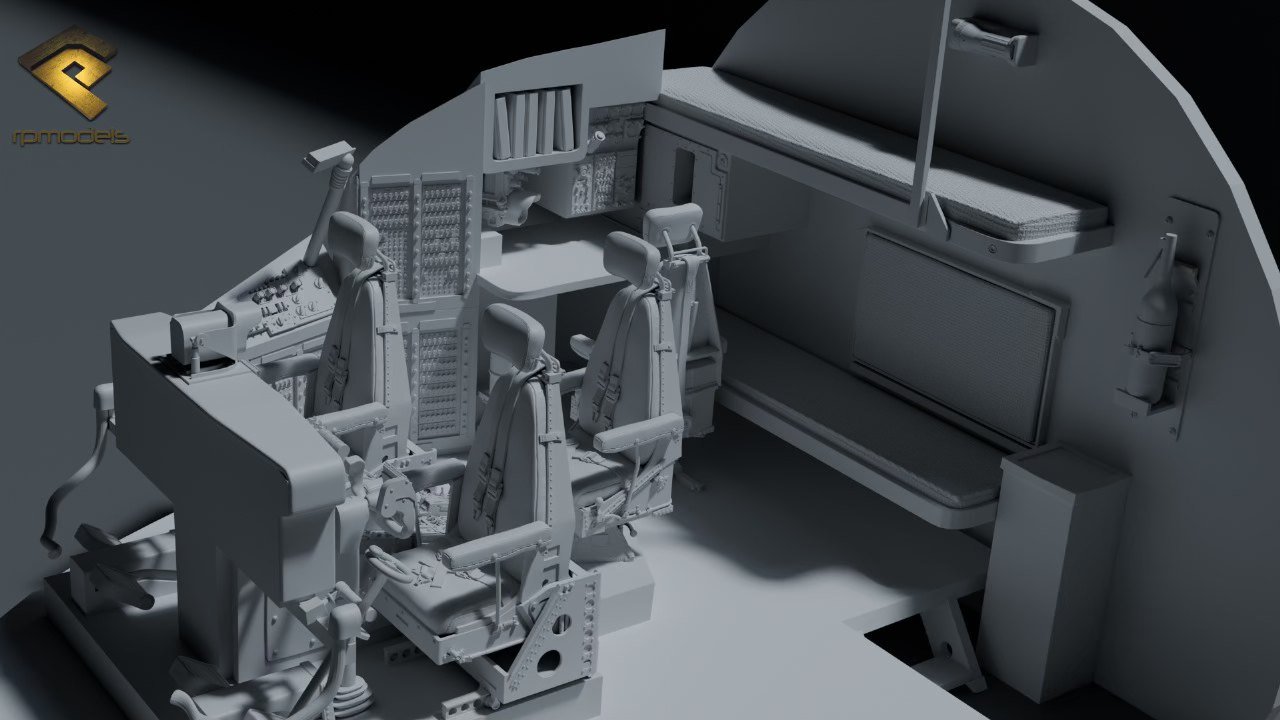
Well, the Portuguese figure manufacture RP Models is making something that its not historical figure... Yes, is a C-130.... I`m folling this very closely and I will keep all LSM informed! Stay close and following! Fran


-
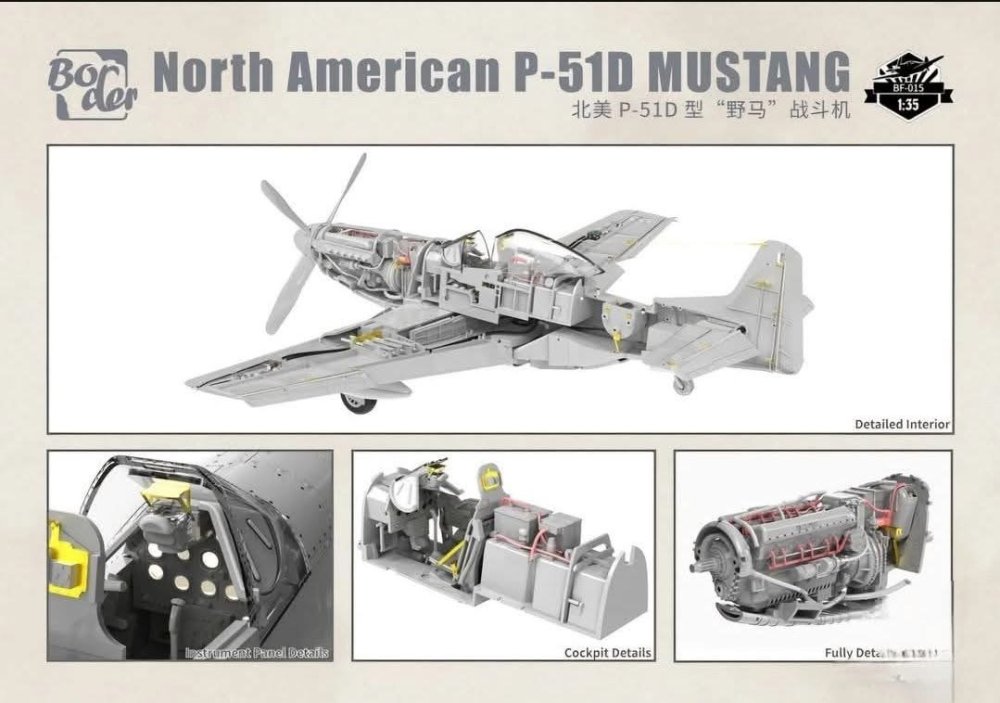
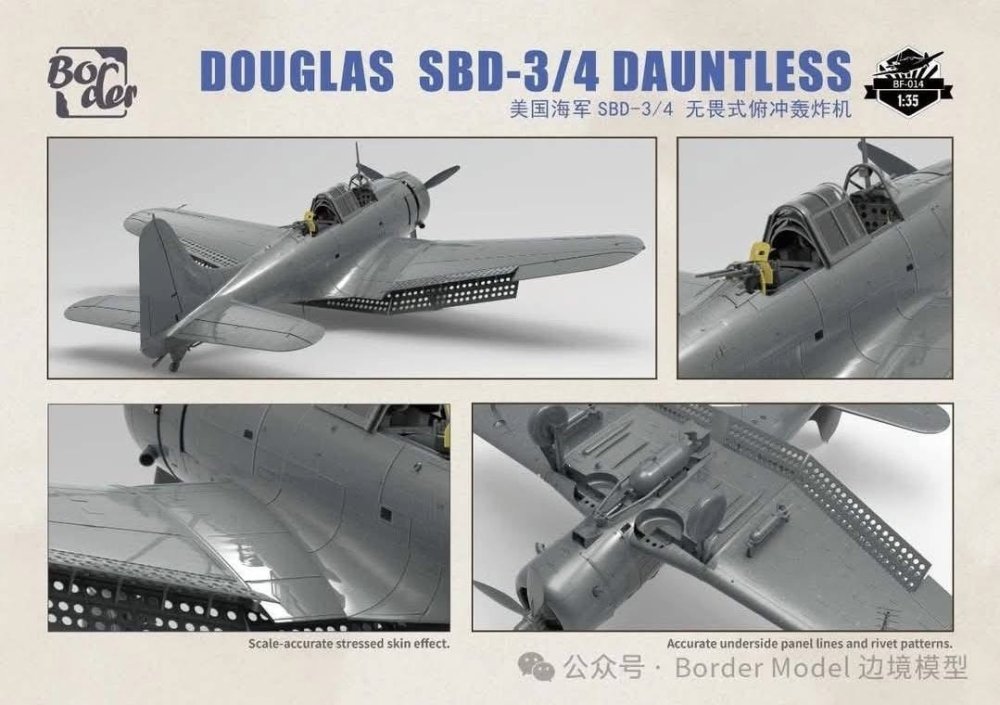
And a P-51!! and a few more pics of the Dauntless


-
 Wow mate!! Looking gourgeous!
 -
I just came across this.... a brand new 1:32 F-4B Phantom II Model from ..... Red Pill??? As Its better be good as it listed at the price tag of (pre-order price) - 340€.... For more pics check here: https://hobbyzero.com/news/red-pill-models-to-release-new-f-4b-phantom-ii-model/ I will try to get more info... Fran

-
Thanks Mike. Absolutely! THese Ju-88 are little gem that beg to be build! This one is going to my top to do pile!
-
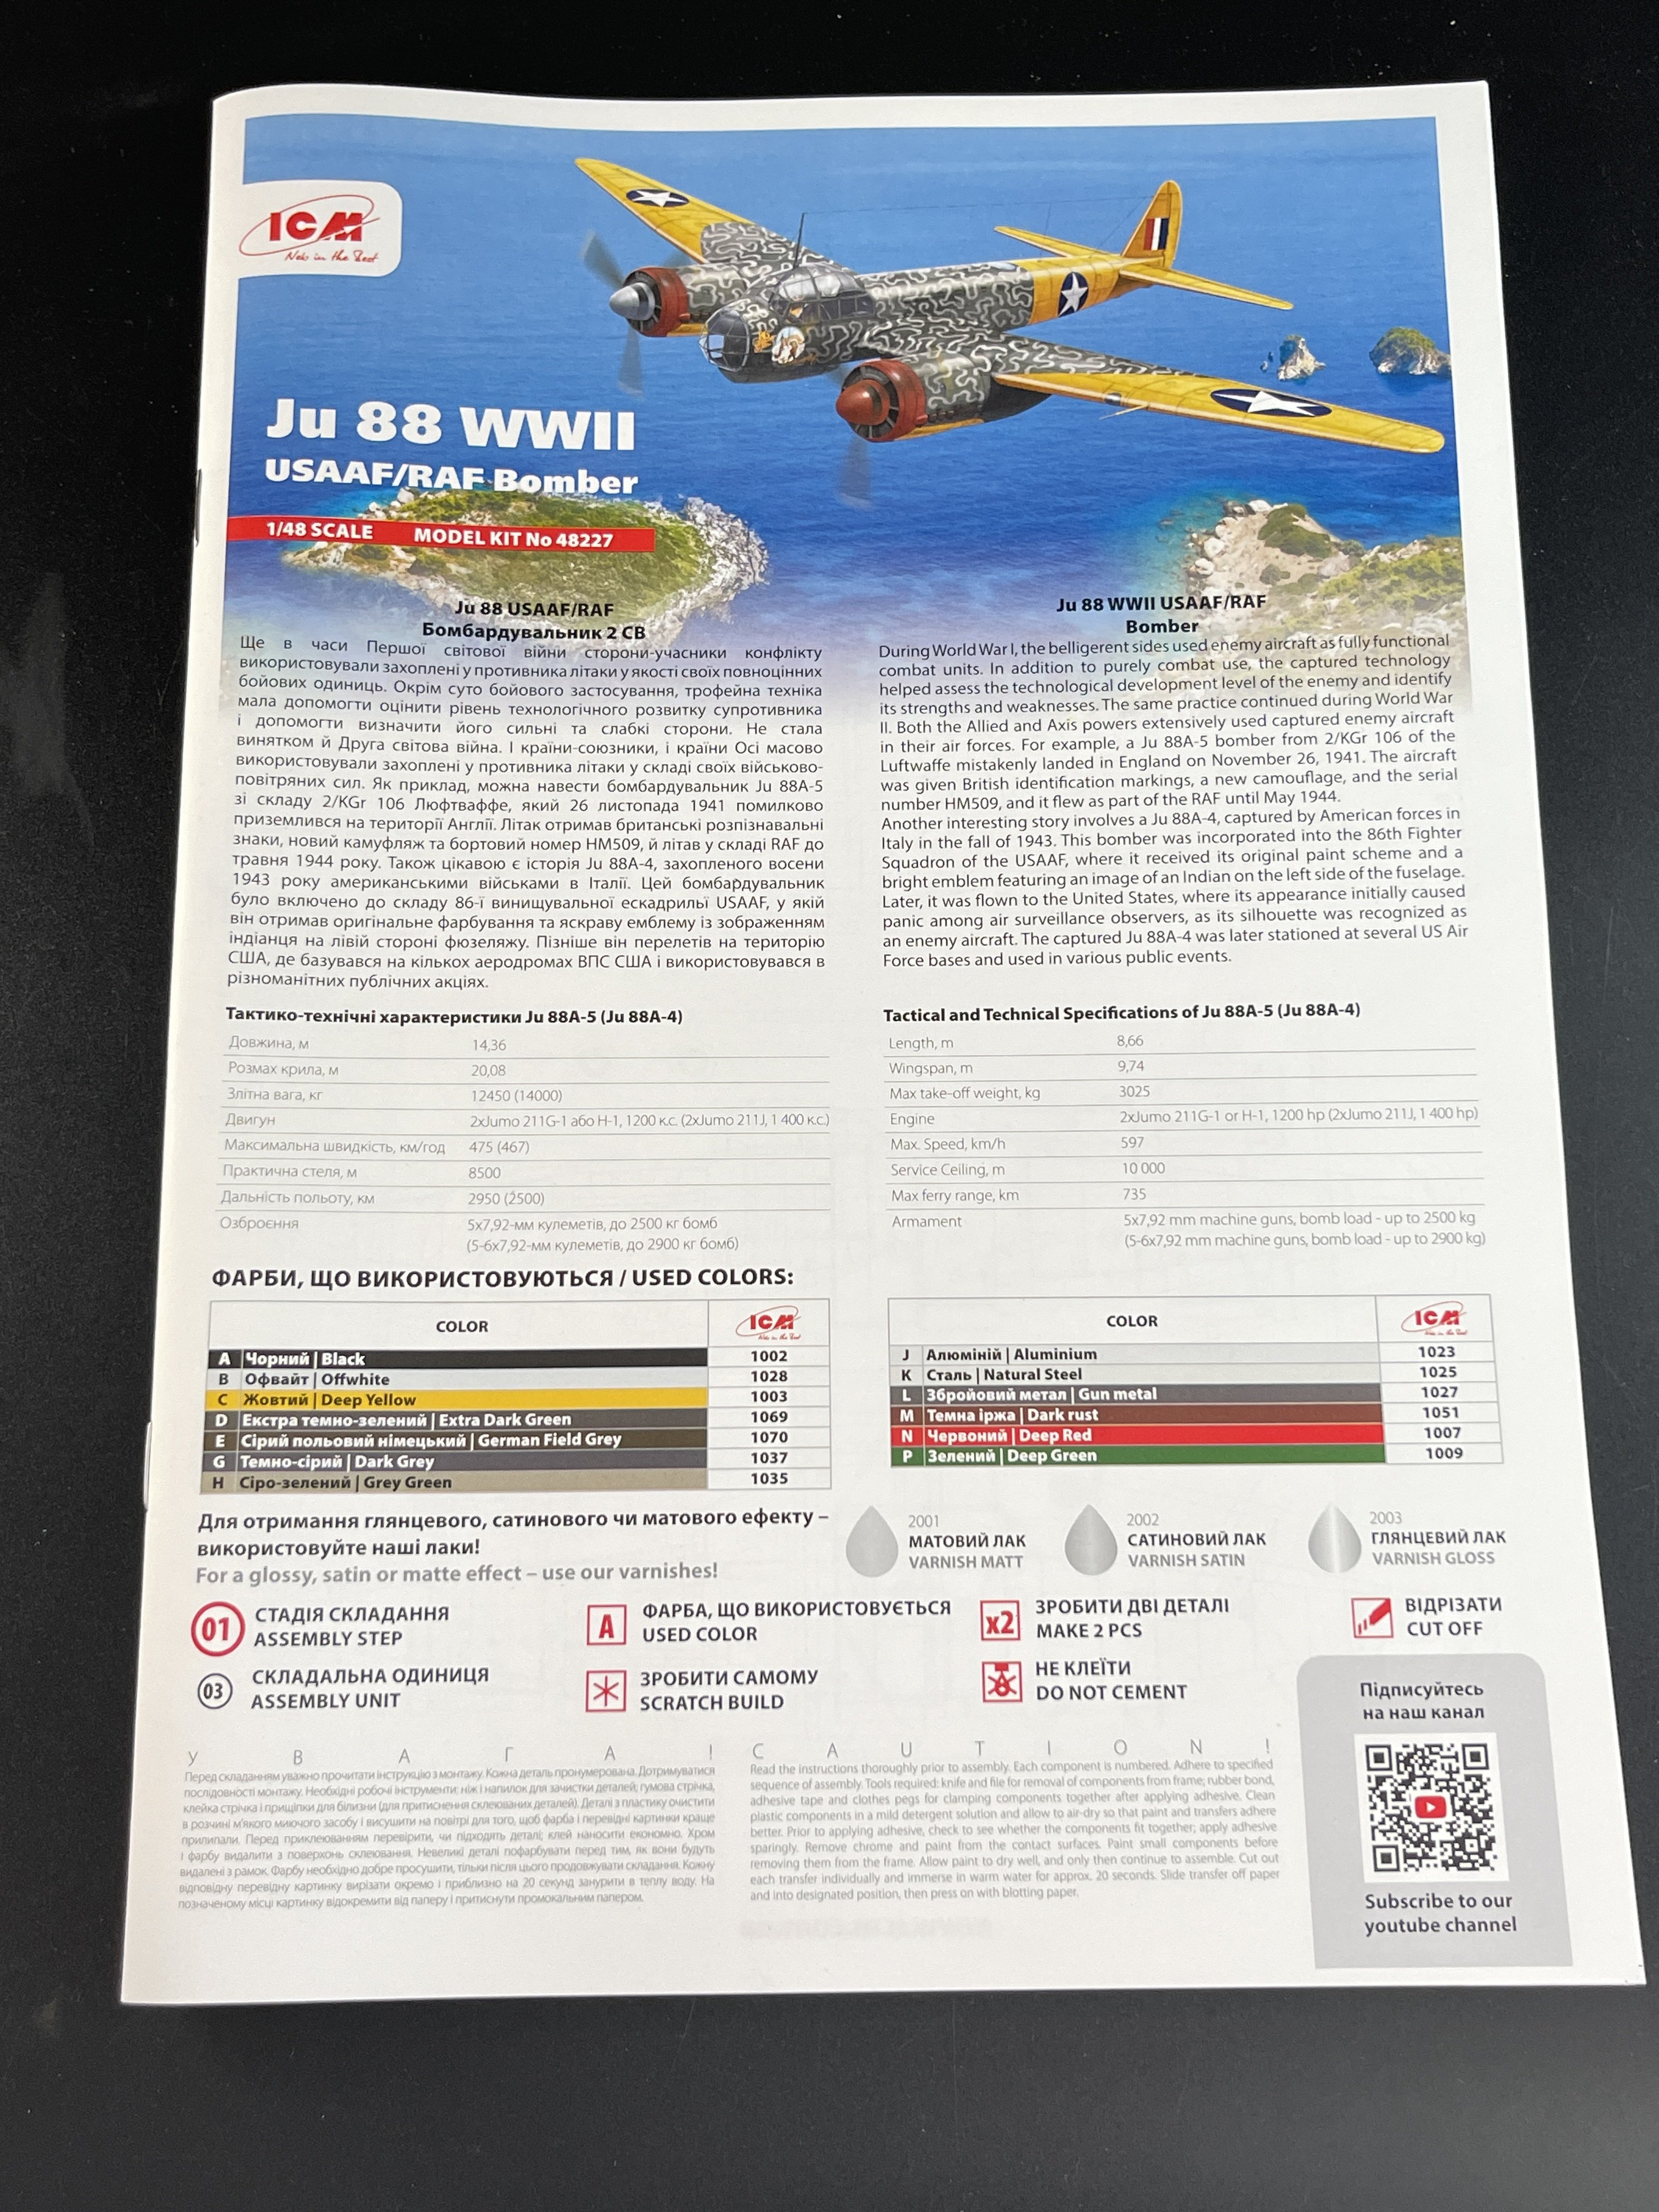
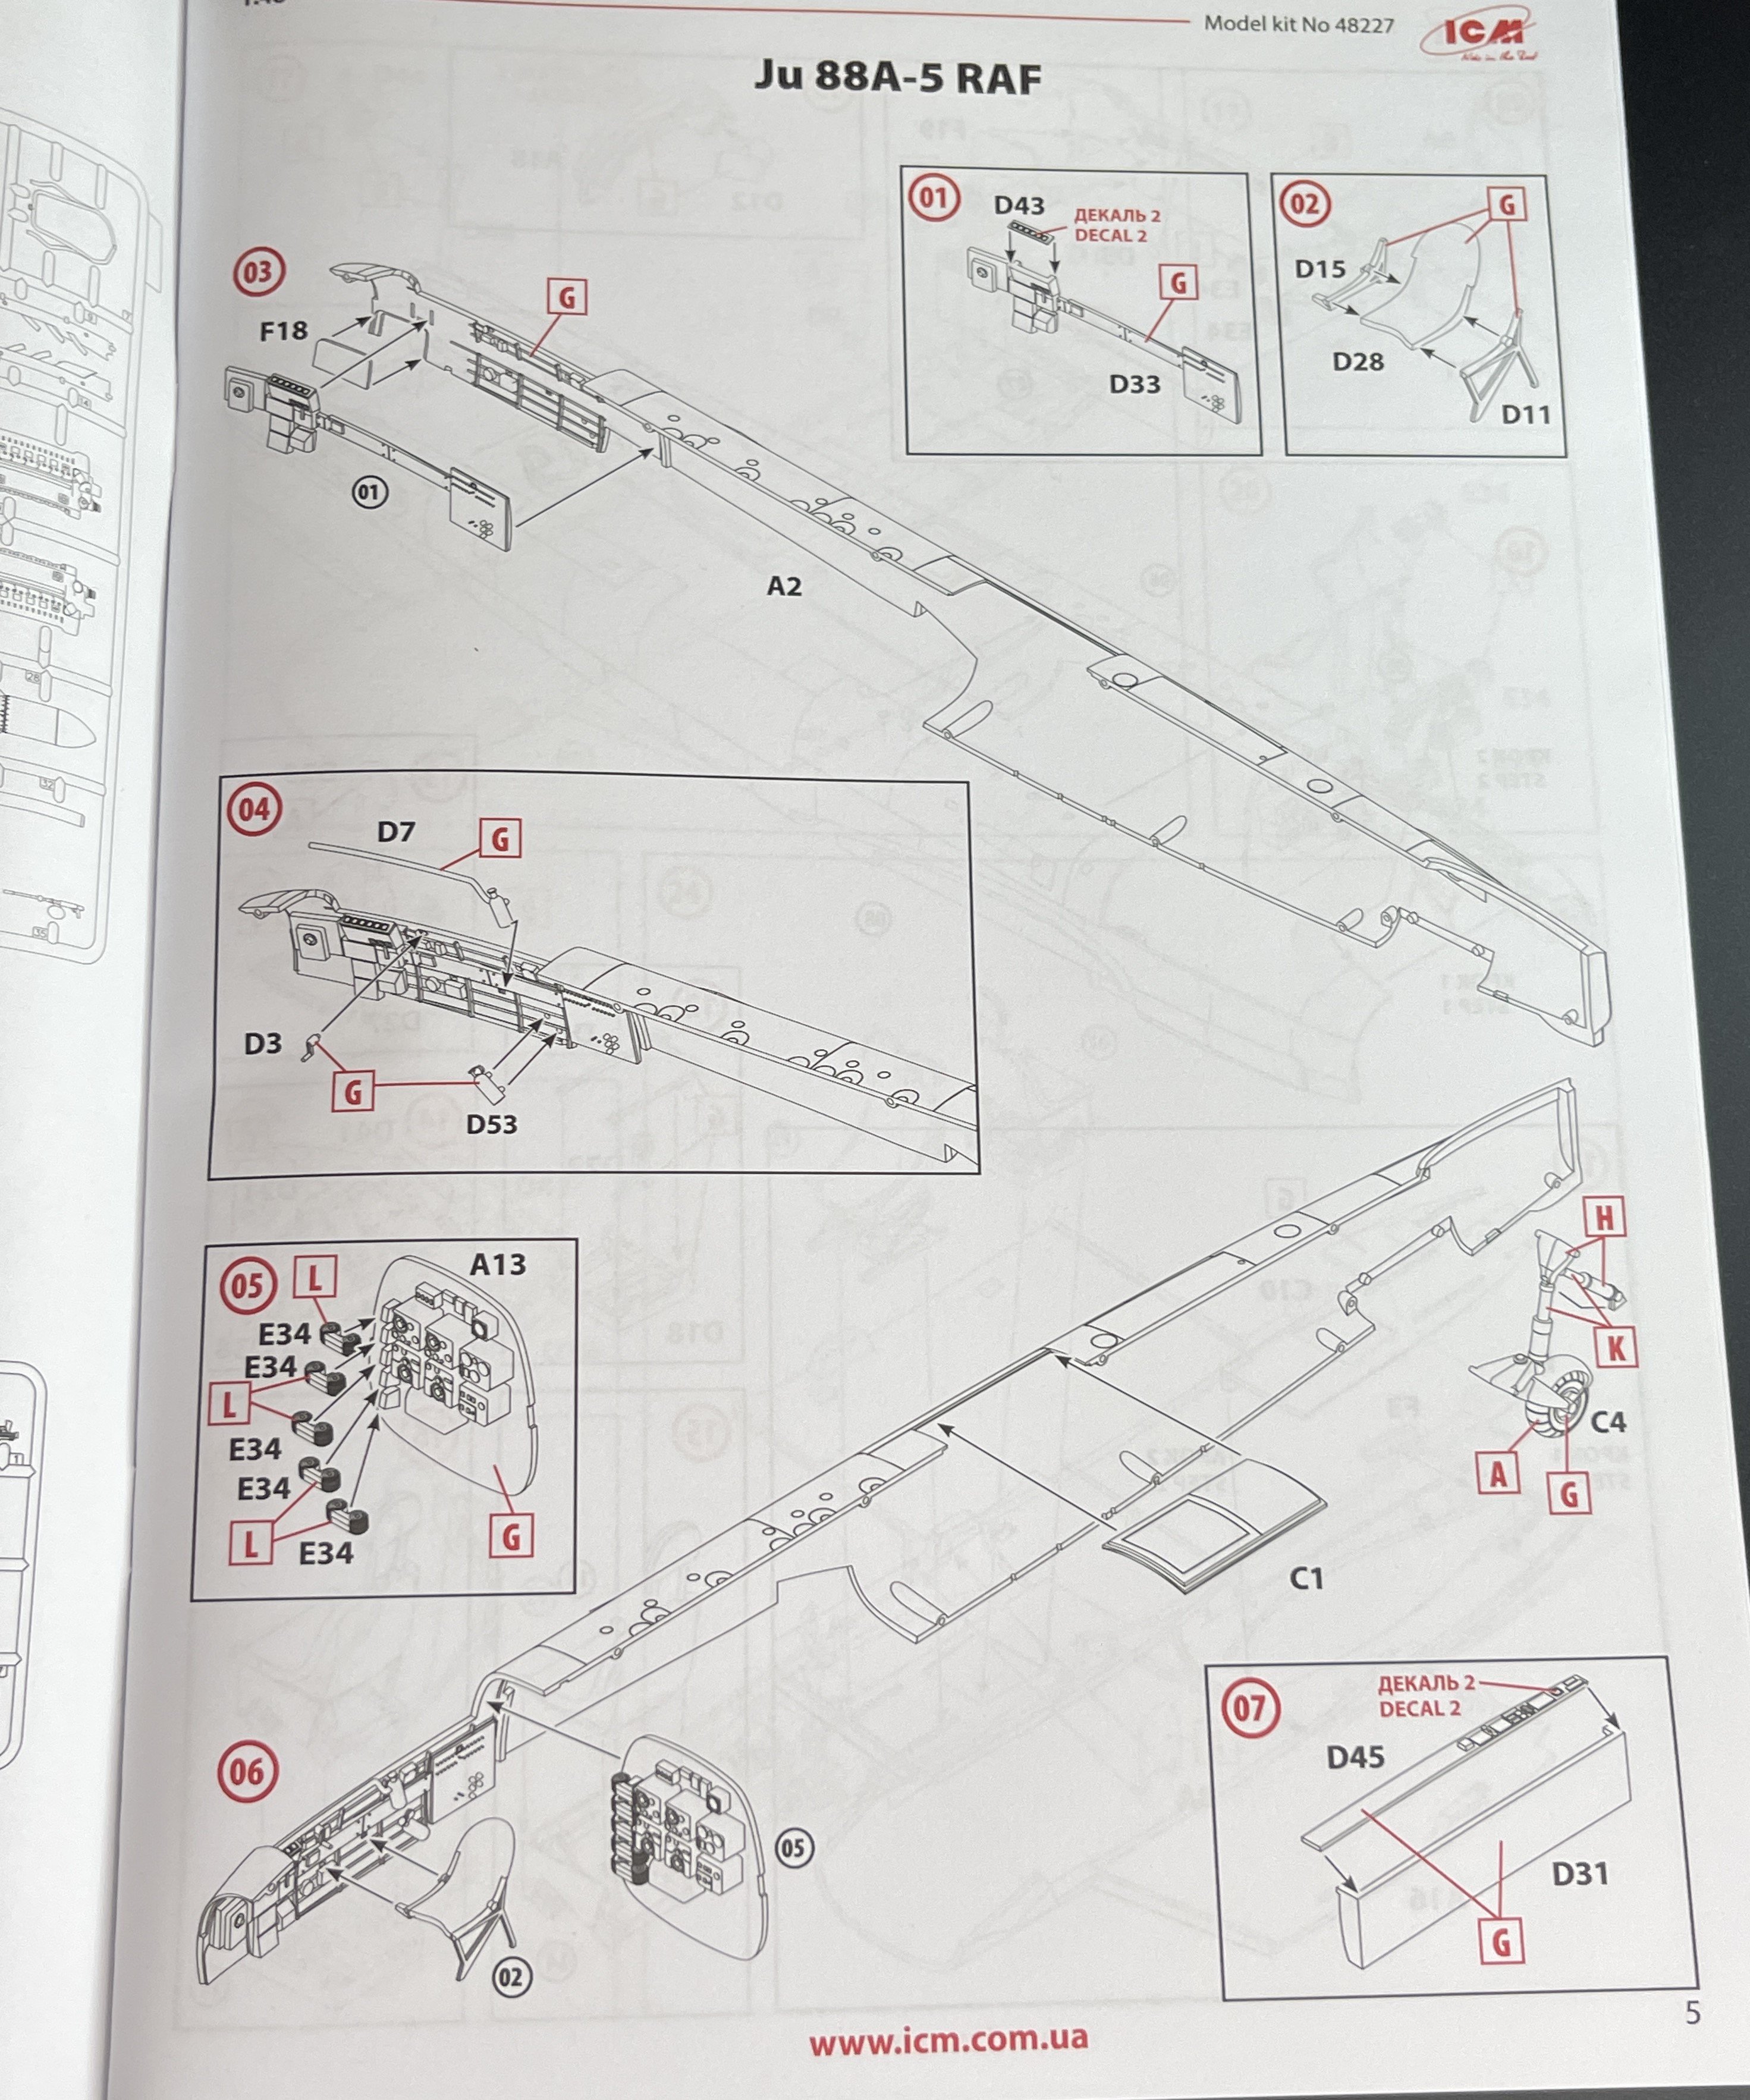
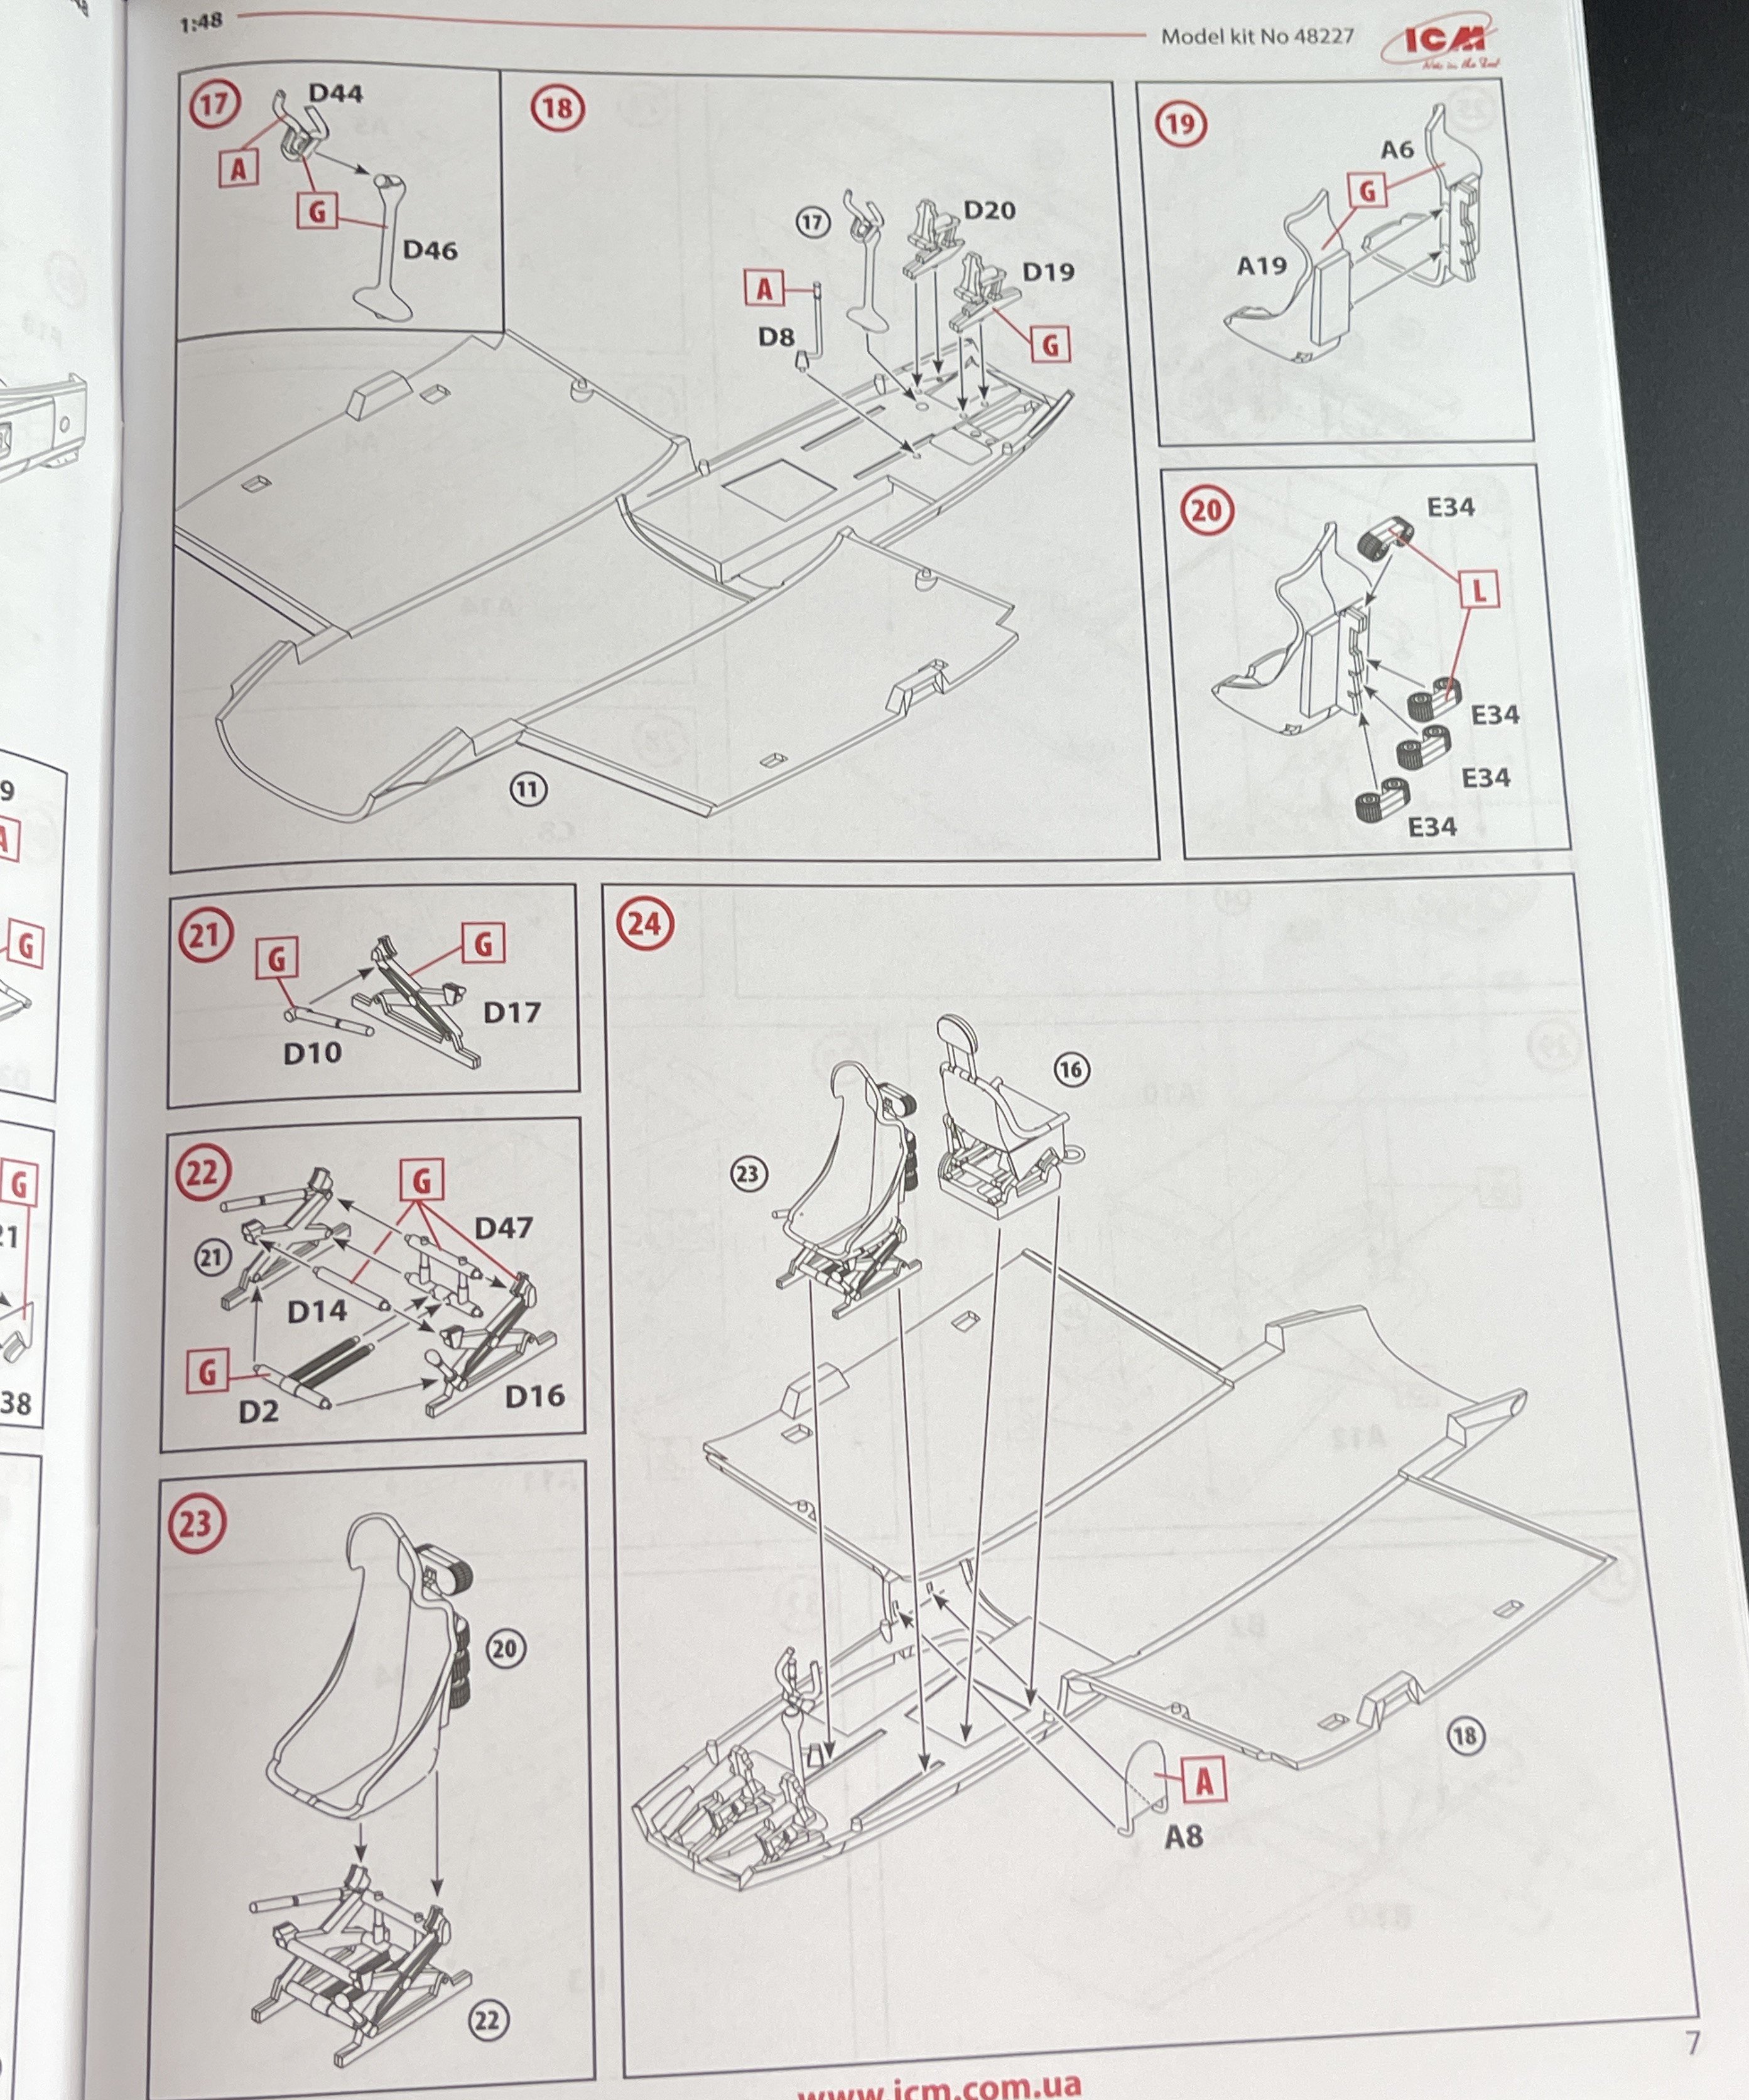
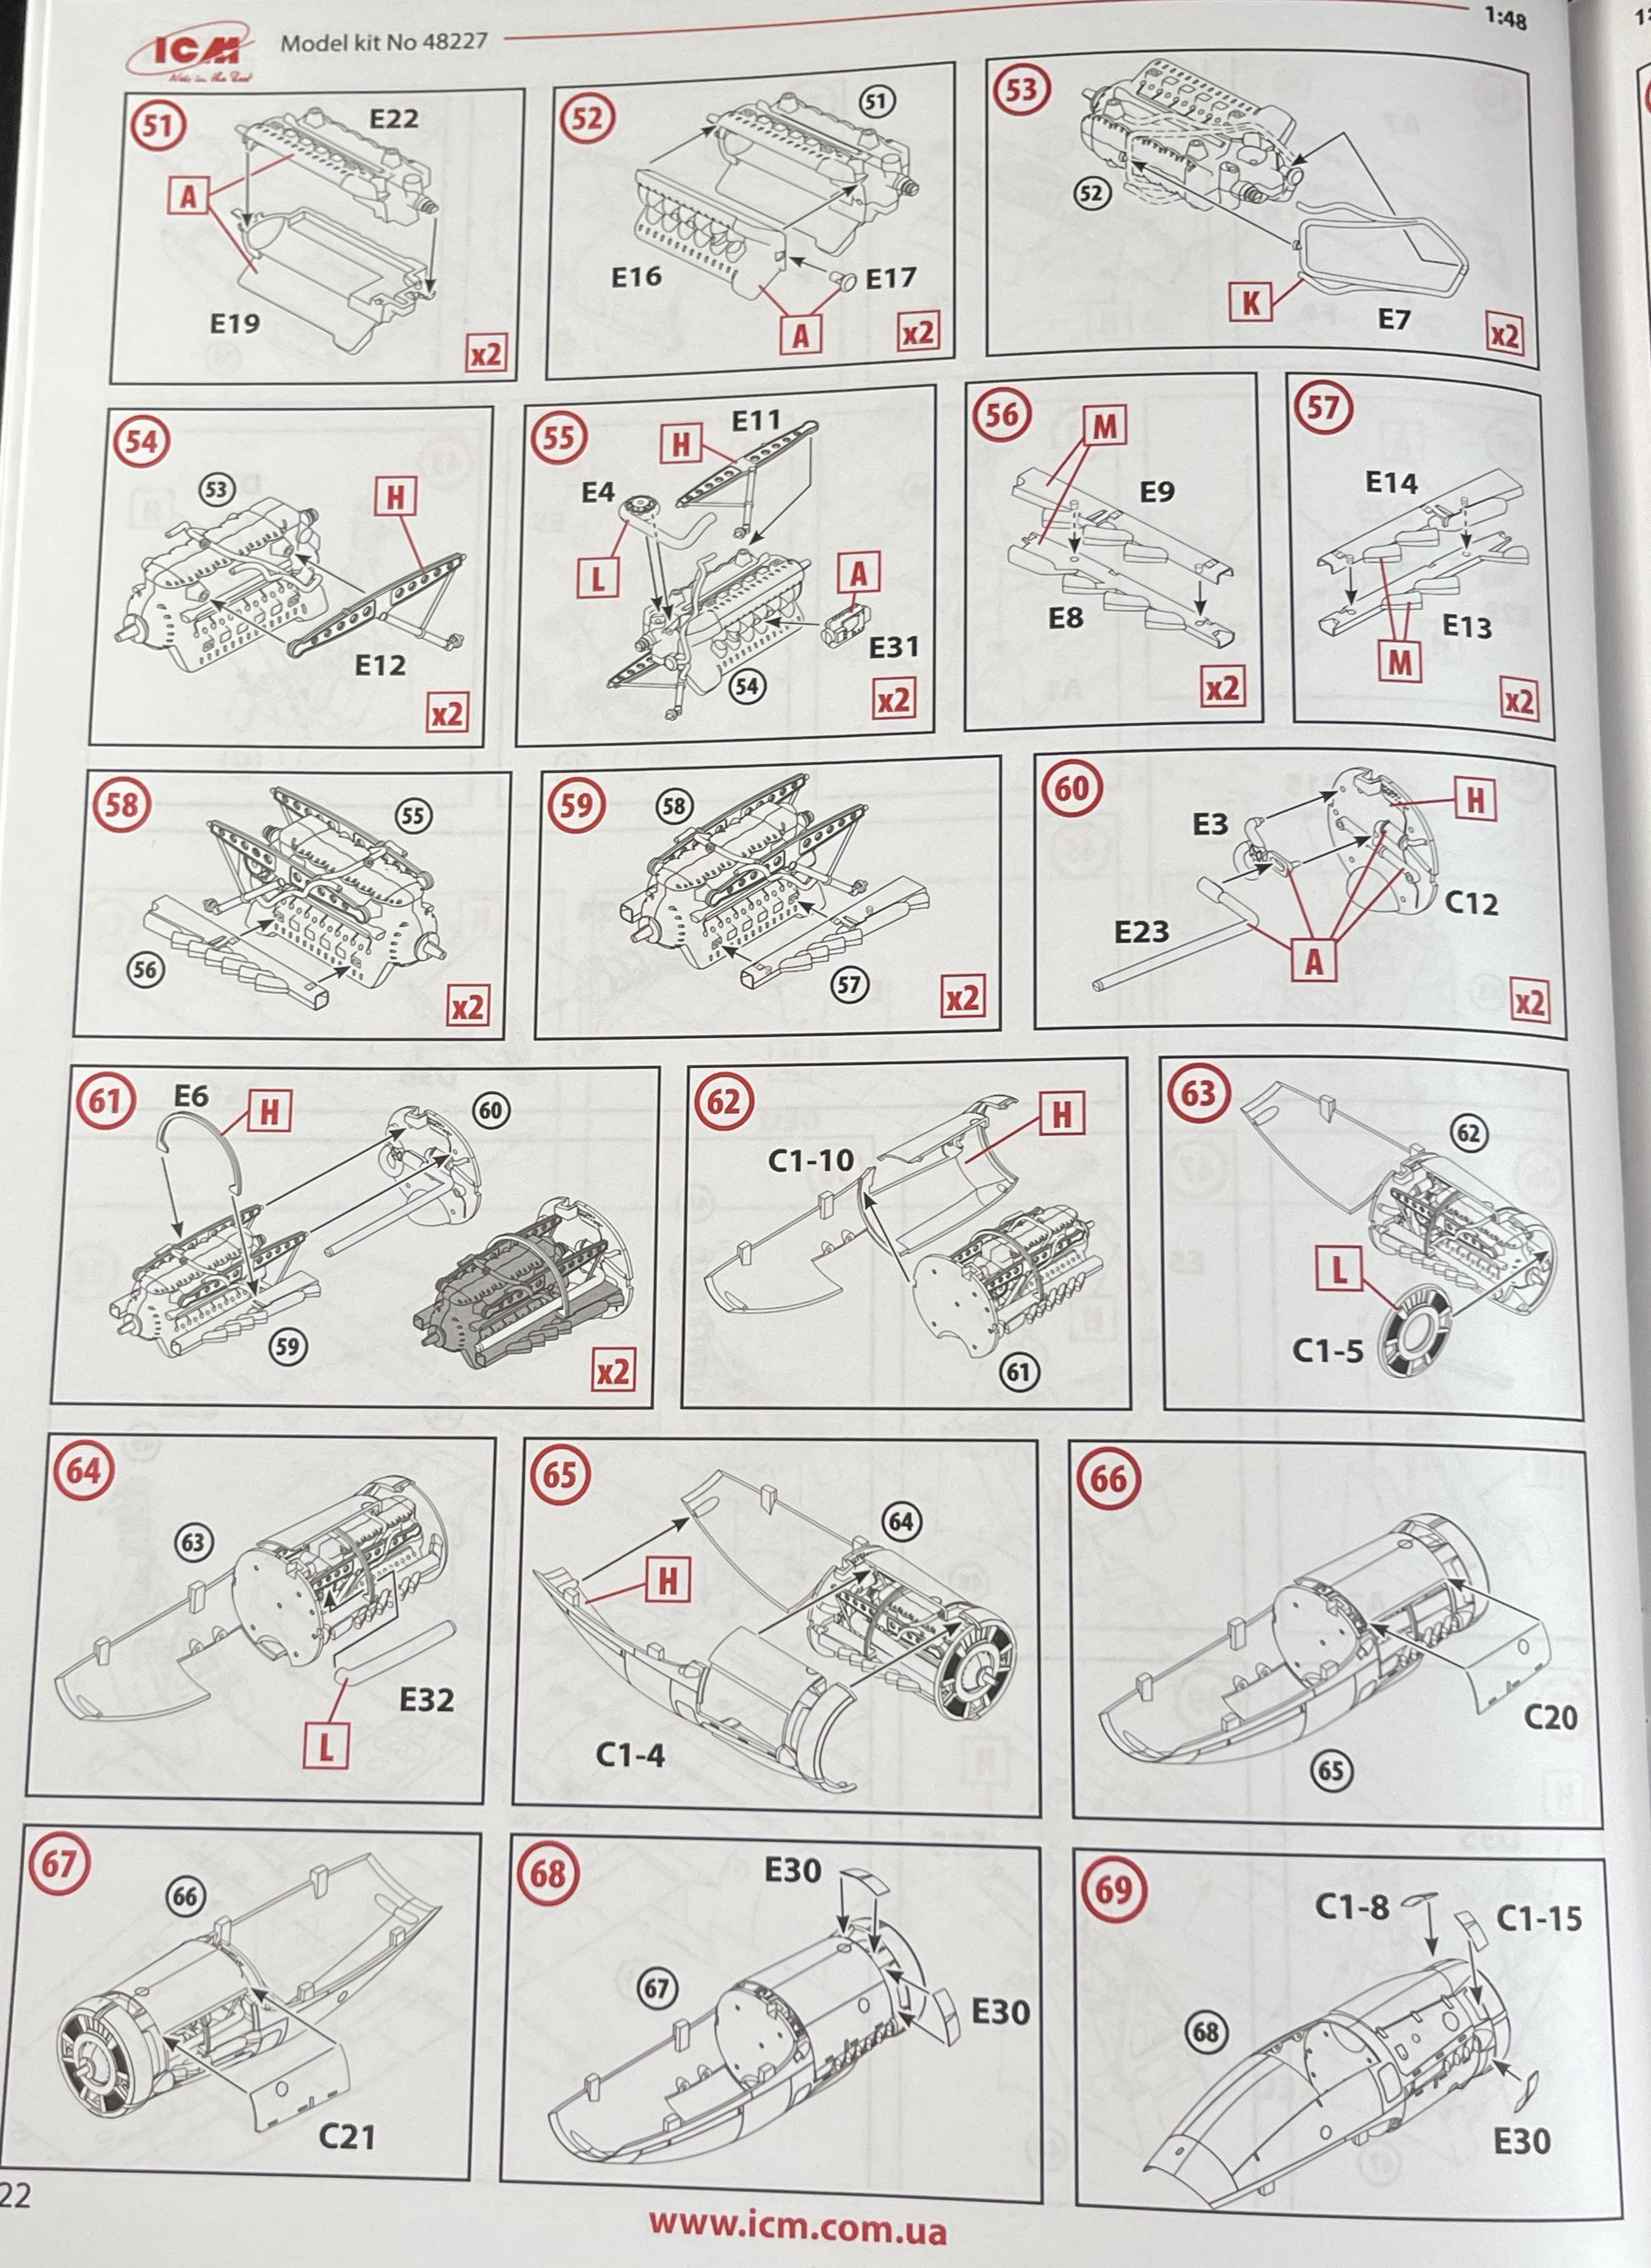
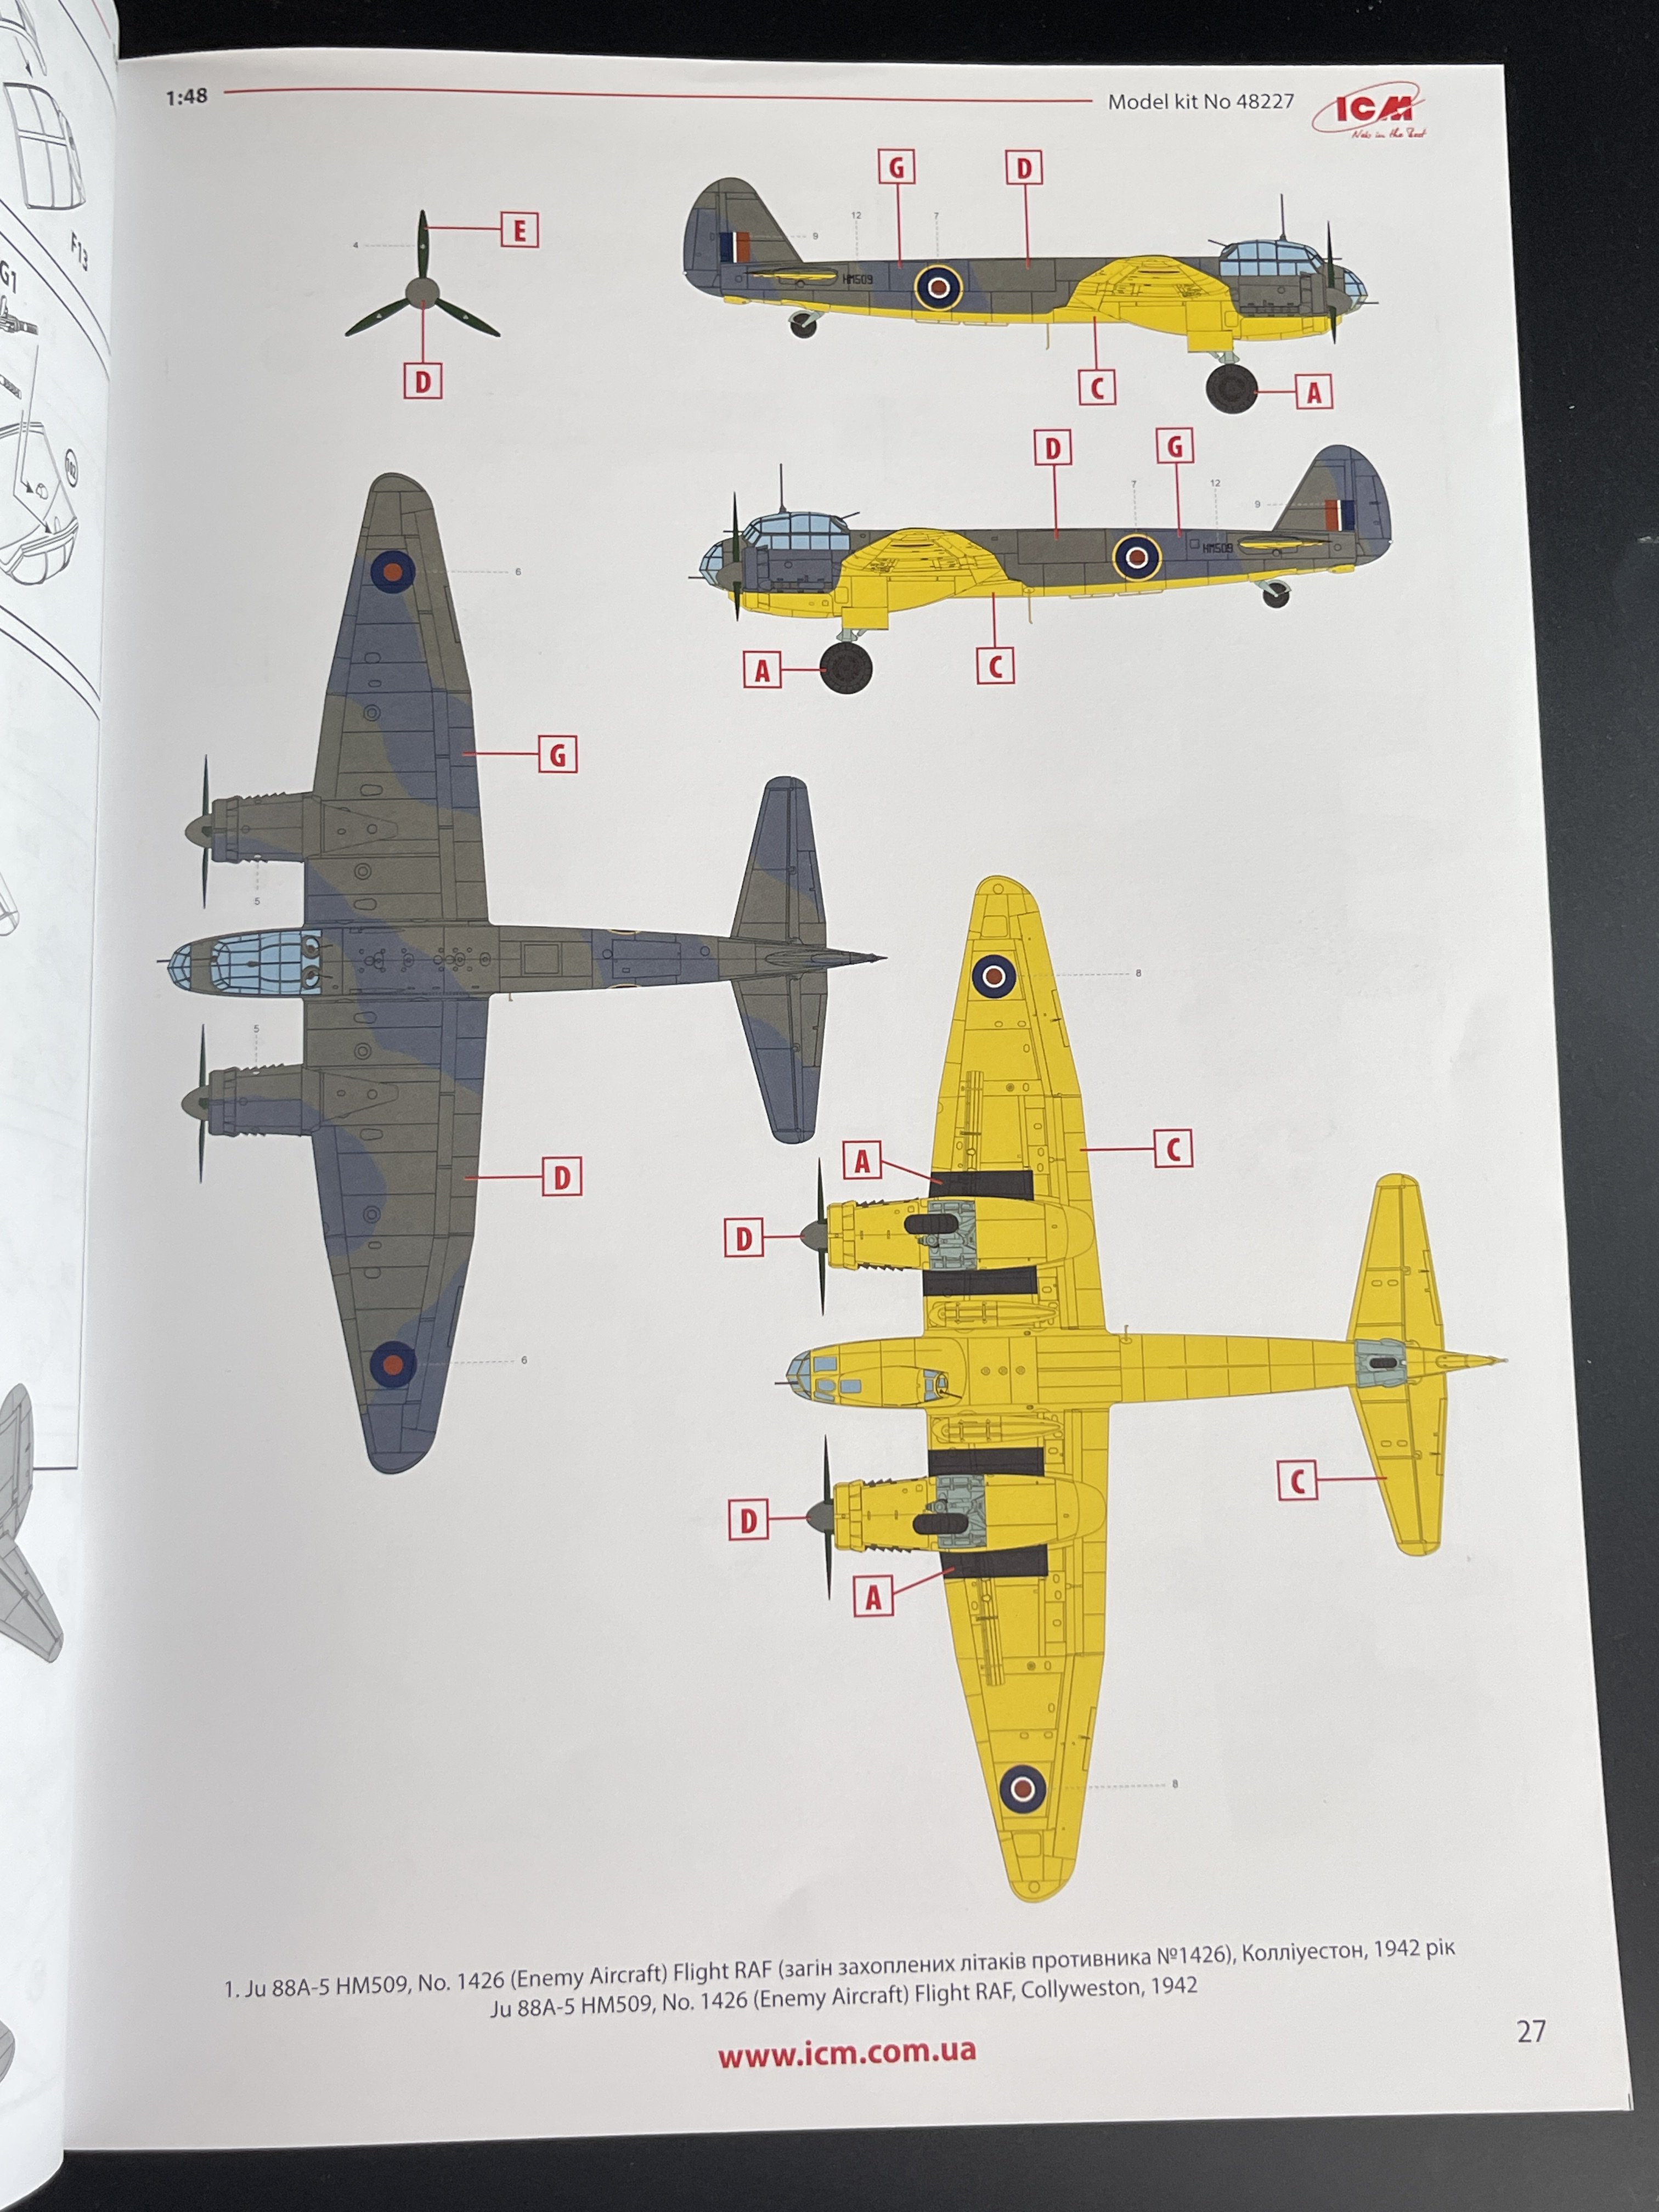
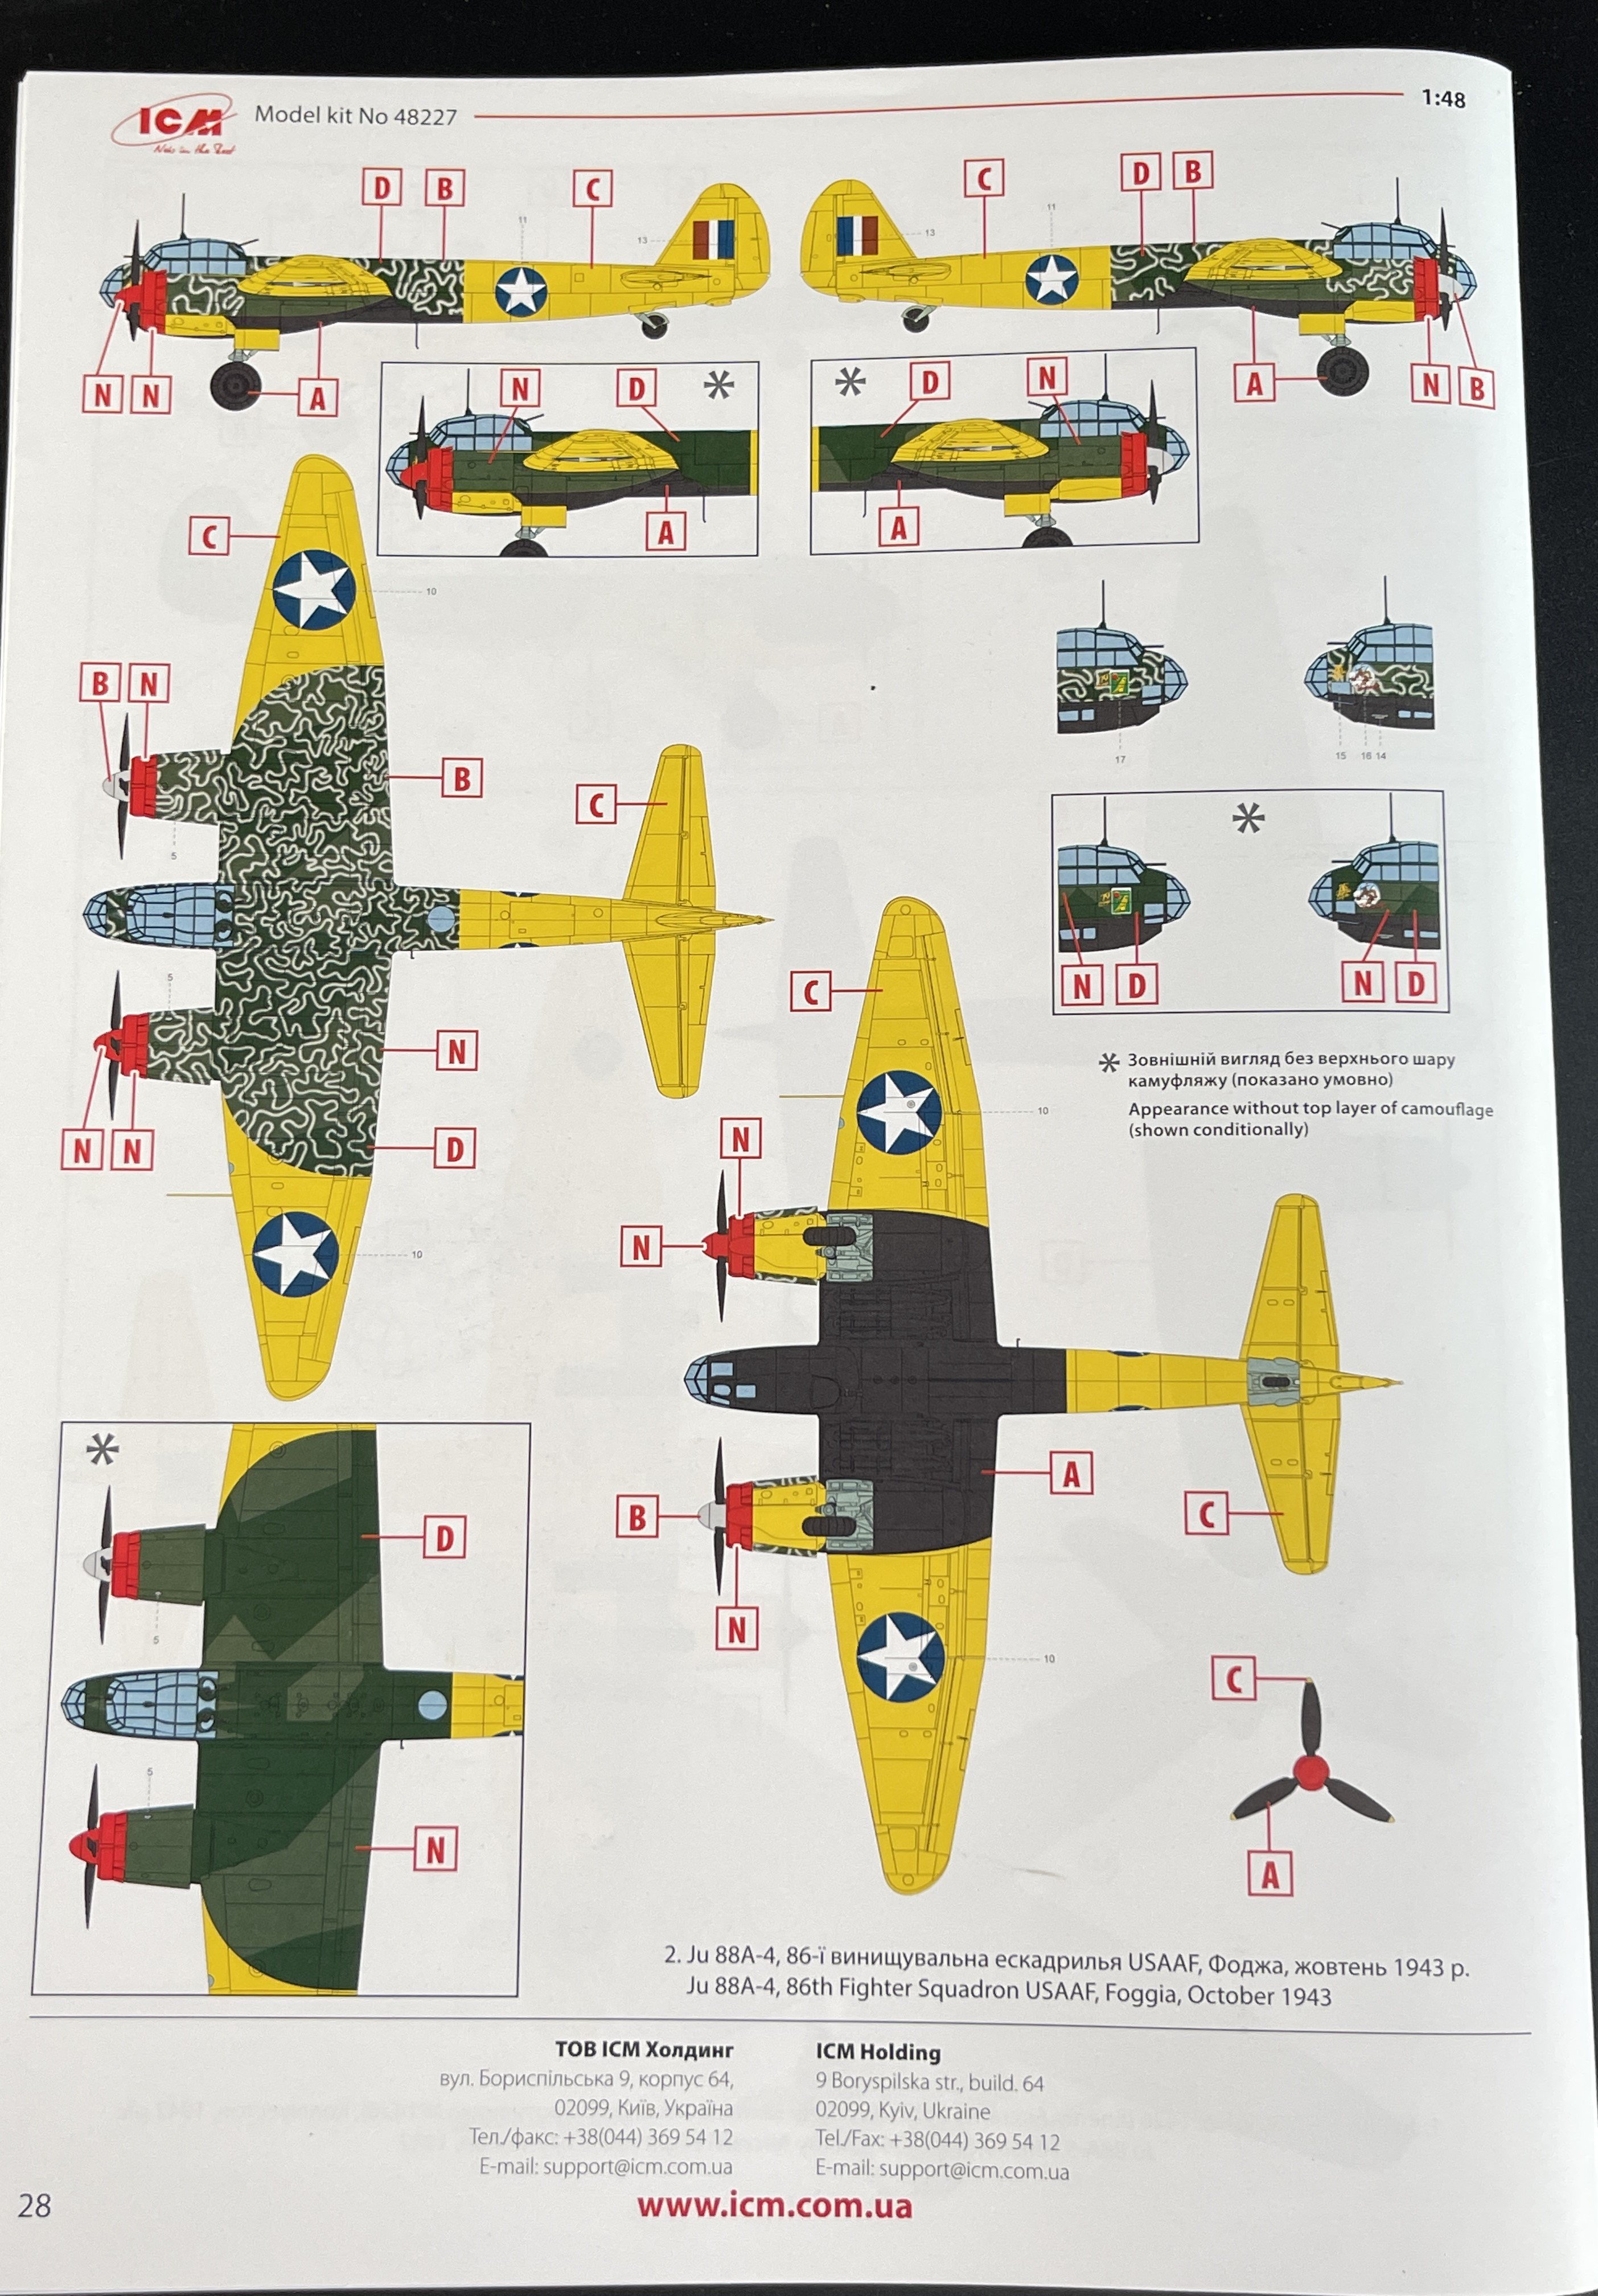
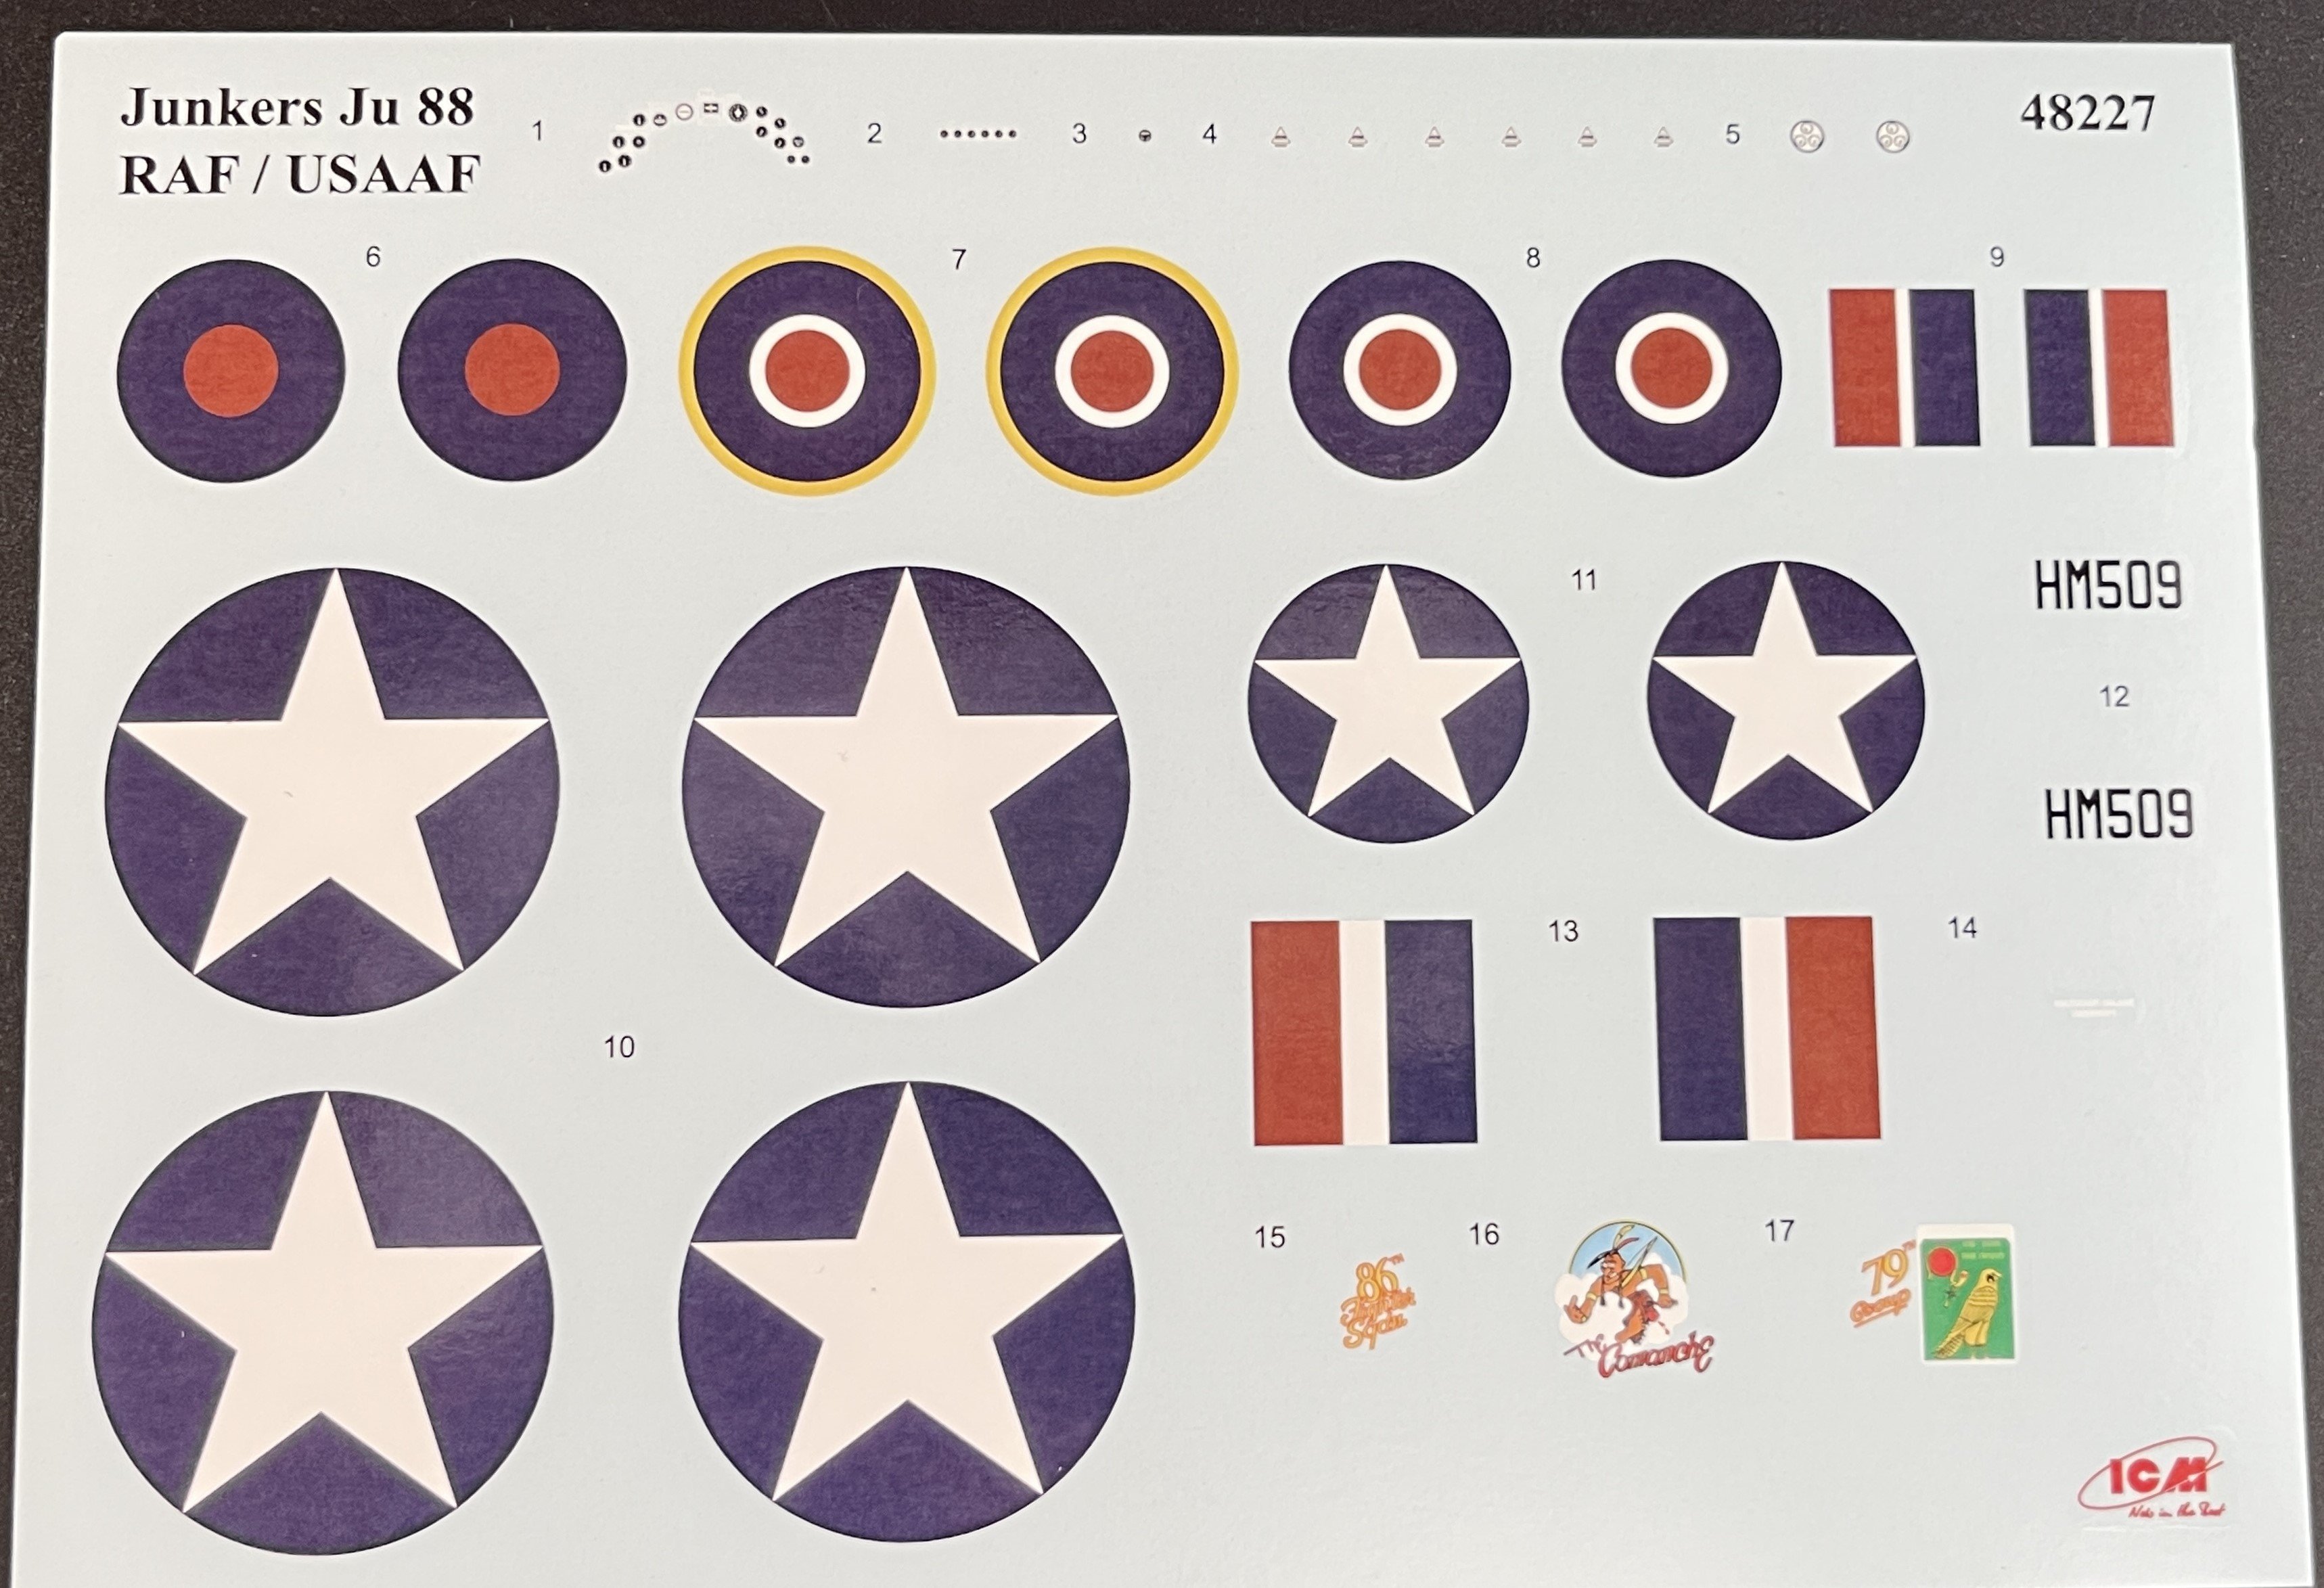
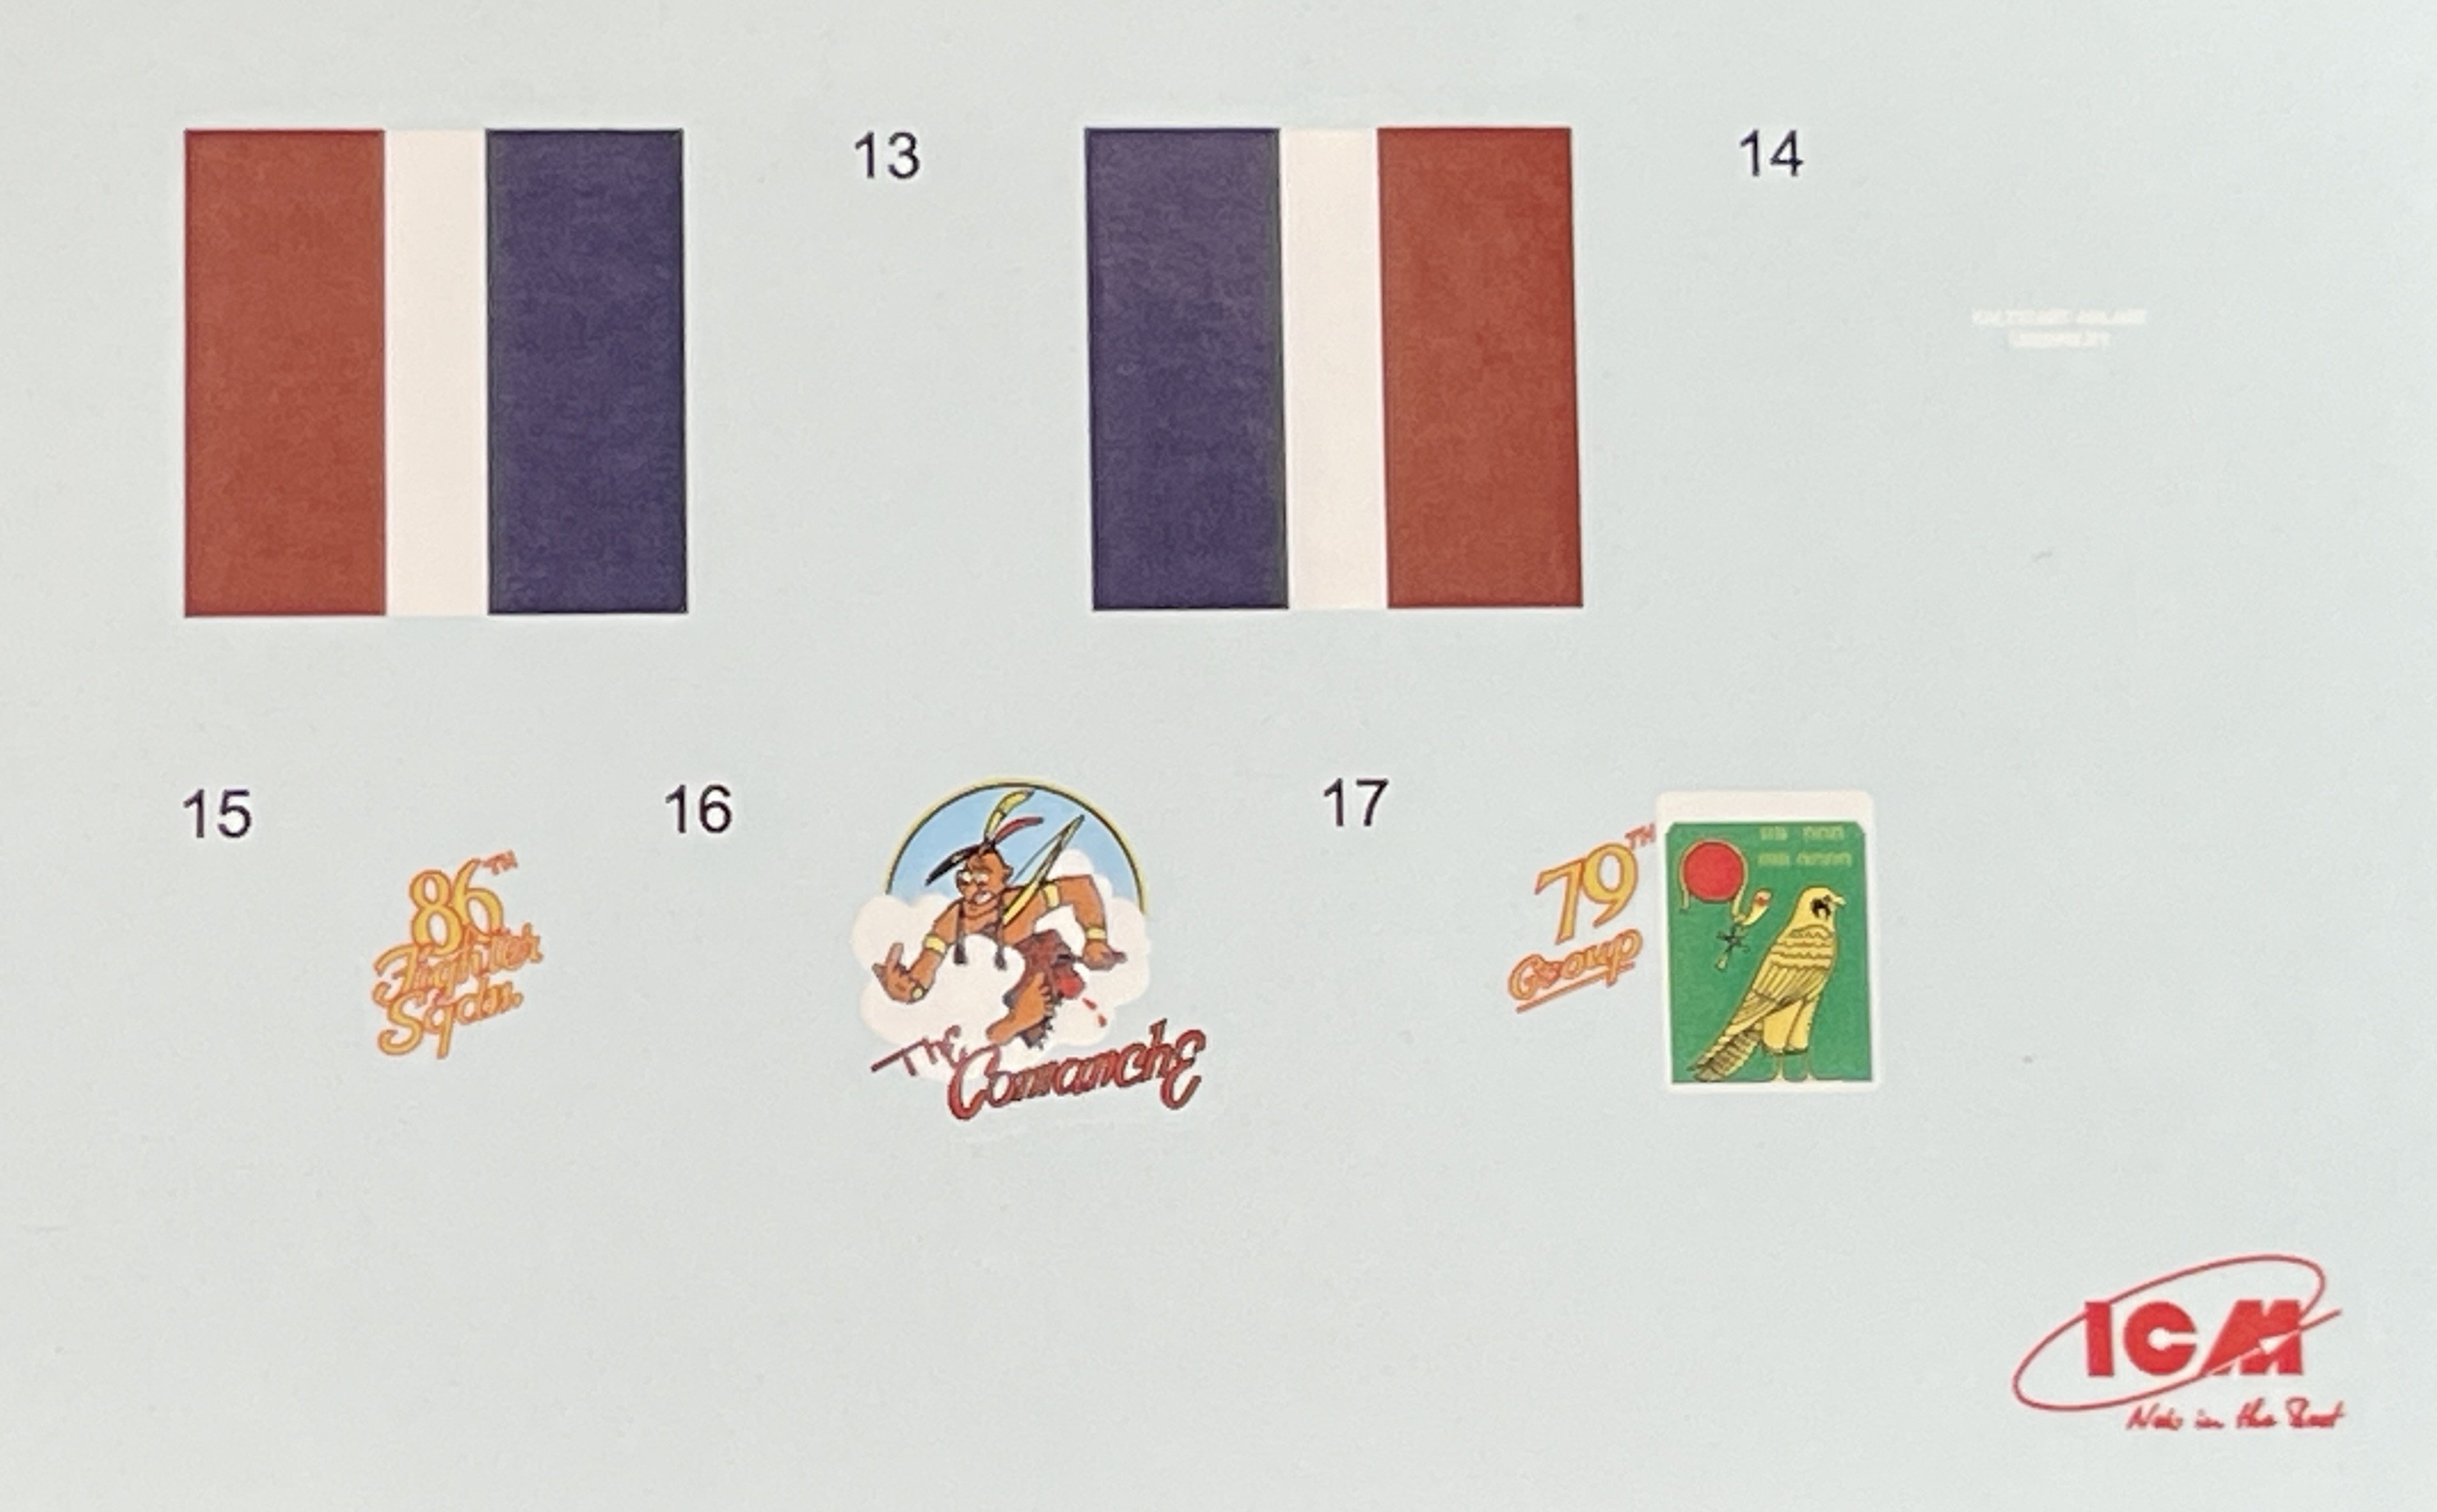
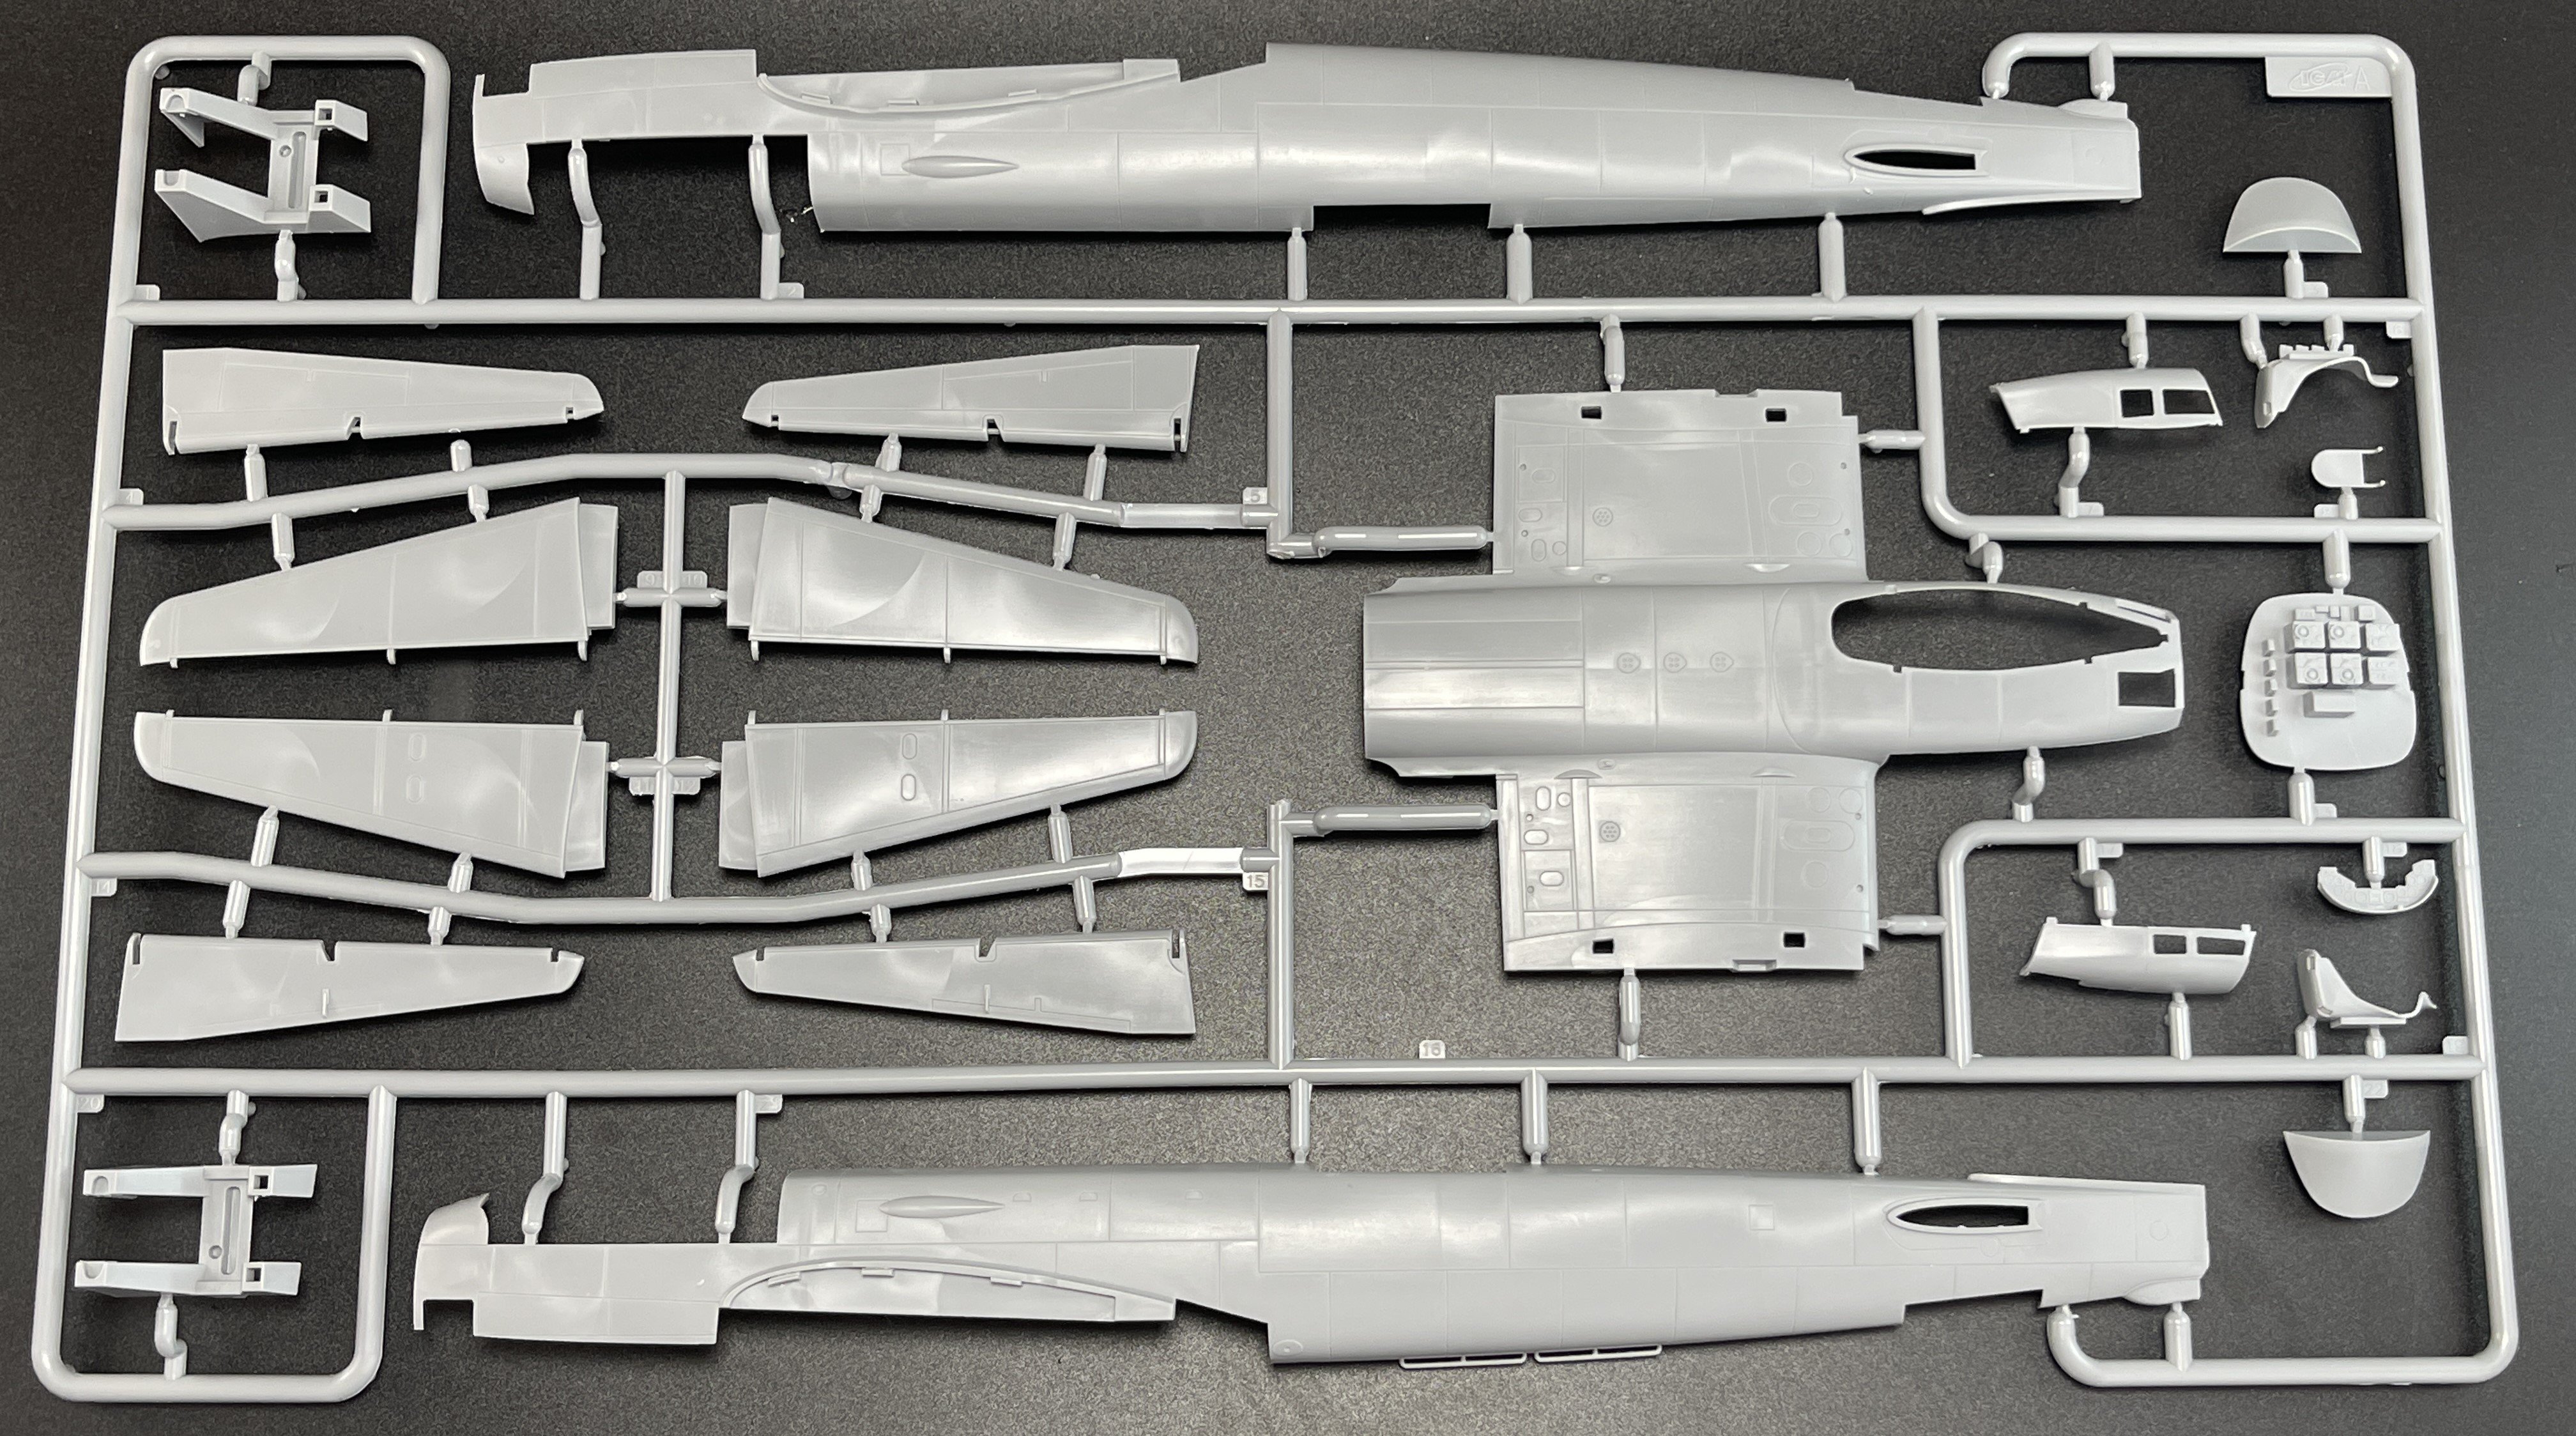
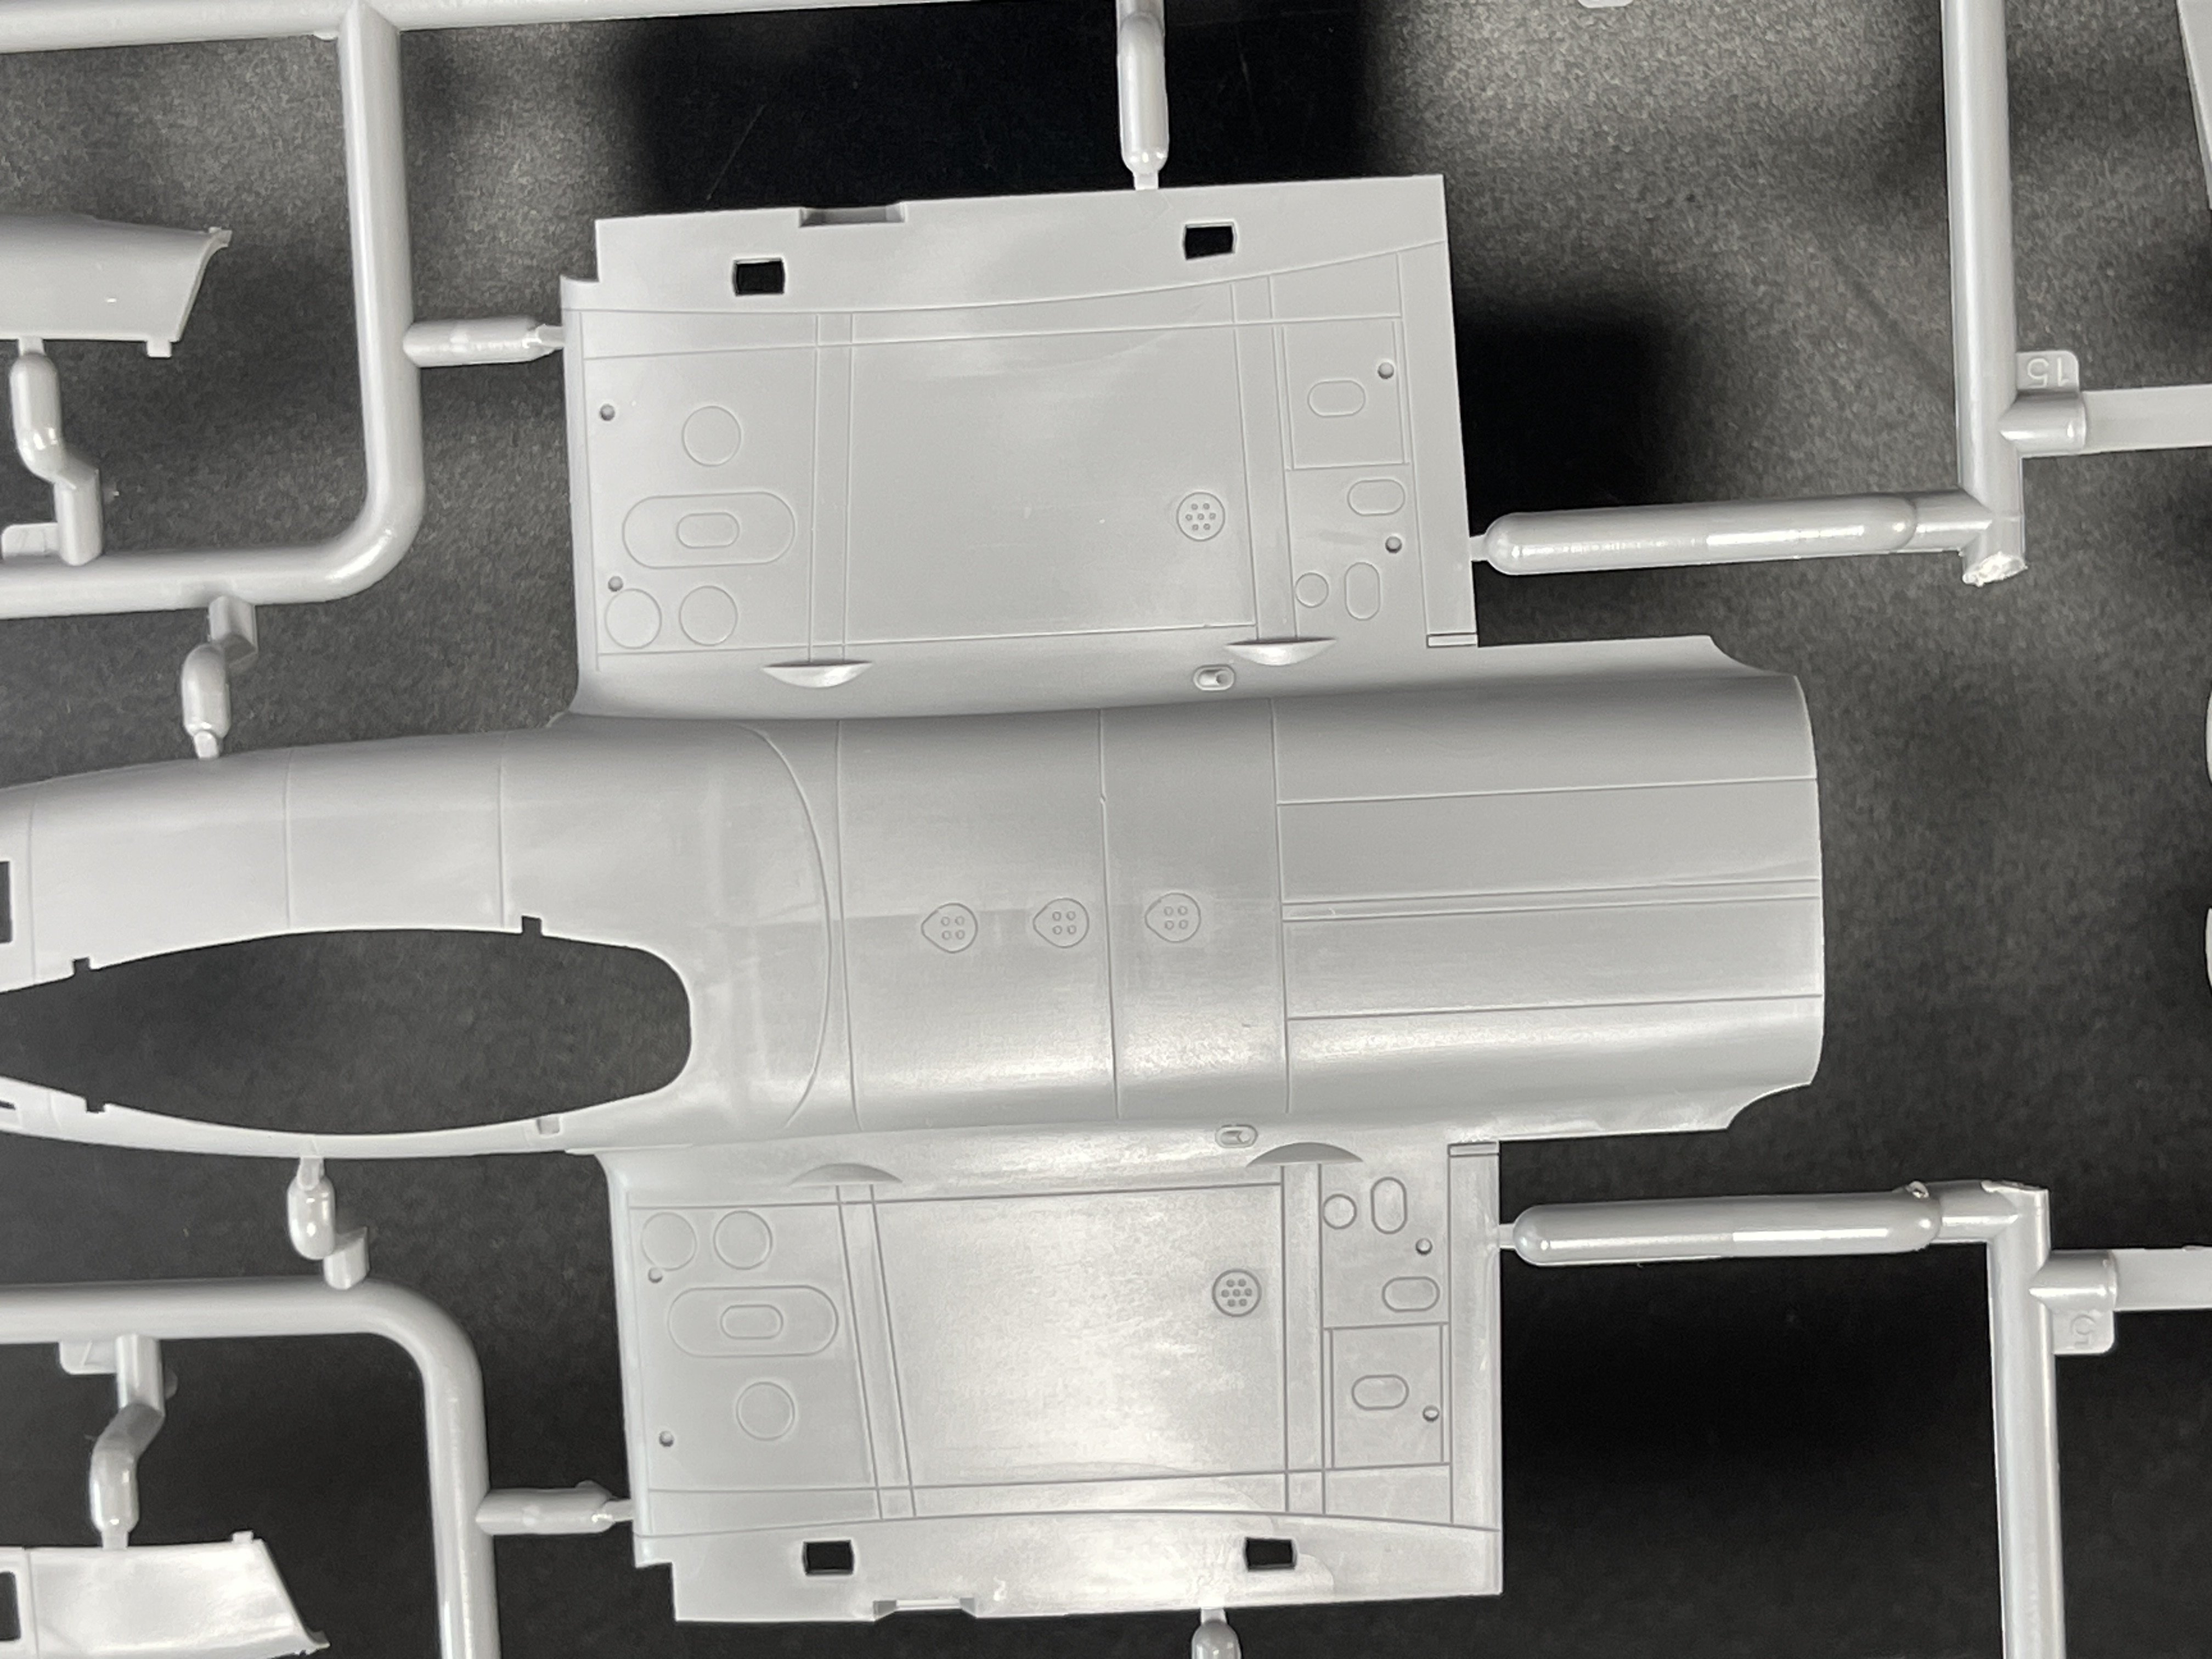
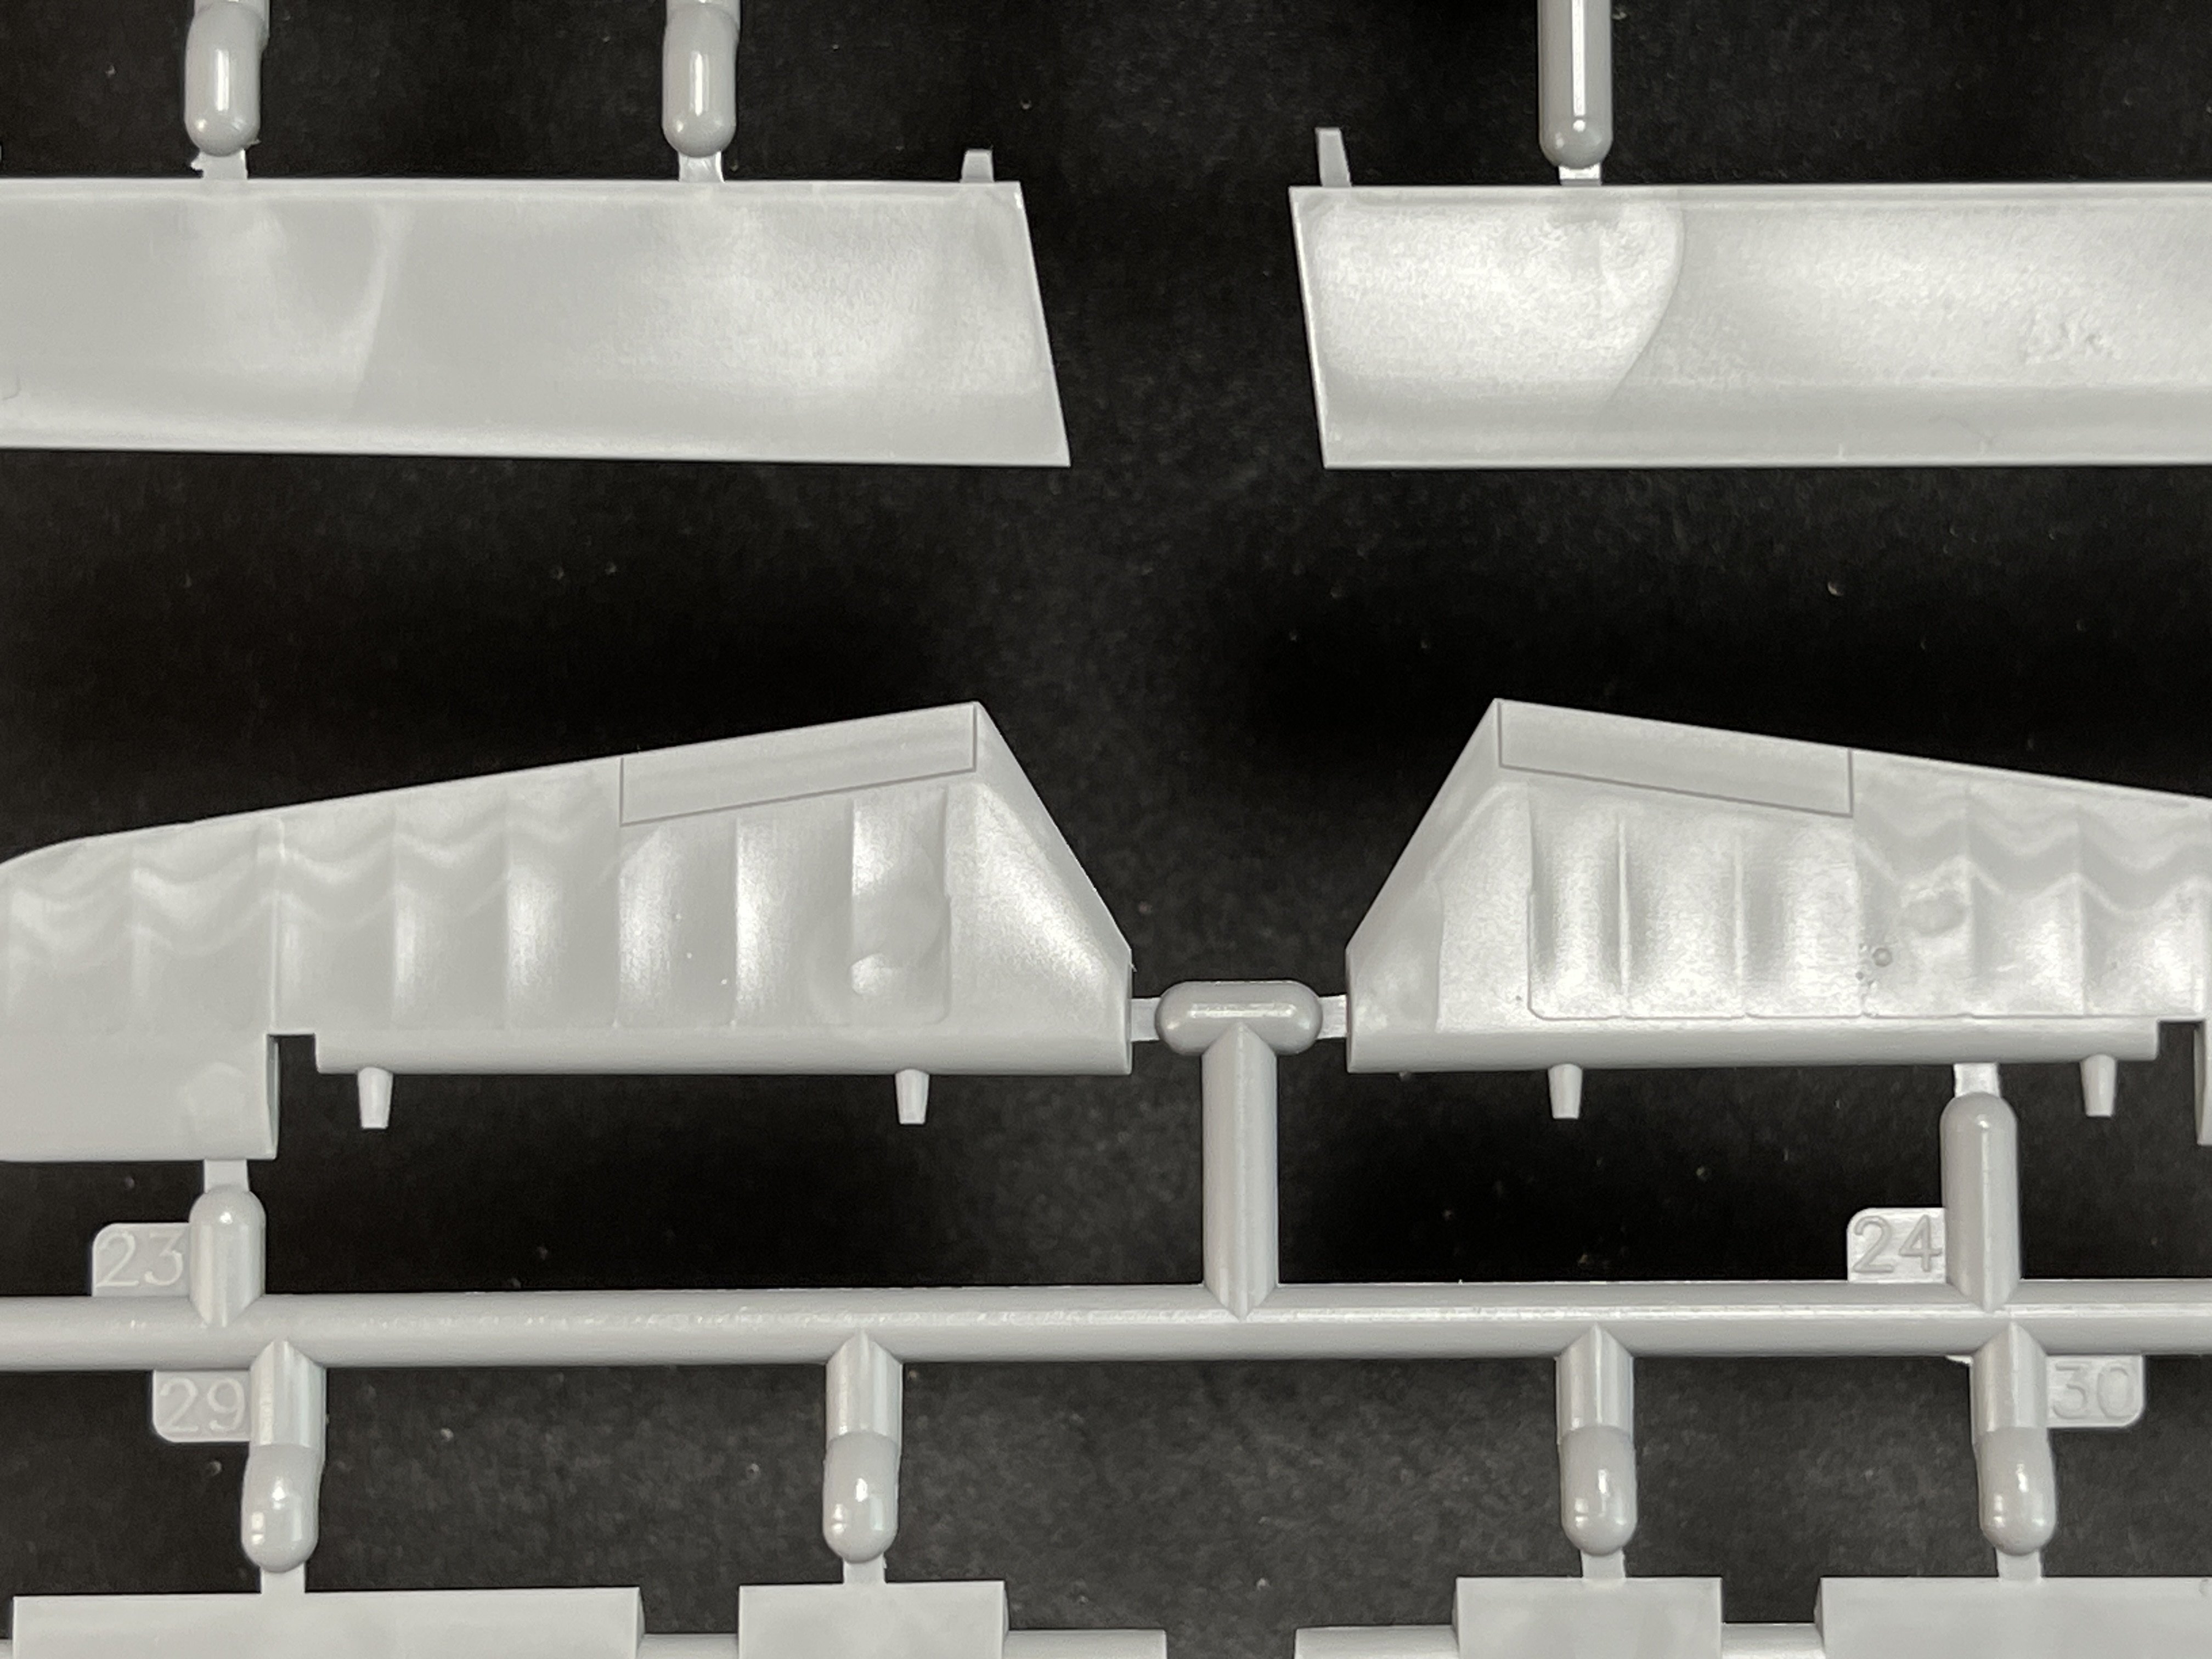
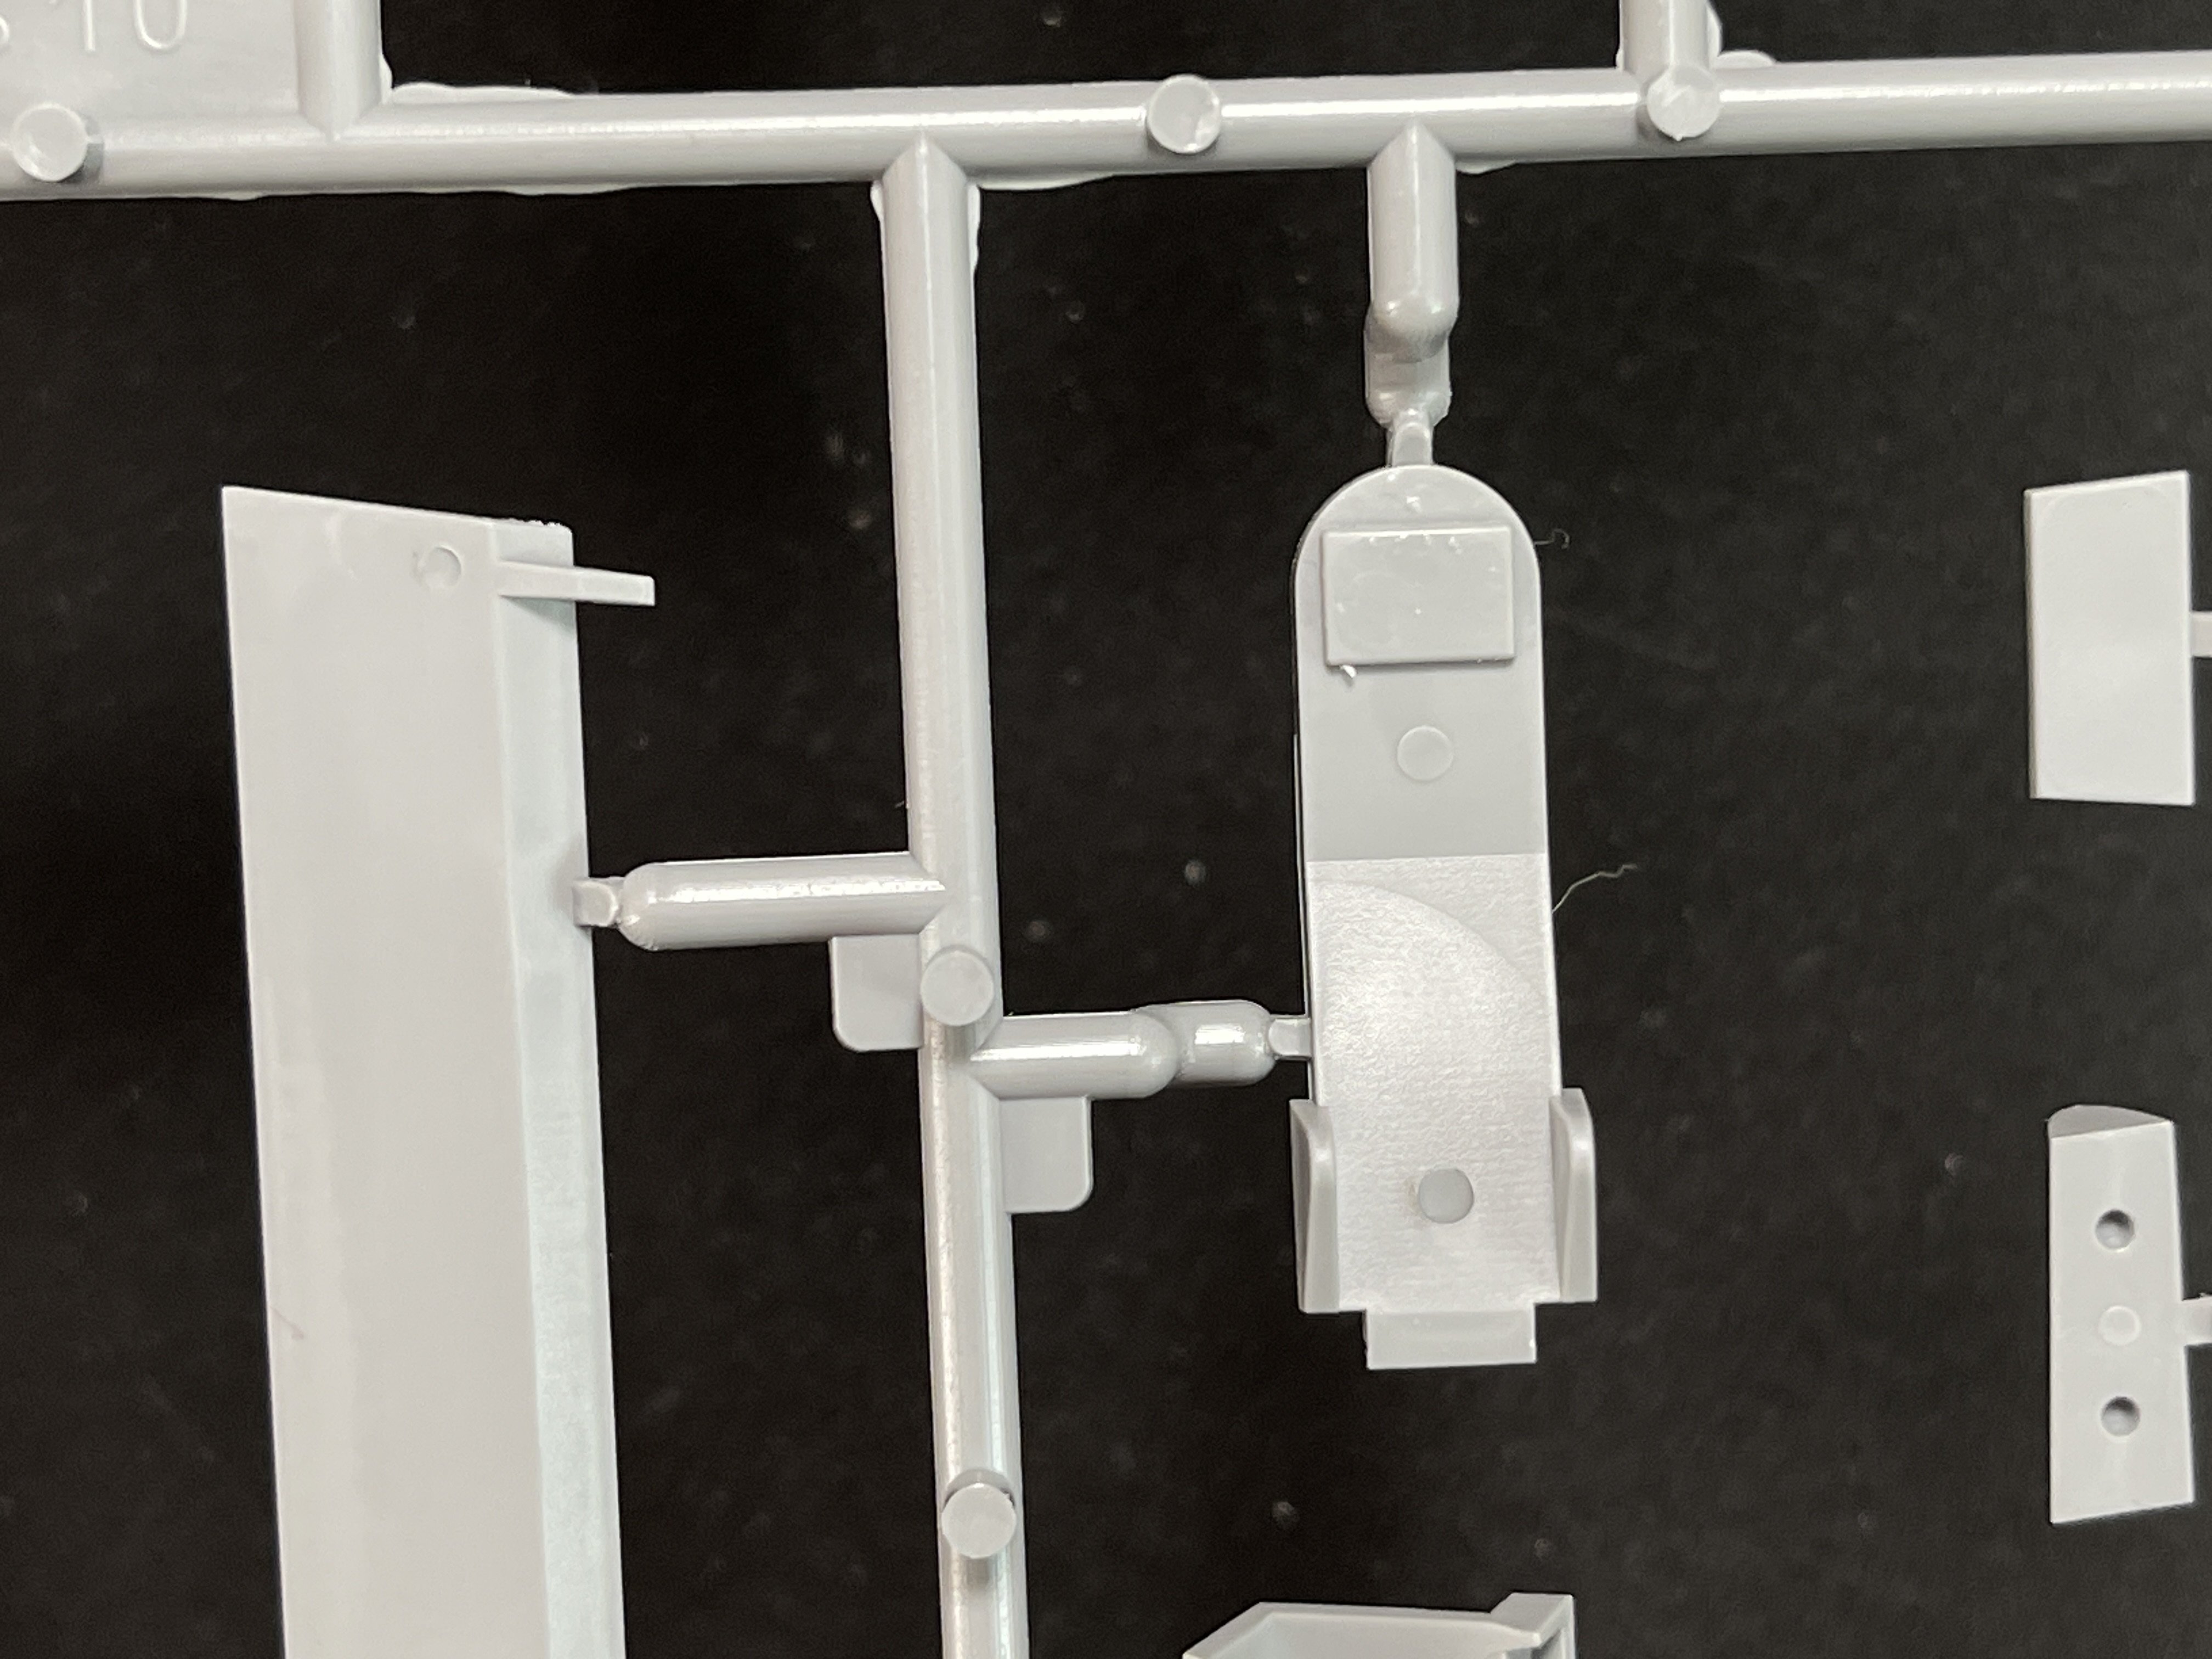
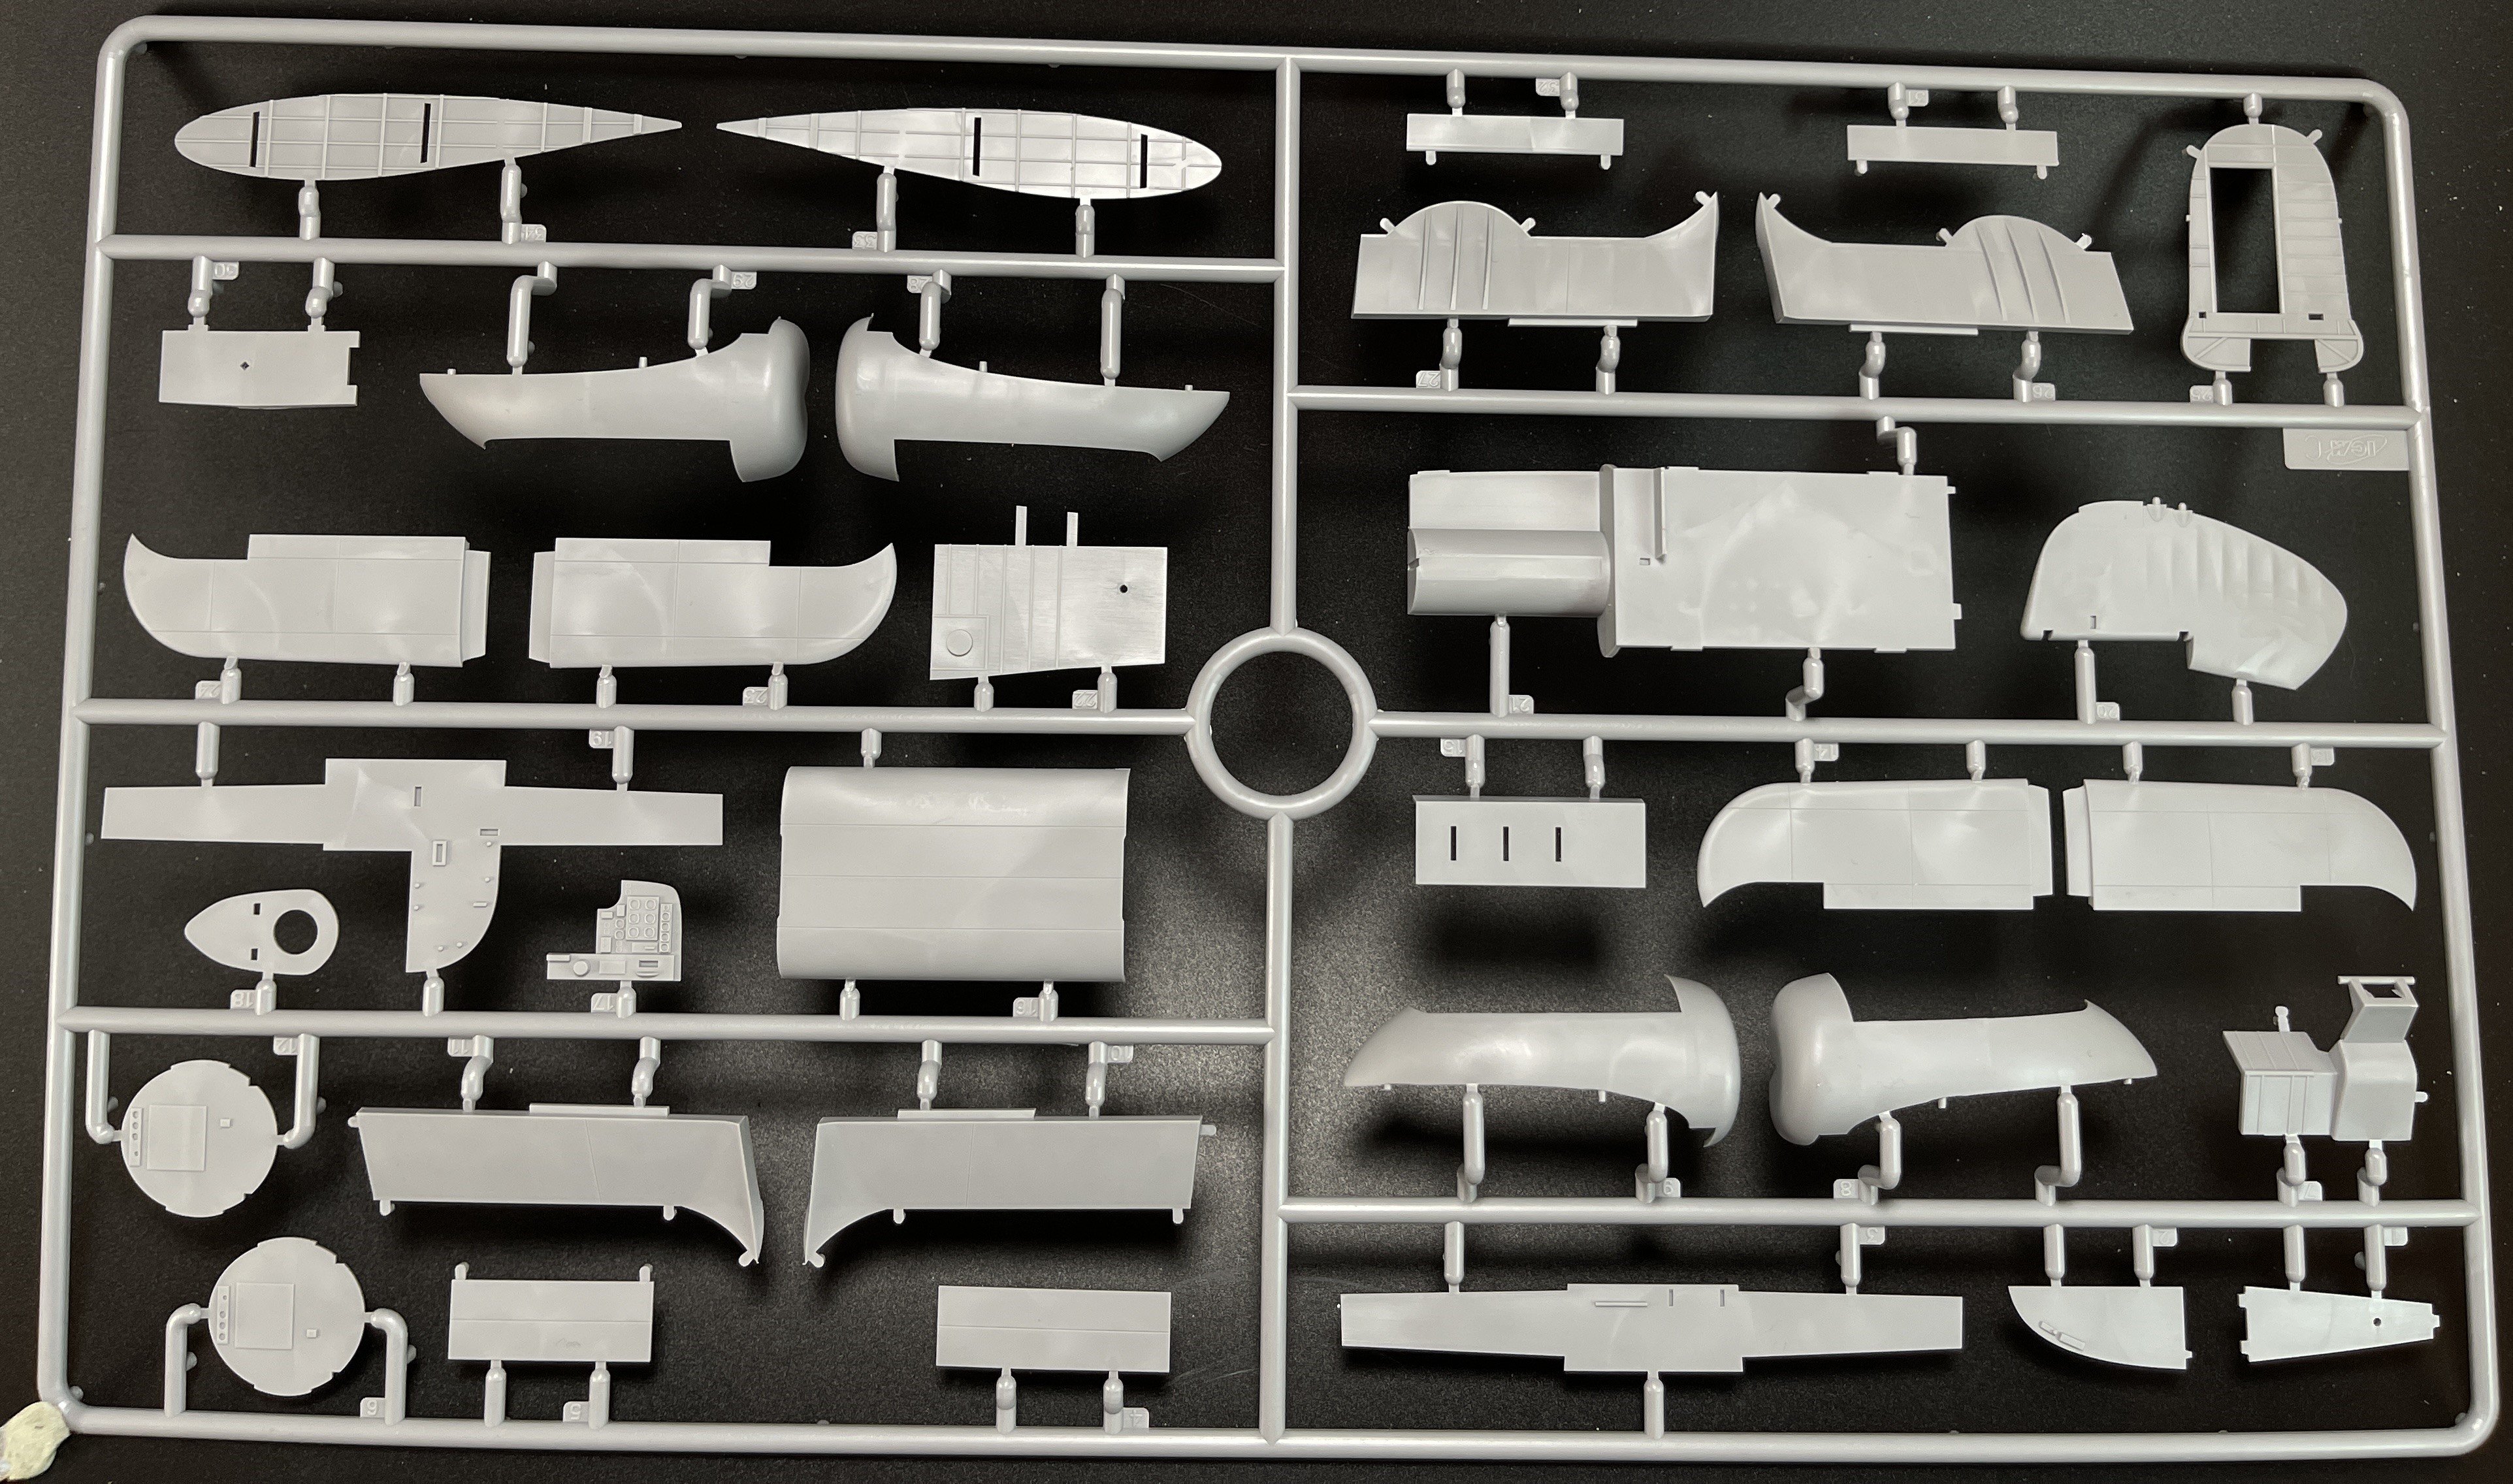
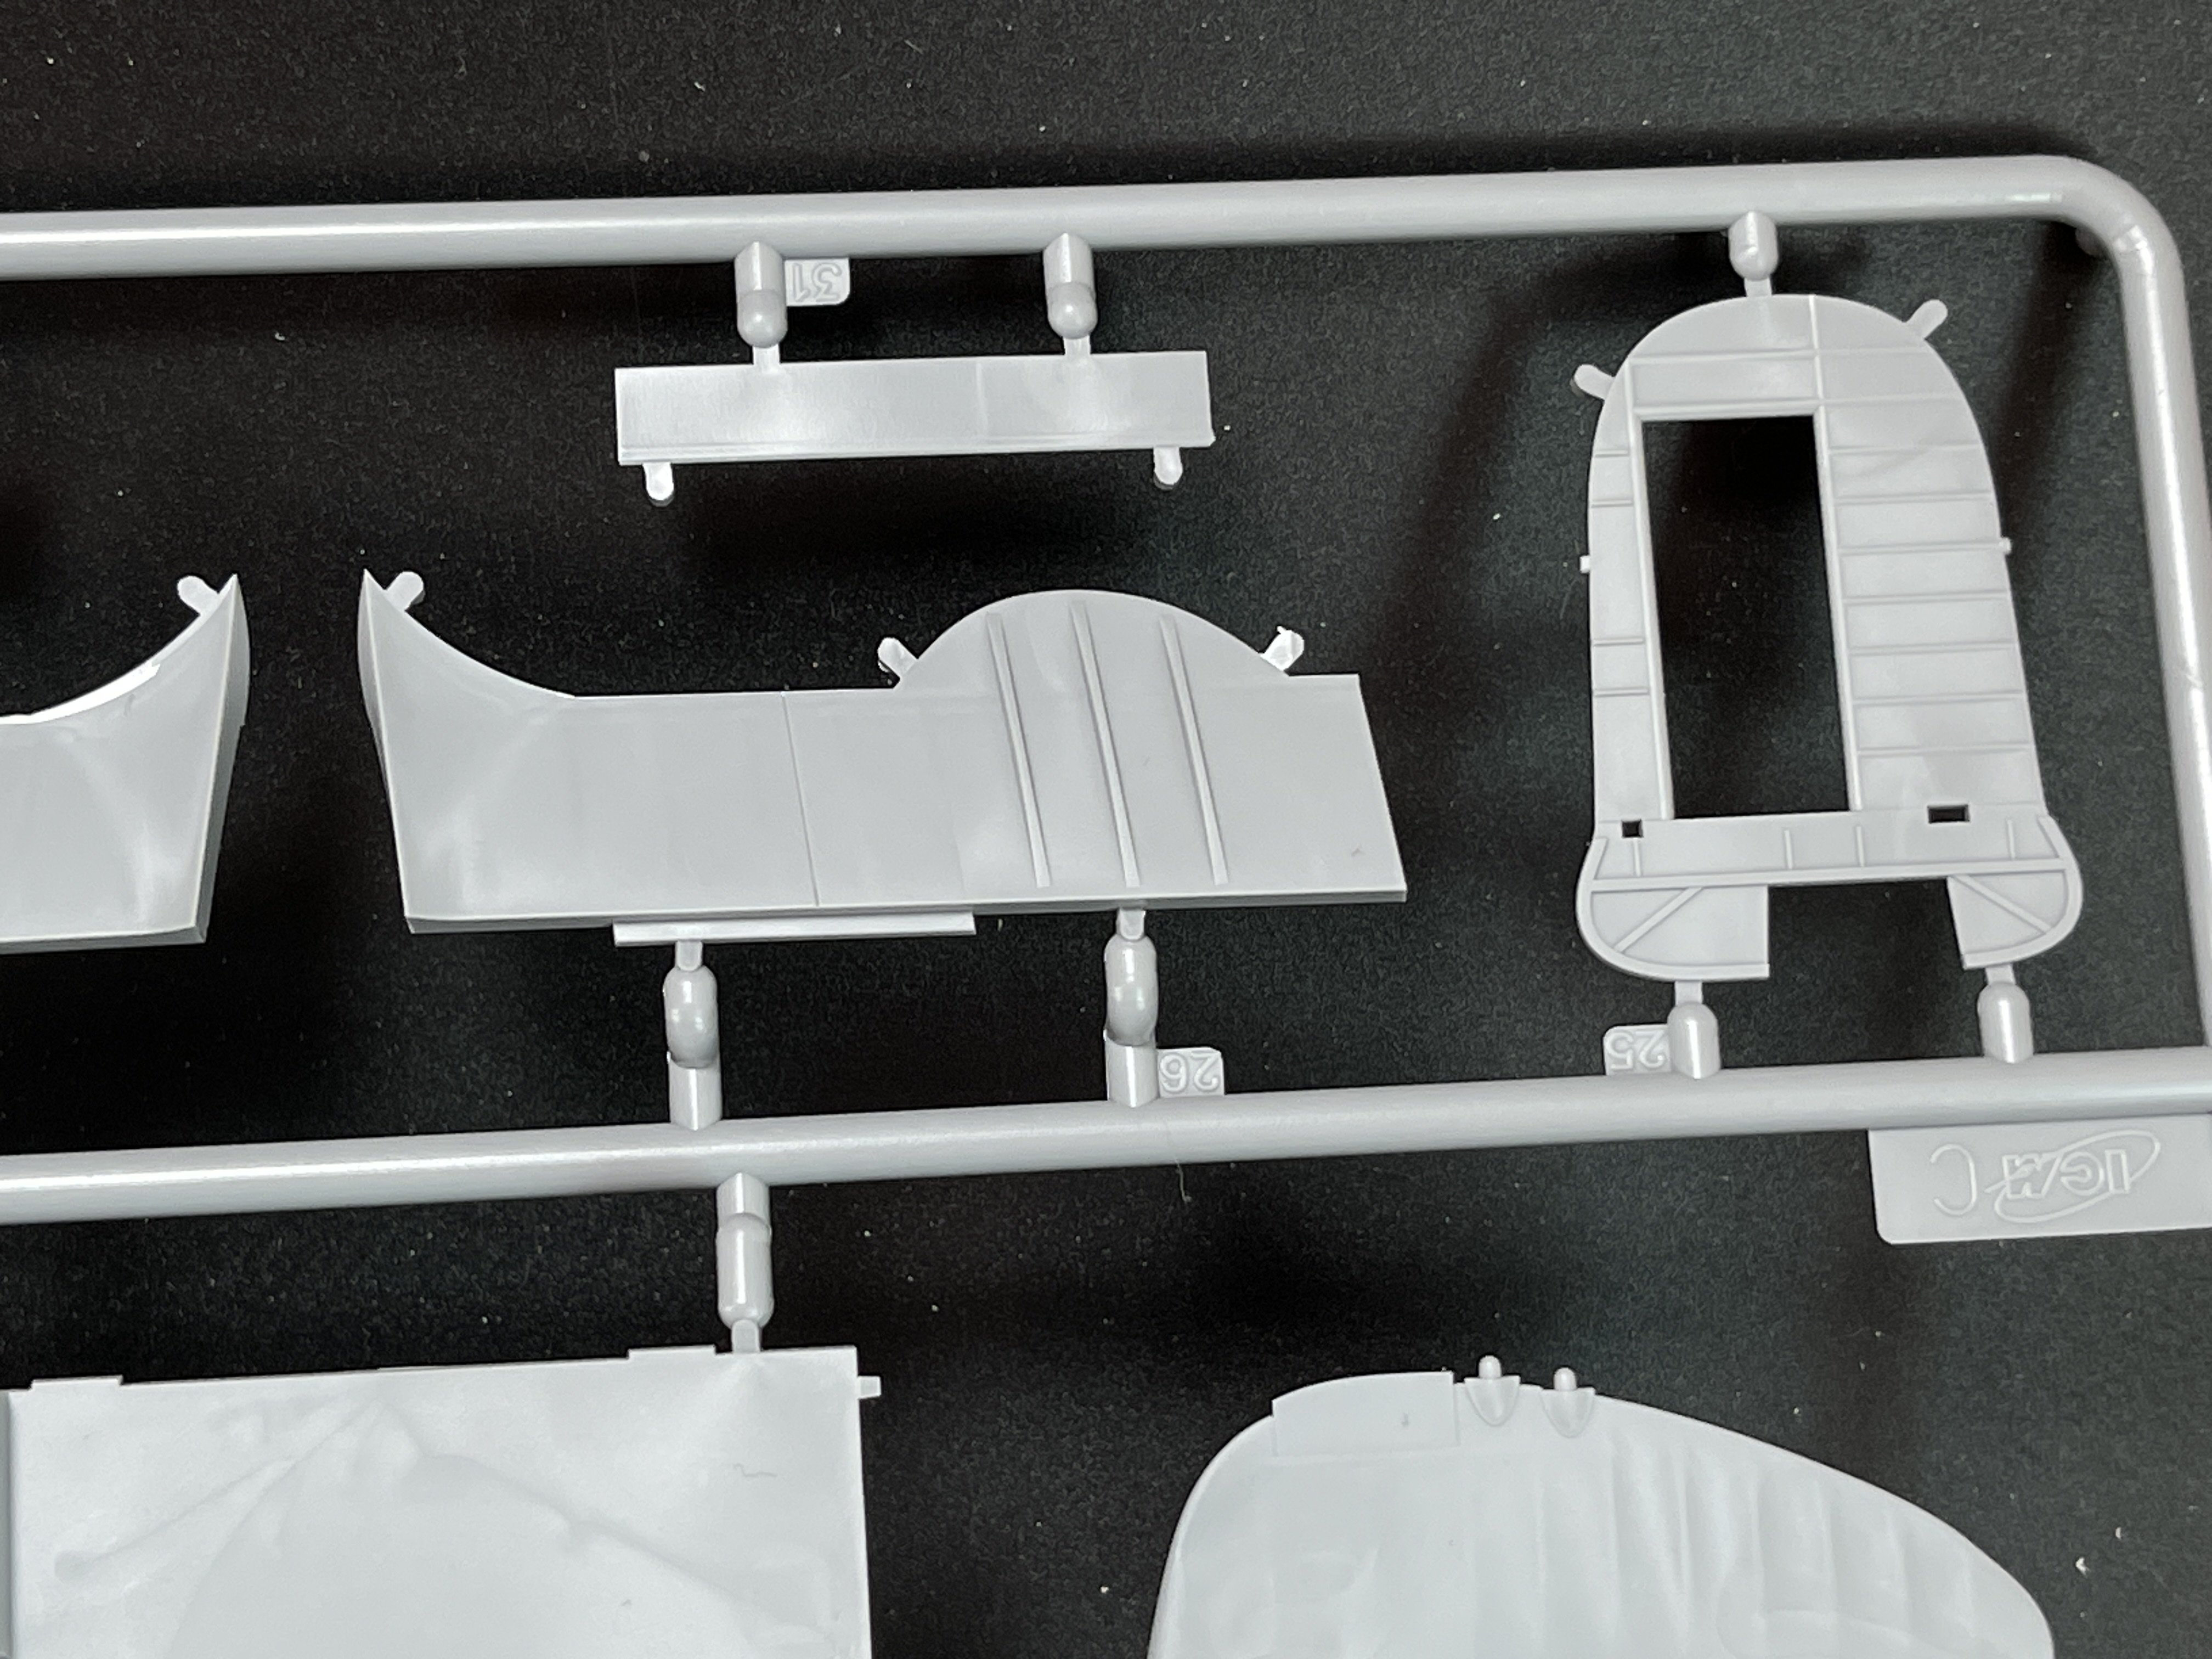
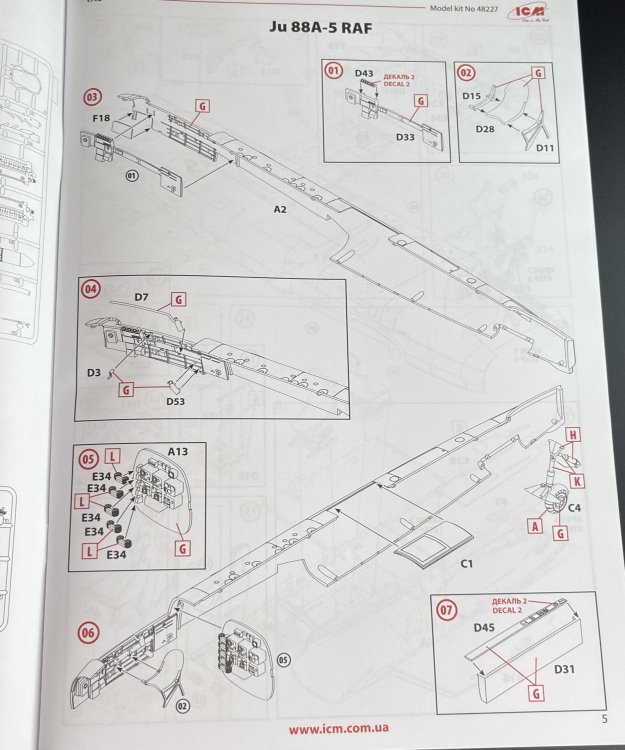
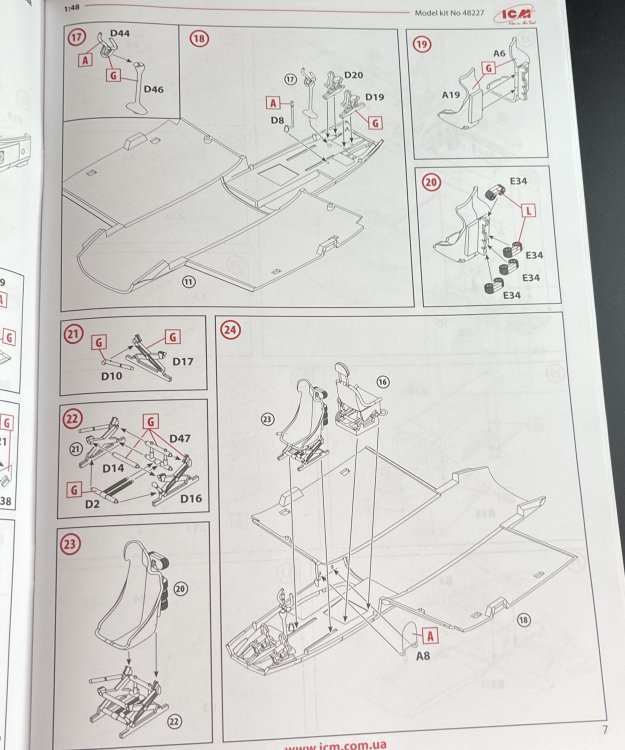
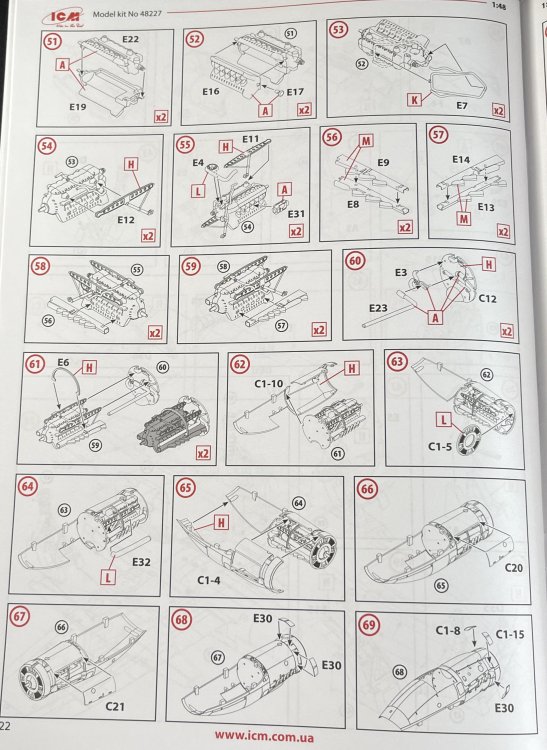
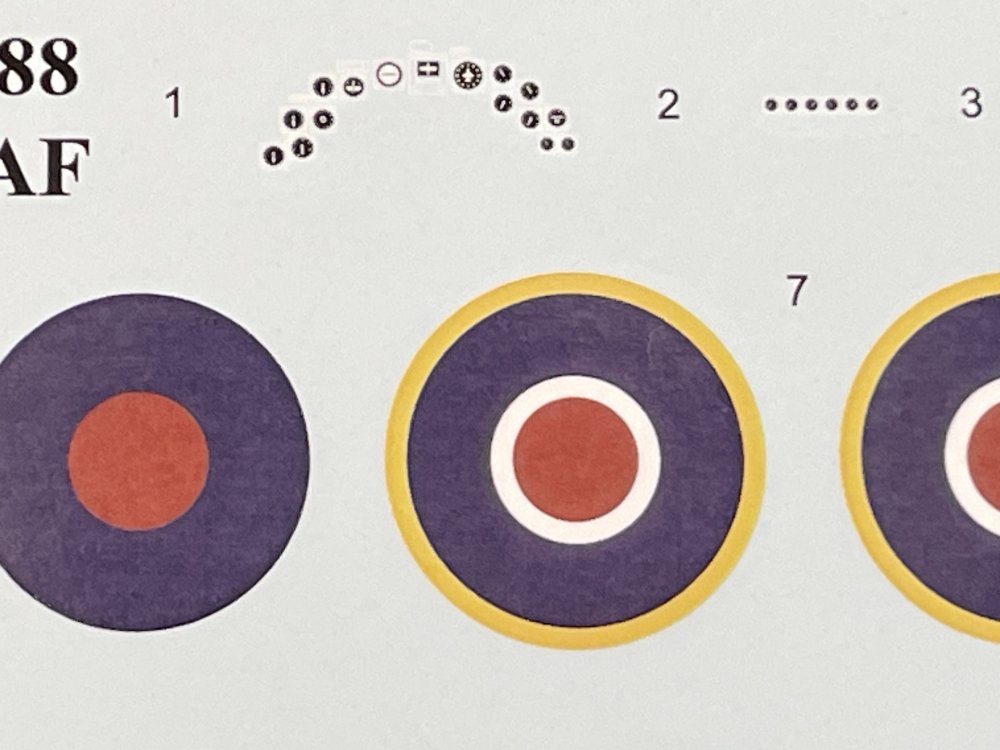
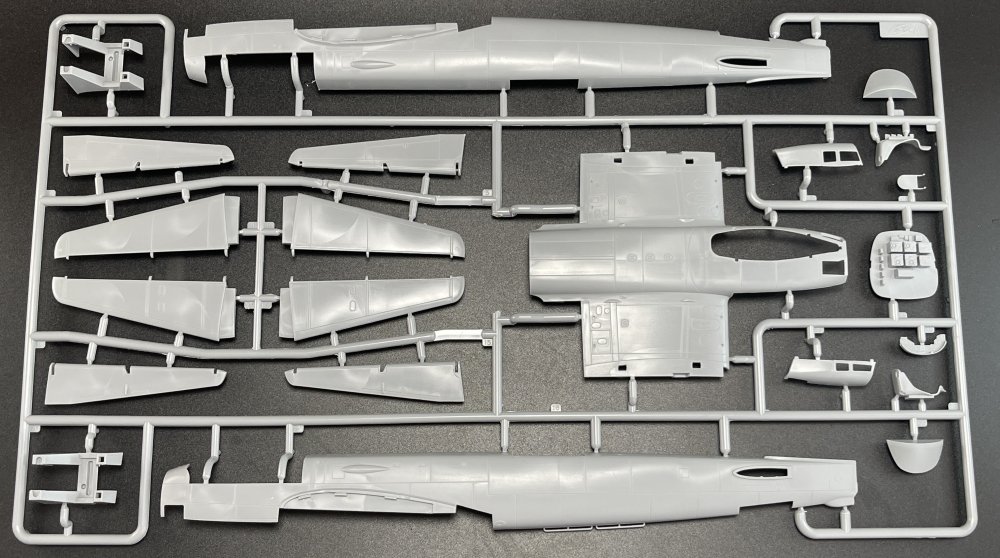
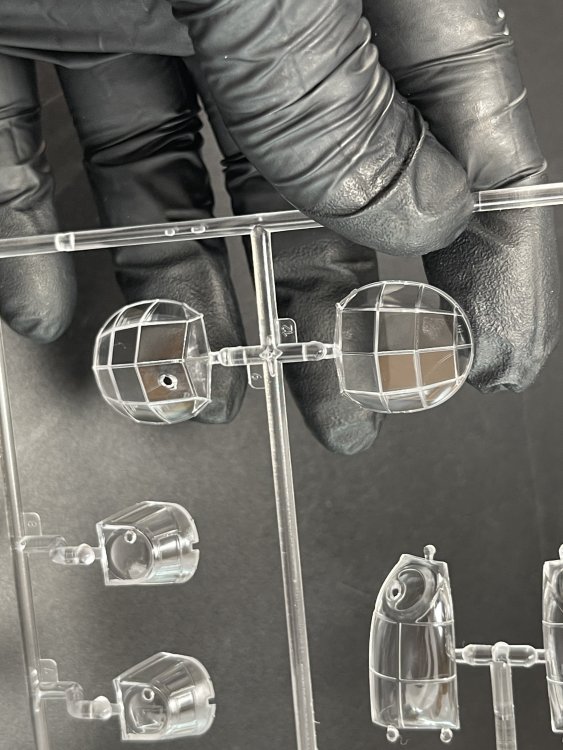
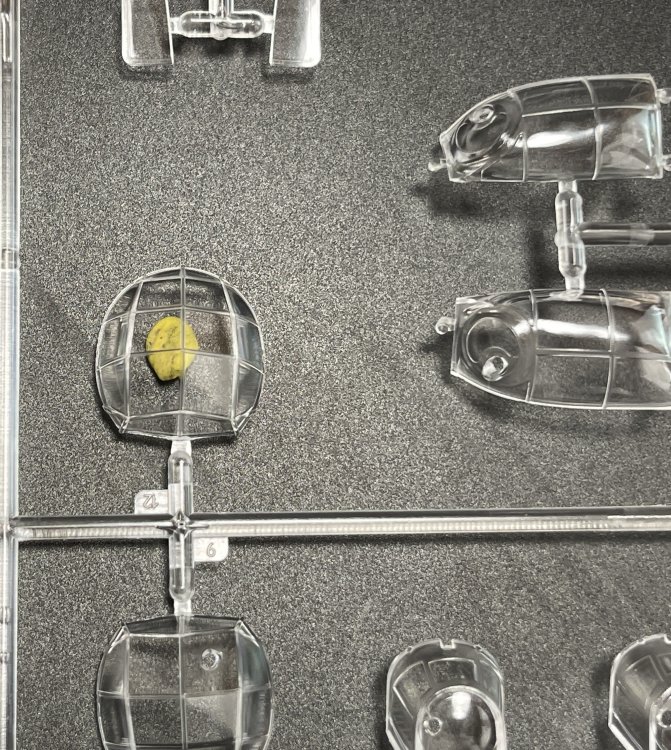
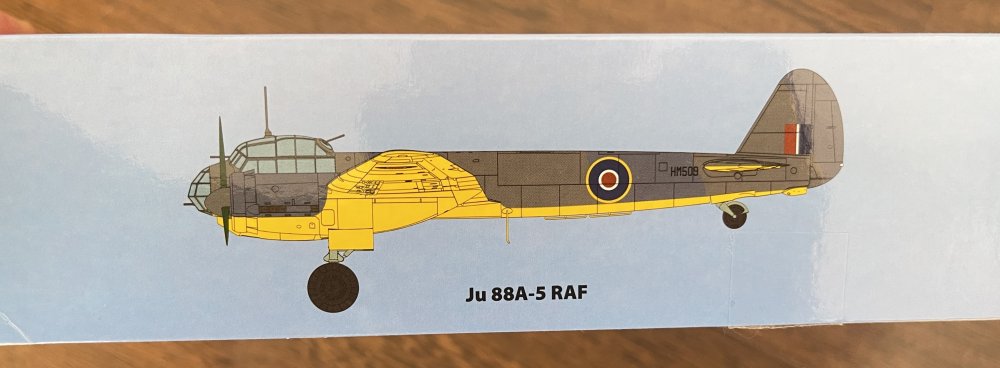
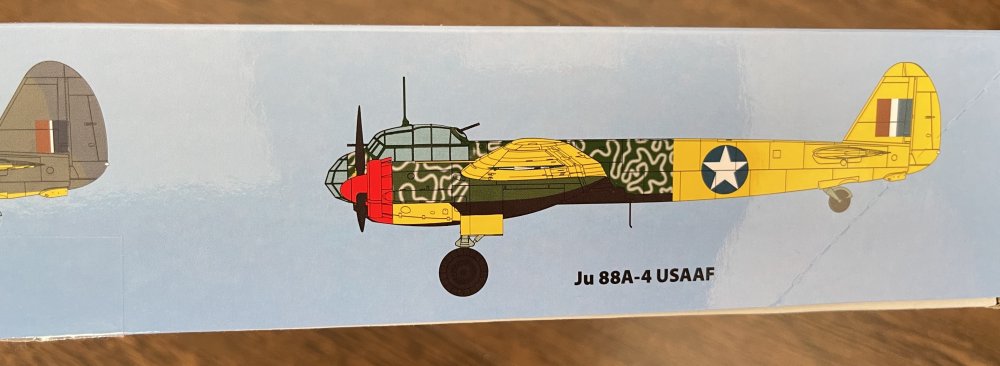
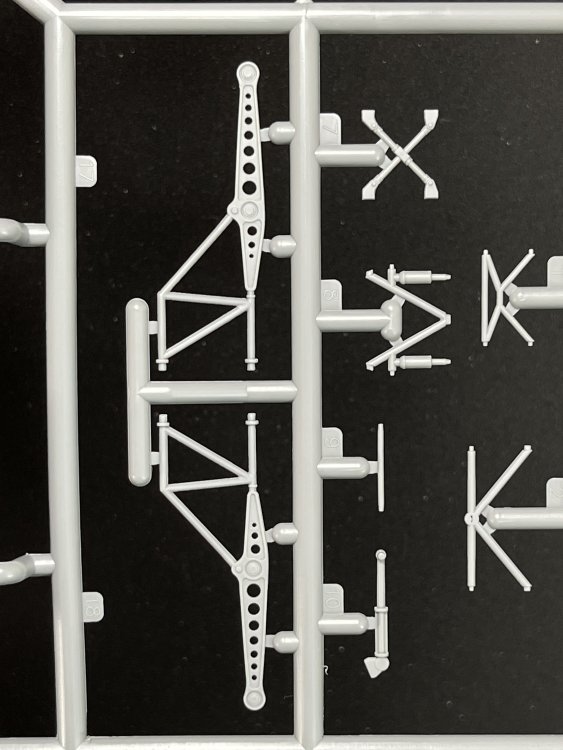
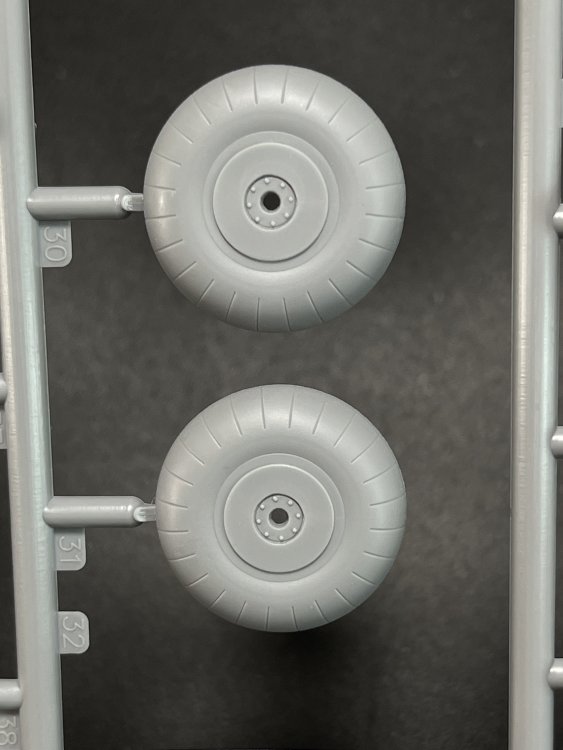
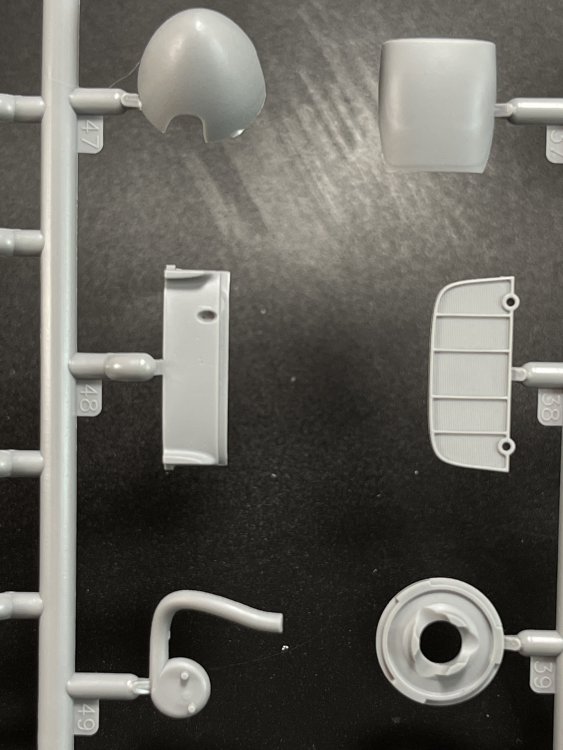
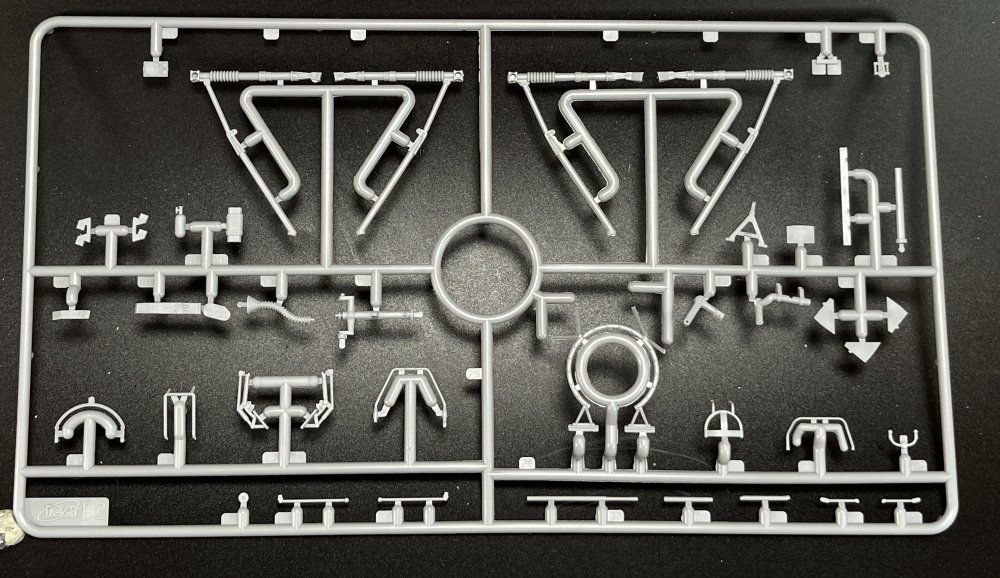
1:48 Junkers Ju-88 USAAF/RAF ICM Catalogue number 48227 Price: around 51€ Junkers Ju-88 was one of the most versatile aircraft of World War II, serving in various roles for the Luftwaffe, including bomber, dive bomber, night fighter, and reconnaissance aircraft. The ICM 1:48 Ju-88 USAAF/RAF Bomber kit (catalogue number 48227) focuses on a unique aspect of the Ju-88’s history: captured aircraft operated by the United States Army Air Forces (USAAF) and Royal Air Force (RAF). Now check this out that I found on the internet. Lovely diorama possibiliy. I was very curious about this release mainly because of the striking scheme that shows in the boxart and curious about these “different” schemes. But first, let´s check the plastic. The plastic sprues are molded in grey plastic with minimal flash and clean mold lines. The grey plastic is of excellent quality, with crisp details and minimal flash. Ejector pin marks are strategically placed to avoid visible areas after assembly. Surface detail is finely engraved, with recessed detail subtle but well marked. The cockpit is well-detailed, featuring molded instrument panels, control yokes, and seats. The sidewalls include structural details, adding realism to the interior. The wings feature detailed wheel wells and accurate aileron/flap lines. The kit includes options for different underwing configurations, such as bomb racks or fuel tanks. You will also get two detailed Jumo 211 engines, though they are not fully exposed unless the cowlings are left off. The engine nacelles are well-designed, with accurate cooling flaps and exhausts. ICM doesn’t gives you the open options to see those beautiful engines in the instructions but with some references I think its possible to do it. The landing gear constructions gives a very robust one with lots of details on structs. Some pictures of airbrakes Clear parts, such as the canopy and nose glazing, are crystal clear and free of distortions, though careful handling is required specially when to glue into one another. This release offer a two schemes in a single decals sheets, dcecals with good color registrations and density, and very good definition. The schemes are: - Ju-88 A-5 HM509, n.º 1426 (enemy aircraft) Flight RAF, Collyweston, 1942 - Ju-88A-4 , 86th Fighter Squadron USAAF, Foggia, October 1943; As for the instructions booklet, is a typical ICM offering with good drawings, good parts place indication, with clear assembly steps. detailed, multi-page instruction manual with clear assembly steps and good color callouts (only with ICM paints) Conclusion Another winner here from ICM as far I concern. It’s a very striking Ju-88, different from all other and it will stand out in your collection. And that picture is calling for a diorama, at least for me. This model is going to the top of to do pile! The detail out of the box is very good and it will make a very good replica. You can get full engine out straight from the box. For the expert and keen modeler some AM will make some extra detail to make this beauty into a masterpiece if you have a very stedy hand for that camouflage. That`s is a real challenge but a really good one! Highly recommend this to intermediate/expert modeler My deepest Thanks to ICM for bringing the subject into model kit form.


-
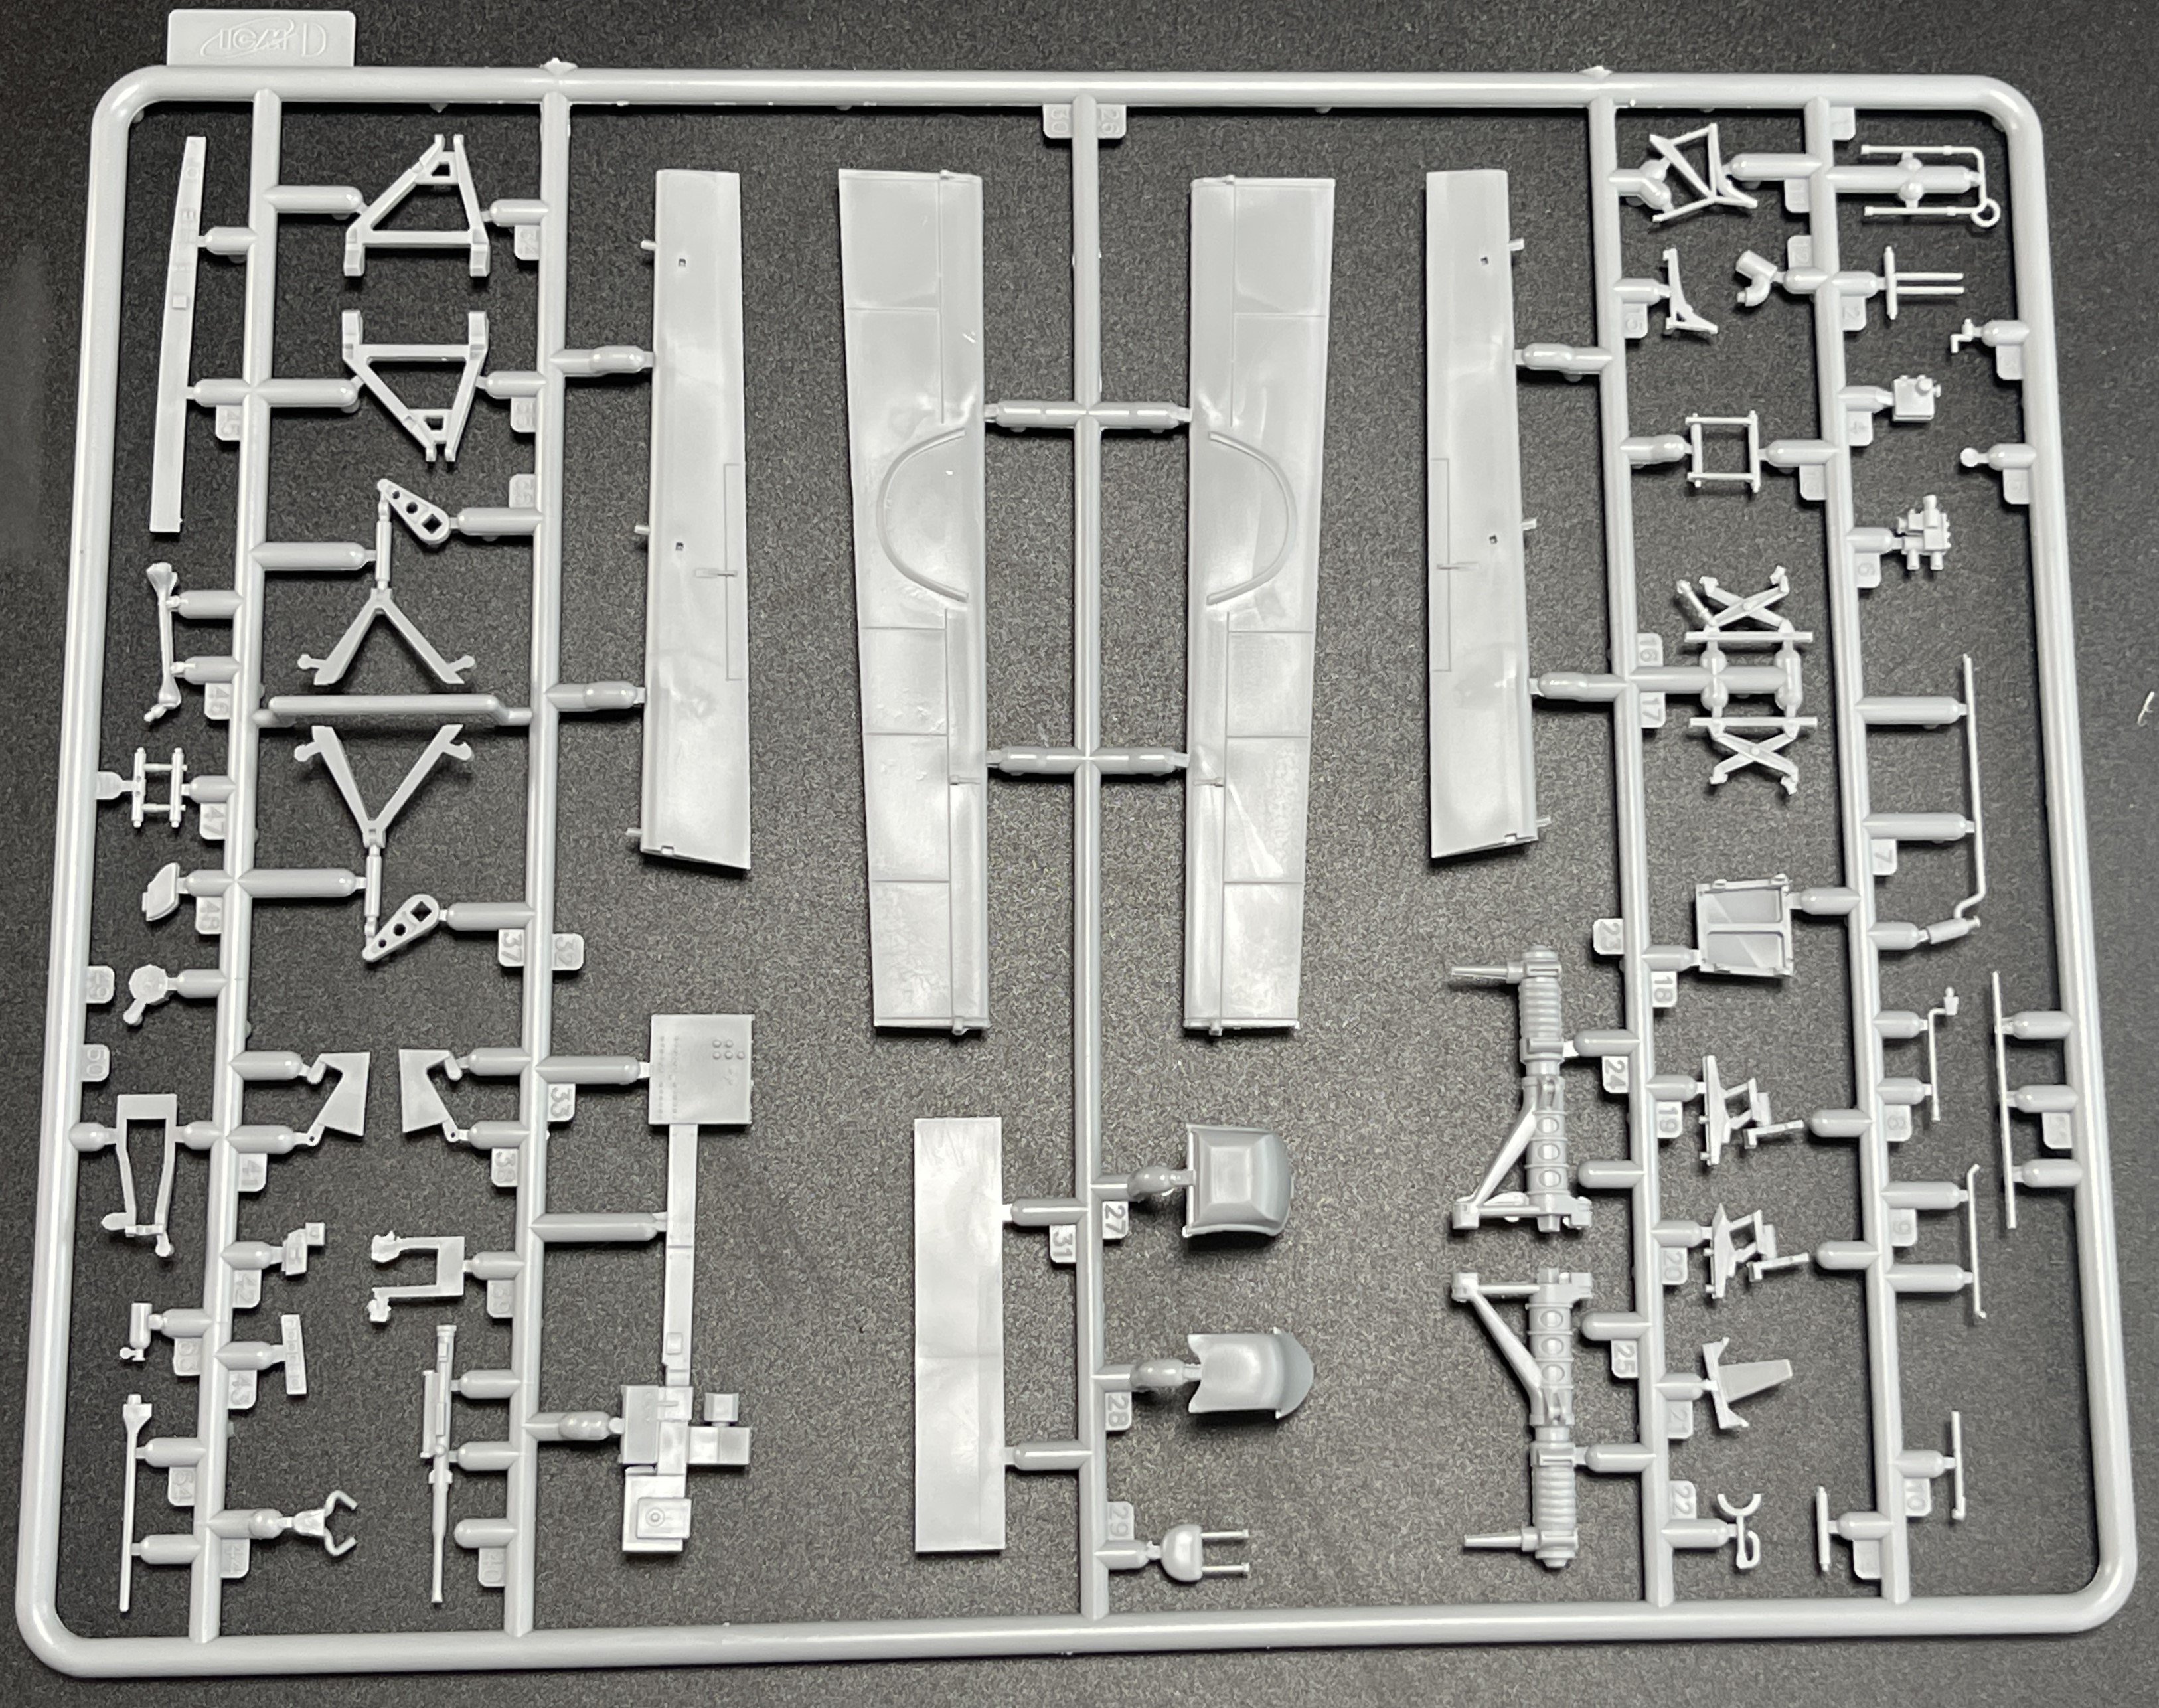
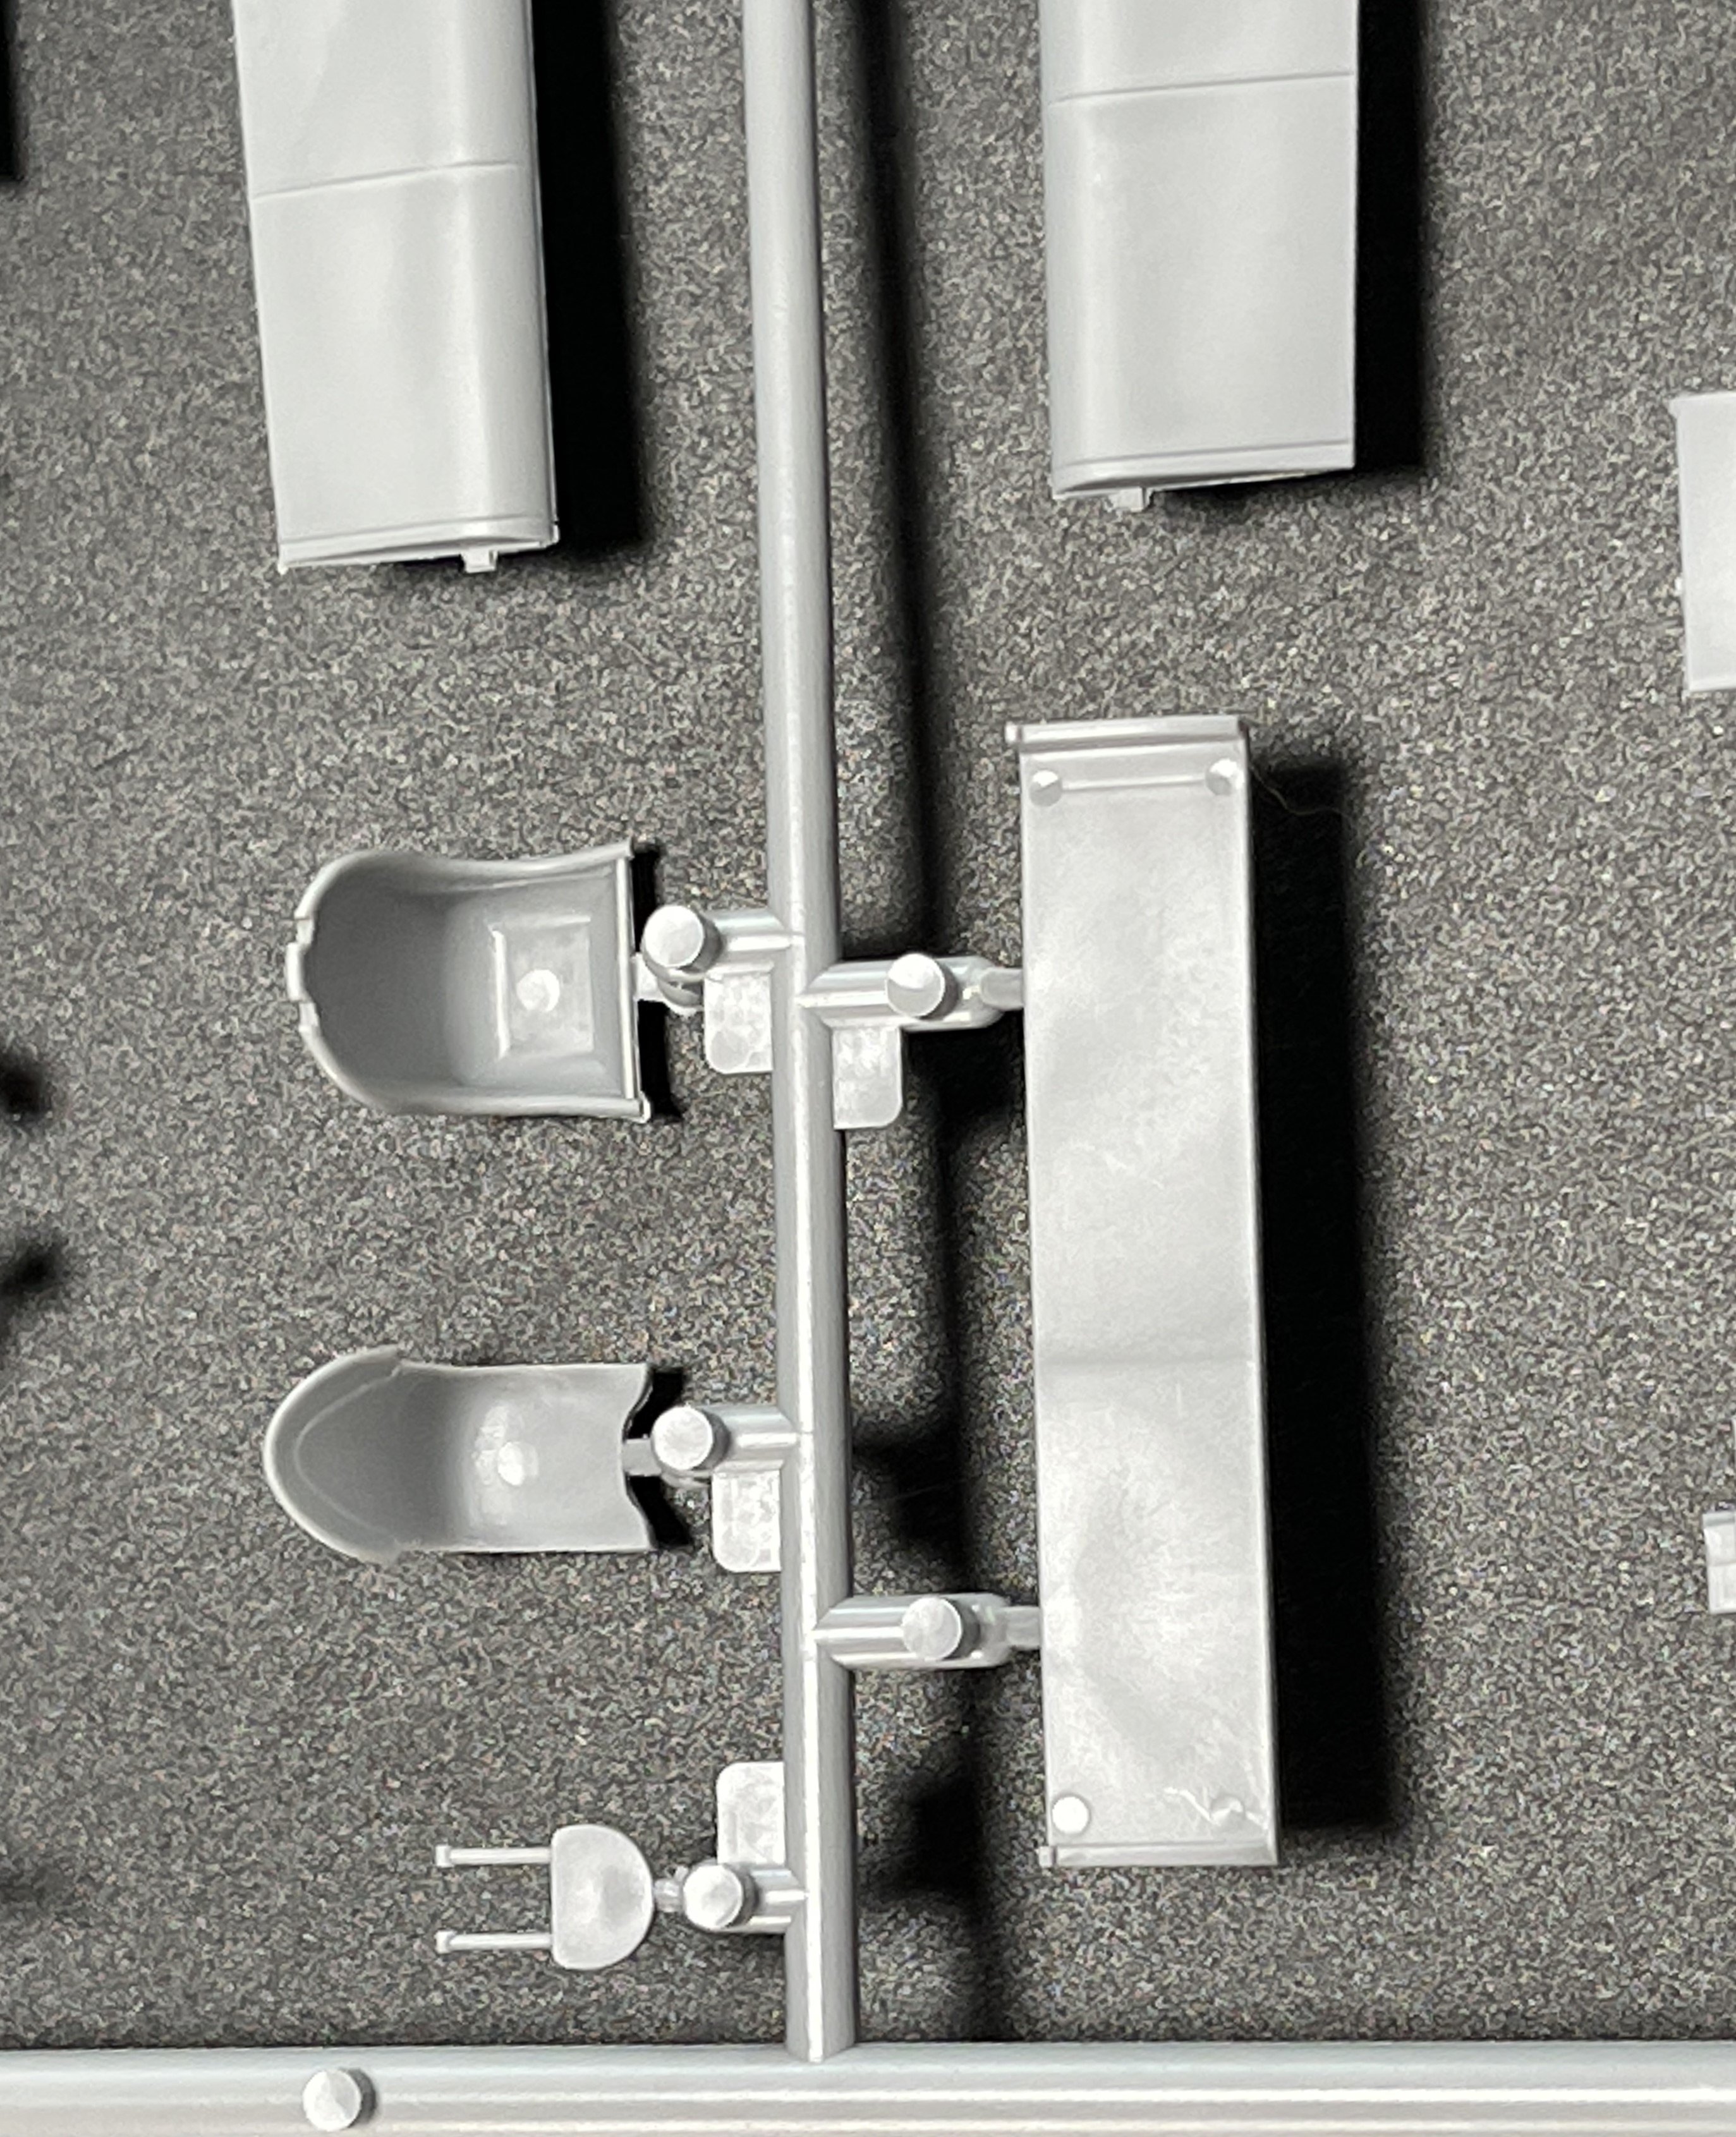
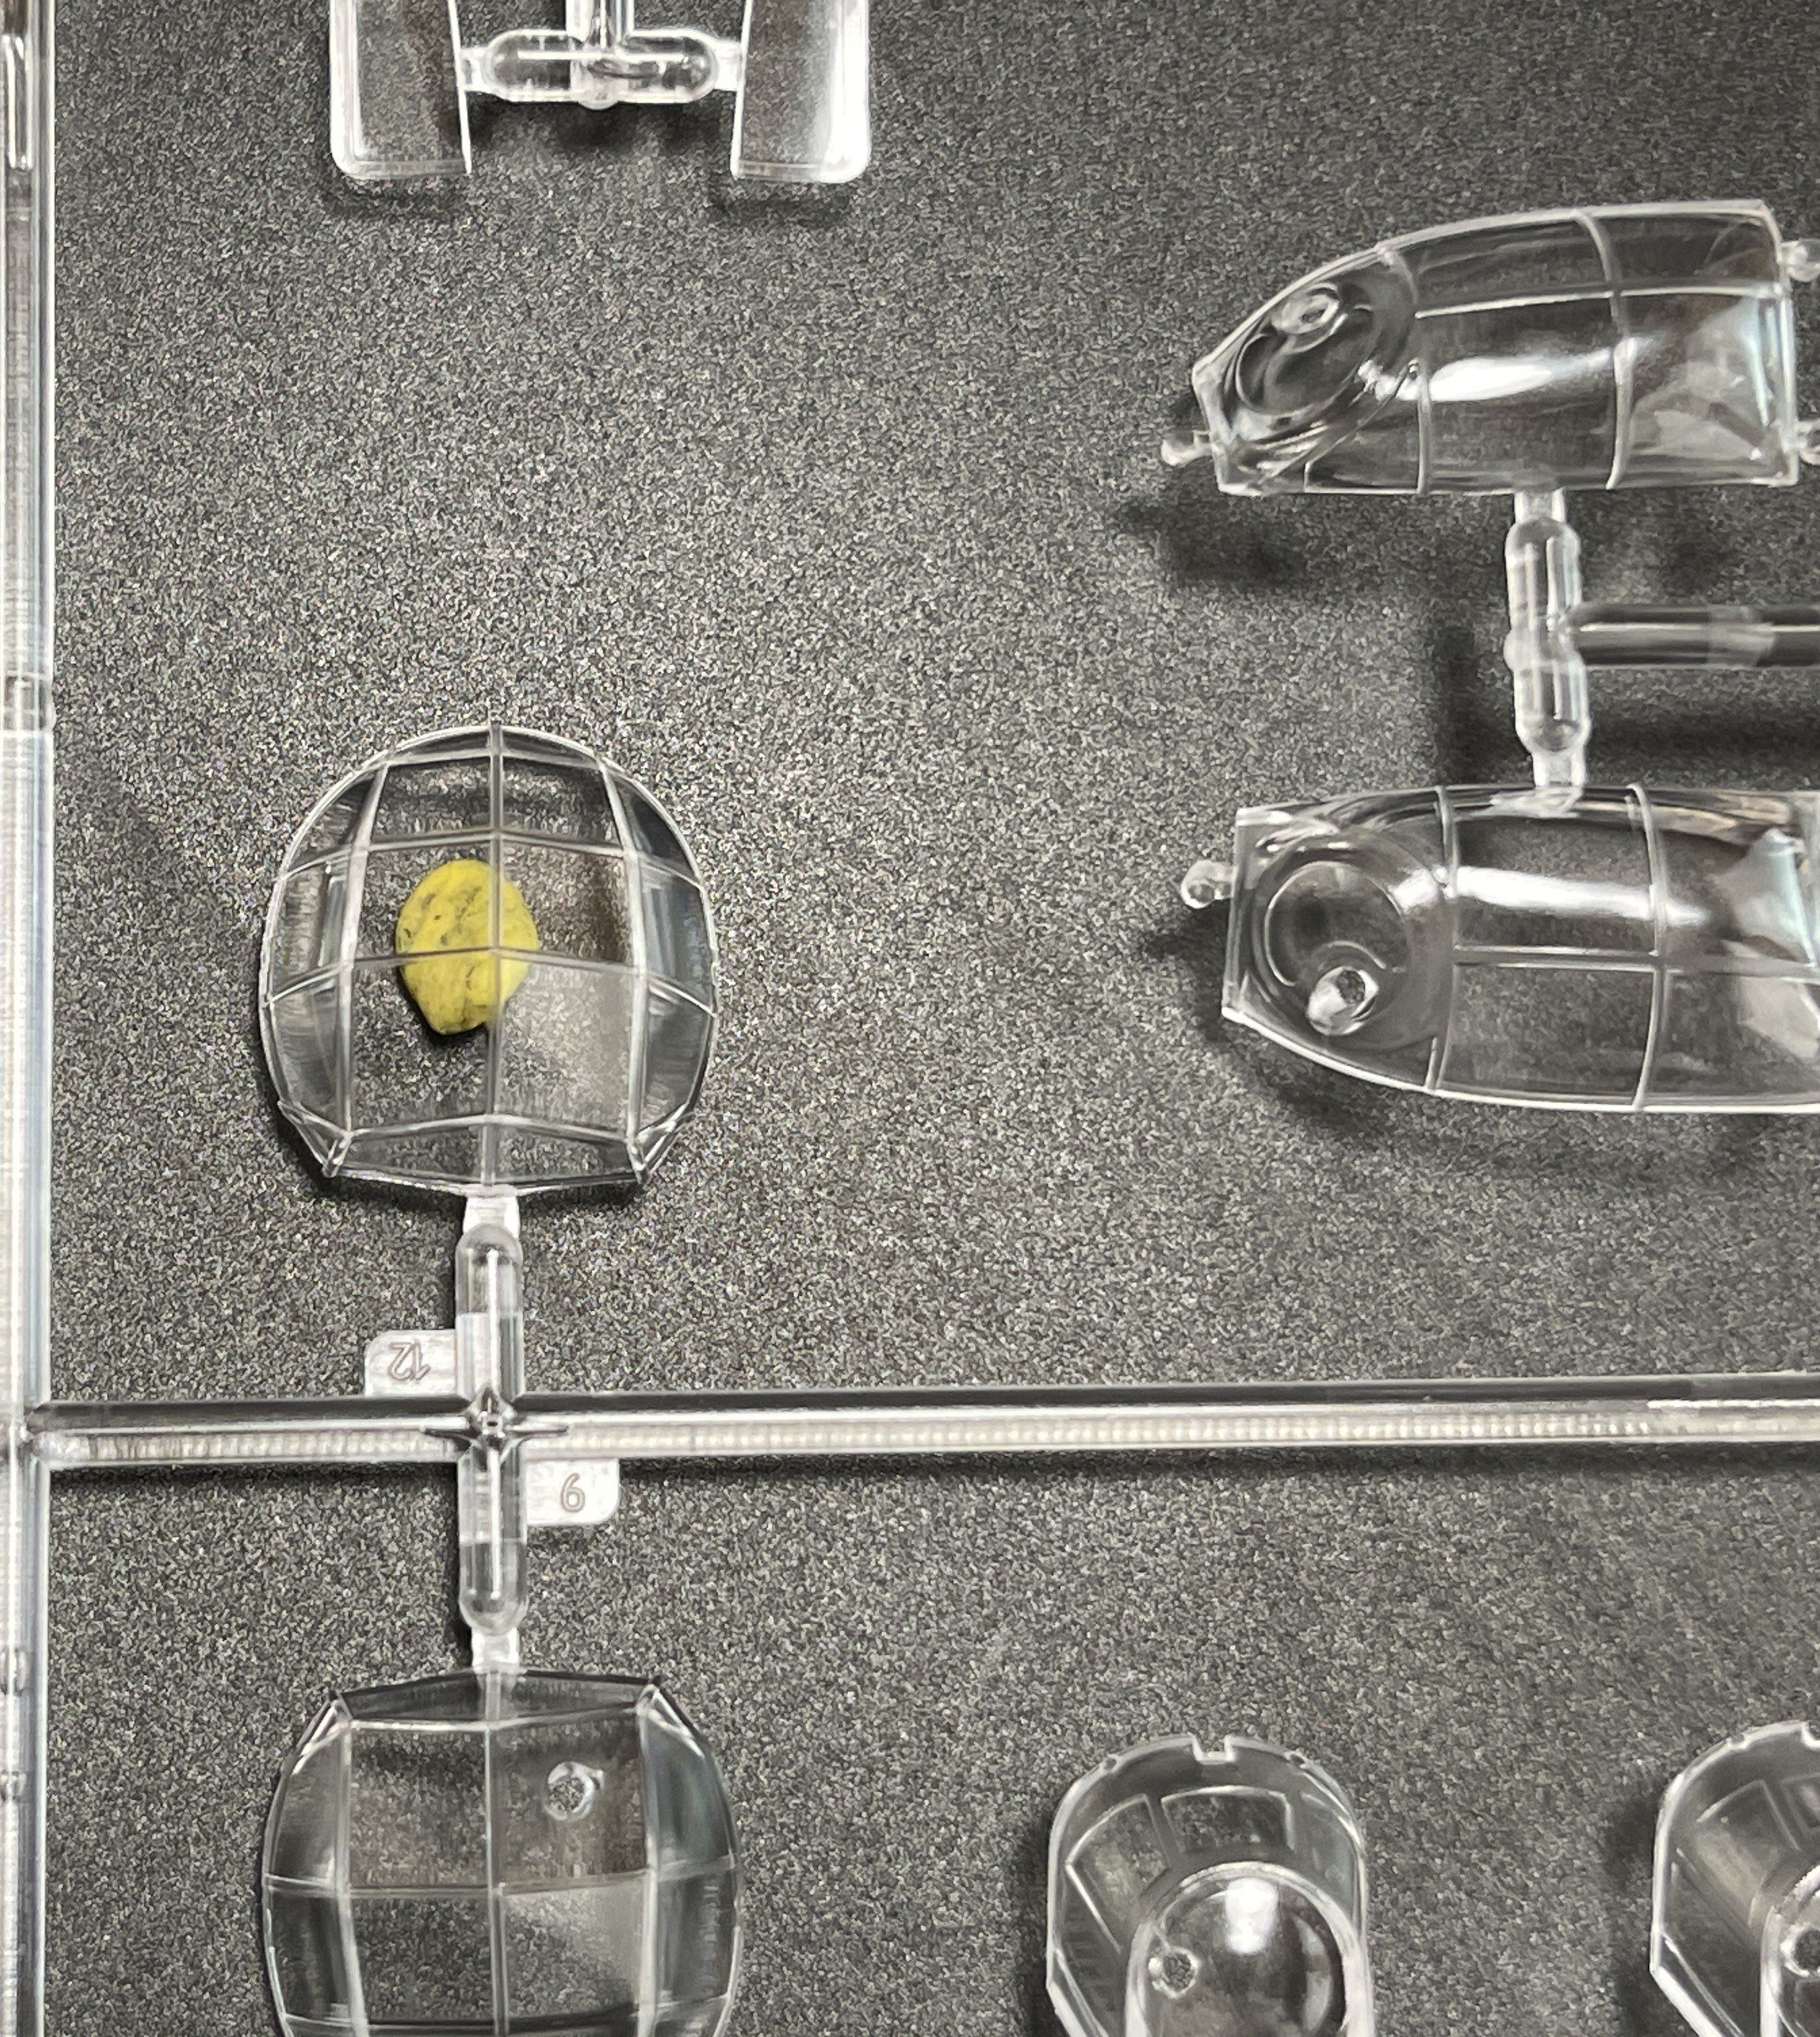
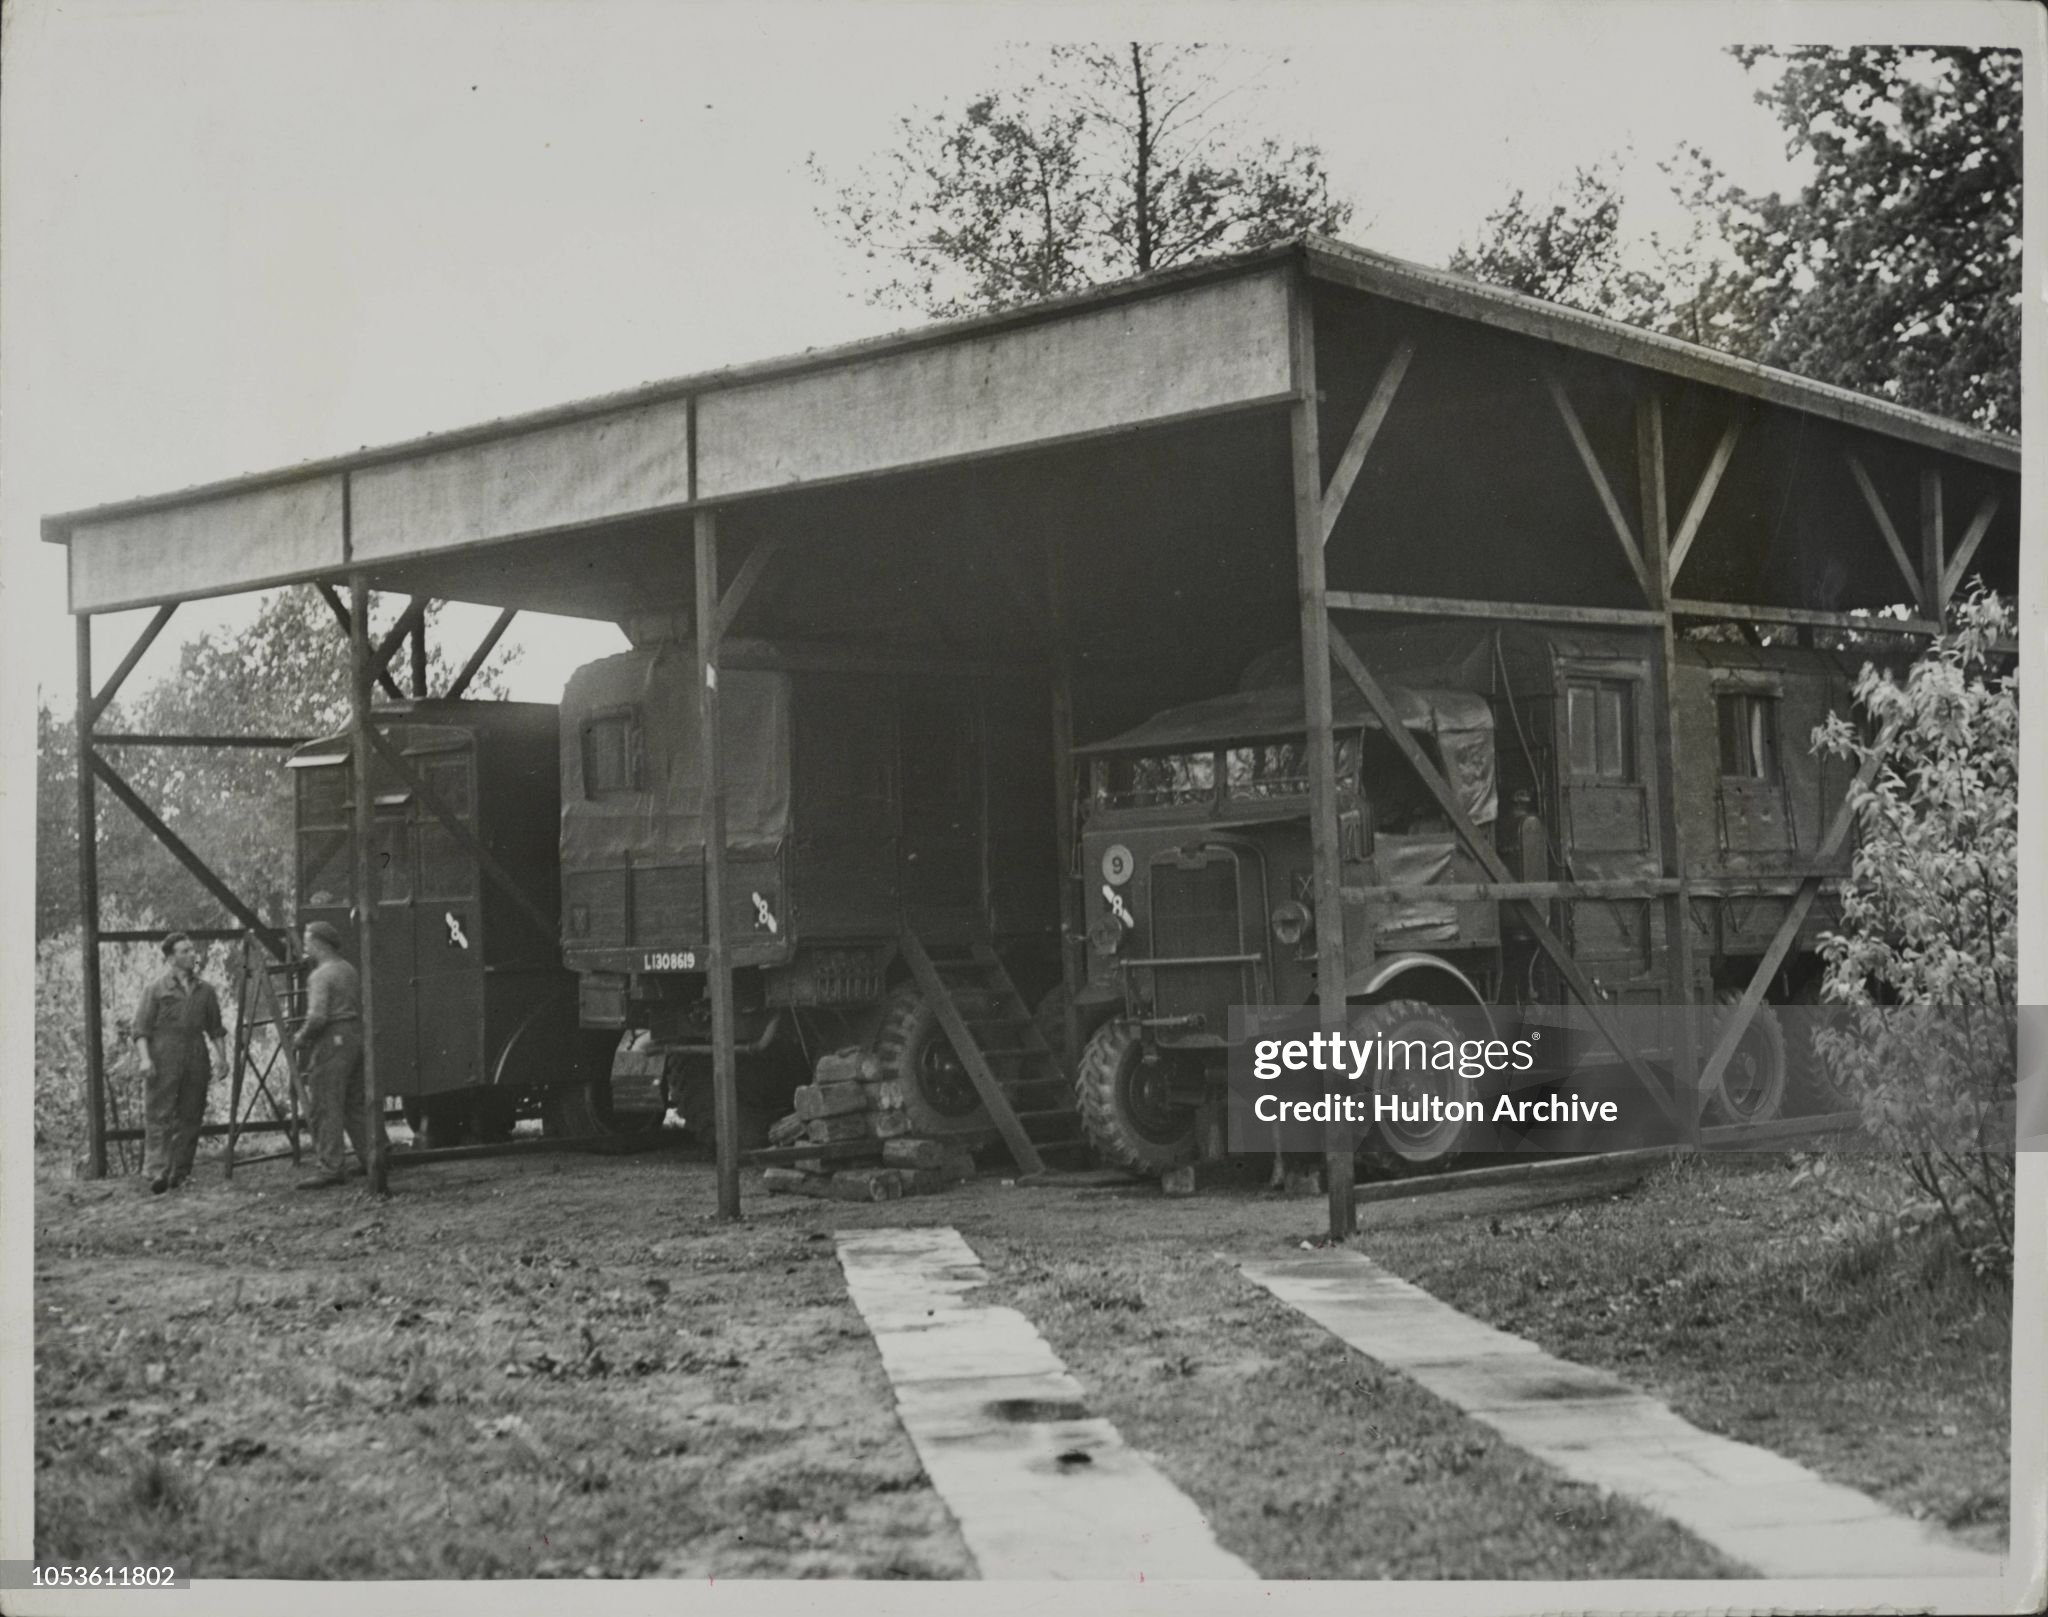
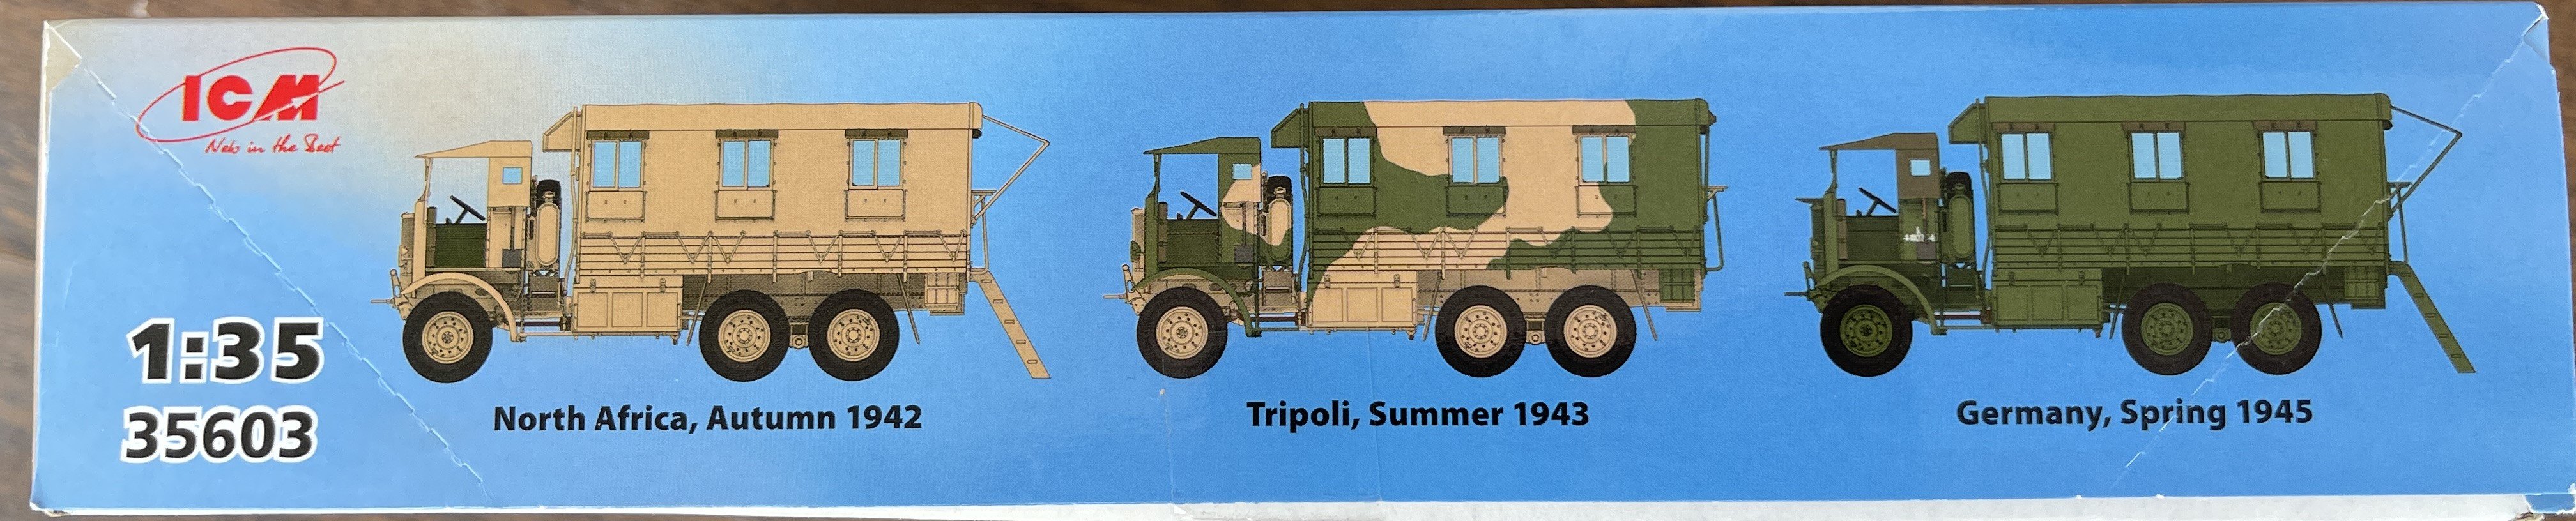
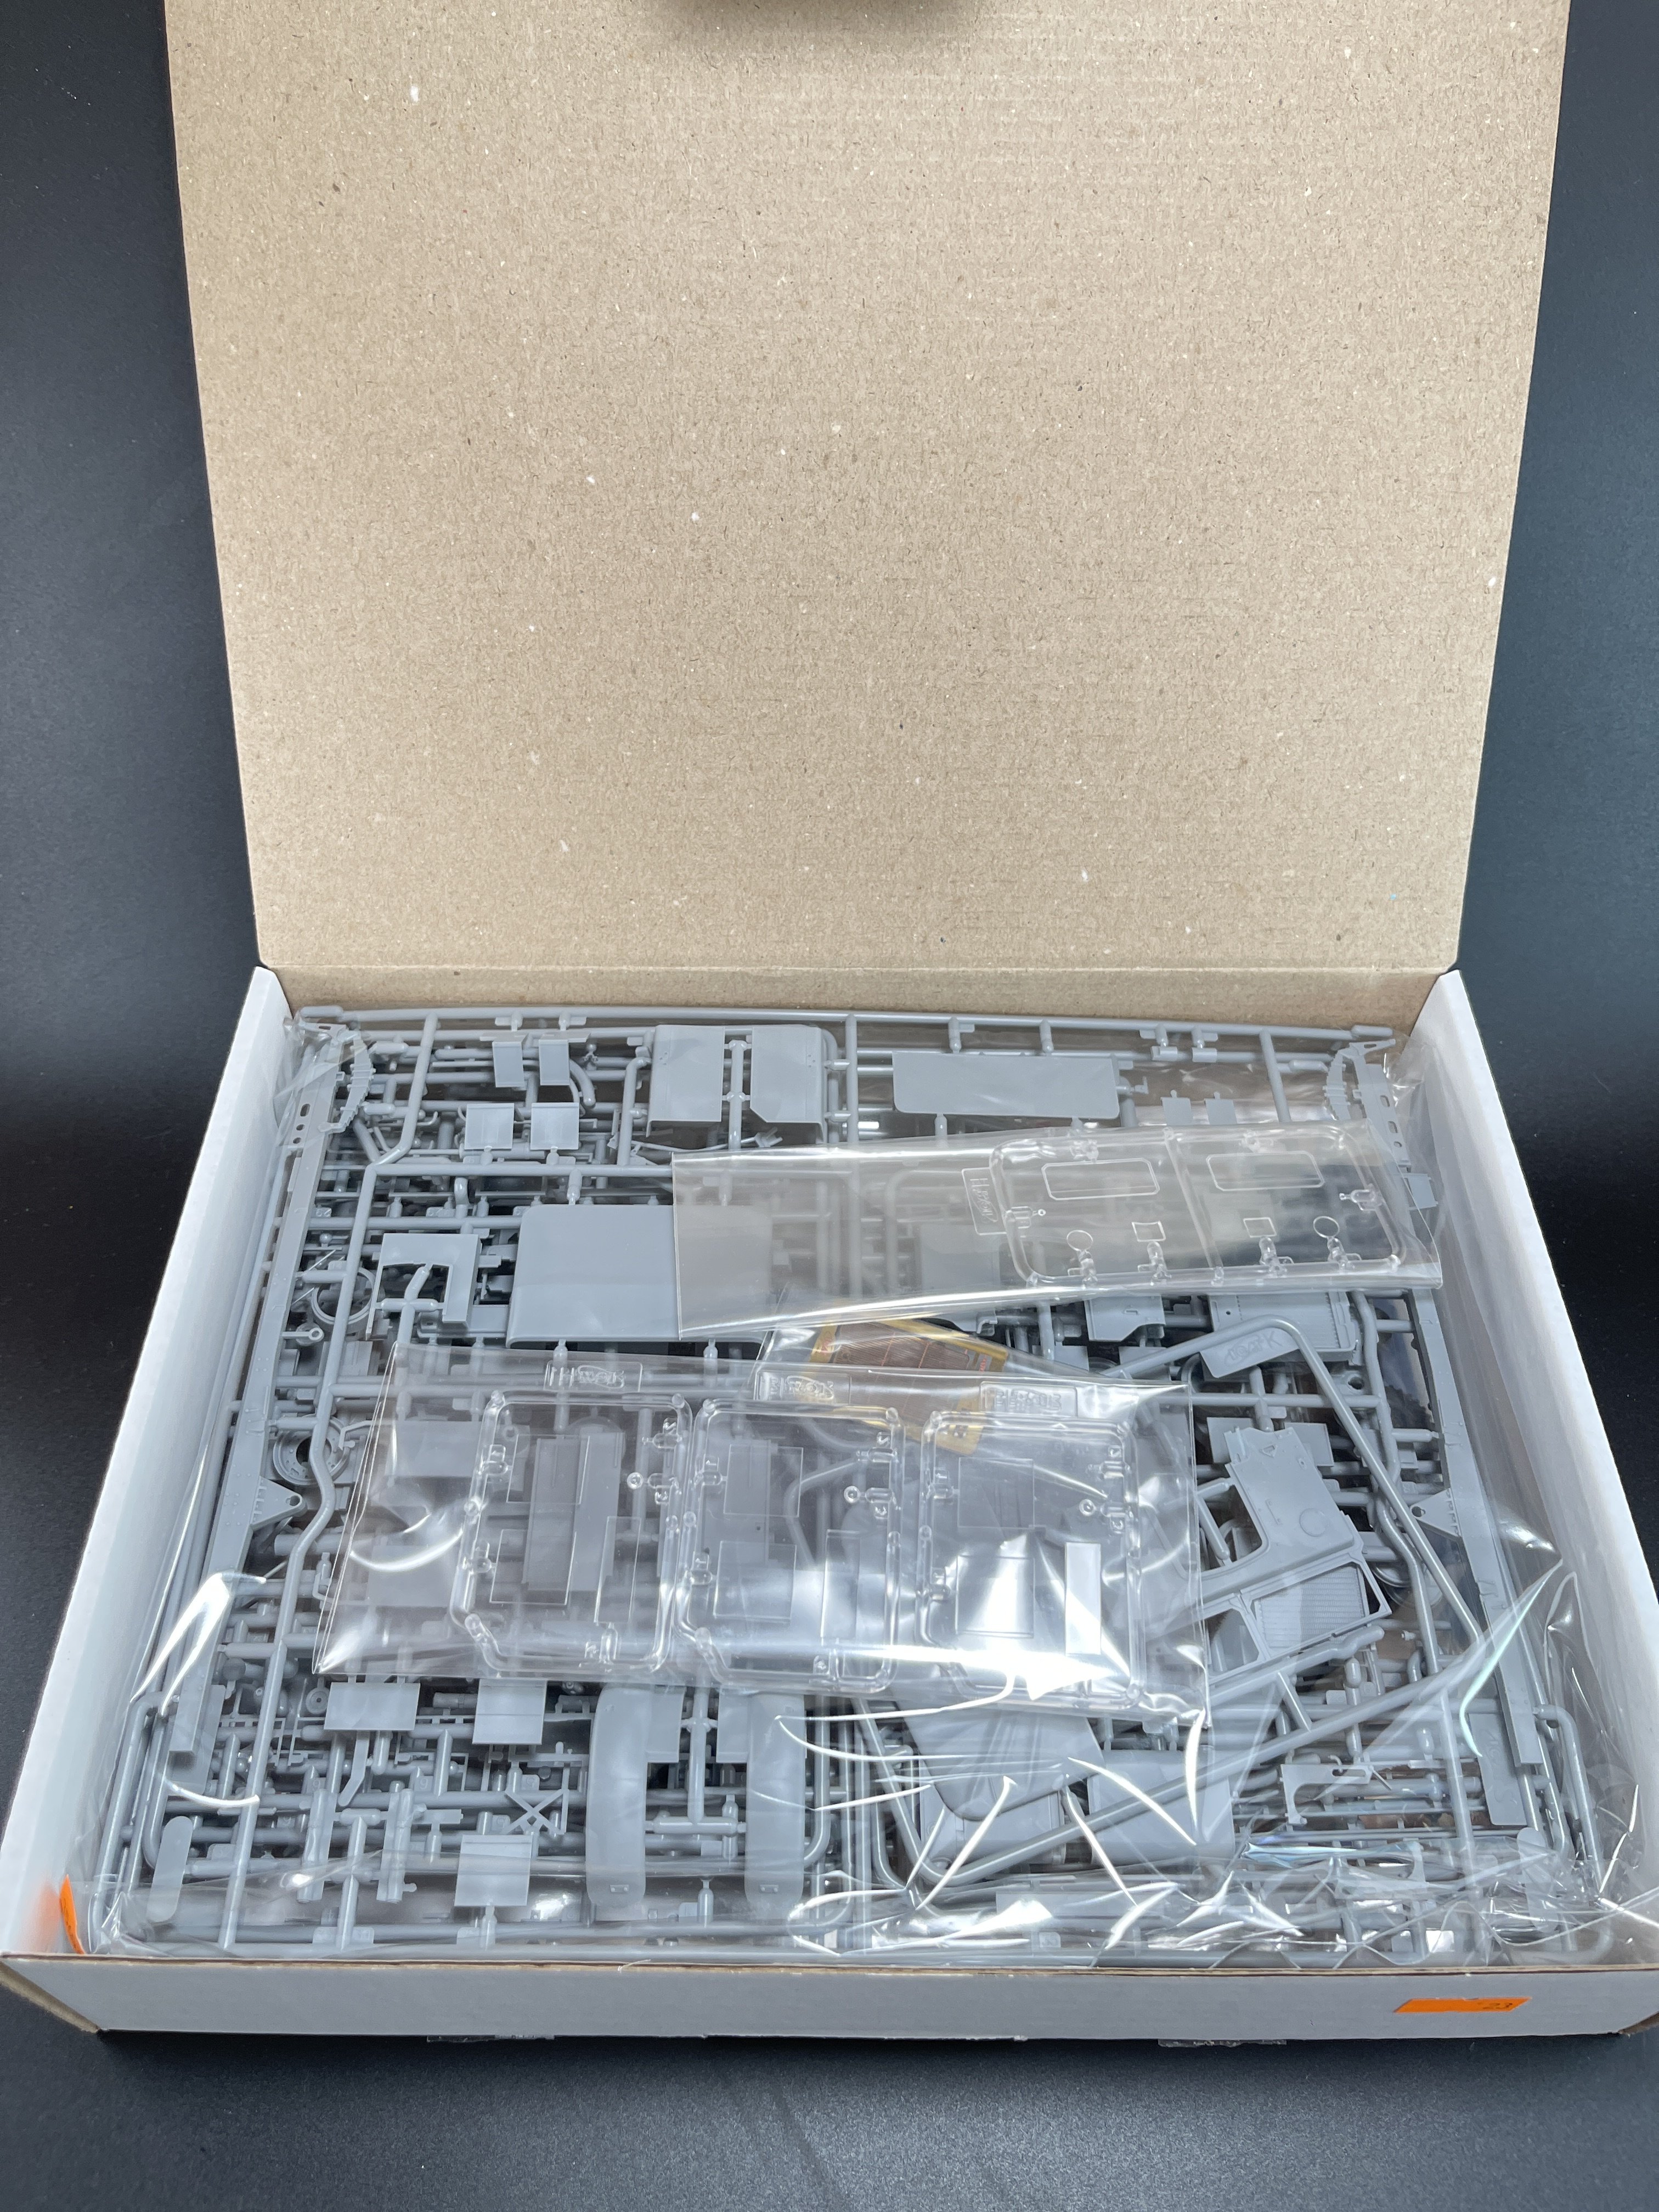
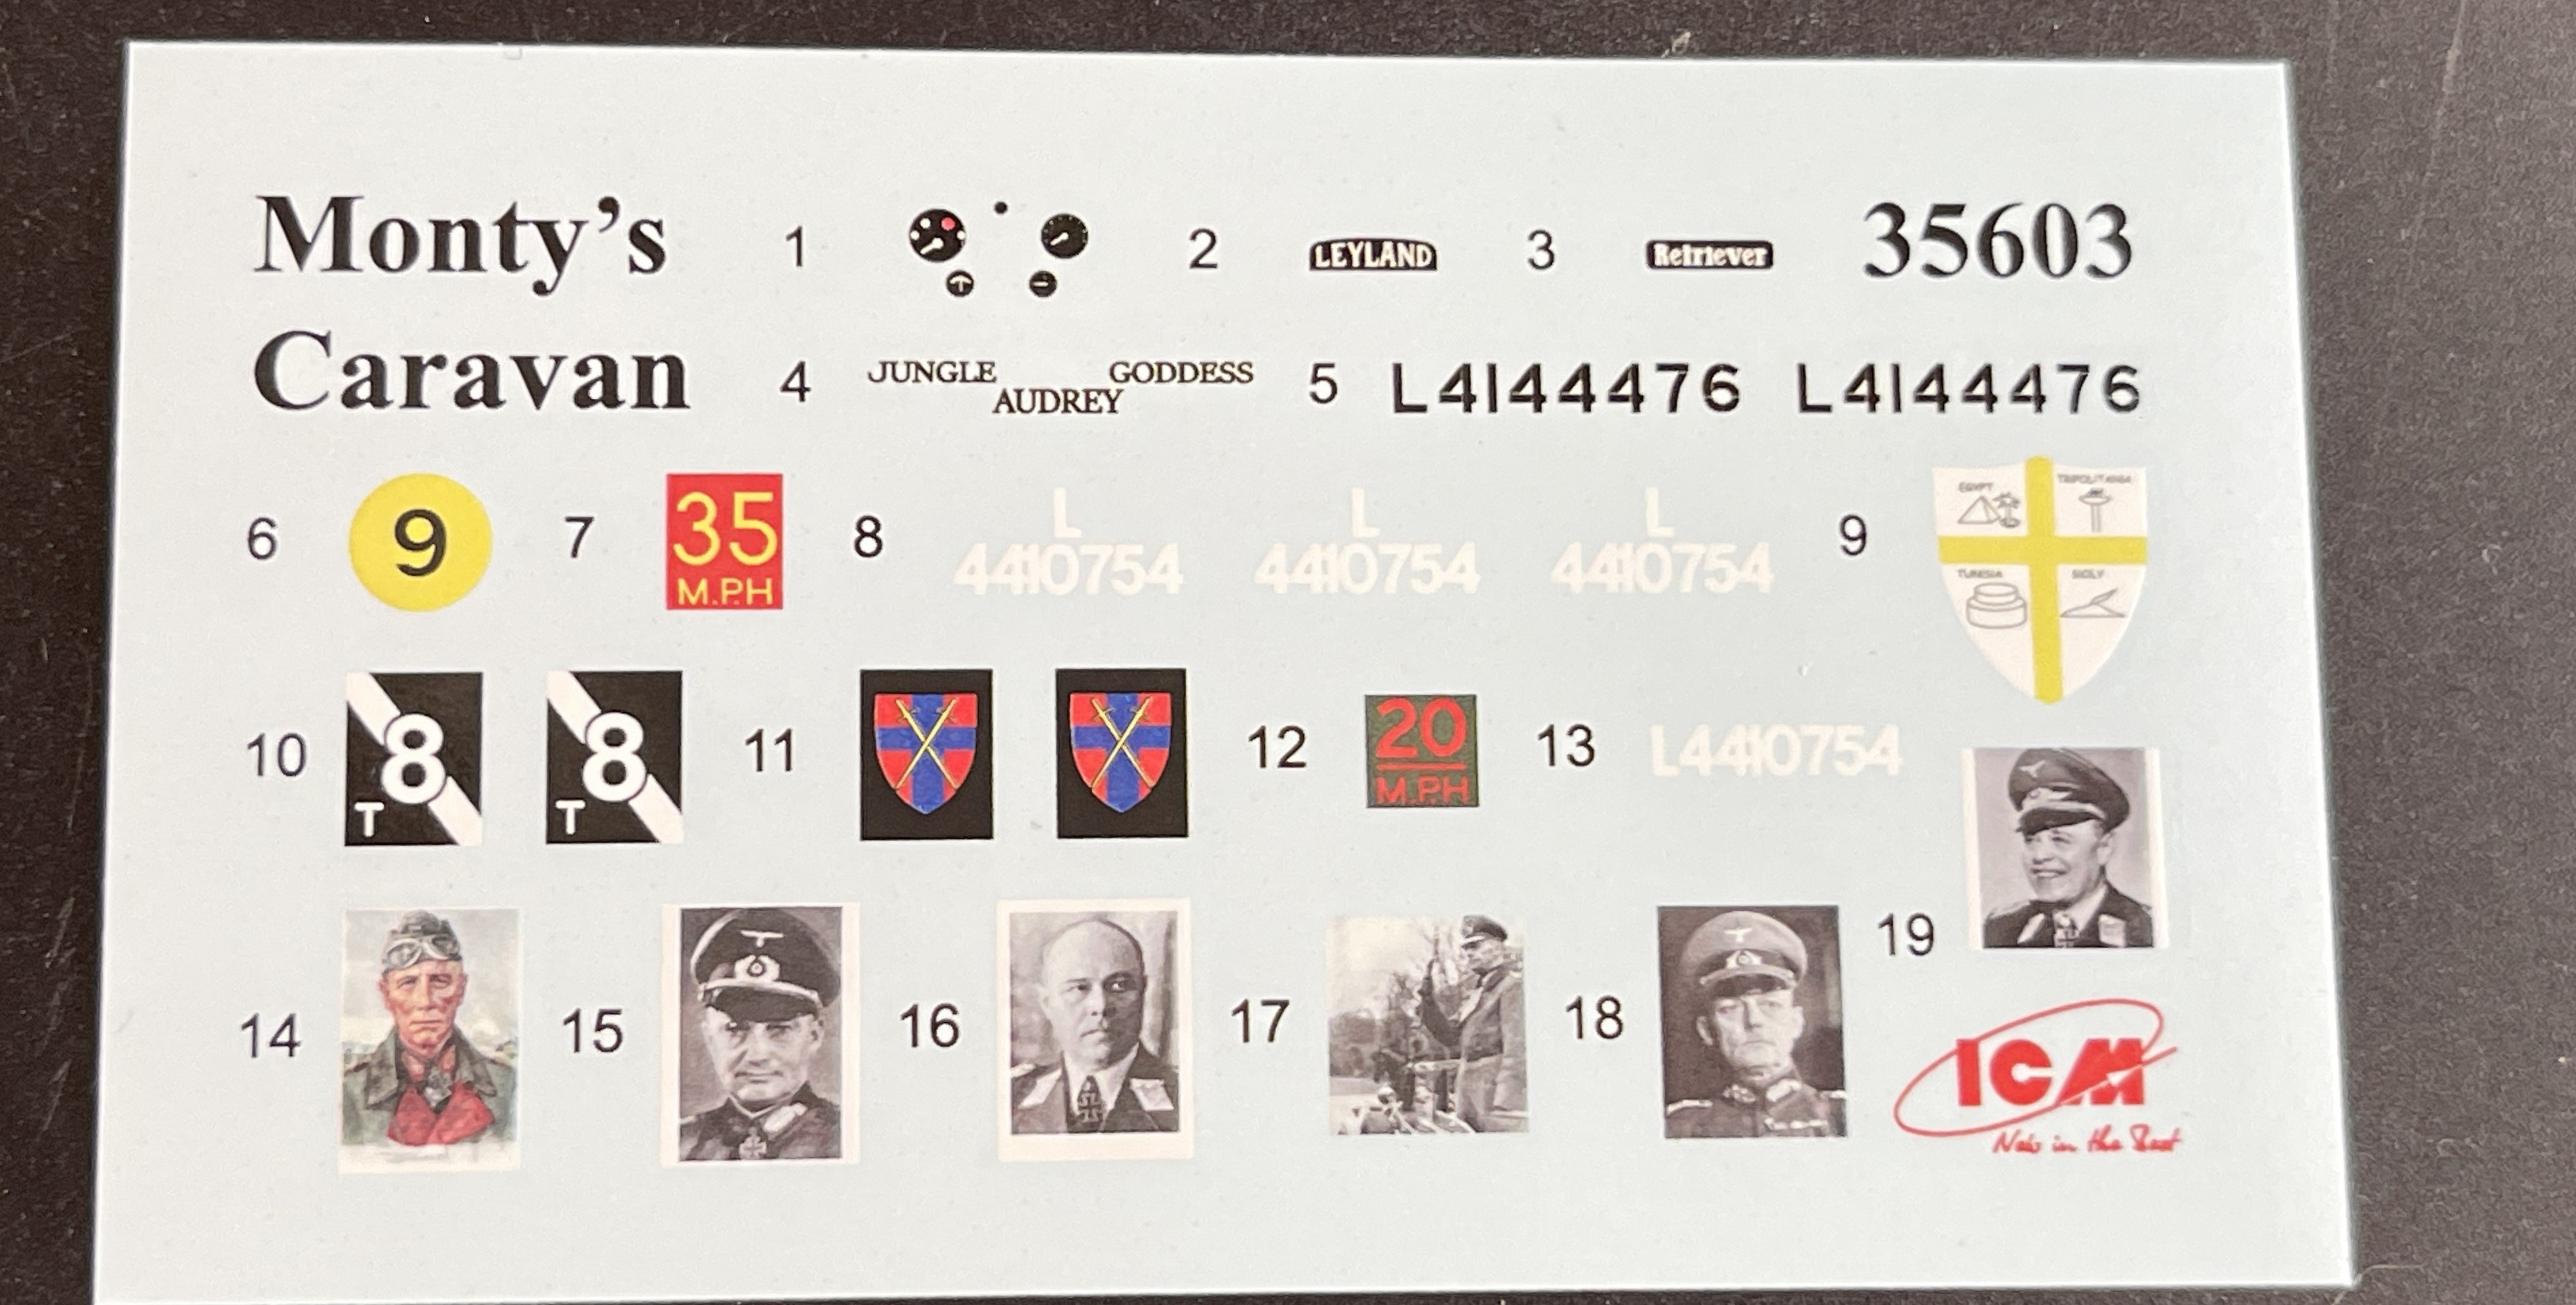
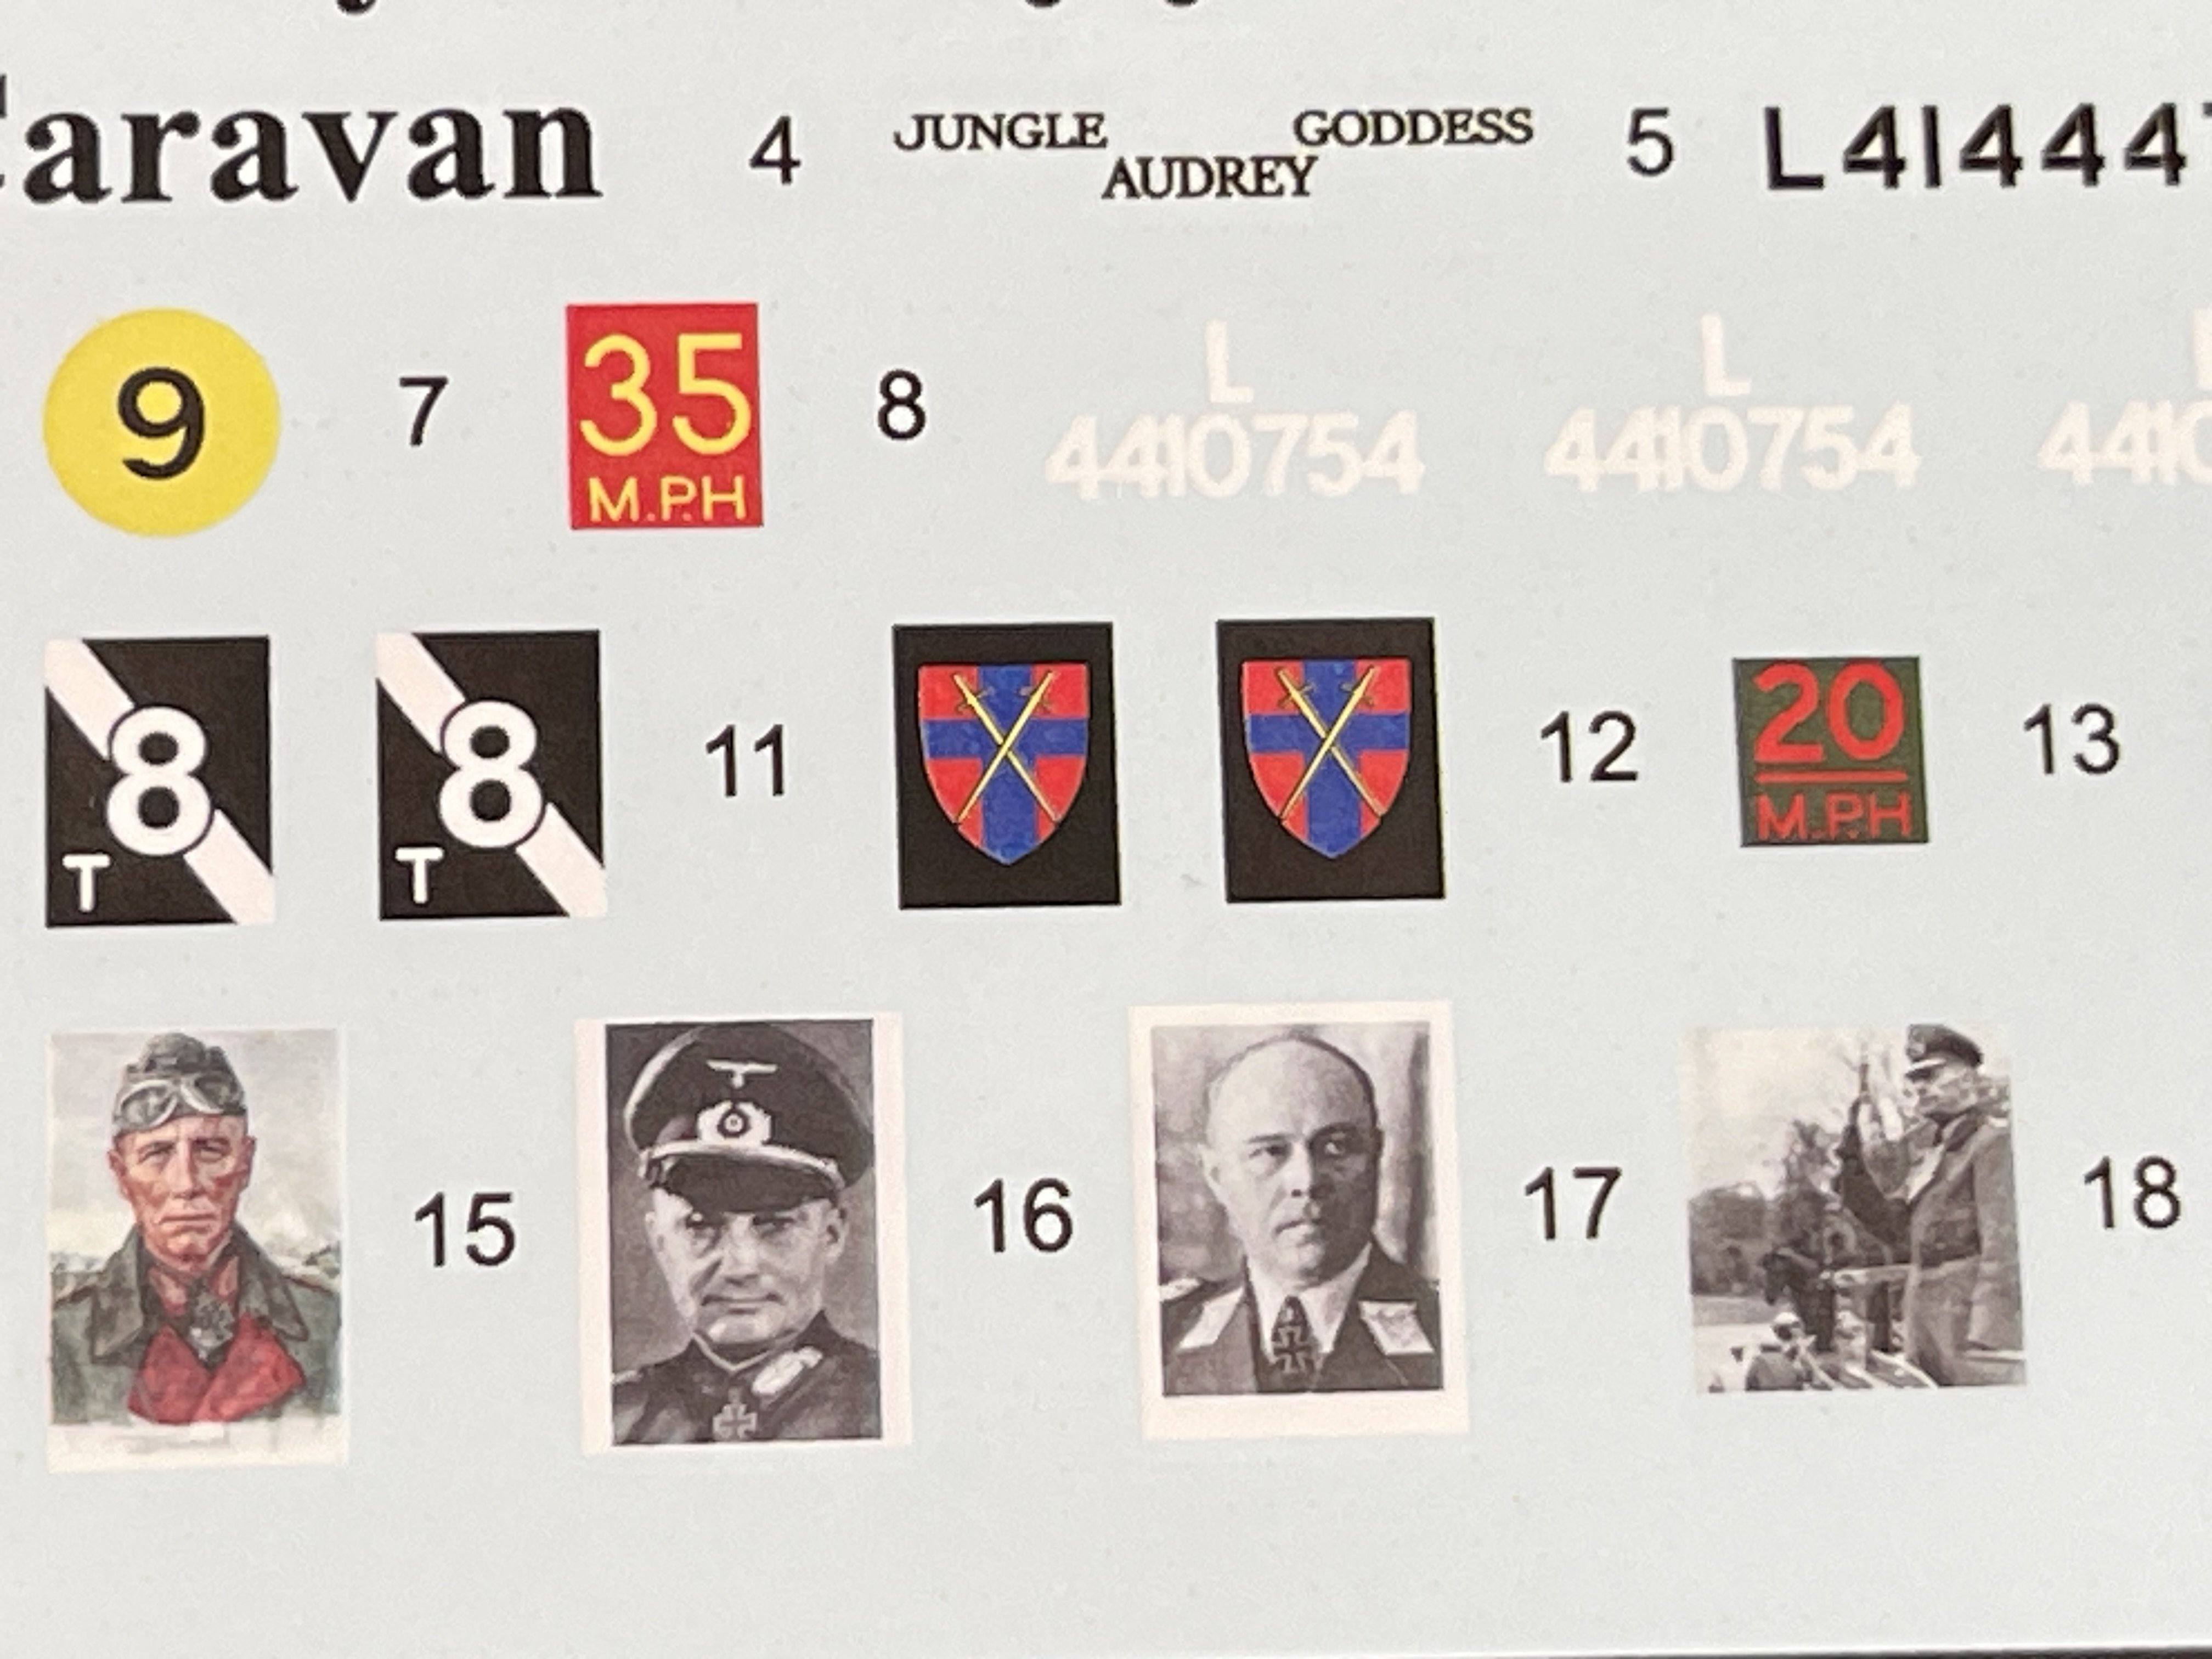
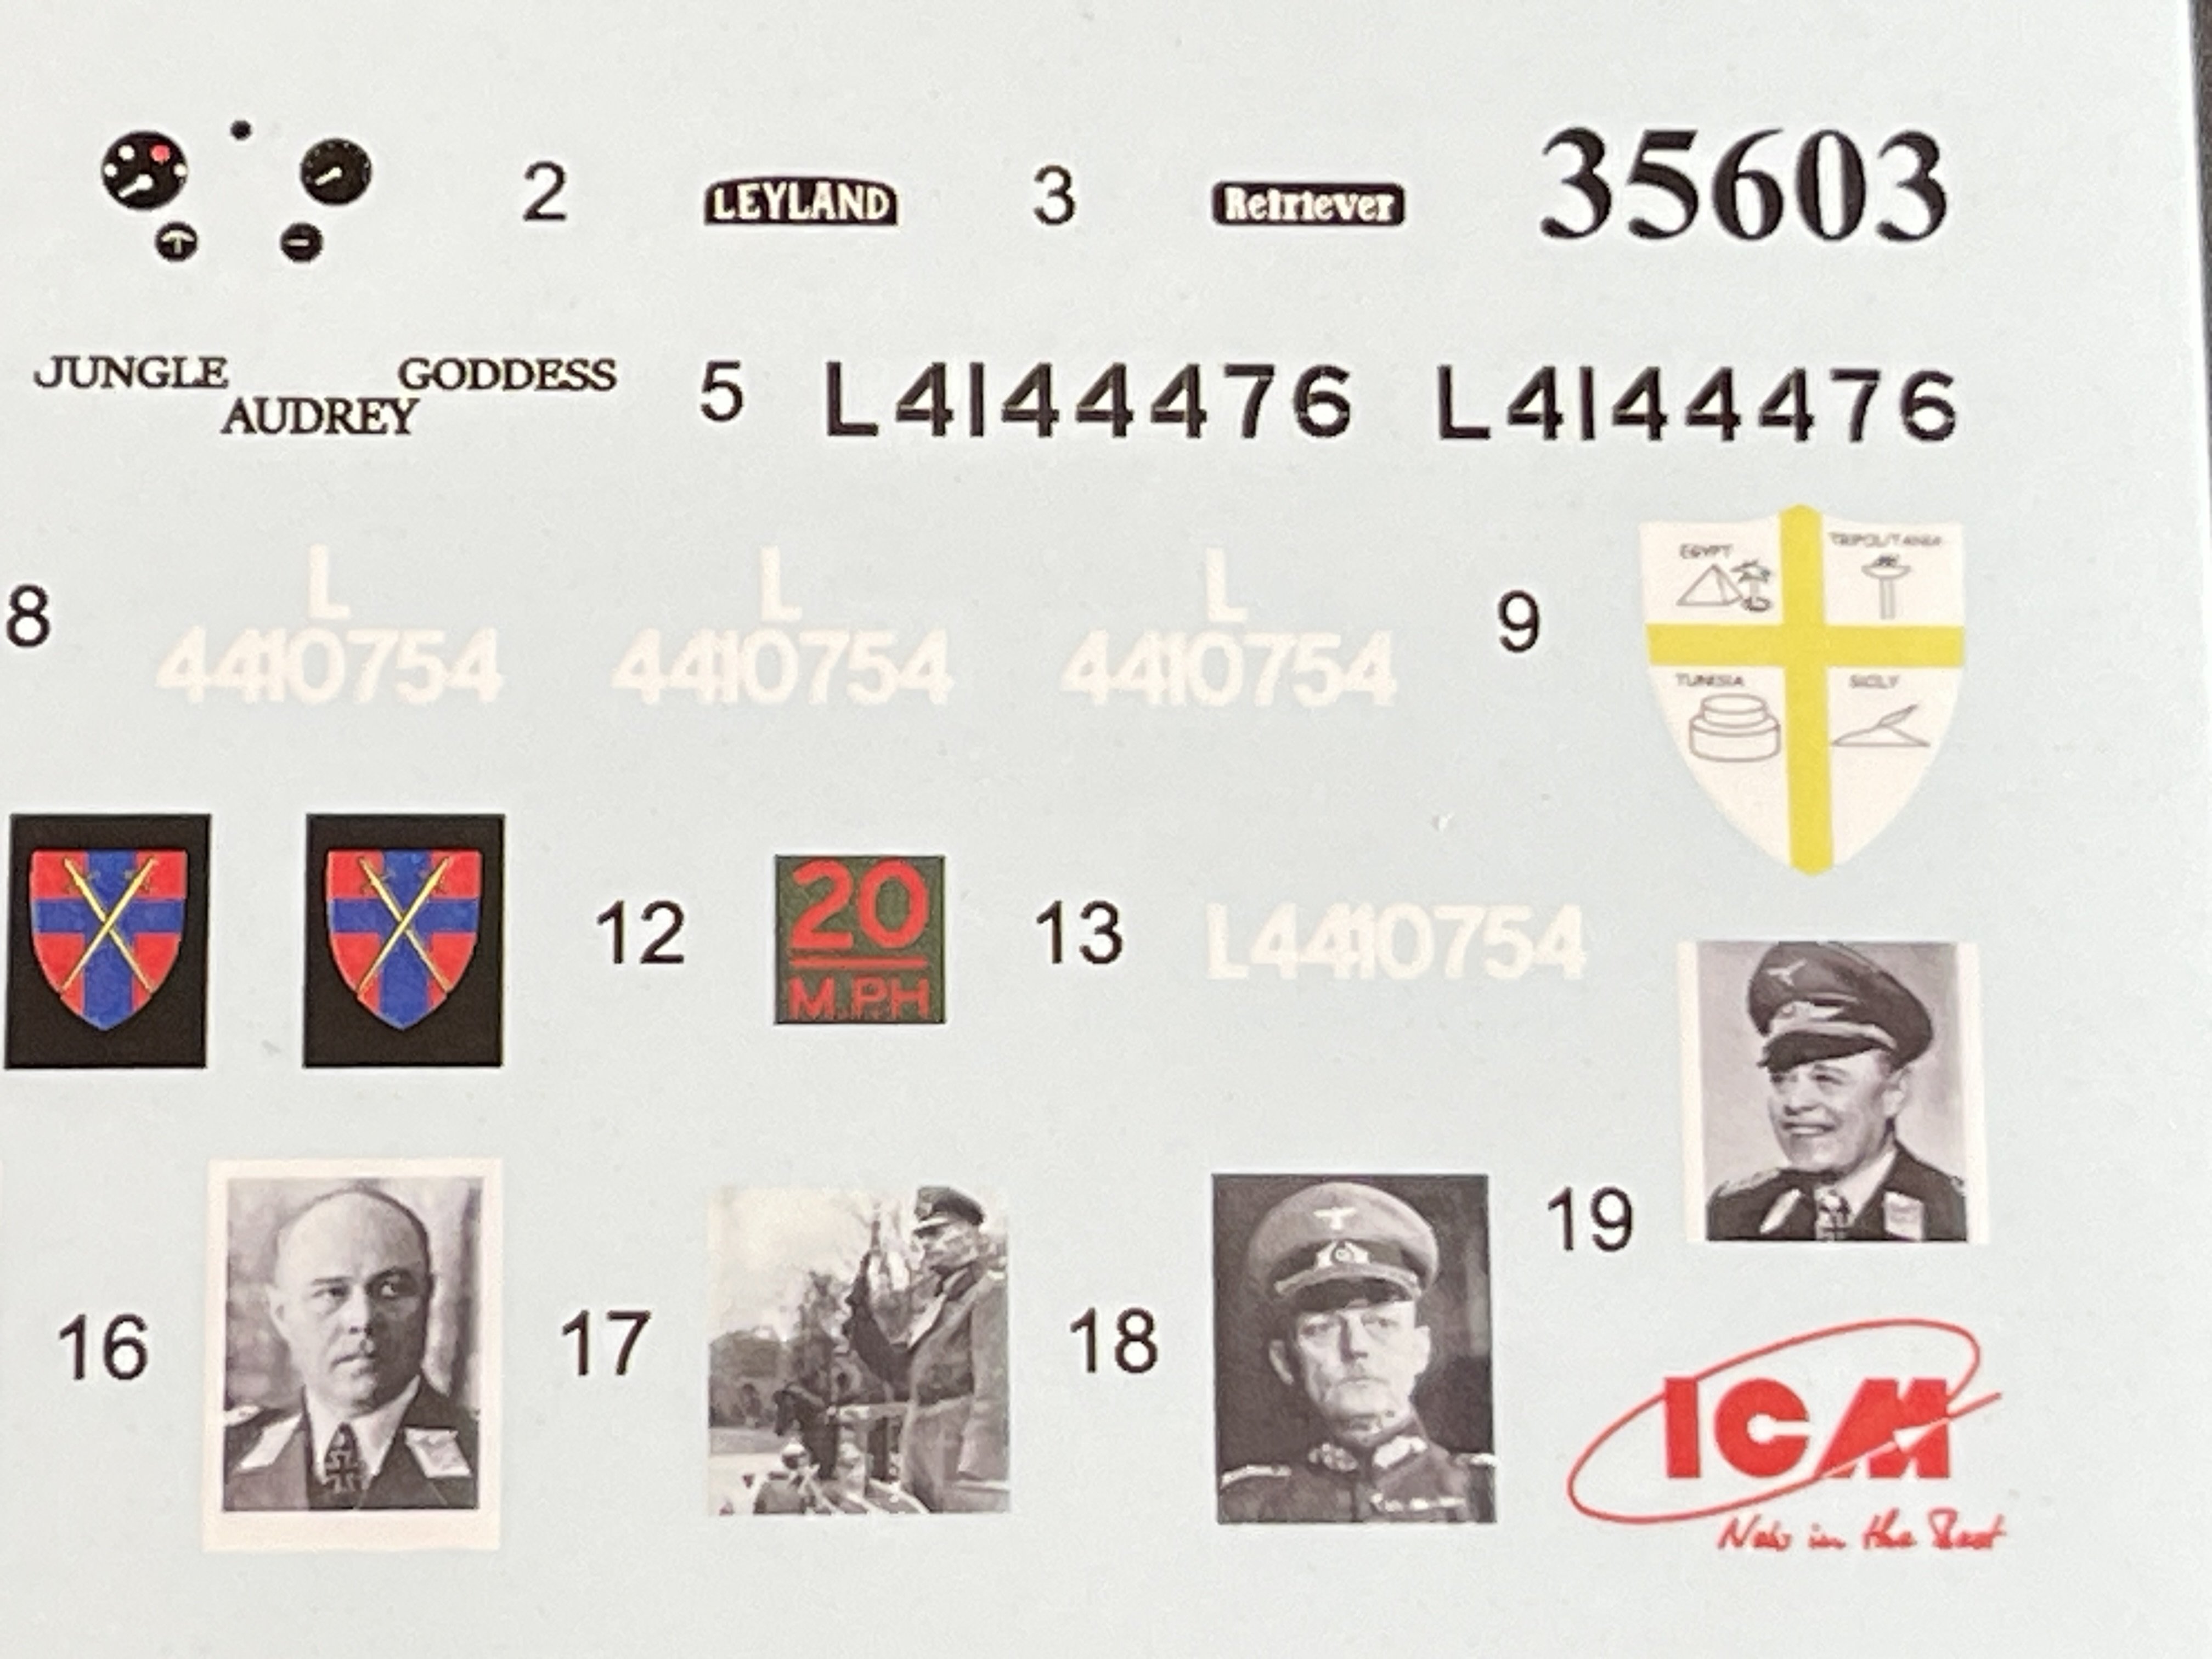
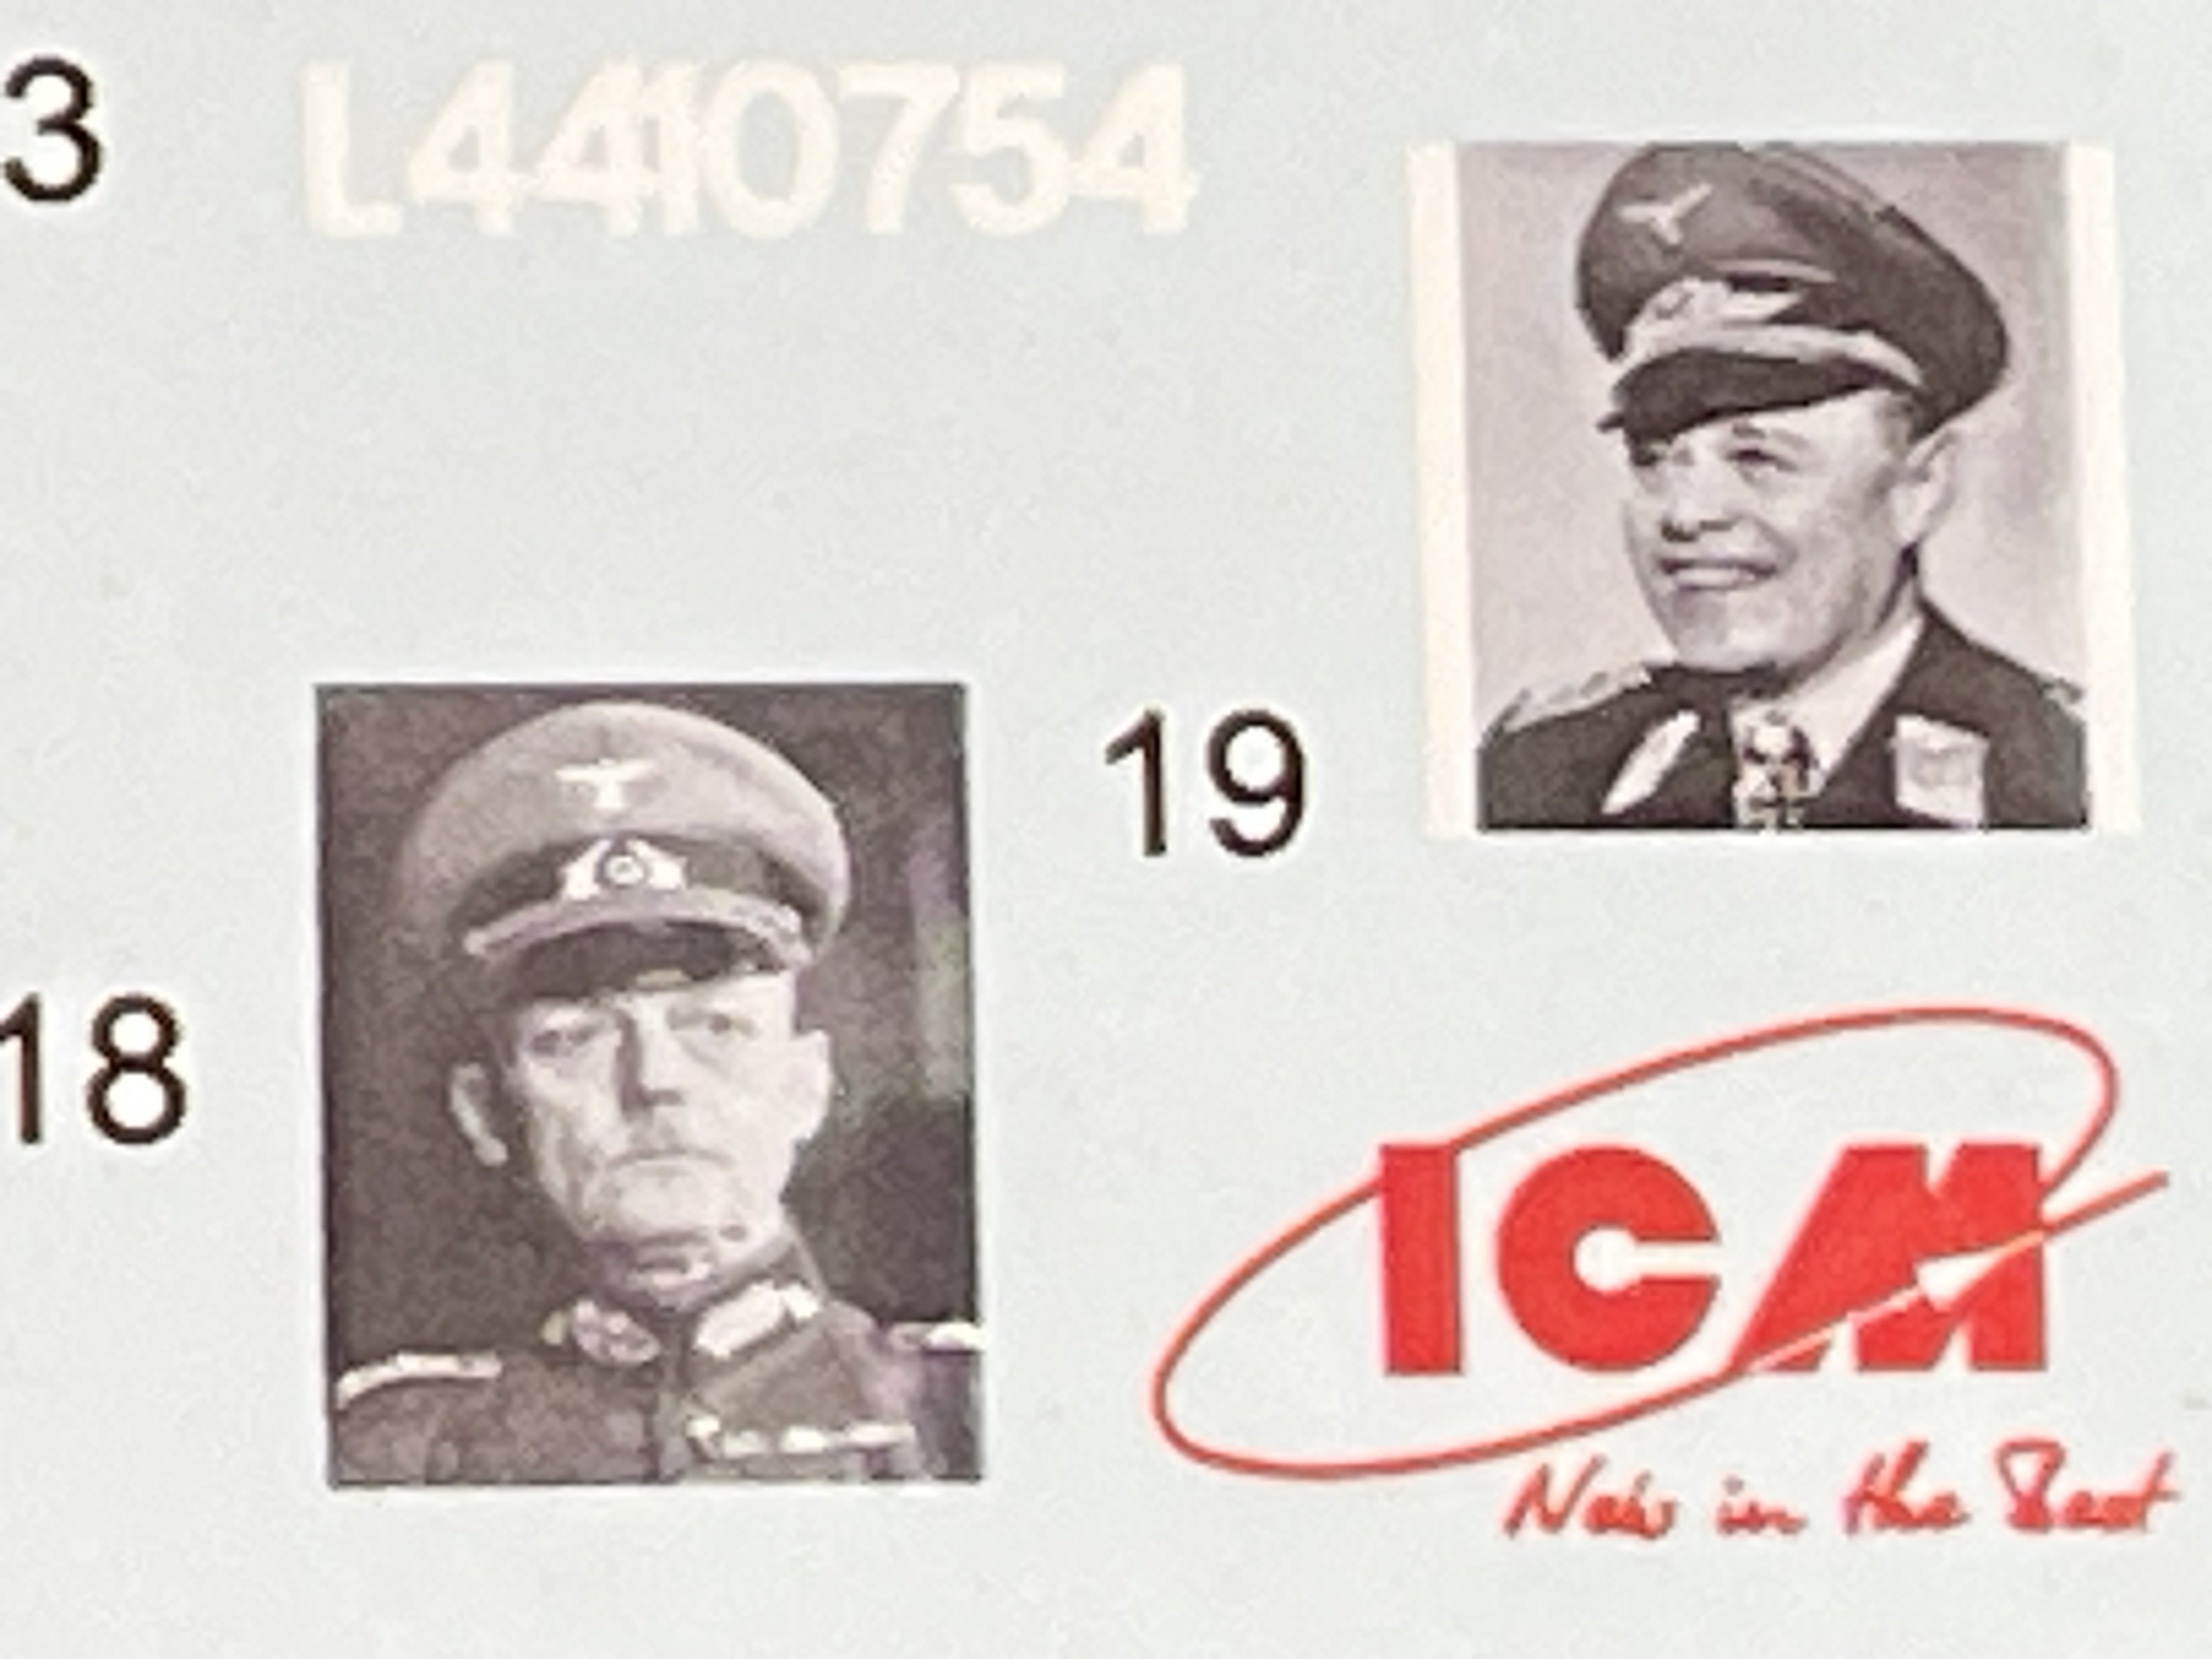
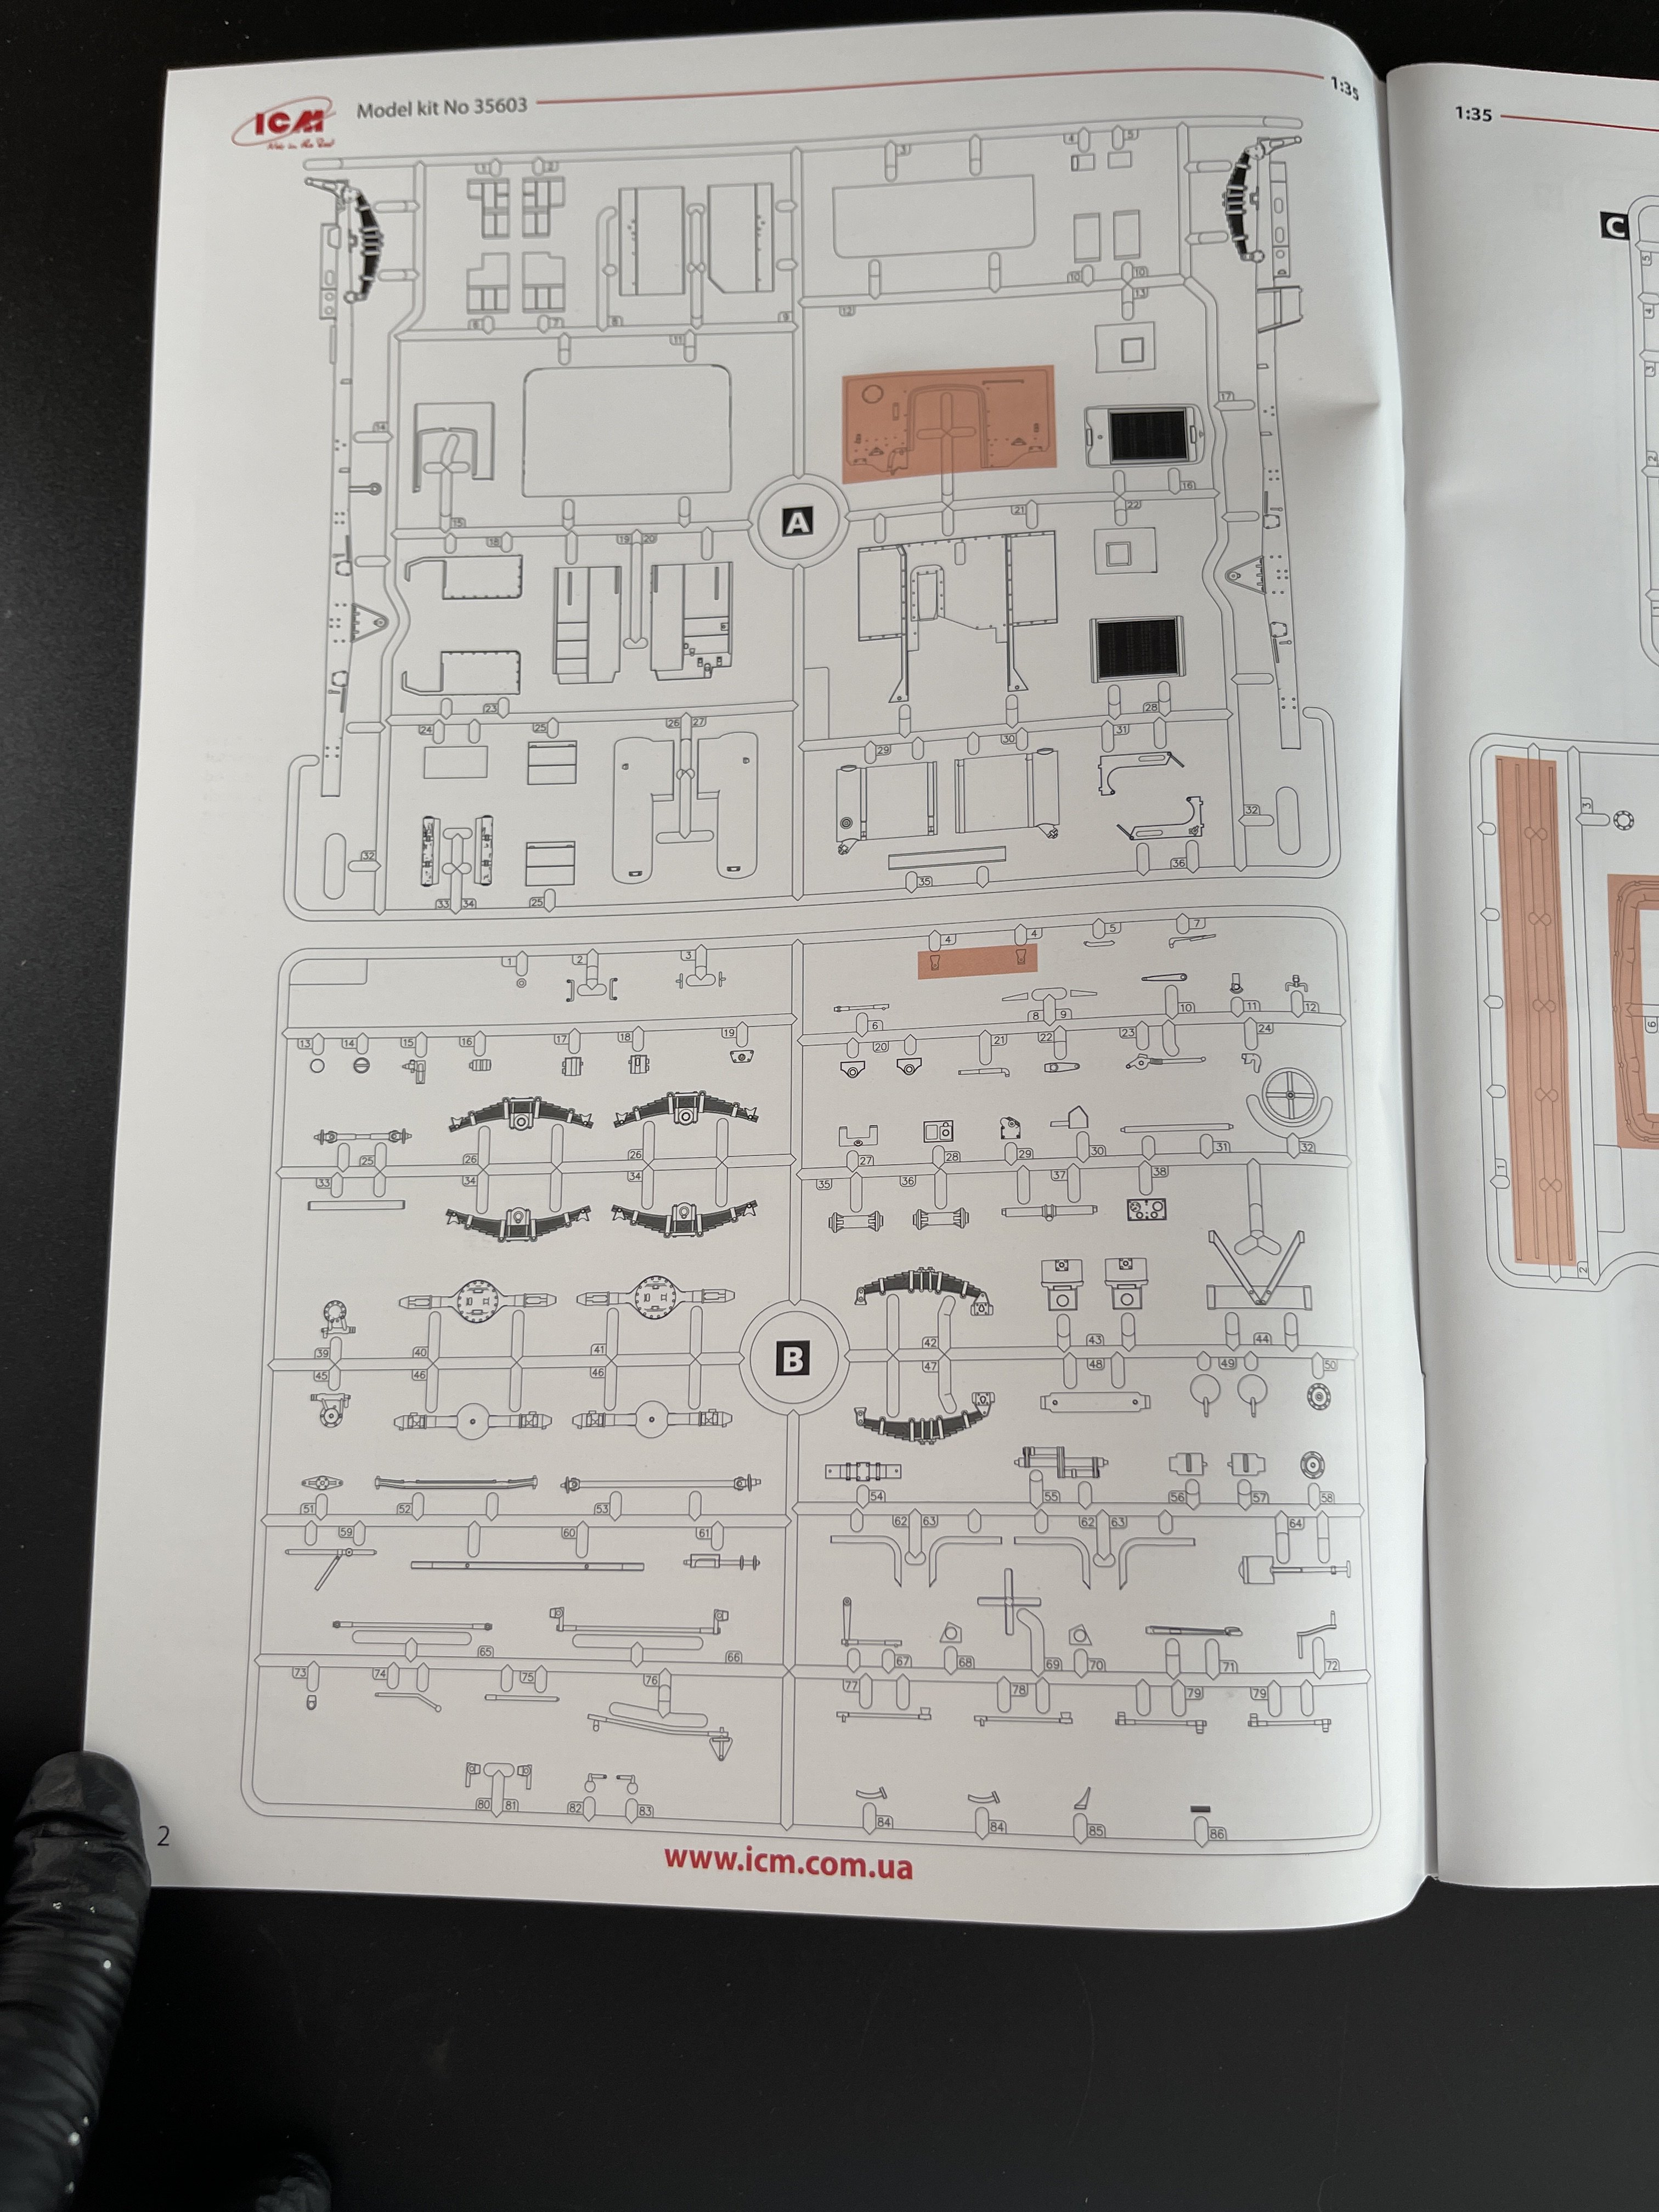
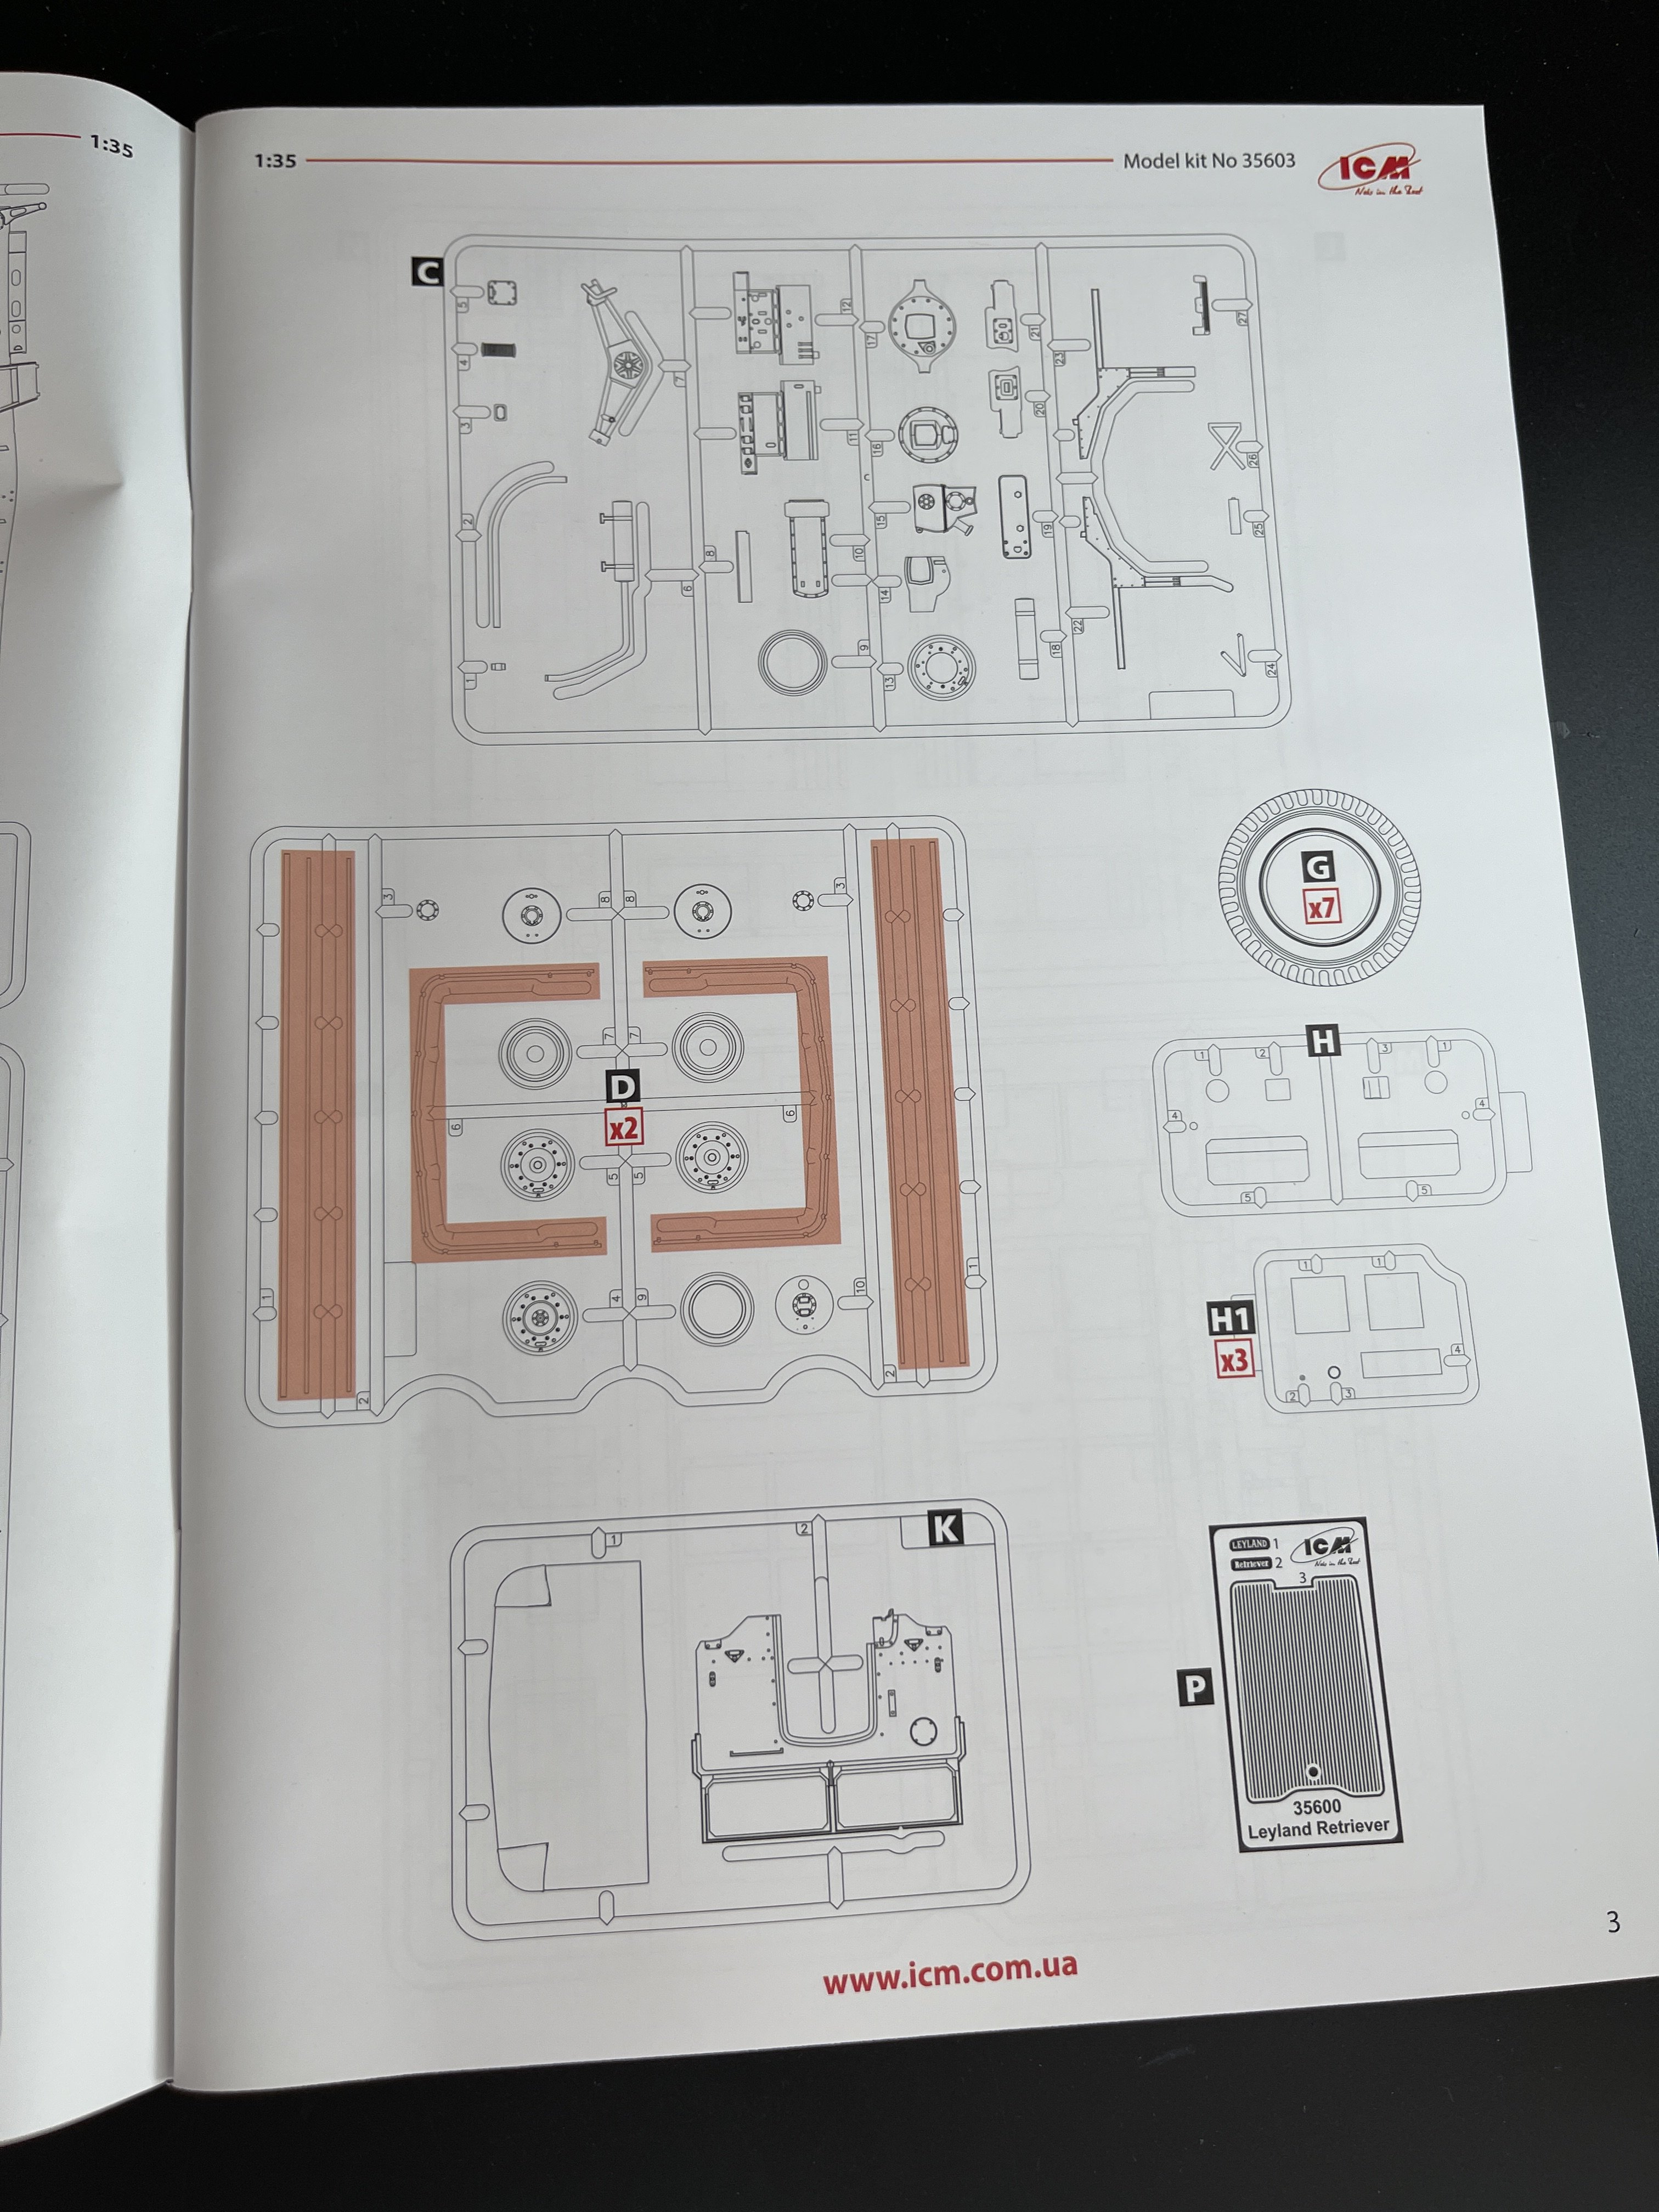
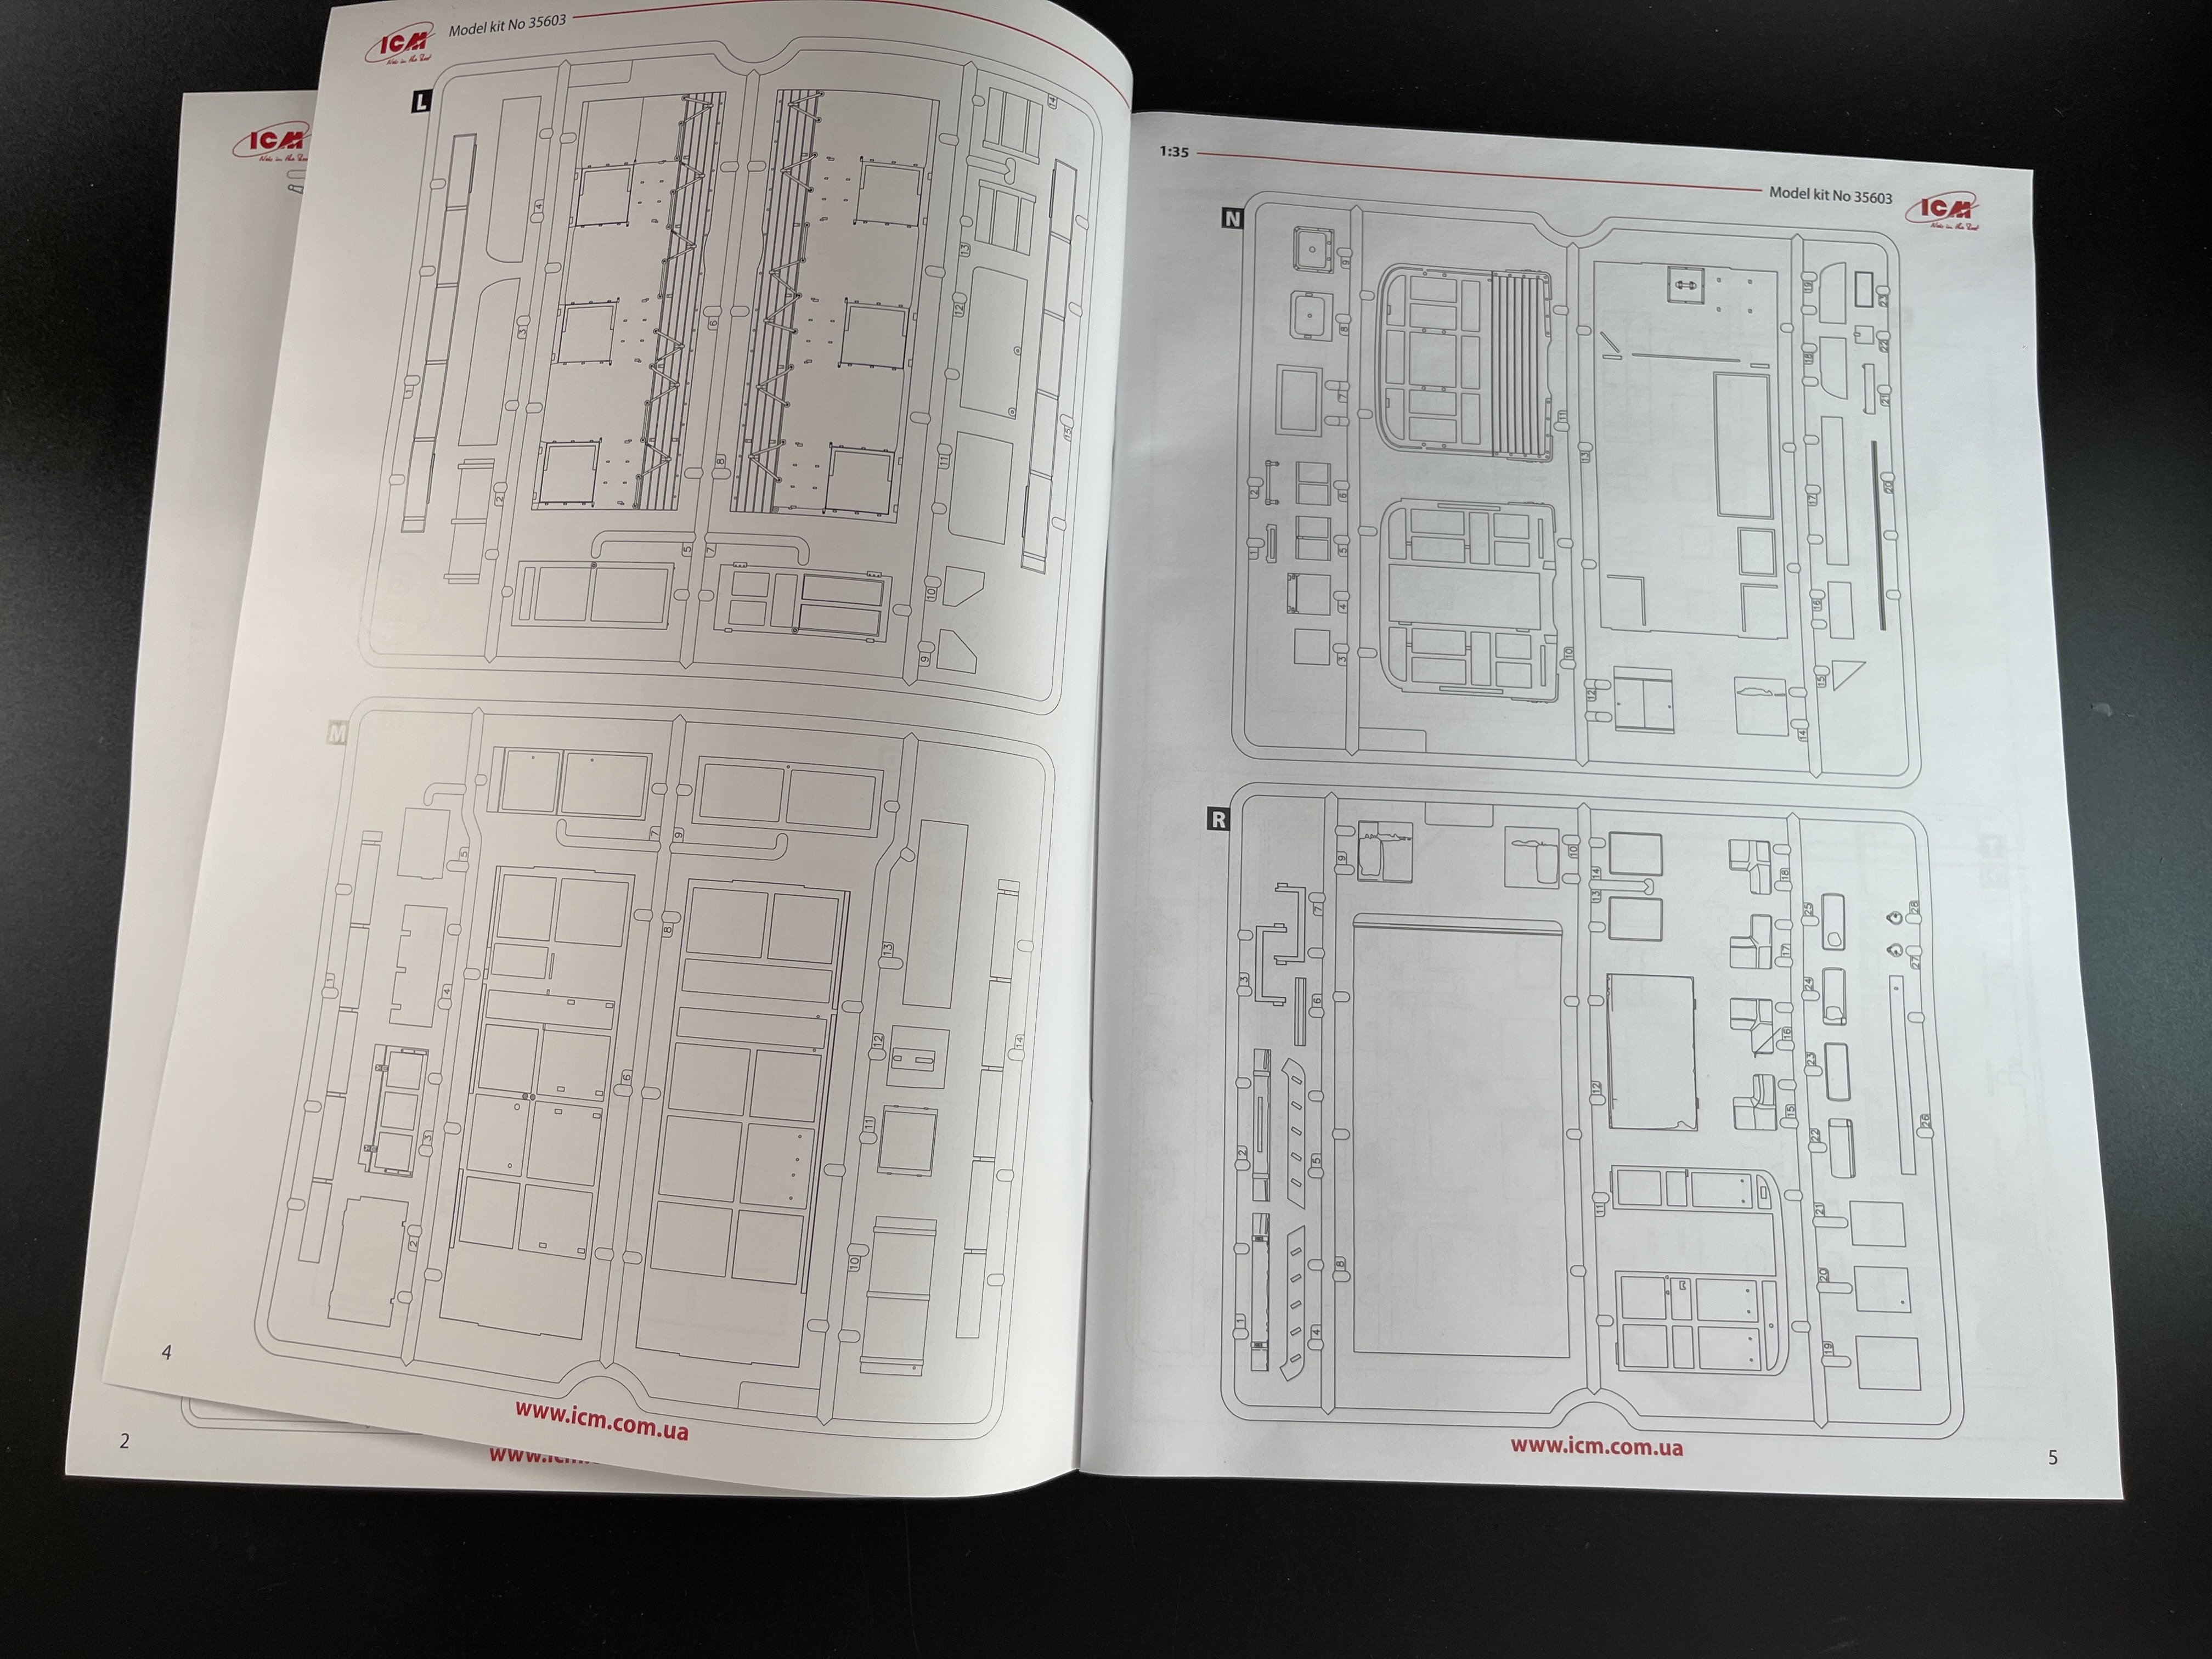
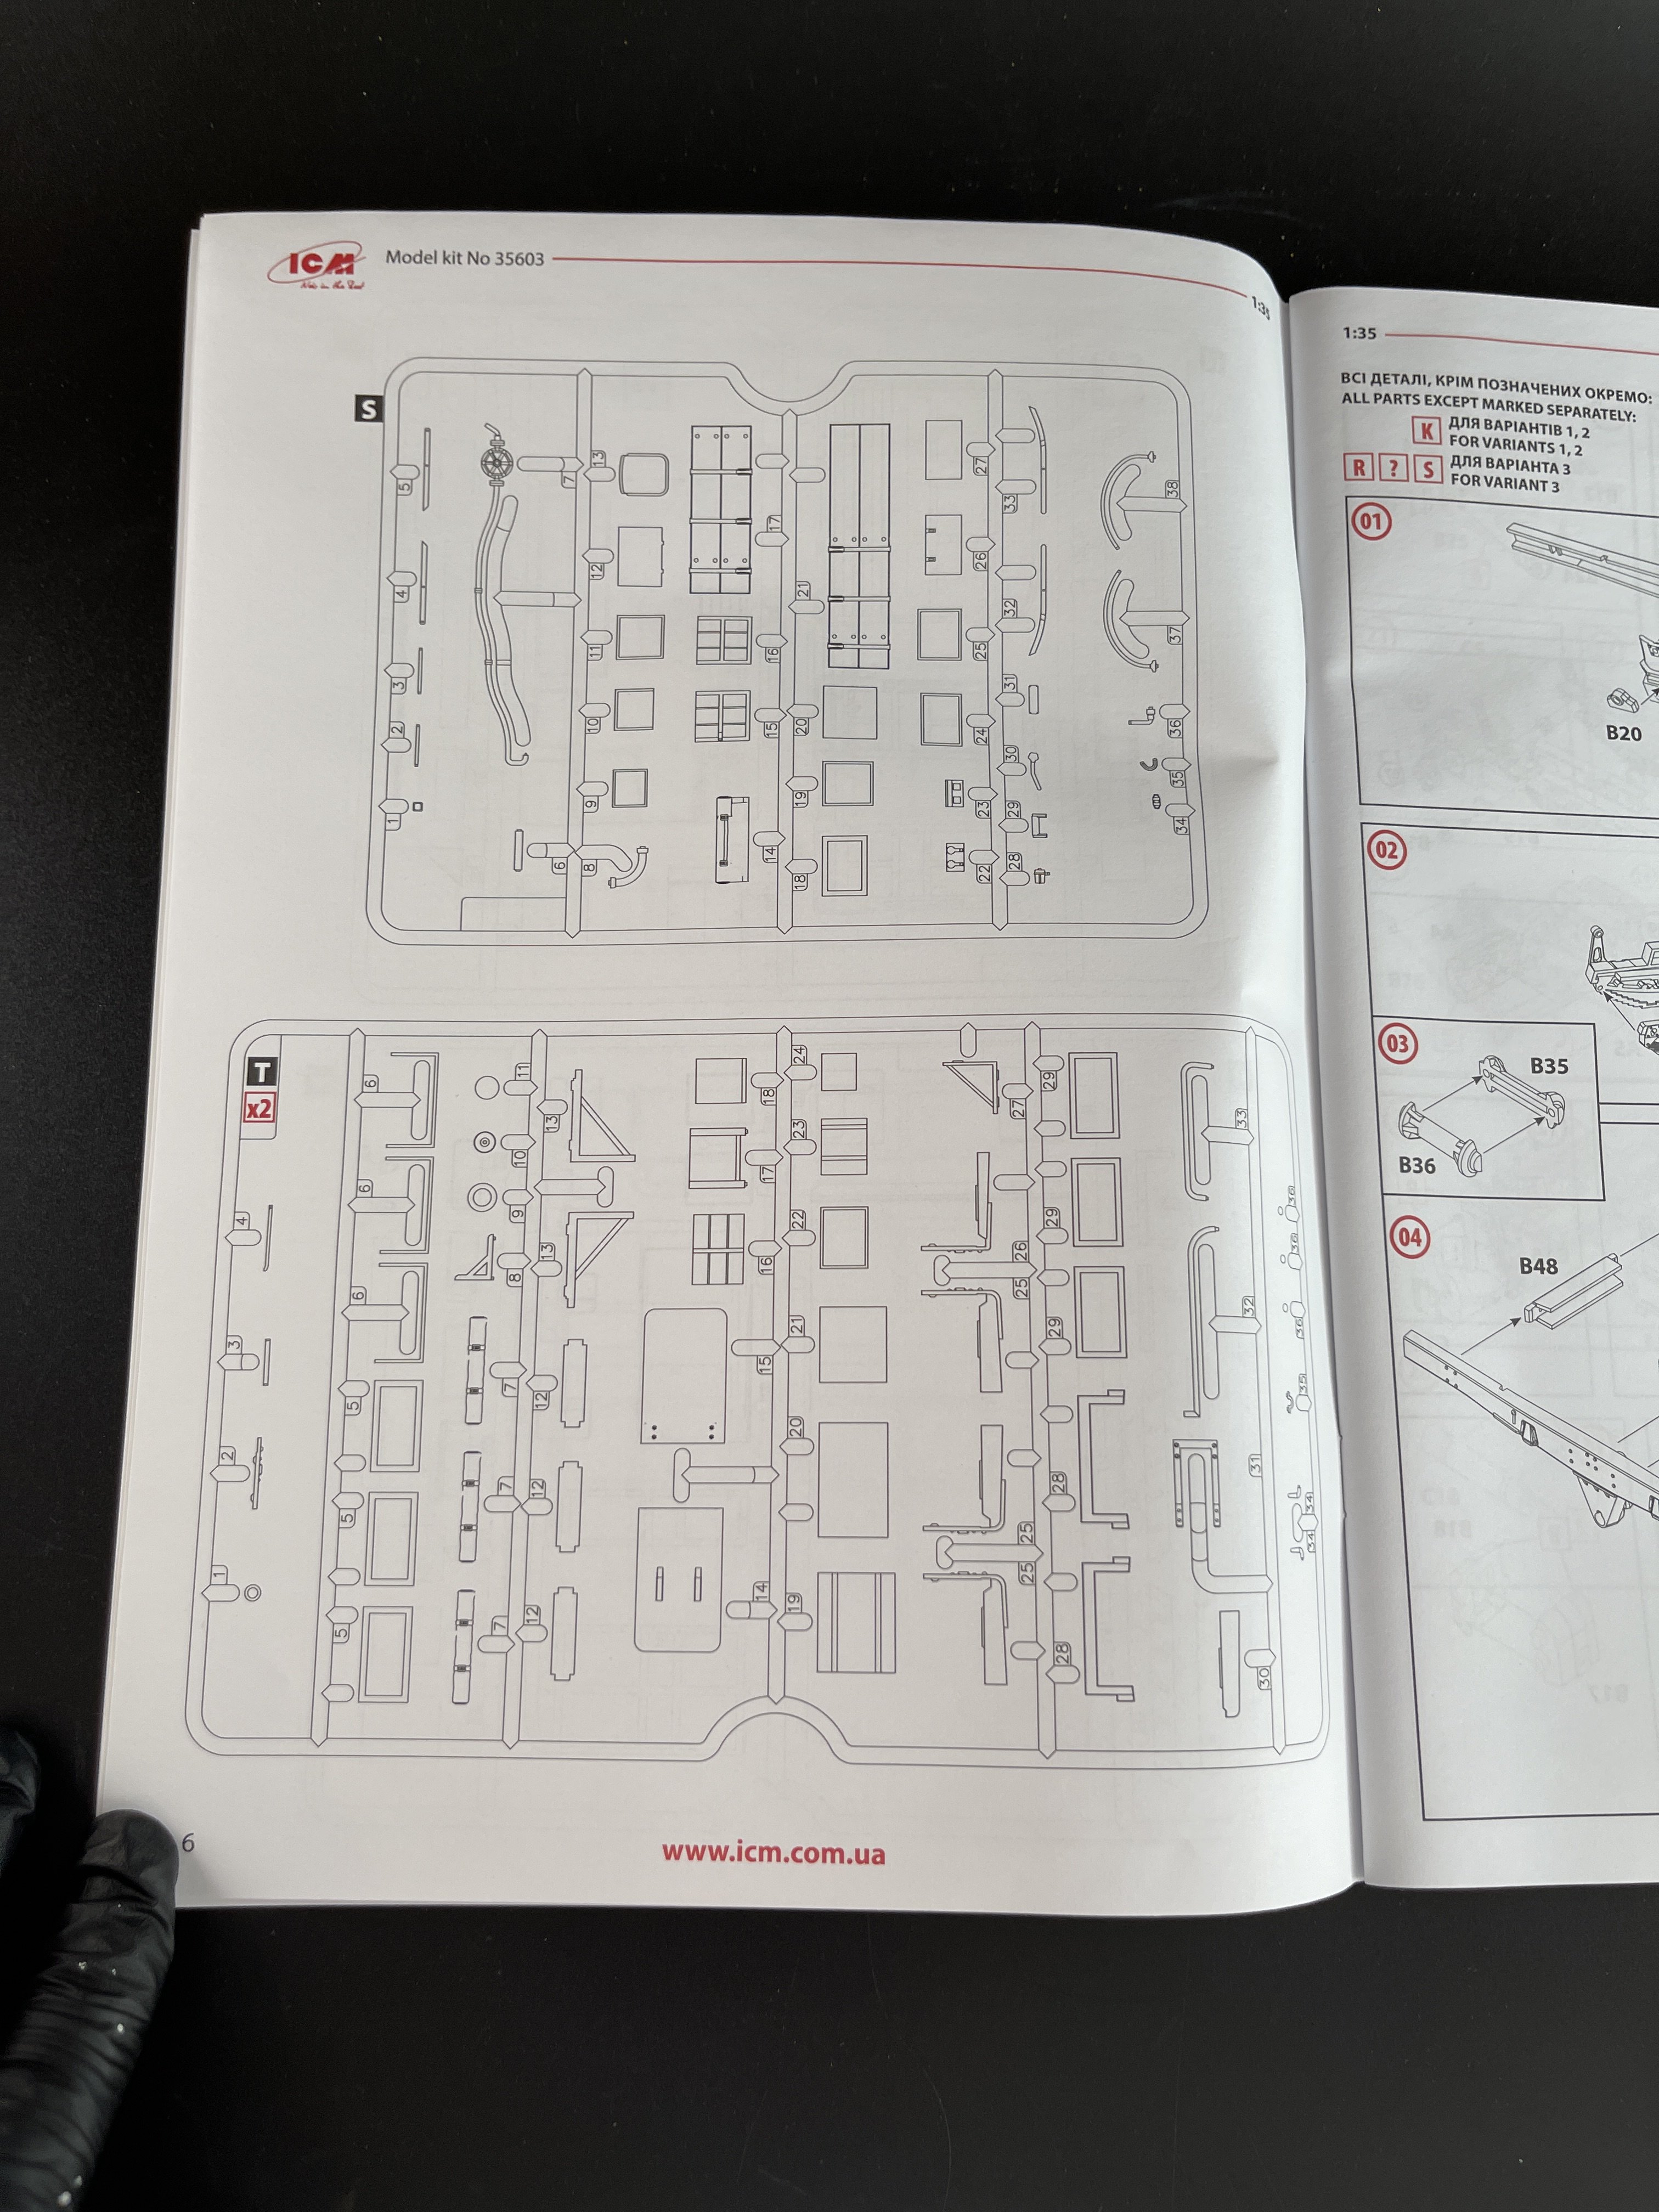
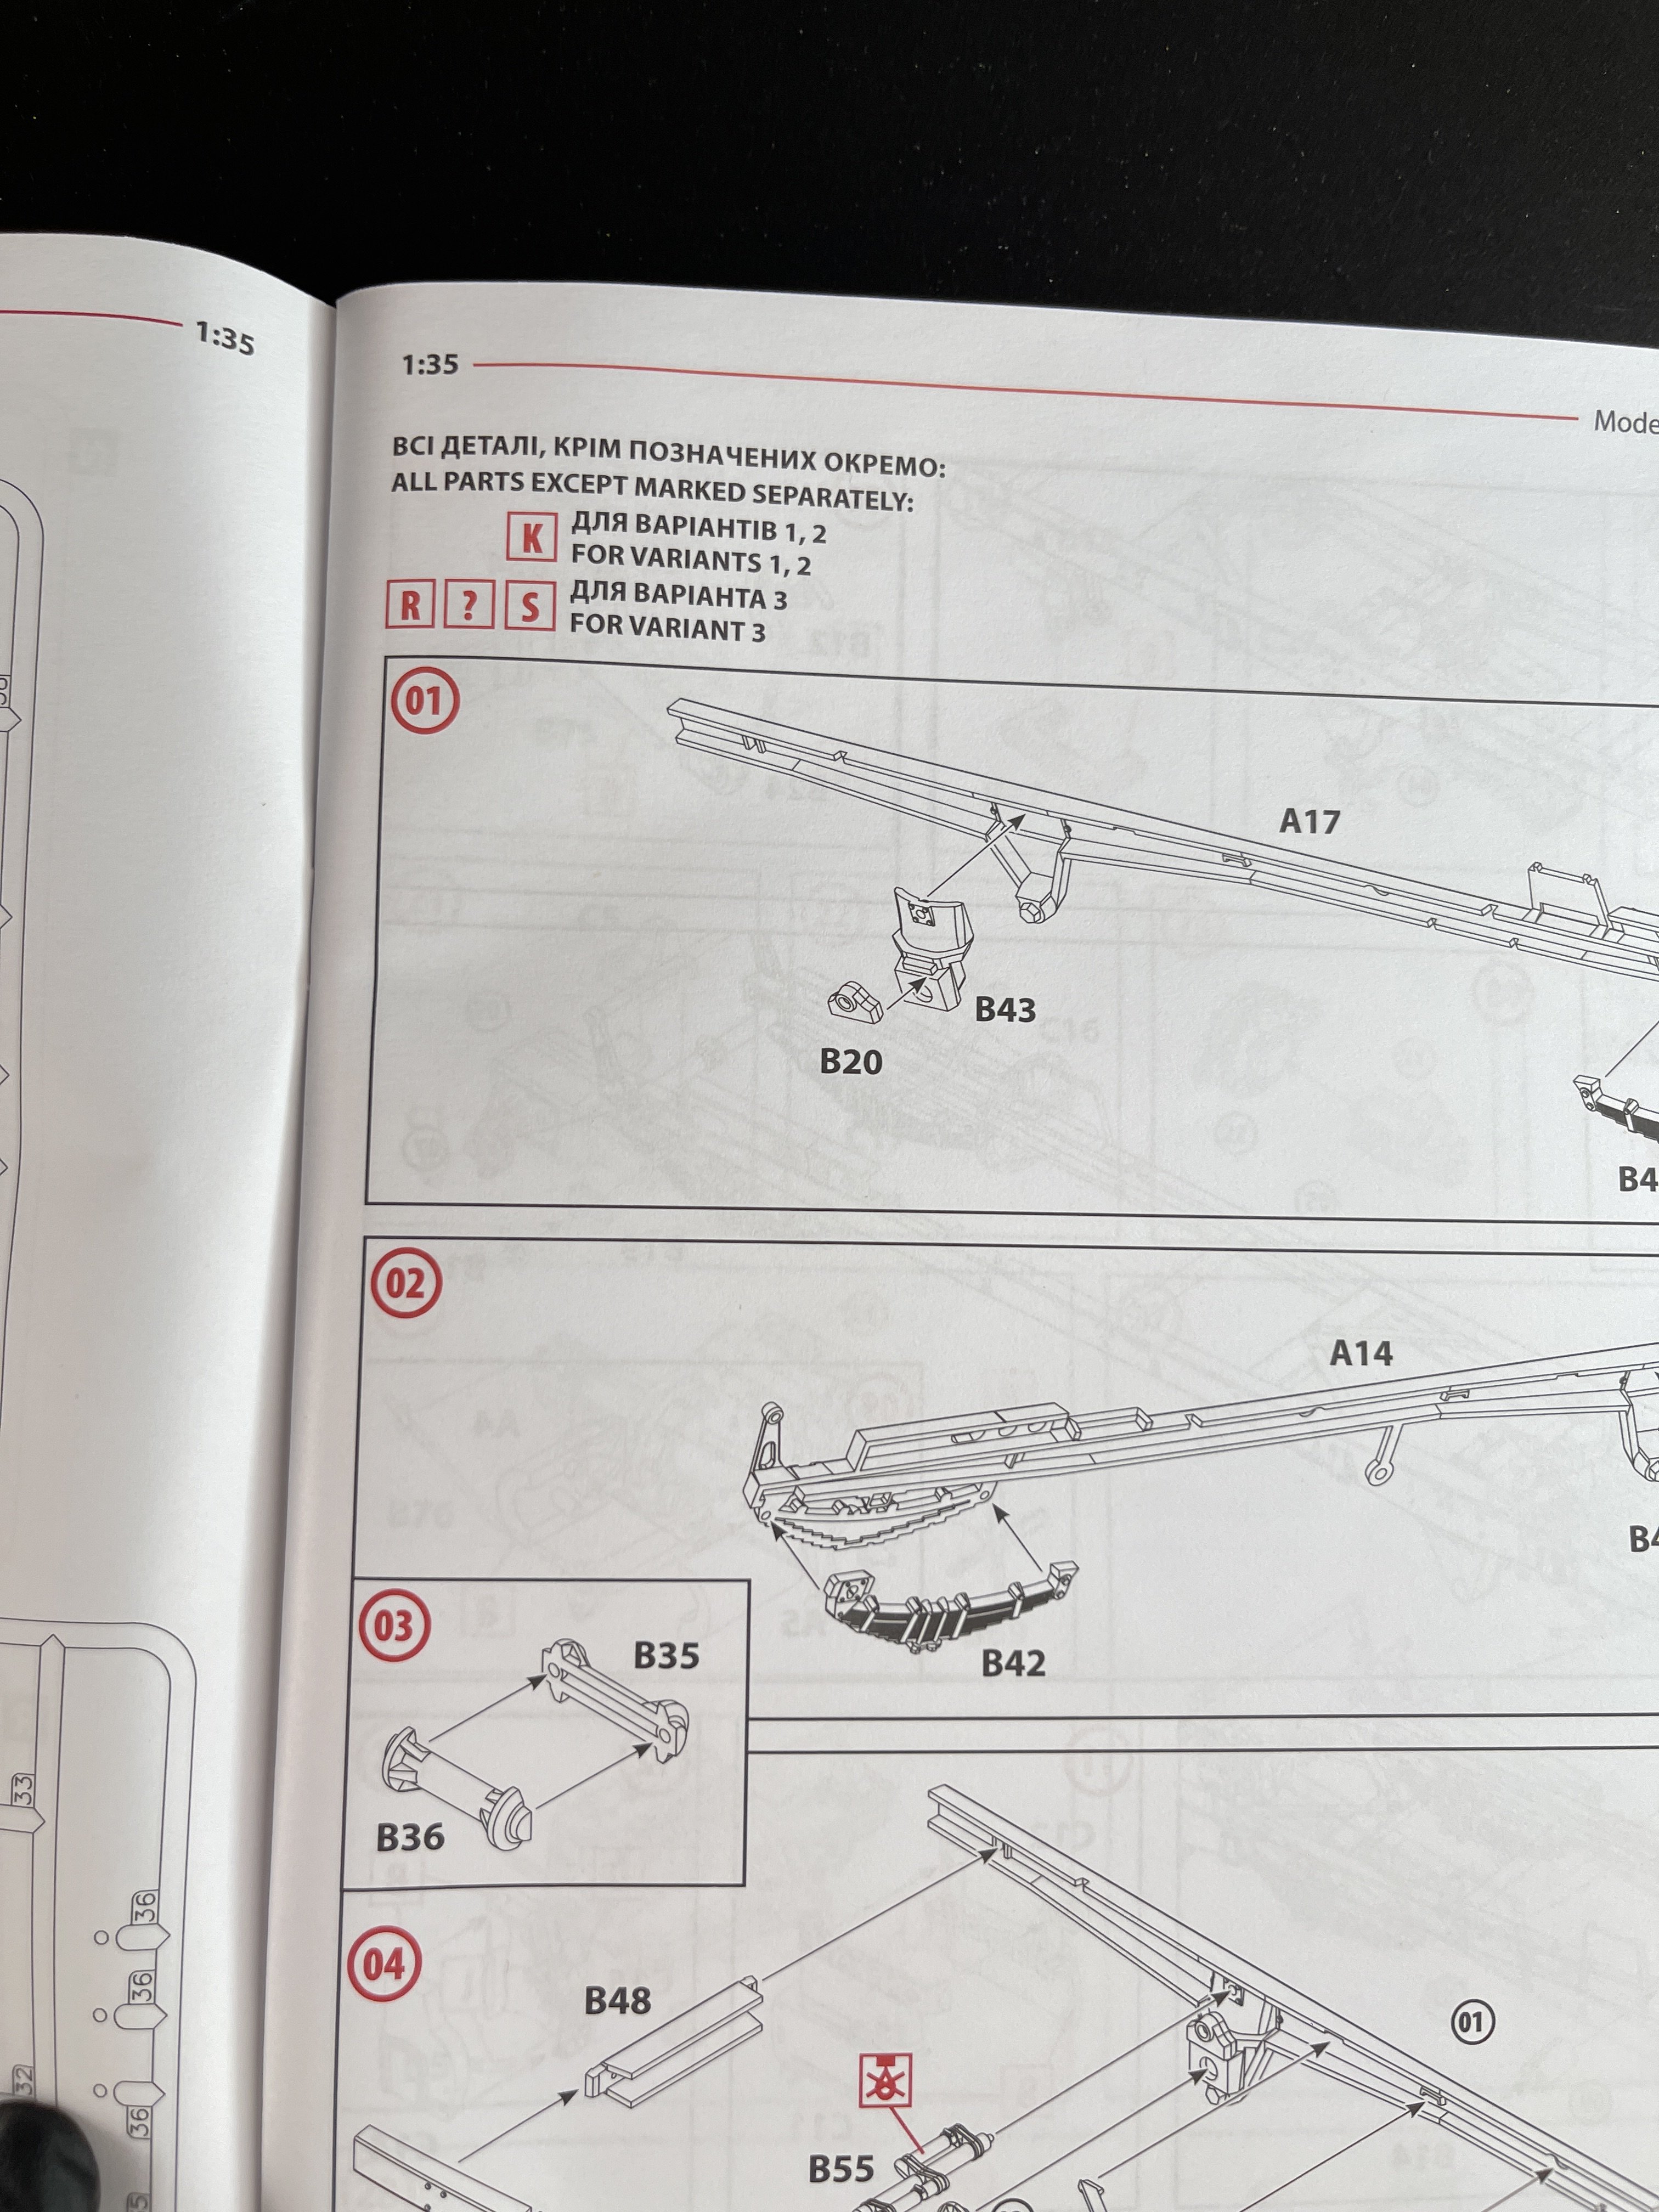
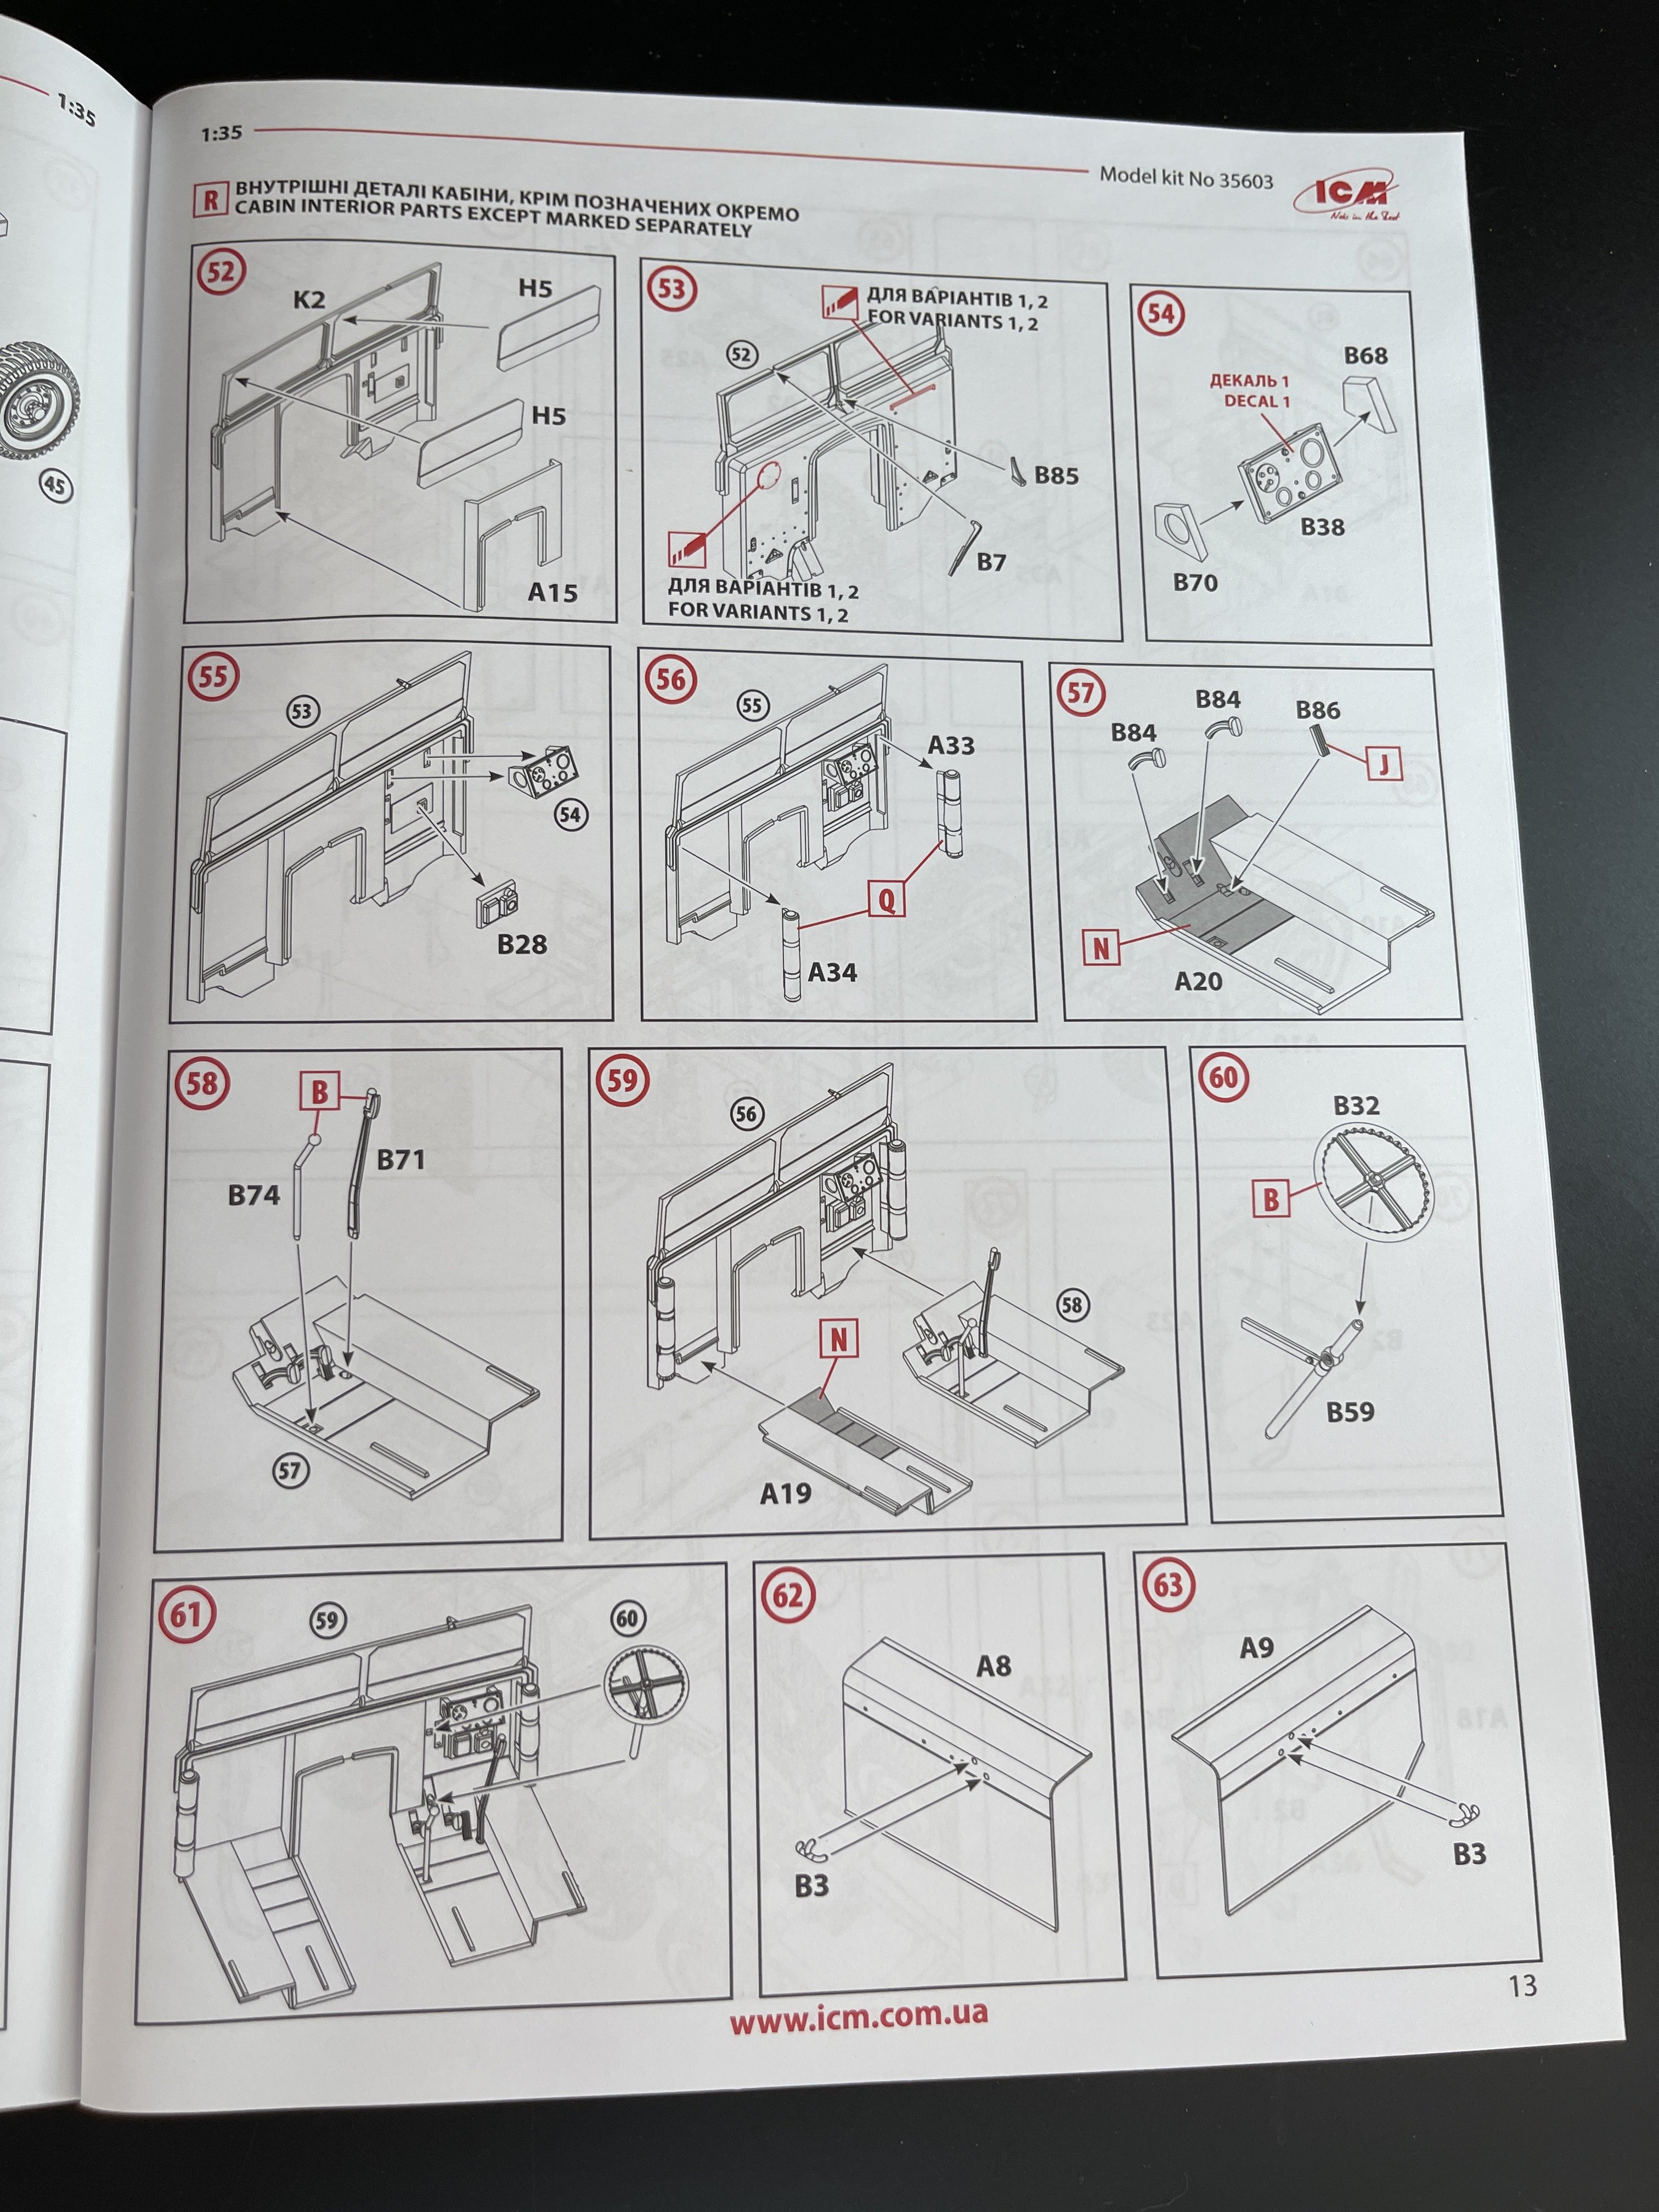
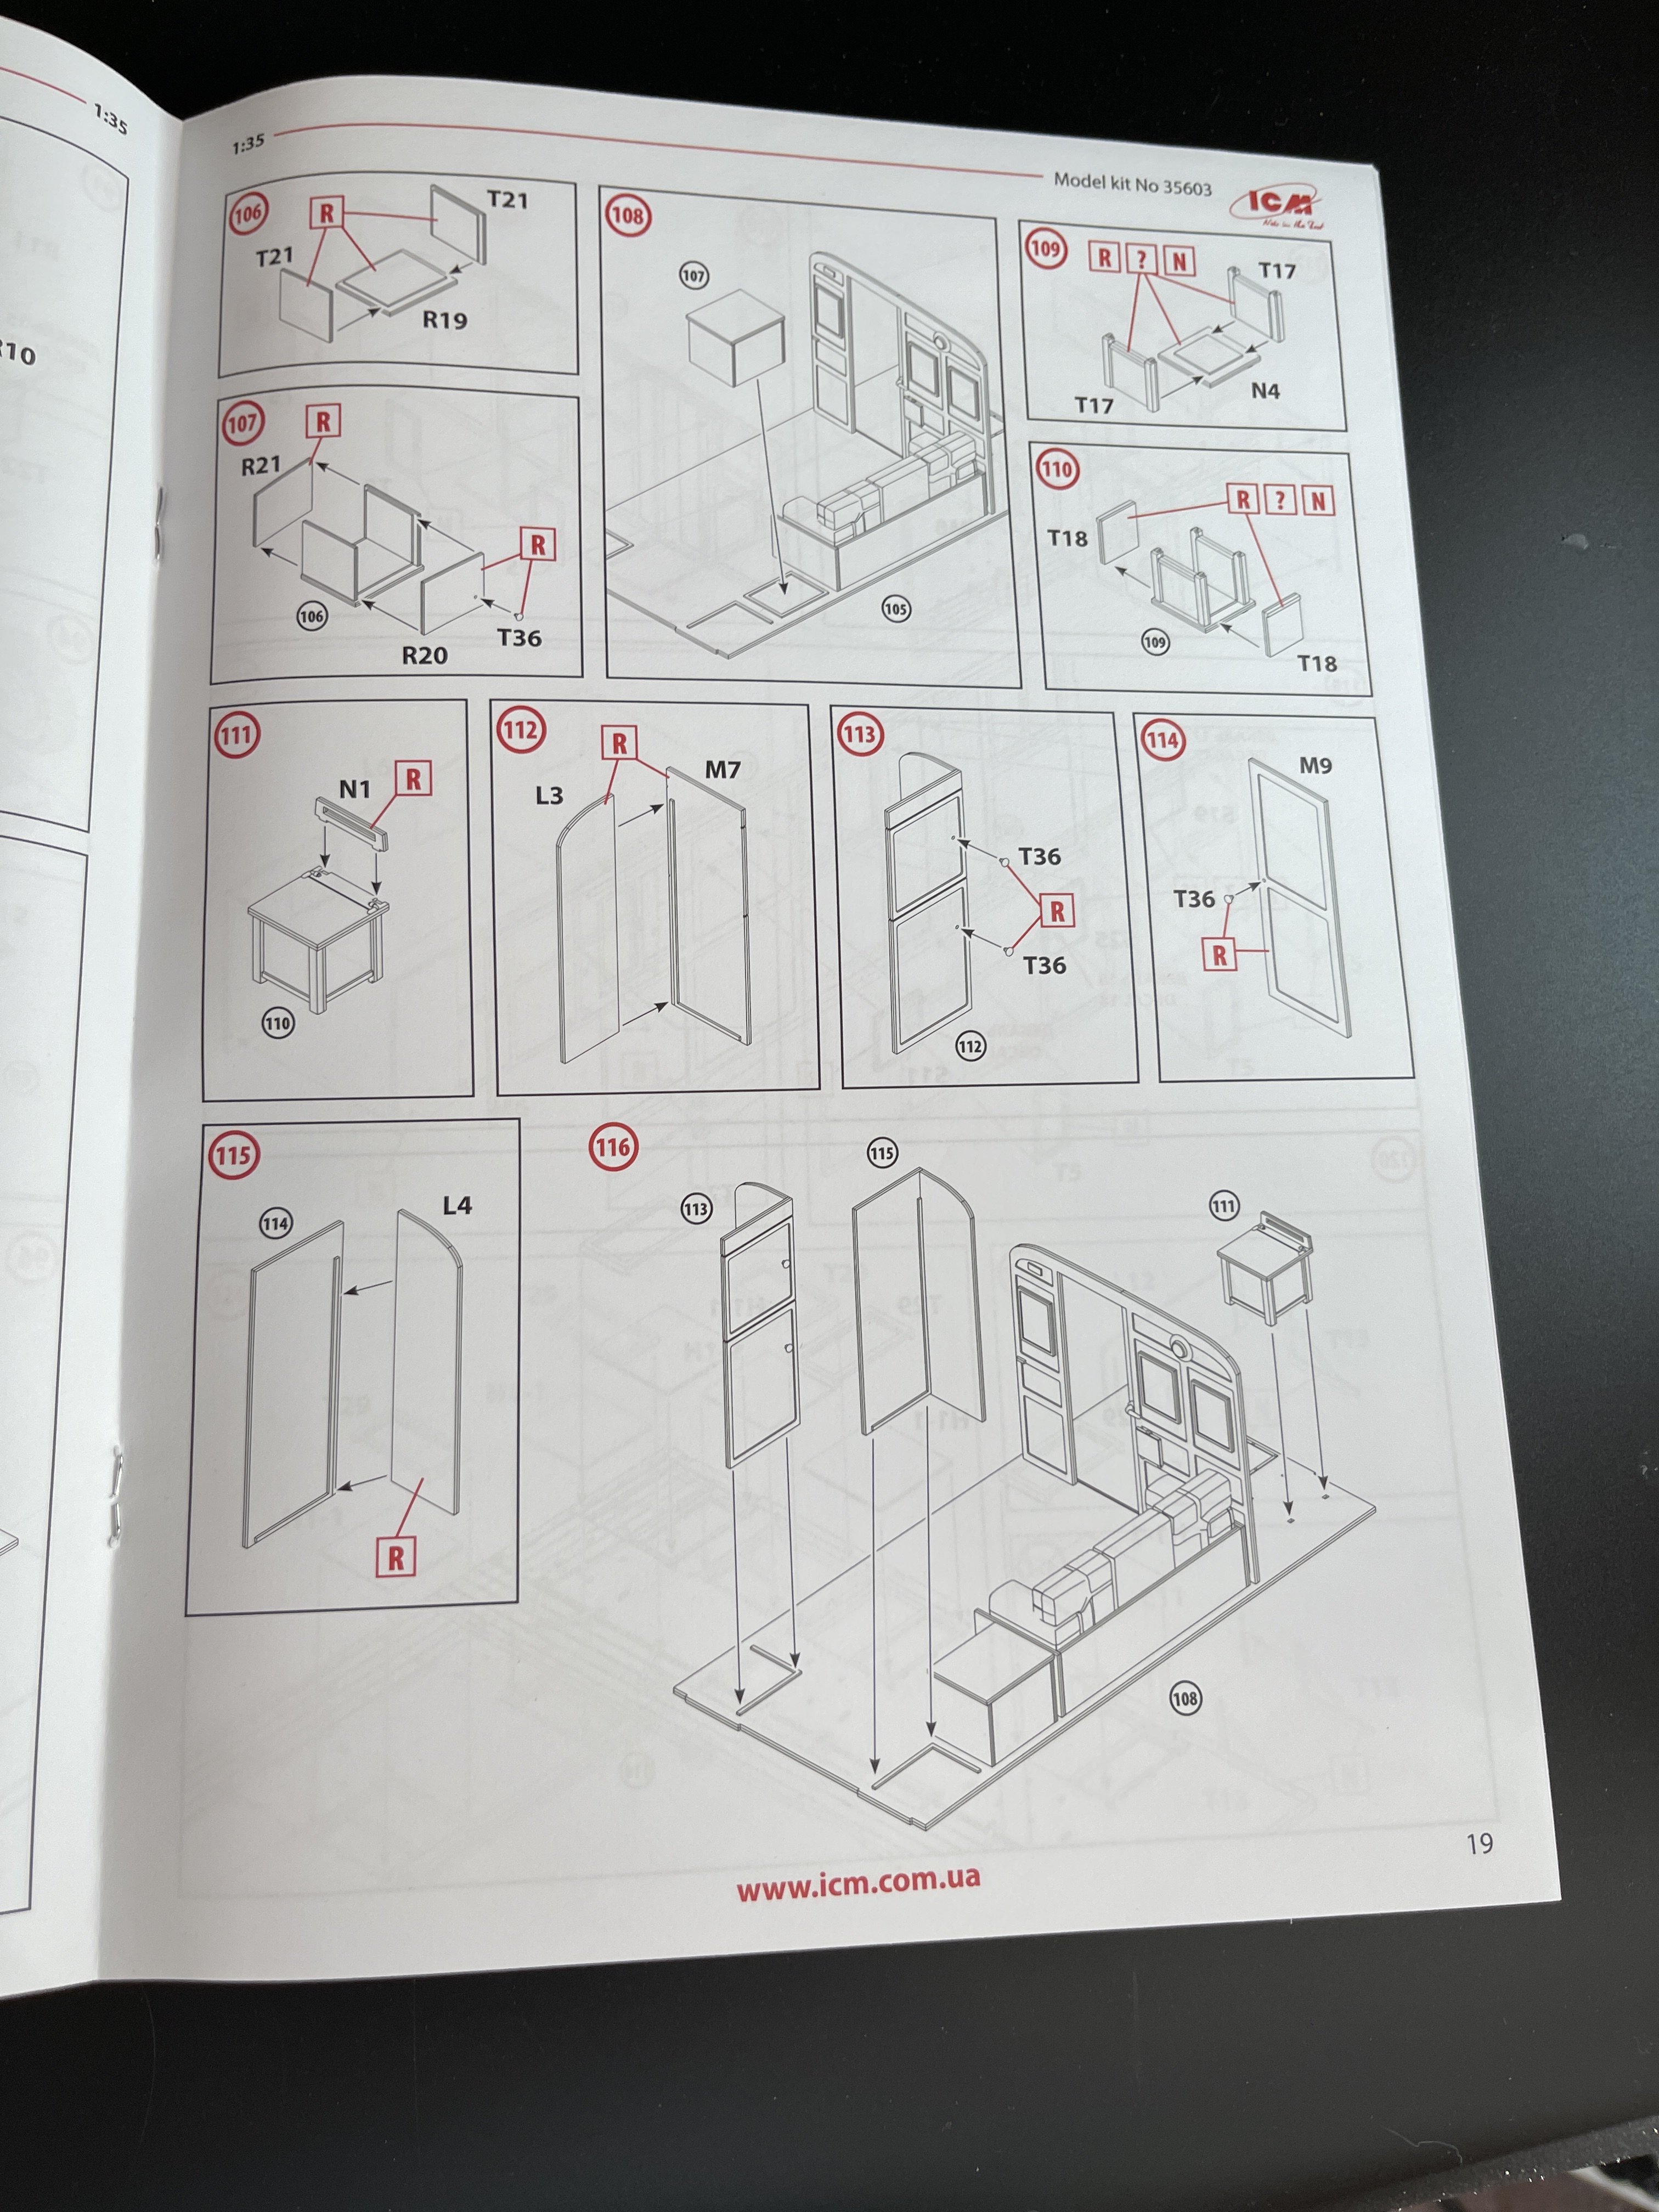
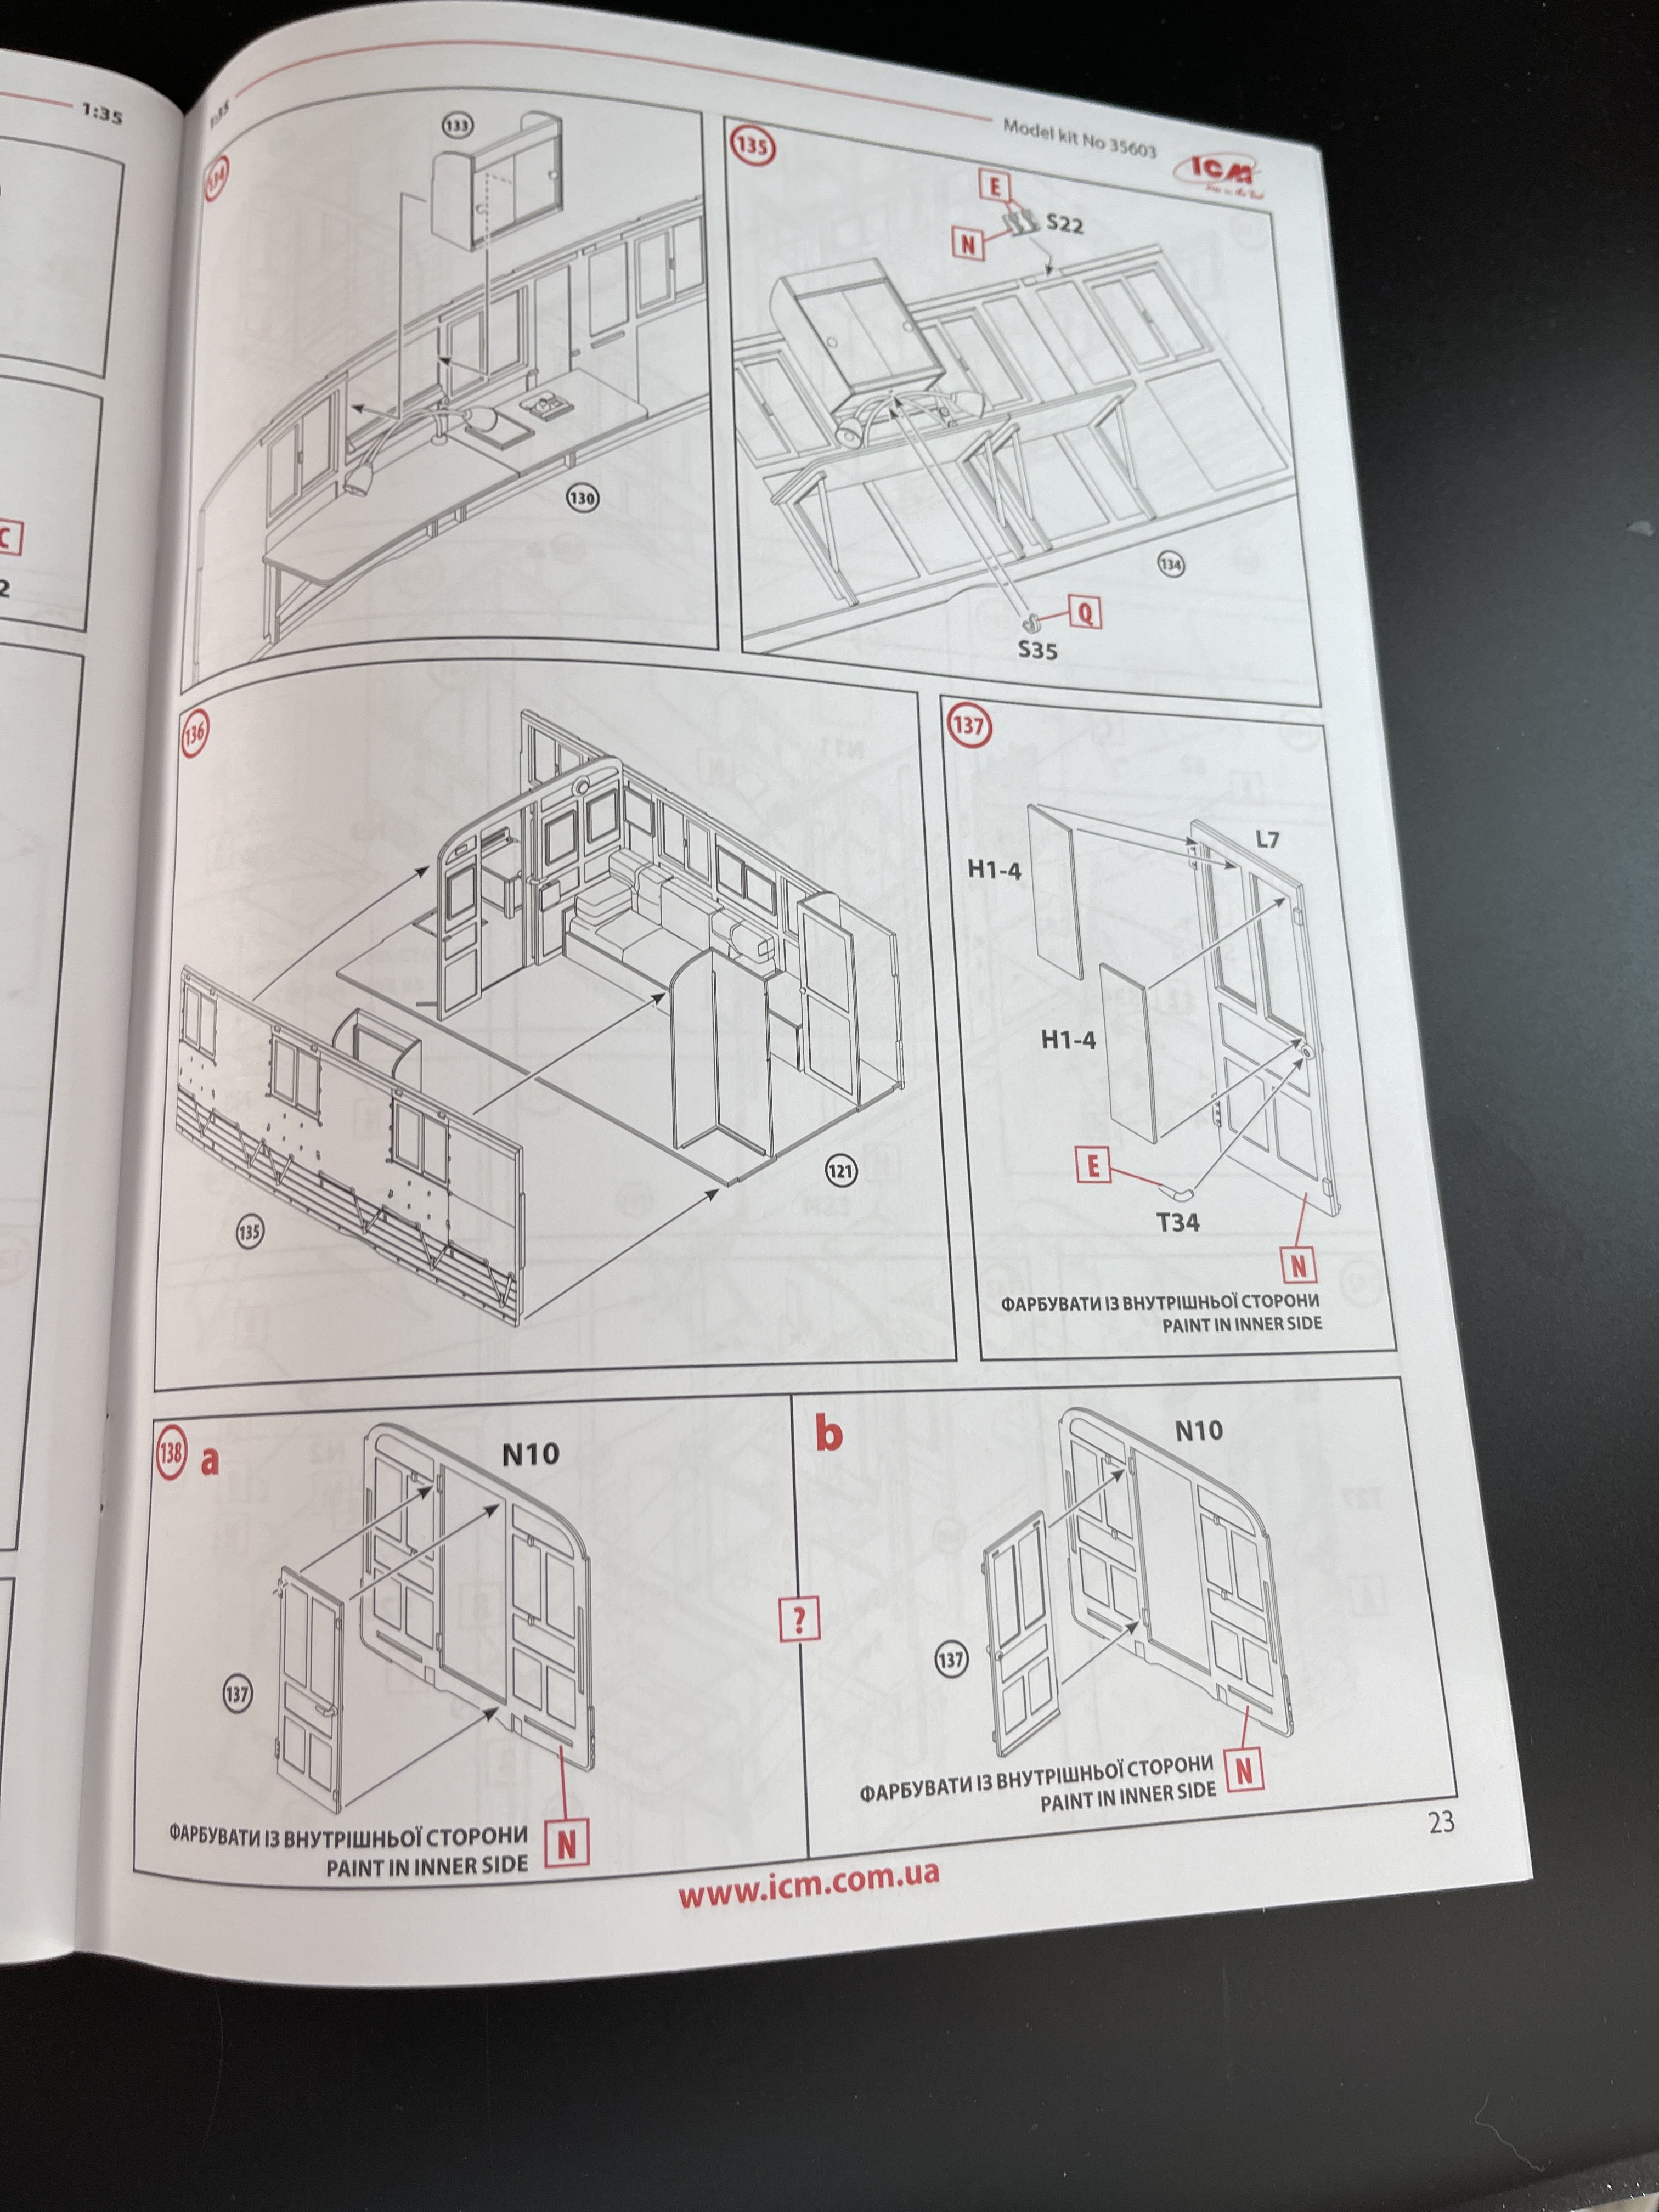
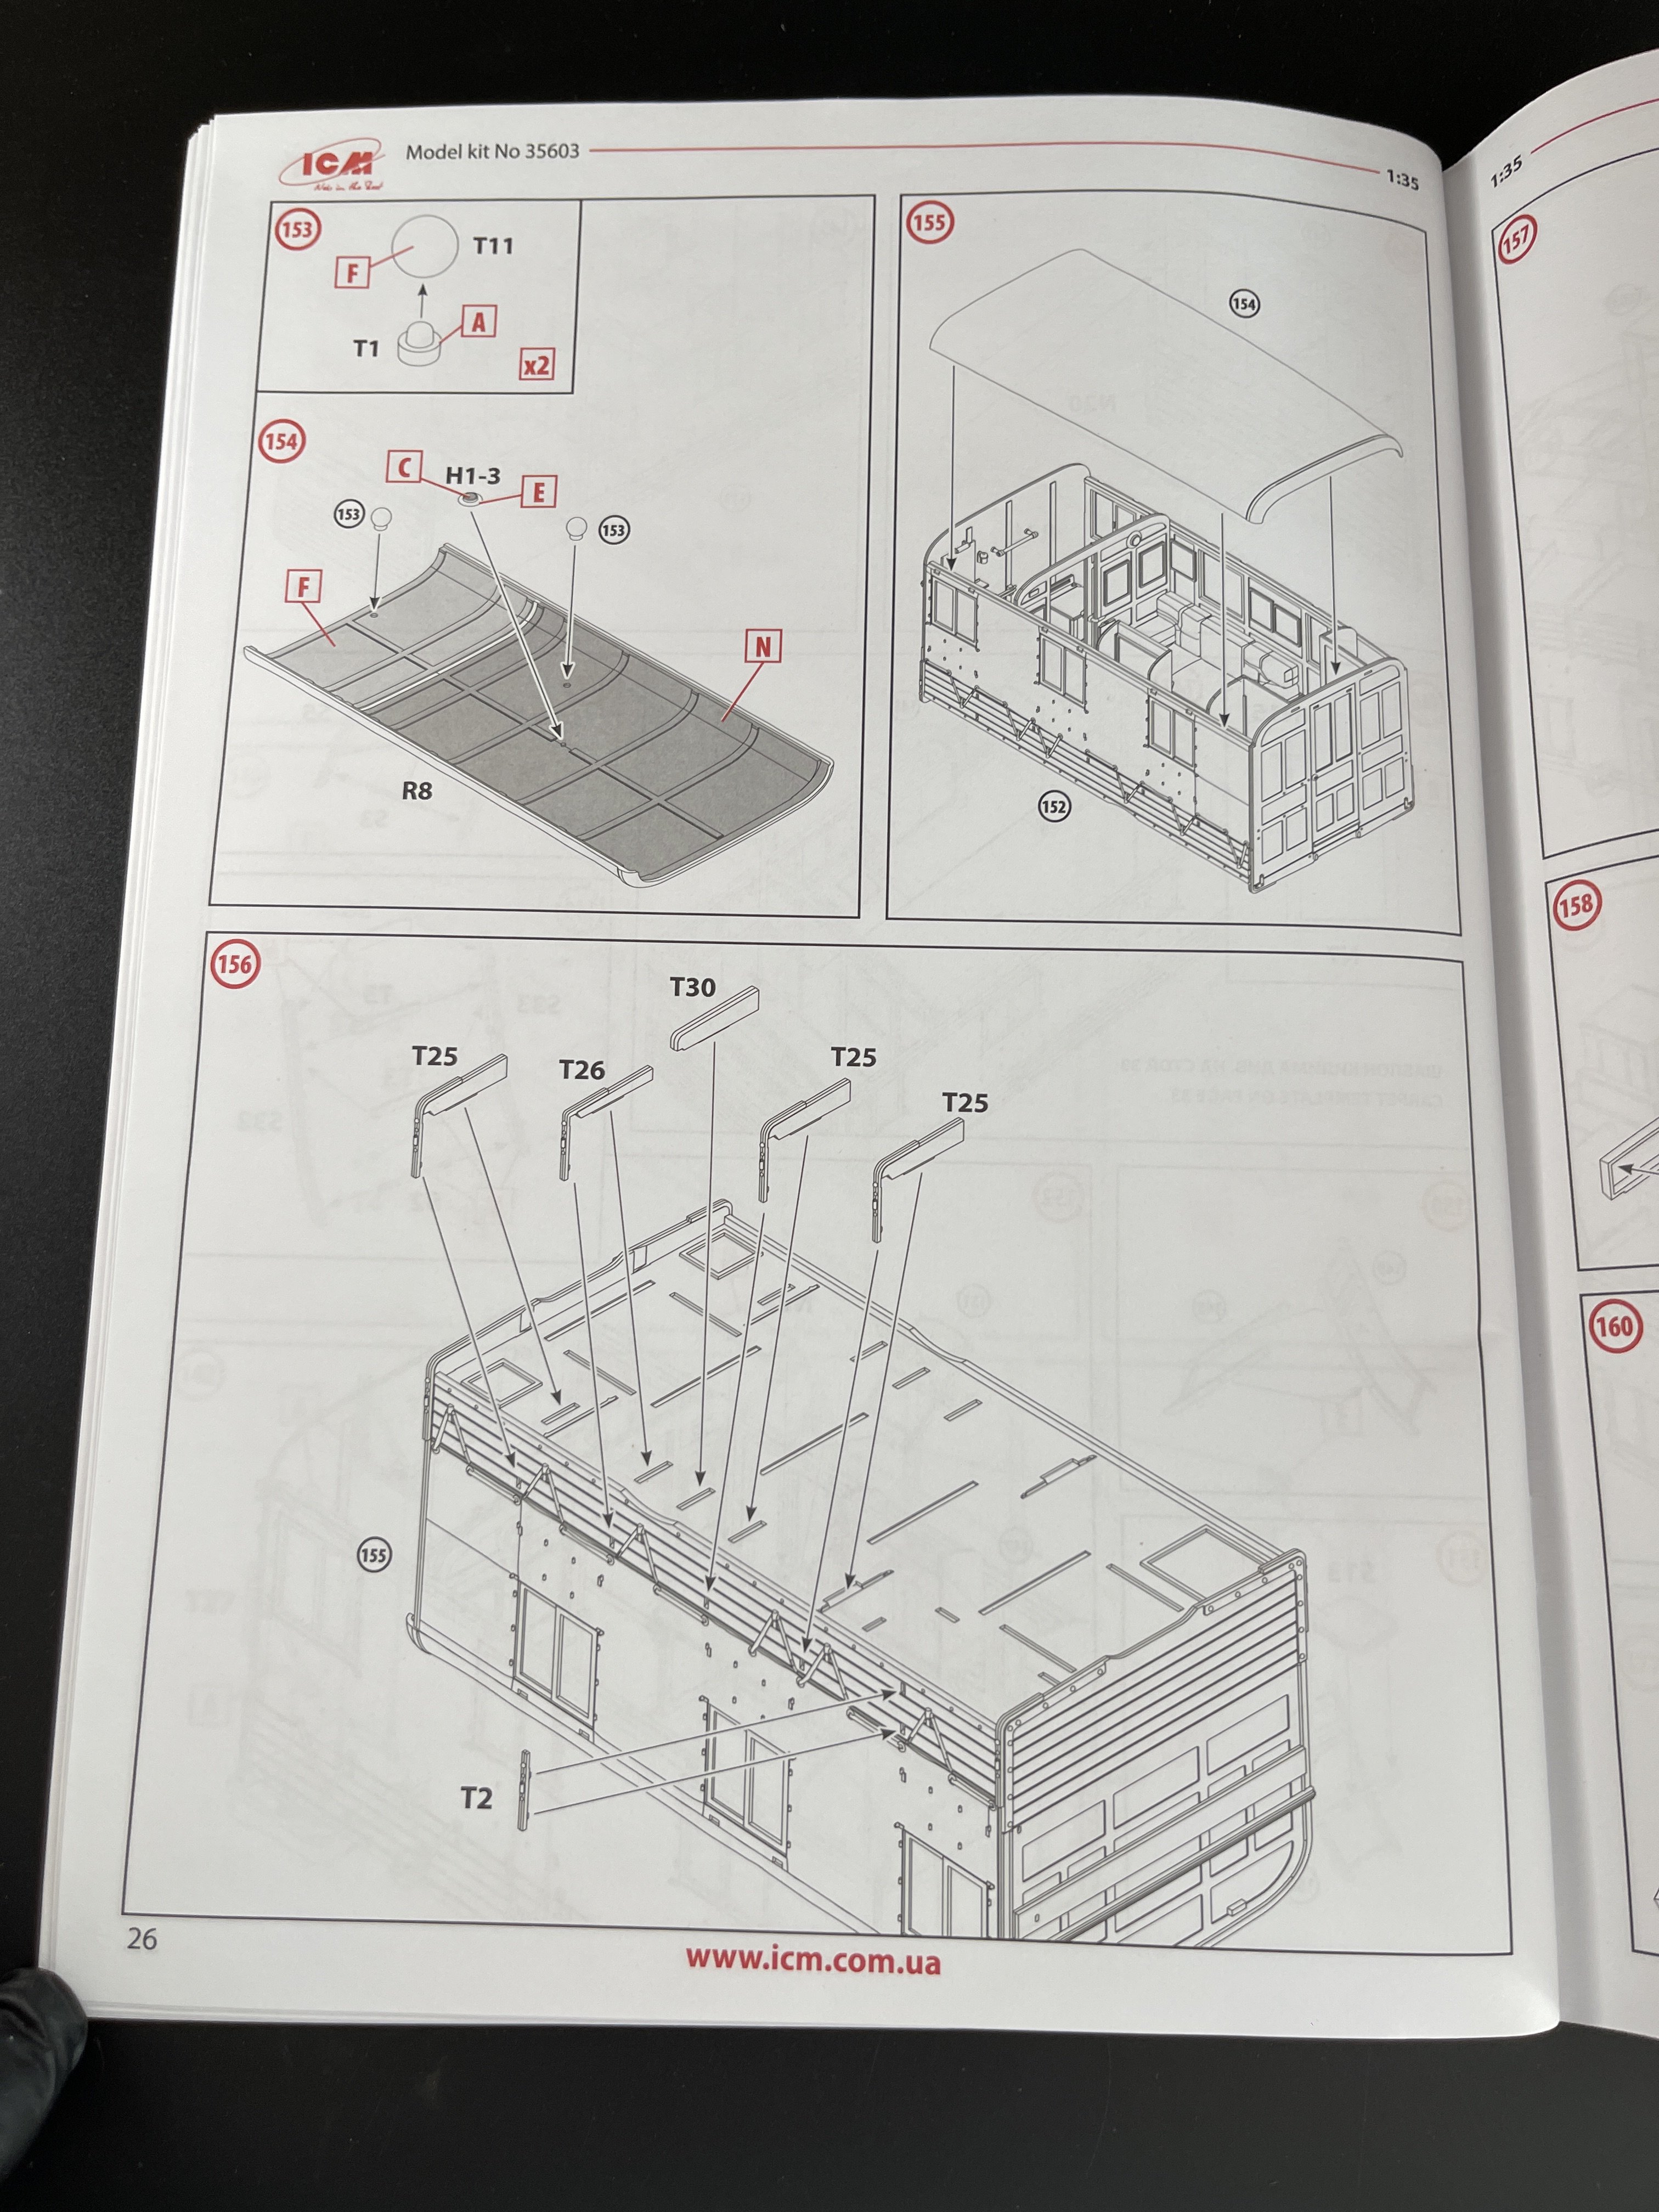
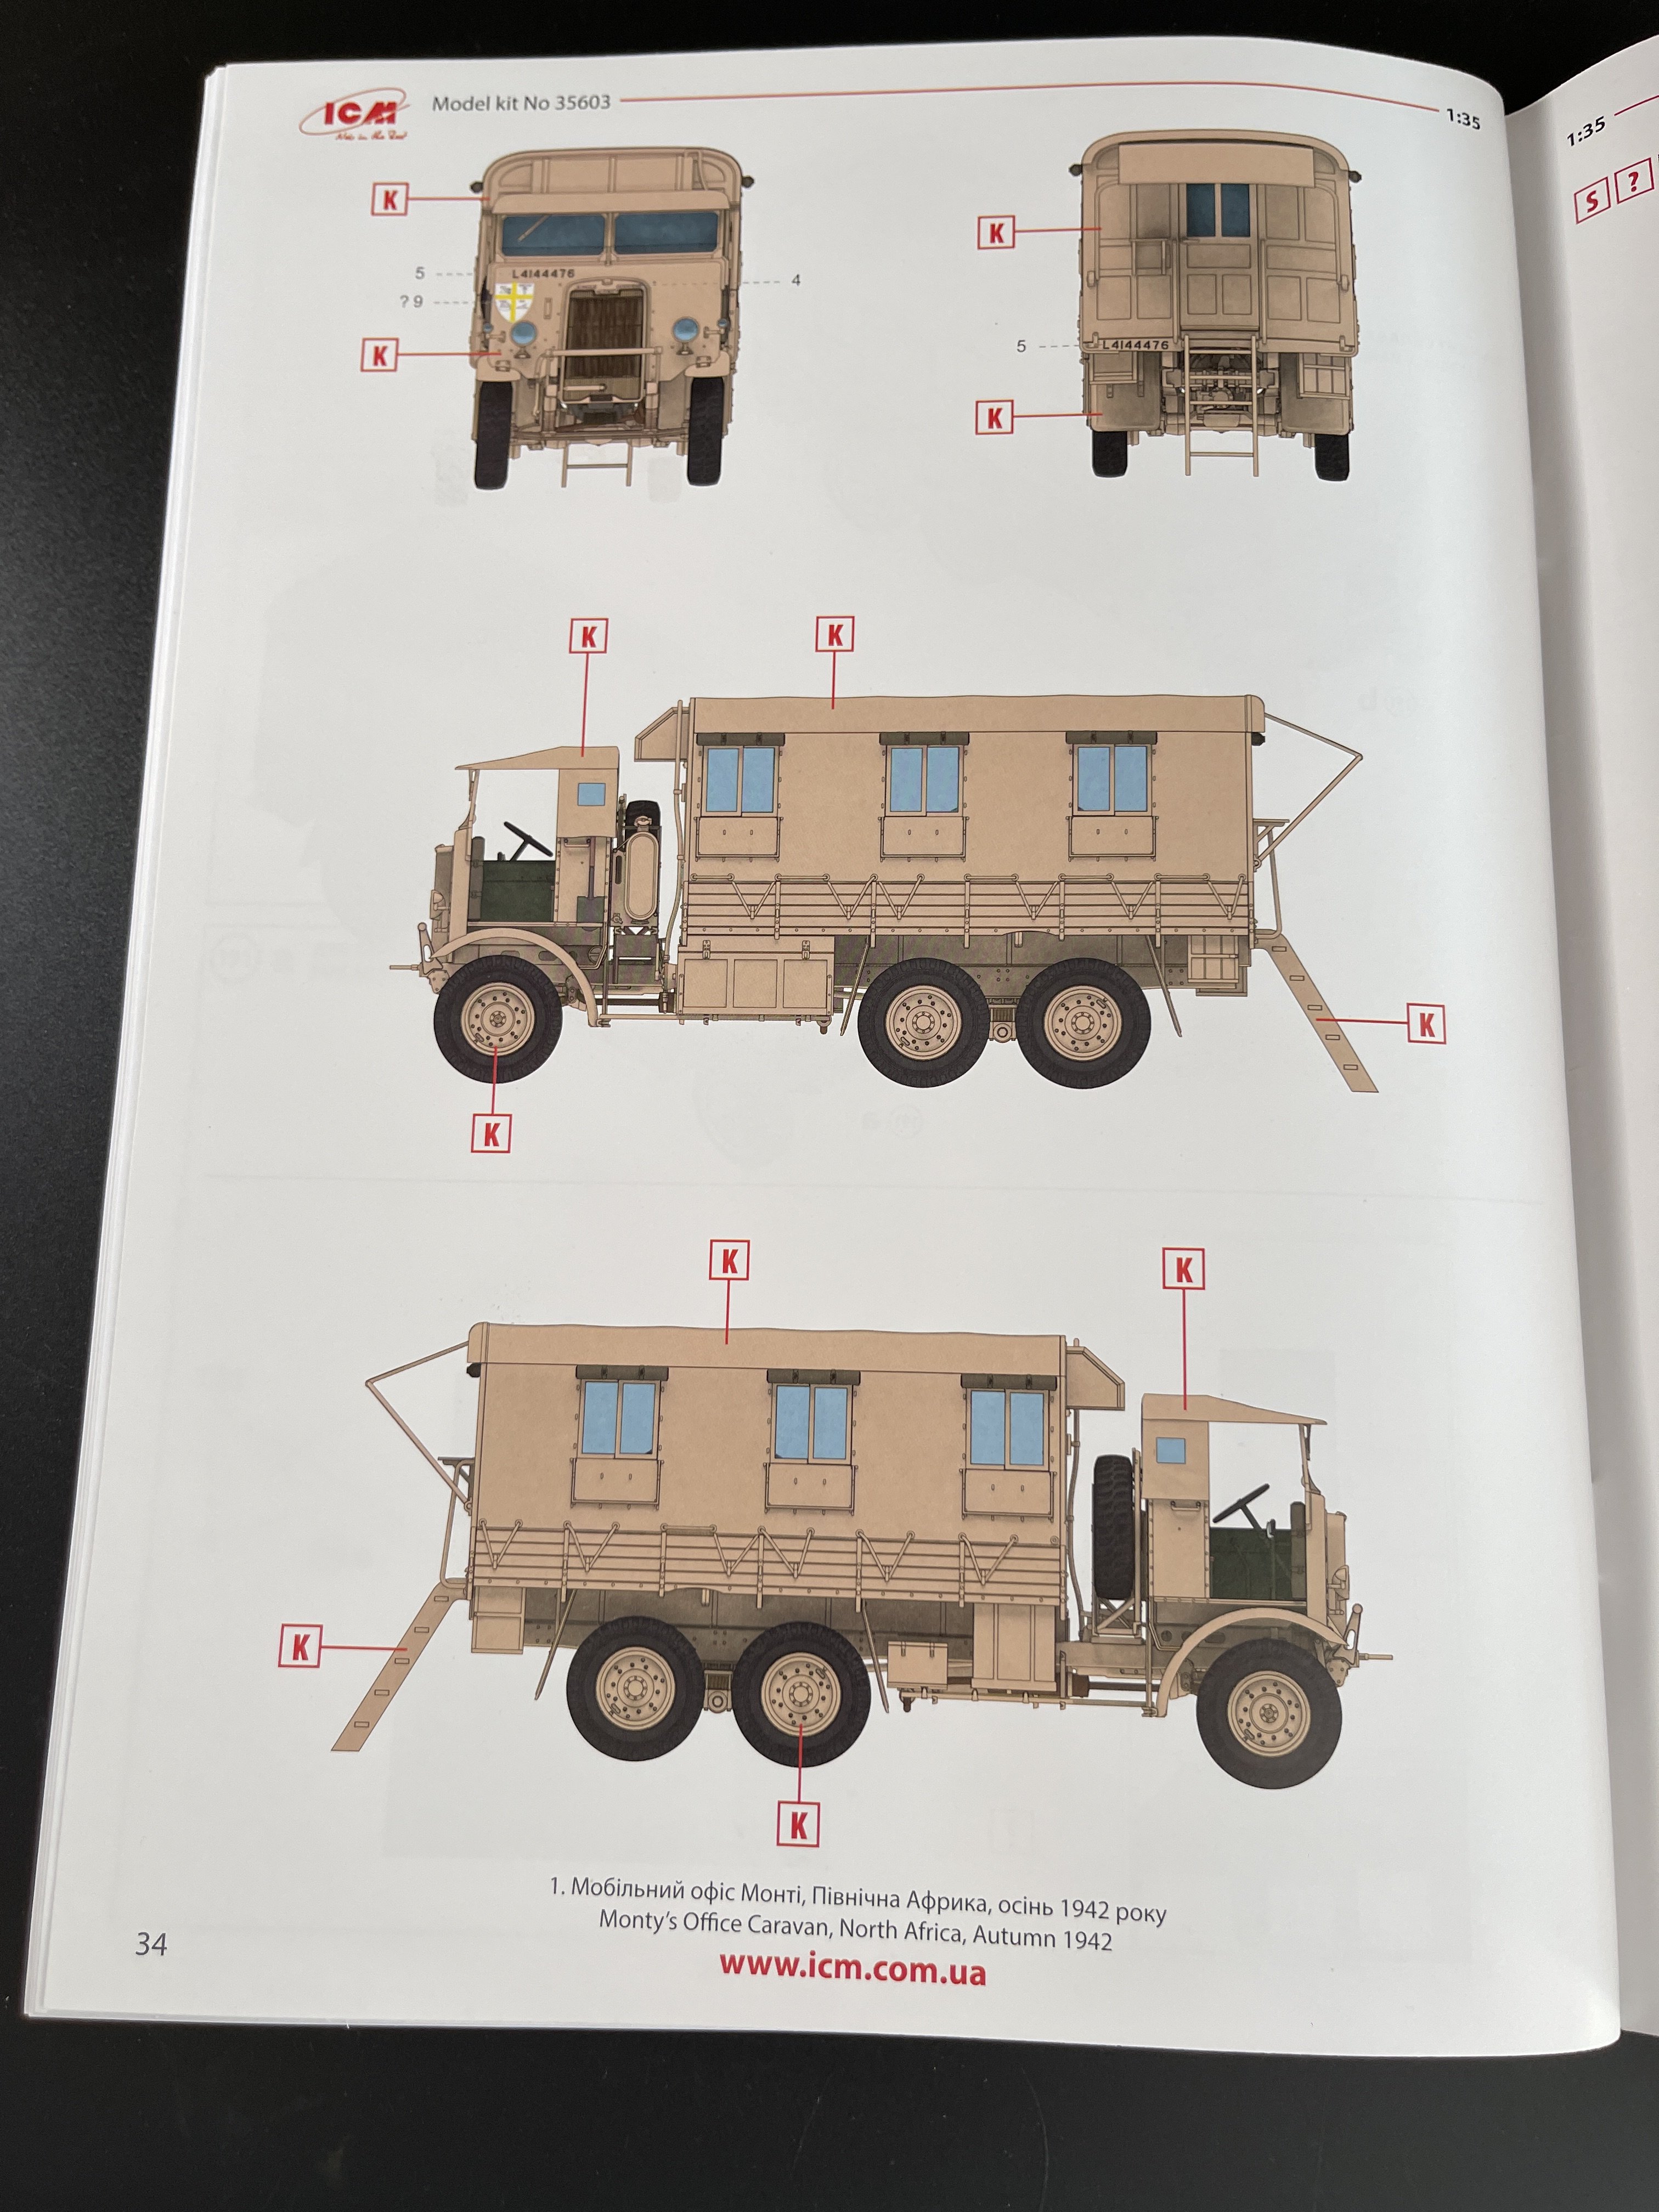
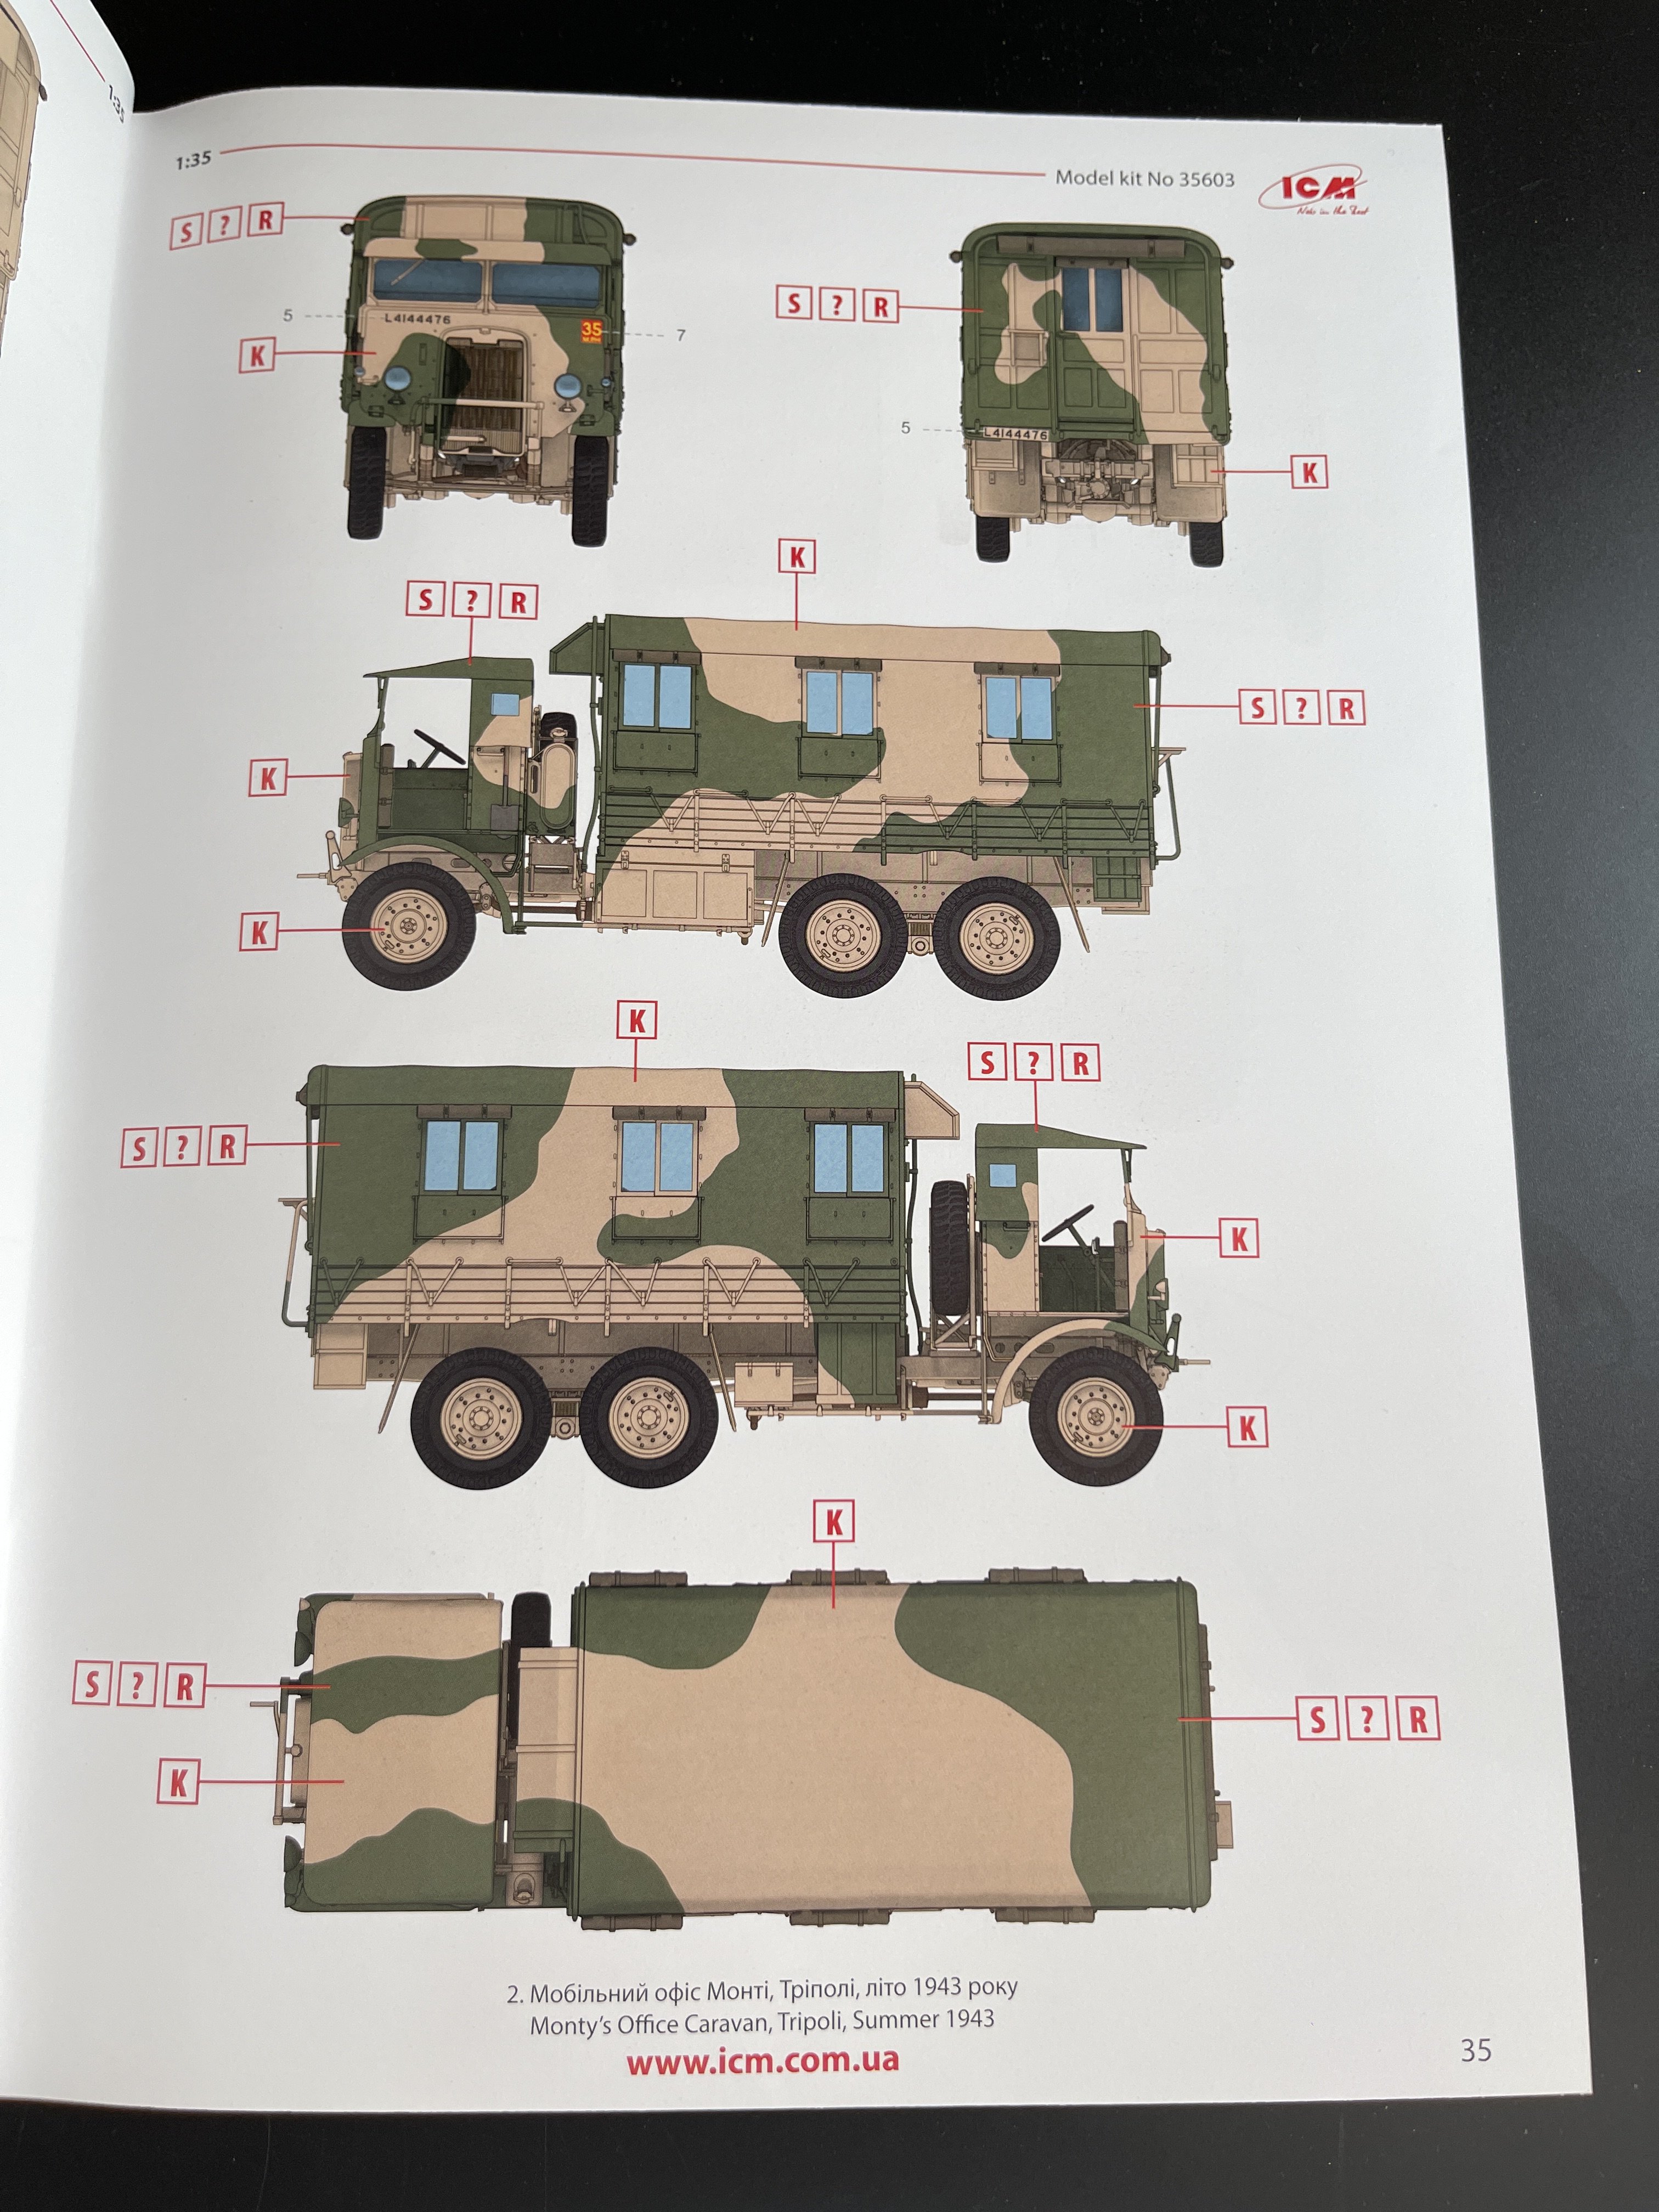
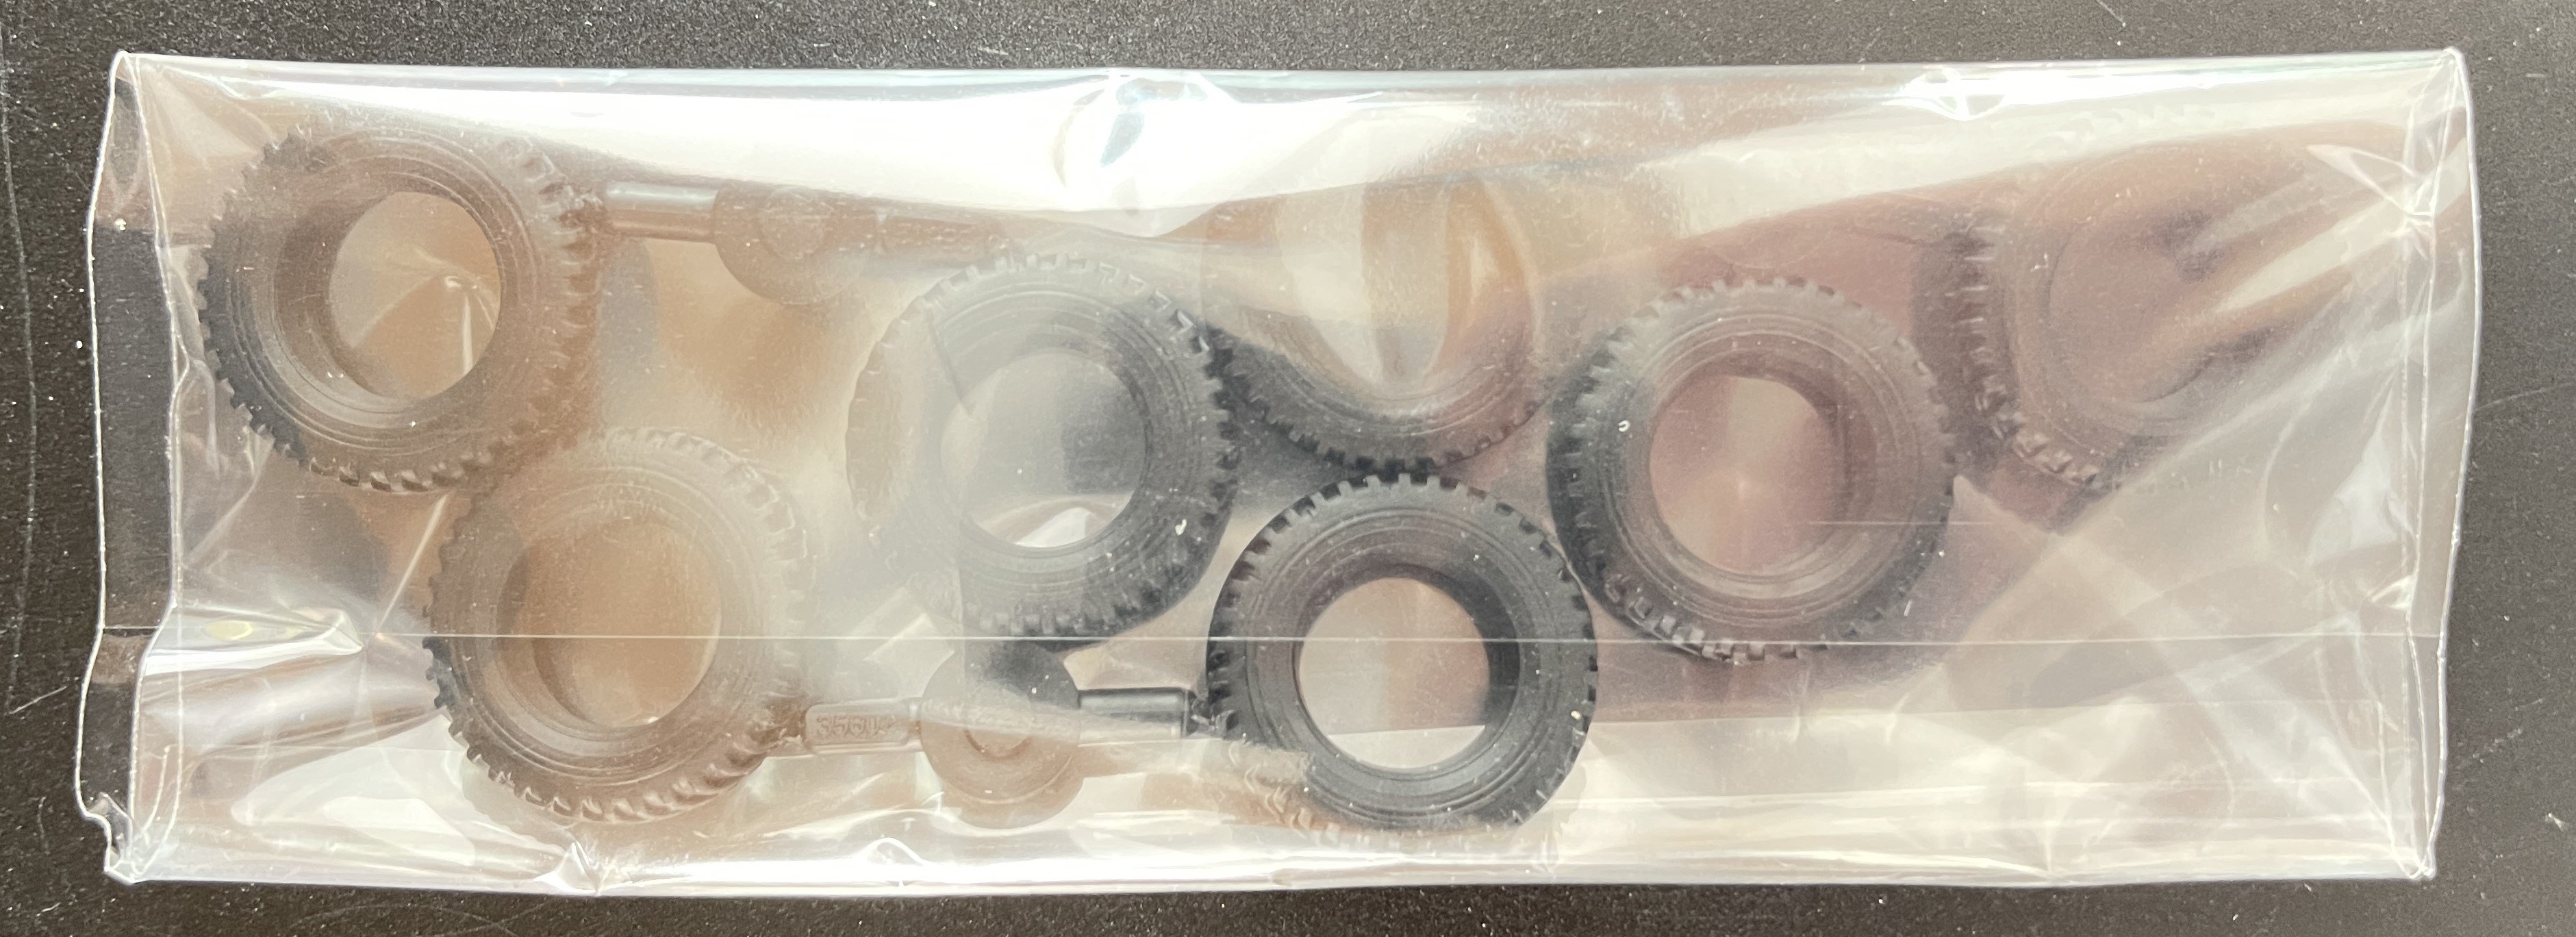
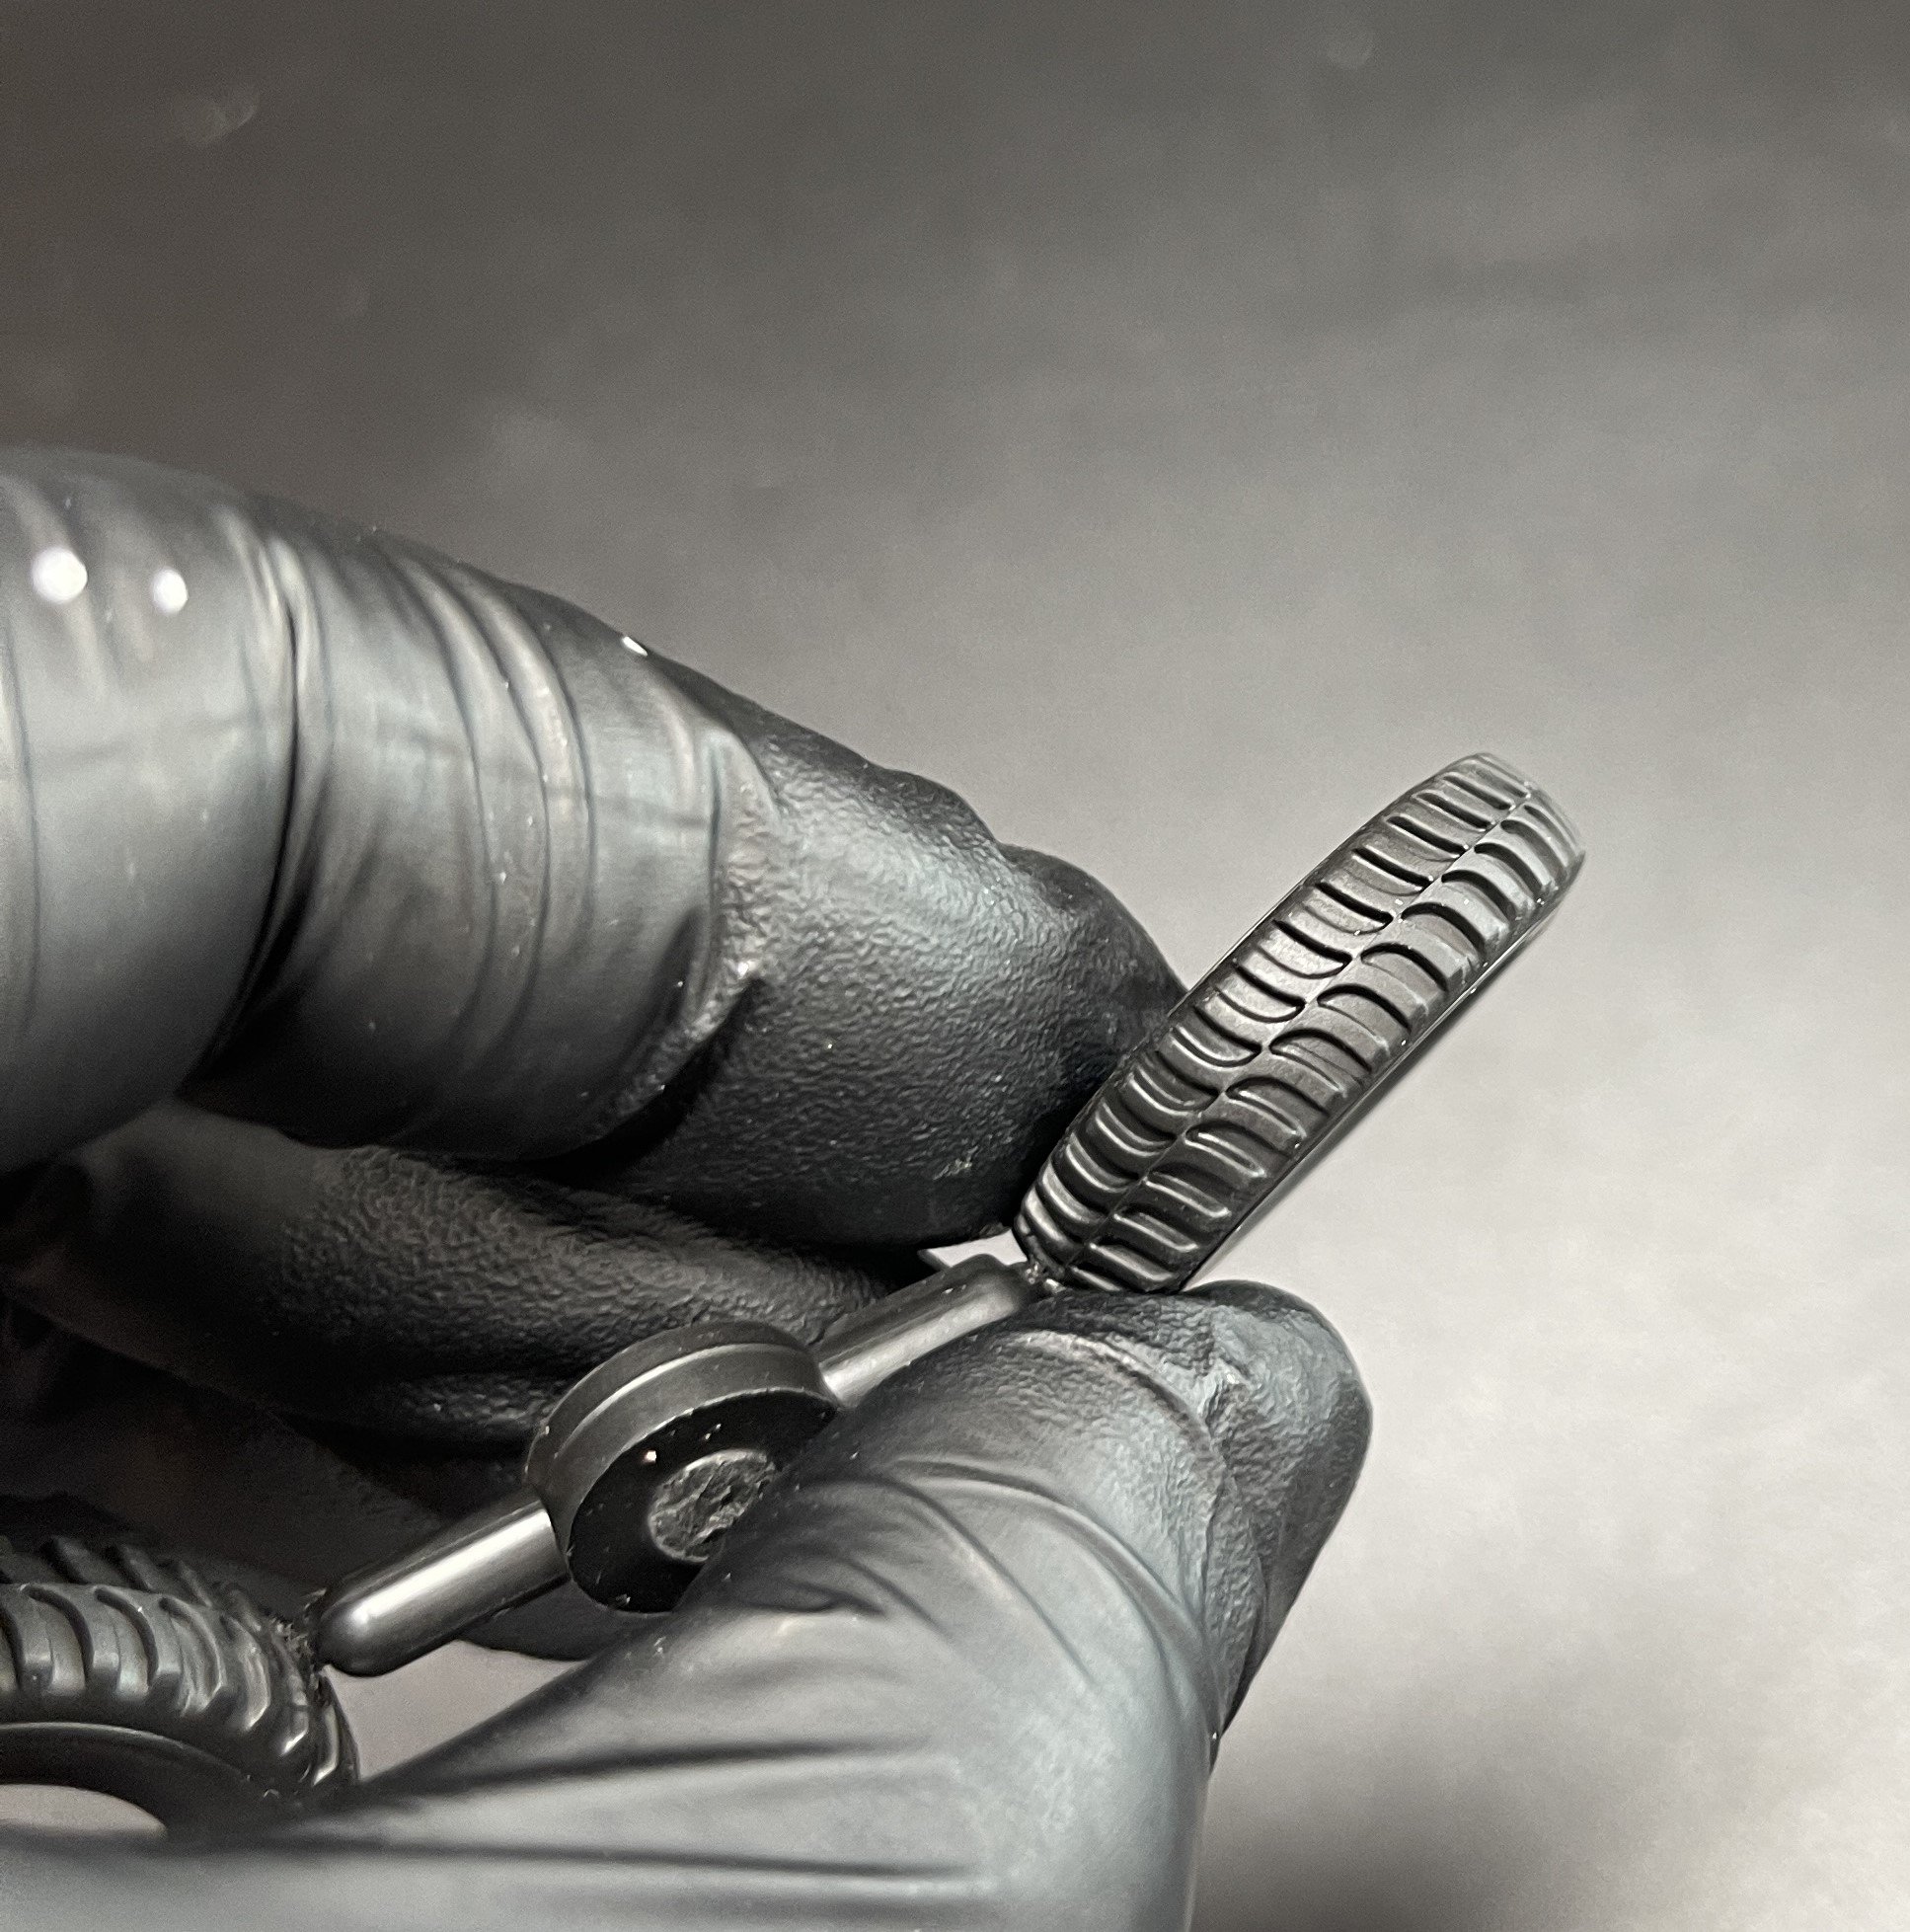
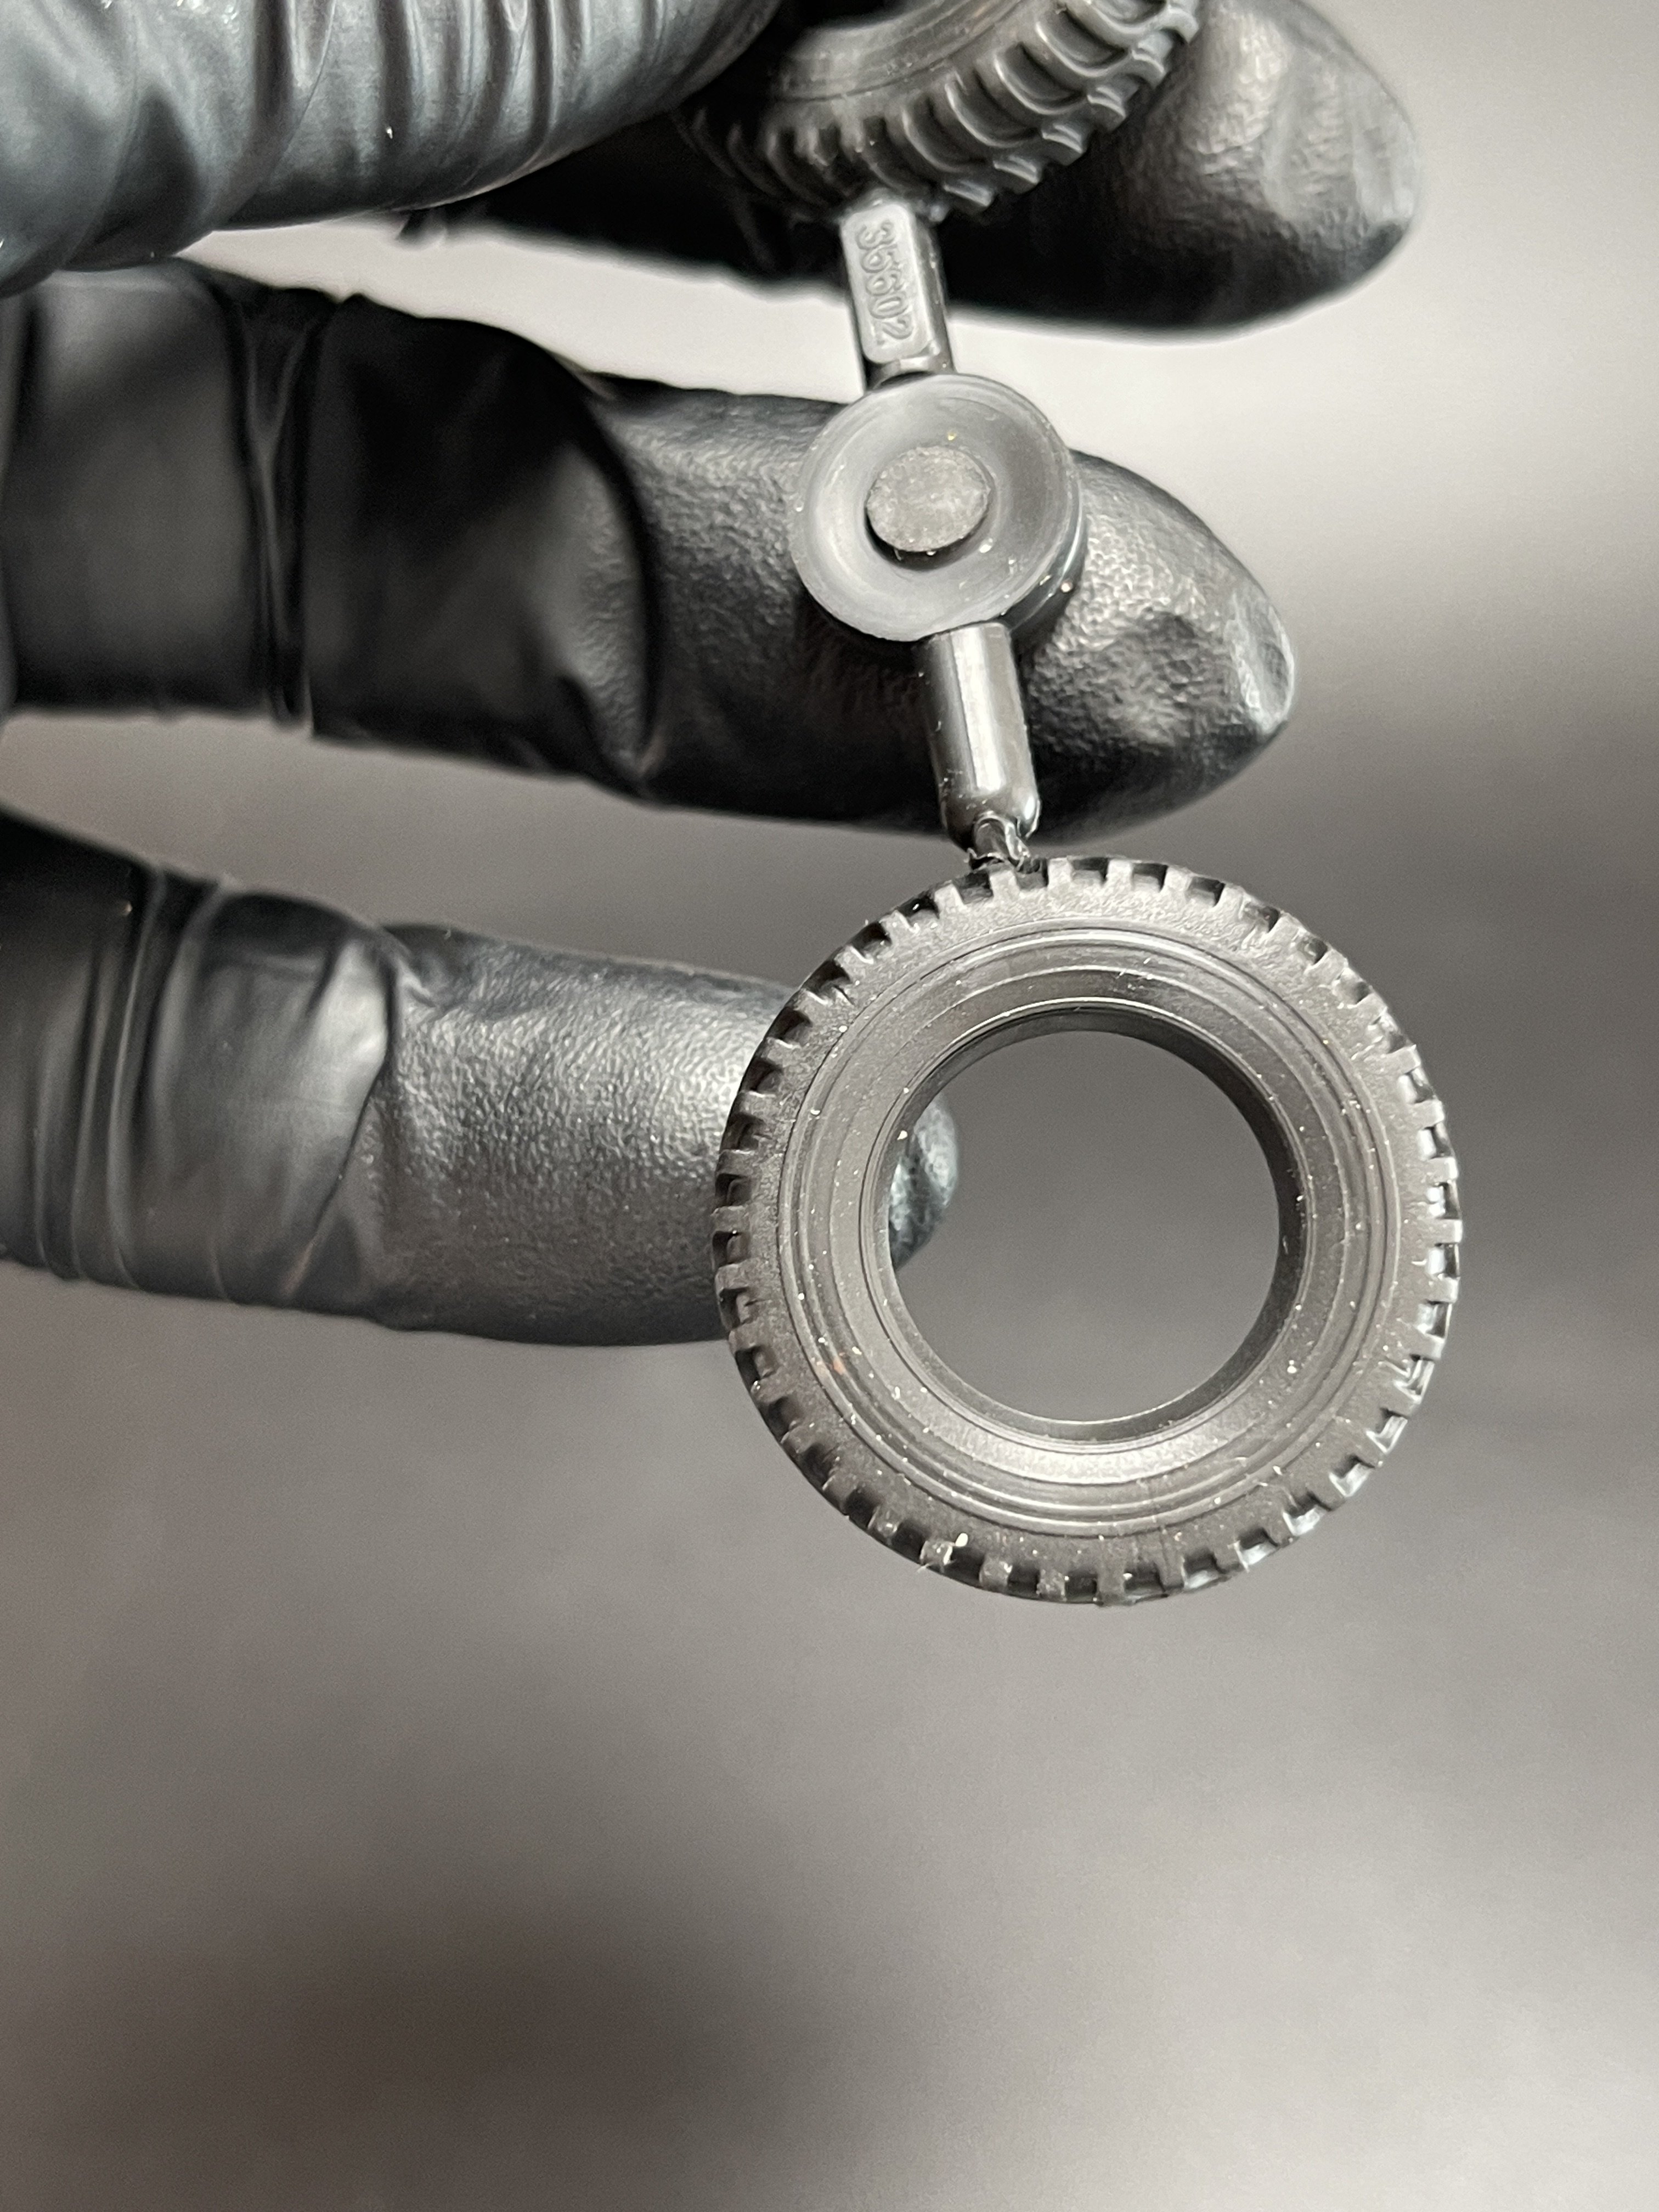
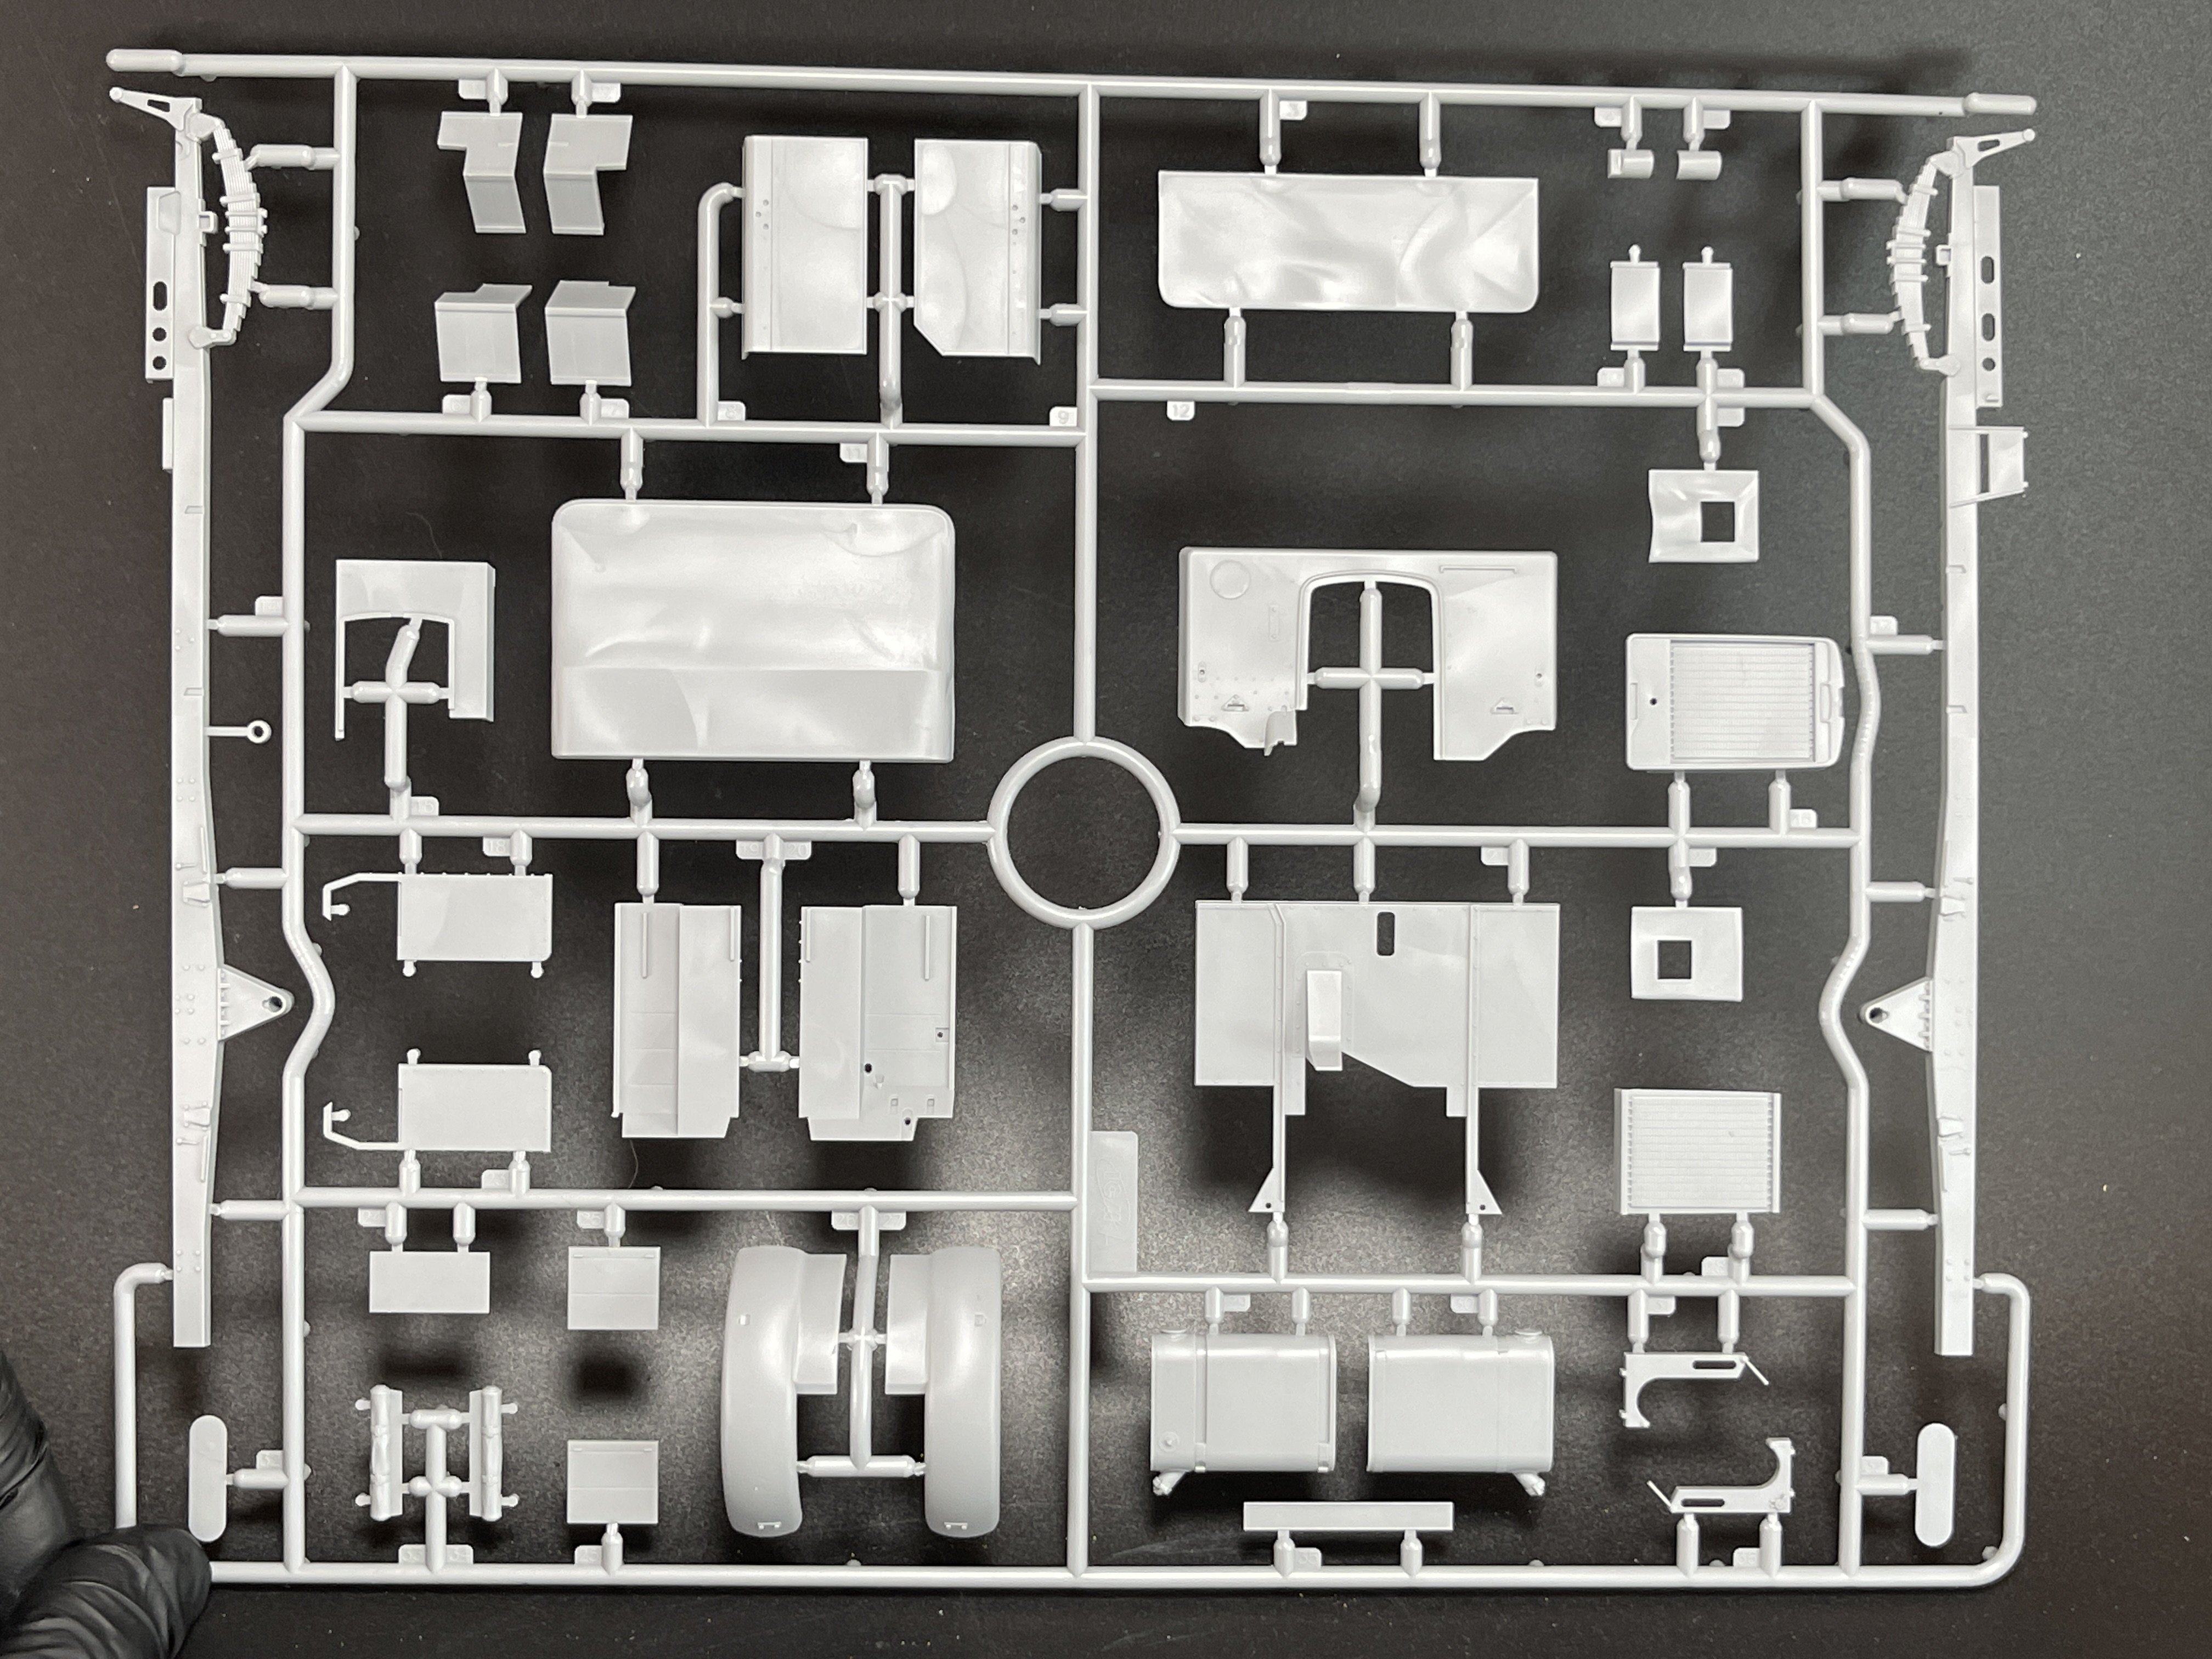
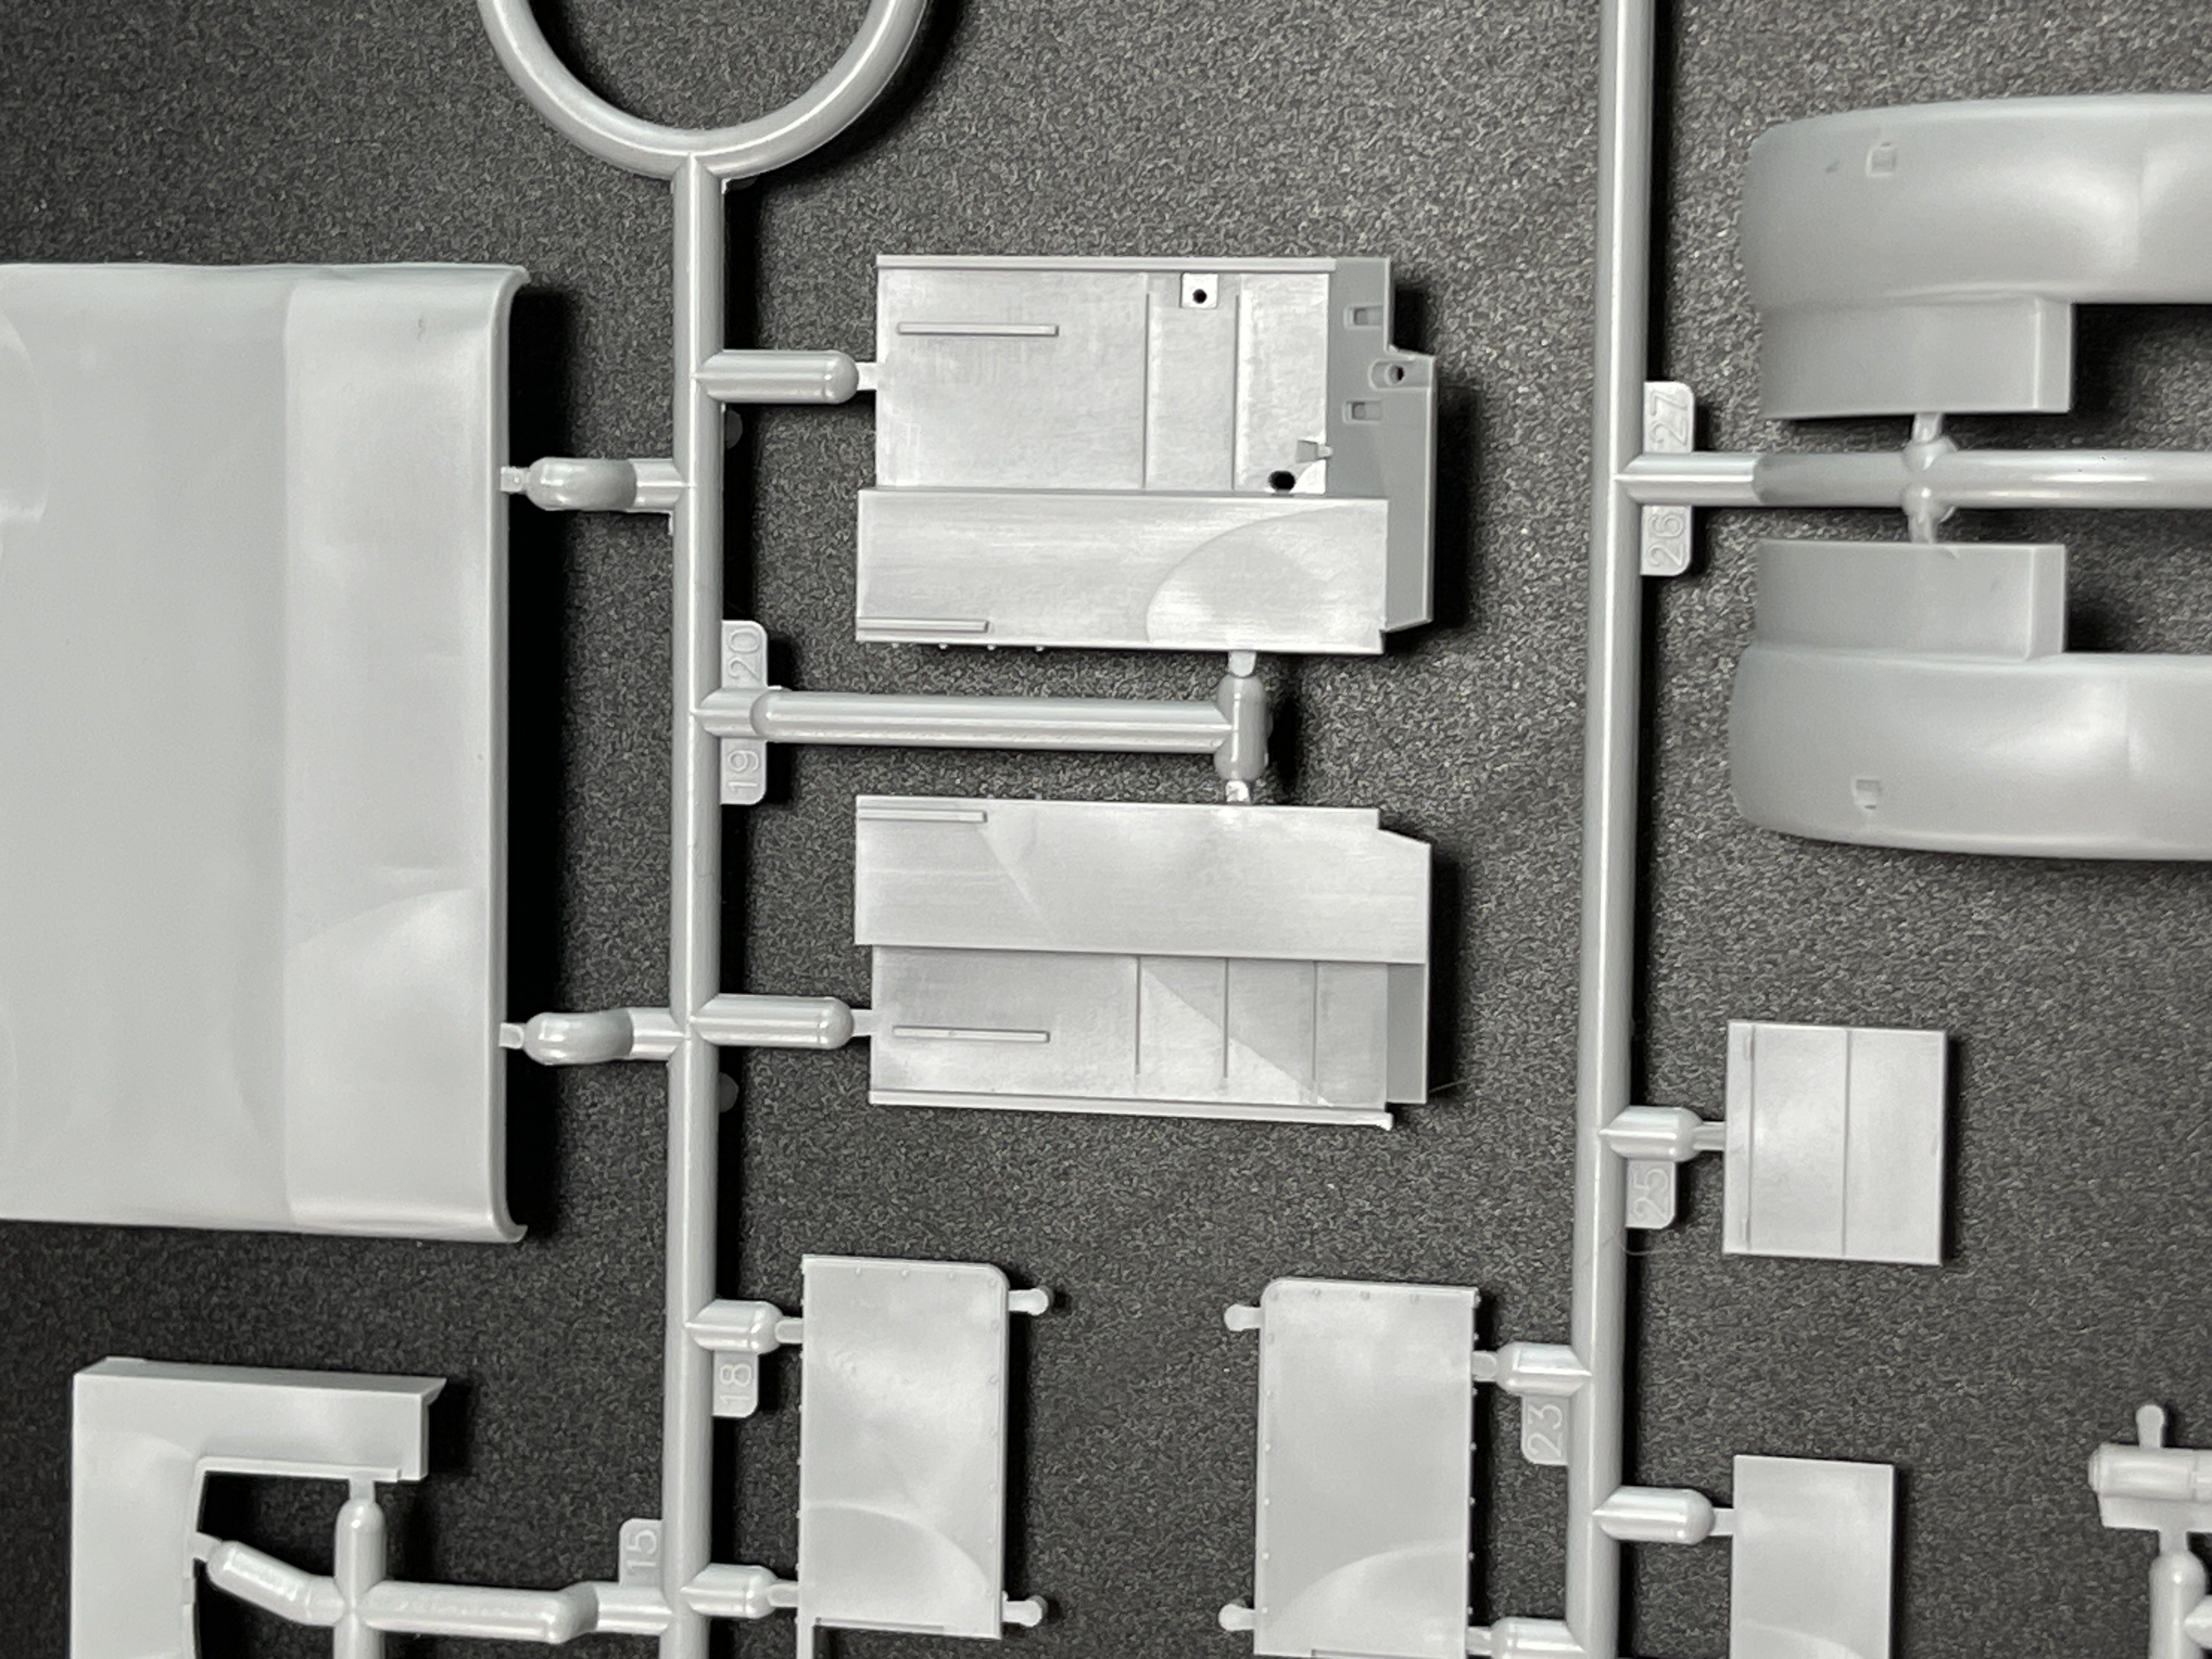
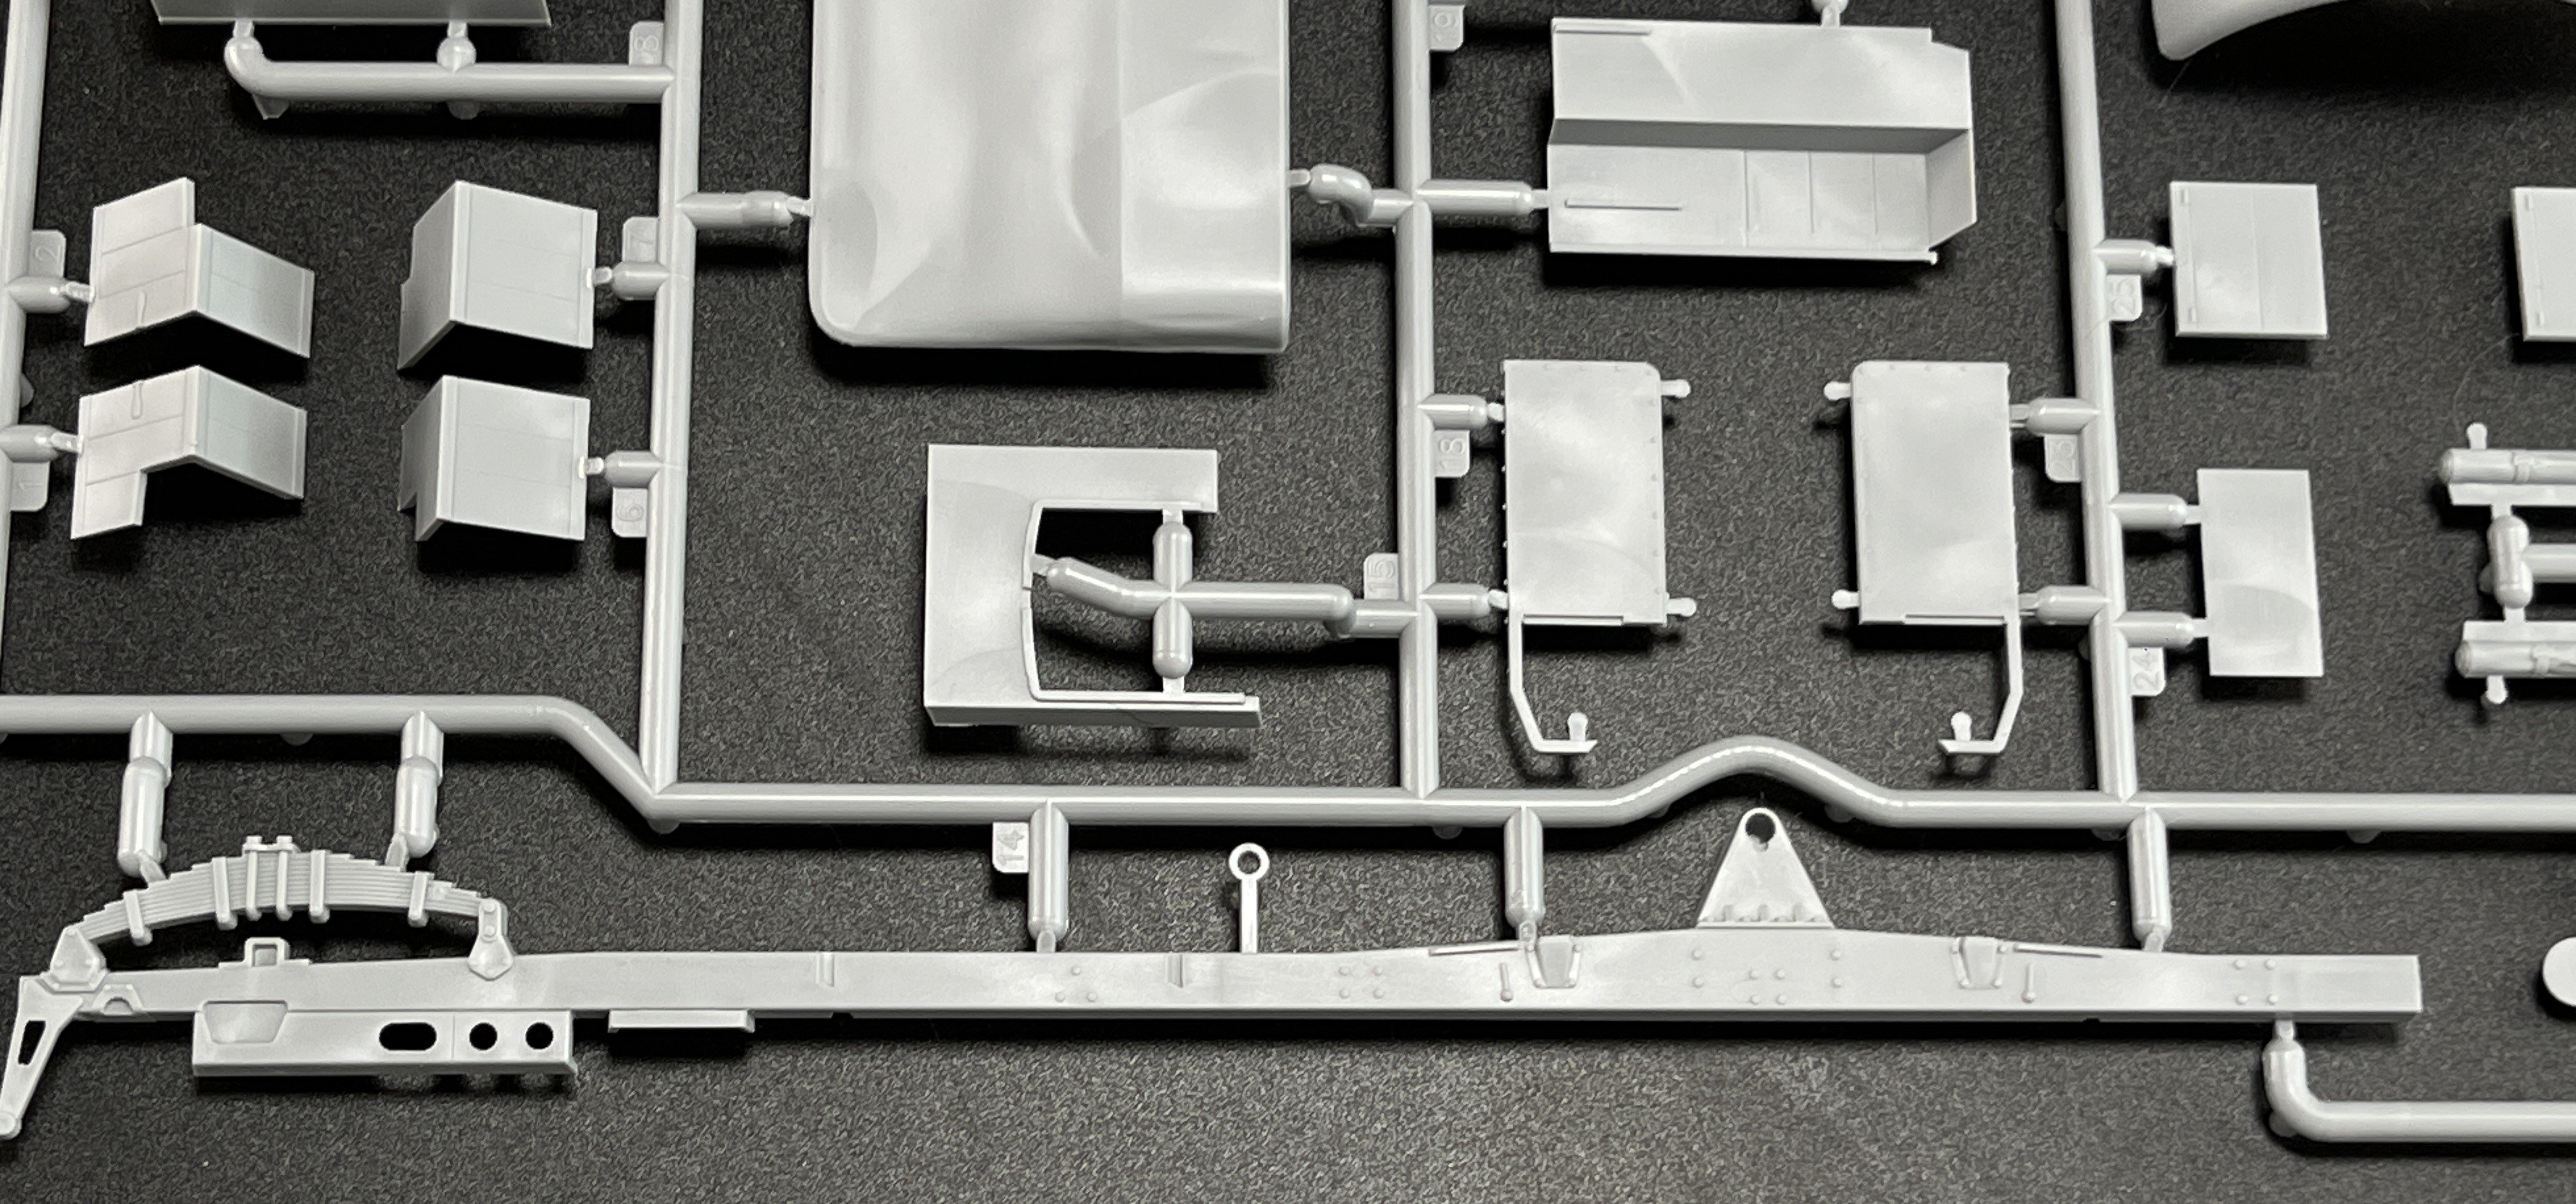
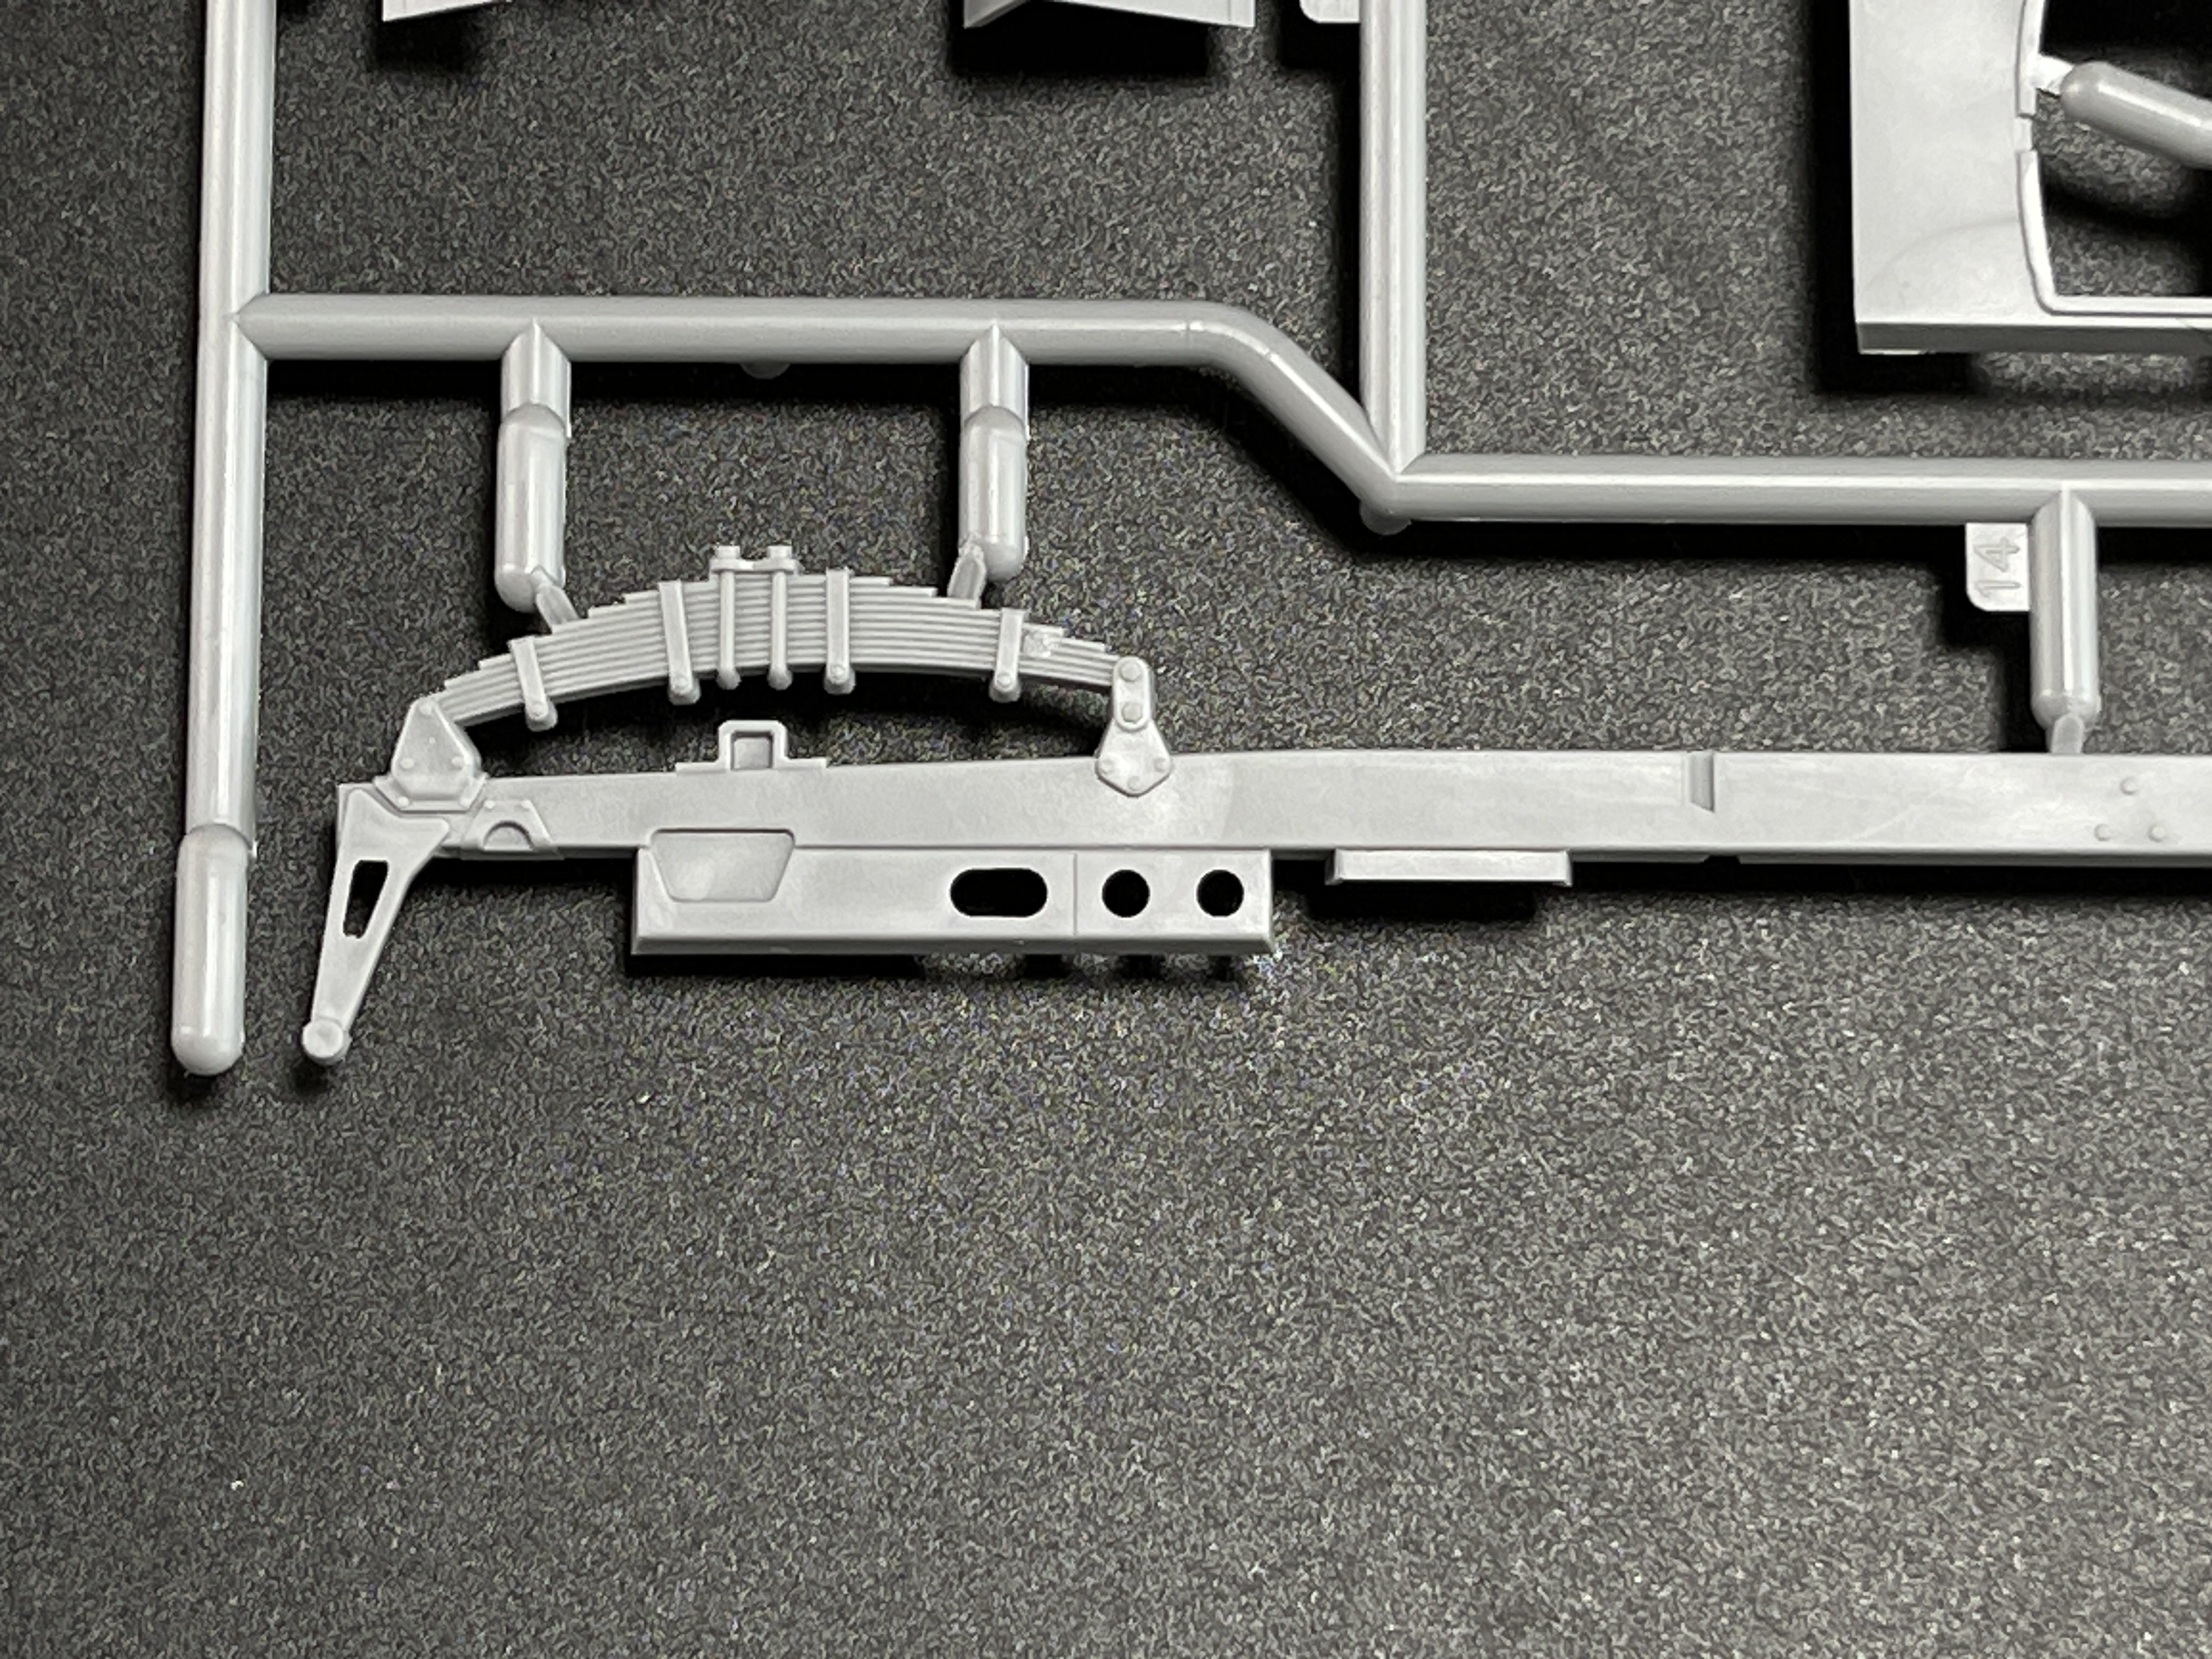
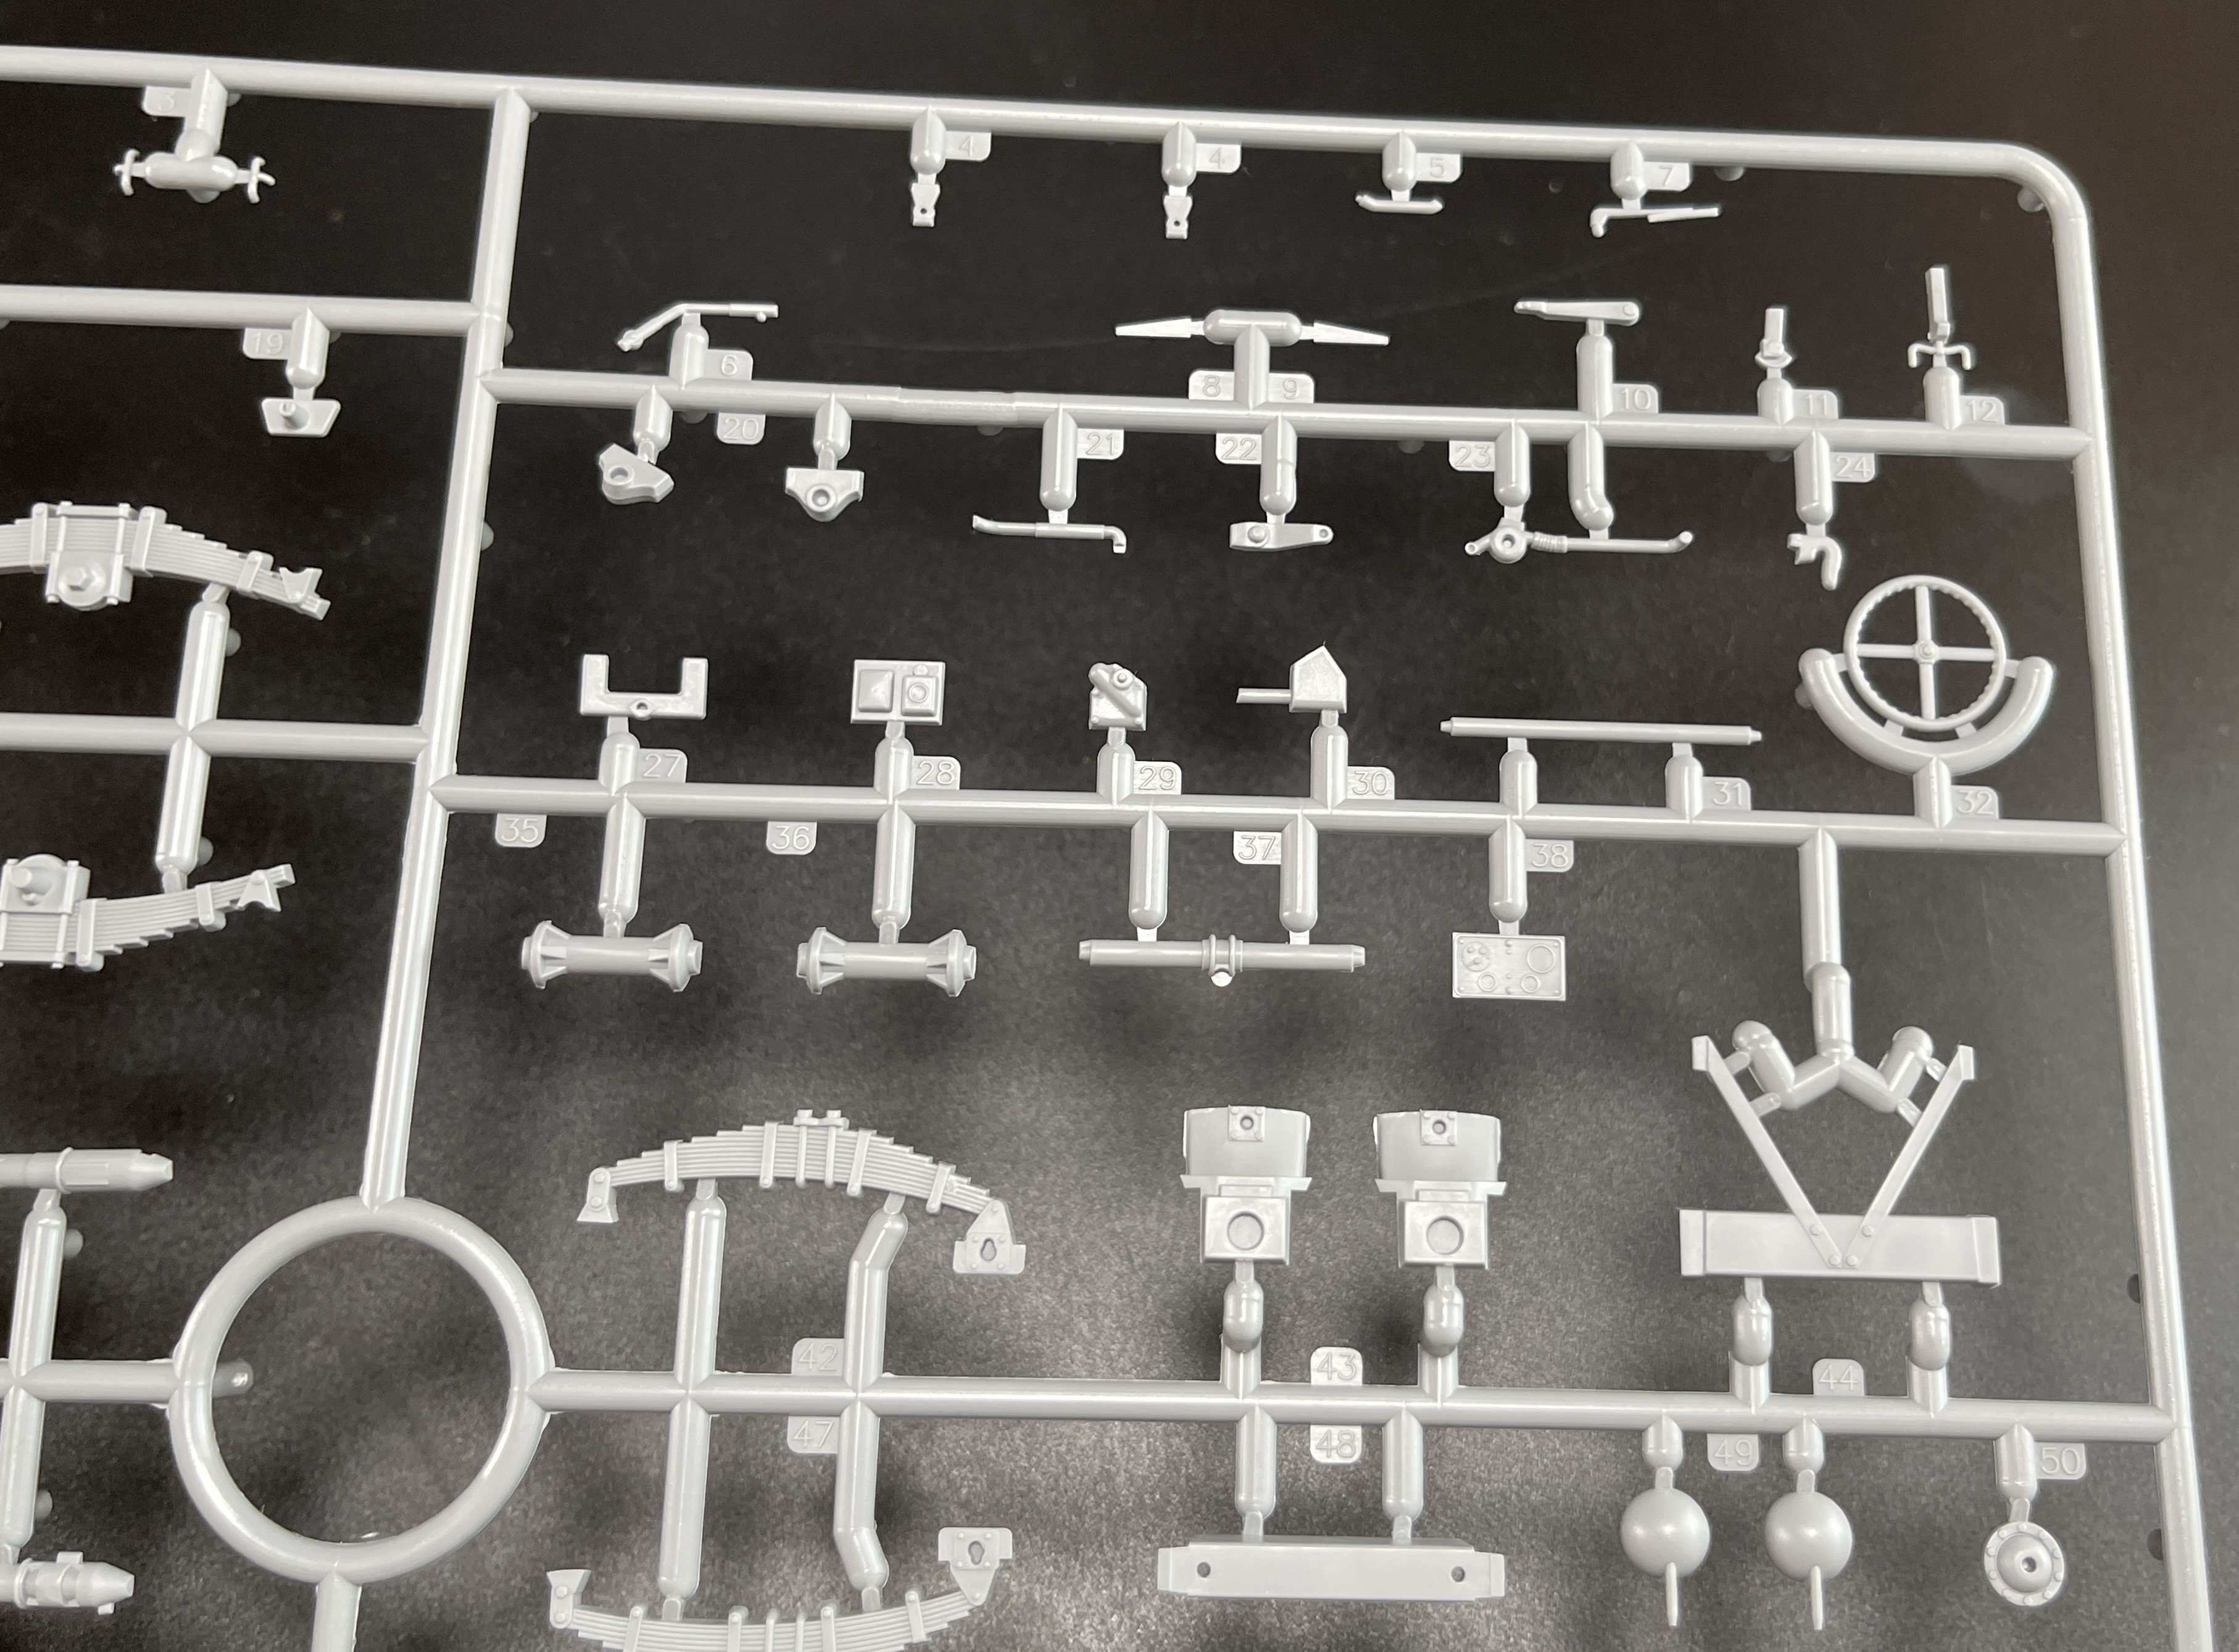
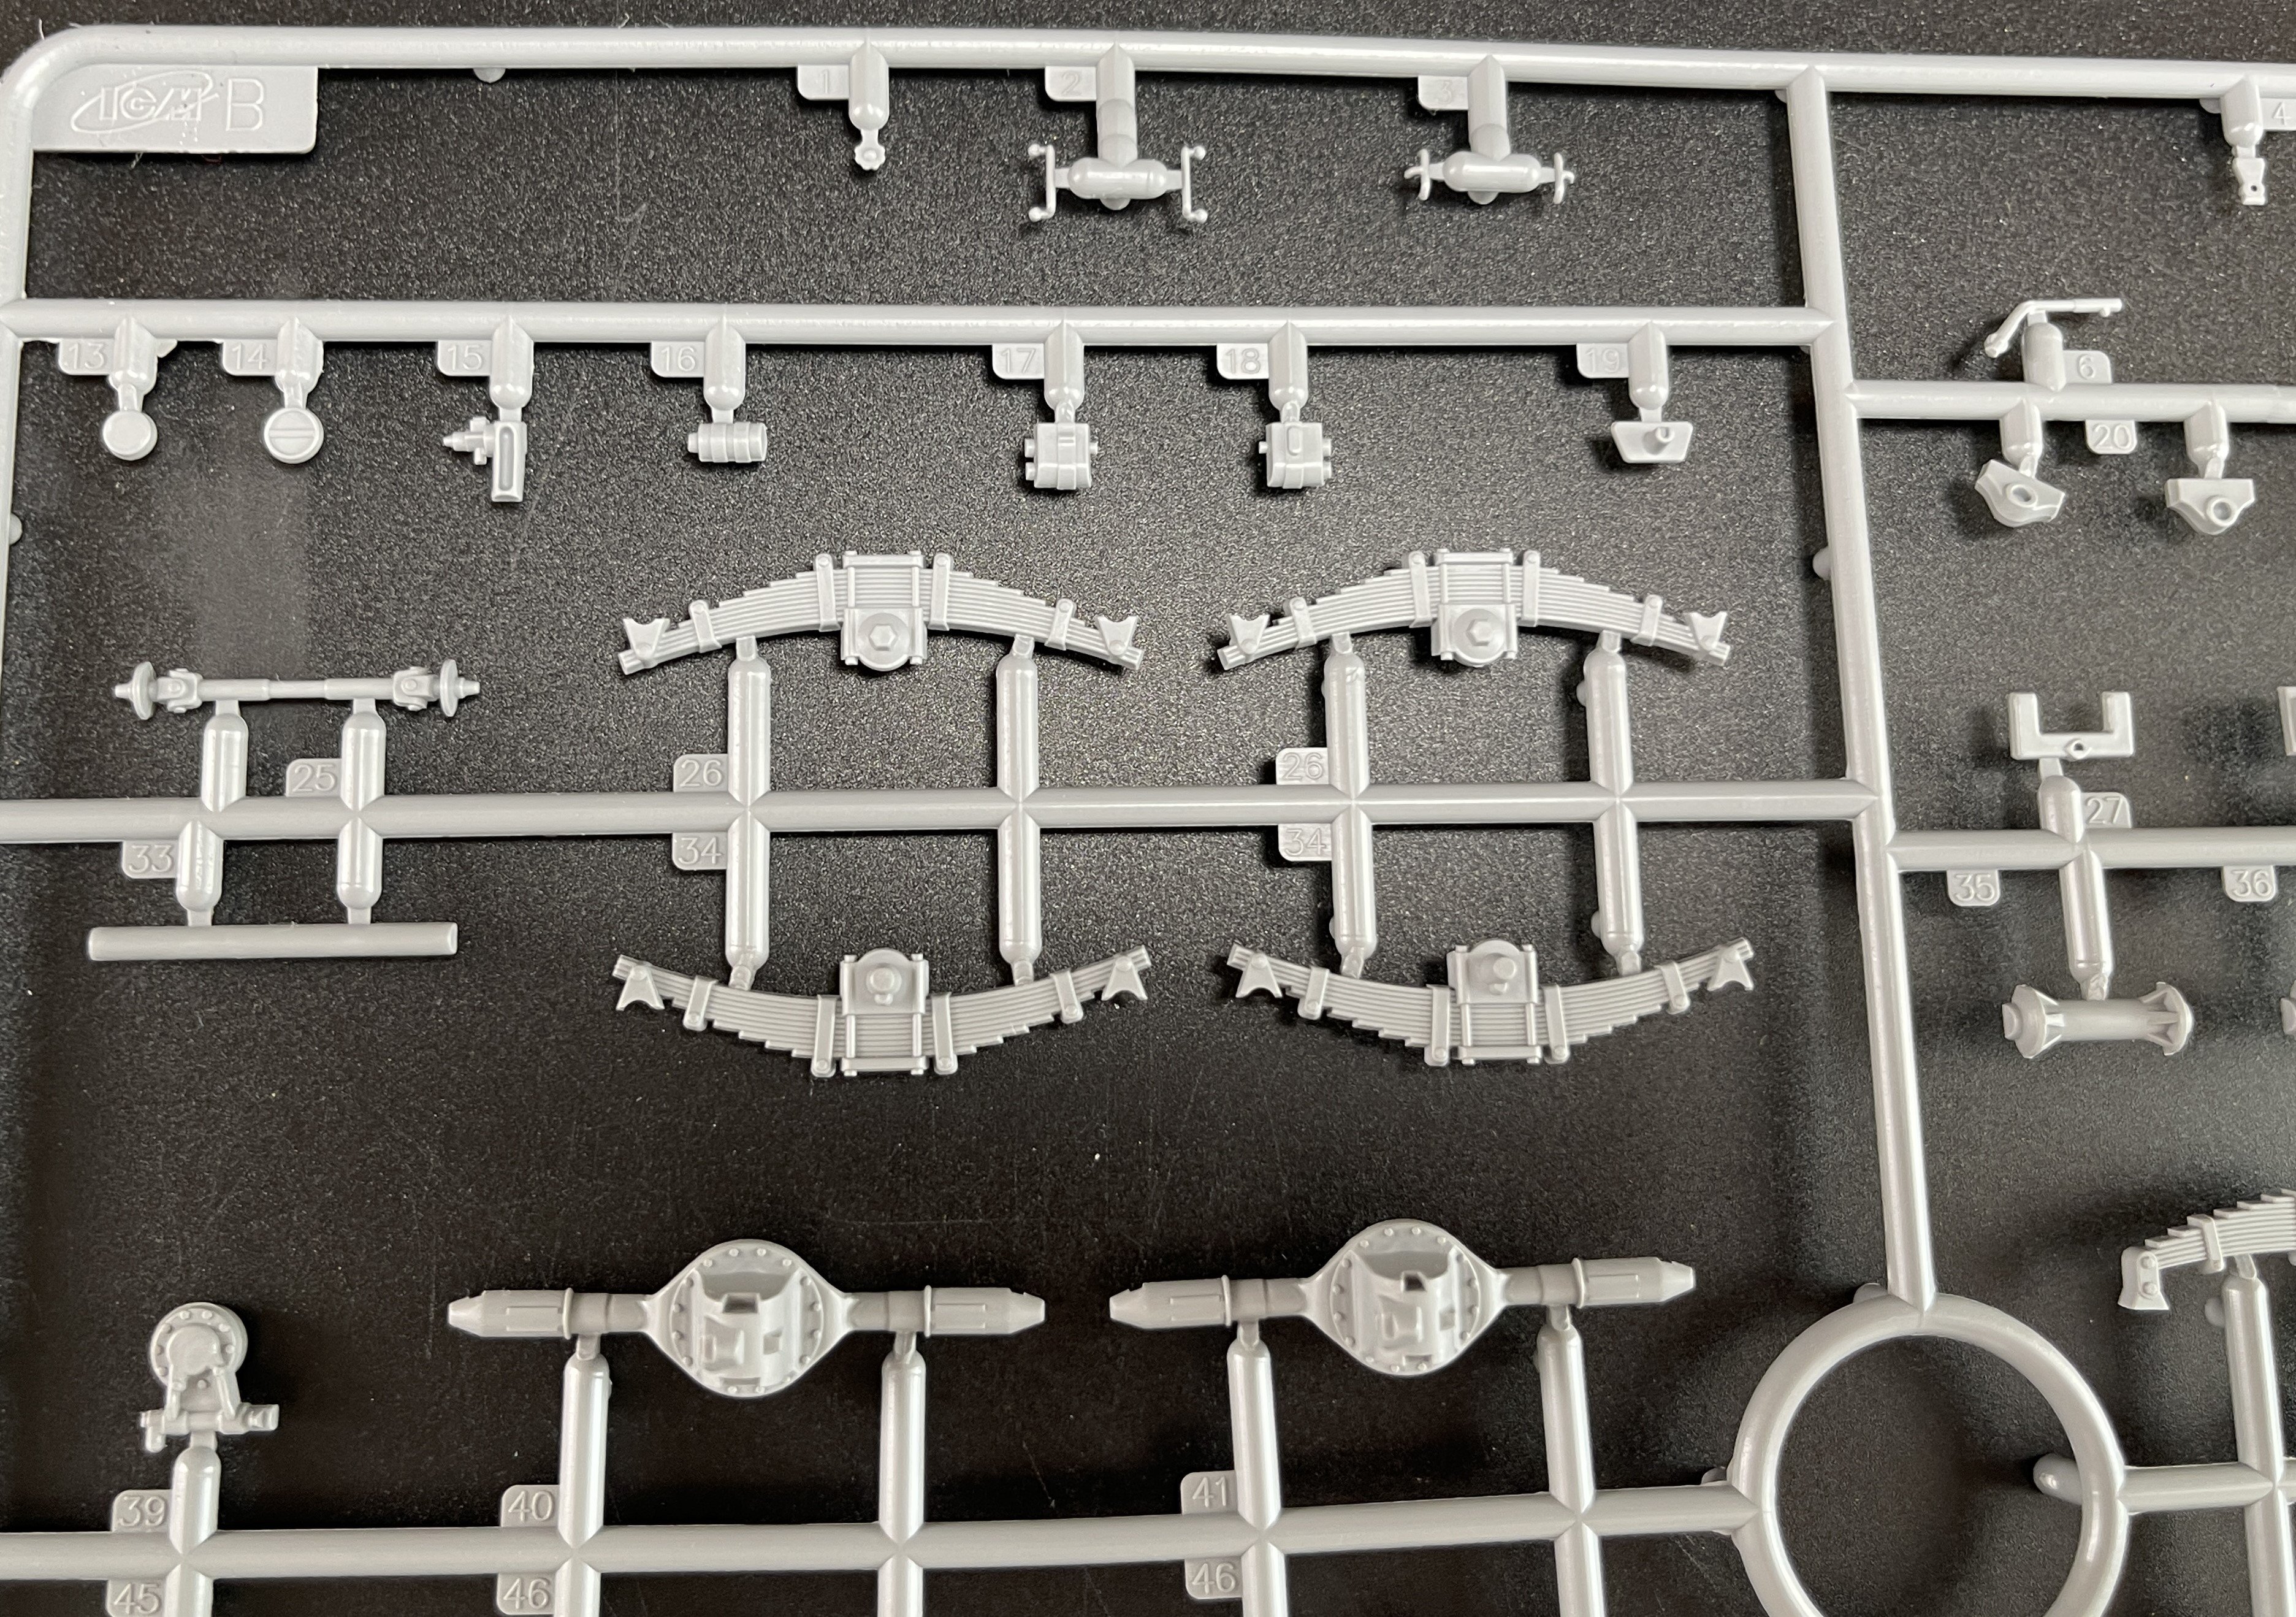
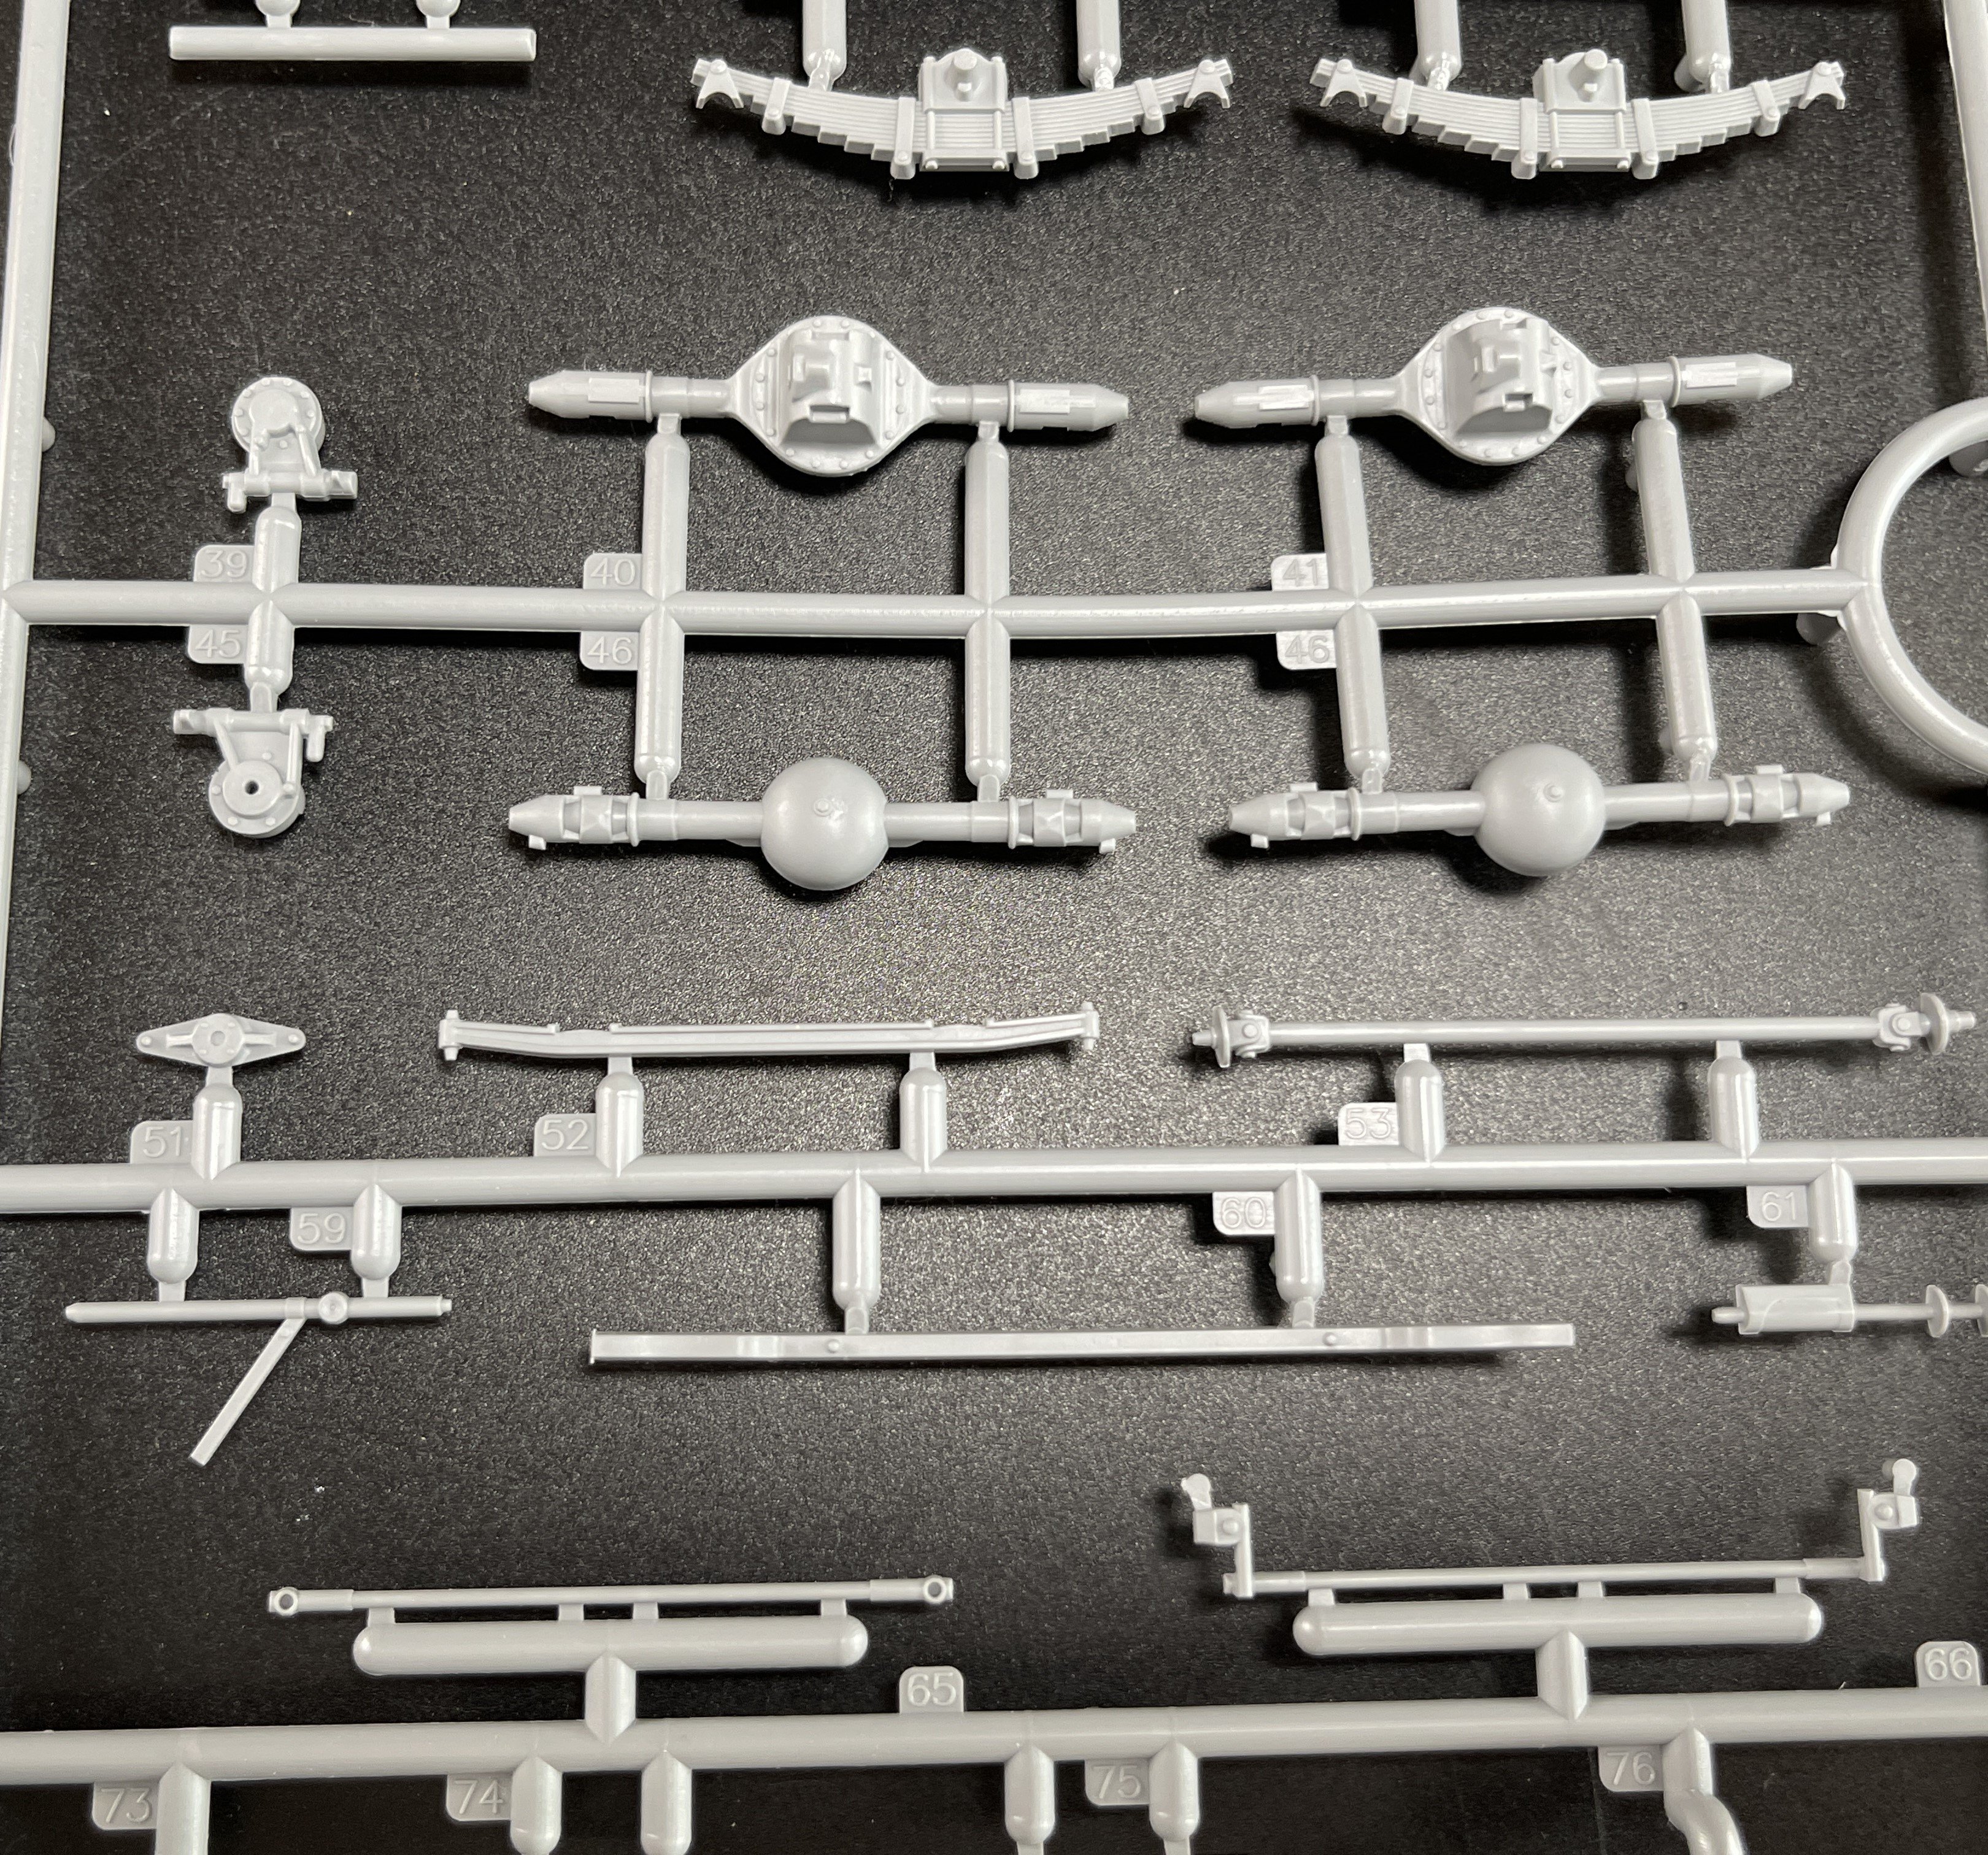
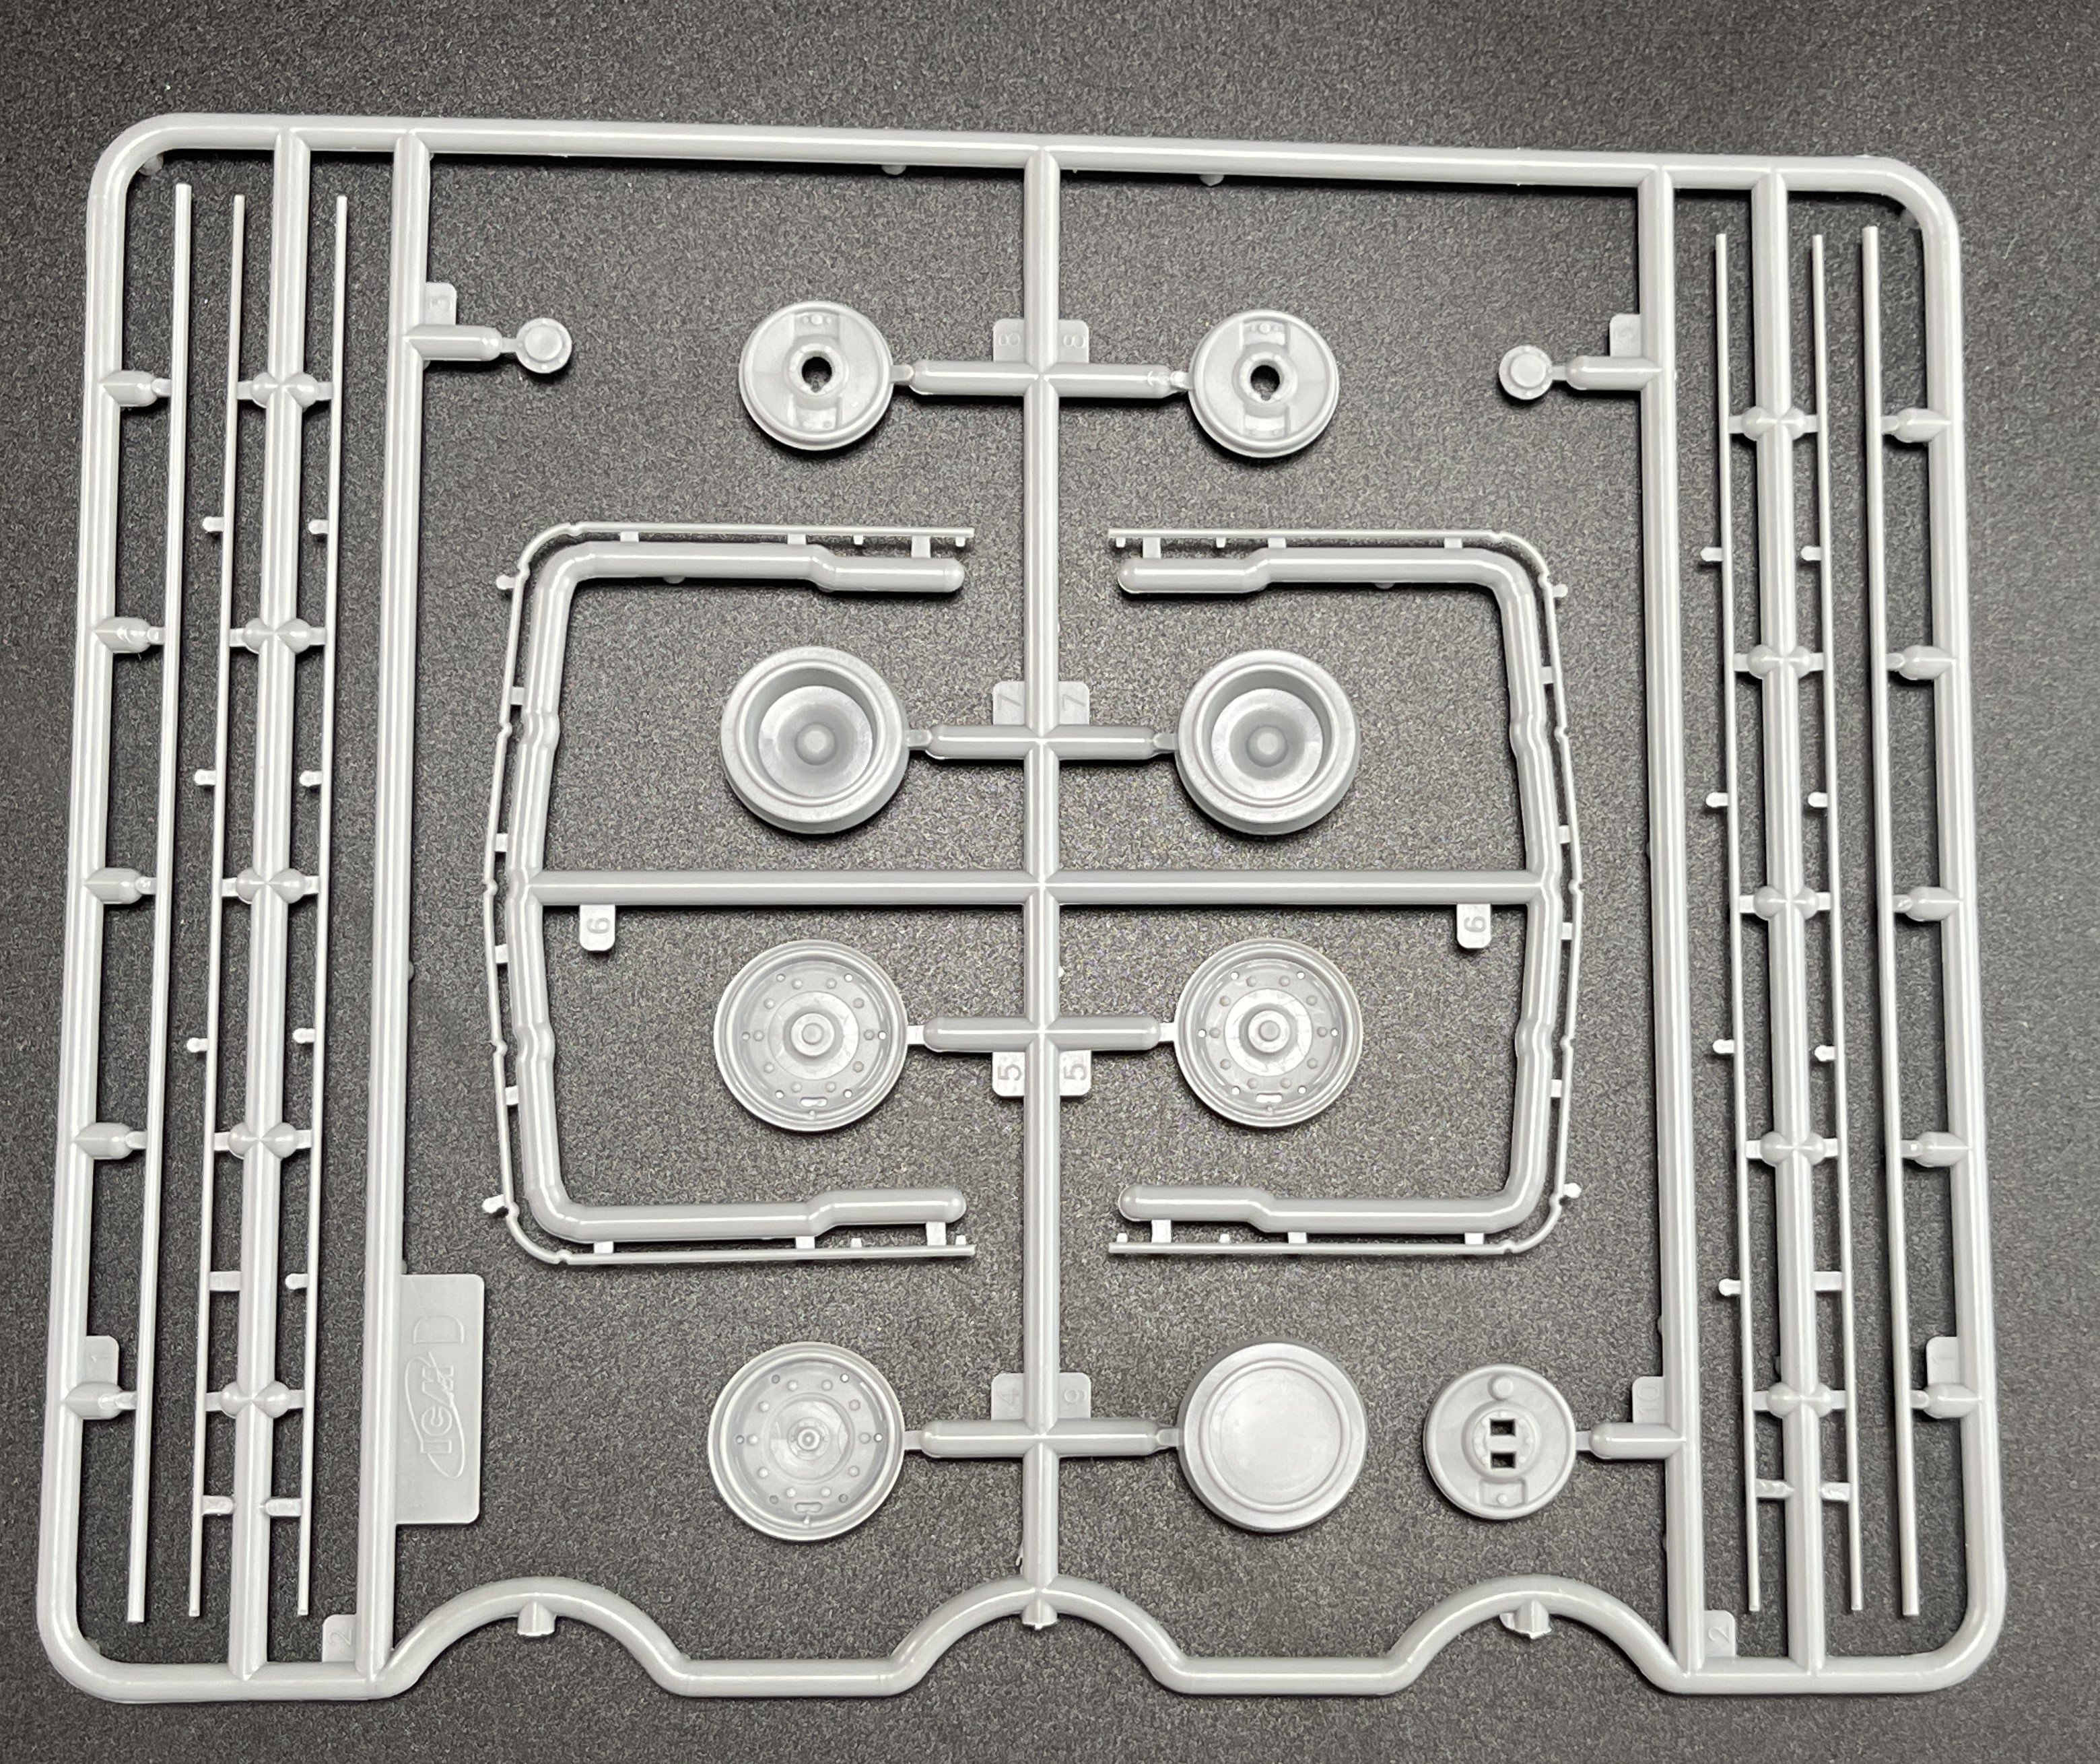
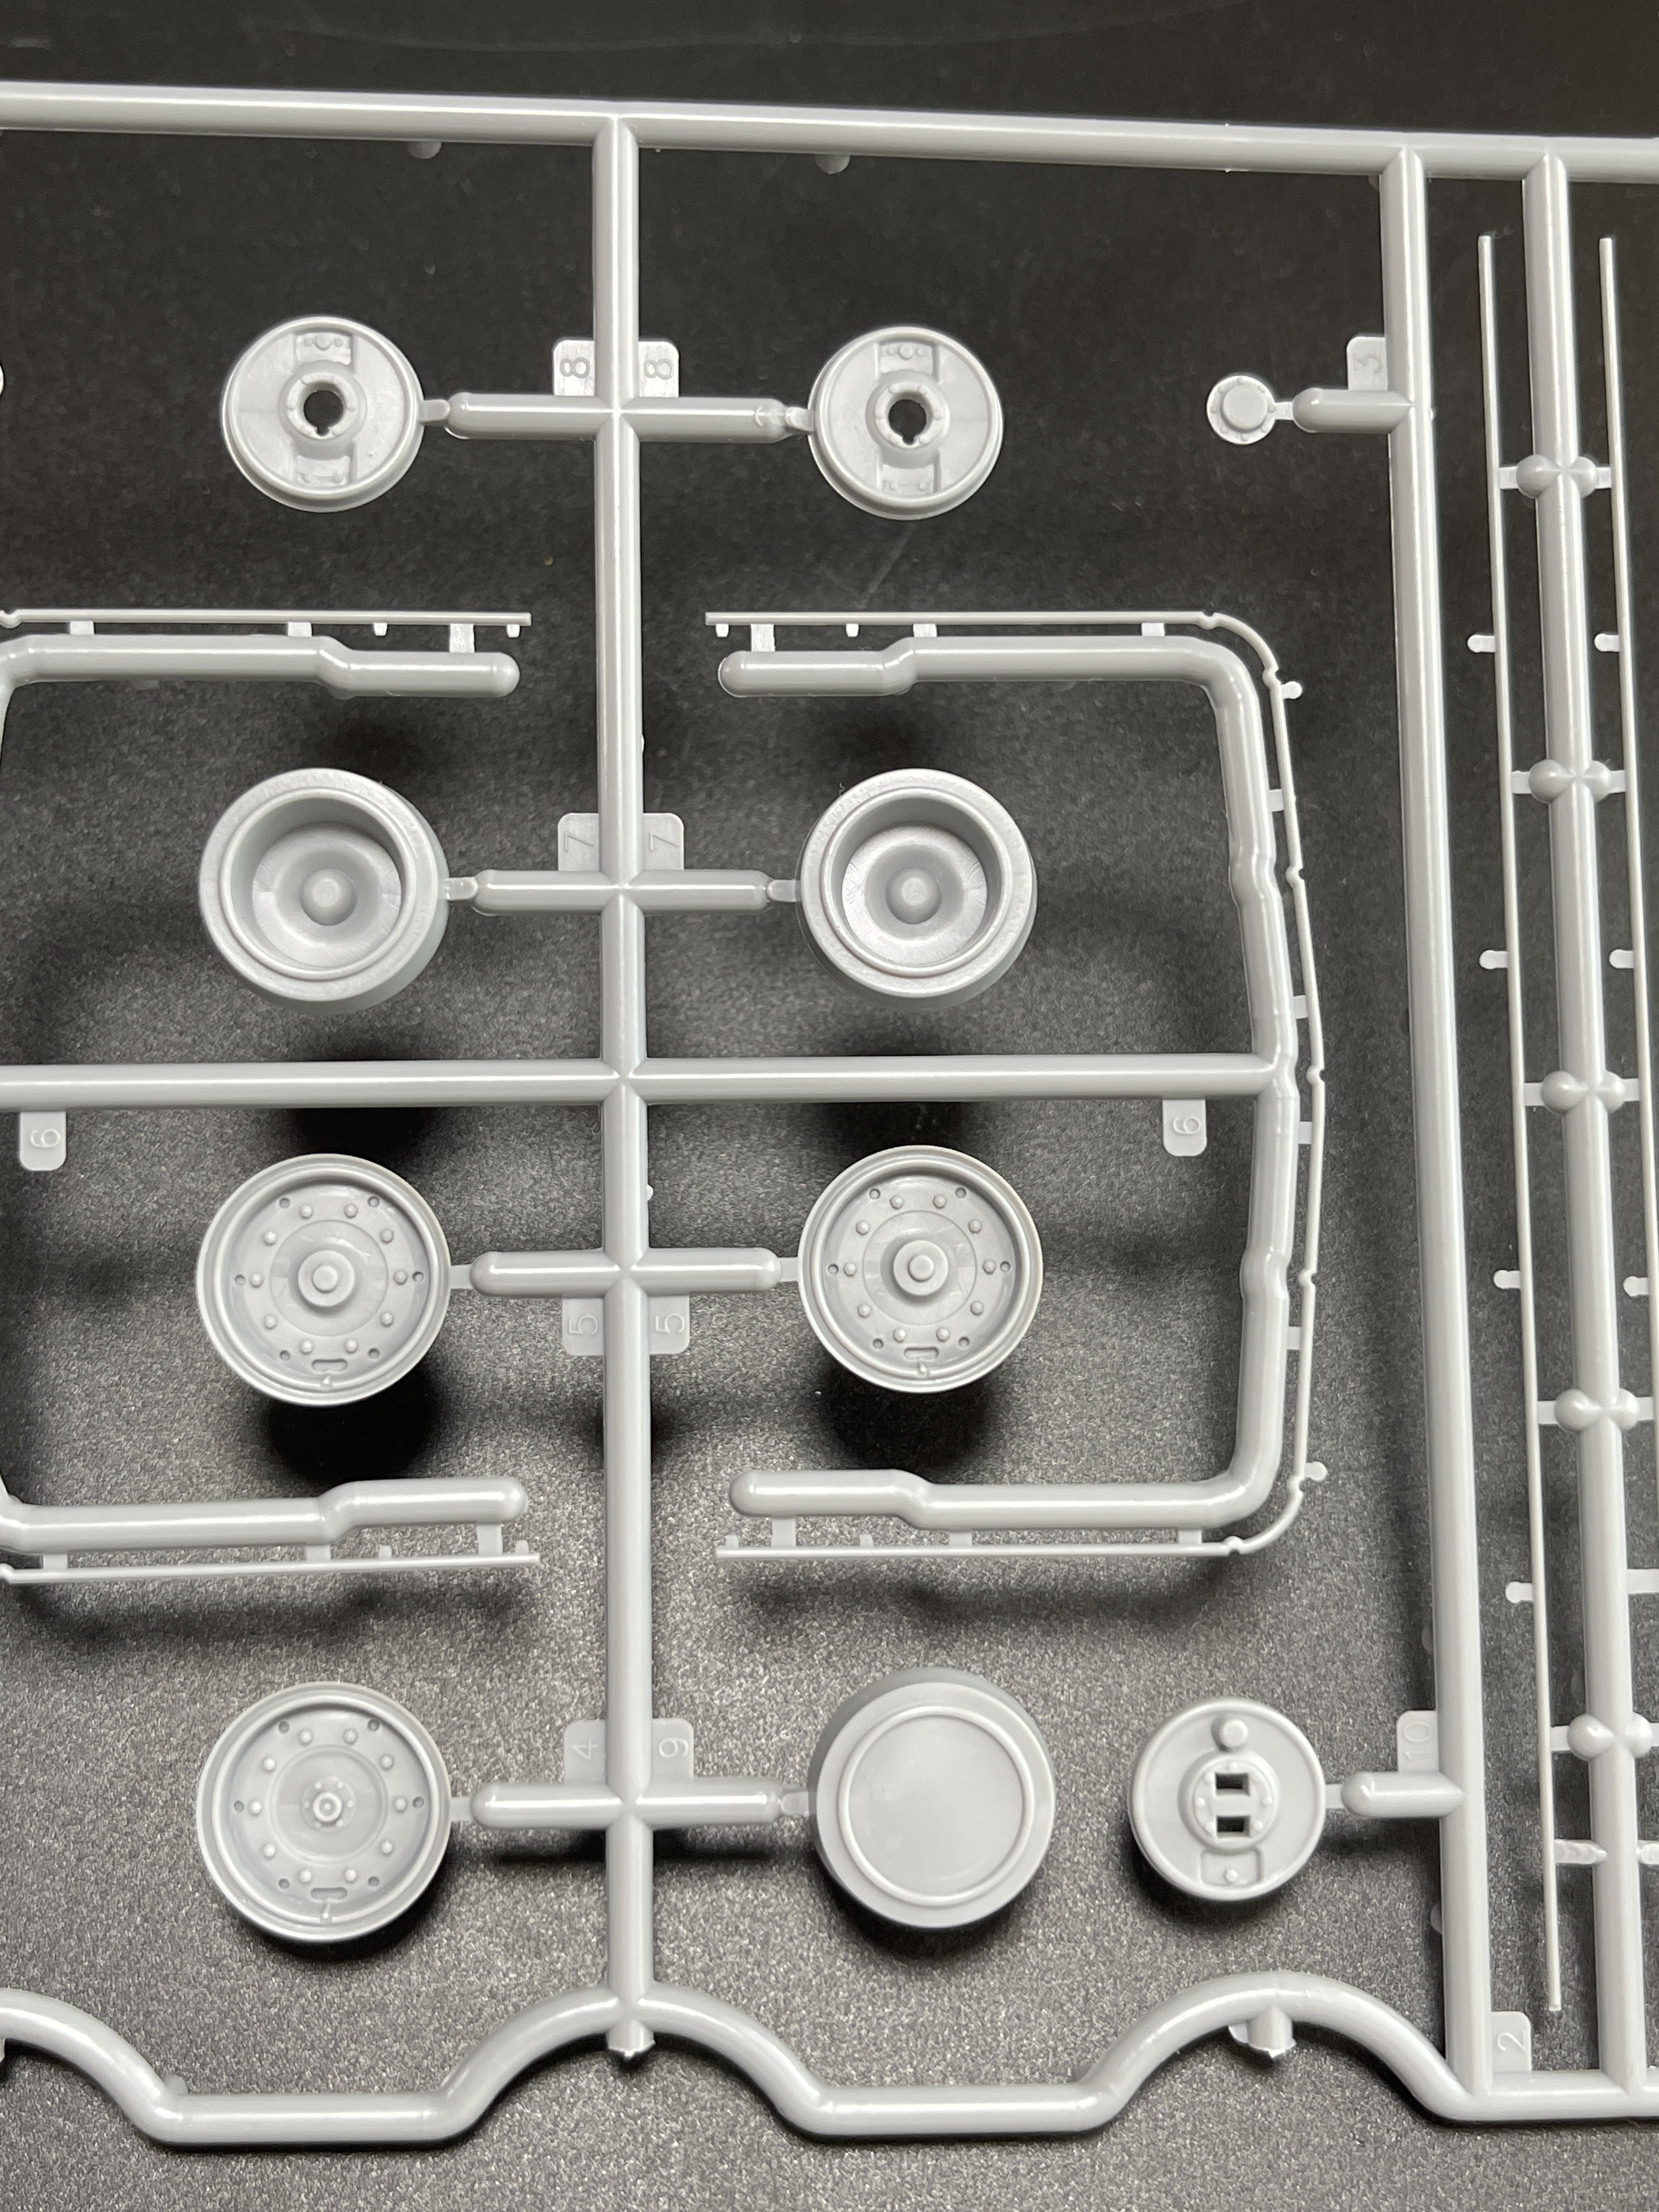
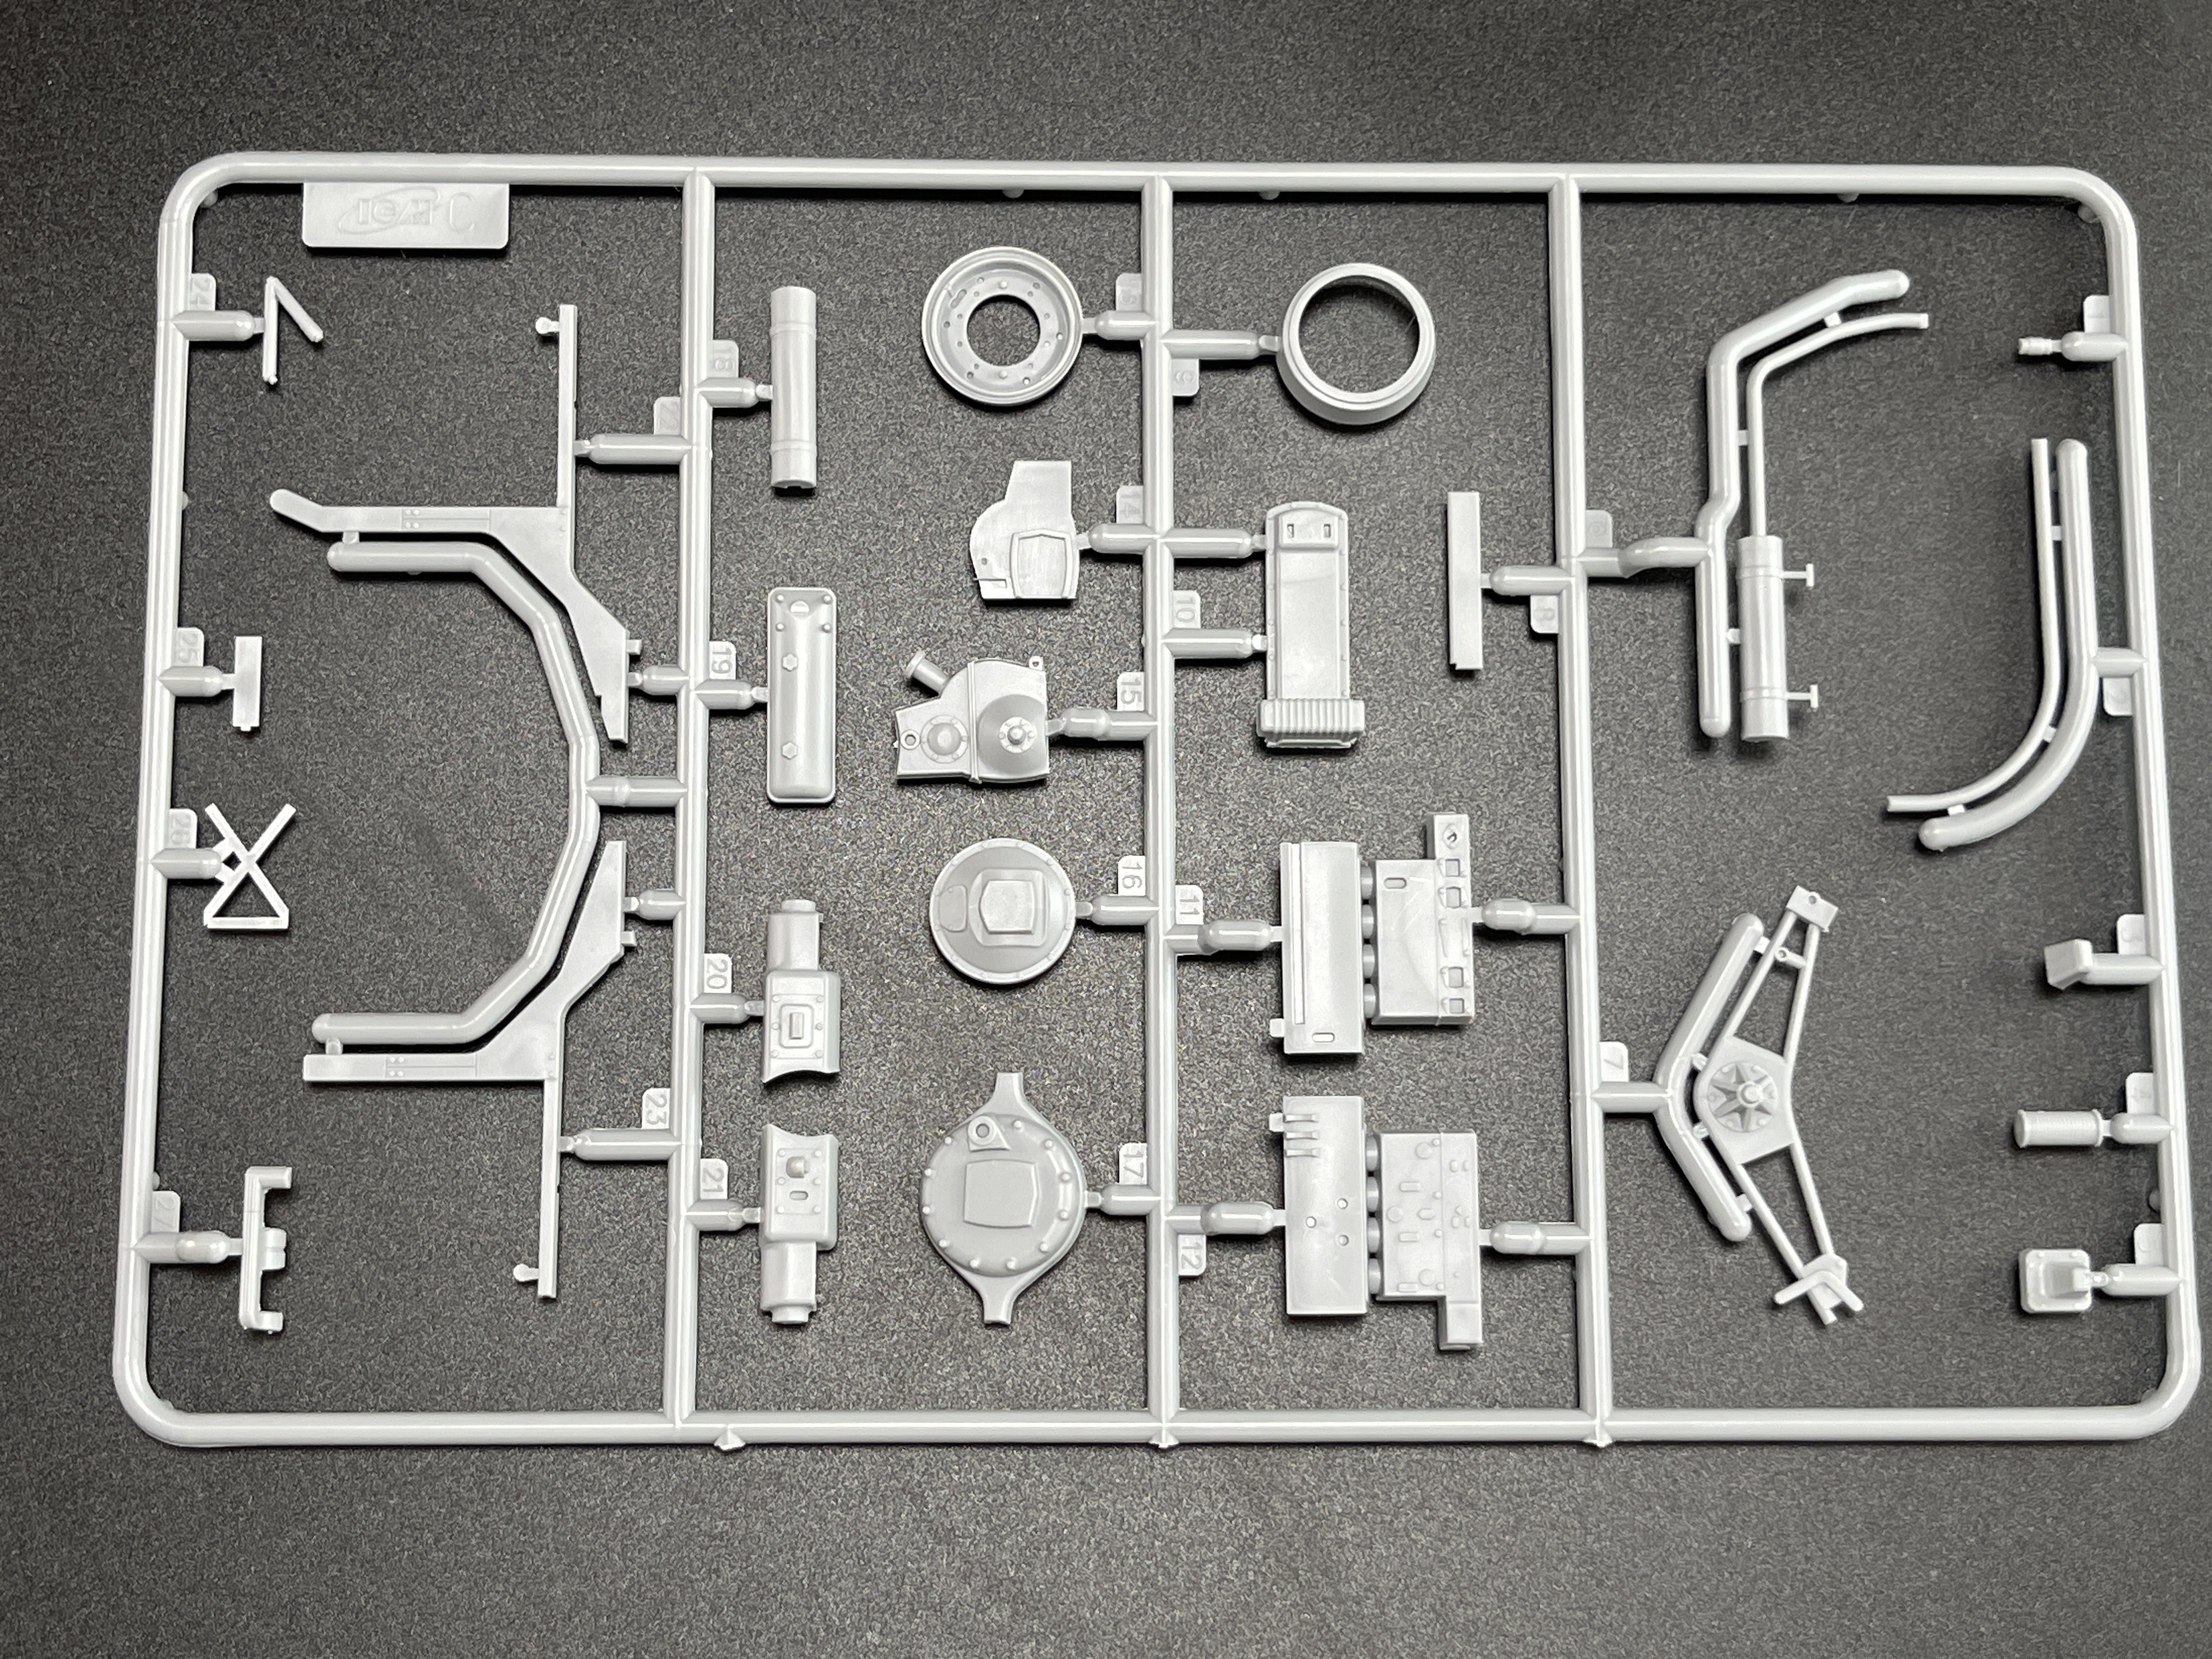
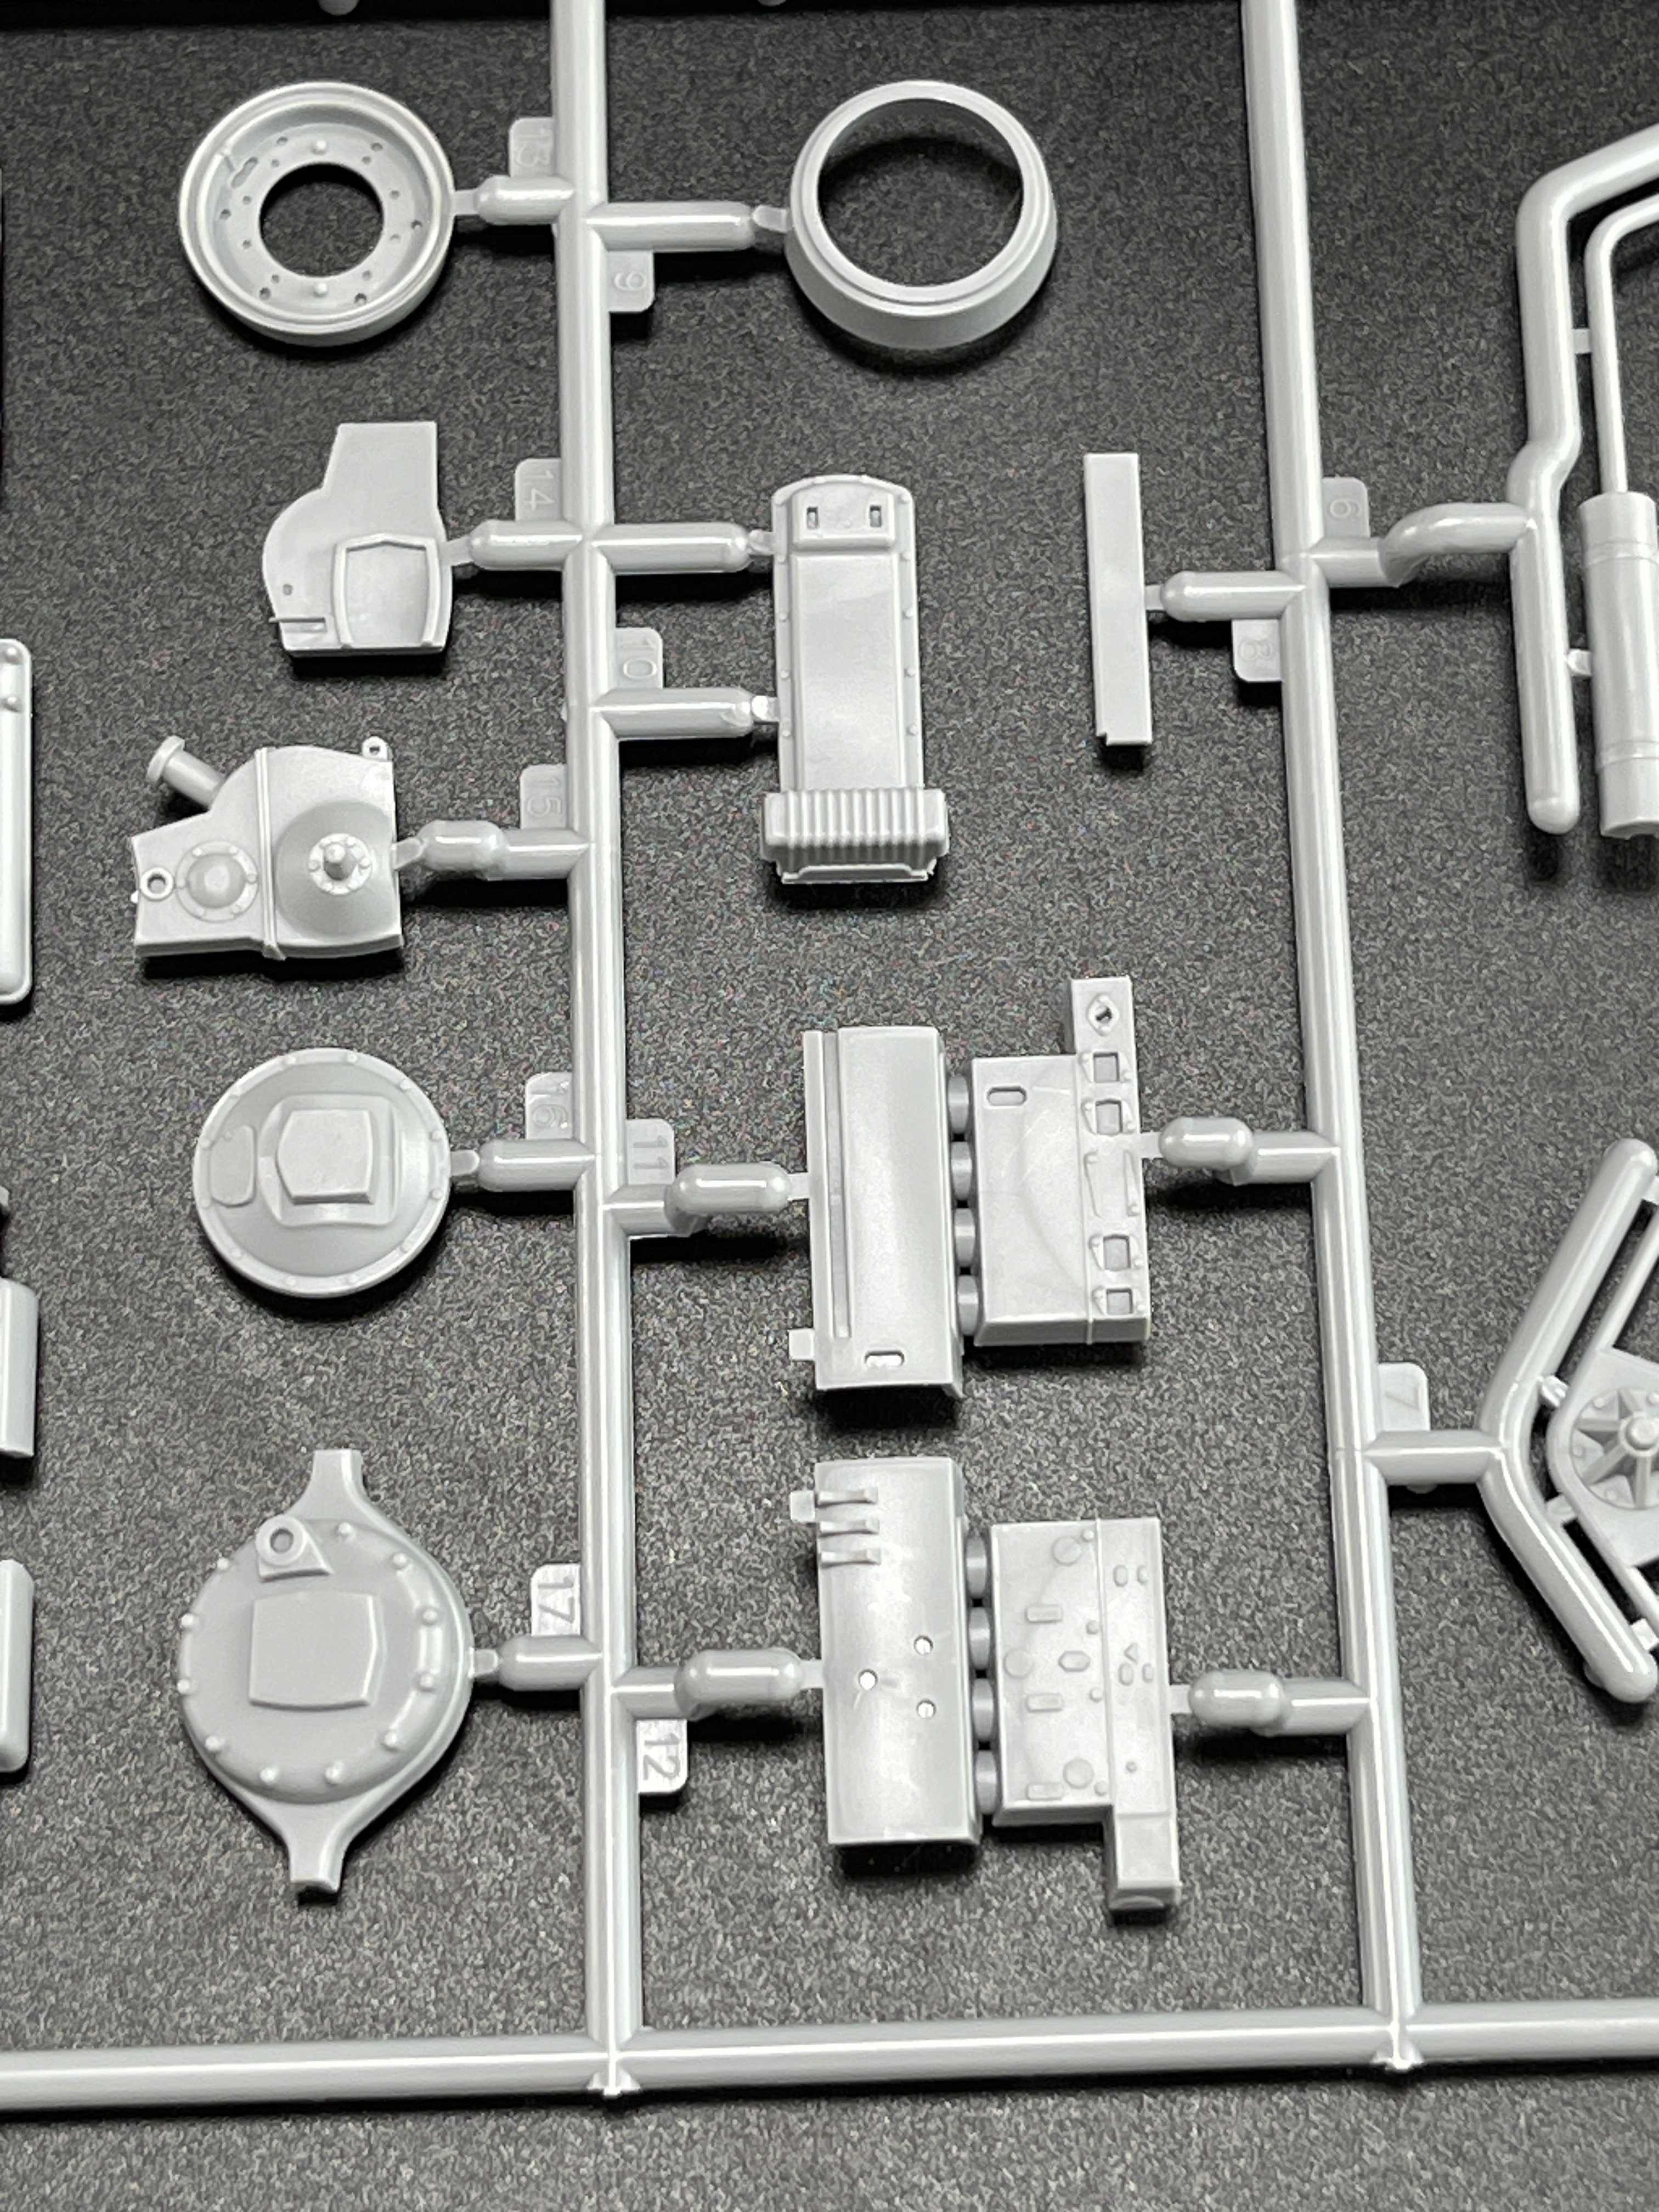
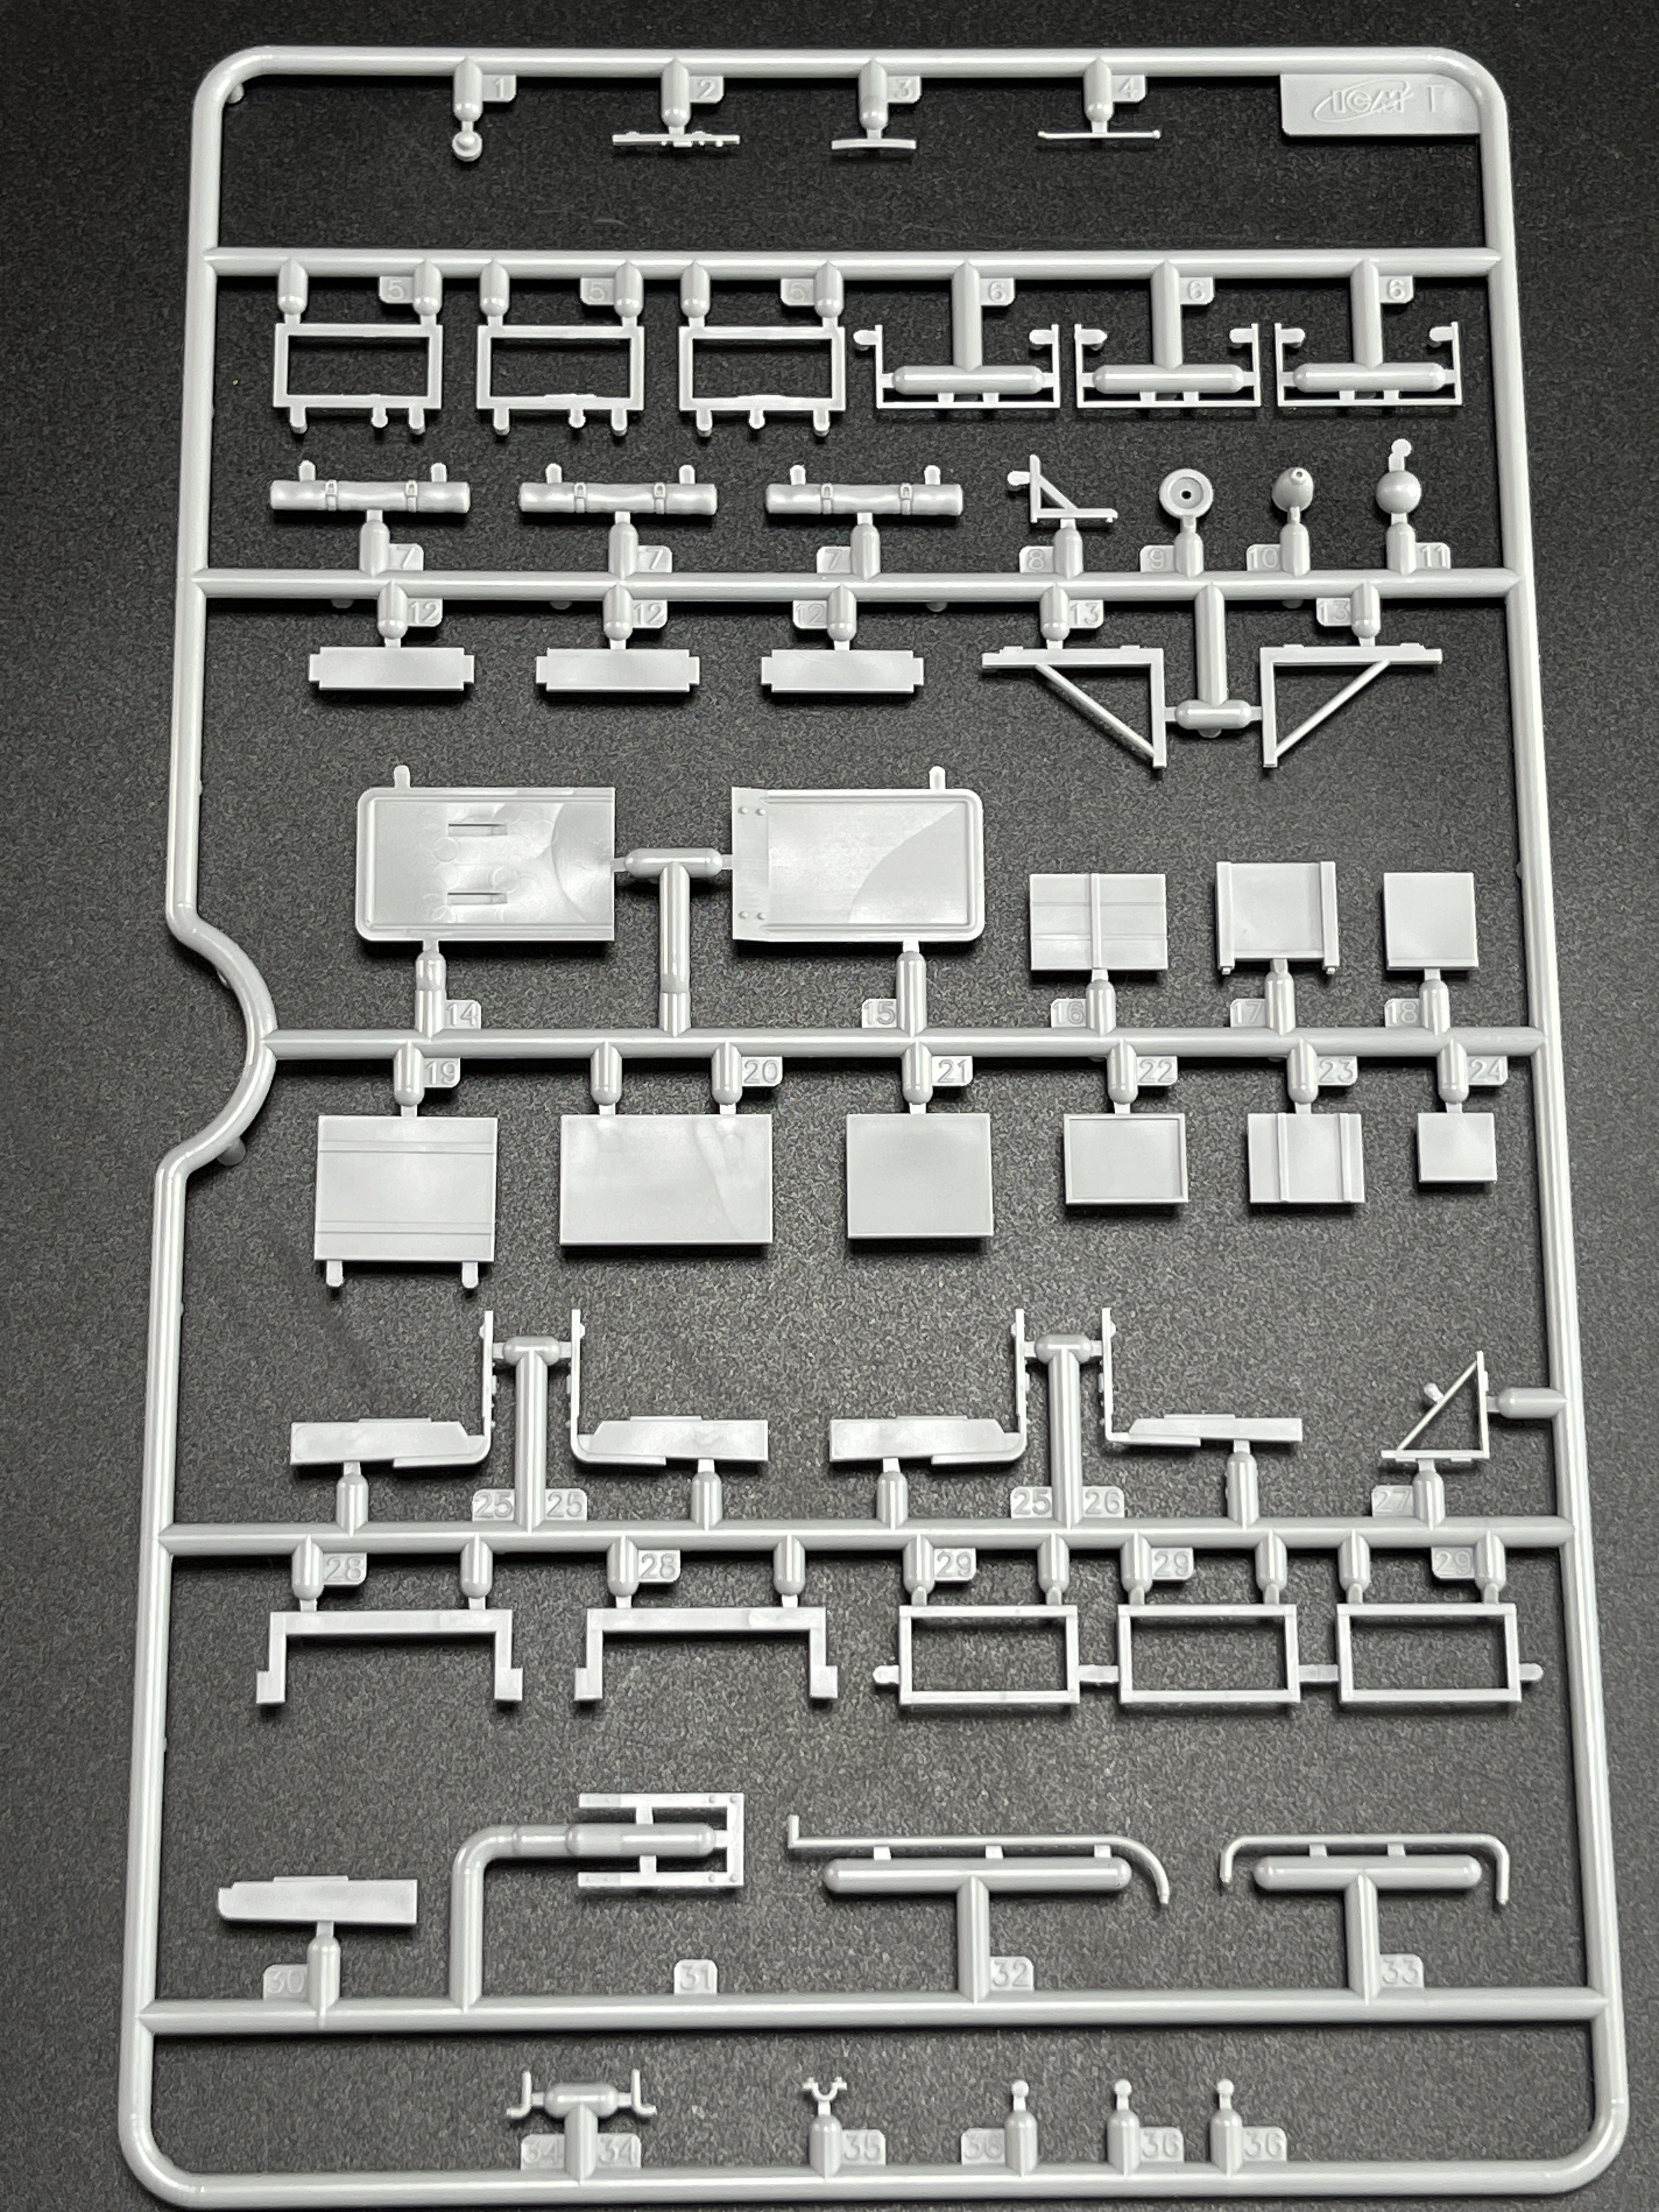
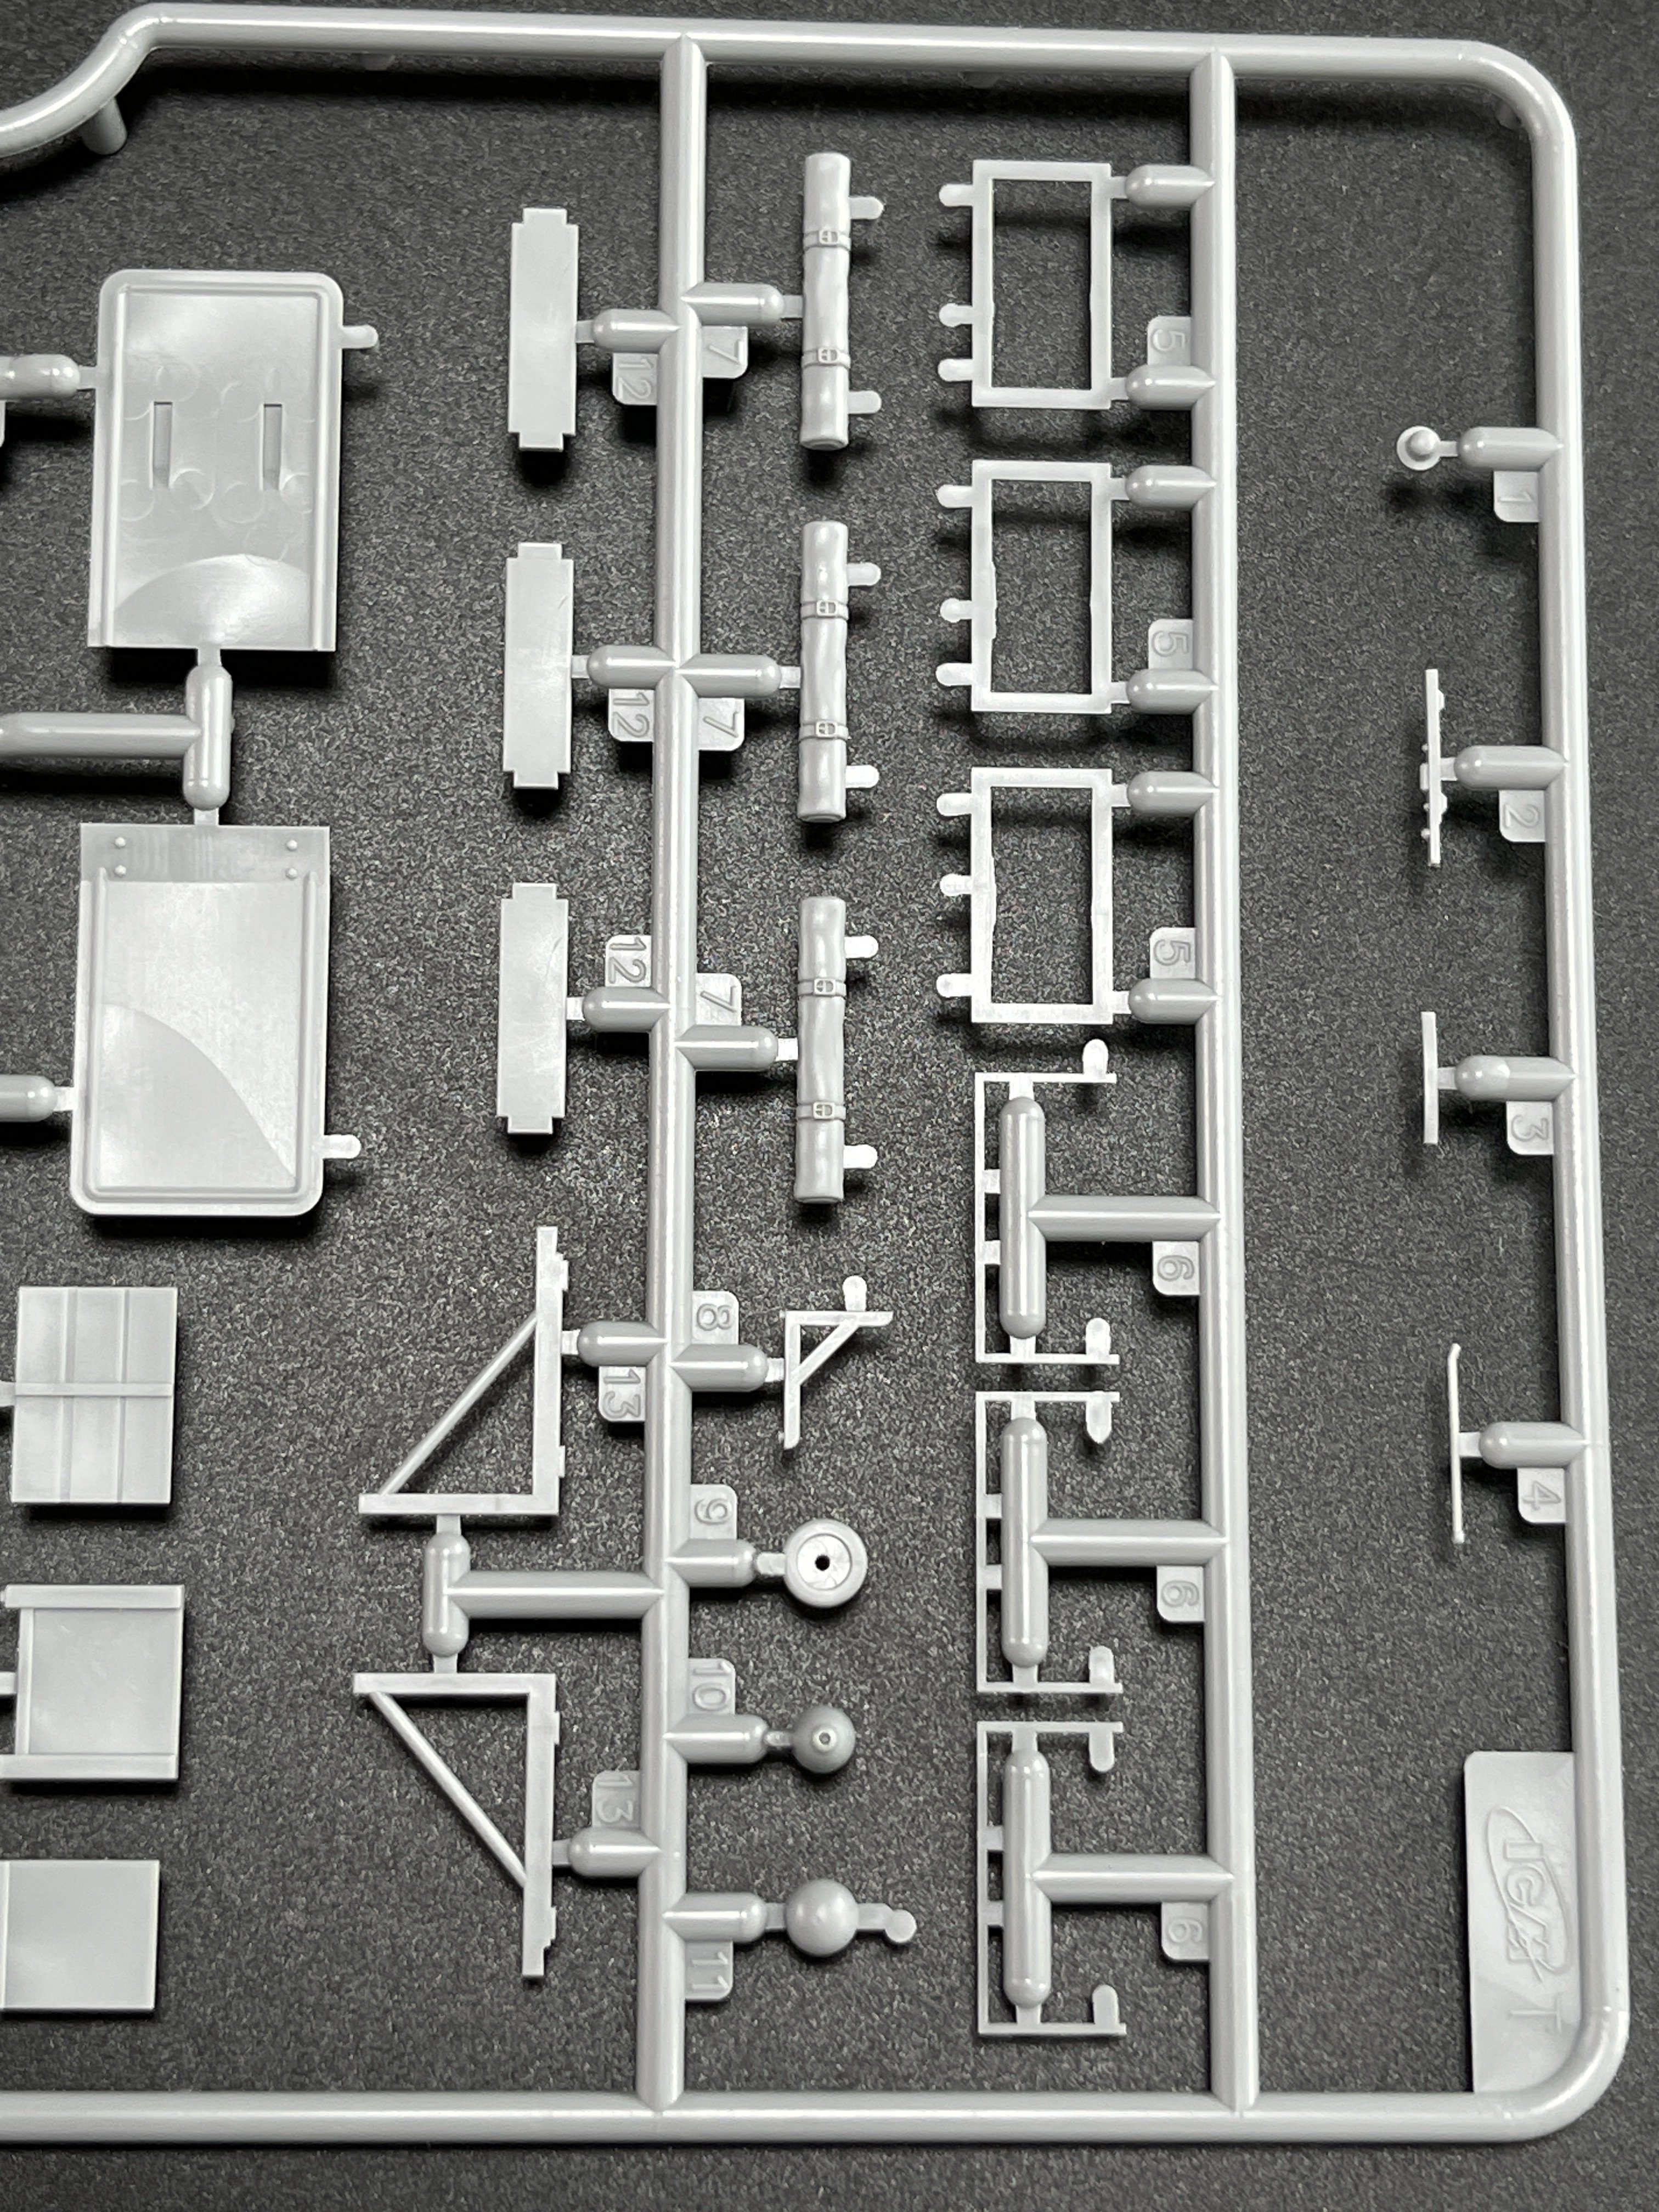
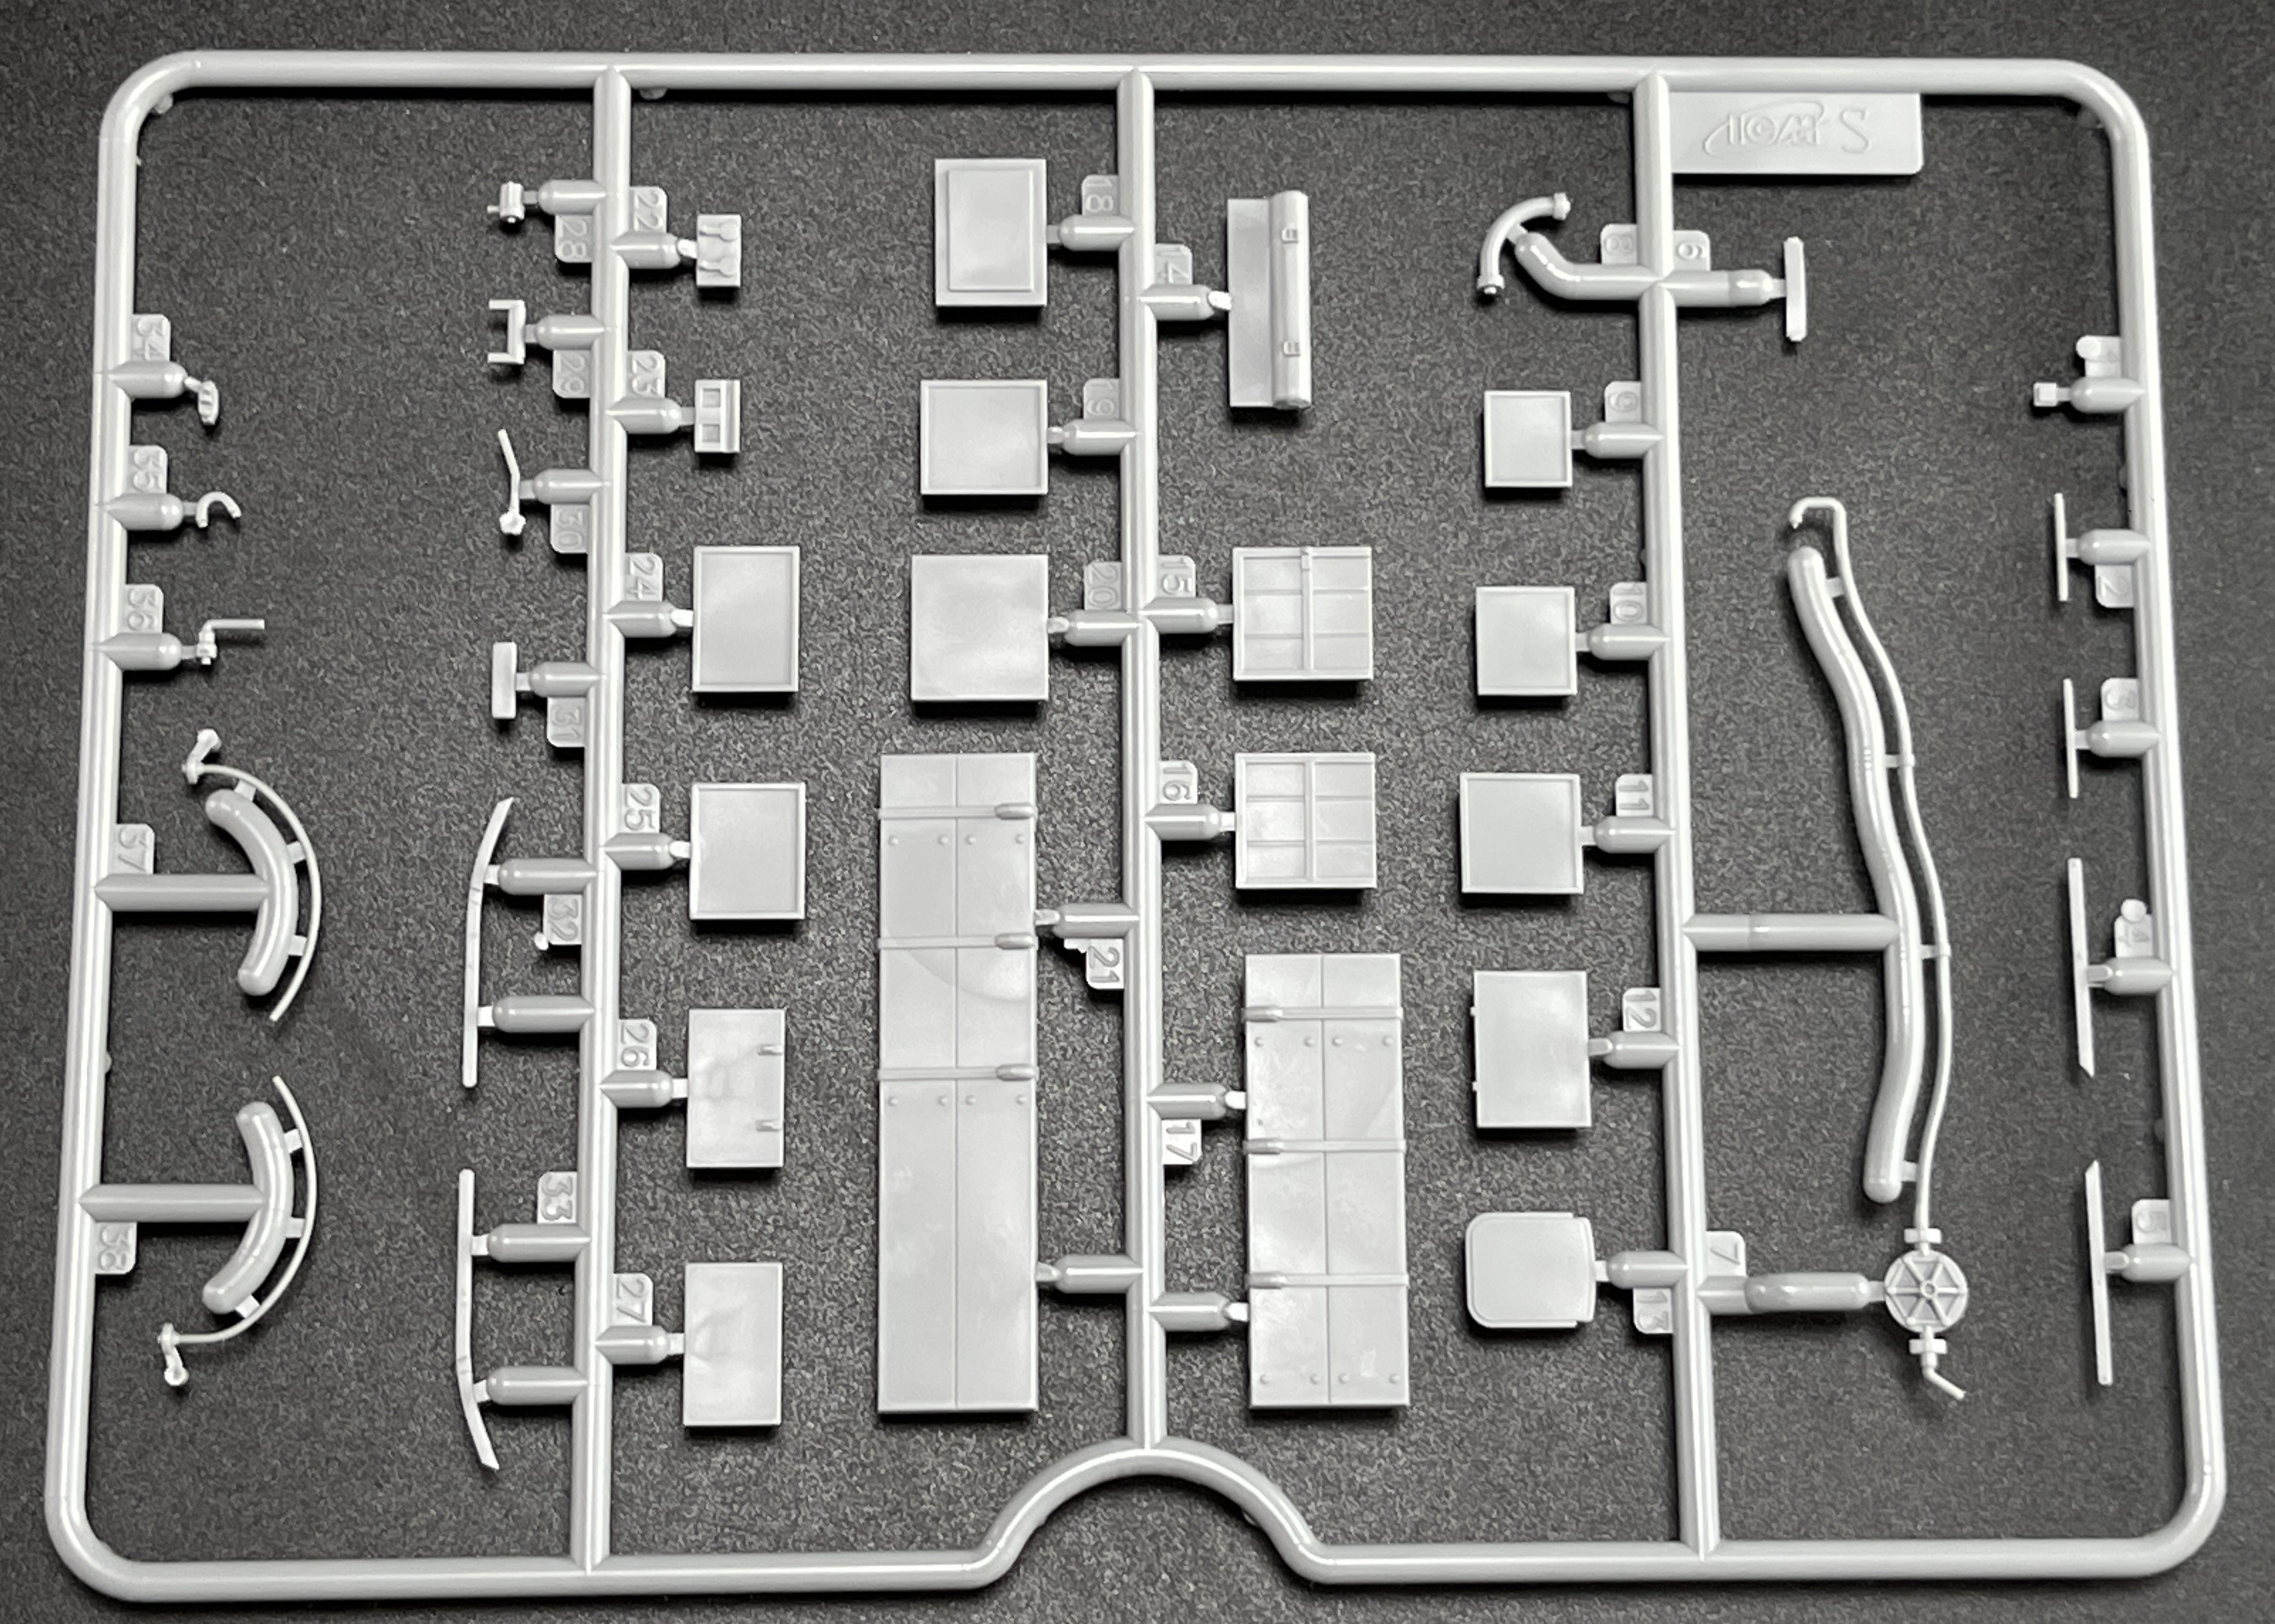
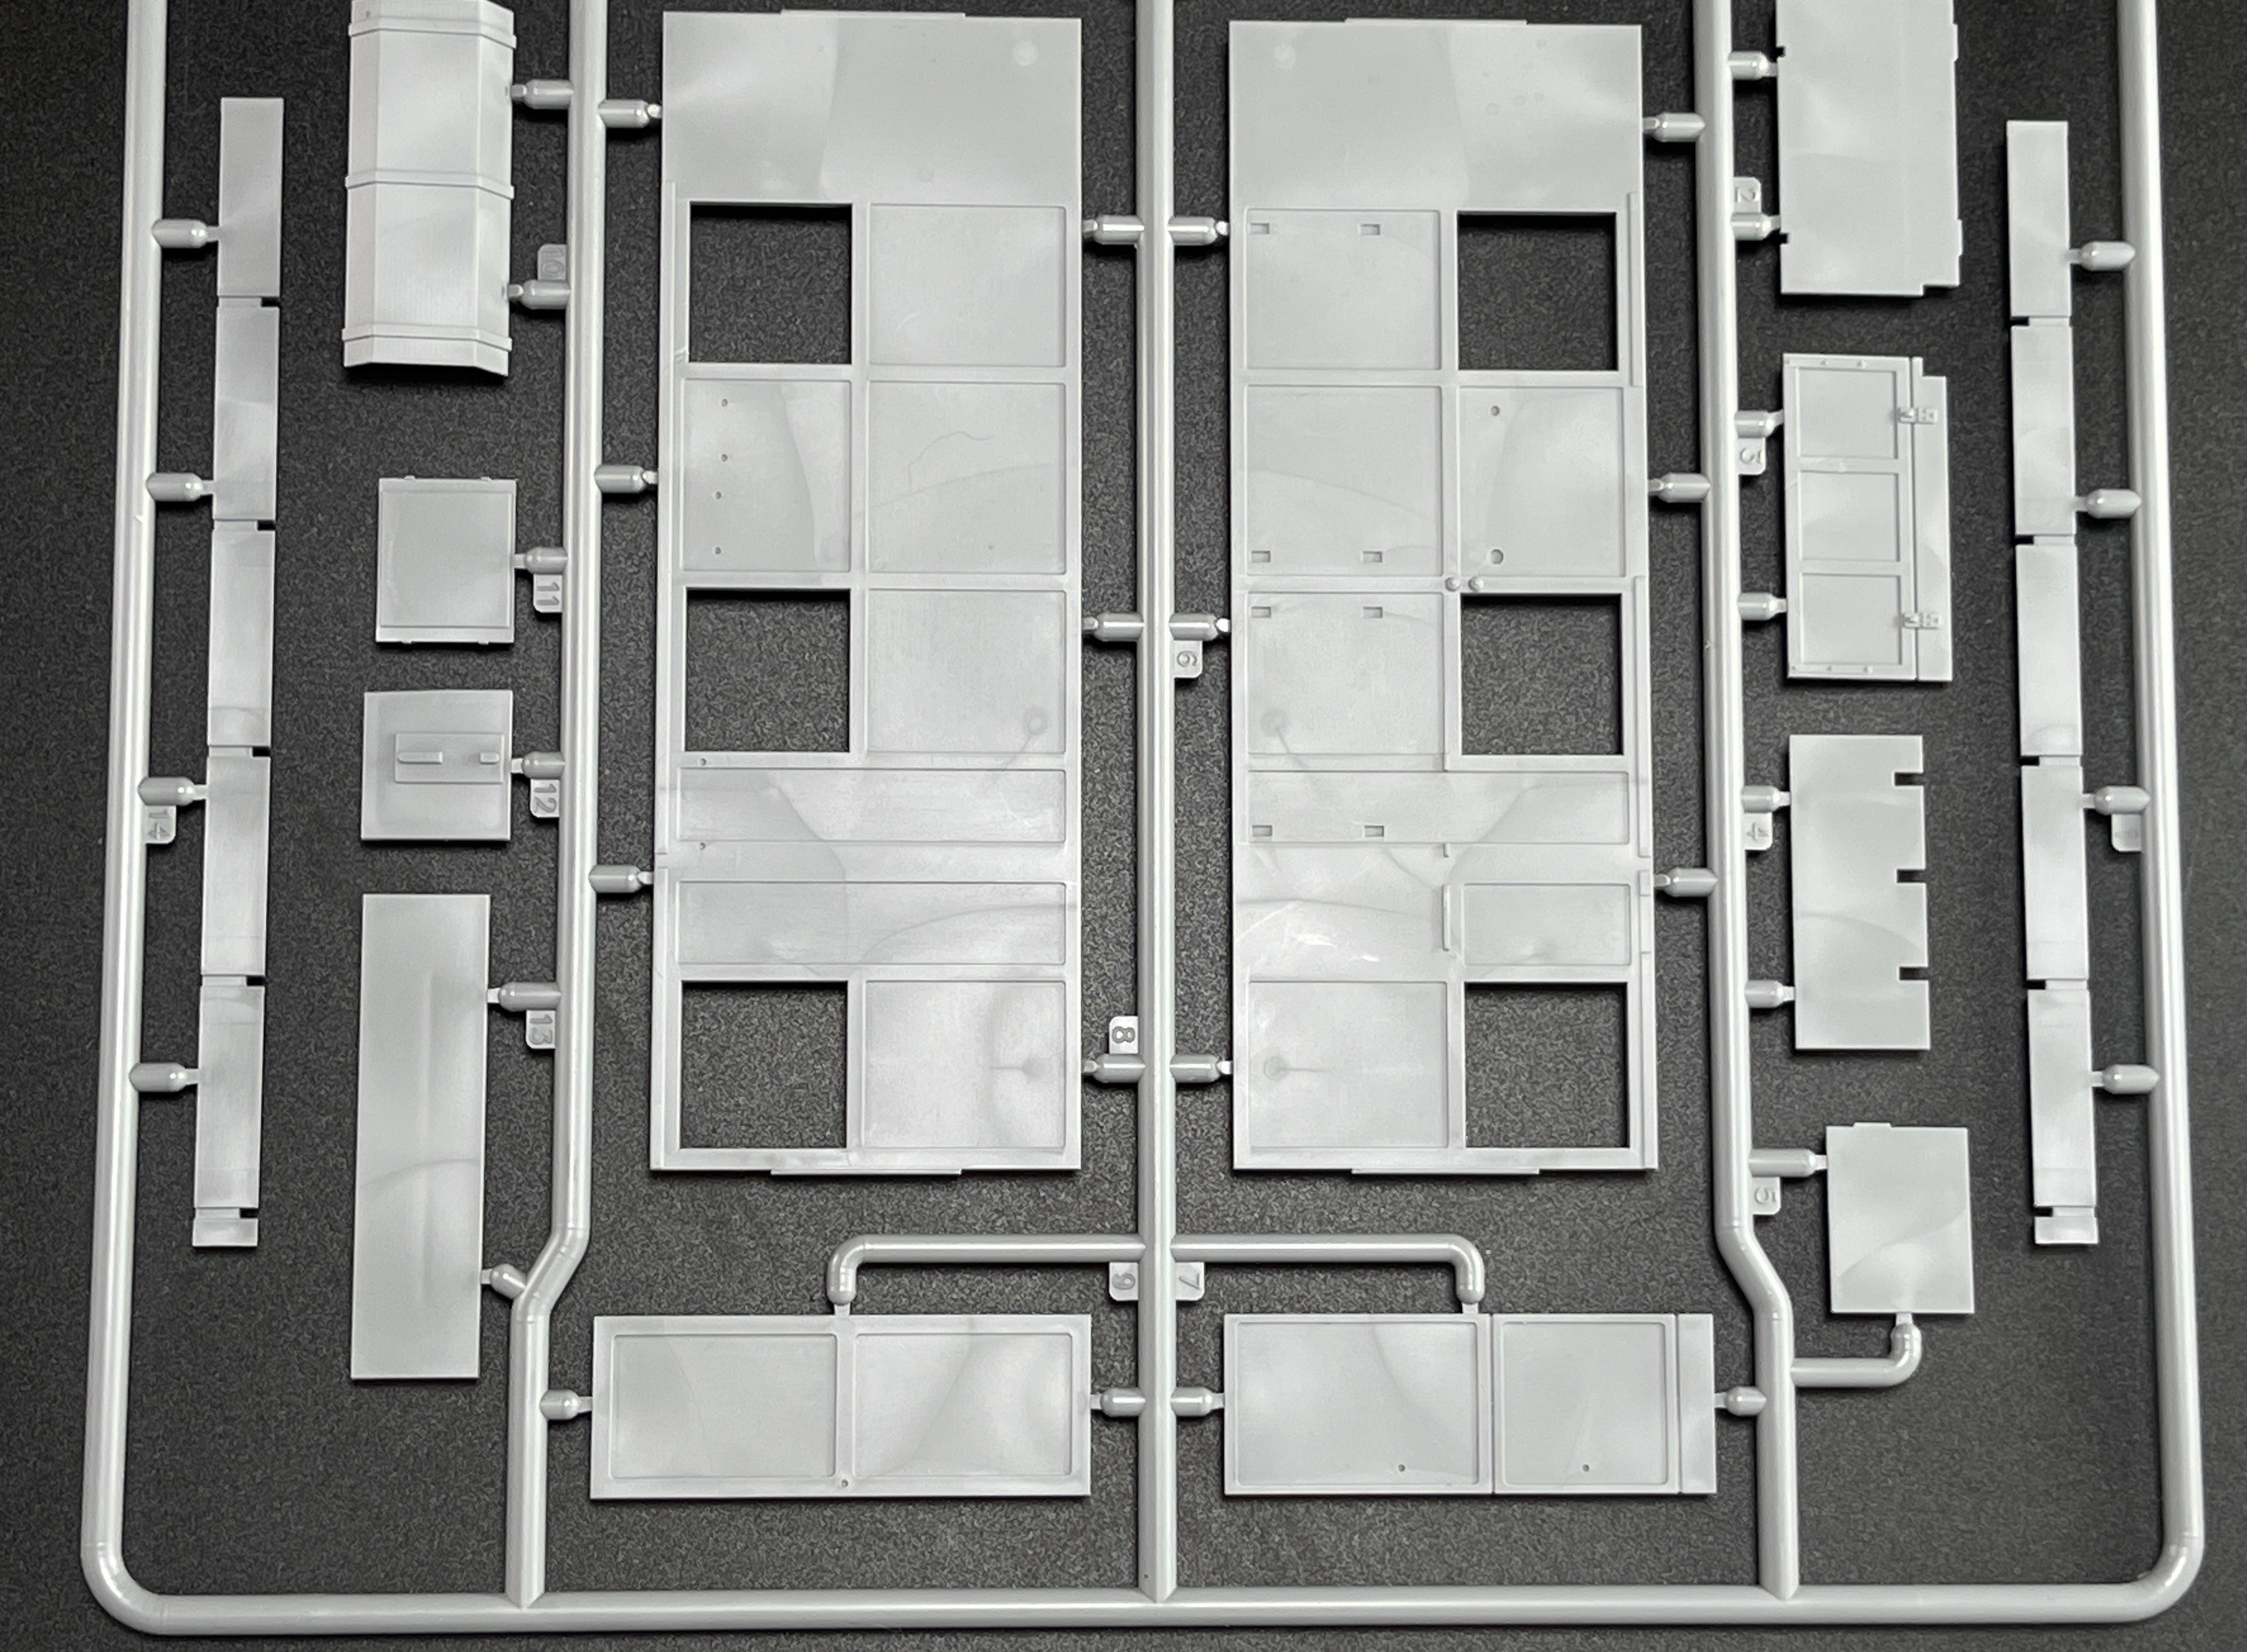
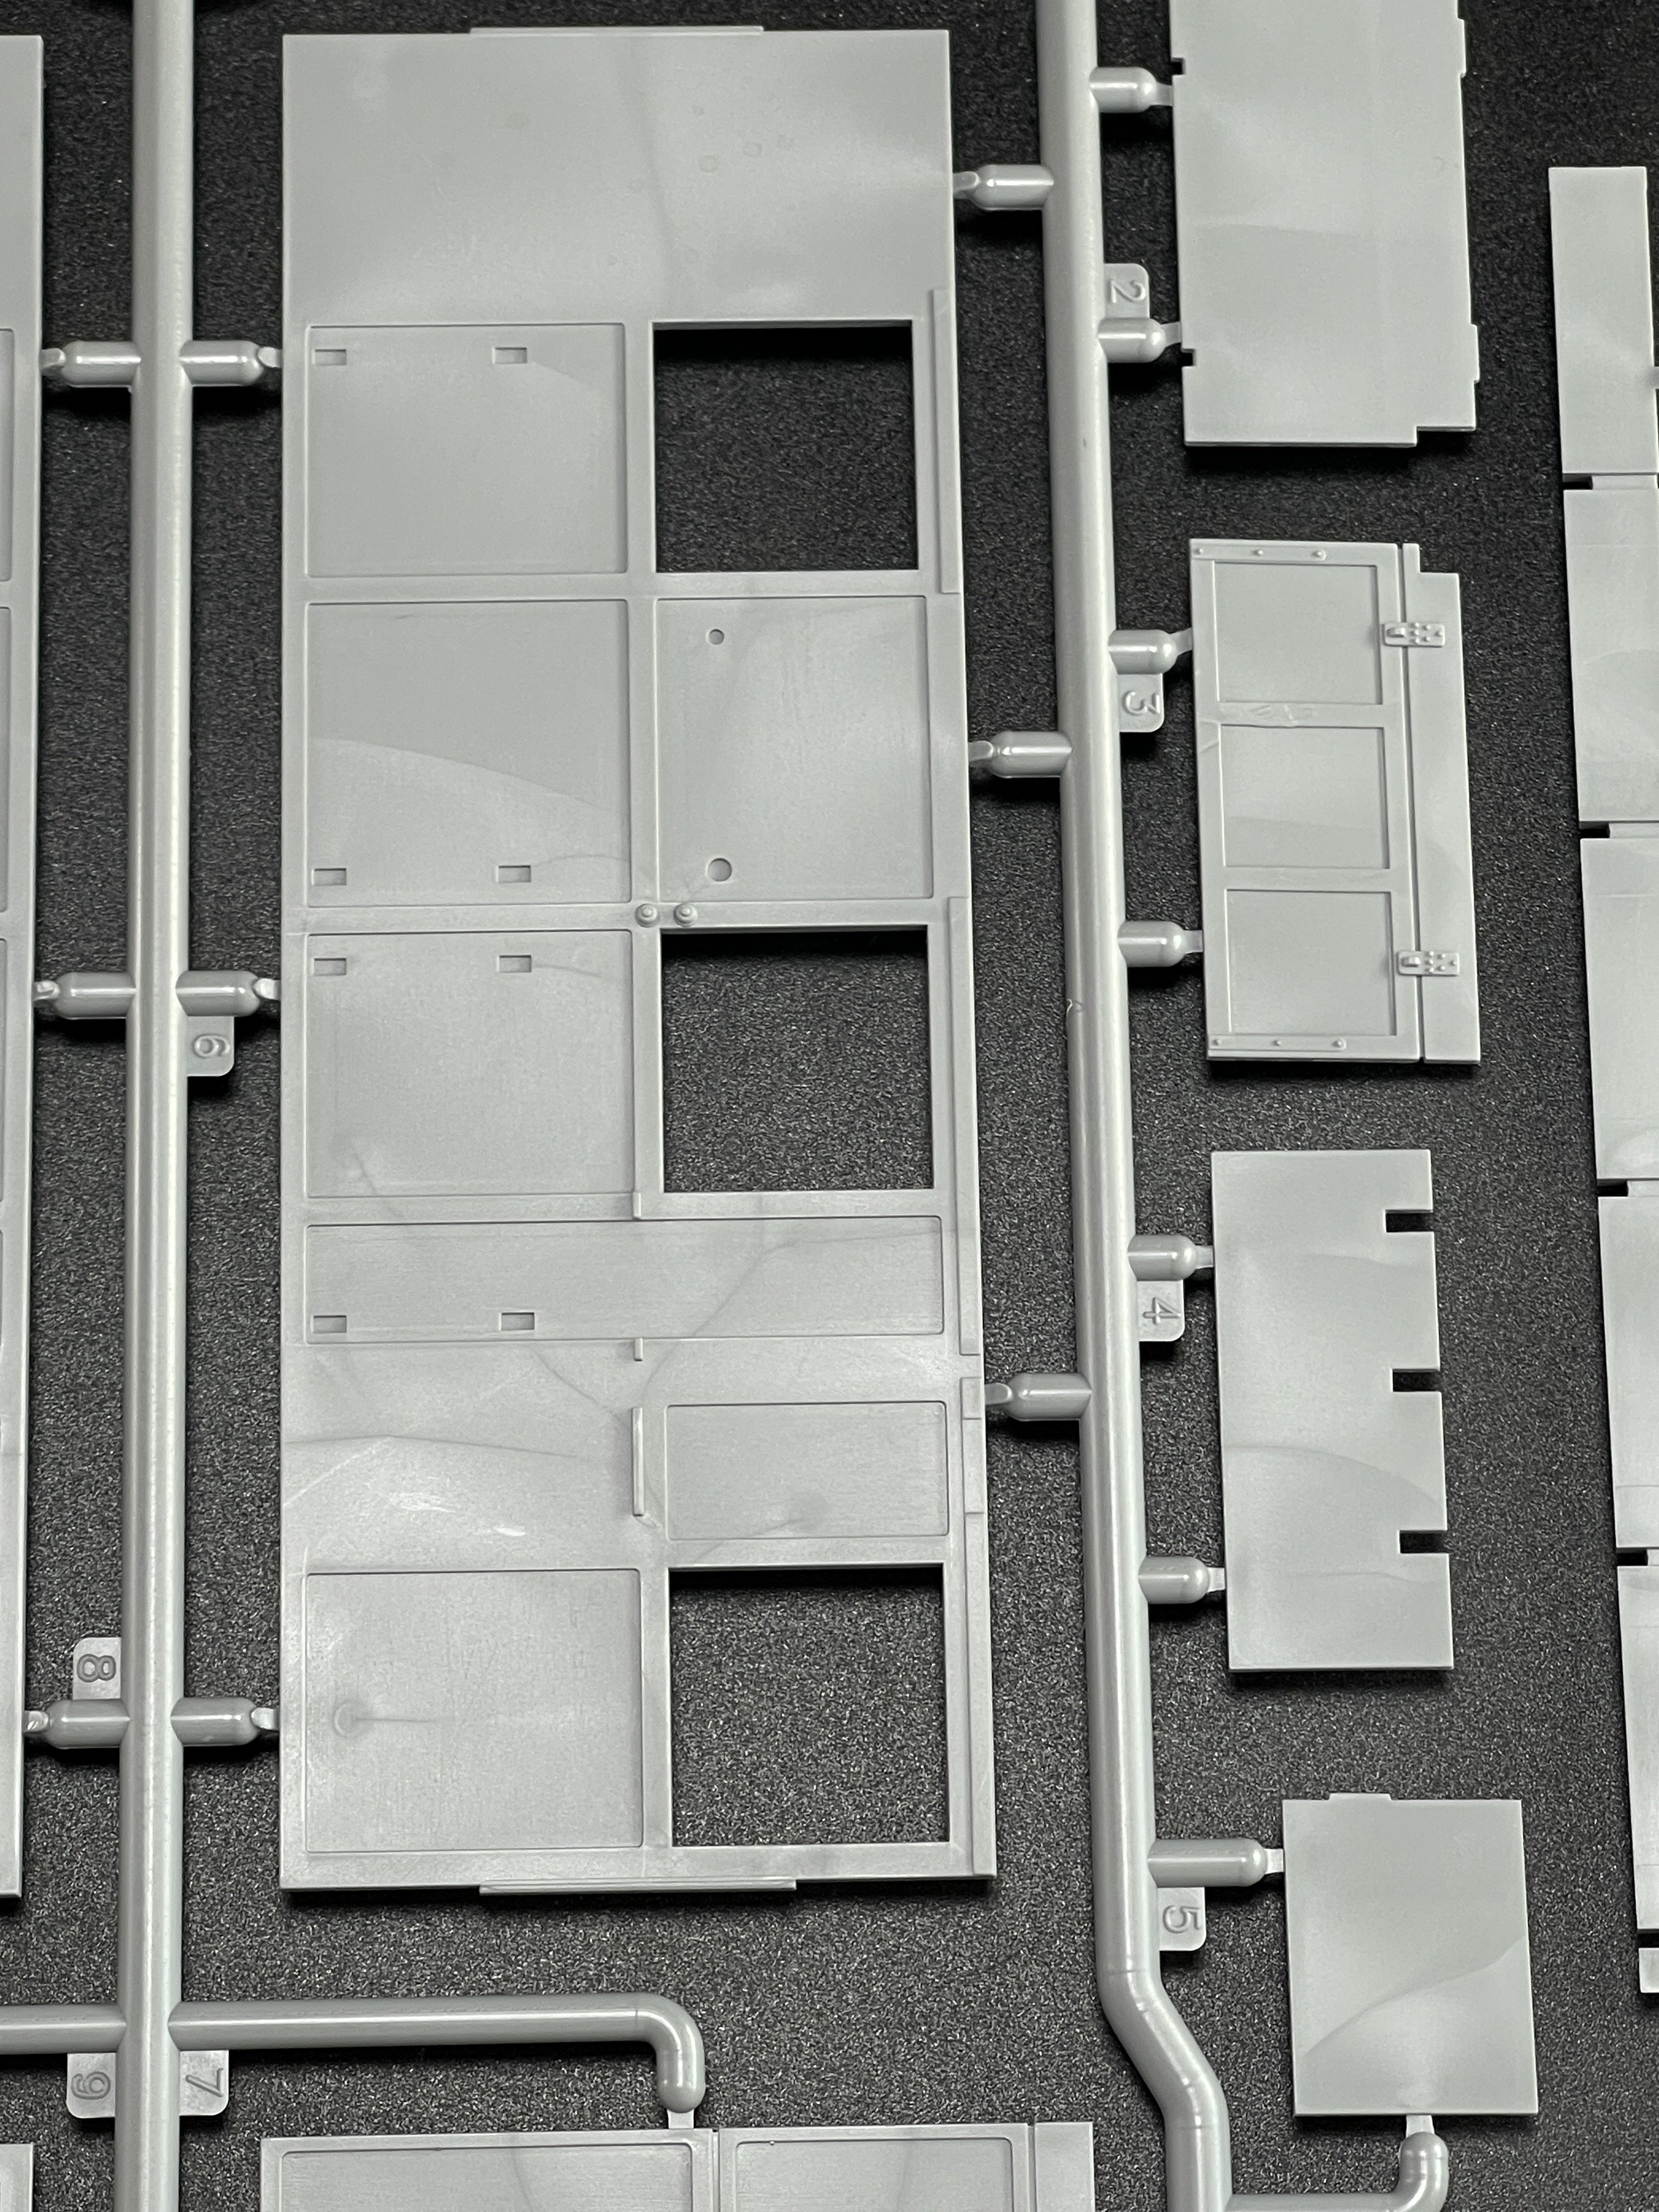
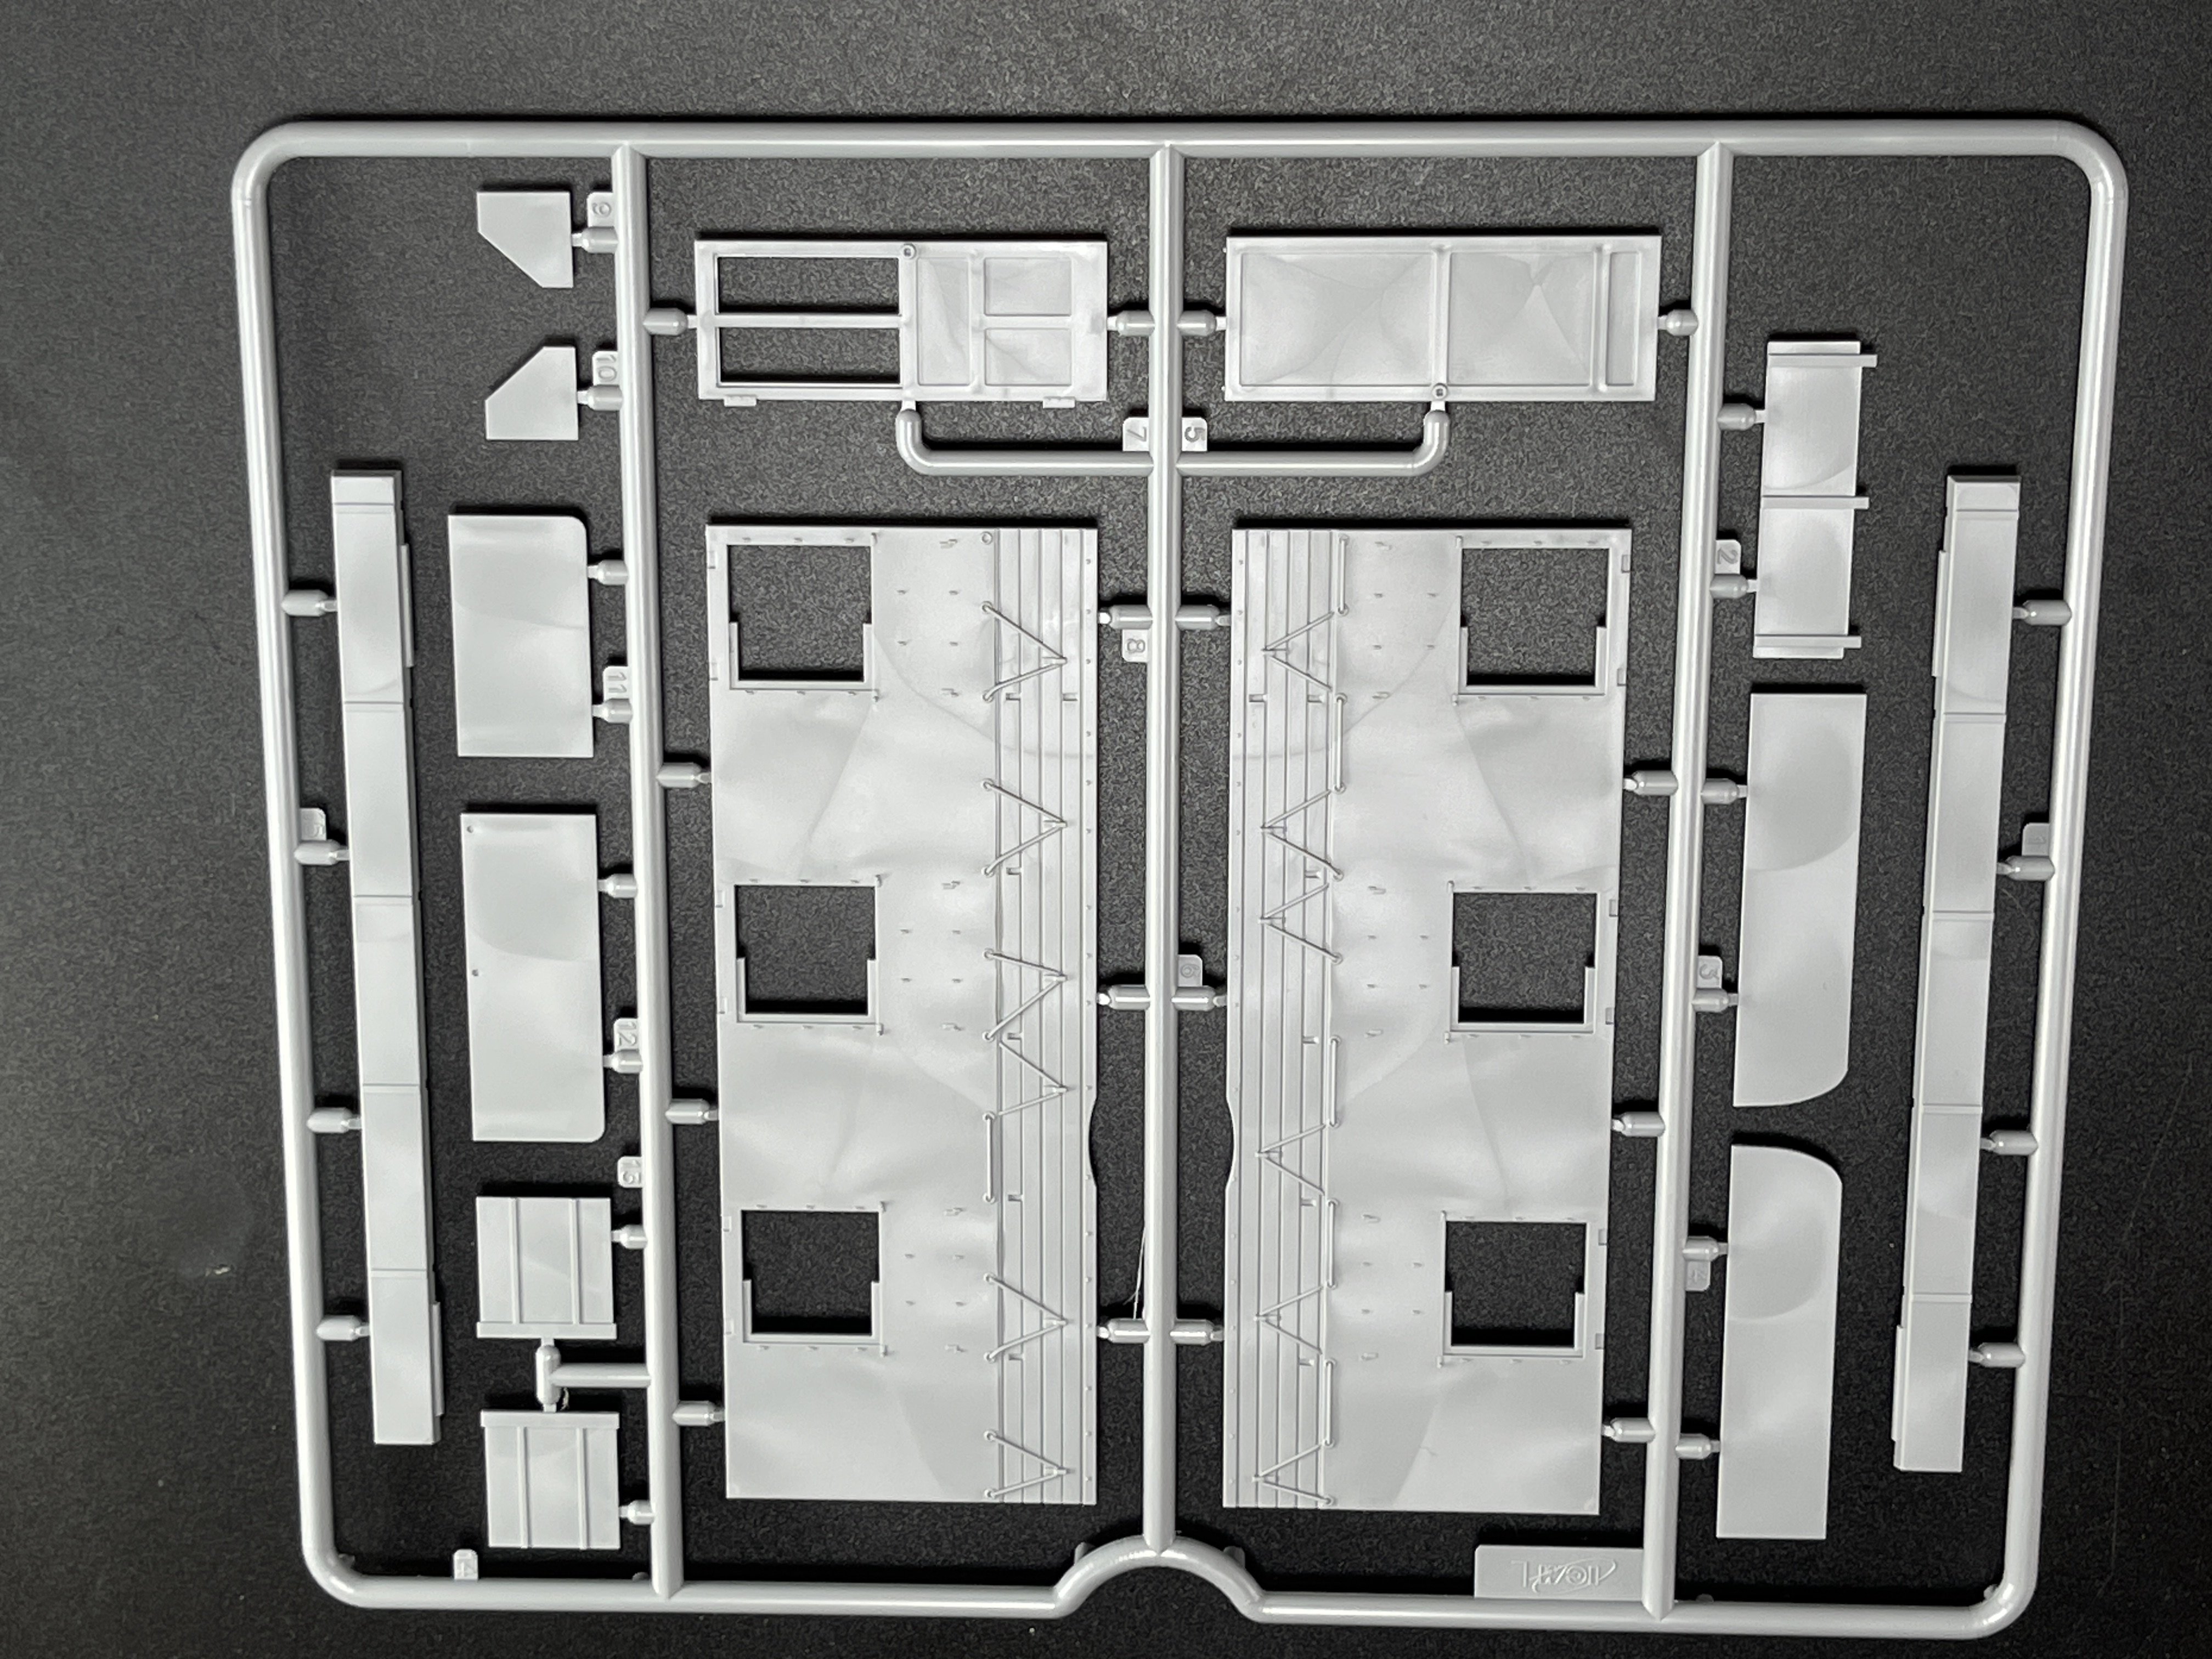
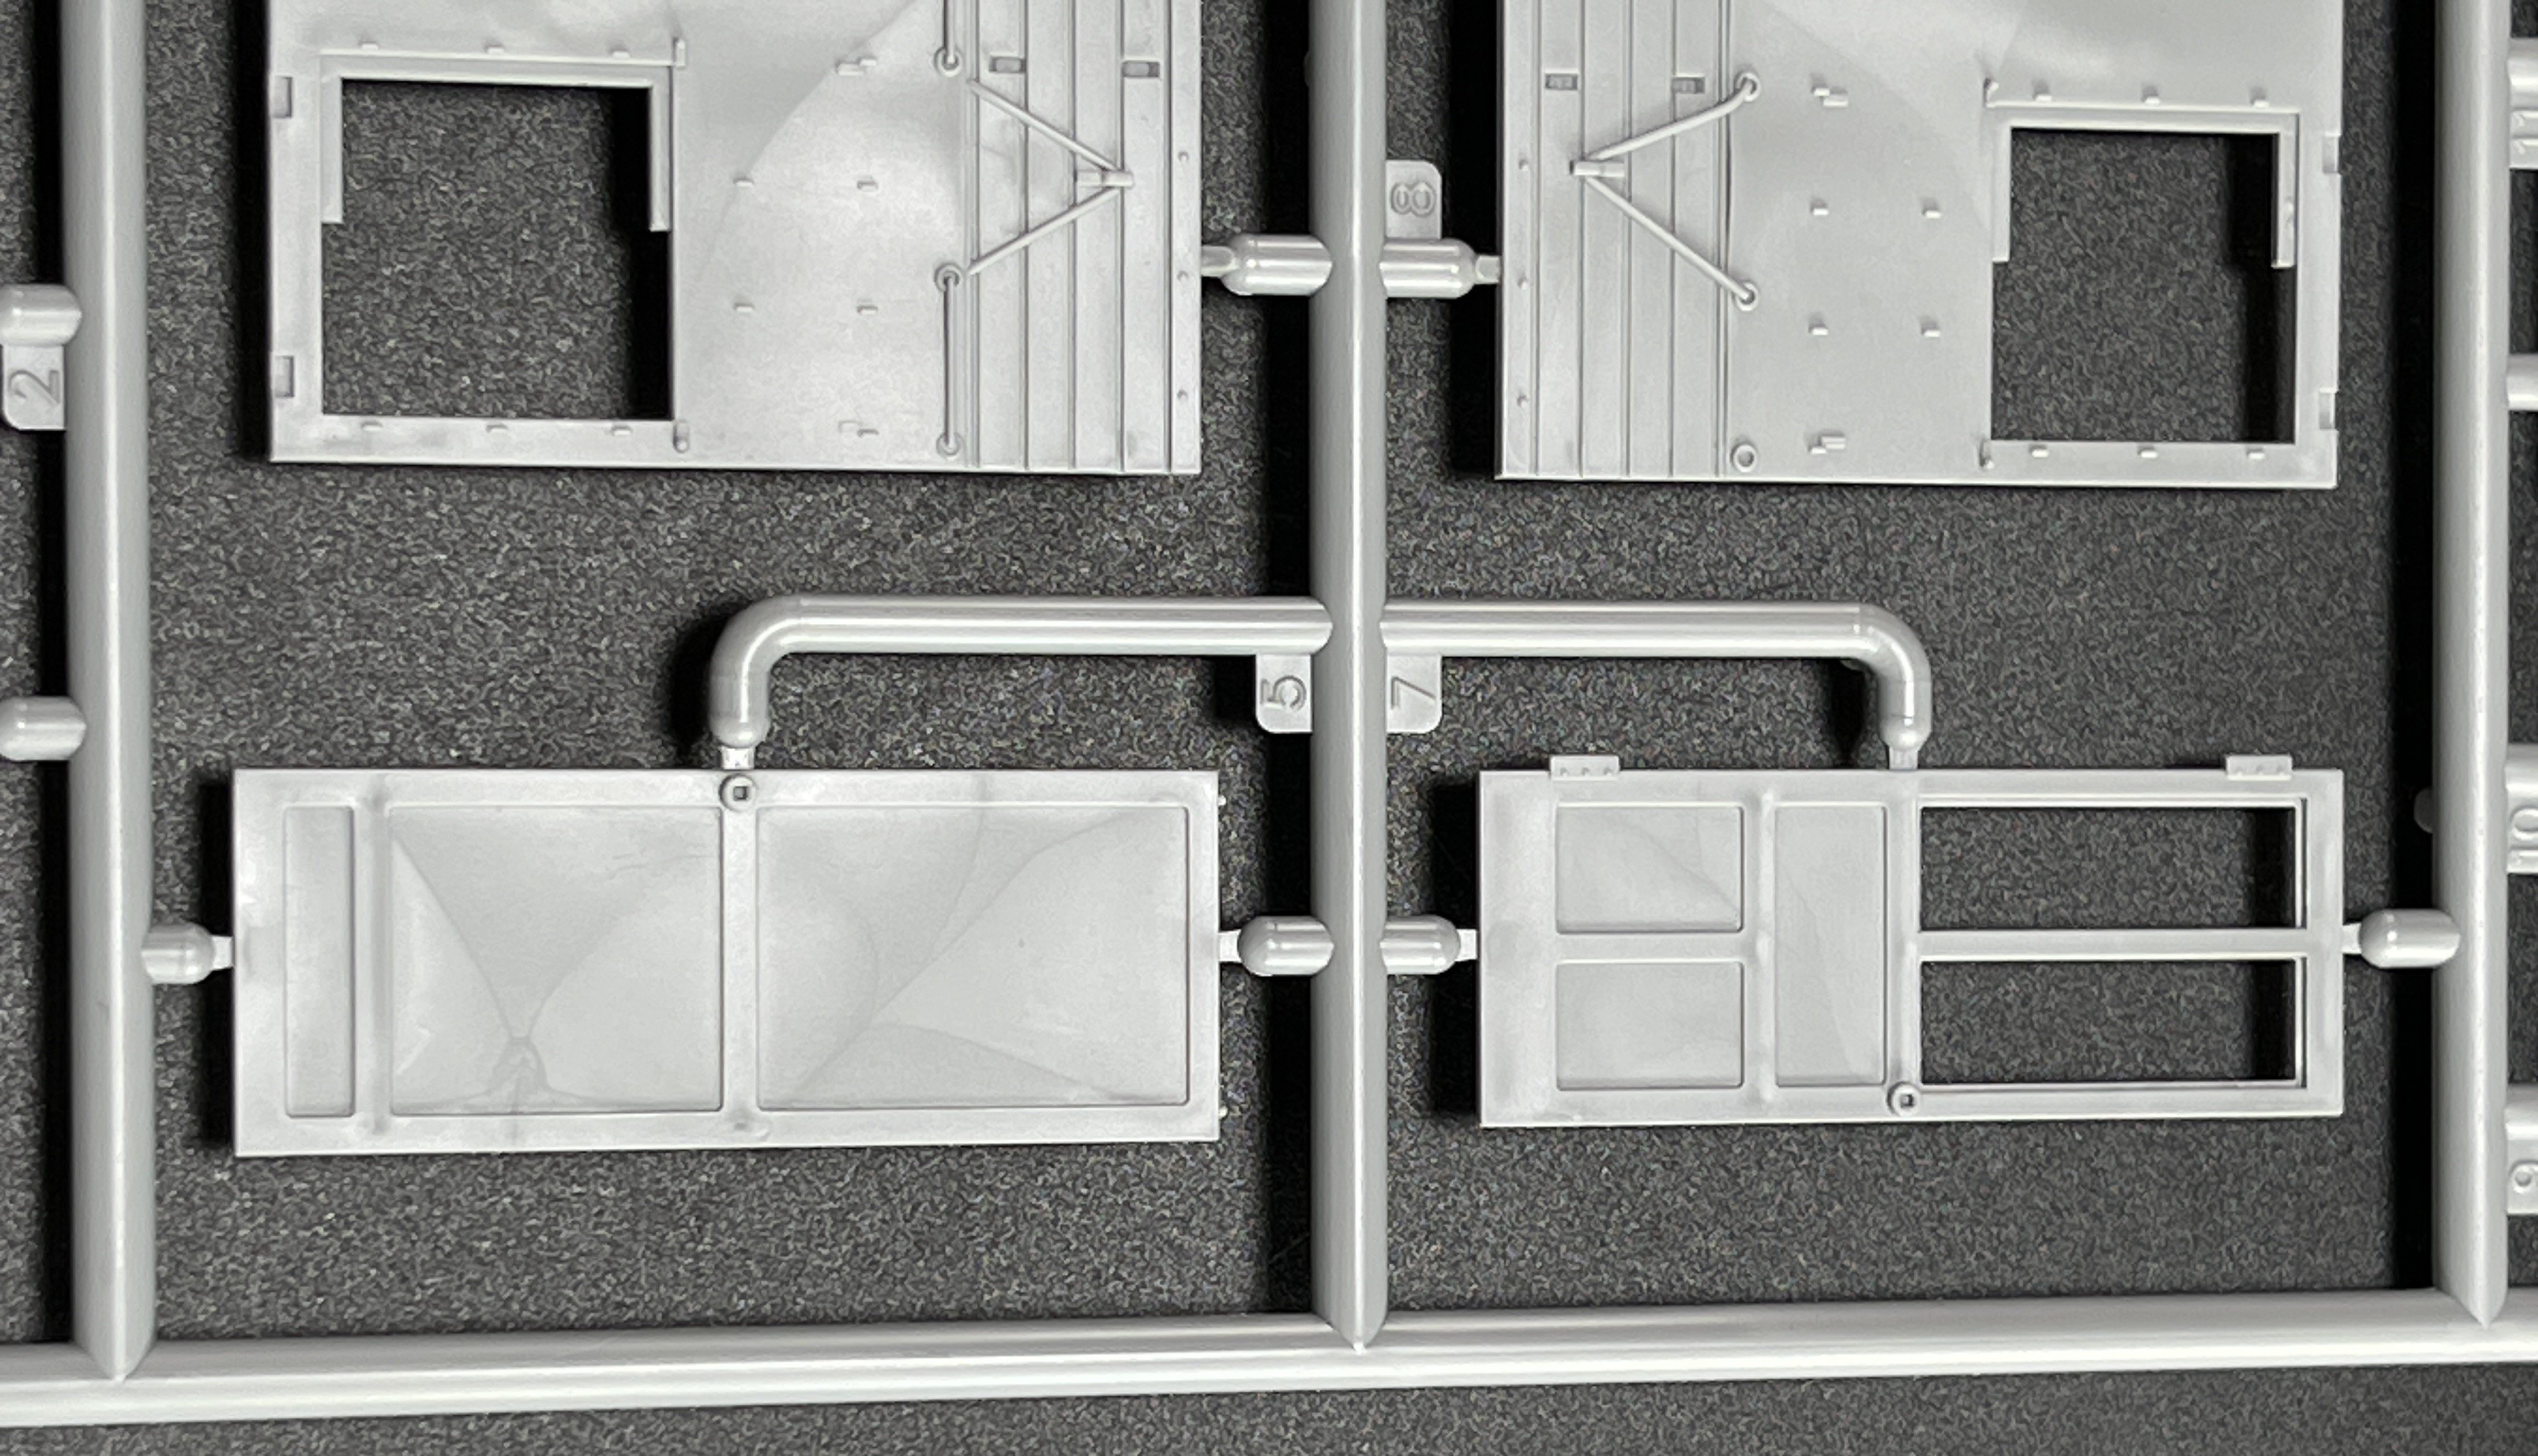
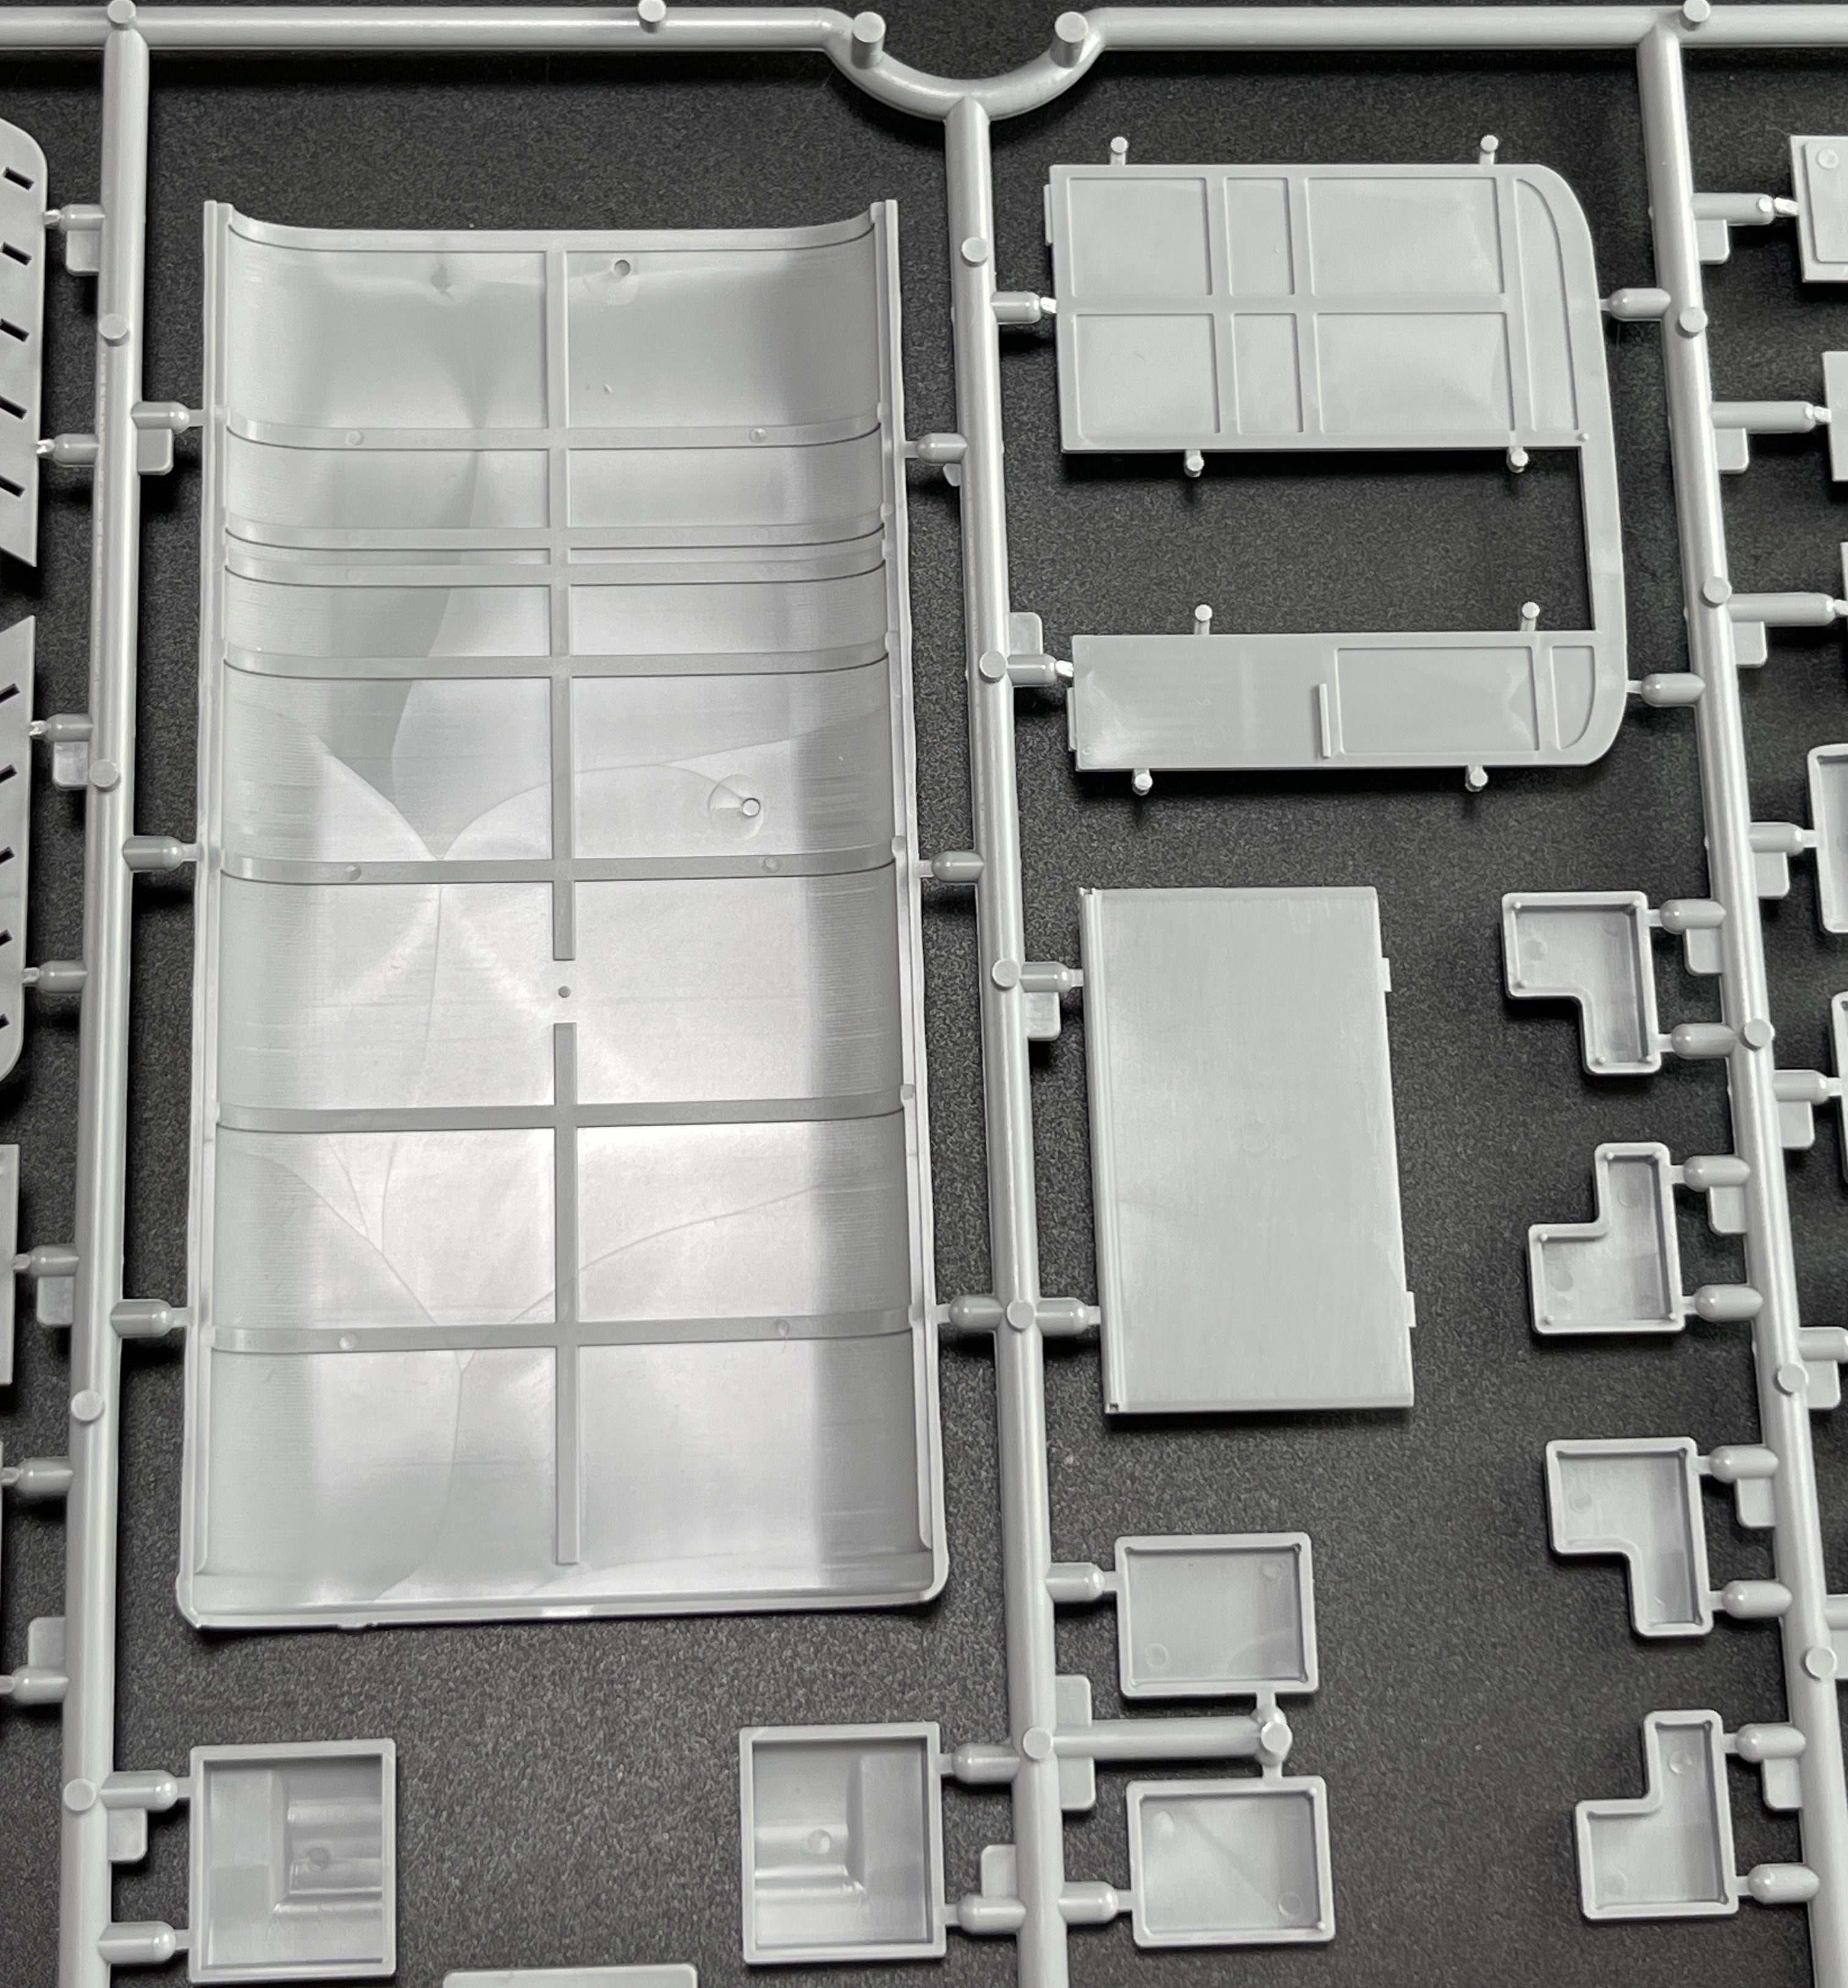
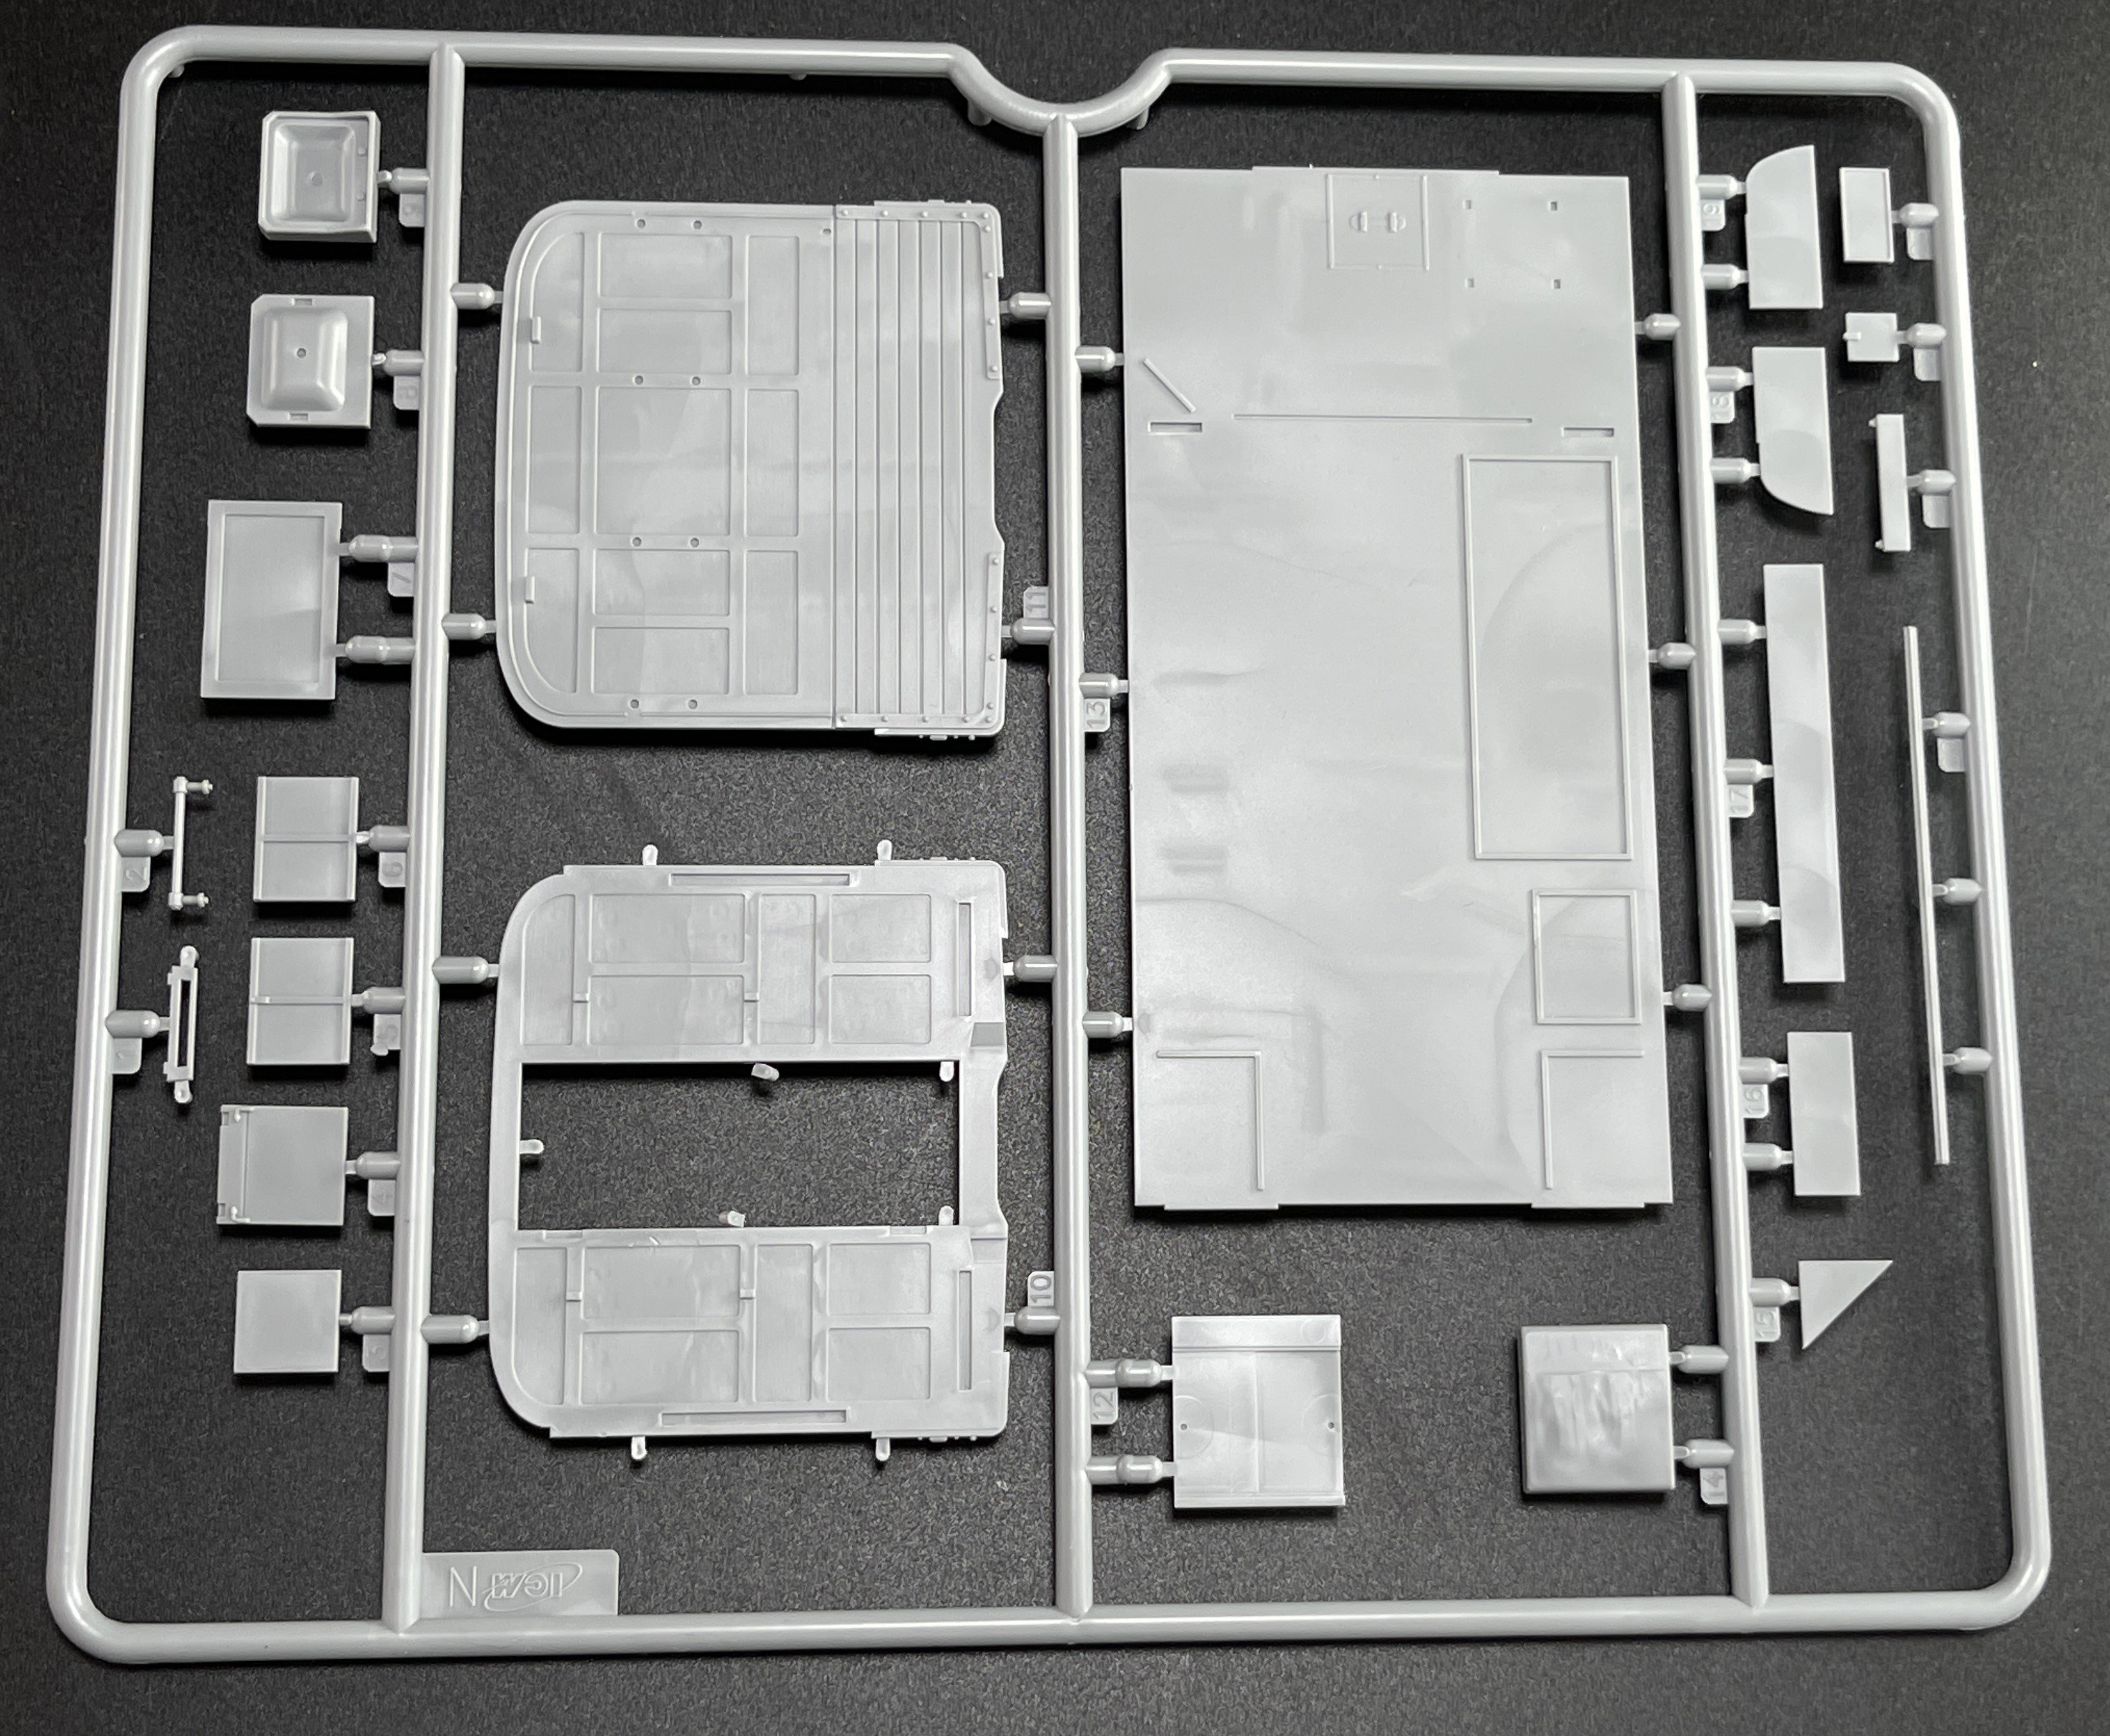
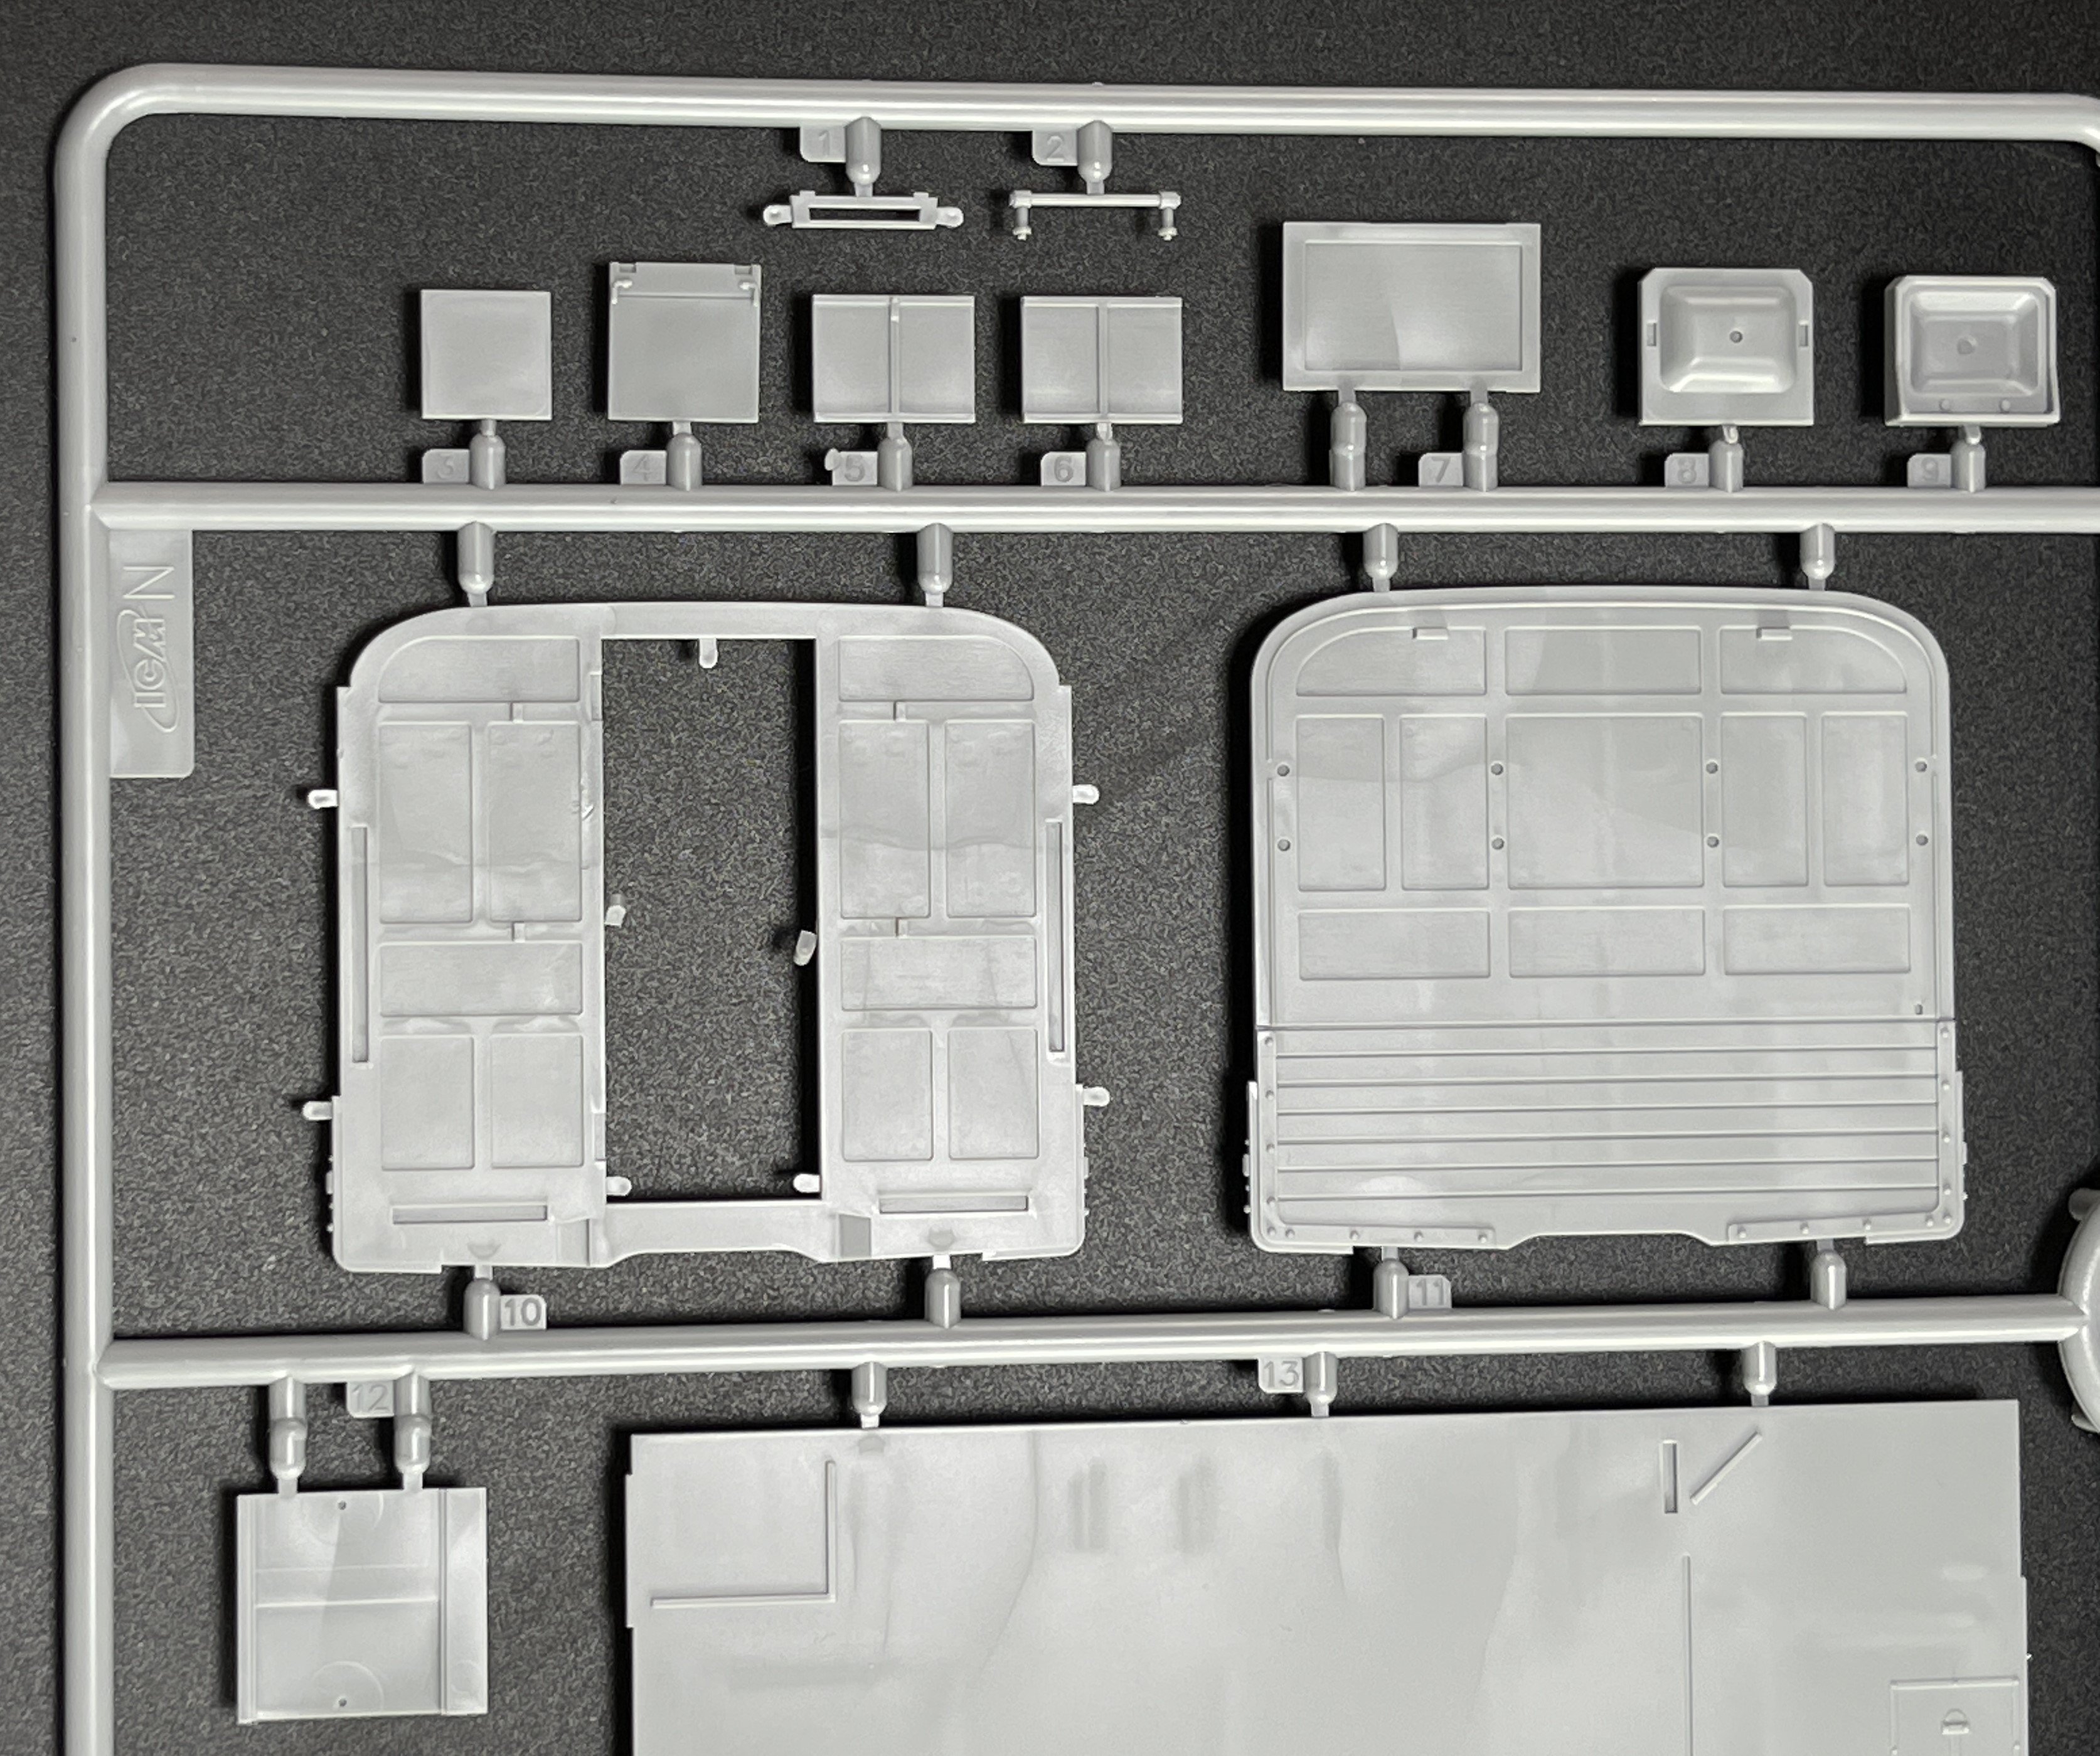
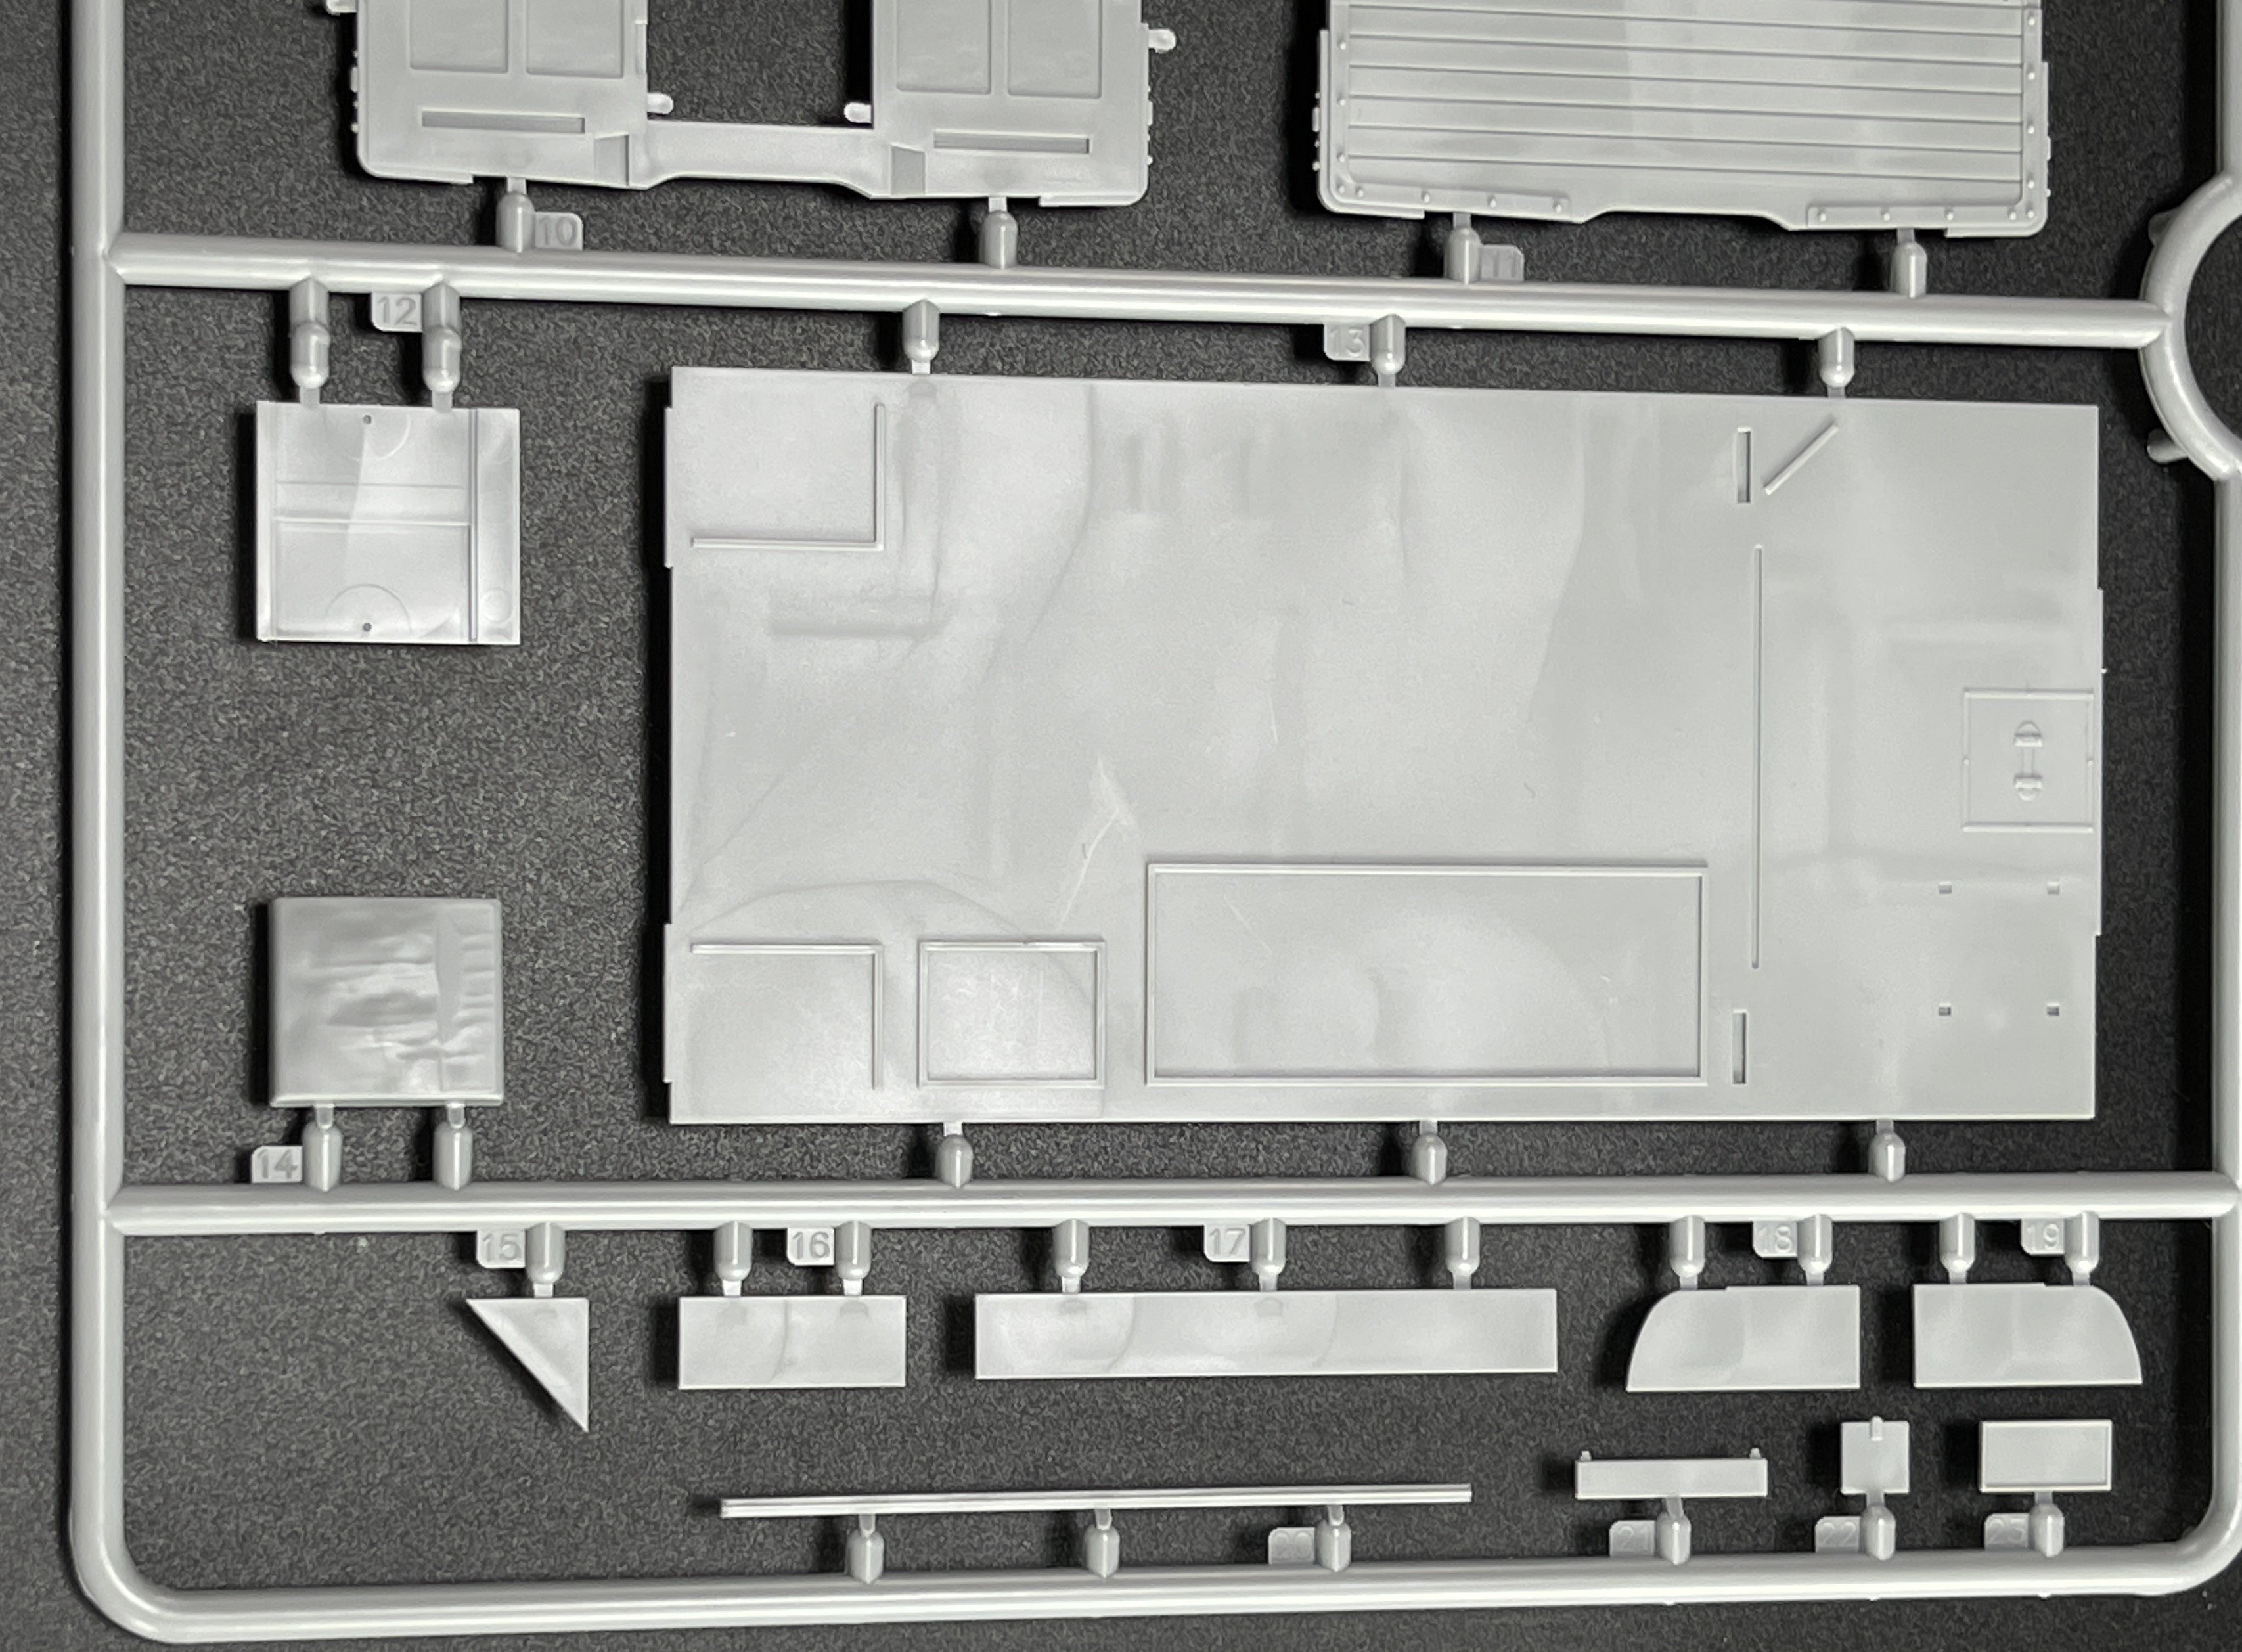
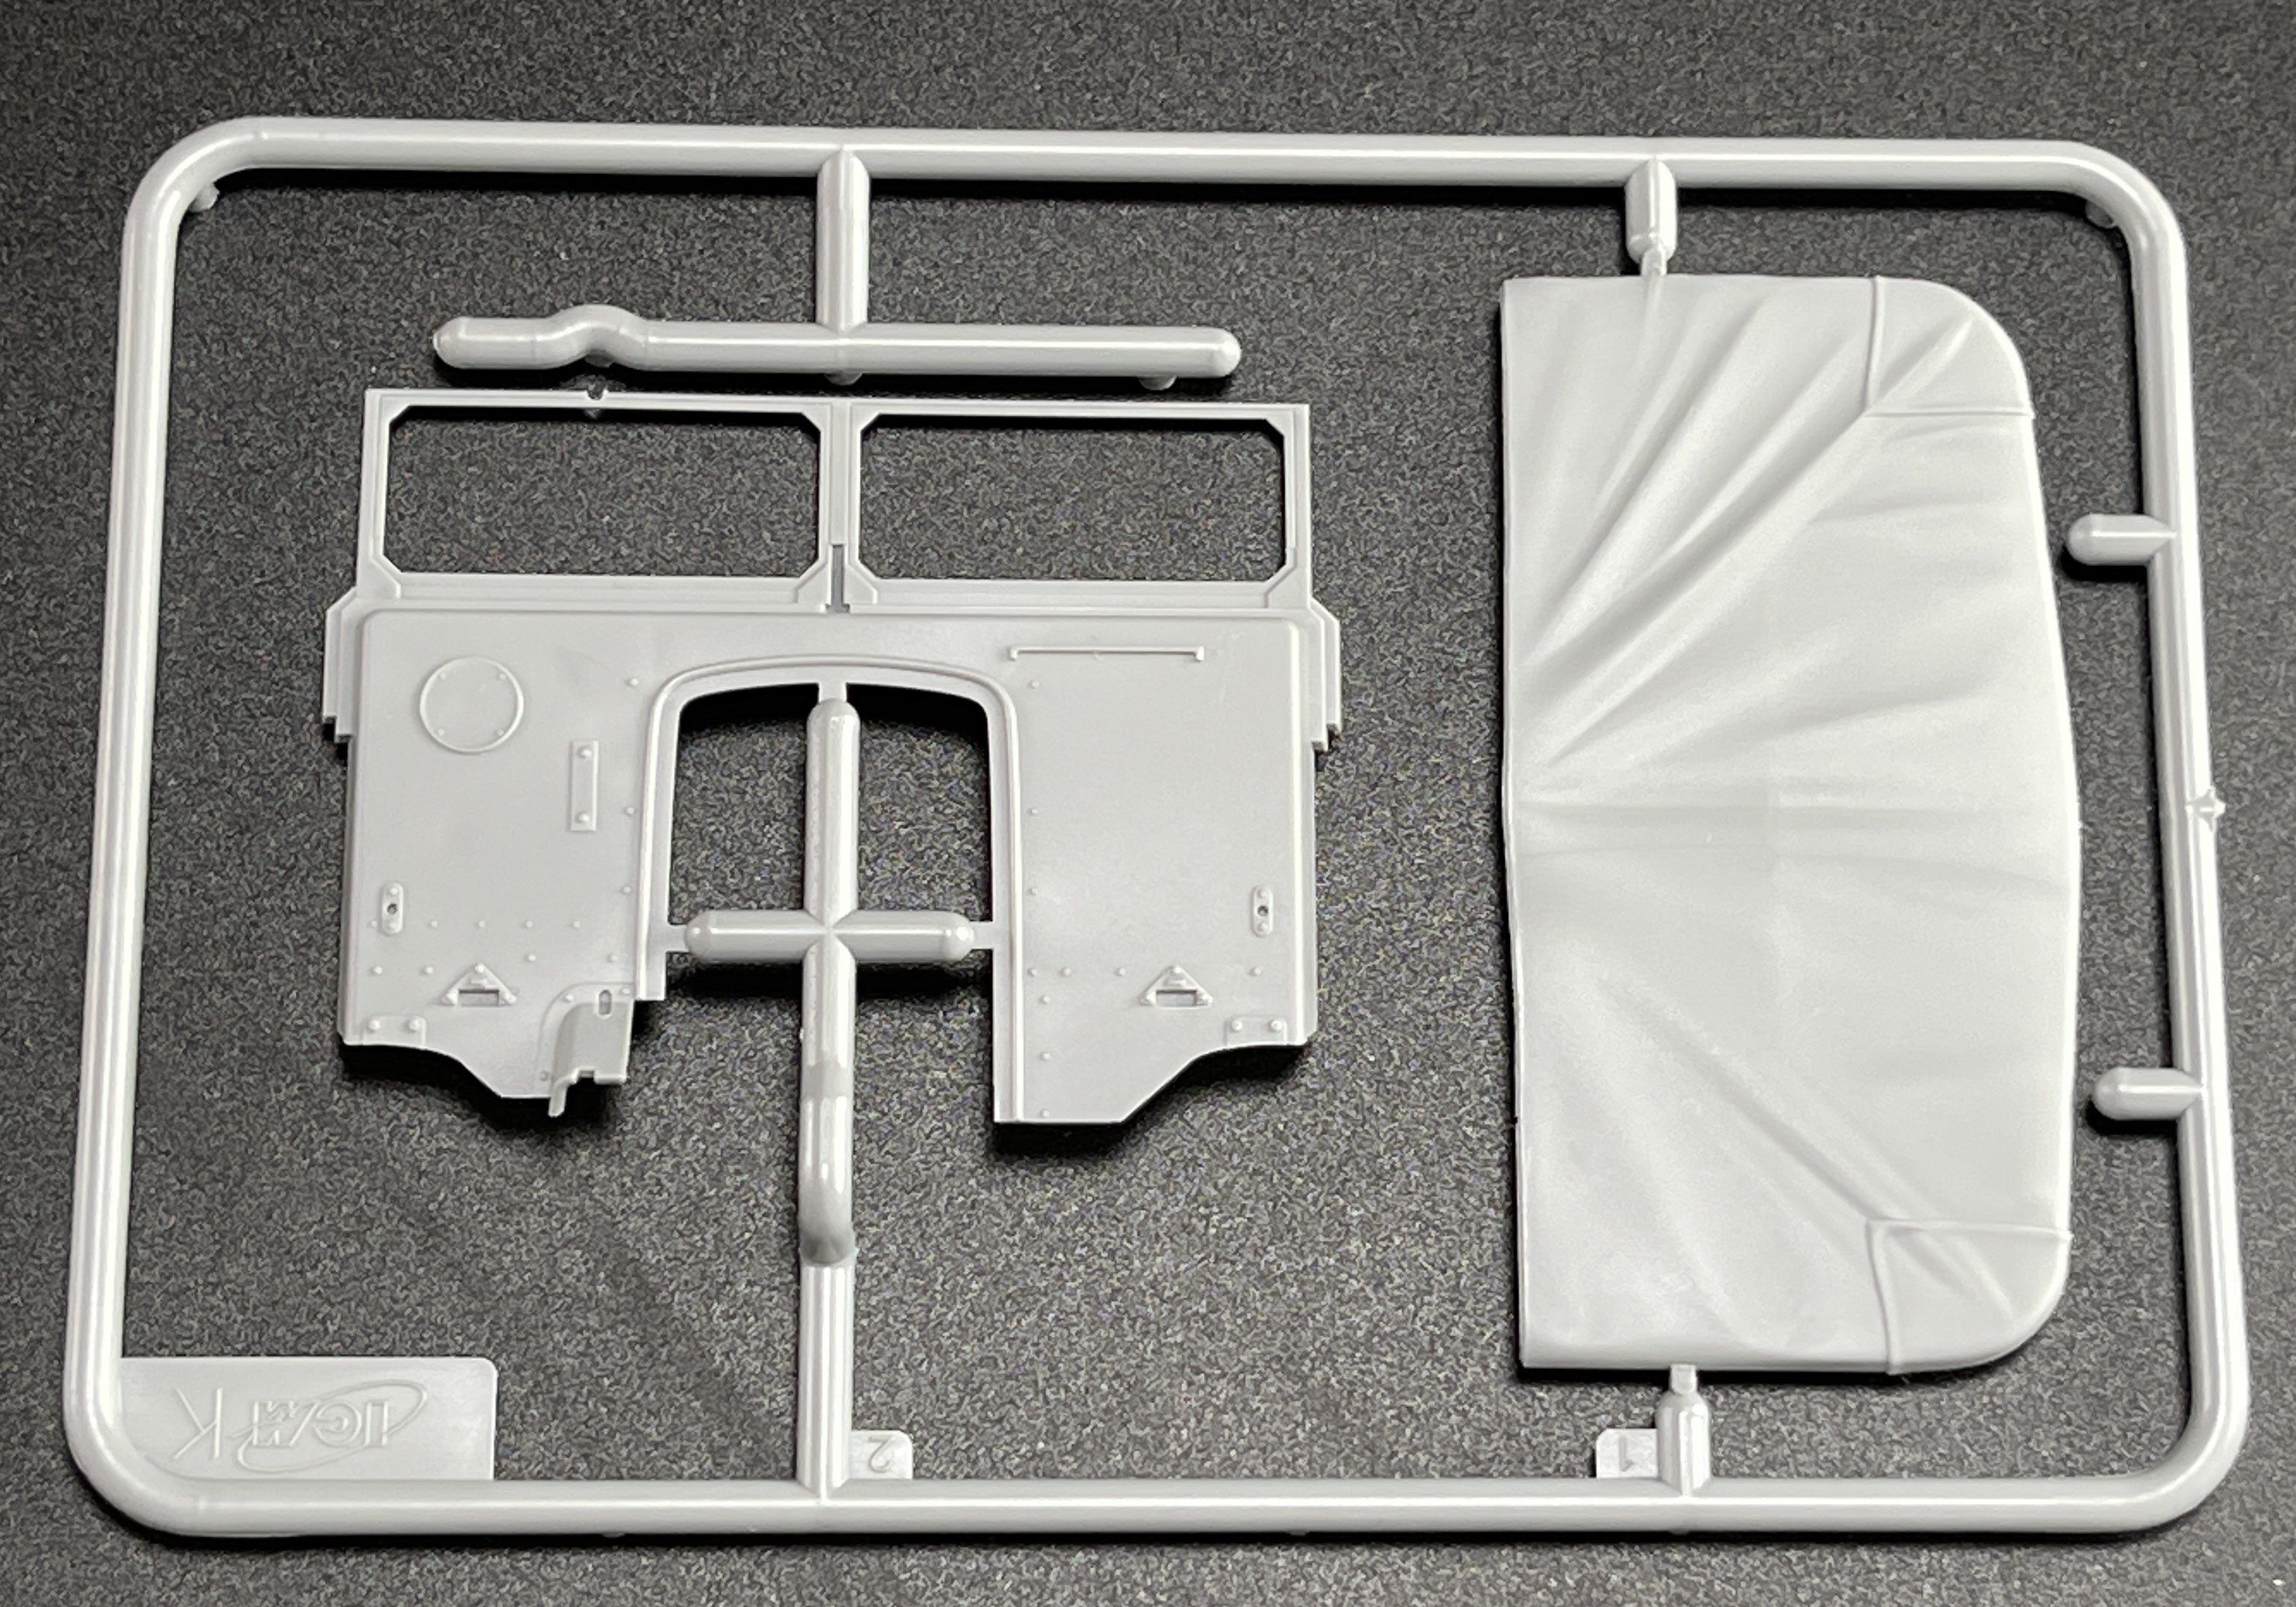
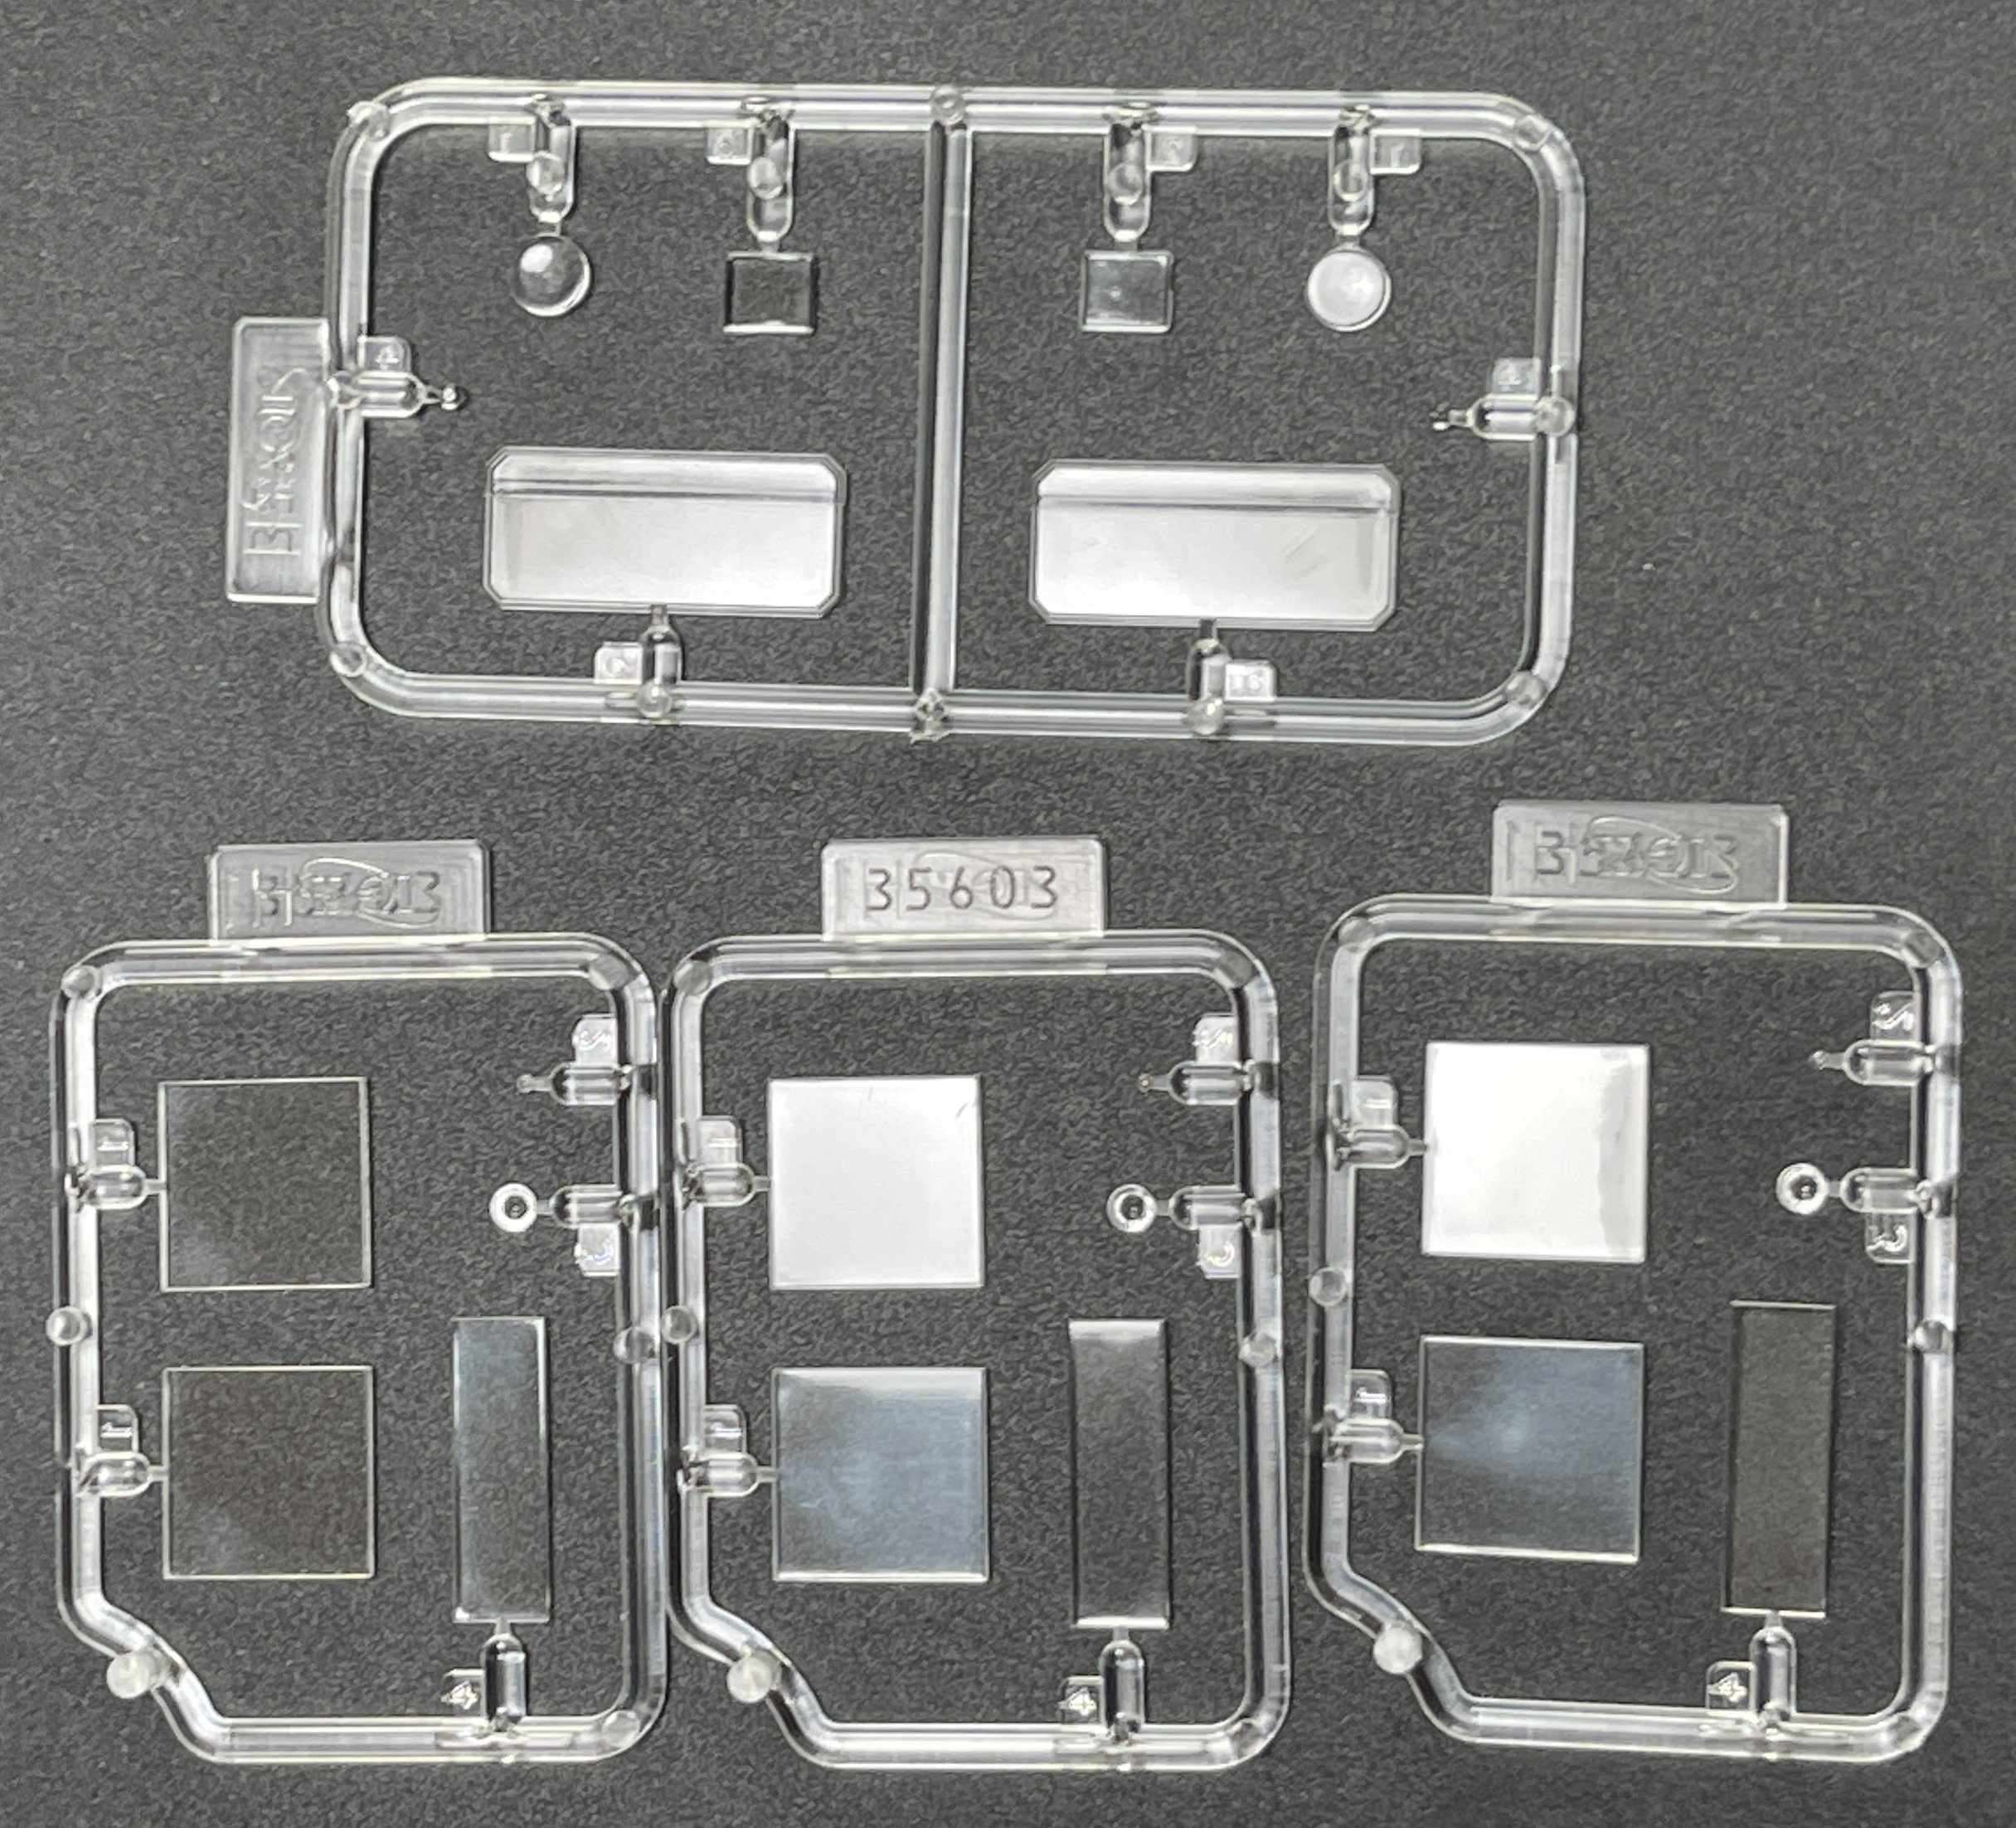
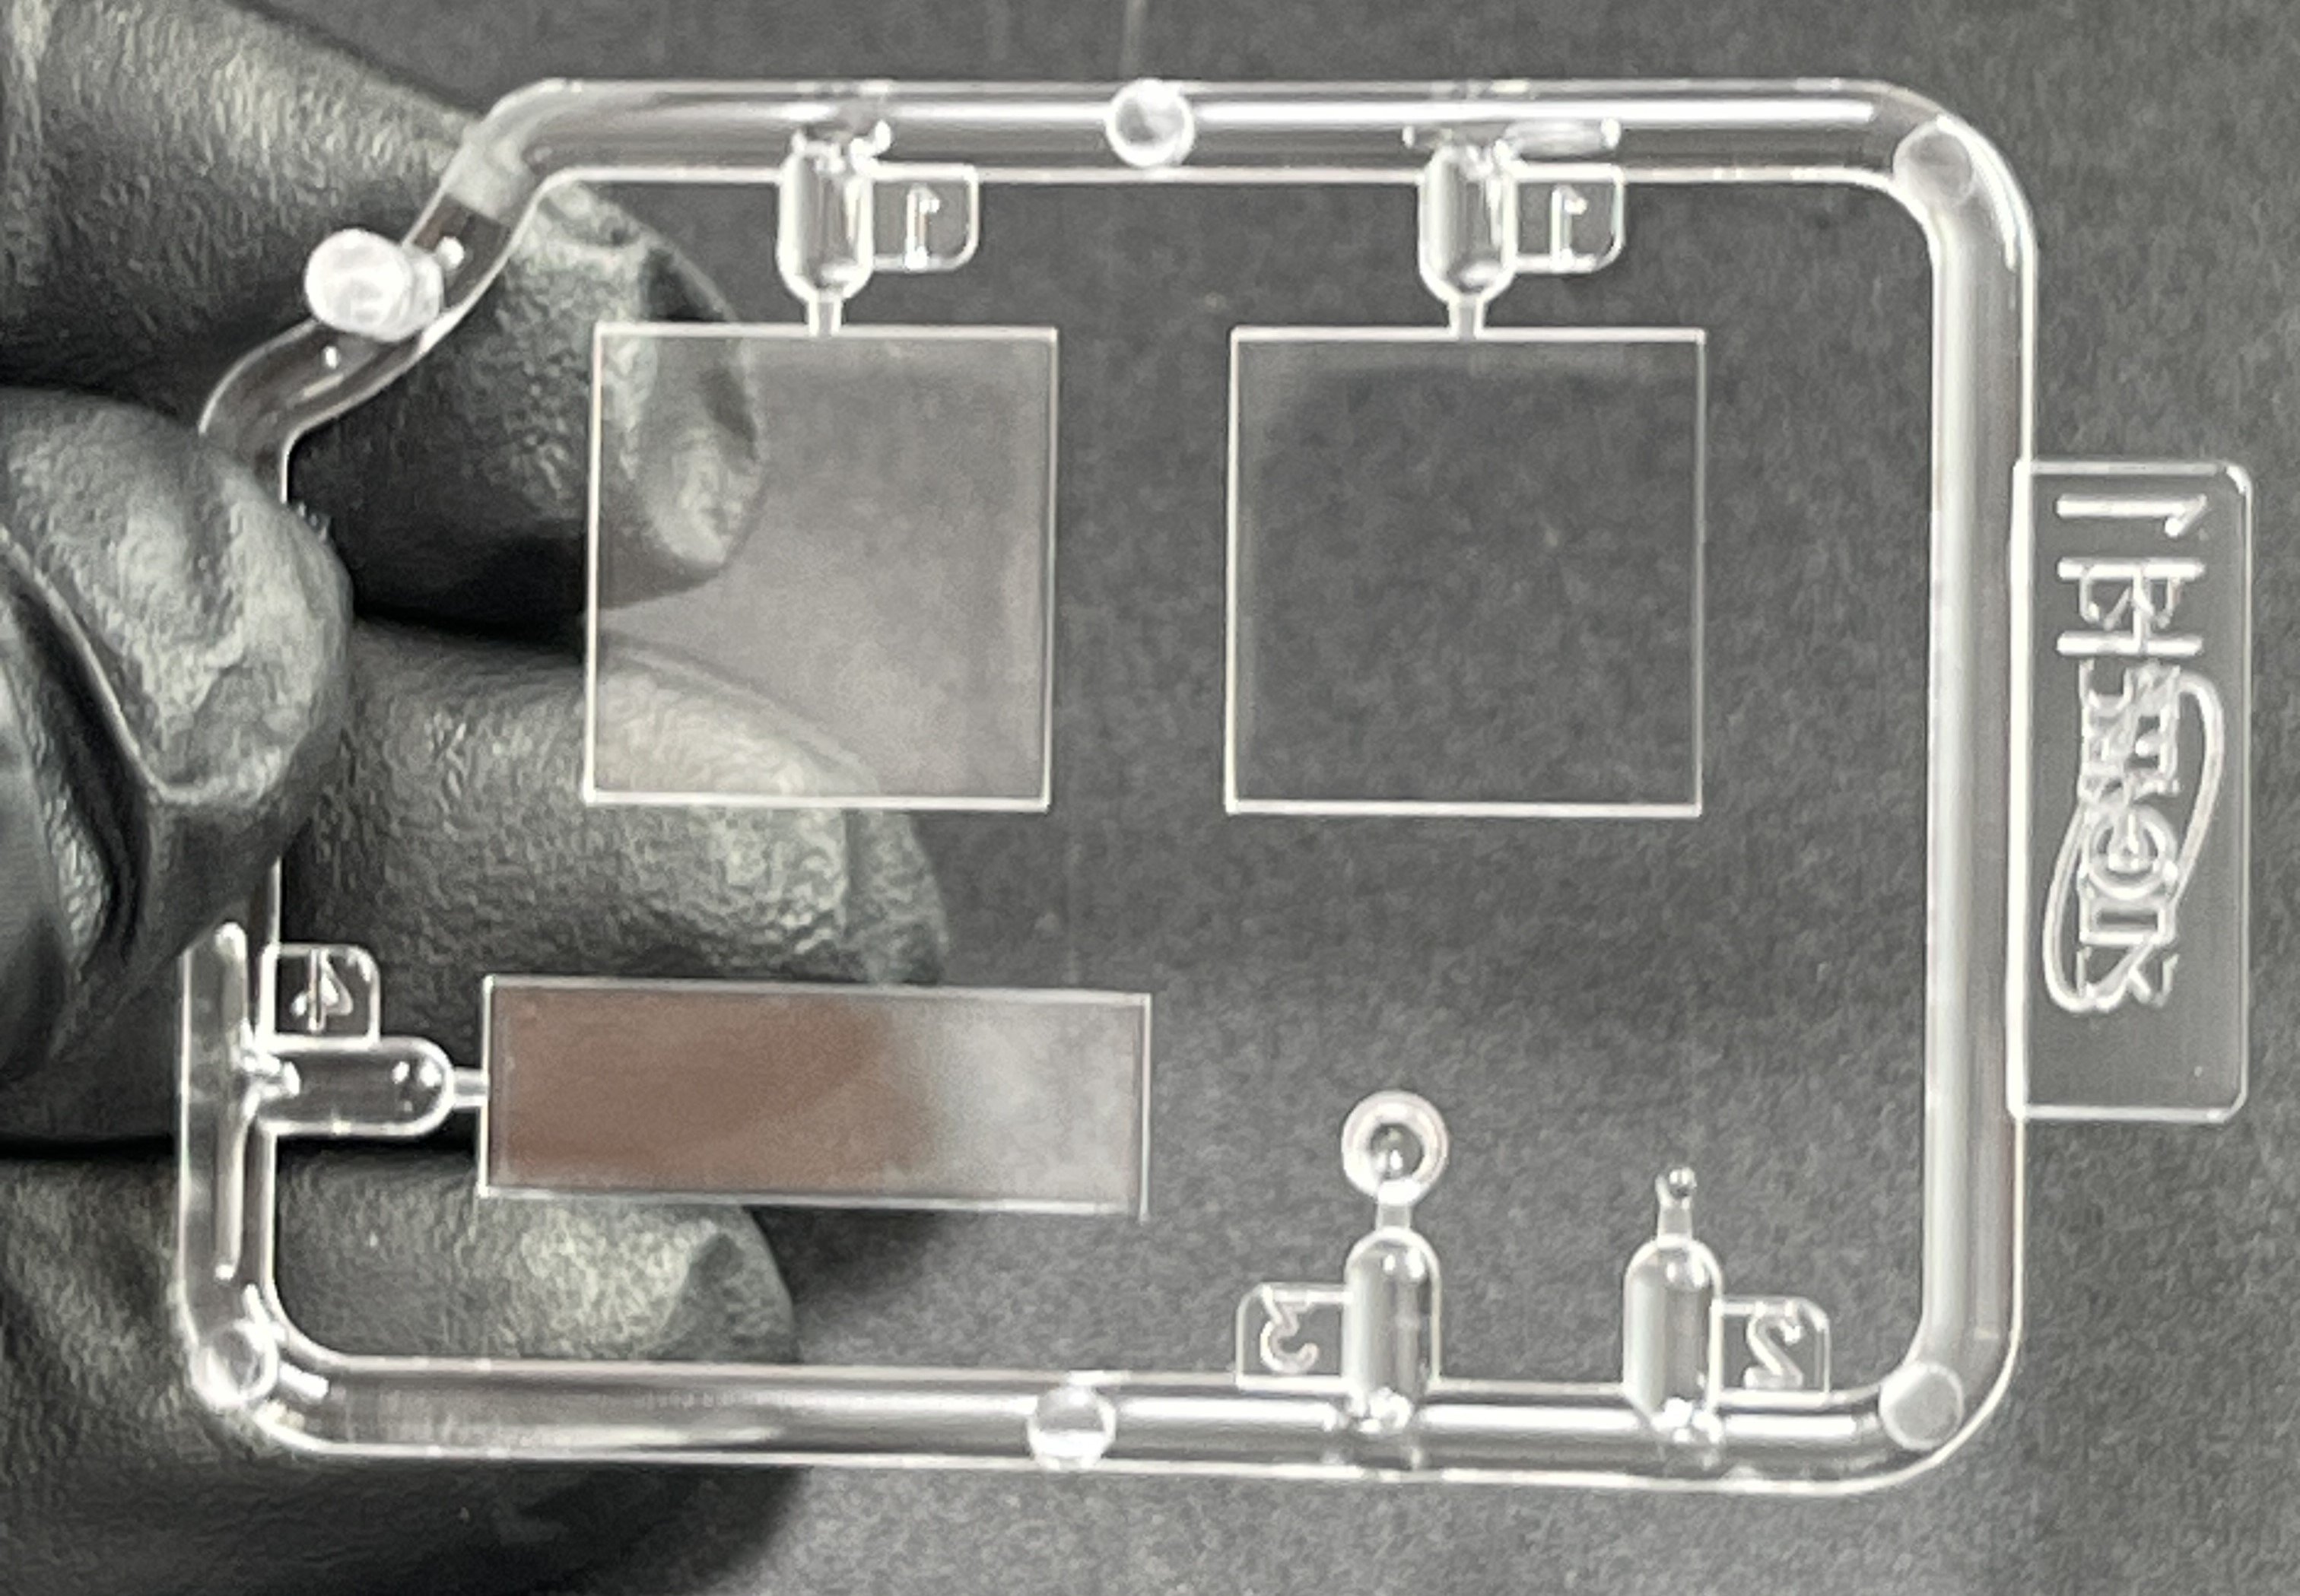
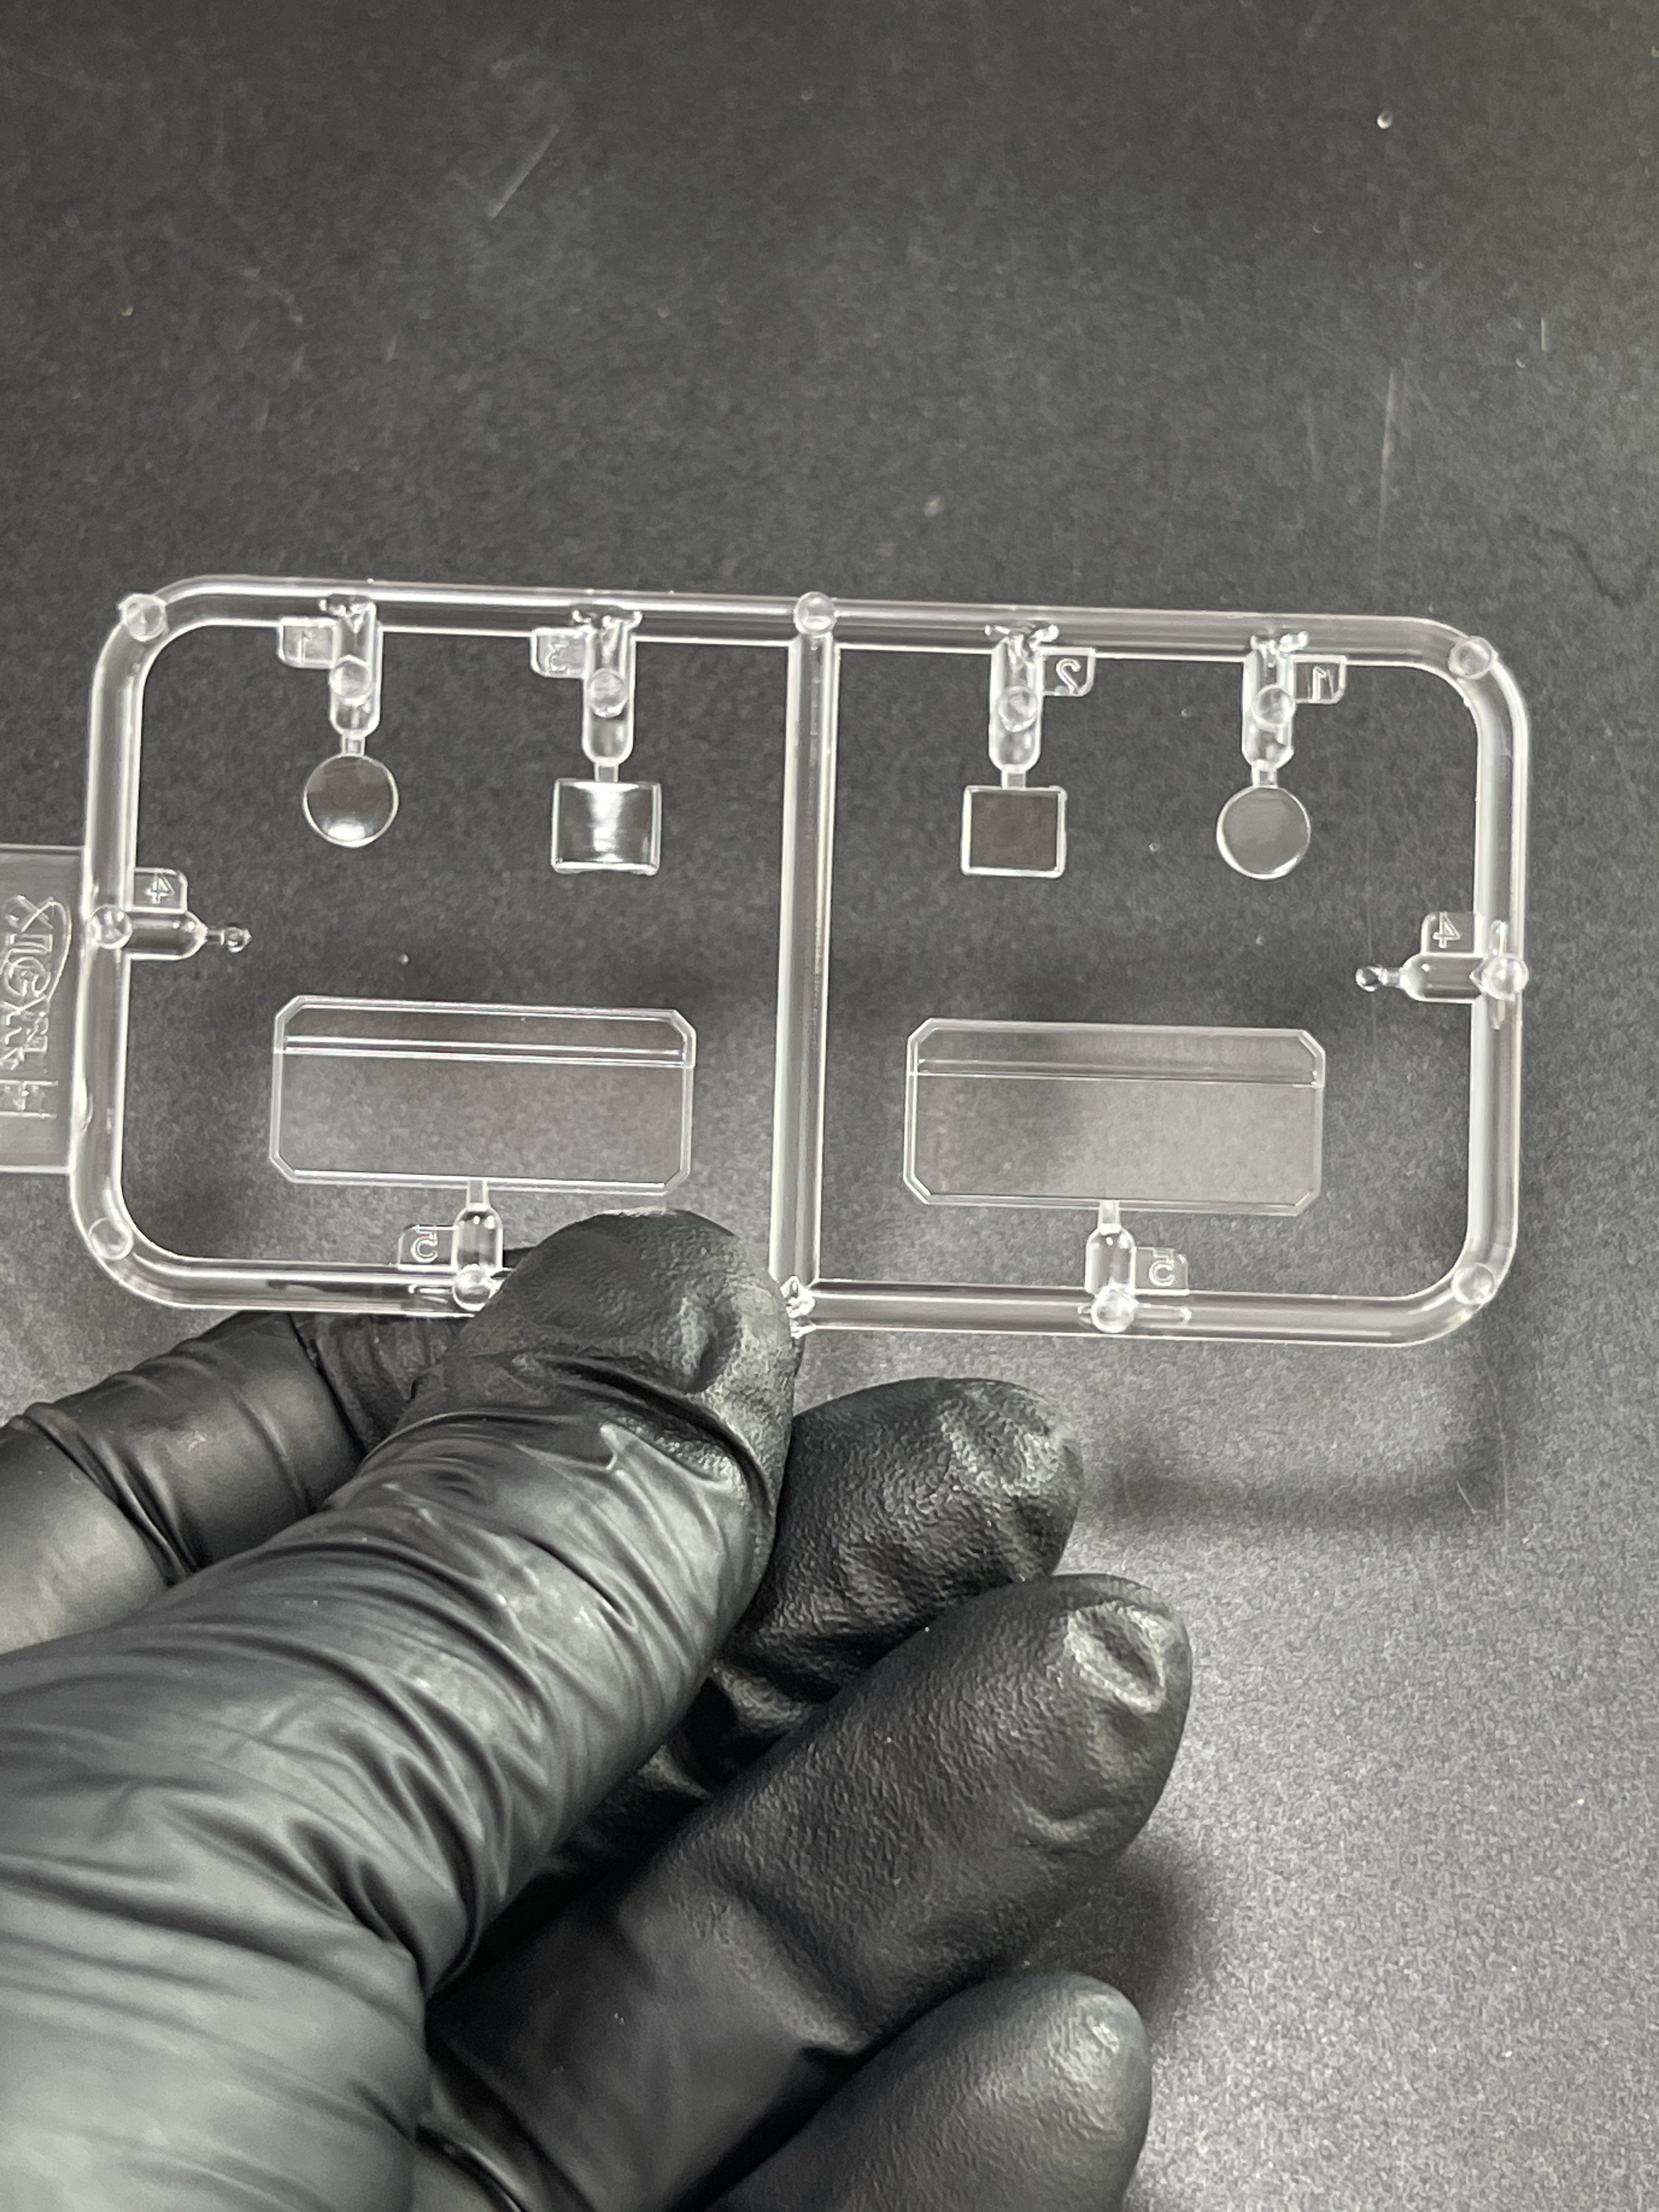
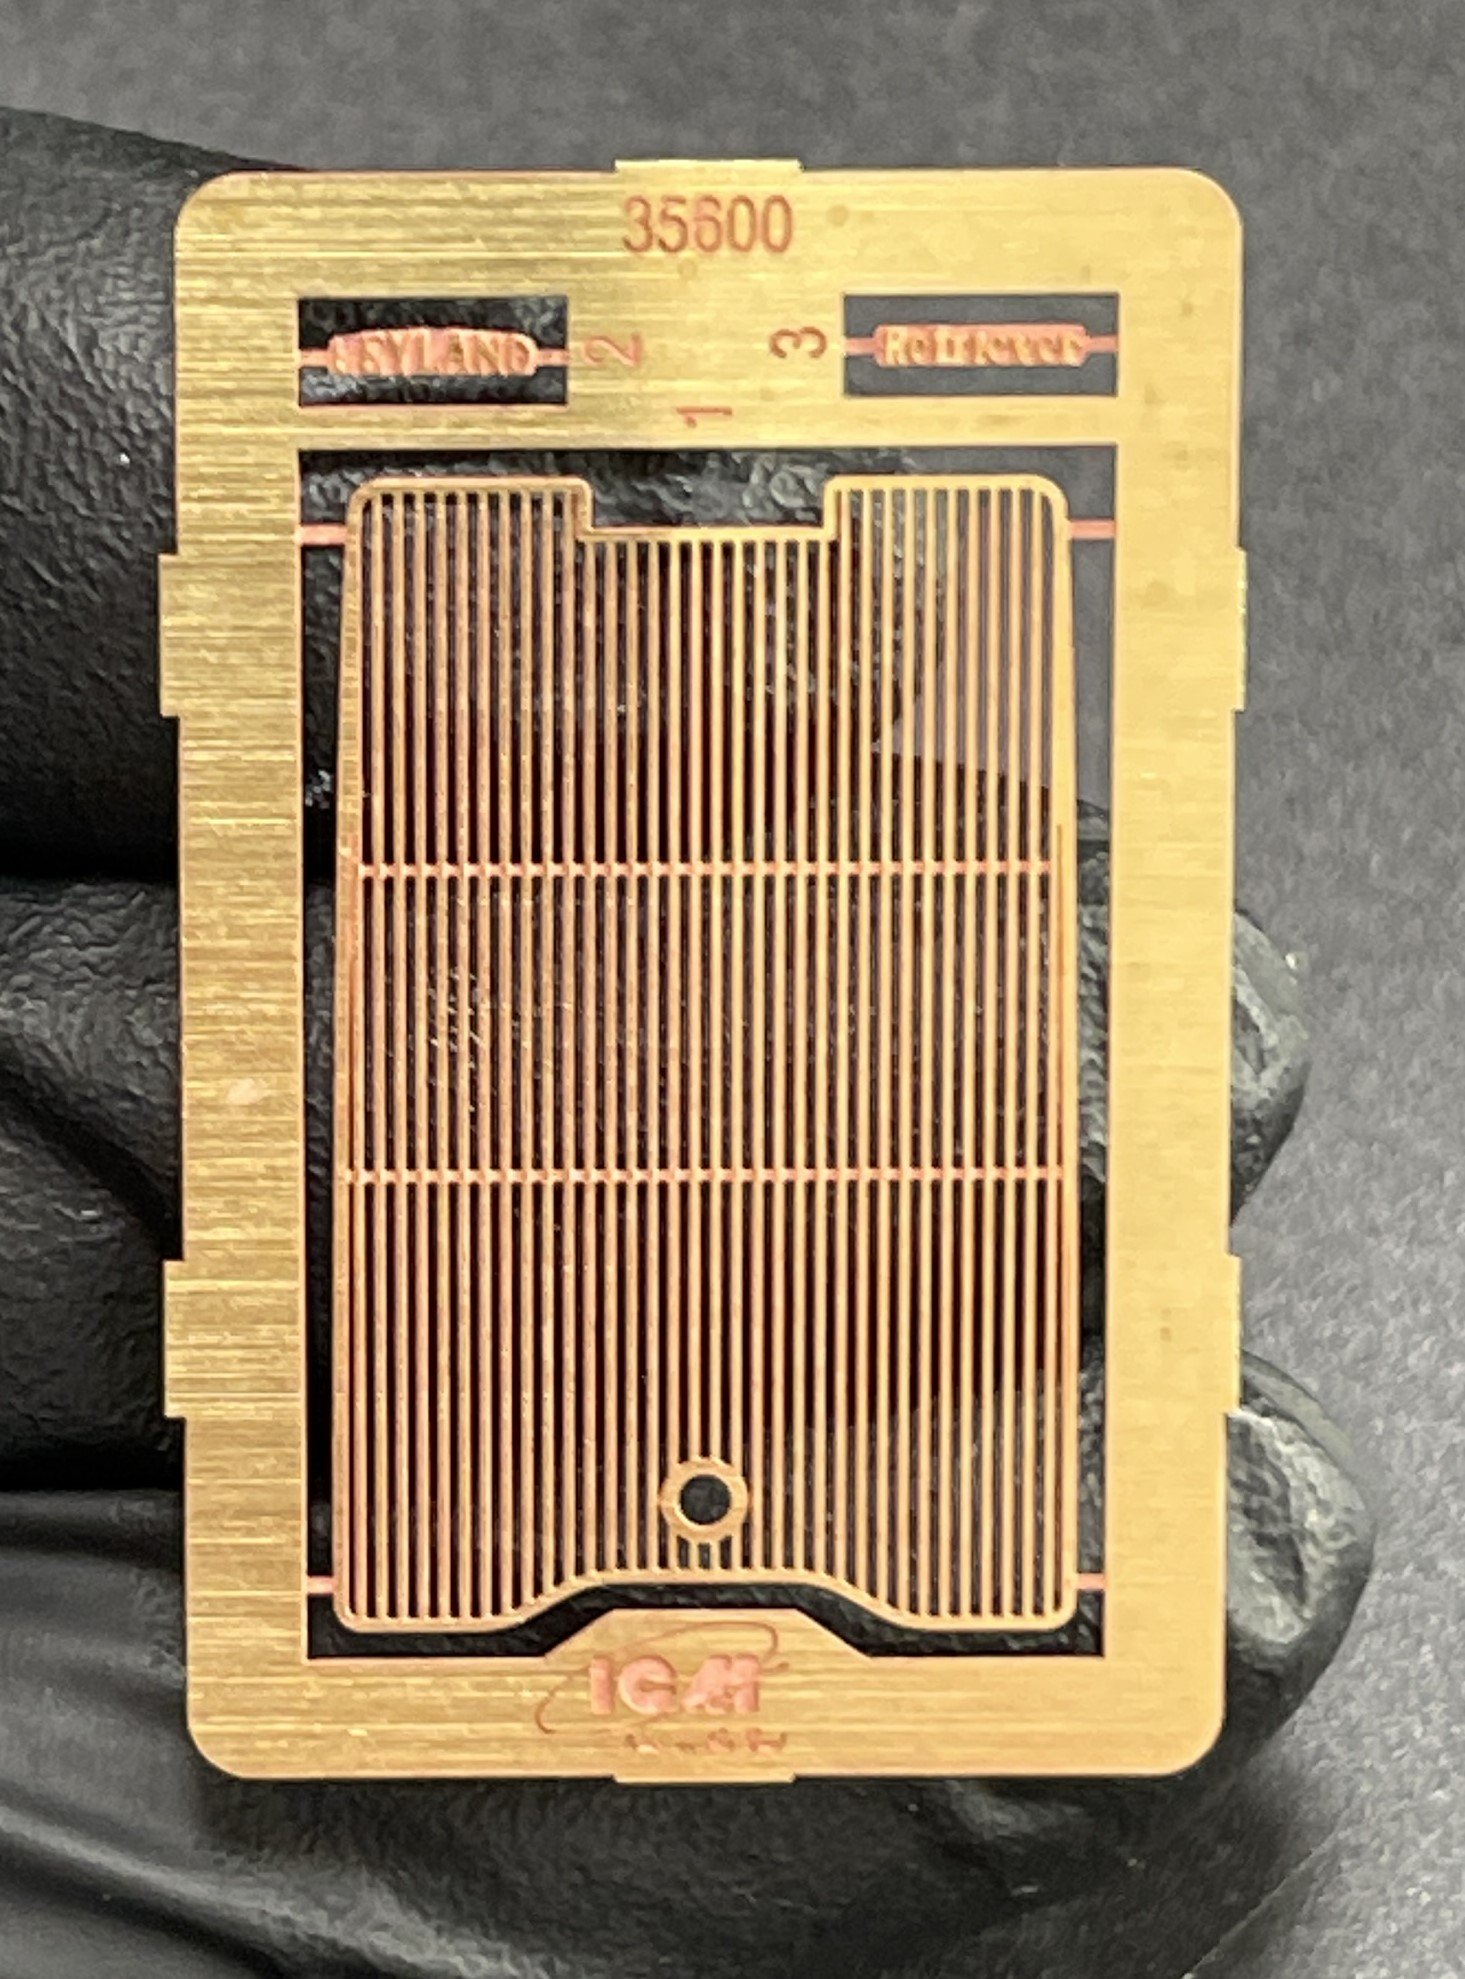
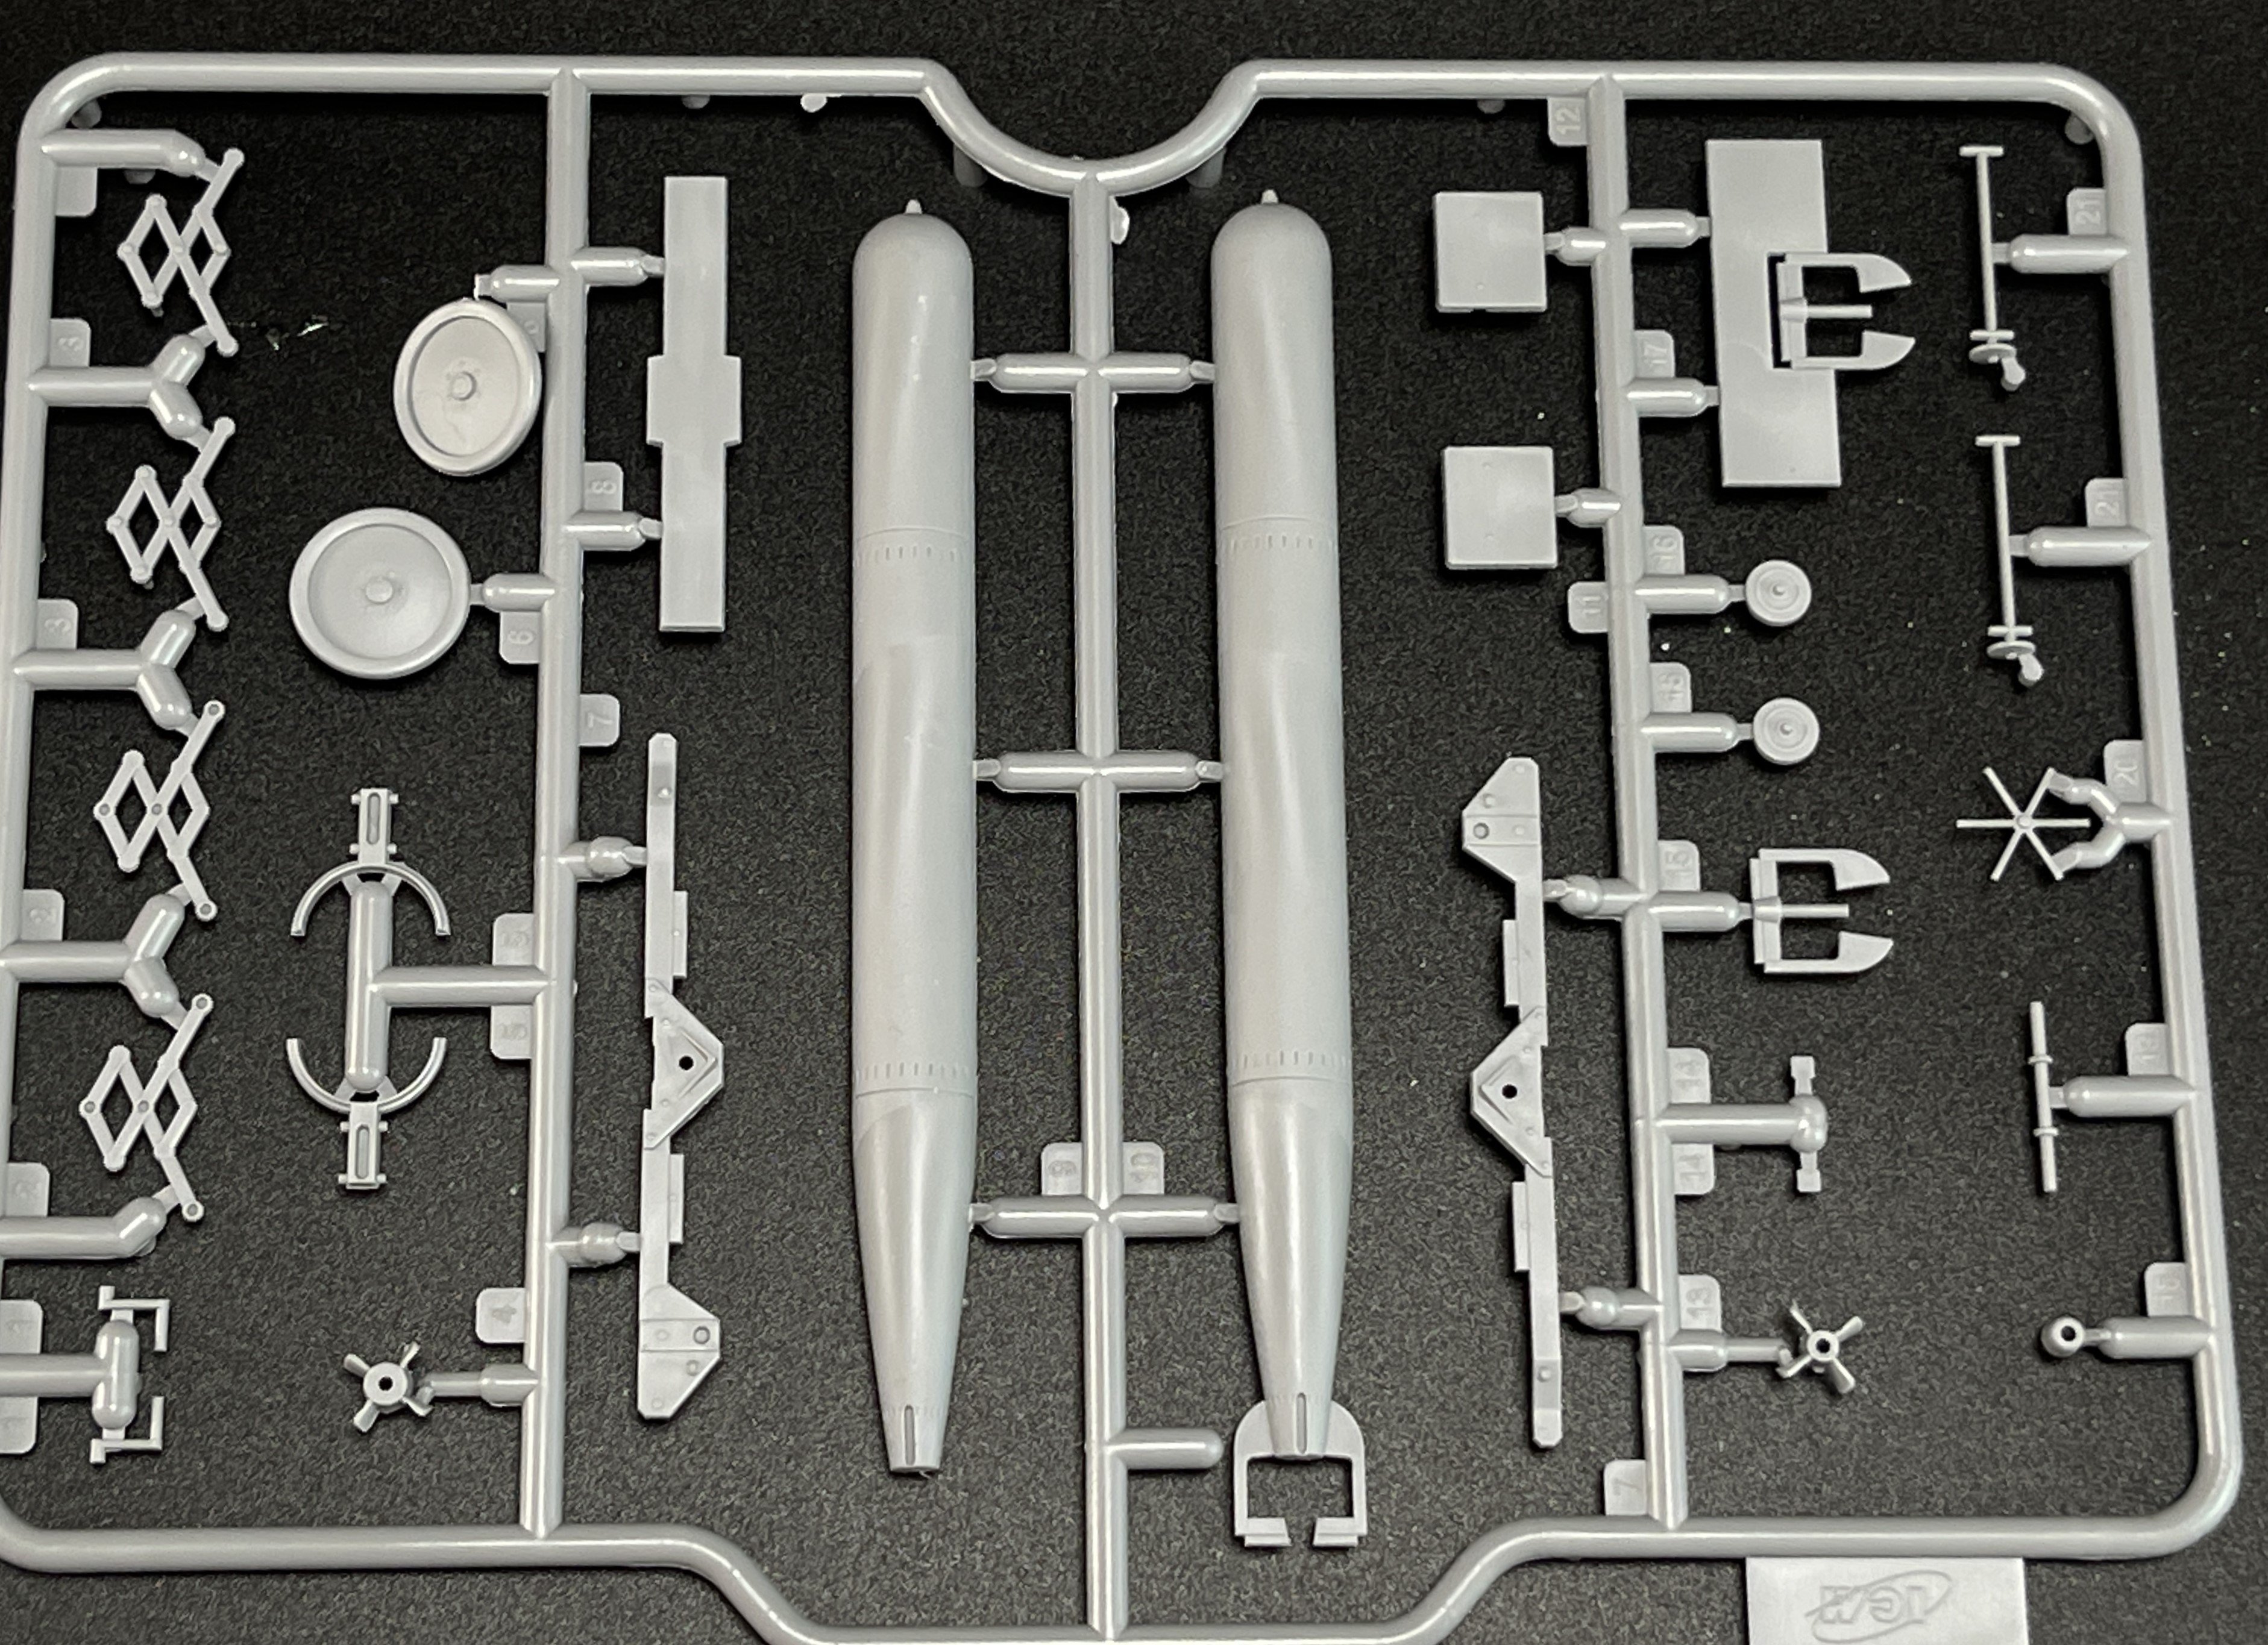
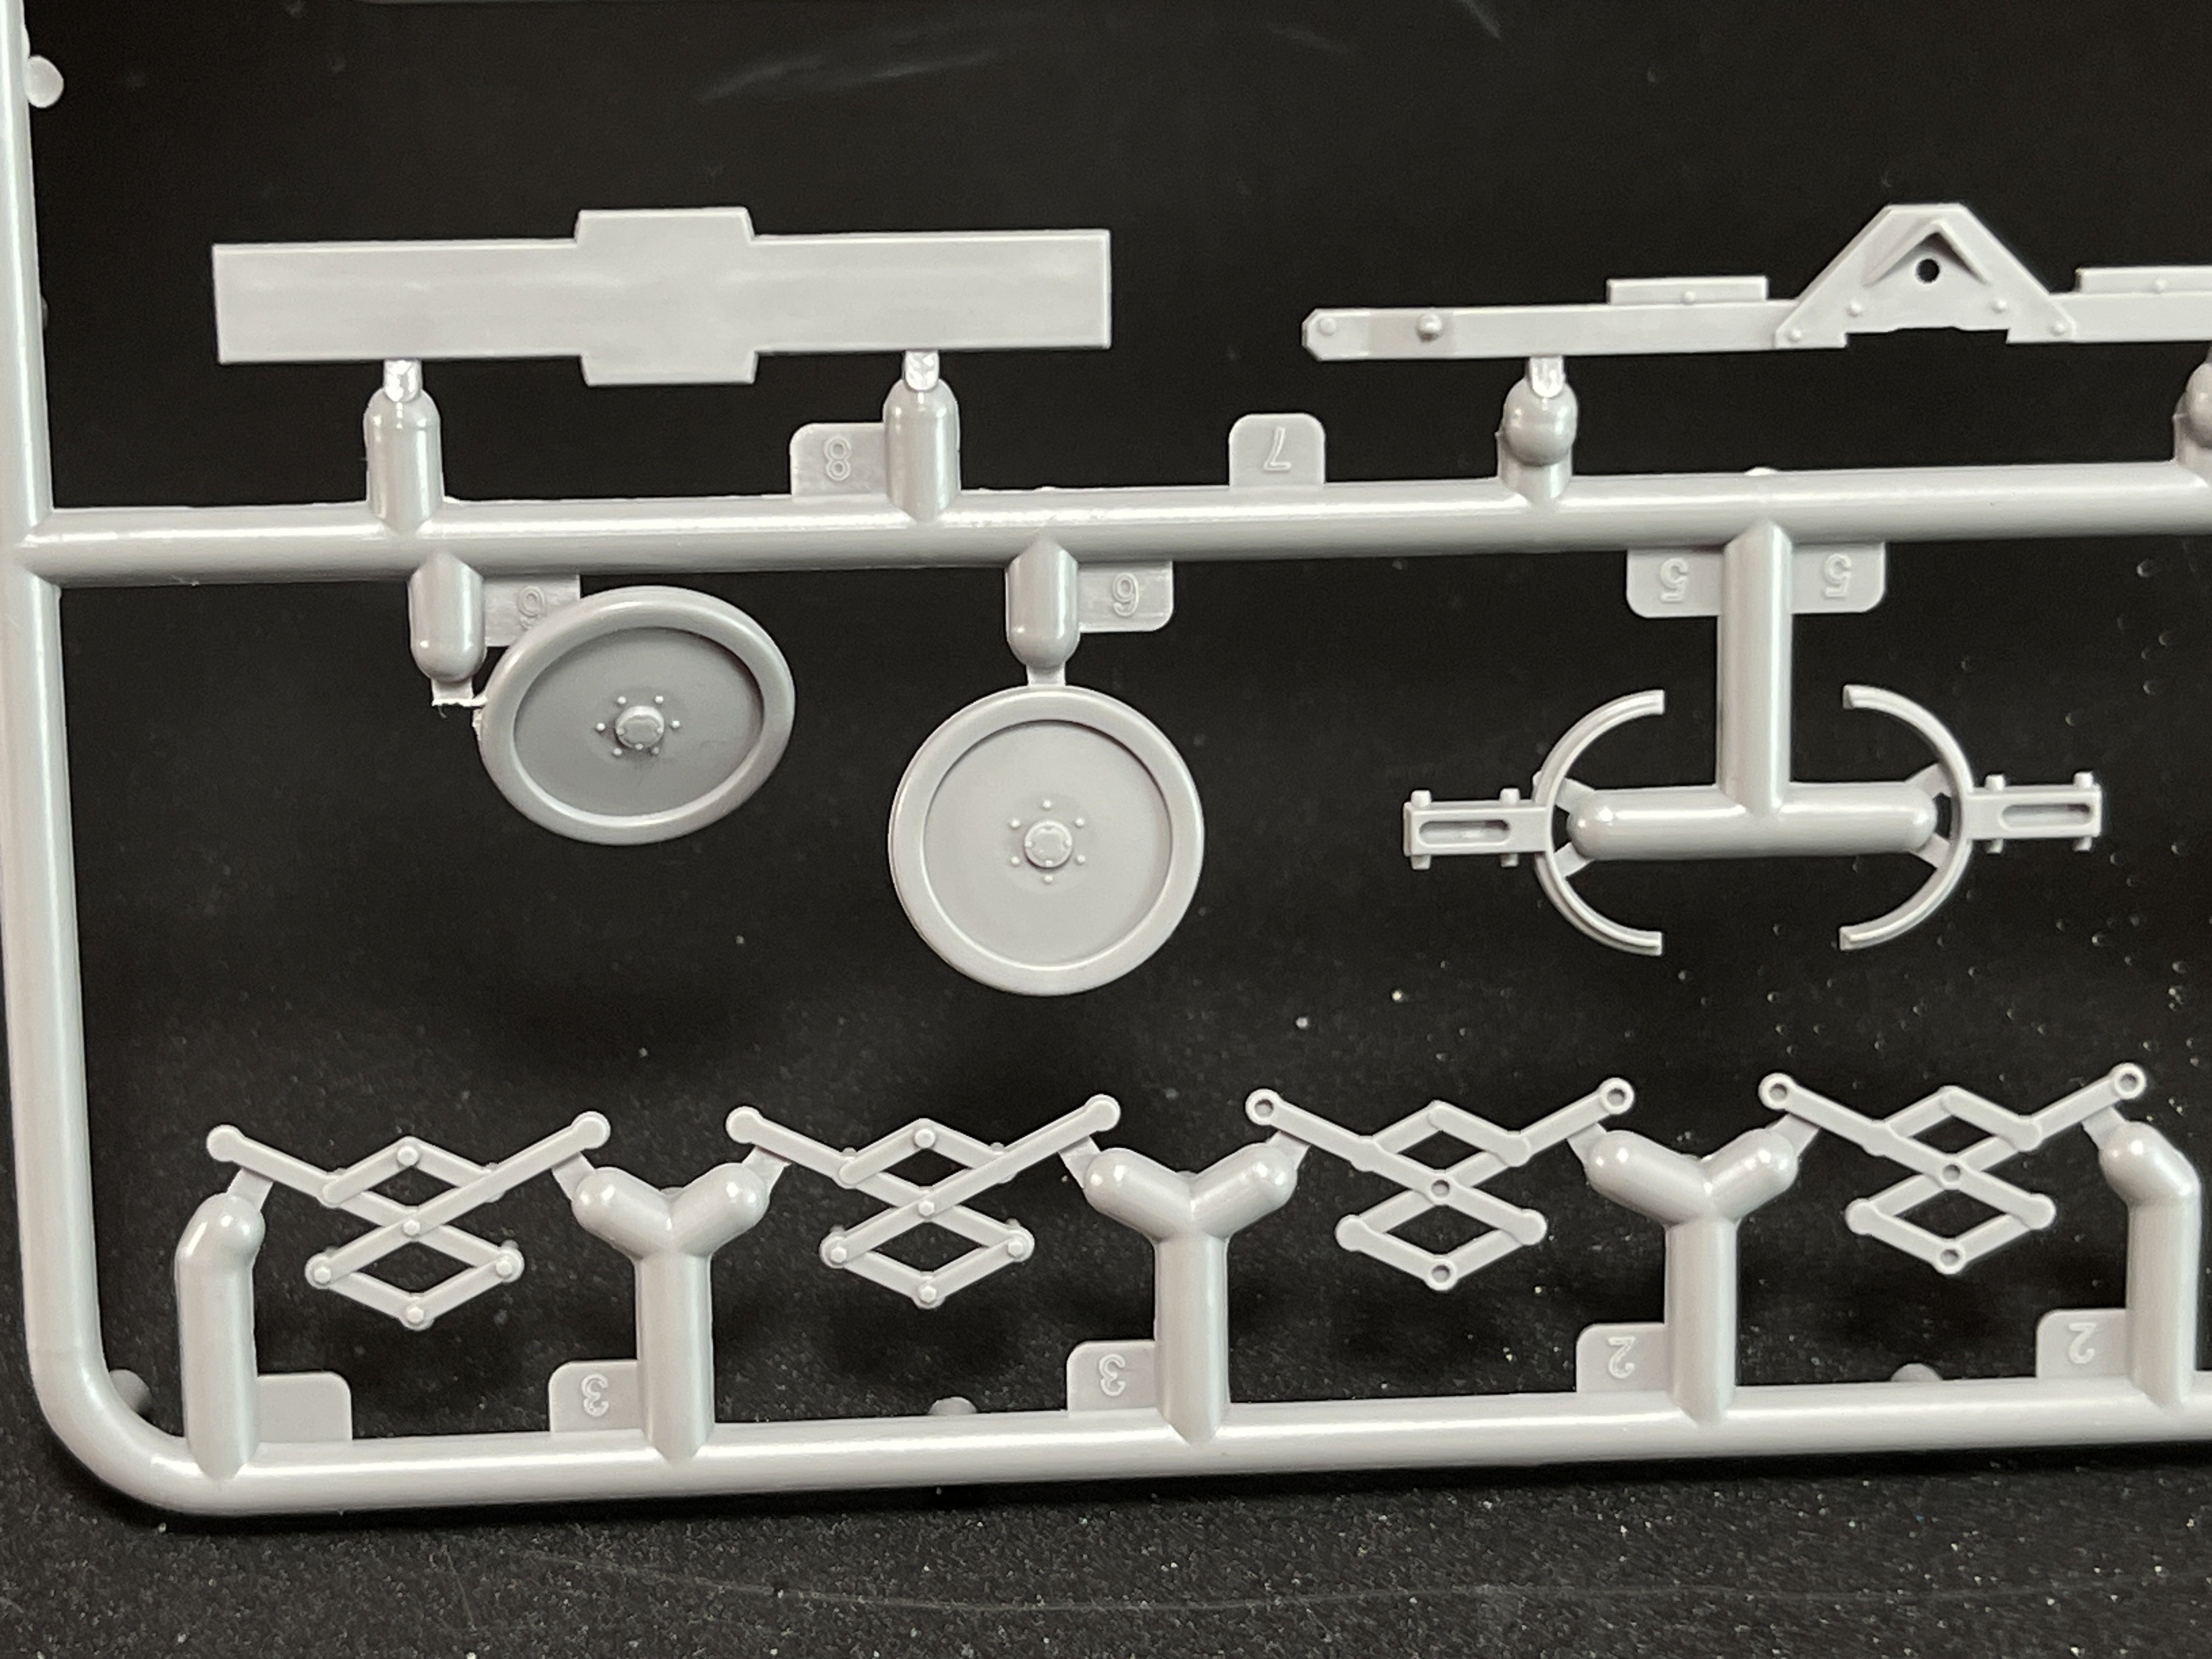
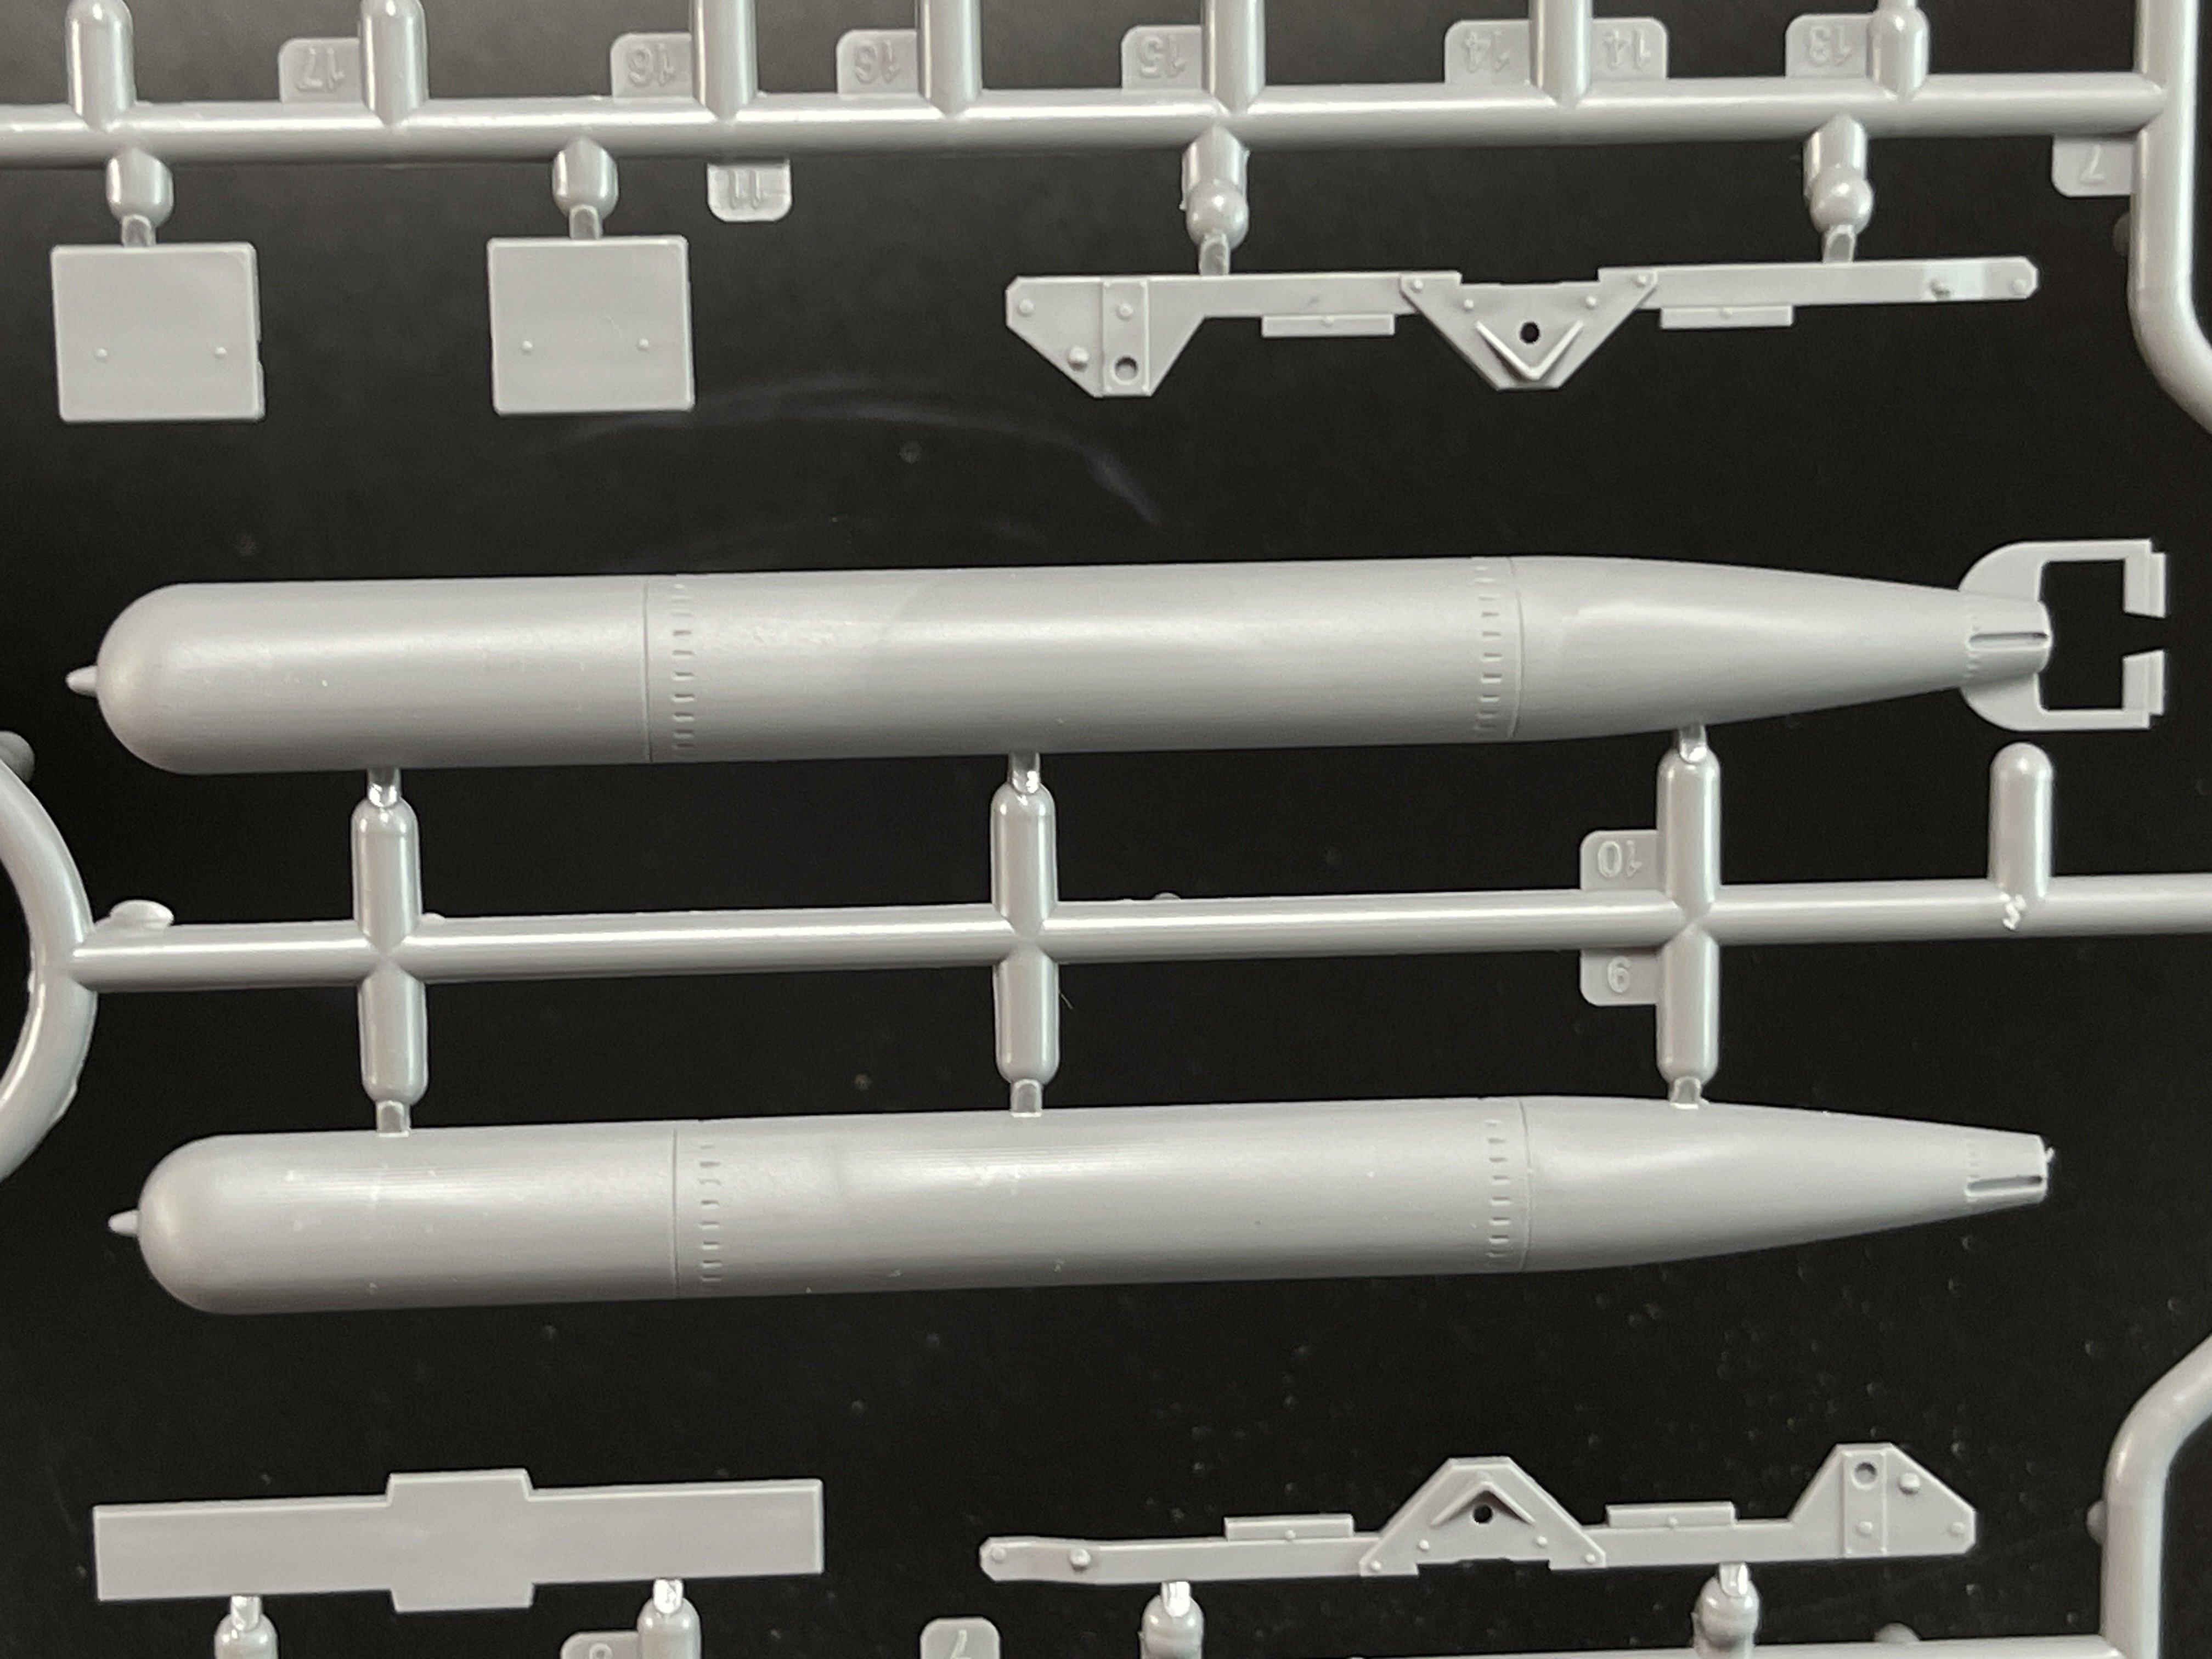
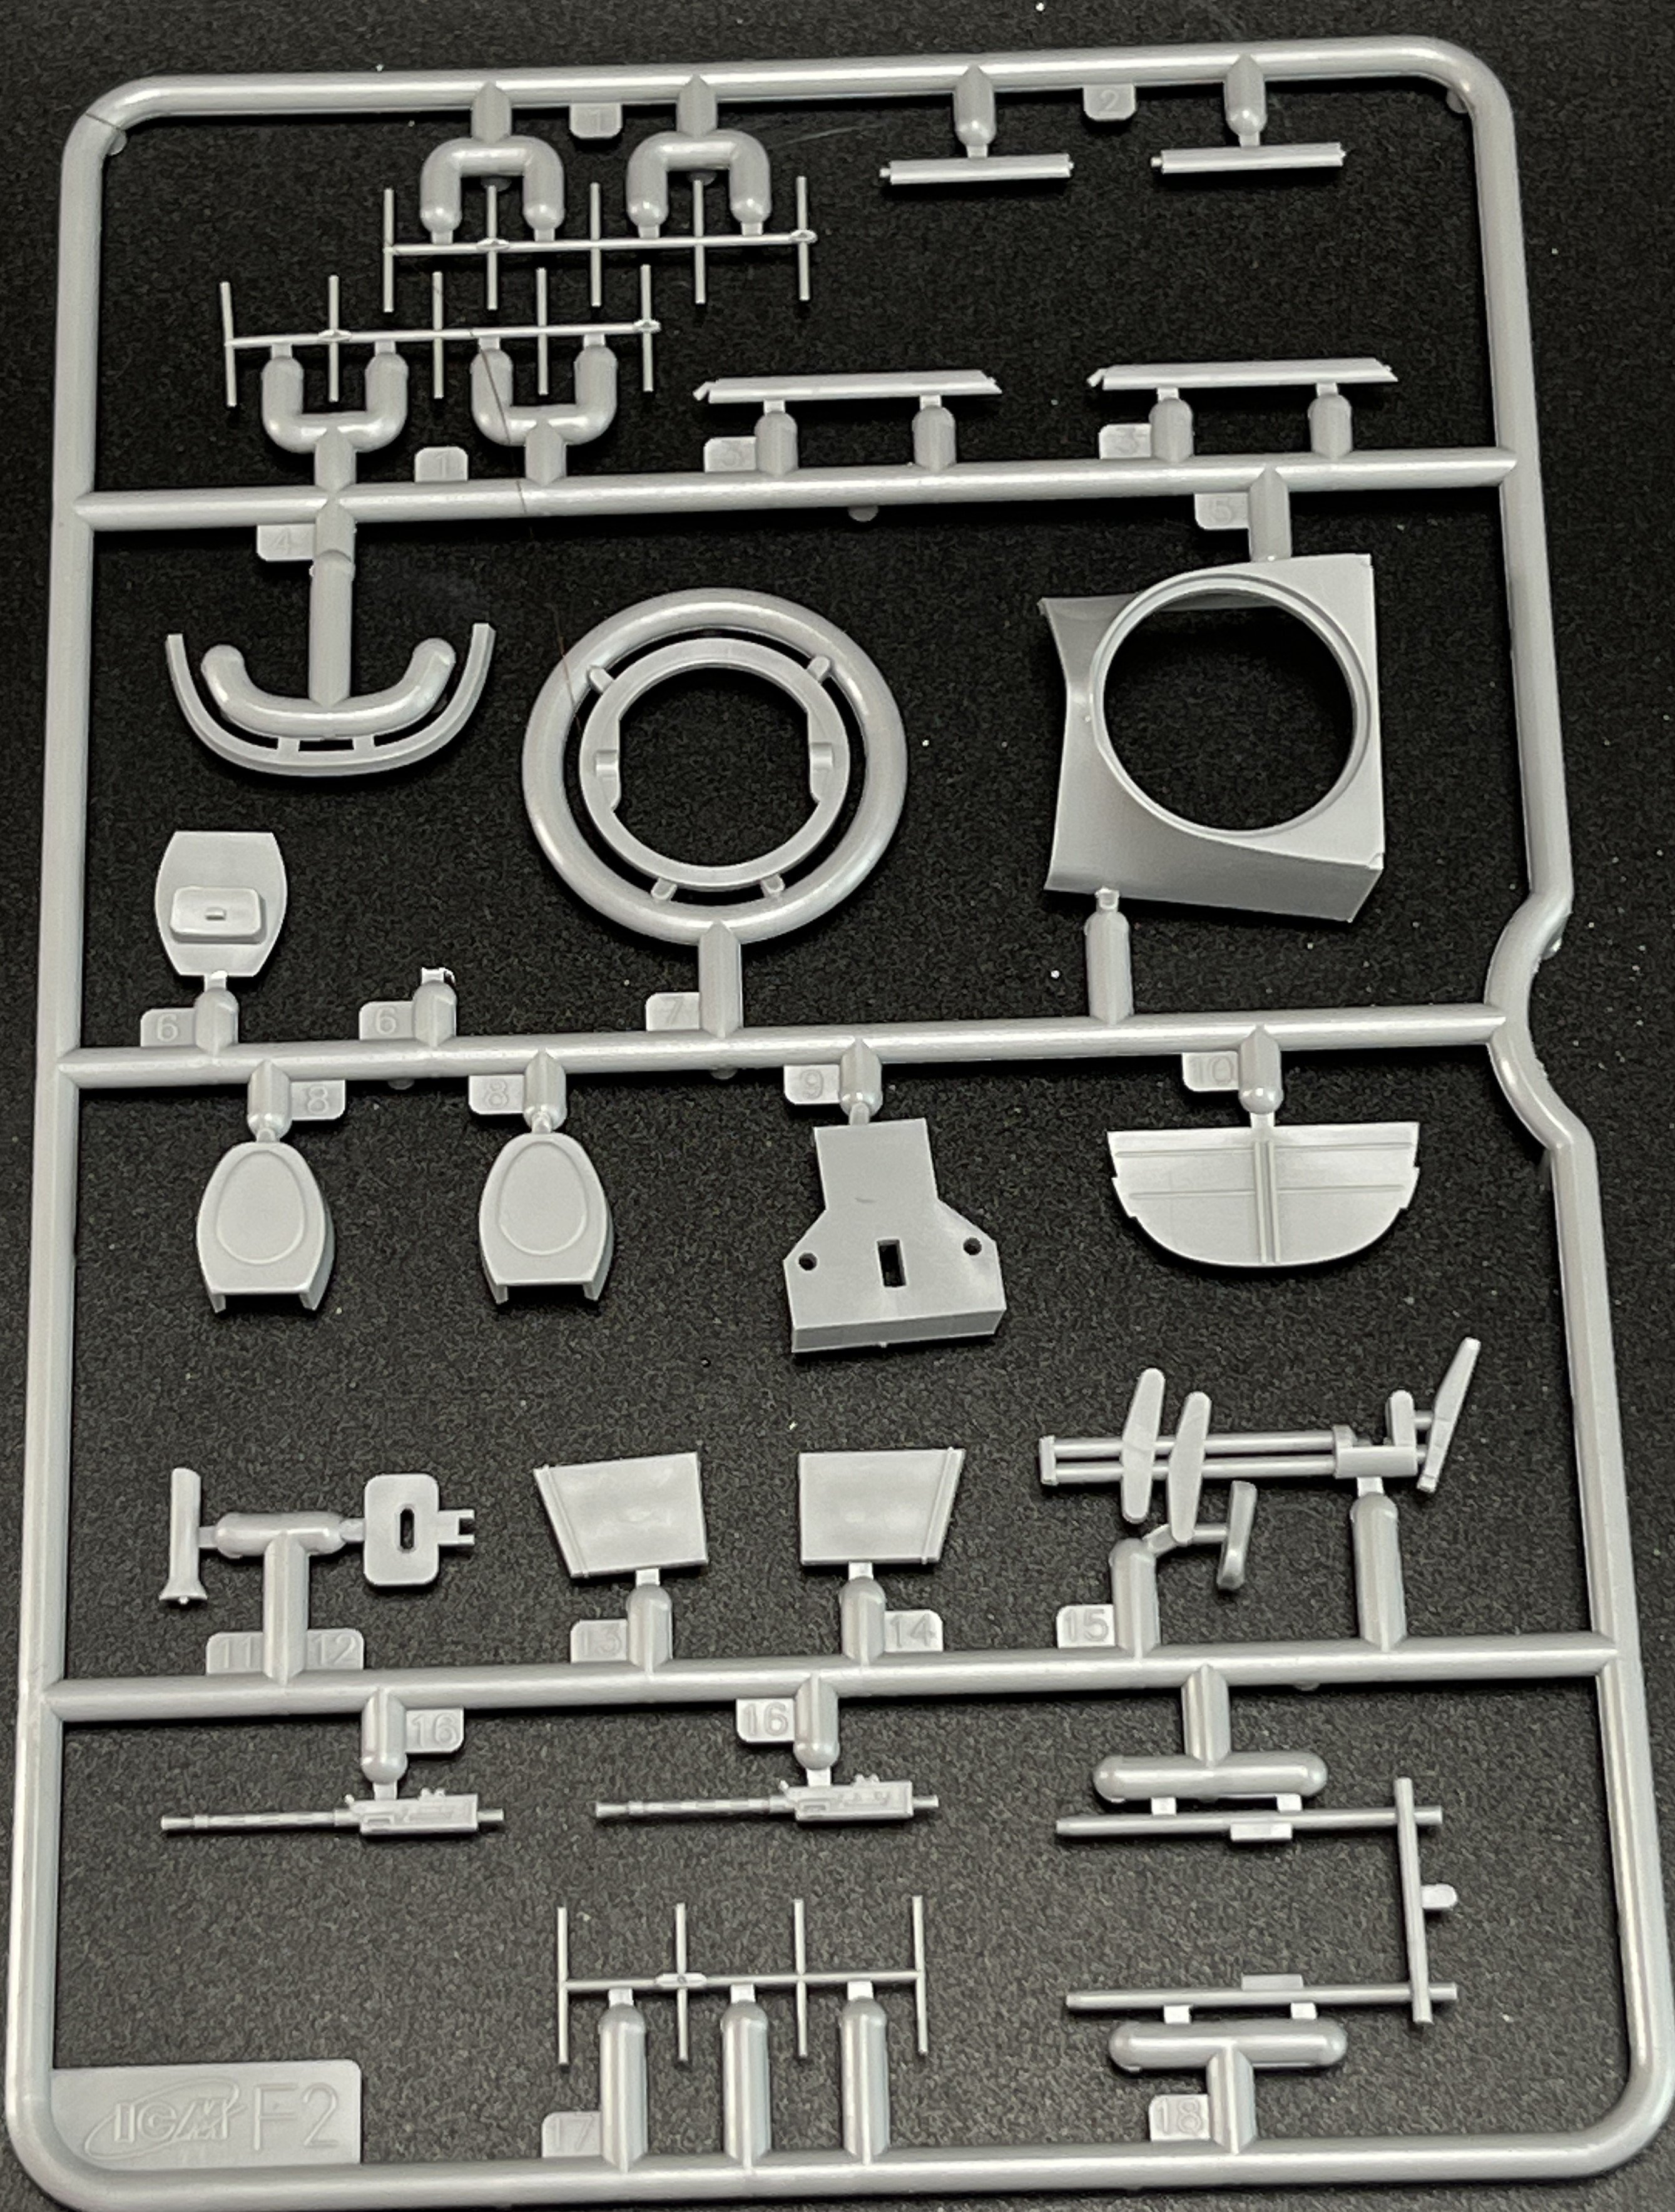
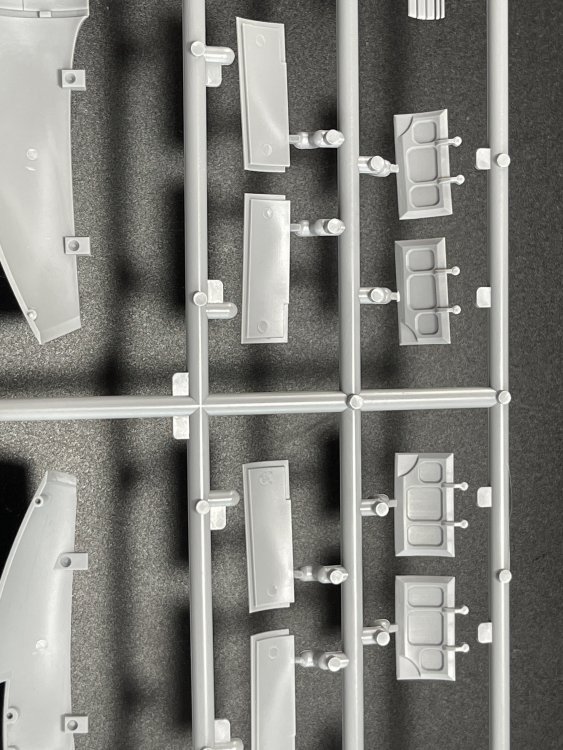
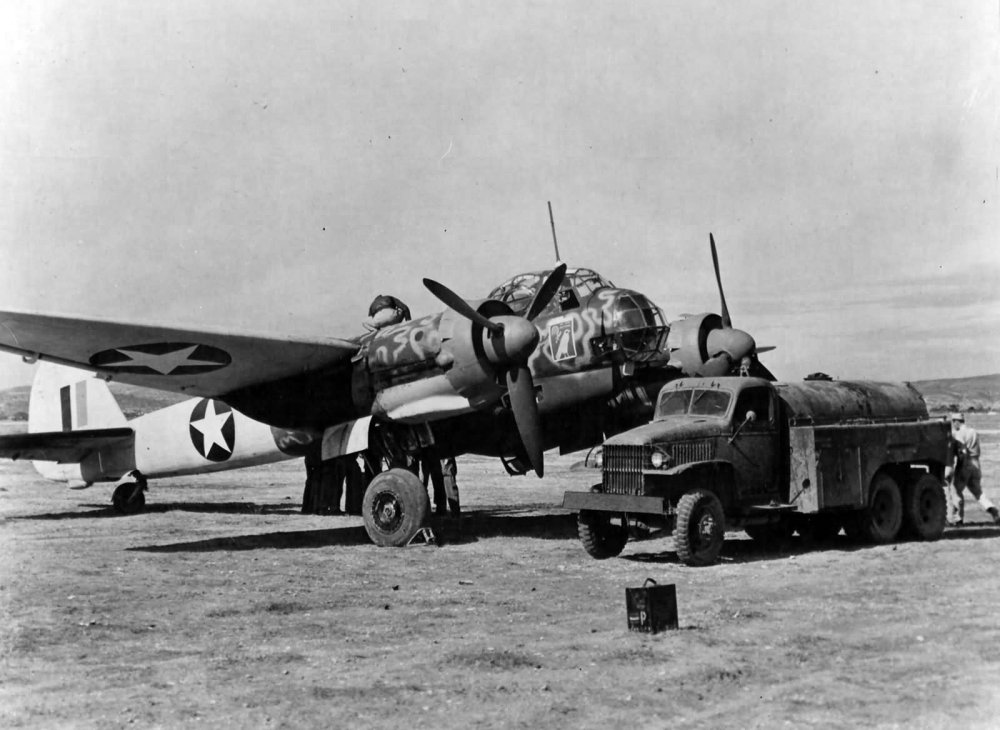
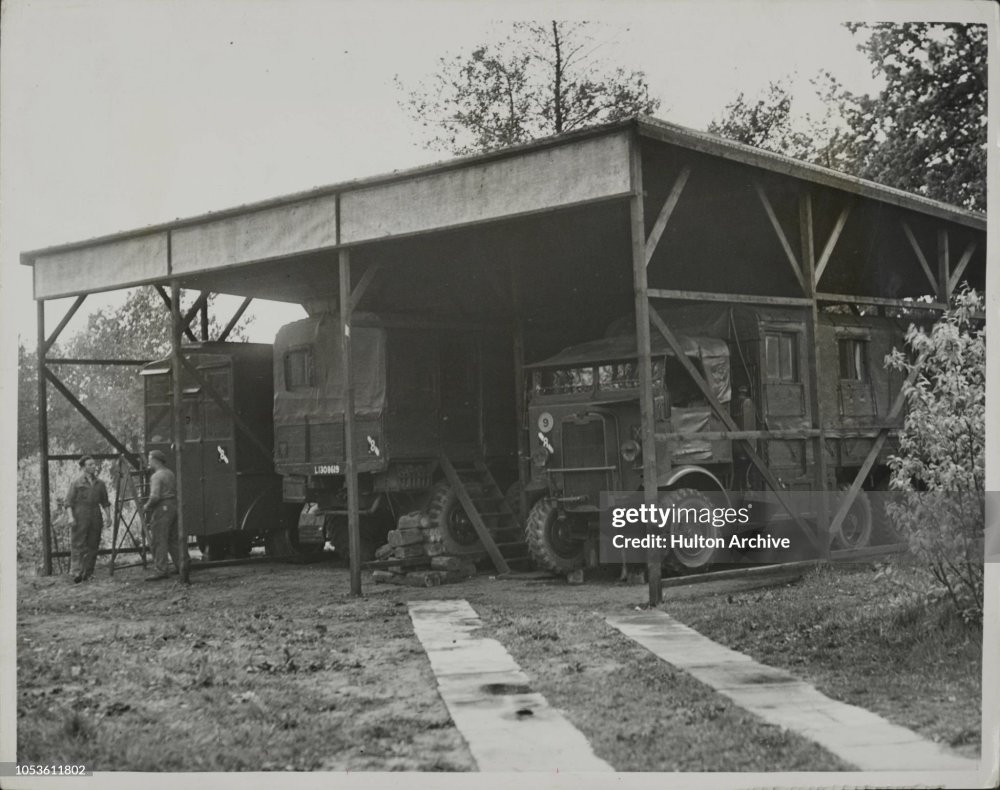
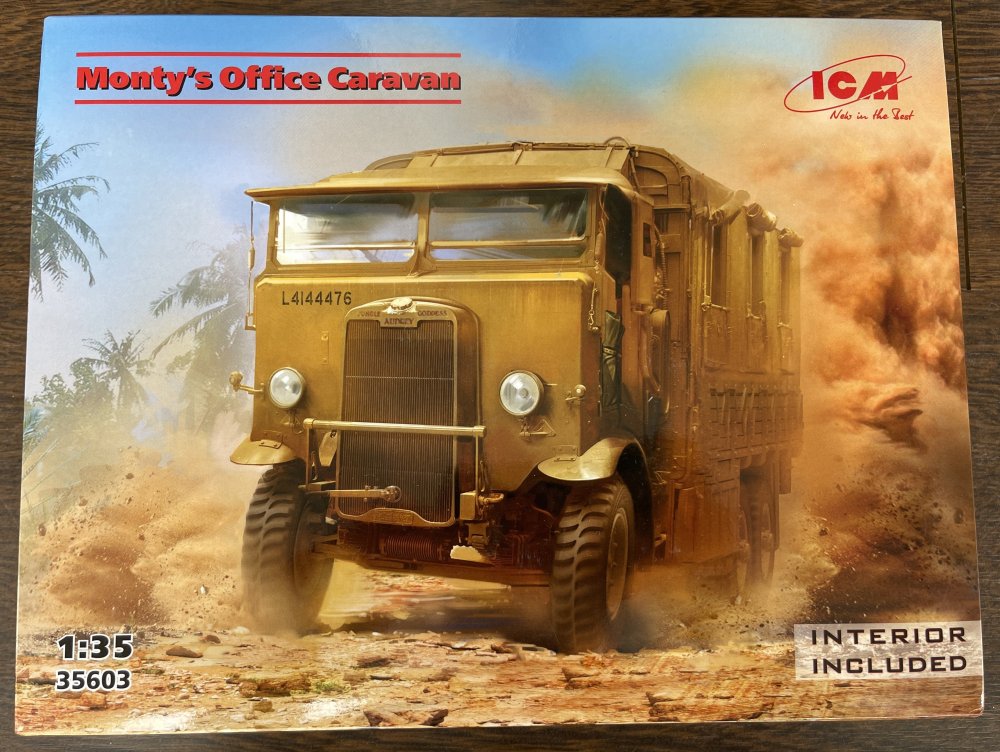
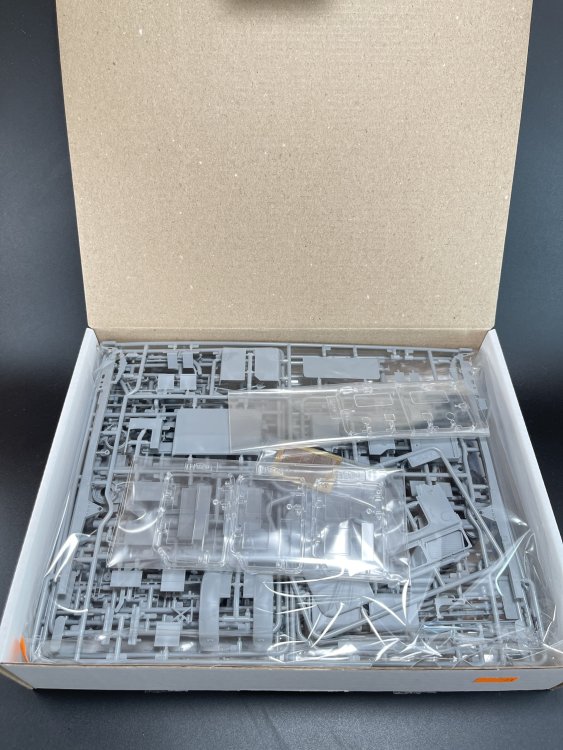
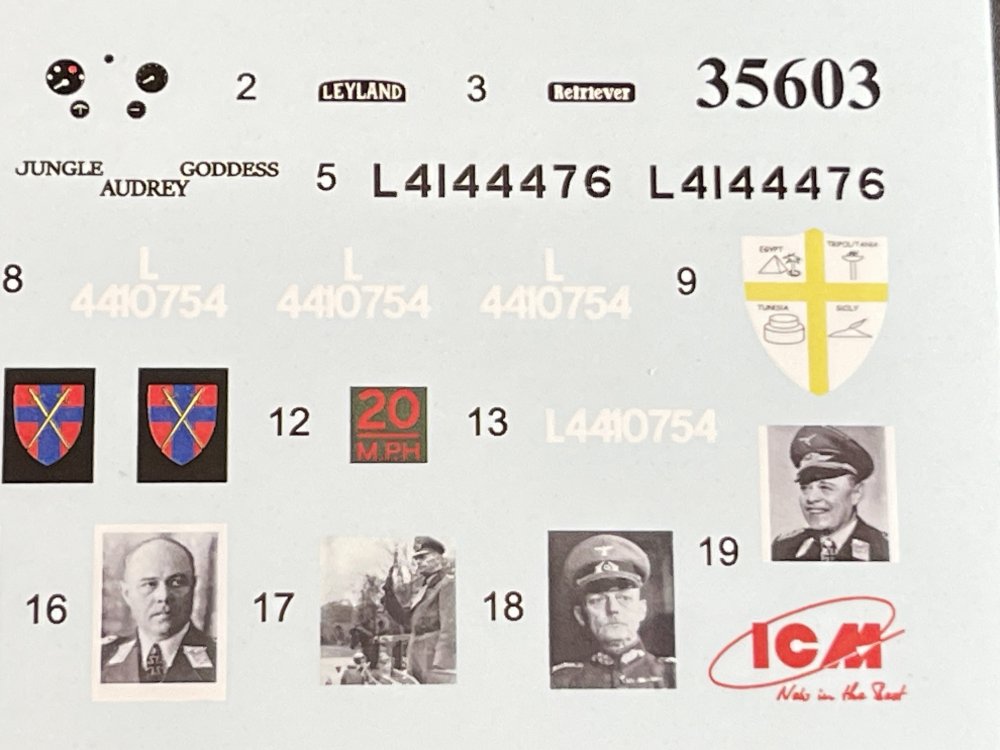
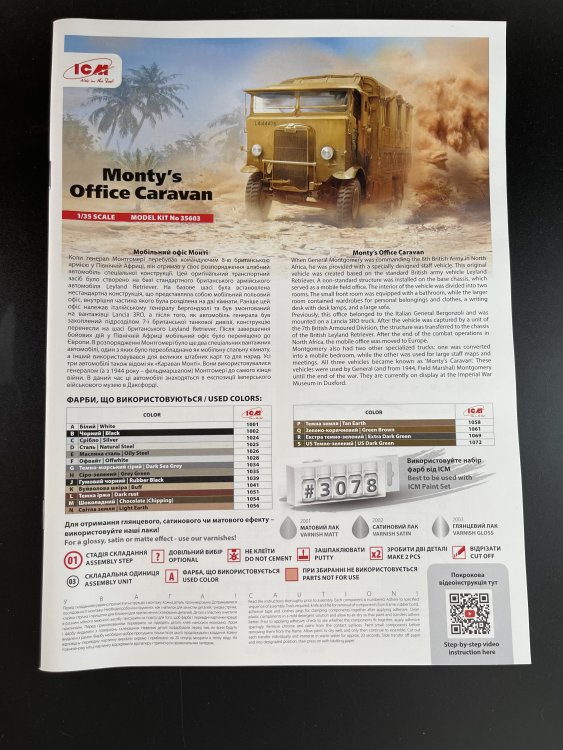
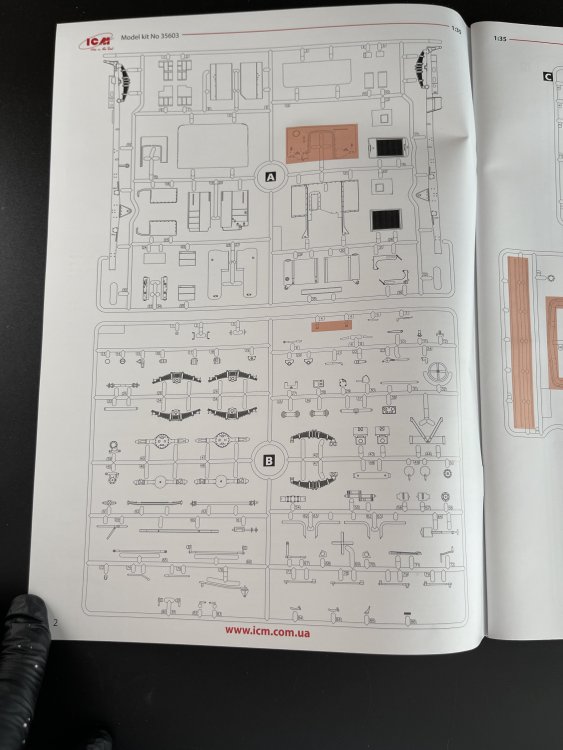
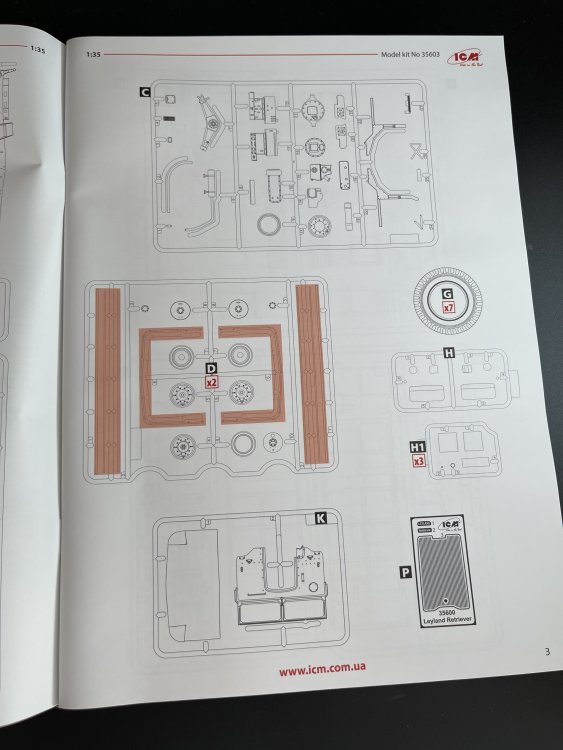
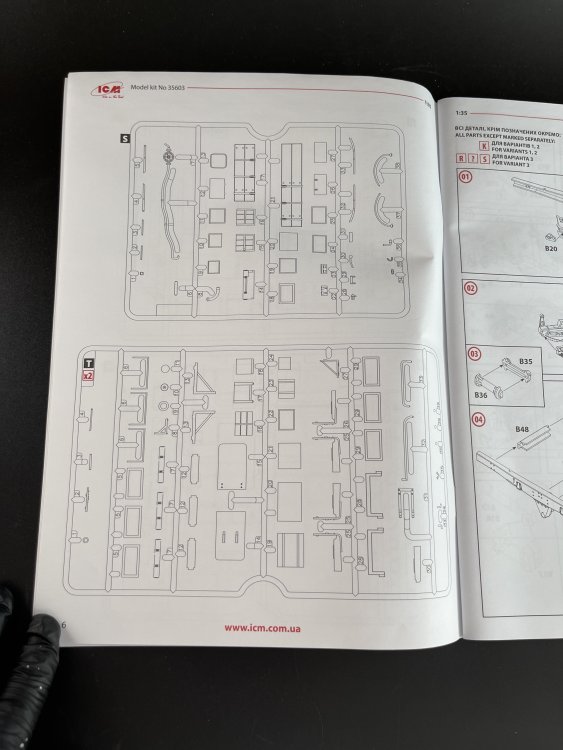
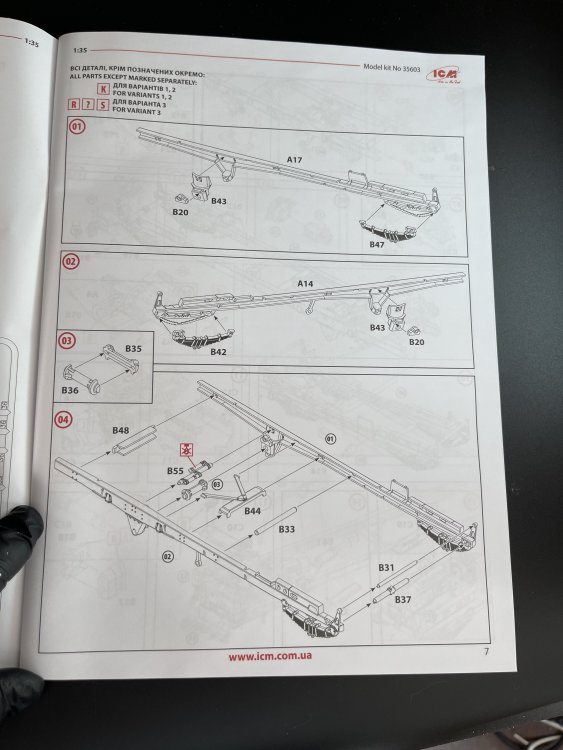
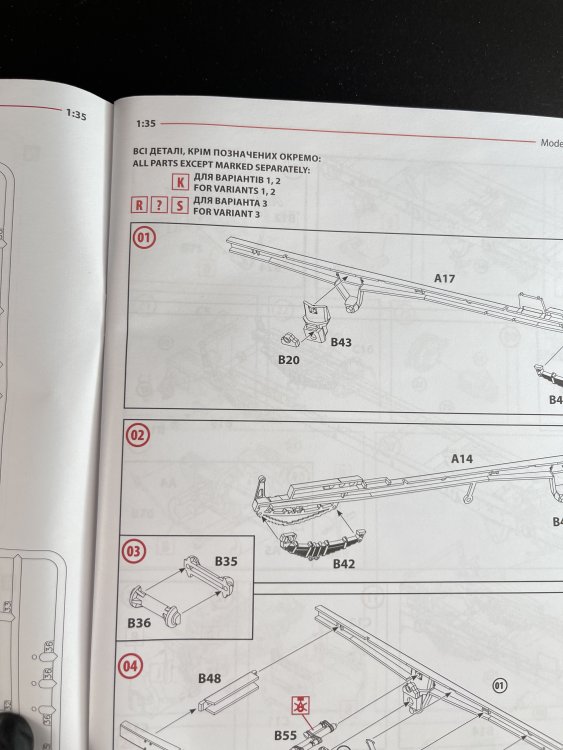
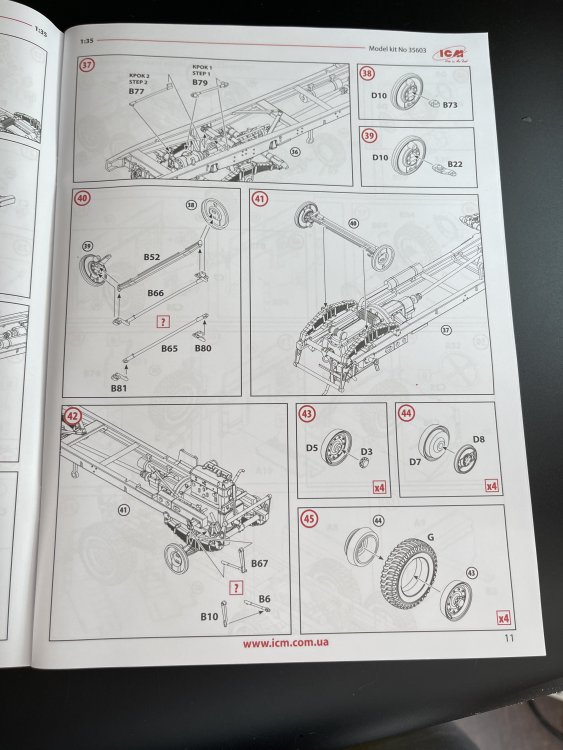
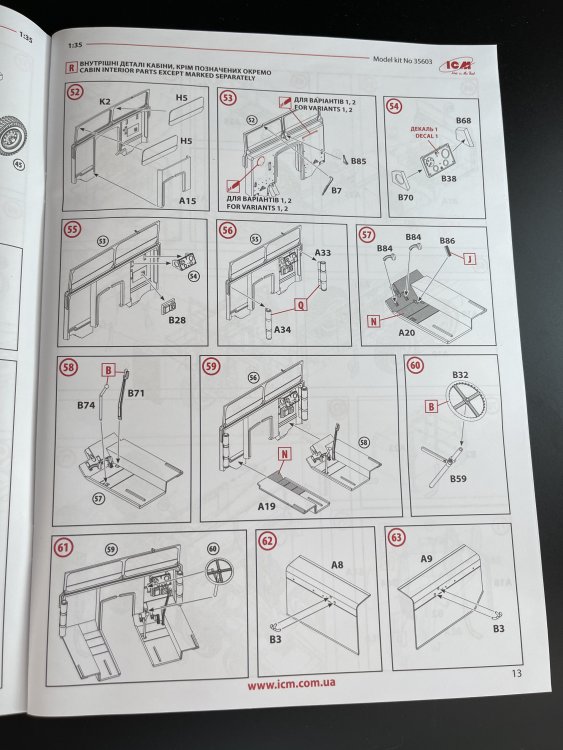
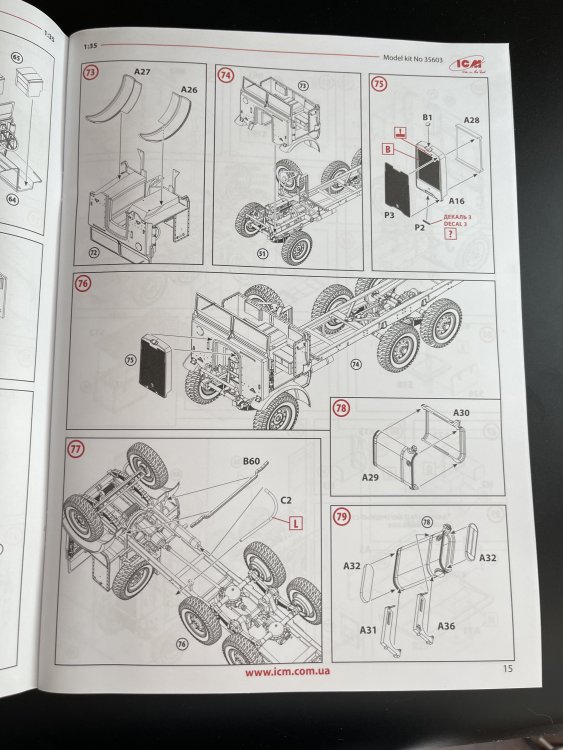
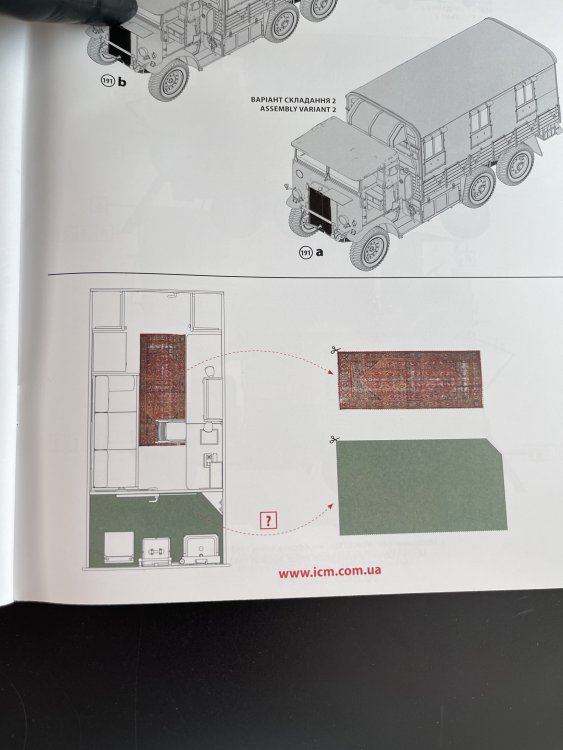
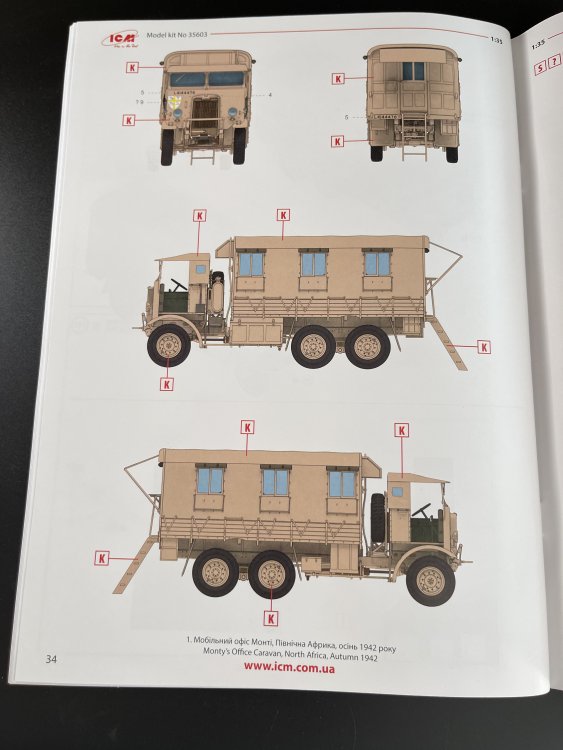
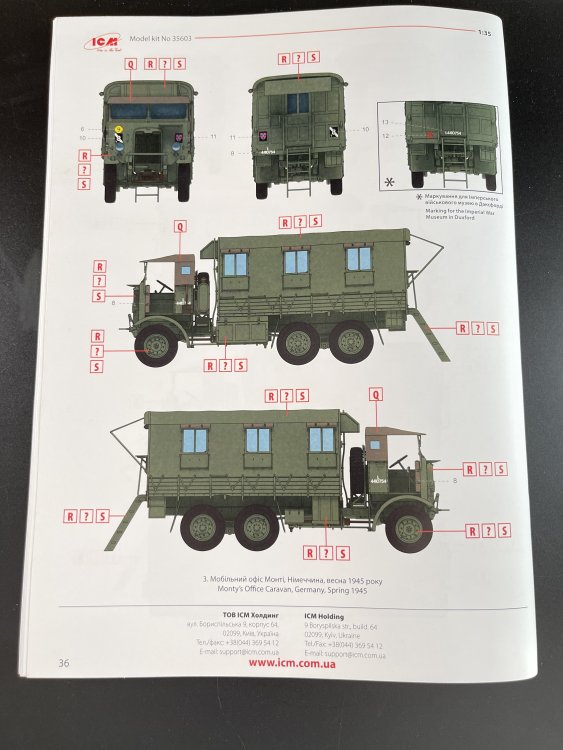
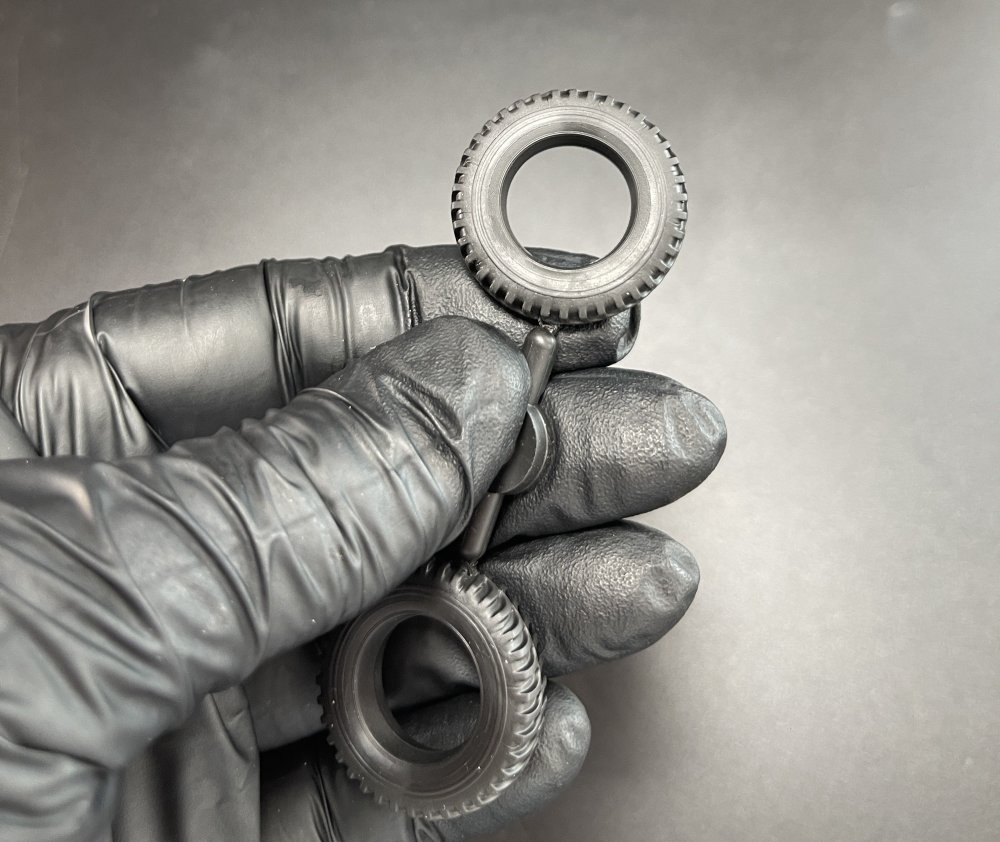
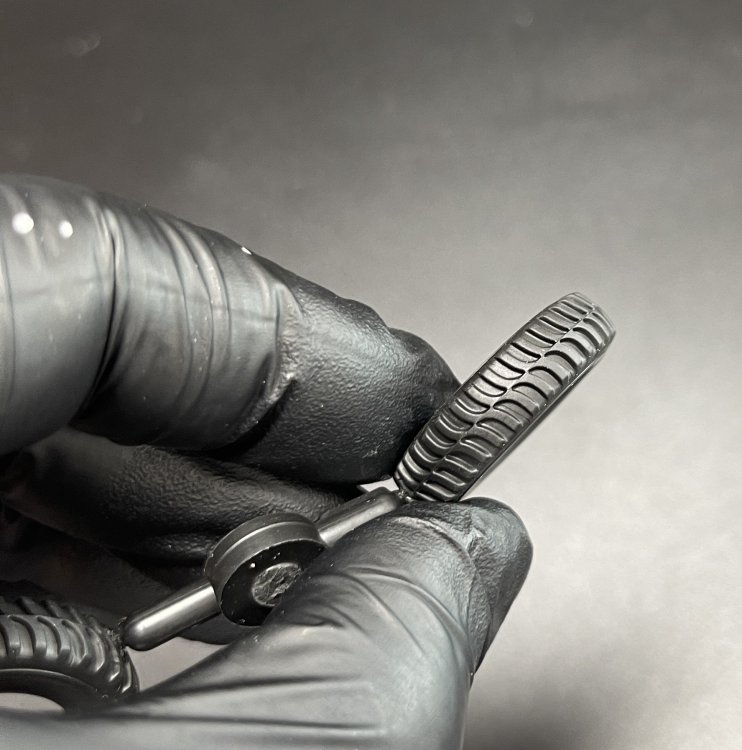
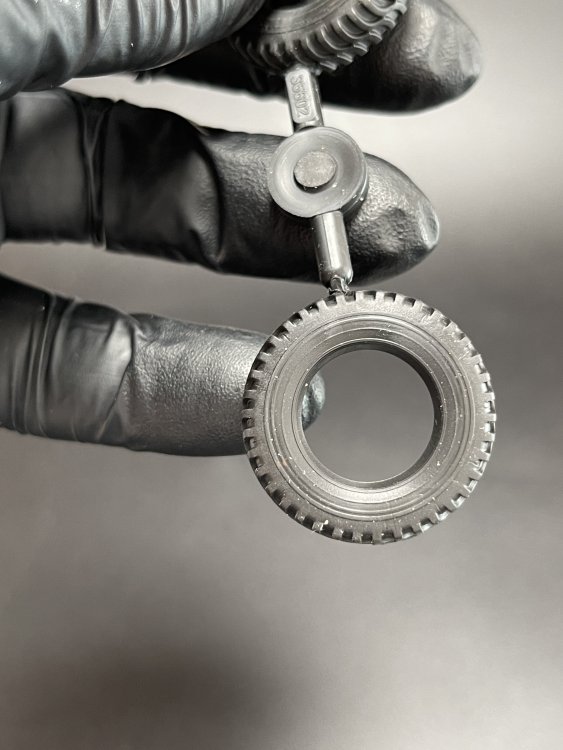
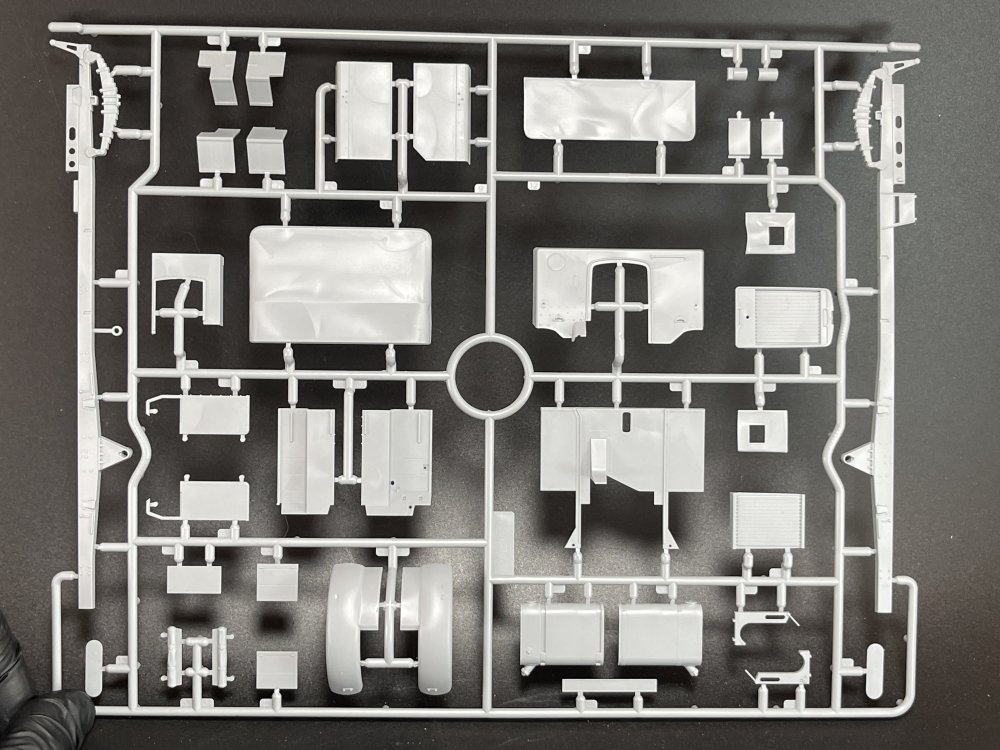
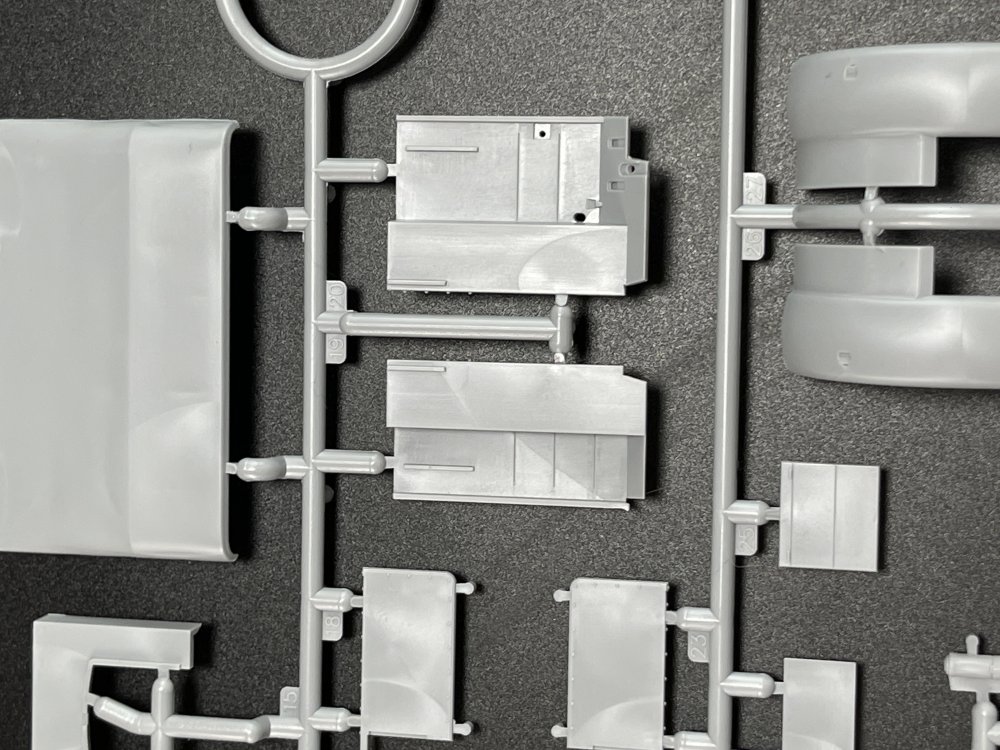
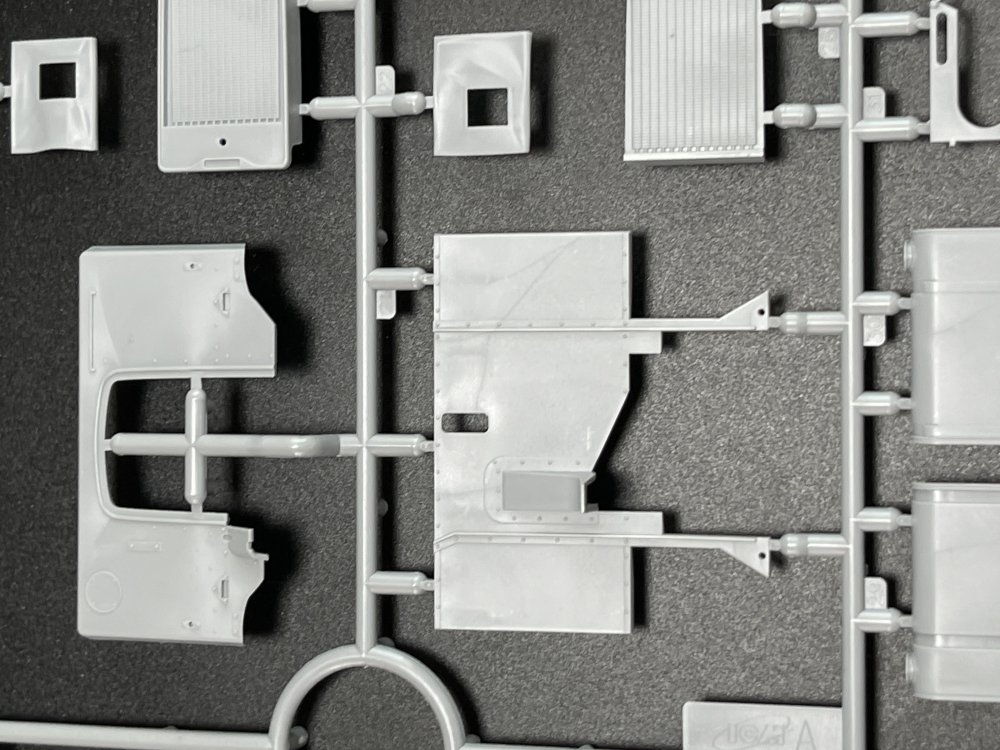
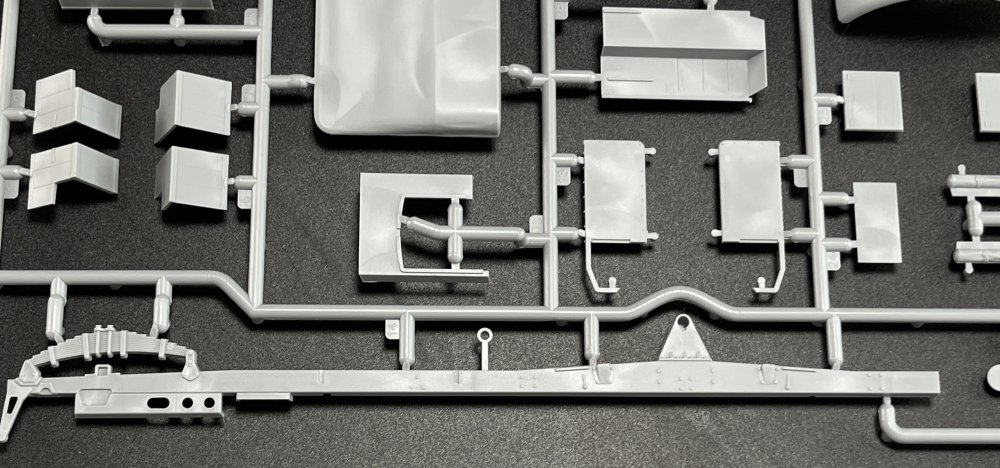
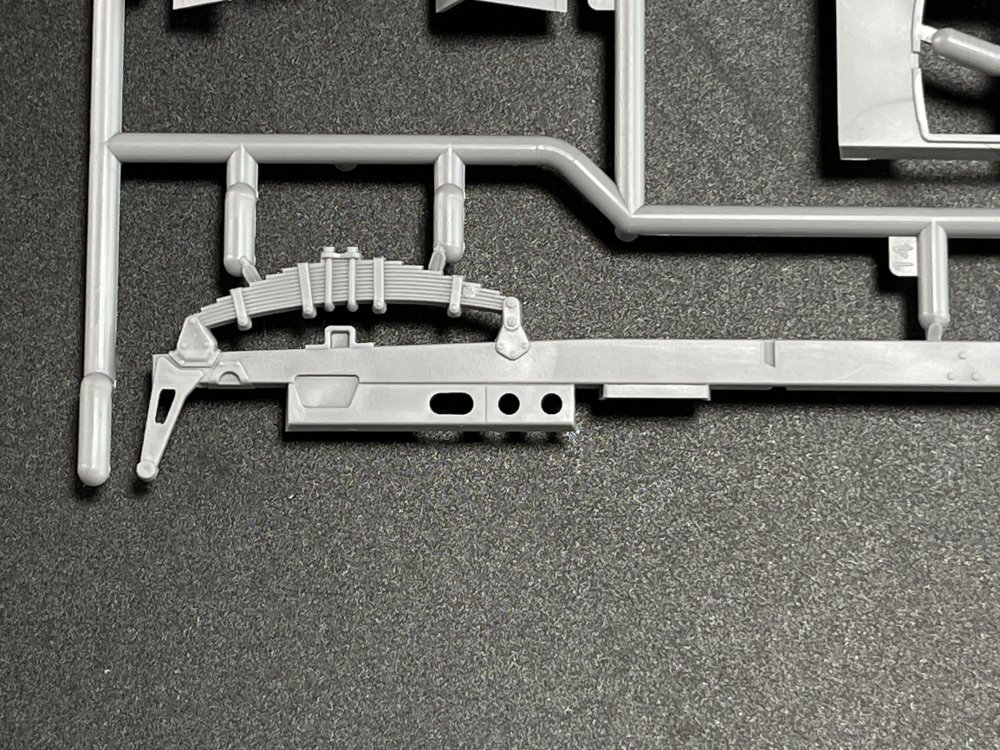
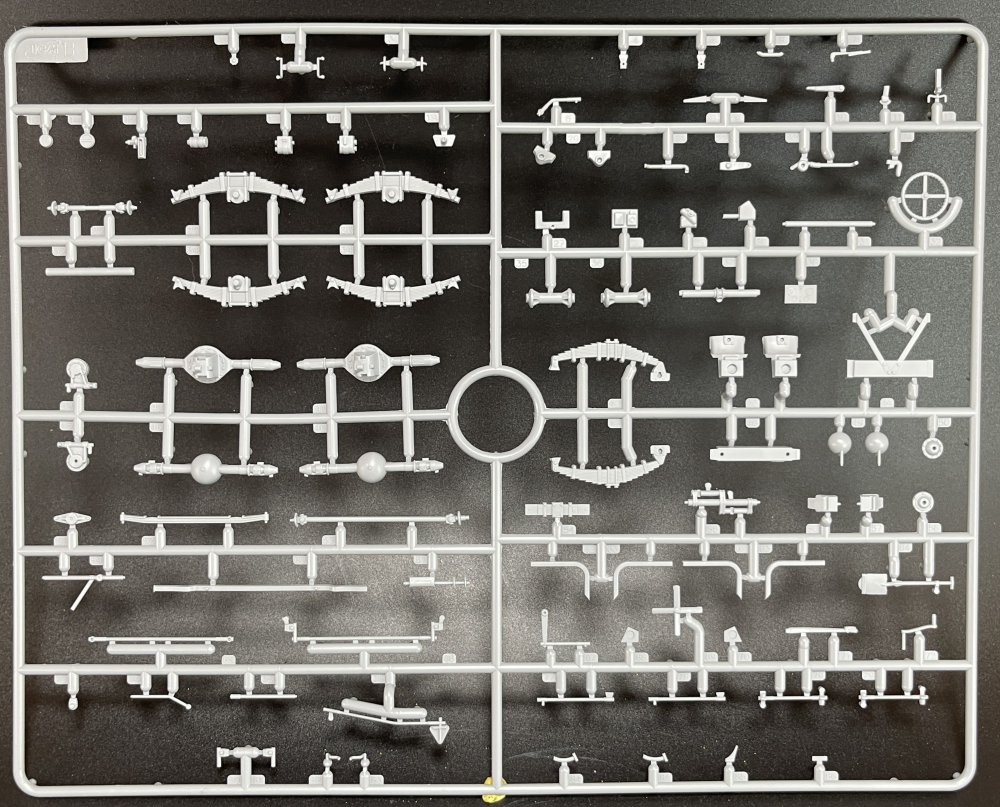
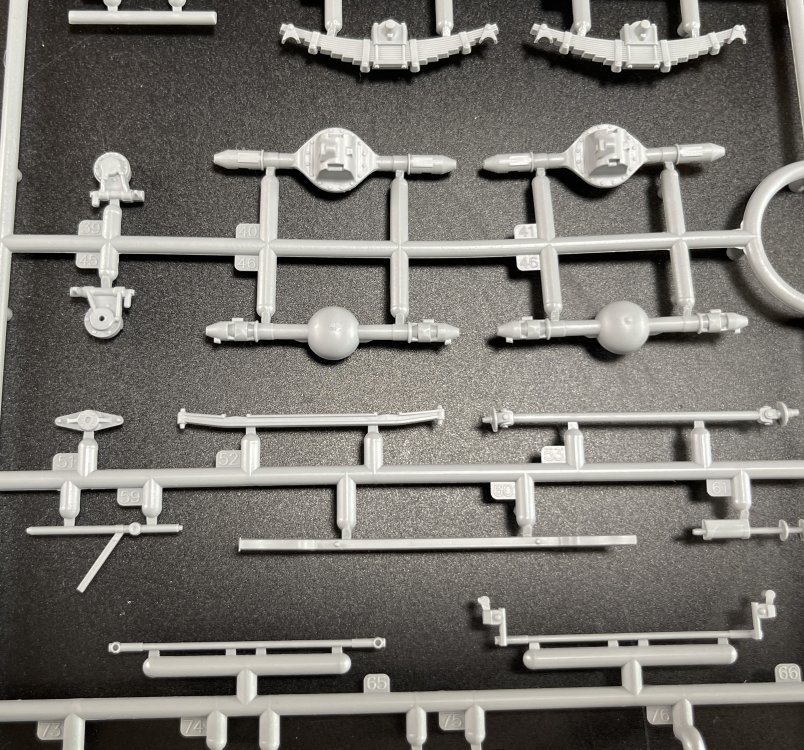
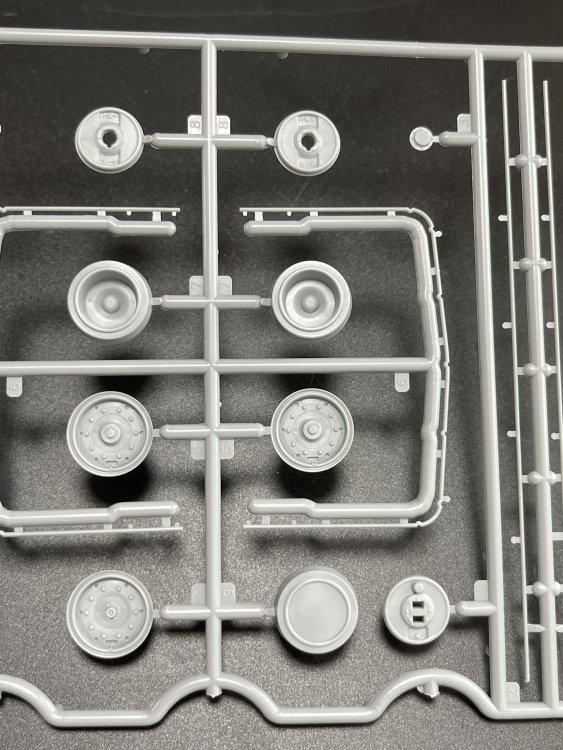
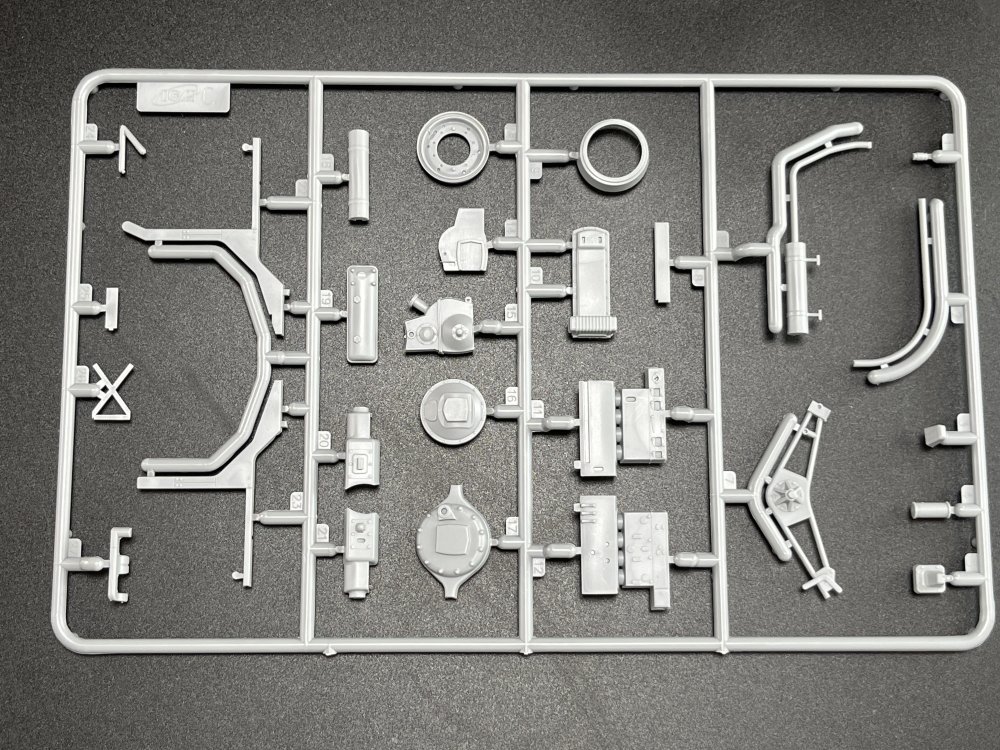
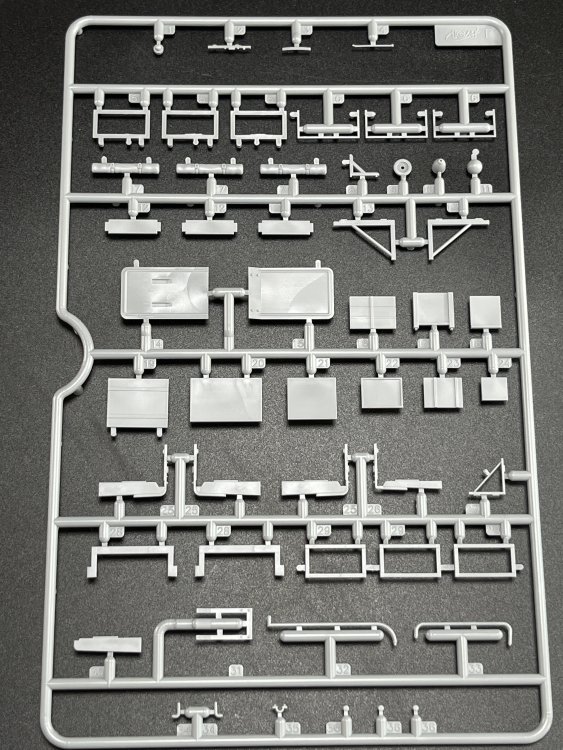
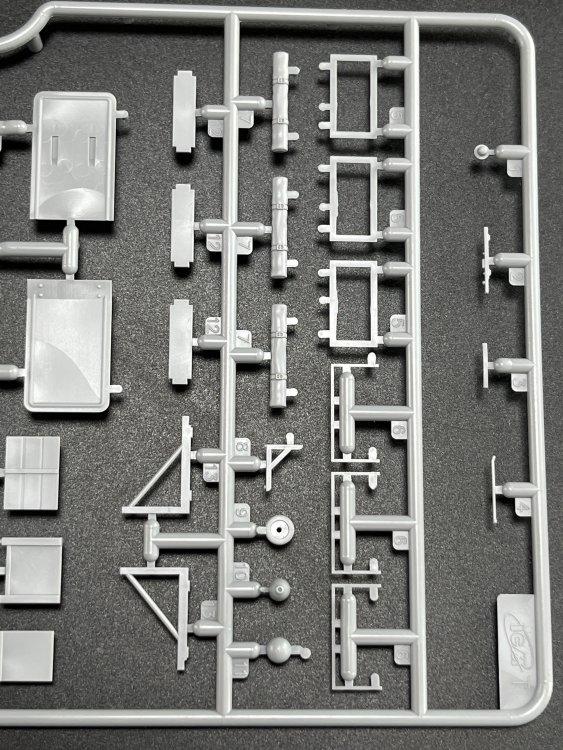
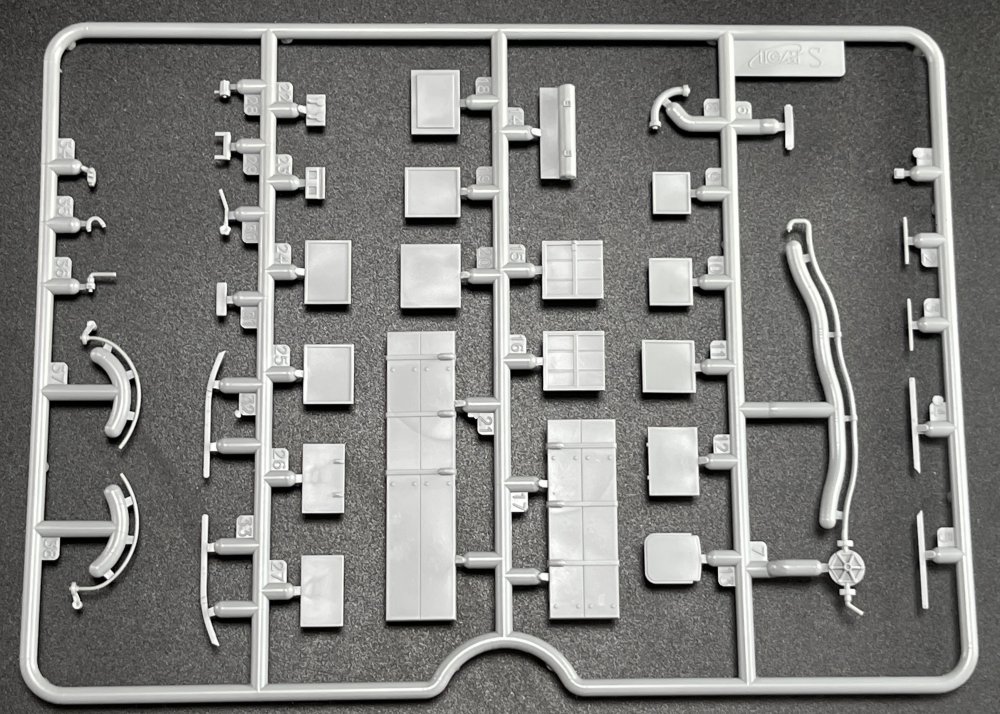
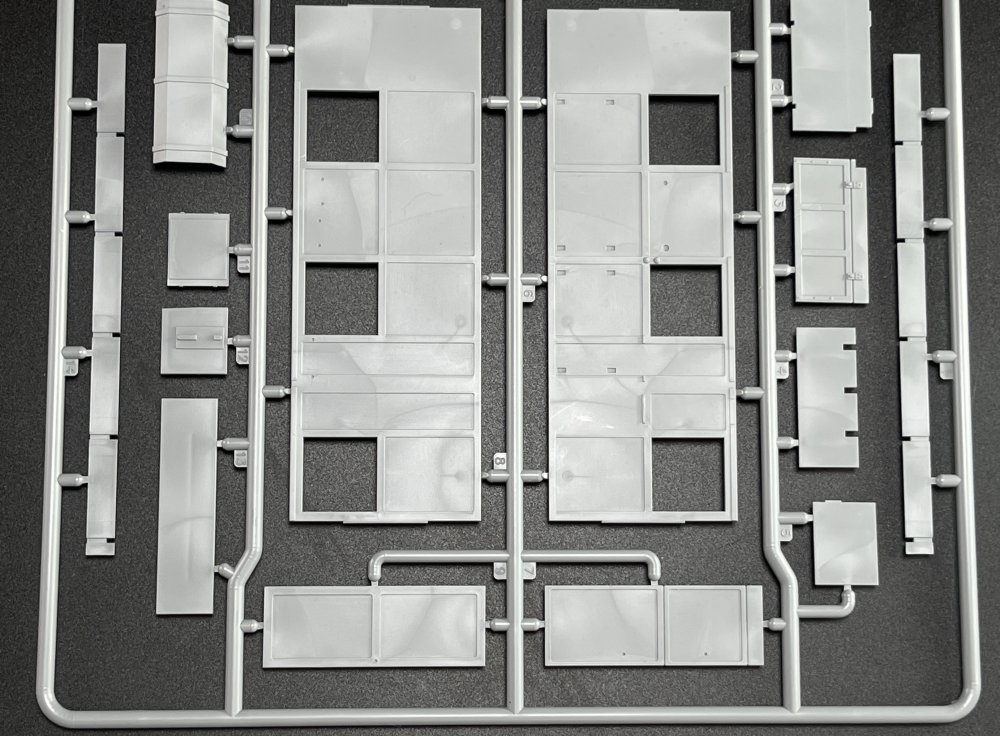
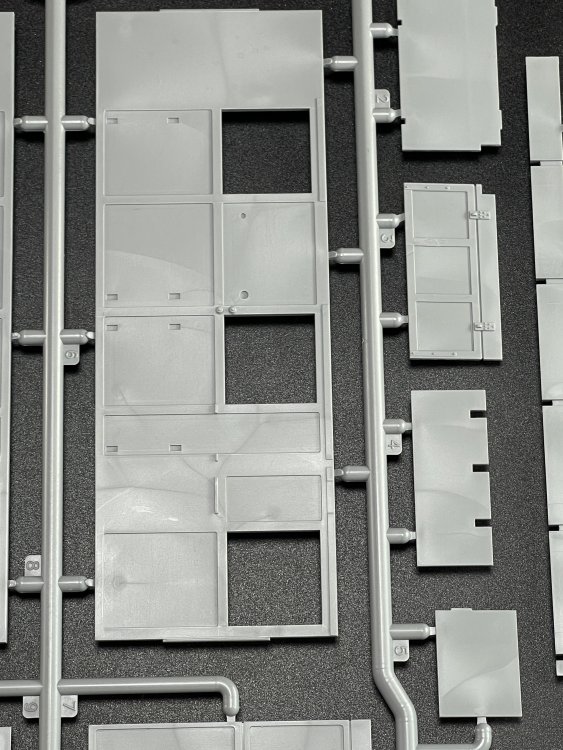
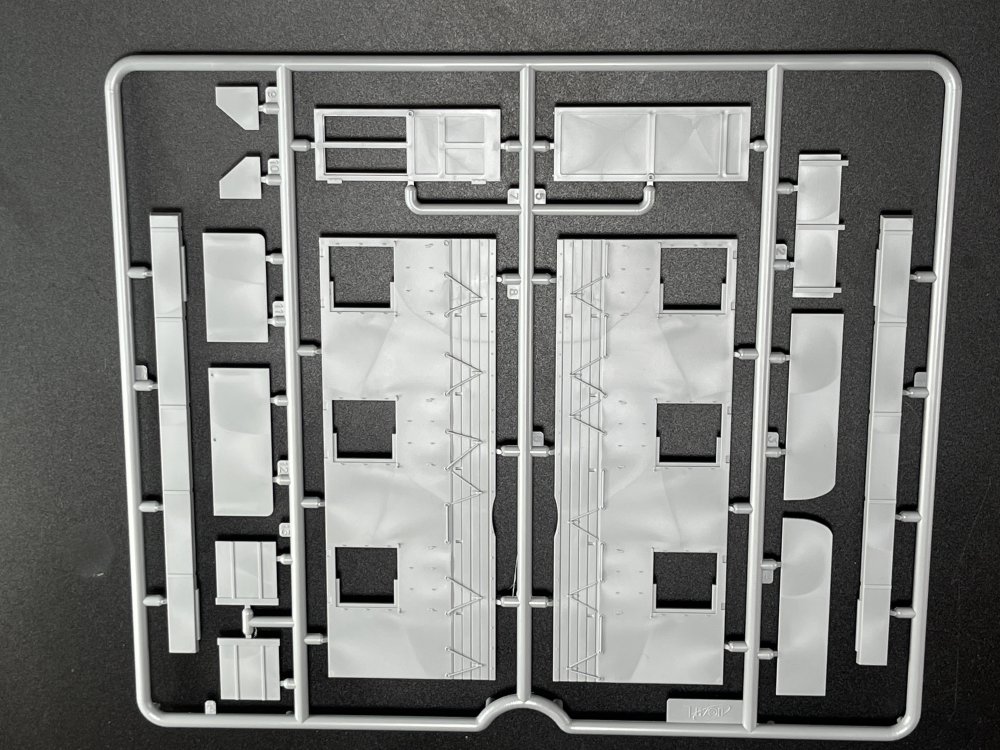
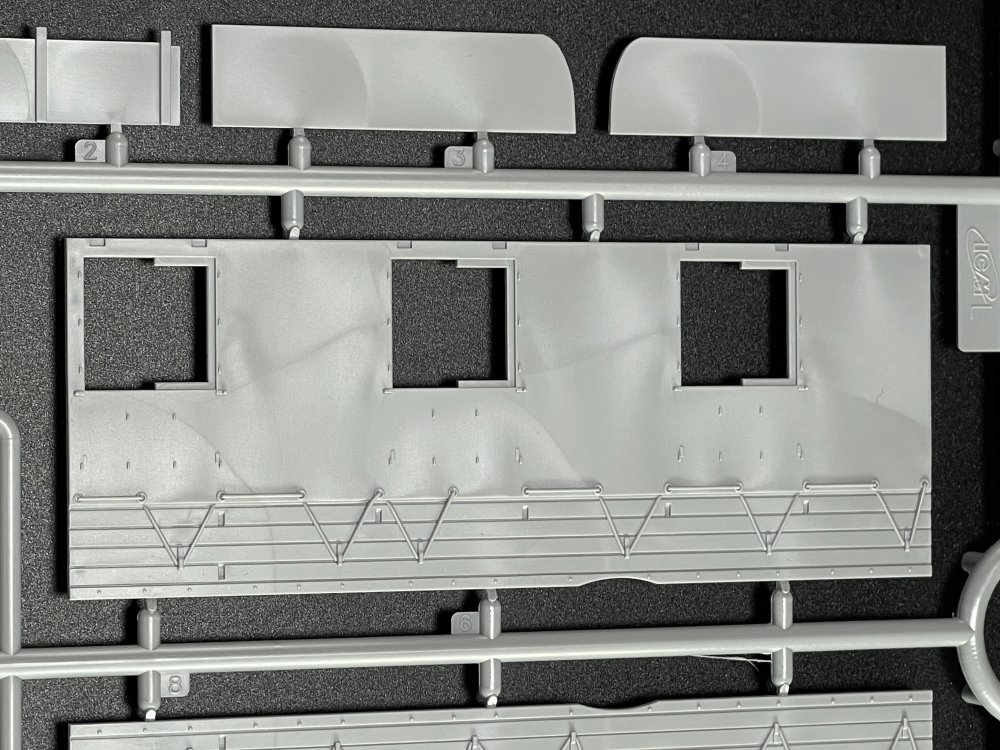
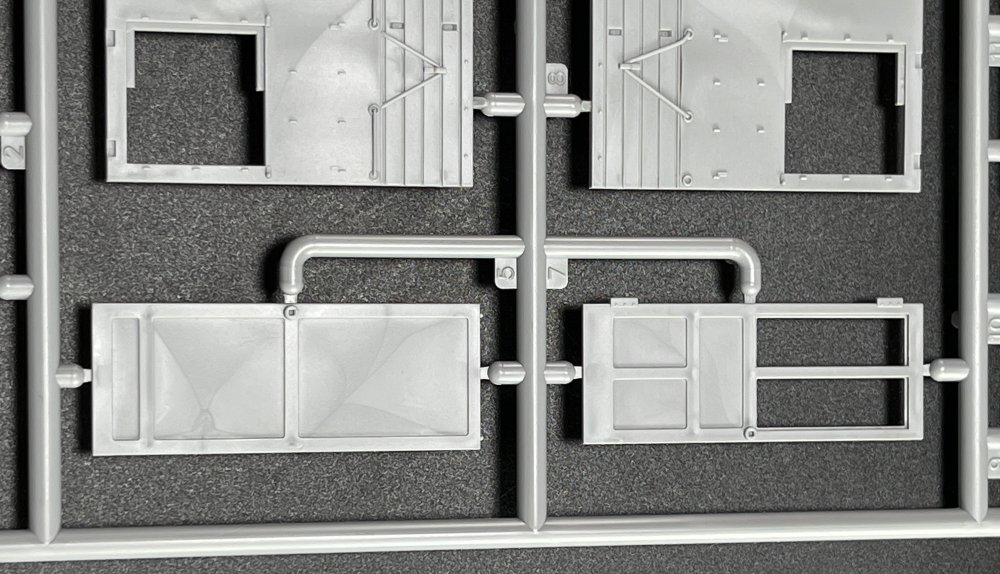
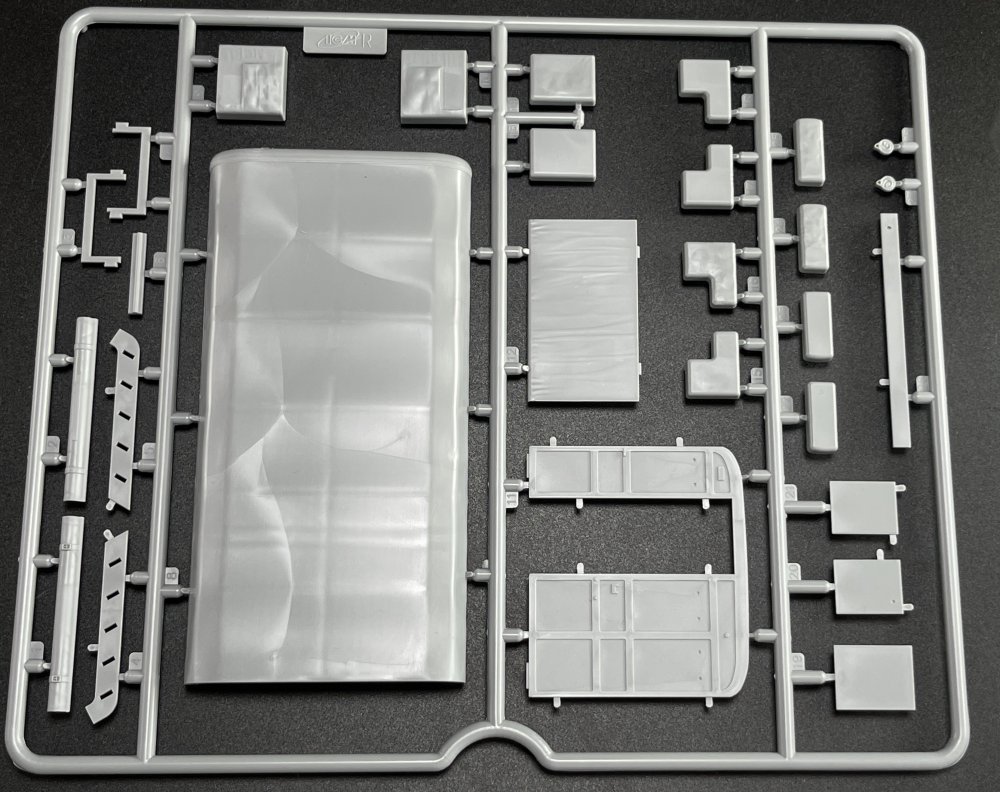
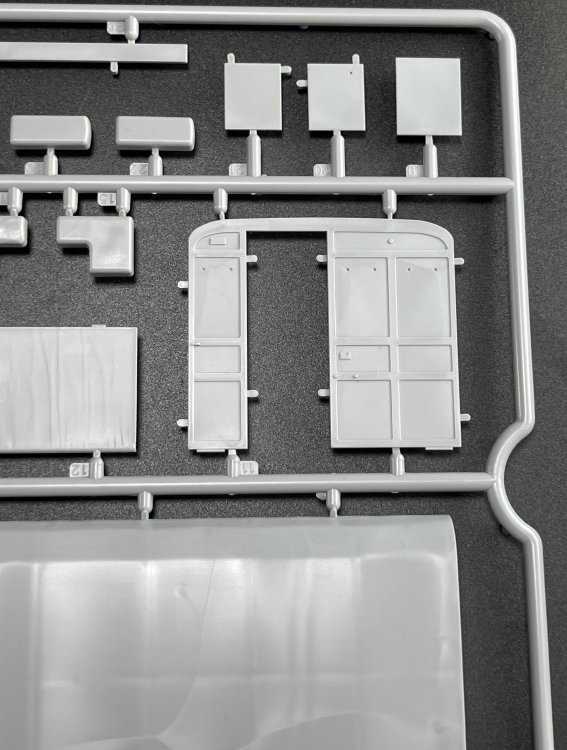
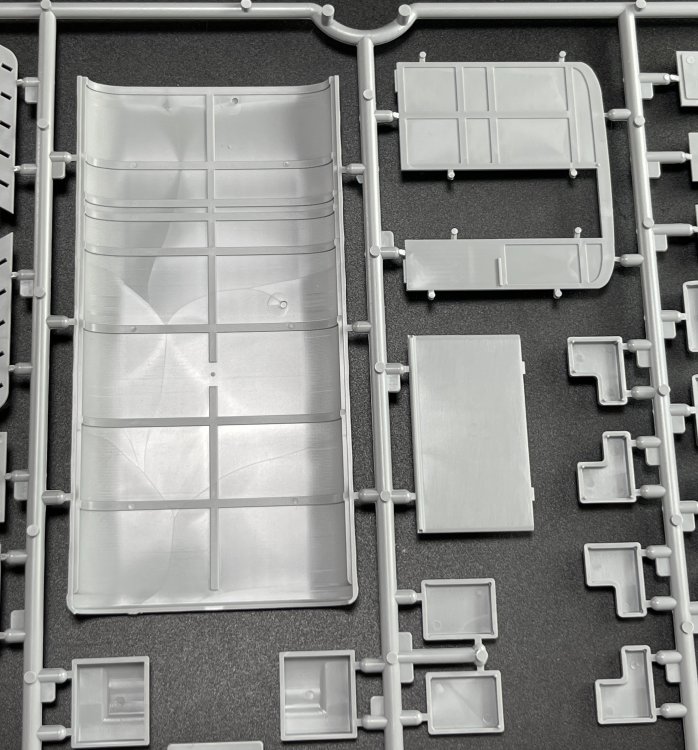
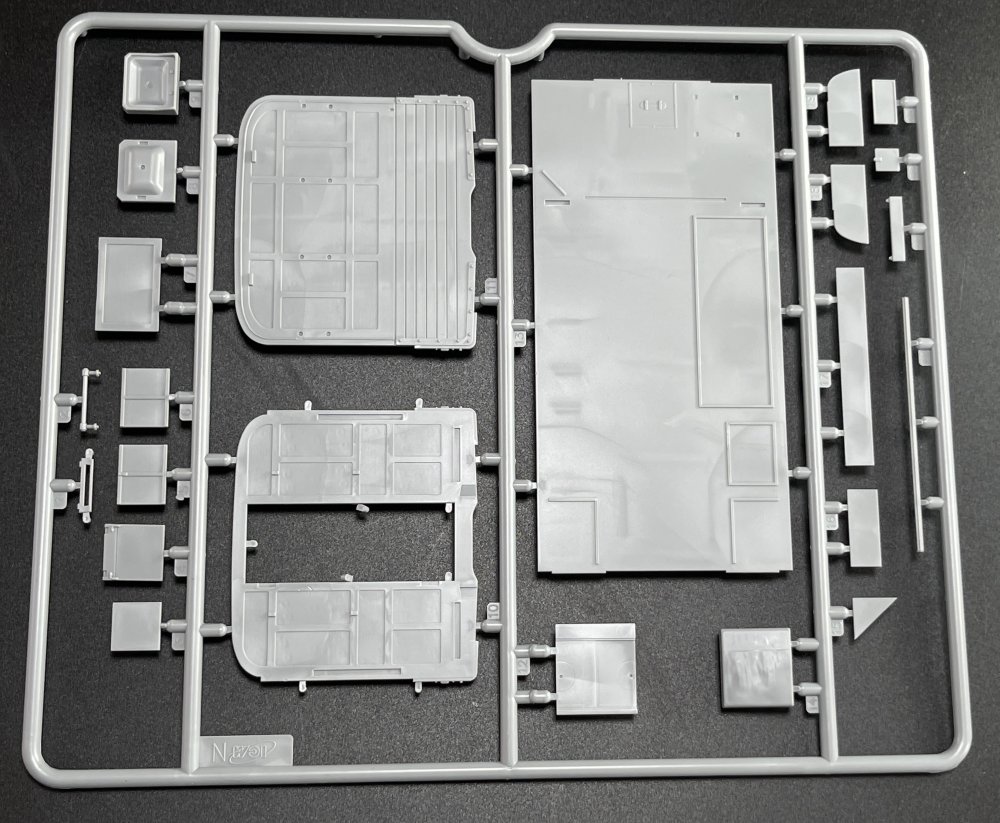
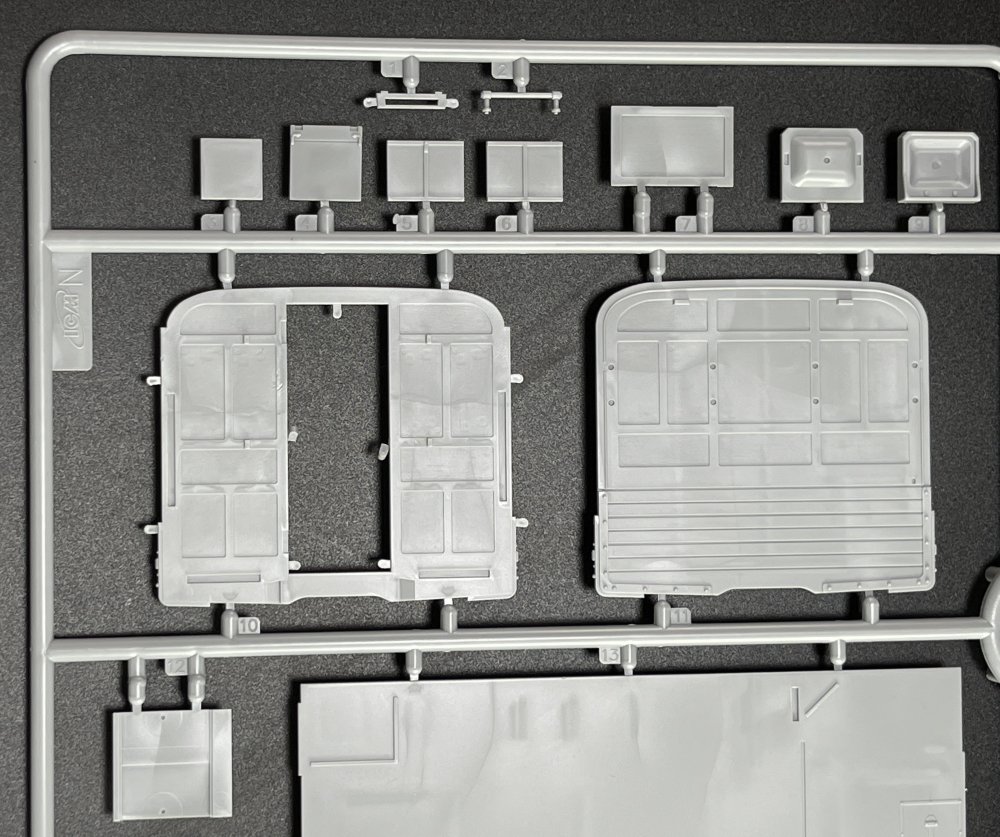
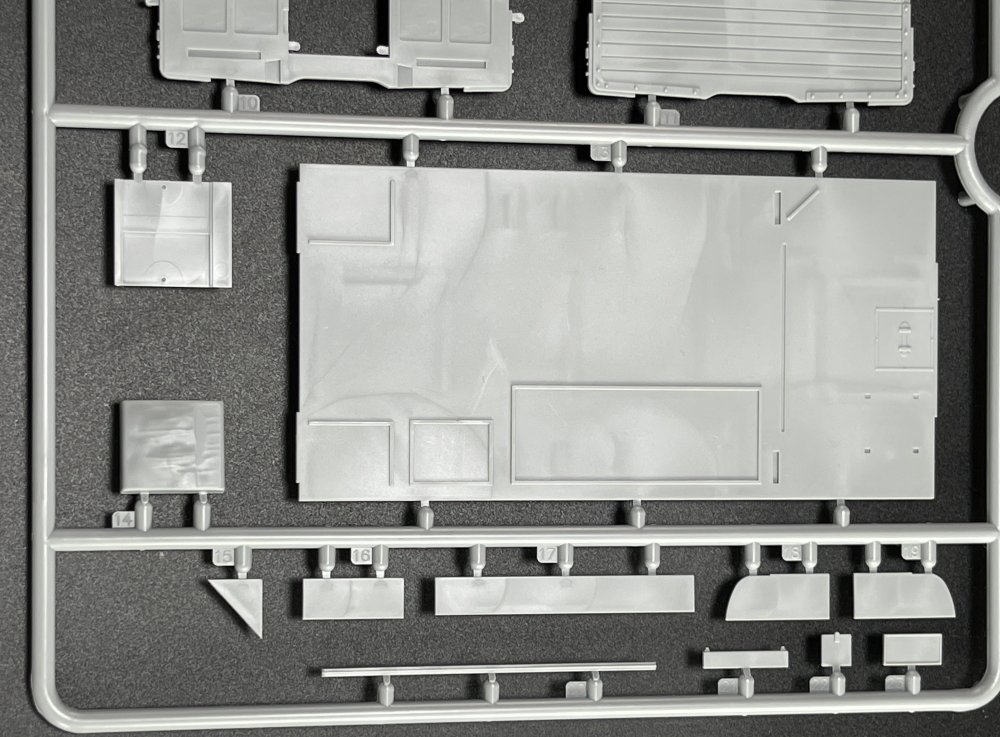
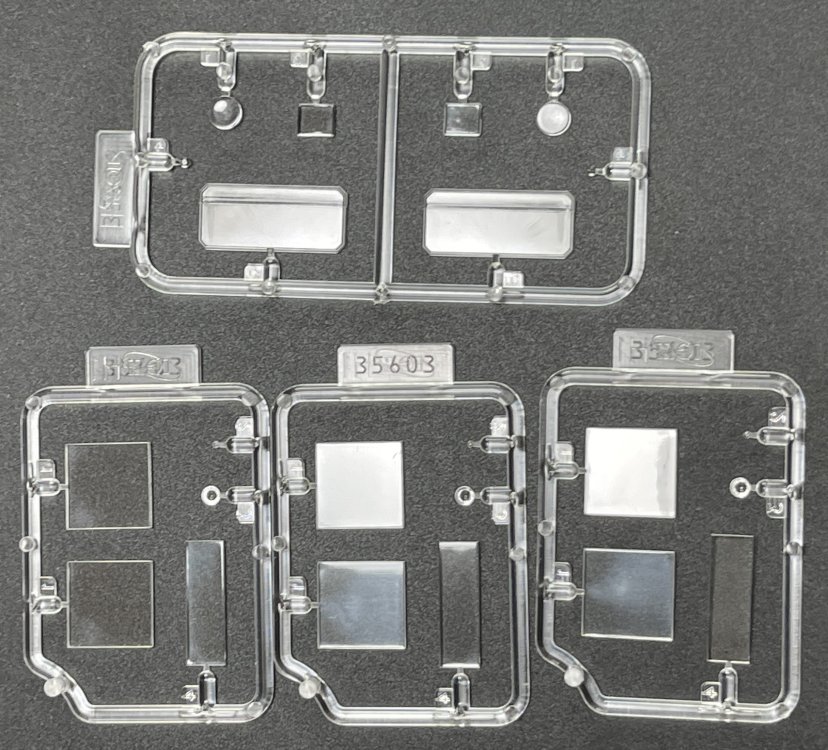
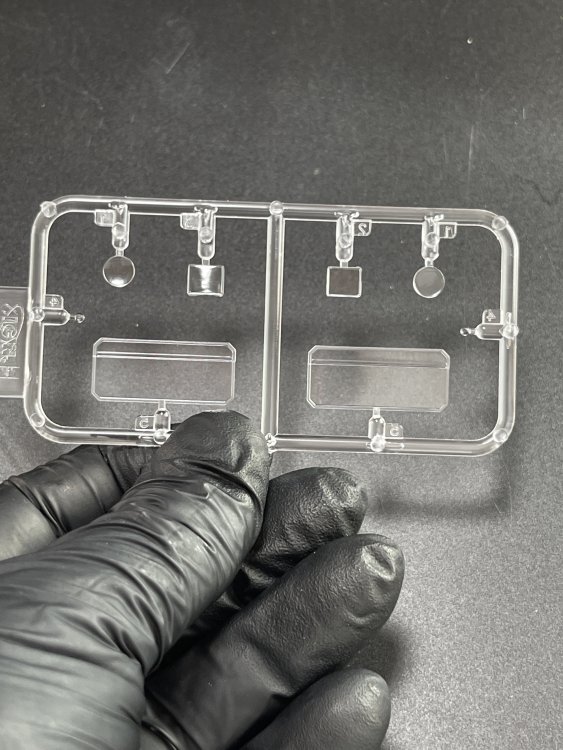
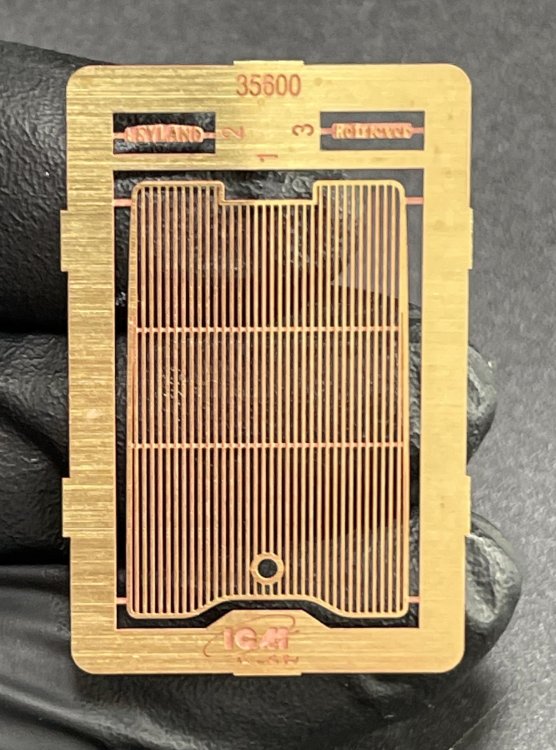
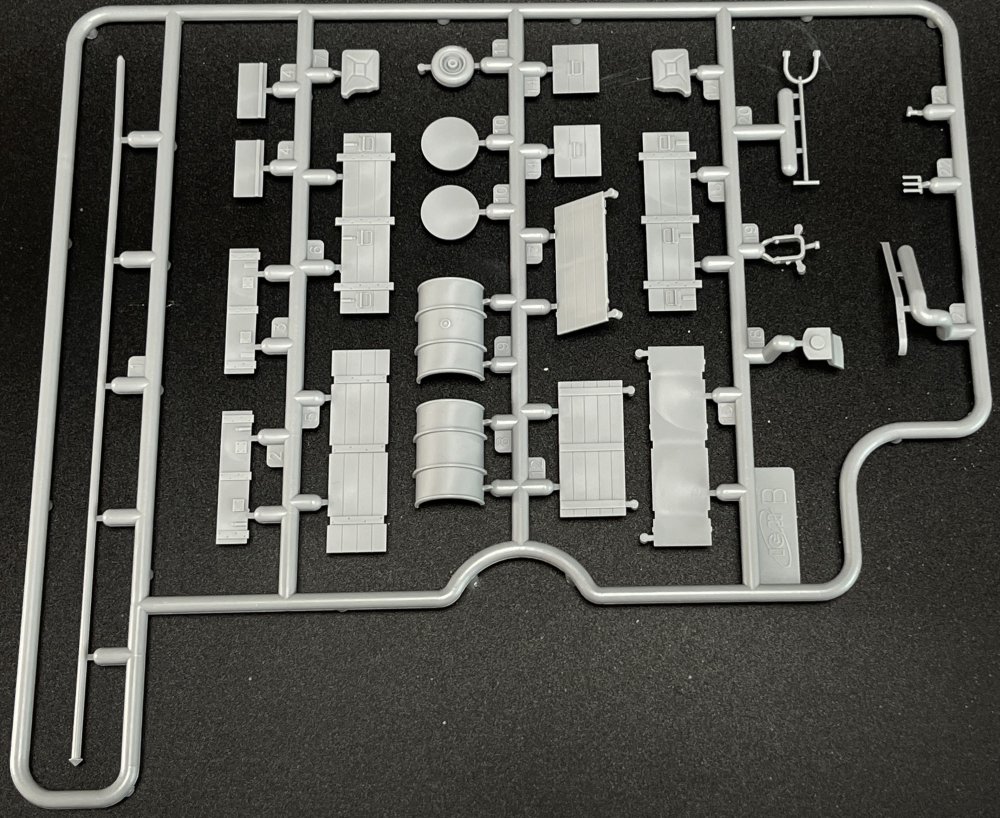
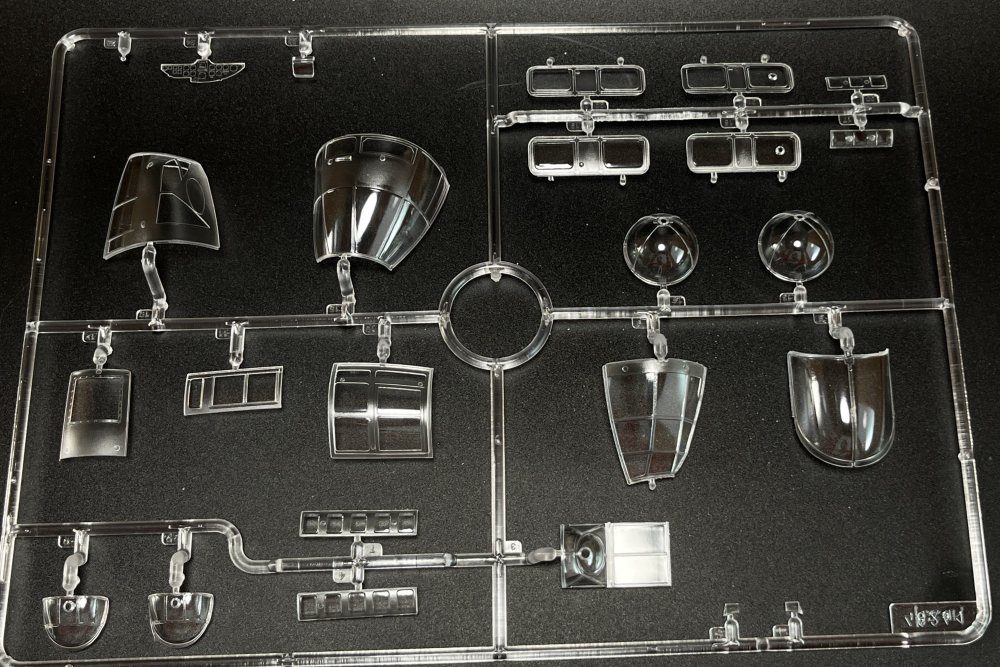
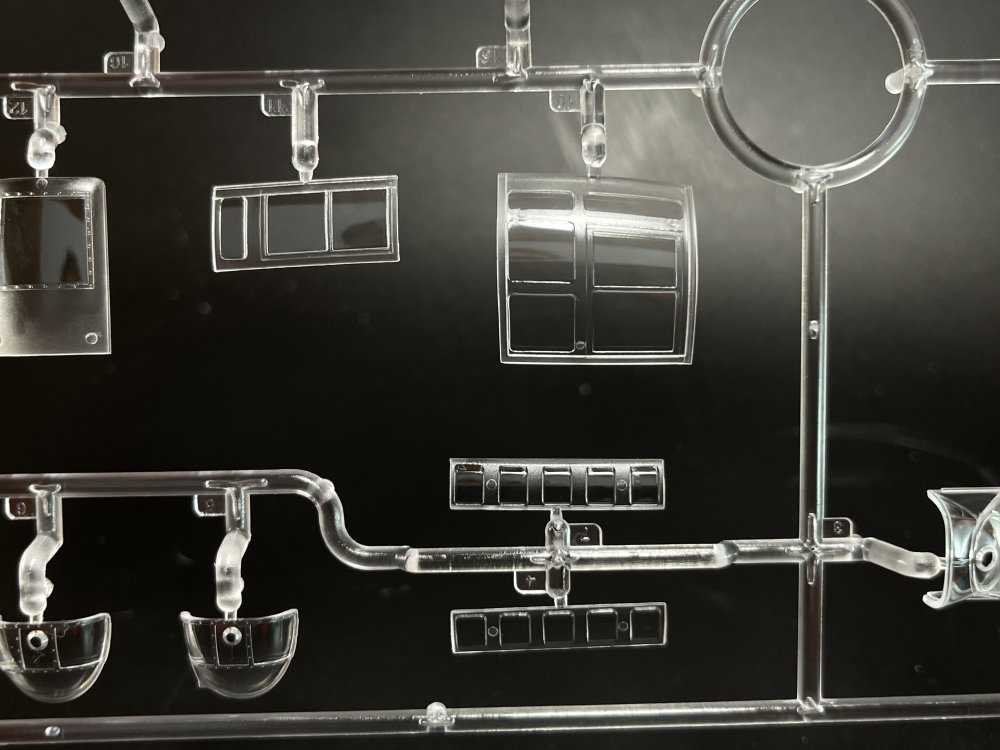
1:35 Monty's Office Caravan ICM Catalogue number 35603 Price: around 63,70€ ICM keeps launching new kits every month, or new variants of their pre-existing kits but this one is a very special ones, and demands a lot of extra work from ICM. The kit is a new tool for 2025, featuring freshly designed parts to replicate the Leyland Retriever chassis and the unique caravan structure. It includes a highly detailed interior, assembly options for an extended canopy and additional steps, and multiple color schemes reflecting the vehicle’s paint variations throughout the war. So, I consider this release an almost a brand new one, and not a true rebox. The mythical and unique Monty`s caravan! The caravan was originally an Italian mobile office captured from General Annibale Bergonzoli, mounted on a Lancia 3RO truck. After capture by the 7th British Armoured Division, it was transferred to a British Leyland Retriever 6x4 chassis. The vehicle served as Montgomery’s mobile field office, featuring a detailed interior with a bathroom and a main room equipped with a desk, sofa, wardrobes, and picture frames. The other two vehicles in the “Monty’s Caravan” trio included a mobile bedroom and a map/meeting room, though this kit focuses solely on the office caravan. So, Field Marshal Bernard Montgomery had, during the war, three field caravans (Bed caravan, Office caravan and Map caravan), and ICM made the second one, the Office Caravan. Will we have all three caravan made by ICM? So, as it said in the box, a full interior is given, unlike the other releases. The package is the usual from ICM, with flip top cardboard with a separate card lid showing the artwork, a lovely artworks as usual. I don’t know who makes the ICM box arts but I do like them. Not my favorite but I do like them. So this model has 436 parts, so it is not a weekend project This box is full with plastic. So full, that after taking the pictures for this review I have had a hard time to put all the plastic inside the box This model is based on the British Leyland Retriever truck chassis, modified to serve as a mobile office for Montgomery. I will leave the office for the end. As for the Leyland Retriever, you can have a full chassis detail straight from the box. Also the engine is well detailed, out of the box. If you desire to show it up, a few wires could add a more realistic aspect. There`s a lot of parts in chassis, suspension and engine. So please do check all the alignment to see if the truck sits properly or will might have a surprise at the end and it can be too late. To see the complexity of all this structure (chassis, wheels and engine) the constructions goes in the instruction until step 51 (in 181). The truck cabin is next and is very detailed from the box. The parts comes with pin alignment making the construction more straightforward that you can imagine. The markings pins are hidden in strategy places that you can see… so kudos to ICM for thinking about it. The wheels are in black vinyl. It`s not the first I said this, but I don’t like vinyl Wheels. The details in not as good as some aftermarkets ones and painting and weathering are much harder to do, but it`s me. Now, the new part: the full office. The office walls come in separate panels, so that is a clever way for ICM to have no worries about pin injections marks in full side caravan walls. The interior is meticulously recreated, featuring a writing desk with lamps, a sofa, shelves, storage cabinets, and picture frames. The bathroom area is also faithfully represented, adding to the authenticity of the build. The interior will be very busy. ICM also give a carpet. It’s a paper printer rectangular. You can easy find better option in the aftermarkets boys but still it’s a great add up from ICM Decals are included for the interior are also given, depicting portraits of German military commanders that adorned the walls of Montgomery's actual mobile office. Based on available information, the kit's decal sheet specifically features portraits of three German generals: Erwin Rommel, Heinz Guderian, and Ewald von Kleist. Those were the German General that Montgomery won in battle being the most famous one Erwin Rommel, that Montgomery won in the second battle for Al Alamein in October 1942. External features are also good, note here the ropes for tarpauline walls. Separate doors should come handy for showing what is inside. As all the ICM kits, that constructions parts have guiding elements for the proper alignment of the things. Roof is a single part so no worries about gapping or filling. The roof panel looks great and deserves a nice weathering work. PE sheet!! Yes, it`s the first time I review an ICM model kit that has some PE inside. Yes, its`a quite small one still give us a front grille and two badges (naming: “Leyland” and “Retriever”). The clear parts. As usual with ICM, these are real clear with not distortion. The decals sheets has a very good definition and color registration. Beside the portraits, it give several markings options for all three schemes given. So you can make three version: - Monty`s Office Caravan, North Africa, Autumn, 1942; - Monty`s Office Caravan, Tripoli, Summer 1943; - Monty`s Office Caravan, Germany, Spring, 1945 The instructions booklet with 36 pages, is typical ICM instructions, very clear. Only ICM colour chart, but these paints are coming more available and I already try with a brush and airbrush and I was surprised with the pigmentation. Conclusion: Well, another great model kit from ICM!! The ICM Monty’s Office Caravan (35603) is a superbly detailed 1:35 scale kit that brings a unique WWII vehicle to life. For those ready to invest time and skill, this kit delivers a satisfying build and a striking centerpiece for any collection. To 8/10 for quality and detail, with minor deductions for complexity and cost. It`s a superb kit! Probably the best kit in 1:35 that I saw from ICM. Highly recommend It`s 9,8 out of 10. My sincere thanks to ICM for making this fantastic model kit.


-
Hi guys. I will 15 days in Japan and 4 days in Tokyo where I will like to get some goodies! I already been searching already the best places to go on web but I would like to hear directly from modeller that have been there. So can anyone tell me the best modelling shops to visit in Tokyo? Cheers
-
Just got some info. So the price would be around 90£. They are going to try to sell it in EU in Aviation Megastore.
-
It`s almost out!! Anyone knows hoe much it will be and where it will be available?
-
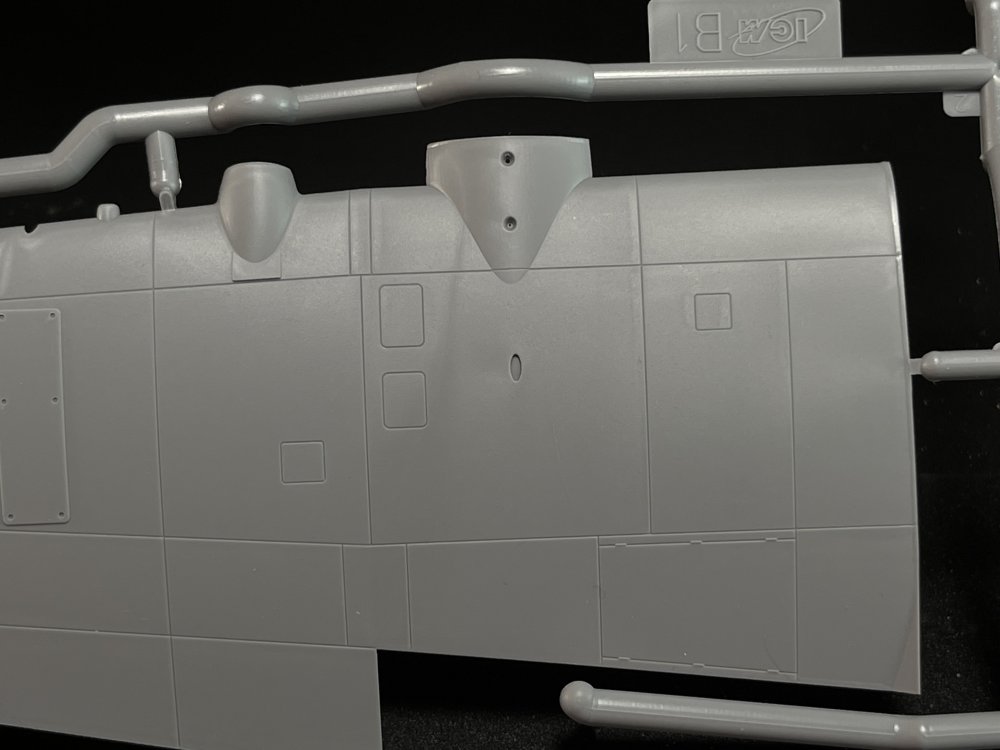
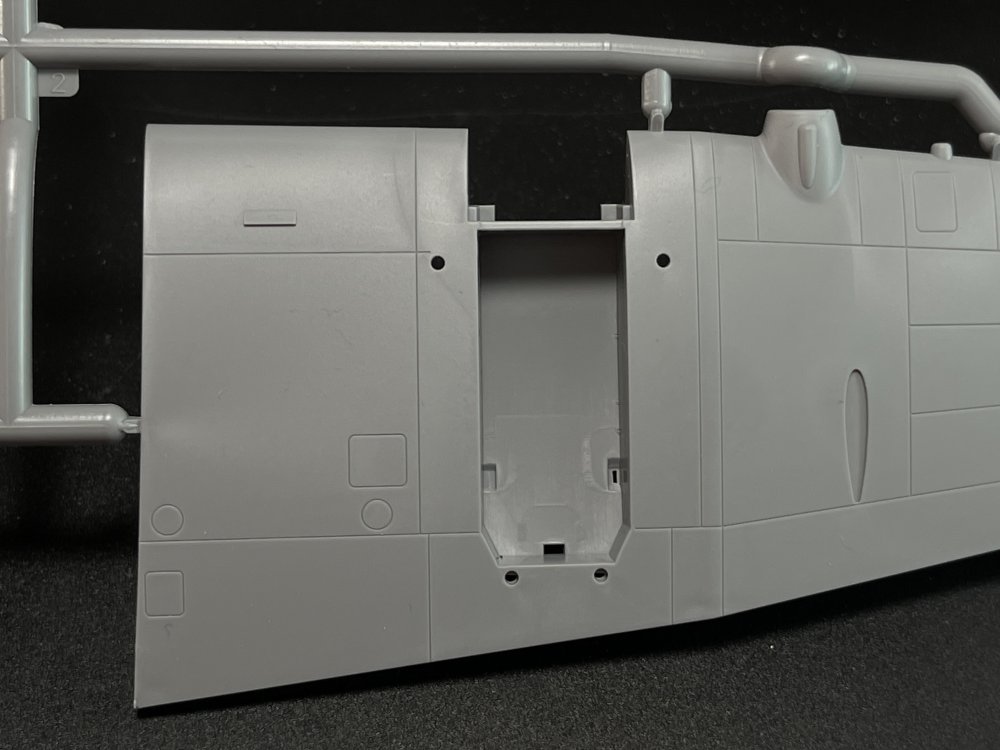
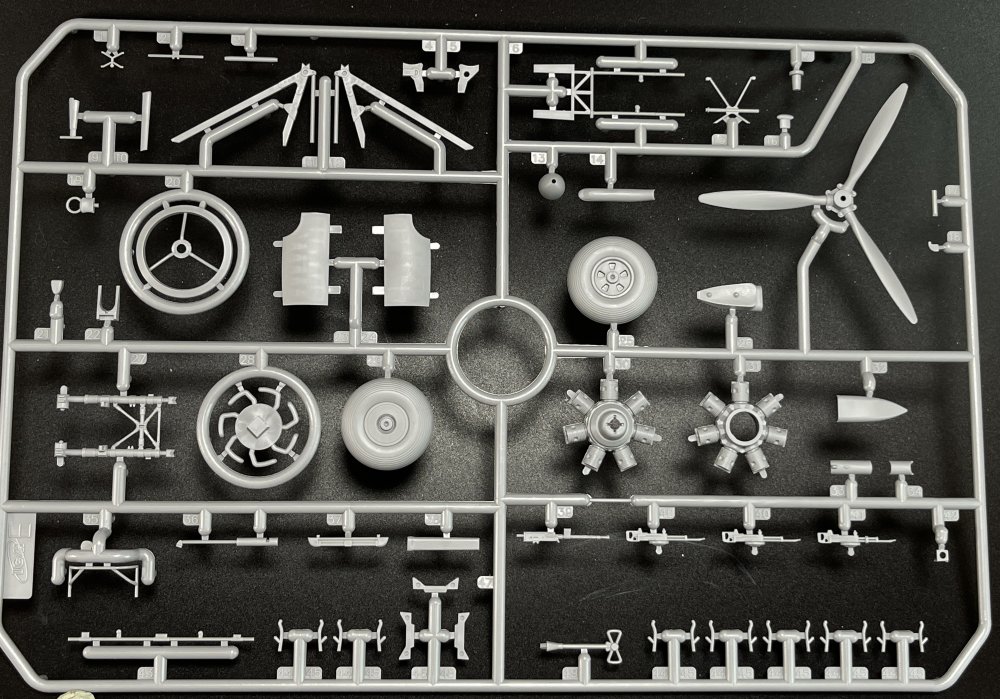
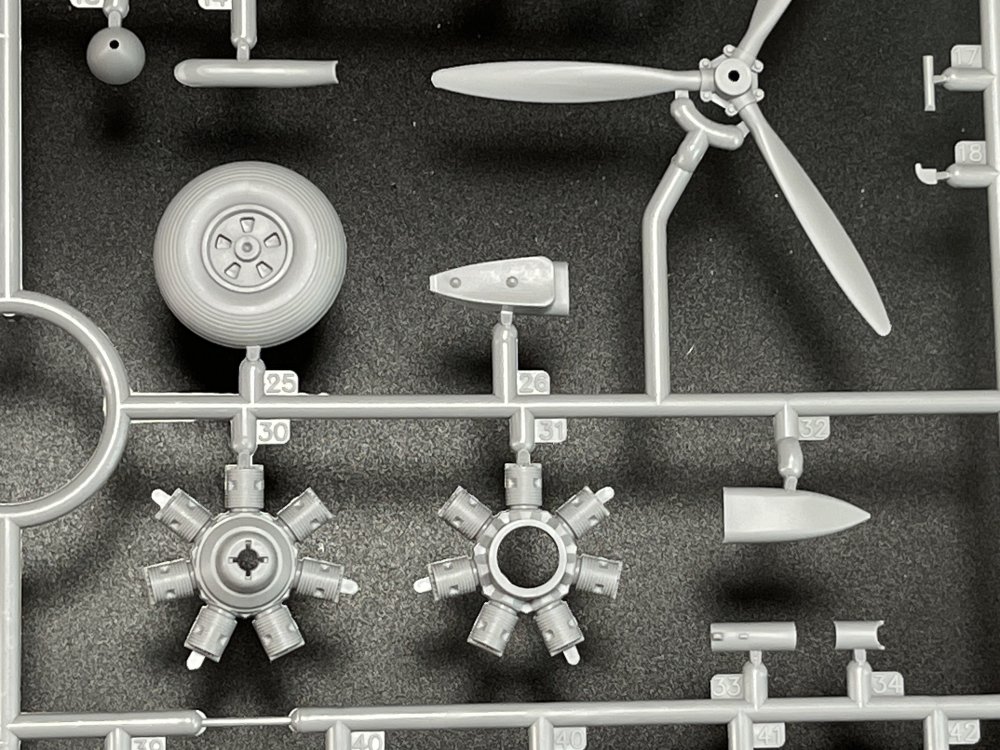
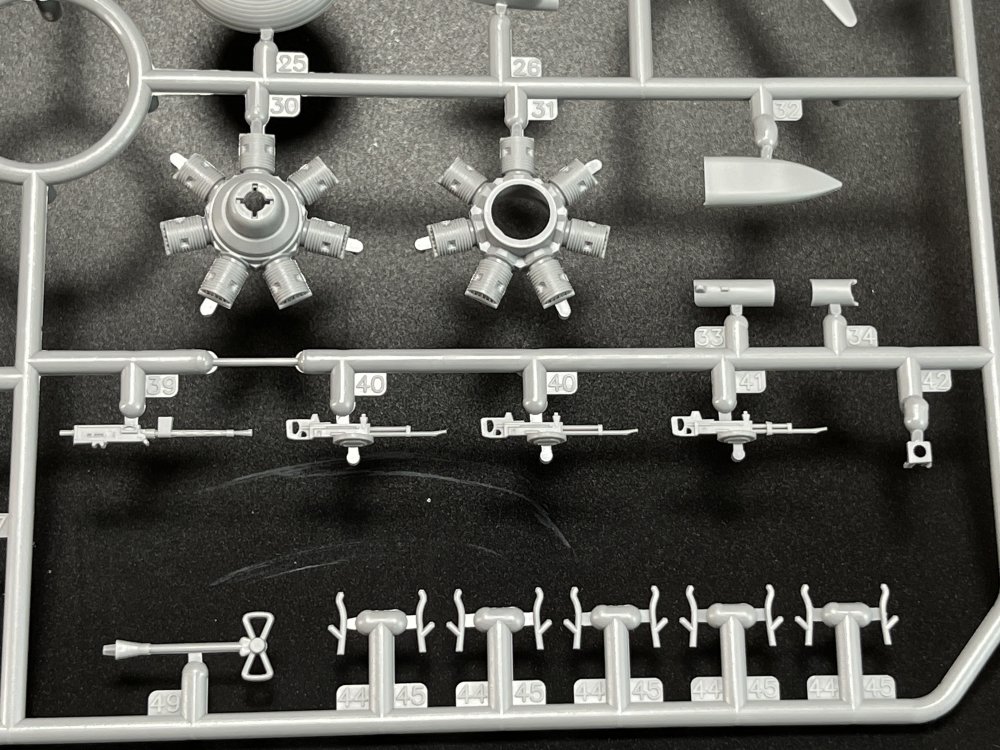
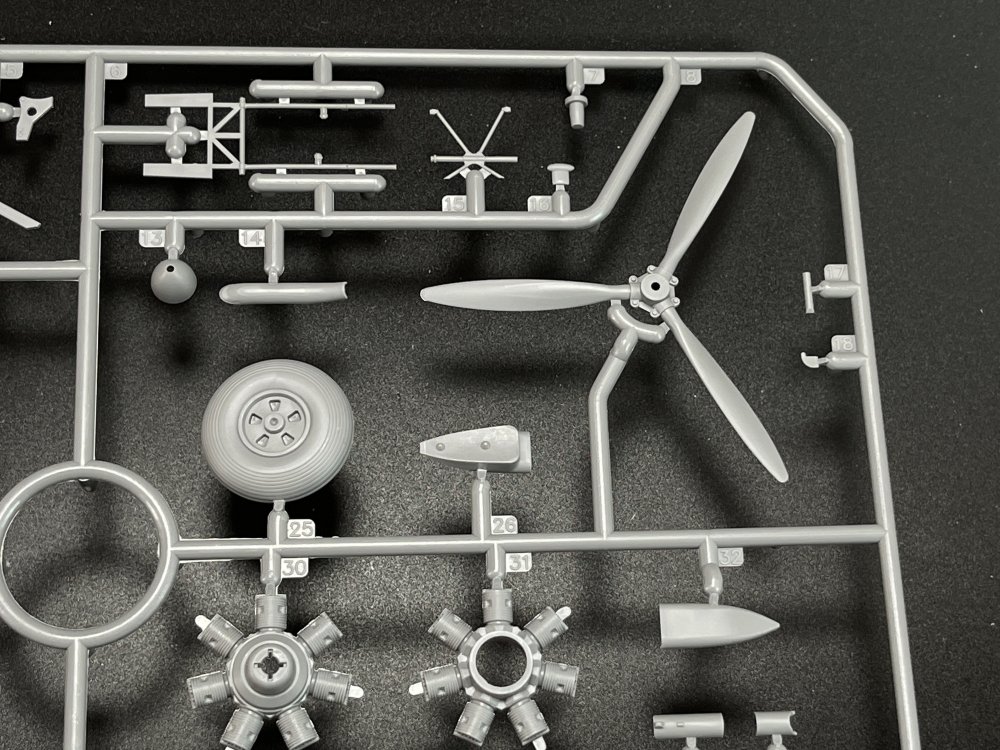
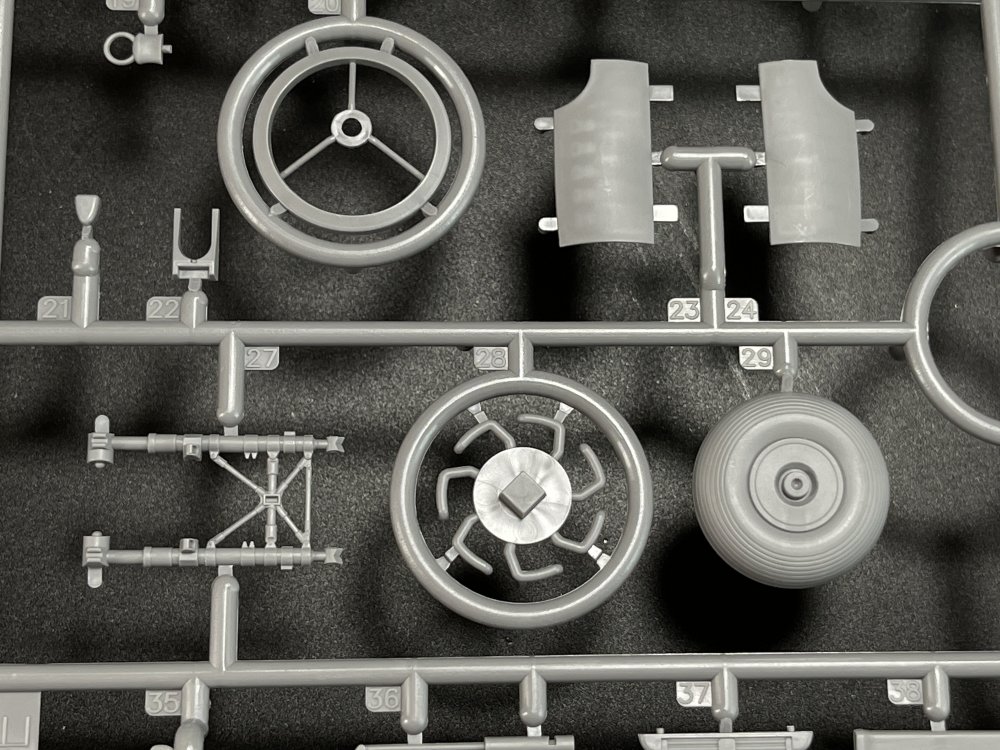
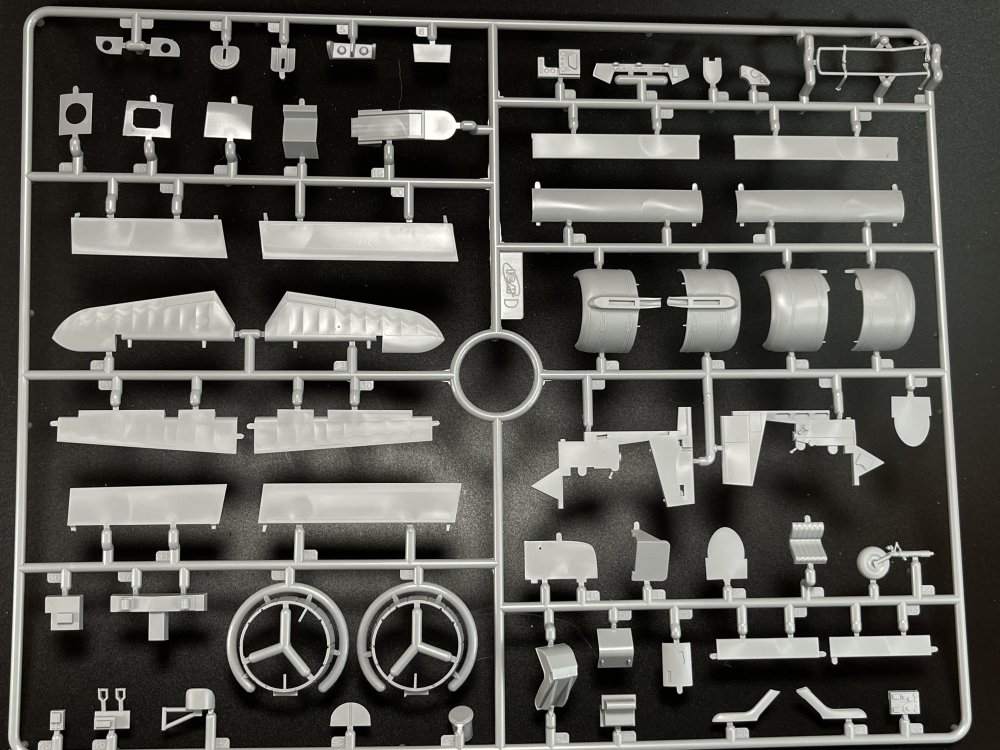
1:32nd scale Pfalz D.VIII
Fran replied to sandbagger's topic in LSM 1/35 and Larger Work In Progress
Fantastic build of an awseome kit! Thanks for sharing Fran -
Thanks for the great review! Appreciated!
-
Well, that`s is great news. Another thing: Technikit is a totally new name for me! Thanks Hubert.
-
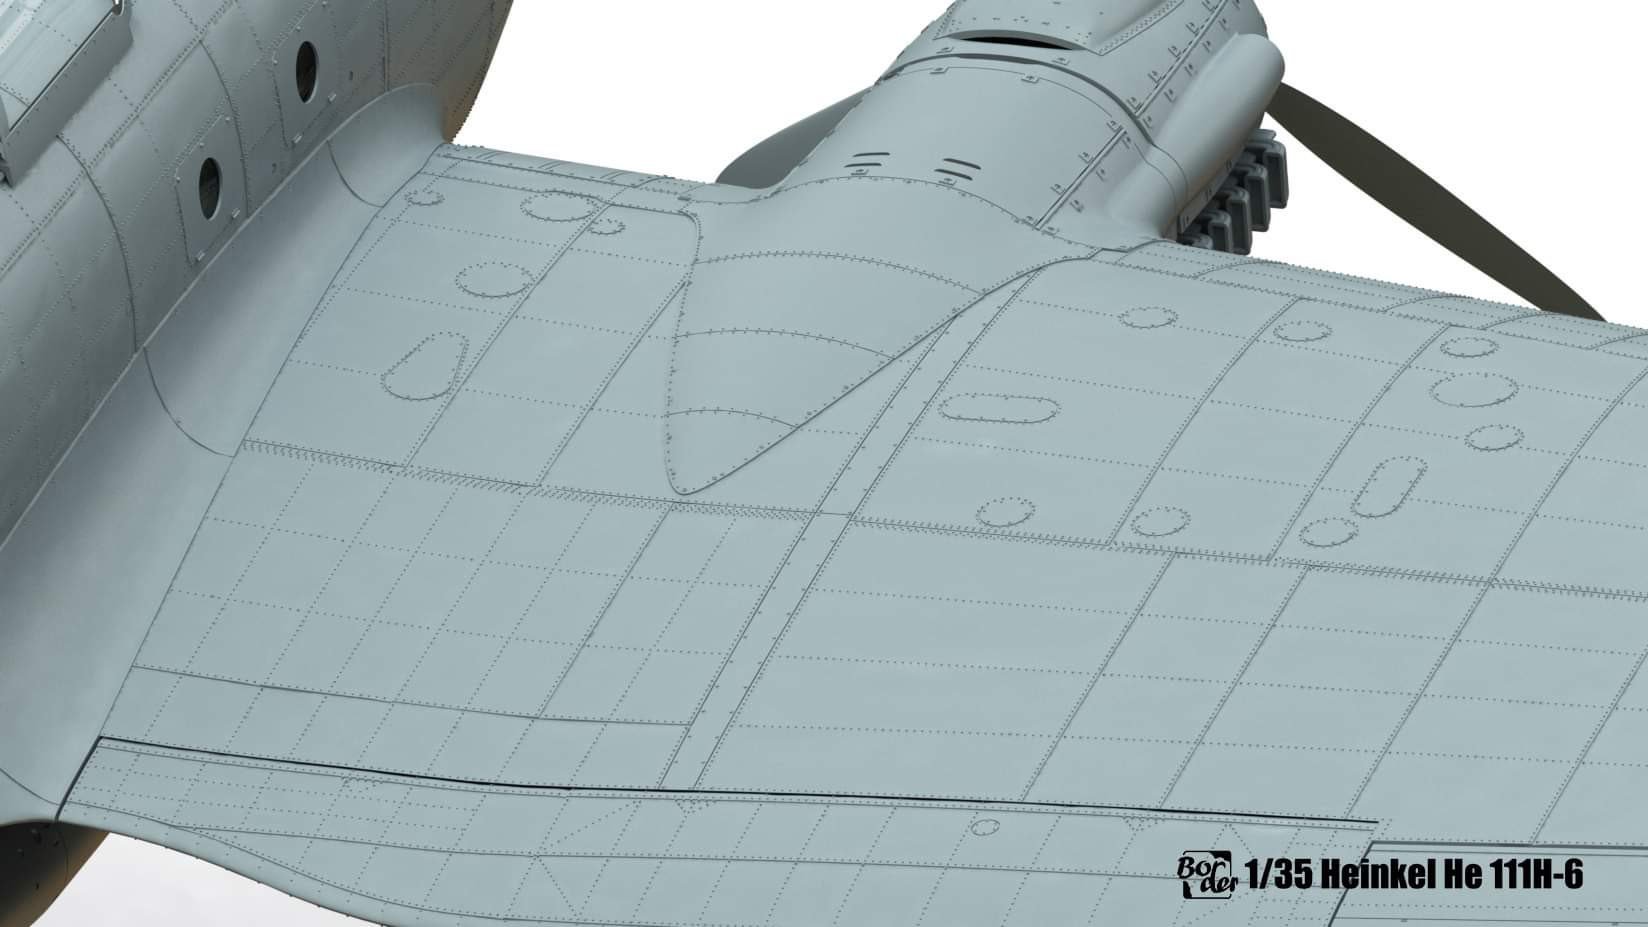
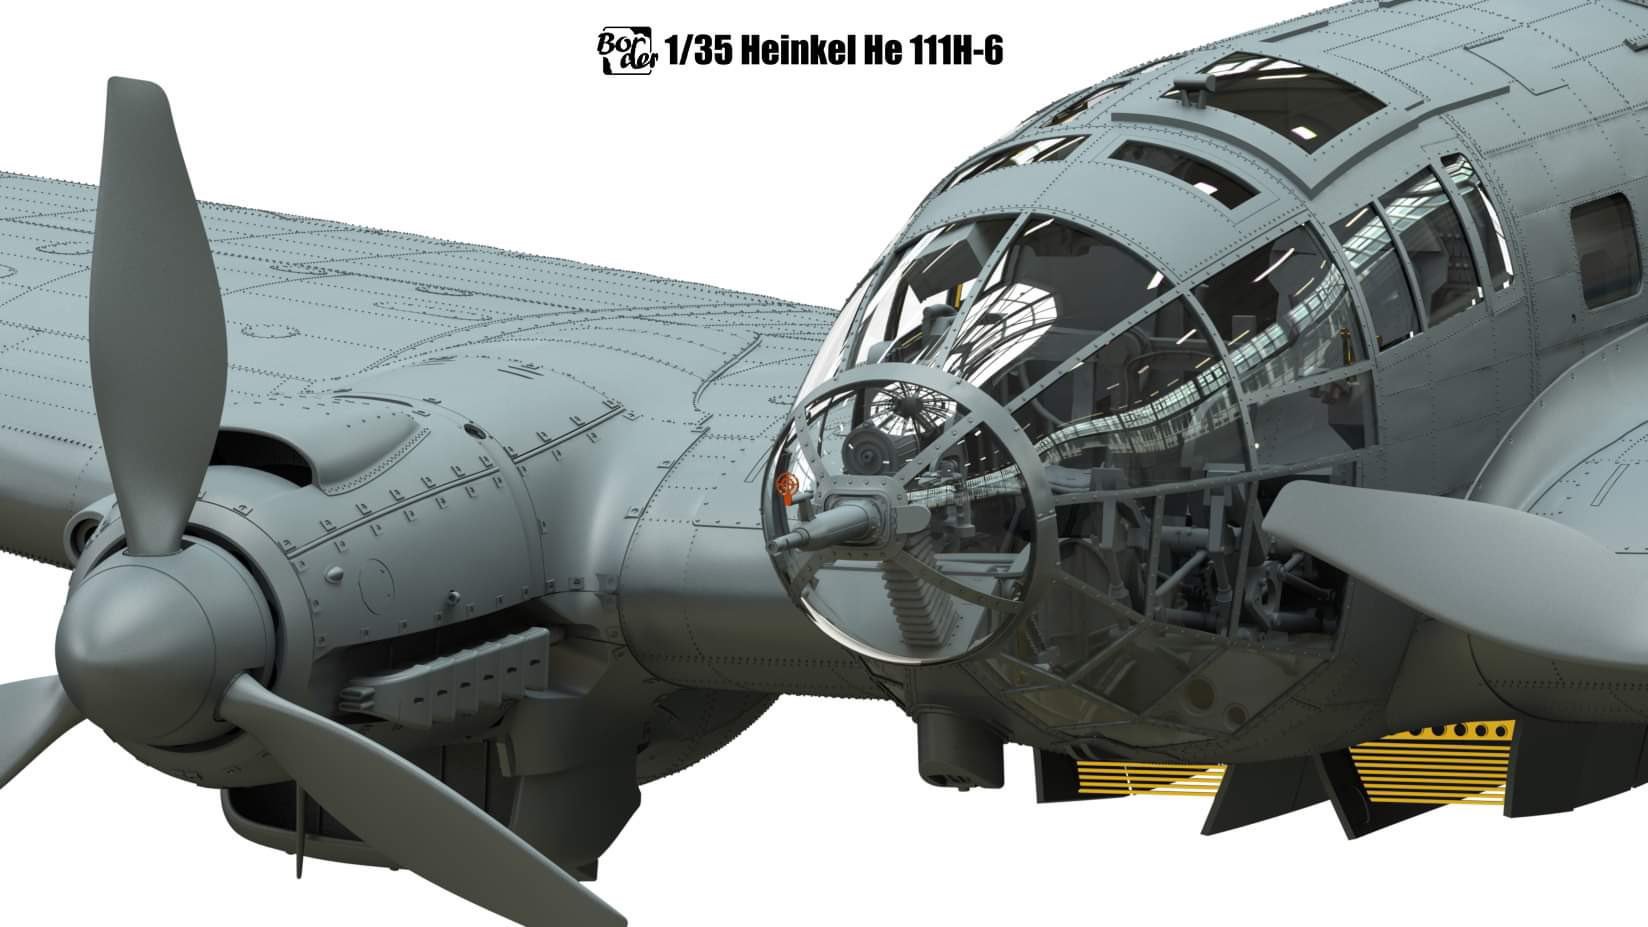
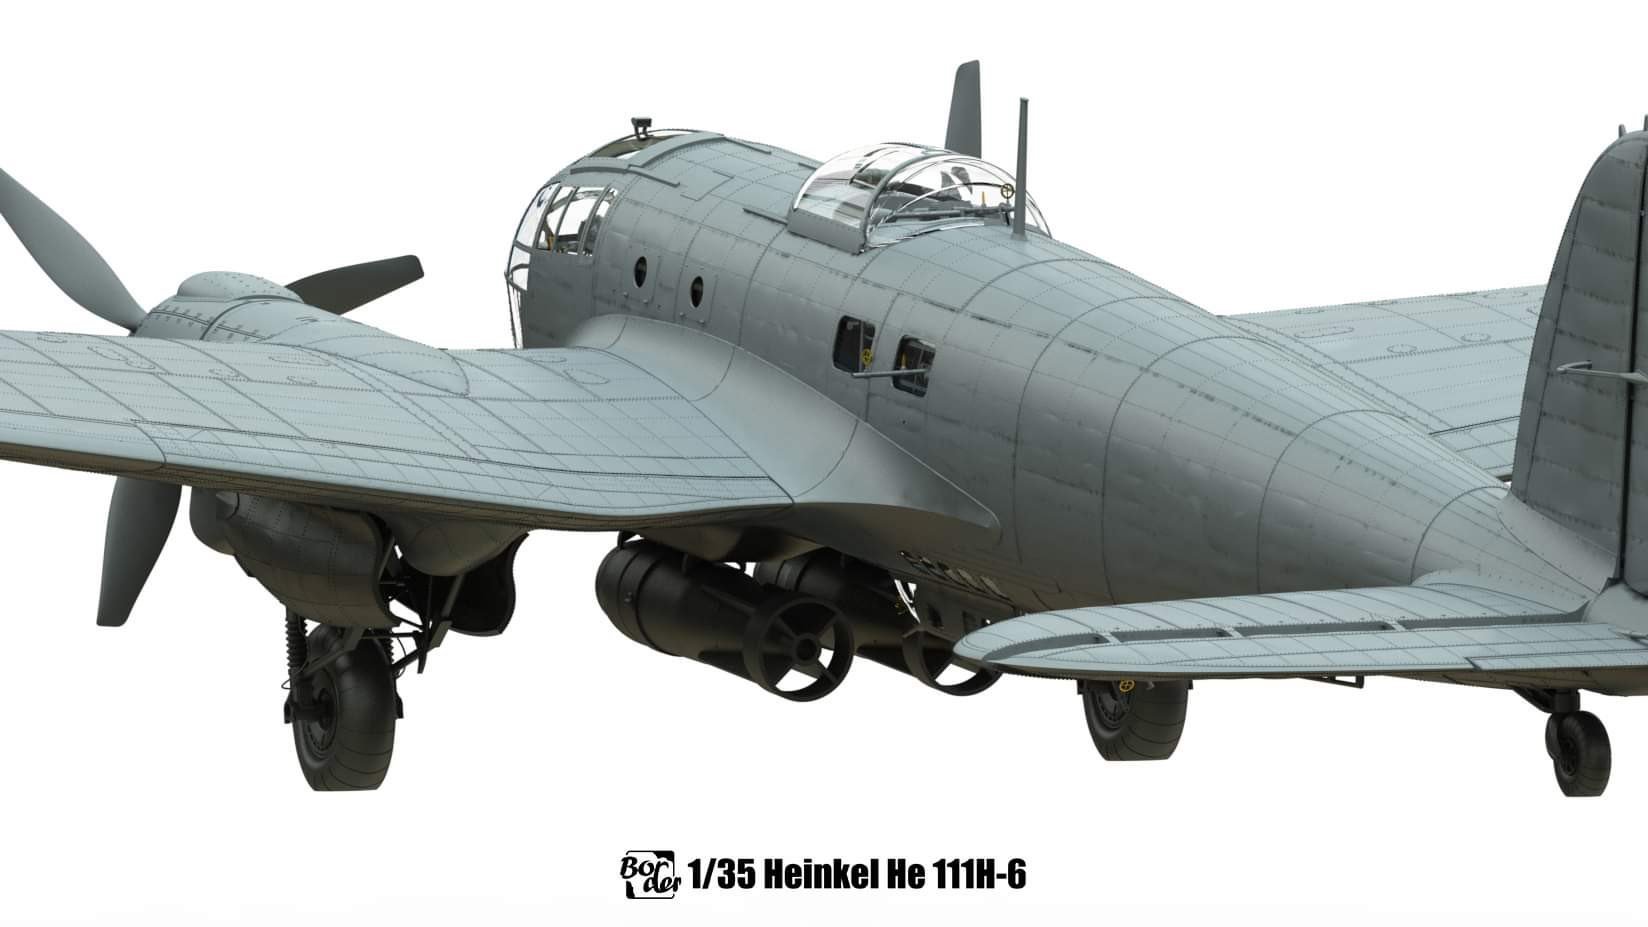
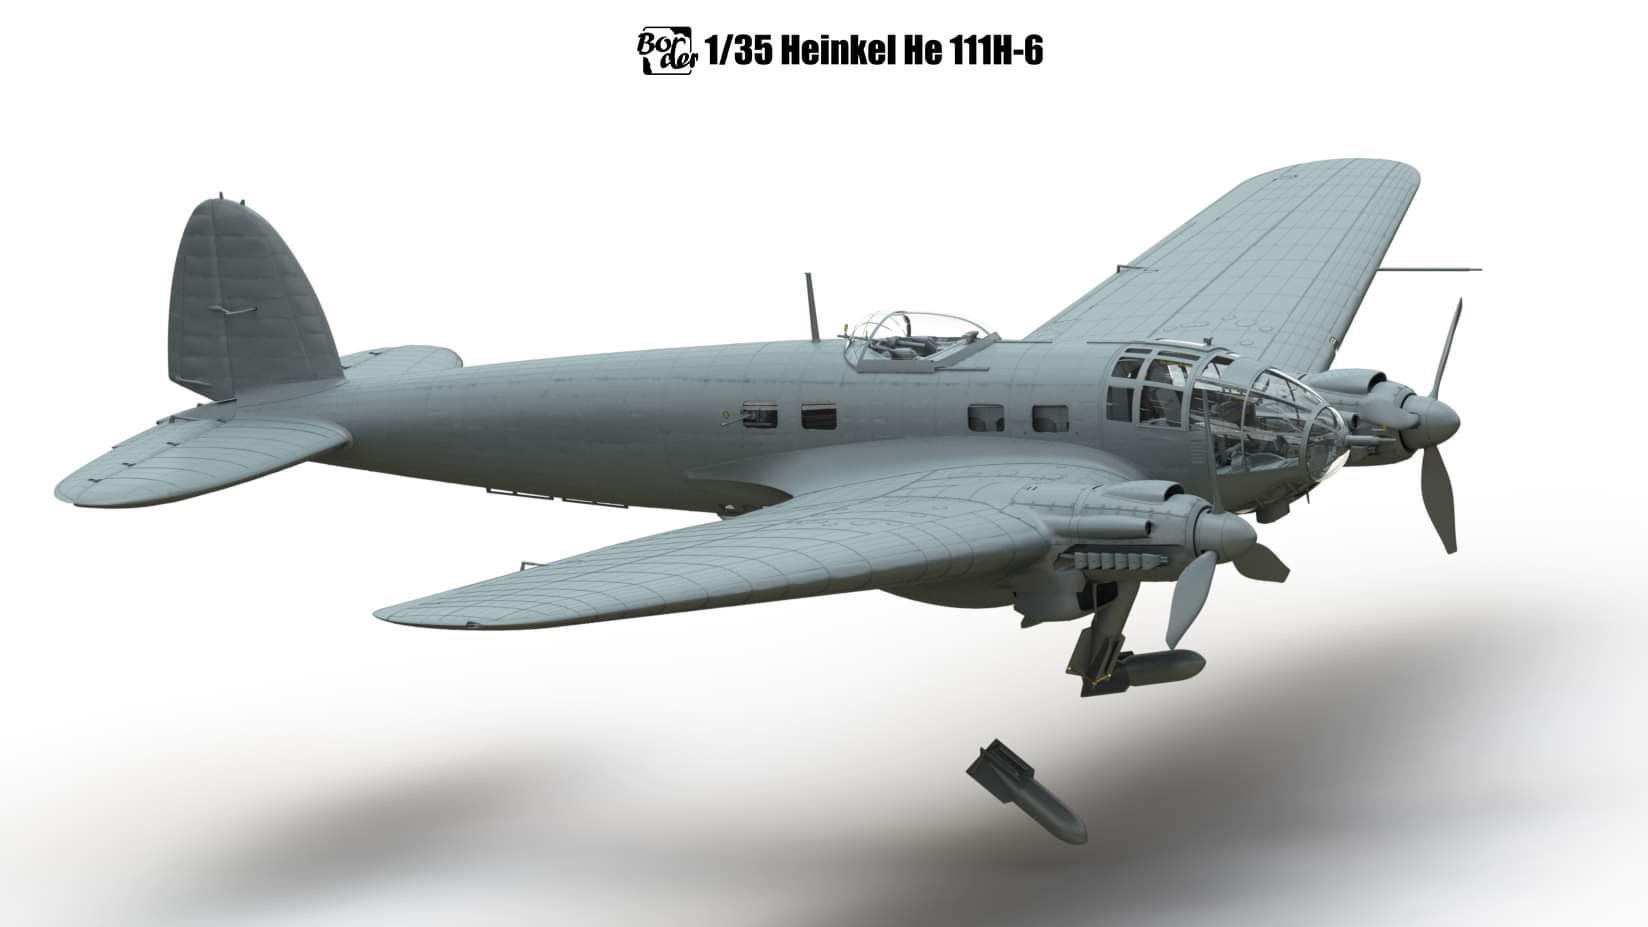
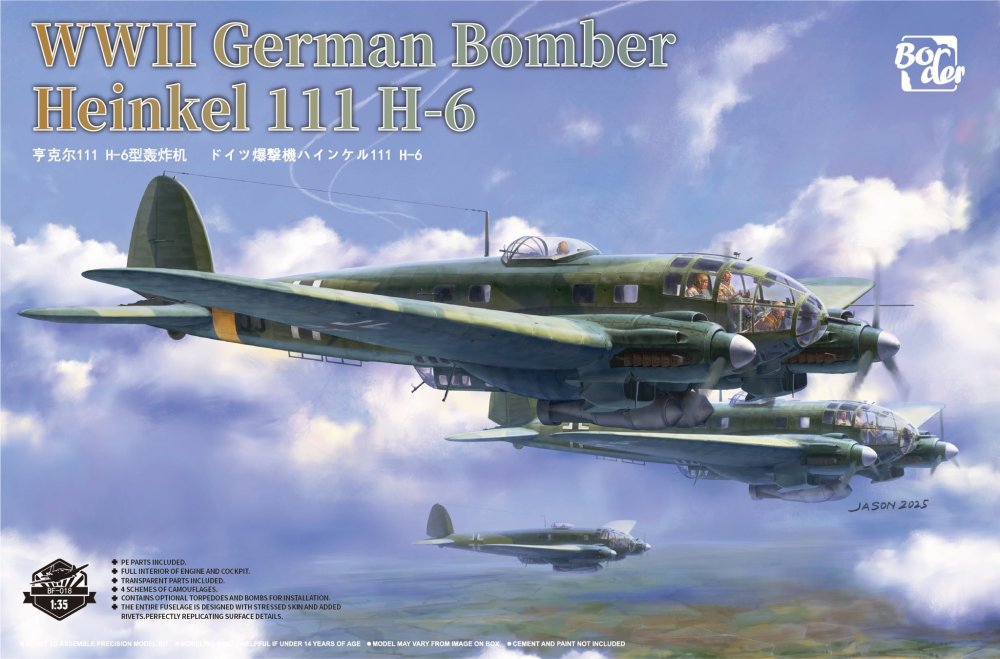
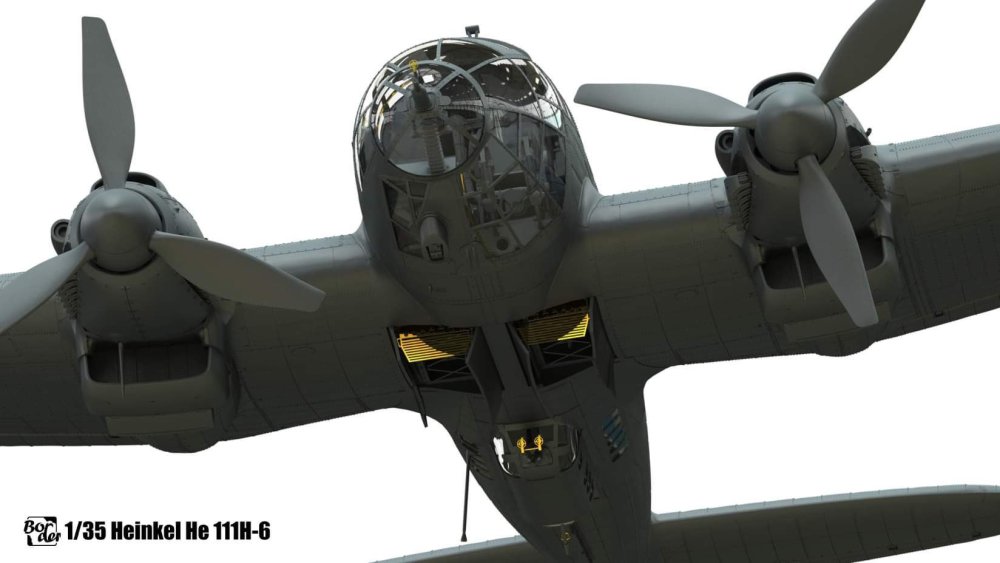
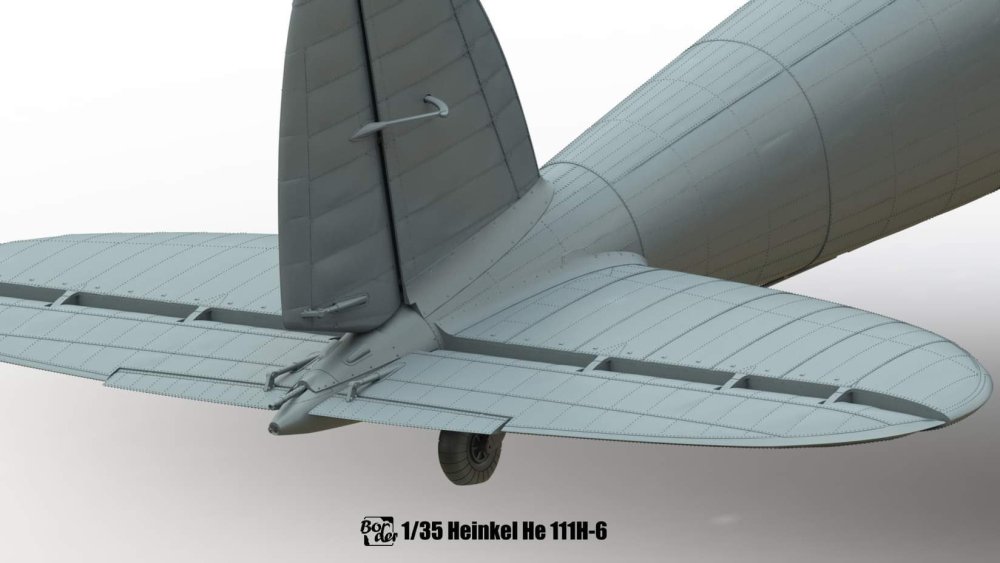
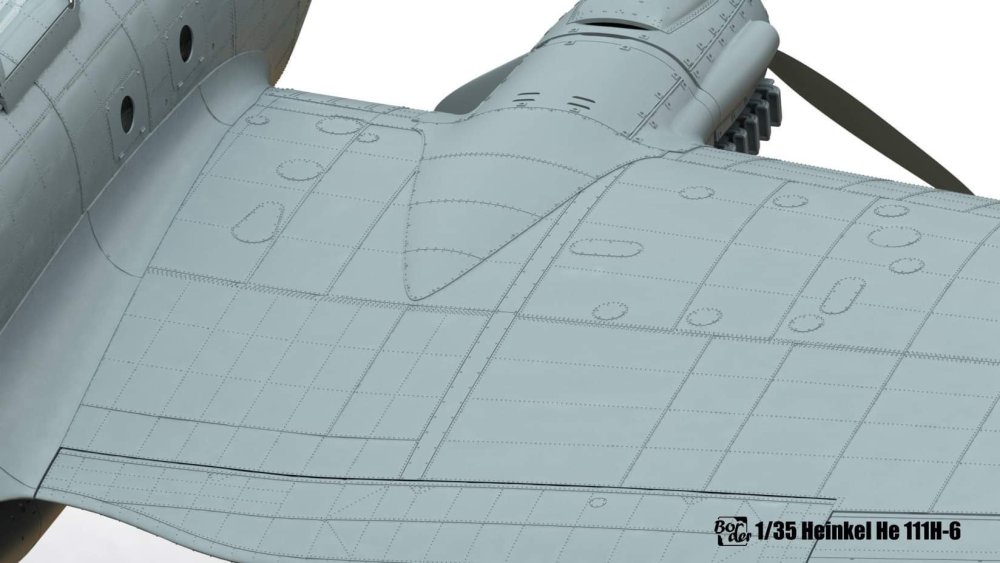
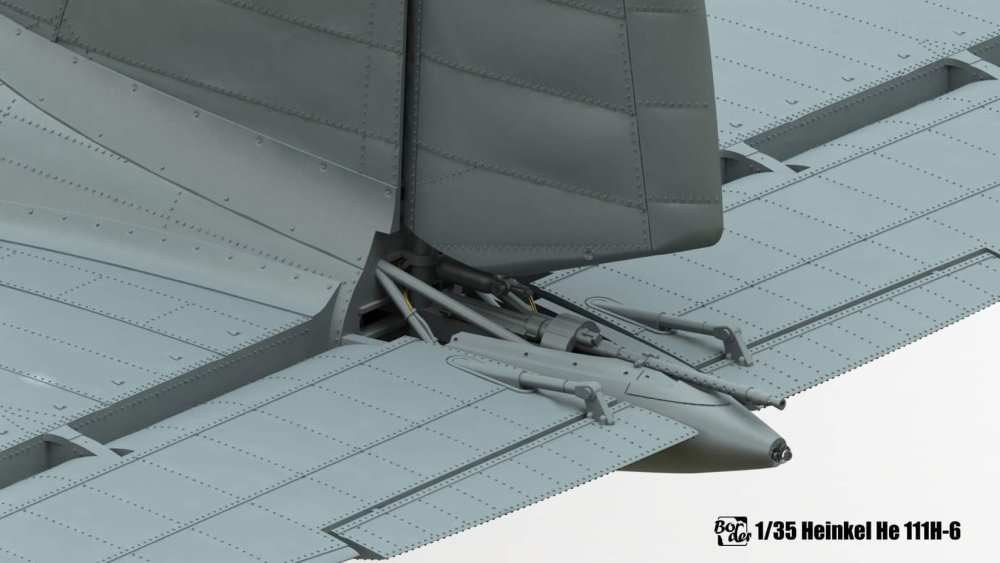
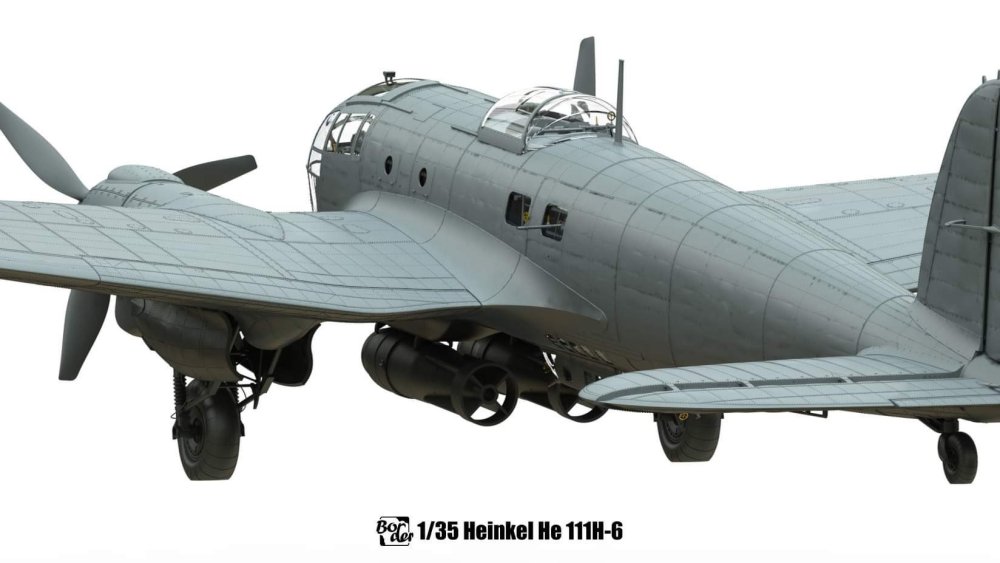
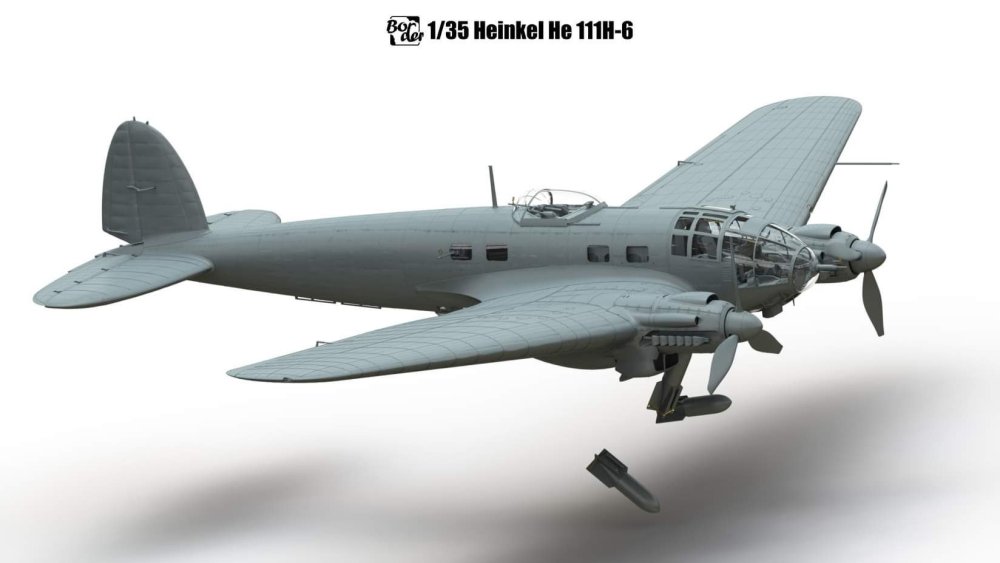
Well, box art and some cad of the upcoming 1:35 He-111 from Border Models.

-
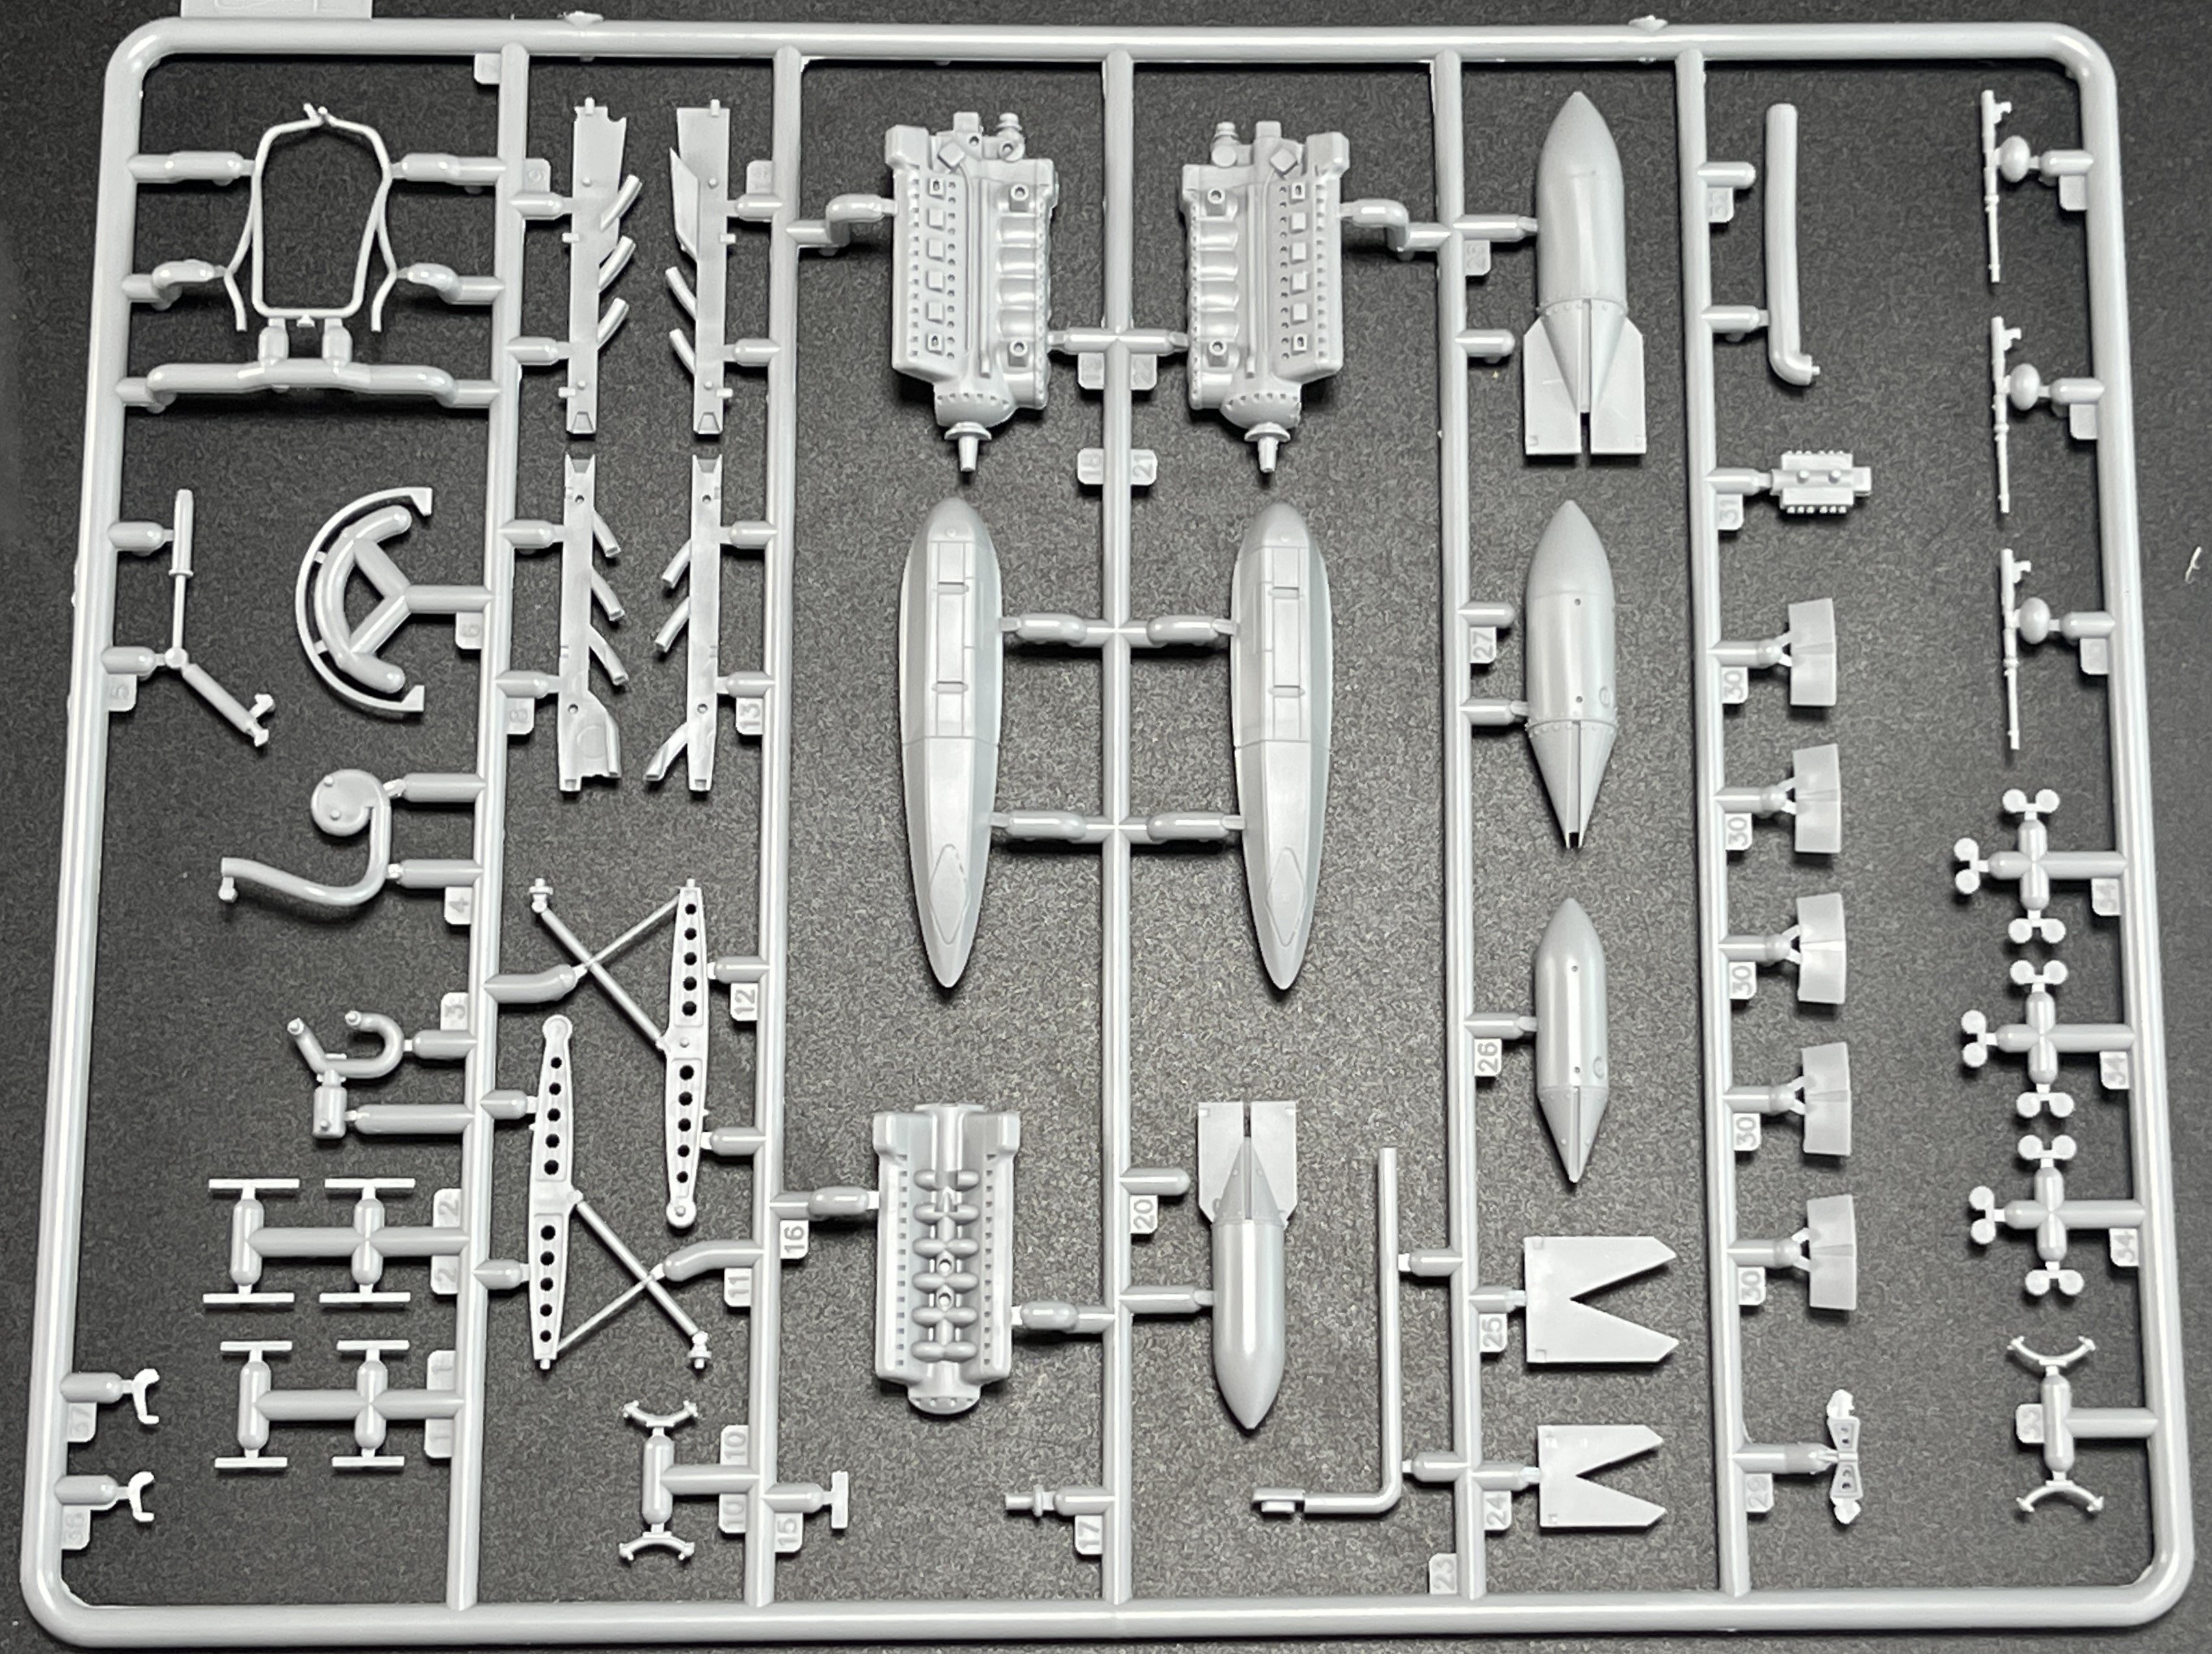
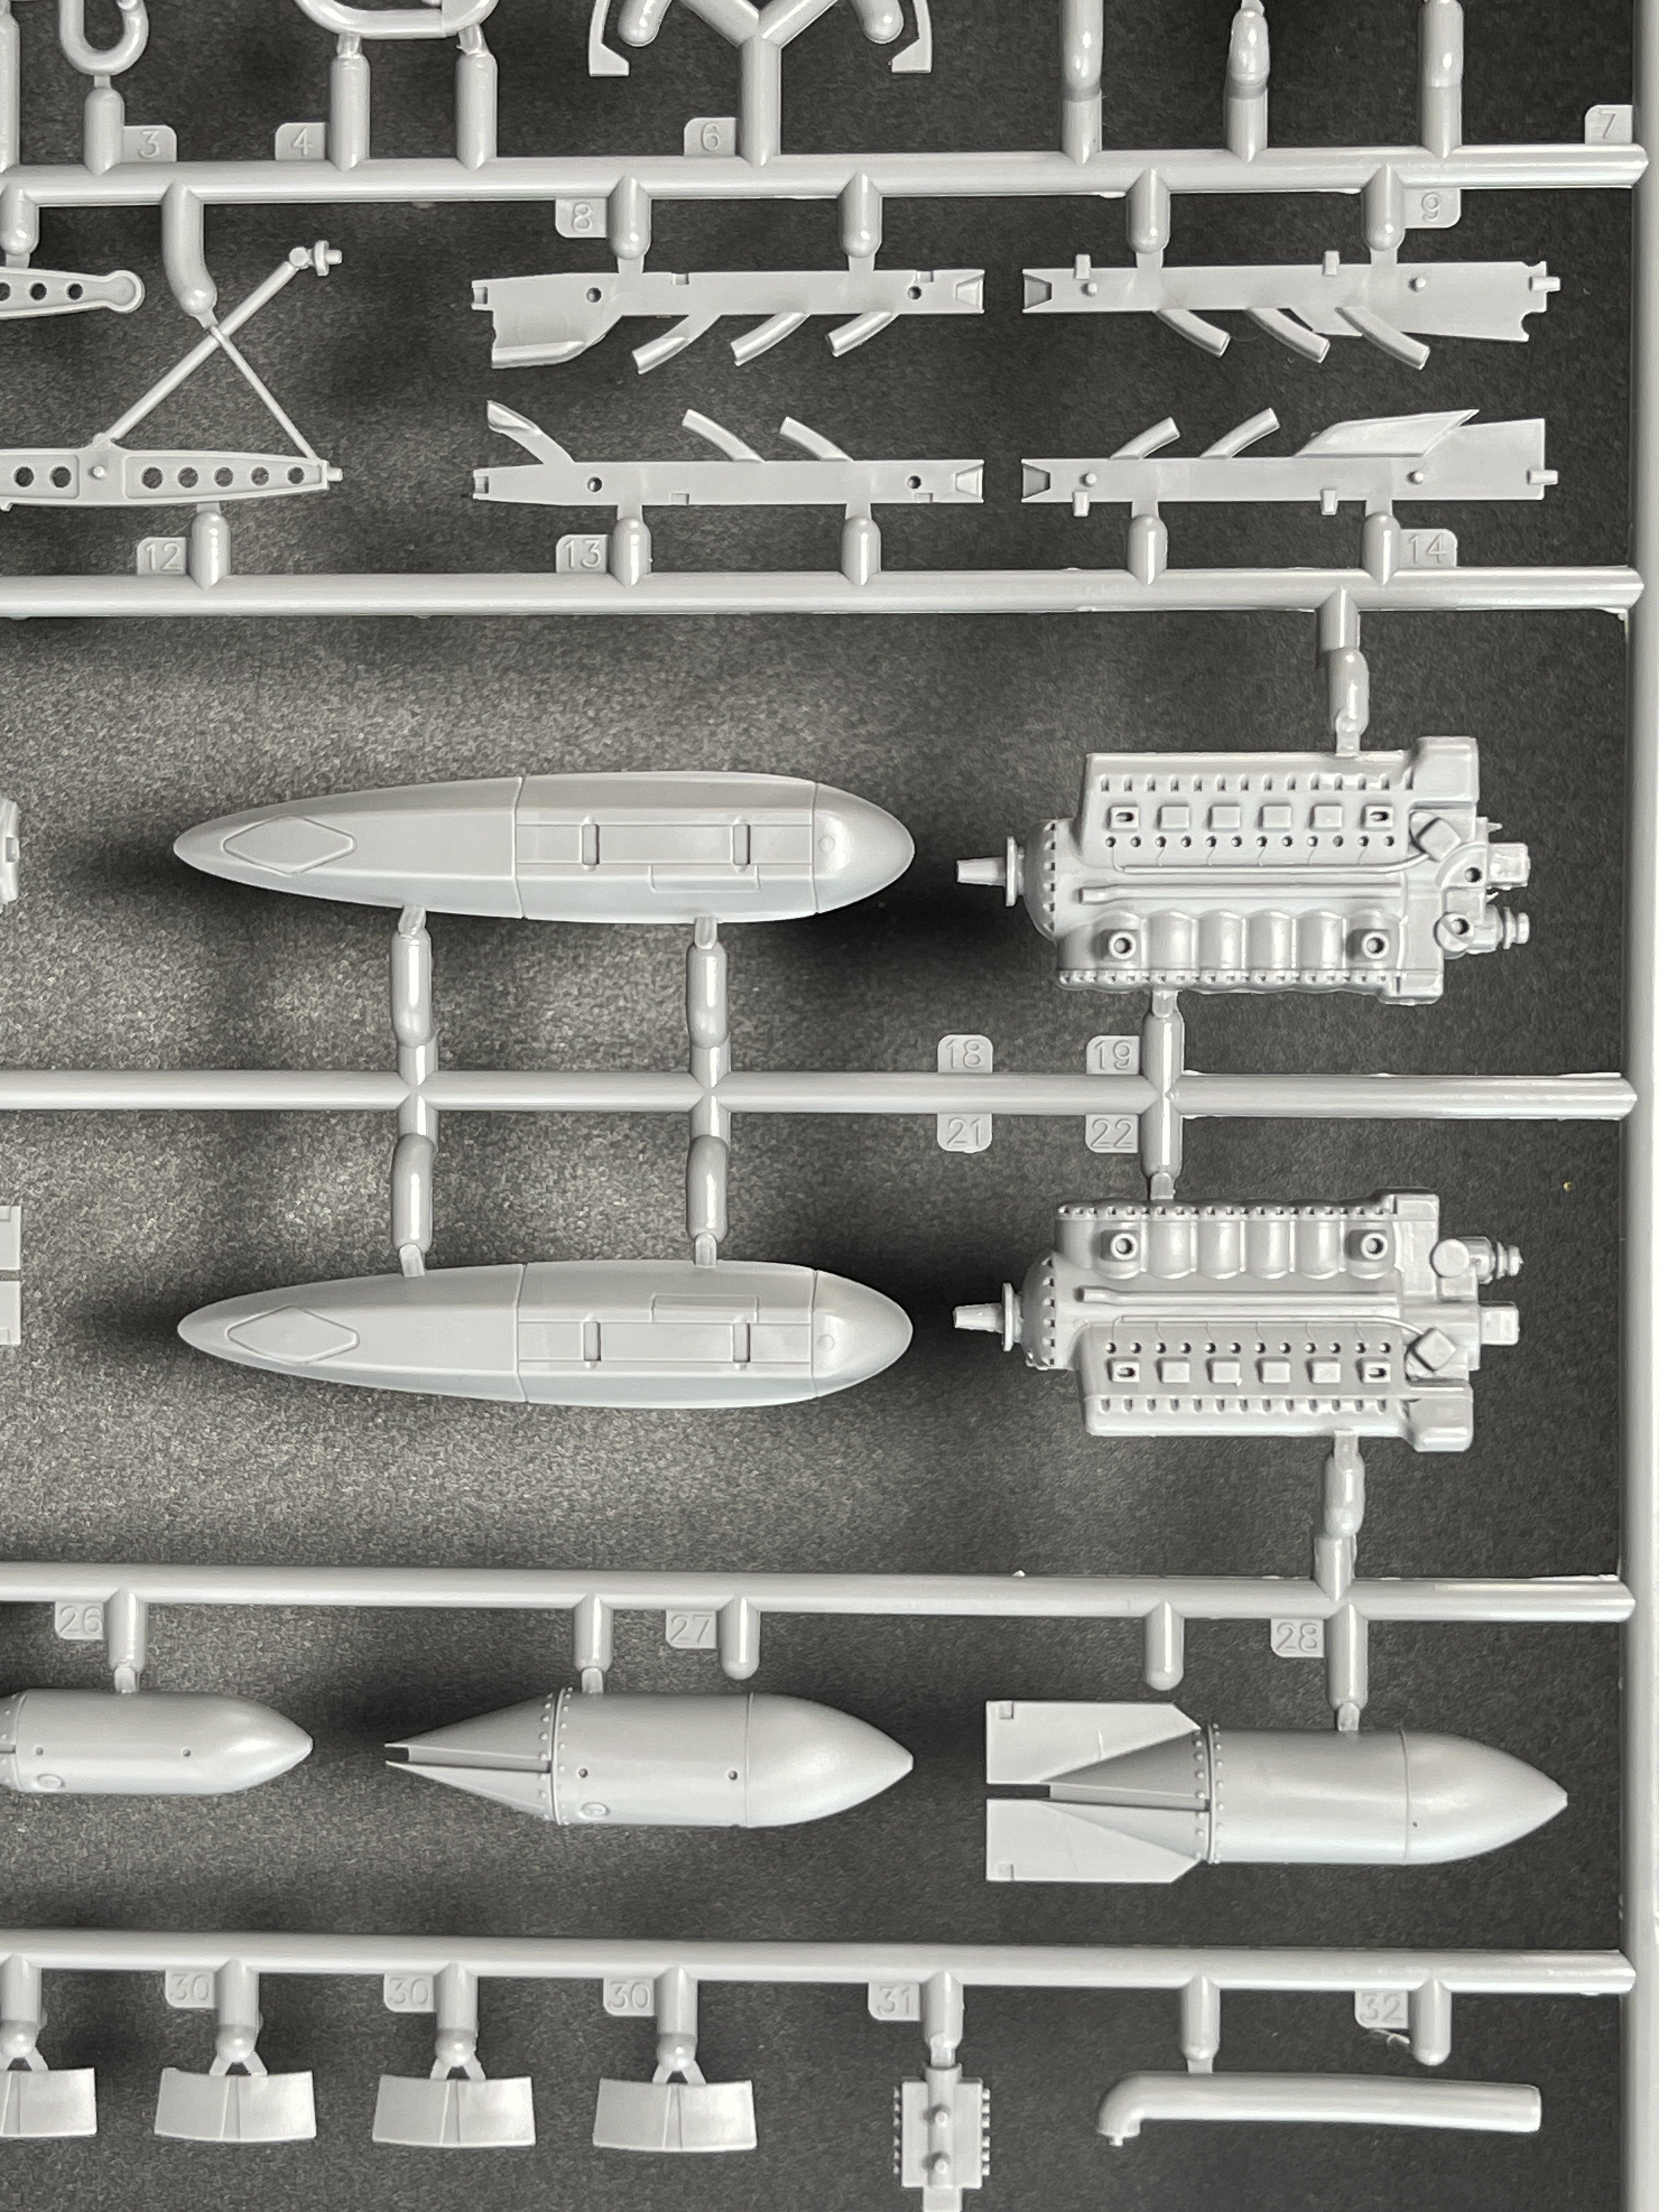
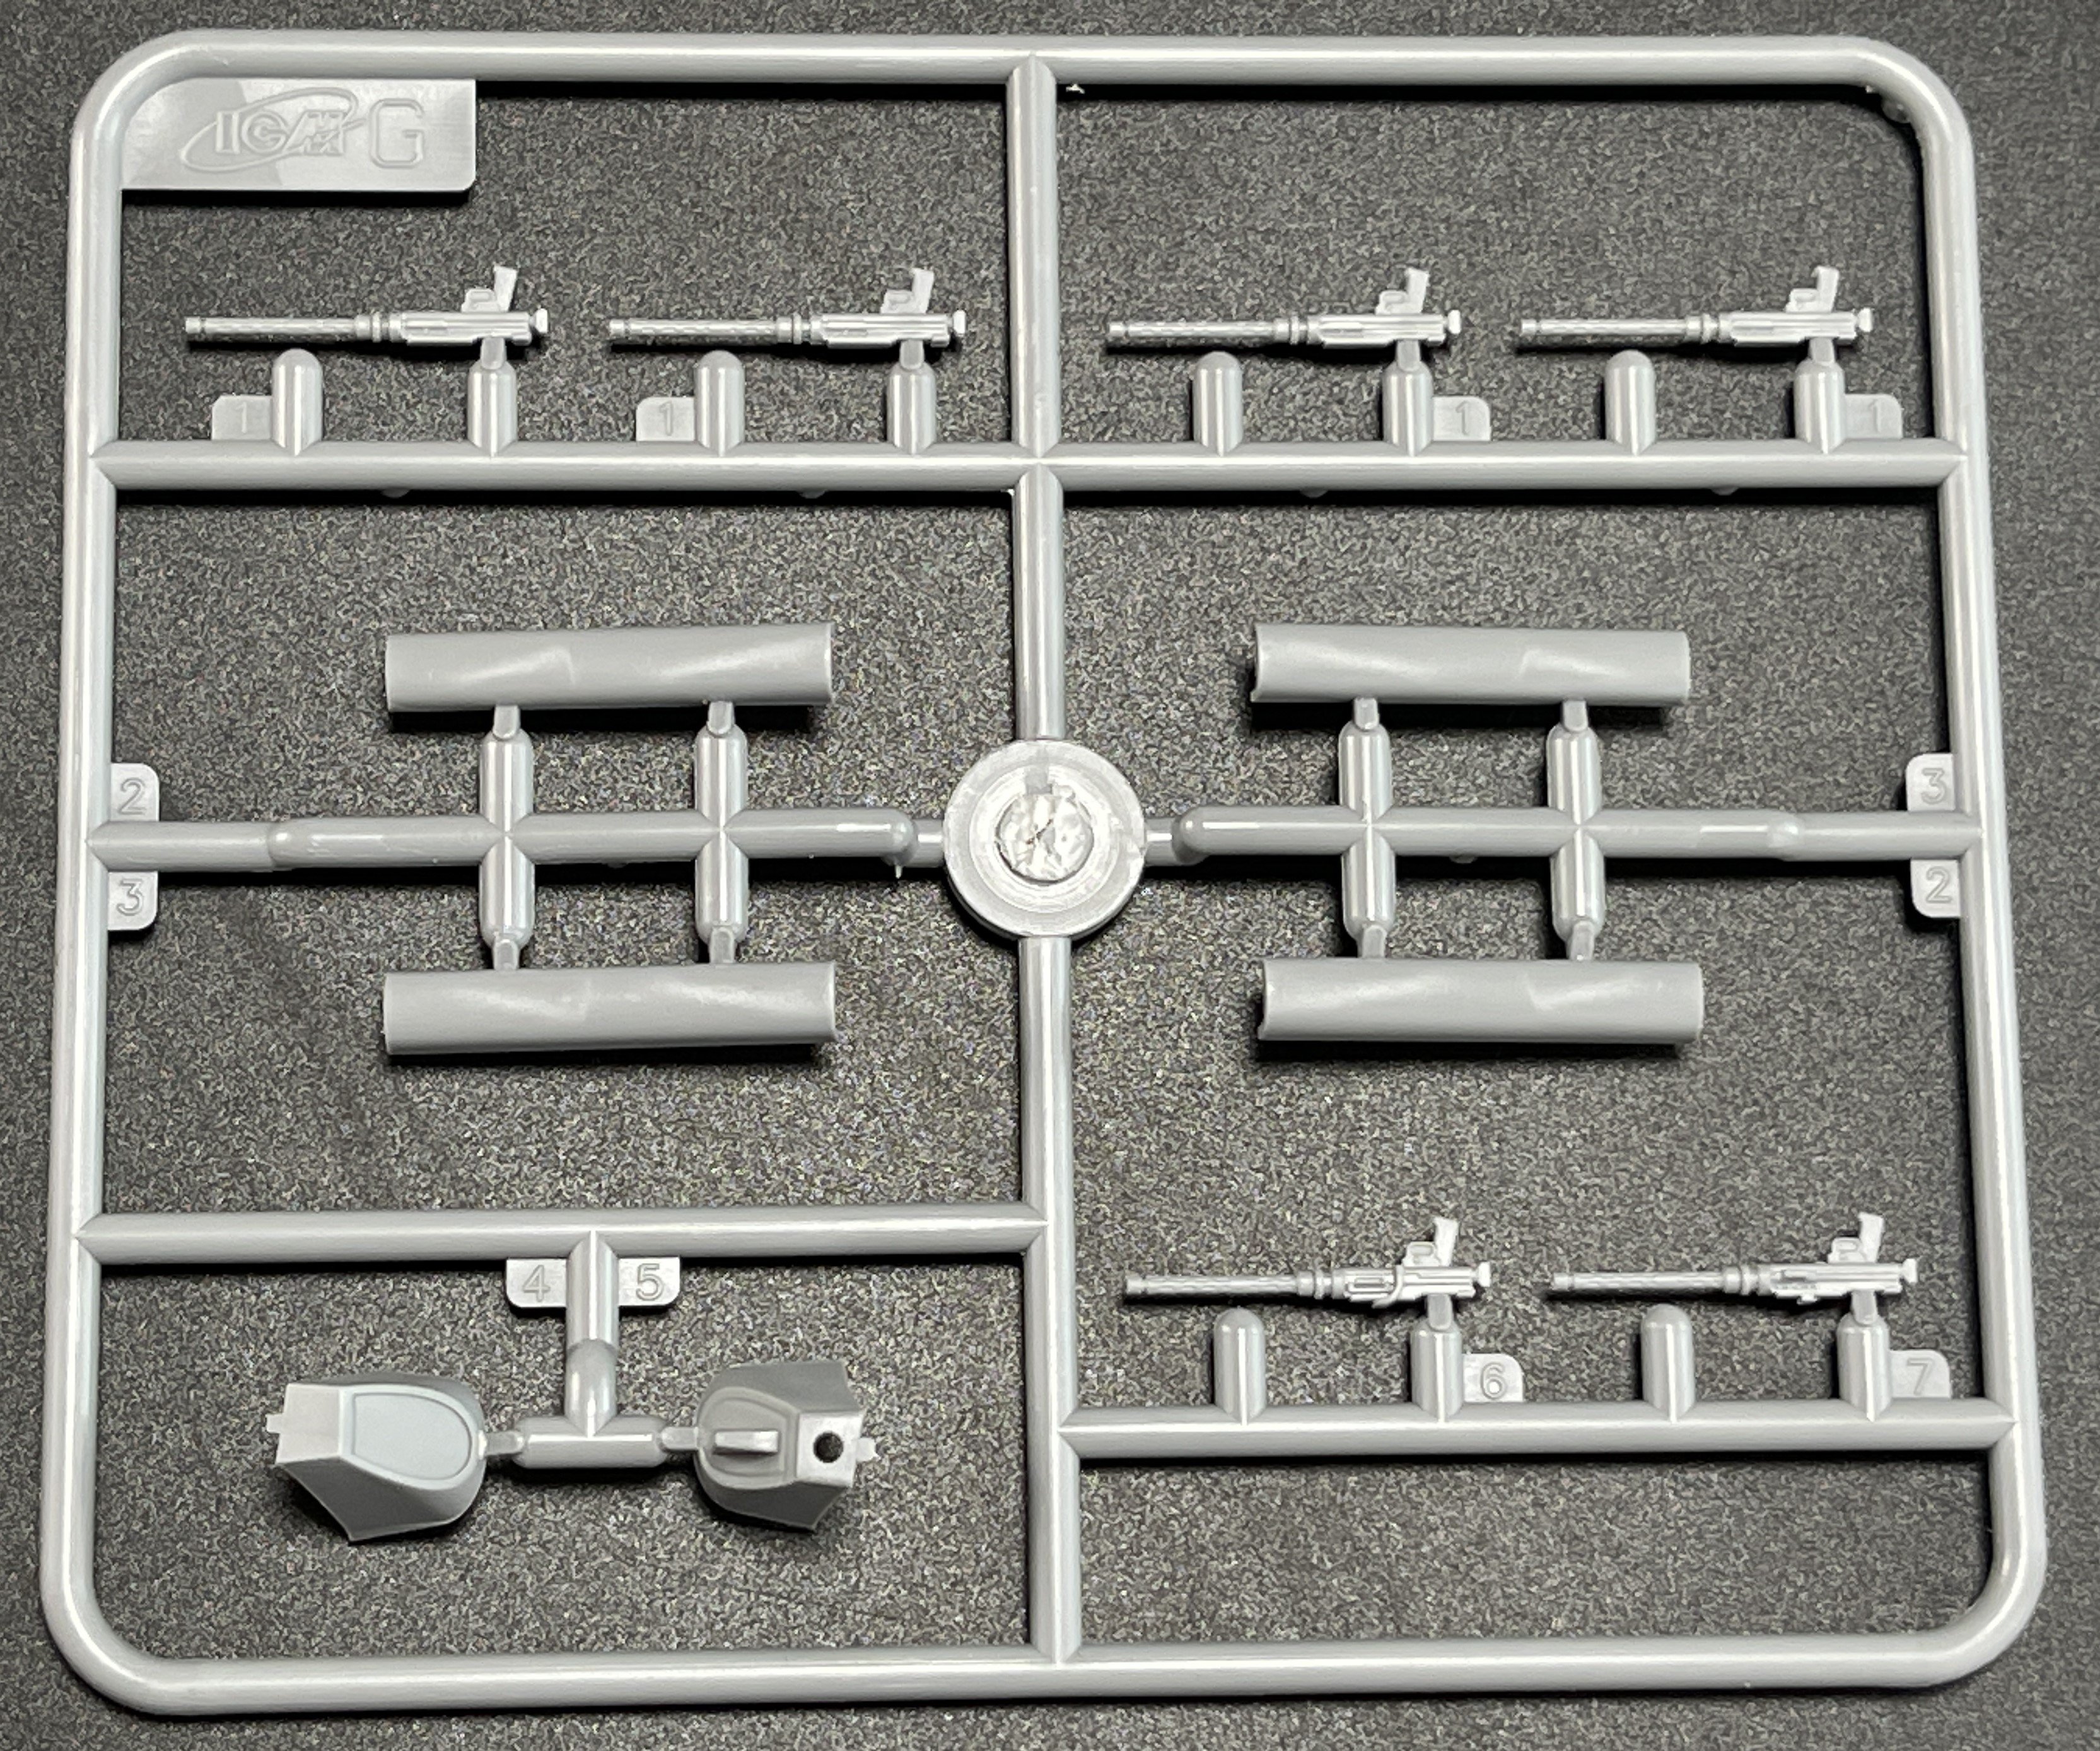
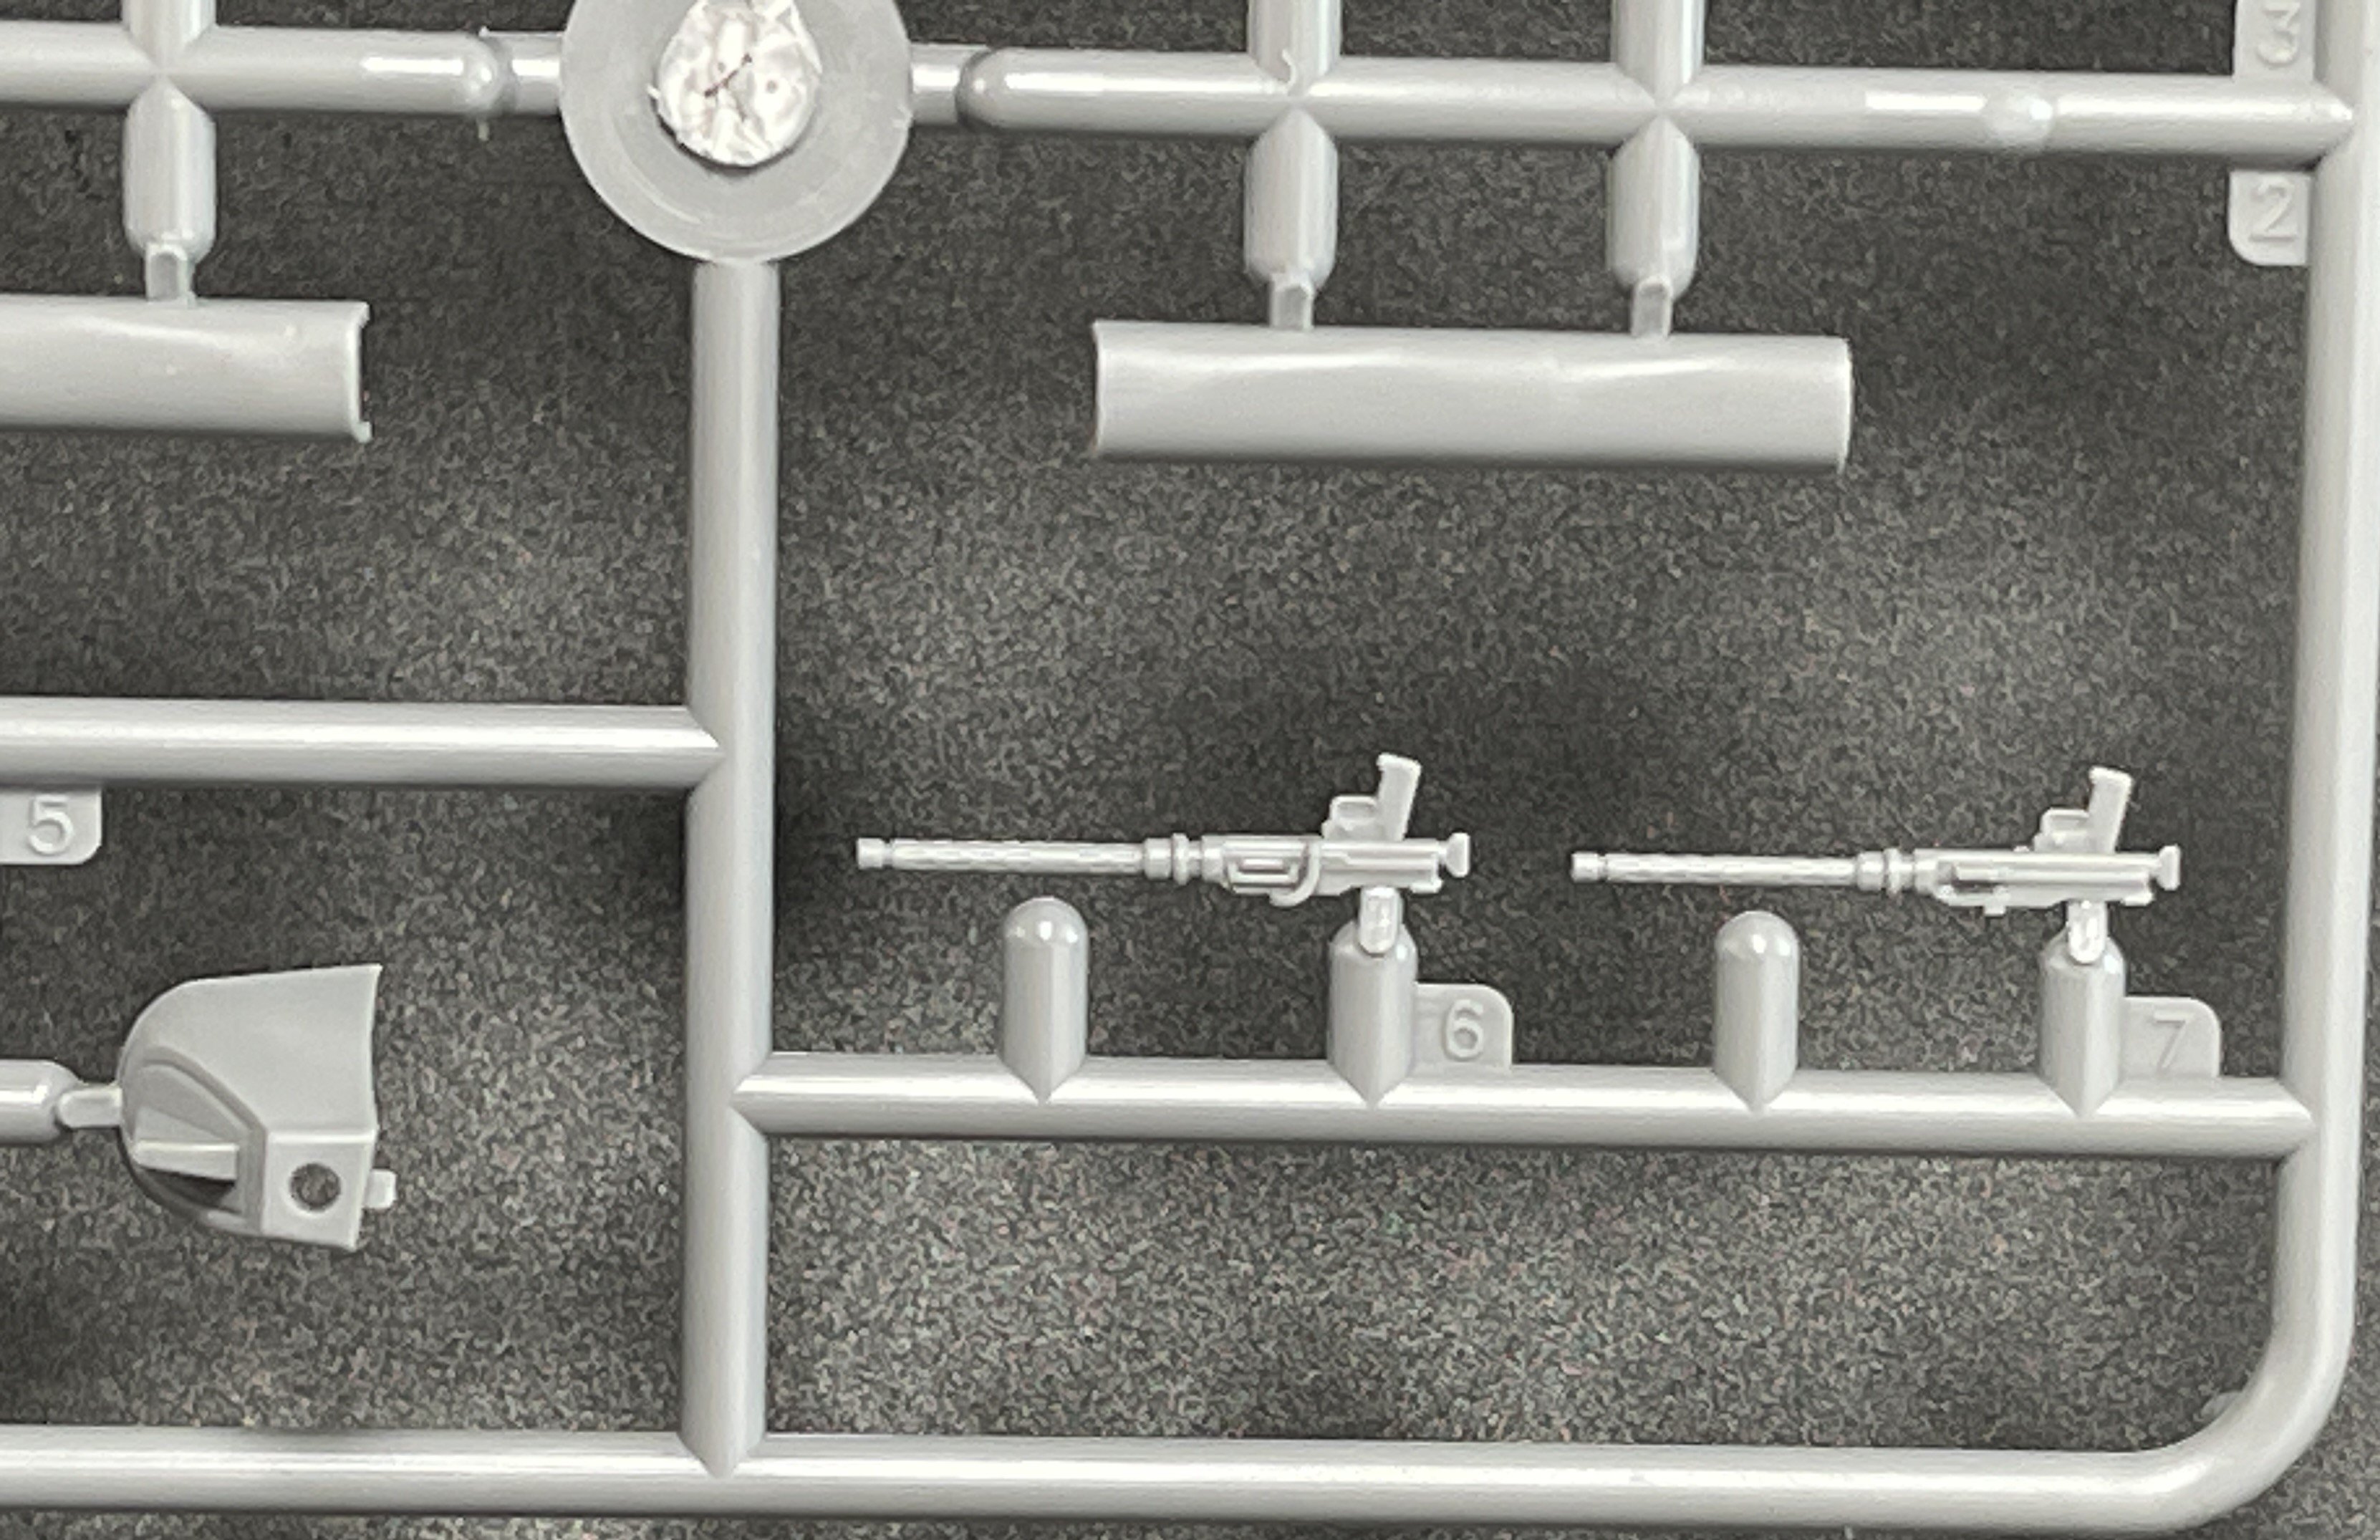
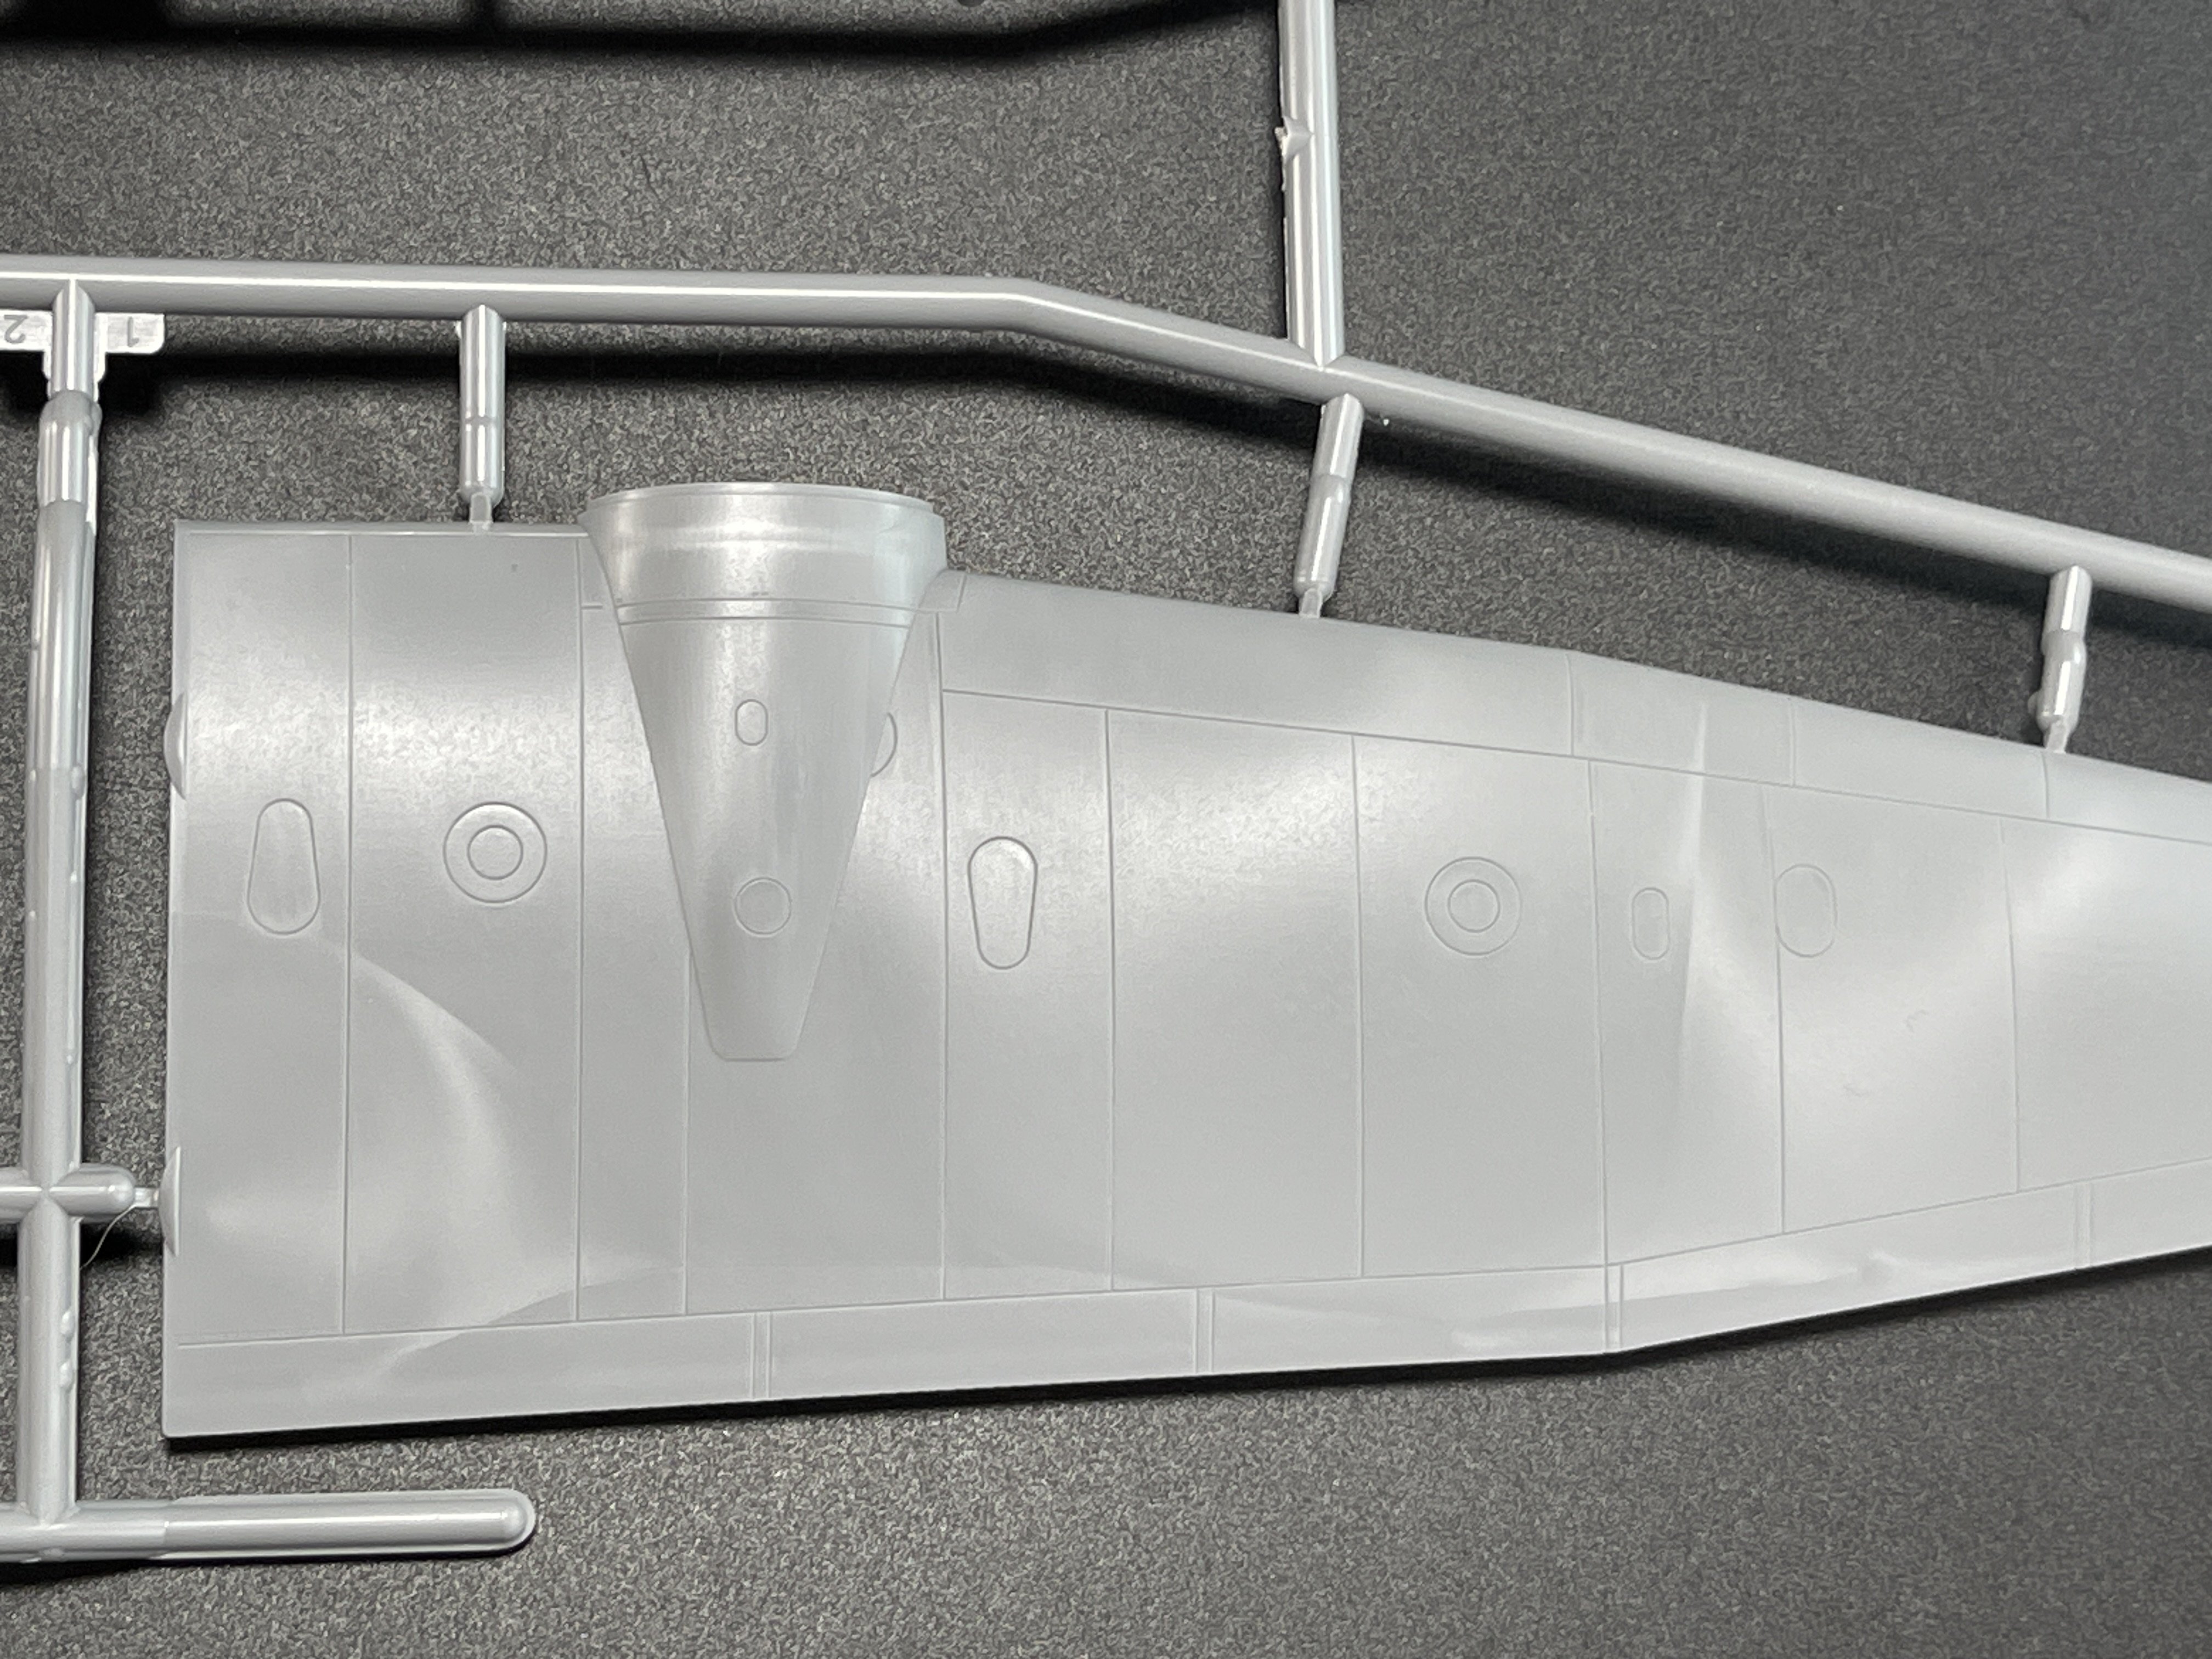
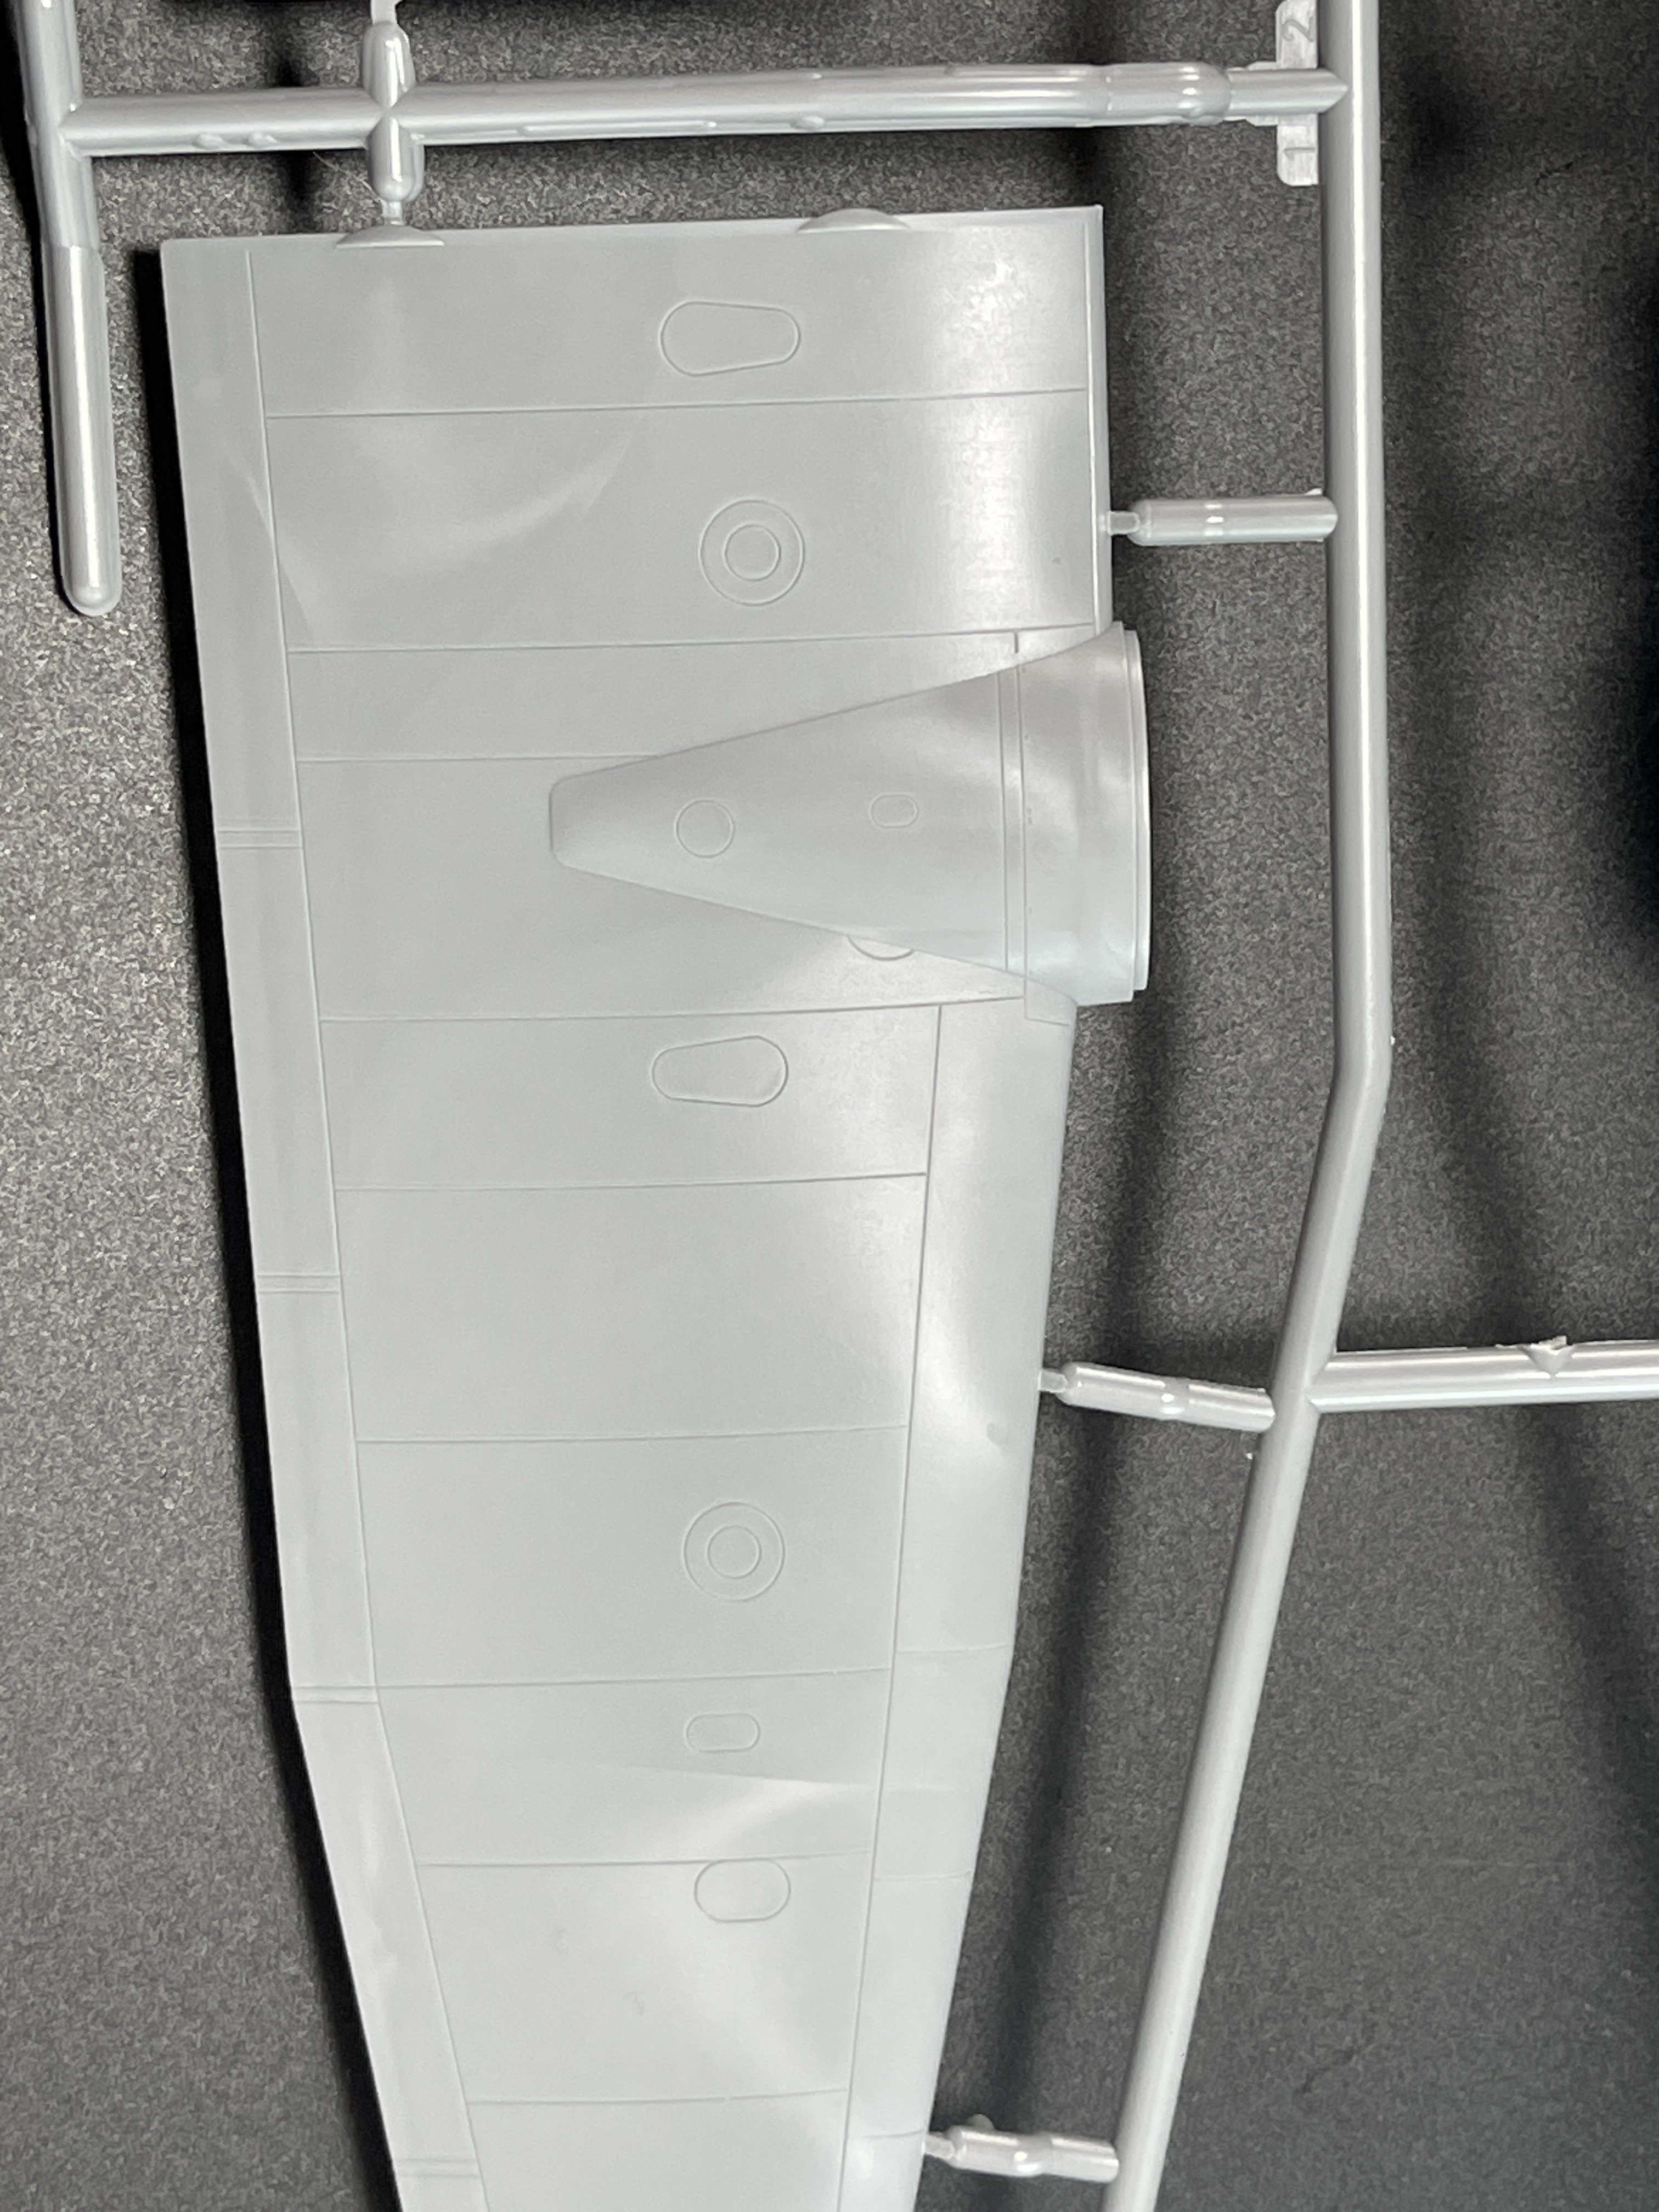
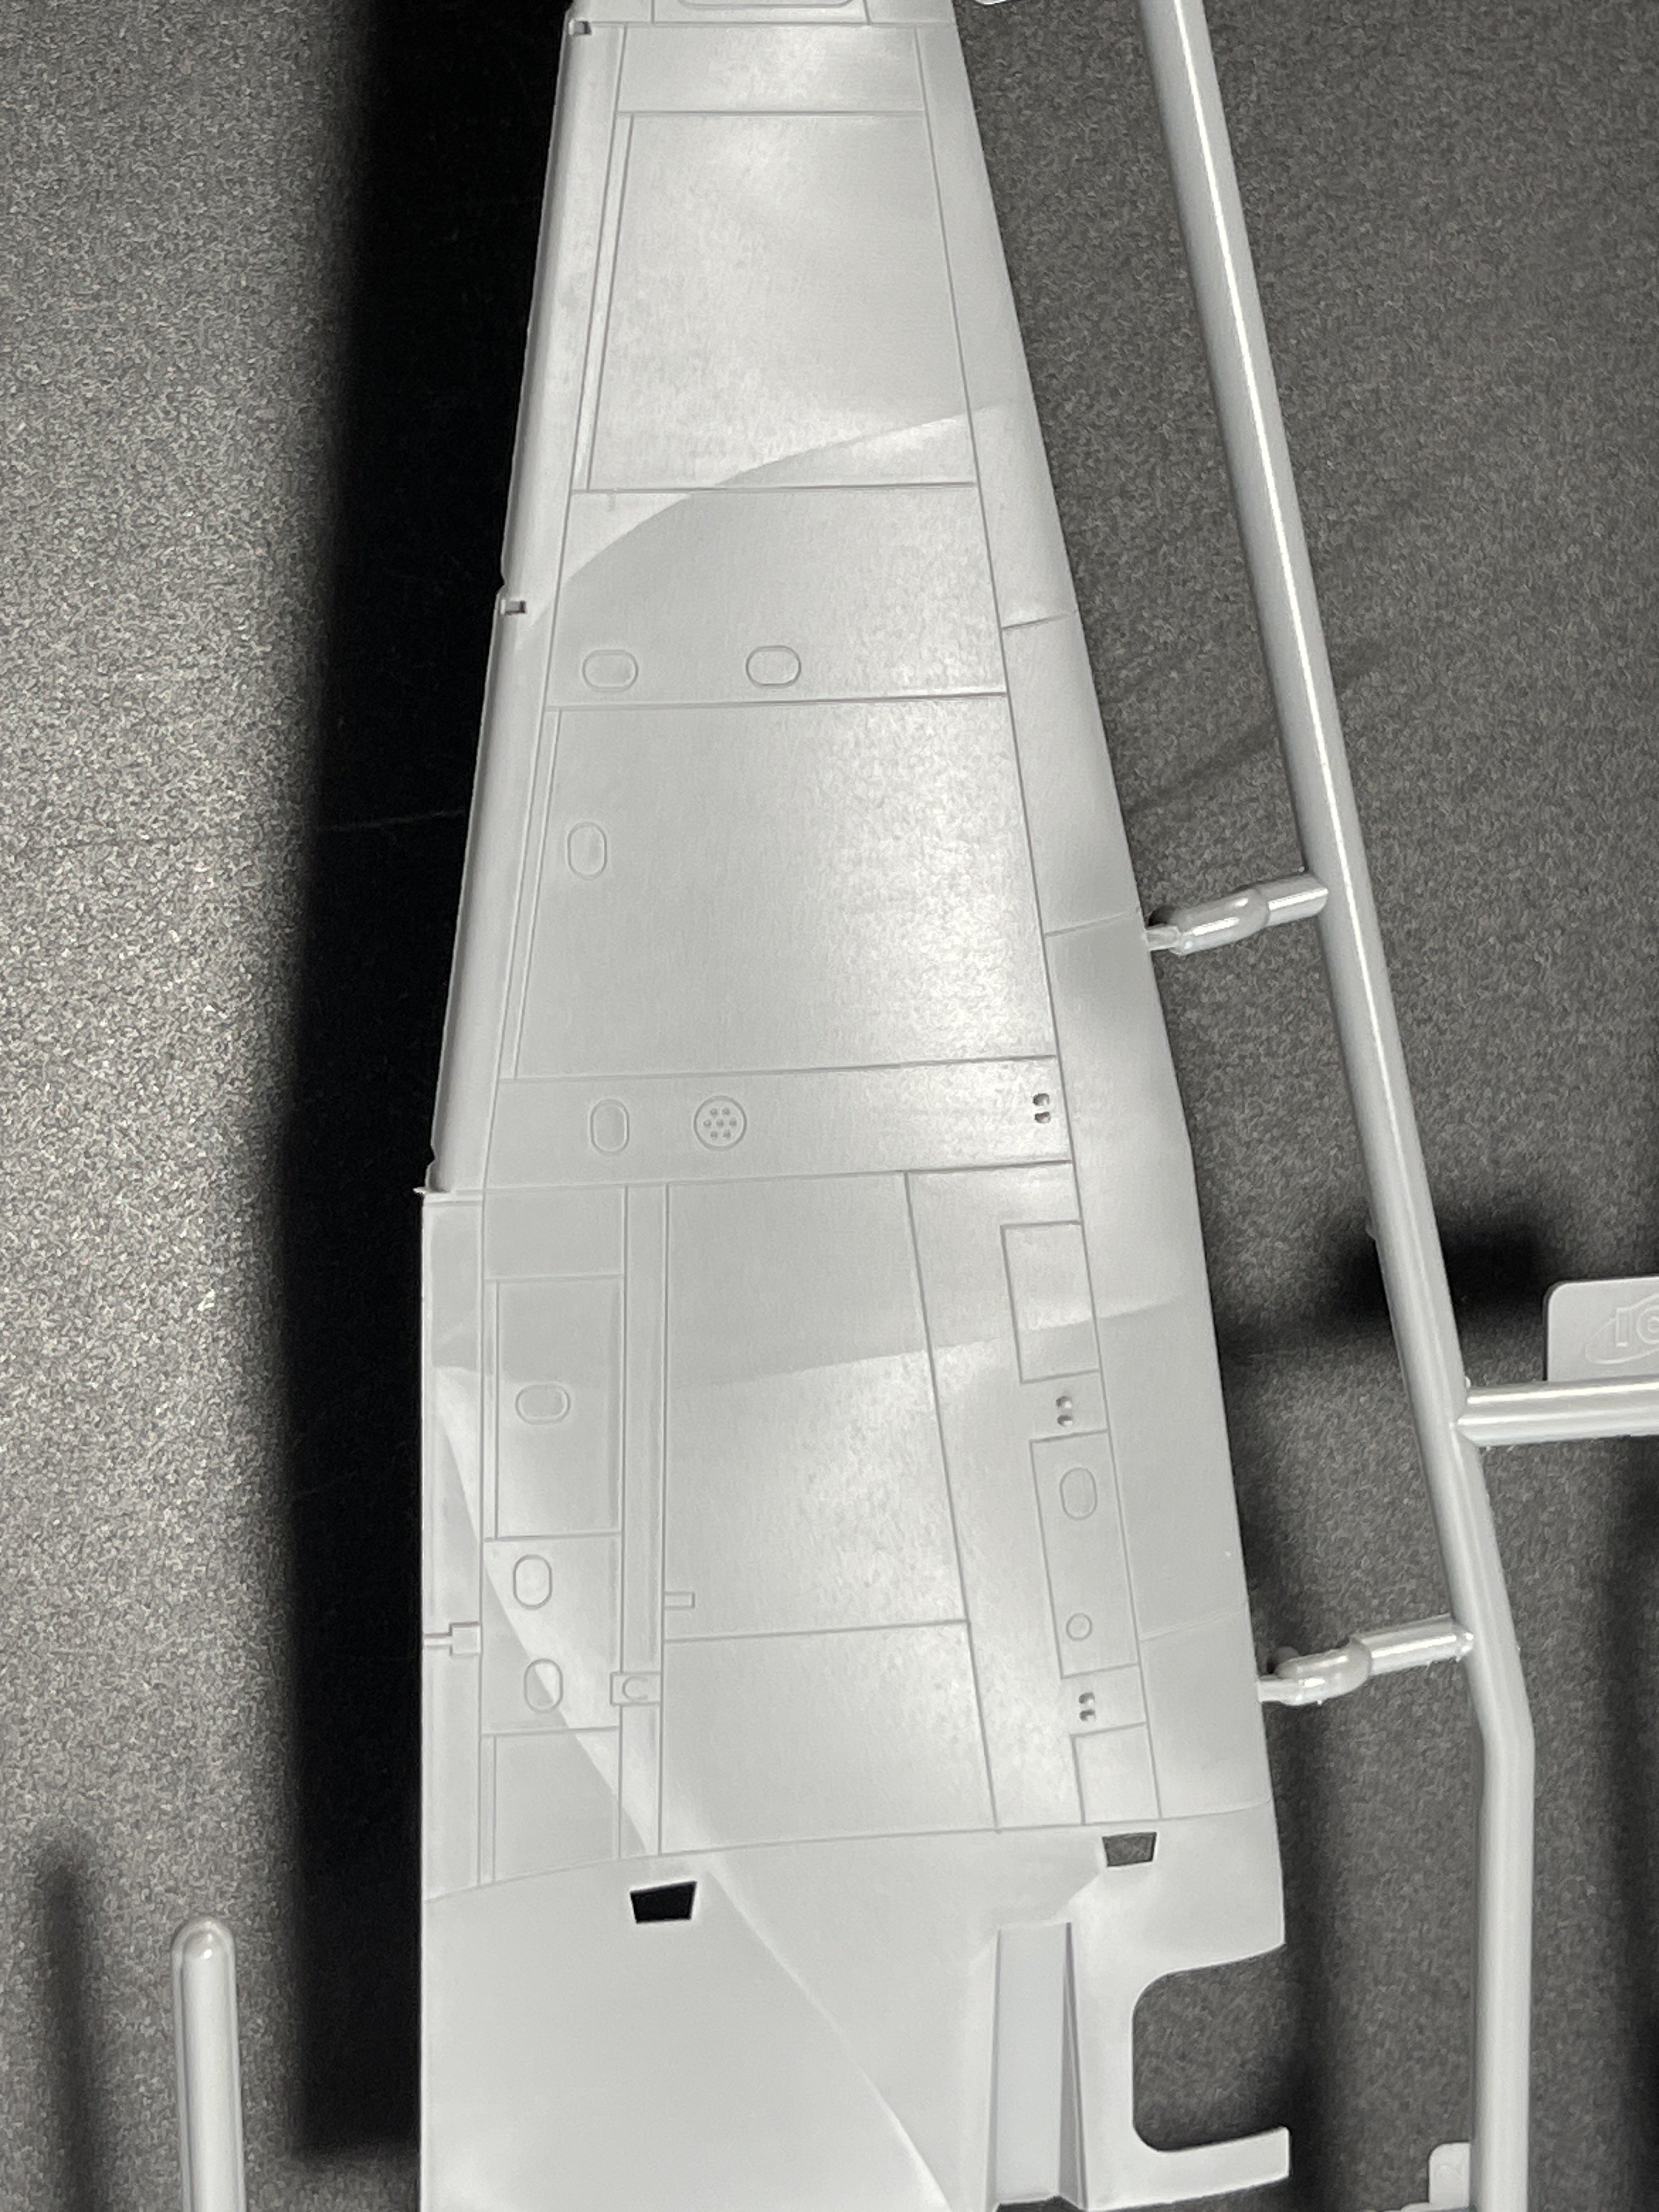
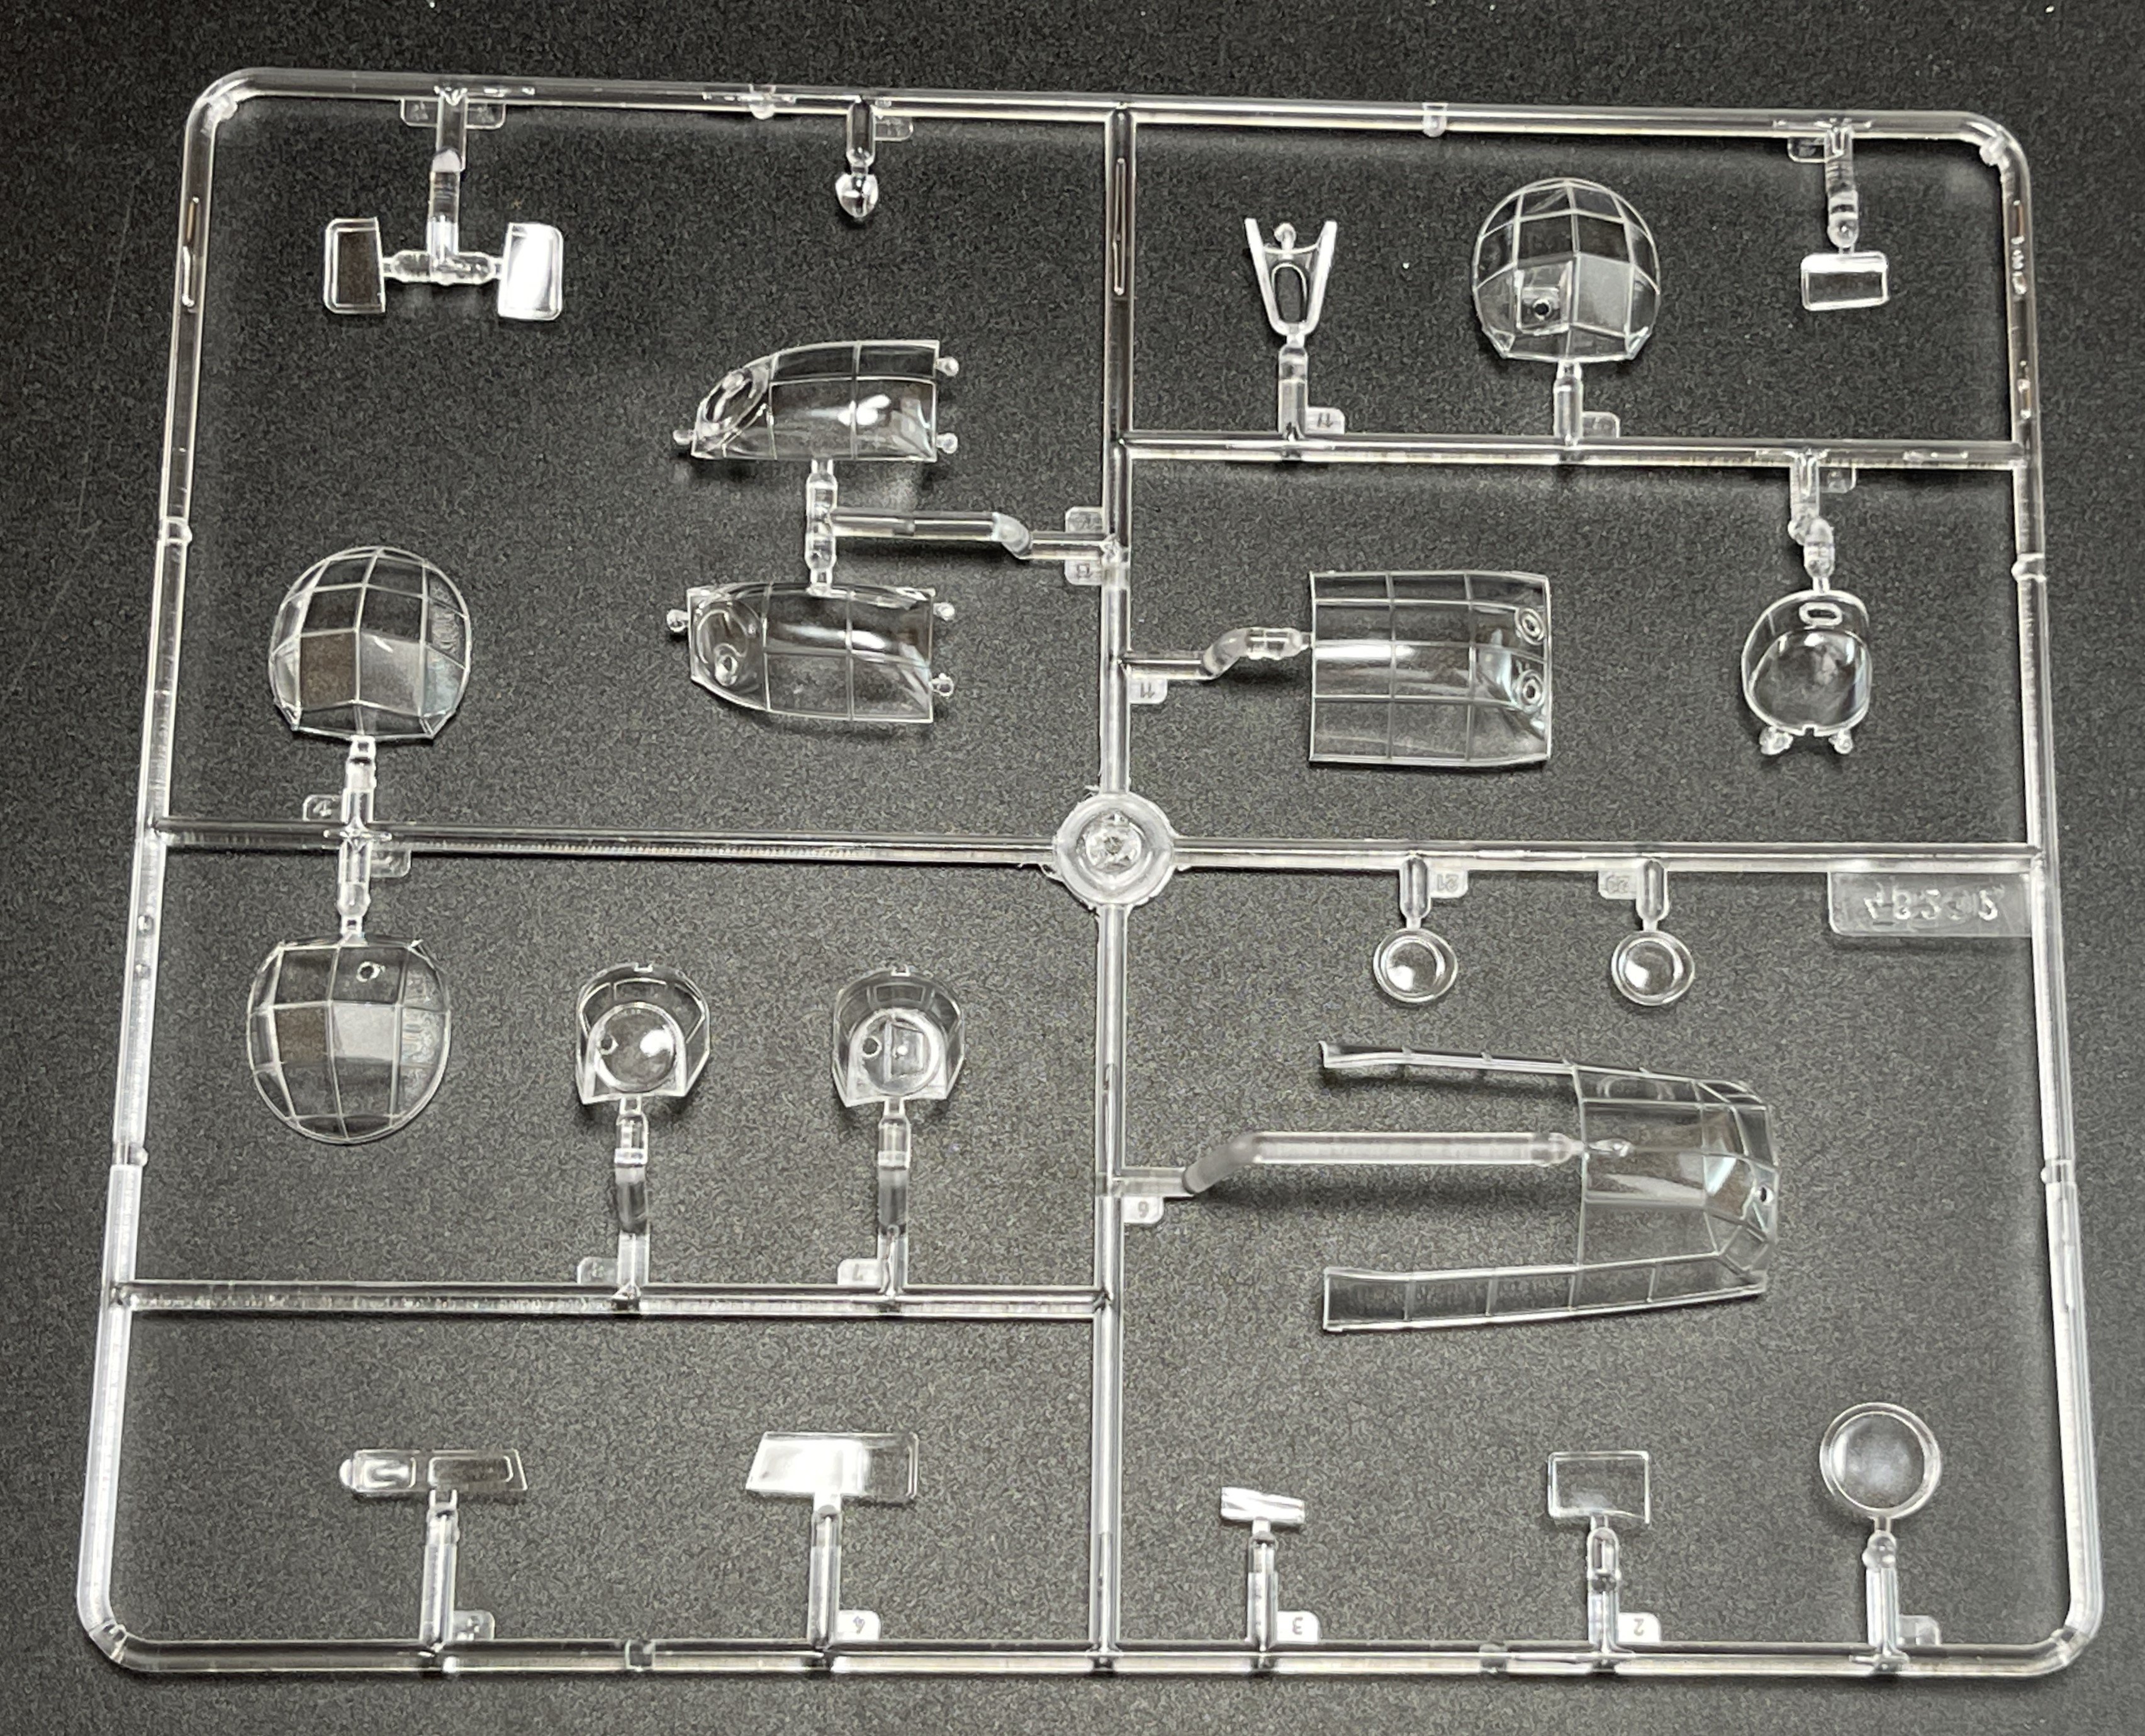
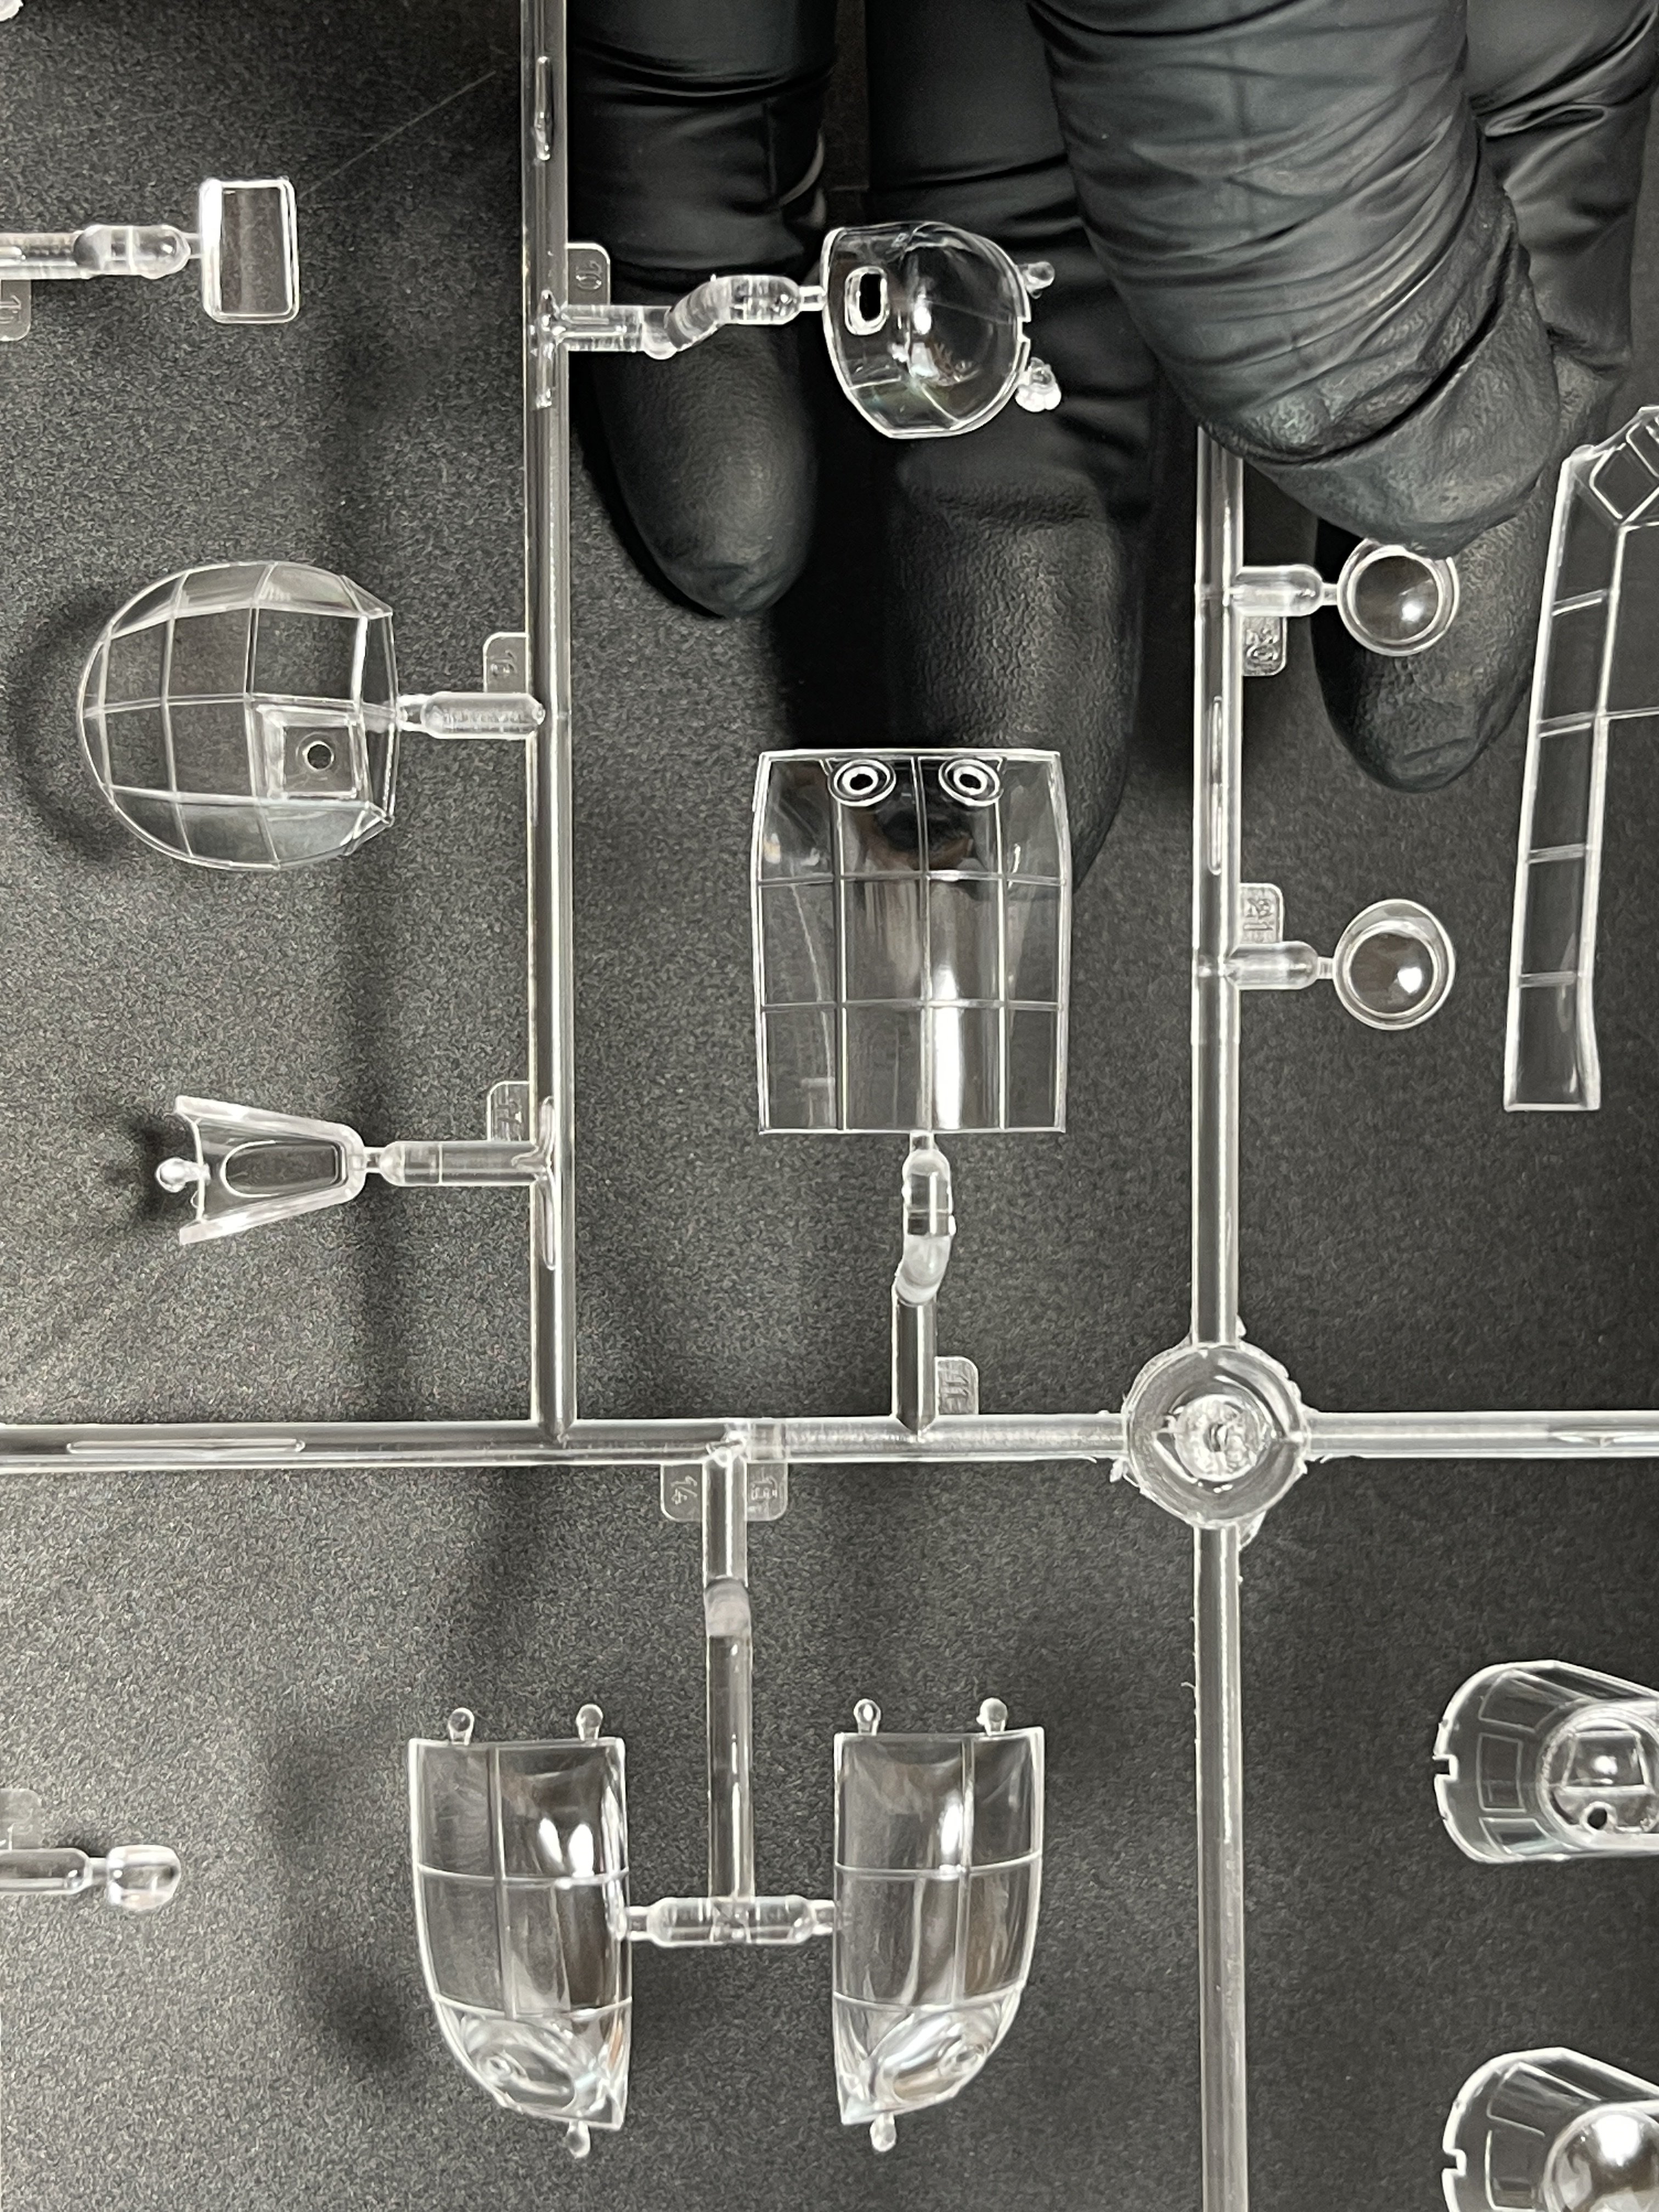
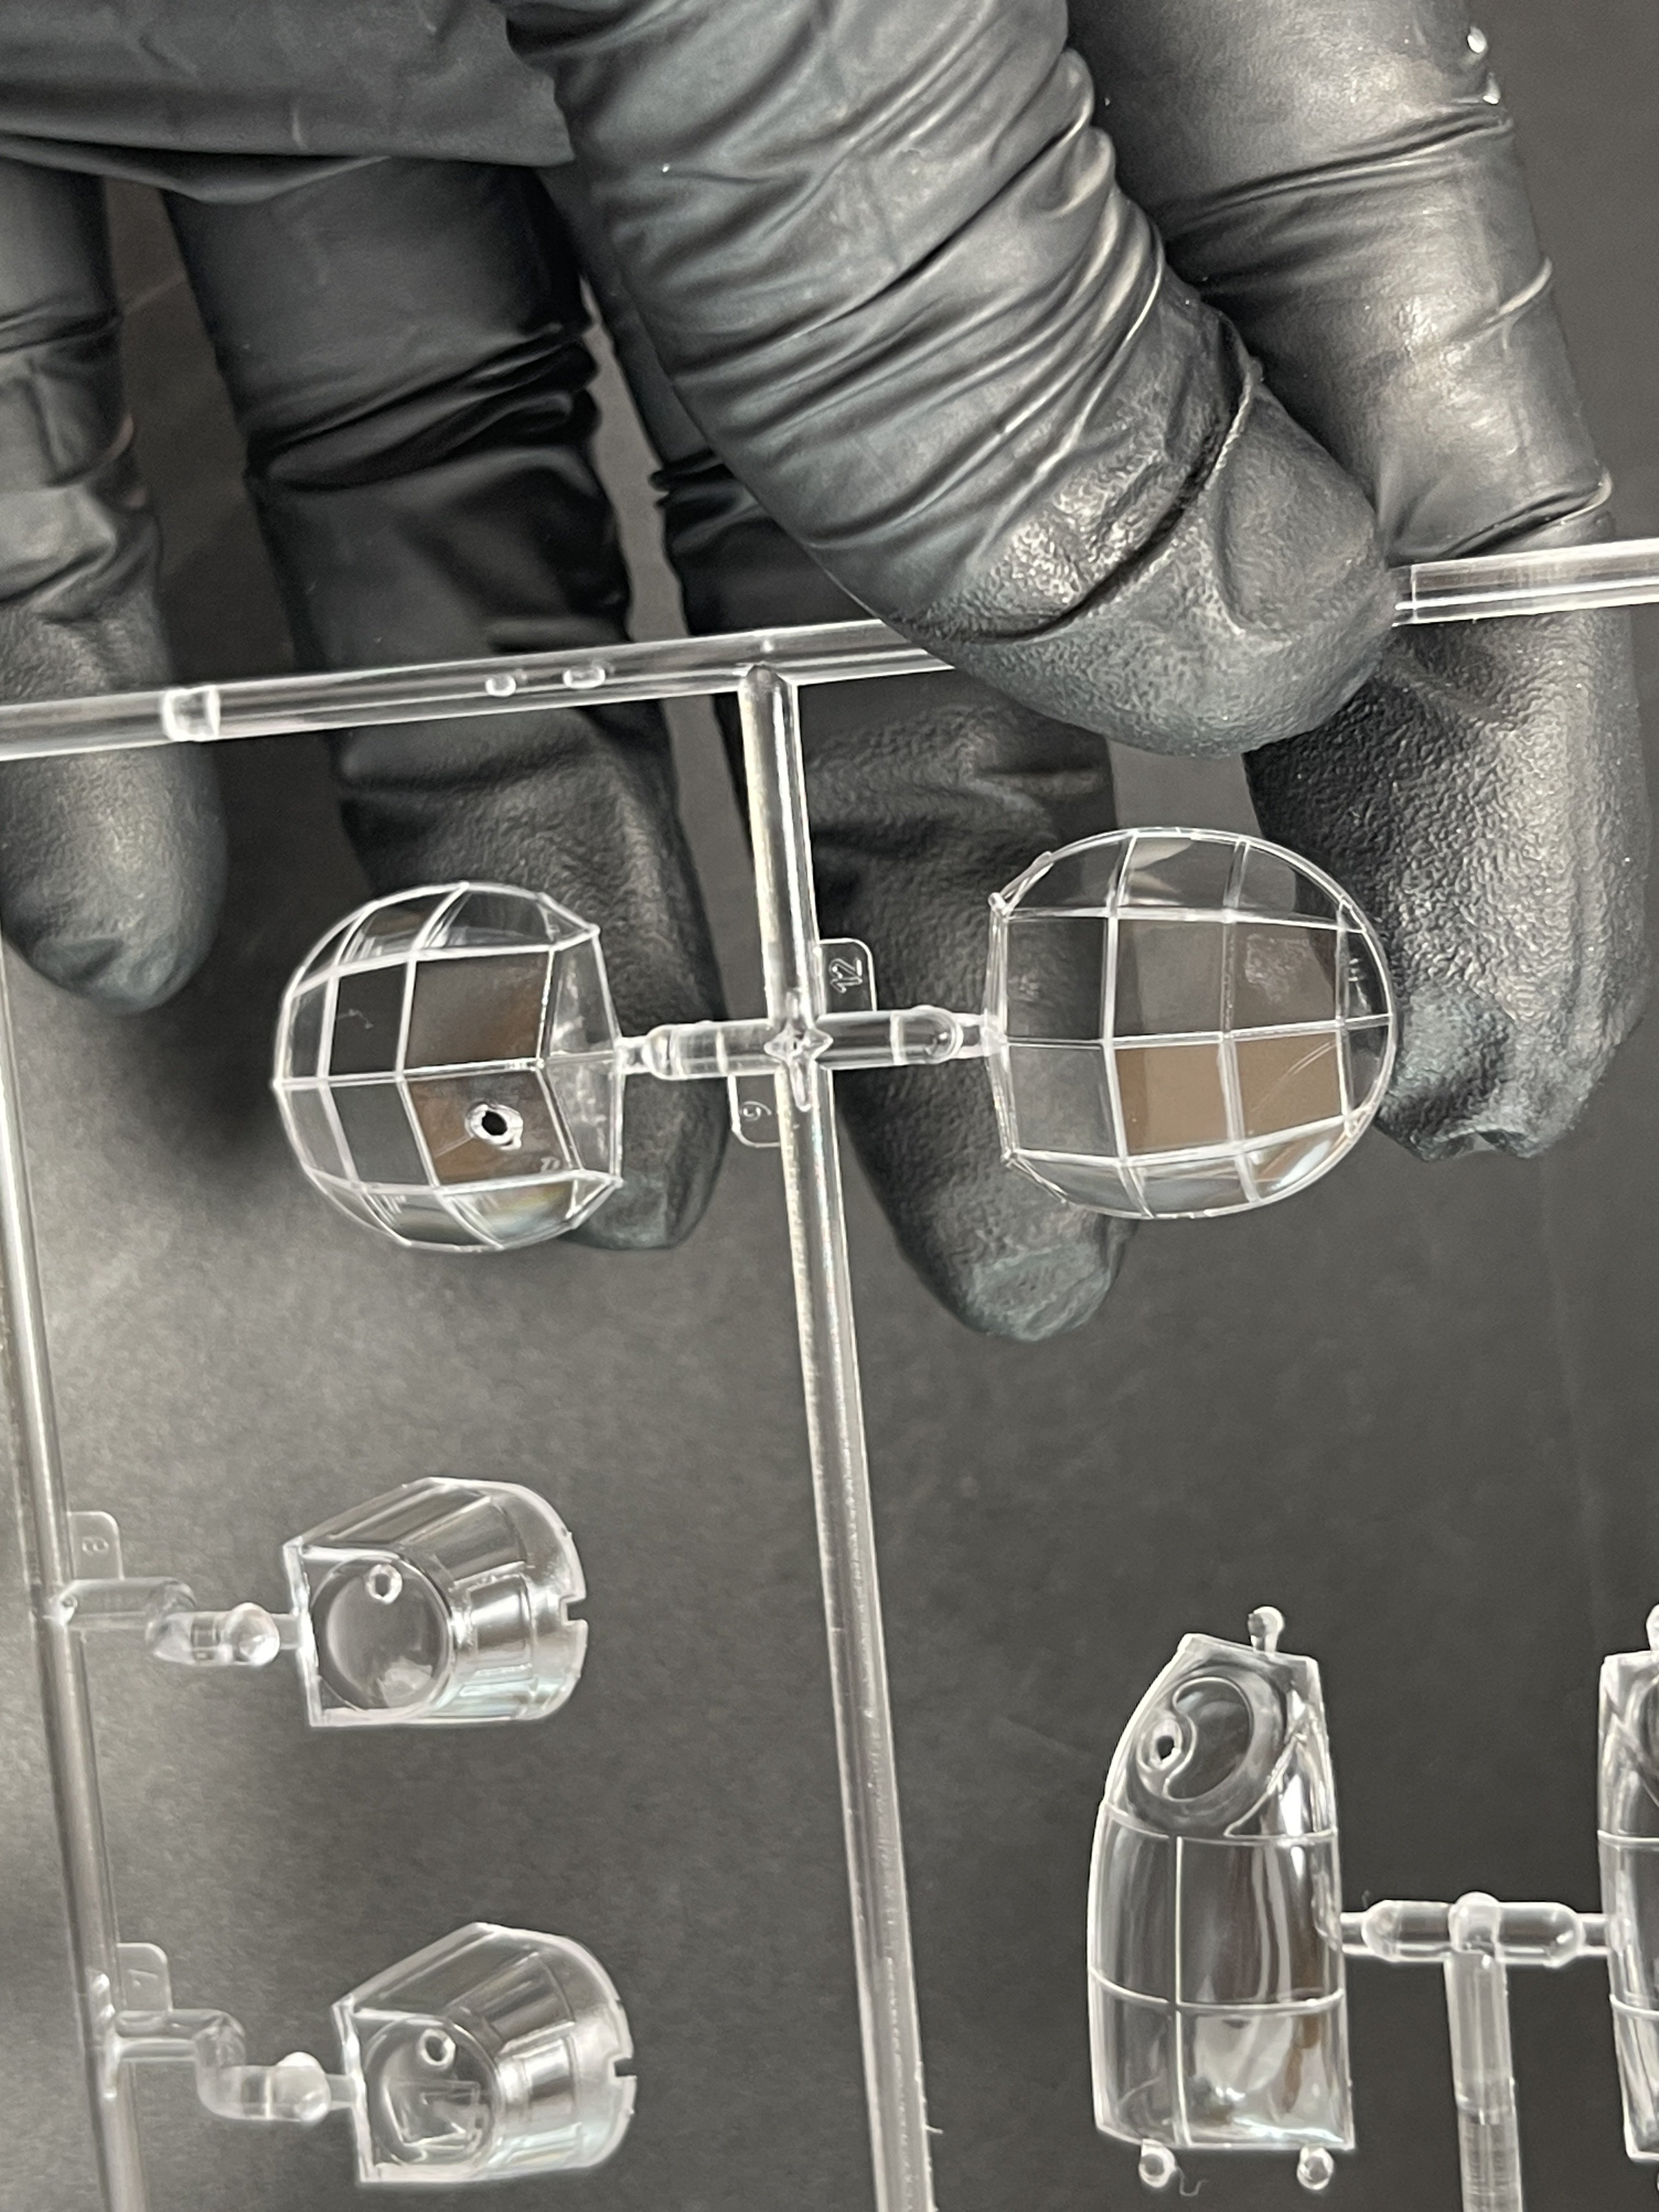
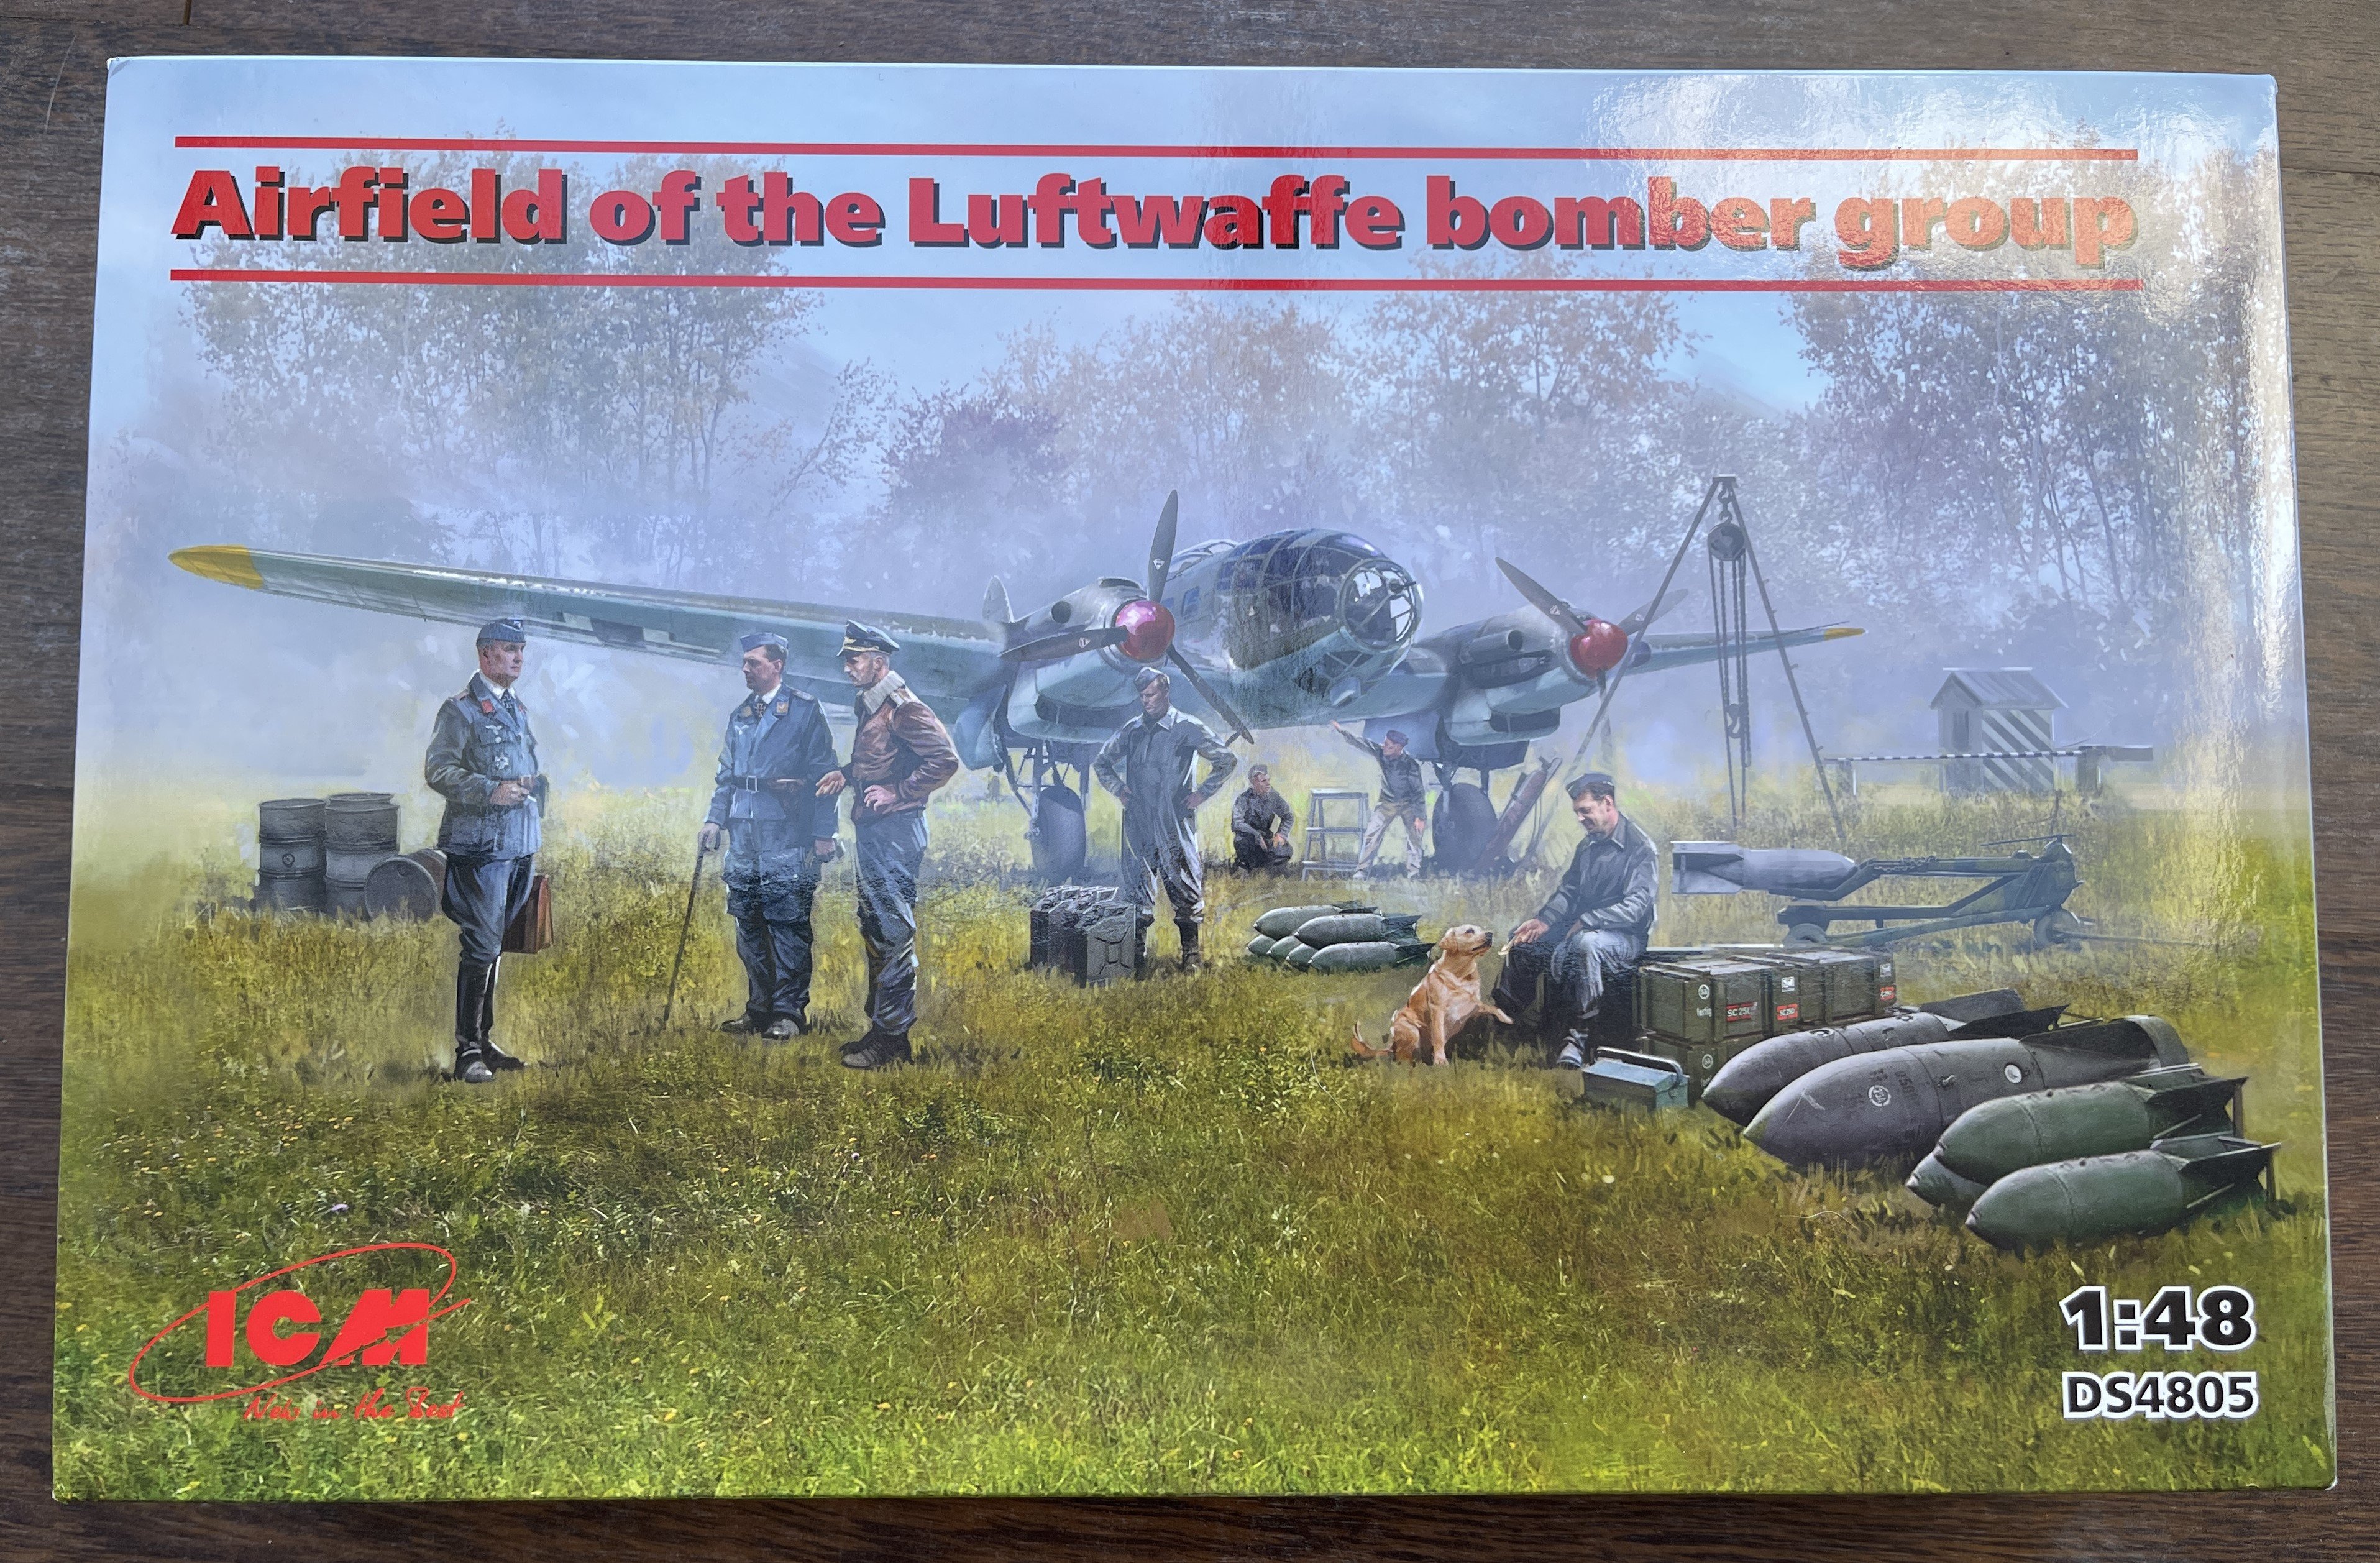
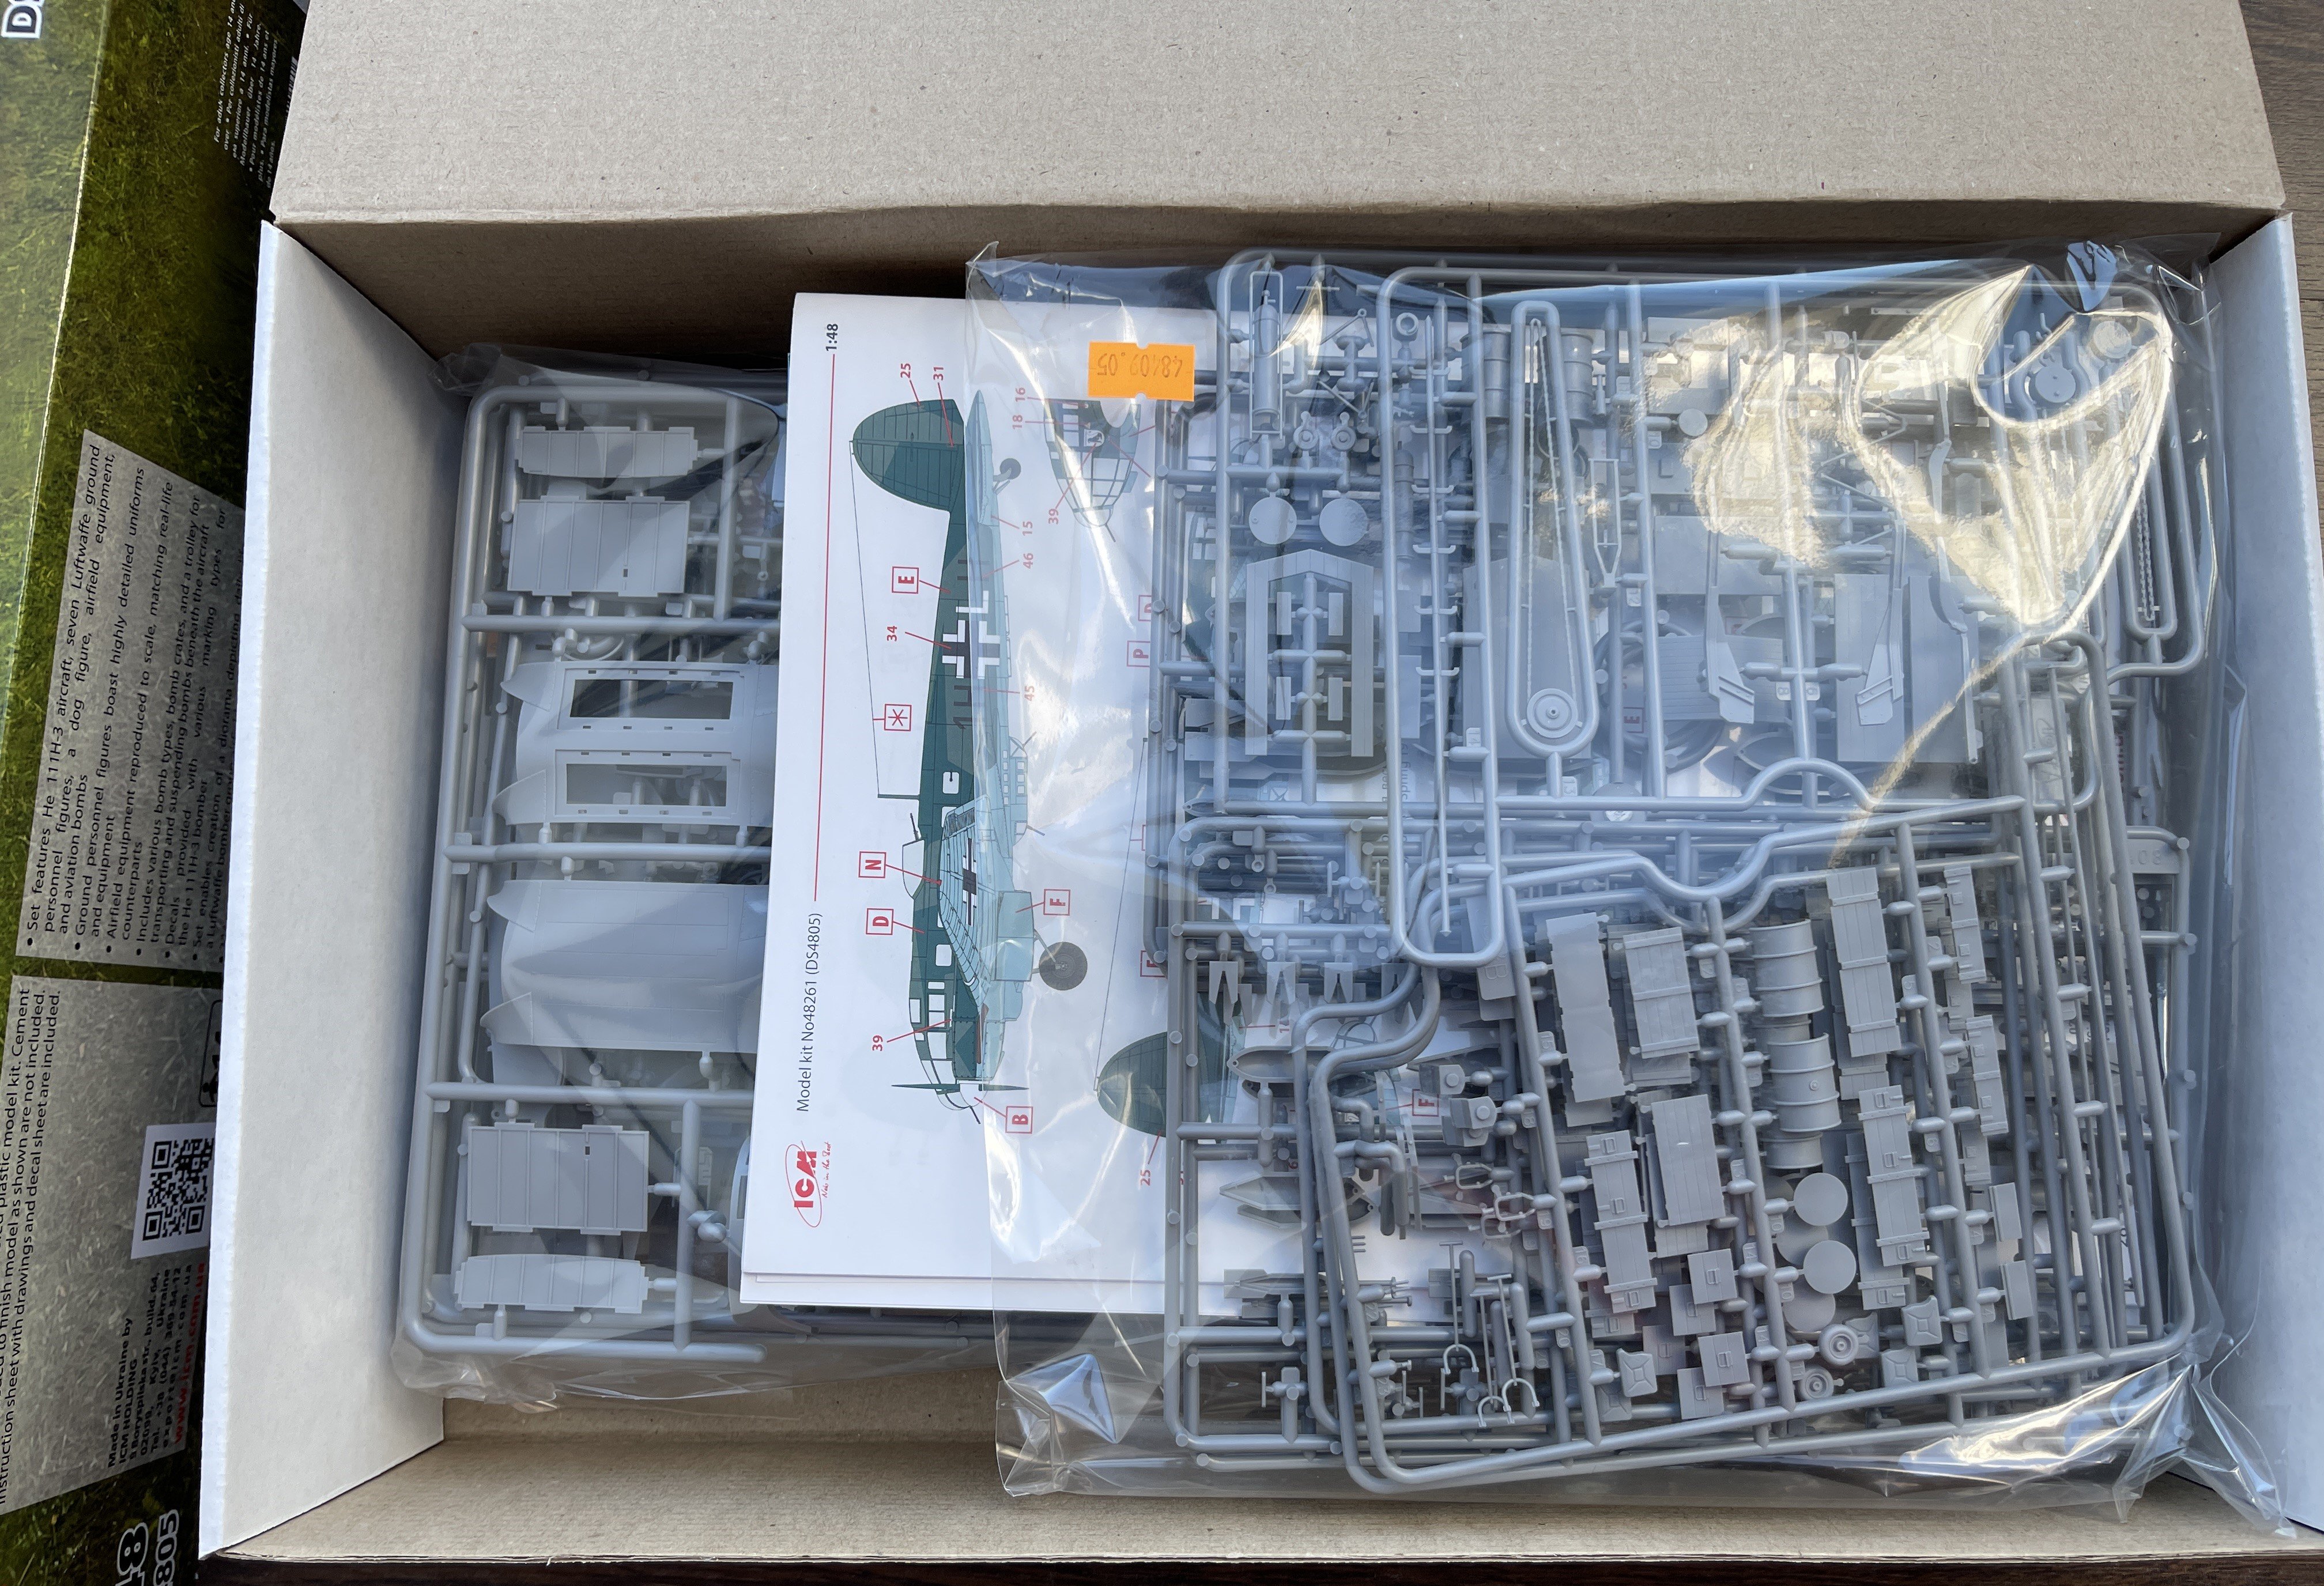
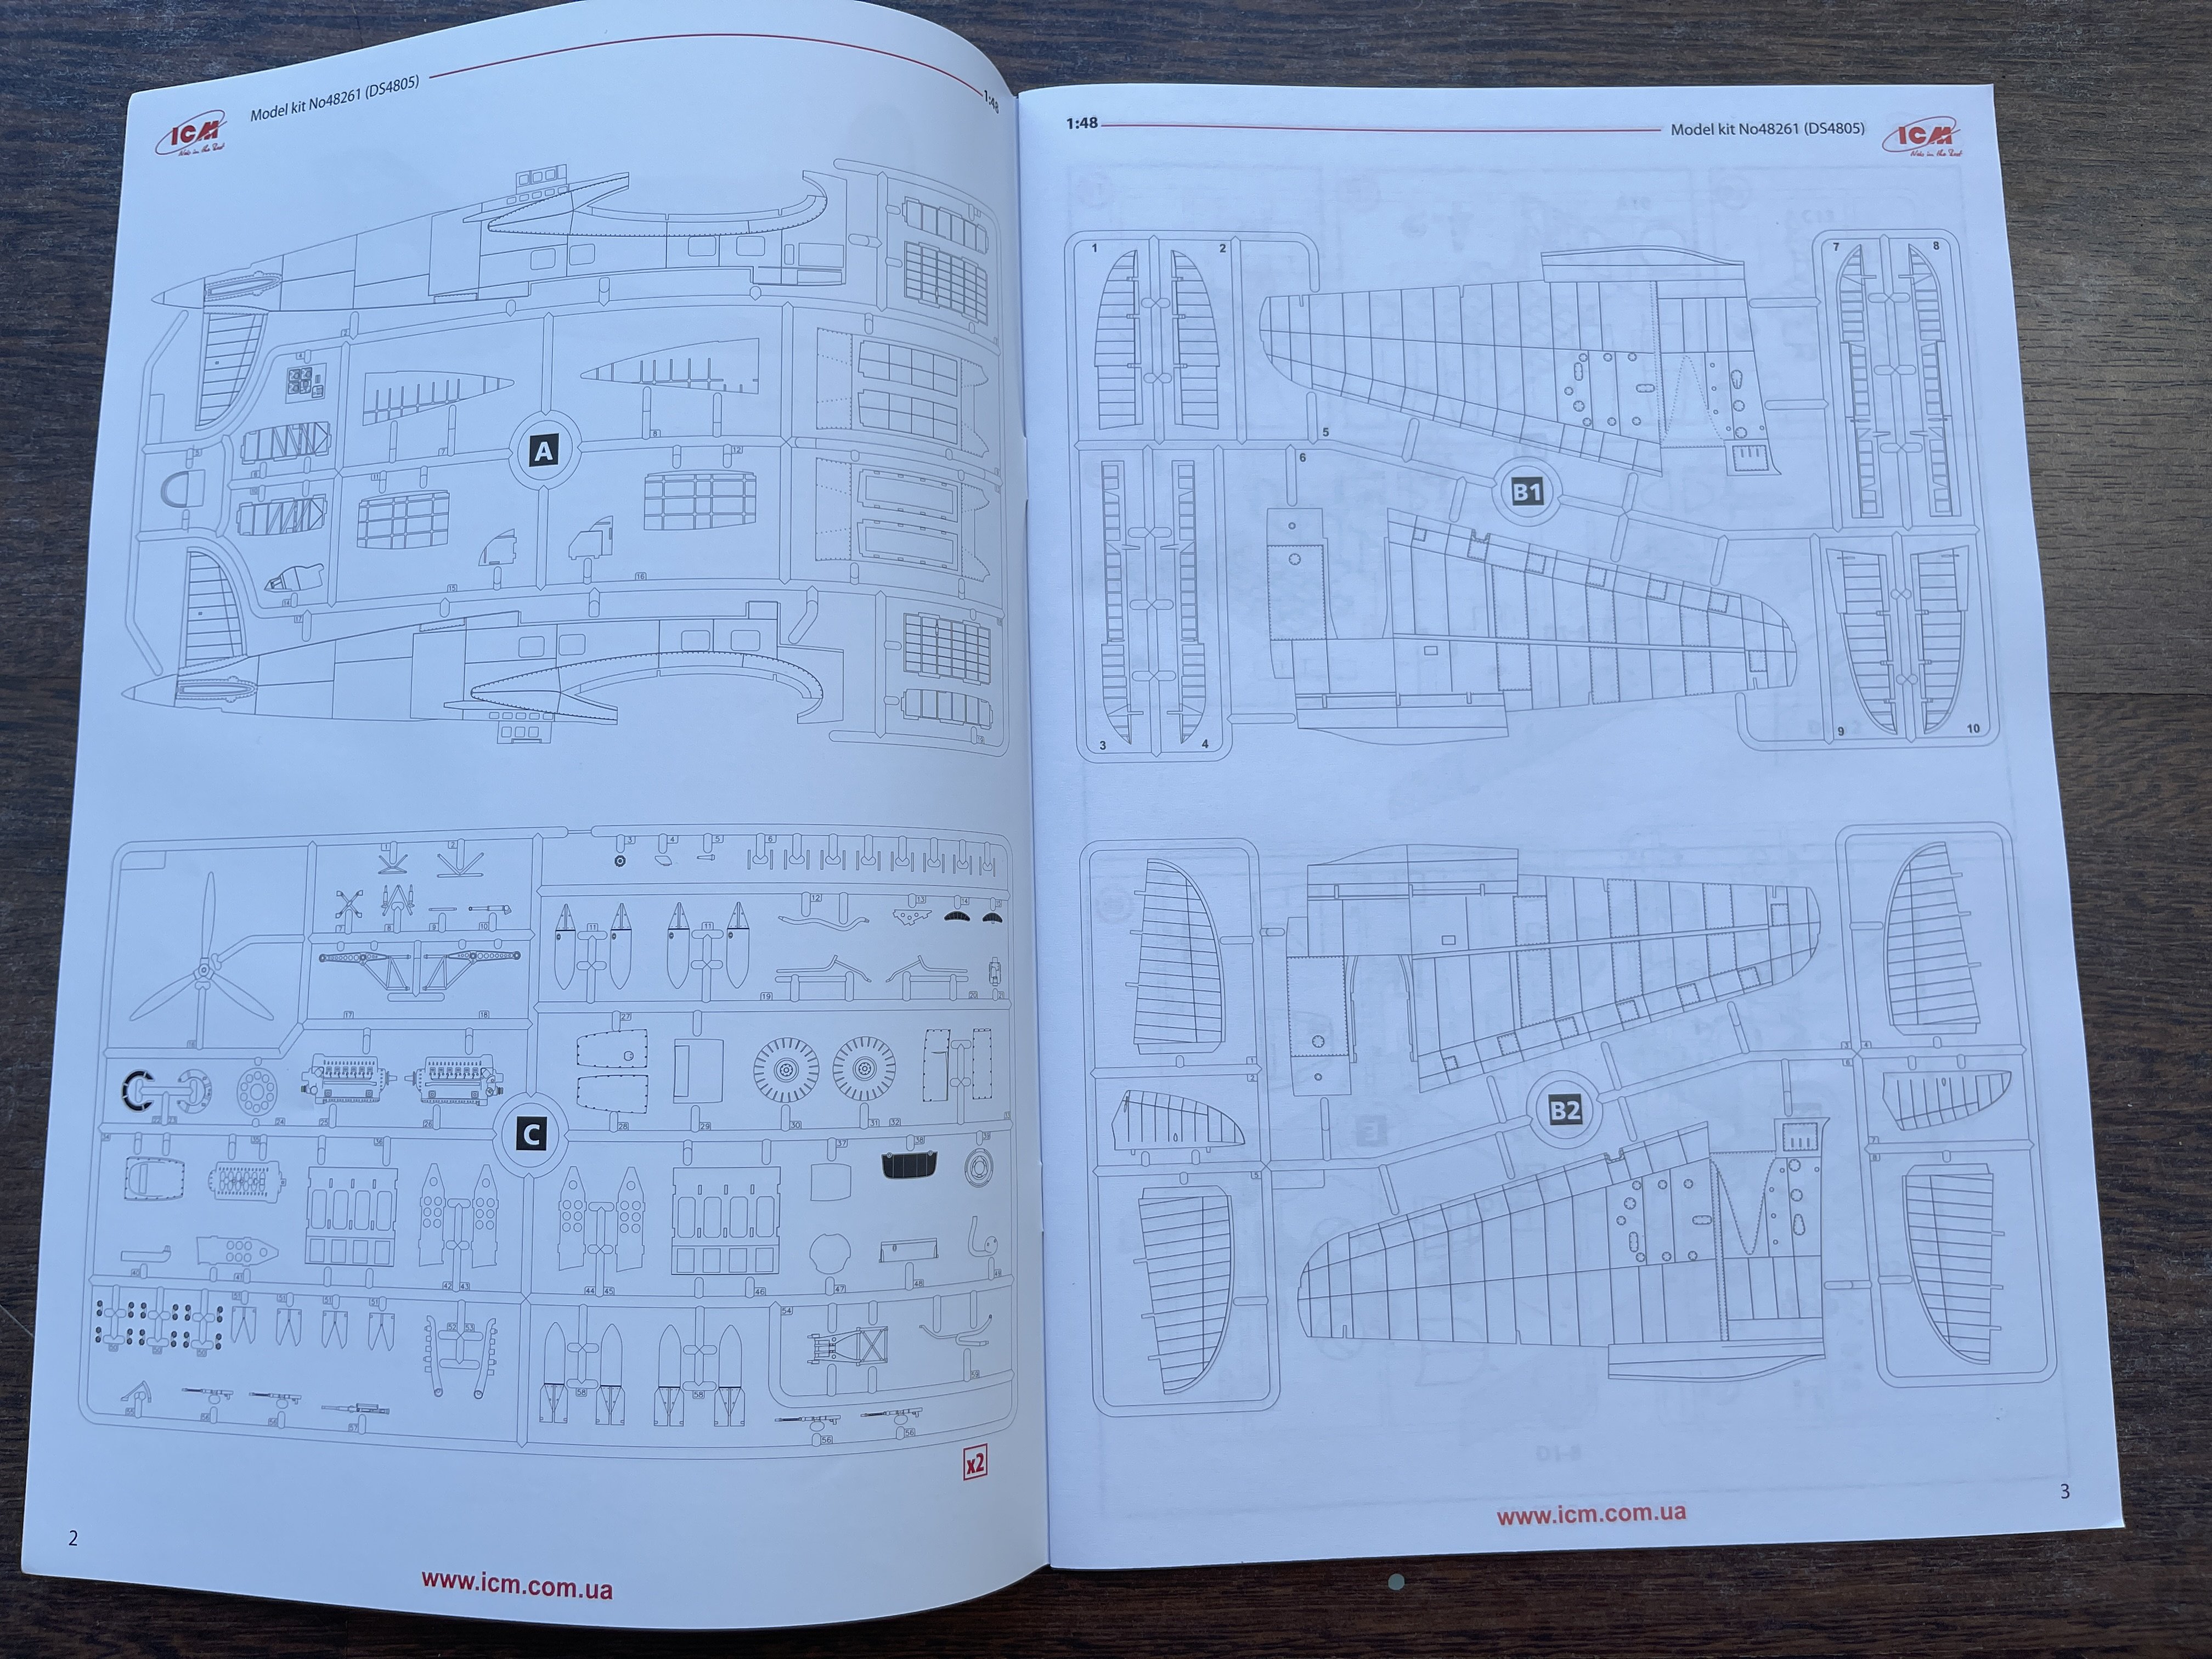
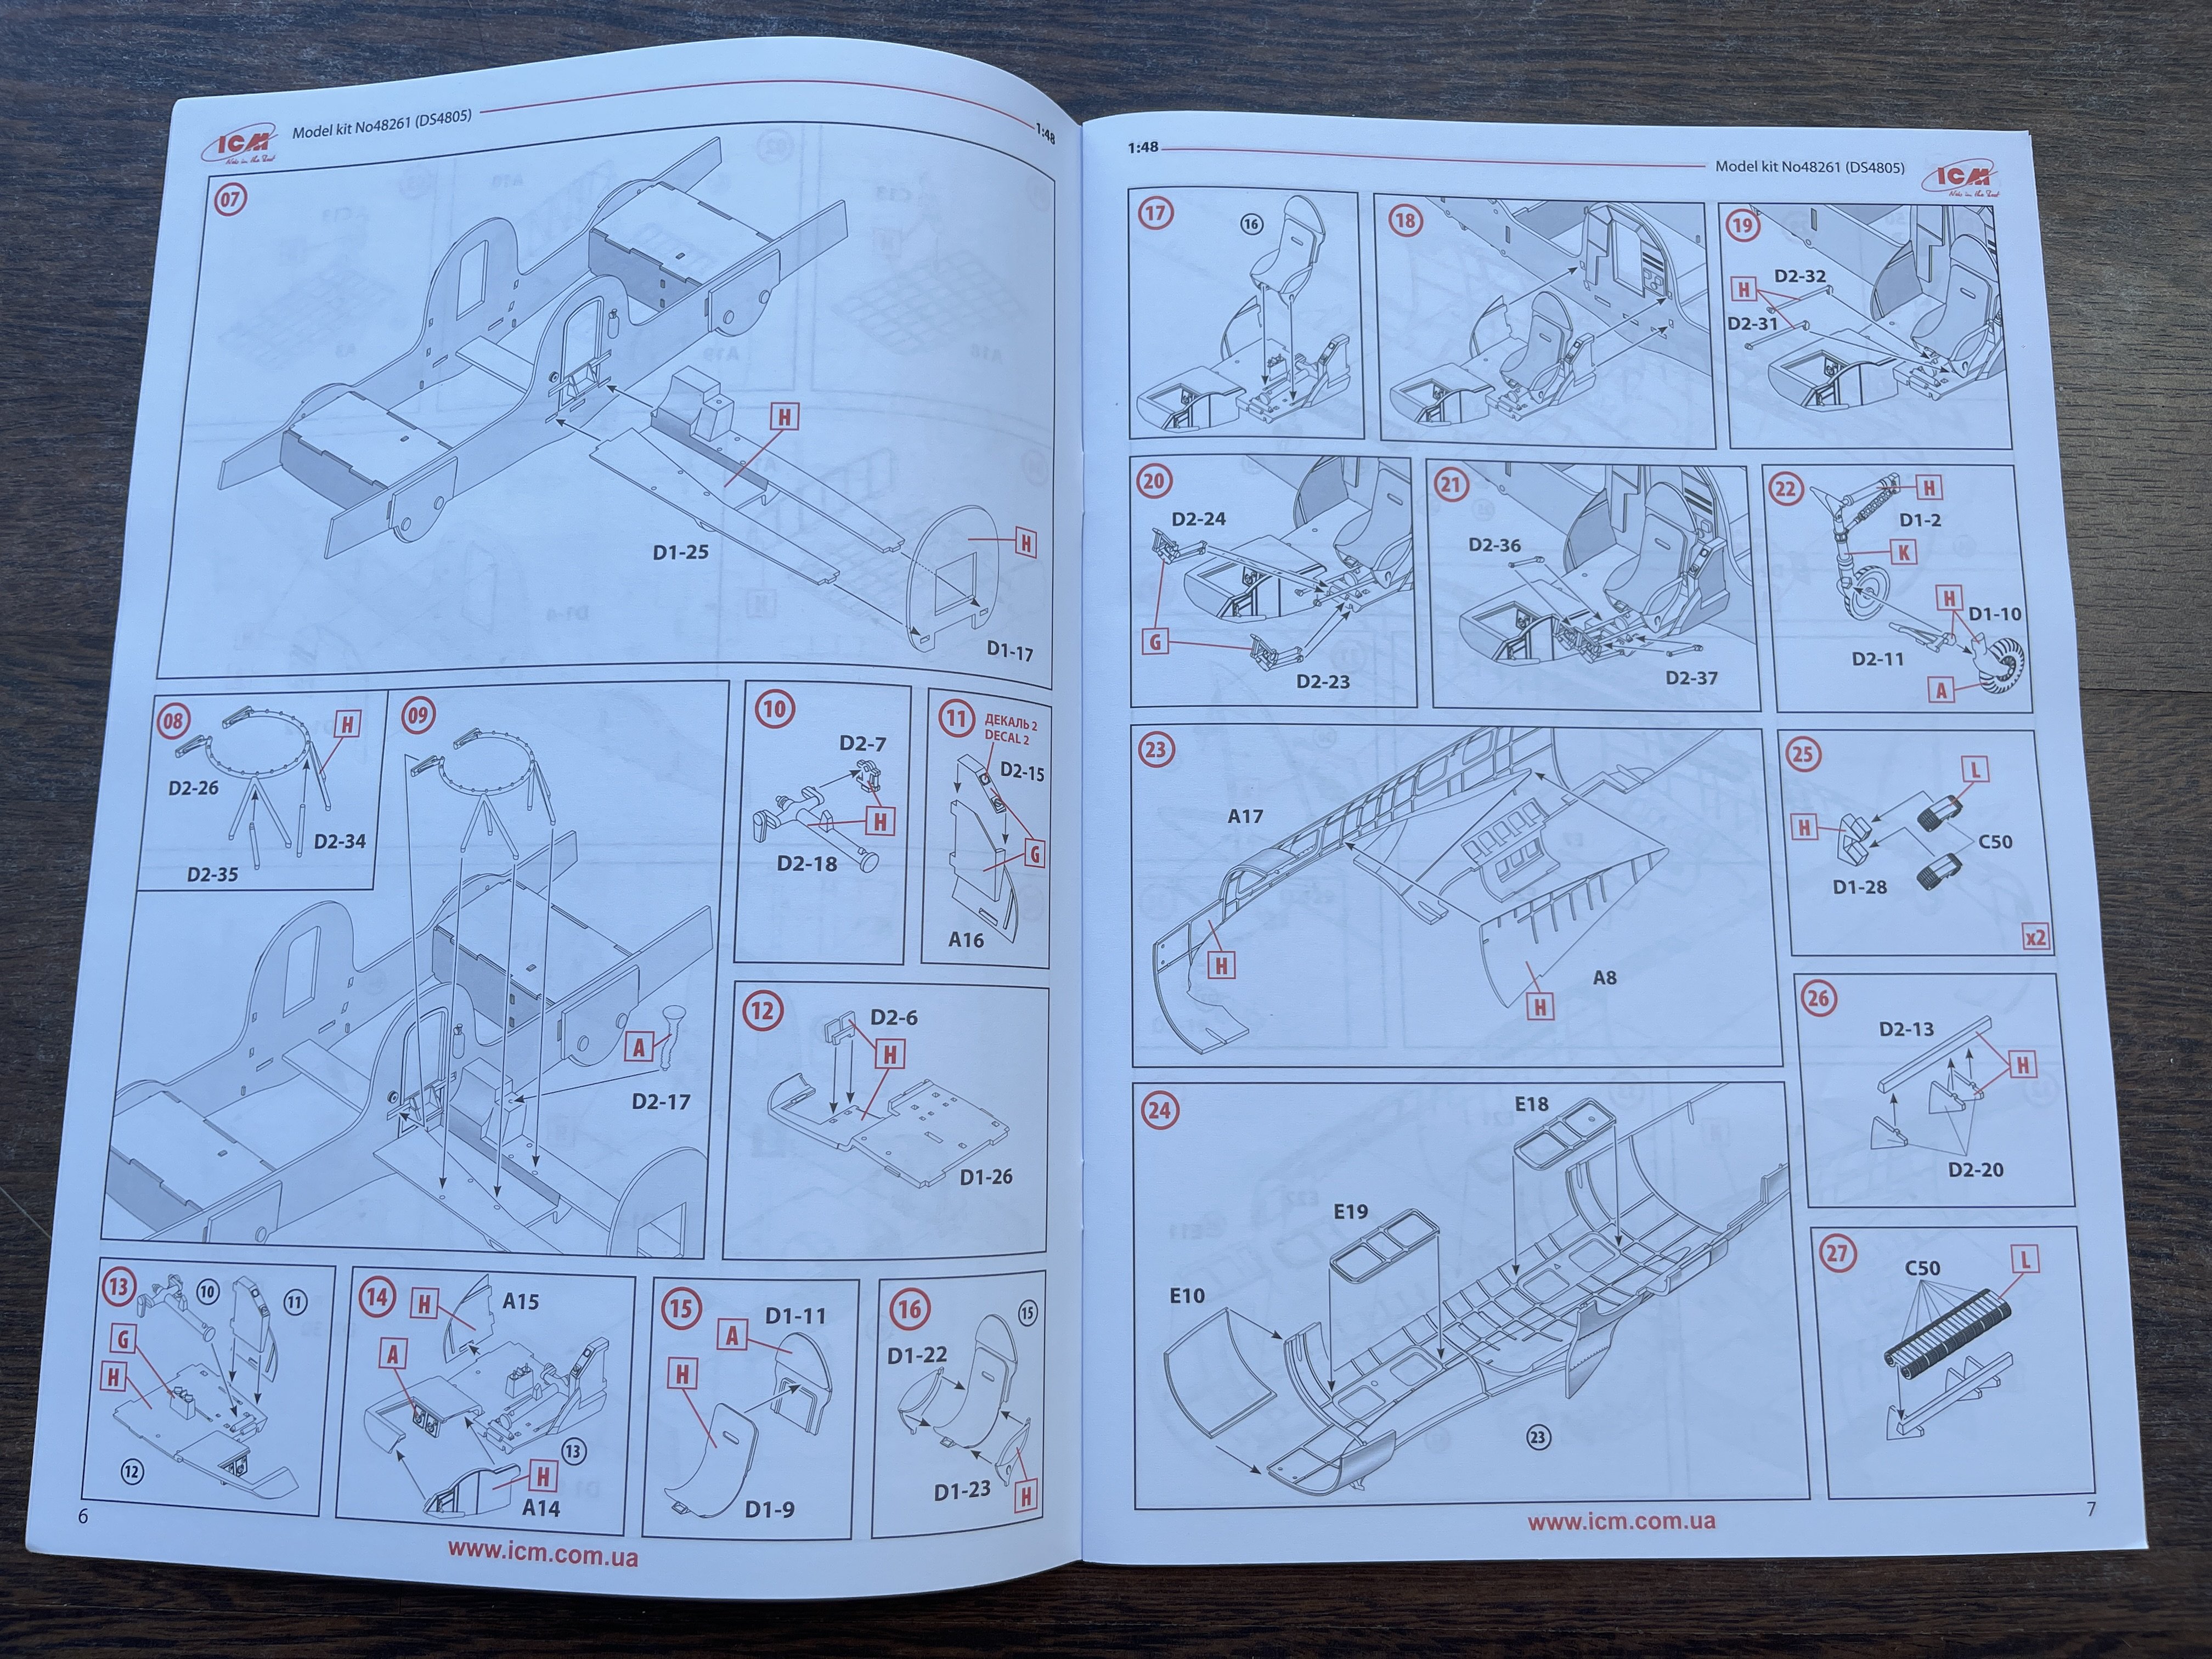
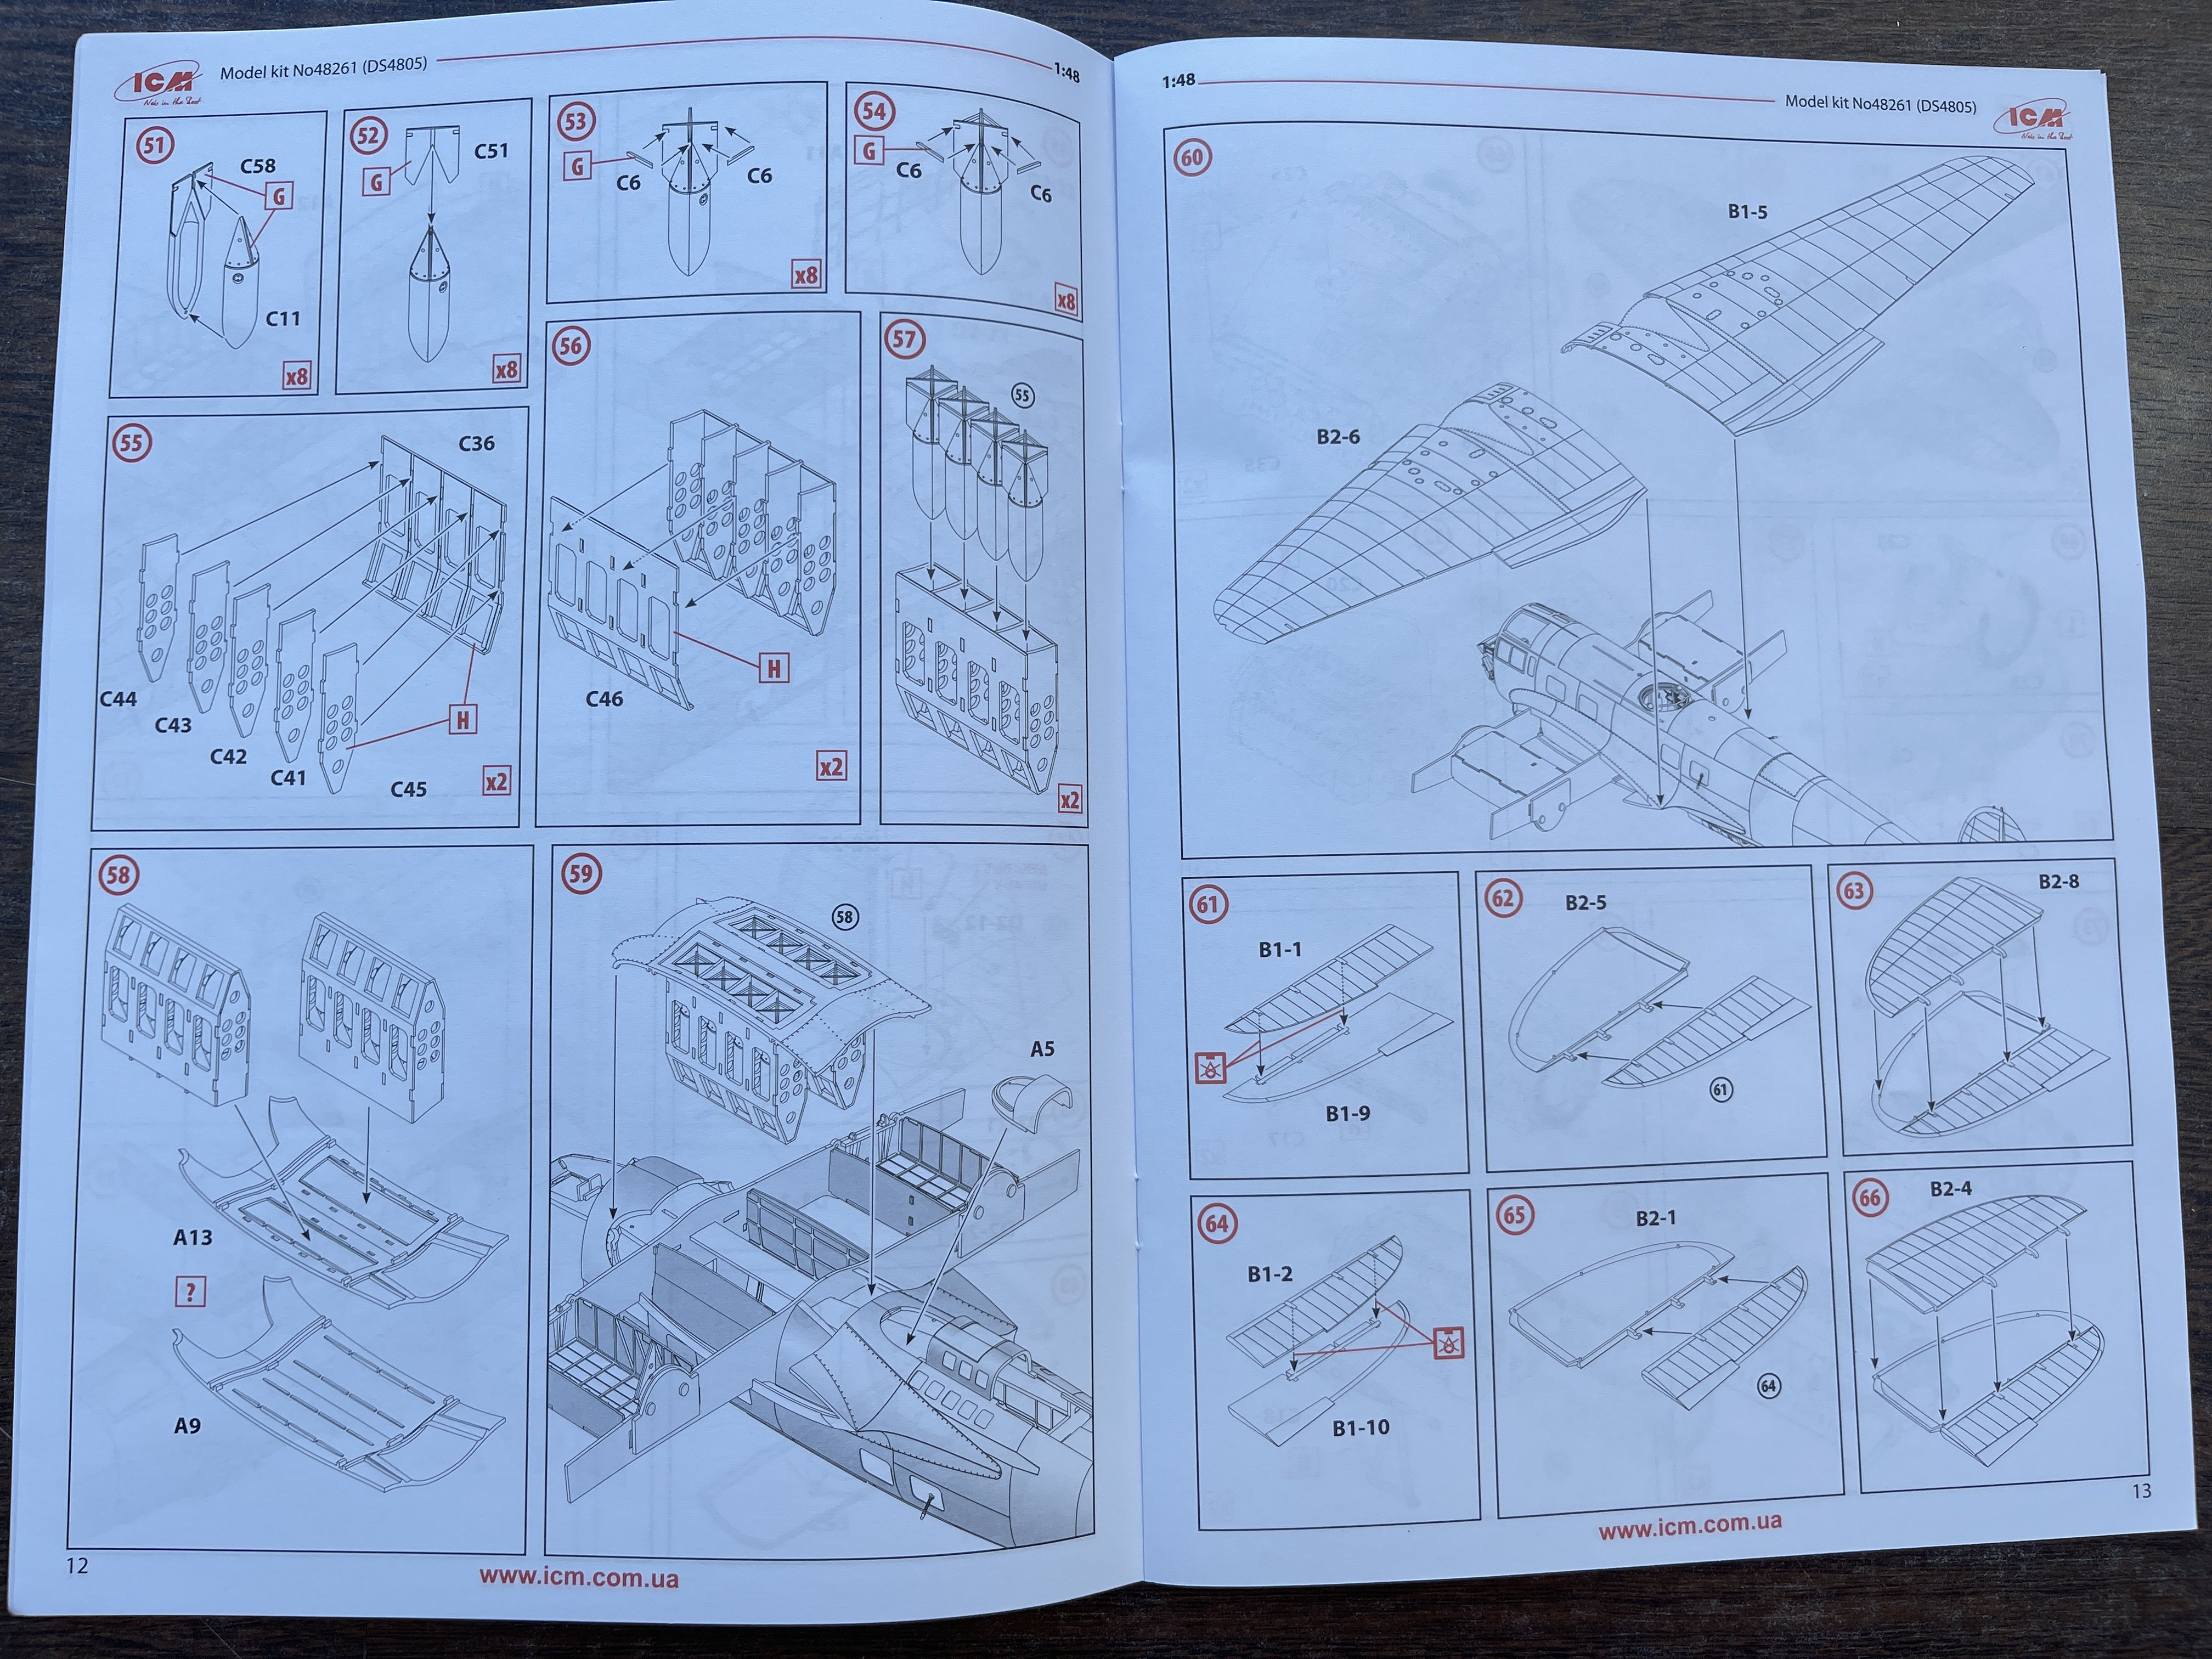
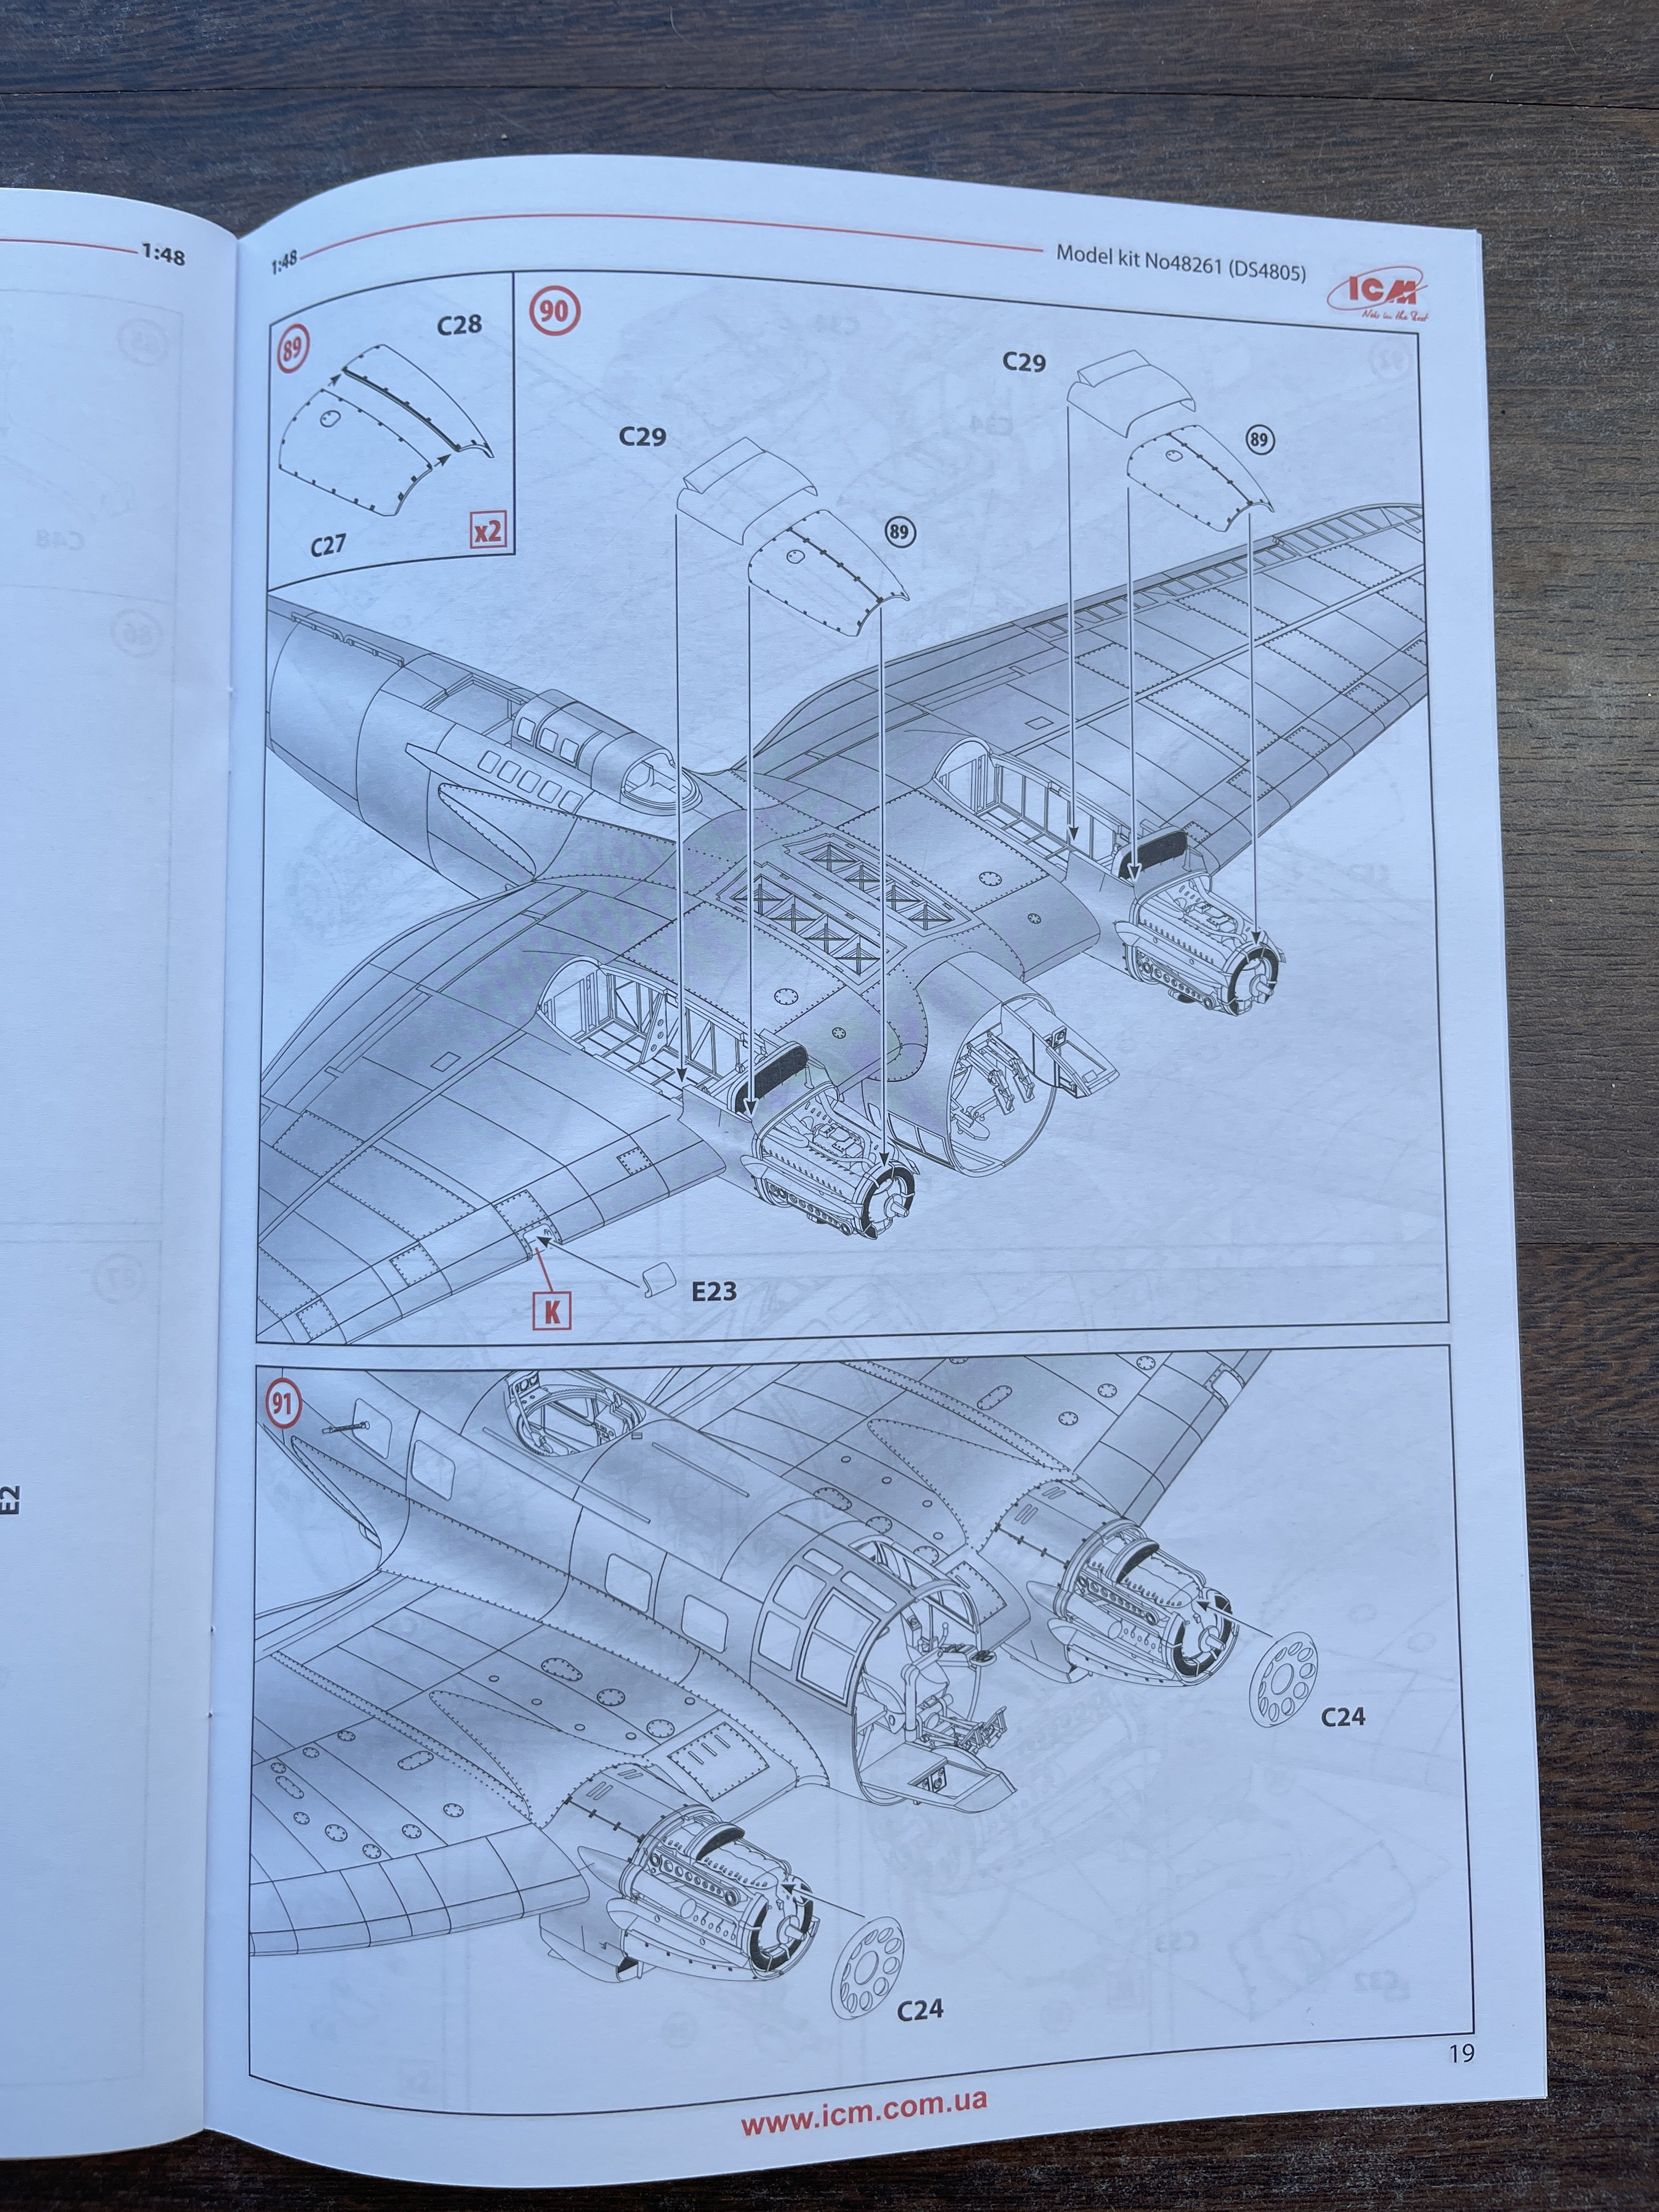
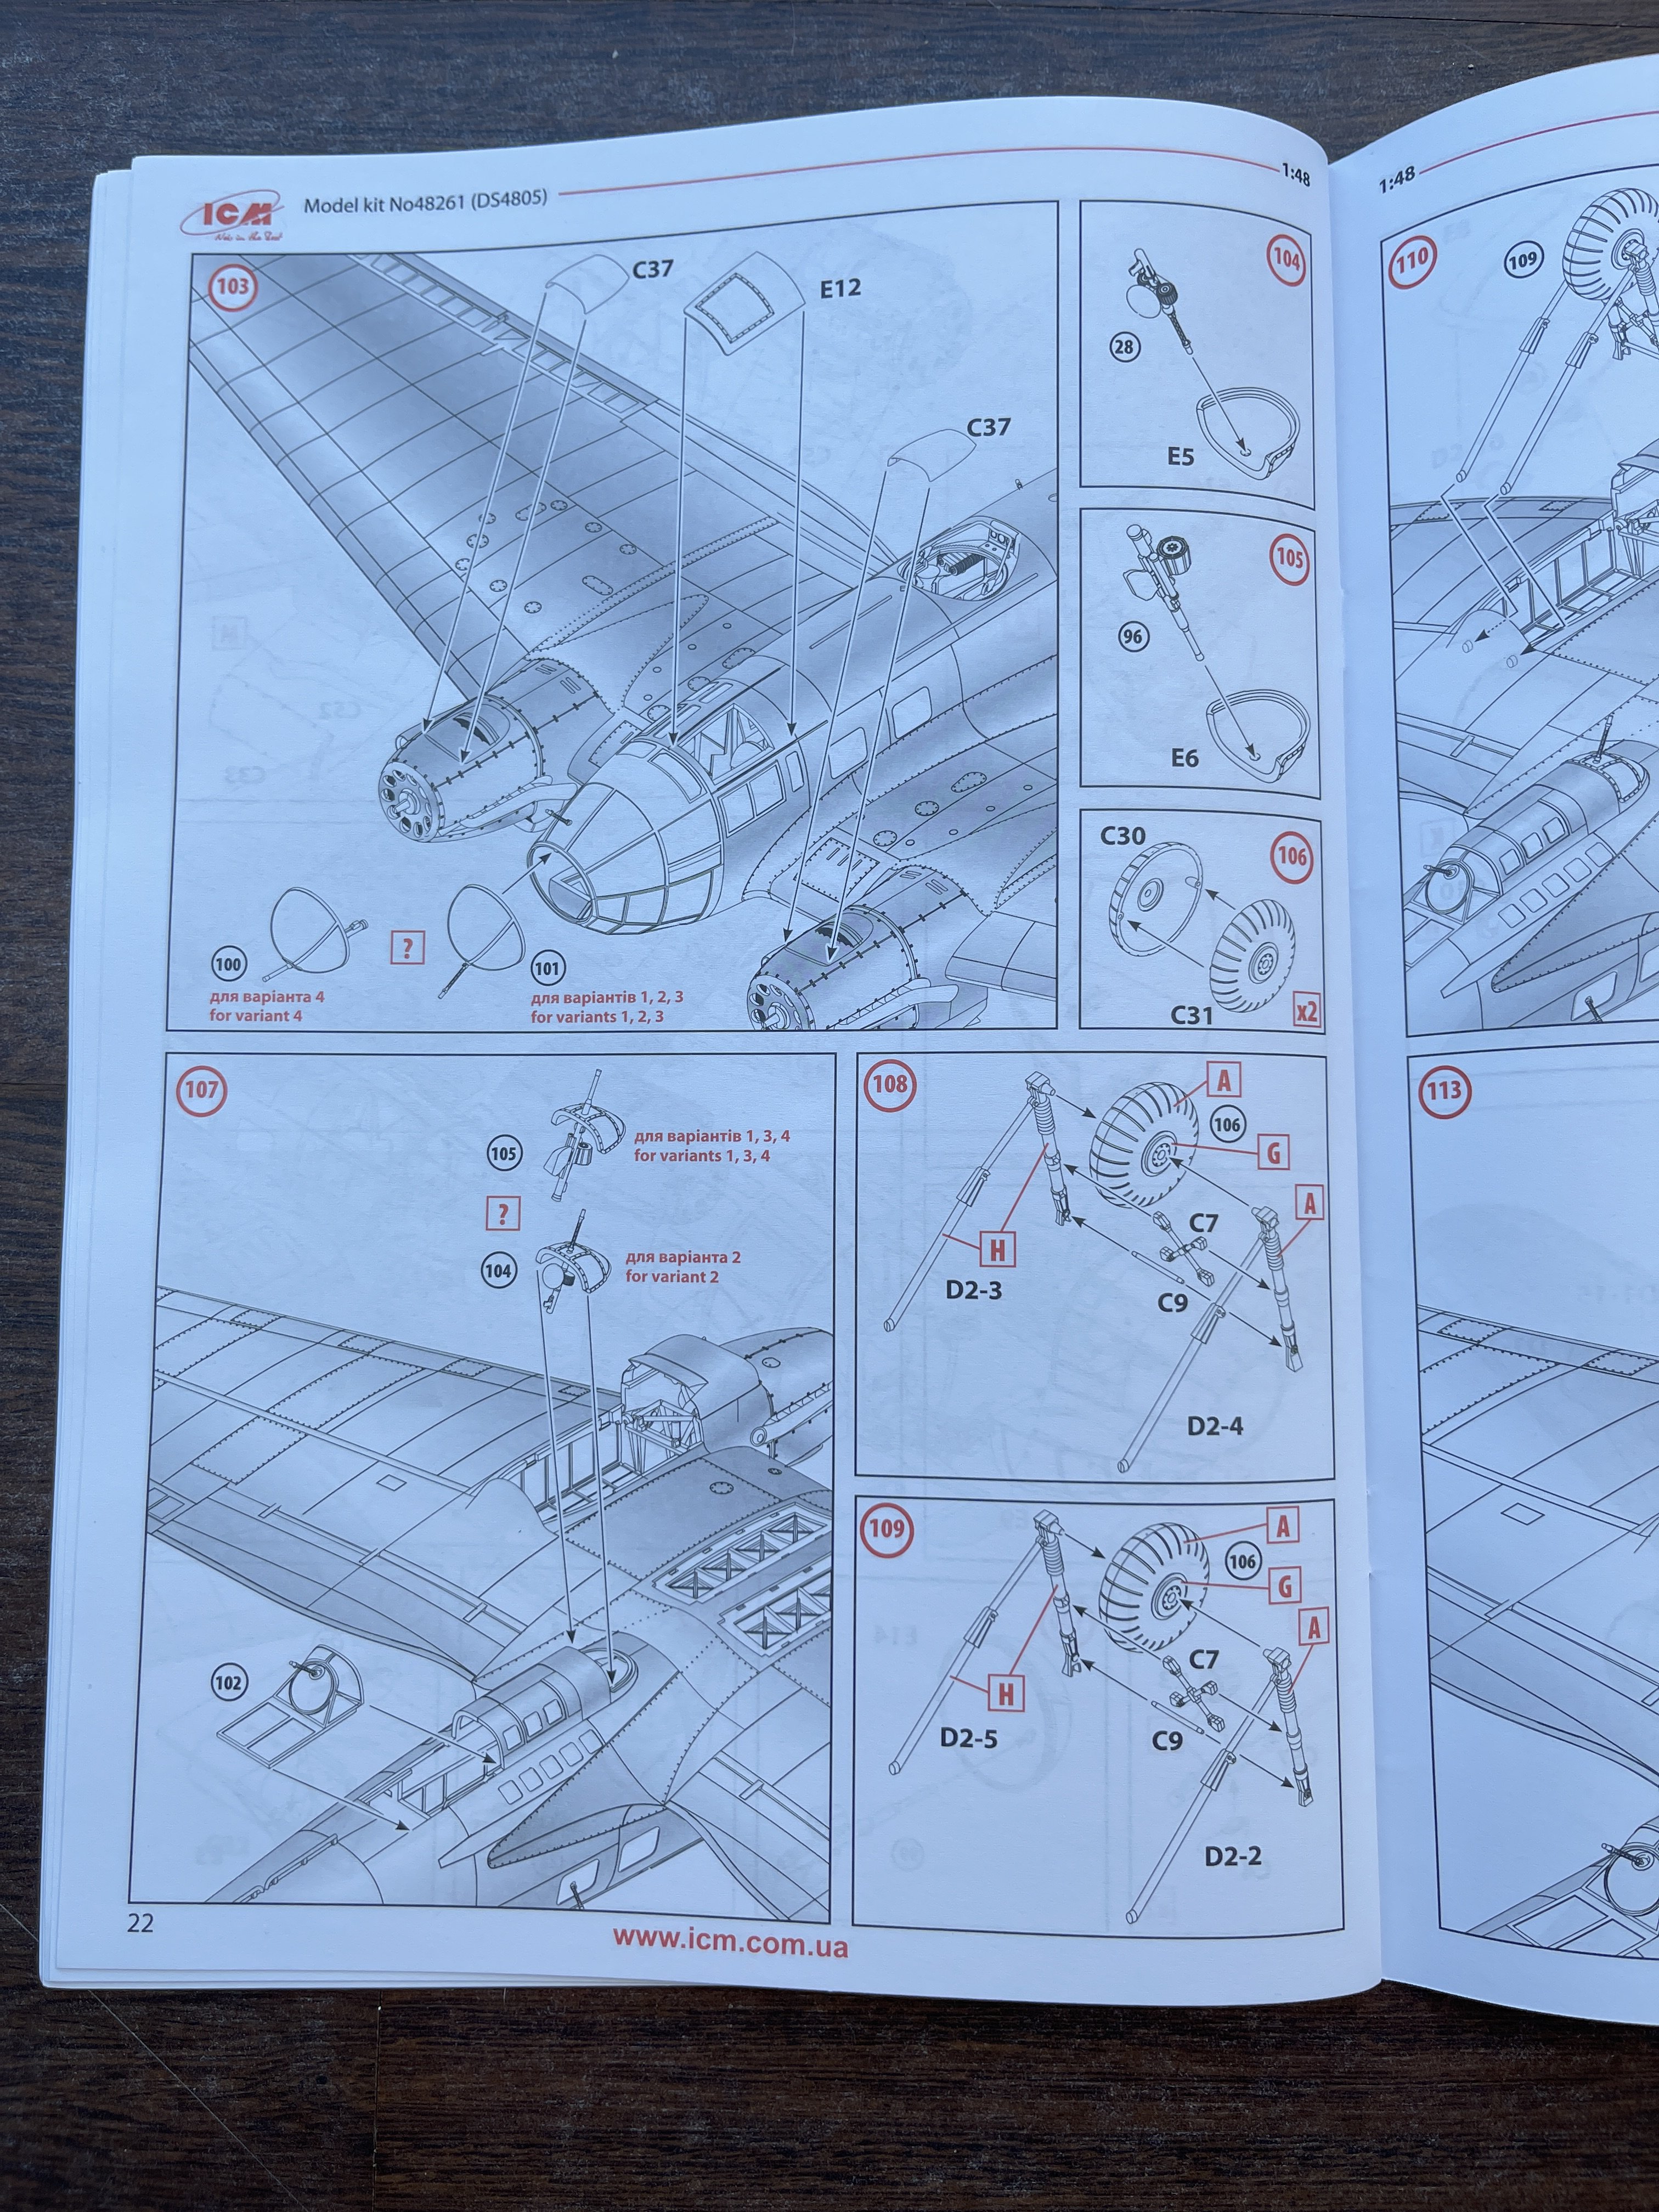
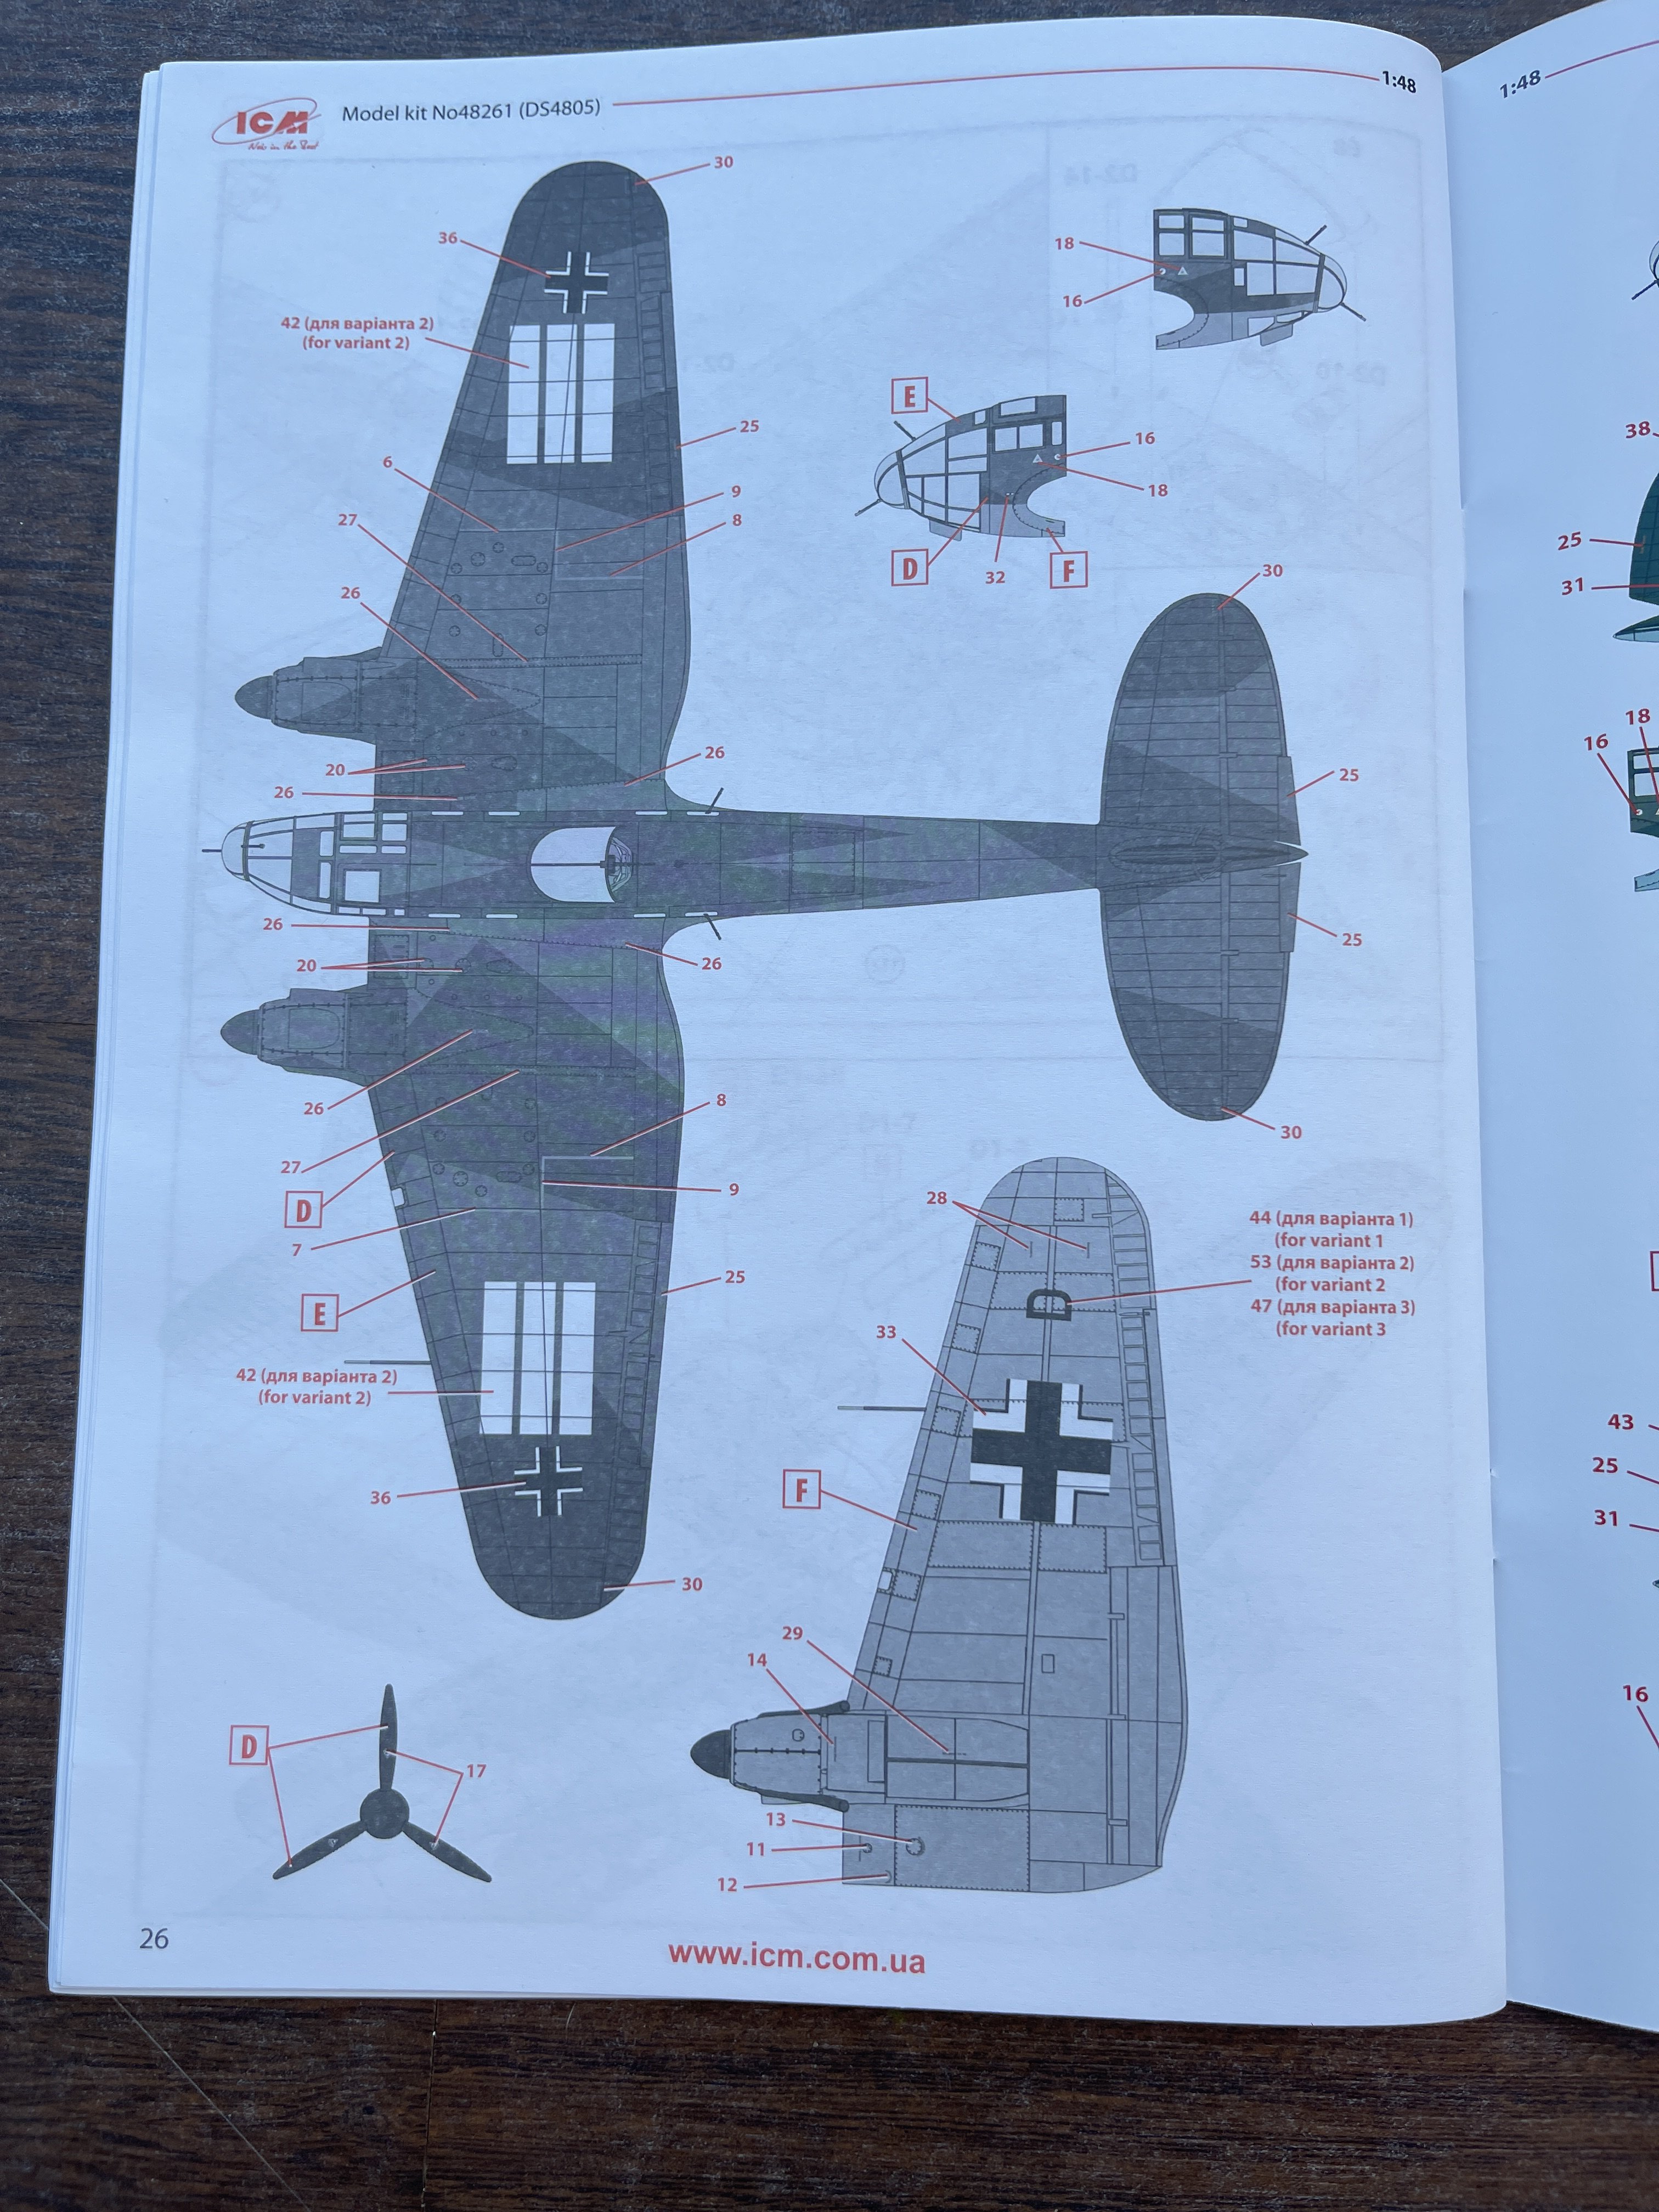
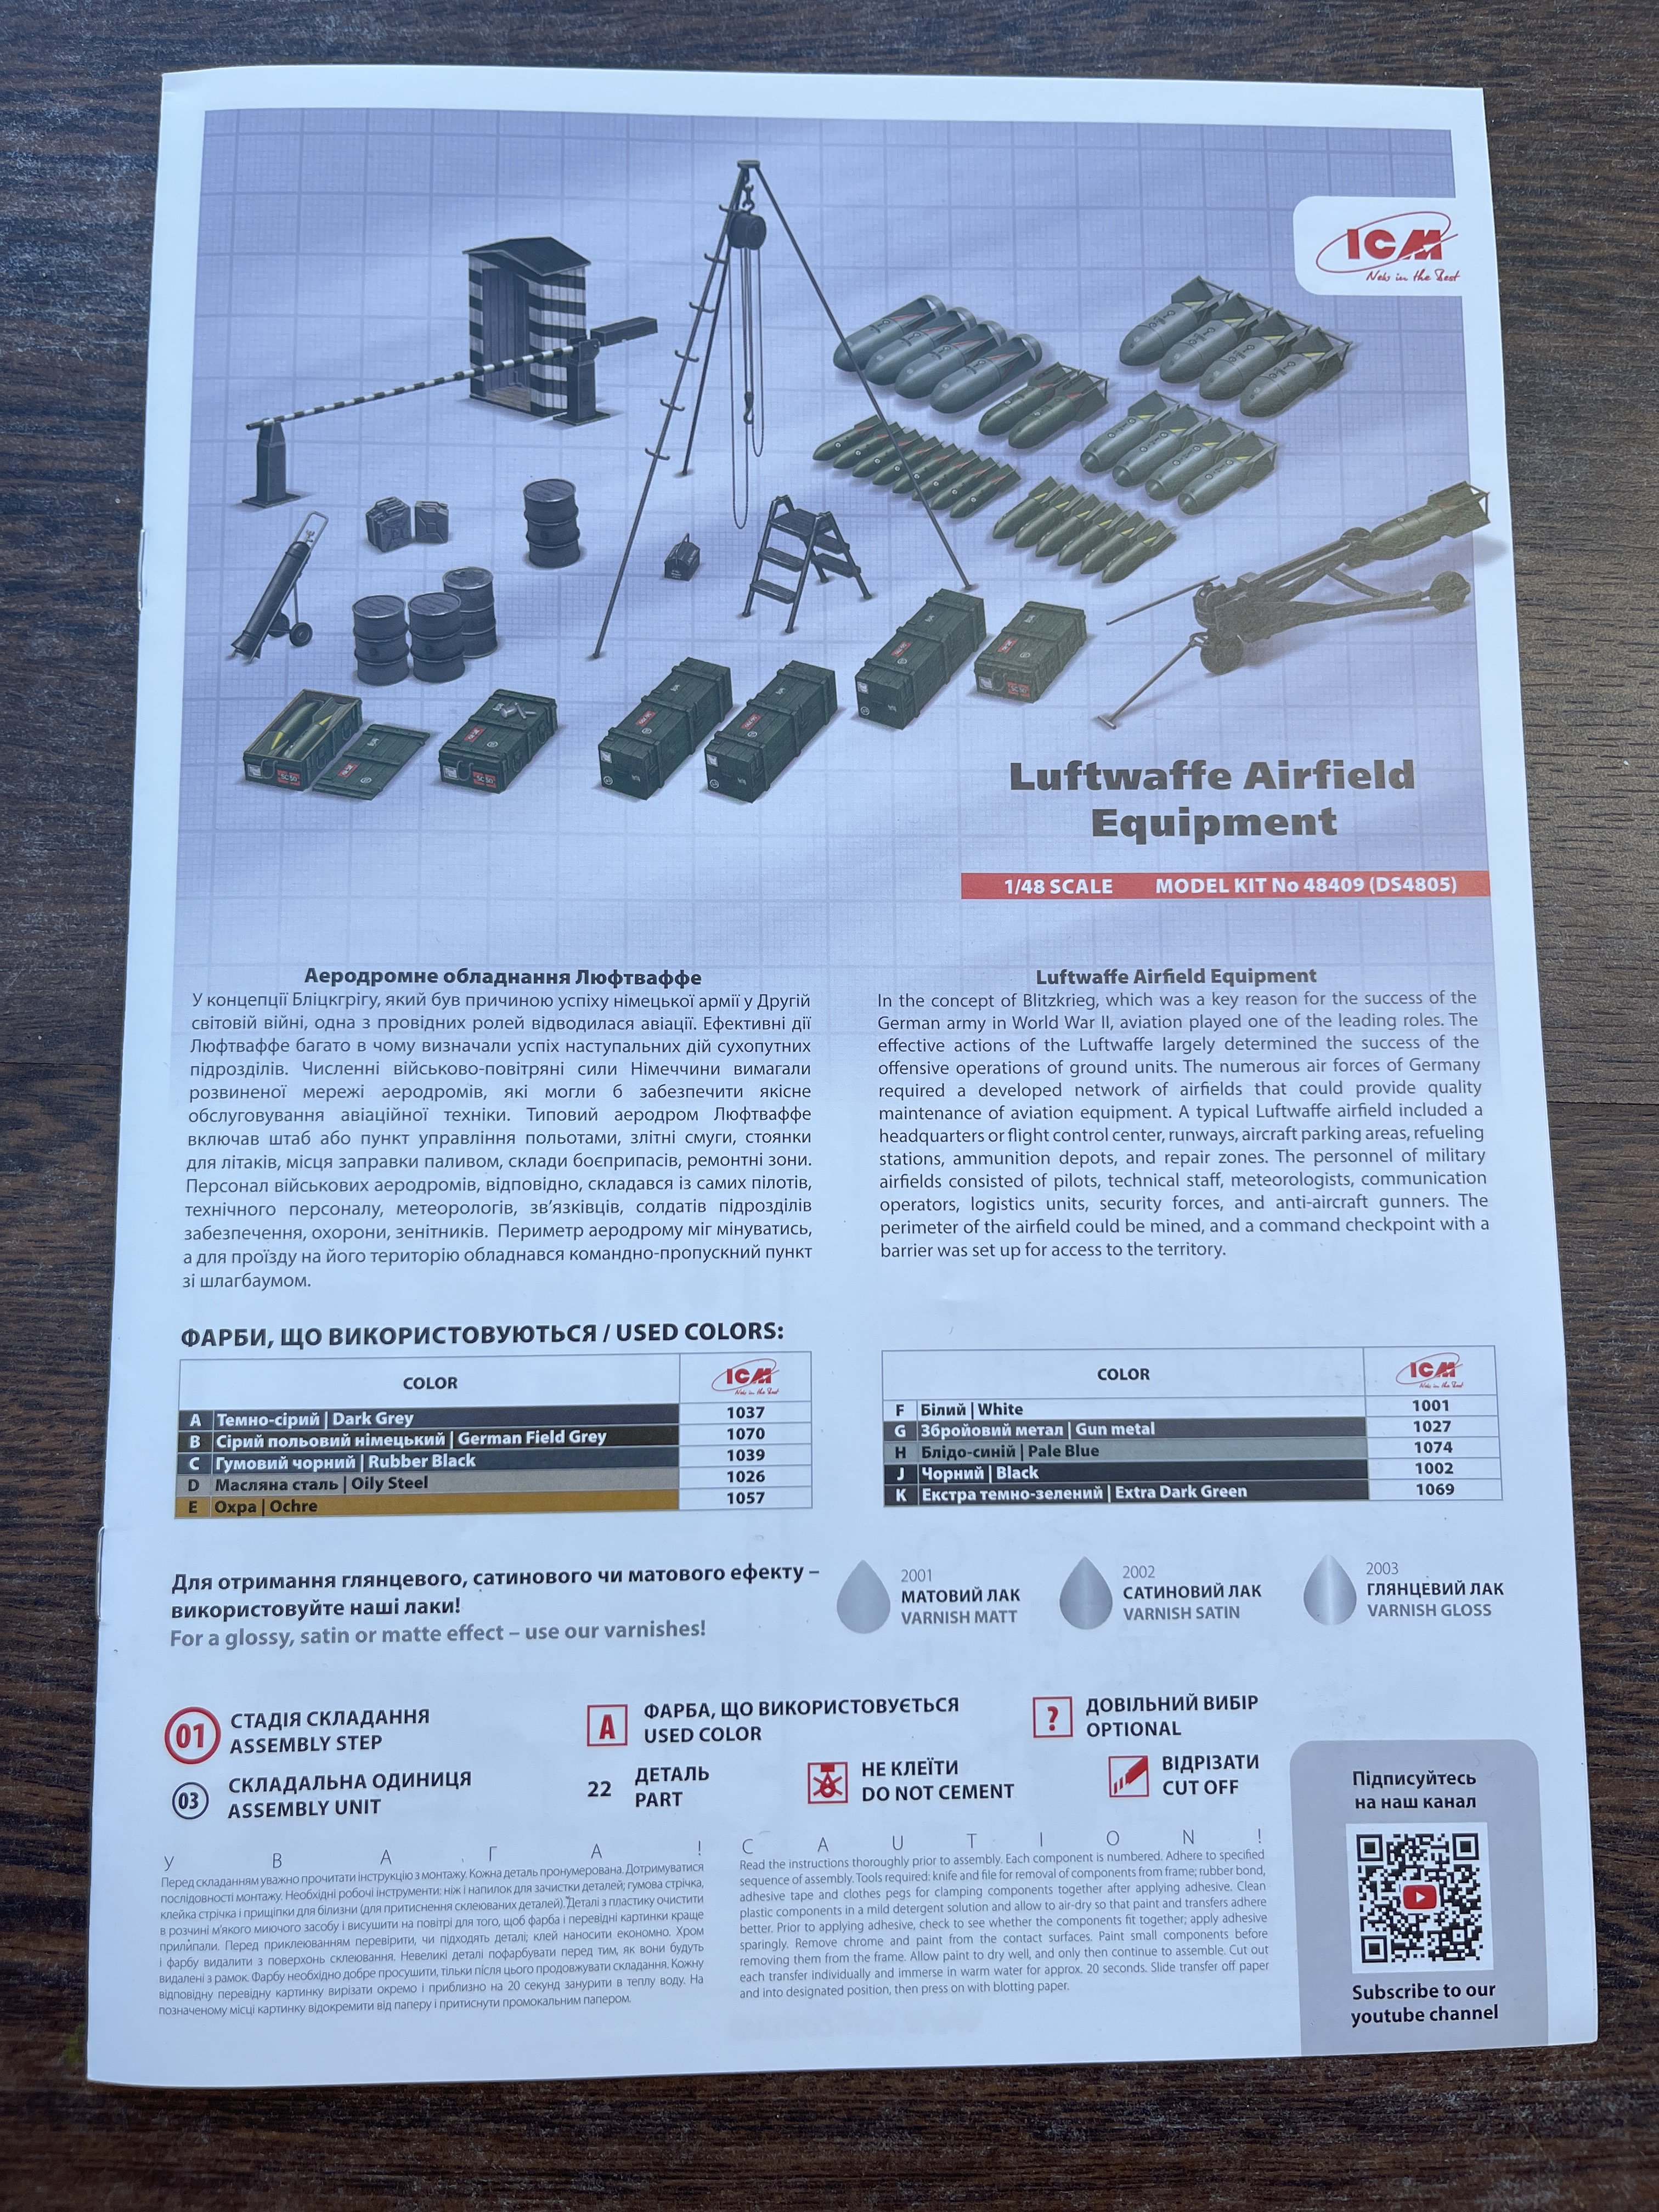
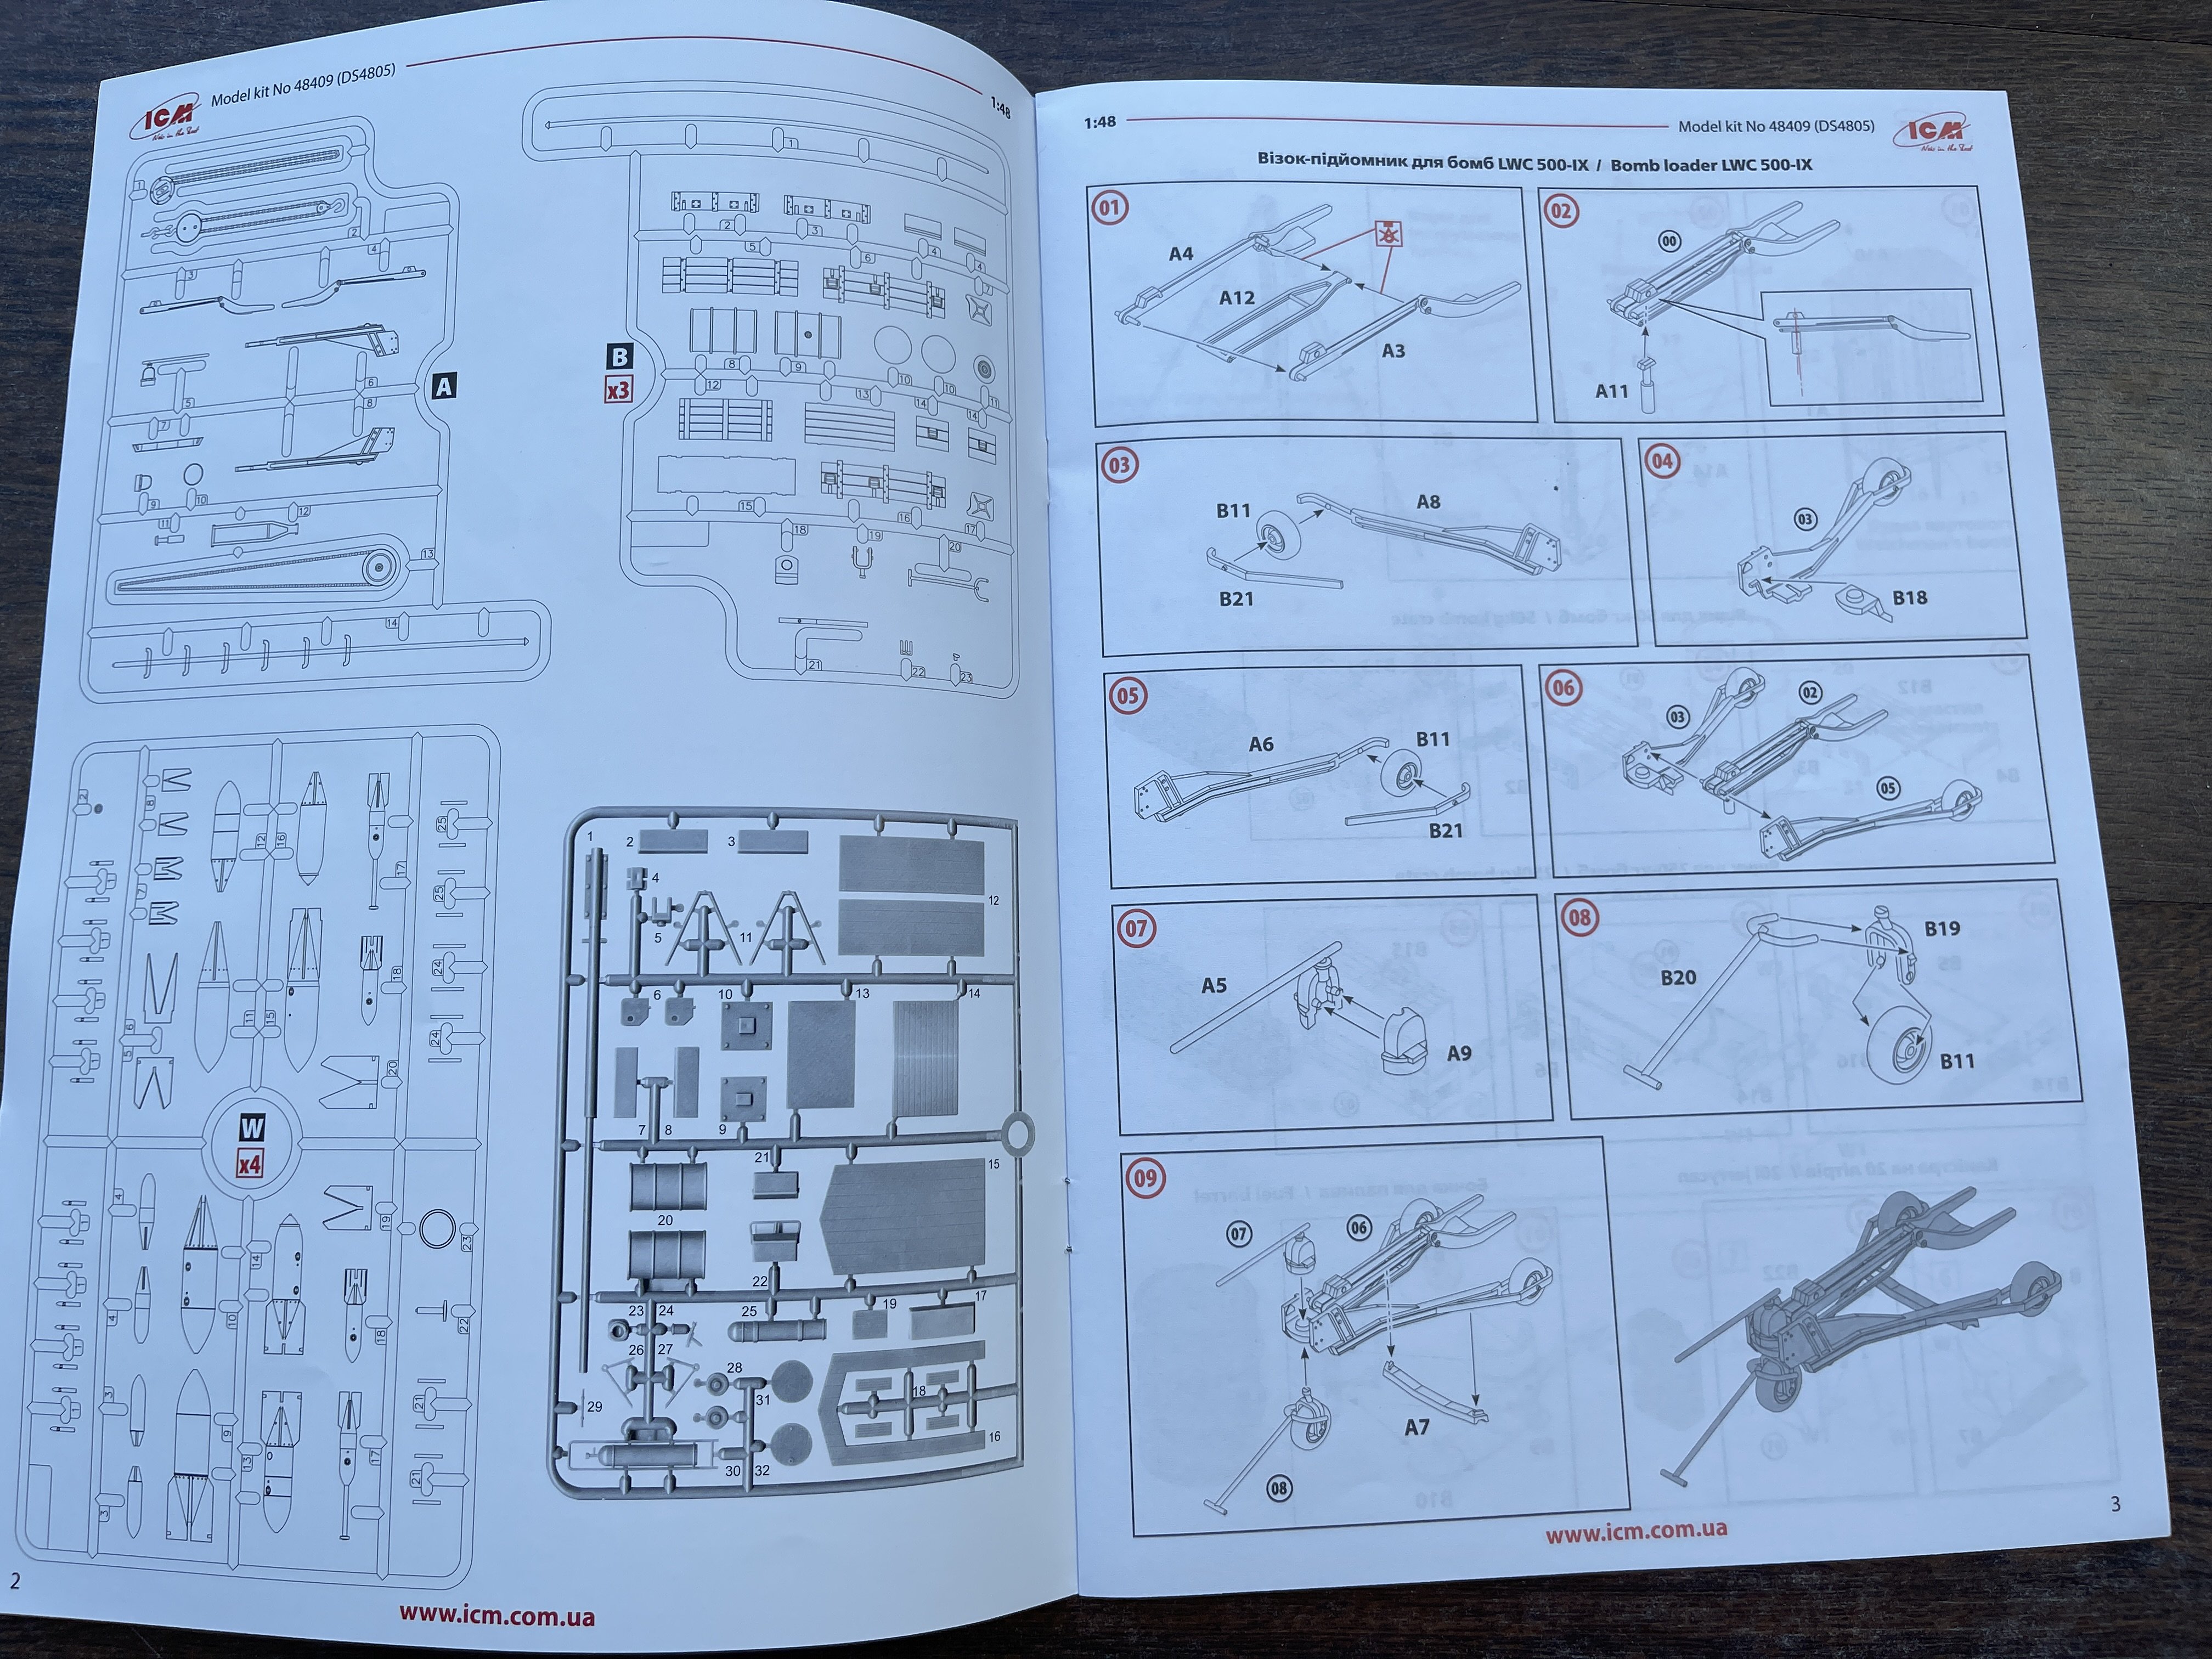
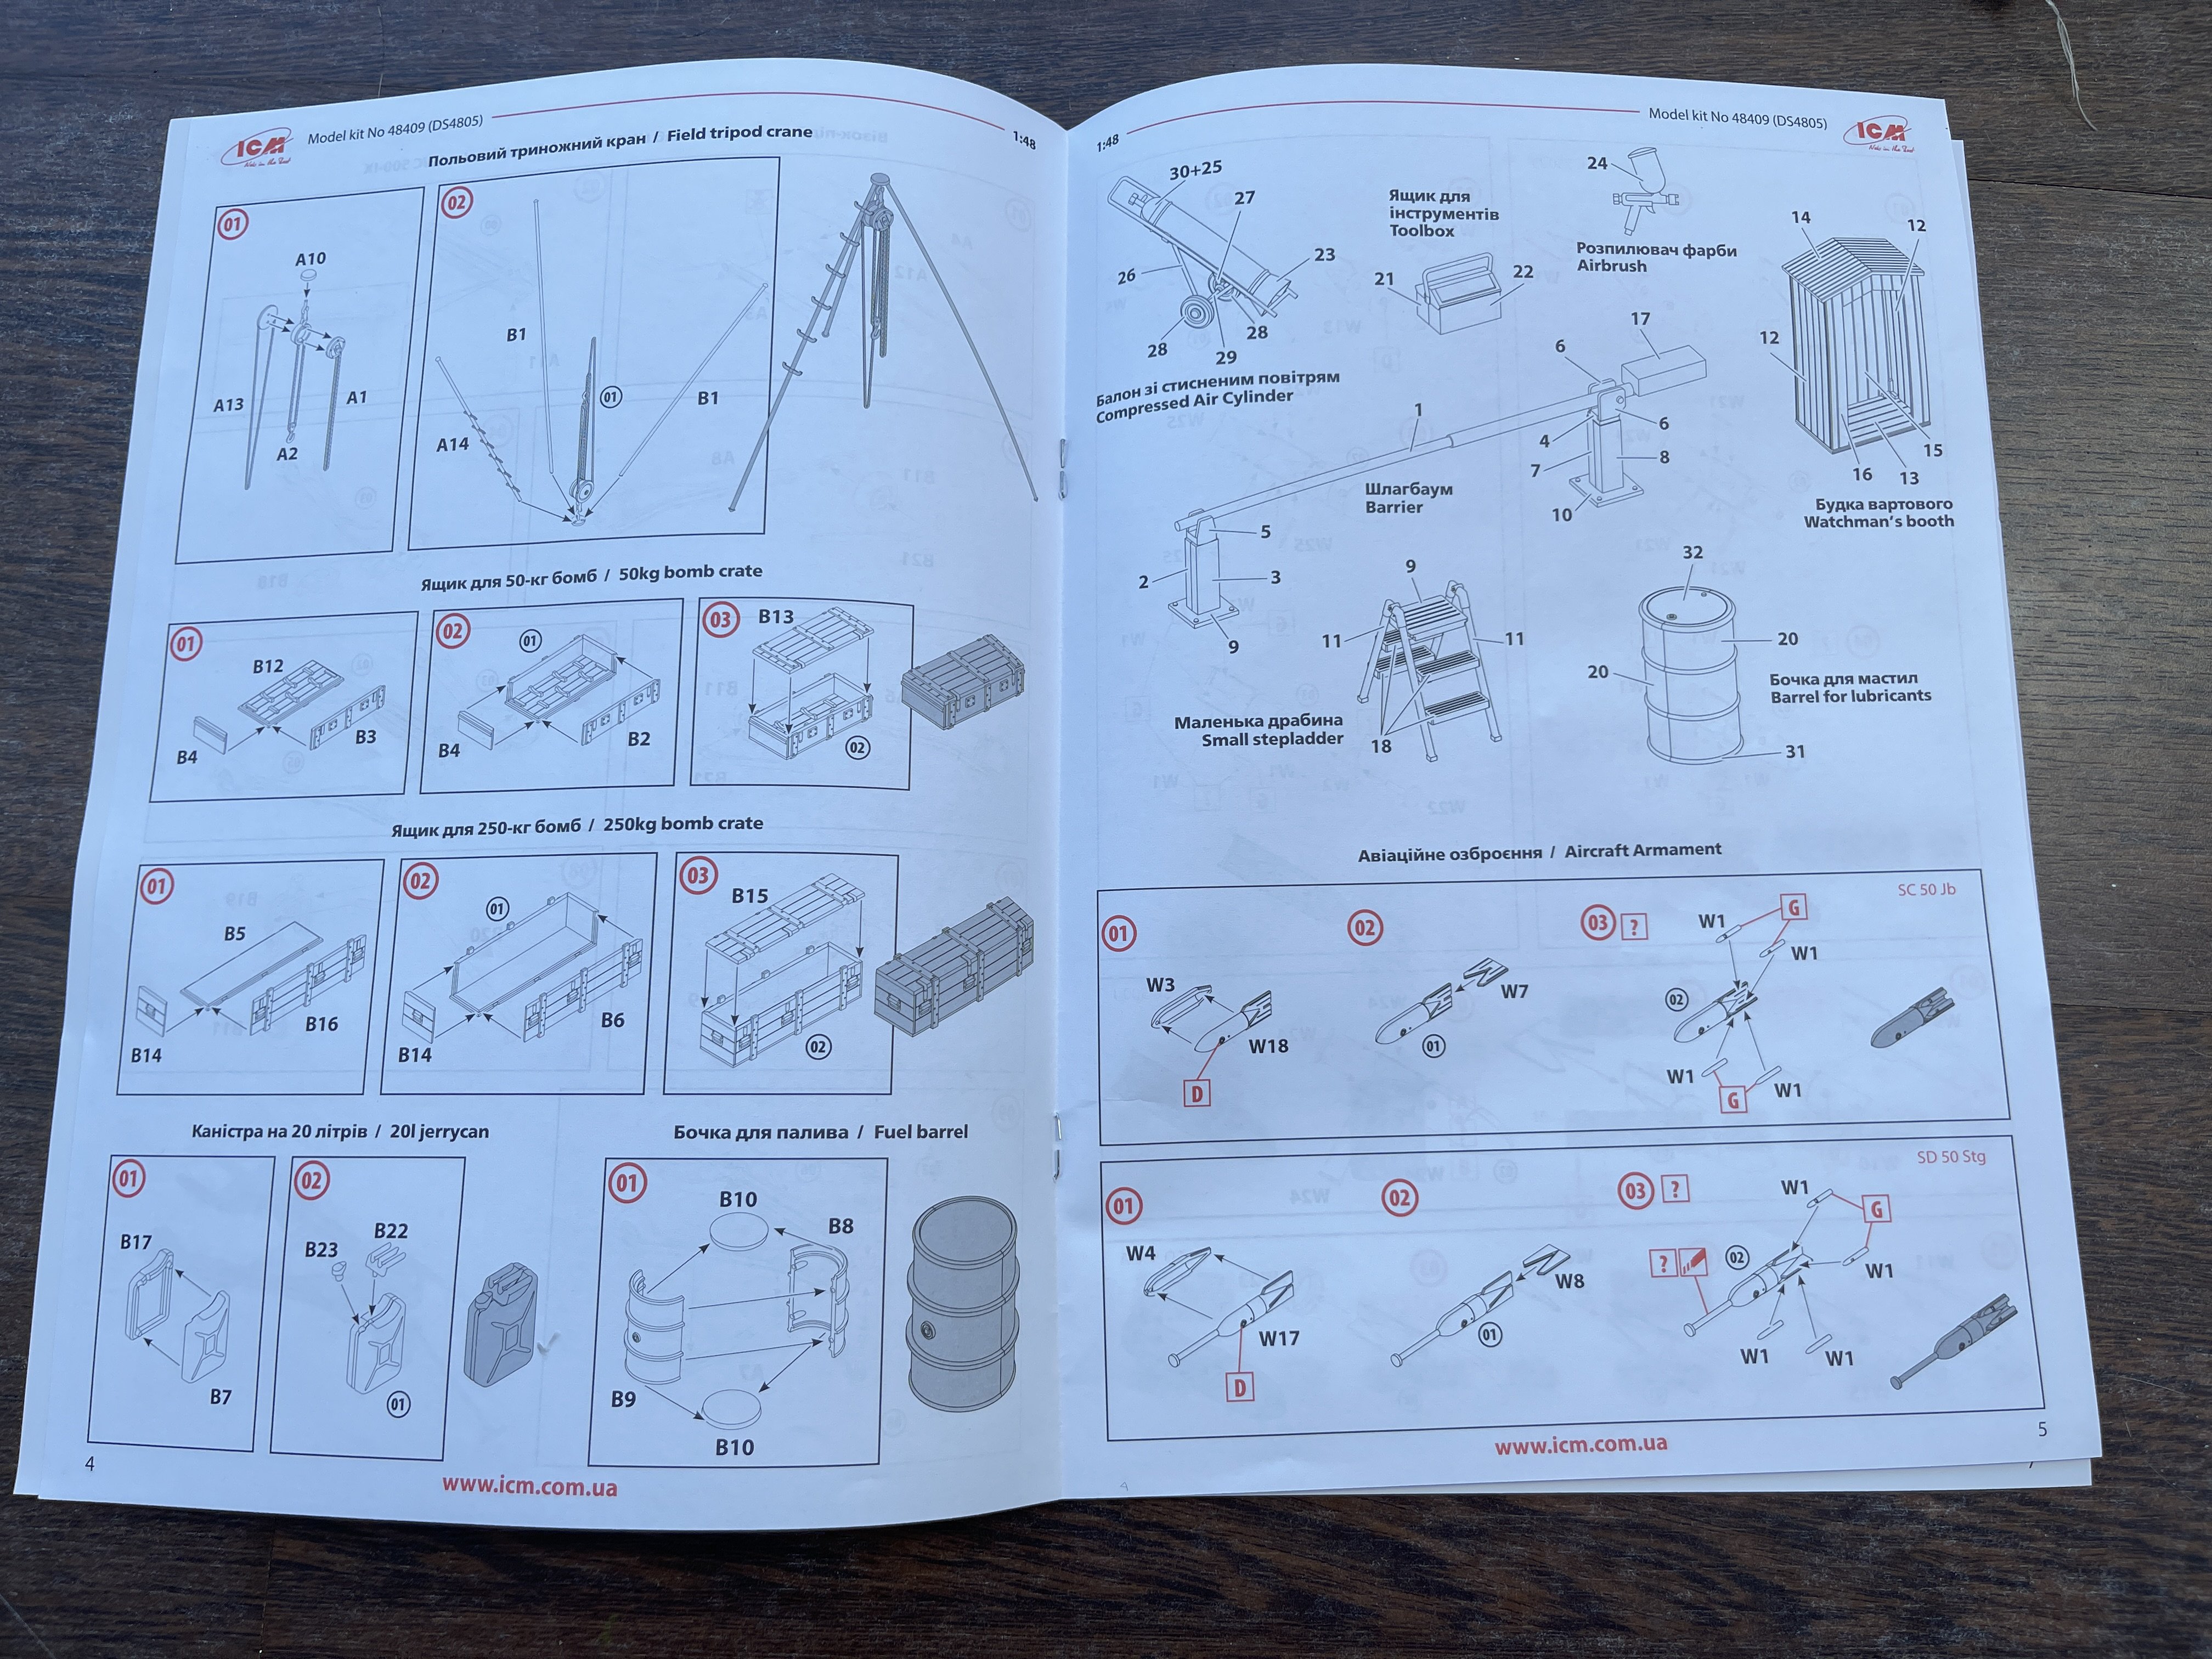
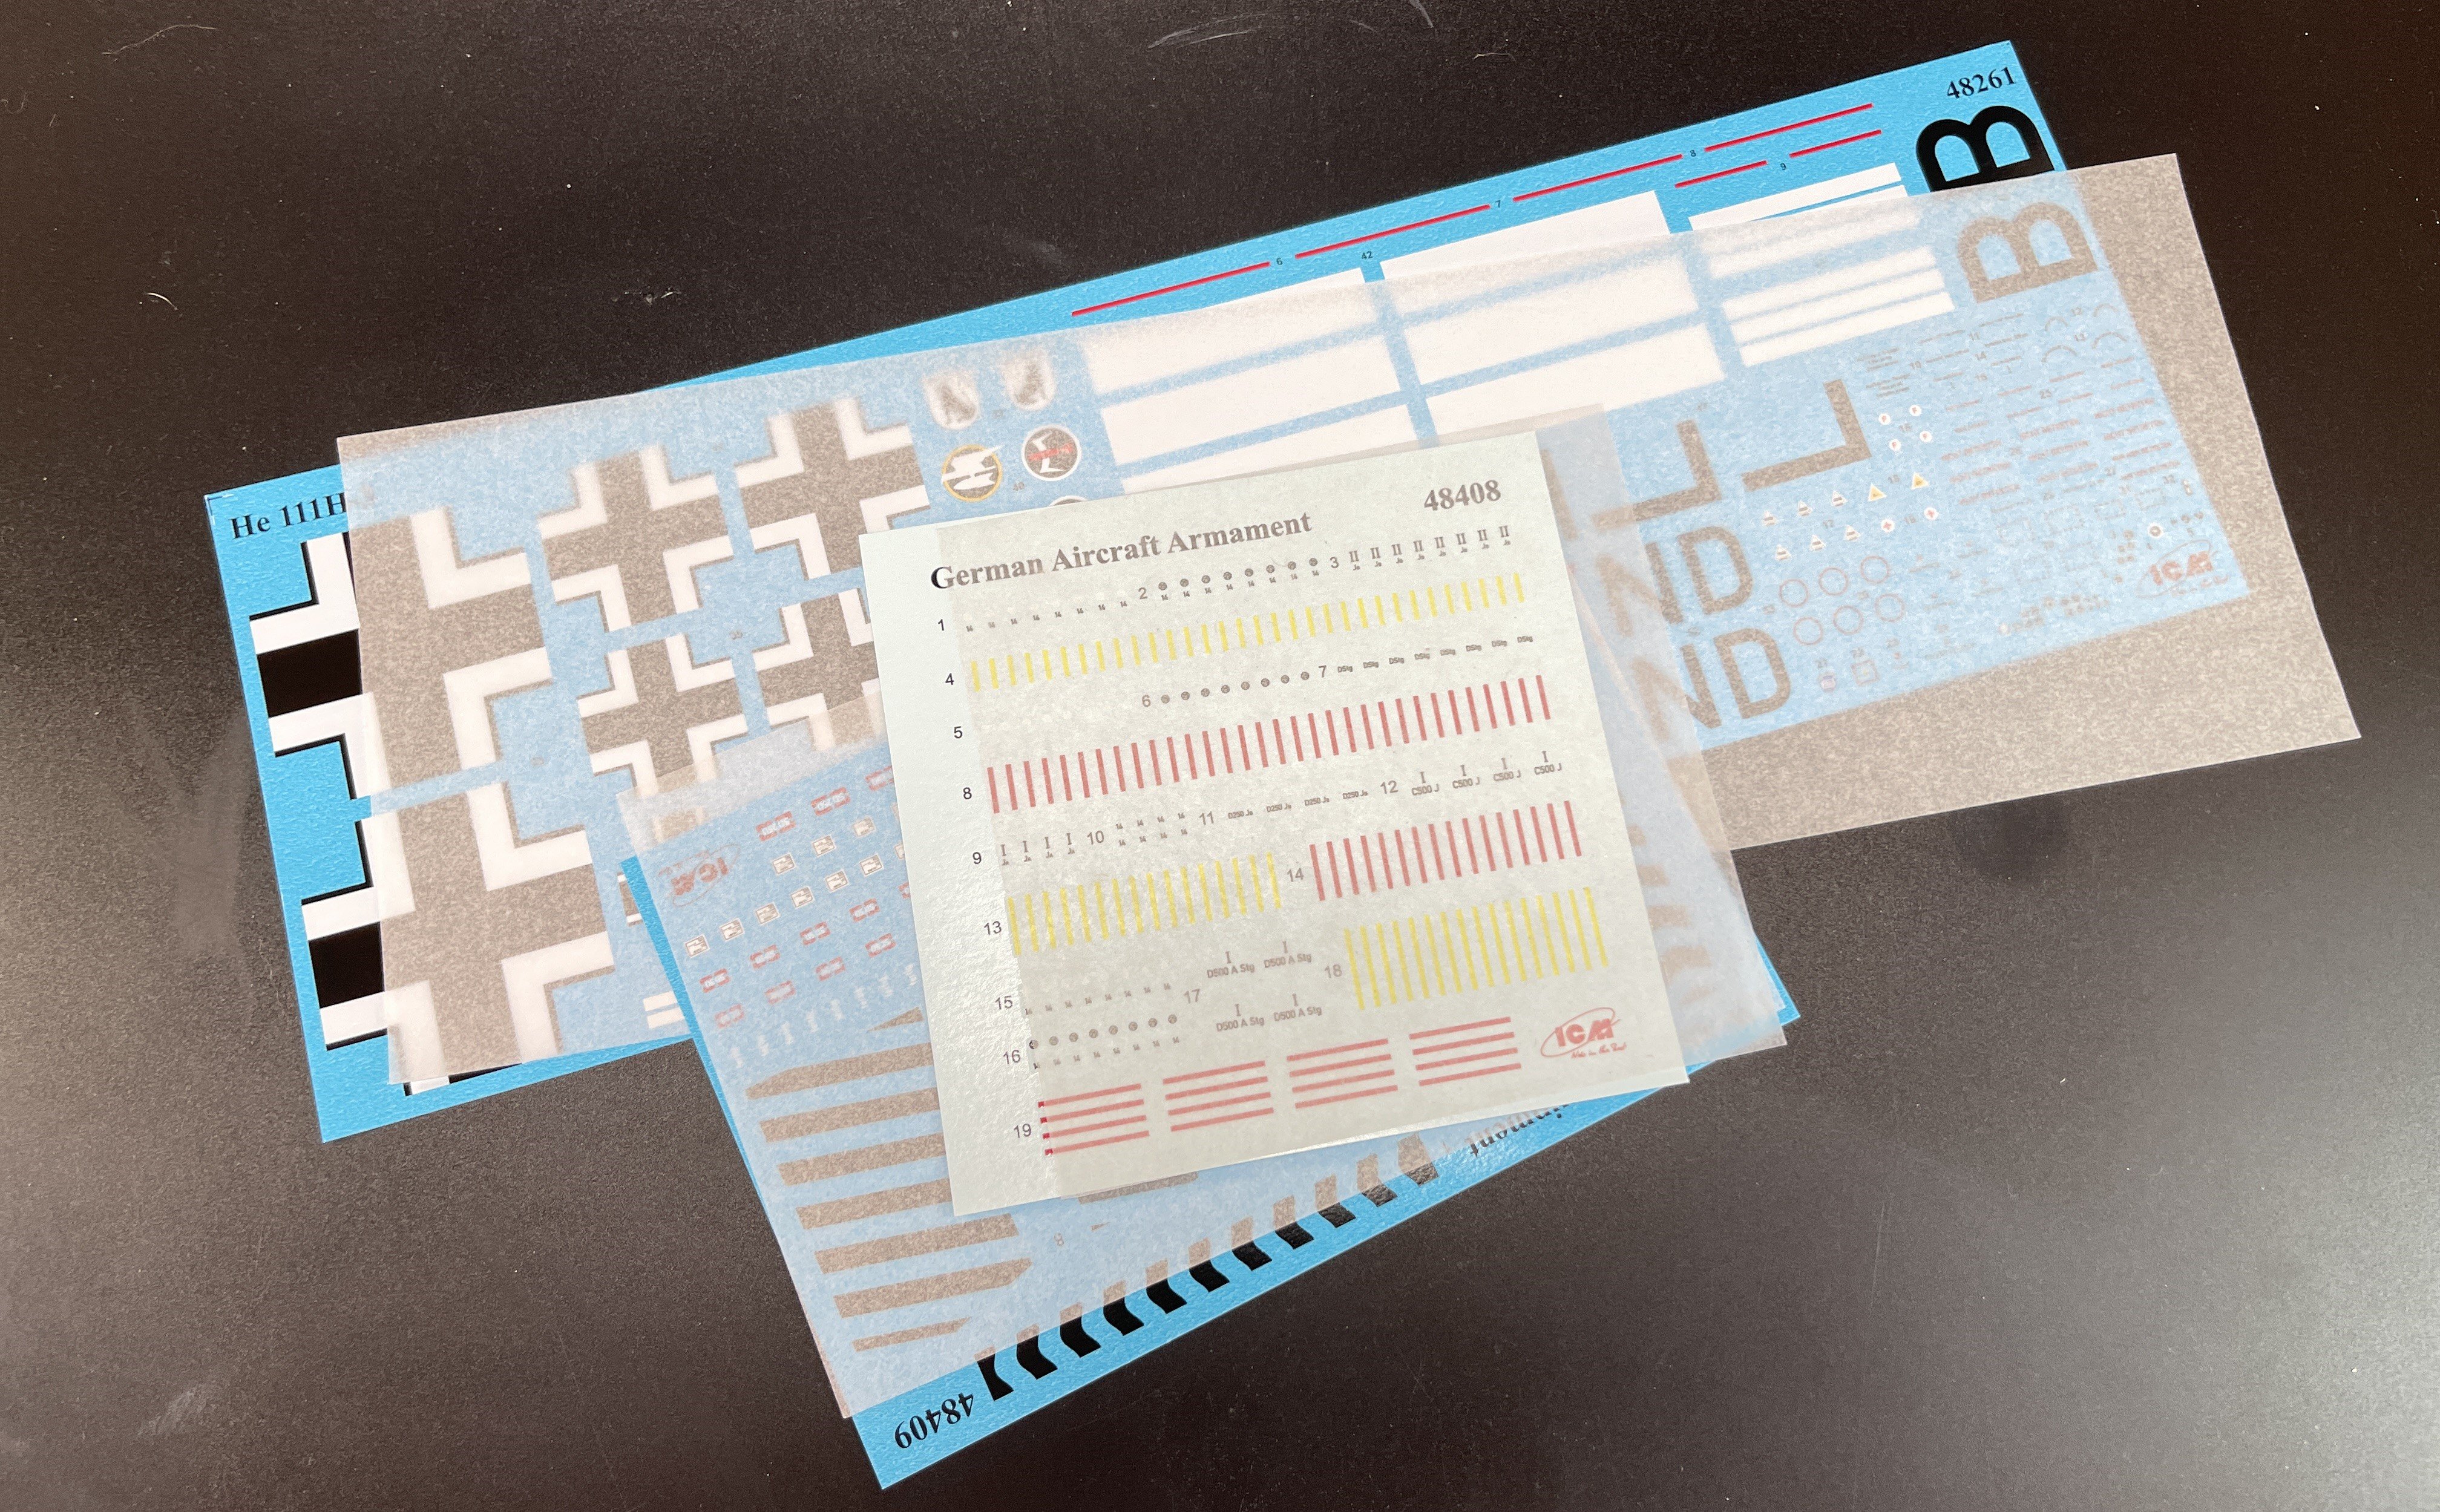
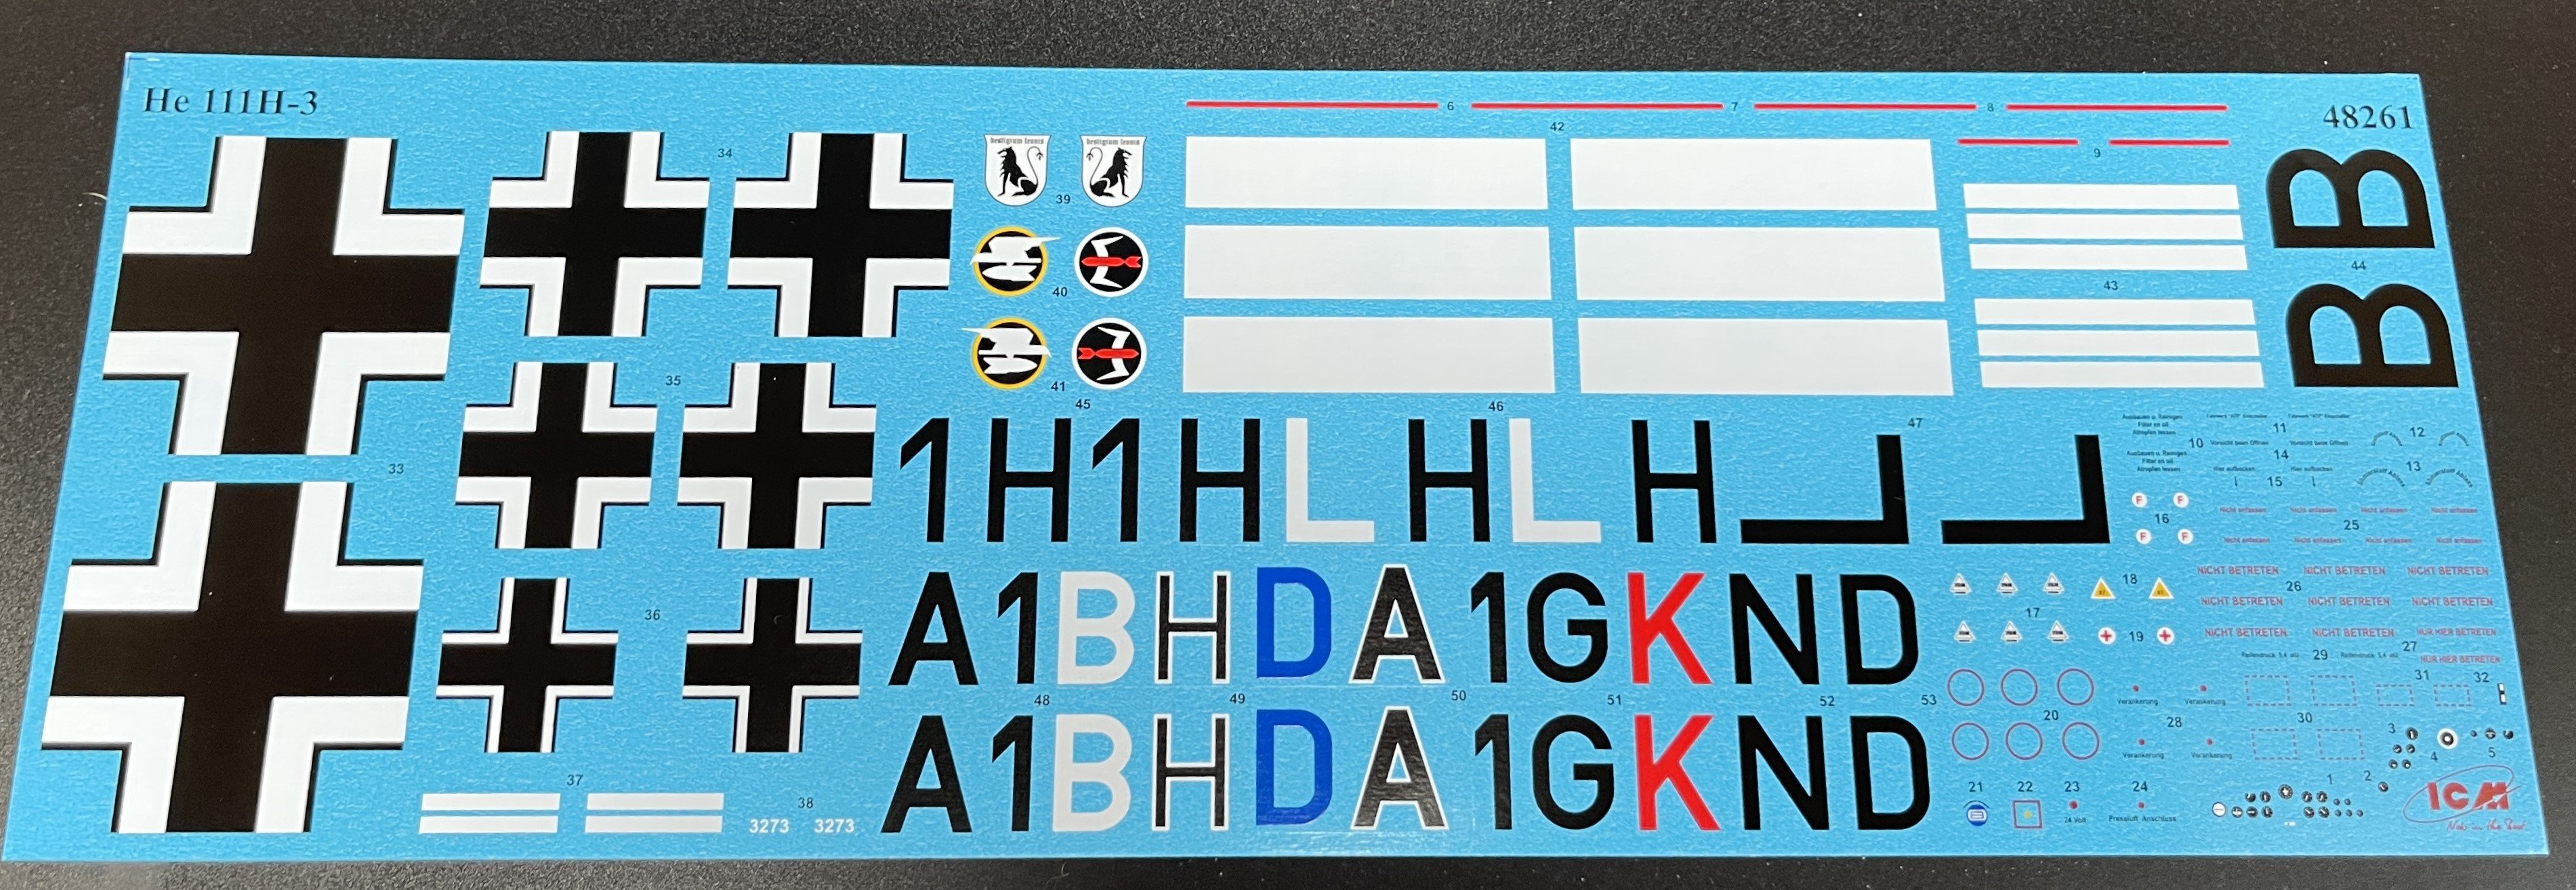
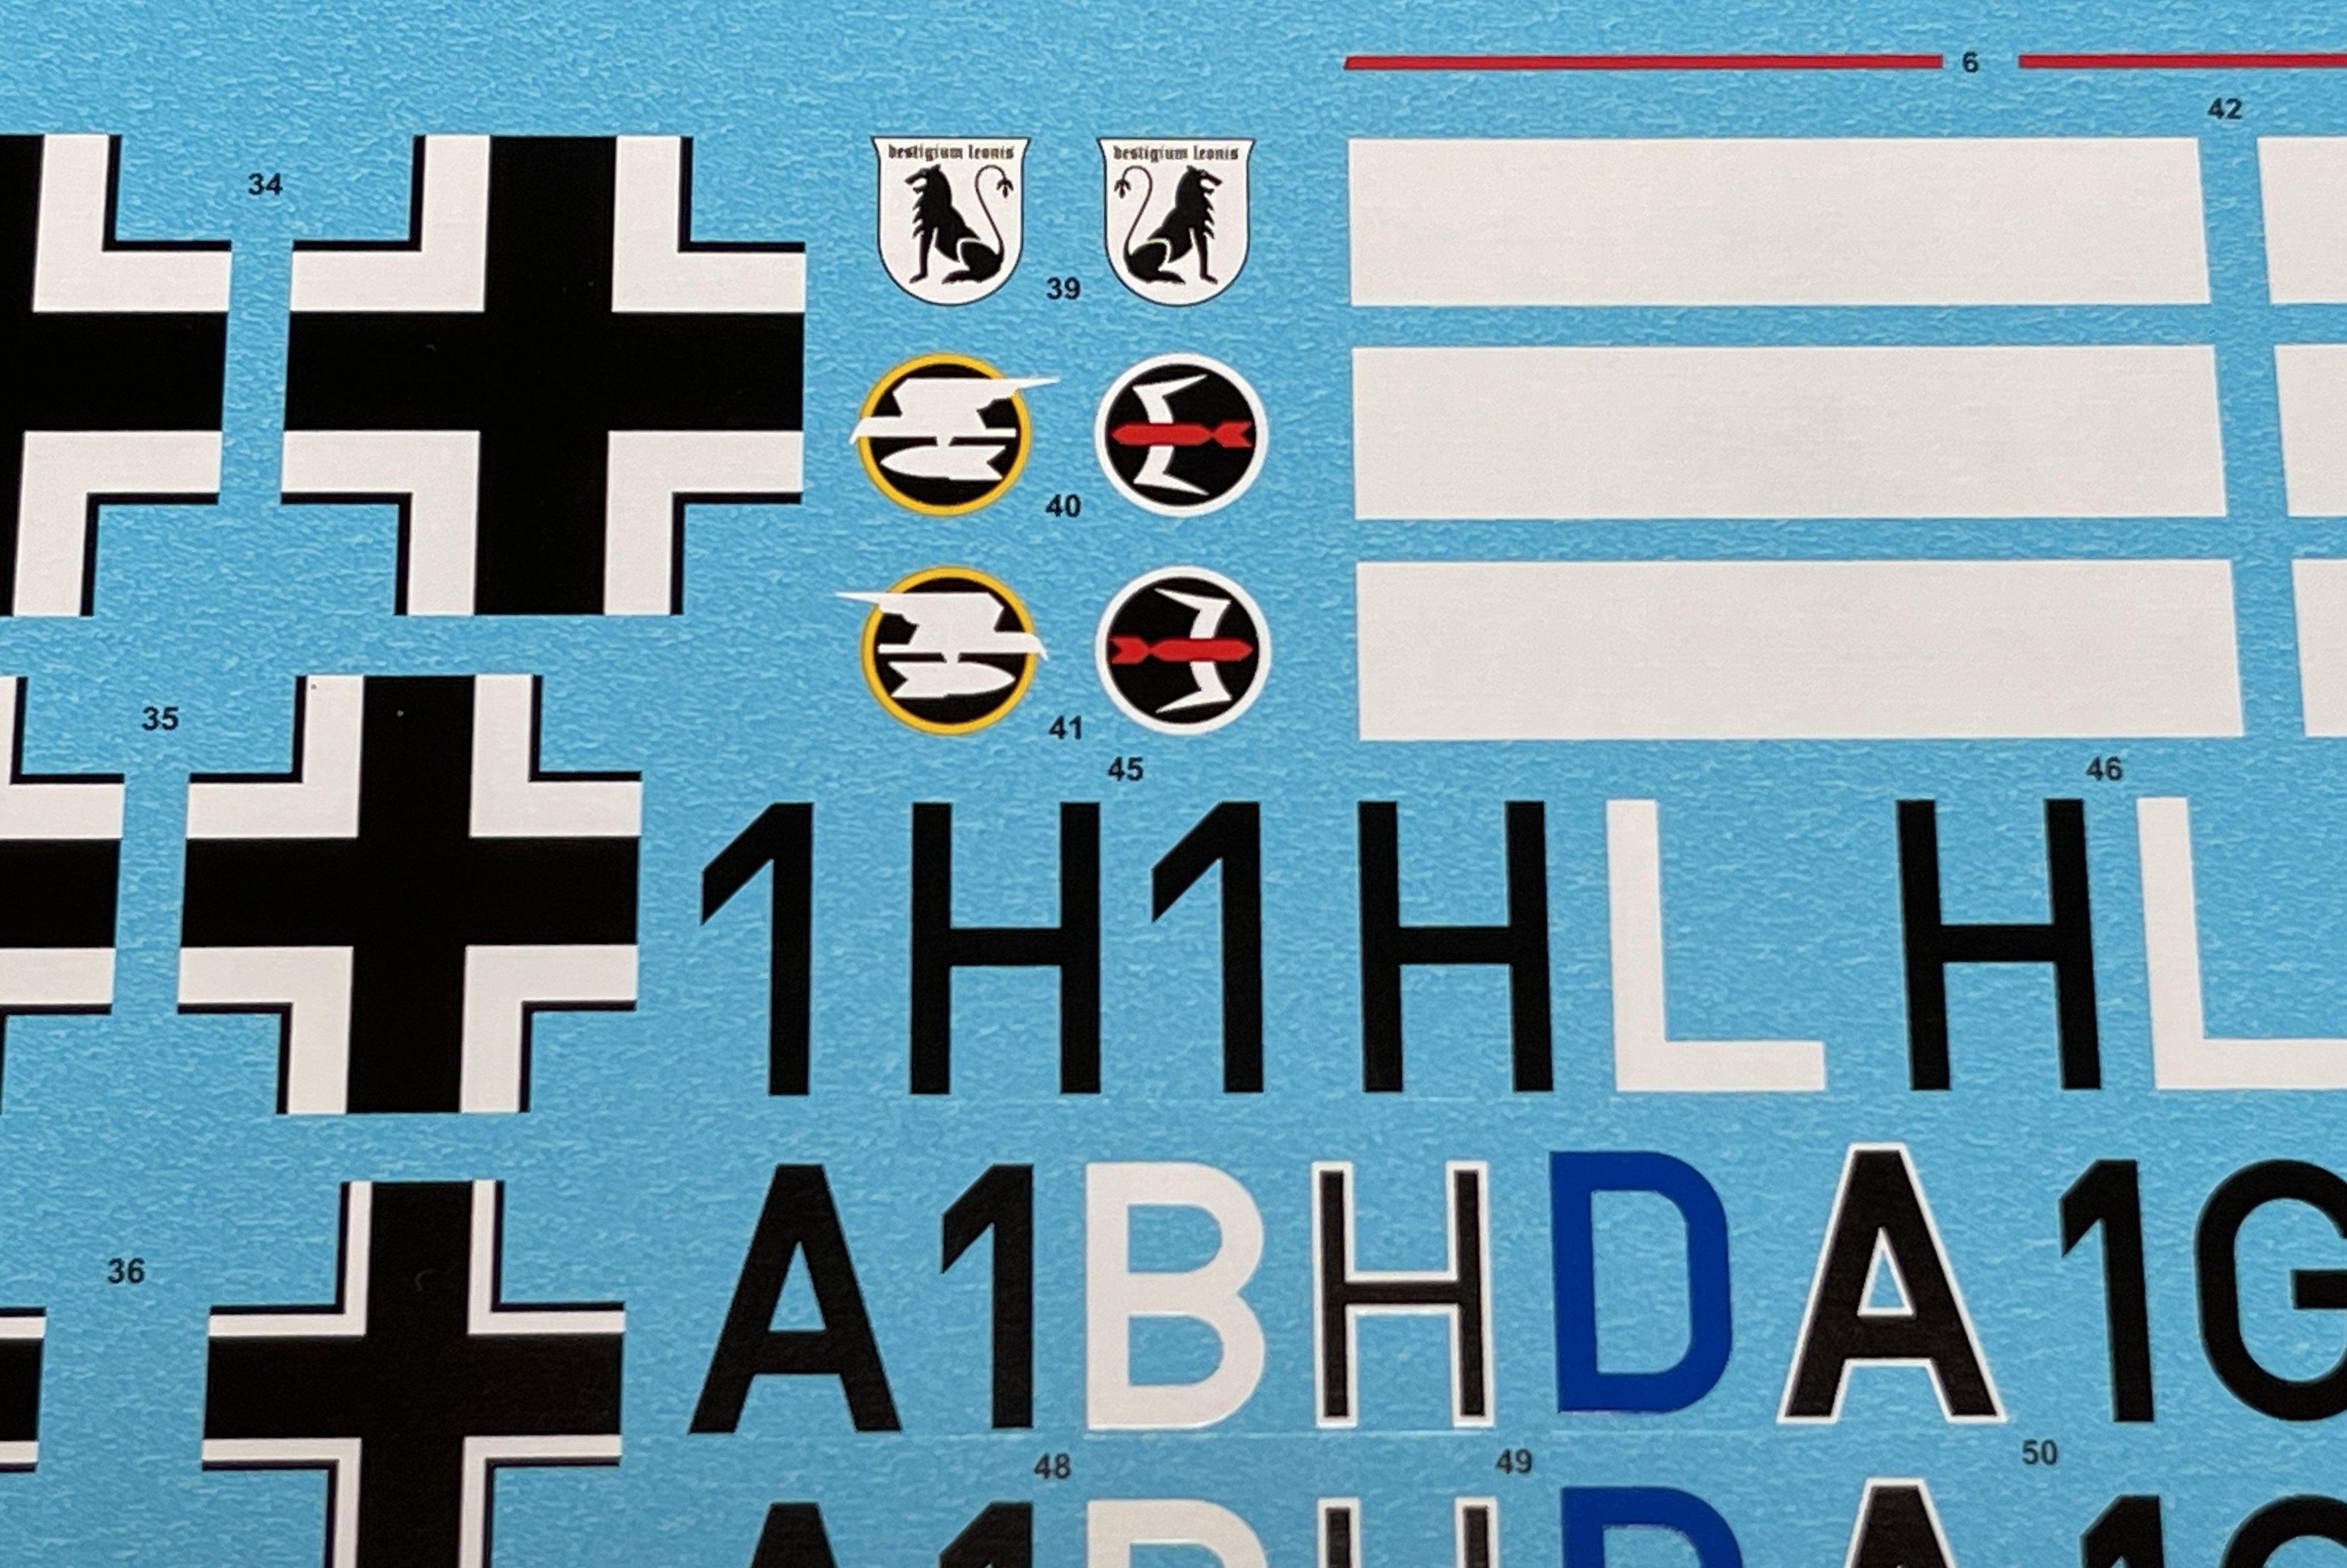
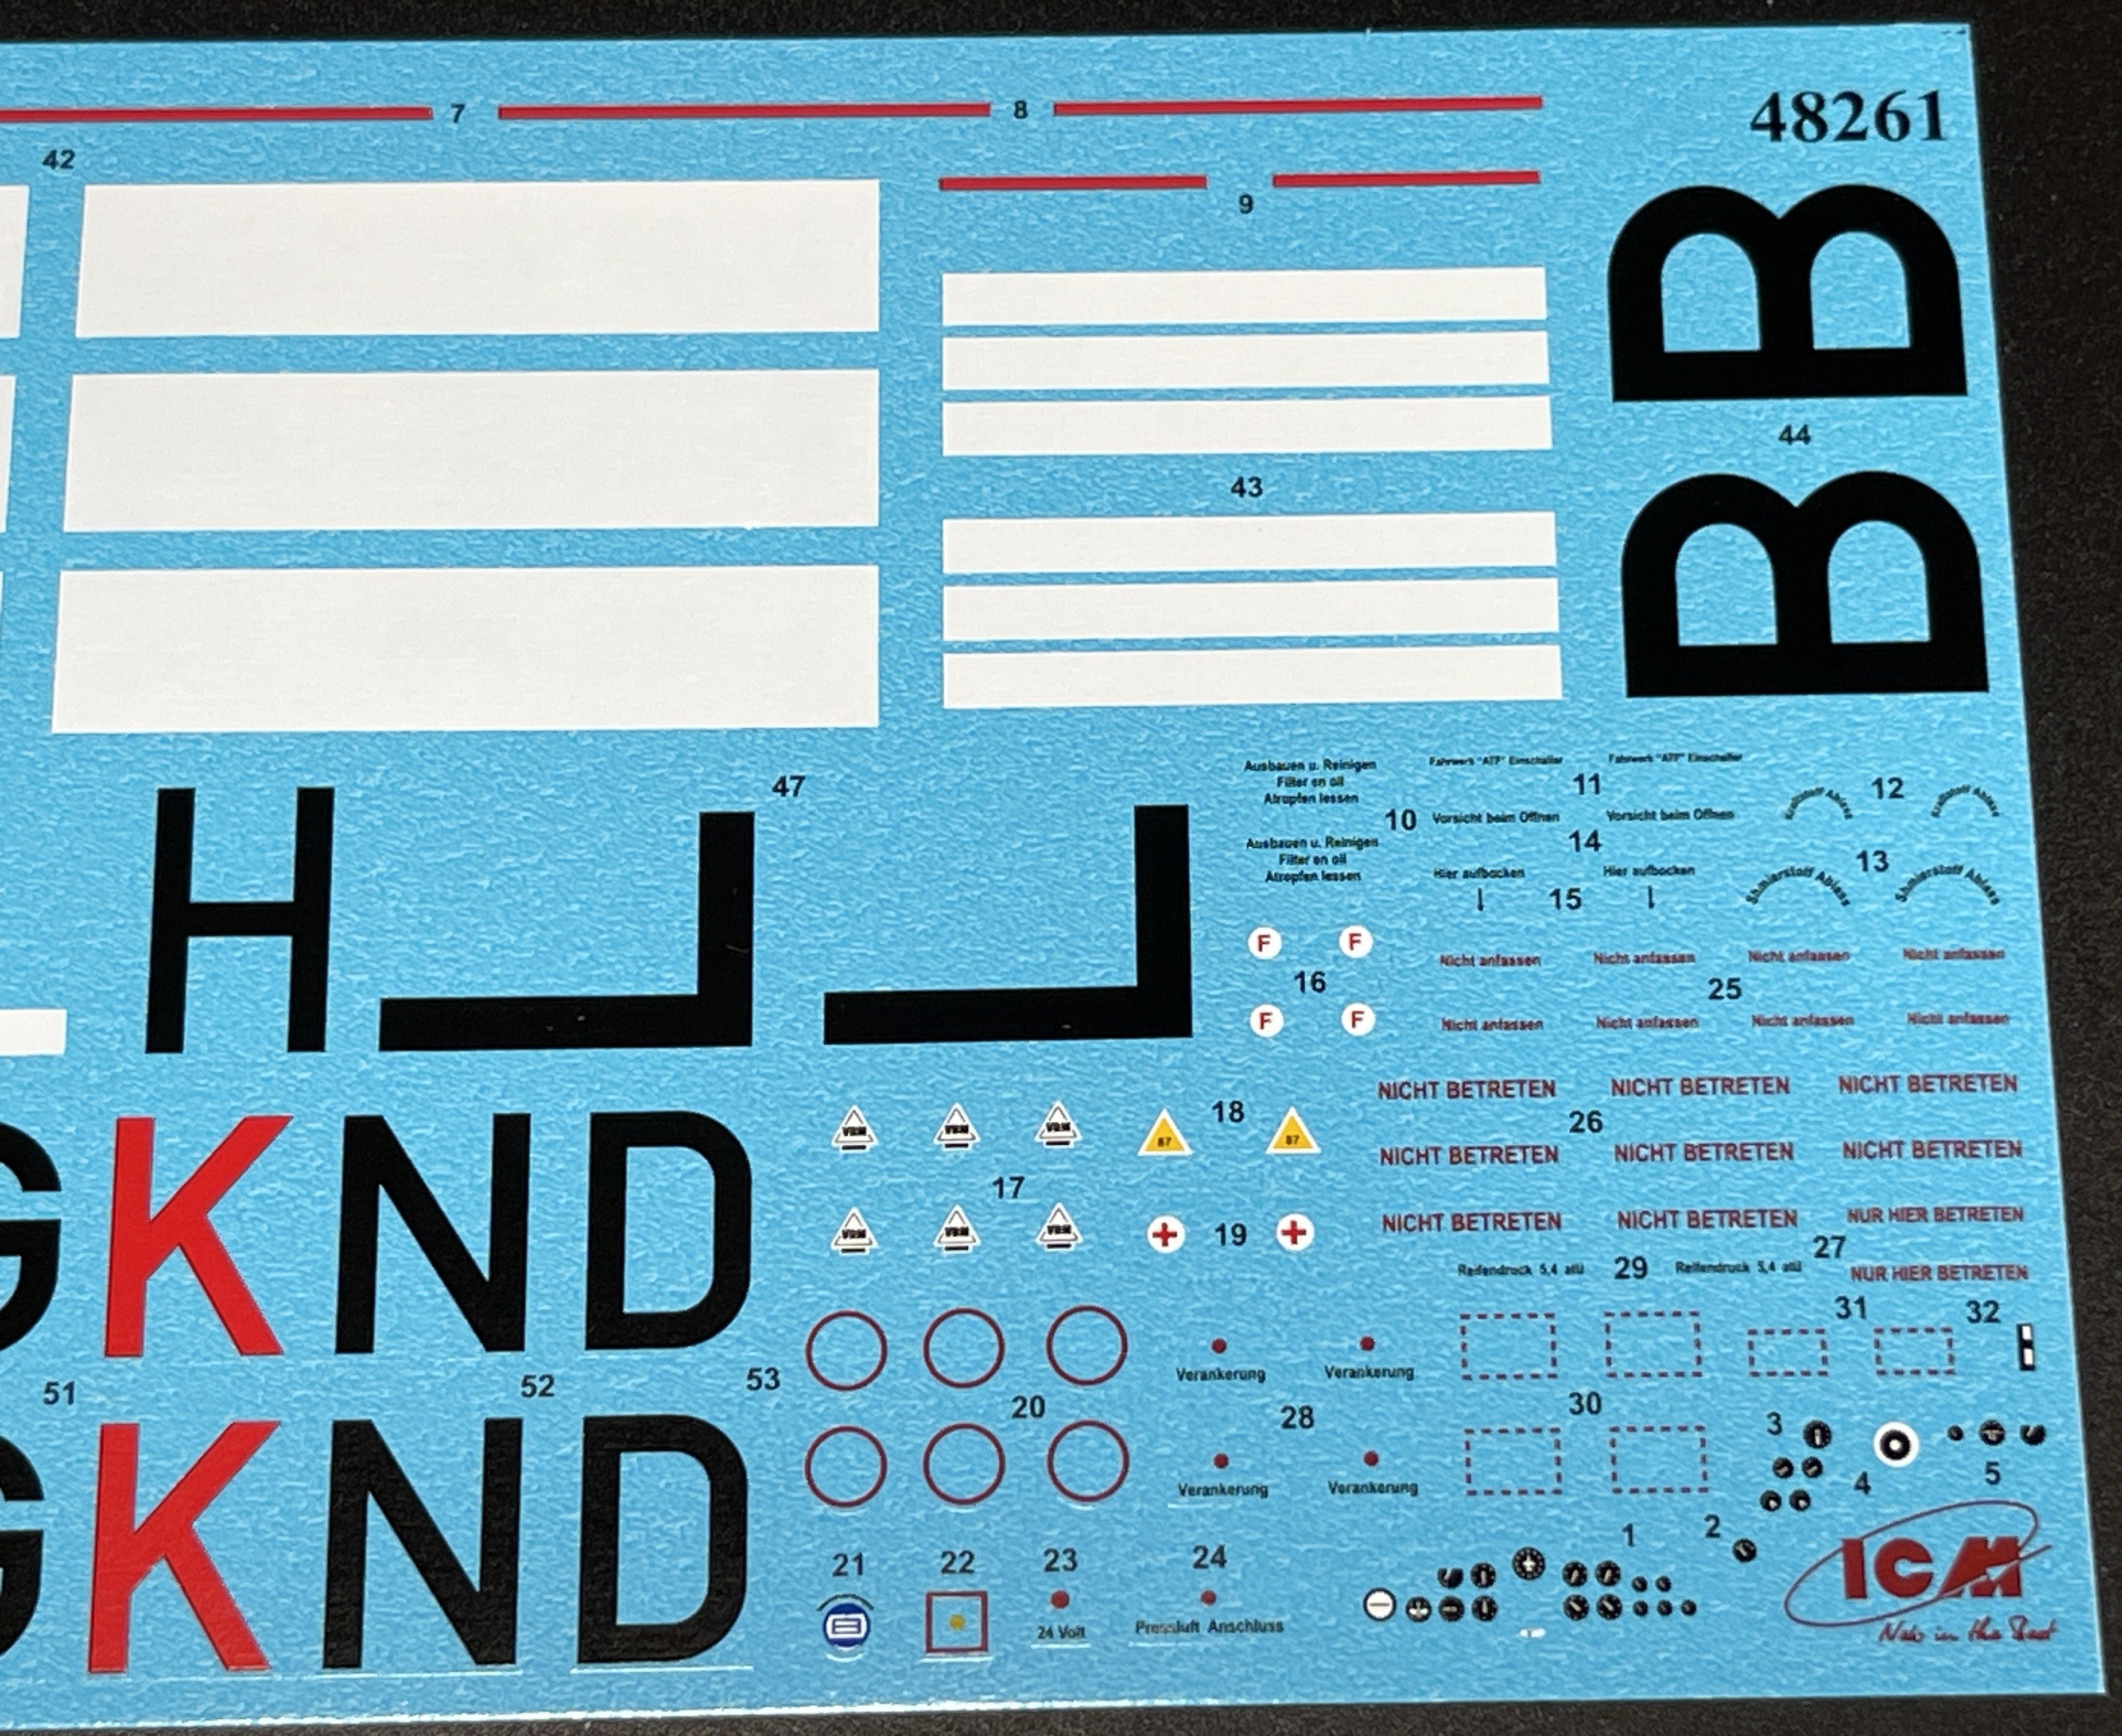
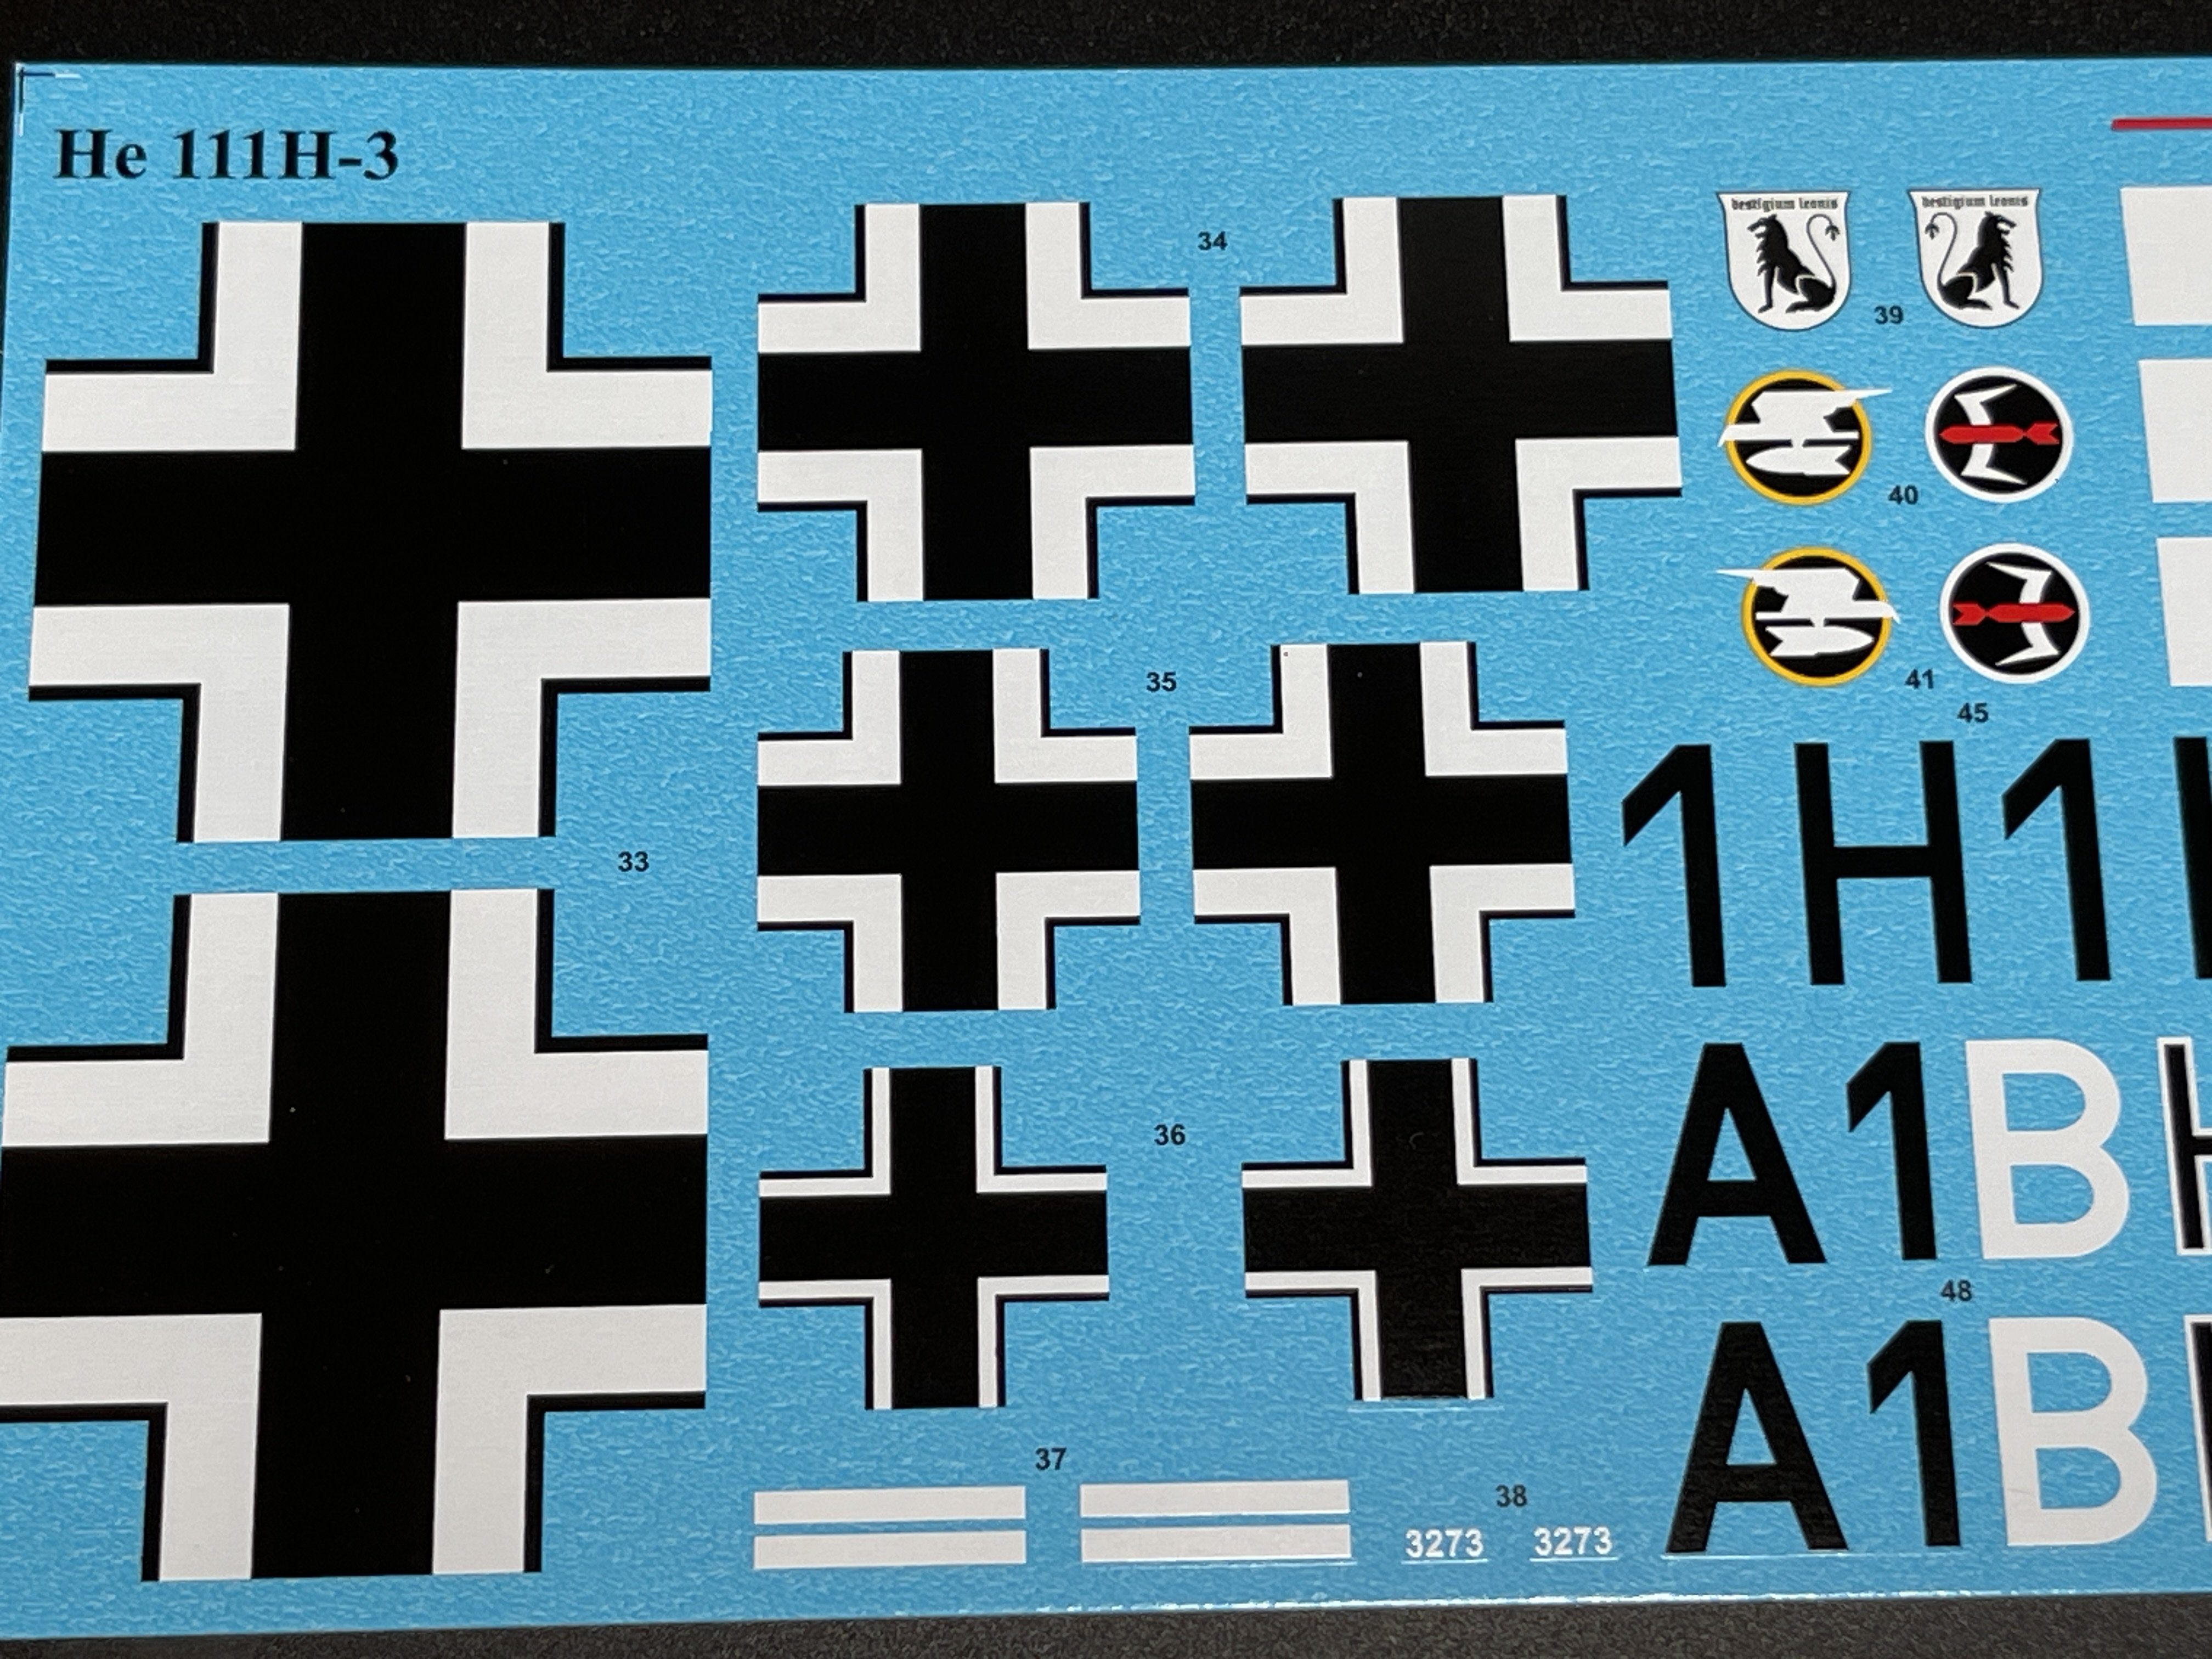
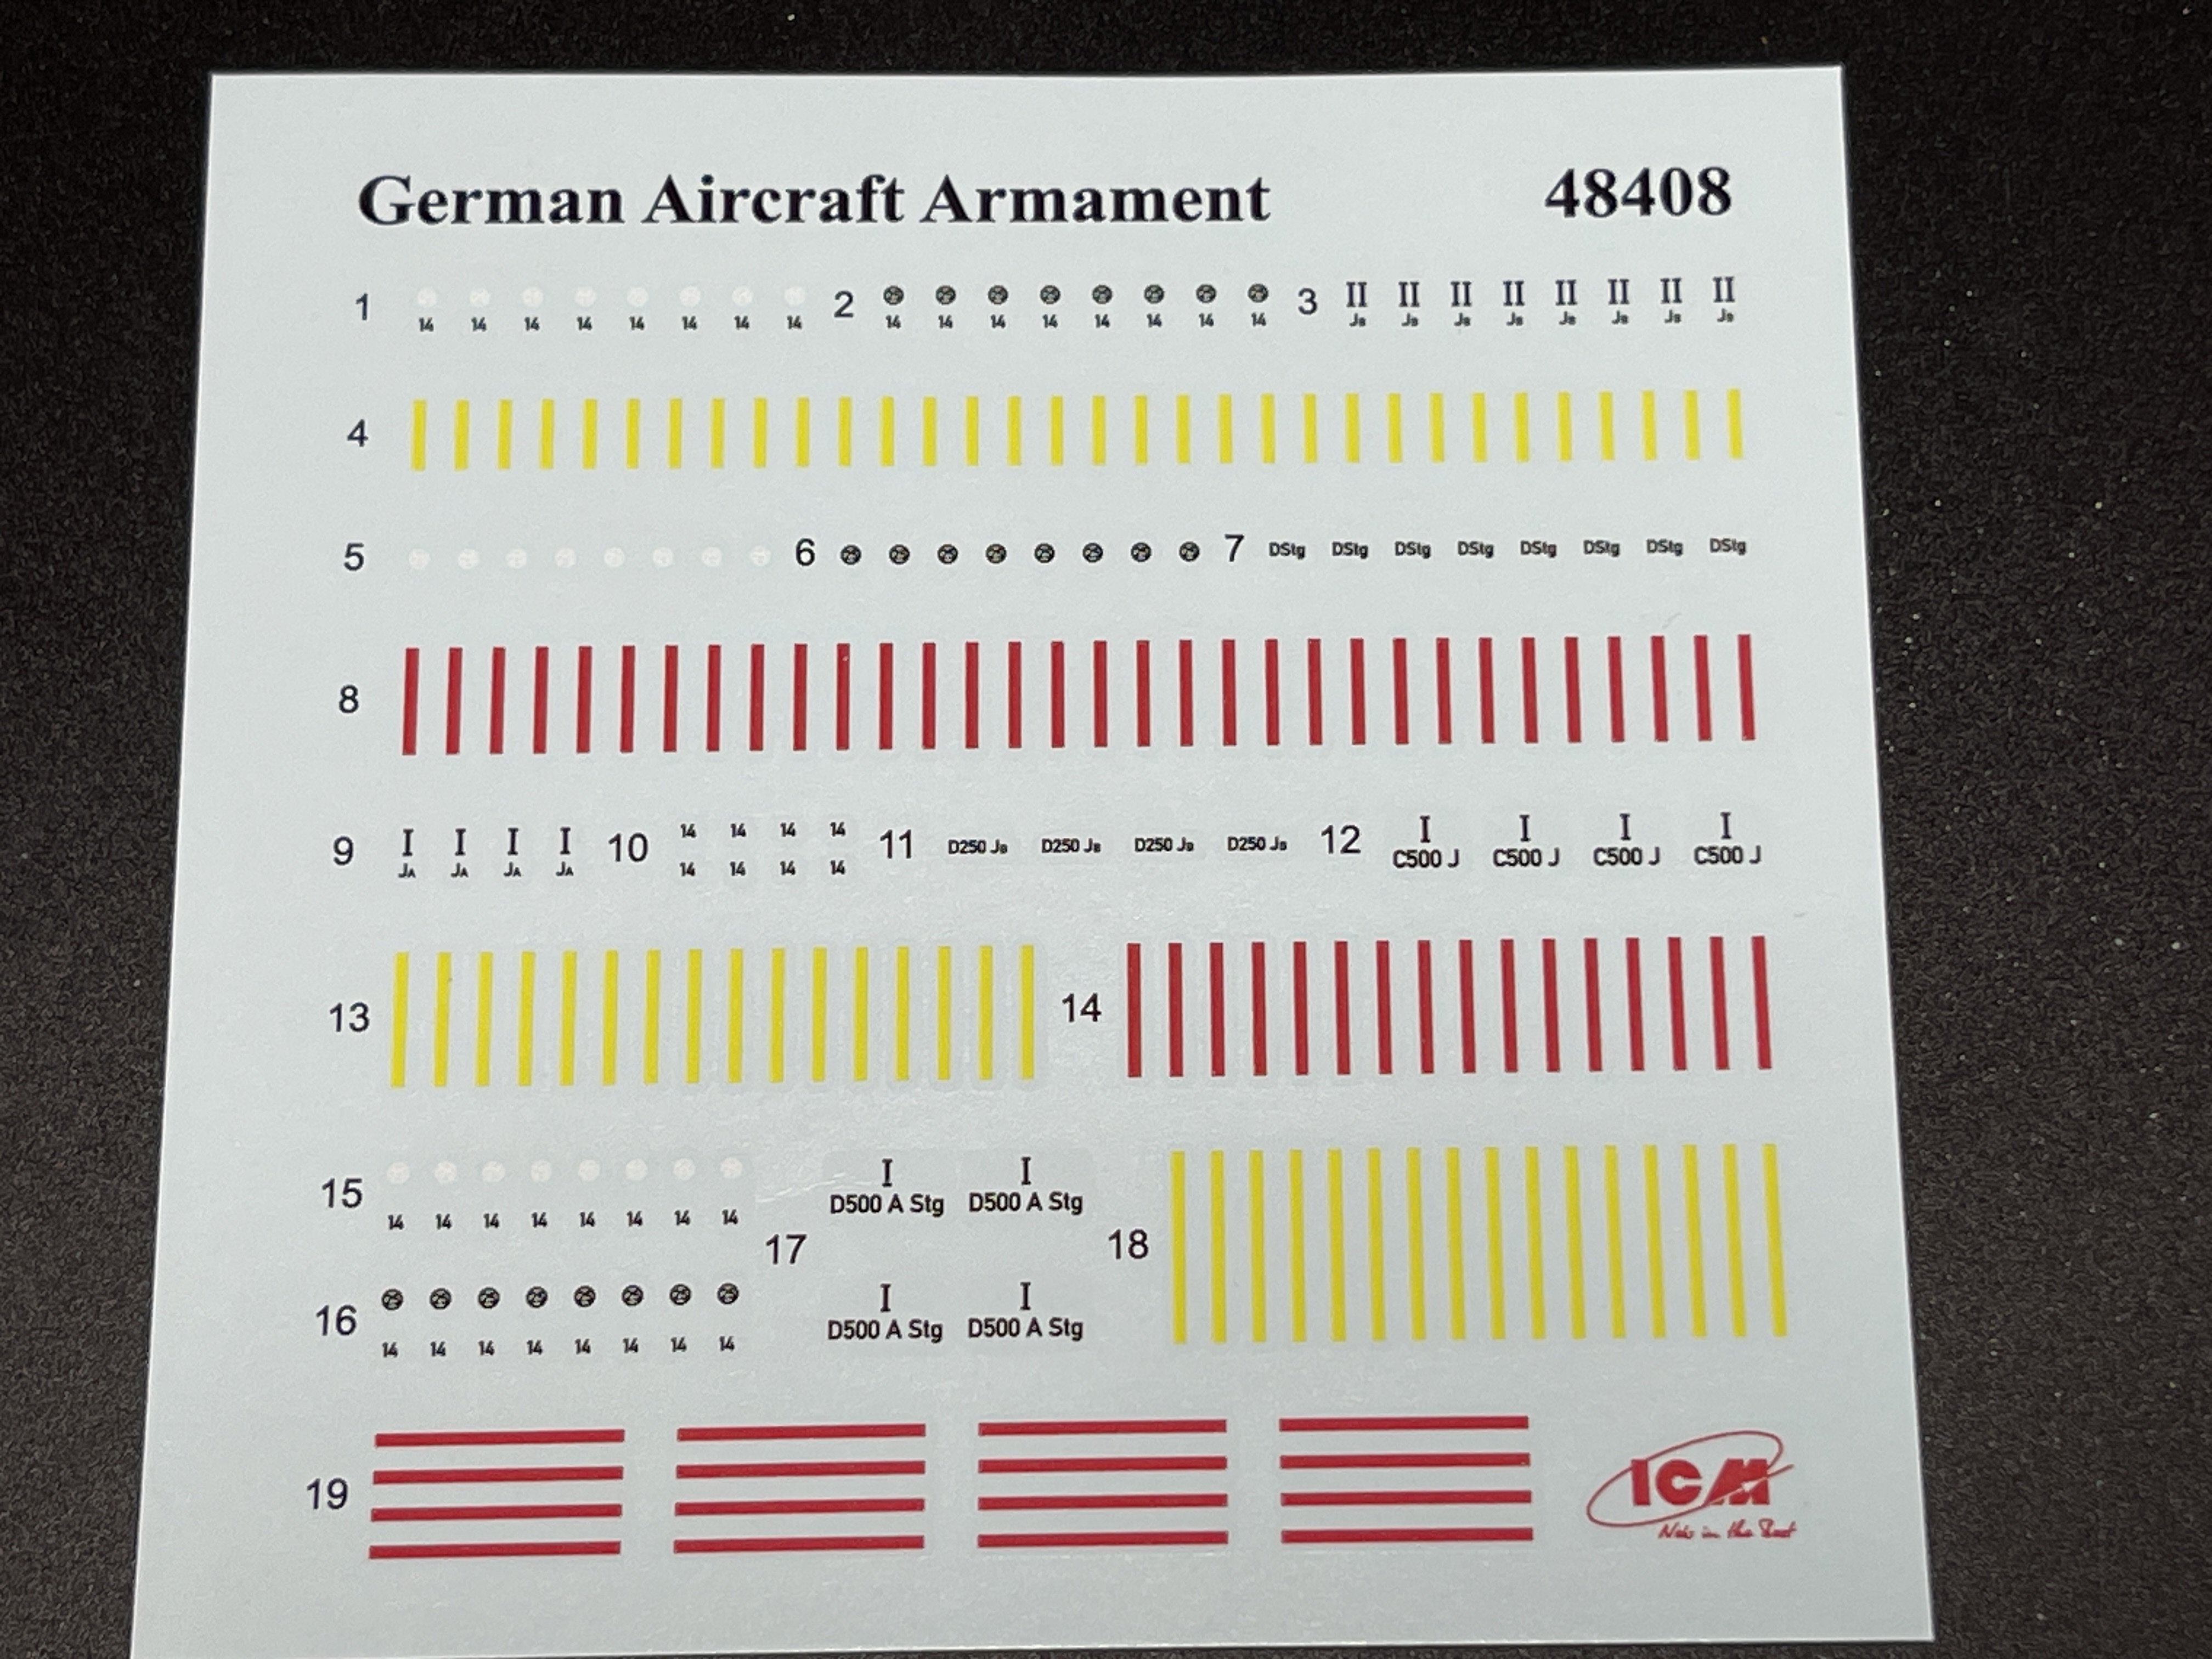
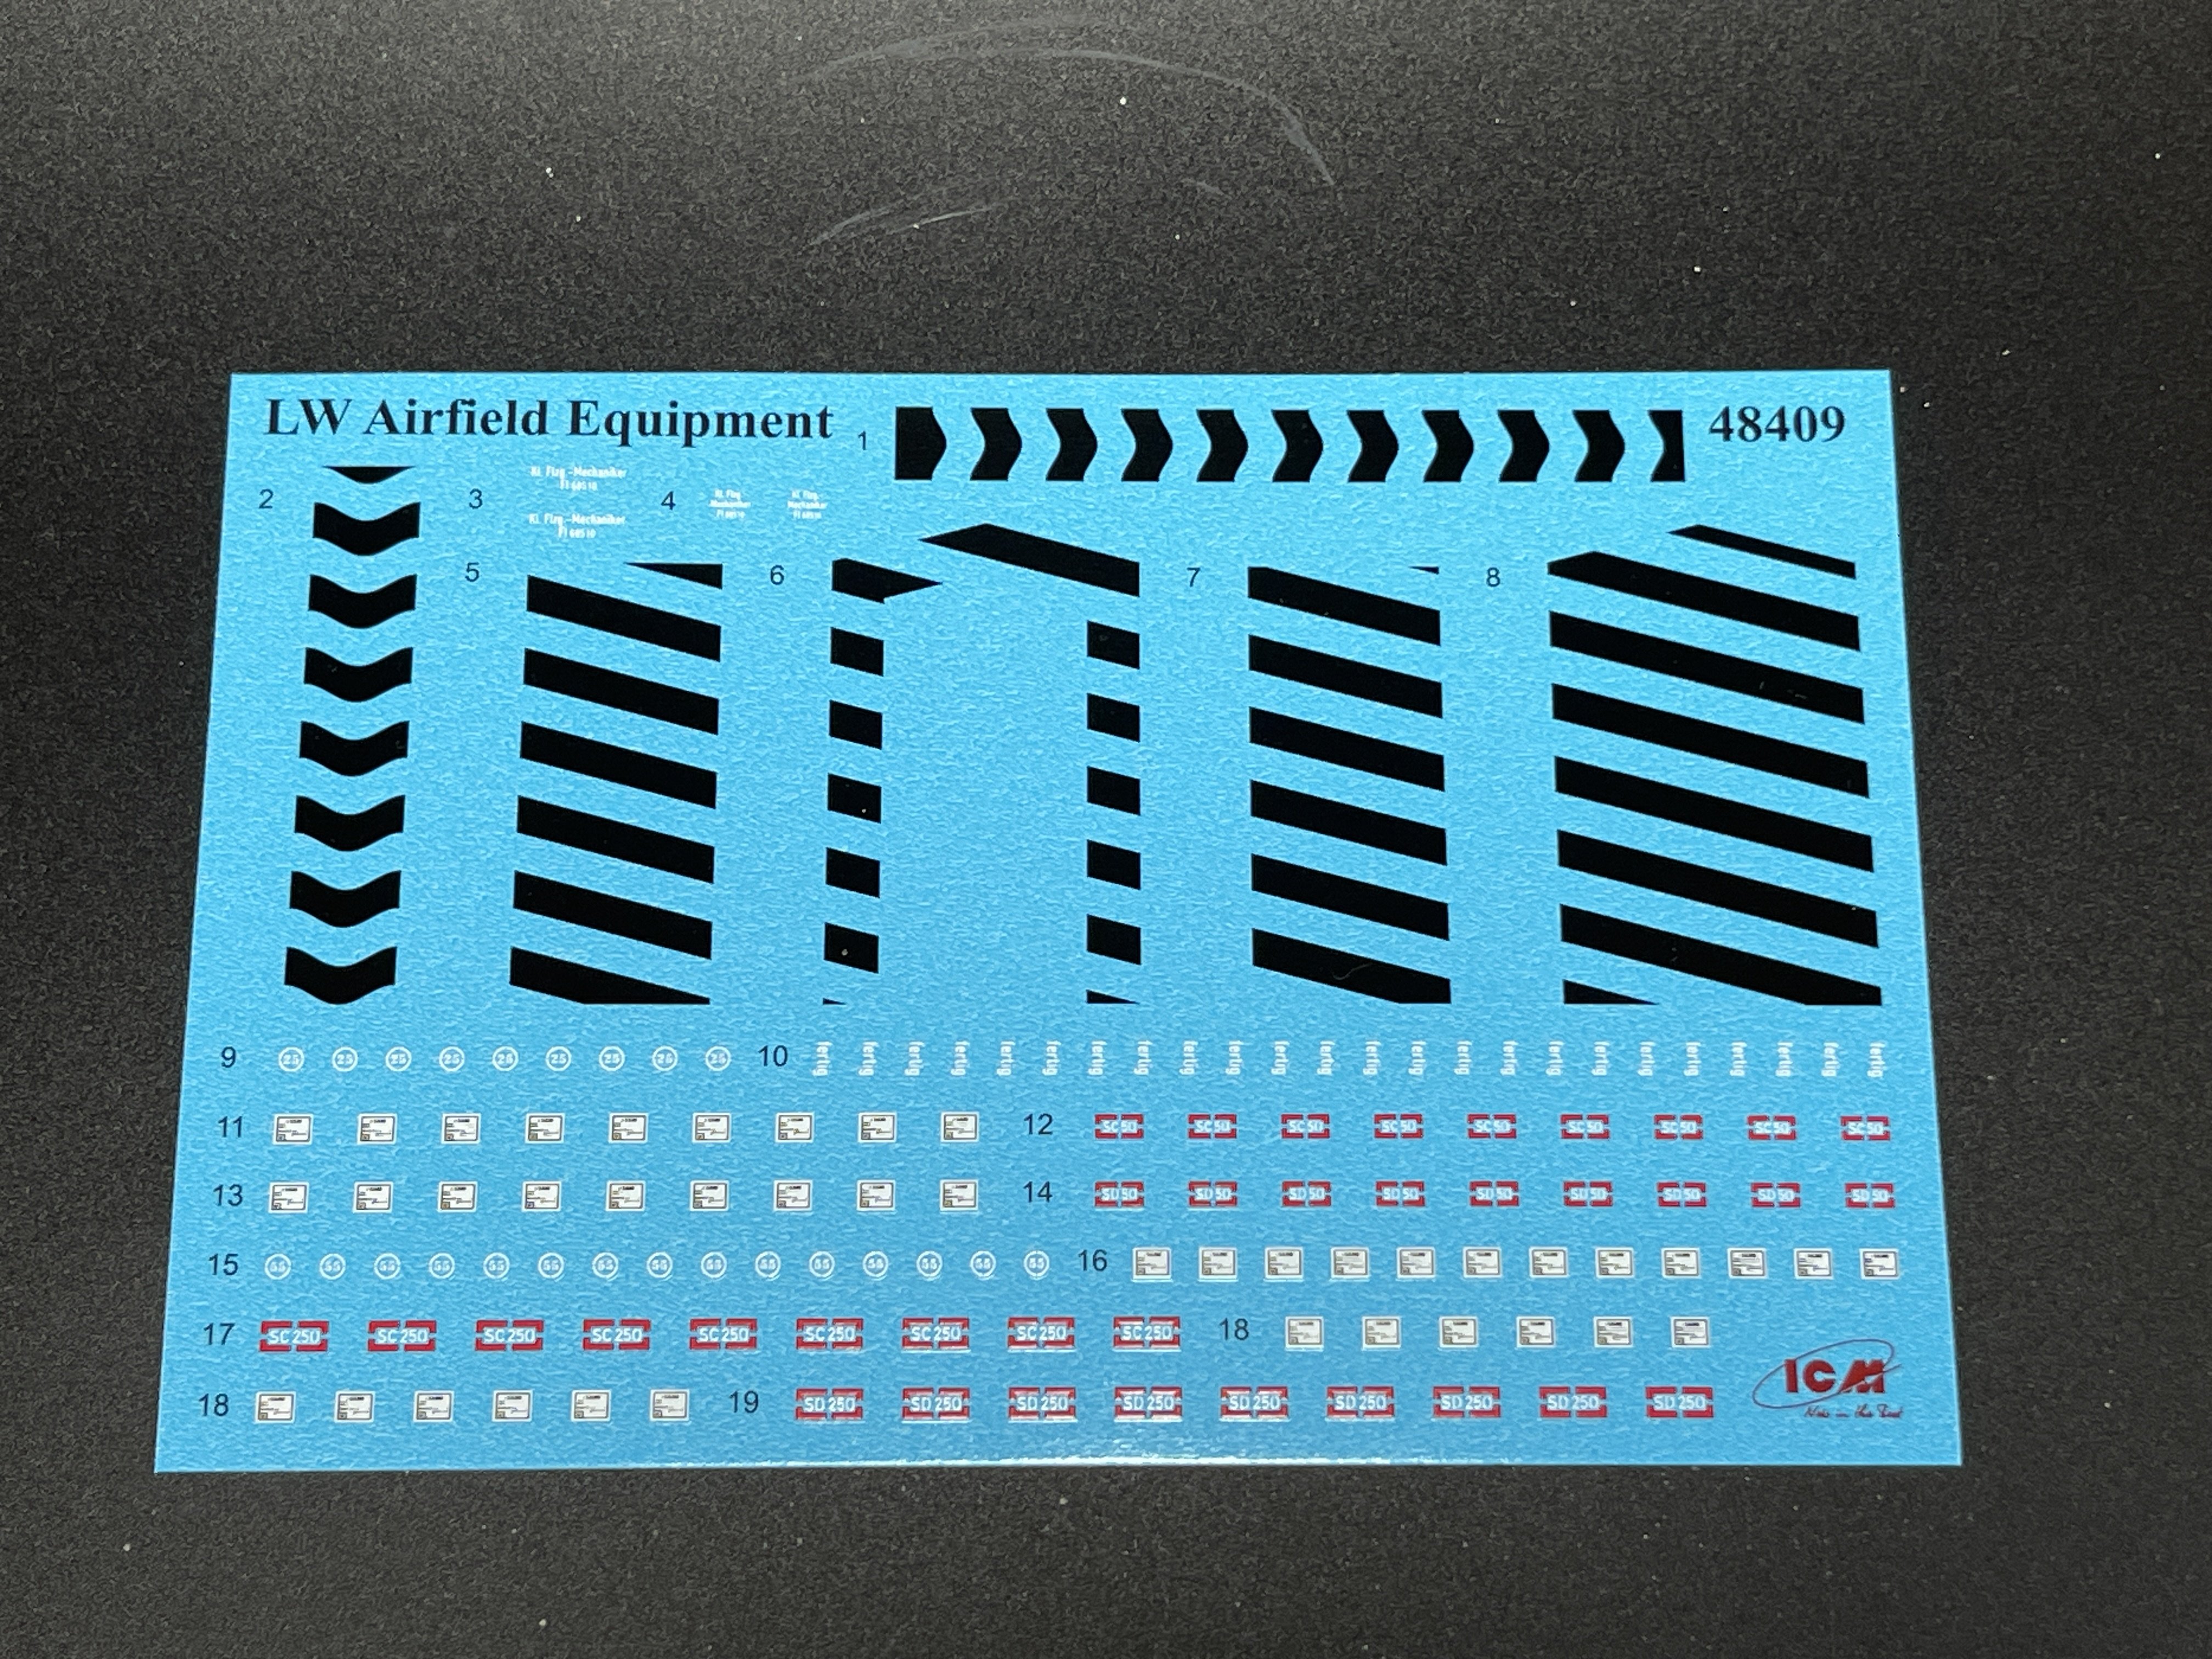
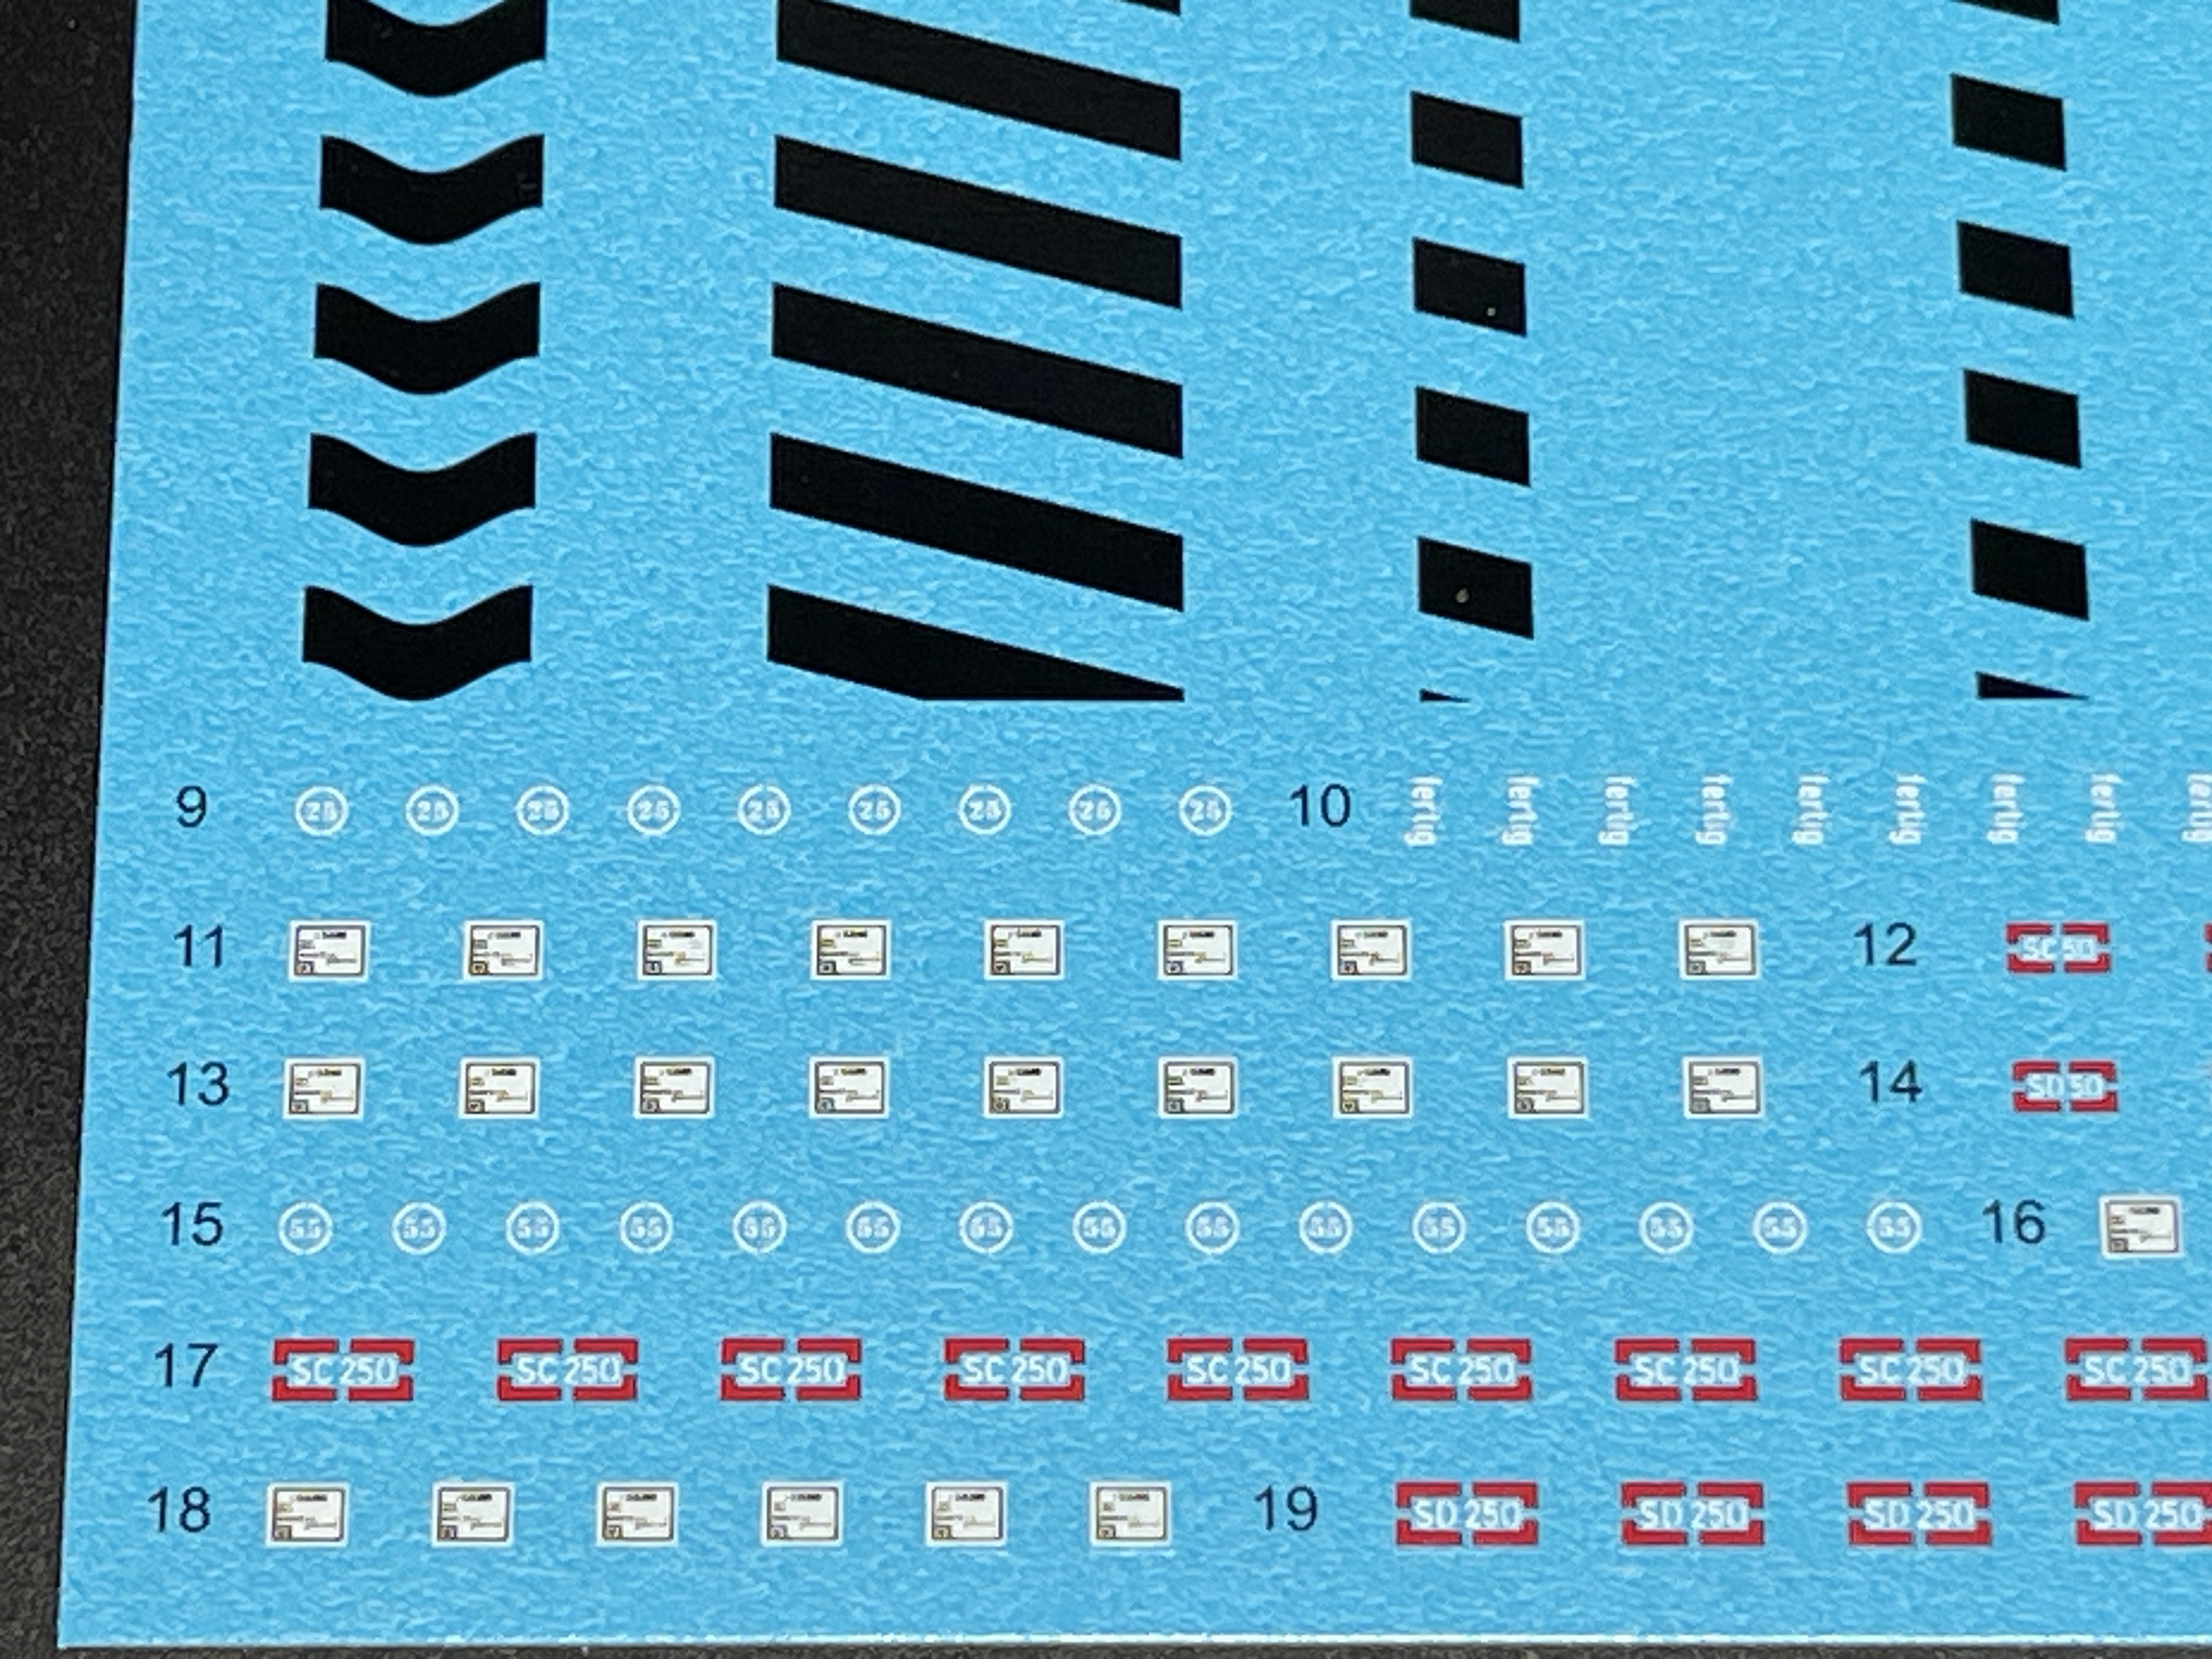
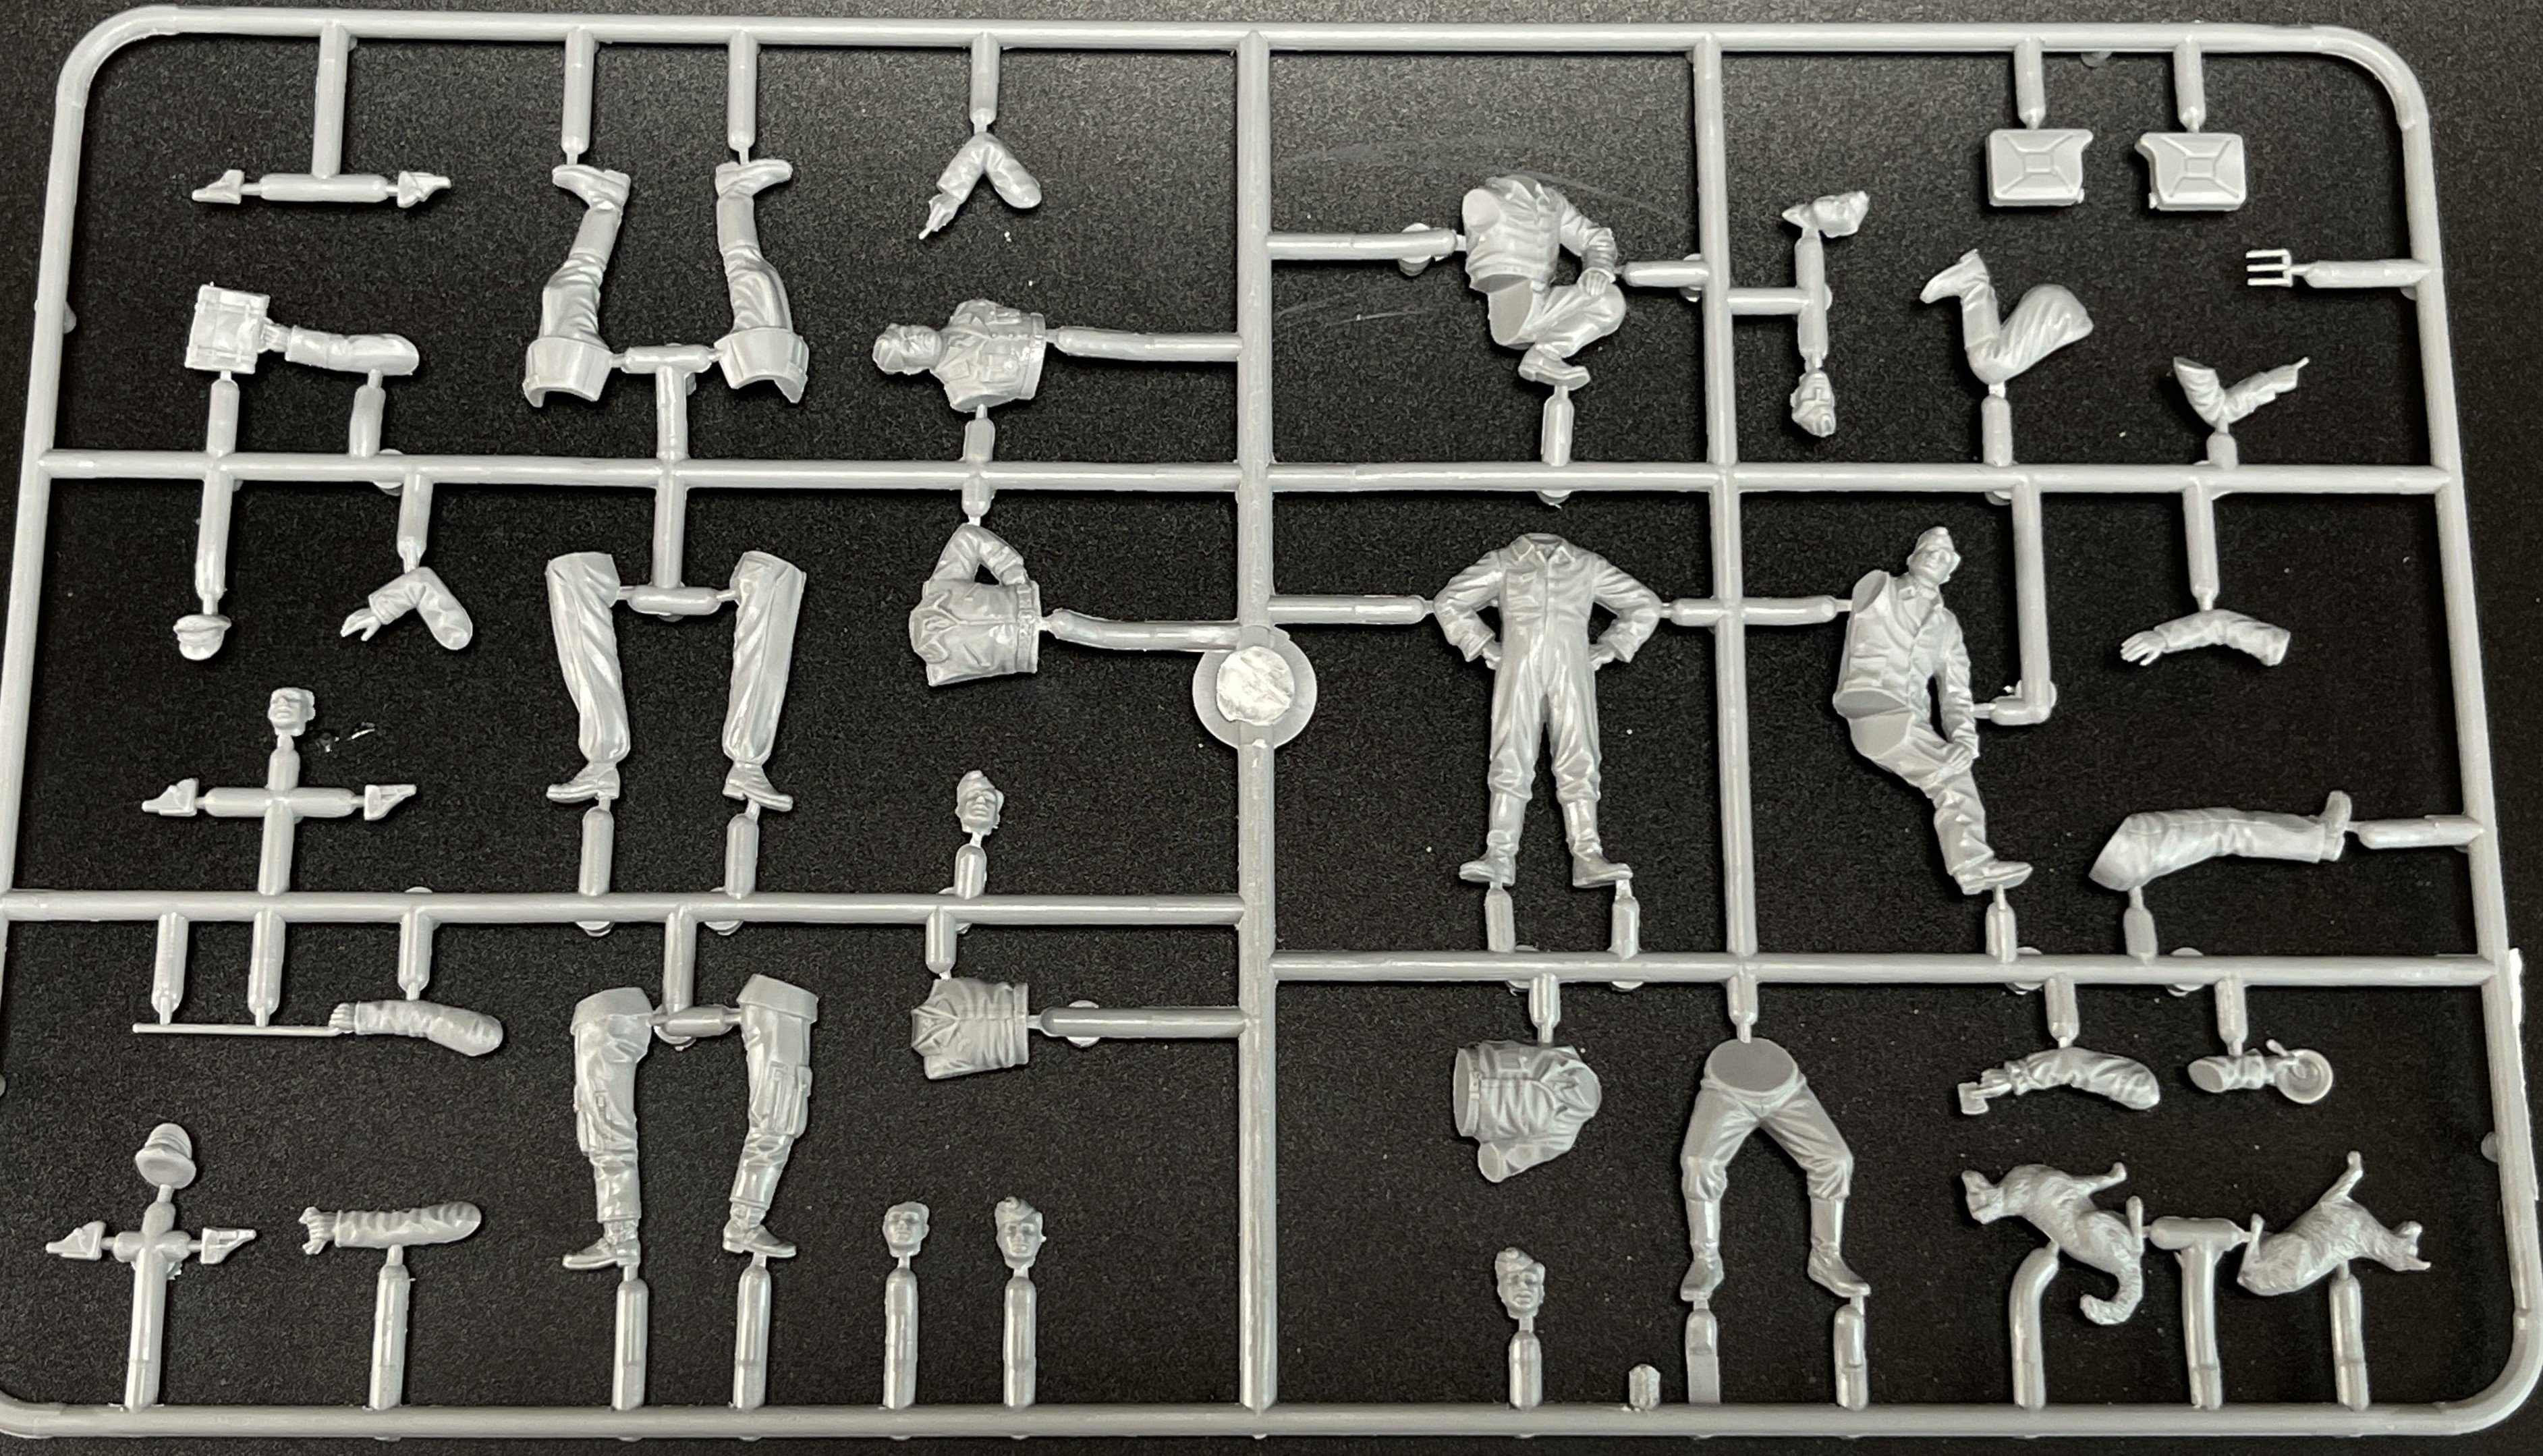
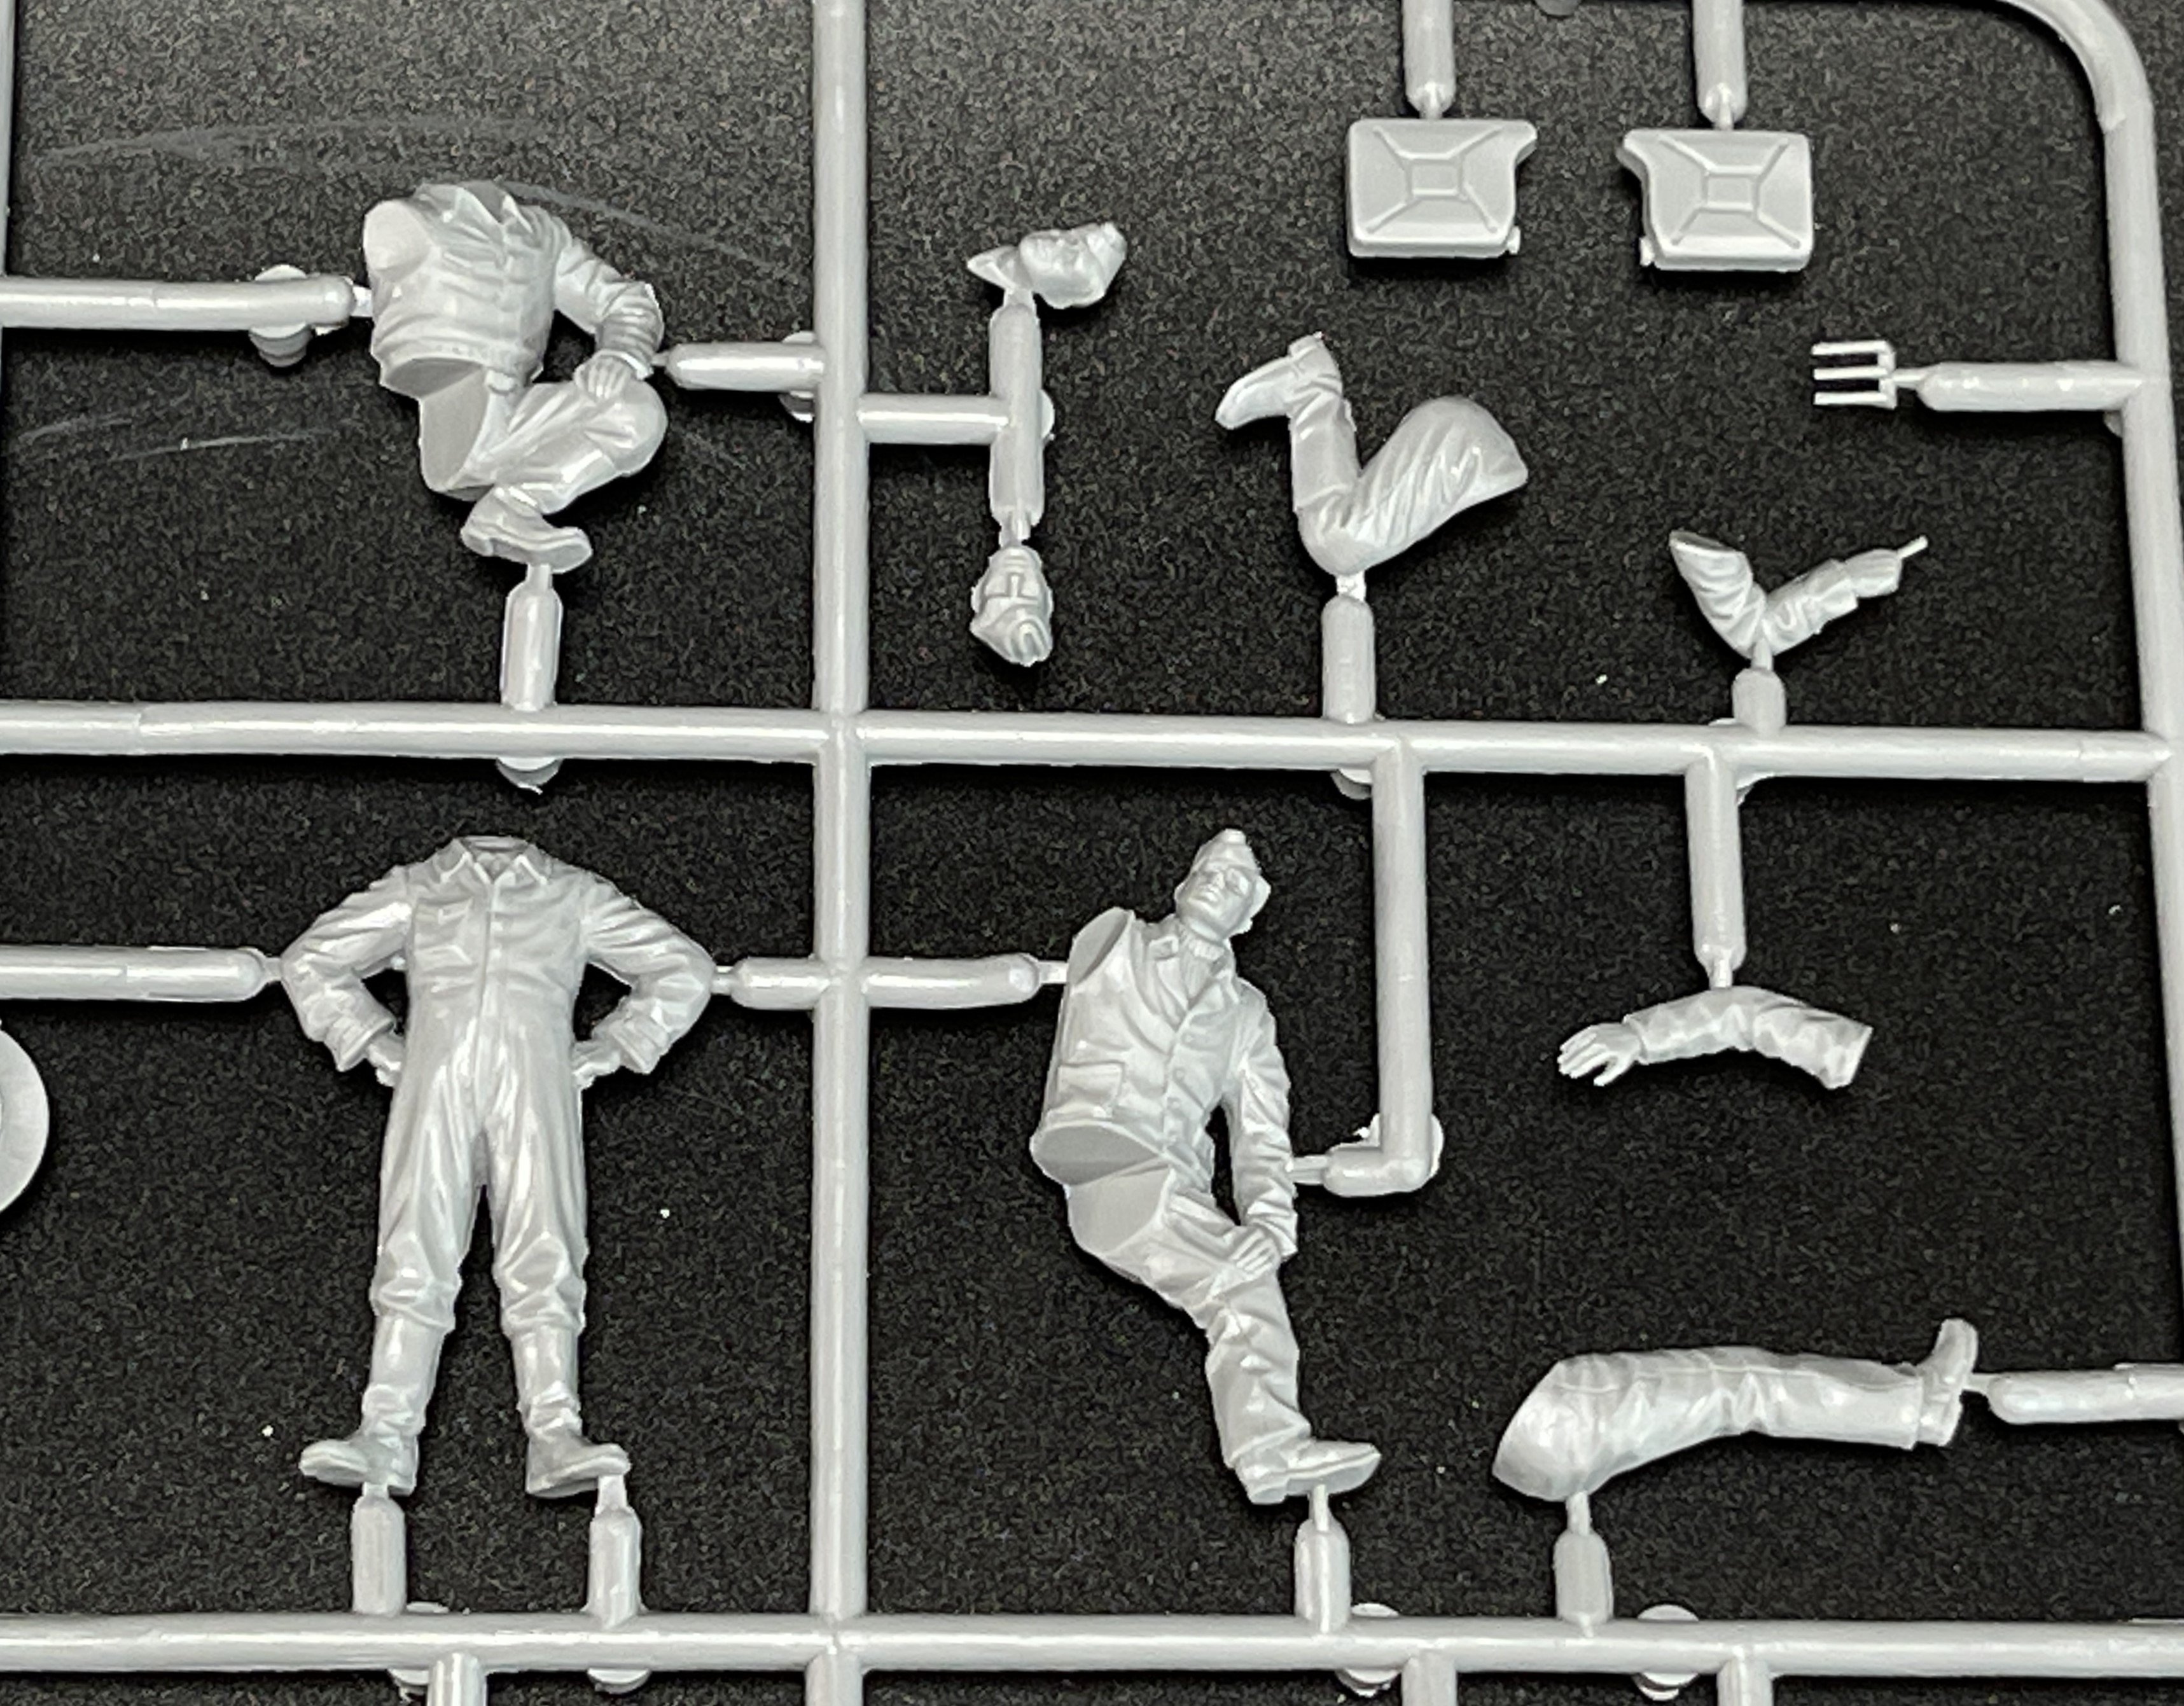
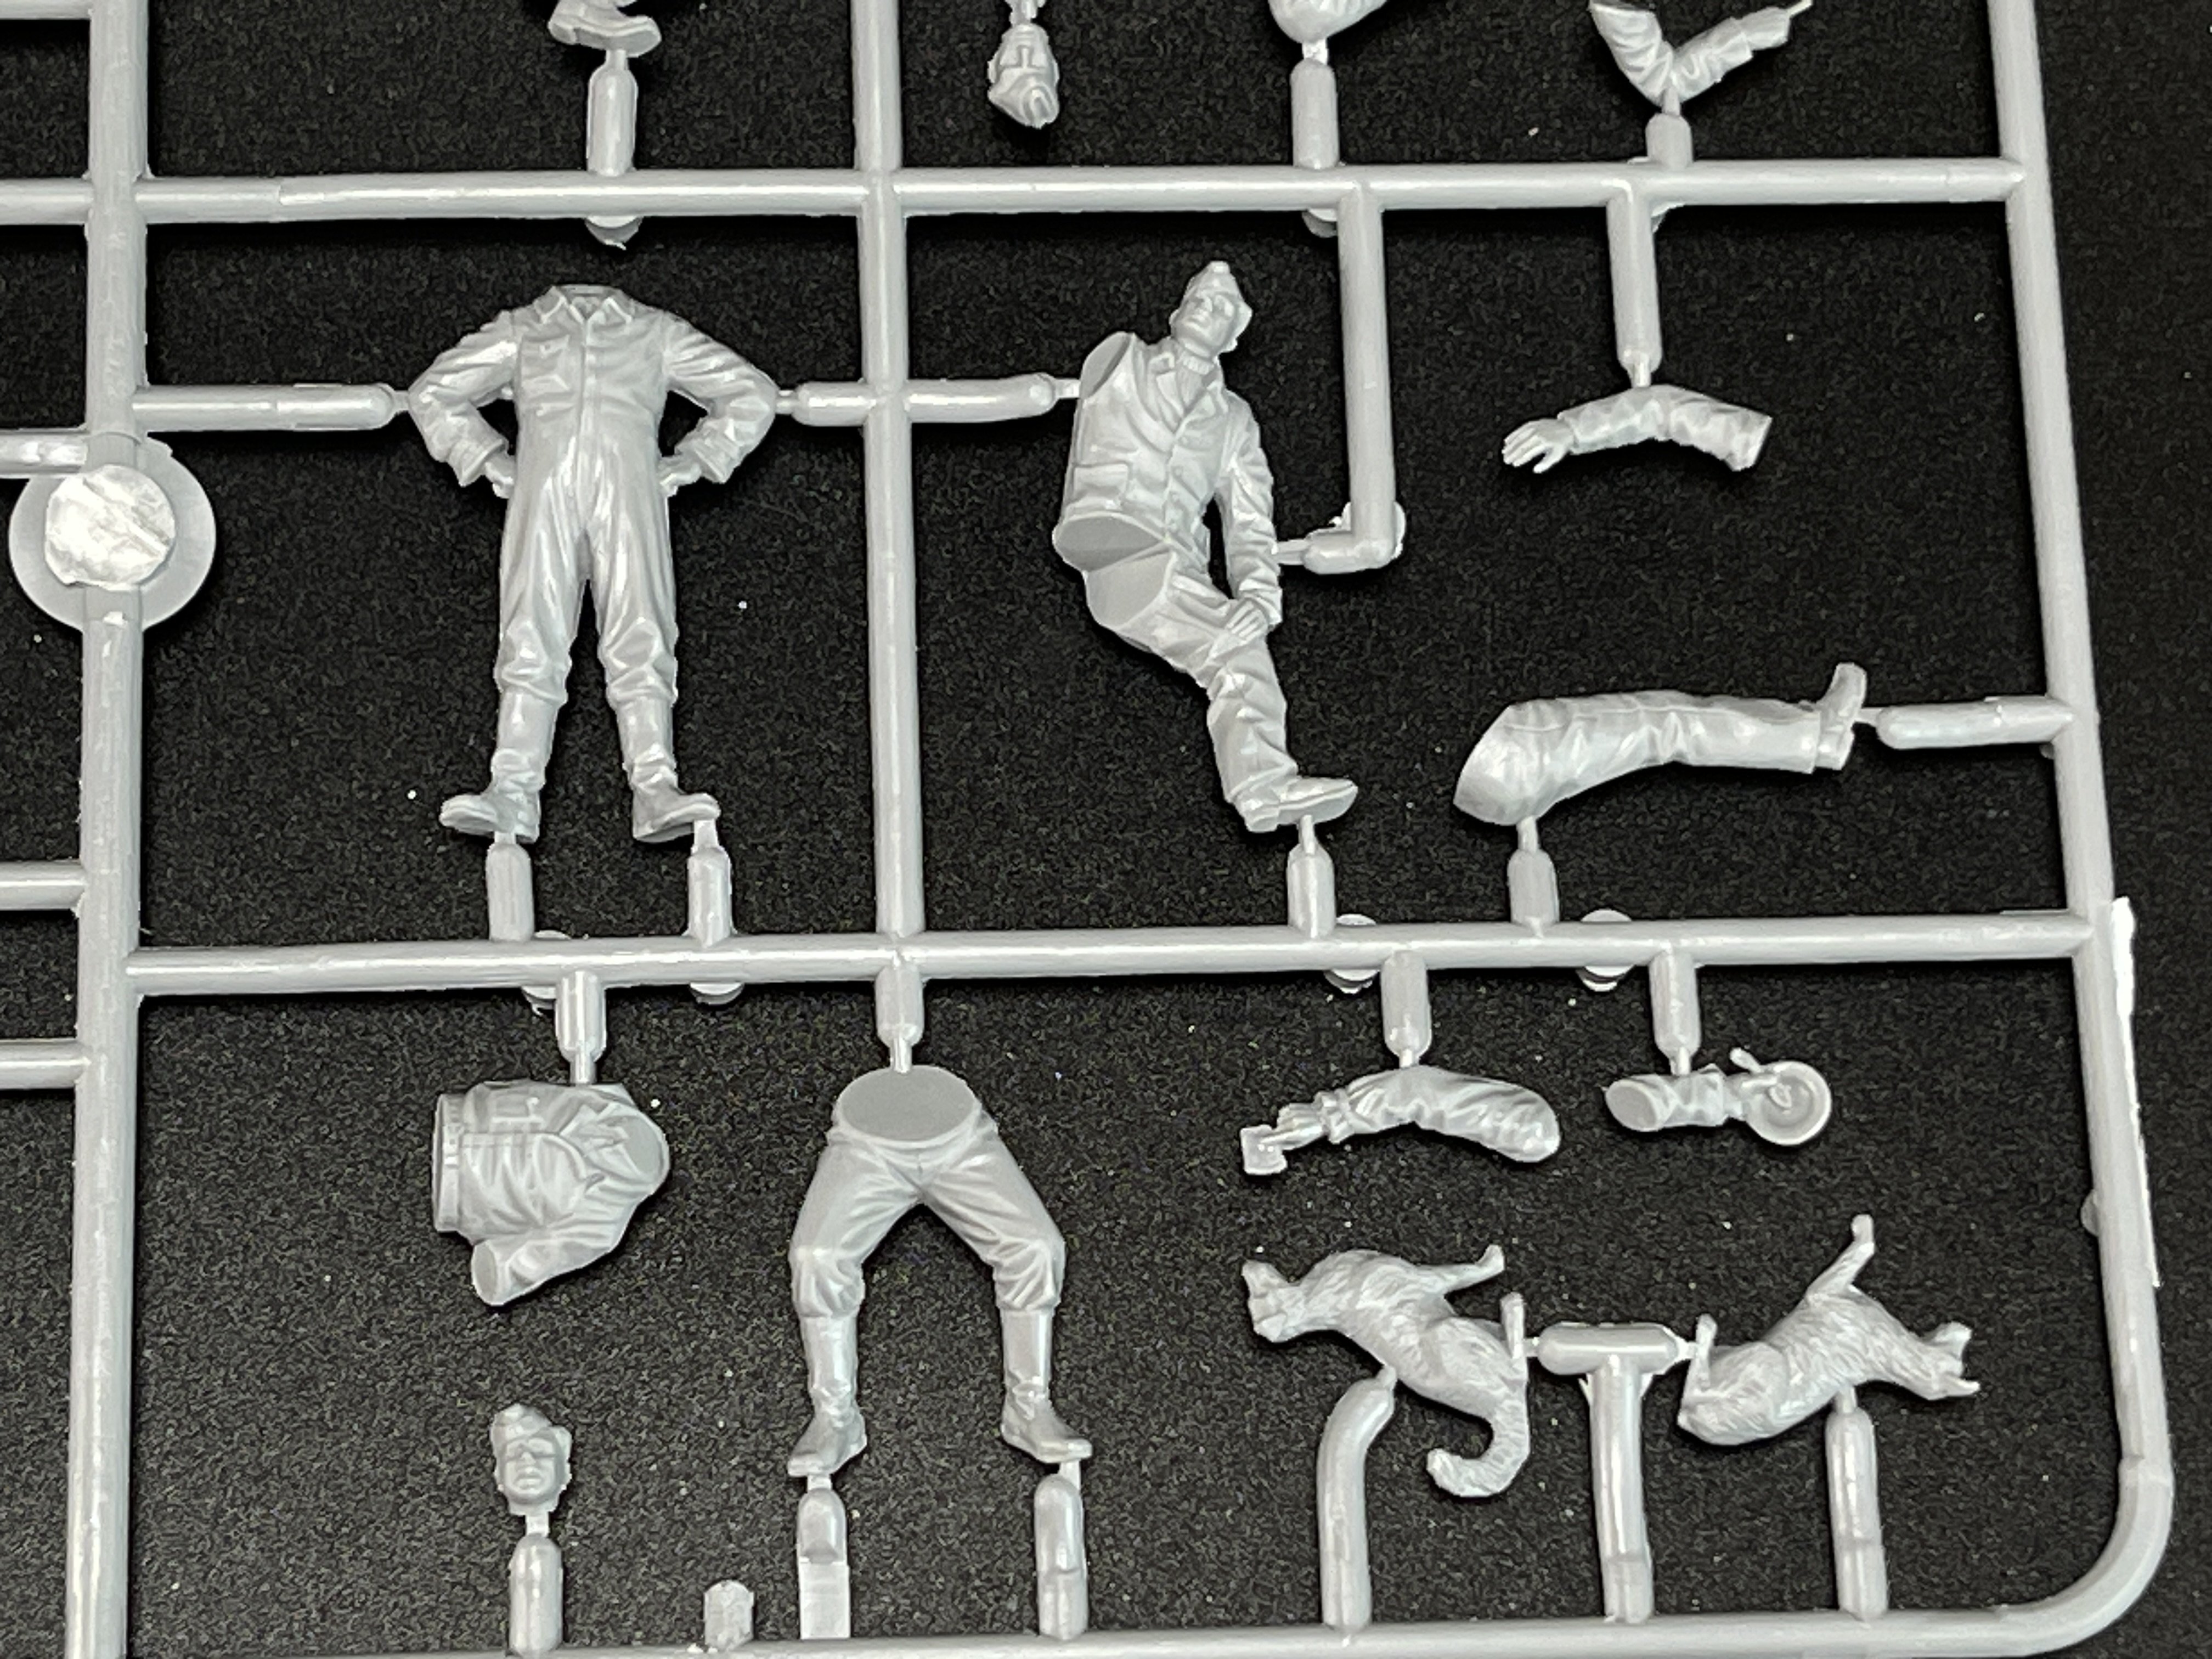
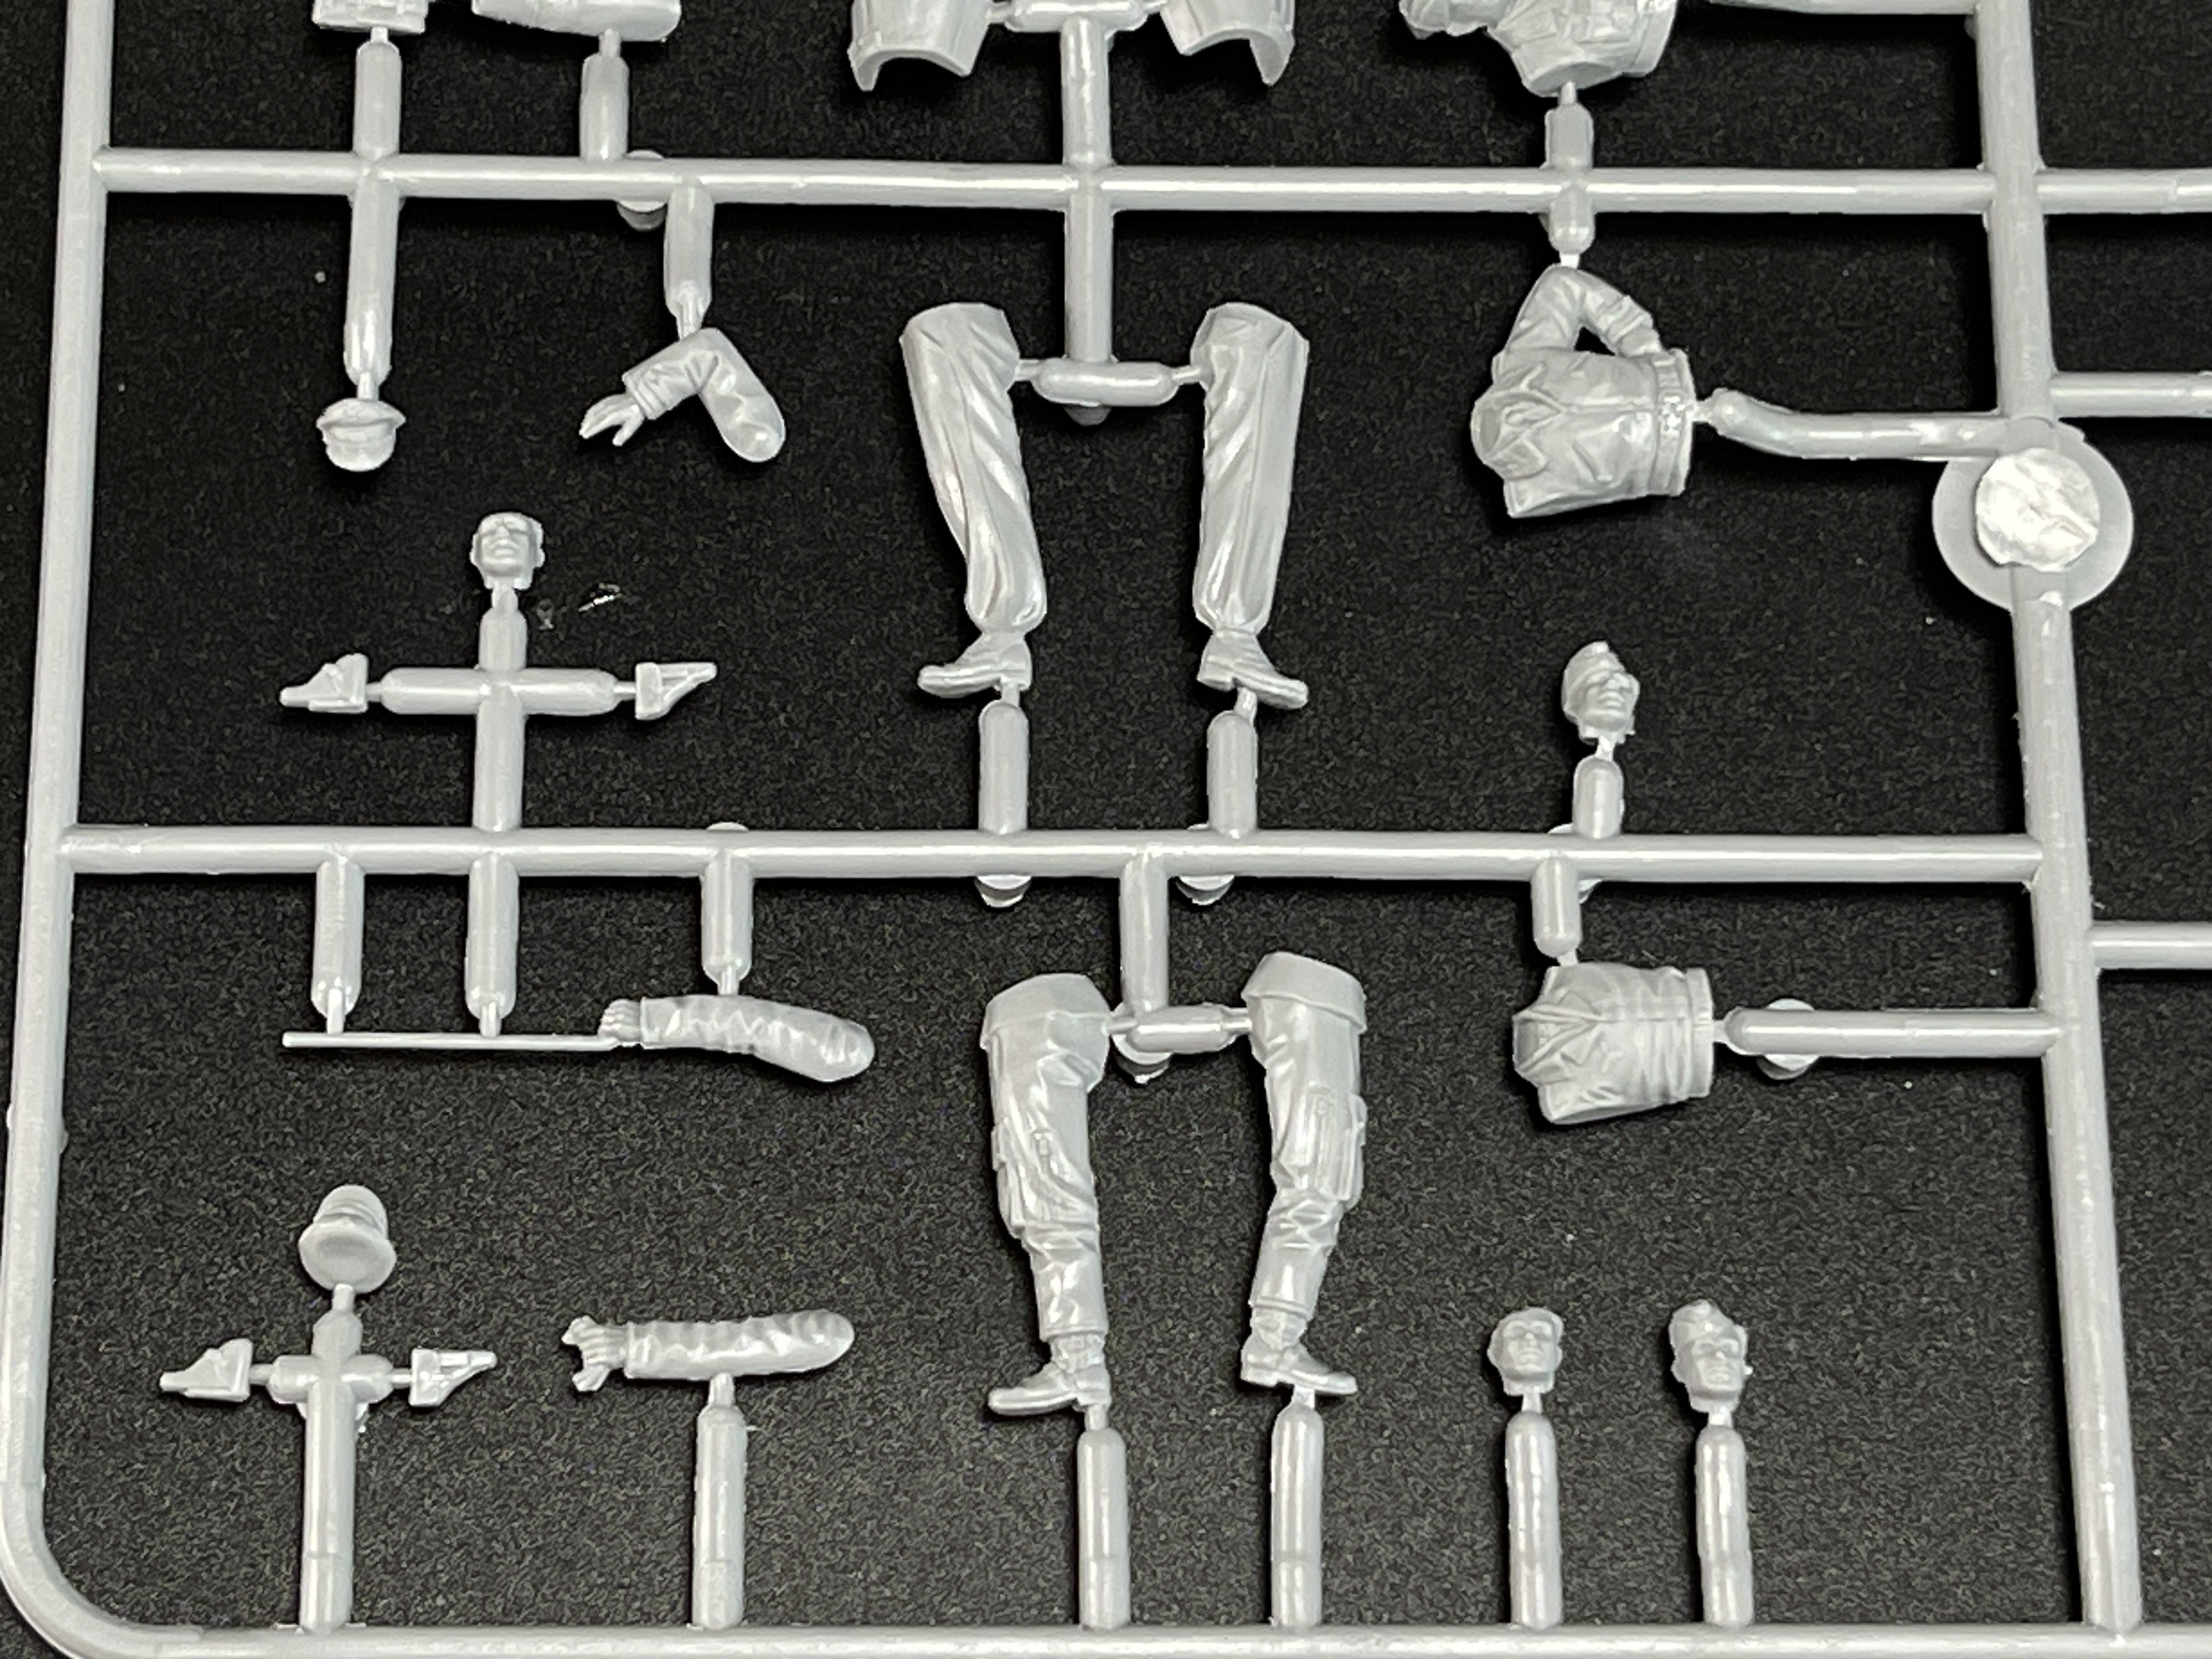
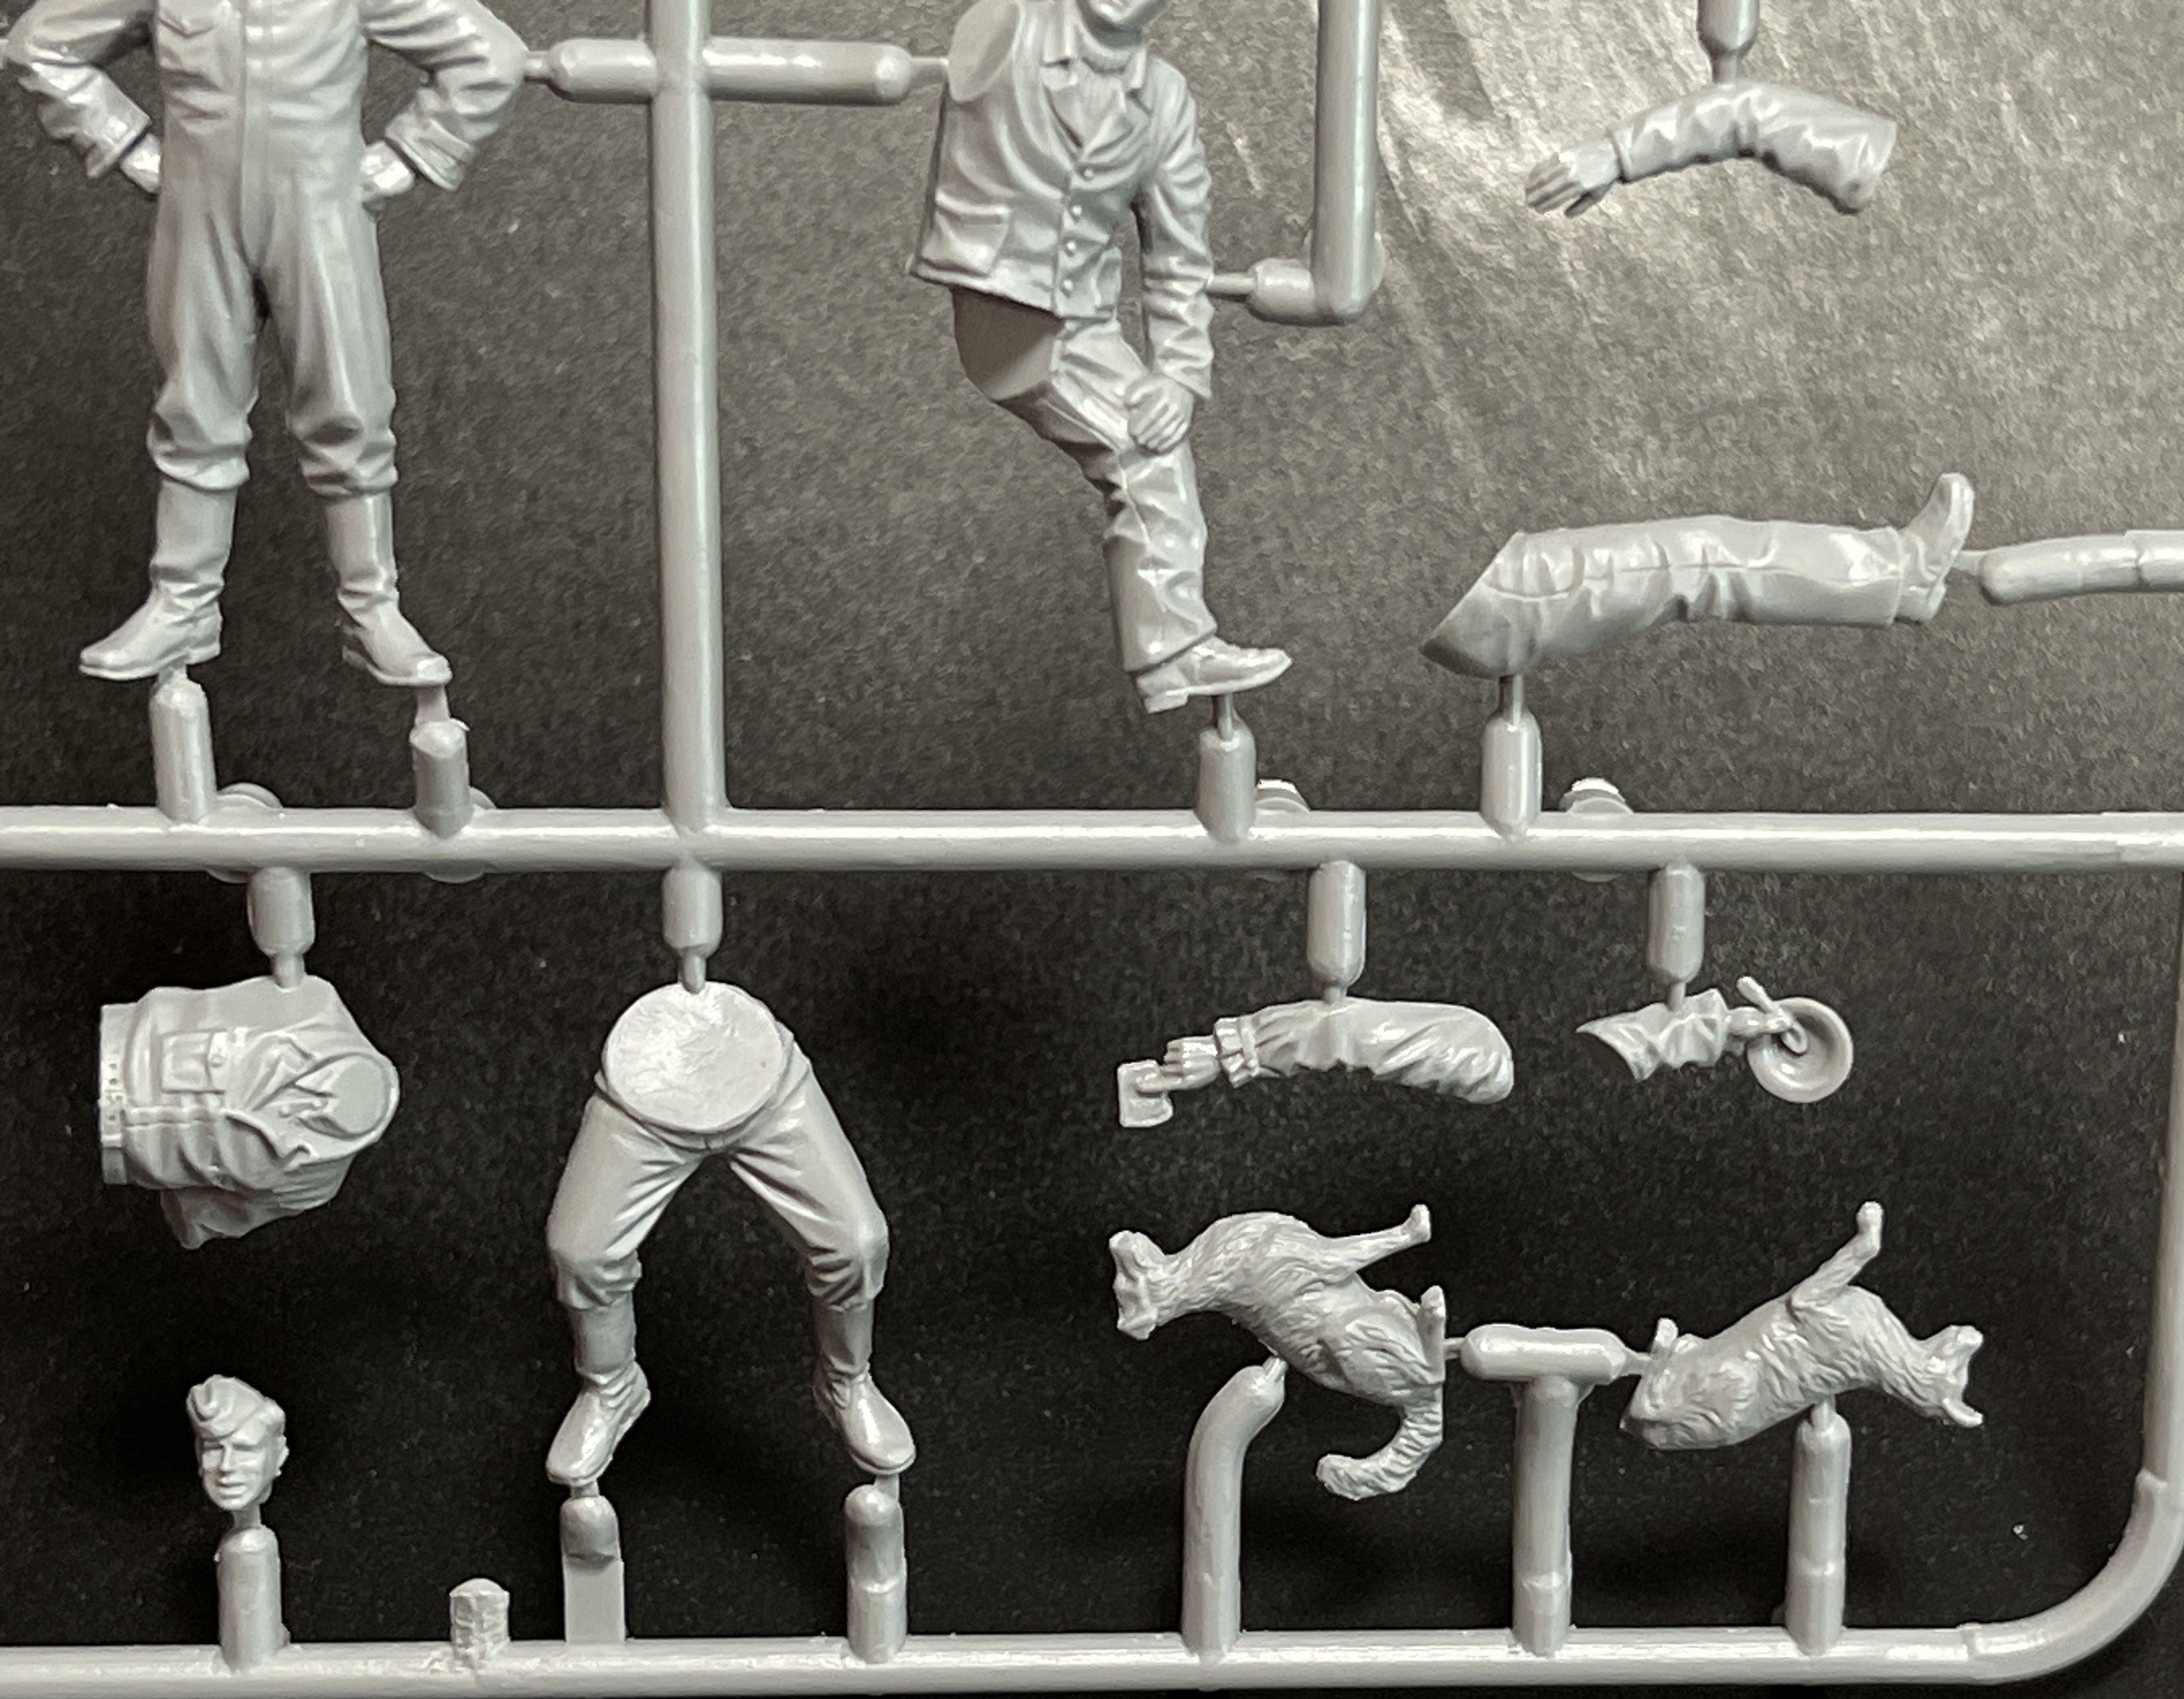
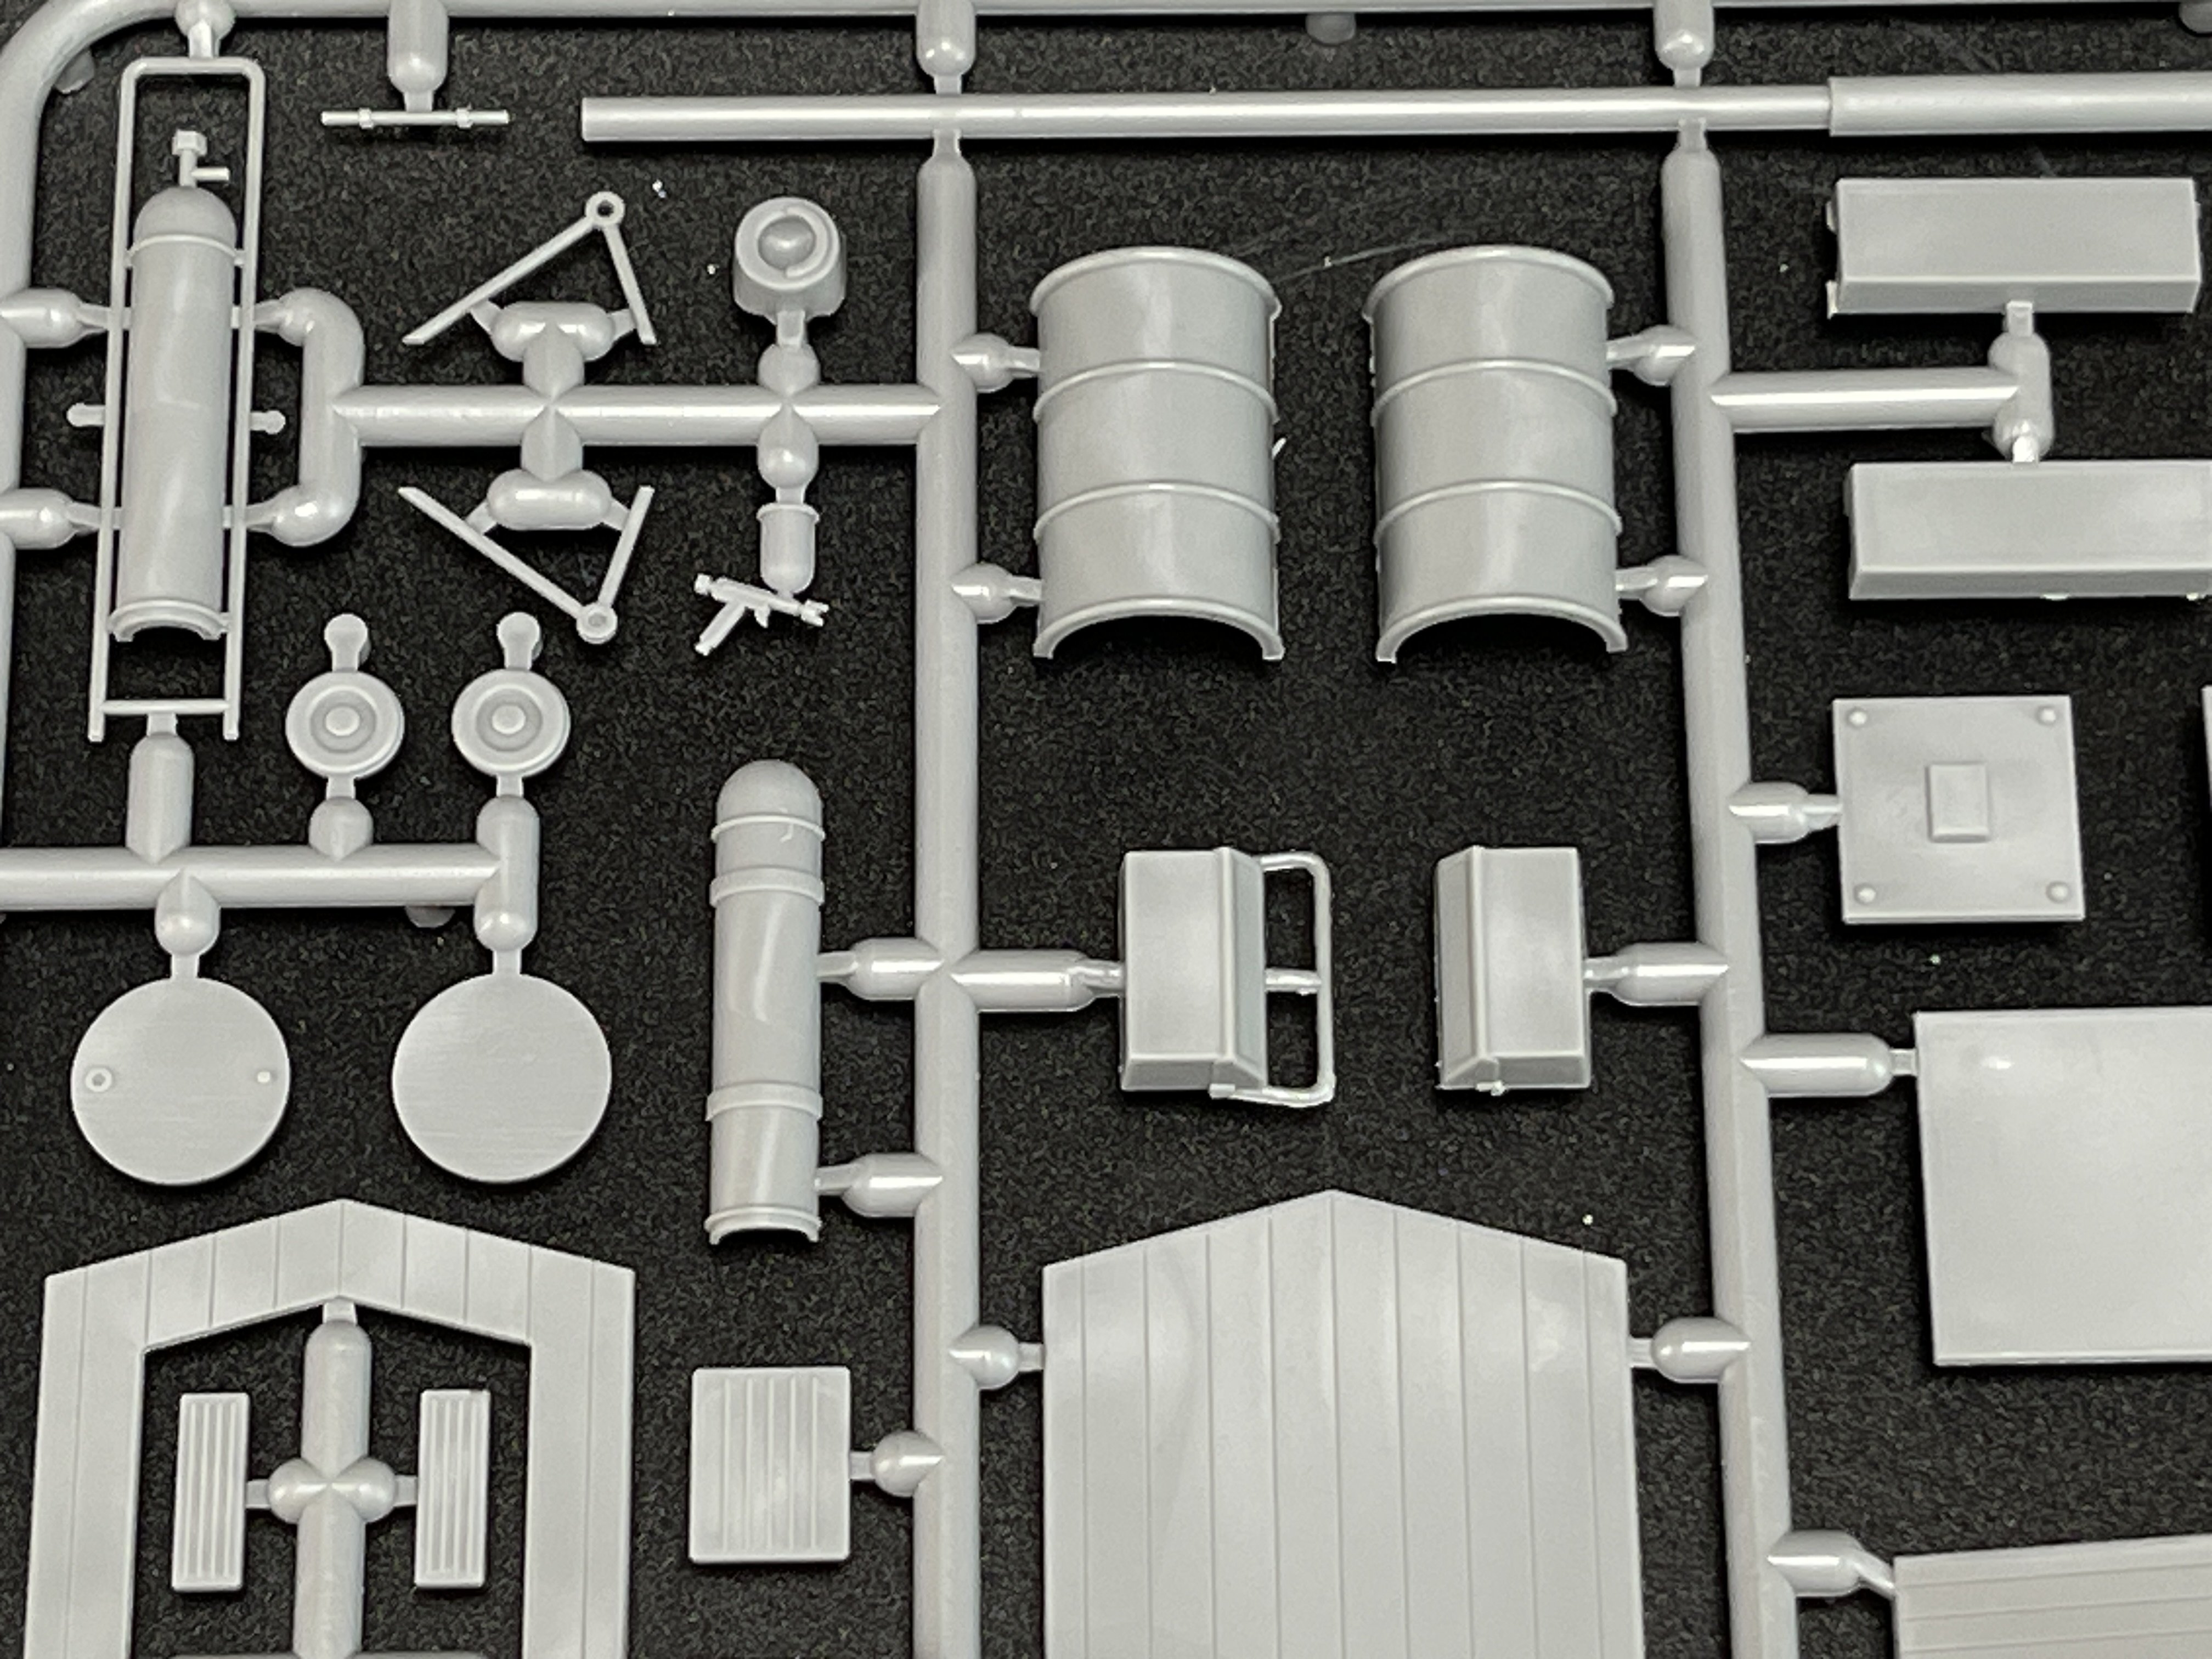
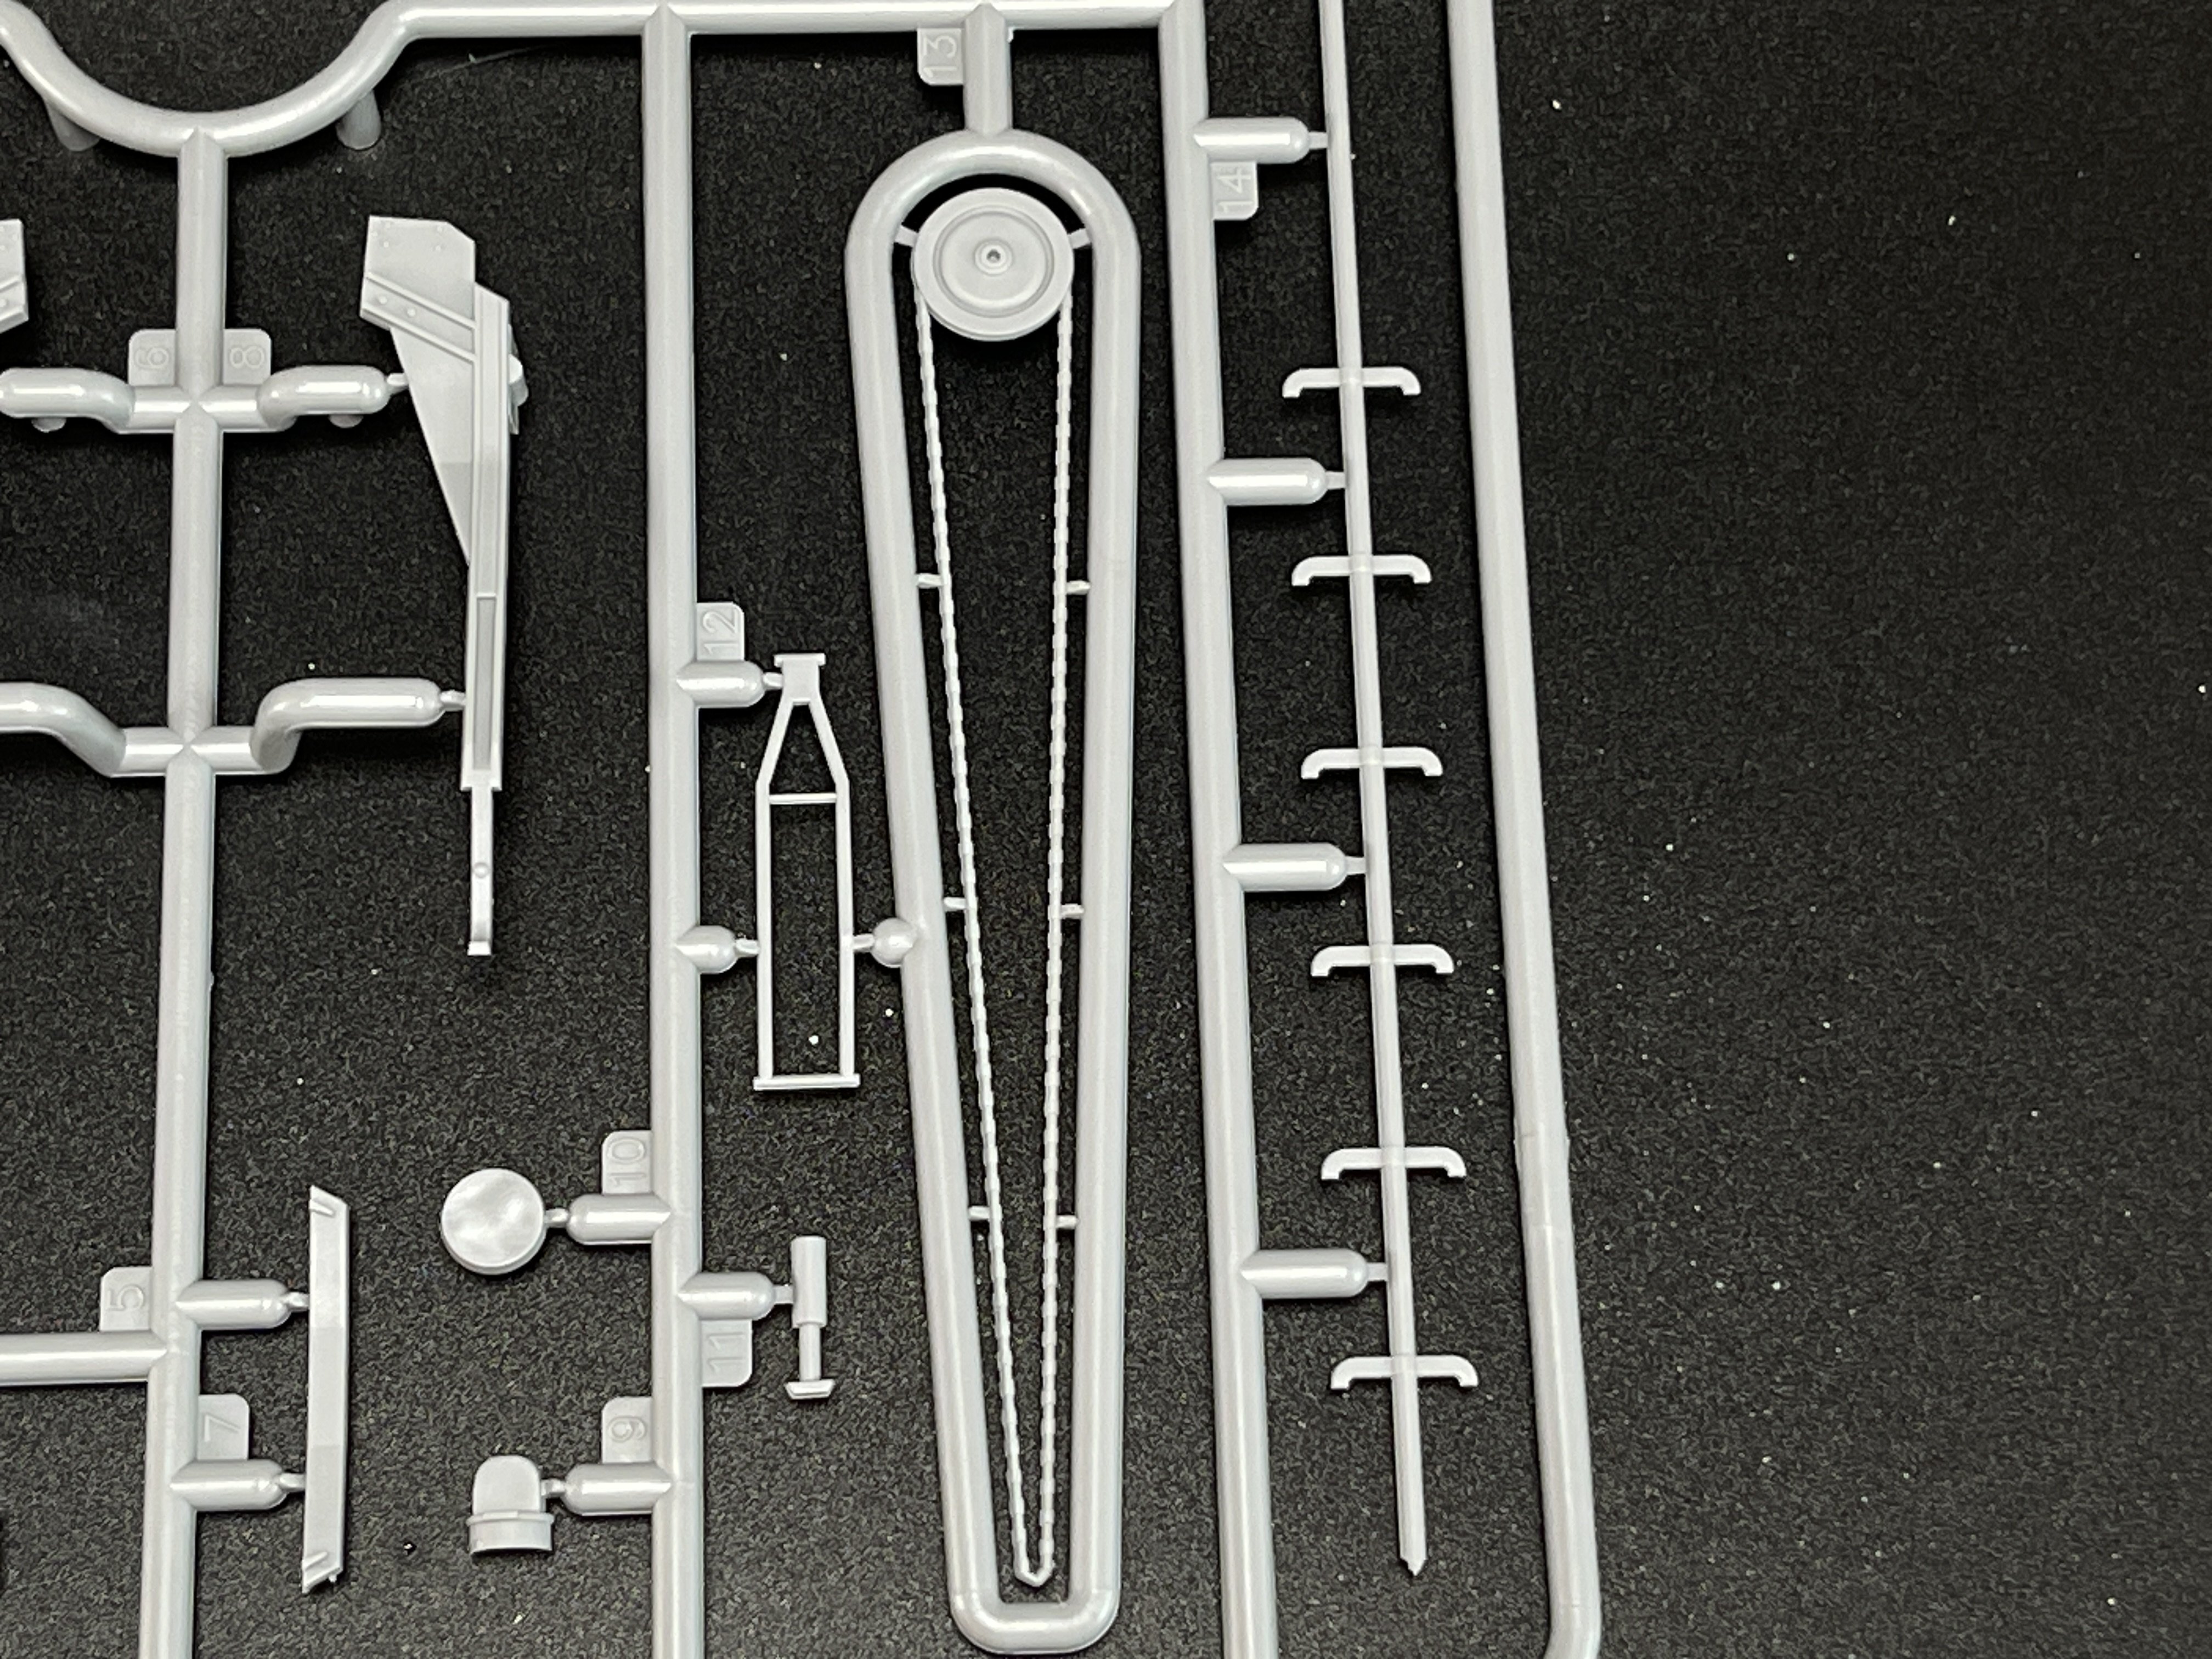
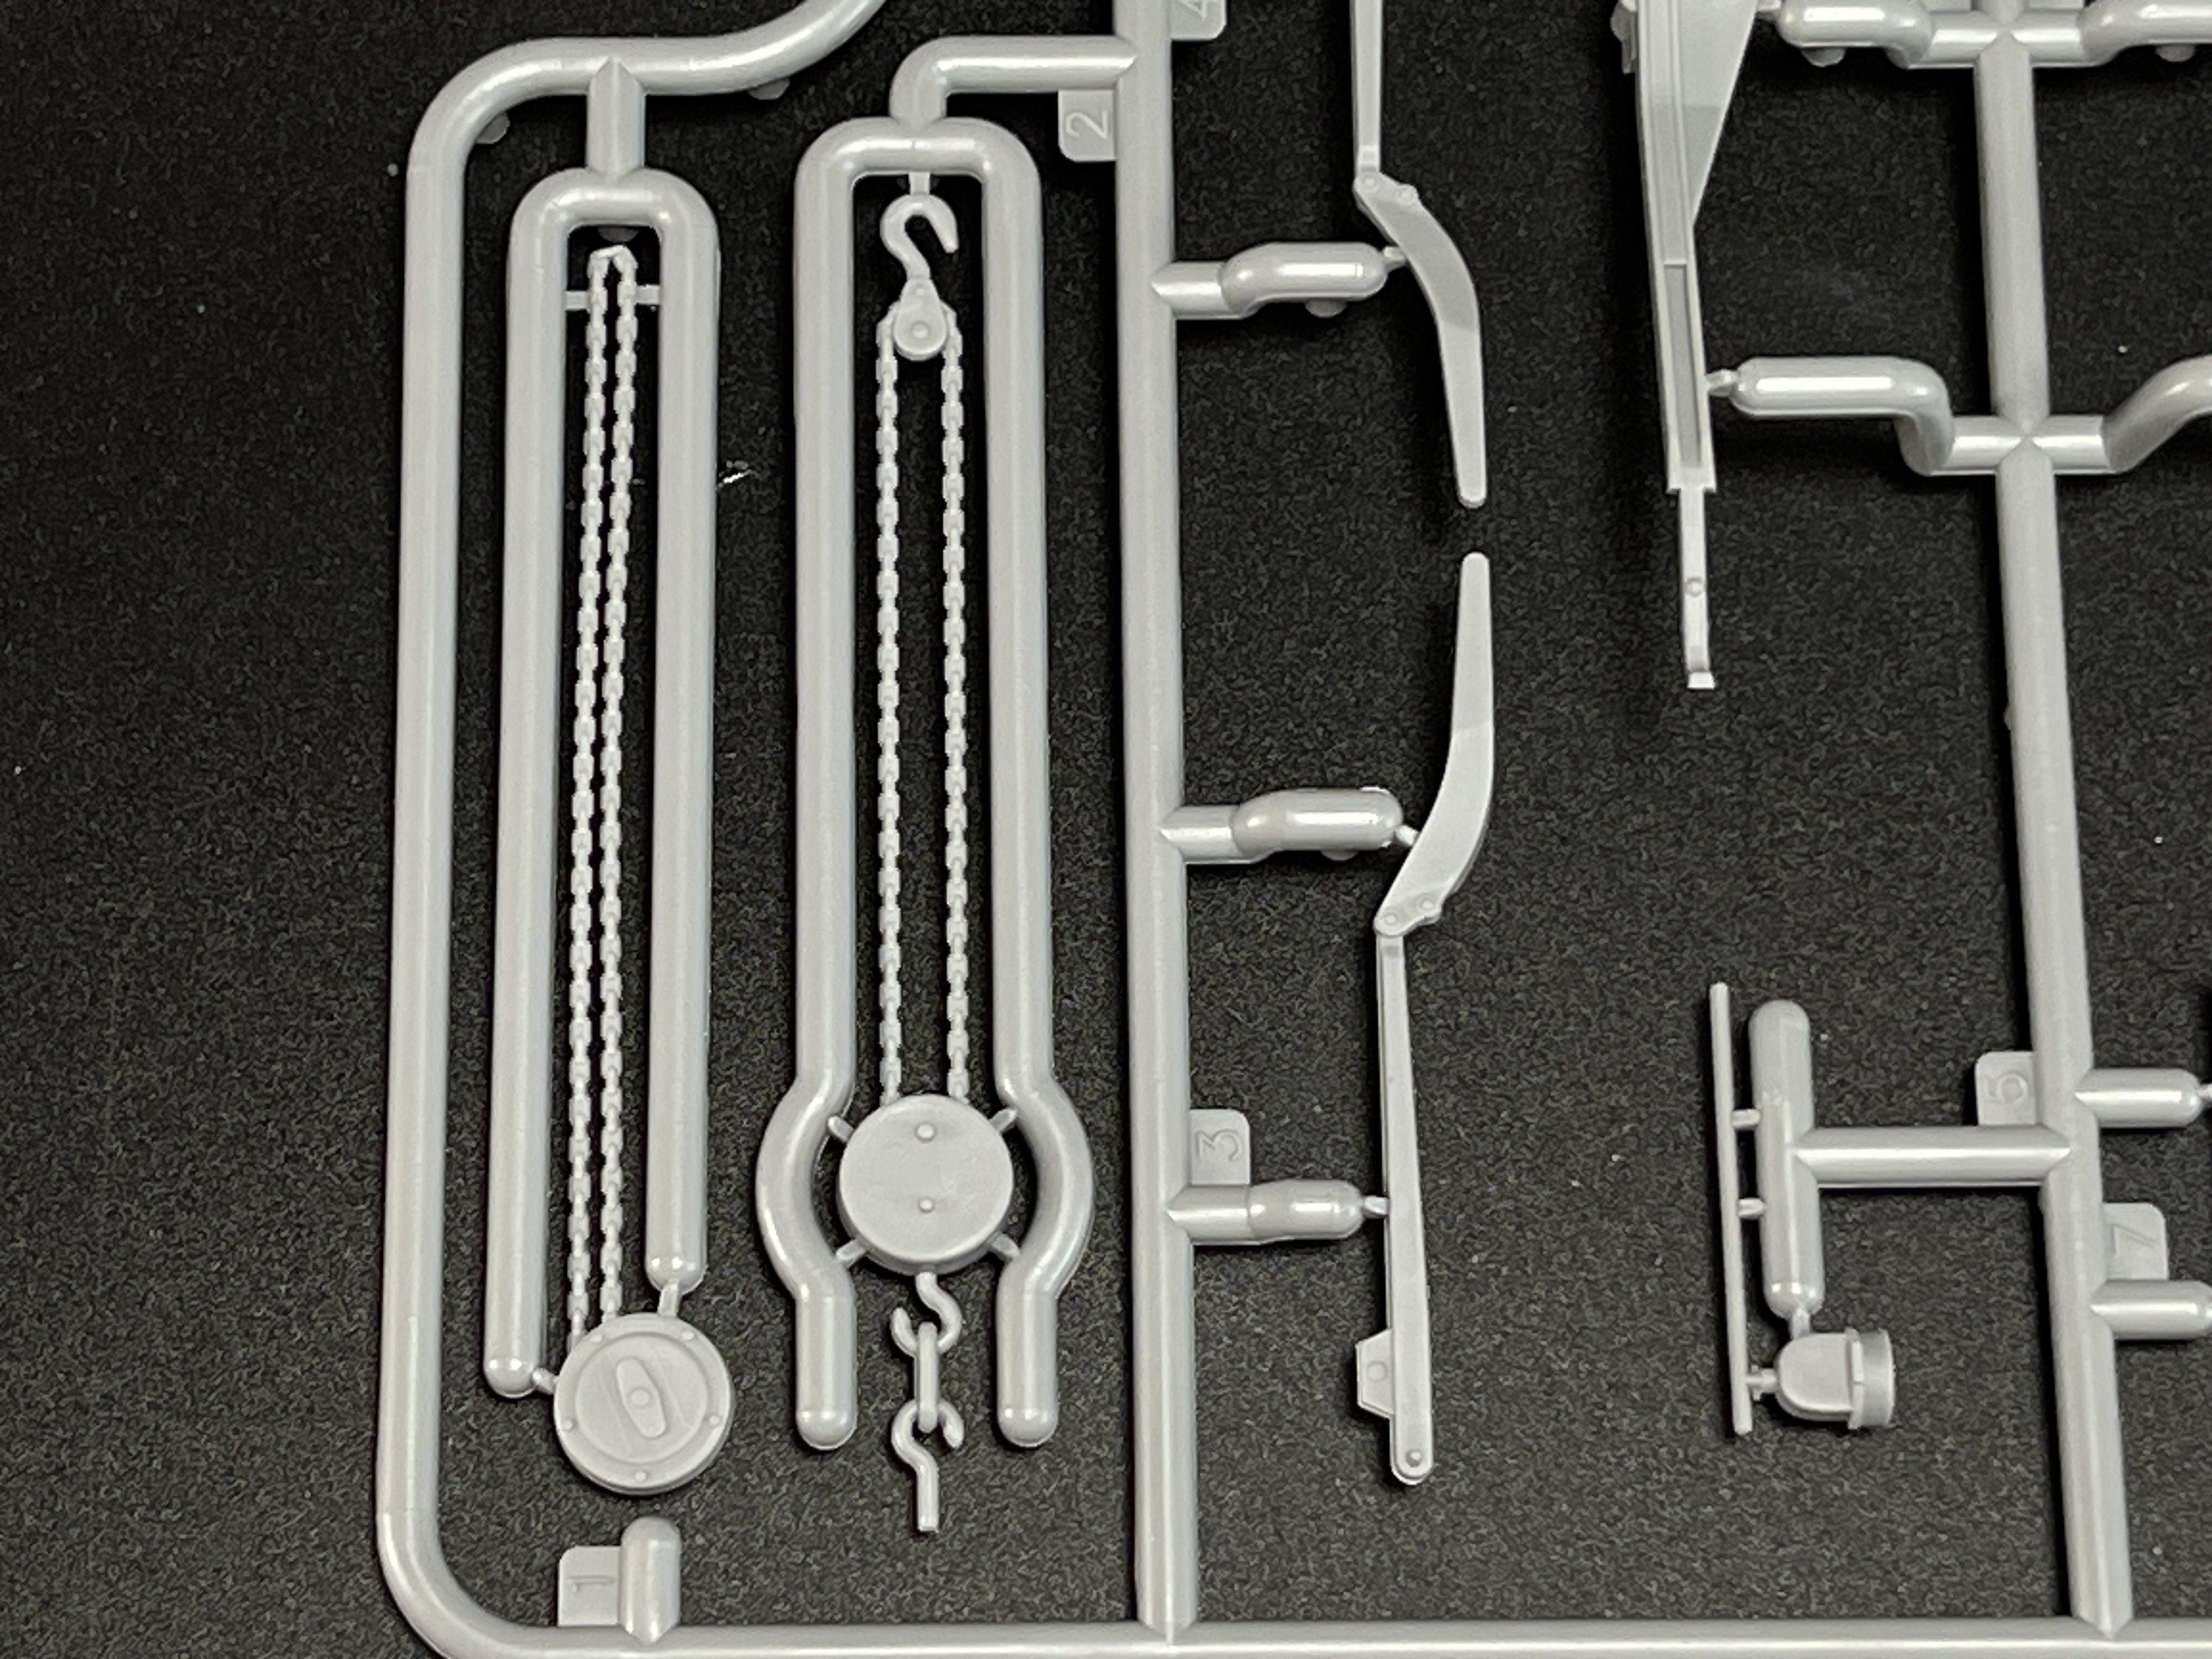
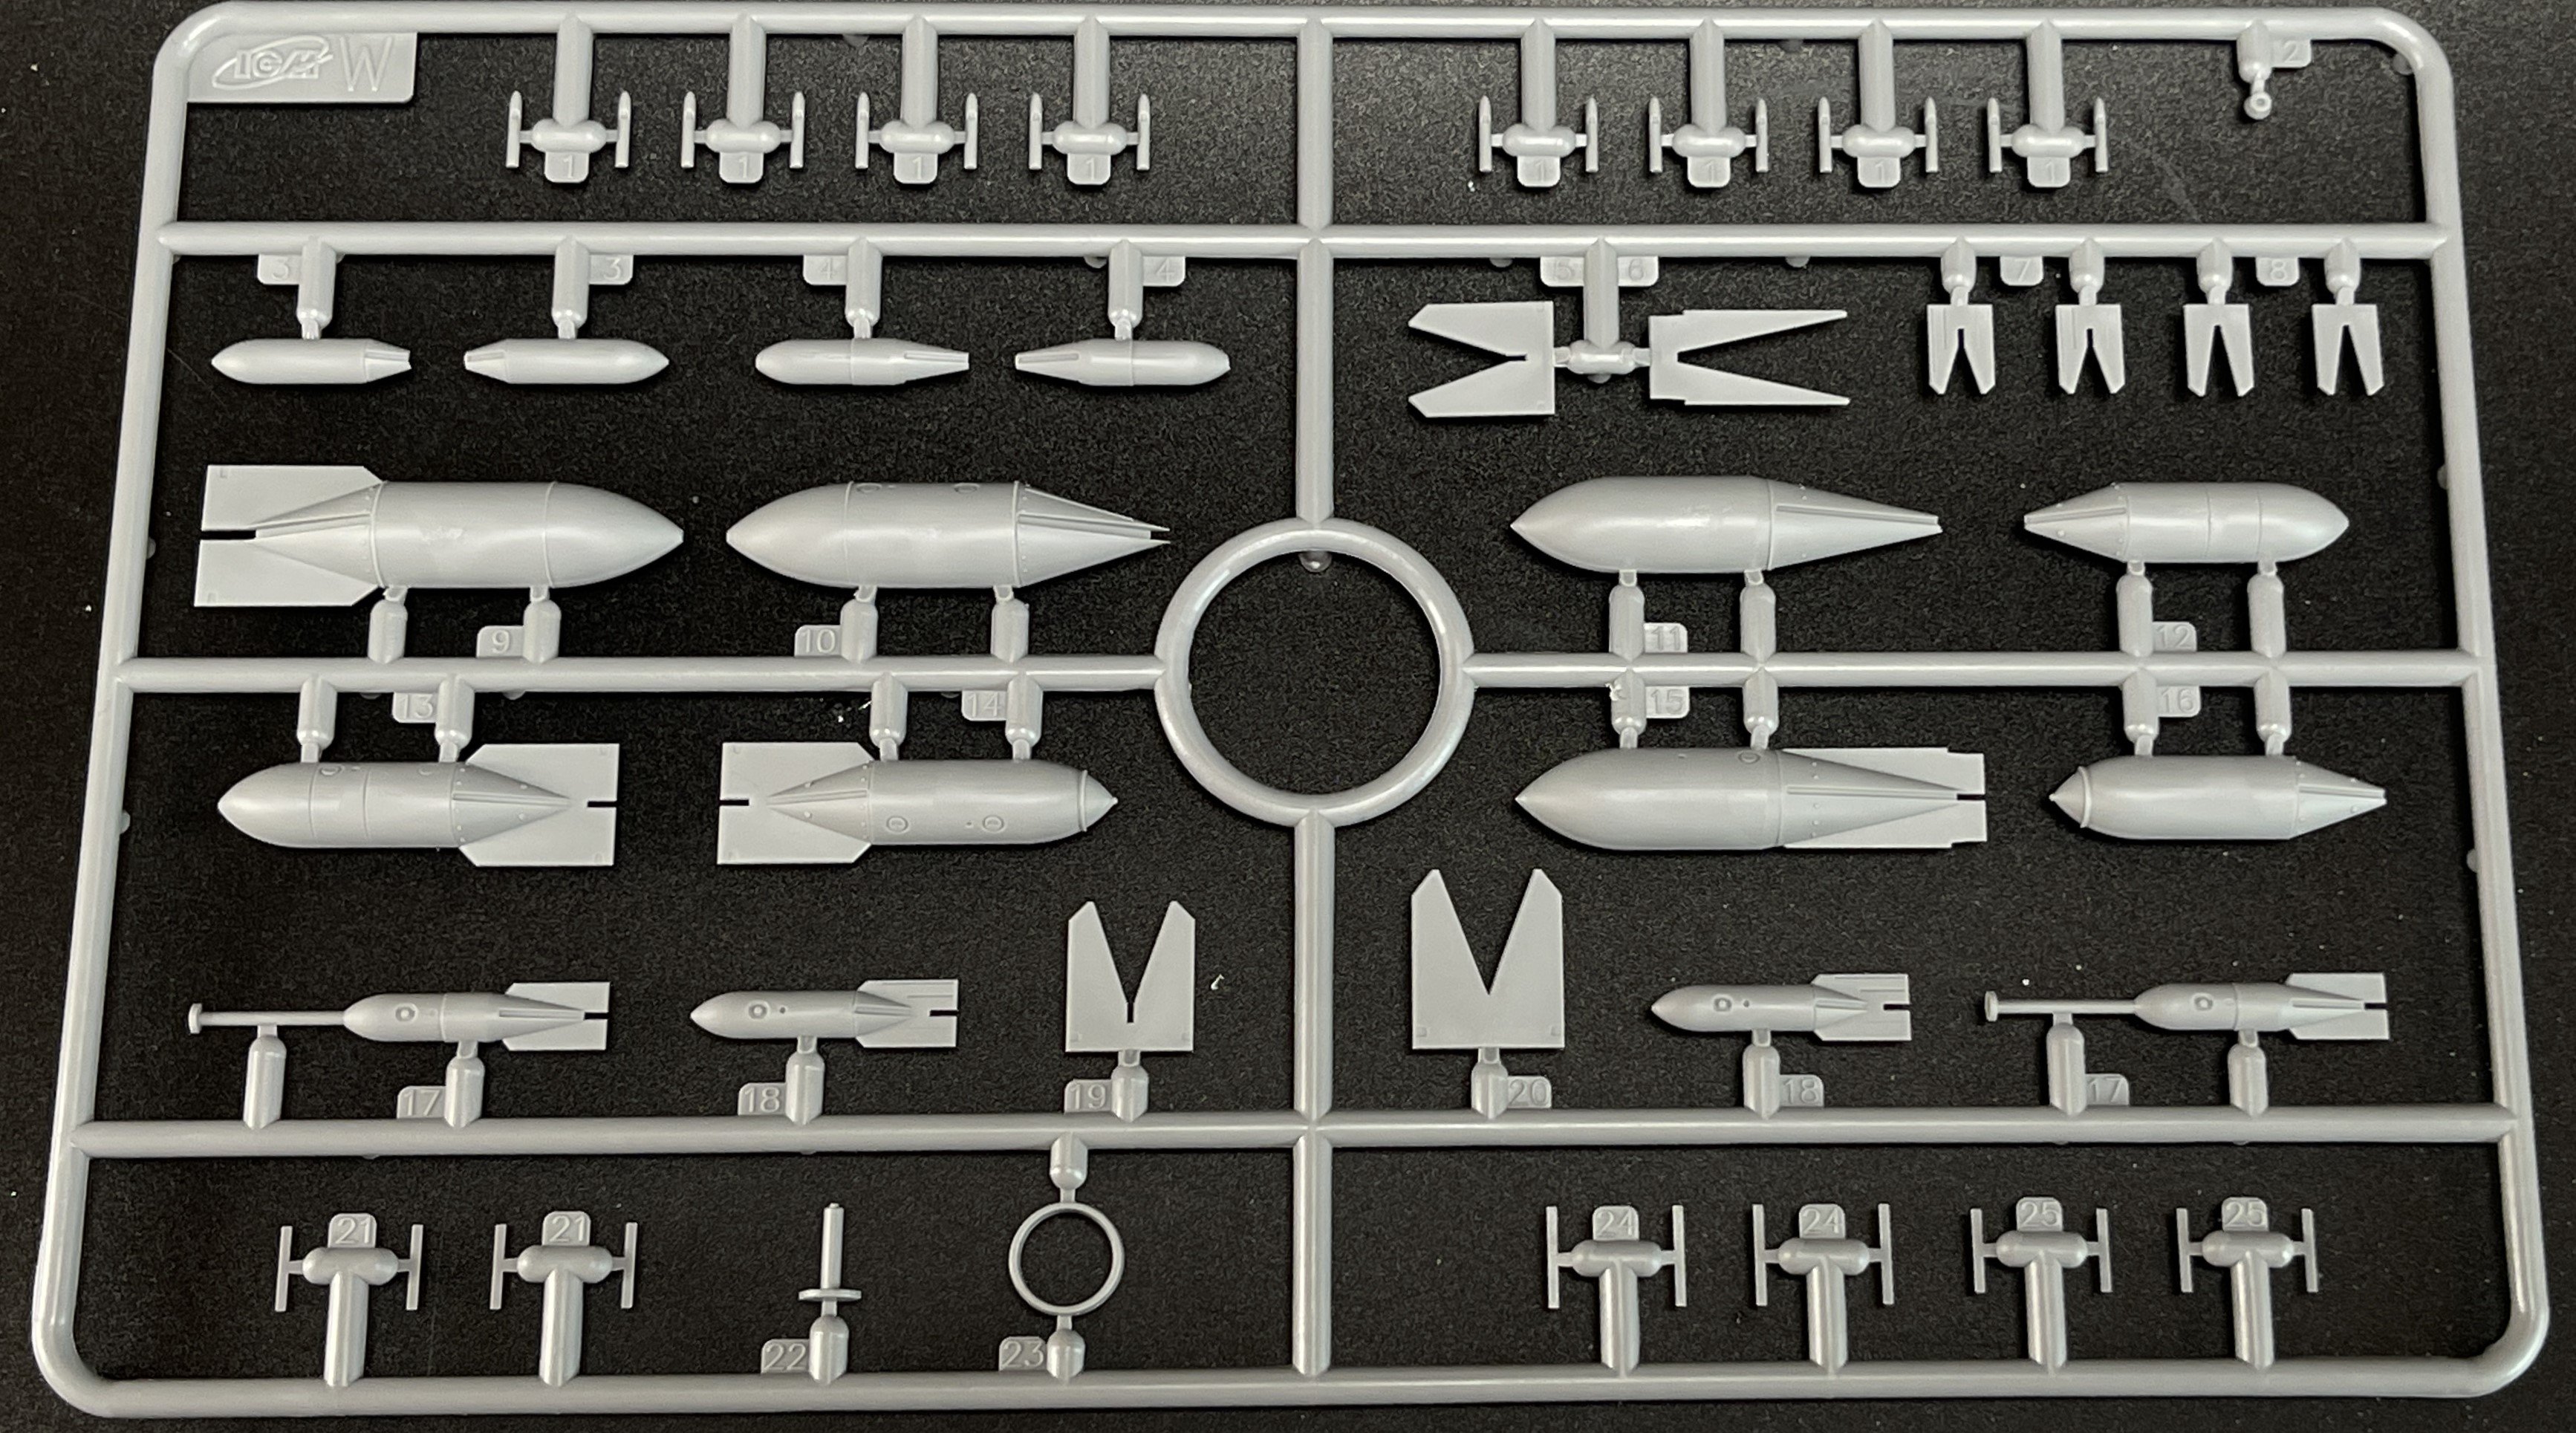
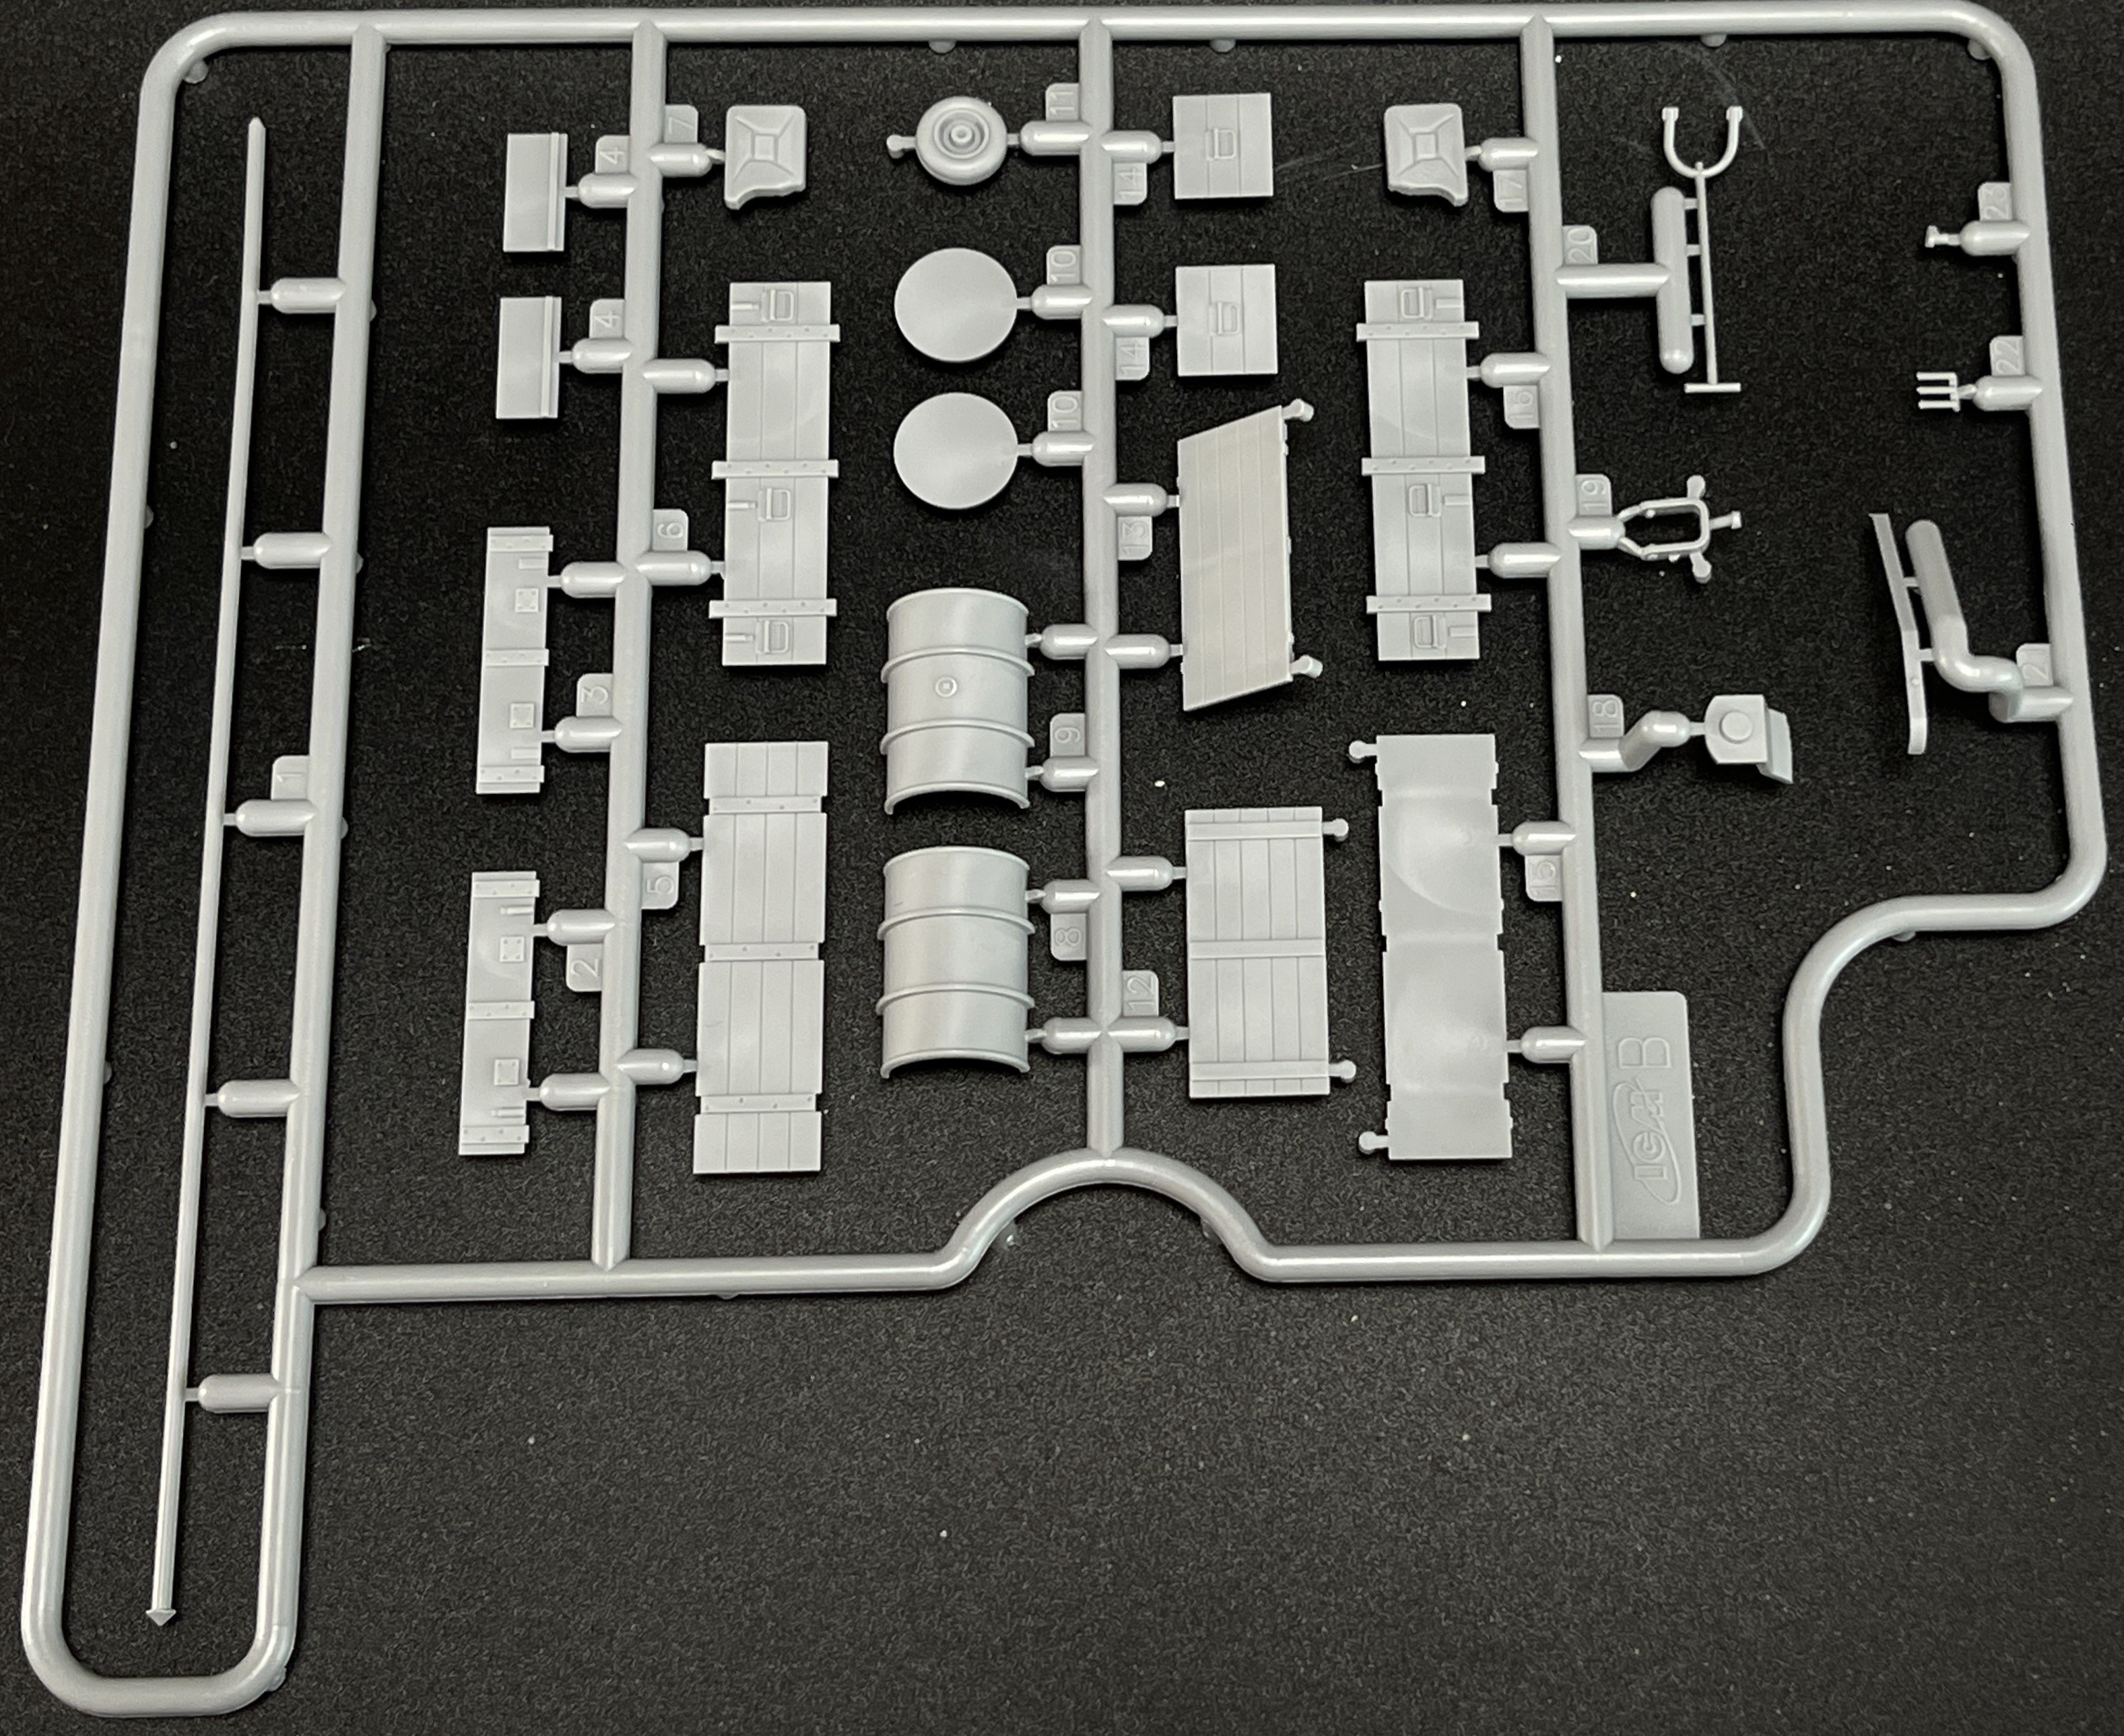
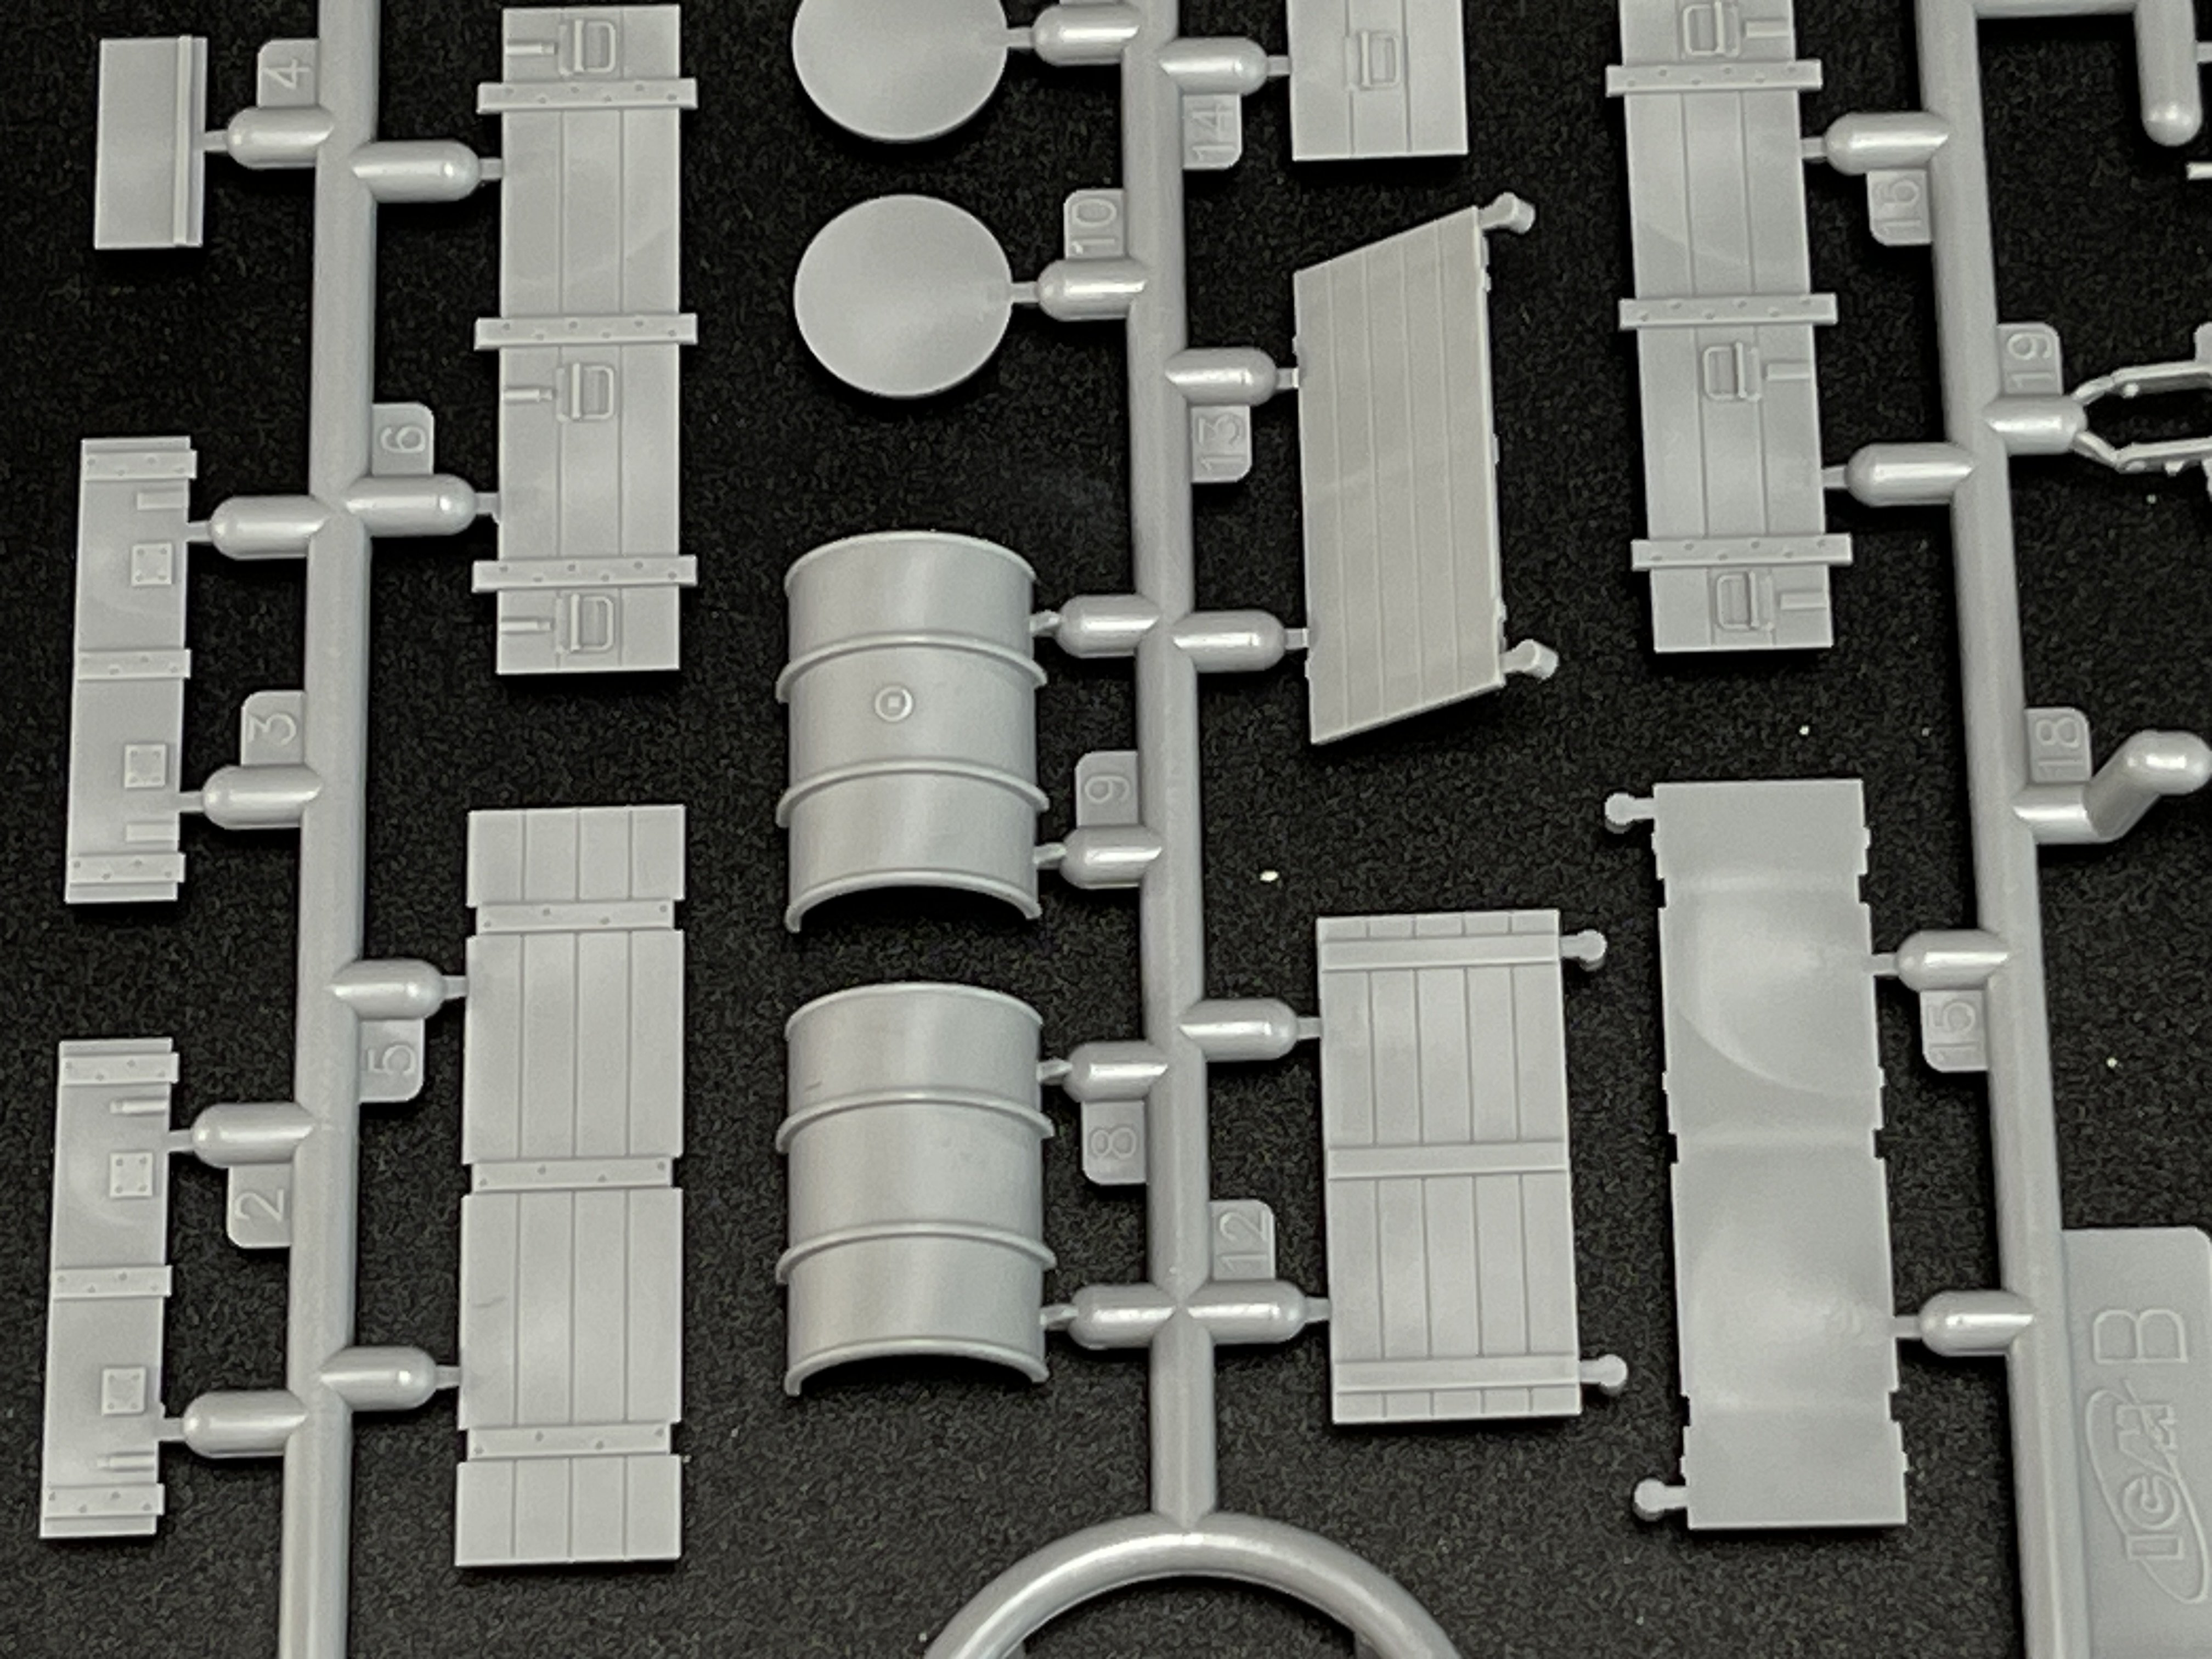
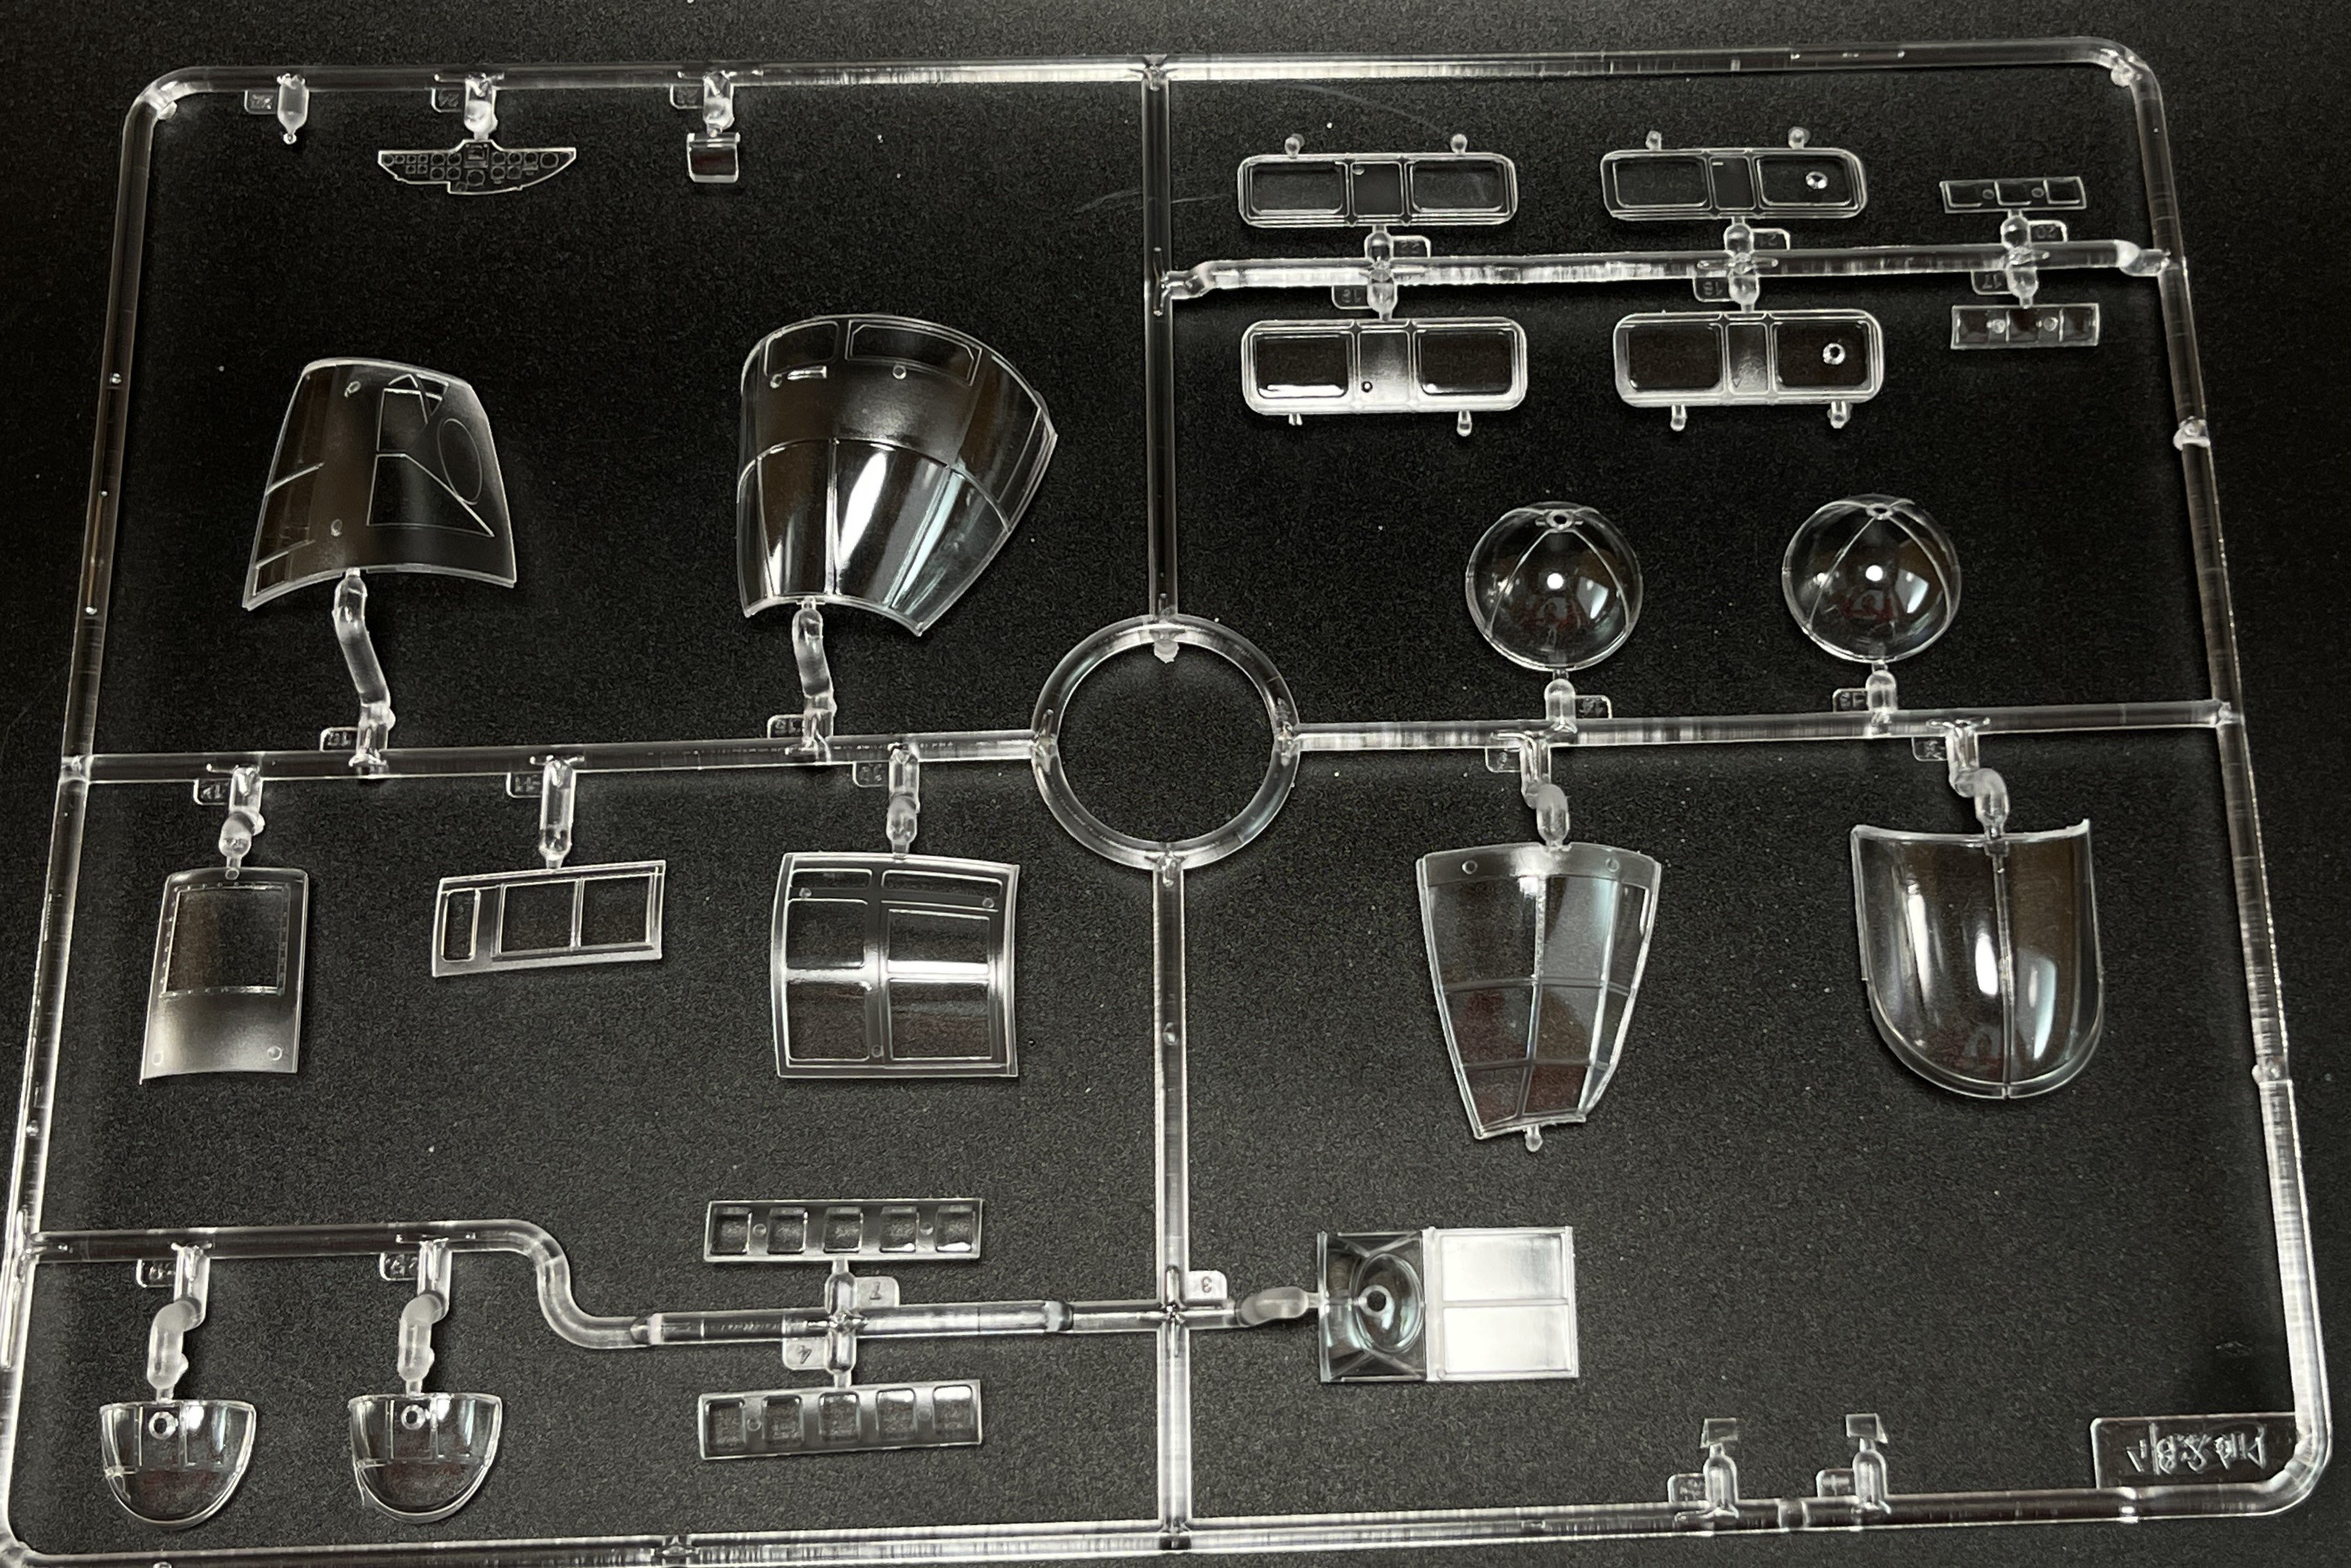
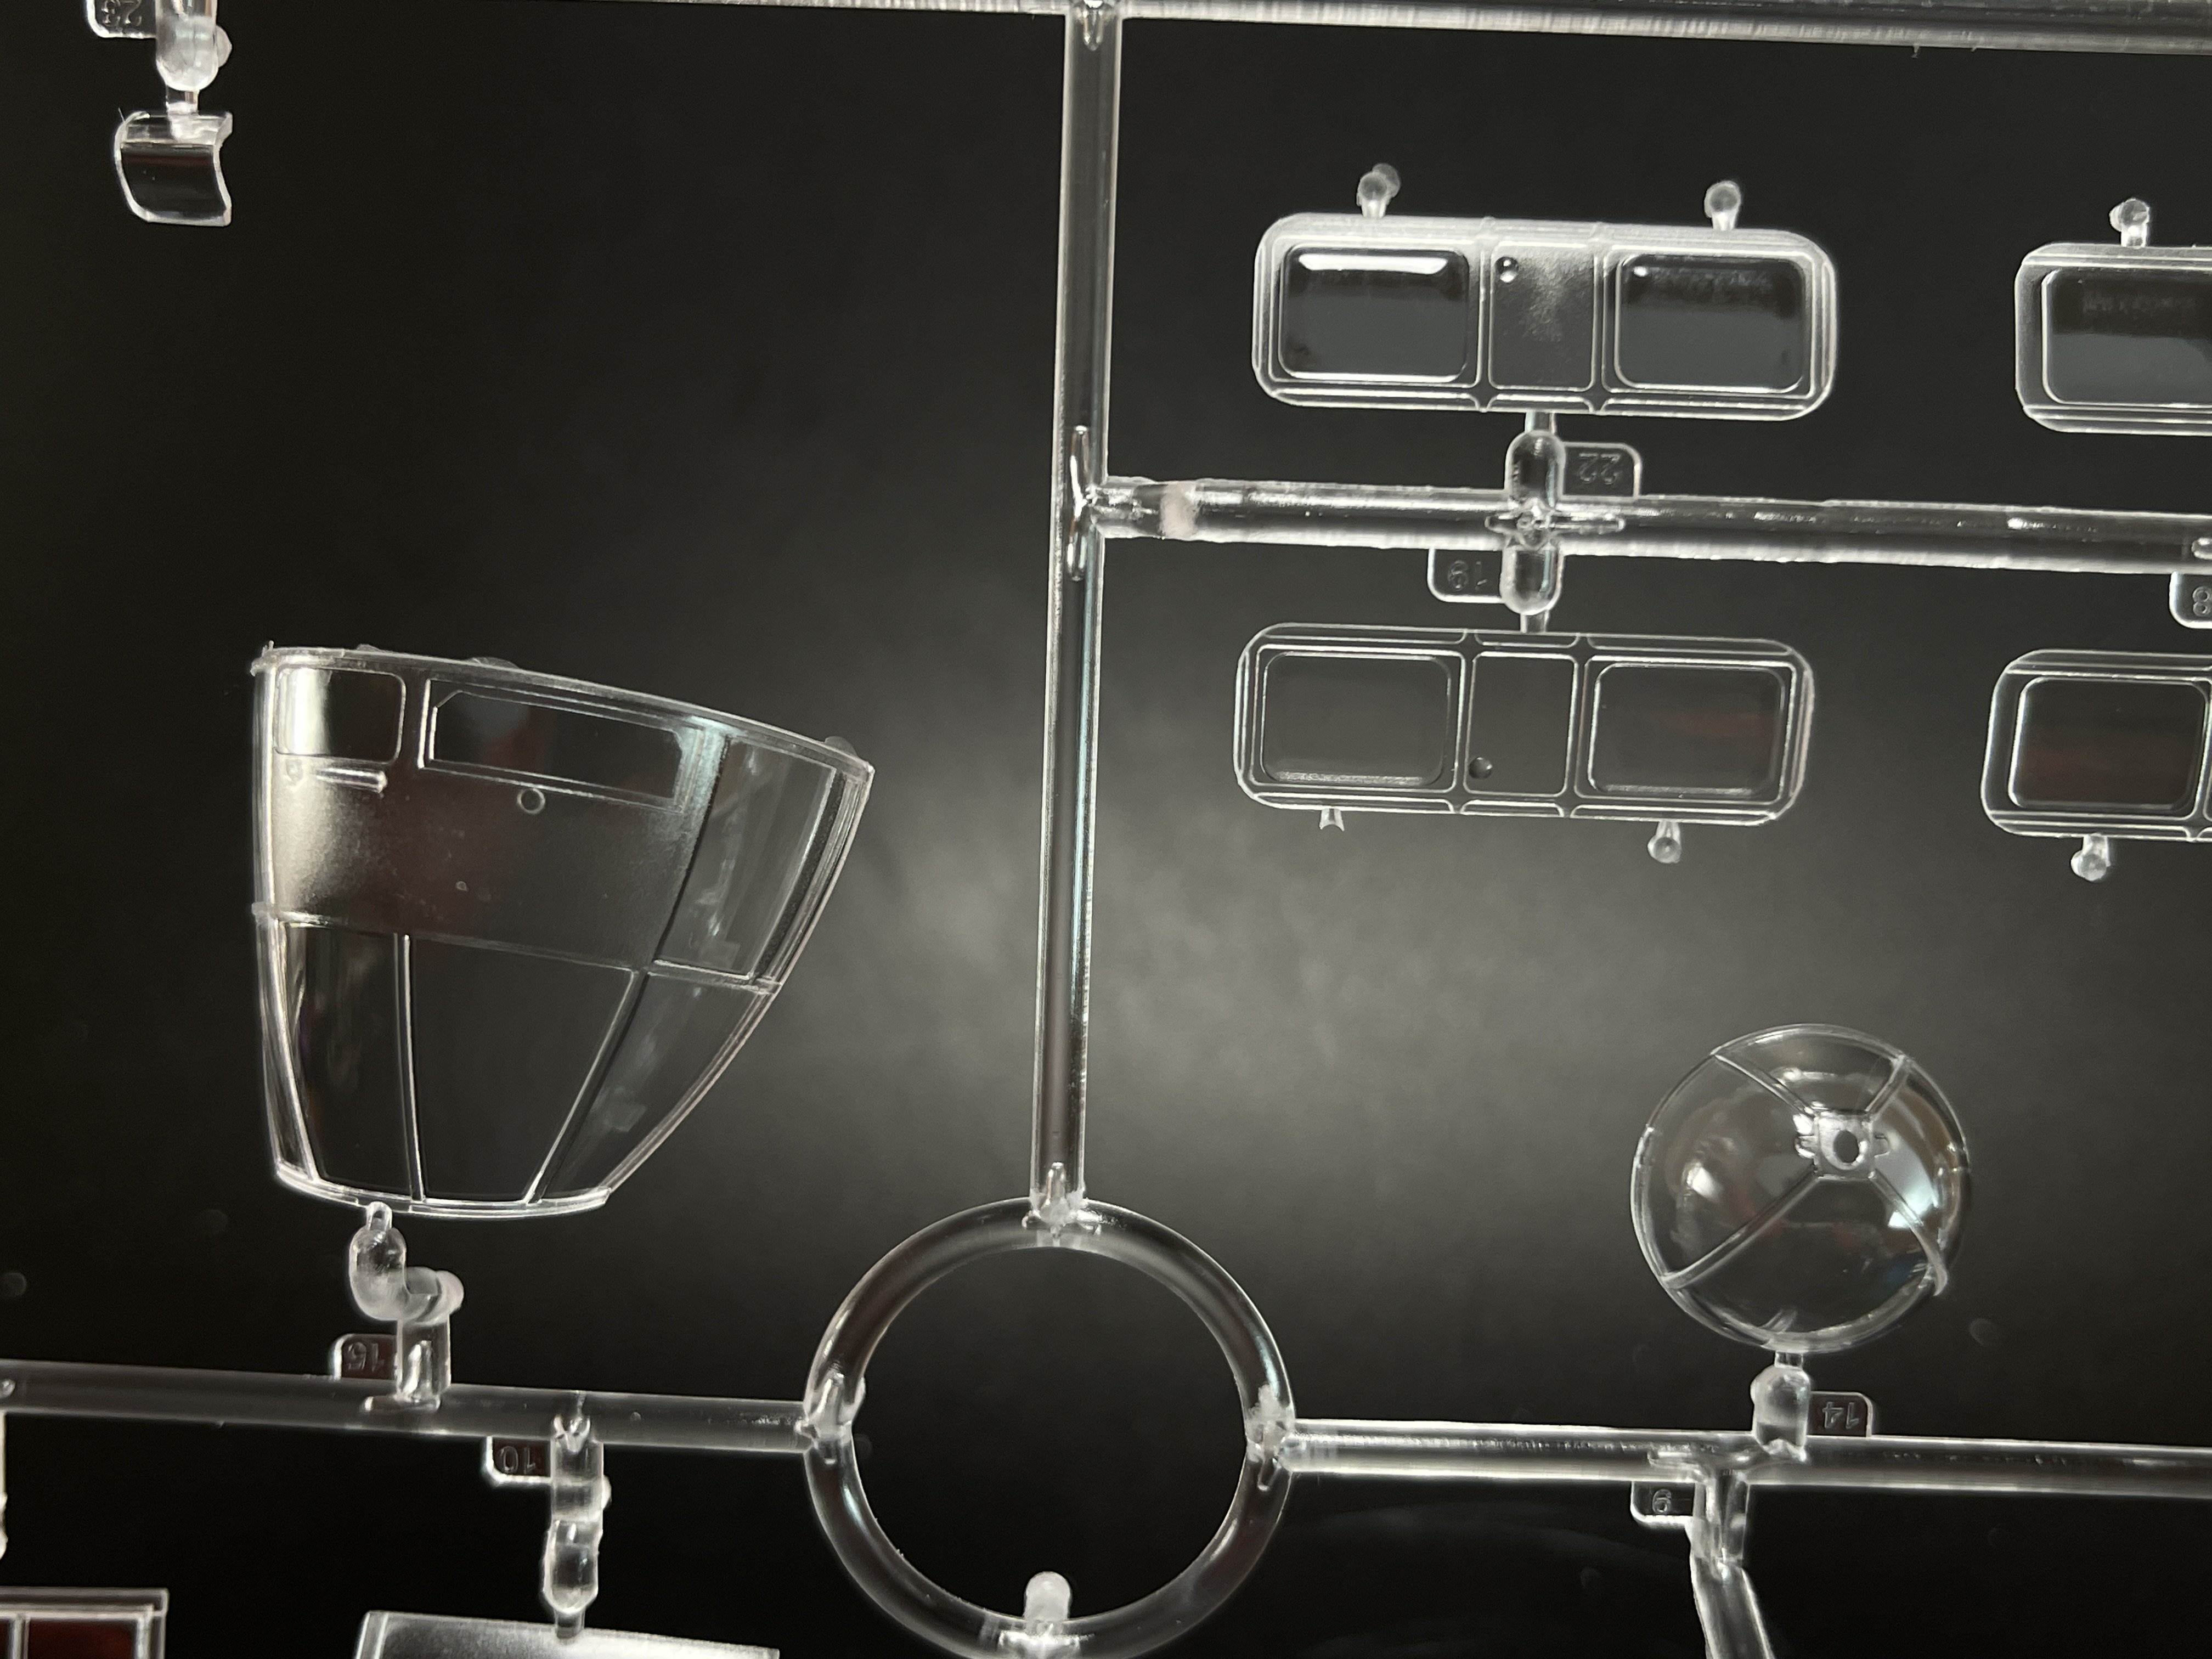
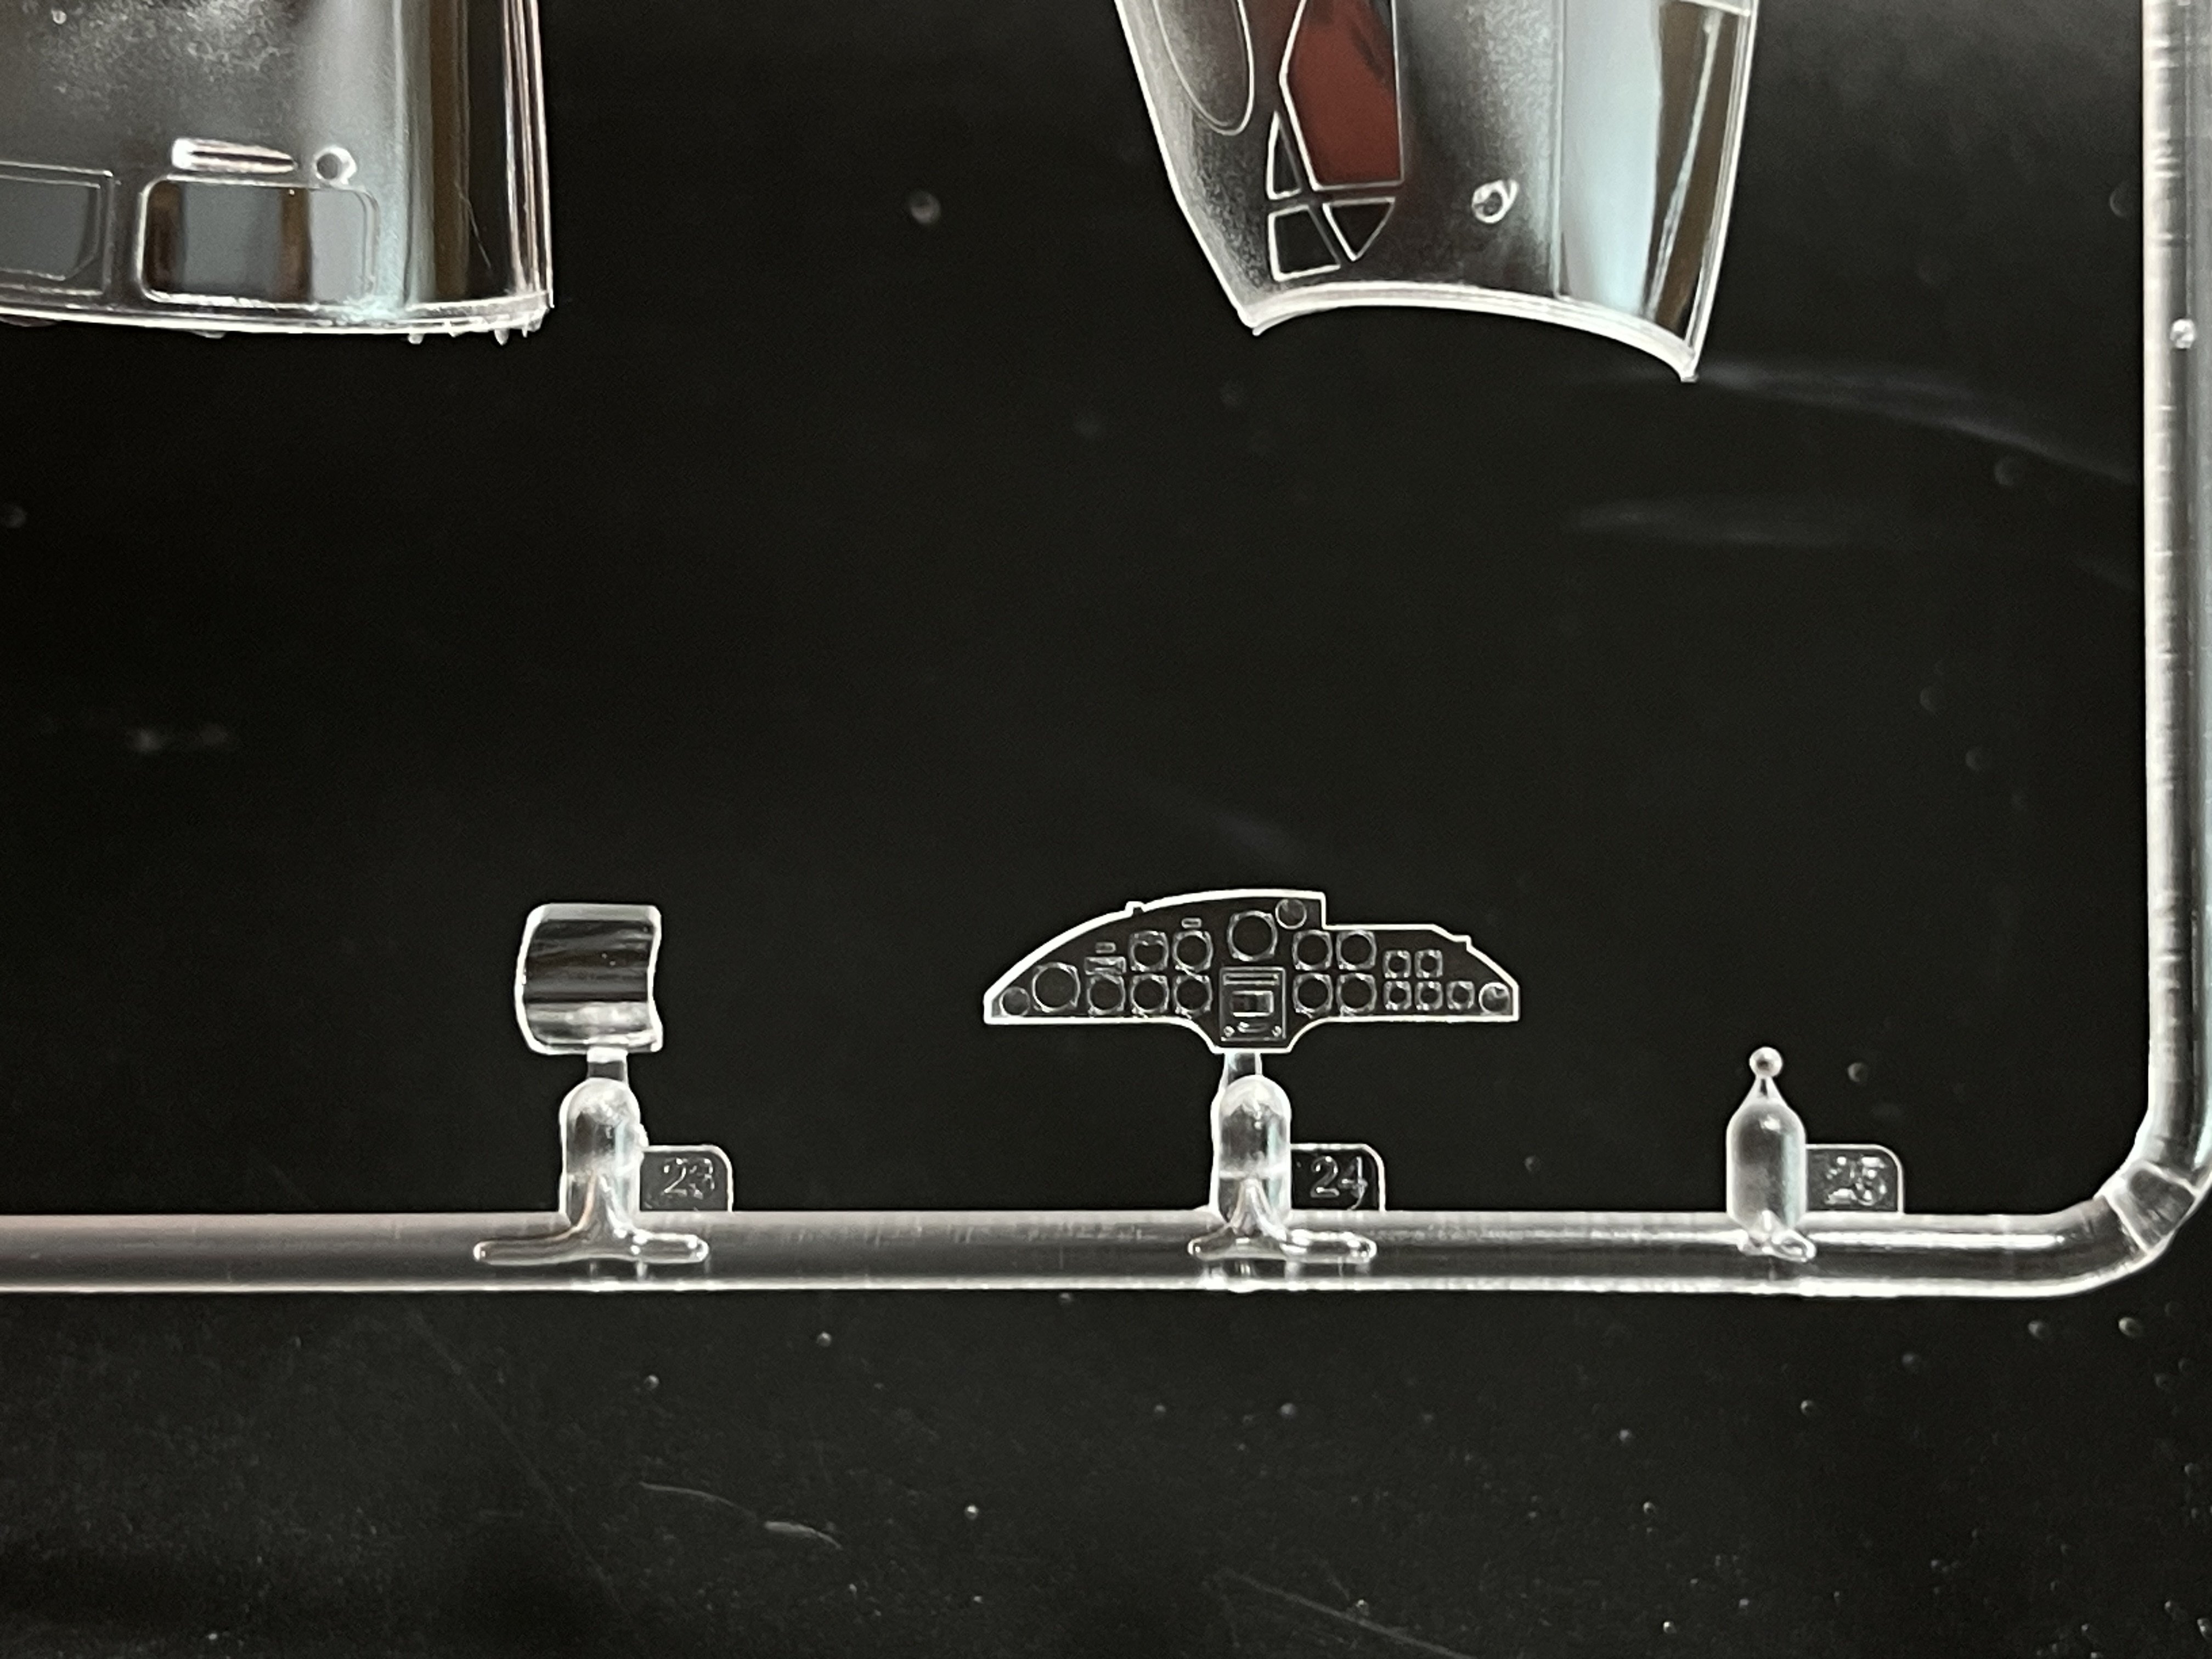
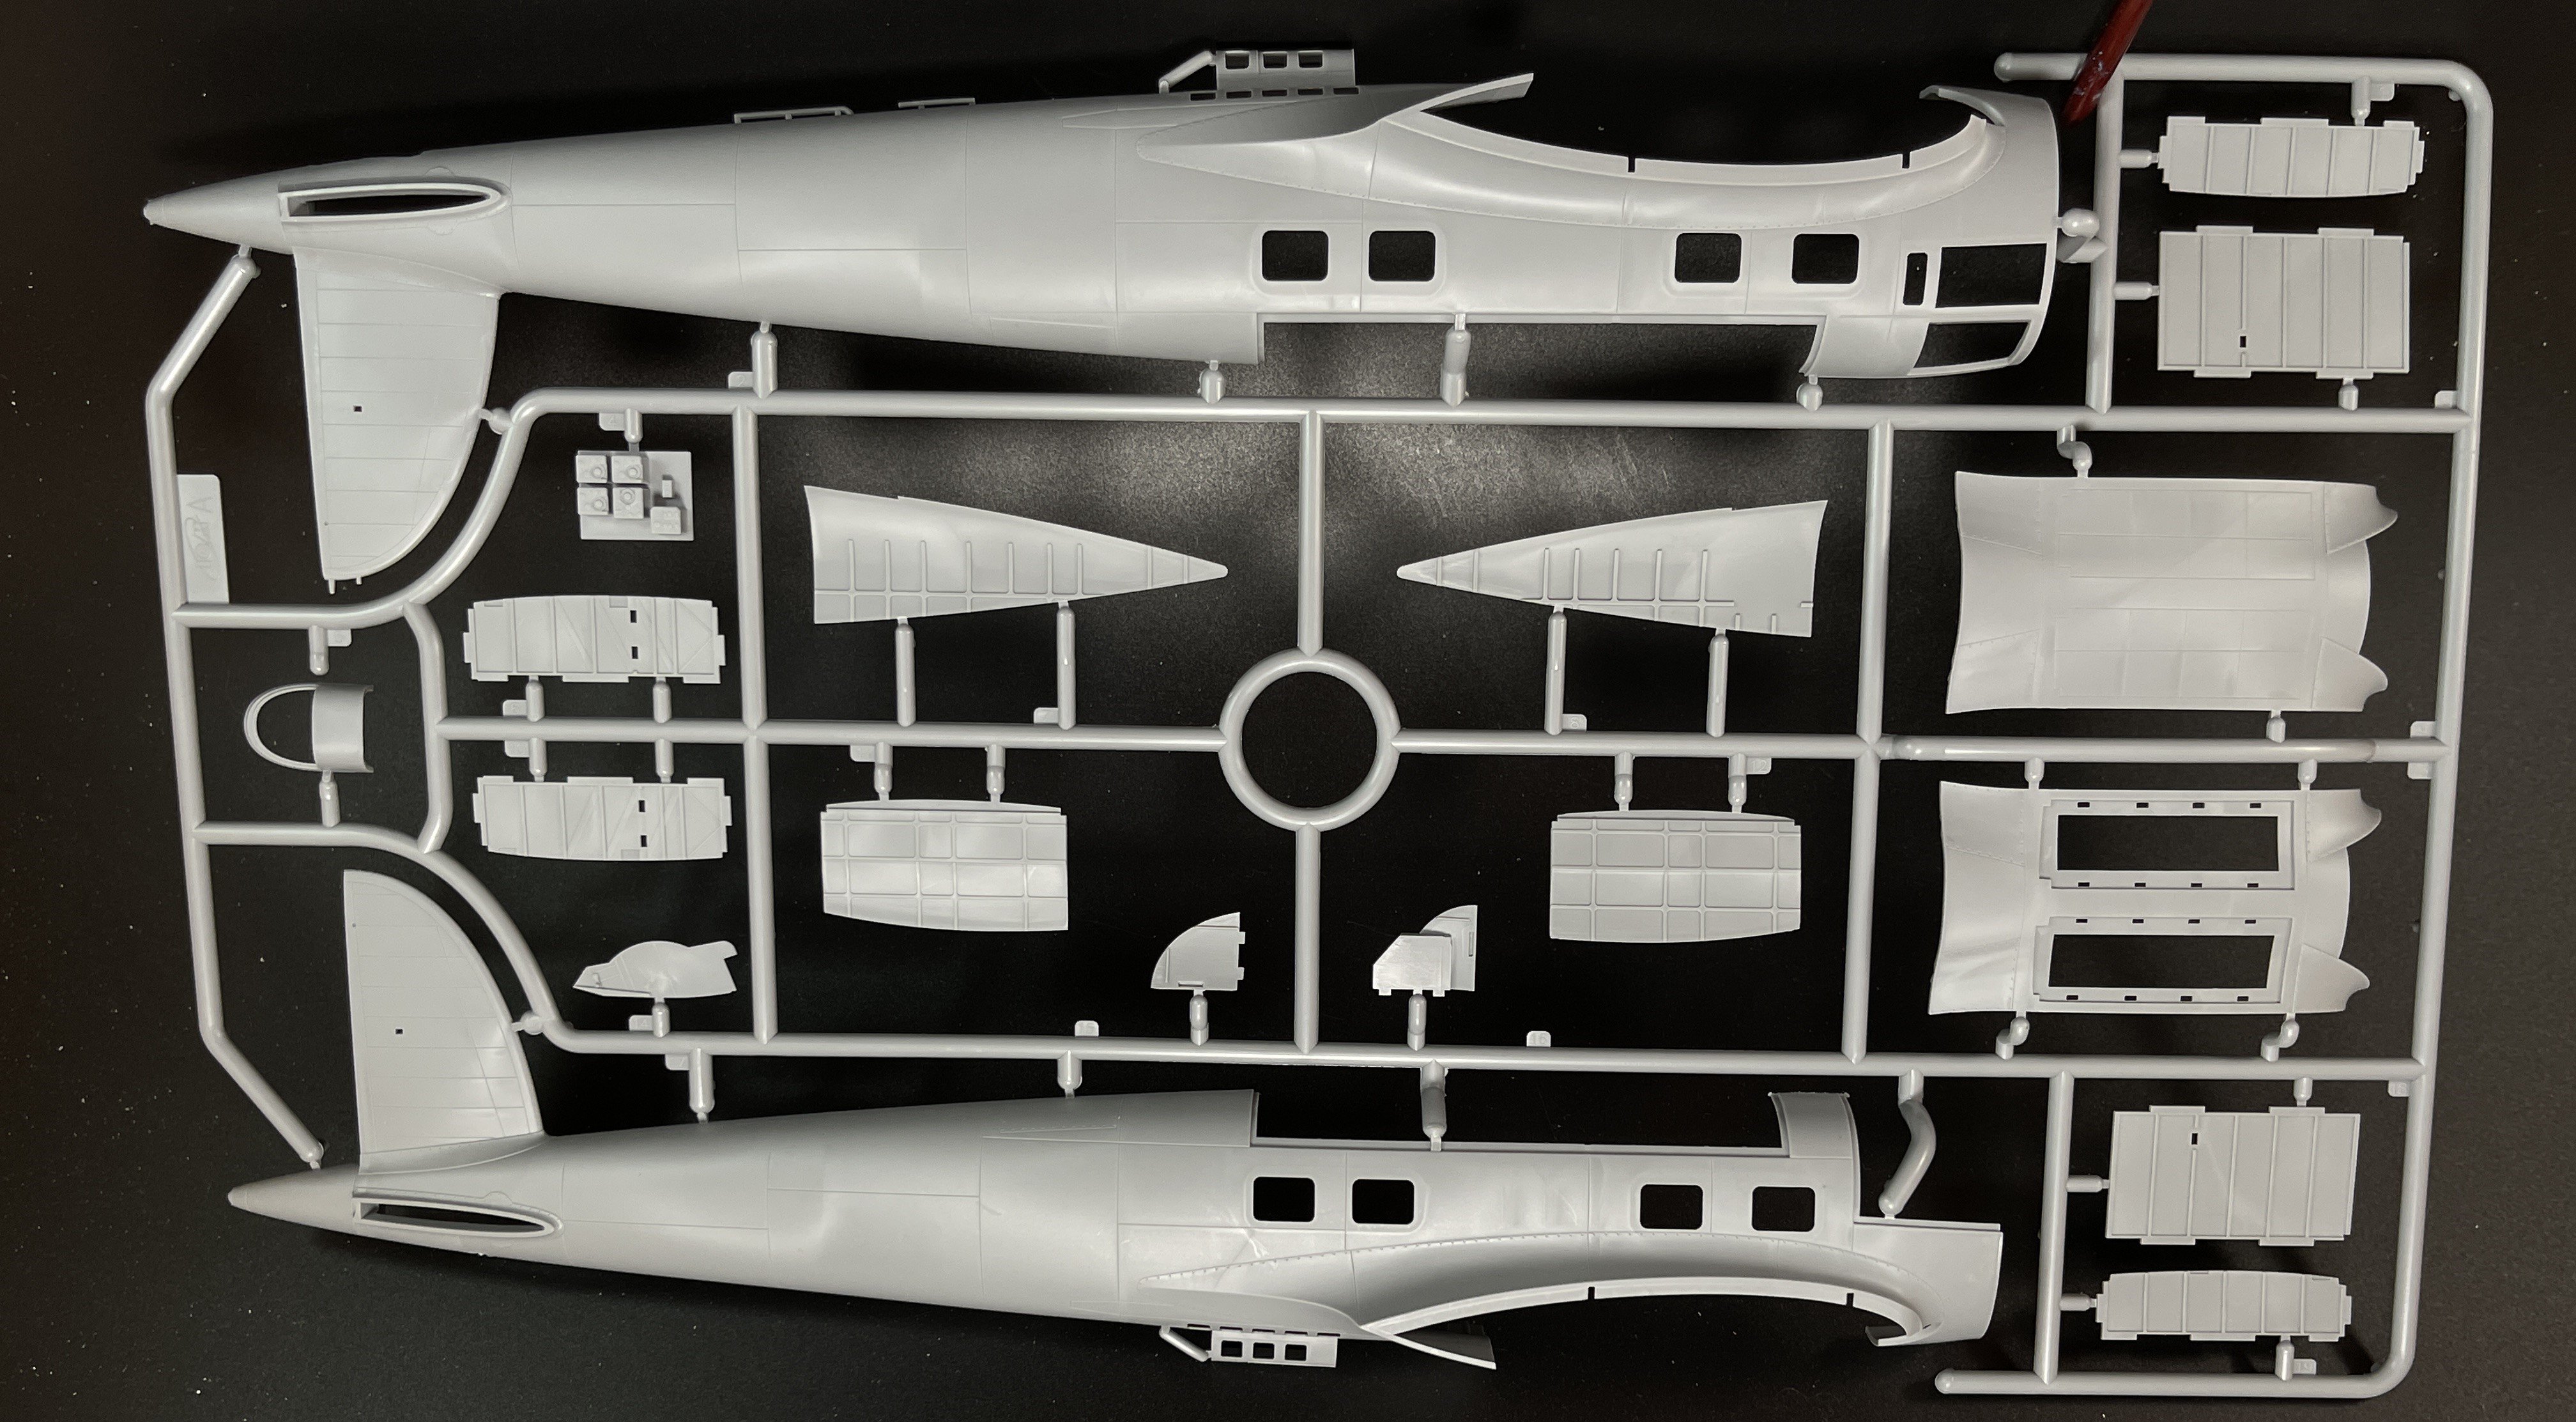
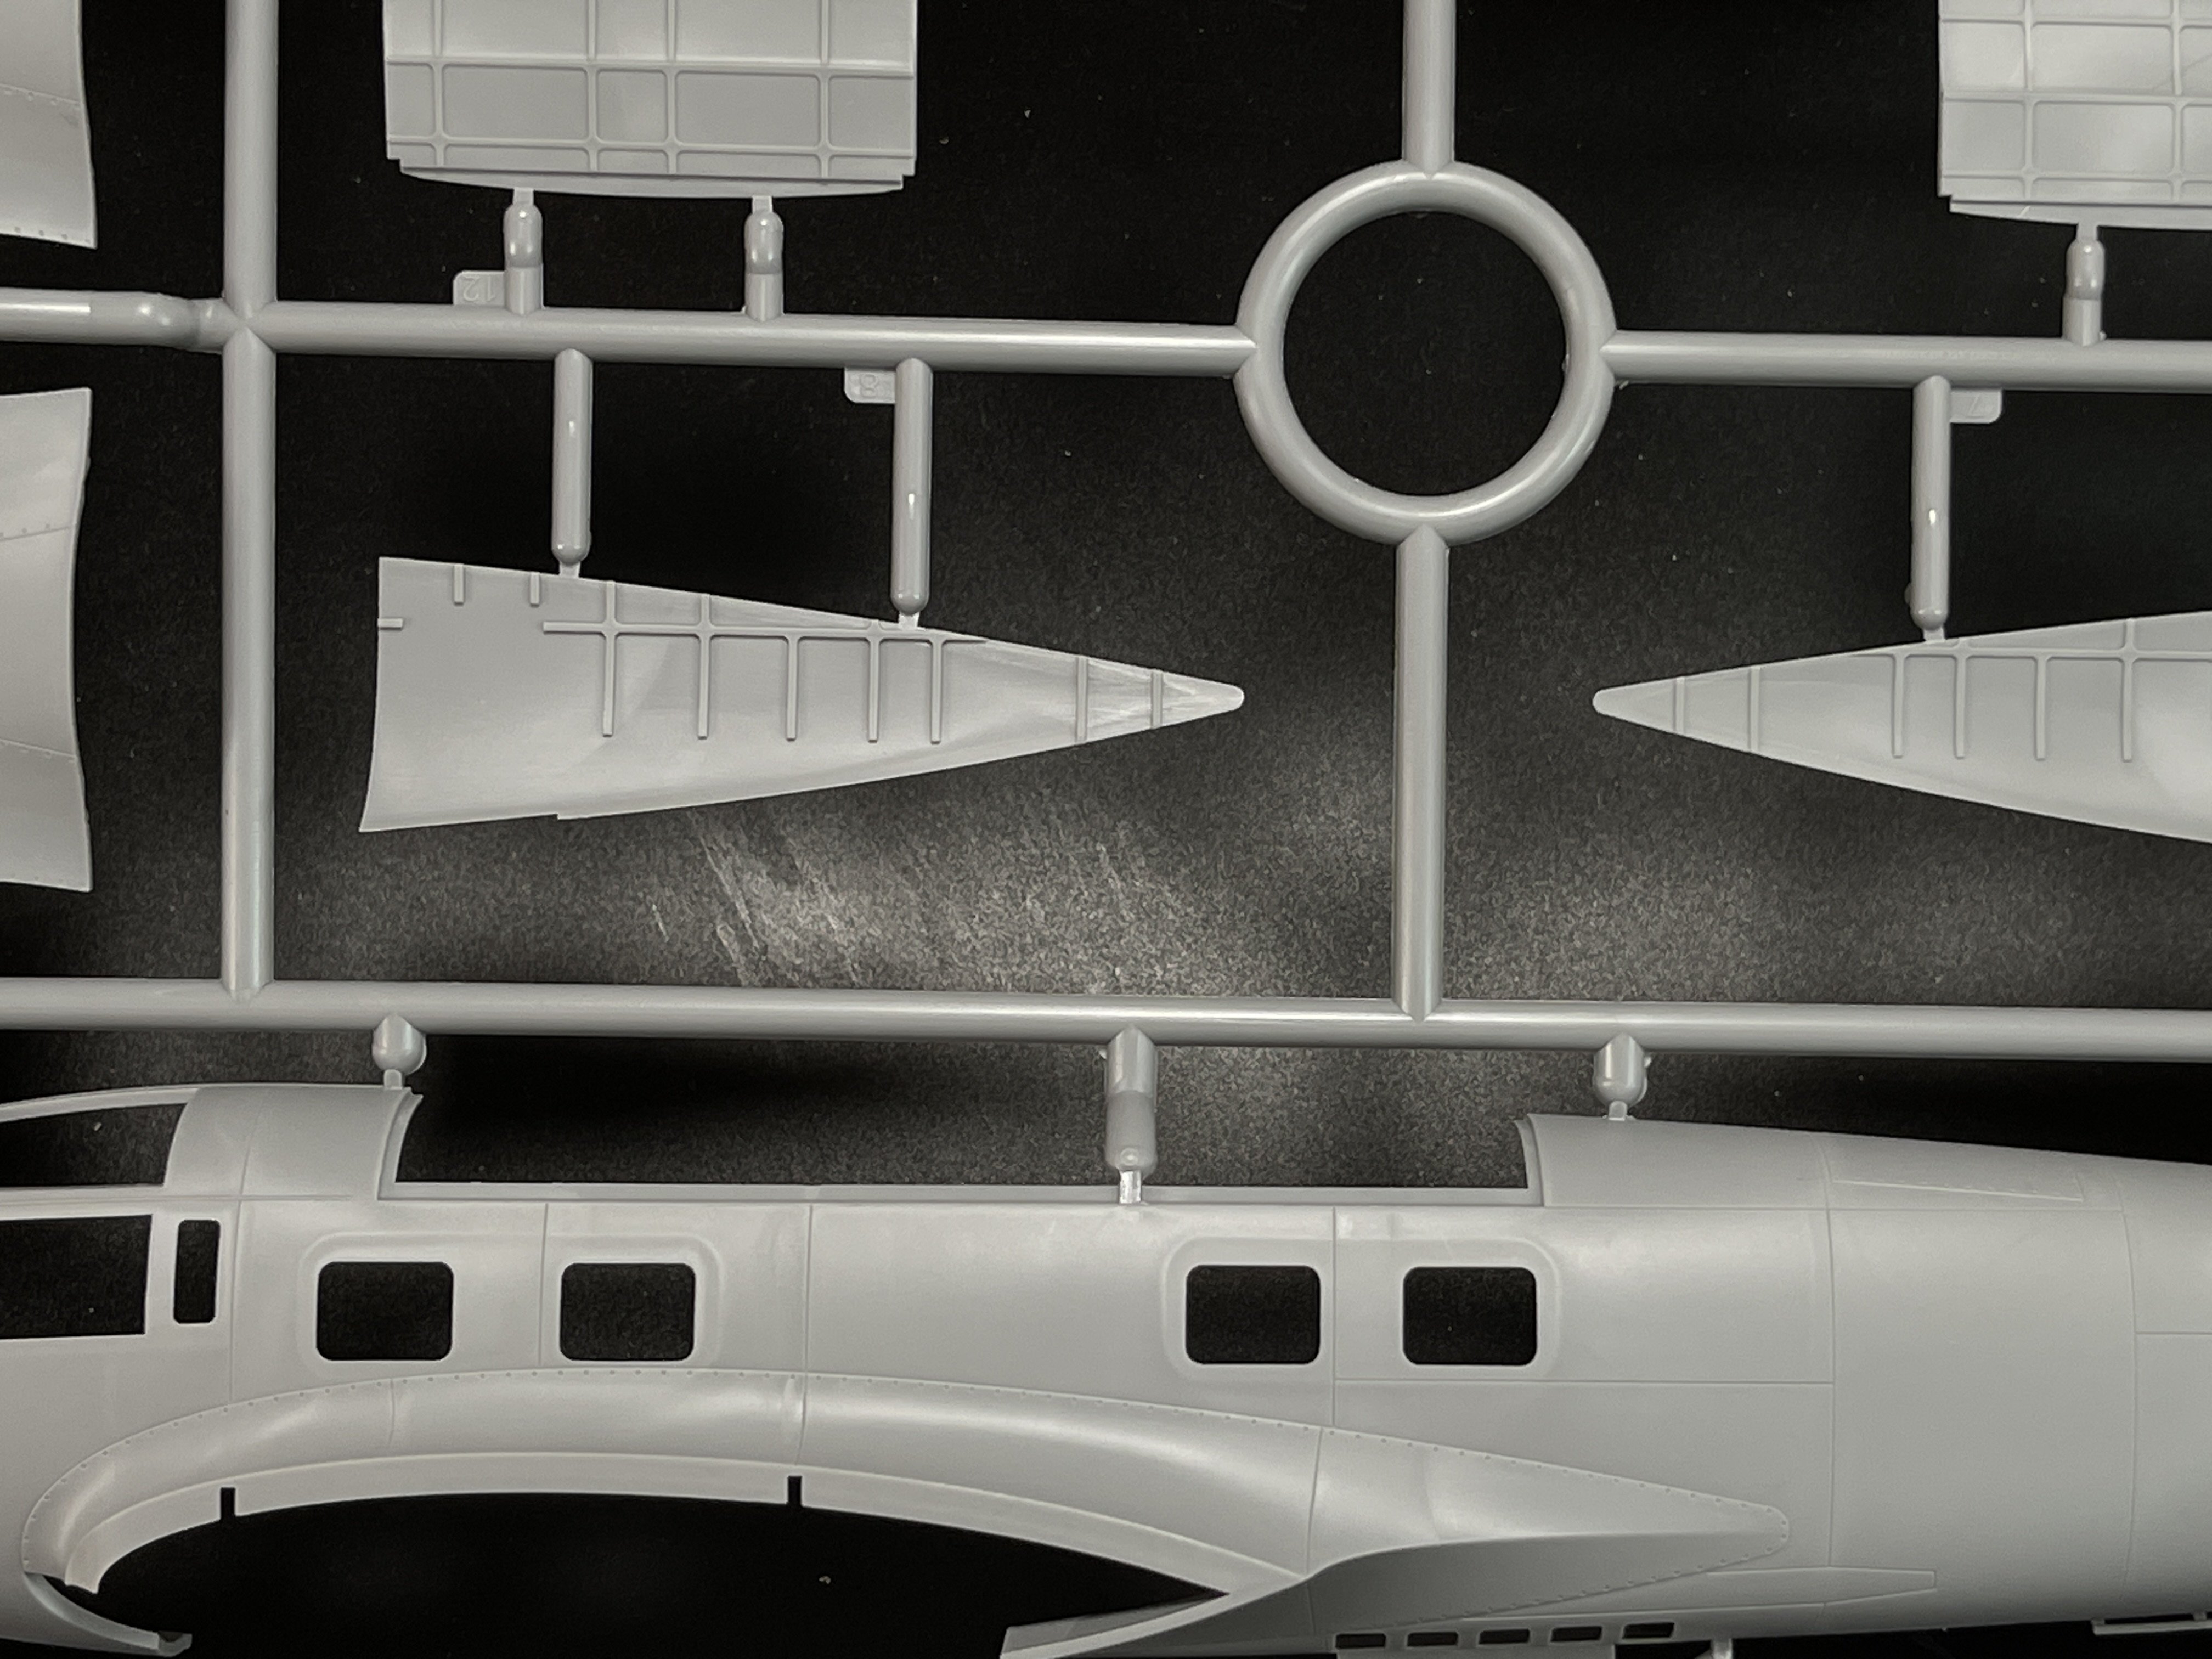
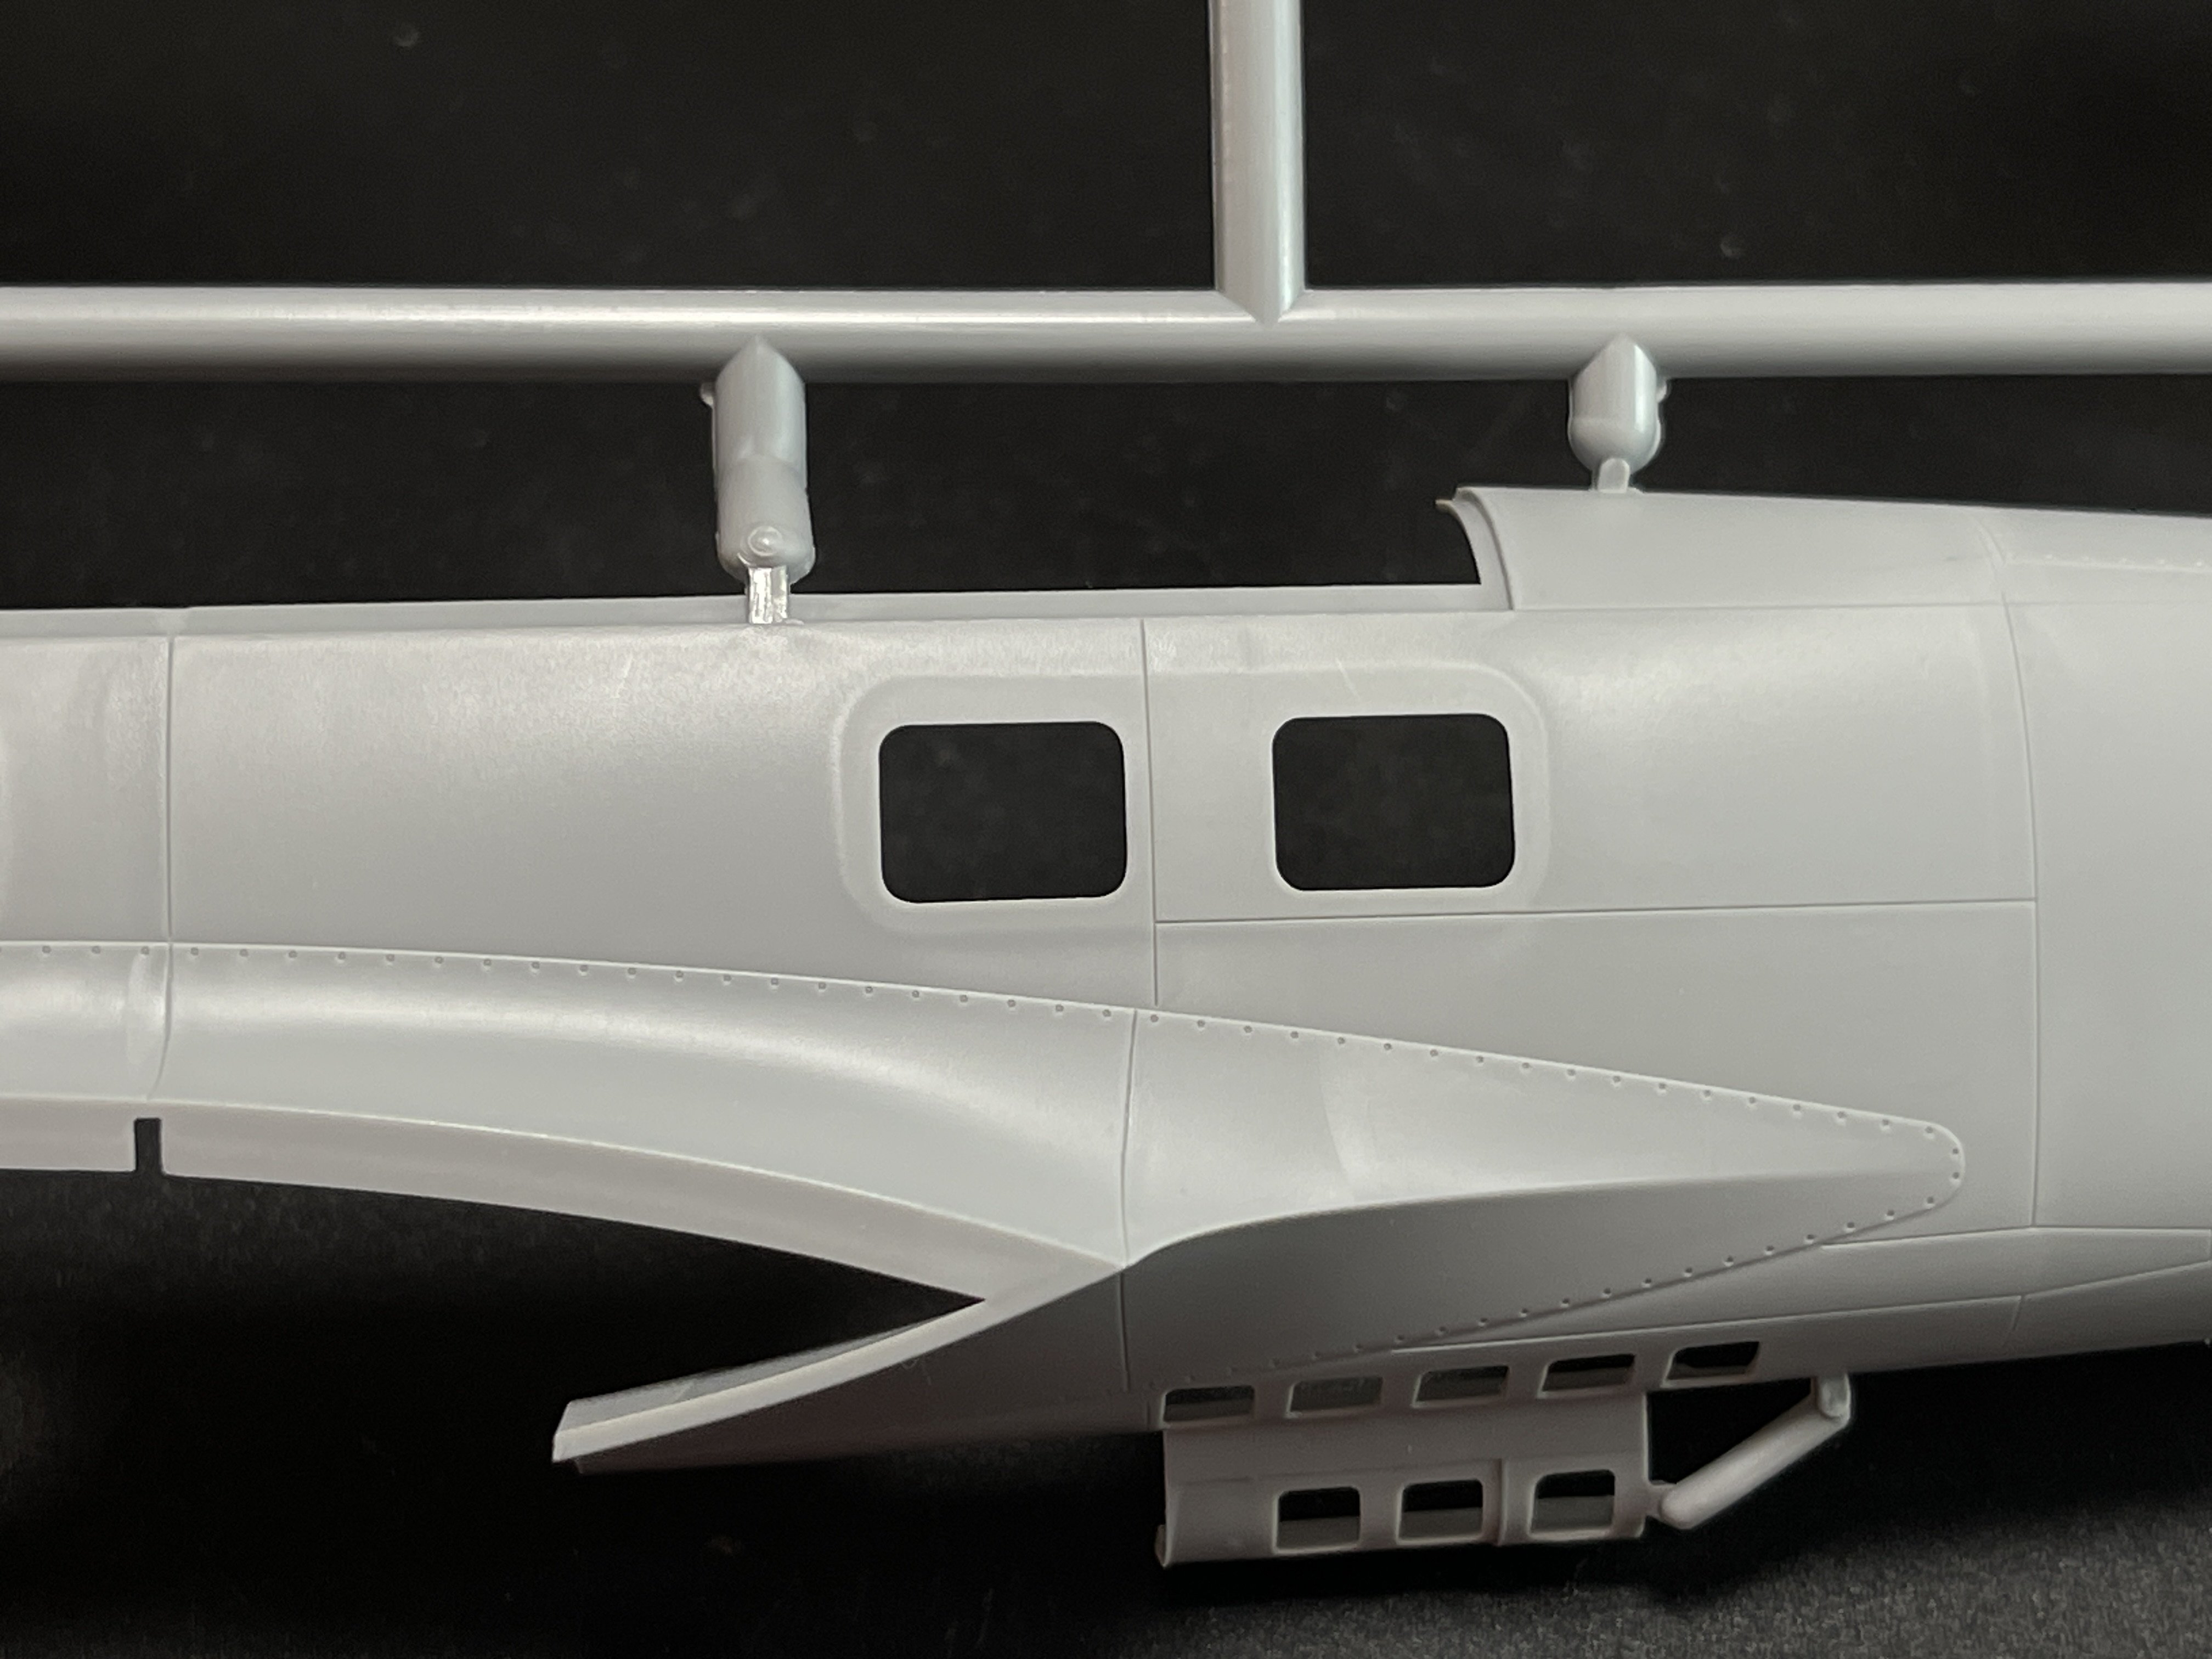
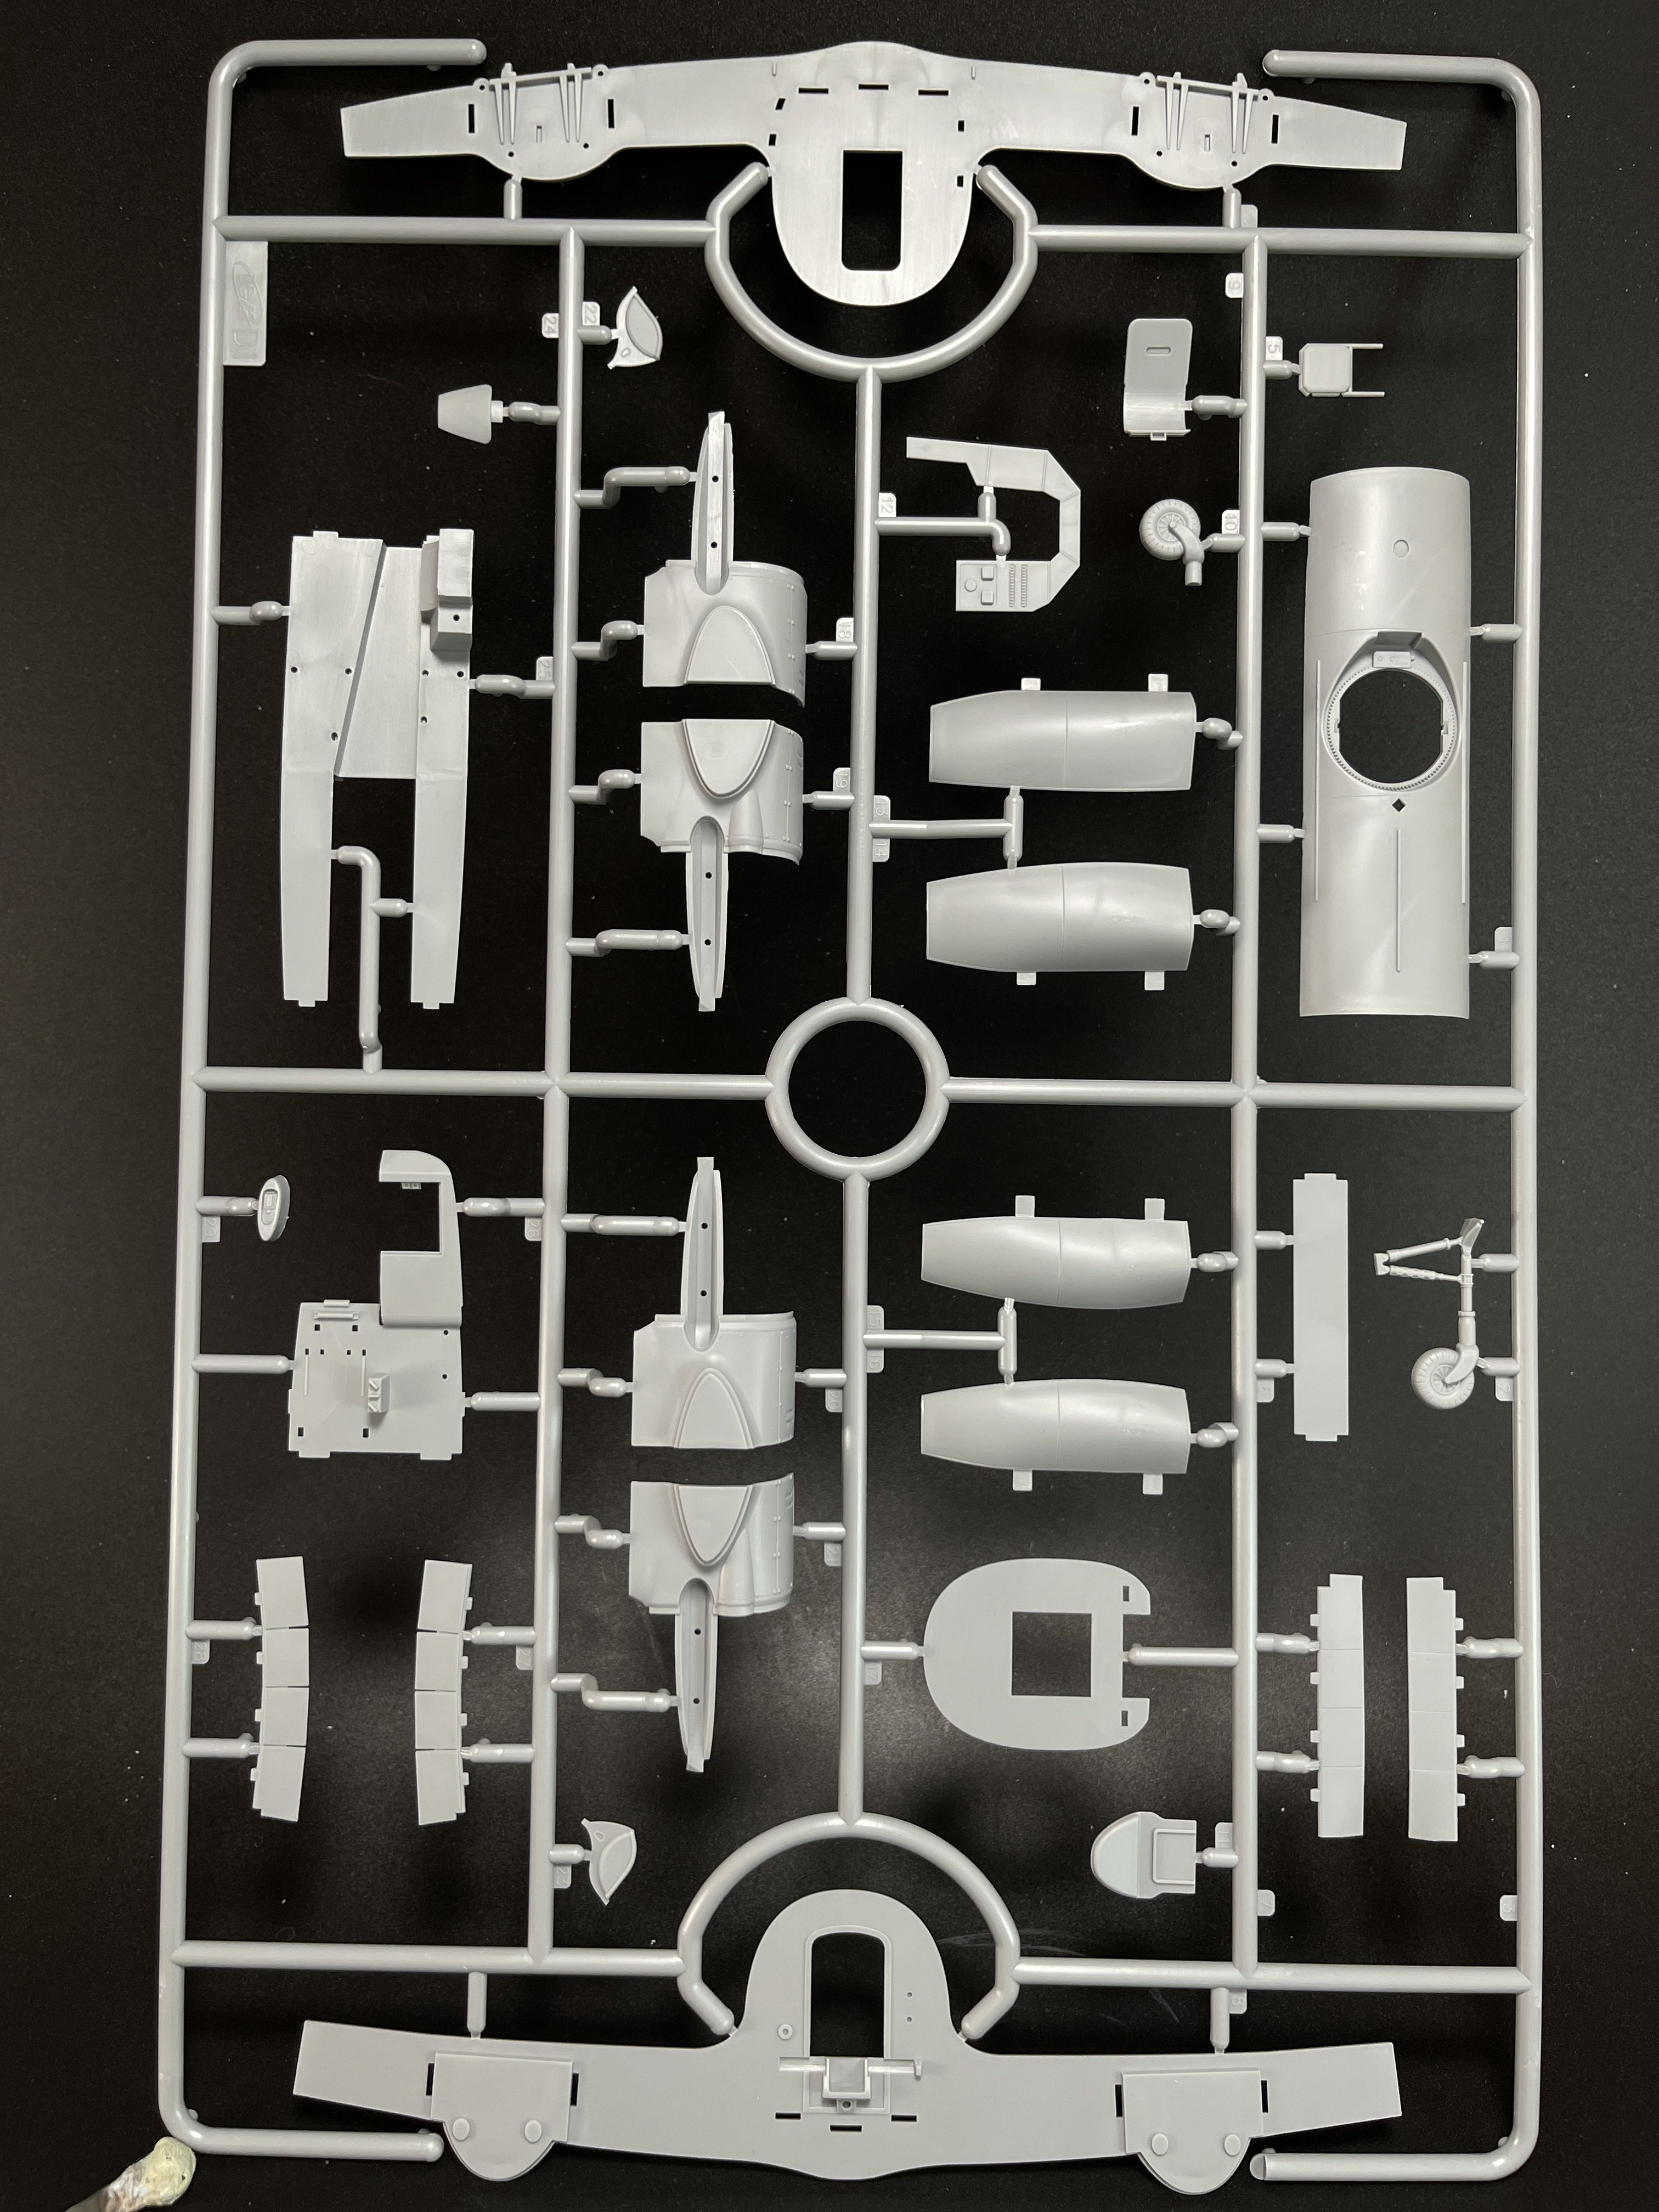
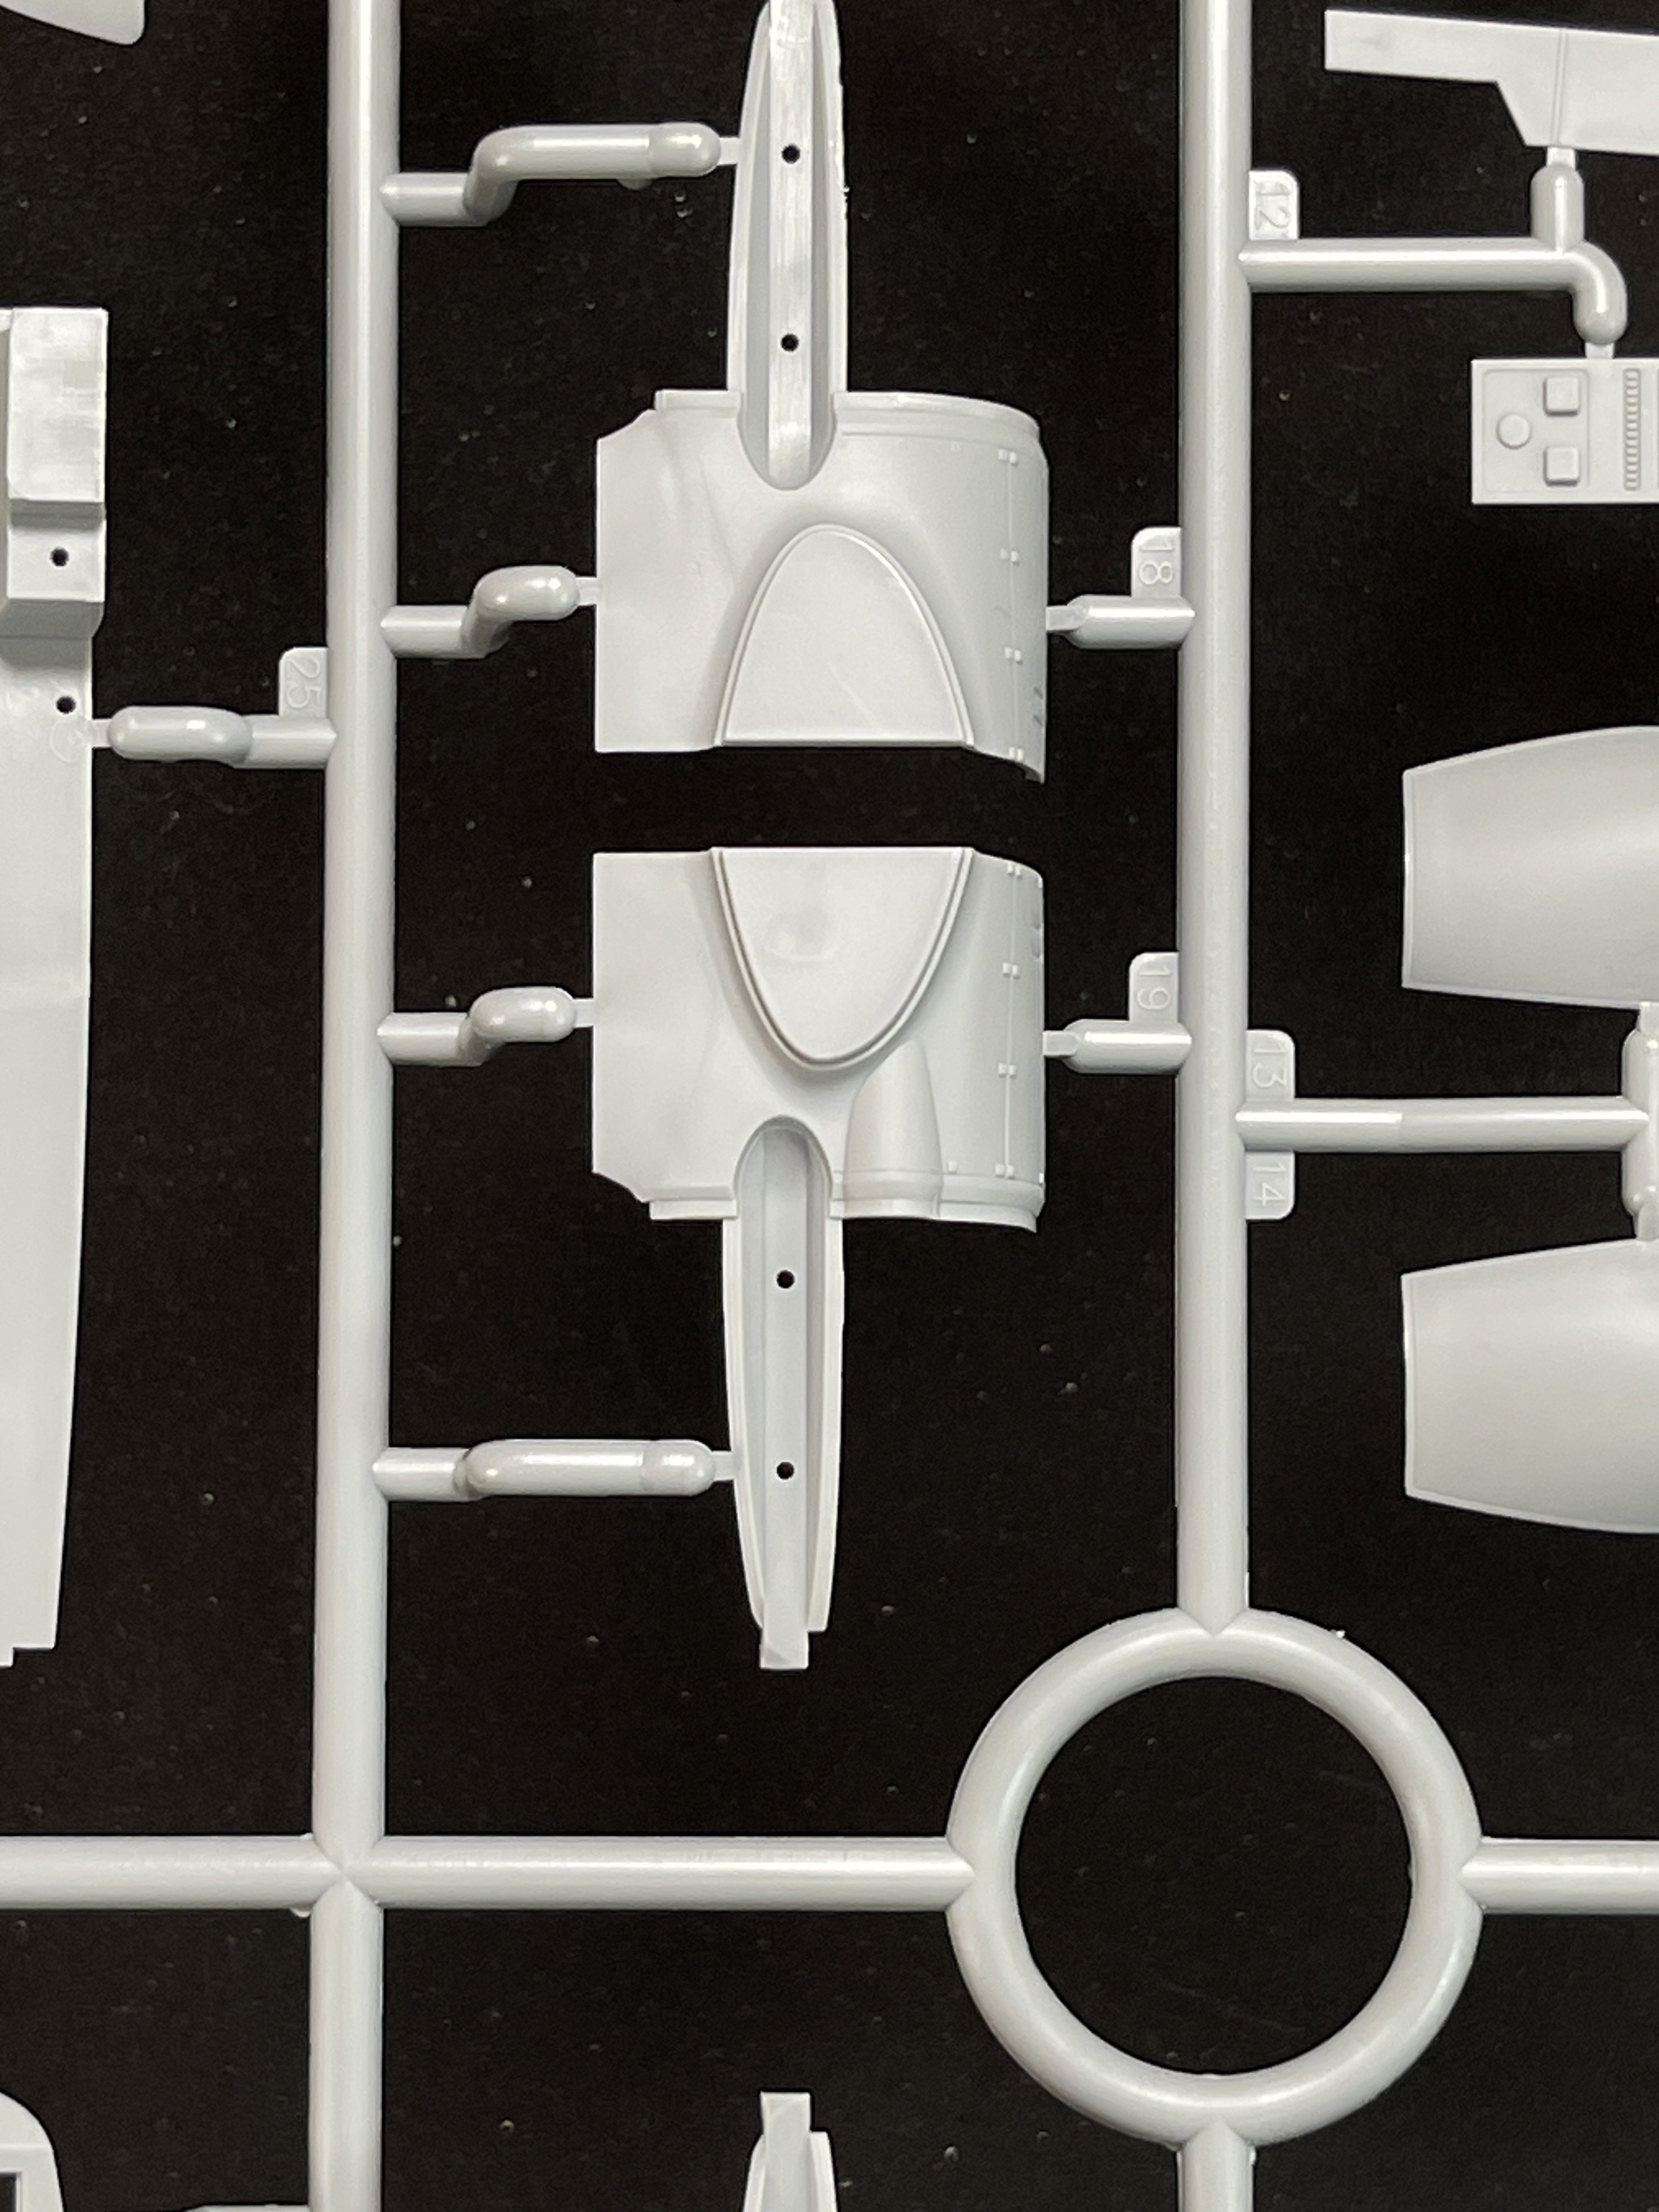
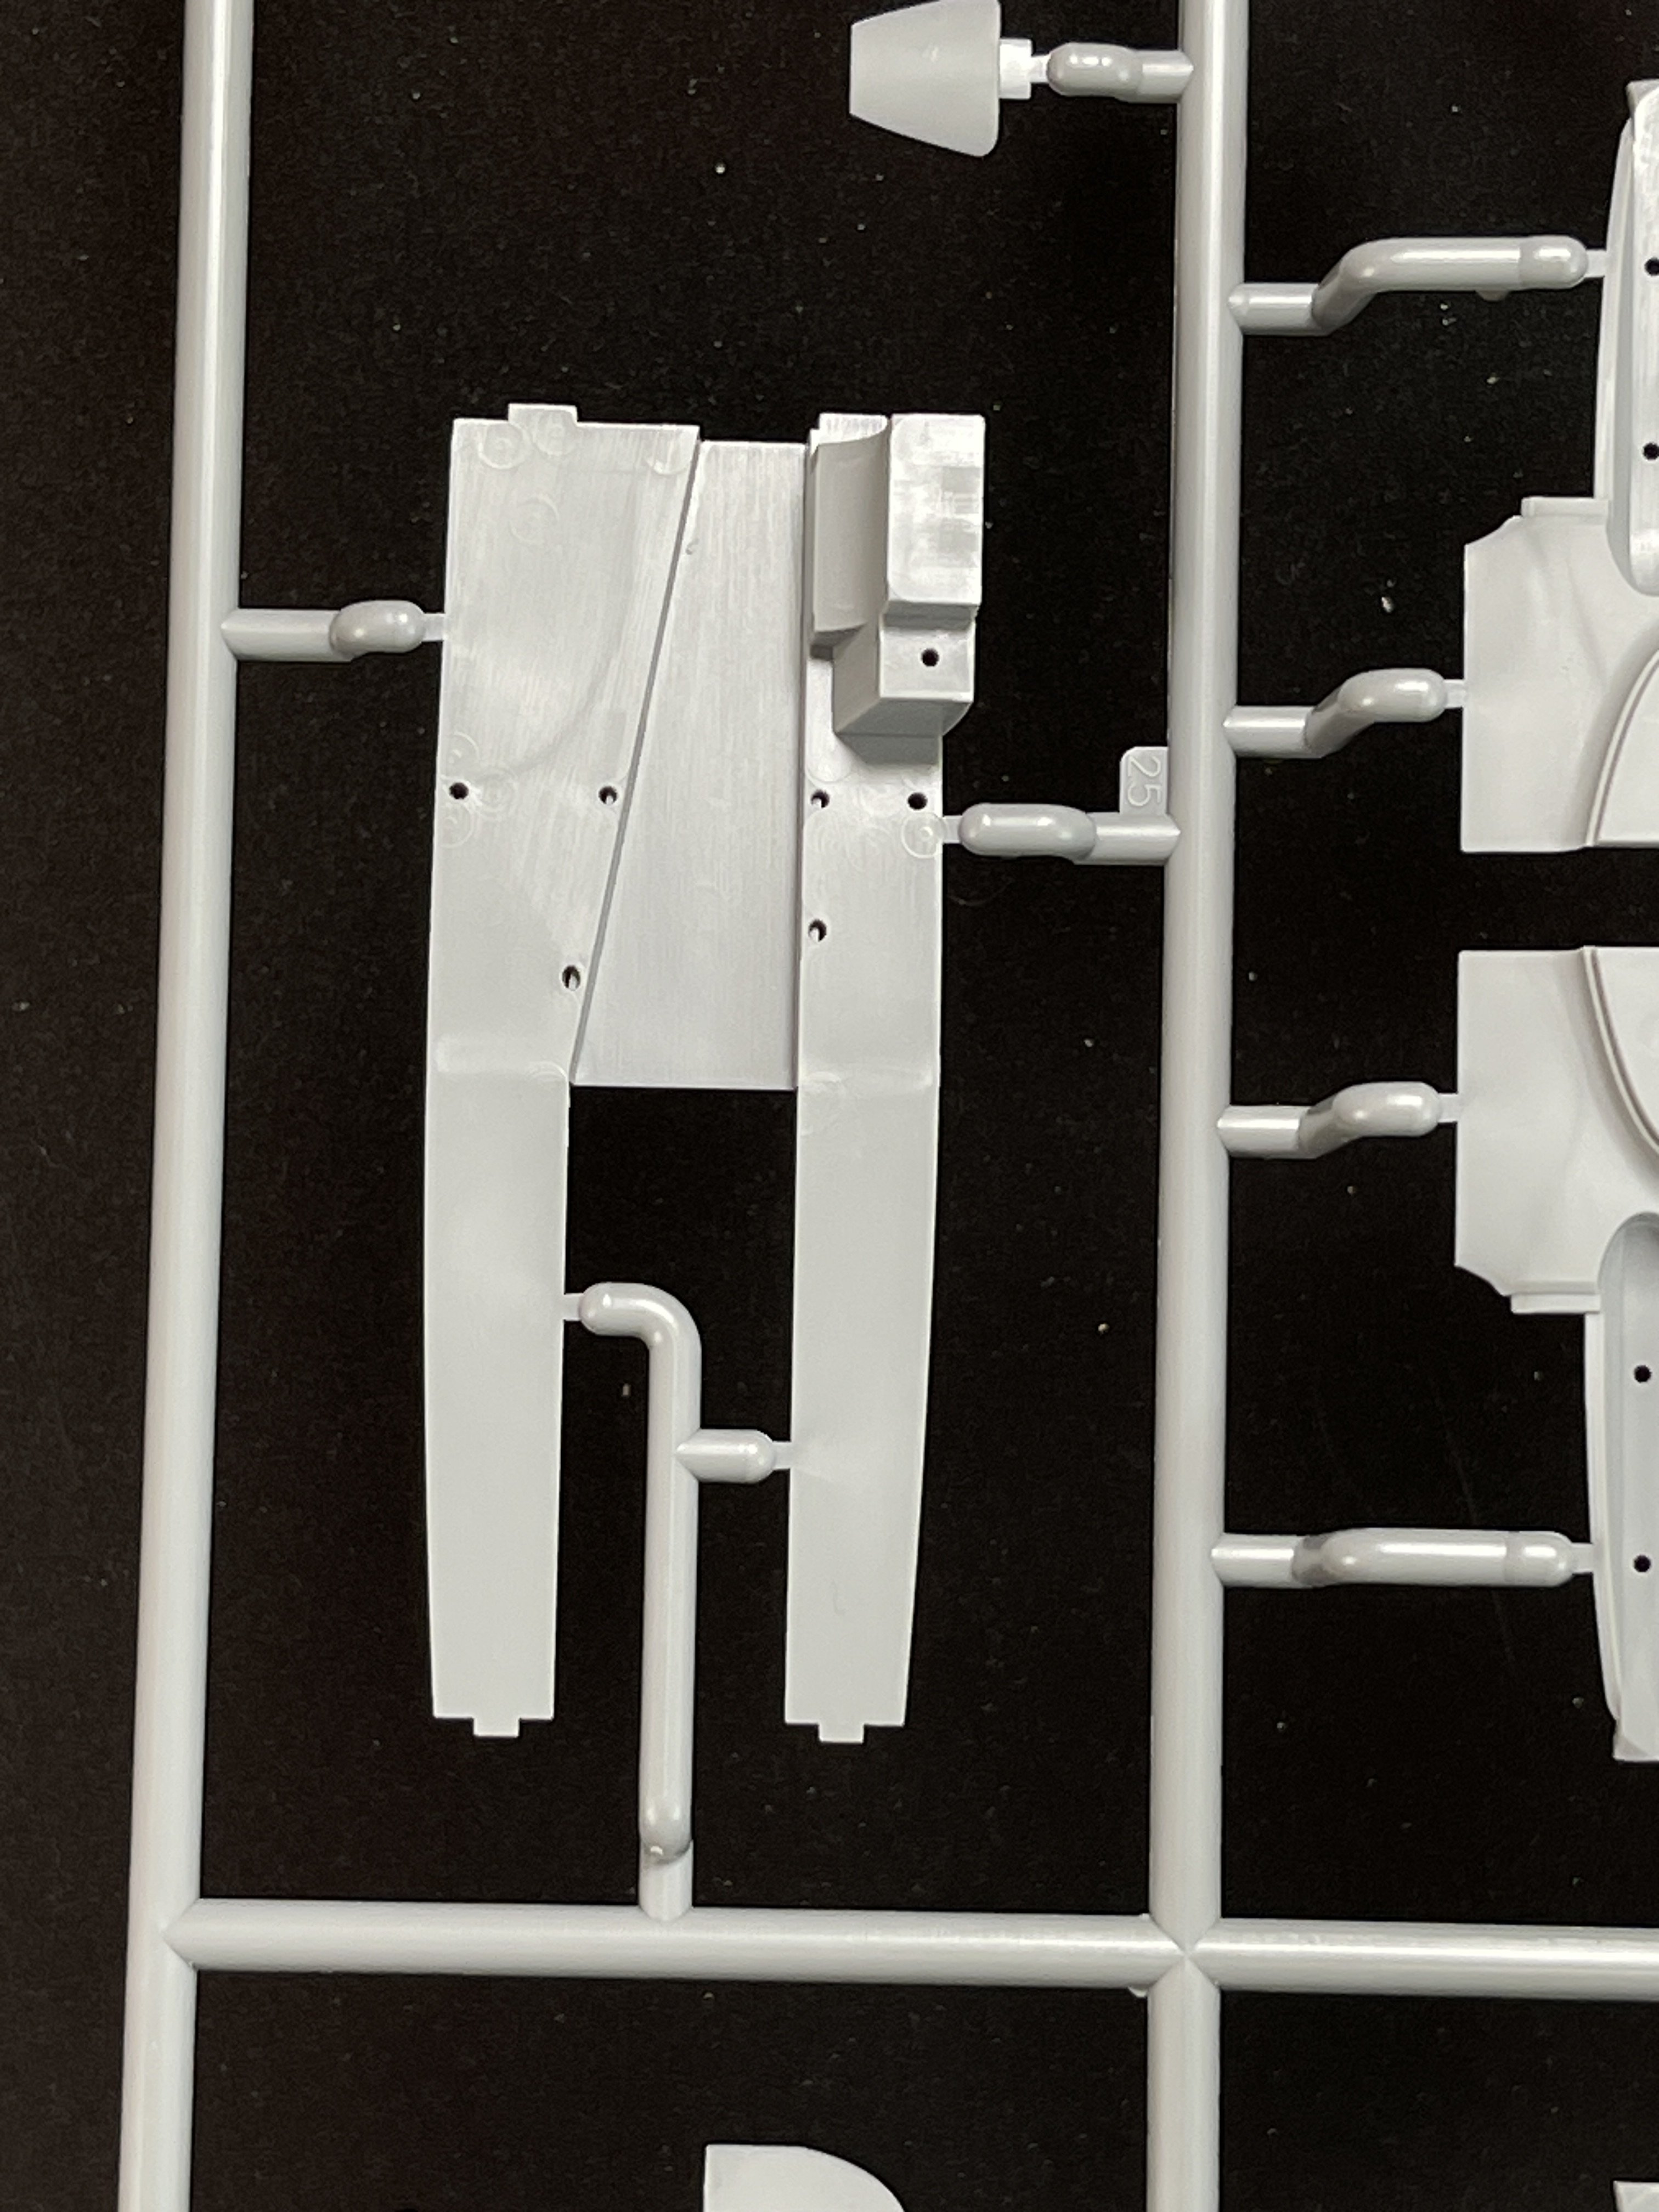
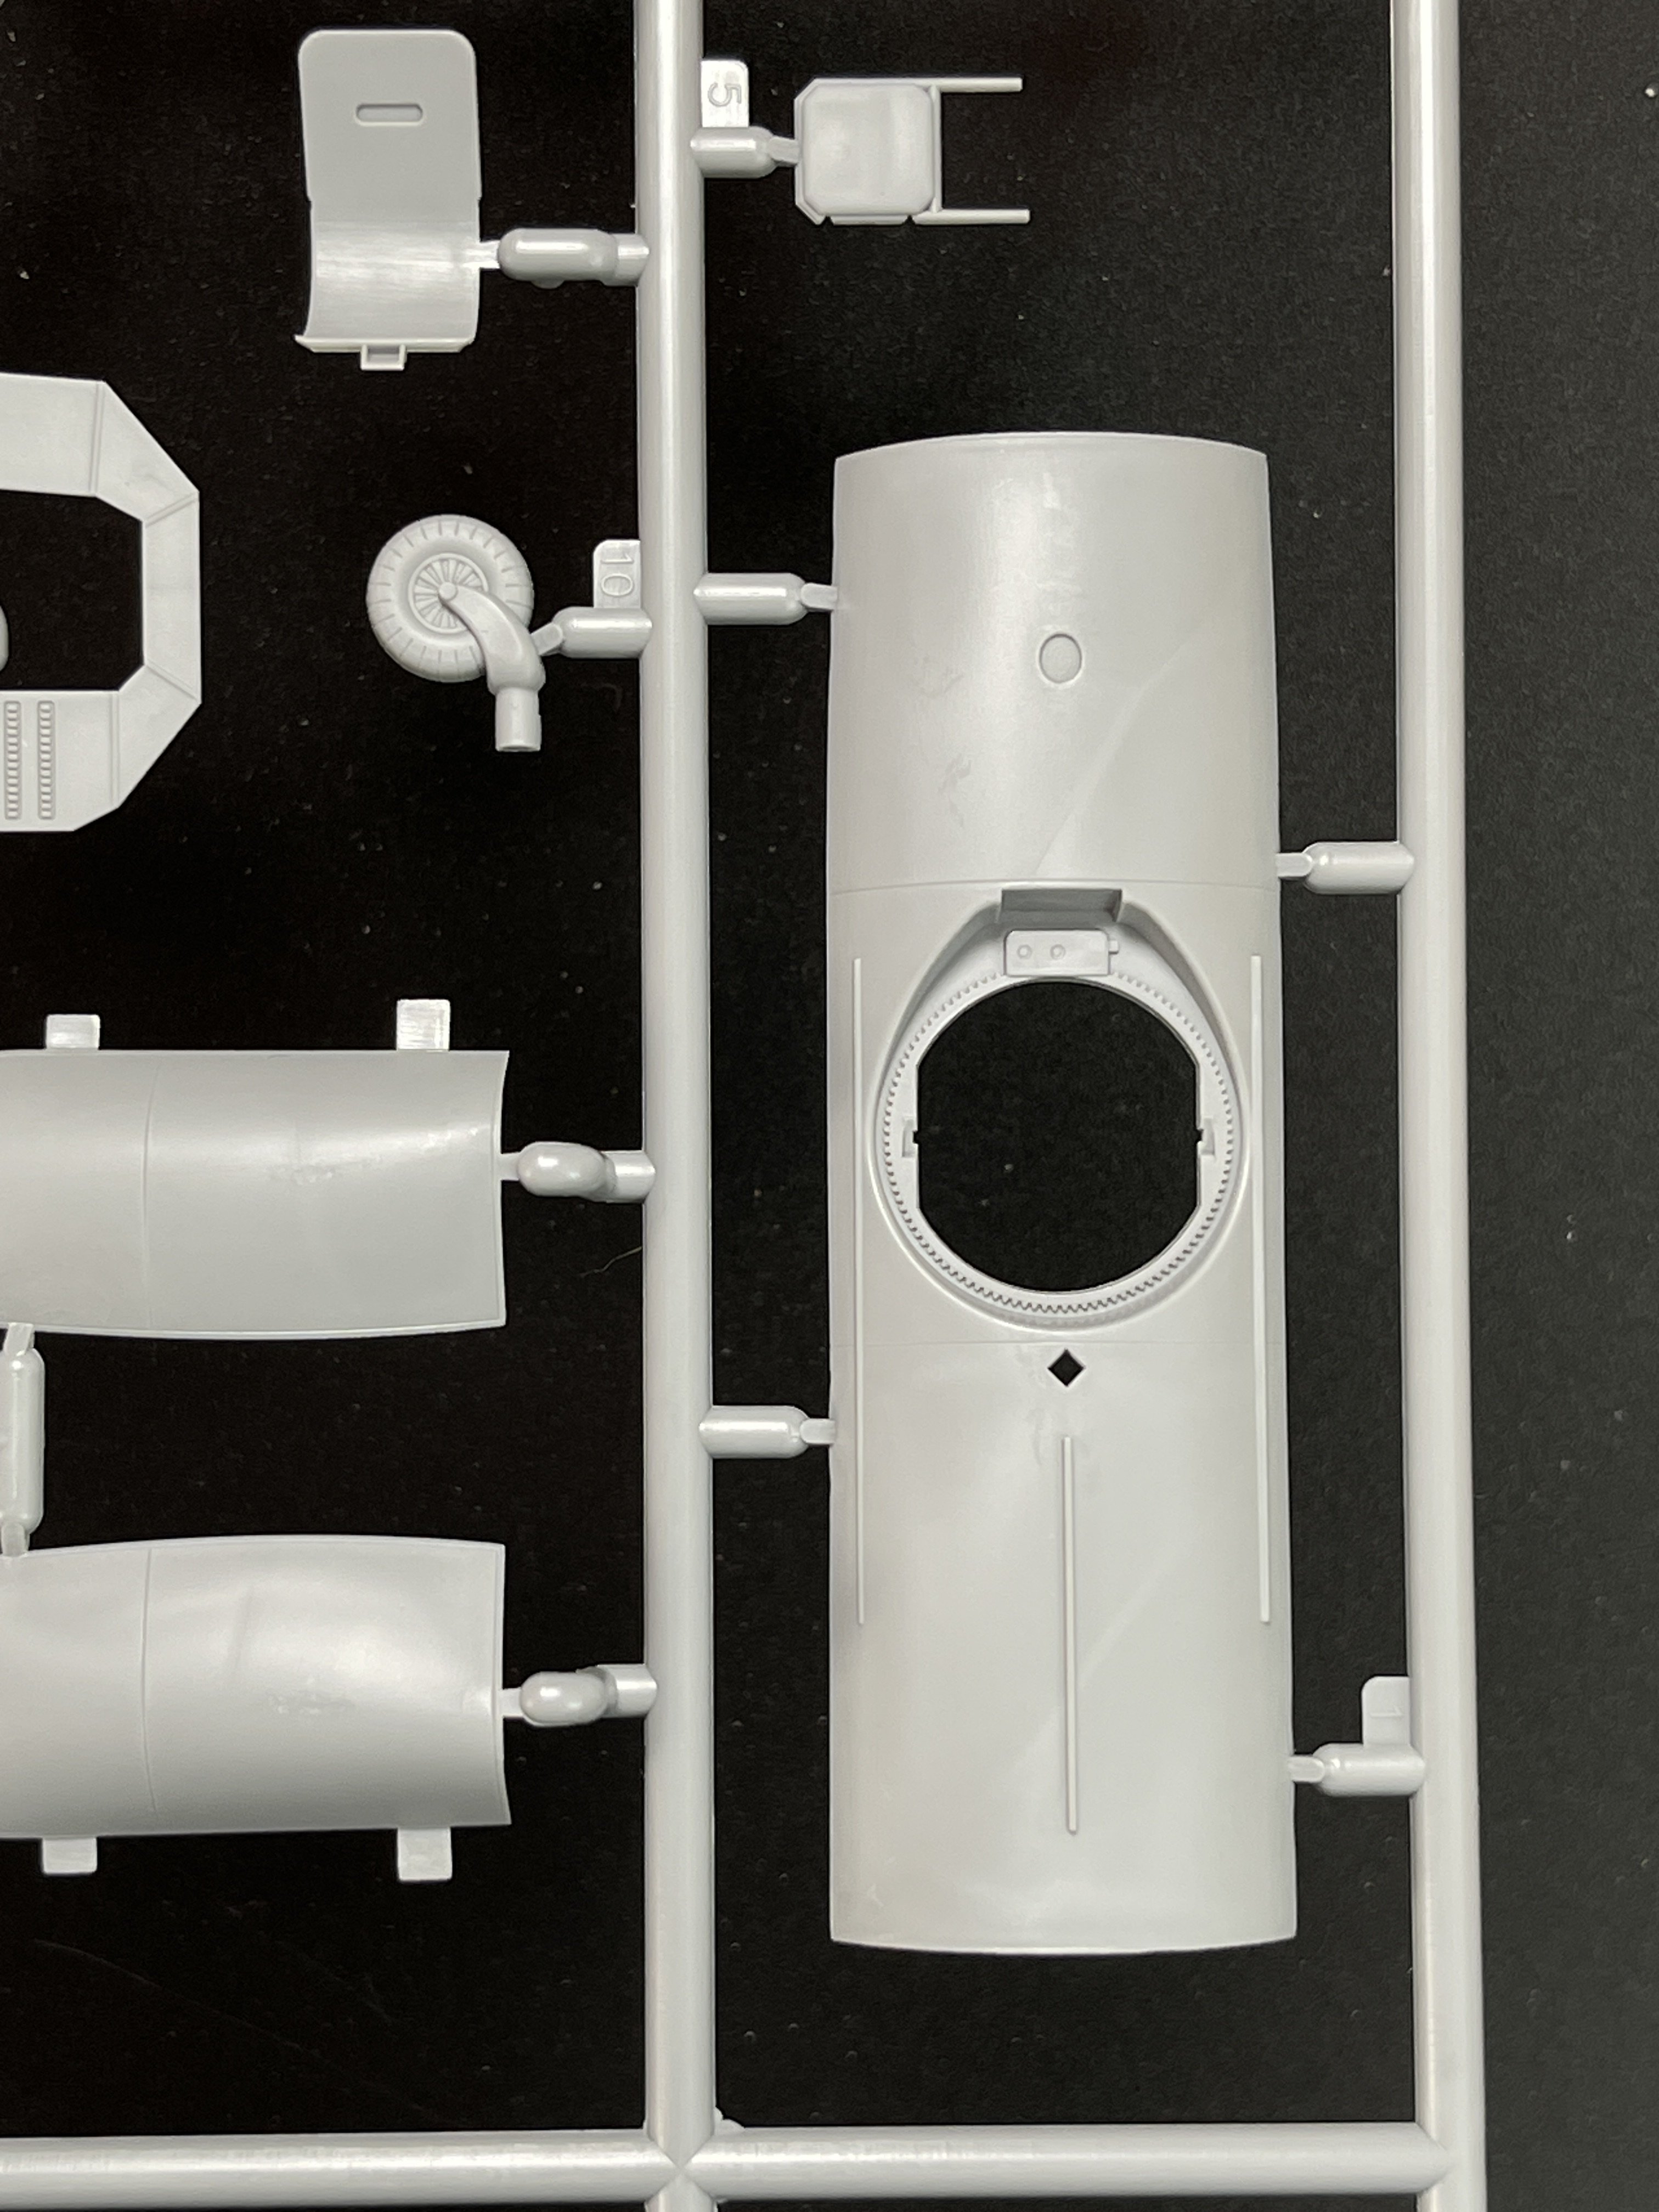
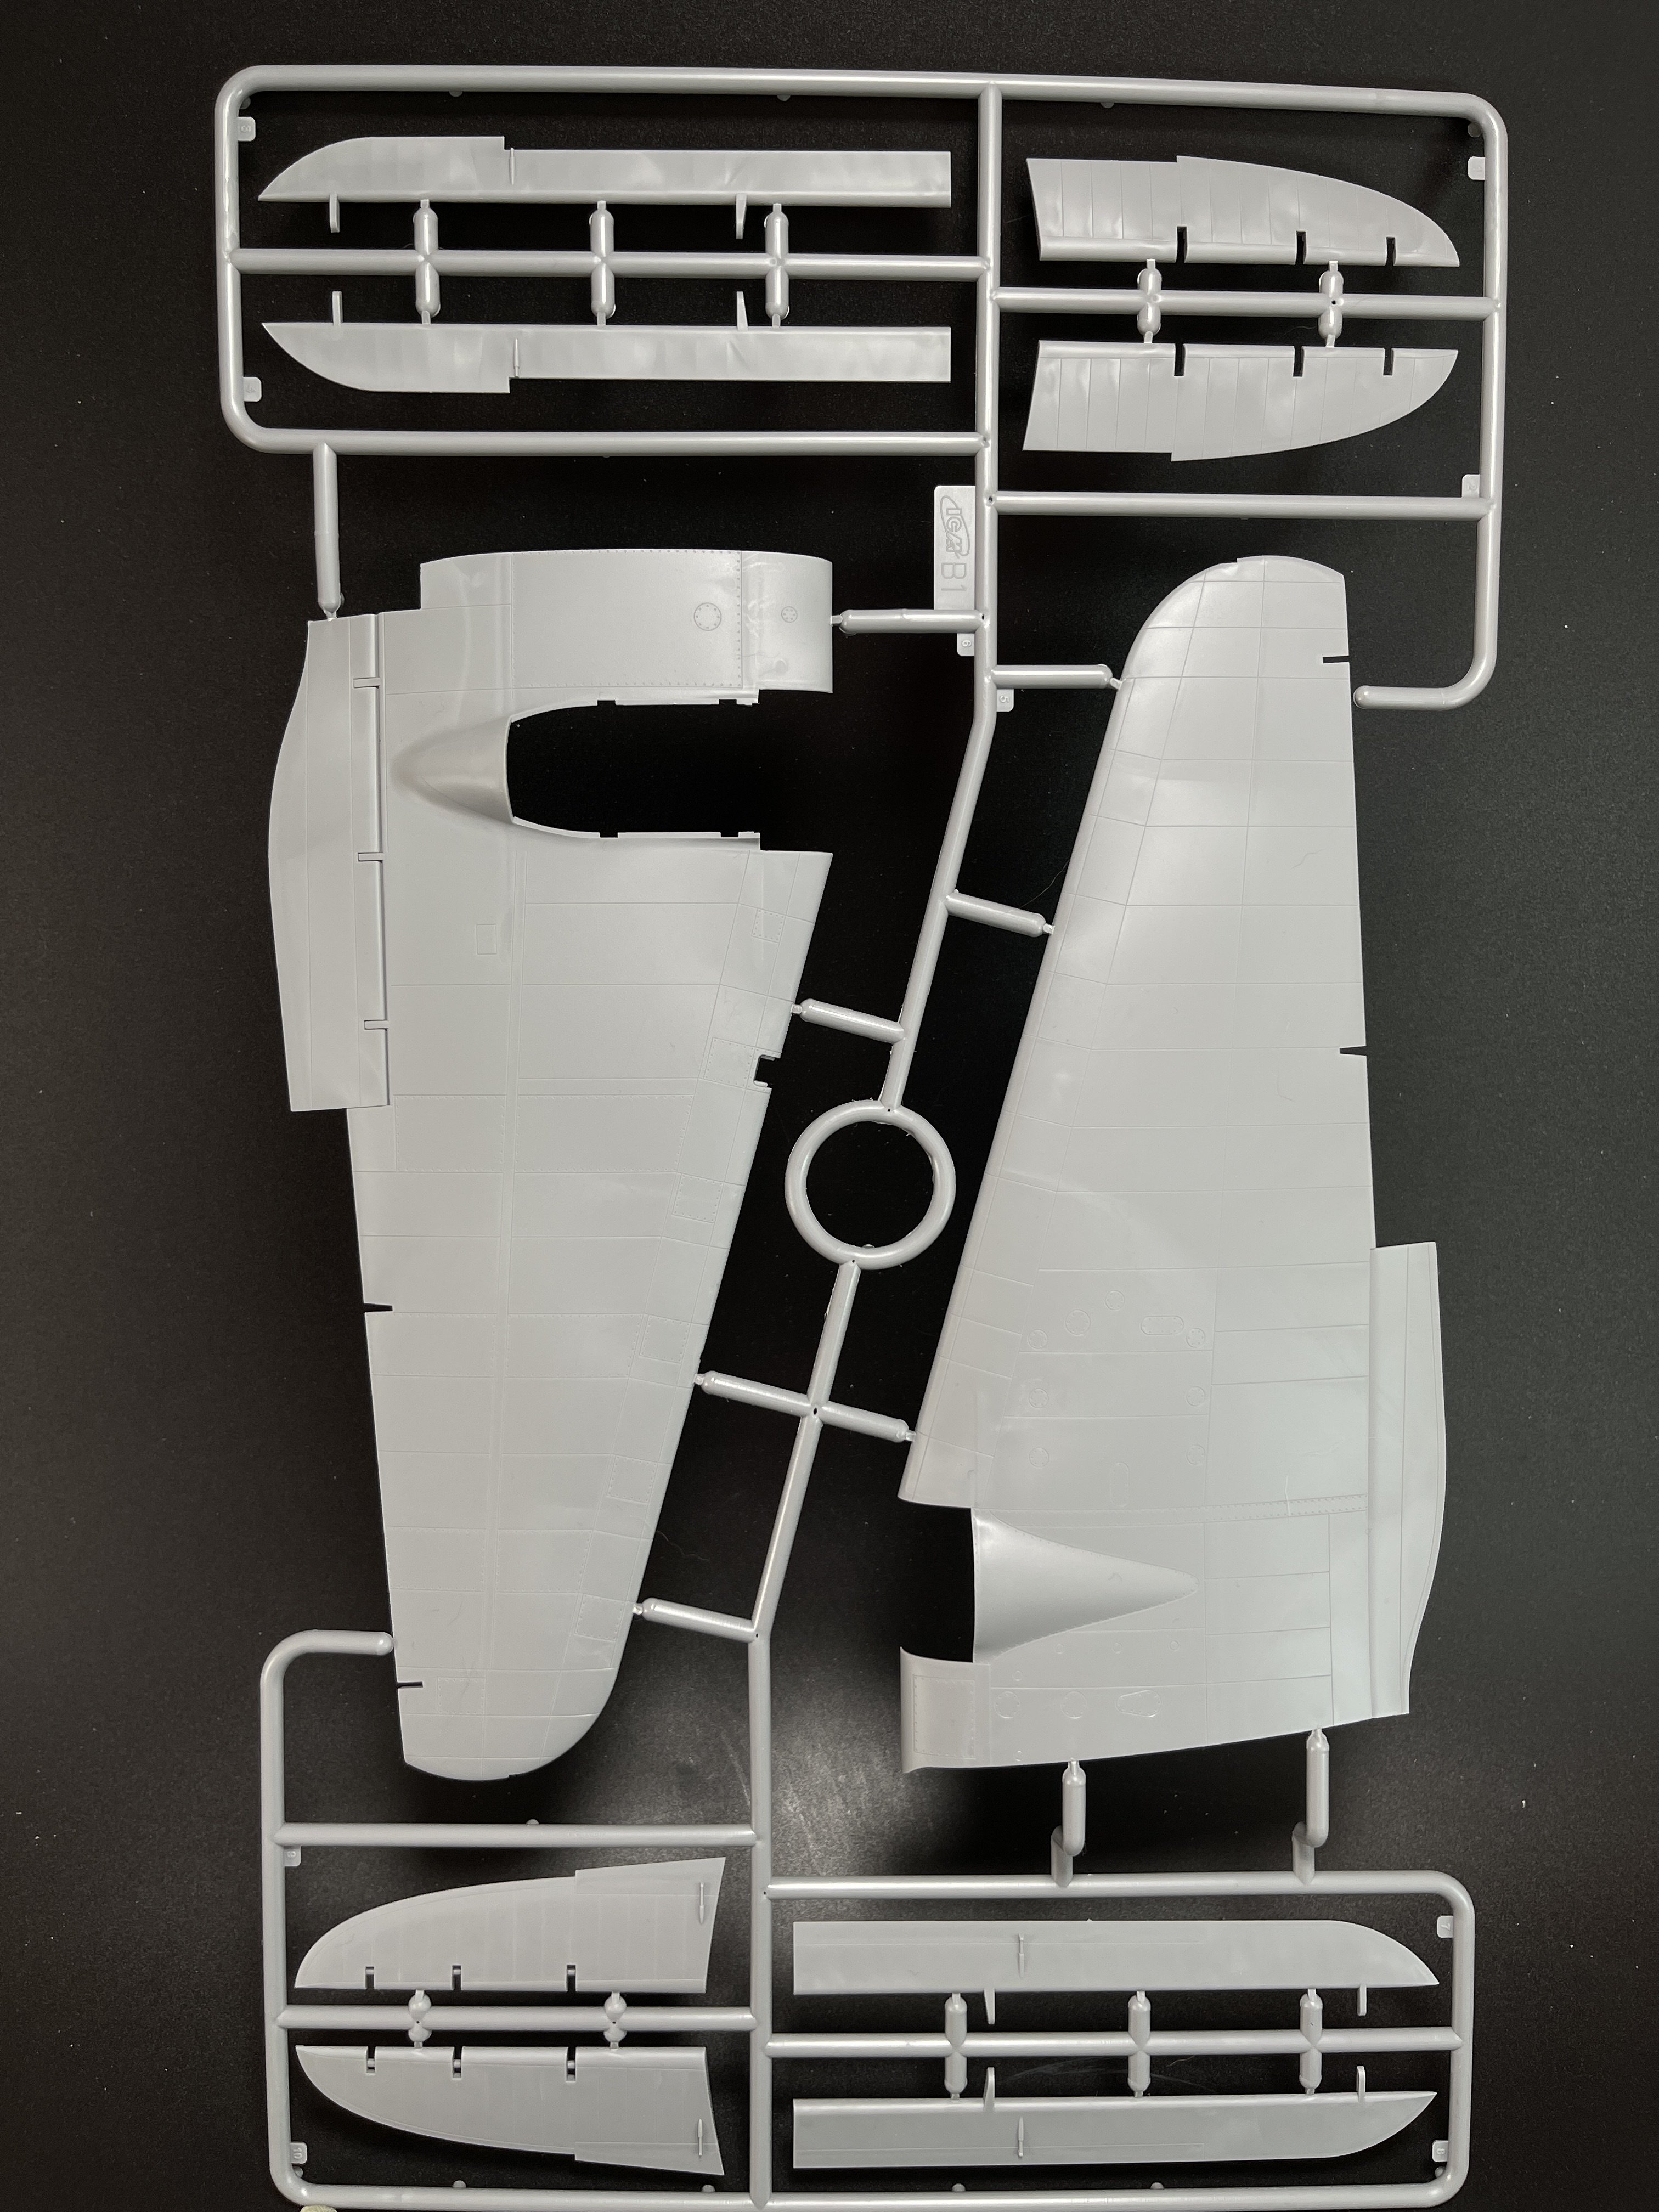
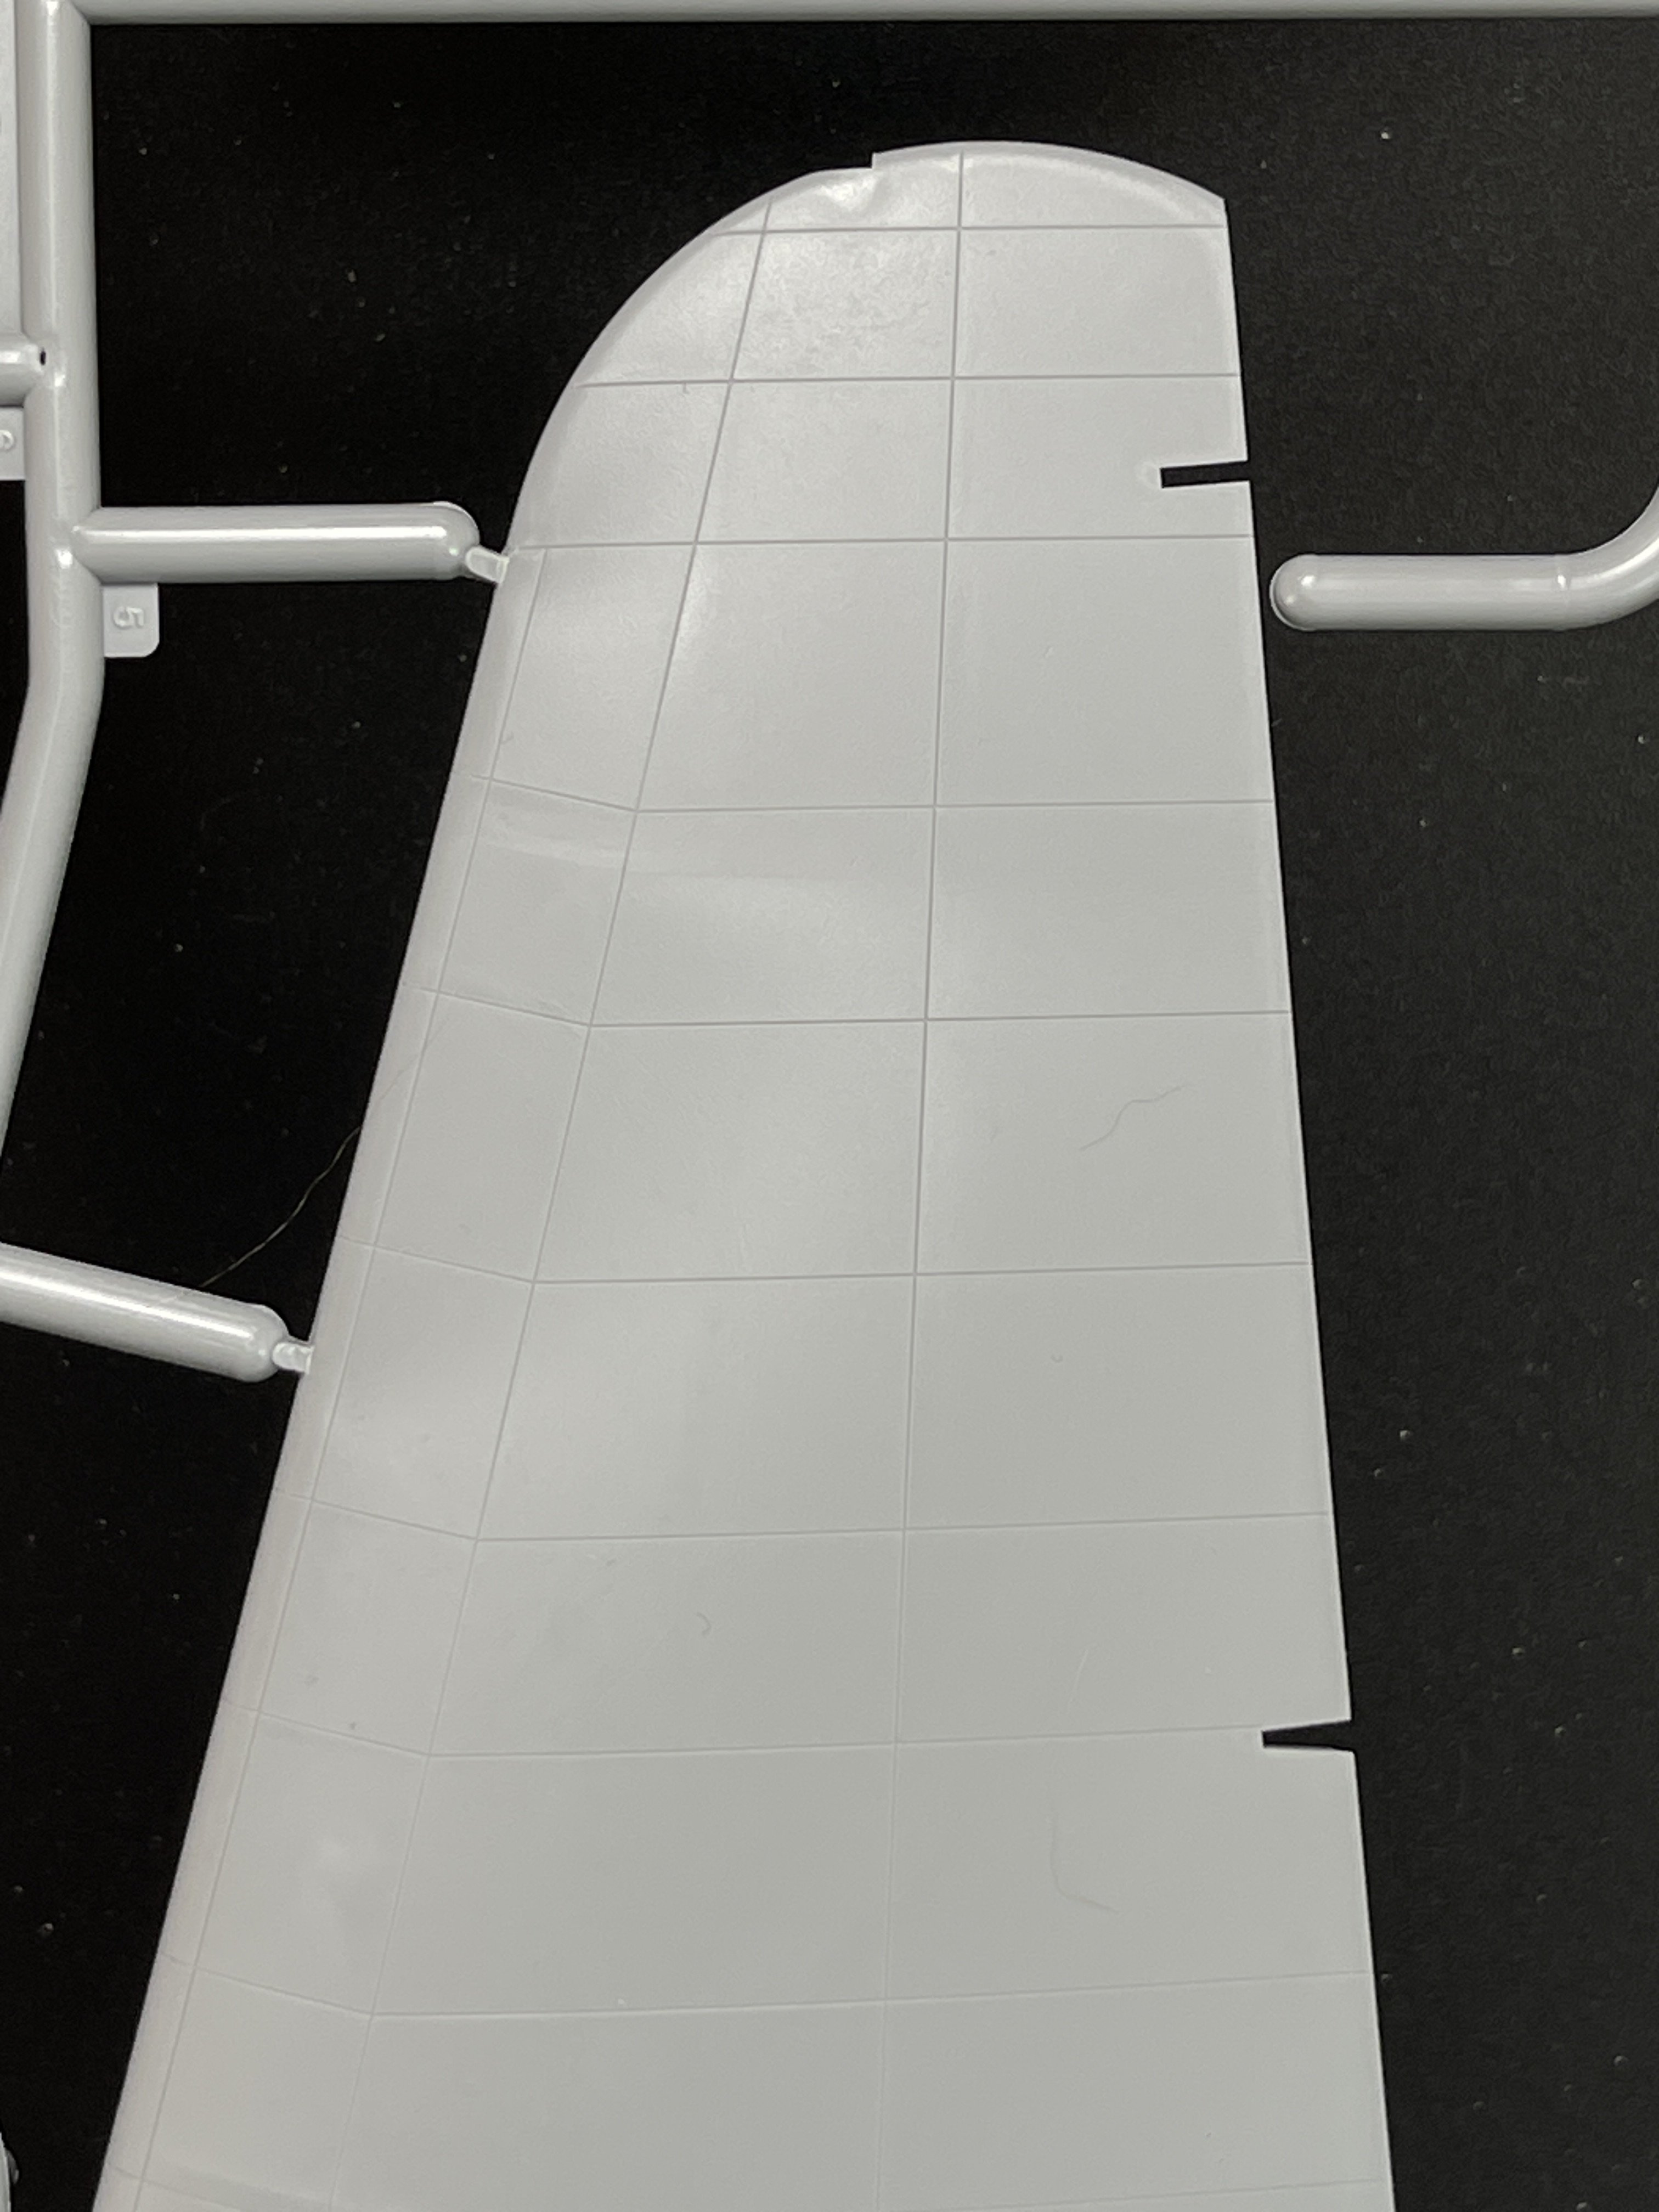
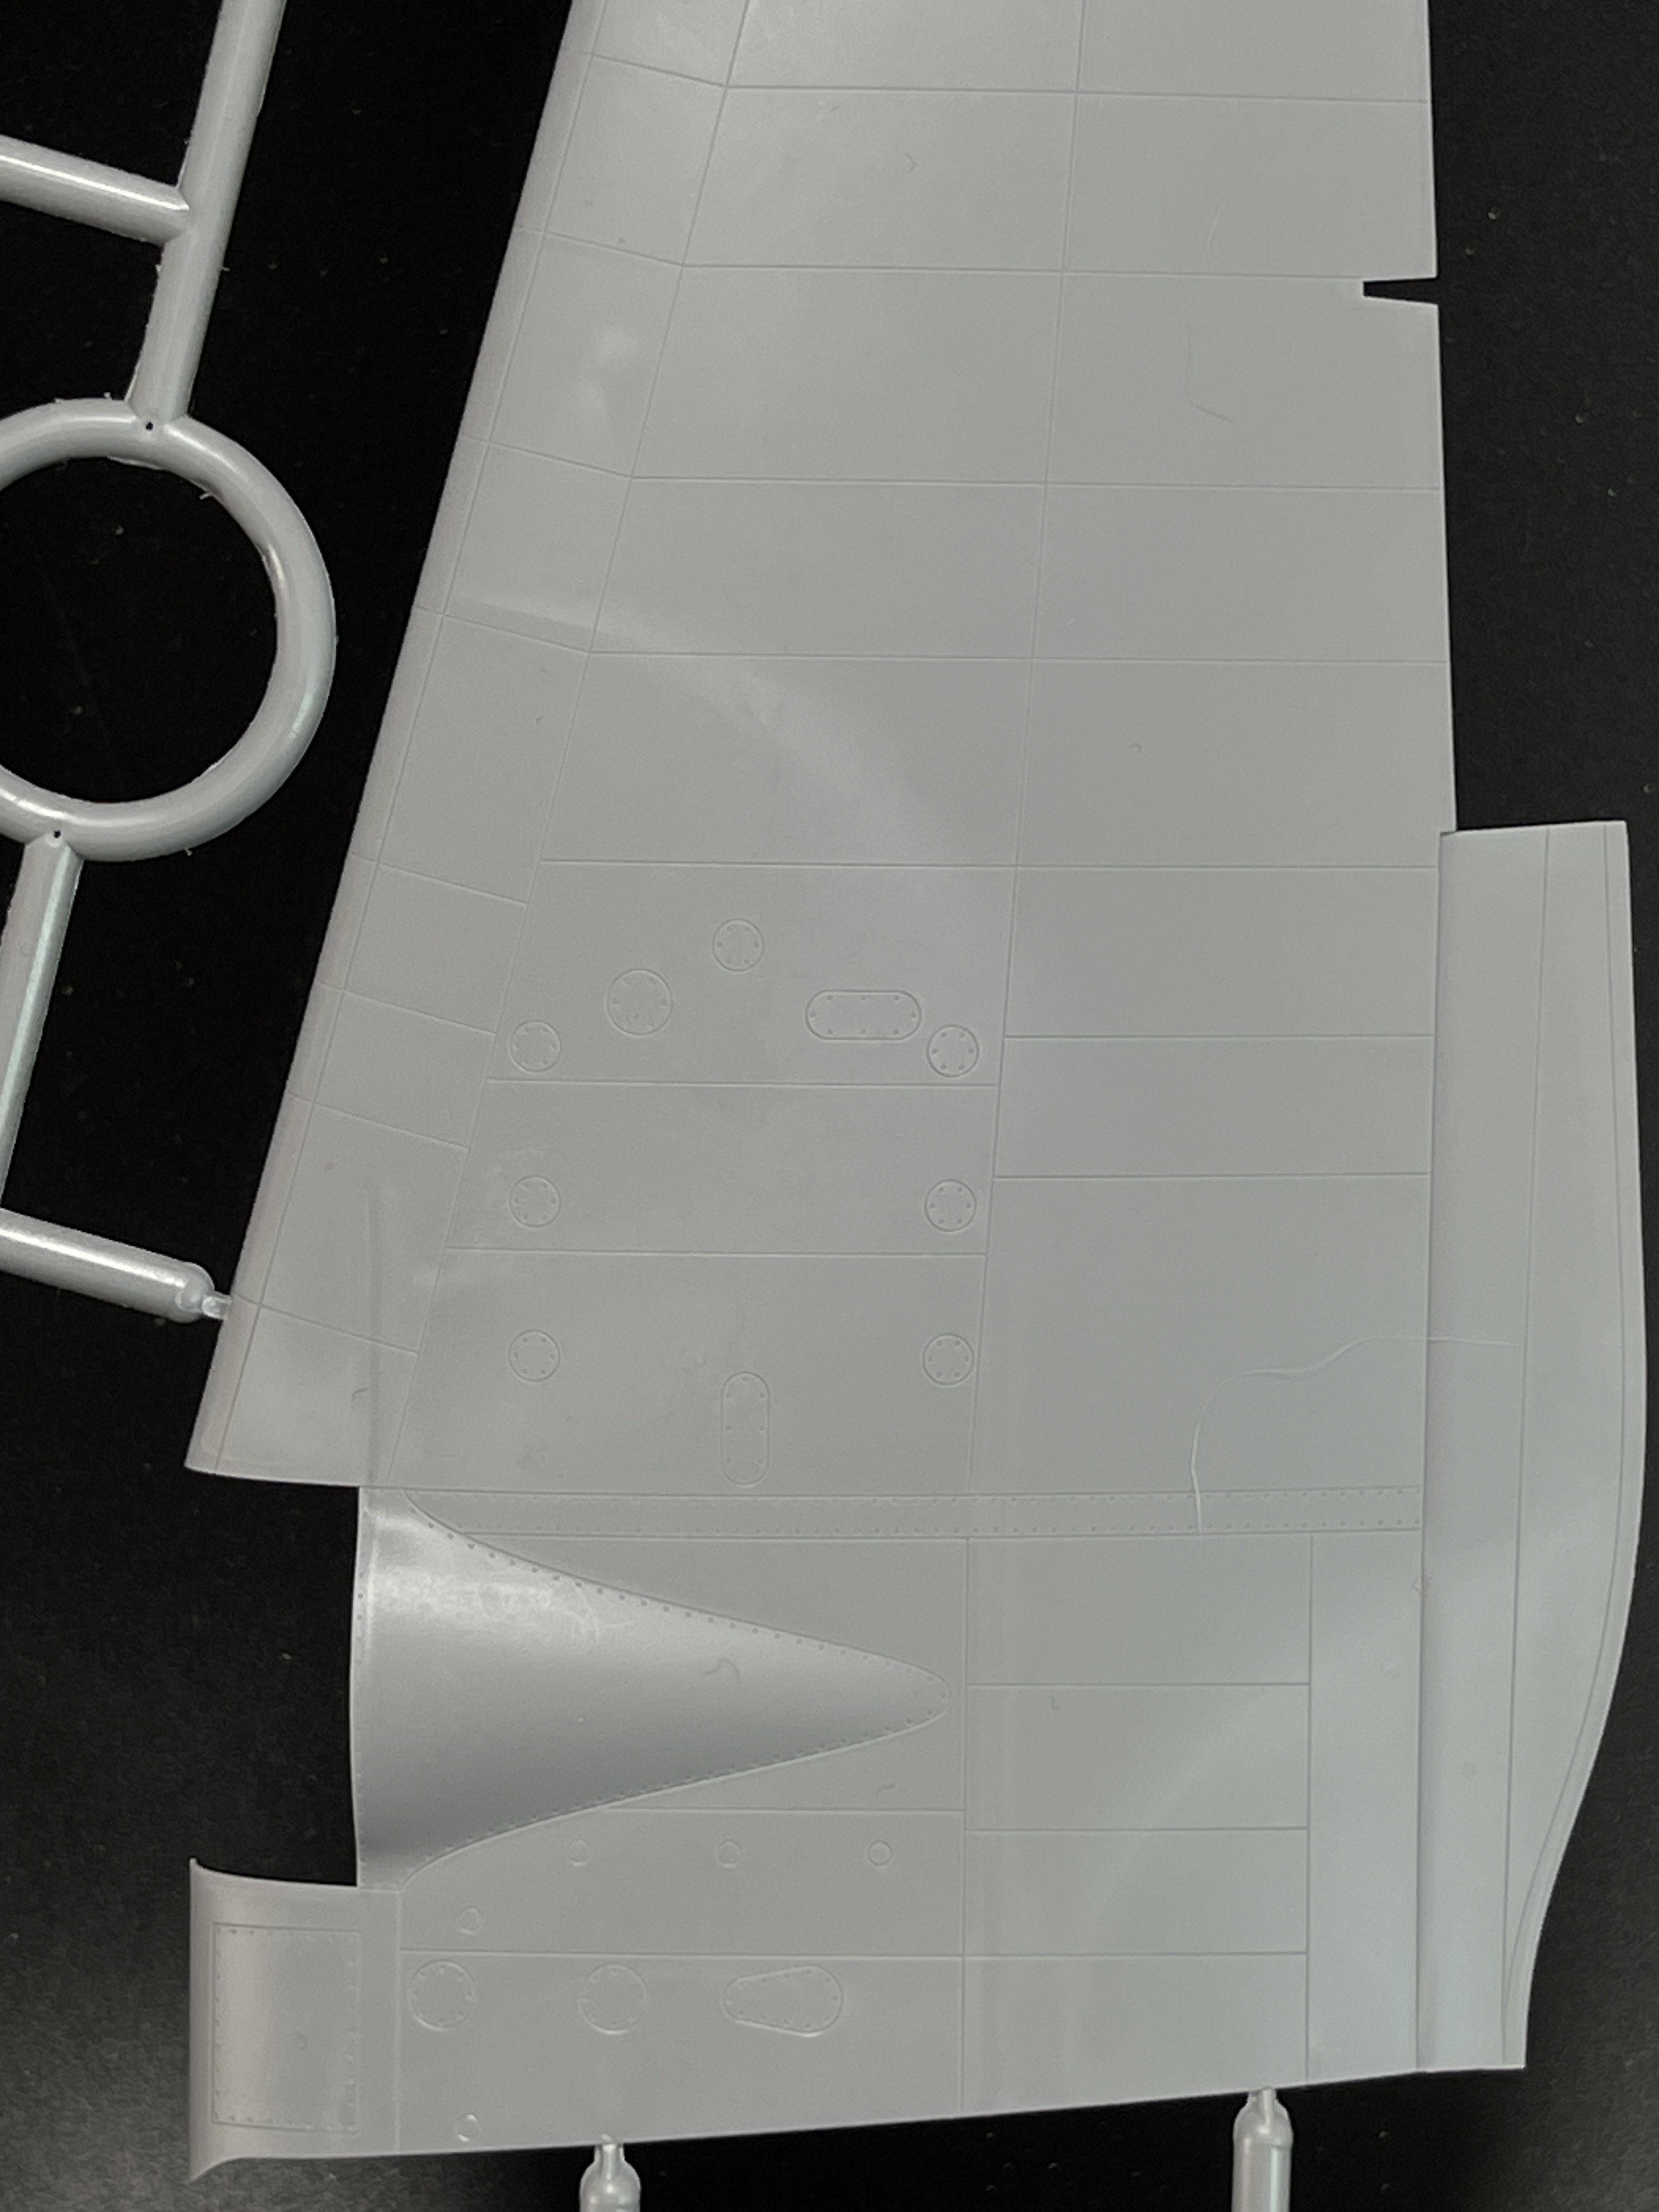
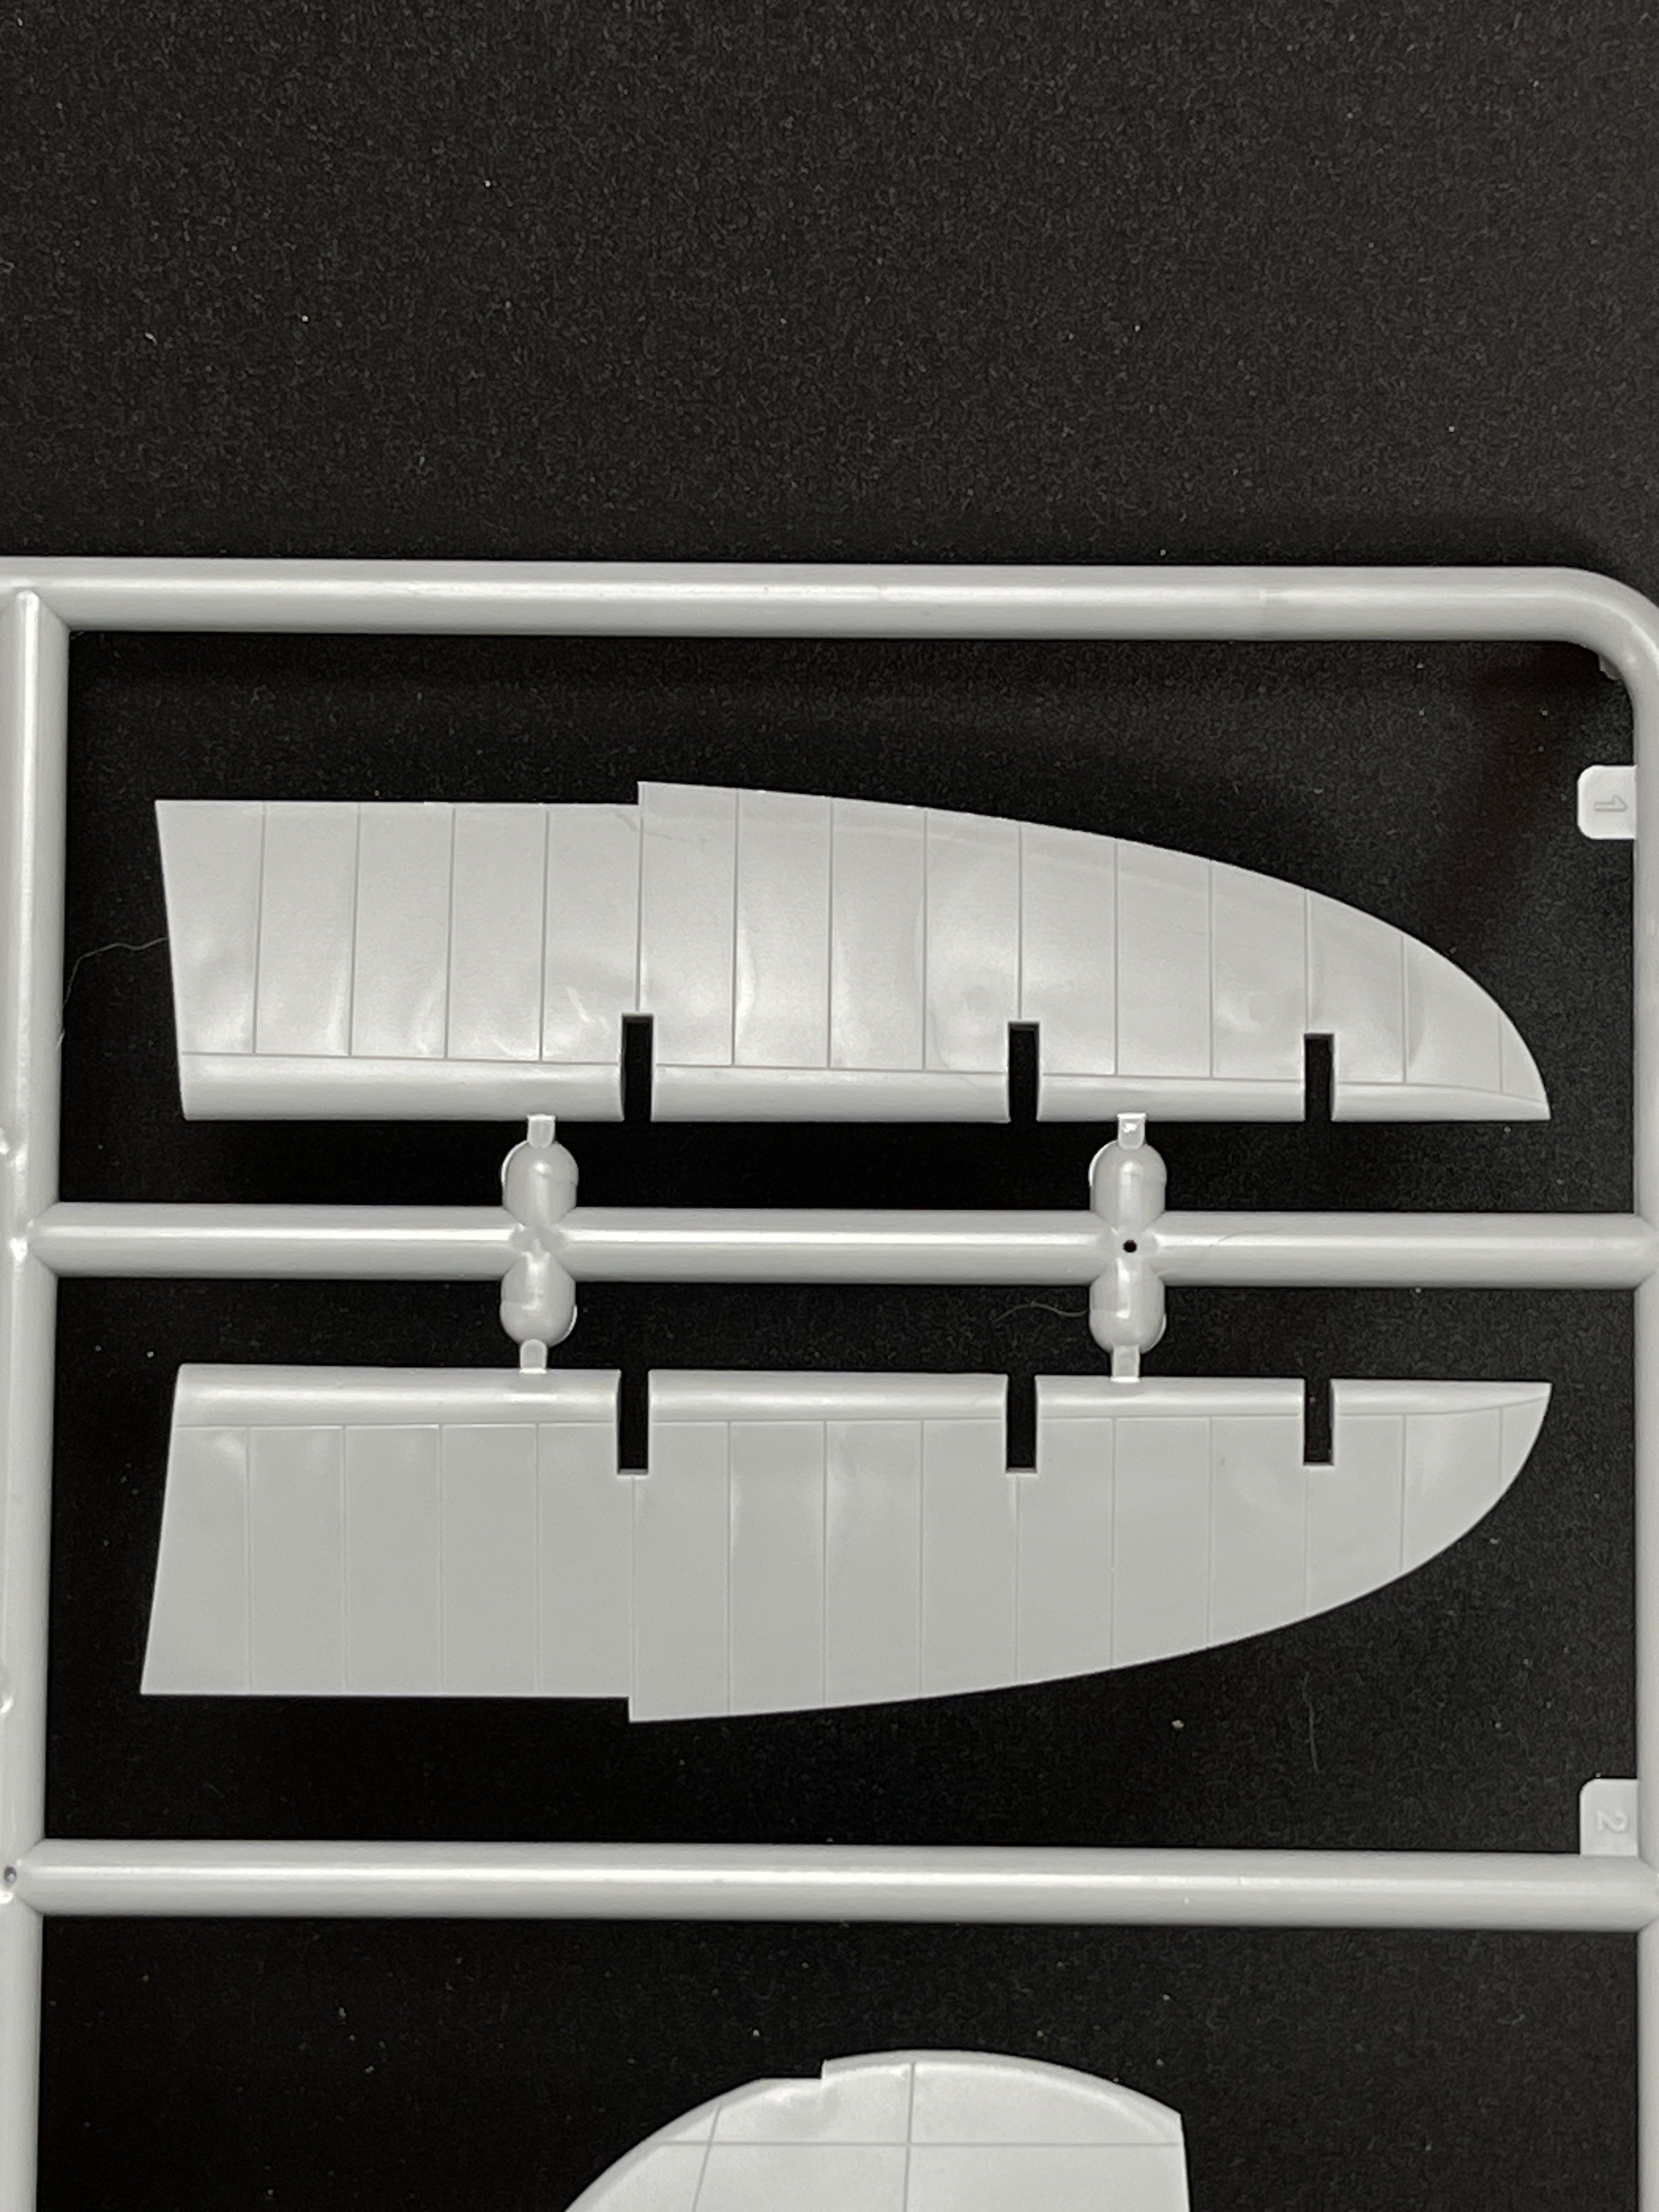
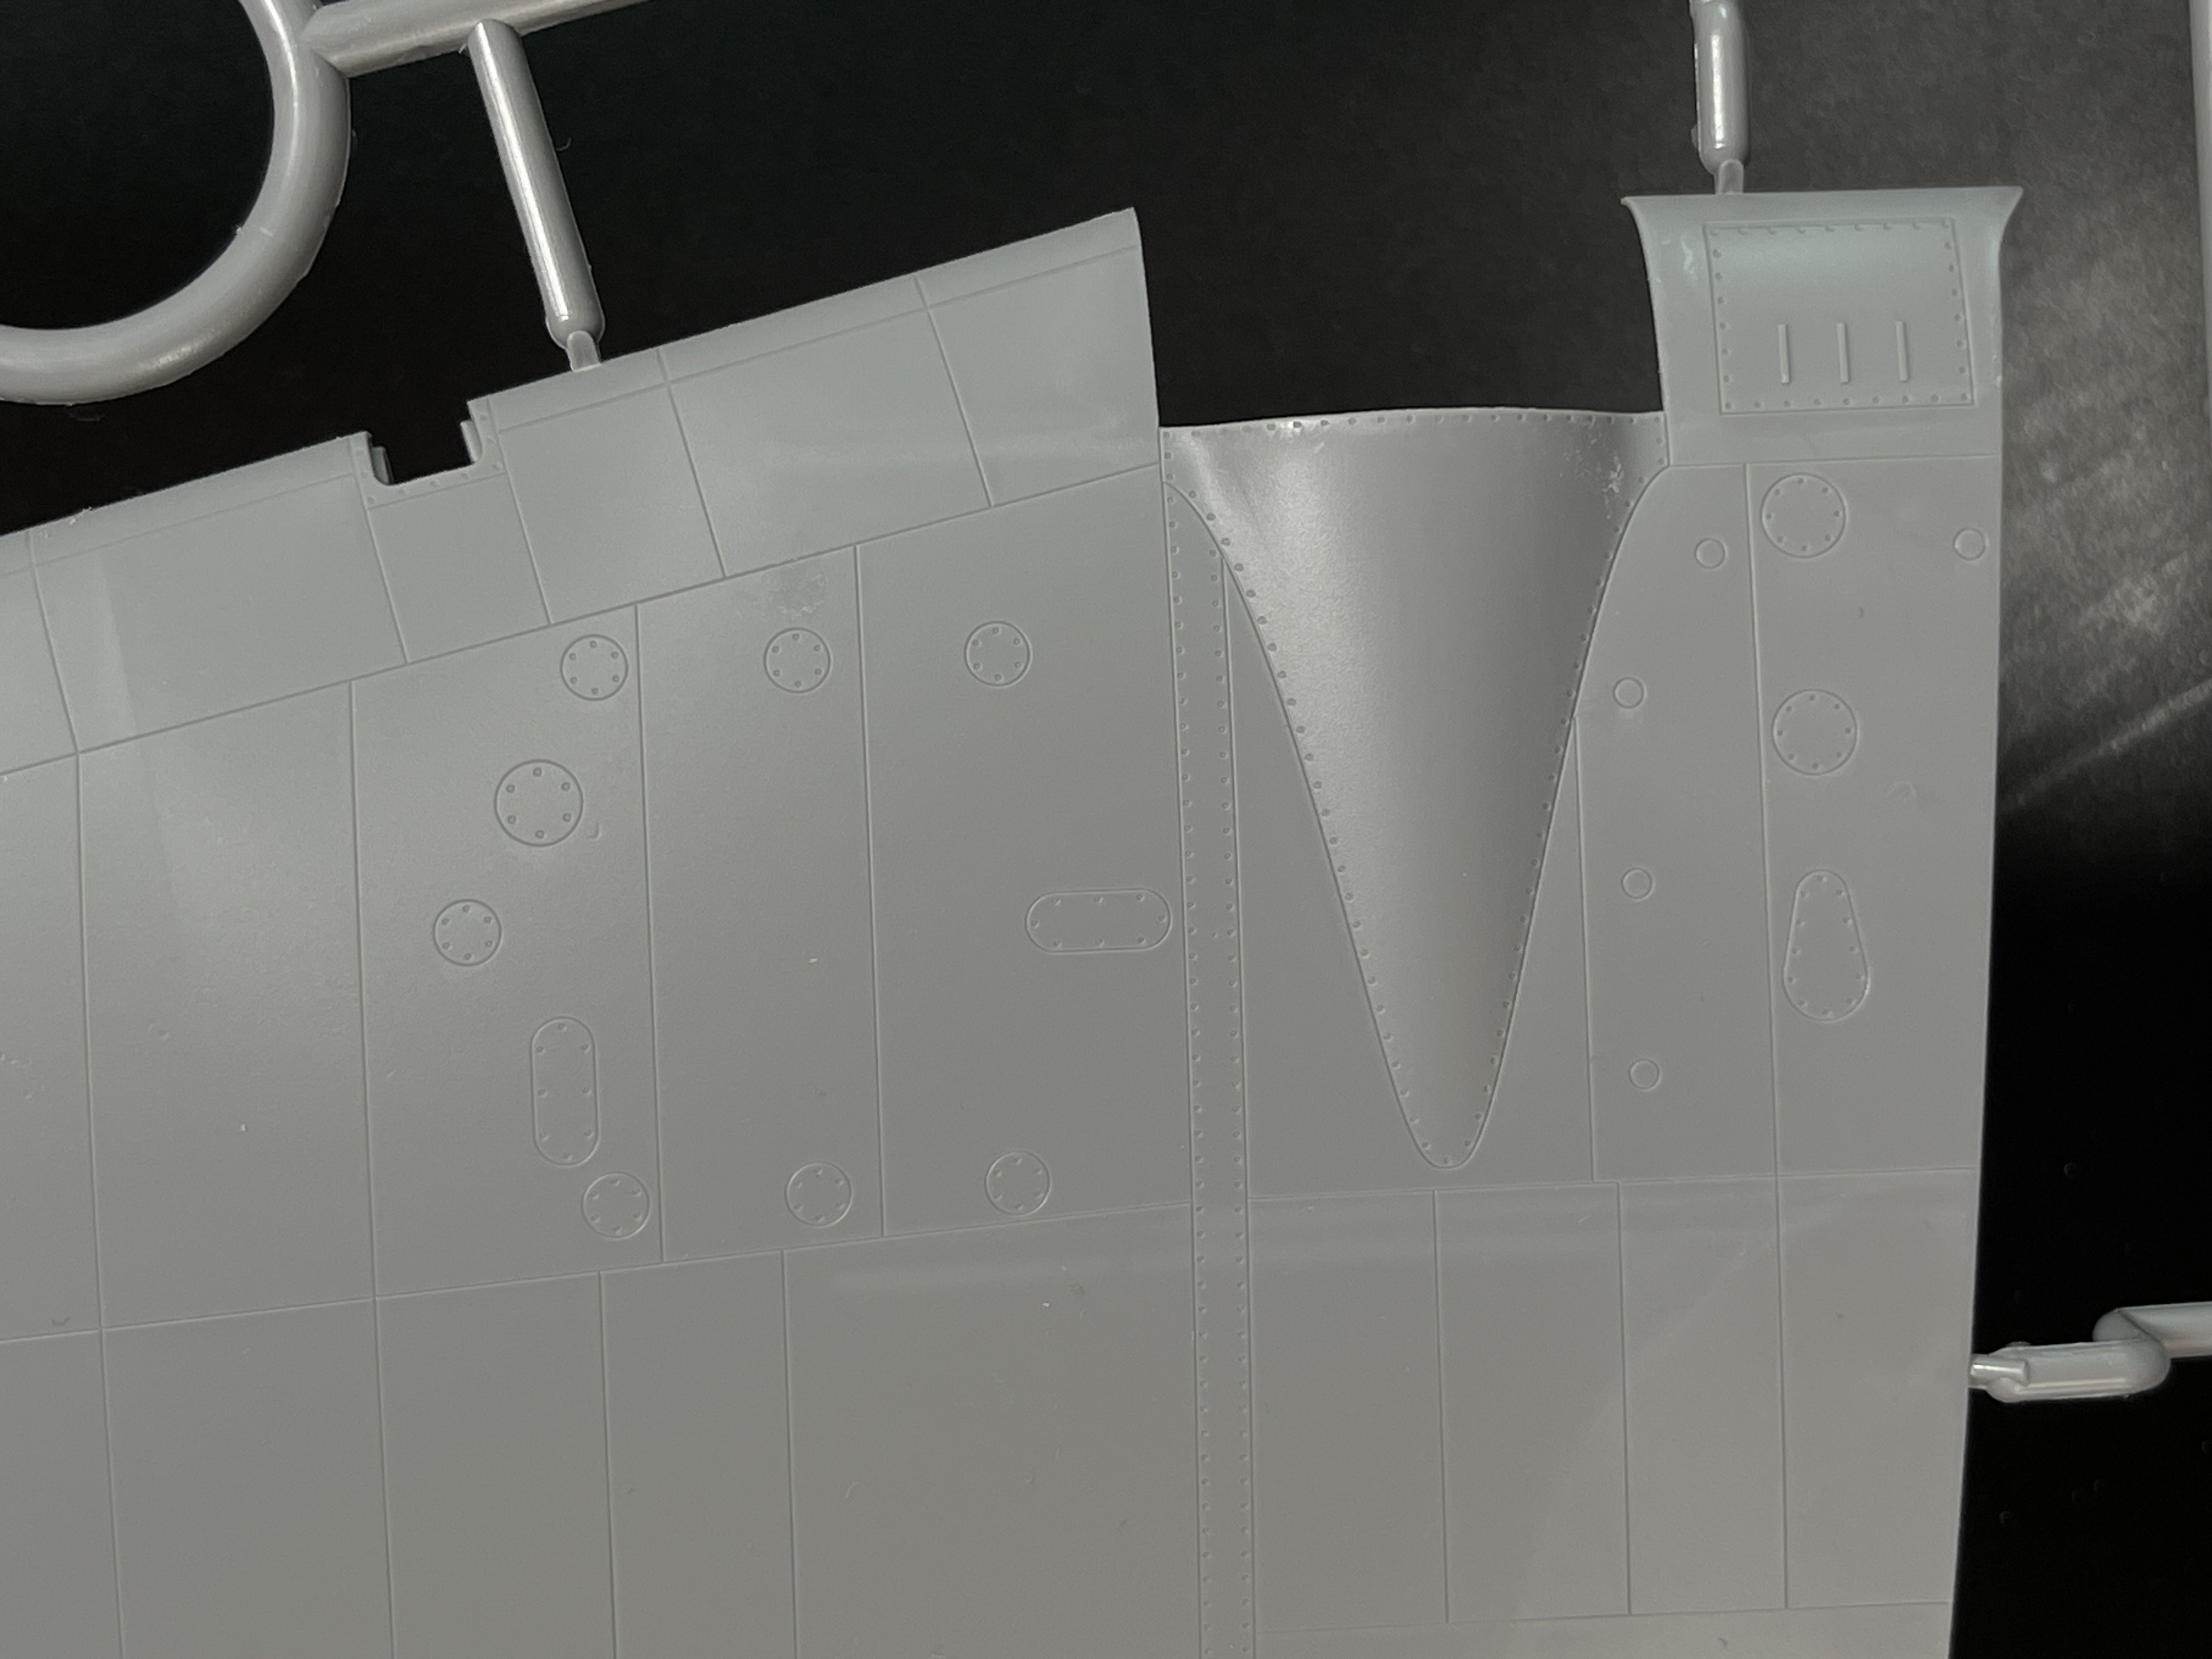
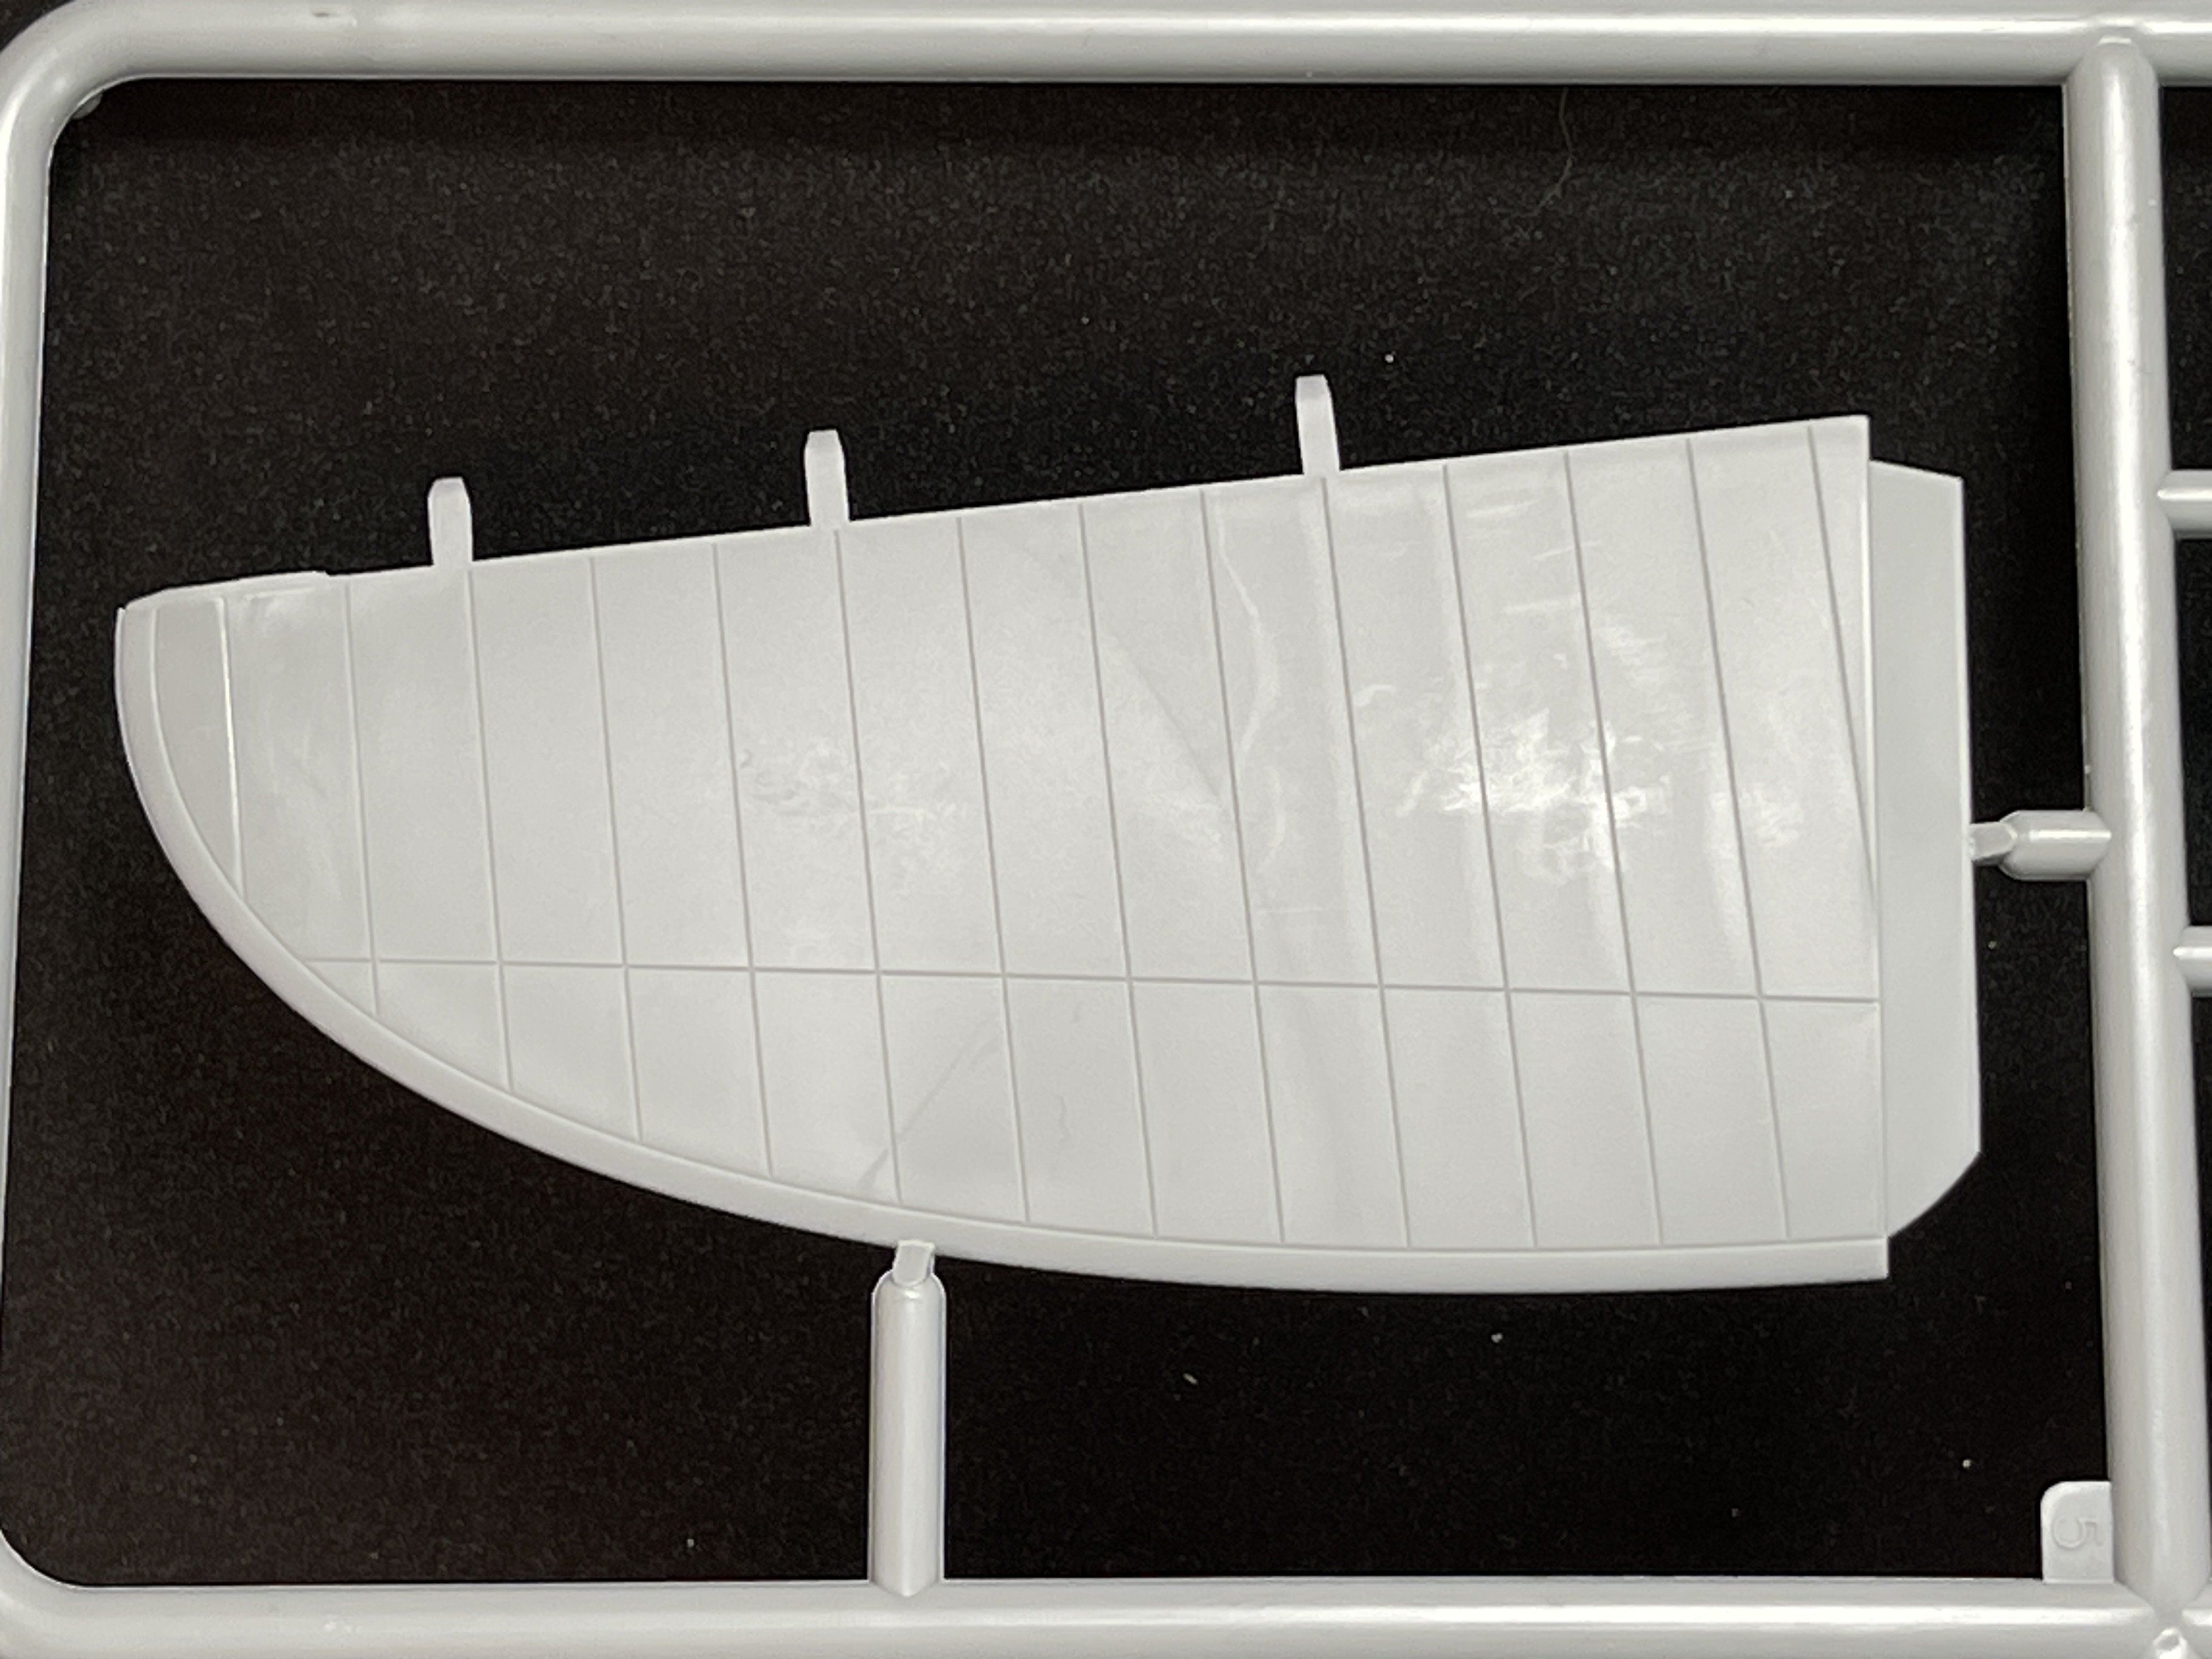
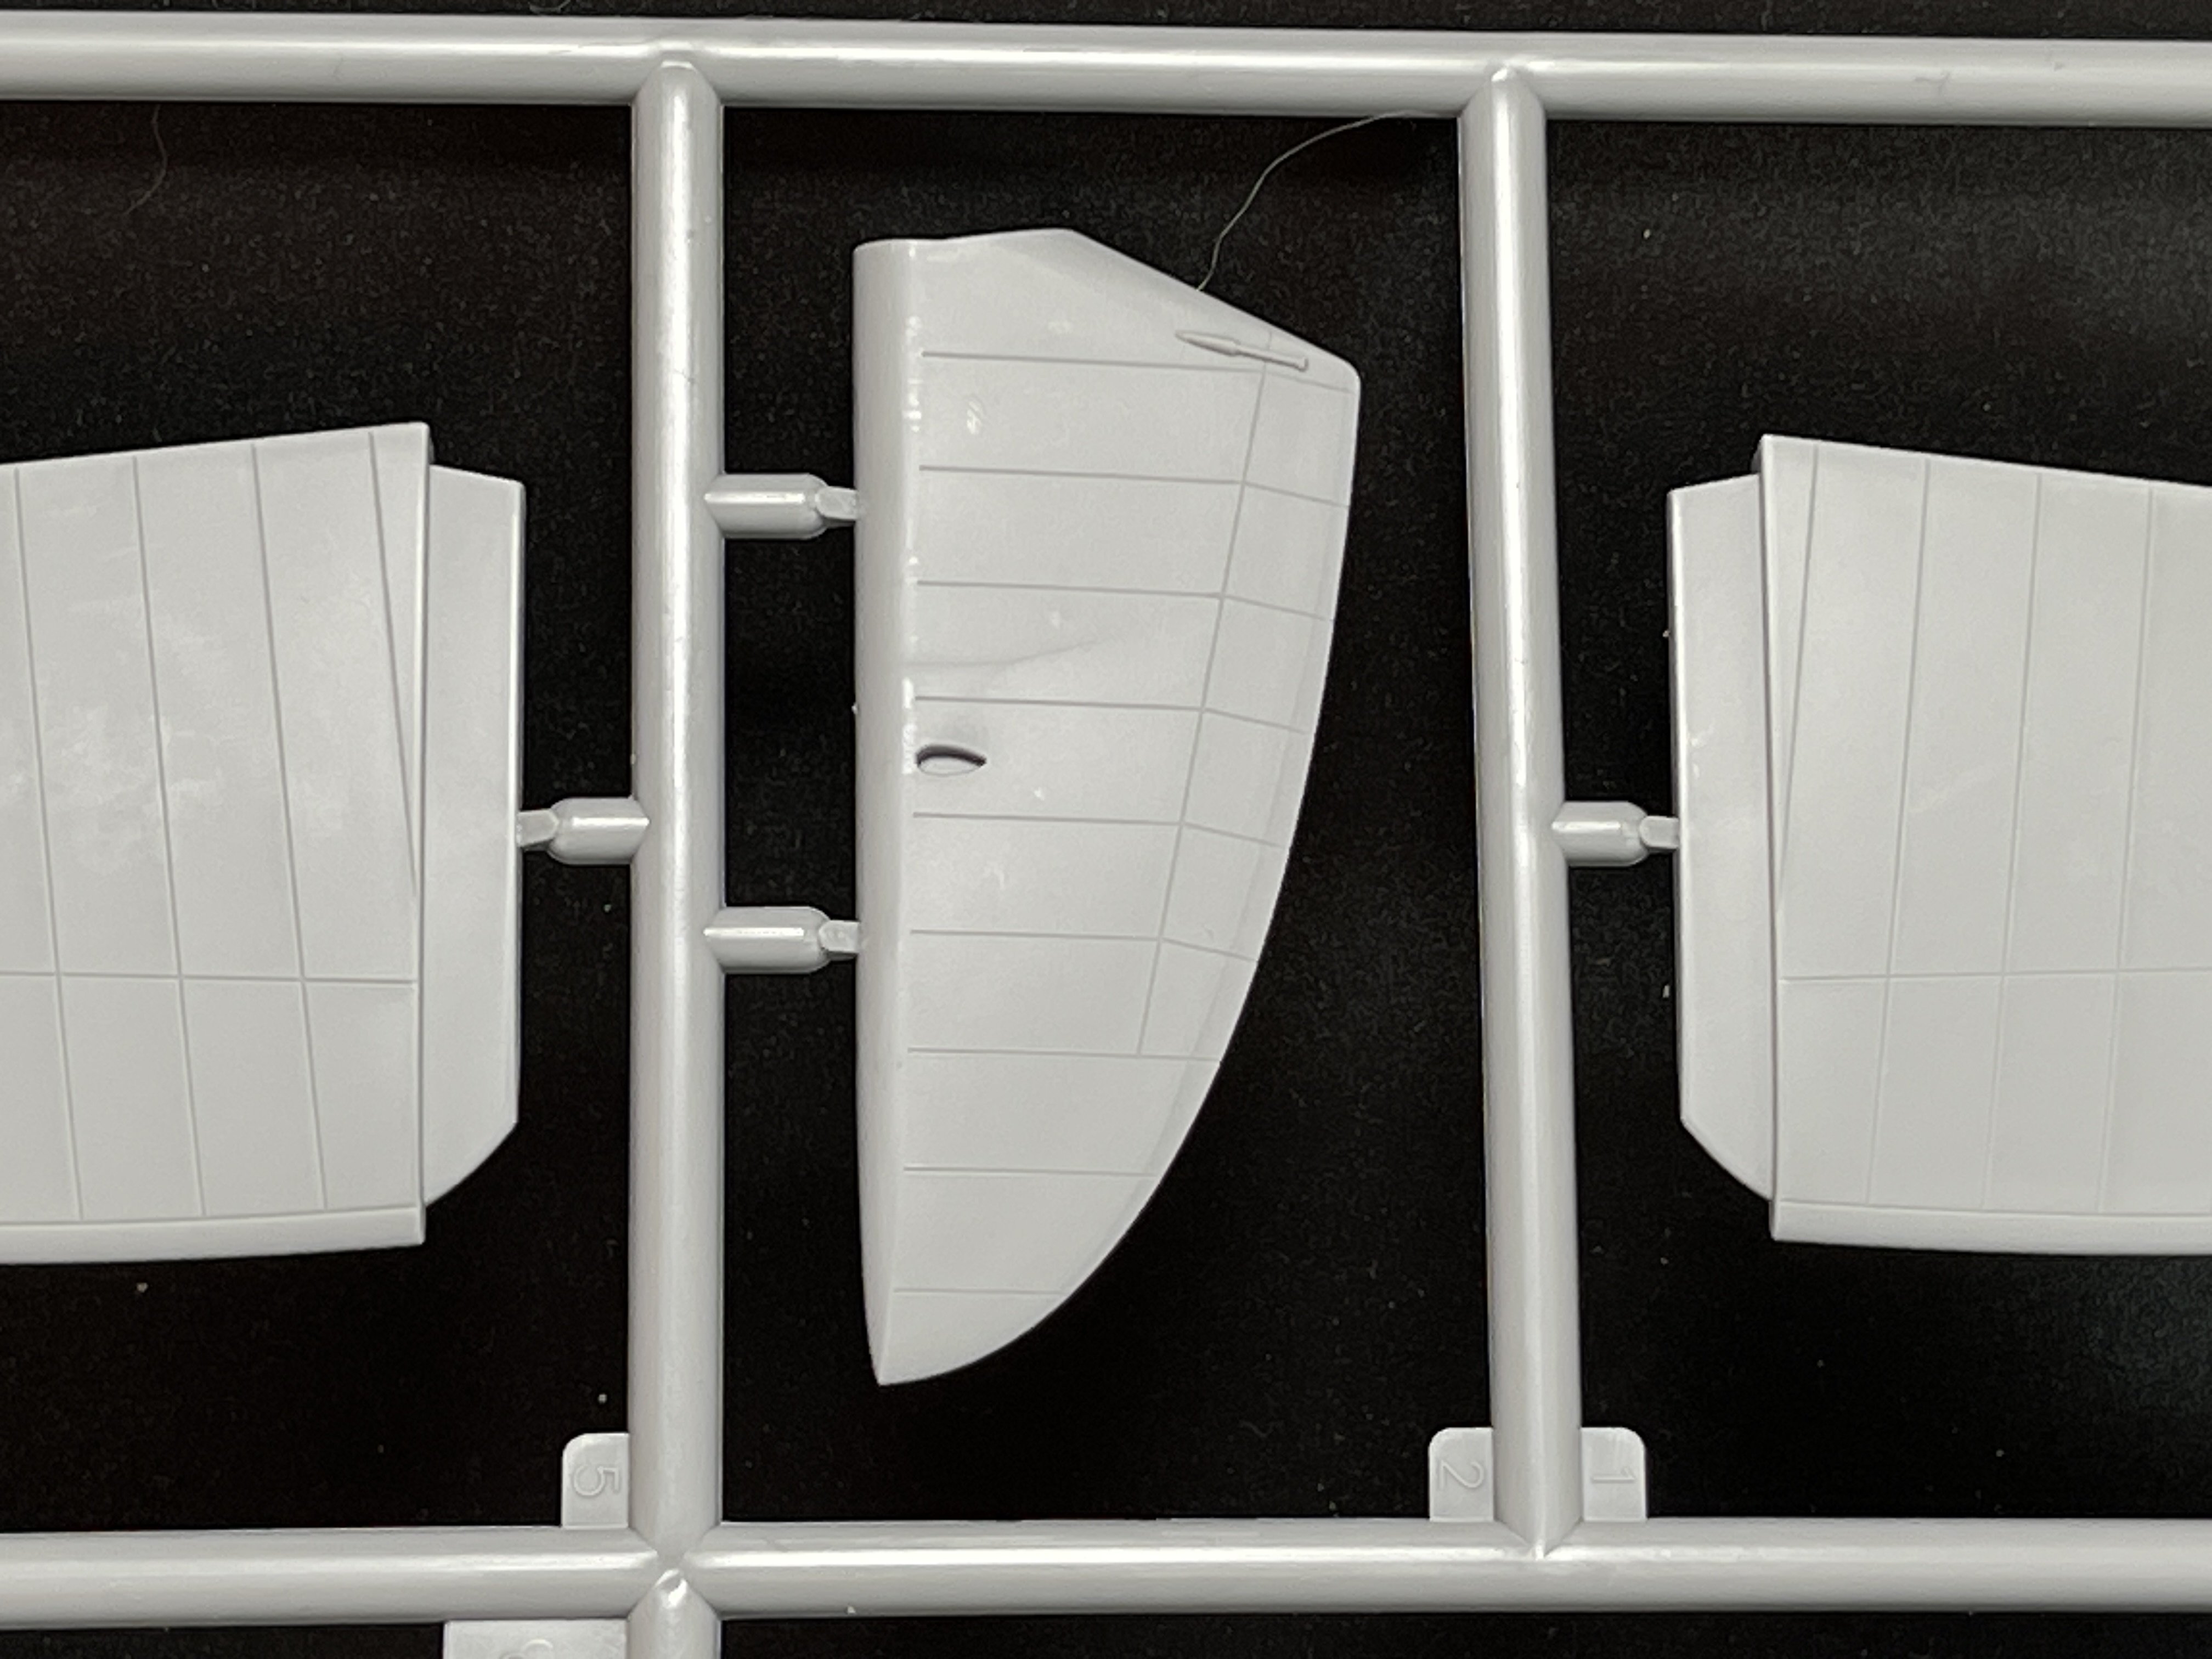
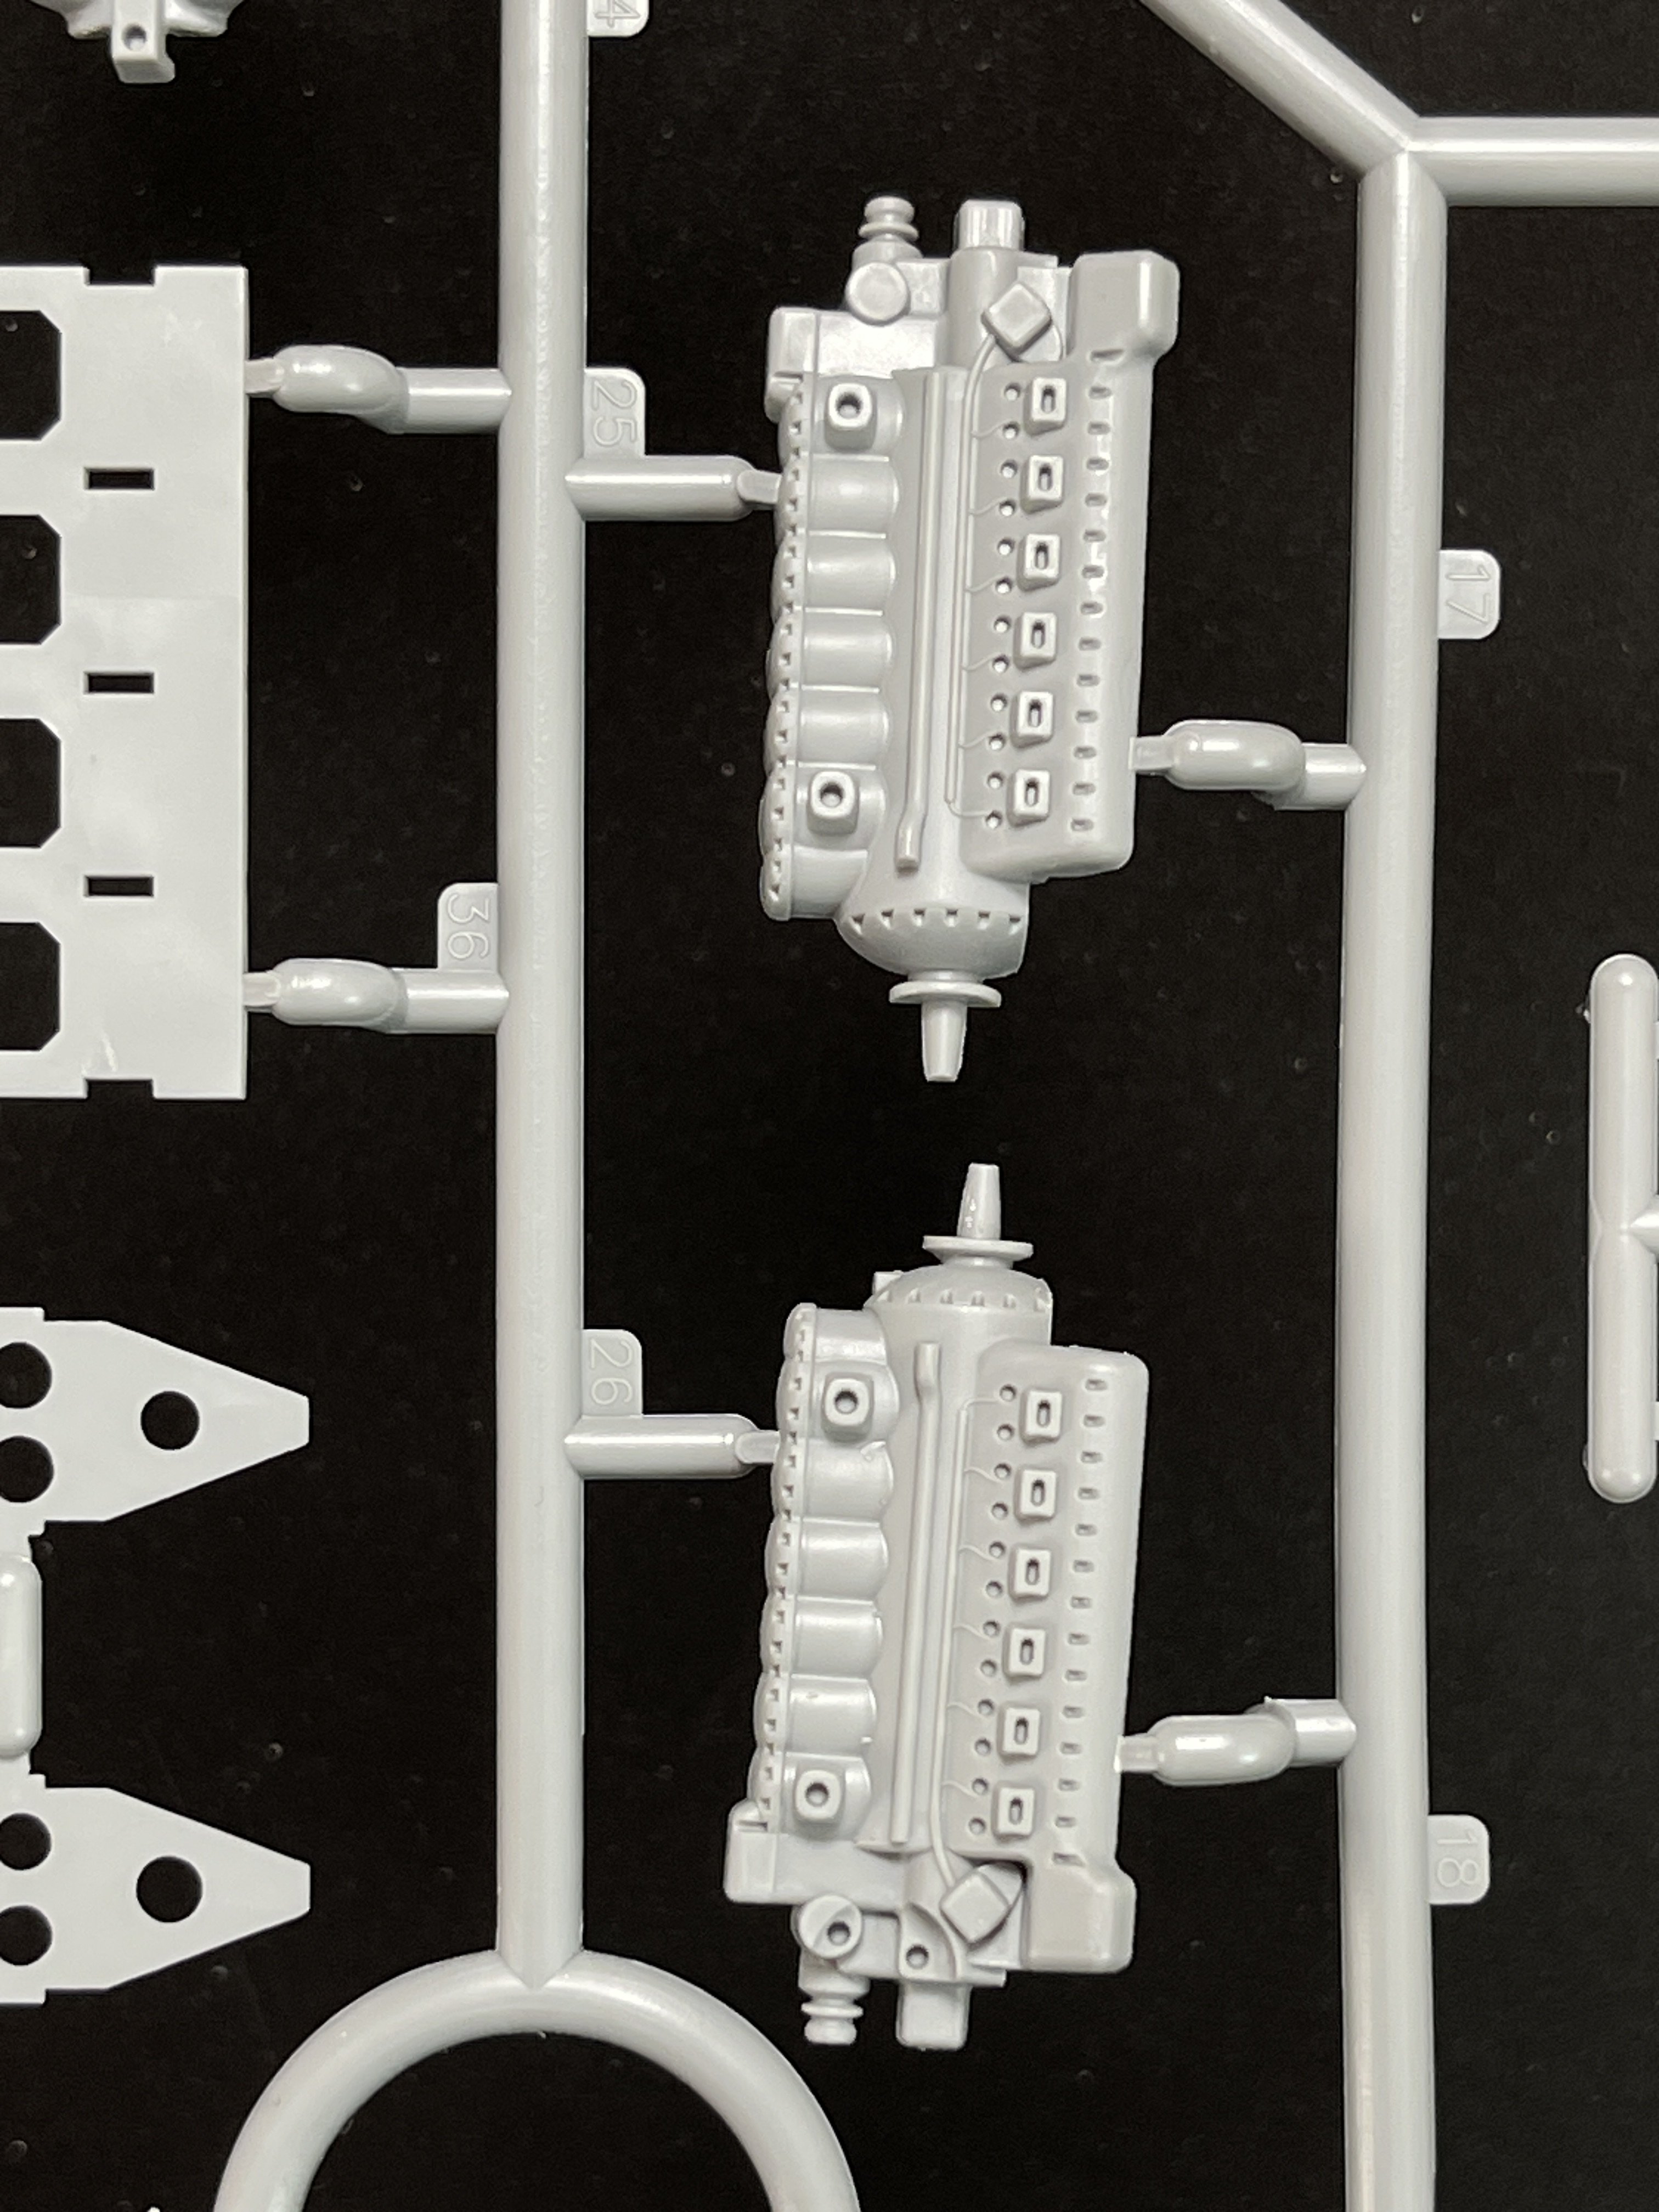
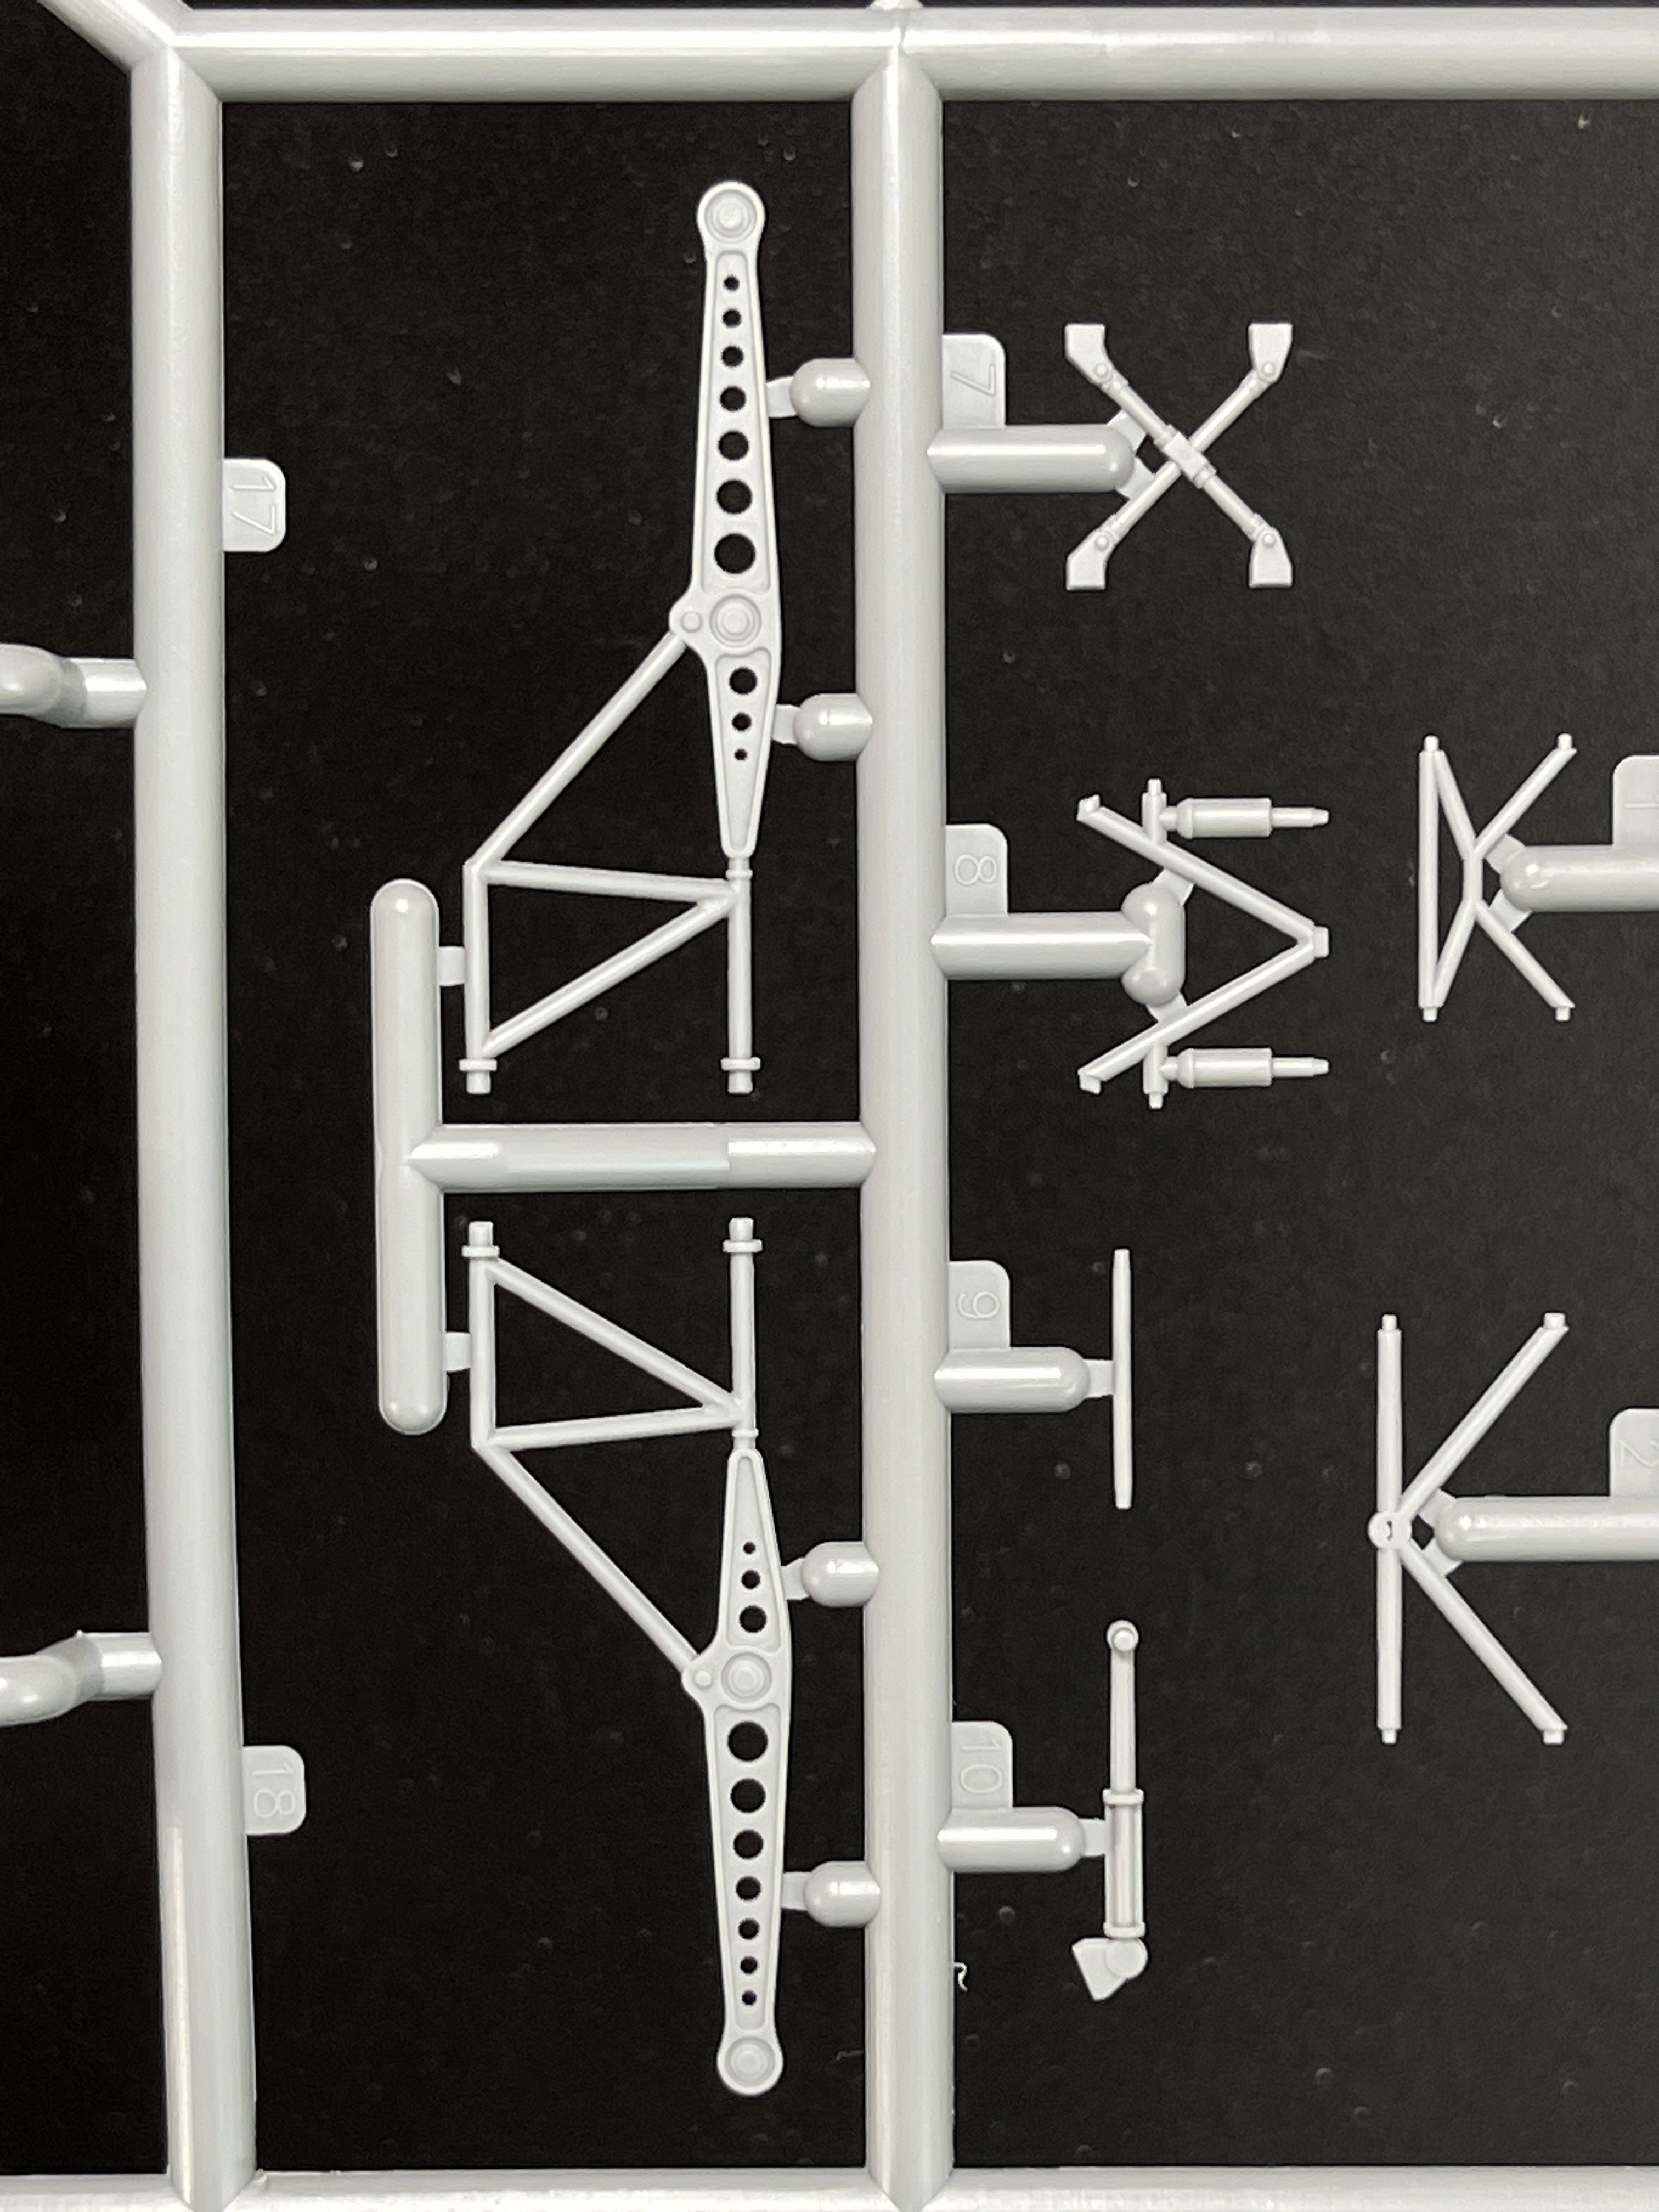
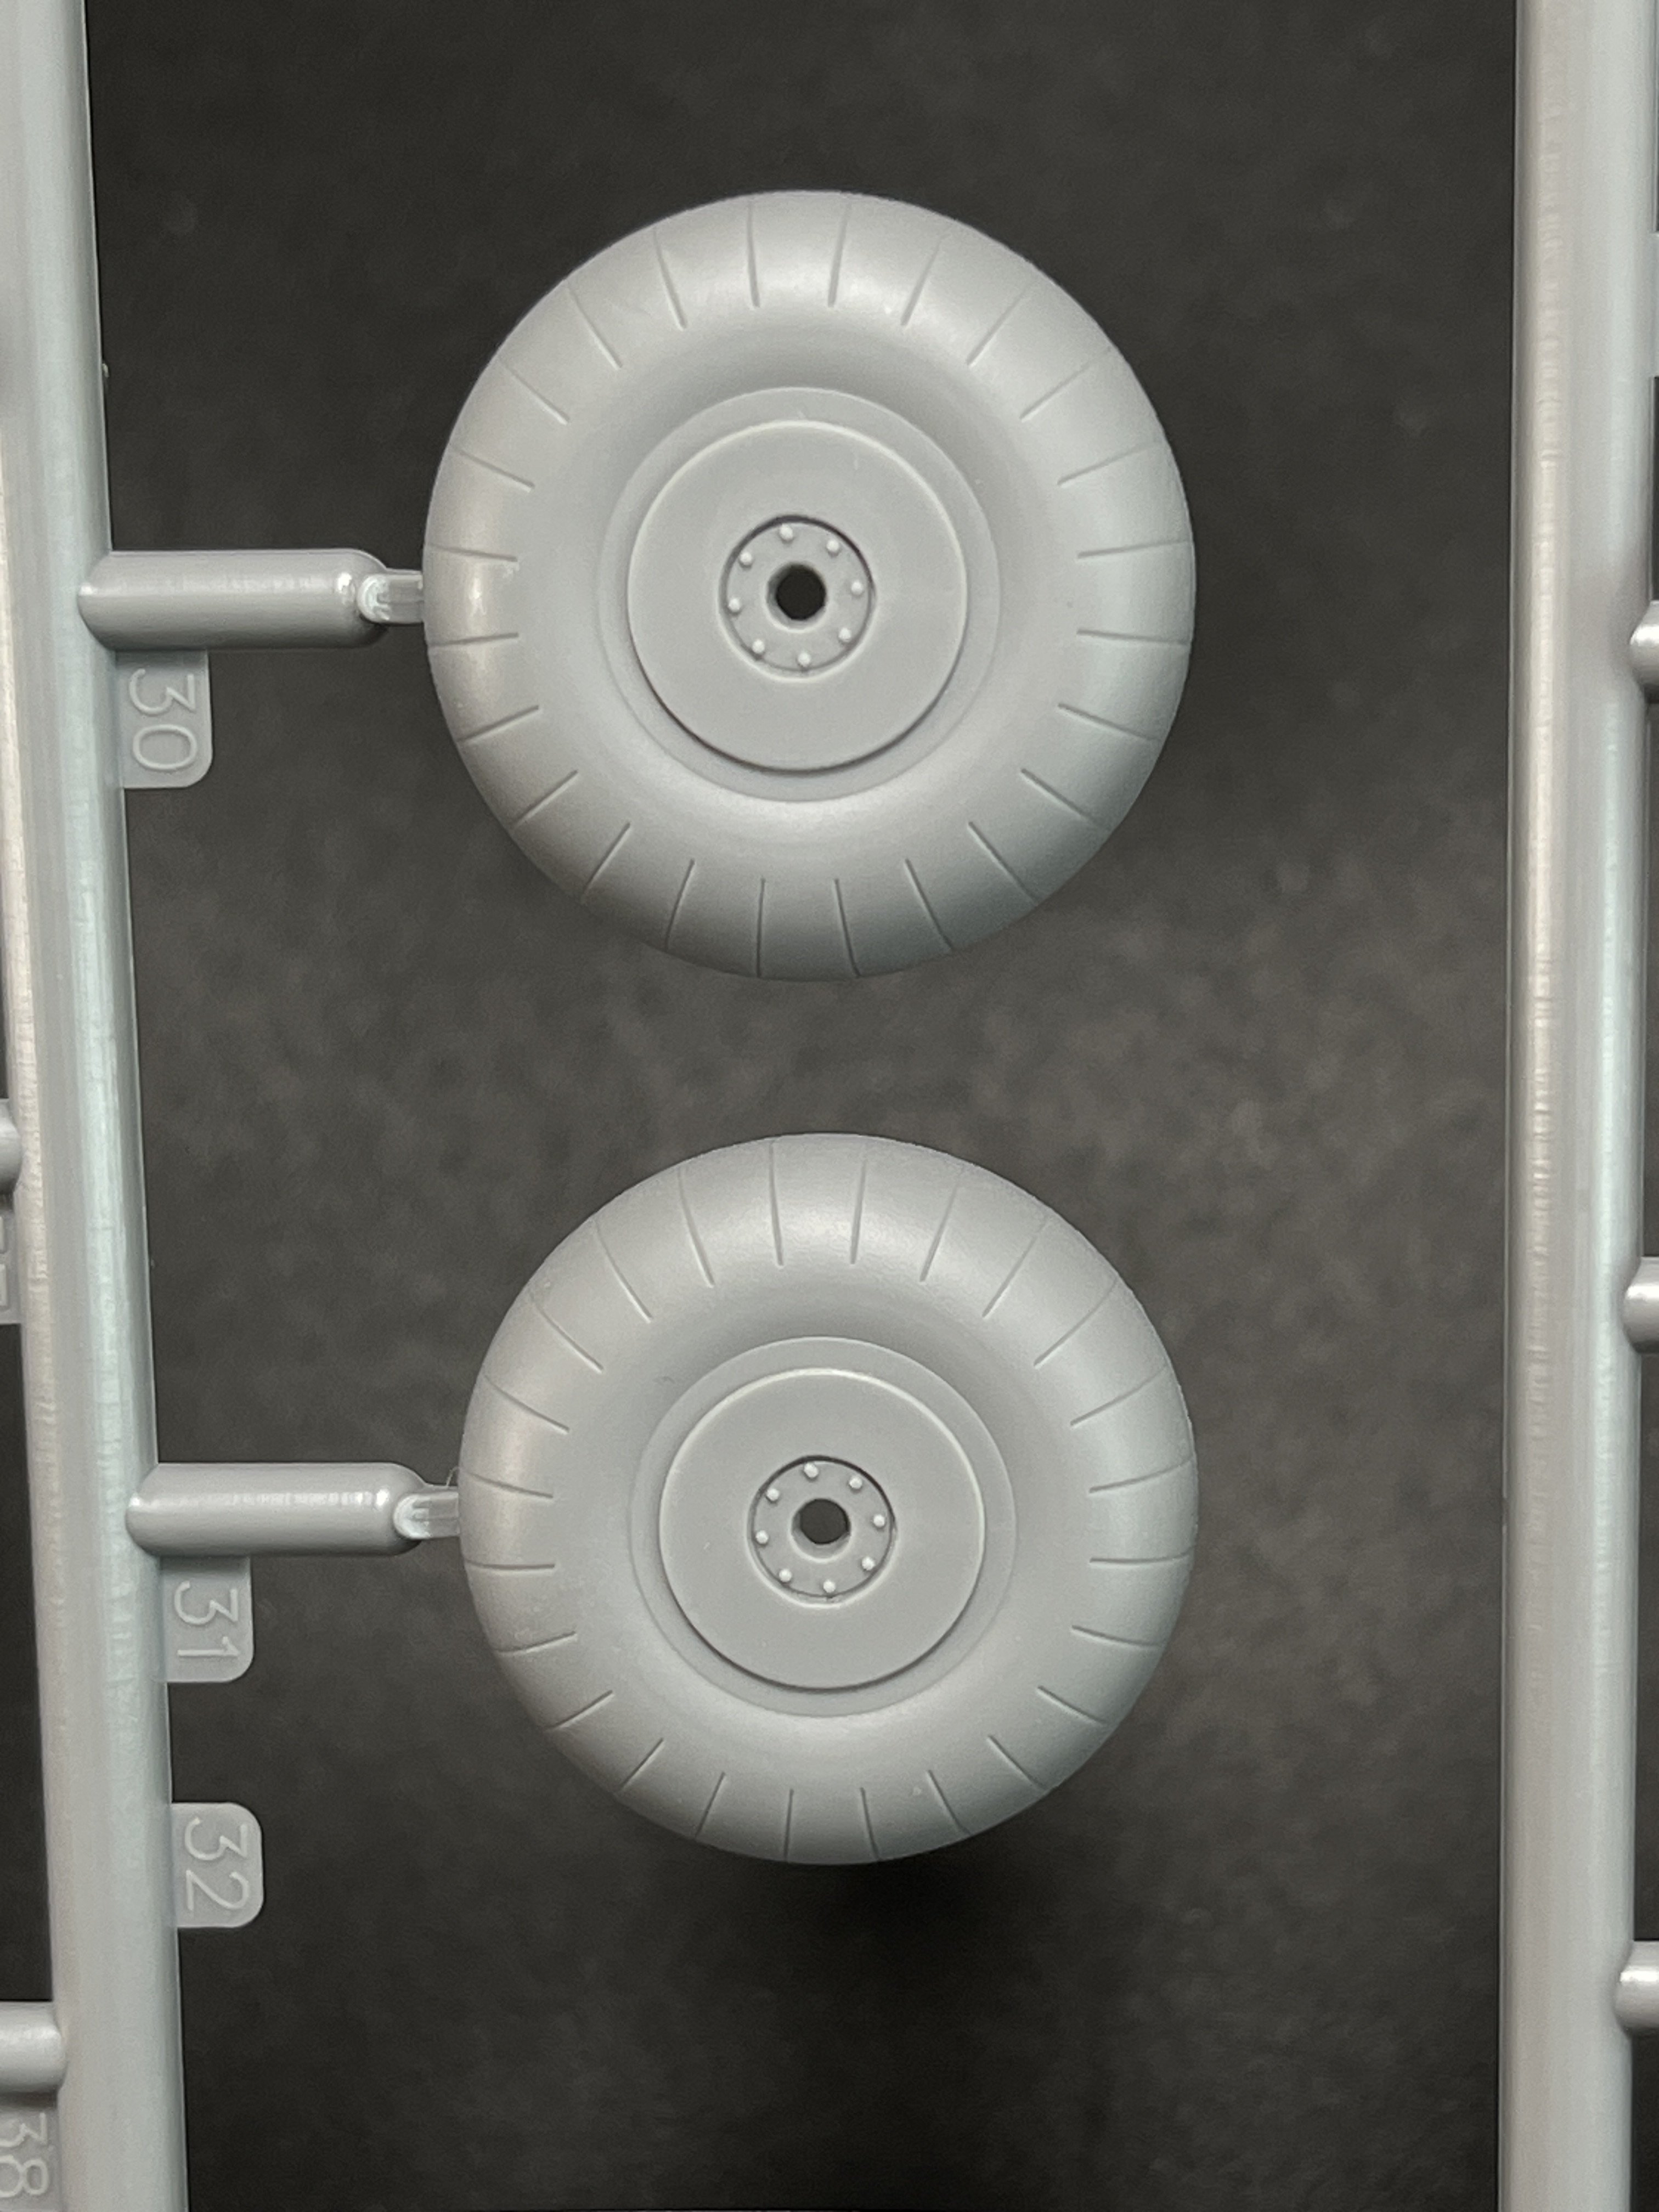
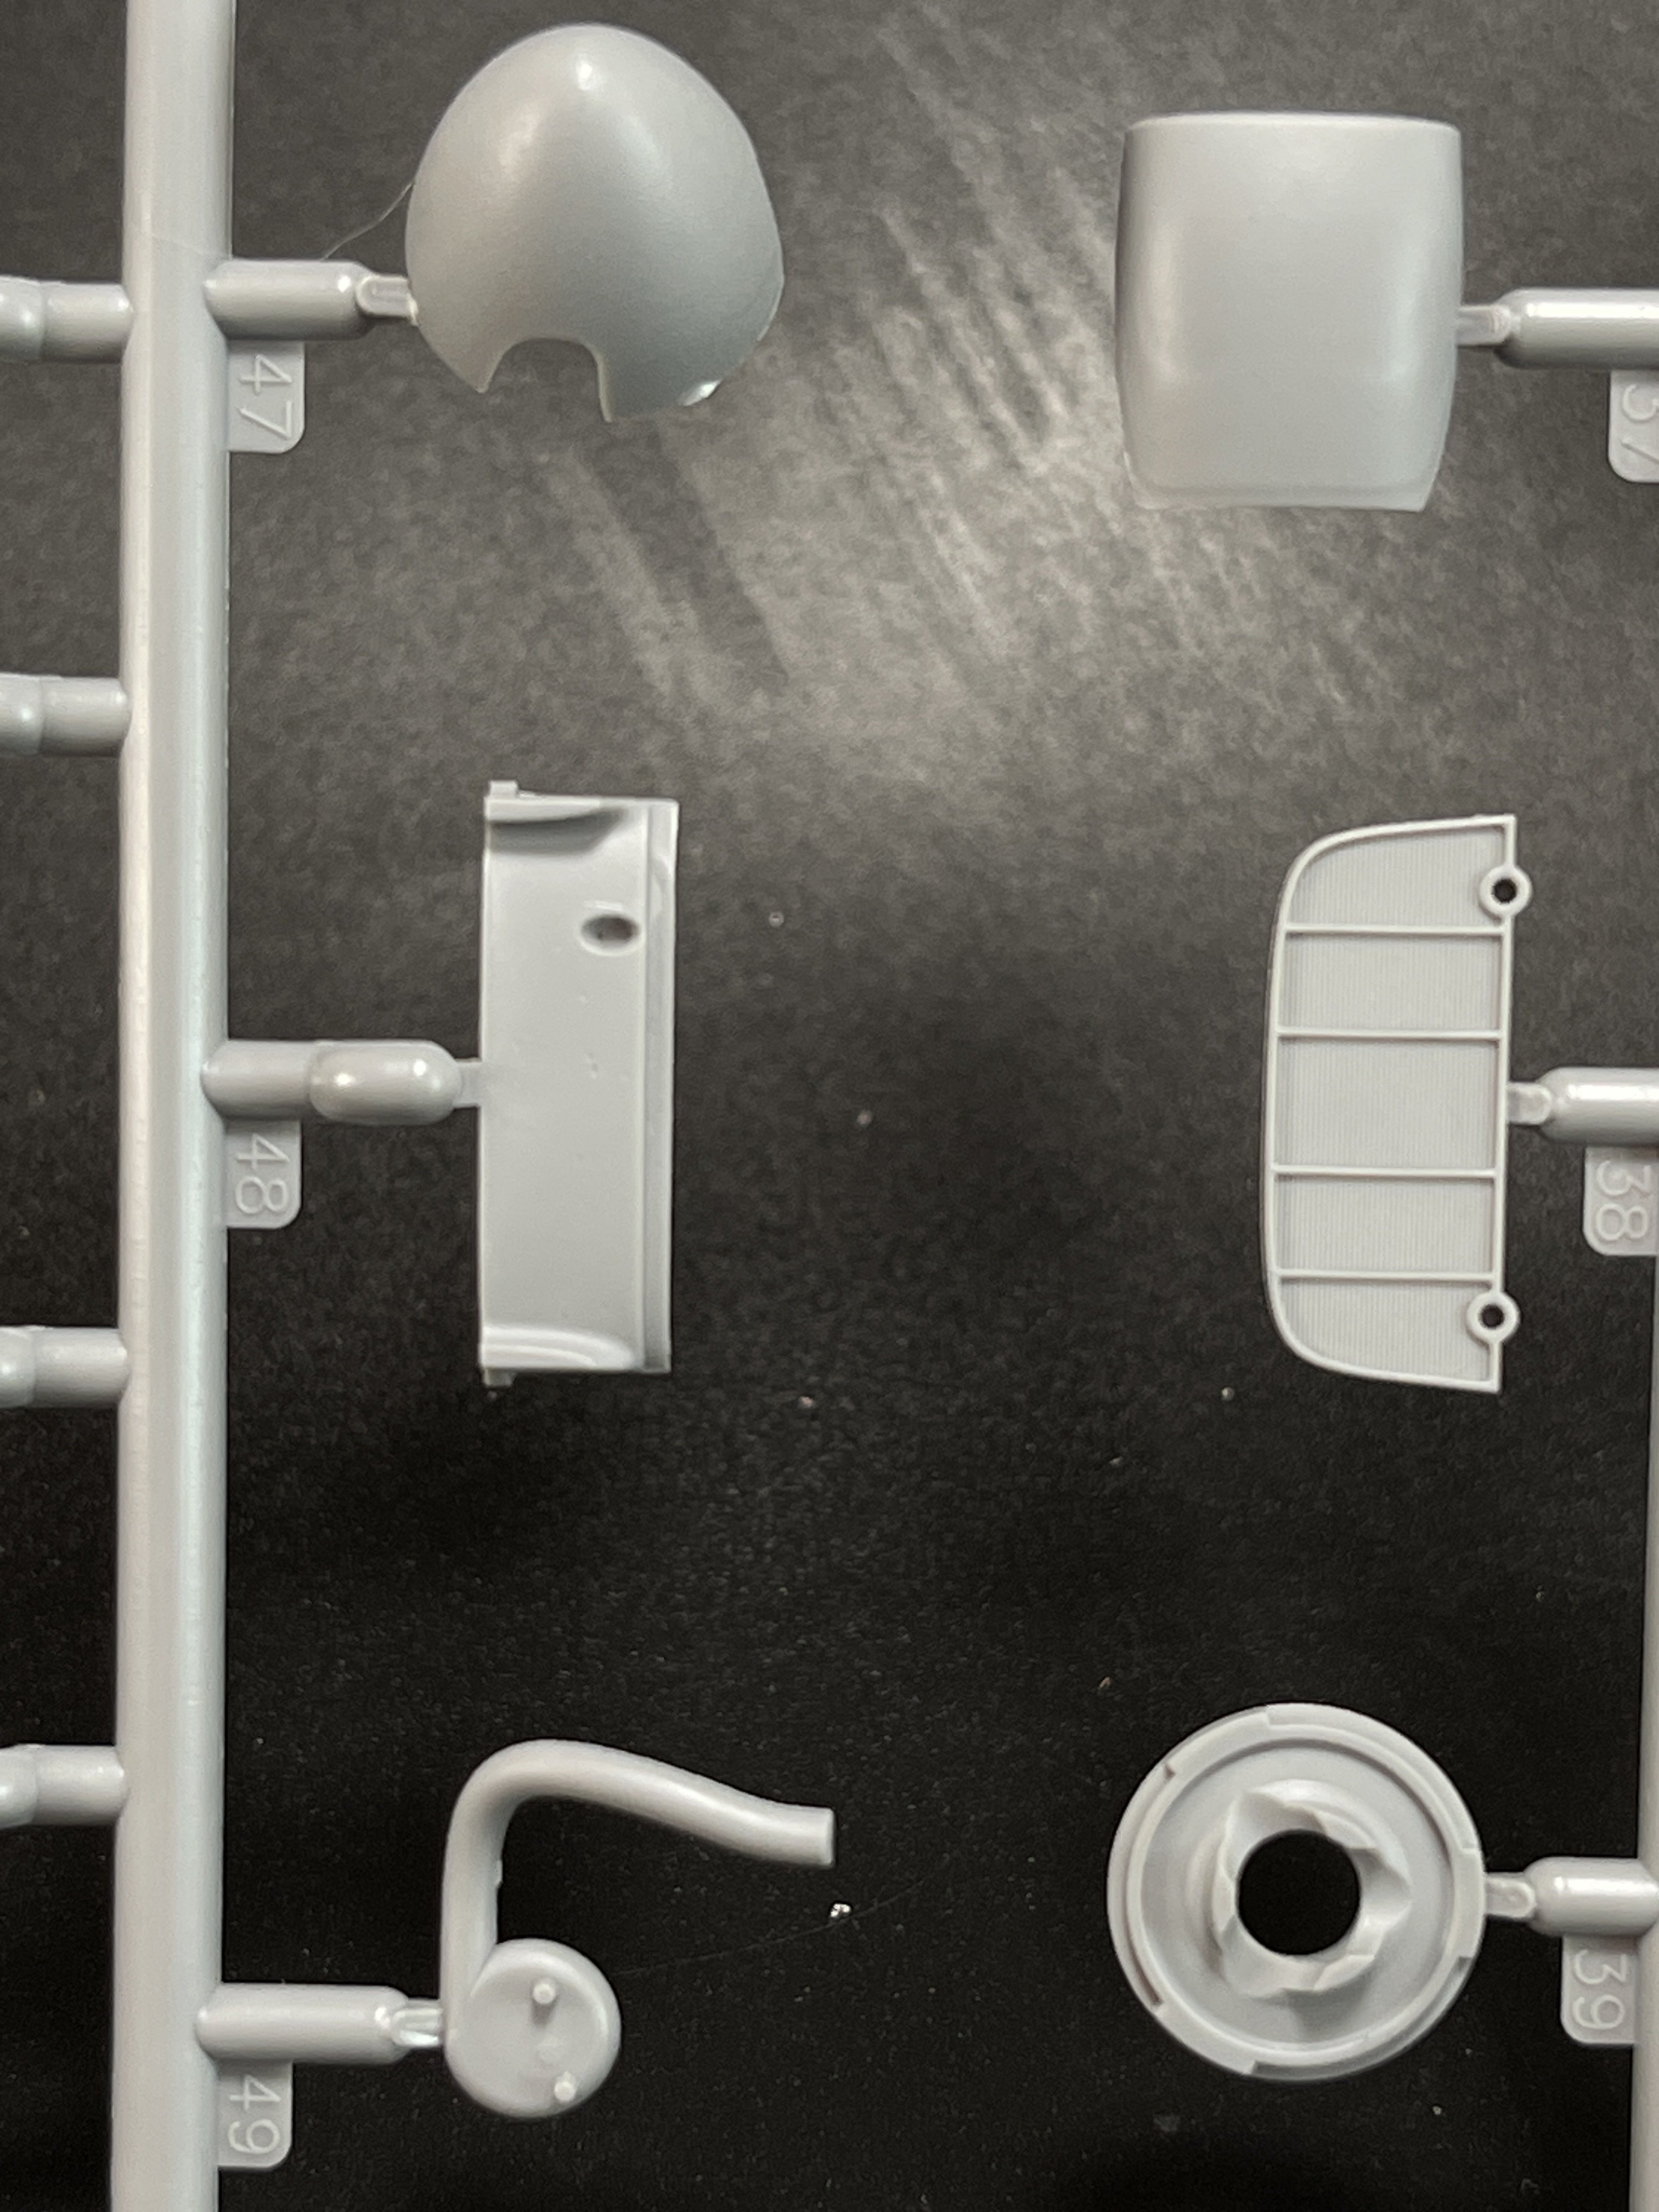
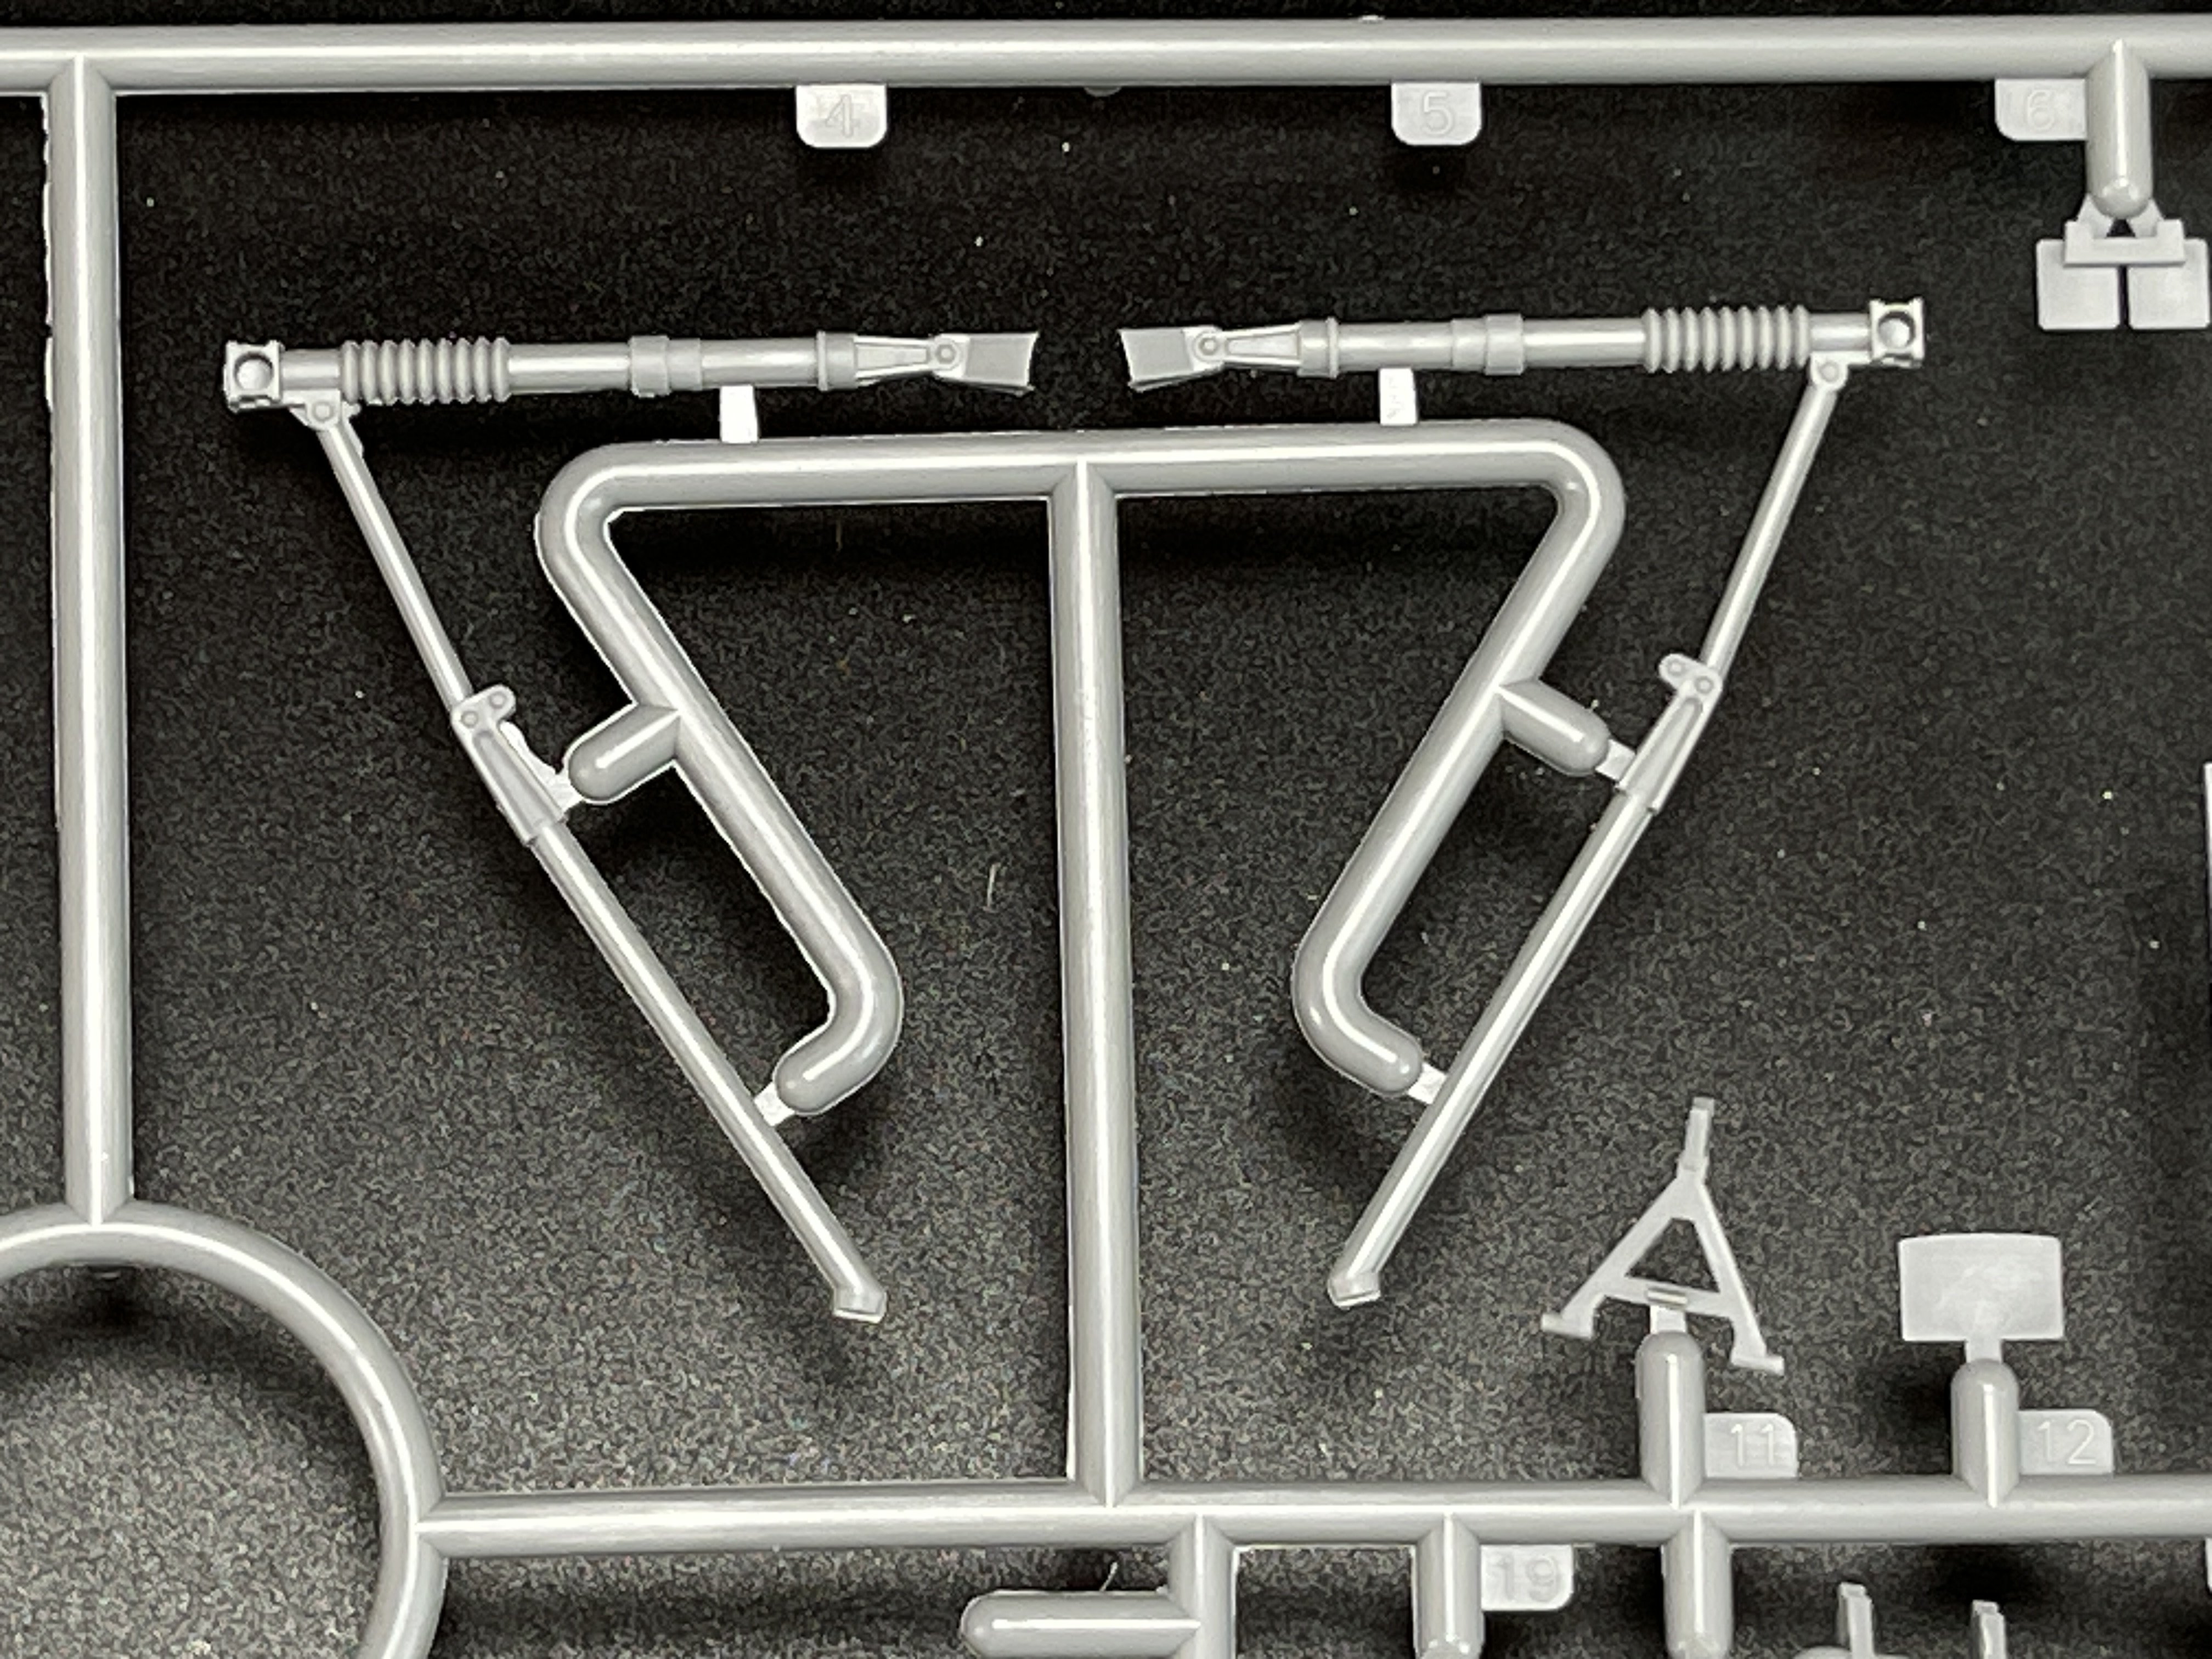
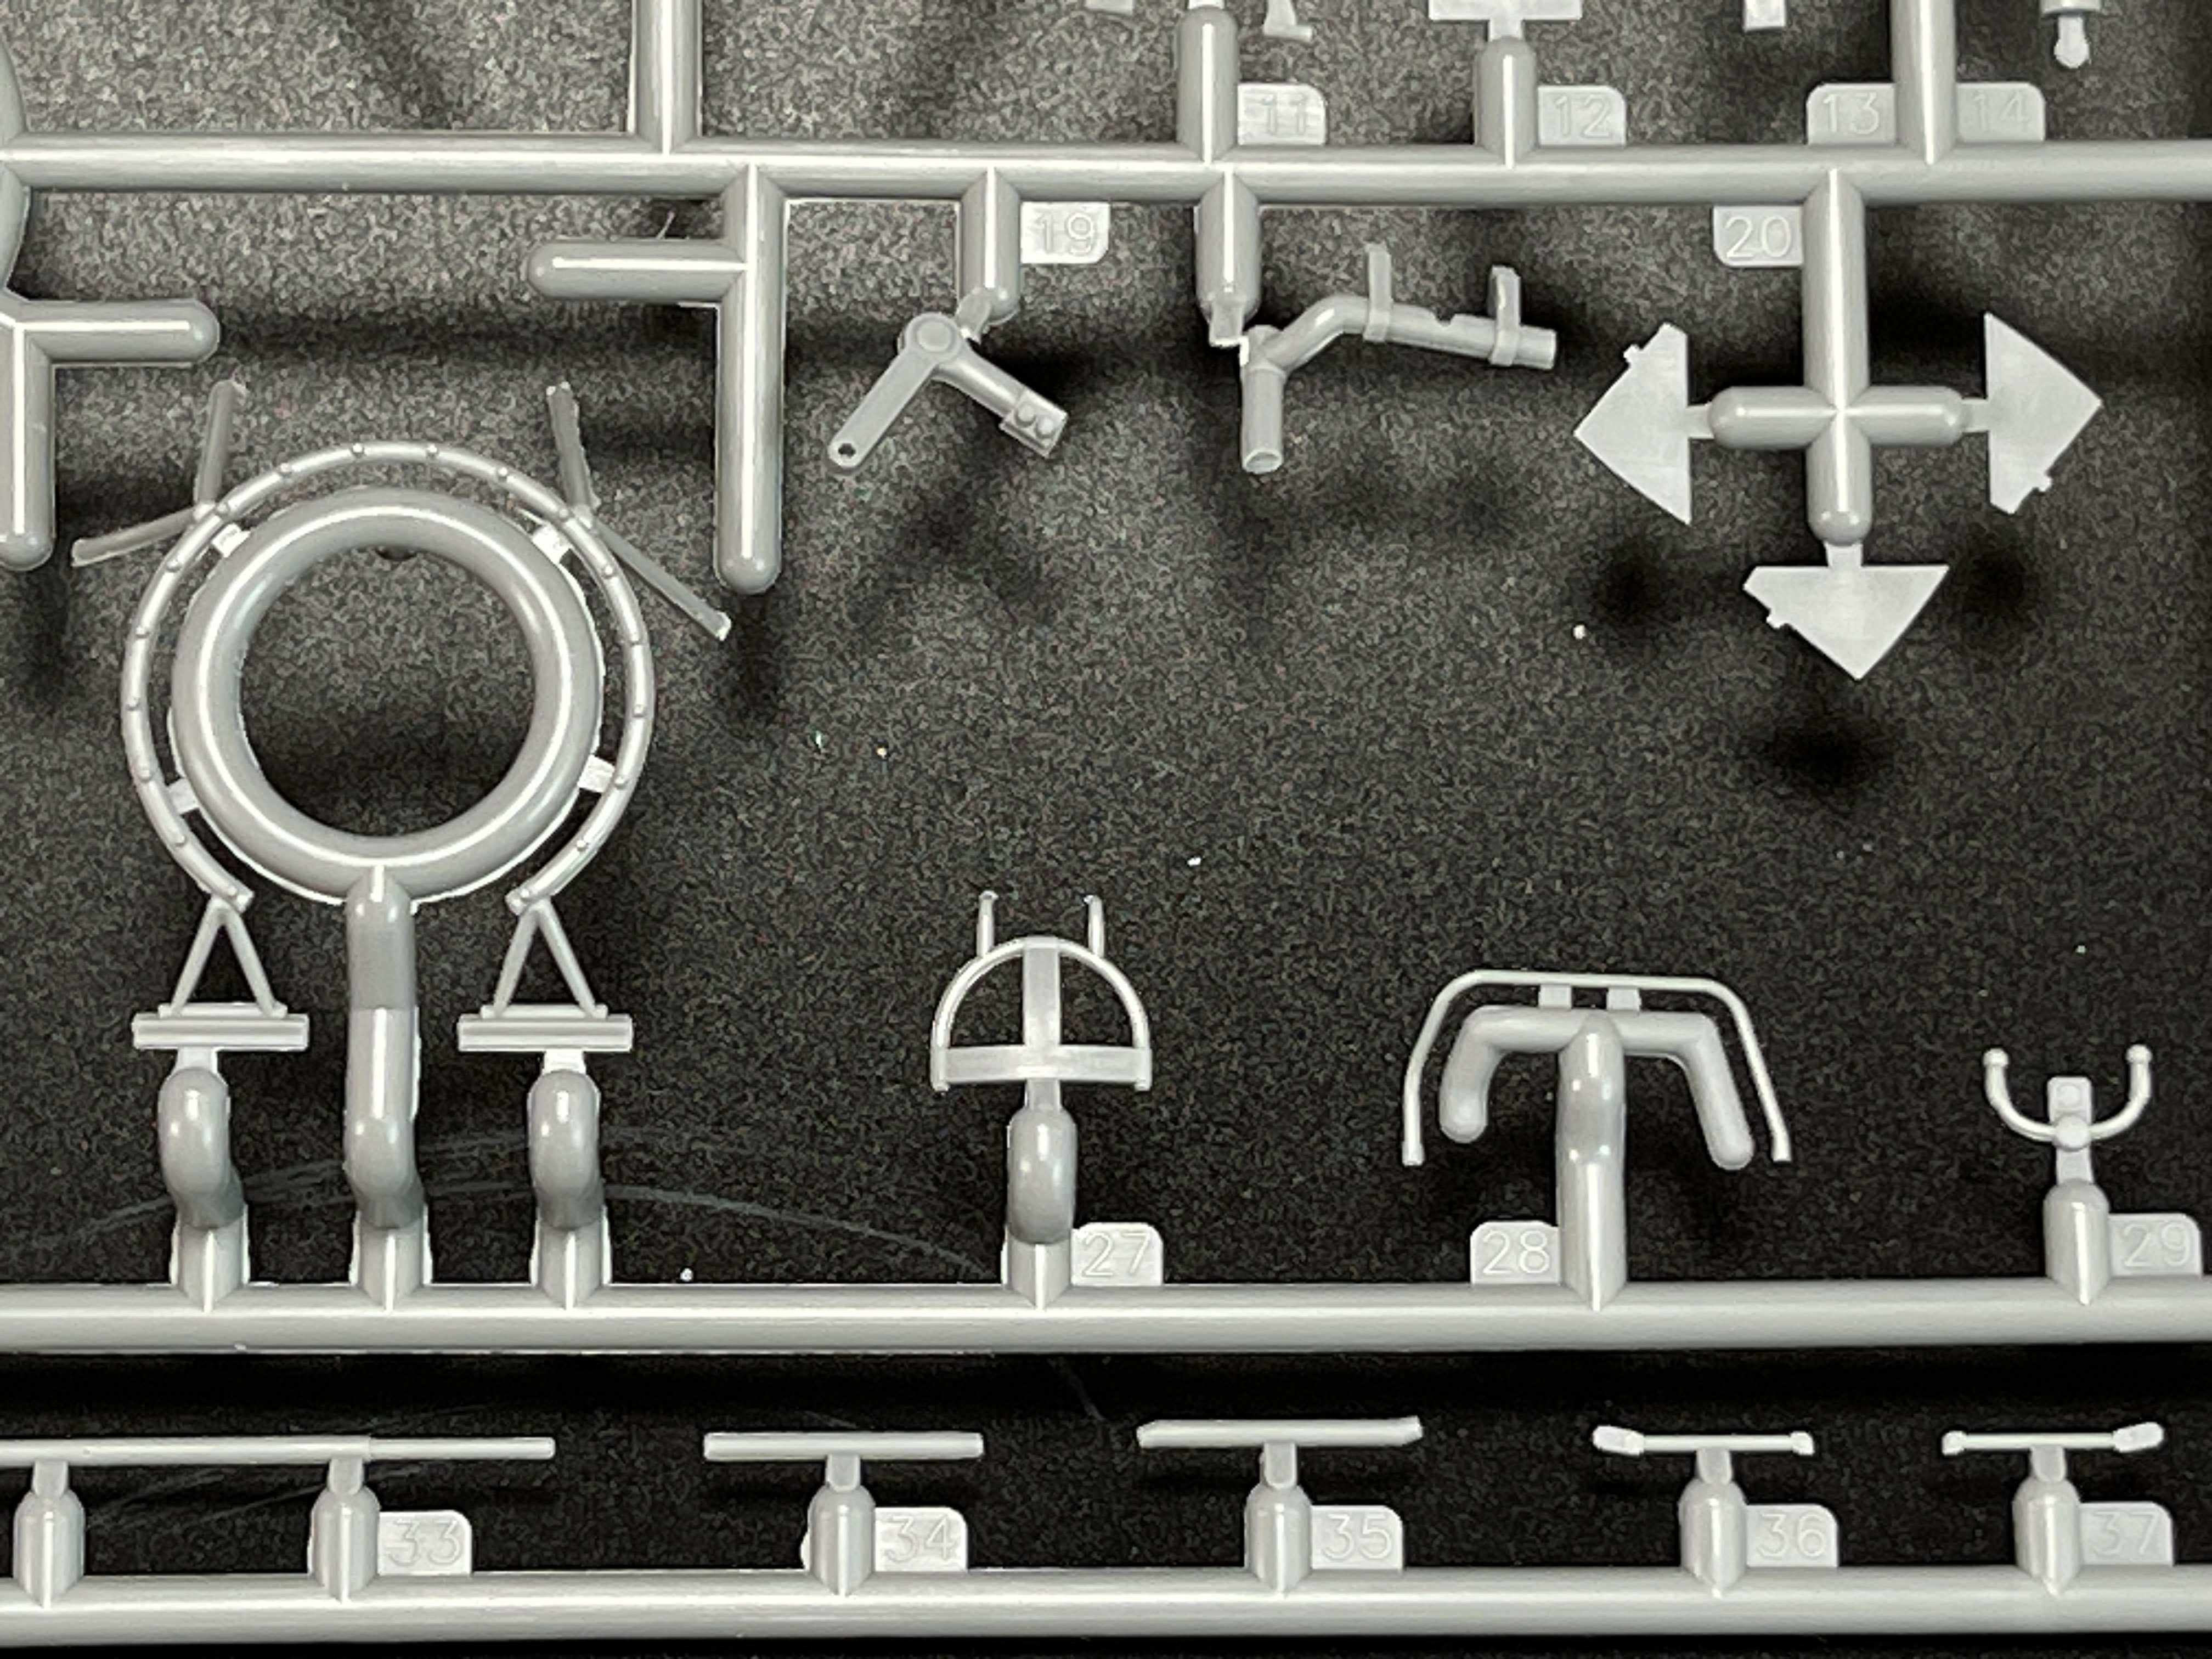
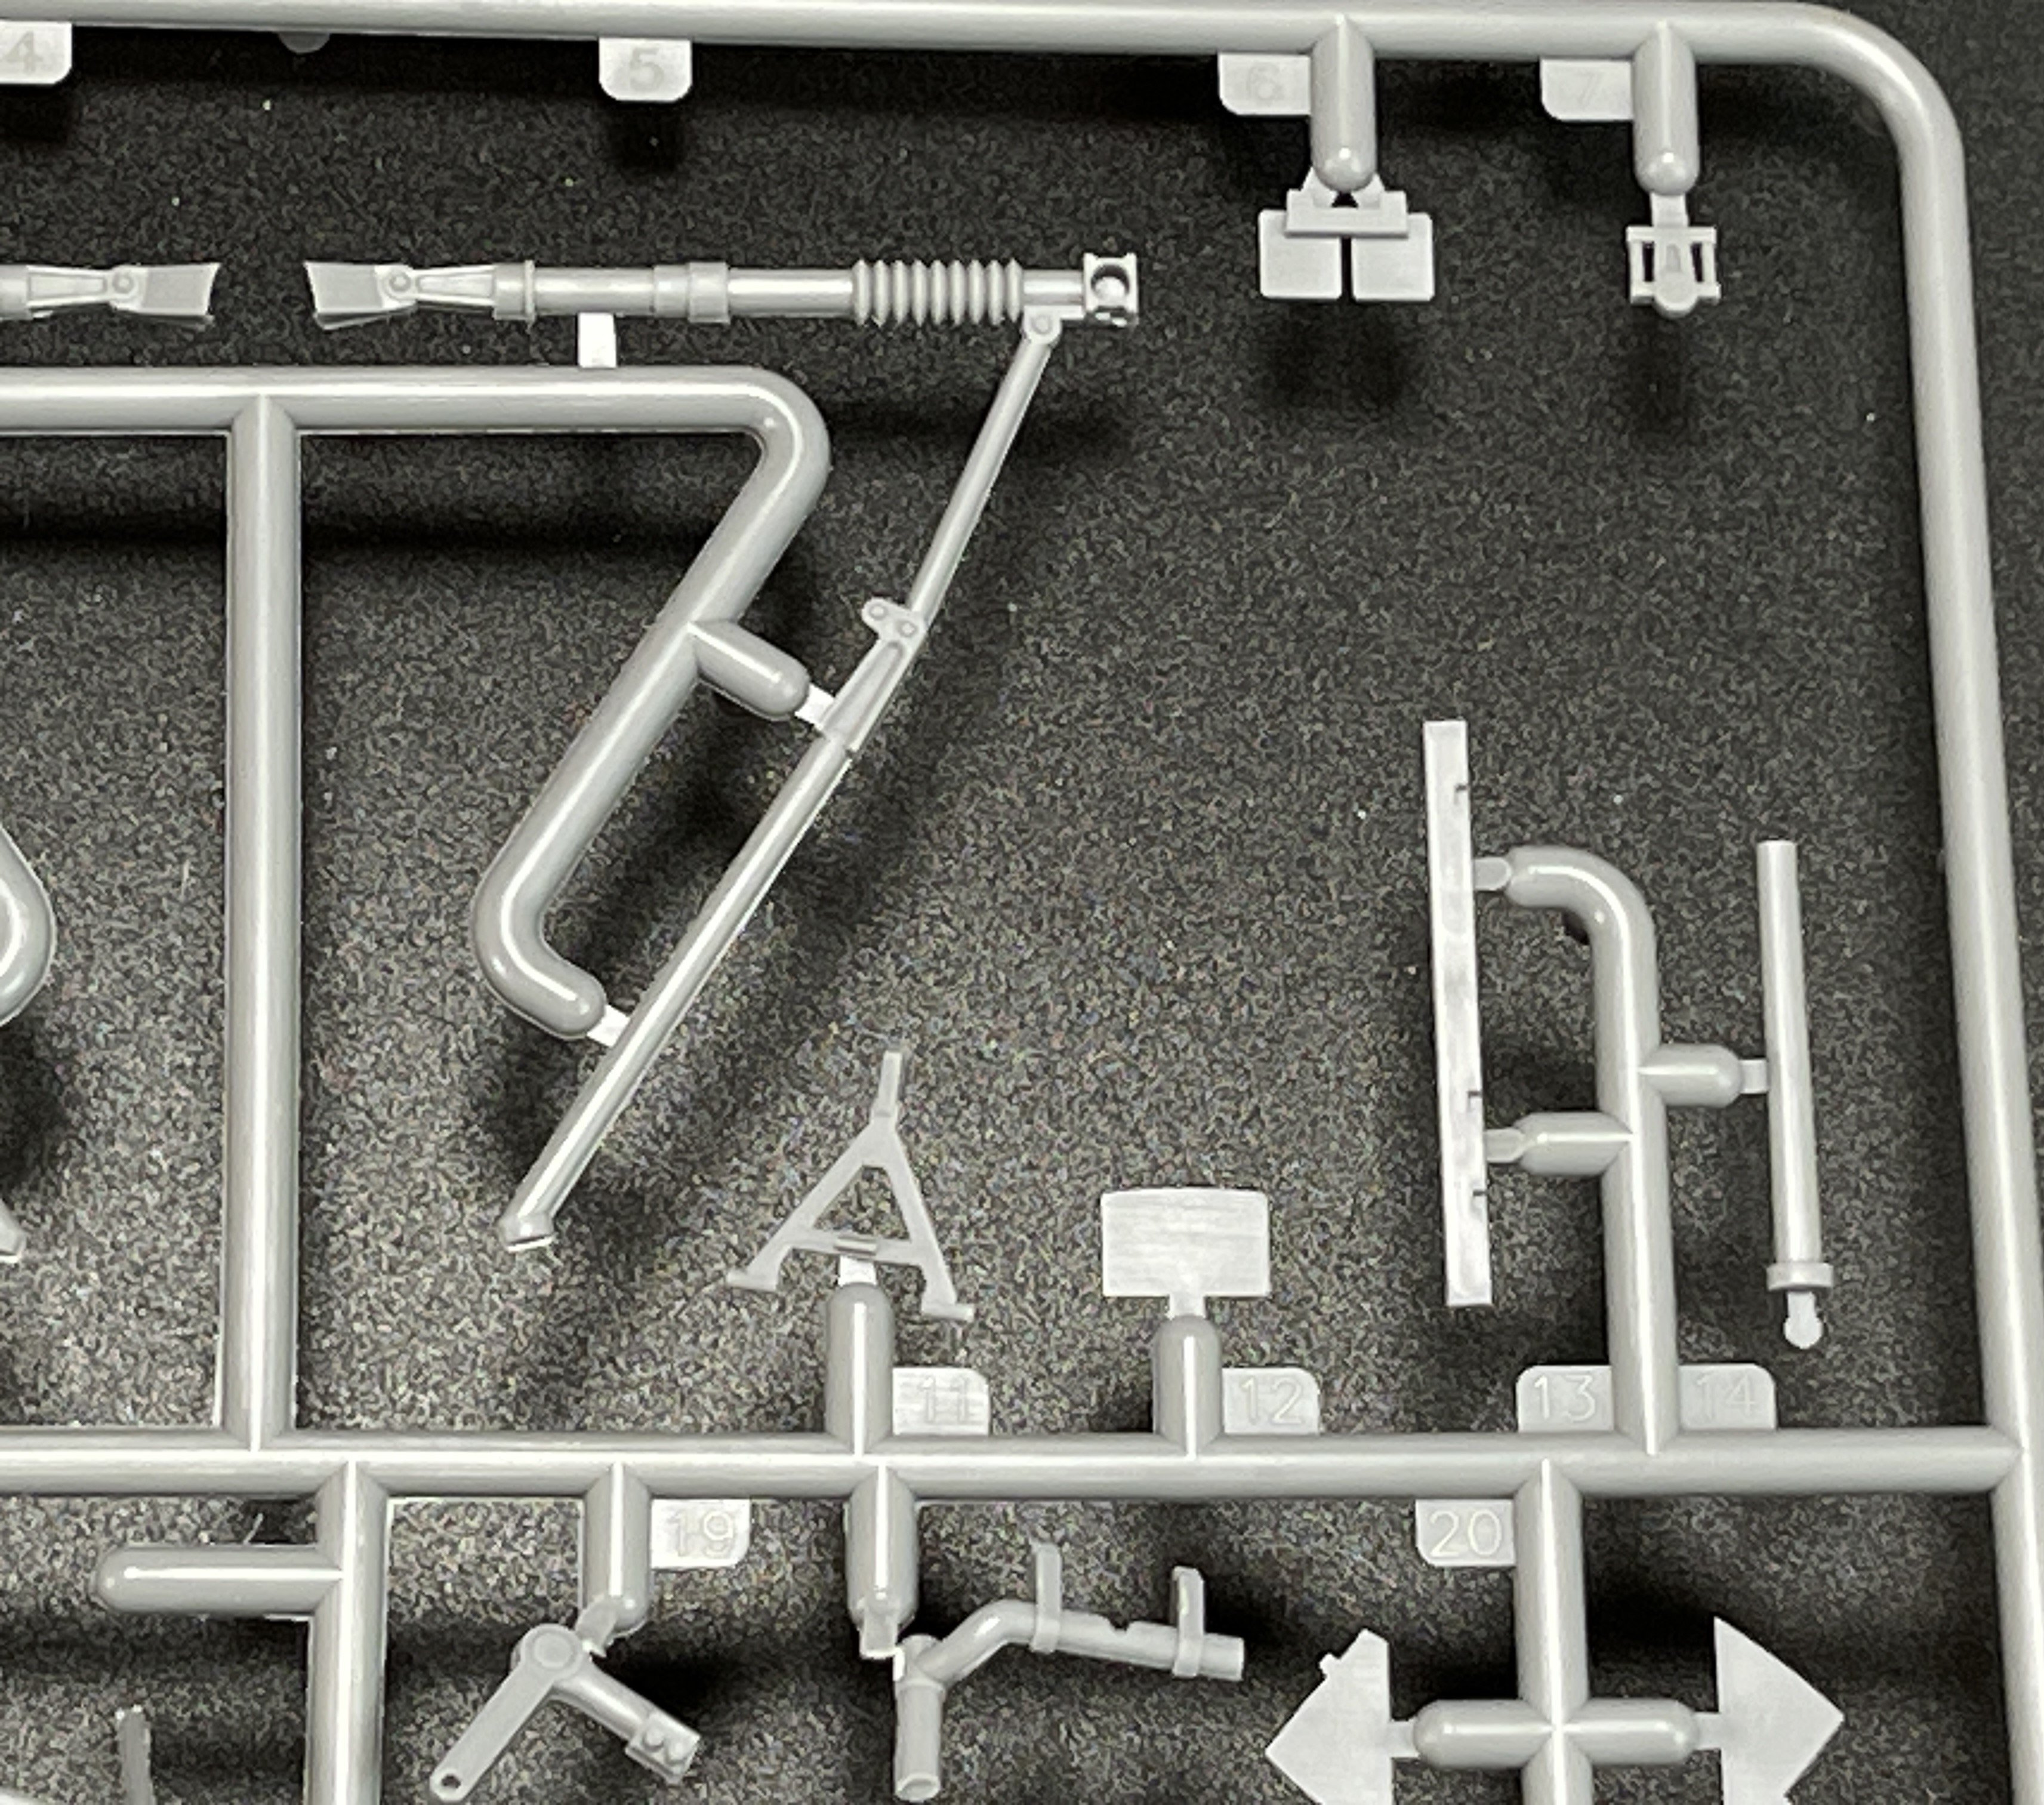
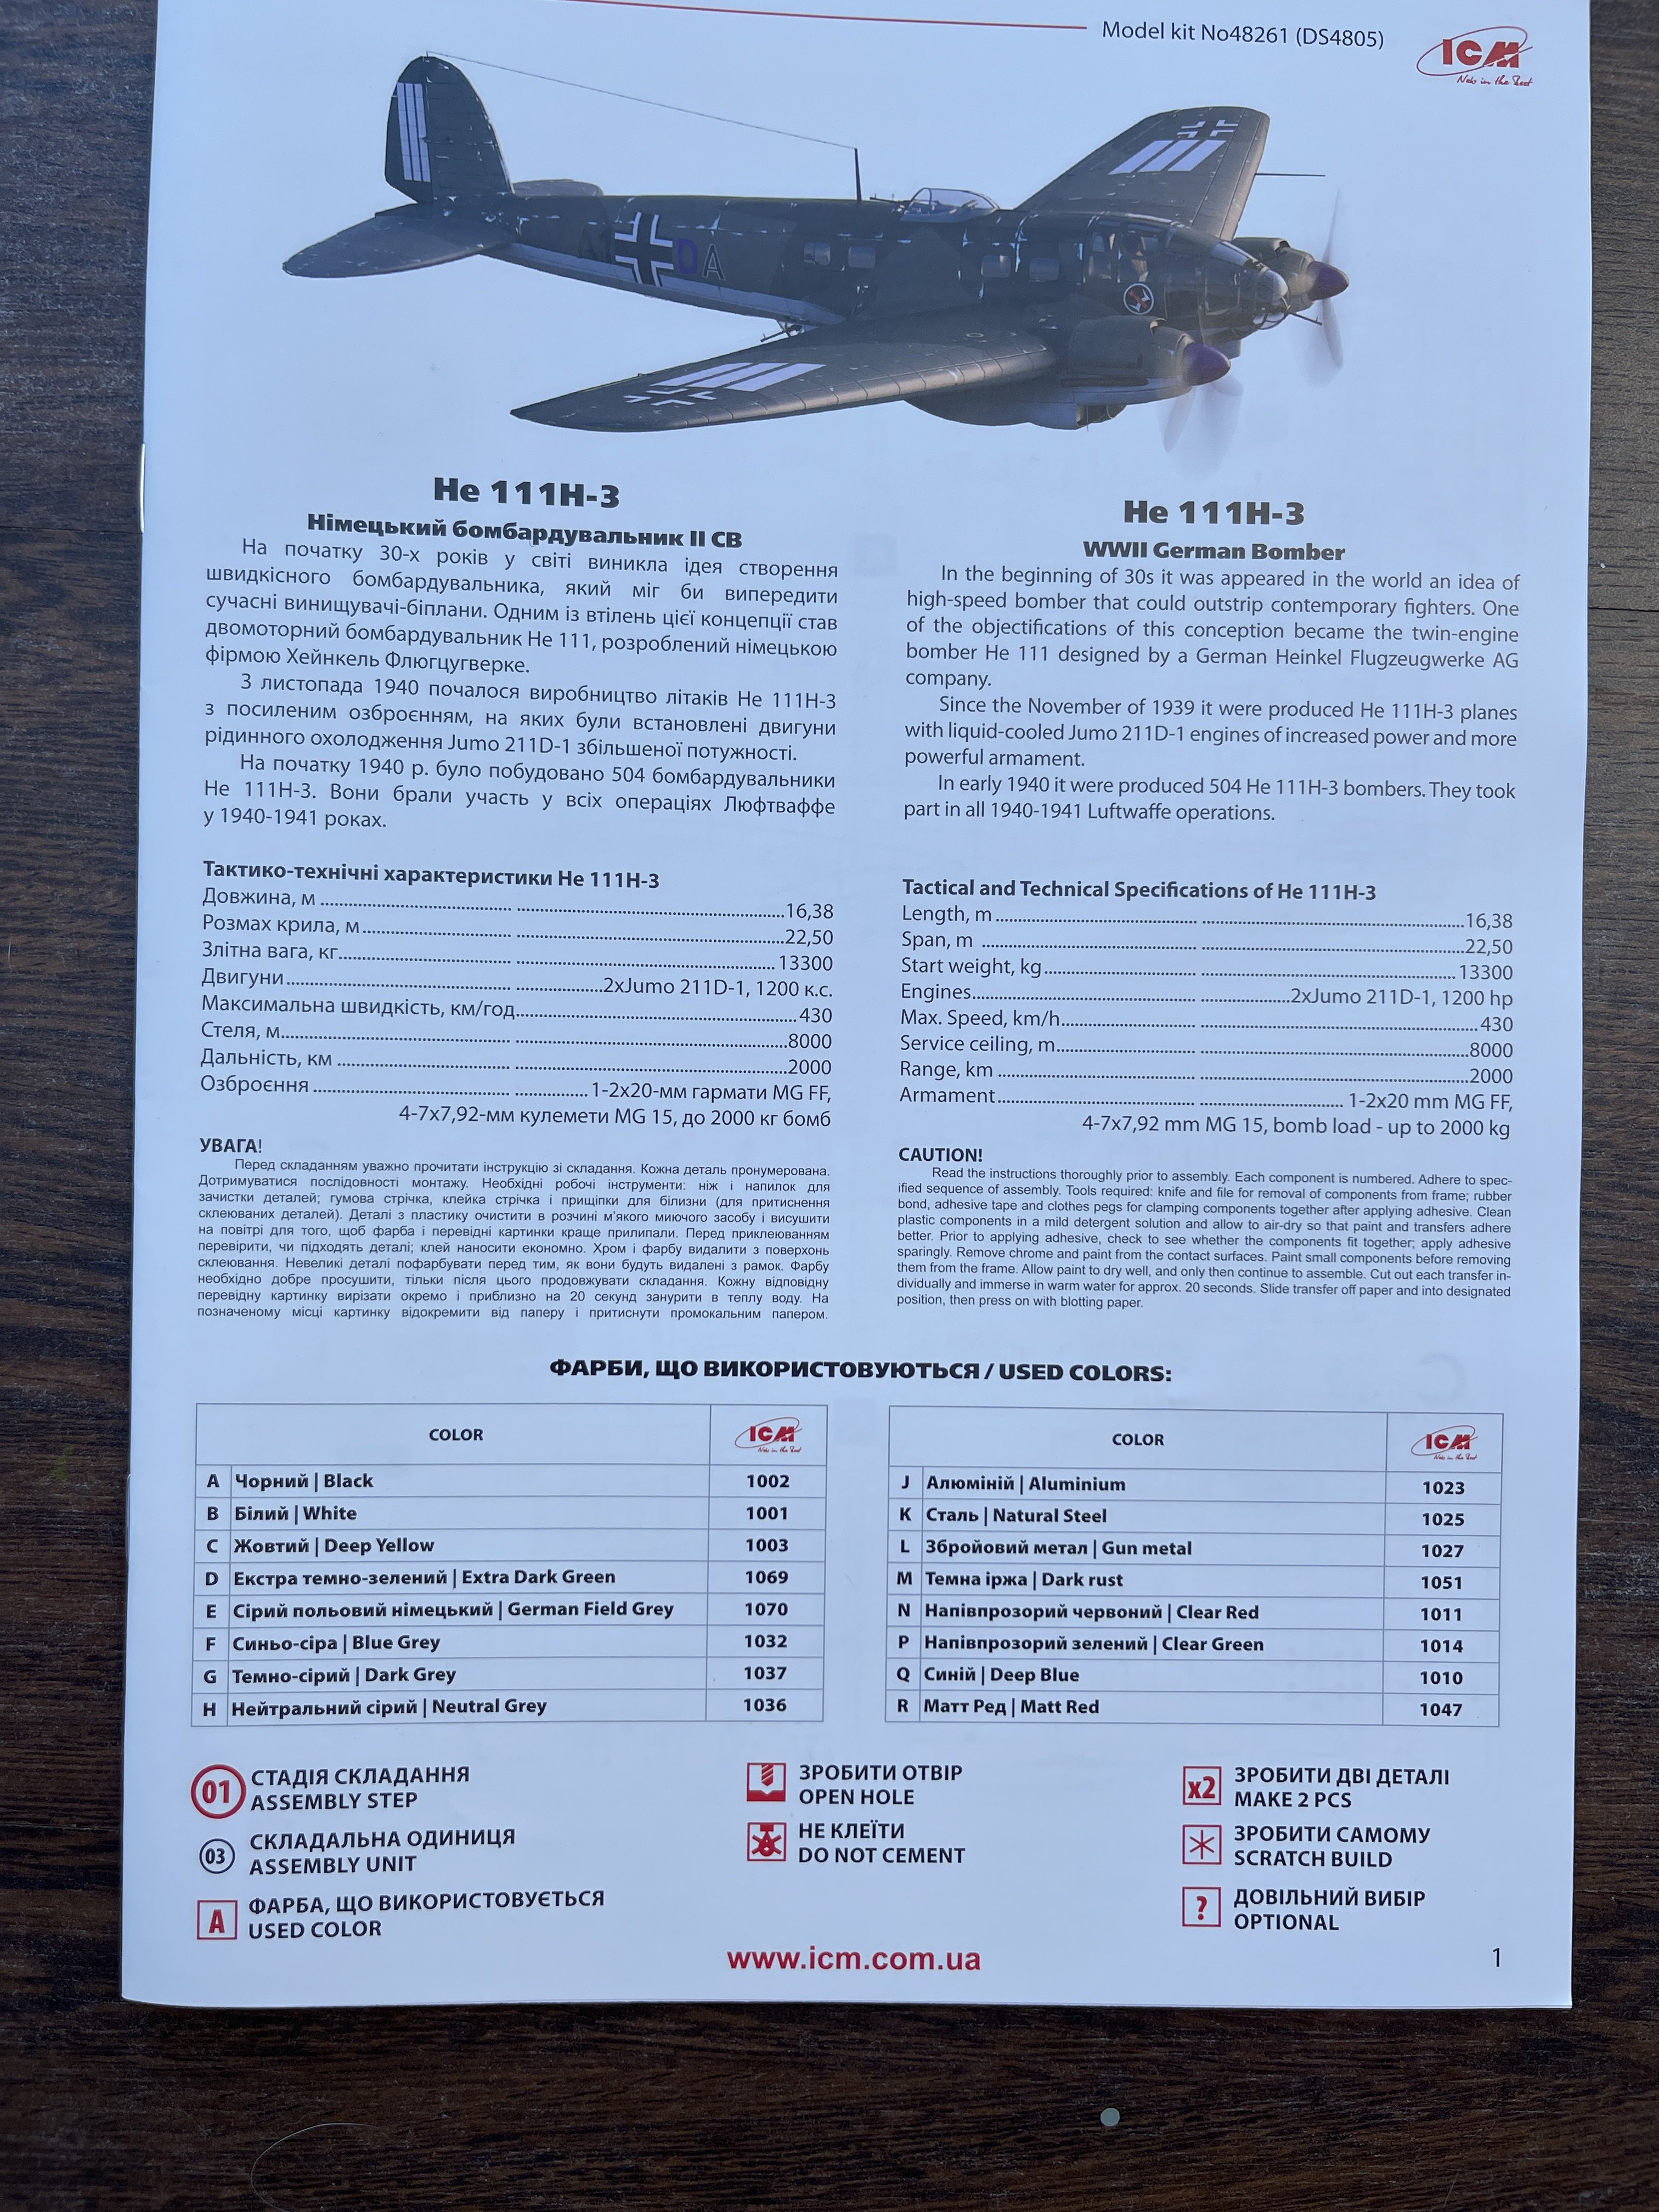
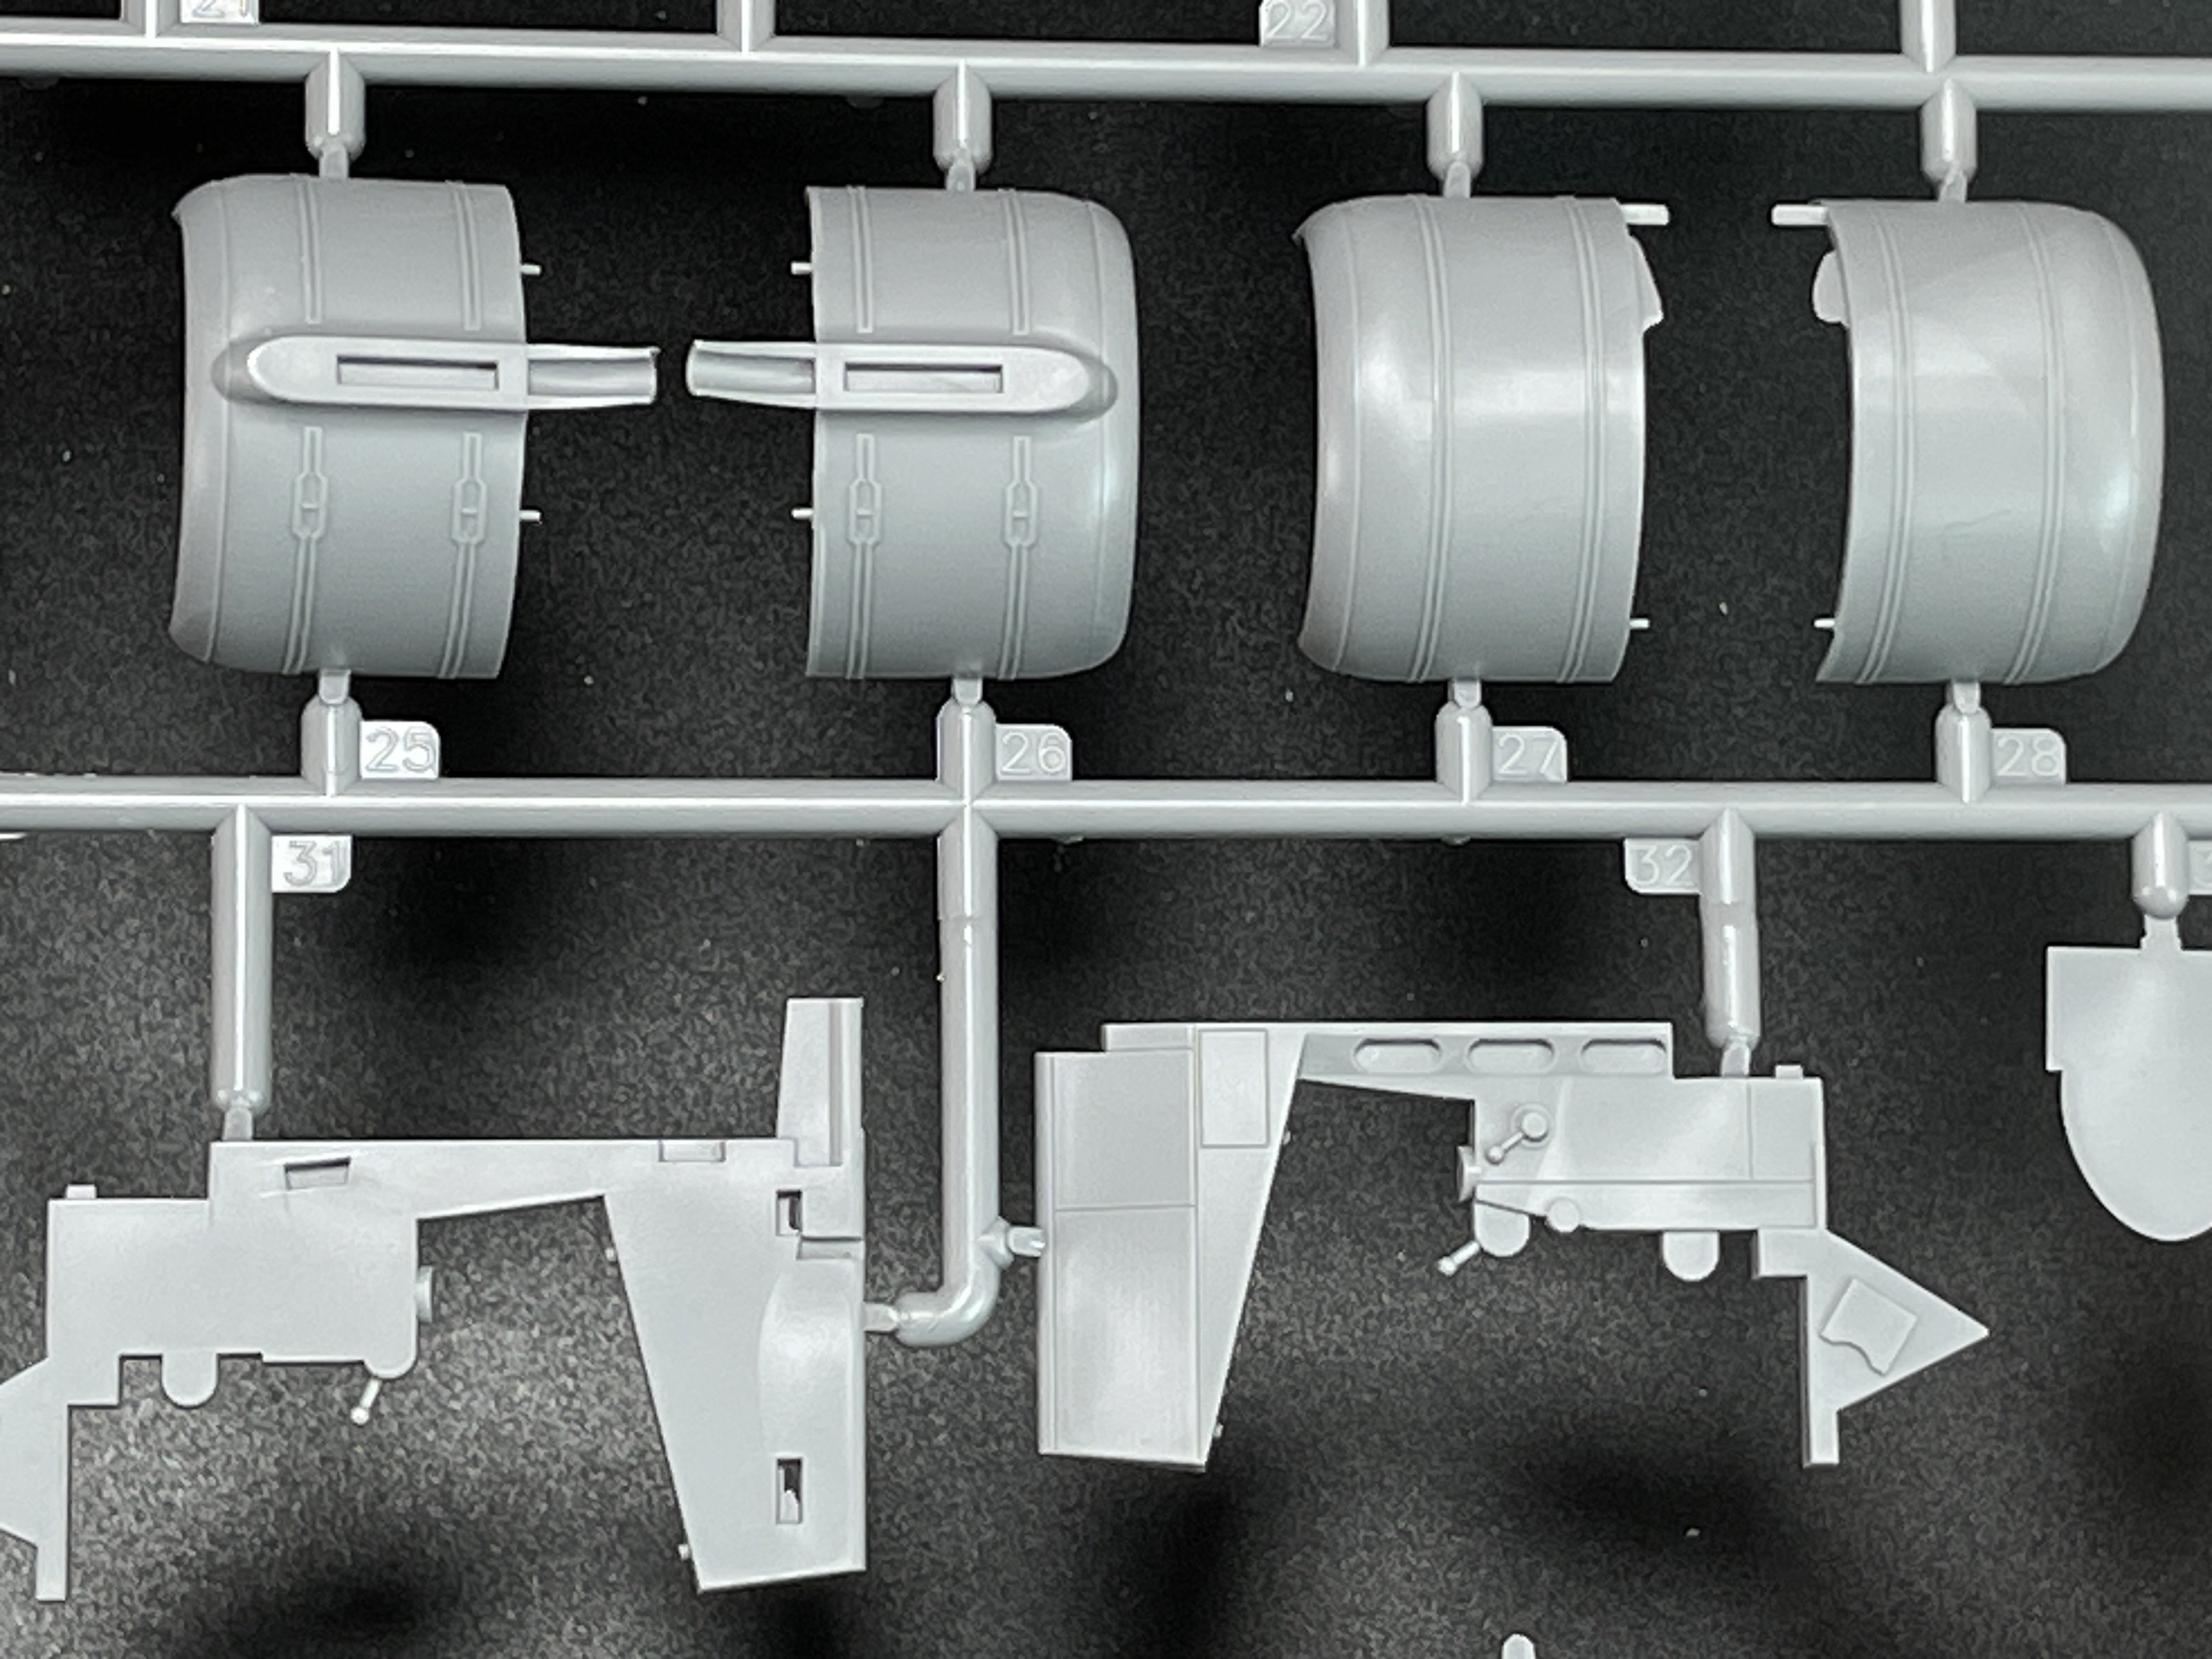
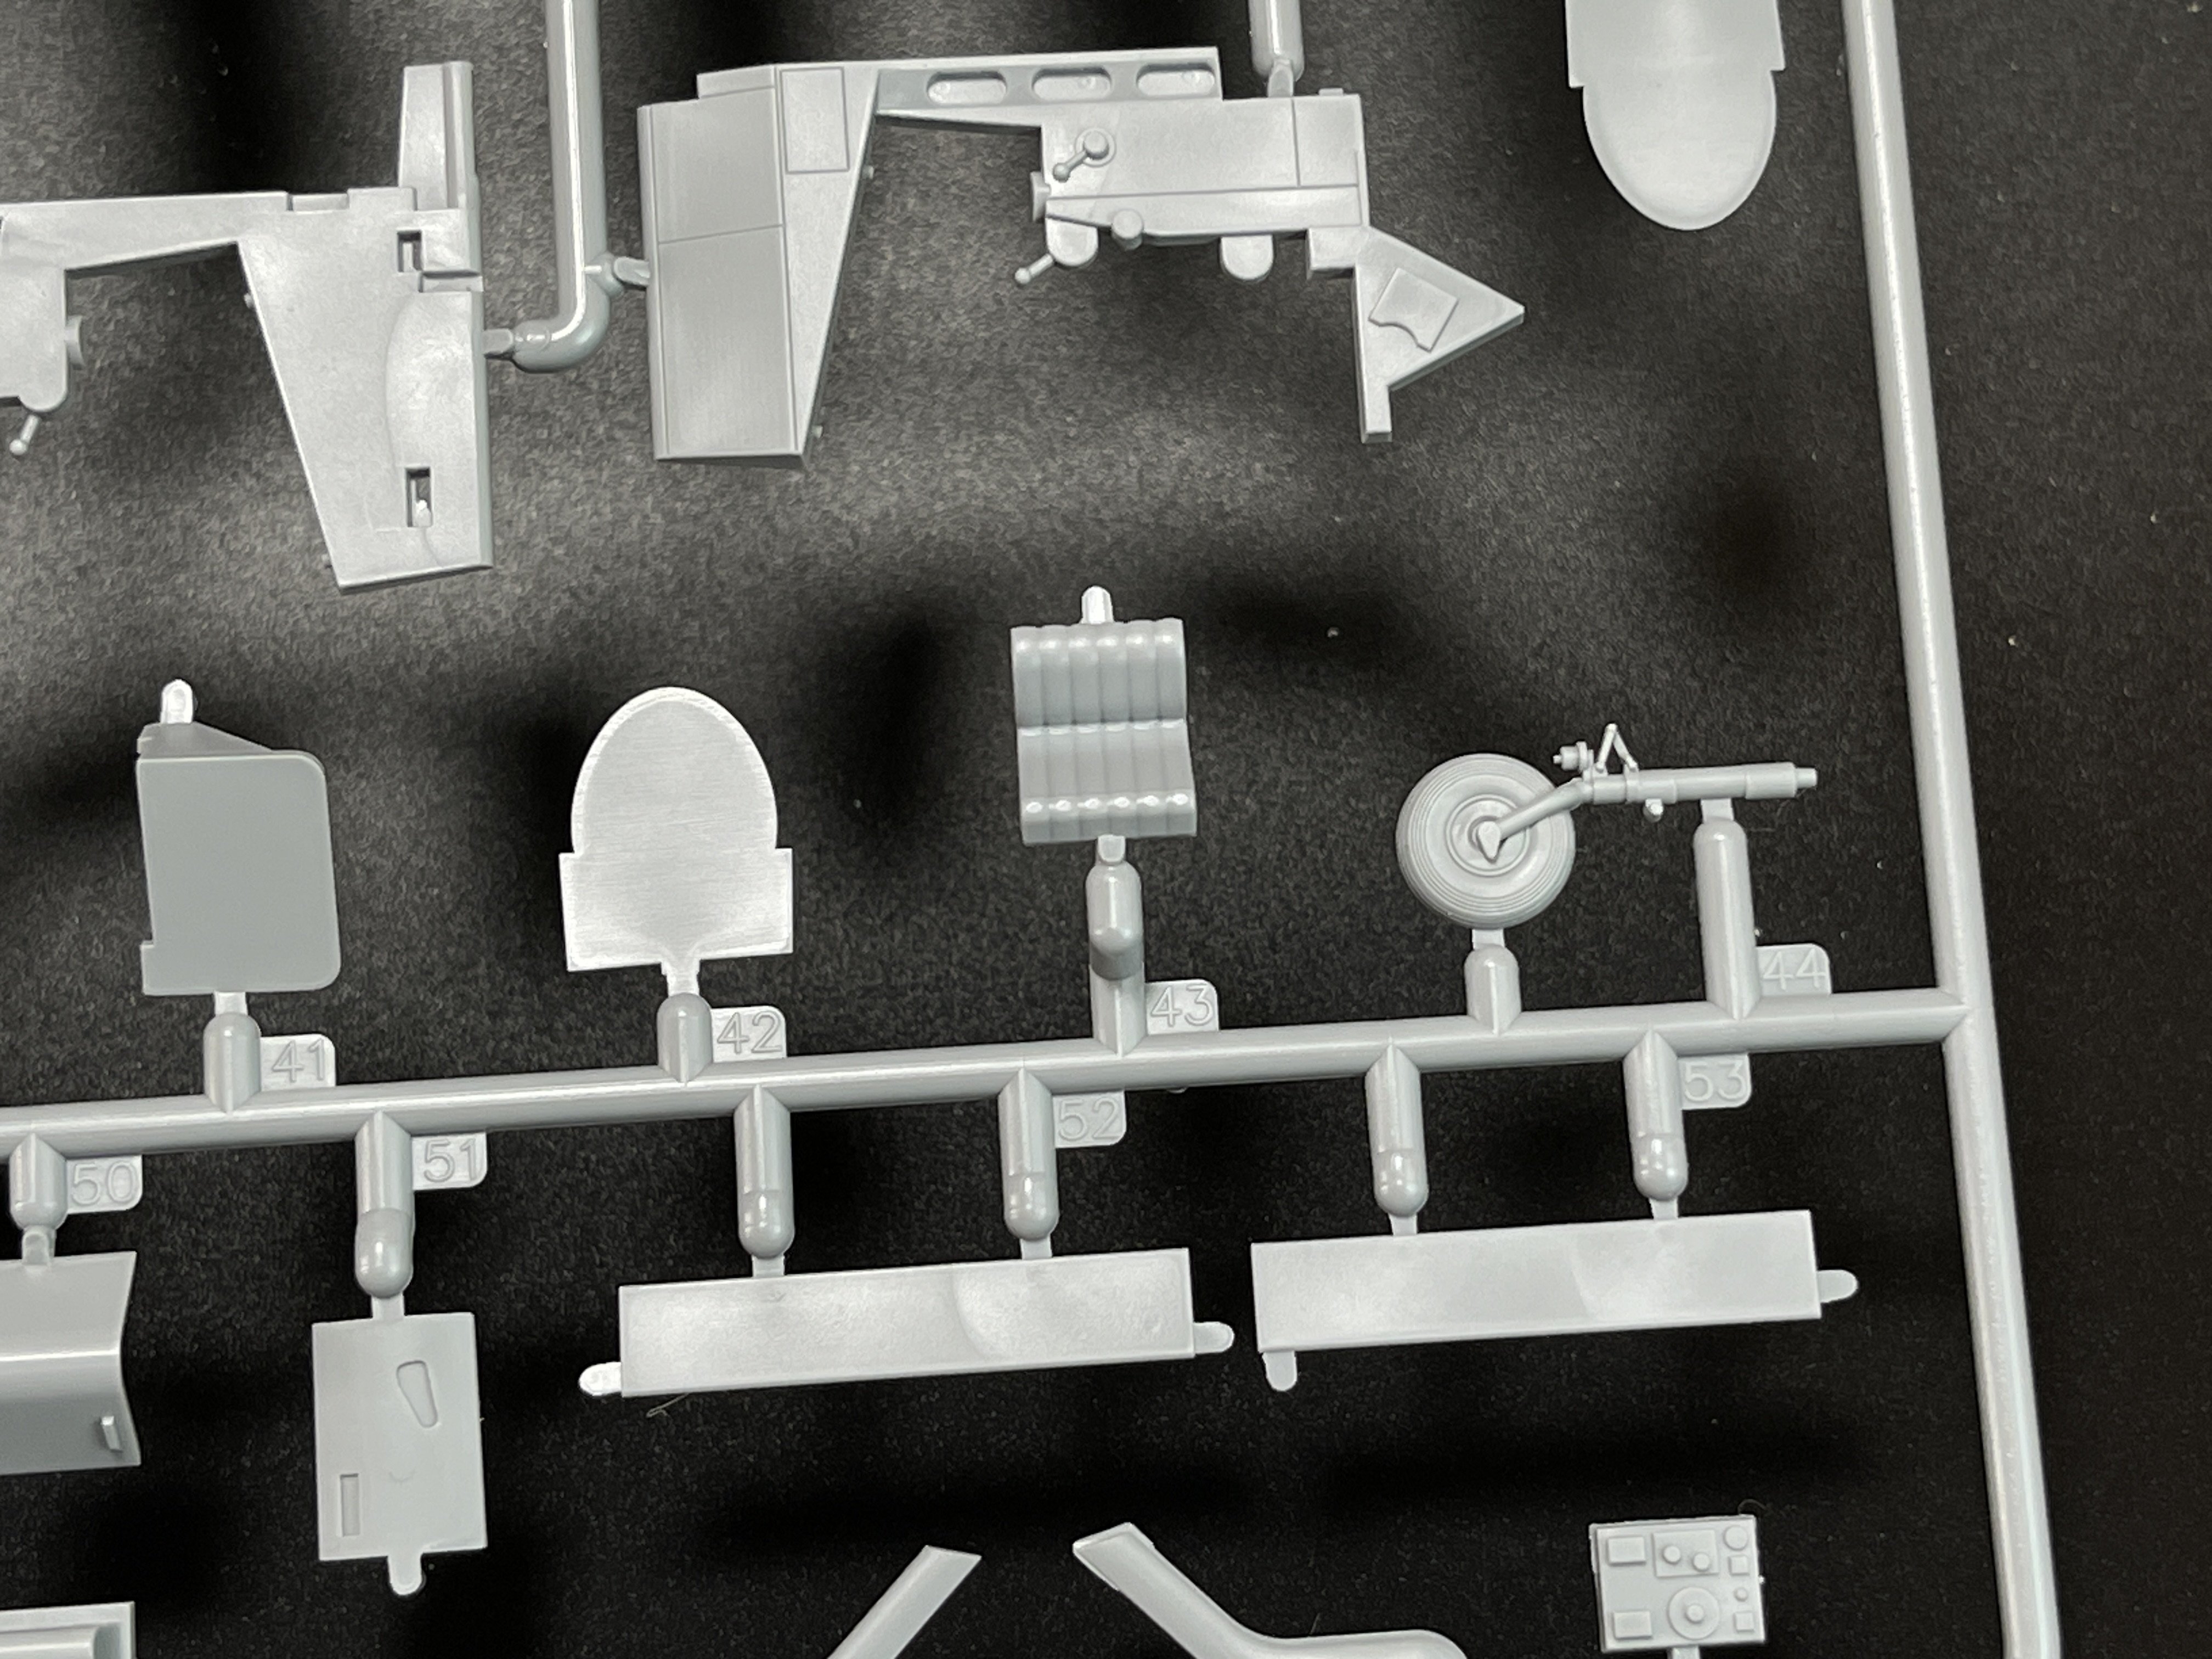
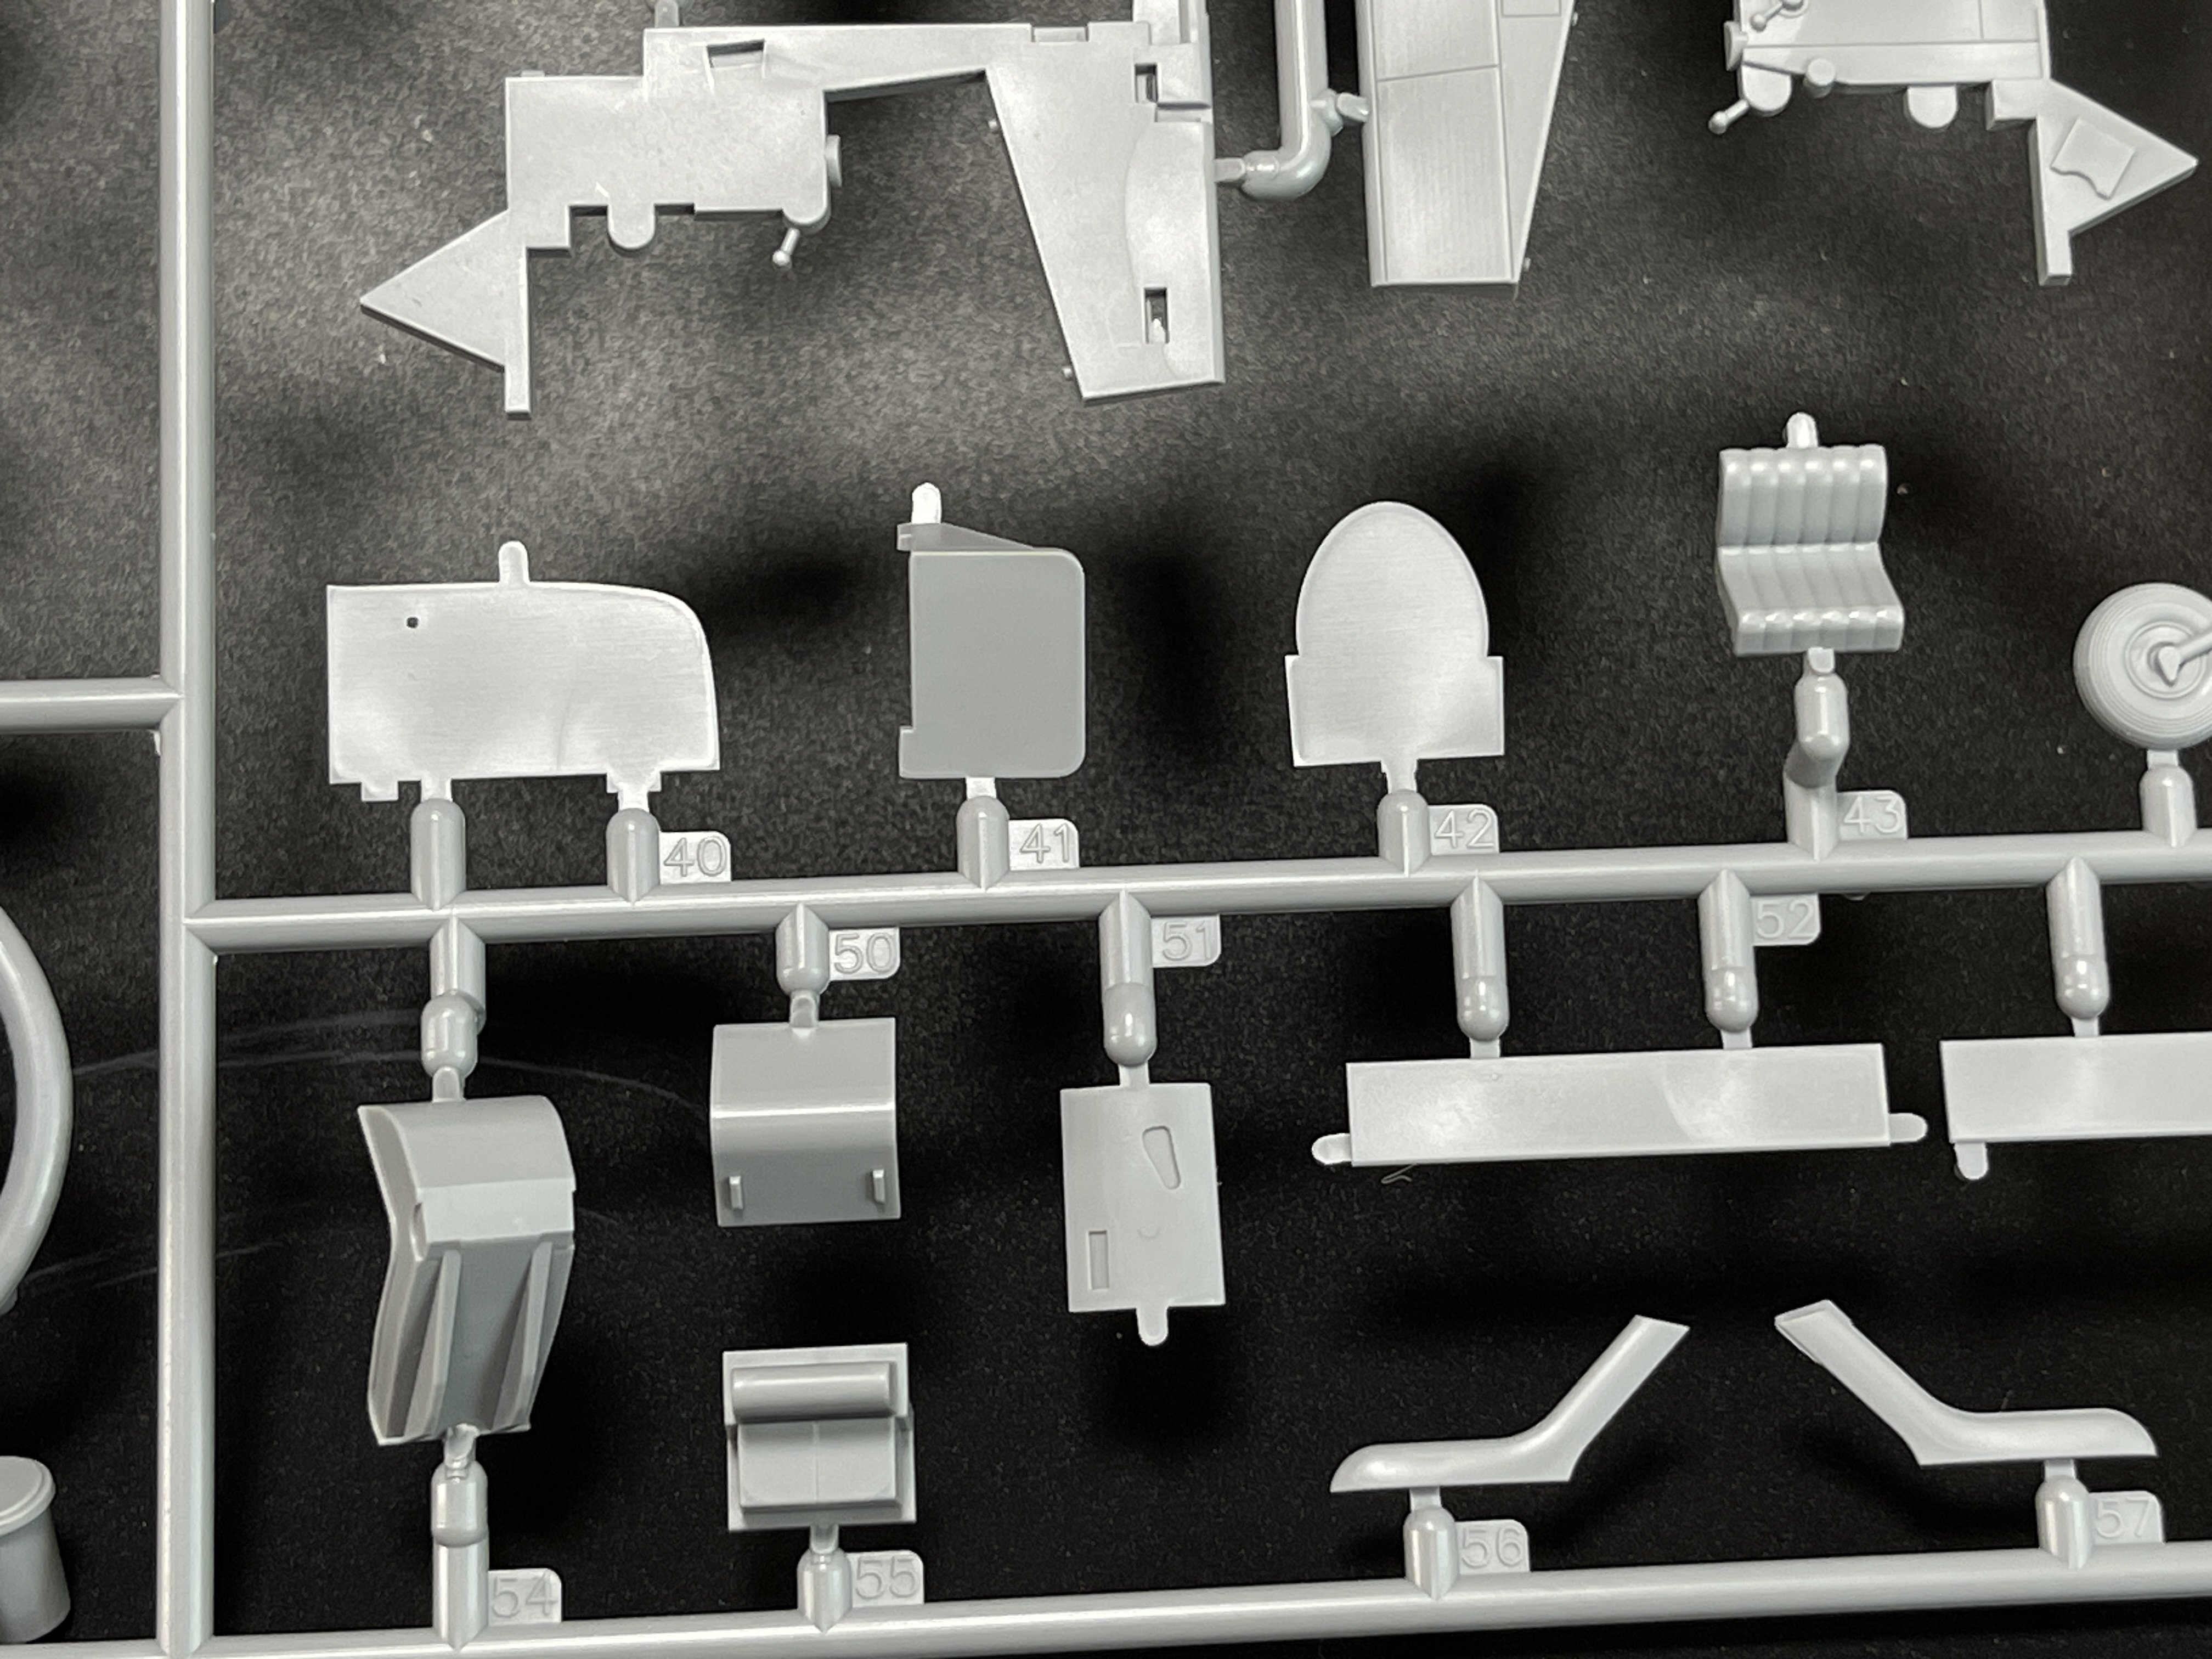
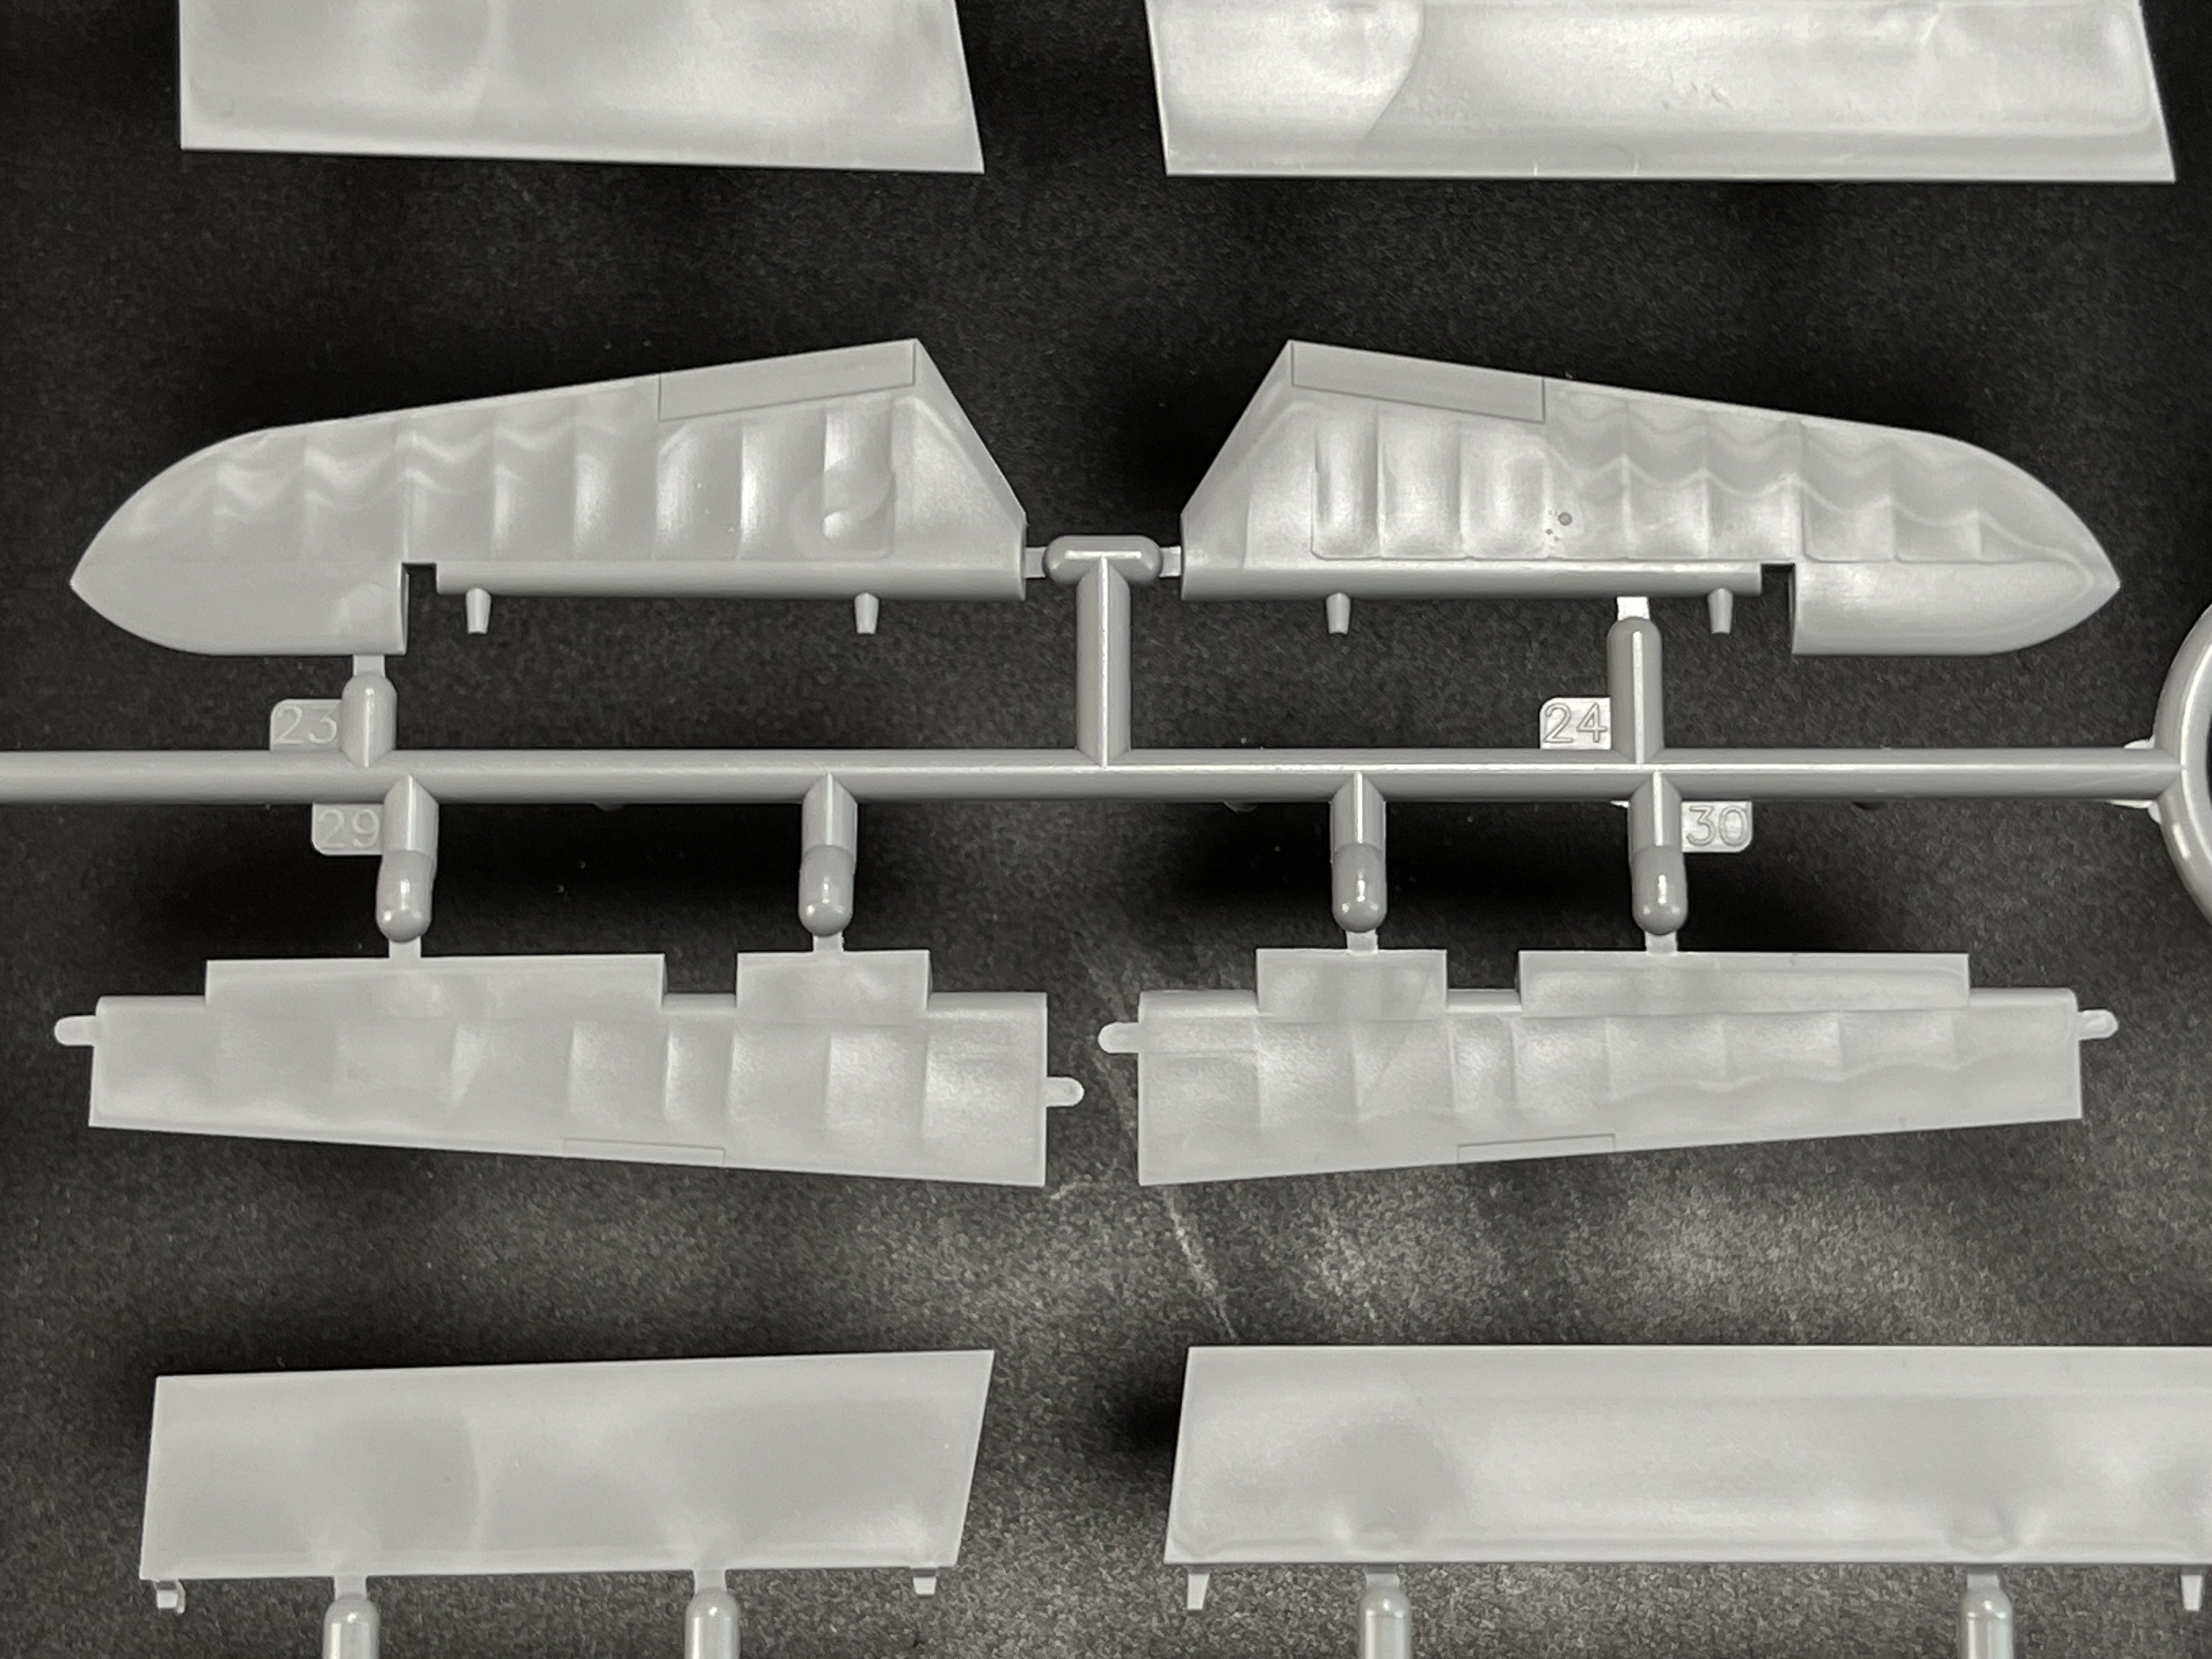
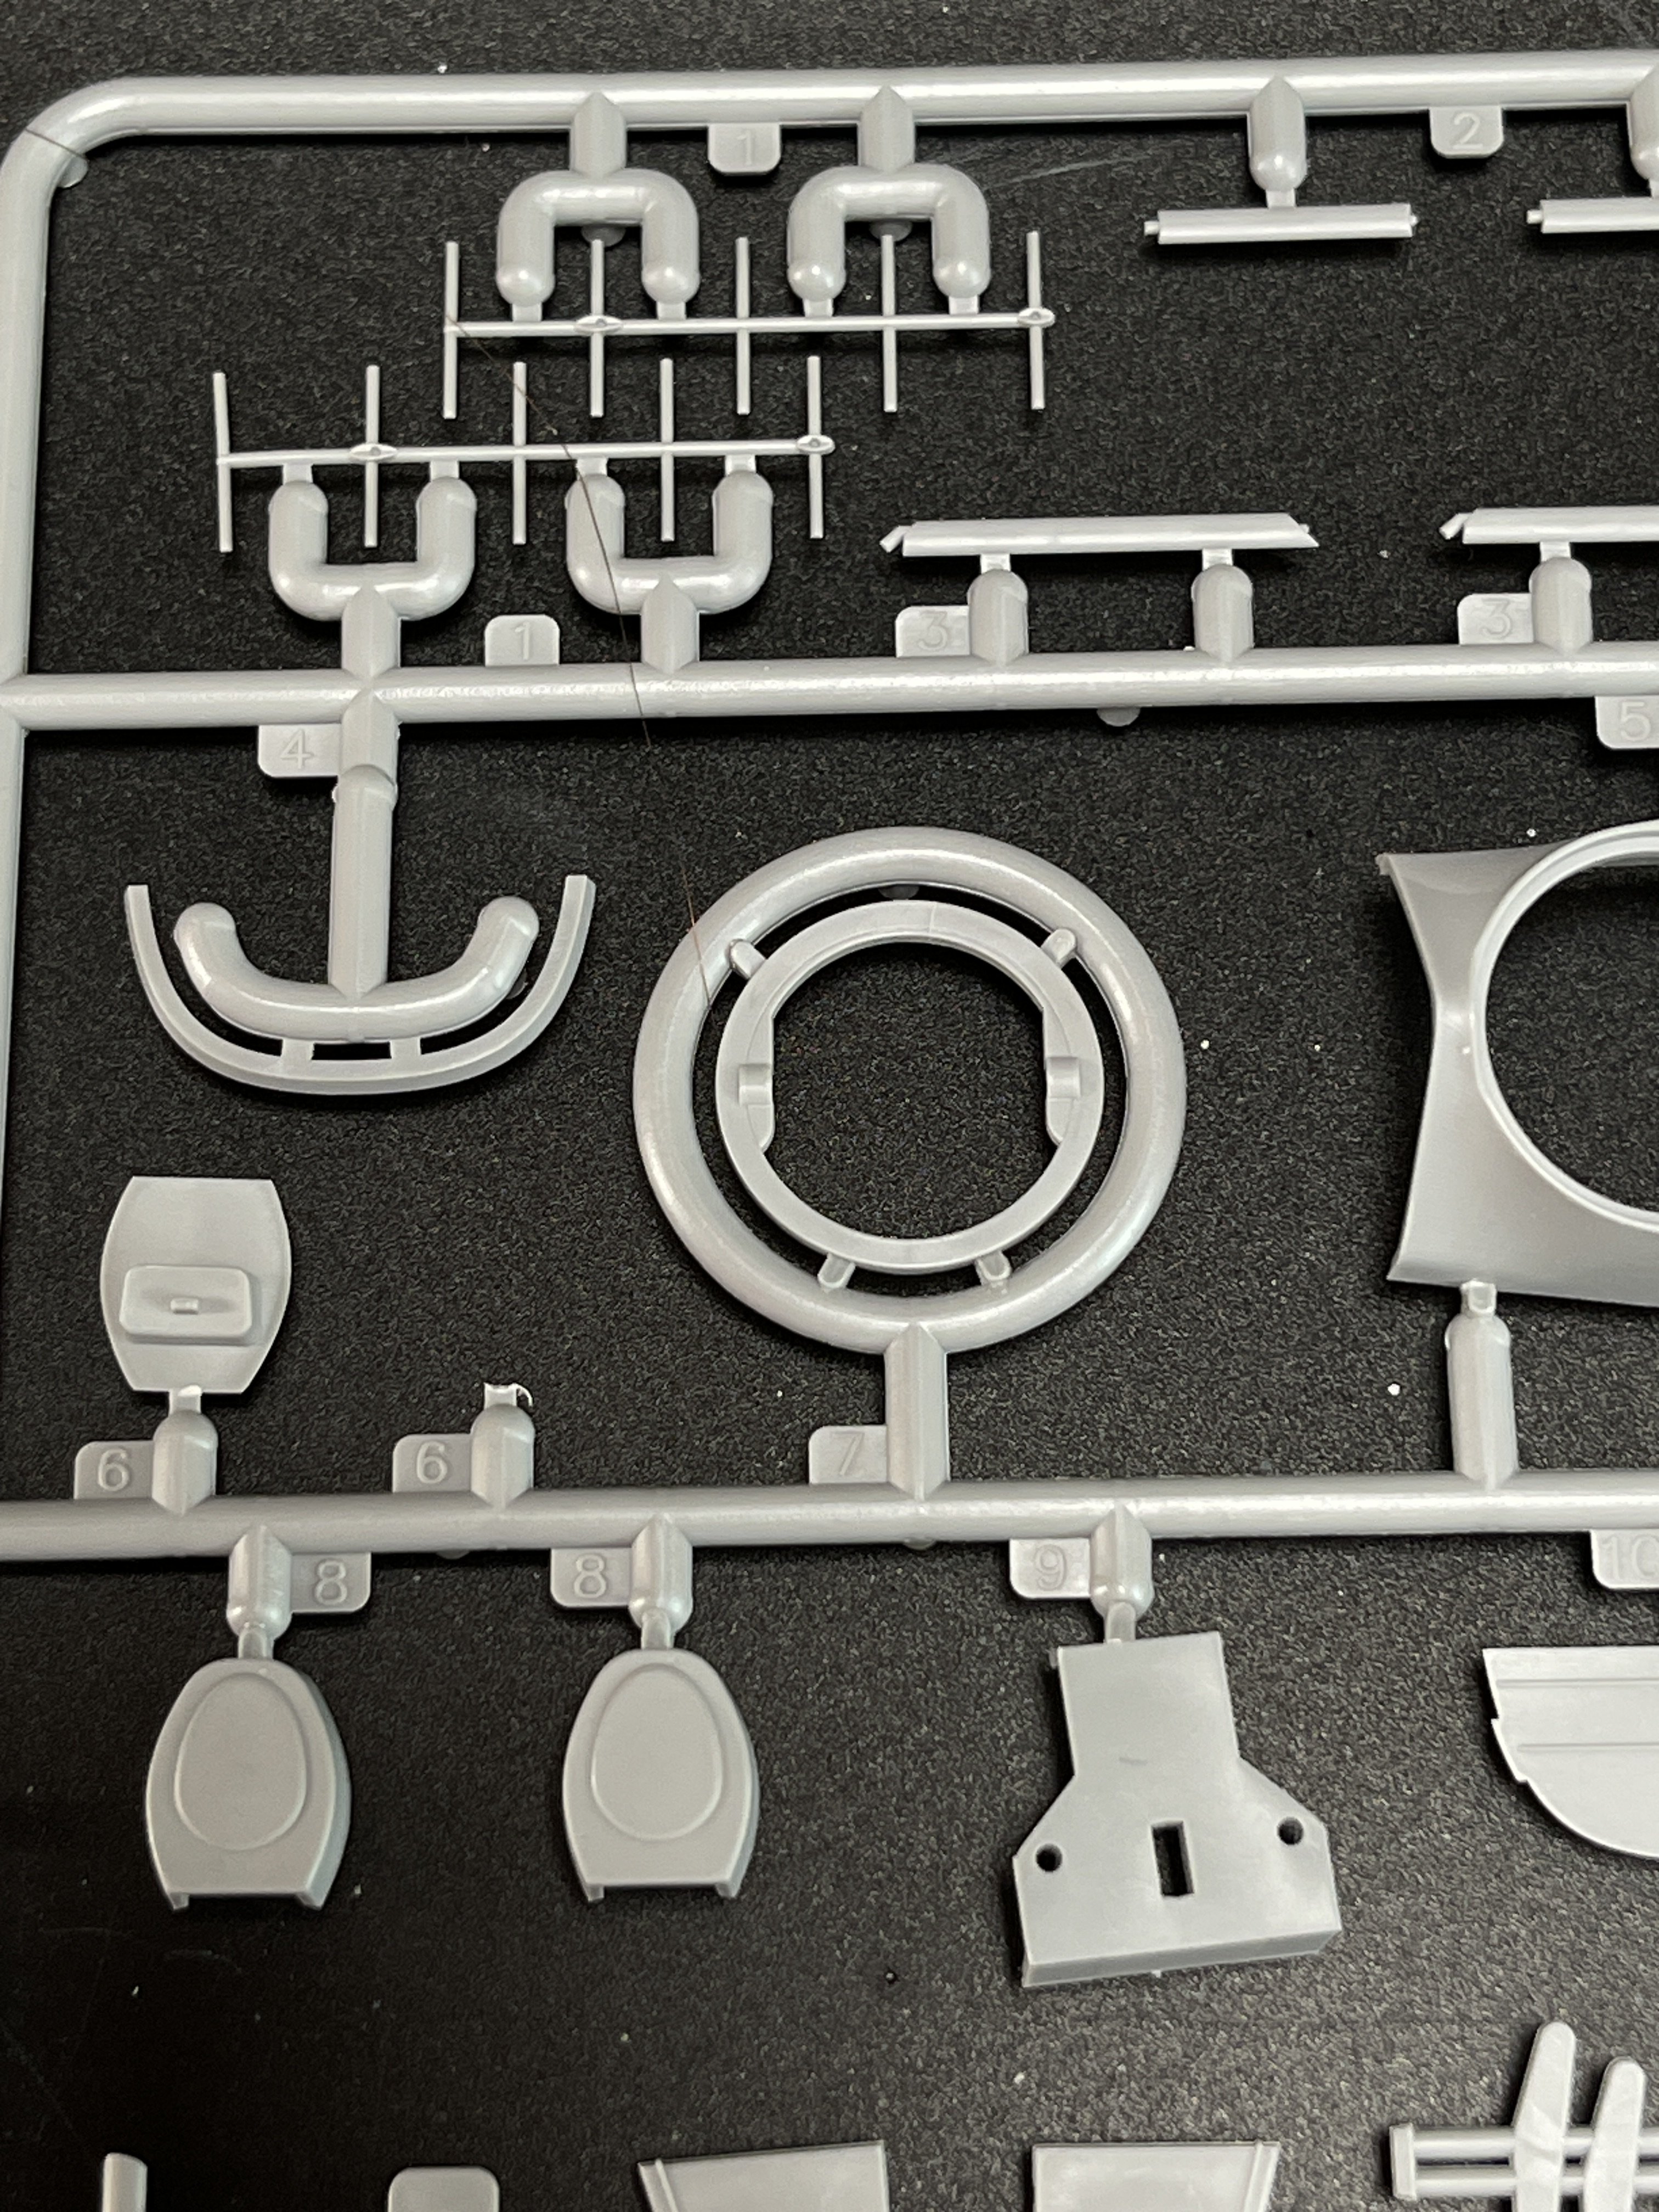
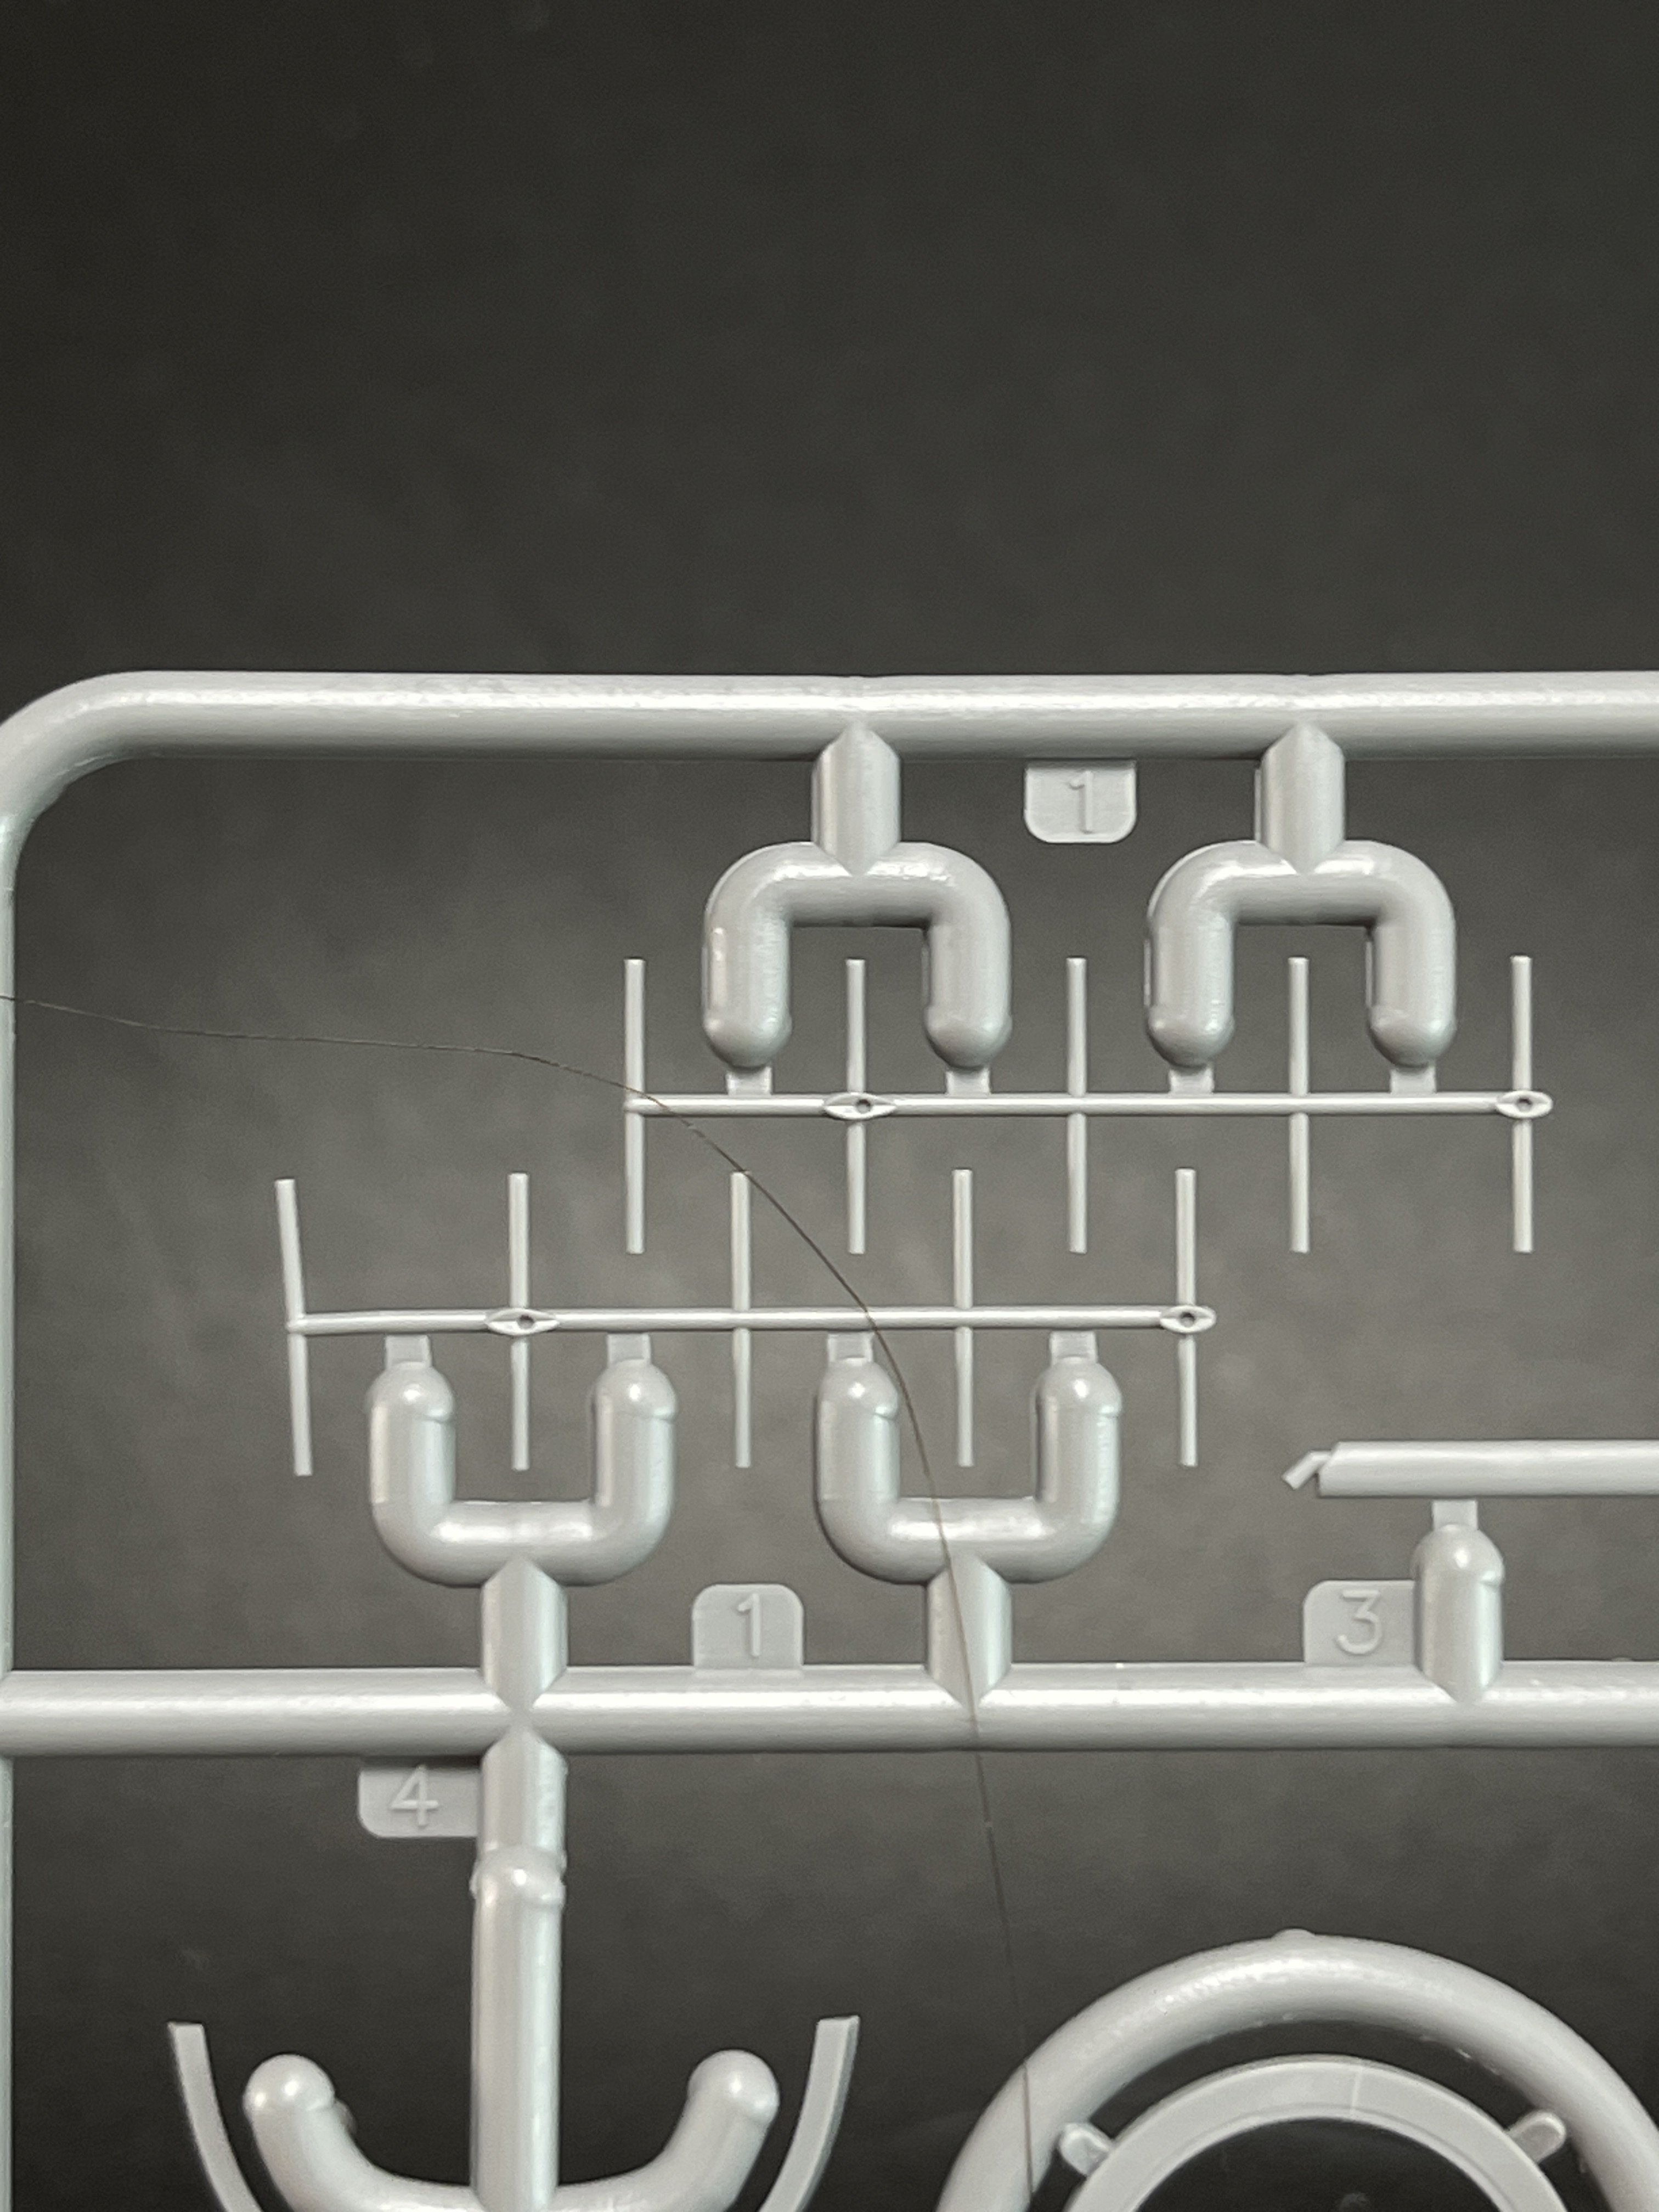
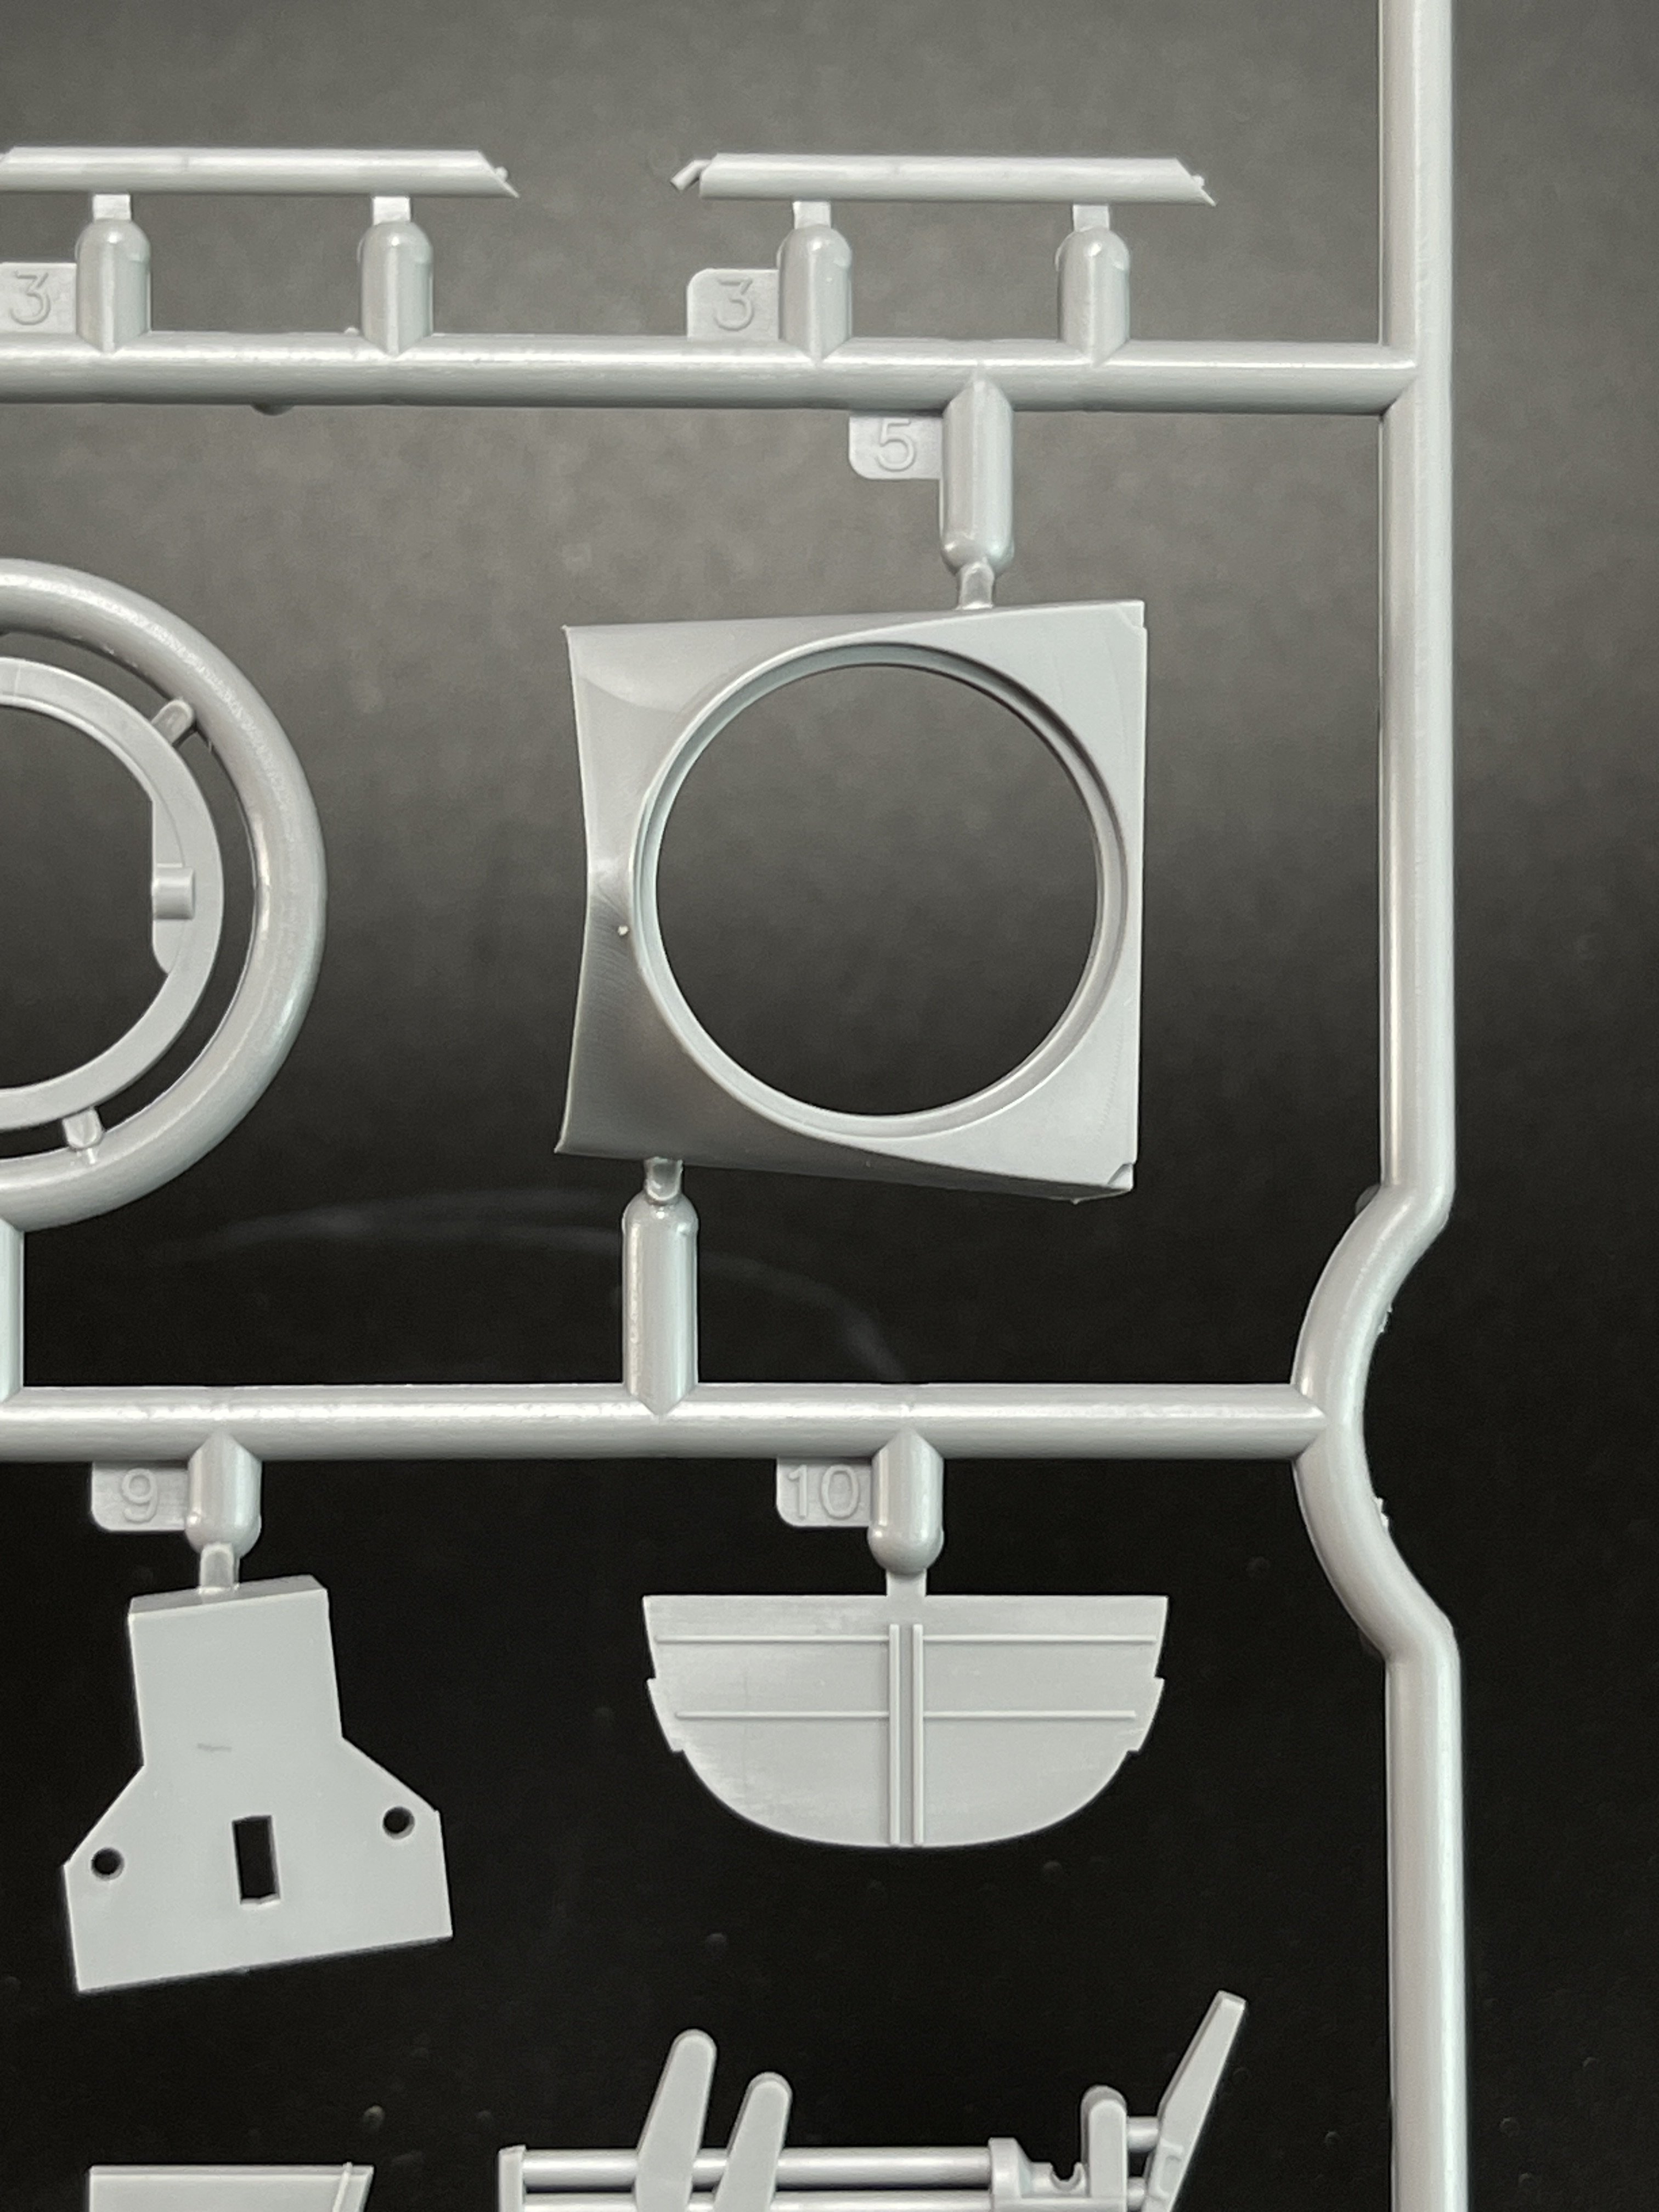
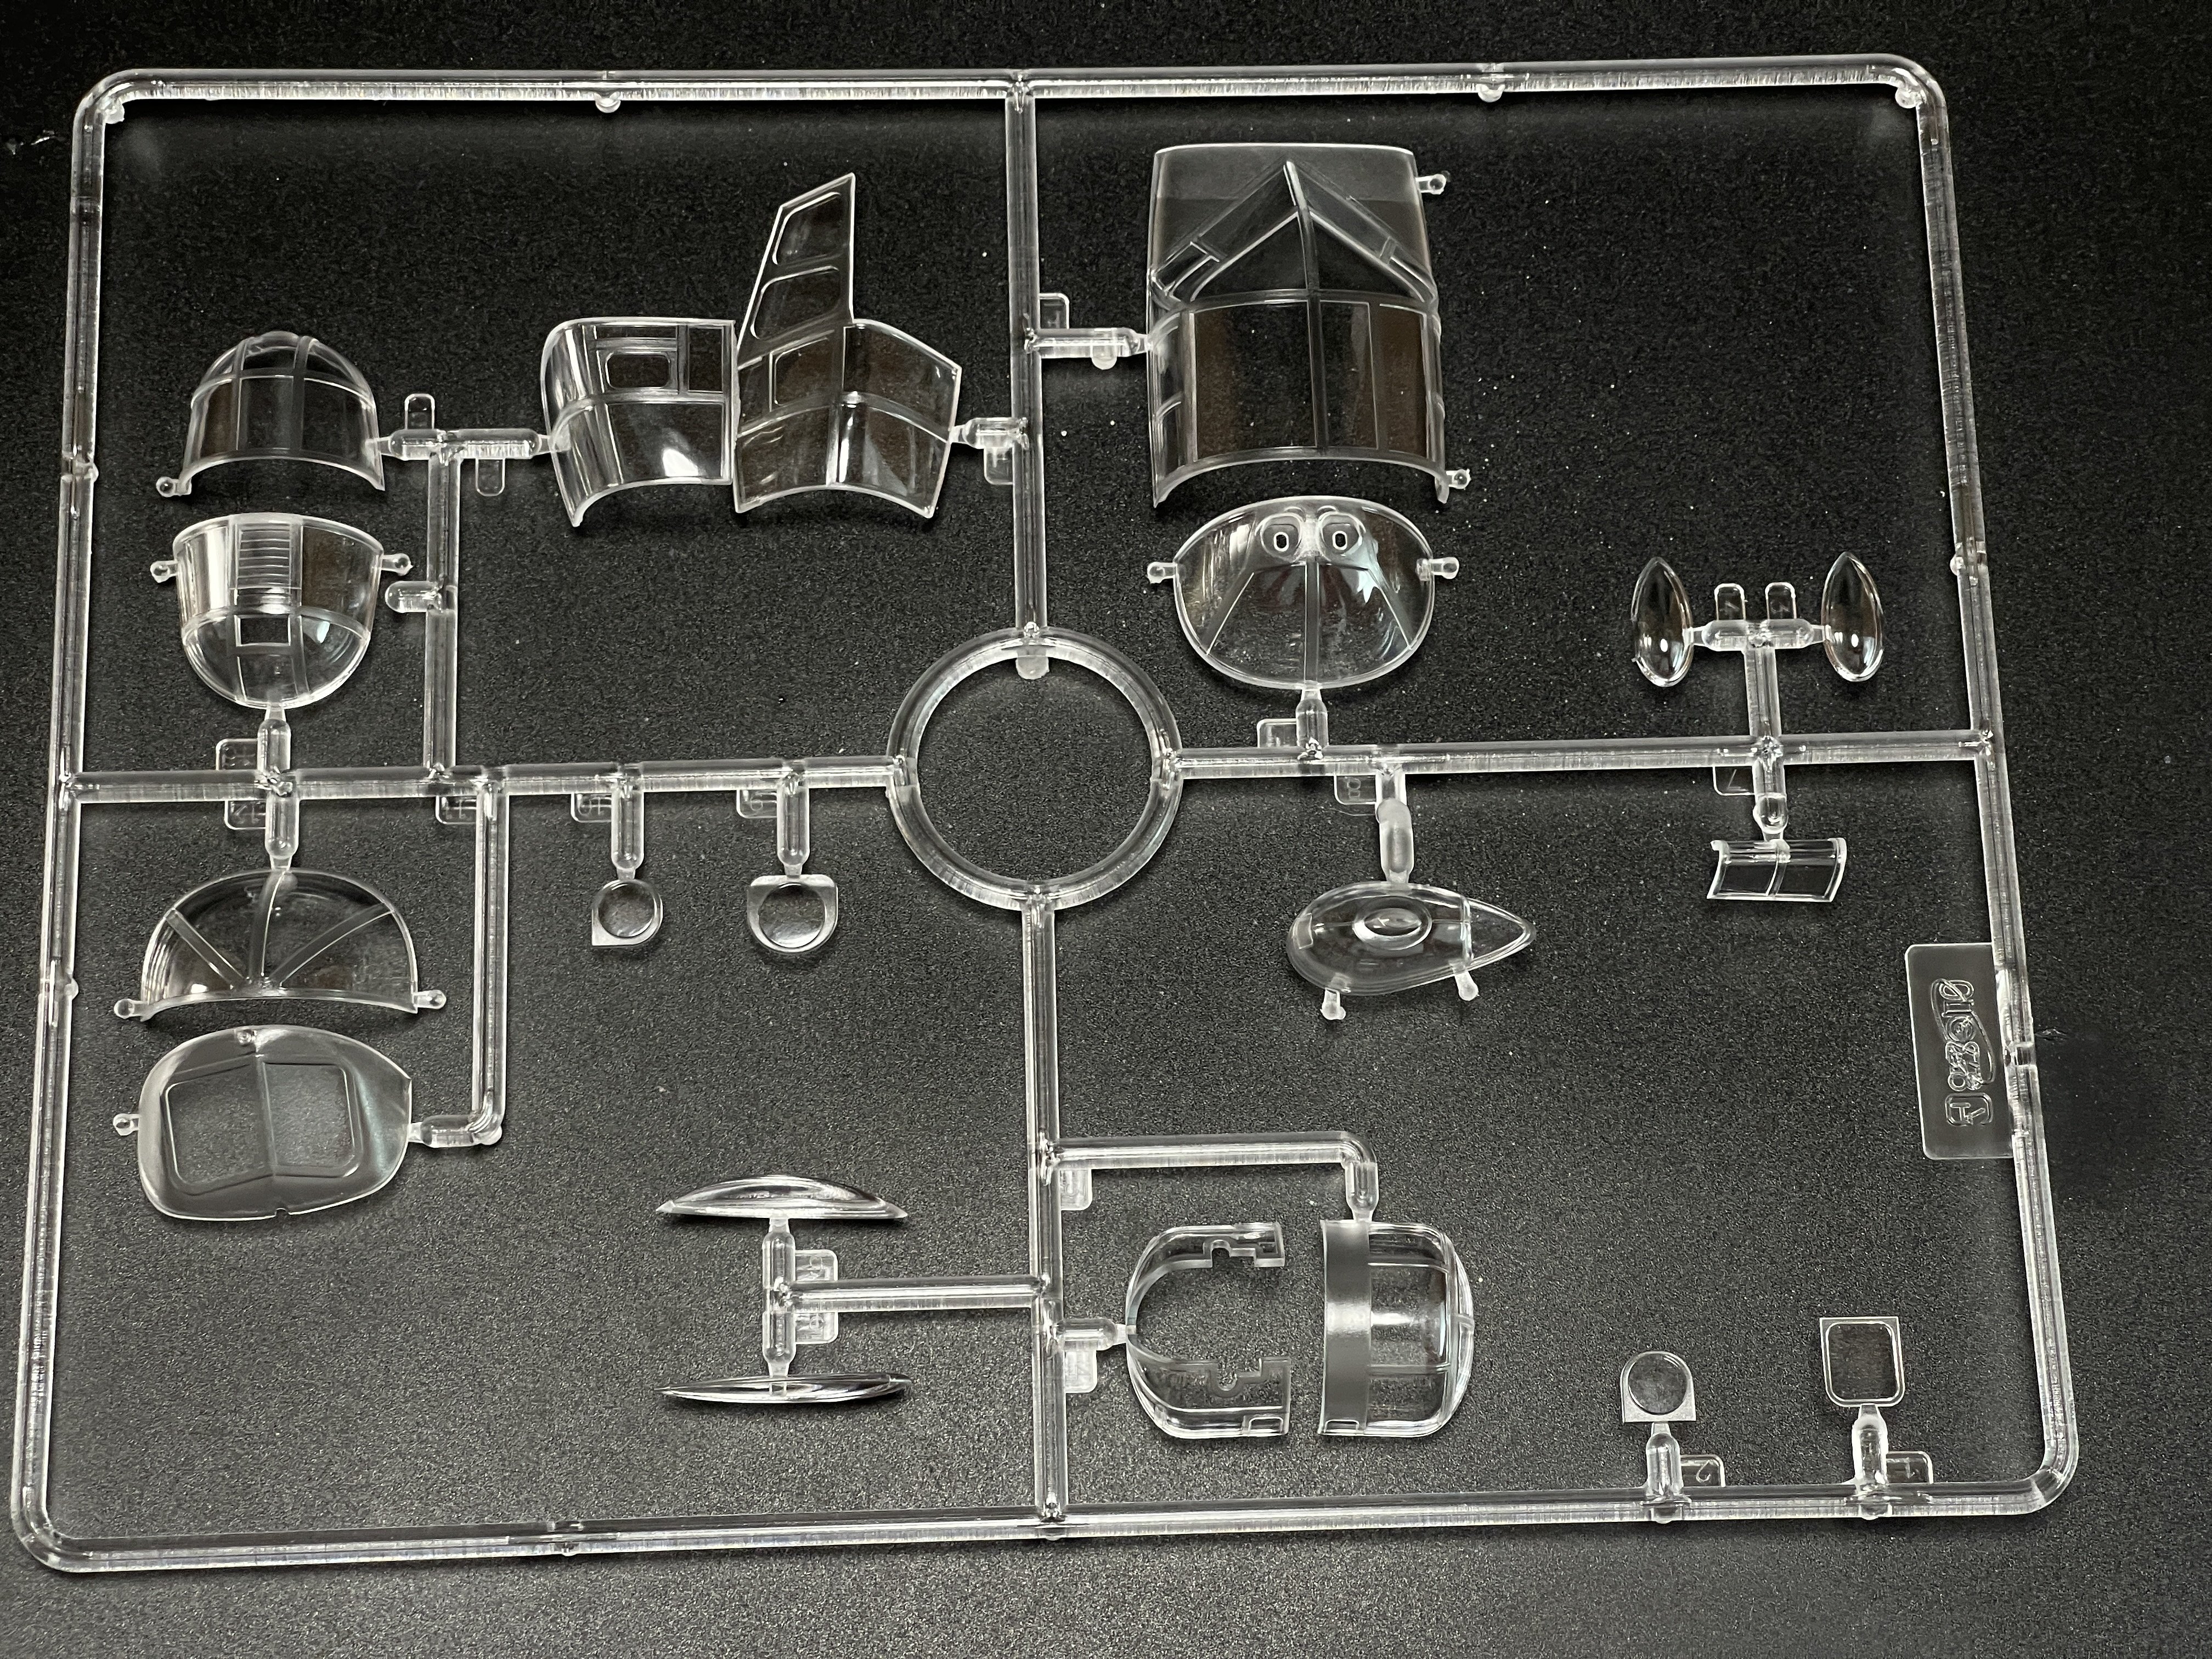
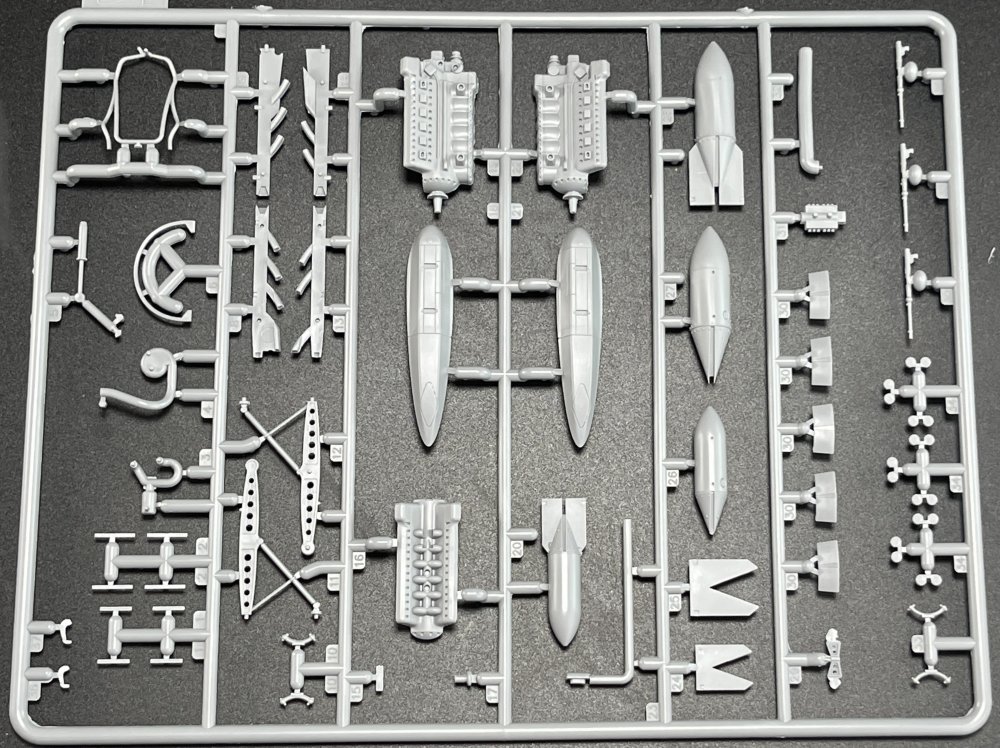
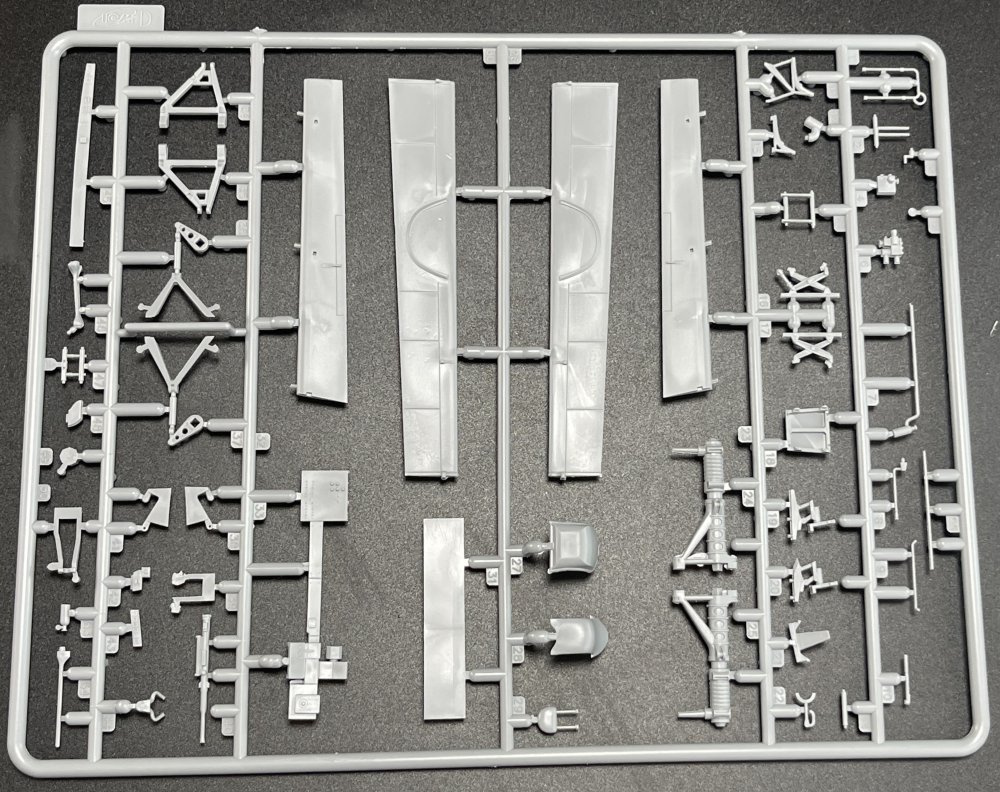
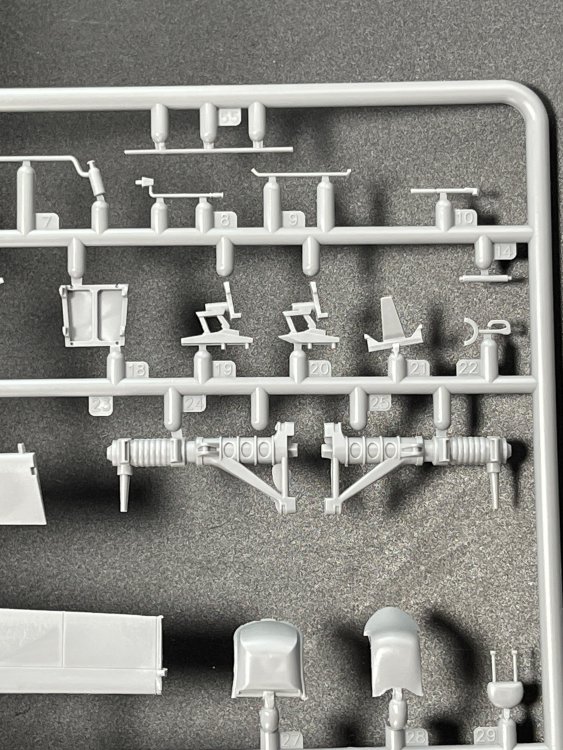
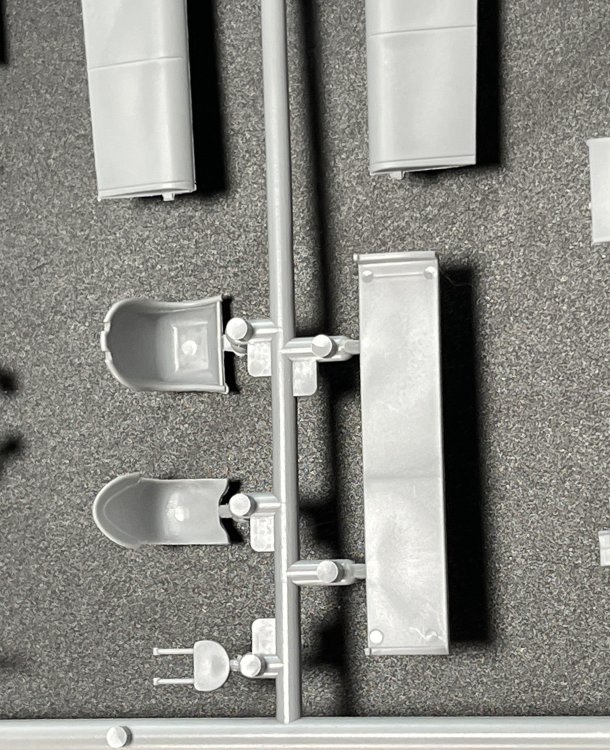
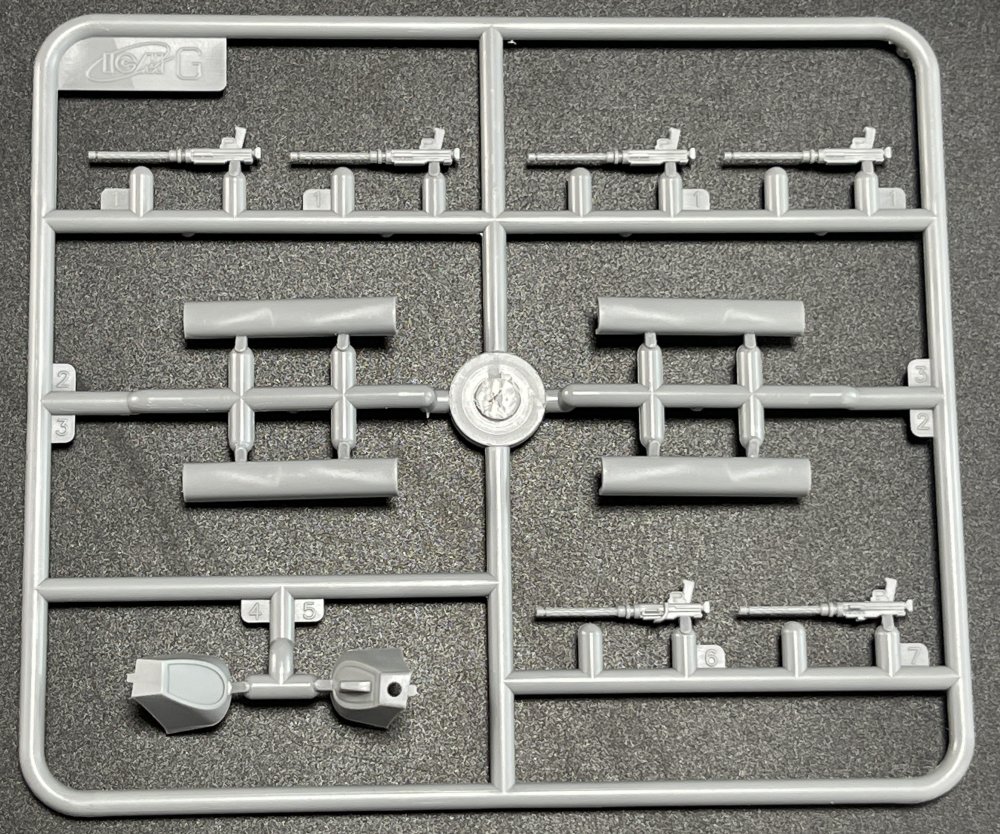
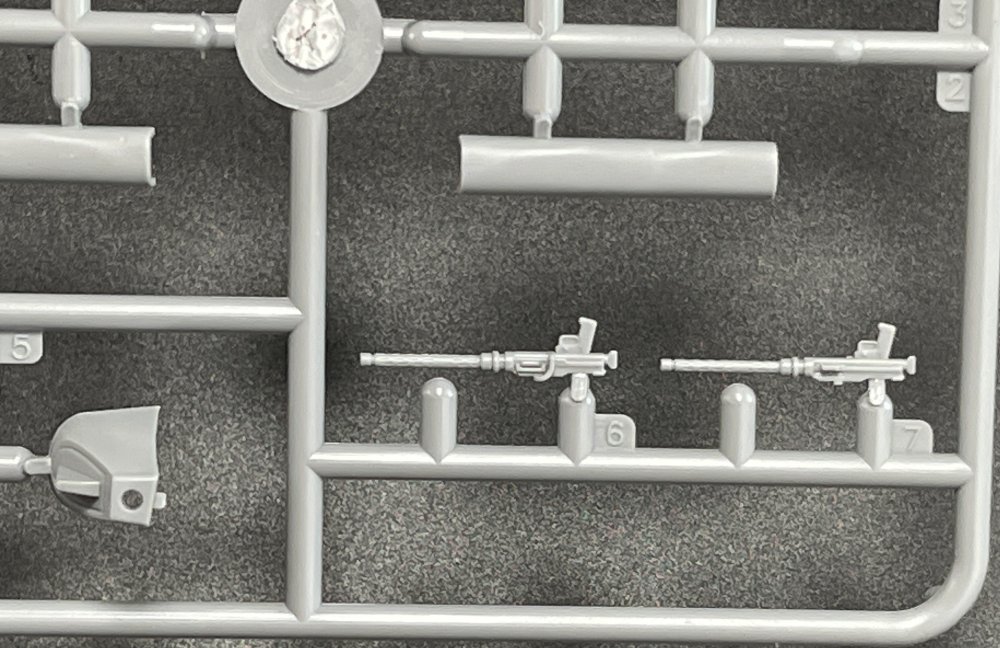
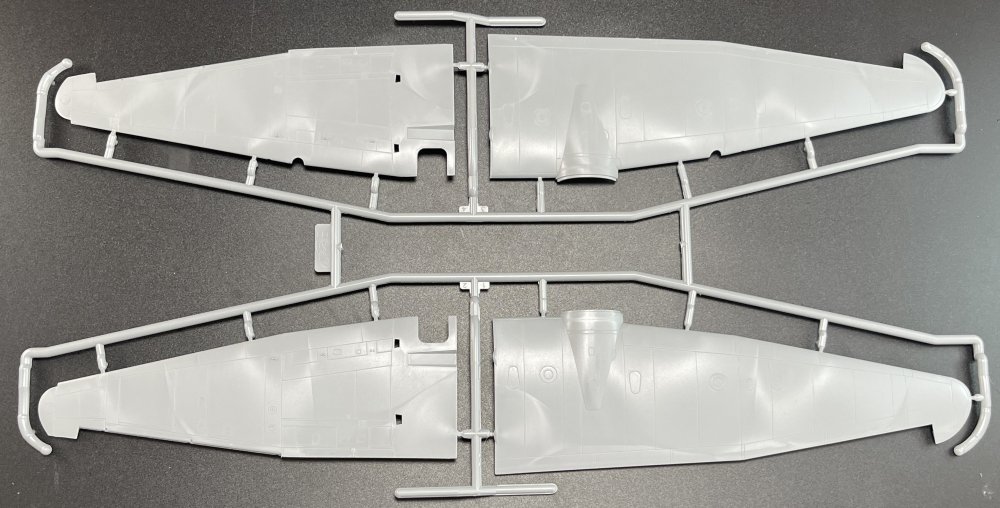
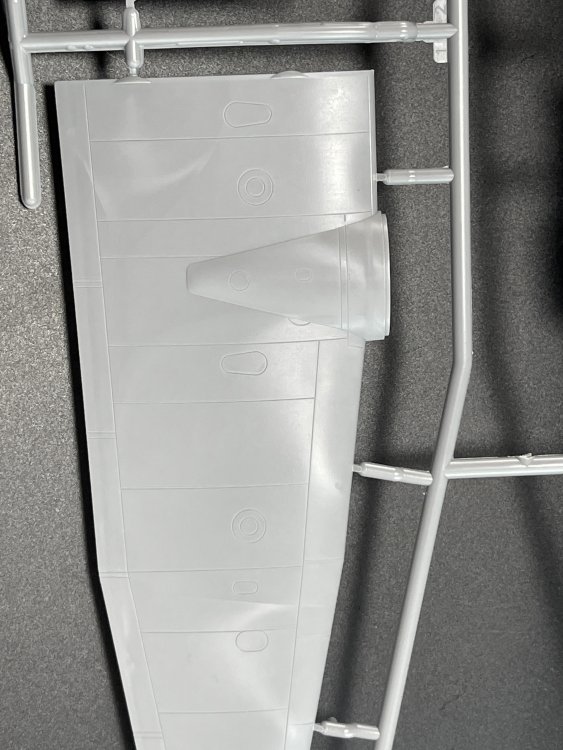
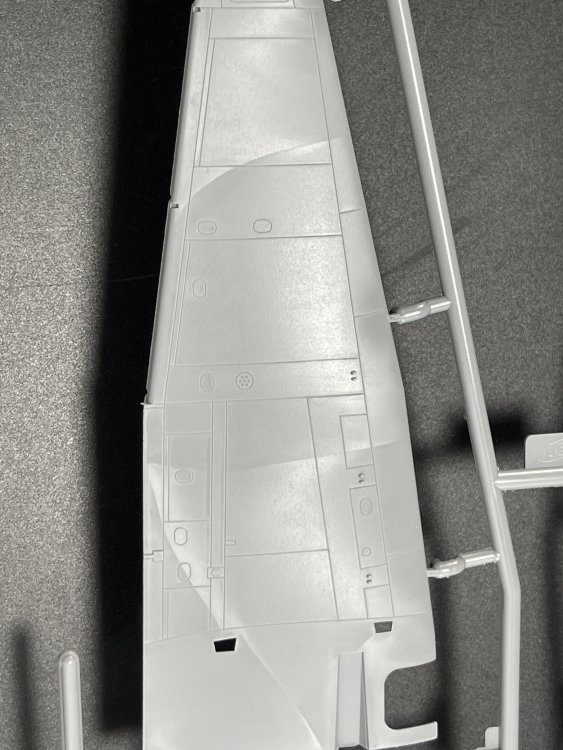
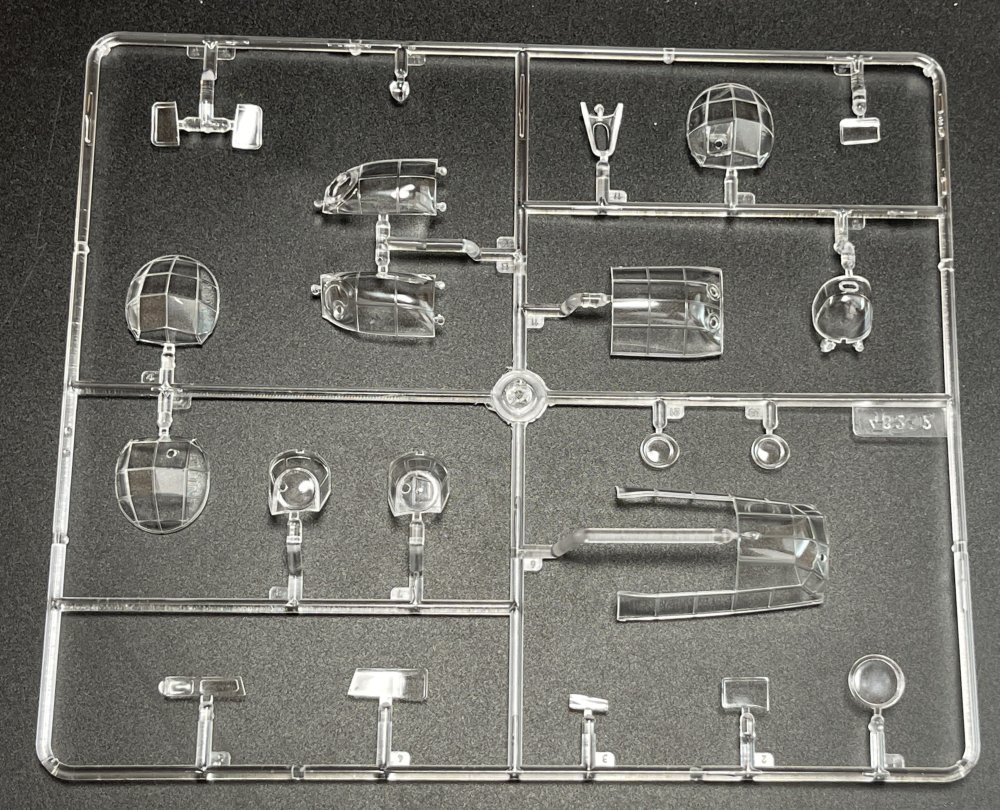
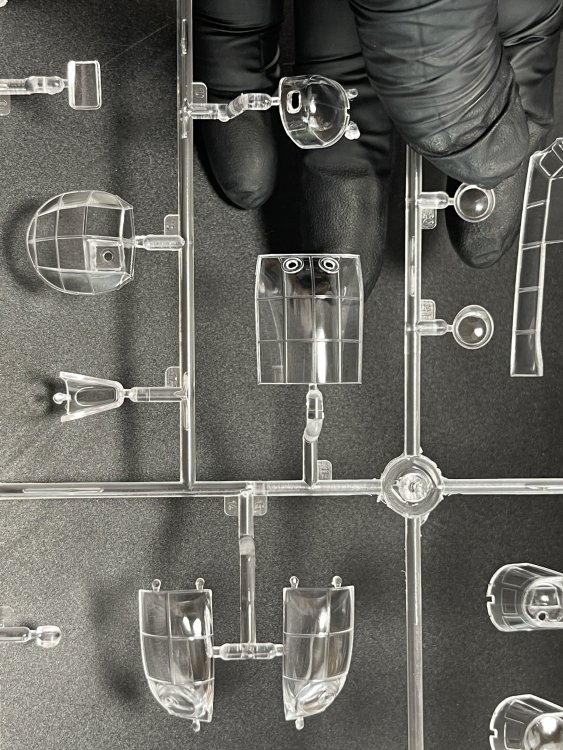
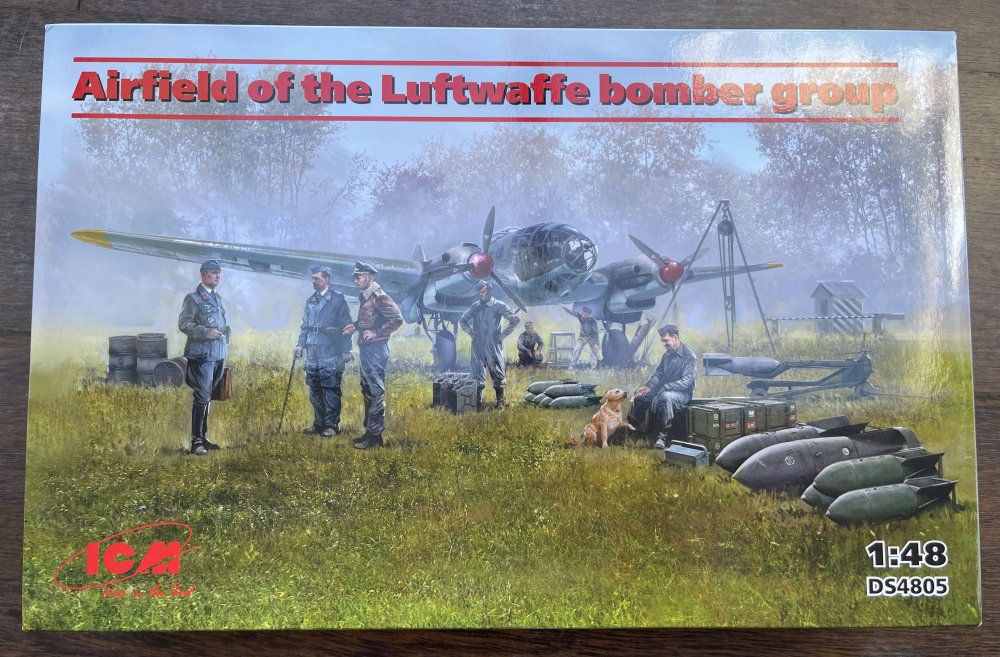
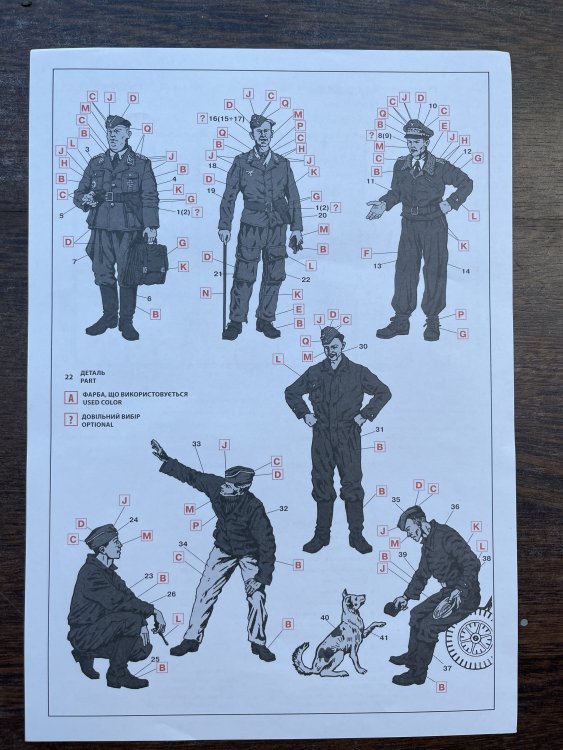
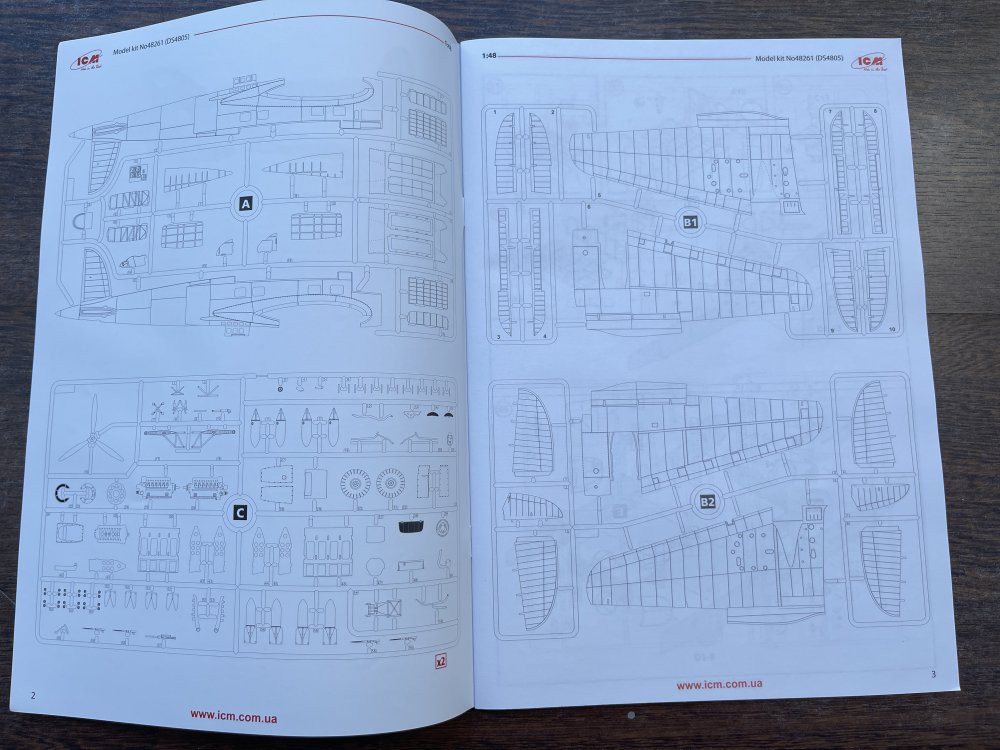
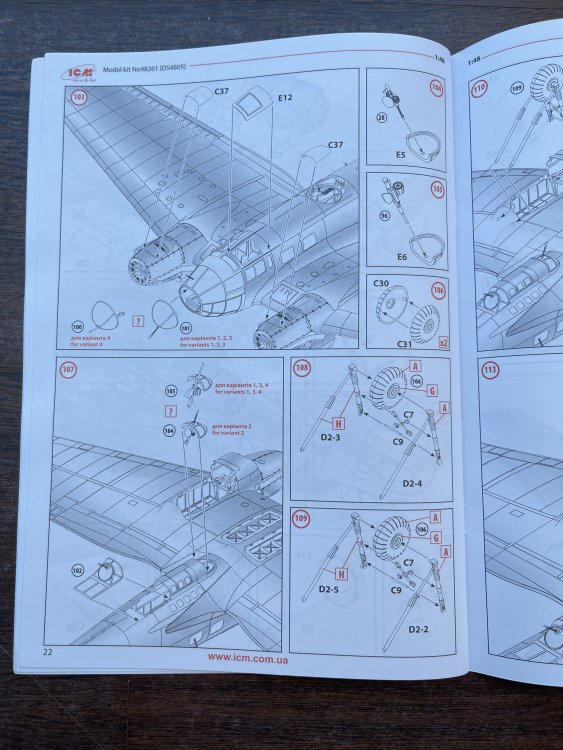
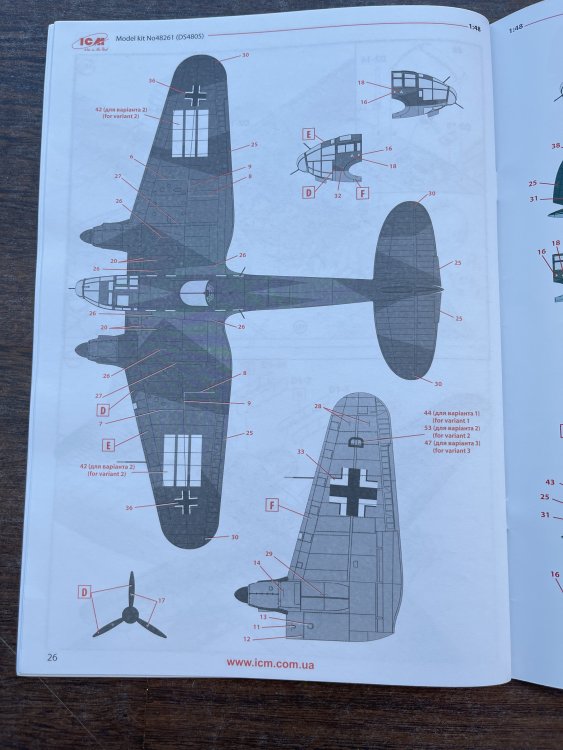
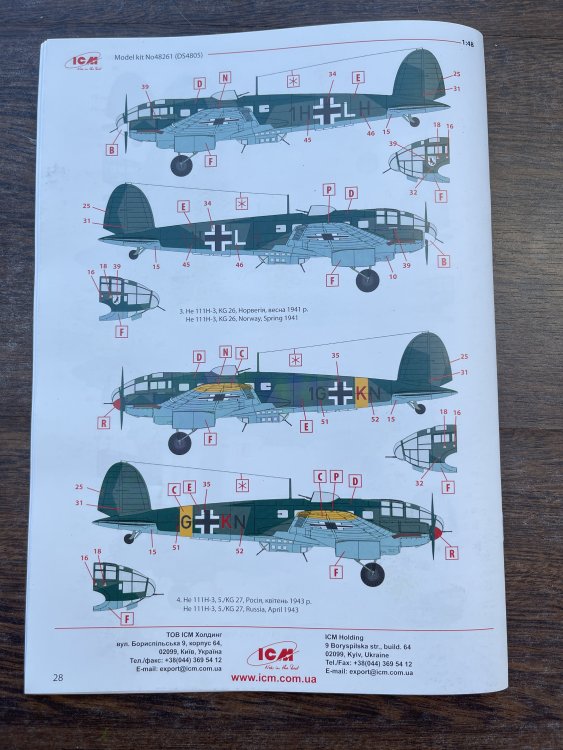
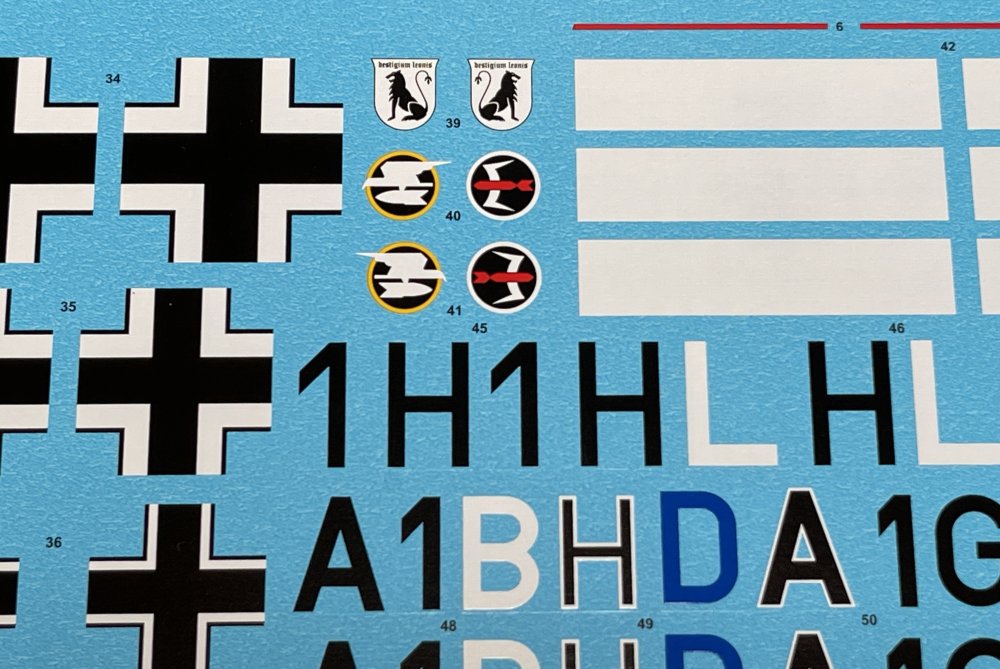
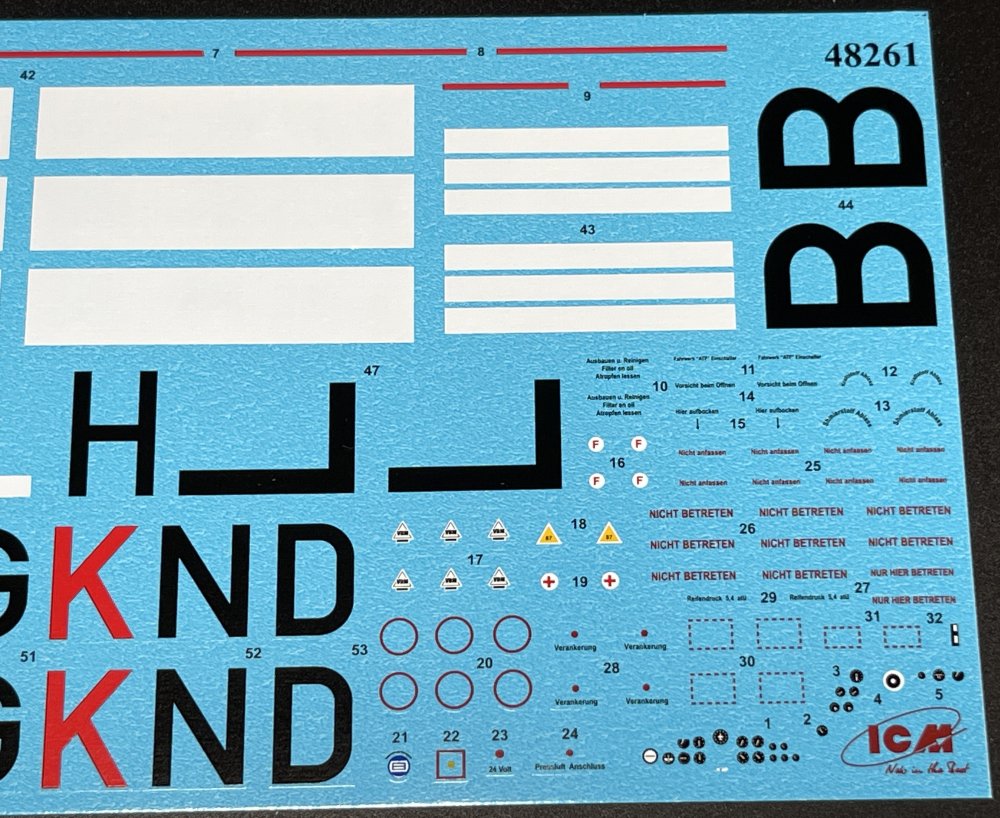
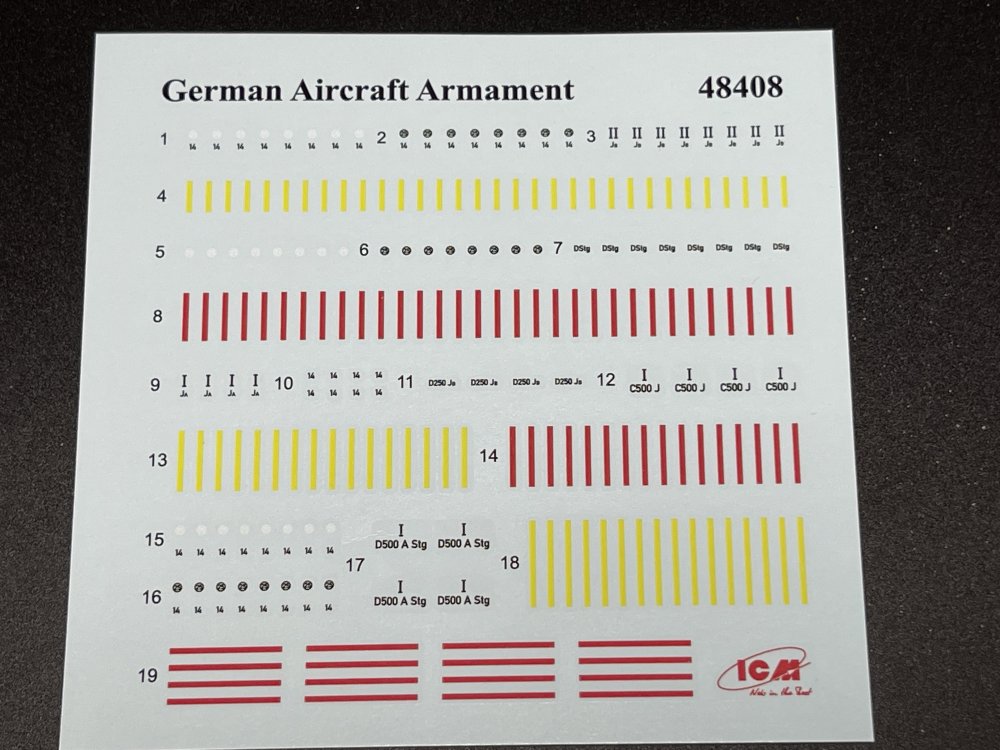
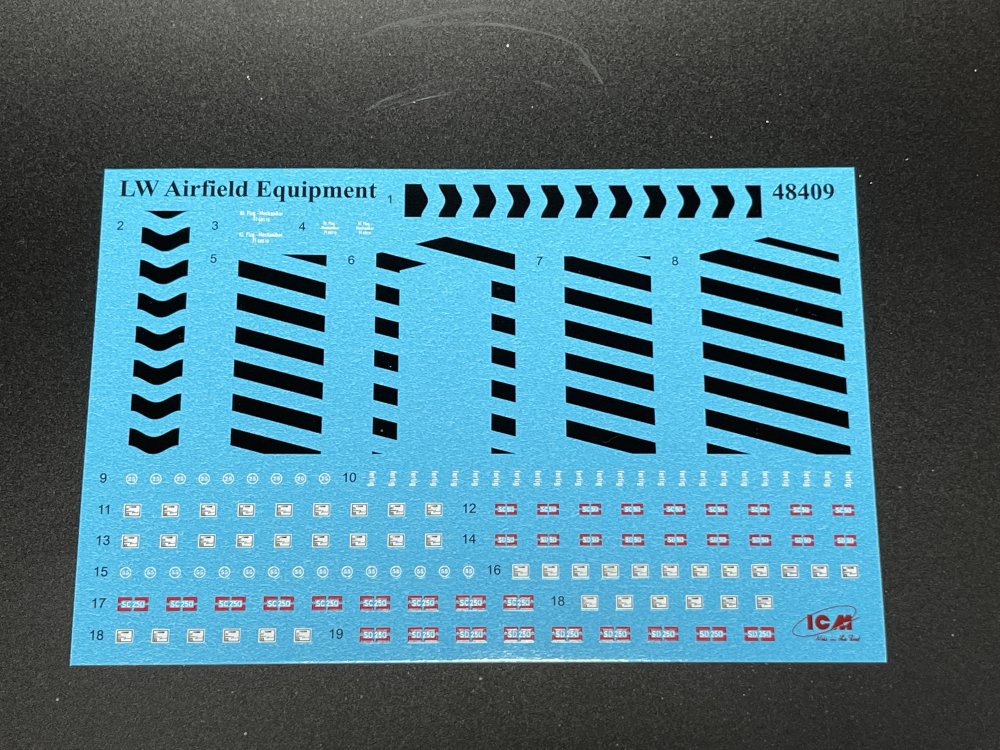
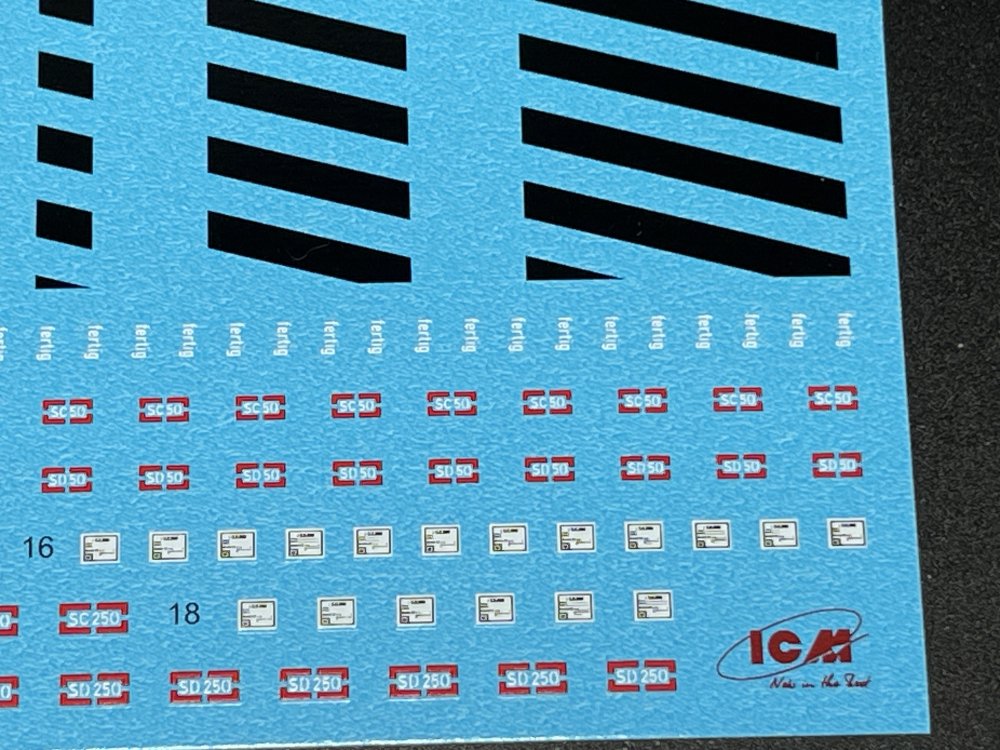
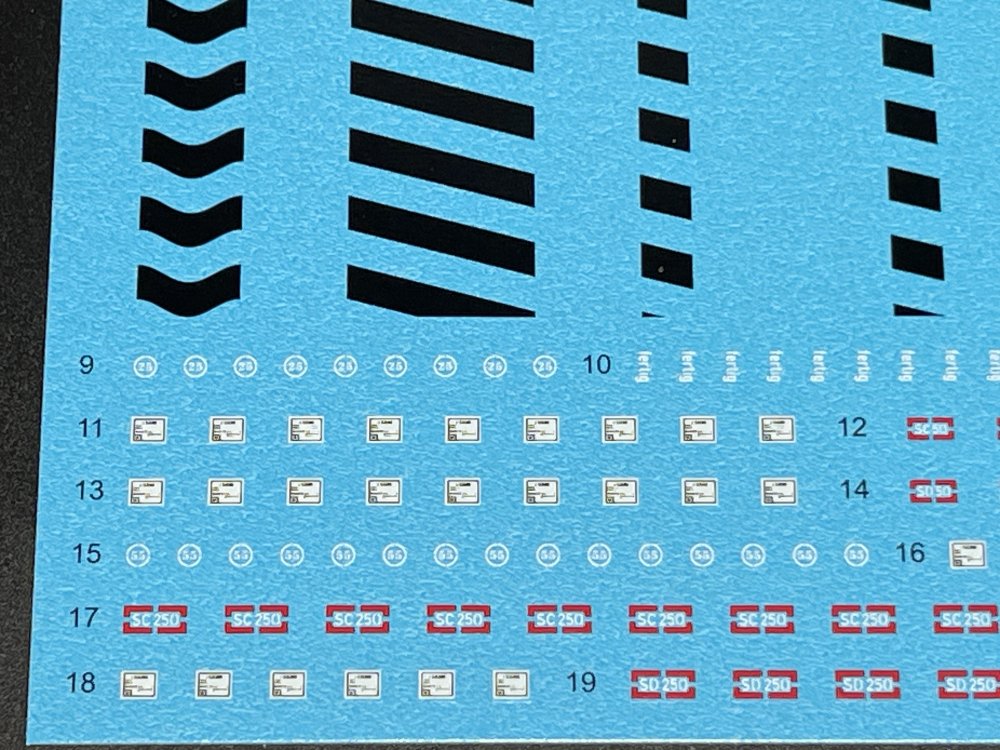
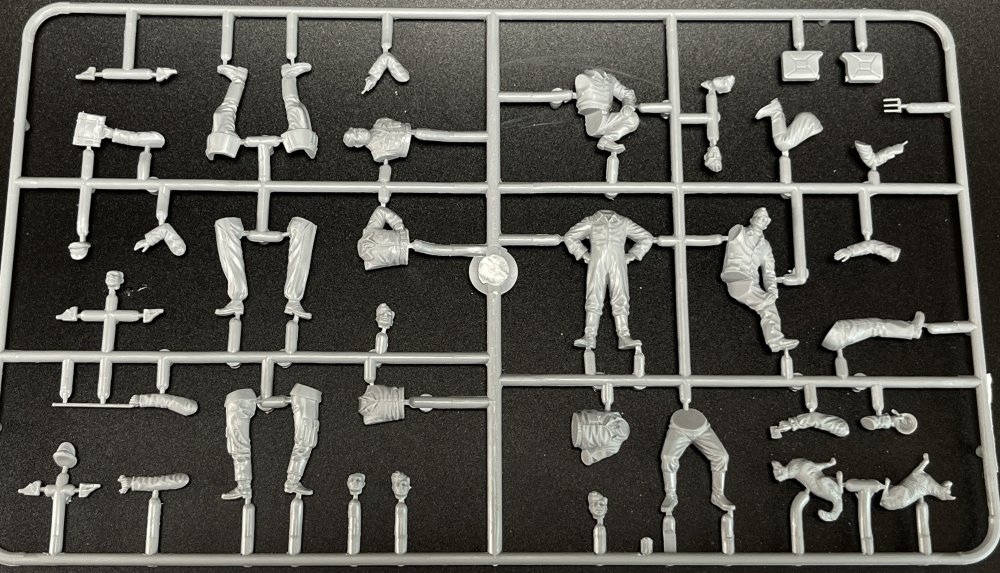
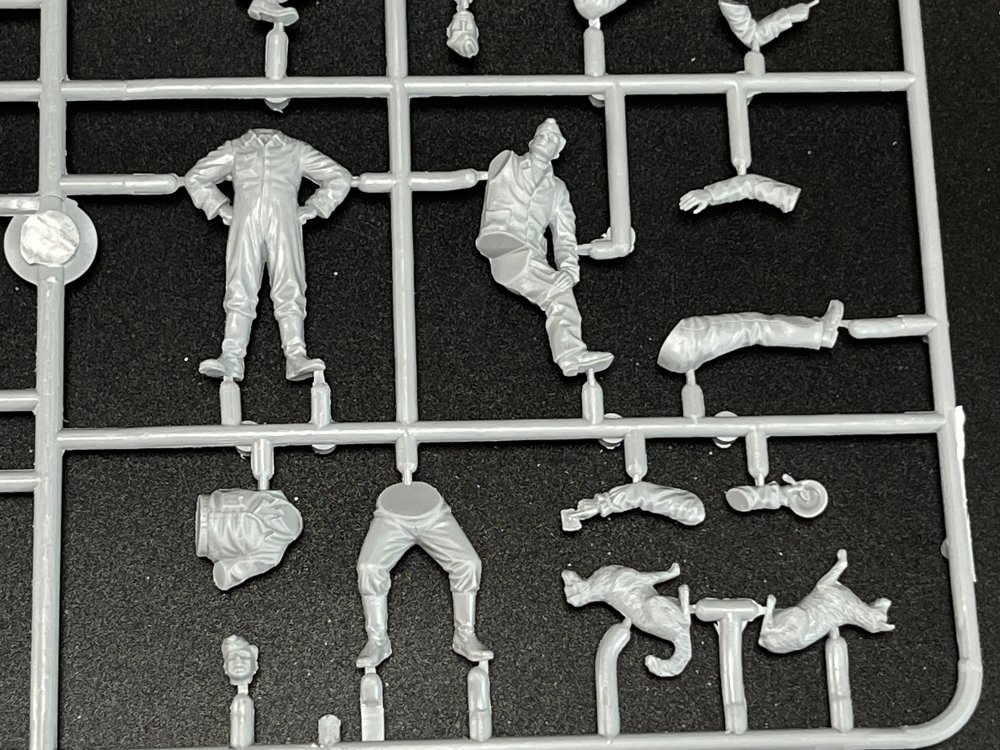
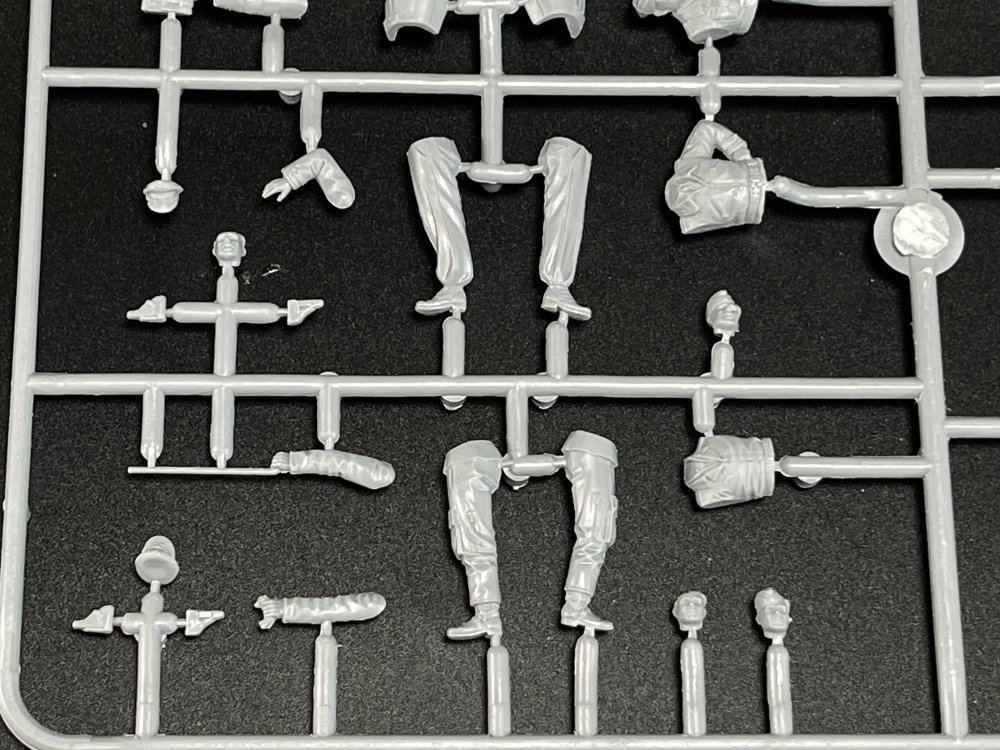
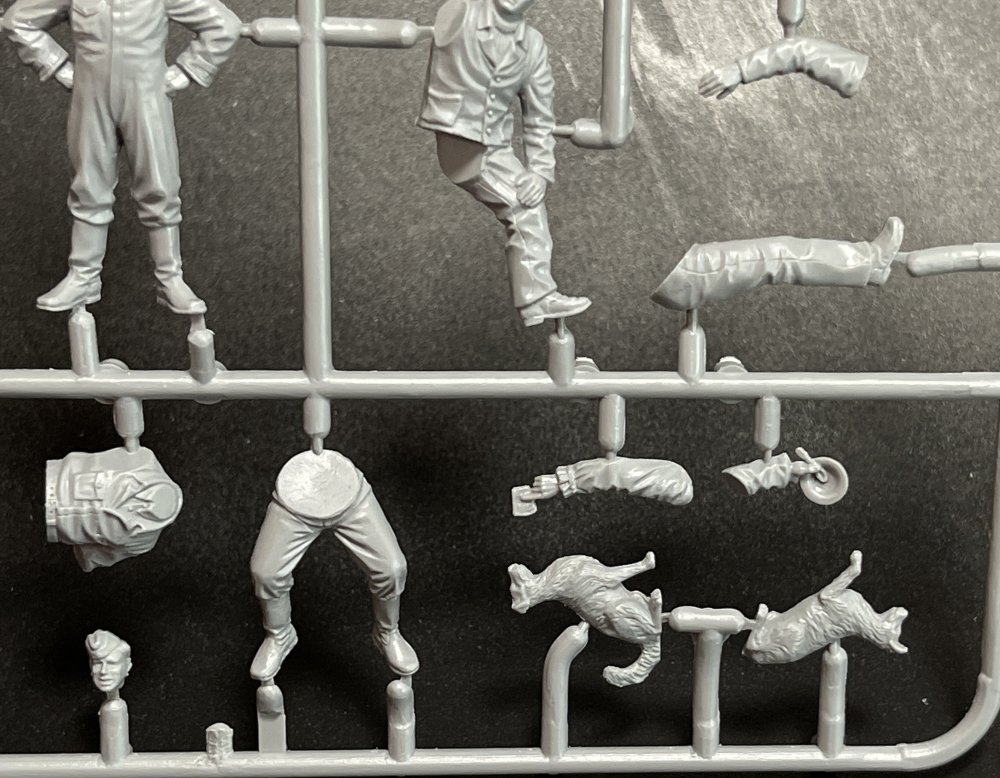
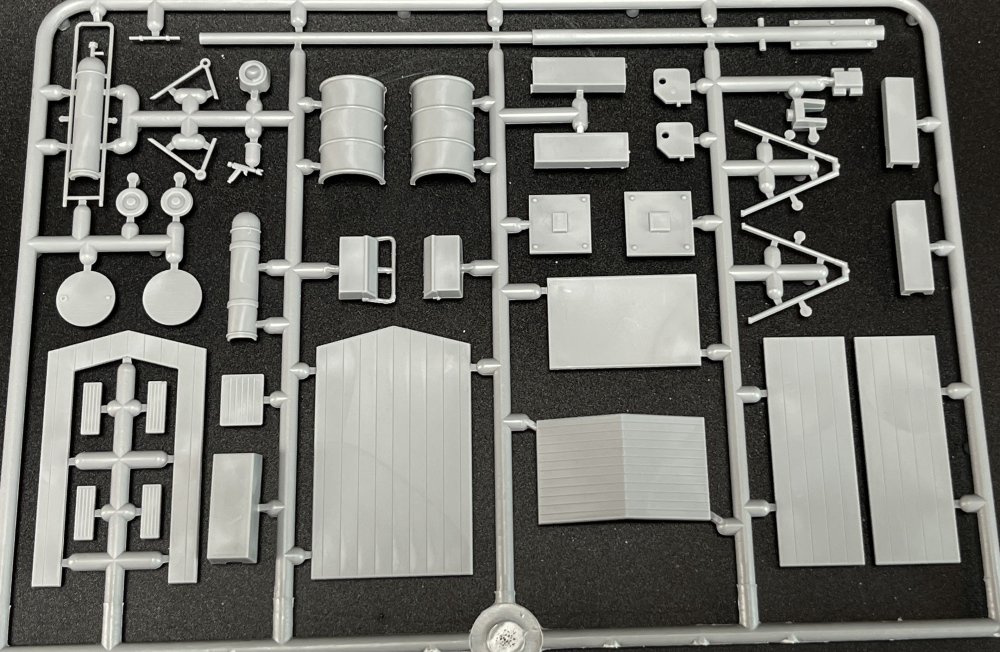
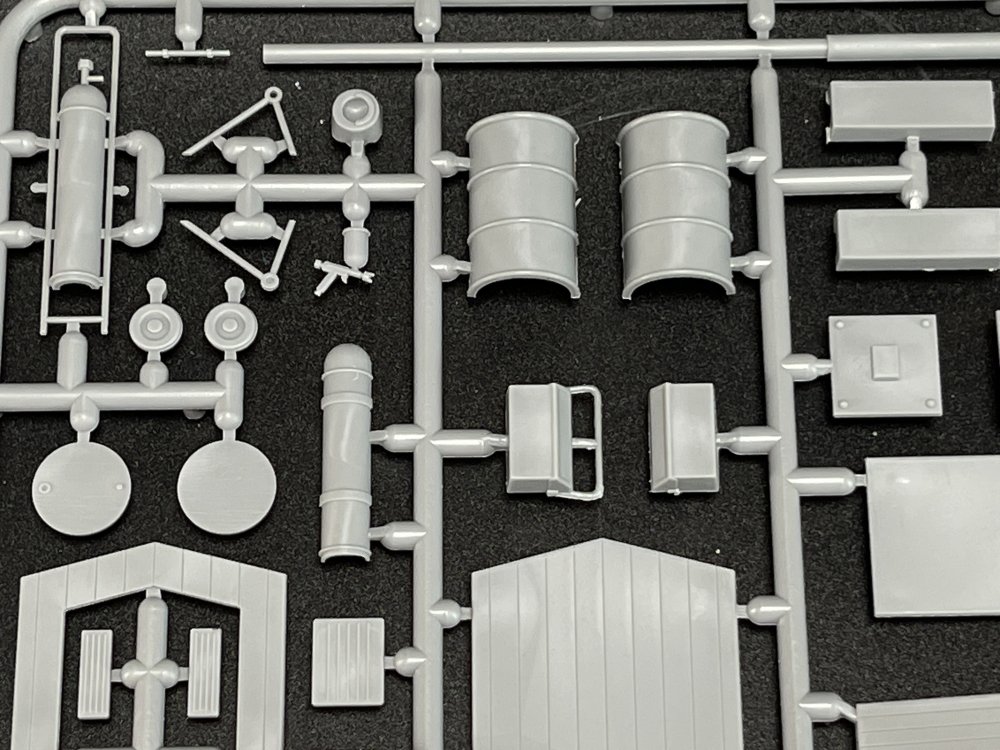
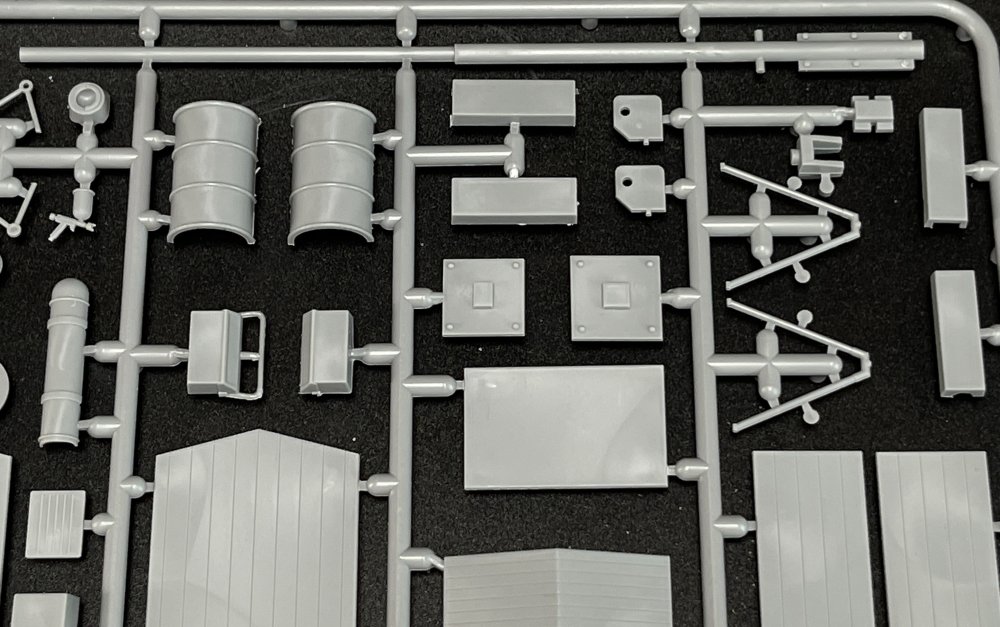
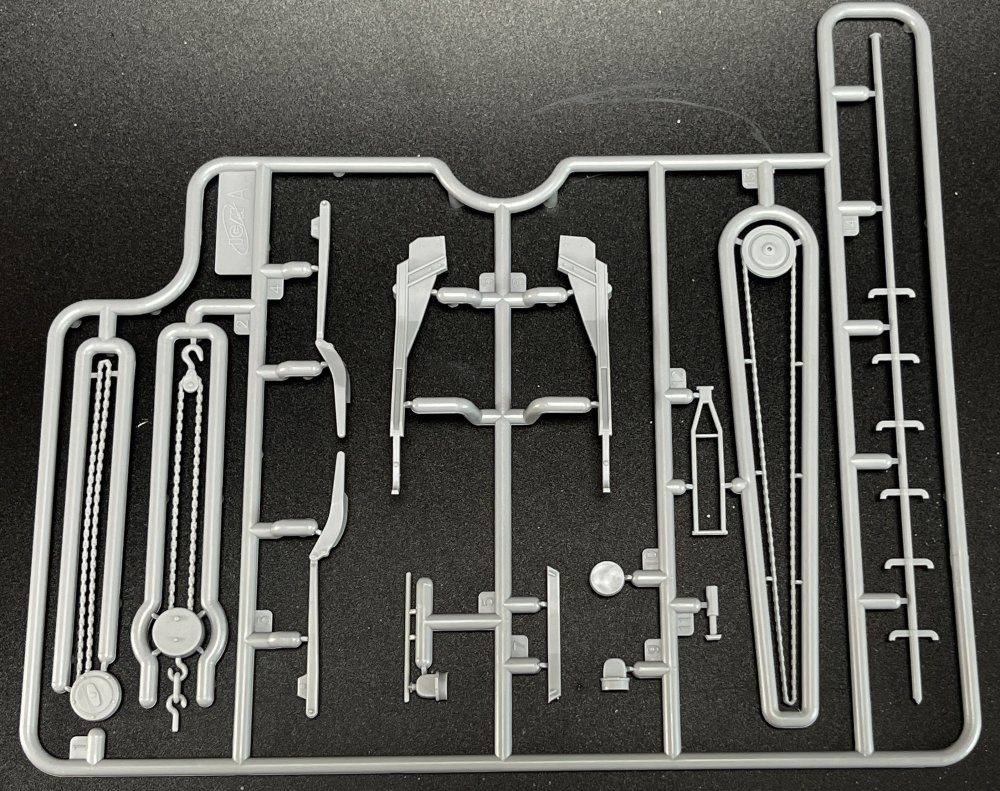
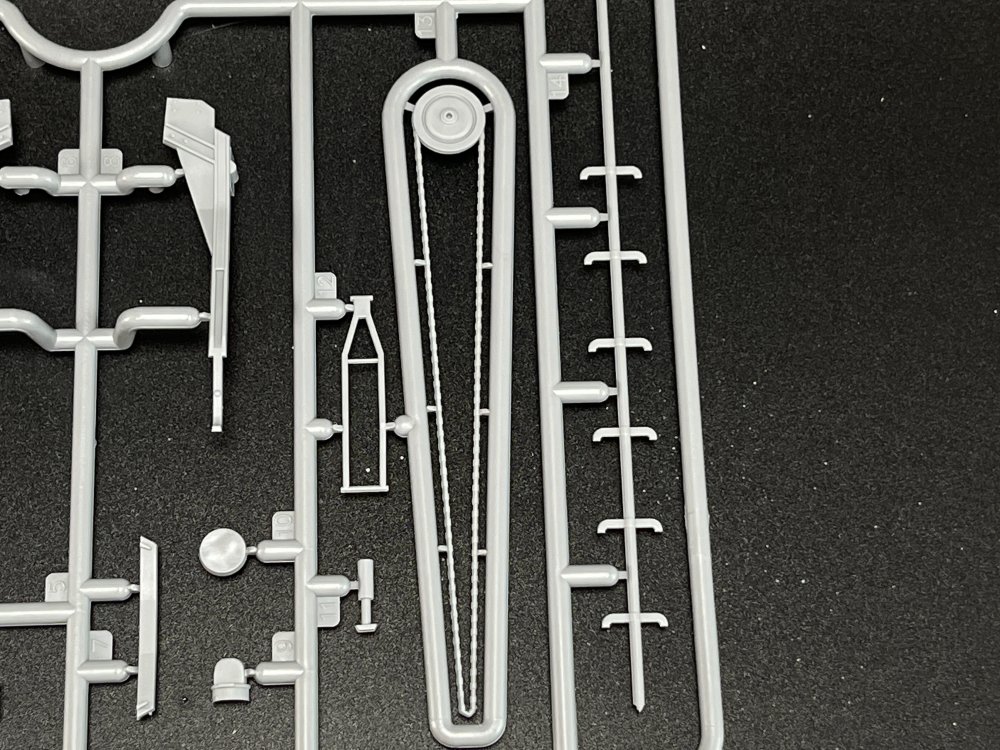
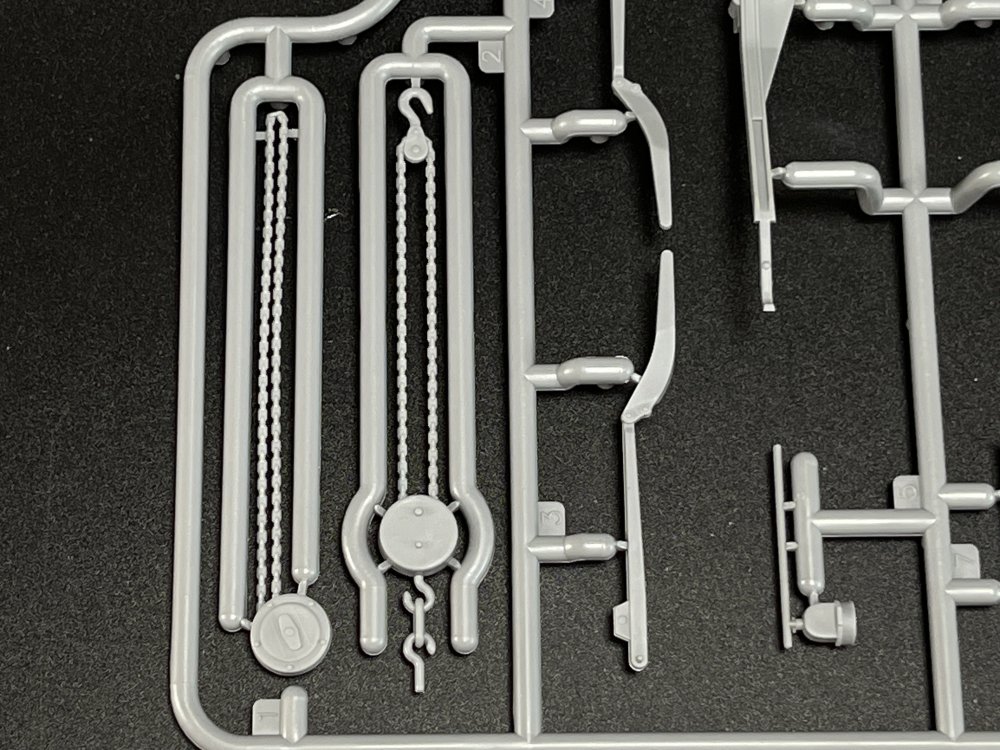
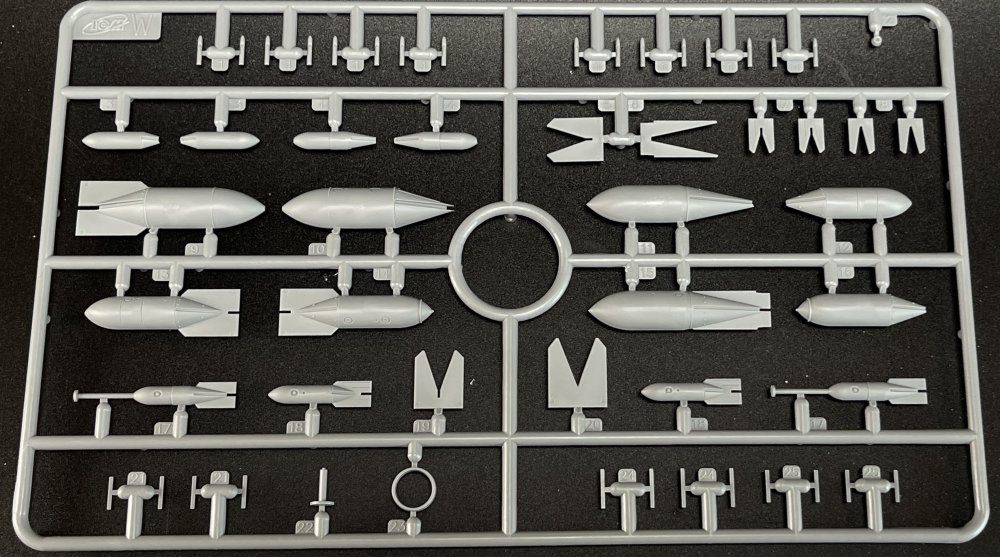
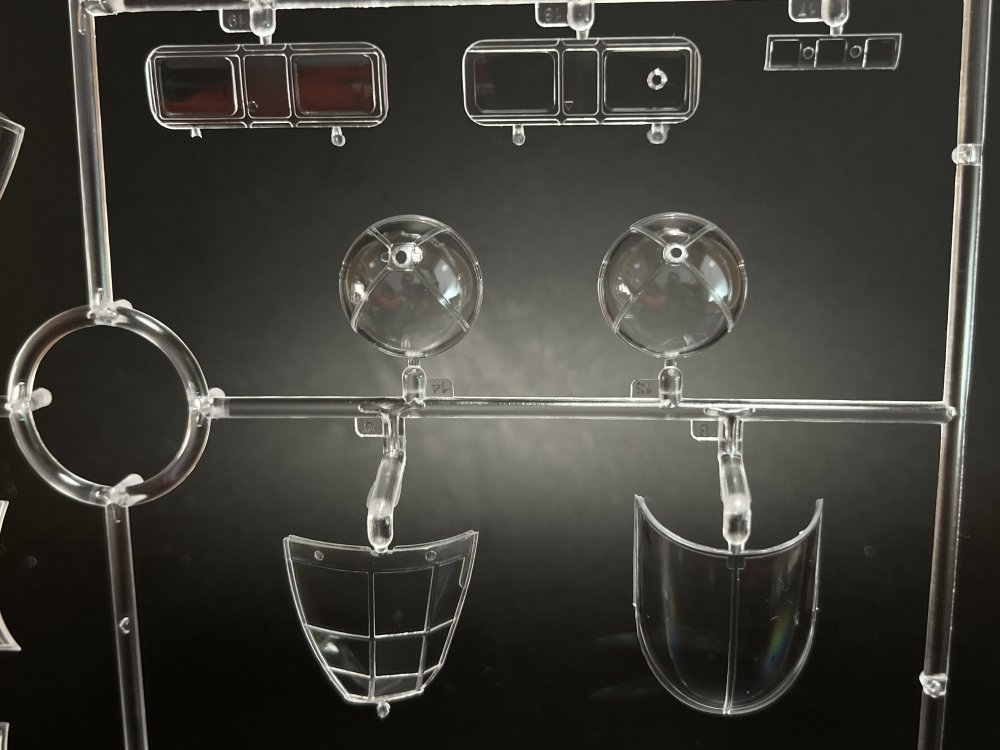
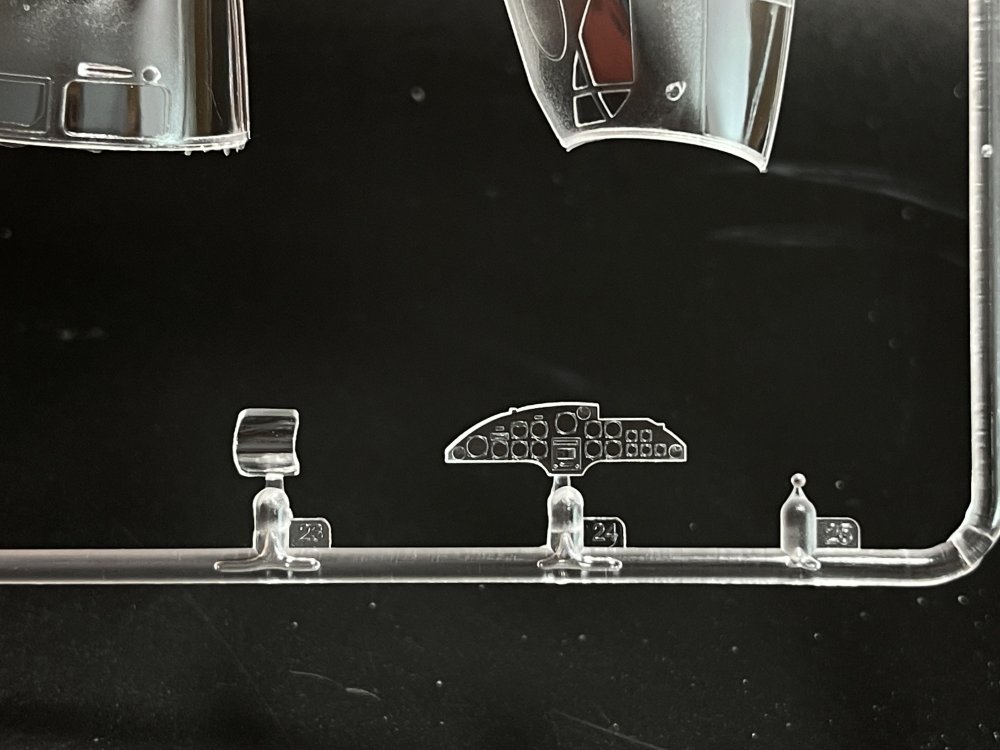
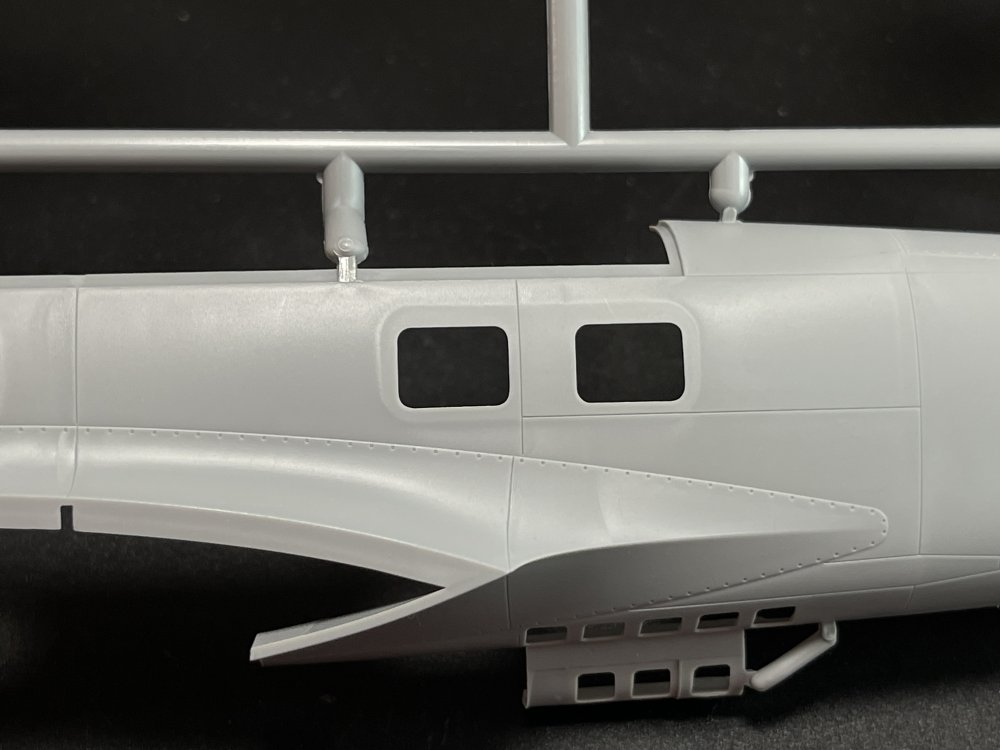
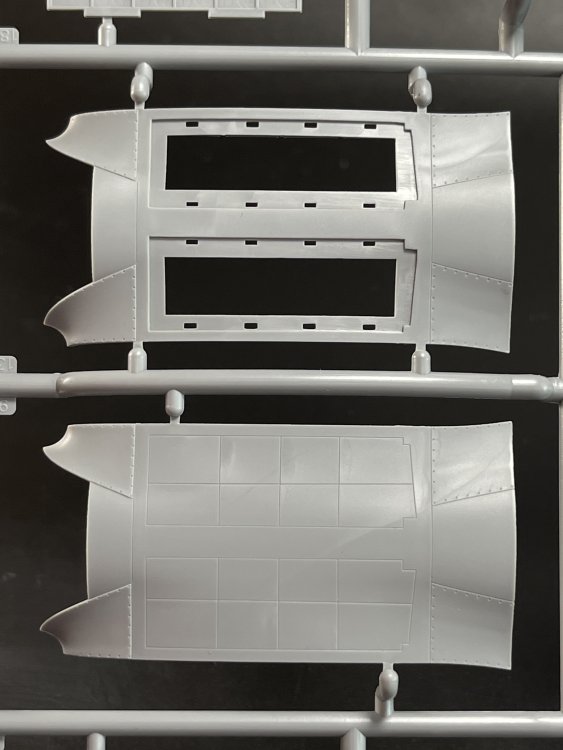
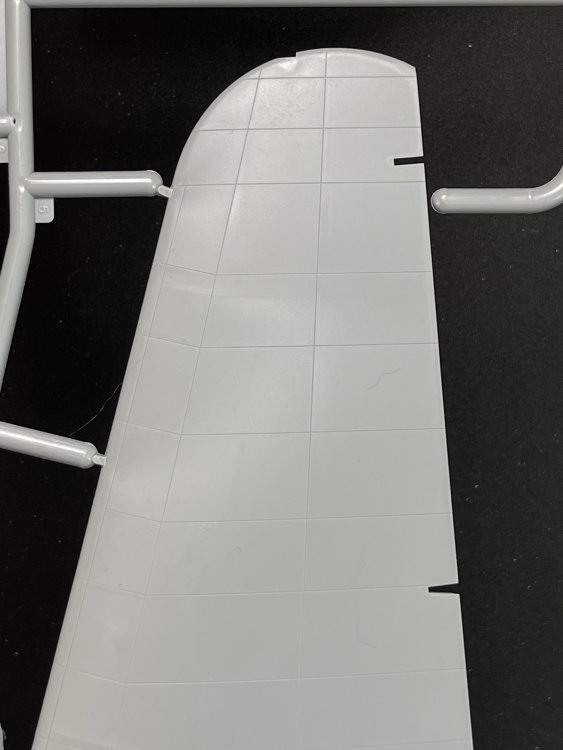
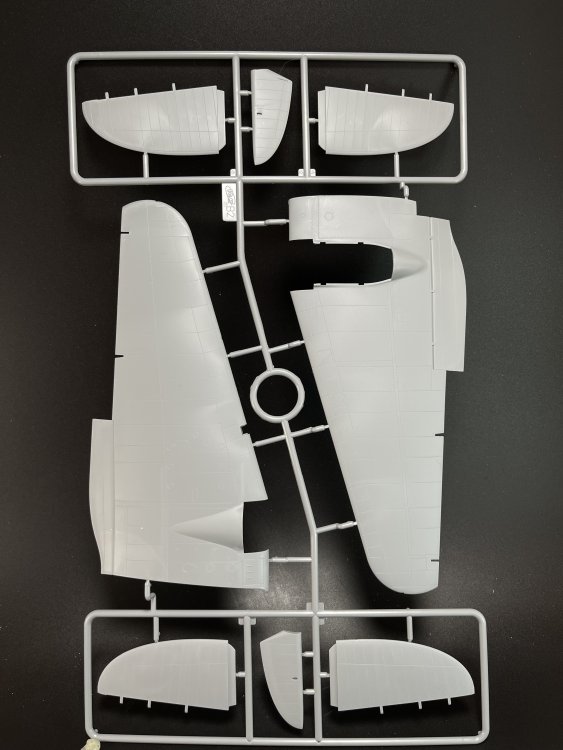
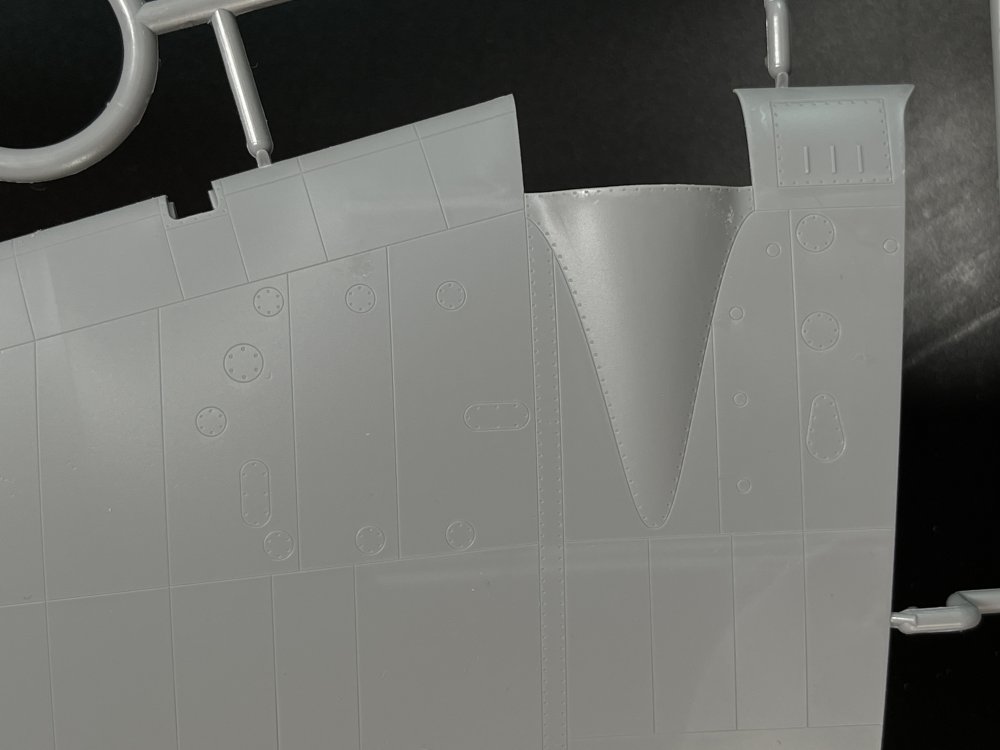
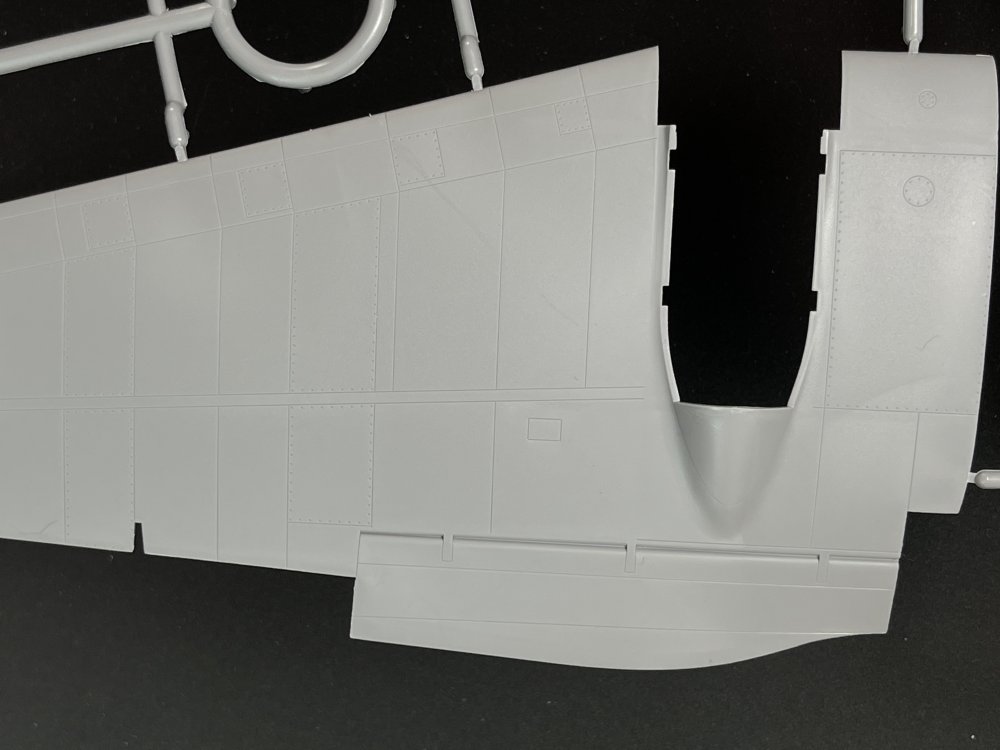
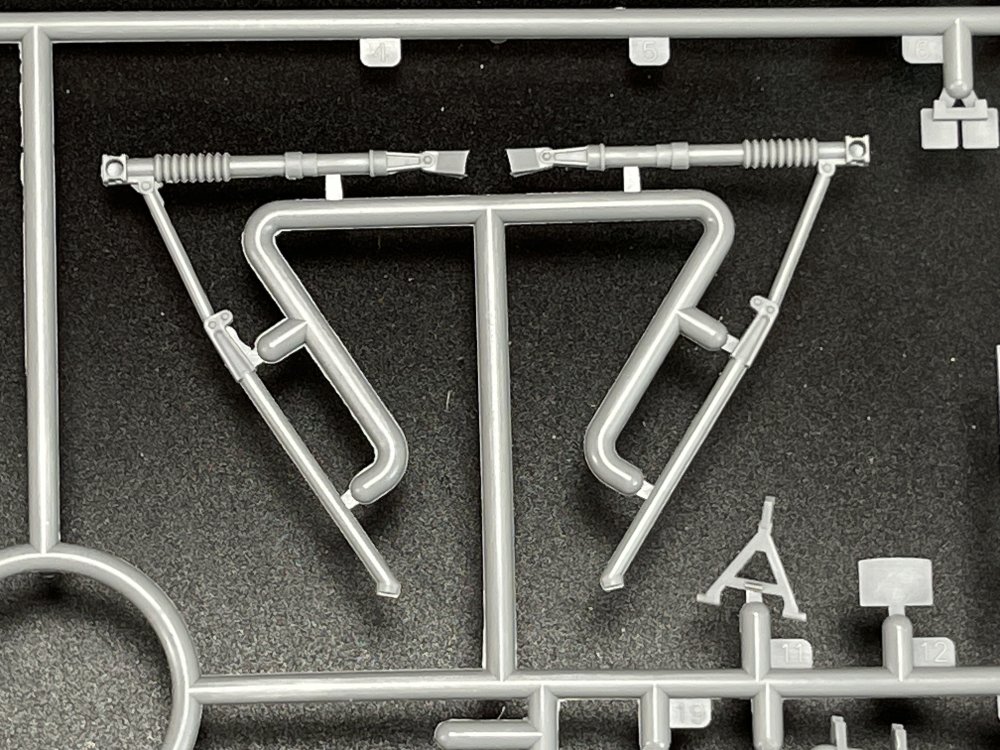
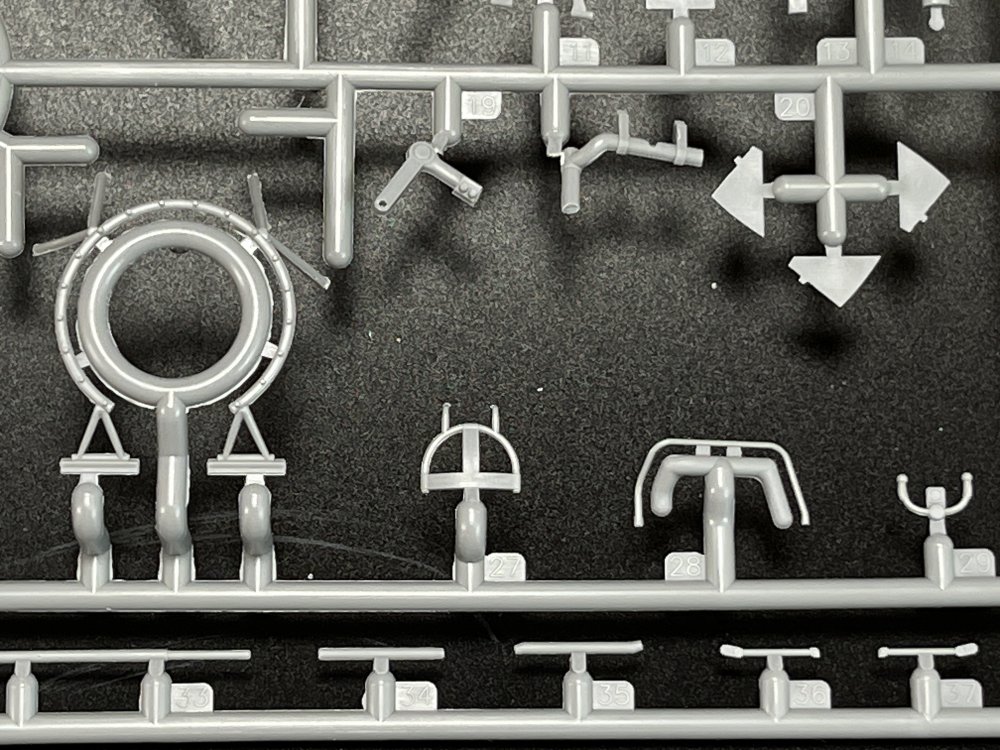
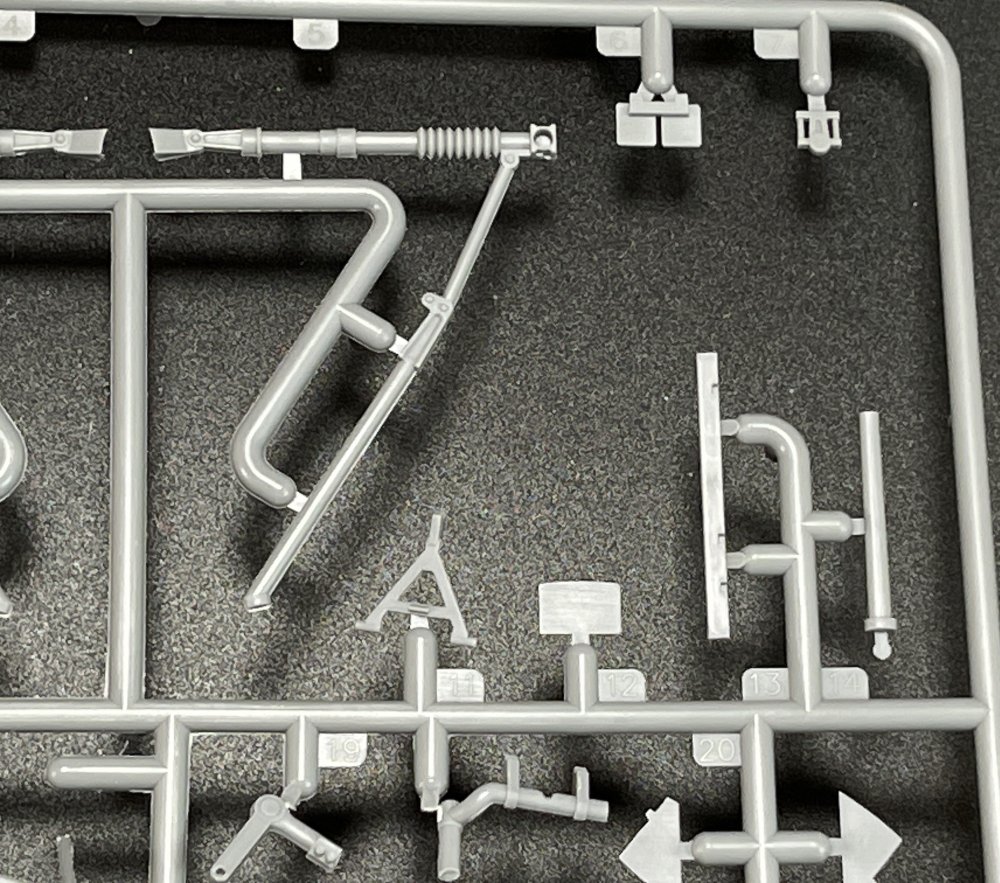
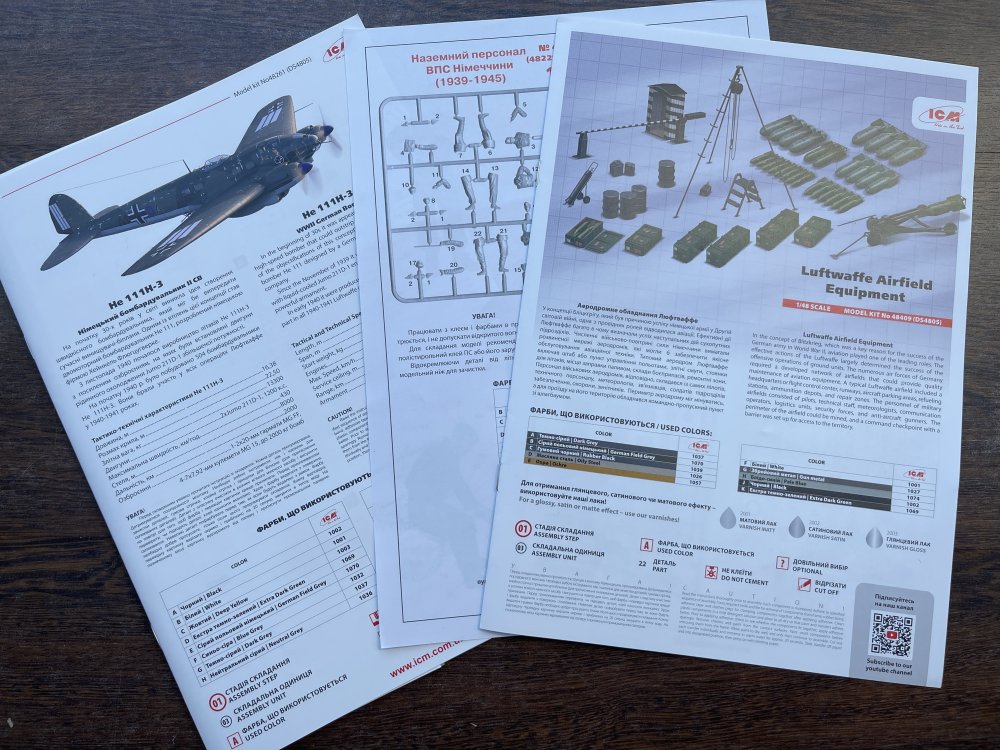
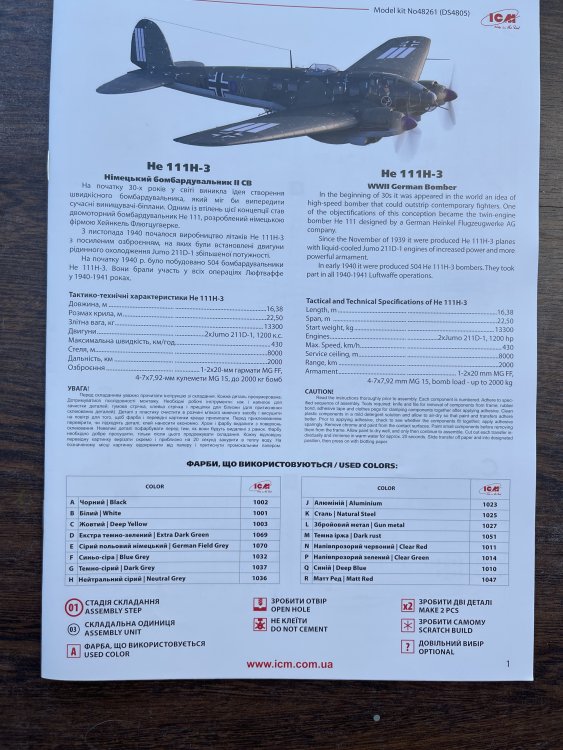
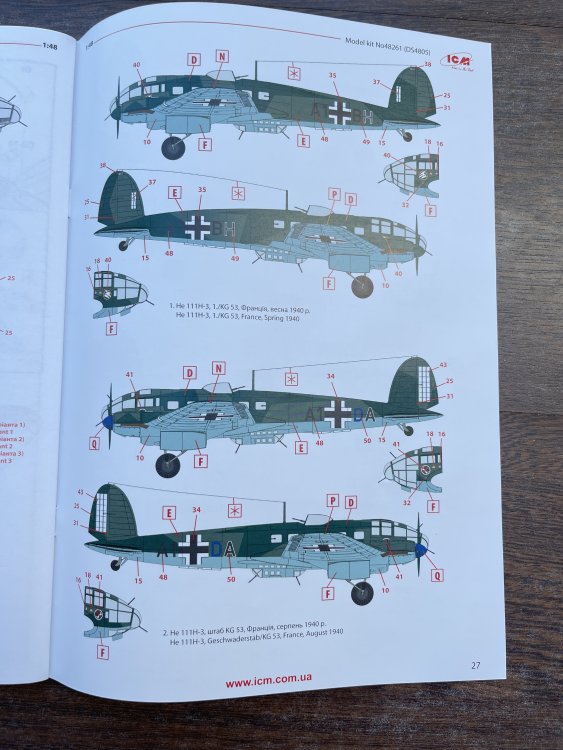
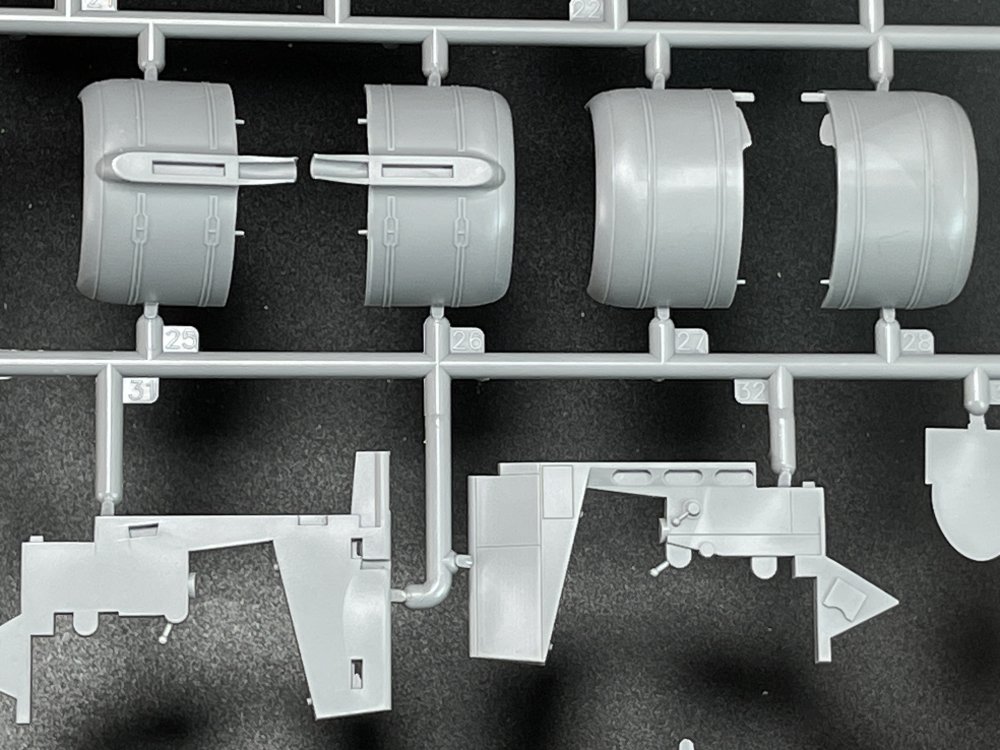
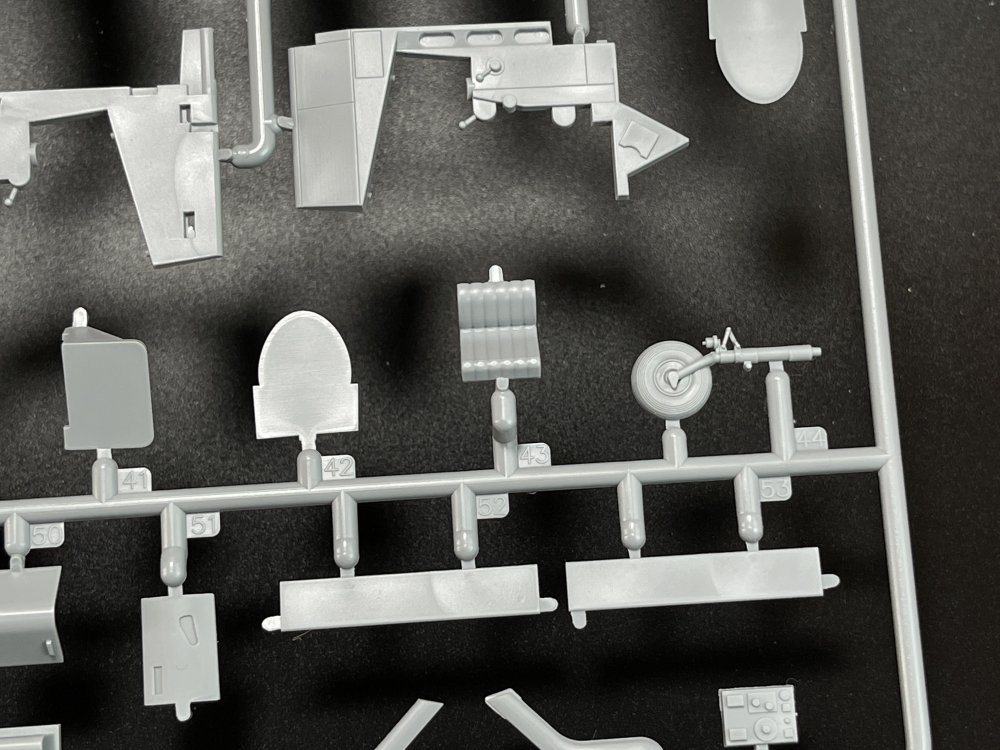
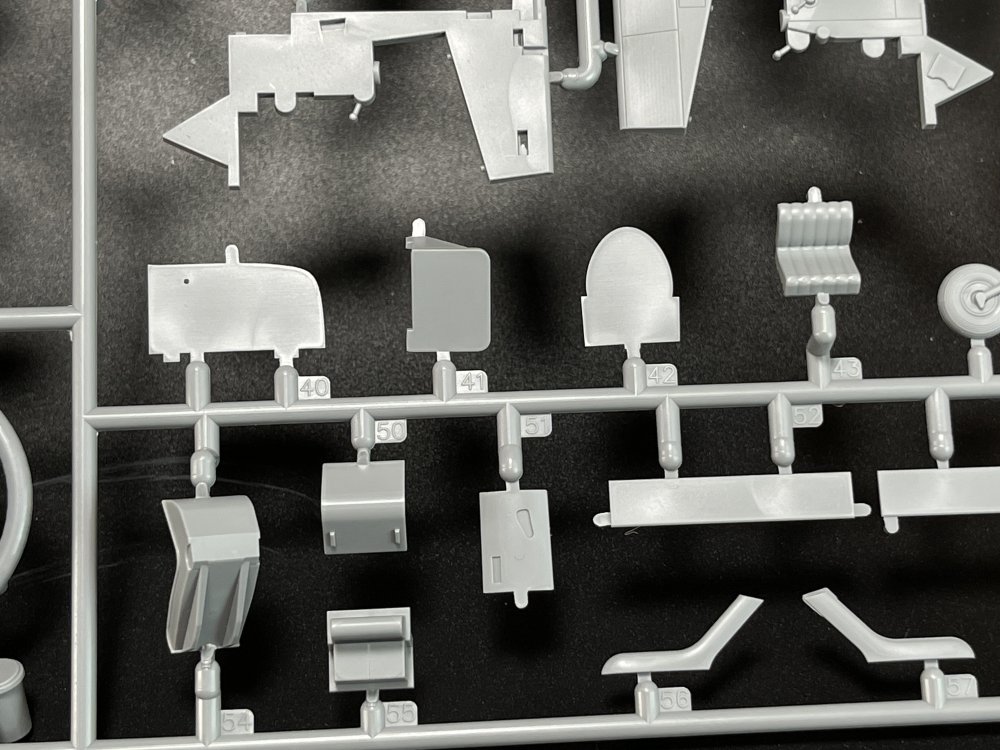
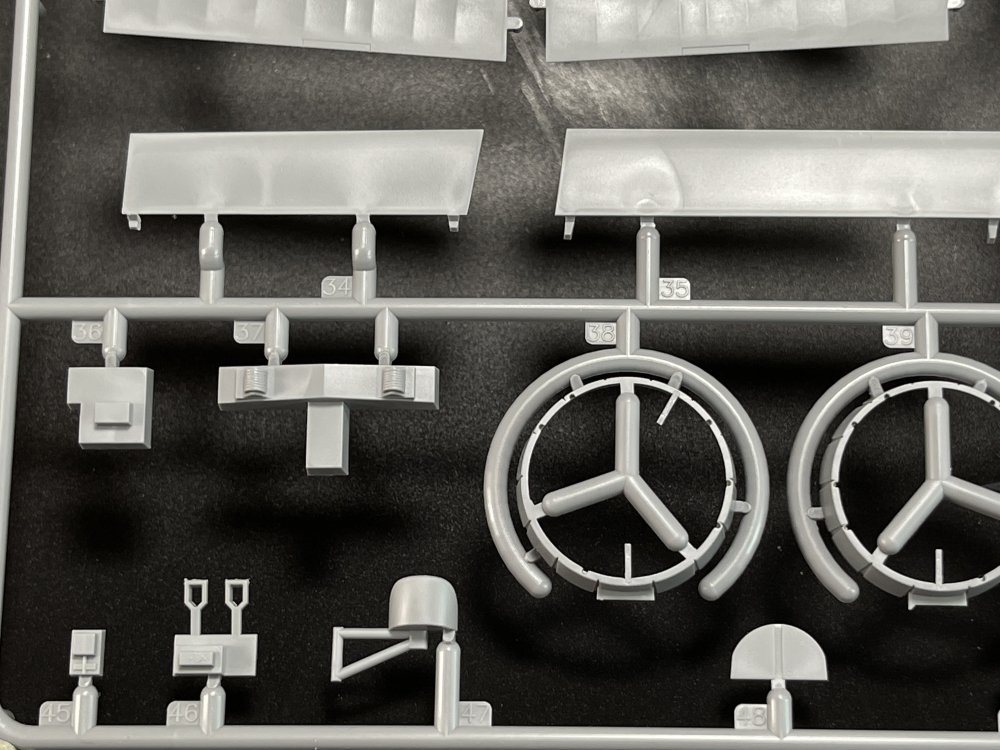
1:48 Airfield of the Luftwaffe Bomber Group ICM Catalogue number DS4804 Price: around 60€ “The Heinkel He 111 is a German airliner and bomber designed by Siegfried and Walter Günter at Heinkel Flugzeugwerke in 1934. Through development, it was described as a "wolf in sheep's clothing". Due to restrictions placed on Germany after the First World War prohibiting bombers, it was presented solely as a civil airliner, although from conception the design was intended to provide the nascent Luftwaffe with a heavy bomber. Perhaps the best-recognised German bomber of World War II due to the distinctive, extensively glazed "greenhouse" nose of the later versions, the Heinkel He 111 was the most numerous Luftwaffe bomber during the early stages of the war. It fared well until it met serious fighter opposition during the Battle of Britain, when its defensive armament was found to be inadequate. As the war progressed, the He 111 was used in a wide variety of roles on every front in the European theatre. It was used as a strategic bomber during the Battle of Britain, a torpedo bomber in the Atlantic and Arctic, and a medium bomber and a transport aircraft on the Western, Eastern, Mediterranean, Middle Eastern, and North African Front theatres. The He 111 was constantly upgraded and modified, but had nonetheless become obsolete by the latter part of the war. The failure of the German Bomber B project forced the Luftwaffe to continue operating the He 111 in combat roles until the end of the war. Manufacture of the He 111 ceased in September 1944, at which point piston-engine bomber production was largely halted in favour of fighter aircraft. With the German bomber force virtually defunct, the He 111 was used for logistics. Production of the Heinkel continued after the war as the Spanish-built CASA 2.111. Spain received a batch of He 111H-16s in 1943 along with an agreement to licence-build Spanish versions. Its airframe was produced in Spain under licence by Construcciones Aeronáuticas SA. The design differed significantly only in the powerplant used, eventually being equipped with Rolls-Royce Merlin engines. These remained in service until 1973.he H variant of the He 111 series was more widely produced and saw more action during World War II than any other Heinkel variant. Owing to the uncertainty surrounding the delivery and availability of the DB 601 engines, Heinkel switched to 820 kW (1,100 hp) Junkers Jumo 211 powerplants, whose somewhat greater size and weight were regarded as unimportant considerations in a twin-engine design. When the Jumo was fitted to the P model it became the He 111 H. The He 111 H-1 was fitted with a standard set of three 7.92 mm (0.312 in) MG 15 machine guns and eight SC 250 250 kg (550 lb) or 32 SC 50 50 kg (110 lb) bombs. The same armament was used in the H-2 which started production in August 1939. The P-series was gradually replaced on the eve of war with the new H-2, powered by improved Jumo 211 A-3 engines of 820 kW (1,100 hp). A count on 2 September 1939 revealed that the Luftwaffe had a total of 787 He 111s in service, with 705 combat ready, including 400 H-1 and H-2s that had been produced in a mere four months. Production of the H-3, powered by the 895 kW (1,200 hp) Jumo 211 D-1, began in October 1939. Experiences during the Polish Campaign led to an increase in defensive armament. MG 15s were fitted whenever possible and the number of machine guns was sometimes increased to seven. The two waist positions received an additional MG 15, and on some variants a belt-fed MG 17 was even installed in the tail. A 20 mm (0.79 in) MG FF autocannon would sometimes be installed in the nose or forward gondola. After the Battle of Britain, smaller scale production of the H-4s began. The H-4 was virtually identical to the He 111 P-4 with the DB 600s swapped for the Jumo 211D-1s. Some also used the Jumo 211H-1. This variant also differed from the H-3 in that it could either carry 2,000 kg (4,400 lb) of bombs internally or mount one or two external racks to carry one 1,800 kg (4,000 lb) or two 1,000 kg (2,200 lb) bombs. As these external racks blocked the internal bomb bay doors, a combination of internal and external storage was not possible. A PVR 1006L bomb rack was fitted externally and an 835 L (184 imp gal; 221 US gal) tank added to the interior spaces left vacant by the removal of the internal bomb-bay. The PVR 1006L was capable of carrying a SC 1000 1,000 kg (2,200 lb) bomb. Some H-4s had their PVC racks modified to drop torpedoes. Later modifications enabled the PVC 1006 to carry a 2,500 kg (5,500 lb) "Max" bomb. However 1,000 kg (2,200 lb) "Hermann" or 1,800 kg (4,000 lb) "Satans" were used more widely. The H-5 series followed in February 1941, with heavier defensive armament. Like the H-4, it retained a PVC 1006 L bomb rack to enable it to carry heavy bombs under the fuselage. The first ten He 111 H-5s were pathfinders, and selected for special missions. The aircraft sometimes carried 25 kg (55 lb) flashlight bombs which acted as flares. The H-5 could also carry heavy fire bombs, either heavy containers or smaller incendiary devices attached to parachutes. The H-5 also carried LM A and LM B aerial mines for anti-shipping operations. After the 80th production aircraft, the PVC 1006 L bomb rack was removed and replaced with a heavy-duty ETC 2000 rack, enabling the H-5 to carry the SC 2500 "Max" bomb, on the external ETC 2000 rack, which enabled it to support the 2,500 kg (5,500 lb) bomb. Some H-3 and H-4s were equipped with barrage balloon cable-cutting equipment in the shape of cutter installations forward of the engines and cockpit. They were designated H-8, but later named H8/R2. These aircraft were difficult to fly and production stopped. The H-6 initiated some overall improvements in design. The Jumo 211 F-1 engine of 1,007 kW (1,350 hp) increased its speed while the defensive armament was upgraded at the factory with one 20 mm (0.79 in) MG FF cannon in the nose and/or gondola positions (optional), two MG 15 in the ventral gondola, and one each of the fuselage side windows. Some H-6 variants carried tail-mounted MG 17 defensive armament. The performance of the H-6 was much improved. The climb rate was higher and the bomber could reach a slightly higher ceiling of 8,500 m (27,900 ft). When heavy bomb loads were added, this ceiling was reduced to 6,500 m (21,300 ft). The weight of the H-6 increased to 14,000 kg (31,000 lb). Some H-6s received Jumo 211F-2s which improved a low-level speed of 365 km/h (227 mph). At an altitude of 6,000 m (20,000 ft) the maximum speed was 435 km/h (270 mph). If heavy external loads were added, the speed was reduced by 35 km/h (22 mph). Other designs of the mid-H series included the He 111 H-7 and H-8. The airframes were to be rebuilds of the H-3/H-5 variant. Both were designed as night bombers and were to have two Jumo 211F-1s installed. The intention was for the H-8 to be fitted with cable-cutting equipment and barrage ballon deflectors on the leading edge of the wings. The H-7 was never built.” The H-9 was intended as a trainer with dual control columns. The airframe was a H-1 variant rebuild. The powerplants consisted of two JumoA-1s or D-1s.[56] The H-10 was also designated to trainer duties. Rebuilt from an H-2 or H-3 airframe, it was installed with full defensive armament including 13 mm (0.51 in) MG 131 and 7.92 mm (0.312 in) MG 81Z machine guns. It was to be powered by two Jumo 211A-1s, D-1s or F-2s.”* *History from Wikipedia. Now, let´s go to the model kit set. This is a combo kit with all in box.! ICM called it "Airfield of the Luftwaffe Bomber Group" All are in 1:48 and all in the box is intended to recreate a Luftwaffe airfield scene from World War II. It includes two main components: the Heinkel He 111 H-3 bomber (a reissue of an earlier ICM mold) and a set of airfield figures and accessories, such as ground crew and equipment. Starting for the main star in this set: The Heinkel He-111 H-3 The centerpiece of the set, this is a German medium bomber widely used by the Luftwaffe. The kit includes parts to build a detailed H-3 version, with a cockpit interior, bomb bay, and visible engines. If you choose to display them exposed, they are quite complete and allows you to make a maintenance scene in a diorama, direct from the box. I thinkg that if you want to make open, just some fine wires will make all the difference in the realism. The plastic parts are in gray color with fine surface details, such as panel lines and rivets, typical of ICM’s more recent molds. The injection markings are very subtle and mainly in places that will be hard to see when build. All the internal structure is present in the fuselage halves and compartment details (like the cockpit, rear gunner) are good in detail straight from the box. A full Bombay area is available from the box and it is quite satisfactory straight from the box and you have the option to make it open or close. The transparent parts are provided for the cockpit canopy, gun turrets, and windows. They are clear and free from distortion, as usual in ICM model kits, allowing for excellent visibility of interior details. Here is where the 4 options given chance a bit, so check your references to use the correct clear parts in the nose and belly gunner. You got 4 markings from the box: 1- He-111 H-3, 1./KG53, France, Spring 1940; 2- He-111 H-3, Geschwaderstab/KG53, France, August 1940; 3- He-111 H-3, KG26, Norway Spring 1941; 4- He-111 H-3, 5./KG27, Russia, April 1943; The instructions are the usual booklet from ICM with ICM colors indication only. Moving to “Airfield Figures and Accessories” As I said, this is a combo kit. So beside the He-111, there`s also airfield accessories that gives a 50kg bomb crane, 250kg bomb crane, jerry can, fuel barrel, barrel for lubricants, compressed air cylinder, toolbox and an airbrush. Also a field tripod crane perfect if you want and have the skills to make e little maintenance engine scene with those engines opens… The parts are very detailed even the chain in plastic is well made for 1:48 but if there is anything that is worth upgraded is the chain and it’s an easy upgraded to make. If these wasn’t enough, ICM gives you even more, a road barrier, a watchman`s booth and a small stepladder. All these plus a full ordnance set. All parts have no flash at all, and the surface detail is very good as the actual ICM standards. The small parts like a tiny 1:48 airbush are just perfect and very well mold with no flash and very little cleaning or almost none. The connection points sprues in perfect places to make easy the cut from the sprues. There`s not a single instruction booklet for this specific box but several instructions from the original release of each. Anyway, the instruction manual is detailed and easy to follow. It includes step-by-step assembly diagrams, color callouts, and decal placement guides. And finally, lets check the German Luftwaffe Ground personnel (1939-1945). This set is 7 figures set and one dog, depicting pilots and mechanics All parts have no flash at all, and the surface detail is quite good so you can really get a very good figure from this set, using all together or just one as the posture could be used in several other scenario. The figures have the torso in one piece without arms or legs as they are separated with the exception of the standing mechanic. The overall detail of all figures is very good even for a mold injection figure. The dog is make into two halves so a good fitting will be necessary to not ruin the fuffy fur. The color indication and instructions is a simple A4 sheet on both sides, one wih the parts diagram and color index and the other side, with figures with parts numbers and color numbers. There is decal for the He-111 H-3 and the Airfield/ordenance set, and both have, as usual, very good color pigmentation and registration. CONCLUSION The ICM DS4805 "Airfield of the Luftwaffe Bomber Group" is a great choice and a perfect set to all that wants a WWII He-111 with some extra to make a diorama or just want a He-111 H-3 and use all other stuff in others projects. With all the stuff package inside you can use that in at least, 3 or 4 others projects, with no problems. This set is an excellent value for your money so once again Judos to ICM for releasing this set. Highly recommend To get one of this beauty, just go to Art Scale


-
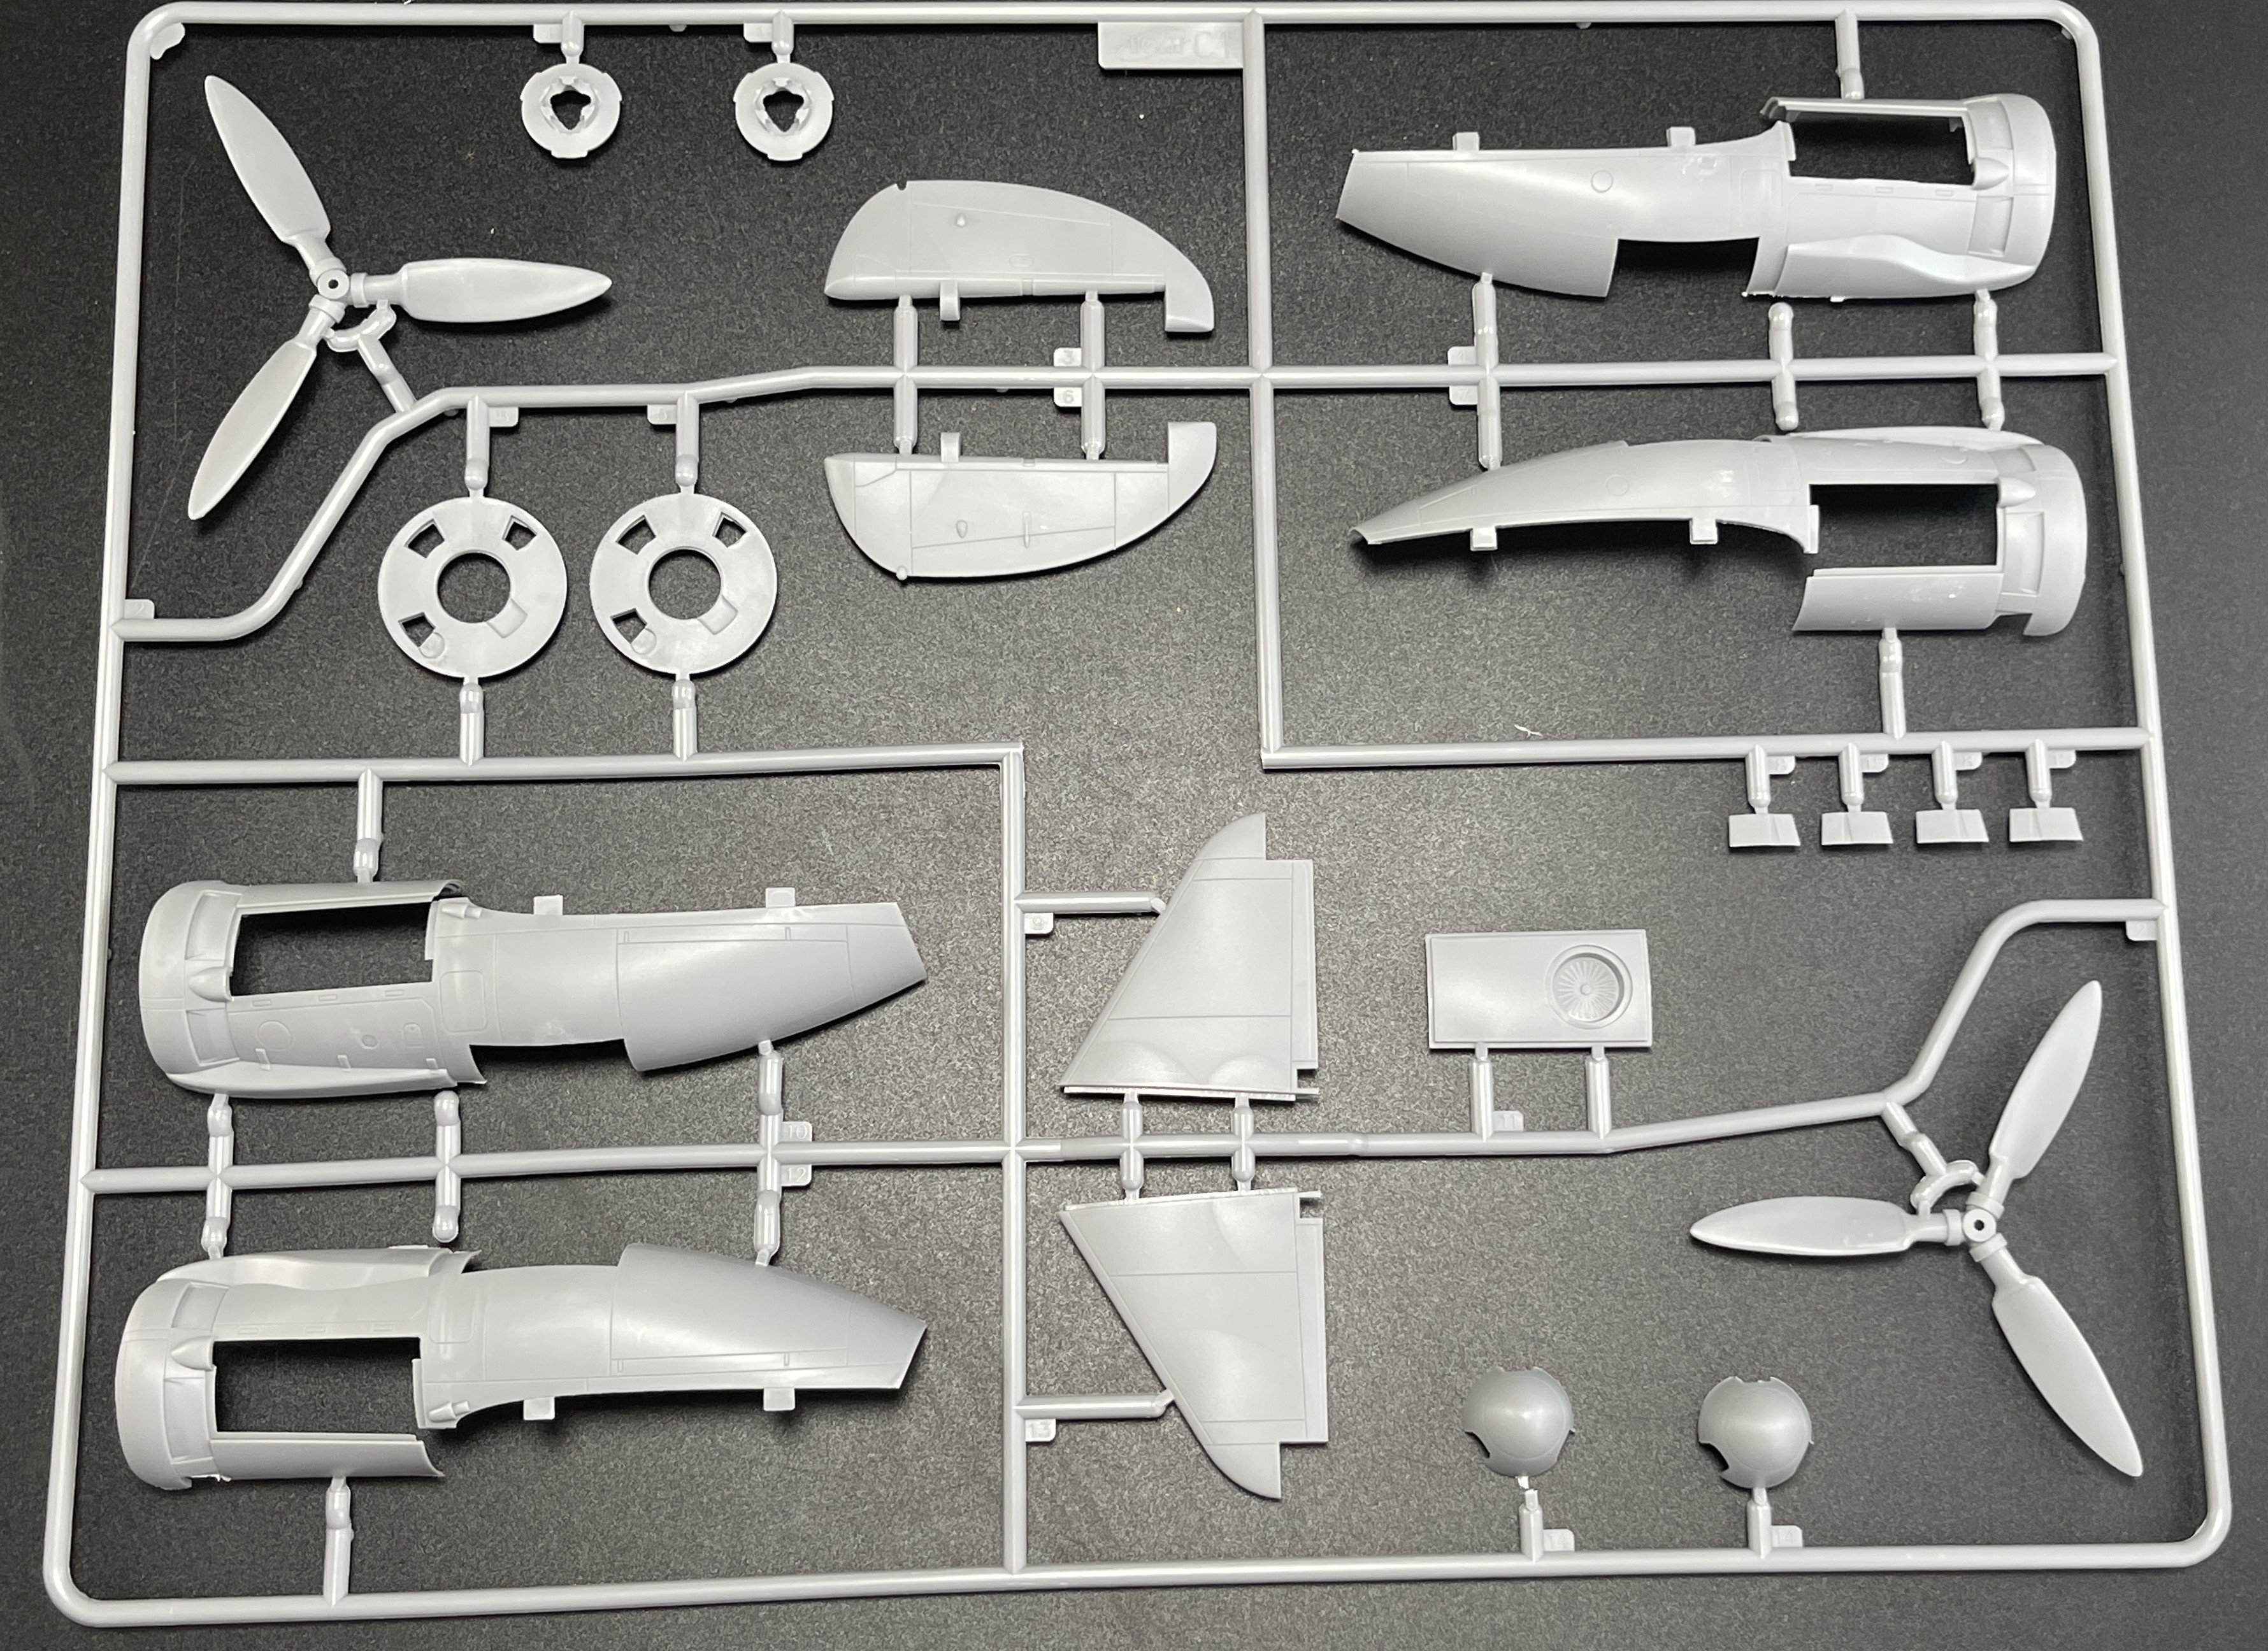
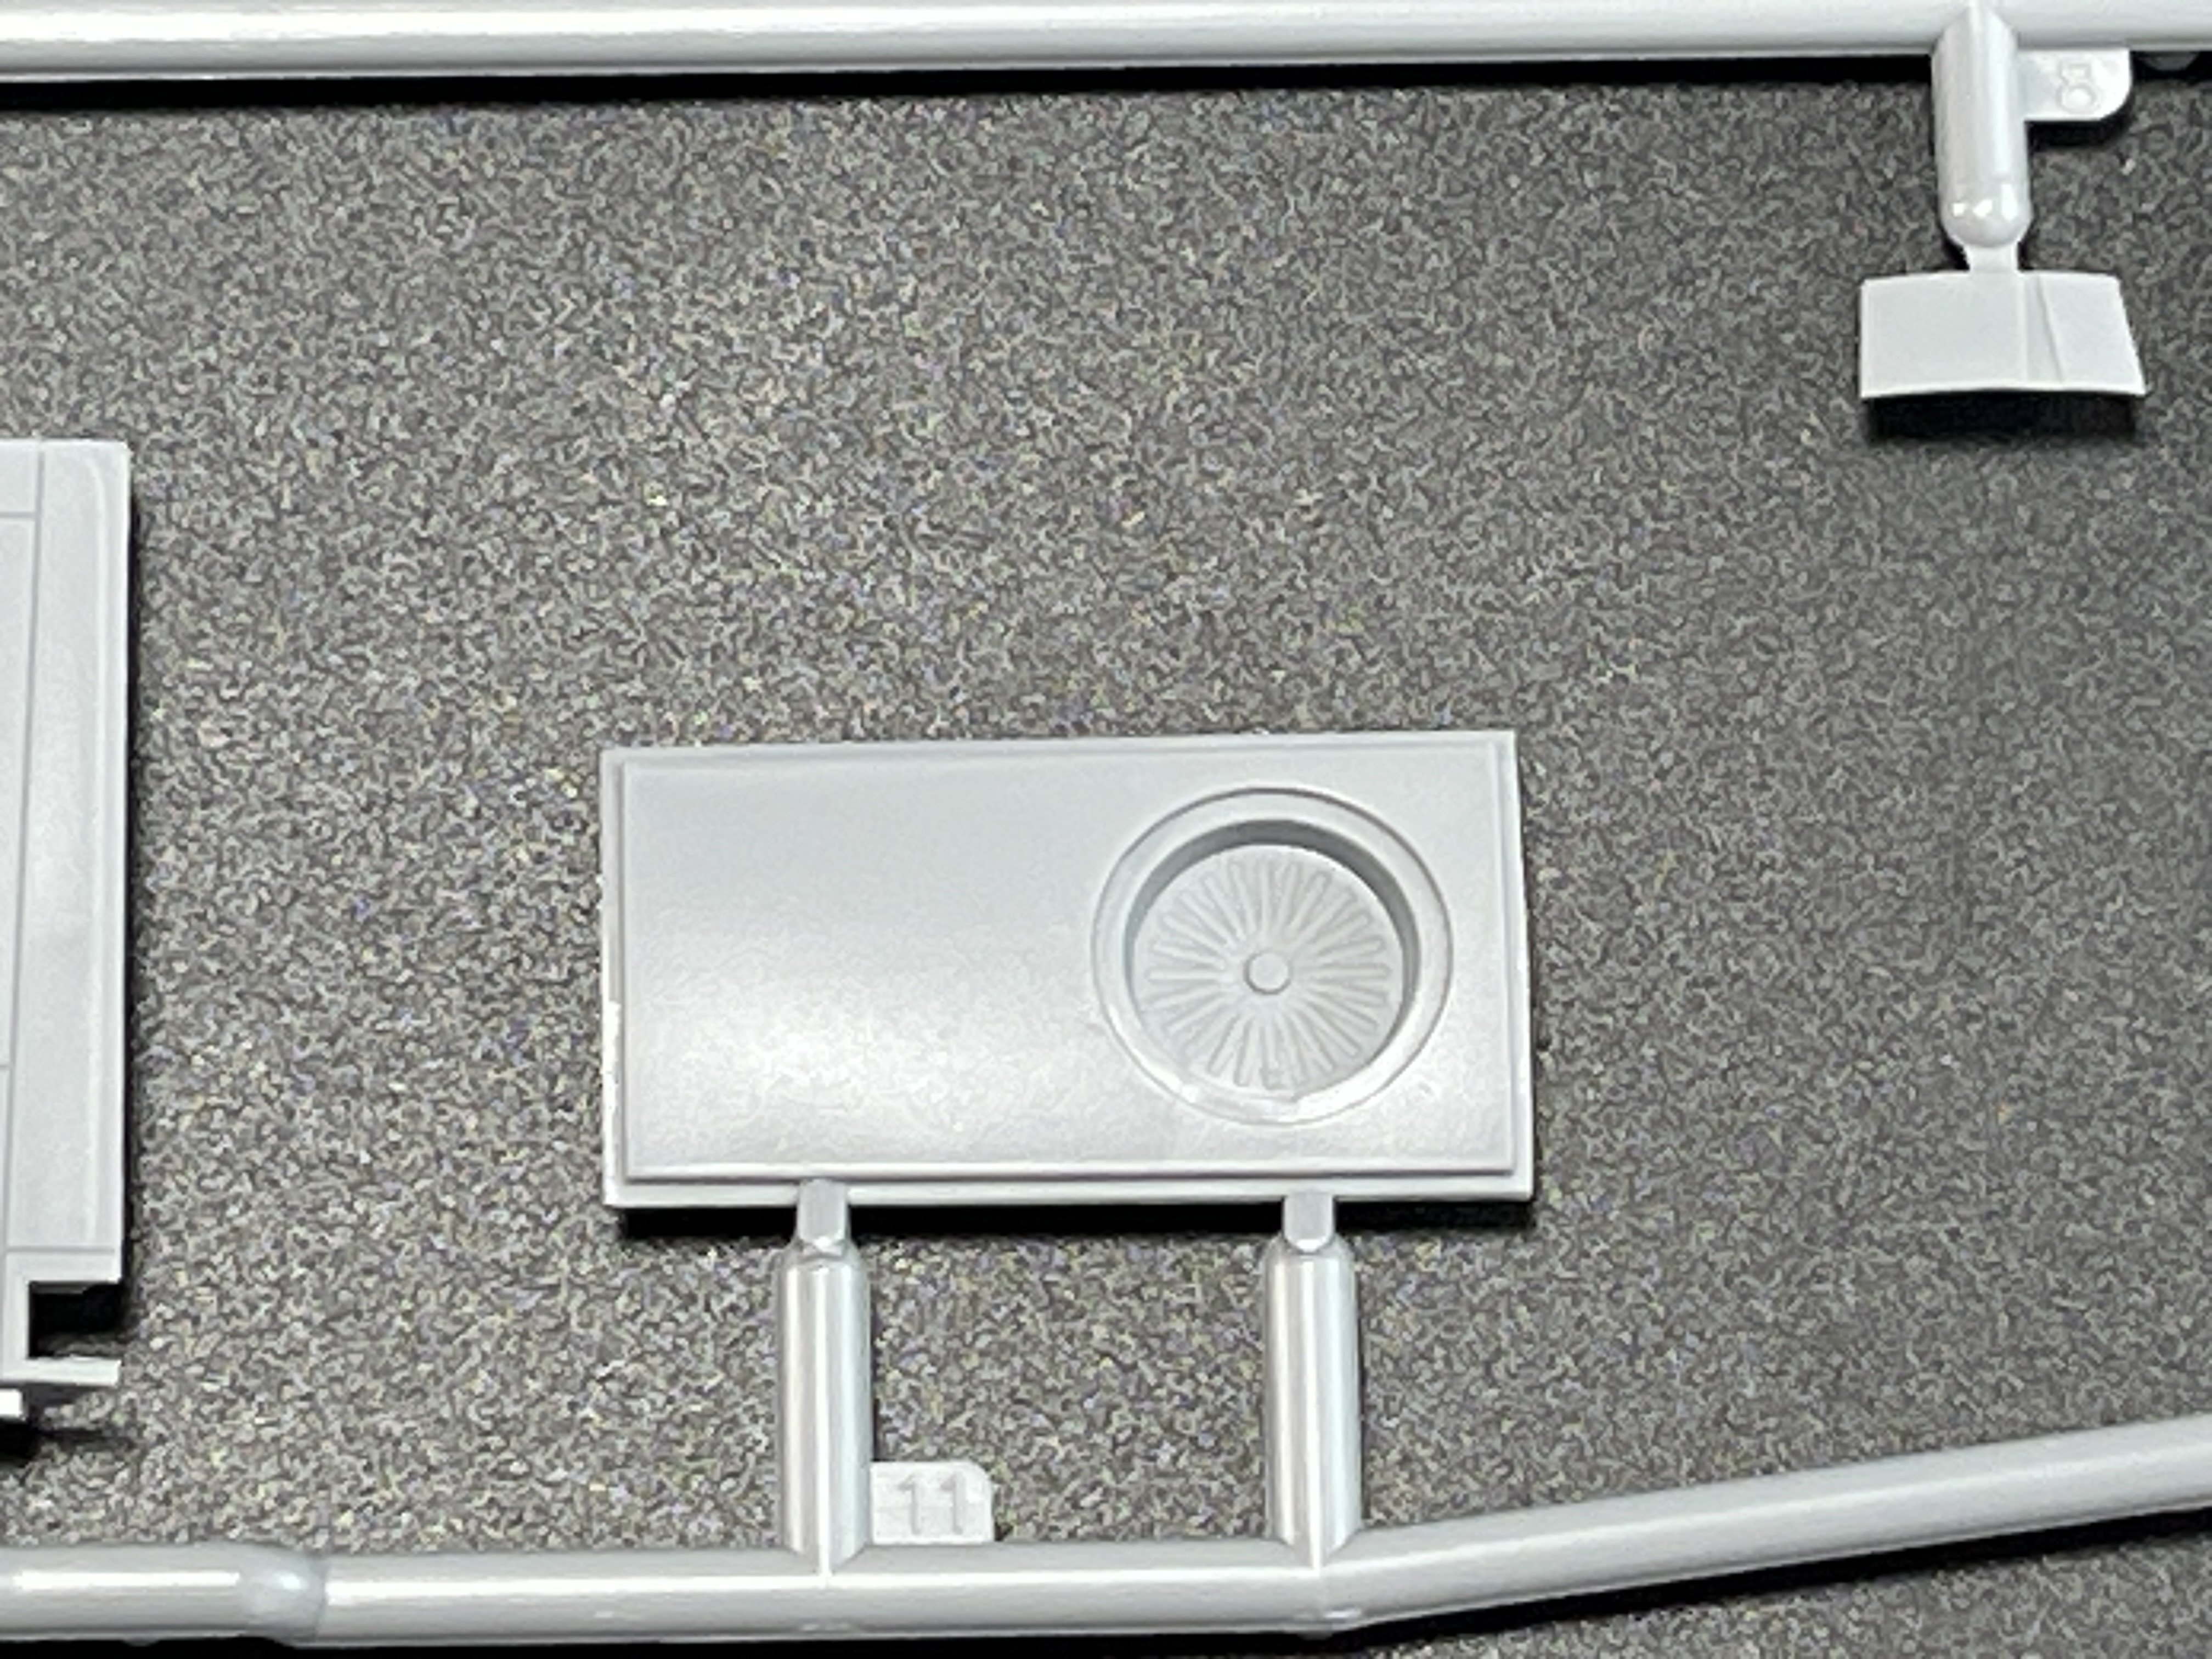
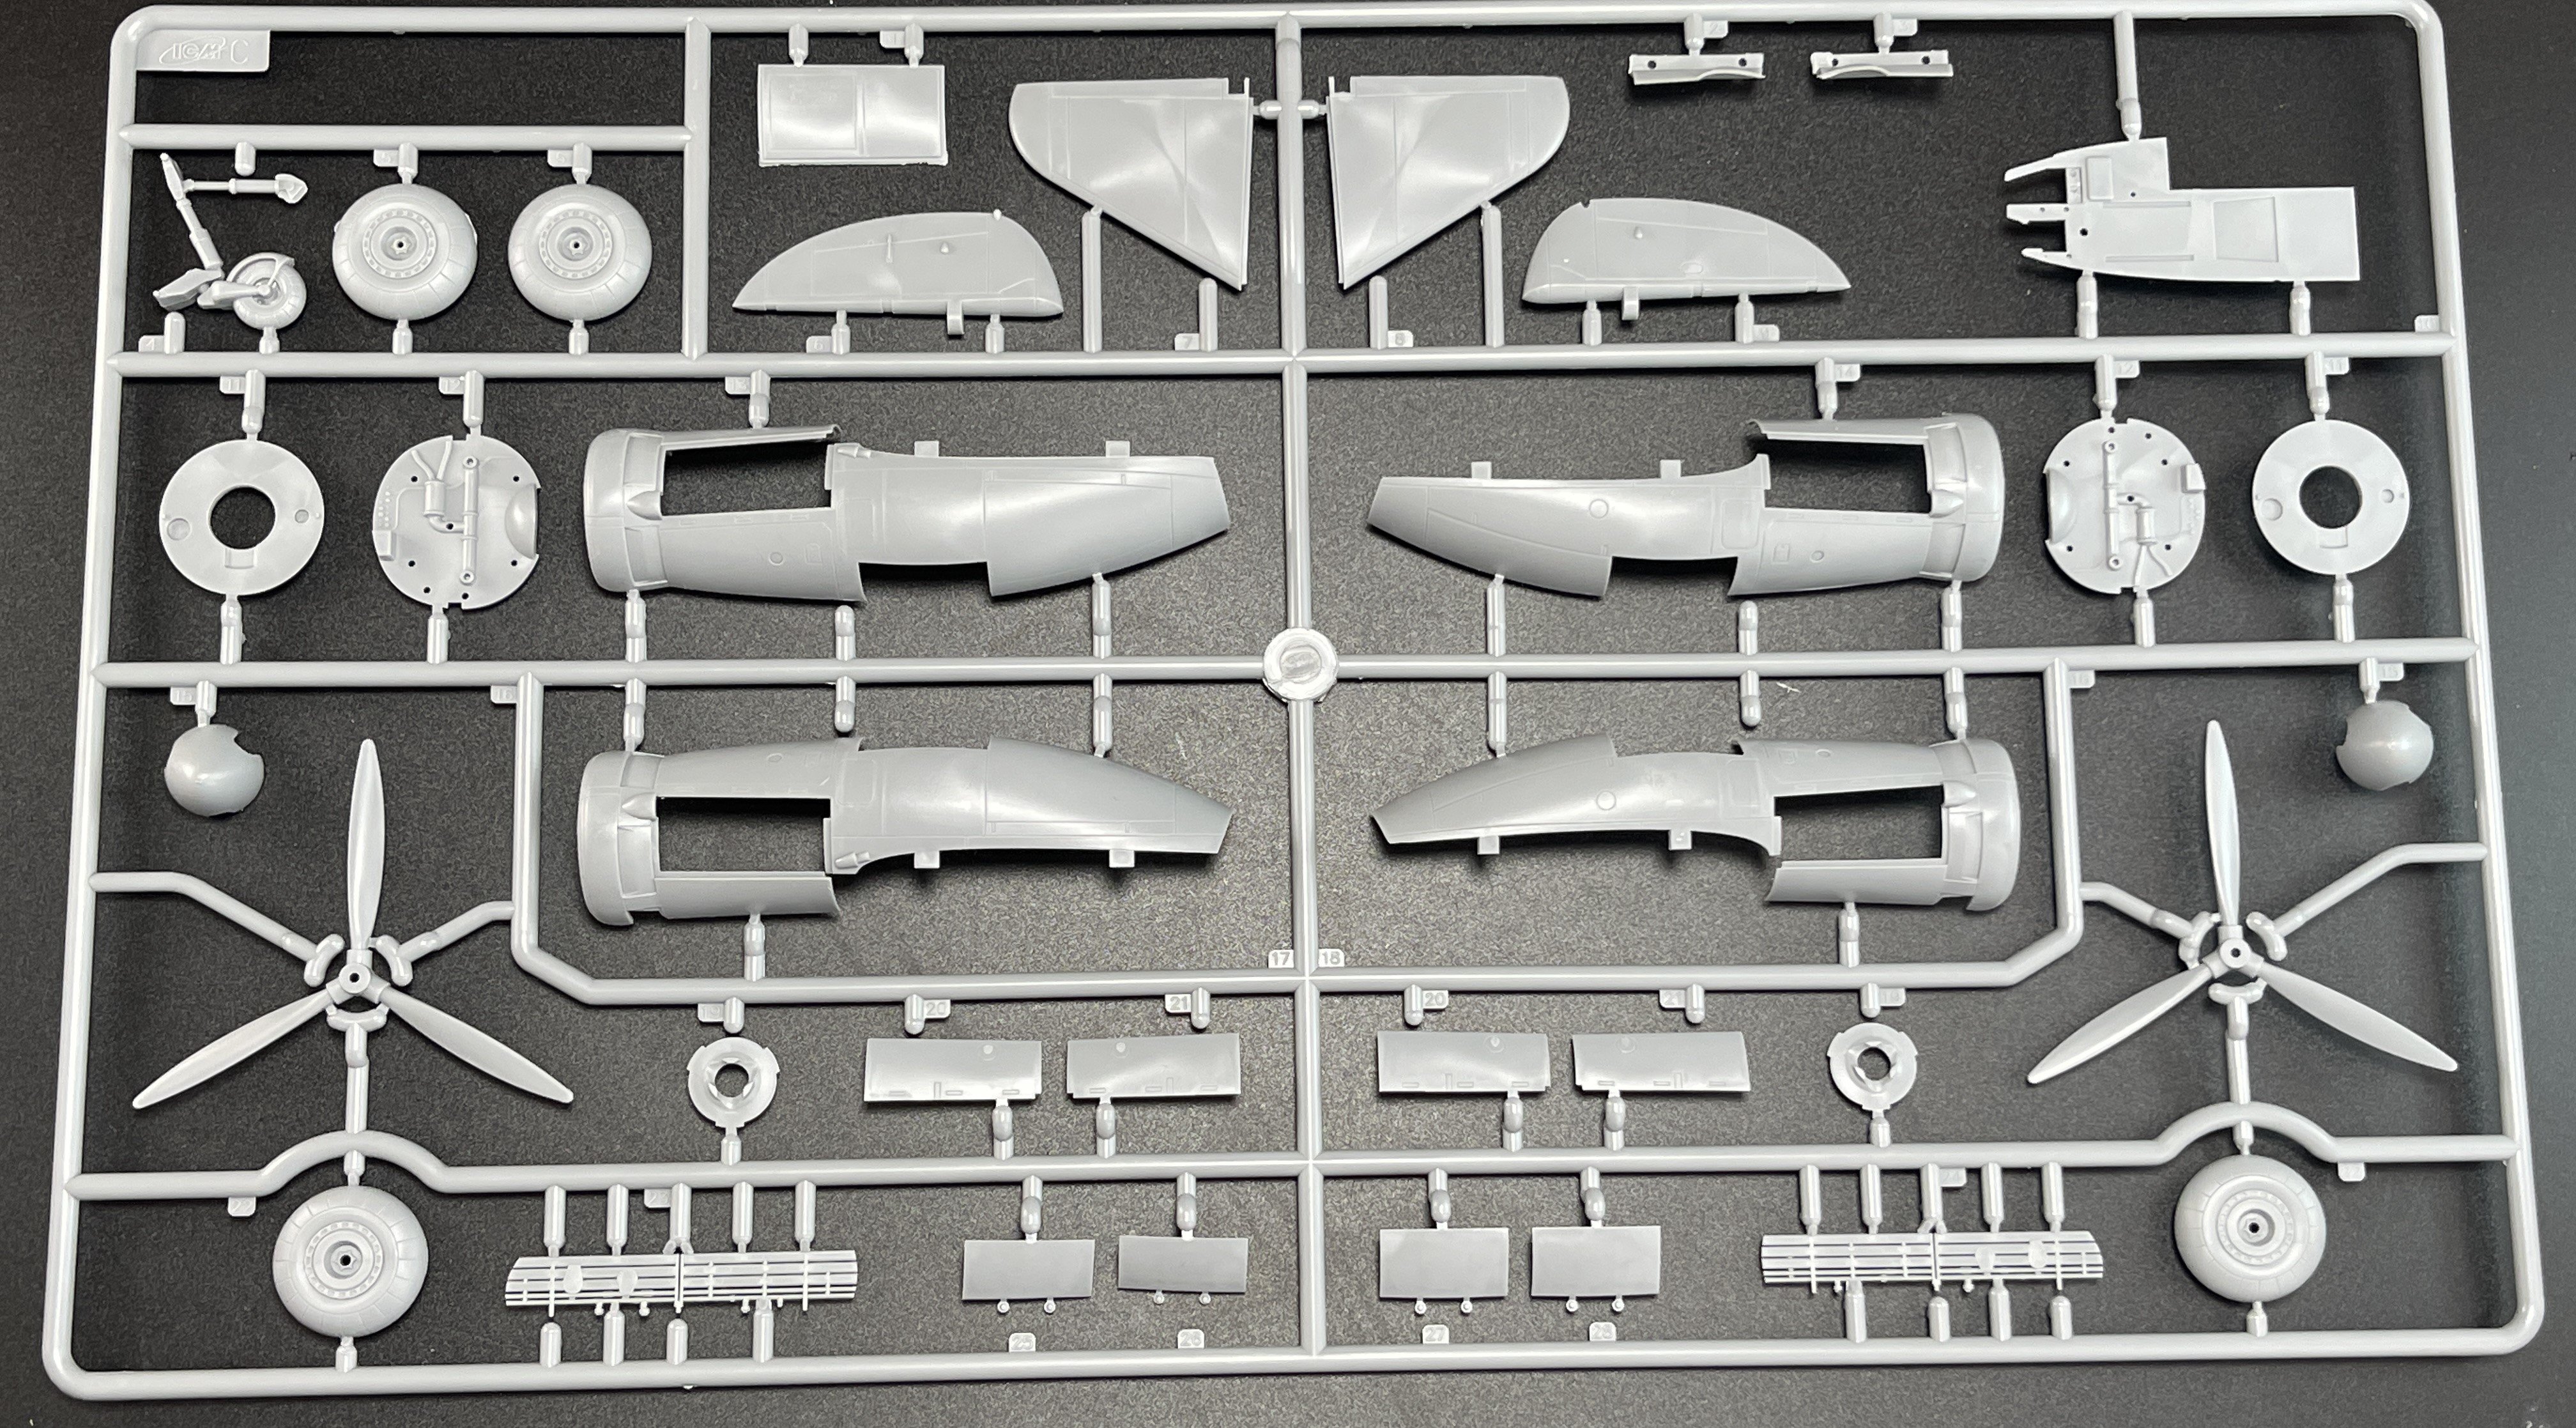
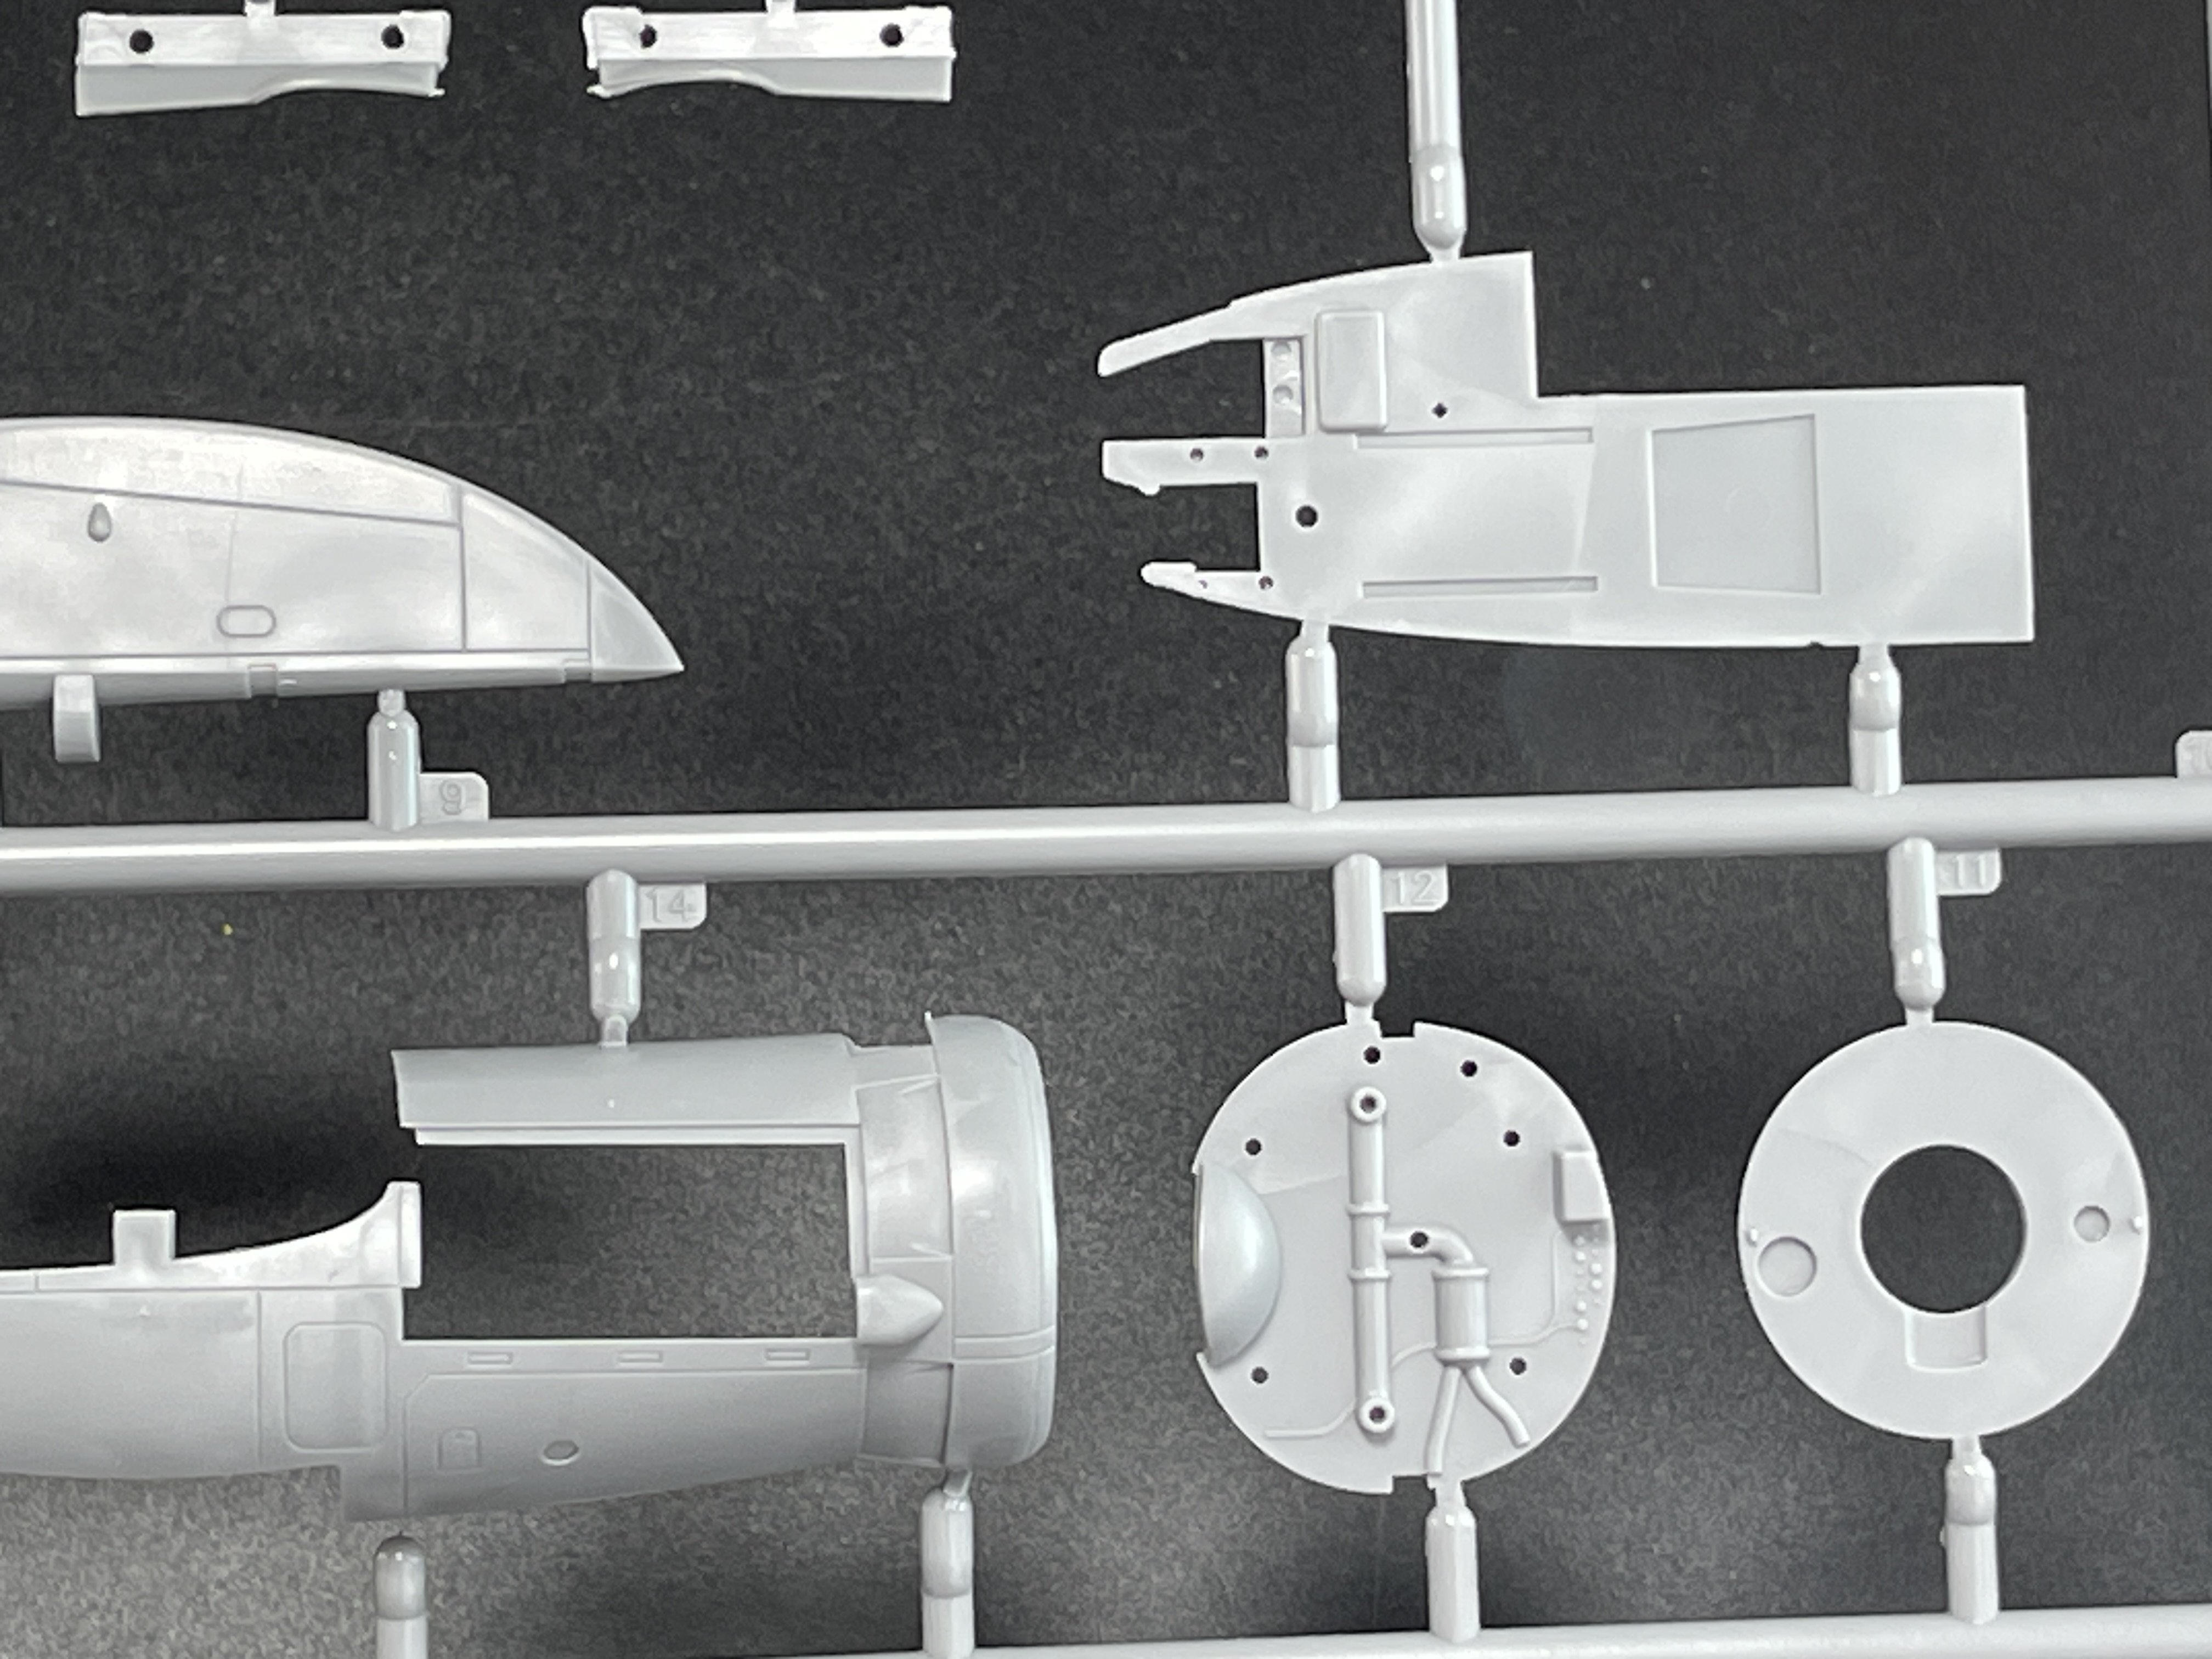
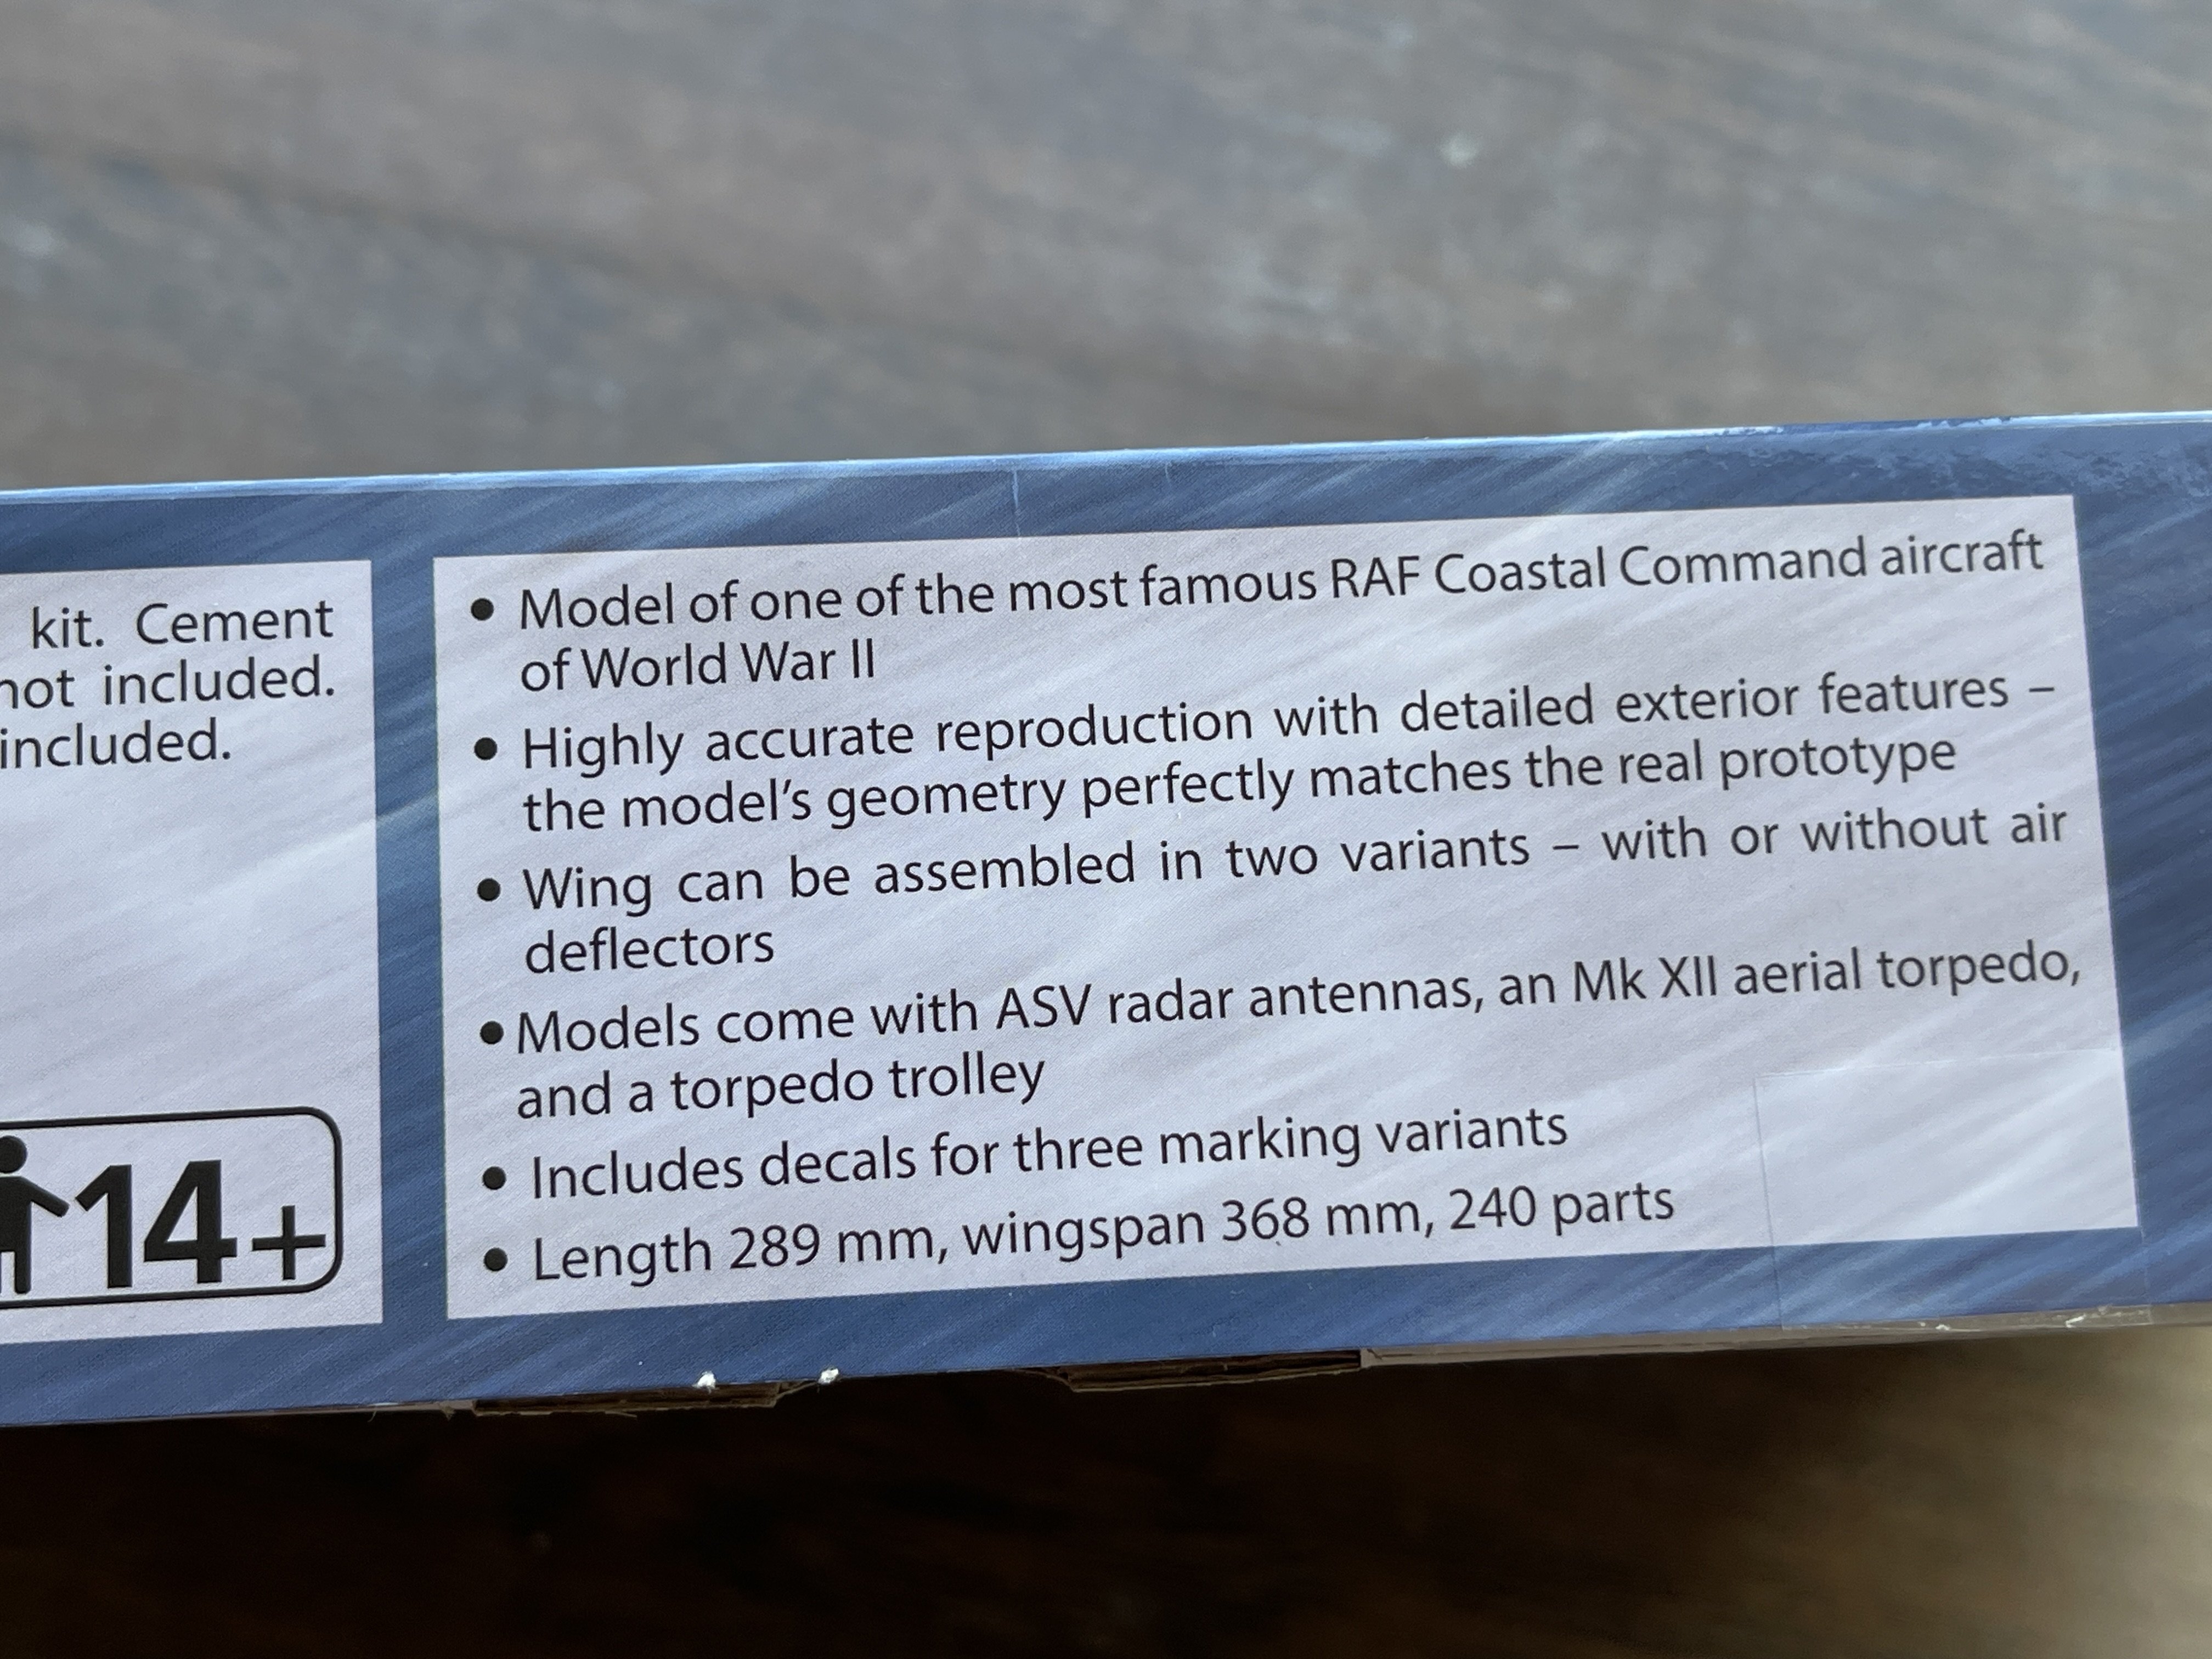
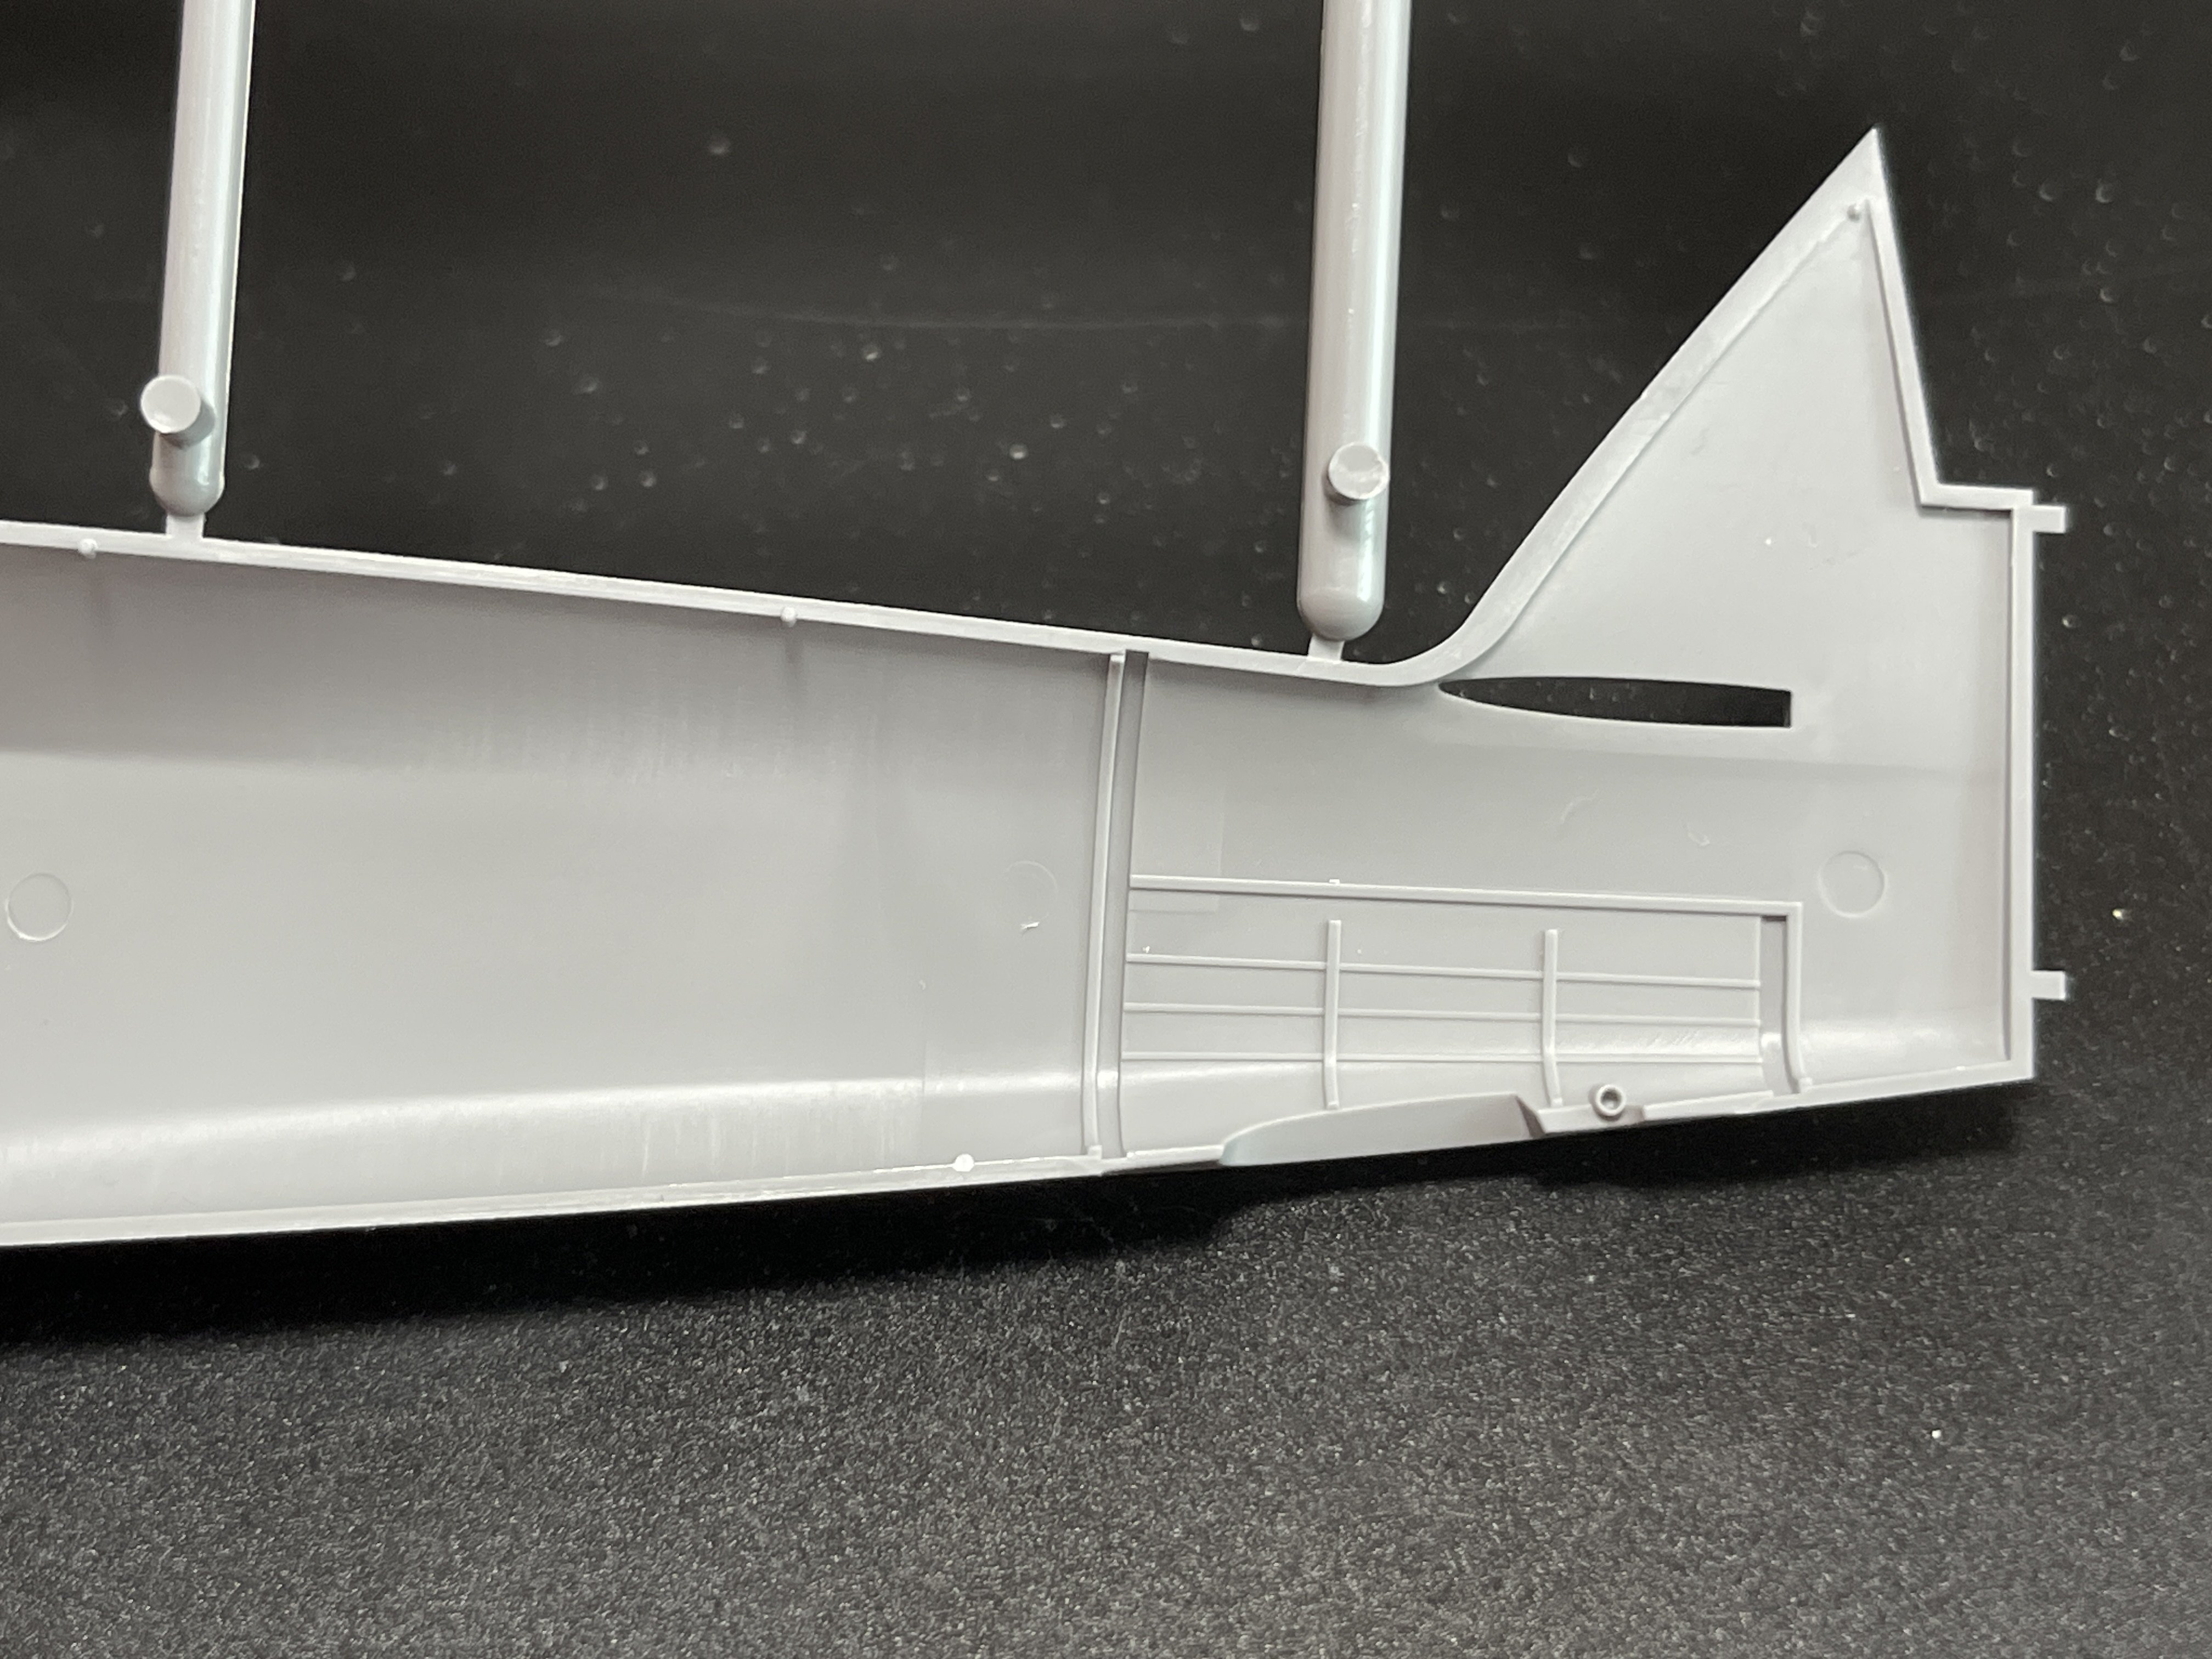
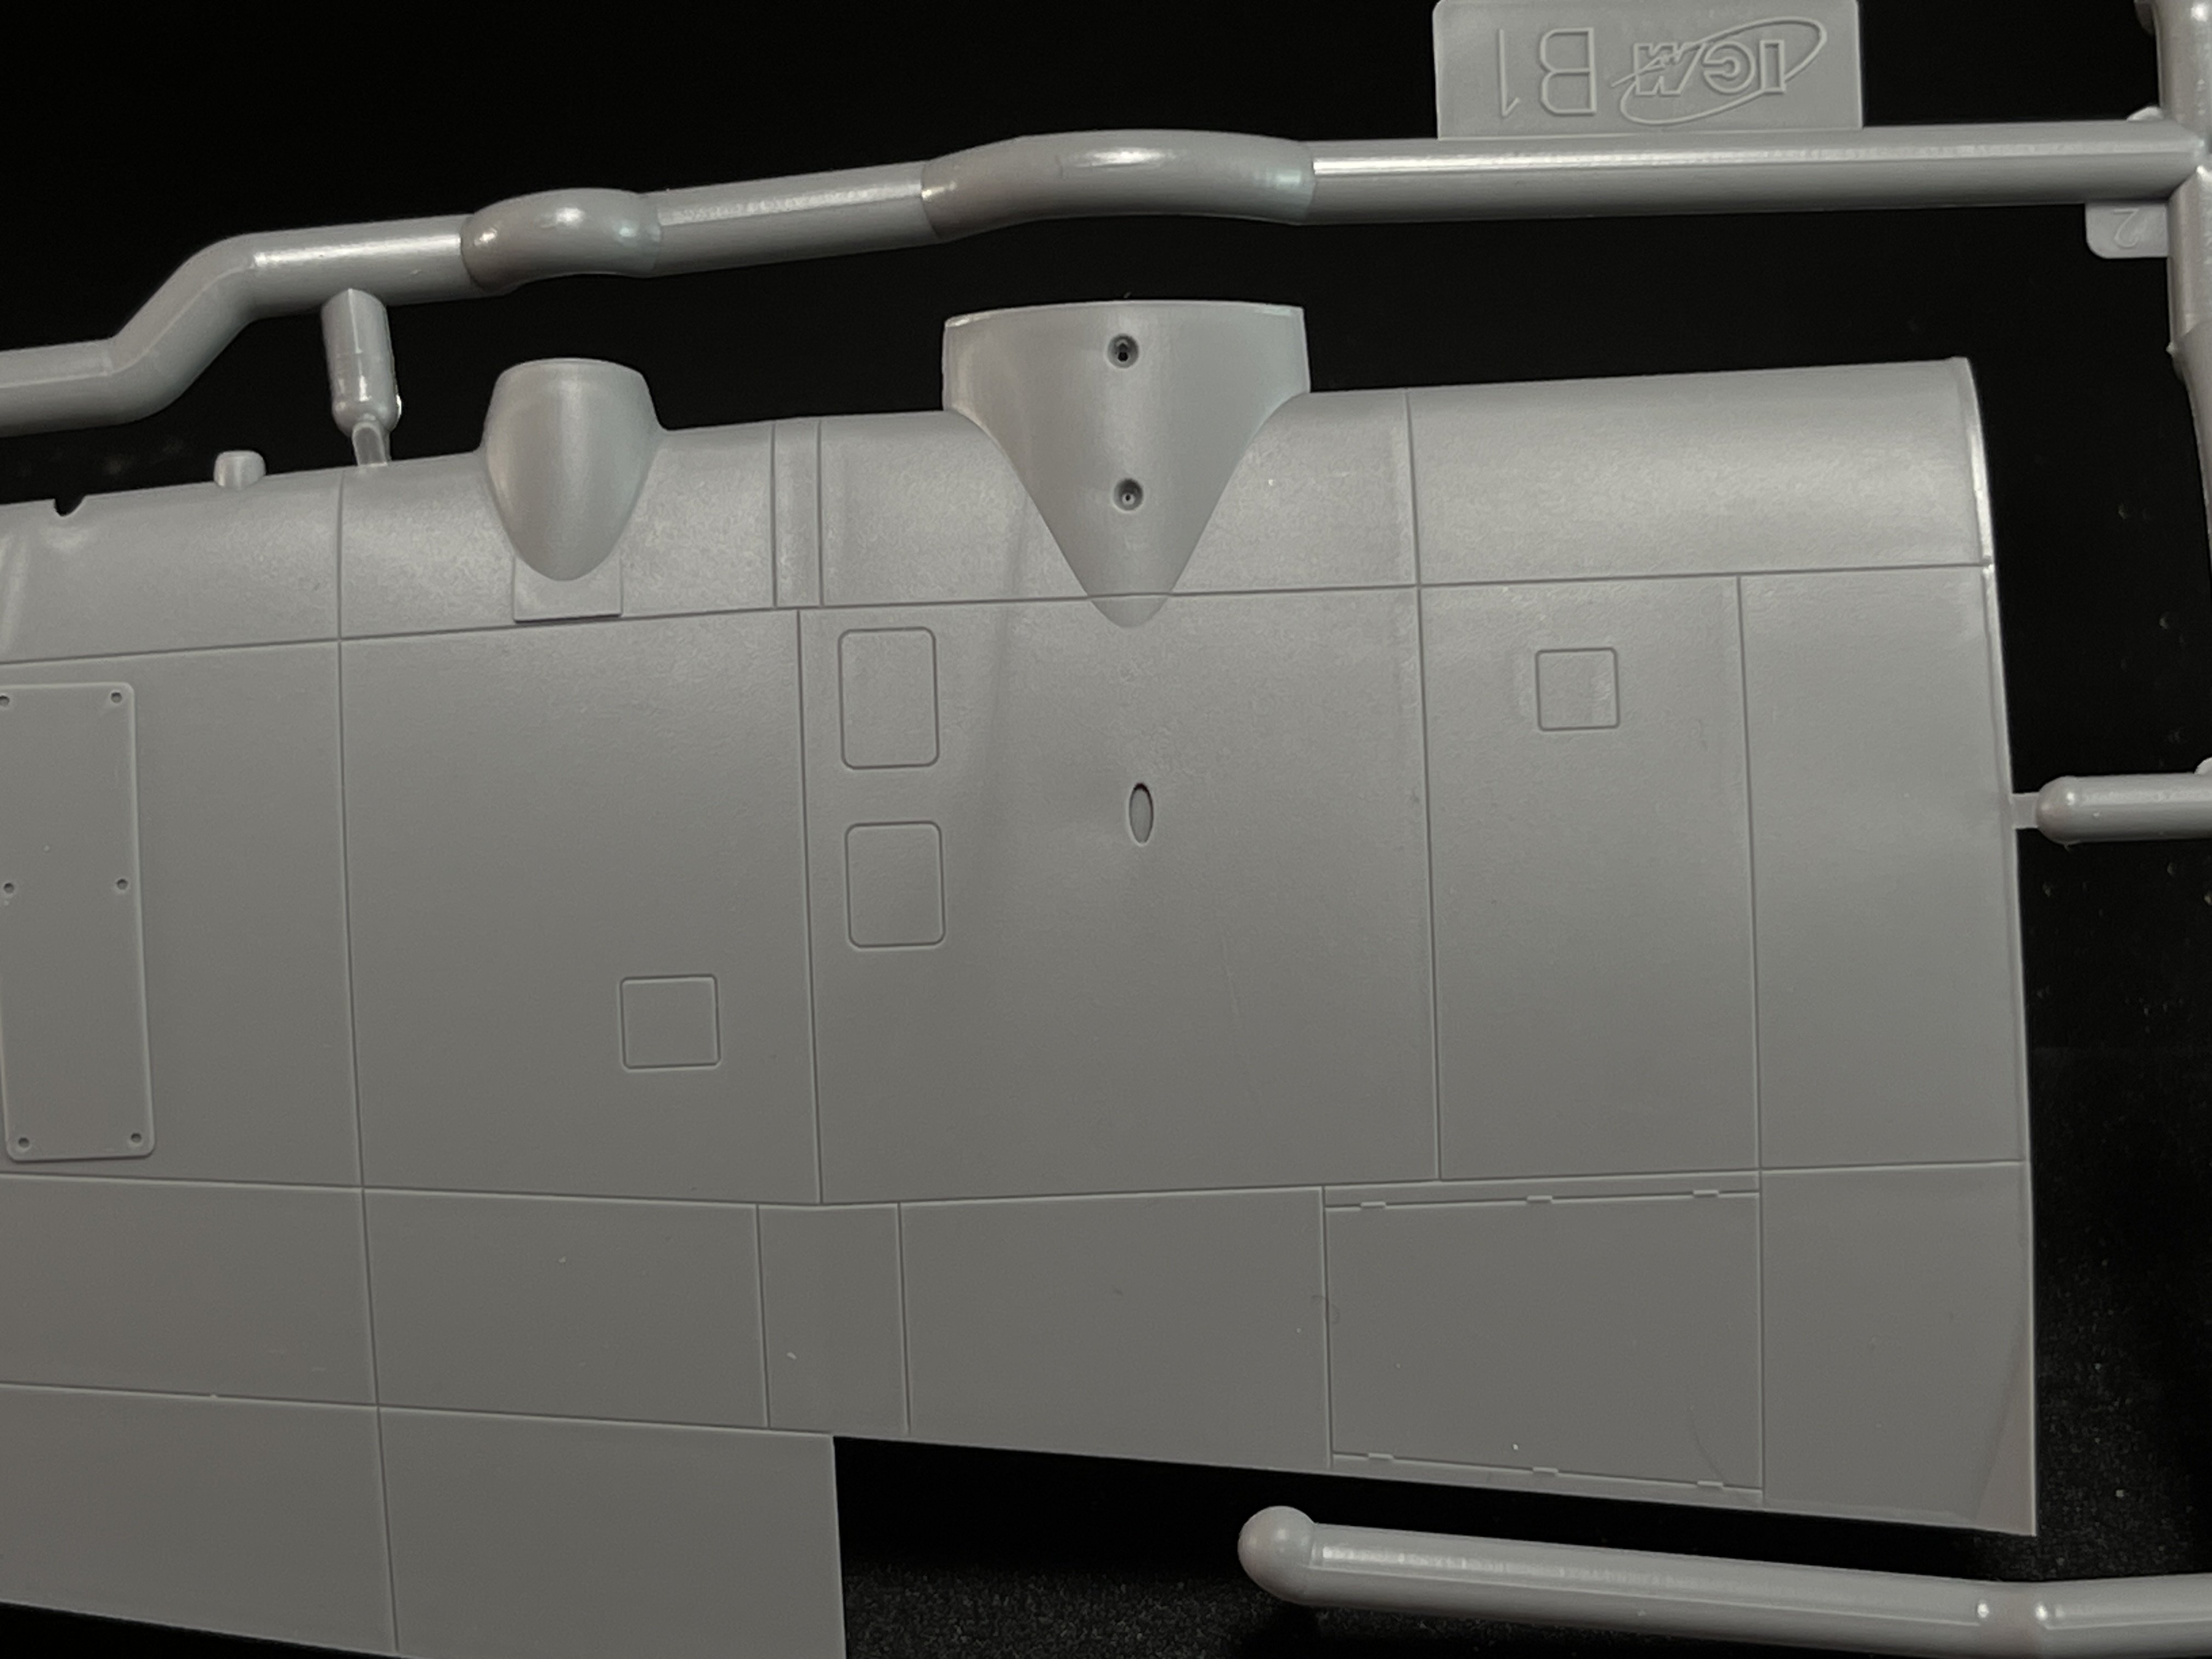
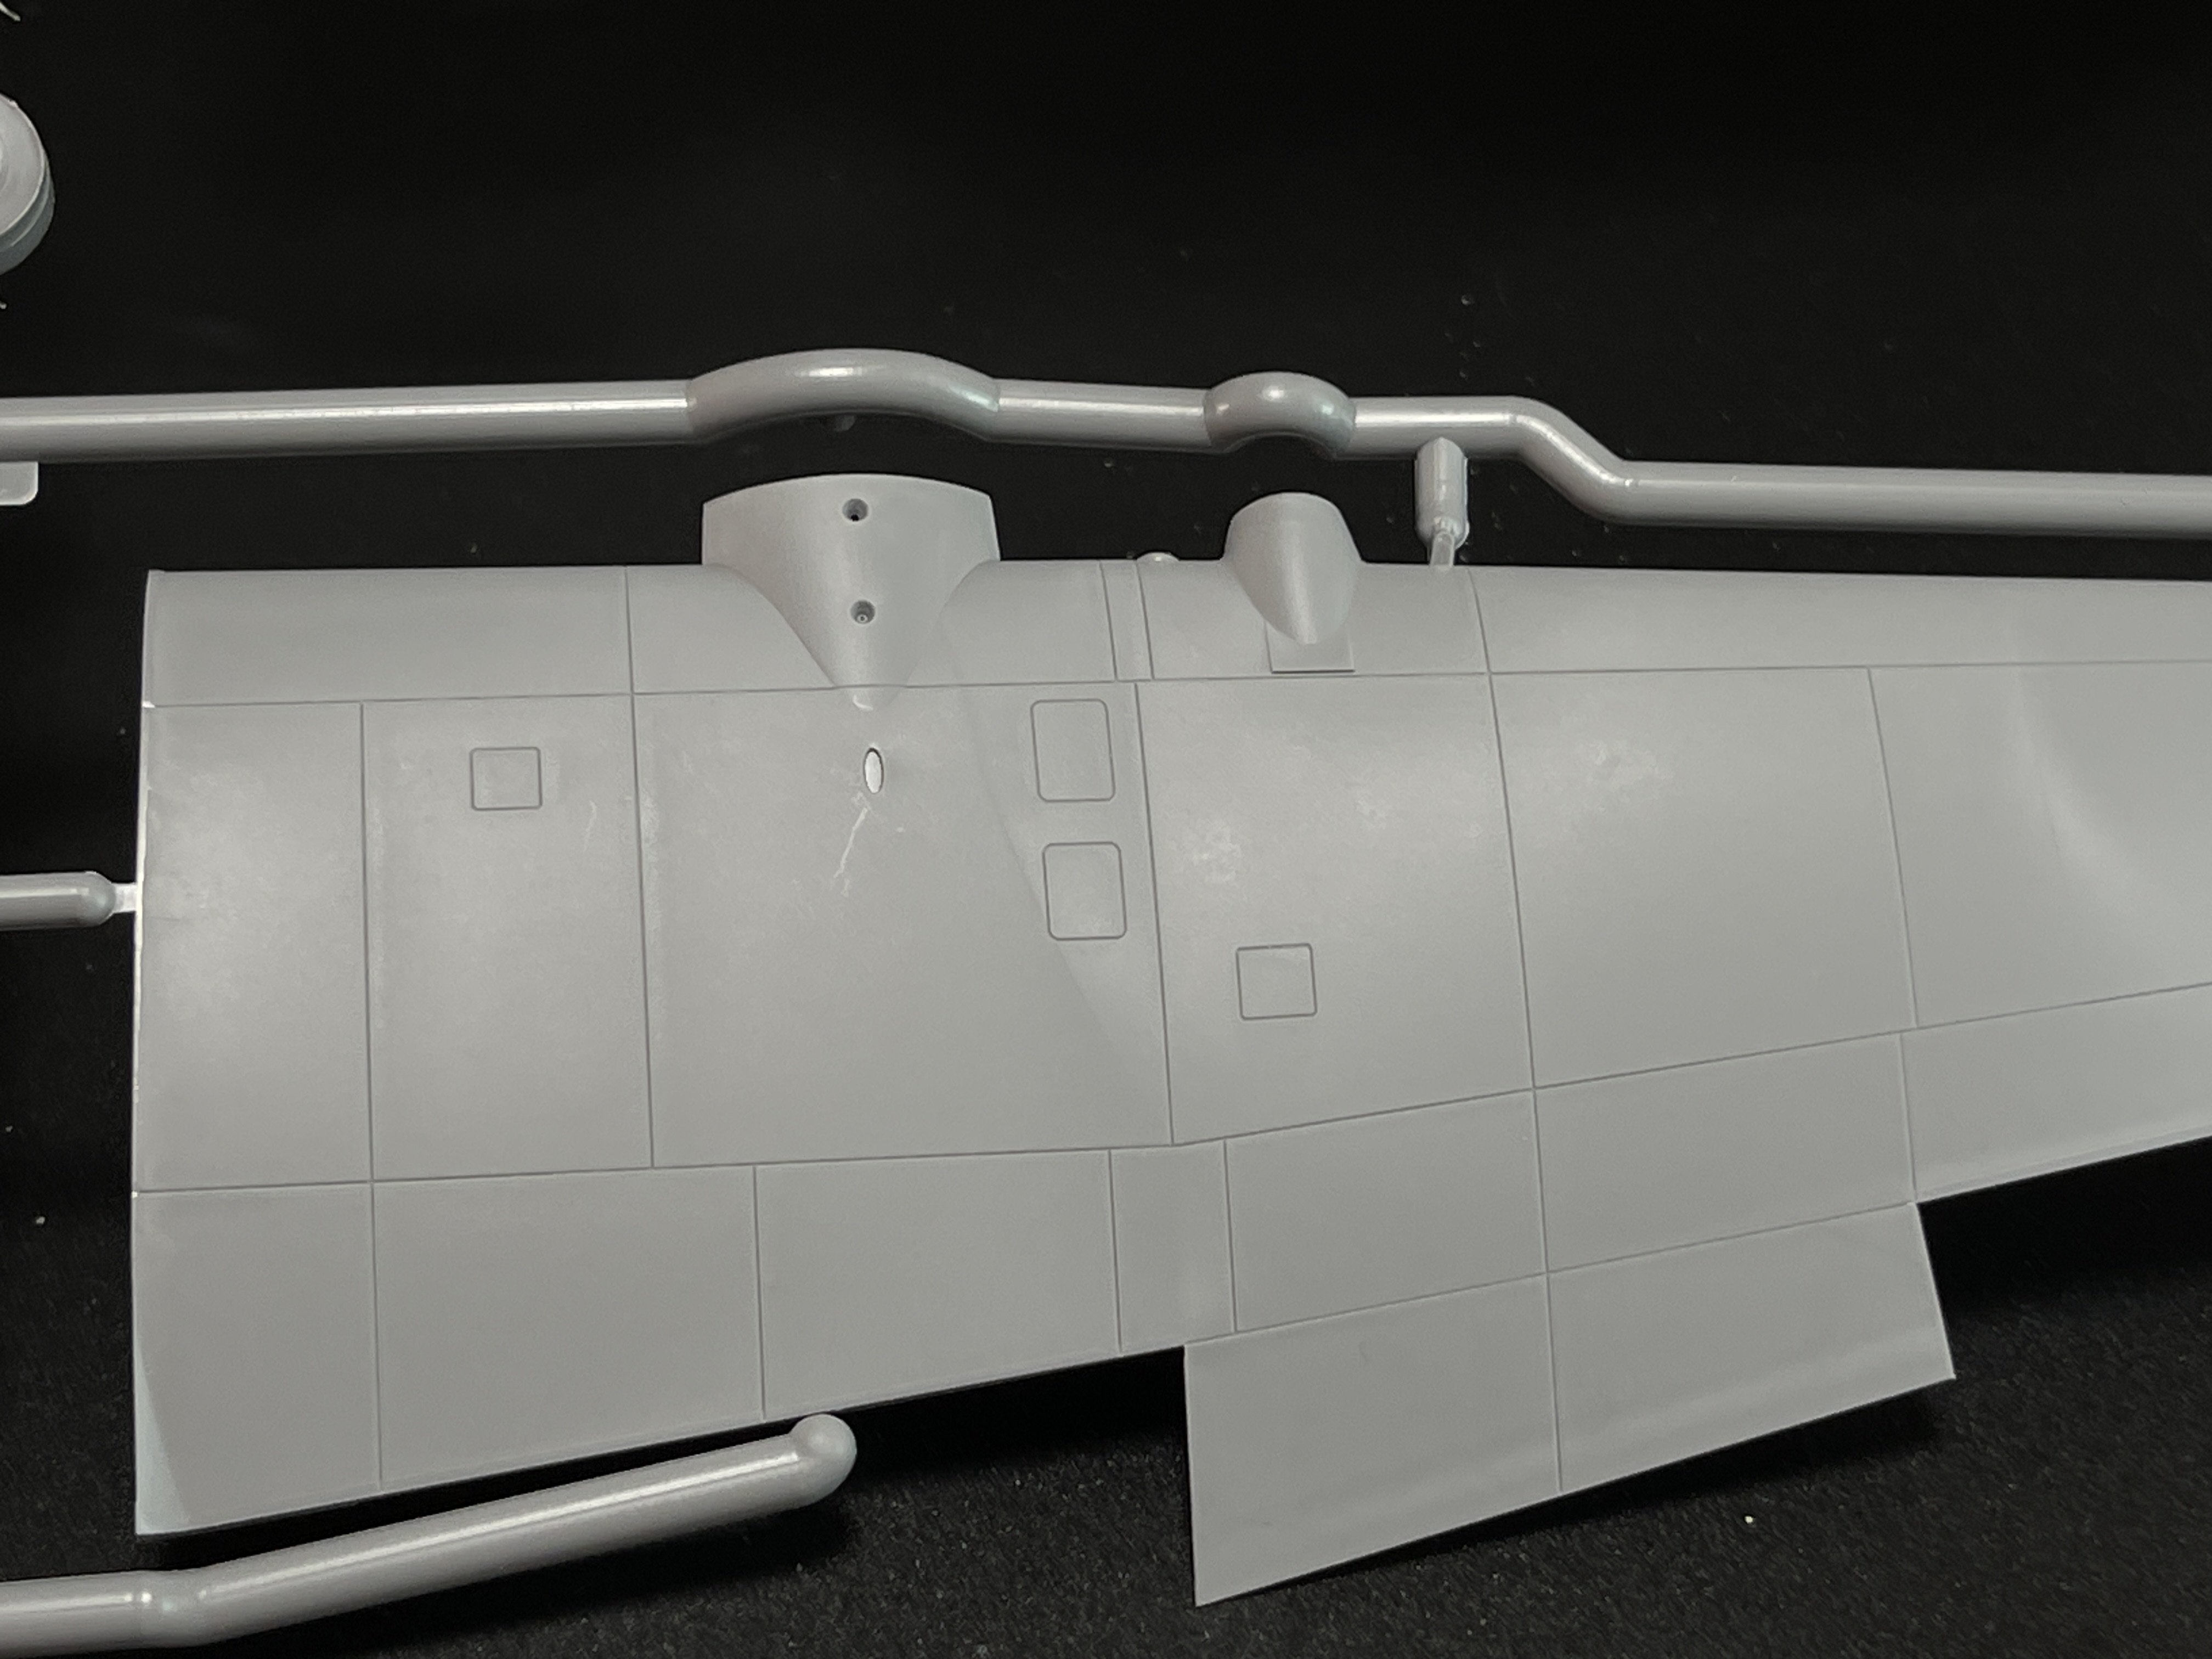
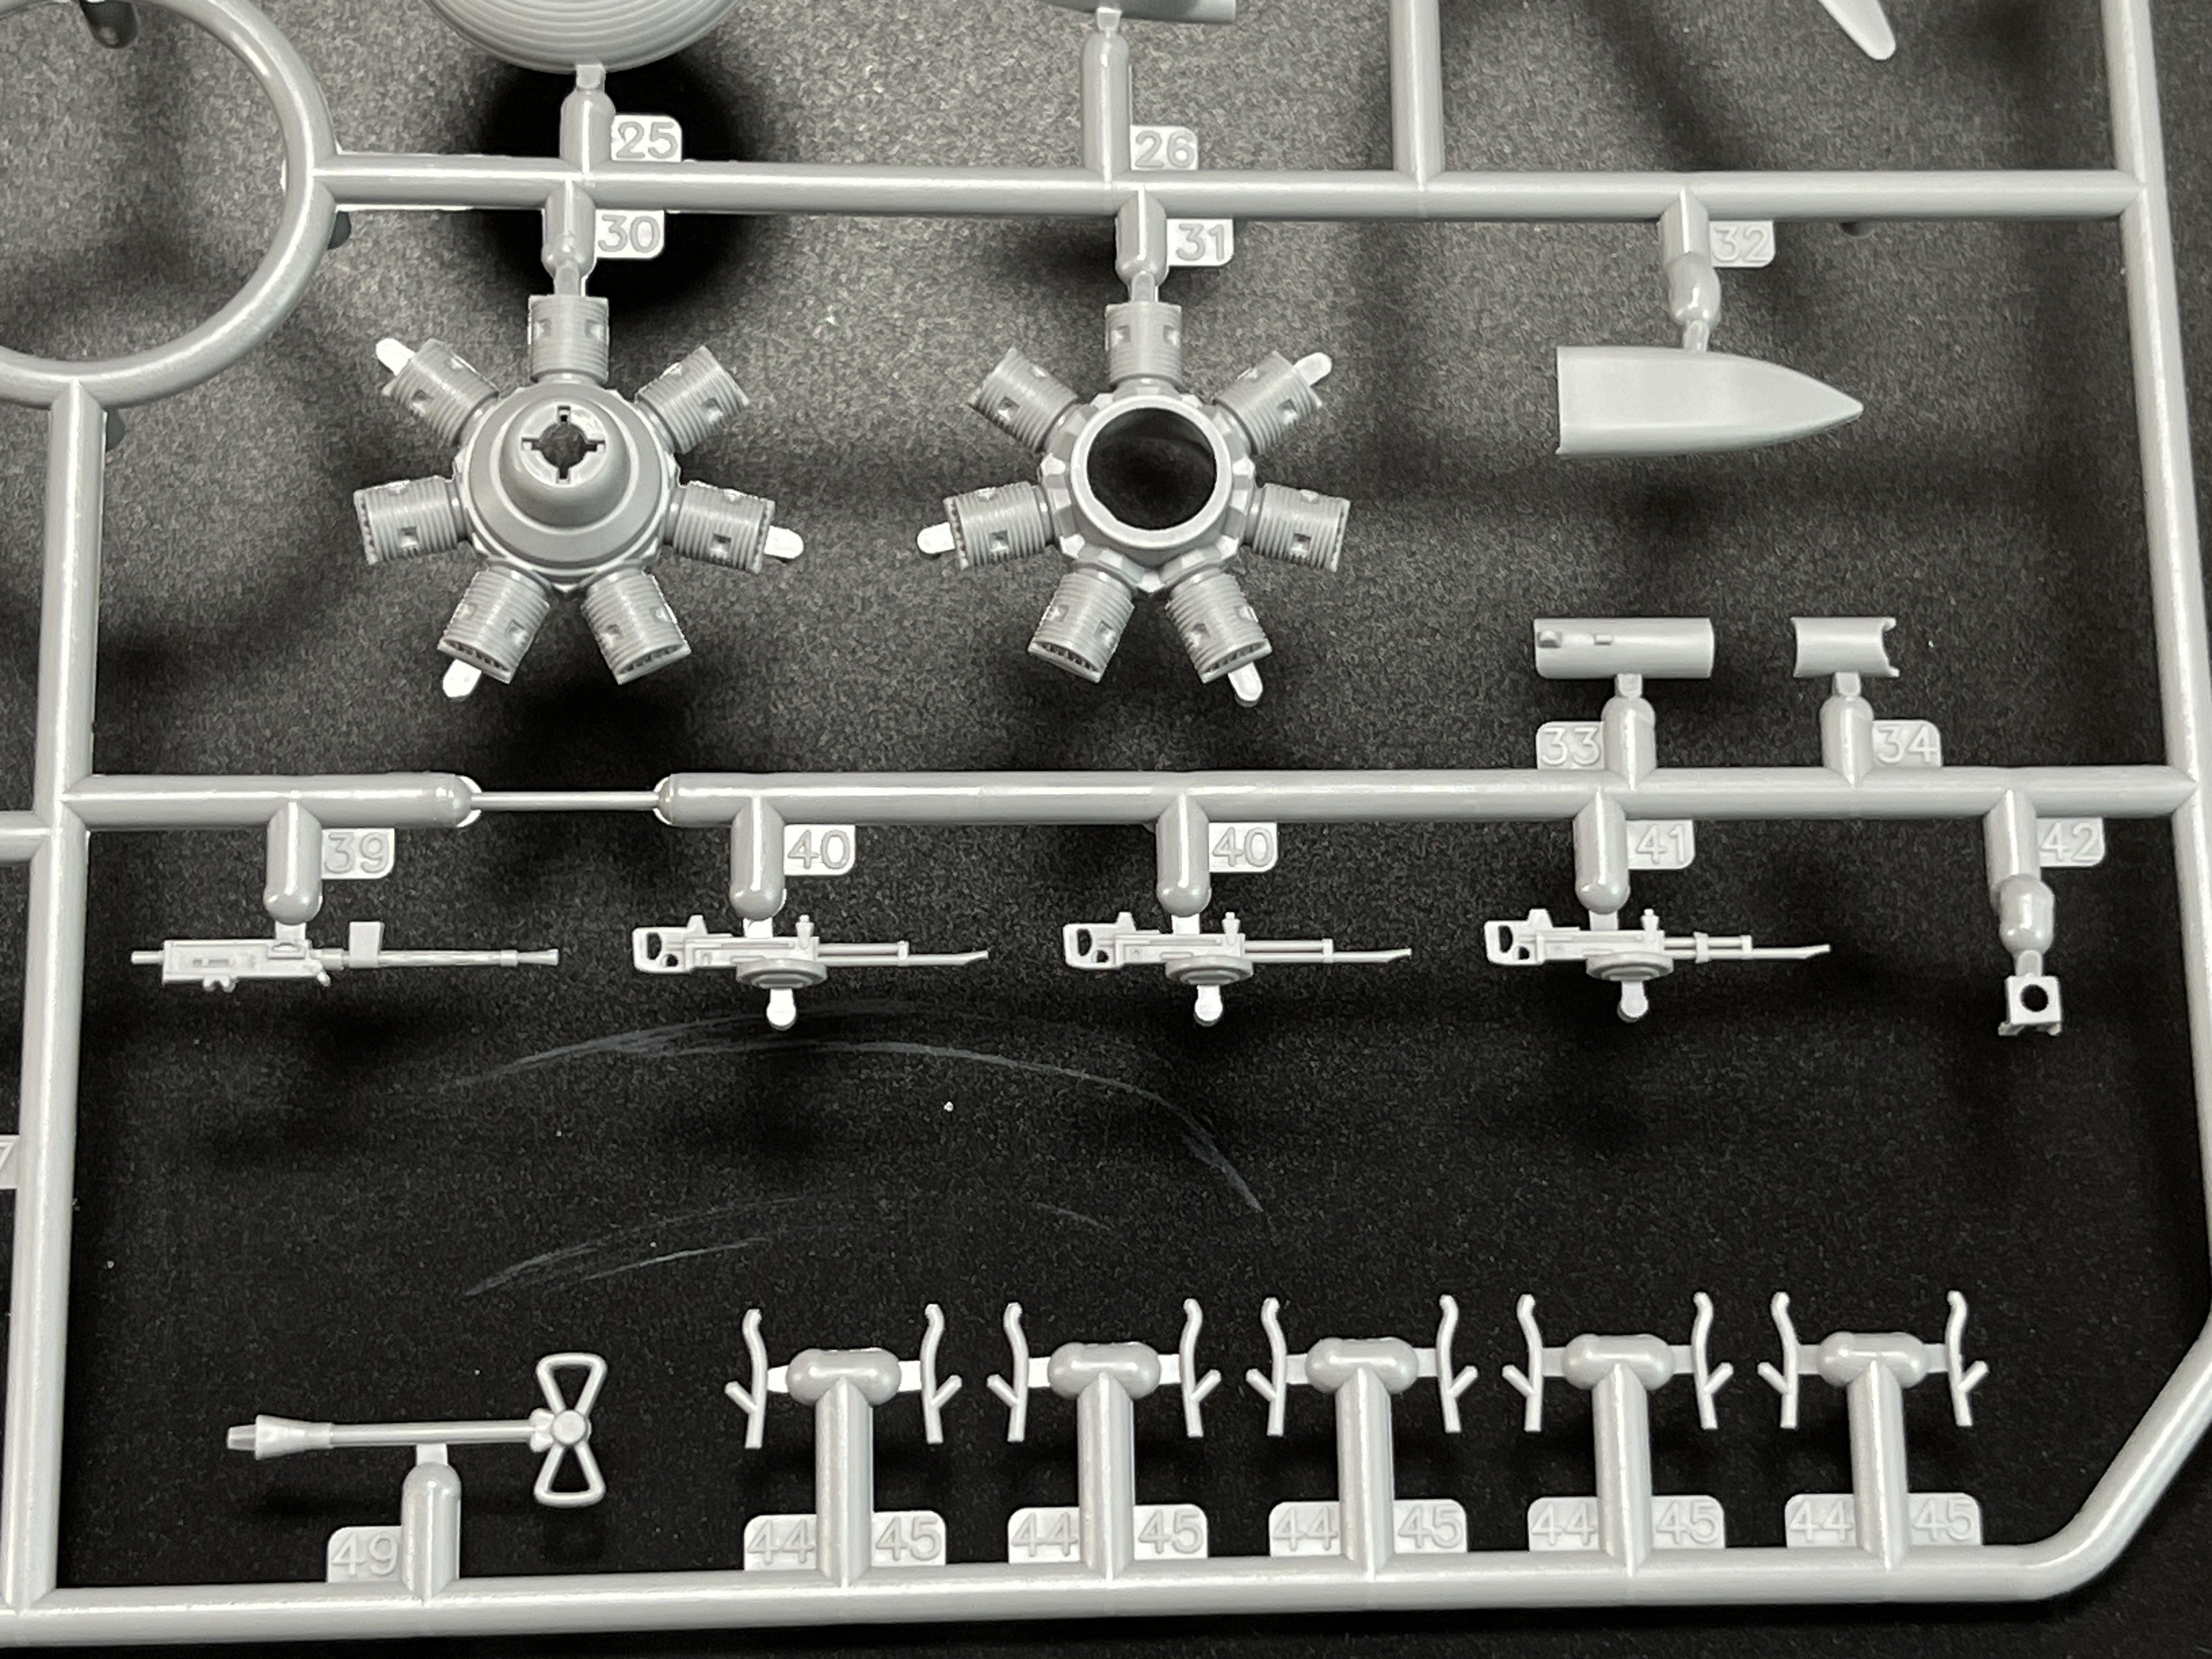
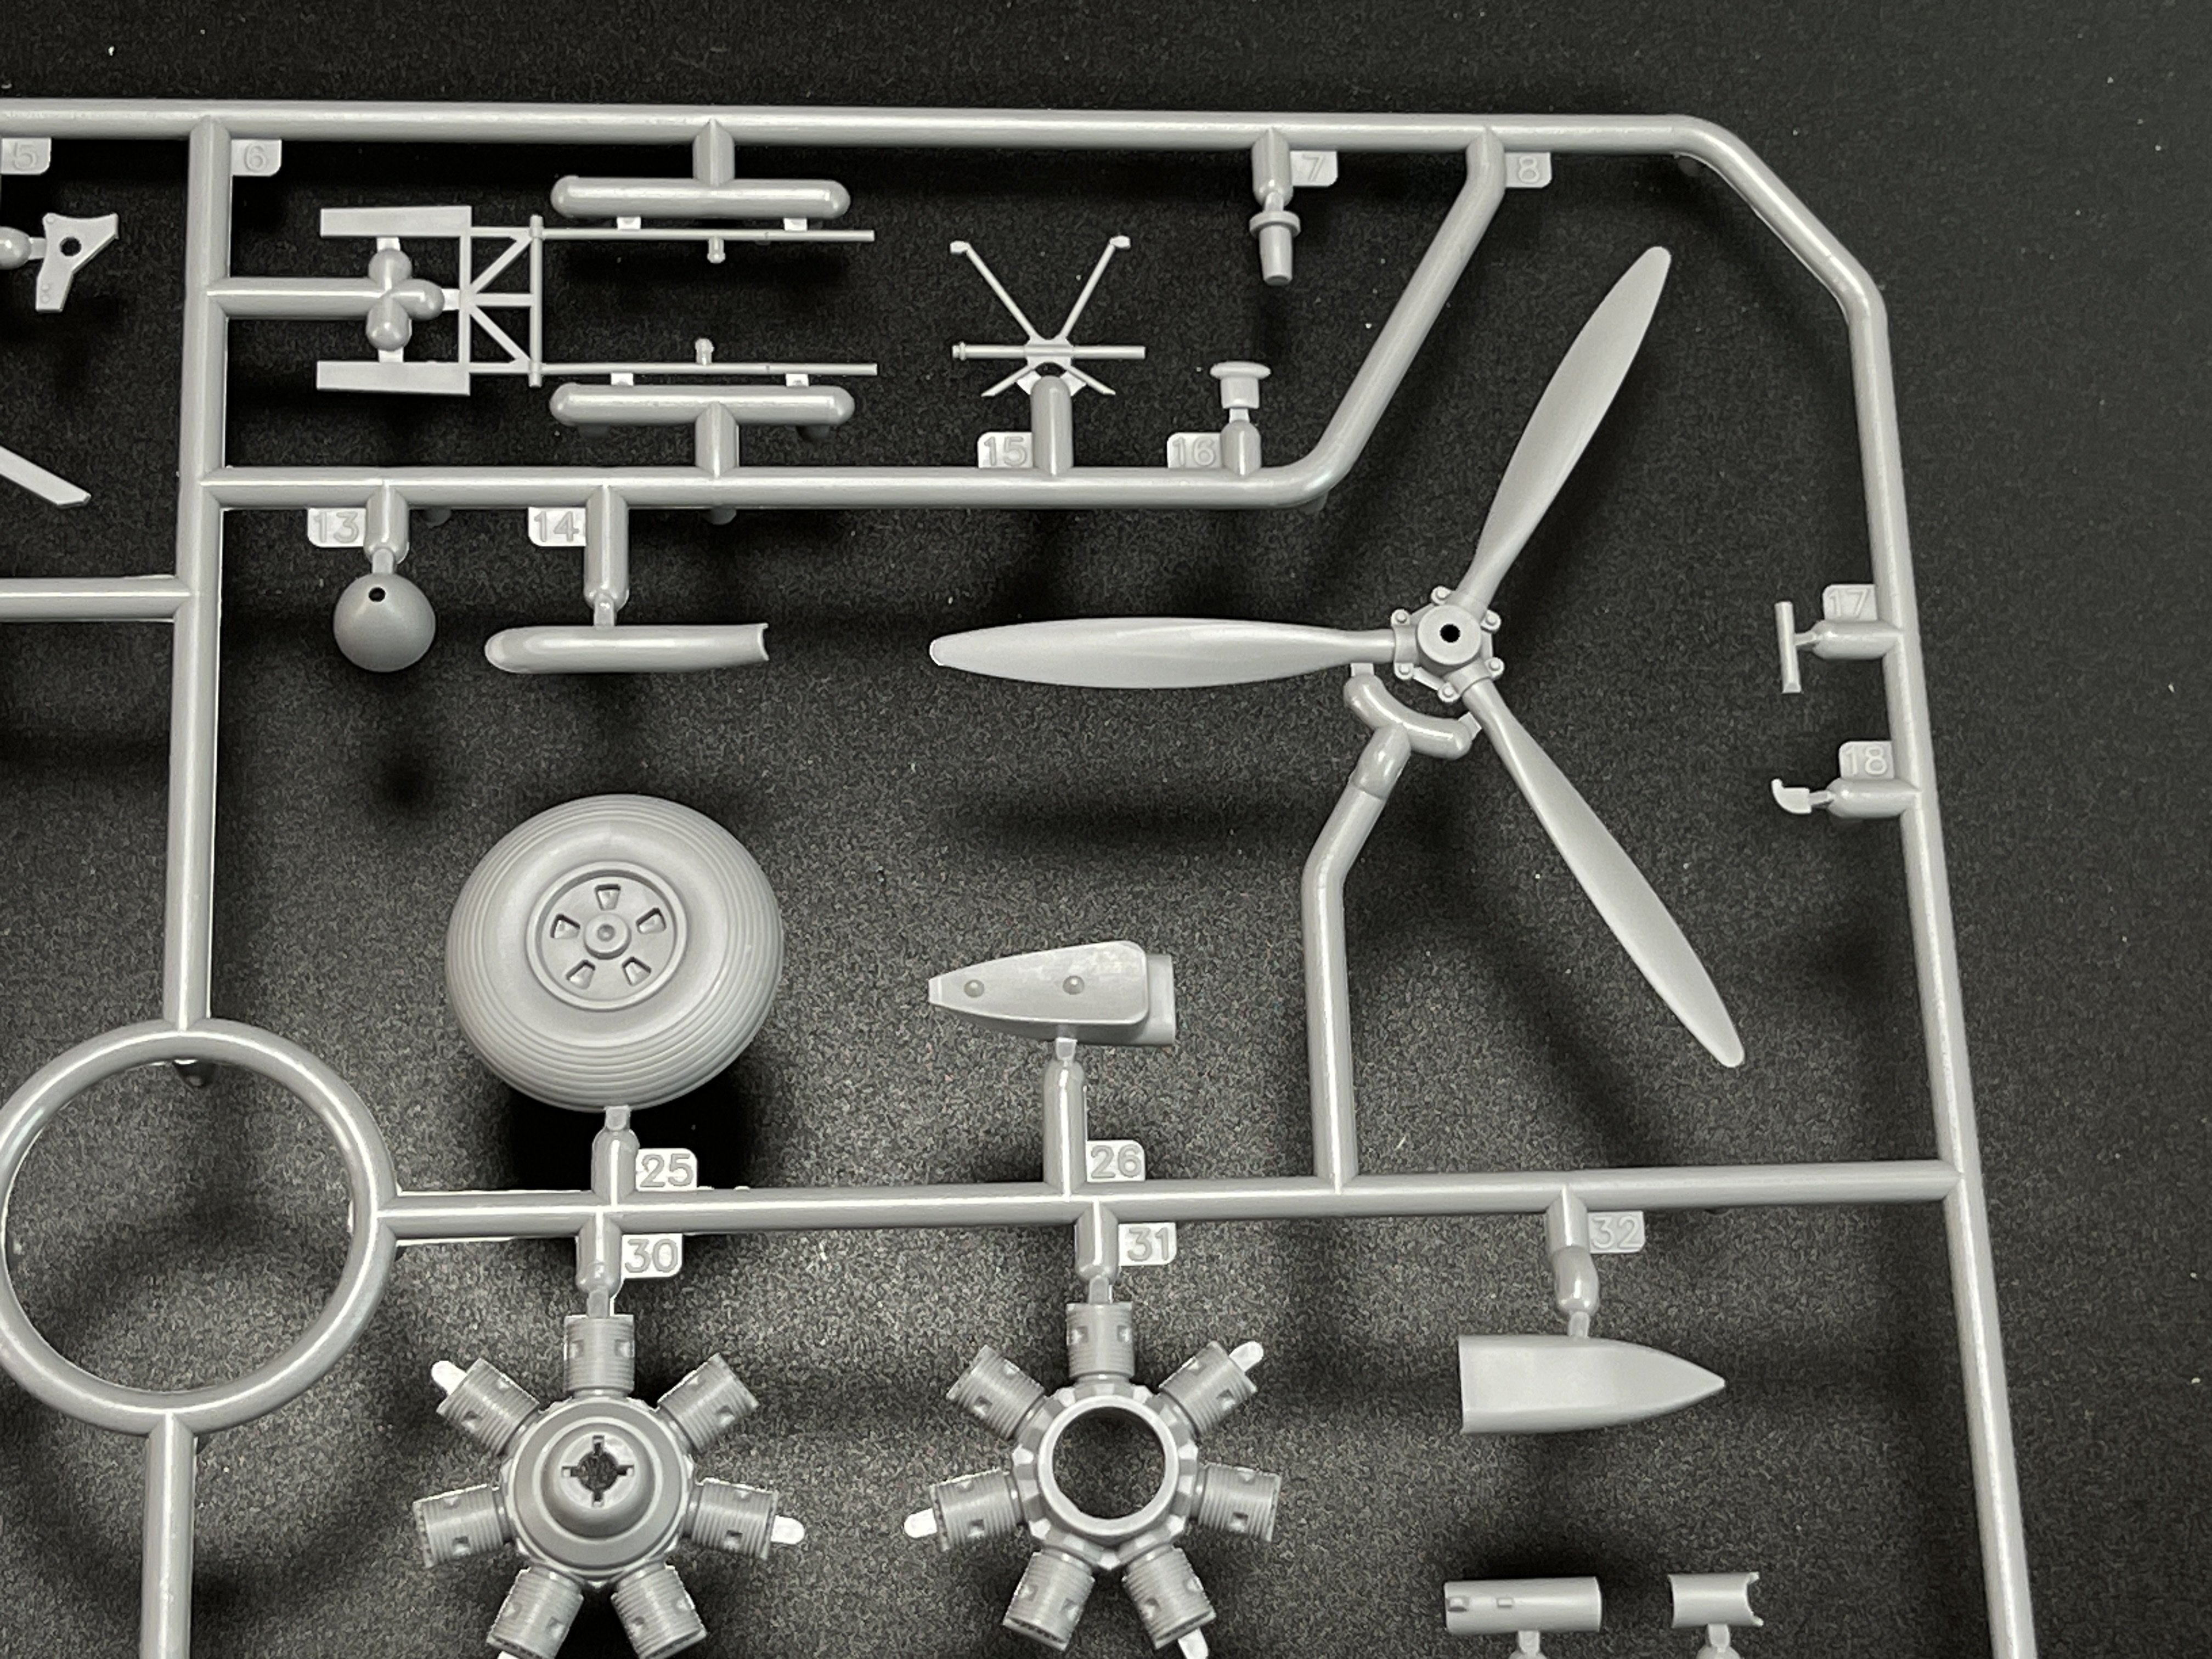
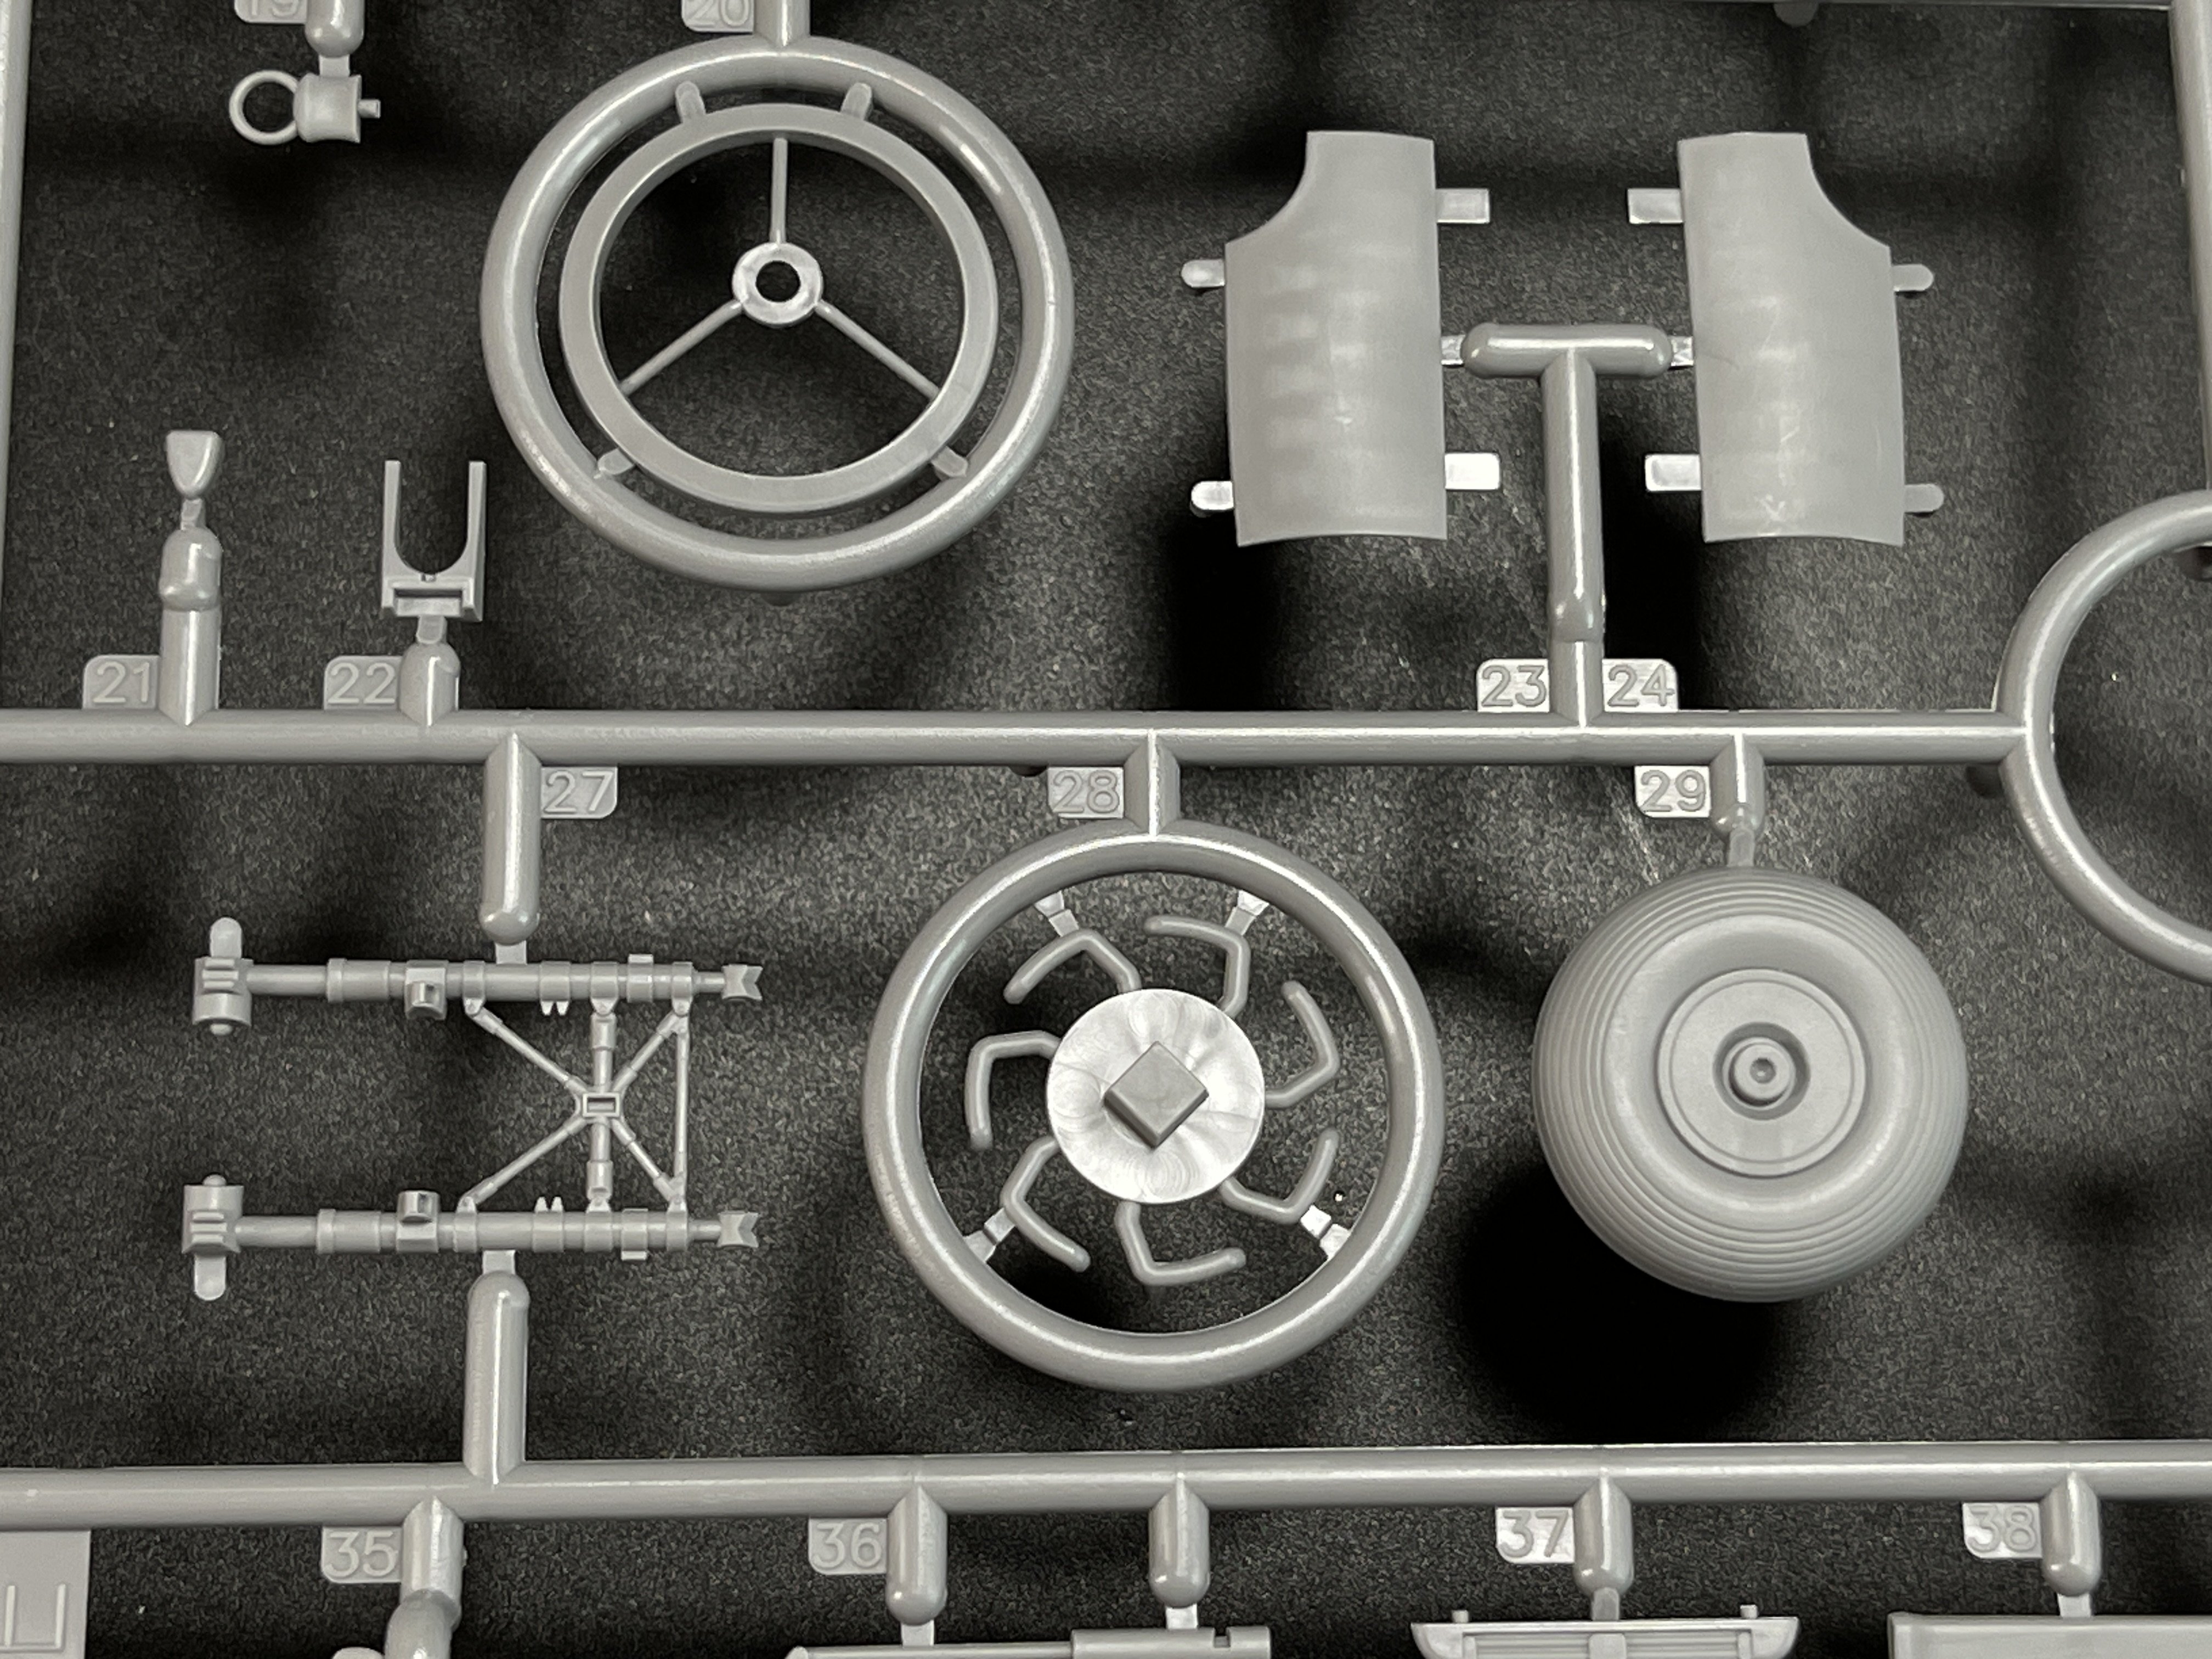
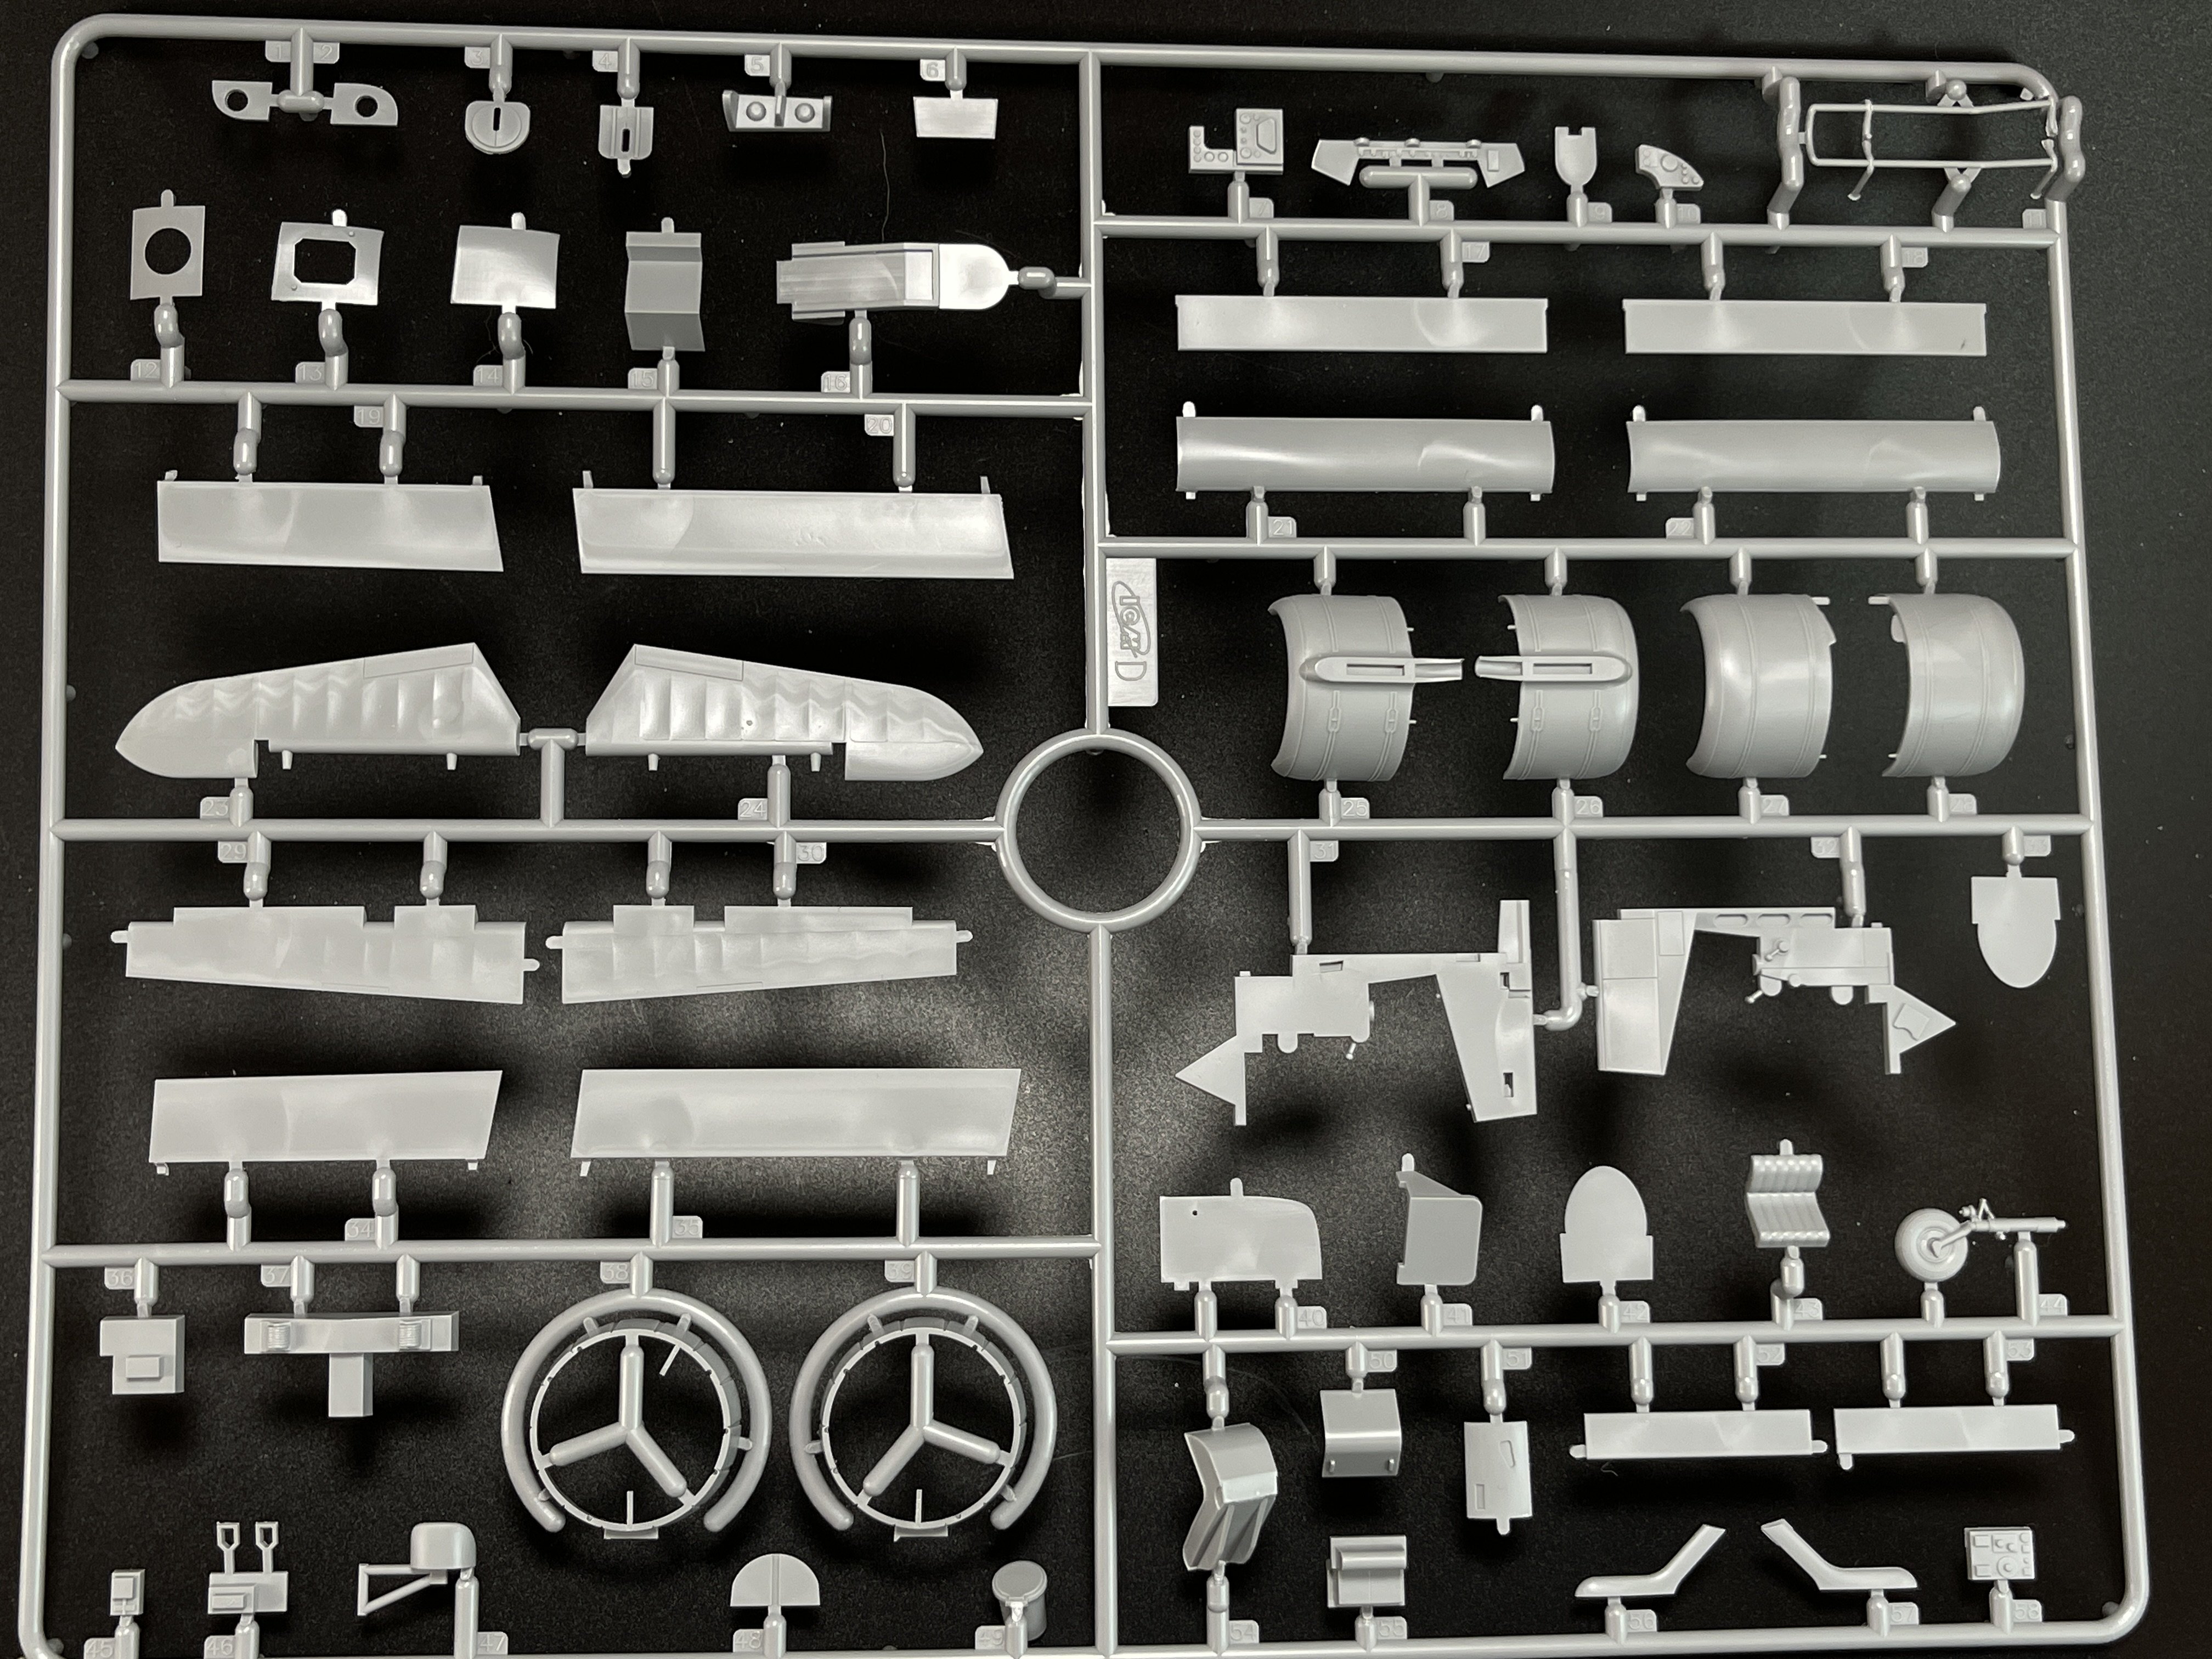
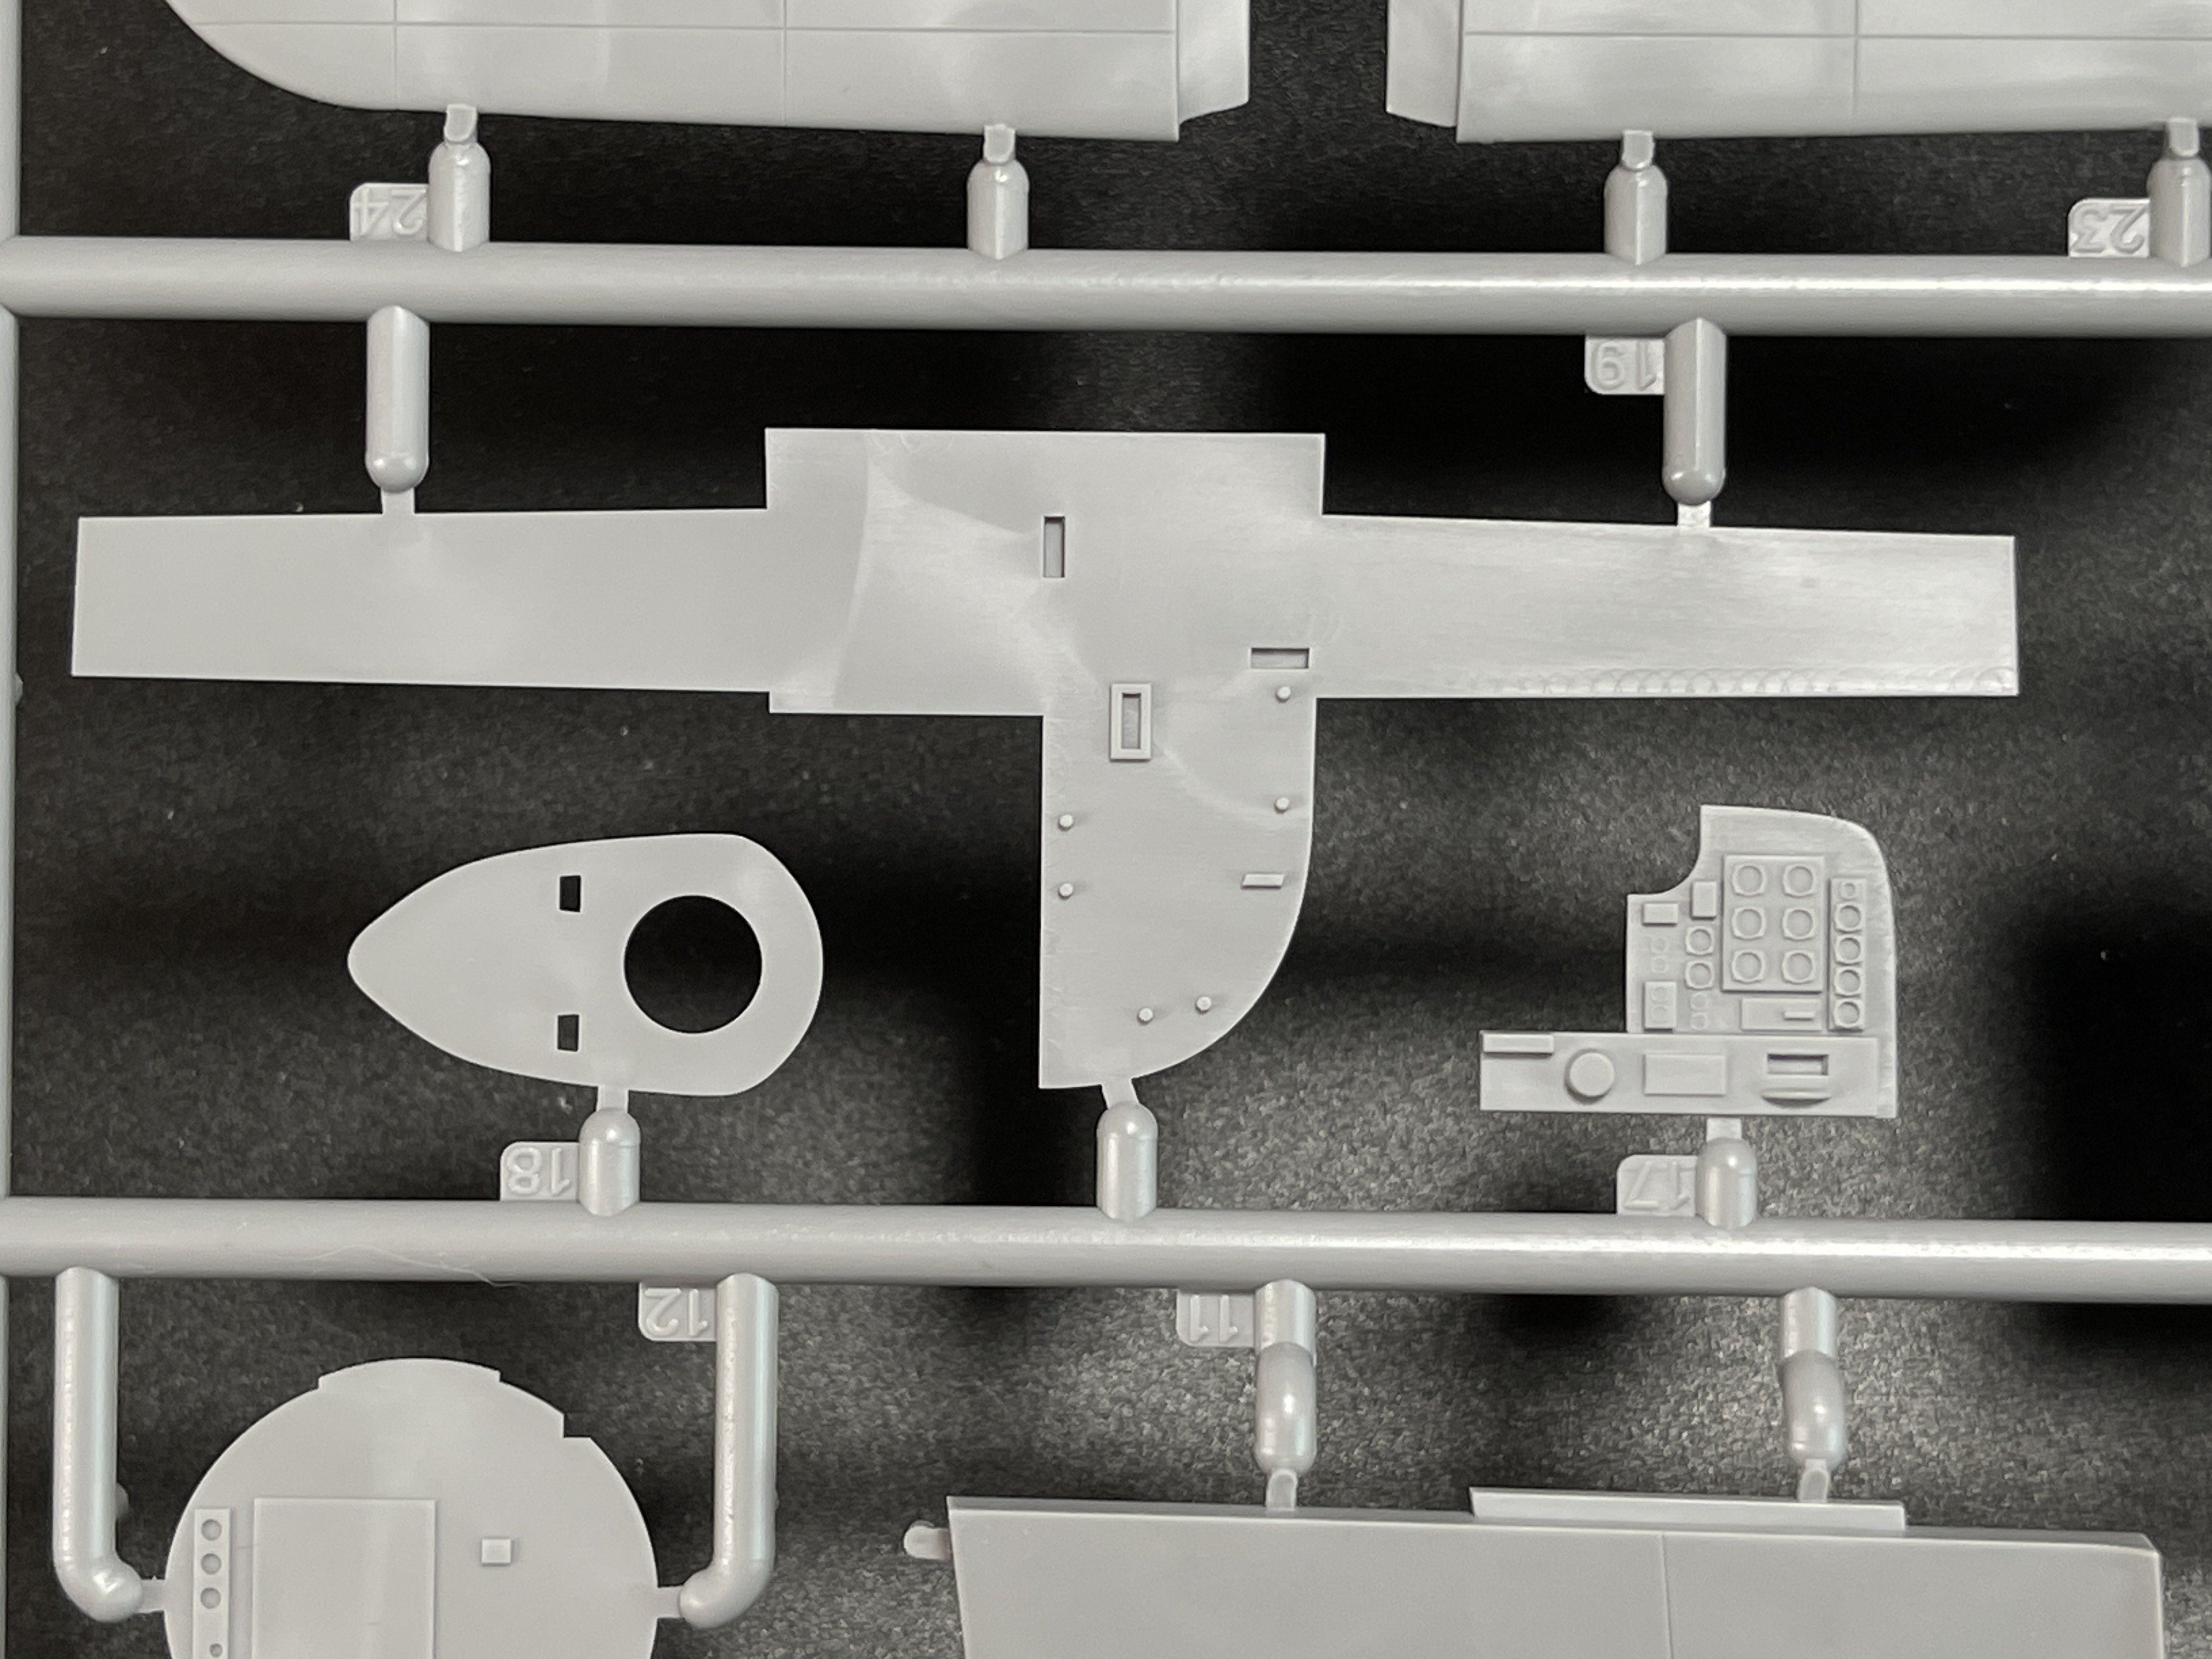
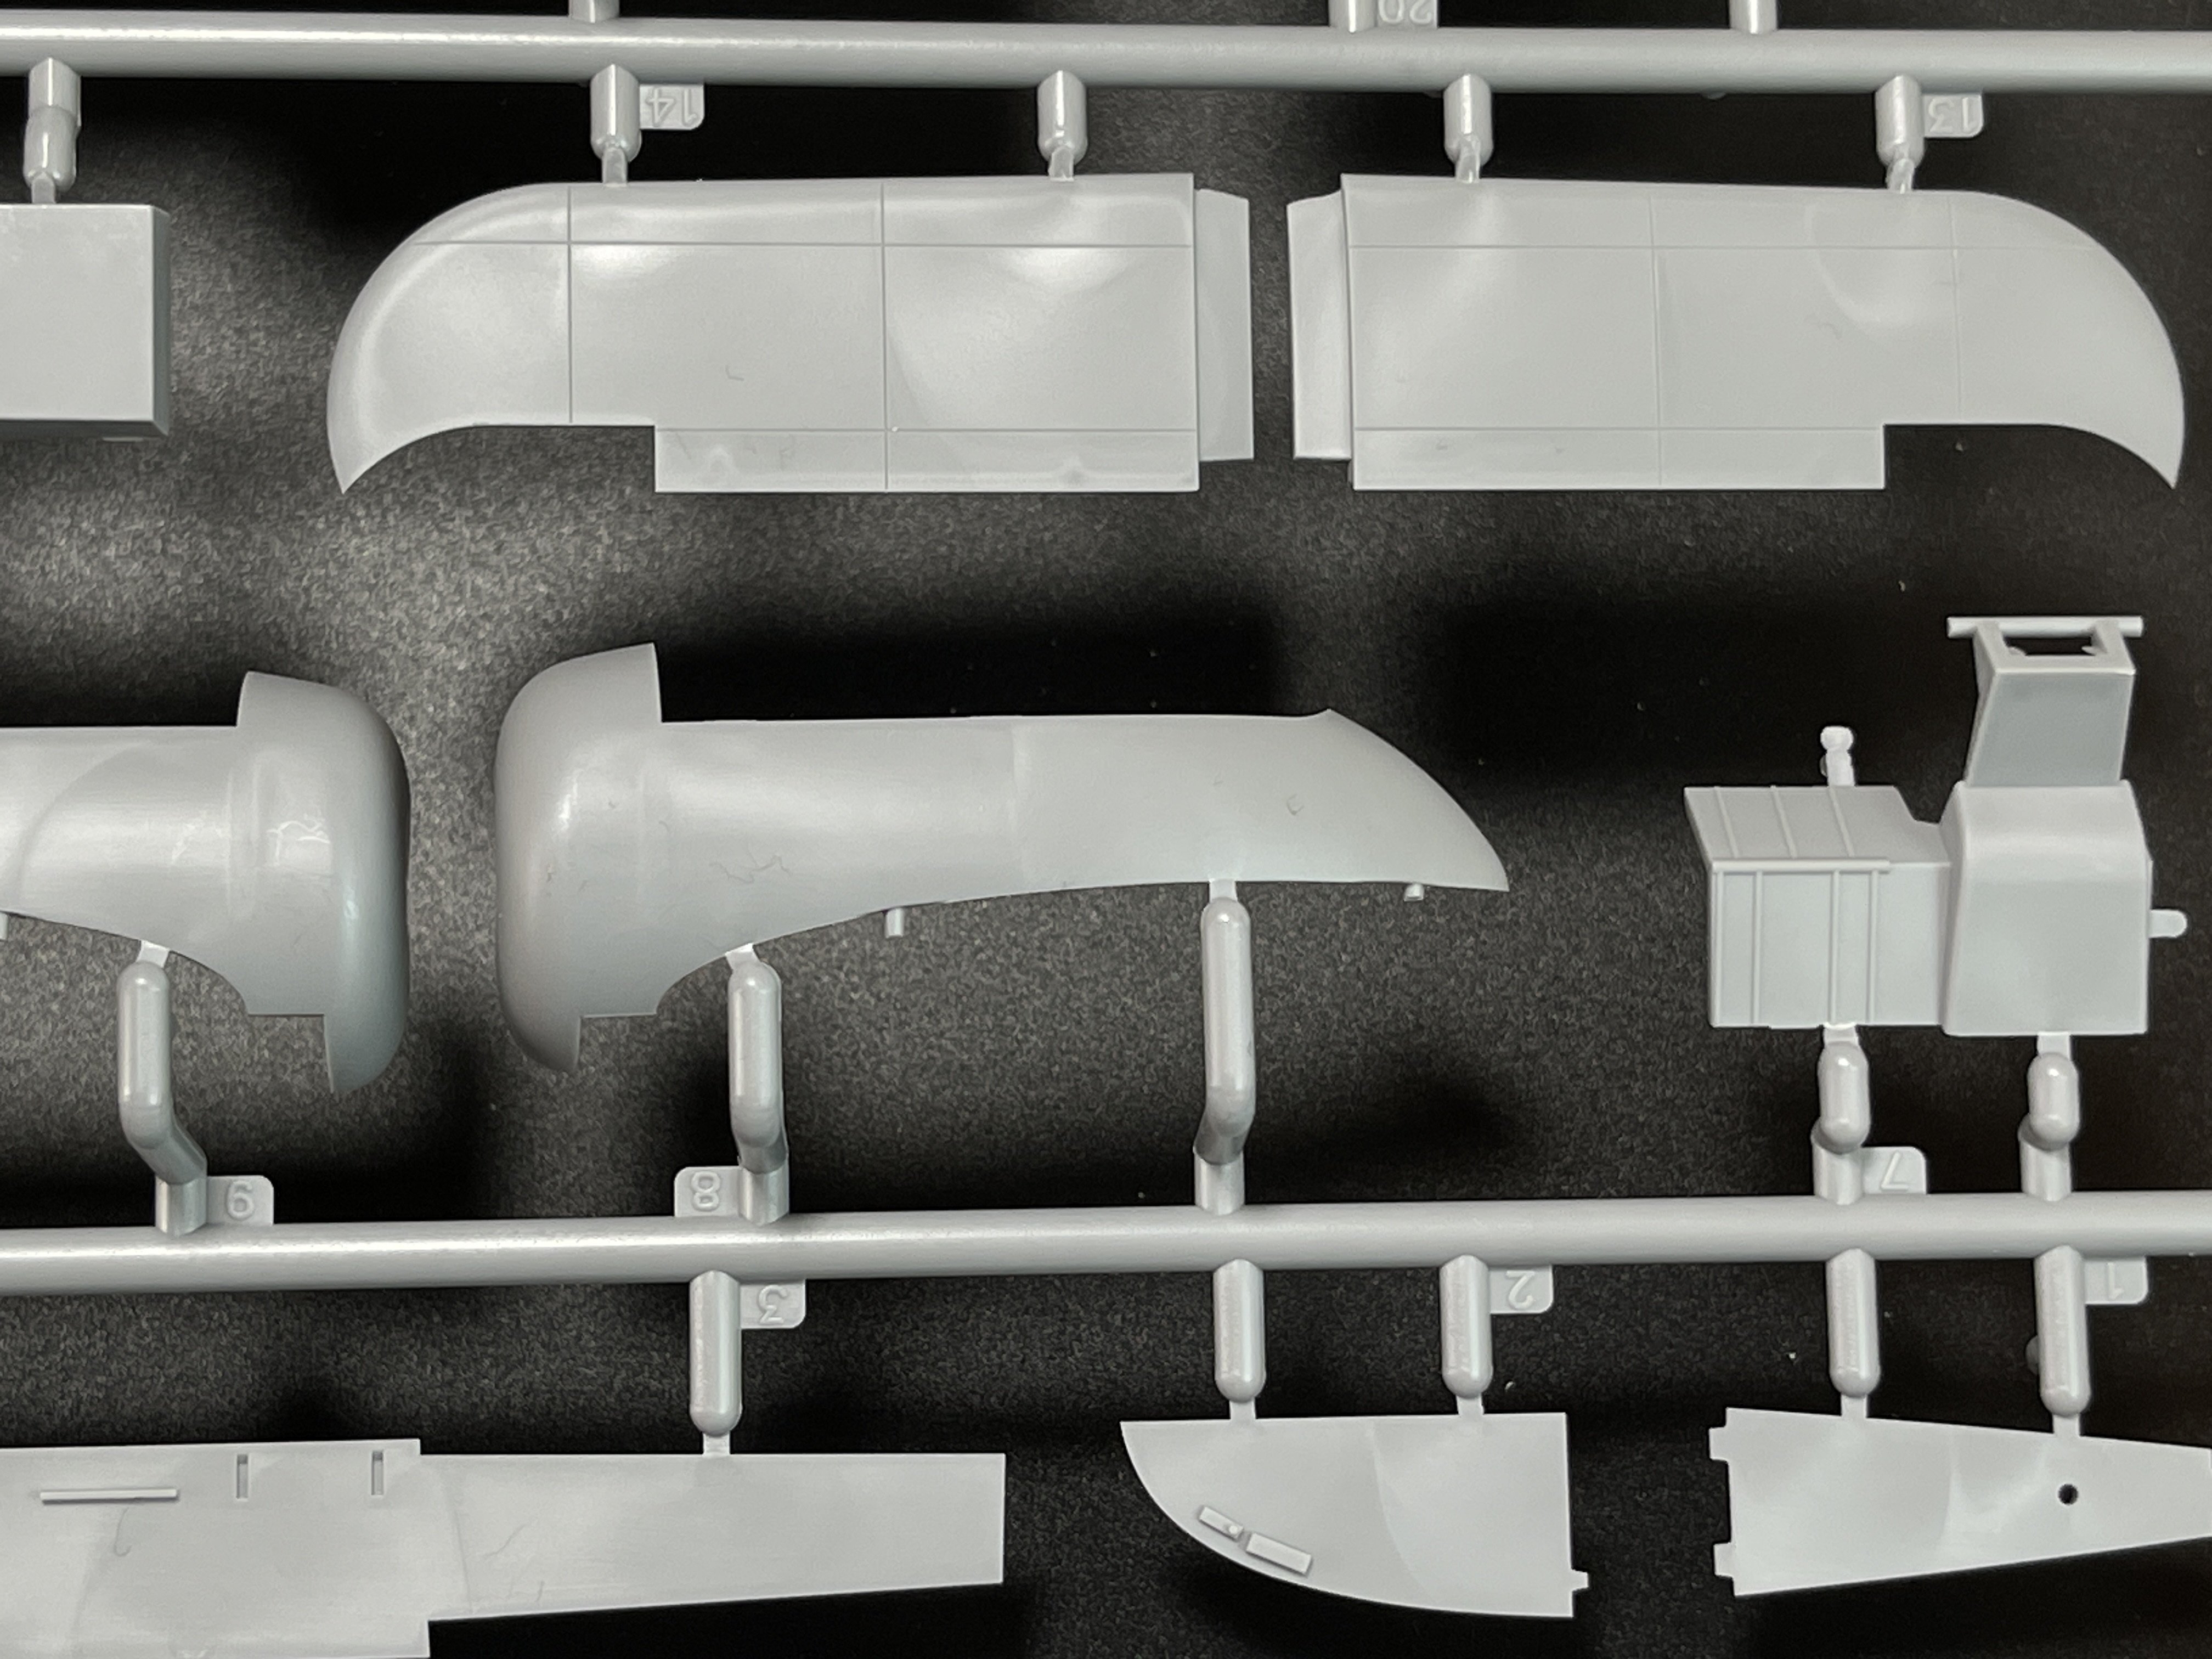
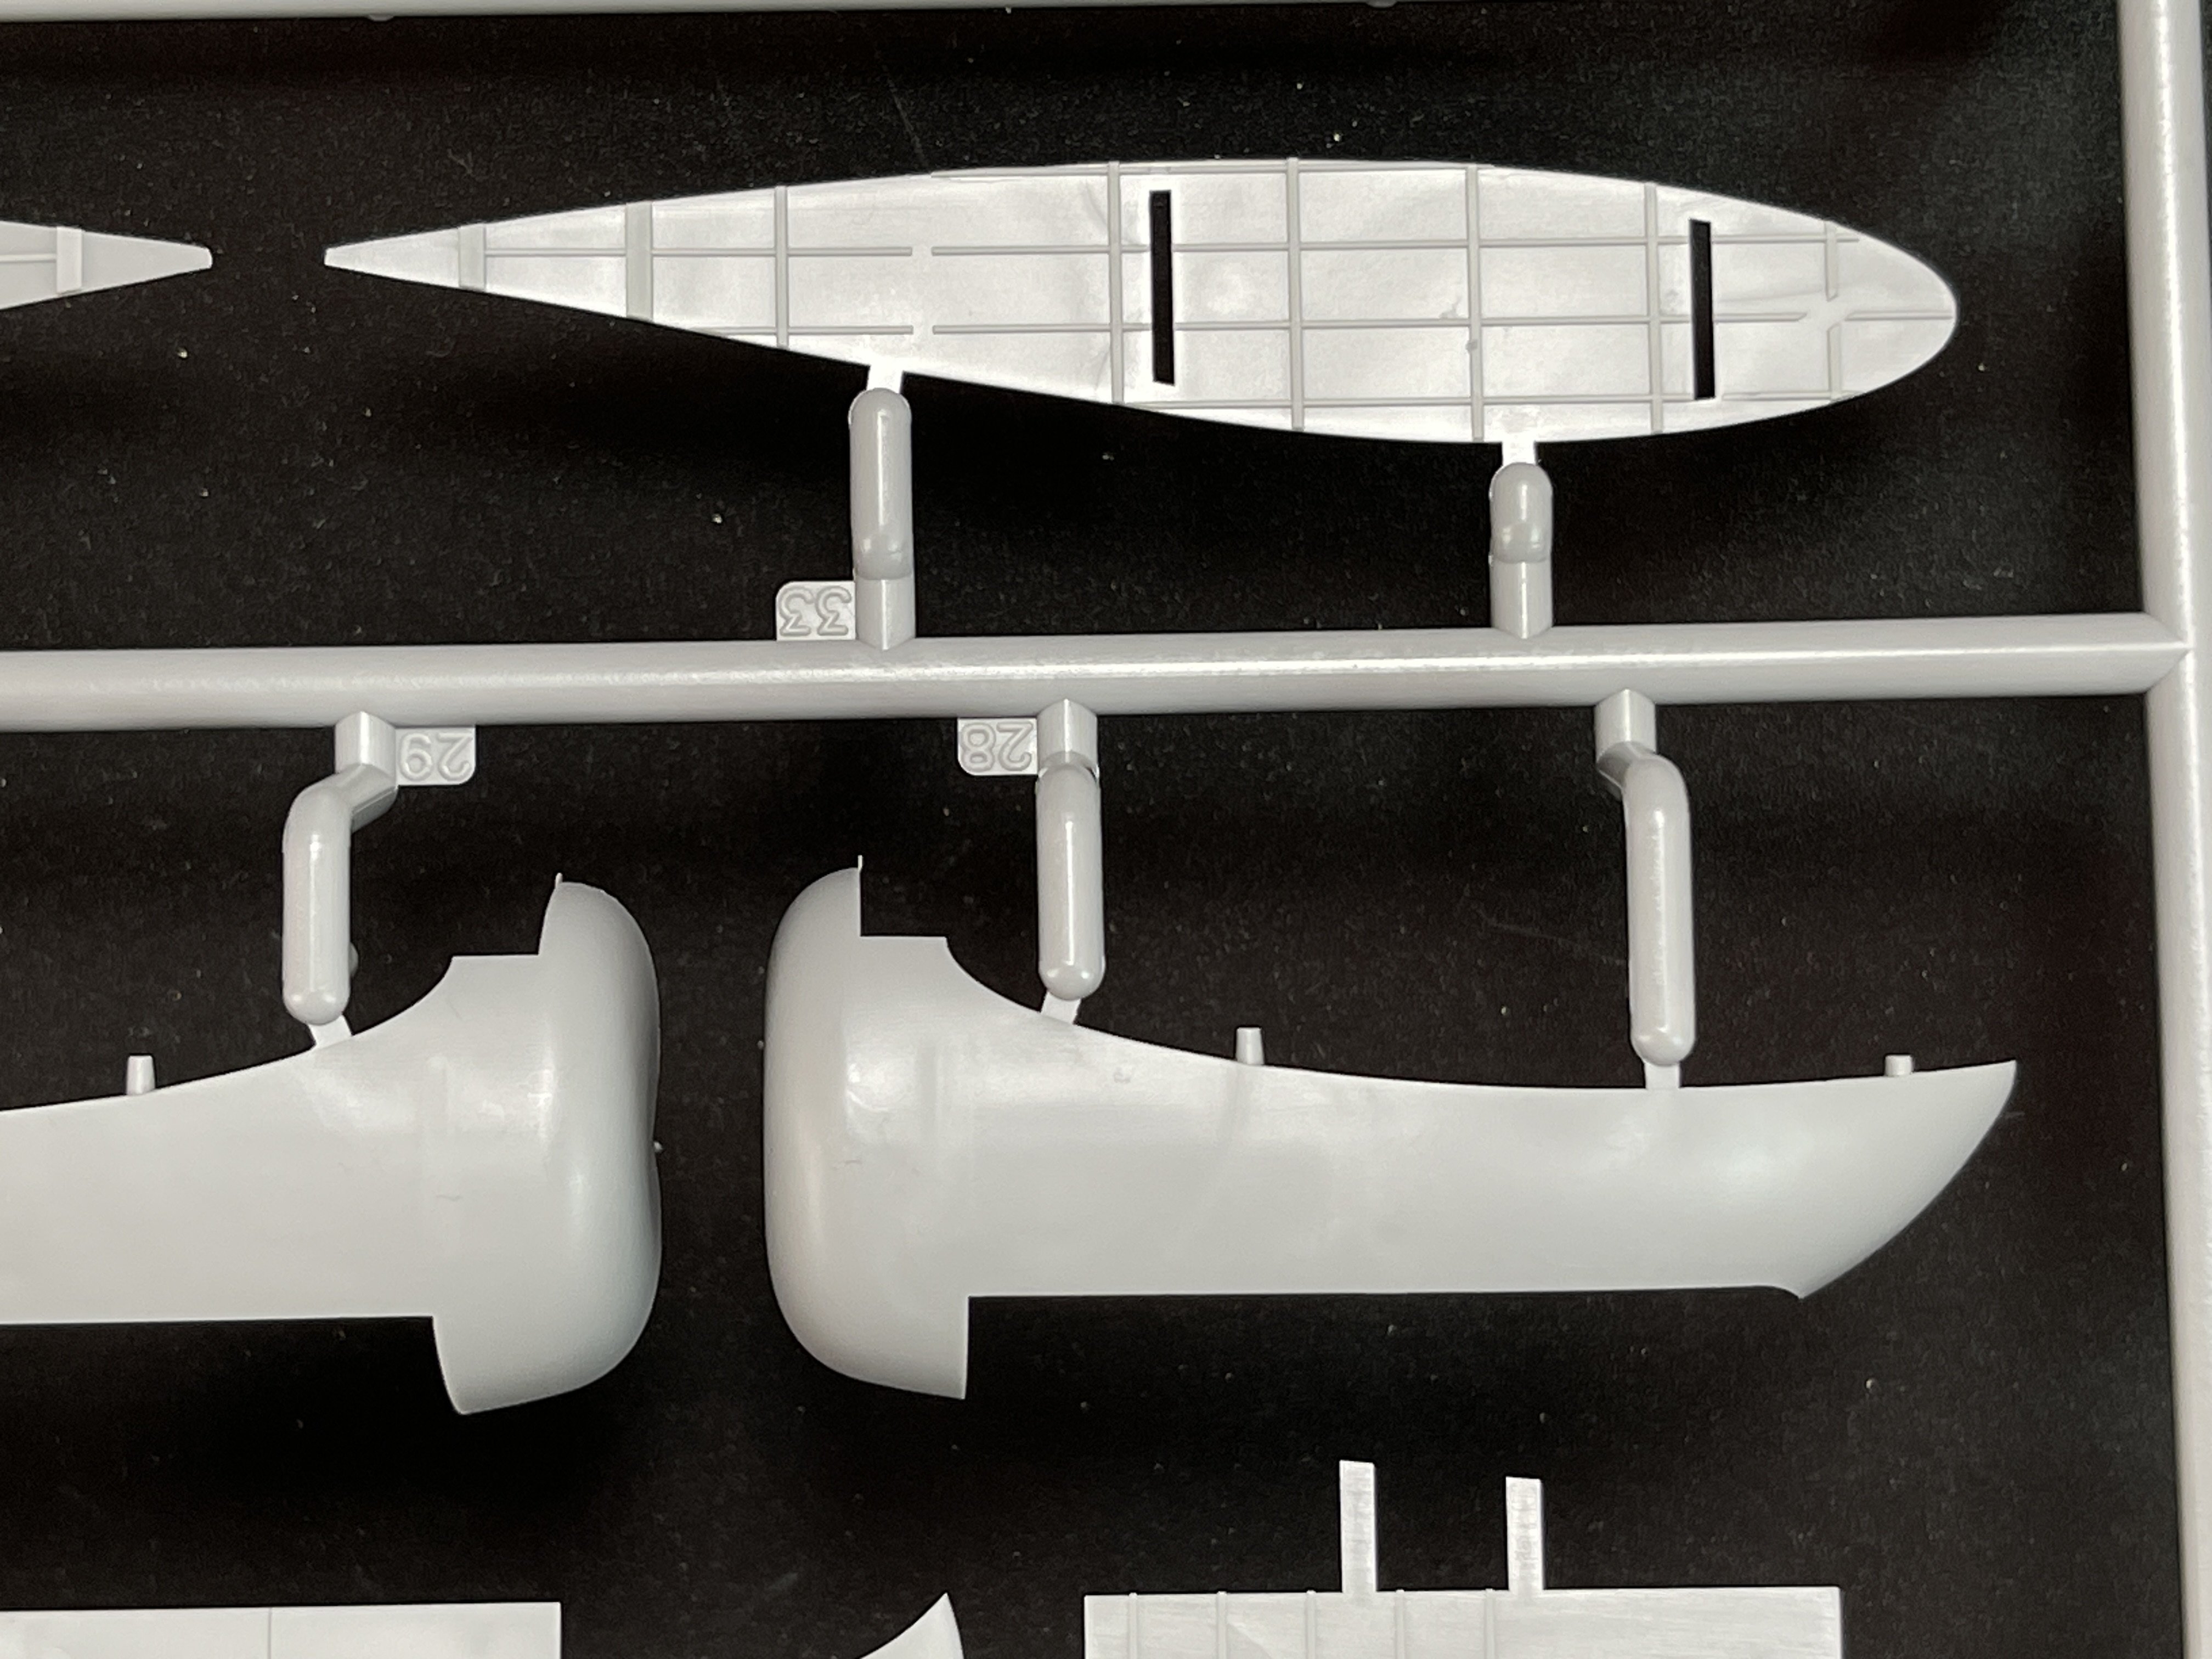
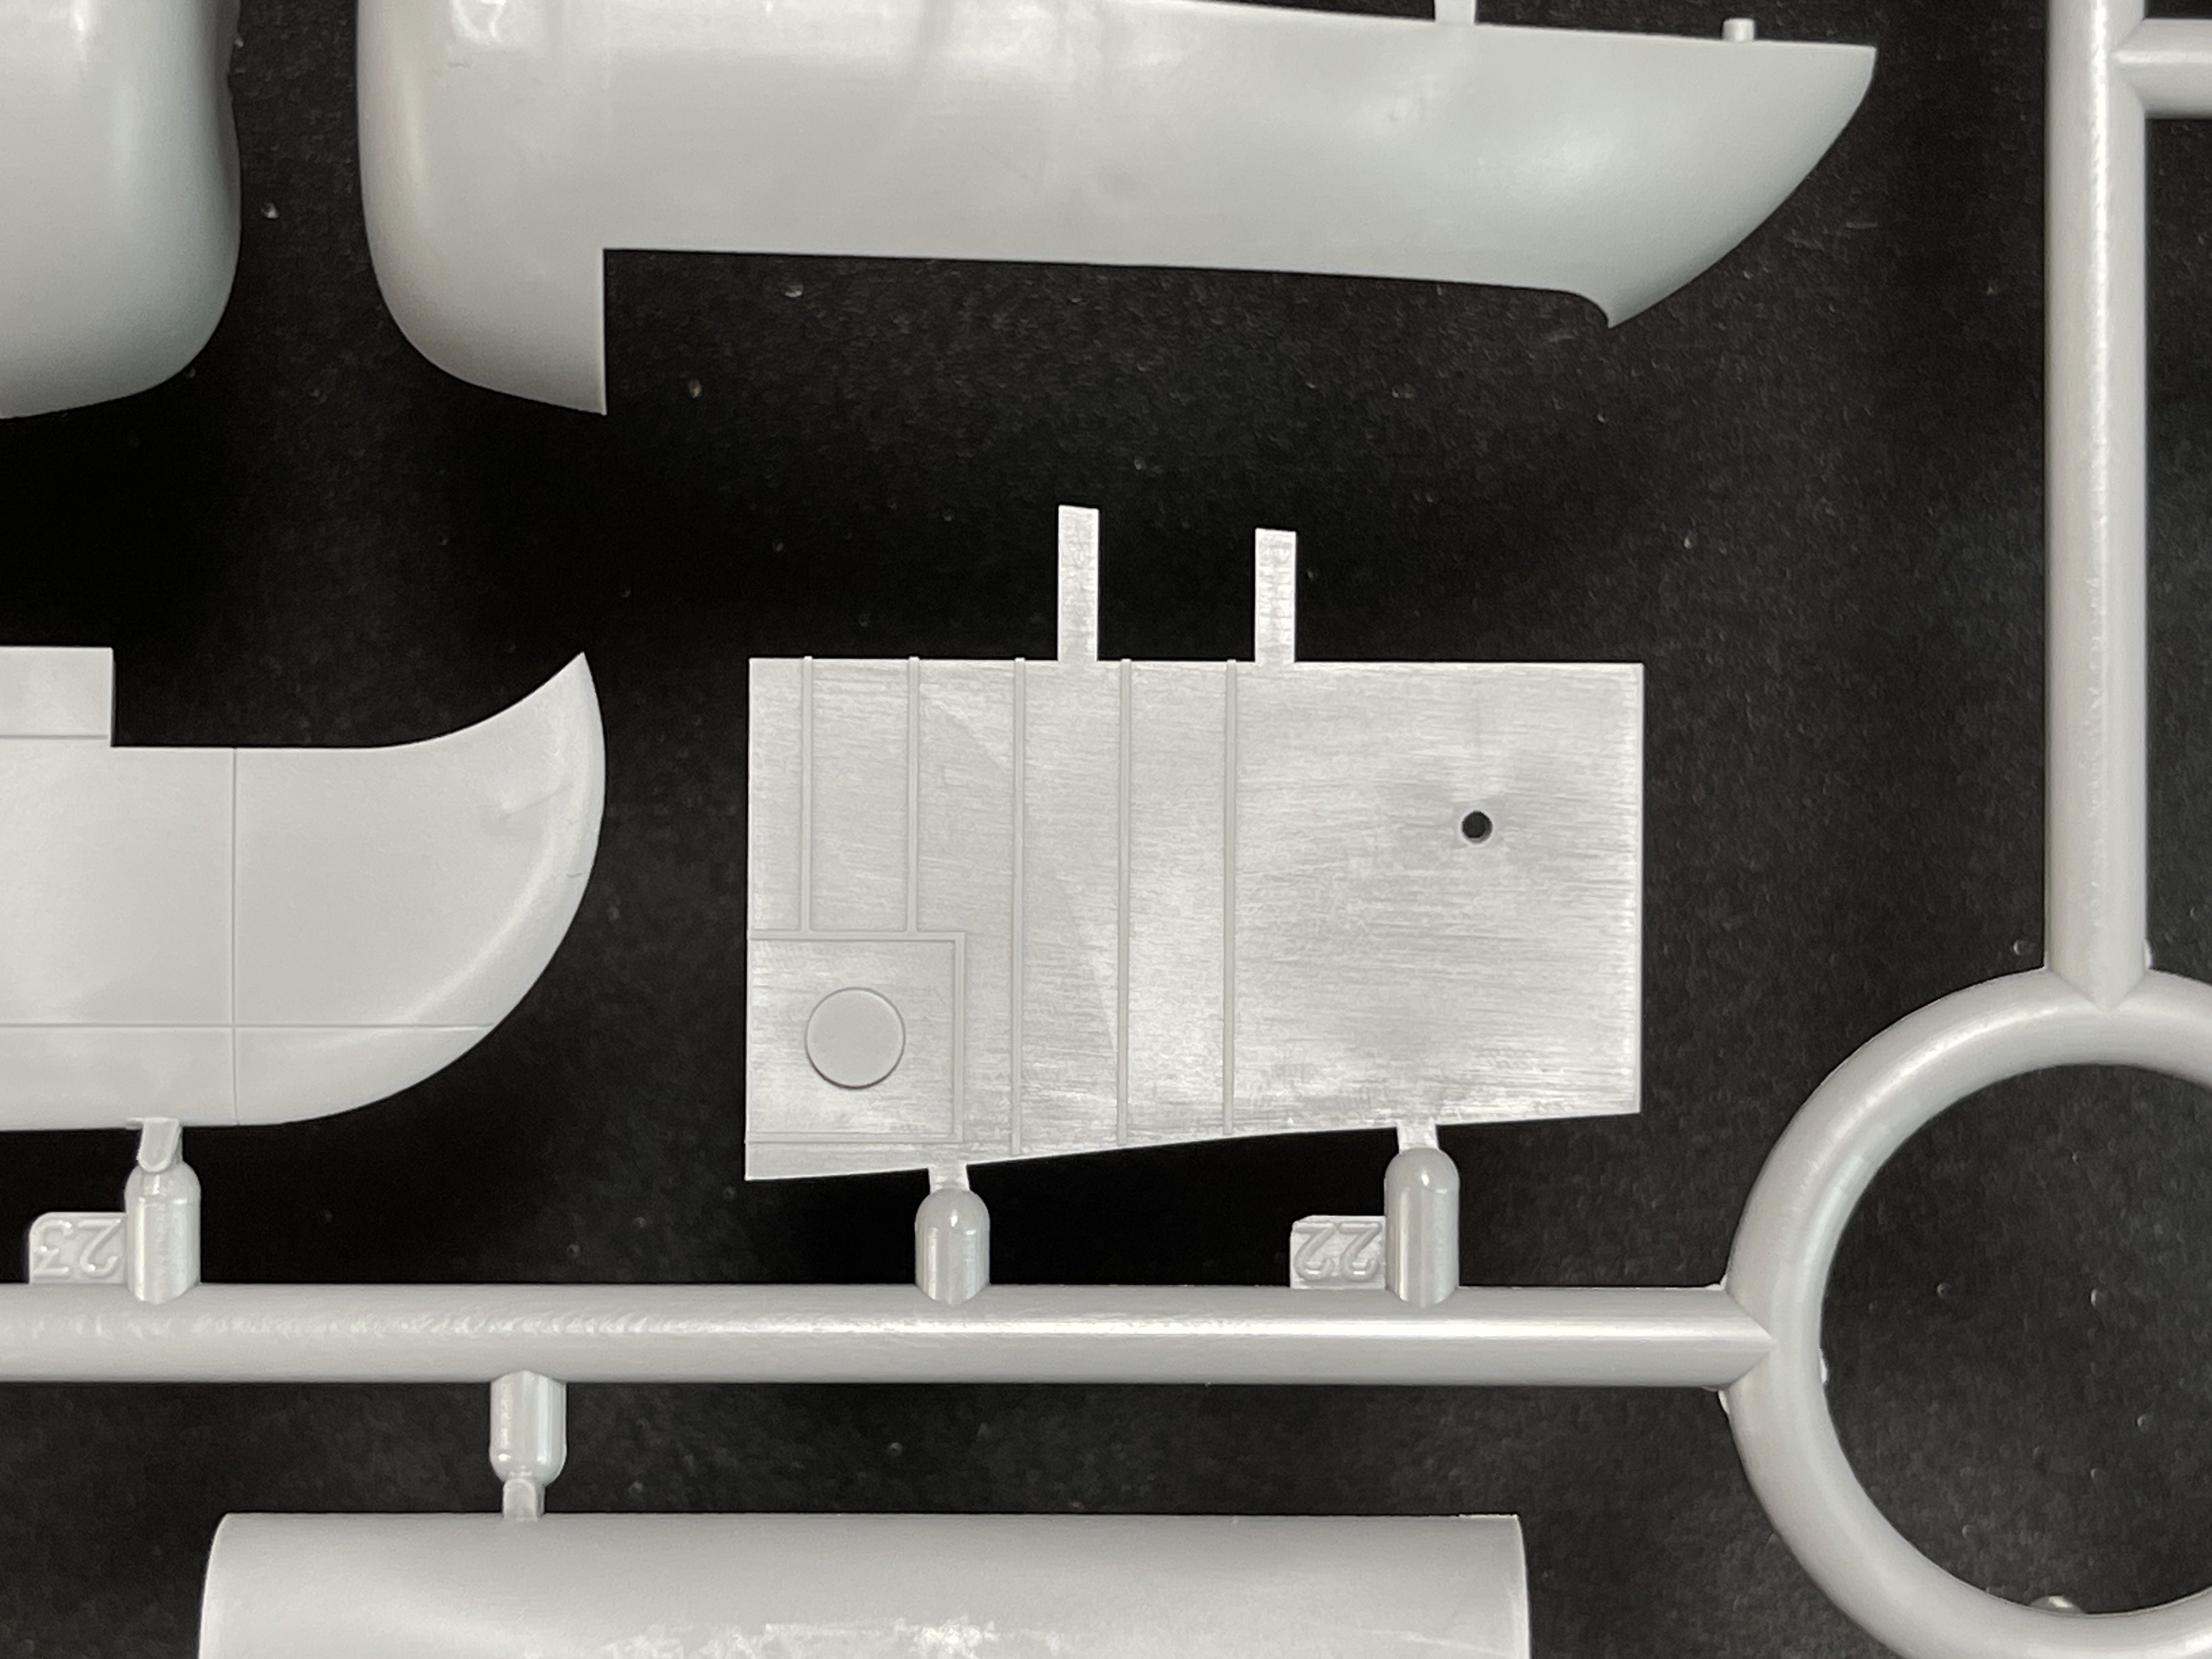
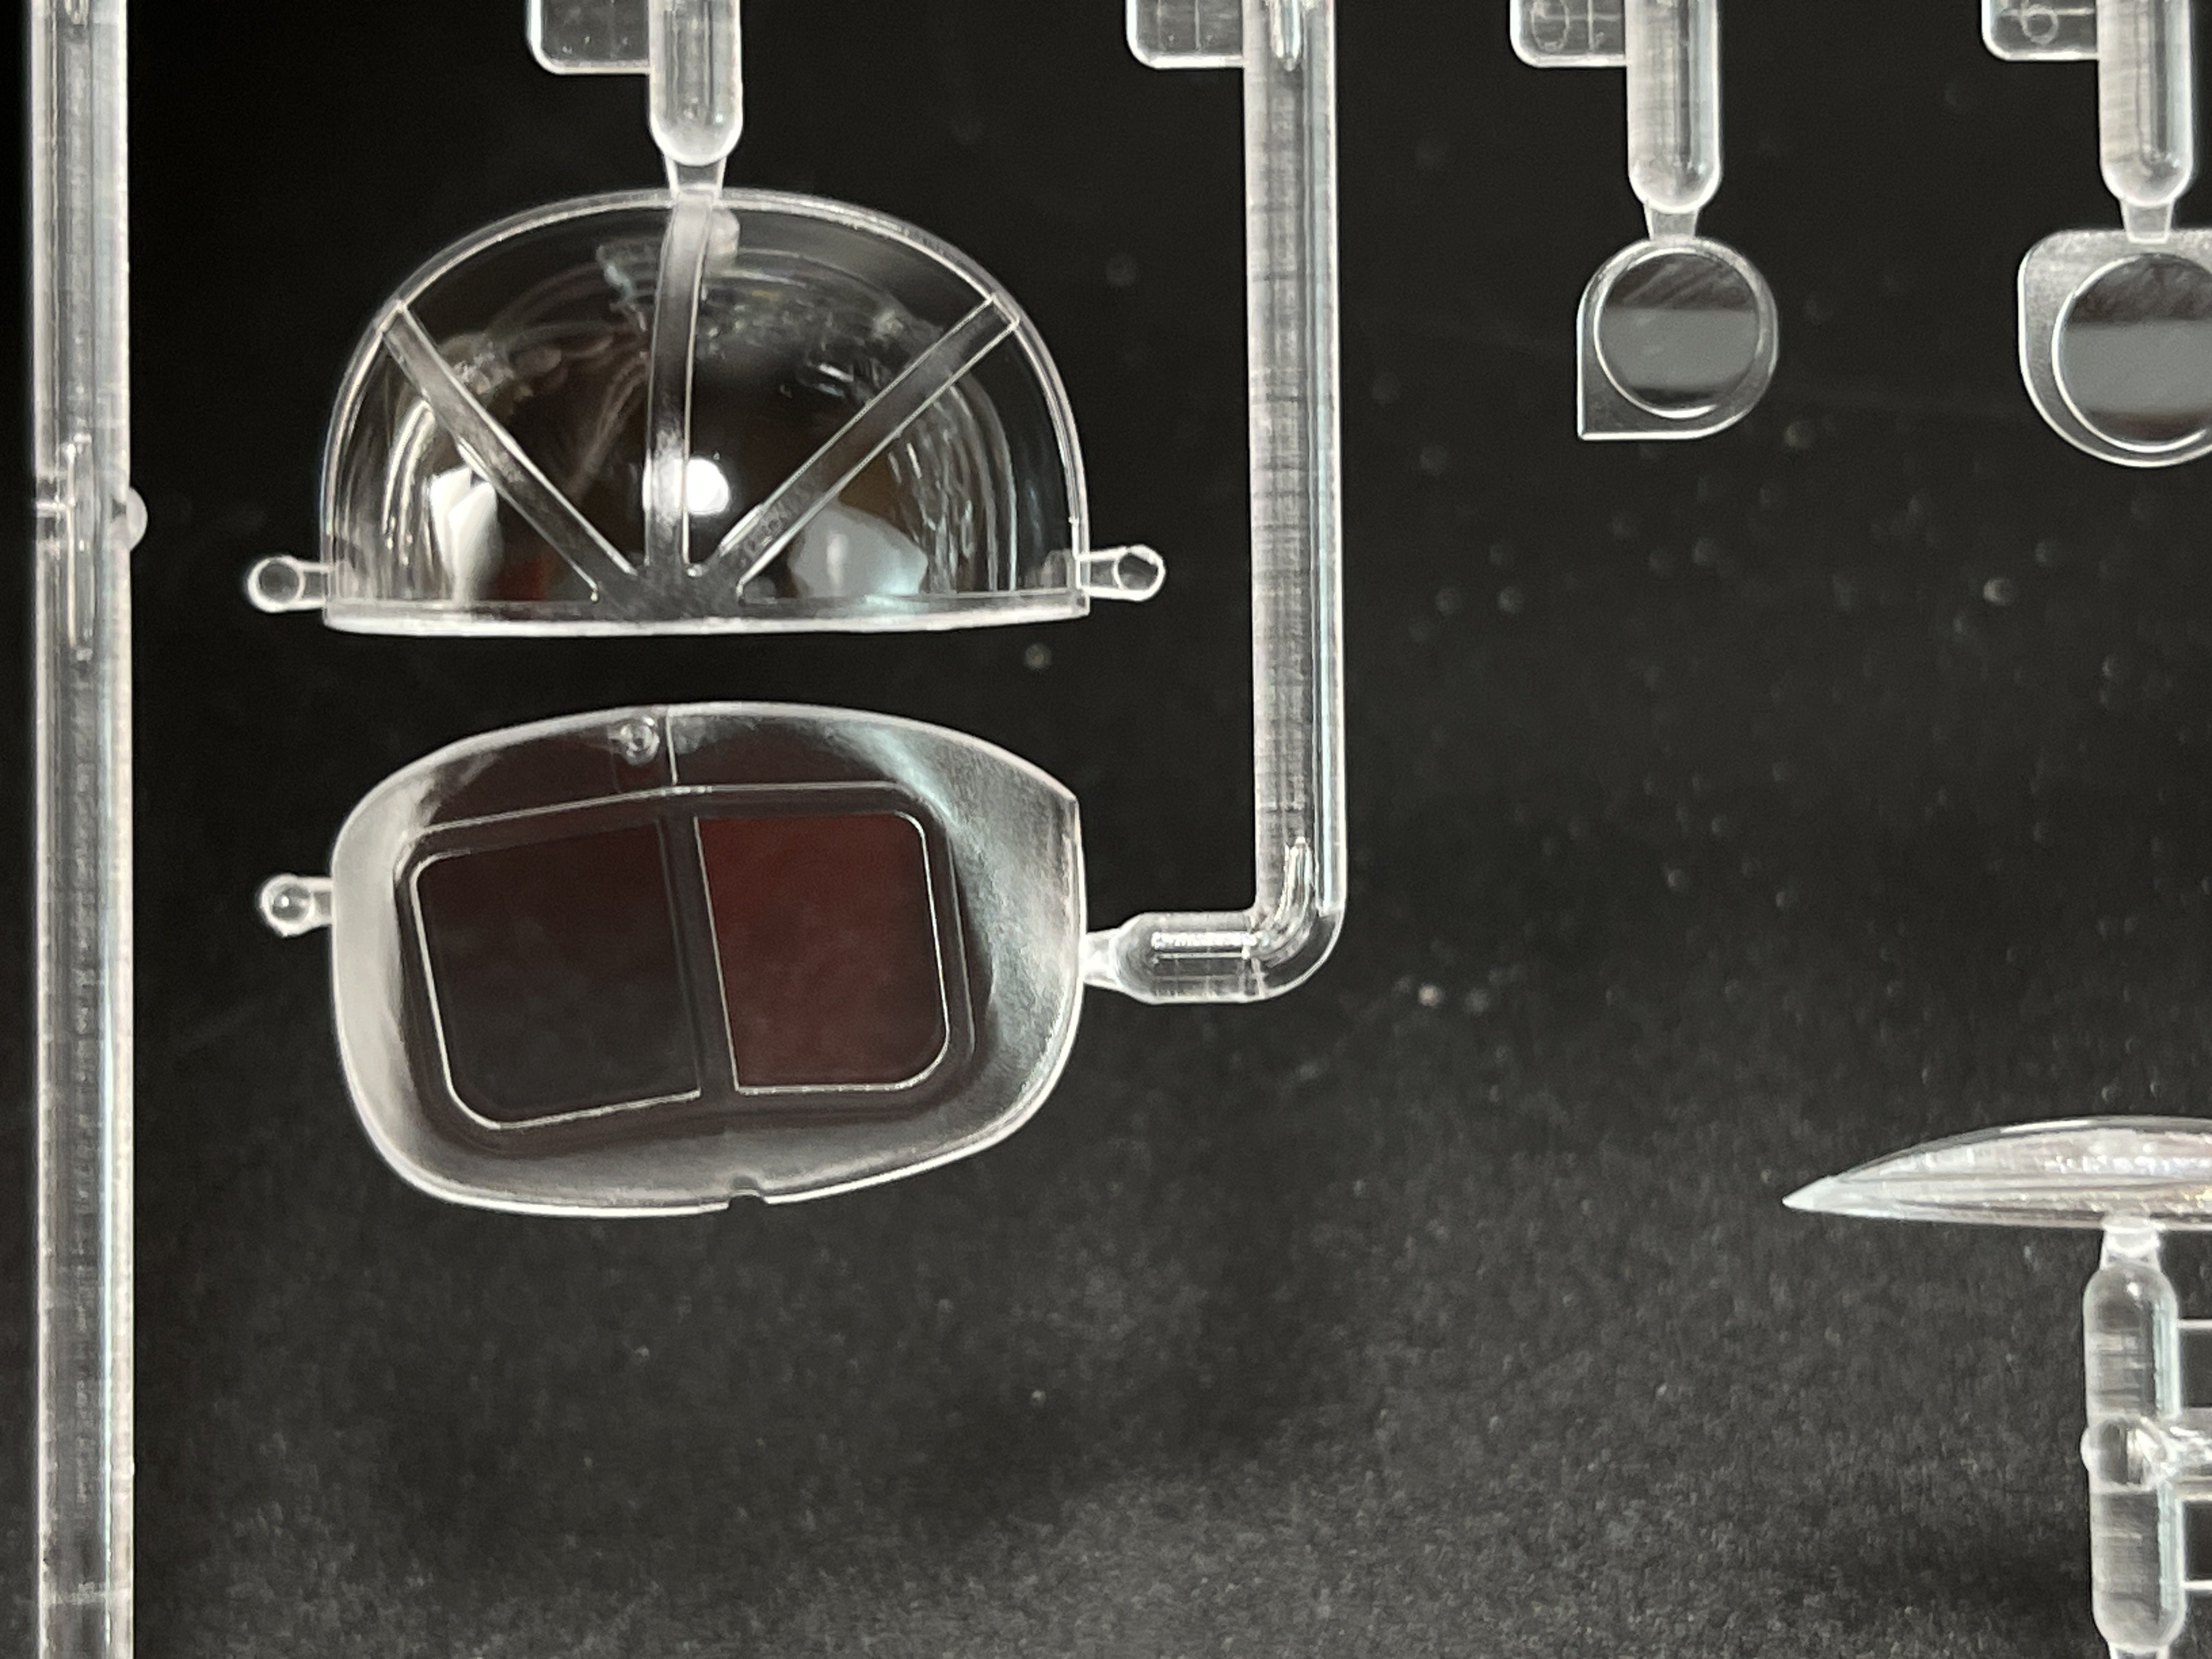
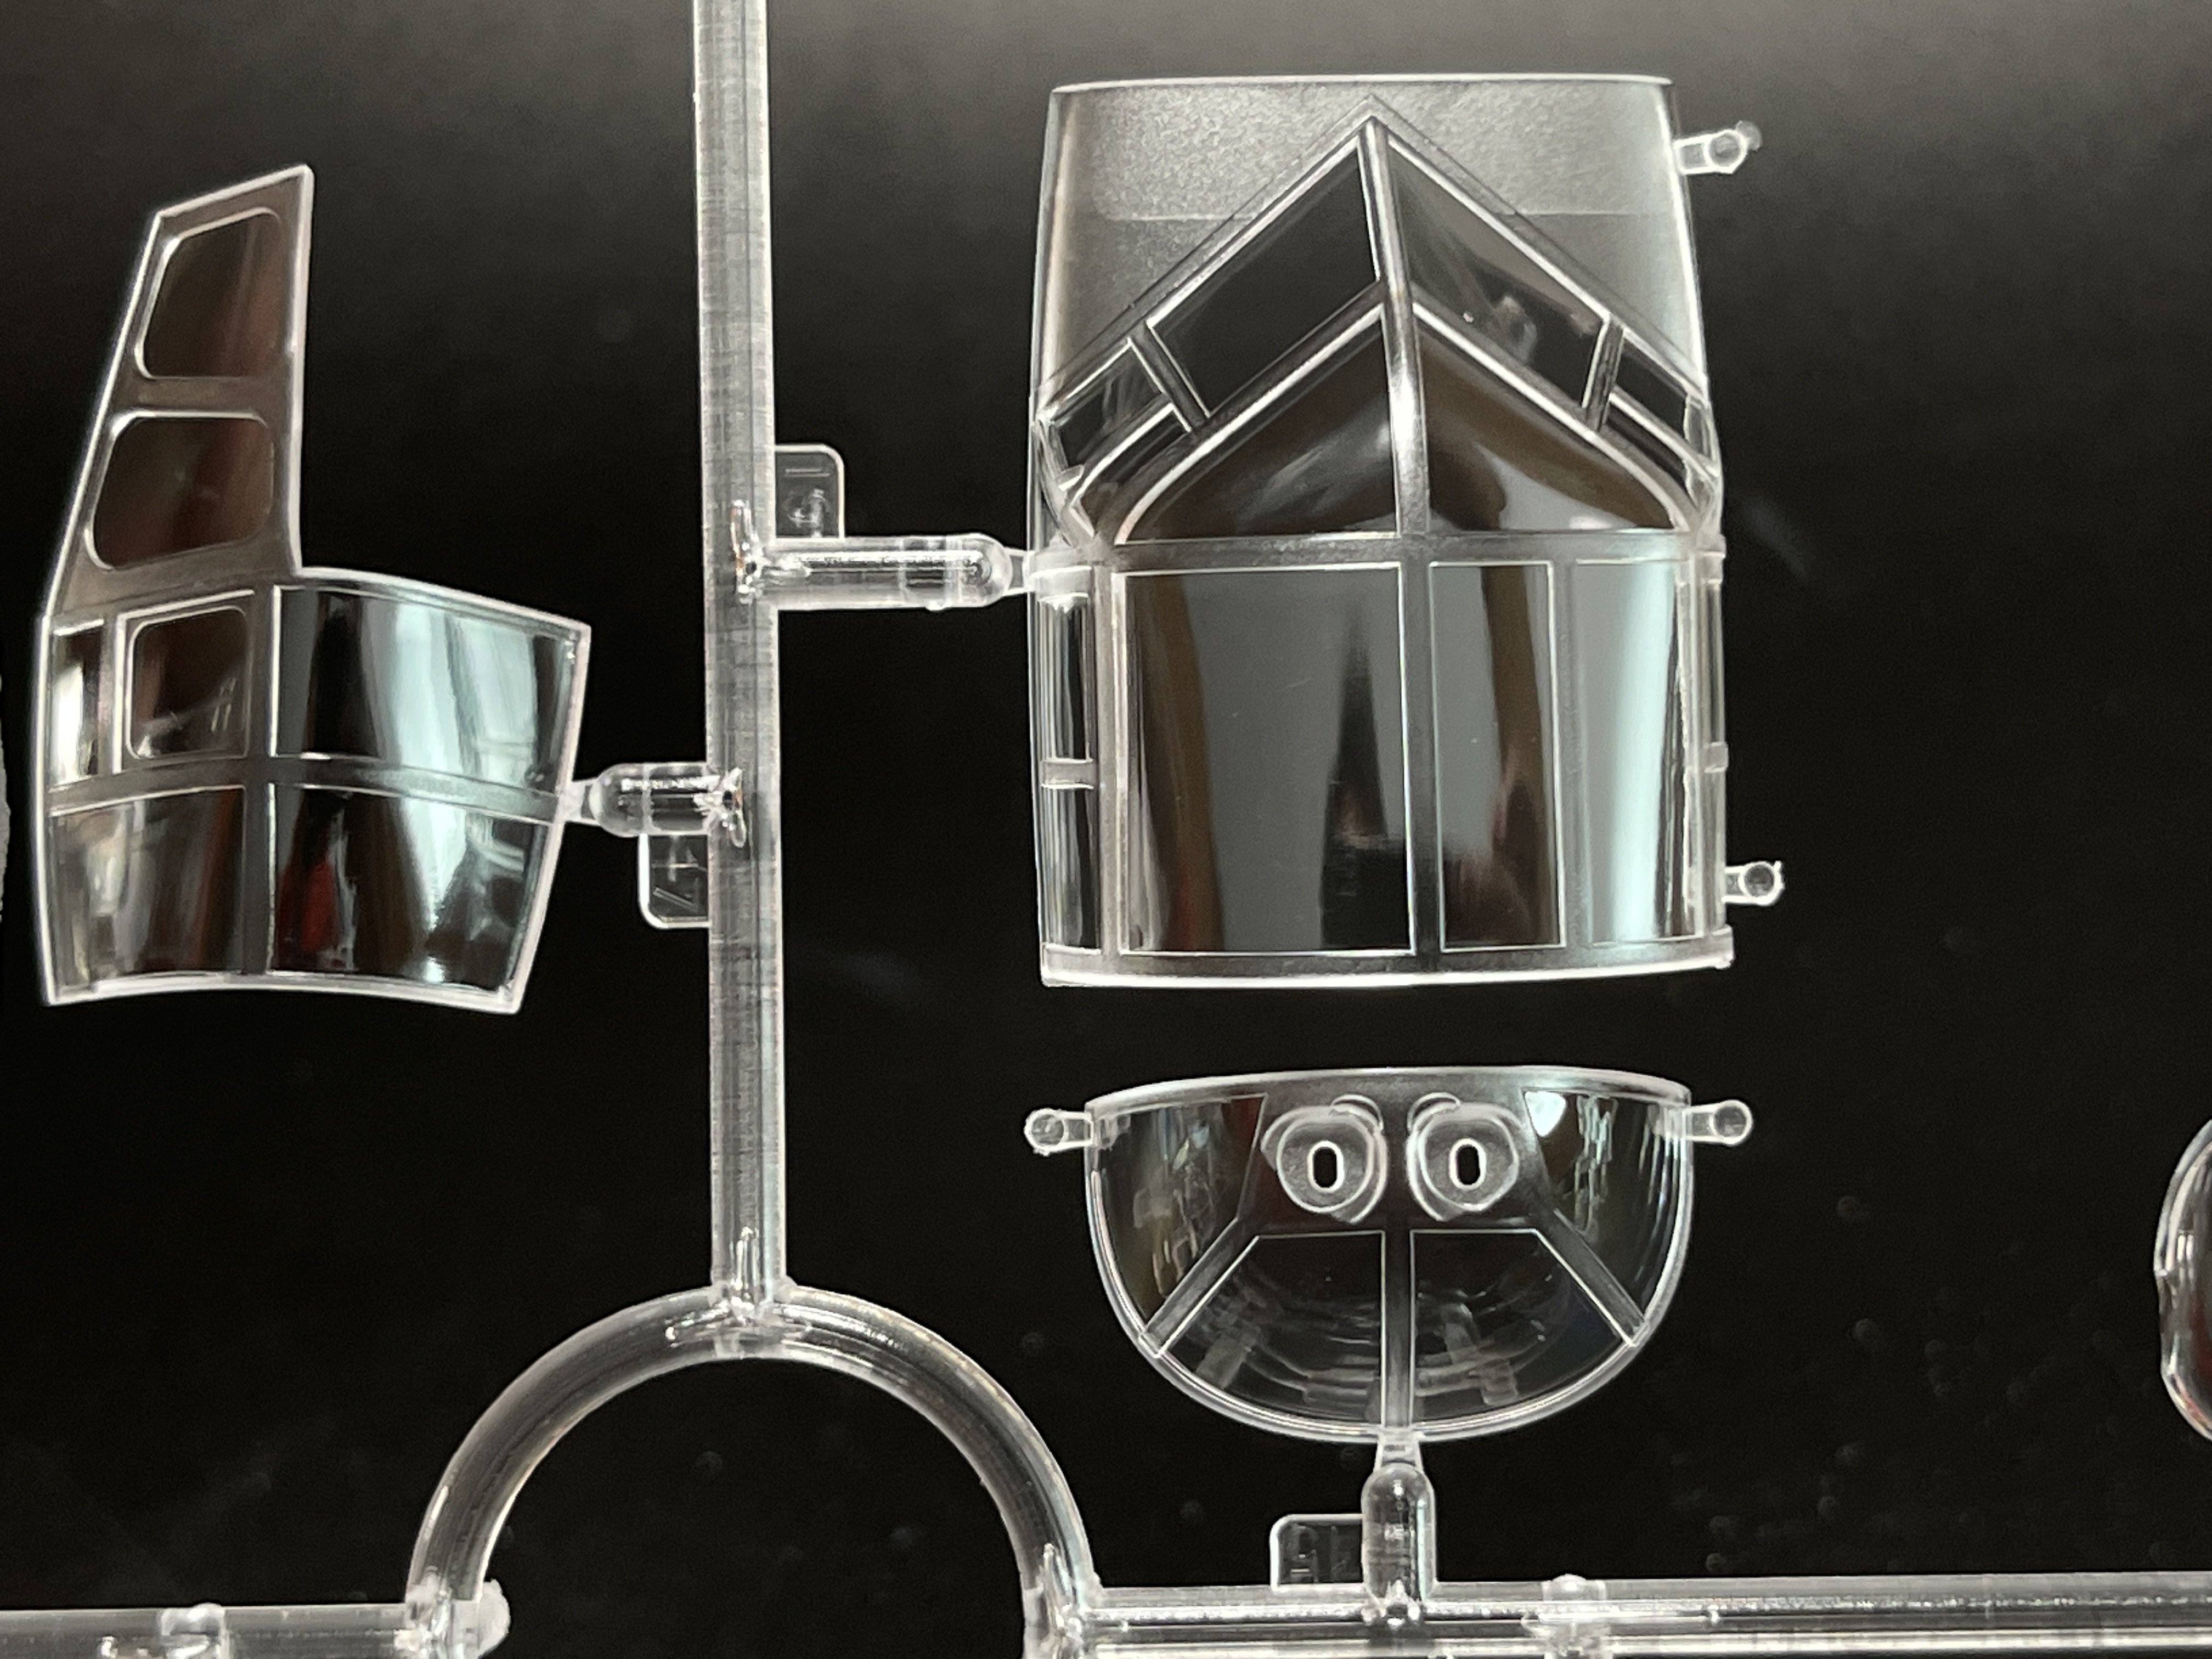
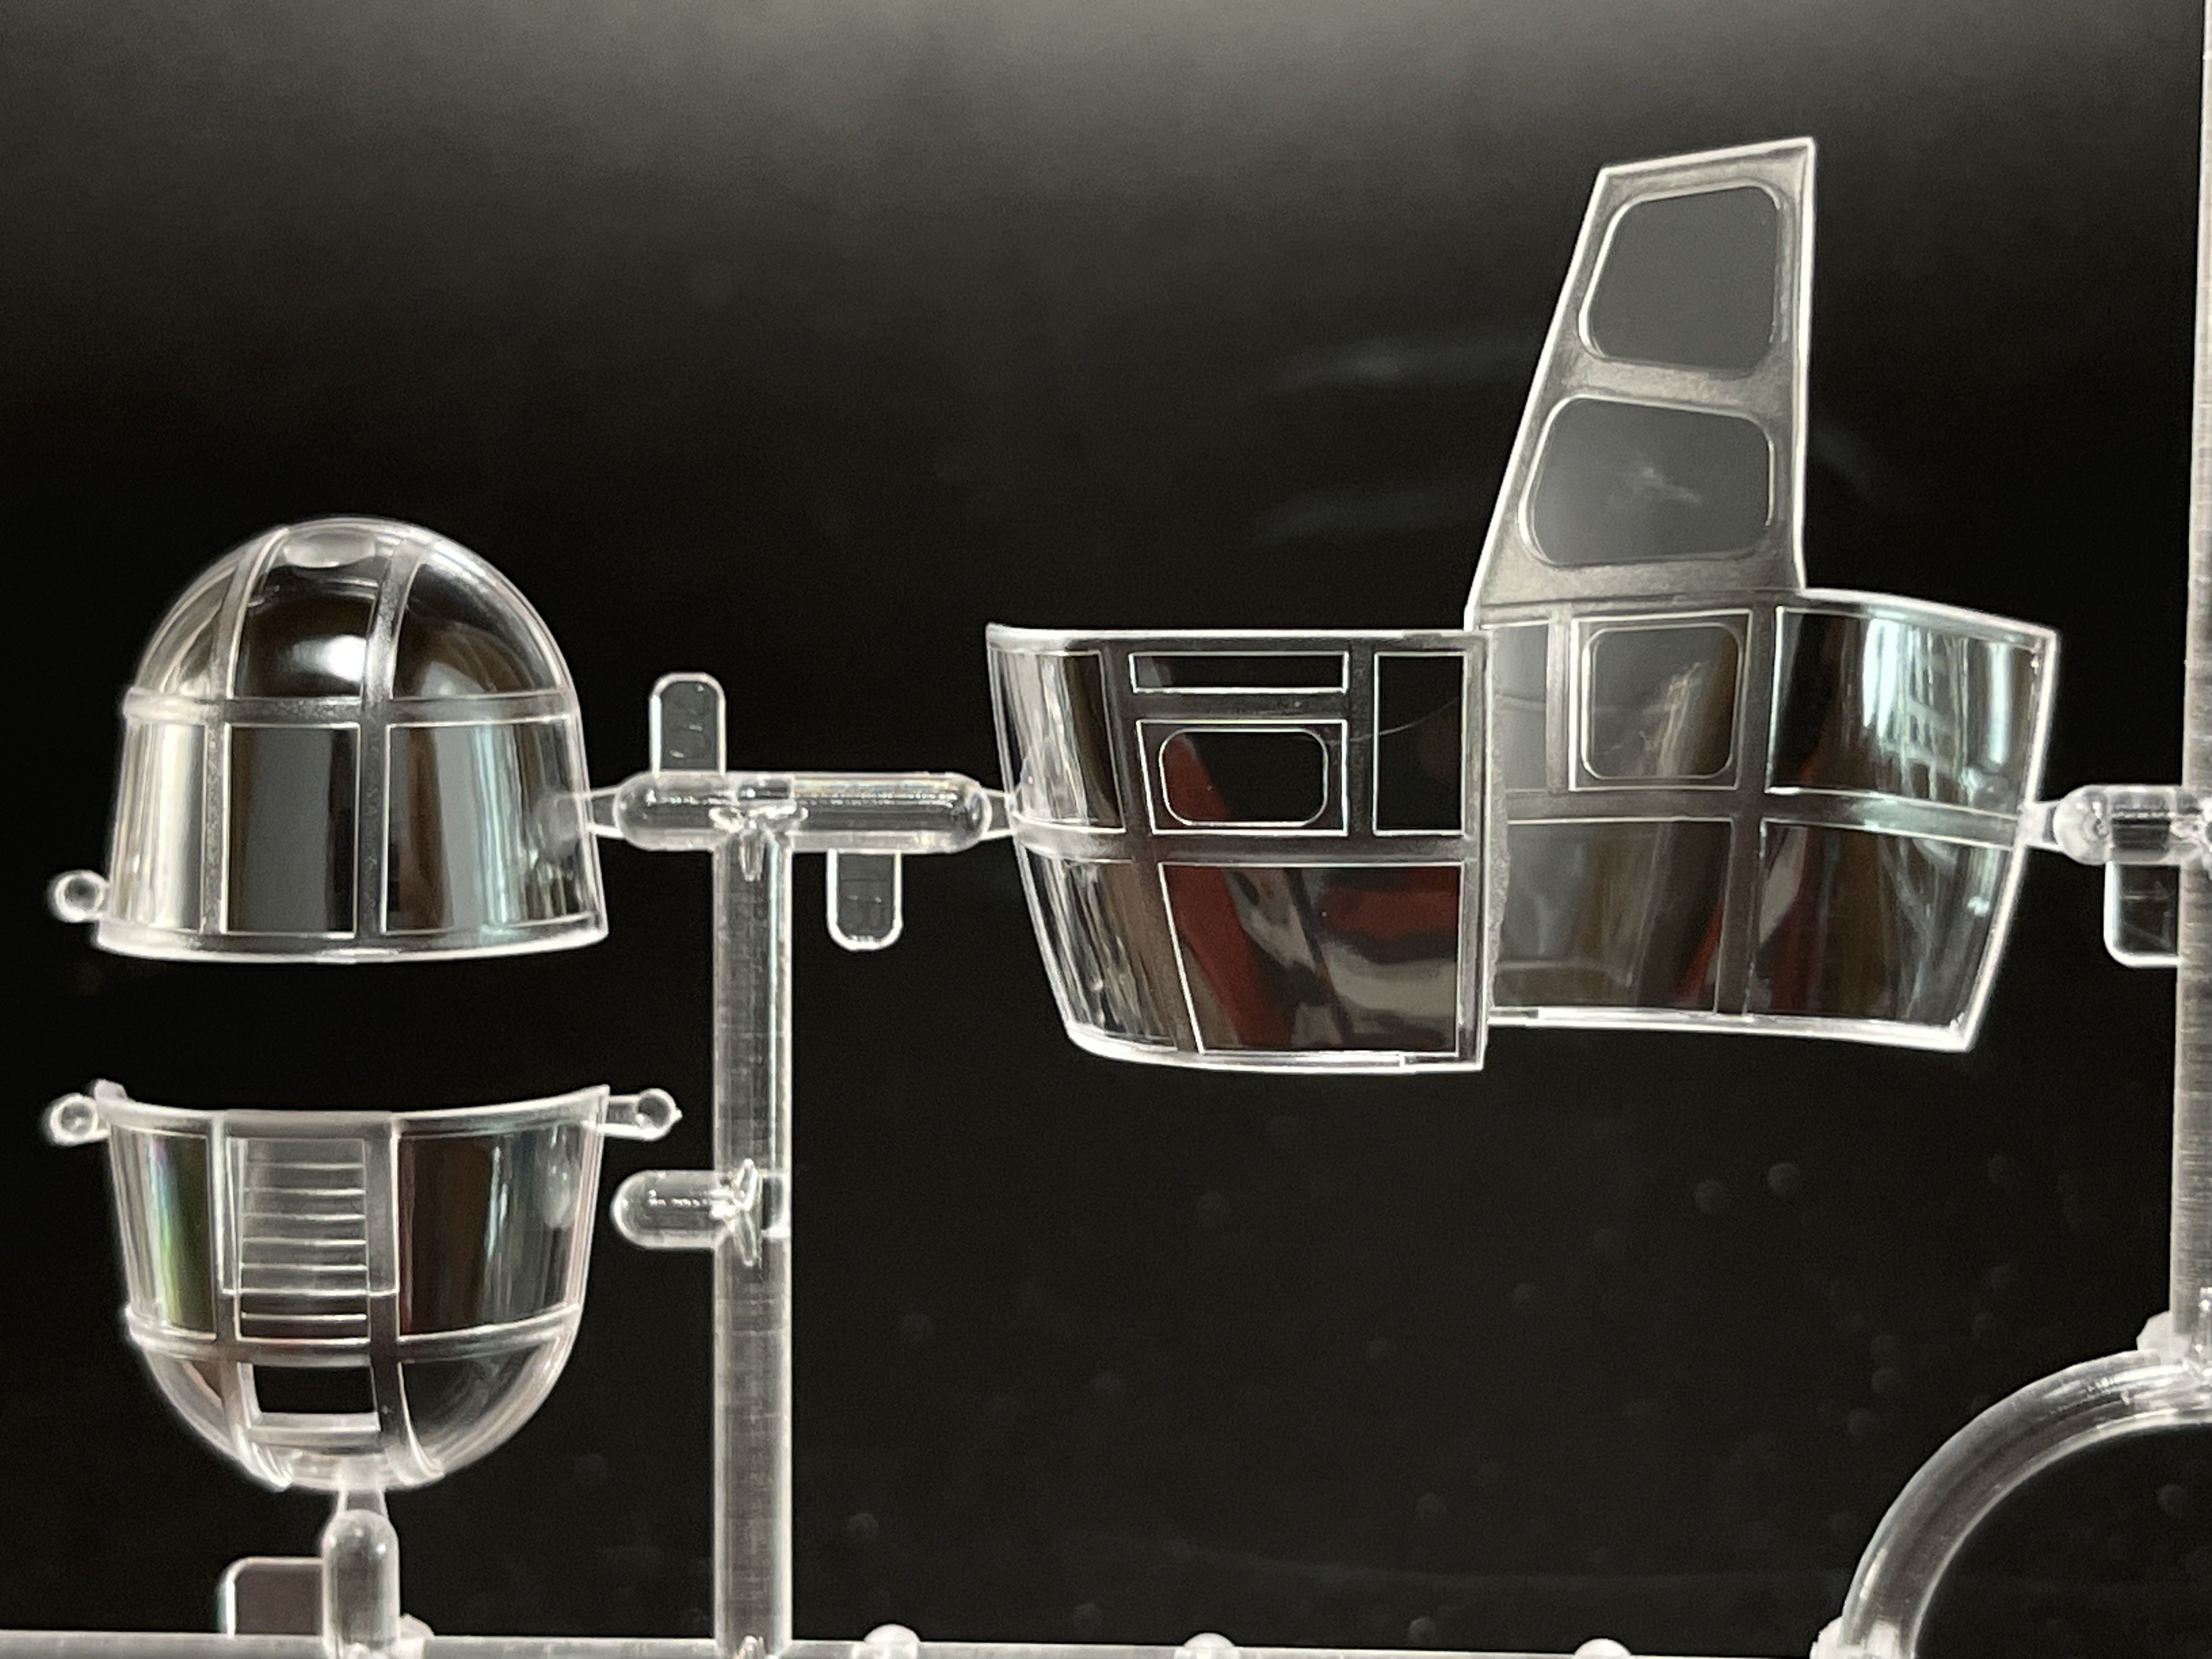
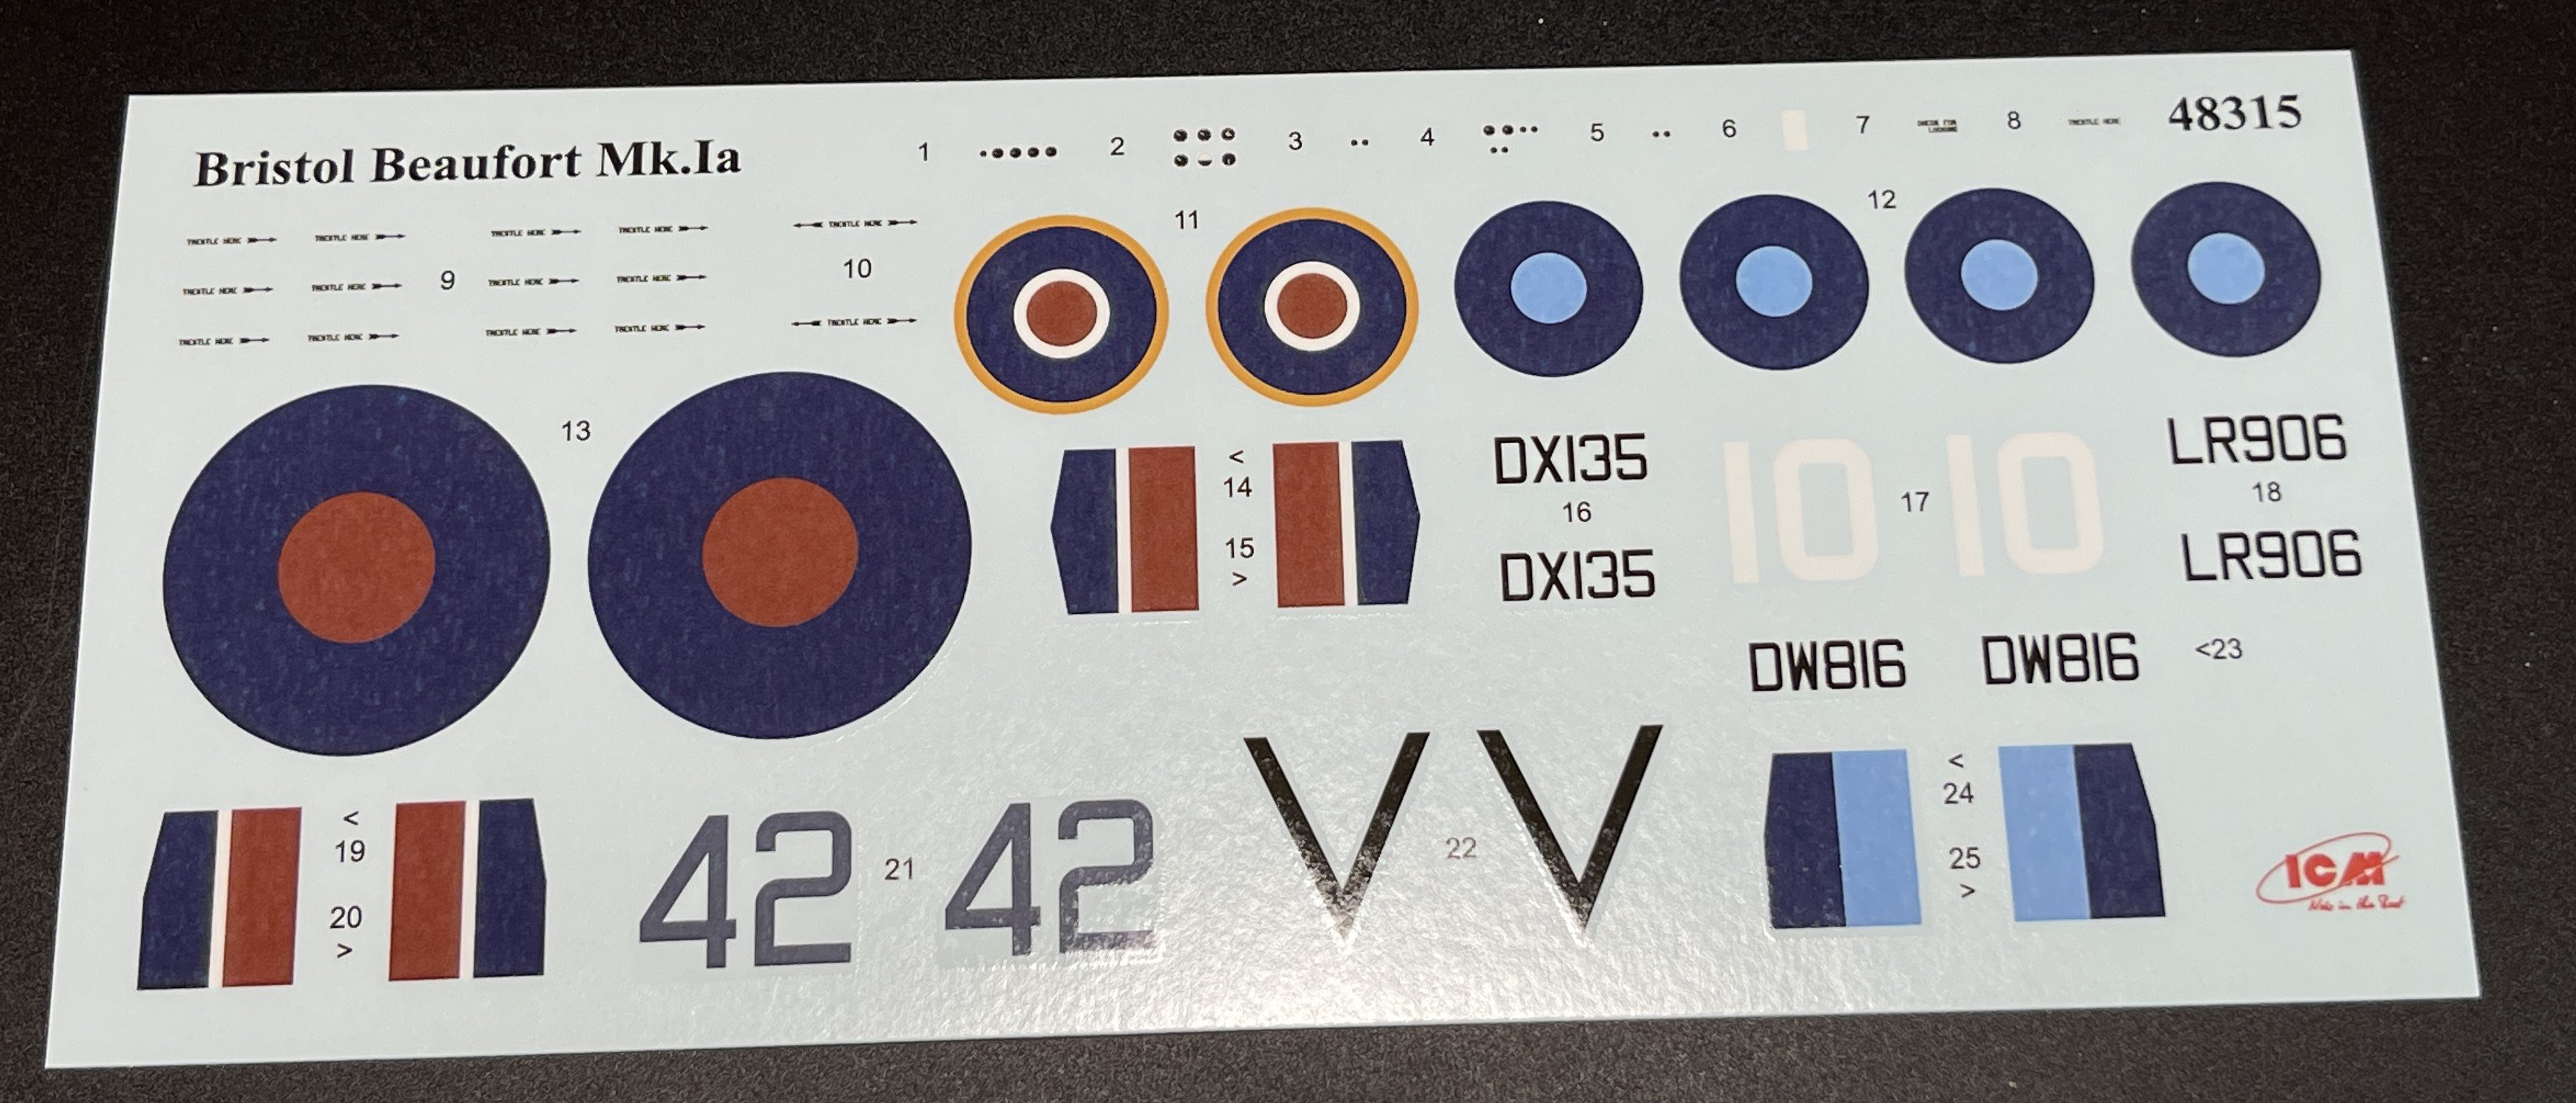
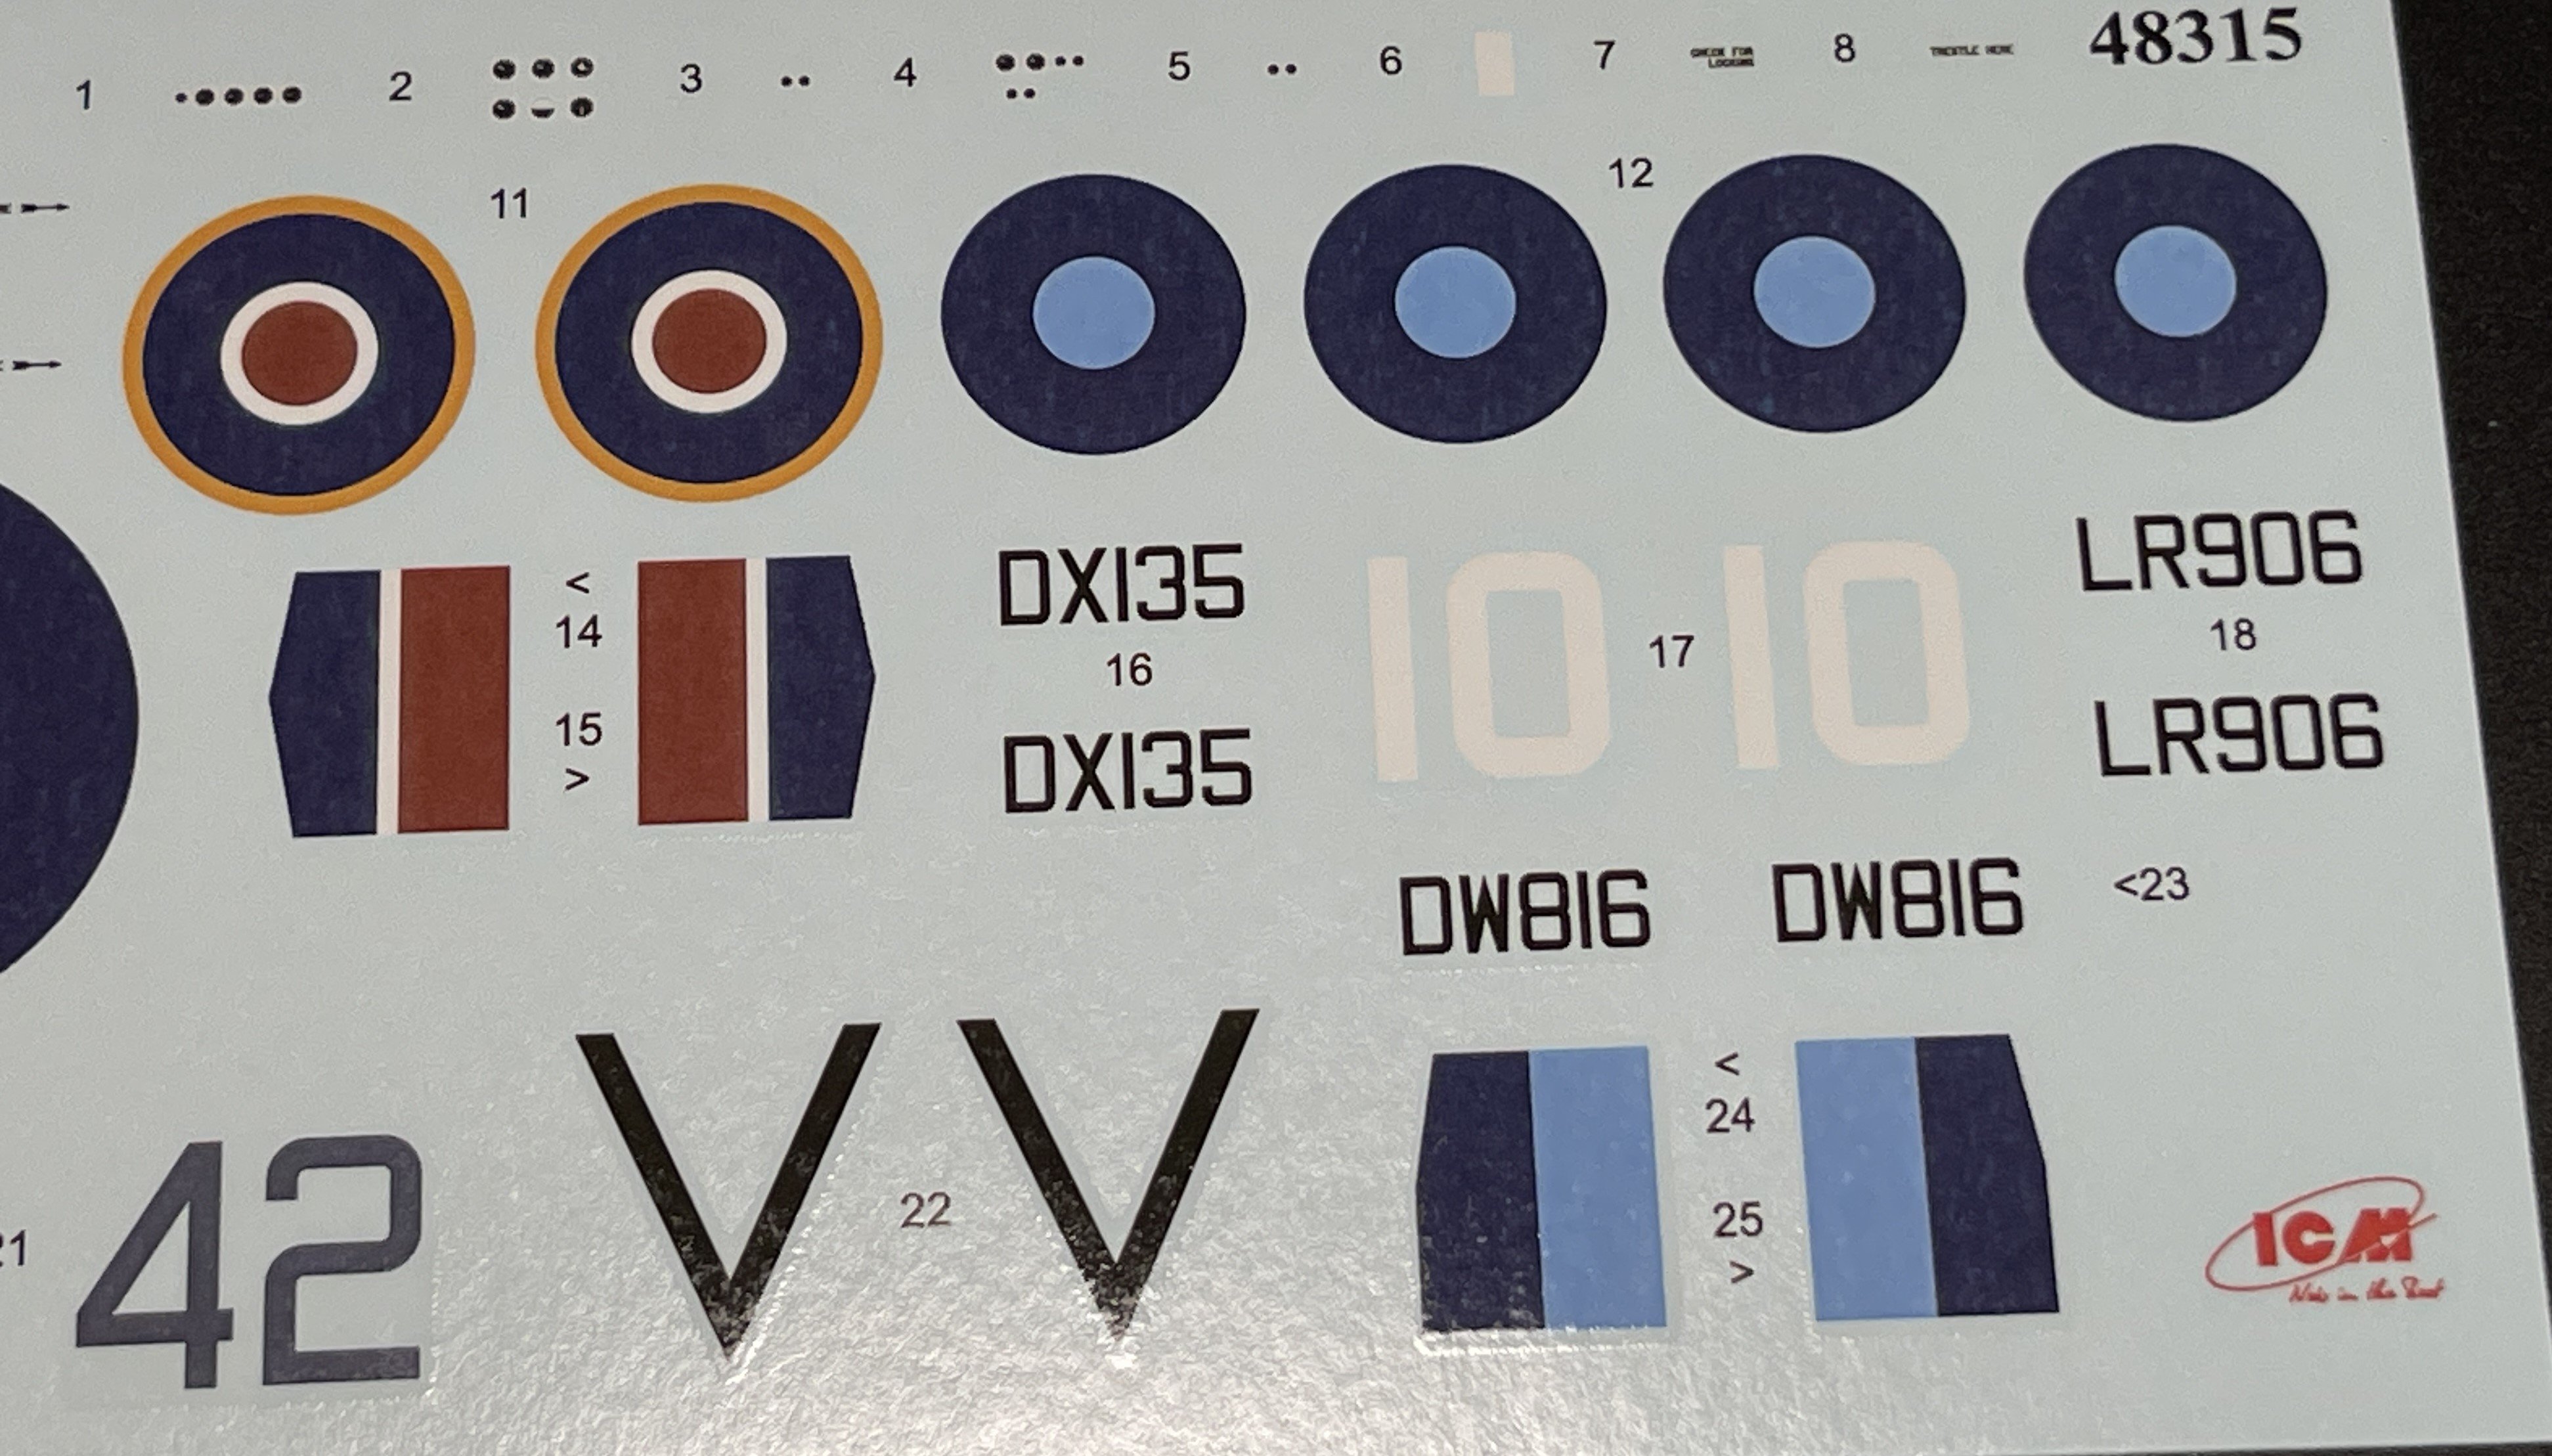
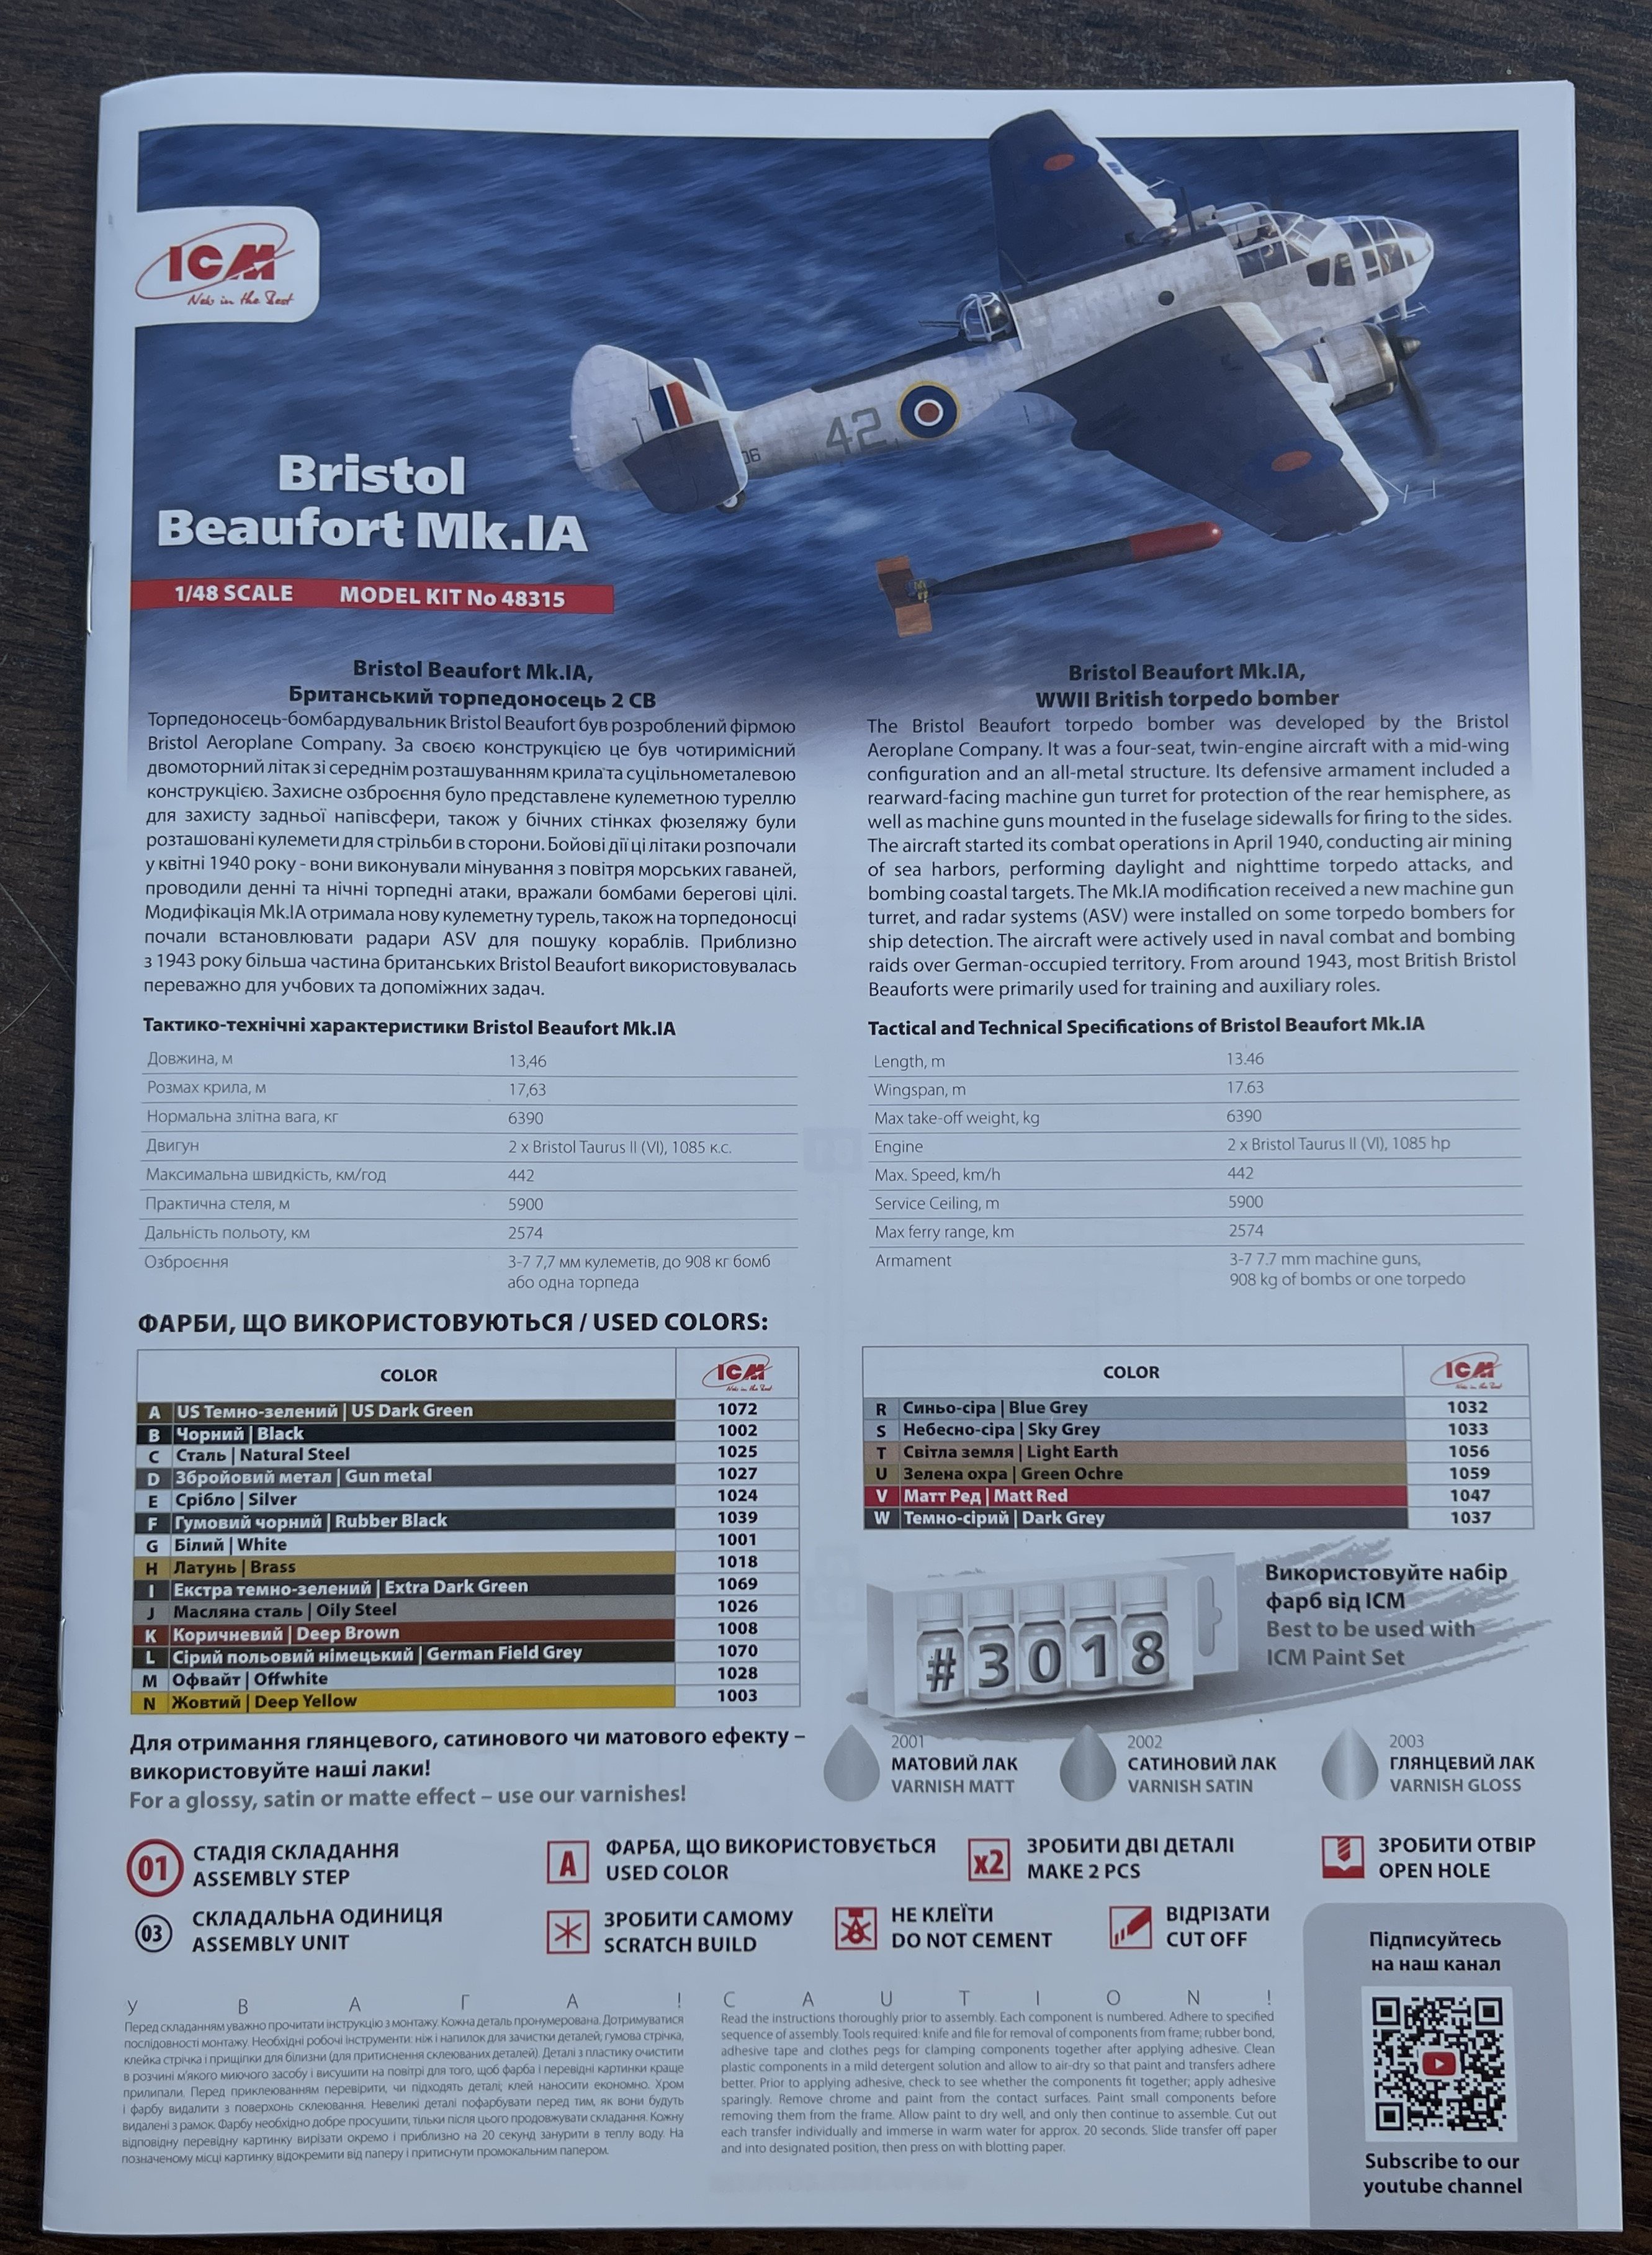
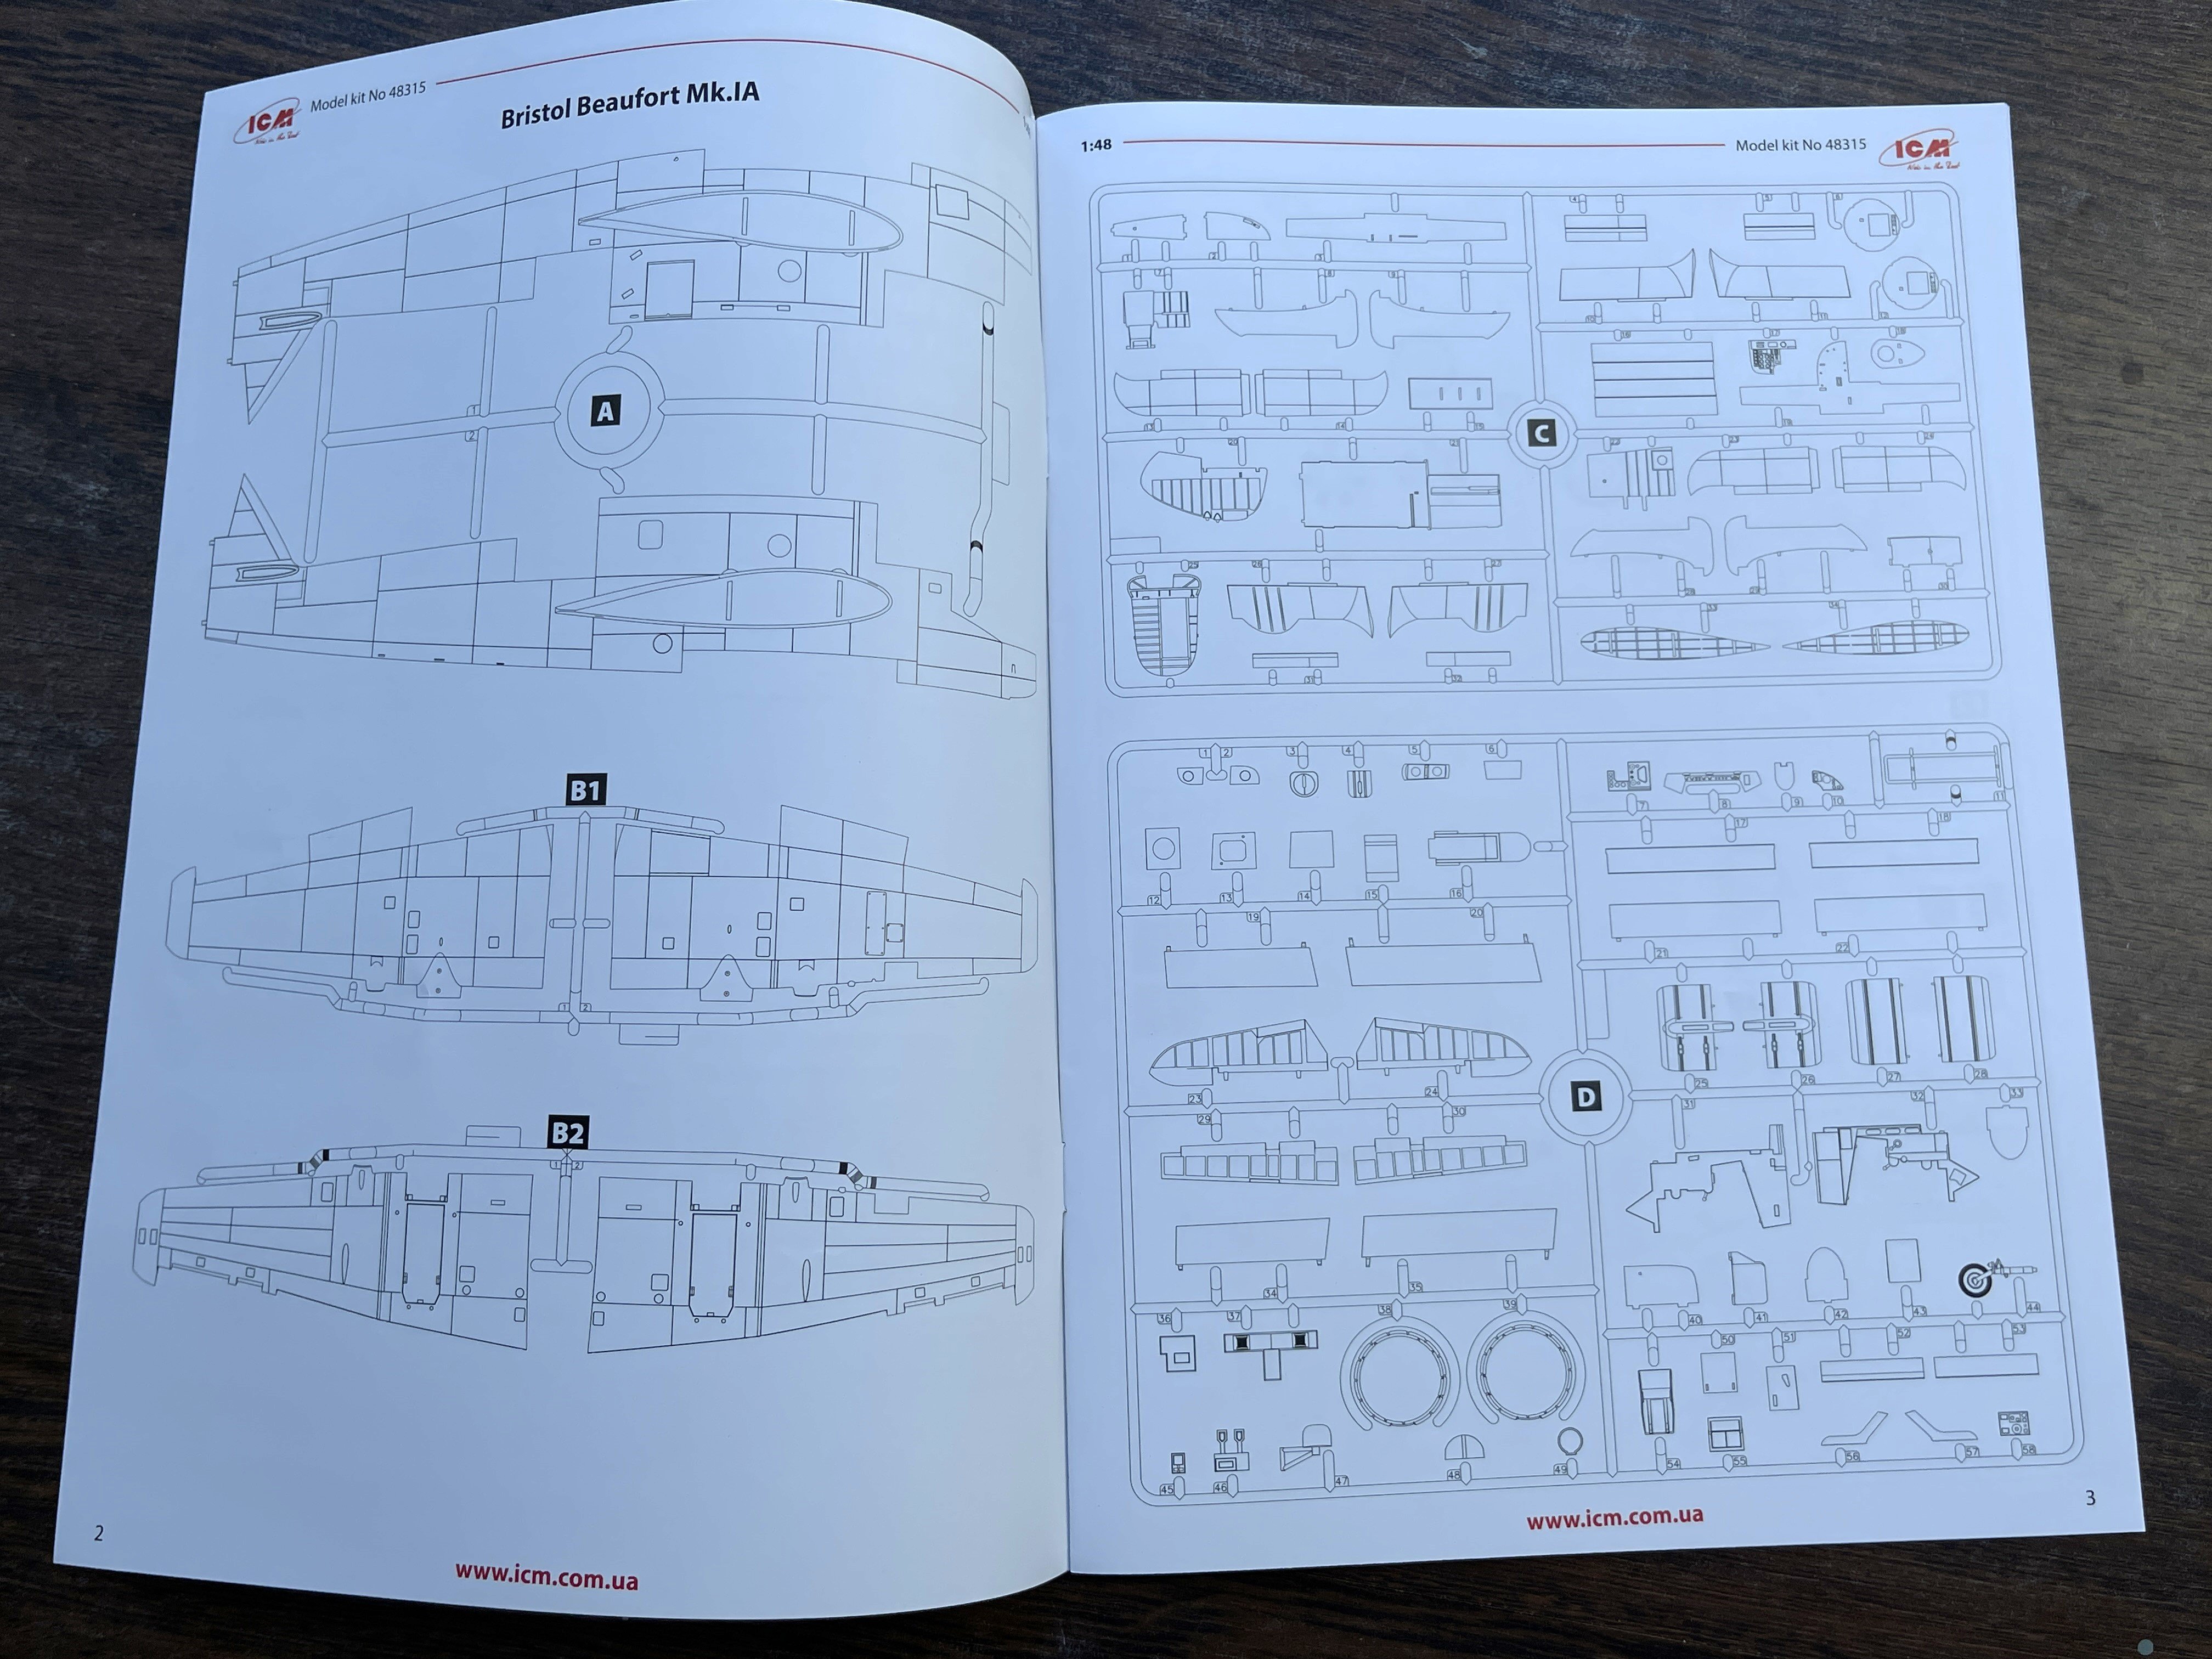
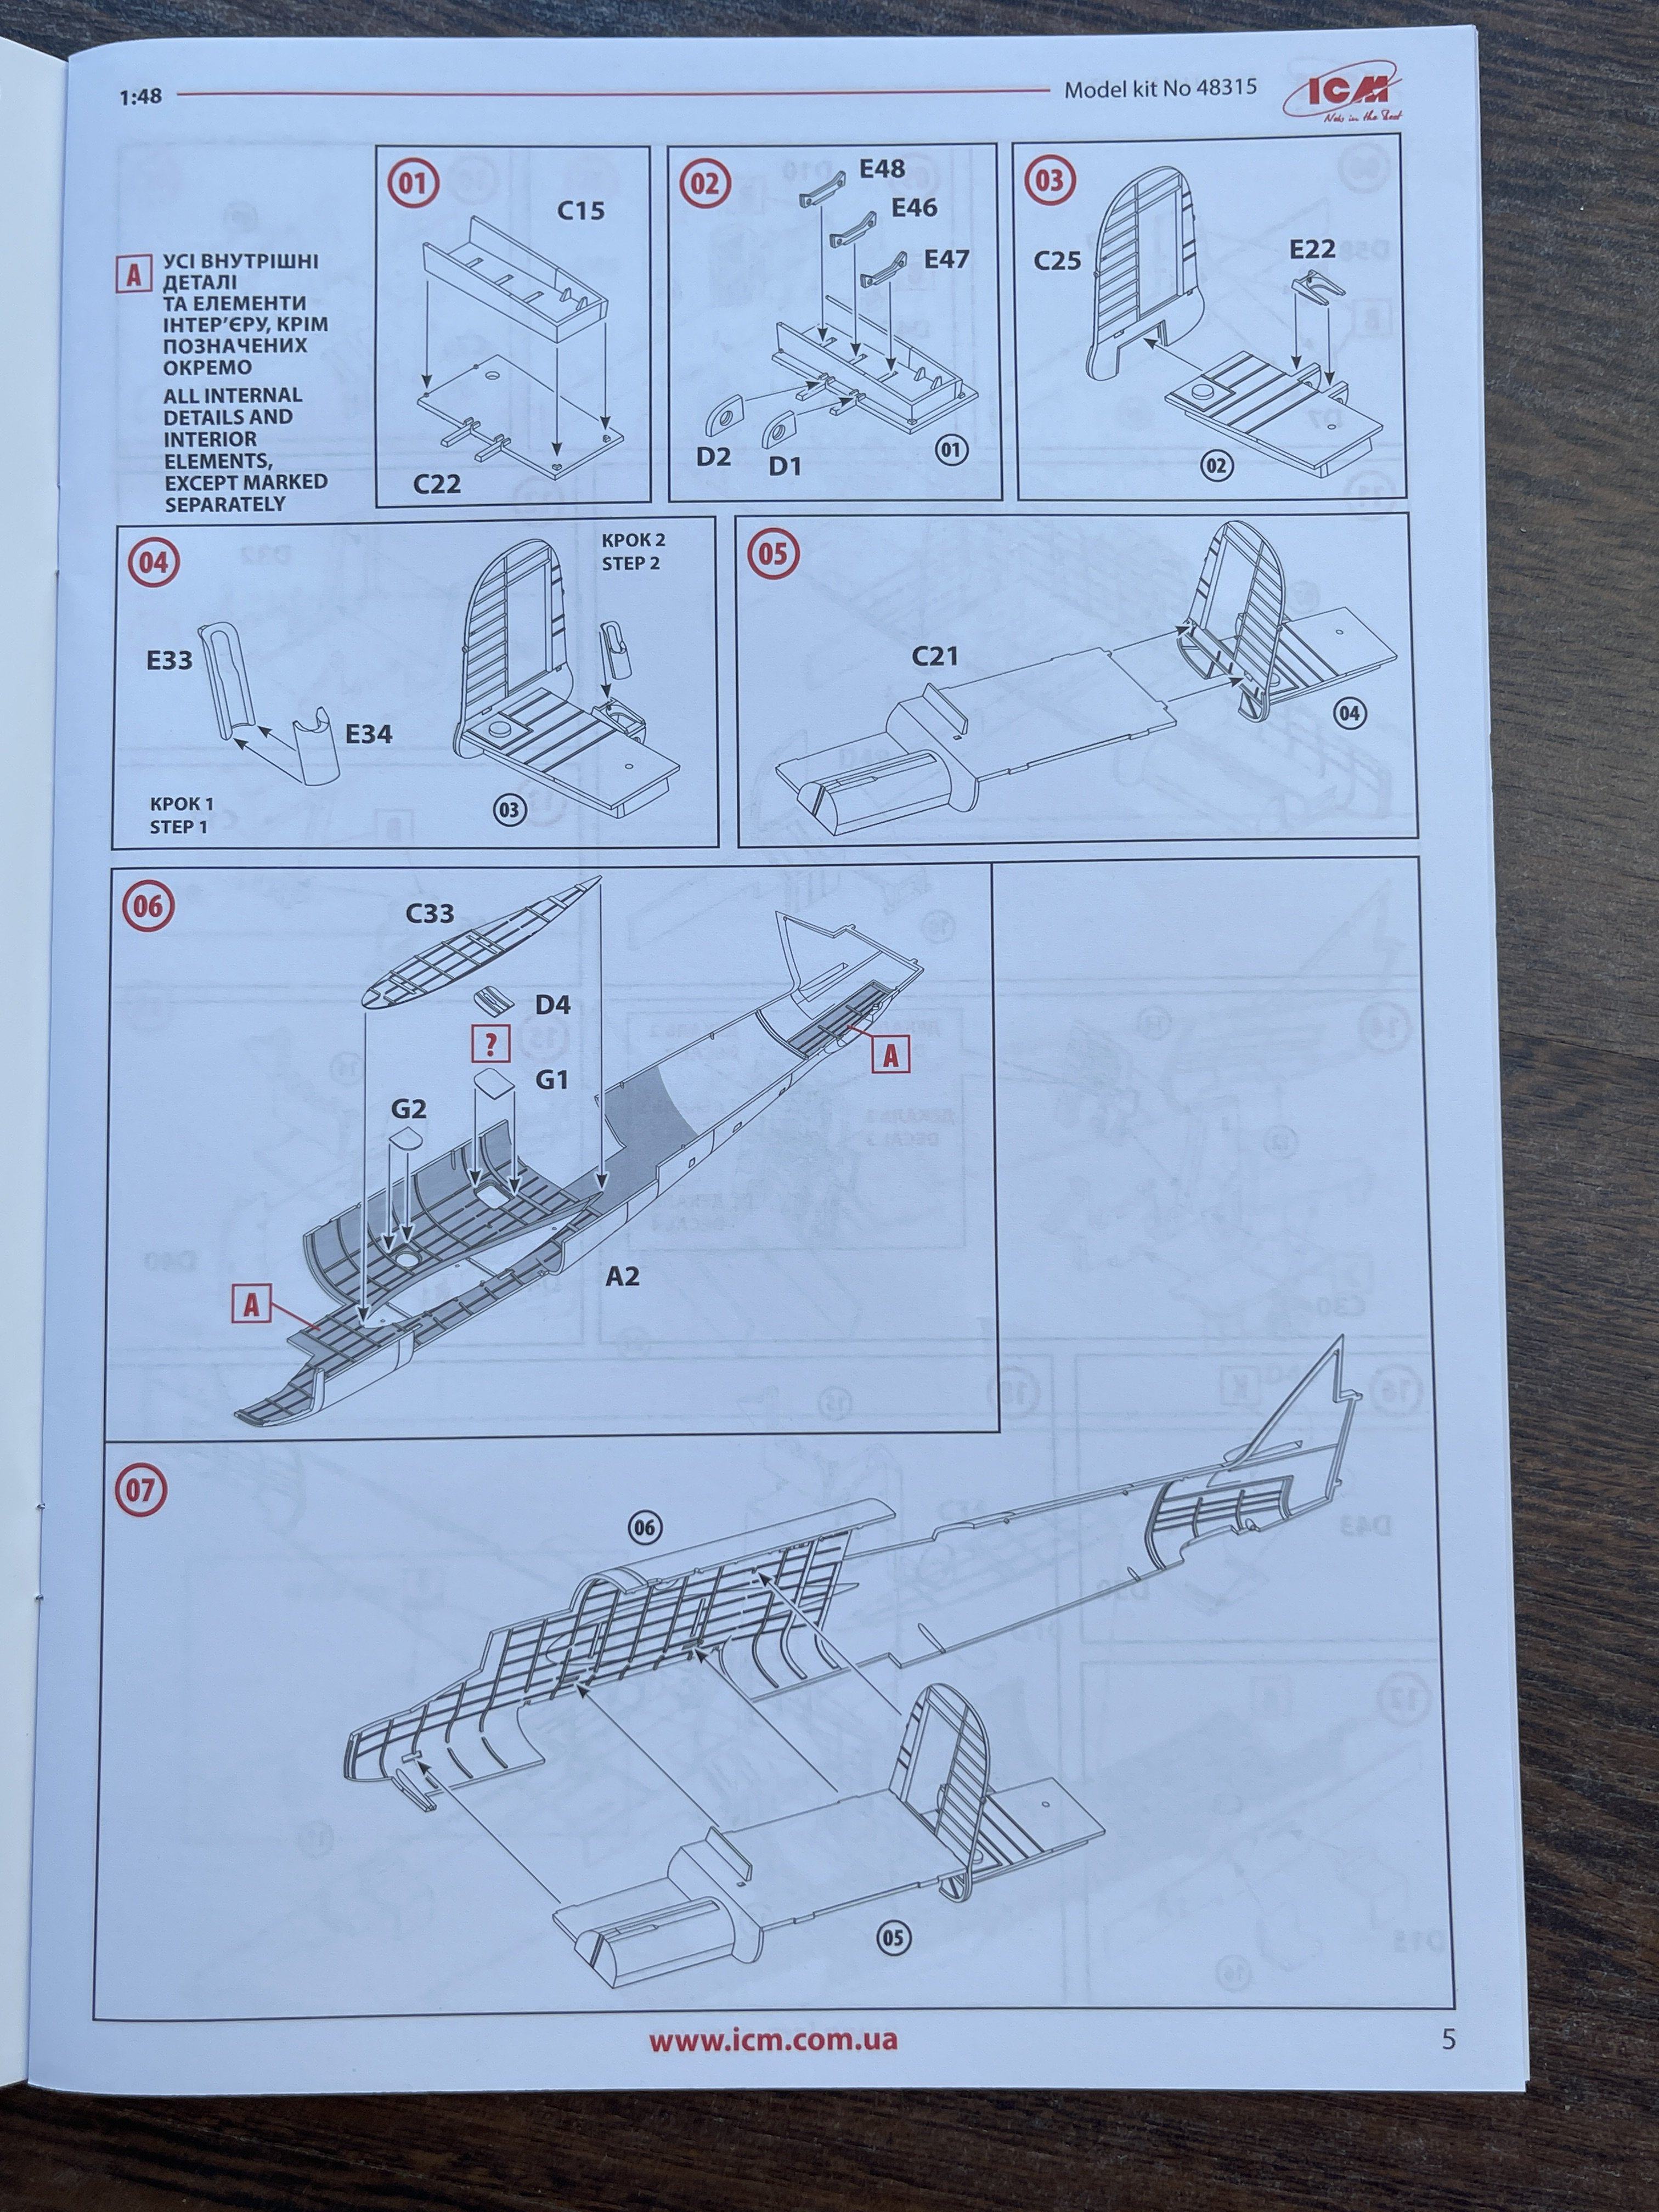
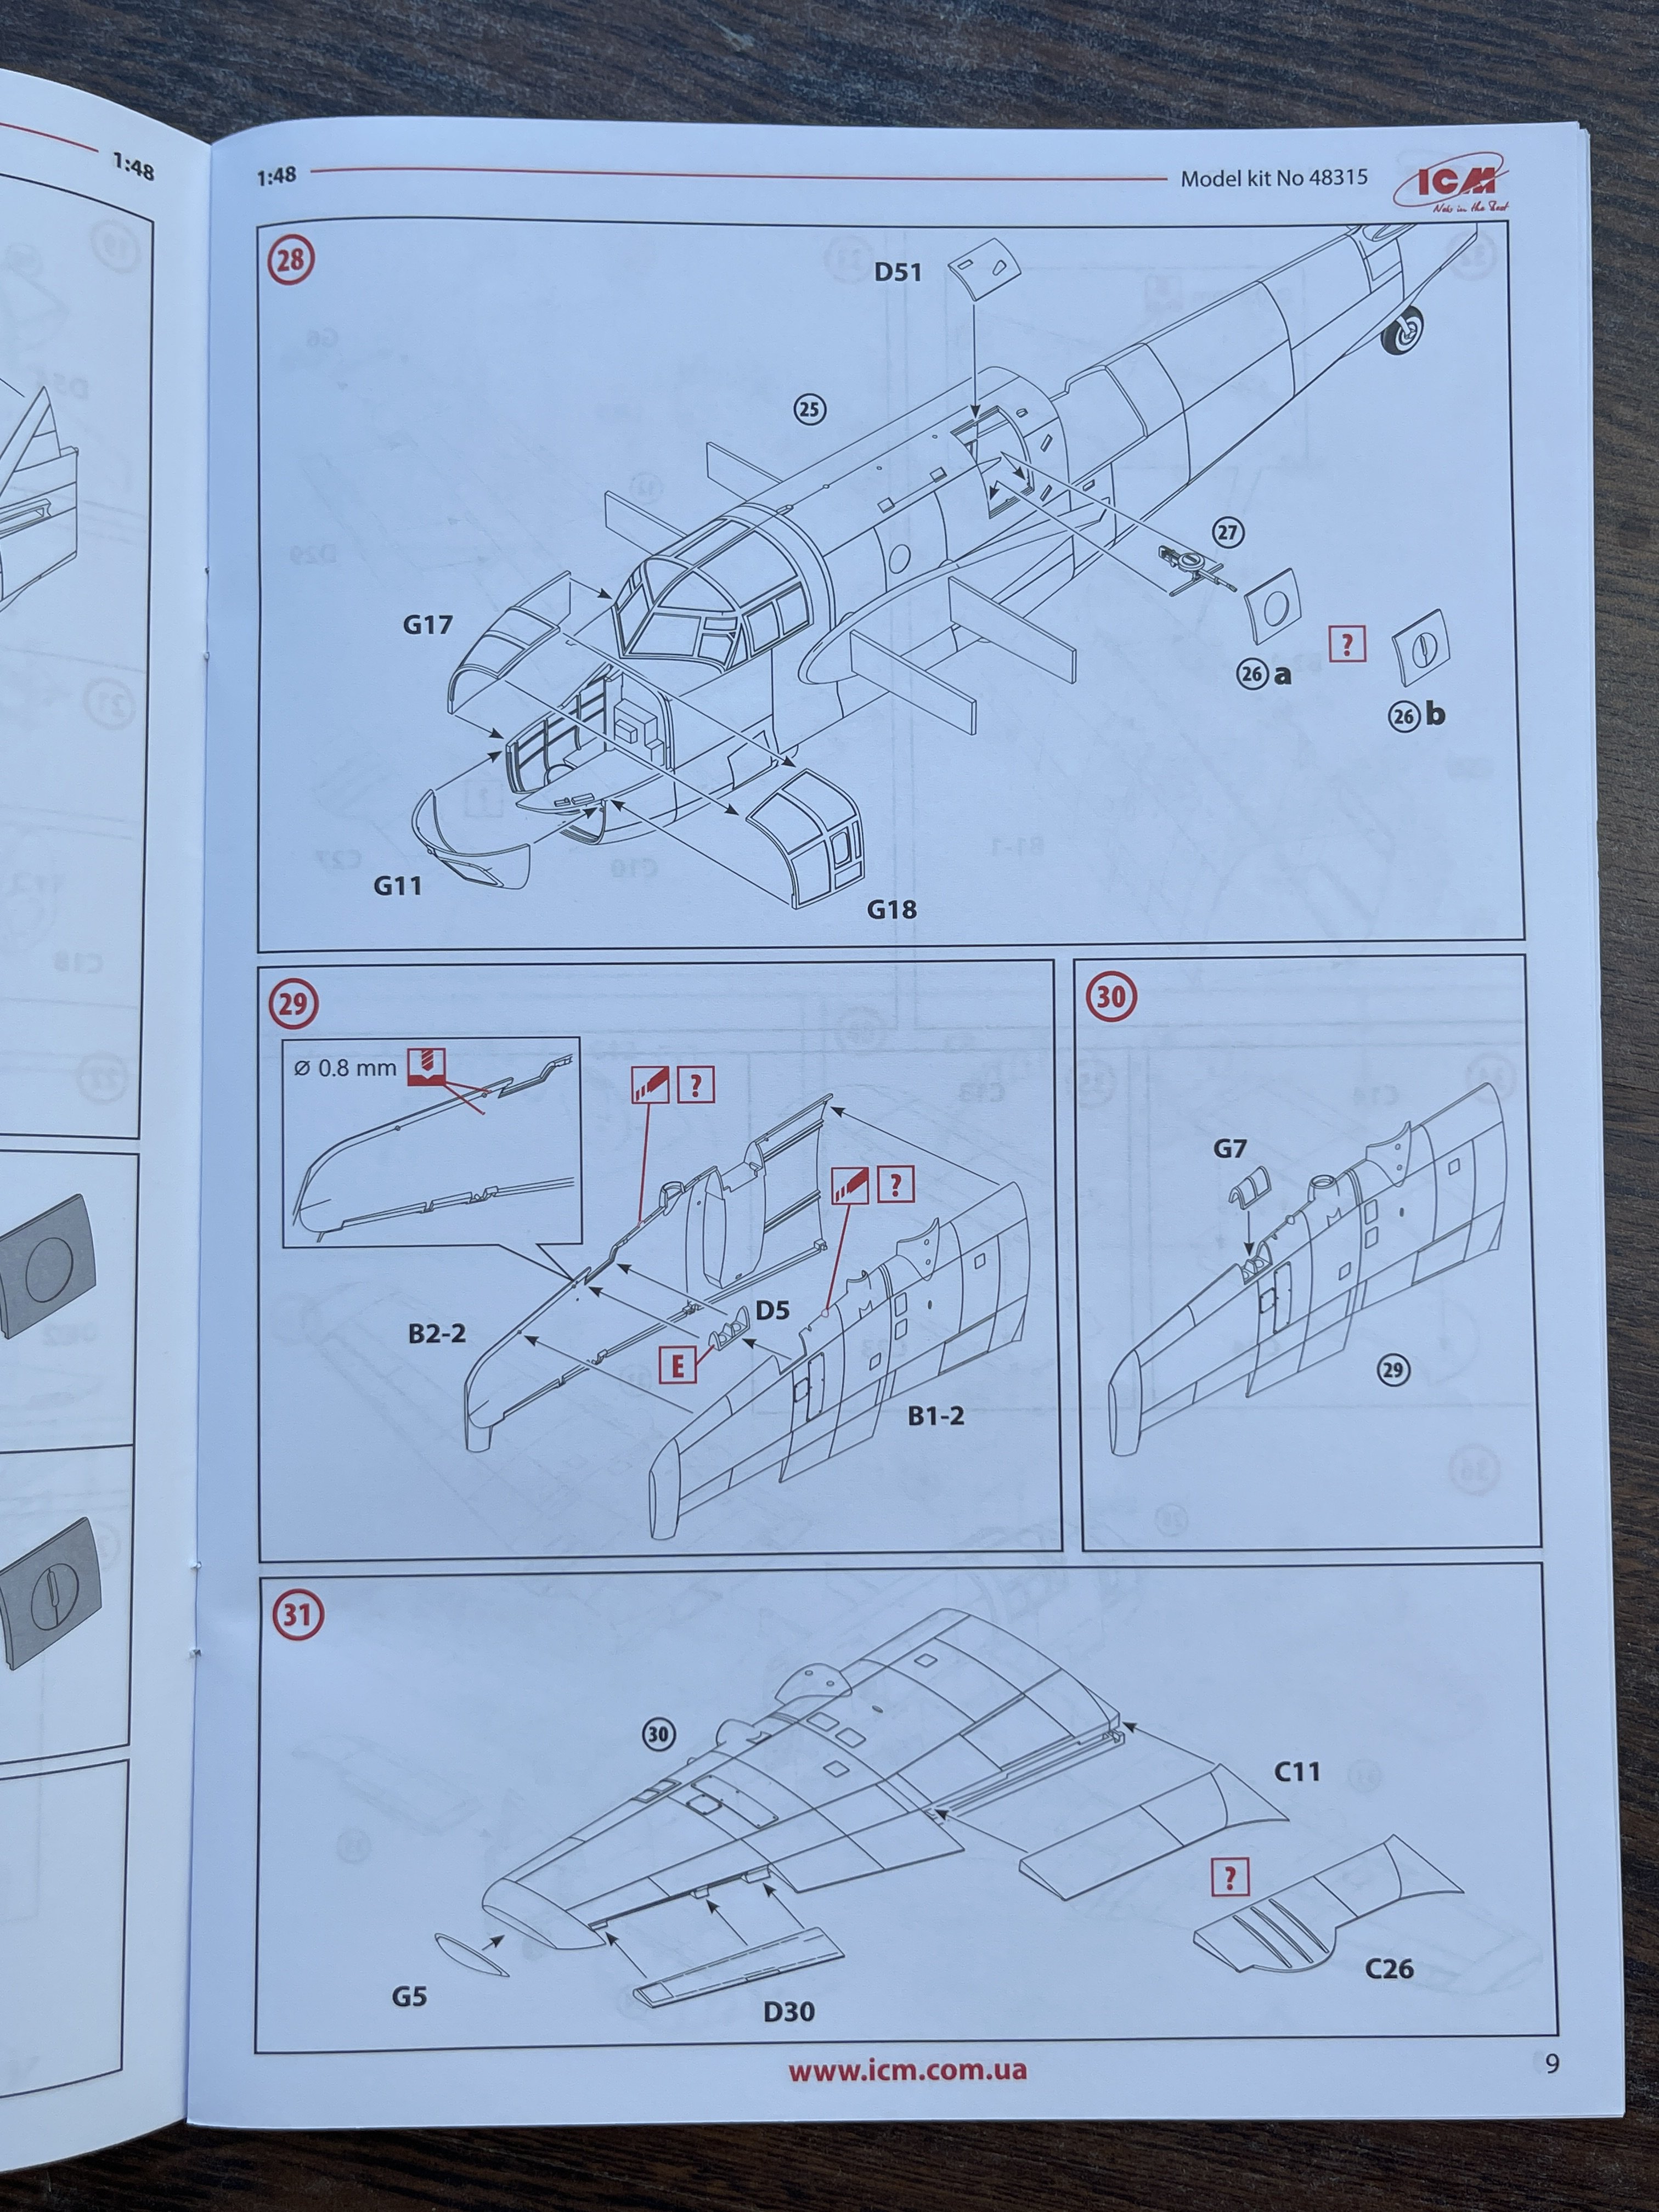
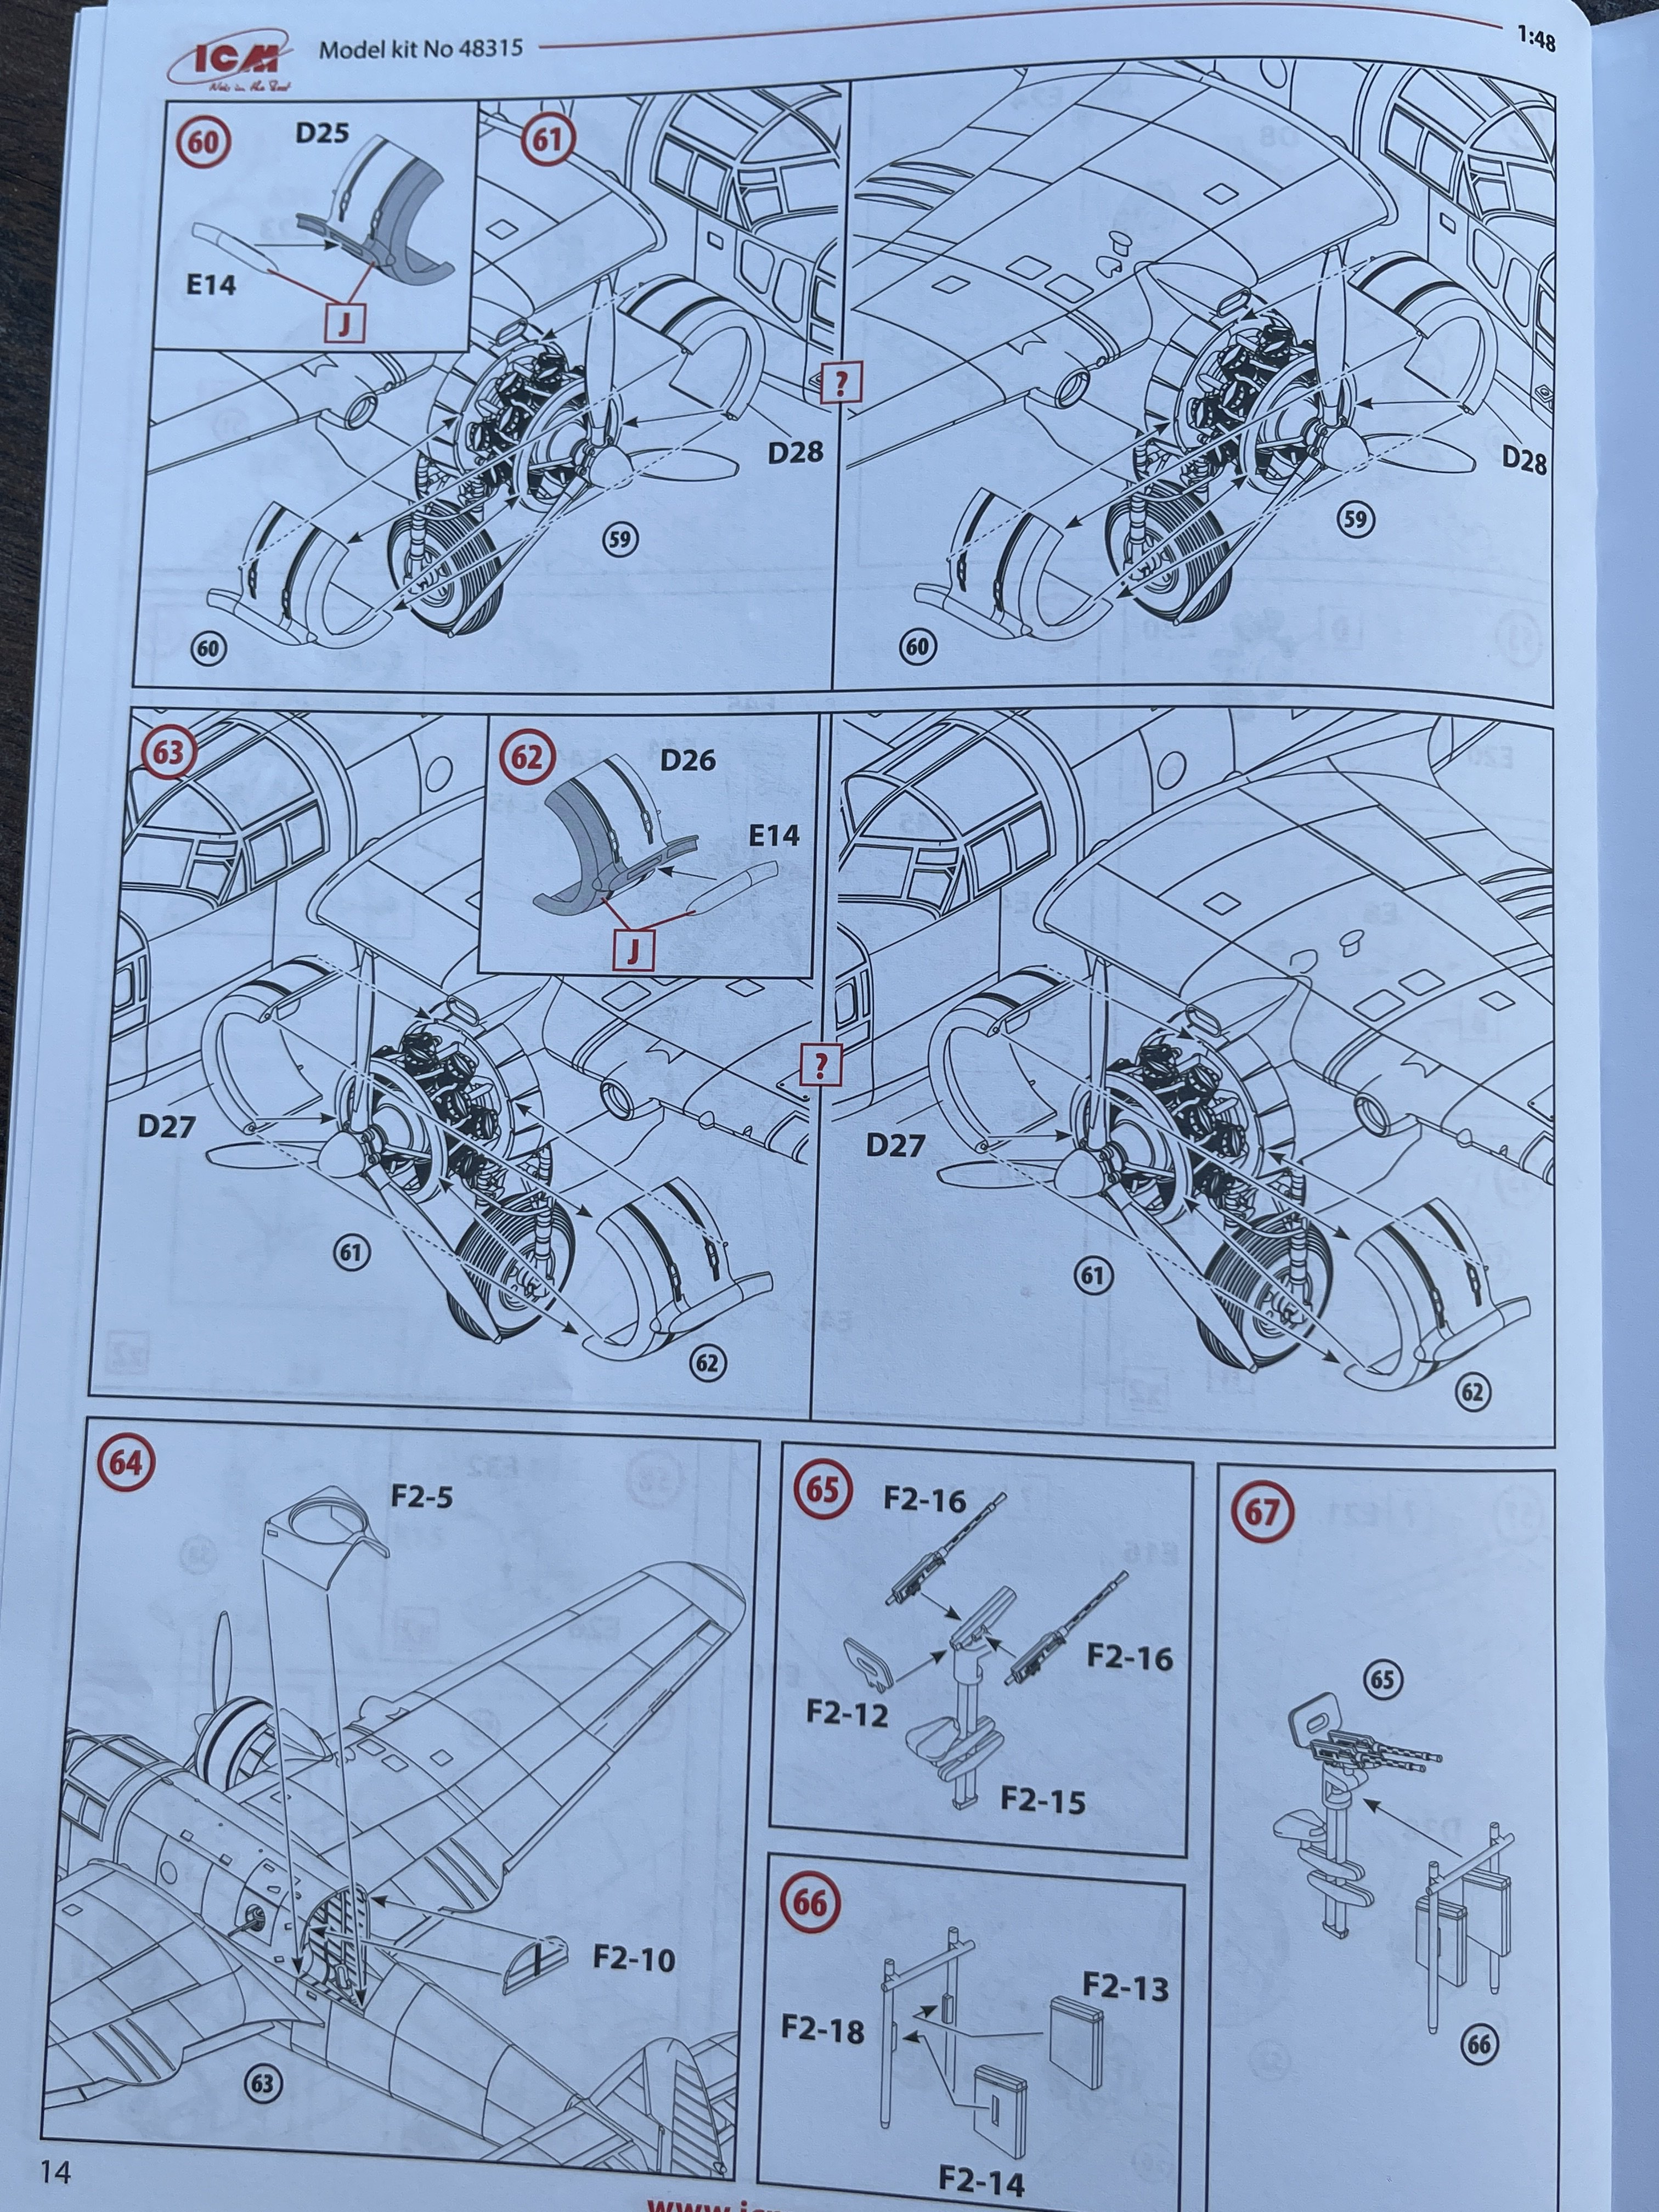
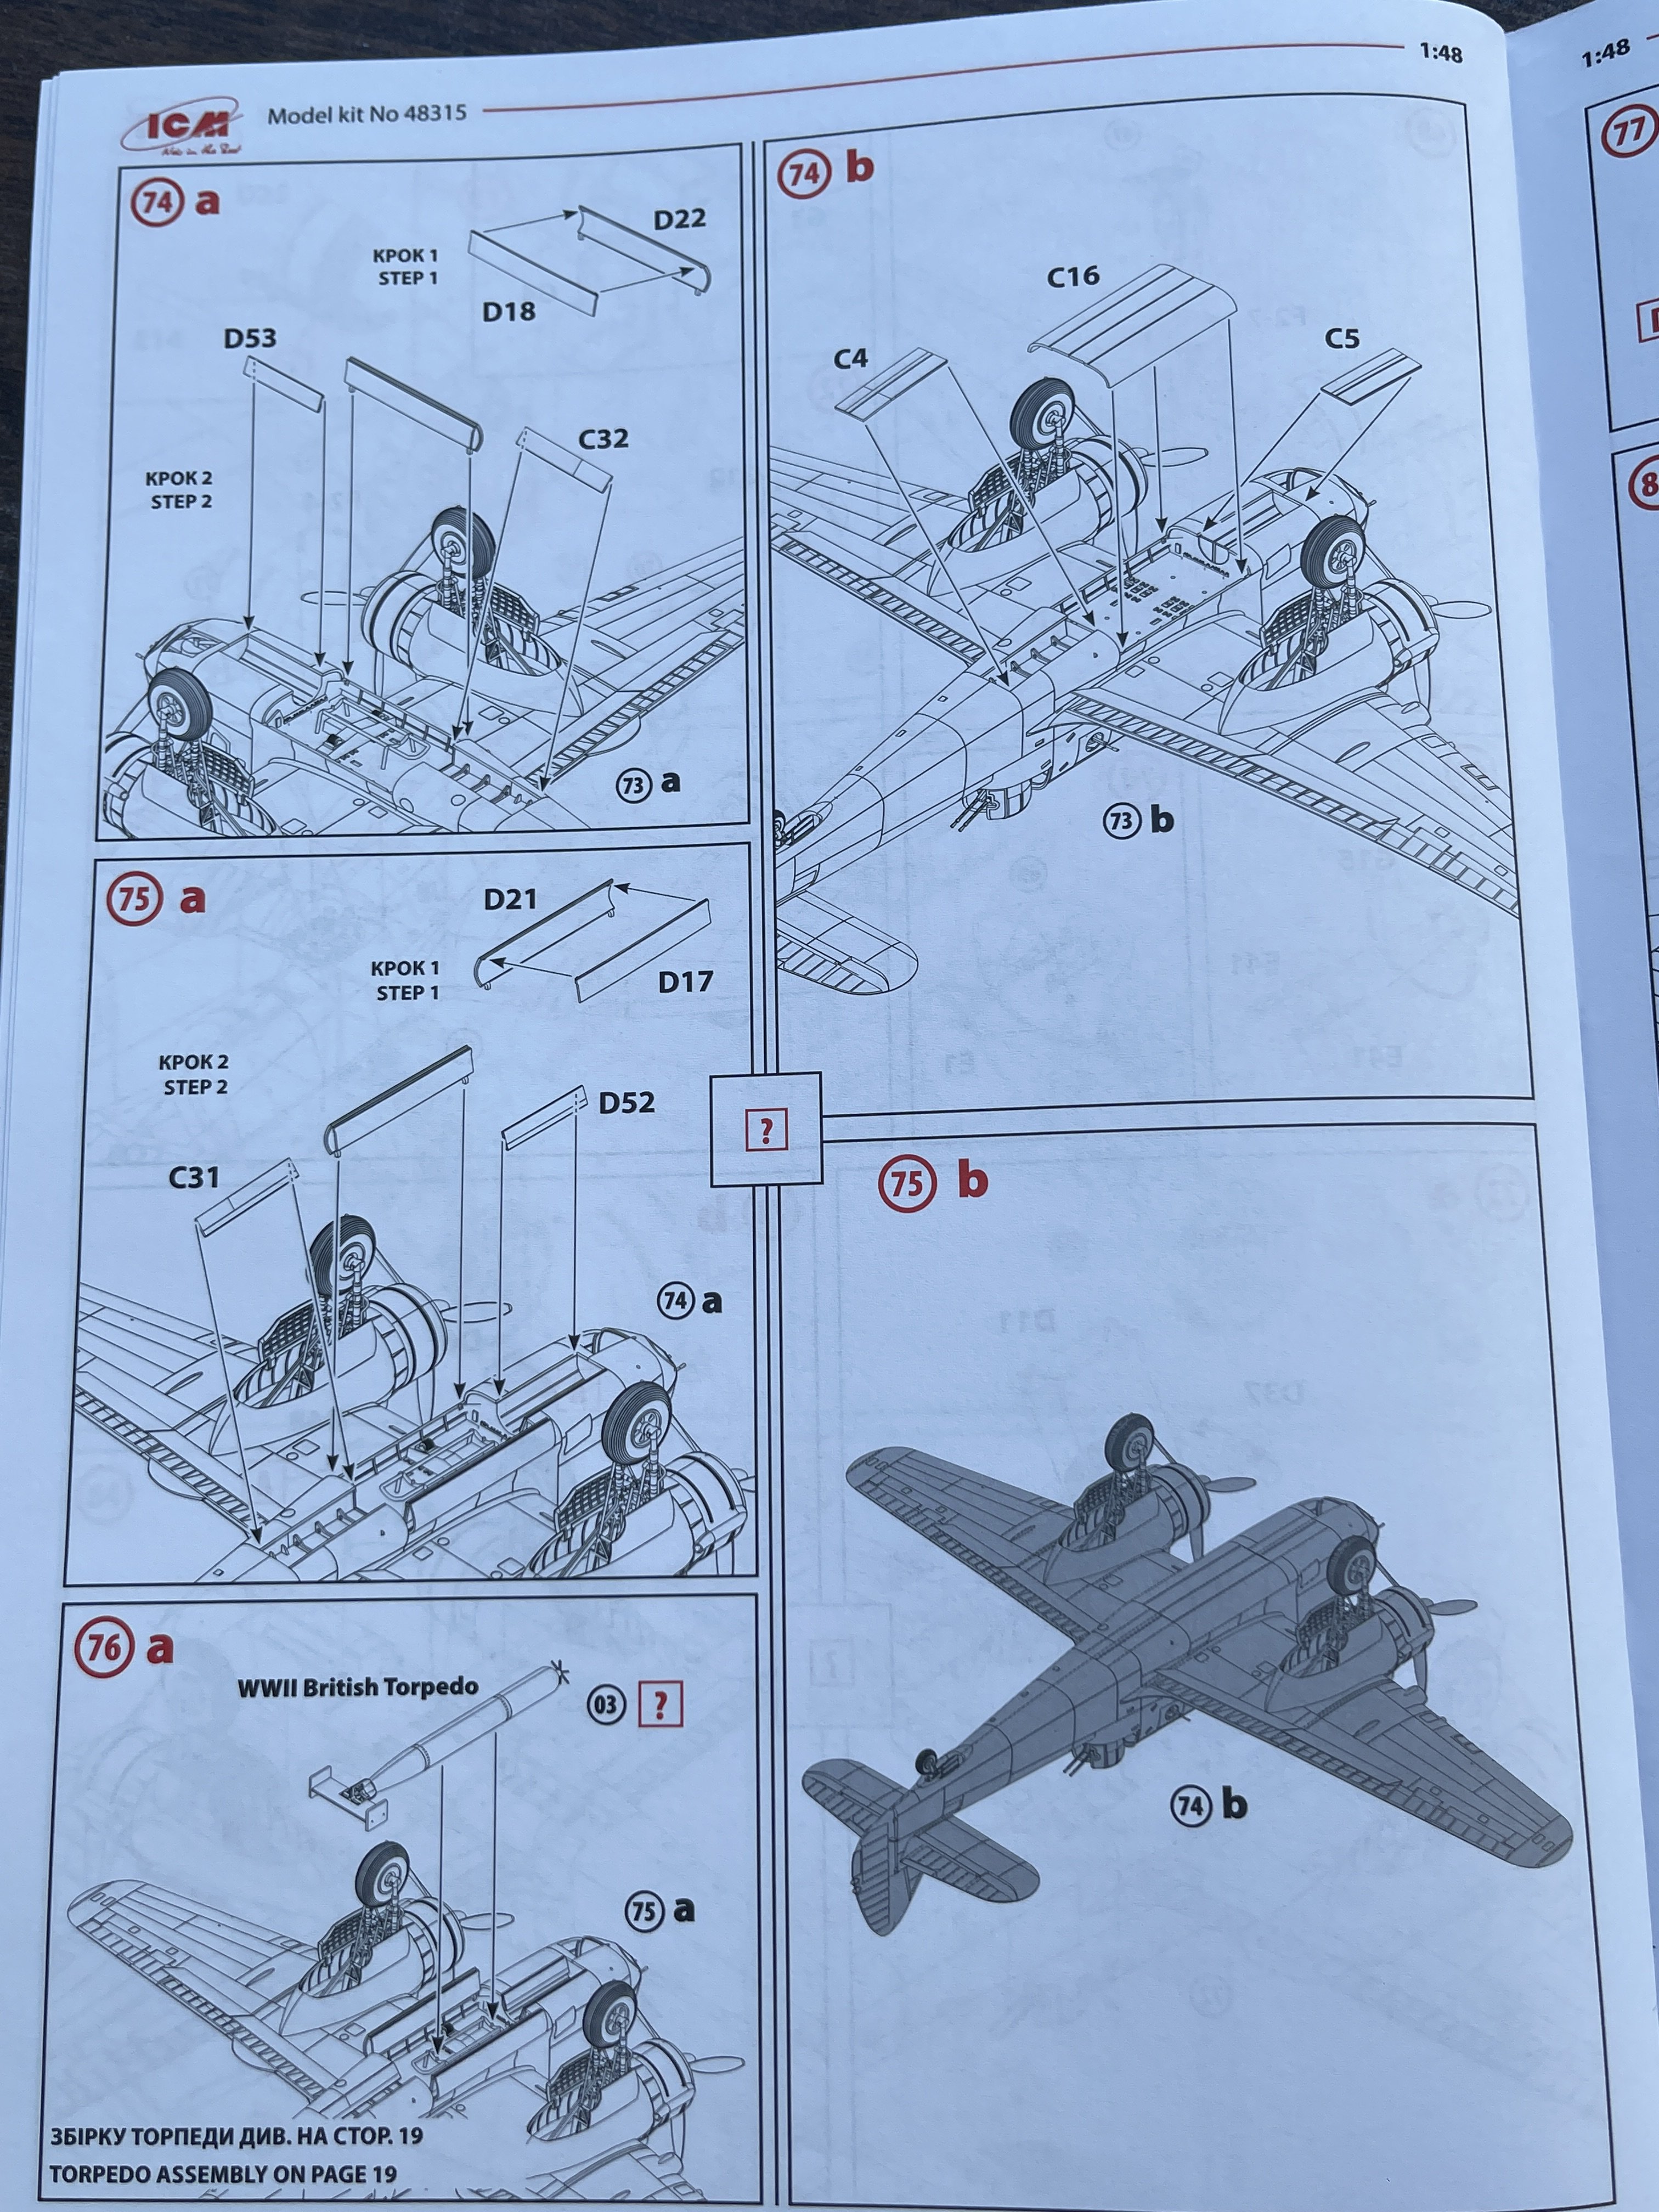
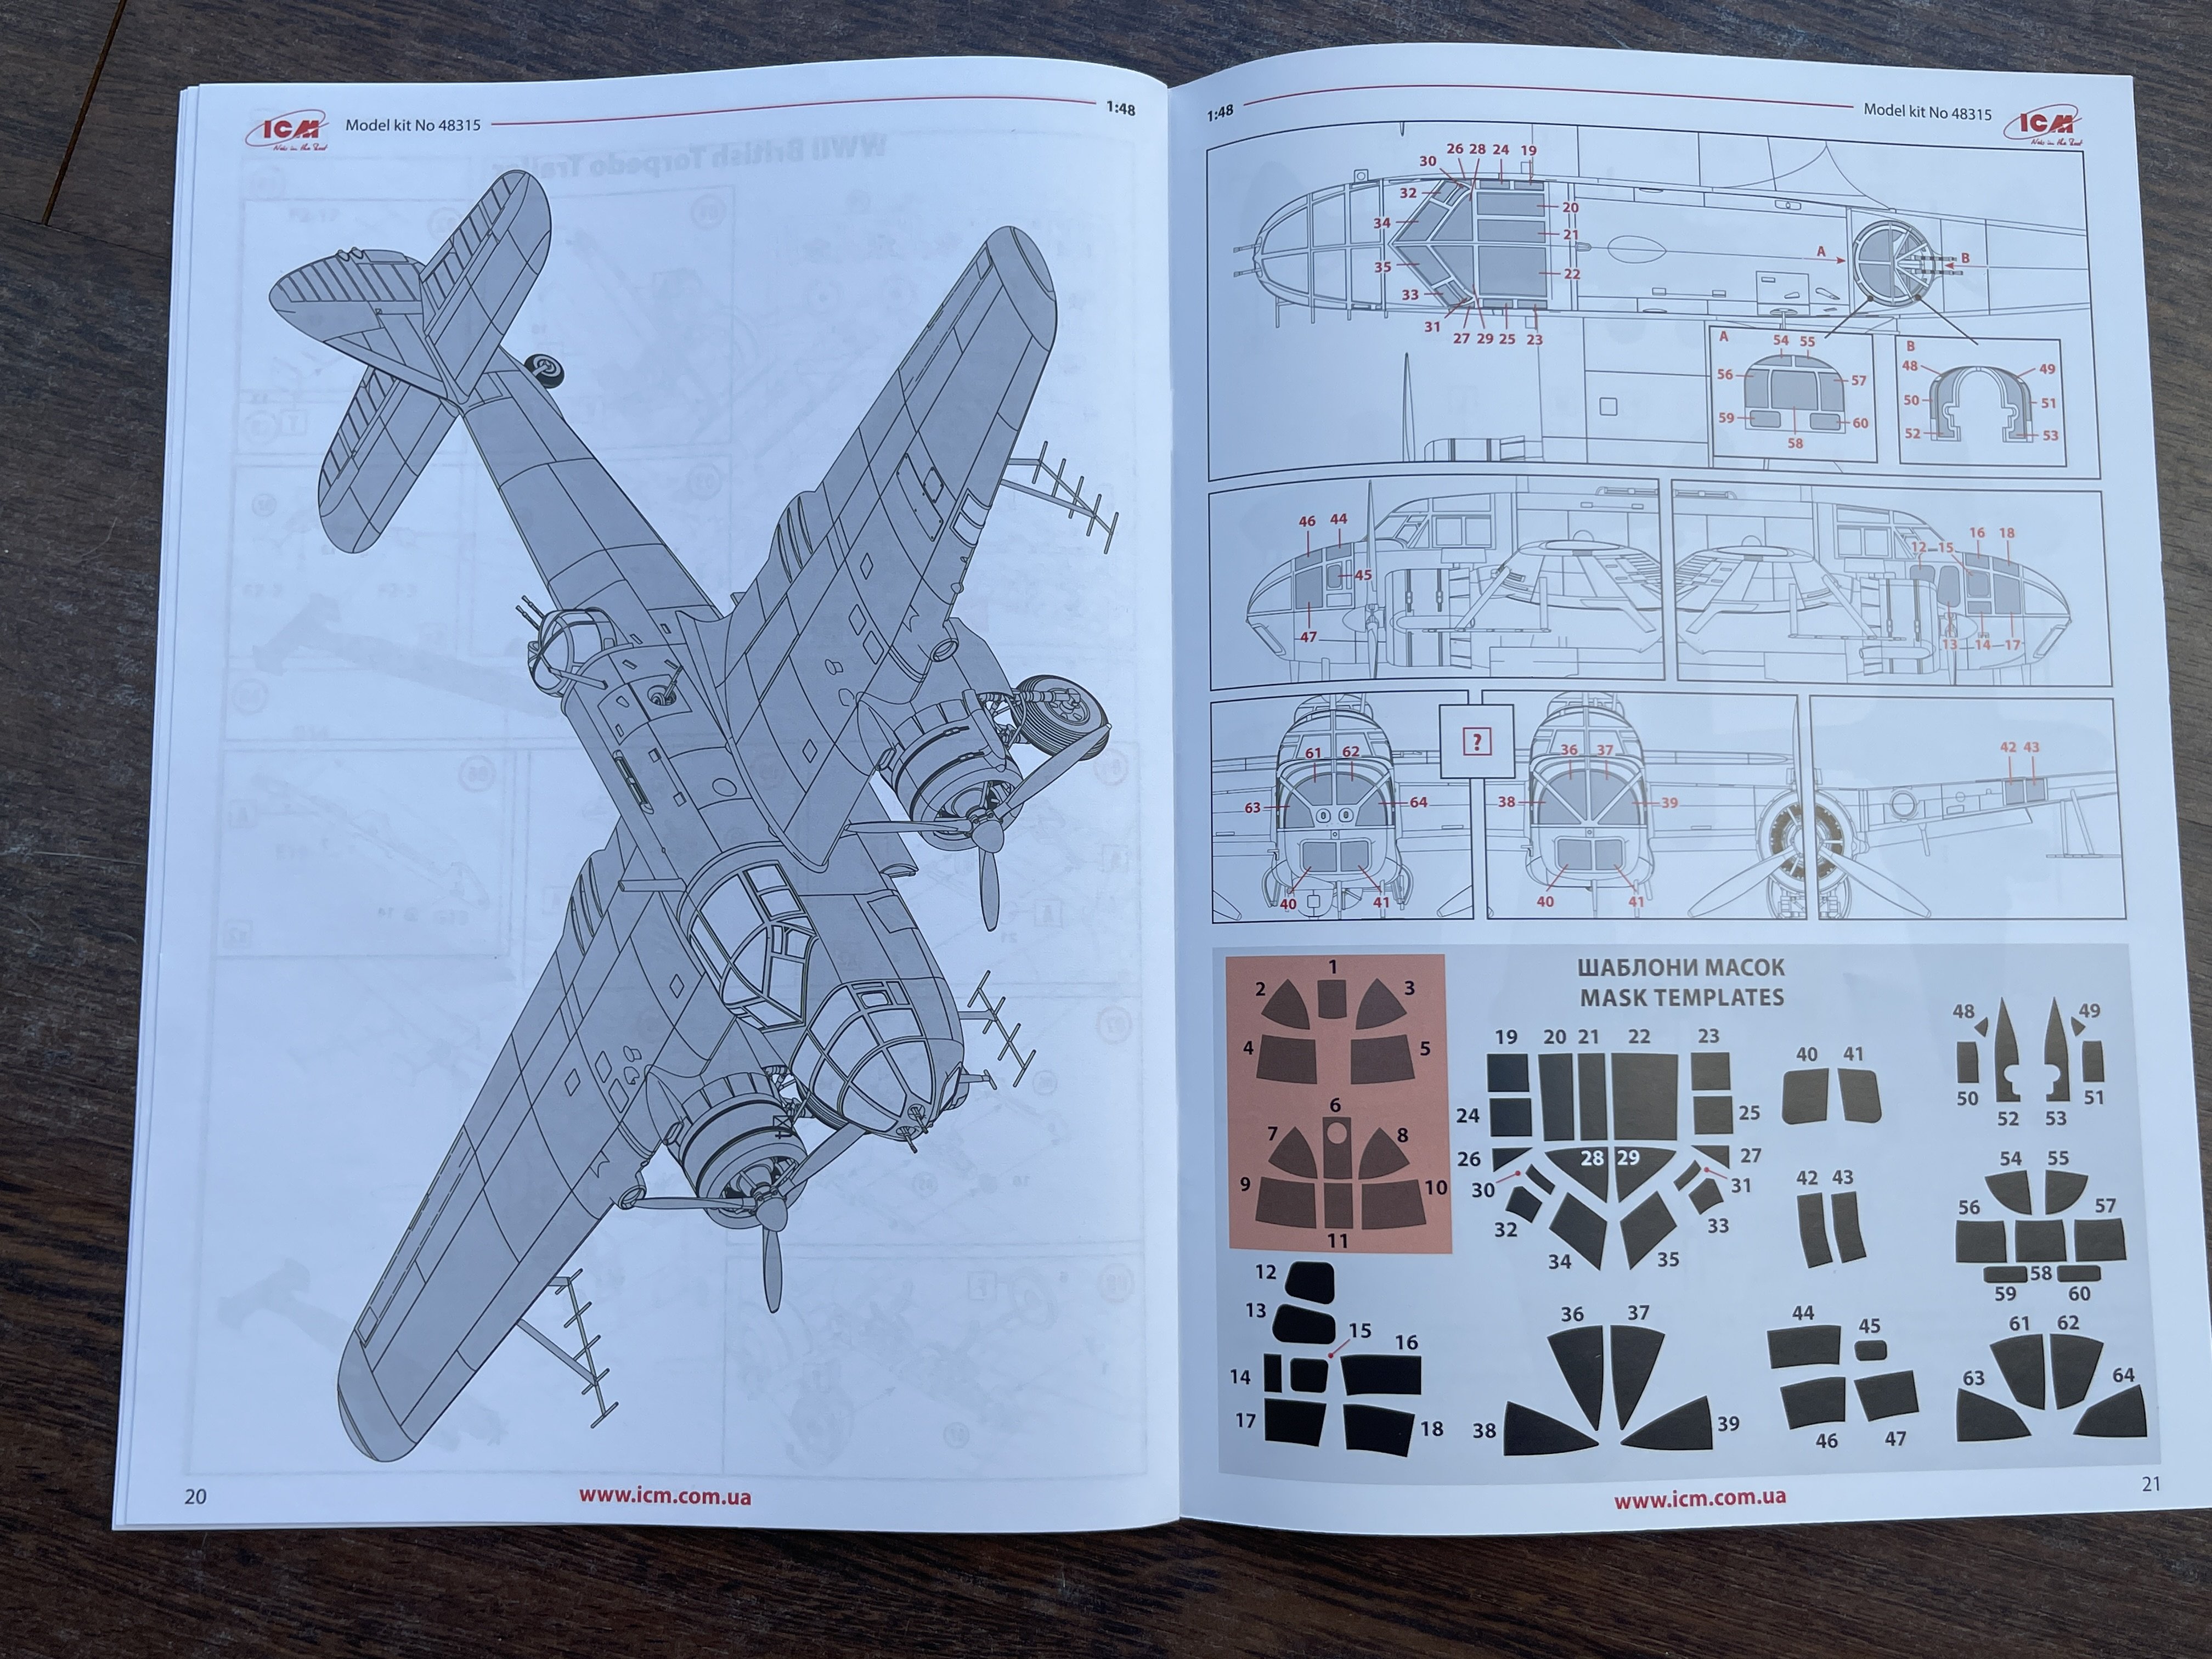
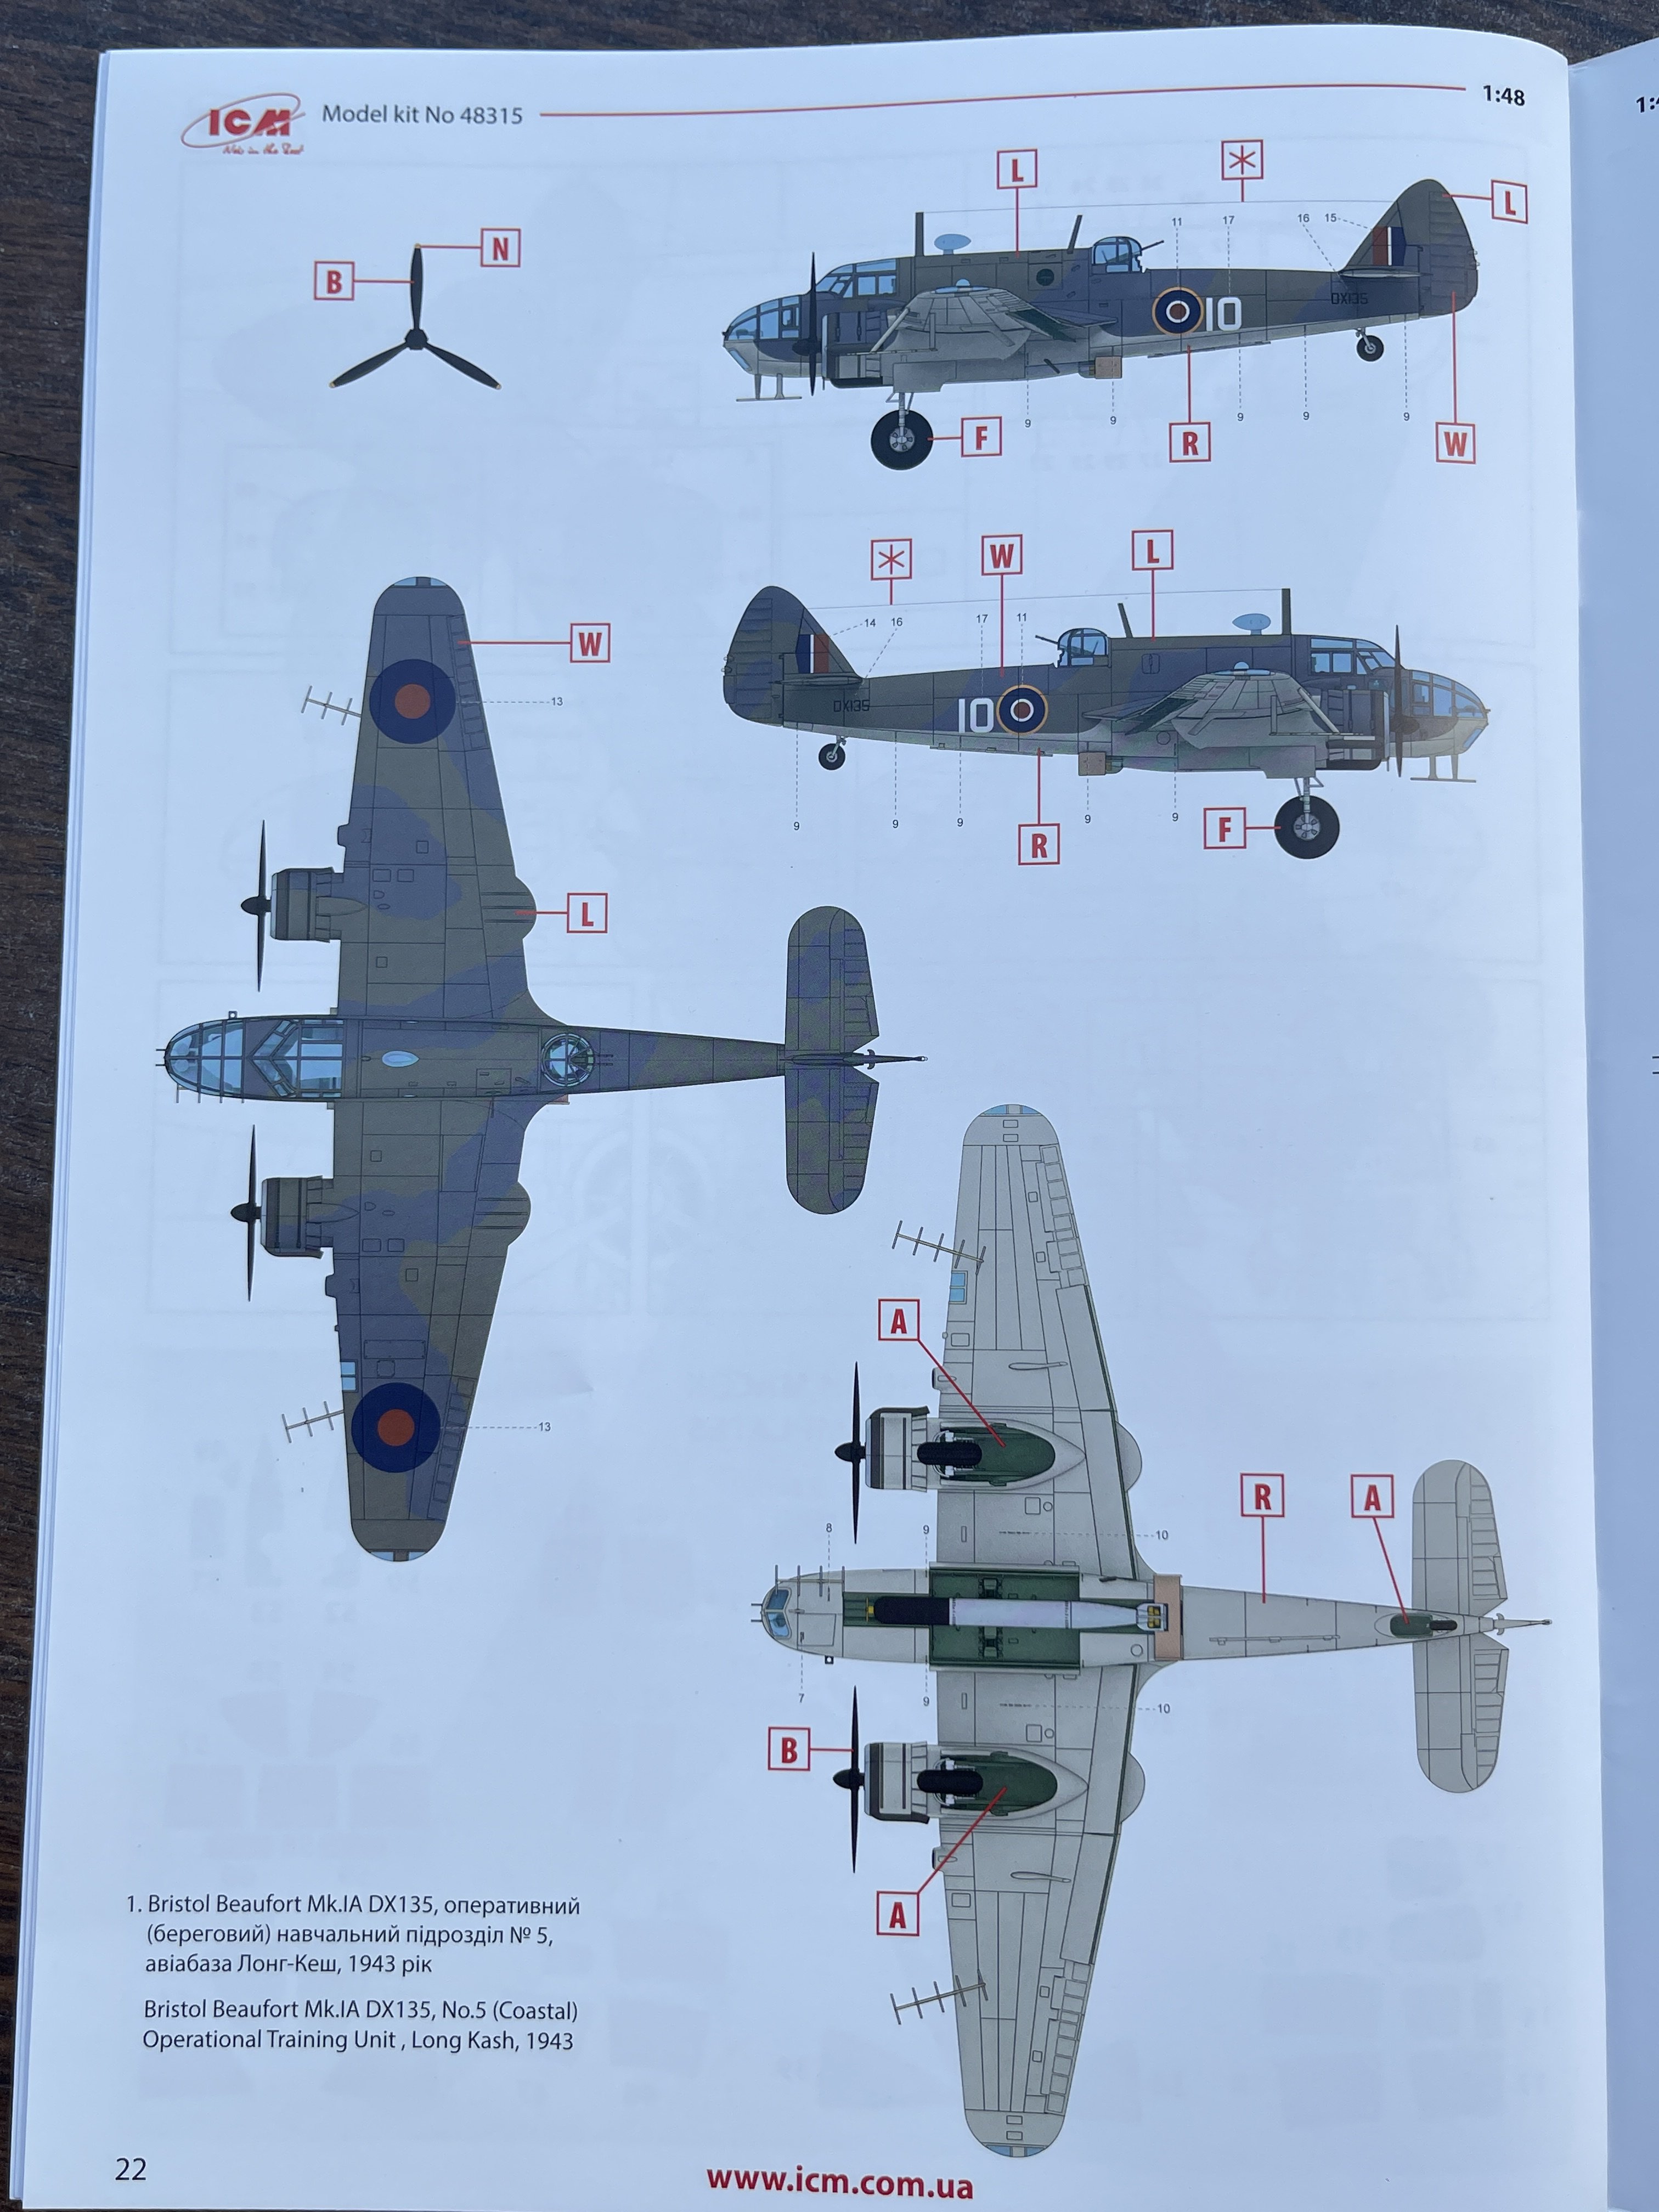
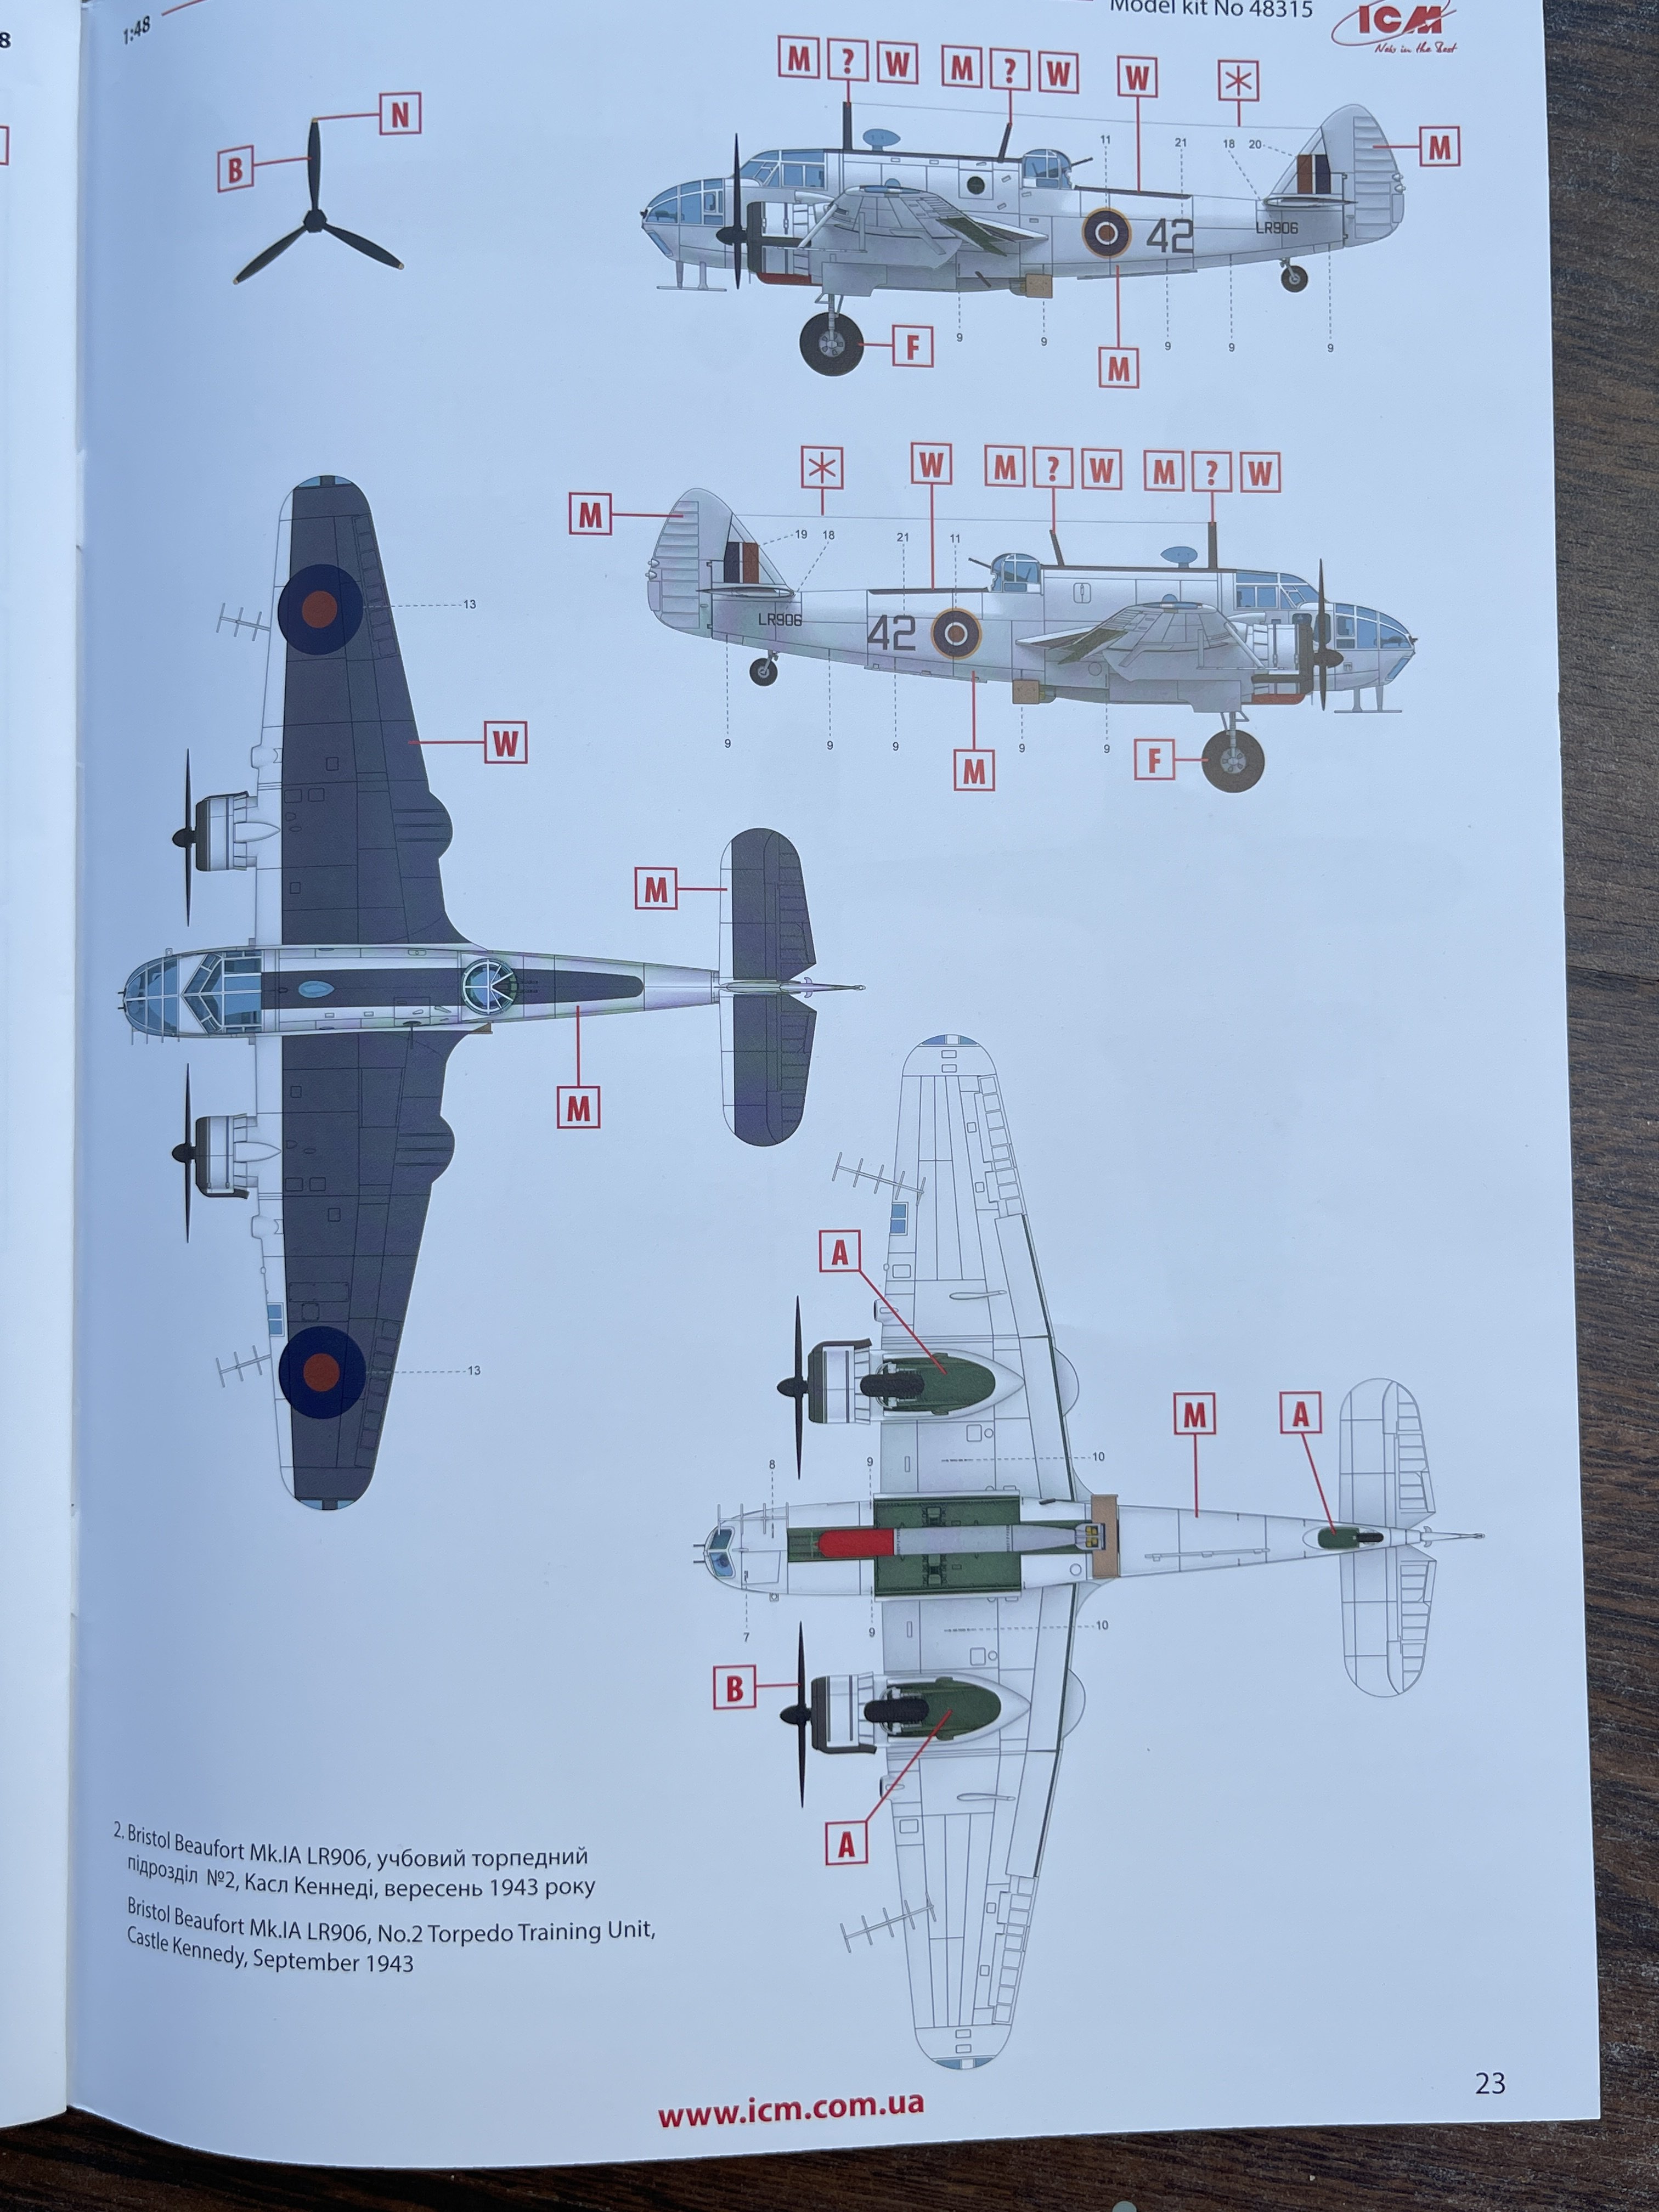
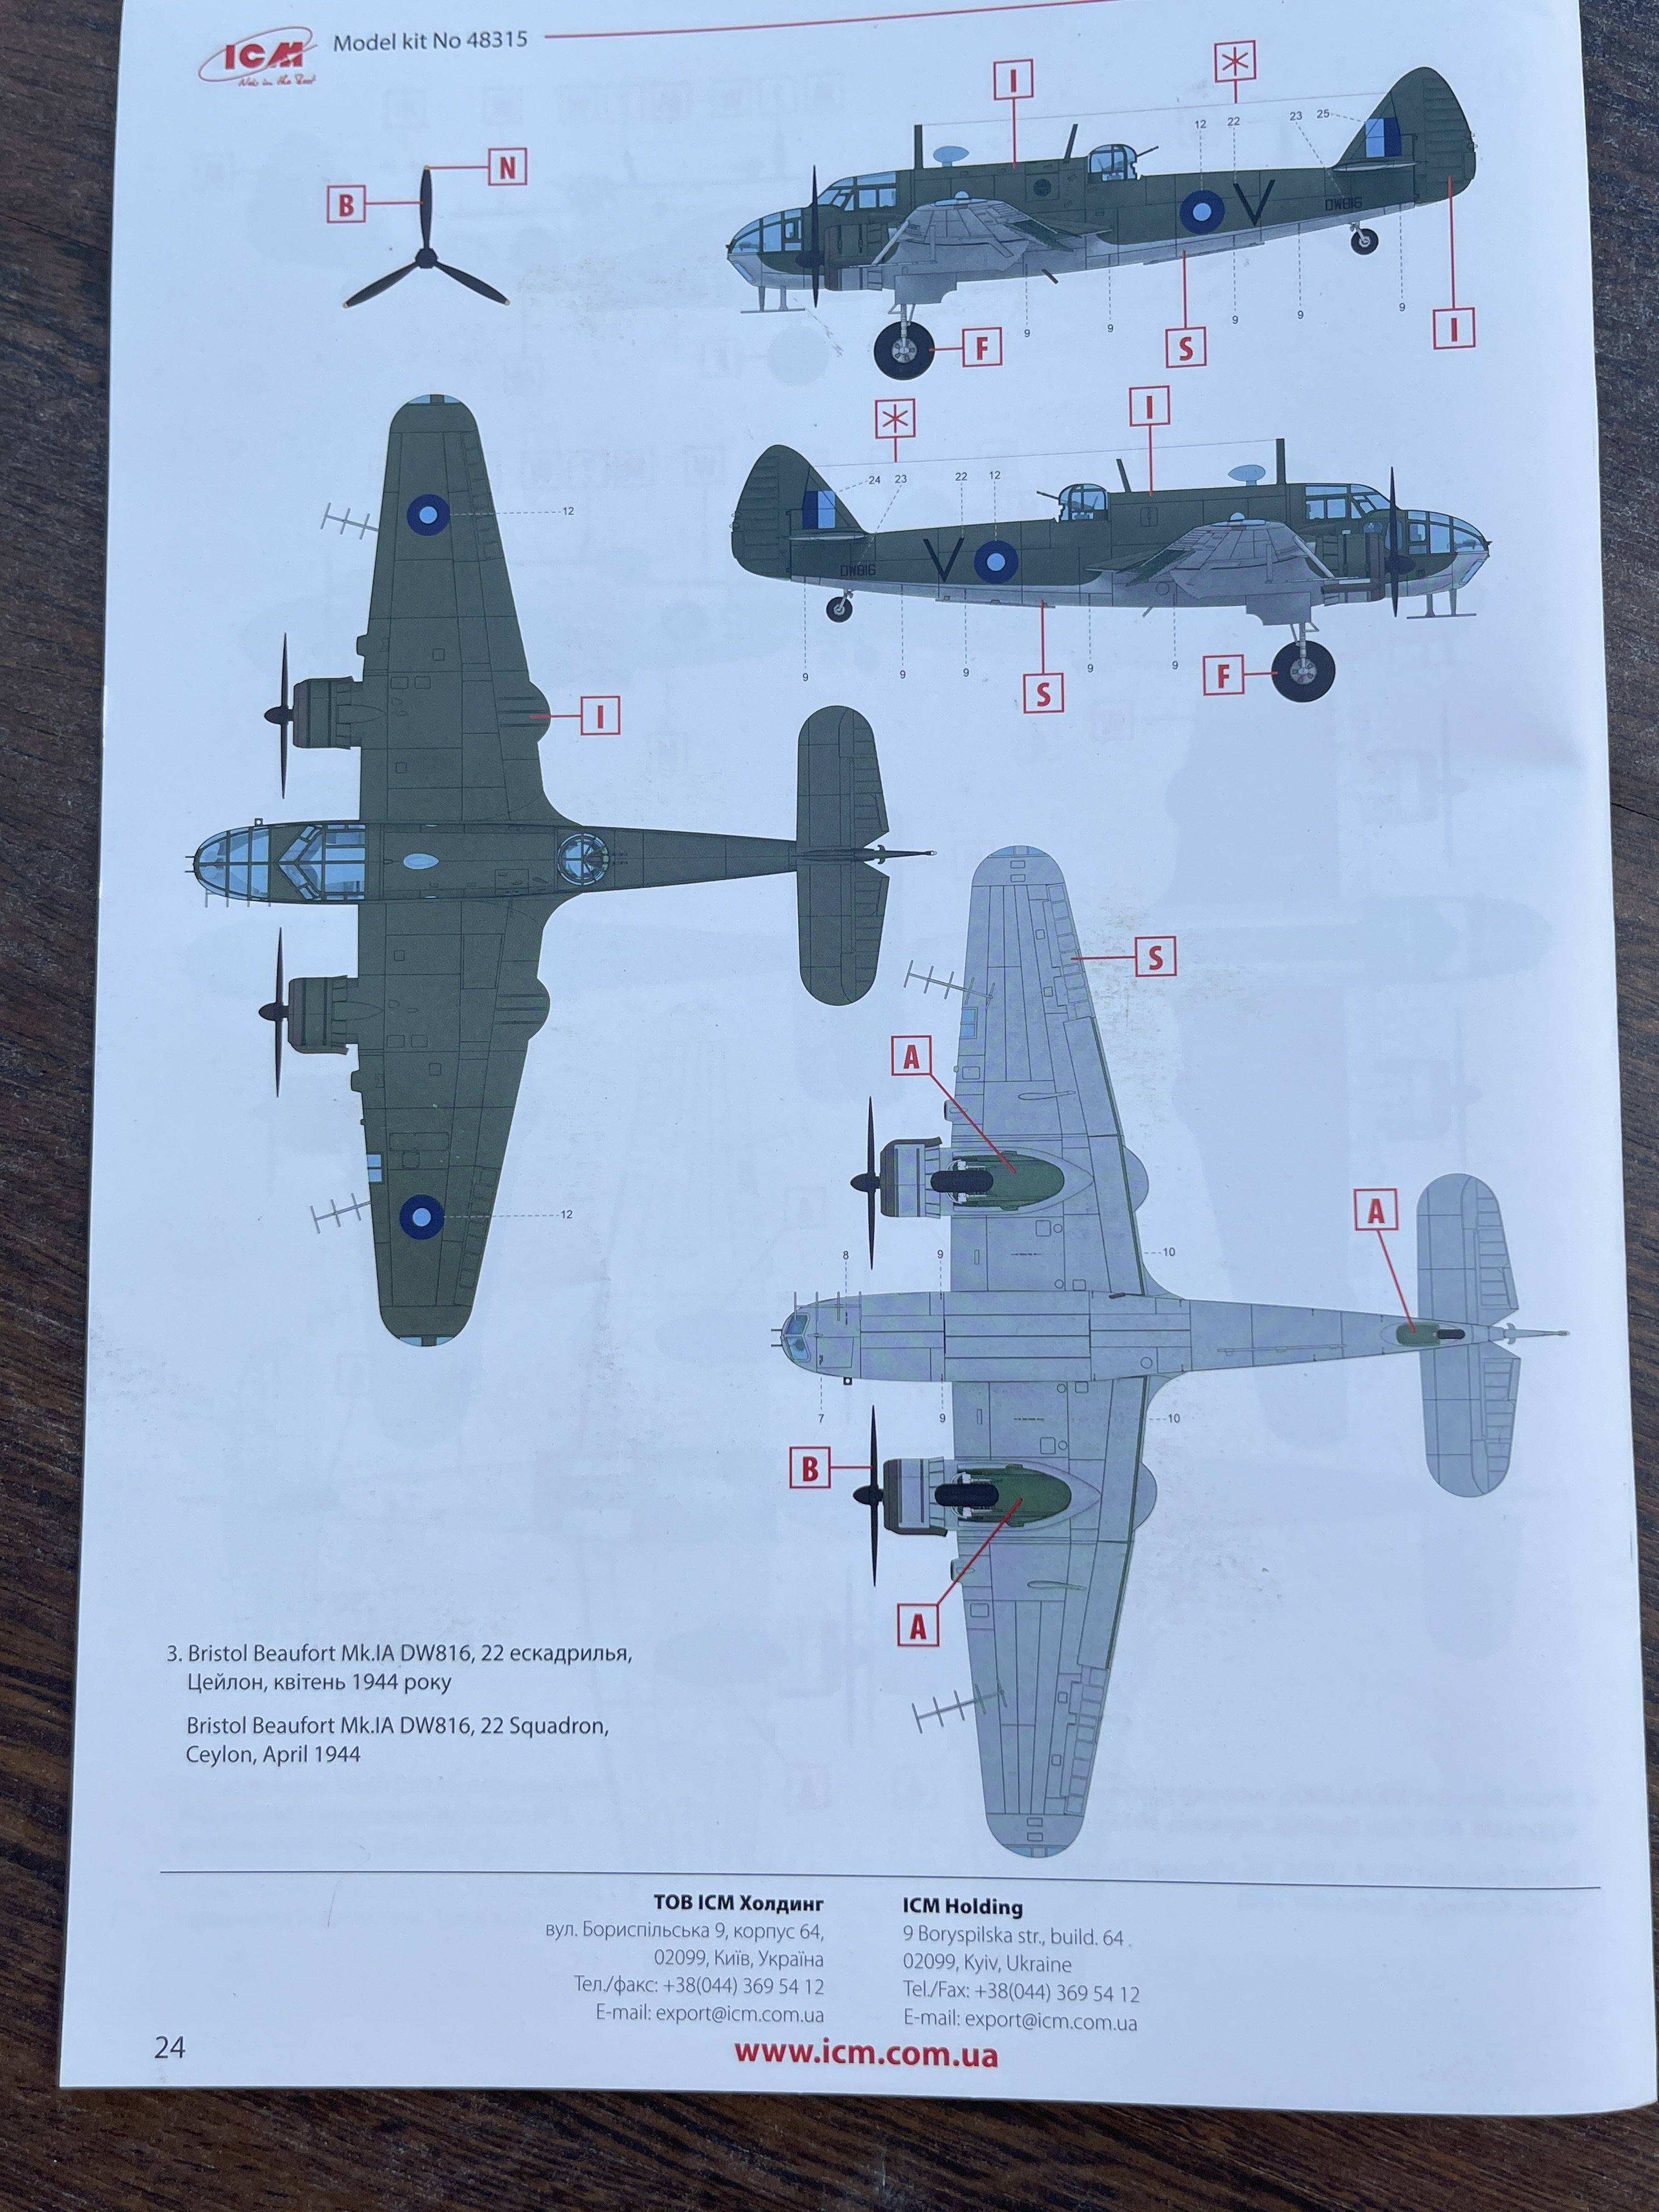
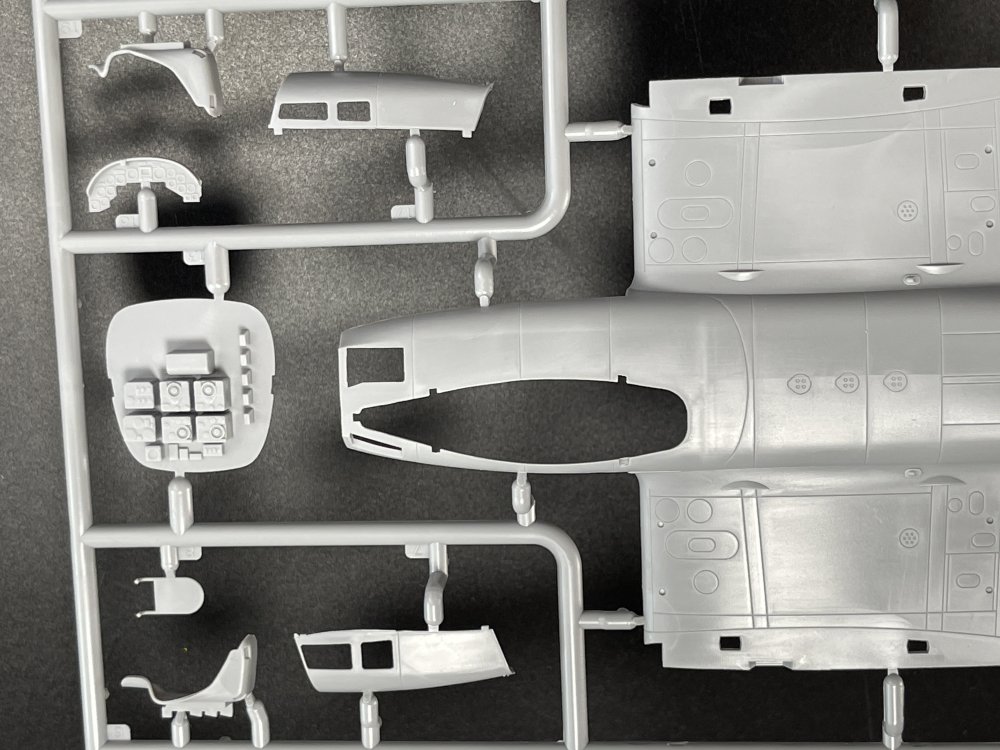
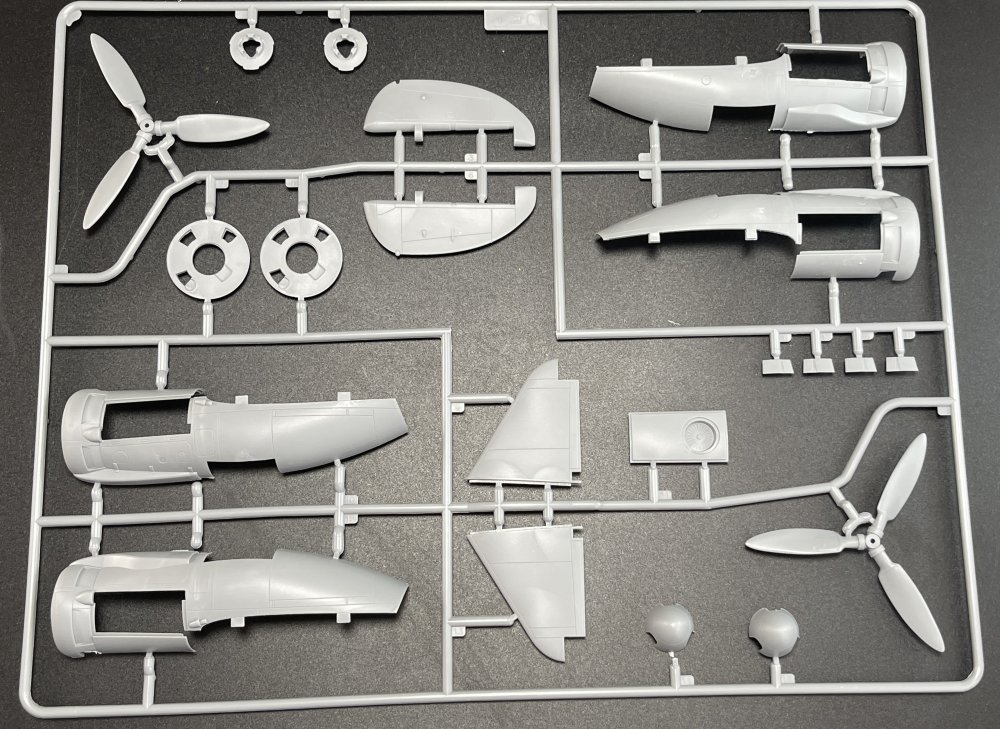
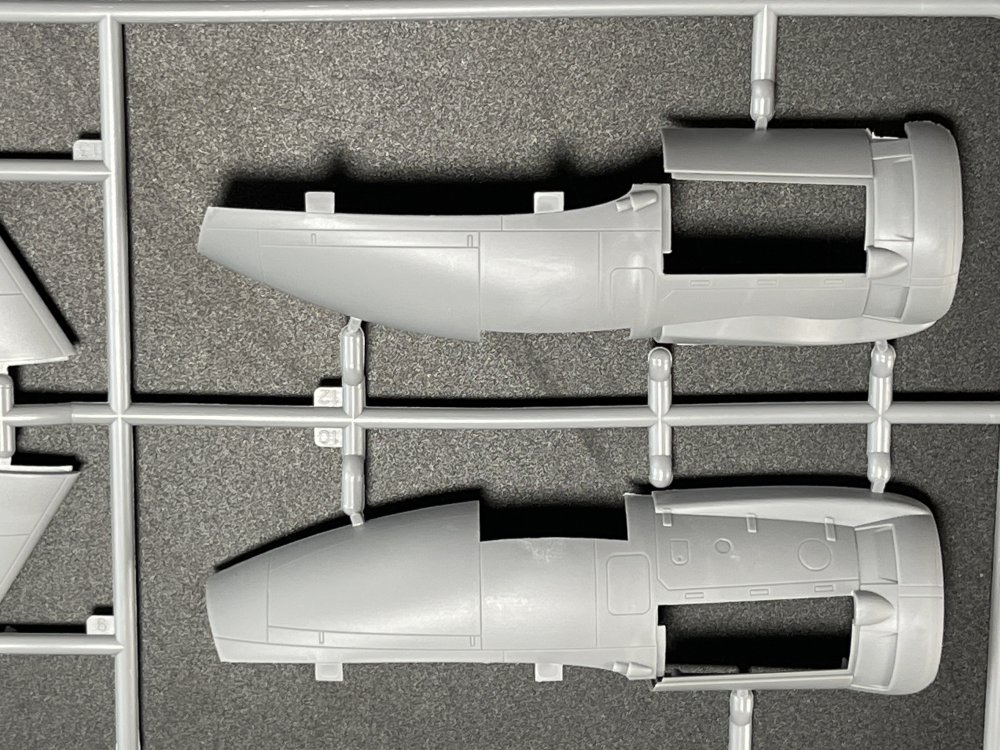
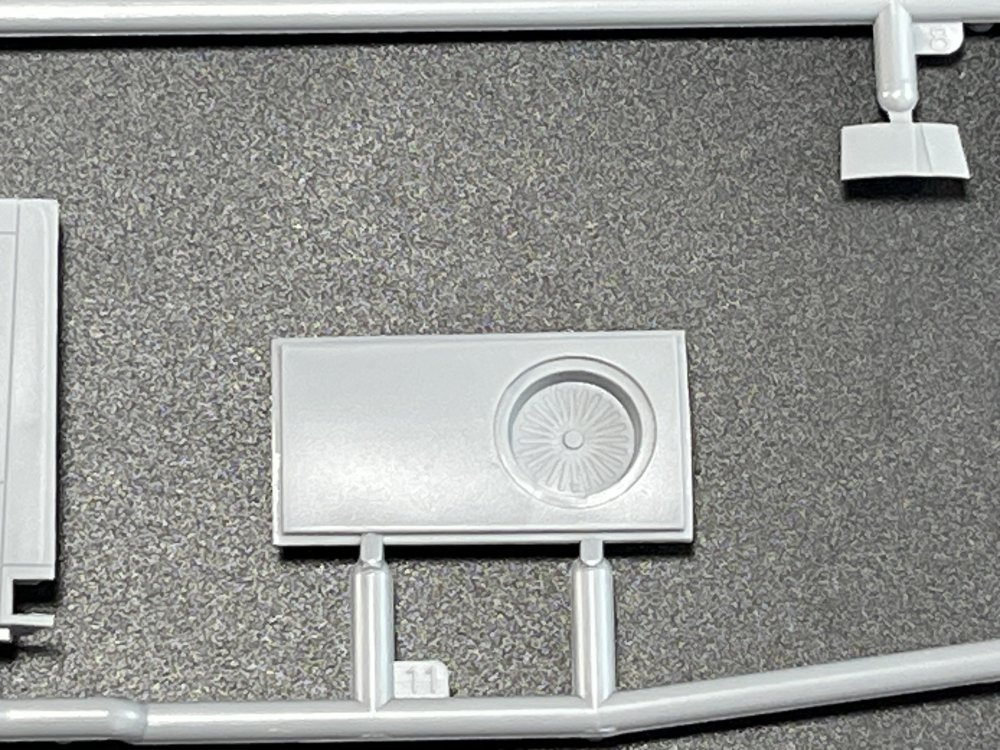
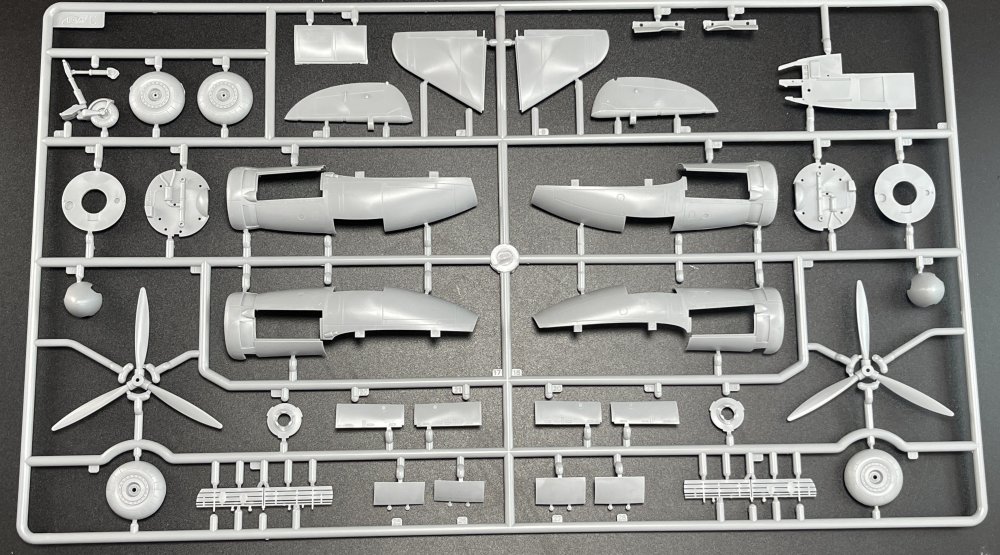
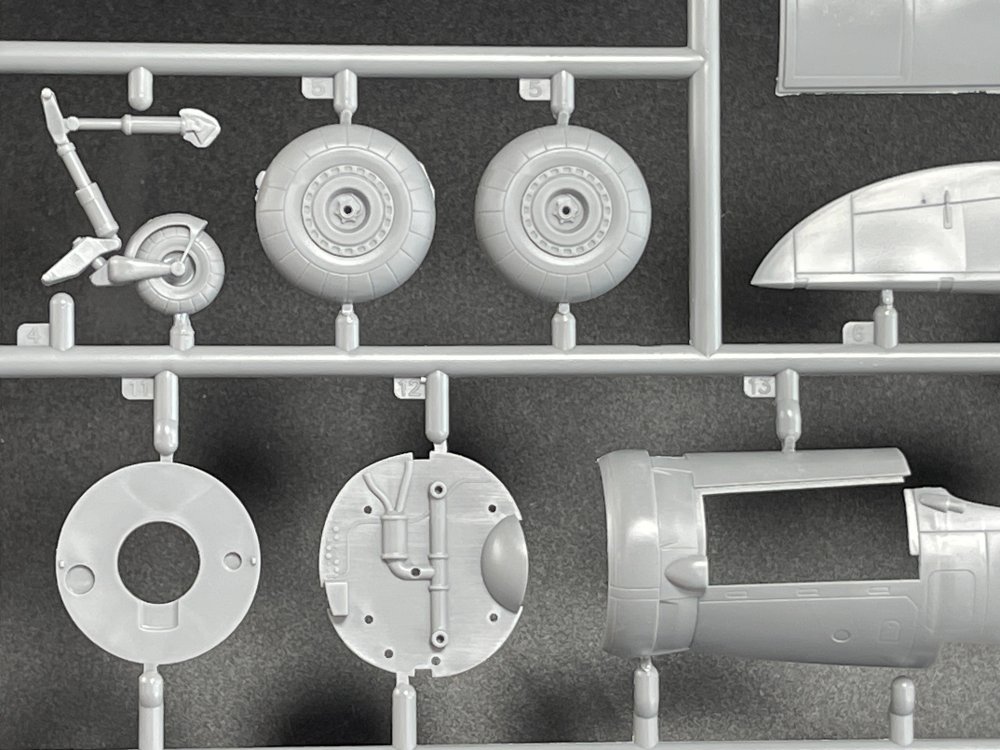
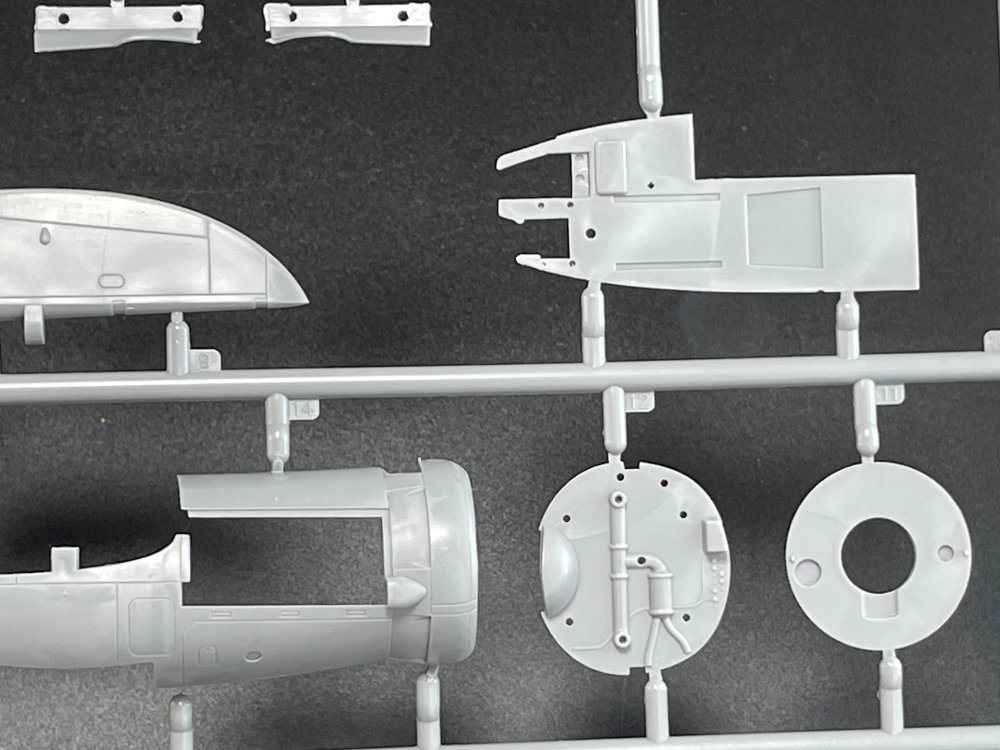
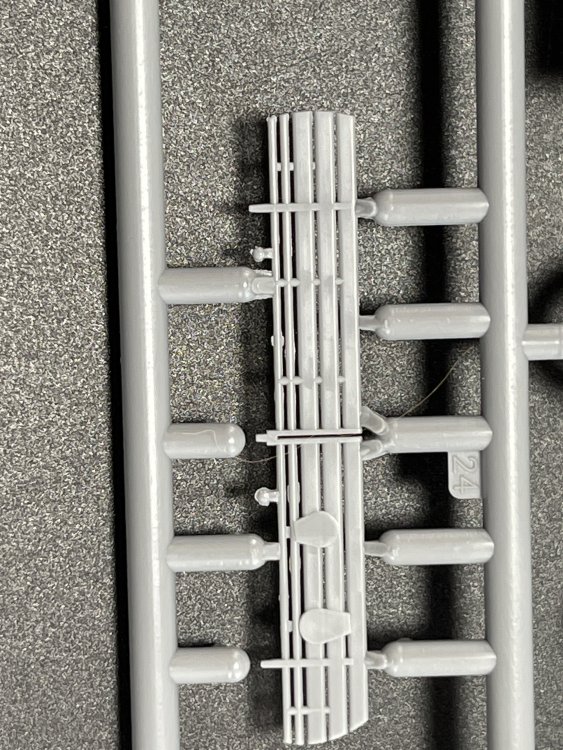
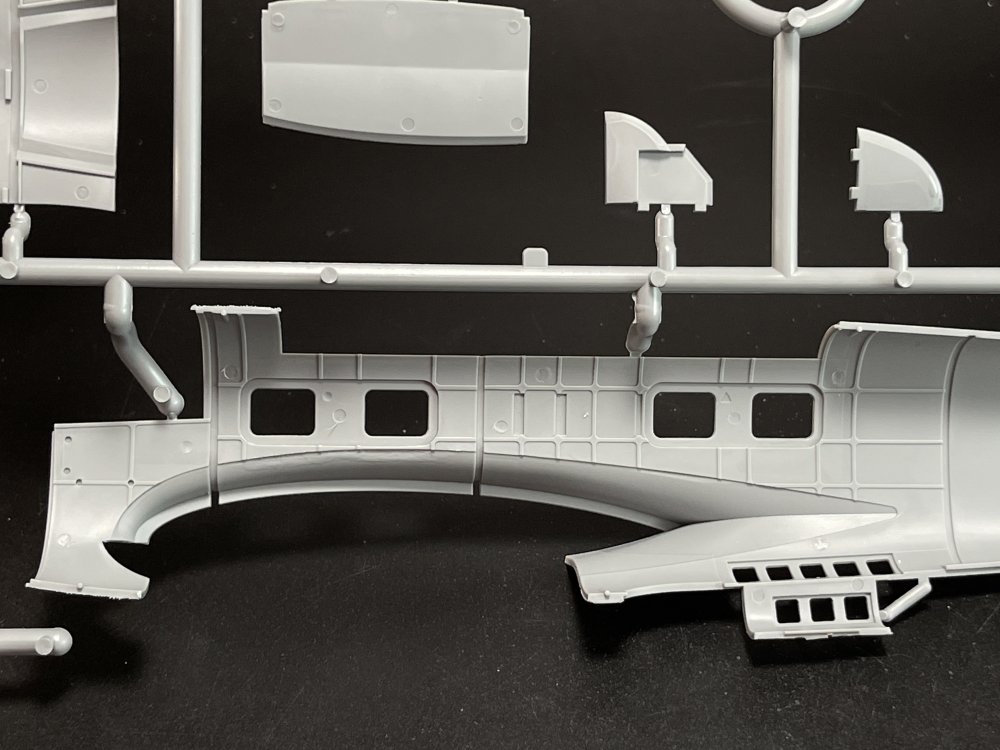
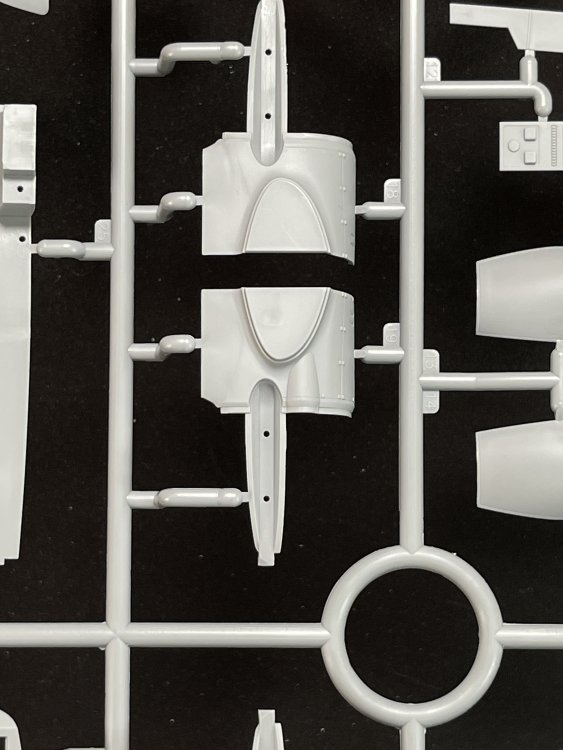
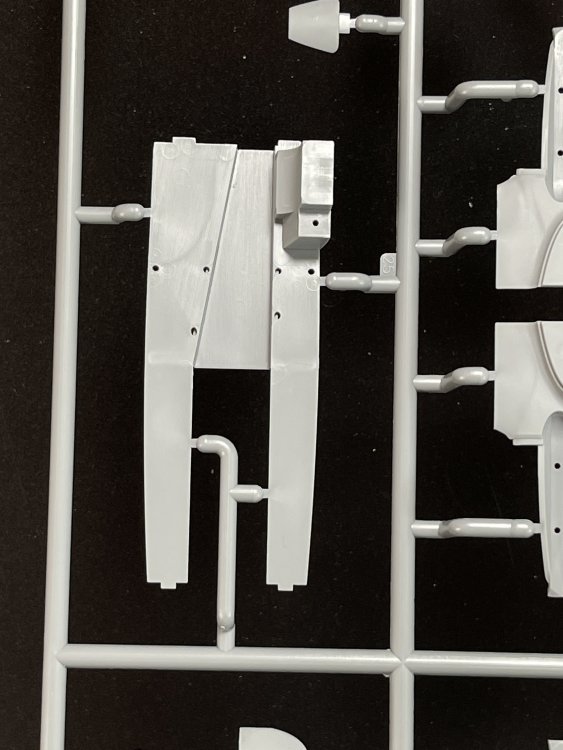
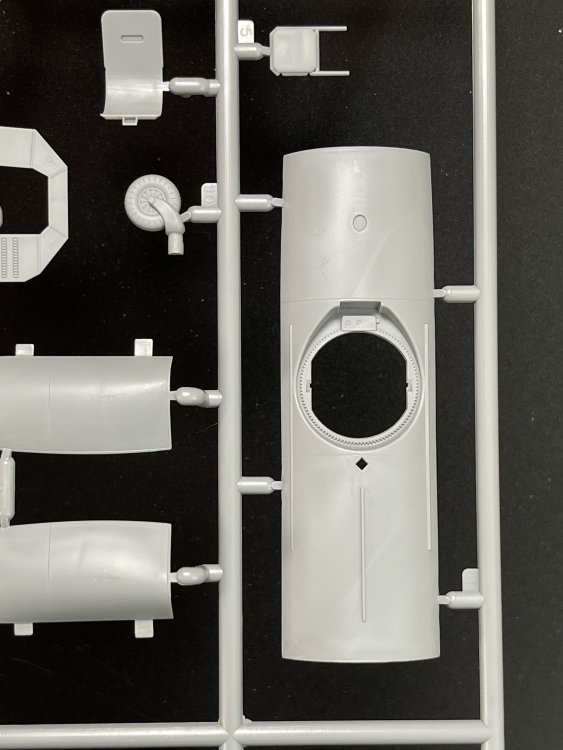
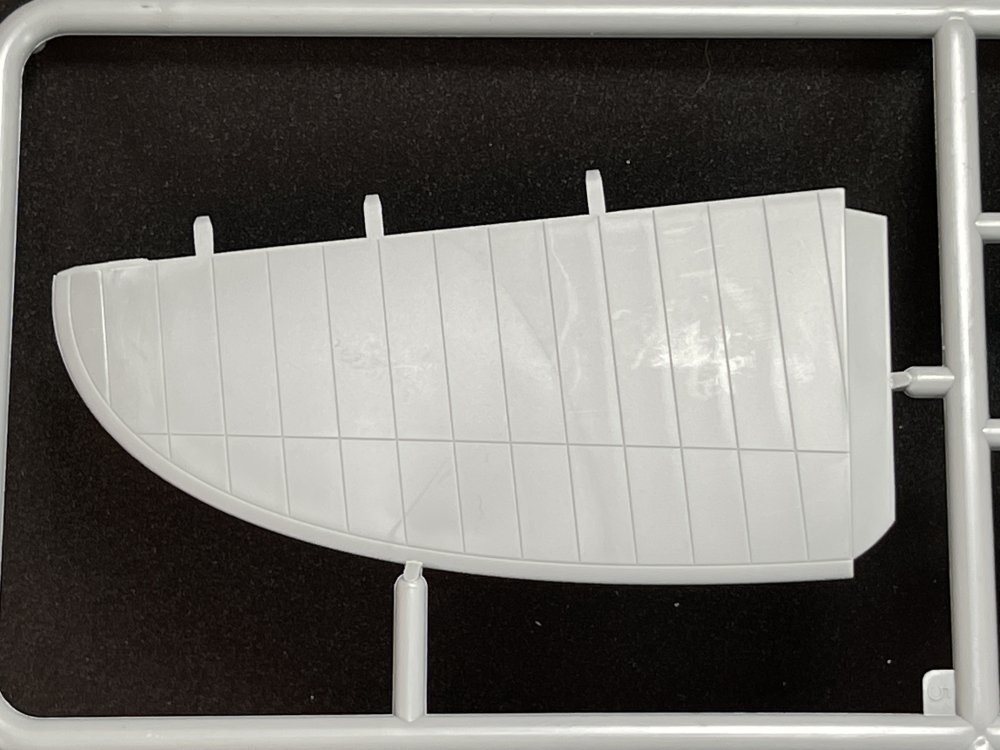
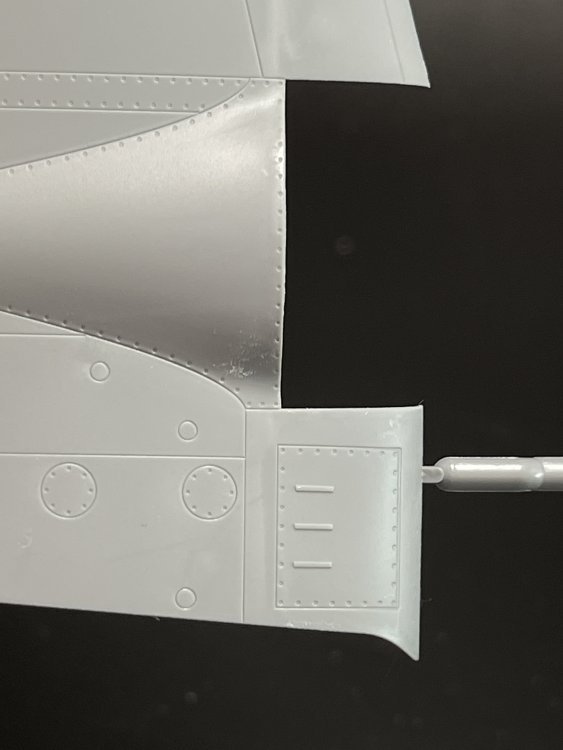
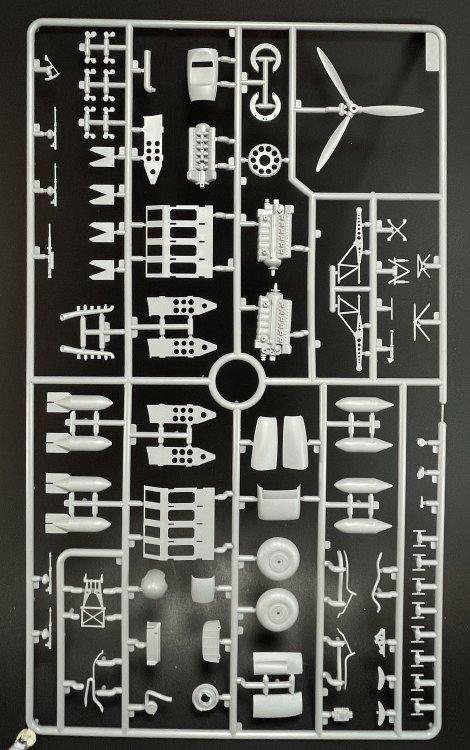
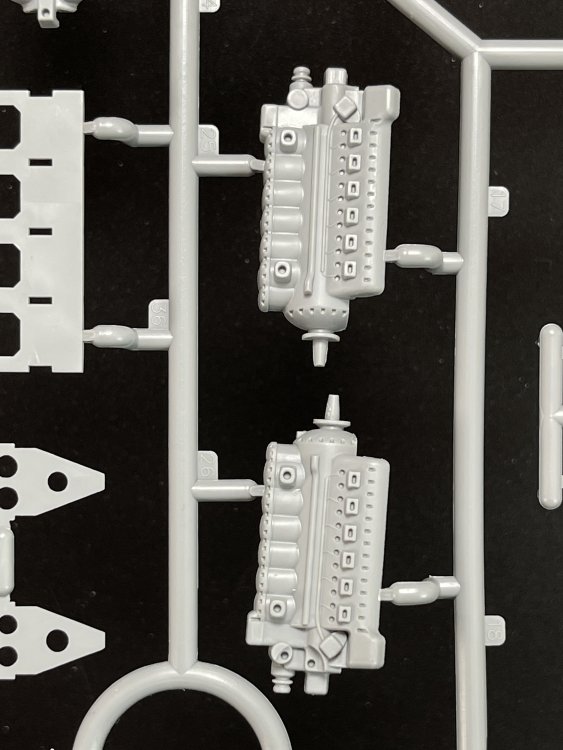
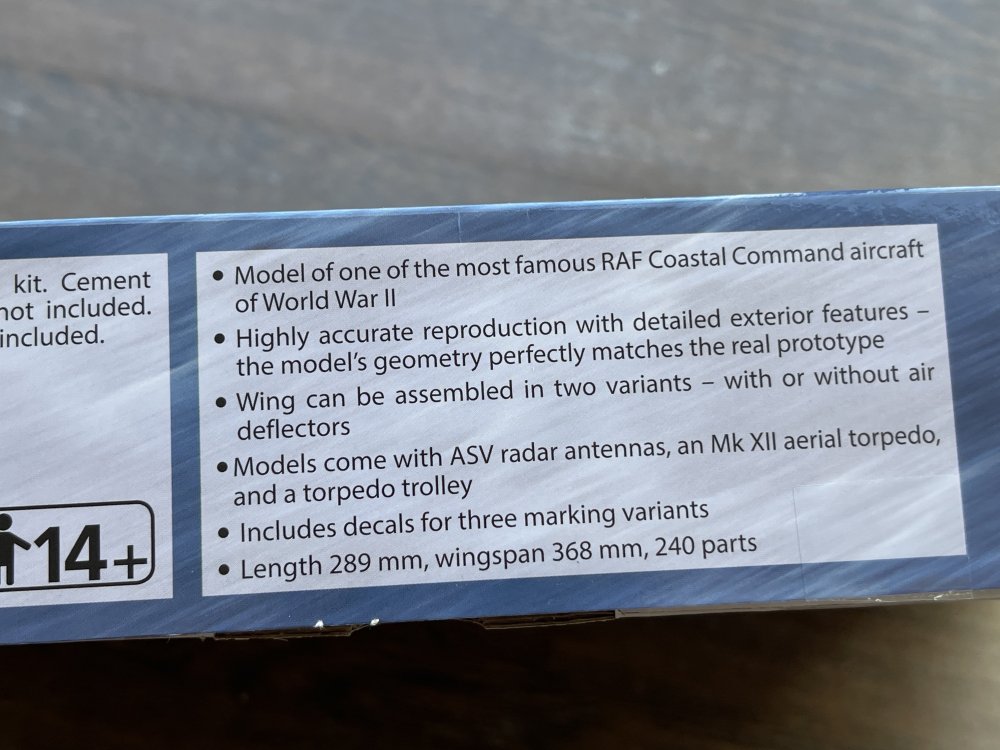
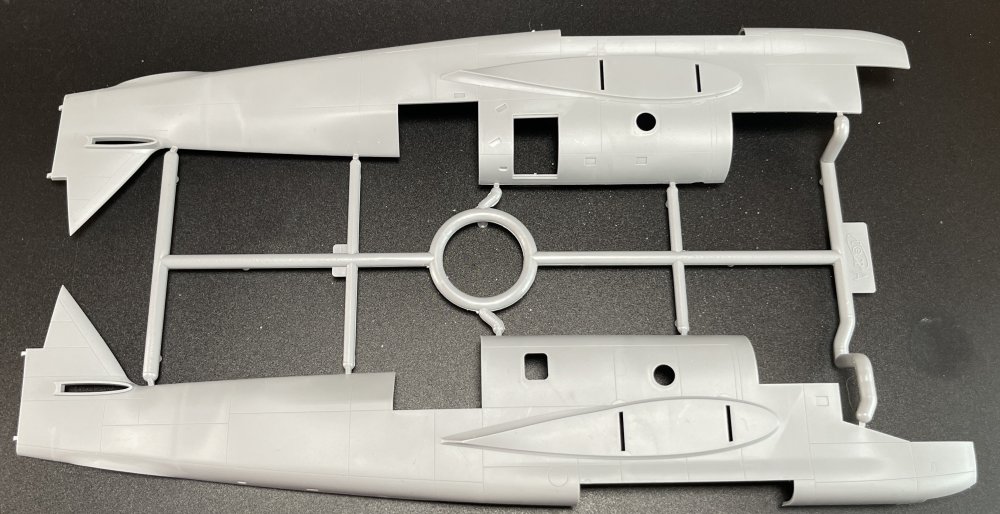
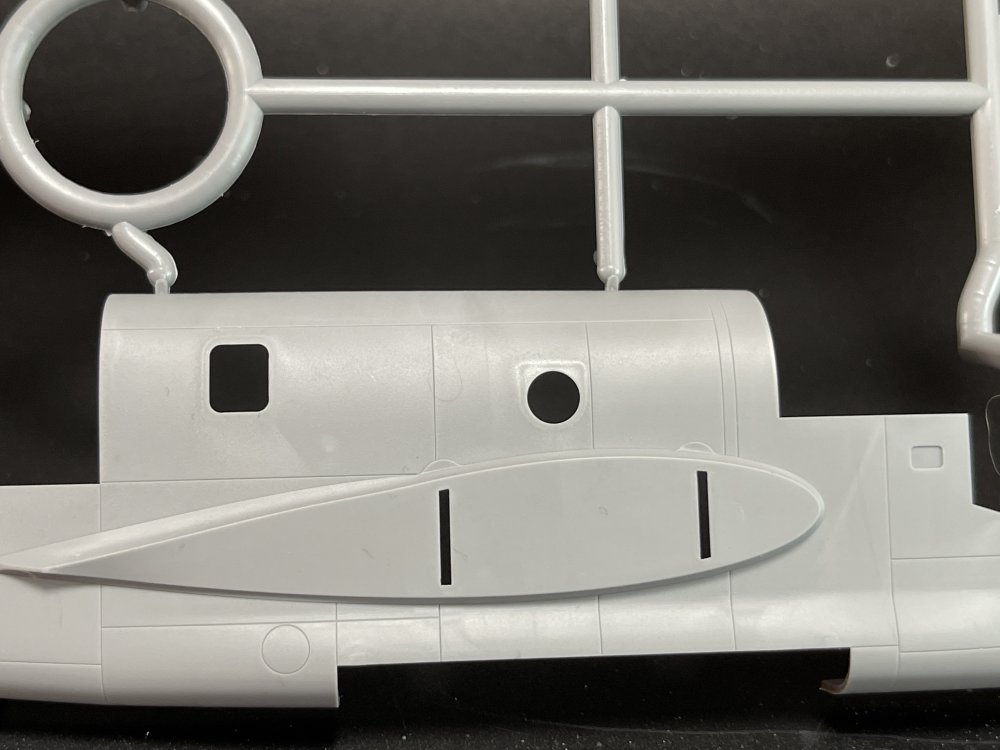
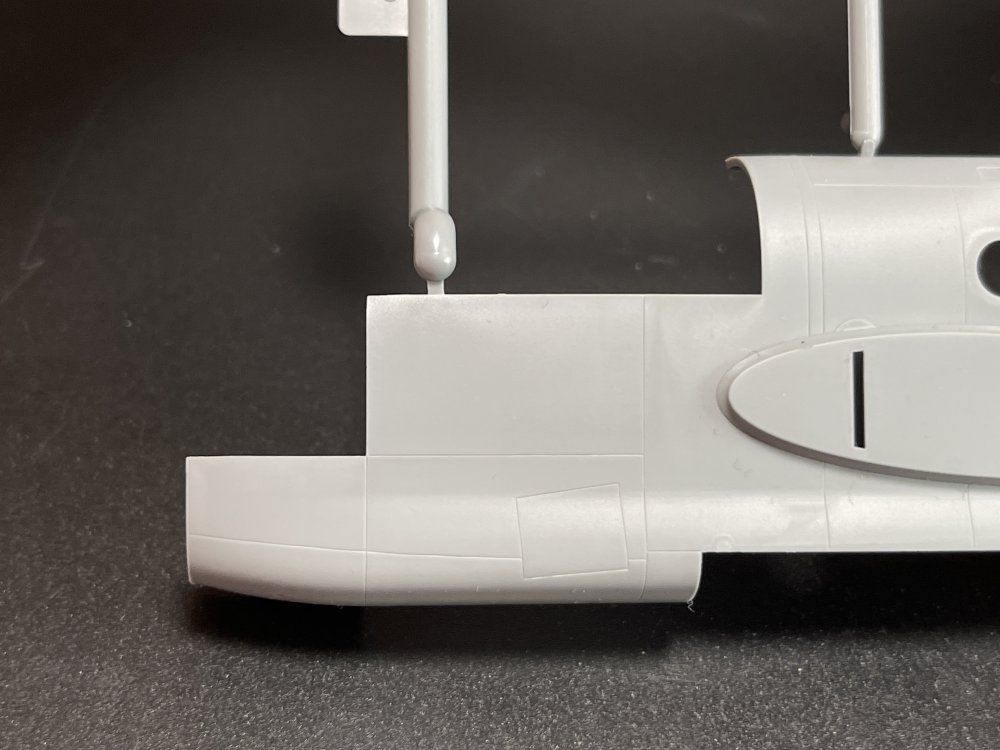
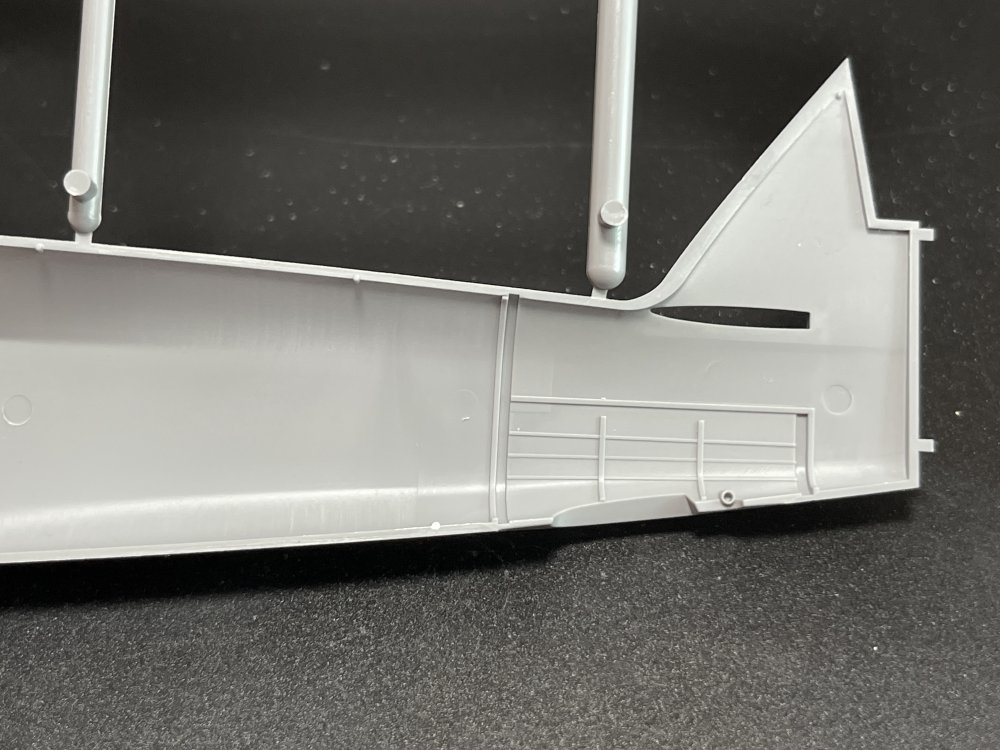
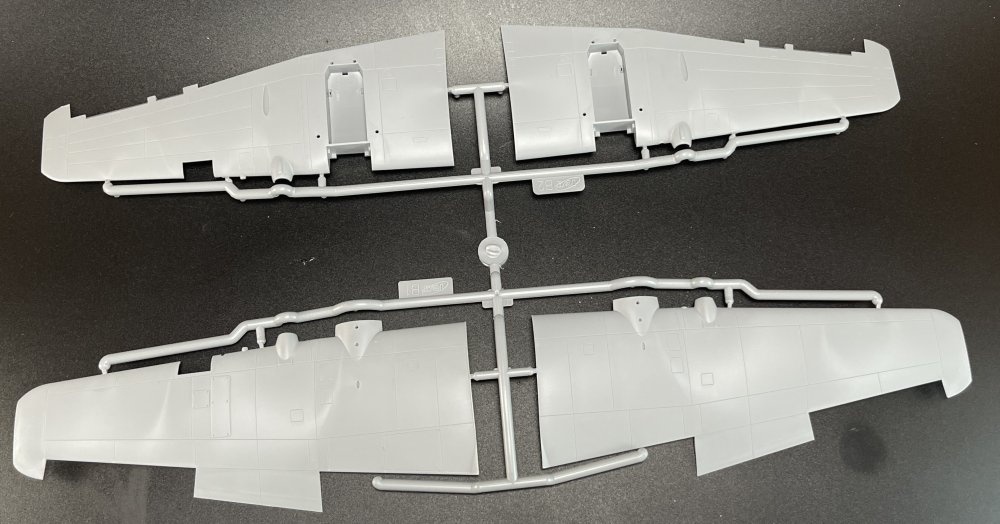
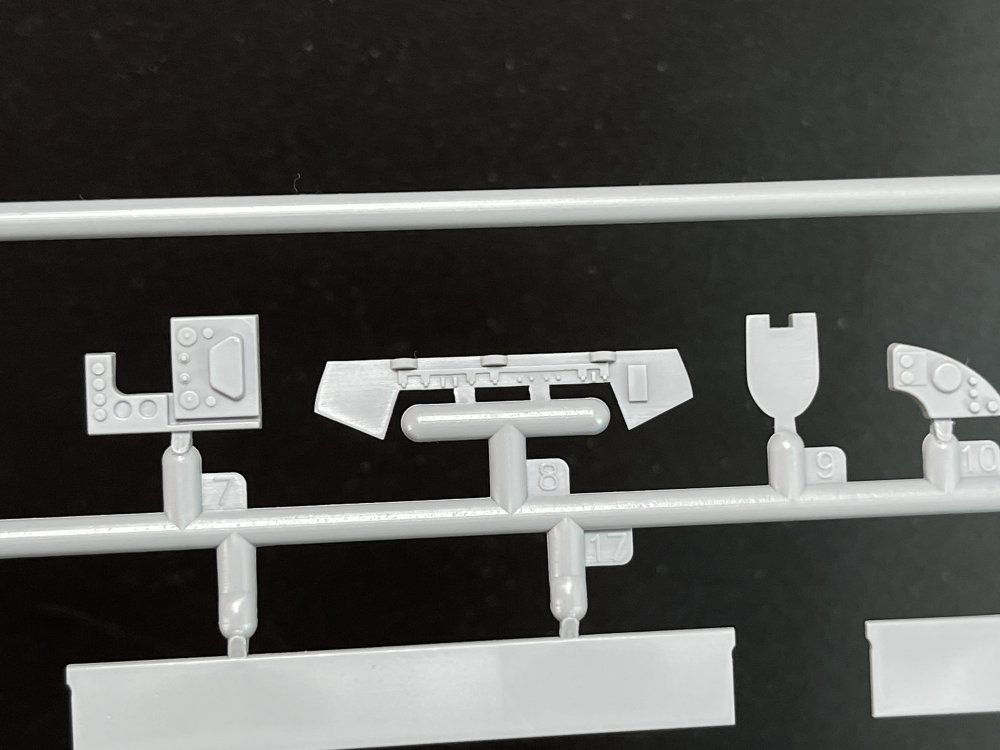
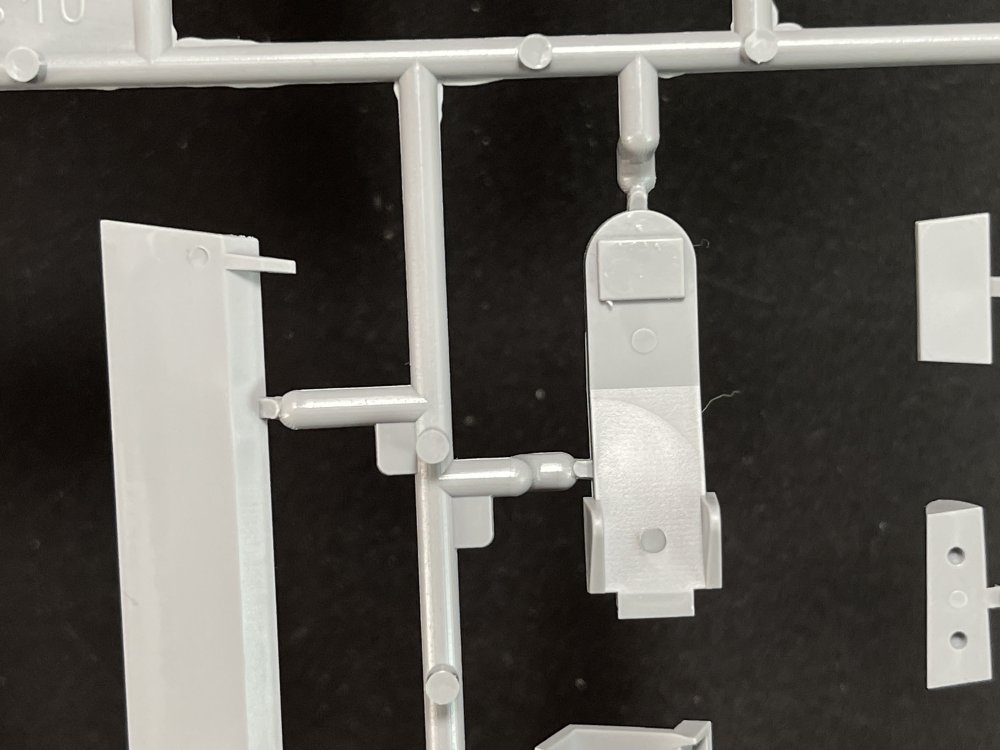
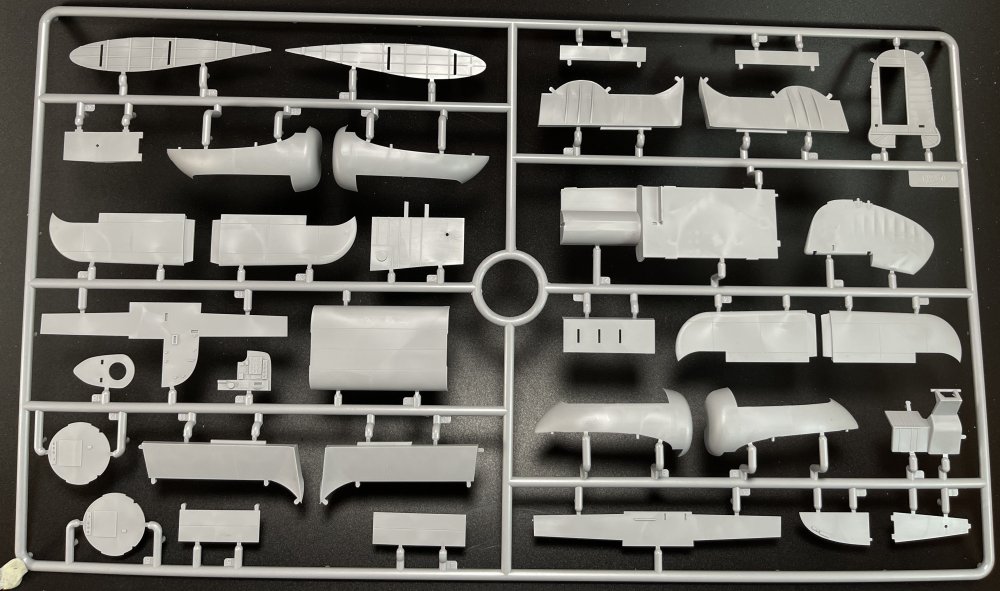
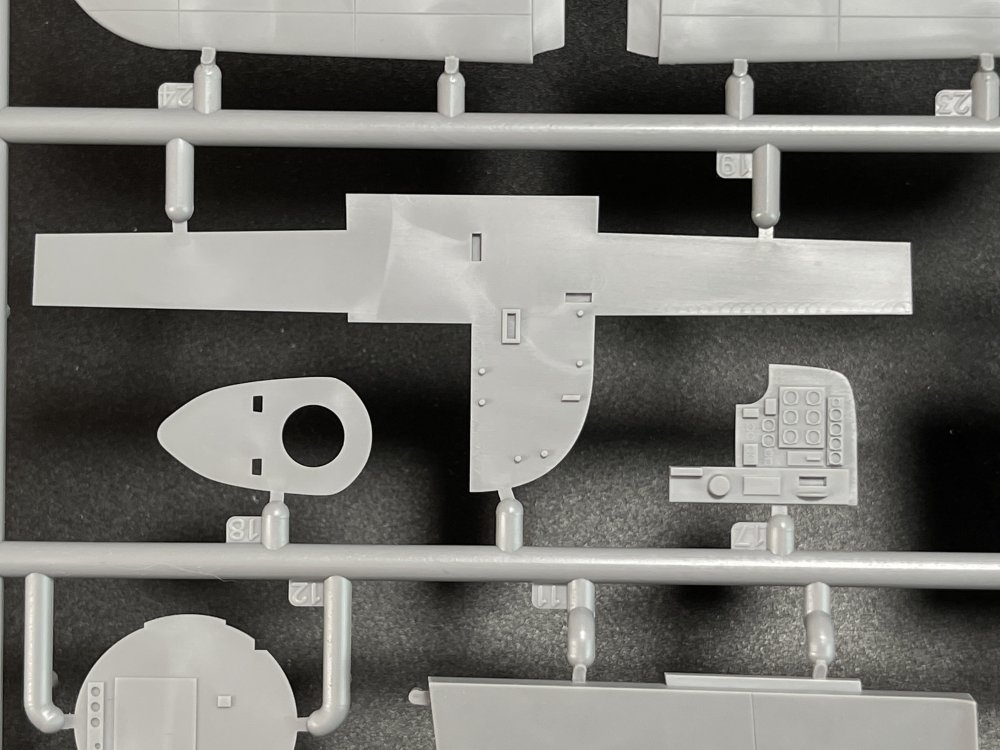
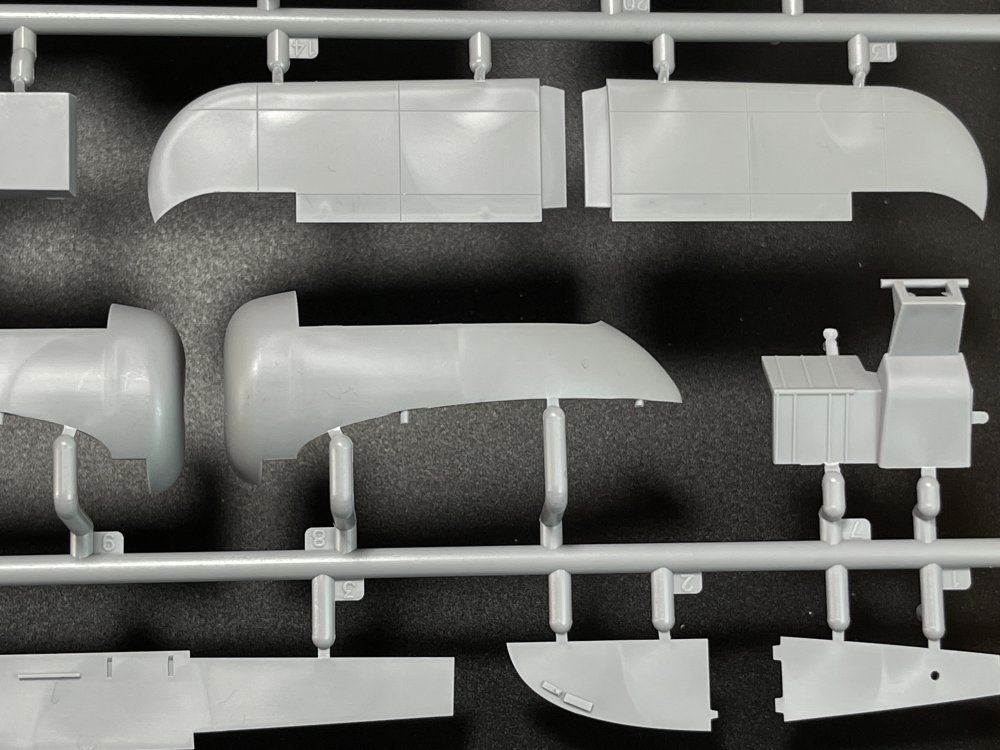
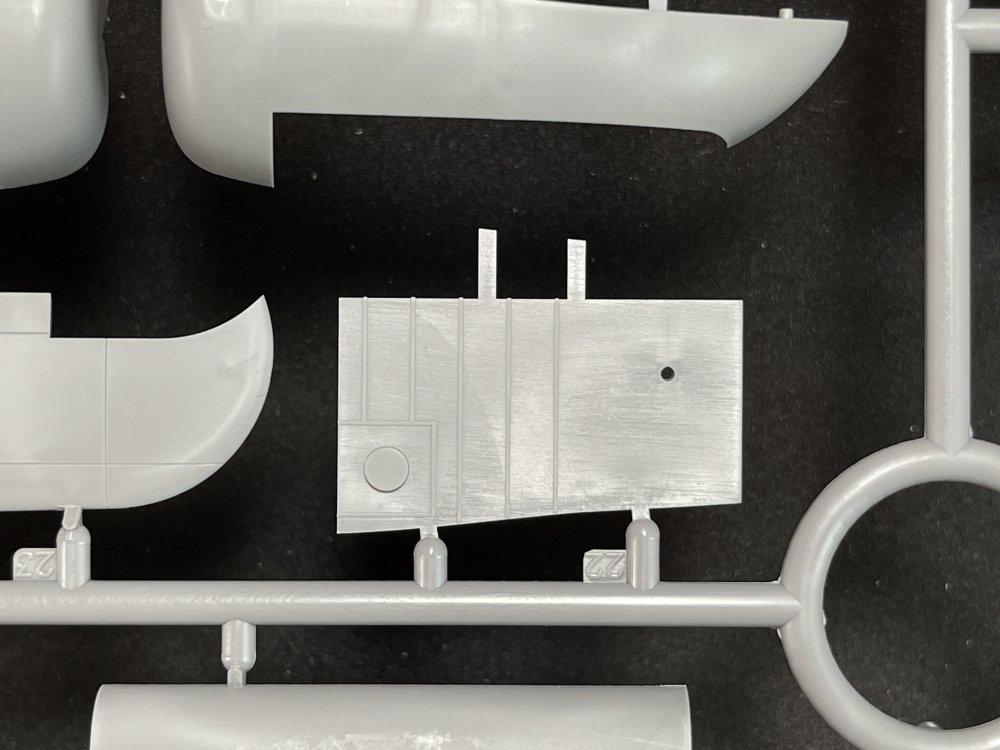
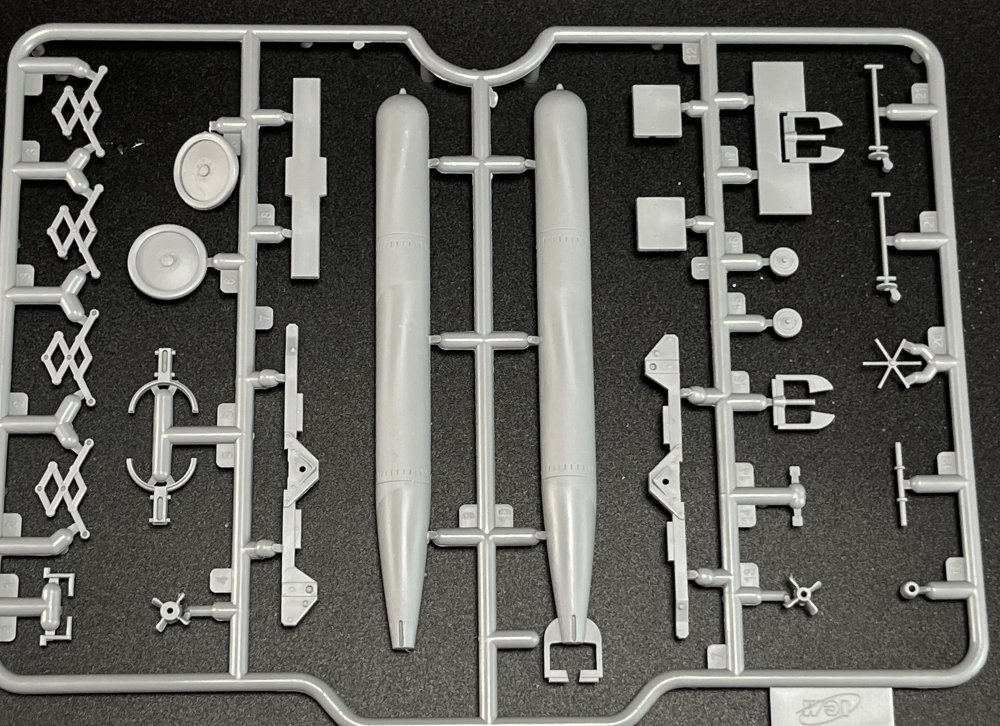
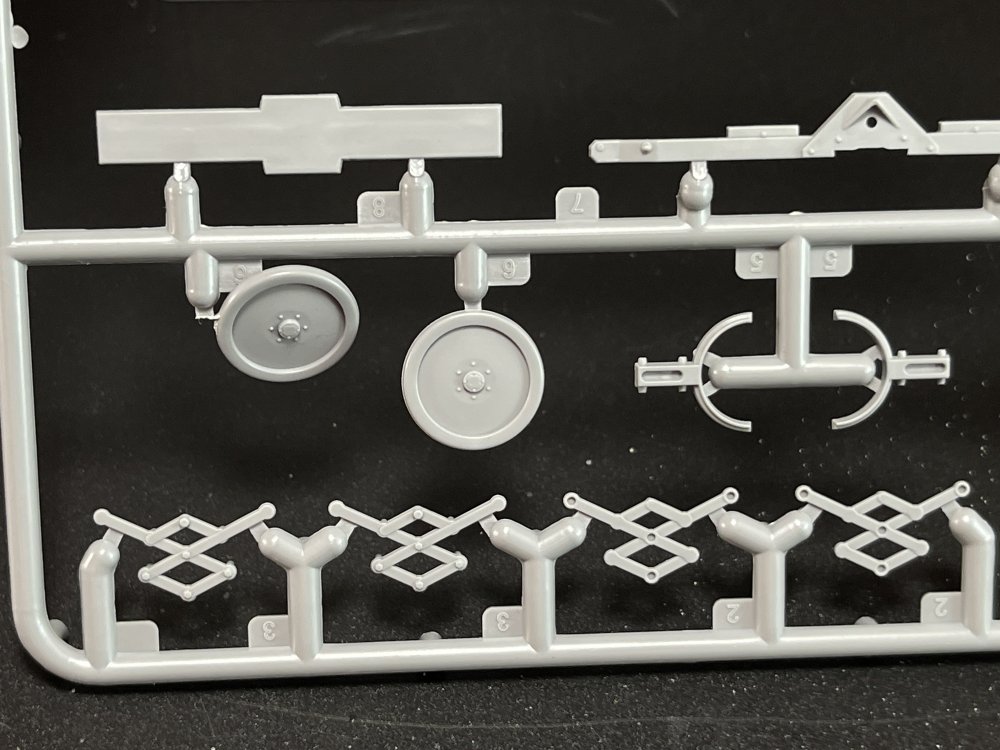
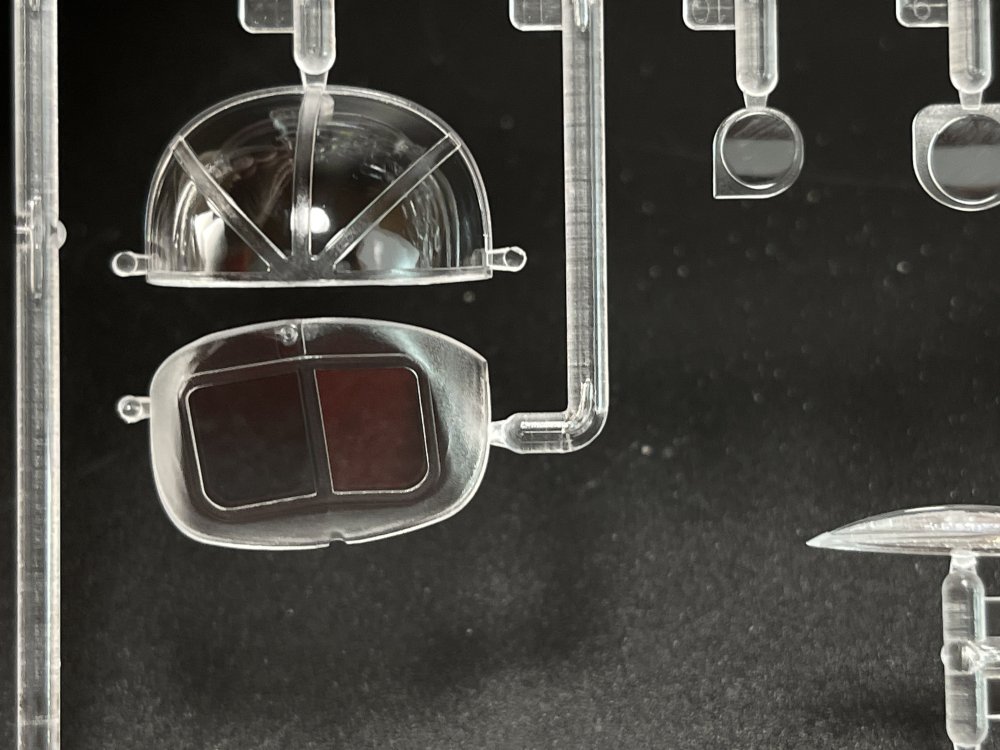
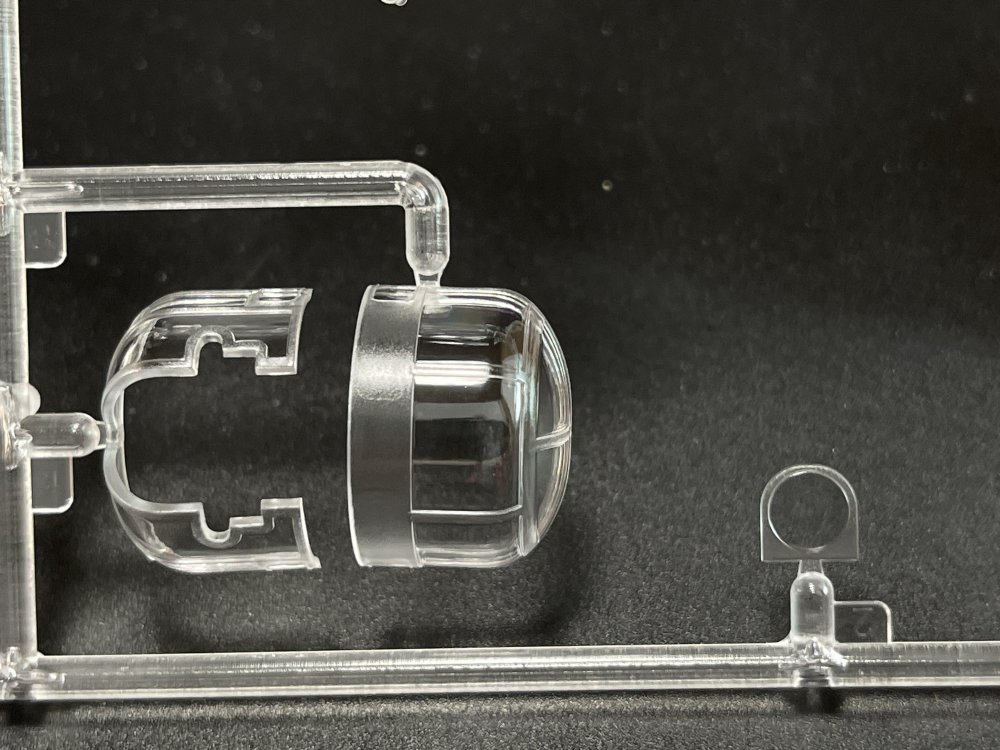
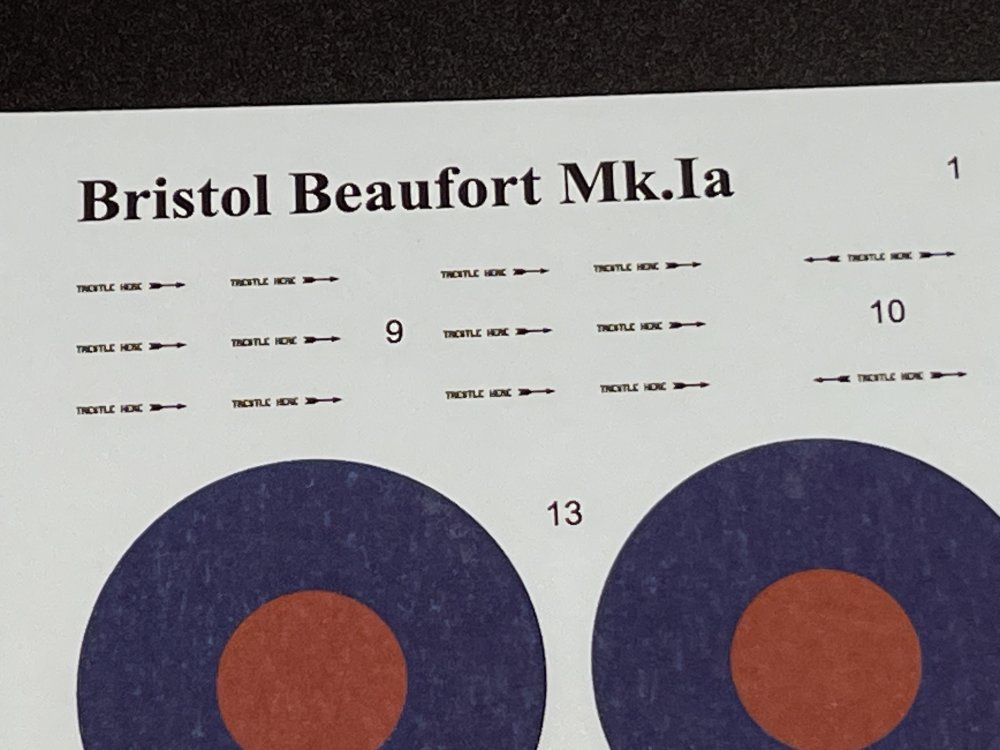
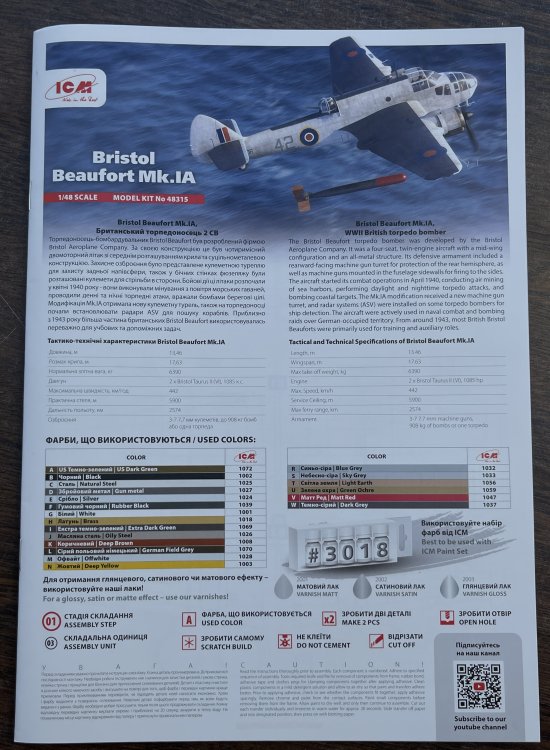
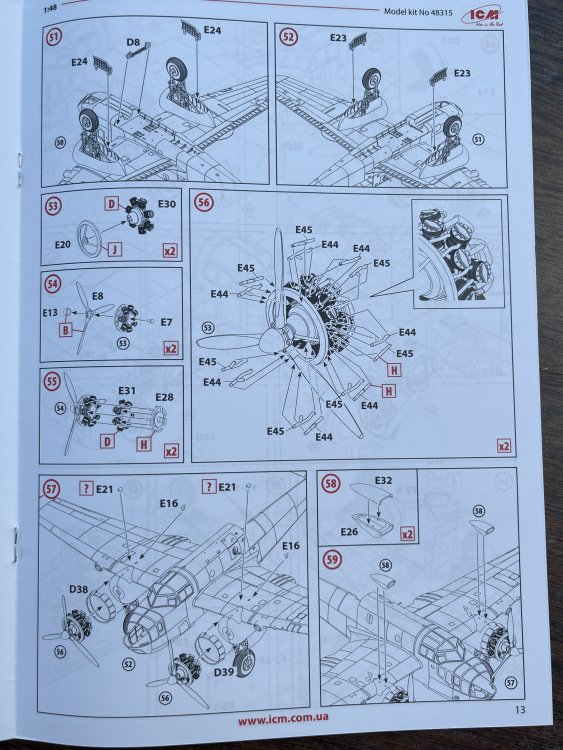
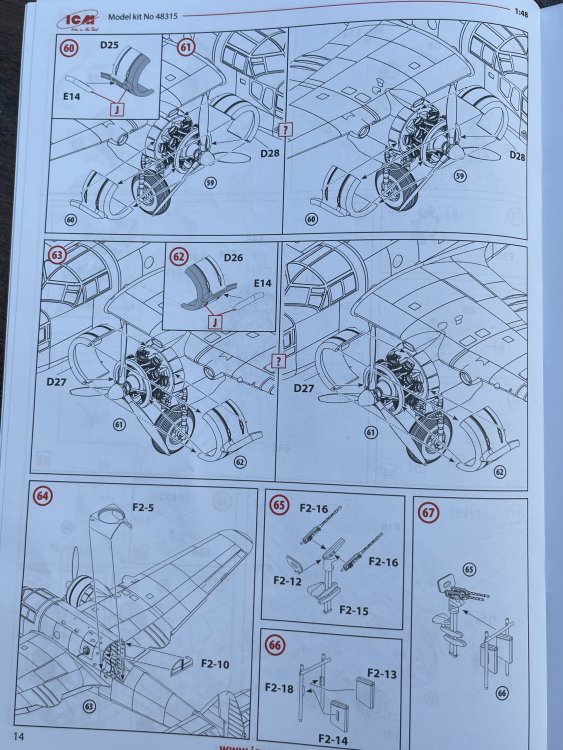
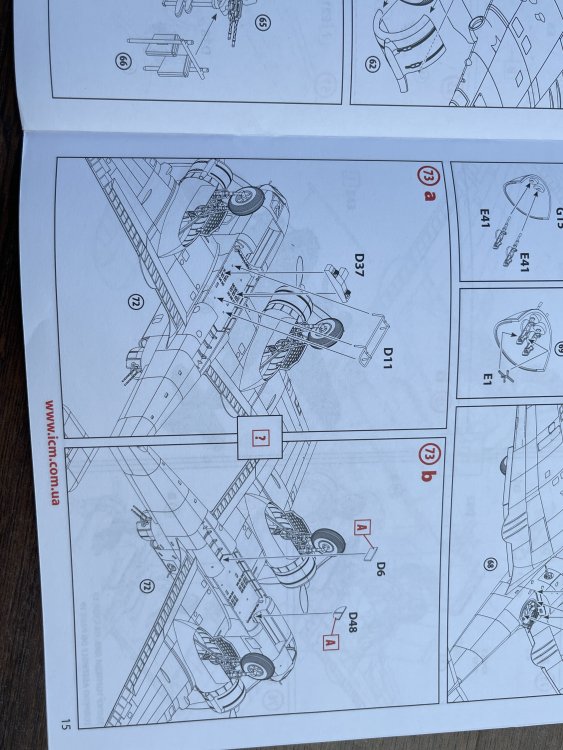
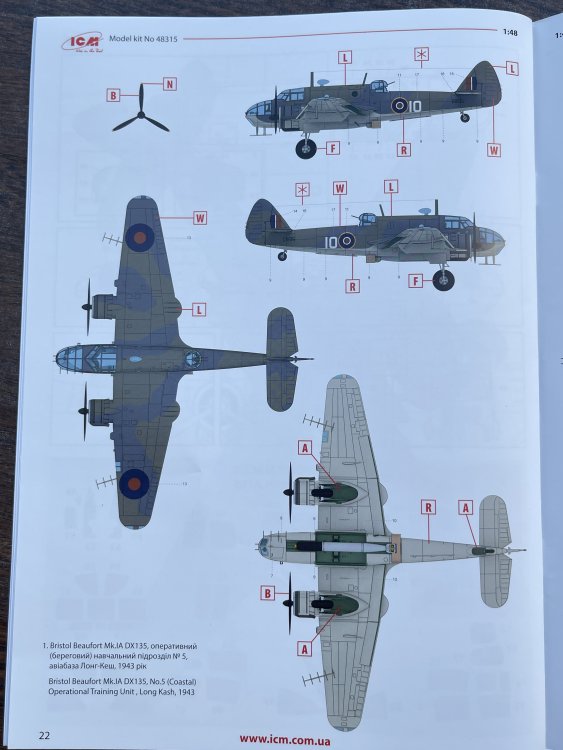
ICM 1:48 Bristol Beaufort Mk. Ia Torpedo Bomber ICM 48315 Available at Art Scale Model € 54,60 – in Art Scale Kit ICM, the Ukrainian model manufacturer, has once again impressed the scale modeling community as this release continues ICM’s tradition of delivering well-engineered models of lesser-known yet historically significant aircraft or variants of well-knowed aircraft. The Bristol Beaufort was a twin-engine torpedo bomber designed by the Bristol Aeroplane Company, drawing heavily on the design of the earlier Blenheim light bomber. Entering service with RAF Coastal Command in late 1939, it played a vital role during World War II, particularly in maritime operations. The Mk. Ia variant, the focus of this kit, featured improvements over the initial Mk. I, including a new machine gun turret (similar to that of the Blenheim), ASV (Air-to-Surface Vessel) radar for detecting surface targets, and tropical filters for operations in hot climates like the Mediterranean and North Africa. The Beaufort saw extensive use against Axis shipping convoys and warships, with notable service from bases such as Malta. Its versatility allowed it to perform torpedo strikes, conventional bombing, and minelaying duties until it was phased out of frontline service in 1942, succeeded by the Beaufighter. It`s the second Beaufort that I have the pleasure to review. So, let´s crack the box. The kit arrives in ICM’s standard sturdy packaging: a strong cardboard box with a glossy slipcover featuring an action painting of a Beaufort in flight, delivering a torpedo. Inside, the parts are well-protected in a single resealable plastic bag, with the clear parts packaged separately to prevent scratching. The sprues are eight in medium-grey plastic, one clear sprue and an extra sprue (of the other Beaufort review made) containing a torpedo and its trolley. The surface detail is quite good with the recessed panels very good. There`s no rivets details on it, but it`s 1:48 scale. I can leave without them. The fuselage halves have location pins so a easy and fine fit will be easy to get. The interior straight from the box offers a decent level of detail for the four crew stations (pilot, navigator, wireless operator, and gunner) as the cockpit includes molded instrument panels, seats, and control yokes. If you want more detail, AM will come from the rescue and there`s already several sets available as the large greenhouse canopy makes the interior highly visible, so aftermarket 3D decals (e.g., from Kelik) are in fact, an option. The turret, a very defining feature of the Mk. Ia, is very well-executed with a multi-part assembly that allows for posing. as for the radar antennas. The wings does have separate control surfaces (ailerons, flaps, and stabilizers). The engine Taurus radial is quite good actually straight from the box and you can display it open. Just leave the cowlings out. The engine detail is quite good but no enough to left it wide open. For that I would add some wires at least. The clear parts, once again, are fantastic as it has been usual in ICM. Also as usual, ICM provides a template in the instructions that is quite good if you don’t want to get some AM masks. The new part from the other Beaufort that we review is the Torpedo and Trolley, as it comes in a bonus sprue. The torpedo is detailed and can be displayed in the open bomb bay, while the trolley adds a ground-handling dimension that complements the aircraft beautifully. The decal are thin, well-printed, and opaque, with good color registration. As for the Markings Options, three schemes are provided: 1. Bristol Beaufort Mk. IA DX 135, n.º 5 (Coastal) Operation Training Unit, Long Kash, 1943 2. Bristol Beaufort Mk. IA LR906, n.º 2 Torpedo Training Unit, Castle Kannedy, September 1943 3. Bristol Beaufort Mk. IA DW816, 22 Squadron, Ceylon, April 1944; As for the instruction booklet, the frist two pgaces (and the last two) are in glossy paper. The instructions are clear and easy to follow as usual in all ICM new models. Conclusion This is a great kit. I already tested the dryfit of the previous model release and it is excellent. You can get a great Beaufort straight from the box or just indulge yourself and get a lot of AM already available and make a top end model. So, just go and get one and built it! You will enjoy. My sincere thanks to ICM for making this beaufort variant. **Rating: 8.5/10** Just get one yourself at Art Scale Model


-
Now this… 2025 will very bad for my bank account!!

-
I share the news on the LSM News 2025 topic. However I could have make it in a new topic...
-
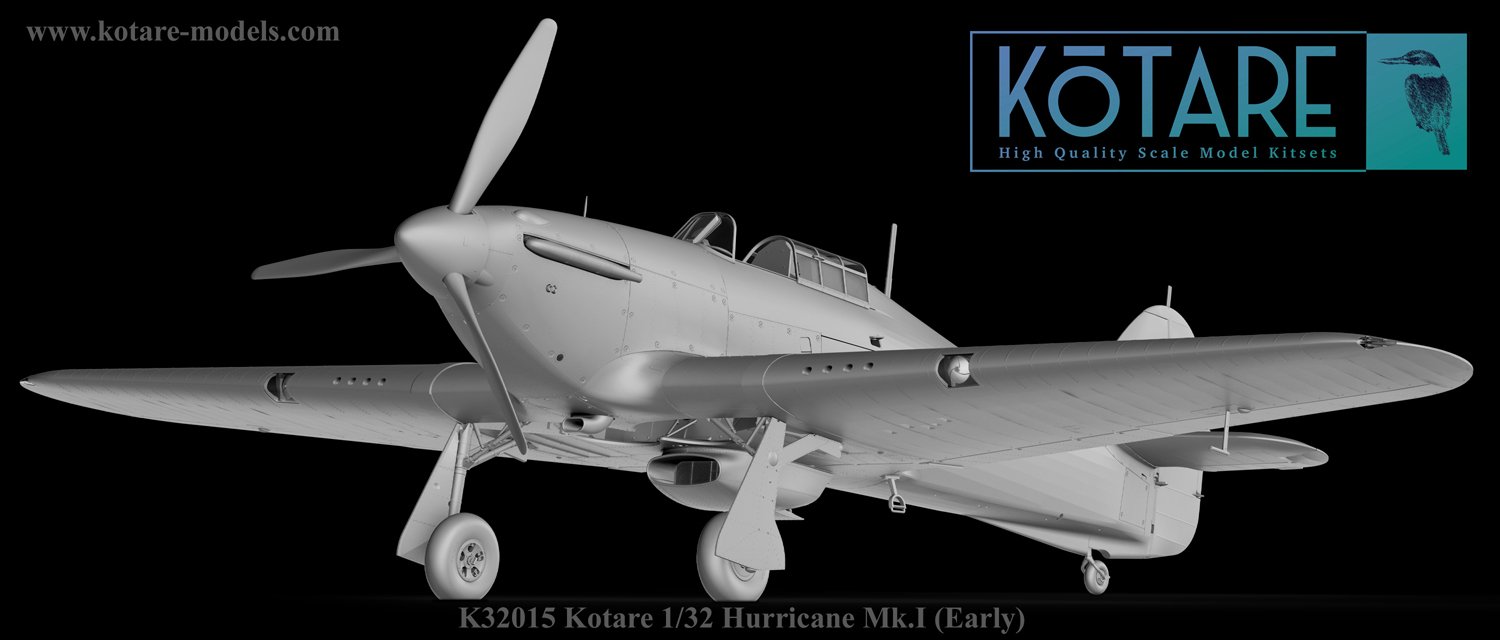
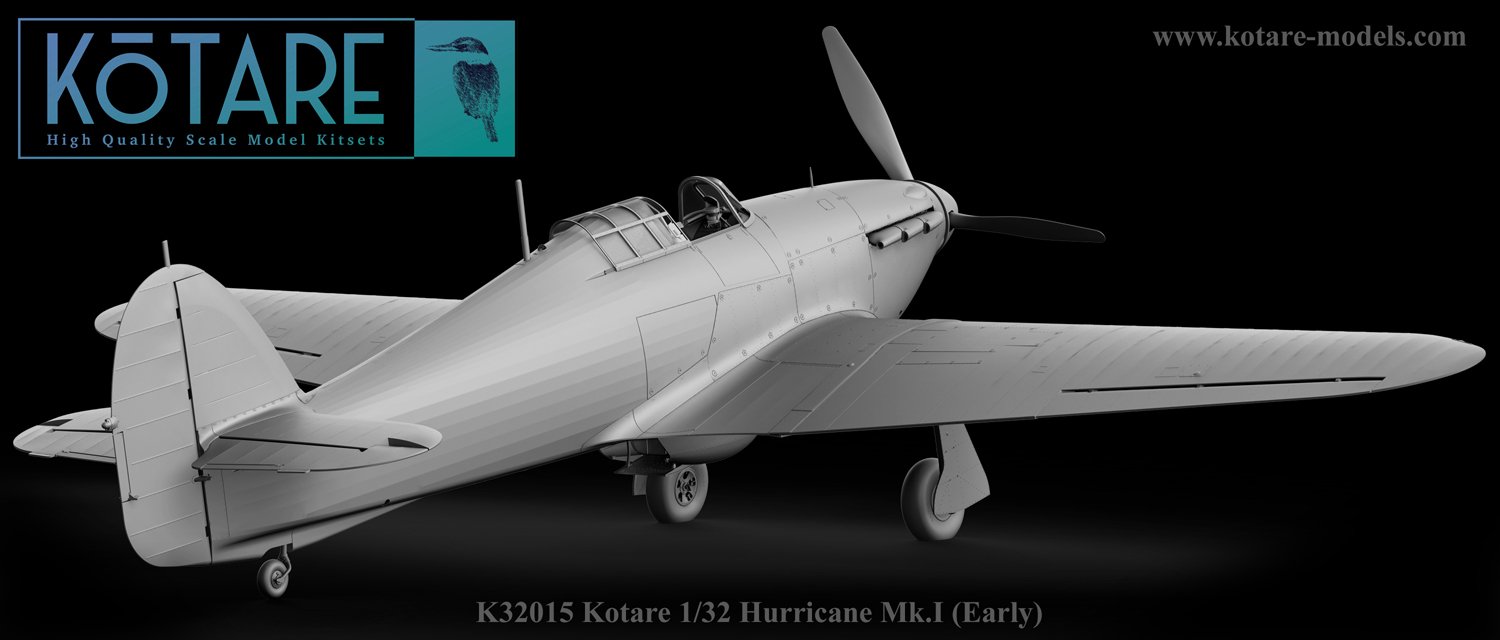
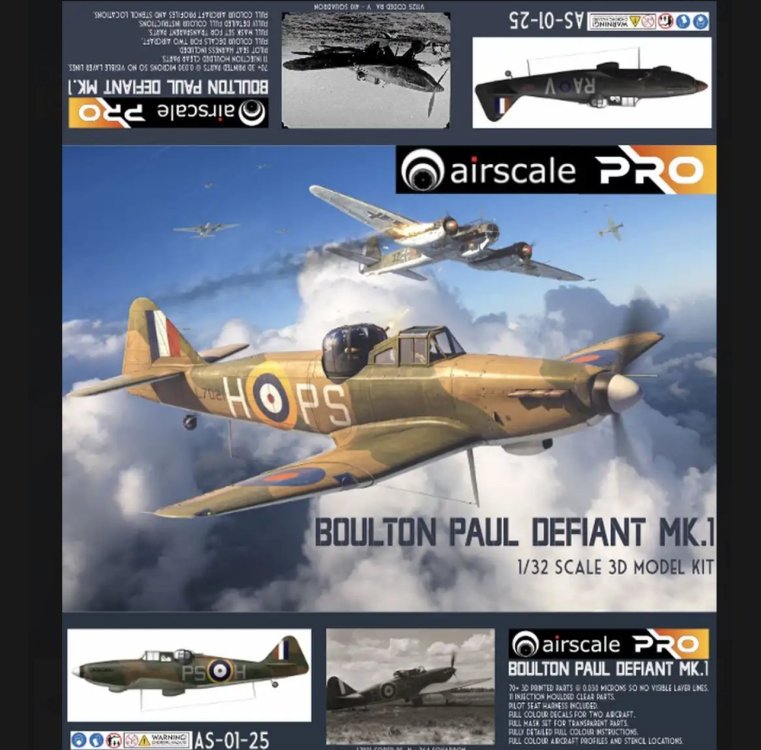
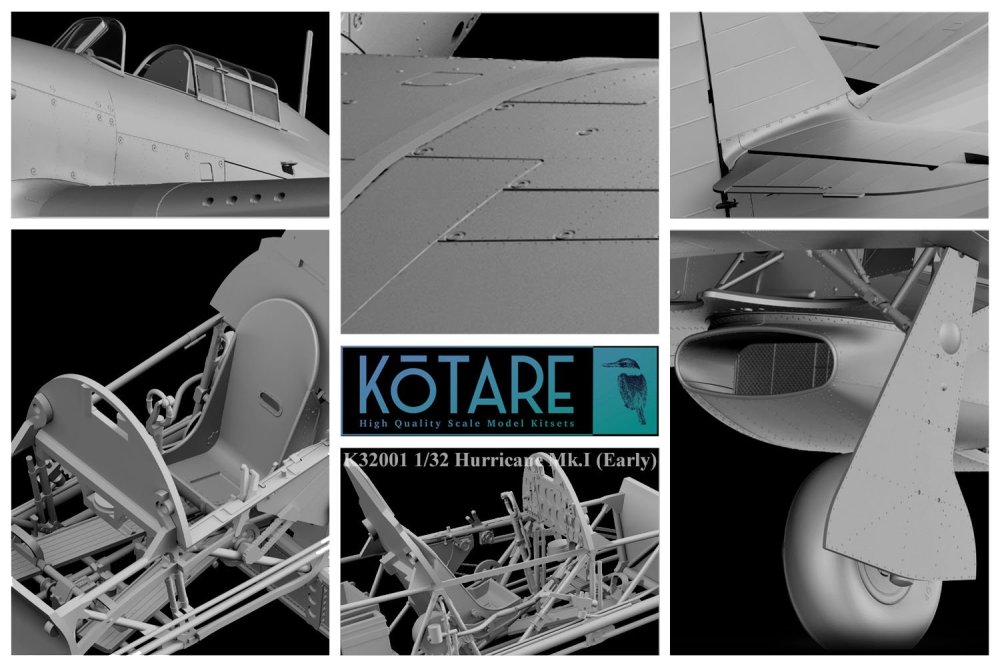
And bang!! A brand new 1:32 Hawker Hurricane!! KOTARE!


-
Late April/early May
-
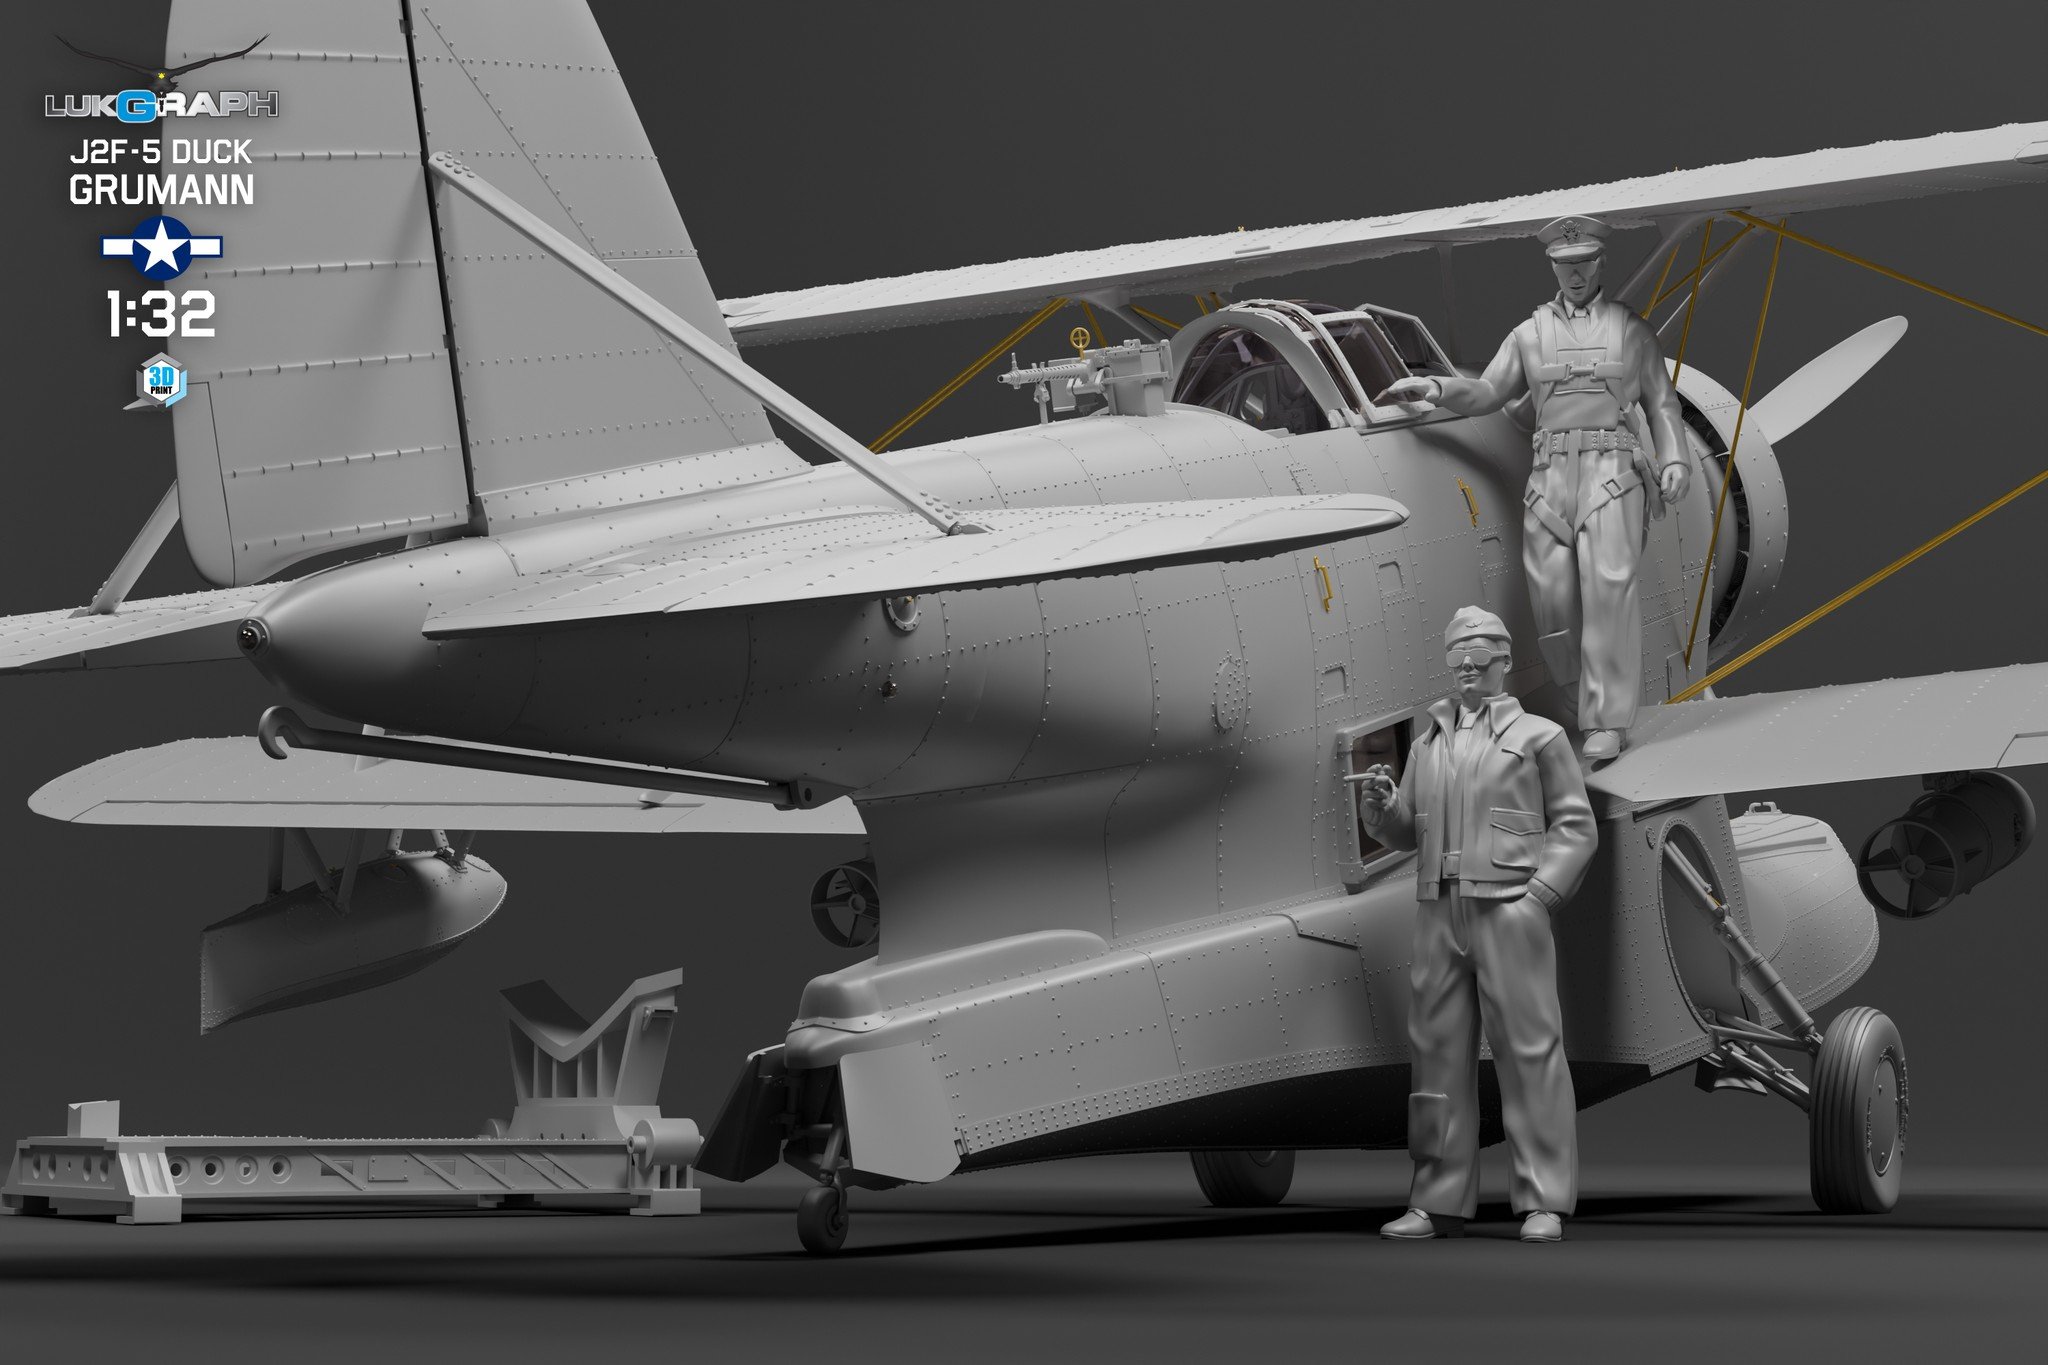
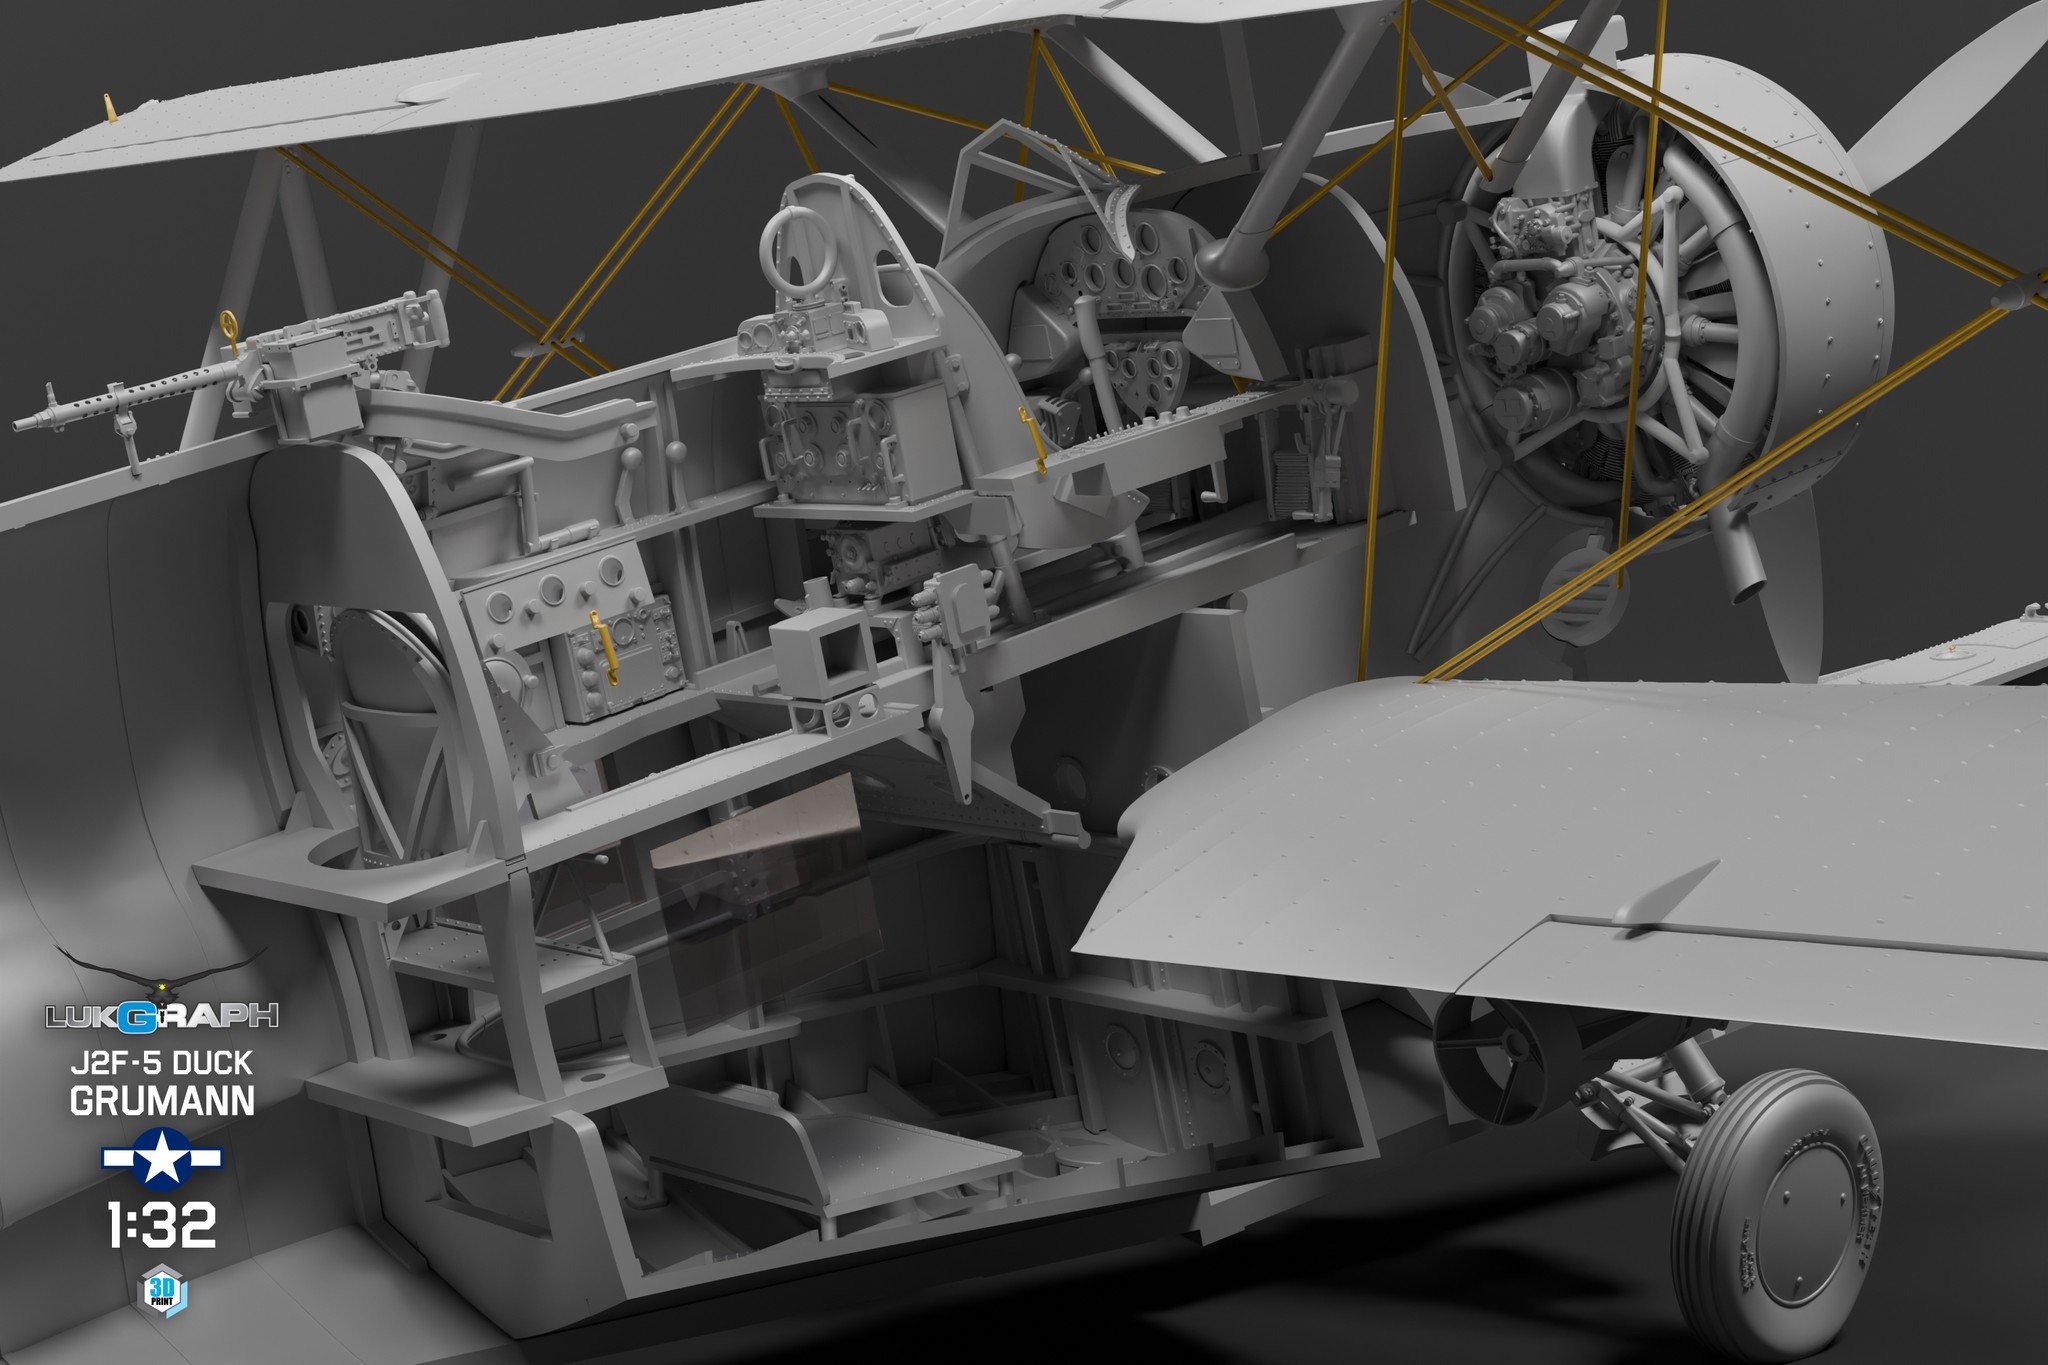
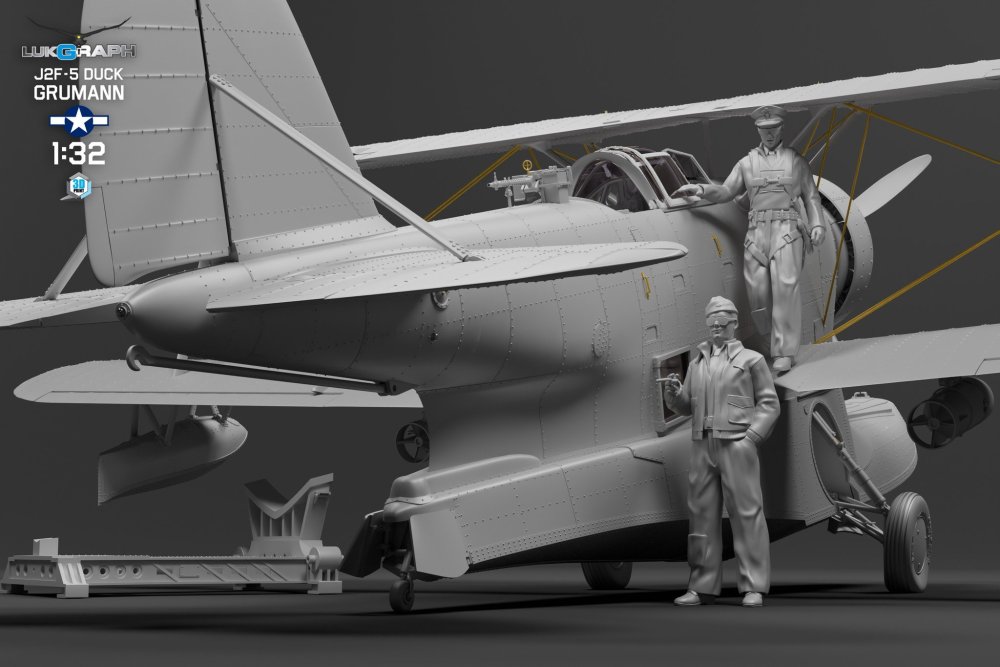
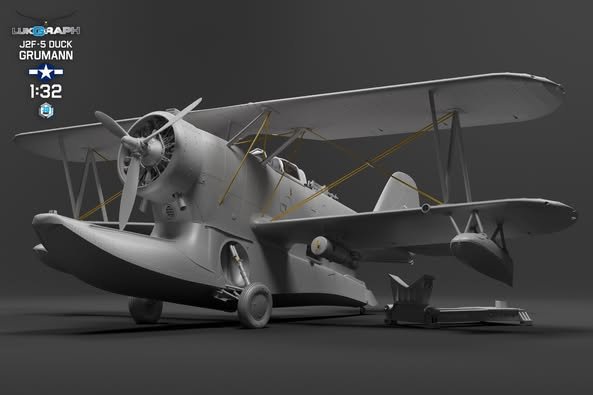
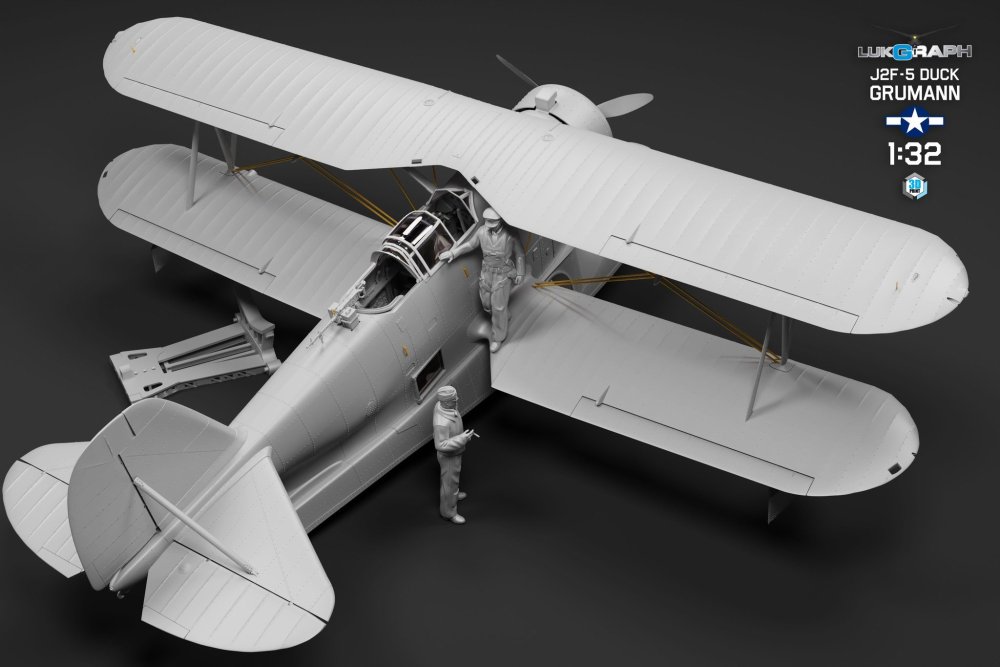
Well,, just announced by Lukgraph!

-
Blues Skies Harv!! we will missed you deeply.!
-
After my move to a small flat, there is no space for large scale models. So I offer the 2 Hughes racers for each $100 plus shipping from Germany. Shipping from Germany to the United States will cost about $22,50. The kits are complete and as new. The
Fran replied to LOTHAR53's topic in Buy, sell, swap, seek
Hi Lothar. can we have more pics of it? for me this kit is totally unknowned. Thanks -
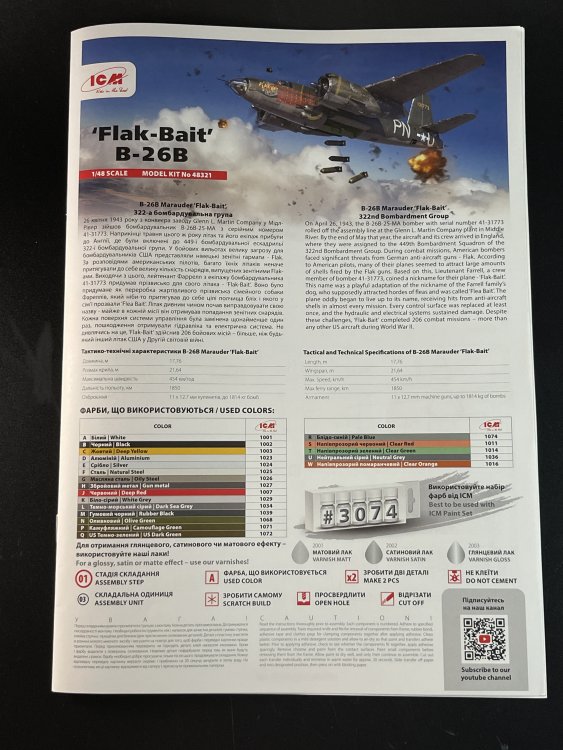
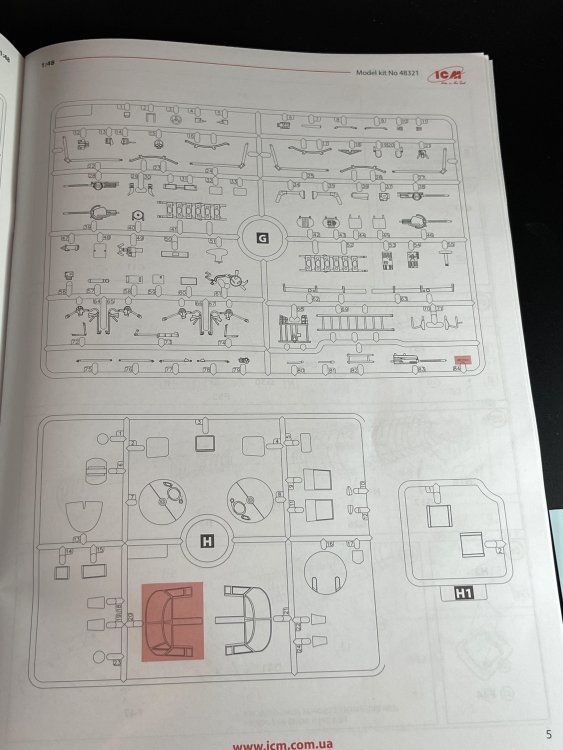
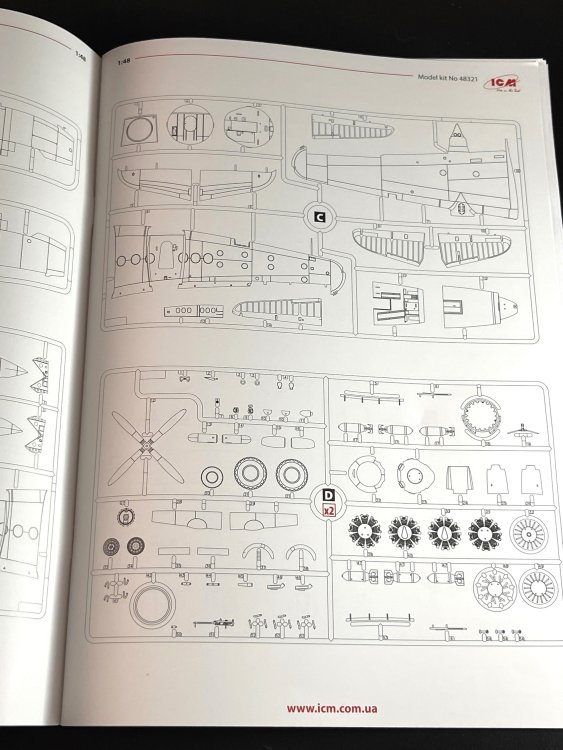
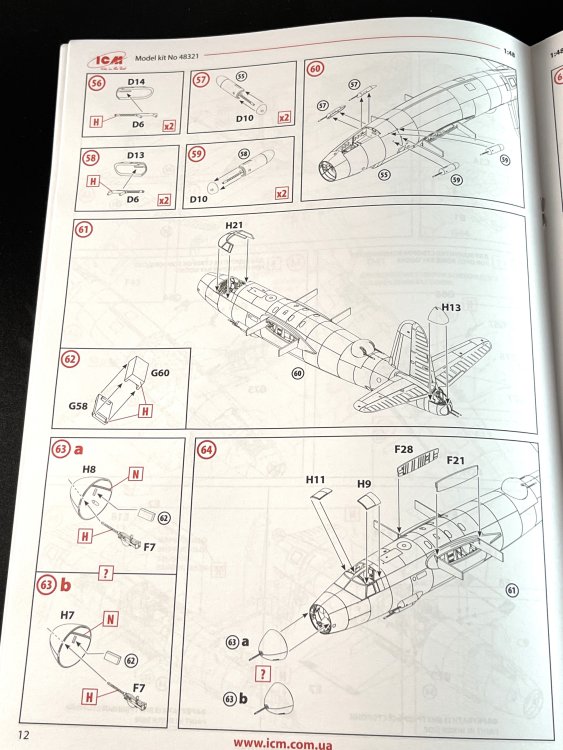
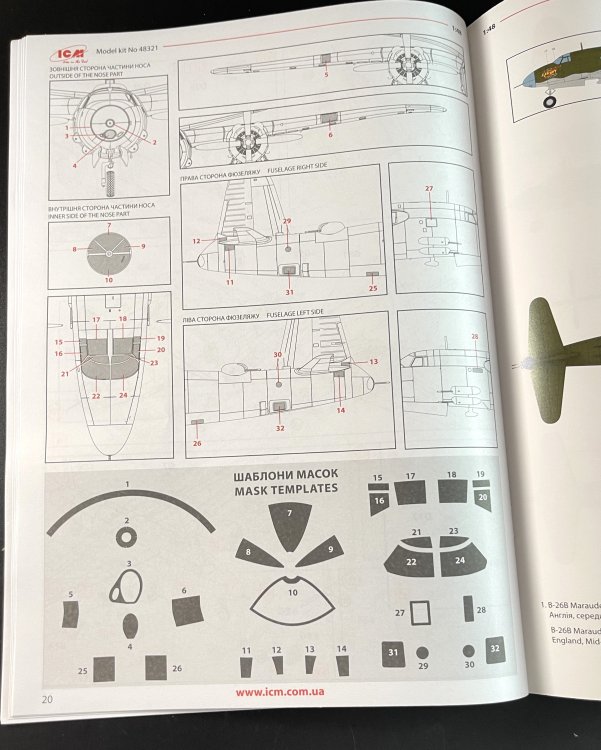
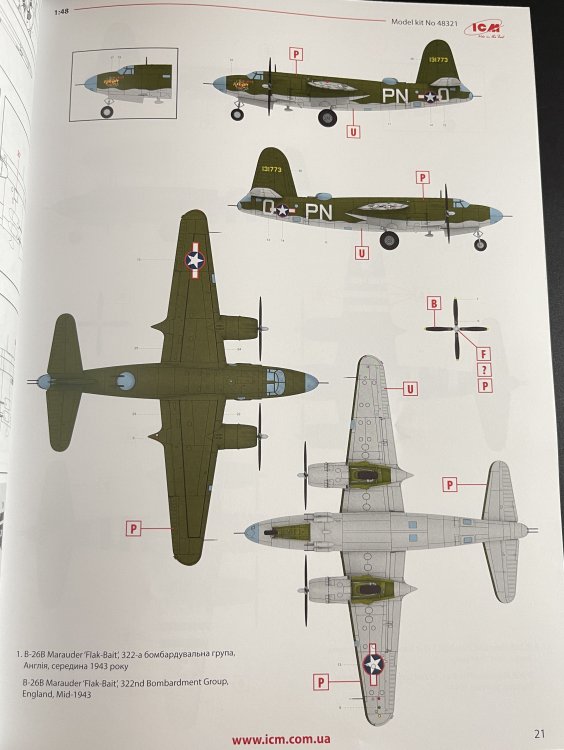
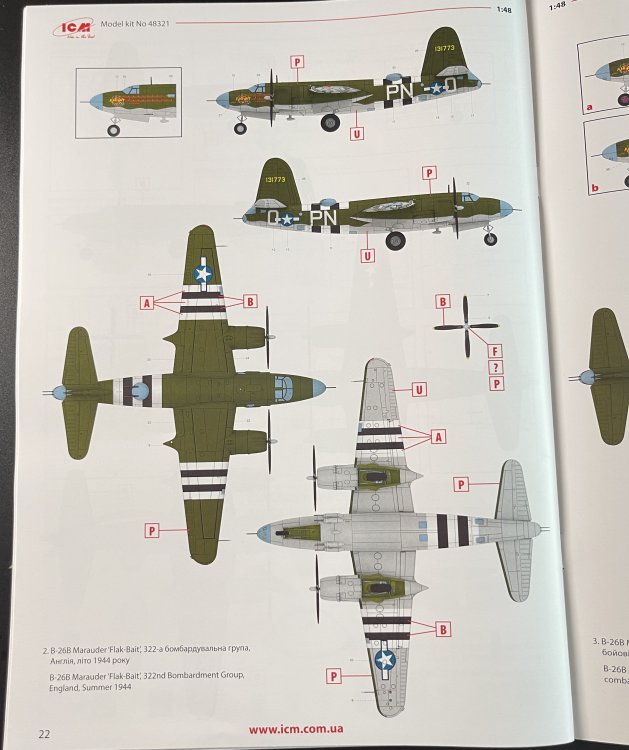
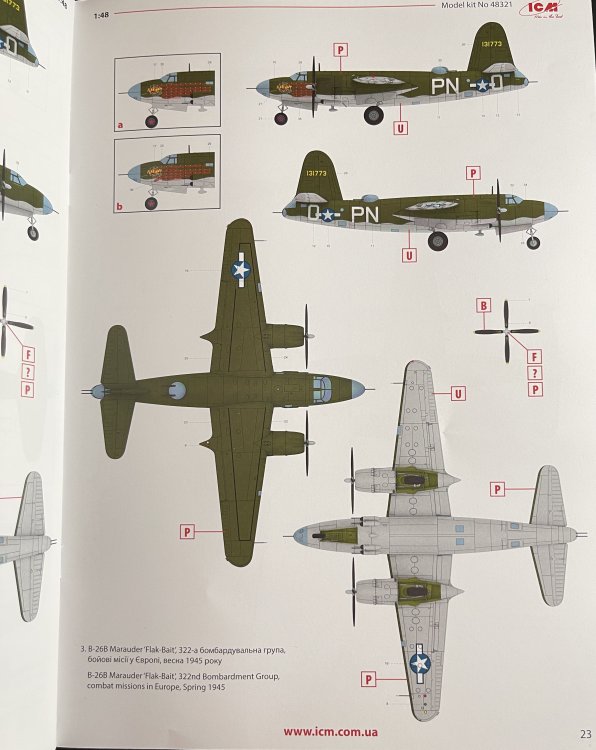
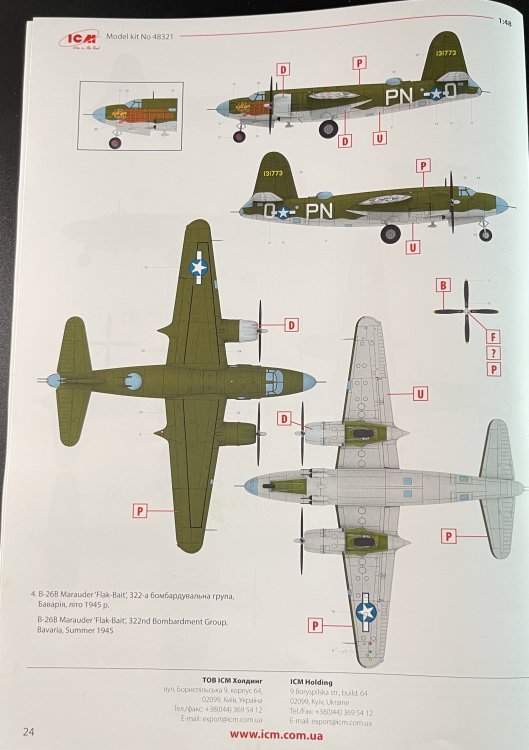
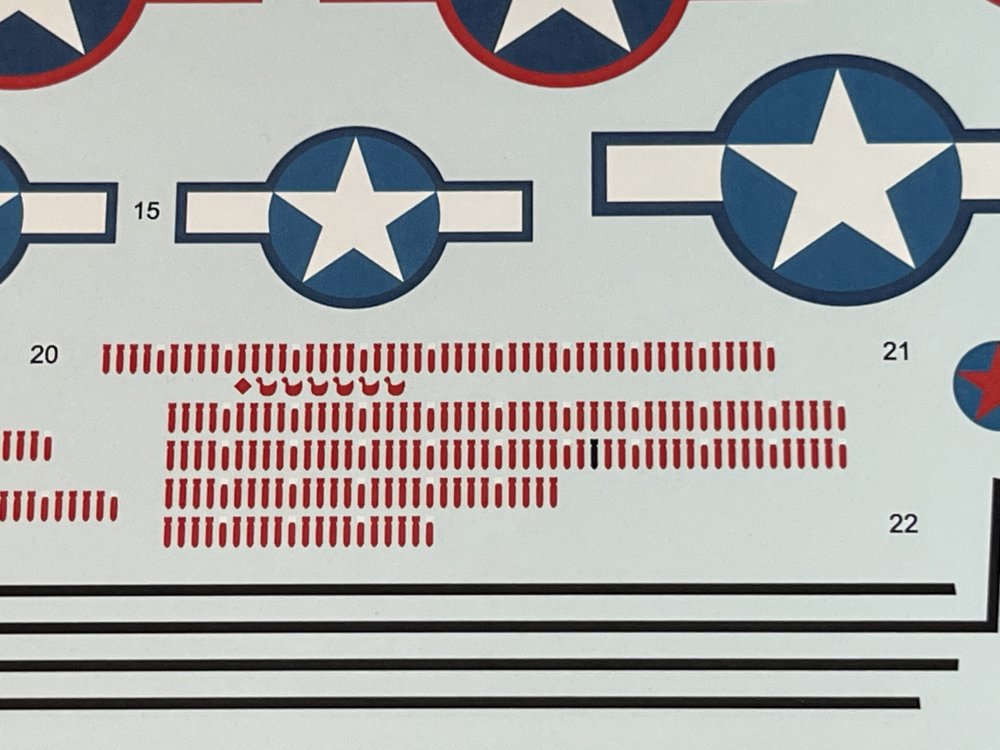
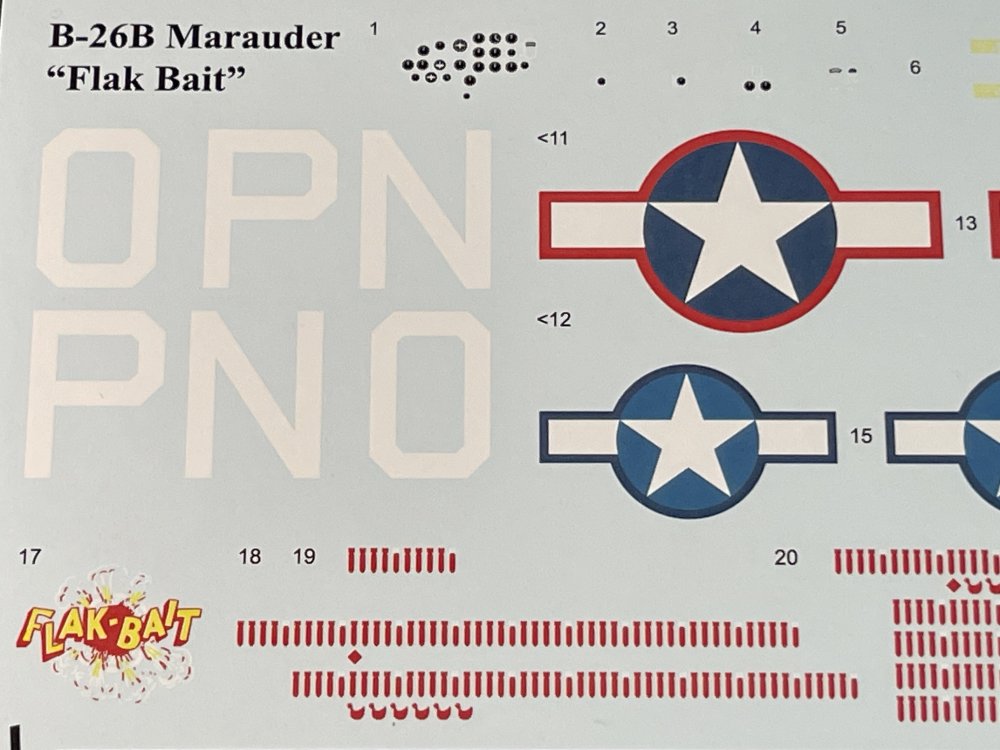
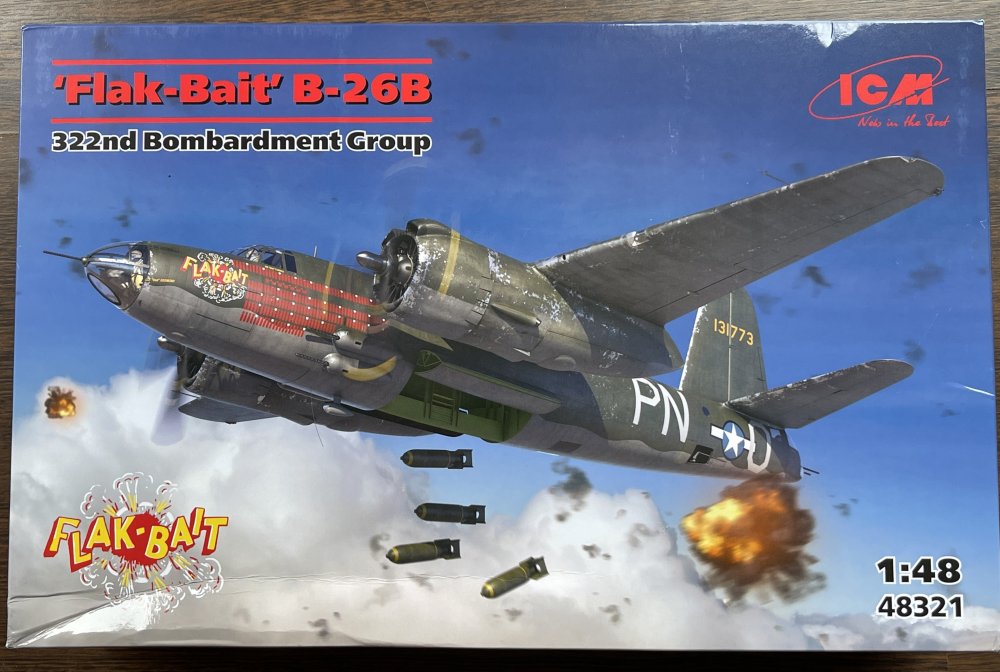
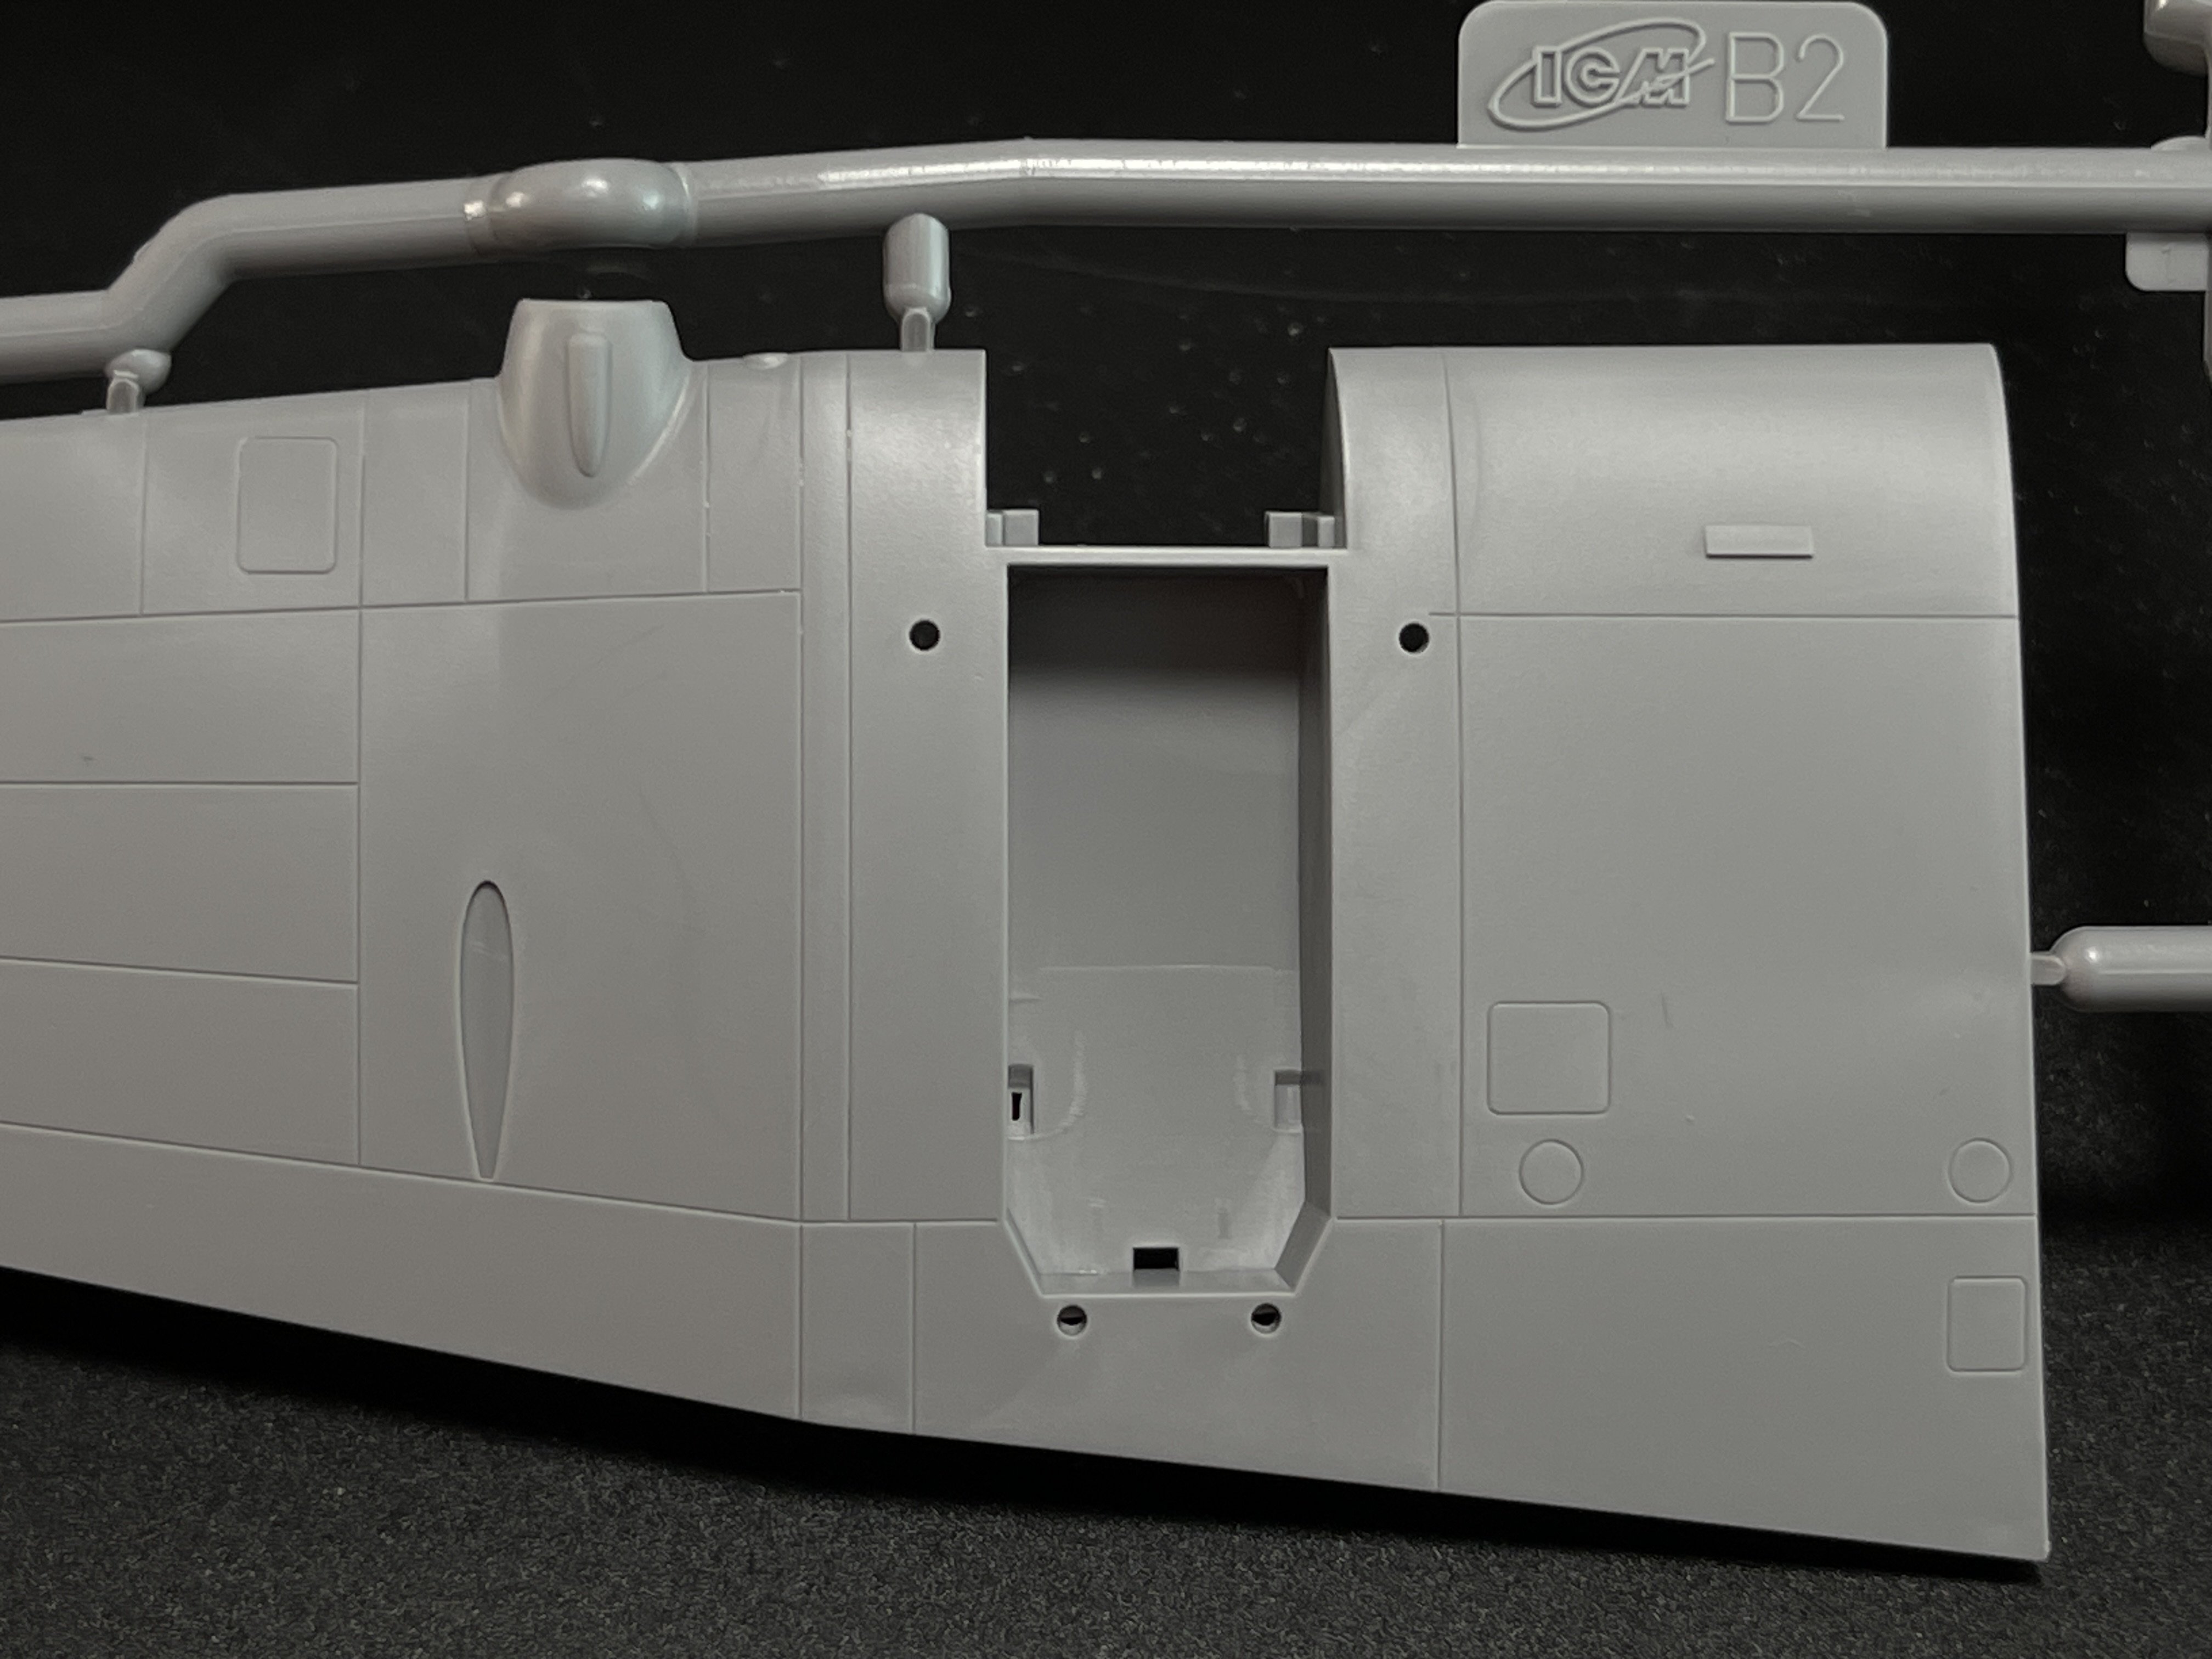
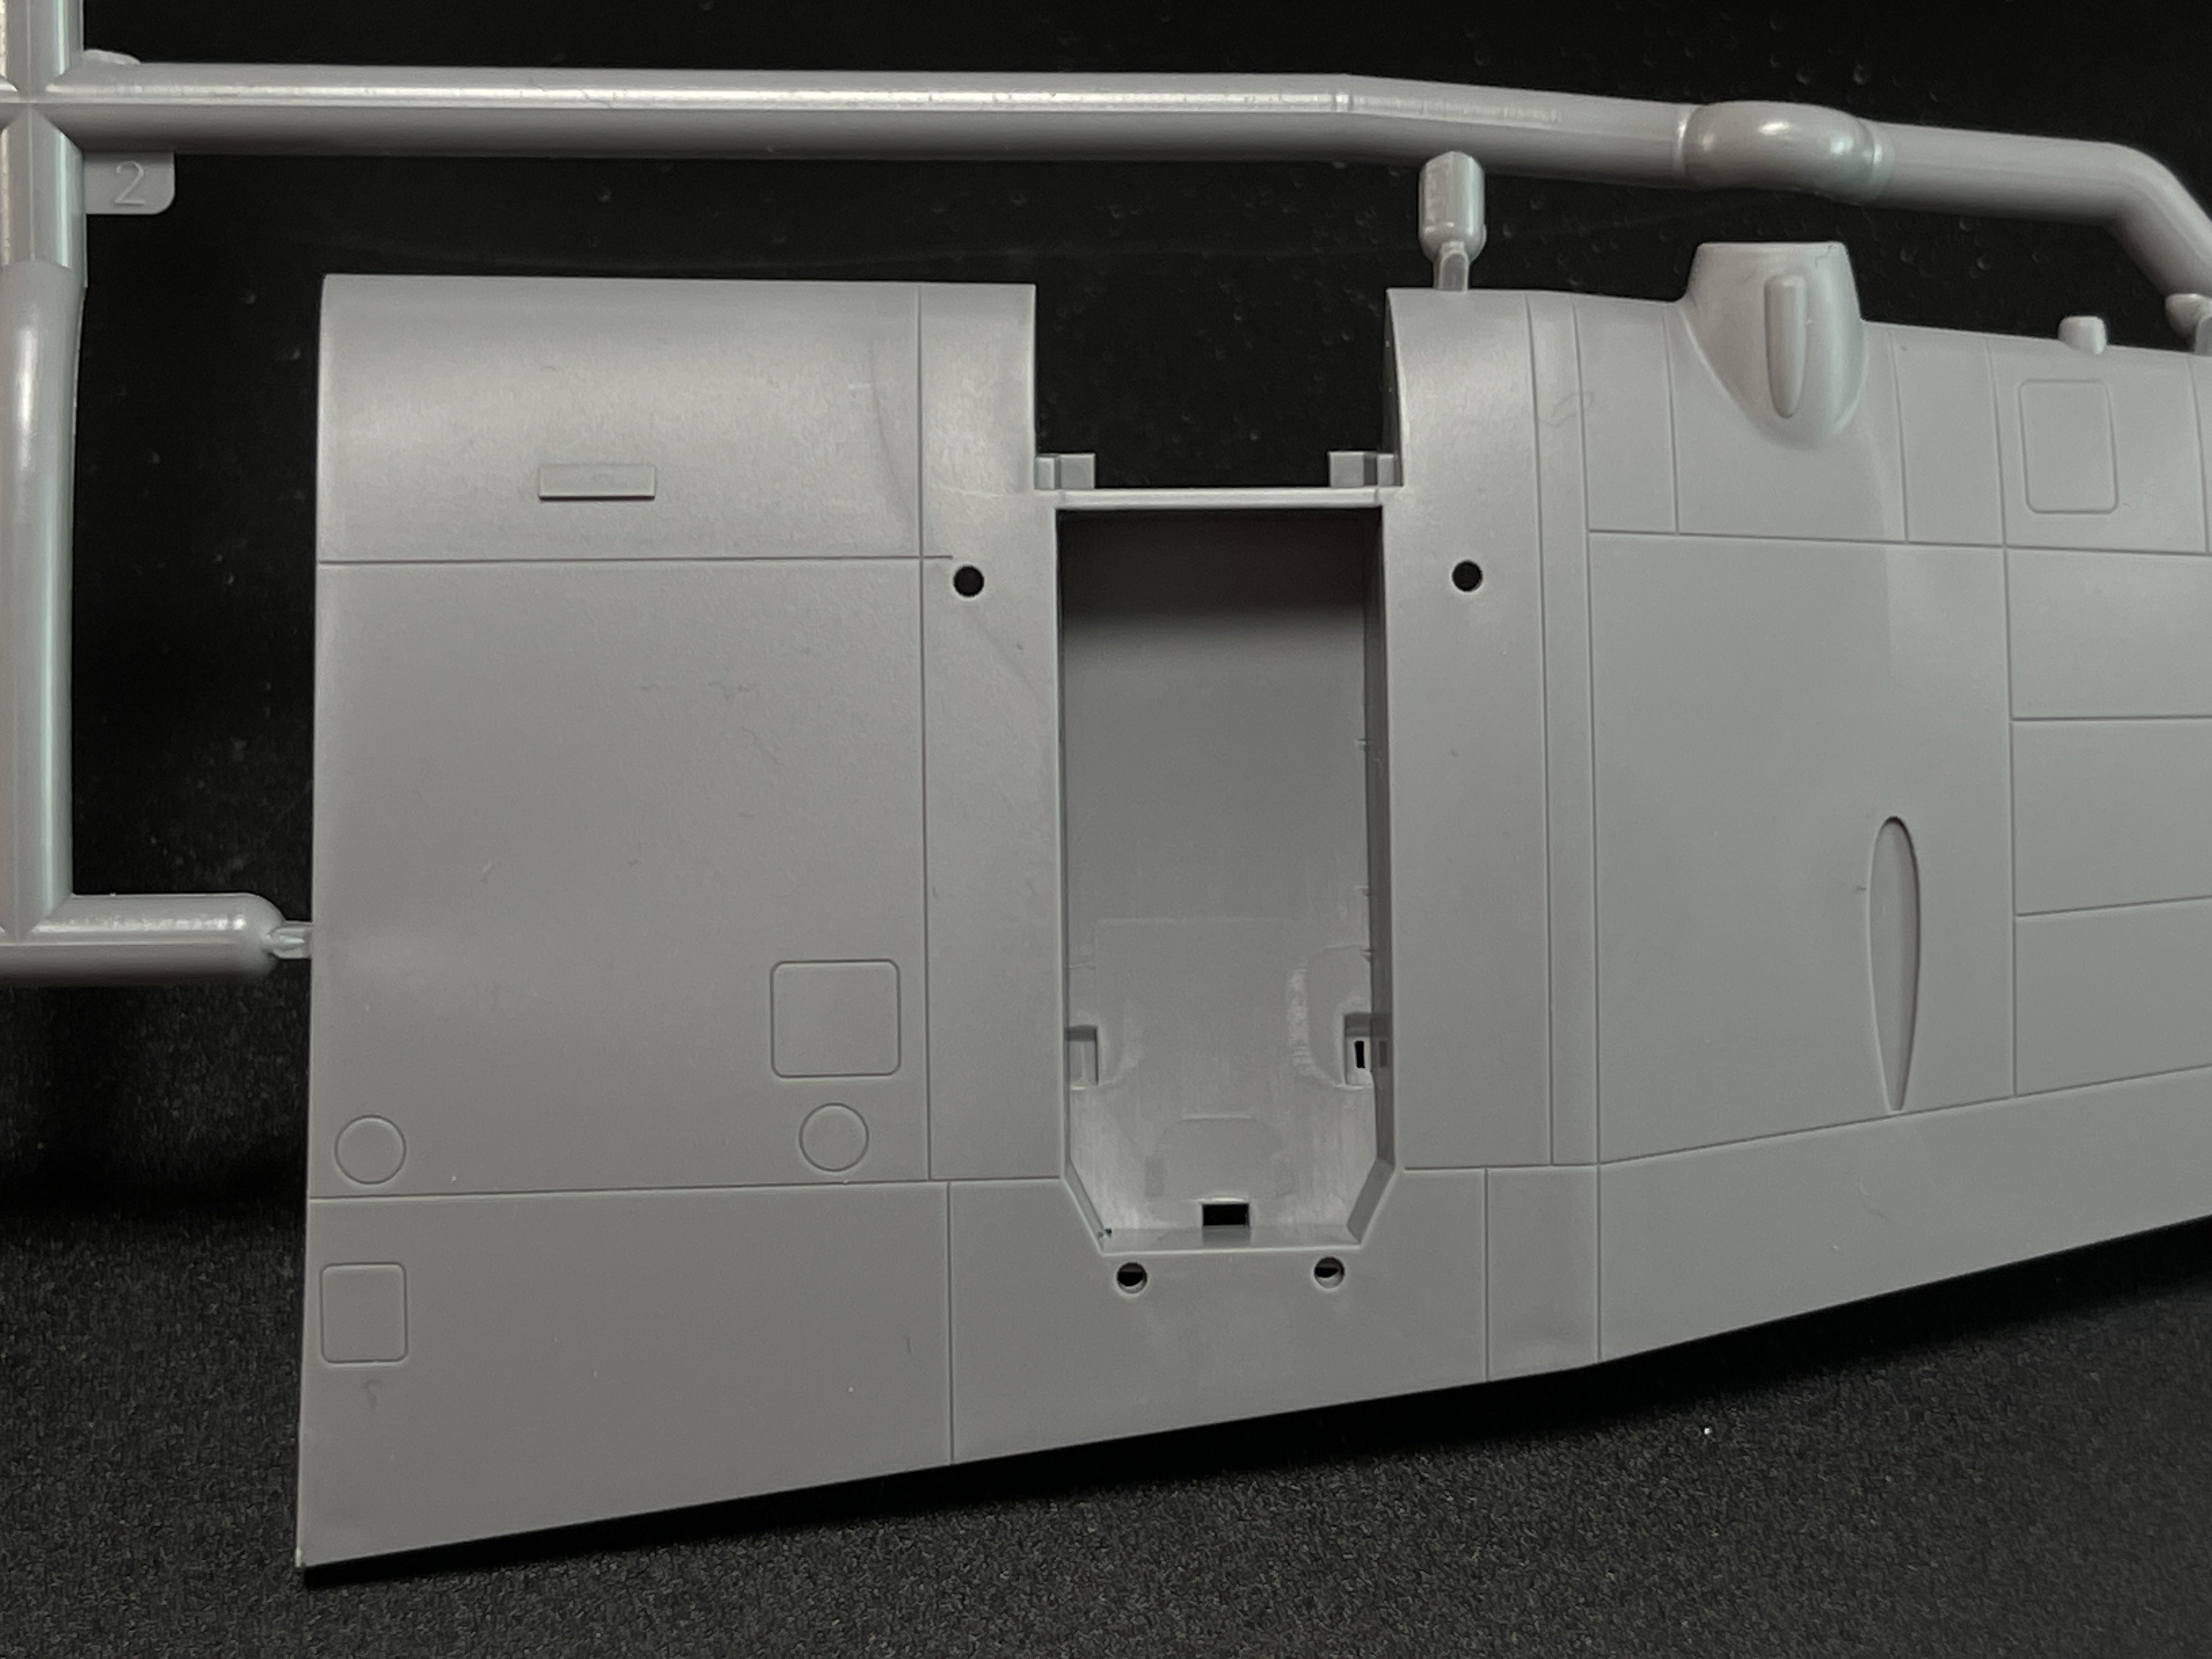
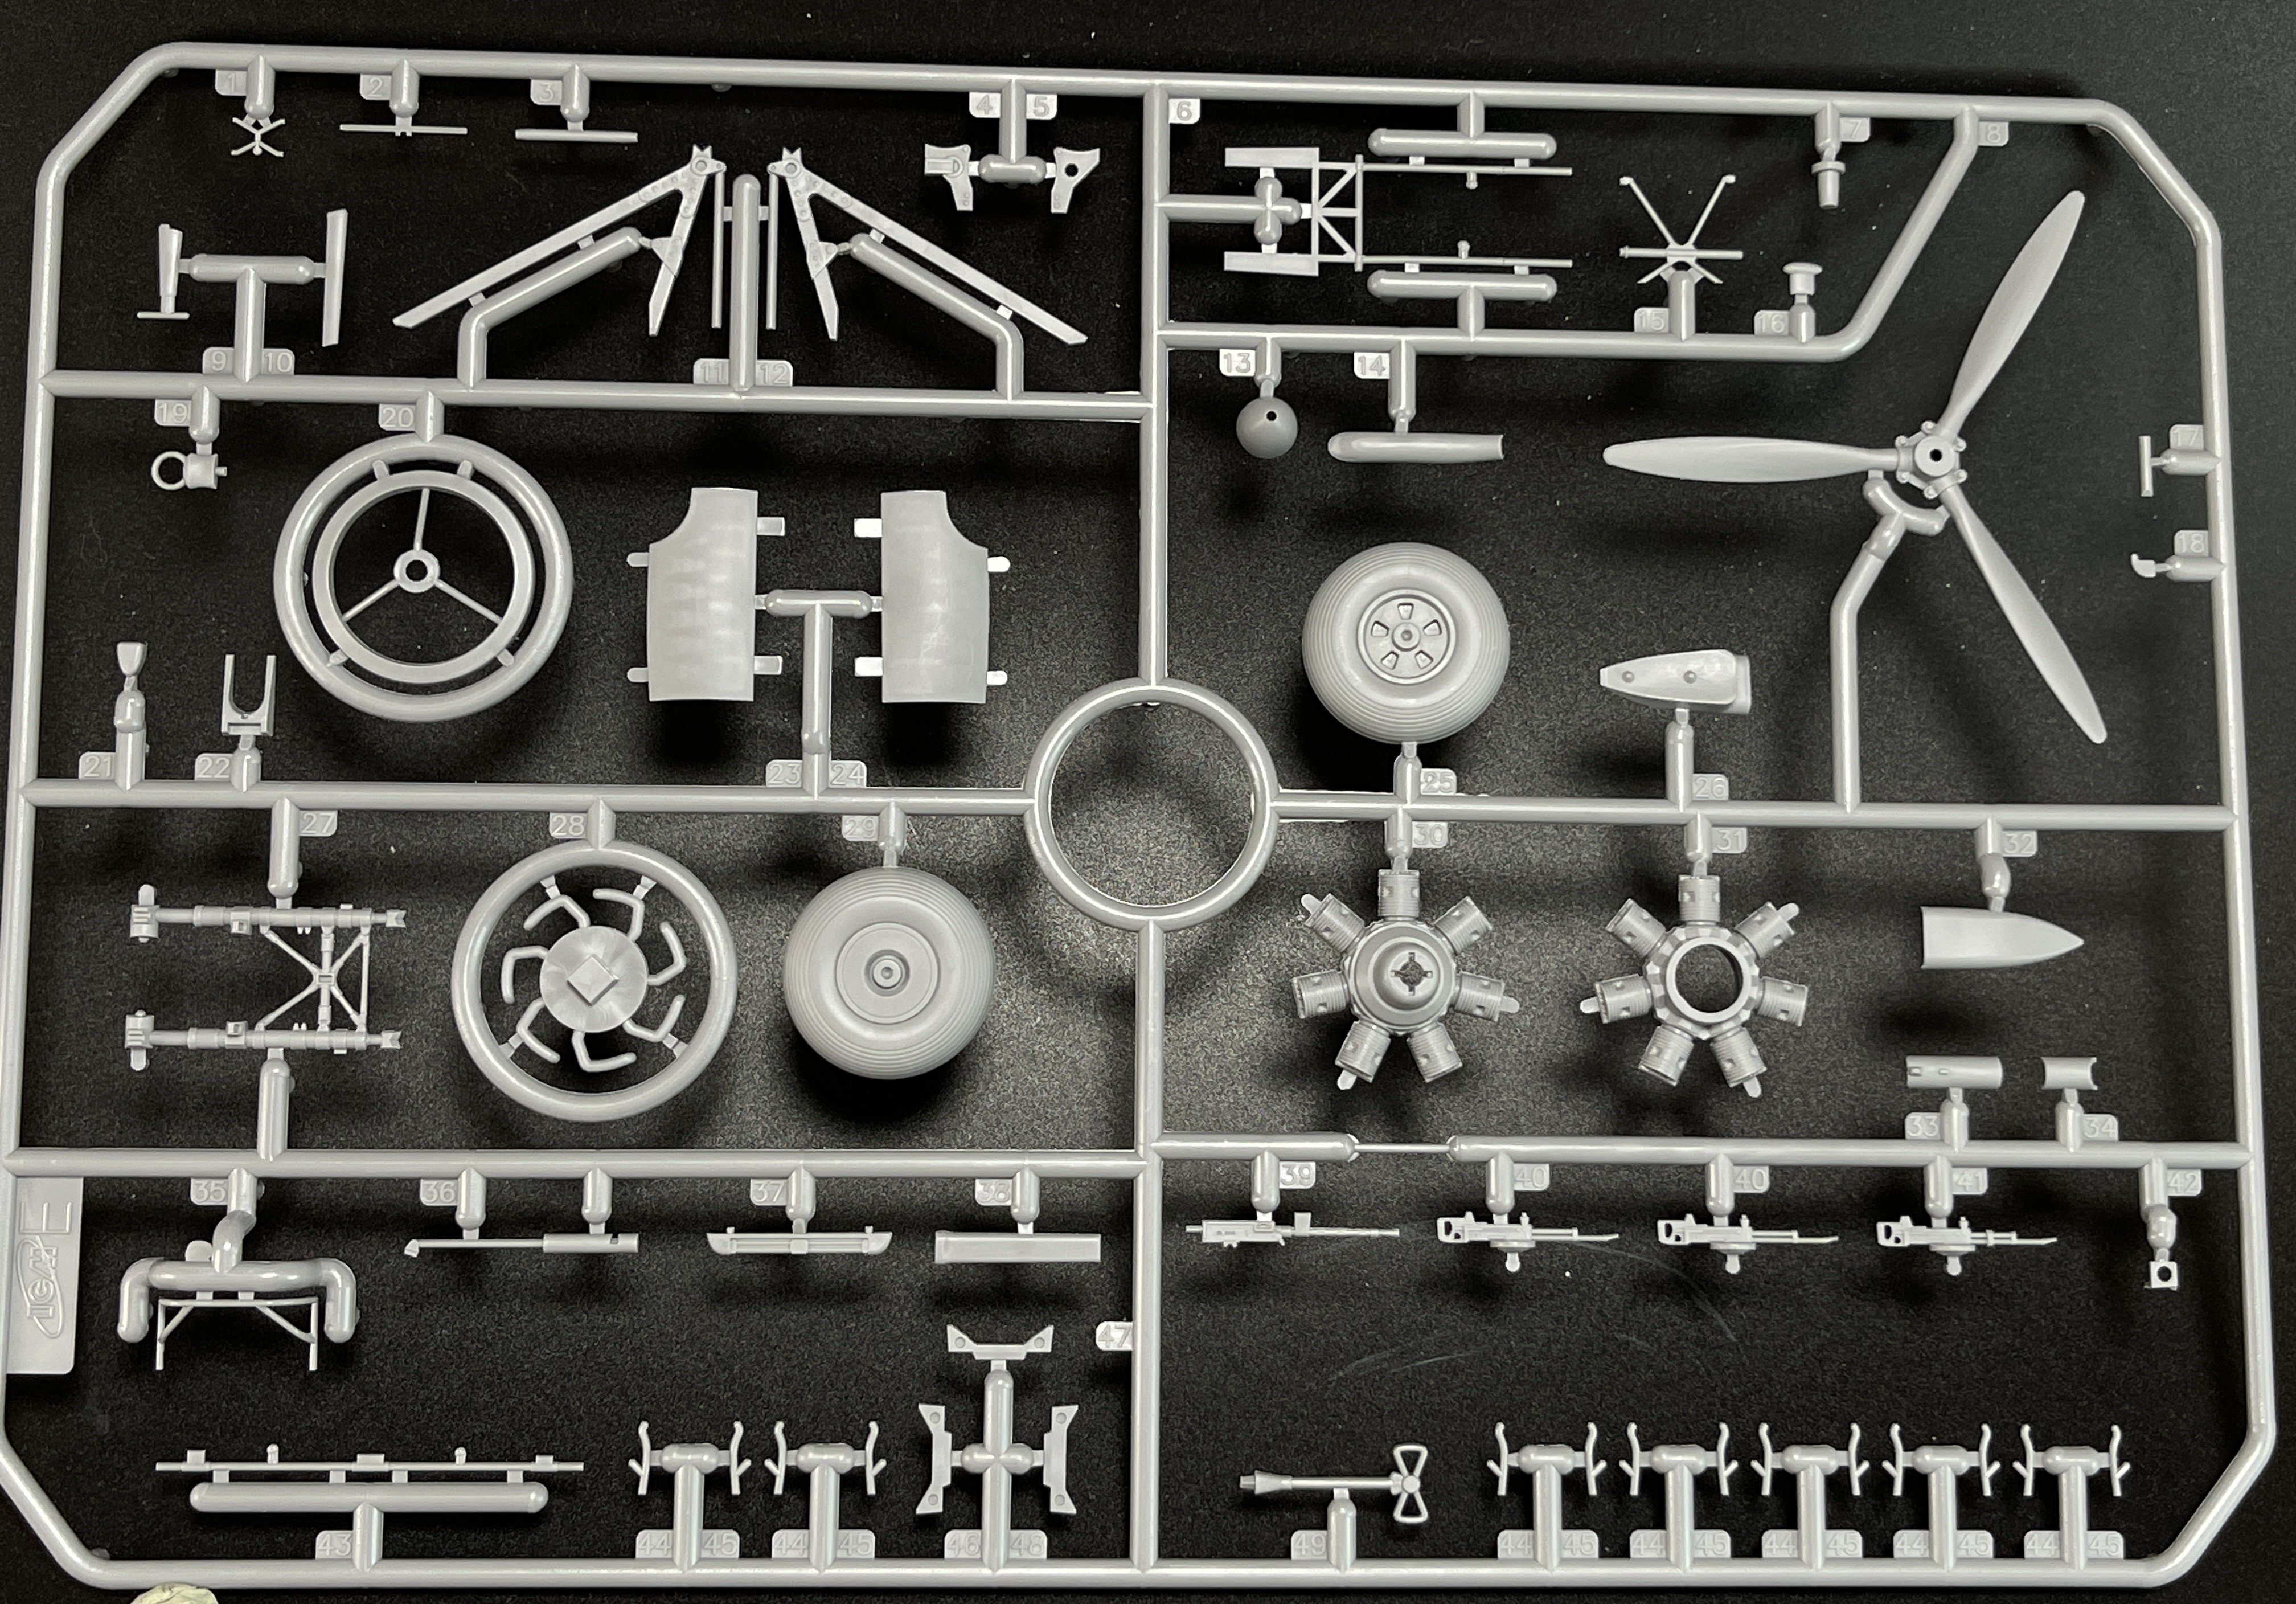
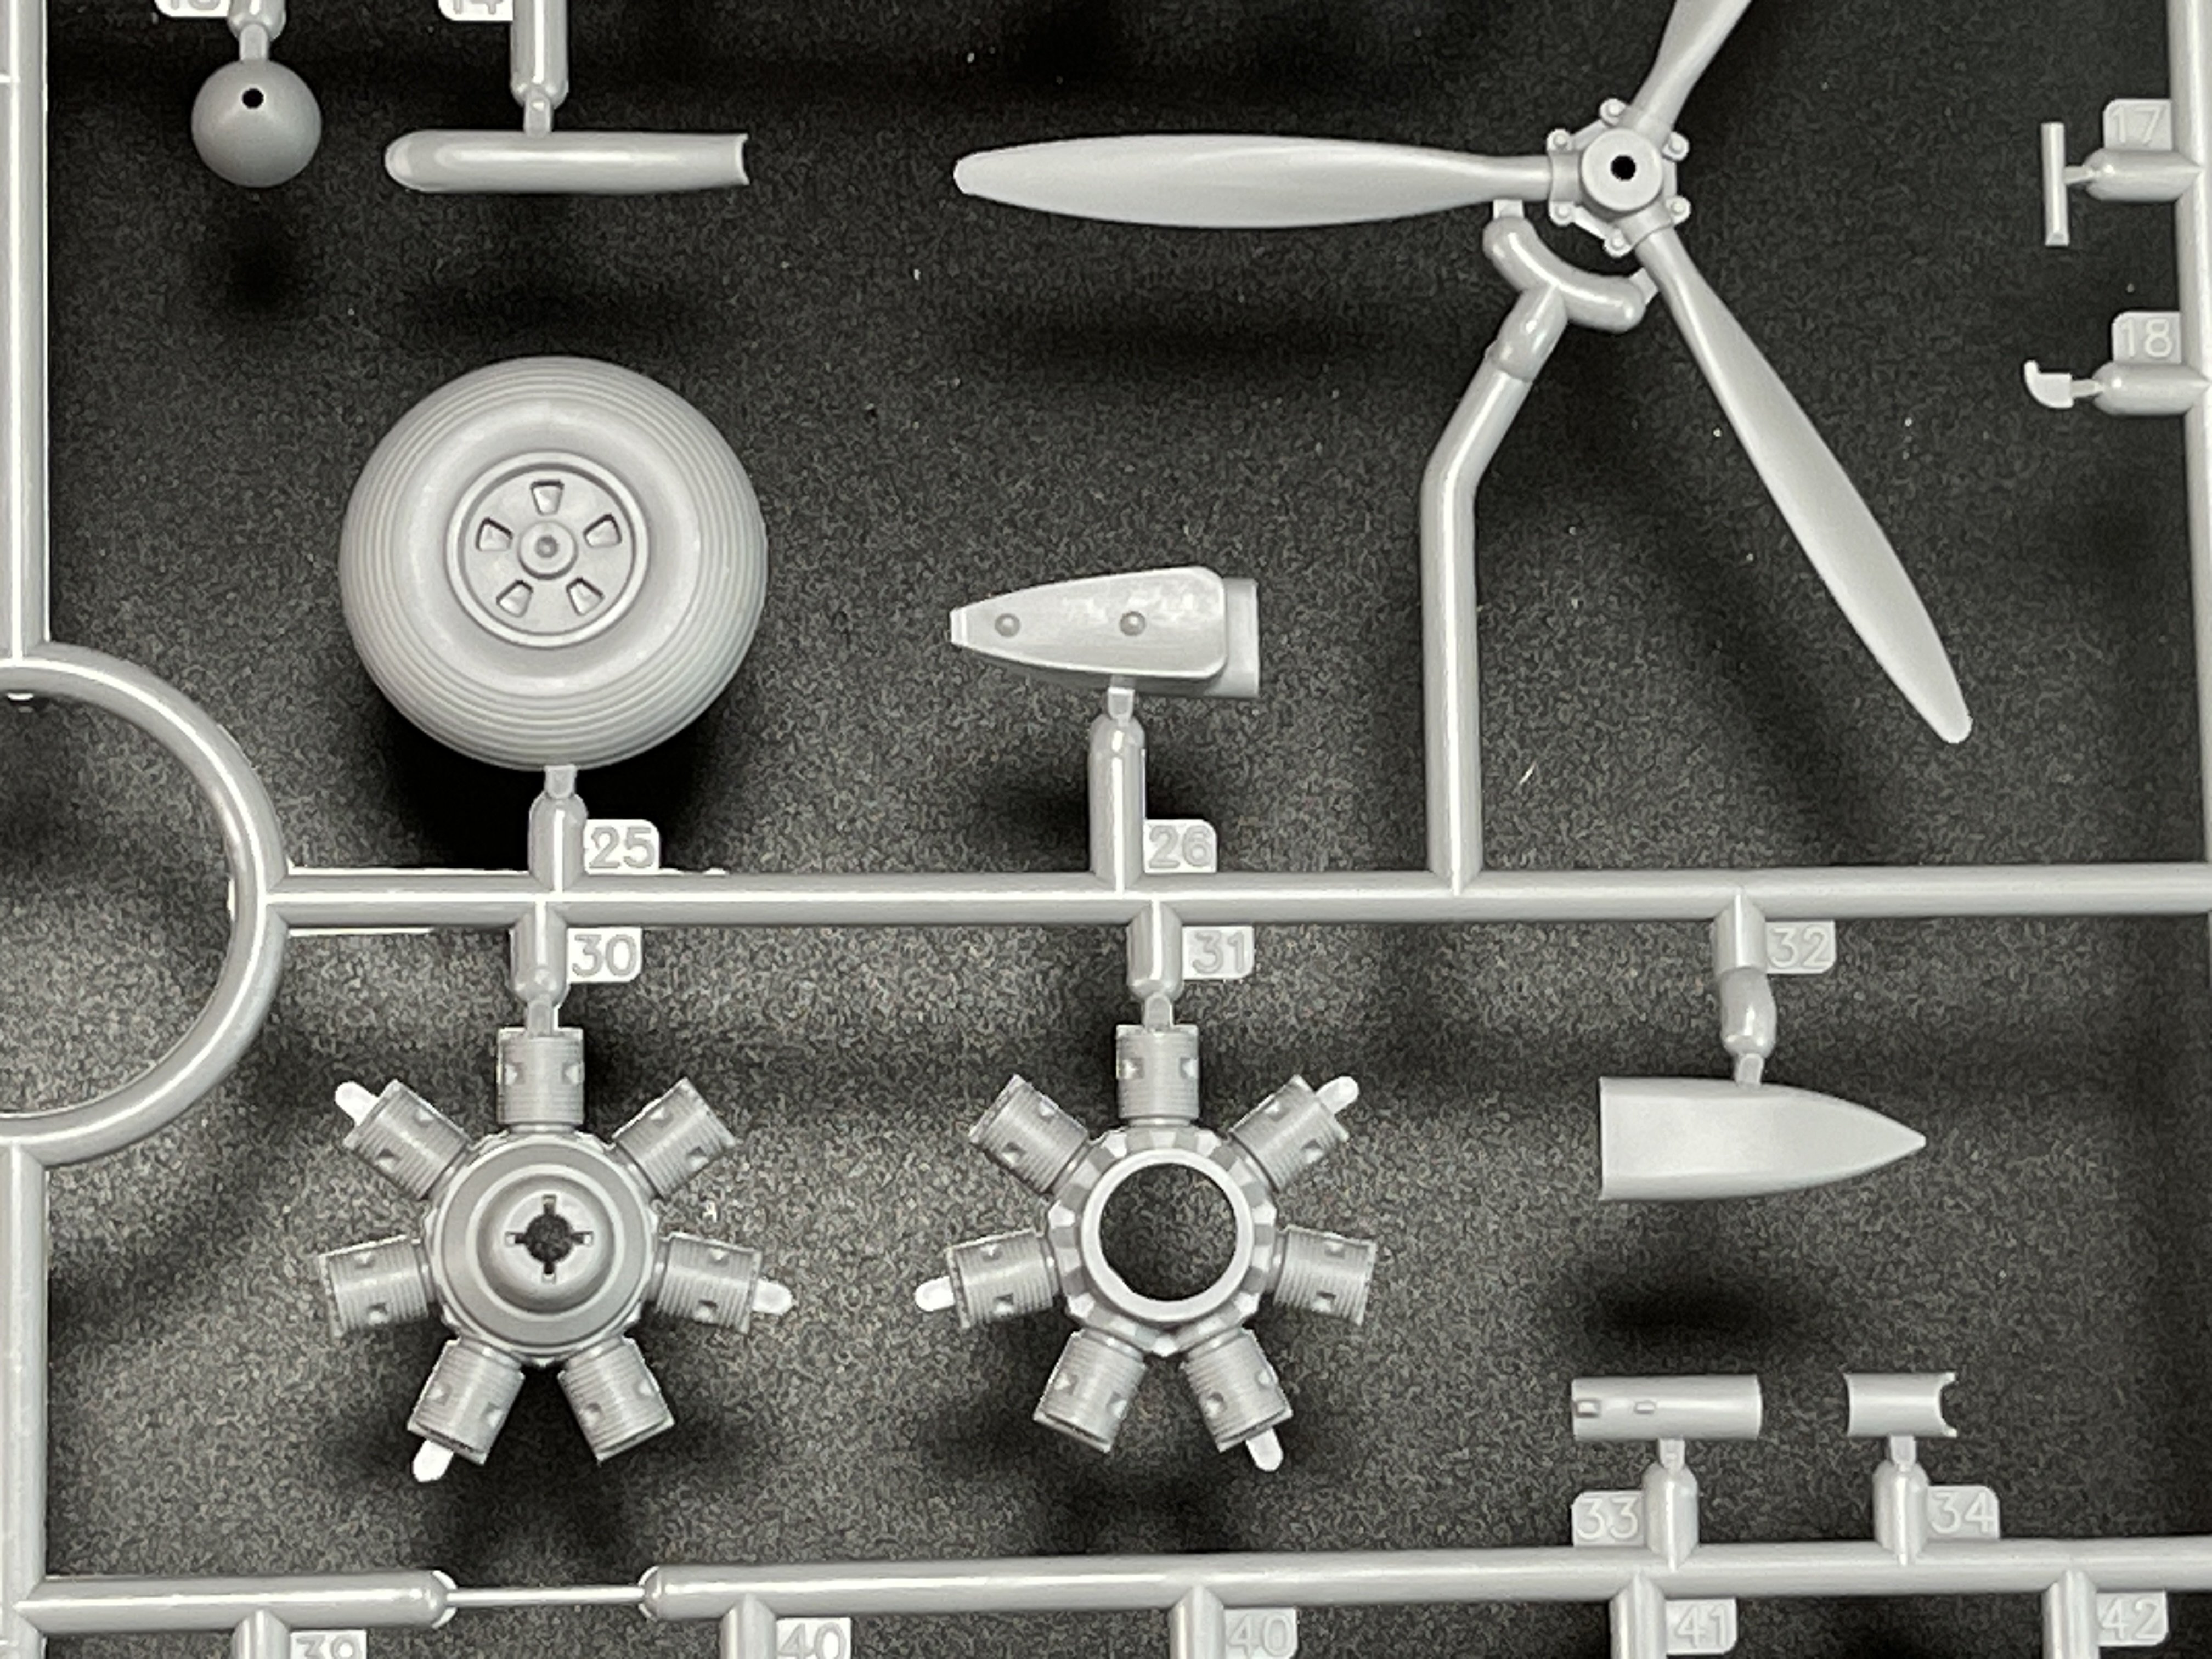
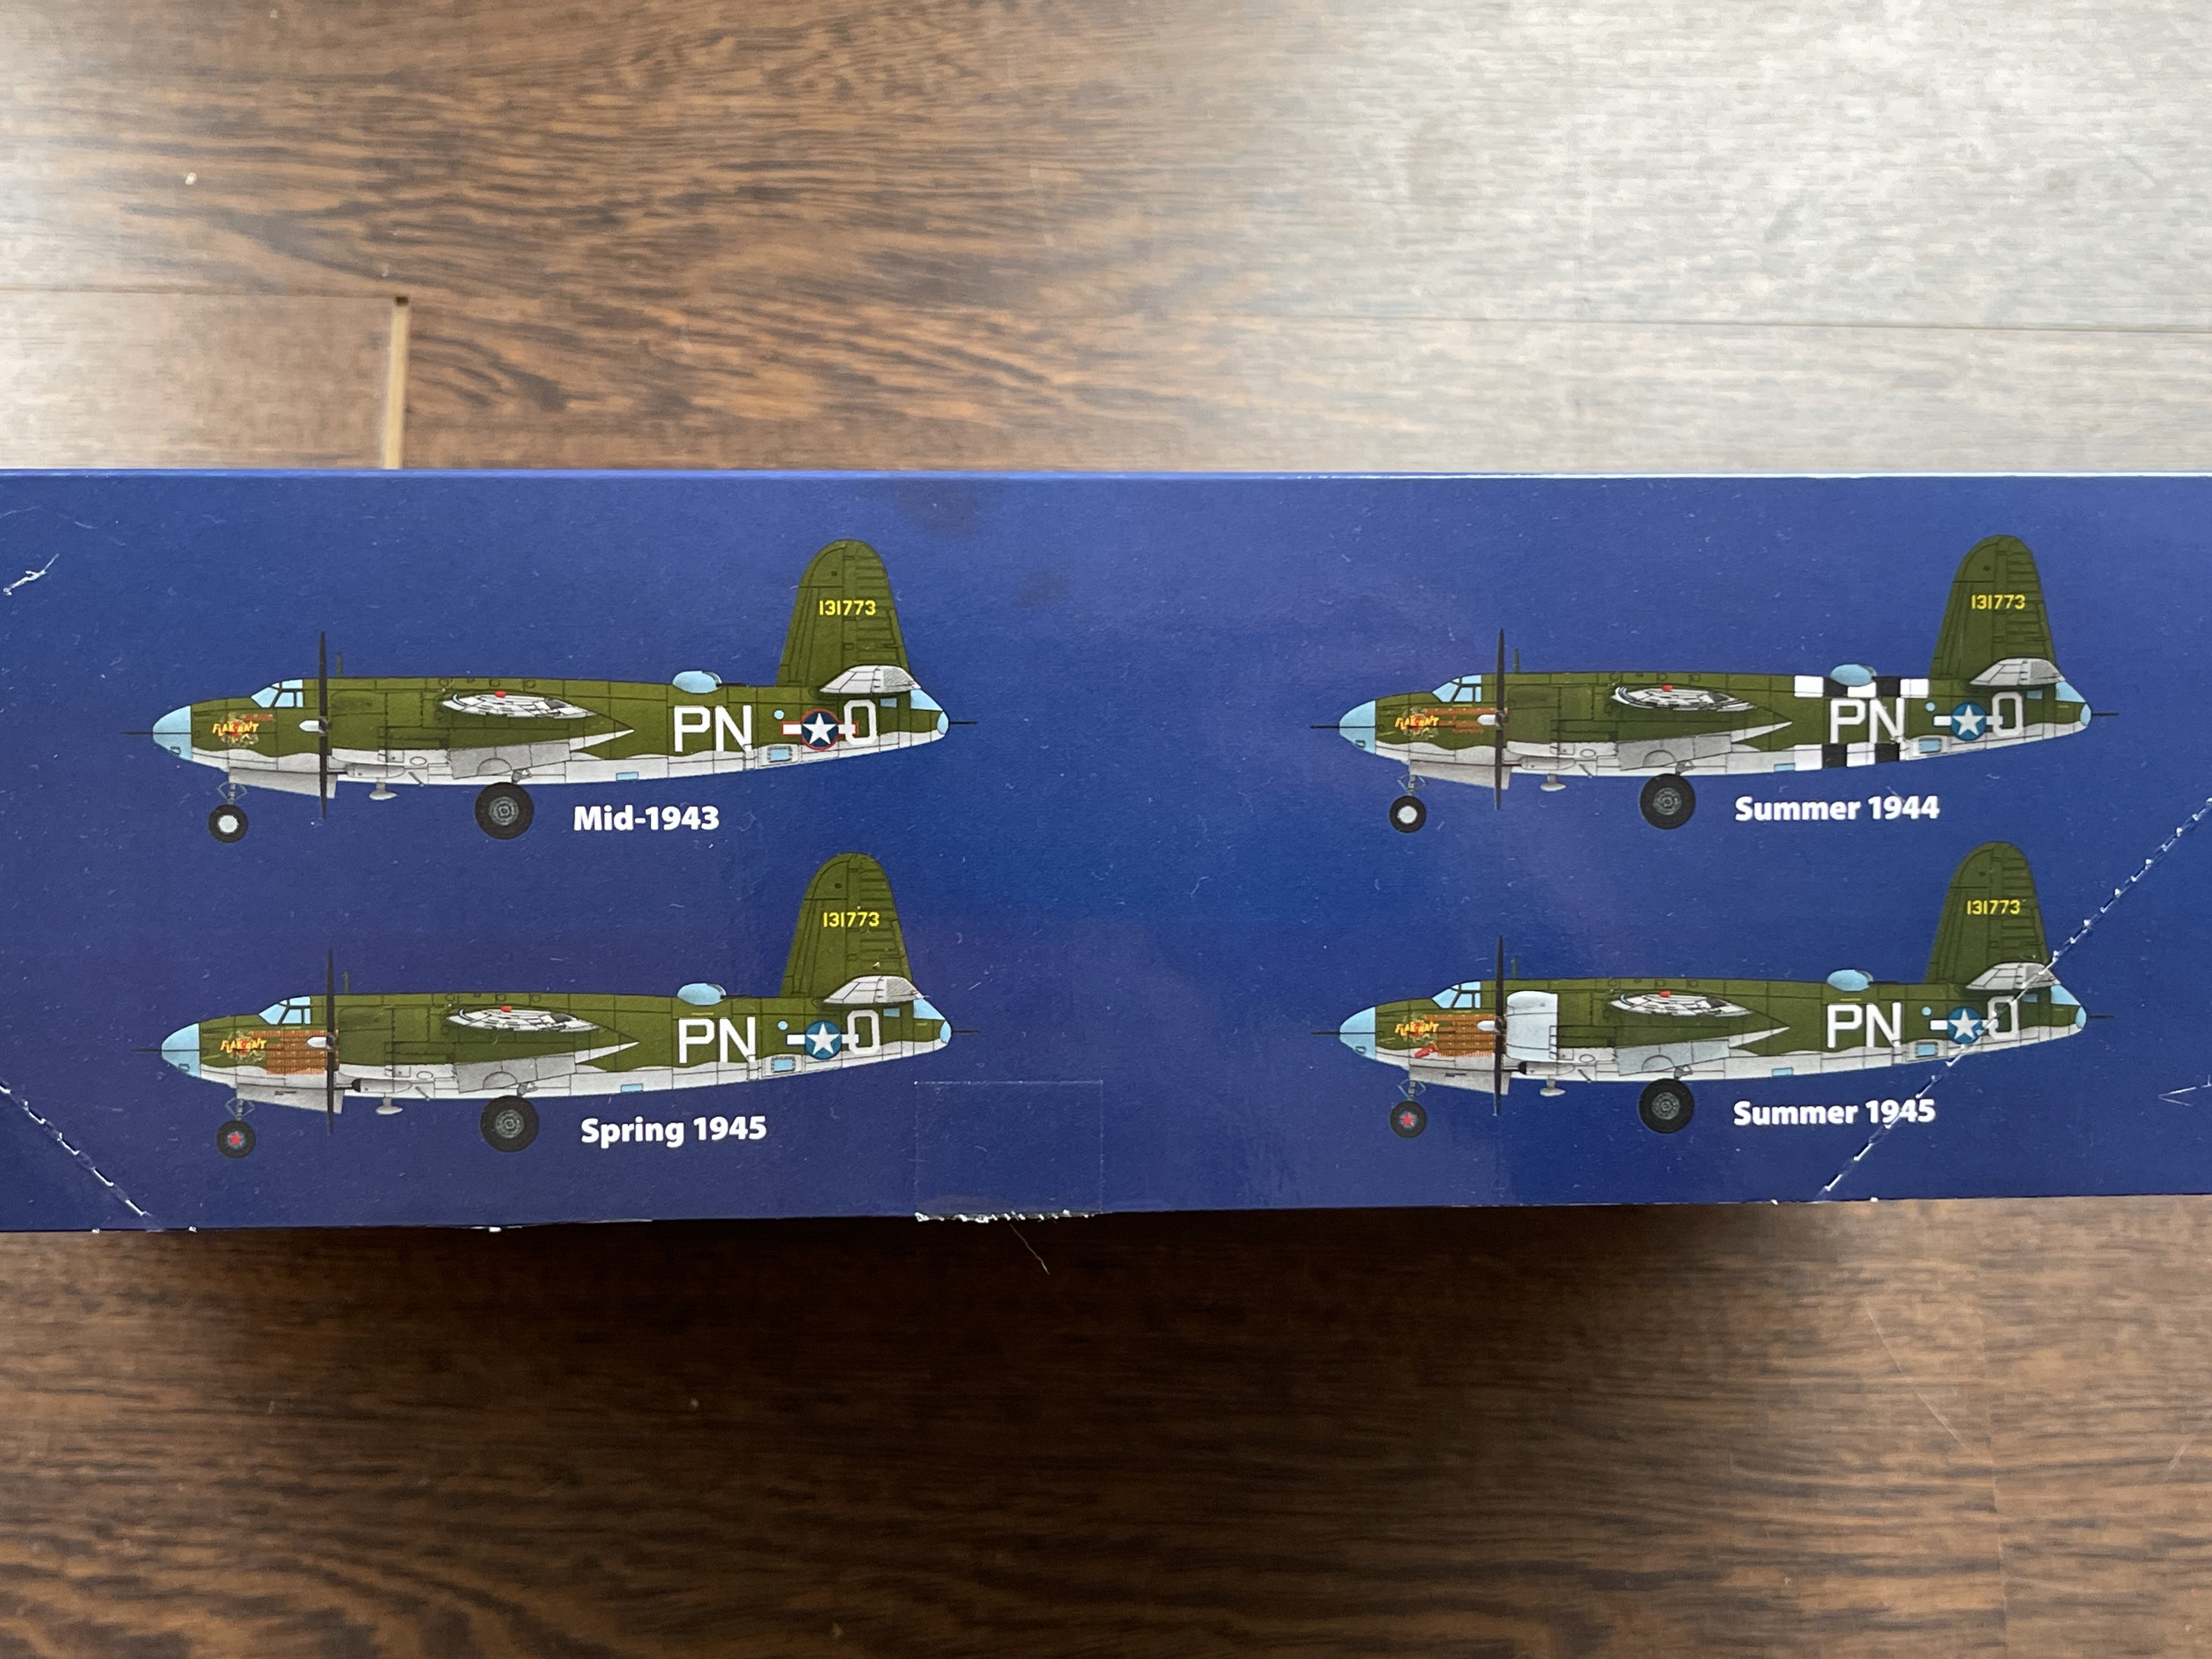
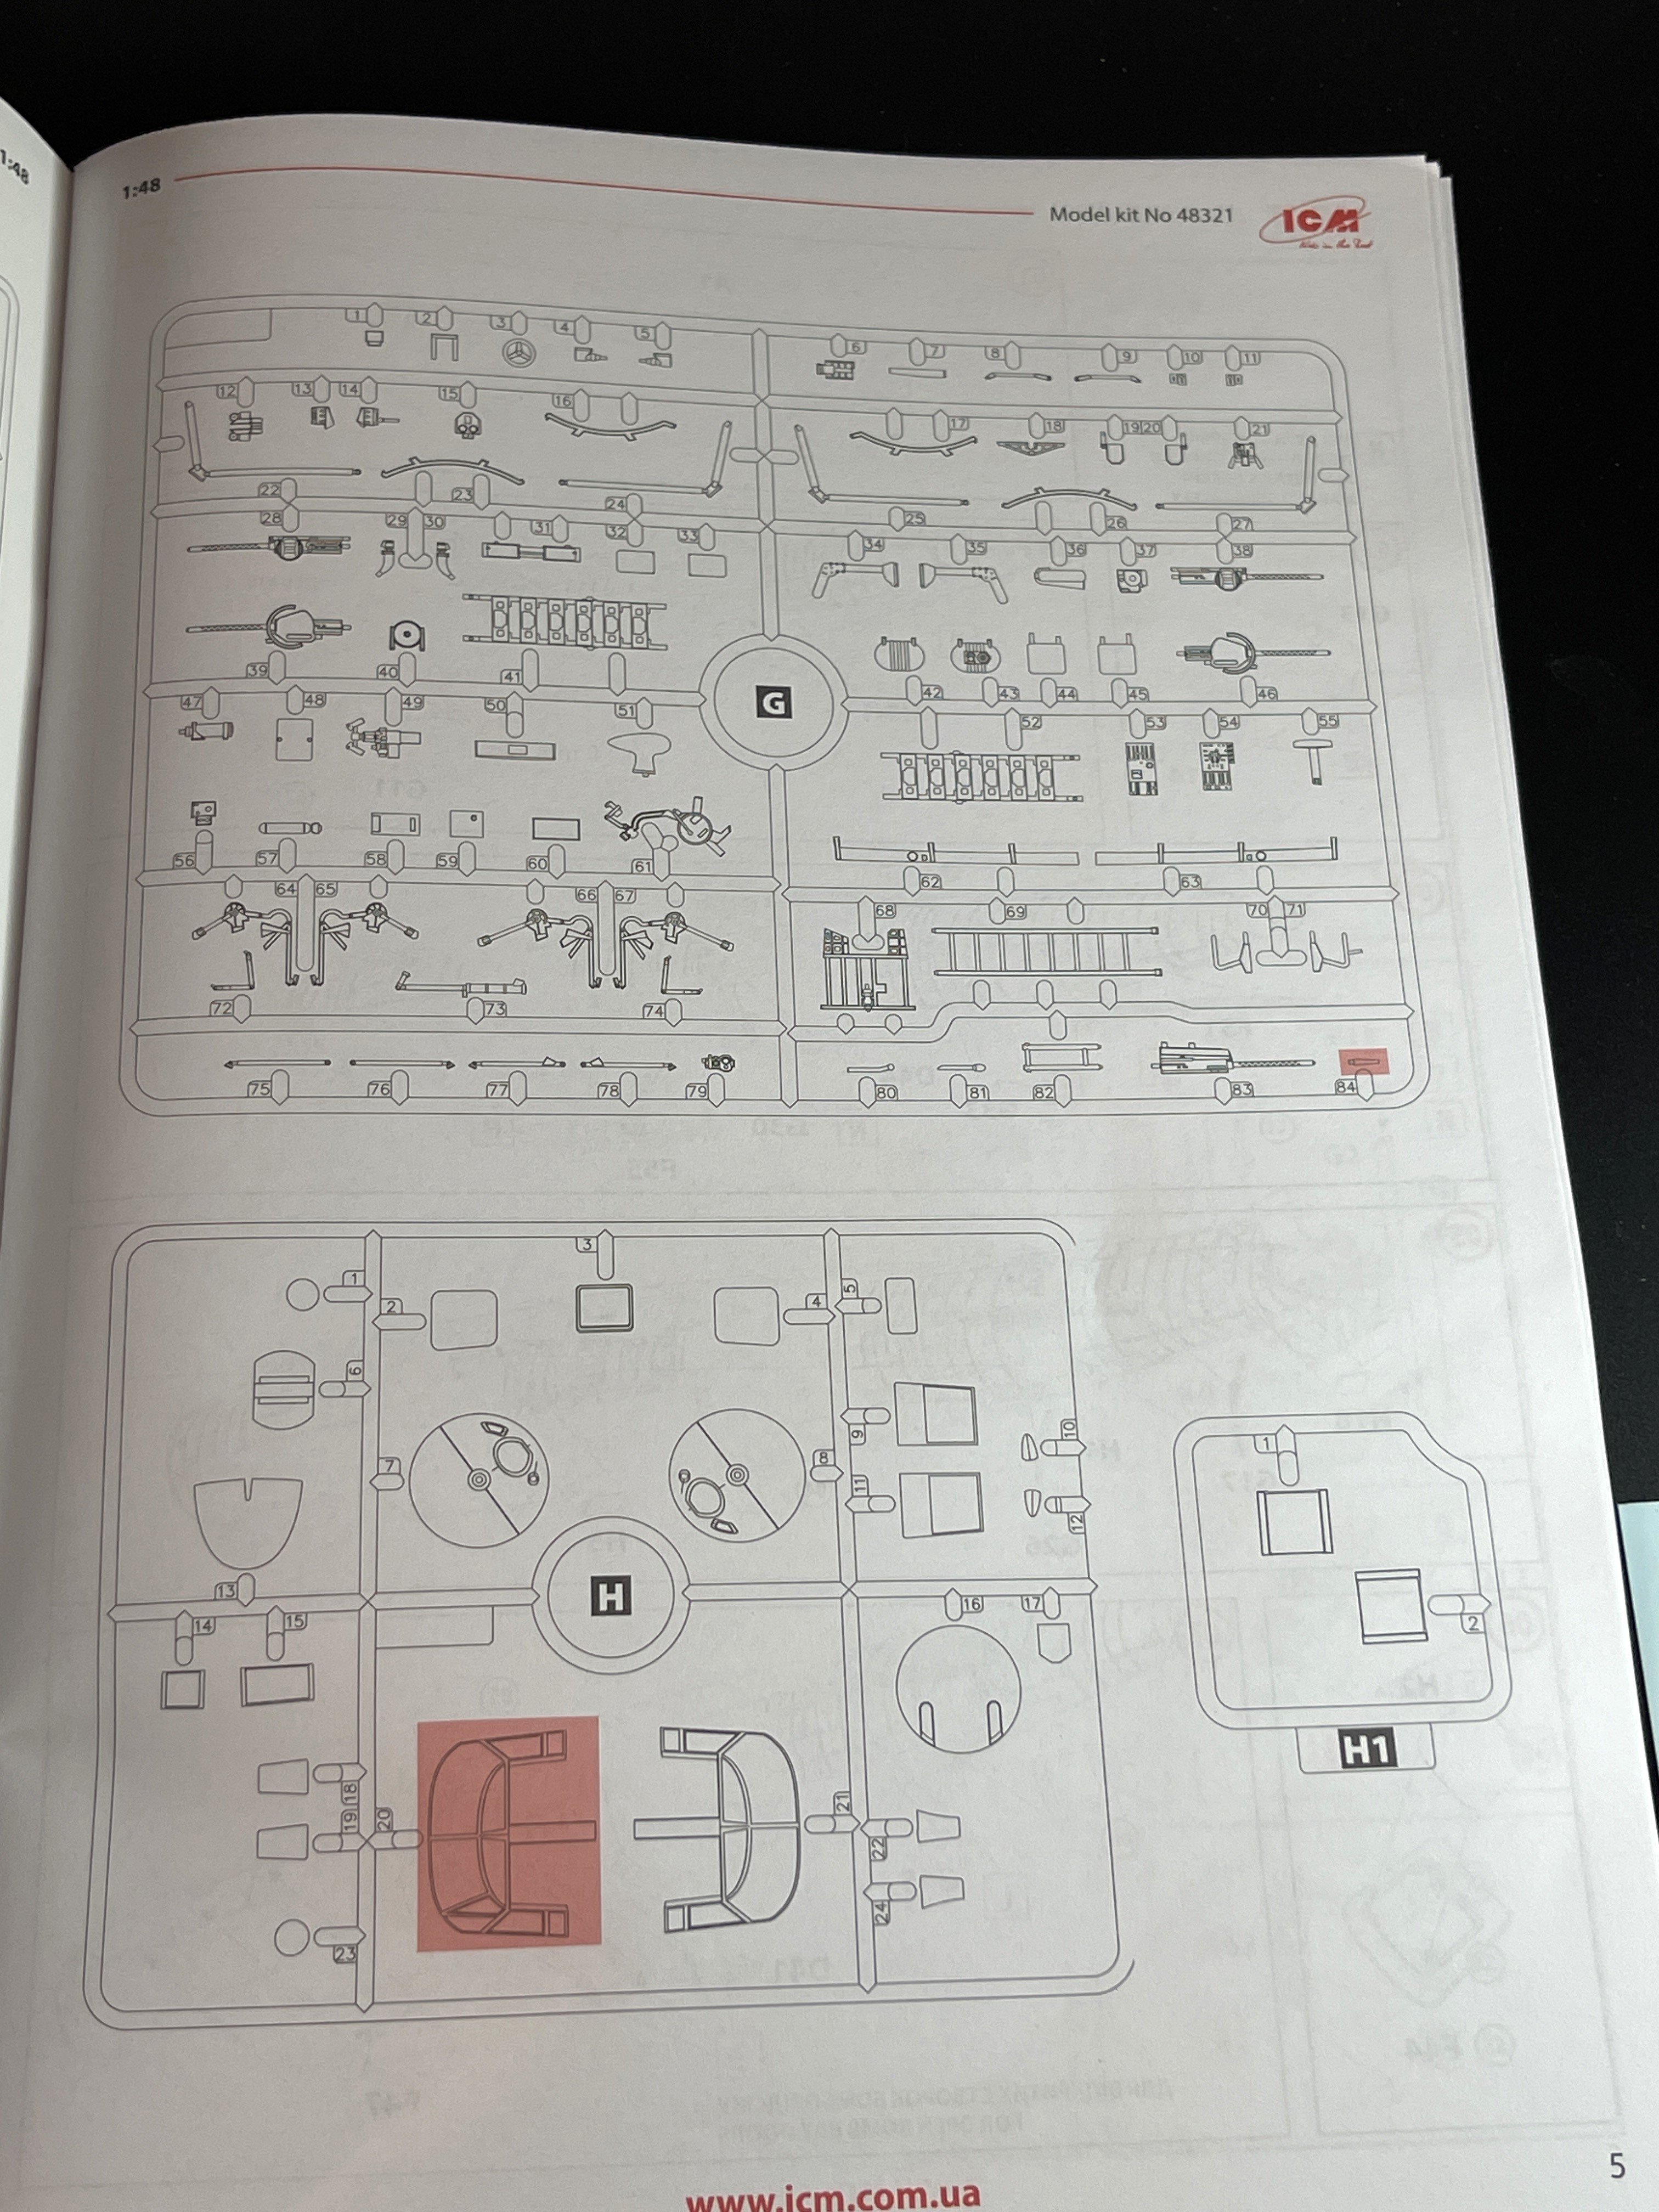
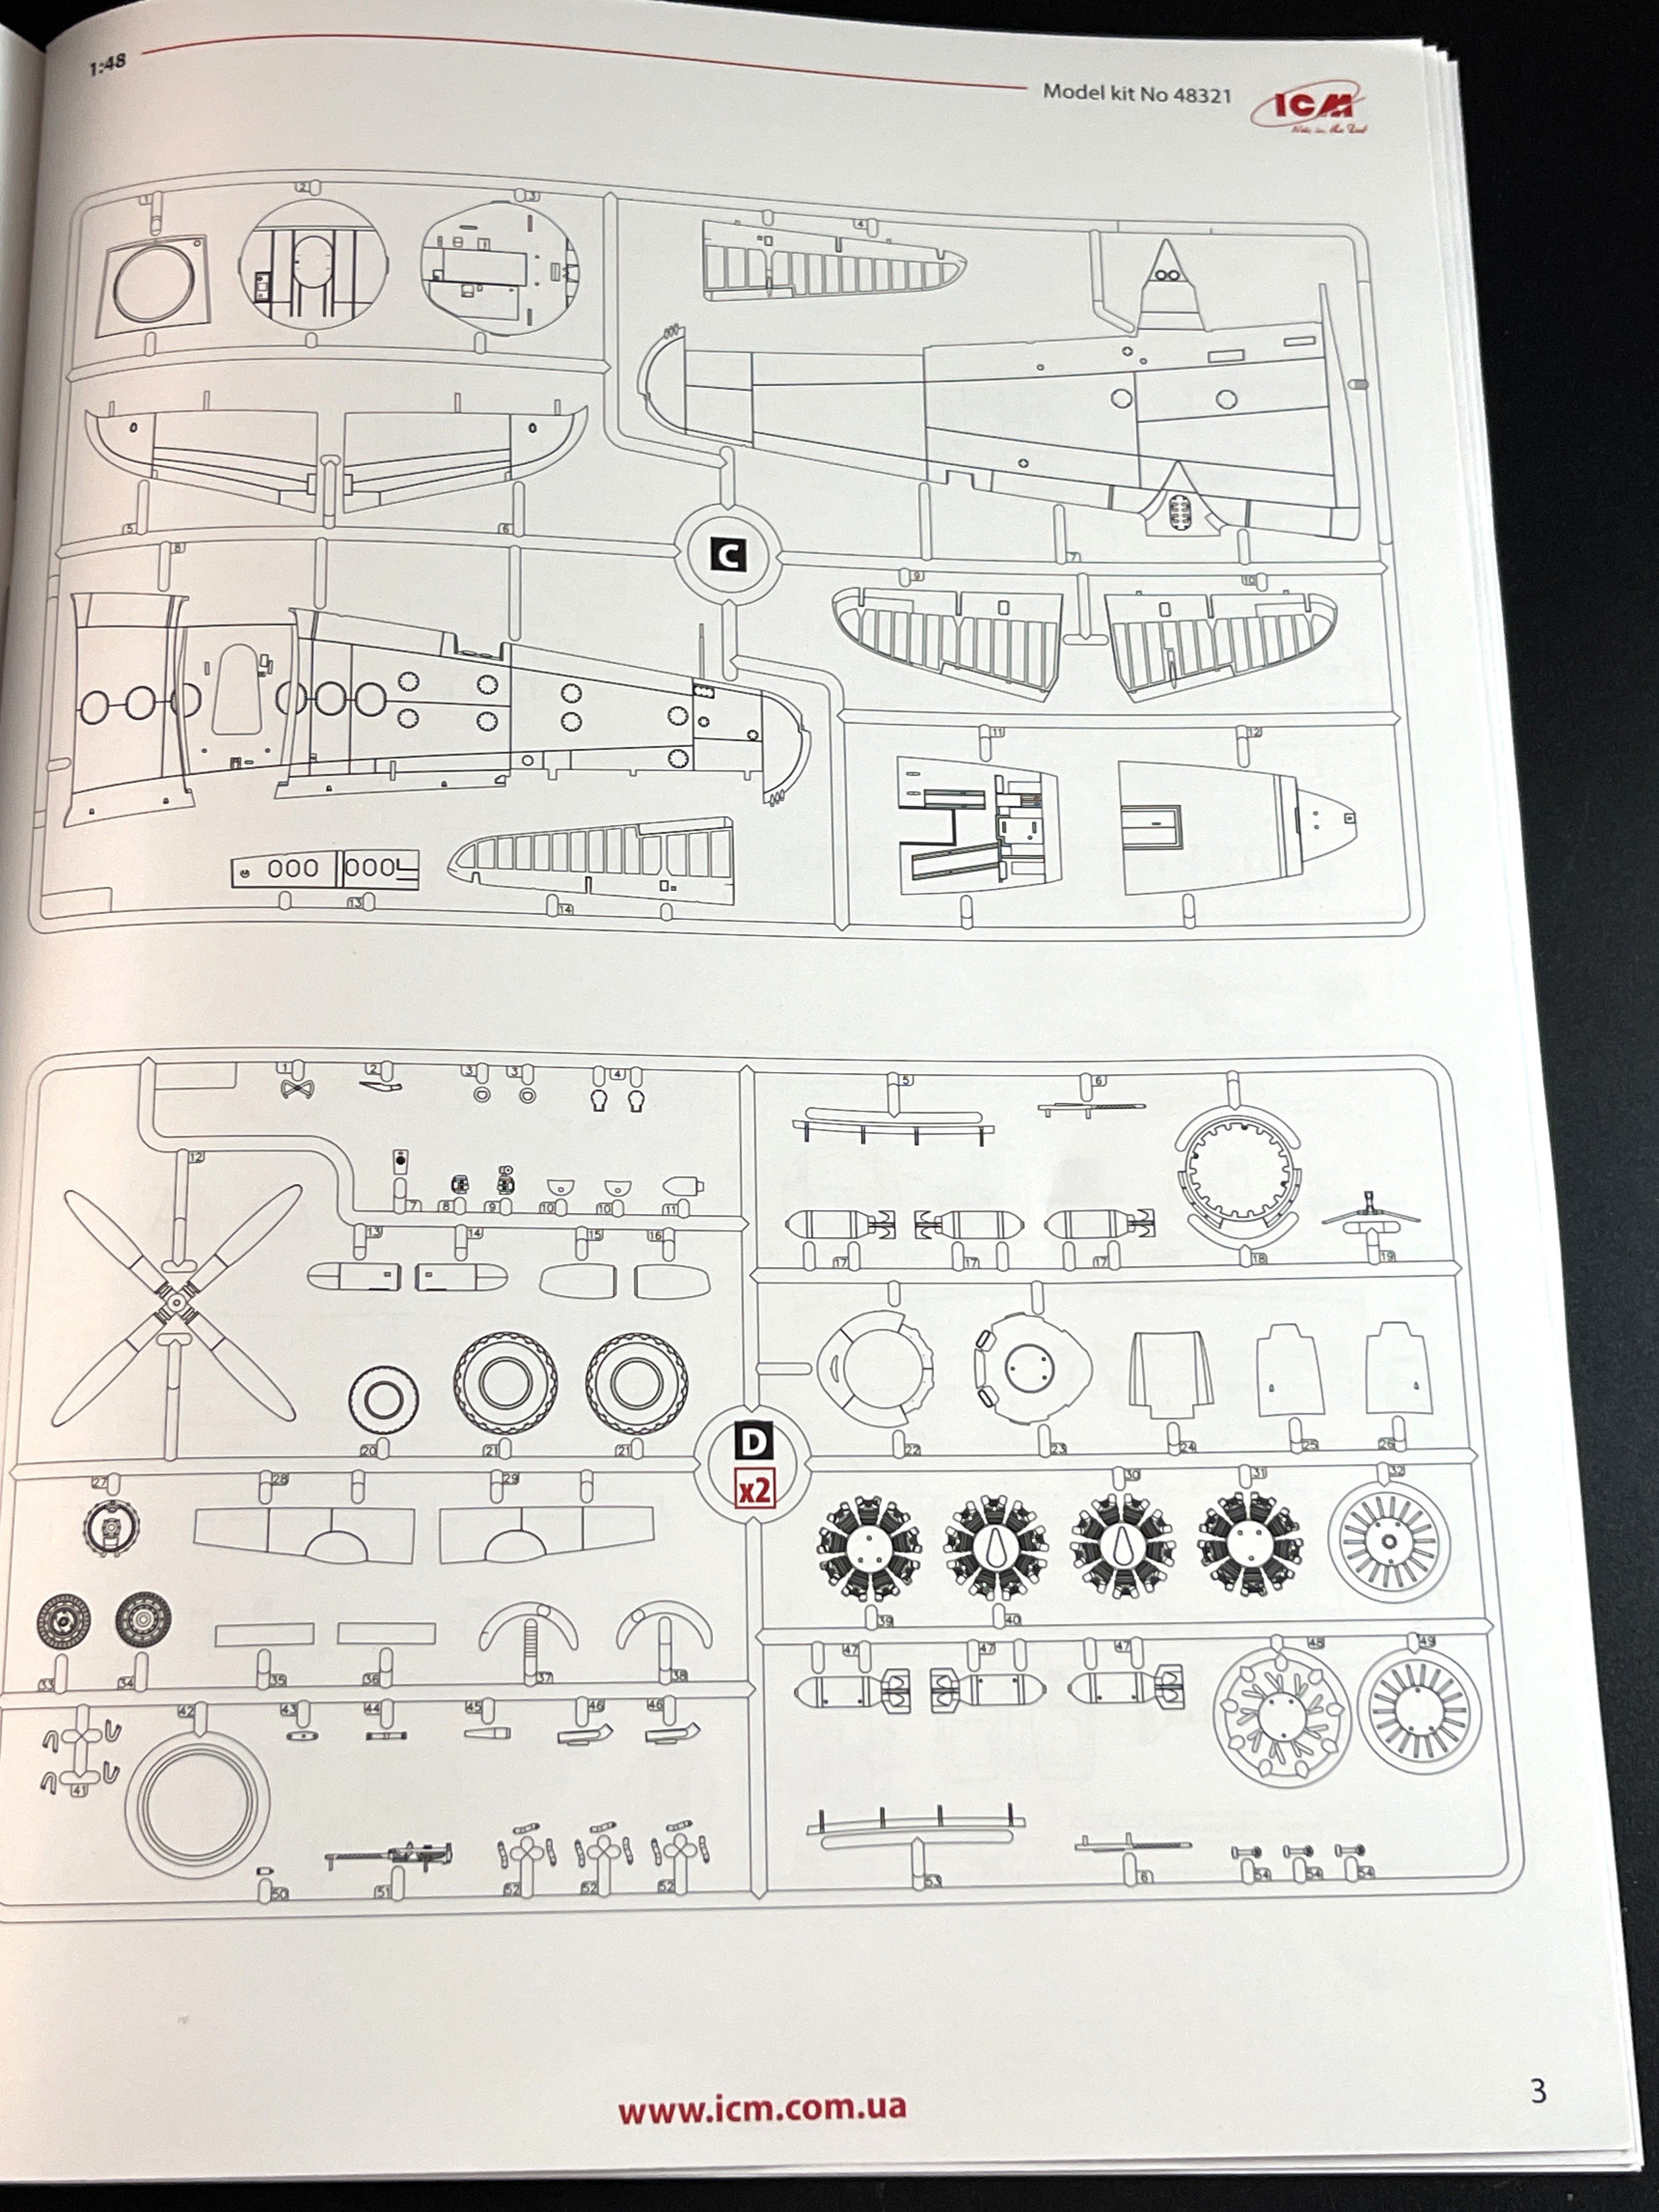
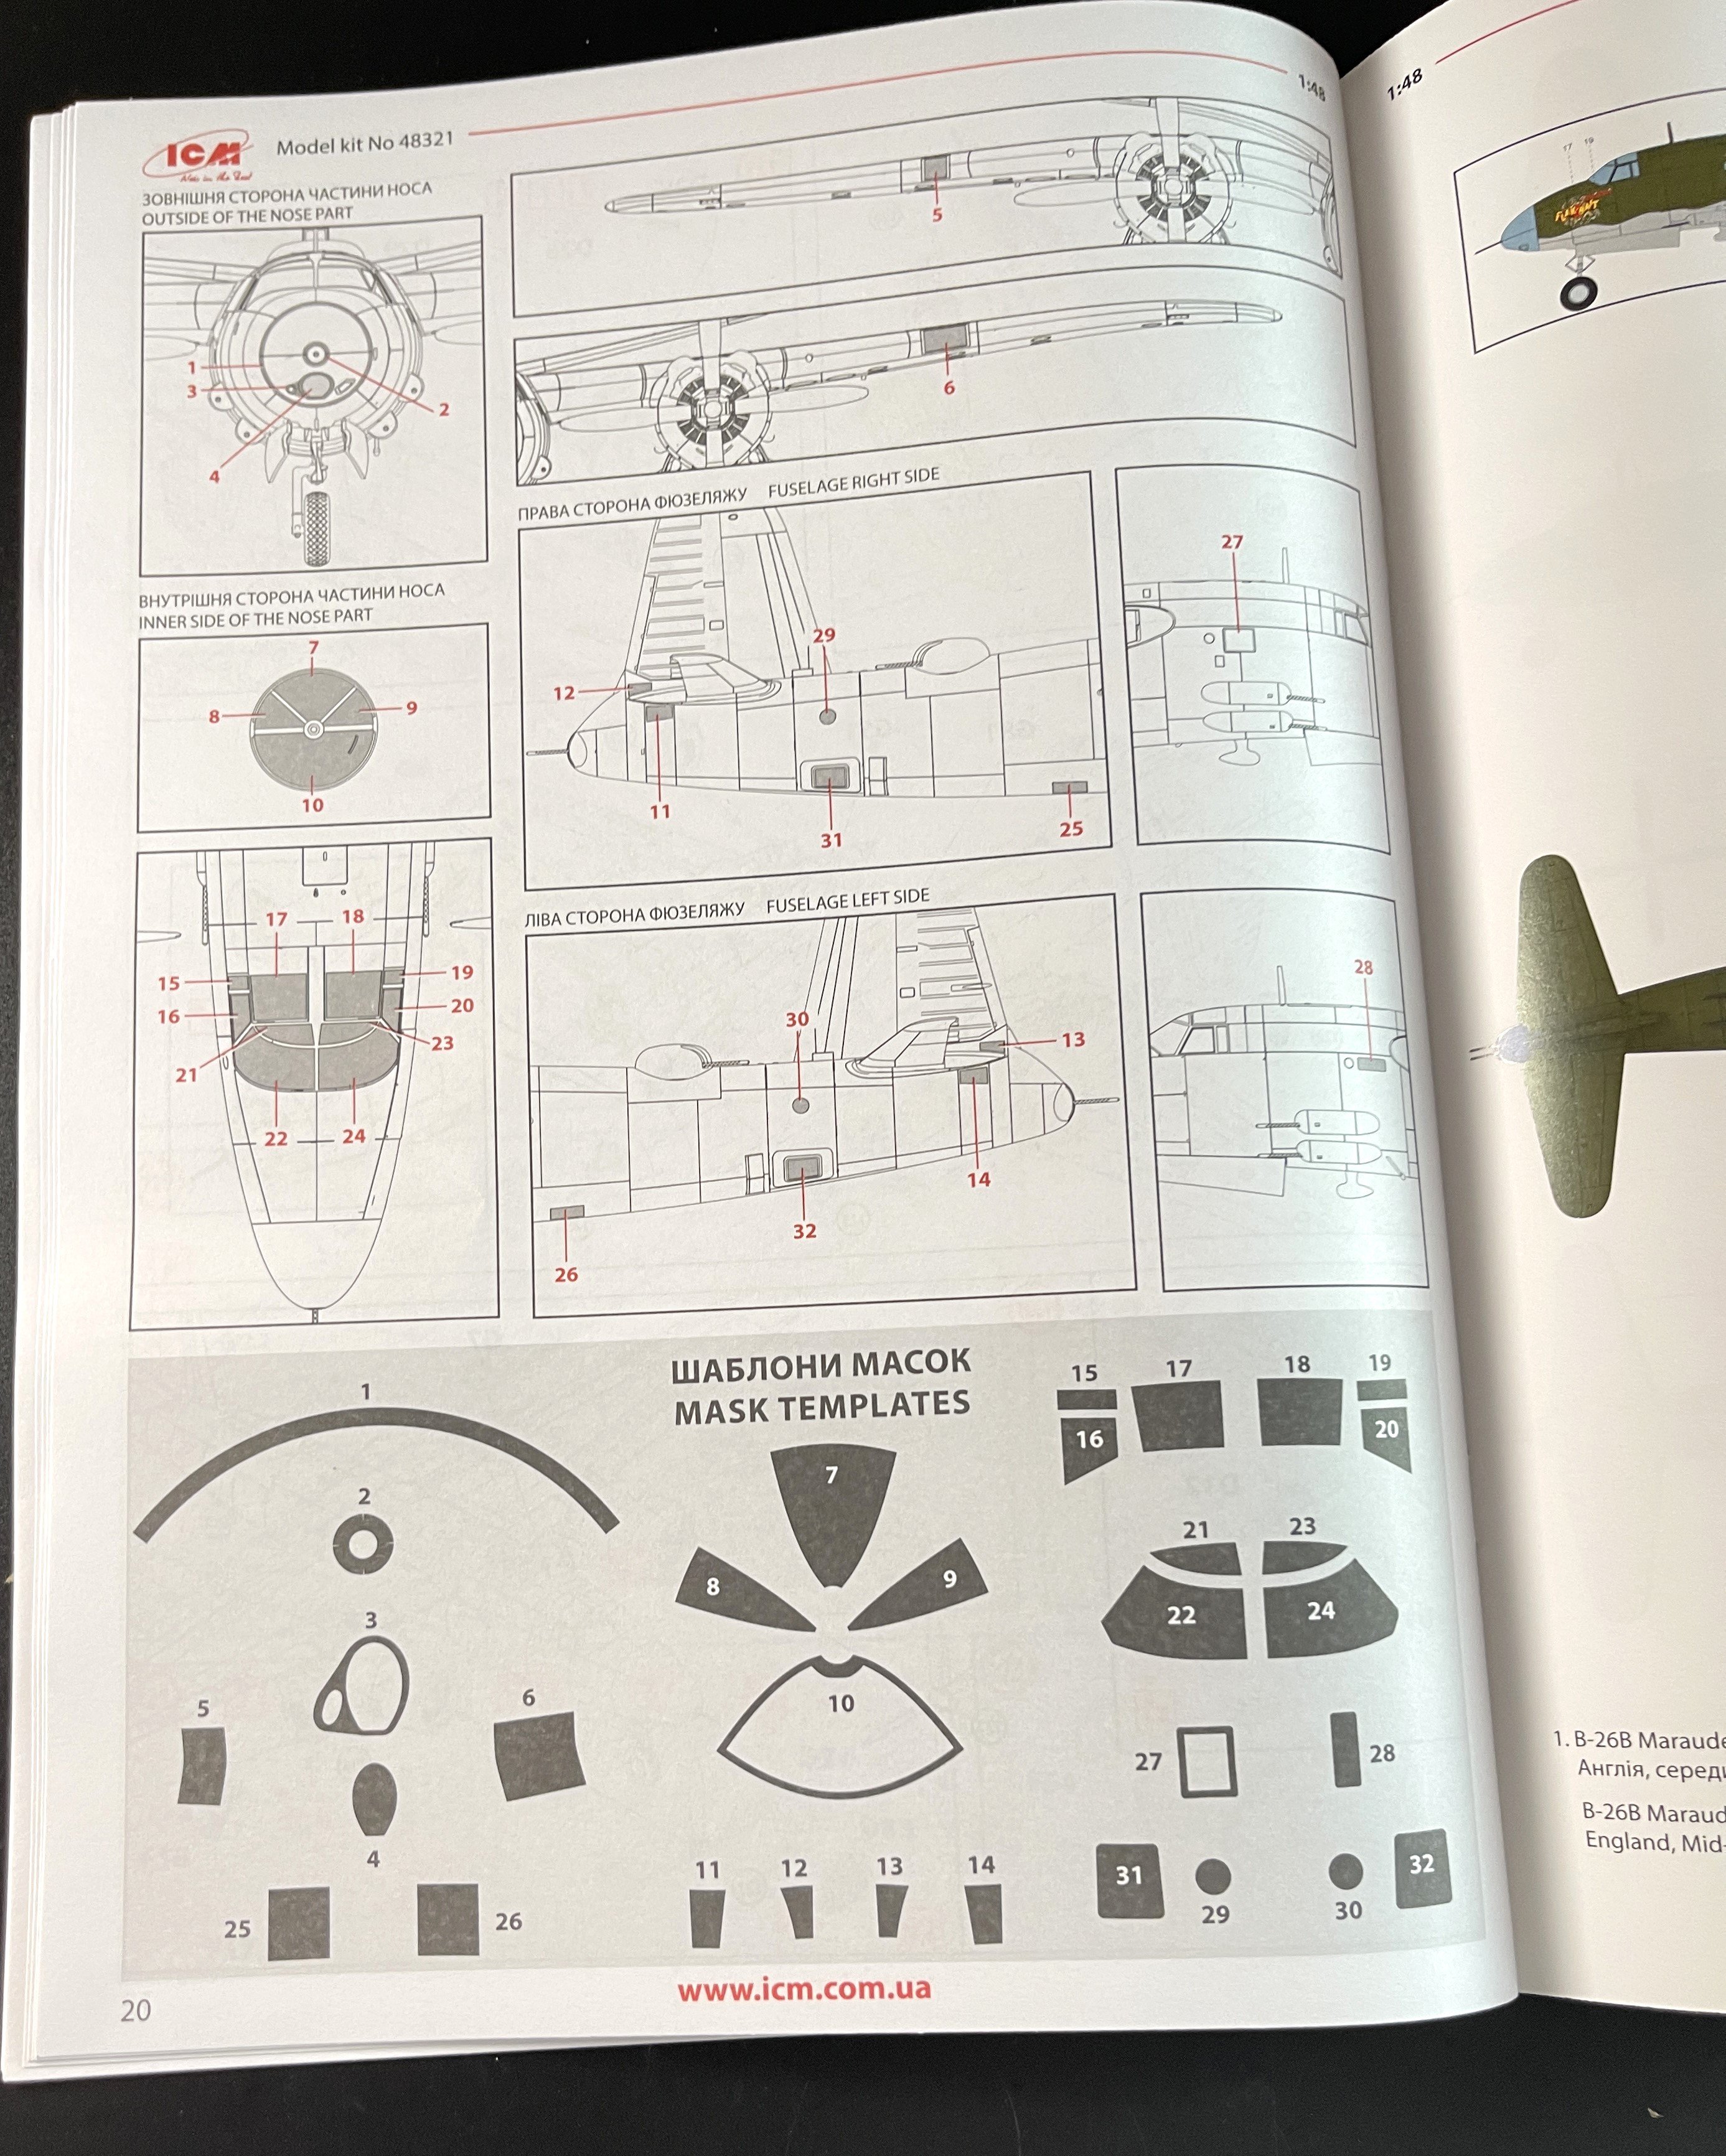
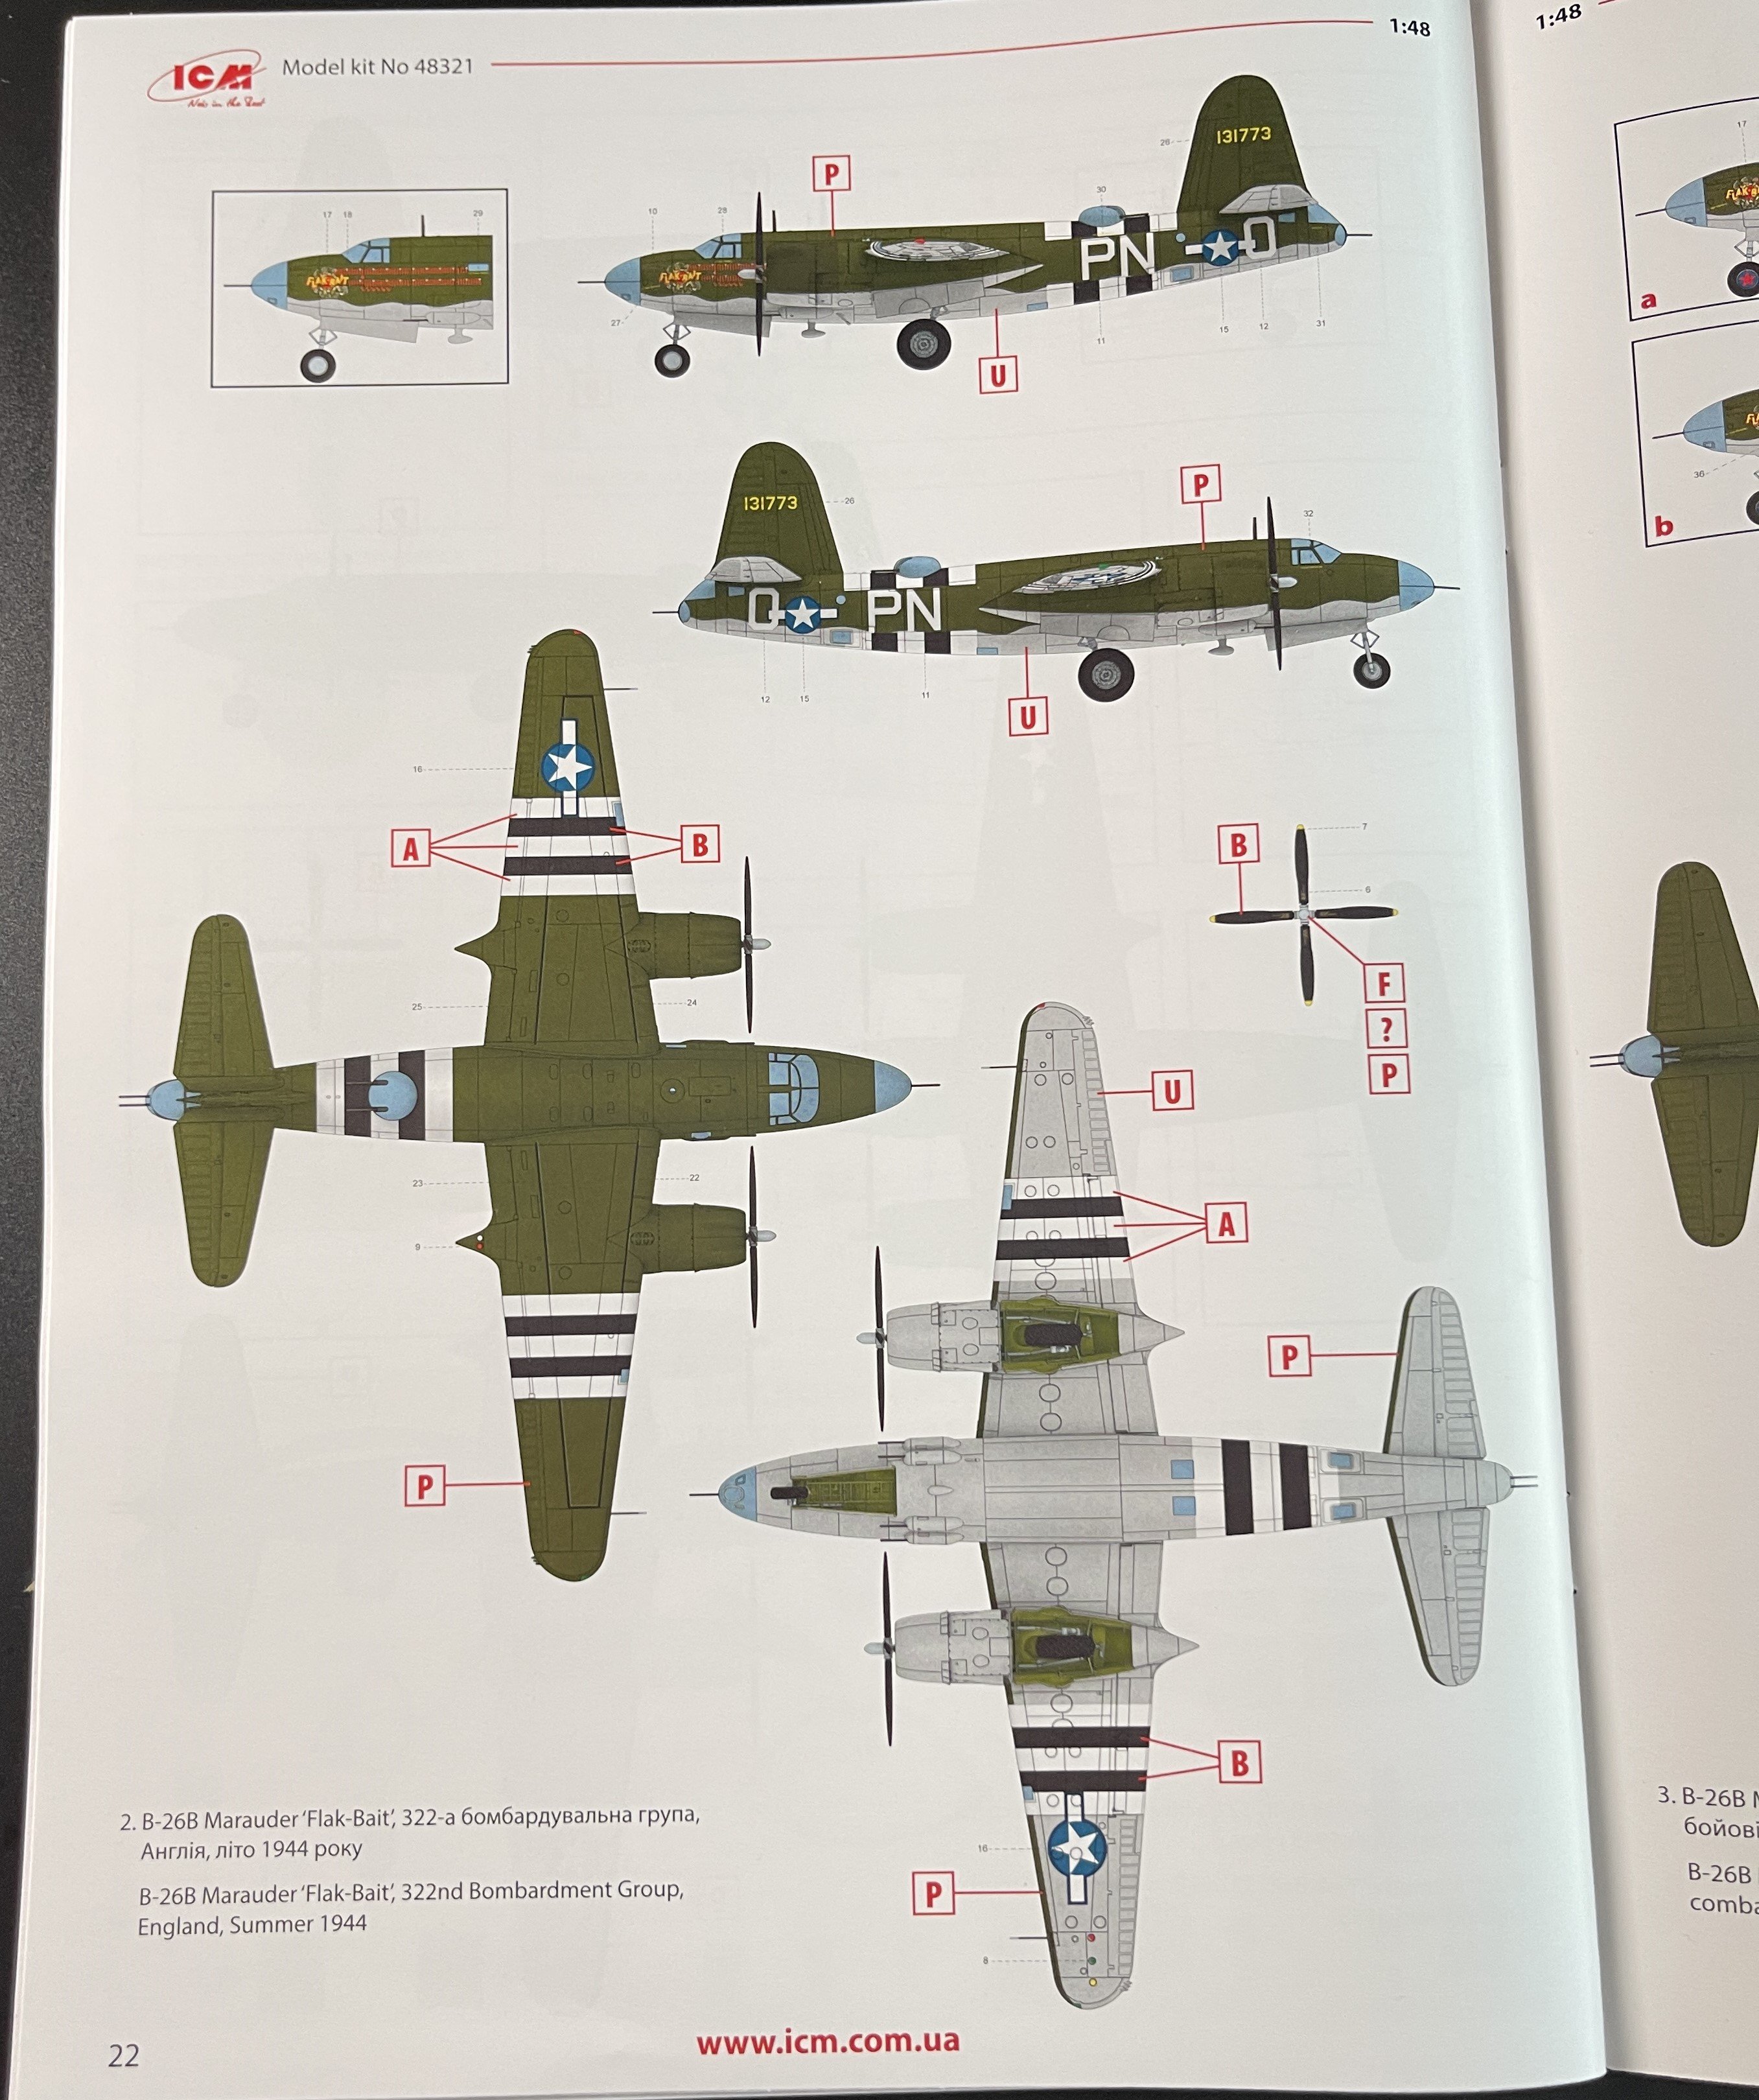
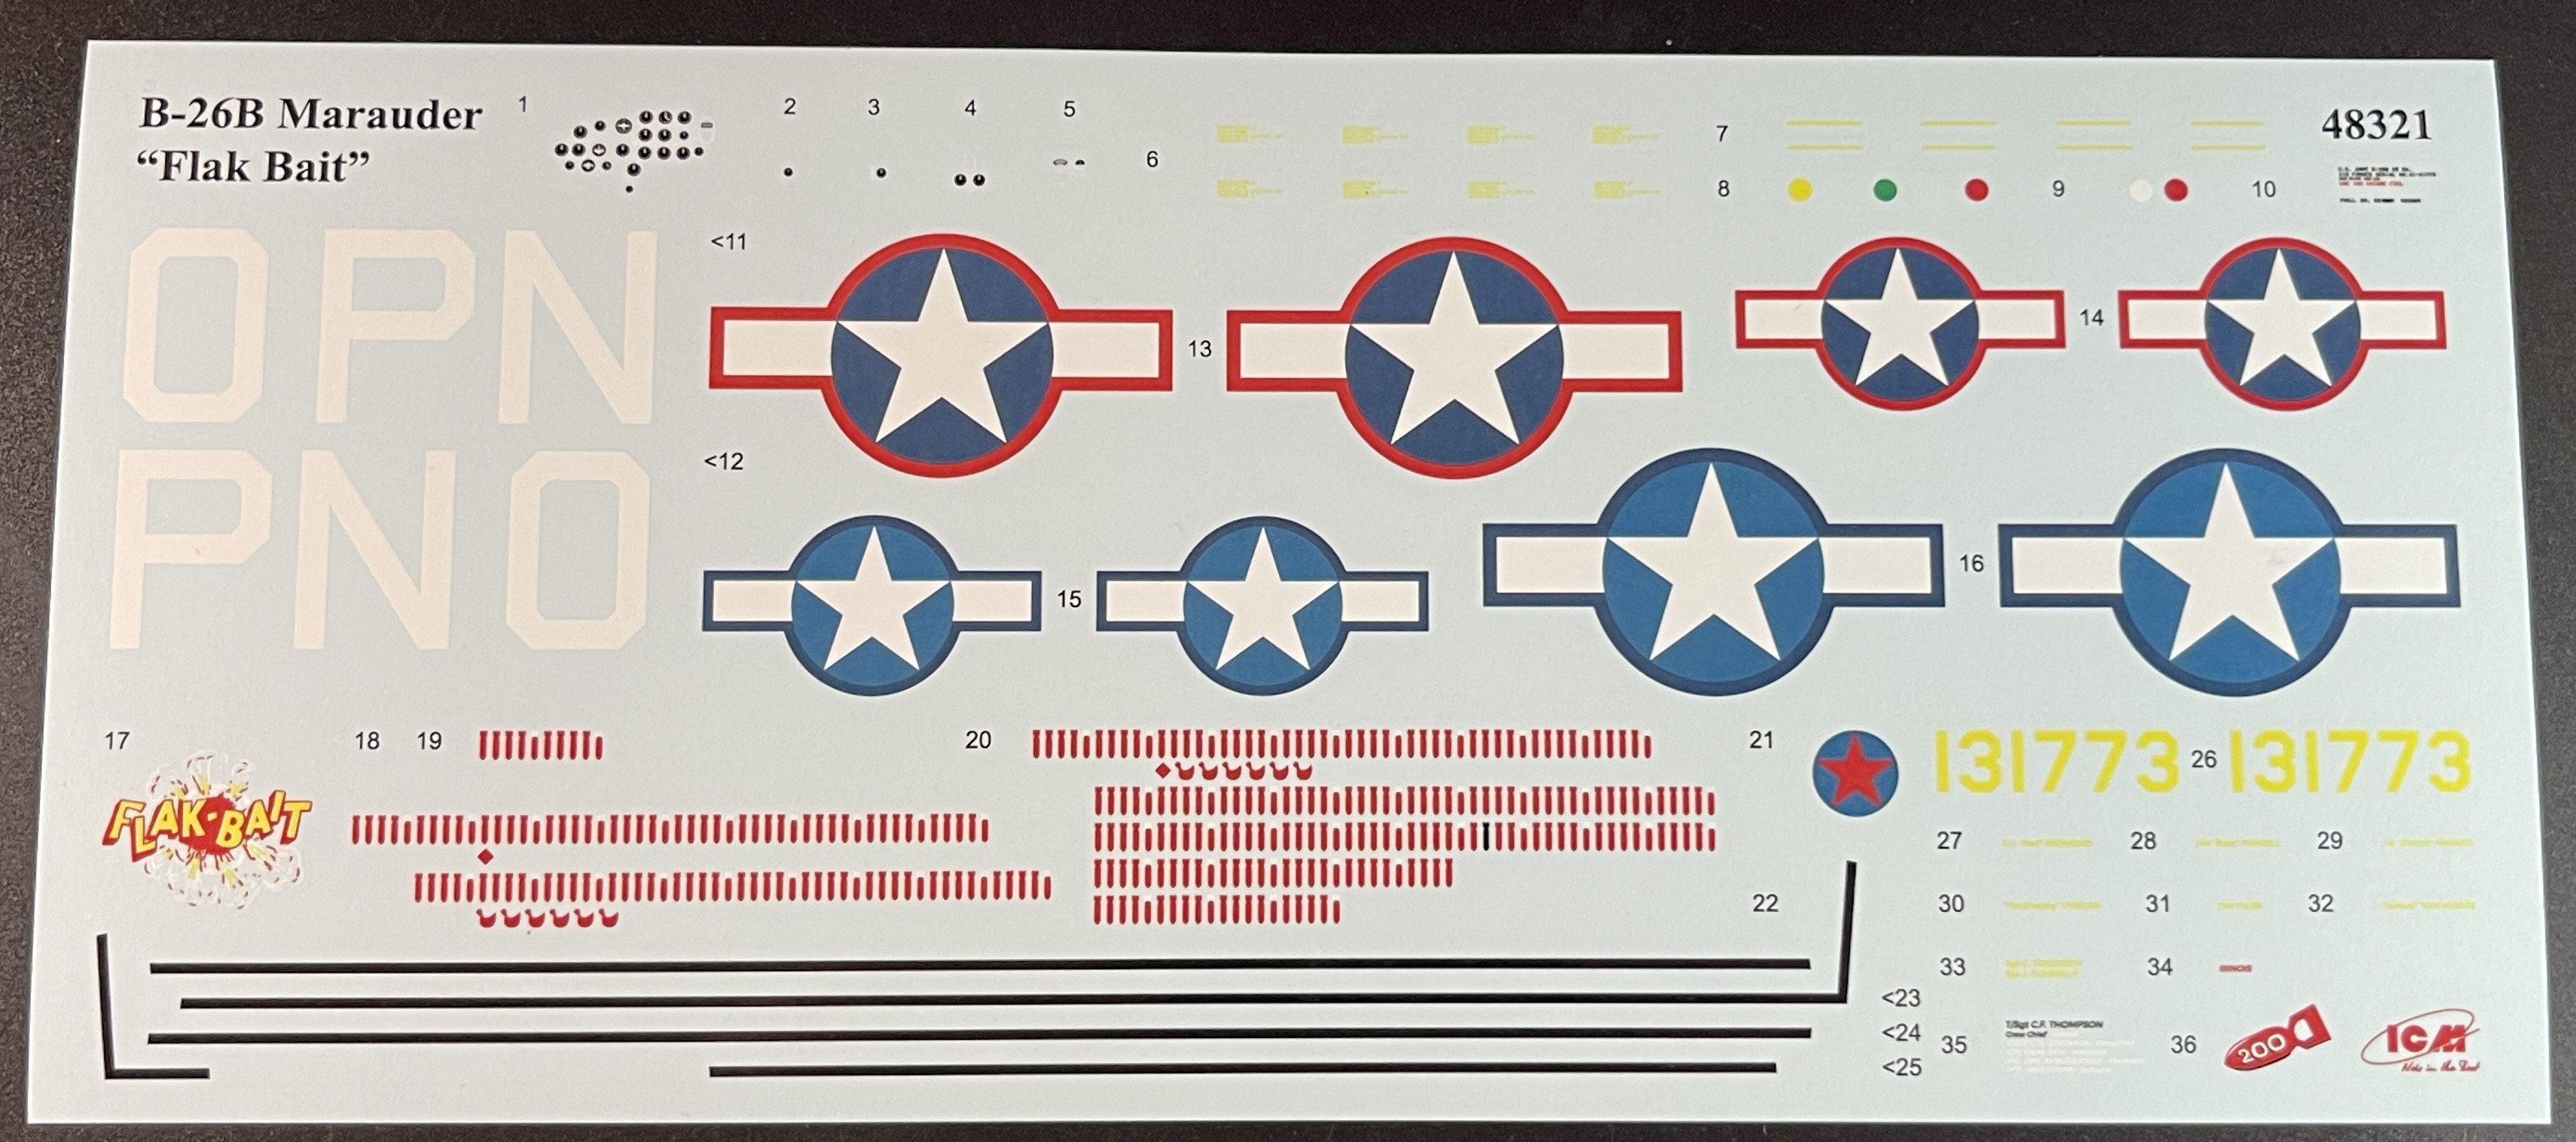
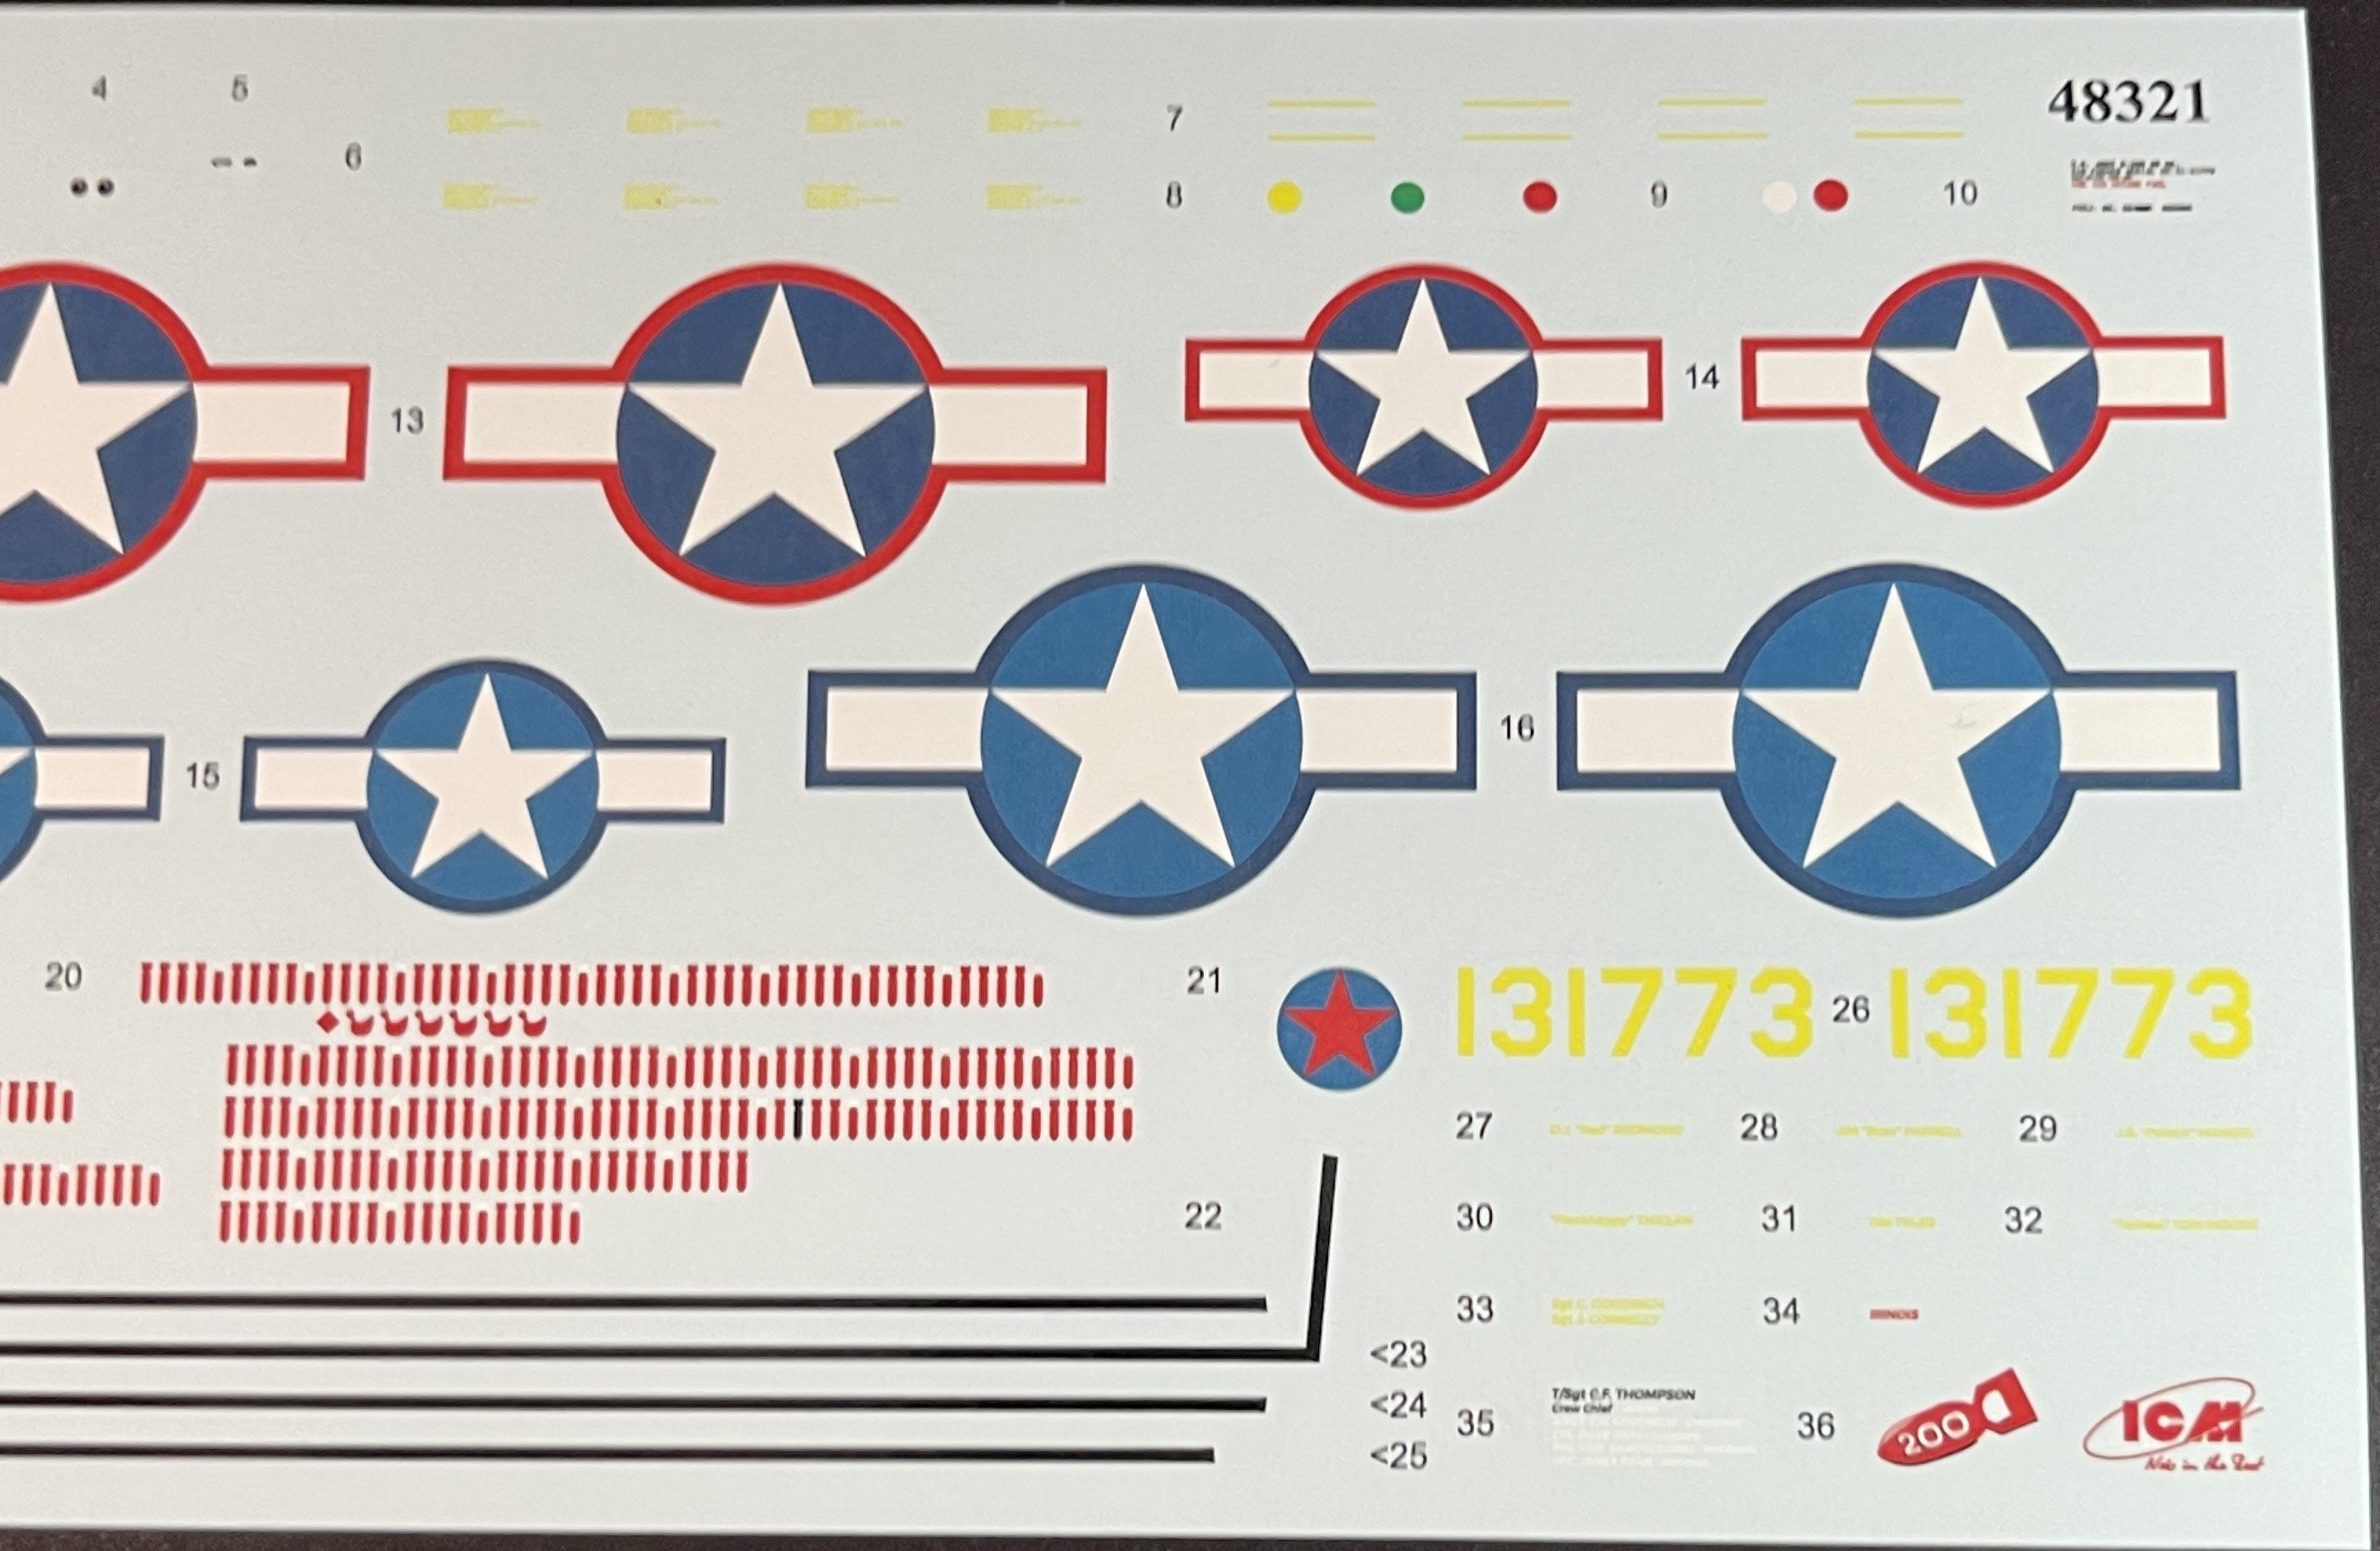
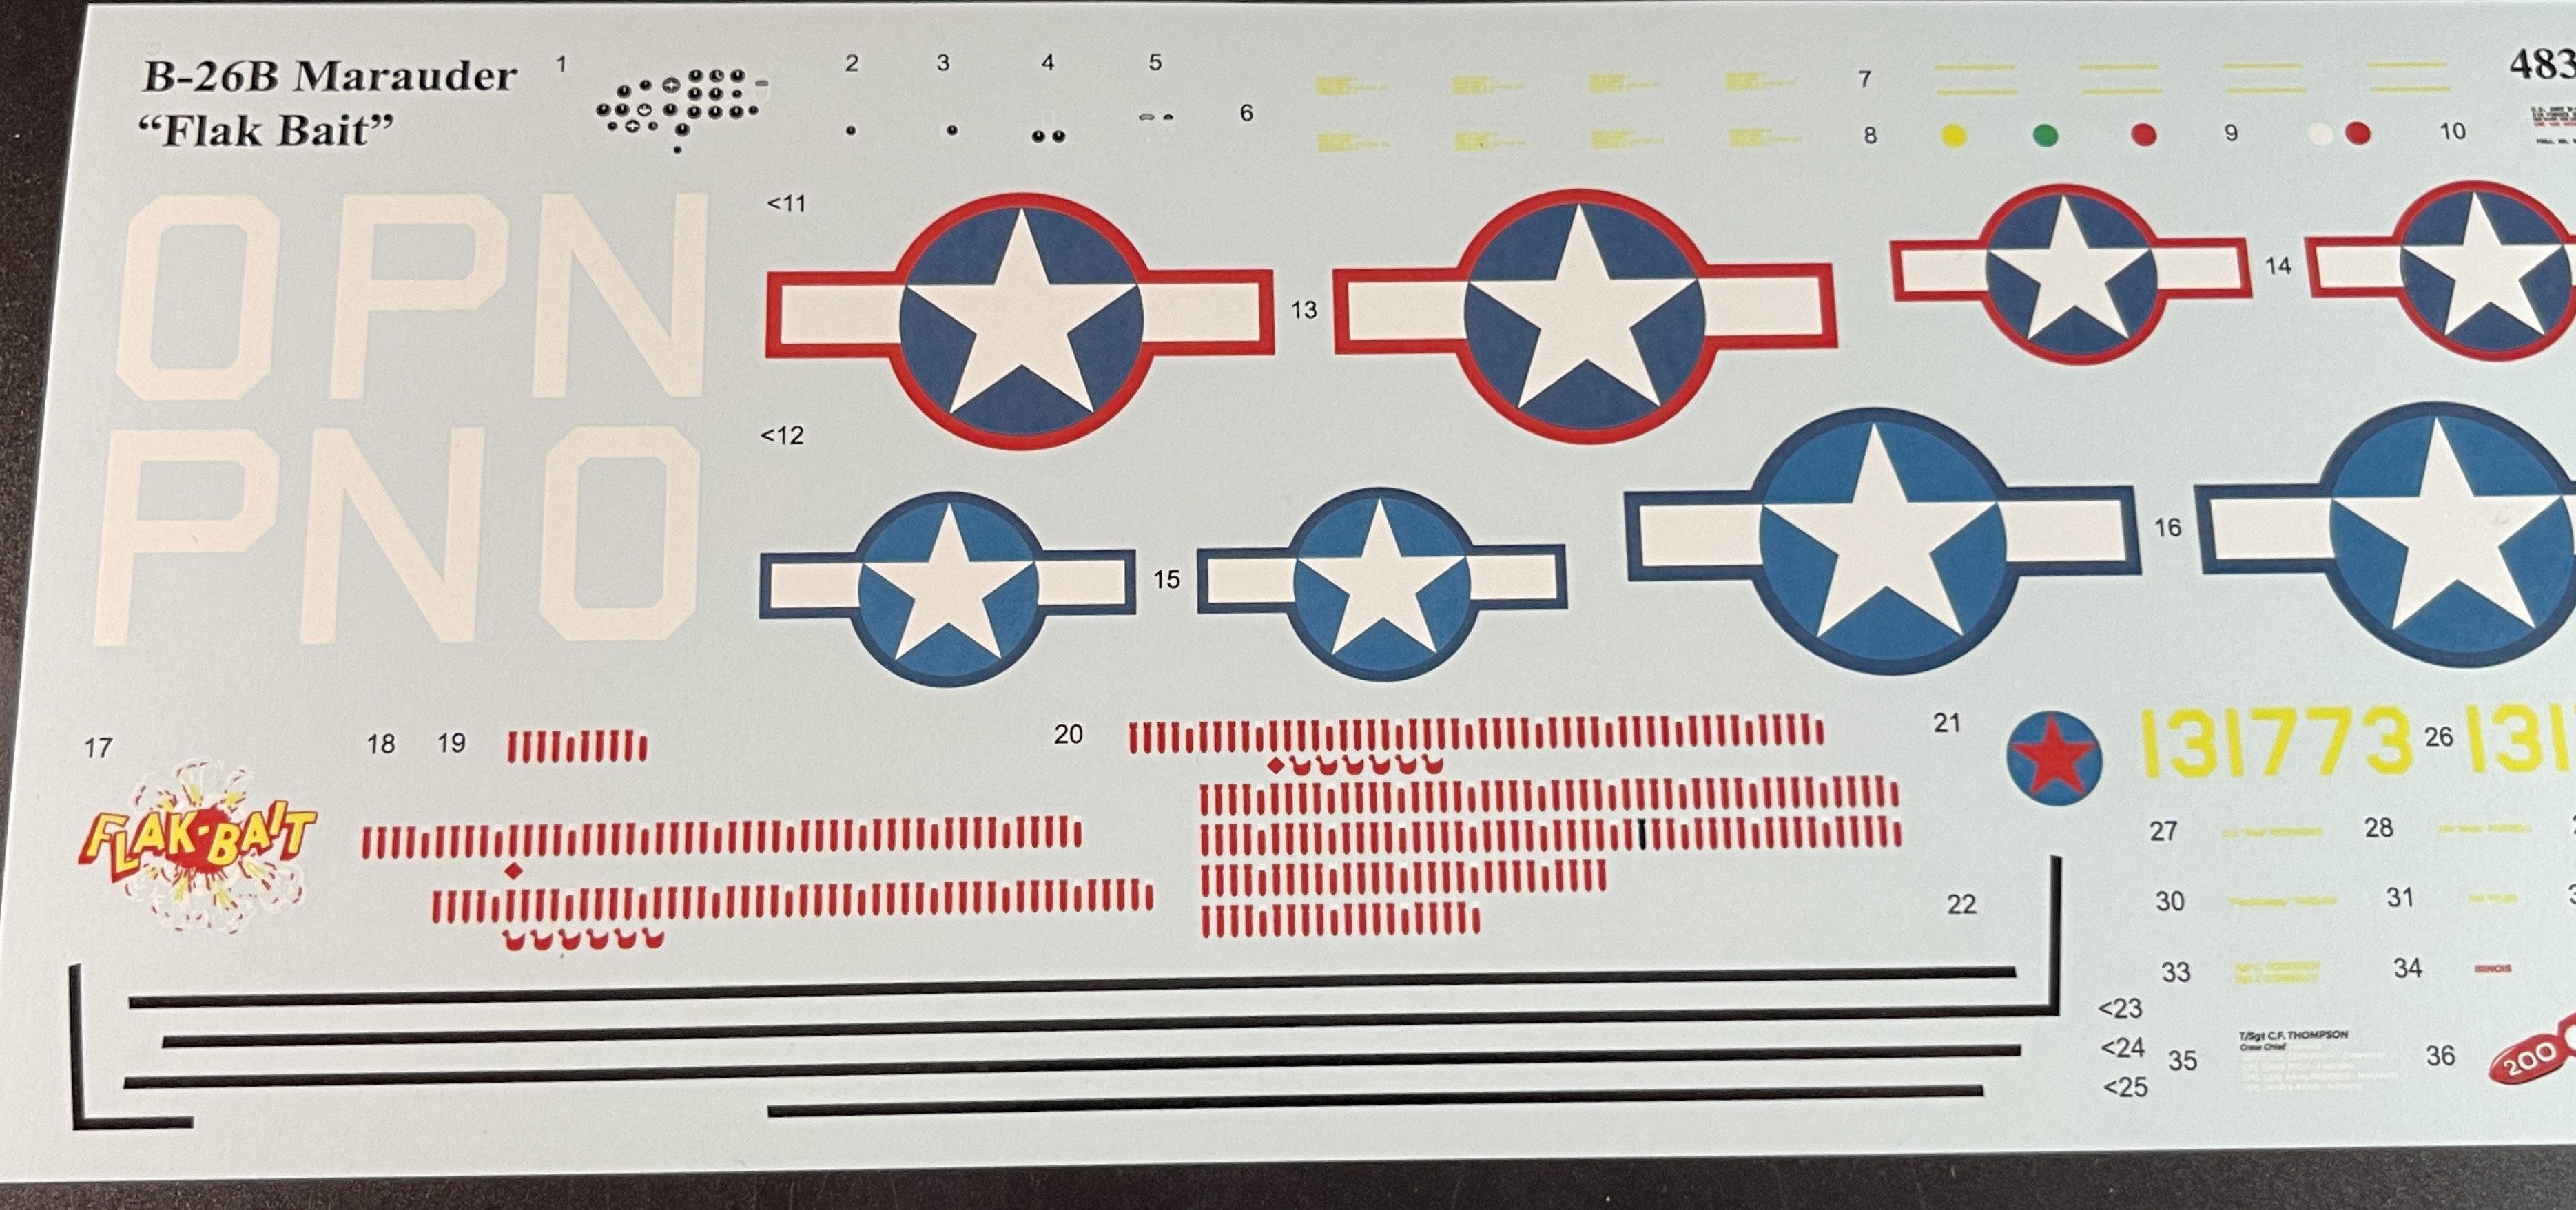
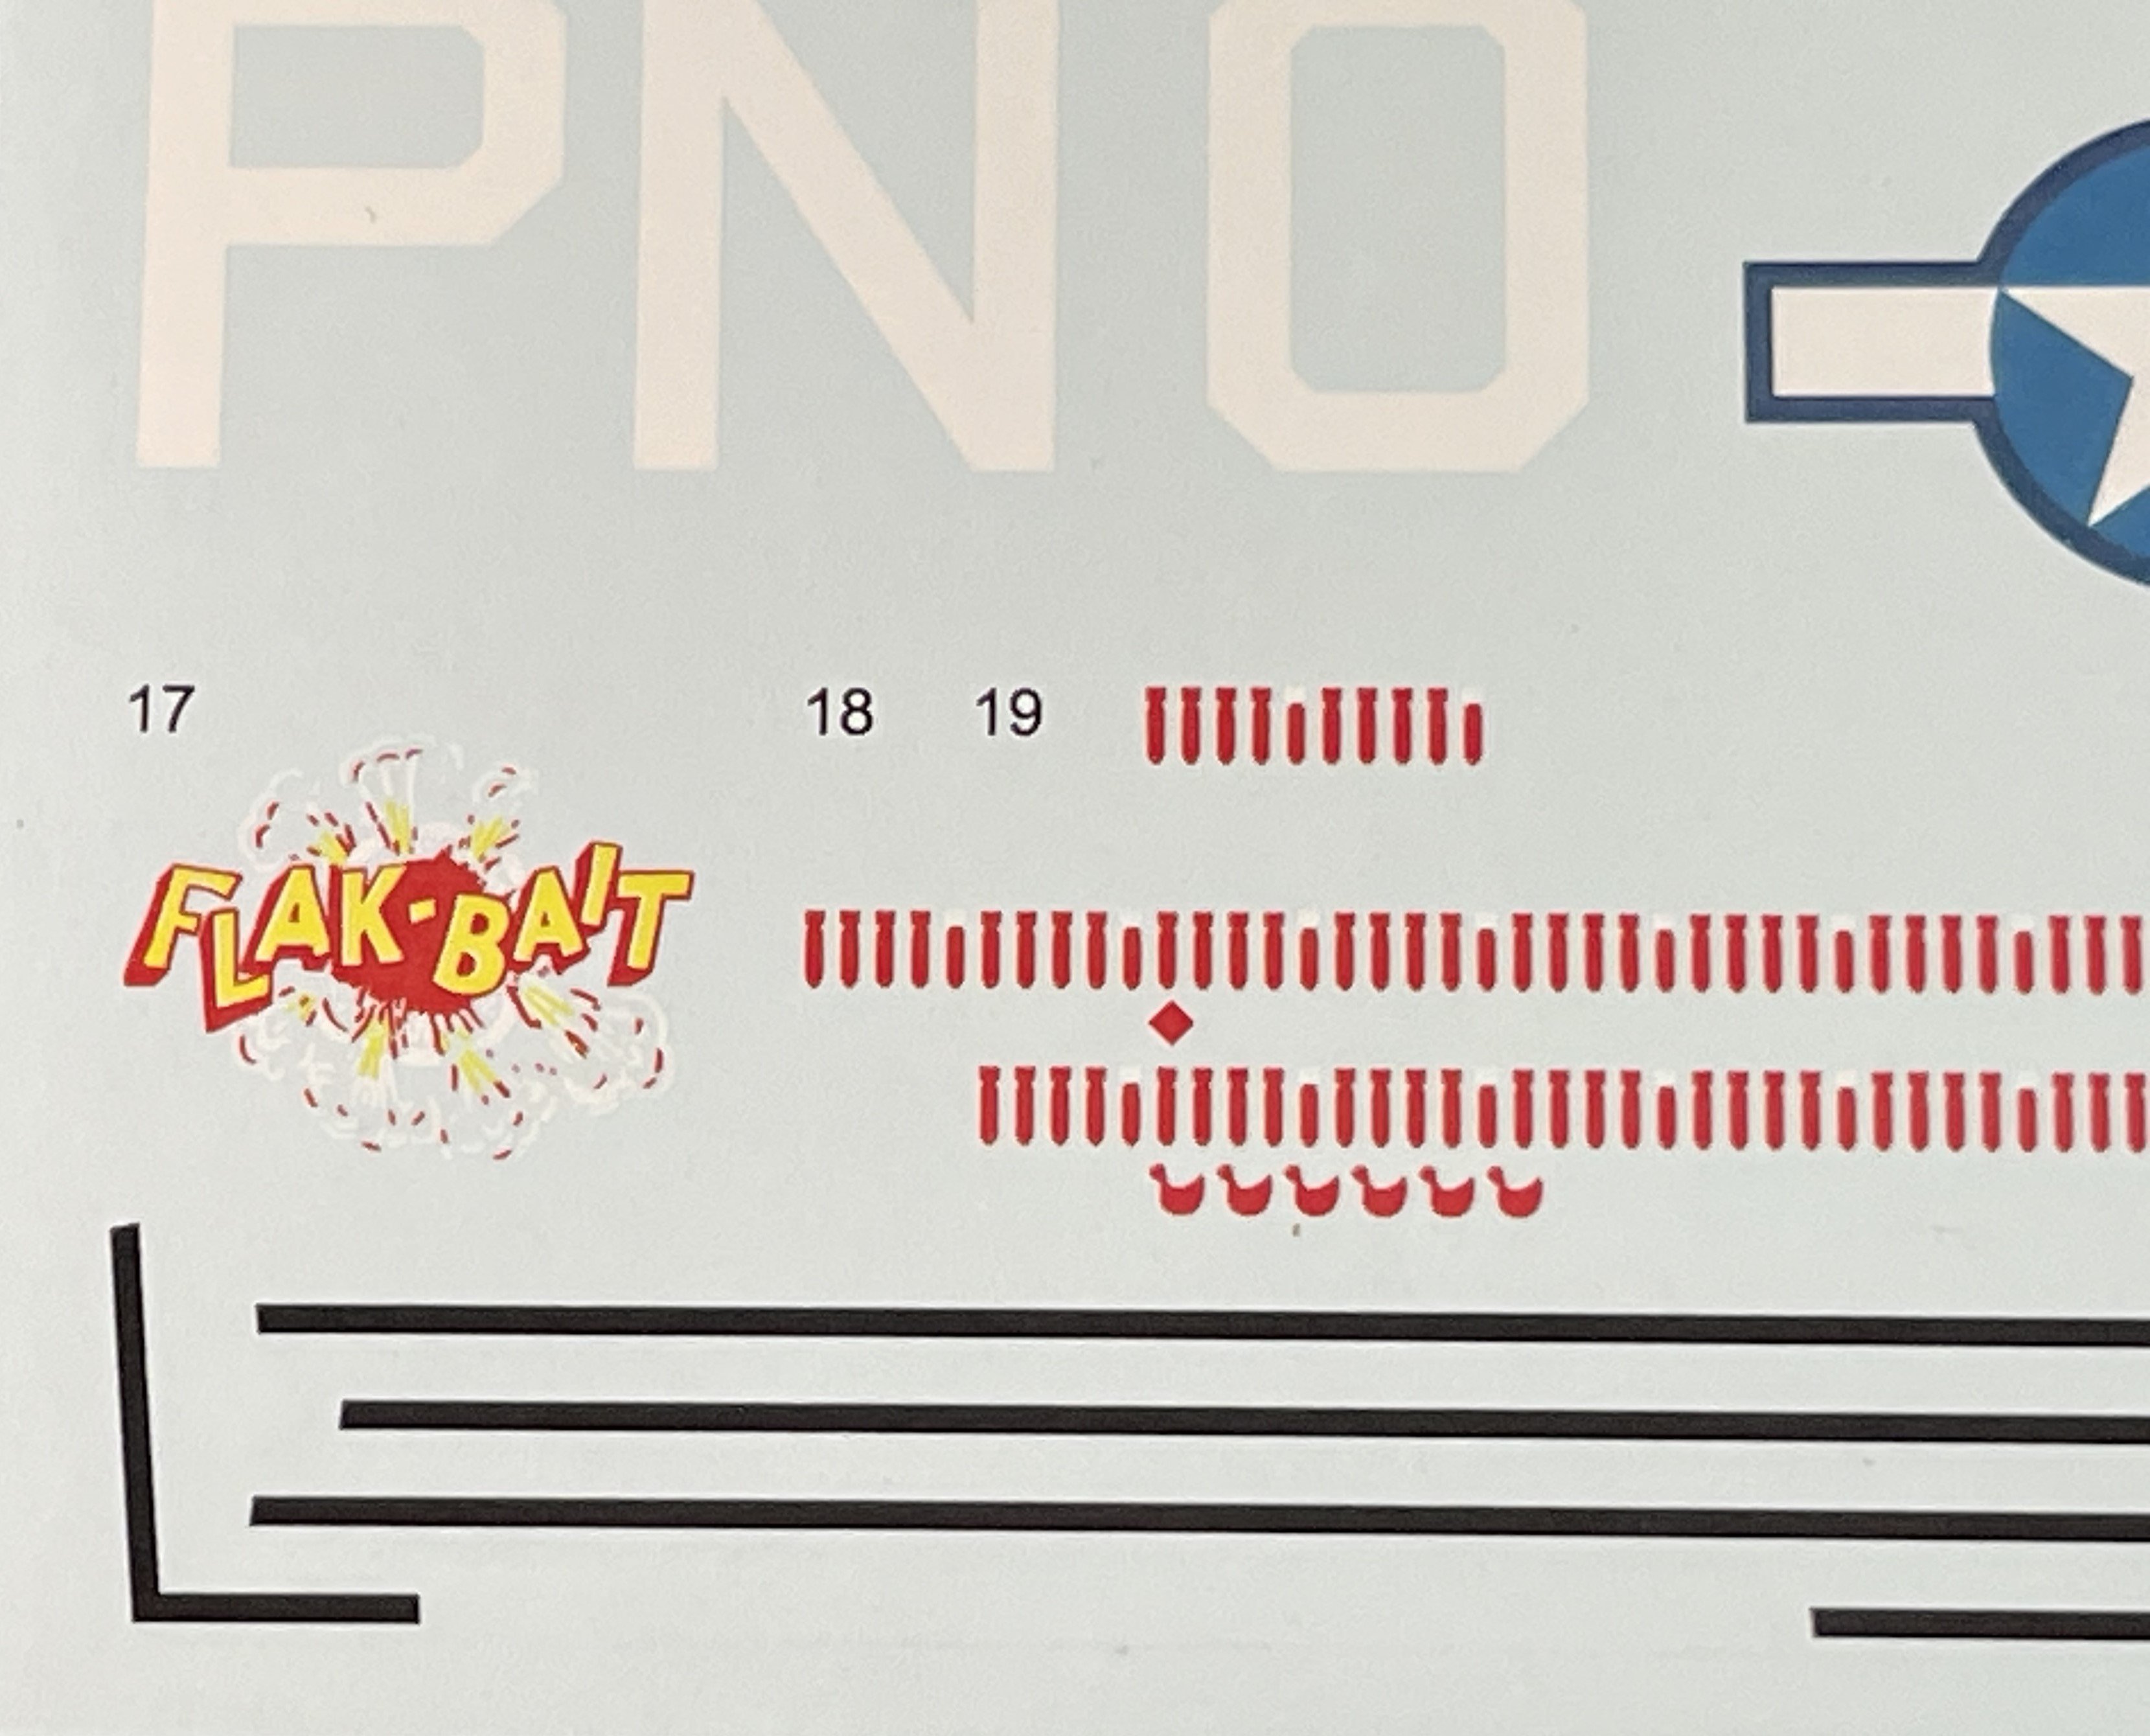
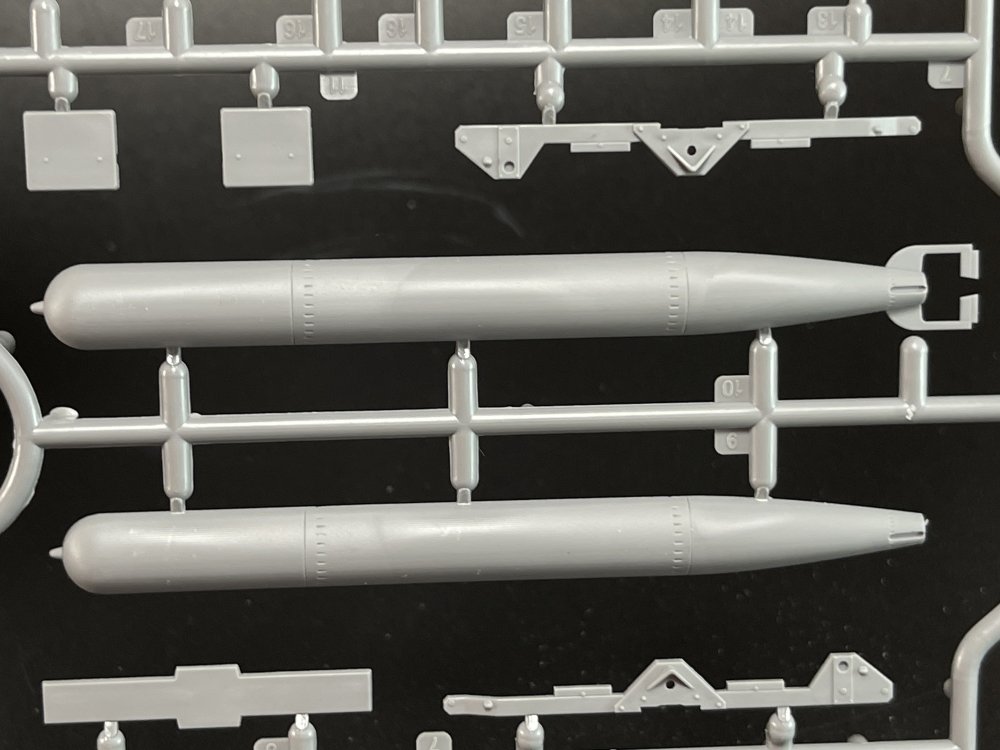
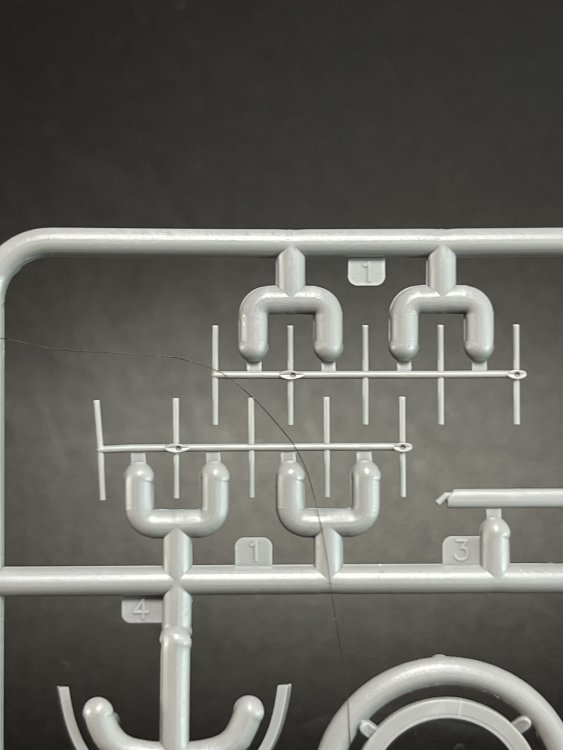
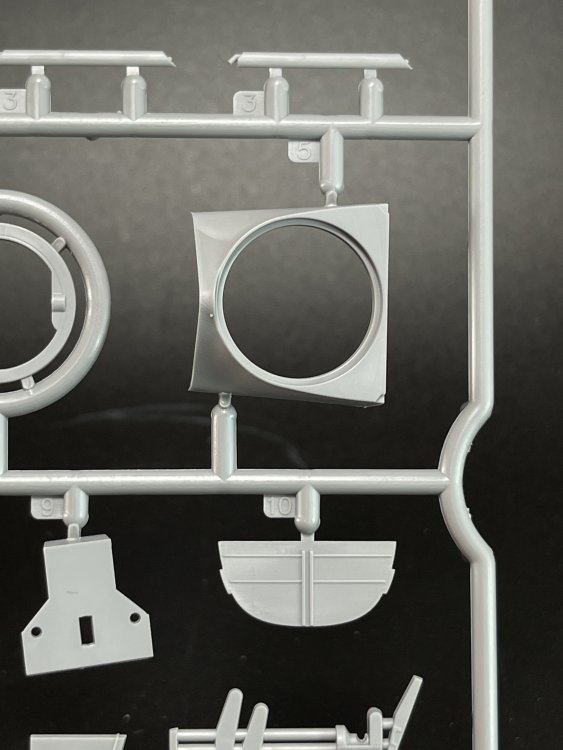
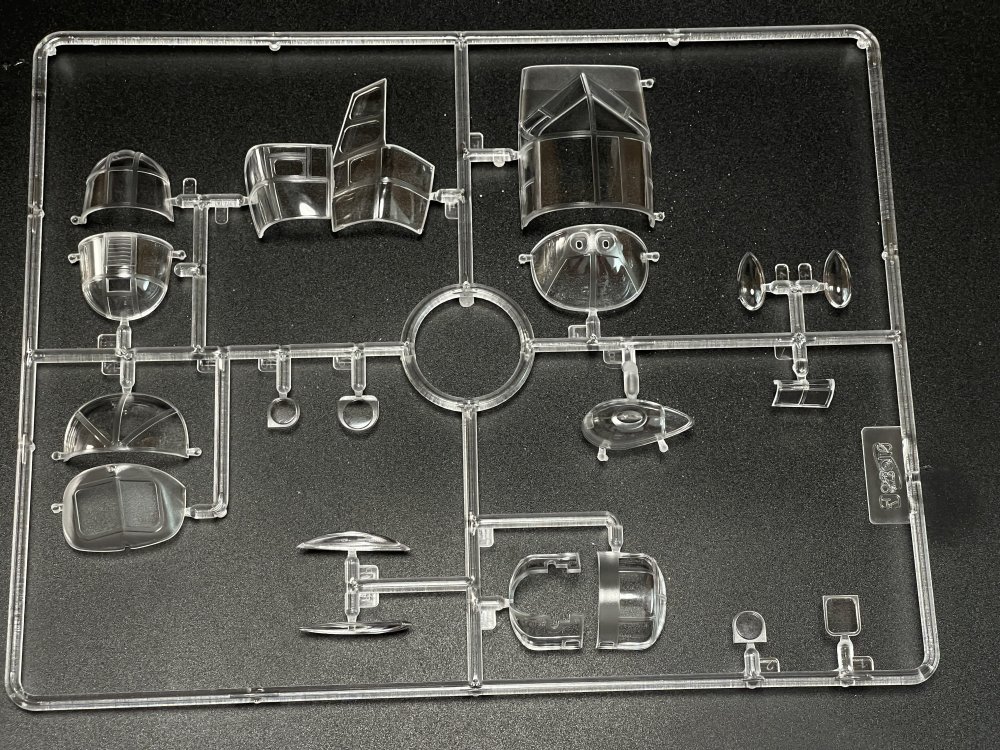
1:48 “Flak-Bait” B-26B ICM Catalogue number 48321 Price: around 72€ This version is a new box and new decals from the fantastic ICM B-26. (nice QR codes to the ICM youtube channel) And the special box is to honor a special aircraft – the famous Flak Bait. “Project engineer Peyton M. Magruder designed the Glenn L. Martin Company's B-26 Marauder in response to an Army Air Corps specification issued in January 1939. This specification also caught the attention of North American Aviation, Inc., and that firm responded with the B-25. War fever caused the Air Corps to forego a prototype test stage and both bombers went from the drawing board straight into production. The consequences were deadly for men flying the Martin bomber. The Army threatened to withdraw the aircraft from combat, but Marauder crews stuck with their airplane. By war's end, they had lost fewer airplanes than almost any other combat unit and compiled a notable war record. As those problems were being resolved, Marauders immediately went into combat after American entry into World War II. On June 4, 1942, Army Air Forces (AAF) Marauders defending Midway Island attacked Japanese aircraft carriers with torpedoes, but failed to score hits. The AAF sent Marauders to North Africa after the Allied invasion in November 1942 for service with the Twelfth Air Force. Eighth Air Force B-26s flew the first bombing mission against German forces in Europe on May 14, 1943. In preparation for the invasion of France, the Eighth's Marauders were transferred to the Ninth Air Force, the primary American tactical air force in Europe, in October 1943. Like the M1 Garand combat rifle, the Sherman tank, and the LST, the Marauder was an important weapon in the war against the Axis powers. B-26 crews flew over 100,000 sorties and dropped approximately 150,000 tons of bombs, primarily against Nazi Germany. The AAF lost fewer Marauders than any Allied bomber it flew—less than one-half of one percent. Besides the United States, the air forces of Great Britain and France operated Marauders in combat. Few Marauders survive today out of the 5,266 produced by Martin. The NASM B-26B-25-MA named "Flak-Bait" (AAF serial number 41-31773) survived 202 combat missions over Europe, more than any other American aircraft during World War II. Workers at the Baltimore factory completed "Flak-Bait" in April 1943, and a crew flew it to England. The AAF assigned it to the 449th Bombardment Squadron, 322nd Bombardment Group (nicknamed the 'Annihilators'), and gave the bomber the fuselage identification codes "PN-O." Lt. James J. Farrell of Greenwich, Connecticut, flew more missions in "Flak-Bait" than any other pilot. He named the bomber after "Flea Bait," his brother's nickname for the family dog.” https://airandspace.si.edu/collection-objects/martin-b-26b-25-ma-marauder-flak-bait/nasm_A19600297000 If you want a full inside study of the fantastic historic, just go and buy this fabulous book. https://www.bookdelivery.com/pt-en/book-b-26-flak-bait-the-only-american-aircraft-to-survive-200-bombing-missions-during-the-second-world-war/9780764363436/p/54275816?bmkt_source=google&bmkt_campaign=21516763169&gad_source=1&gclid=CjwKCAiA5eC9BhAuEiwA3CKwQpaLqfC3T9cvvbJ8iHpkpcSuQh4JJv7iQqzdYVCVjXP0f7IYTy6d7hoCysUQAvD_BwE Let`s crack the box. The parts of the B-26 Flack Bait are exactly the same of the original box B-26B. So the sprues are the same as the original b-26B release that we already reviewed here. So, ICM, cleverly, already made the initial release ready for the Flack Bait one… not hard to do, yes, but still. So check all the instructions, is possible to see the, for make the Flack Bait, you need to use differences parts (canopy and front glass nose) and one piece more – the G83. And, the instructions tell you to use a different canopy, the H-21 part. Also the front glass nose, you can use version A or B, depending the time war that you are thinking of making. However, ICM don’t gie the modeller which front glass nose you should use in any of the four schemes. So check carefully your references of the on you want to make. I think that would be a nice touch from ICM to indicate which glass nose version that the modeller should in any of the four version. As far of the construction process, is very very similar to the B-26B original box, but in this version, you will have to do a very little surgery in both fuselage halves, by cutting one small windows the the fuselage bottom. (step 1 and 39) Another difference is to cut the pitot on step 126, while in the original boxing, this step does not exist. At the end, the masking templates, ICM gives two more for the new window. Anyway, the instruction manual is detailed and easy to follow. It includes step-by-step assembly diagrams, color callouts, and decal placement guides. Passing on, a fist general view, is a typical ICM quality plastic, with no distortion, no flash, with very good surface detail. In the external view, the surface detail is there but you don’t see most of the rivets made. An intermediate modeler will do that with no problem. The fuselage has a fantastic fit as usual in the ICM models in a few years now. As for more inside detail of the kit, as I said just check our review of the B-26B original box HERE. The decal sheet has a good color registration and supply 4 Flak-Bait options: Ø B-26B “Flak-bait”, 332nd Bombardment Group, England, Mid- 1943. Ø B-26B “Flak-bait”, 332nd Bombardment Group, England, Summer 1944 Ø B-26B “Flak-bait”, 332nd Bombardment Group, combat mission in Europe, Spring 1945; Ø B-26B “Flak-bait”, 332nd Bombardment Group, Bavaria, Summer 1945; The decals are design by ICM and made for the third party but I have no idea who. Conclusion Well, A fantastic release from ICM and without the pitot (the only thing I didn’t like with the first release) this one is even better. The detail out of the box is very good and it will make a very good replica. You just need some references of the Flak bait you want to make, to chose the right nose glass cone. The construction is not totally straightforward as there are several sub-assembly that you need to take care and time (as undercarriage is a complex sub-assembly steps) to get it right on spot., so the novice could have some trouble in build this one. But all other modelers can make from this a truly fantastic model of the B-26 Marauder. VERY Highly recommend this to intermediate/expert modeler My thanks to ICM for making this fantastic model. Just get yours on