JeroenPeters
-
Posts
4,875 -
Joined
-
Last visited
Content Type
Profiles
Forums
Events
Gallery
Everything posted by JeroenPeters
-
love it! Congrats!!!
-

1/48 Wellington Mk.X (He727 NA-K)
JeroenPeters replied to JeroenPeters's topic in LSM 1/35 and Larger Work In Progress
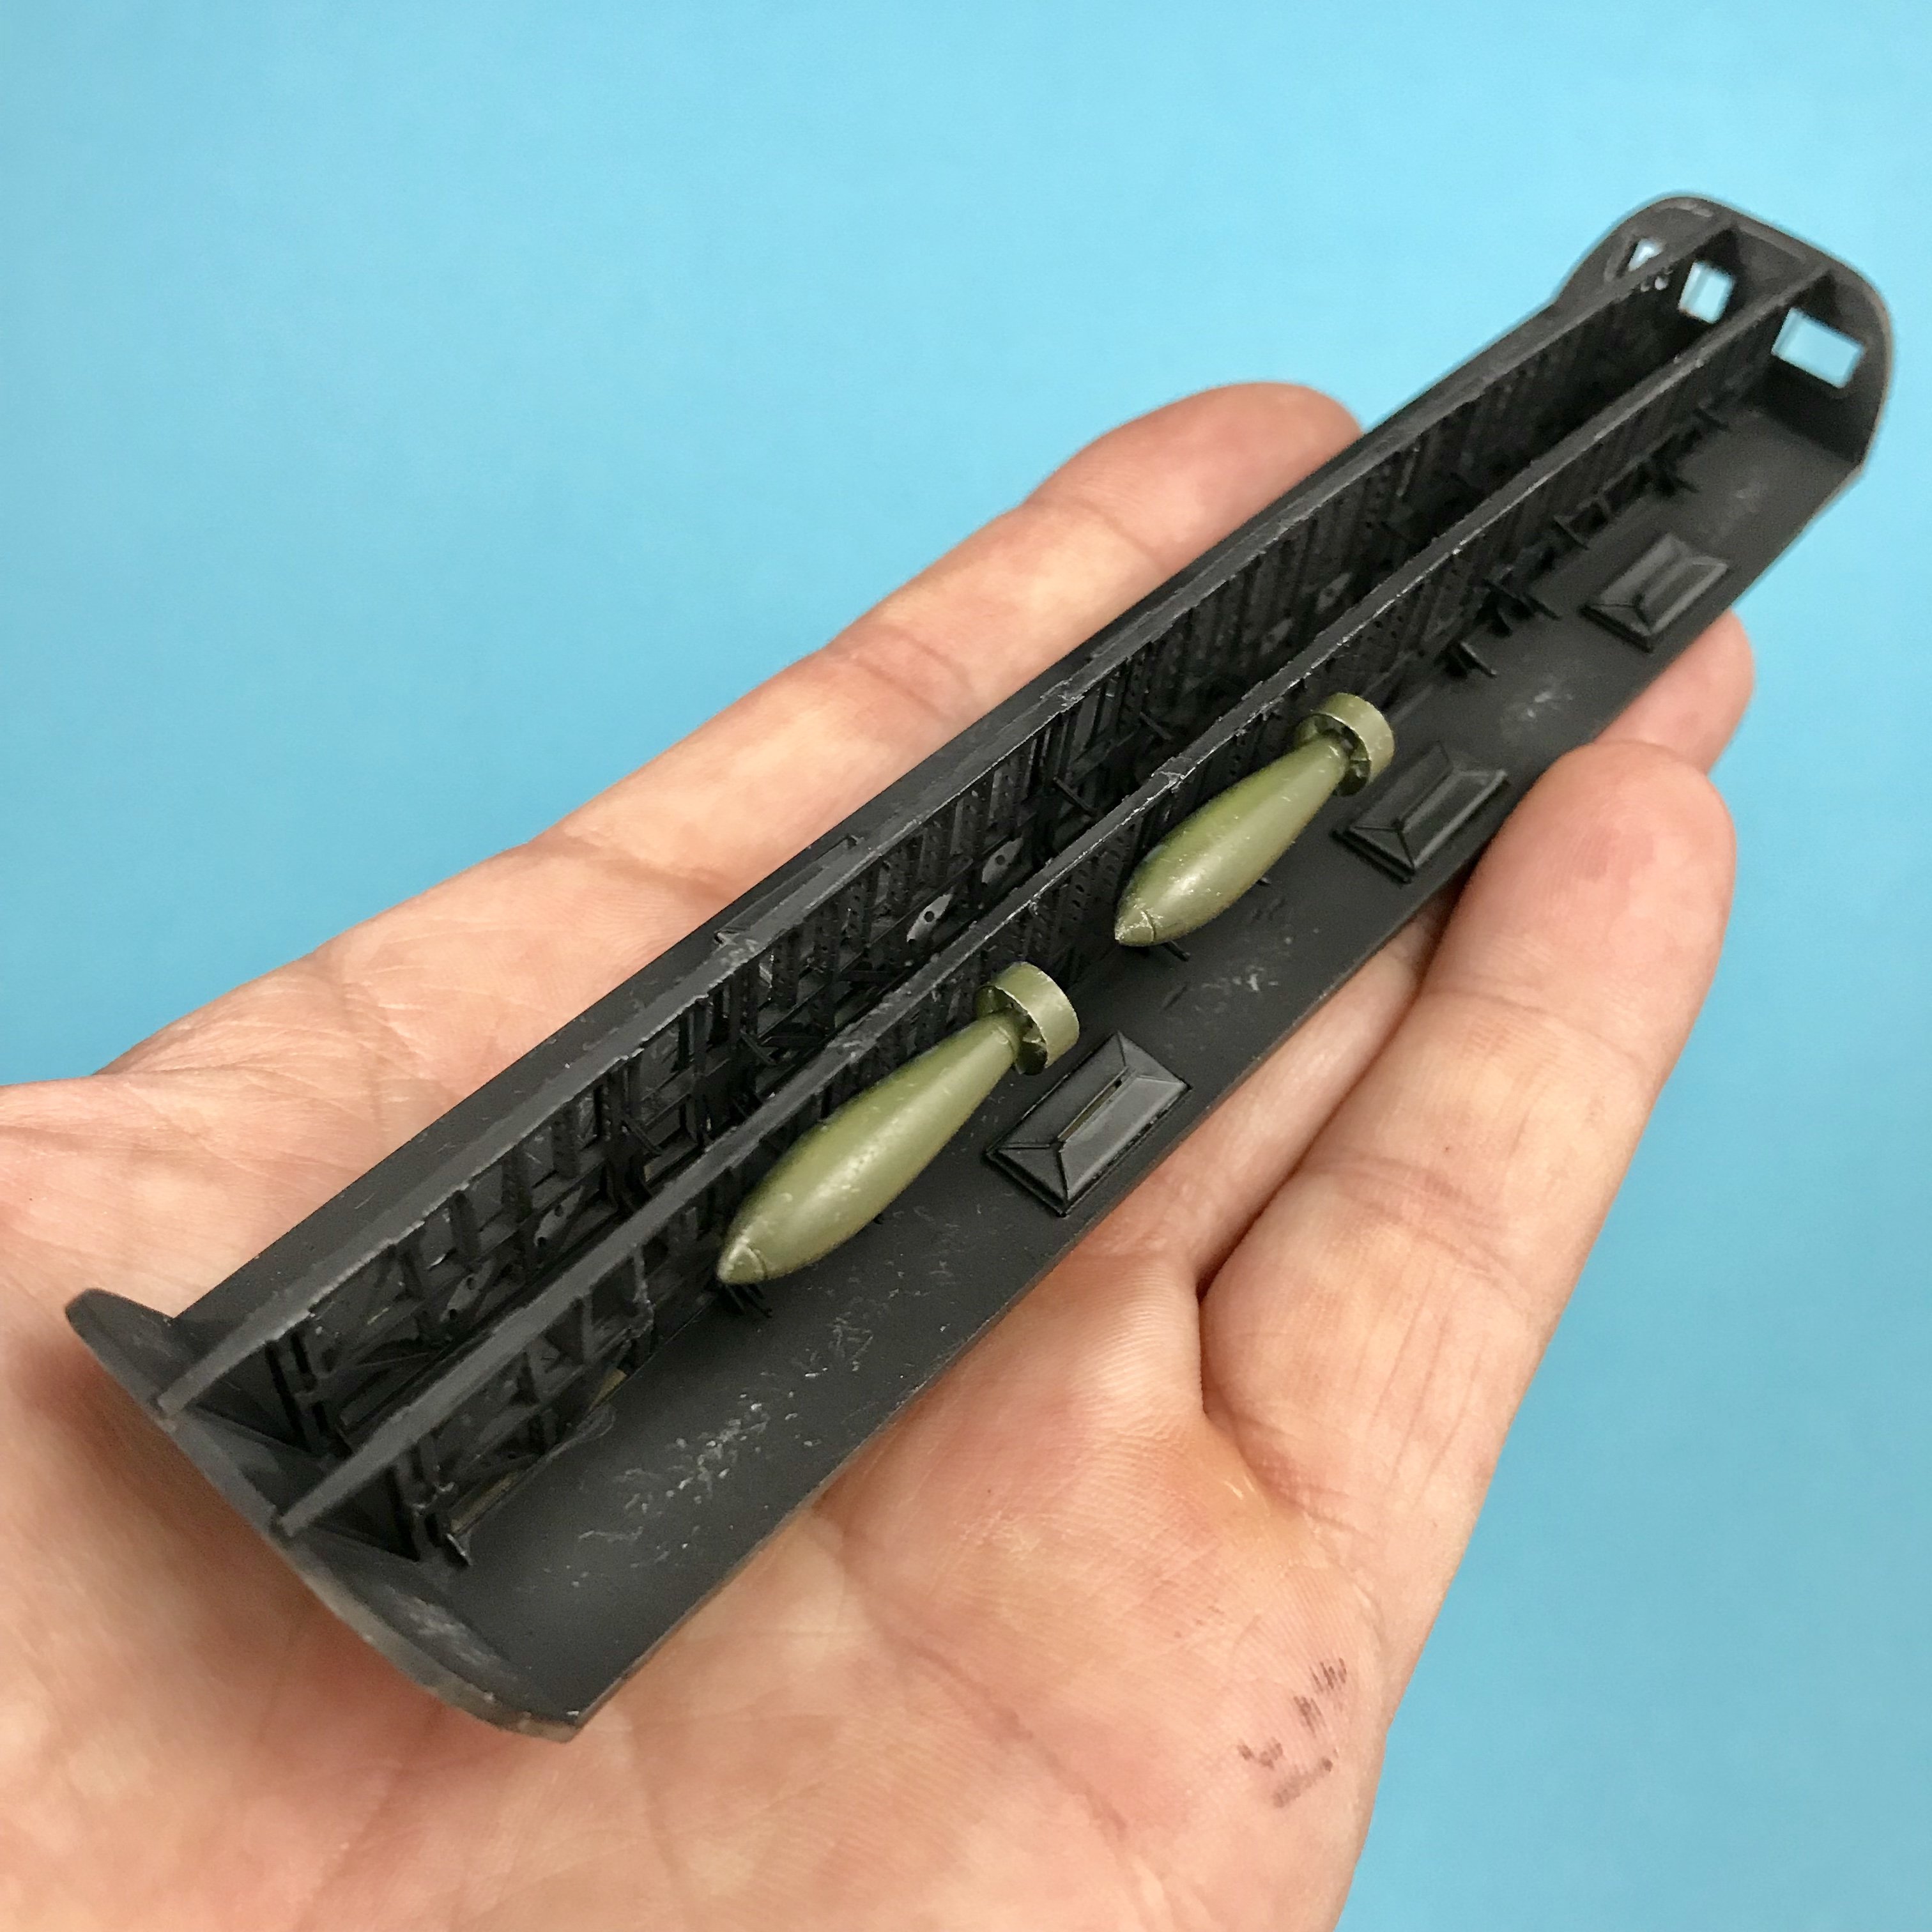
Here you go! The bomb bay completed. All the air bags installed. In placed two 500lb bombs (should actually be phospohr bombs for this plane, but this looks better. The bomb tails were replaced by PE from Eduard.
- 304 replies
-
- 6
-

-
- wilnis crash
- trumpeter
- (and 1 more)
-
Welcome Ernie Great to have you here!
-
Really cool John, A beast of a plane.
-
Lovely! Currently building a 1/48 Wimpy myself and kinda like the change from 1/32 for once. Following this.
-
Damn! That's a long list of plans... Beware it doesn't start to feel like a proper job with deadlines :))) I'll be happy to finish my current subject and maybe another one this year.... Looking forward to the big cat though!
-
Dang... Sorry to hear that. Kinda puts everything in perspective. Take care.
-
Welcome!! Looking forward to see some of your armour and plane builds. If you want to post 48th scale, well that's fine too! Cheers, Jeroen
-
takom Takom 1/35 Bergepanzer Ausf.D Umbau Seibert 1945
JeroenPeters posted a topic in Armour/AFV Reviews
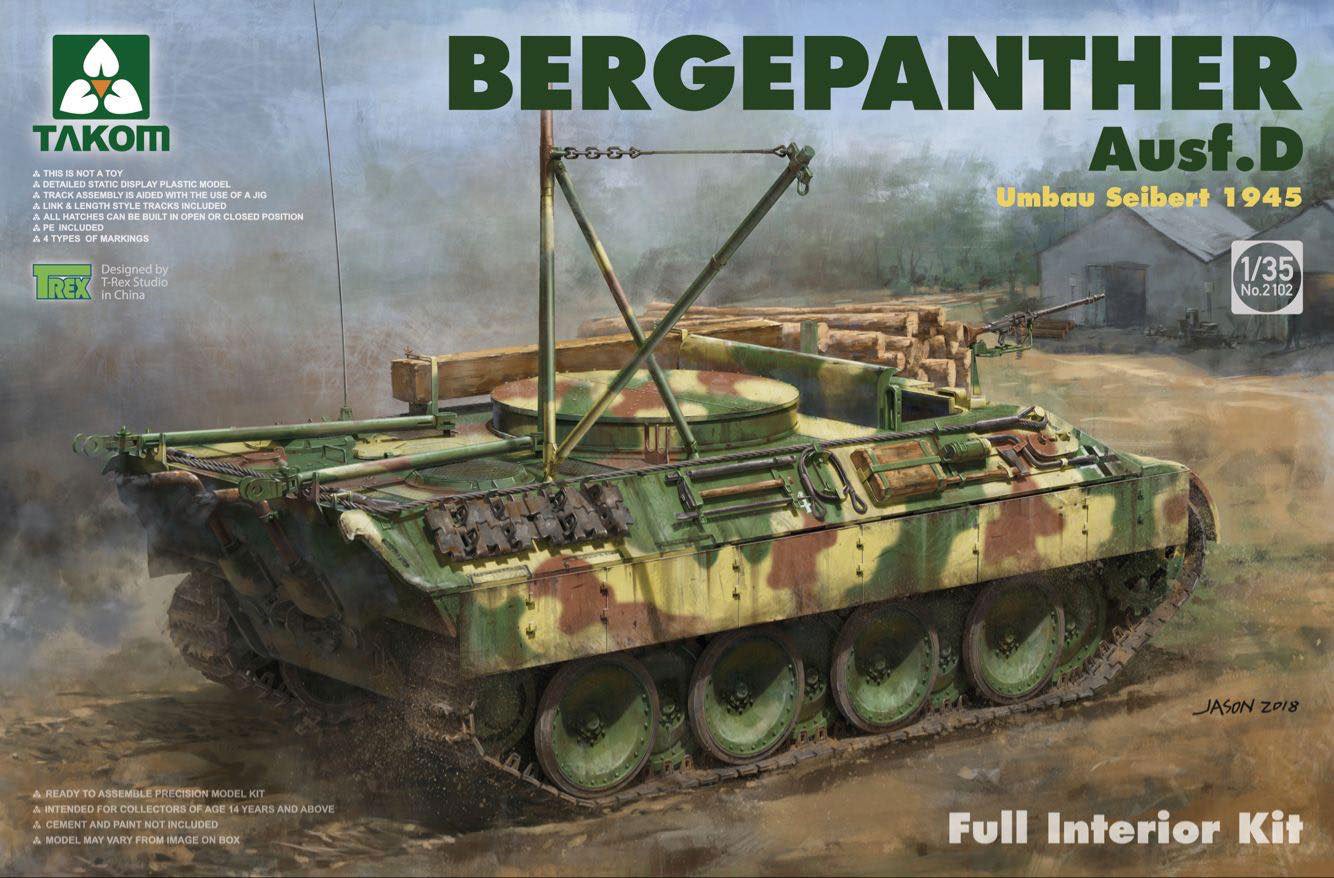
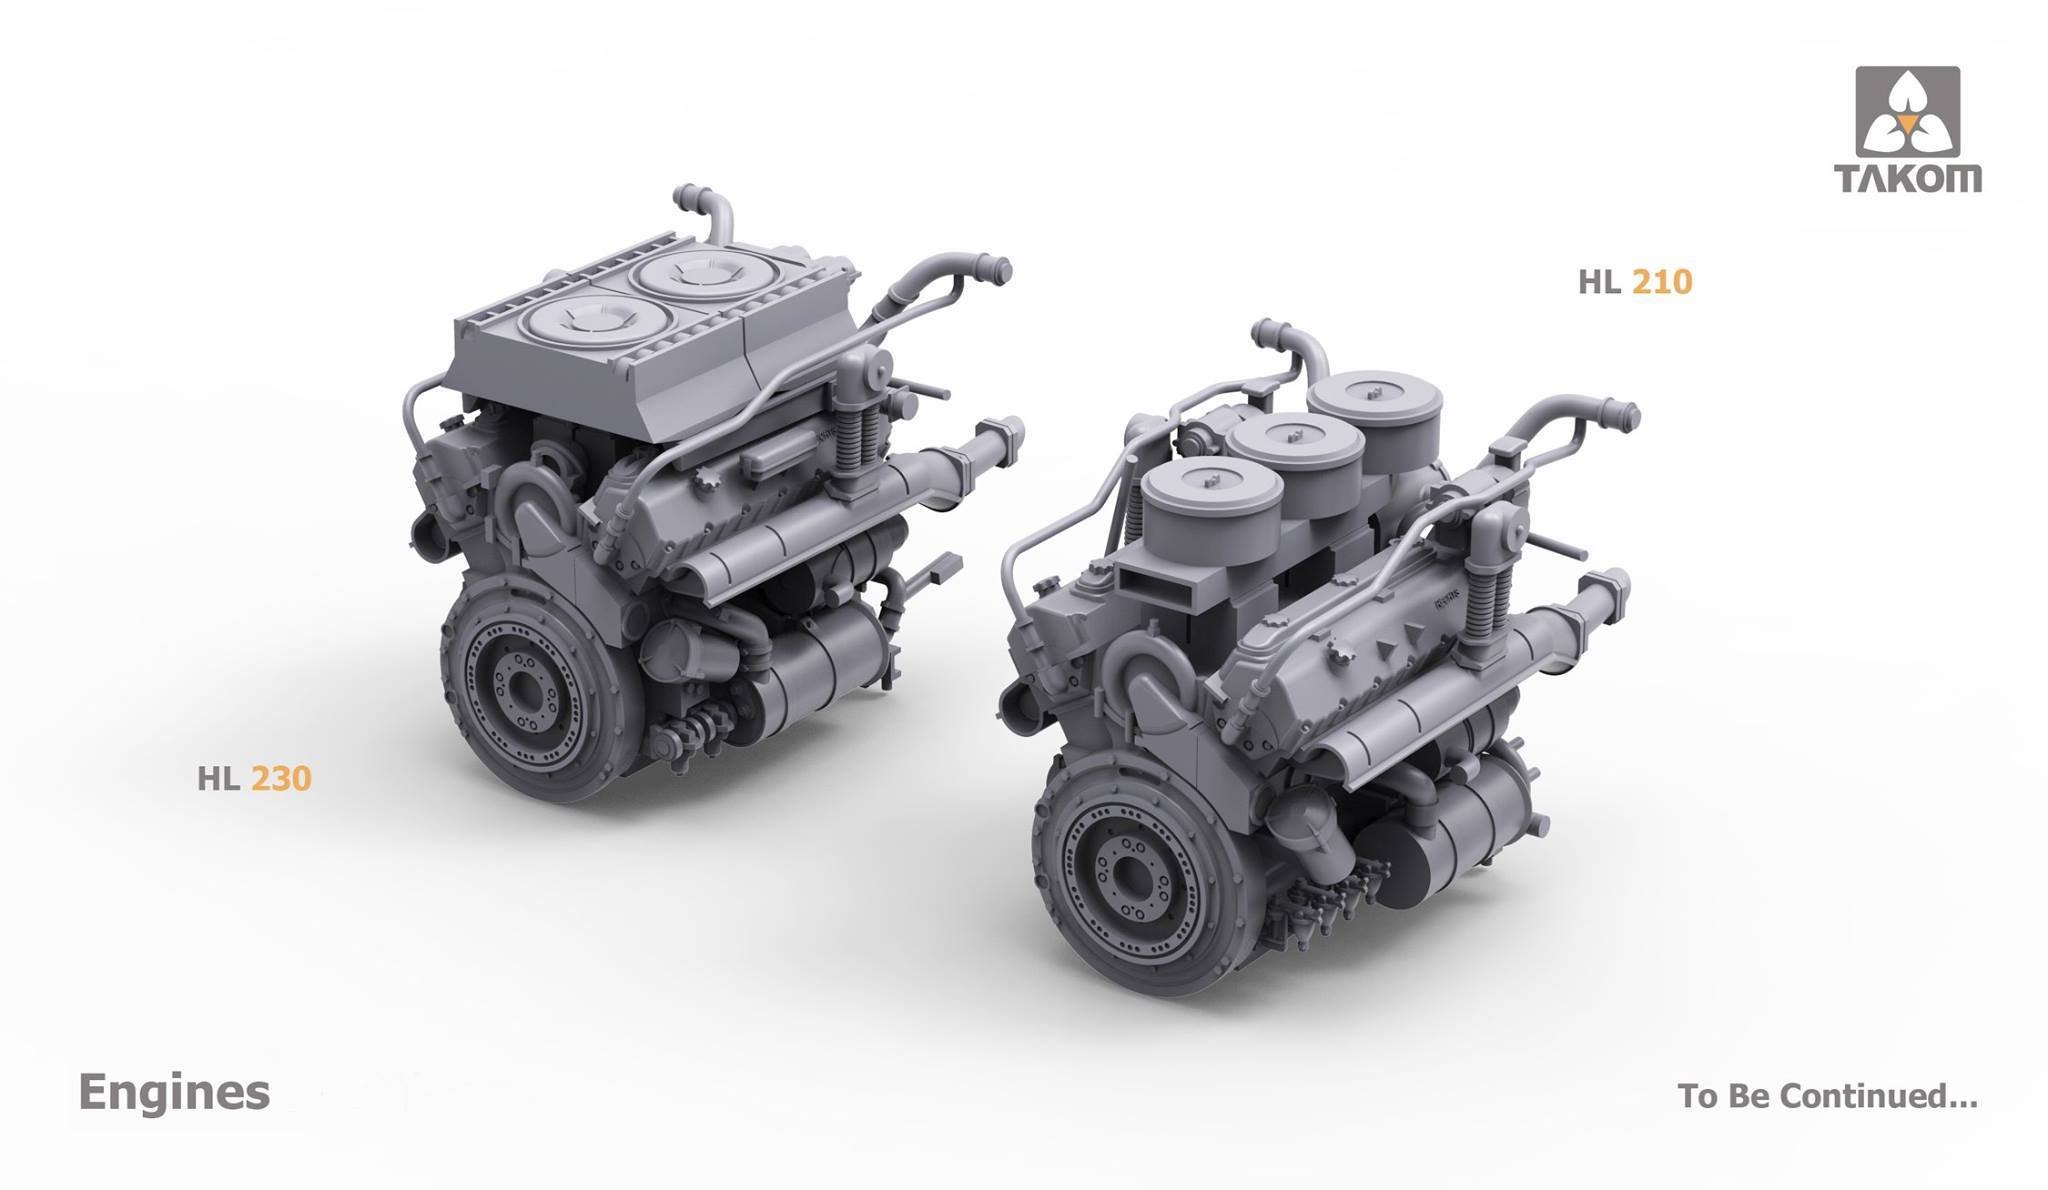
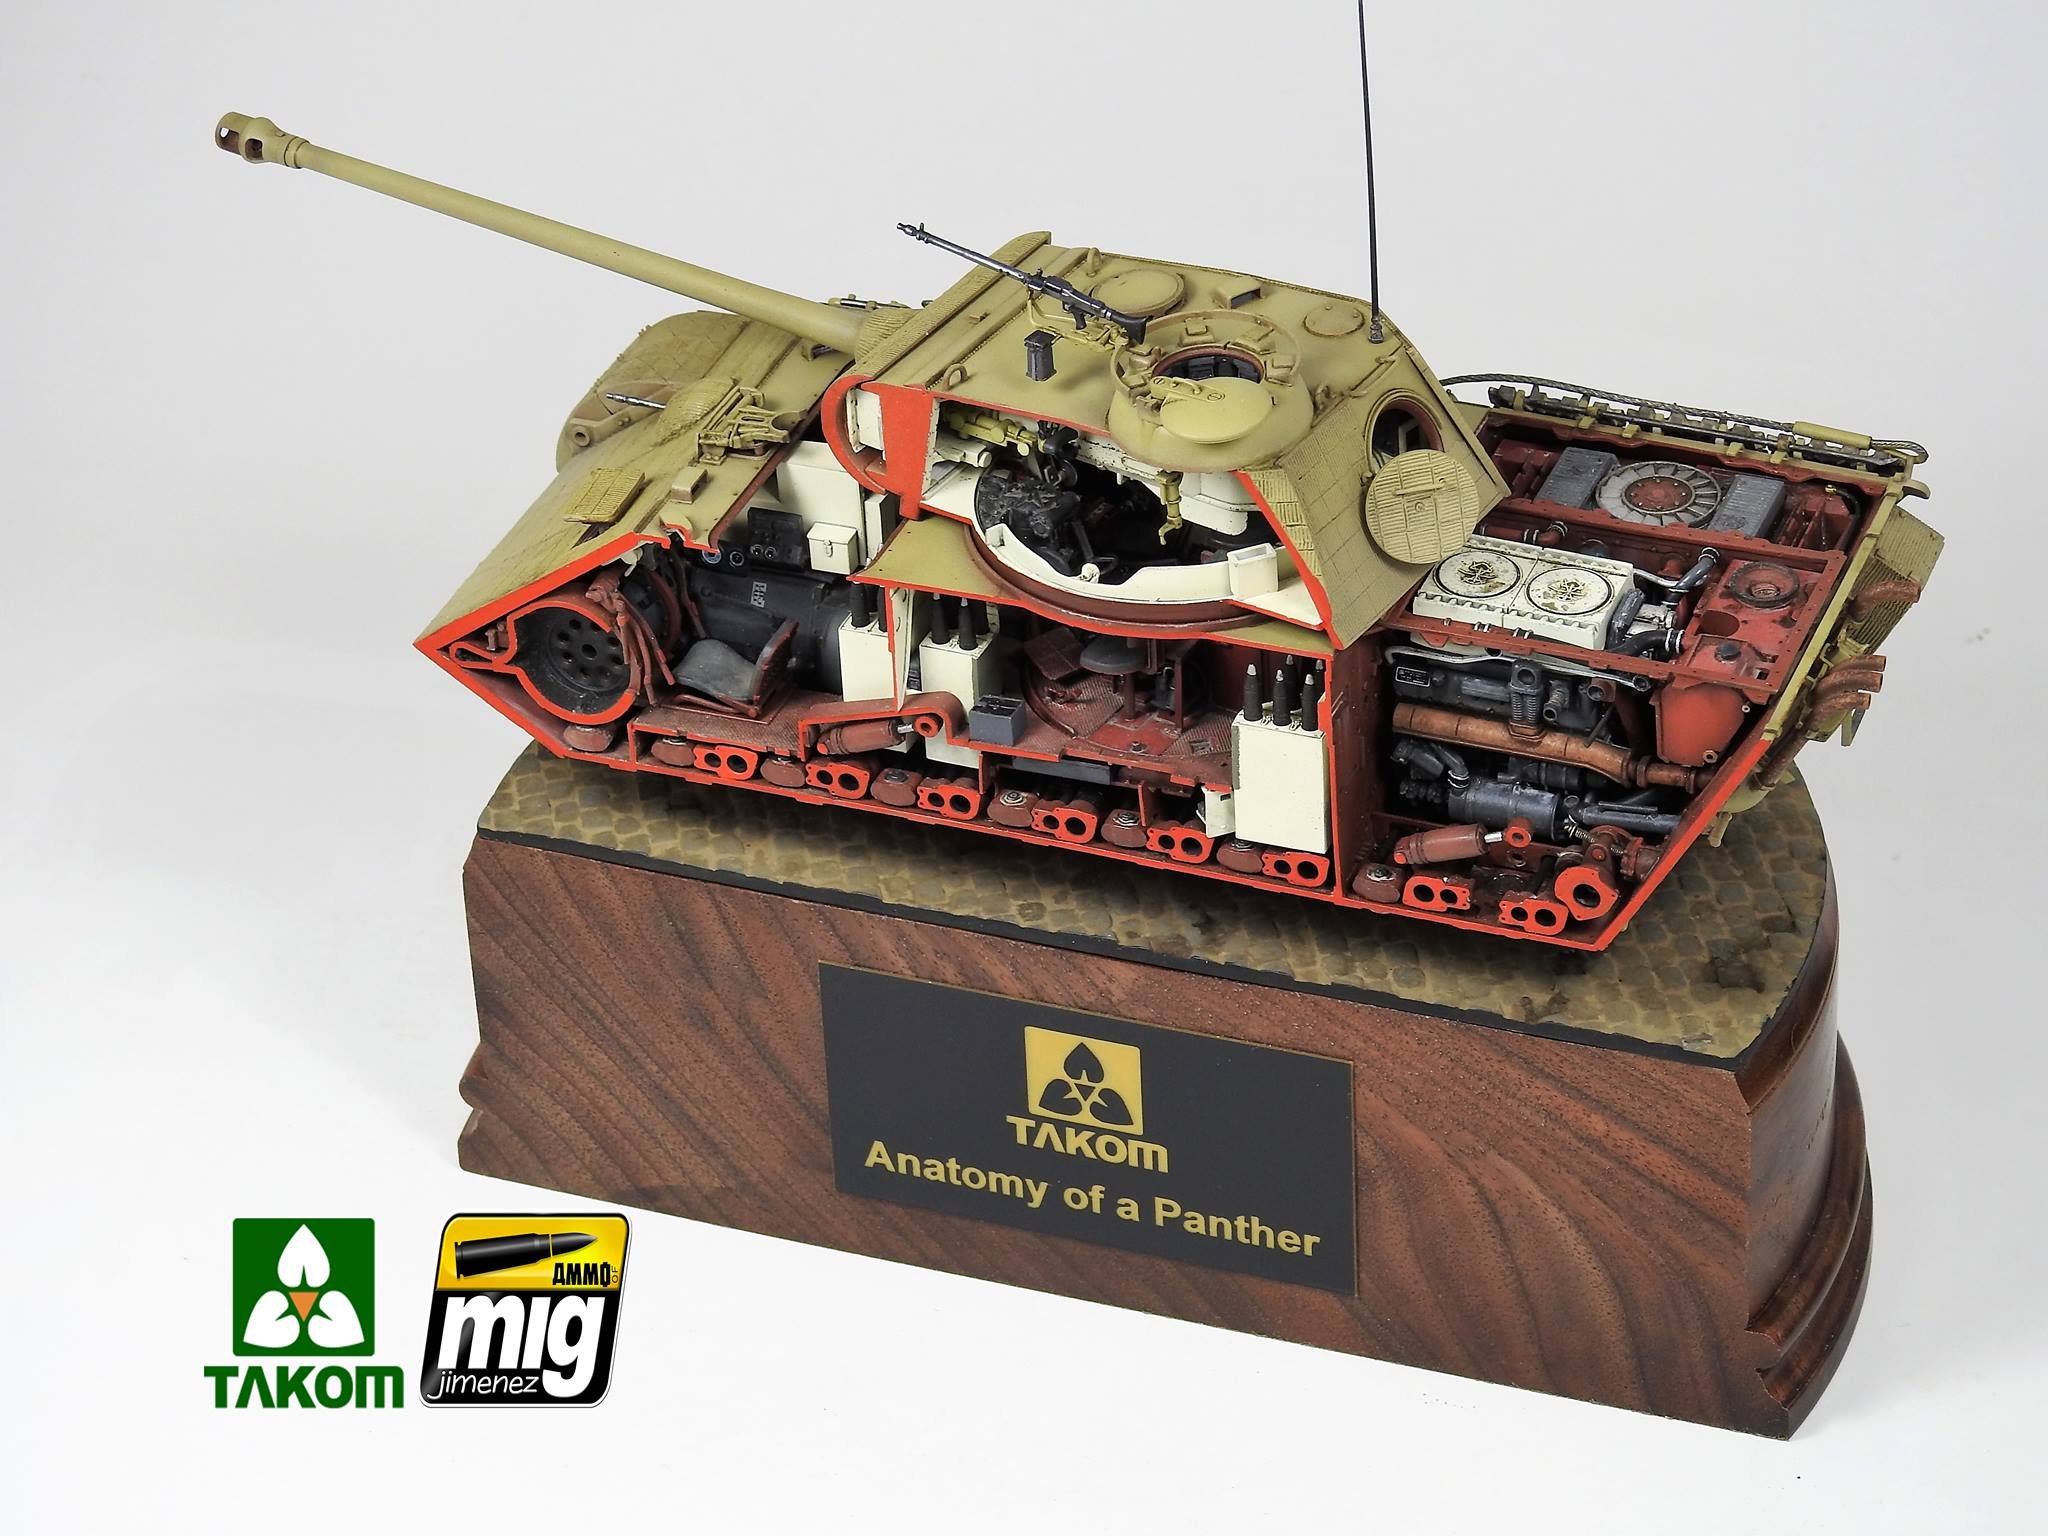
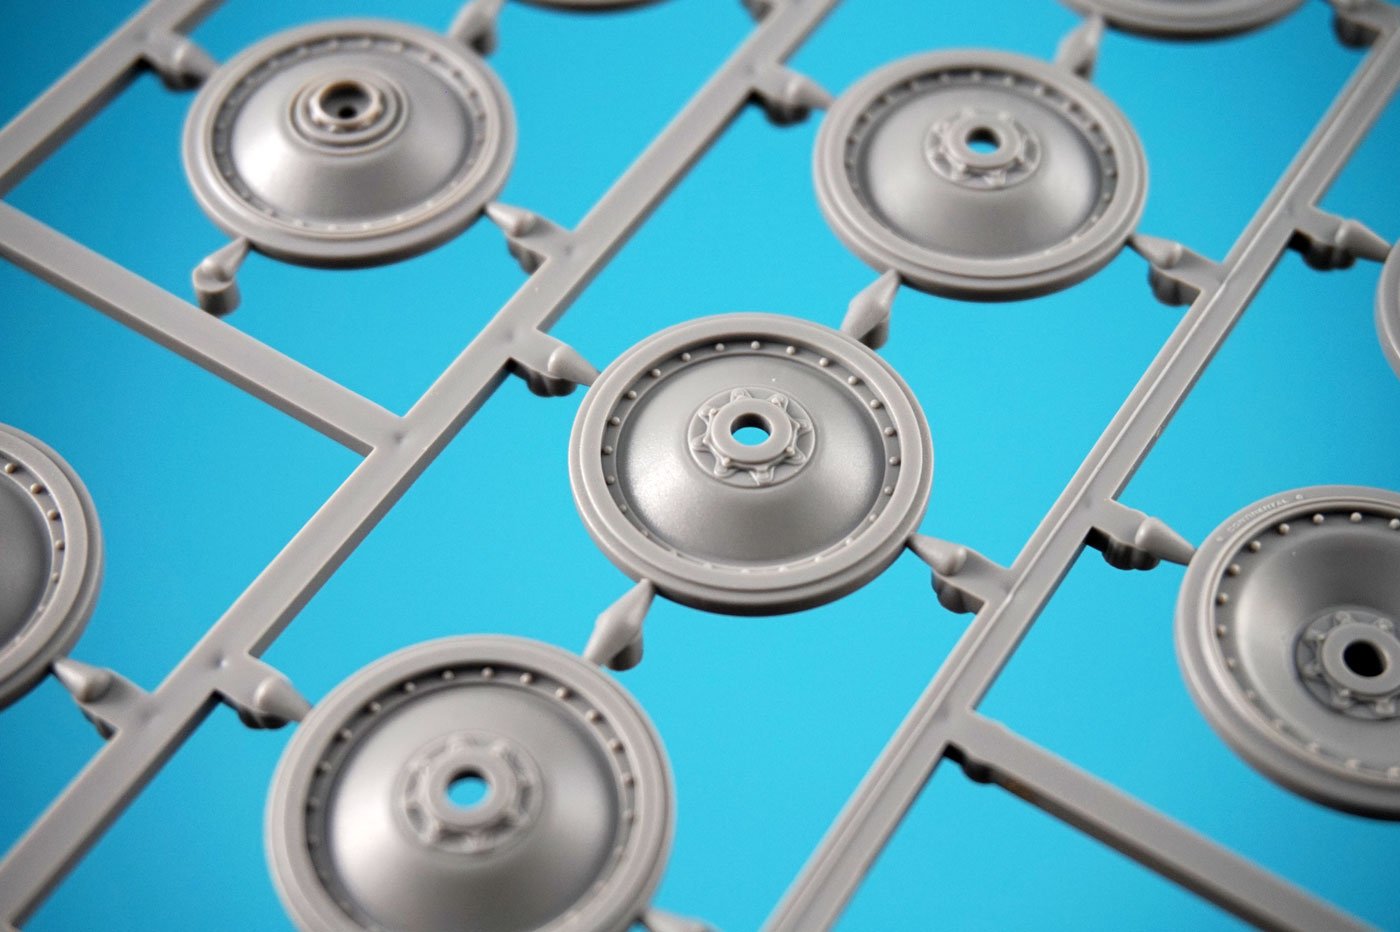
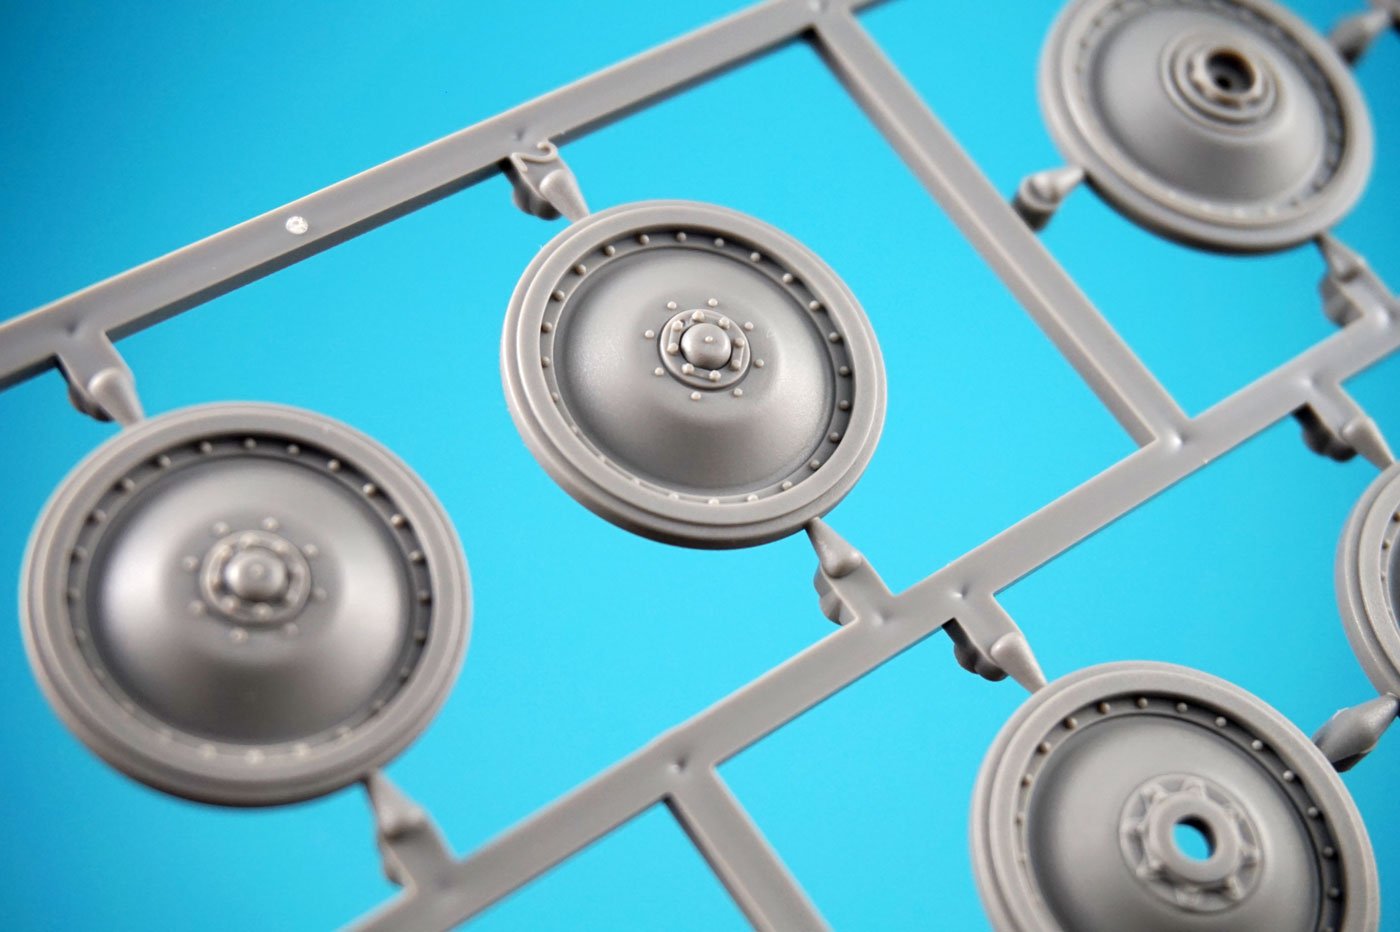
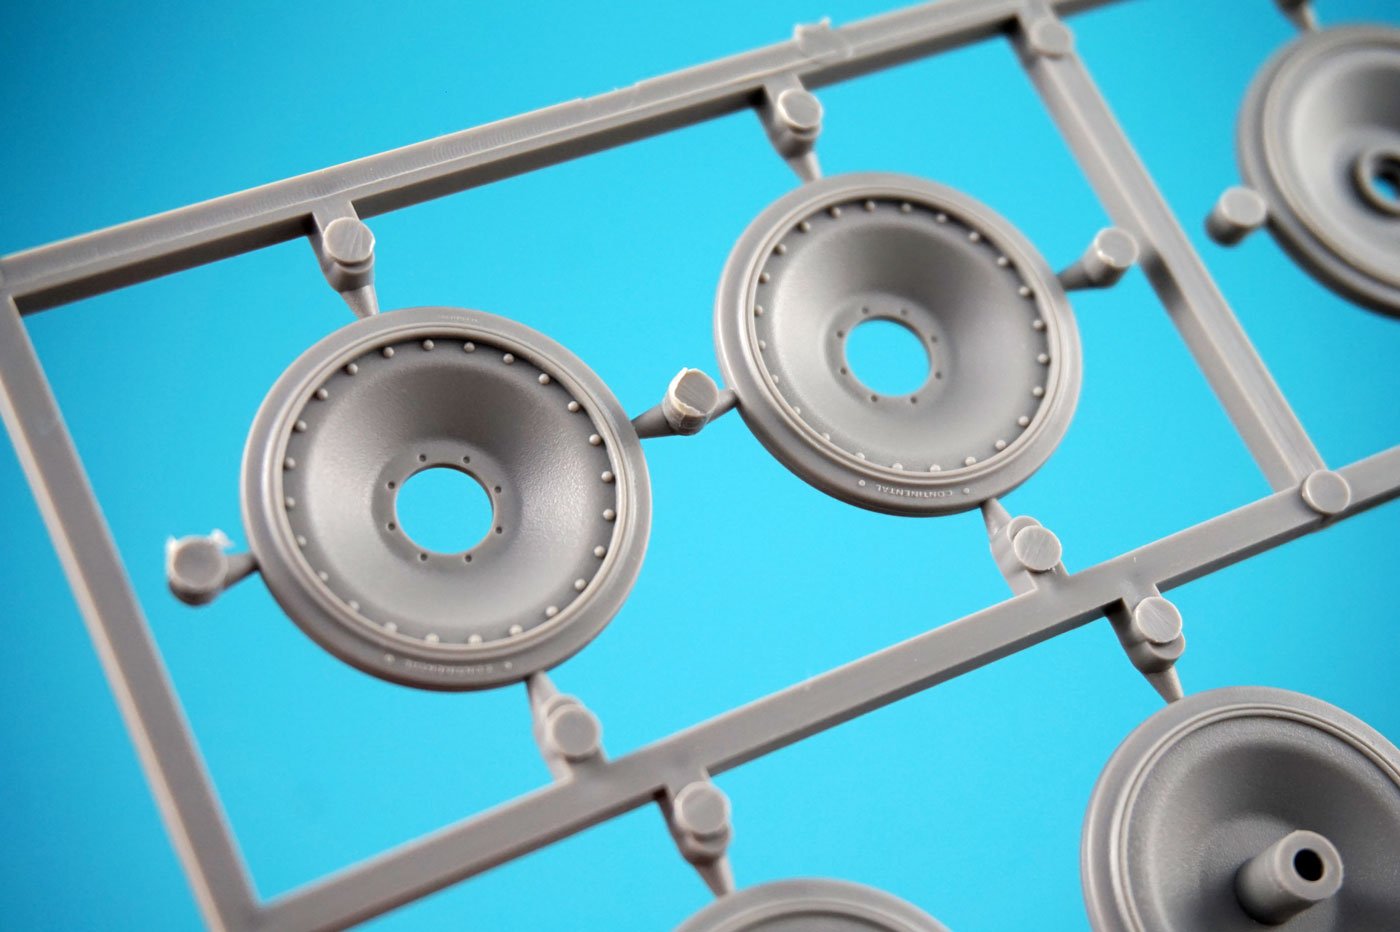
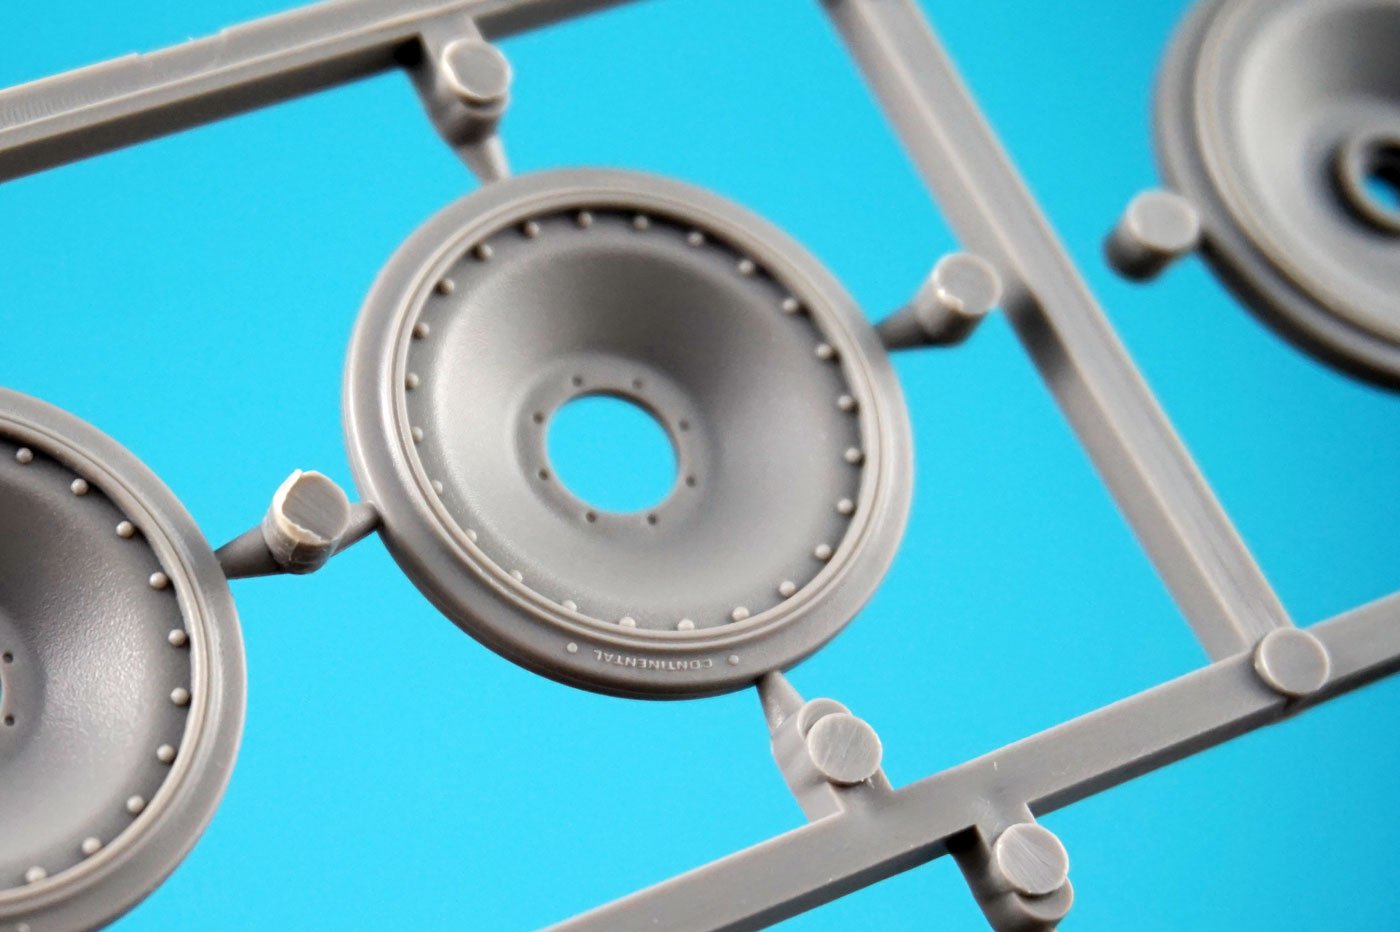
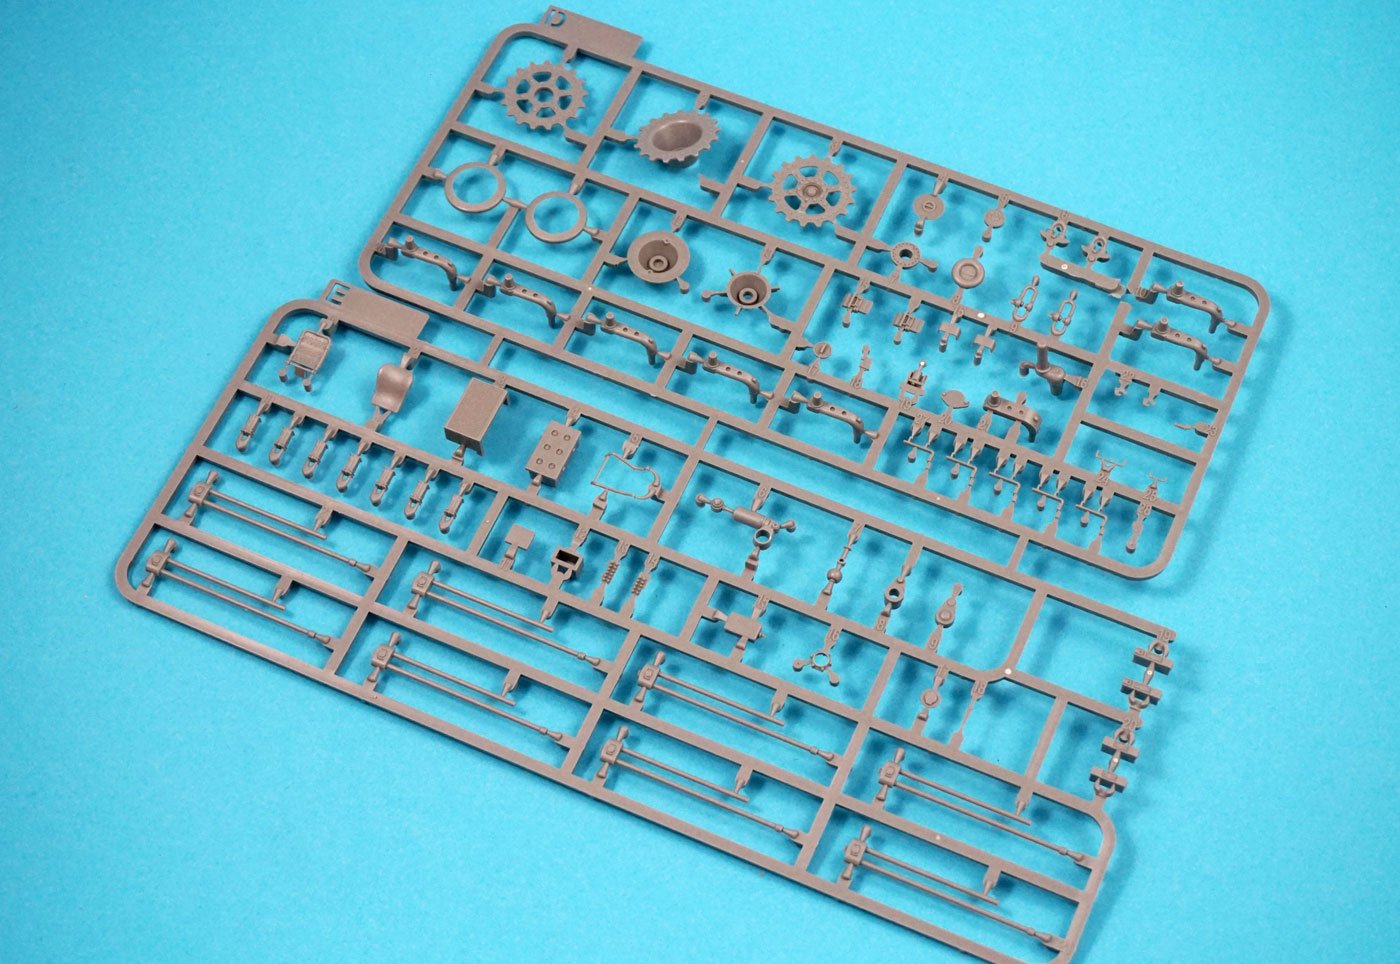
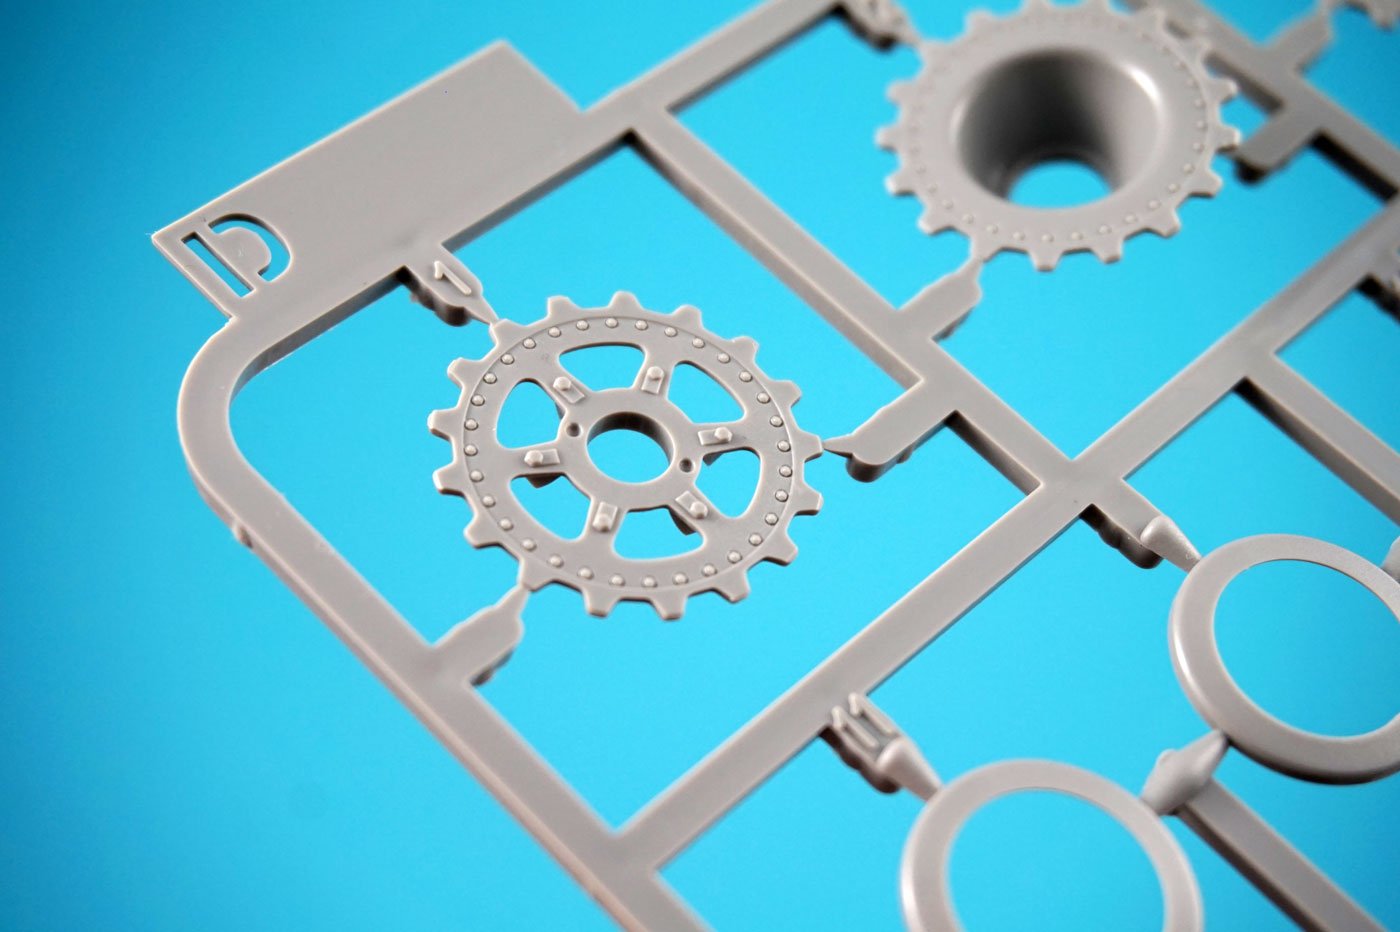
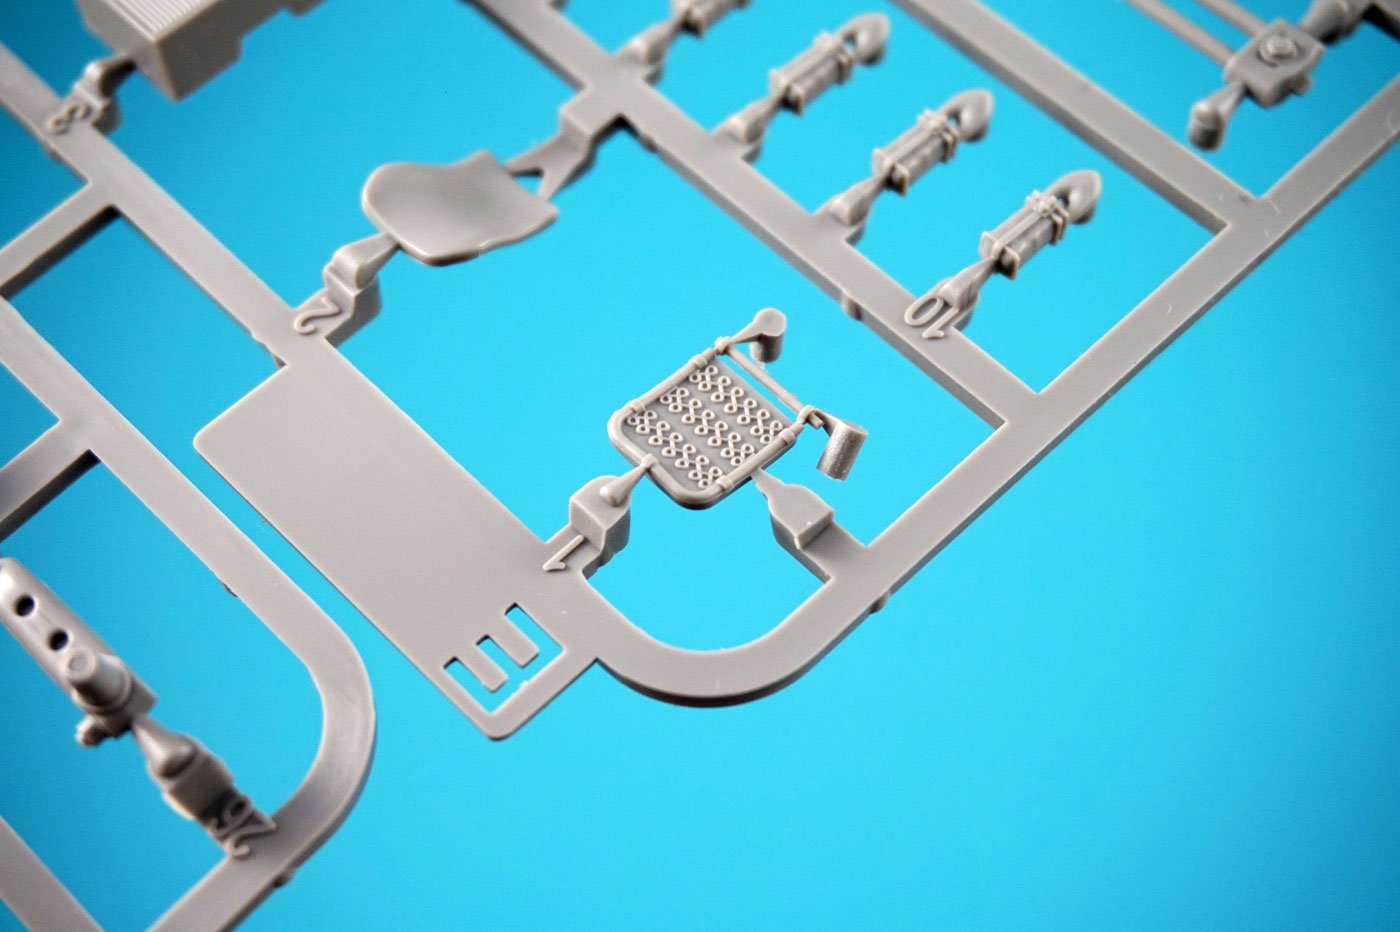
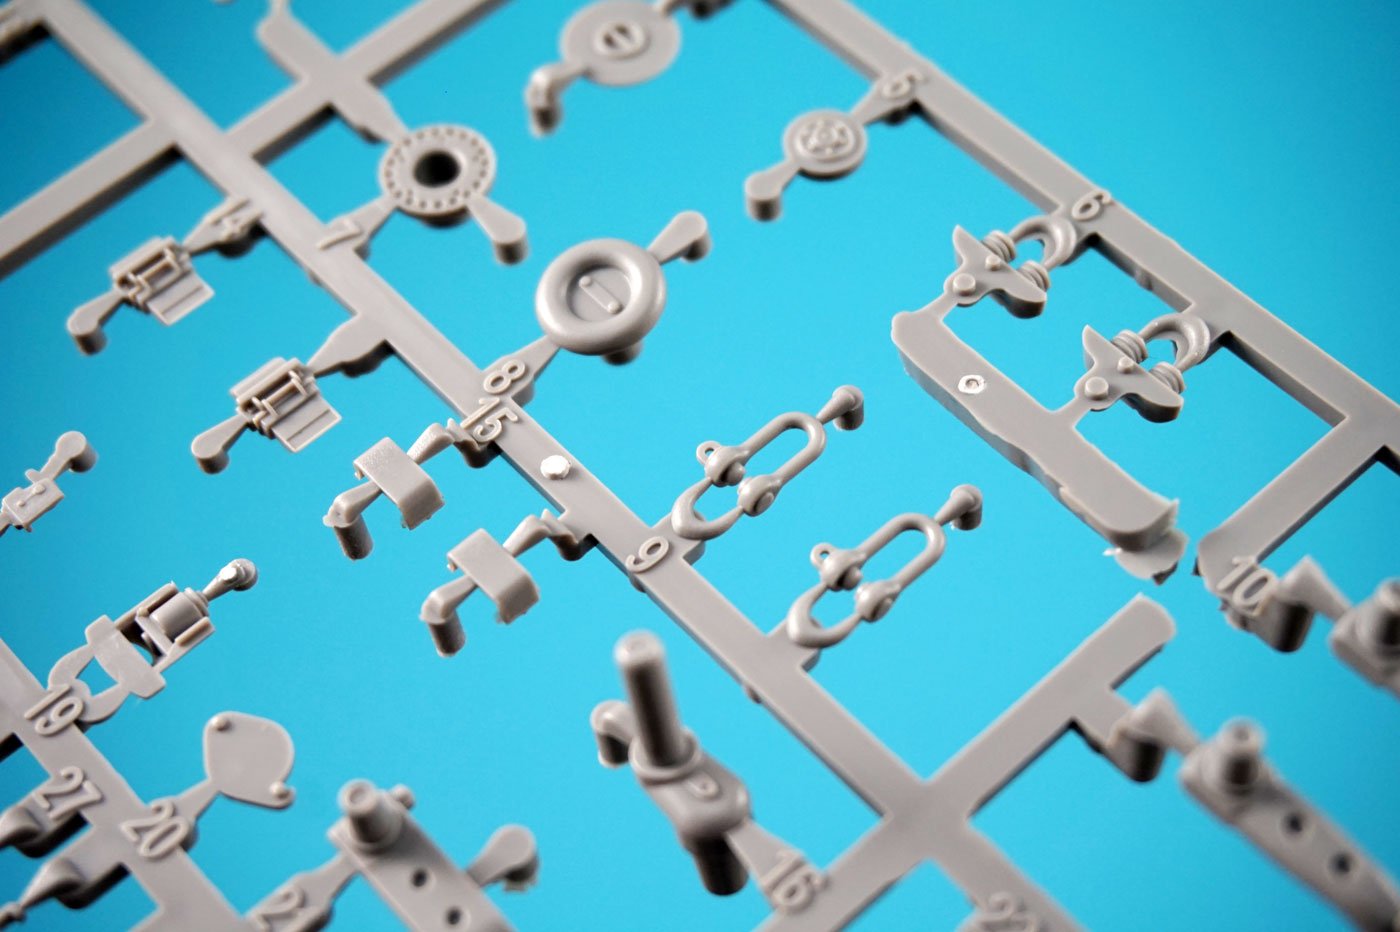
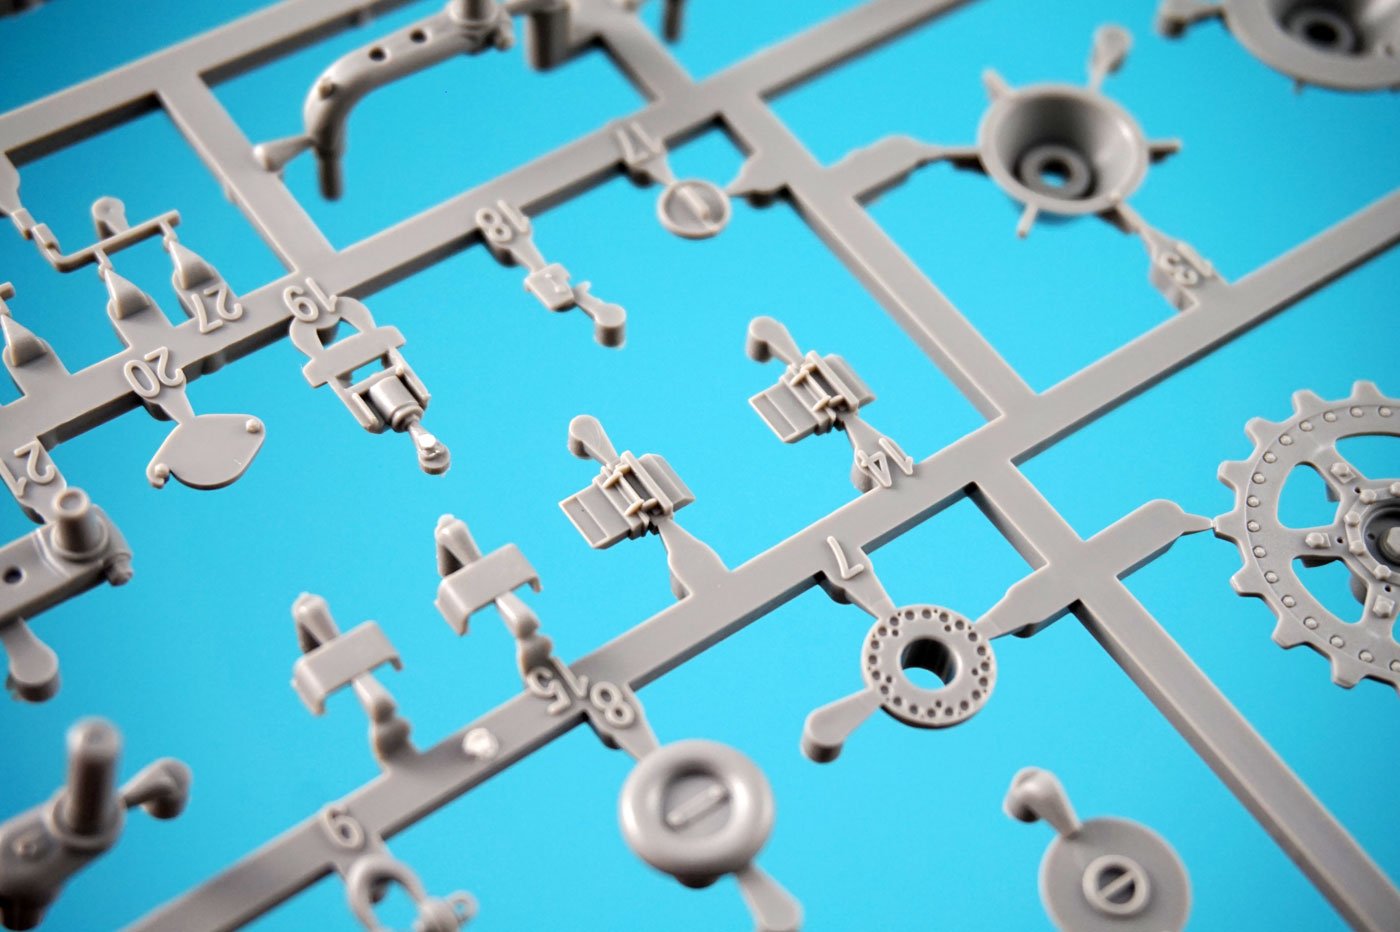
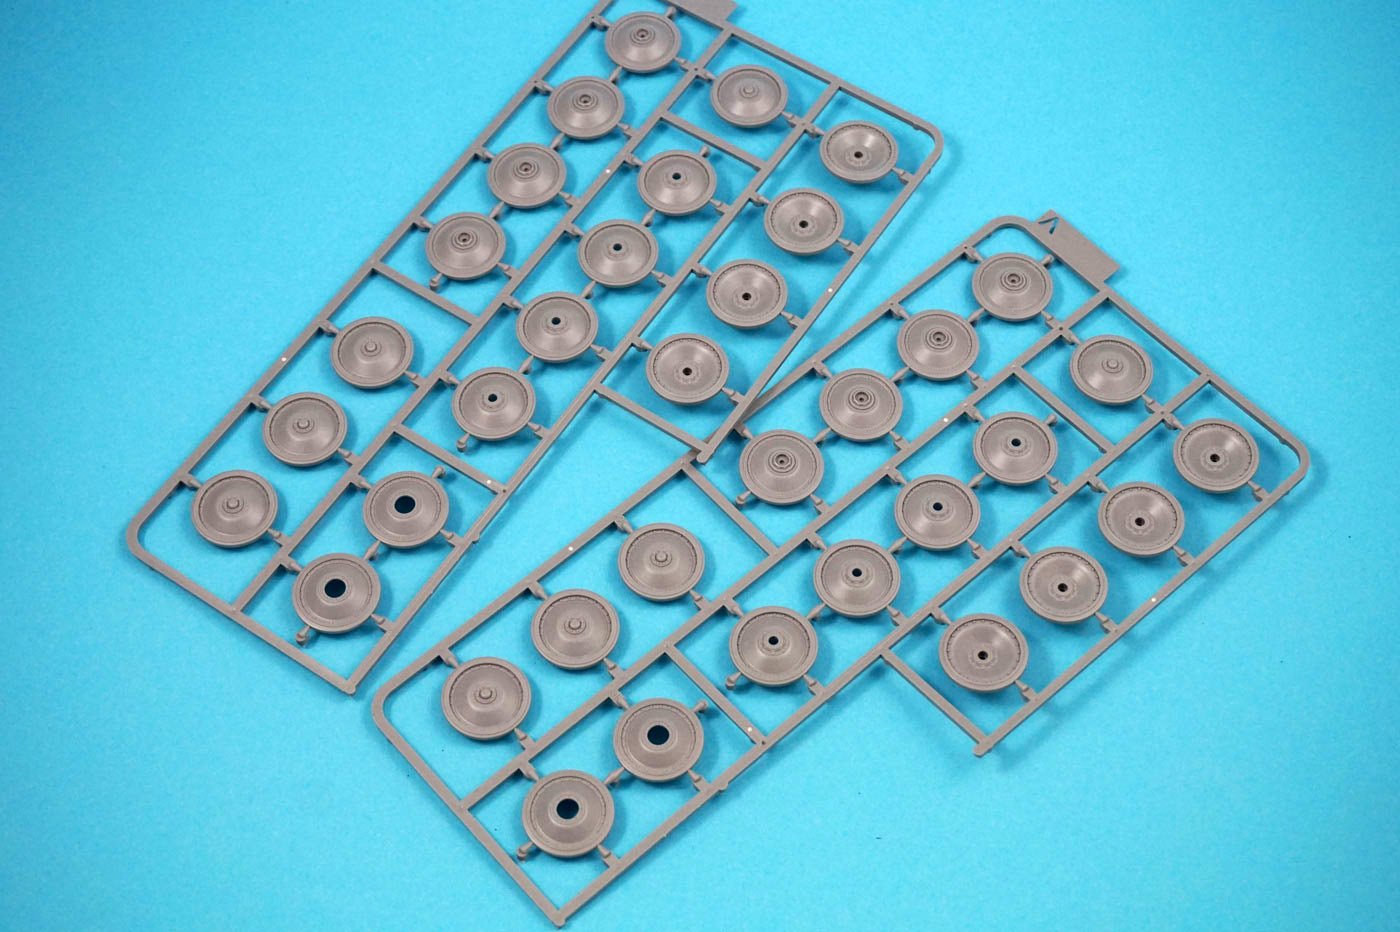
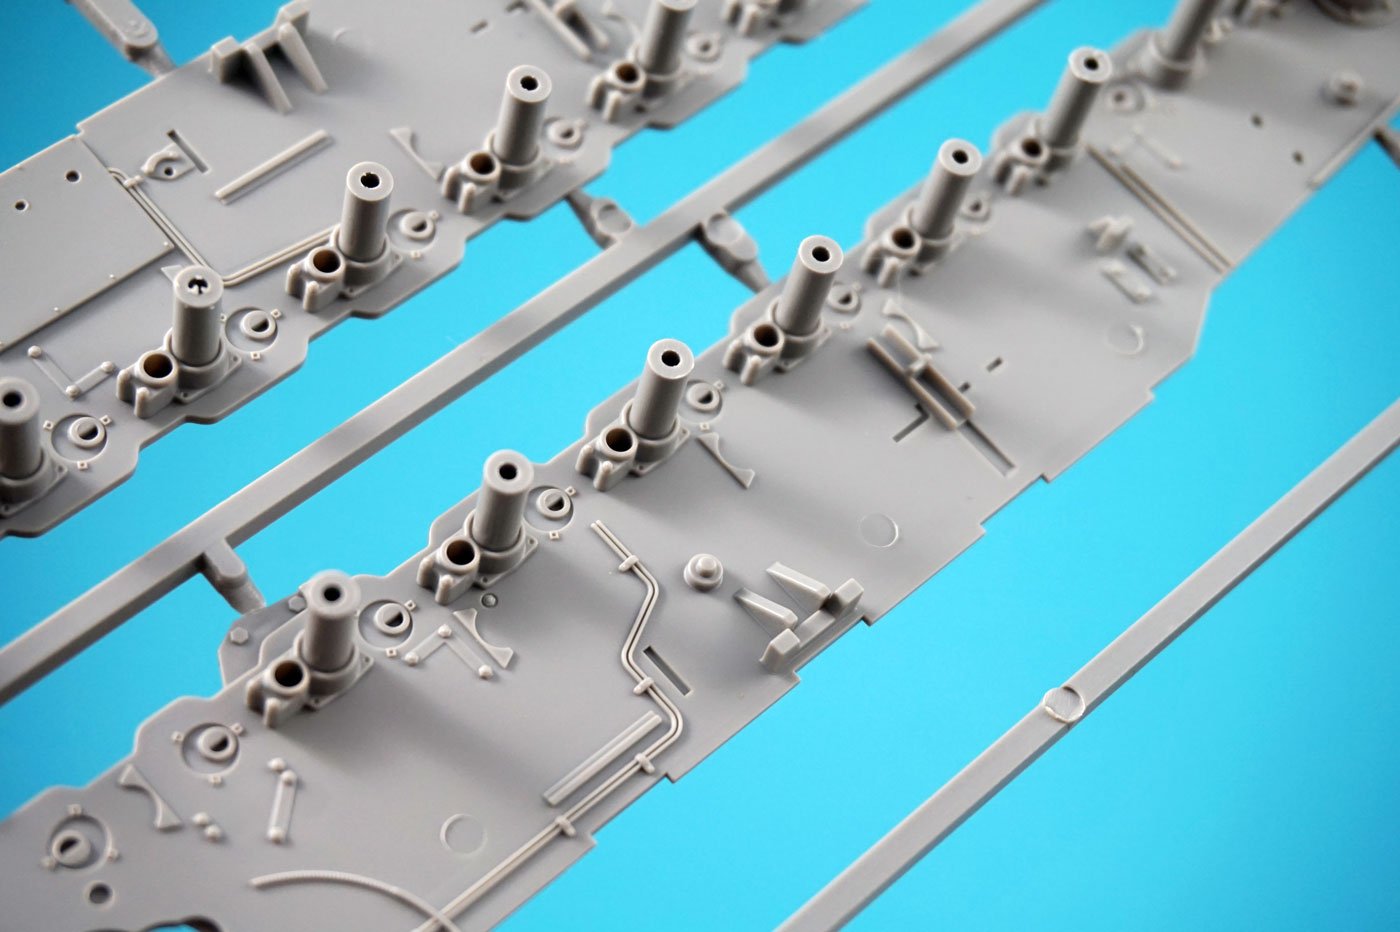
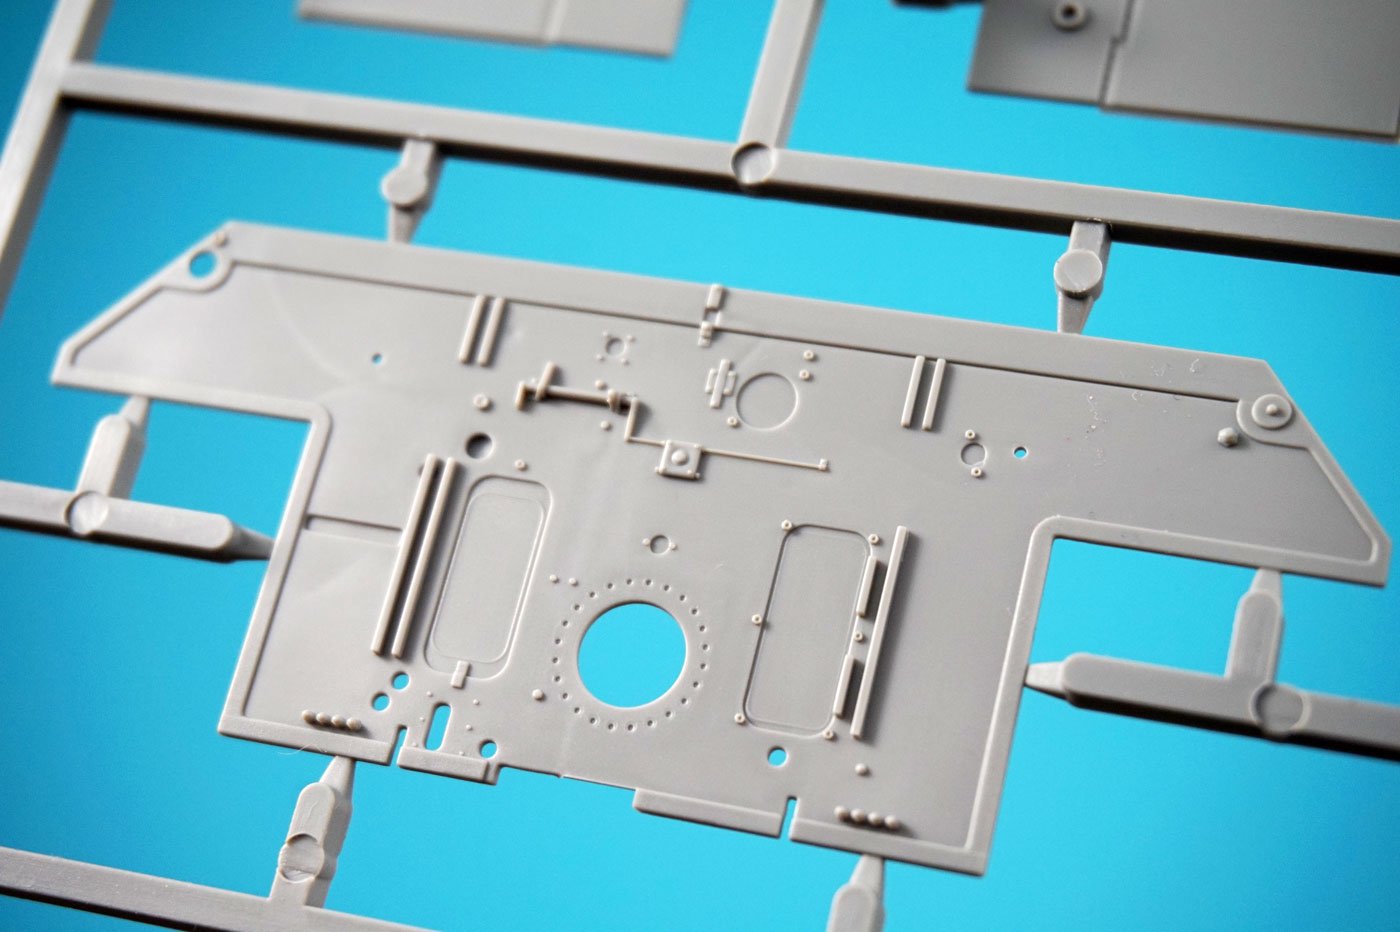
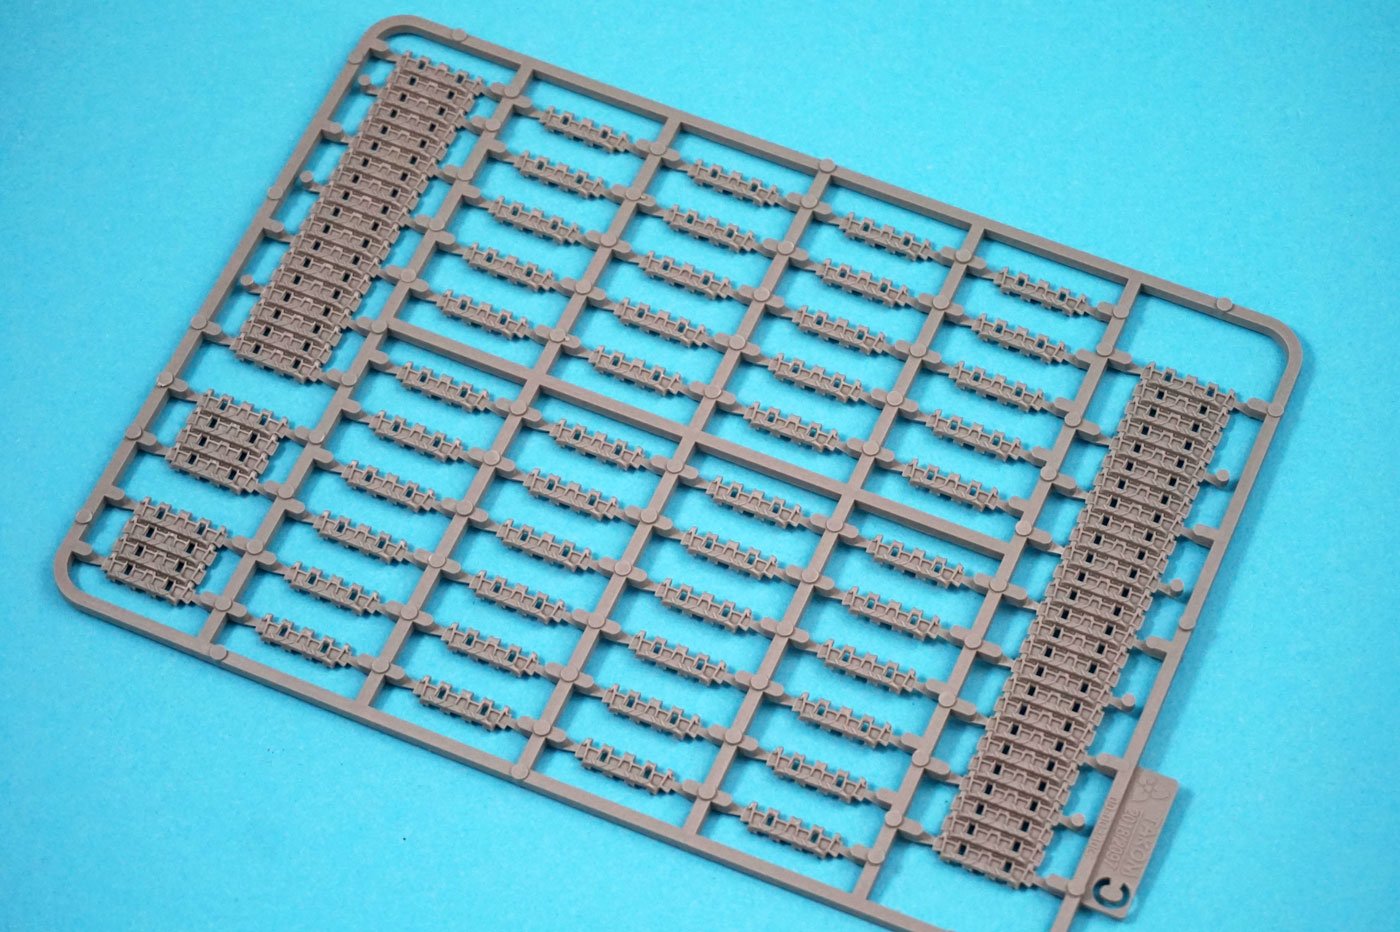
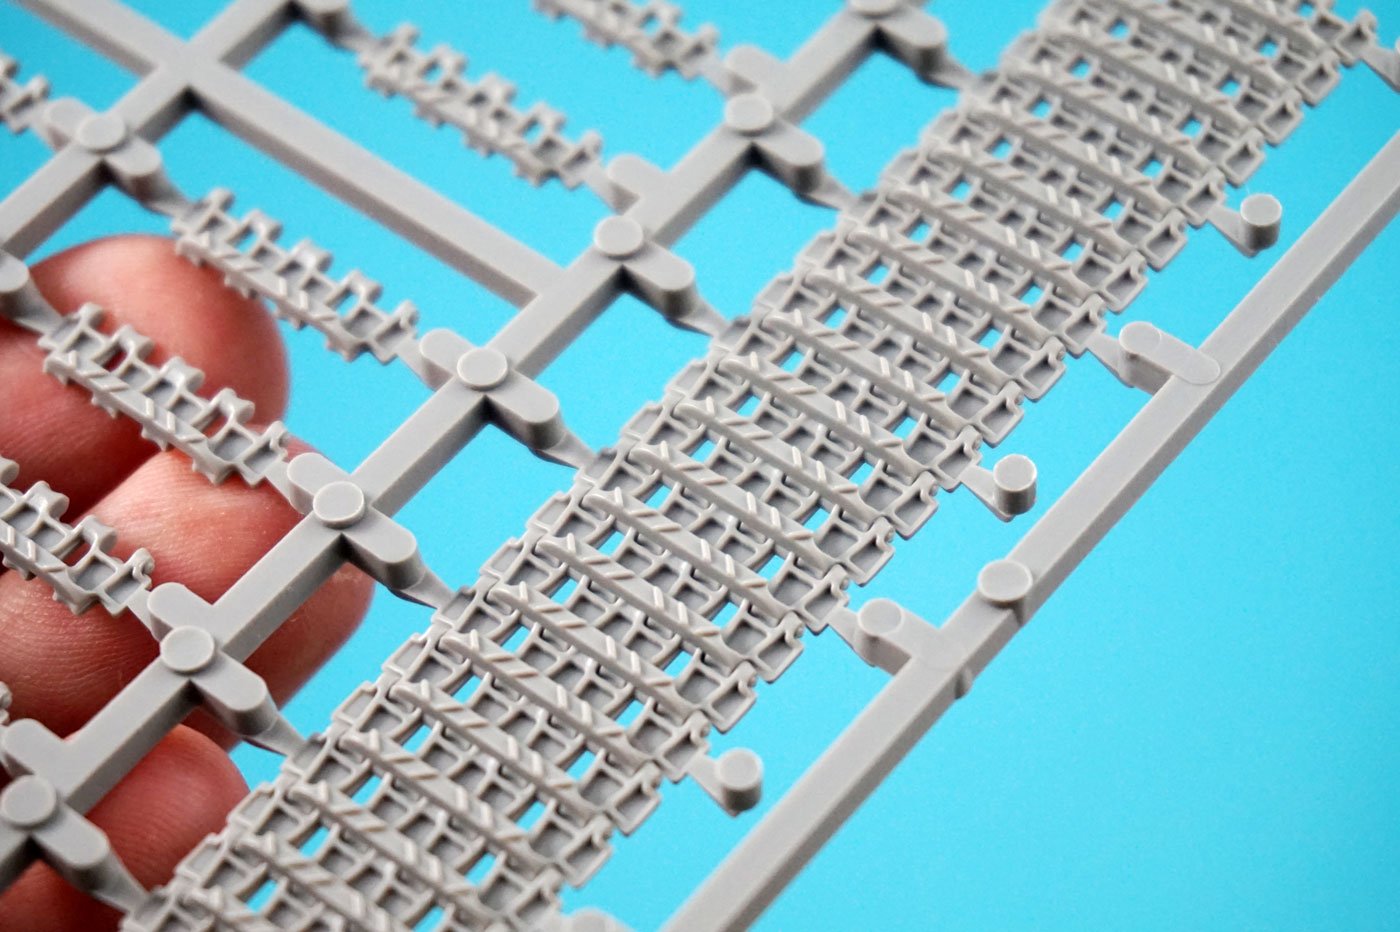
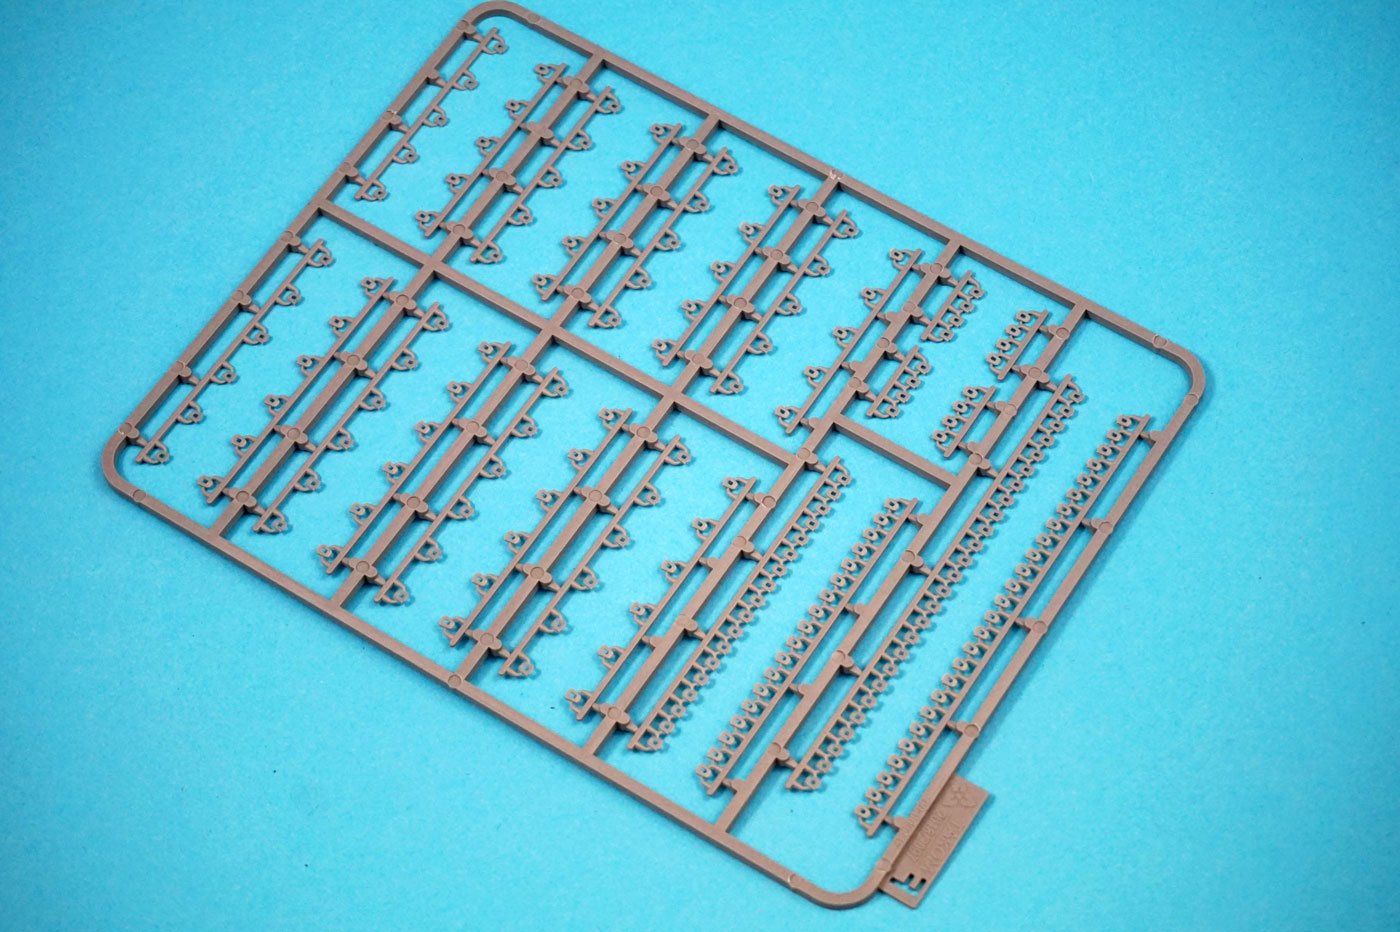
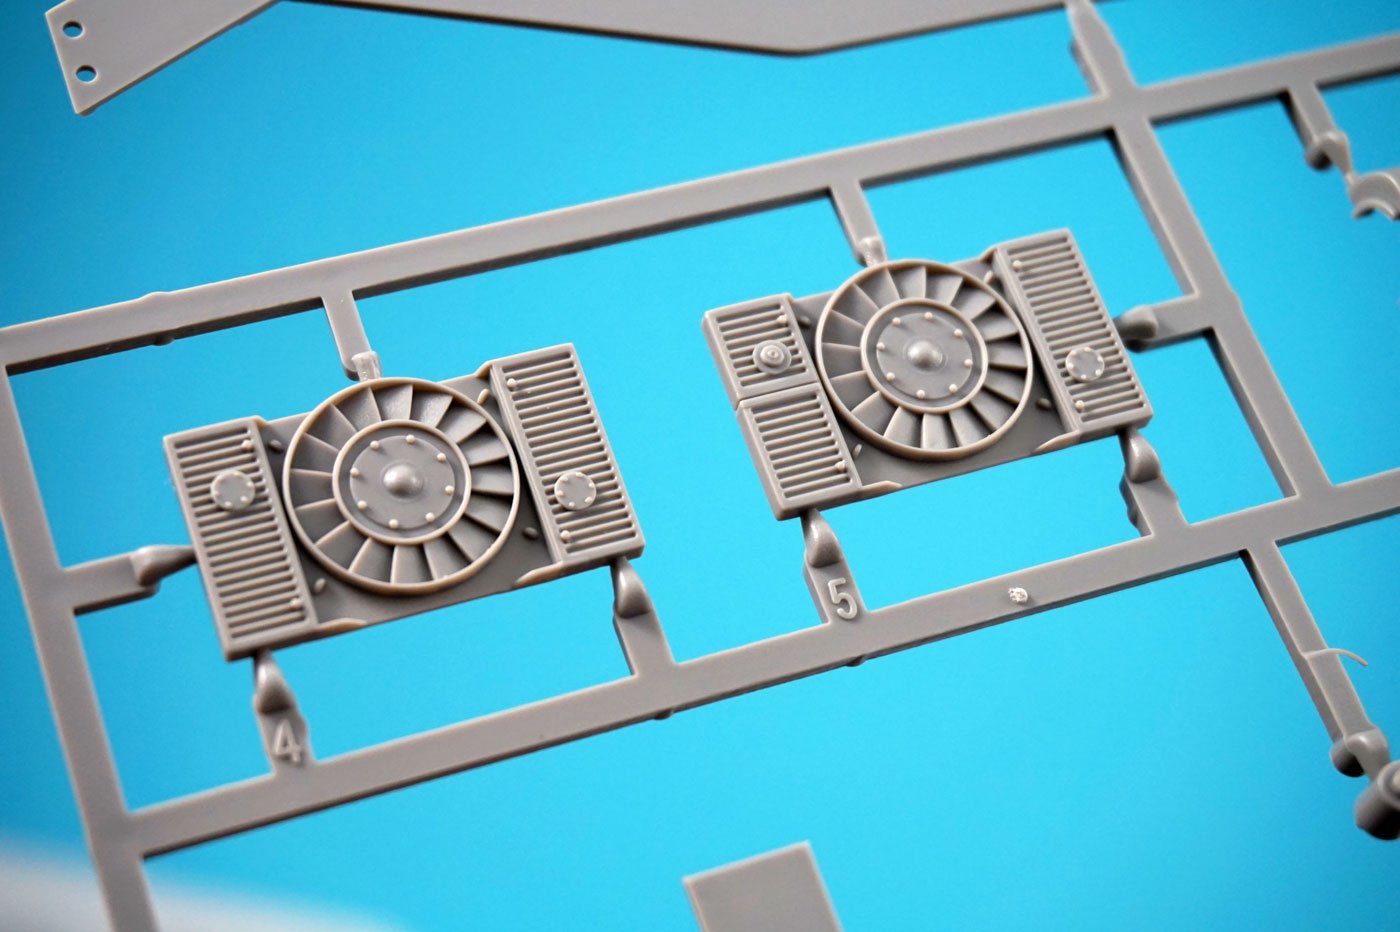
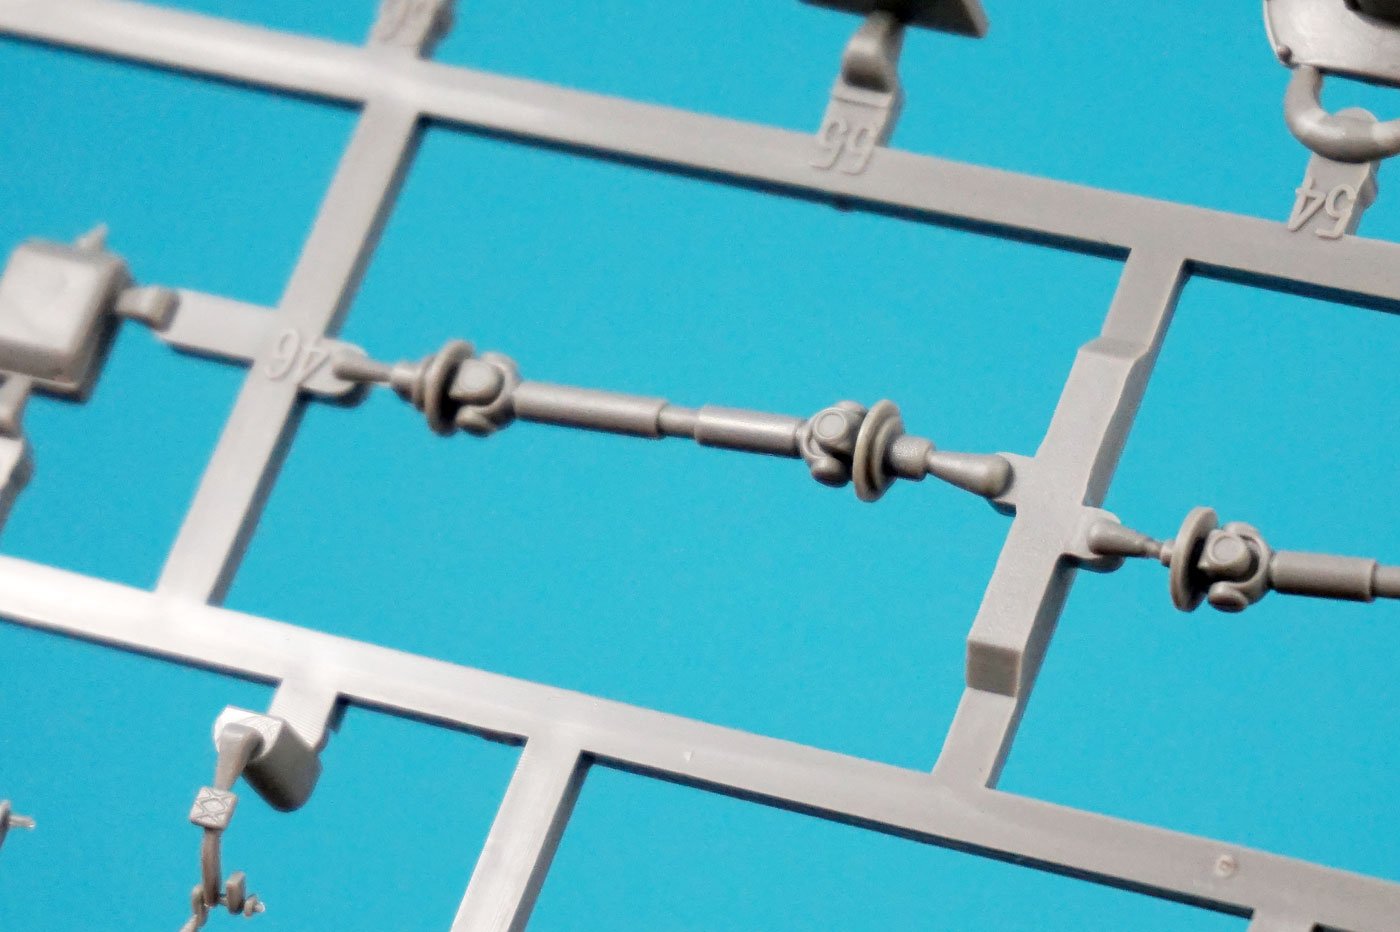
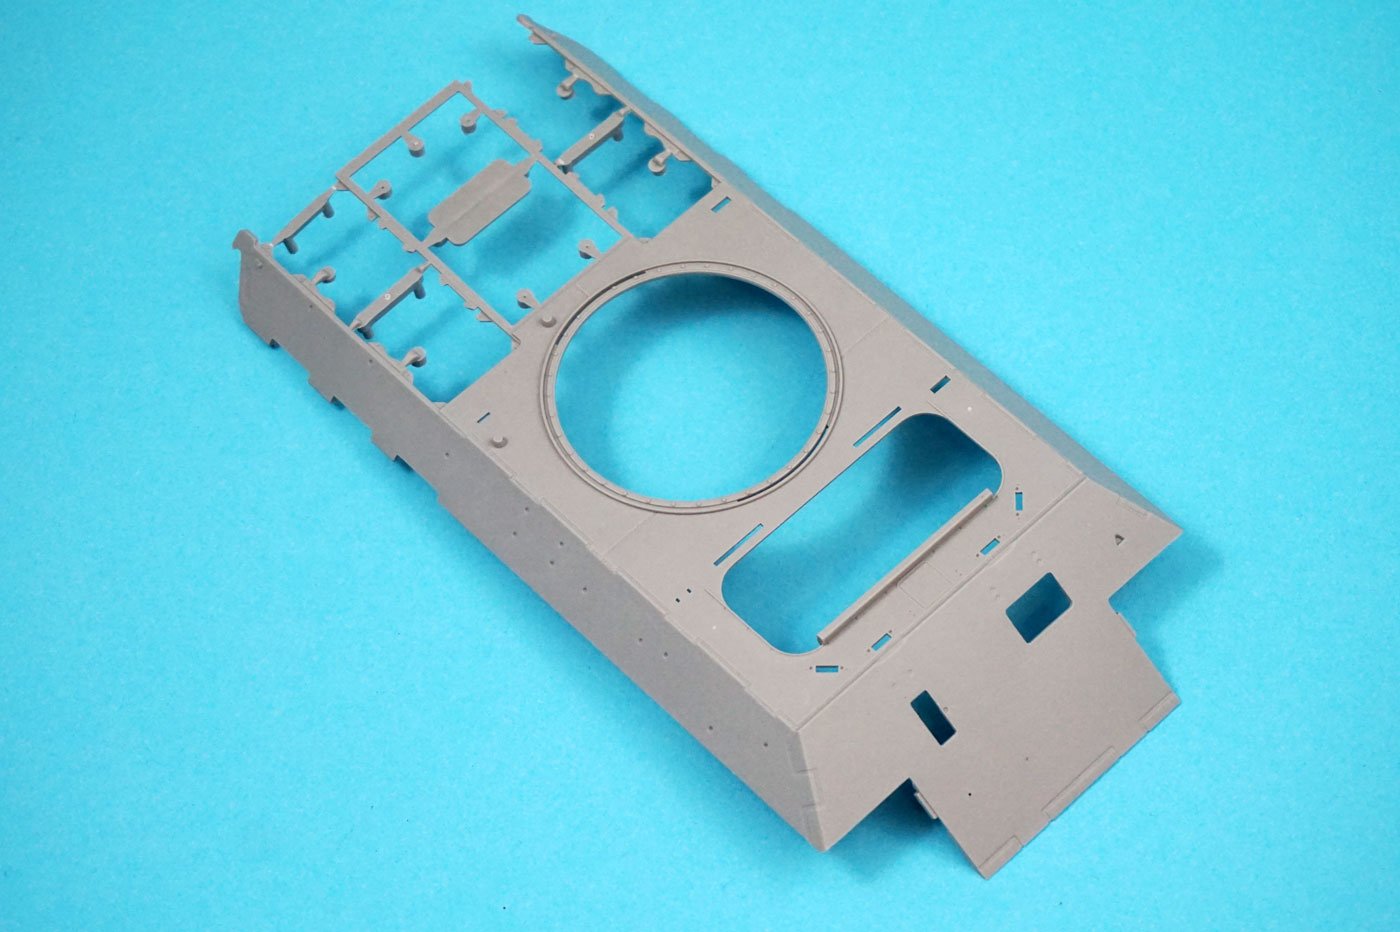
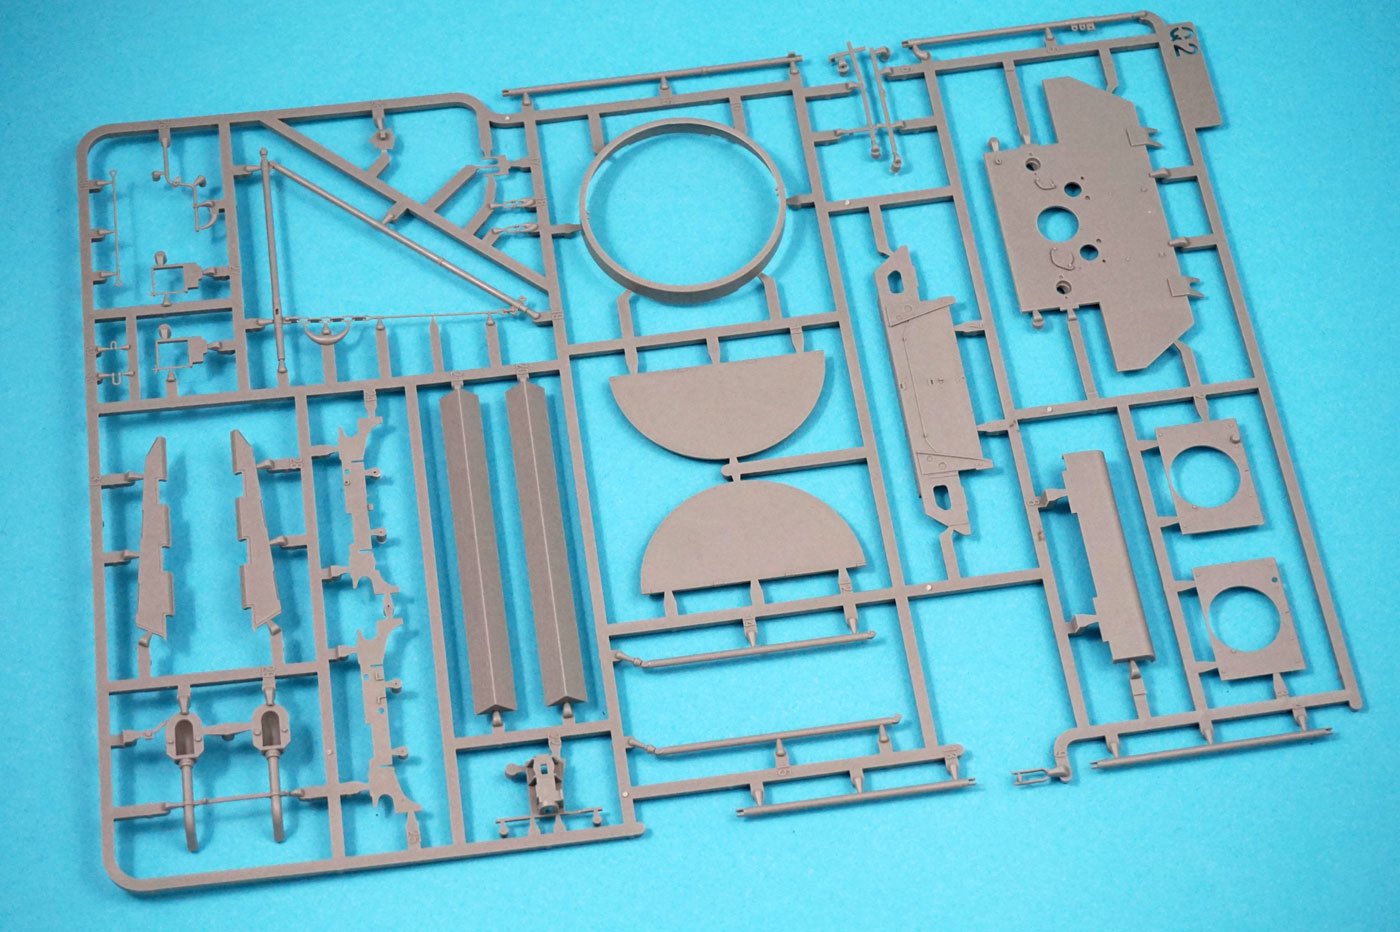
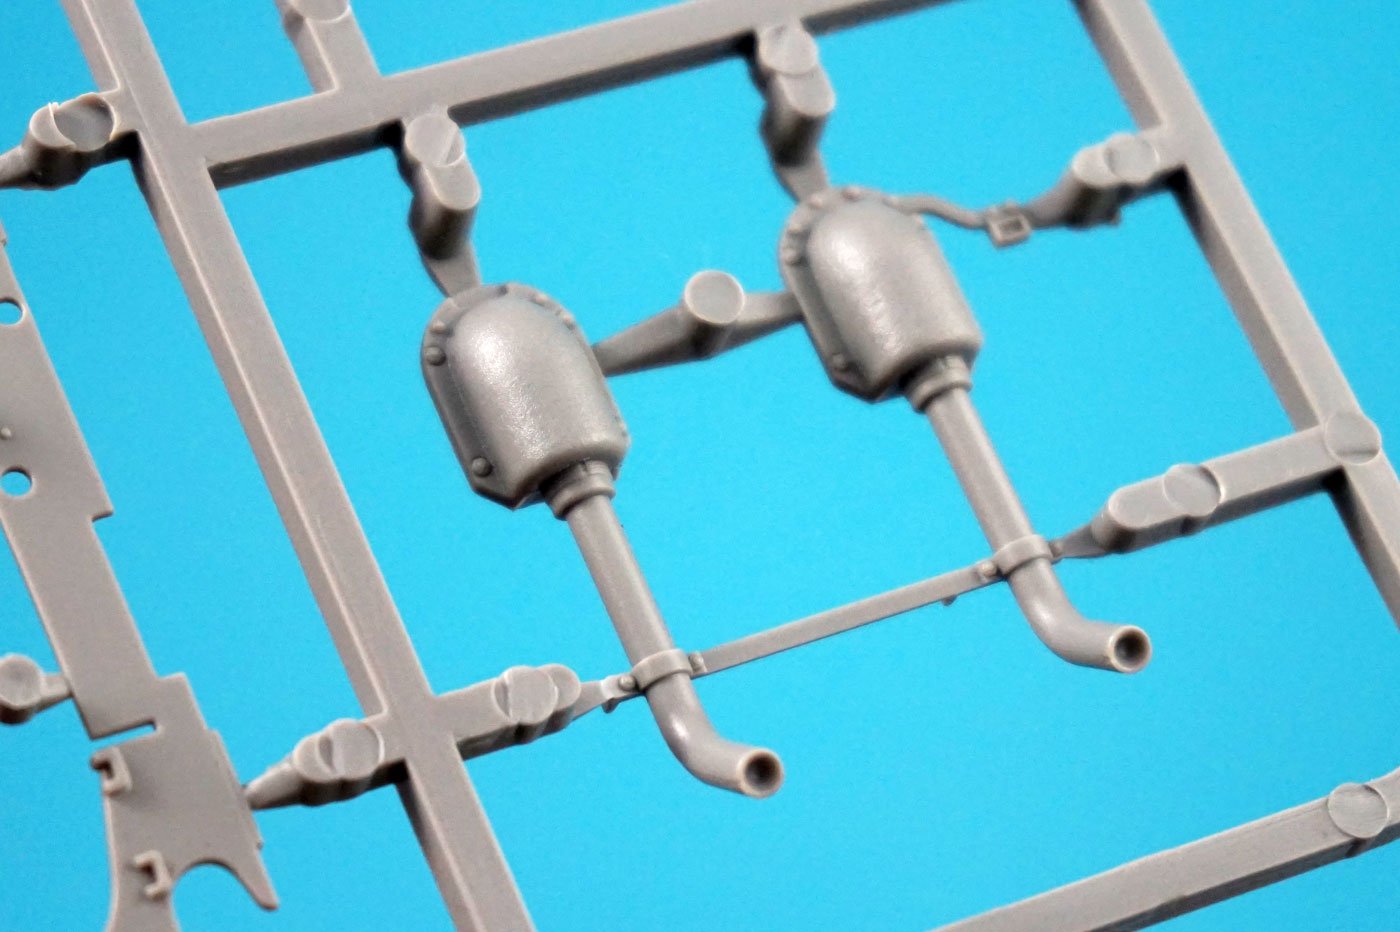
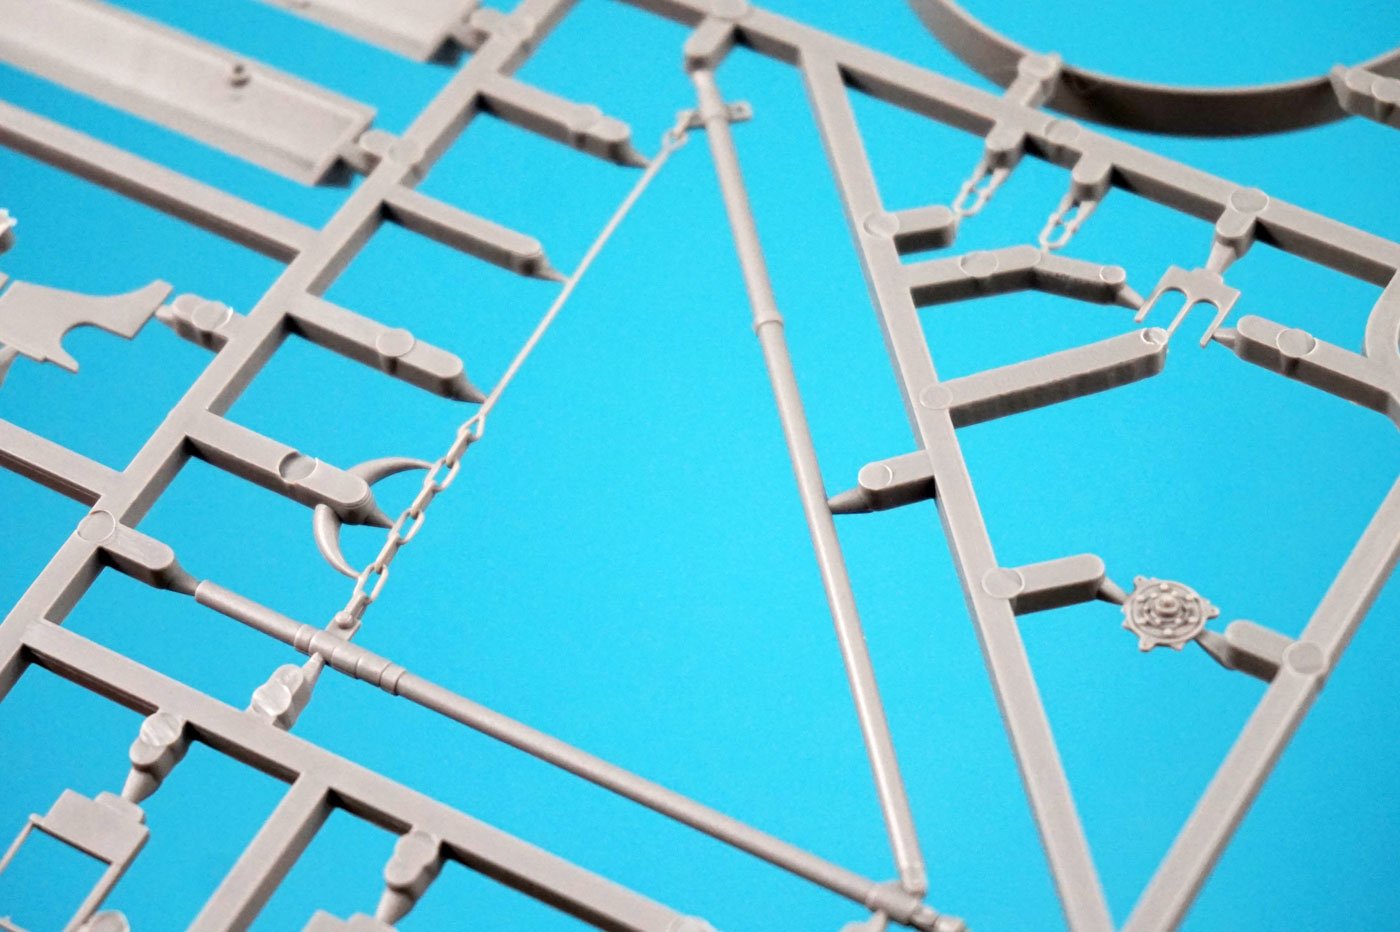
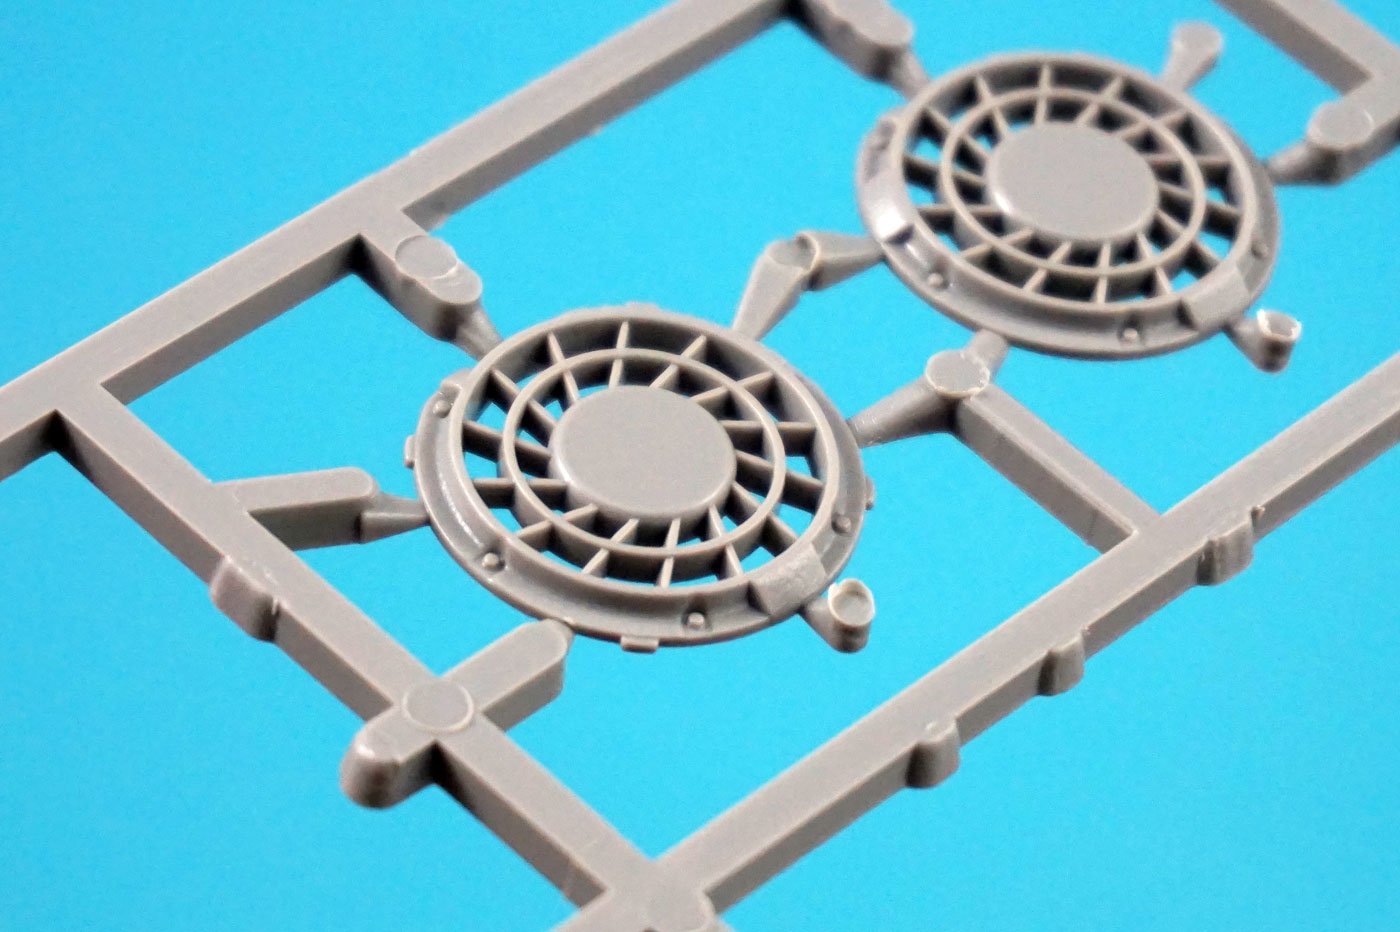
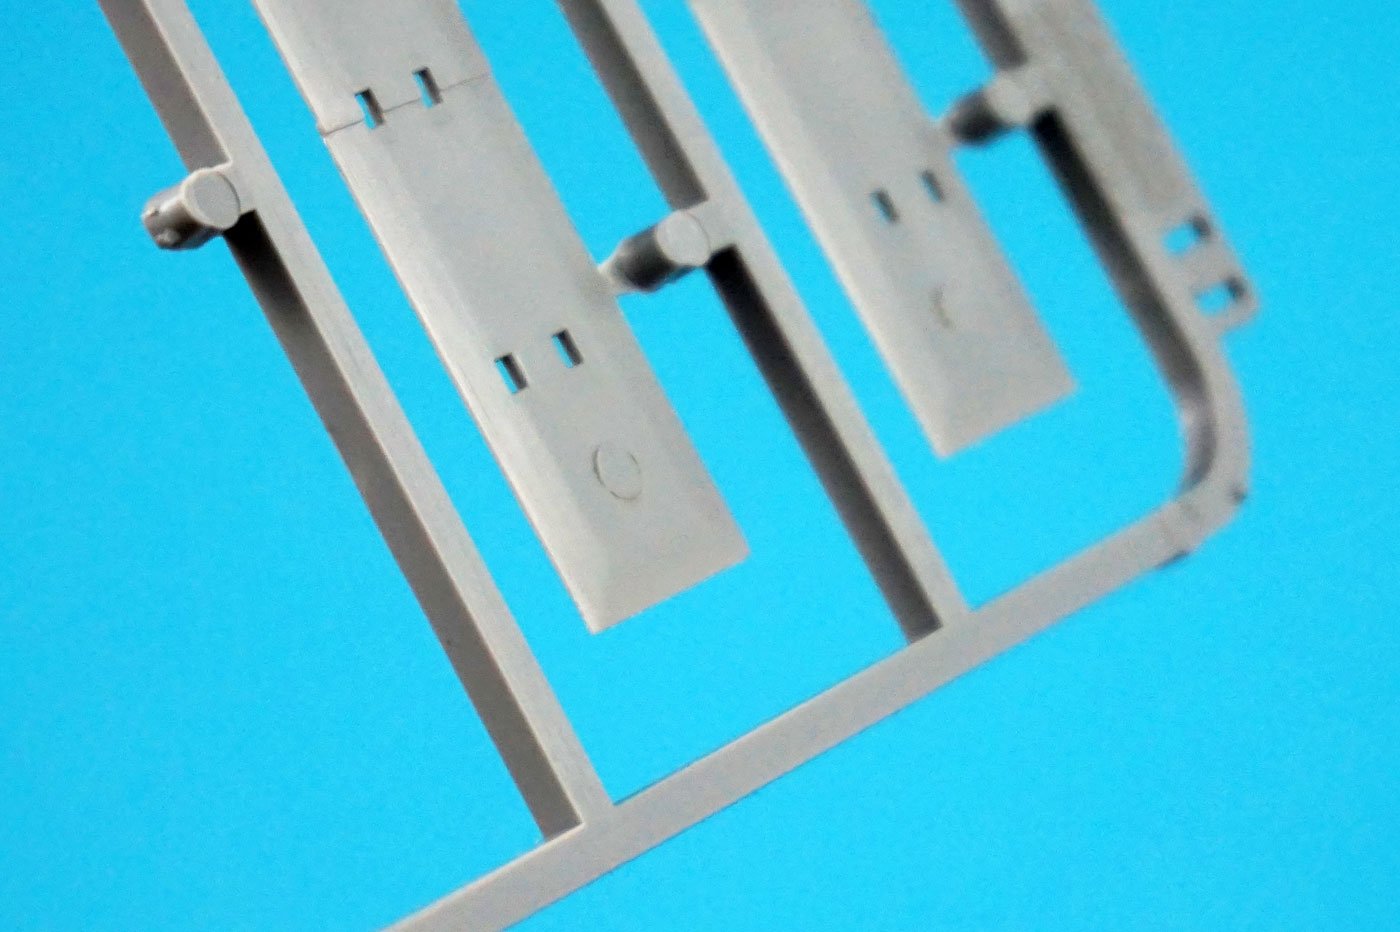
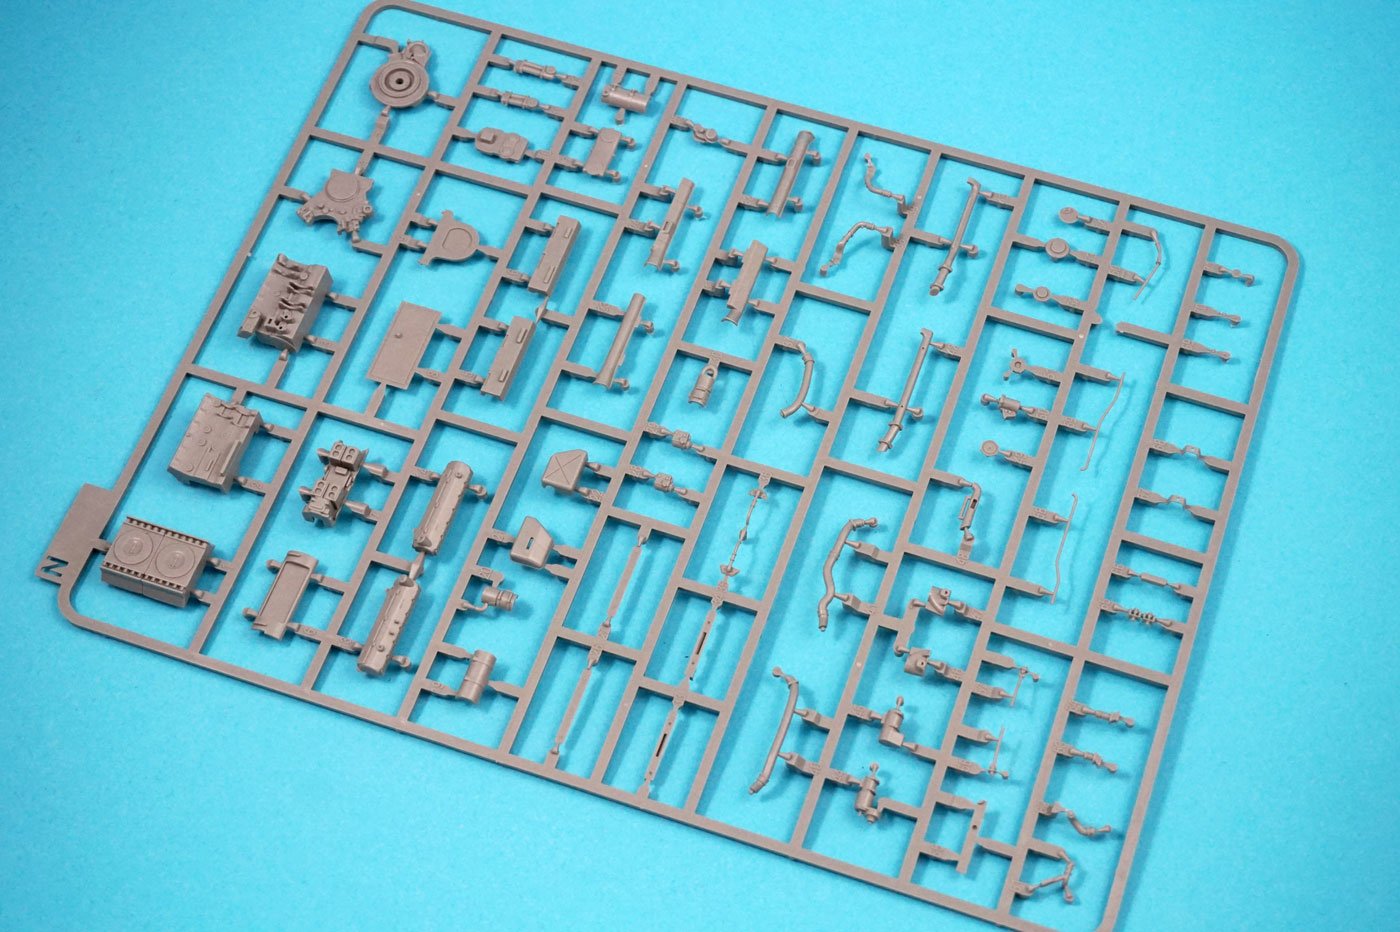
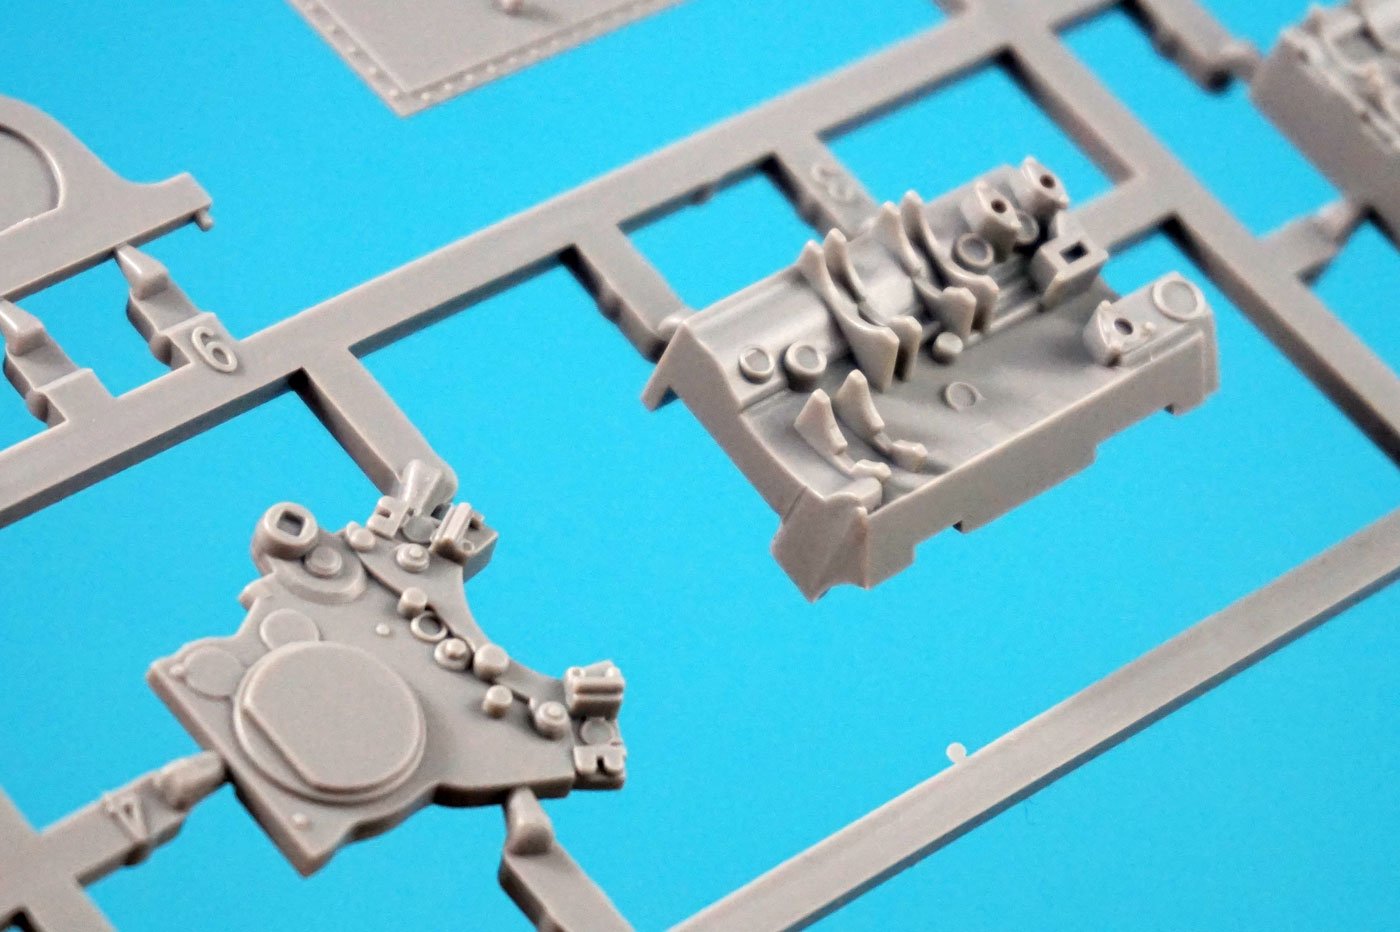
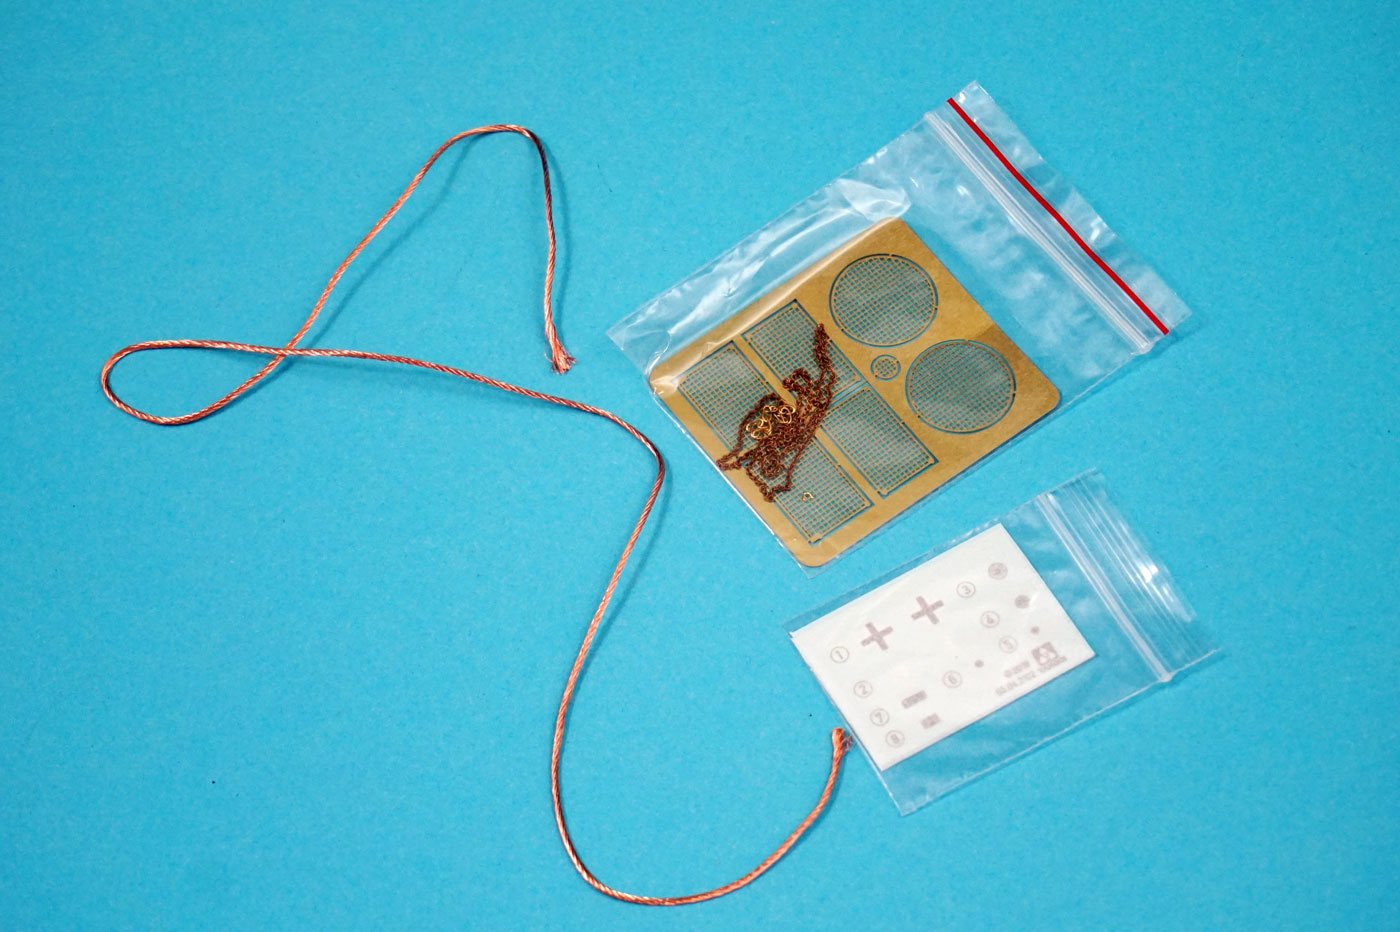
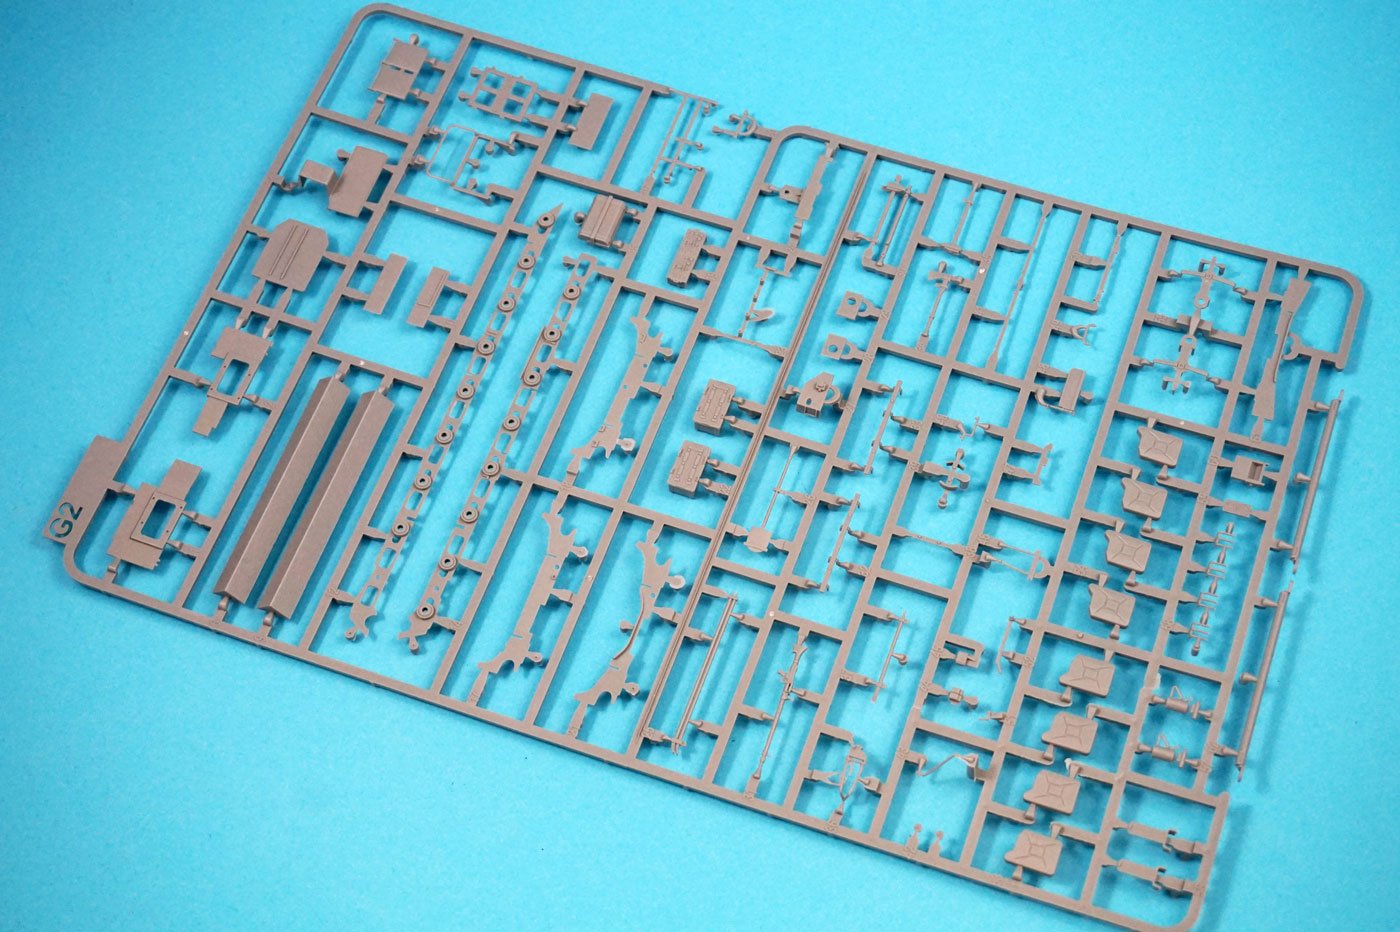
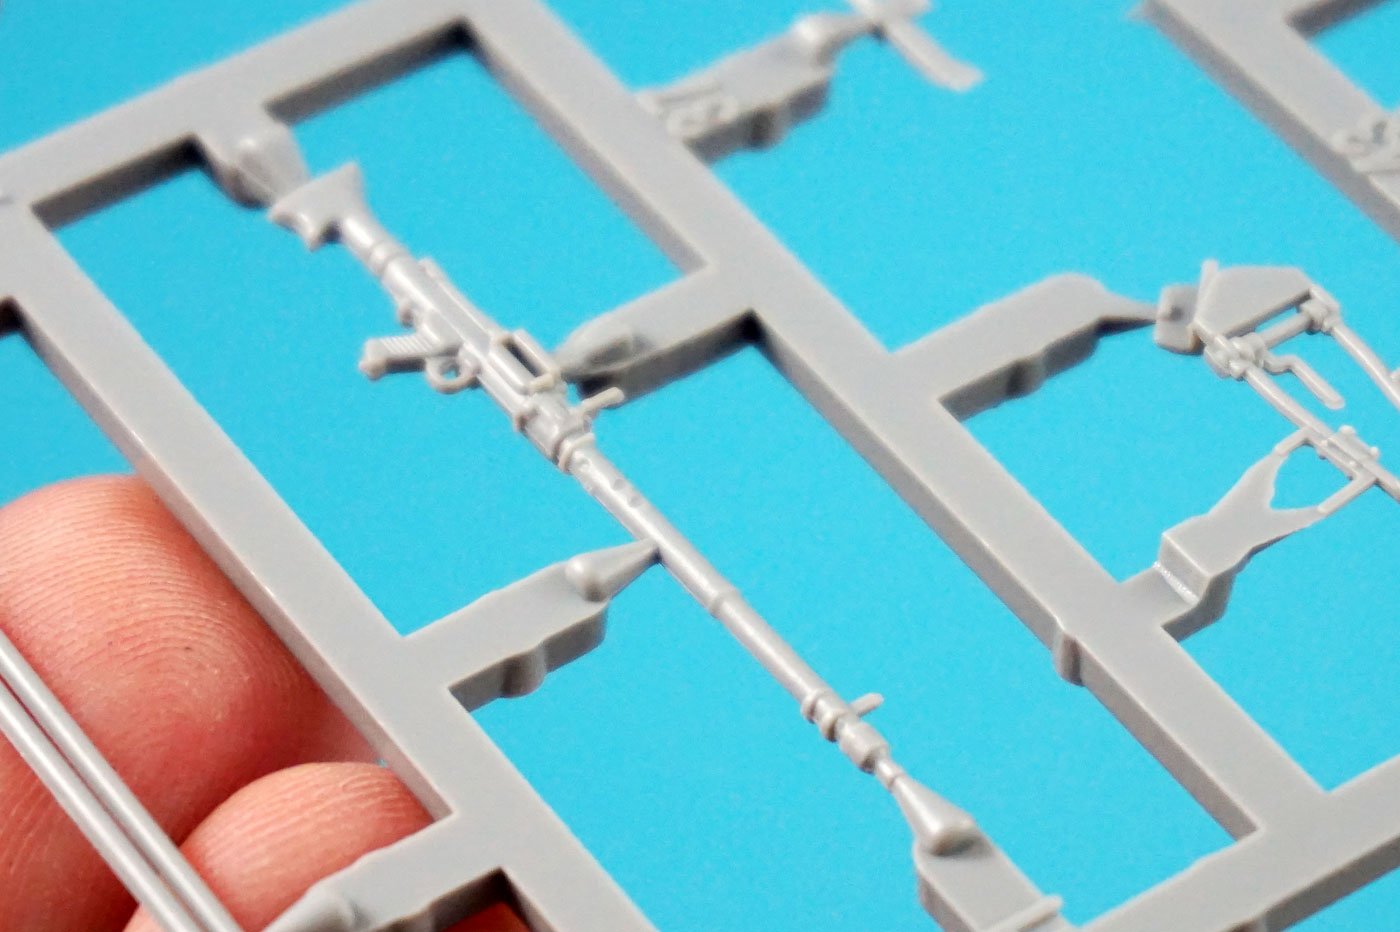
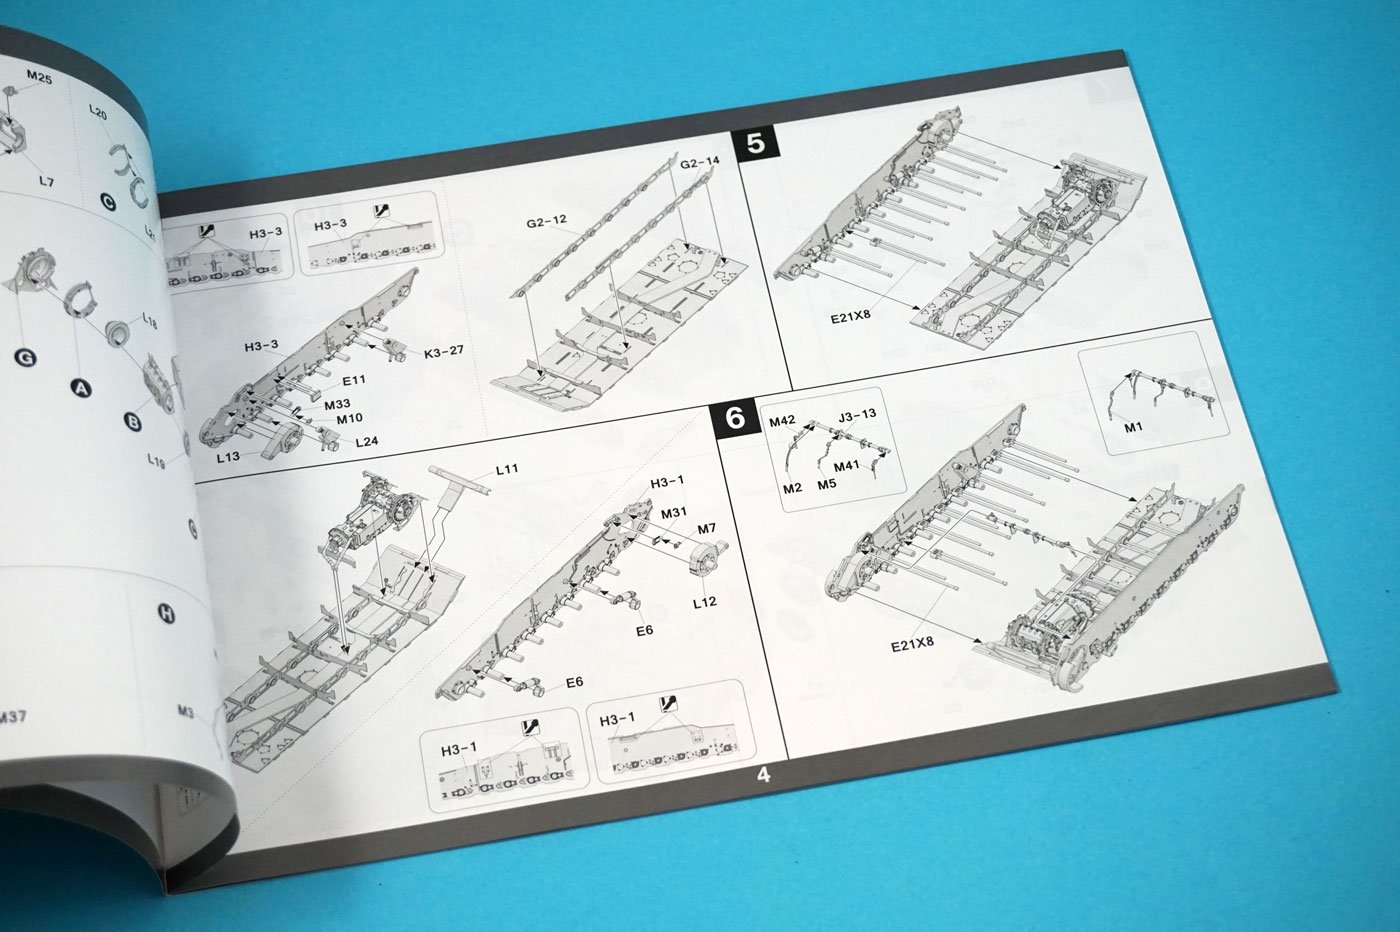
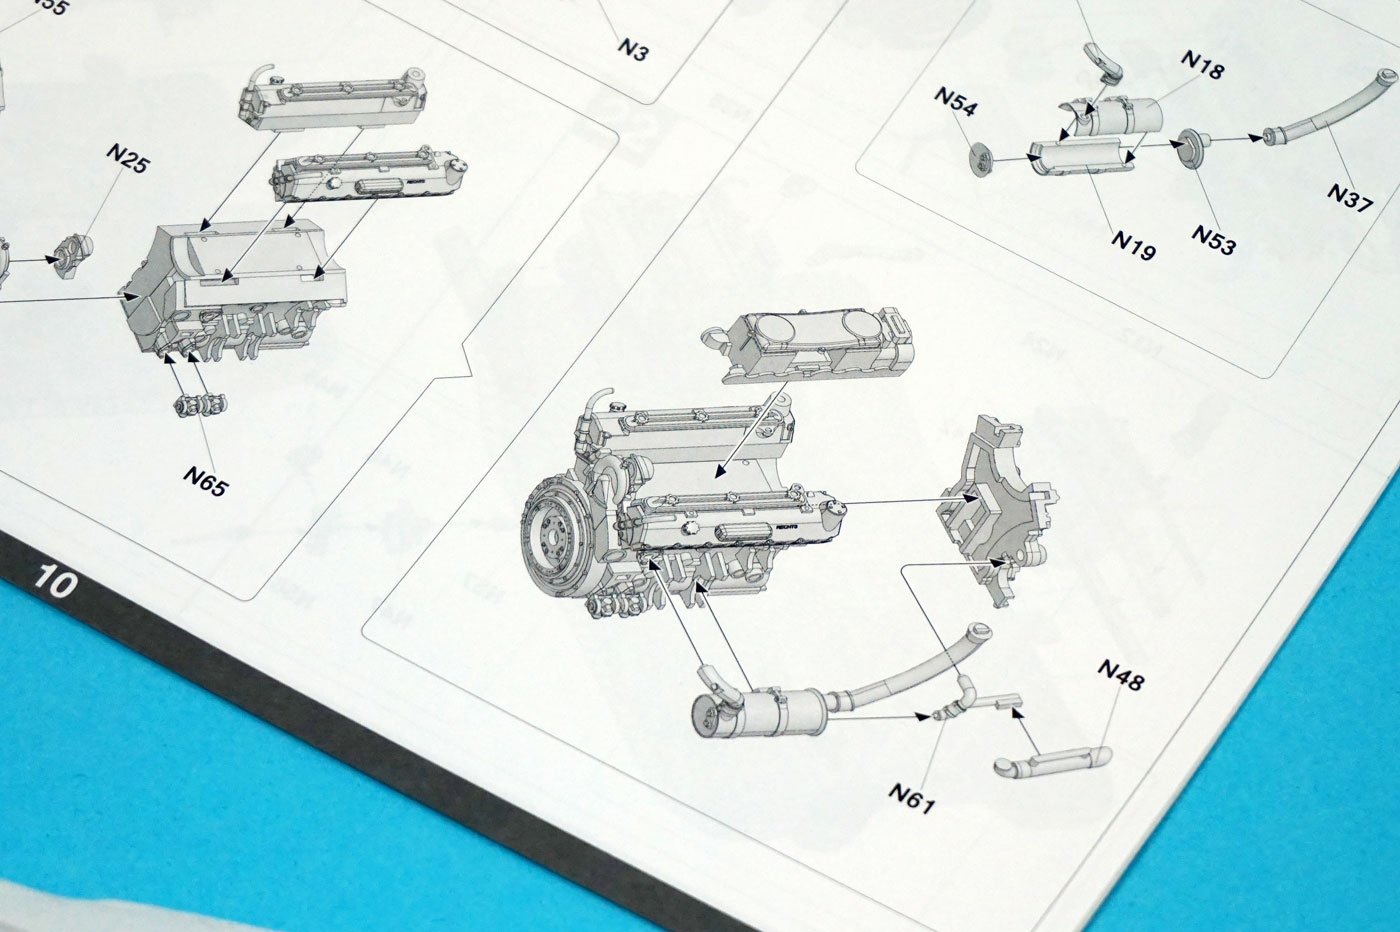
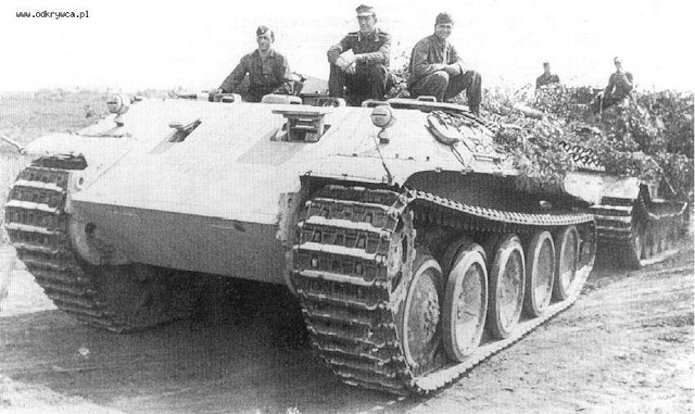
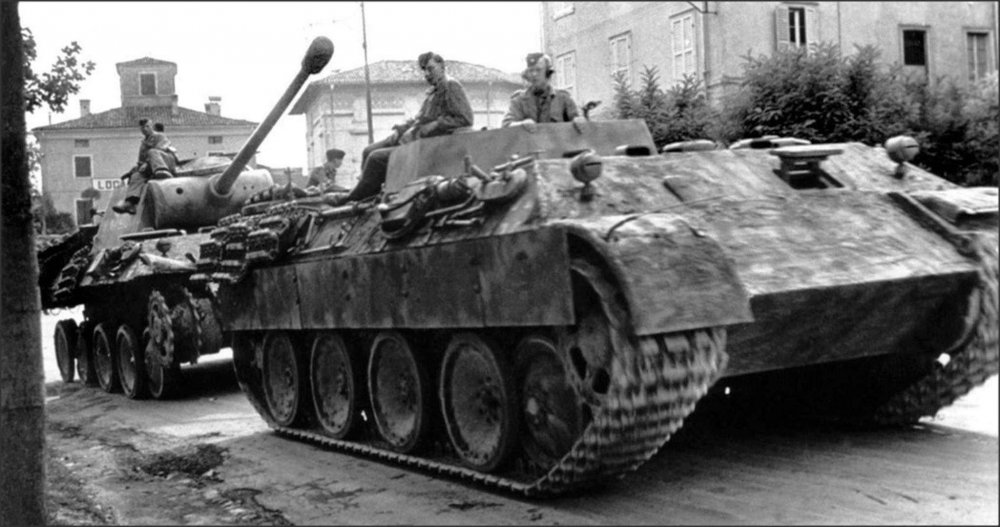
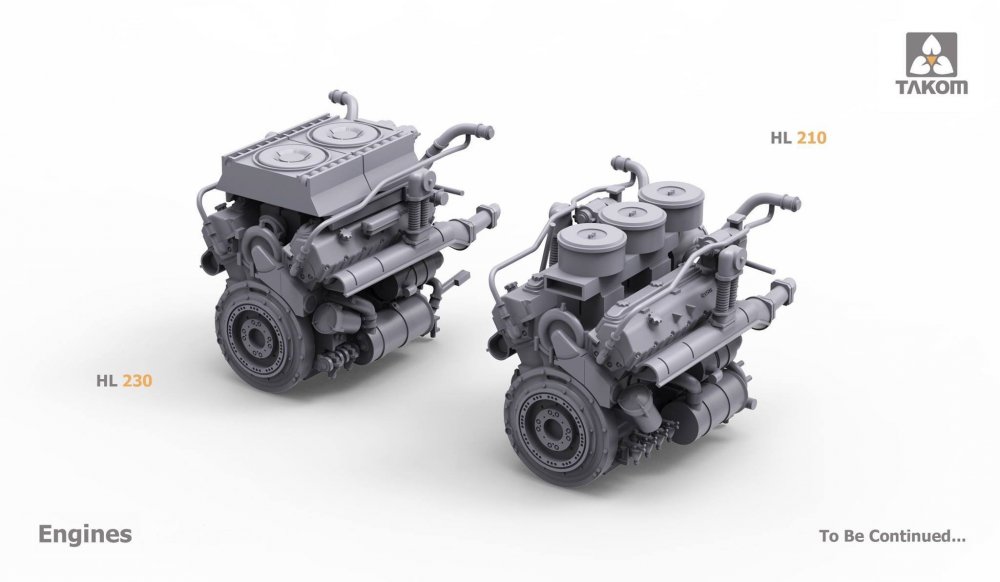
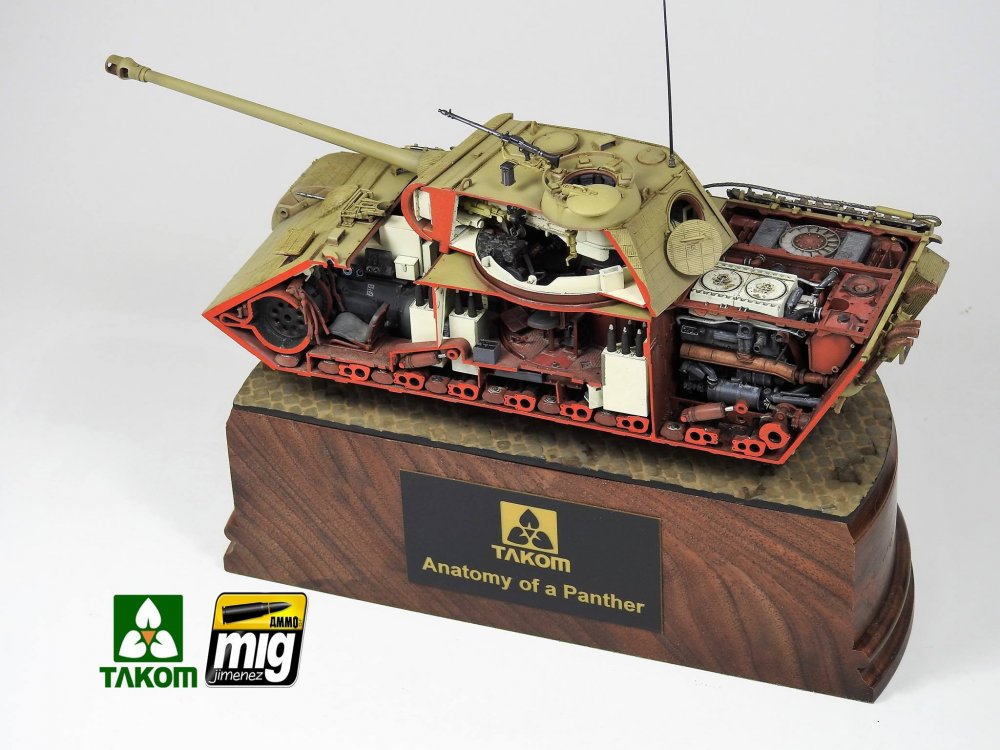
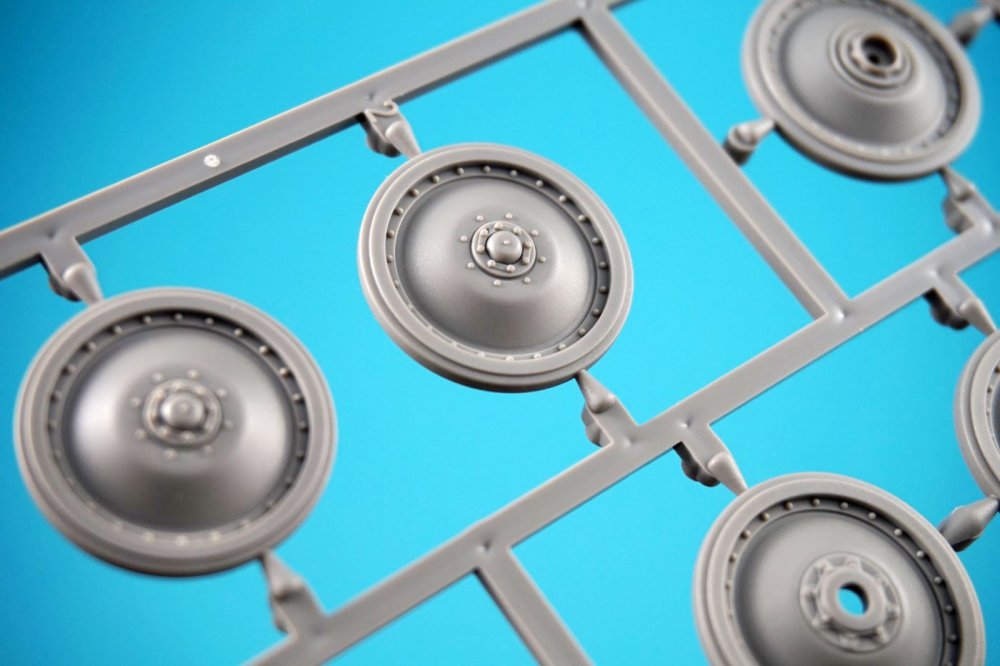
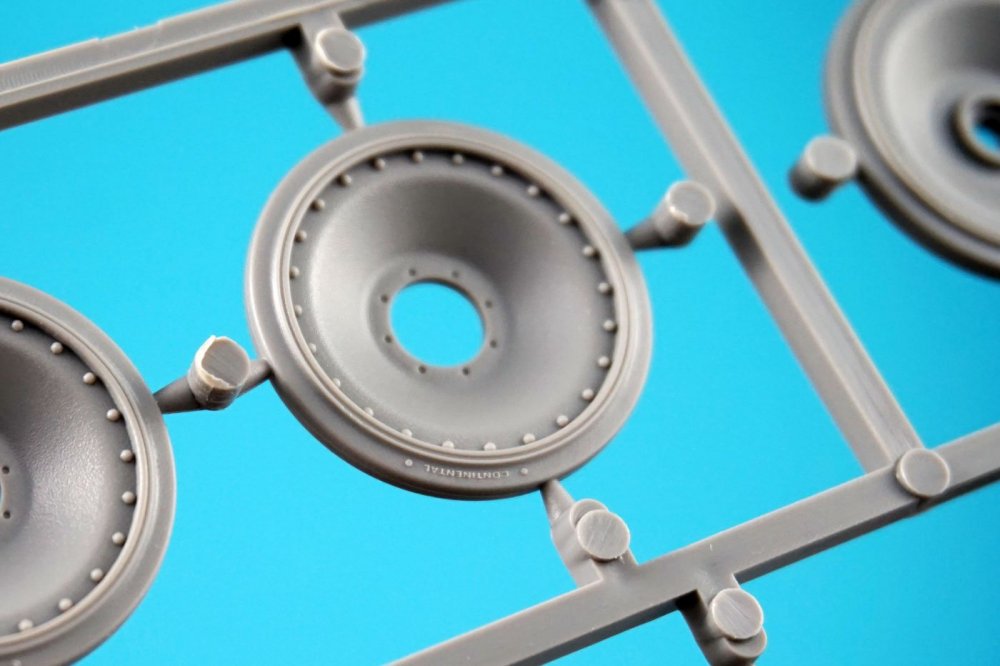
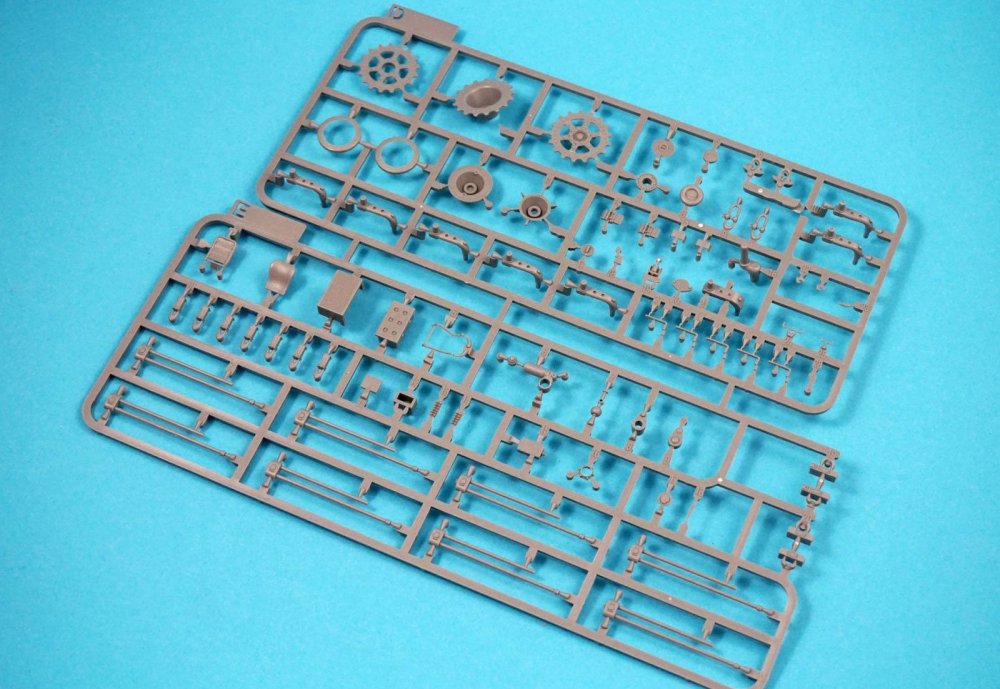
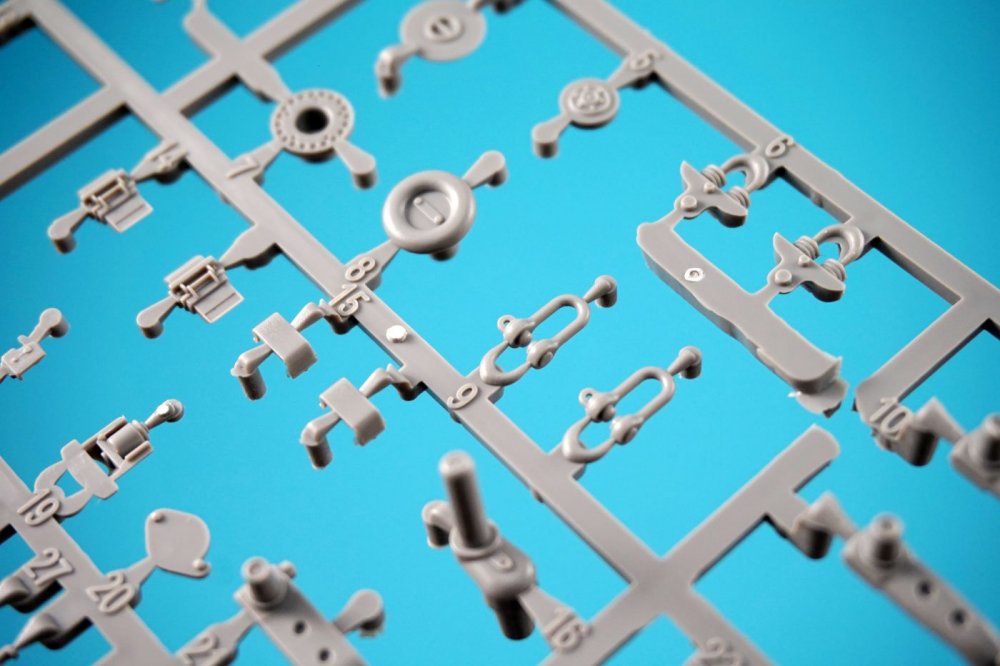
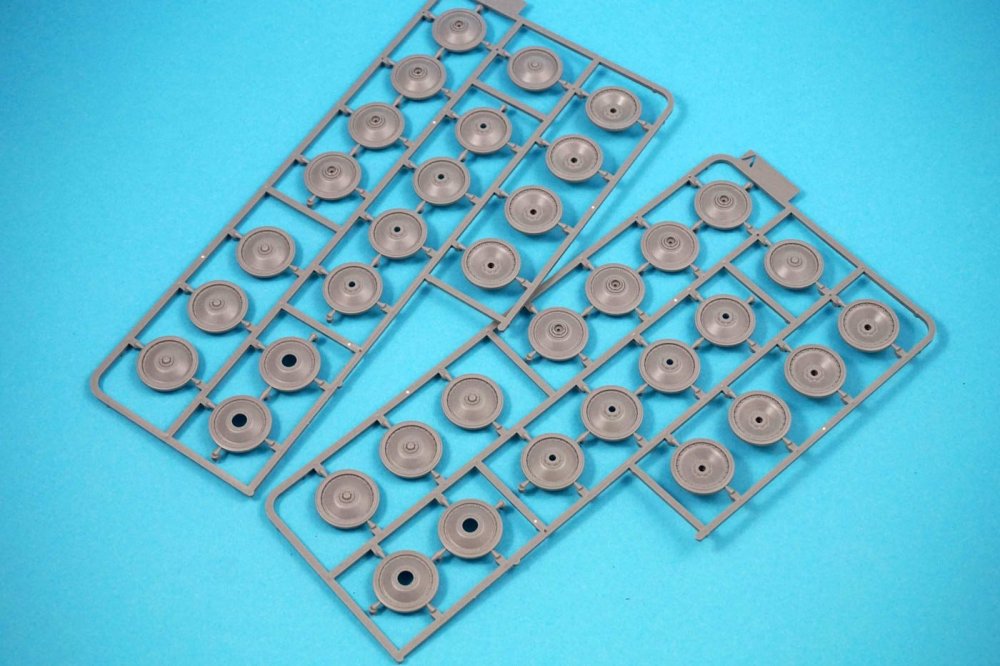
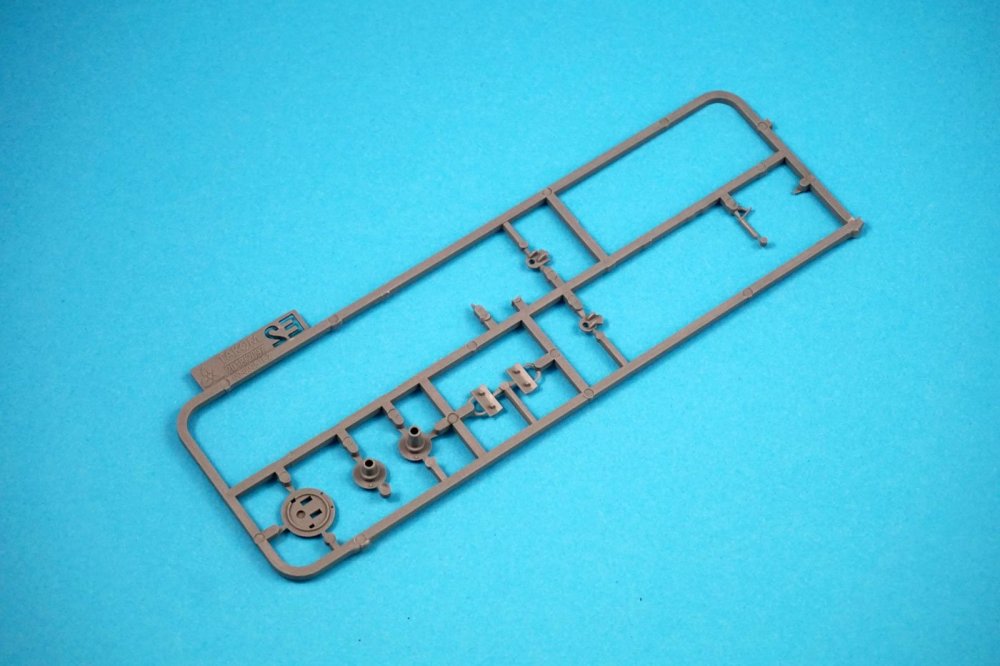
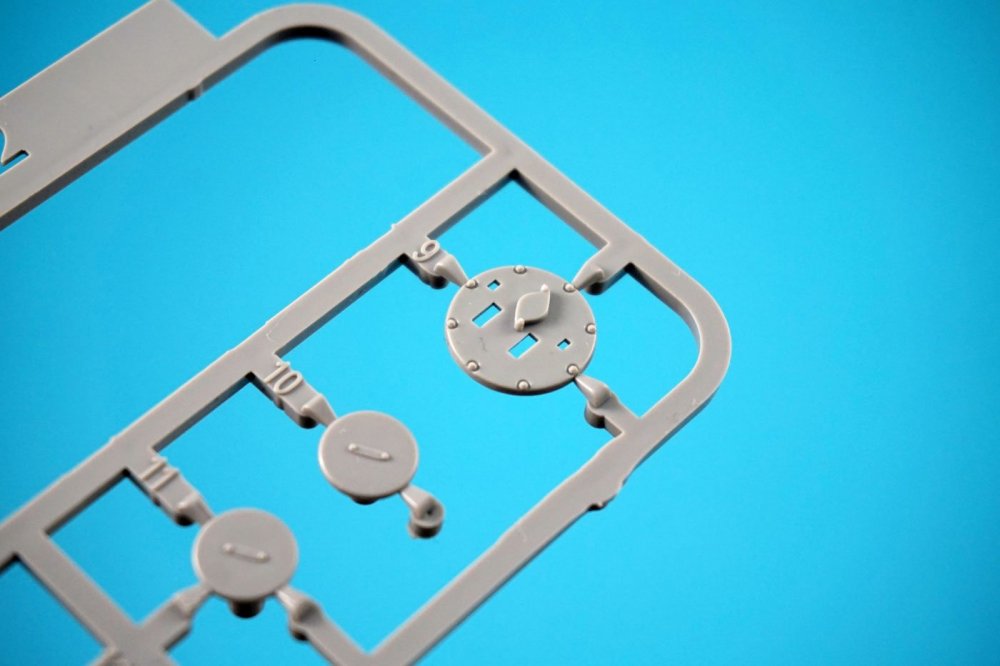
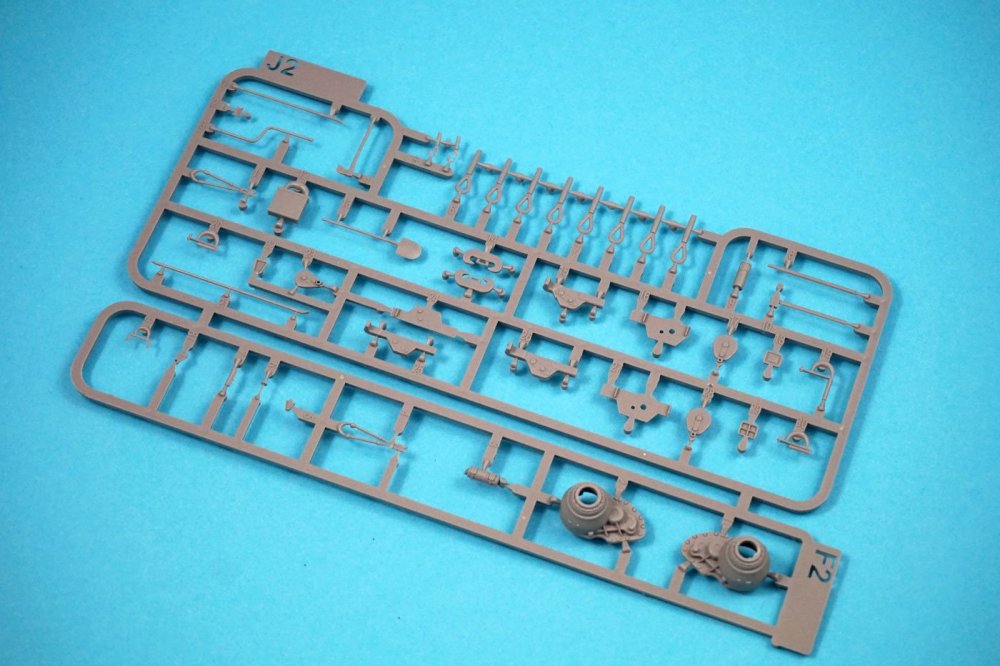
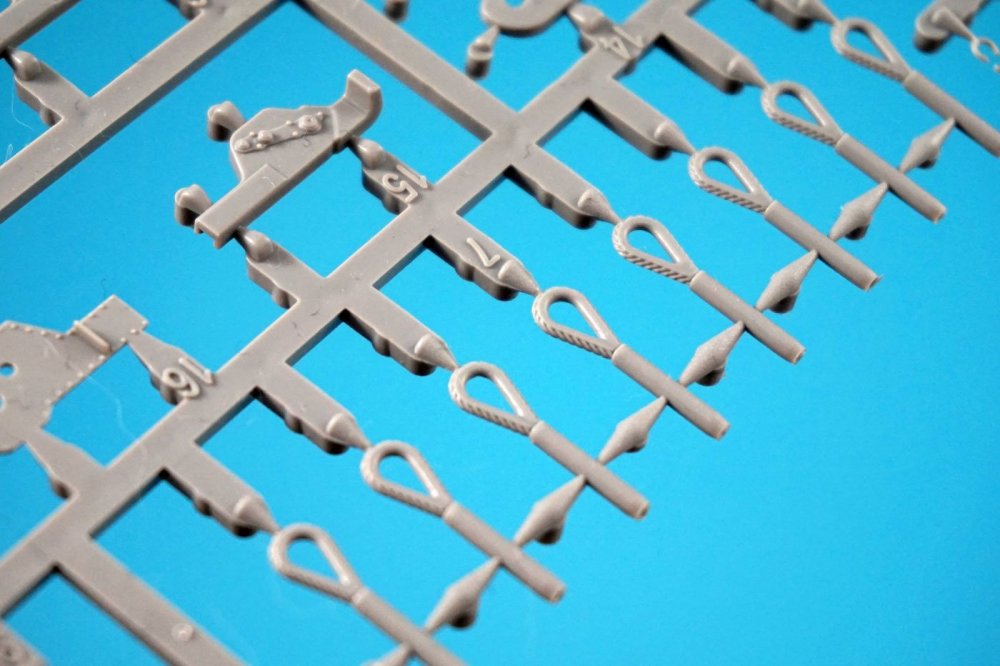
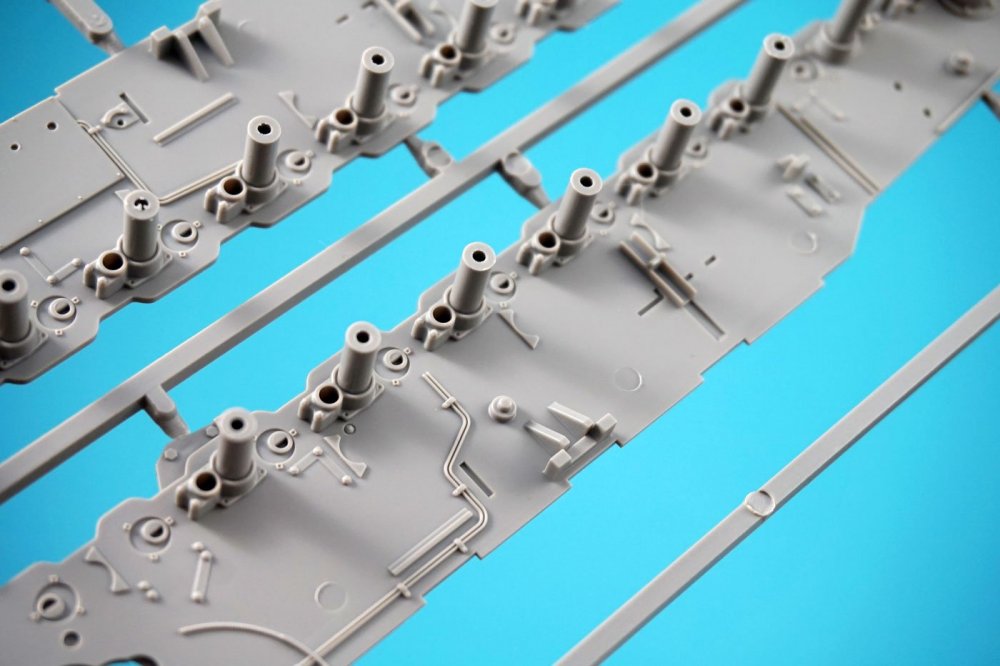
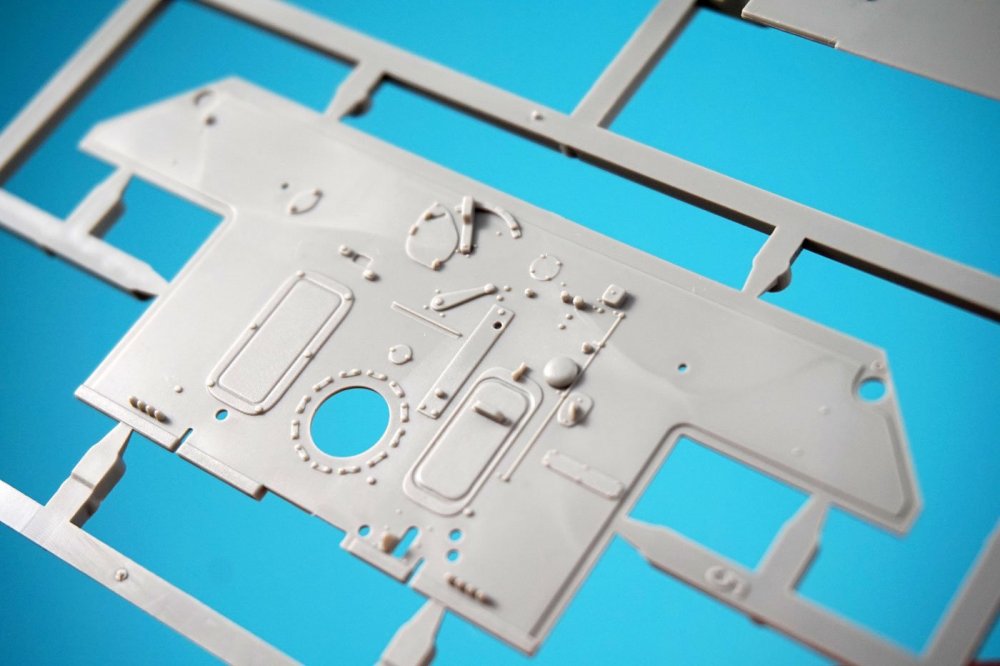
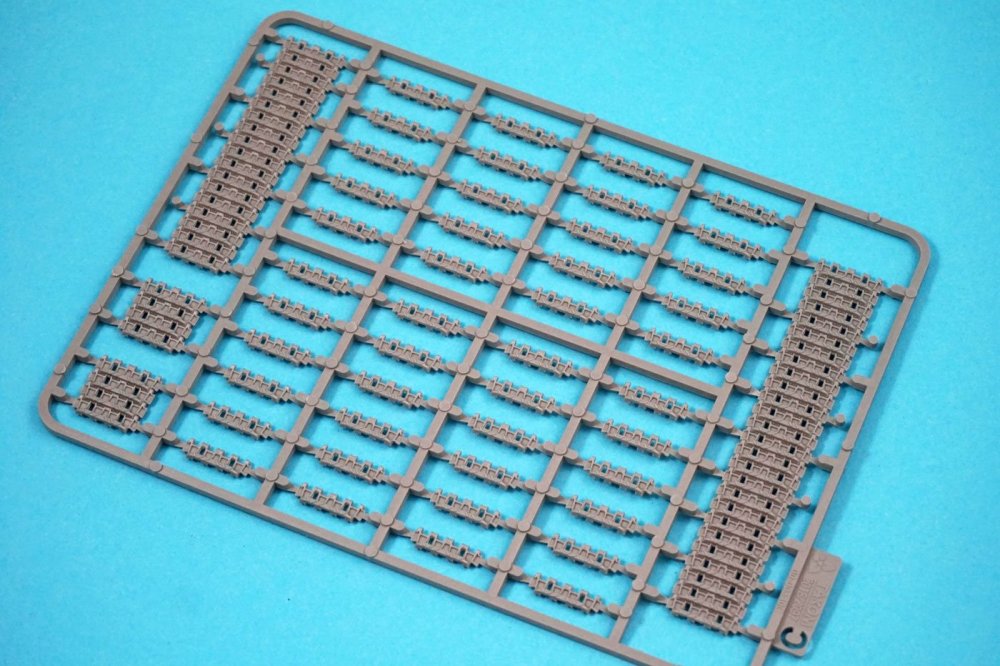
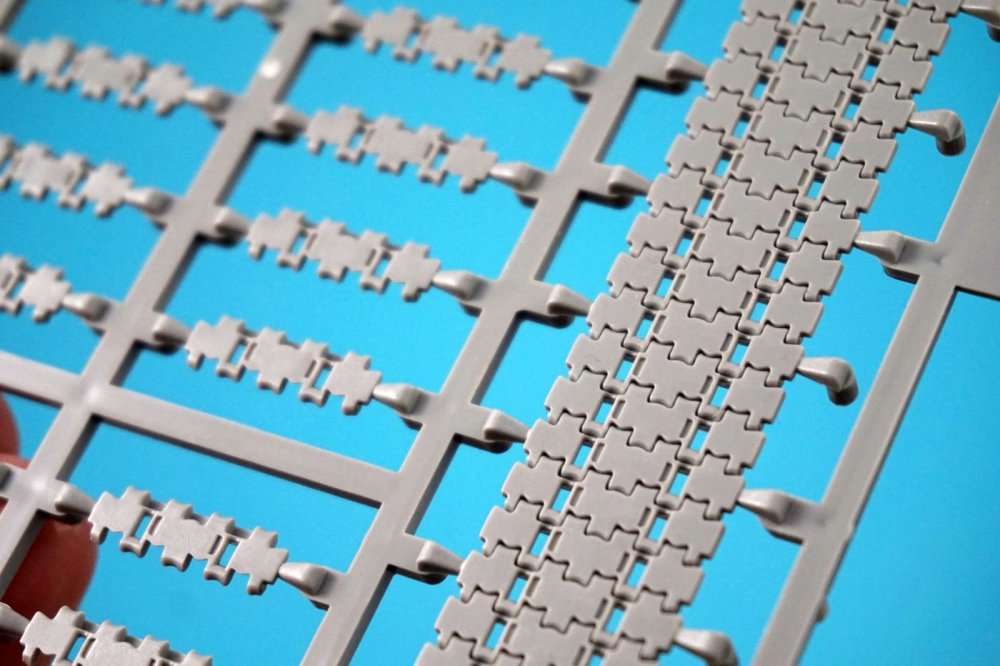
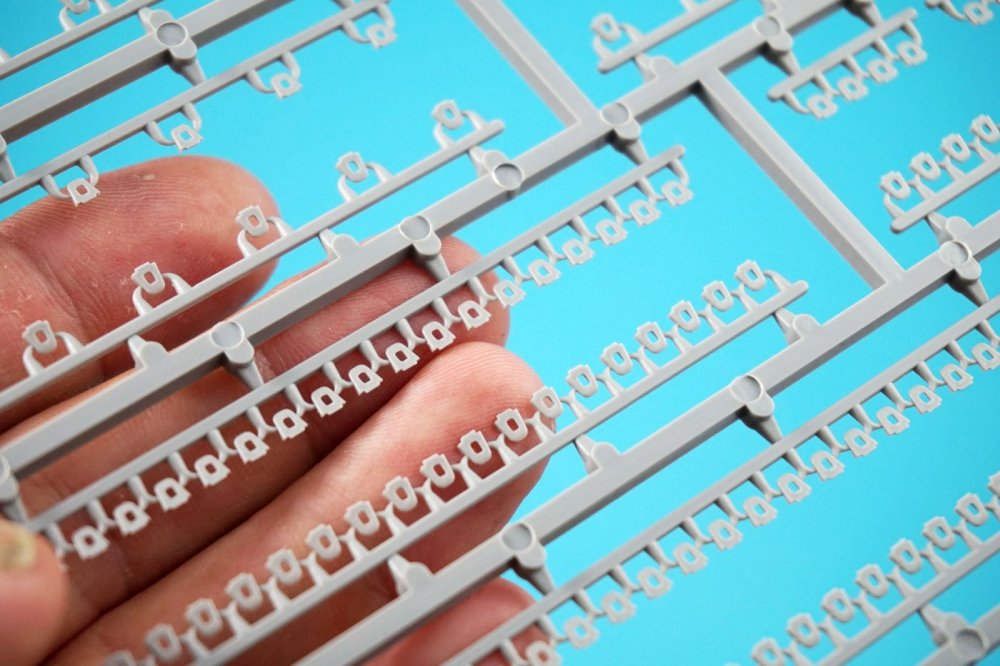
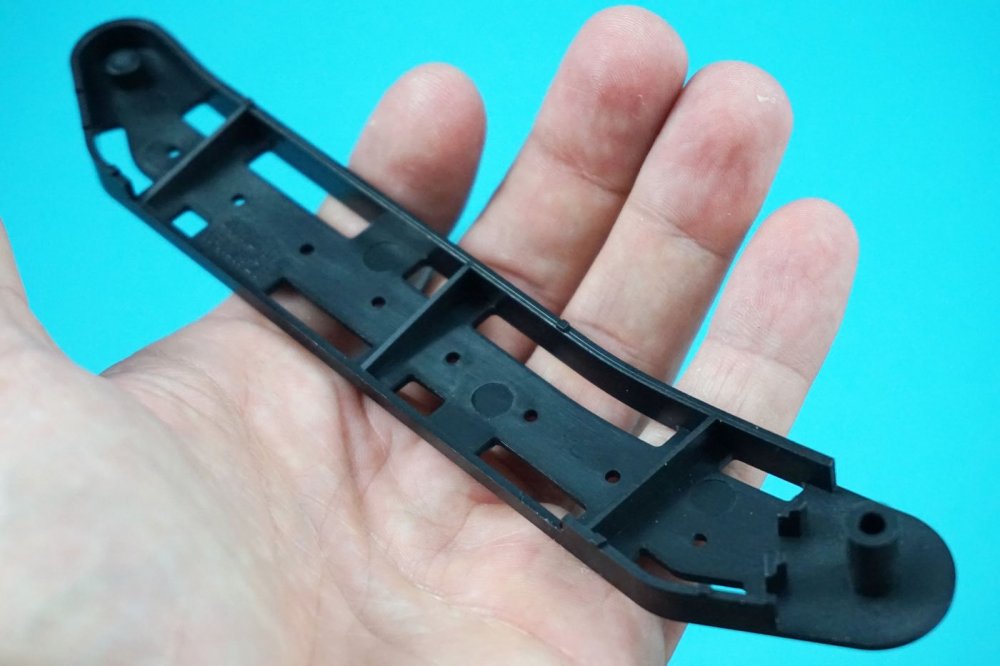
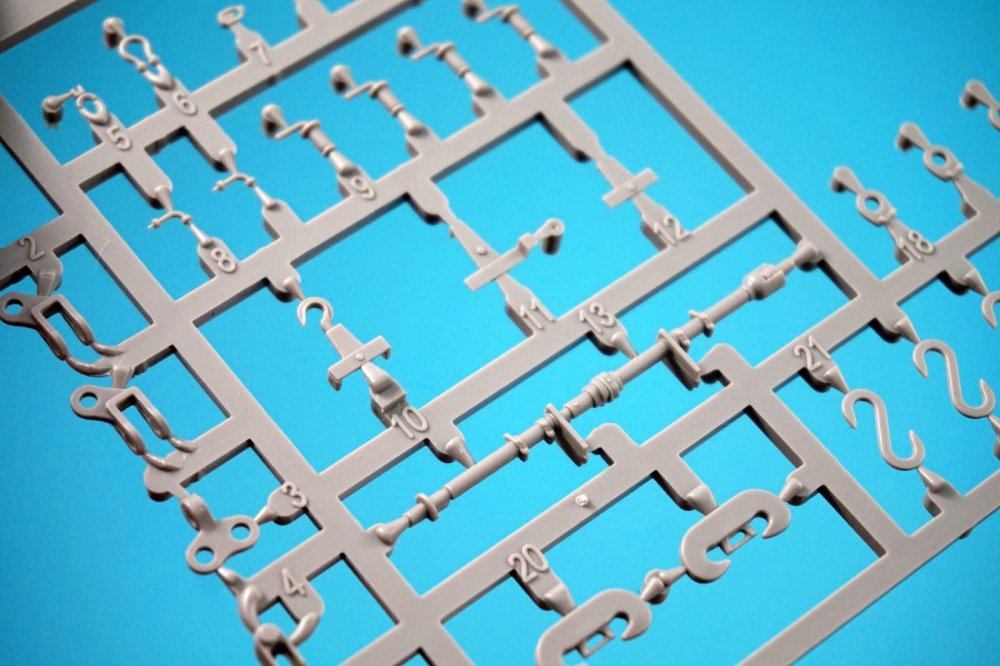
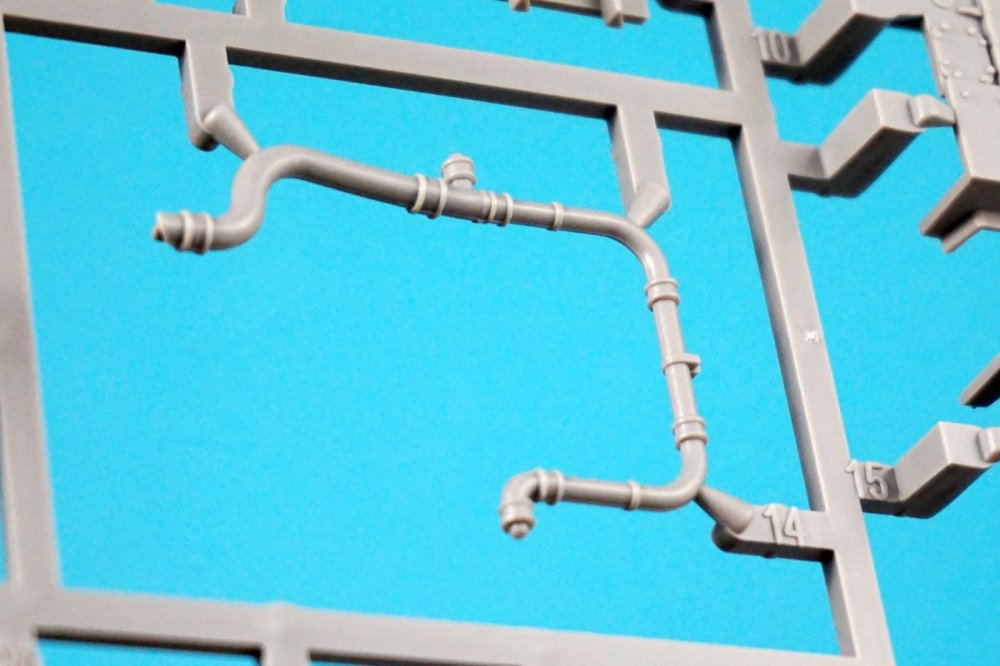
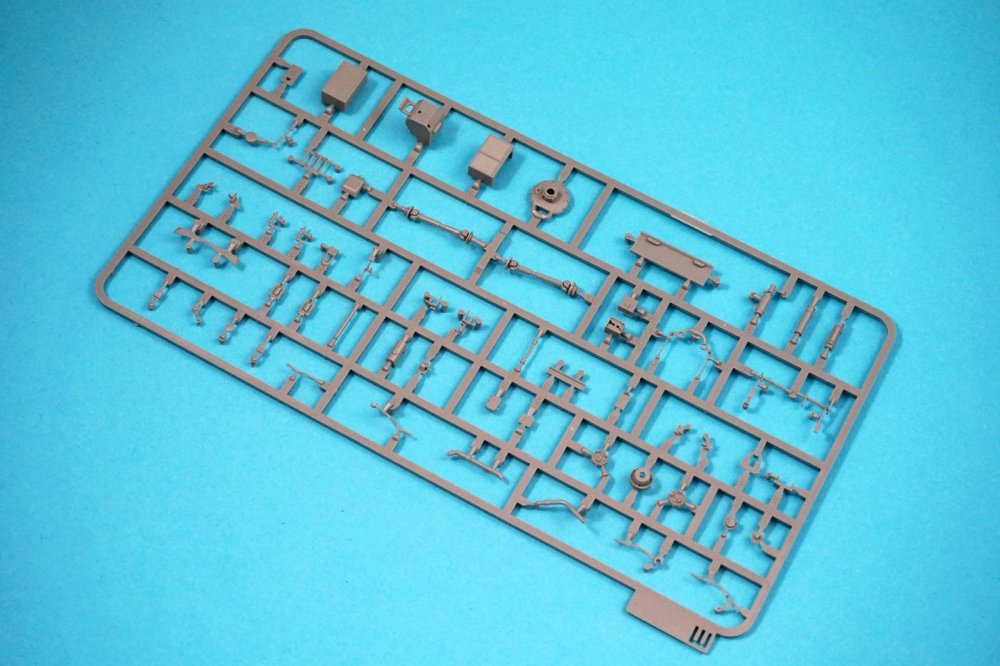
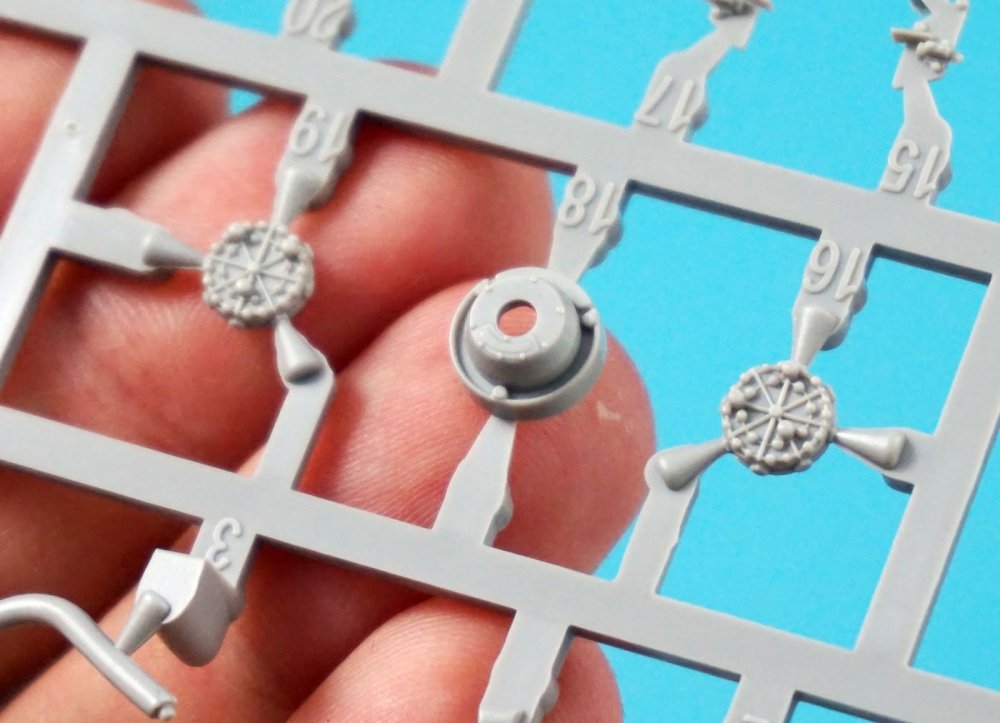
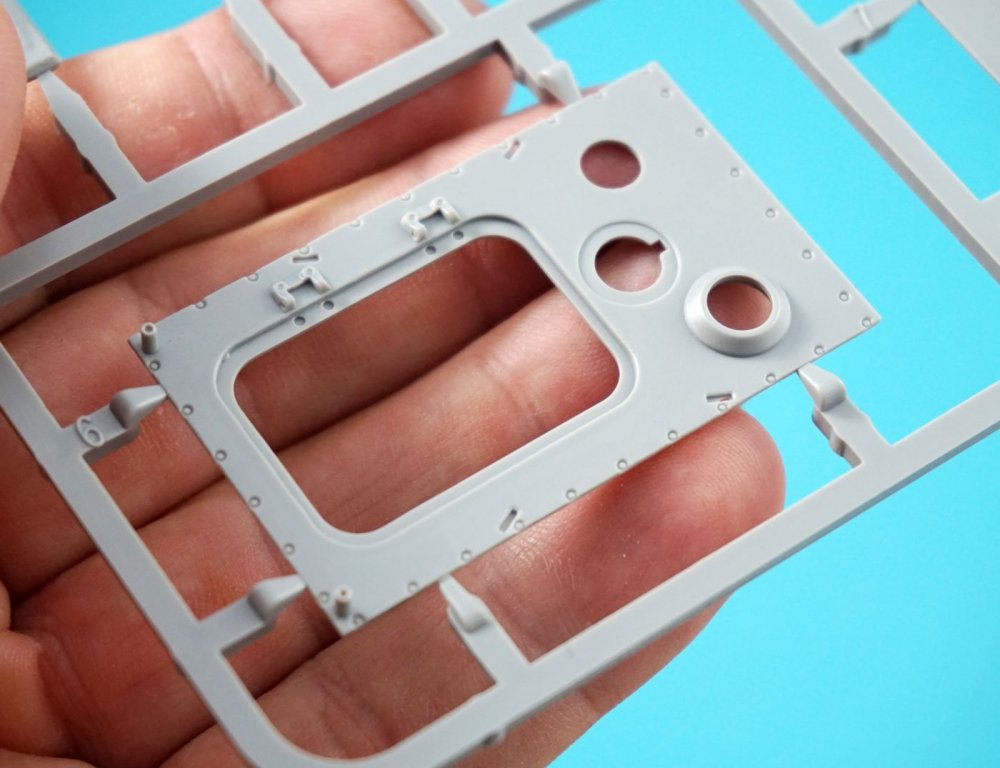
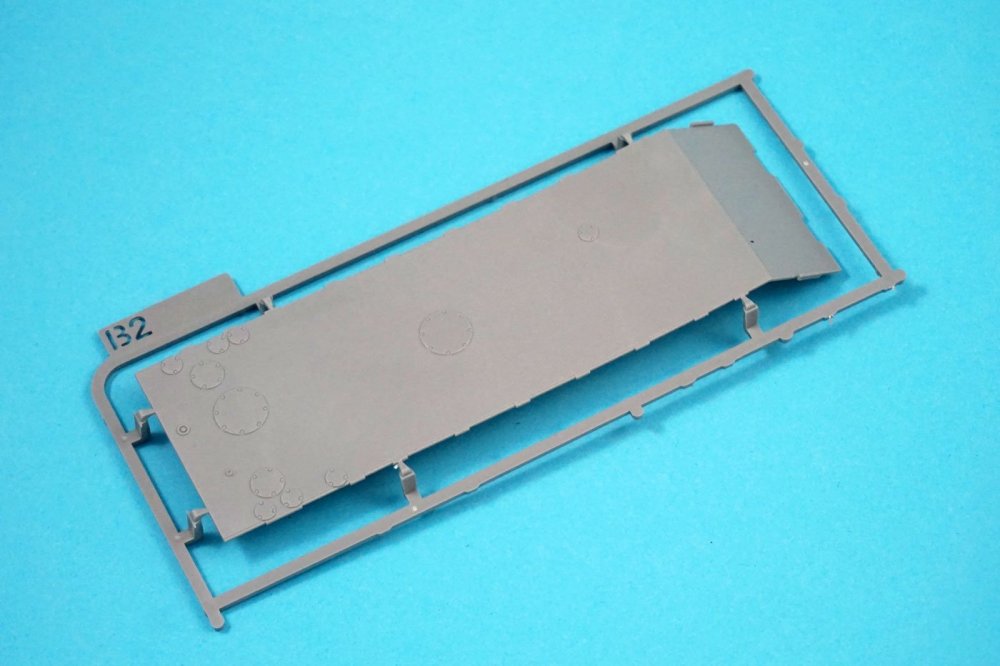
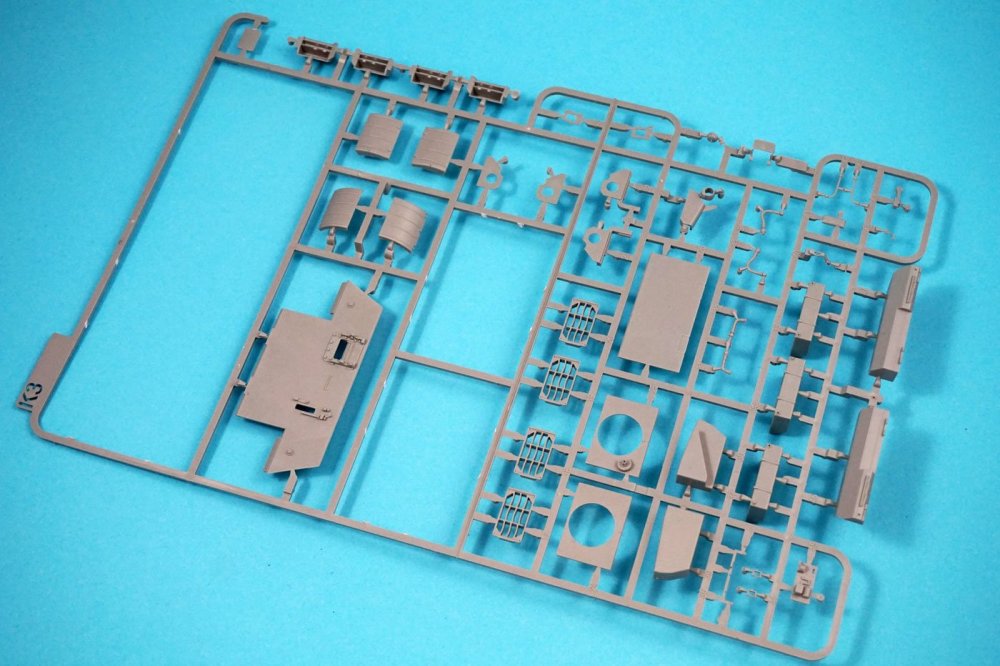
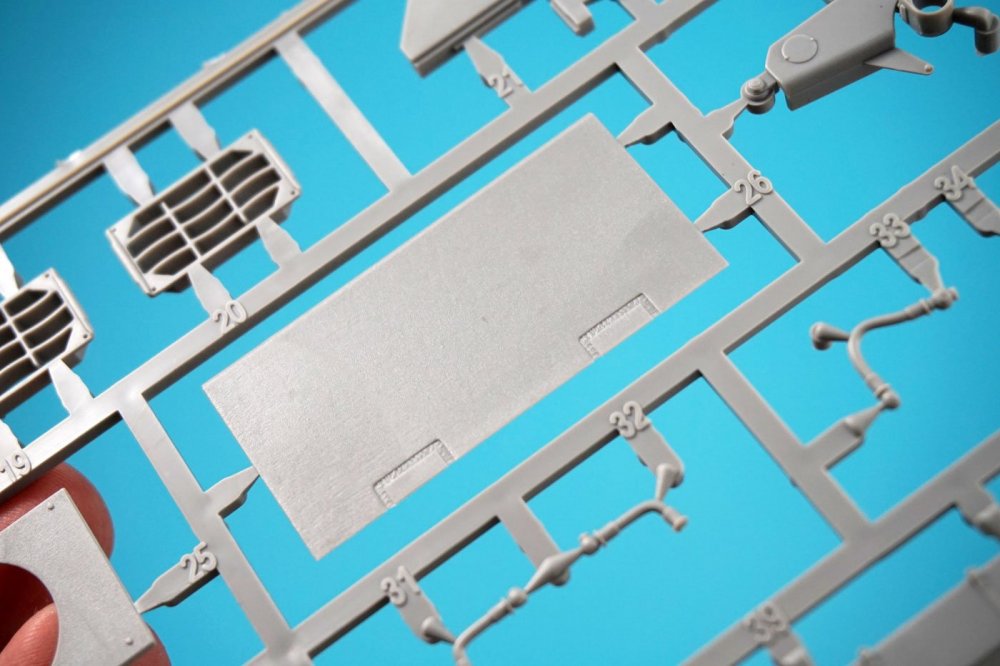
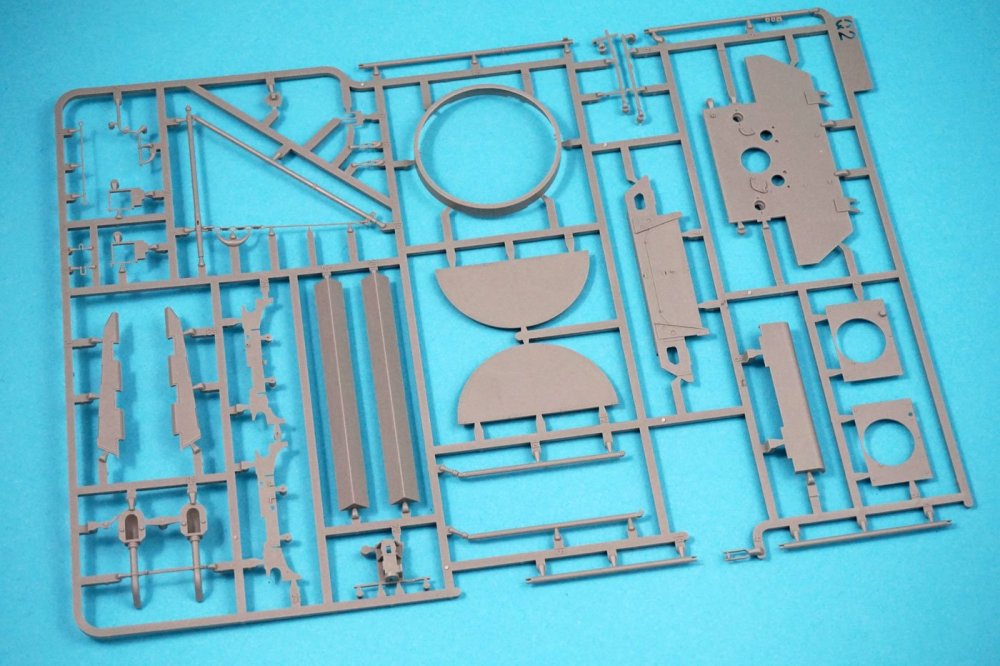
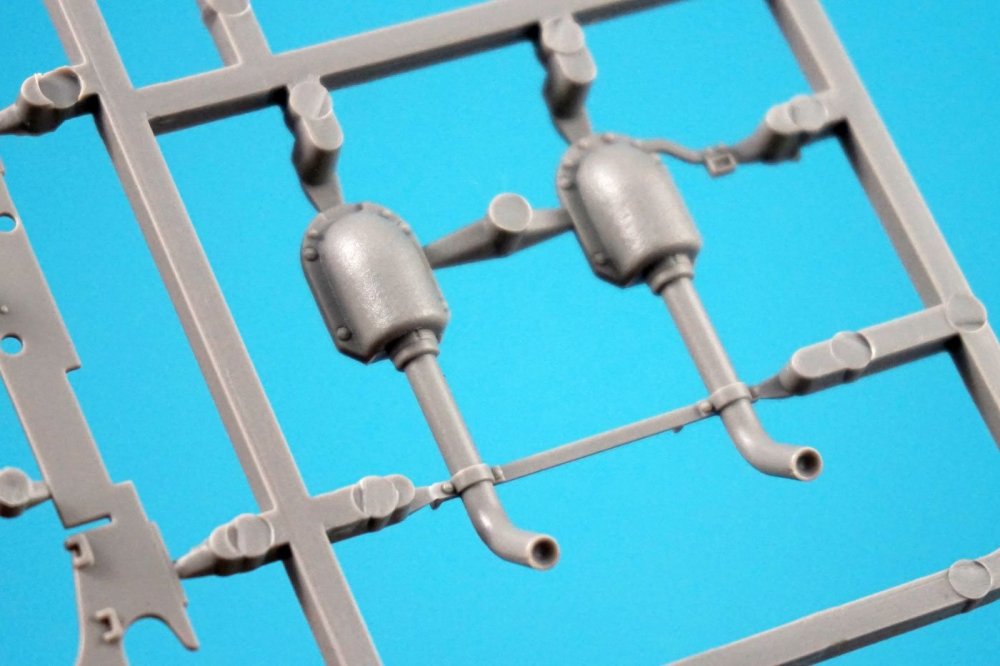
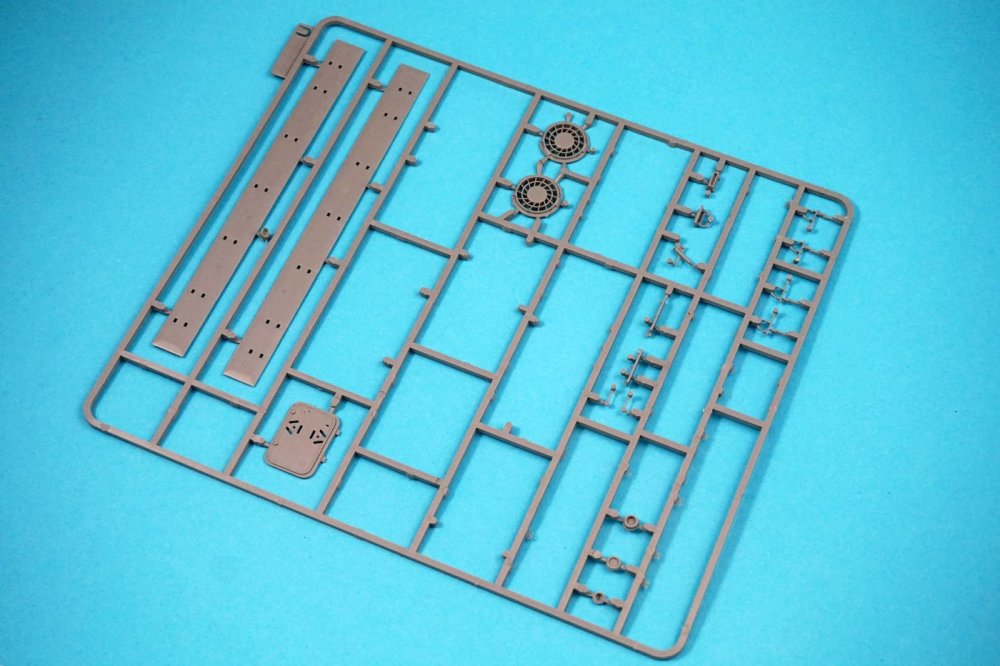
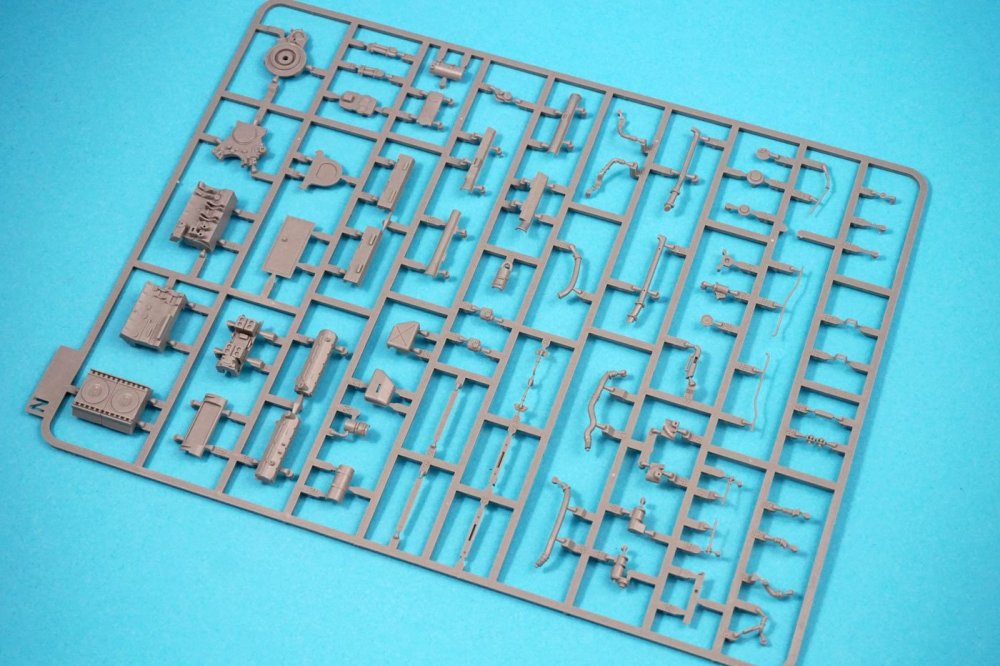
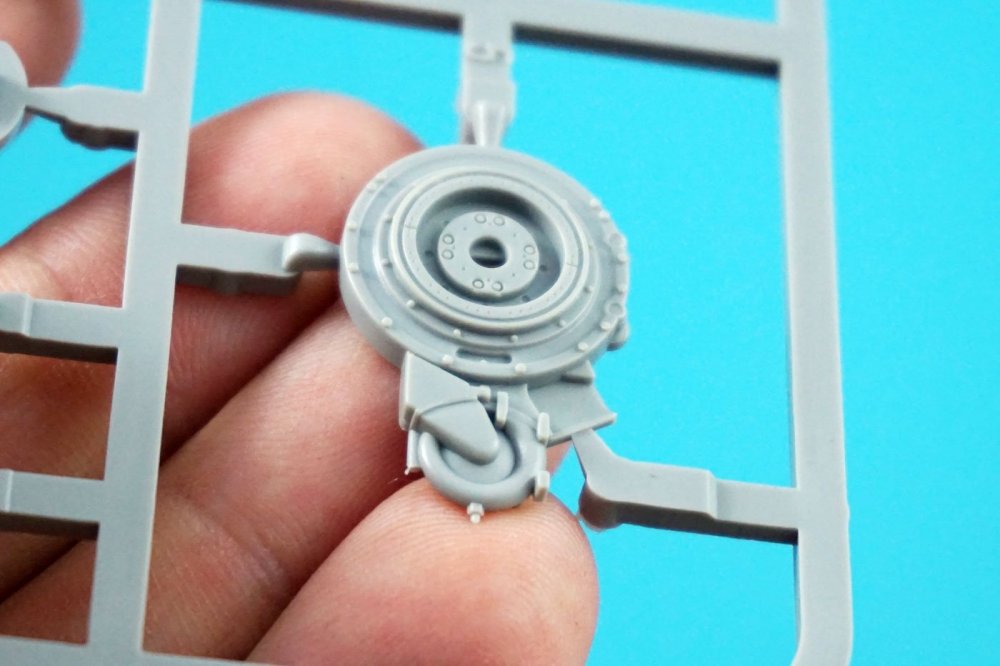
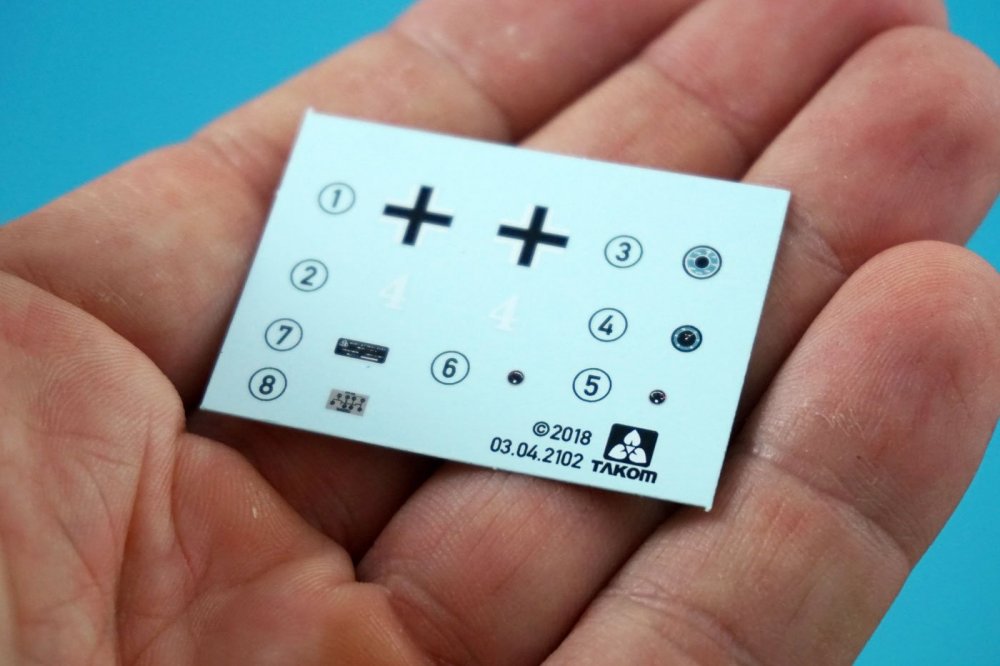
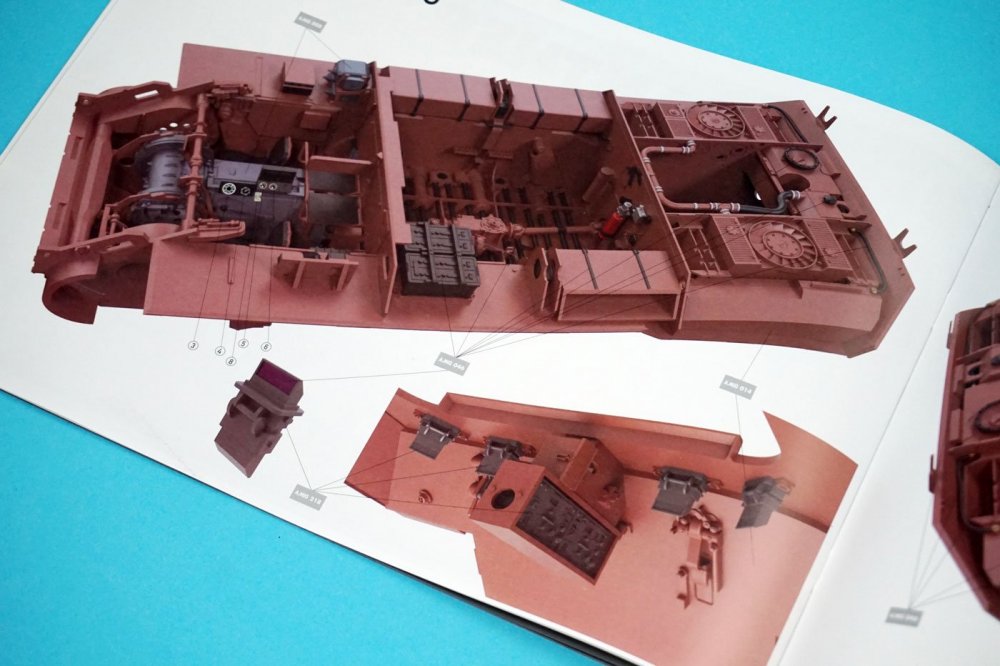
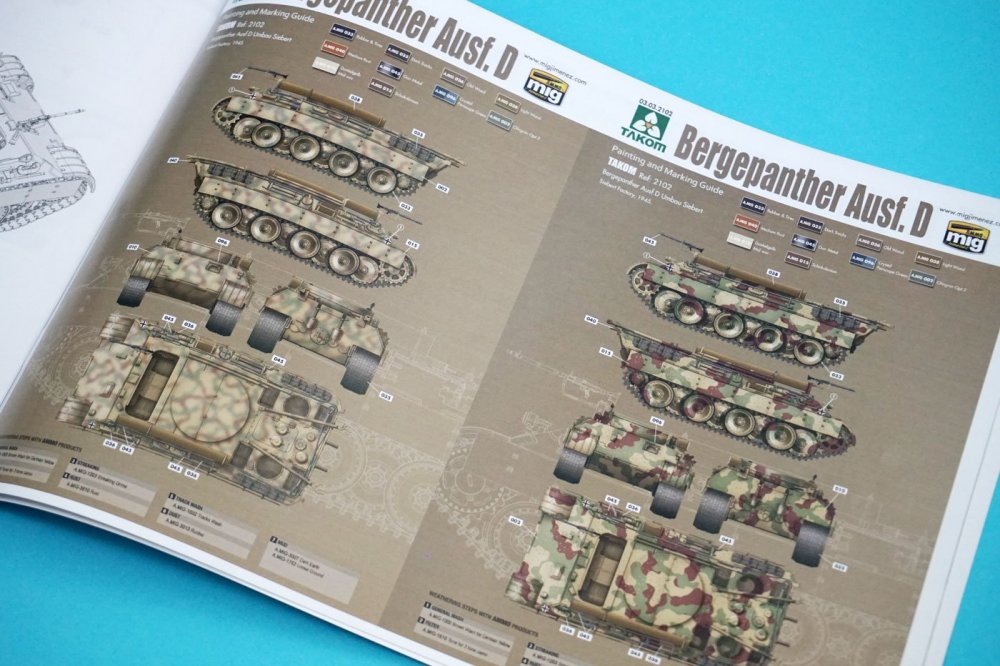
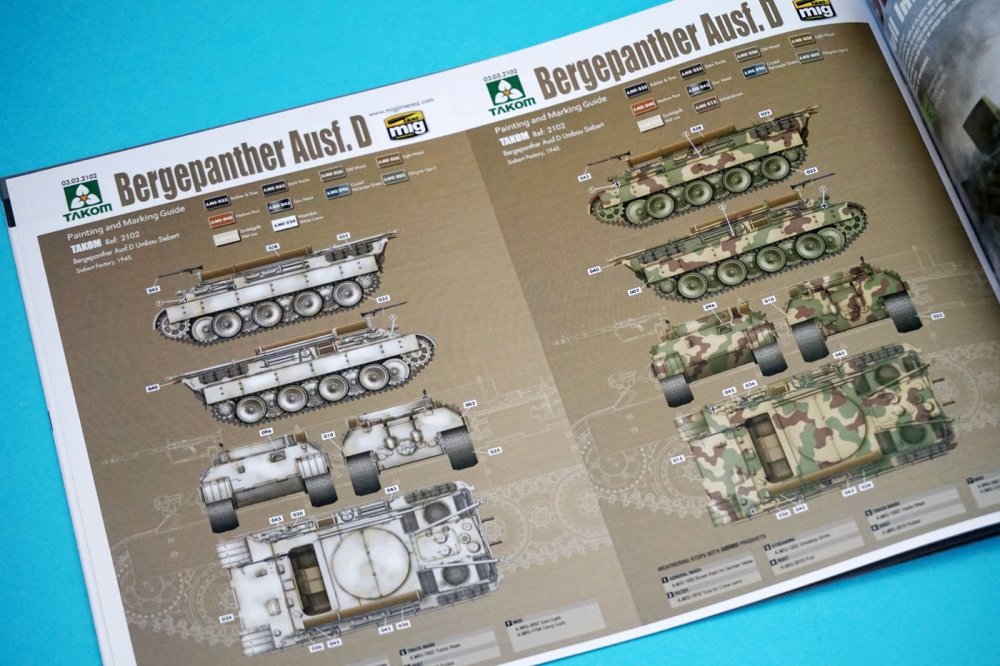
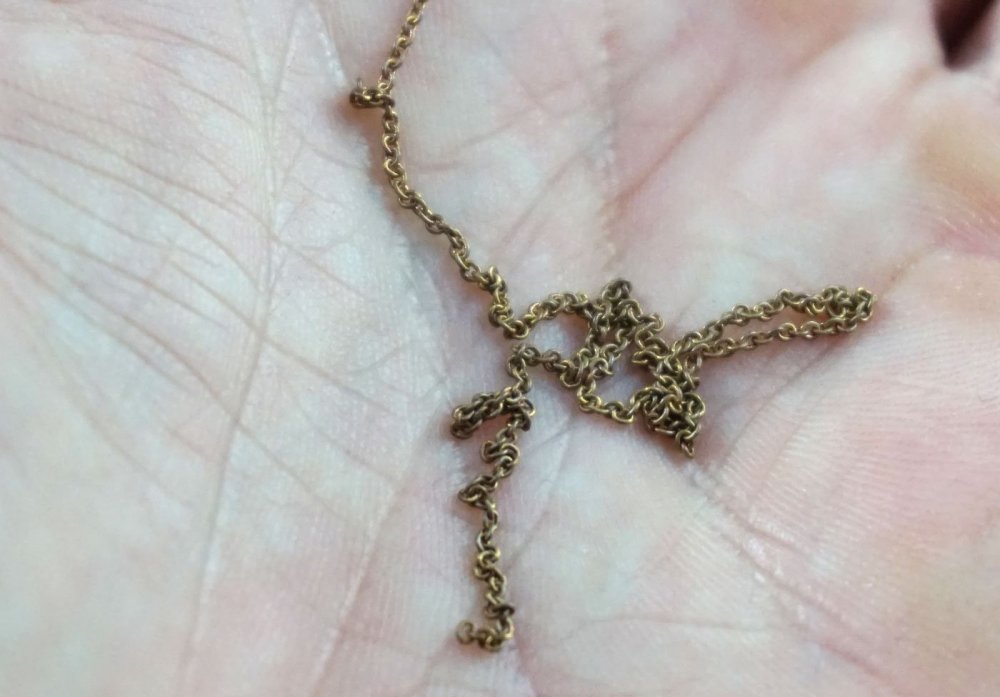
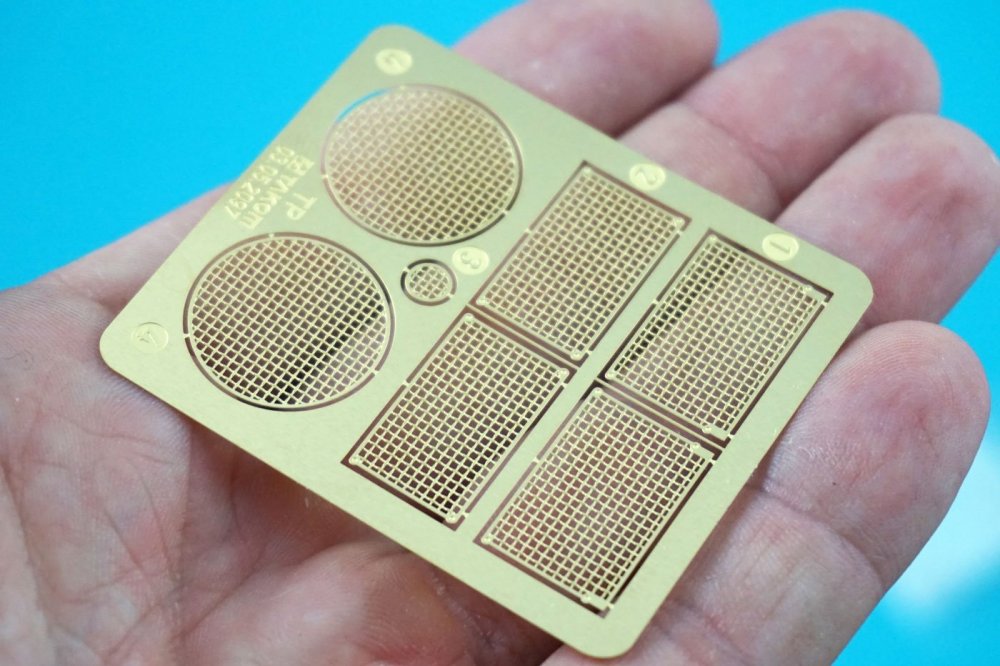
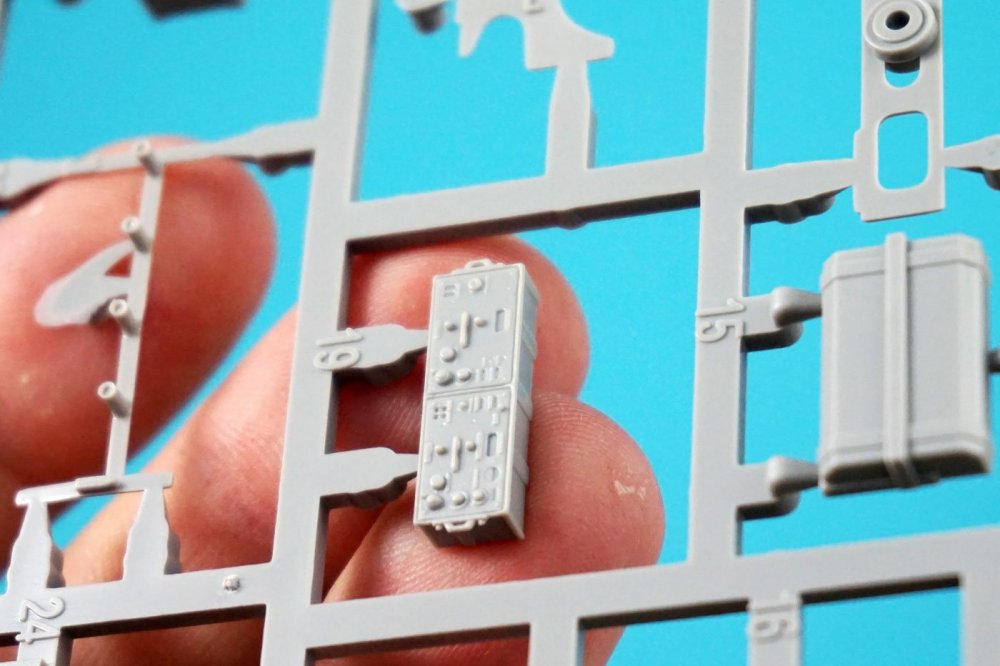
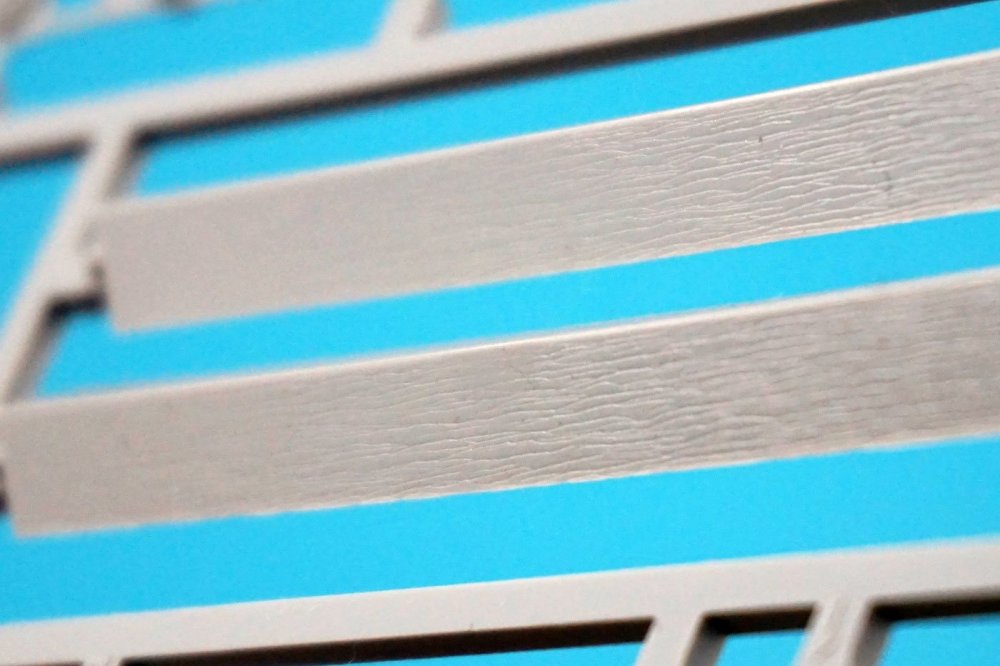
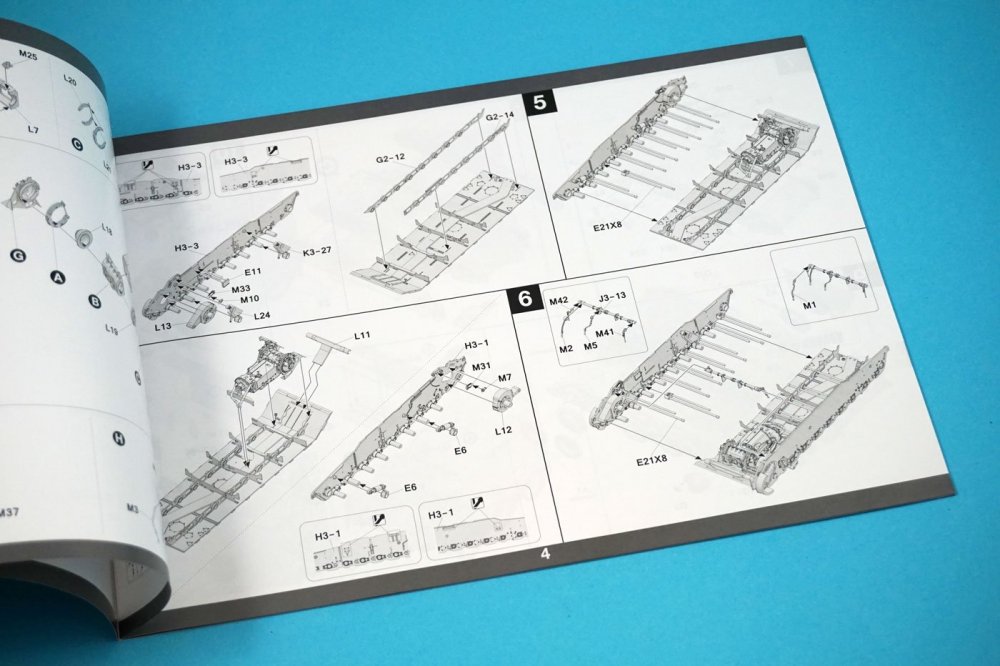
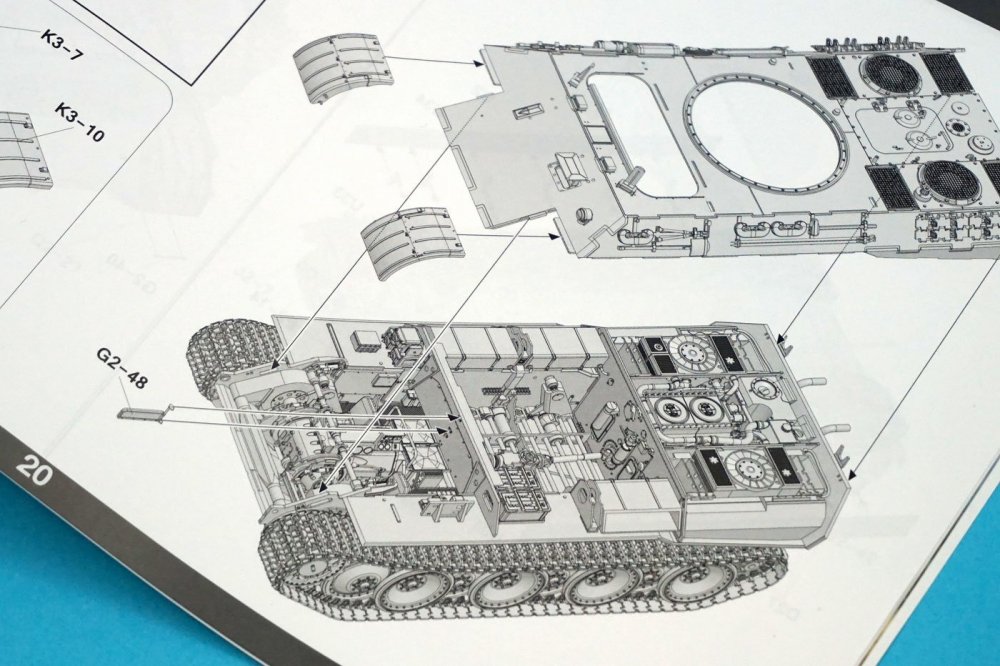
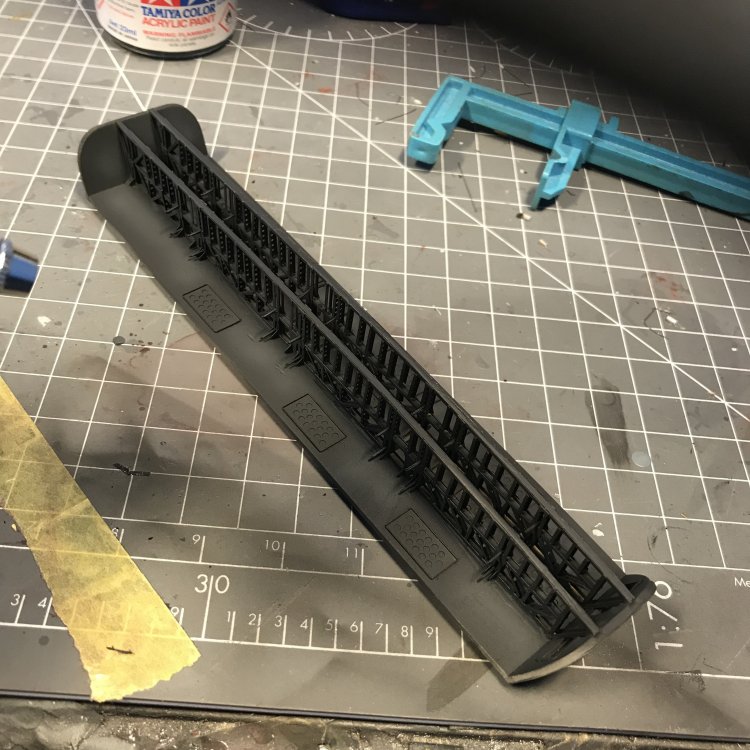
1:35 Bergepanther Ausf.D – Umbau Seibert 1945 Takom Catalogue # 2102 With German armour growing bigger in the course of the war, the need for bigger recovery vehicles rose. One FAMO wasn’t enough anymore to pull a Panther or Tiger out of a ditch. As a matter of fact two Famo 18 ton vehicles were needed to pull one Tiger I tank. This is why the Panzer V Panther was chosen as the base for a new Bergepanzer: The Sd.Kfz. 179 Bergepanther. Still existing truck brand MAN was issued the order to produce the first batch which were delivered in June 1943. In total about 347 Bergepanthers were built on Panther Ausf A and G hulls with various lay-outs by different factories: MAN, Henschel and Demag. For this latter one please see James Hatch’s excellent reviewof the Ausf A version of this kit. Most of them containing a 40 Ton winch. This specific type was built by Sieber. If you are a U-boot nut this may sound familiar. Sieber was a company that had a lot of experience building U-boot hulls. They built / assembled 61 Bergepanthers Ausf.D (Umbau) between July 1944 and March 1945. The word ‘Umbau’ means ‘Conversion’. As you can see this Bergepanther resembles an ordinary Panther most. All it’s missing is it’s turret and transmission hatch and has a large round steel plate instead. The kit Takom is on a head to head race with Meng. Leaving Dragon and Tamiya in their wake. Where it used to be a no brainer buying a Tamiya kit for quality and fit and a Dragon kit for ease and detail, you now follow Takom’s and Meng’s releases with hawk-eye’s. With these two brands picking the same subjects over and over the battle for detail lifts their quality level to great heights. The boxes keep getting bigger and bigger, but the prices somehow stay in the green. I used to be an avid armour modeler and thought we were spoiled over our ears with detail, subjects and possibilities, but what this kit brings is something else… All this detail and what do we see in the end? You might want to make a cross section model. Check this out: I don’t think it’s fair to compare this kit to the 1995 Italeri Bergepanther nor the Revell or ICM offering. They all offer pretty basic kits that lack most of the interior. To get the full interior you would have to buy the resin Verlinden set, but that would still get you the early Maybach engine. None of the mainstream brands produced this particular late version of the Bergepanther: Ausf.D. For that you had to buy the Precision Models conversion set (which is not an easy find…). As you see a lot these days certain brands go head to head and tackle the same excotic subjects. I never got this… As it happens RFM (Rye Field Models) is releasing their own Bergepanther and knowing them, it will also feature a whole interior, just like their latest Sturmtiger. Takom: beware! The high heavy box is bursting with sprues and parts. 25 sprues in total (!). So I just started with studying the instructions, doing some research and unpacking the top sprue in the box. Overall the casting is really crisp with no flash anywhere. To be fair: Dragon, Meng and Tamiya have the same reputation. Hardly any cleanup needed. With a kit like this featuring a full interior the question is: where are the ejector marks?? More on that later. Another something to add here is that all parts on the sprue intended for the Early version are removed. This prevents an even more overload of parts, confusion, weigth and mistakes. Construction starts with the floorplate of the Bergepanther and is quickly followed by the gearbox and drivetrain. The suspension rods are then placed and we have seen this on other Panther kits, since they actually work on the finished model. Floorplate: Sprues A (2x) with the wheels. Lovely steel texture and bolt detail: Connected sprues E and D with the sprockets, suspension and various interior details. Drivers' seat with spring seat back: Periscopes. Usually these are provided in clear plastic. Since i never like that feature, I'm happy with grey plastic. Sprue E2: Sprue J2 with the jack, tools and towing cable eye lets: The tracks are done in an innovative way. Link and length, but with long stretches of track for the straight parts. The track horns for these stretches are all connected on one long sprue. You need to glue the whole stretch of horns to the track and only then cut the sprue loose. It will be interesting to see how this works. Word of caution: if you want to position this model in a diorama, the straight length of tracks on the bottom of the model will make it difficult to curve the track. So: this method saves time, but limits possibilities. There is also a handy tool / jig that helps you assemble the tracks before they go on the model. This way you can paint your tank and tracks separately. I like this. I’m curious to see whether my Friulmodel tracks fit on this kit. I think so… Sprue F (x2) and C 9x2) with the track links: The jig (x2) for left and right track assembly: On to the engine. This Maybach engine differs somewhat from the early Bergepanther. The detail is outstanding and so is the engineering. I reckon you only need some leadwire to spice things up here. When done, the complete engine drops in the hull of the tank. Just like on the real thing. Check out the differences in the early and late Maybach engines: Sprue N with the engine parts: Sprue J3: Sprue L: Engine piping with only a minimal seam line to remove: Sprue M: Sprue R2: Then work begins on the rear armour plate, grills and upper hull. Photo etch is supplied for all the engine grill meshes. All the tools that go on the sides of the Bergepanther are done nicely in injection moulded plastic, but I would recommend replacing the clasps with photo etch on a model with this much detail. I love the restrained surface texture on the hull, wheels and hatches. Sometimes this is overdone or omitted completely. It will be interesting to see how RFM approach this. As said in the introduction, ejector pin marks on a model that shows so much of it’s insides are crucial. Trust me: they’re hard to find and this saves you a lot of filling and sanding. I found a few on the insides of hatches but they’re not deep and probably disappear with some quick sanding. Sprue H3: Sprue K3 with front armor: Lovely steel surface texture and weld seams: The same goes for the upper part of the hull: One part you almost always want to replace with photo etch are the Schurzen panzer plates on the sides of the tank. In this case you may not have to. The plastic tapers to the sides, making it look much thinner than it actually is. Beware: if you want to remove one or two of these plates, you need to thin the new edges as well. The last items that go on the model are the wooden beam and crane. Real delicate with real chain provided that goes around the pully. Sprue Q2 with the crane and wooden beam: Exhaust stacks: Minimal ejector pin marks on the inside of the hatch: Delicate detail on the crane: Sprue U. Note the absence of the Early Bergepanther parts. Note the thin edges of the Schurzen panzer: Sprue G2: Delicate and refined wood texture on the wooden beam: Detailed Mg34. Only needs the barrel end drilled out: Copper wire, photo etch and chains: Note that the mesh isn't just a plate with holes but features overlapping wiring: Painting schemes Four full colour profiles are provided for you to choose from. All built in 1945 by the Seibert Factory. Reference photo’s are not provided and neither is information as to where what scheme was operational. You’ll find one in Winter camo and three three-tone camo patterns. What I love are the full colour 3d drawings on the last pages of the instruction booklet, showing you want needs to be painted in red brown primer and what need to be black or white. Lovely. Makes me thing of the 3D illustrated books by Kagero. A small sheet of decals is provided, giving you some data plates, markings and the instrument faces for the drivers’ compartment. The 3d drawings in the back of the booklet show you exactly where these go. The instruction manual: Conclusion This is an Epic kit with a dazzling amount of parts. It makes you forget your stash of DML/Dragon and Tamiya kits. The engineering is clever and the quality is top notch. The only thing I don’t like are the tracks that make it hard to position the tank on an un-even terrain. In terms of aftermarket this kit doesn’t need a lot. Maybe just some TLC in the outer detail, like photo etch clasps for the tools. This is a kit that I can whole heartedly recommend to any armour builder. I hope to see the first build here on LSM soon! PS: a fun detail. The brand name Continental is spelled fully and correct on the wheels. Dragon in the past placed the word: Continentau on them, since copyright and brand name protection didn’t allow them to use the name Continental. Wonder if laws changed? Thanks to Takom for supplying LSM with this sample.


-
Nice! I wanted to buy the resin kit recently but this is cool as well!
-
1/48 Wellington Mk.X (He727 NA-K)
JeroenPeters replied to JeroenPeters's topic in LSM 1/35 and Larger Work In Progress
Hi Clunkmeister, Thnx for your reply. The more i work on this model and dive into its operational history the more respect i get... here’s some more progress: and here with some paint: weathering to follow. Followed by the floatation bags and a few bombs. 3 or so...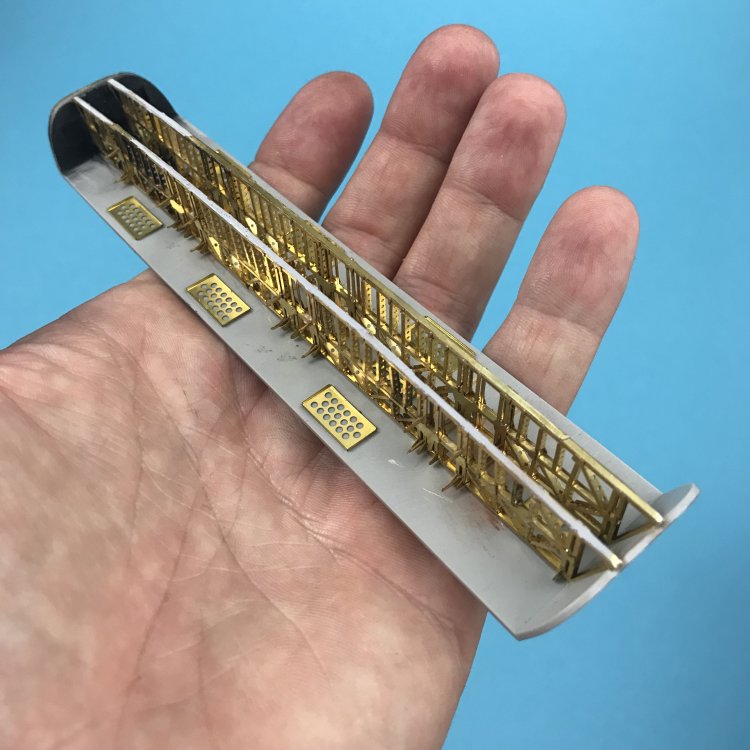
- 304 replies
-
- 9
-
-
- wilnis crash
- trumpeter
- (and 1 more)
-
Really cool work. Recently dropped my 1/32 version on the floor
-
My pets story,1:18 Pagani Huayra Dinastia in carbon
JeroenPeters replied to model arts's topic in Non LSM 'WIP
Holy wow. That's pretty impressive... Love that carbon look. Looks like my Yamaha Fz8 which is covered in carbon too -
Cool.. You use the black marker to check panel lines?
-
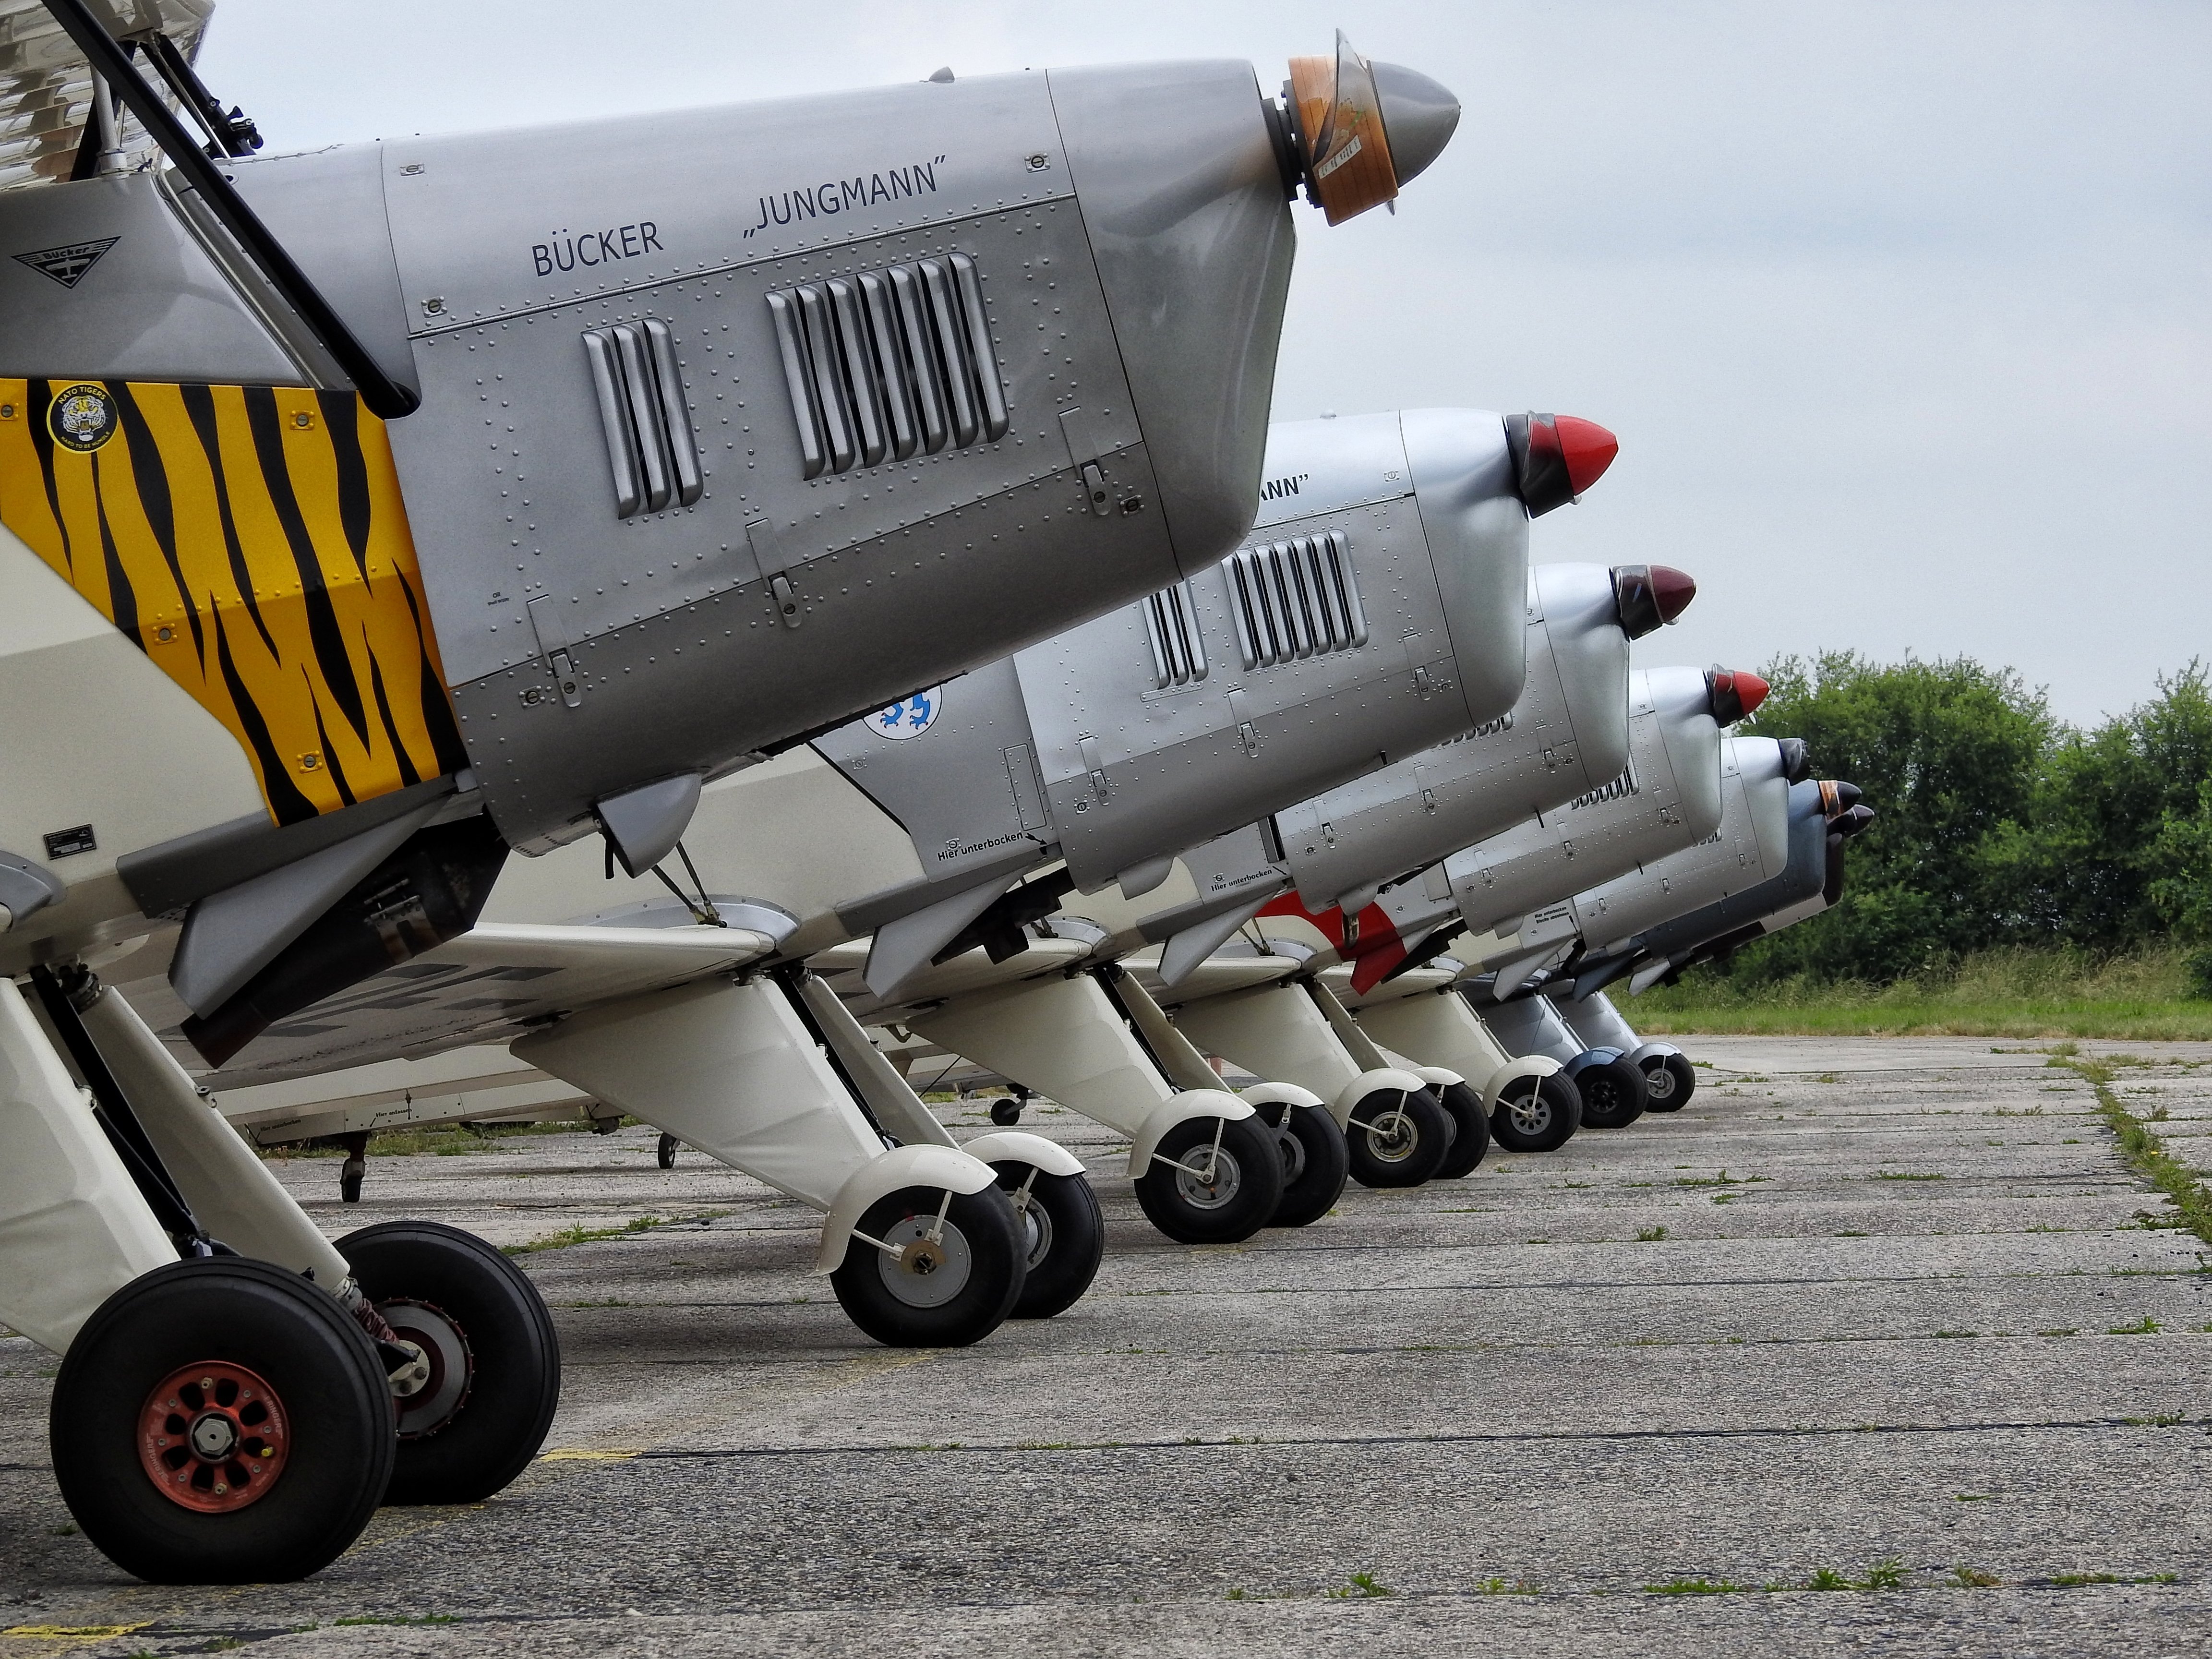
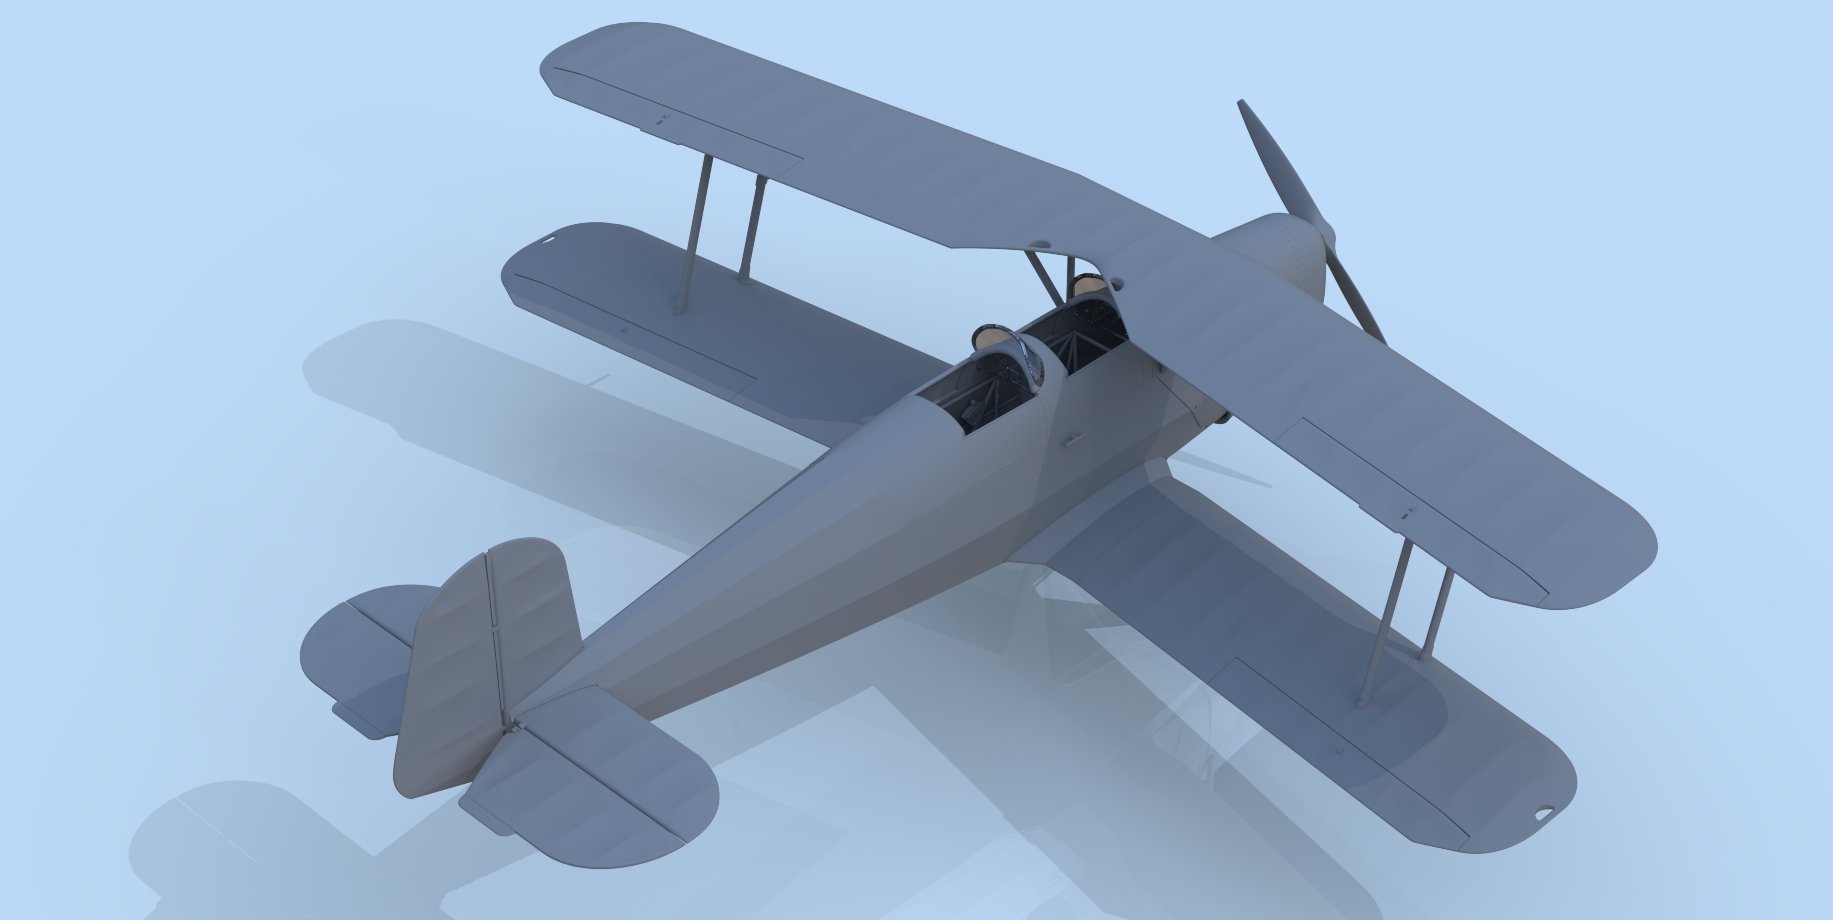
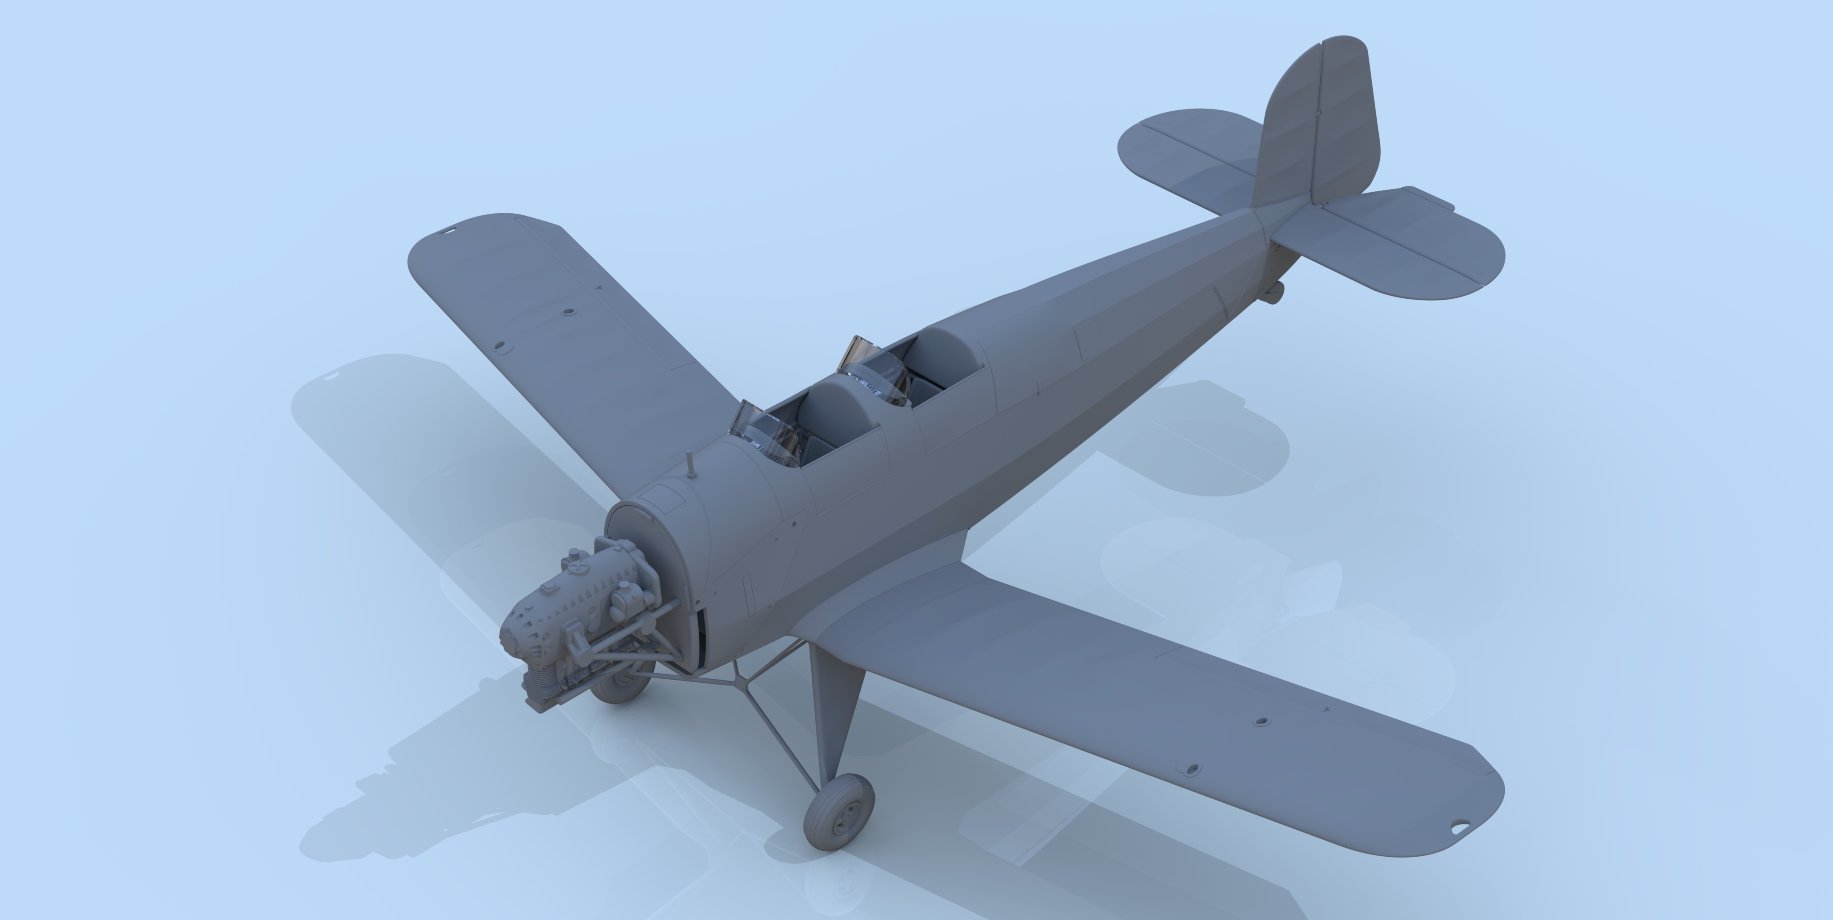
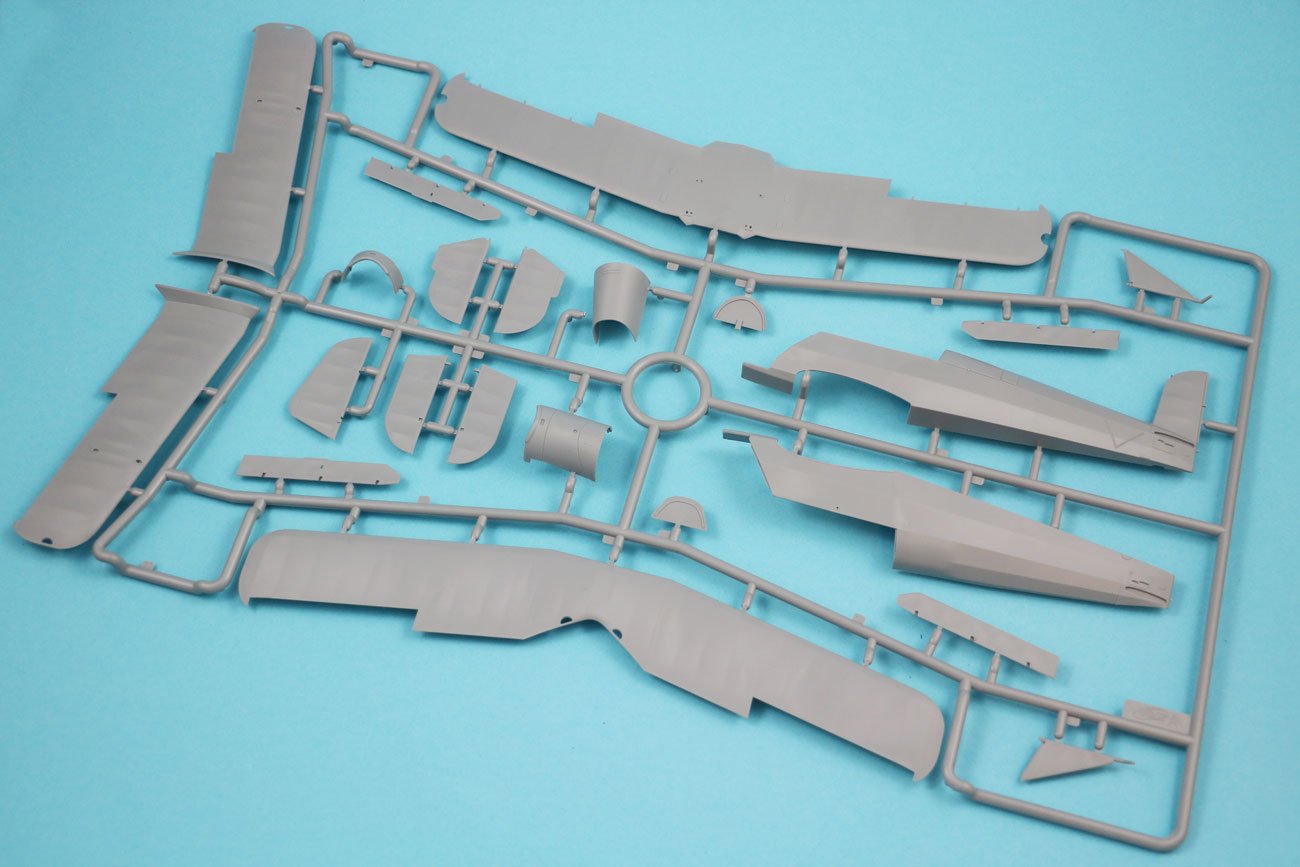
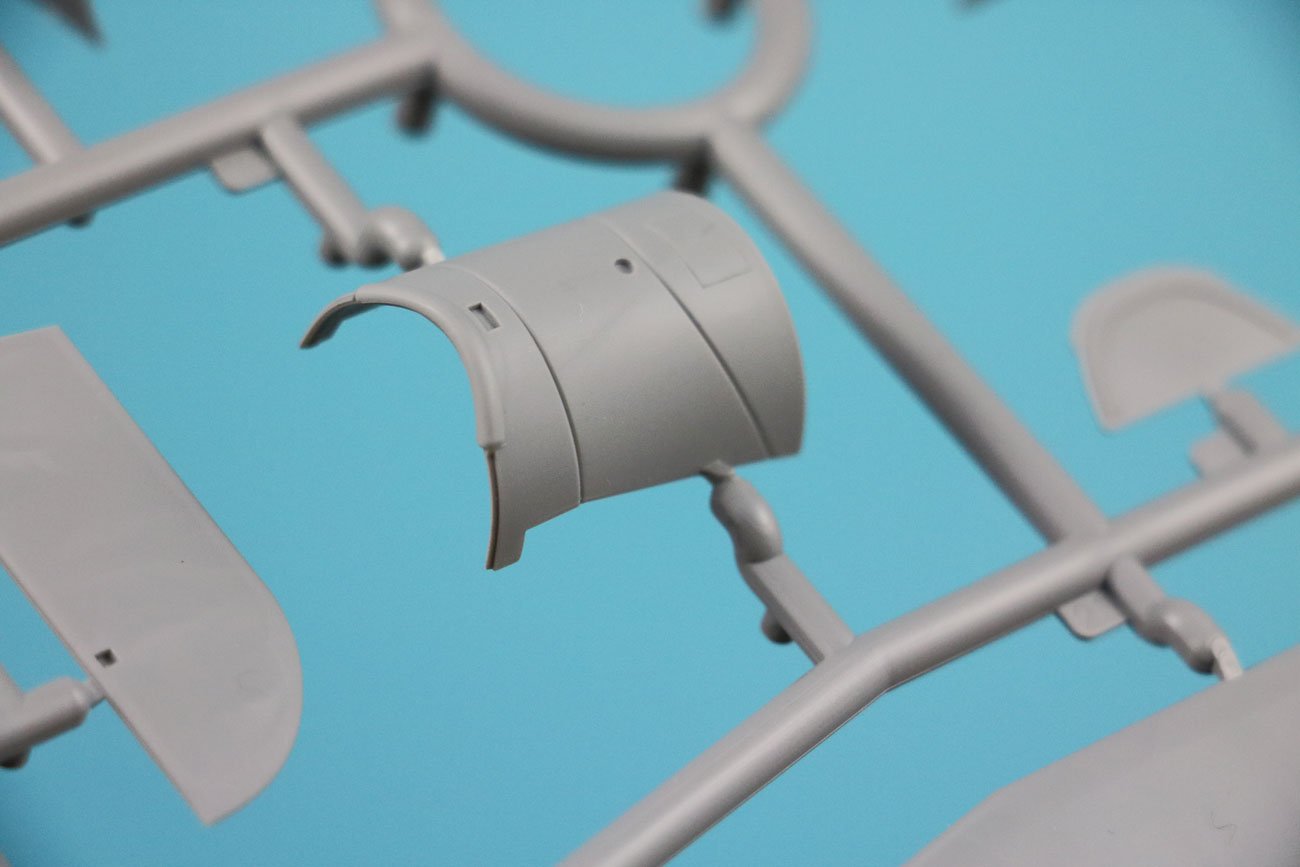
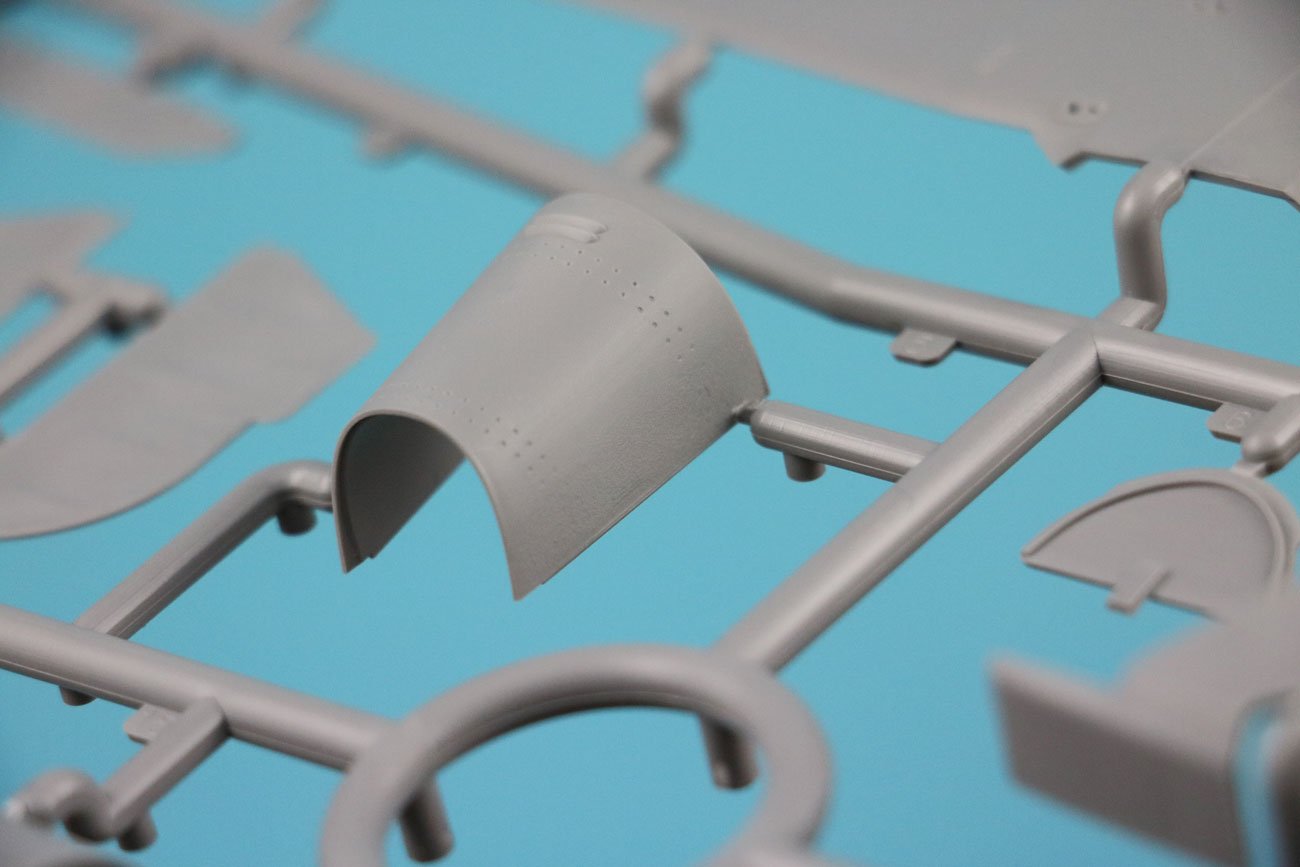
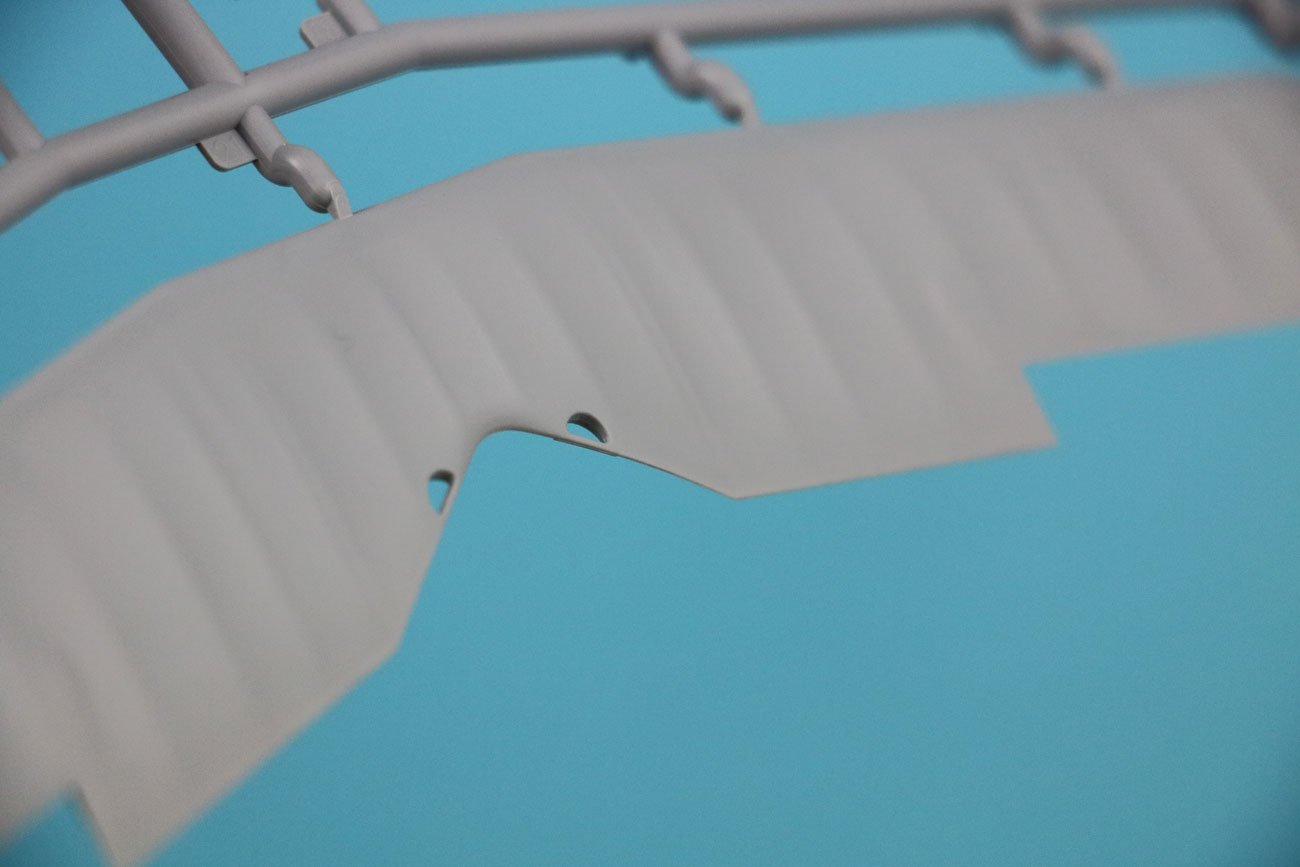
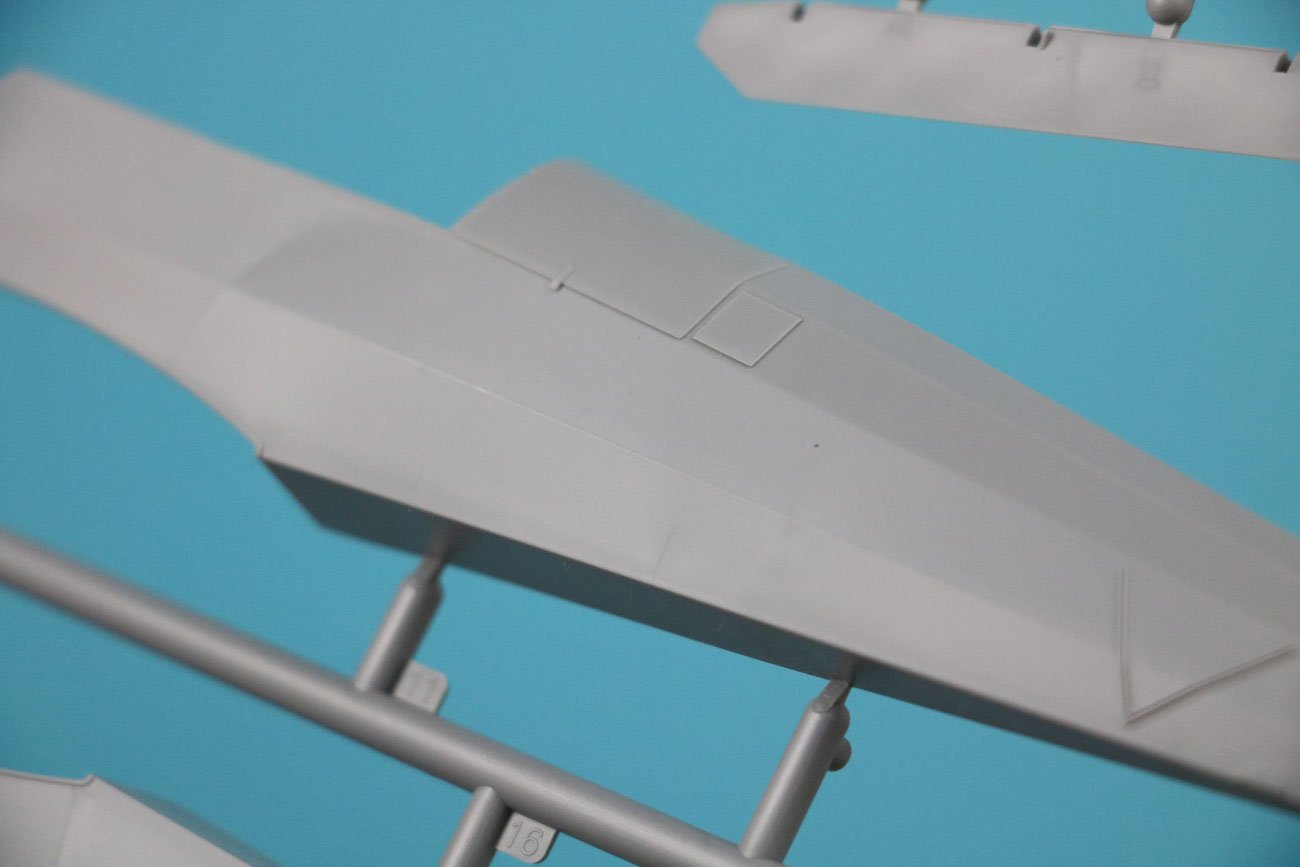
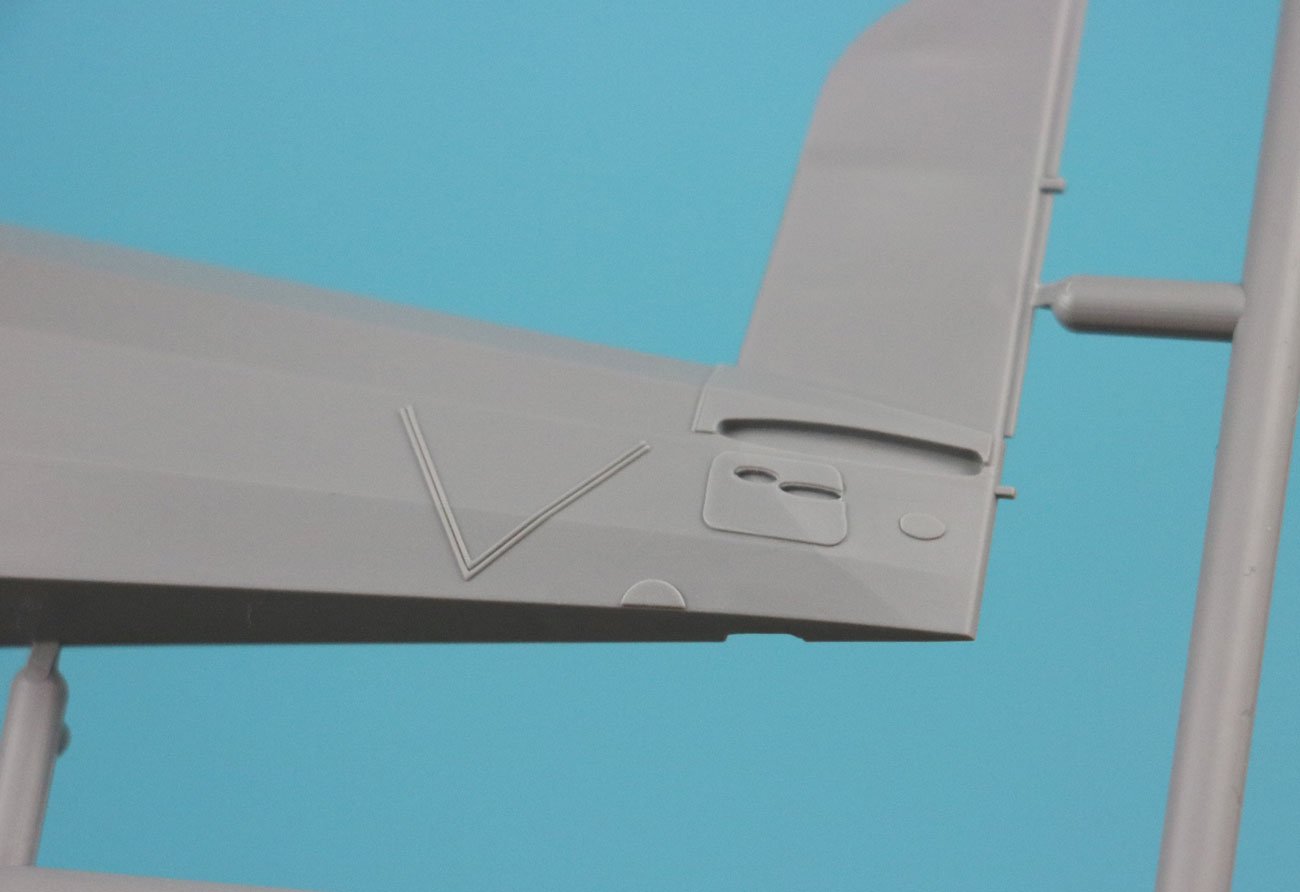
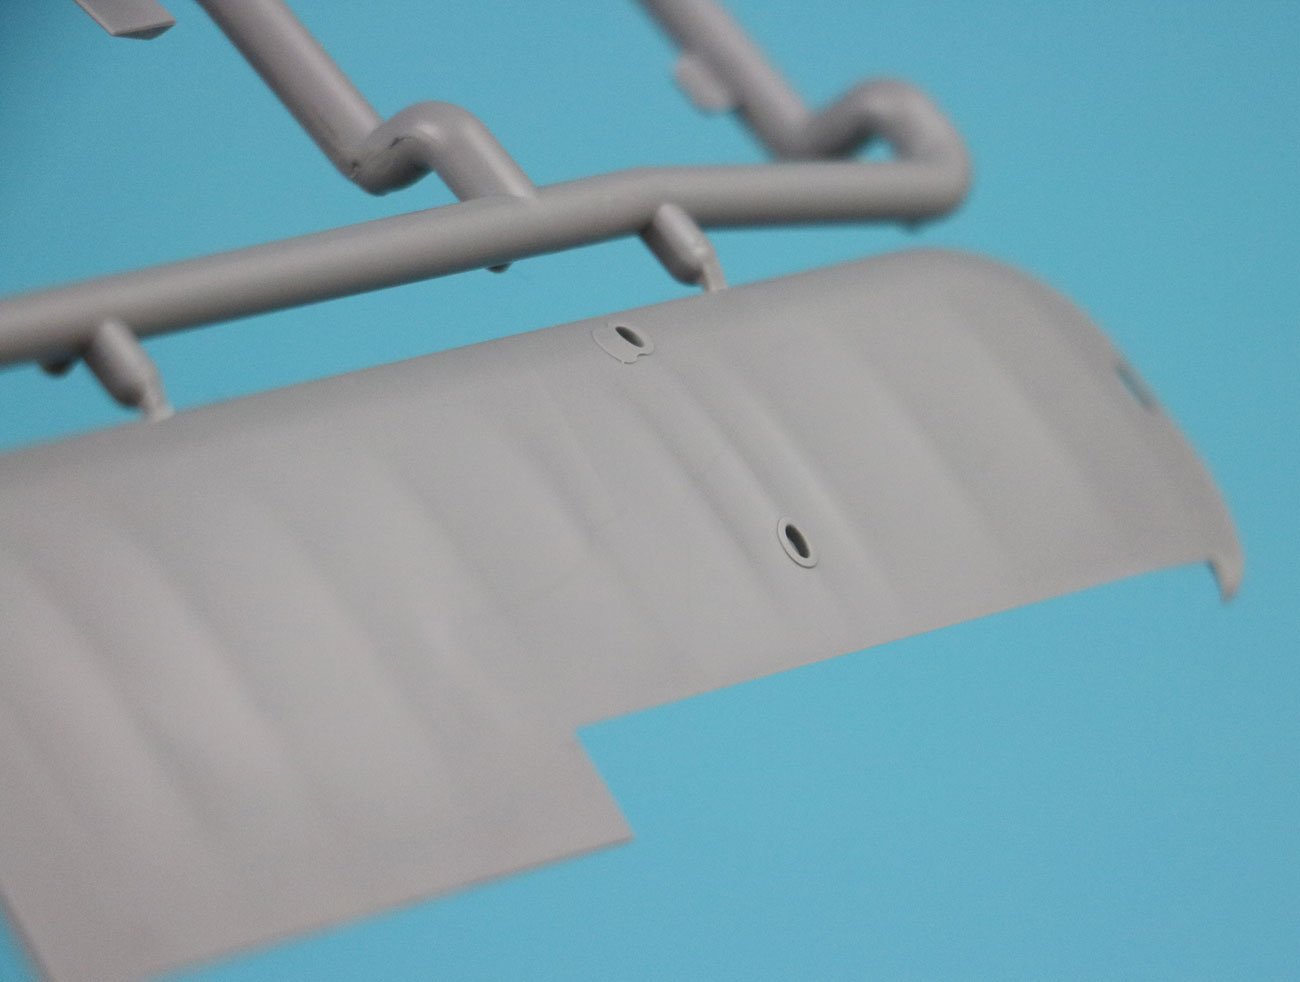
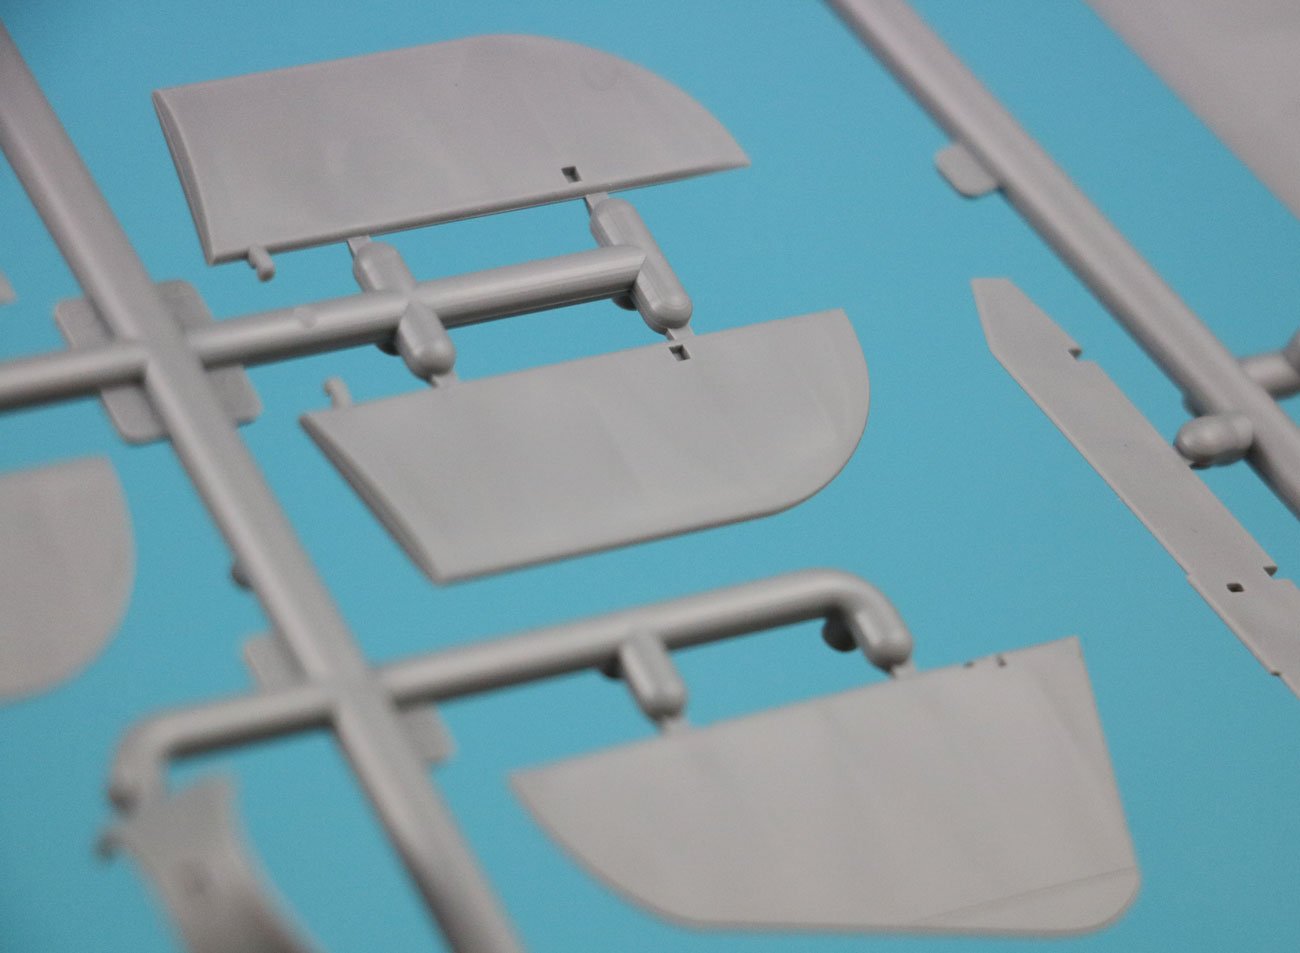
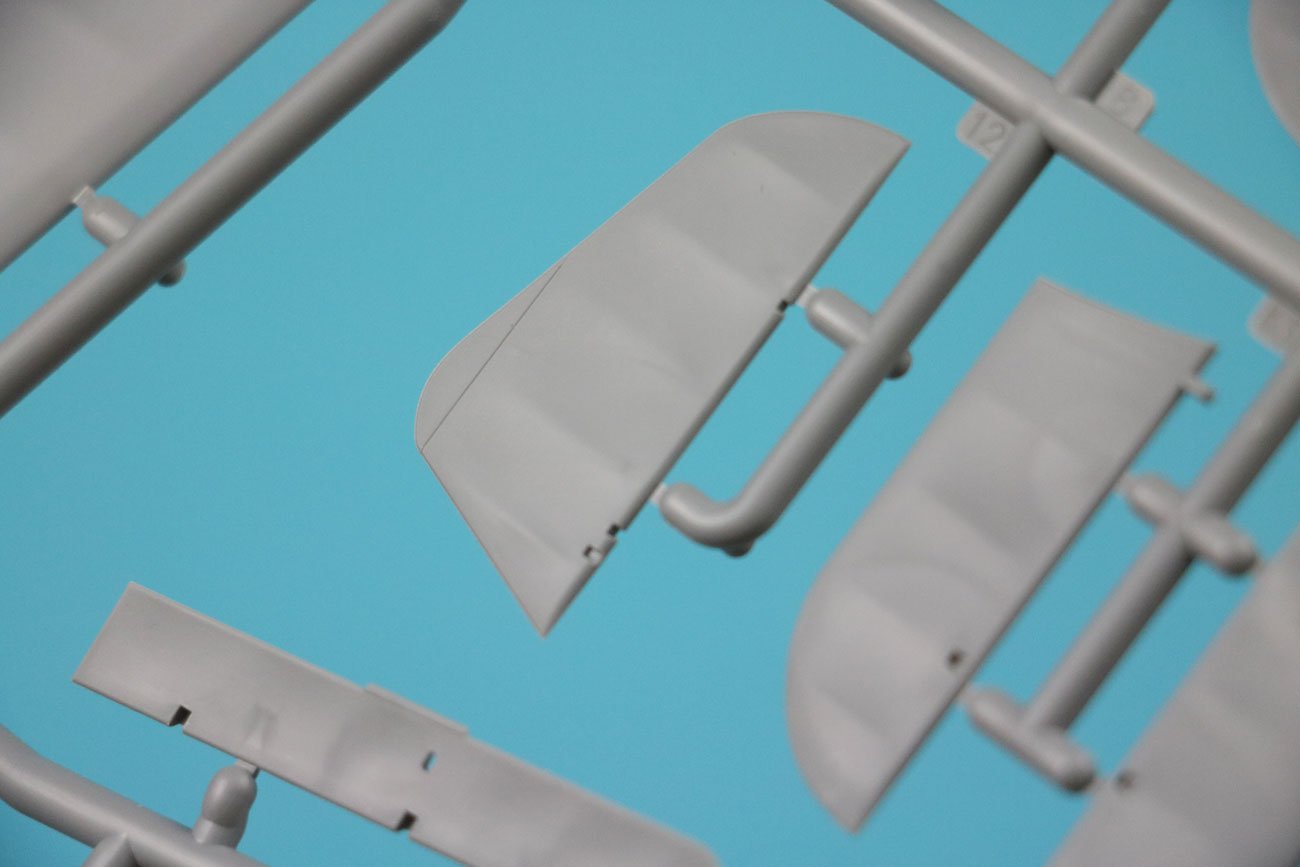
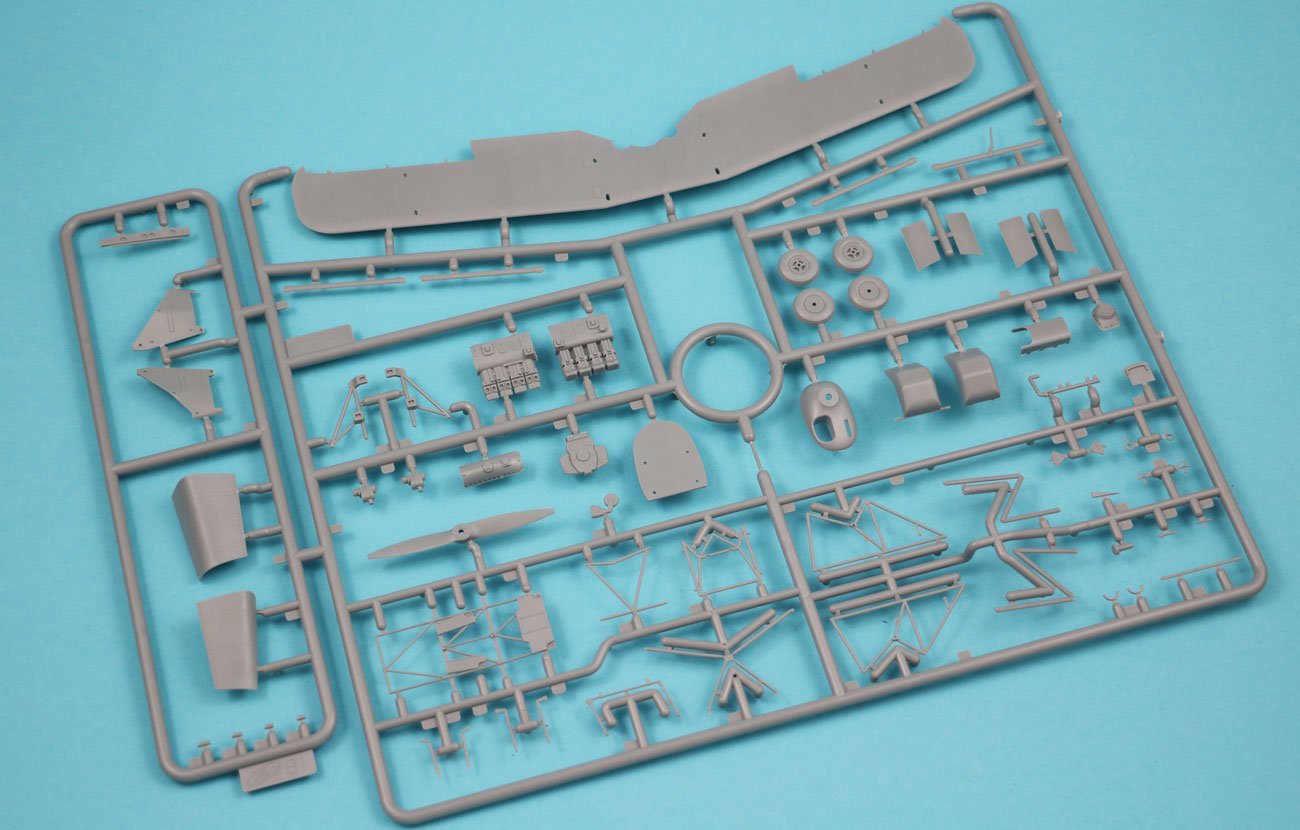
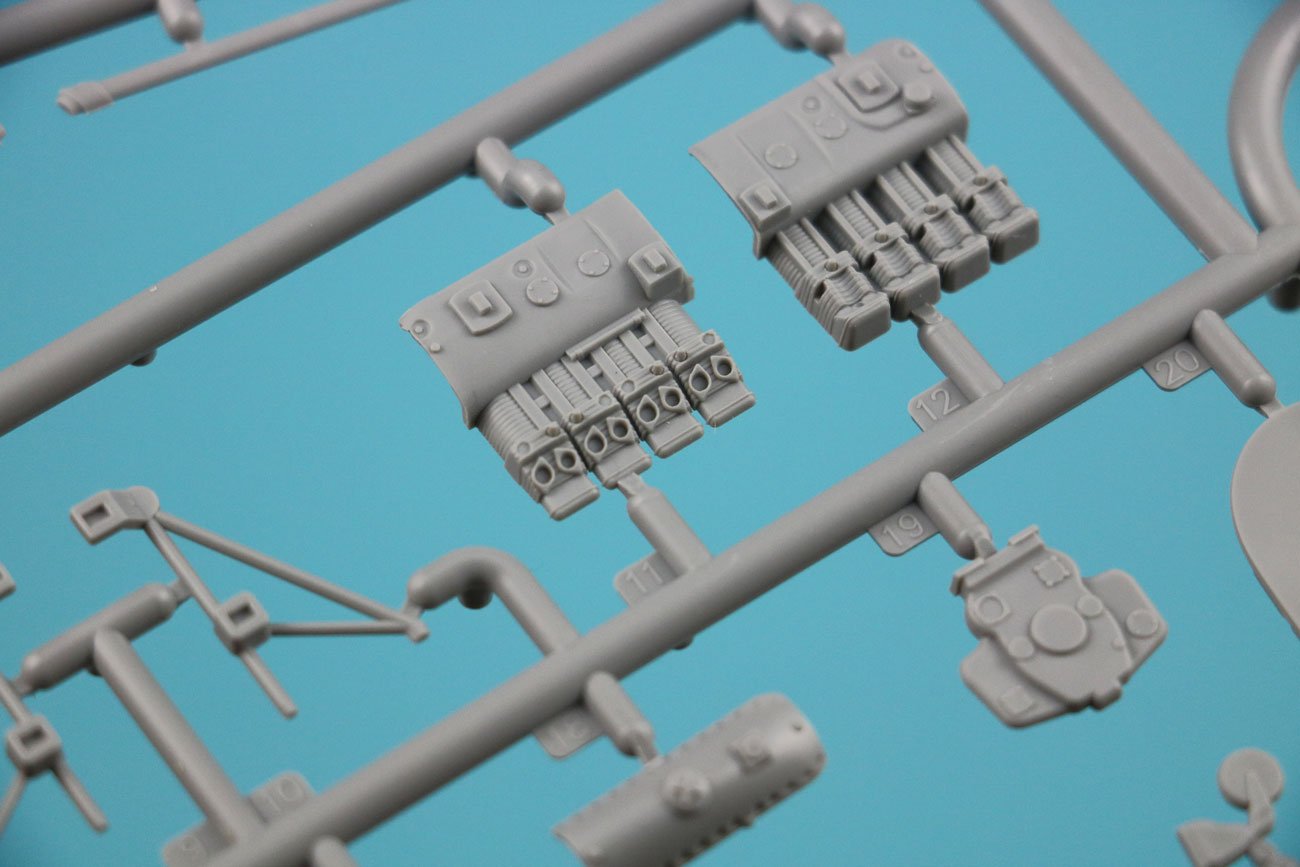
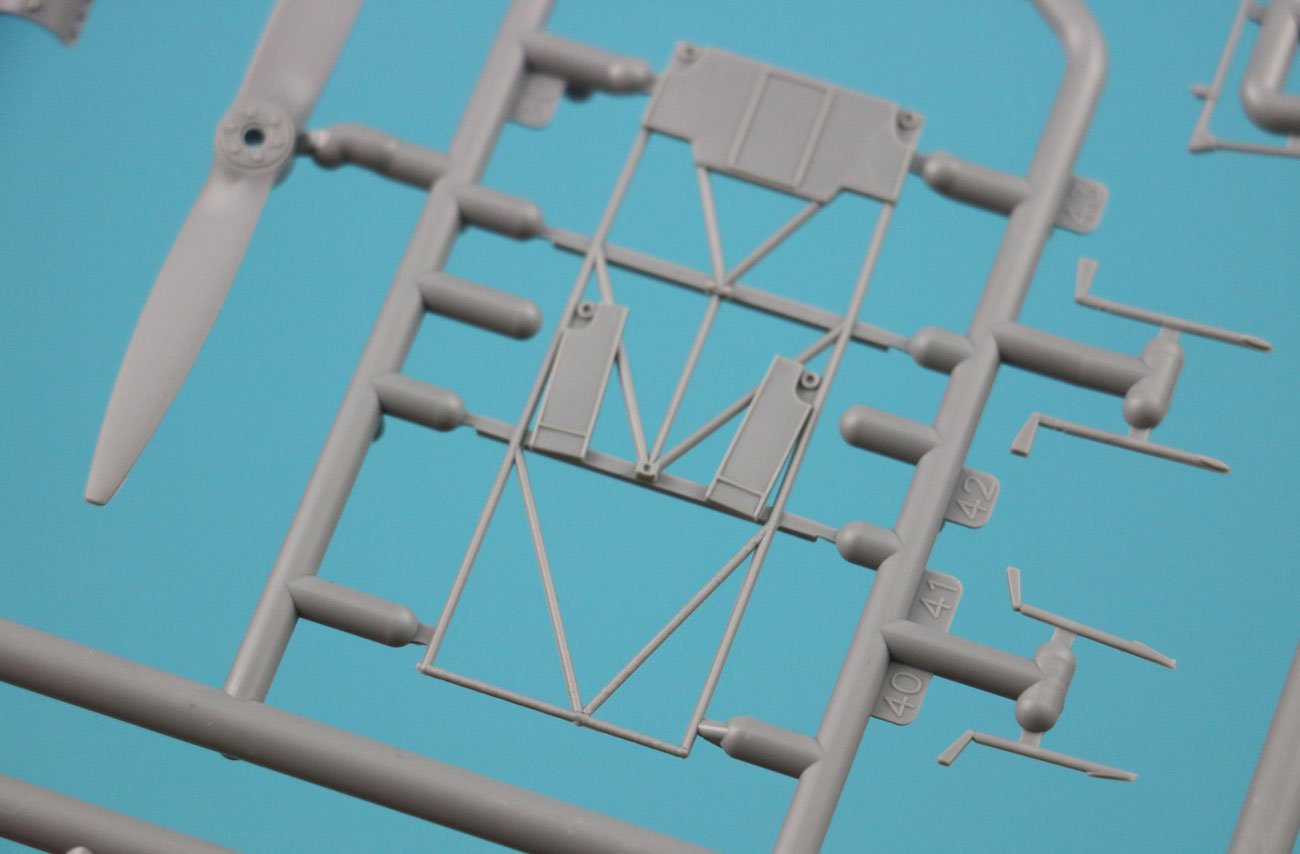
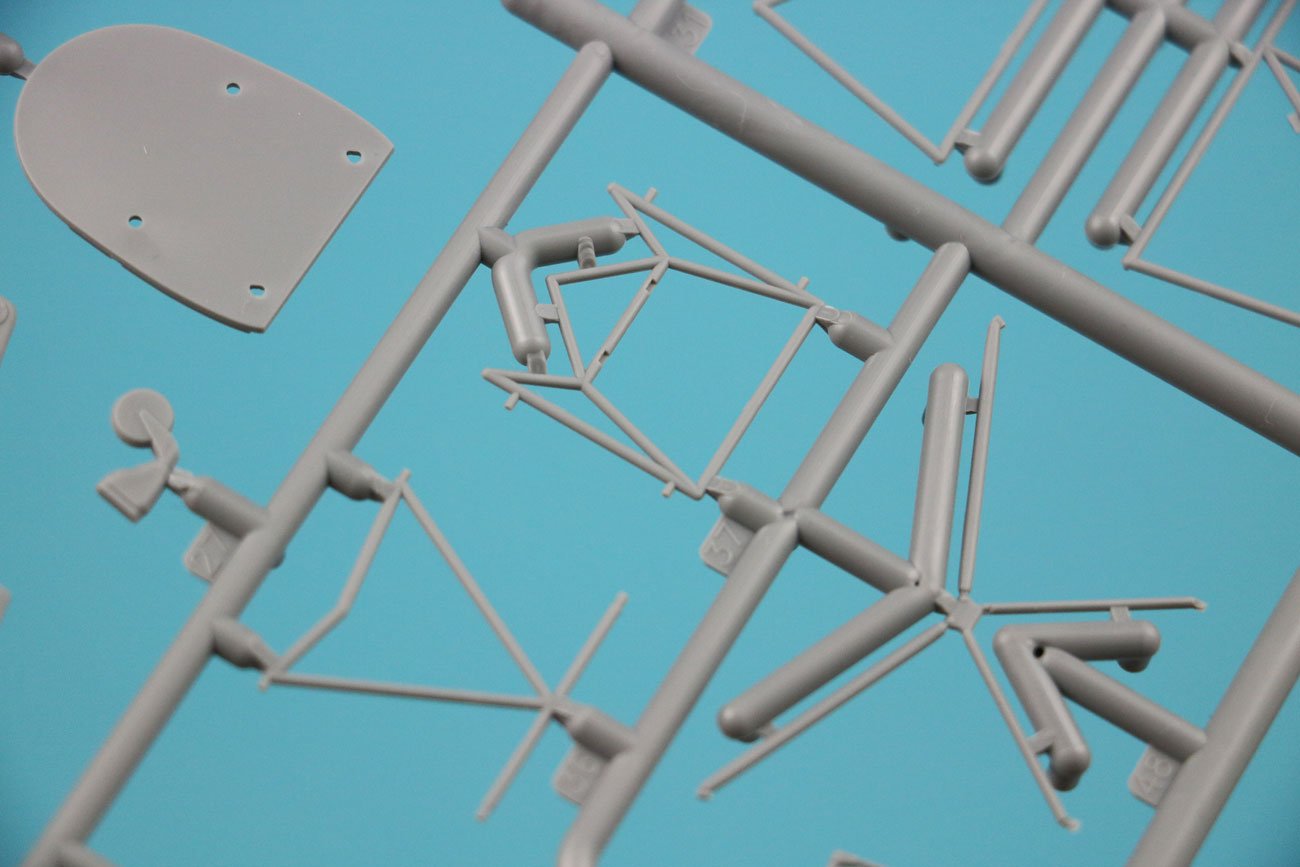
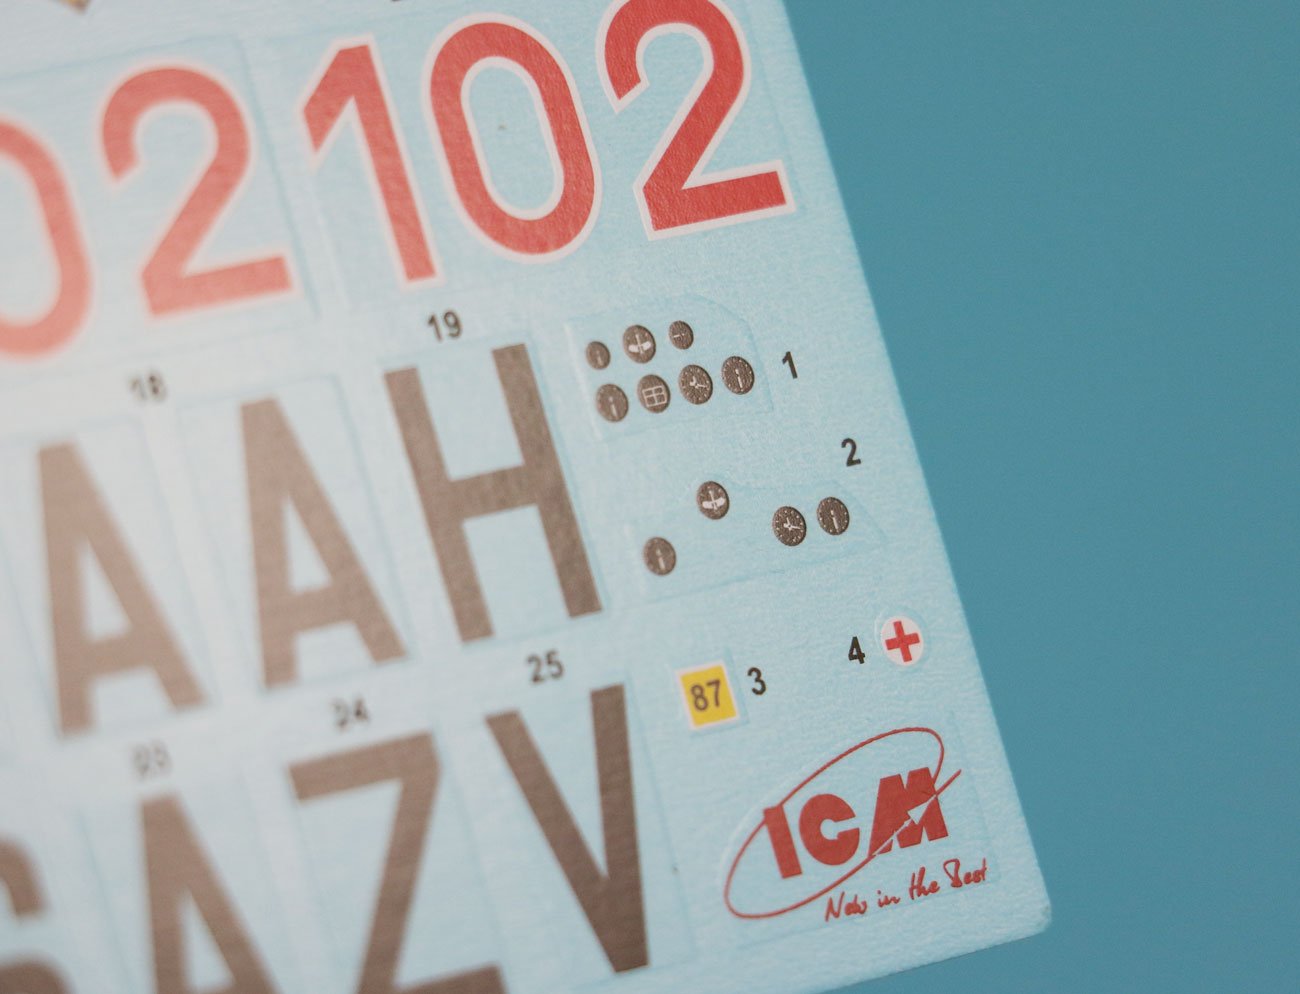
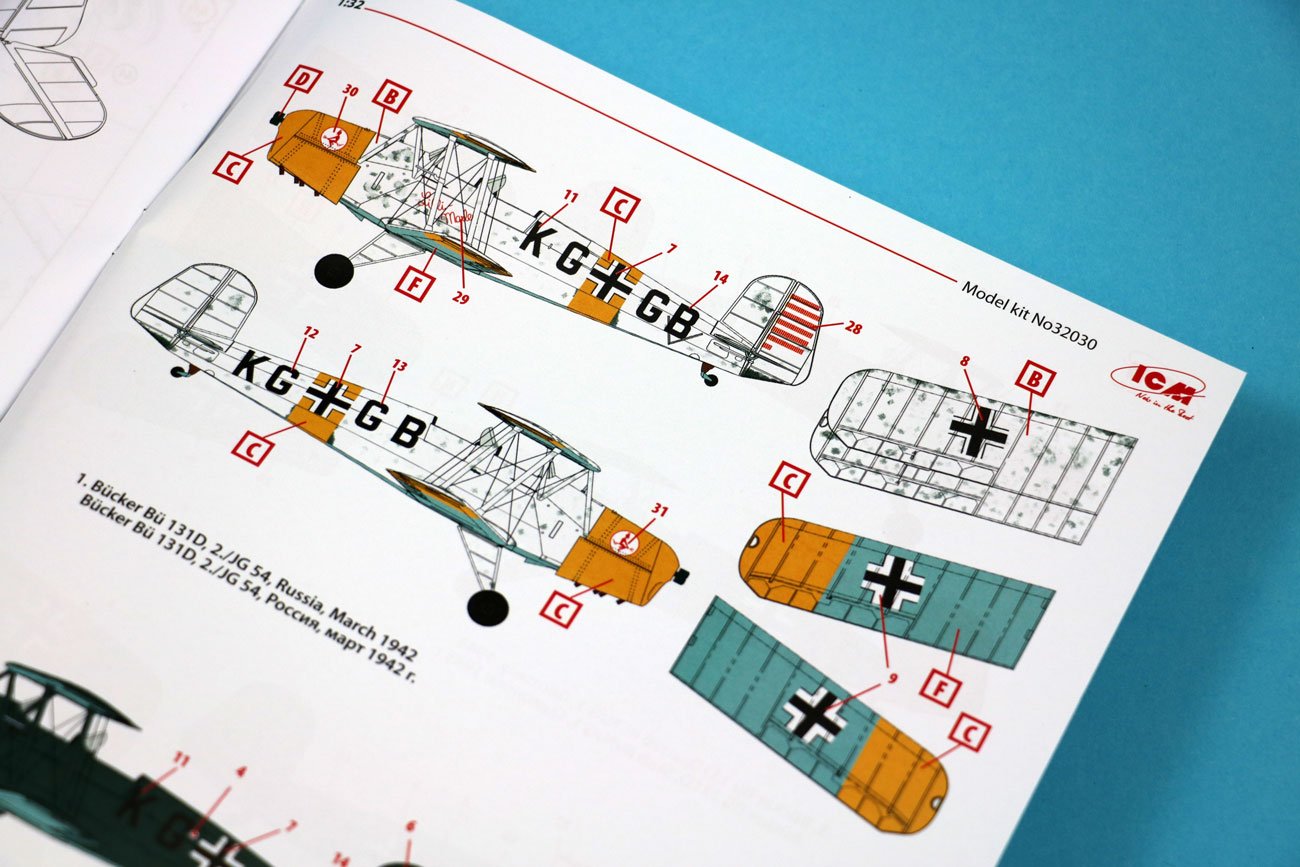
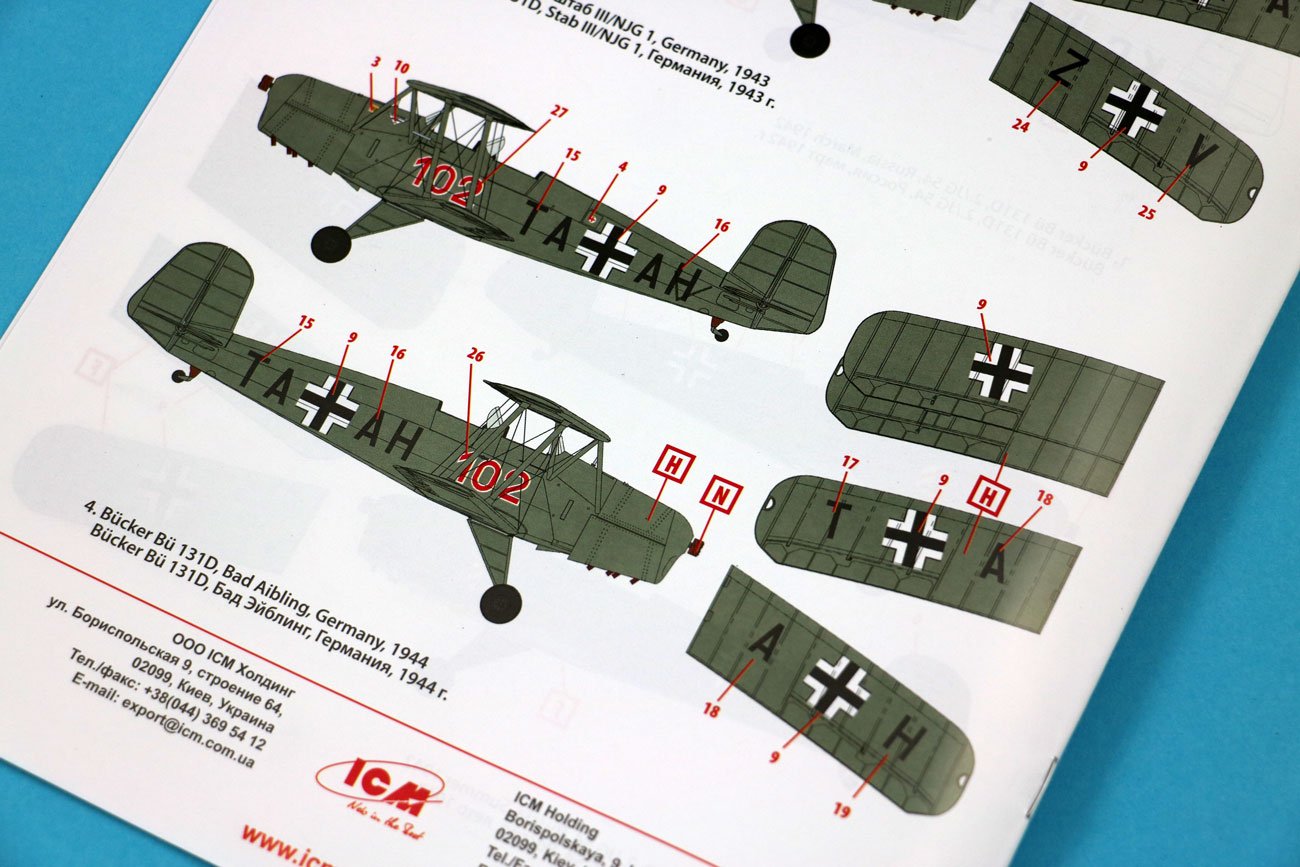
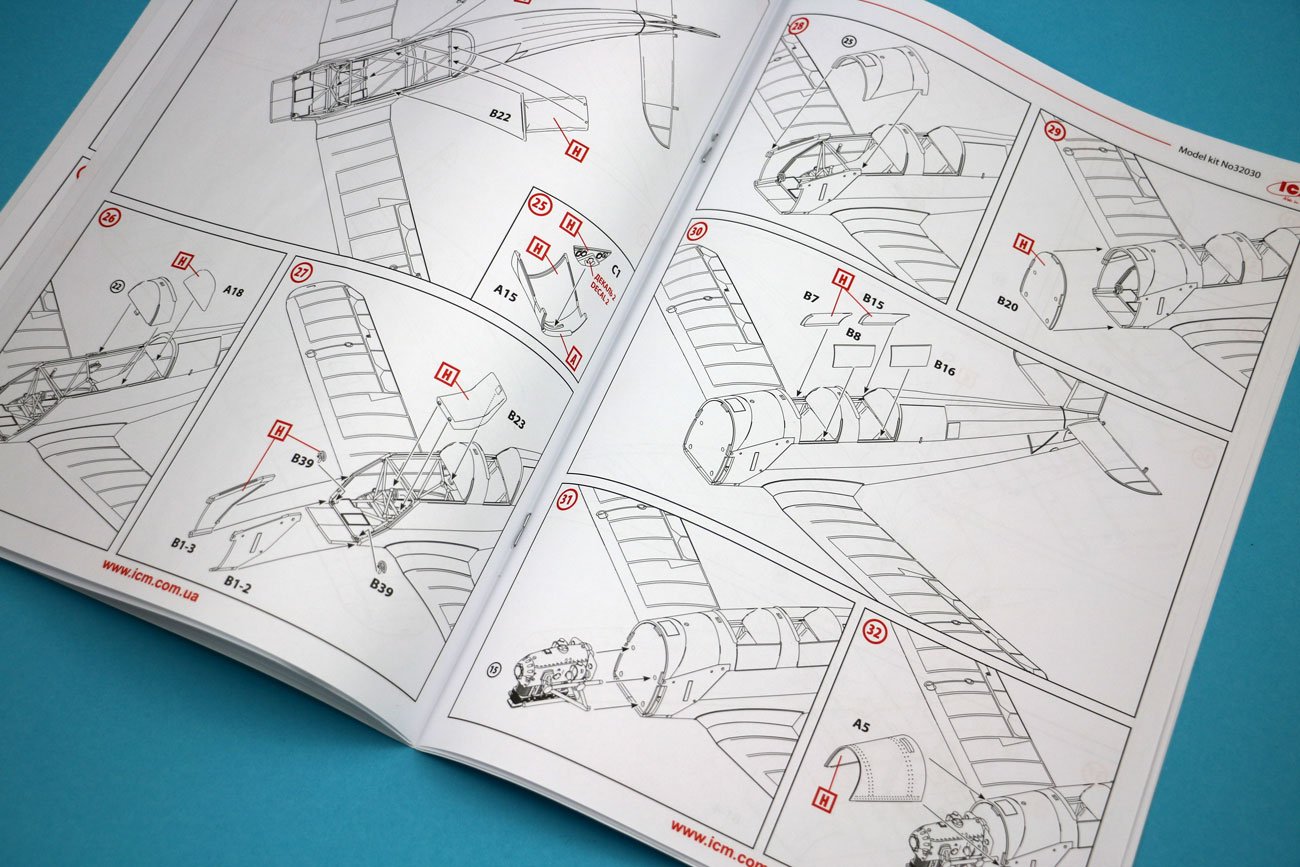
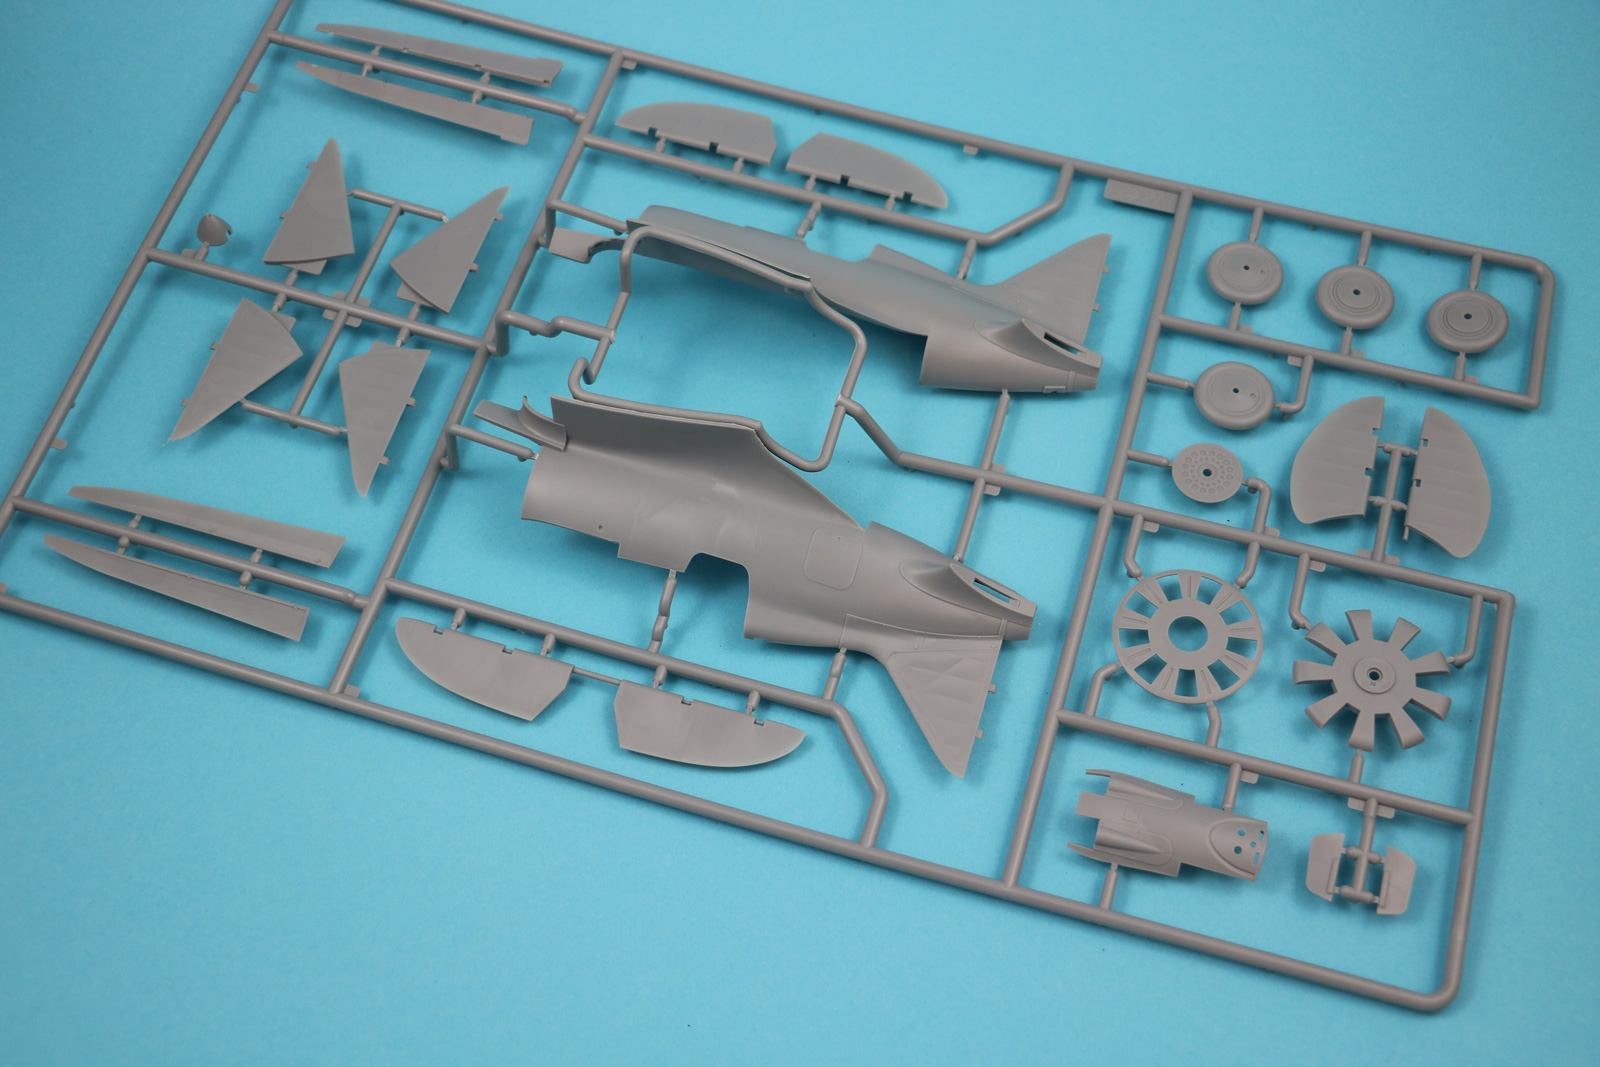
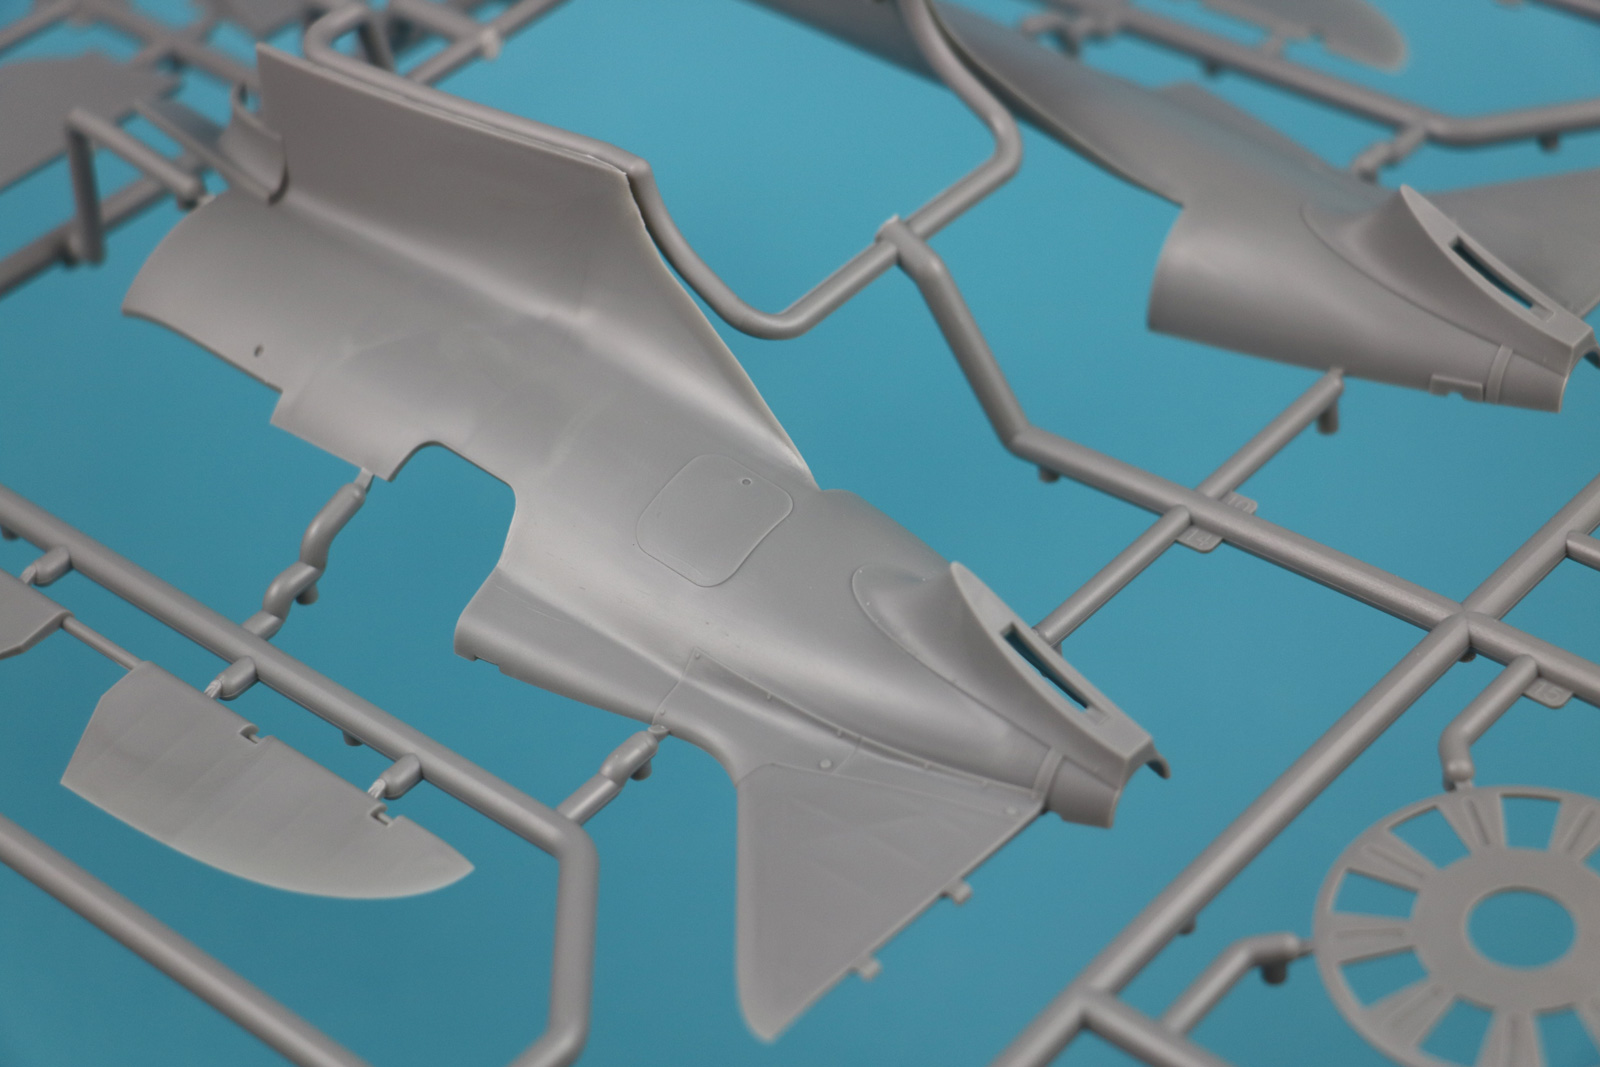
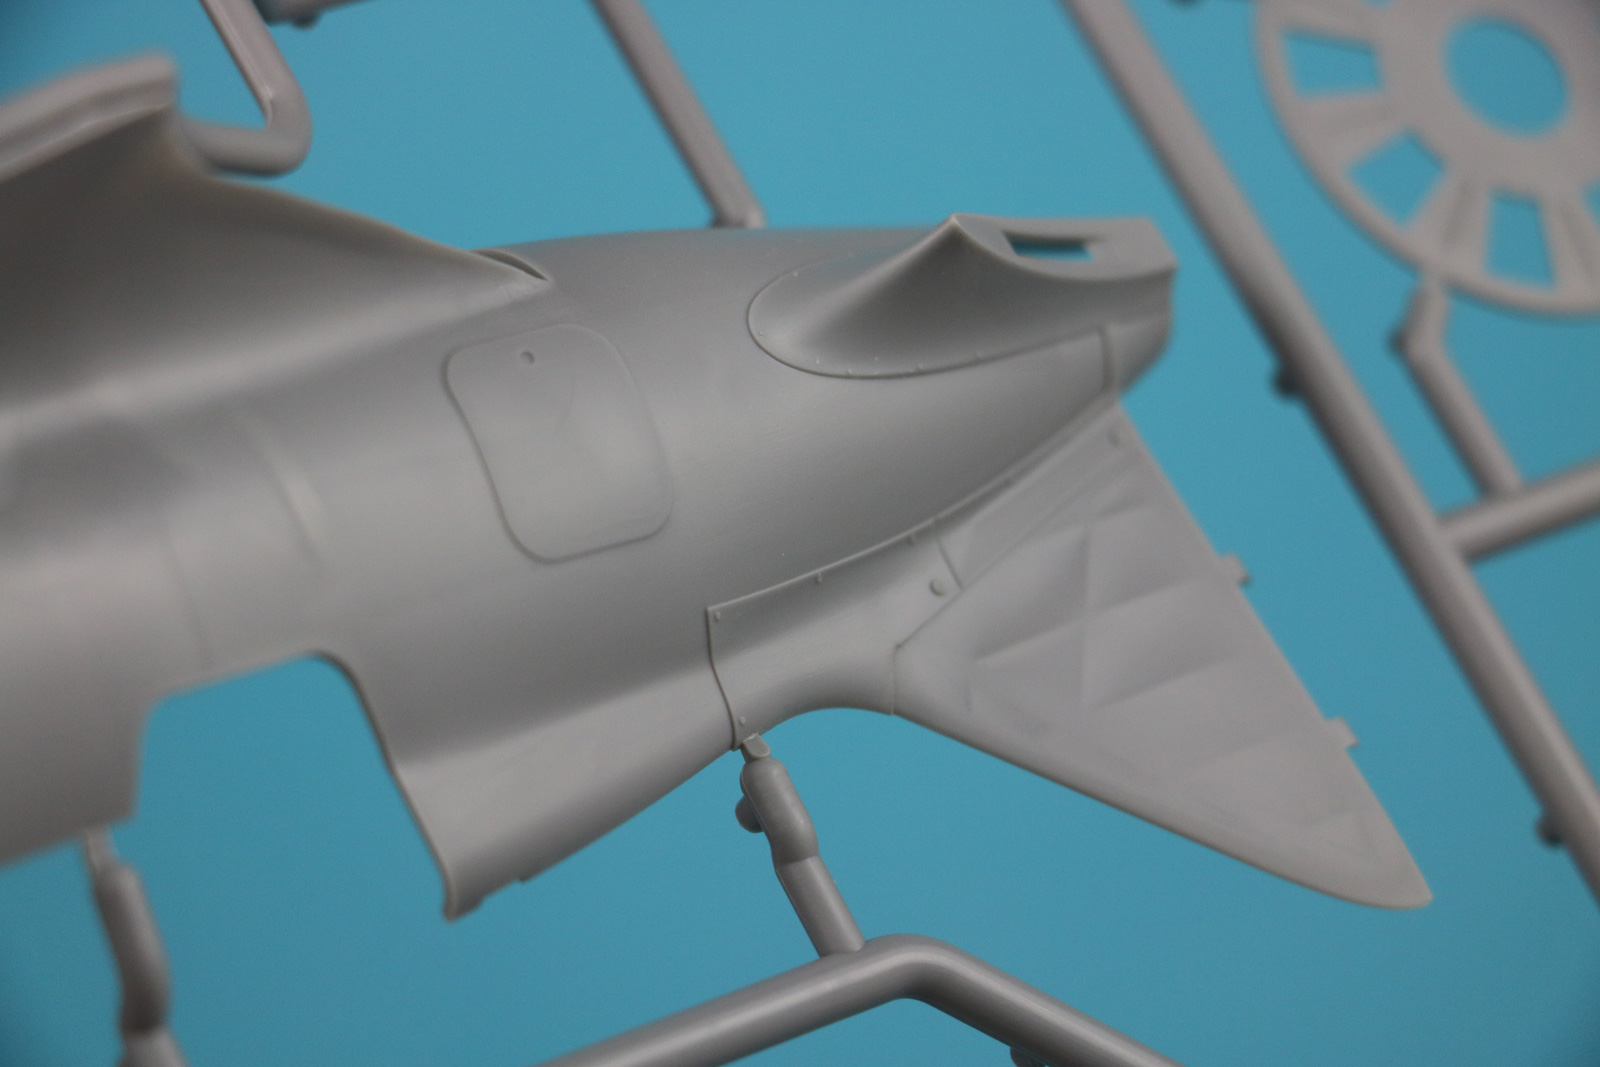
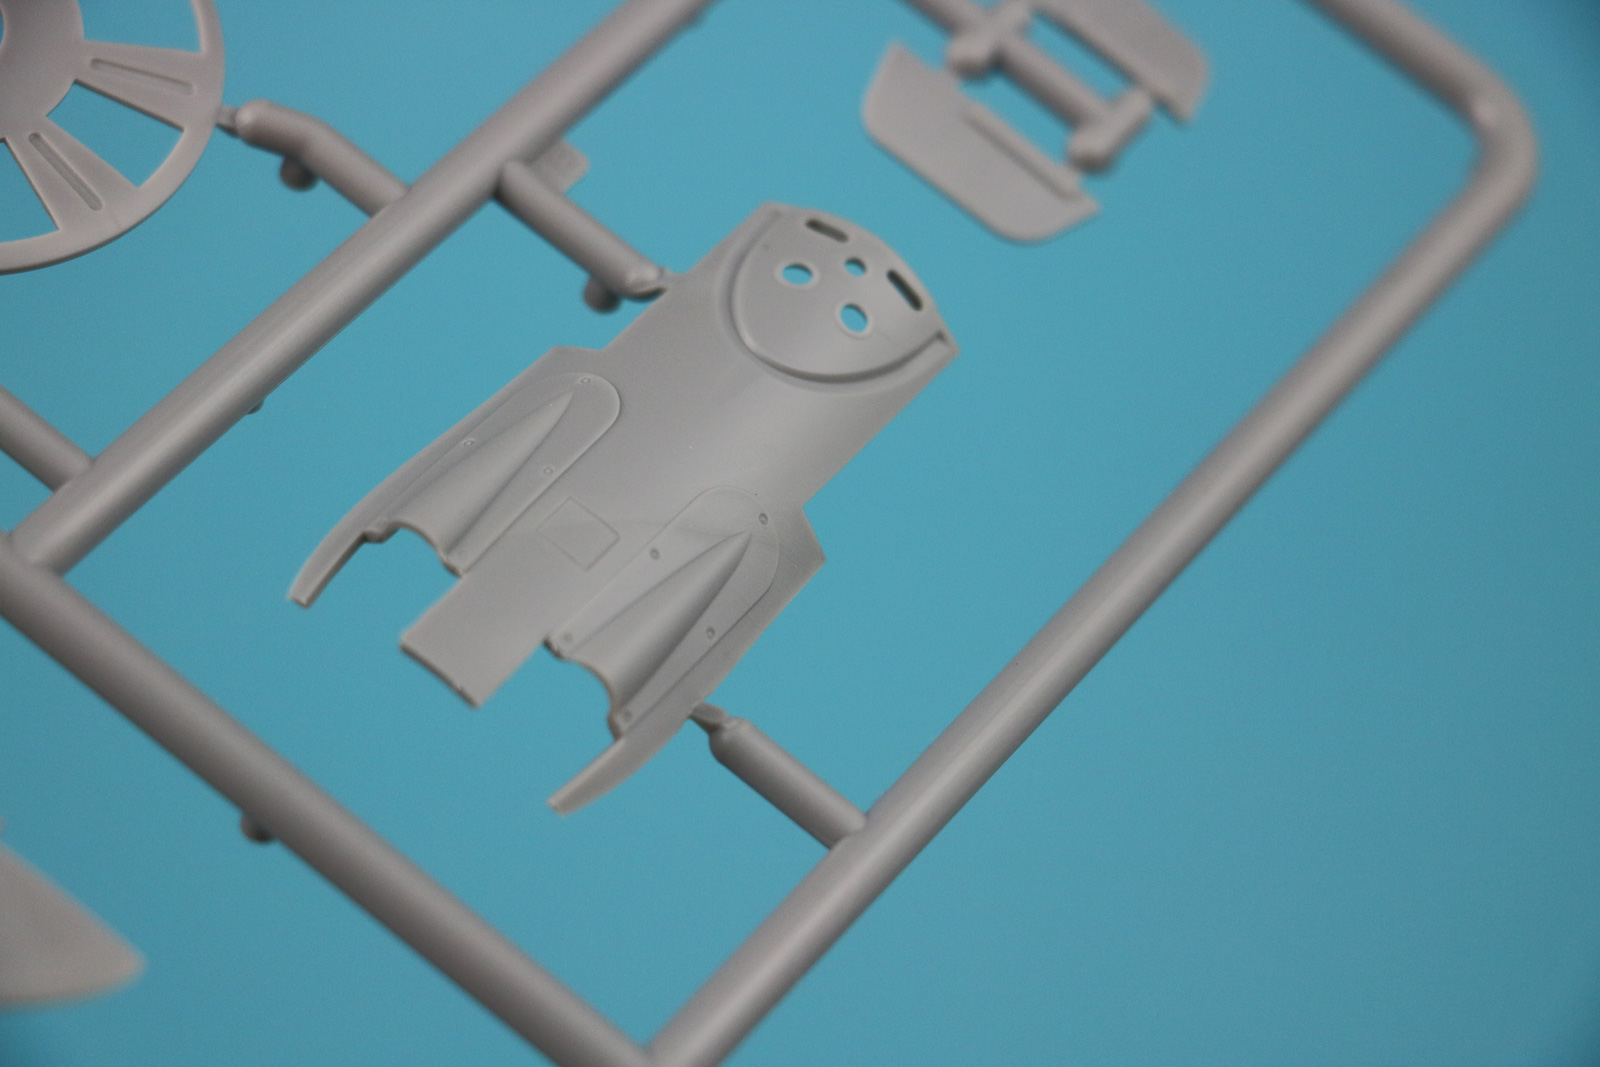
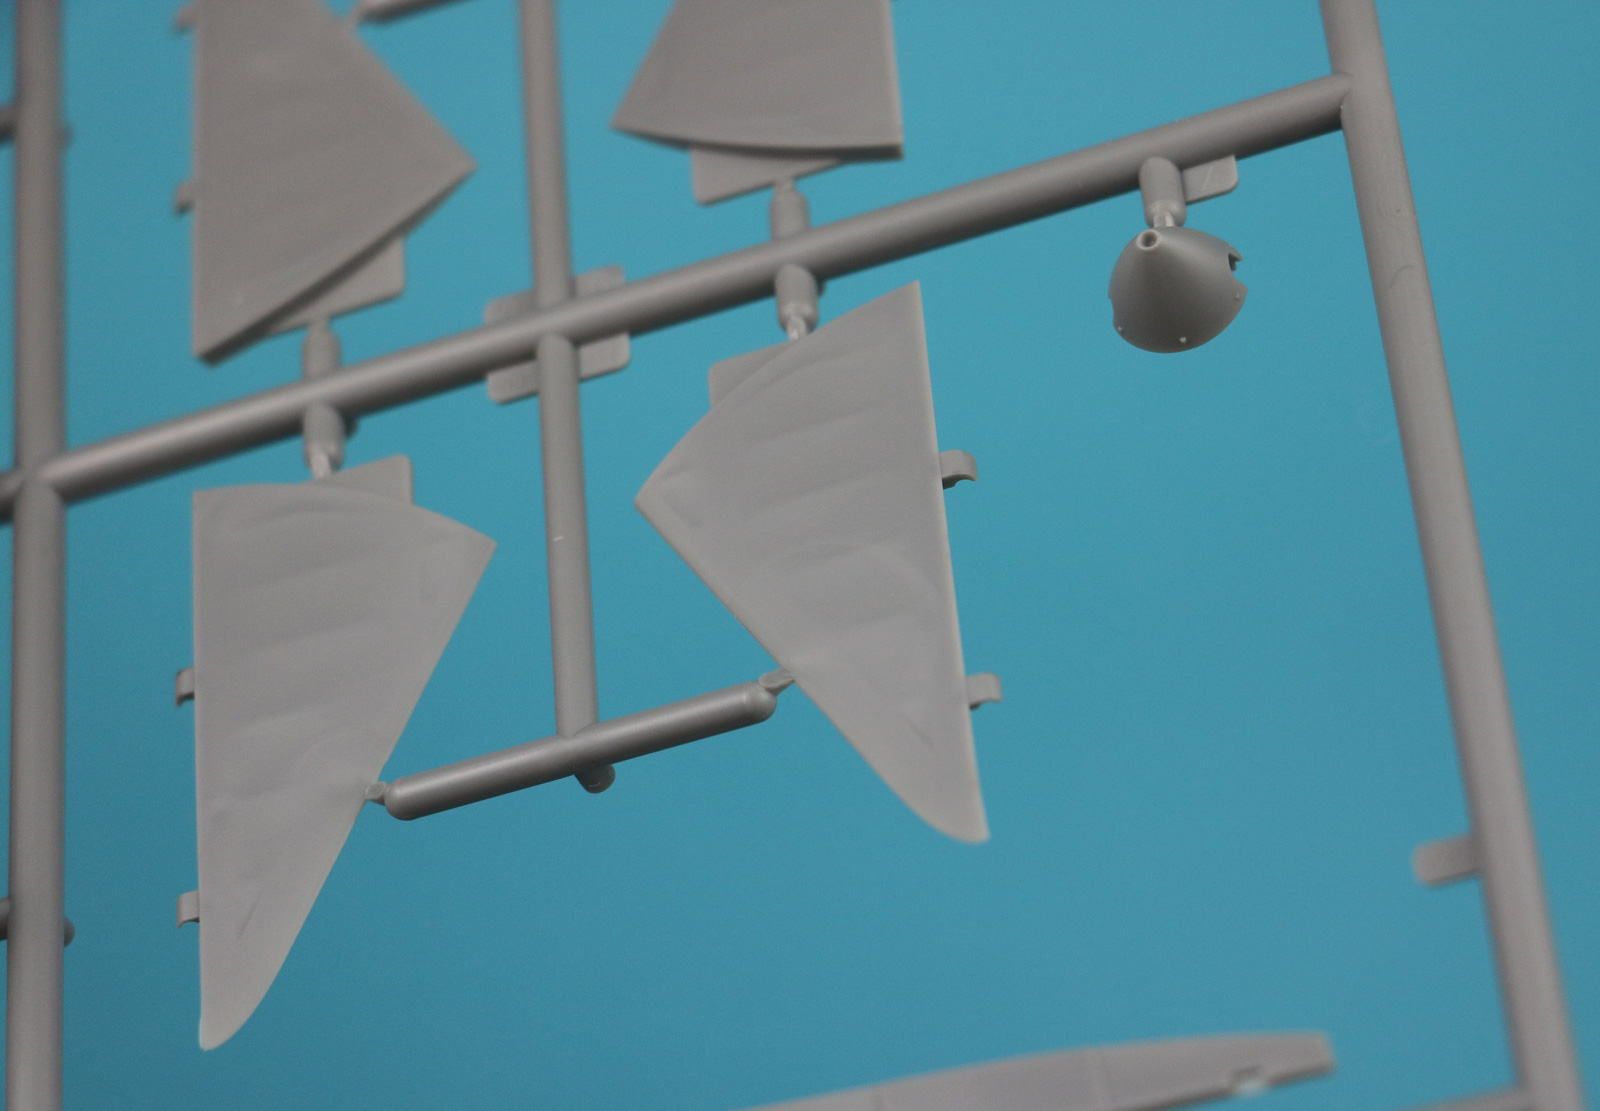
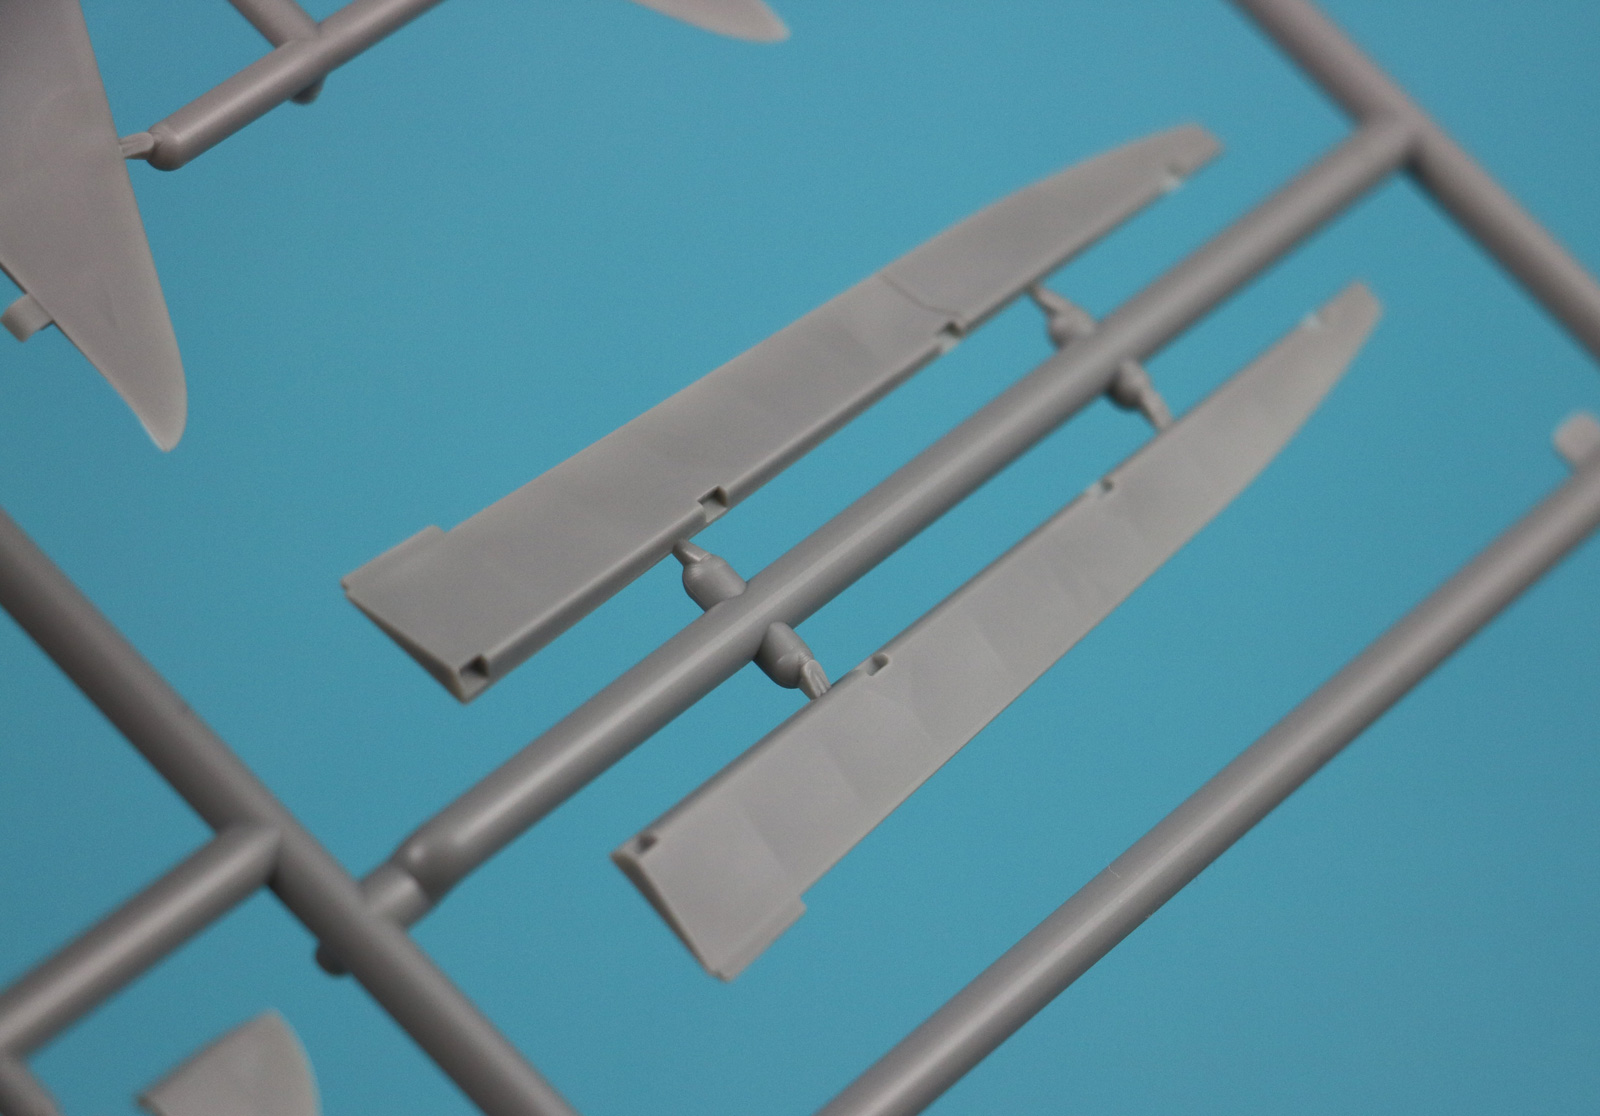
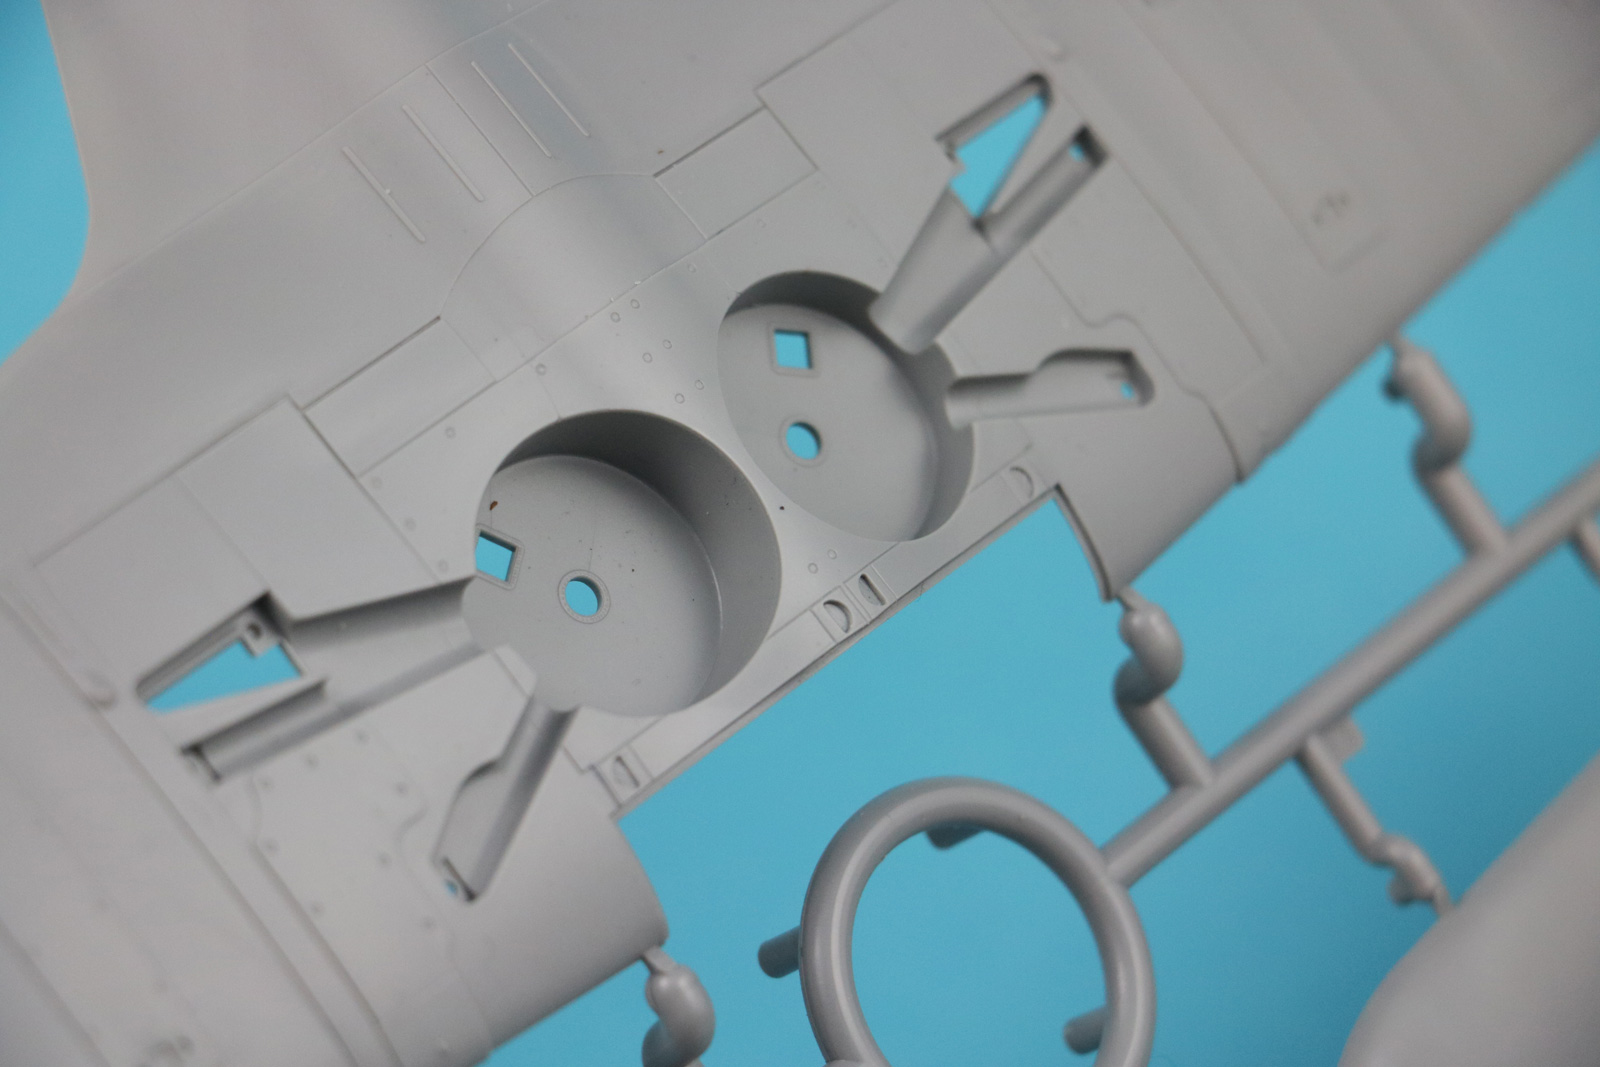
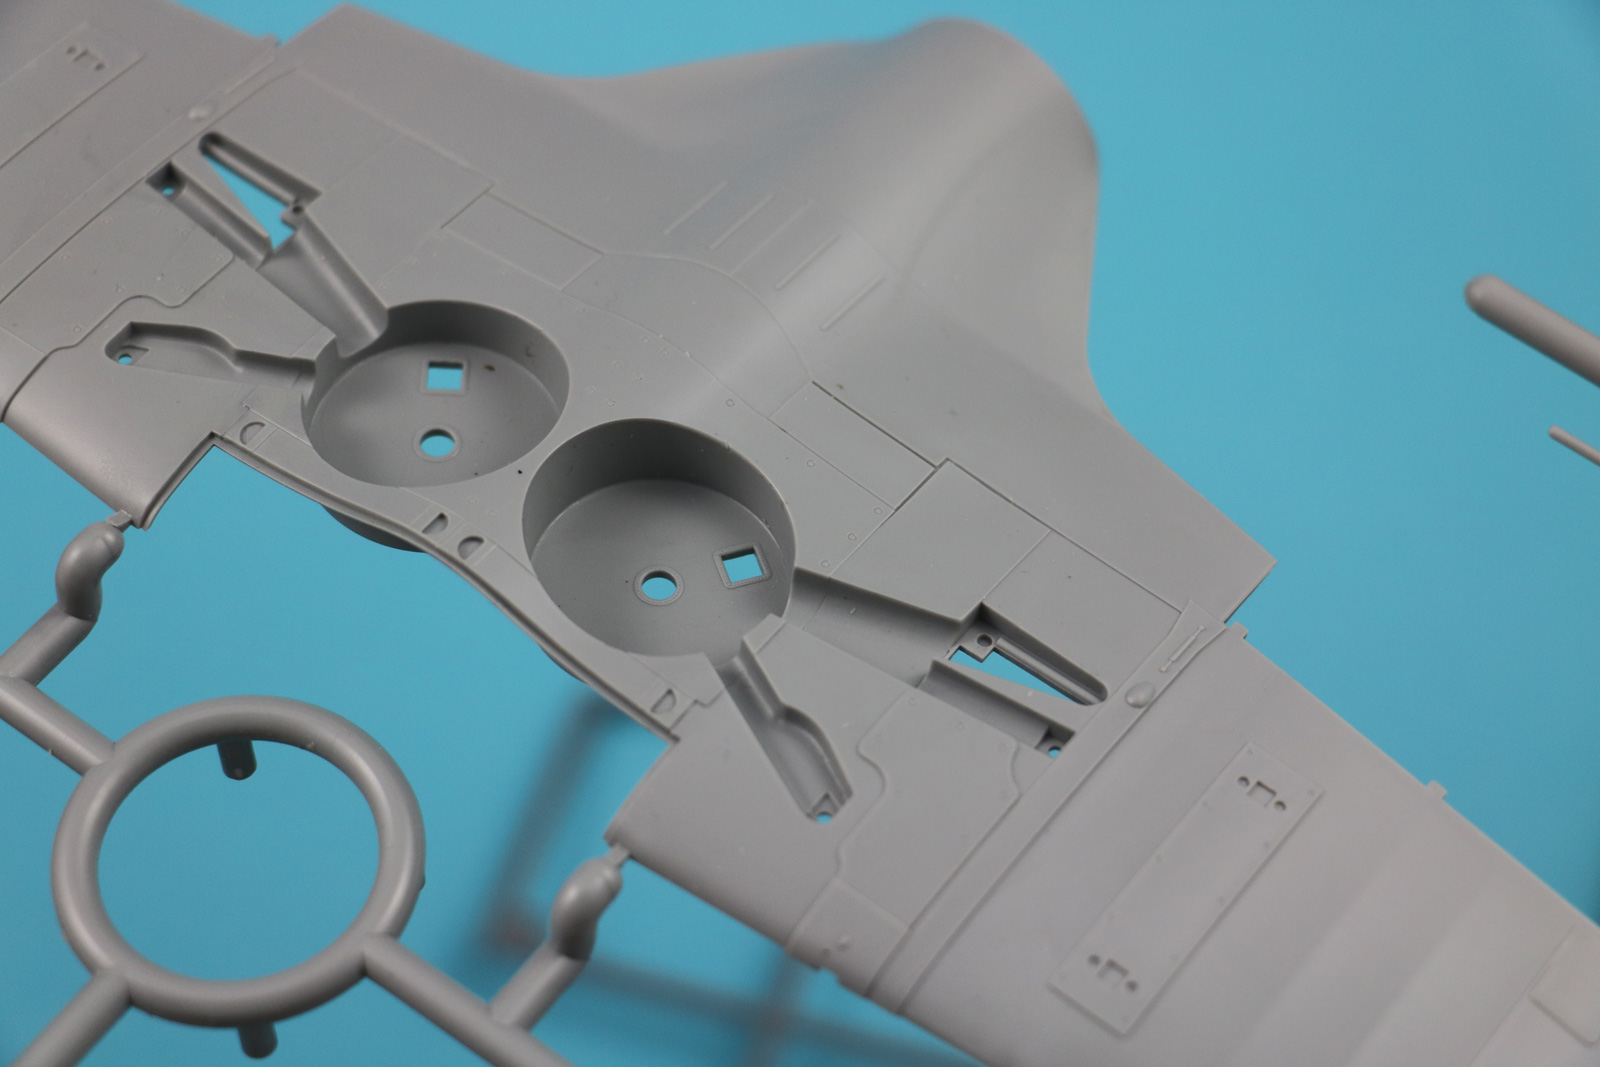
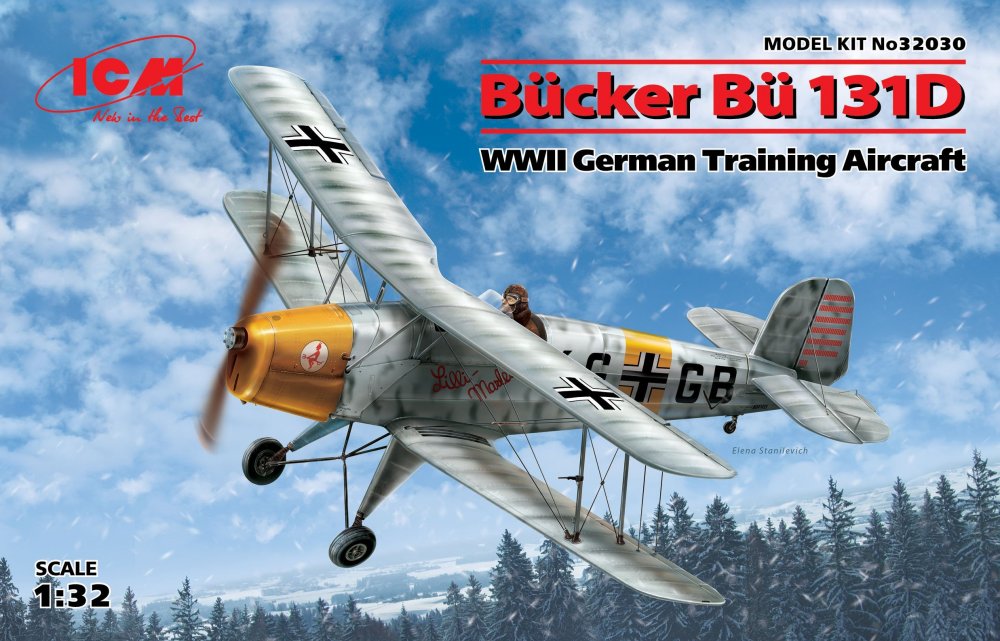
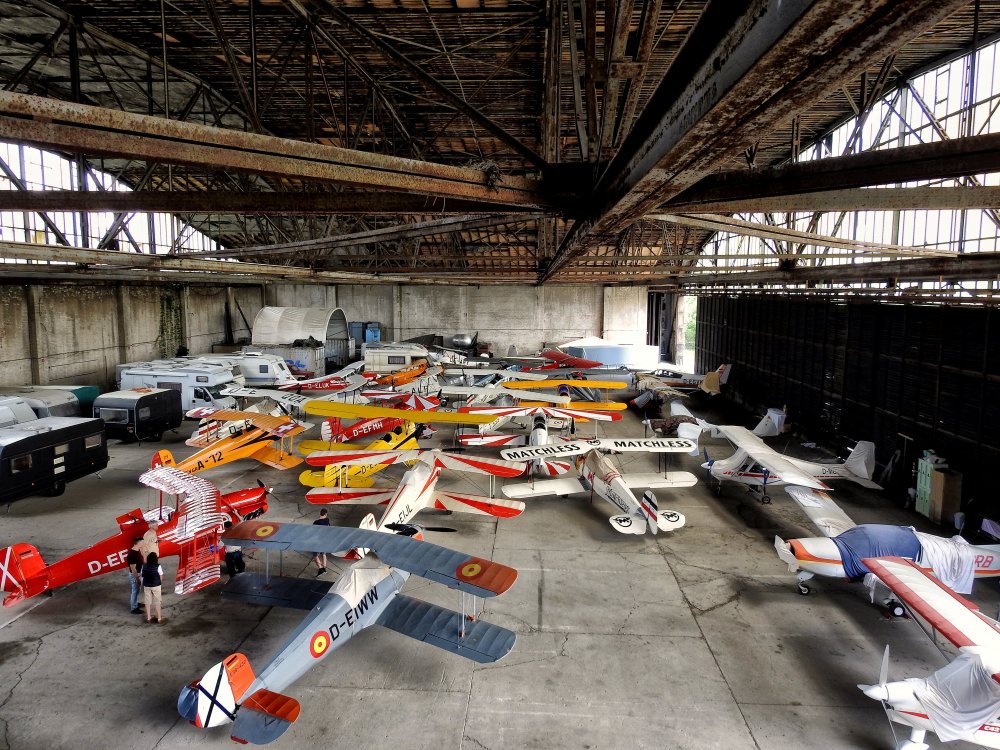
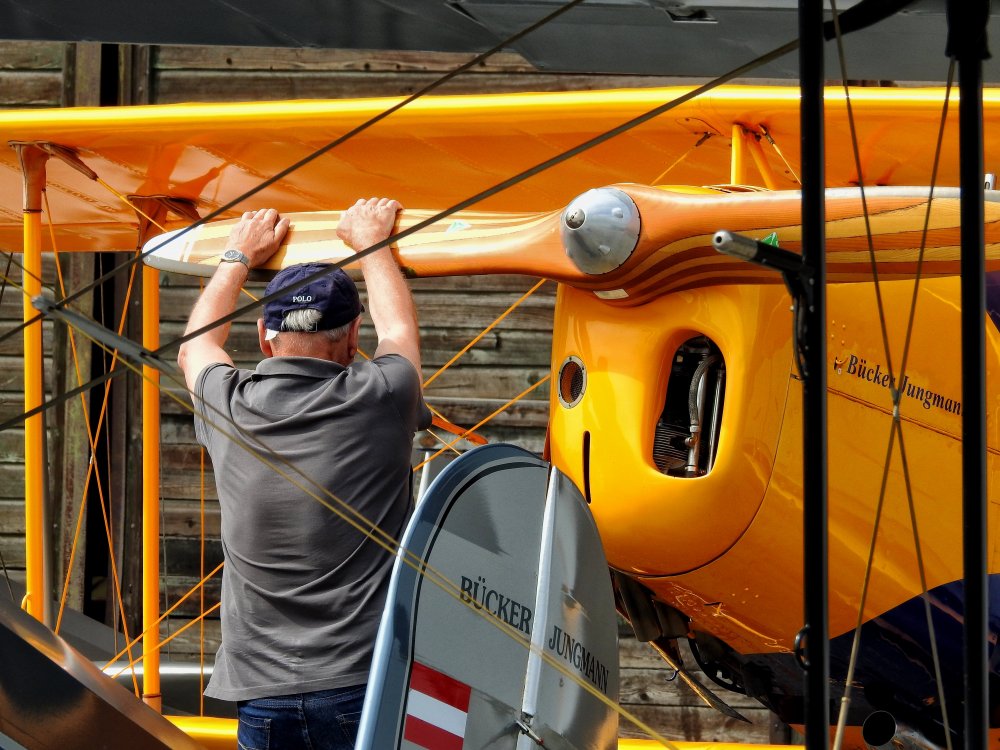
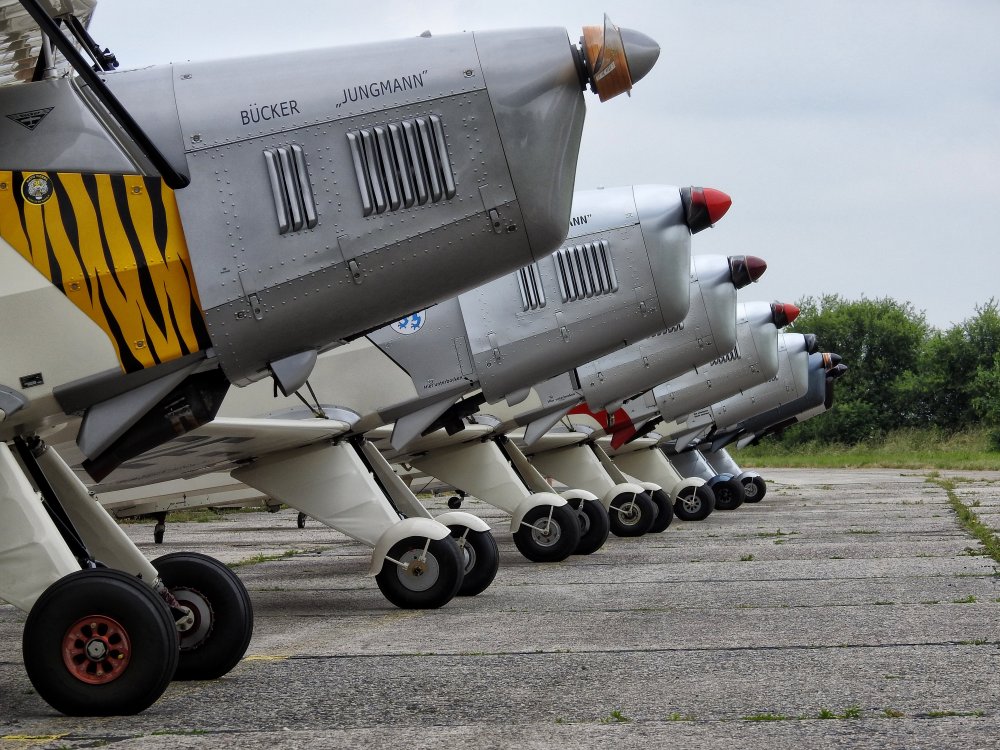
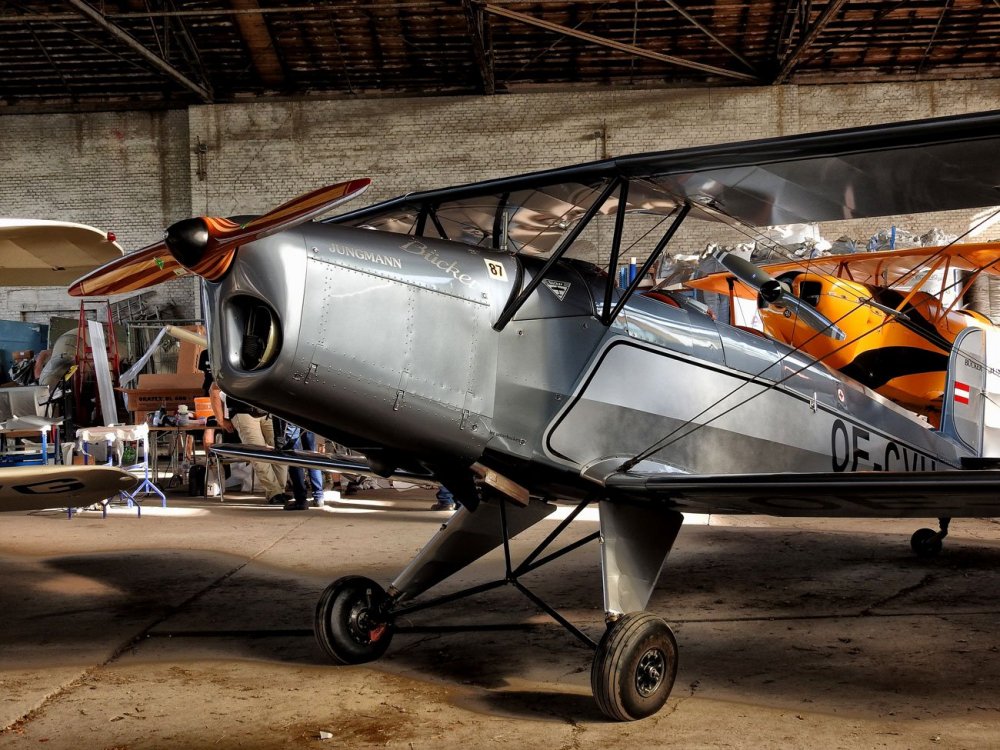
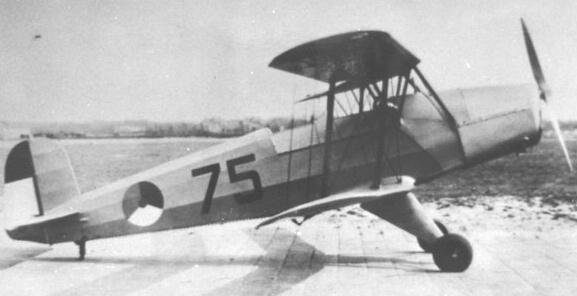
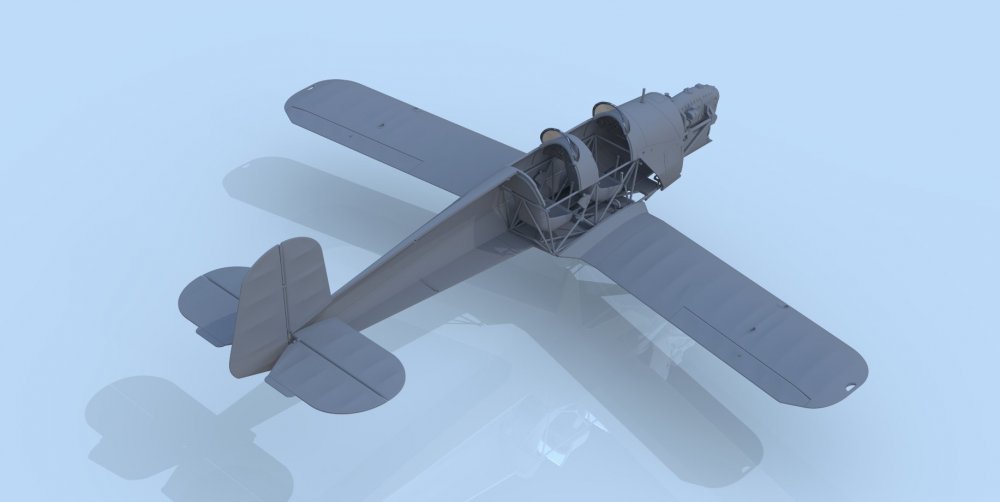
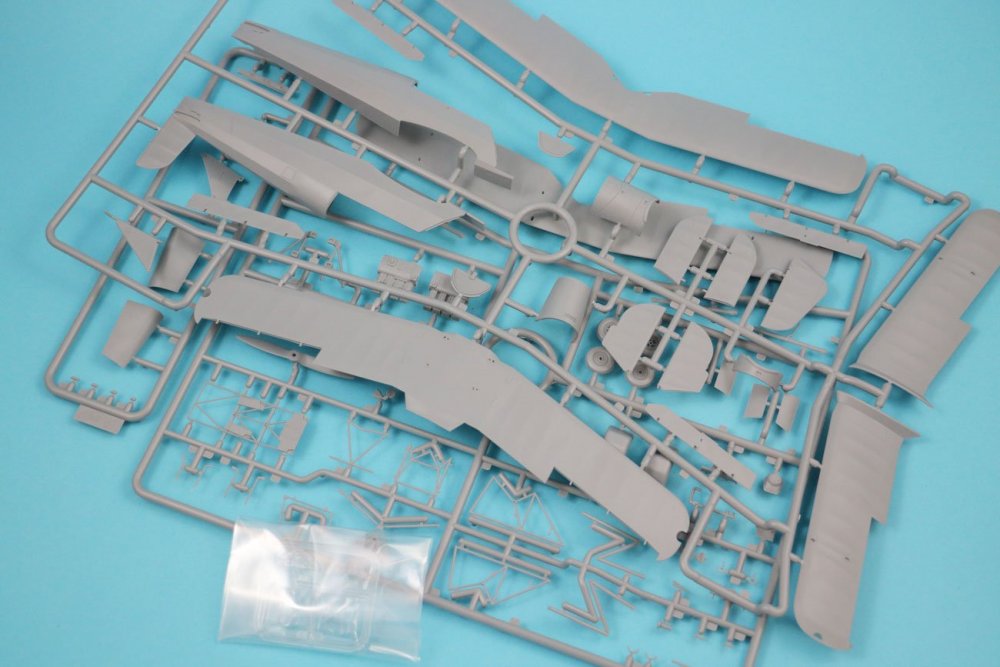
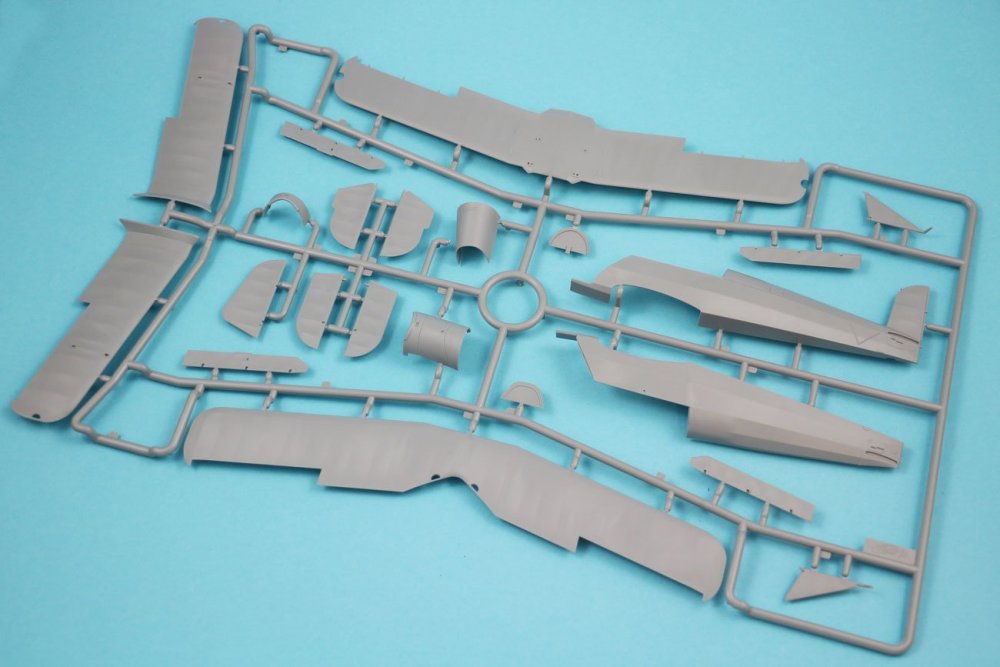
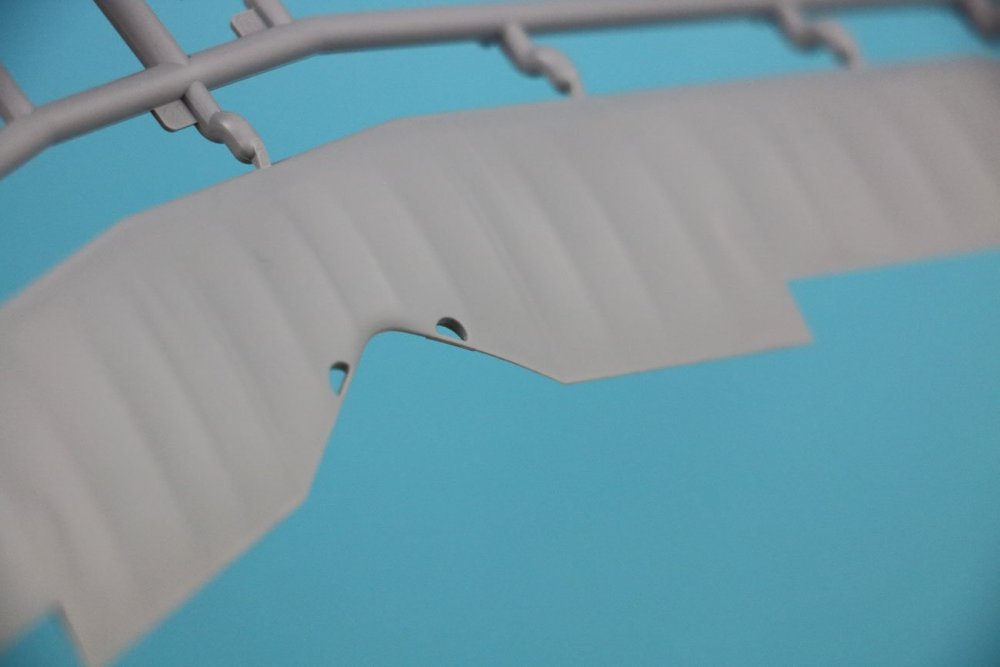
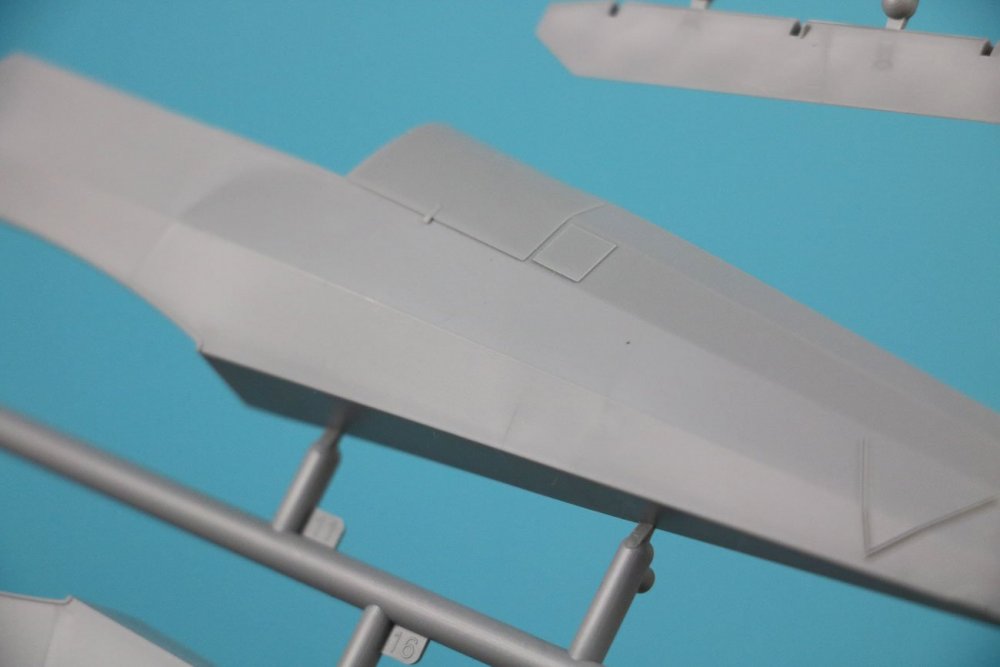
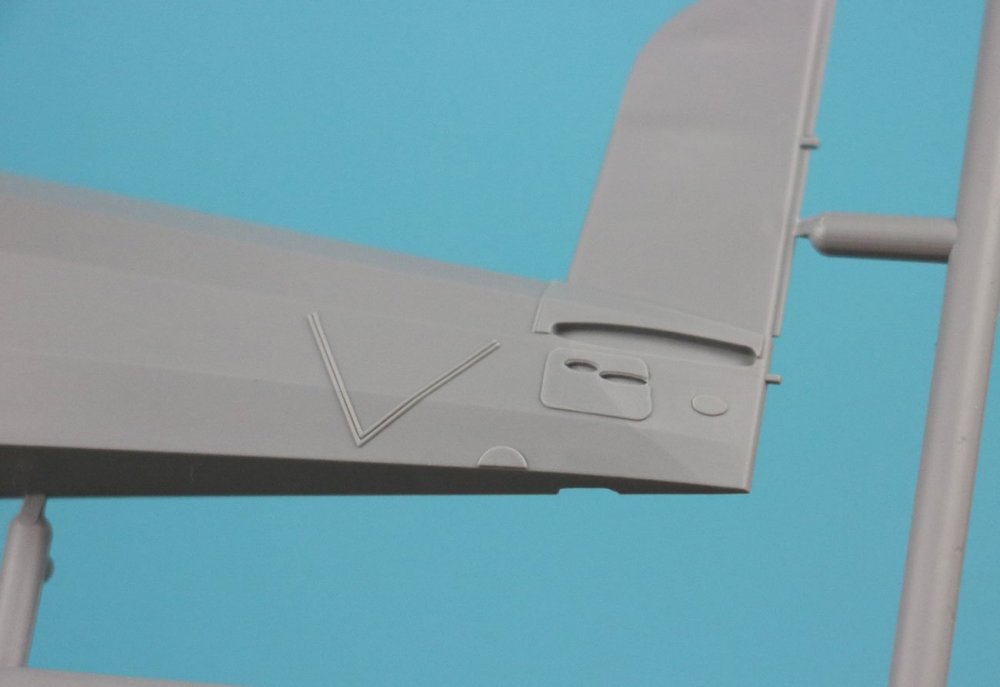
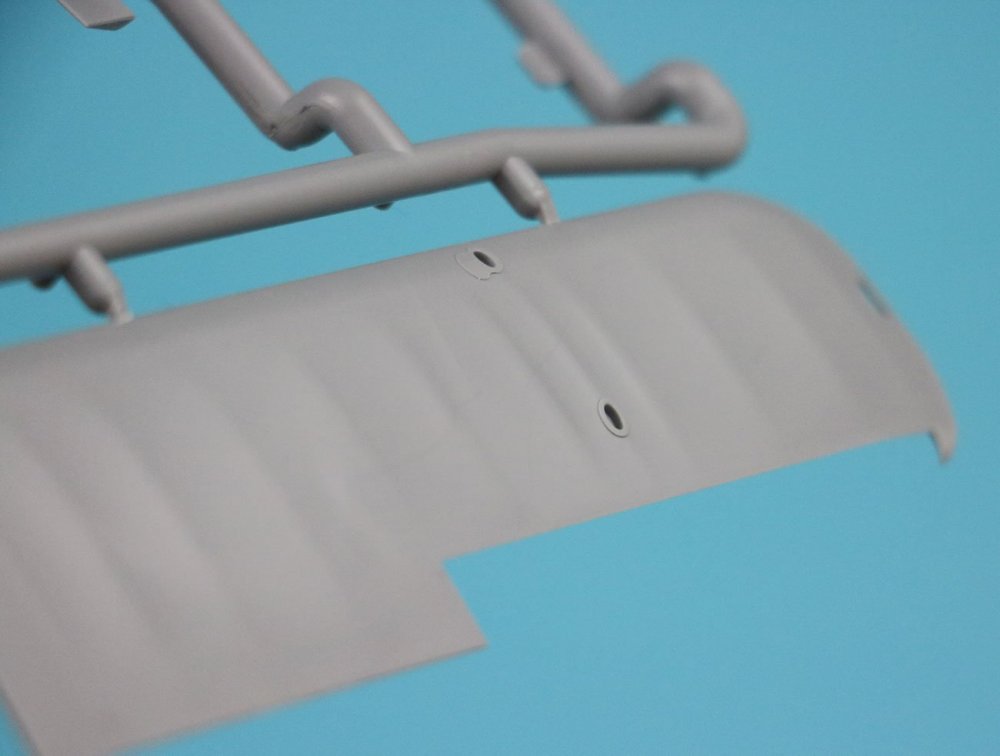
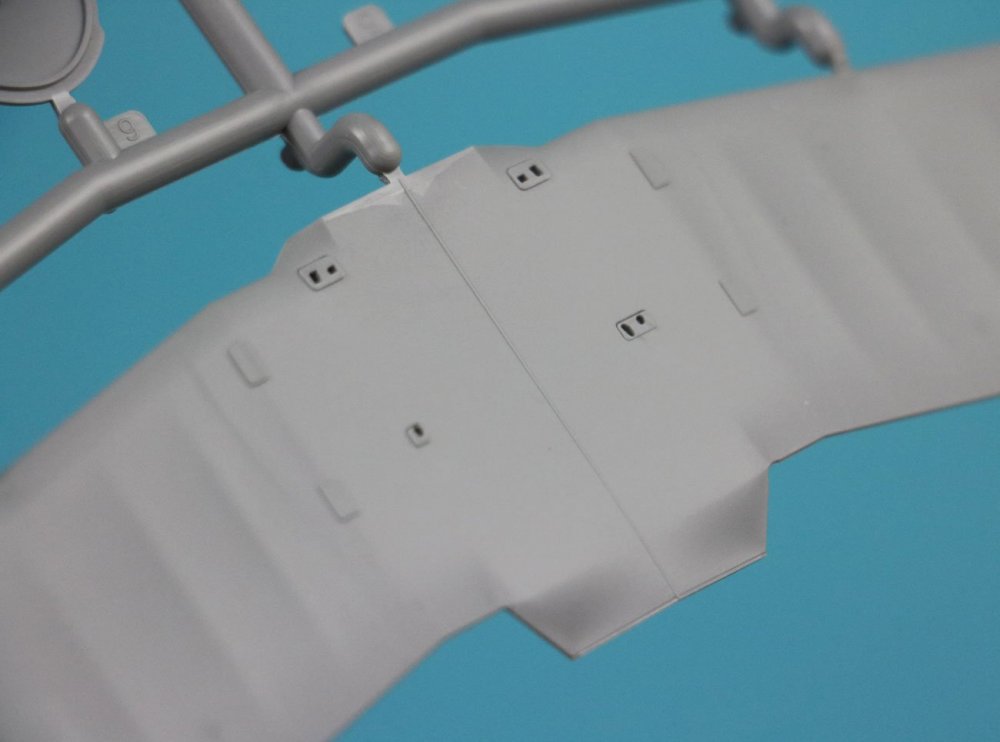
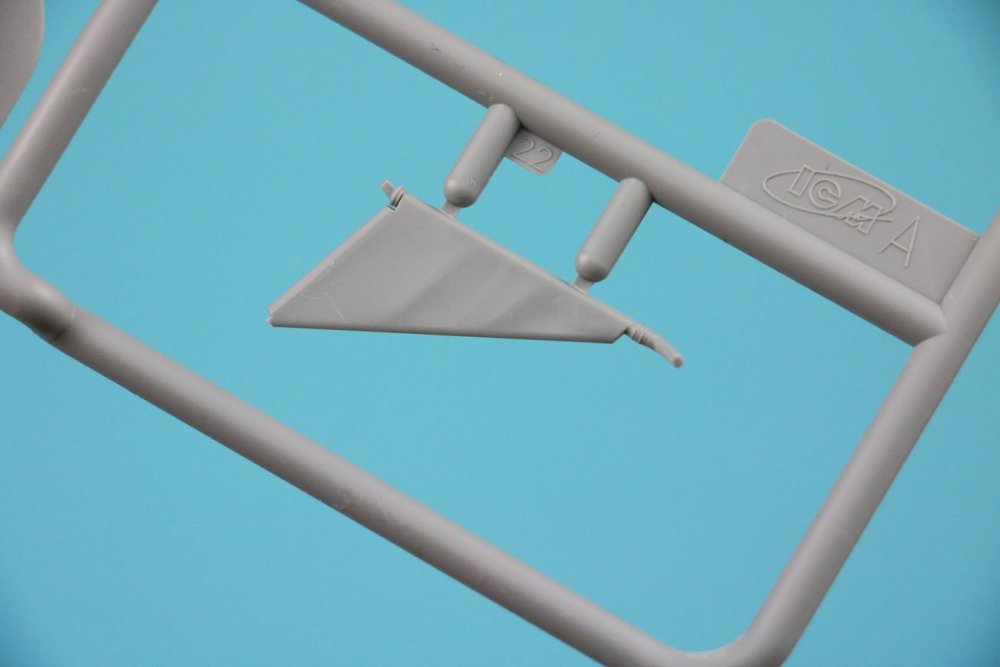
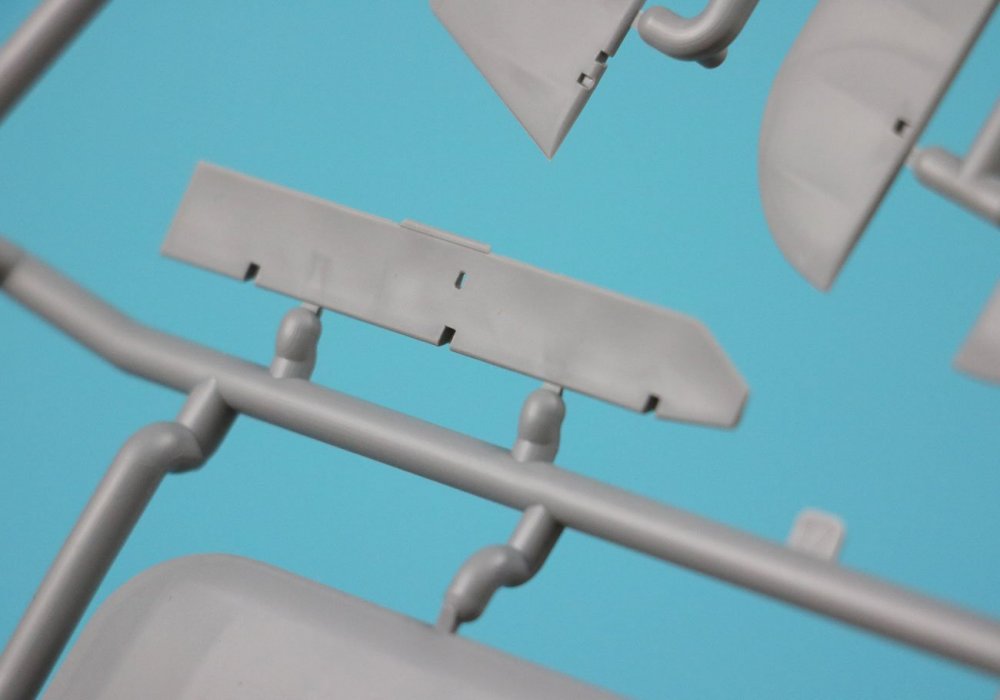
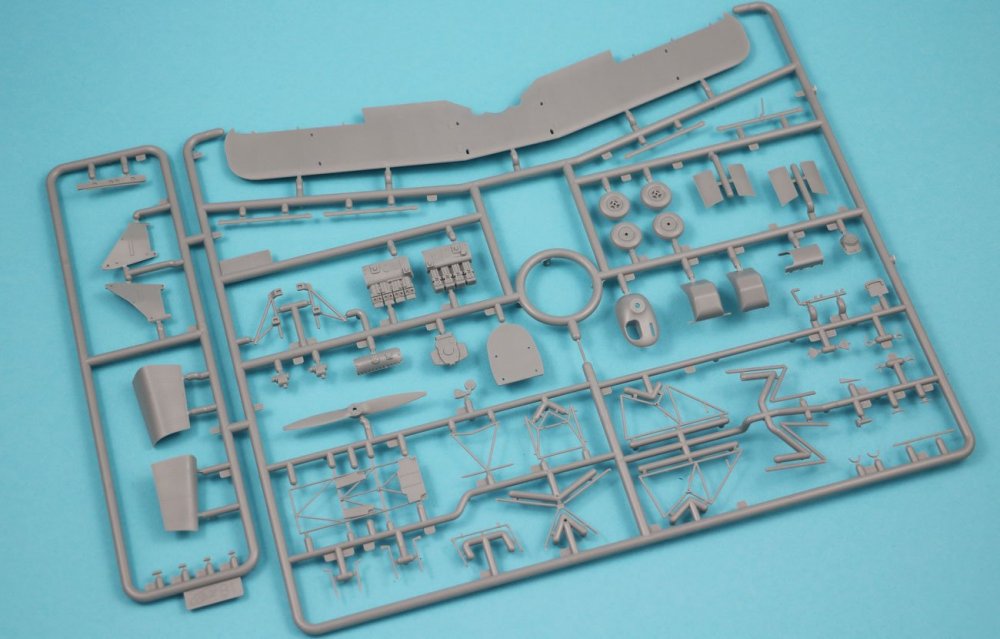
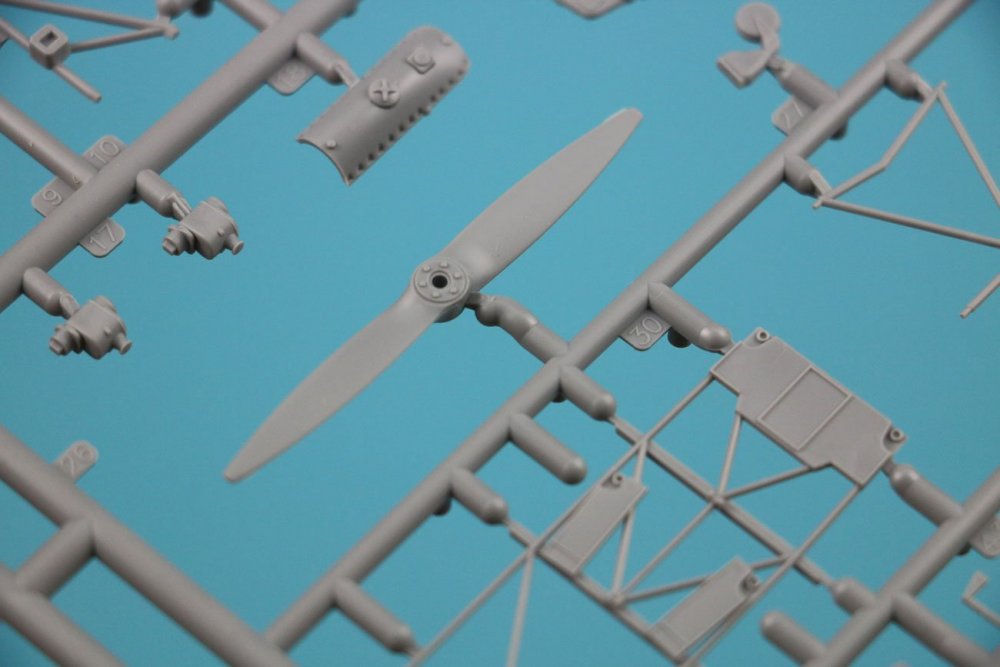
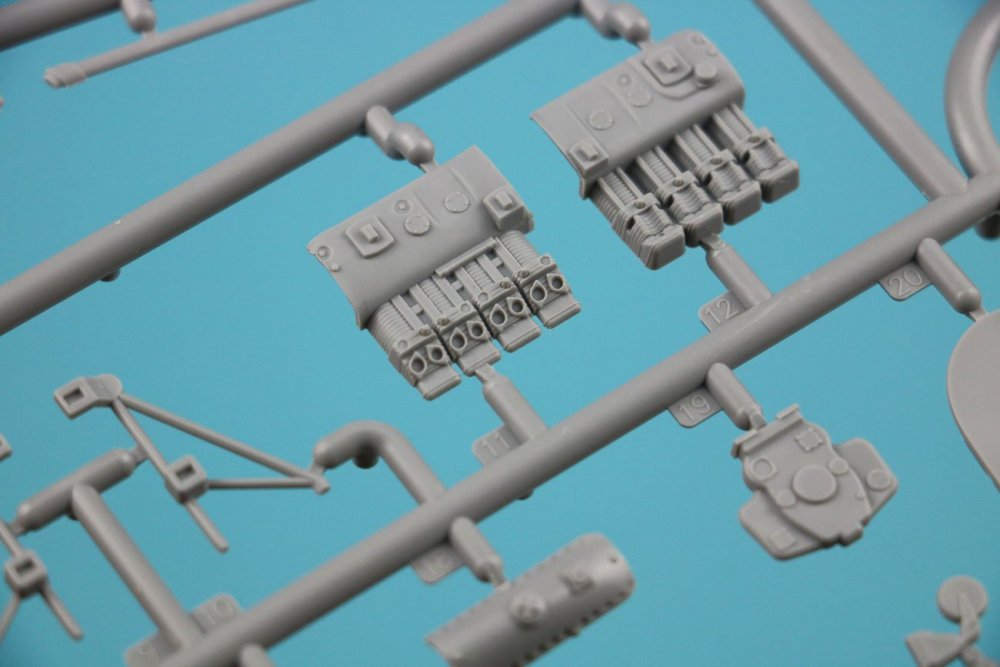
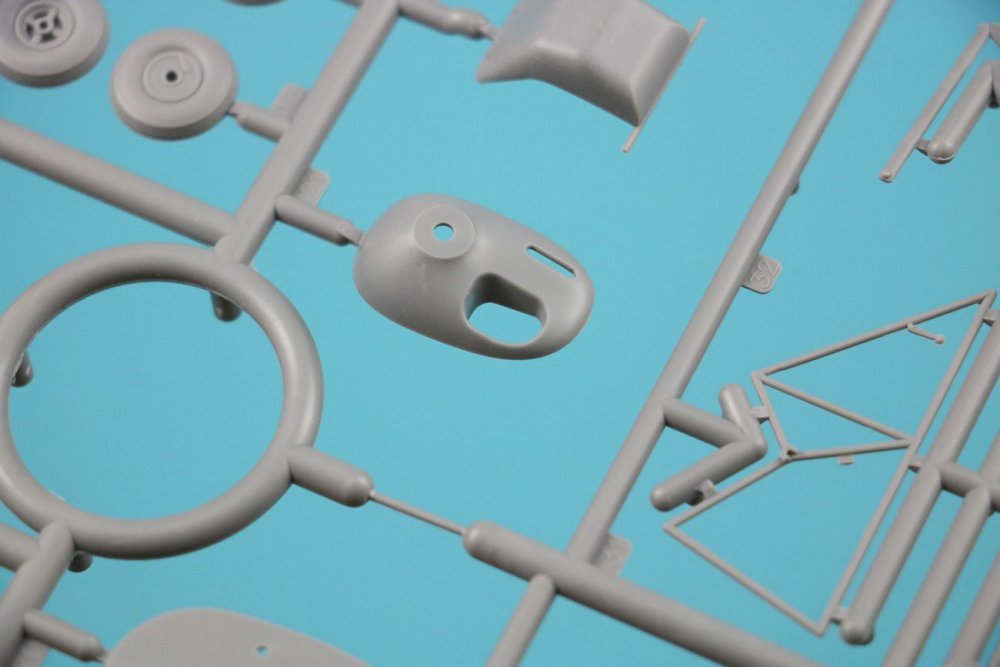
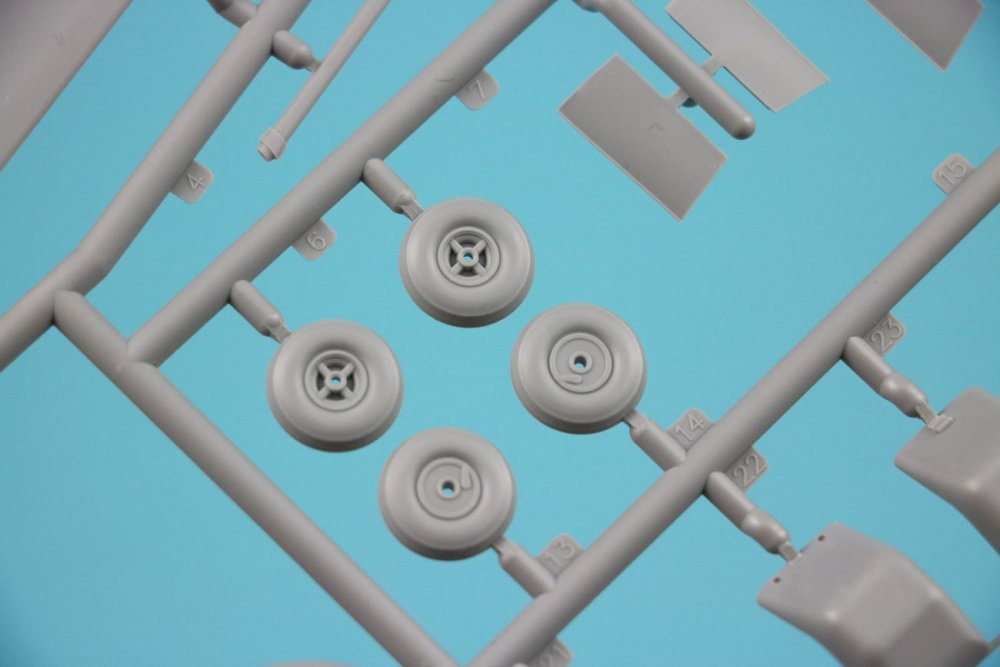
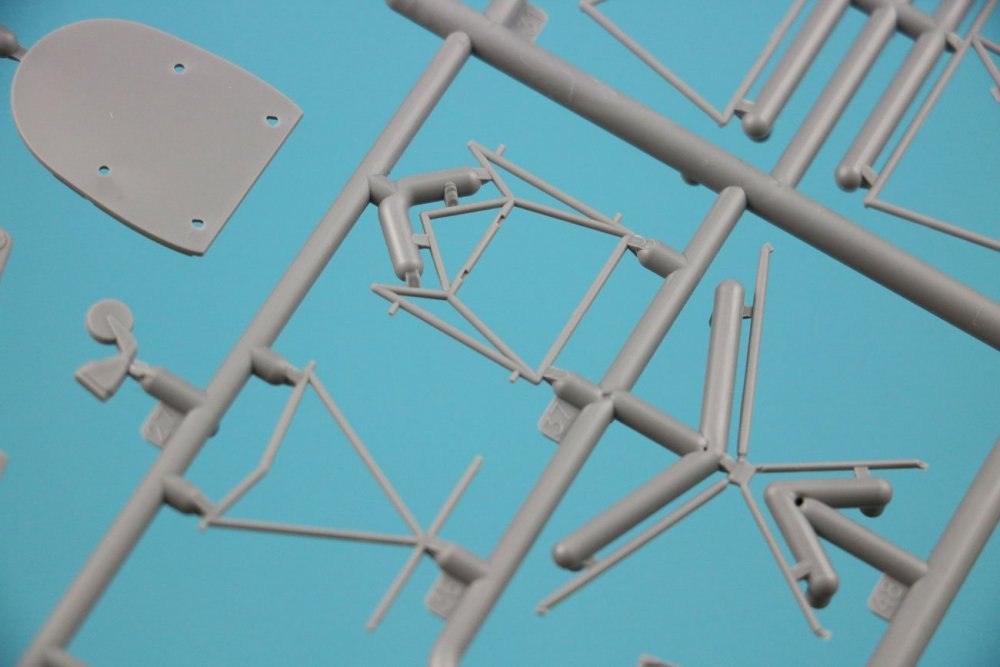
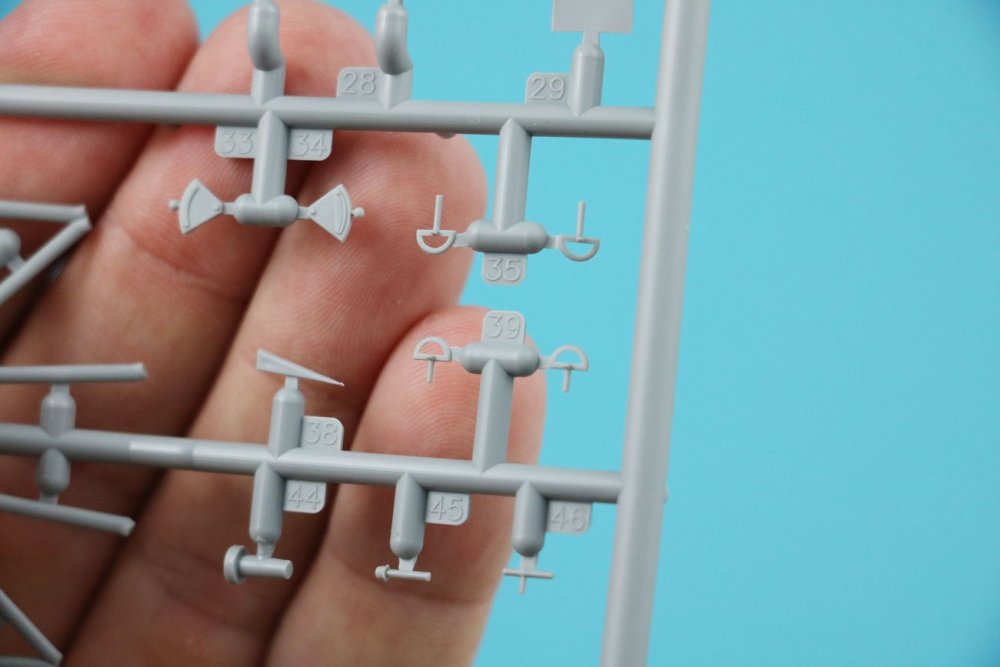
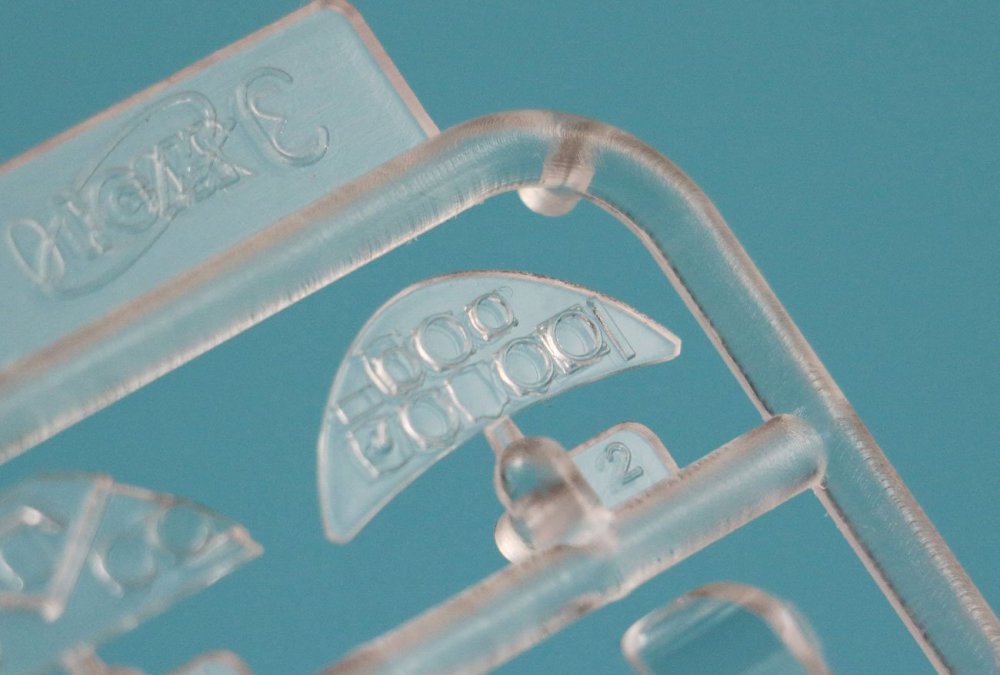
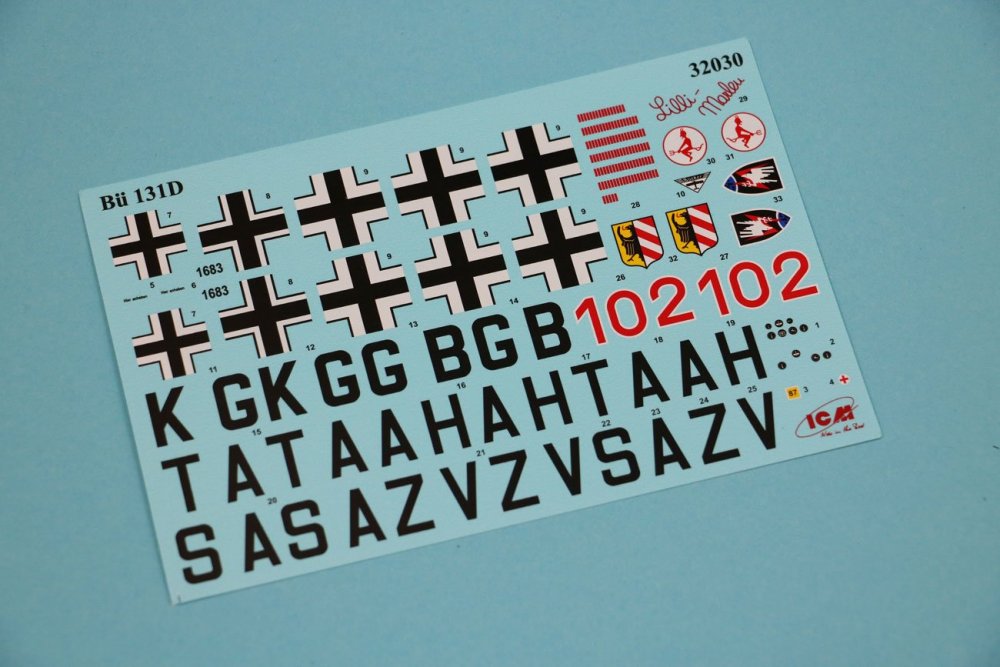
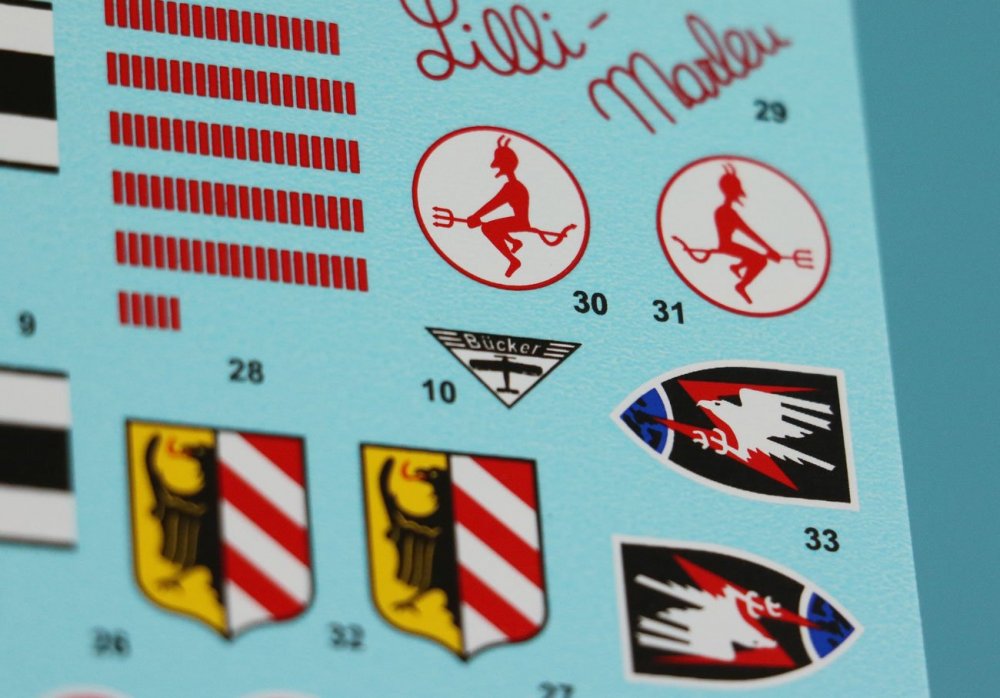
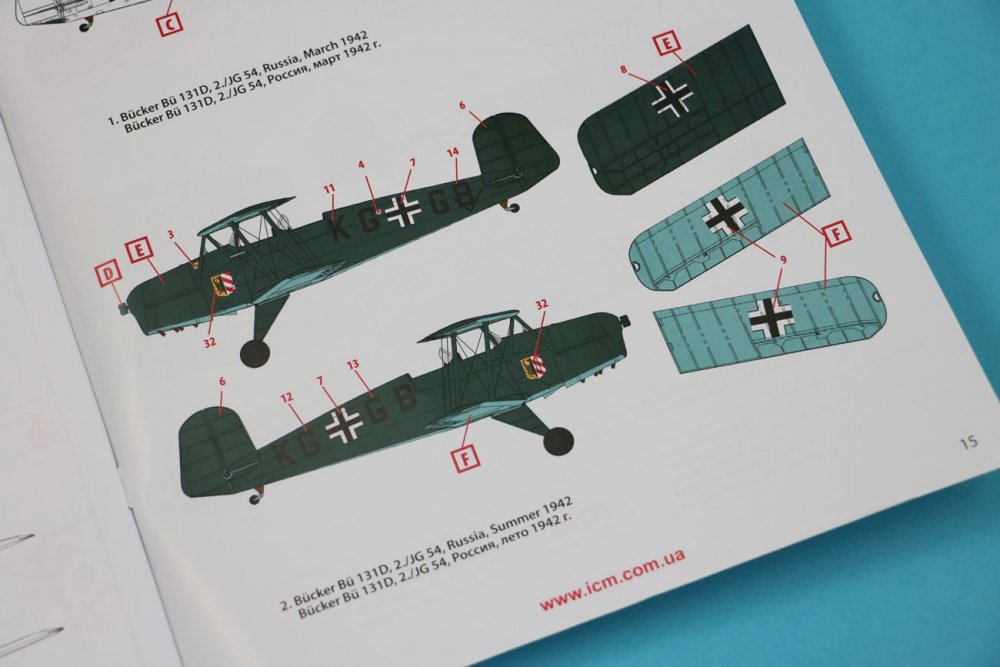
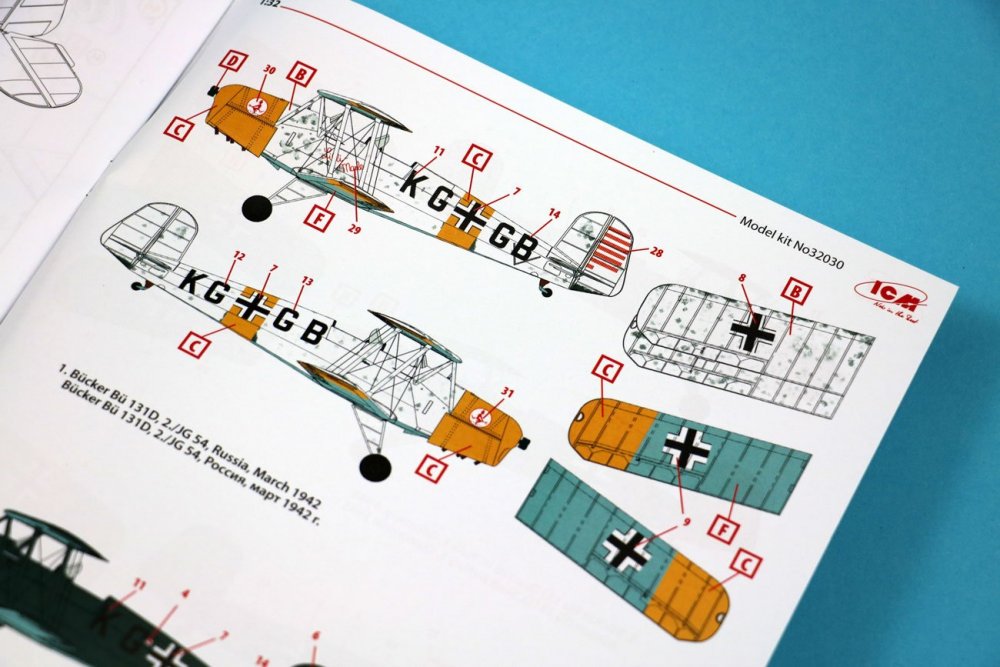
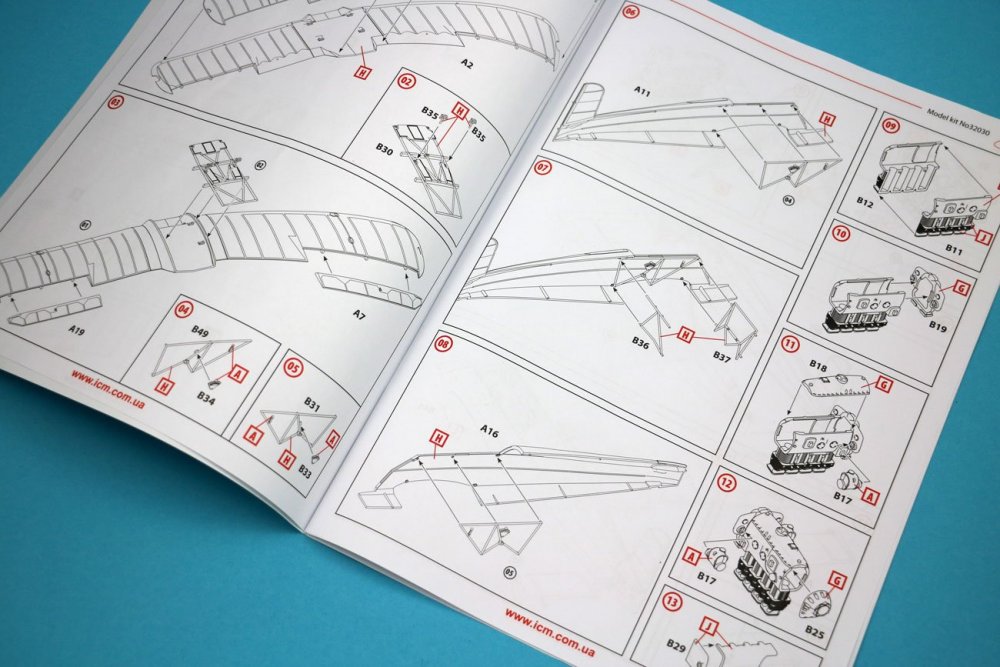
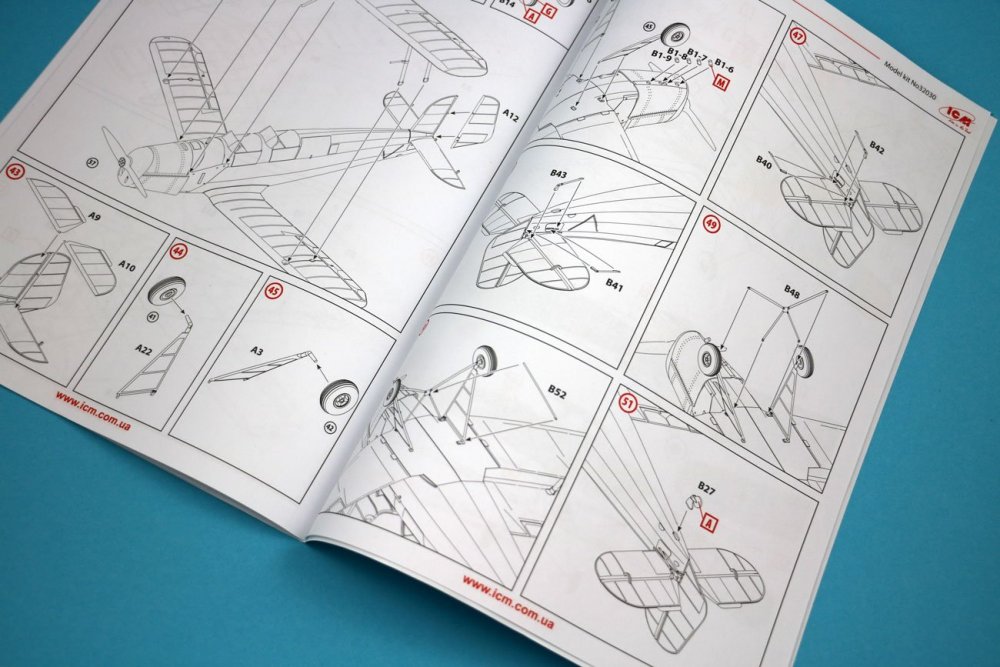
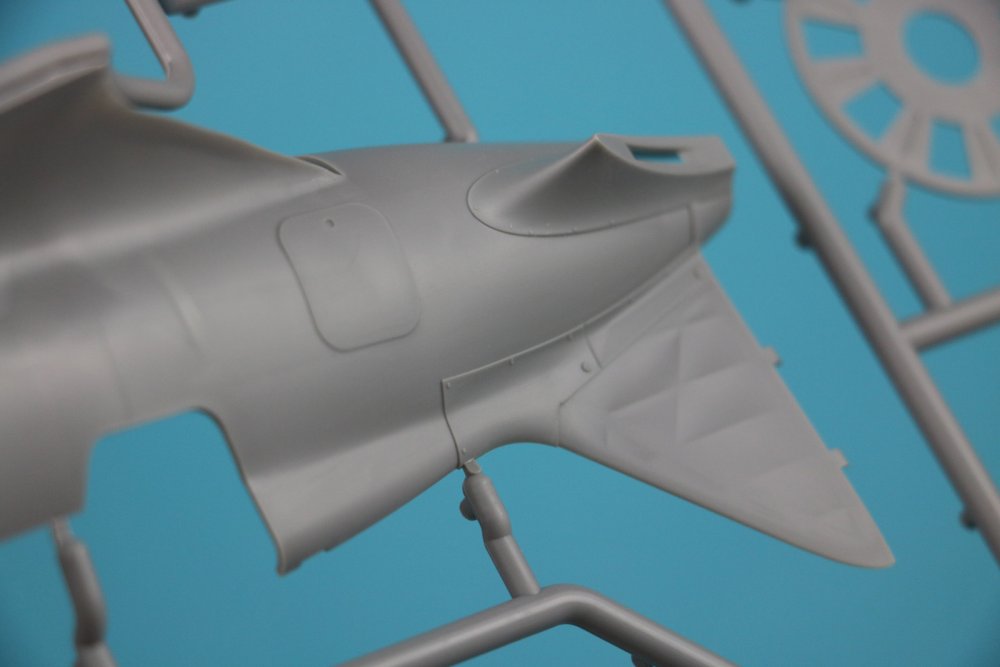
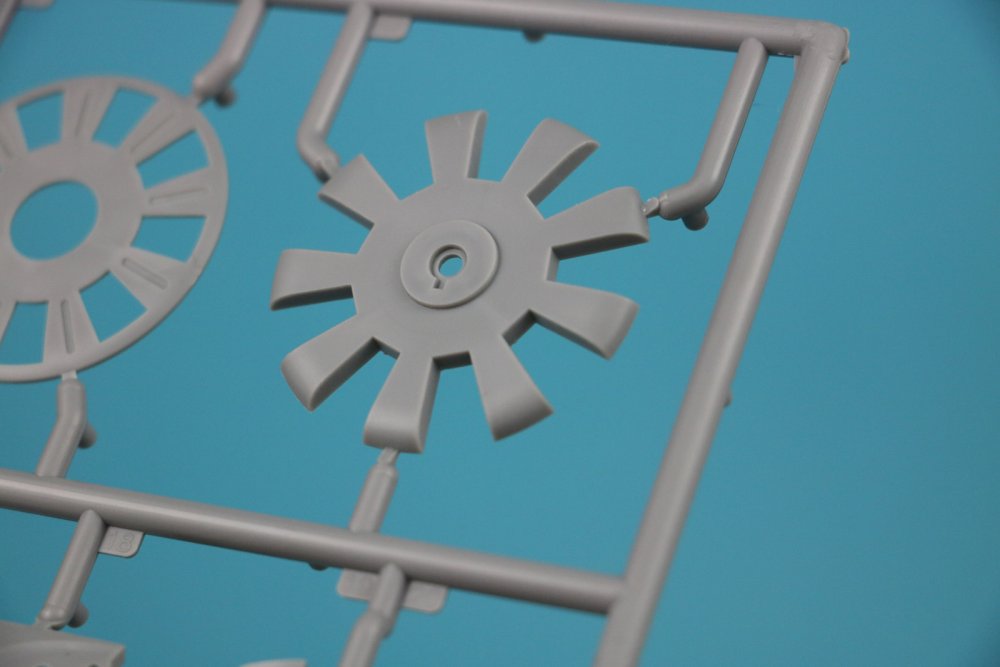
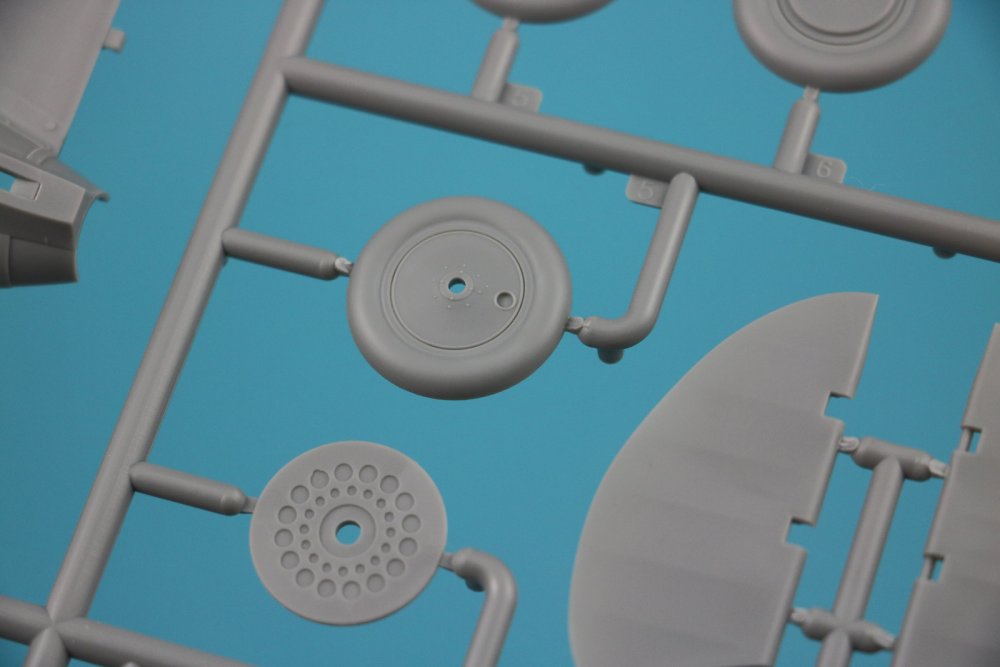
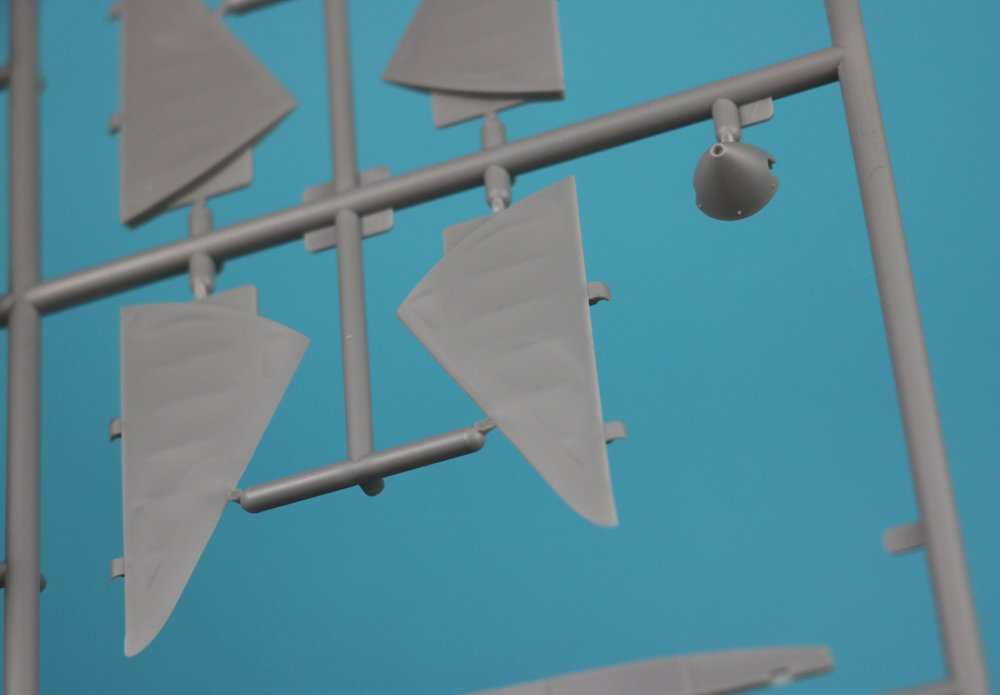
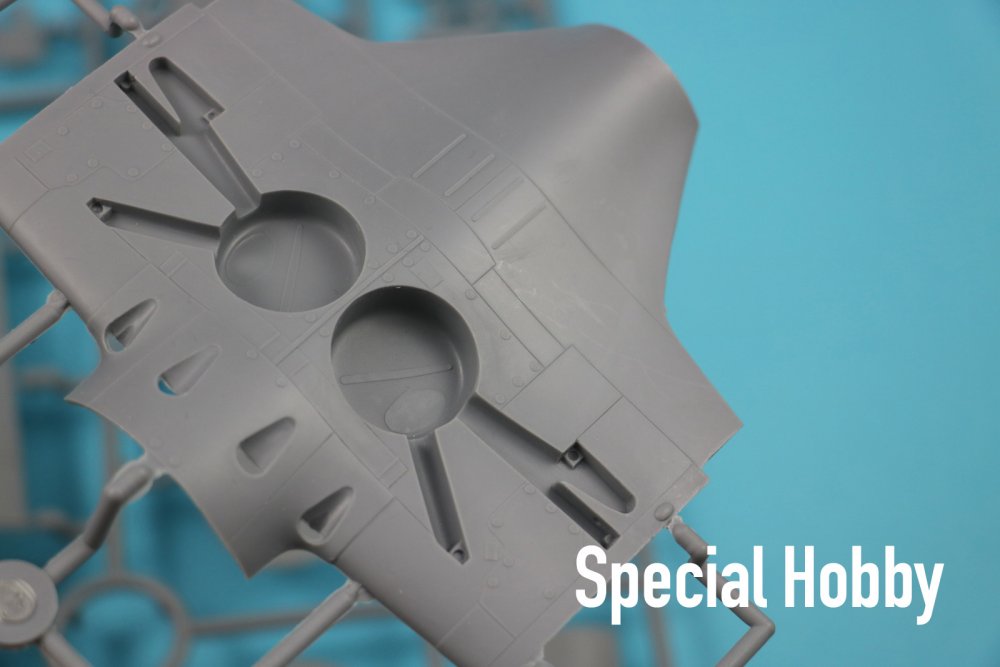
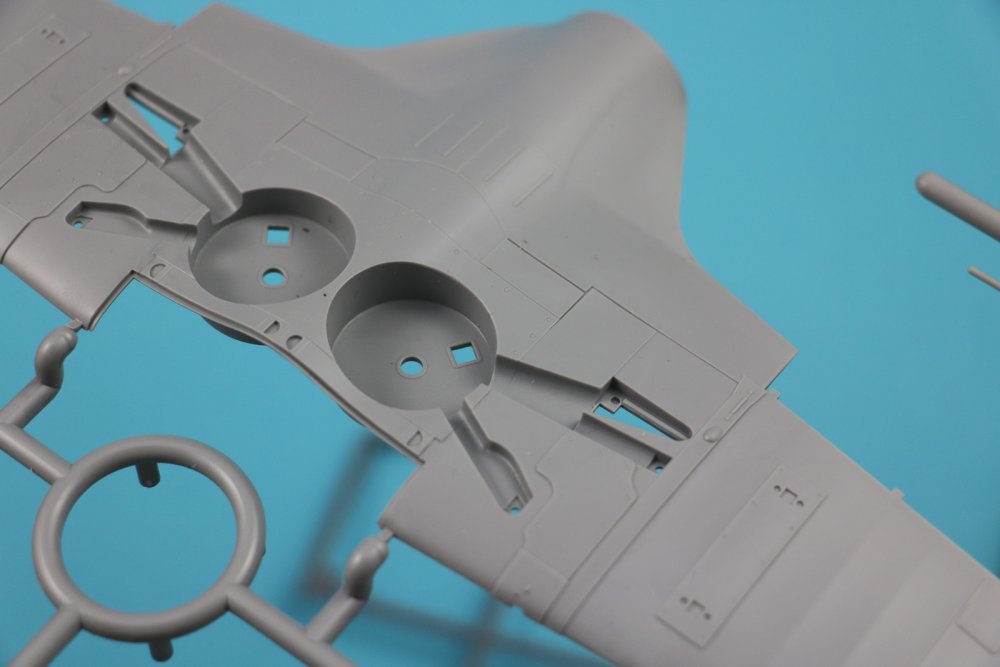
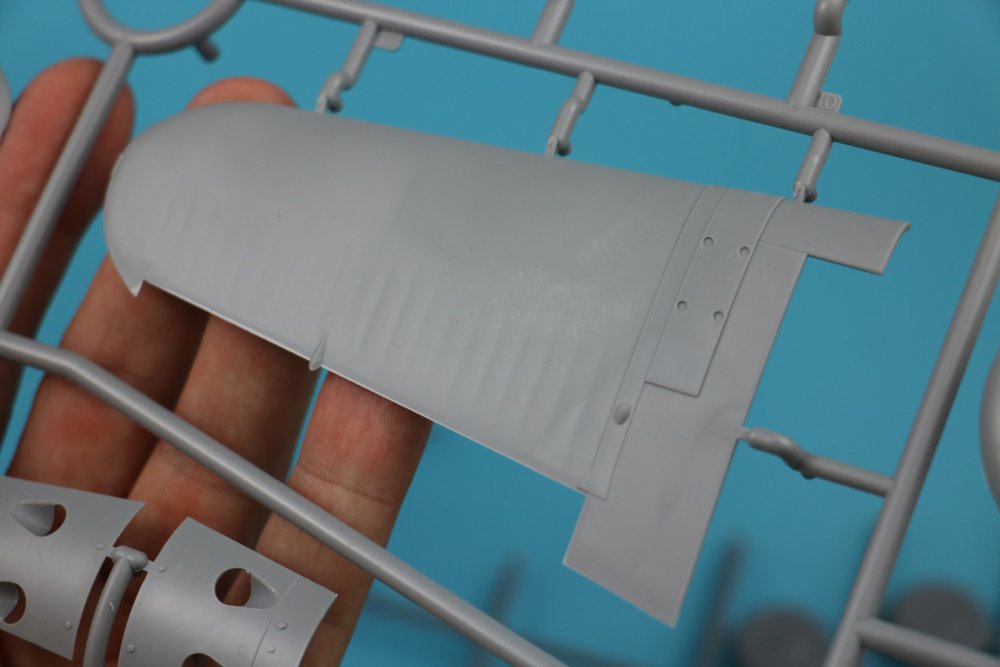
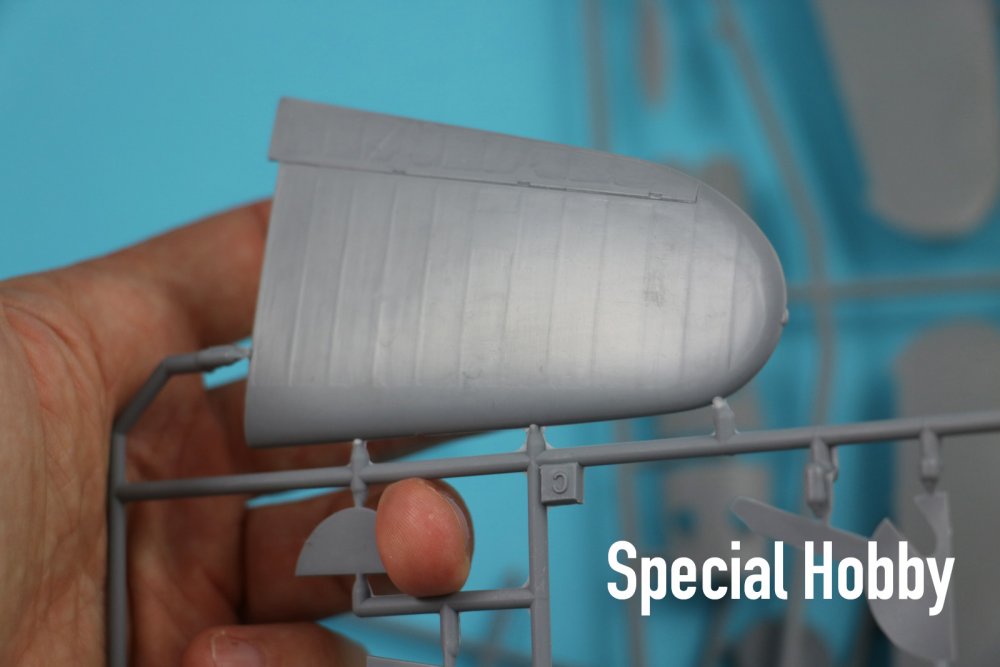
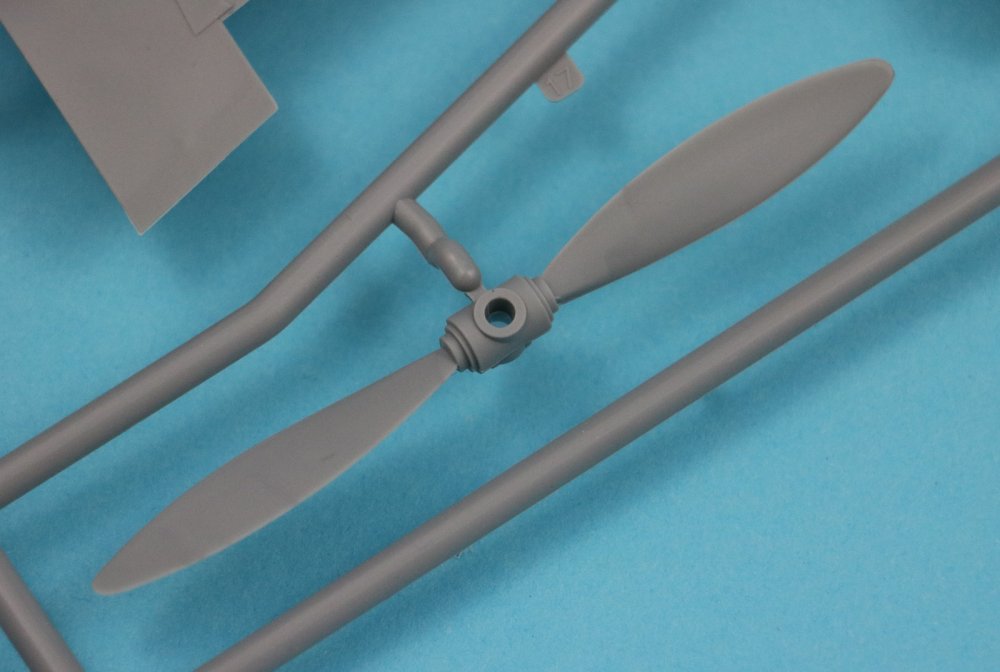
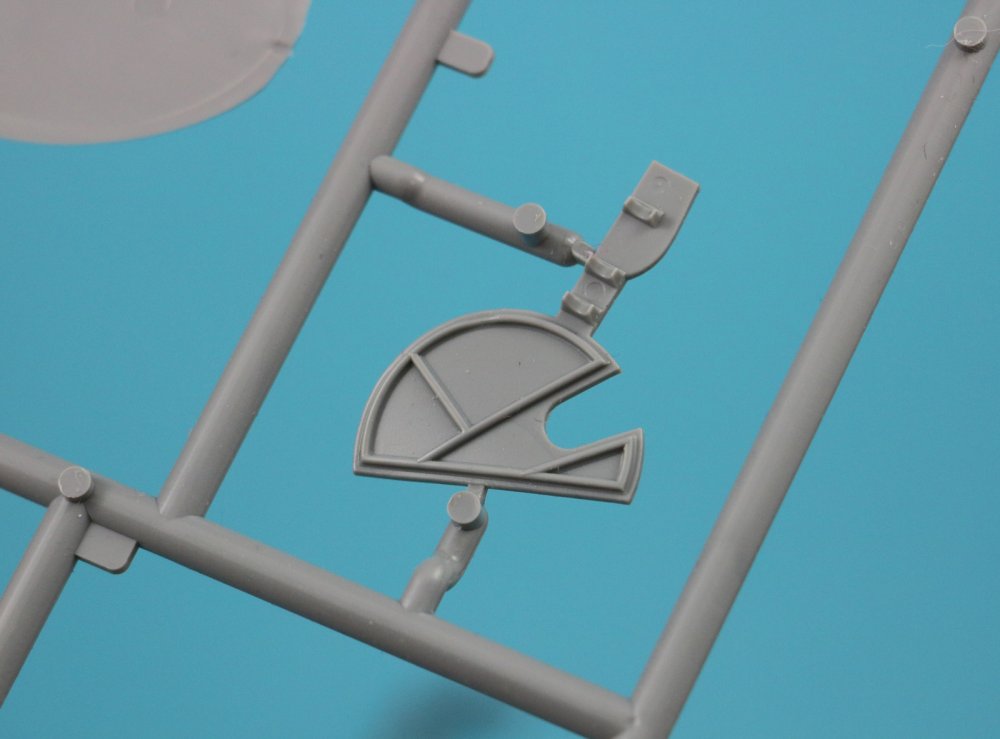
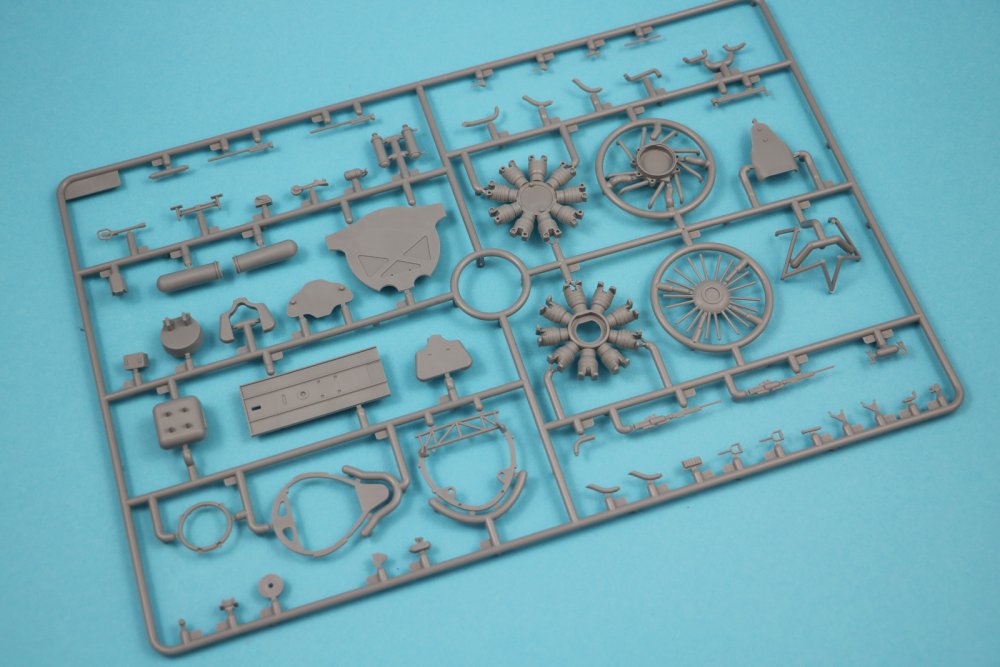
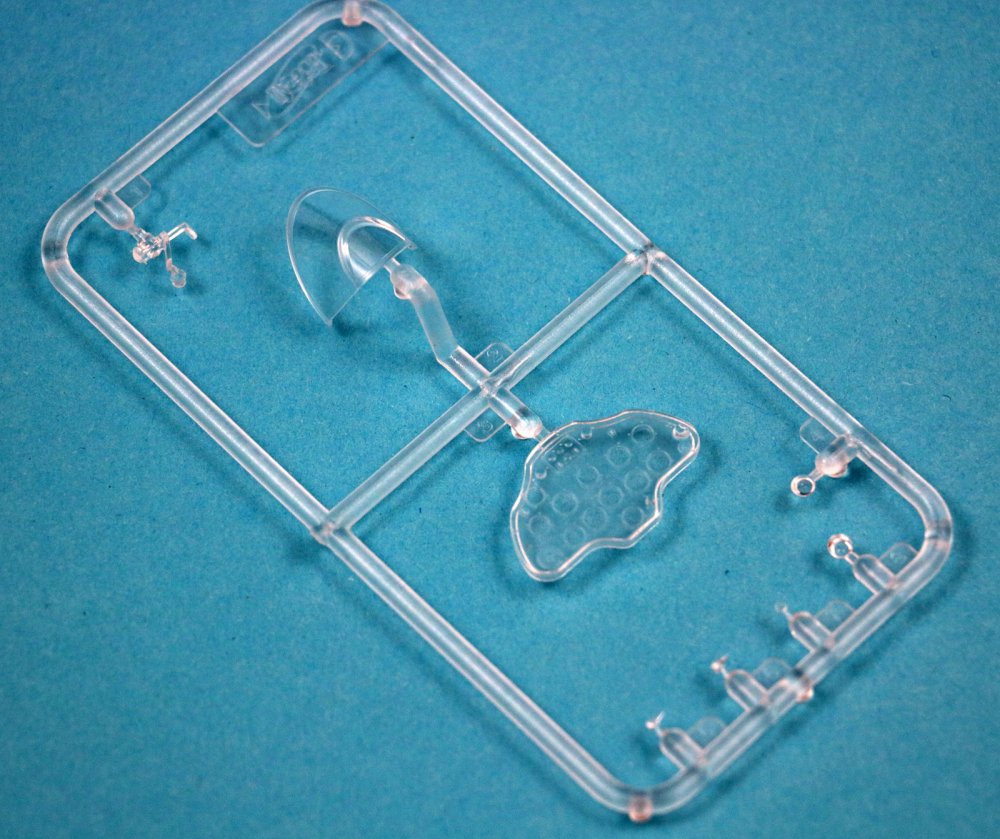
1/32 Bücker Bü 131D ICM Catalogue No32002 Available from Hannants for € 34,13 Introduction It often happens that I receive a kit for review and think: ‘Mehhh… not my cup of tea…’. This happened when I received the new ICM Bücker Jungmann kit. Not a subject that I could see myself build. And then I start to do some research for the review and discover that there is a whole tribe of pilot enthusiasts that fly and maintain this particular plane. They have fly-ins all over the world where they show off their skills and planes. Planes that are painted in the coolest schemes. Ranging from original wartime liveries to post war Swiss training colours to candy apple red air racer. I’ve noticed that there is a large fan base for the Jungmann in the United States. In the sixties and seventies the Czech, Spanish and Swiss airforces started to sell their Jungmanns training planes and many were sold to private buyers in the United States. Today there are about 200 Jugmanns left, which is pretty much for a plane that saw the light of day in 1932! Many have been fitted with a more modern engine: the Lycoming O-320/360 with 180 HP (which is 80 HP more than the original Hirth engine). Today’s pilots flying the Jungmanns praise it for its agility, acrobatic skills and ease of maintenance. All of a sudden I get ideas get enthusiastic. Check this video if you need some motivation to get yourself one of these kits: https://vimeo.com/266517423 Also take a look at this link with photo’s from the ‘Bücker treffen’ (Bücker meet) in Germany to get some inspiration for cool schemes: http://www.bueckertreffen.de/index.php/wilhelm/ The scheme I’m drawn to? One in dutch livery ofcourse! Exactly one Bücker Bu 131 was purchased in 1937 by the dutch airforce. Later, in 1939, the dutch east india airforce purchased 6 planes. The Bücker was the first plane to come off the drawing tables of the Bücker Flugzeugbau GmbH. A plane very similar to the Tiger Moth, Stampe SV4 and Polikarpov Po-2. A plane that slipped under the ‘radar’ of countries like Britain and France that didn’t allow Germany to rebuild their airforce. That’s why many Luftwaffe pilots were trained before the war in civilian sport flying clubs, and this plane was perfect for the job. Light, cheap, aerobatic and easy to maintain. About 3.000 of these planes were built and some even saw frontline action. This would have been at the eastern front, where they were used in night time missions, harassing the Soviet front with little bombs. The Kit Like with the I-16 kits, this kit is cleverly engineered and fully designed in 3D. Only three sprues (well actually two and one transparent) make up the entire model without skipping detail. The engine is there, a detailed cockpit and anything else you need. The boxing is (like the I-16 kits) strong. With a box top that slids off and reveals another top folding box inside. The fit of these two boxes is so tight, you want to be careful not to tear the top sliding box. The first thing that strikes is how small this plane is. Especially when comparing it to for instance a Fokker D.VII. The second thing that strikes is that the whole kit is made up from only two main sprues. The third is that there is NO flash at all and the detail is really crisp. I would rate this above Trumpeter and Revell. The plastic is strong, easy to work with and slightly flexible. I have seen some of these models already built over the internet and it’s a lot of fun to see people go crazy with their schemes. Sprue A This sprue holds that main components. Fuselage parts, wings, ailerons, rudders, cowling and gear legs. The surface detail could have been a little better in the sense that some is lacking. I’m talking about rivet rows on the engine cover and some fasteners on the fuselage. The wings were in reality smooth as a baby’s ass, so these are fine as they come in the kit. If you look at reference photo’s which are easy to find all over the net, you’ll see where you can add some detail. Like the hinges on the radiator cover. Easily made with thin plastic rod, with added small cuts every 1,5mm. Engine cover. Could use a little more surface detail: Check the hand holds in the upper wing: Fuselage detail: Strut attachments: Gear legs: Aileron: Sprue B Here we have the engine, cockpit, prop, wheels, top wing, struts and radiator cover. The eyes are immediately pulled to the small Hirth engine. What a little gem. You will need to add quite some detail to properly show this though. I’m thinking: inside of engine cover, wiring and additional engine detail. But on a kit otherwise so straightforward it will be worth the extra mile. The cockpit framing is exquisite. The instrument panel is (like the I-16) a transparent part. This is definitely not something I like. I mean.. why?? Grey styrene, instrument decals and some Micro Clear for the glass. Anyway, this will work just as well if you paint the instrument panel first. Another thing I don’t get is (like with the I-16) the omission of seatbelts. Ofcourse you can make them yourself with some spare buckles and masking tape (or lead). You may even have some spares while you’re at it. But still a weird omission. Especially on a plane with 2 open cockpits. If you do choose to build this plane in a modern livery, like seen in my linky above, make sure to do some alterations on the cockpit. A modern harness, modern radio and probably compass. Lovely prop with nice detailed bolts: Check out that crisp Hirth engine: Cockpit floor frame with foot boards: Wheels with brake details: More cockpit framing. No cleanup necessary at all!: Transparent Sprue Here we have the two instrument panels. And the two wind screens. To be honest I would recommend filling the hole on the top fuselage where these slot in and not using these parts since, well, scale thickness. I would however use them as a template to cut my own from thin transparent sheet. Decals No idea who prints these for ICM, but these are just lovely. Sharp, detailed and they register really well. Decals for four schemes are provided. Two from the Eastern front and two from Germany. Scheme1: Bücker Bü131D DR Military Wehrmacht Luftwaffe (German Air Force 1935-1945) 2./JG 54 KG+GB March 1942 Scheme 2: Bücker Bü131D DR Military Wehrmacht Luftwaffe (German Air Force 1935-1945) 2./JG 54 KG+GB July 1942 Scheme 3: Bücker Bü131D DR Military Wehrmacht Luftwaffe (German Air Force 1935-1945) III./NJG 1 SA+ZV 1943 Scheme 4: Bücker Bü131D DR Military Wehrmacht Luftwaffe (German Air Force 1935-1945) unknown TA+AH Bad Aibling | 1944 The instruction manual (as this kit is designed in 3d) is pretty clear and well drawn. Overal: A surprise to see this subject tackled in 32ndscale. A kit that I wanted to build since I saw it flown by Harrison Ford and Sean Connery in Indiana Jones. ICM is quickly climbing the ranks of quality model supplier and we welcome every release. This one is no other. Really well executed with attention to detail. Only critique is the omission of seatbelts and some surface details here and there. Highly recommended. Our sincere thanks to ICM for providing this kit for review.


-
Holy shit. Nurse! He's at it again! Following this!!
-
takom 1:35 Bergepanther Ausf.A – Assembled by Demag
JeroenPeters replied to JayDee's topic in Armour/AFV Reviews
Wow.... insane detail. -
Effective work and weathering on that engine!
-
1:32 Dambusters Lancaster Conversion kit
JeroenPeters replied to GrahamF@Iconicair's topic in Modelling Discussion
Oh wow! That is one epic conversion! -
1:32 Fw 190d-9
JeroenPeters replied to polsen's topic in LSM 1/32 and Larger Aircraft Ready for Inspection
That is the best 190D i've seen in some time. Love it!! -
I-16 Type 5
JeroenPeters replied to Johann's topic in LSM 1/32 and Larger Aircraft Ready for Inspection
ISM? Is that an ICM kit? Lovely scheme of a very early type of this plane. What scale is it? -
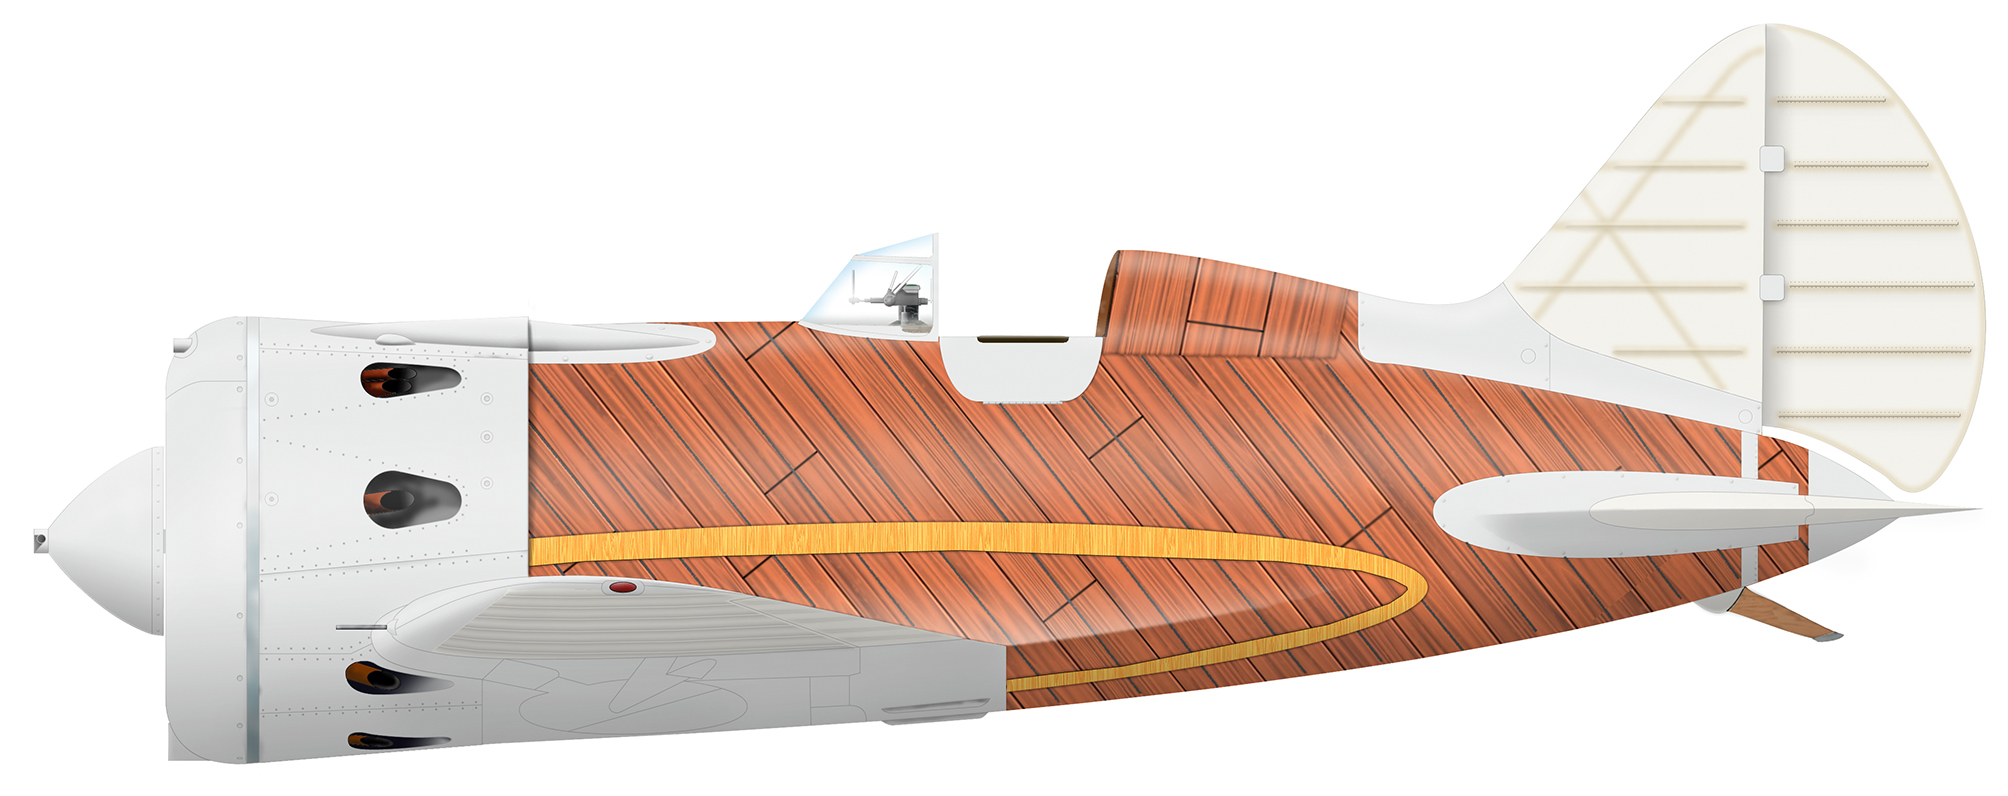
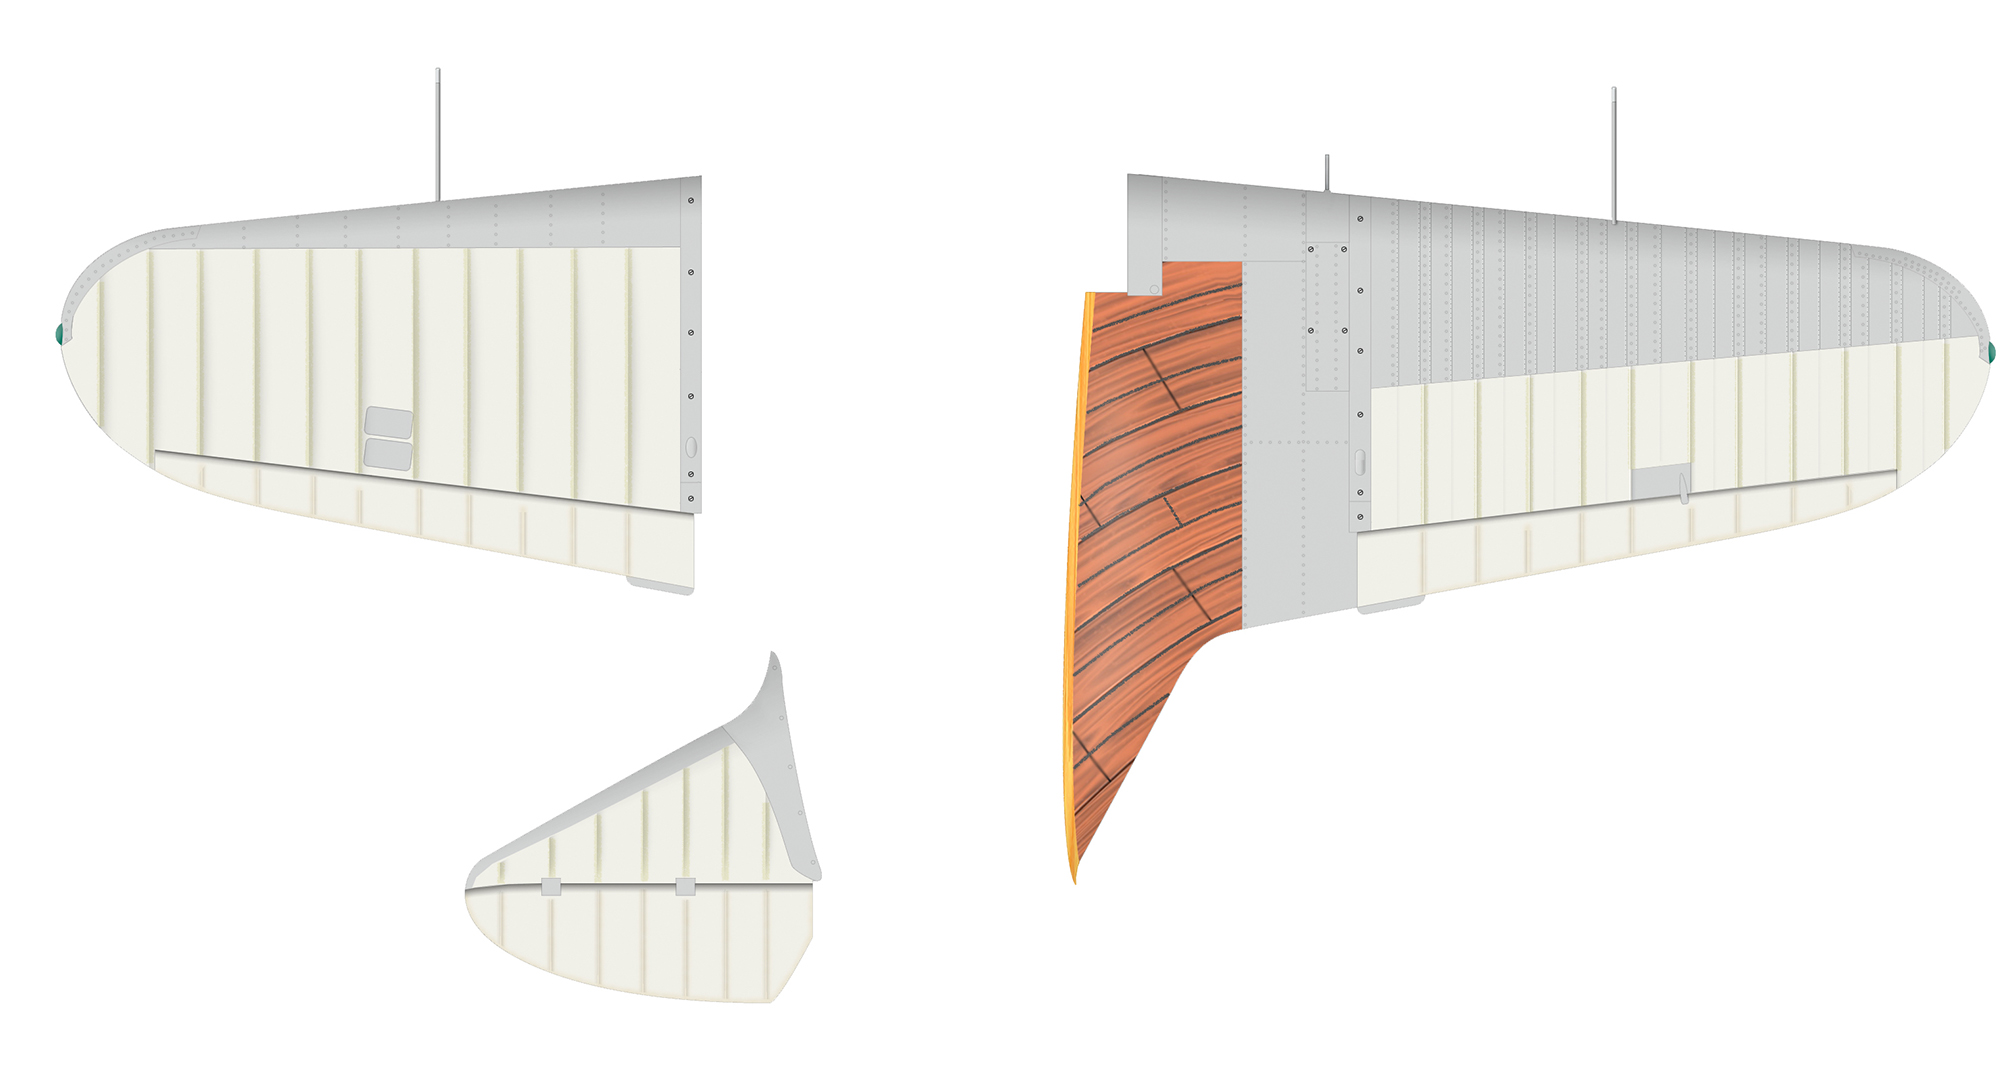
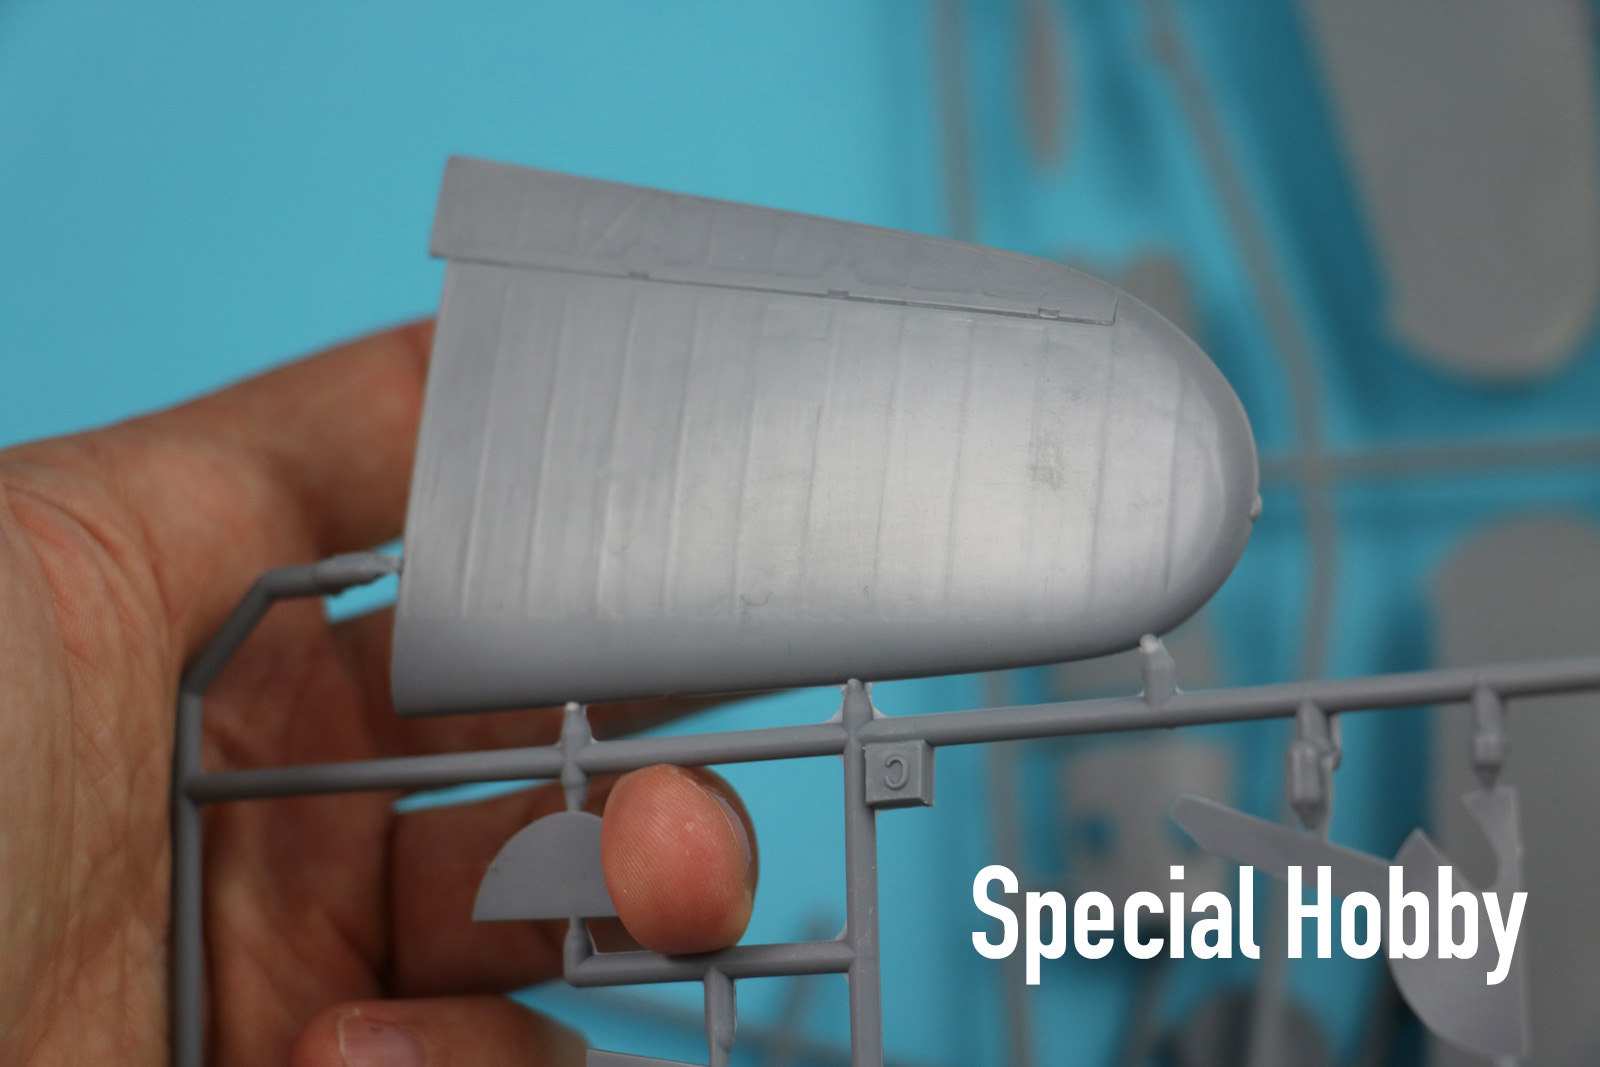
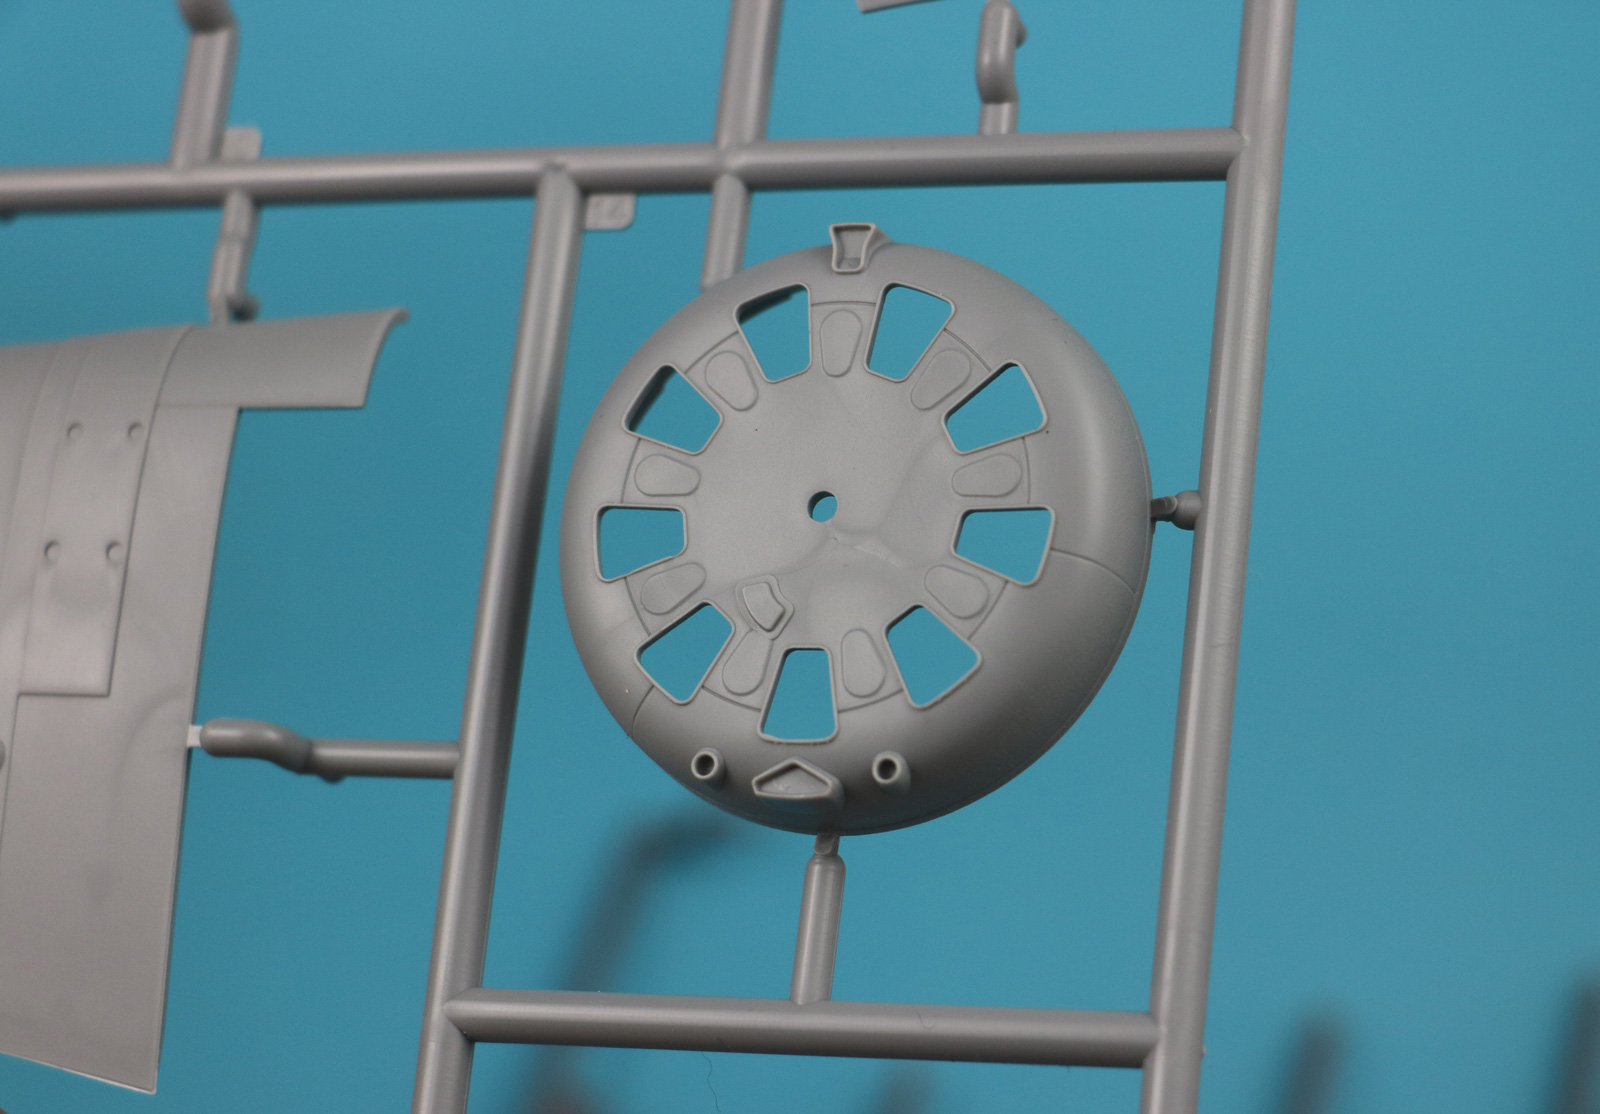
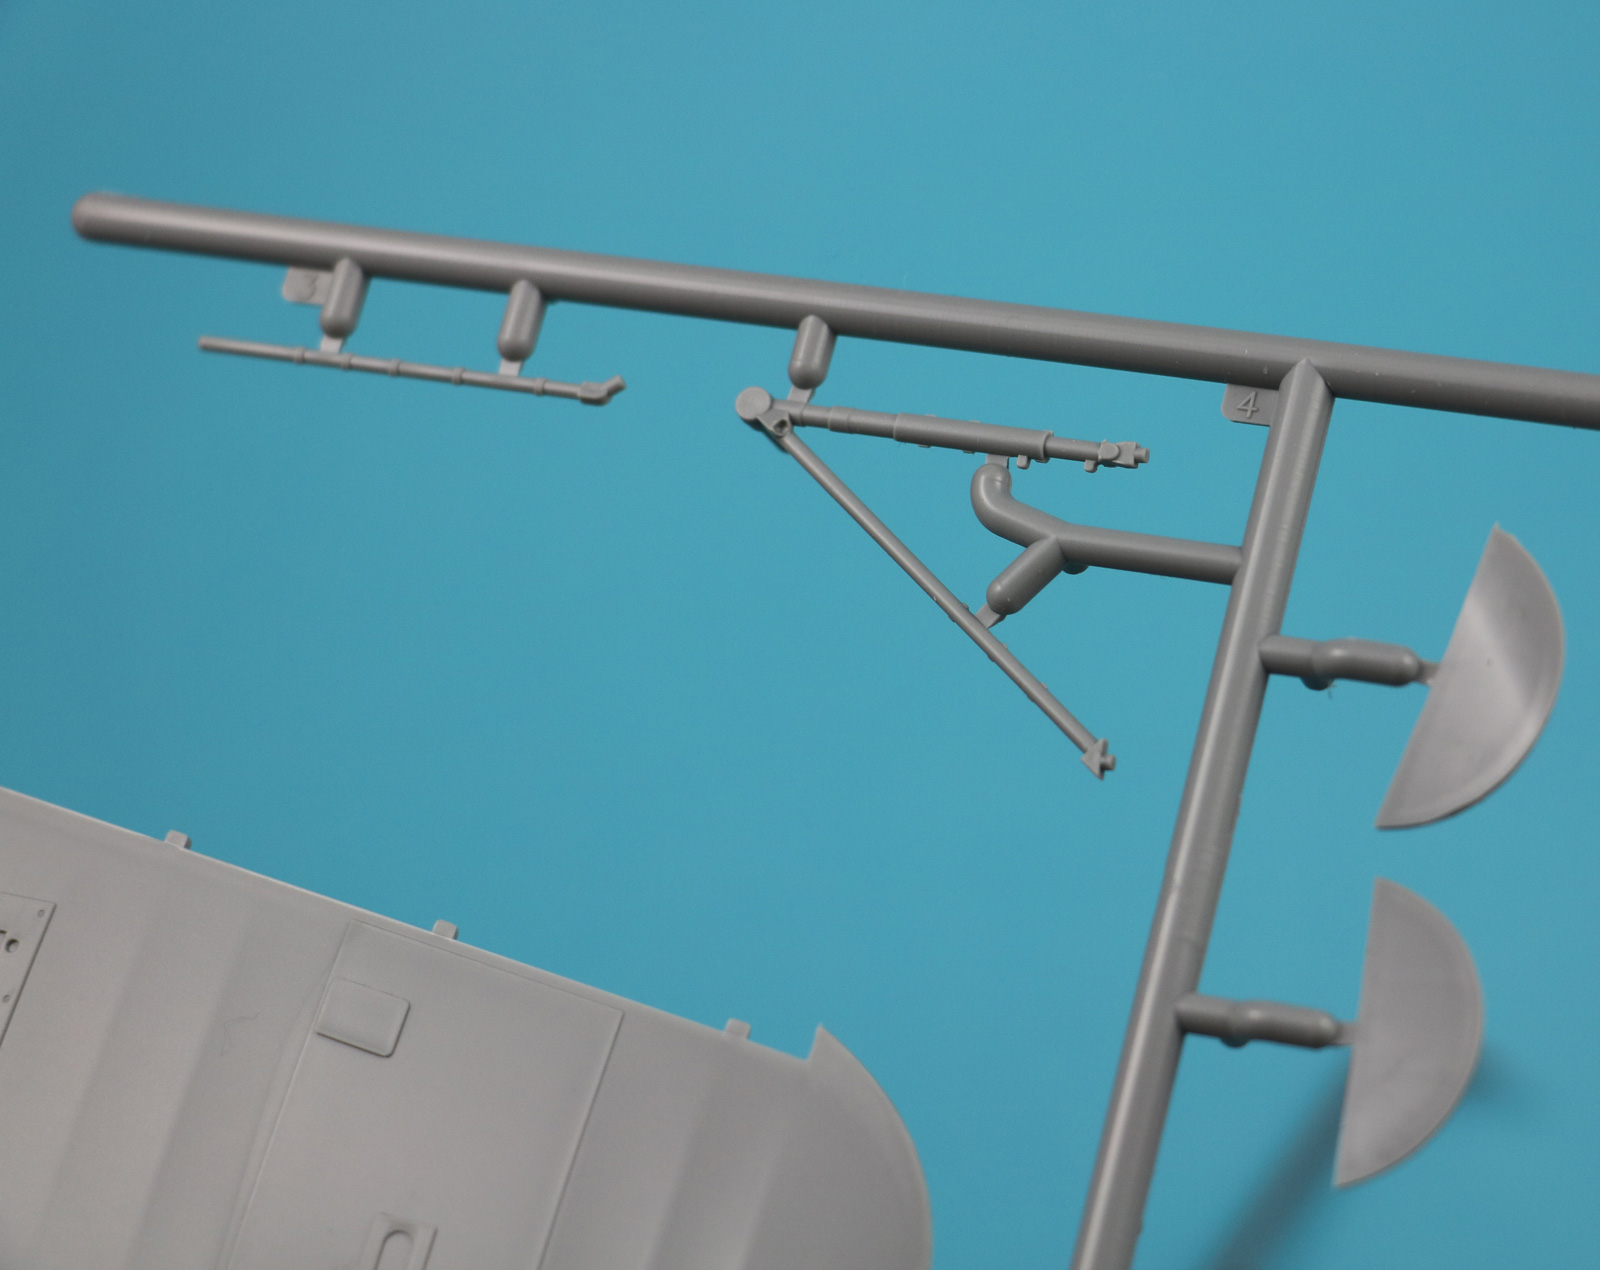
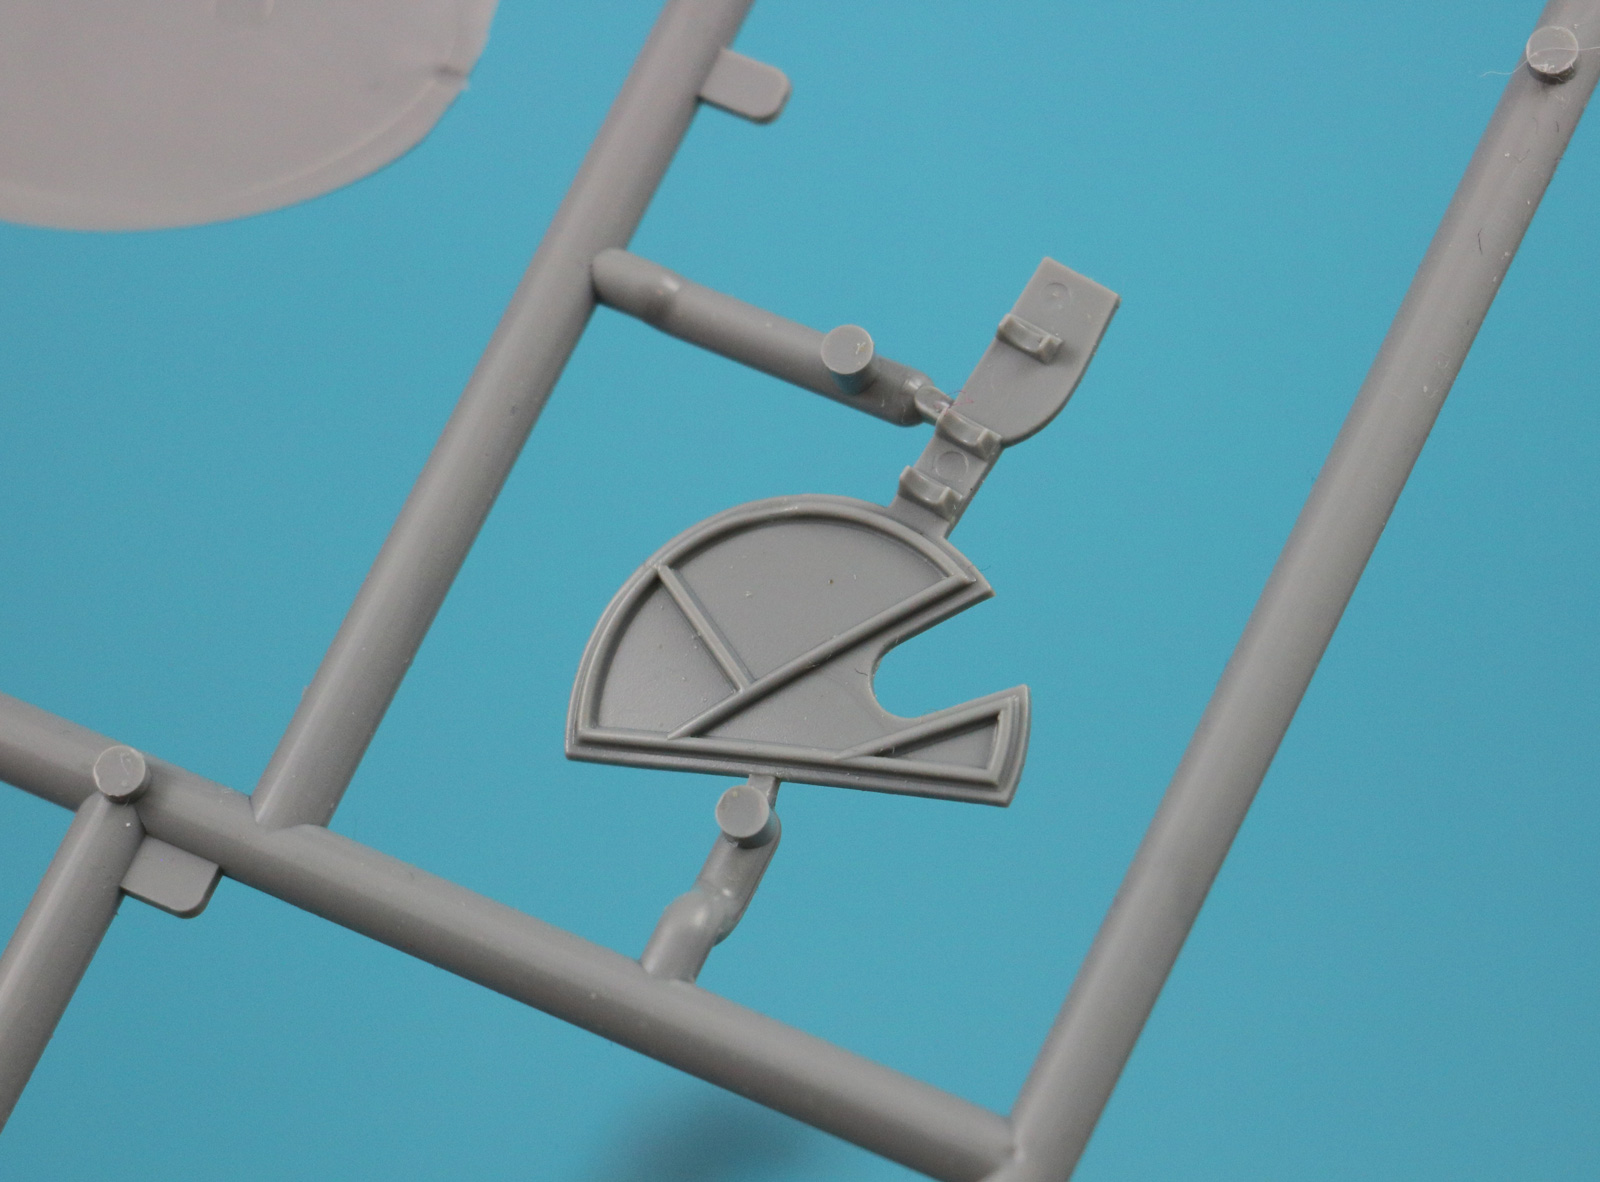
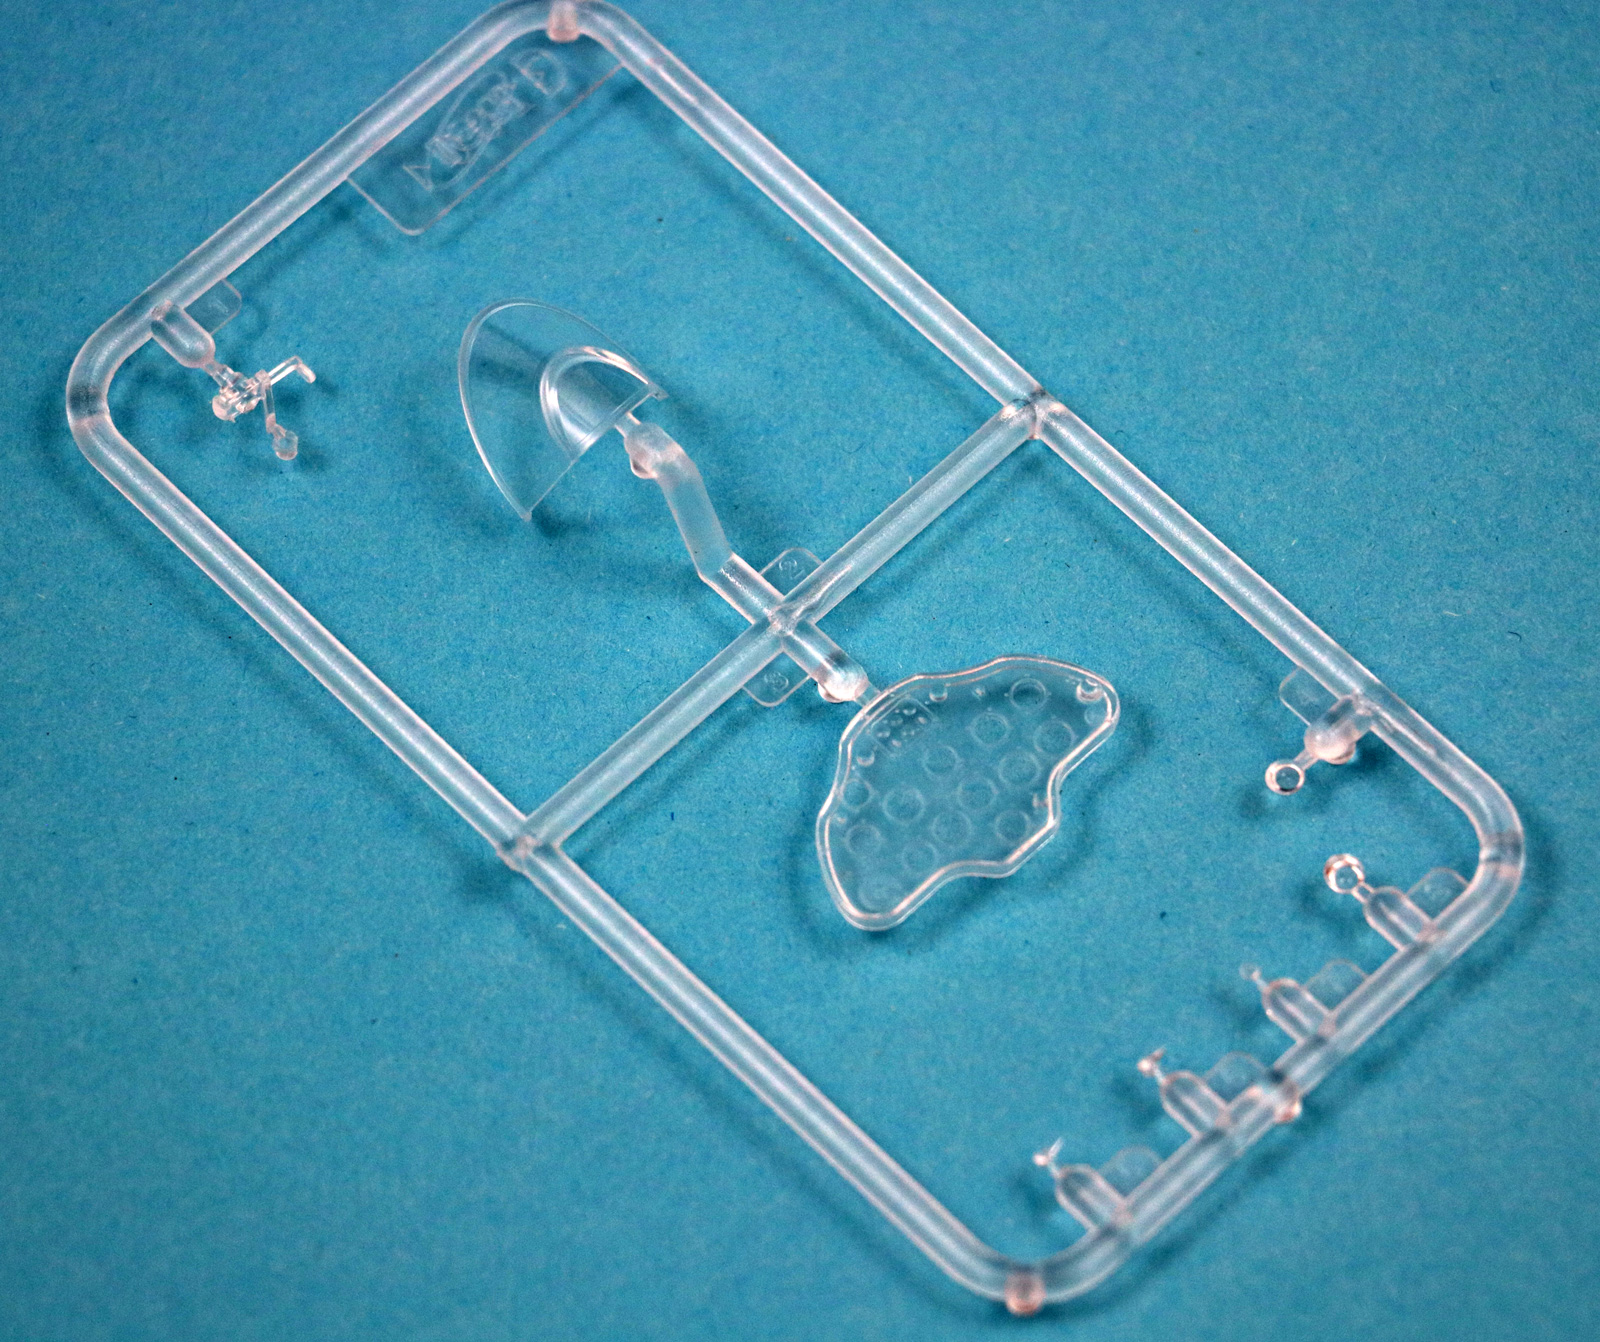
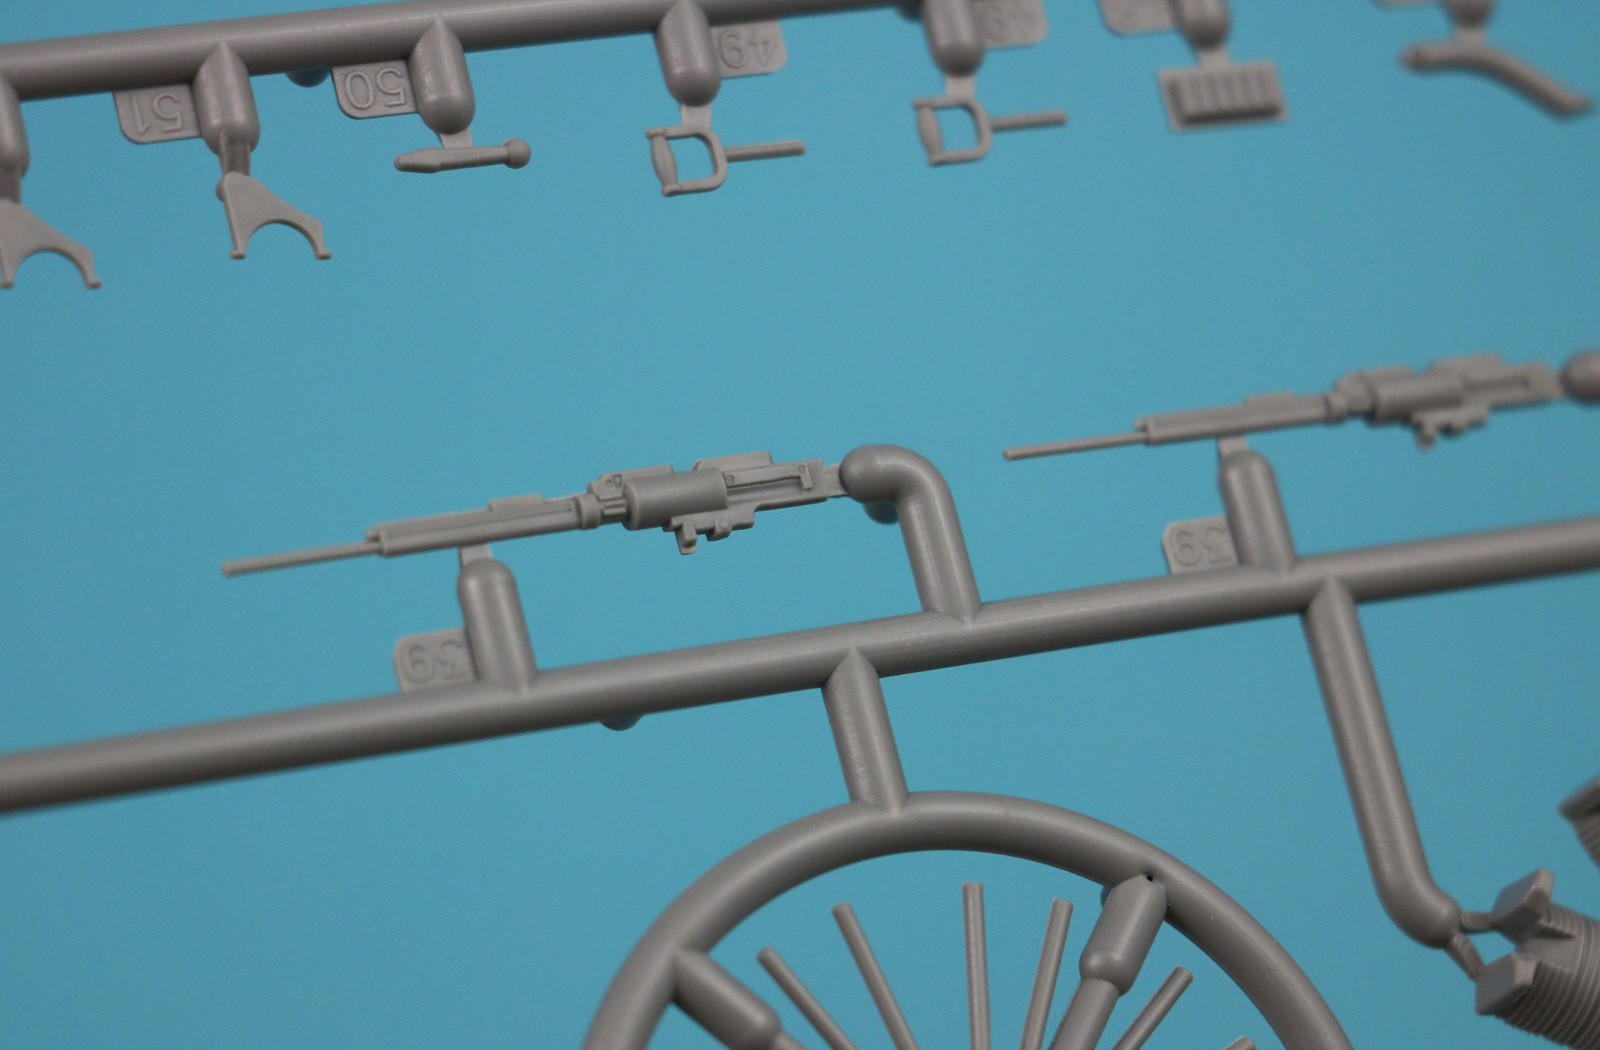
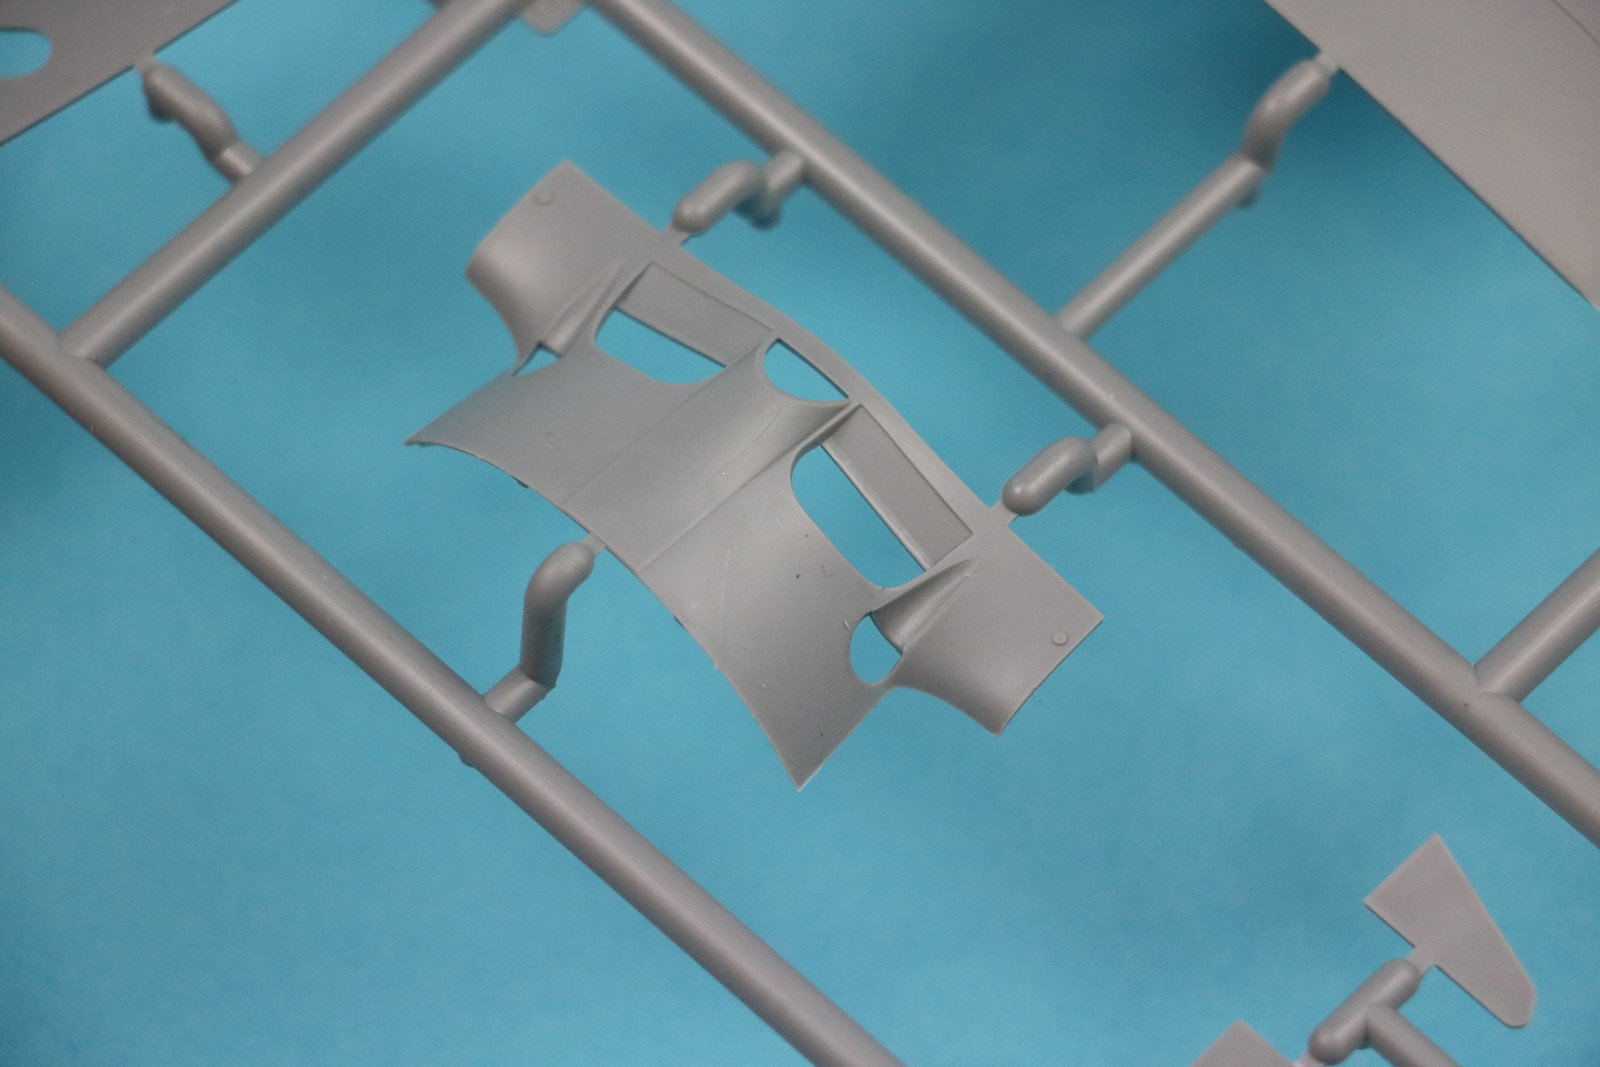
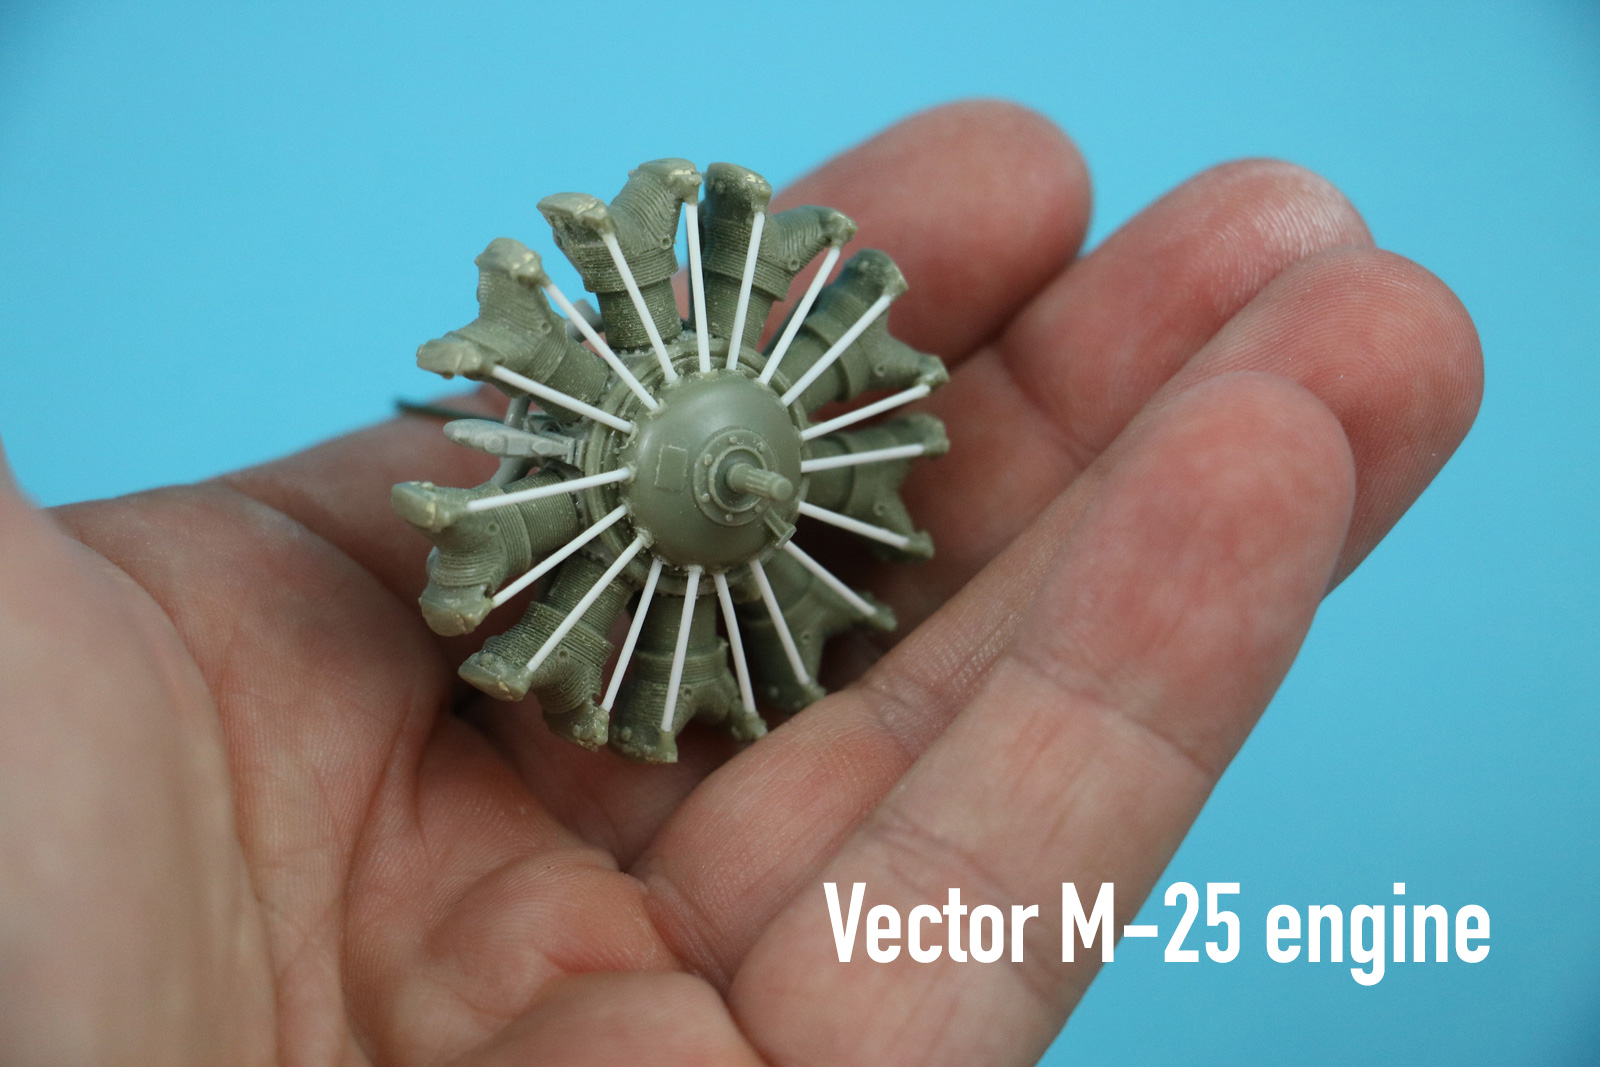
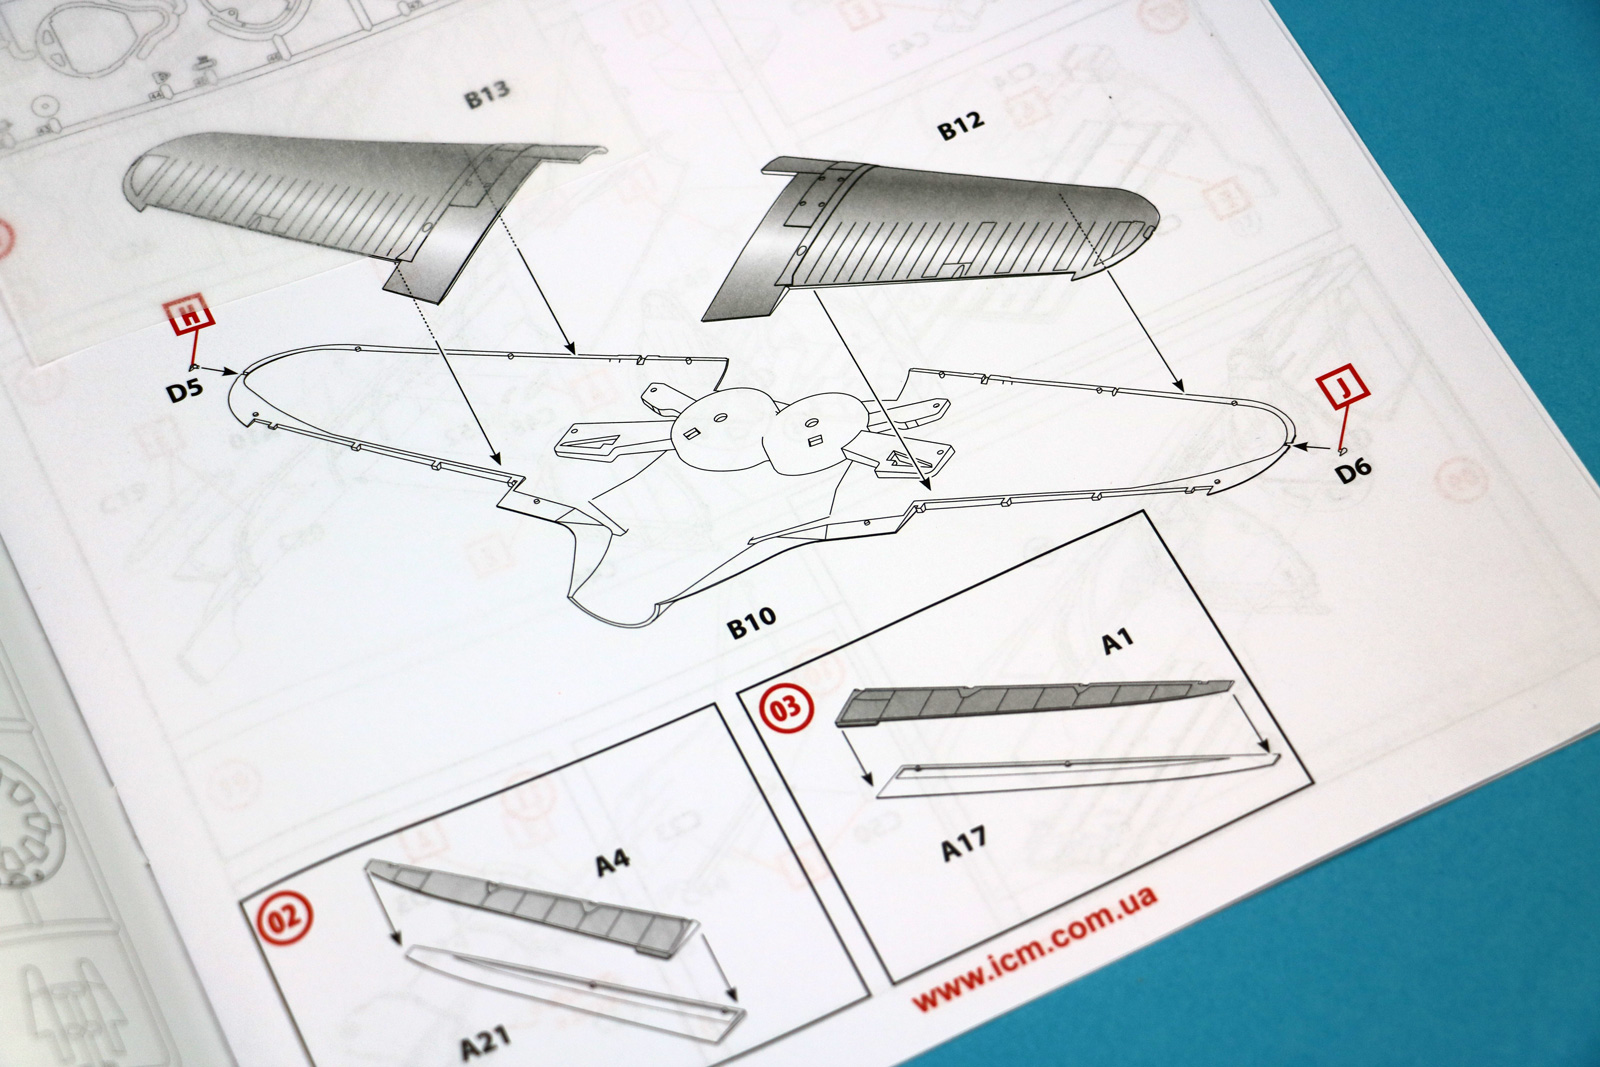
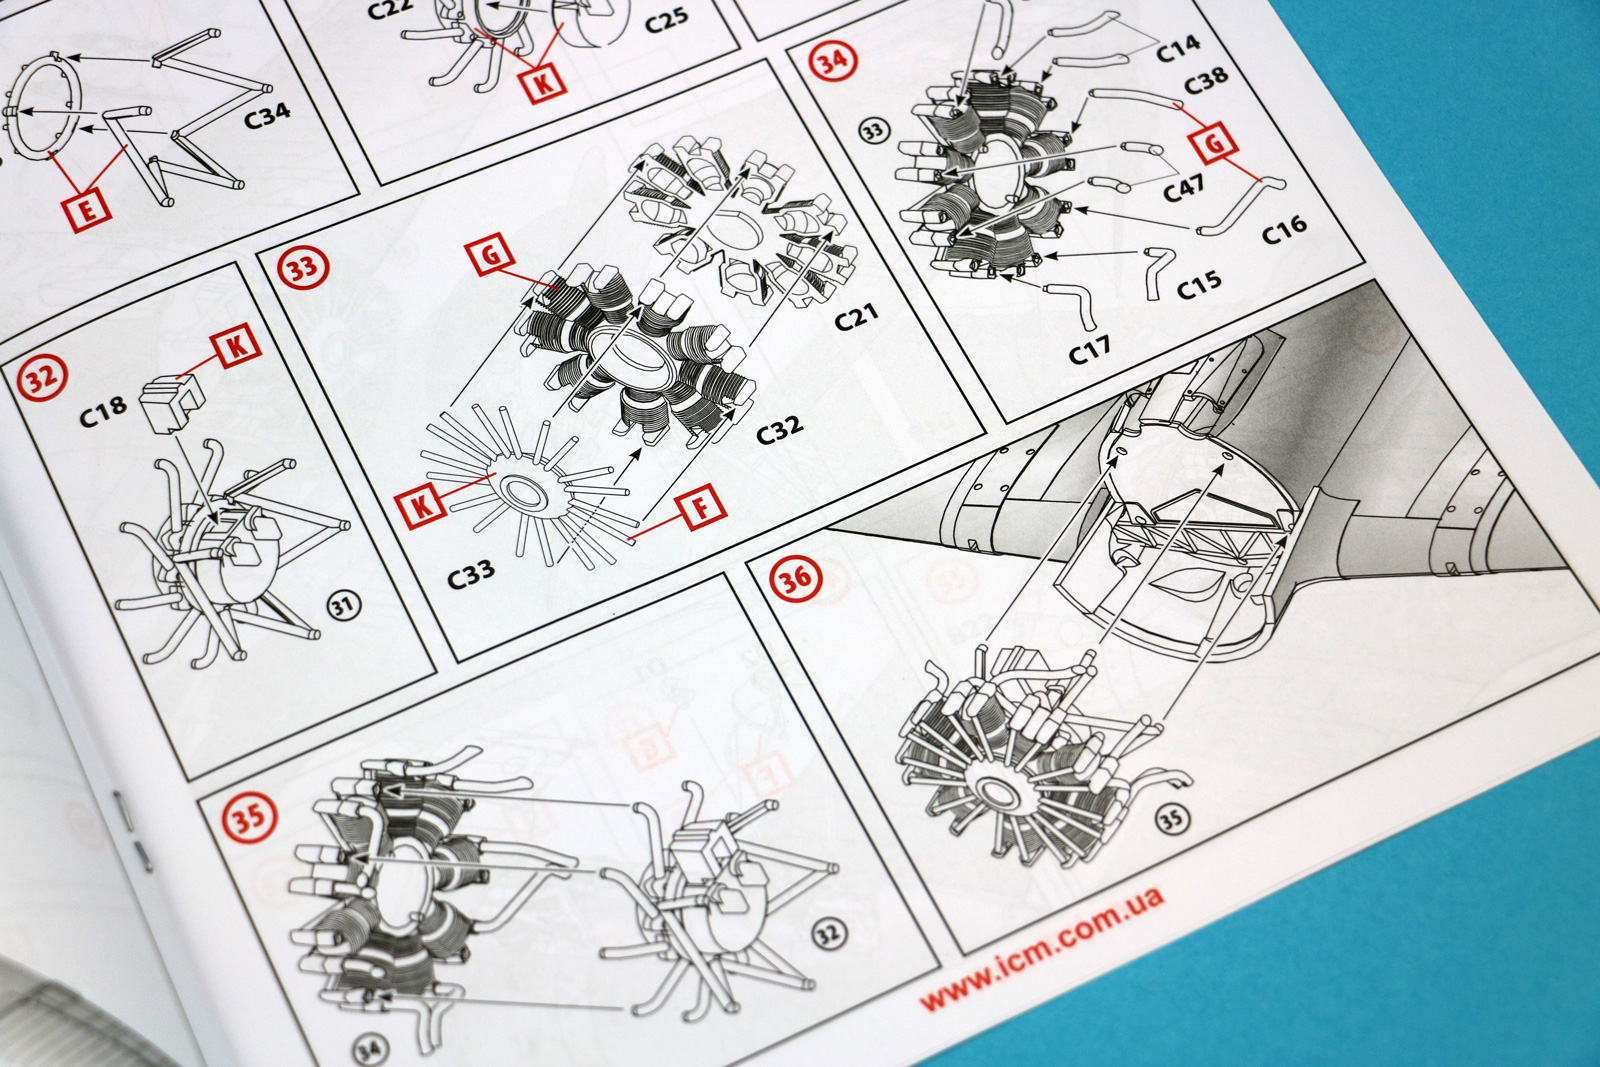
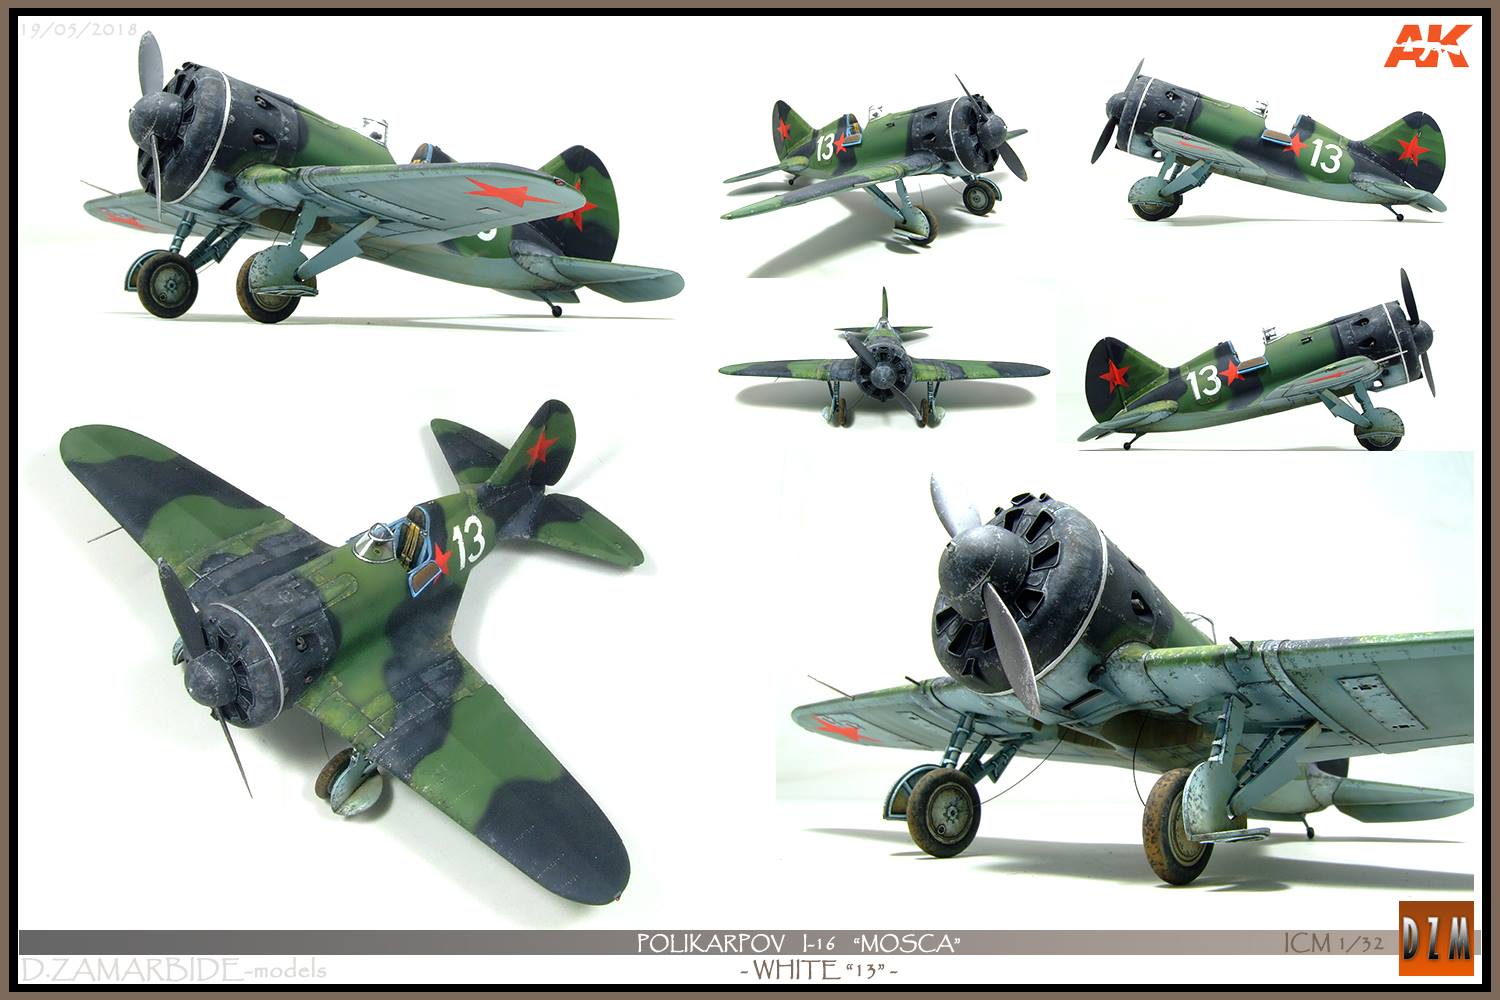
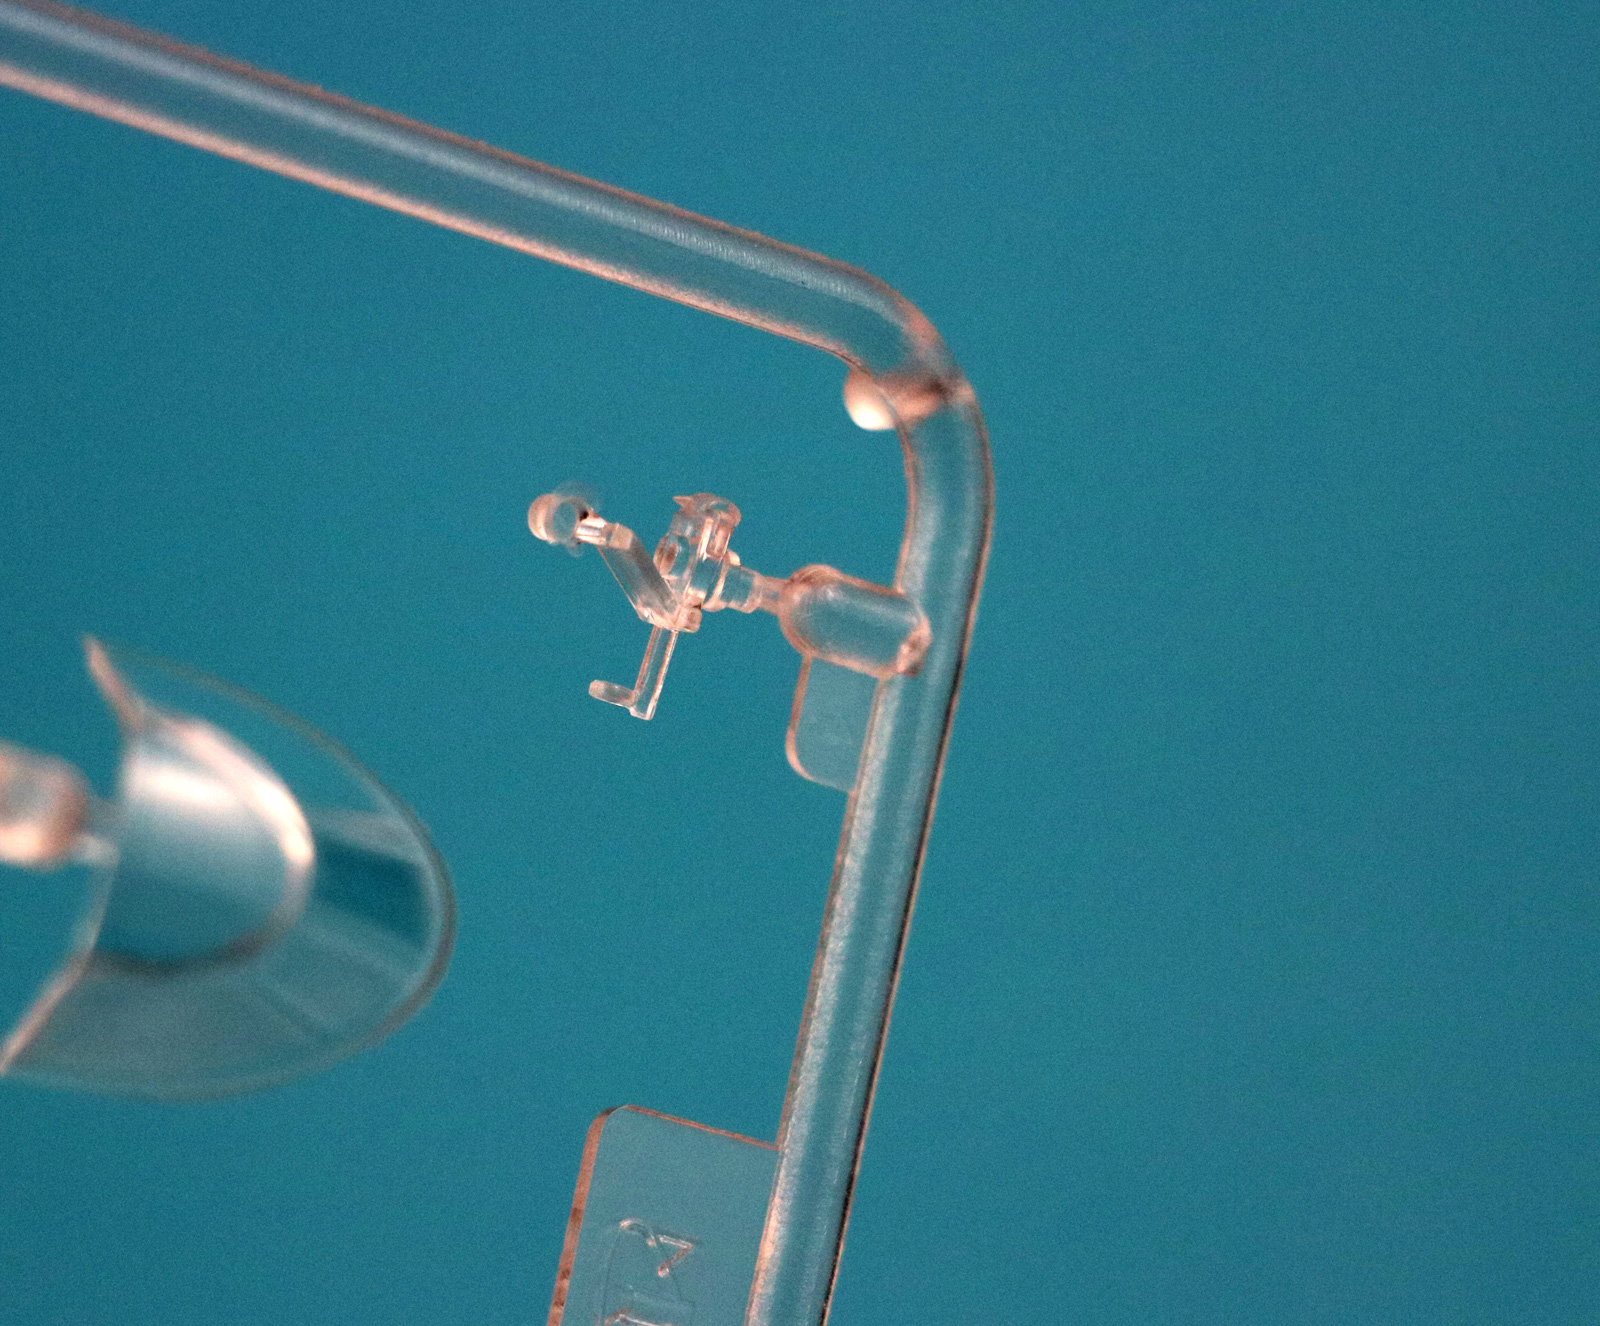
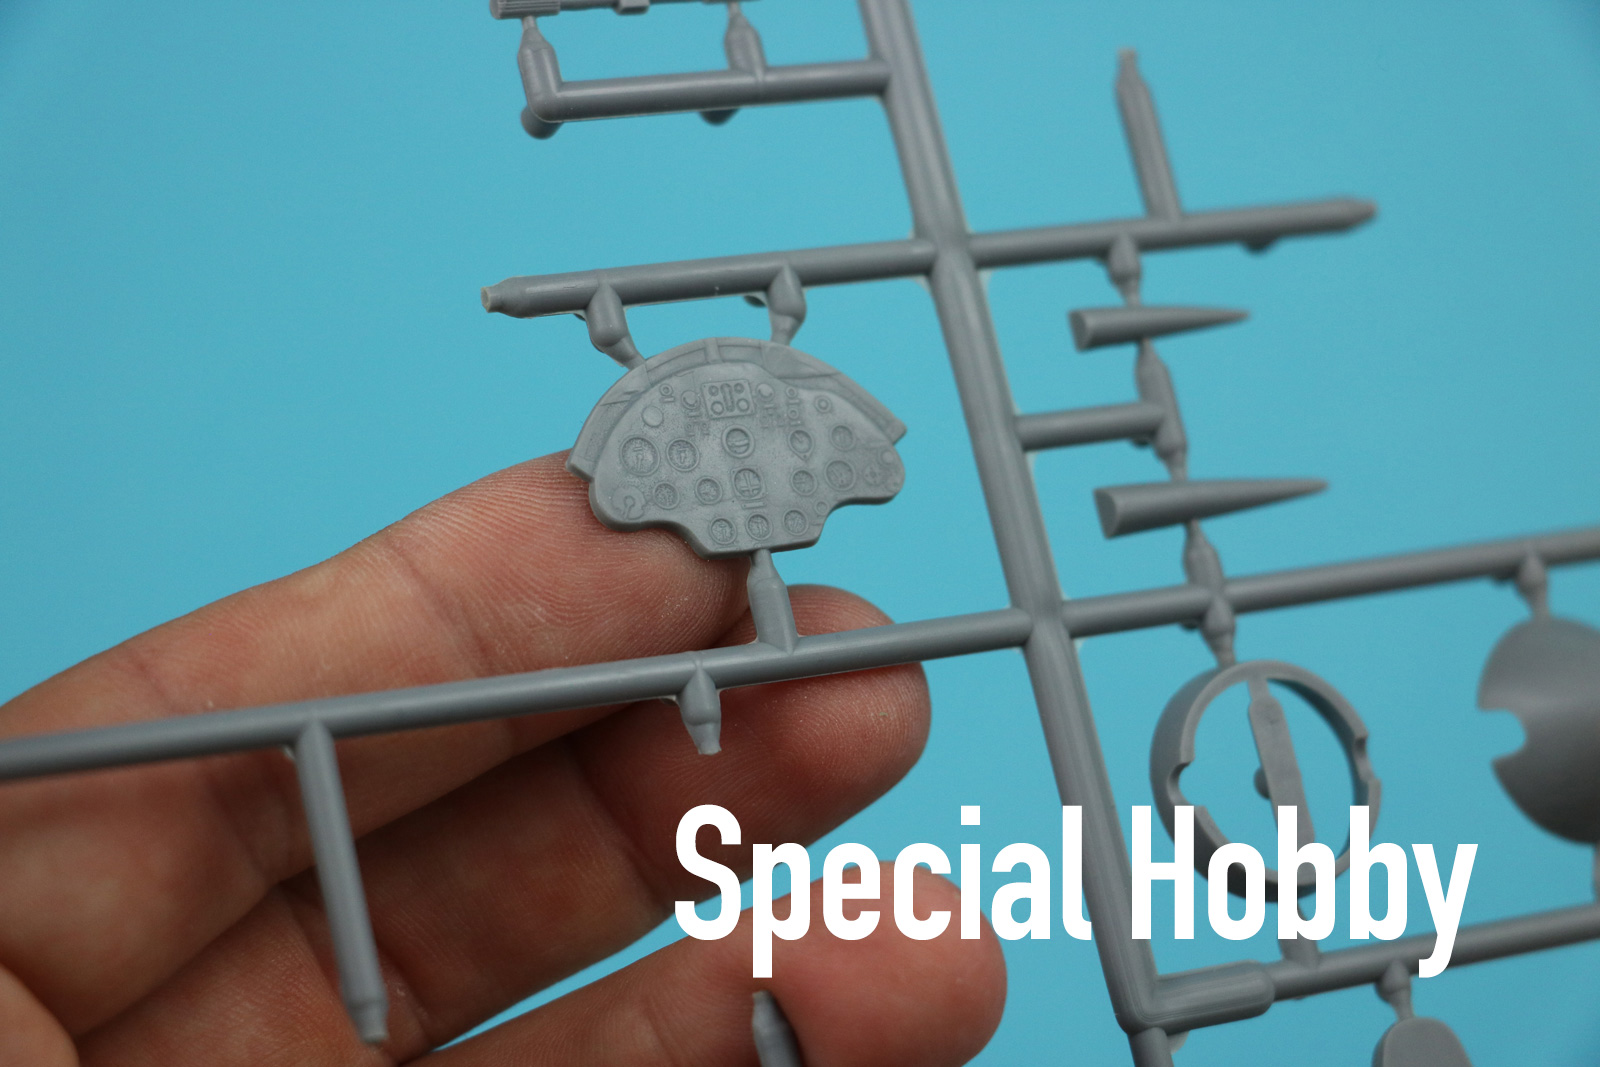
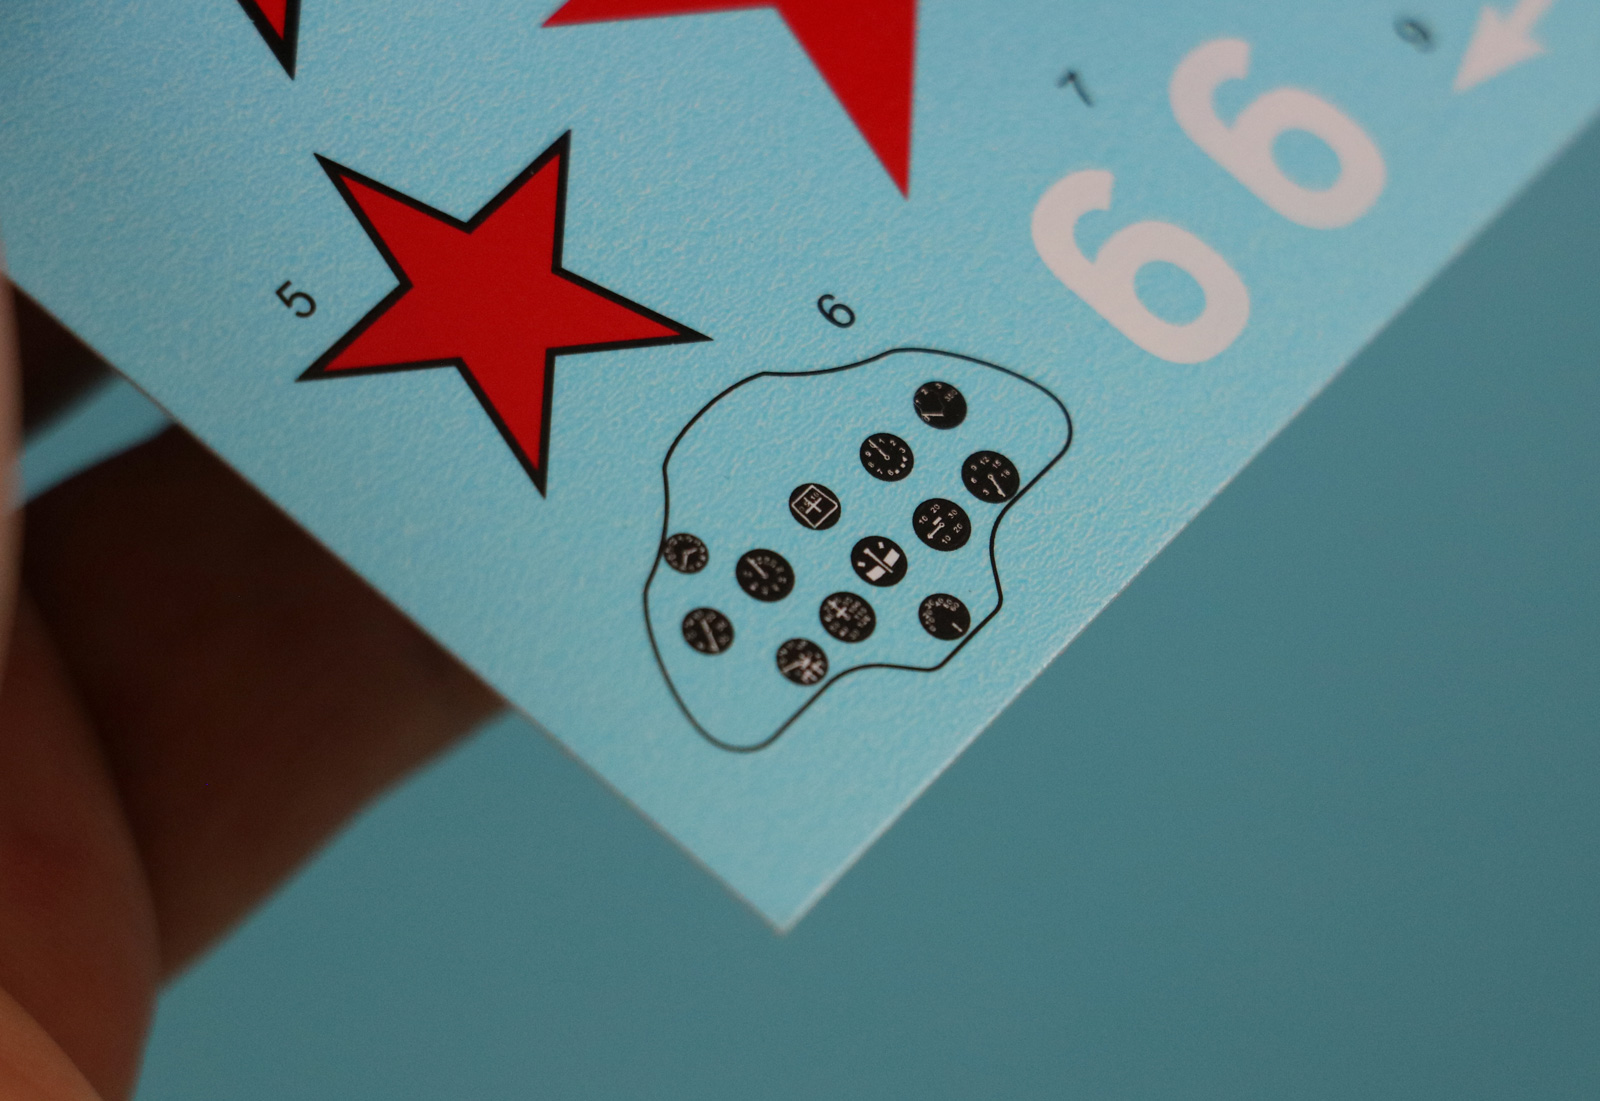
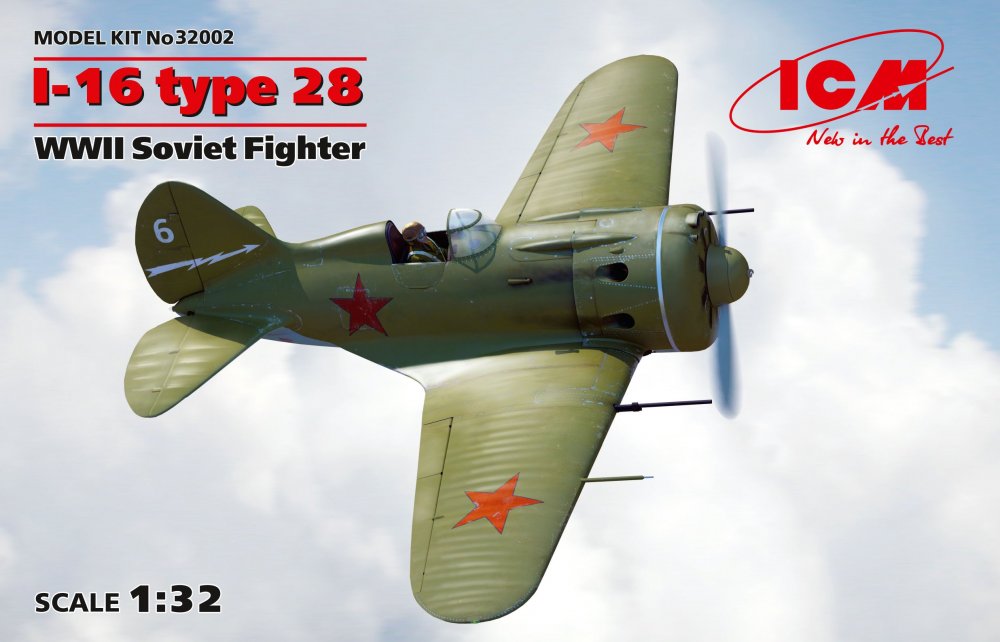
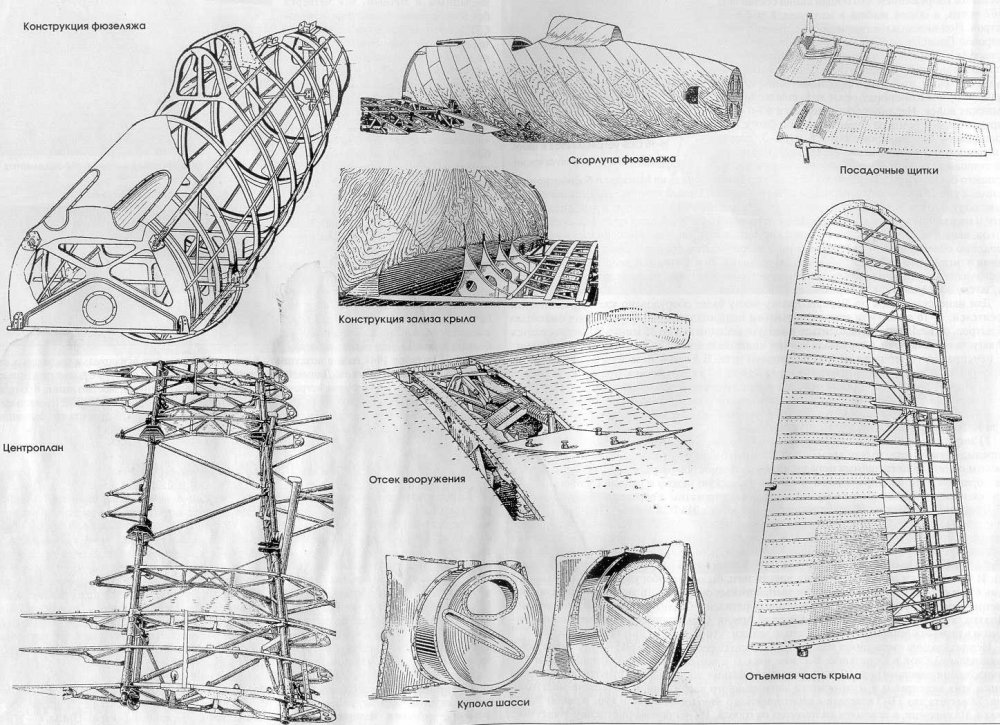
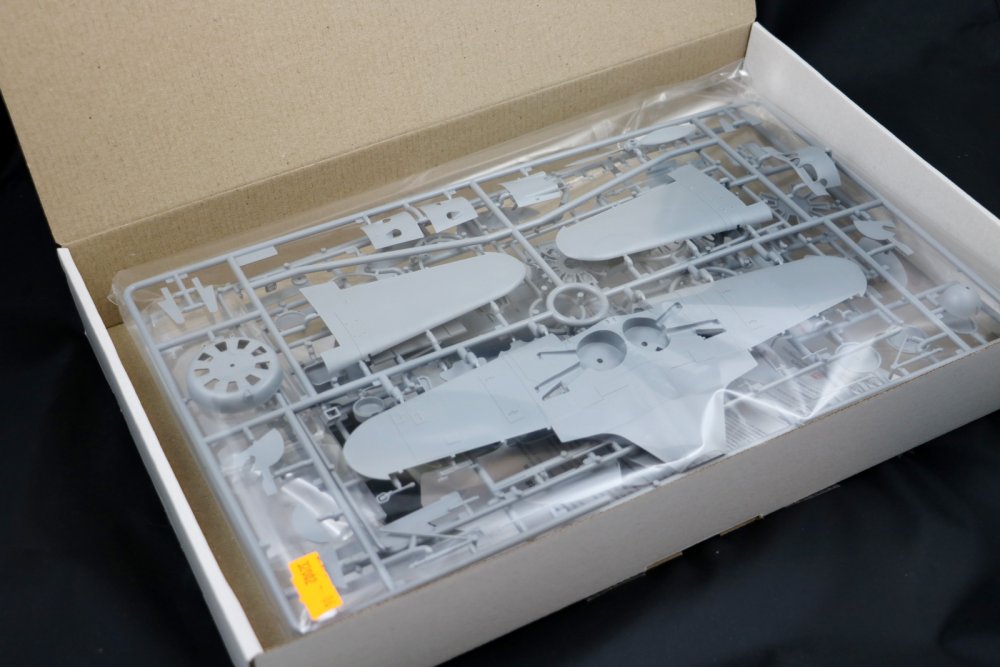
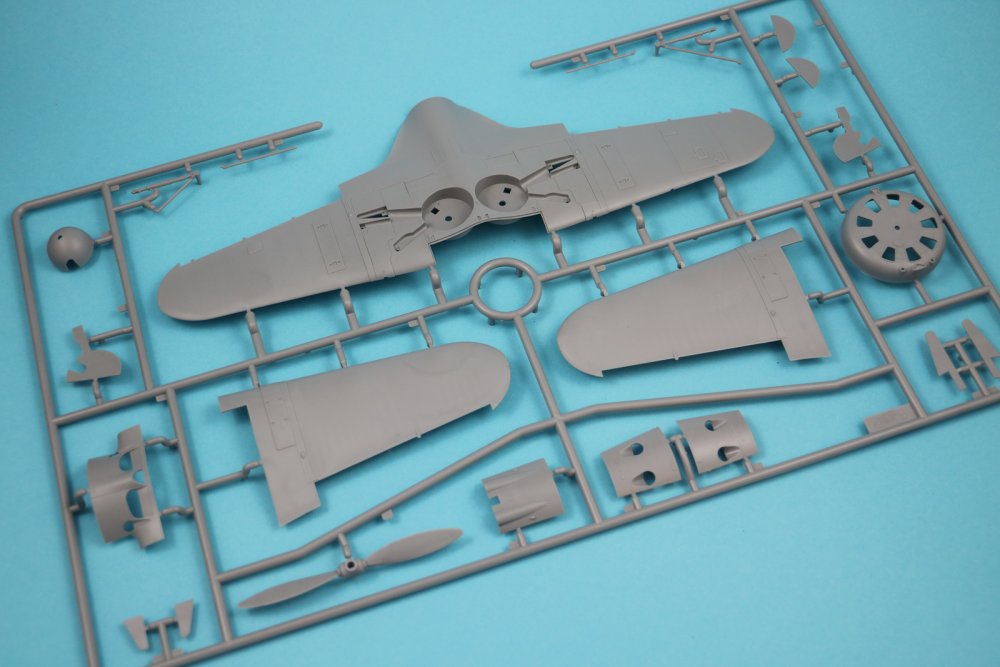
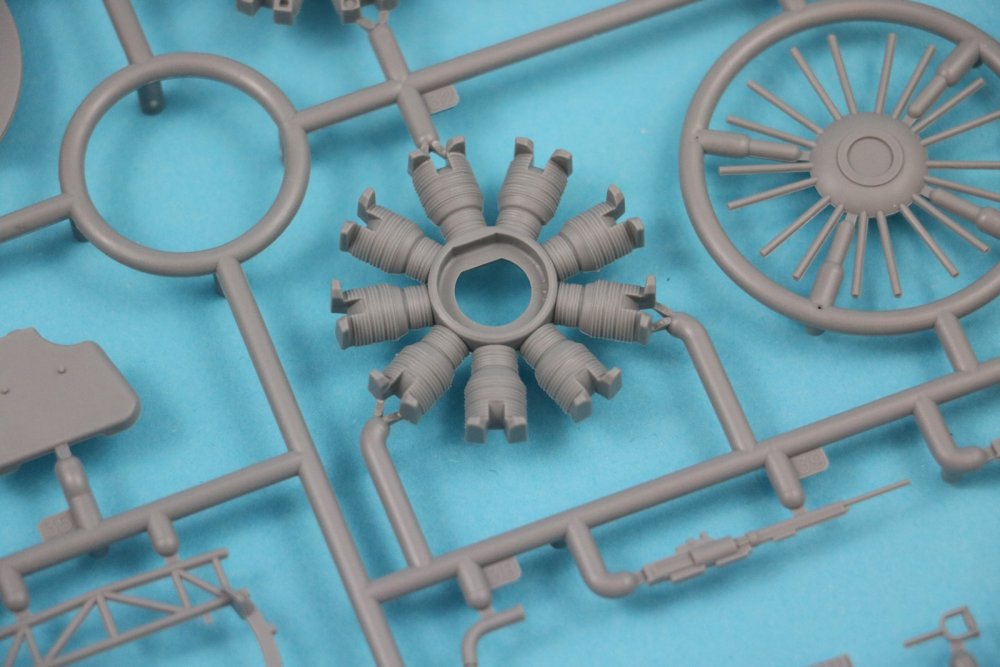
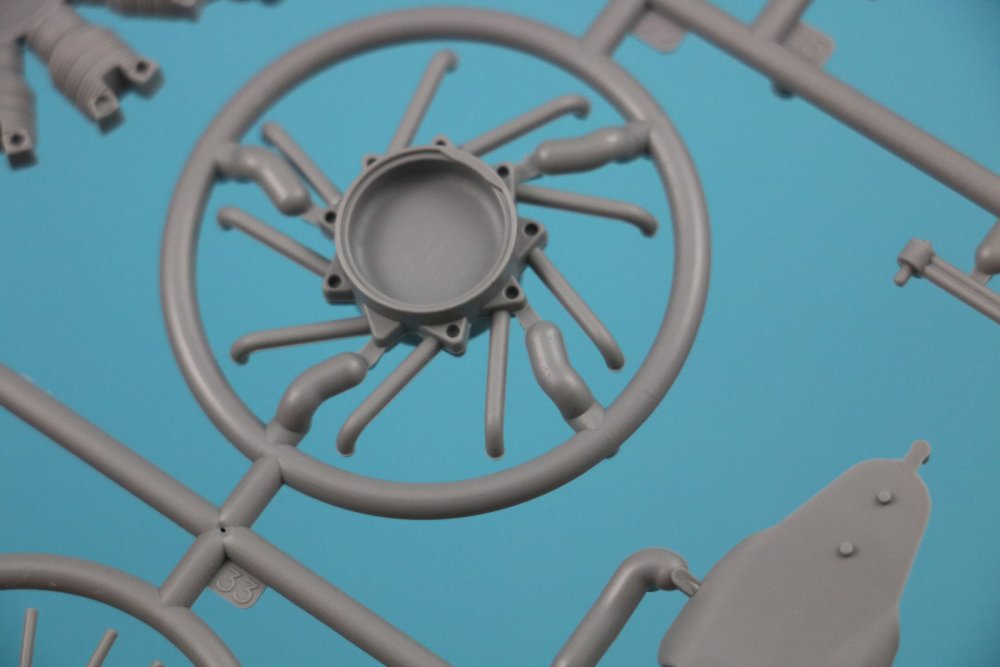
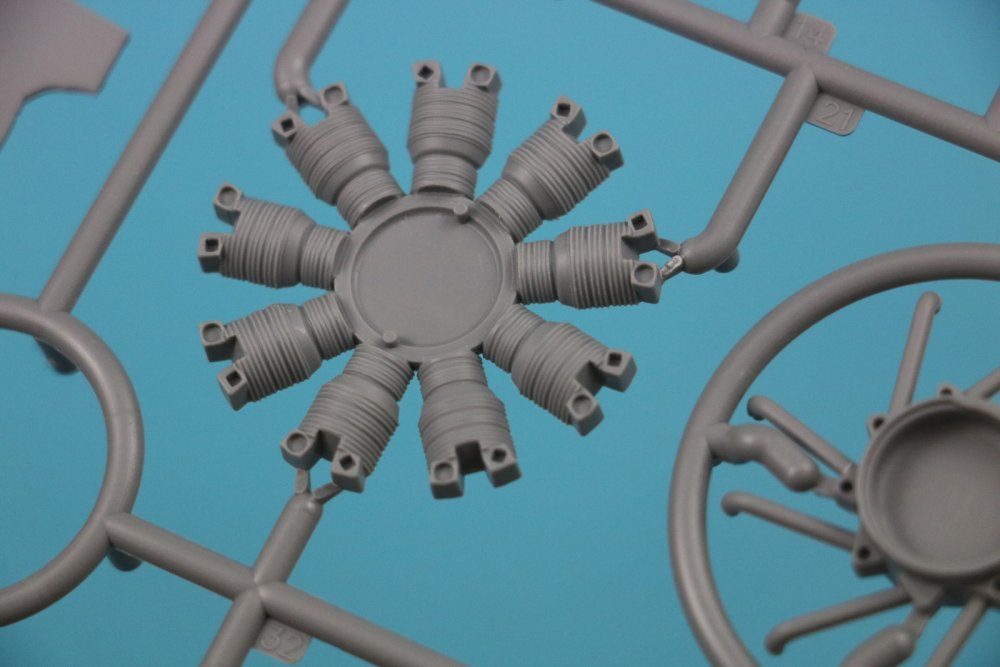
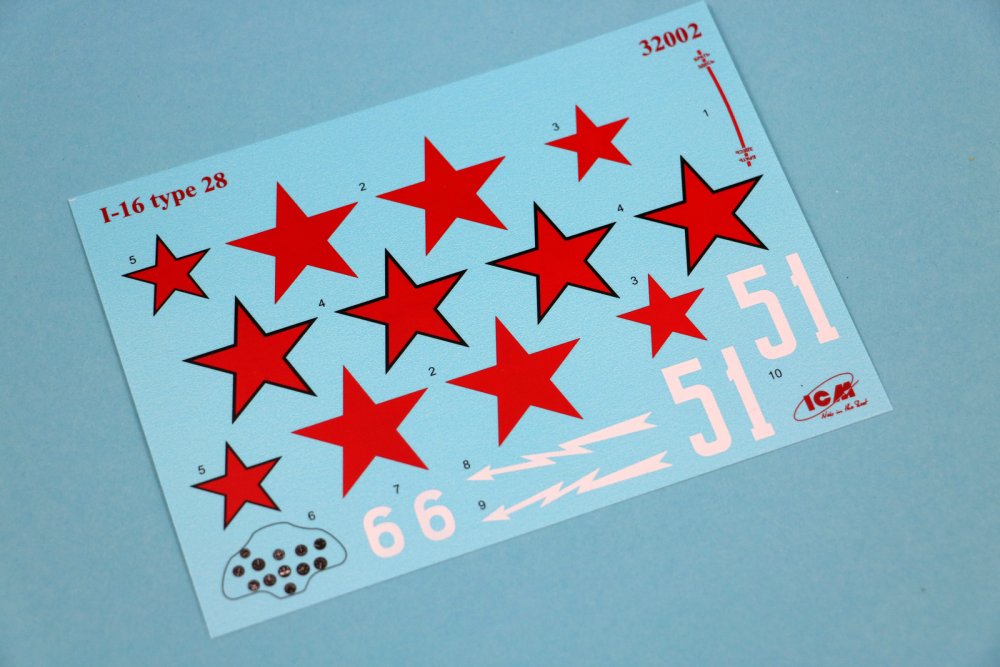
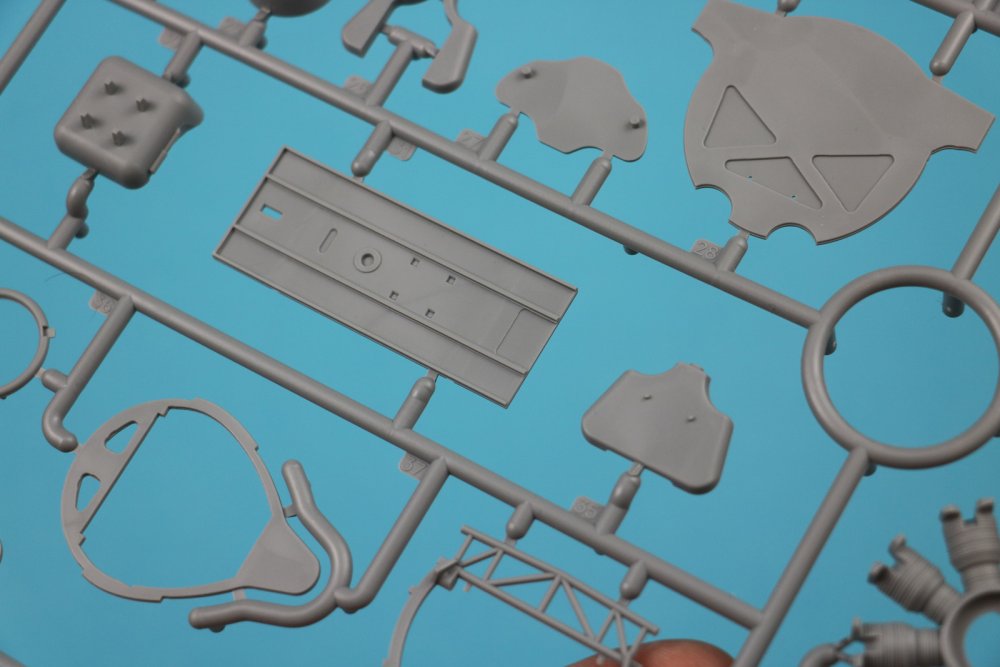
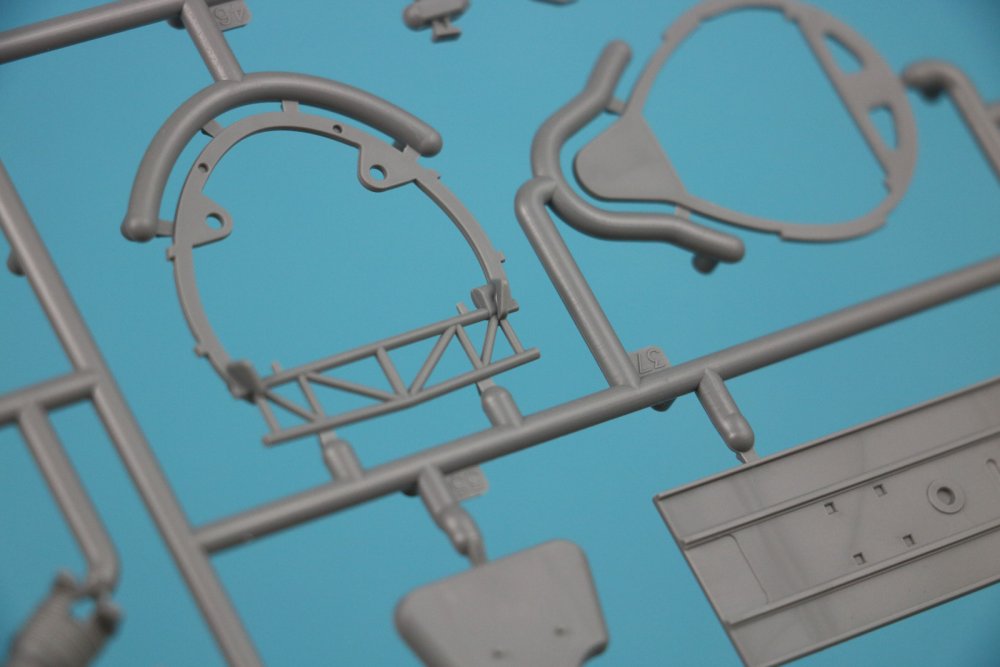
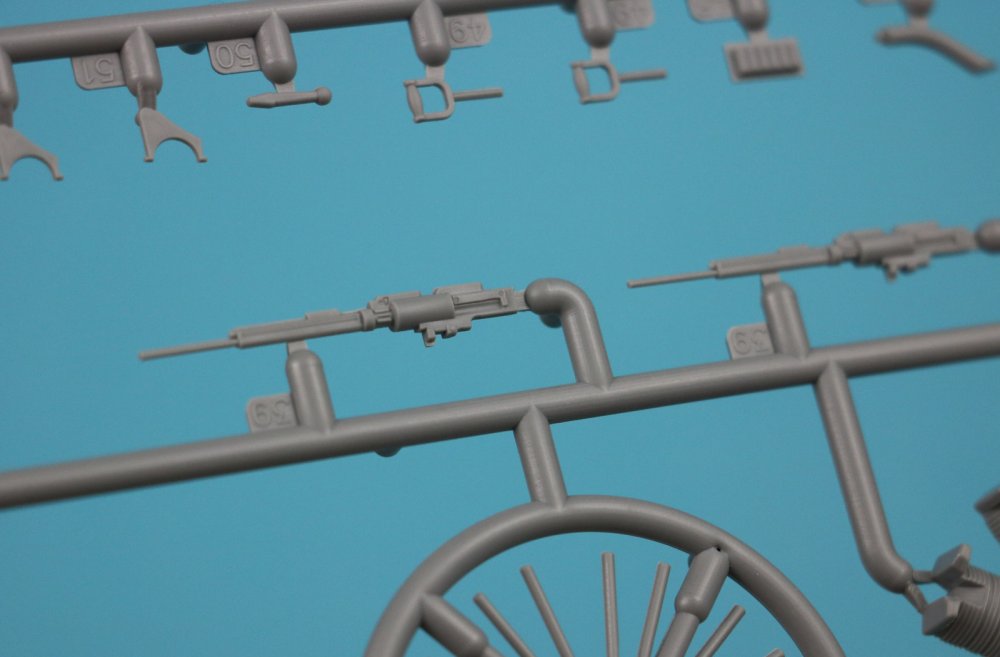
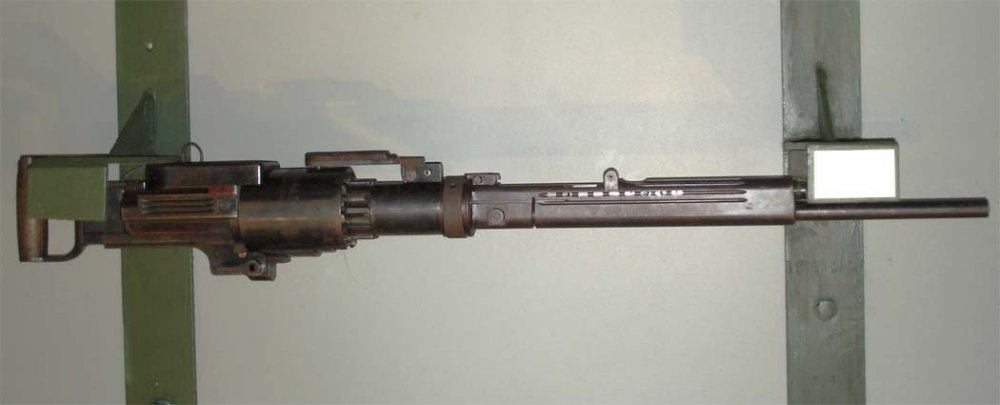
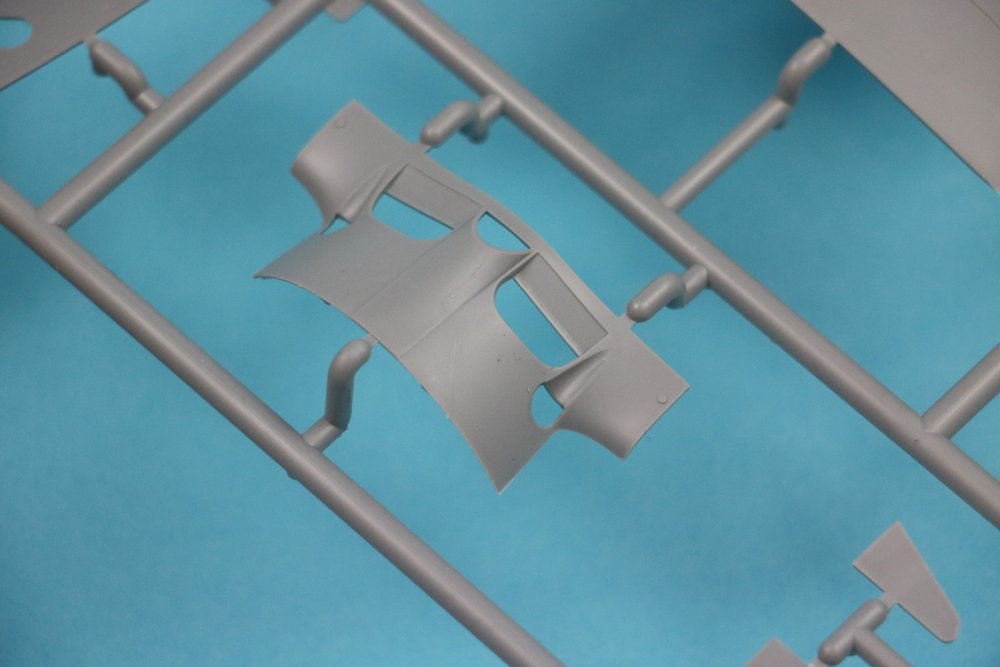
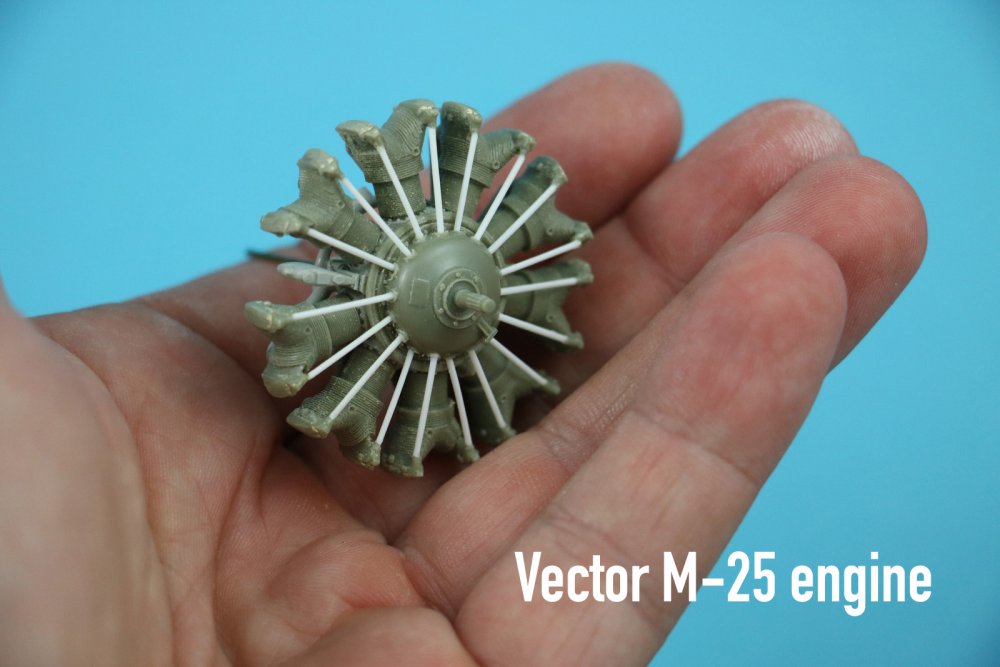
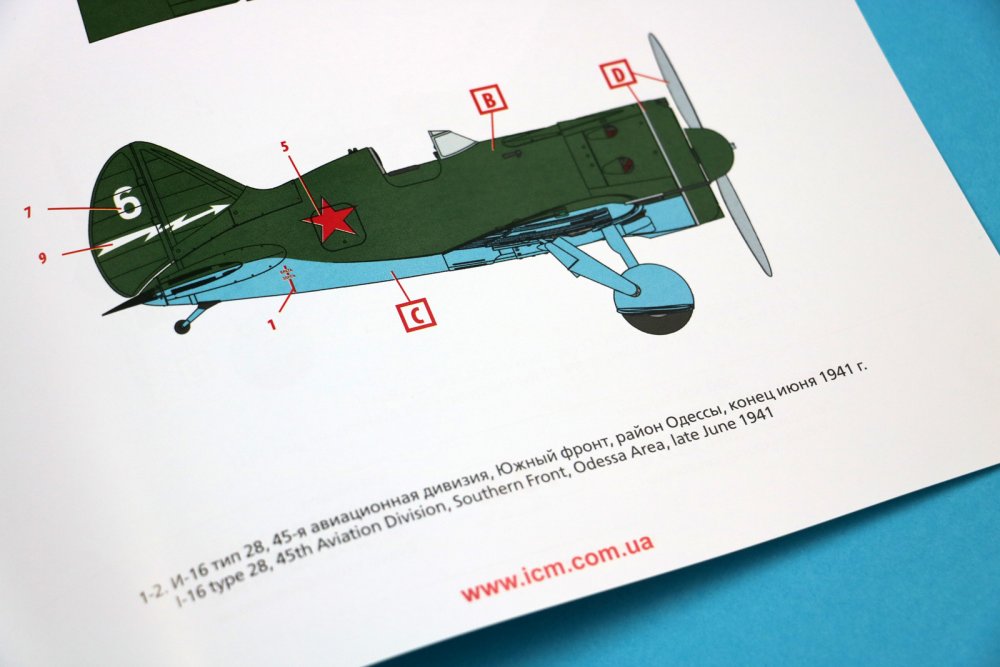
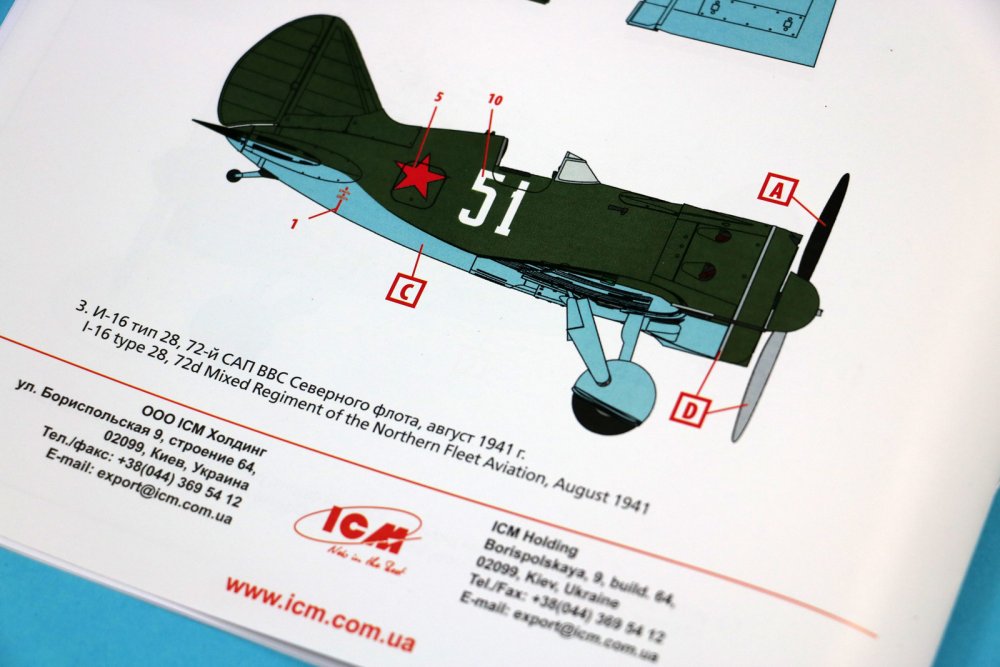
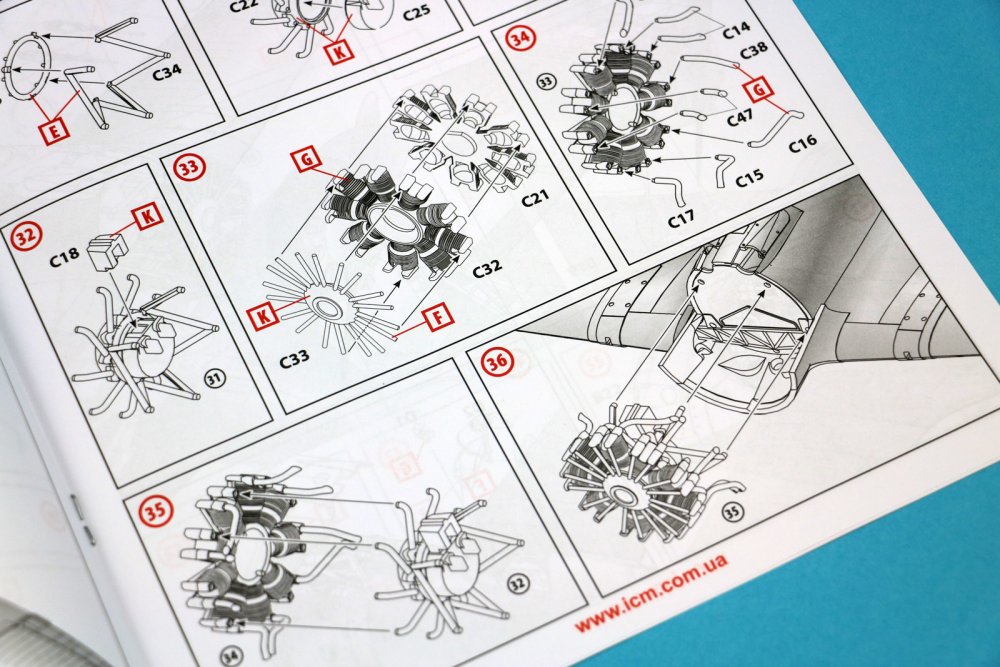
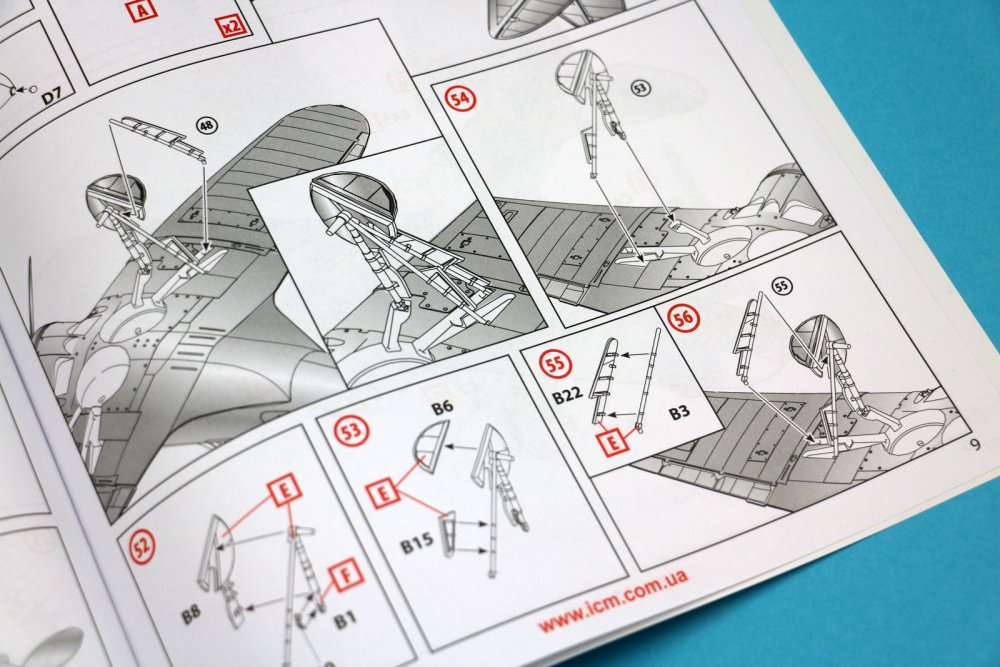
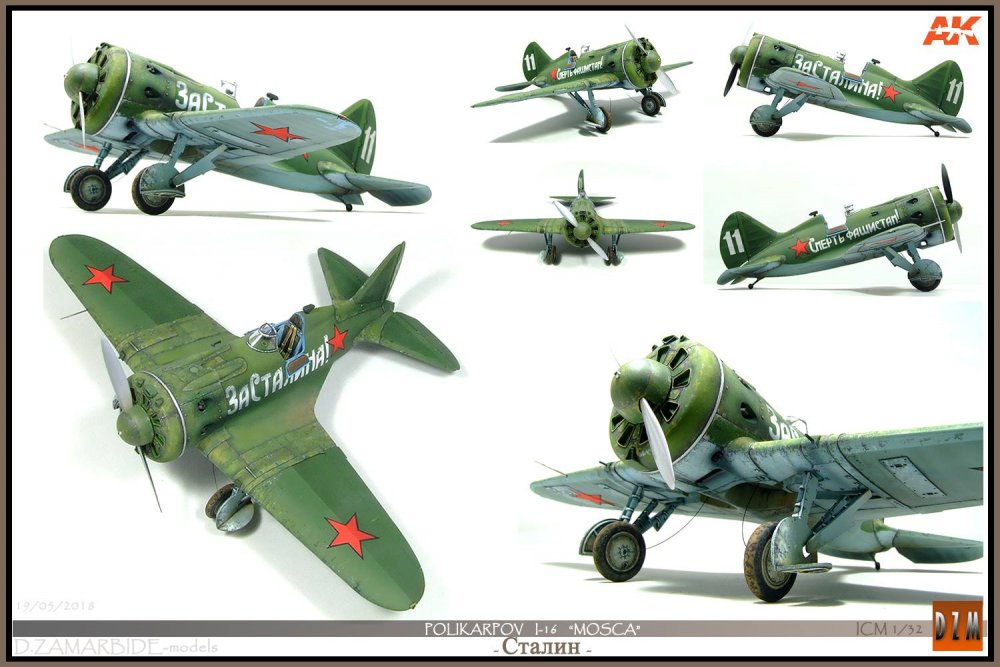
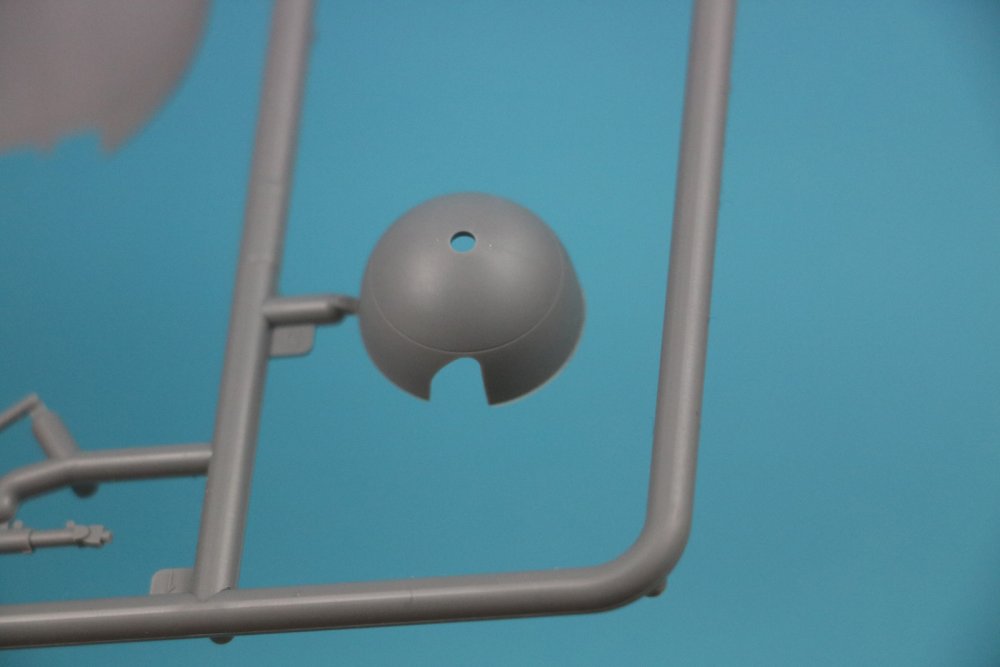
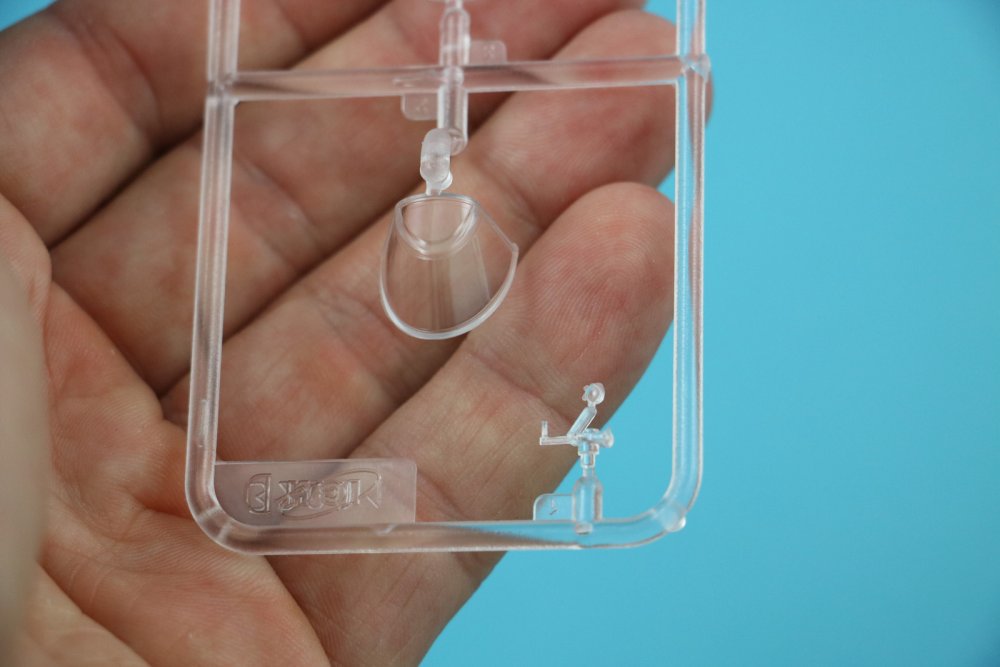
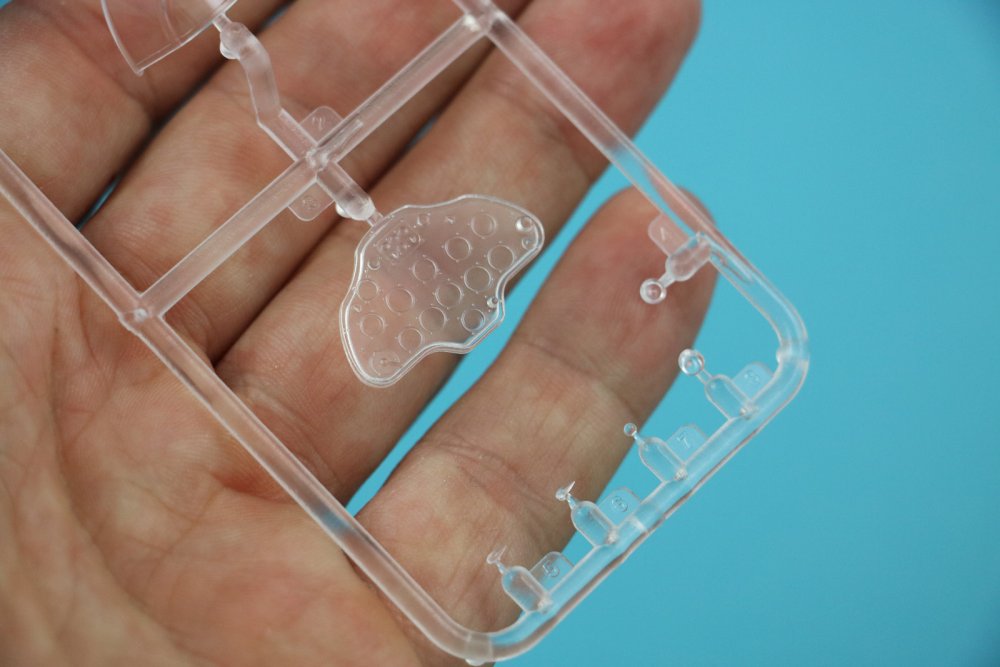
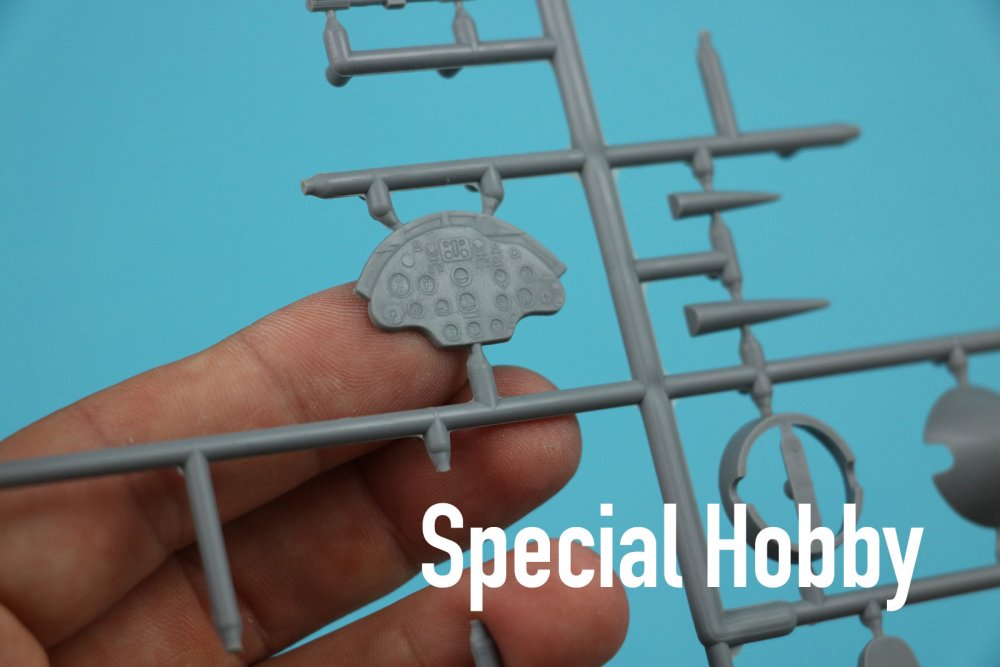
1/32 I-16 type 28 ICM Catalogue No32002 Available from Hannants for € 37,63 Introduction The I-16 was one of those designs that pushed the envelope and paved the way for new fighter designs. A closed cockpit, monoplane design, metal plating and a retractable landing gear. It’s licensed built Wright Cyclone SR-1820 9 cilinder engine (Shvetsov M-25) with it’s large diameter made the I-16 look short and stubby. This didn’t give the plane the menacing look of sleeker designs, but it proved it’s worth nonetheless. A whole series of improvements followed the first designated production type of the I-16 type 4. Most changes were made in the engine and guns / cannons. The type we’re looking at today however is the type 28. It differed from the type 24 (also released by ICM and reviewed by James Hatch here) only in armament: 2x ShKAS and 2x ShVAK. The ShKAS being a 7.62mm machine gun and the ShVAK being a 20mm cannon. The ShKAS mounted in the nose and ShVAK mounted in the wings. The major differences between the early type 10 and the late model 24 and 28 are the presence of flaps, a tailwheel instead of skid, a second cockpit door on the starboard side and the Shvetsov M-63 engine replacing the M-25 version. The different materials used in this plane make it perfect to model ‘without paint’. We see a laminated fuselage, linen, aluminium and putty. The method of the laminated fuselage is basically the same as we saw on WW1 Albatros fuselages and even the WW2 Mosquito fuselage. Not that easy to replicate due to the angled wooden planks, but if you manage to pull it off, you’ve got a winner. I managed to find a pagethat shows the different materials. The Kit Let me start by saying that the I-16 has been covered pretty decently before by Azur and Special Hobby. Having built the Special Hobby kit I know the detail is quite sufficient and that there are numerous detail sets to spice it up. Eduard has done various sets for the cockpit, exterior and masks which I can all recommend. You can also get yourself a Yahu Models instrument panel and HGW harnesses. Vector has done a great Shvetsov M-25 engine (which fits the type 10/17. I myself managed to get my hands on a few sets by Contact Resine (a French company) which include a thin cowling, cockpit set and wheels. In line of order, these kits have been released of the I-16: 1997 – Azur released the I-16 Type 10 2004 – Special Hobby added new parts and released the type 10/17 2008? – Special Hobby added new parts and released the type 24 2008? – Special Hobby added new parts and released the type 10 with ski’s (Finnish service) 2011 – Special Hobby added new parts and released the type 10/17 (Chinese & Japanese service) 2017 – ICM releases a fully new tool kit of the type 24 (review by James Hatch) 2017 – Revell releases this same kit (type 24) under their brand with new decals 2018 – ICM added new parts and releases this new type 28 When you lift the box top, a full closed internal box appears, which give it a sturdy construction. Only four sprues (including the clear sprue) make up this kit. The first thing that strikes is the quality of the moldings. No flash anywhere. Really crisp moldings. Since I have an unbuilt Special Hobby I-16 in the stash, I decided to make some comparisons. Sprue A This sprue contains the fuselage halves, tail, rudder, cowling, wheels and ailerons. The tail was fabric, so we see some sagging between the ribs of the tail. Not too much. The nose / cowling had radiator louvres. I like that you get to pose these open or closed by rotating the louvre disc inside. A feature that is not present on the Special Hobby kit, where it’s always closed. Why? Because the Special Hobby kit doesn’t include an engine and this kit does! Also: this kit offers separate ailerons (and separate elevators). Also not an option in the Special Hobby kit. The I-16 had a mostly wooden fuselage. This means there are not a lot of rivets to be found. In that sense the Special Hobby and ICM fuselage don’t show a lot of discrepancies. You do however get some more detail in the ICM wheels. I also have Fabflight resin wheels which show a complete different bolt layout. Make sure you study your references before changes out the wheels. You’ll find a lot of alterations exist. The top cowling is supplied as a separate piece. This enables you to show of the guns and engine. I bought myself (and built) the Vector M-25 engine once. The Type 28 featured the M-63 engine though, so it wouldn’t be right for this version. Still, I love the detail that comes with this kit! Engine mounts are included, guns, so you’ll only have to add a few wires and scratch the fasteners of the cowling to do a decent open engine model! Fuselage halve: Top cowling: Radiator louvres: Wheels: Ailerons: Sprue B Here we have the wings, more cowling parts, prop, gear, prop hub and wheelbay doors. The wheelbay doors show some more pronounced detail than the Special Hobby ones’. An interesting difference comes to light when you look at the bottom mid wing section. Delicate rivet detail on the ICNM kit versus round discs on the Special Hobby kit. The surface texture of the main wings is almost non existant on both kits. As said: a nice feature of the ICM kit is that the ailerons are provided as separate parts, enabling you to pose them up or down. The gear legs are really nice and way nicer than the Special Hobby ones’. Crisp and detailed. Underwing surface detail: Compared to Special Hobby: Upper wing detail: Compared to Special Hobby: Radiator: Prop: Gear legs: Wheel doors: Sprue C and D Wow! The Shvetsov M-63 engine. A real gem. Pretty complete right out of the box. The ShKAS guns (see my photo for reference), lovely exhaust stubs. It’s all there. When we look at the cockpit we are greeted with the same level of detail and completeness. Or aren’t we…? I’m kinda missing seatbelts here! A quite prominent and visible feature in this open cockpit. I don’t understand this, because everything else seems to be there. The instrument panel is a transparent plastic part. Transparant? Why? Decals are provided for the instruments, so this part might as well have been grey plastic. I would recommend getting the Yahu or Eduard offering for this part. Other than that the cockpit is up to par with the big brands. The windscreen is lovely. Really clear and with a nice sharp edge for the cockpit framing. The Shvetsov M-63 engine: Compared to my Vector M-25 engine: Cockpit floor: ShKAS guns: And here's the real deal: Cowling underside: Spinner, typical for type 28: Gunsight: Windscreen: Instrument panel: Compared to Special Hobby: Decals Decals for two schemes are provided. Both rather dull to be real honest. A dark green top and flat light blue underside. Both sporting the red star and white numerals. Still, if you look at the work of Daniel Zamarbide Suarez, you might get some inspiration to turn dull green into a lively scheme! The decals look great but don’t seem to be printed by the usual suspects. Still, for a subject like this, I would recommend spraying the insignia on. But who am I? Scheme 1: I-16 type 28, 45thAviation Division, Southern Front, Odessa area, Late June 1941 Scheme 2: I-16 type 28, 72nd Mixed Regiment of the Northern Fleet Aviation, August 1941 Instructions: Overal: This kit is an improvement over the older Special Hobby kits. In terms of fit, detail and molding quality. The fact that it includes a full engine, lovely cockpit, guns, separate ailerons etc… very welcome. The only thing I don’t get is the omission of seatbelts. With only a few upgrades (instrument panel, seatbelts) this kit can be turned into a winner. Check out Daniel's work: Highly recommended. Our sincere thanks to ICM for providing this kit for review.


-
oh wow! You're making real progress. Lovely to see some colour on her.
-
HPH model 1/48 scale B-36 Peacemaker !
JeroenPeters replied to IainMackayDall's topic in Modelling Discussion
I've held it in my hands at Telford last year. Insanely large...- 32 replies
-
- 4
-
-
- b-36
- peacemaker
- (and 1 more)
-
Insane! Nice way to show all the insides.